Outdoor Pre-Easter Brunch and our Easter Dinner


Happy Easter

The Story of the Easter Bunny
Outside in our Backyard

Will the Easter Bunny be Good to You?

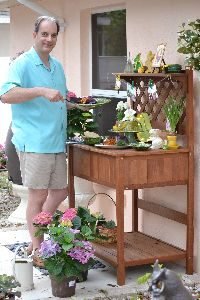
We Had a Lovely Pre-Easter Brunch on our New Potting Bench Outside
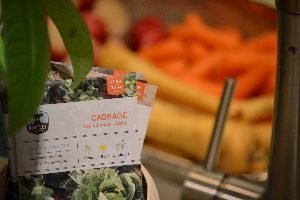
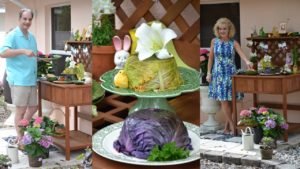
Delicious Cabbage Timbales
Welcome to our Outdoor Easter Brunch
———————————————–
Easter has always been a very special time for me. It conjures up so many childhood memories of past Easter’s with my Grandparents and Great-Grandparents along with other family members. Everyone all dressed up. My Grandmother wearing a hat, gloves and carrying her special Easter handbag. Me wearing a pretty Easter frock that my mother or Grandmother picked out for me, usually with a cute petticoat underneath. I remember they were scratchy, but yet it never bothered me. Almost as if it were a ‘right of passage’, something us girls had to endure.
Also a big Easter dinner on white linen tablecloths with the finest china and crystal glasses to drink out of, that’s what I remember. Sterling silver utensils set at each perfect place setting with linen napkins that the women would use to dab at their mouths after every bite full, careful not to smear their lipstick. It always amazed me that they never got their bright red lipstick on their white linen napkins. I came to understand that it was decades of southern lady breeding and skill to do that. My Grandfather, Frank Haskin, always sat at the head of the table, while my Grandmother Nell sat at the other end. As hostess she sat there because she would have to jump up to retrieve things from the kitchen as people needed them. She was so focused on everyone’s dinner plate or drinking glass, asking if they needed more iced tea? She was a very attentive hostess.
She always had her eye on me, seeing as how I usually sat beside her, making sure that I was eating my dinner, and not just the dinner rolls that I loved the best. She would give me knowing looks when she wanted me to sit up straight, or to quit talking, she didn’t have to say a word to me, I knew those looks. Sometimes I followed them, sometimes I didn’t.
My Grandmother was always the last one to finish eating because she spent the entire dinner making sure everyone else was taken care of. So as I was finished with my dinner I would watch her eat. She loved to mix her food together, I always thought that was gross, yet she made it look so tasty as she savored every bite.

Nellie Mae and Me
(Could this be why I love short skirts and dresses?)
My Grandmother showed me how to entertain through example. How to be a good hostess through example. Although most of the time I am a very informal person, because of her I will drag out the ‘good stuff’, just because.
She is who I think of every Easter, so therefore I will always include her in whatever holiday I may write about. Because she isn’t gone, she’s always with me, right there inside of me, telling me to sit up straight and to quit eating all the dinner rolls and to eat the other food on my plate.


Sitting Pretty for Photos, and Rolling in the Dirt with the Dog

Me and my Mother, Mary Keith
Growing up in Georgia, we usually had very warm Easter’s. Living here in Florida, same thing.
Usually nice weather for the holiday.
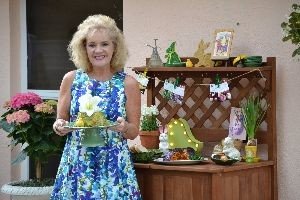
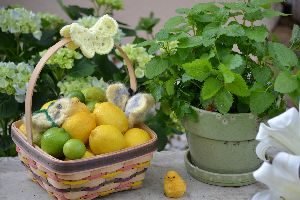
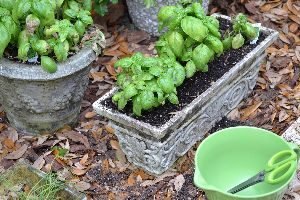
This year we decided to have our little Easter brunch outside in the backyard. To me Easter says Spring, and Spring means newness, warmth, green, and lots of potting dirt. So therefore, why not have our Easter on my new potting bench outside?

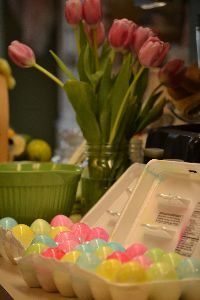
Easter Egg Pink

My New Favorite Spot in the Backyard

So Pretty For Spring

————————————
Easter Brunch is Ready

Hope Your Hungry?
——————————-
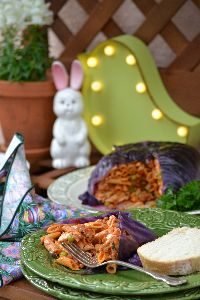
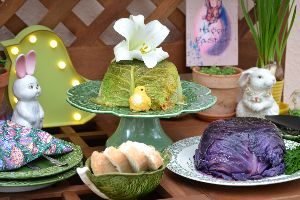
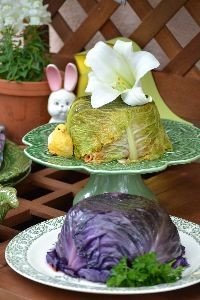
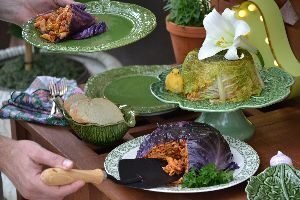
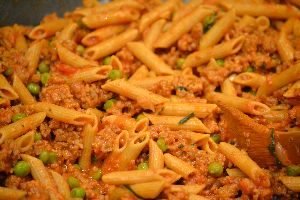
So Beautiful and Delicious
Topped with a Pretty Easter Lilly

Hello, Hungry?
Why not use a garden tool to serve up your brunch?
I mean, why not?
(A new and clean one, of course.)
Gordon Helping Himself
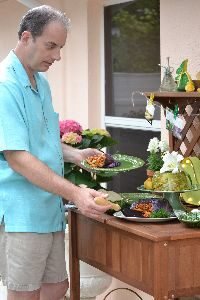
This is very pretty and tasty. The only other food items you would need to serve this would be some nice bread and maybe even a ‘garden salad.’ Just set up some tables and chairs and let everyone help themselves. You could even throw in an Easter egg hunt for the kids as well. While the adults mingled, the kids can play. All you need is a nice warm spring day.
The Recipe:
(Note: The following recipe ingredients are our guide. We tend to add more of this, and less of that, as we go. Sometimes we throw in more pasta, or more cheeses, or more sausage, etc. Sometimes substituting ingredients as well. This mixture is excellent eaten alone with some bread. It isn’t just for stuffing a cabbage.)
—————————————-
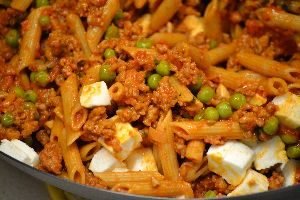
- 1 – 1/4 Pounds Penne Pasta
- 1 Medium Head of Green Cabbage (We used about 6 – 7 leaves per mold.)
- 1 Medium Head of Purple Cabbage (6 – 7 leaves.)
- Olive Oil for Sauteing
- 1 Pound Ground Turkey
- 1 Pound Ground Sausage, (We used an Italian sweet, and a spicy.)
- 1/2 Cup Marsala Wine
- 1 Large Sweet Vidalia Onion (You can use whatever you like.)
- 3 – 4 Garlic Cloves, Chopped
- 2 Cups Frozen Peas
- 1 Large Jar Marinara Sauce
- 1 – 6 oz. can of Tomato Paste
- Salt and Pepper to Taste
- Chopped Fresh Basil, About Half a Cup
- 1/4 – 1/2 Cup Chopped Fresh Parsley
- 1 Cup or so of Shredded Pecorino-Romano
- 1 Cup Shaved Parmesan
- 1 Cup Mozzarella, Chopped
- Olive Oil Cooking Spray
- (We also made an Eggplant Timbale with the extra mixture.)
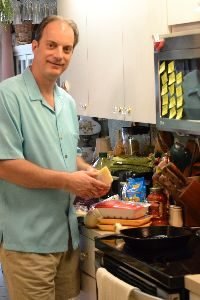
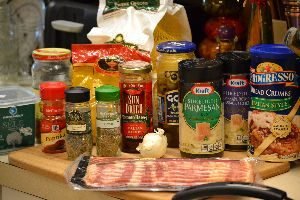
Gordon in the Kitchen Ready to Make our Timbales
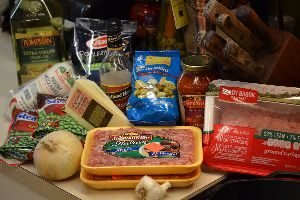
The Ingredients
(I do have some tortellini pasta, pictured above, that we didn’t add to this recipe.)
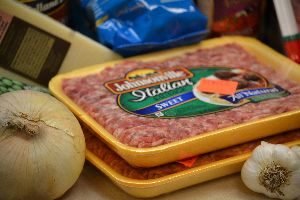
Spicy and Sweet Italian Sausages
You can use any sausage you like, but this timbale is Italian so we used some Italian spiced sausages.
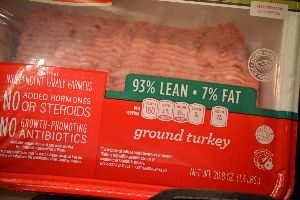
Ground Turkey
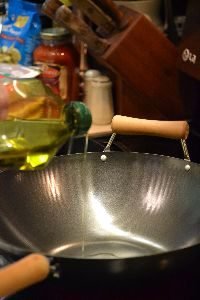
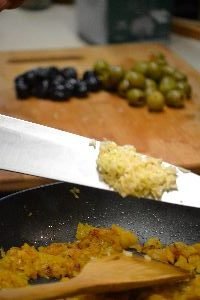
Olive Oil in the Wok
Just enough oil to saute your chopped onions and garlic.
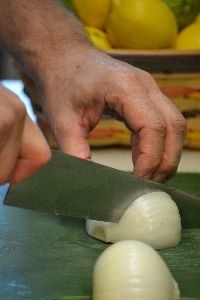
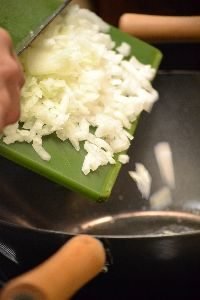
Chopping the onion and adding it to the wok.
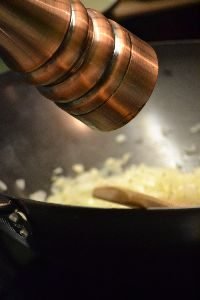
Adding Freshly Ground Black Pepper
Rinse your knife with water after you chop your onion, and before you chop your garlic, so that the garlic doesn’t stick to it.
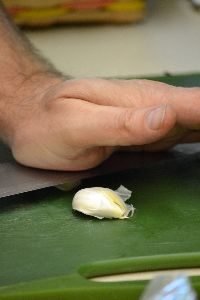
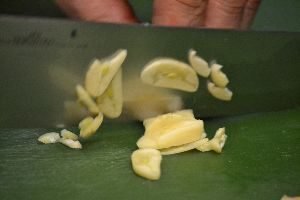
We love garlic, so we tend to add a lot of it when we cook. You can omit this or just add one or two.
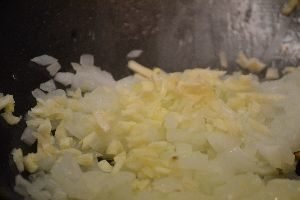
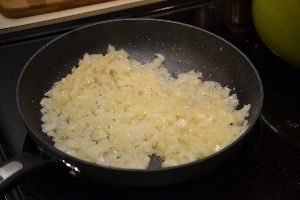
Sauteing the onion and garlic in the wok.
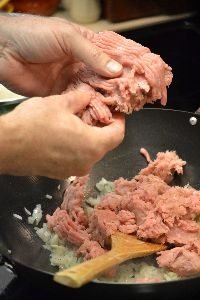

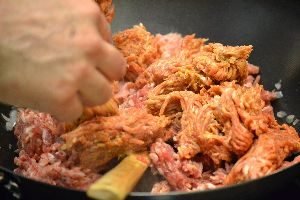
Adding the turkey and sausages to the onion and garlic.
Browning the ground turkey and the sausages in the wok.
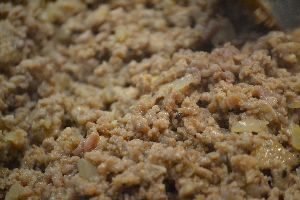
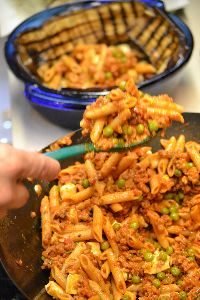
Your Timbale Base is Ready

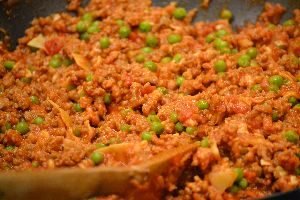
Adding Marsala to the Meat Mixture
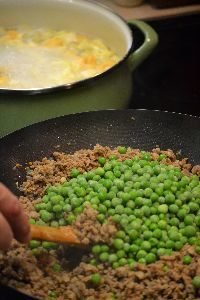
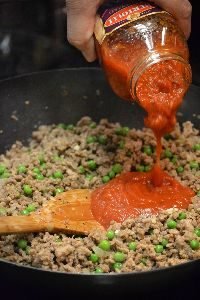
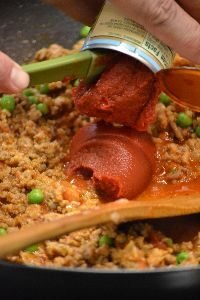
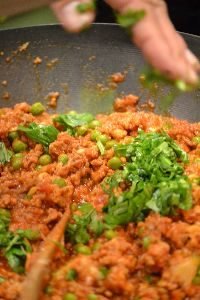
Next, Adding the Frozen Peas, Marinara Sauce, and Tomato Paste
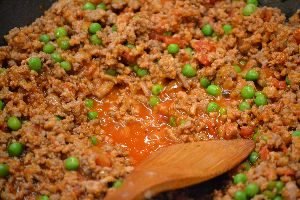
Simmer to reduce the liquid.
——————————————–

———————————-
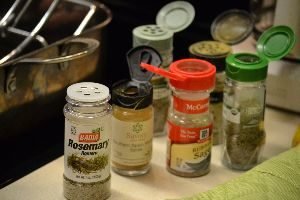
I gathered some of our herbs from our garden for our Timbales.
Curly Parsley and Fresh Basil
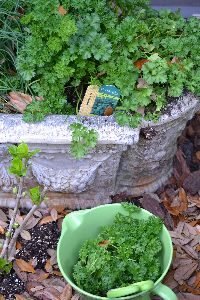
While I was gathering herbs I discovered our first rose of the season.

Beautiful!
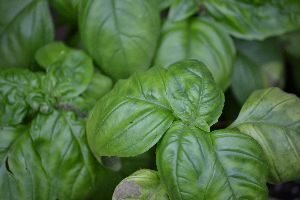
Our Basil is Beautiful, Healthy and Delicious
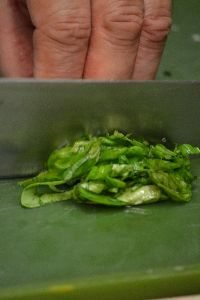
Chop Your Basil and Parsley, Add to the Mixture
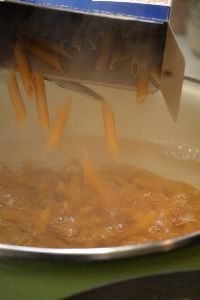
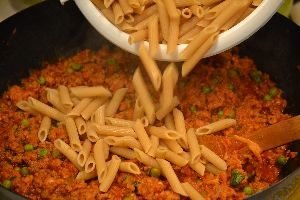
In the Meantime, Boil your Whole Wheat Penne Pasta until Al Dente.
Drain, then add to the mixture.
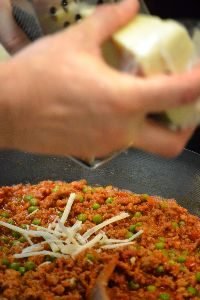
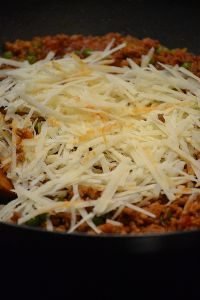
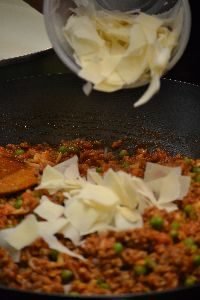
Next you add some of your cheeses.
Gordon added some grated Pecorino-Romano, and some shaved Parmesan.
The Cheeses above have been melted into the timbale mixture.
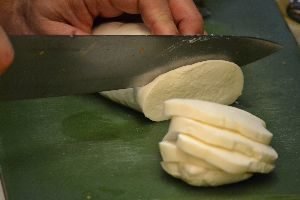
The last step is to chop some Mozzarella and add to the mixture while it is lukewarm. You don’t want it to melt as the other cheeses did.
———————————————–
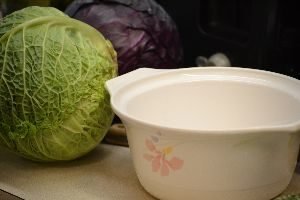
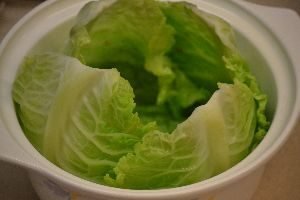
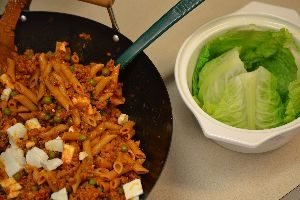
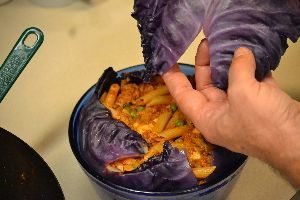
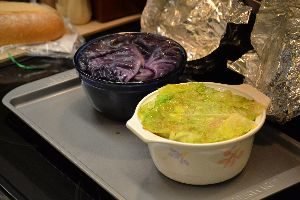
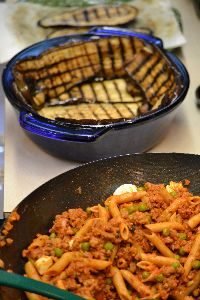
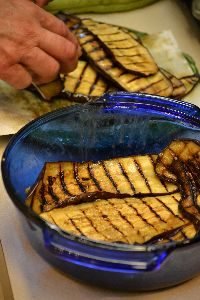
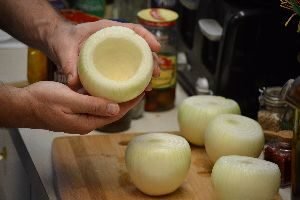
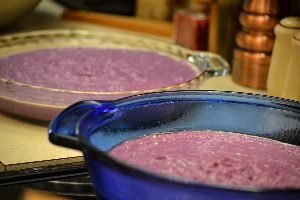
Our Molds for the Timbales
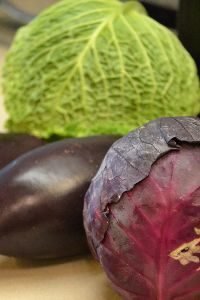
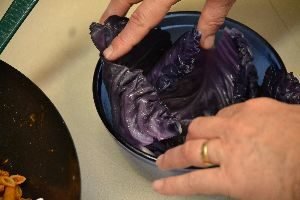
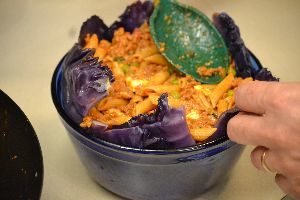
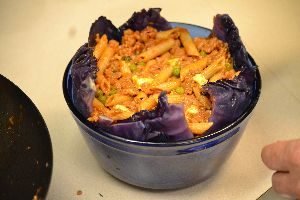
Green Cabbage, Purple Cabbage, and Eggplant
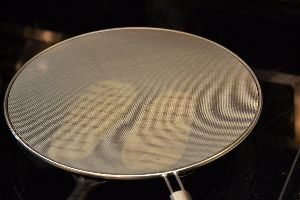
Spray your “Mold” with an Olive Oil
We chose the bowls as molds for our cabbage timbales.
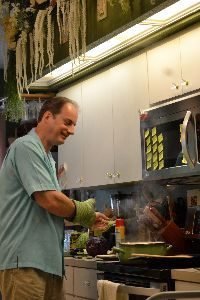
Gordon is an excellent cook!
I may come up with the ideas, but he implements them.
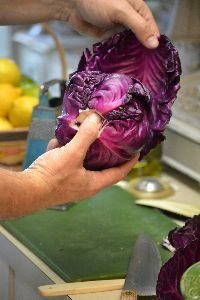
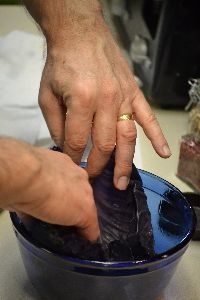
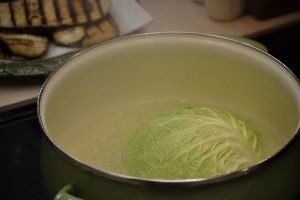
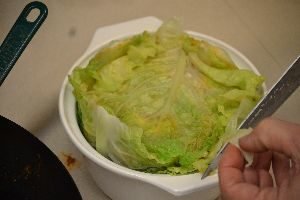
You want to remove the cabbage leaves very carefully as not to tear them. In a medium sized pot you want to boil some water on a medium – high heat. You will blanch the cabbage leaves. You just want to soften the leaves. Blanch one leaf at a time, it shouldn’t take long at all, about 15 seconds. Then set the leaves aside to dry.
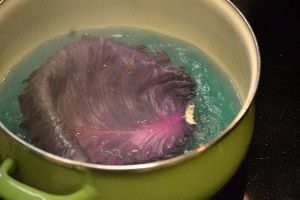
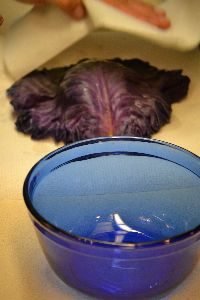
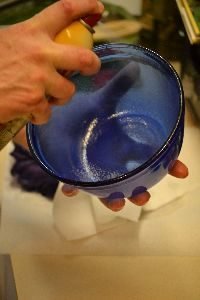
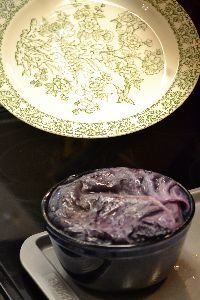
I love the color of the water.
You can color eggs in this, and they would look great, a natural blue hue.
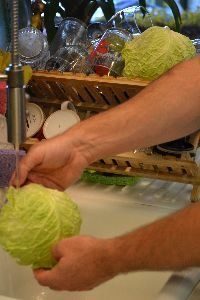
Here Gordon is Washing the Green Cabbage Leaves, Above
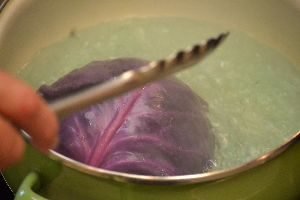
And Blanching the Green Cabbage Leaves, Below
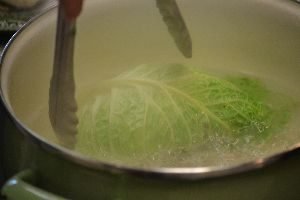
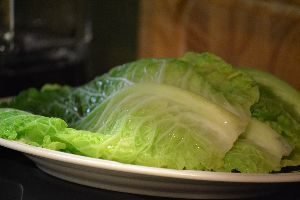
The Blanched Green Cabbage
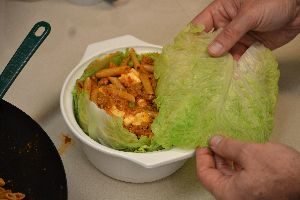
Place the cabbage leaves onto a plate and pat dry before assembly into the bowl molds.
Gordon sprayed each bowl with cooking spray before he added the leaves.
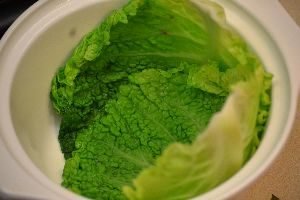
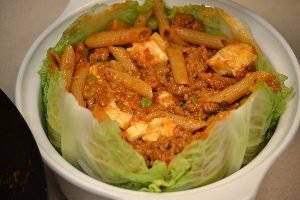
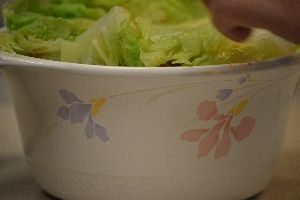
Each of our Molds Holds About 6 – 7 Cabbage Leaves
Make sure the bottom of the bowl/mold is covered.
You also want to make sure your mixture has cooled a little and not blazing hot before adding it to the cabbage leaves.
You want to arrange the leaves in the bowl, overlapping each one. When you have the cabbage leaves all arranged inside the mold that you want to use, now you add your meat mixture.
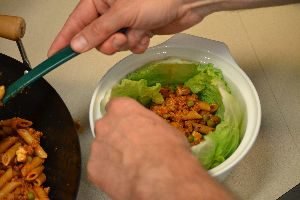
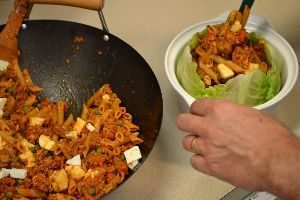
Filling all the way up to the top, as the top with end up being the bottom. when you flip them over.
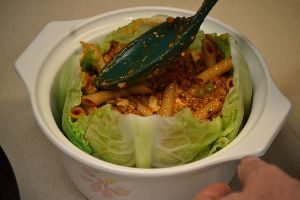
Make sure the mixture is packed down good.
Next you want to fit the last cabbage leaf on top. Slice a “V” at the stem section for a better fit.

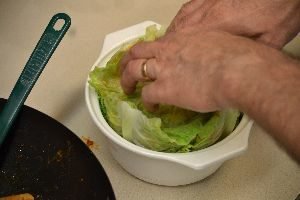
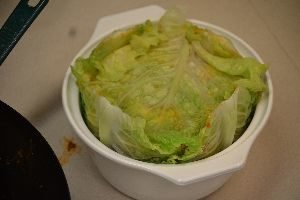
Tuck everything in good. If need be you can use some scissors to do some trimming.
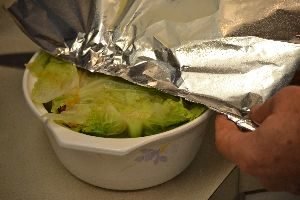
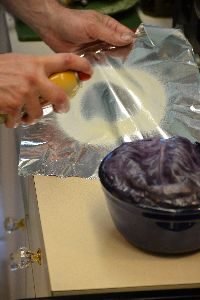
Next you want to use some aluminum foil to cover each timbale mold, but first you want to spray some olive oil cooking spray onto the part that will touch the cabbage.
Preheat the Oven to 350F
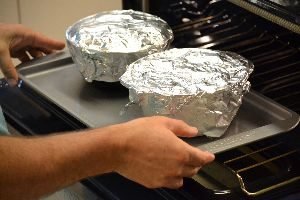
You Want to Bake 25 – 30 Minutes
When out of the oven, let stand a good 15 minutes before you flip them over onto your cake plate or platter.
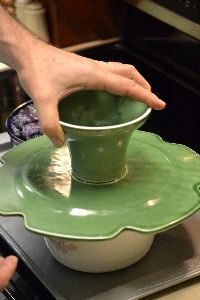
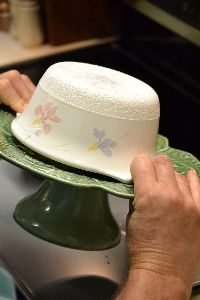
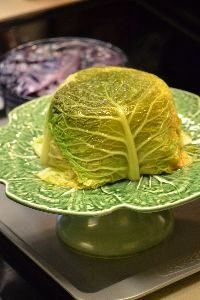
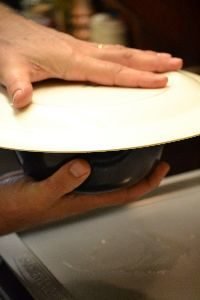
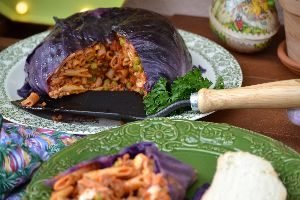
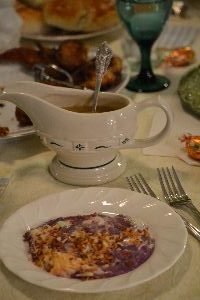
Unmolding Our Cabbage Timbales
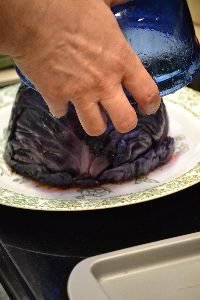
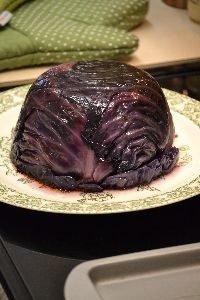
Don’t they look Beautiful?
————————————-
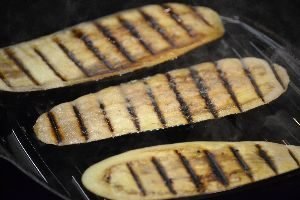
We had some leftover Timbale mixture and thought we could make an eggplant one as well.
Eggplant Timbale
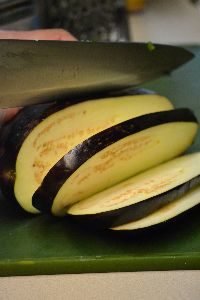
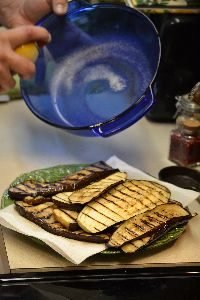
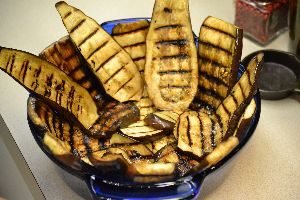
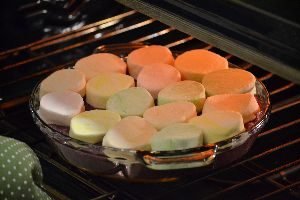
Here Gordon is slicing the eggplant lengthwise, then coating them into some olive oil spray, and placing them on a grill plan on the stove top.
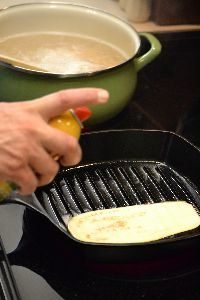
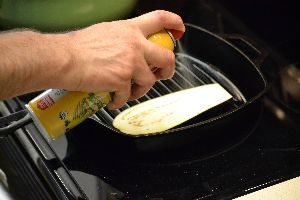
You want those really nice grill marks. Cook the eggplant through.
See How Lovely?
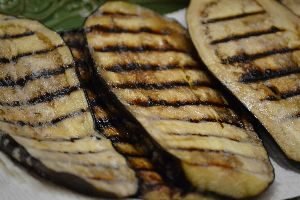
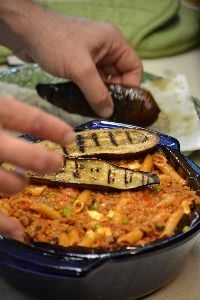
Next you want to arrange the eggplant into an already greased casserole dish, in the same way you did the cabbage timbales above.
Gordon did experiment with different ways of placing the eggplant into the dish.
When you decide how you want it, then add your mixture, same as above.

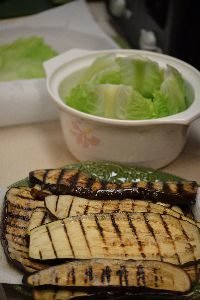
I might have put the photos out of order, but you can tell how to complete this. It doesn’t really matter what it looks like because this is one of the best things you will ever eat. I promise!
You can top with grilled eggplant, cover with aluminum foil, bake on 350F for 25 – 30 minutes, then done!
We didn’t unmold this one, we just ate it right out of the dish.
————————————-
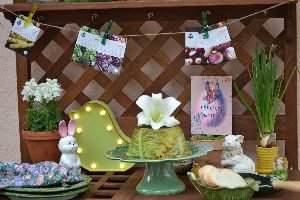
Beautiful Cabbage Timbales for Easter Brunch
—————————————-
Now that we have our Easter Brunch out of the way, it’s time for:
Our Easter Dinner

Brian and Veronica Ready to Dig In
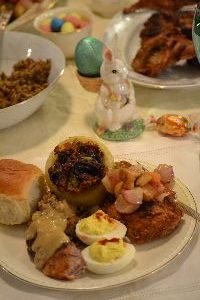
Julie’s Dinner Plates
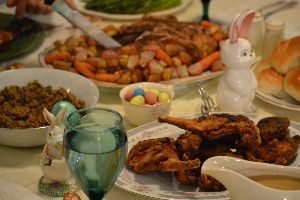
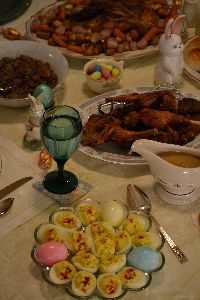
What’s On the Menu?
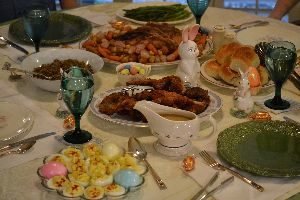
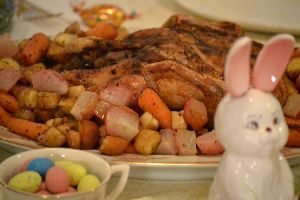
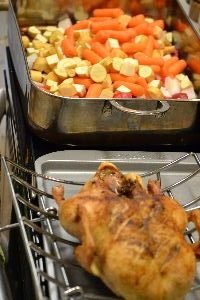
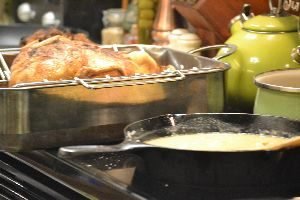
Duck
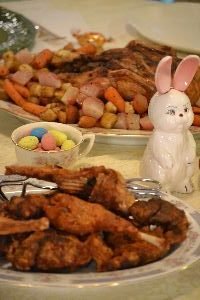
Fried Rabbit
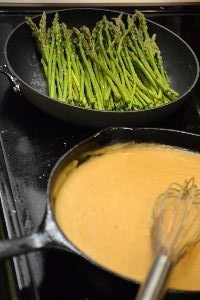
Asparagus
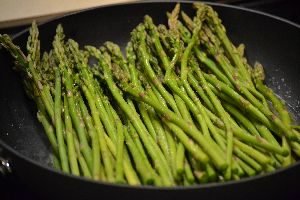
(We really don’t have a recipe for this asparagus here. Gordon just sauteed it in some butter on the stove top.)
Stuffed Vidalia Onions
Roasted Carrots, Parsnips, Radishes
Wild Rice
Purple Yams with Marshmallows
Julie’s Deviled Eggs
Dinner Rolls
Gravy

An Excellent Easter Dinner
————————————
Easter Linen’s
To me it would not be Easter without eating our delicious dinner on top of nice linen’s, as in linen tablecloth and napkins.

Fine Linen from Japan
I find the nicest things at yard sales. This particular set however, Gordon found at a yard sale in our neighborhood that was just $2.00. Beautiful quality! I was so thrilled when he brought them home. And whether or not they get ruined or not, we are only out $2.00 so I always let our guests know that if you spill something on the tablecloths, don’t worry about it. We never pay much for our linens that we find at thrift stores or yard sales, so it’s no big deal if they get ruined.
Paying $2.00 for a lovely table for Easter? Worth it!
———————————–
The Recipes For Our Easter Dinner
Duck

With Roasted Rabbit Foods
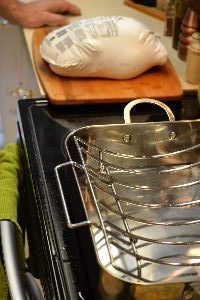
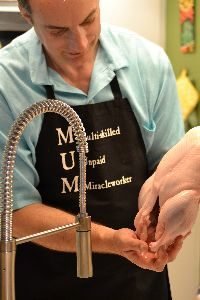
Our MUM Preparing the Duck
M ulitskilled
U npaid
M iracleworker
—————————
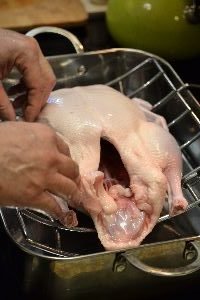
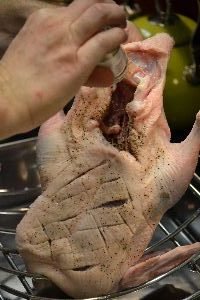
You first want to rinse the duck under running water to clean it.
Scoring The Duck
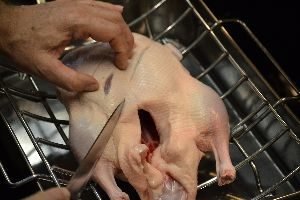
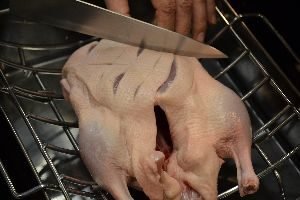
Doing this will help to release the large amount of fat in the duck.
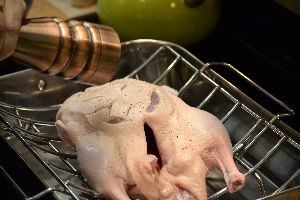
Adding Salt and Pepper
The Spices for the Duck
1 Tbsp Rosemary
1/2 Tbsp Sage
1/2 Tbsp Orange Peel
1/2 Tbsp Marjoram
1 Tbsp Thyme
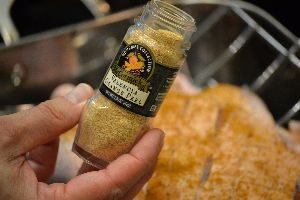
1 Tbsp Southern Spain Pinchito Spice (Savory Spice Shop)
1 Cup shaved Vidalia Onions (from the inner stuffed onions)
3 to 4 whole Garlic Cloves
1/4 Cup Olive Oil
Salt and Pepper to taste
Ground Orange Peel

Add the chopped onions and garlic along with half of the spices to the inside of the duck.
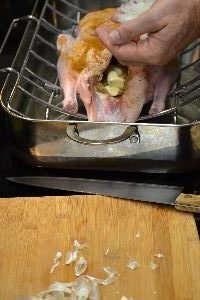
Adding the Garlic Cloves
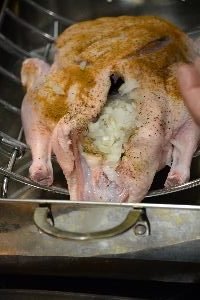
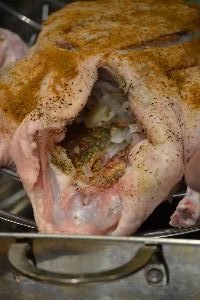
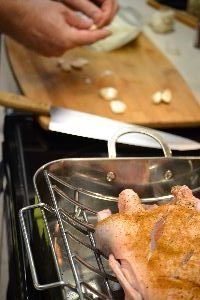
Add the rest of the spices to the outside of the duck and coat with the olive oil.
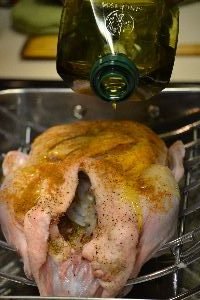
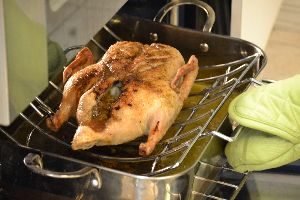
Place in a 425’F oven for ~ 50 min. or until the internal temperature of the duck reaches 160’F
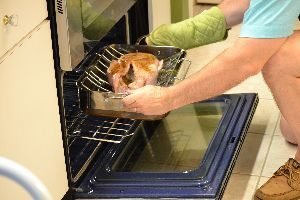
Into the Oven it Goes
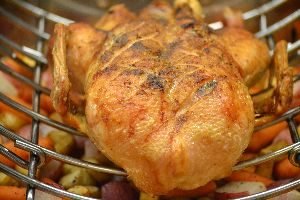
Once cooked the very hot juices of the duck going back into the center of the meat will raise the internal temperature of the duck to 165’F.
Let the duck rest for at least 15 min. before cutting into it, or those juices running back into the meat will run all over your platter, and your duck will be dry.
————————————
Now for the Rabbit Foods
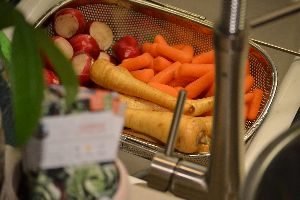
Washing the Parsnips, Carrots, and Radishes

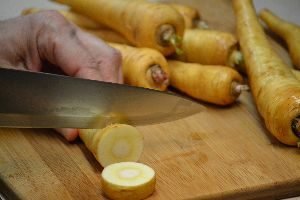
Next Chop the Rabbit Food
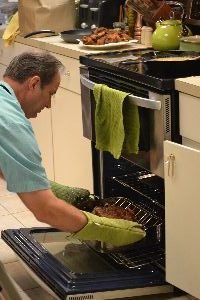
Meanwhile, Gordon is checking on the duck.
Rabbit Veggies:
Enough parsnips, carrots, and radishes to fill the pan. Slice them into equal sizes so they cook evenly.
About half way through the cooking of your duck, add your Rabbit Veggies and a little salt and pepper to taste.
Mix your veggies around with the fat of the duck to lightly coat them.
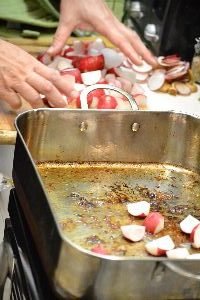
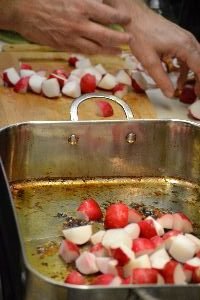
Duck Fat is Very Healthy For You
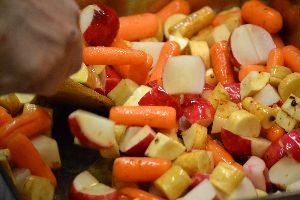
Here you can see the duck fat coating the veggies.
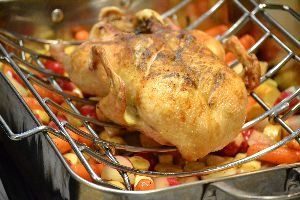
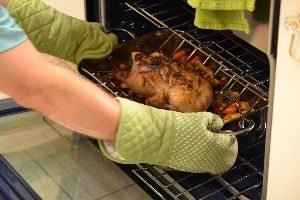
Now you place the duck and the veggies back into the oven.

Cook the veggies until they are tender…about 25 min.
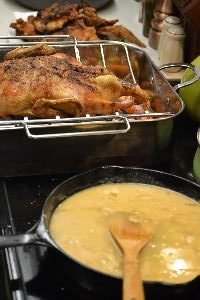
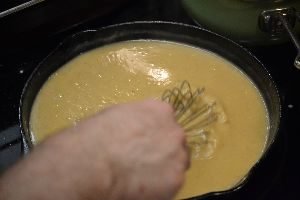
Gordon Making our Easter Gravy
————————————————–

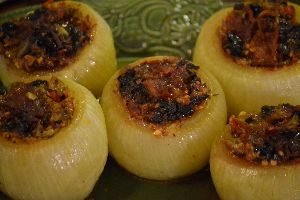
Stuffed Vidalia Onions
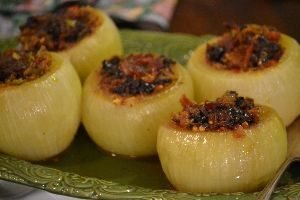
I came across an old recipe in an ancient cookbook and I really wanted to try it, except I didn’t like some of the ingredients that were featured in the recipe. So, Gordon and I rewrote the recipe to our tastes and here it is.
If we were living in Hawaii then these Vidalia onions would be Maui onions, but seeing as how we are in Florida, Vidalia it is! What you want is a large sweet onion. Vidalia onions are grown in Vidalia, Georgia.
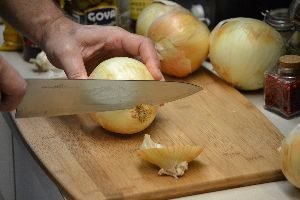

You want to cut off the end of the onion, so that it will sit flat.

You next want to chop off the top of the onion and remove the outer skin. About 1/4 off the top.
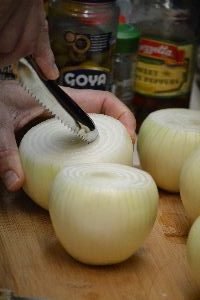
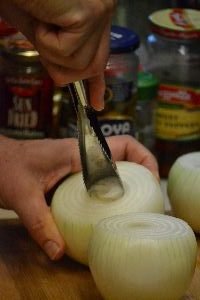
Then just start twisting this fish scaling tool around inside the onion to make a hole. You want to make it deep enough, and wide enough for your filling.
Gordon bought the fish scaling tool at the Asian store.
You want the onions to look like the photo at top, right. Carved out beautifully.
We never throw food away, the onion that was removed, photo top, left, will go into omelets, salads, etc.
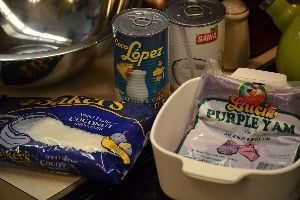
The Ingredients For Making the Stuffed Onions
My Favorite Ingredient?


Bacon! Bacon! Bacon!!
A nice thick bacon is perfect here.
The Recipe:
- 5 Large Vidalia Onions
- 10 Strips of Cooked, Chopped Bacon
- 1/2 Cup Butter or Margarine
- 1 Cup Black and 1 Cup Green Olives, Chopped
- 2 – 3 Garlic Cloves, Chopped
- 2 tsp Turmeric Powder, Mainly for Health Reasons (kills cancer cells)
- 1/2 Tbsp Paprika
- 1/2 Tbsp Thyme
- 1/2 Tbsp Sage
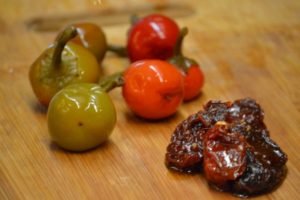
- 1/4 Cup Chopped Sun Dried Tomatoes in Olive Oil
- 6 Chopped Sweet Cherry Peppers
- 1/2 Cup Shredded Parmesan Cheese (Craft)
- 1/2 Cup Shredded Parmesan, Romano, Asiago Cheese (Craft)
- 1/4 Cup Italian Bread Crumbs
- Salt and Pepper to Taste

Gordon is sauteing the insides of the onion, that was carved out, in a pan with some butter/margarine. Then adding some chopped garlic cloves and some turmeric.

Sauteing some of our Vidalia Onions, Garlic, and Turmeric

Look at these Beautiful Onions!
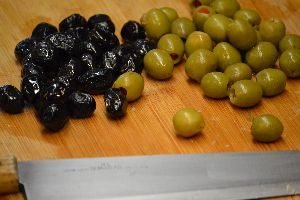
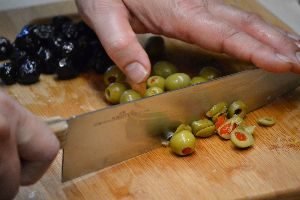
Black and Green Olives

Onions, Olives, and a Reflection of Gordon and Julie
All Added to a Large Mixing Bowl
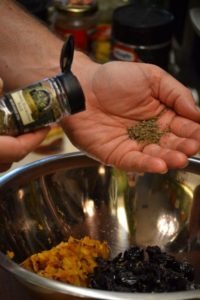


Gordon Adding the Spices

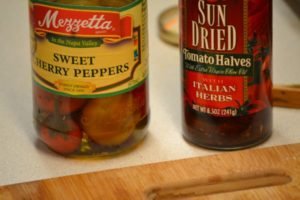
Next comes the Parmesan cheese, and chopped sweet cherry peppers, along with some chopped sun dried tomatoes.

All of these flavors blended together add so much taste to the onions.

Ready to Add the Bacon


Chop the bacon into small chunks.
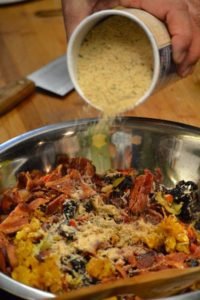
Gordon Adding the Bread Crumbs
Then just mix together.

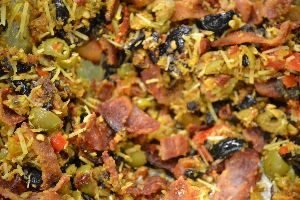
This Filling is Perfection
Gordon got the idea to place the onions into foil and then put them into the holes of a muffin pan.

Before baking, place a pat of butter into each onion.


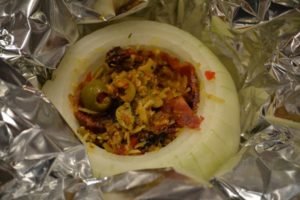
Then fill to the top with your delicious mixture.
Bake in the oven for about 25 minutes in a 350’F.

Our Stoic Brian
Brian loved the onions so much that he wanted the recipe to cook for his fire fighter co-workers.
Gordon even gave him the tool to carve out the onions.
We do love our Brian,
Julie
——————————————————-
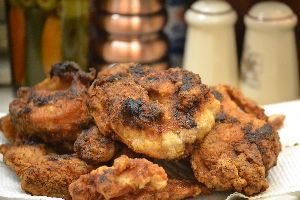
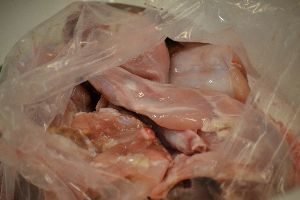
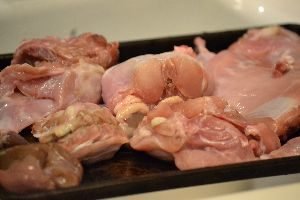
Fried Rabbit
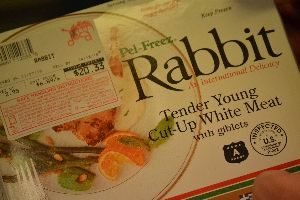
$20.33!!
While I was doing my commissary shopping for our Easter dinner, I saw this in the freezer section. Rabbit, Tender Young Cut-Up, White Meat. Hmmm, I thought? How appropriate. Rabbit for our Easter dinner?
I knew Gordon would be cooking a duck, so I thought rabbit would be another nice meat to go along with our dinner.
I then felt guilty, because I love rabbits and think they are so cute and cuddly, and how cruel that it would be to kill one to eat. It was at that point I realized it was already dead after all, so what could it hurt? Right?
It’s always interesting how we justify things in our heads. 🙂
So, I bought the box of RABBIT!
I LOVE RABBIT now!!
It tastes similar to chicken.
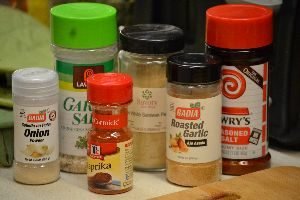
The Spices for the Batter
1 1/2 Cups Flour
1/4 Cup Corn Starch
1 tsp Garlic Salt
1 Tbsp Onion Powder
1 tsp Roasted Garlic Powder
1 tsp Paprika
1 tsp Lawry’s Seasoned Salt
1/2 tsp White Pepper
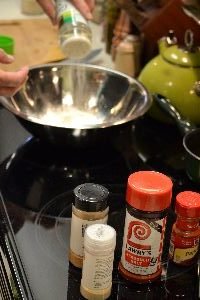
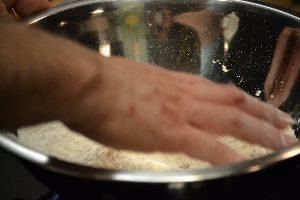
Mix all the ingredients in a bowl large enough to dredge the rabbit pieces in.
What I do love about it is that the pieces are so dainty.

Just look at those little dainty bones?
The Rabbit
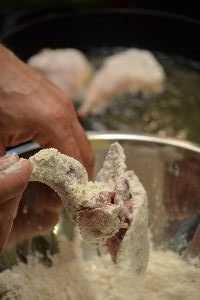
Gordon Dredging the Rabbit
(I believe that I captioned the photo at right, ‘dredging the chicken’, but it is really rabbit.
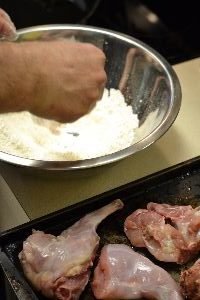
Dredge the Rabbit in the spice, corn starch, and flour mixture.
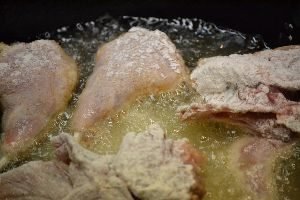
Place in a large cast iron skillet with about an inch of vegetable oil.
Heat the oil over medium high heat and cook the rabbit until golden brown… or just like you would fry chicken!
——————————————————
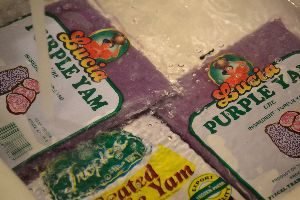
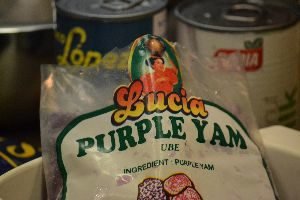
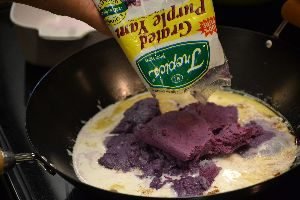
Purple Yams with Marshmallows
This is the first year that we have ever had these purple yams. I believe they are from the Philippines.
Ingredients:
2 Tbsp Butter
1 Can Coconut Milk
1/2 Tbsp Chinese Ginger Powder
1/2 Tbsp Cardamon
1/2 Tbsp Ground Coriander
1/2 Cup (Splenda) Sugar Blend
3 Packages Purple Yams
1/4 Can Coconut Cream
1 Bag Marshmallows (Egg Shaped)
1 Bag Shaved Sweetened Coconut
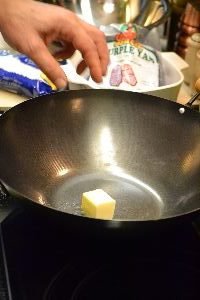
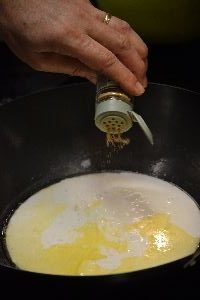
In a Wok or large sauce pan over medium heat, melt your butter and add your coconut milk…

sugar blend…
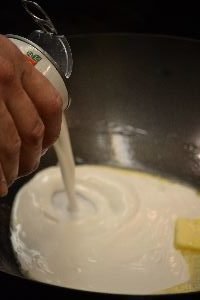
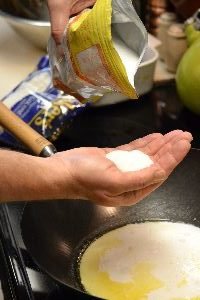
and spices.
Once combined, add your yams and mix well.
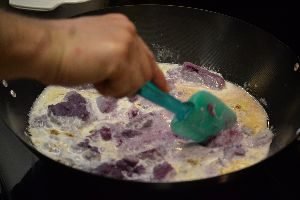
then add your coconut cream and mix well.
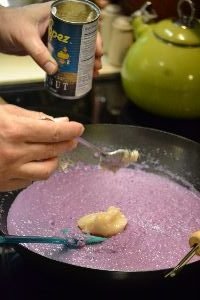
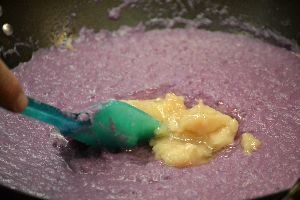
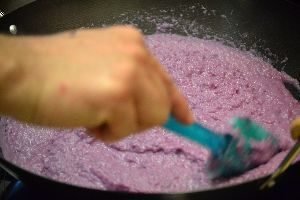
Heat until well combined.
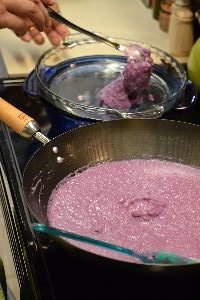

Add the mixture to two Pyrex pie dishes.

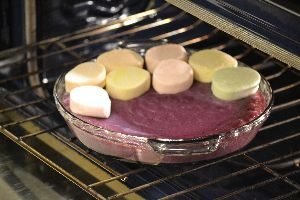
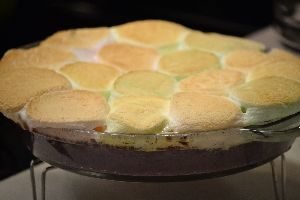
Easter Egg Marshmallows
Top the Yam mixture with the Marshmallows and place in a 350’F oven.
Gordon Adding them to the Purple Yams
We did think about using Peeps for this as well.
Toasting the Coconut
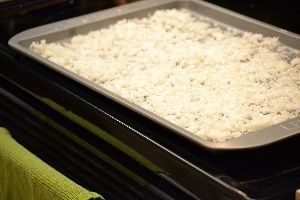
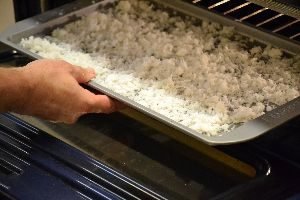
Place your shaved coconut on a baking sheet and place in a 350’F oven.
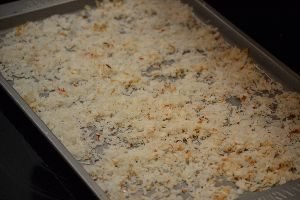
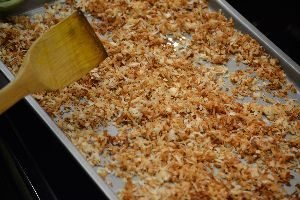
Stir occasionally and bake the coconut until golden brown.
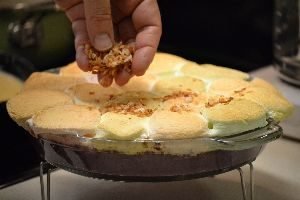
Sprinkle with the Toasted Coconut on top of the Yam and Marshmallow dish.
My Place Serving
It is a bit runny but very delicious, kind of like a pudding.
———————————————
Gordon Cooked our Excellent Dinner
We thank him very much!
————————————

————————————————
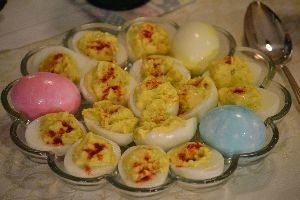
Julie’s Deviled Eggs
My Contribution to our Easter Dinner
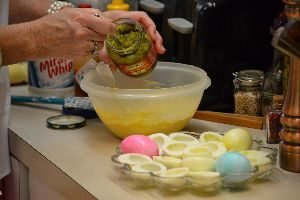
You can’t make deviled eggs without first boiling them. Here I’m using my colored eggs from Easter.
This is a typical southern deviled egg recipe that I learned from my grandmother.

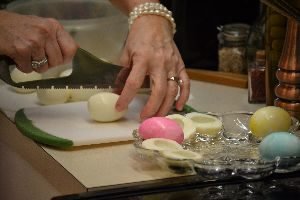
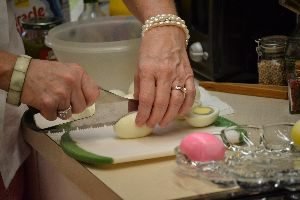
Being from the south, we cook everything well done so my eggs are always cooked to the max. I happen to like that green ring around the yolk when I slice them open. Which is a no-no in cooking circles.
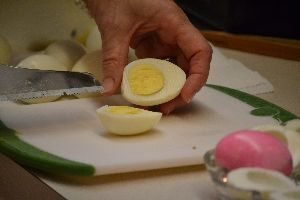
After I’ve removed the egg shell, and I’ve washed the outside of the egg and patted it dry, I use a cutting tool to slice the egg lengthwise. This particular tool is from Japan and it makes the prettiest ridges along the egg whites. I think it was originally intended for slicing veggies by sushi chefs.

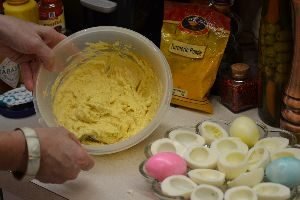
Once I have removed the egg yolks from the eggs, I place them into a bowl and smash them with a fork.
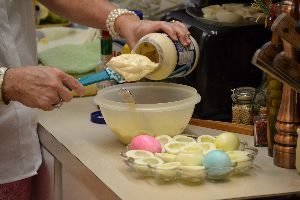
Adding the Mayo
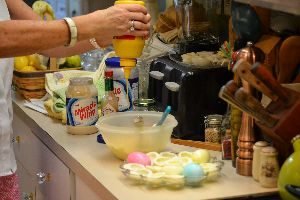
I wish I could give you exact measurements.
But the truth is, I just eyeball everything.
I add mayonnaise, yellow mustard, lots of fresh ground pepper, sweet pickle relish, some dashes of Tabasco sauce, and I always drizzle some extra sweet pickle juice at the end.
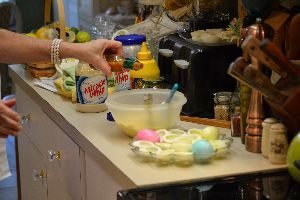

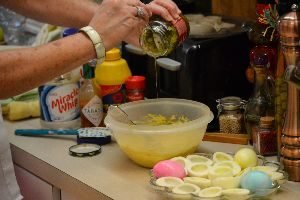
Here I’m adding some Tabasco and some Turmeric.
The turmeric is a very bland spice so it doesn’t affect the taste of the food, but it is known to kill cancer cells and it gives my deviled eggs a beautiful golden color.
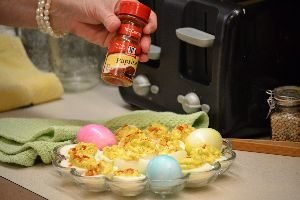
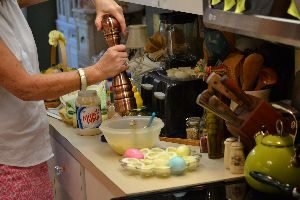
Sprinkle some Paprika on Top

I’ve also been known to add some crumbled up bacon and even some of our chives from our herb garden.
————————————————
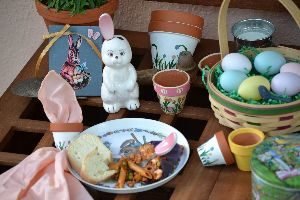
Gifts For Veronica
Childhood Memories
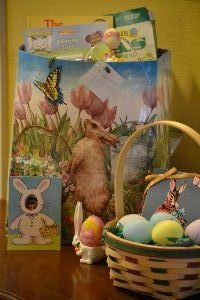
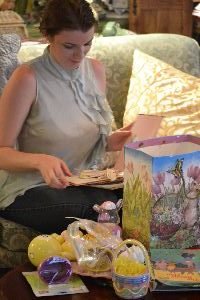
I was going through some of the old Easter things that were in the attic and I came across some of her old things that I knew she would be happy to see again. So I passed them down to her.
Happy childhood Easter memories.
———————————————-
I love our Backyard Lizards
Sitting Pretty in Pink
————————————————
Easter
1965

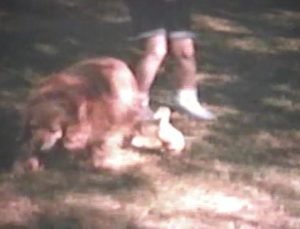
That is me, Easter afternoon 1965 in my grandparents backyard where I just got something very special in my Easter basket.

A Duck!

Cookie and the Duck
They were friends long before it was cool for animal opposites to befriend each other. What about that?
We even had progressive pets.
Never thought I would ever eat a duck after owning one, but I did.
——————————-

I still like the petticoats.
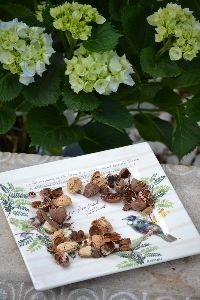
Don’t forget our backyard critters.
The nuts above are for the birds.
The nuts below are for the squirrels.
(The birds get a nice plate from New Zealand, while the squirrels get an aluminum muffin tin.)
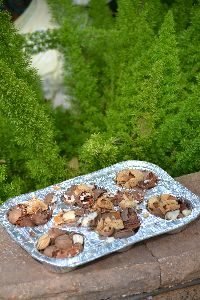
Hey, the squirrels are messy eaters. 🙂


Happy Easter

With Much Love and Appreciation,
Julie and Gordon
—————————————–
Click Here For: Potting Bench Easter
—————————————–

———————————
Click Here for: How to Make an Easter Bunny Cake
————————————-
Click Here for: Julie’s Easter Muchness

————————————
Click Here for: Outdoor Pre-Easter Brunch and our Easter Dinner
————————————-
Enjoy!