
Welcome to our Edible Gifts for Christmas Page

I think the best gifts are what we make ourselves whether it is something that we have baked, cooked or just assembled in the form of a care package.

I don’t know about you but my house is full of trinkets and knick-knacks that we have received through the years and there really isn’t any more room for anything else. So the gift of food is always welcome. Here I have put together some fun, interesting, edible, and recyclable gifts that I would love to receive myself.

So whether you celebrate Christmas, or Hanukkah, or Winter Solstice, or Ramadan here are some ideas that you might enjoy.

Cookie, Anyone?
For this recipe see my:
You also might want to check out our other edible gifts pages. Anything can make a nice edible gift to give.
———————————————-

The Gift of Greek

This year we wanted to give a Greek themed gift, with items that we had purchased from our visits to the famous Greek-American community of Tarpon Springs, Florida.
Tarpon Springs has the largest Greek-American population in America. It was made famous by the Greek sponge divers that arrived from Greece in the late 1800’s. They still wear the diving helmets and dive suits to walk the bottom of the ocean floors harvesting their sponges.

Tarpon Springs is a very charming community and one of our favorite places to visit, not just for the scenery, but for the food as well.

Beneath The 12- Mile Reef
This is a movie that was filmed in 1953 in Tarpon Springs, starring a very young and handsome, Robert Wagner. The movie depicts accurately the life of this small Greek fishing village and the sponge diving industry here in Florida.

In addition to the gift of food, we also wanted to give the gift of knowledge as well by including in the care package things like books of the area and even a documentary on Tarpon Springs sponge divers.
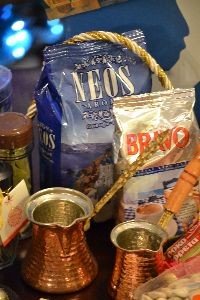

Some of the items that we put together were this delicious Greek coffee and a briki to cook it in on top of the stove.
We also included items of sea salt and olive oil from Greece.

Agora Food Market
Most of the items we purchased from the Agora in Tarpon Springs. Which means market in Greece. So actually the sign above reads, Market Food Market.
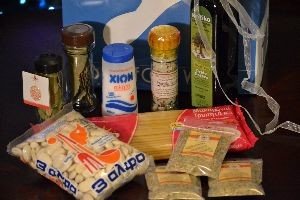
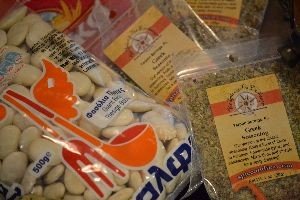
The Gift of Giant Beans, Greek Pasta and Greek Seasonings
You can also include a Greek cookbook or at least some recipe cards with some great ideas.
We bought some postcards from Tarpon Springs, photo above, to use as the ‘greeting card’. We also bought postcards with the Tarpon Springs Greek Salad recipe to enclose.


You can make the gift as simple or as elaborate as you like.
You can also find any sort of bag or box with the colors of Greece, blue and white.

Although not edible, I did include the gift of olive oil soaps and even one of the famous sponges.
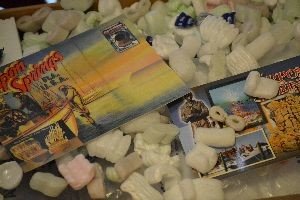
This is my favorite thing to do right before I seal the package up to be mailed. I like to give hints of what is inside.
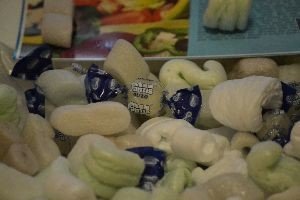
I placed some of the postcards on the top and I’ve scattered some Greek licorice candies all throughout the popcorn packaging.

Ouzo Candy
—————————————————————————
Greek Bay Leaves
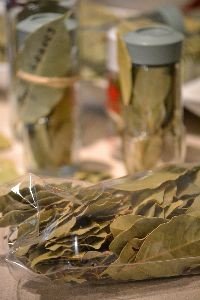
While we were doing our shopping at the Agora in Tarpon Springs, I noticed these big bags of bay leaves from Greece. One big bag only costs $2.99! There must have been about 60 – 70 leaves per bag. When I go shopping at the local groceries stores I probably spend almost $4.00 on a small bottle with about 5 of them inside.
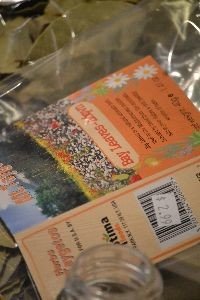
So I bought a few bags and decided to add them to our Greek themed Christmas gifts.
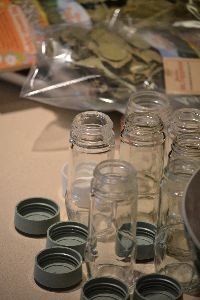

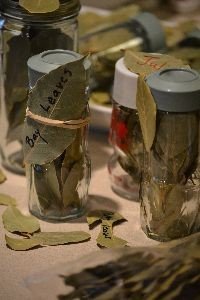
I always save these little glass jars for just such a project.

Because I had so many nice bay leaves to chose from, I set to work picking out the nicest ones.

Beautiful Bay Leaves
A nice little addition to our gift of Greek.
—————————————–

Ready to Make Some Delicious Christmas Gifts

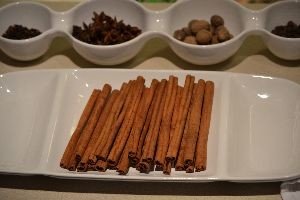
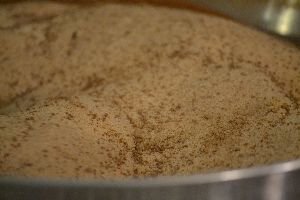
Spices of the Season


I love working on Edible Gifts but I also love creating an atmosphere that is conductive to that.
My kitchen is, and my home is, my sanctuary and I like to create areas in which I can work and be creative.
I like surrounding myself with lots of fruit and nuts and festive decorations to put me in the mood to be creative during the holidays.
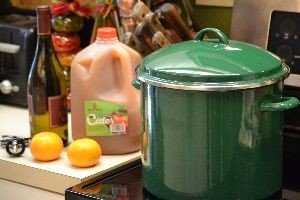
Gordon and Julie’s Wine and Cider Punch
This is a seasonal favorite of ours. We love it and devour it every year. It is very easy to make and it will give your home the most welcoming aroma, inviting guests in that will not want to leave any time soon.

You first want to simmer on the stove a gallon of apple cider, along with a bottle of white wine. We are not white wine drinkers so whenever anyone gives us a bottle we save it for this very occasion. You also want to add some sort of citrus, whether it be oranges, clementines or whatever. We use about 3 cut in half clementines, or 2 whole oranges. You want all that to simmer on the stove on a low heat.


This in itself is excellent. The aroma is magnificent!


But to make it even better you want to add all the spices.

Cinnamon Sticks, All Spice Berries, Star Anise, Whole Cloves, Ground Nutmeg
You add these ingredients to the apple cider, white wine, and citrus. Then simmer on the stove for several hours while all the ingredients blend together. The smell alone is wonderful and will put you in the holiday spirit.

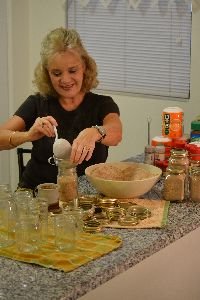
Here I am putting together little containers of the spices required to make the punch to give as gifts, so that others can make this punch as well.


We like to recycle these spice containers after we use them and save them for just such an occasion.
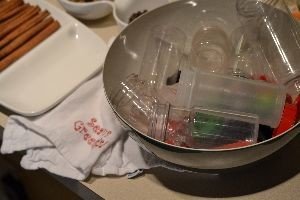
Filling them with all the spices that you will need to make this lovely wine and cider punch yourself.
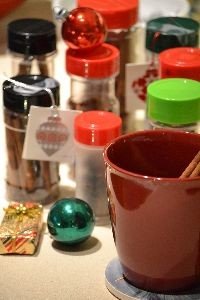
These little containers are great additions to your gift giving. These spices along with the recipe above, so they can make their own Wine and Cider Punch.
————————————————————————
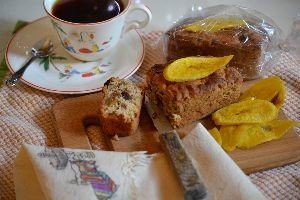
Plantain Bread with Mexican Chocolate
(Garnished with a Platano Chip)

I’m told I make some of the best banana bread but this year I wanted to do something different.

While Gordon and I were shopping in our favorite Latino’s Supermaket last week I got the idea to use the fried plantains from the cafeteria as a substitute for my bananas. I also thought that I could add some Mexican chocolate to this recipe as well.
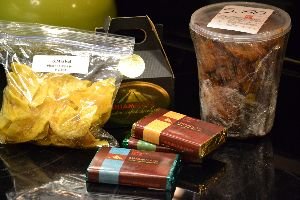

My Secret Ingredients
Mexican Chocolate and Fried Plantains


The platano chips are just a garnish. I bought them at the Latino market as well.


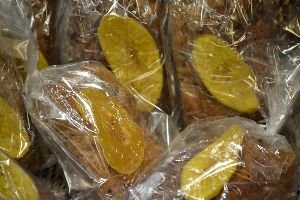
Plantain and Mexican Chocolate Bread Ready for Delivery

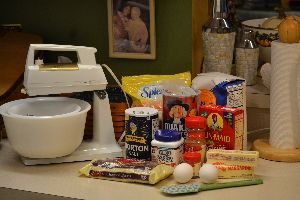
My Plantain Bread Ingredients
This is my basic banana bread ingredients the only difference here is in the substitutions and omissions.

You first want to preheat your oven to 350F and grease and flour whatever baking dish you plan on using. Because these will be gifts I like using these little mini loaf pans. For those novices you just wipe some of the lard all around the inside of each individual loaf pan and then dust with some flour getting rid of the excess.

Mix the Dry Ingredients and Set Aside


I Doubled This Batch

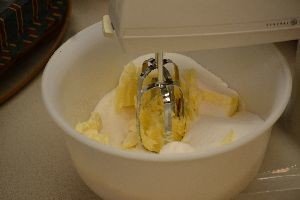
Here I creamed the butter and sugar together and then added the eggs and blended before adding the fried plantains.
NOTE: If you want a smoother batter then I would put the plantains in a food processor prior to adding here. Or you can chop them up a little bit and then add to the mixture. I wanted this bread to be very rustic, and it is.

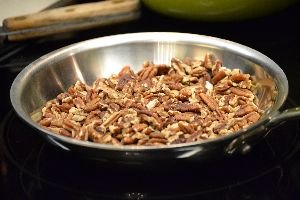
The only additions that I added to this bread were some chopped roasted pecans, (just place into a small pan on a medium heat and brown them a little bit), and some chopped Mexican chocolate.
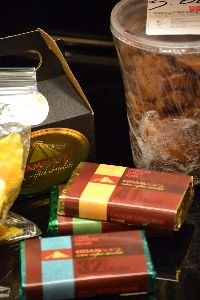
Mexican Chocolate

I used Chiammaya Custom Crafted Chocolate
Chiammaya Chocolate Website Link
(4 Ingredients: Cacao, Sugar, Cinnamon and Almonds)
This product is custom crafted from the Mexican Maya traditions. It is not your typical chocolate as it is loaded with ground cinnamon and almonds. Really good nice chocolate.
TIP: I’ve included the link above if you would like to check out their website and learn more. But I do recommend that you order the chocolate during cooler weather months as it is shipped through the mail.
———————————————–
Because I was making this for the masses, I did use regular dark chocolate bars in place of the Mexican chocolate in some of the loaves.
———————————————-
This is the thickest batter that I have ever worked with.
After combining the wet and dry ingredients together I added the chopped toasted pecans.


I ended up having to just dig my hands into this and blend it that way. Kneading it all together.
So after exhausting myself I knew there was no way that I would be able to blend all of the chocolate throughout the mixture so I did this instead. I spooned some of the batter into the pans, then then sprinkled a layer of chopped chocolate on top, then added another layer of the batter.

In the photo above the chocolate I used here was regular dark chocolate.

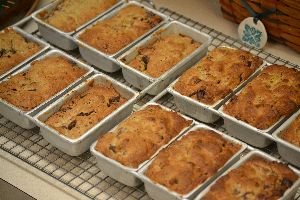
Fresh Mexican Plantain Bread Right out of the Oven
Oh yeah, who’s your momma??

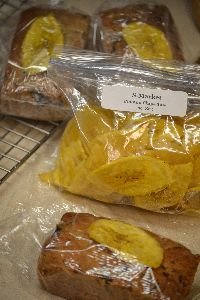
Once the bread has thoroughly cooled then wrap them individually and here I added a friend platano chip as a nice accent and a hint about what kind of bread this is.
Gordon took a few of these into work and passed them out along with my regular banana bread and everyone preferred the plantain bread. Although before I created this I used to get big raves over my banana bread.
The men seemed to prefer the hint of chocolate (I had just added a sprinkling in the middle of the loaf, see photo above) instead of having the chocolate mixed throughout the bread.
I thought that was interesting. I guess it’s just us women that seem to love a lot of chocolate.
————————————————–
RECIPE
Seeing as how I just created this plantain bread with Mexican chocolate I think it only appropriate that I name it after me.
Julie’s Plantain and Mexican Chocolate Bread
Preheat your oven to 350F and grease your baking pan with some Crisco and dust with flour.
Next combine all of your dry ingredients:
- 2 Cups of All Purpose Flour
- 1 teaspoon of Baking Powder
- 1/2 teaspoon of Salt
- 1 teaspoon of ground Cinnamon
- 1 teaspoon of ground Nutmeg
Combine all the dry ingredients above into a large bowl and set aside. I like to double and triple the batch depending on how many mini loaves that I want.
Wet Ingredients:
- 3/4 Cup of Butter or Margarine, softened.
- 2 Eggs
- 1/2 Pound of Fried Plantains
and
- 1 Cup of Sugar
You want to cream together in a blender the margarine and sugar until combined, then add the eggs, mix together, then add your fried plantains.
This is a very thick batter.
Now as you mix in your blender you want to add the dry mixture and combine it with the wet batter slowly. Add a little at a time and mix together until all the dry mixture has incorporated itself into a thick batter.
Now transfer into a large bowl.
Additional Ingredients:
- 4 oz. Mexican Chocolate, chopped
(or any chocolate that you desire, I recommend dark)
- 2/3 Cup Roasted and Chopped Pecans
Now you want to add your roasted pecans to the mixture and you can also add your chopped chocolate and stir through. Or you can save this step and sprinkle the chocolate throughout your batter as you place it in each little loaf tin. (See photo above.)
Pour into your loaf pan. I used the little mini pan loaves and I get 6 out of this recipe. Which is why I tend to double the batch so that I can get at least 12.
It took the loaves about 30 minutes to cook. If you do decide to make a large loaf then you will need to double the cooking time. My advice is to always keep an eye on what you are cooking.
———————————————————-
Once they have cooled then garnish with a platano chip
—————————————————
Julie’s Banana Bread


My Banana Bread Ingredients

You first want to grease and flour your loaf pans, whatever cooking vessel you will be using and preheat the oven to 350F.
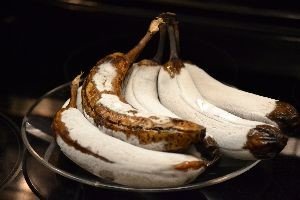
Prior to my plantain bread above, I was always told that I made the best banana bread. I do not know whether people were just being polite or that they really meant it. But perhaps the secret ingredient is that we freeze our bananas. When they are at their most rotten that is when we throw them in to the freezer and then bring them out for such an occasion. We also use frozen bananas in our banana milkshakes. These bananas do make a difference. So perhaps freezing them does add a bit of flavor that just letting them ripe on the counter doesn’t.
First cream together your butter and sugar before adding the egg.


I of course, doubled the batch but to make a single batch I use 3 bananas. Here I’ve added them to the mixture of softened butter and sugar and one egg.

You want to mix all your dry ingredients separately and set aside.
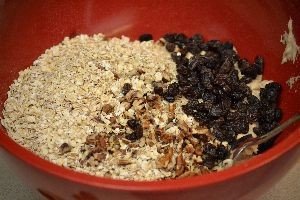
When you have added the creamed butter, sugar, egg and bananas to the dry mixture, you want to fold in some chopped pecan nuts, some raisins and some oats. Now stir together . This is a very thick batter.

Before and After
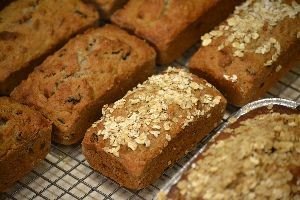
I like using these little loaf pans whether I am giving them as gifts, or not. They are nice and easy to carry with me. More like portion control for me.

I like to set aside a few of the cooking oats to add to the tops of some of the bread loafs. I just place on top of the bread about 5 minutes before they are finished cooking.
I let the breads cool a little bit on the rack before I remove them from the pan. Then I let them sit on the rack until thoroughly cooled.
Recipe:
Preheat your oven to 350F
- 2 cups of All Purpose Flour
- 1 teaspoon Baking Powder
- 1/2 teaspoon fine salt
- 1 teaspoon ground Cinnamon
- 1 teaspoon ground Nutmeg
———————————————————-
- 3/4 cup Margarine or Butter
- 1 cup Sugar
- 2 Eggs
- 3 mushy, ripe Bananas
———————————————–
Additions:
- 1/2 cup of Raisins
- 2/3 cup chopped Pecans or any chopped nuts that you desire.
- 1 cup Cooking Oats (Quaker brand)
——————————————————–
You want to combine your All Purpose flour, baking powder, fine salt and your ground cinnamon and ground nutmeg together and set aside in a mixing bowl.
In your electric mixer you want to cream together your margarine or butter and your sugar until light and fluffy. Then blend in your eggs. Next you want to add your ripe bananas and blend in as well. Once you have done that you want to add your dry mixture slowly as you beat together everything on a low speed.
You will next fold in your raisins, nuts and cooking oats into the batter. It is a thick batter. Once that is done then place the mix into a greased and floured pan of your choice. Depending on what kind of vessel you are using, that will determine cooking time. In the small loaf pans that I used it took a good 28 minutes to cook.
On some of them I added some of the extra cooking oats. I just removed the bread about 5 minutes before they were done and topped a few of them with the cooking oats, then placed them back into the oven to finish cooking.
If you decide to use a regular bread loaf pan then I suggest your cooking time to be about 50 minutes but it depends on your oven so I would keep my eye on it. To be sure it is done place a toothpick into the bread and if it comes out clean then it is ready.
Allow the bread to cool on a wire rack for about 10 minutes before removing the bread from the pans, then place the individual loaf bread onto the wire rack to thoroughly cool before packing the bread away. I however, start eating one while it is still nice and warm.
ENJOY!
———————————————————
(Making Russian Tea at the condo for Christmas gifts.)
Russian Tea

Russian Tea is something I first learned about from dating Gordon back in the 80’s and meeting his family. It was something of a staple for the holidays in their household. They would make up a large batch of it and pass it out as Christmas gifts.

It’s such a beautiful color that it would also make an excellent gift at Thanksgiving.


Gordon Making the Russian Tea
I once asked him why it’s called Russian tea but he didn’t know. His family just always called it that.
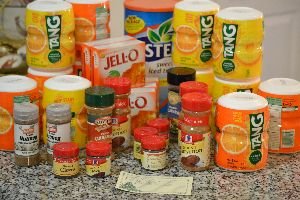

The Russian Tea Ingredients
As you can see we are making quite a bit to give as gifts for the holidays.


Gordon pouring the ingredients into a large bowl.
Note: Gordon had originally bought a lemon flavored tea which we both thought would add a nice lemon twist to this tea. However when we opened the canister the tea was a very pale color. Now normally there is nothing wrong with that but part of the appeal of this tea is in the colorful swirl of all the ingredients working in harmony with each other. So Gordon had to quickly run out and buy some regular Nestea.

This is a Beautiful Looking Tea


Taste Test
It’s my job to do the canning but before I do that it’s time for a taste test.
Just add a teaspoon or two to a hot mug of water. The cinnamon will float on top but that is o.k.
It’s Perfect!


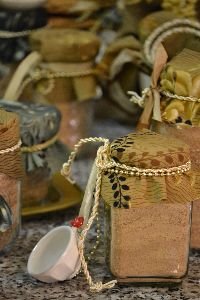
Now for the Assembly
All you really need are clean jars and lids, a funnel and a ladle. The rest is extra adornments that you can leave up to your own discretion.

I do however love to dress them up with some lovely fabric, (this fabric Gordon bought in the Middle East years ago and brought back to me. Also some lovely vintage Santa Christmas ornaments, some cord ribbon and even some gold bead chain.

Russian Tea Mix Recipe
(This is the original recipe. We have altered it to allow for ingredients that we simply cannot find or to allow for our ever evolving tastes. You can do the same if you like, it’s up to you. You can also double or triple the recipe, like we have here.)
-1 Jar Tang (about 20 ounces)
-1/3 Jar Tea (we used a 3 ounce jar of Nestea so you will only need about an ounce.)
-2 small Pkg. Pineapple/Orange Jello
(We can’t always find the pineapple/orange jello so we use one pineapple and one orange jello.)
- – 2 T. ground cloves
- – 4 T. ground cinnamon
- – 2 T. ground nutmeg

Lovely Gift Idea
—————————————————
Kitchen Art Vinegar’s


Beautiful Colorful Peppers and Olives
Now I did not make these. I found them while I was shopping at Tuesday Morning and thought they were so beautiful to give as Christmas gifts.
(I never said that I made all the Delicious Christmas Gifts myself on this post.)
But anyone of us could easily make these. Just find a nice jar and pack with any chopped or sliced bell peppers that you like or an assortment of olives, then just add vinegar and seal the top and tying something pretty. It’s called Kitchen Art and I think it is perfect!
Wish I could take credit for it but I can’t but it does give me ideas on doing something similar.
—————————————————–
RED and GREEN
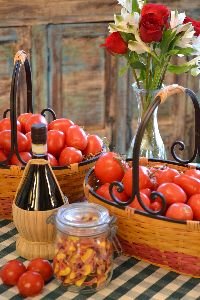
Sun Dried Tomatoes with Basil in Olive Oil

Oven Dried Roma Tomatoes
Notice the Pretty Flower of Basil Leaves on top?
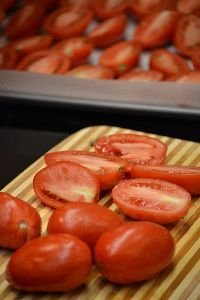
The first thing you need for this is a lot of Roma tomatoes. I would say I bought about 60 – 70. We find using Roma just makes for a more perfect looking, tasting and textured tomato. A perfect thickness, all you have to do is slice them in half and place them onto a cookie sheet. But first, put down some parchment paper.

———————————————————
You want to wash them and then slice them in half.
After Two Hours of Baking

We baked them on 300’F for two hours and achieved this result.
Which was great and we did set aside a few of them for our Naan bread pizzas.
Then, we put the rest back into the oven so they could dry out a bit more.
Below is after 3 1/2 hrs. total cooking time.
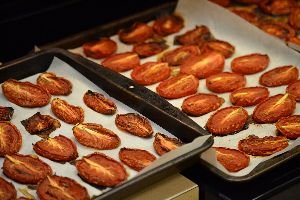
So chewy and caramelized!
Perfect!

Next, you just want to store your oven roasted tomatoes into a jar,
adding layers of basil, garlic, and even some of our oregano or other fresh herbs,
while covering in extra virgin olive oil.
Makes for an excellent gift!

Tastes Great on Our Italian Naan Bread Pizzas.
——————————

Buon Appetito!

——————————————————–
The Gift of Italian

This was so much fun to put together. I simply bought several of these purple reusable grocery bags and filled them with an Italian food cookbook and some basic ingredients for creating a few lovely meals.

All Italian Ingredients:
One colorful bag (Made In America) of course.
Various Pastas
Olive Dipping Oil
Marinated Artichoke Hearts
Capers
Kalamata Olives
Marinated Sun Dried Tomatoes
Panettone (Italian Christmas Bread)
Lots of Chocolate Tuffles sprinkled all around.
Italian Cookbook

In this VERSION of the Italian Gift Bag I added Nigella Lawson’s newest cookbook, Nigellissima. I also included some of my homemade Spaghetti sauce.

In this version I added Giada De Laurentiis’s Italian Cookbook.

Here are also some extras that I added to the gift. Some wooden spoons and a Ghiradelli chocolate brownie mix. Taylor the gifts to fit the recipients. For your local giftee’s you could include a loaf of rustic Italian bread or some pancetta, (Italian bacon).
Everyone that we gave this gift to loved it! That’s all that we wanted to hear. That they were happy. Isn’t that what gift giving is all about?
Buon Appetito!
—————————————————
Christmas Party Take-Home Gifts

I love sending everyone home with a gift after a party and this is such a perfect and unique gift after a Christmas party. Pasta in the shapes of Christmas. Trees, stars, Santa Clause, etc. Great for making a nice pasta salad or even some comforting mac’n’cheese for the kids.
Below we used the ‘Christmas Pasta’ to make a nice Pasta Salad.
It also looks very festive when placed in a nice jar in the kitchen for the holidays.


————————————————