Sand Globes

How To Make “Sand Globes”

Actually they are my version of Snow Globes which I am referring to as’ Sand Globes’ because they are beach themed.

Some of my ‘Sand Globes’ are very colorful for kids.
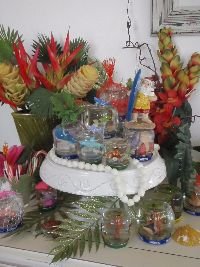
I did this while out at the condo a few years ago. A Beachy Christmas is always fun!
Someone had posted my photo above, on their website and called it “very tacky and funny.” The “tacky”, I agree with you.
Tacky is always fun and I did it for kids, not picky adults. Kids always seem to appreciate good kitch.

I love the vintage Hawaiian cake toppers the best.
I love that I feel I am recycling something and turning it into a nice gift. Something that kids will like to look at and shake up, and adults will feel that nostalgia from their own childhoods.


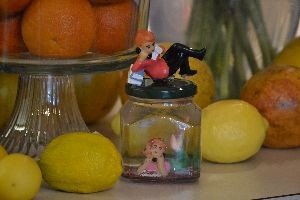

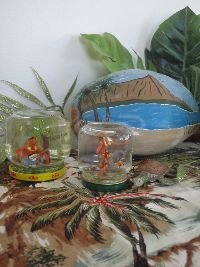
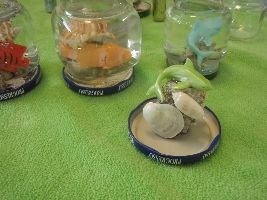
The Sharks!
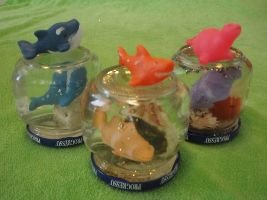
Who says the toys only go on the inside of the sand globe? I also glued the toys on top.
The Fish, Whales, Sharks and a Seal.

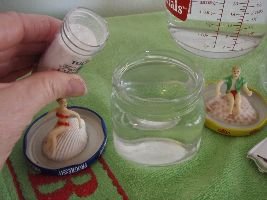
I made this sand globe by gluing a piece of coral into the cap of this jar. Then adding some sea turtle beads to “swim” around the coral with some glitter in the bottle when I shake it up.
Pictured are an assortment of beads that I had to choose from.
————————————————————————————-——–
The Supplies

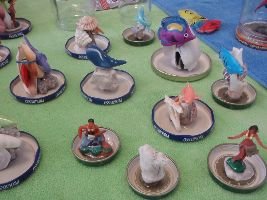
Little plastic kids beach toys,
most of which I found on sale at the end of the summer,
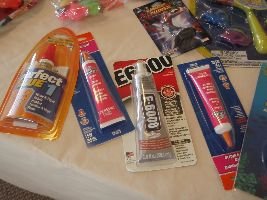
some waterproof glue,
sea shells…….. And lots of jars.
Lay all your supplies out in front of you.


You want all of your supplies to be nice and clean so wash everything.

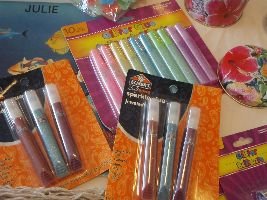
Paint pens, glitter, stickers,
and of course jars………
Glitter, and glitter pens.

Some of the glitter I bought at Michael’s and some I bought
at the Dollar Tree.

——————————————————————-
Some Inspiration

The beautiful Hawaiian themed mug my daughter made in a ceramics class. The fish clipboard my daughter made from using paints and stencils that I had laying around when she was a little girl.
She and I were always working on some sort of ‘crafty’ project. I never throw anything away.
These items are inspirational to me as I work on this particular project.
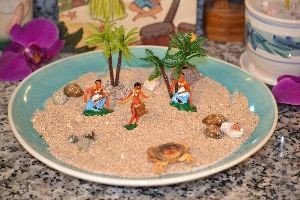
More toys I used for the ‘sand globes’.
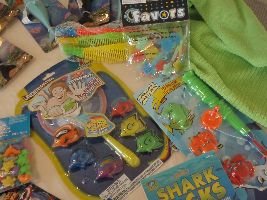
For this project I was specifically looking for small little plastic ocean themed toys.
Lots of fish mainly.

Look what I also found! Our old Hawaiian name place mats that I bought at Ala Moana Shopping Center in Honolulu when we
first moved to Hawaii in 1986. They were just about $1.00 each at the time but I love them! They are just plain fun!
The place mats were my inspiration for the ‘sand globes’ after all. Something very fun, tropical, childlike and a bit tacky.
To me this is heaven.
Gets the creative juices flowing but it’s important to have everything
out in front of you. All of our projects tend to ‘evolve’ and take on a life of their own after we start because we have all of our ‘clutter‘ out in front of us. This inspires.
Gordon is very creative and I always appreciate that he takes an interest and likes to help me. We make a good team.

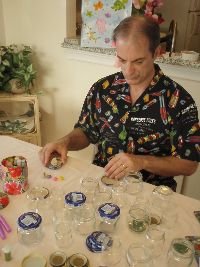
Here Gordon is gluing some coral onto one of the jar lids to start to create the underwater ocean scene for the sand globes.
Here are a lot of odds and ends that I found on the beach. I can always seem to find a use for most everything that I pick up.
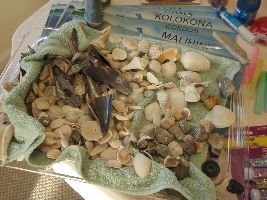
The things that I tend to pick up from the beach most other people would walk by and not even bother. But I know that bit of junk is actually a treasure. Most times I don’t know what I am going to do with it, but I know I need to have it!

I am the weakest person when it comes to opening up anything.
——————————————————————————————-

Gordon gluing our coral and sea shells to the lids of the jars for the ‘sand globes’.


The fun of this project was watching it evolve as we would work on it. We
thought of things as we went along that we didn’t when we first started the project.
We used pieces of coral, large imperfect shells
were used as undersea cliffs where we would glue fish and other shells to. In some cases while the glue was drying we would use
rubber bands to help the fish stay in place.


Once the glue has thoroughly dried, I would give it several days just to make sure, then it’s time to start the assembly.


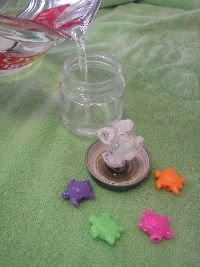
Make sure you have an absorbent towel underneath this project when it’s time to use the water. You want to pour as much water into the jar as you can. Then add as much glitter into the jar full of water as you want. But not too much!

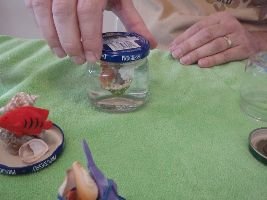
Next place your seascape into the jar and make sure you screw the lid on very tightly
so it doesn’t leak.

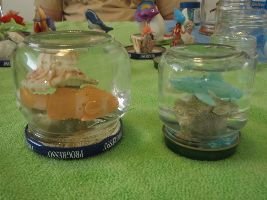
Now shake it up and look at how lovely it is!


Here is a shark glued to a piece of coral. He looks as if he is swimming around it.
Some pale blue glitter looks so nice here.

Great project for kids to do.

With this sand globe we didn’t glue the turtles to the coral, we just let them “swim” around it when you shake it up..


We used a lot of marinated artichoke jars.
They were just a perfect size for this project. But we also used some salsa jars and pimiento jars.

Sea Life on top of jars as well.
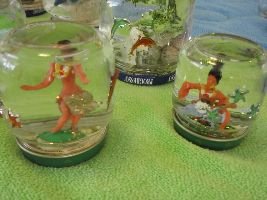
If you look closely you can see that I added some sea life stickers to the outside of the jars. You can see some star fish above with my hula dancers.

Stickers are always fun too.

I also wanted to accent the pretty ‘sand globes’
by applying some colorful stickers to the outside
of the jars. Such as these pretty dolphins, star fish, etc.
Although I haven’t done it yet I wanted to use some
of the glitter paint pens to maybe write something on the jars as well. Maybe the name of the gift recipient, or maybe something like Mele Kalikimaka, (Hawaiian for Merry Christmas).
——————————————————————-——————–
Below is a very simple sand globe to do. Here I just bought some very small colorful
shells from a craft store, placed them in a jar, filled water to the top, poured in two different shades of glitter, screwed on the
jar lid and then, viola!


Just shake and see the shells float around and see the sparkle. Easy. But they need to be very small lightweight shells in order for this to work.
Fish Nets

All I did here was to tie some plastic net around some of my sand globes here. Just to add an undersea touch. The idea came to me when we bought some pearl onions and as I was throwing
the bag into the trash that it when the idea
occurred to me. So I dug it out of the trash and cleaned it up.
————————————————————–
Happy Crafting!
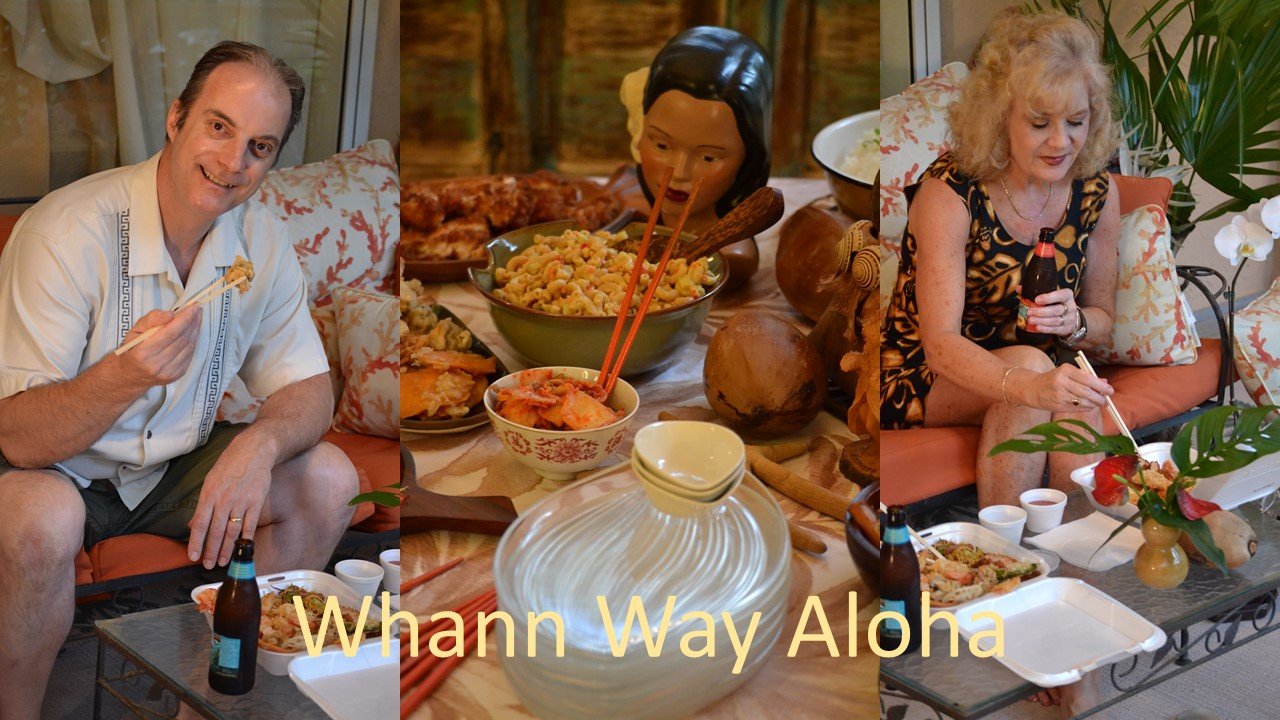
Click Here For: Whann Way Aloha
AND,
Click Here For: Whann Way Aloha, Hapa Elua (Part 2)

AND,
Click Here For: Blue Hawaiians and Huli Huli Chicken

AND,

AND,

AND,
Click Here For: Weekend Spamin’ Spam Musubi

AND,
Click Here For: Julie’s Lunchbox

AND,
Click Here For: Gordon’s Hawaiian Potatoes and Huli Huli Pork Chops

AND,
Click Here For: Whann’s In Not Always Paradise

AND,
Click Here For: Julie Barefoot Cookies and Beachy Edible Gifts

AND,
Click Here For: Grillin’ With Aloha

AND,
Click Here For: Julie’s Vintage Hawaiian Mango-Mac Nut Bread Cake w/ Pasta Flowers

AND,
Click Here For: Gordon’s Dole Pineapple Outrigger Canoe and Cocktail

AND,
Click Here For: Hawaiian Hum Lum Sun Prunes

AND,

AND,
AND,
Click Here For: A Mother’s Day Aloha

AND,
Click Here For: Aloha Wahine Jezebel Sauce
AND,
Click Here For: Whann Way Hawaiian Luau
AND,
Click Here For: Hawaiian Popcorn and Moana Maika I’ Loa

AND,
Click Here For: Beachy Hawaiian Thanksgiving Pu Pu’s

AND,
Click Here For: Barefoot Beach Teas

AND,

AND,
Click Here For: Hawaiian Kalikimaka

AND,
Click Here For: Christmas/Kalikimaka Oysters on the Grill

AND,
Click Here For: Tropical Hawaiian Cranberries and our Mele Kalikimaka Me Ka Hauoli Makahiki Hou
