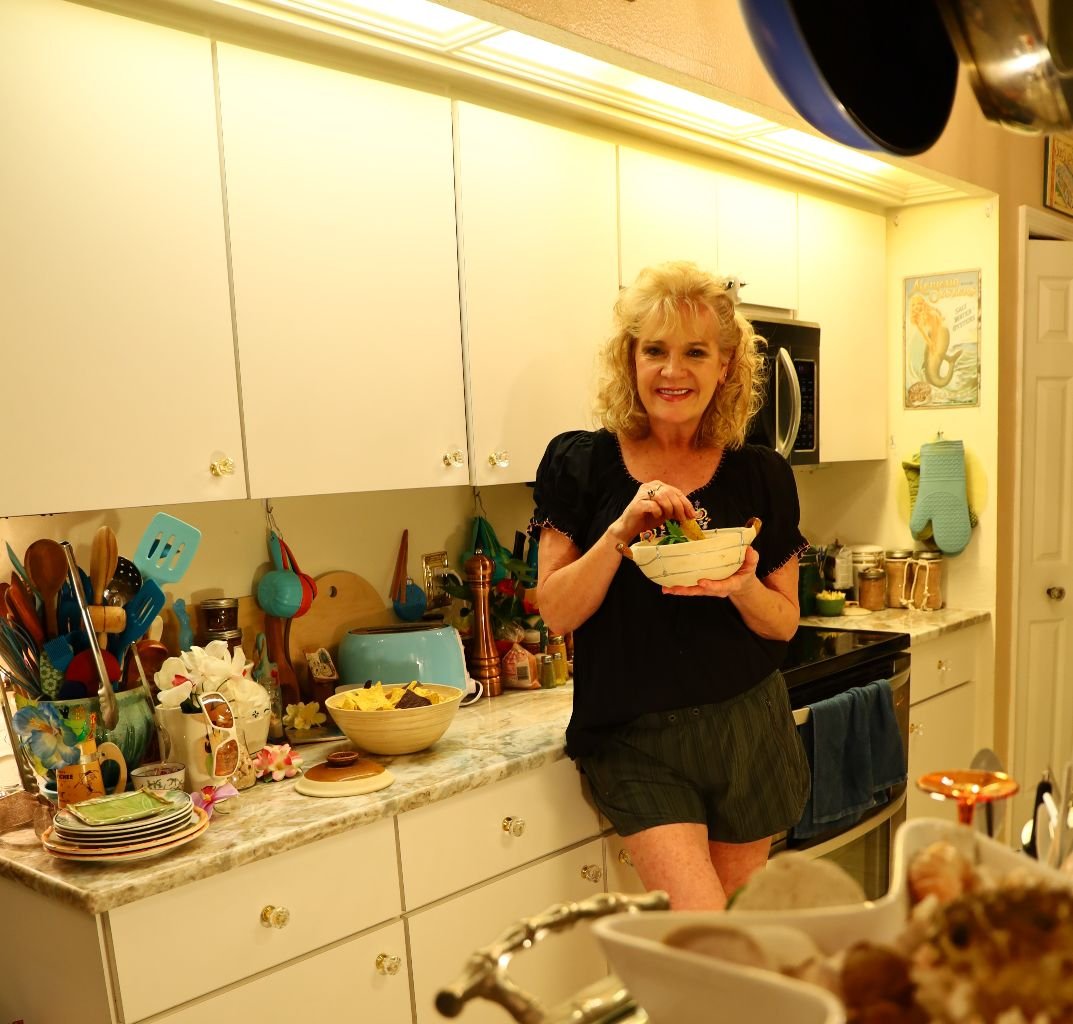
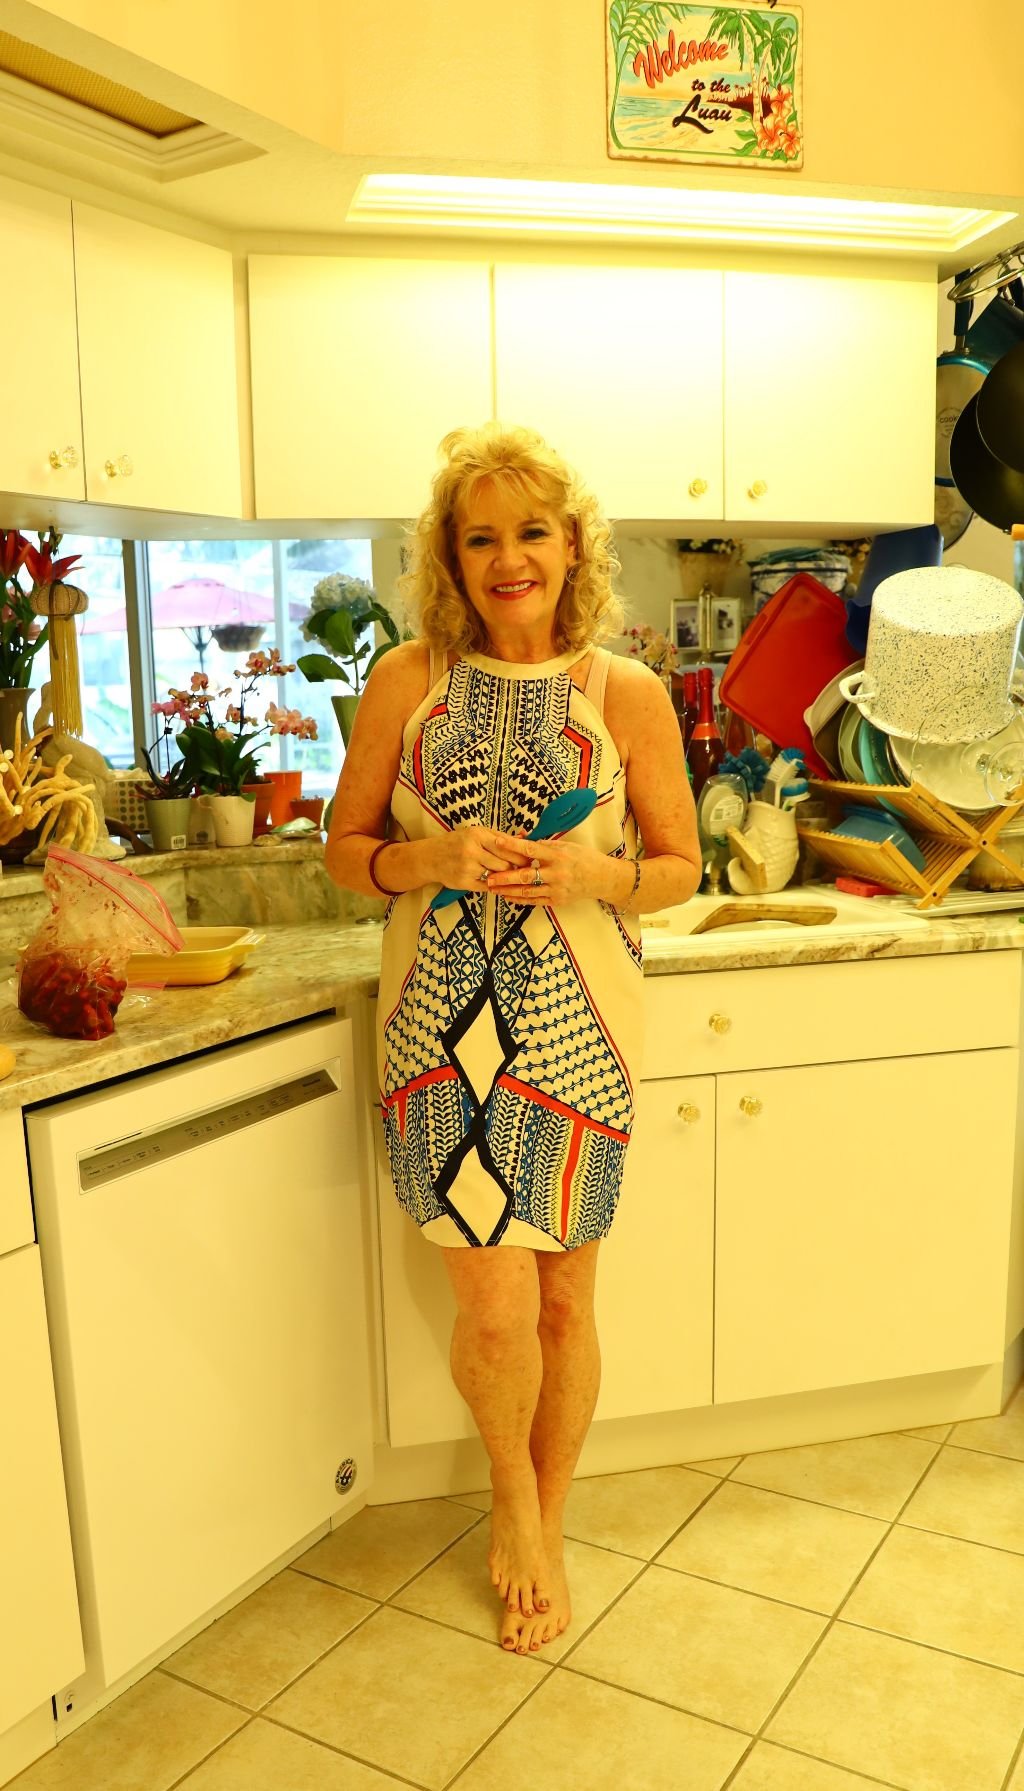
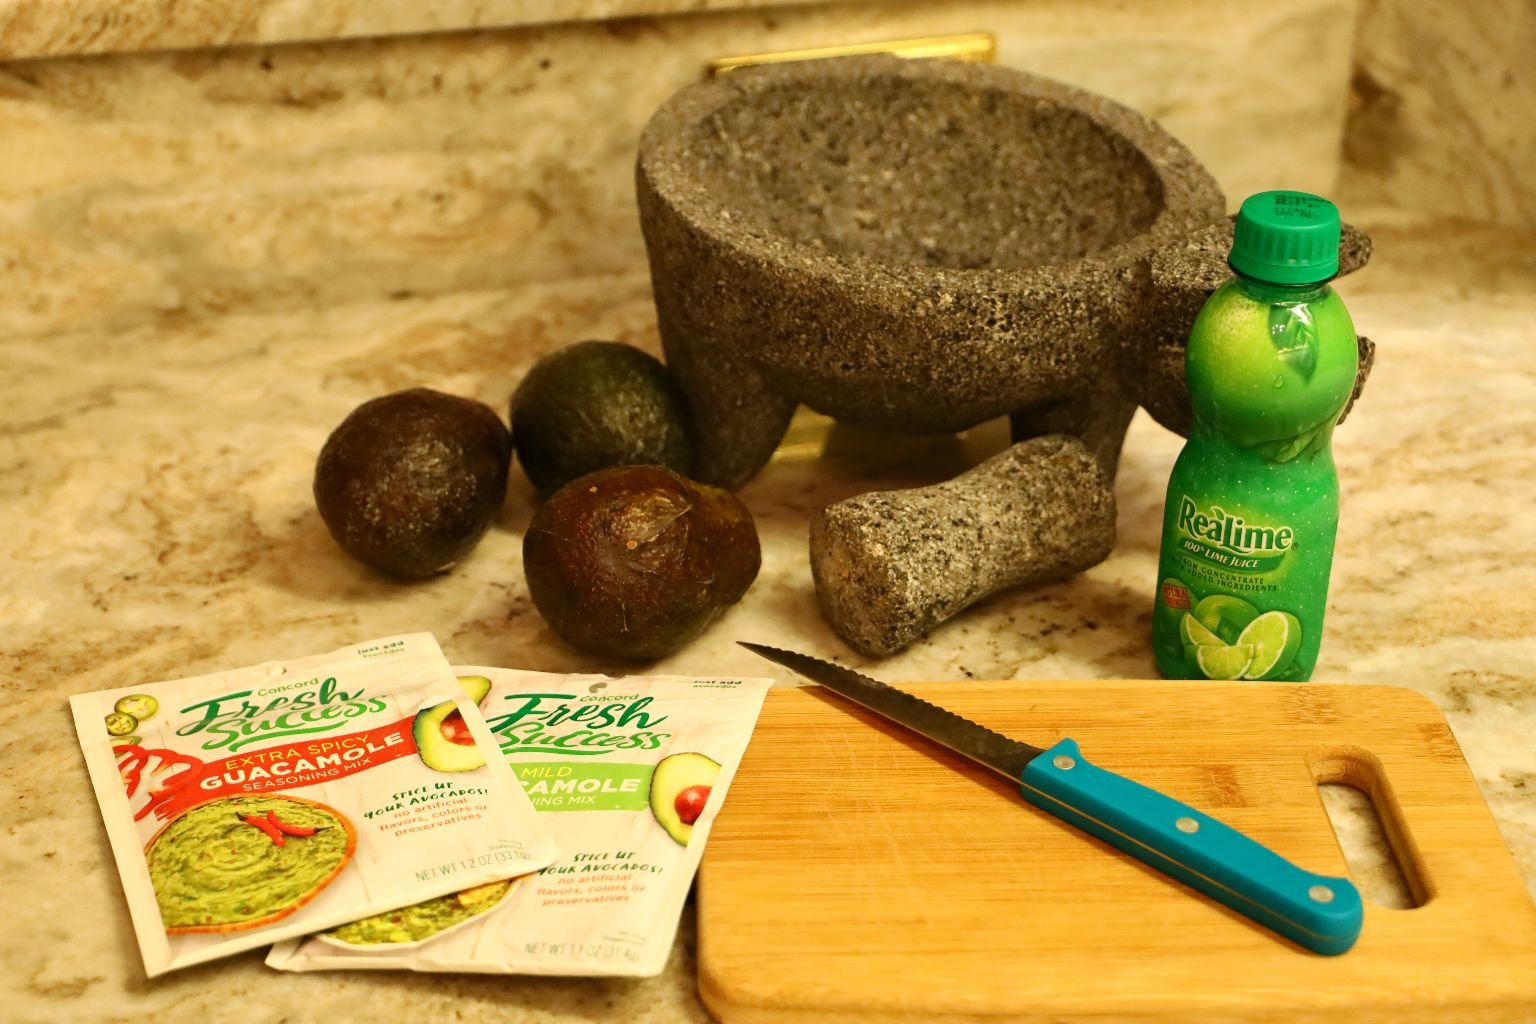
Julie and Gordon Whann Way Mexicana Cuatro


HOLA!

HOT! HOT! HOT!
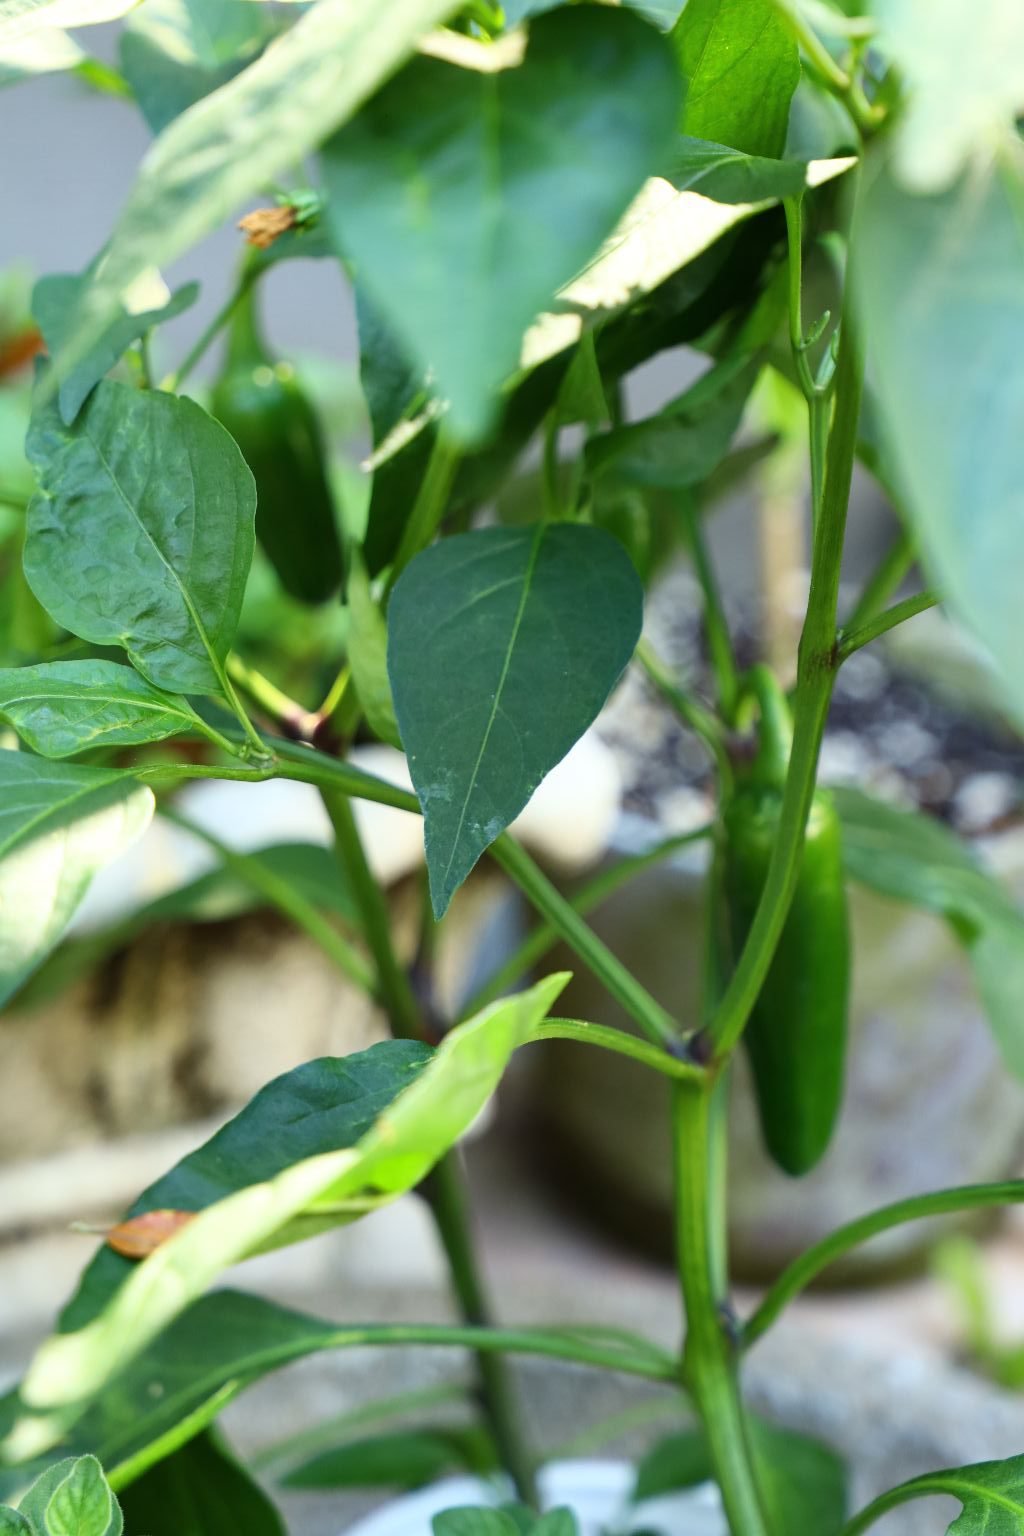
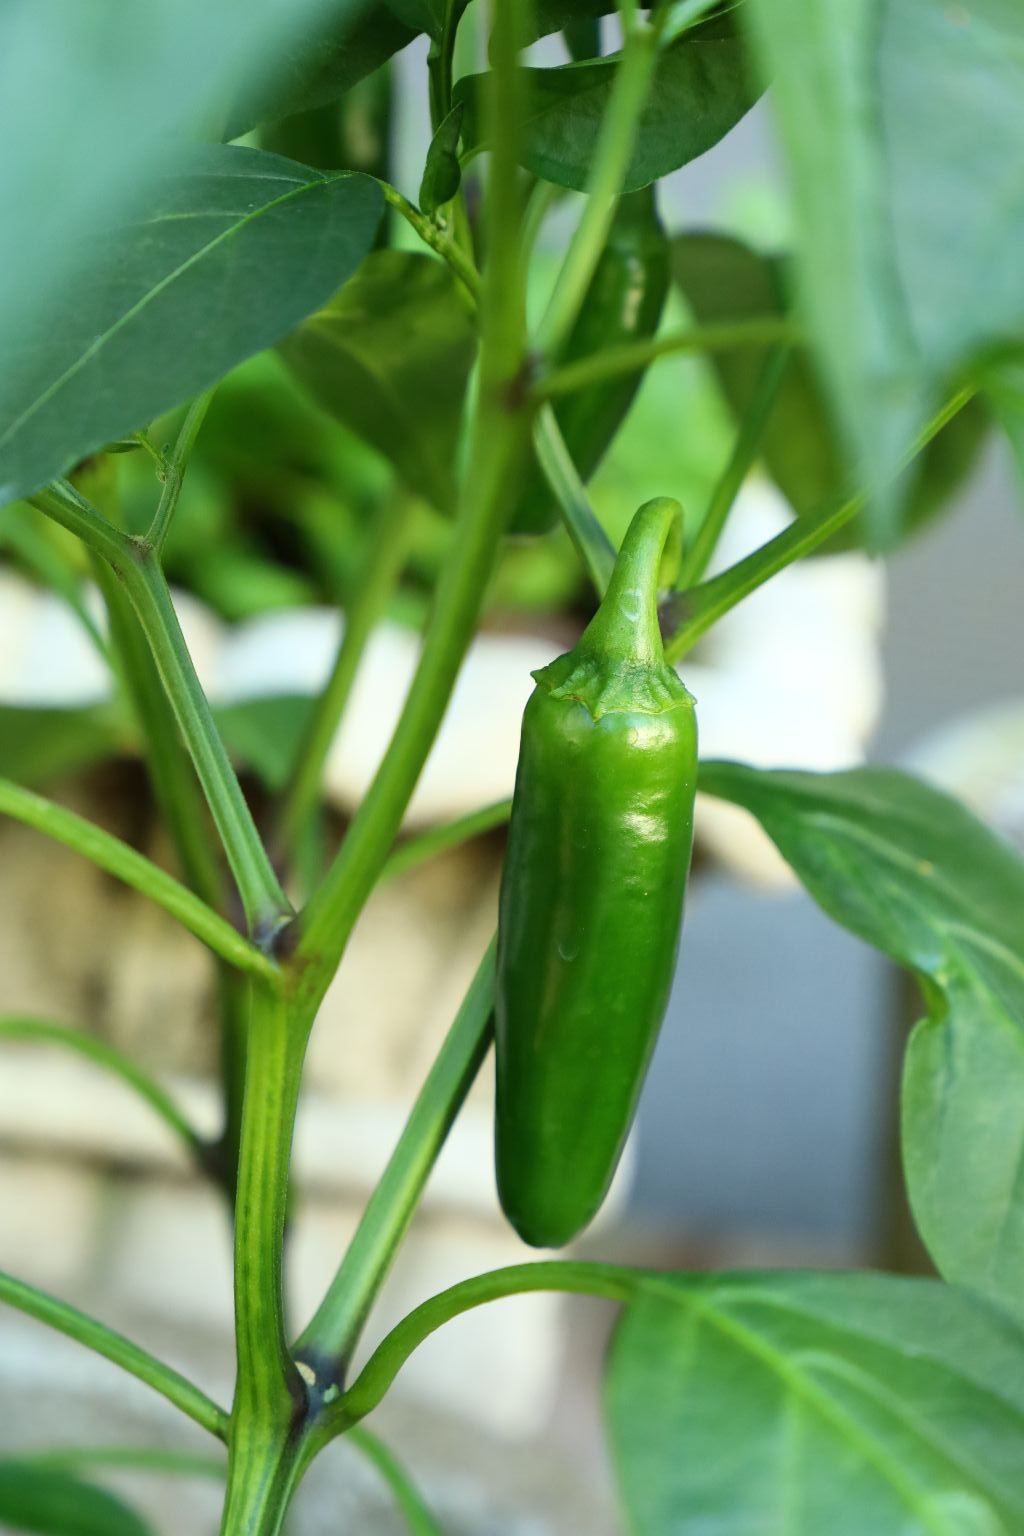
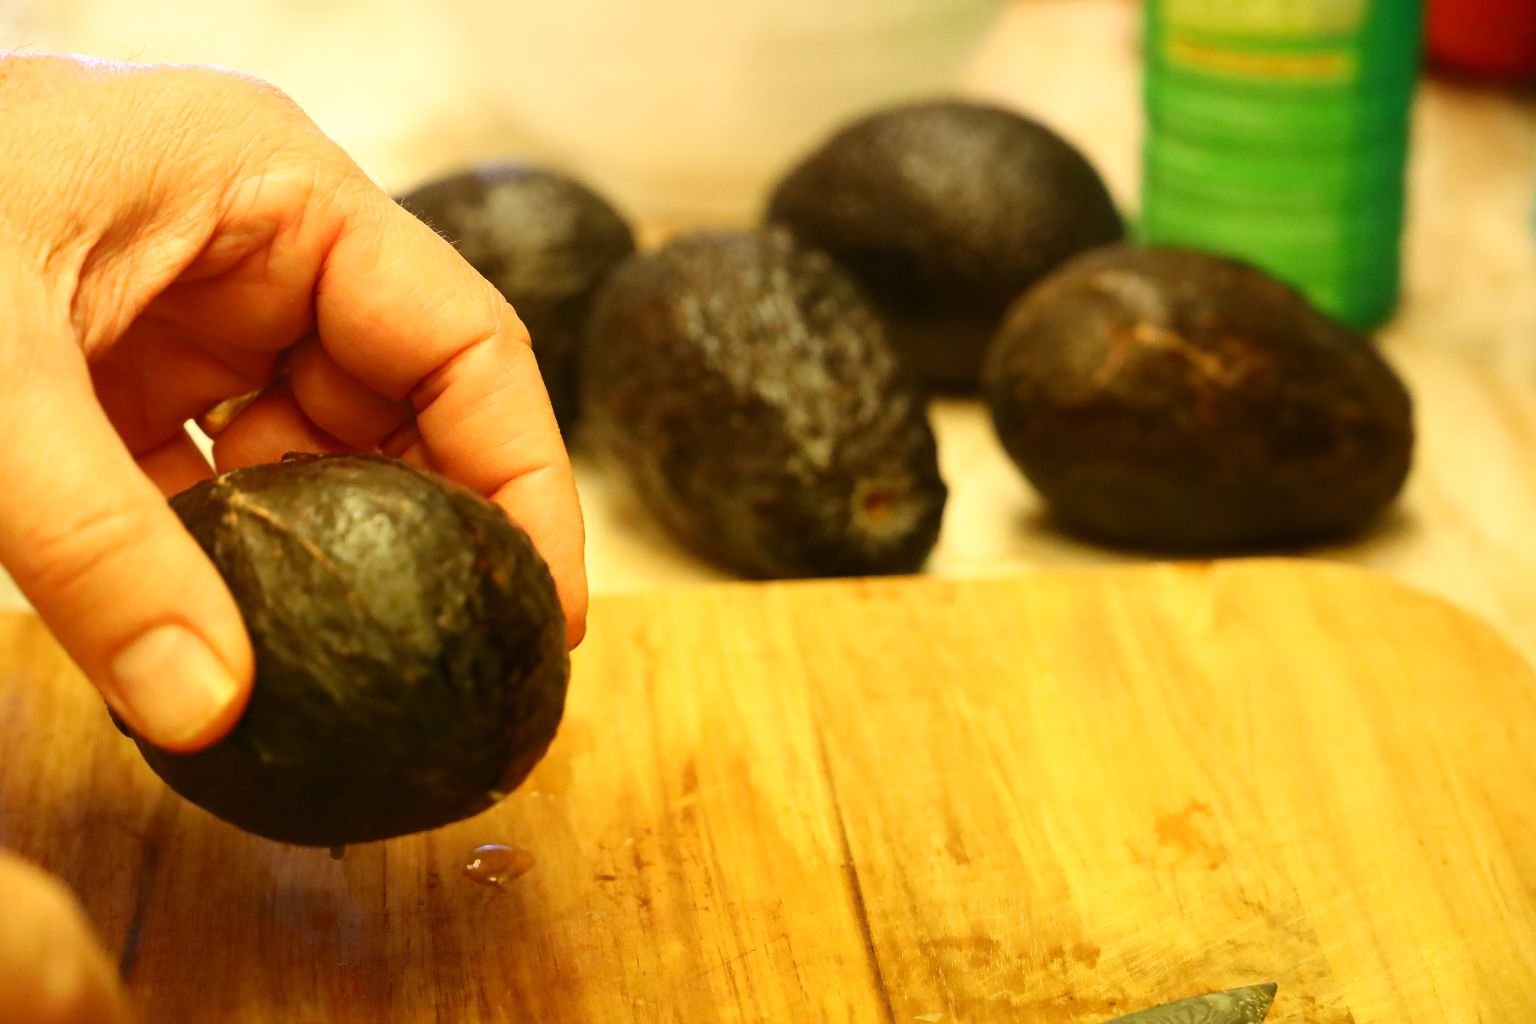
Growing Jalapeno’s in our Backyard
——————————————————
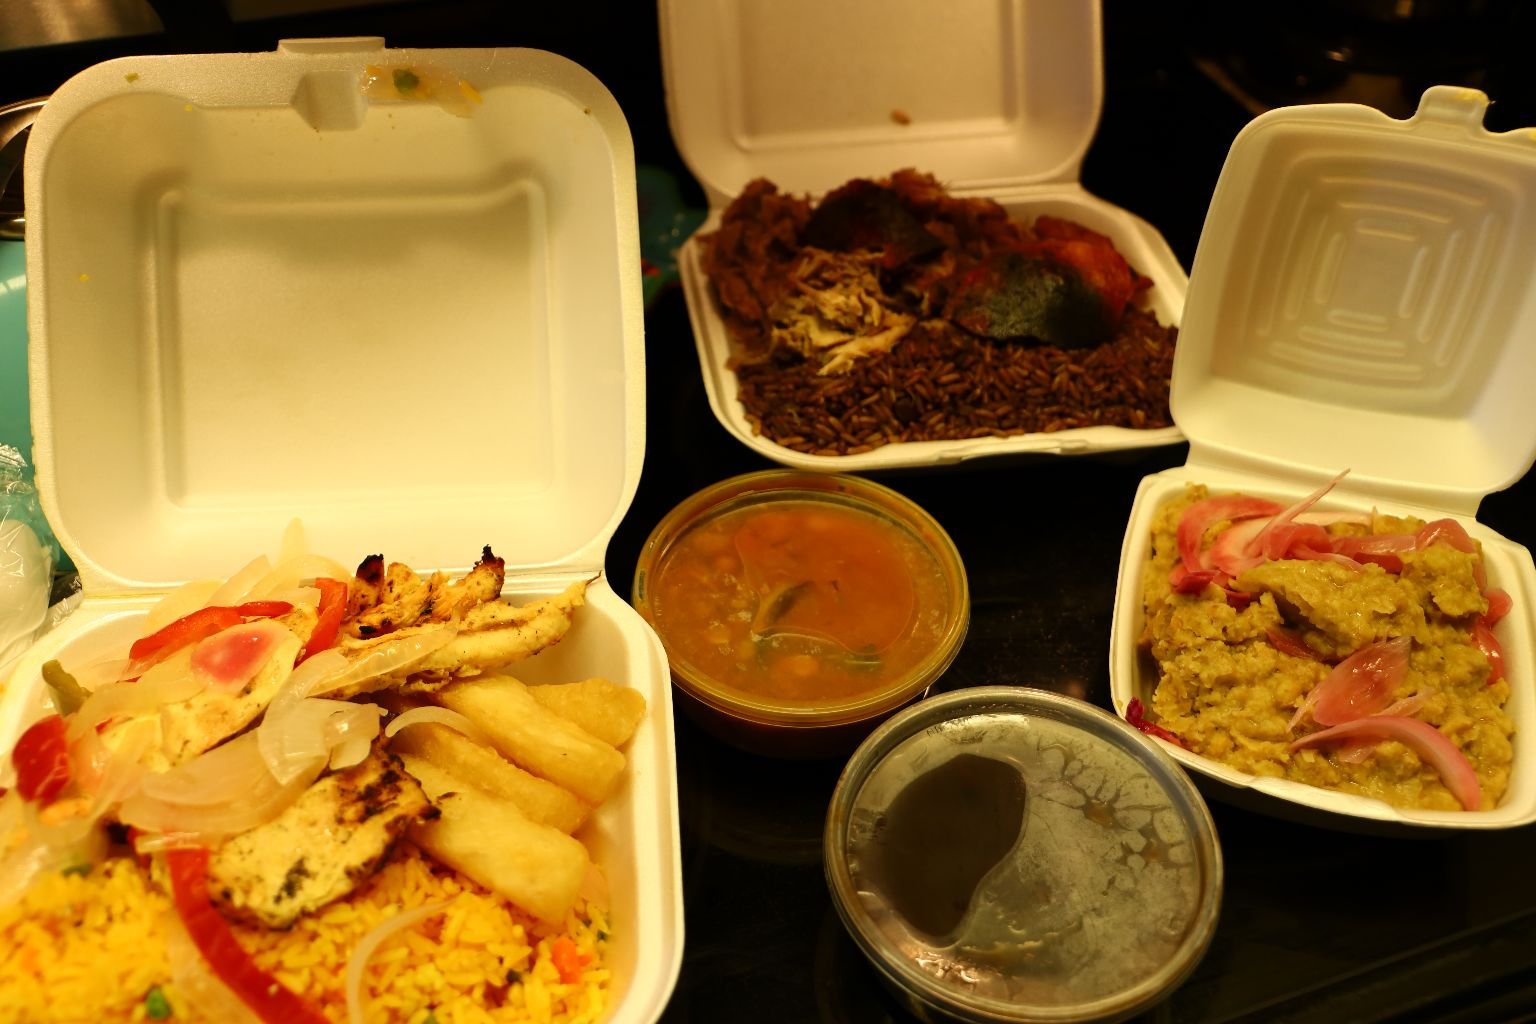
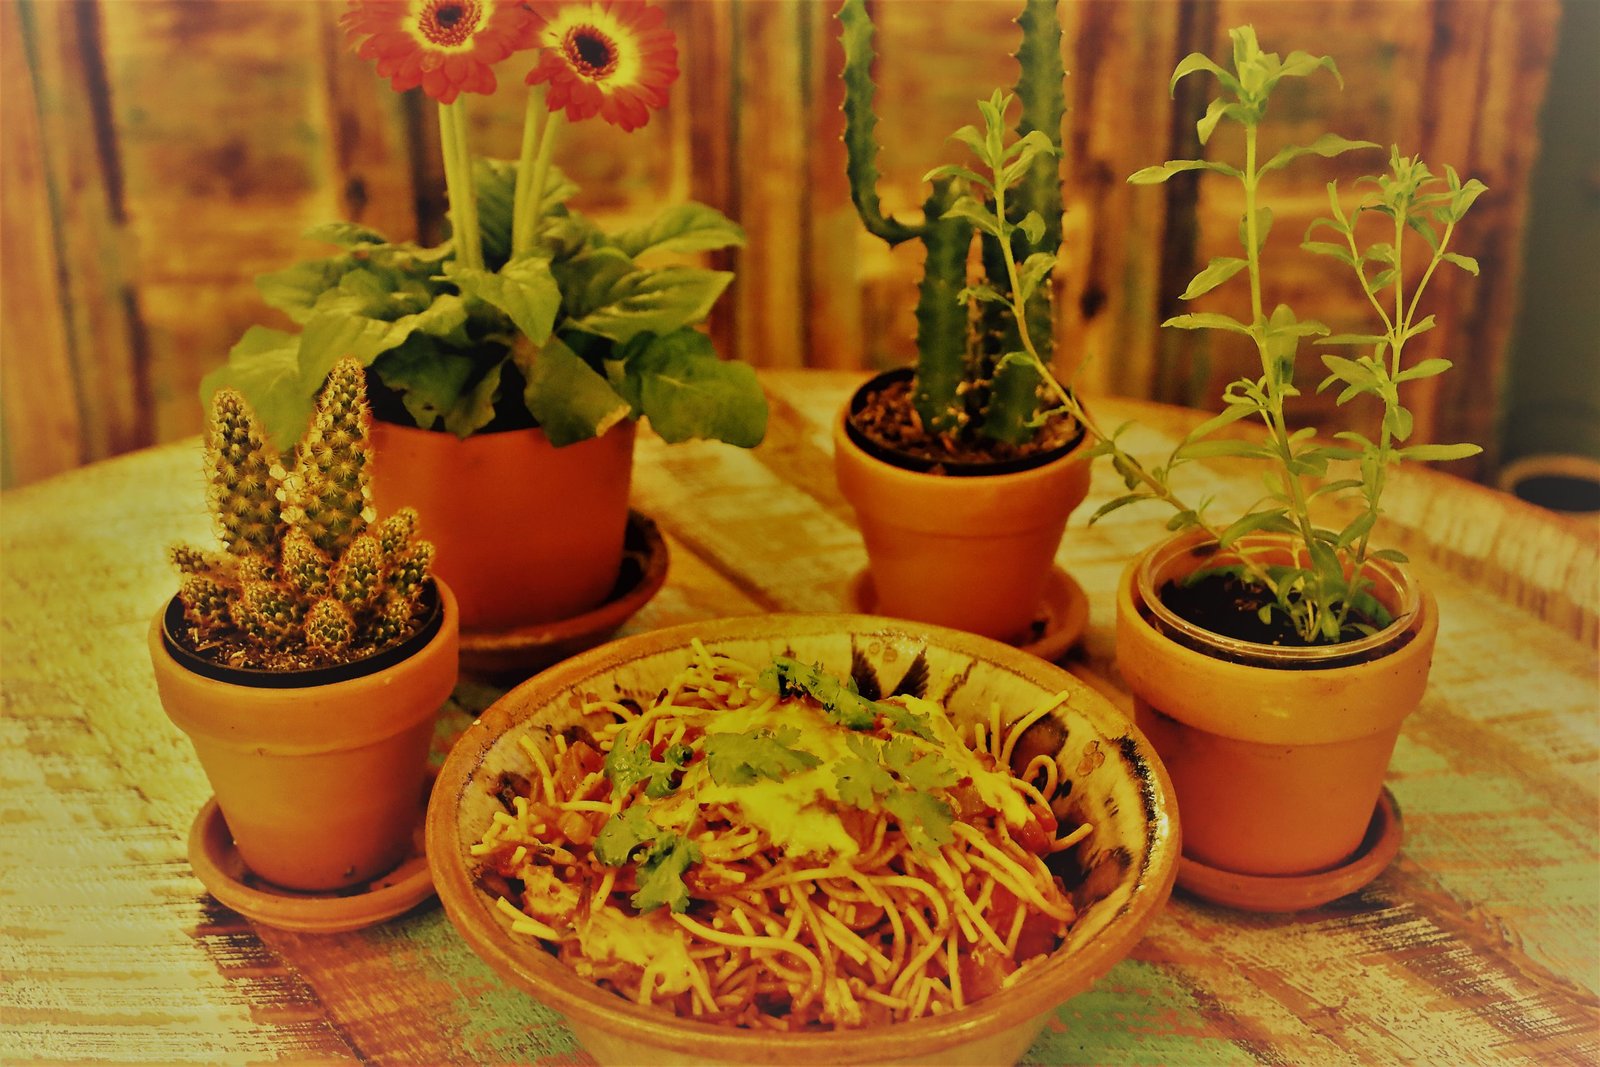
Sometimes It’s Nice Just Picking up Dinner at The Latin Supermarket
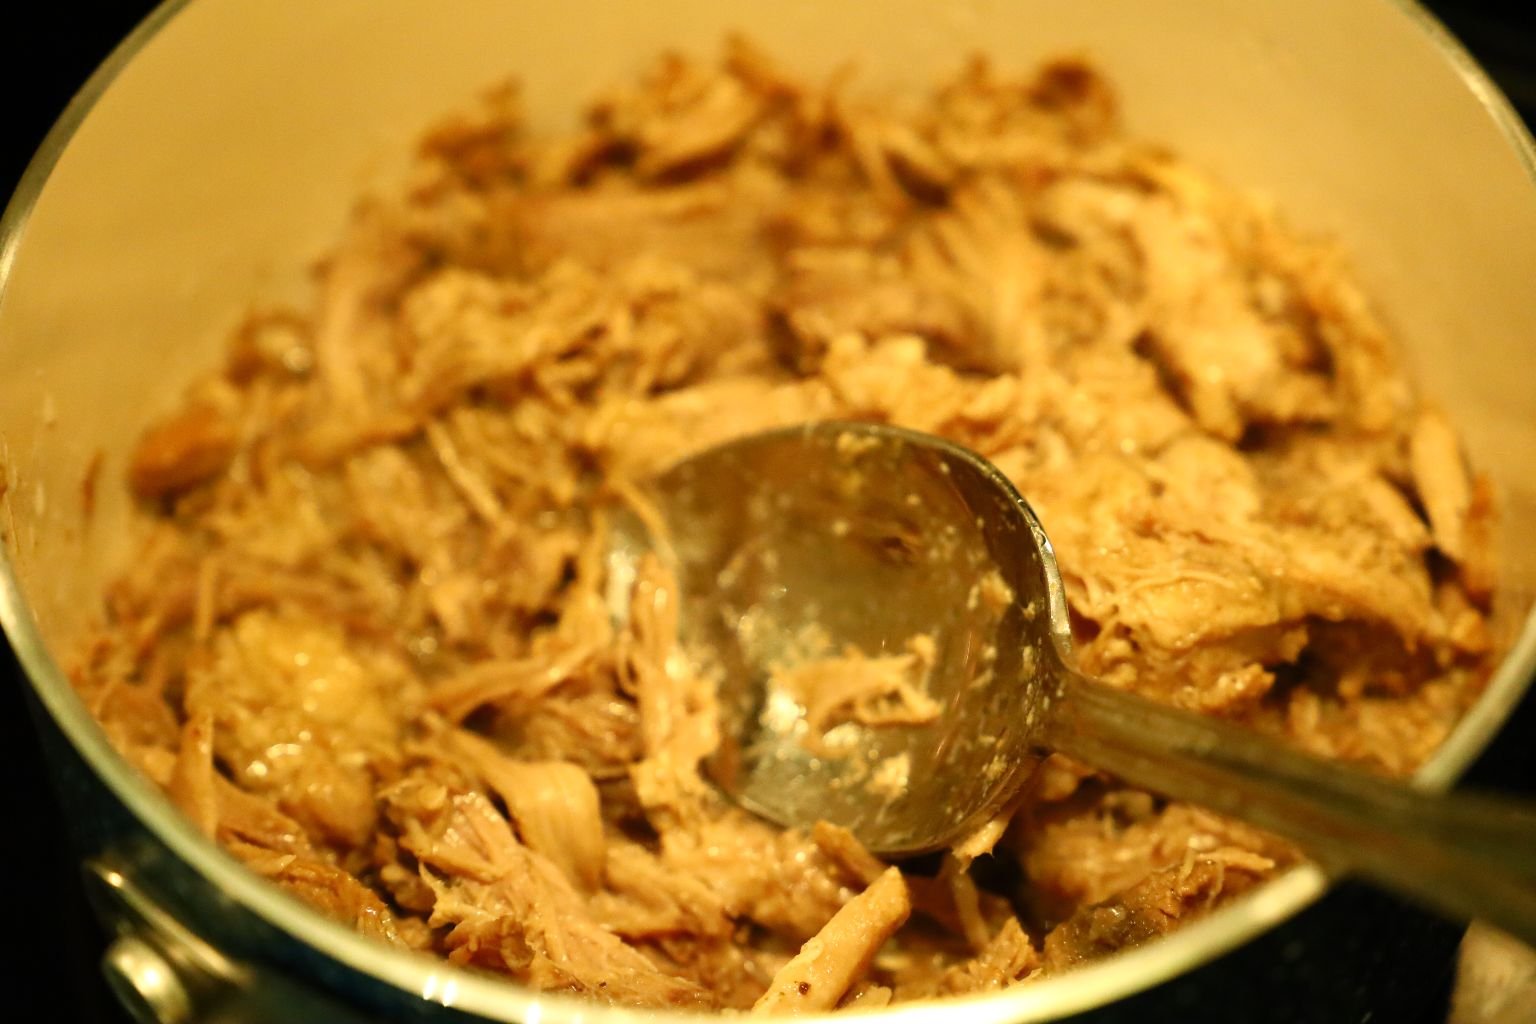
Grilled Chicken Breast with Peppers, Yuka Fries and Yellow Rice, Sides of Red Beans, Black Beans, and Gordon’s Roast Mojo Pork, Sweet Plantains and Black Rice with a side of Mofongo.
——————————————————
Bienvenido a nuestro cuatro pagina web de inspiracion Mexicana.
(Welcome to our 4th. Mexican inspired webpage.)
This time Gordon was here to help me with this one. My first tres Mexicana webpages were done by me alone while Gordon was working overseas. It’s nice he’s here to help build this one. We love Latin / Mexican foods and we especially love adding our take to some of the recipes that we love the most. Which is why nothing here will ever be authentic and only ever inspired.
Feliz de que estes aqui,
Julie and Gordon Whann
————————————————-
An Easy Weeknight Treat

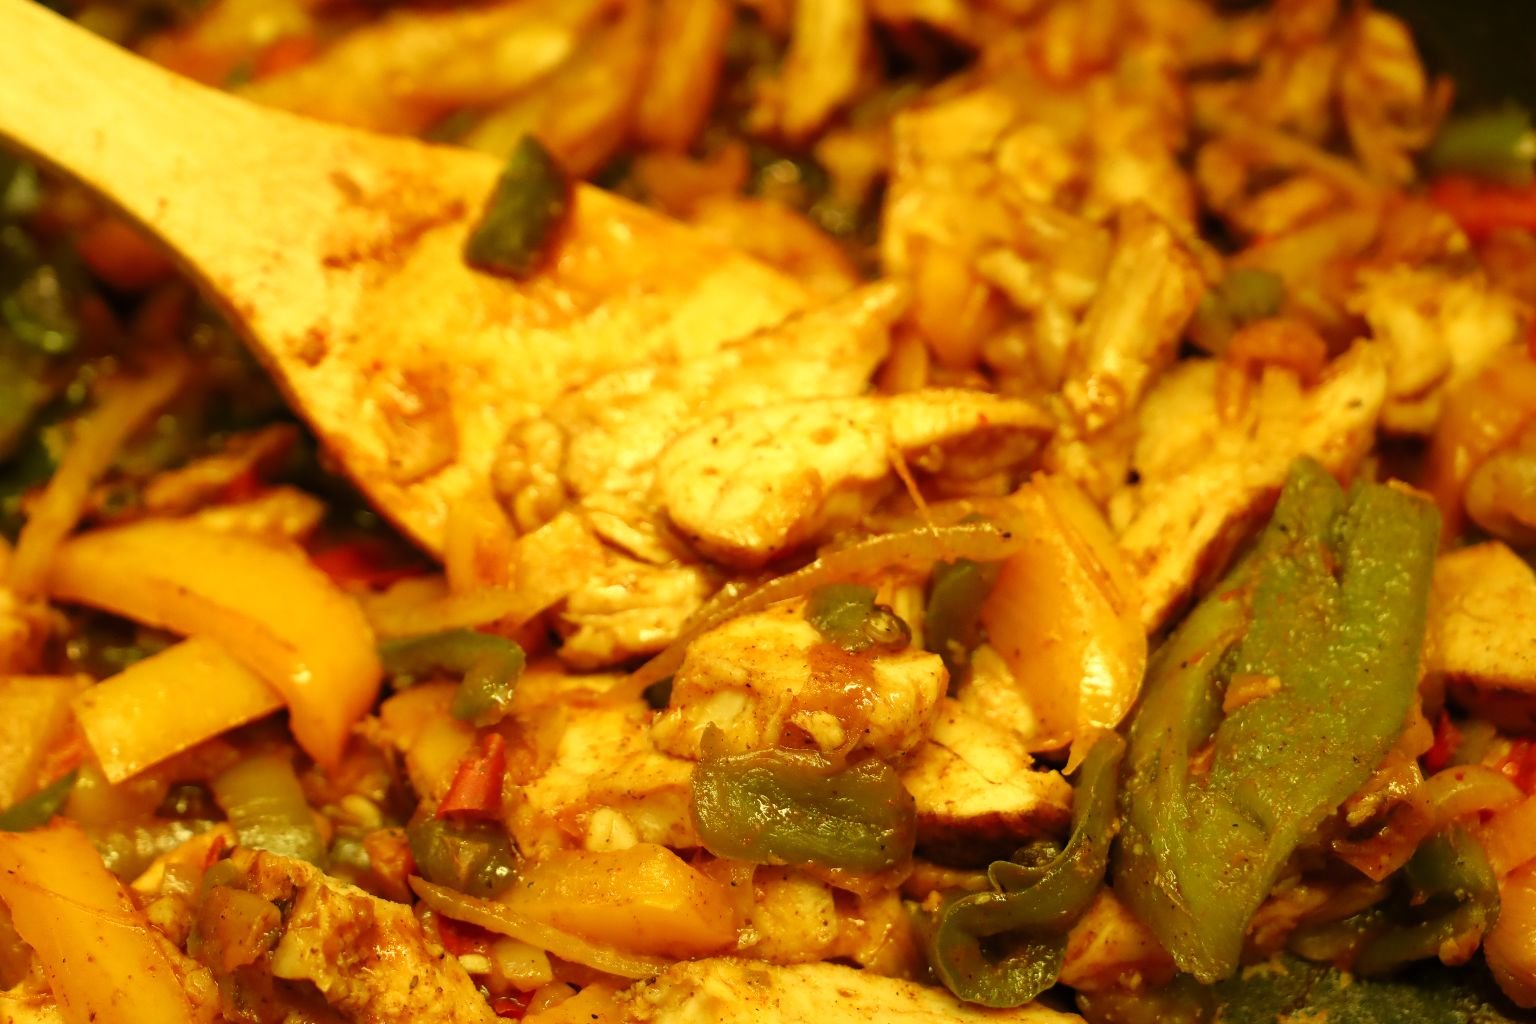
I would love to say that this is one of our homemade recipes but actually we bought this ready-made and in the freezer section at our commissary. Just an easy dinner that you can cook up yourself on the stove top and ready in about 30 minutes. Sometimes we add an extra bell pepper or two. We definitely add a few of our favorite spices to spice things up a bit more. Just place into ready-made tortillas and roll up with some sour cream and fresh cilantro from your garden. Top with your favorite hot sauce.
Eat it till it ouches you!


Not Everything Has to be Homemade to be Delicious
—————————————————————-

A New Favorite Mustard

A Light Lunch for Dos
What you see here is our Tocino Pork Mini-Sandwiches on the Sweet/Whole Wheat Hawaiian Dinner Rolls with the Tequila Mustard from above and some of our Cilantro from our herb garden.
Also, a few Plantain Chips seasoned by the juice from that Jalapeno Pepper that is leaking onto them.
Not totally Mexican but definitely inspired because of.
————————————————————–

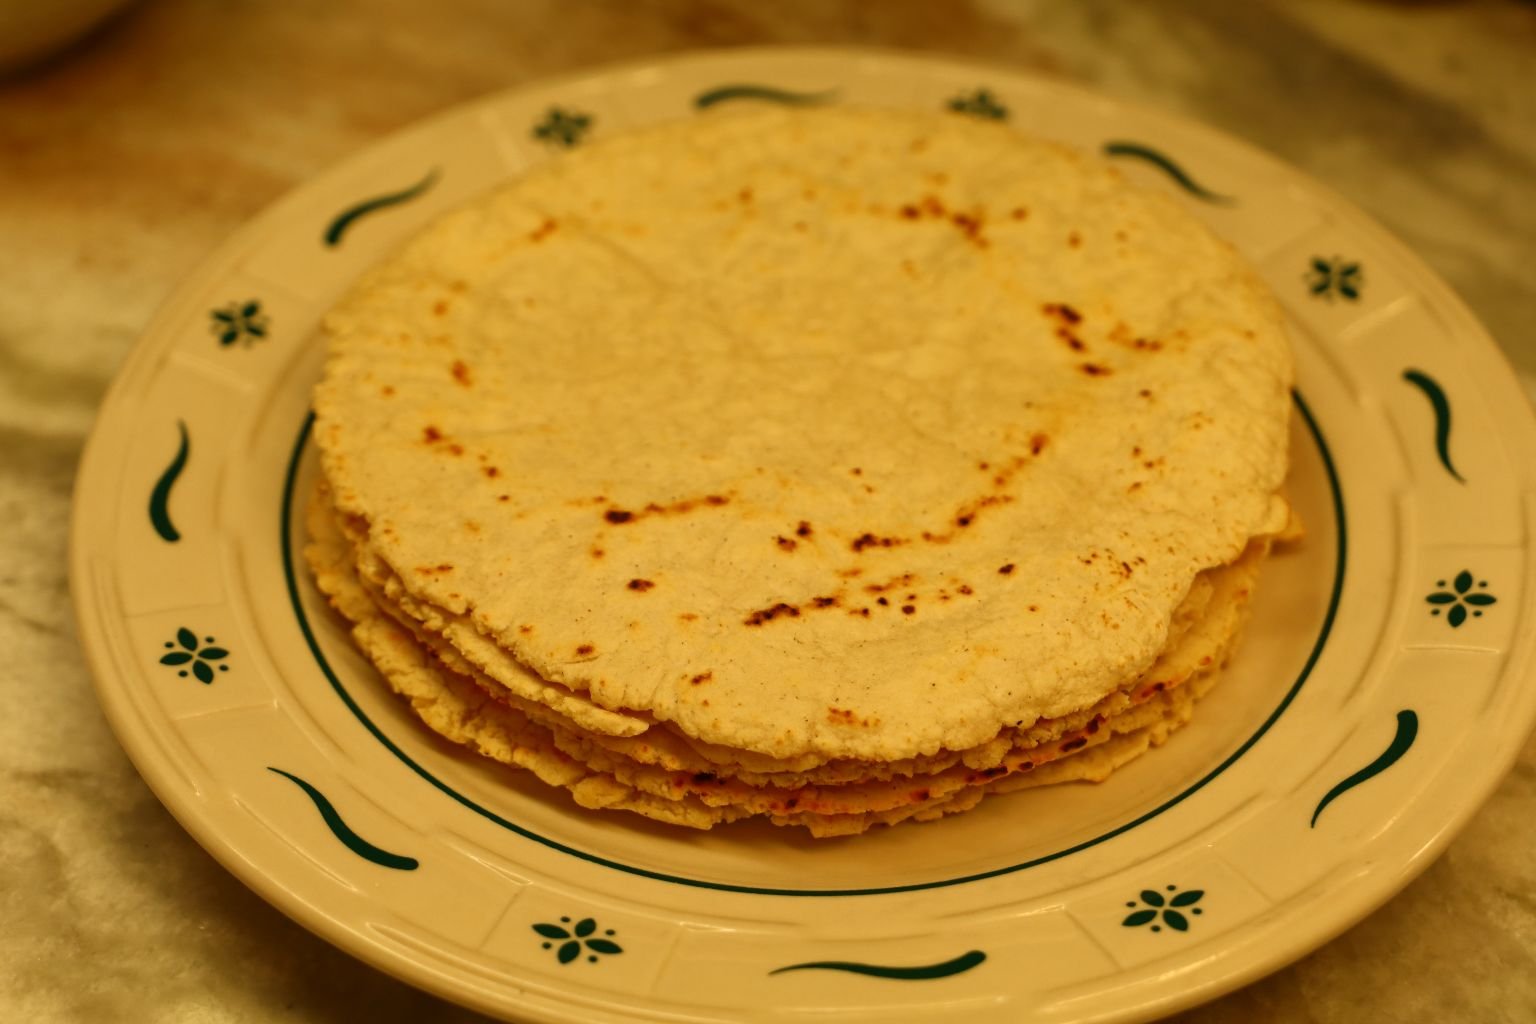
Our Authentic Tortilla Maker

Our Homemade Tortillas
(We will show you how down below. Hint: It’s EASY.)
———————————————————–


Julie’s Wild Grain Lime Rice
(Recipe Down Below)
——————————————————————-
Our Mexican Spiced Cheese Ball
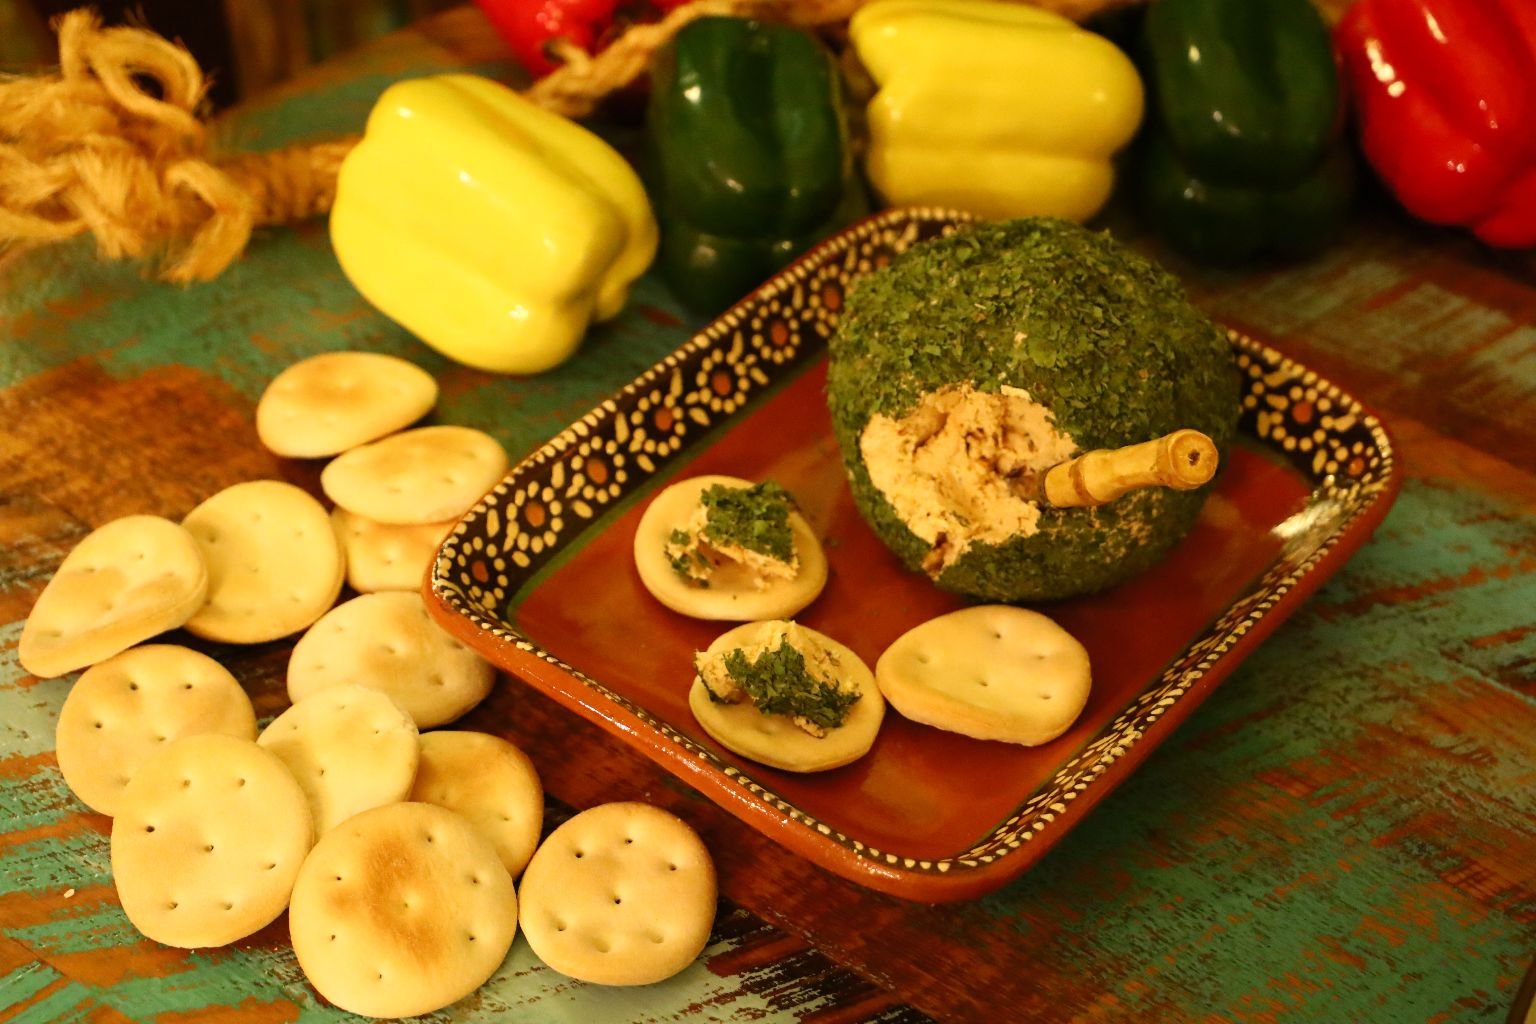
Rolled in Dried Cilantro
and served with….
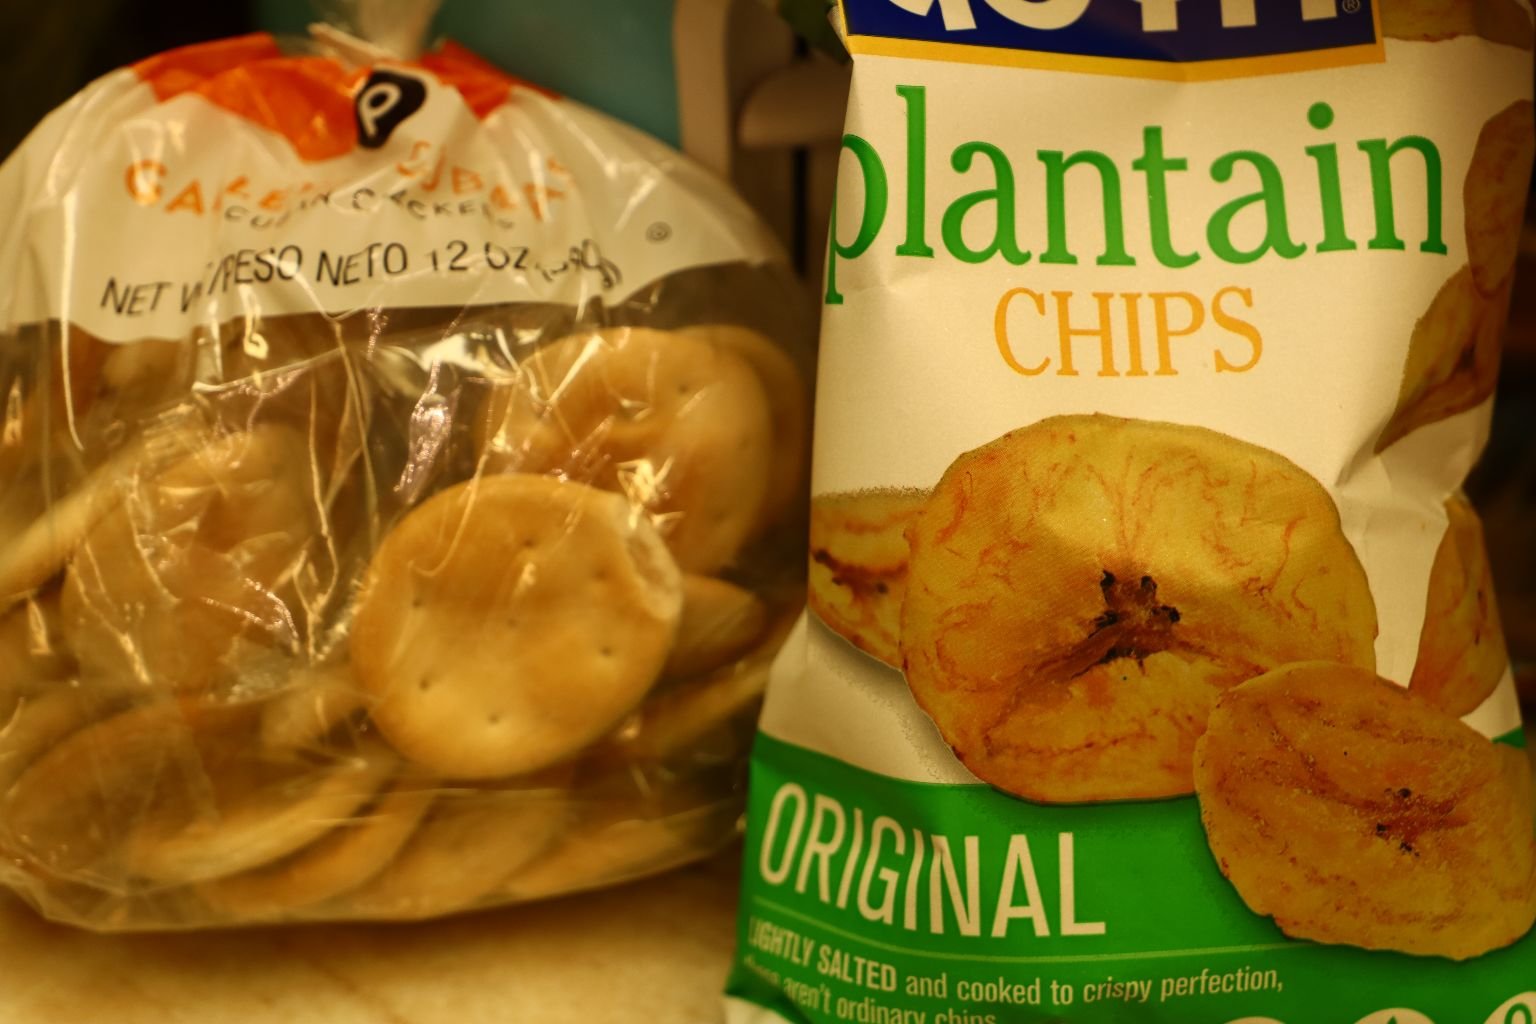
Cuban Crackers and Plantain Chips
(Recipe Down Below)
————————————————————

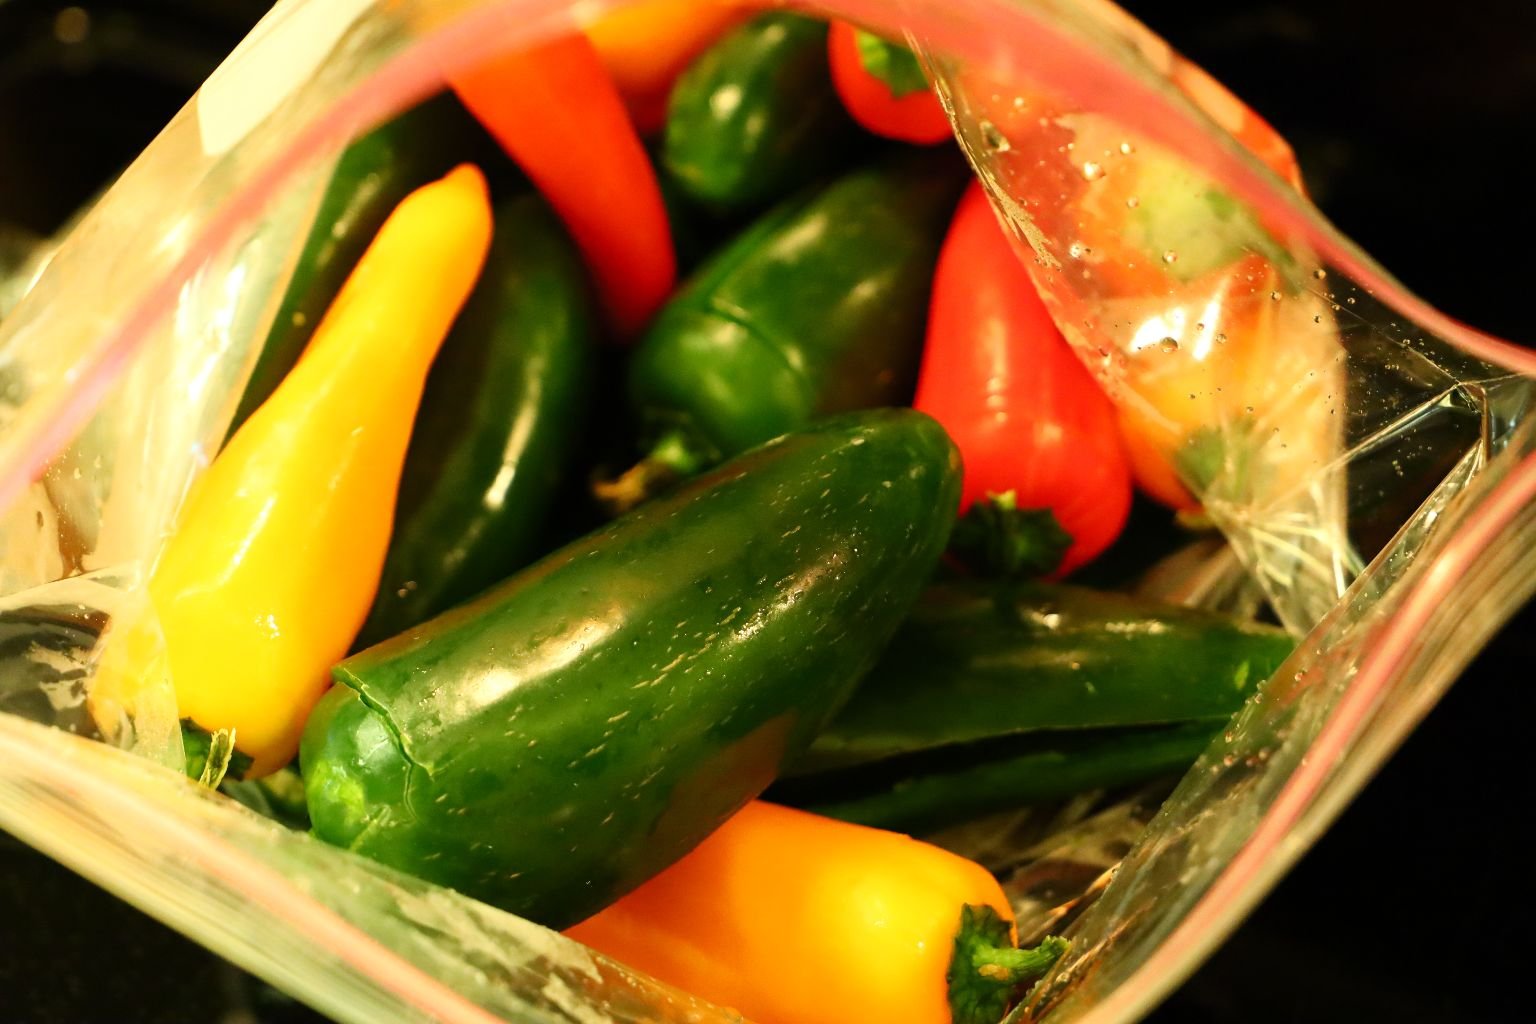
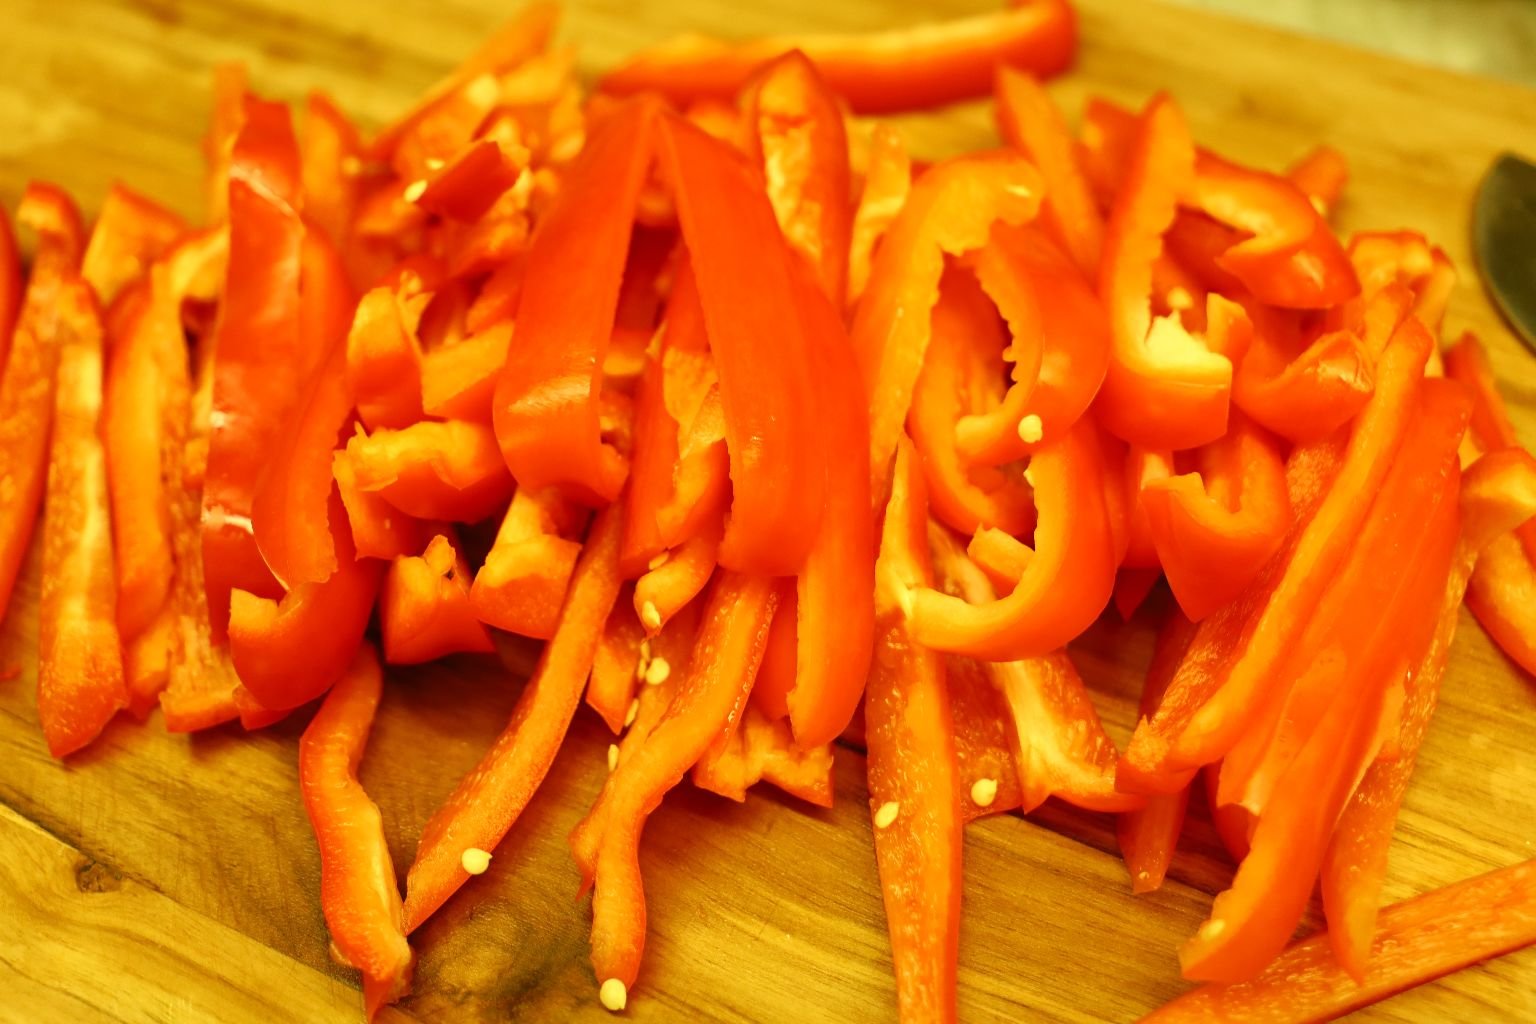
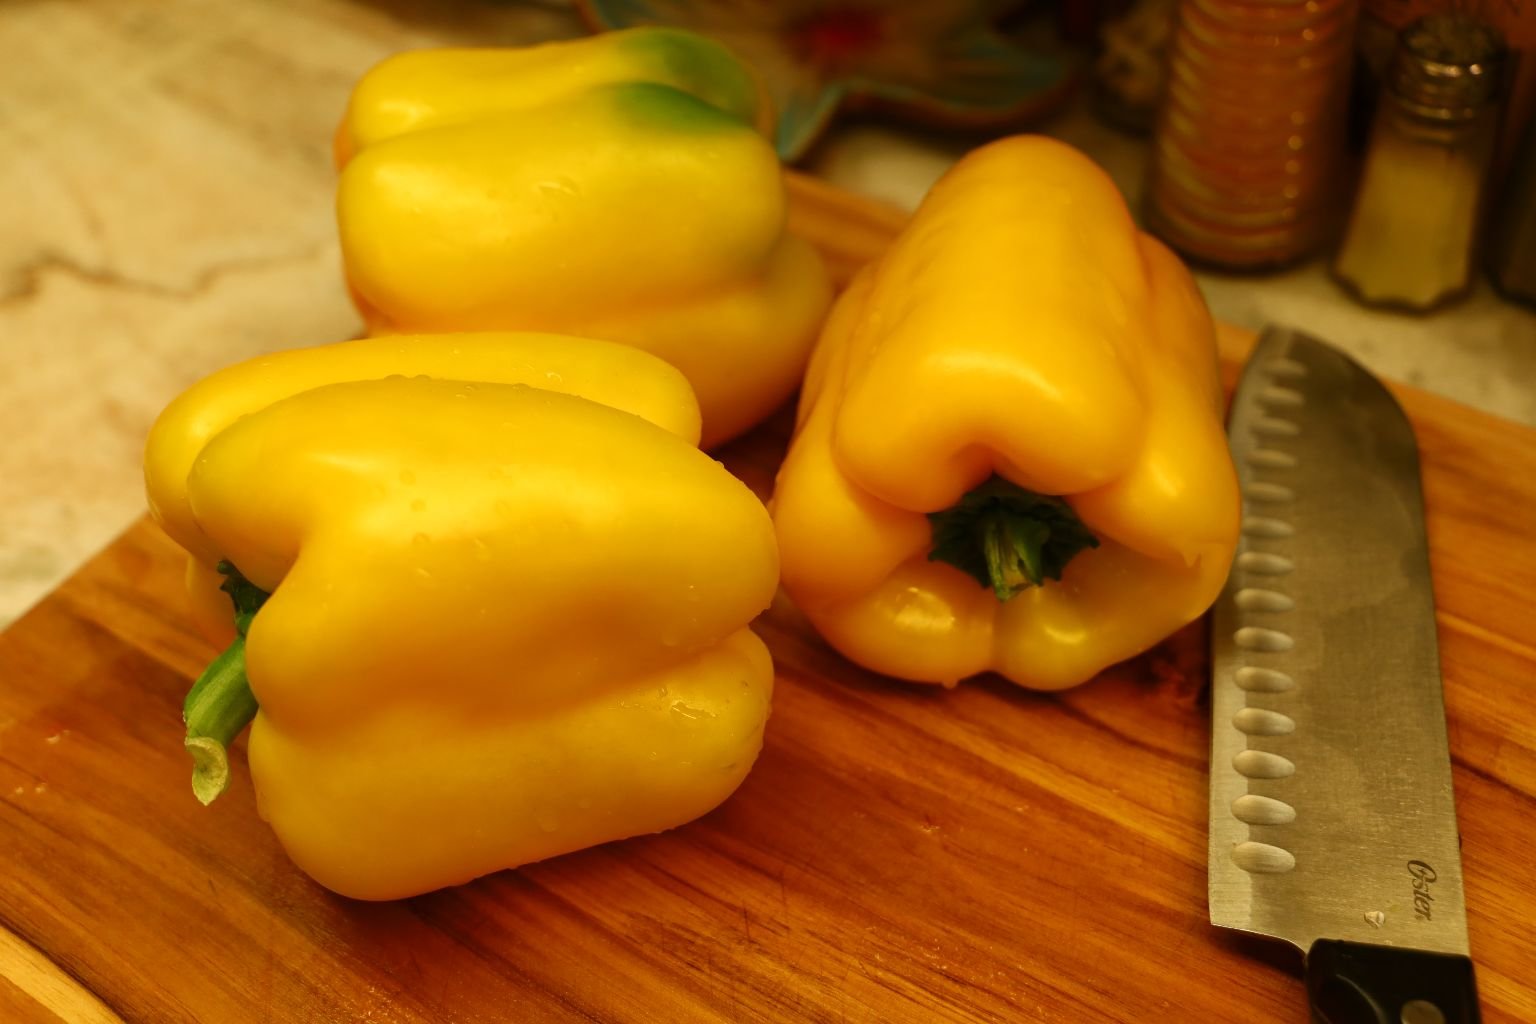
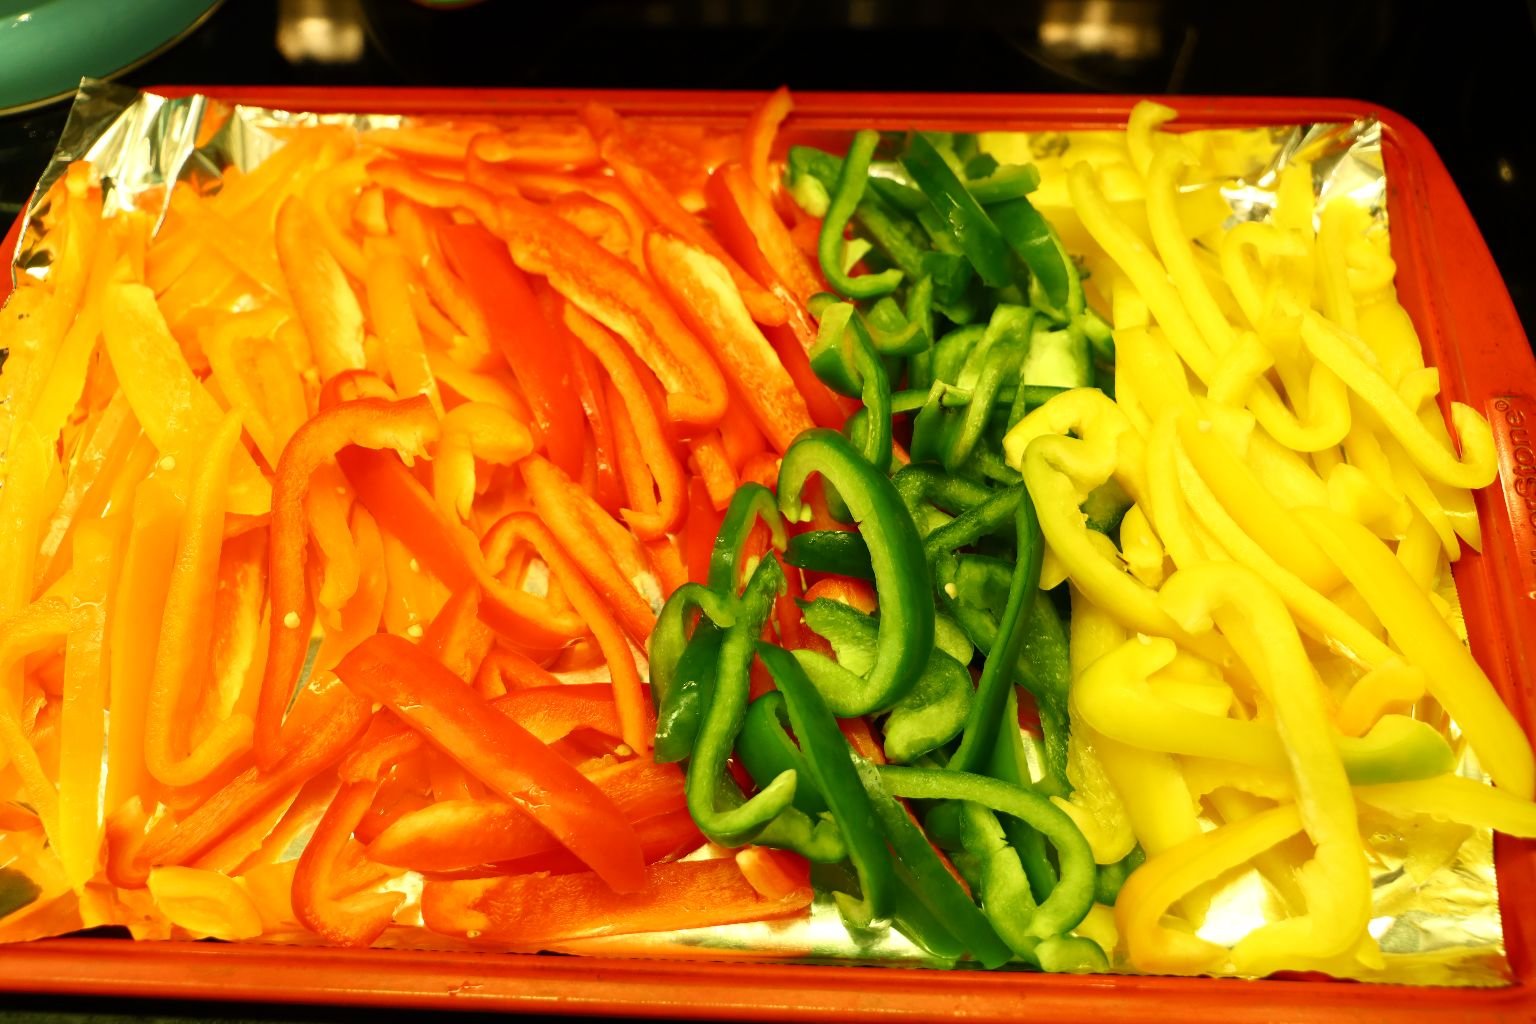
Beautiful Colorful Peppers Play a BIG Role in our Mexican Foods

Washed and Drying in the Cocina
————————————————————
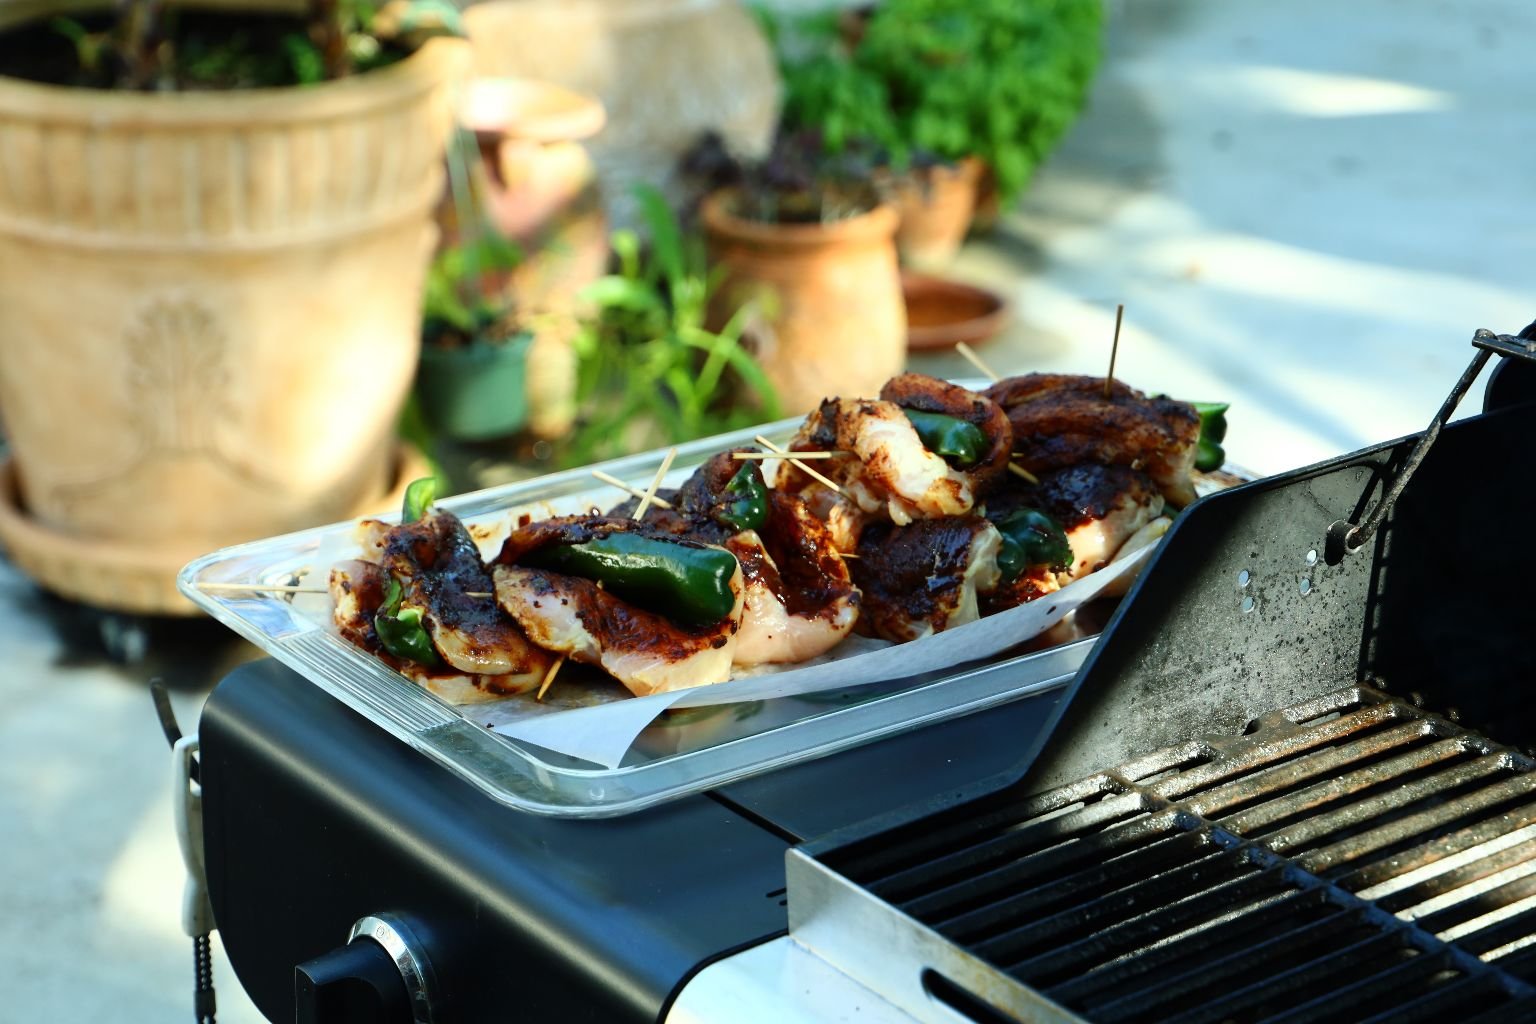
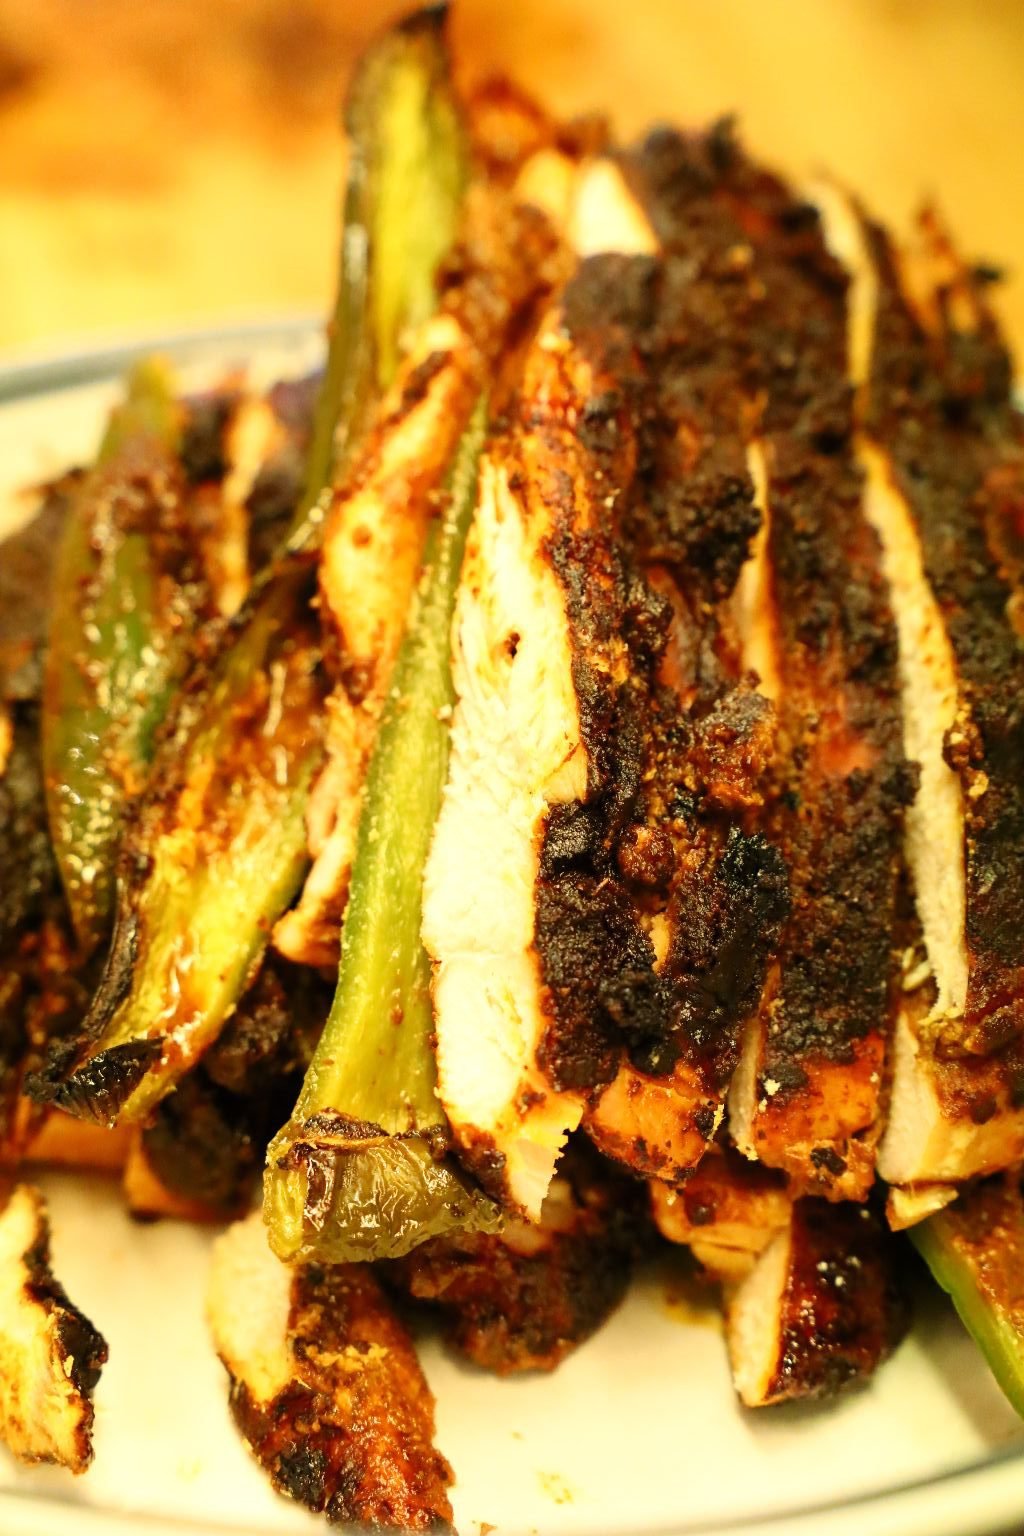
Our Poblano Stuffed Grilled Mole Chicken Breasts

These Will Make Great Fajitas

(Recipe Down Below)
———————————————————-


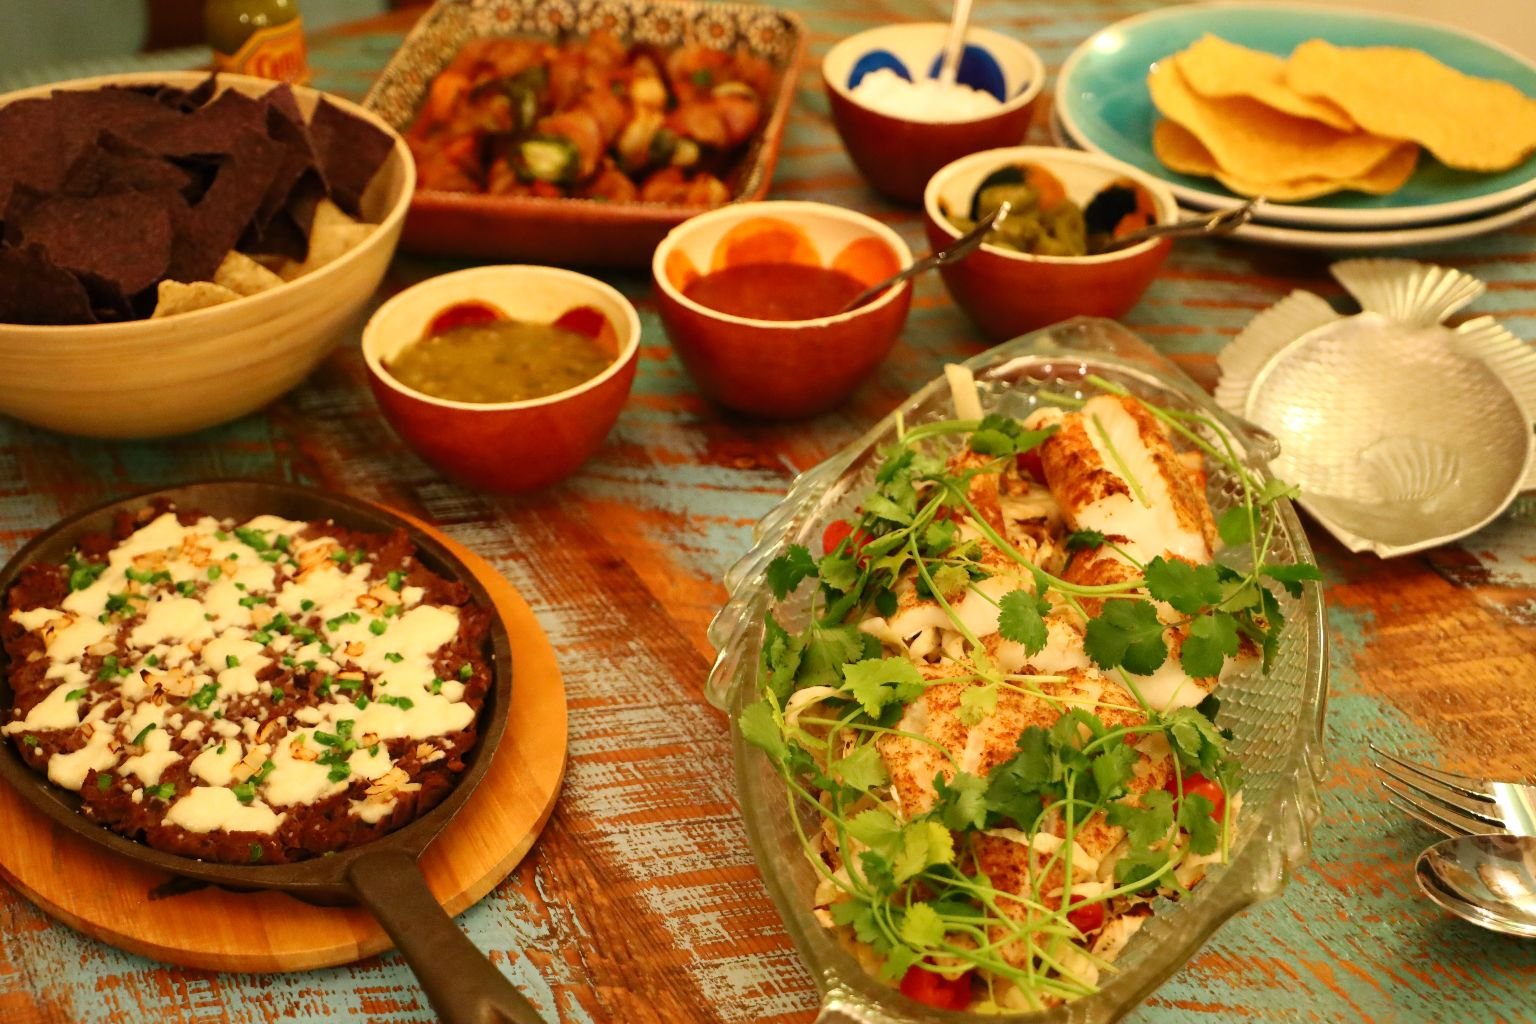
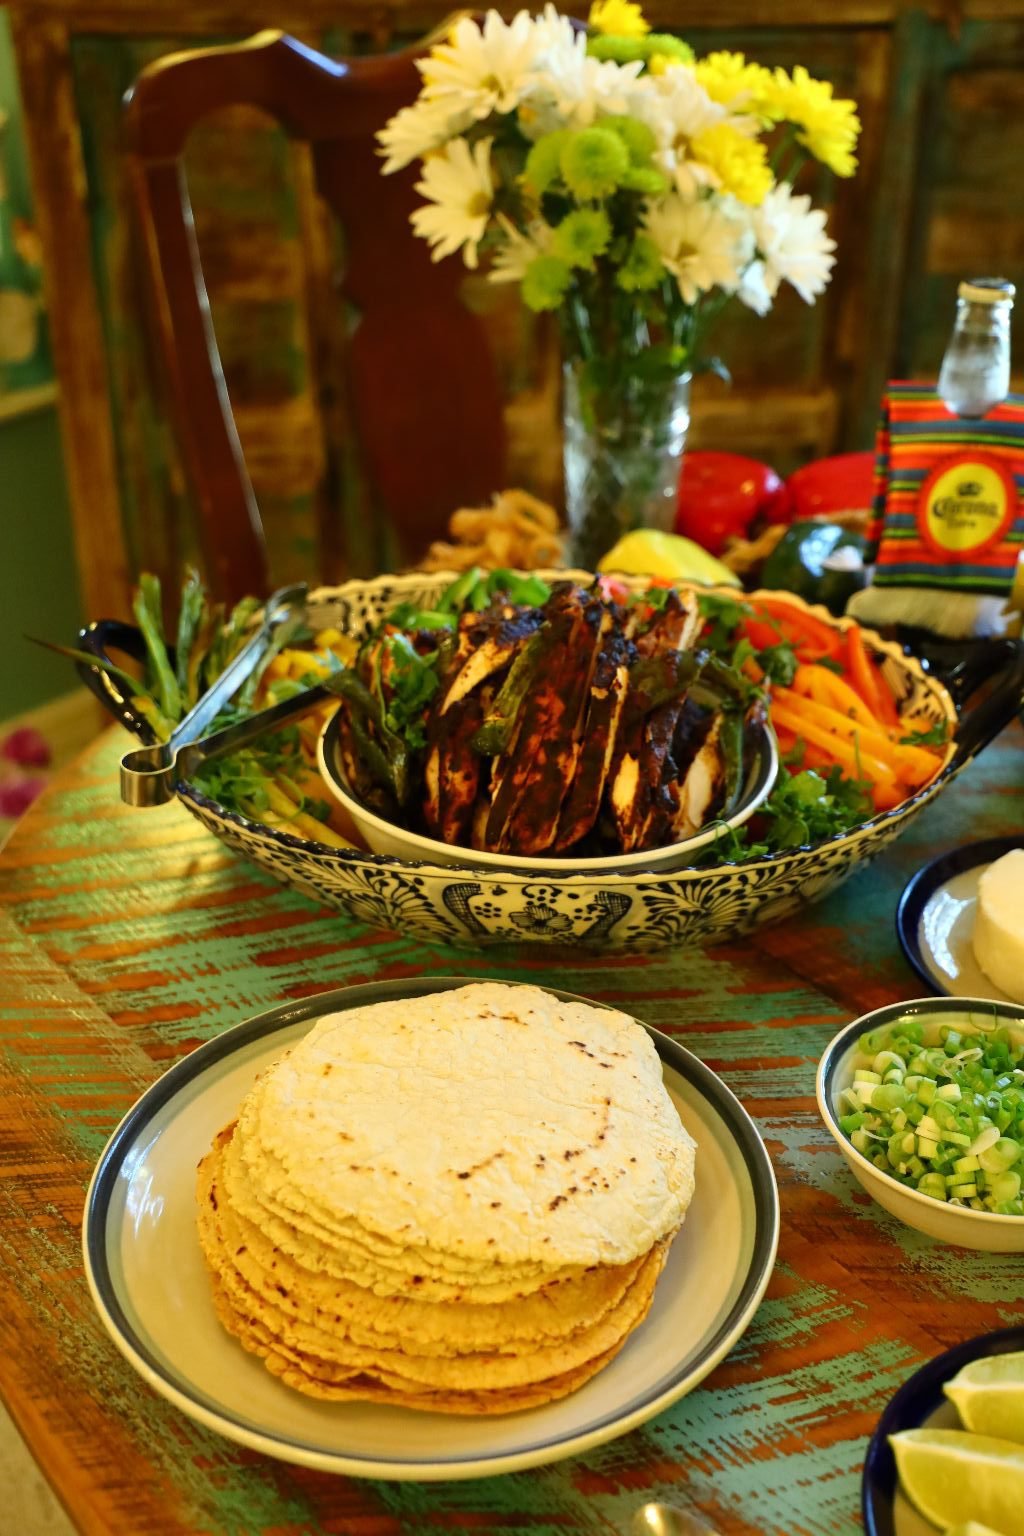
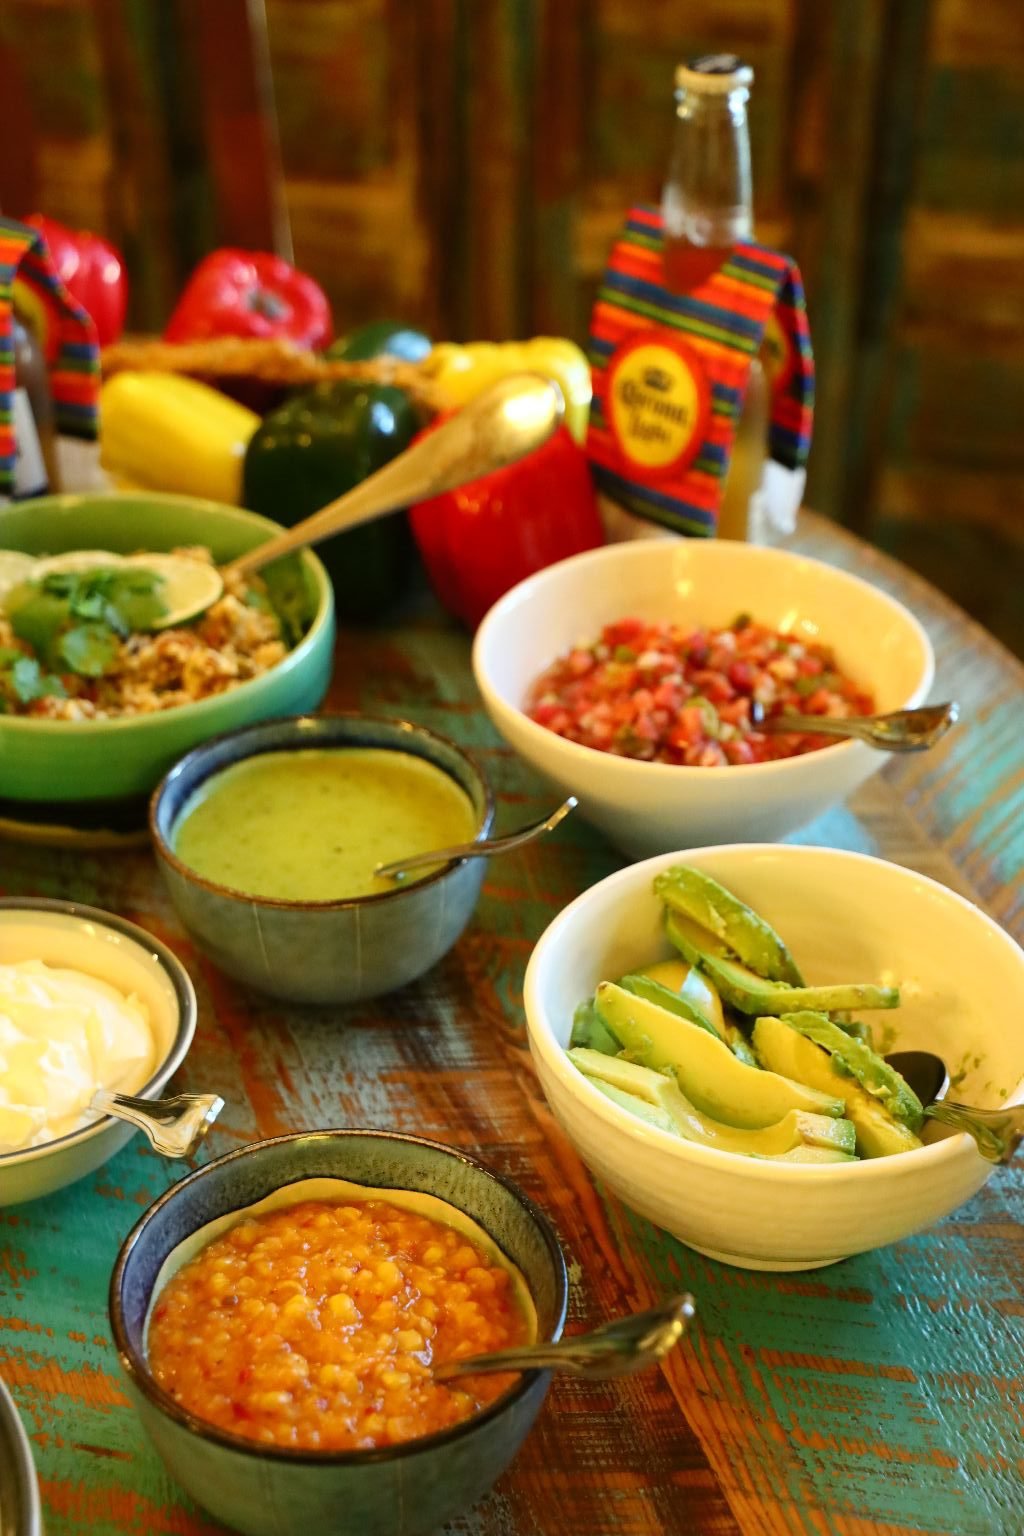
Our Cinco de Mayo Fajita Buffet
Don’t Forget the Corona

THE WORKS!
Our Homemade Tortillas, Grilled Mole Chicken, Colorful Bell Peppers, Grilled Spring Onions, Fresh Cilantro, Chopped Spring Onions, Sour Cream, Mexican Cheeses, Mexican Sauces and Hot Sauces, Limes, and Julie’s Wild Grain Lime Rice.
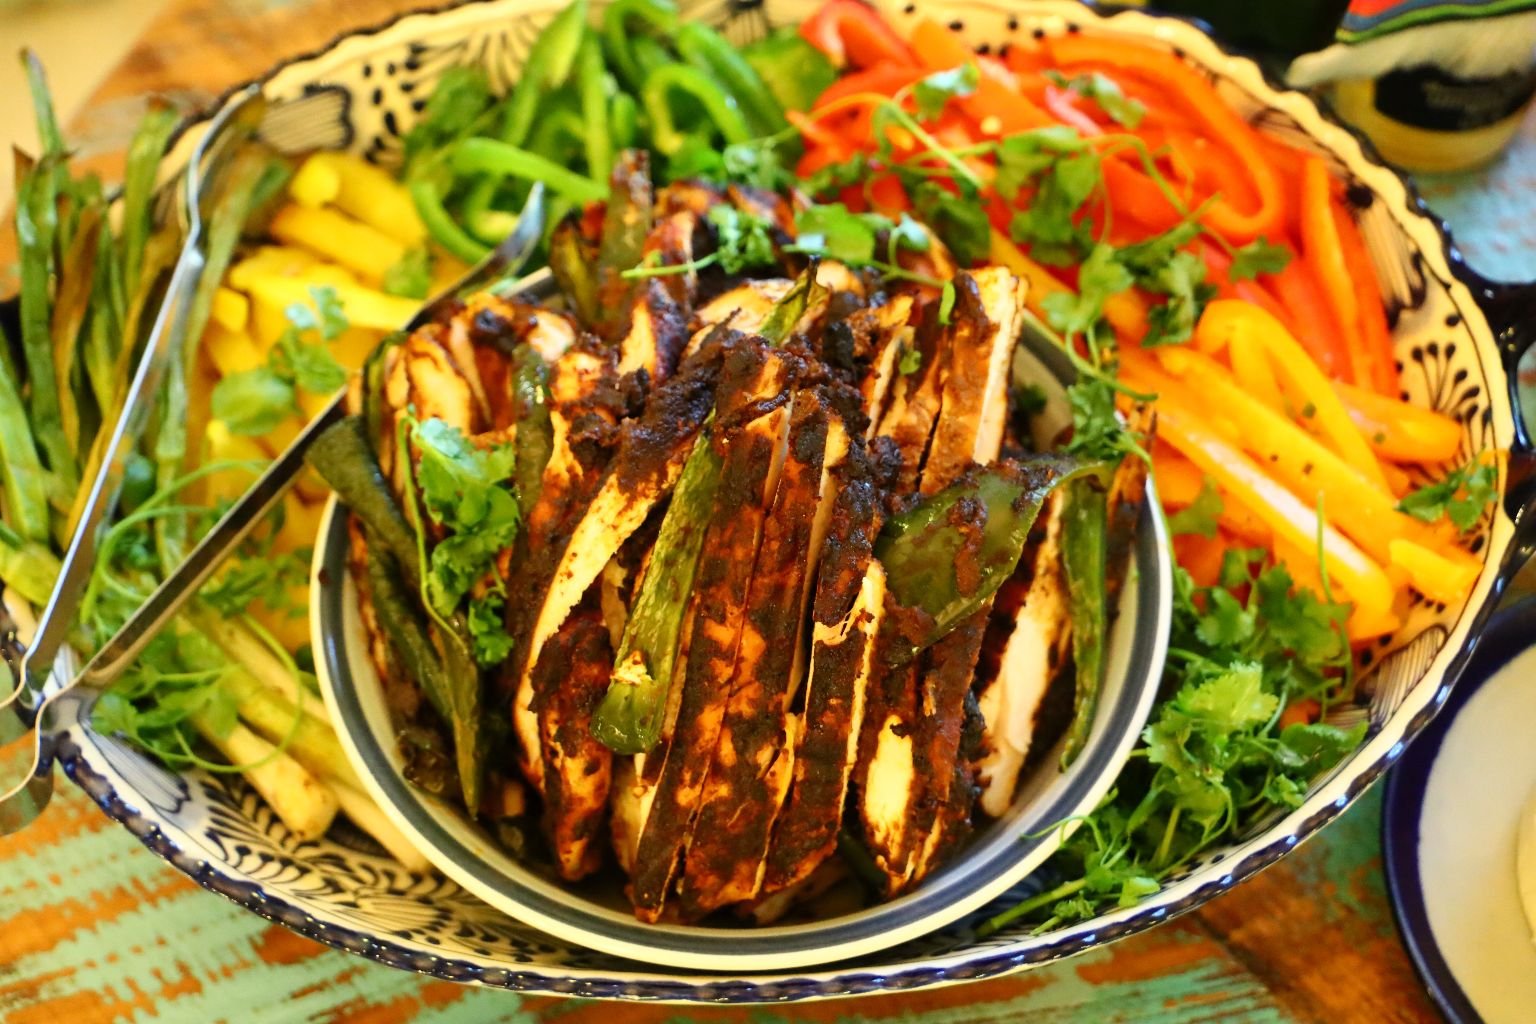
Colorful and Delicious

Topped with a bit of Queso, Avocado and Lime
And some Pico de Gallo
(Recipes All Down Below)
—————————————————————-

Poblano Stuffed Grilled Mole Chicken Breast Sandwiches
We set aside two of these breasts just for this. 🙂
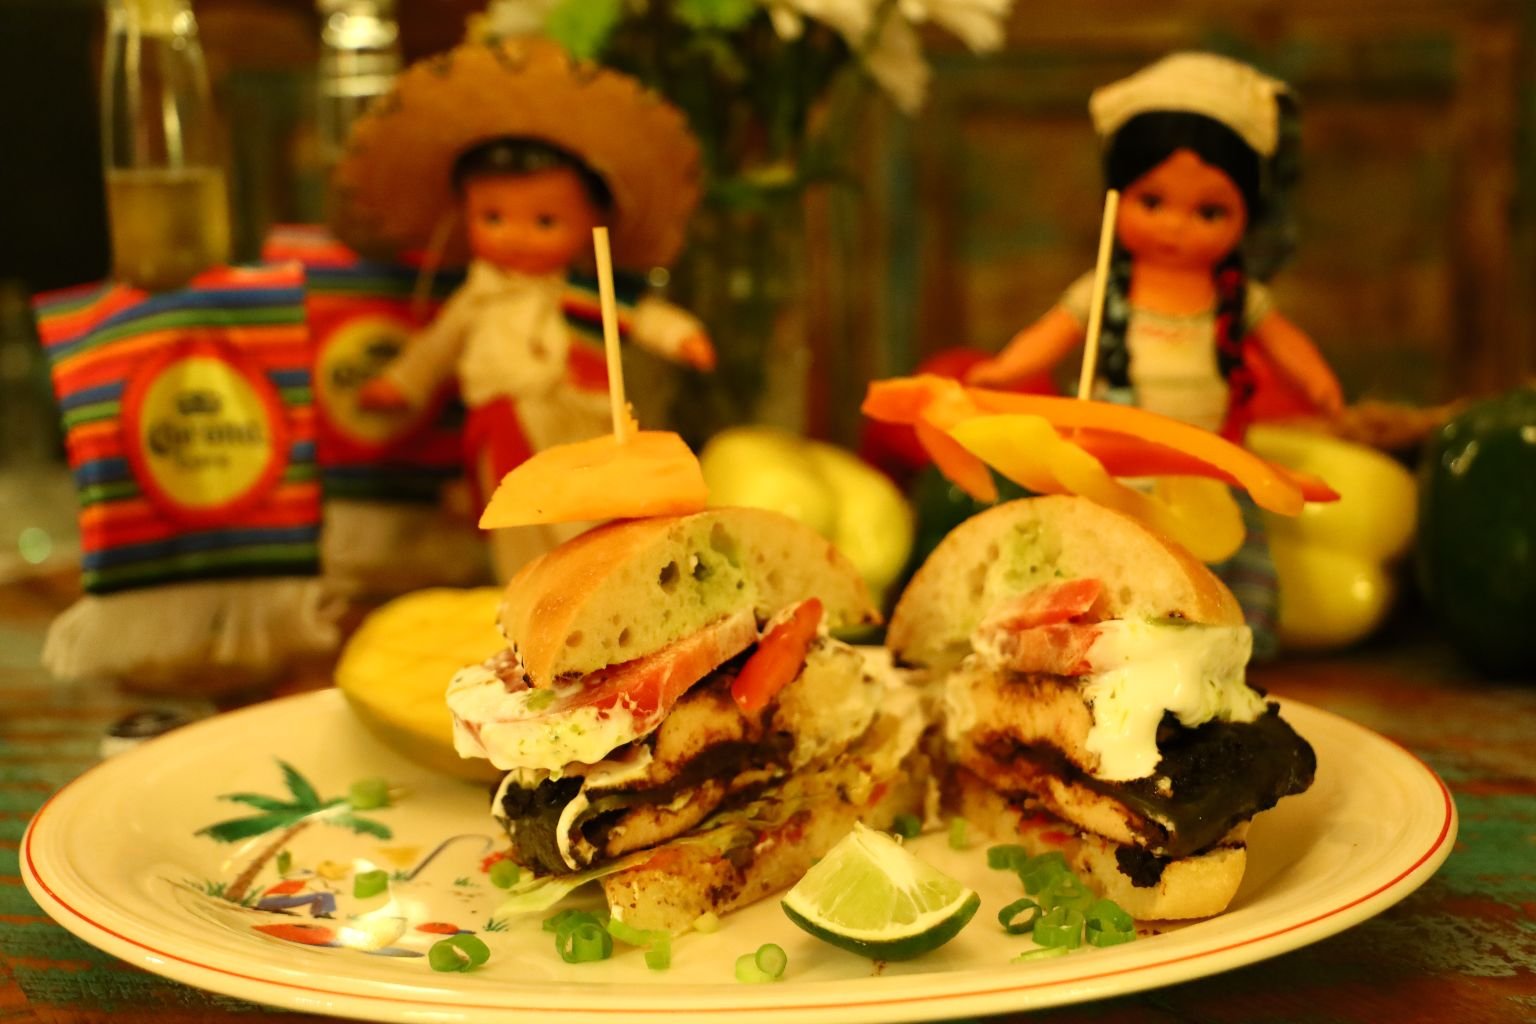
Another Great Way to Eat our Mole Stuffed Chicken Breasts
w/ Mango and Lime
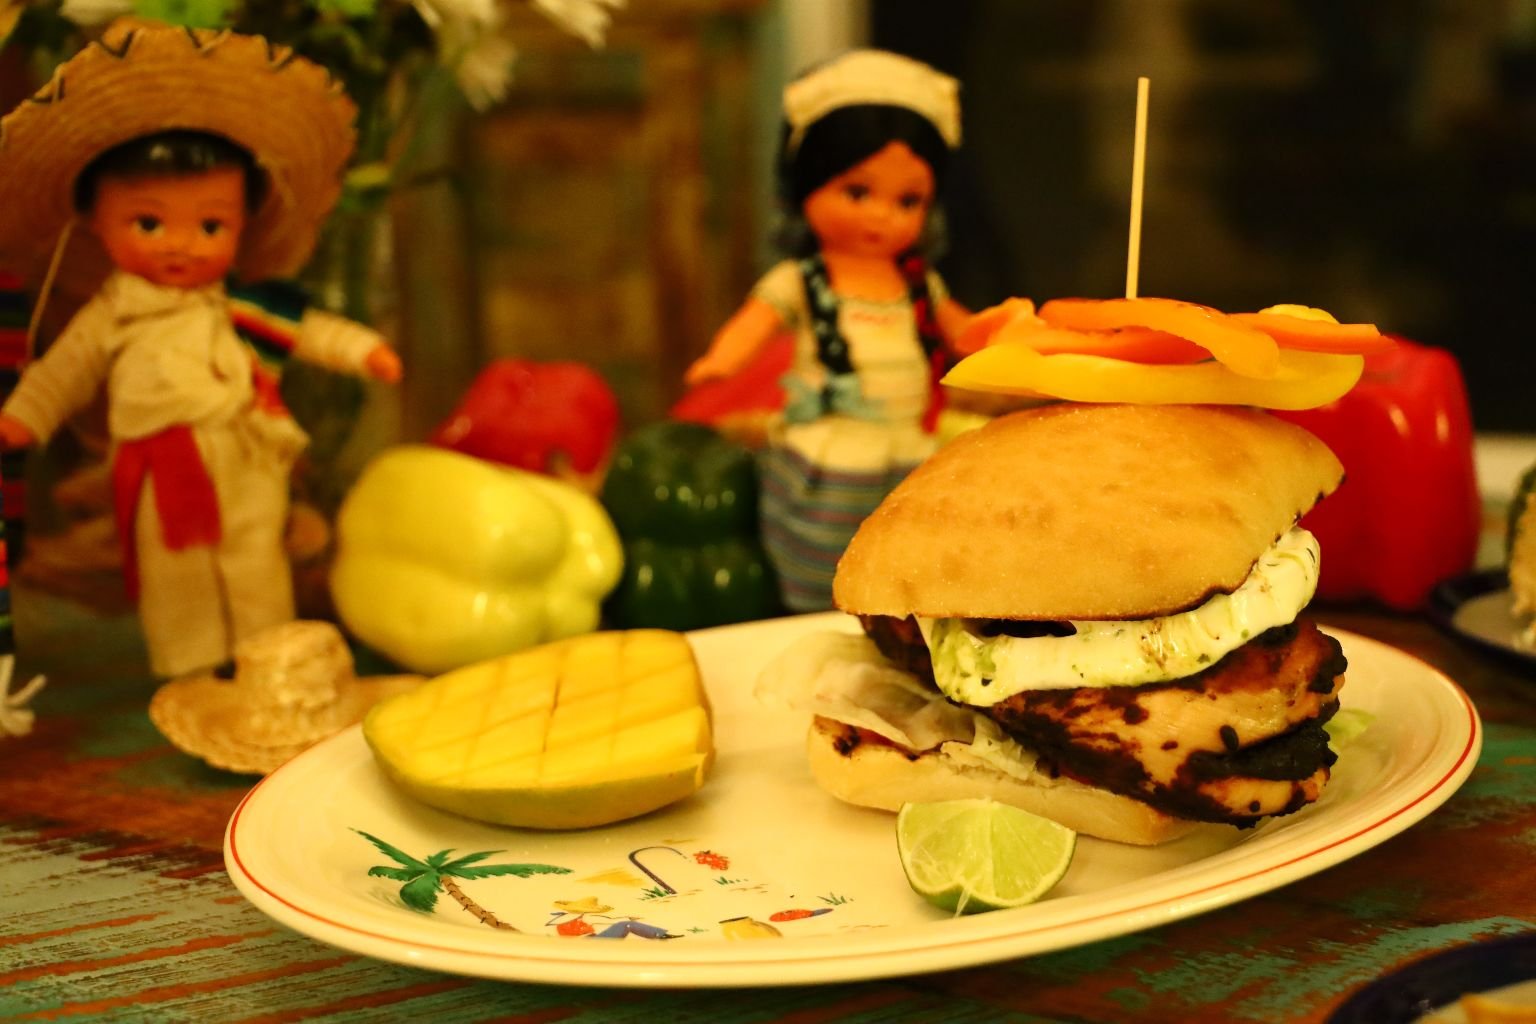
With Colorful Bell Peppers
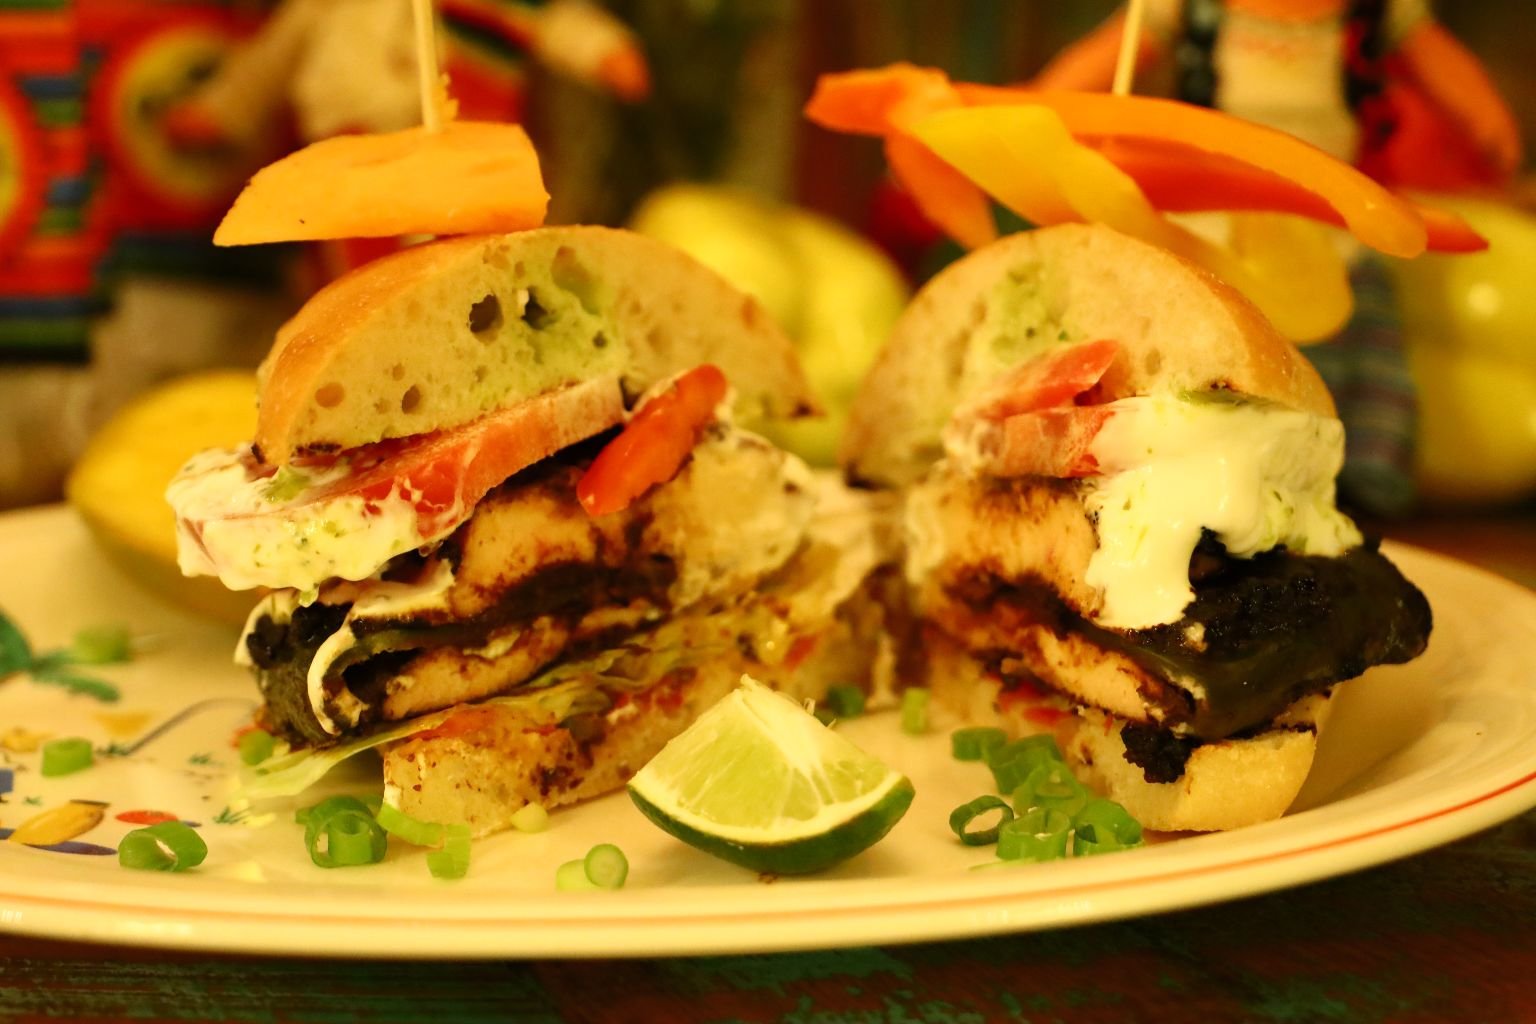
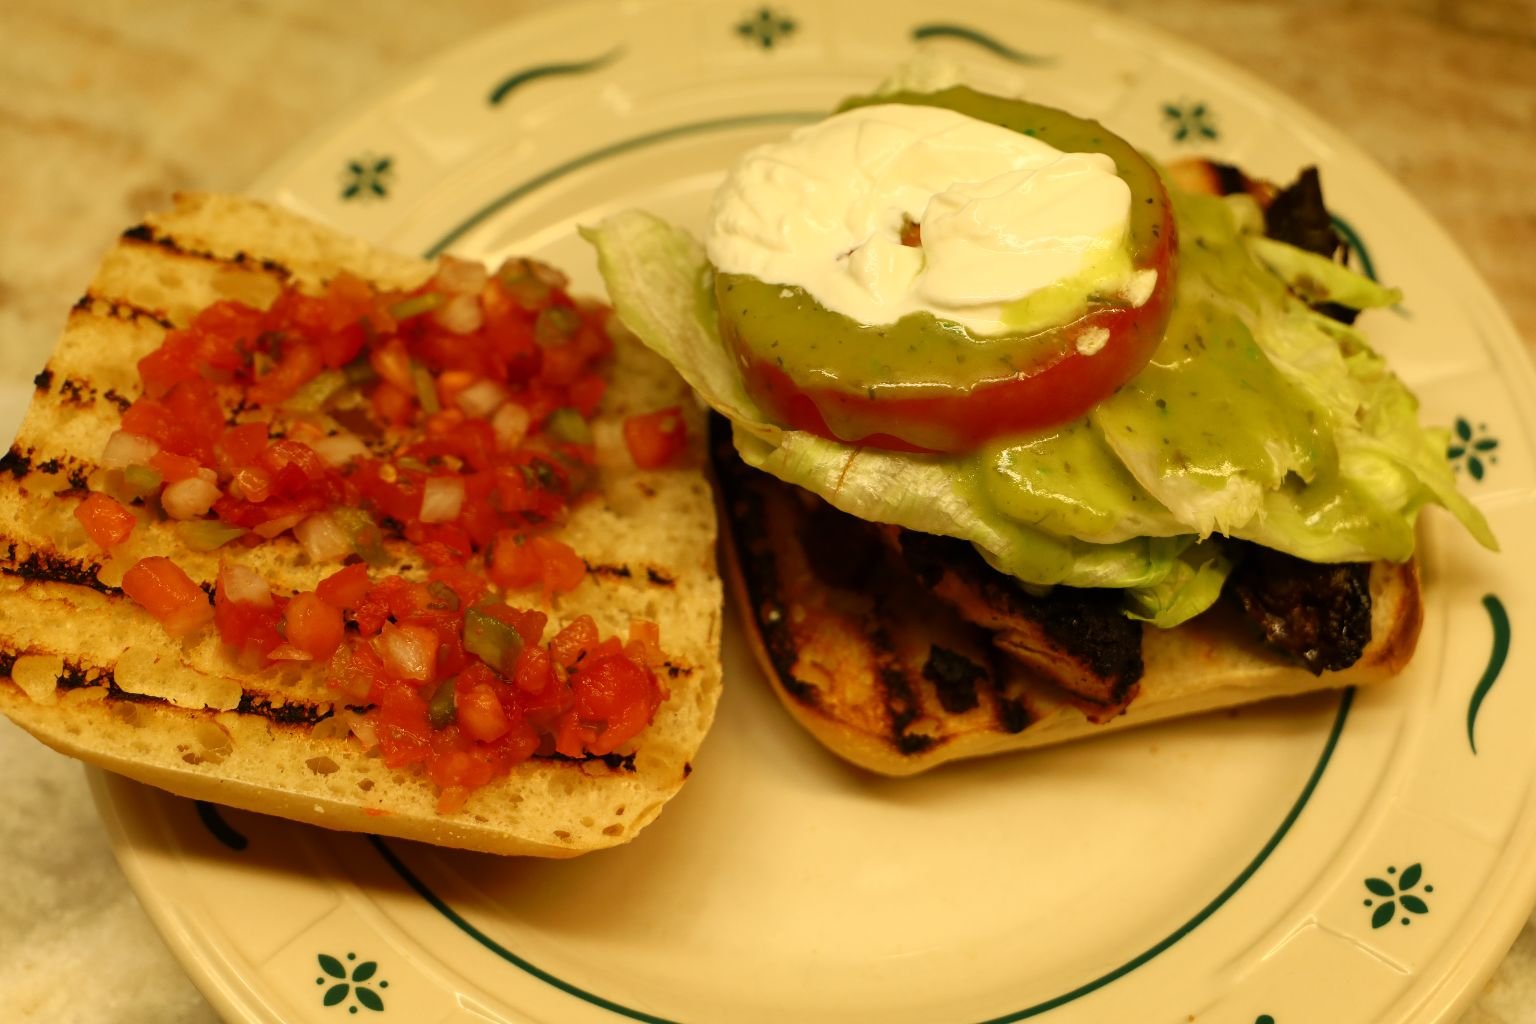
The Build up of the Sandwich
Bottom to Top: Lettuce, Sauce, Chicken, sprinkling of Chili Powder, Tomatoes, Sour Cream, more Sauces, between two slices of Bread.

You can have the Mango in the Sandwich or on the Side
(Recipe Down Below)
————————————————————–
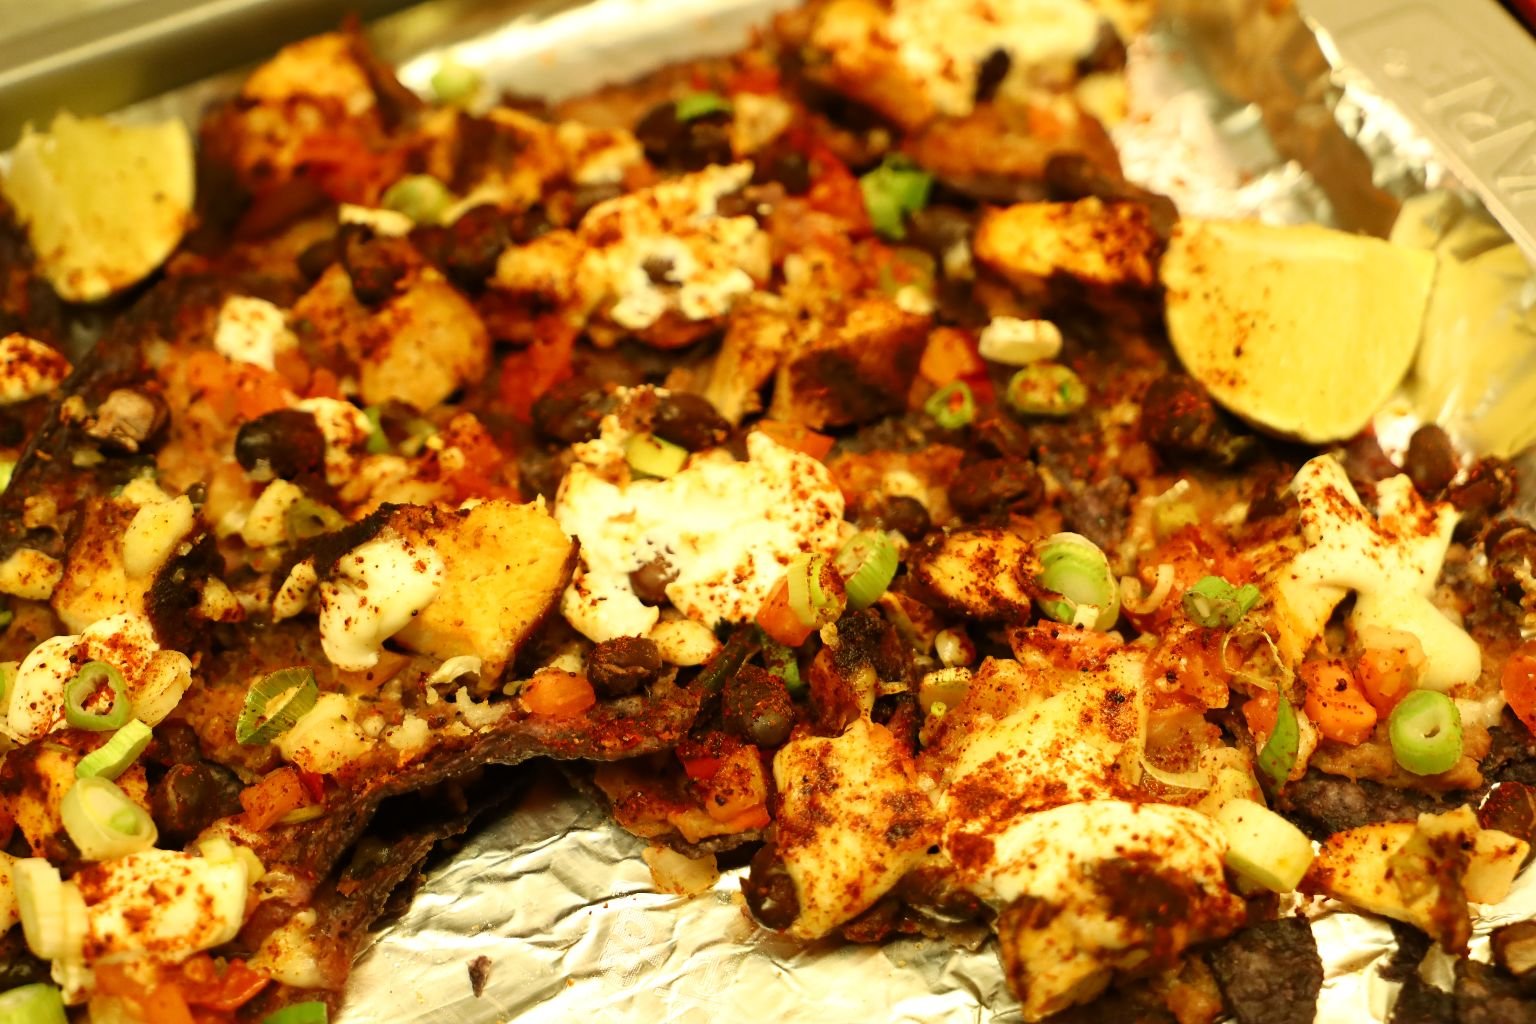
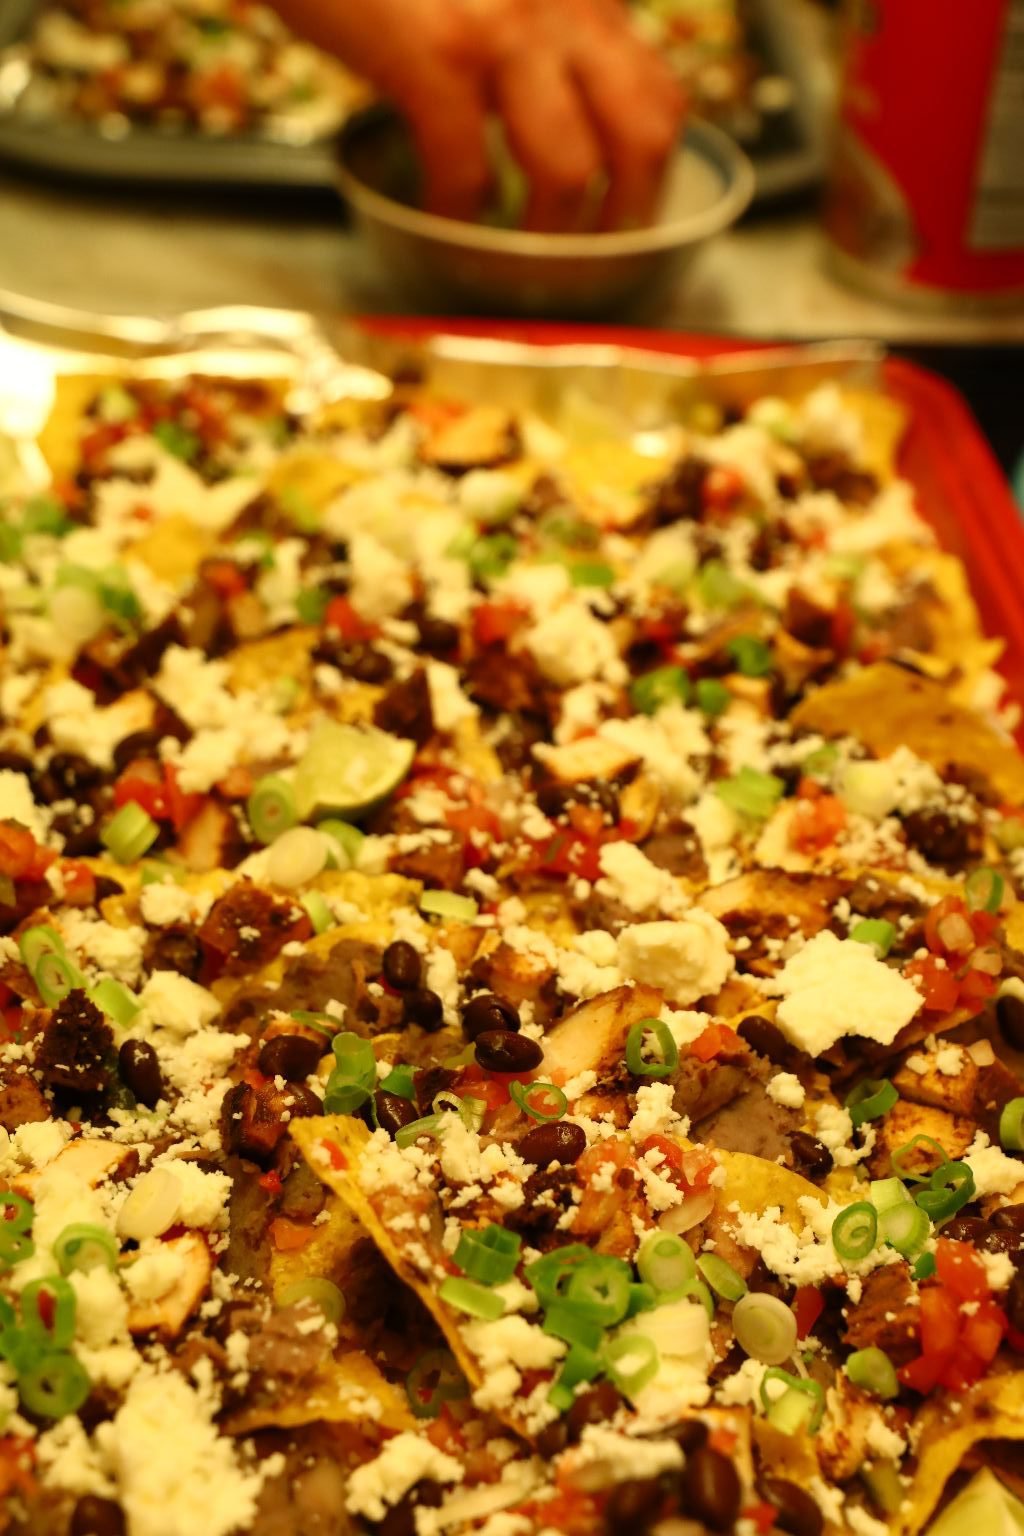
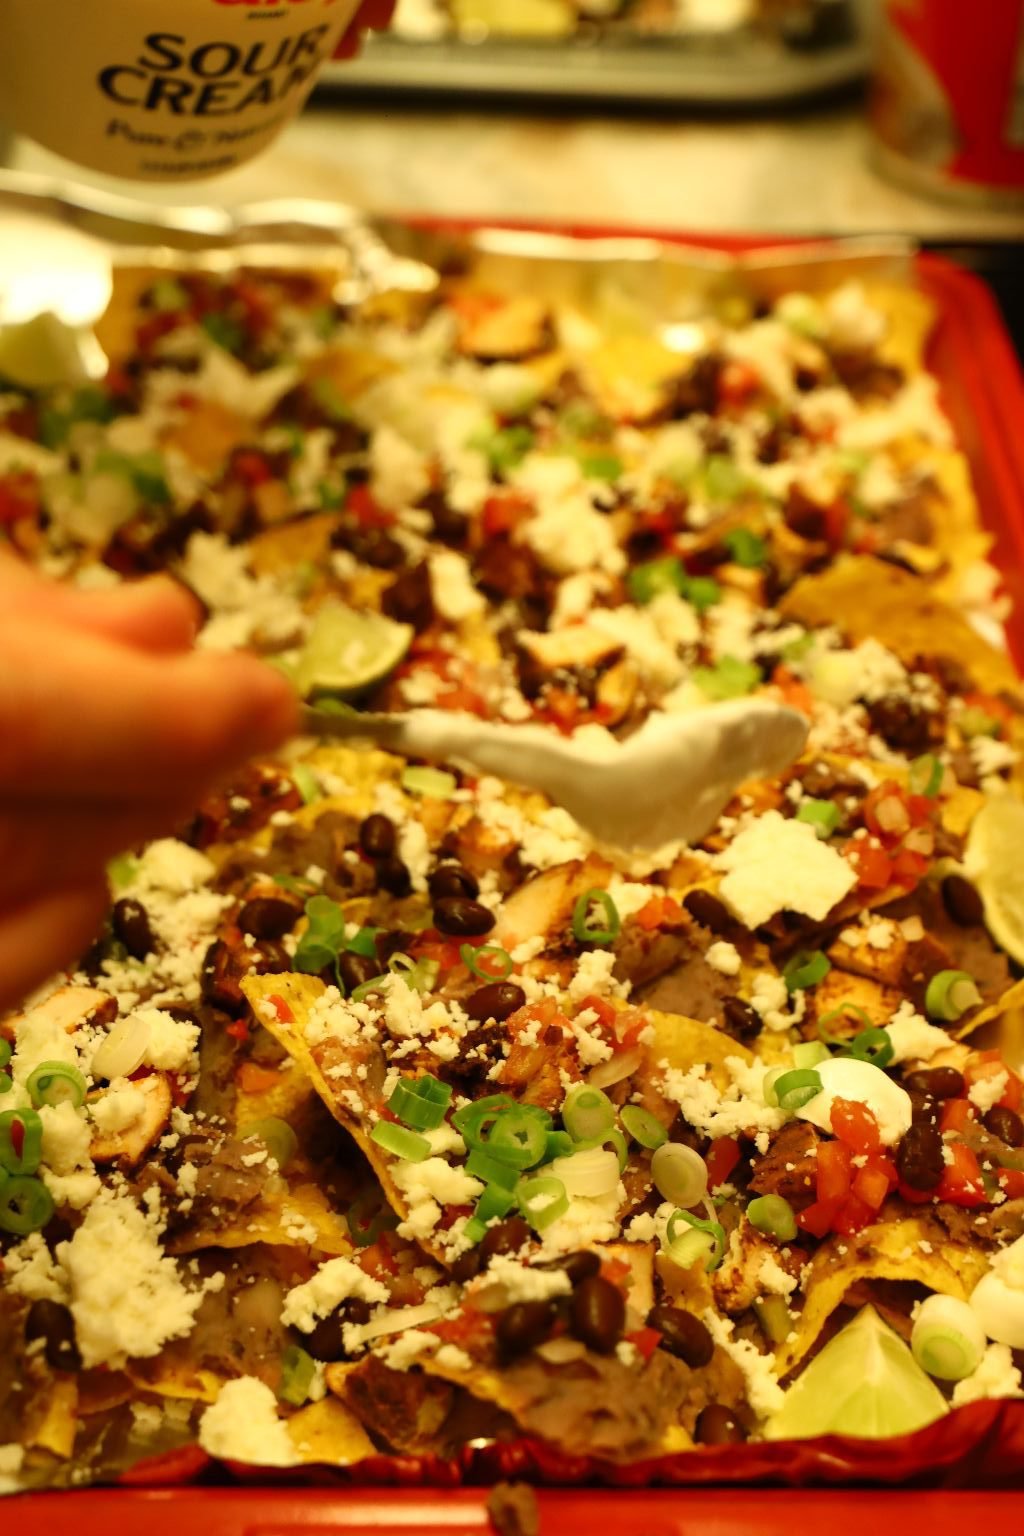
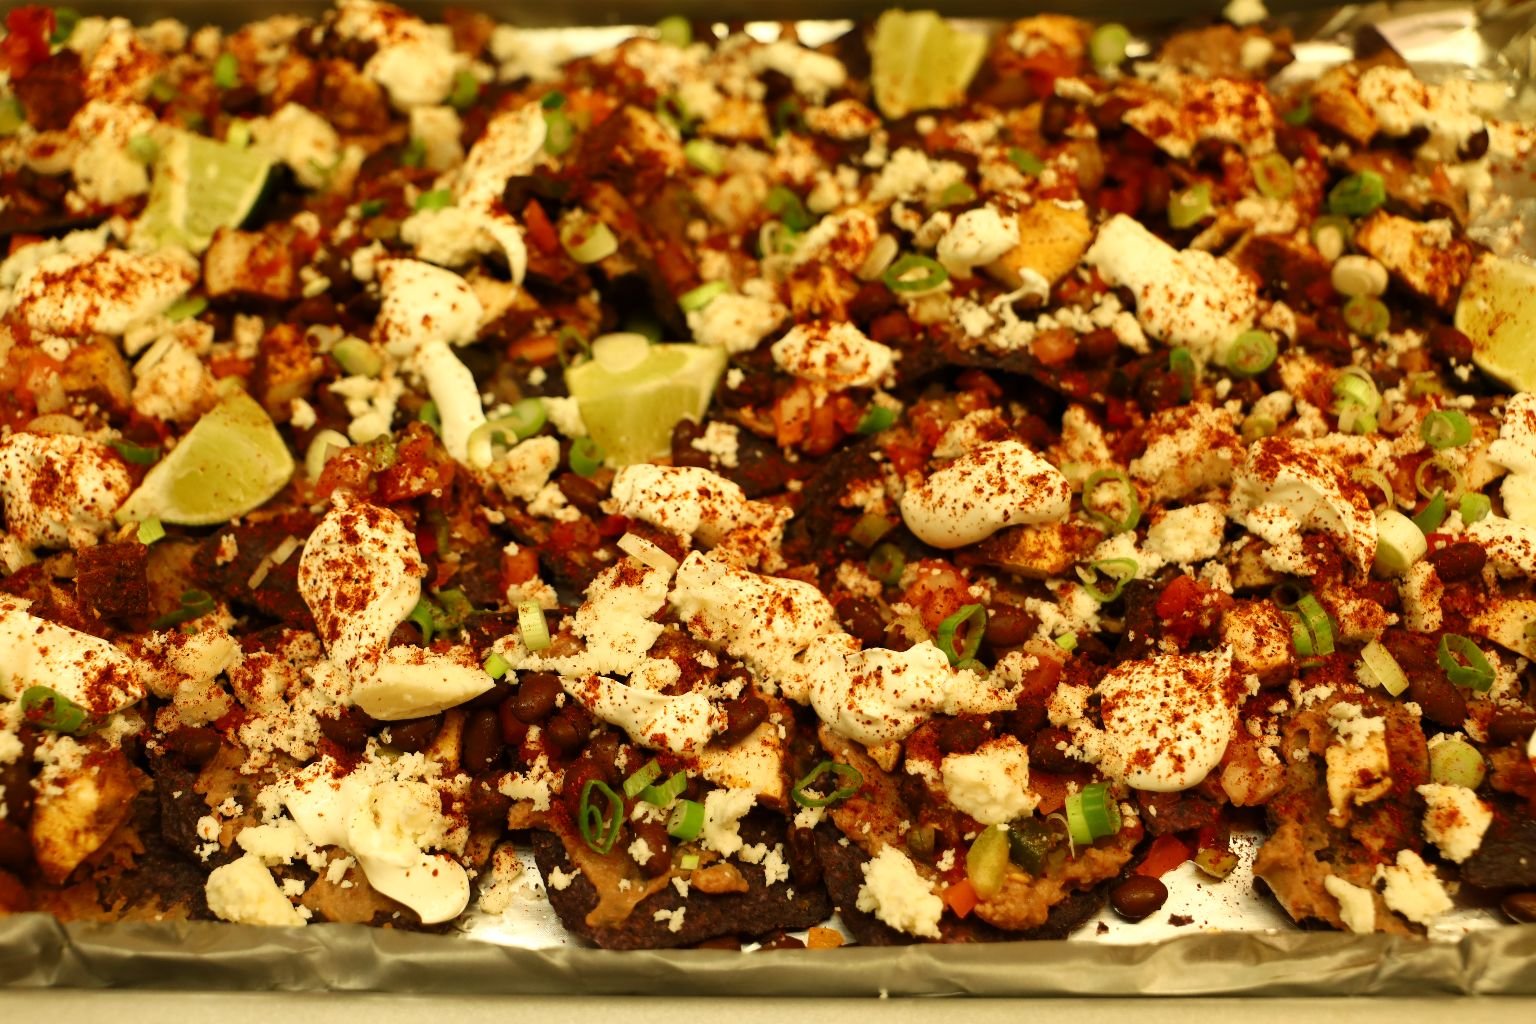
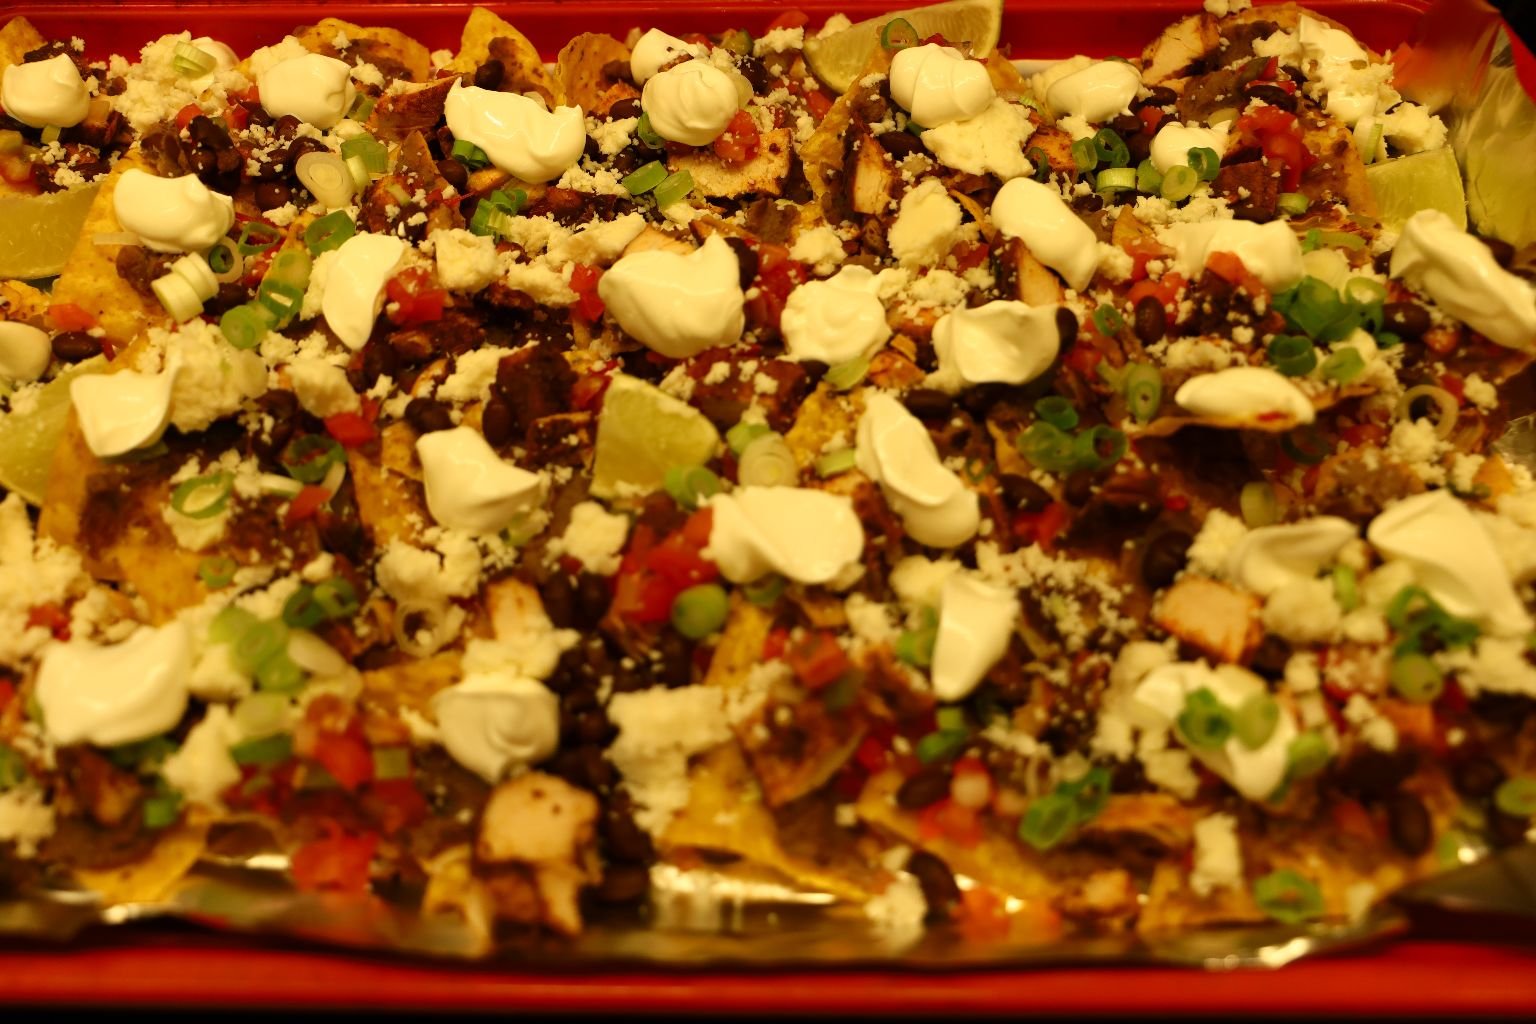
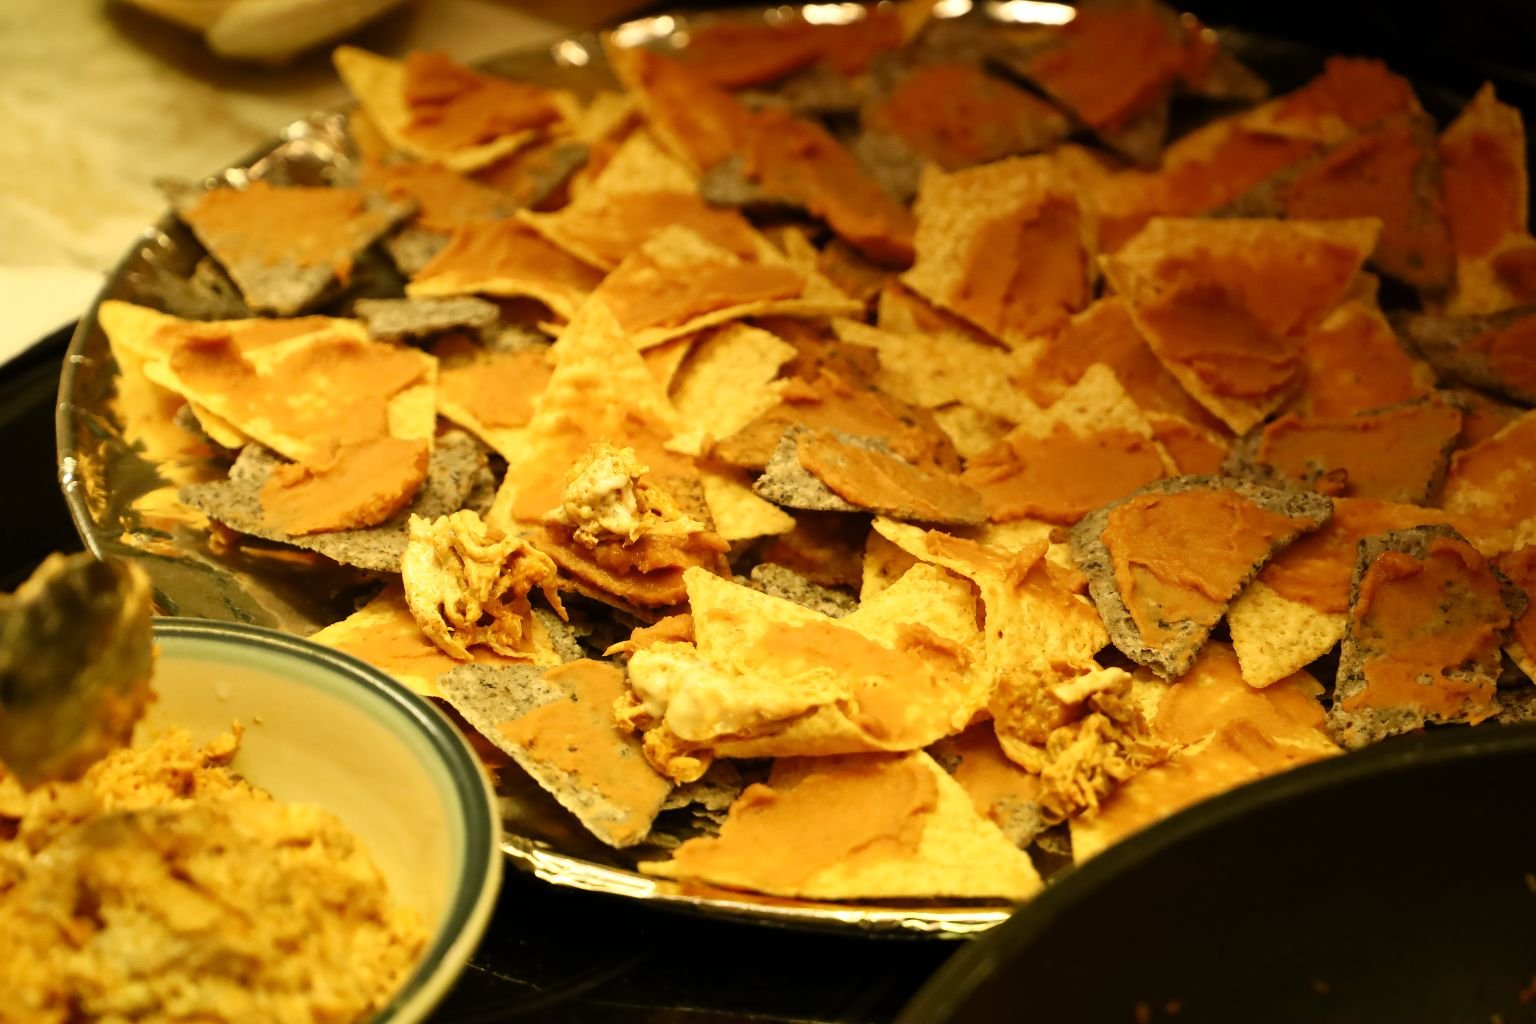
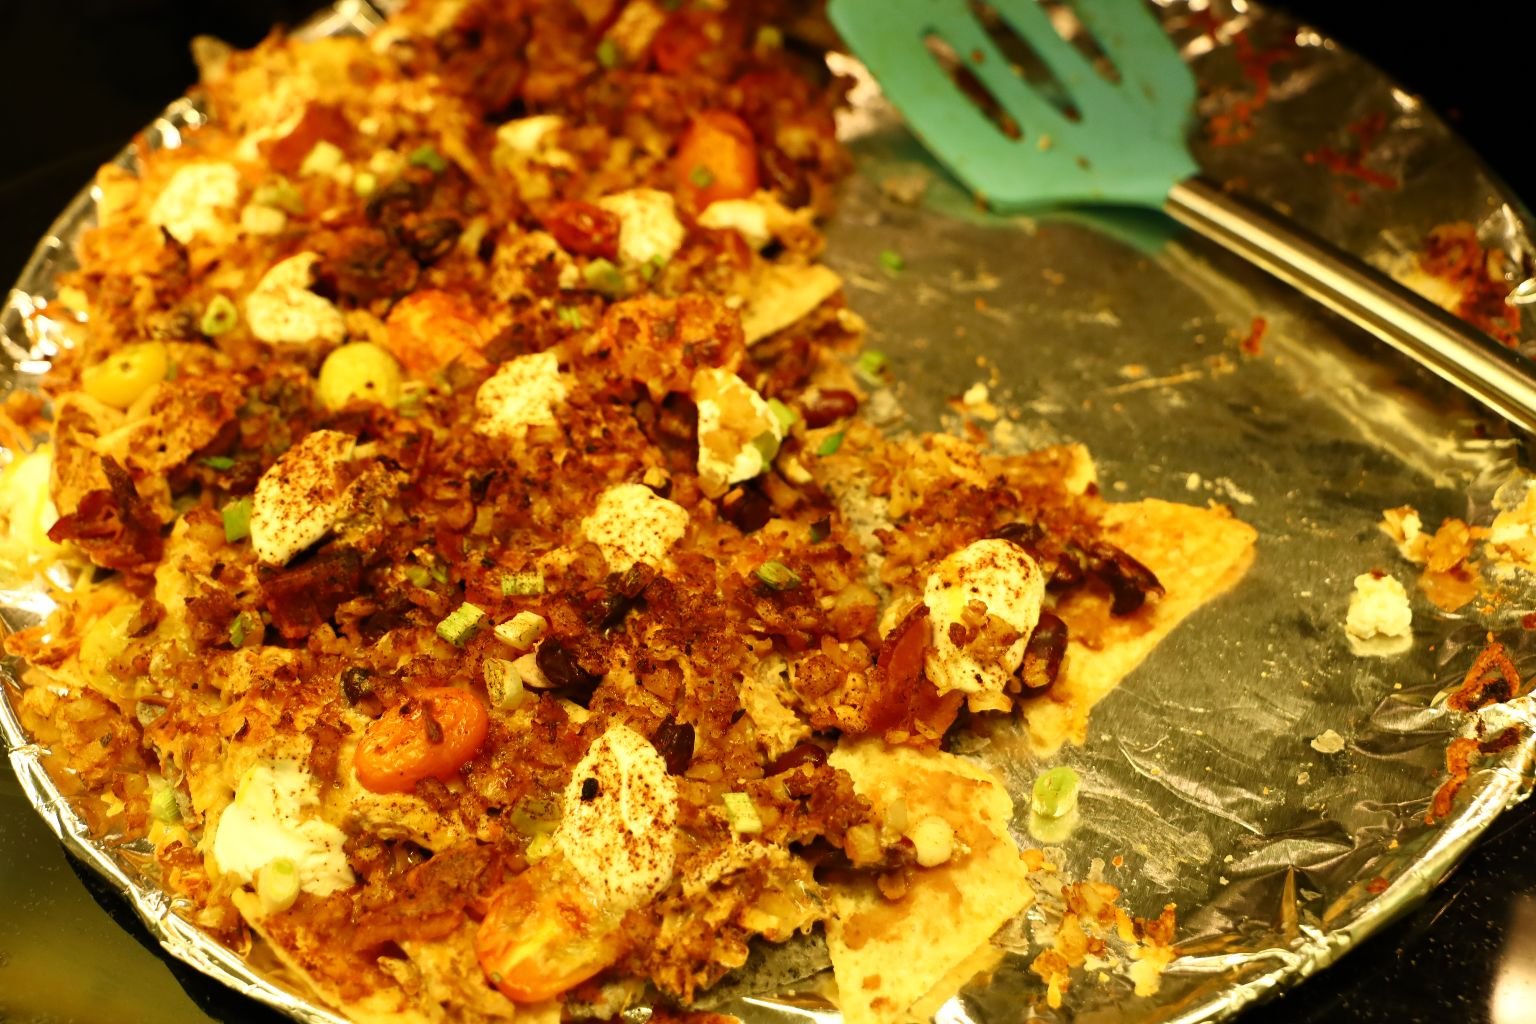
Our Leftover Chicken Mole in Nachos
There are so many delicious ways to eat it.
WE LOVE NACHOS!!!!
We made these with all the leftovers that you see above. Tortilla Chips, Refried Beans, Chicken Mole, Pico de Gallo, Black Beans, Chopped Spring Onions, Sour Cream, Various Spices such as Chili Powder, and Fresh Limes.
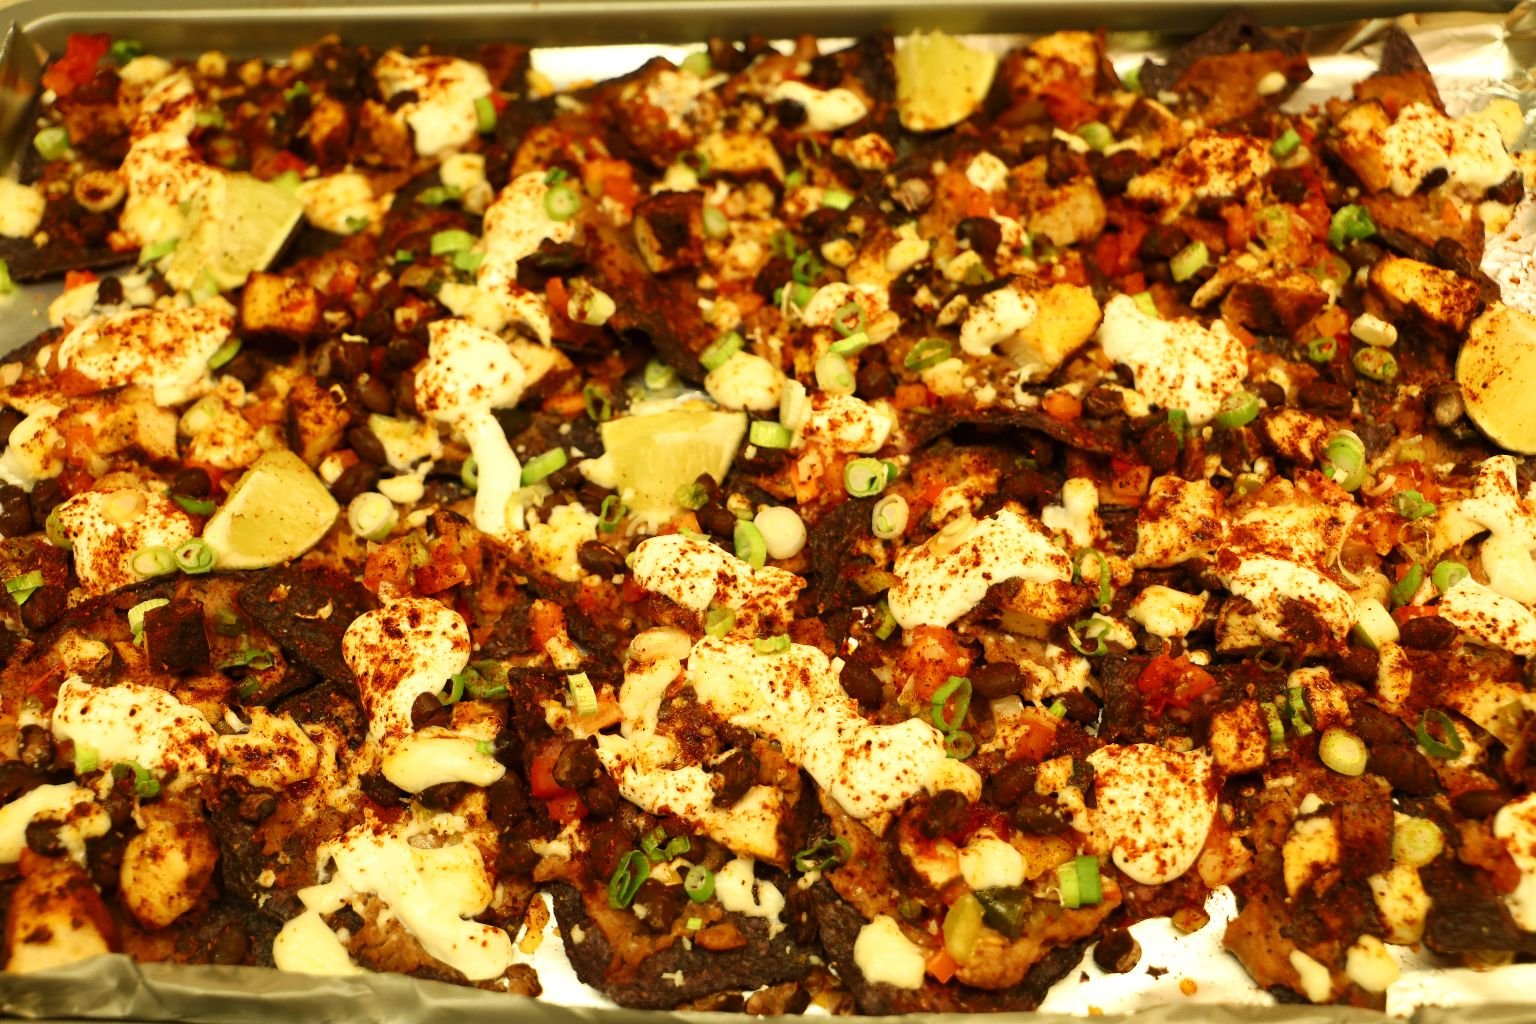
Although the recipe is down below I will say that Nachos are such a fun and easy food to make and eat.
Sometimes a bit messy, but always a lot good!
So Very Easy To Make and Eat

(Recipe Down Below)
————————————————————————
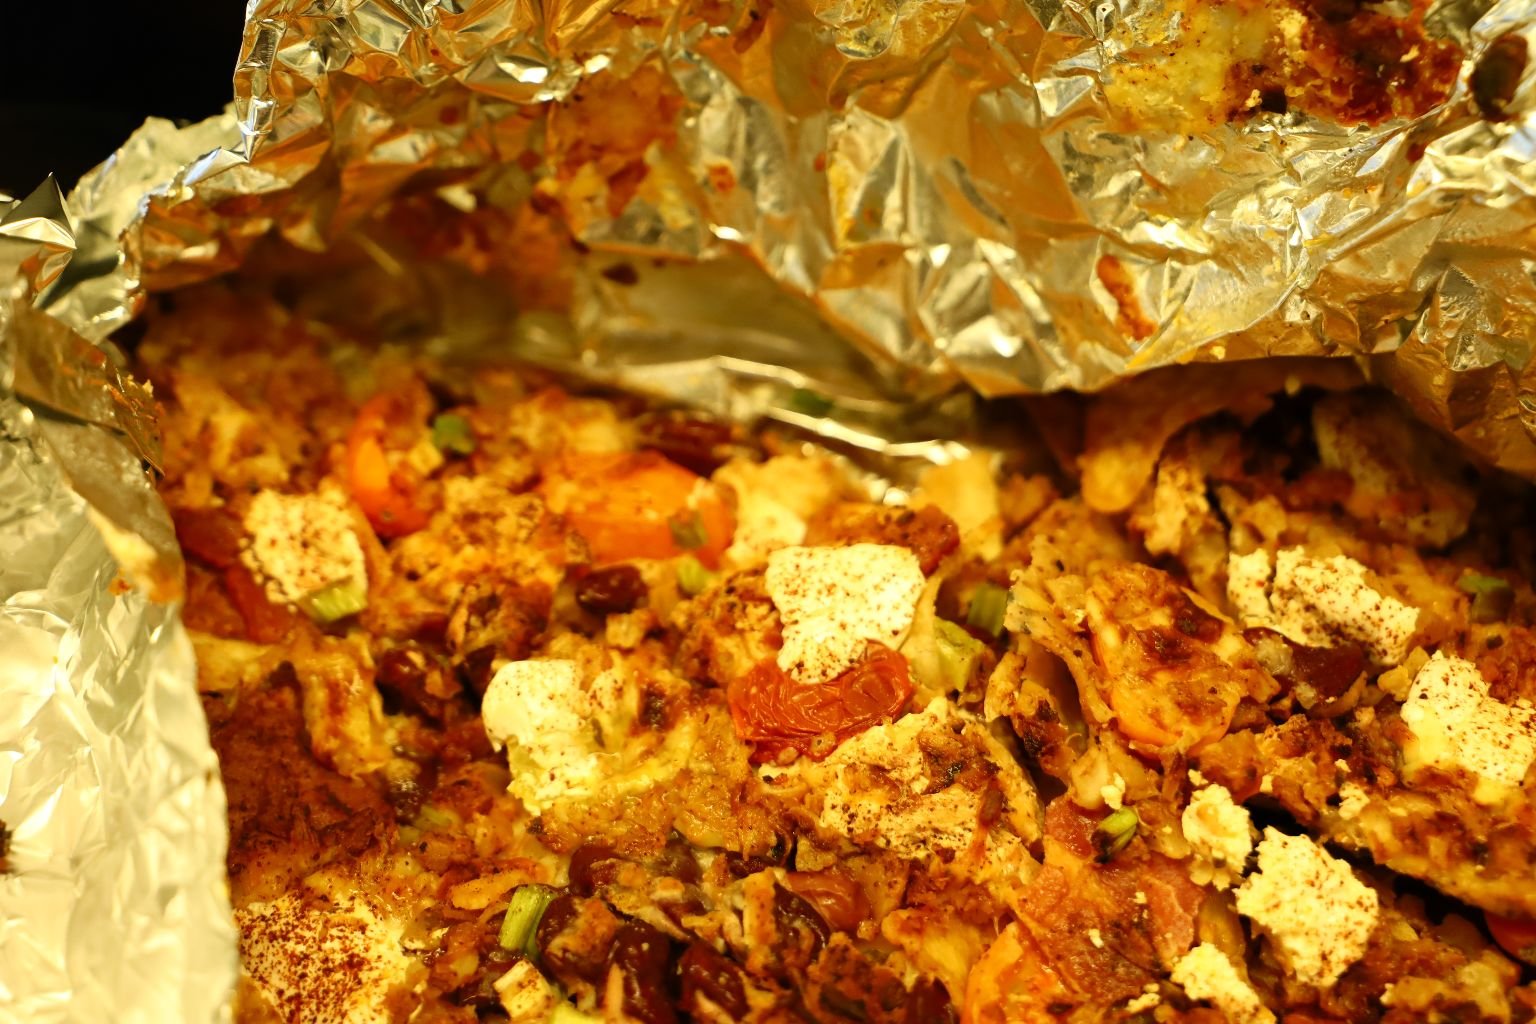
Throw Together Nachos

Gathering Foods From the Refrigerator and Pantry


Also, Our Secret Ingredient is Spiced and Sauteed Cauliflower

(Recipe Down Below)
———————————————————-
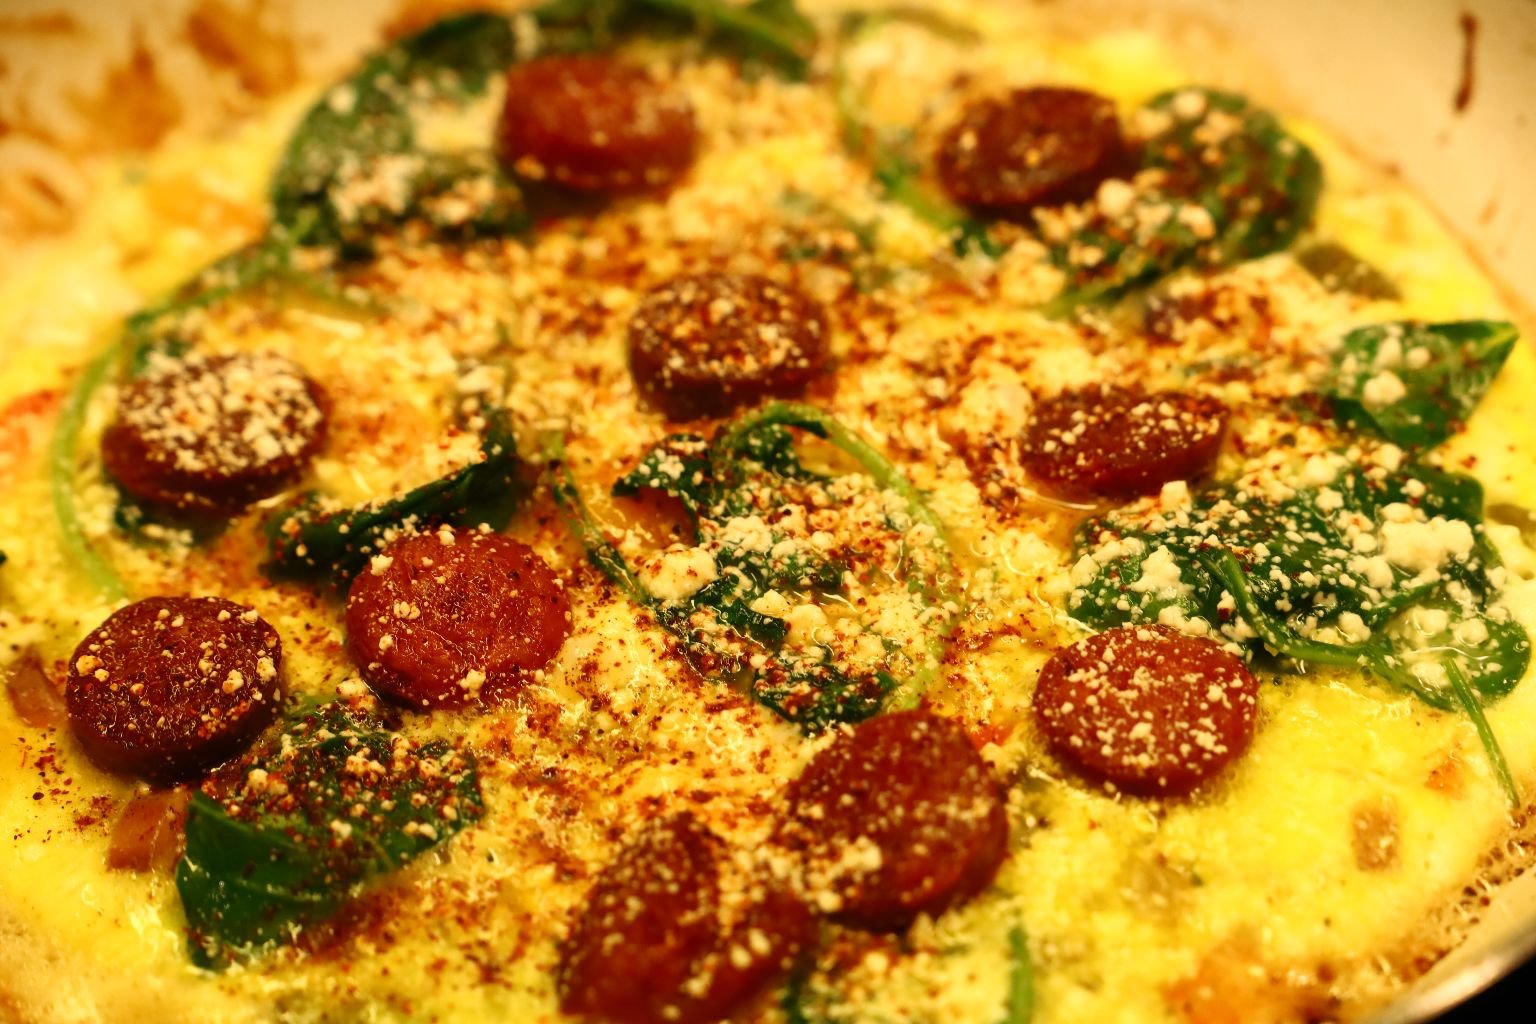
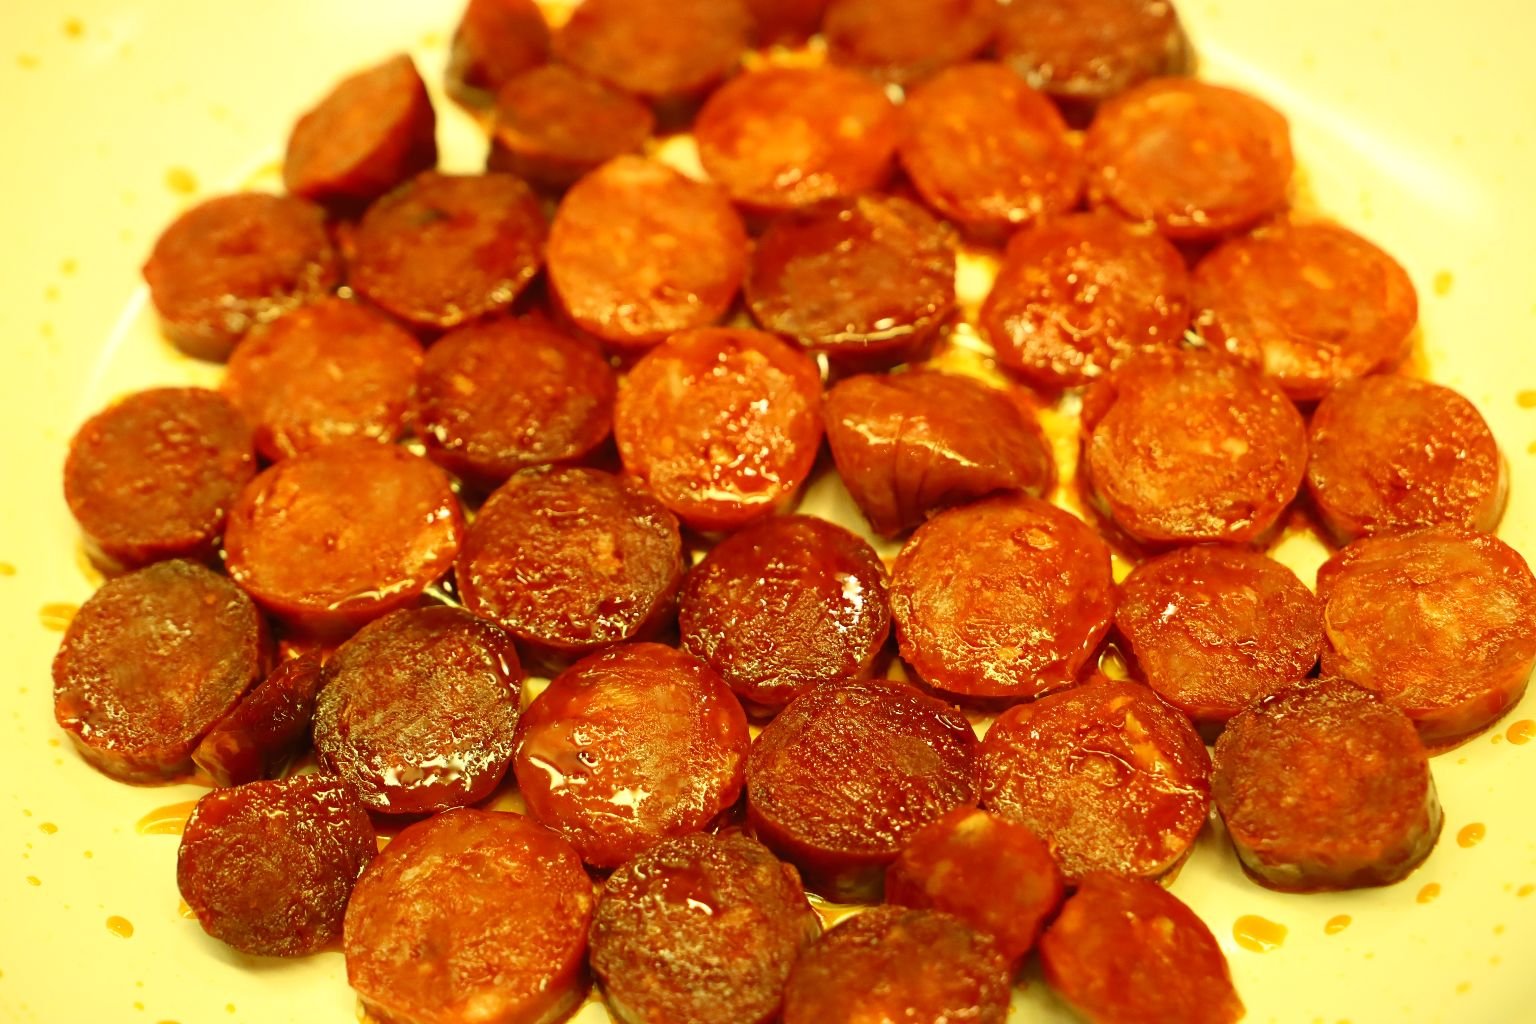
Chorizo, Kale and Spinach Tortilla Omelet


Made with our Leftover Tortillas
(Recipe Down Below)
—————————————————————
Our Baked Queso Fresco Cheese
(Think Mexican Baked Brie)
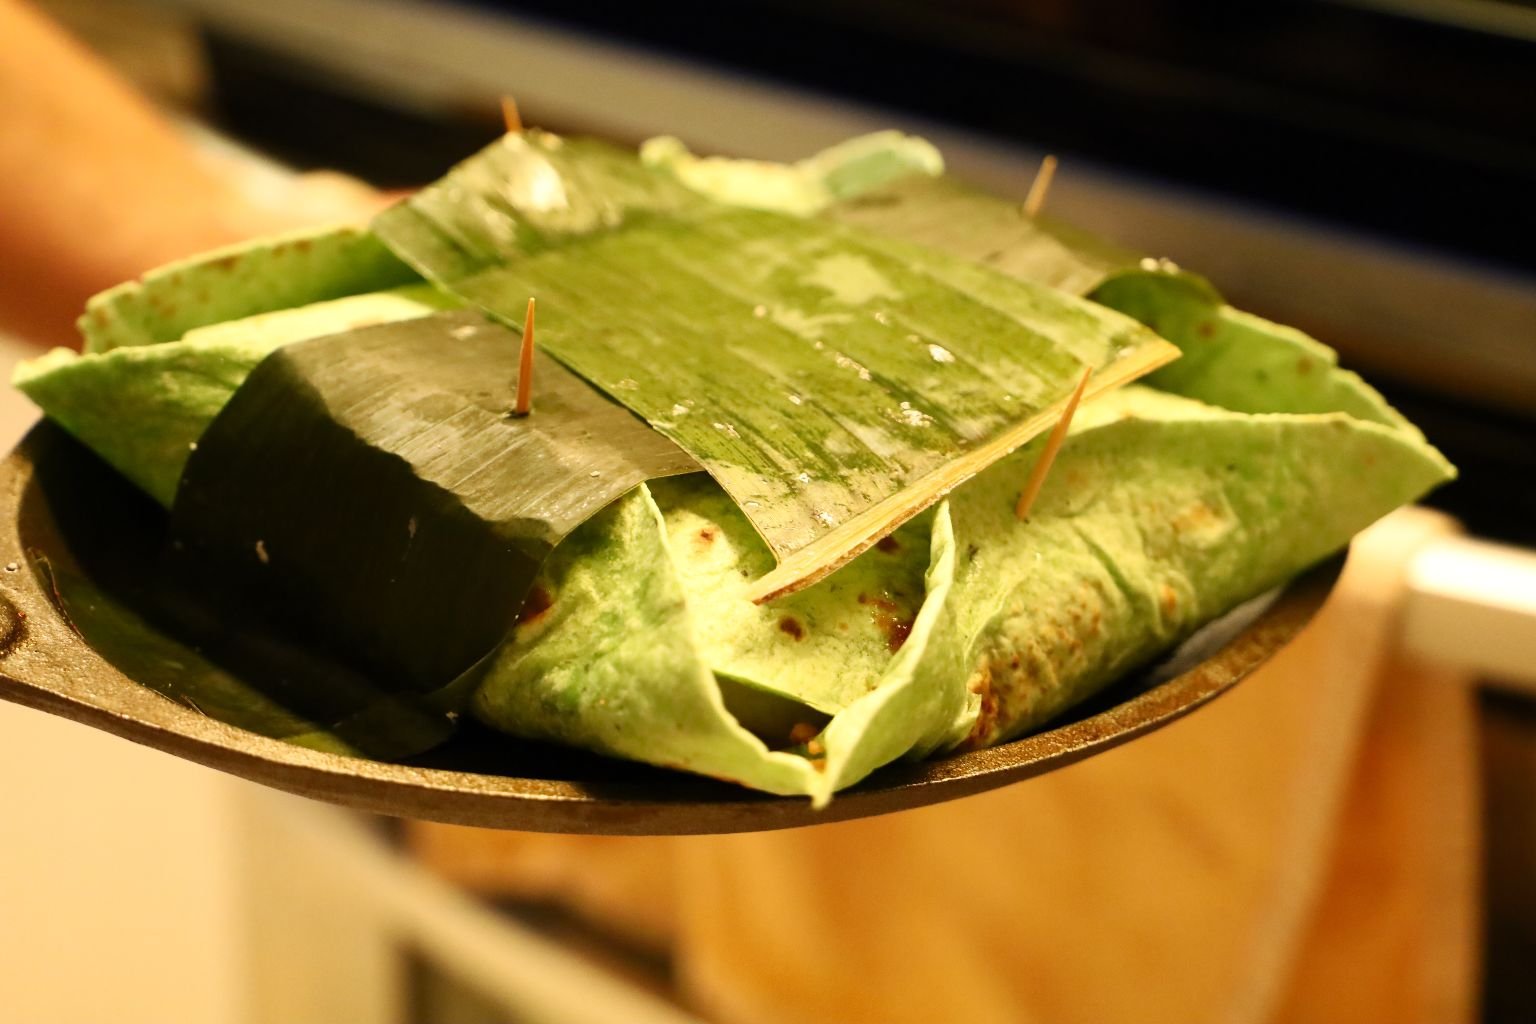
Wrapped in a Tortilla and Banana Leaves

(Recipe Down Below)
—————————————————————
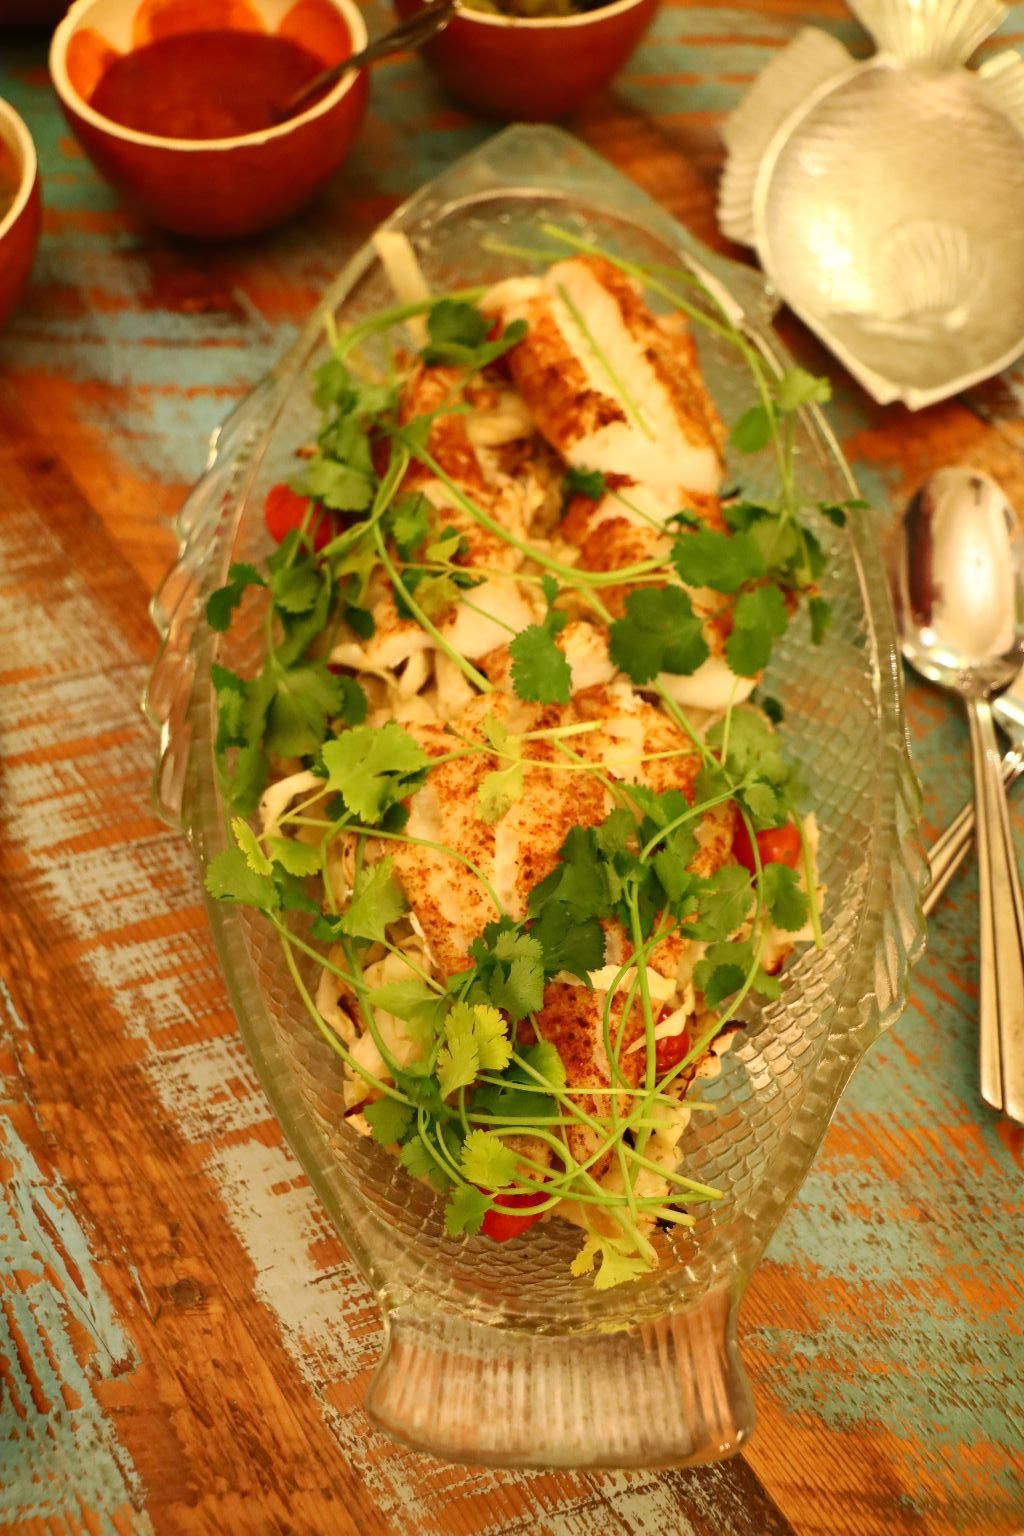
Tostadas de Pescado
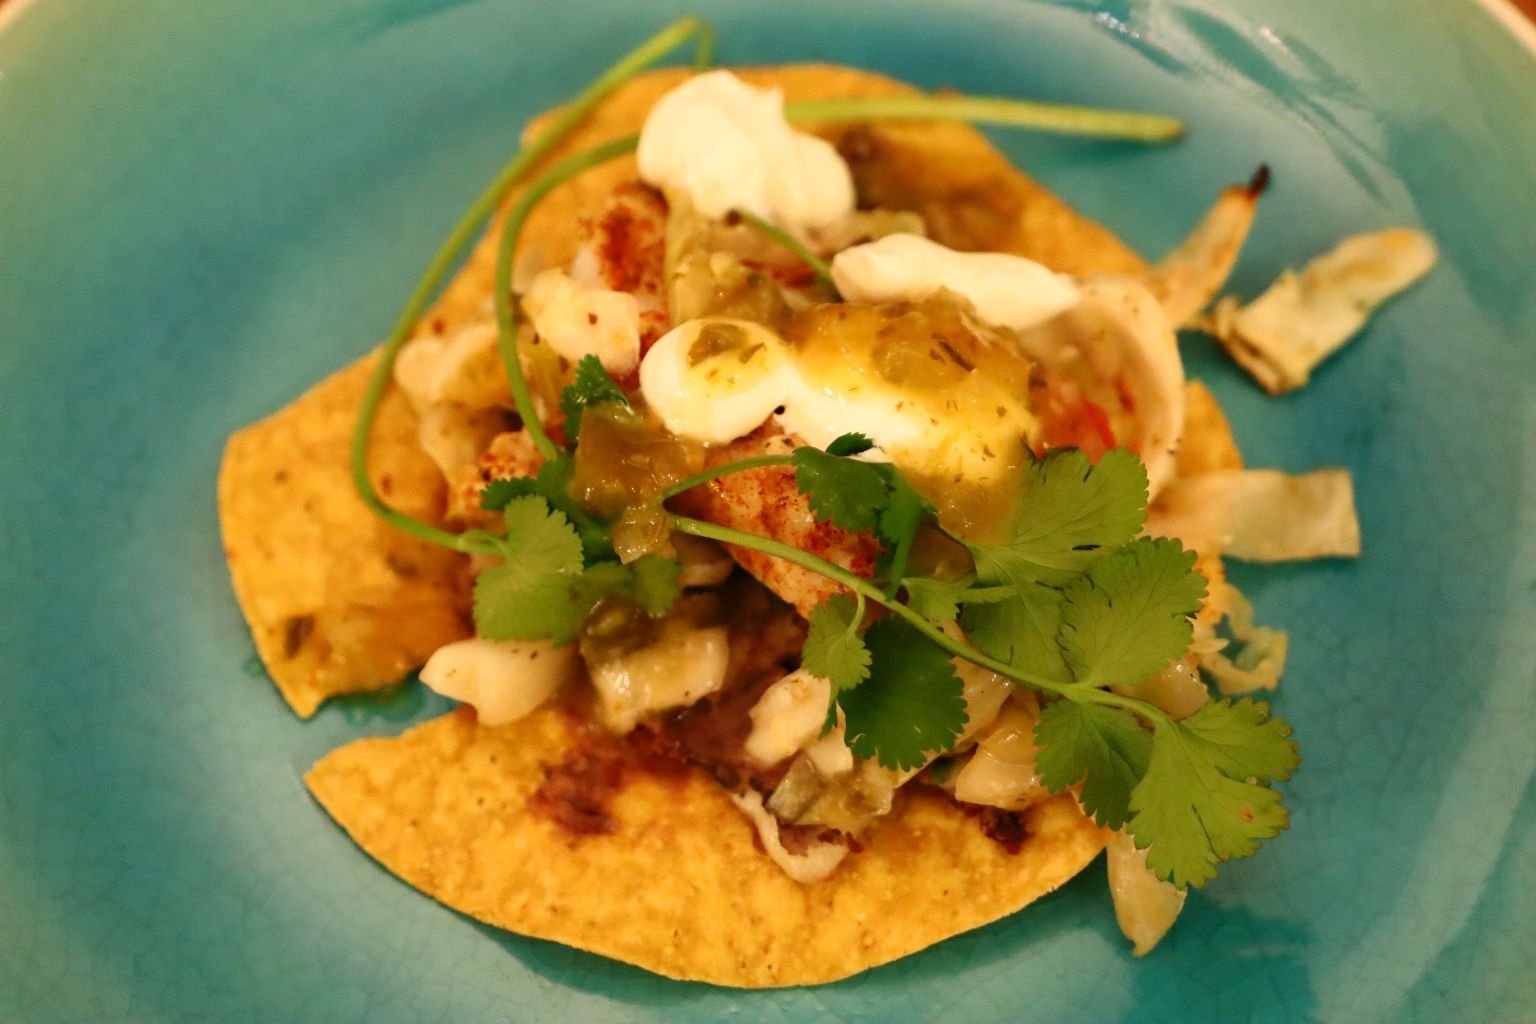
Spicy Cod and Mojo Cabbage Tostadas
Fish Tacos/Tostadas originated in Baja, California in Mexico

Crispy Tostada Shells
Delicious Tostadas in the Making

Refried Beans topped with Queso, Chives and Spring Onions, Left

Baked Spicy Cod in Marinated Mojo Cabbage
Tostadas Ready to Assemble
——————————————————————-
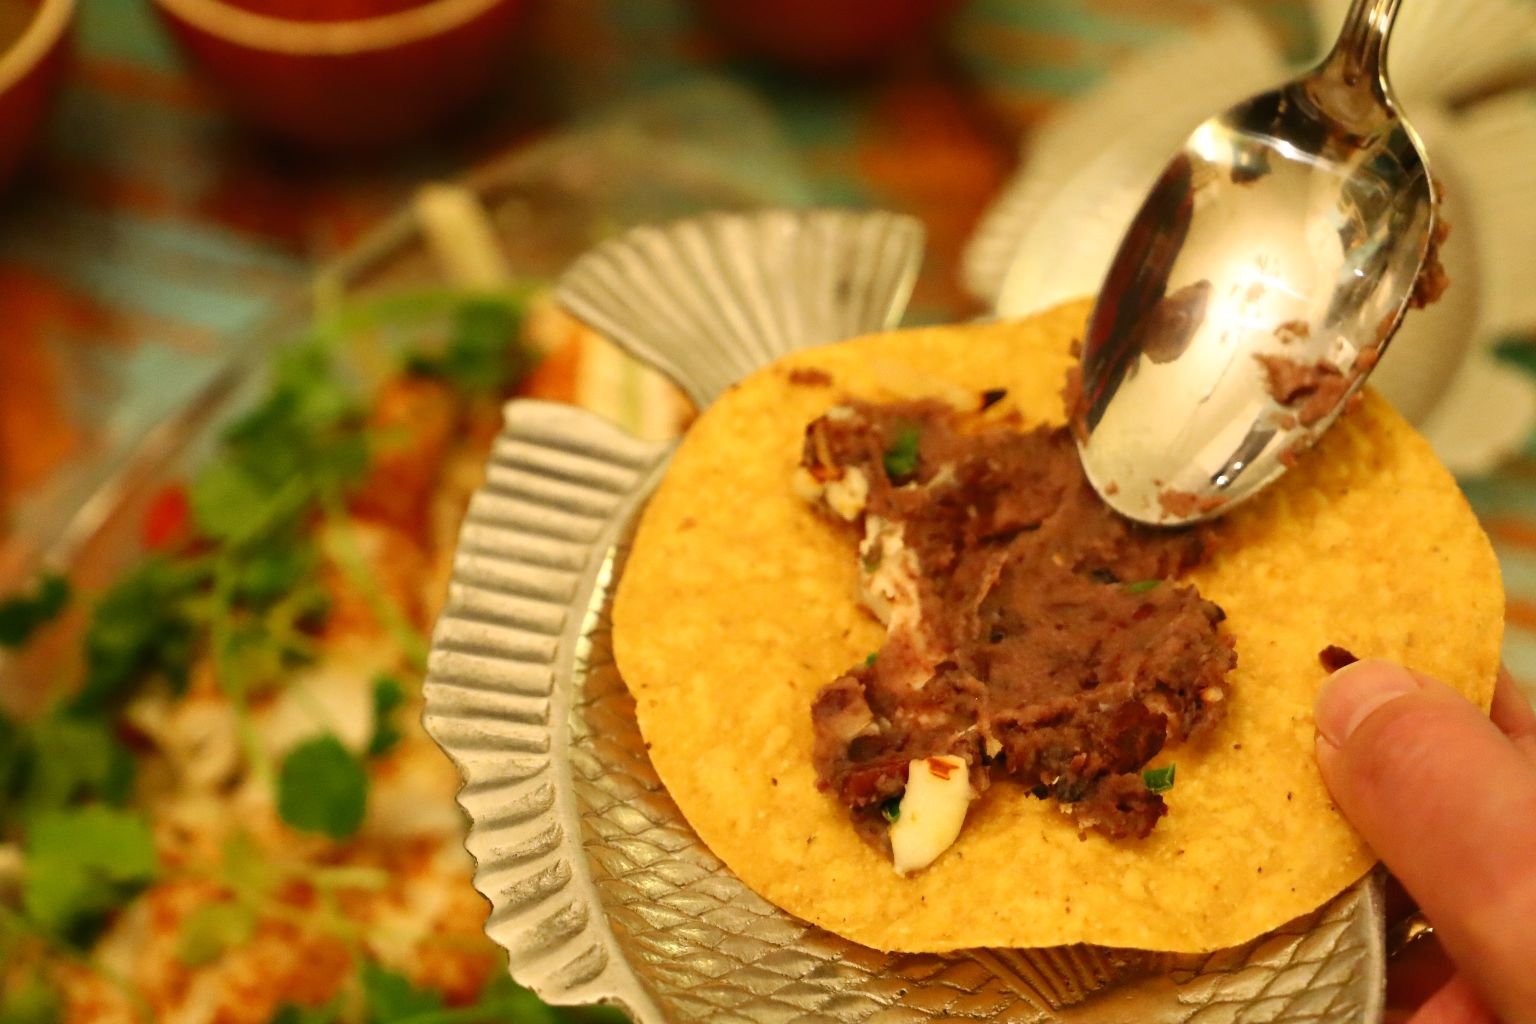
Shell, Refried Beans, Cod, Mojo Cabbage, Fresh Cilantro…..

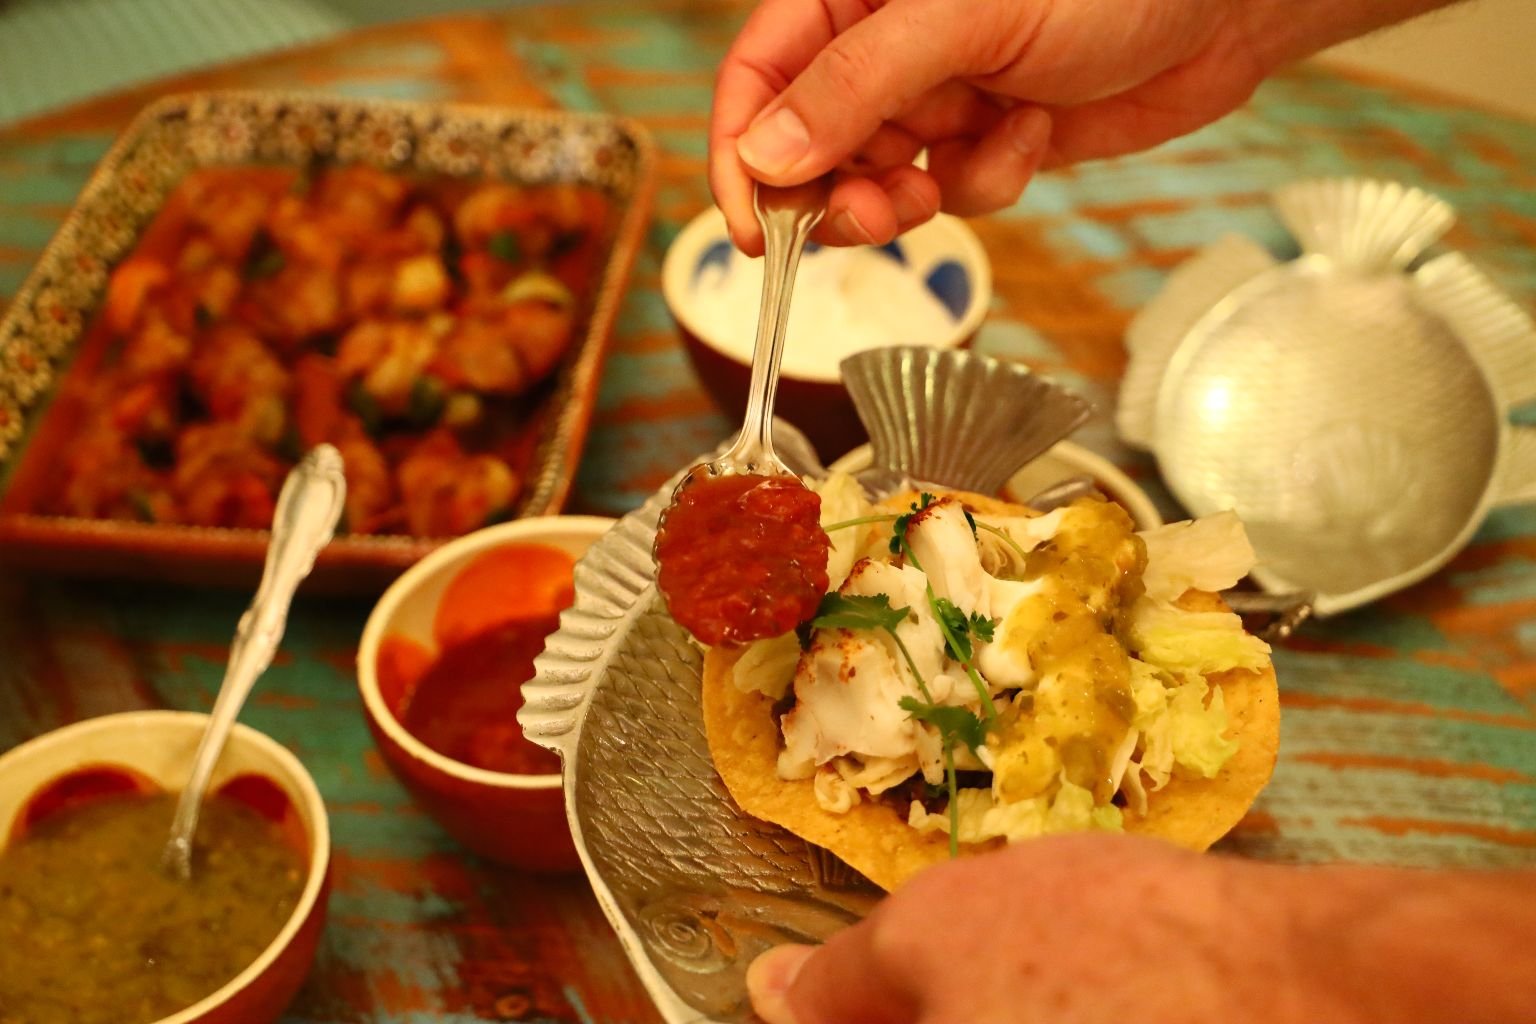
Topped with Sour Cream and Tomato Salsa
(Recipes Down Below)

—————————————————————–

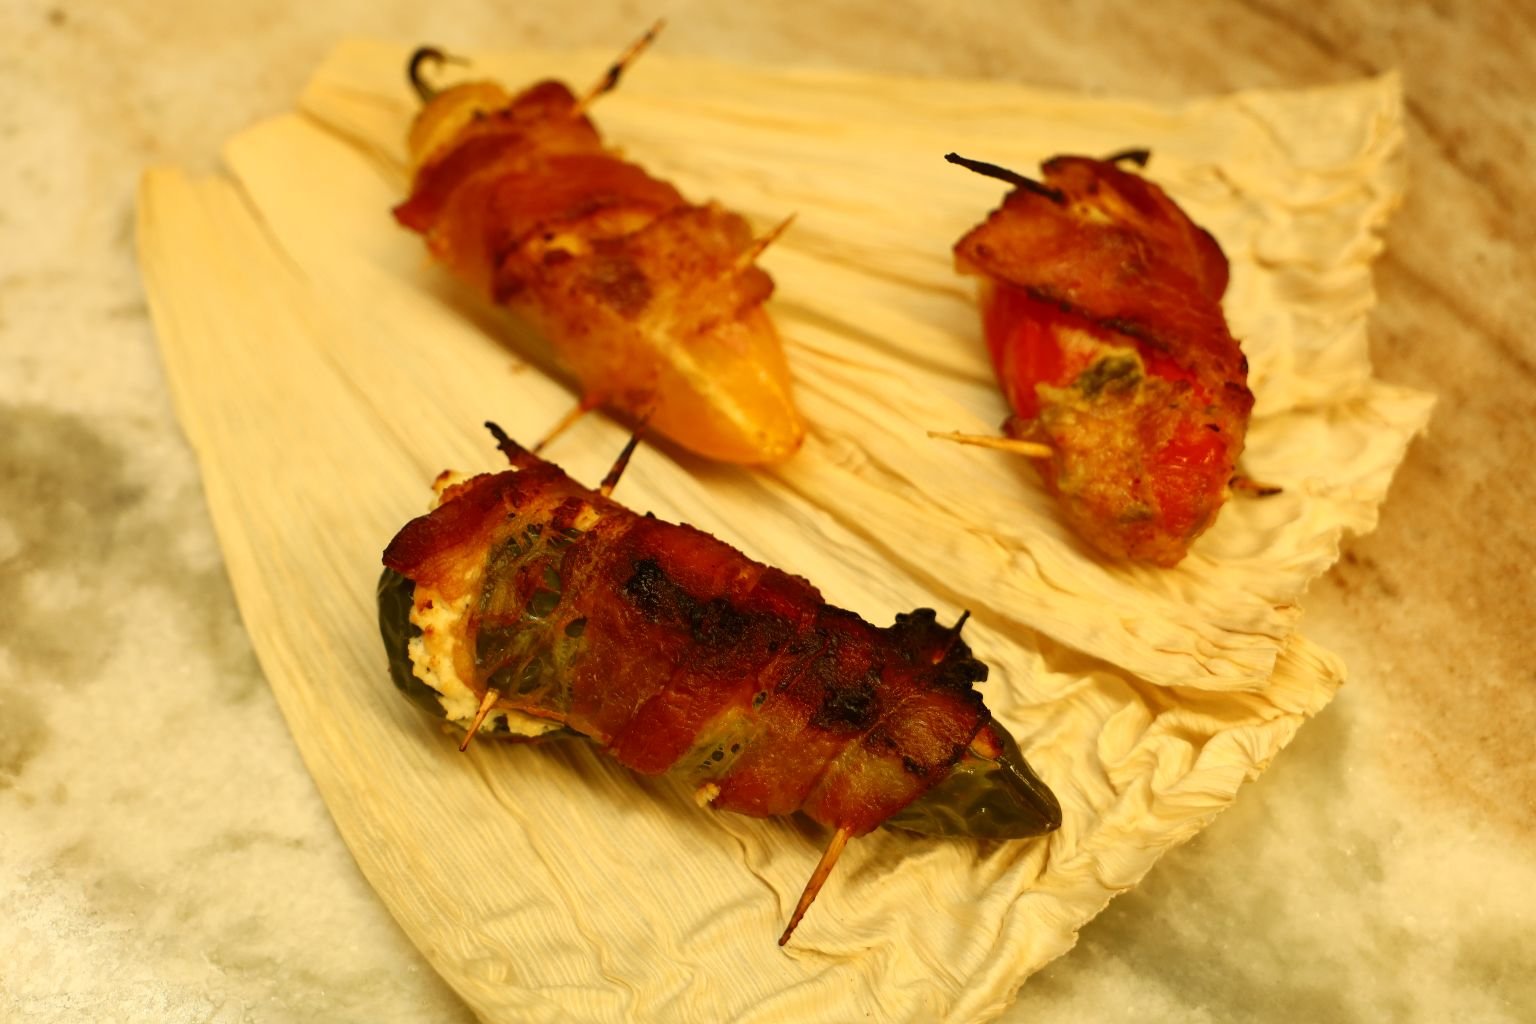
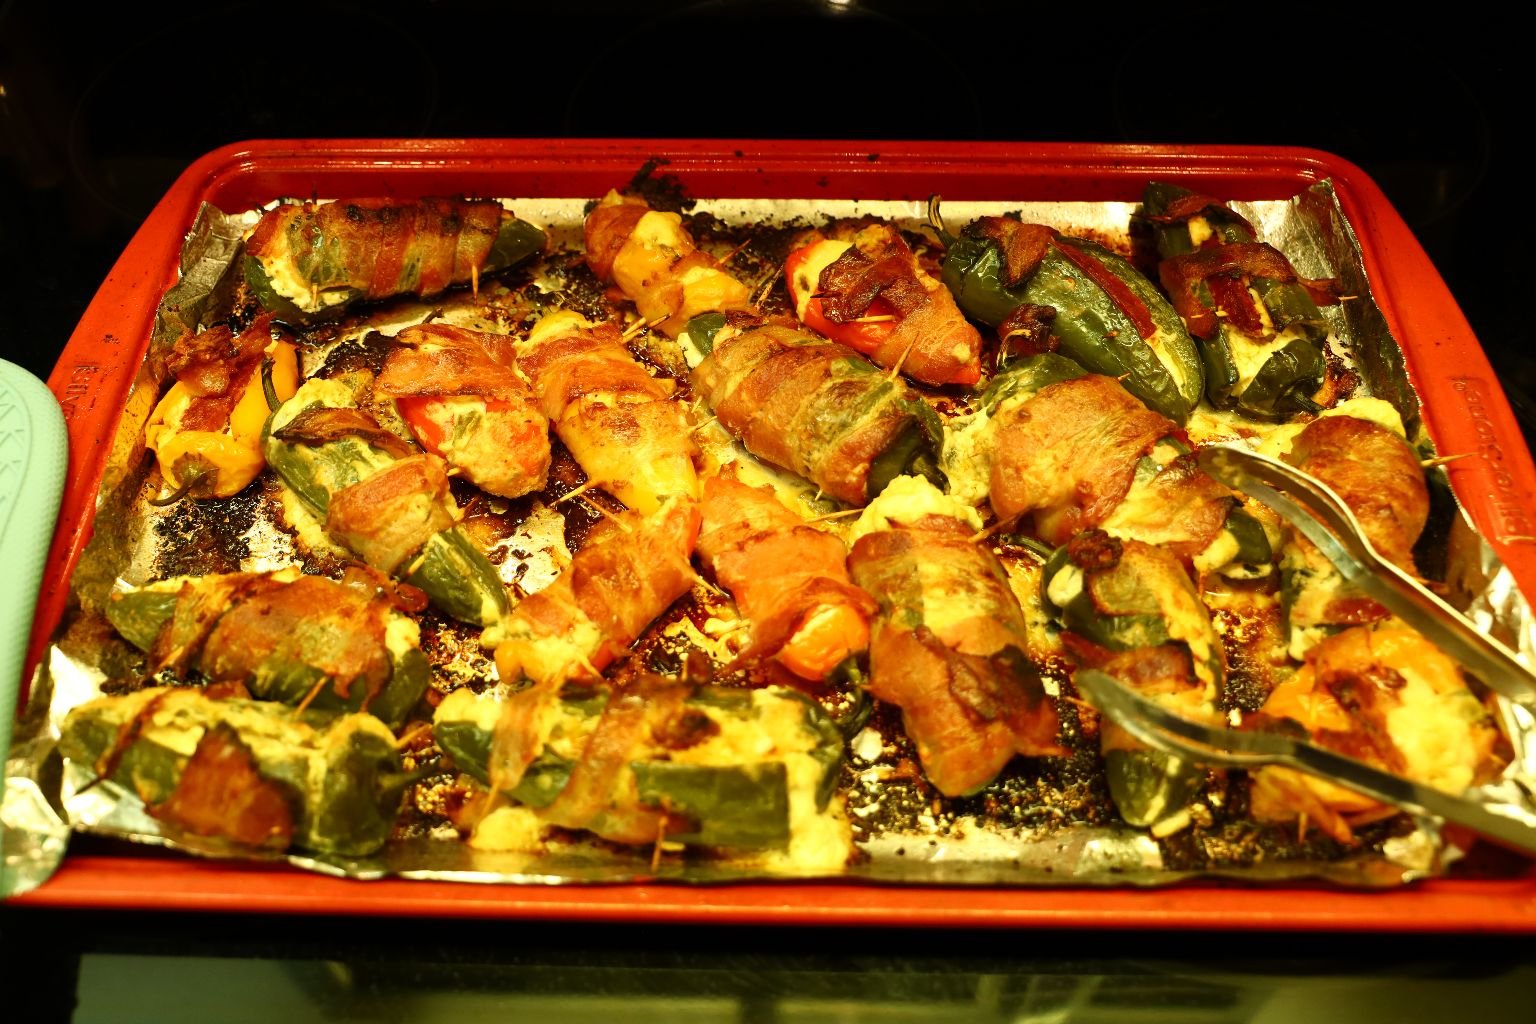
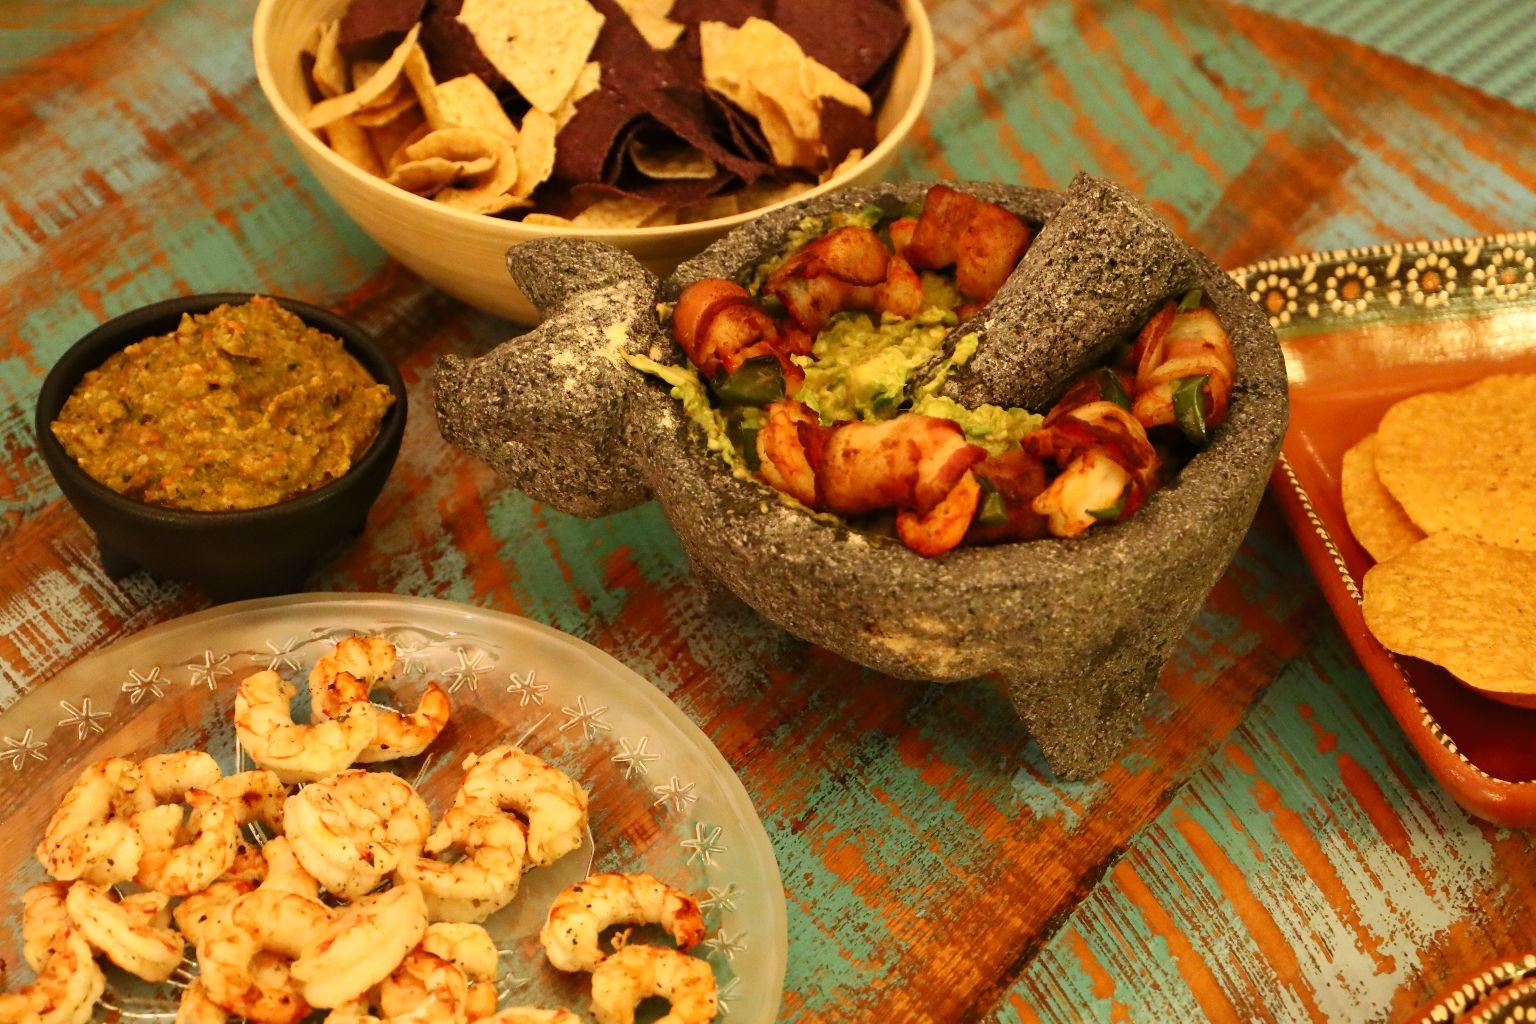
Bacon Wrapped Jalapeno Shrimp

Cheese Stuffed/Bacon Wrapped Jalapeno Peppers
(Recipes Down Below)
————————————————————
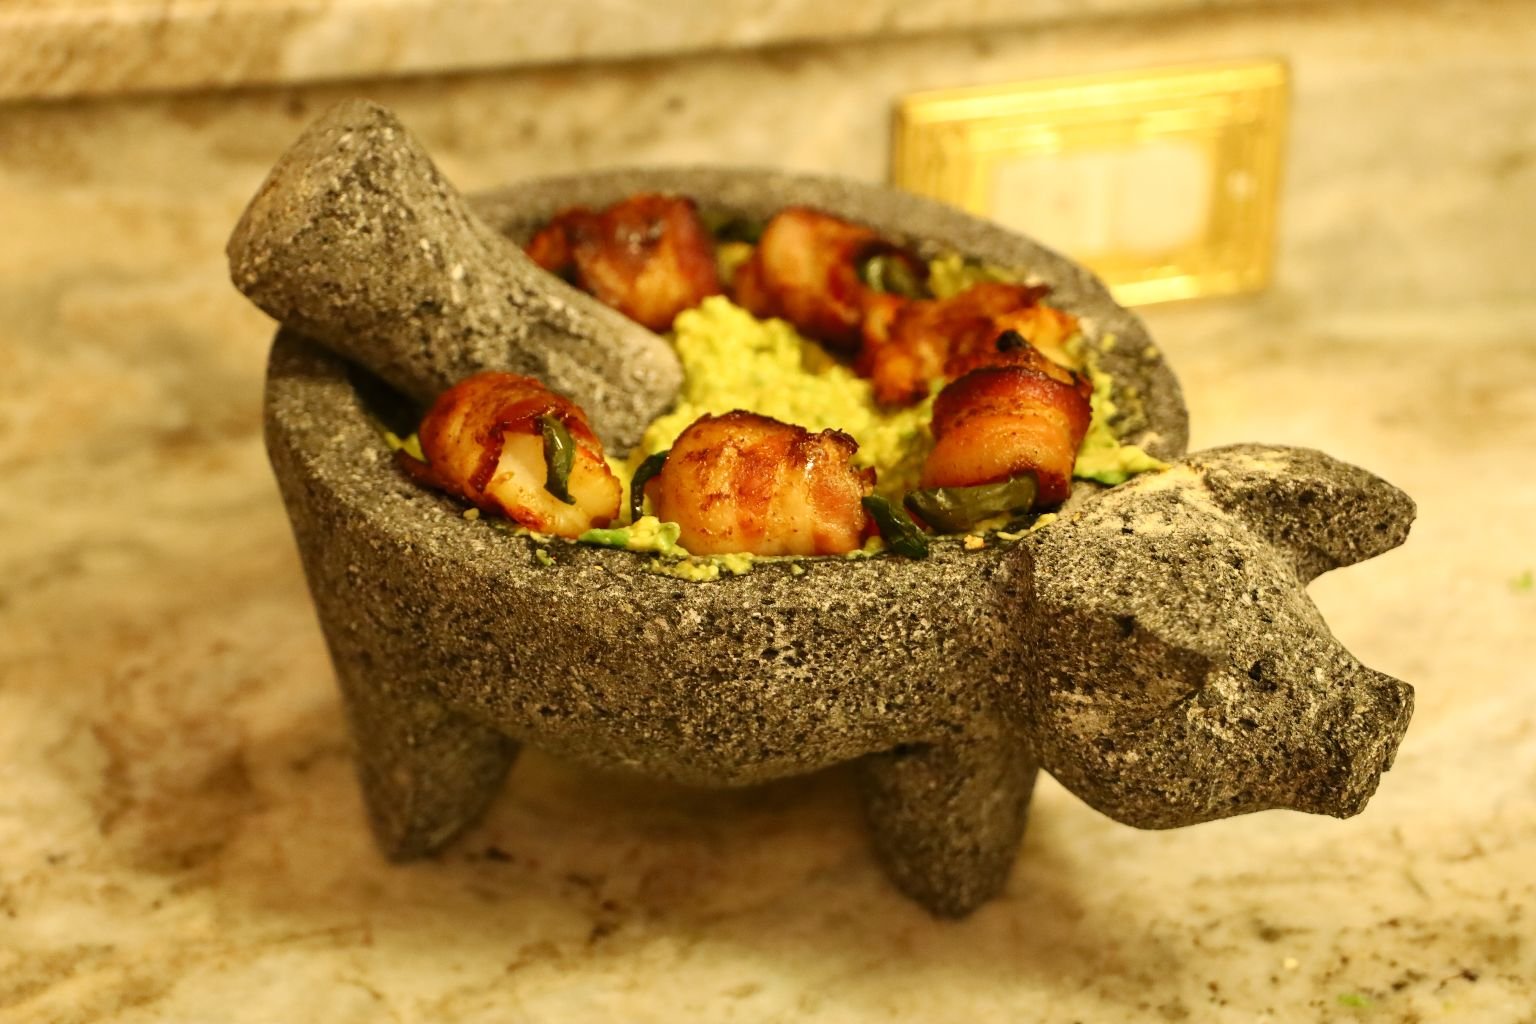
Leftover Bacon Wrapped Jalapeno Peppers
And Guacamole


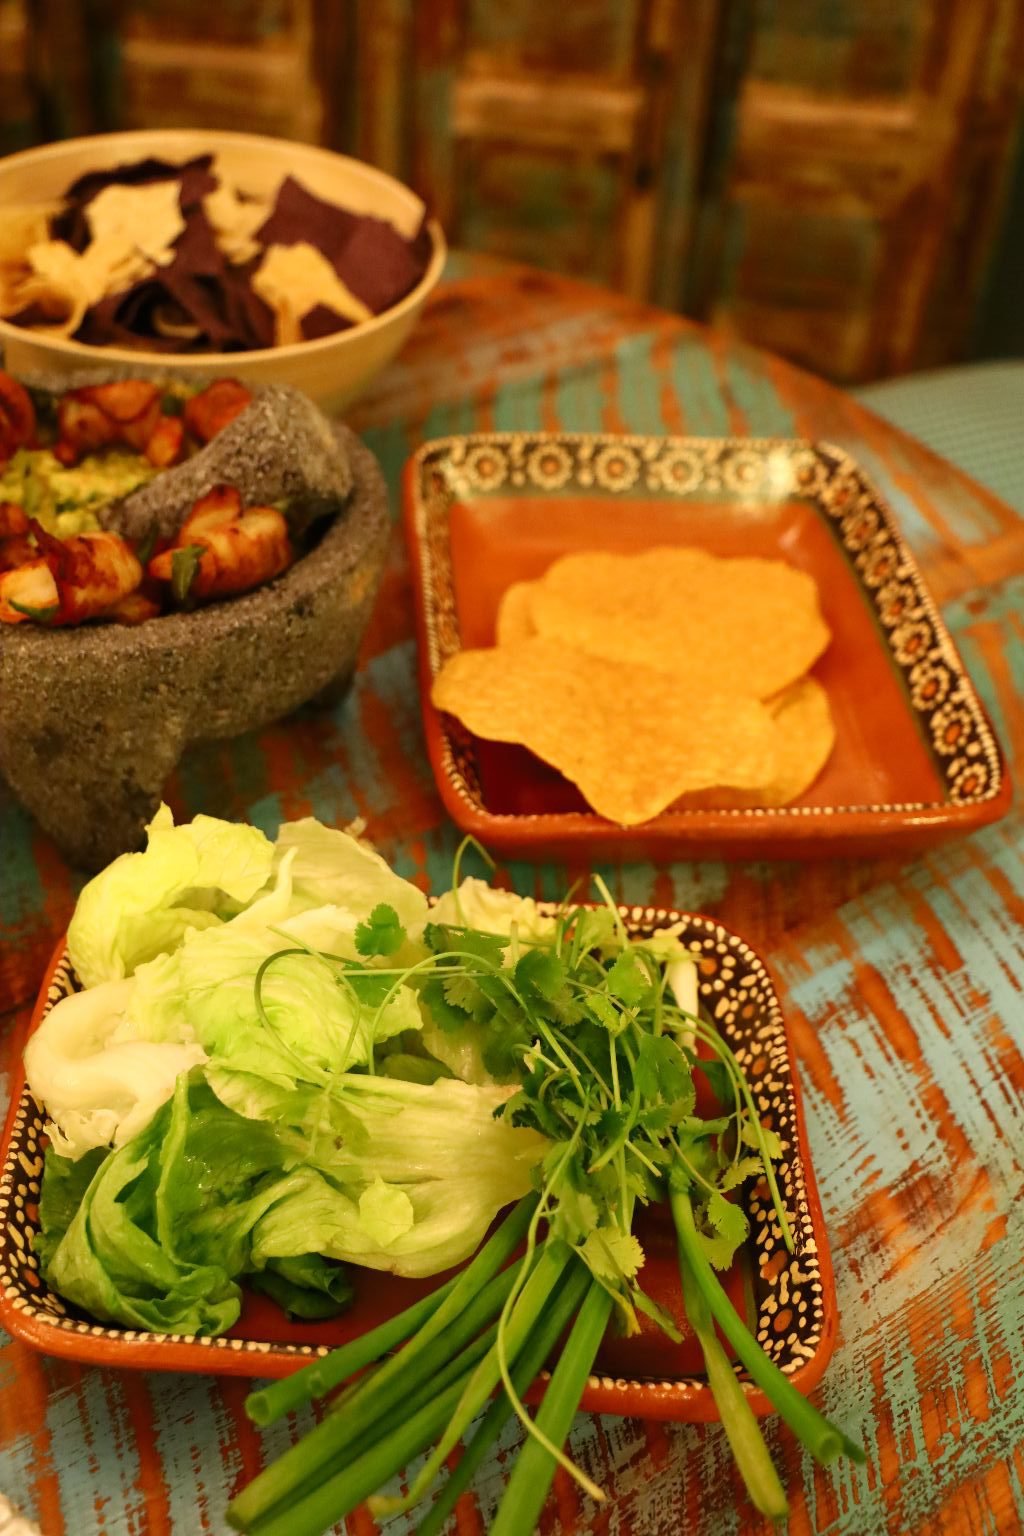
Leftover Latin
Leftover Cod, Leftover Shrimp, Leftover Mole Verde, Leftover Tortillas, Leftover Guacamole, Leftover Tostadas, Leftover Cabbage, Leftover Spring Onions, Leftover Cilantro.

It’s Great Throwing Leftovers Together

Excellent Shrimp Dip
(Recipes Down Below)
————————————————————-
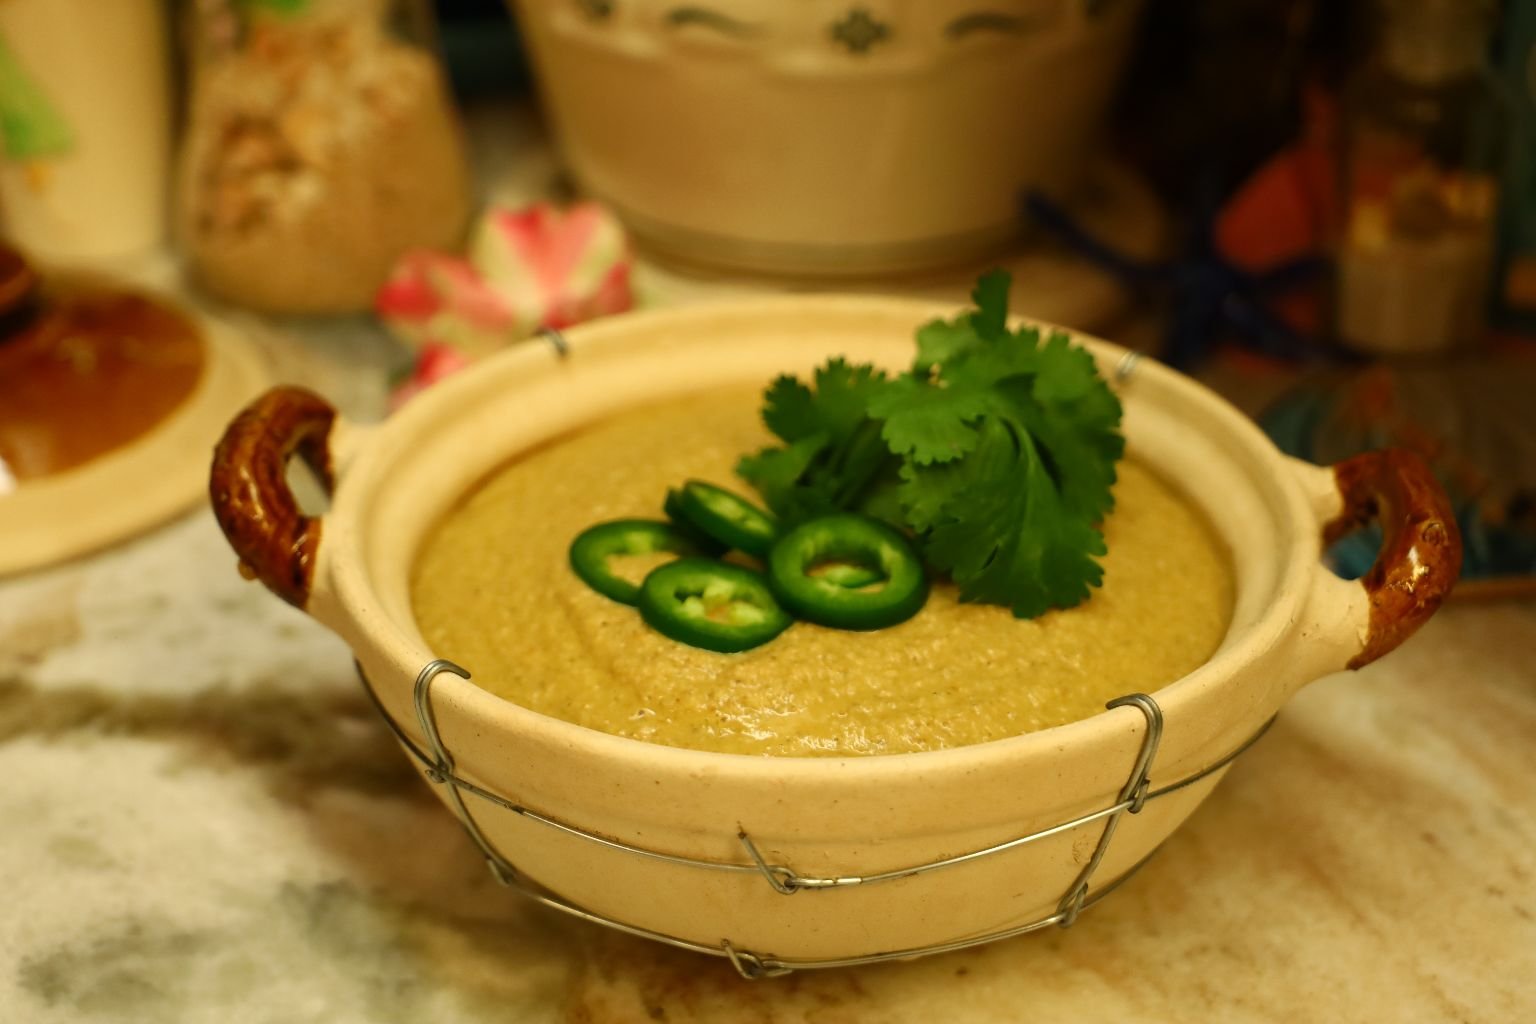
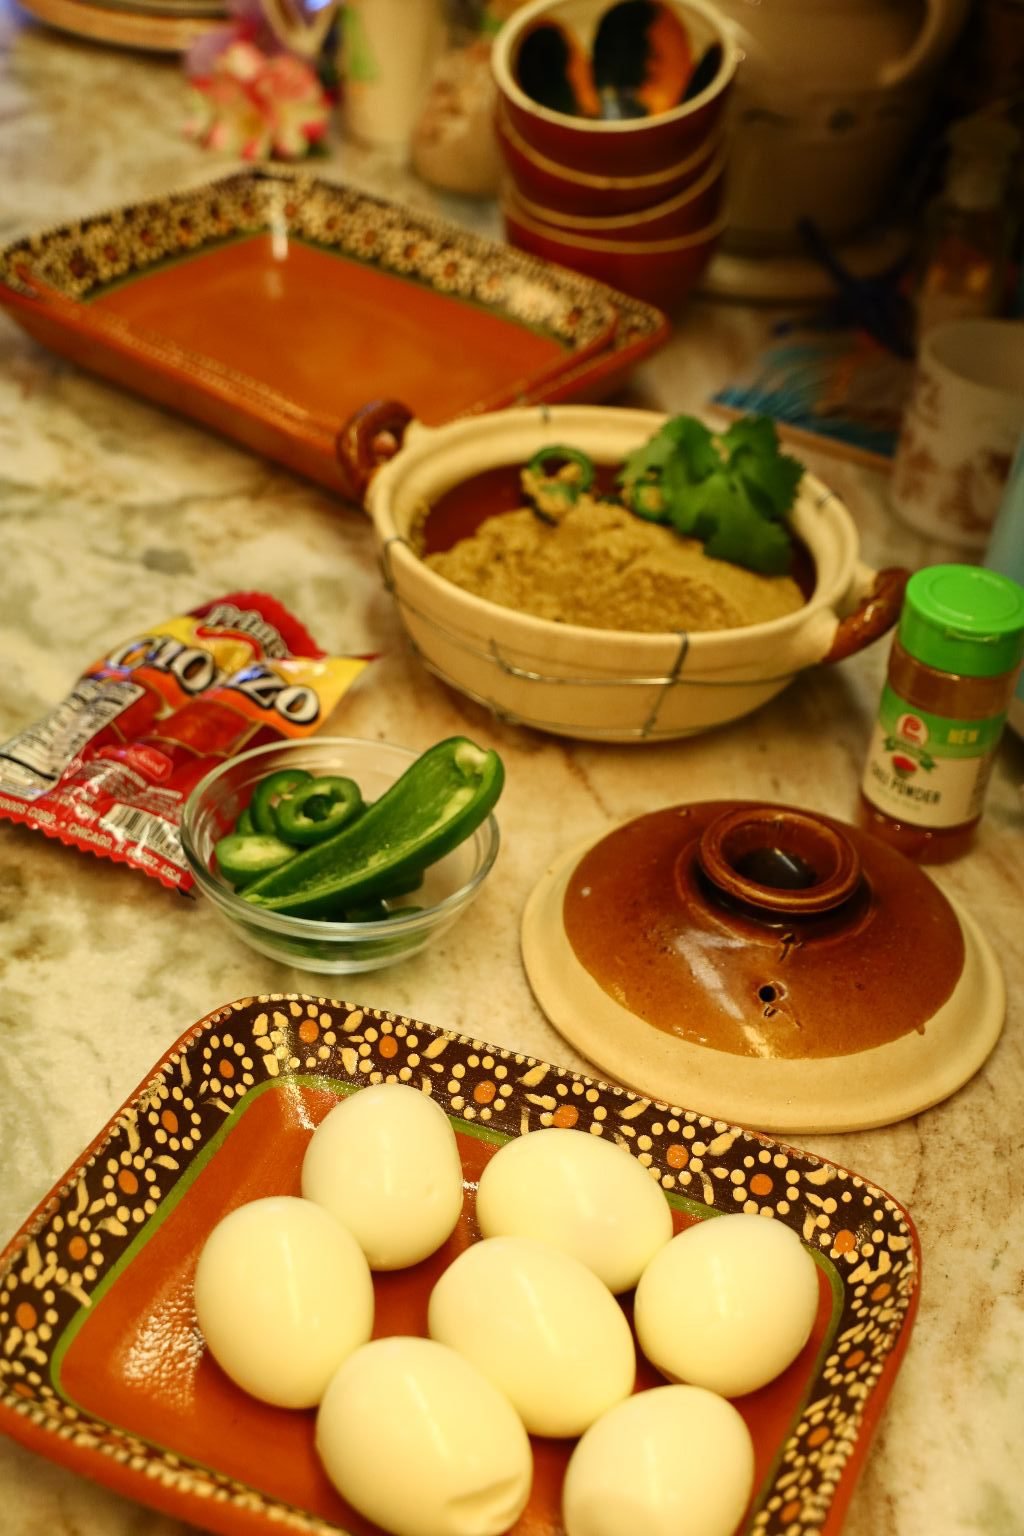
Our Mole Verde
Julie’s Mole Verde Deviled Eggs
(Recipes Down Below)
———————————————————————————
In The Cocina


Just a Mole Verde Snack
———————————————————

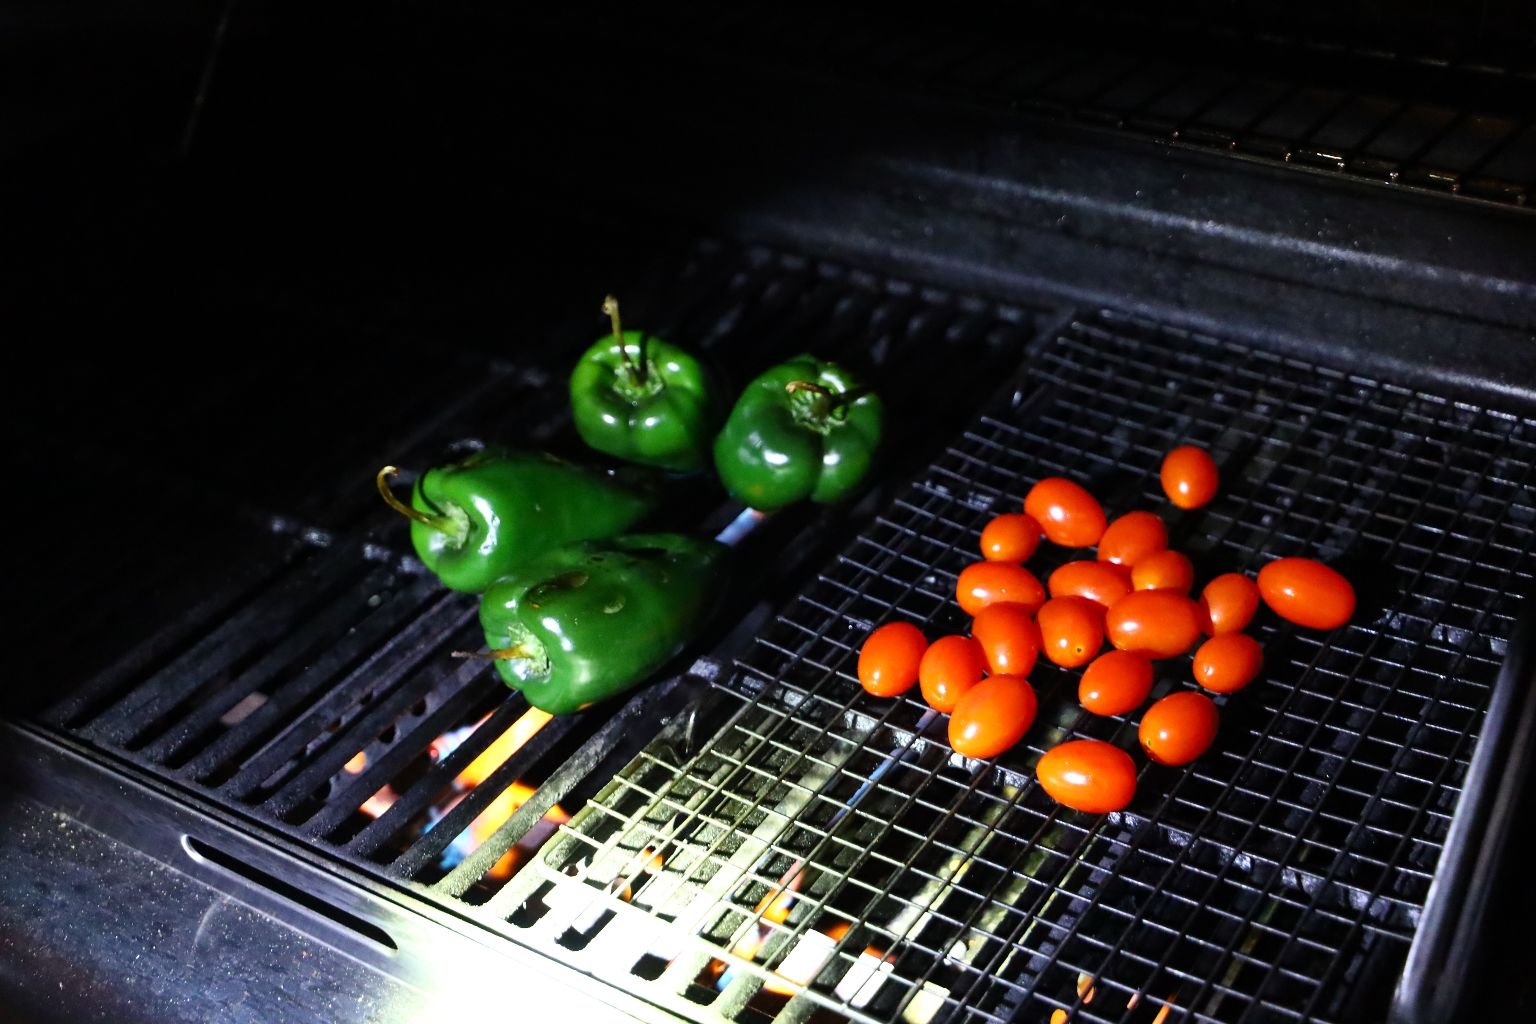
Beautiful Green Jalapeno Peppers and Red Tomatoes
———————————————————————-
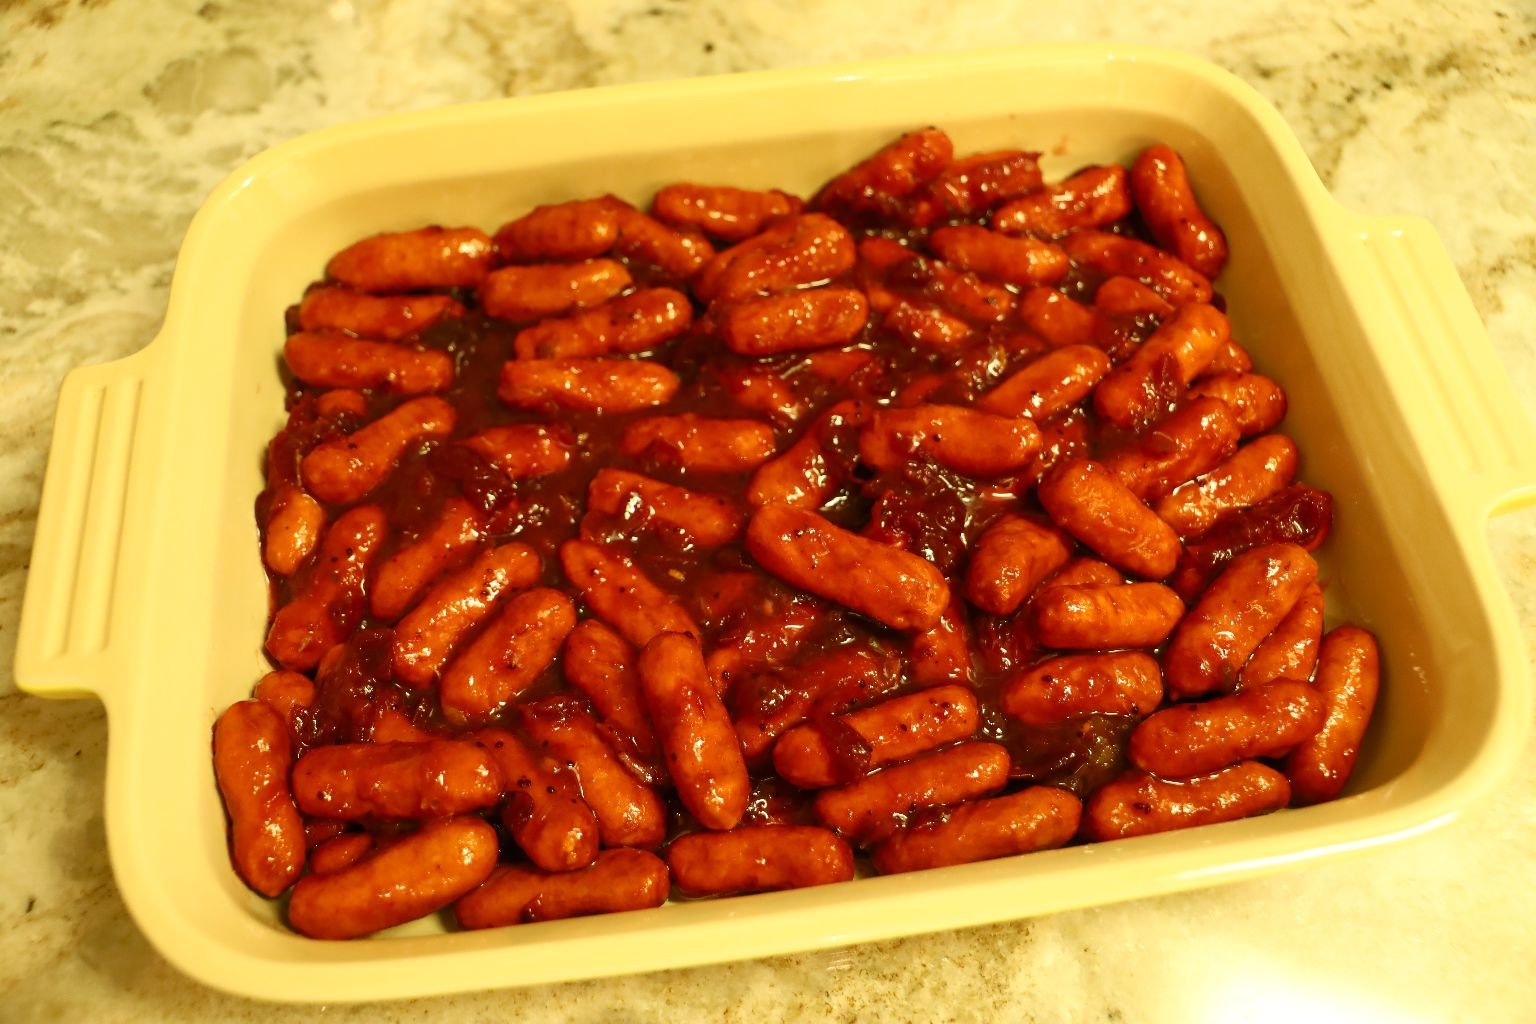
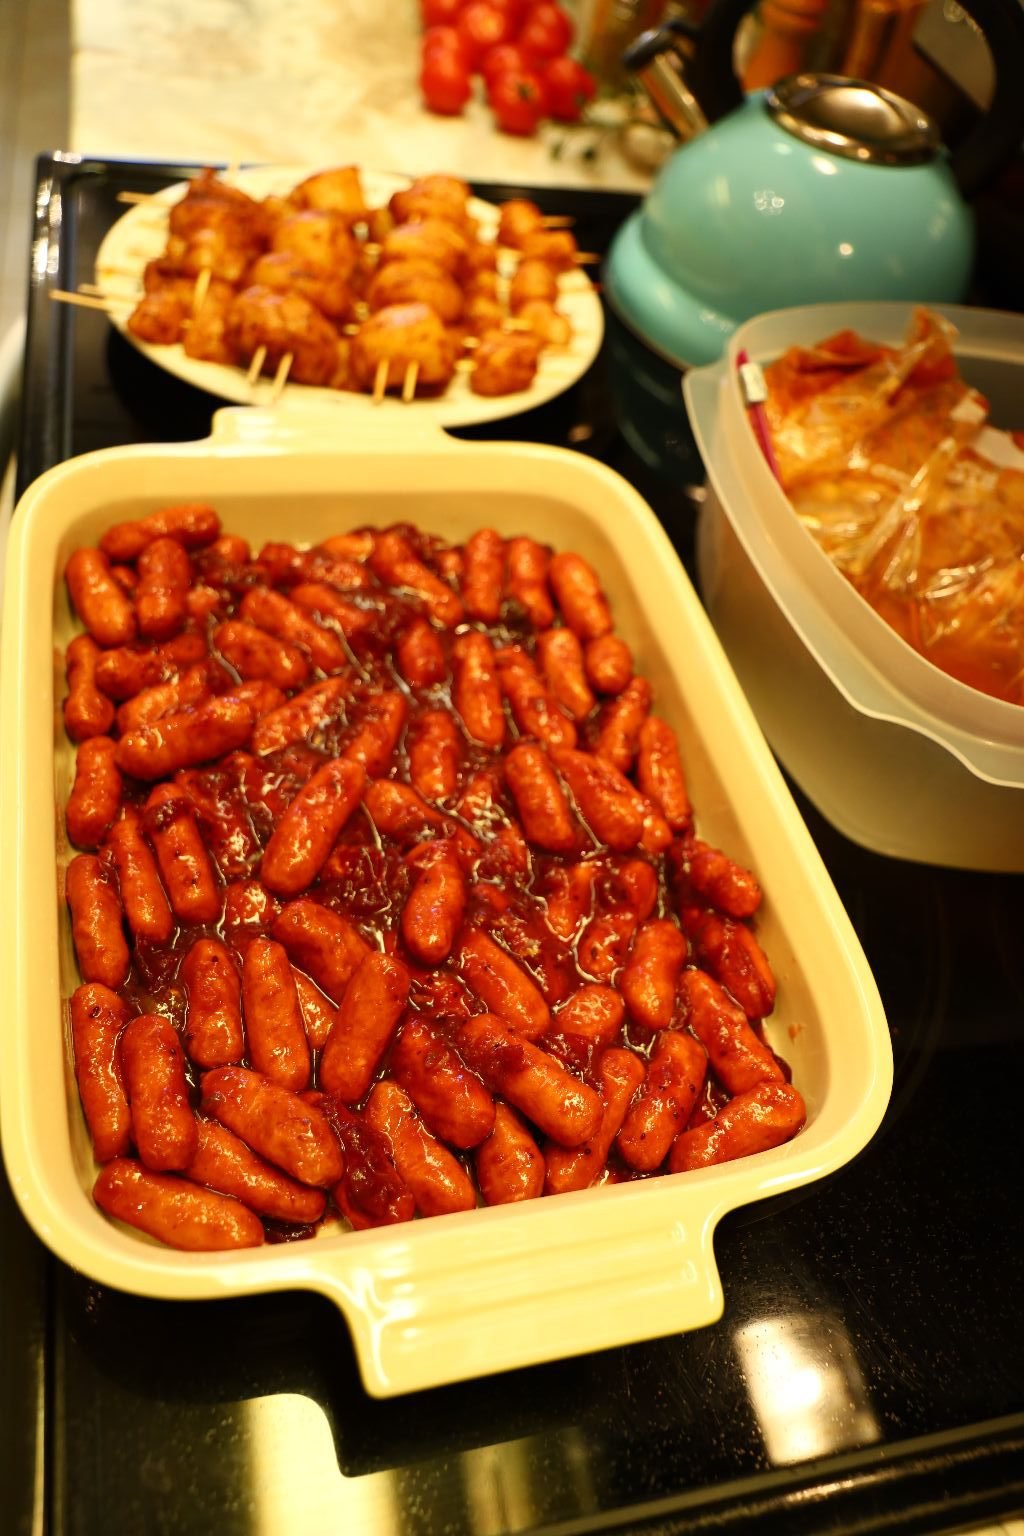
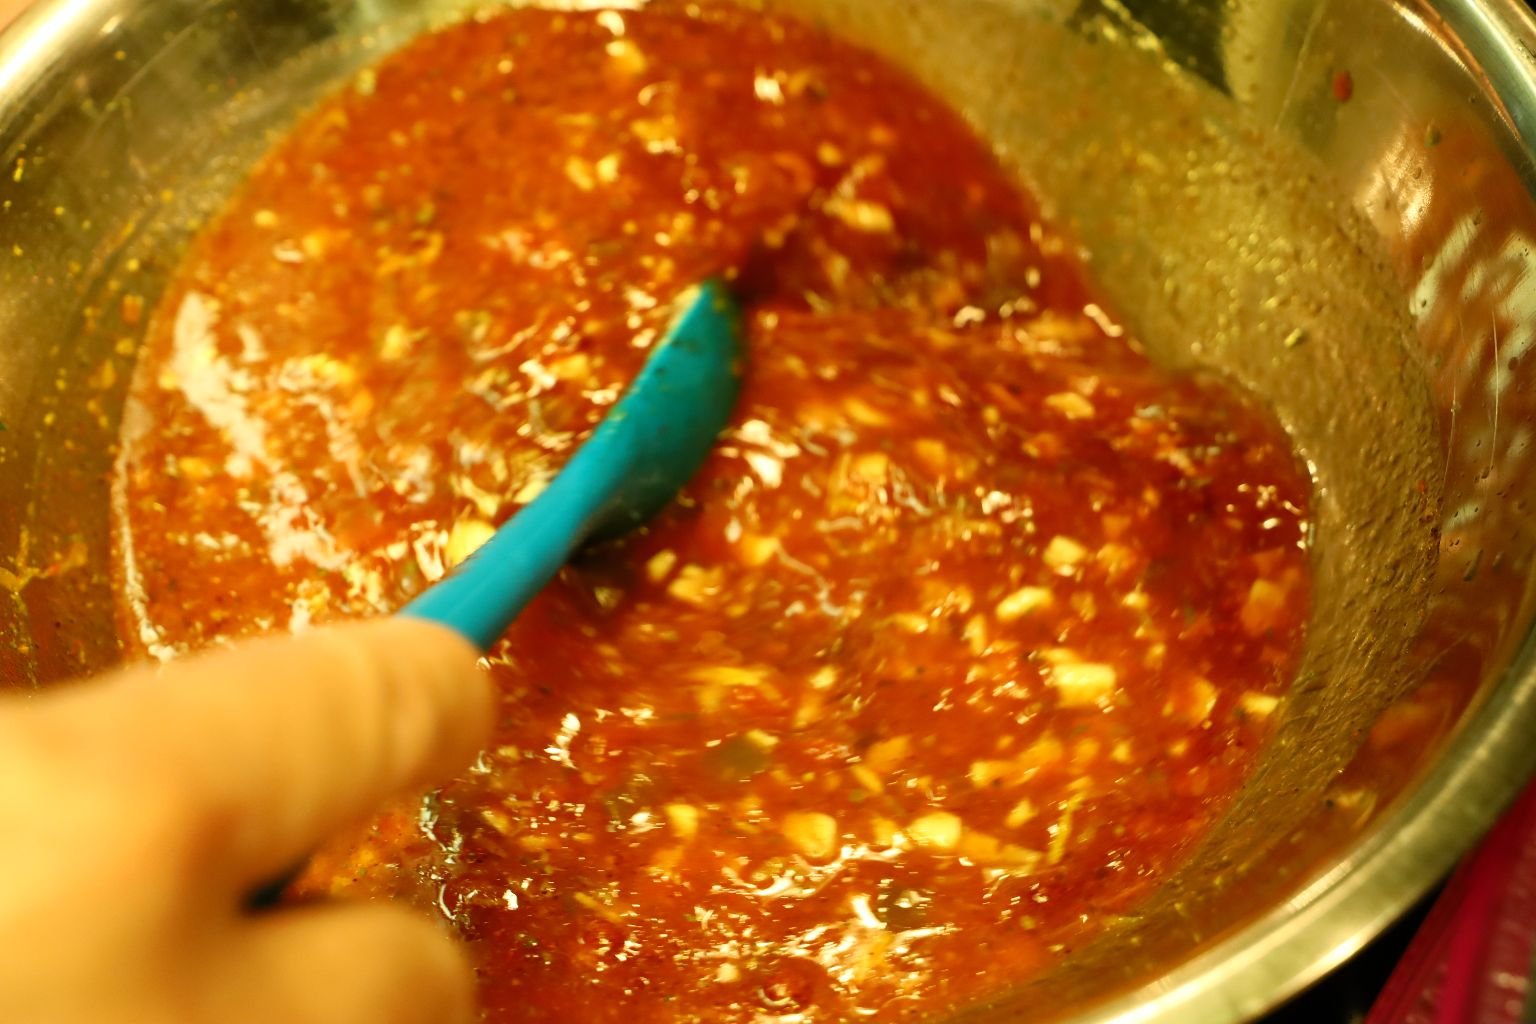
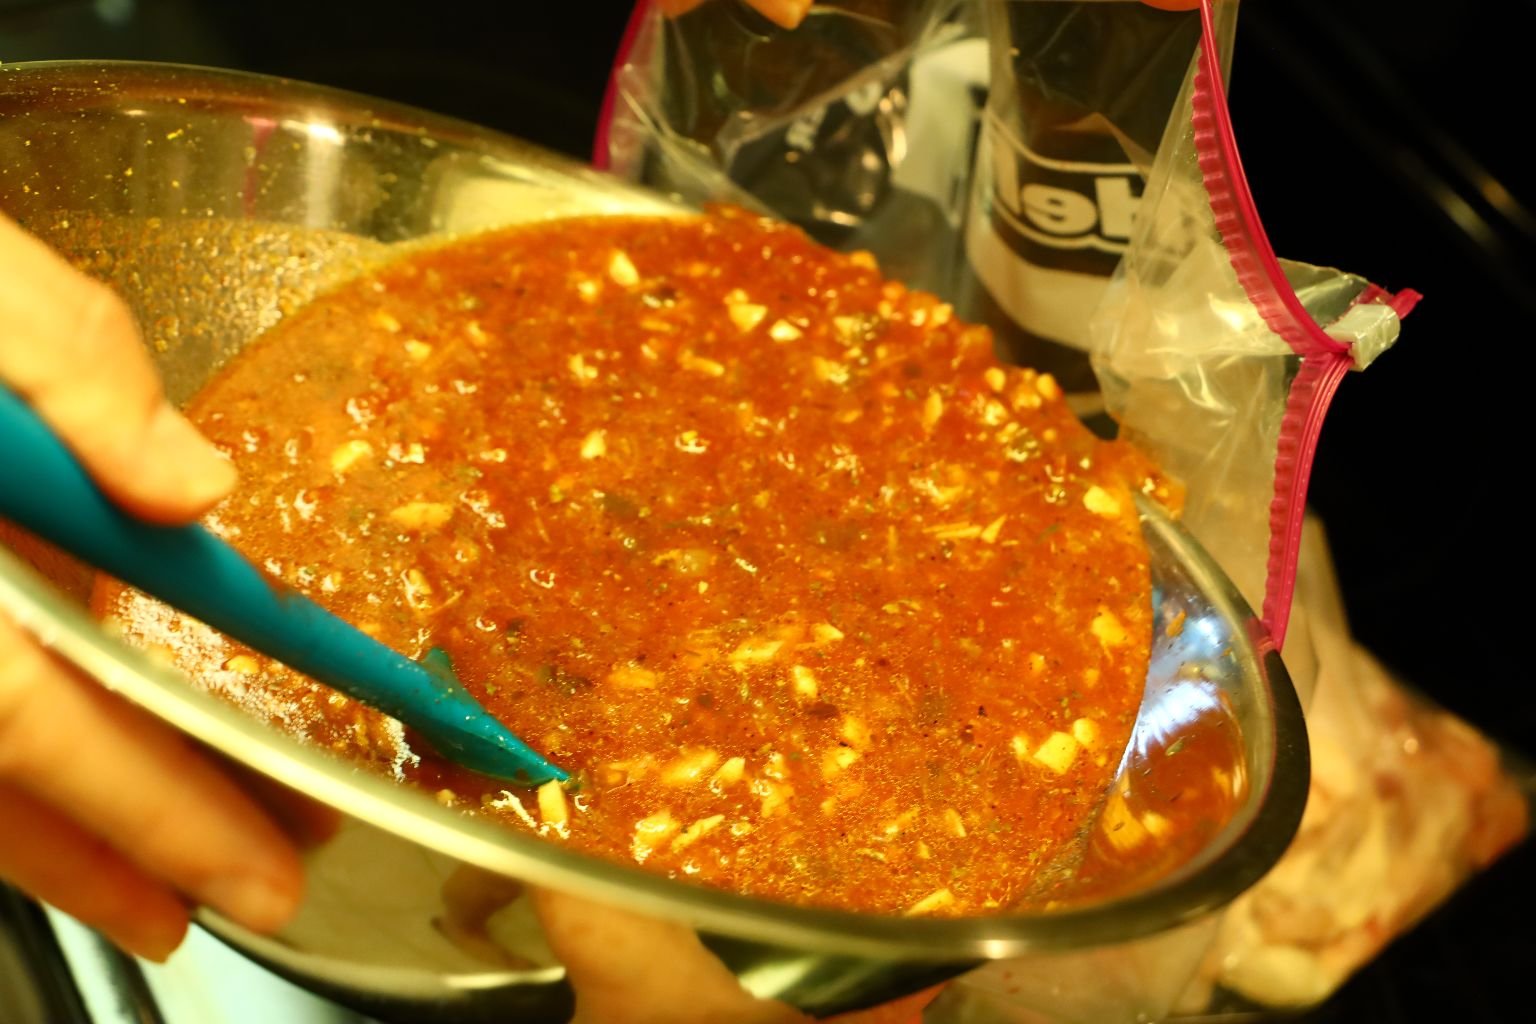
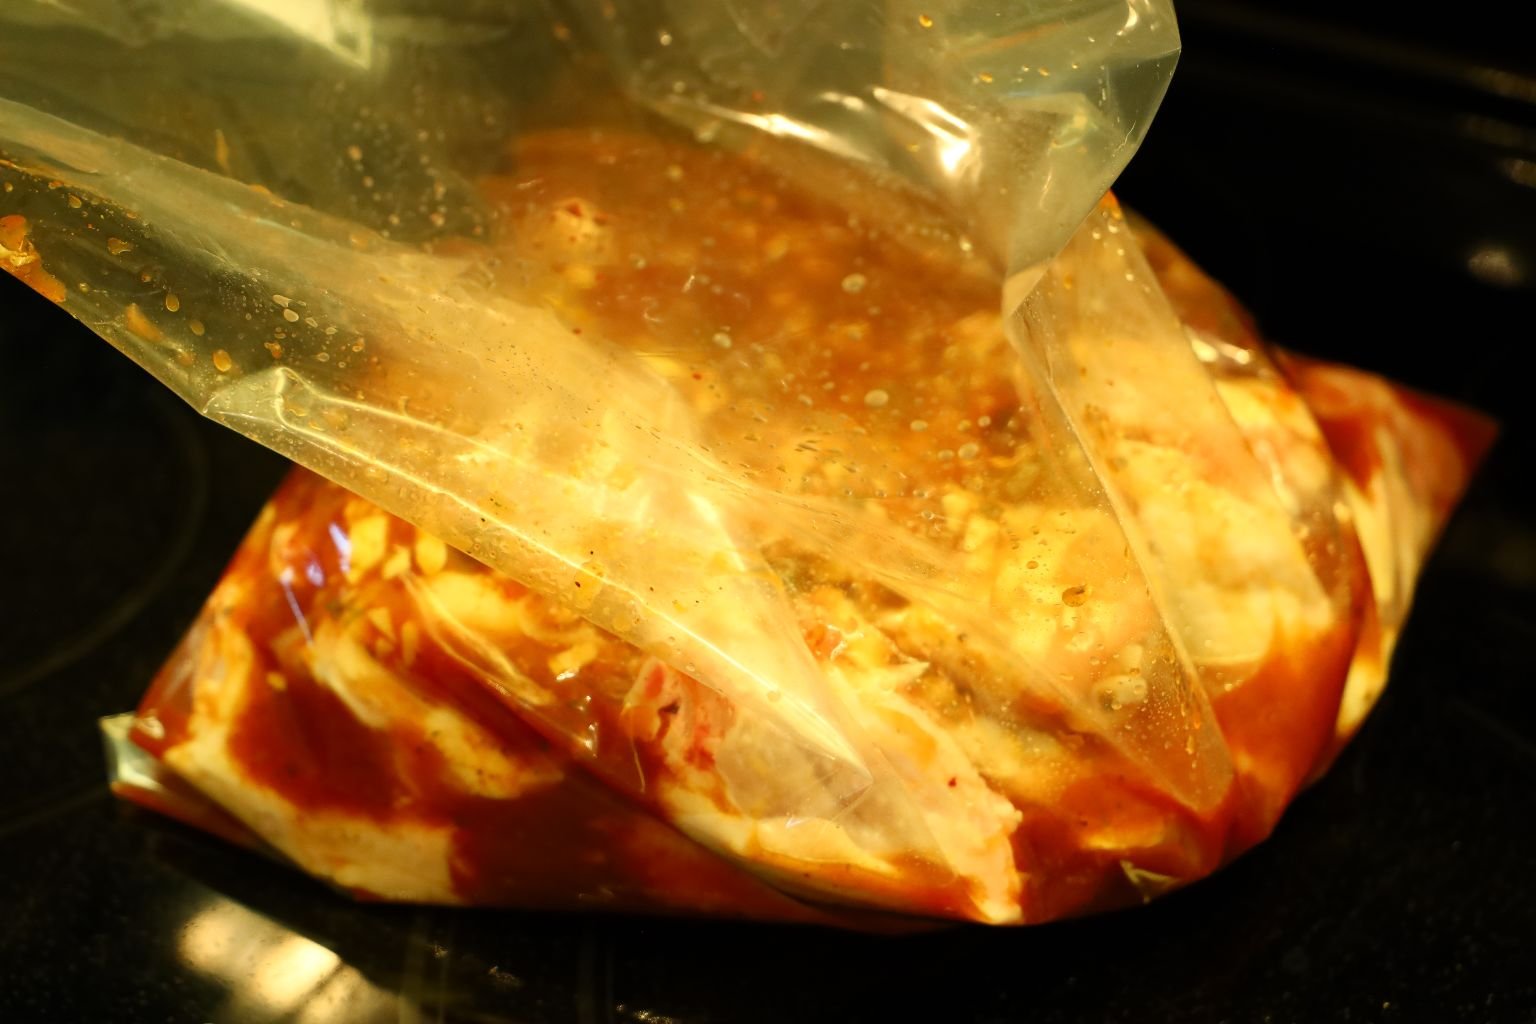
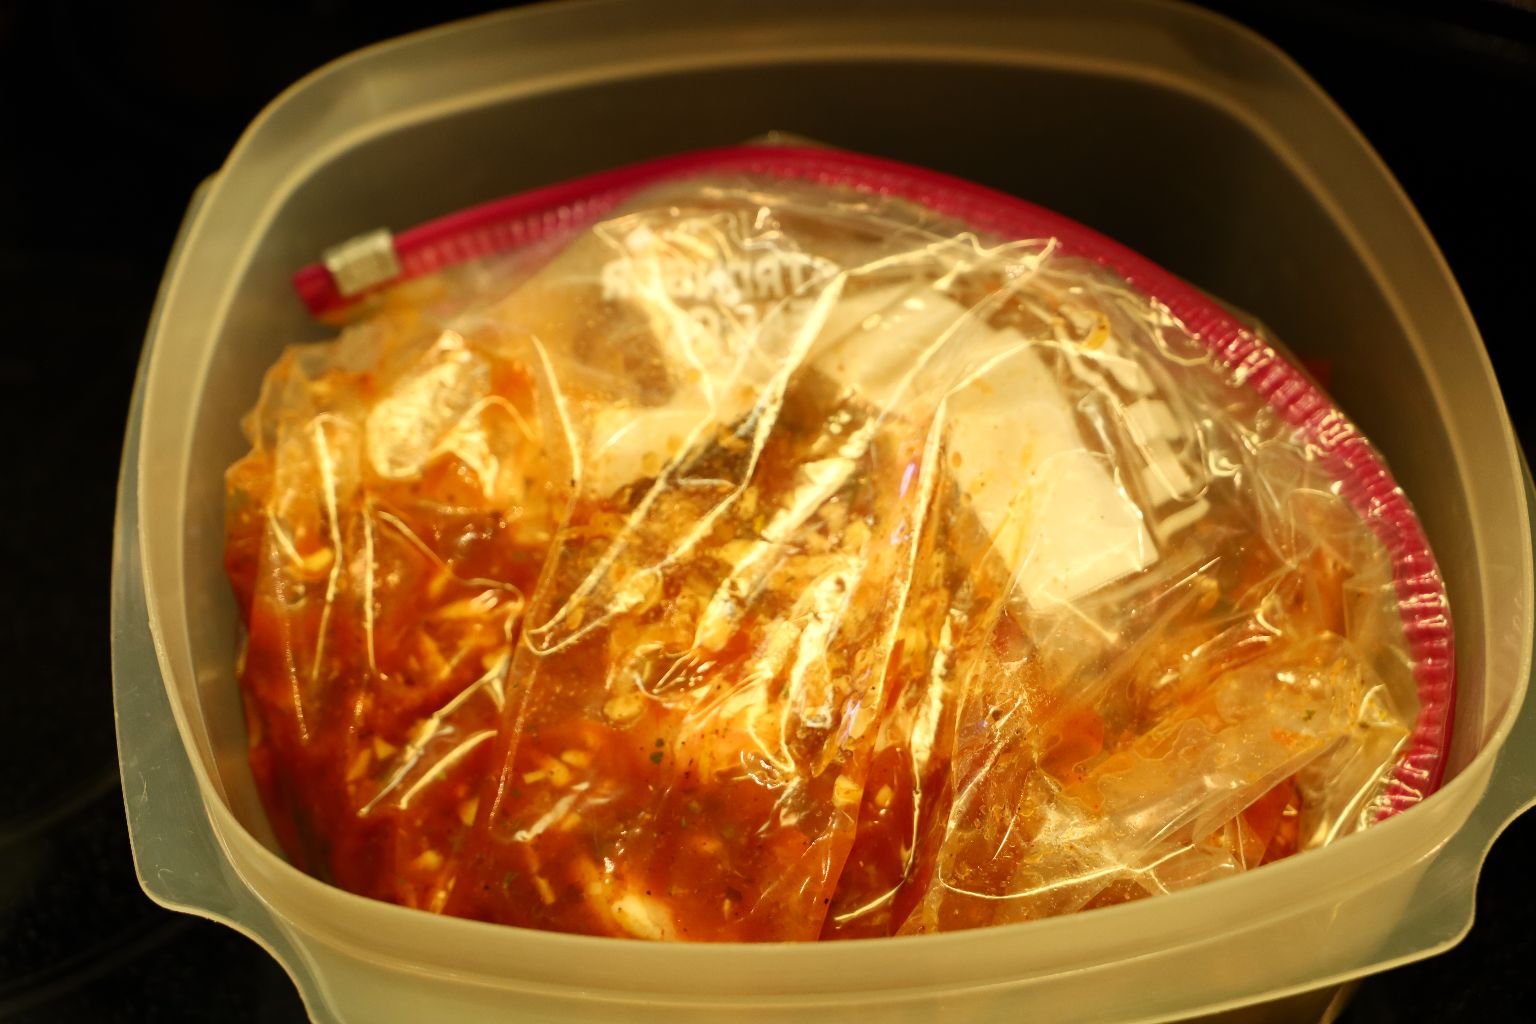
Marinating Cocktail Sausages
(You can see them marinating in that baggie to my right, your left.)
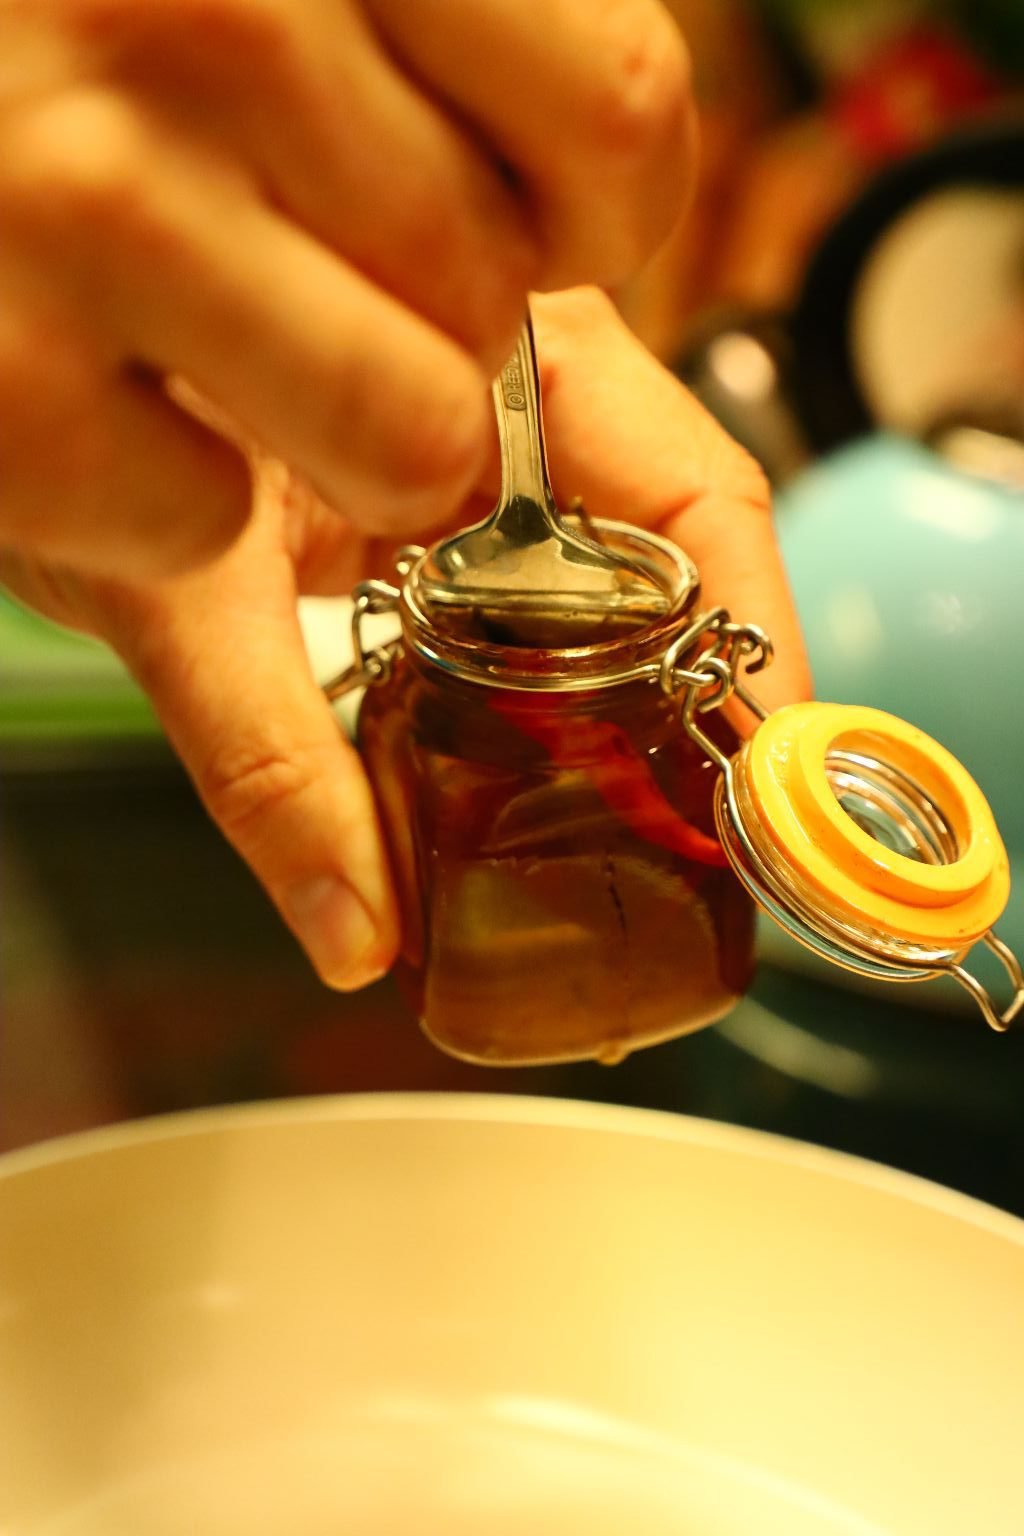
In order to make my Mexican Sausages I simply marinated them in our Spicy Hot Mexican Cranberry Sauce
Click Here For: Spicy Hot Mexican Cranberries

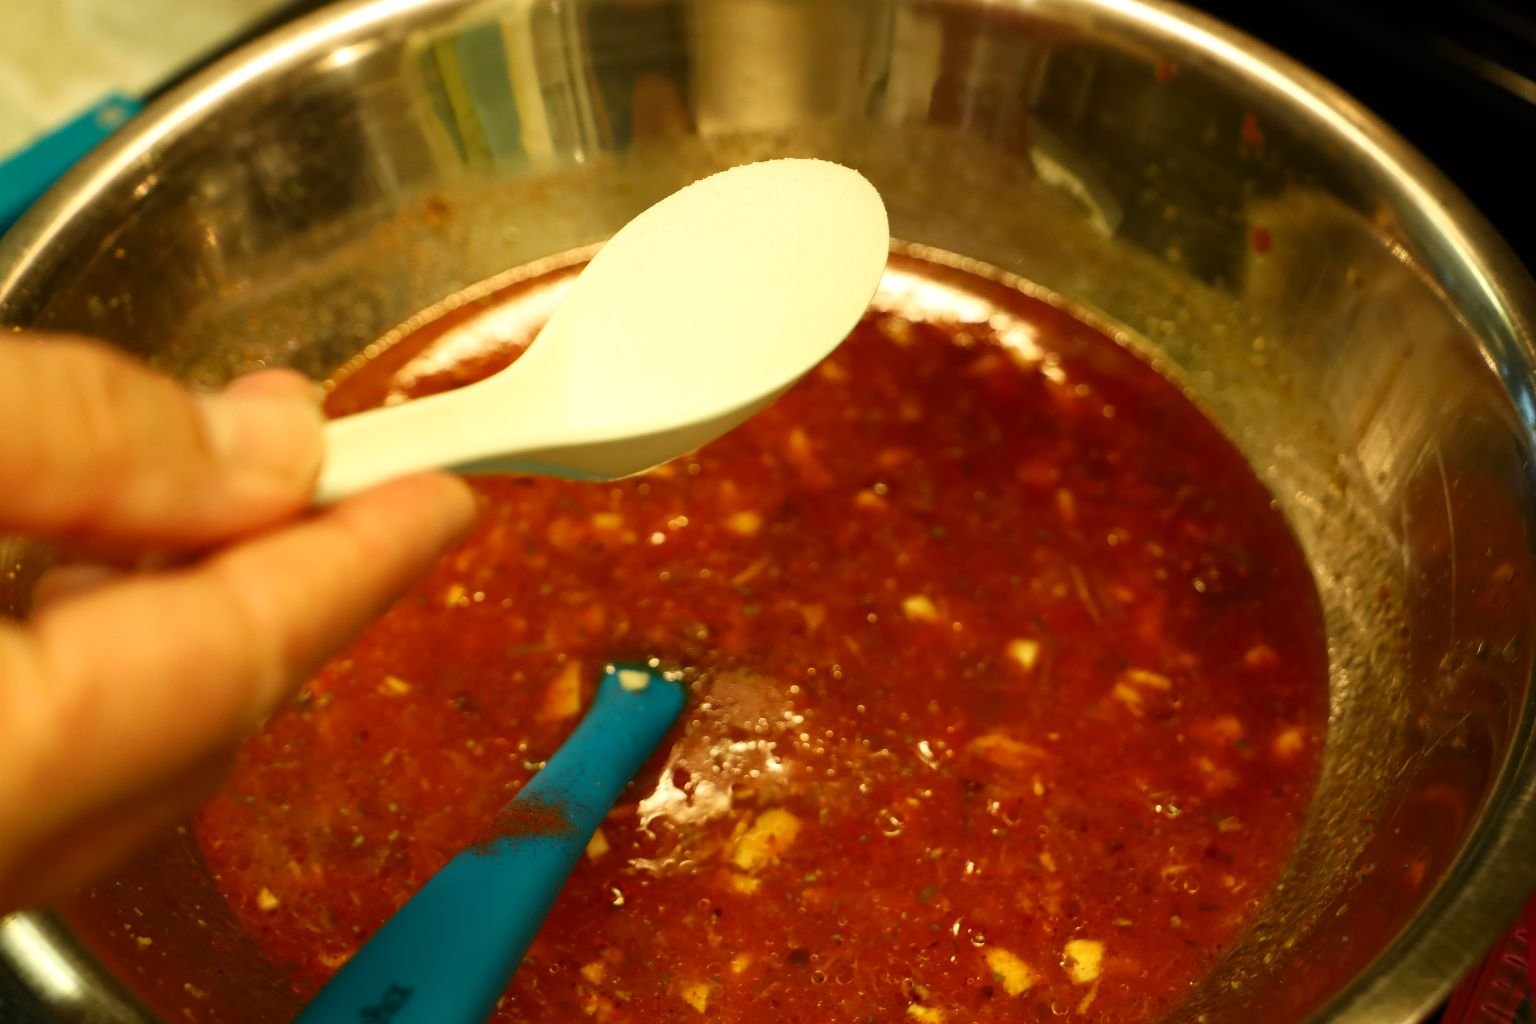
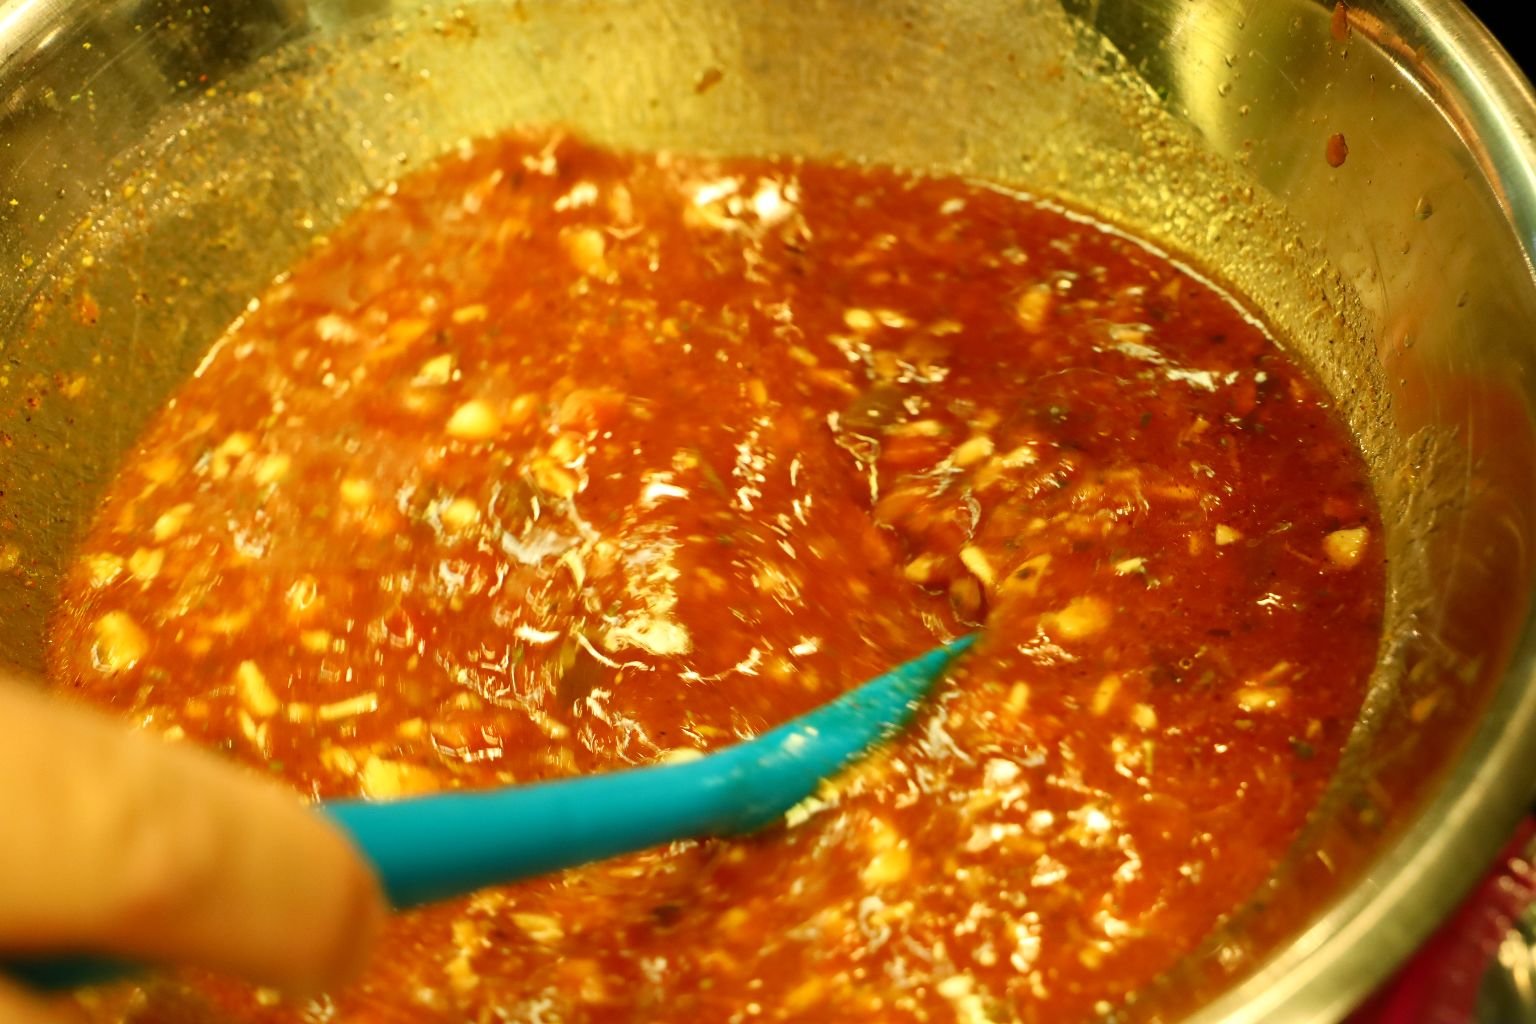
I also used the juice of probably 2 limes and marinated the cocktail sausages for about 24 hours prior to.
I then just placed them into a casserole dish and baked in the oven uncovered for close to an hour in a 350F oven. I would remove them every 20 minutes to stir them around. I knew they were ready when they were all plump.
Into the Oven They Go
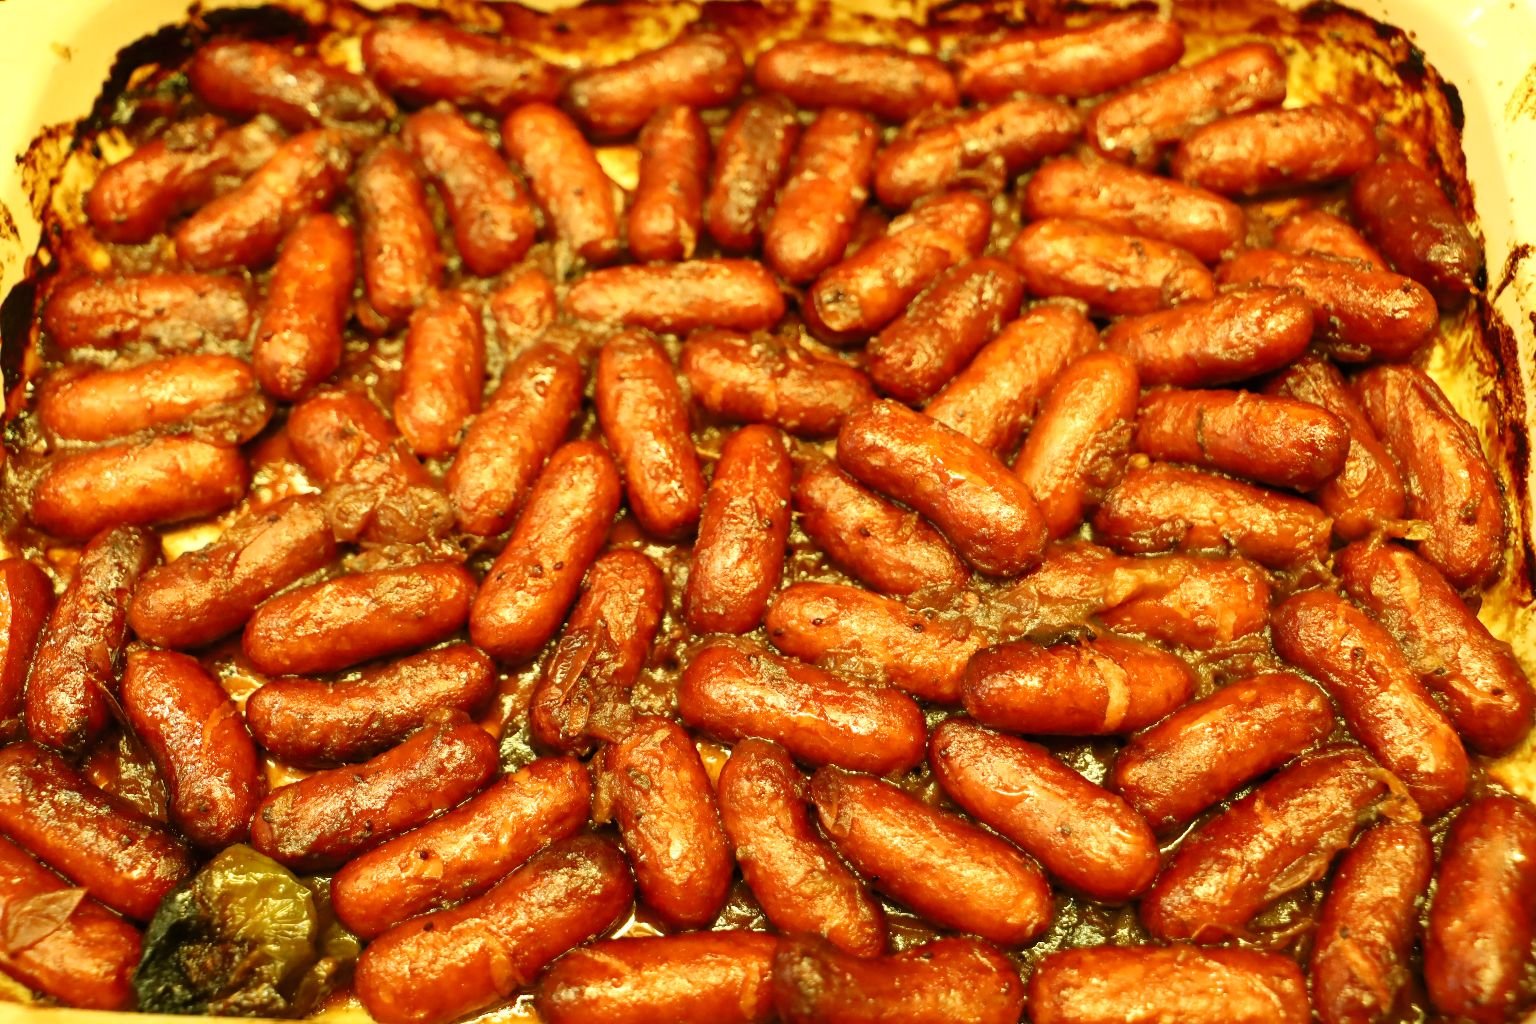
And When They Are Done
Perfect!
A Nice Twist on Cocktail Sausages
———————————————————————
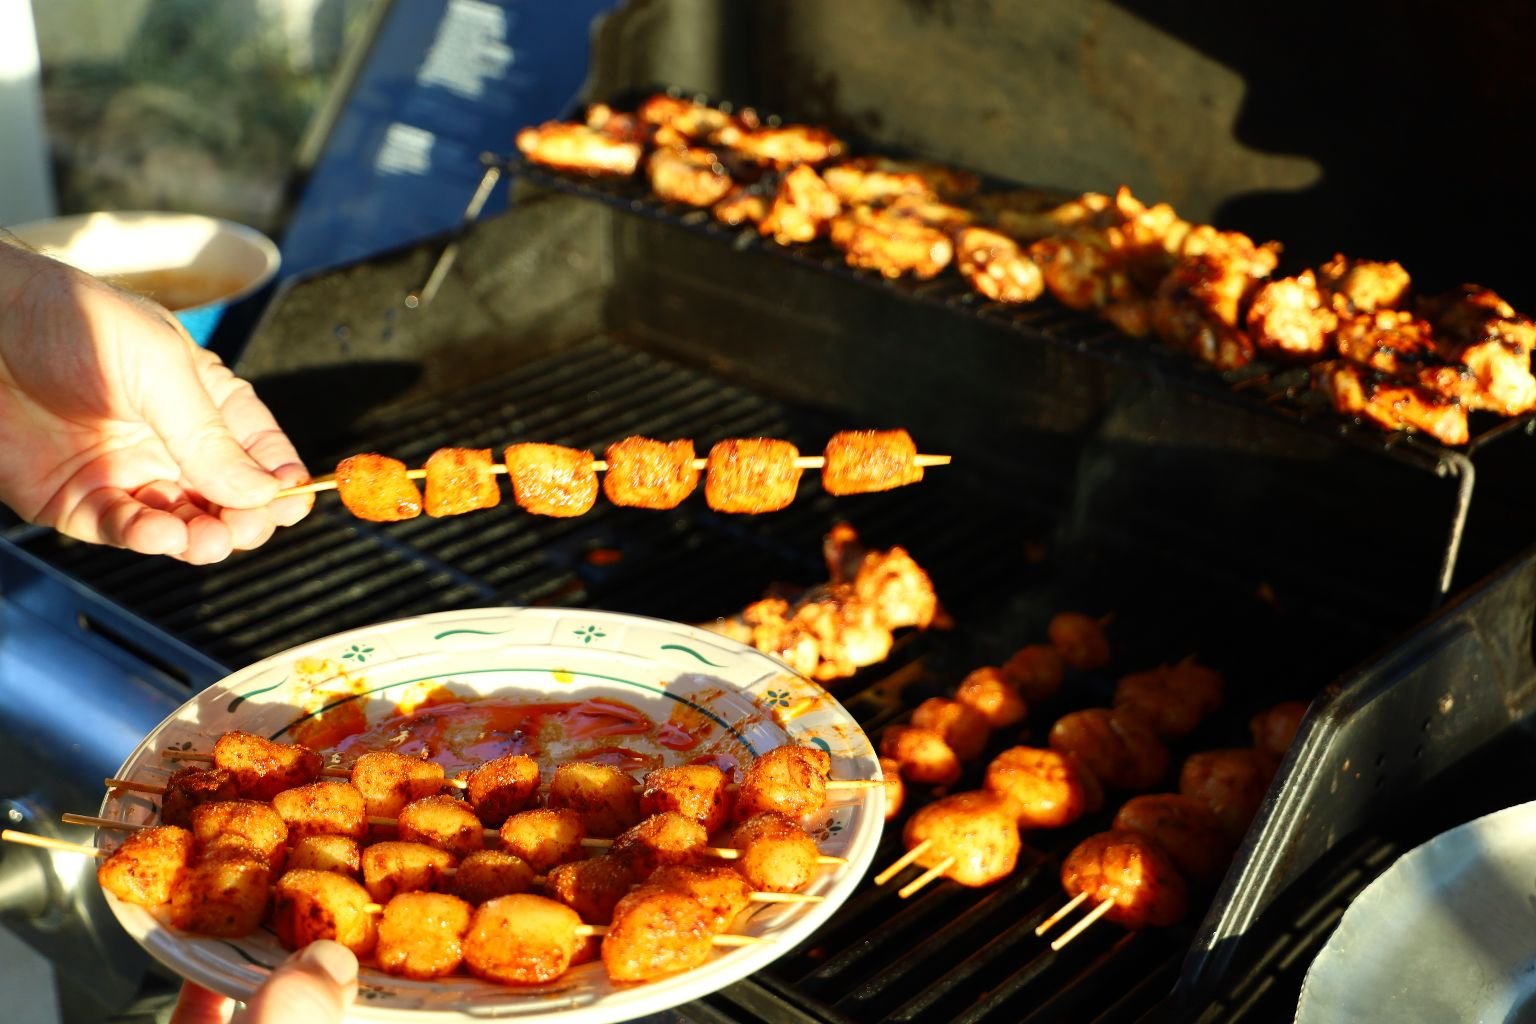
Our Mexican Grill

Grilled Tequila Wings and Drumettes

Our Tequila Wings Marinade Cooked Down to a Dipping Sauce
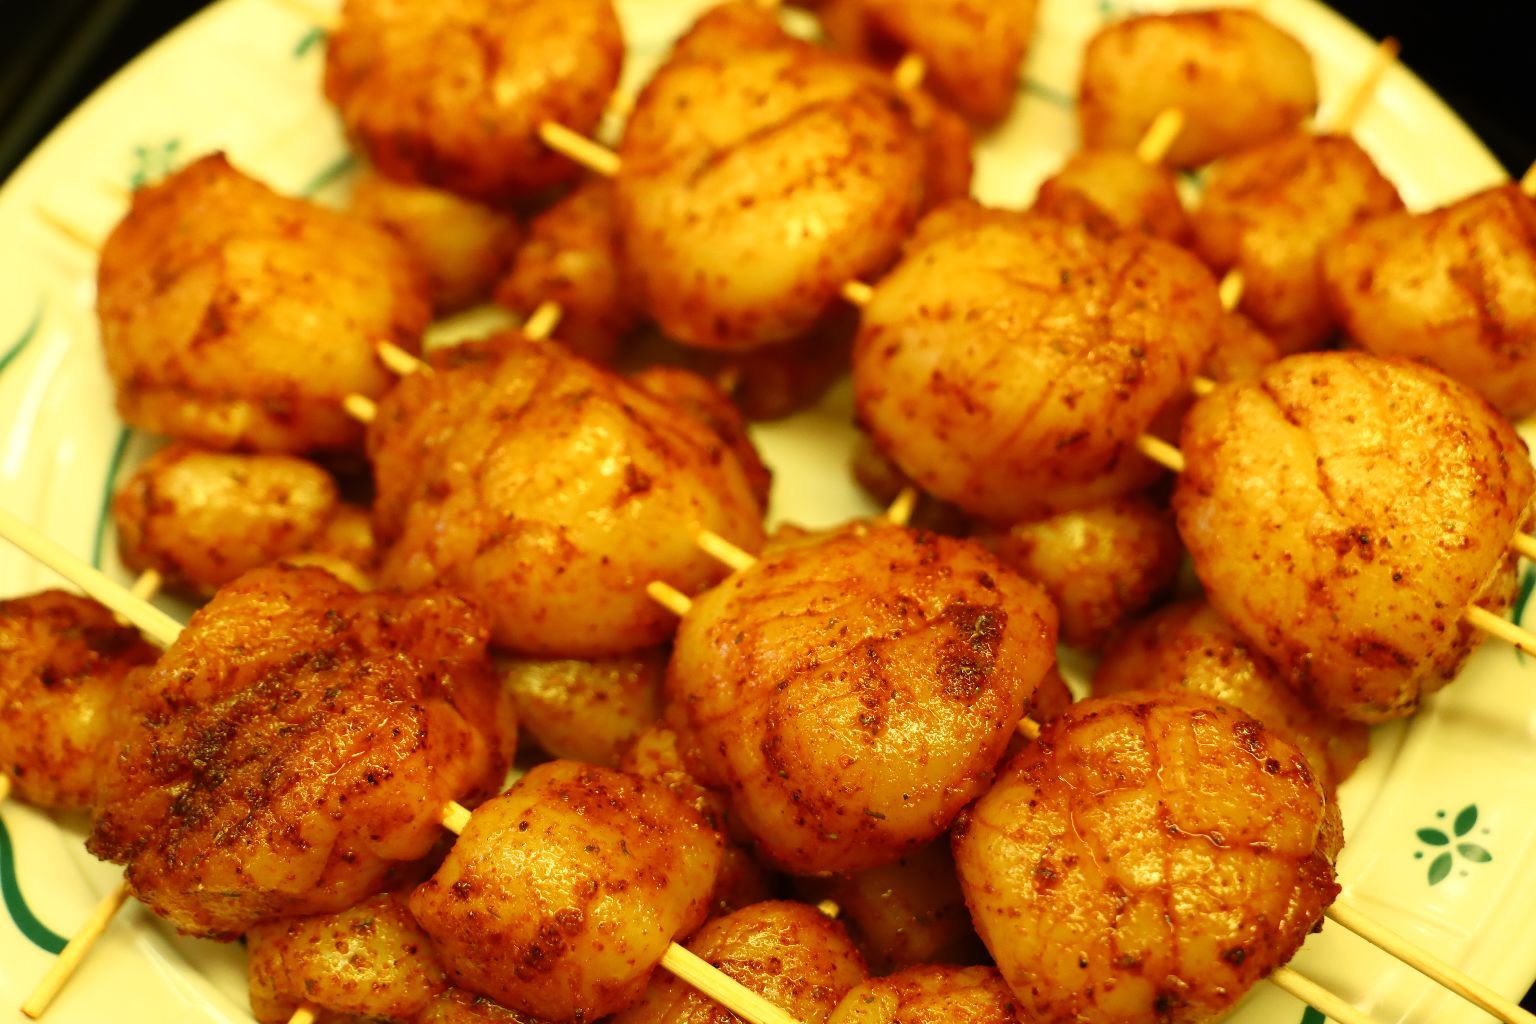
Spicy Scallops Ready for the Grill
Spicy Grilled Scallops

Also a few Grilled Tomatoes

The Tequila Wing and Drumette Marinade Dip for Little Toasts
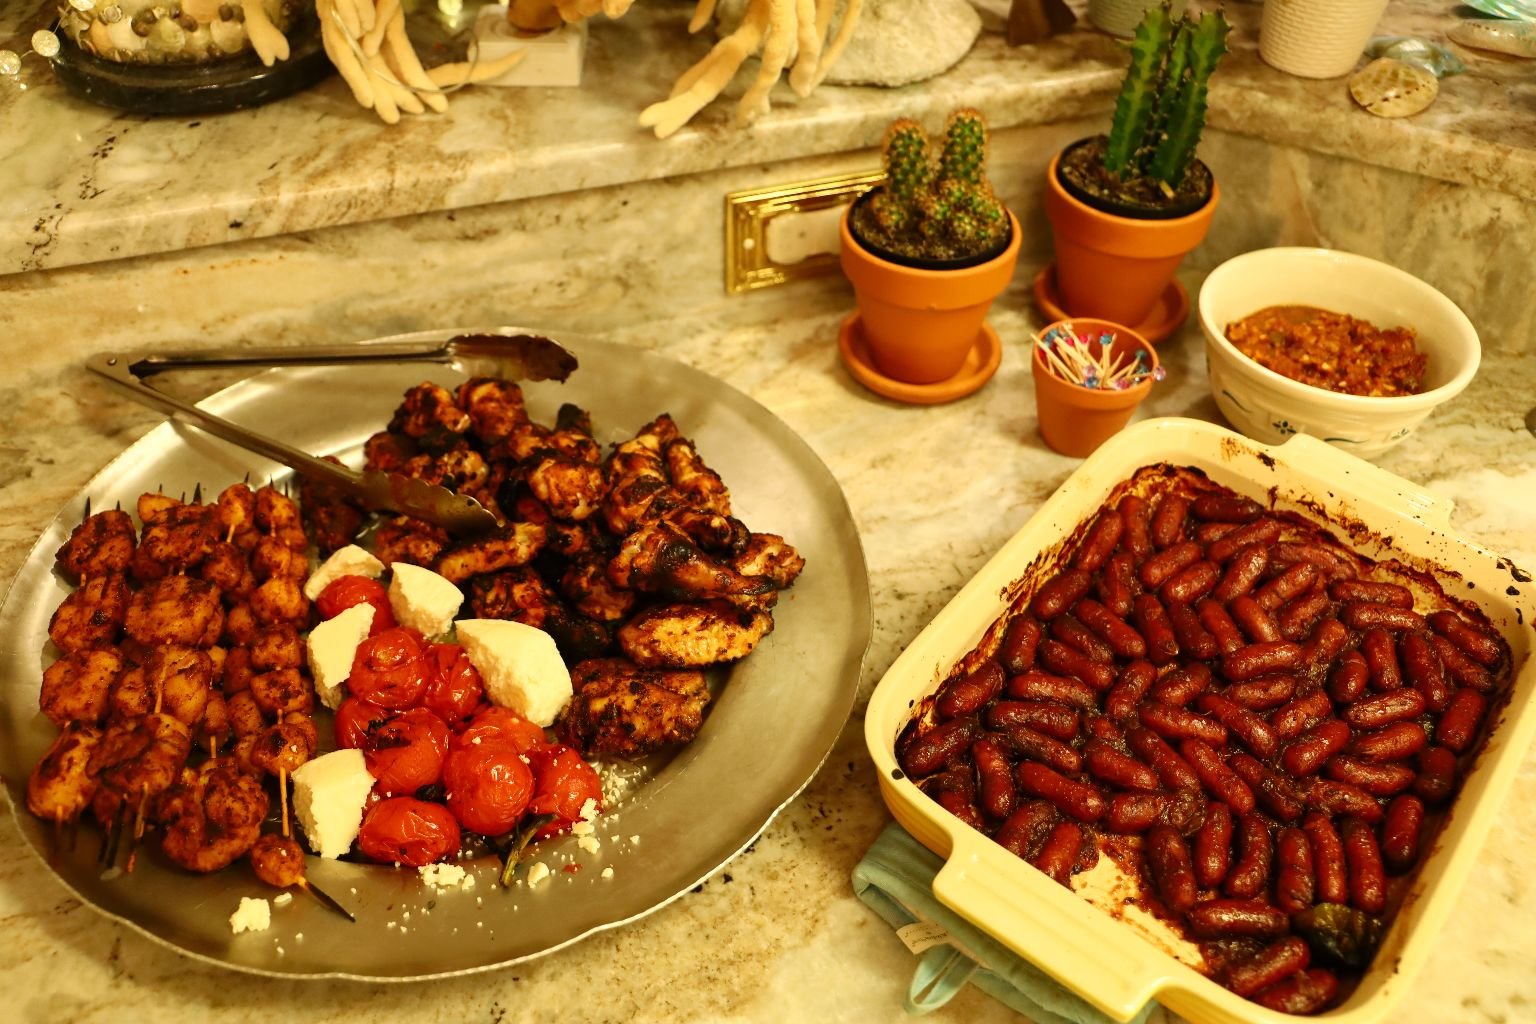
A Very Easy, Tasty Light Meal
(Recipes Down Below)
—————————————————————-
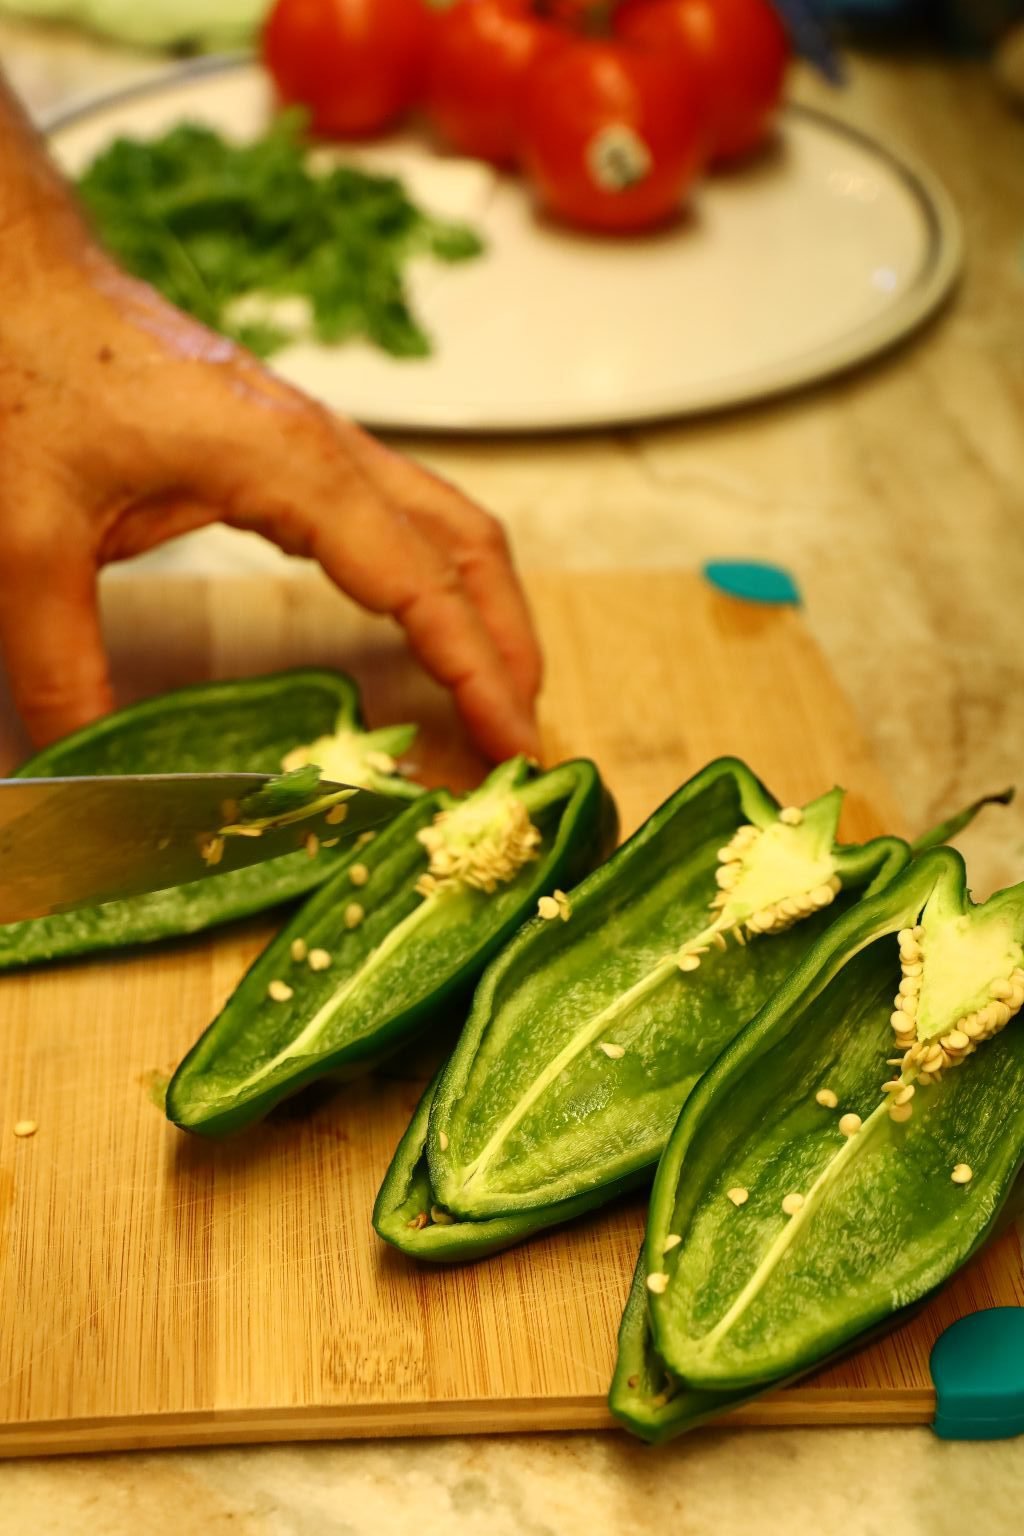
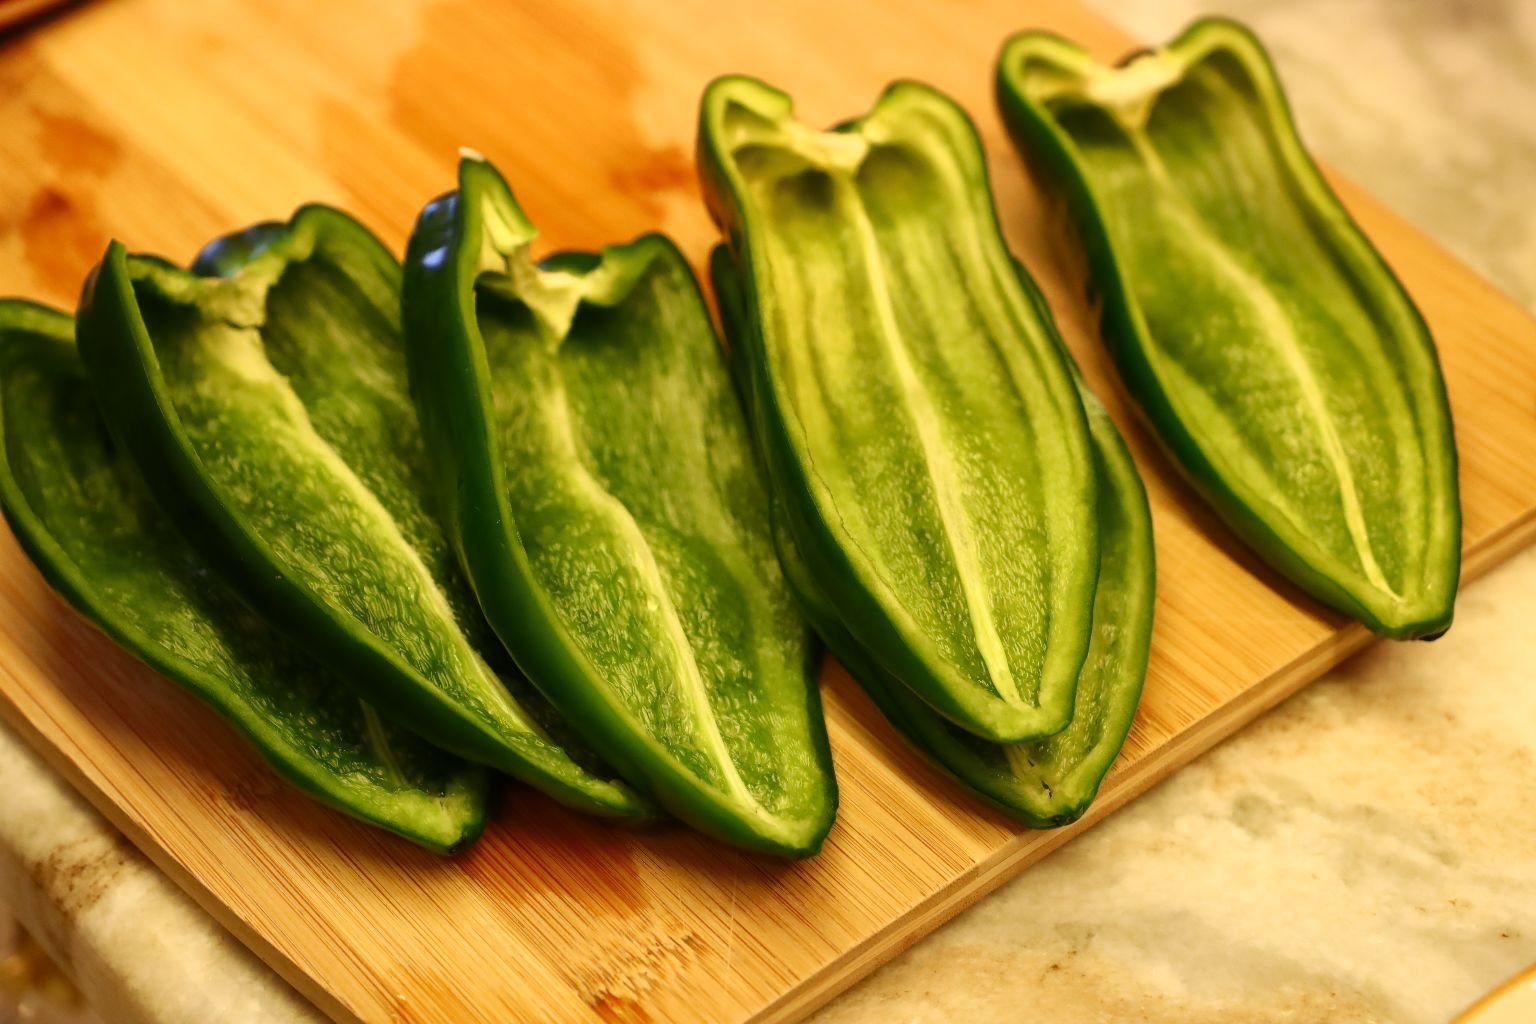
Stuffed Sweet and Jalapeno Peppers
This is probably the most popular of Mexican food in our area, stuffing the peppers with cheeses and chorizo.
I love a variety of peppers.
Jalapeno, as well as some nice sweet.

Take out a baking sheet and line it with aluminum foil. Do a light spray of an oil. Even though you will be wrapping them in bacon, sometimes they still stick.
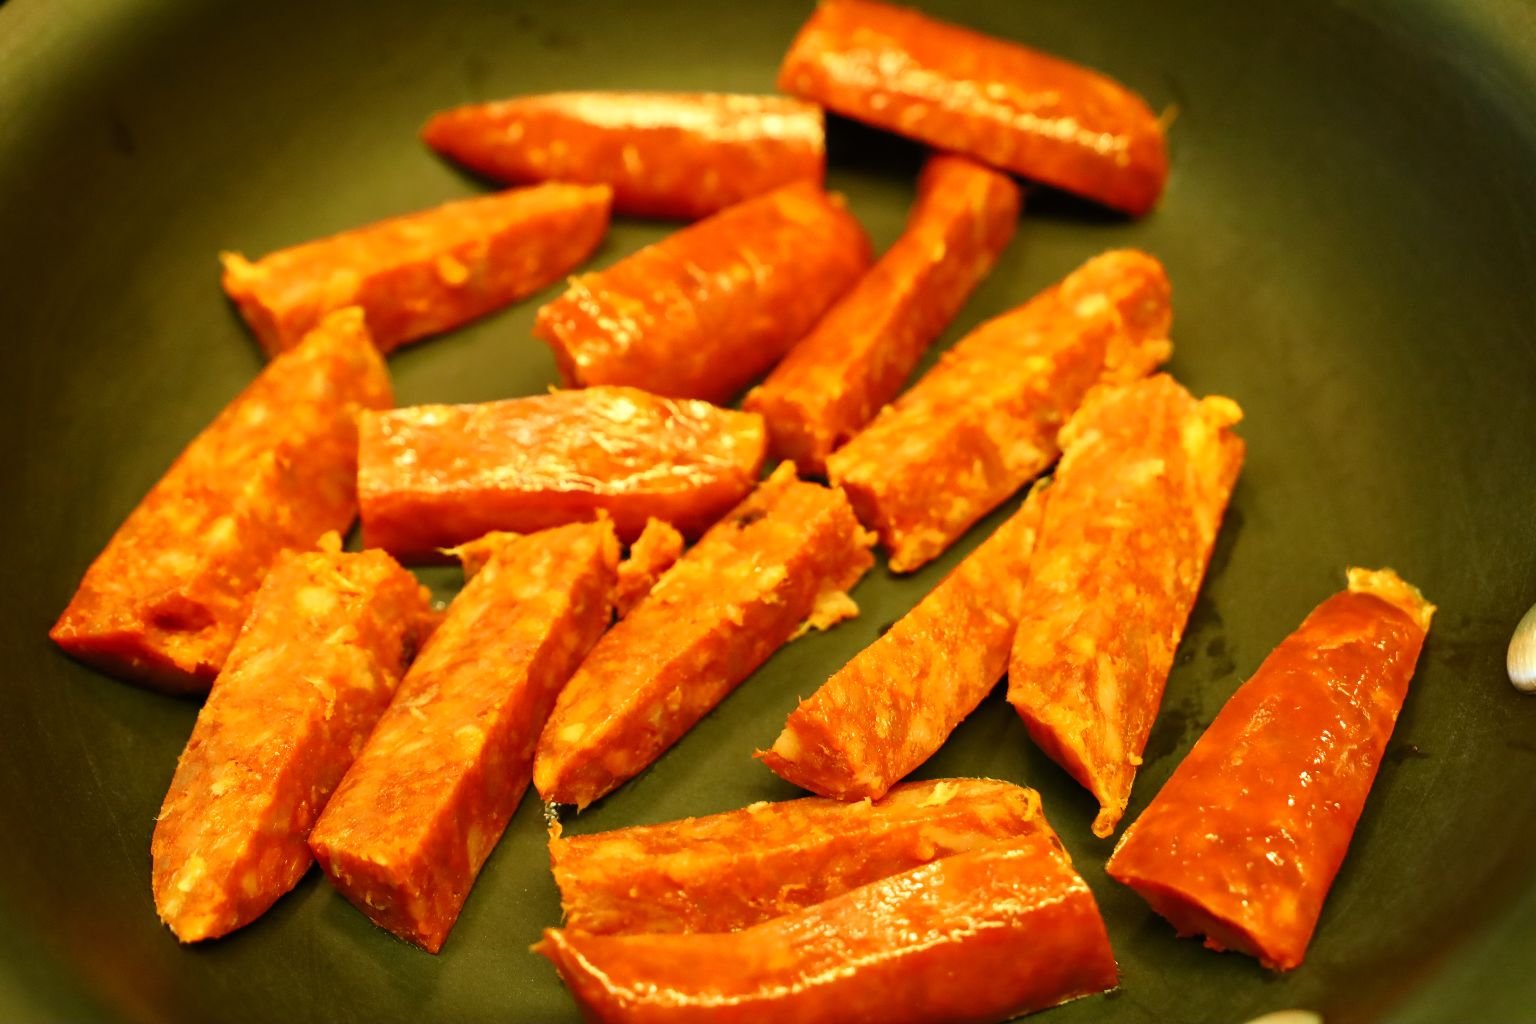
Here I am frying up a bit of Chorizo to stuff the peppers with.
Place on a paper towel to drain.

I have already slit the peppers down the middle and removed all the seeds, washing them and drying them.

Stuffing the Peppers with Cheeses and Chorizo

Wrapping Them in Bacon and Securing with Toothpicks

Place Into a 400F Oven for 15 Minutes Cut Side Down

After 15 Minutes Remove and Turn Over, Baking Another 15 Minutes
——————————————————————–
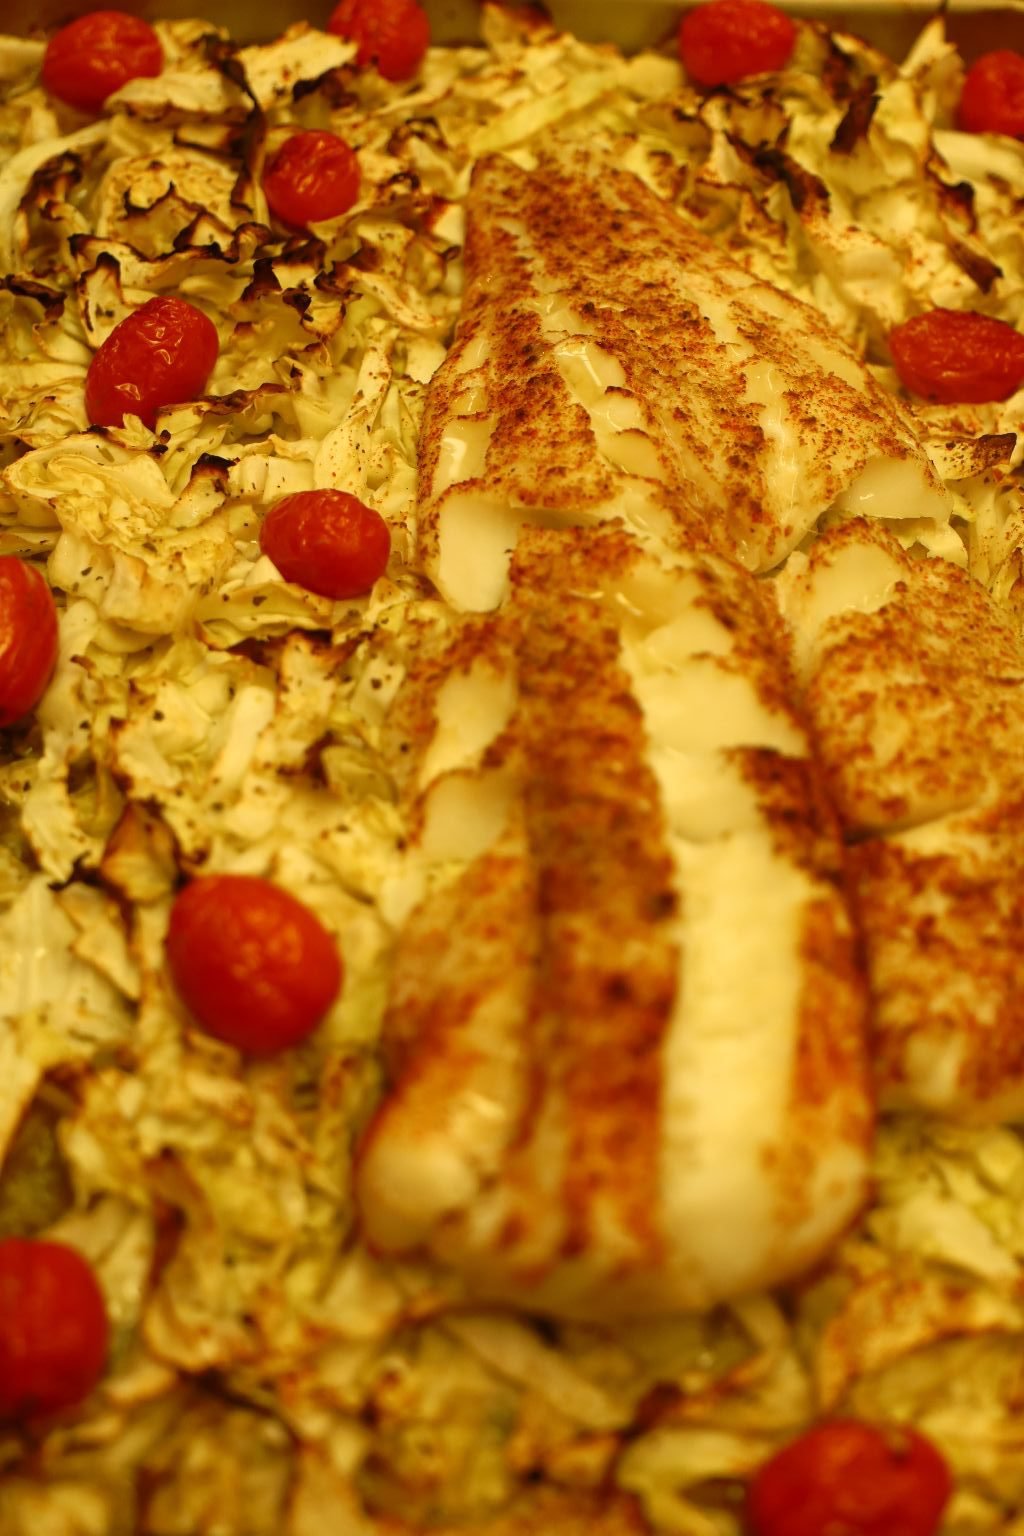
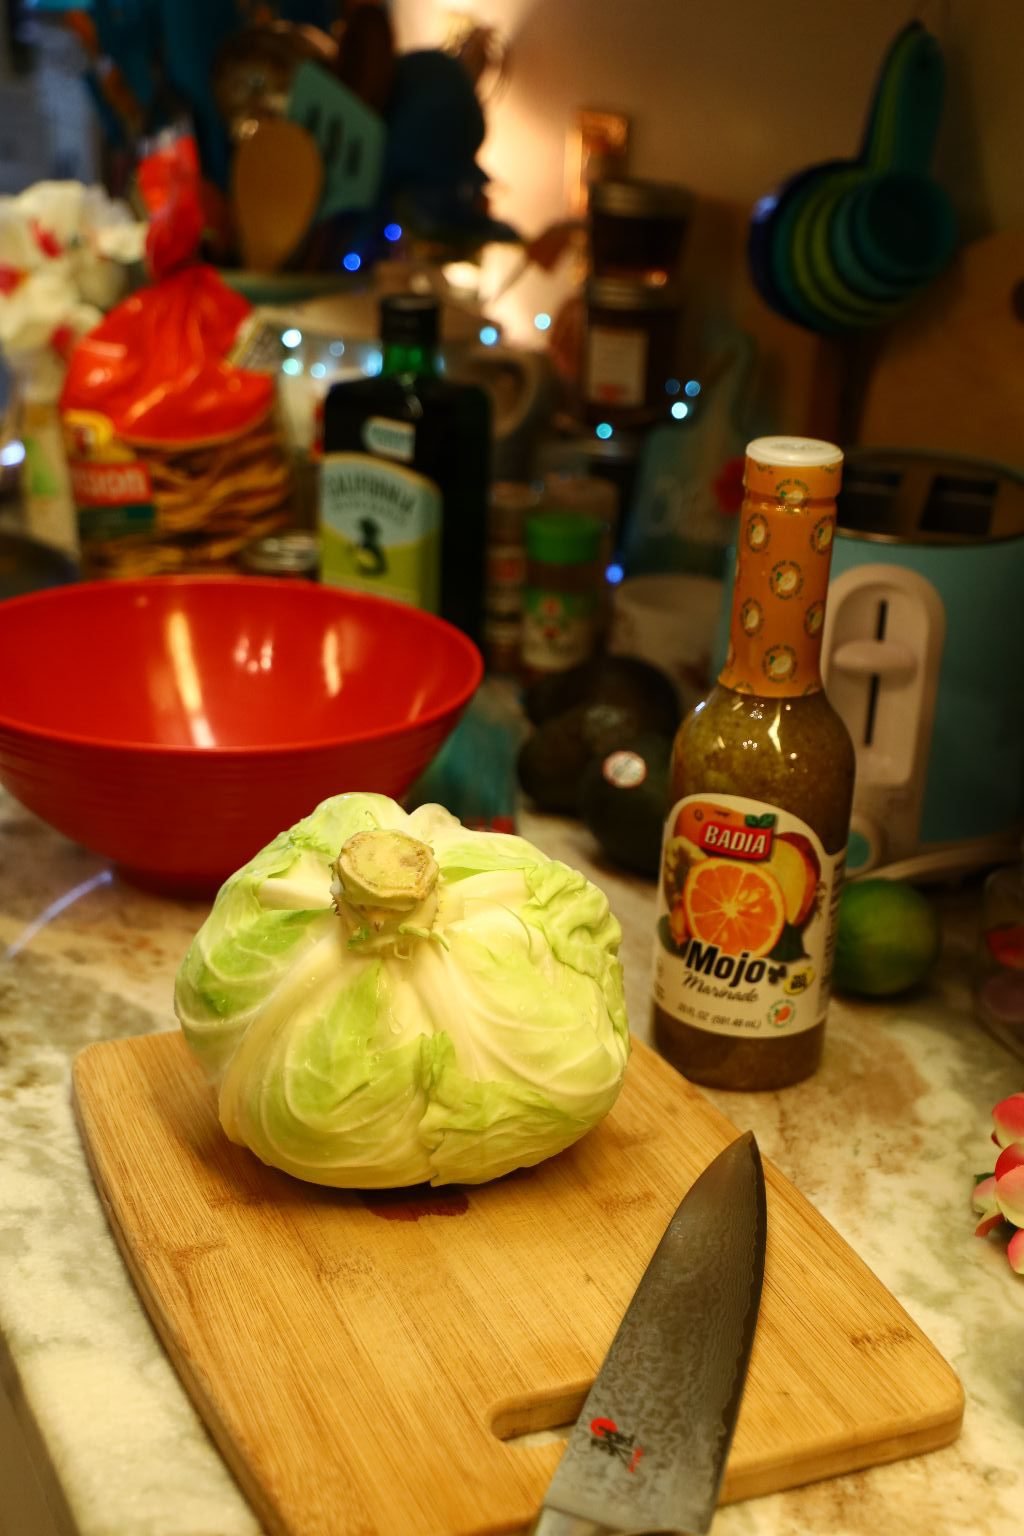
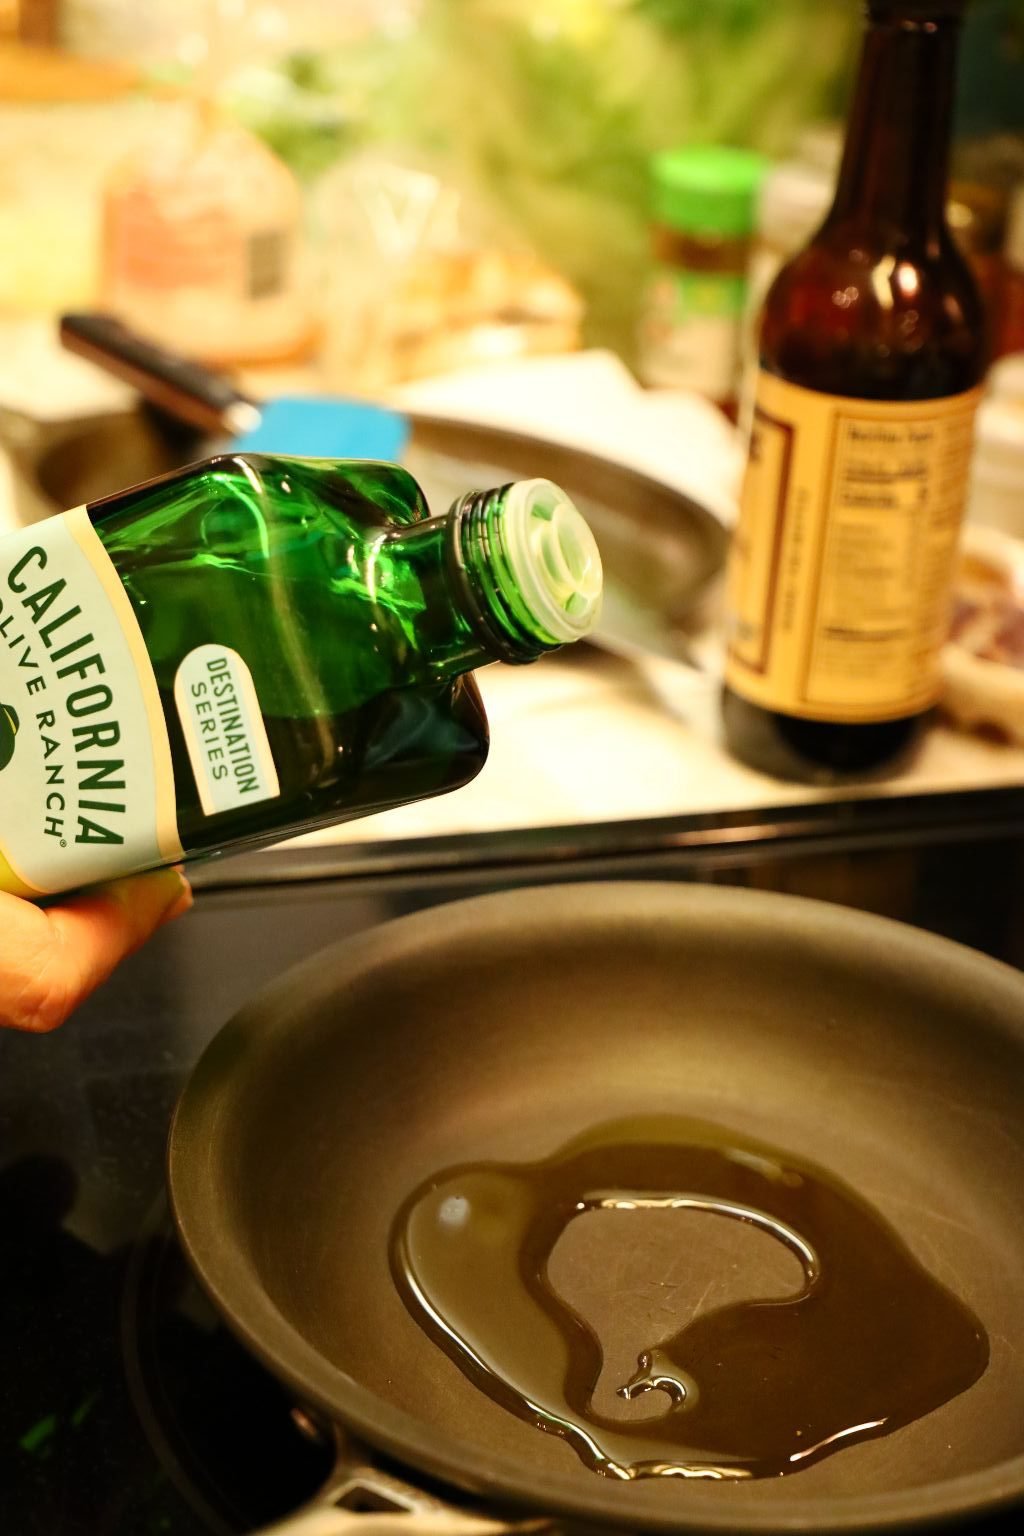
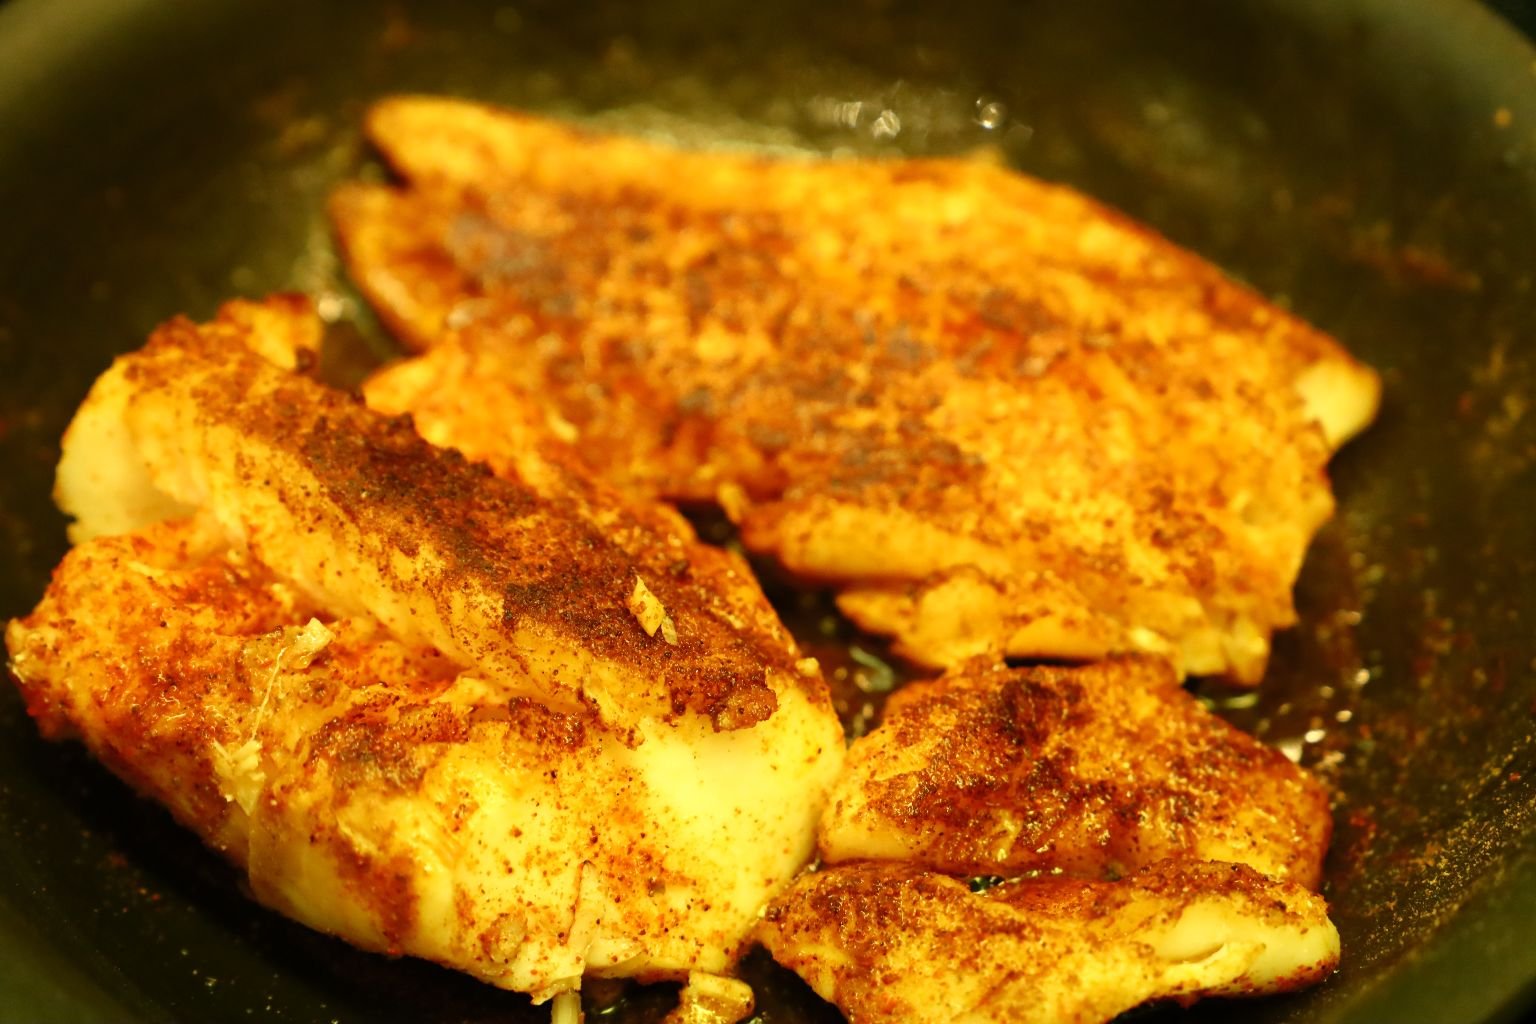
Our Baked Spicy Cod in Marinated Mojo Cabbage
Ingredients:
1 Cabbage Head – cored and sliced thinly
~ 16 Cherry Tomatoes
~ 2 Cups Mojo Marinade
1 Large Cod Fillet
2-3 Tbsp. Olive Oil
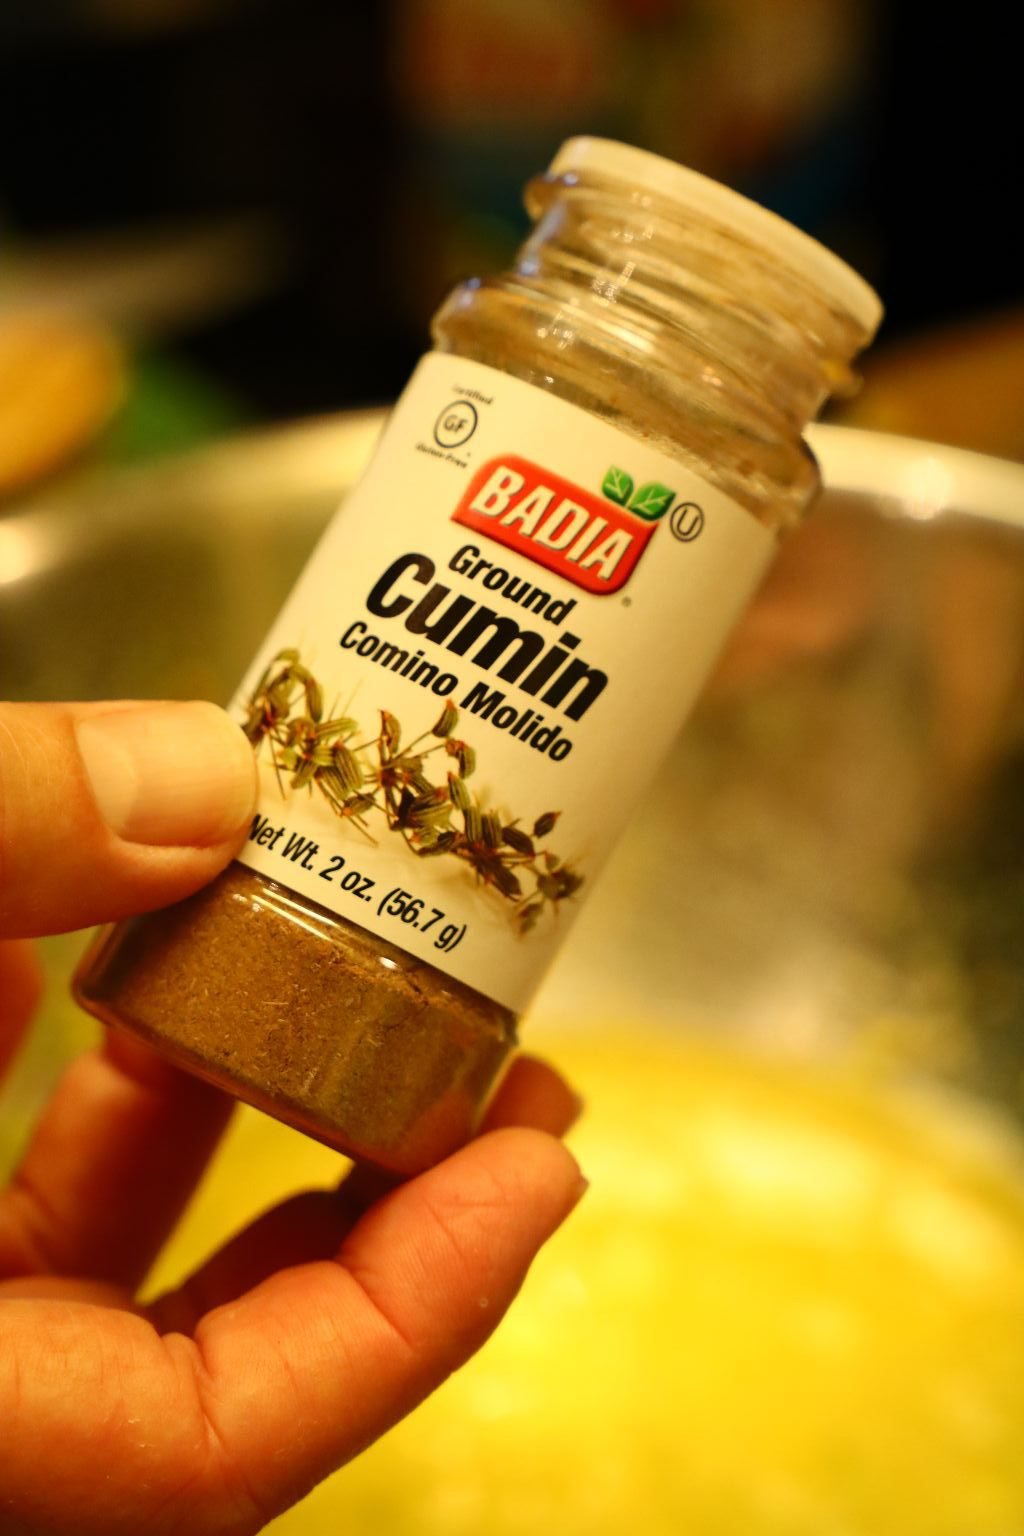
1 Tbsp. Ground Cumin
1 Tbsp. Chili Powder
1/2 Tbsp. Ground Jalapeno
———————————————————————
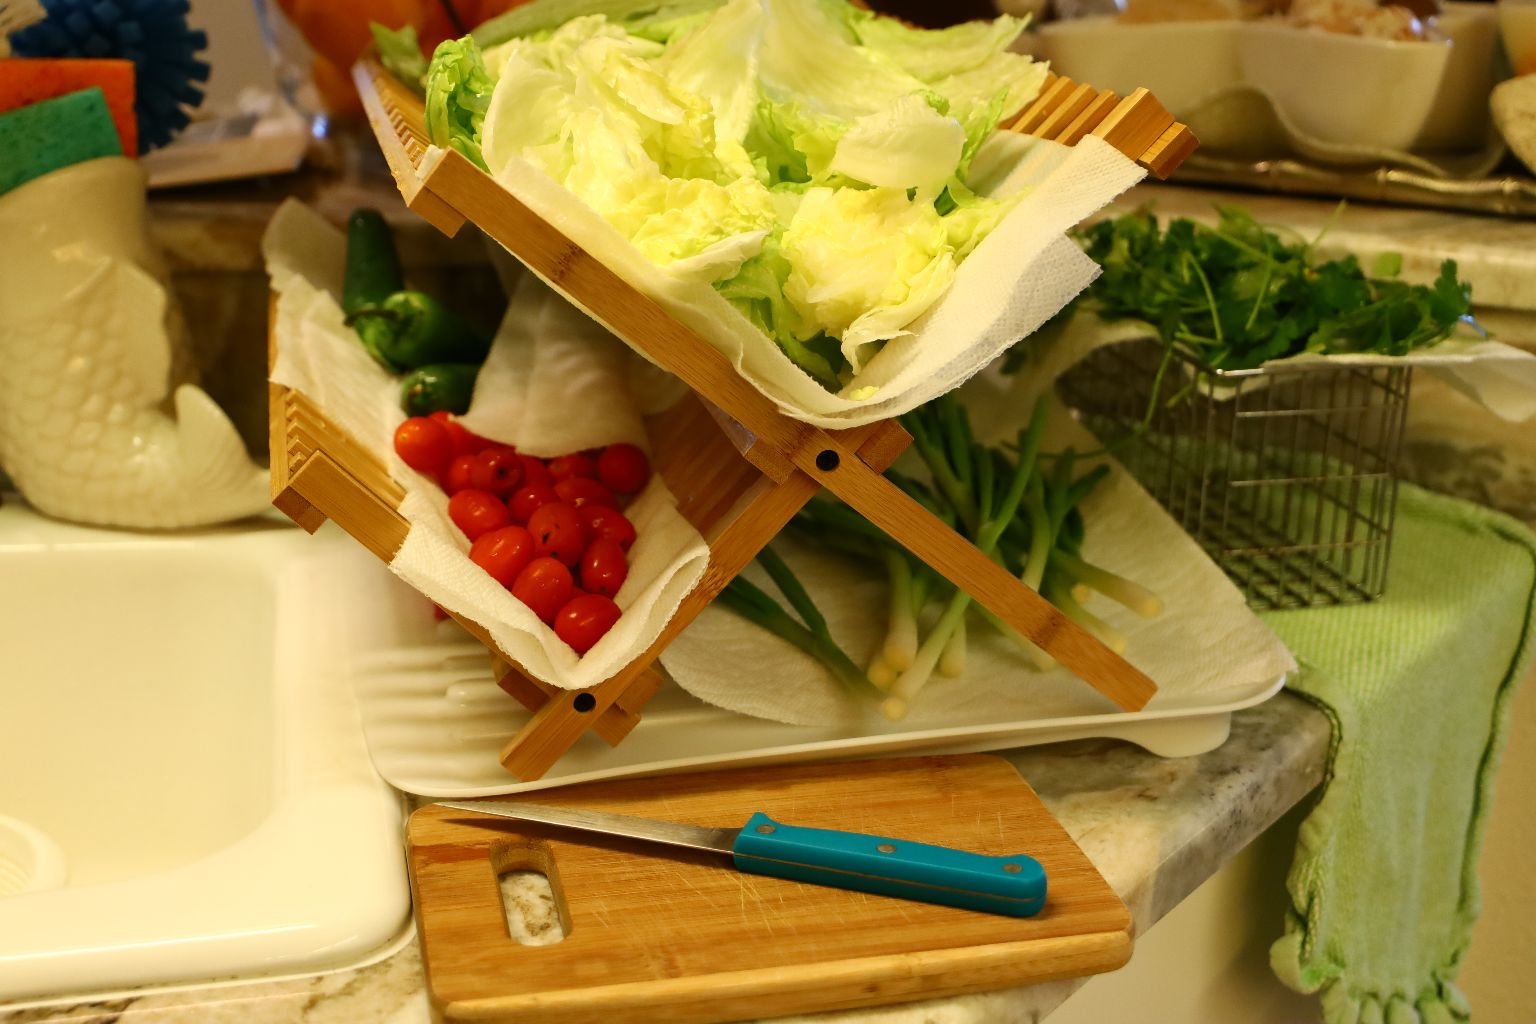
Fresh Vegetables Washed and Drying

Mojo Marinade and Cabbage
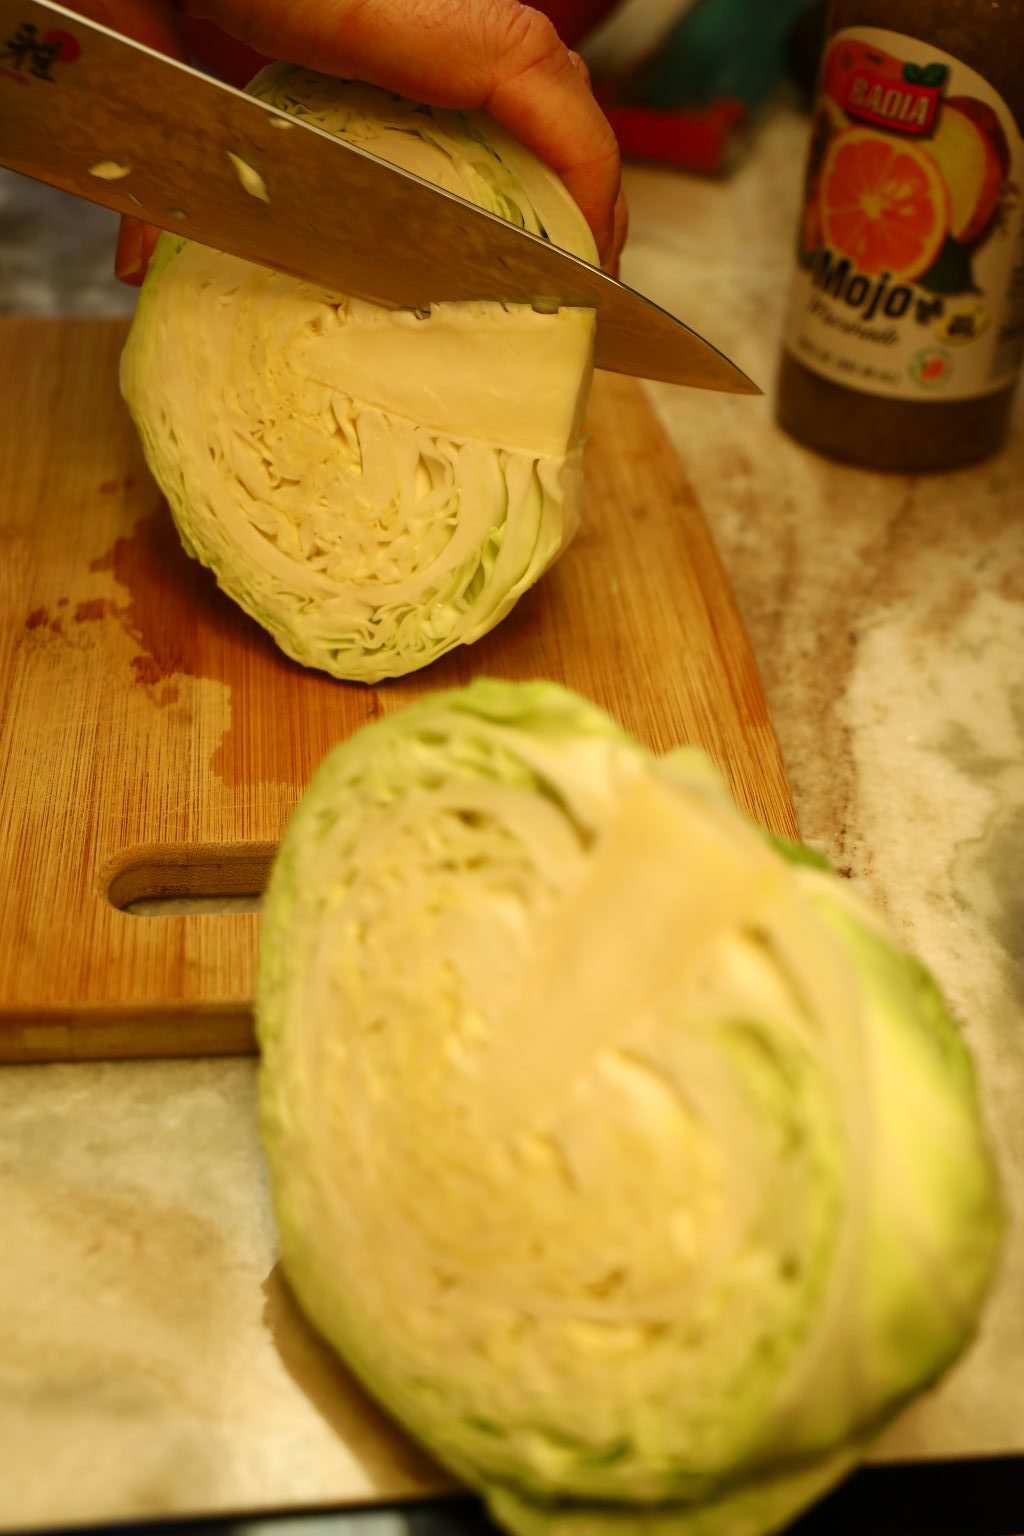

Slice the head of cabbage in half then slice around the core and remove it.


Slice the cabbage in 1/4 inch slices and place all the sliced cabbage in a large bowl.
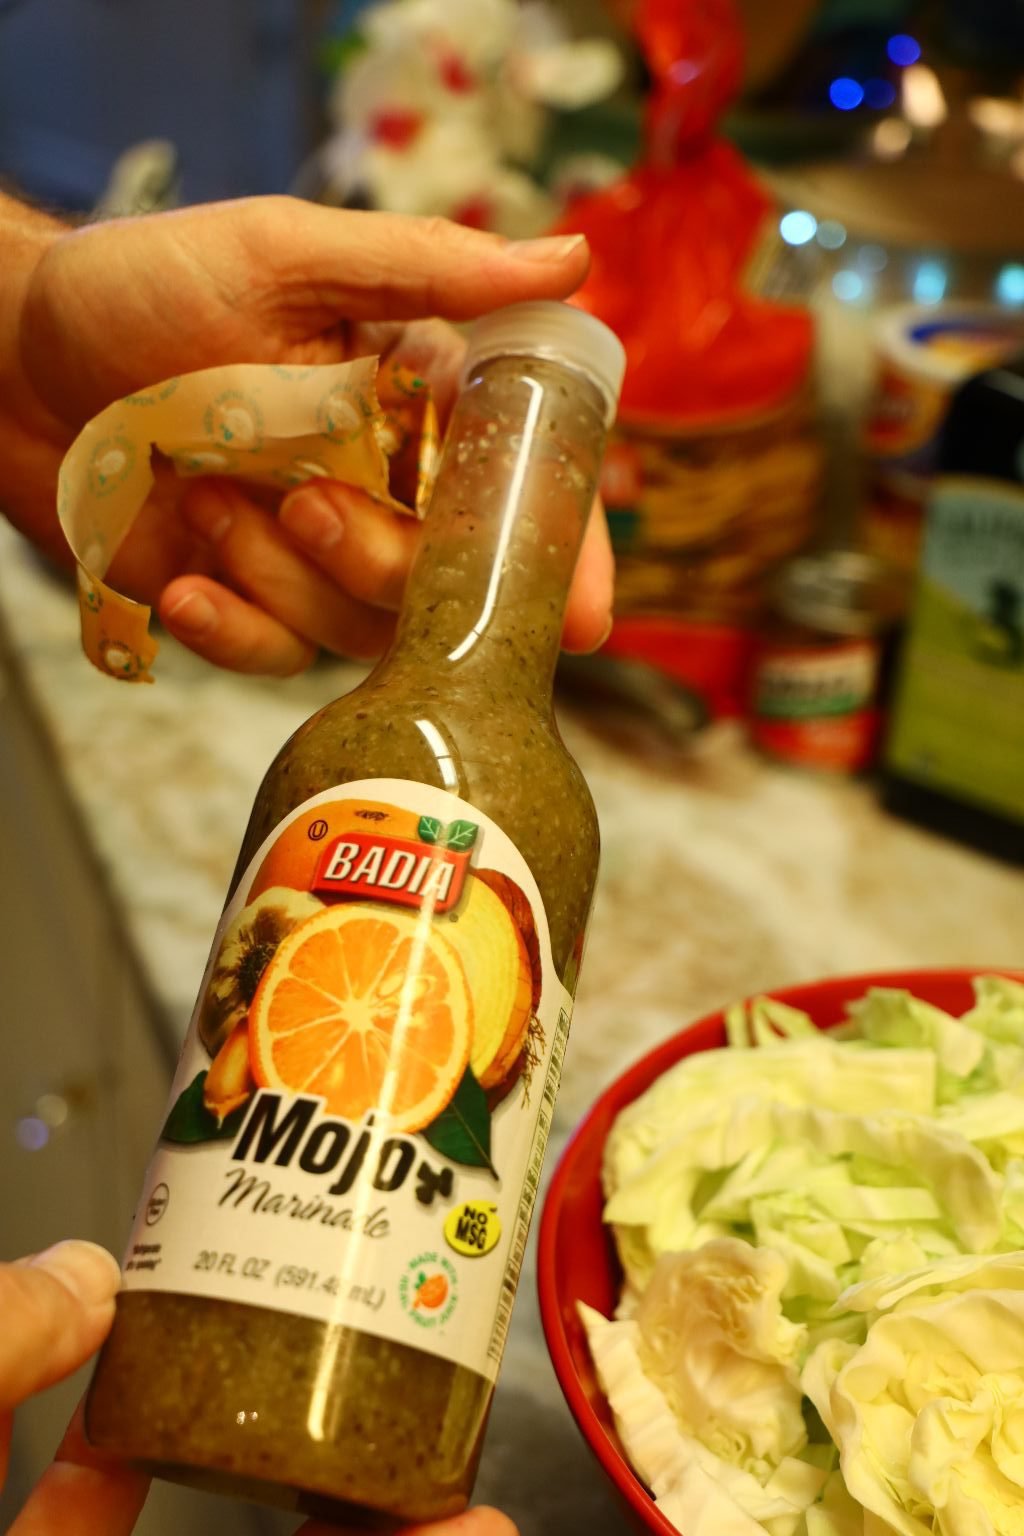

Pour the Mojo marinade over the sliced cabbage and mix well to combine.

—————————————————————-

Here is our Cod fillet which I just removed from the bag it came in which kept it on ice.


Place your olive oil over a large sheet pan as shown and spread it evenly over the pan using your fingers or a piece of cabbage.


Spread the marinated cabbage over the sheet pan.

Place the Cod fillet on top of the marinated cabbage.
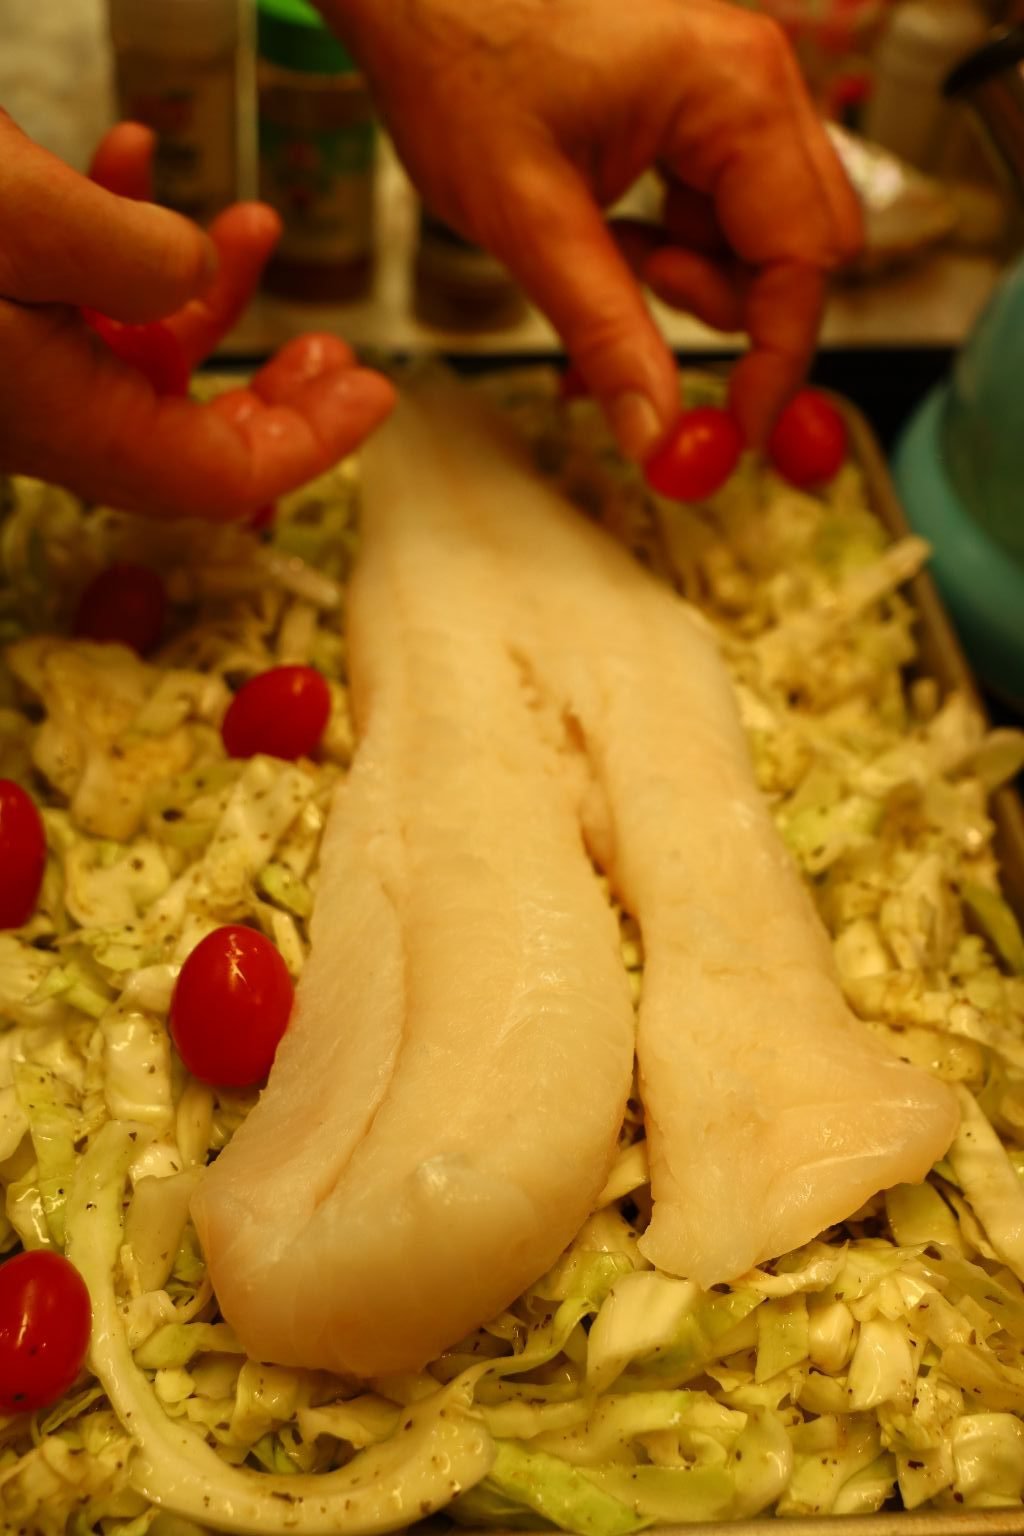
Add your cherry tomatoes to the cabbage and Cod.
Just dot them around the pan.


Sprinkle your Ground Cumin over the Cod…


Then your Chili Powder…


and lastly your Ground Jalapeno.
Add more or less of the spices to suit your taste.

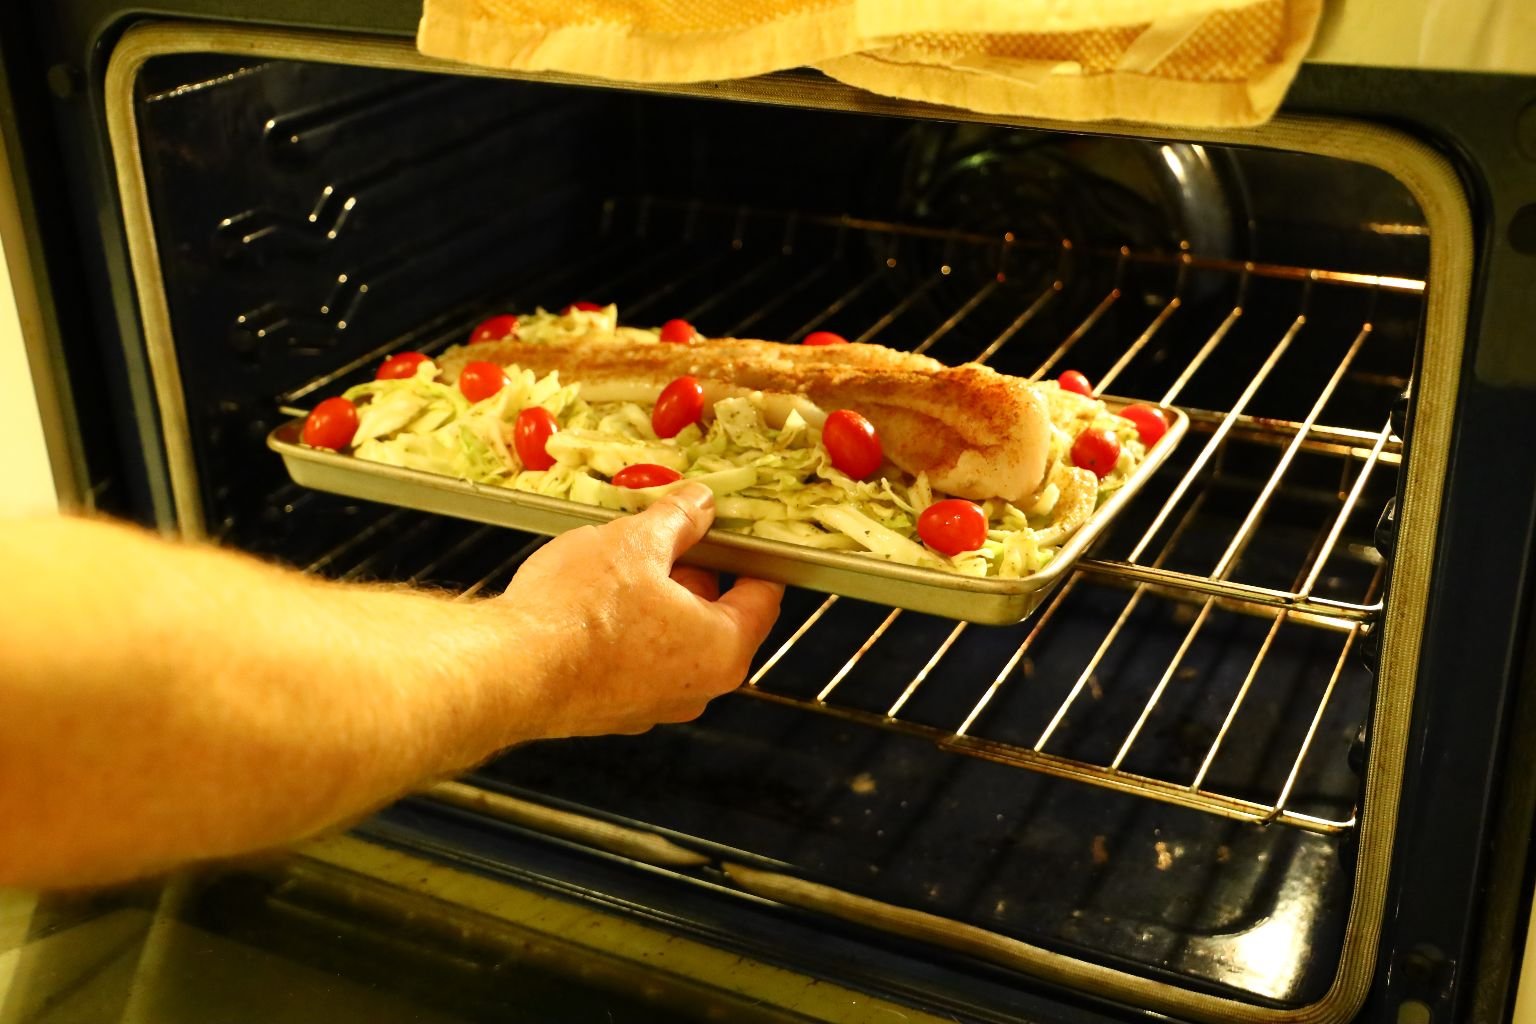
Bake the Cod in a preheated 400’F oven for ~10-15 min. or until fish flakes easily.

Smells Wonderful!!
————————————————————–
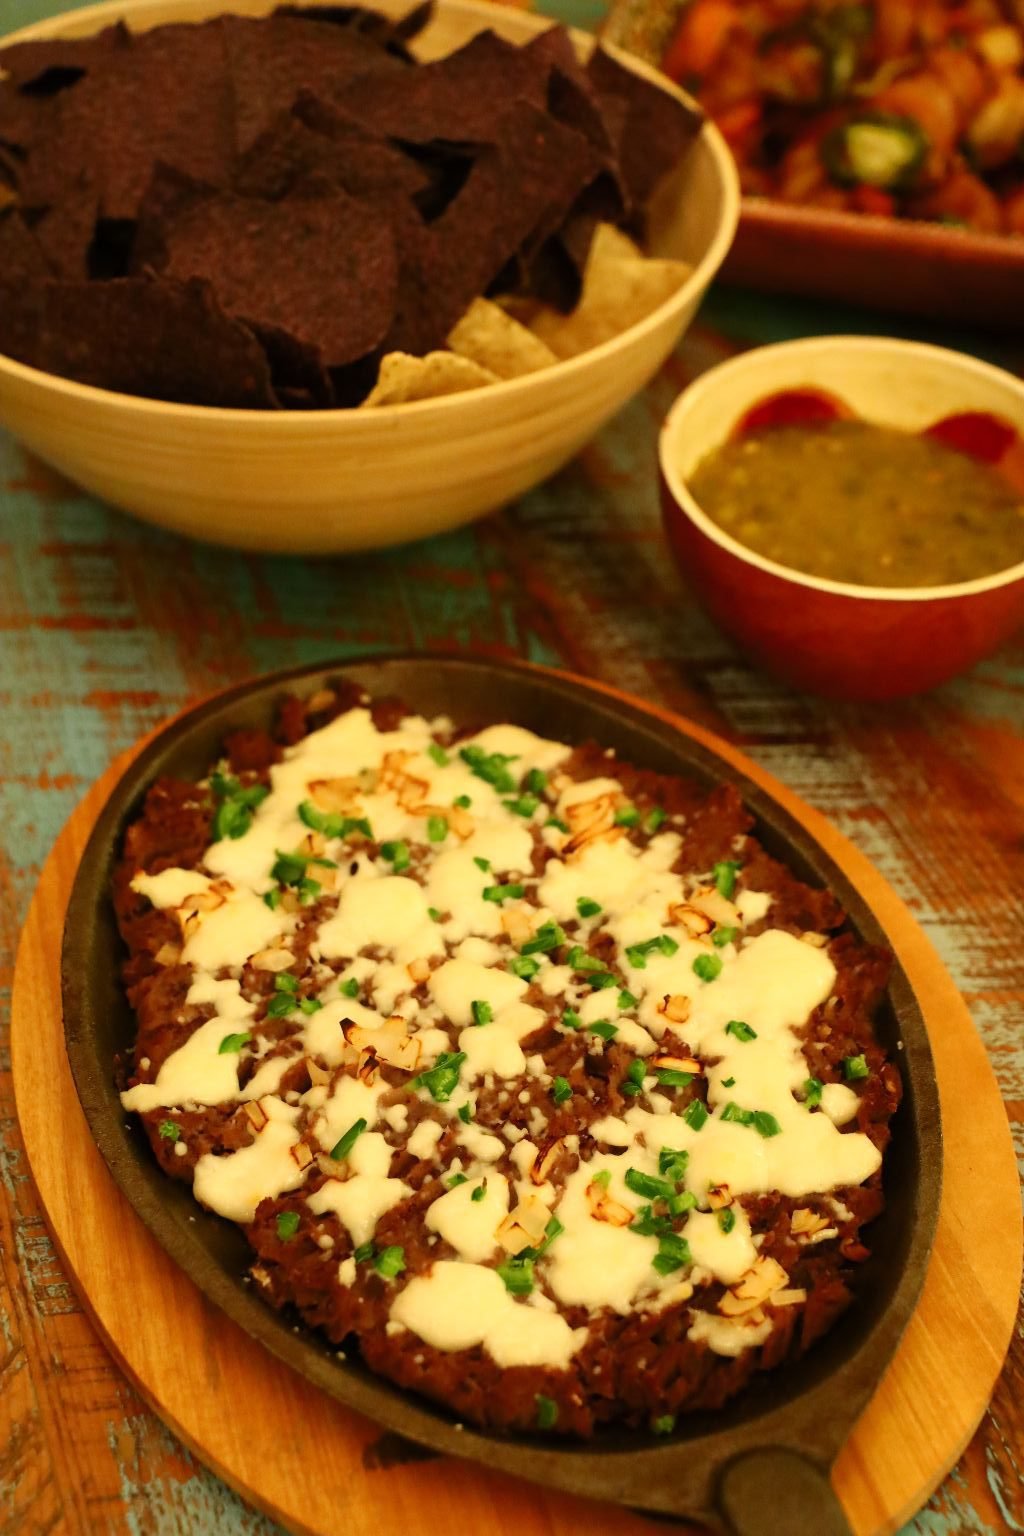
Baked Re-fried Beans
This is very easy and a favorite of ours.

Just open a can of Re-fried Beans.
Any one that you prefer and spread them out onto some sort of baking dish or in our case, this perfect cast iron skillet.
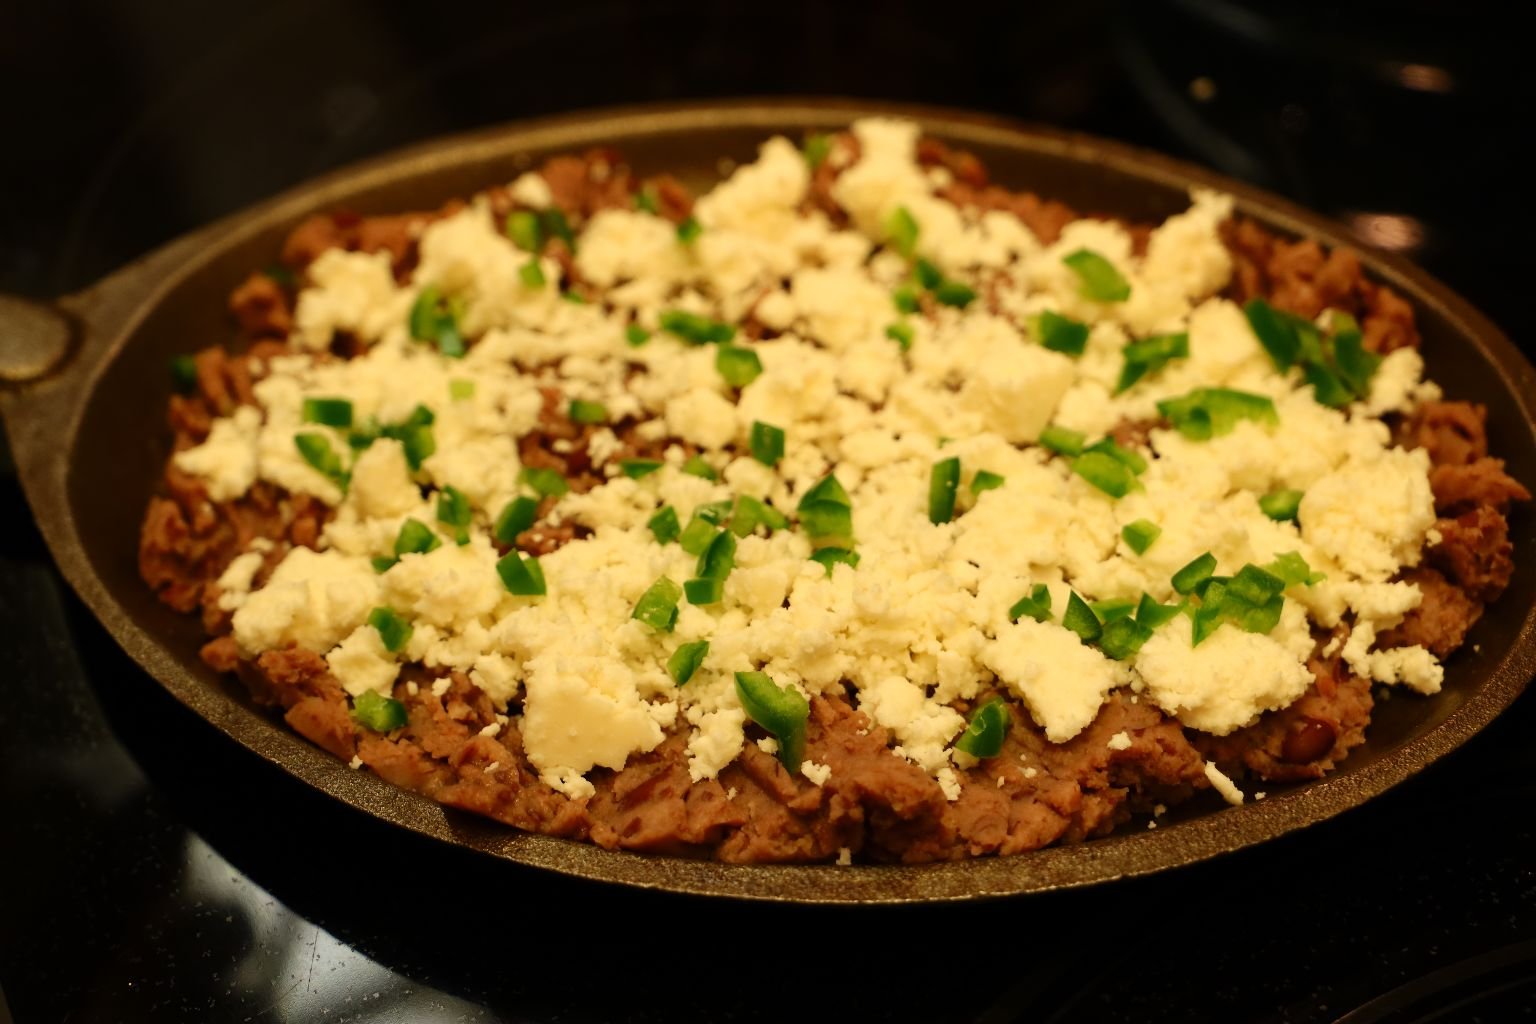
Now just top with some of your favorite cheeses. We used a Queso Fresco here.
It crumbles very easily and melts nice too.


Here Gordon is topping with some of our freshly cut Chives from our garden and some chopped Spring Onions.
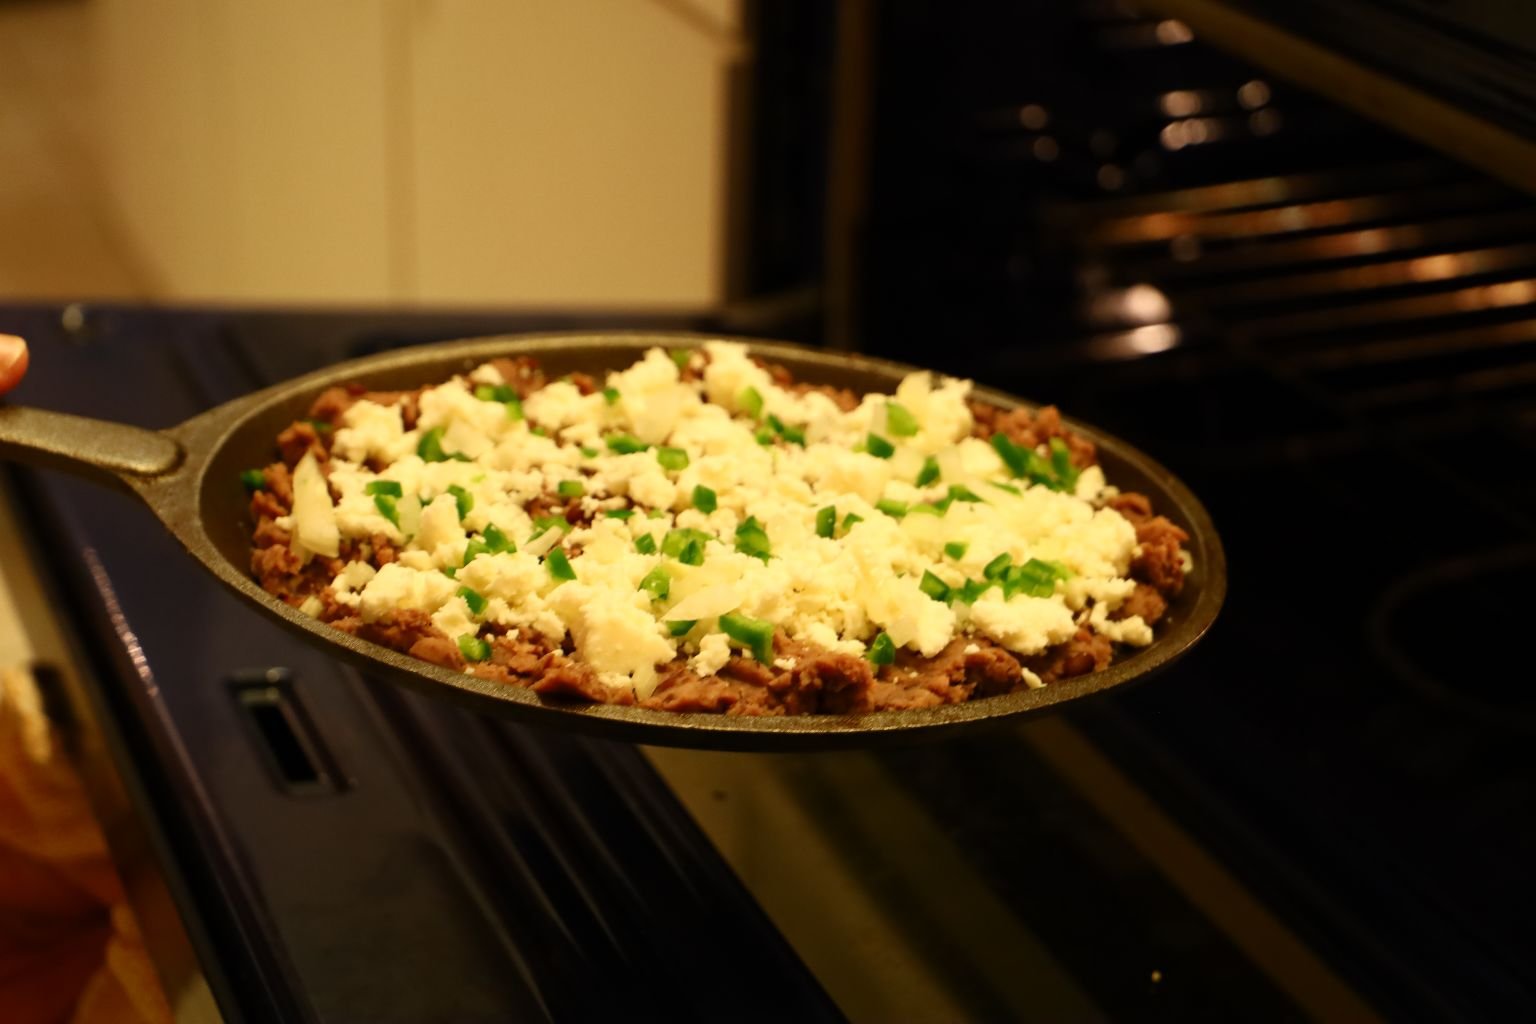

Next, place into a 400F oven for about 15- 20 minutes.
You just want the cheese to melt and the beans to warm up.

We did drizzle a bit of our Chili Oil over top.
An excellent side for any Mexican meal. Don’t forget the tortilla chips!
————————————————————–
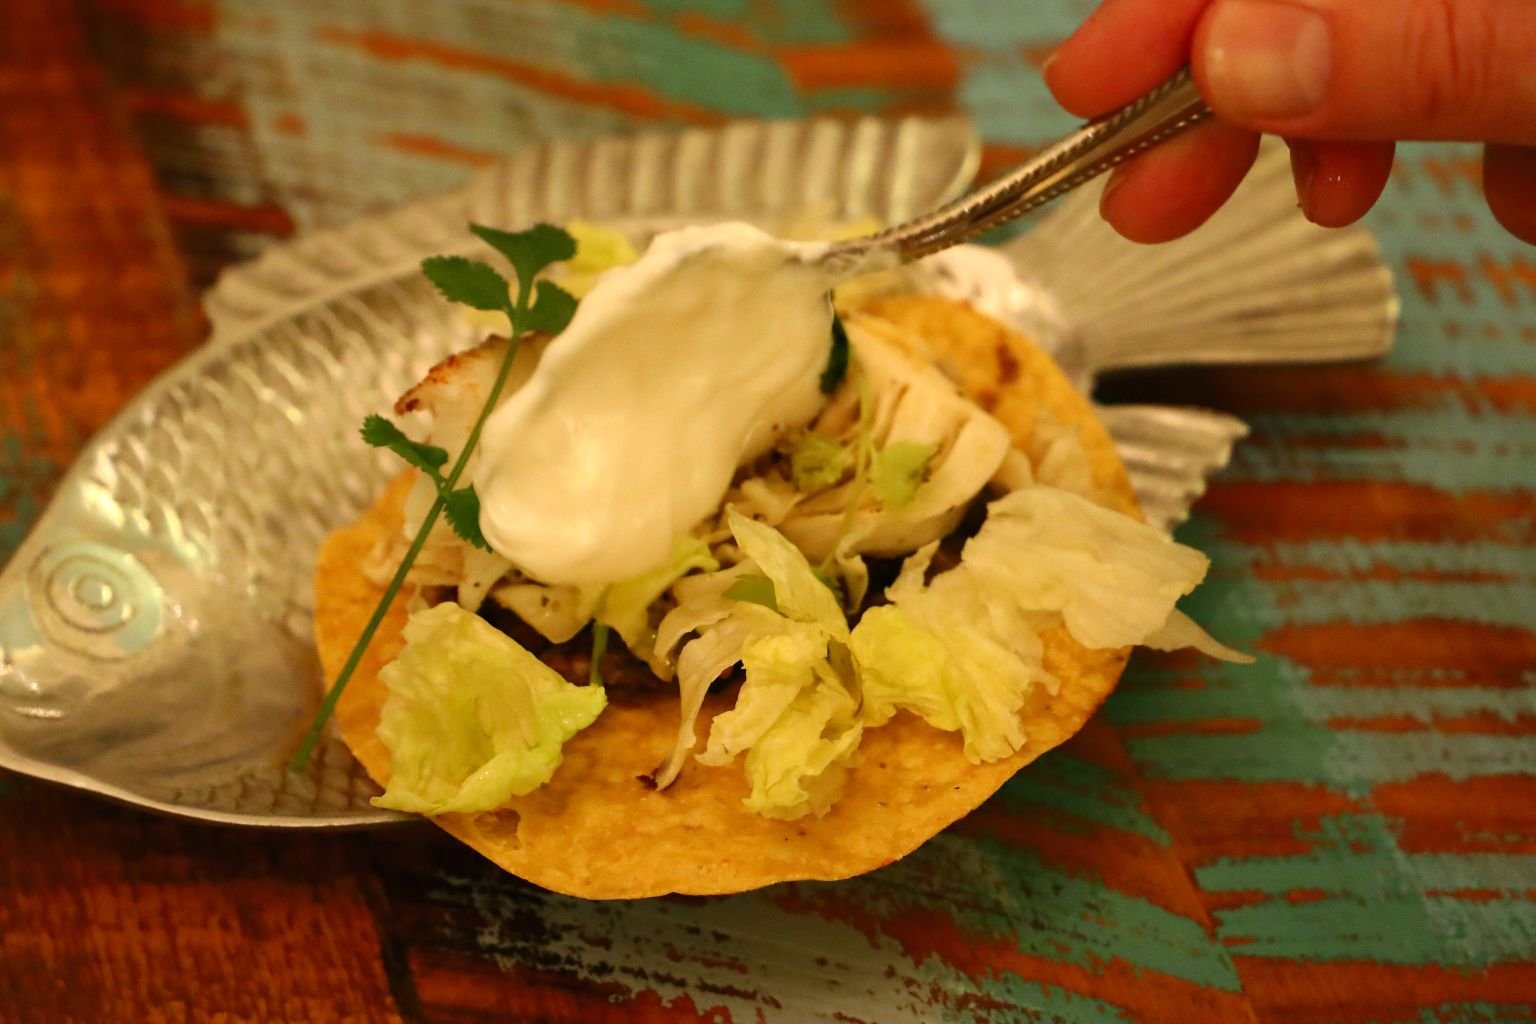
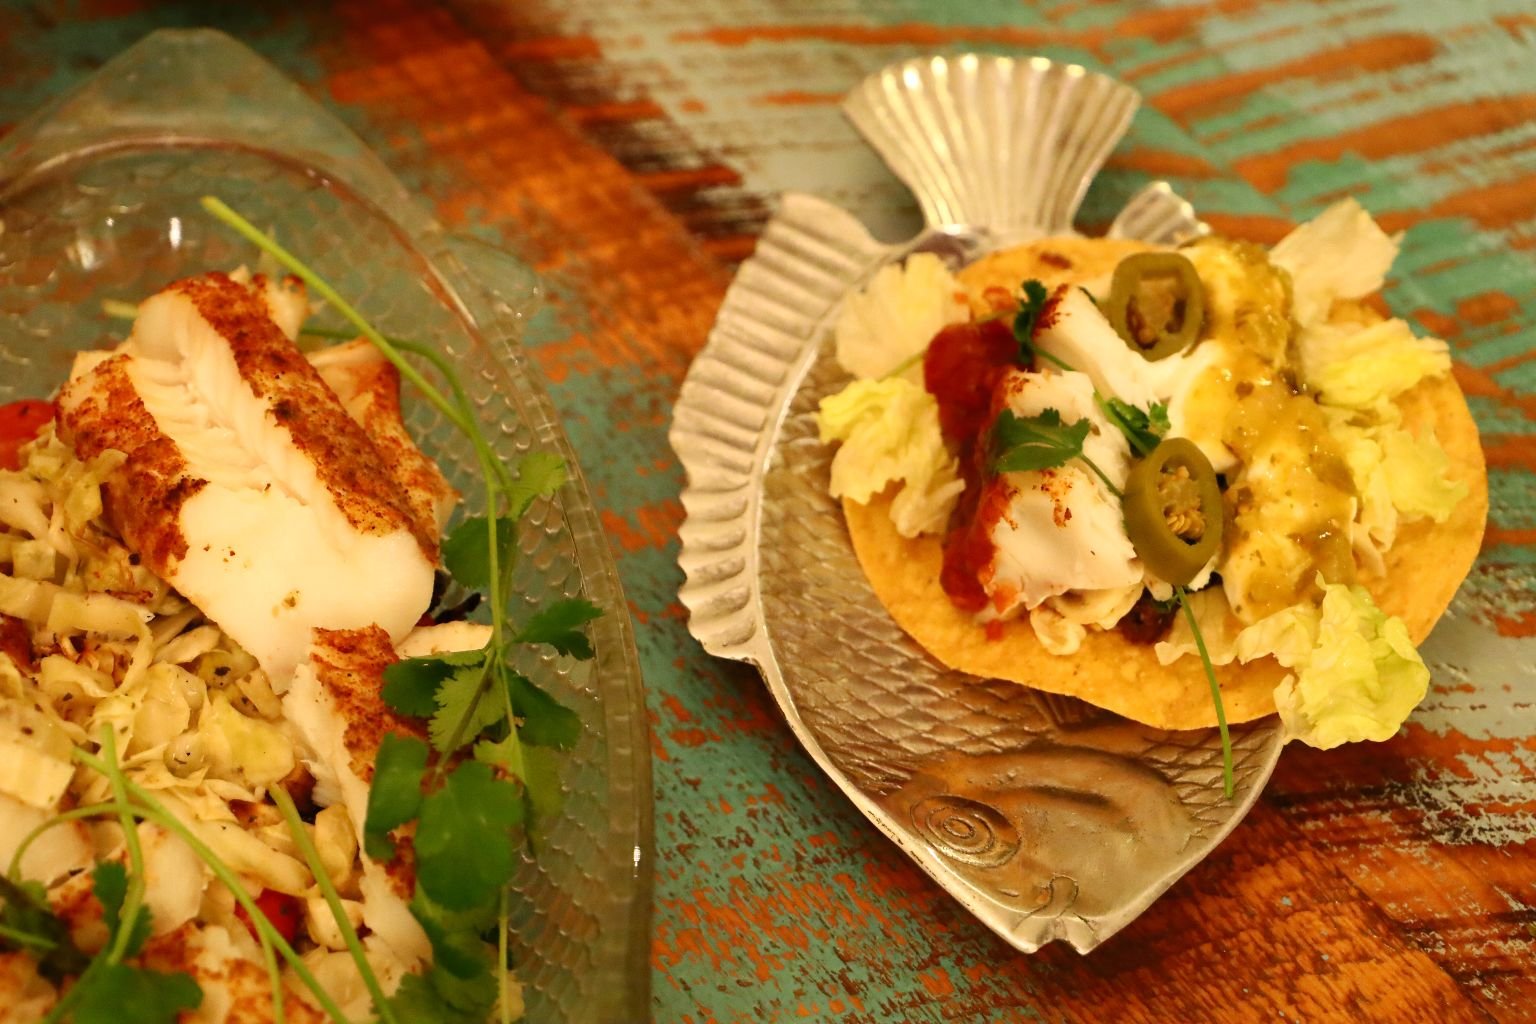
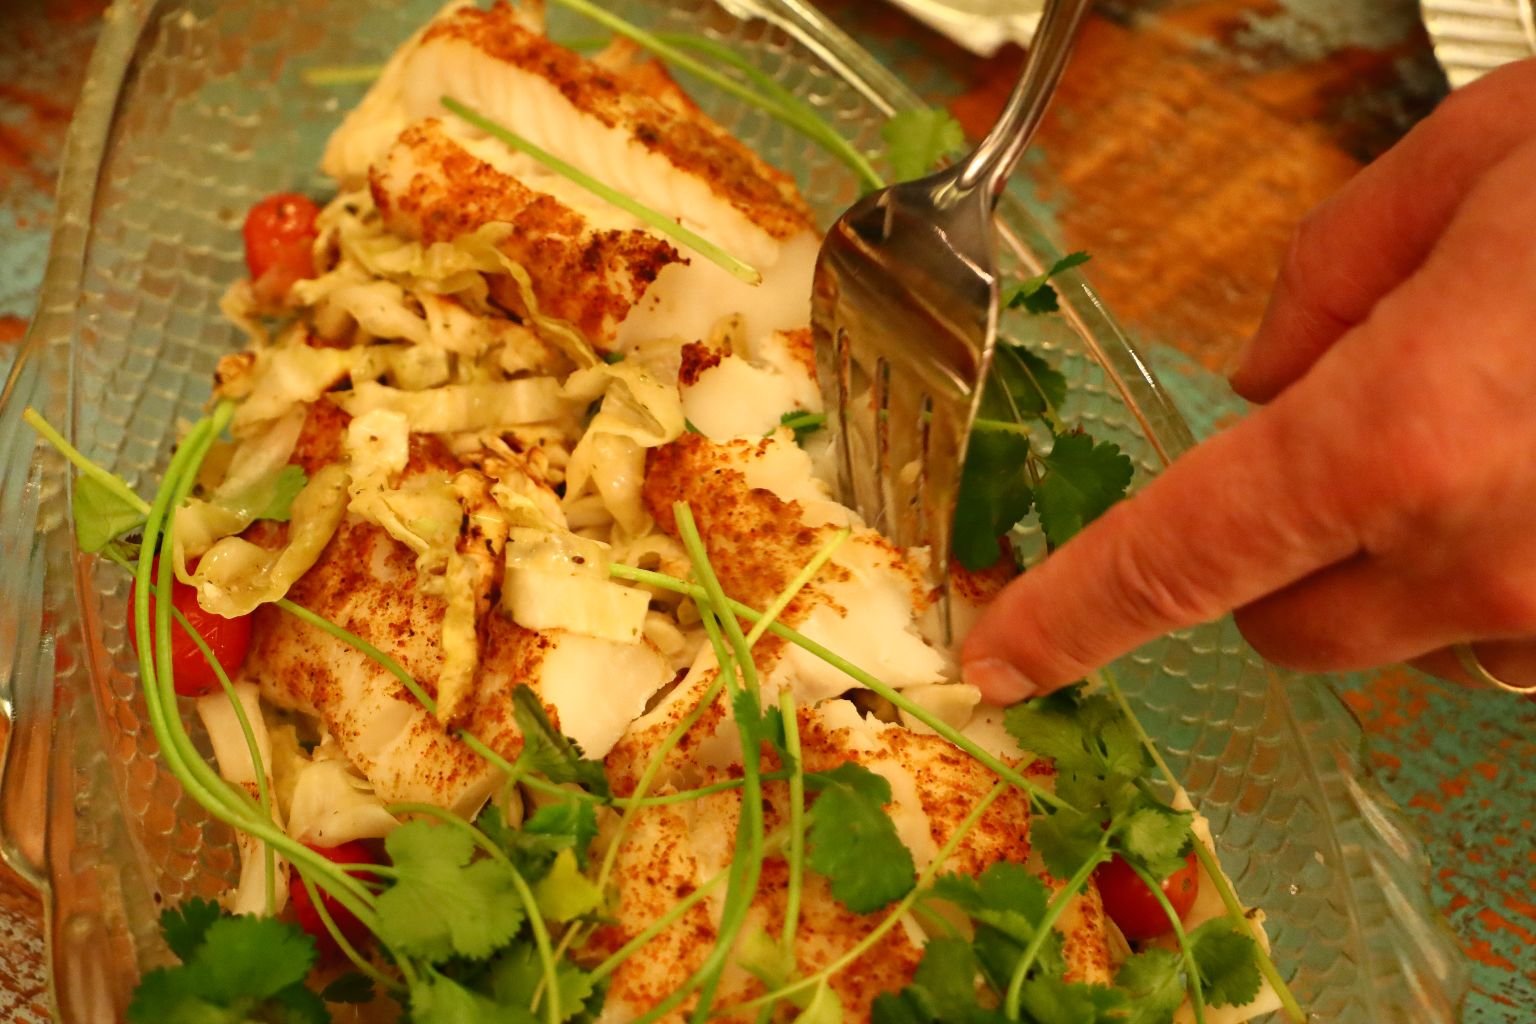
Baked Cod with Mojo Cabbage
This was so delicious!

Our Cod Draped on a Bed of Mojo Cabbage and Encircled with our Fresh Cilantro
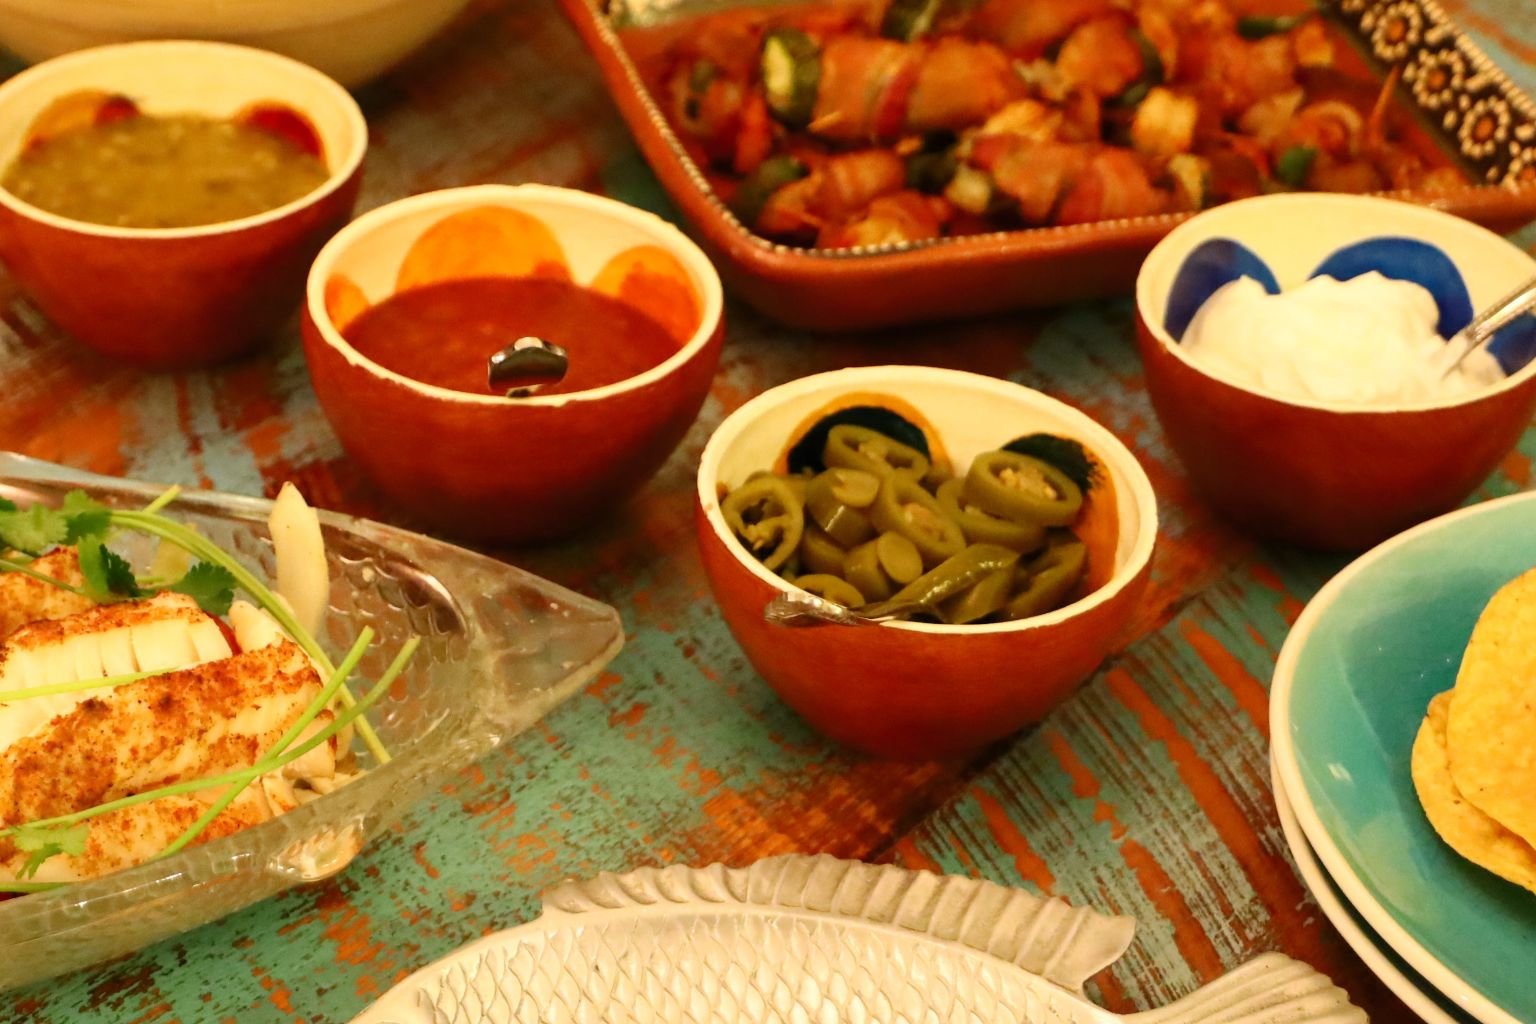
Salsa Verde, Hot Sauce, Pickled Jalapeno’s, and Sour Cream

Fresh Cilantro from our Herb Garden

Freshly Washed Iceberg Lettuce is also a Topping
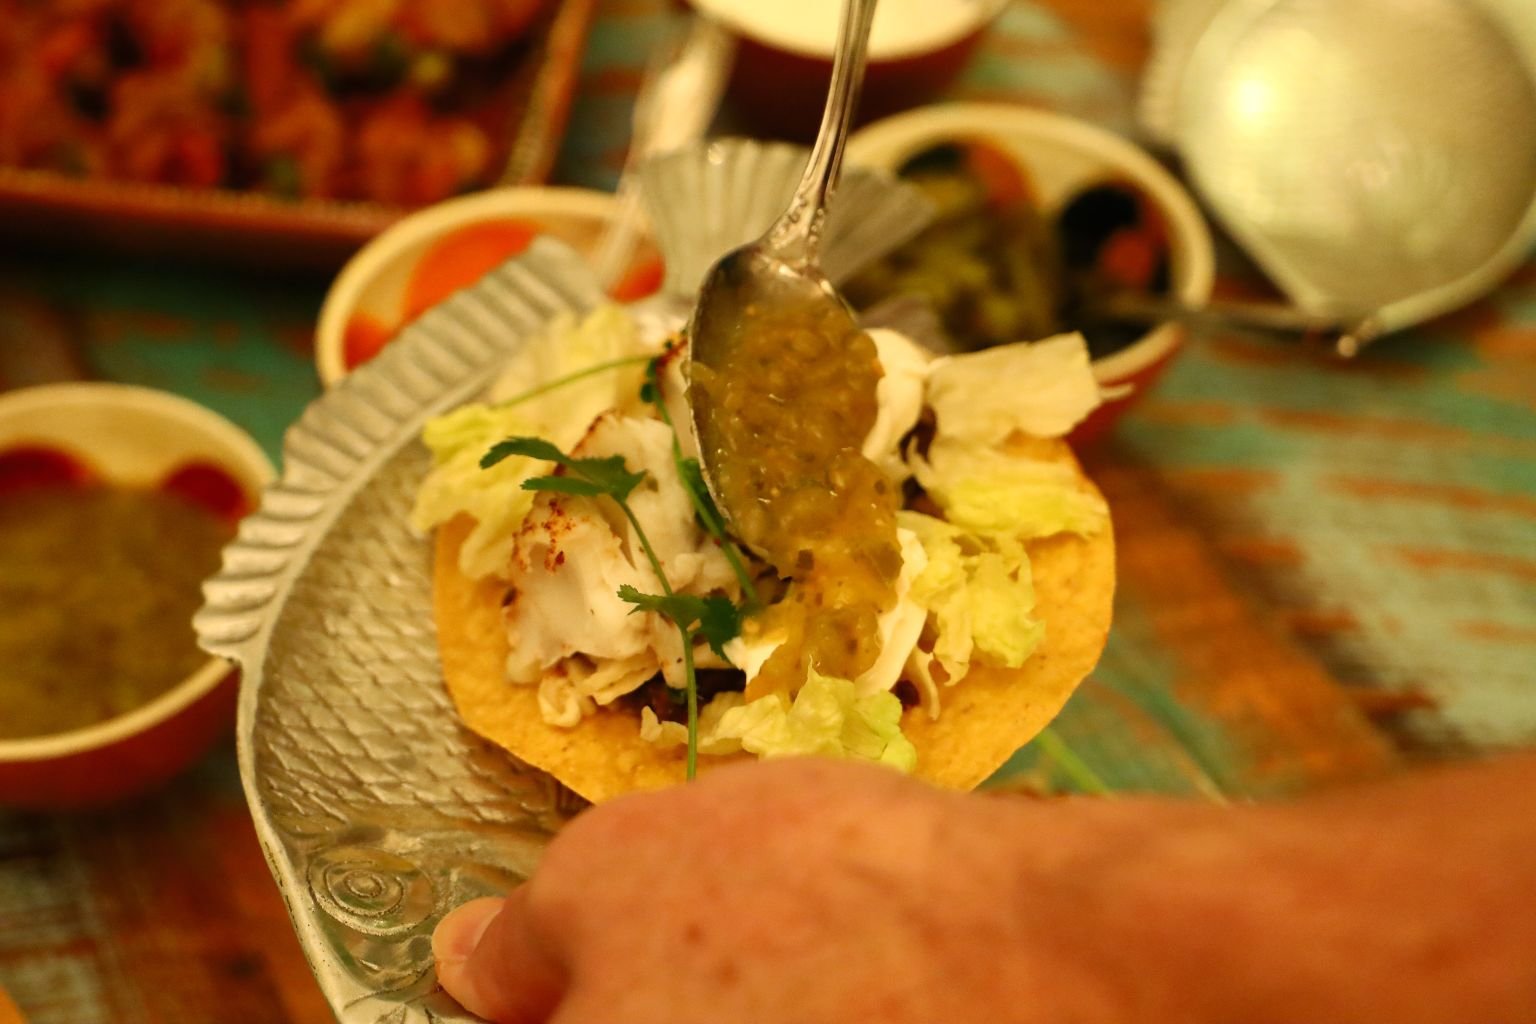

Gordon Building His Tostada
California did Popularize Fish Tacos in America
—————————————————————-
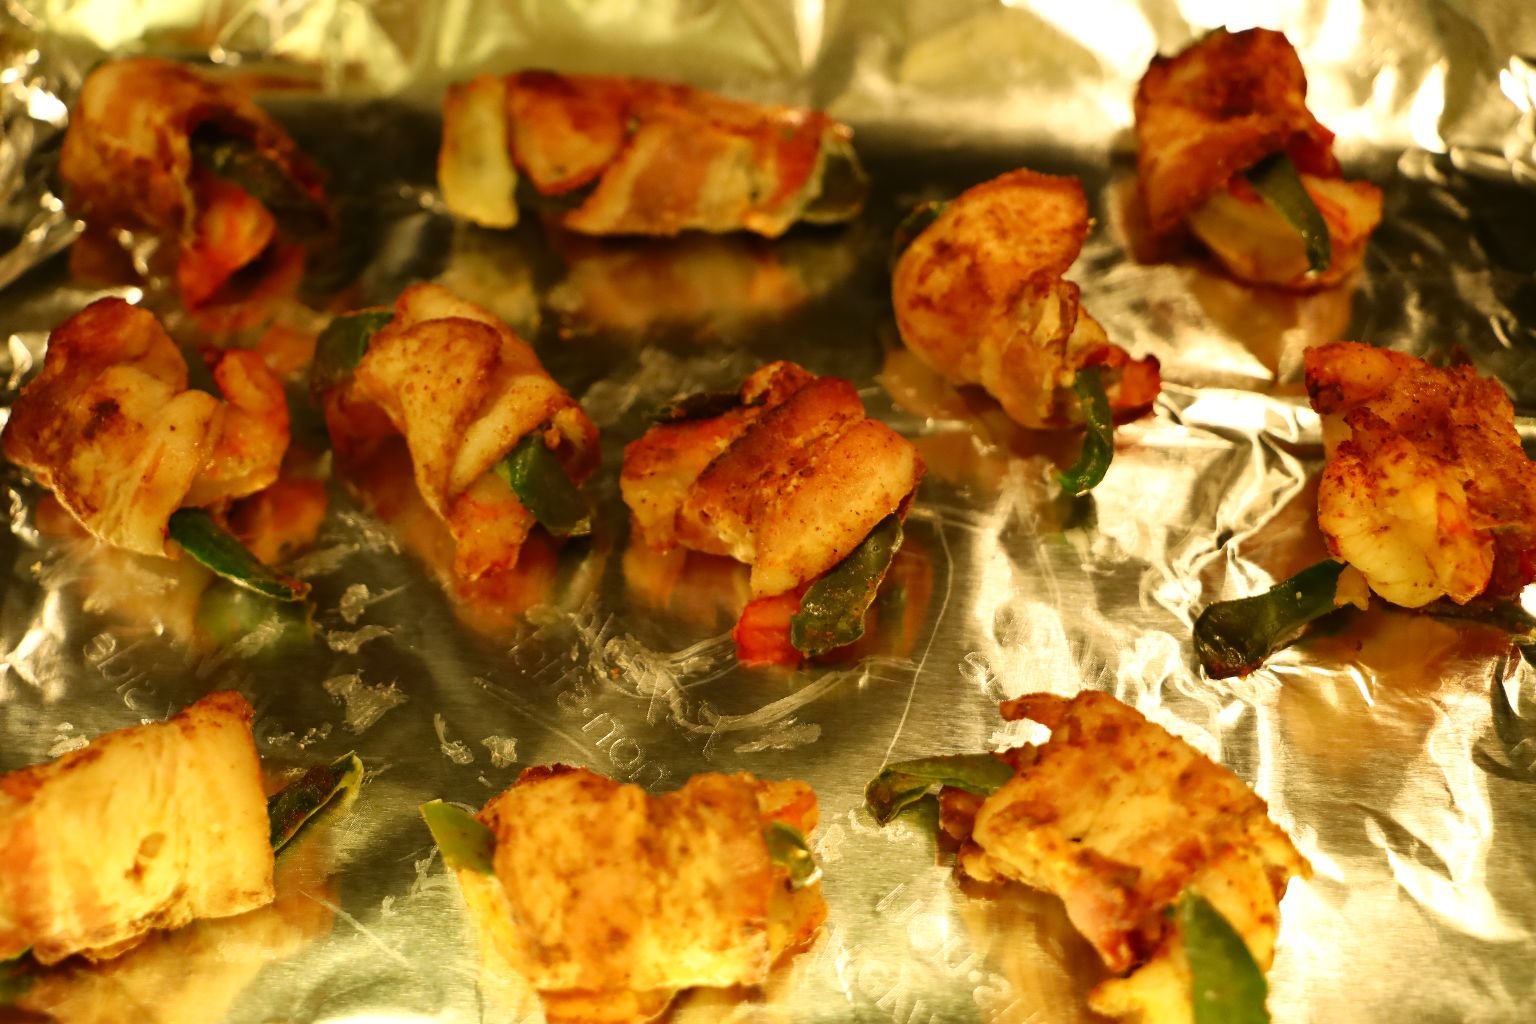
Bacon Wrapped Jalapeno Shrimp
Stuffed Bacon Wrapped Jalapeno Peppers


Bacon, Shrimp, Jalapeno Peppers
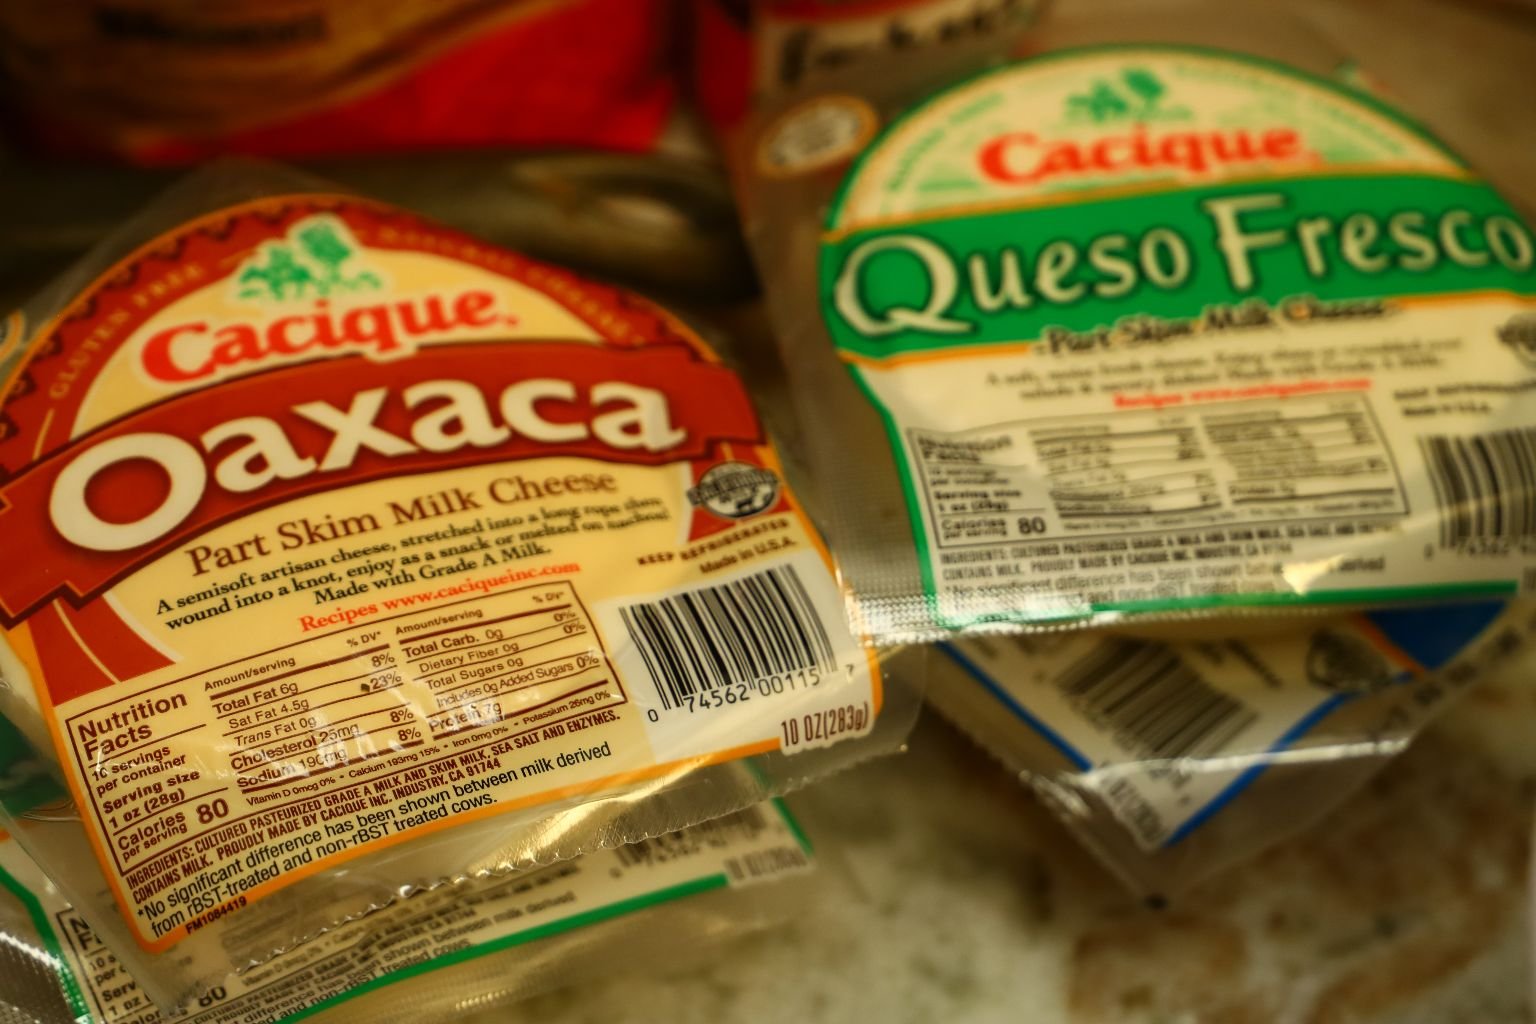
Oaxaca and Queso Fresco Cheeses
————————————————————-
I’ve got 2 recipes going on here:
One is the Bacon Wrapped Shrimp and the other is the Stuffed Jalapeno Peppers
Let’s Start With The Shrimp
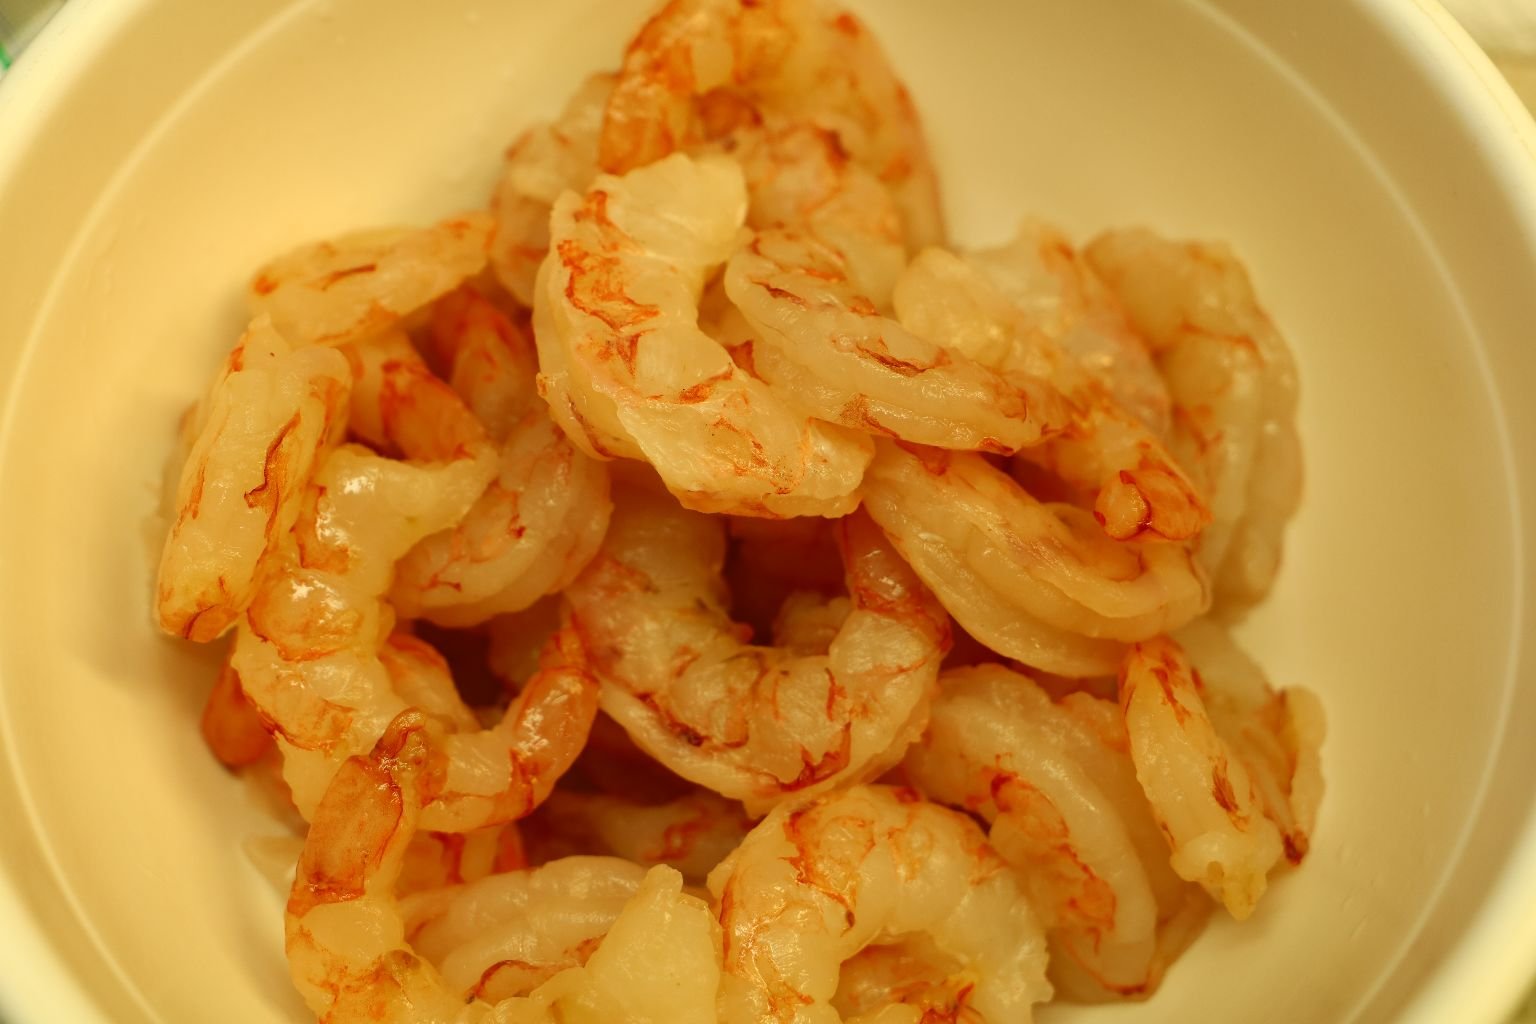
The only ingredients for these are Shrimp, Jalapeno Pepper strips and Bacon.
The shrimp we bought frozen and just thawed out.
They had no shells on them.


The Jalapeno Peppers we just washed and sliced and de-seeded and cut them into strips.

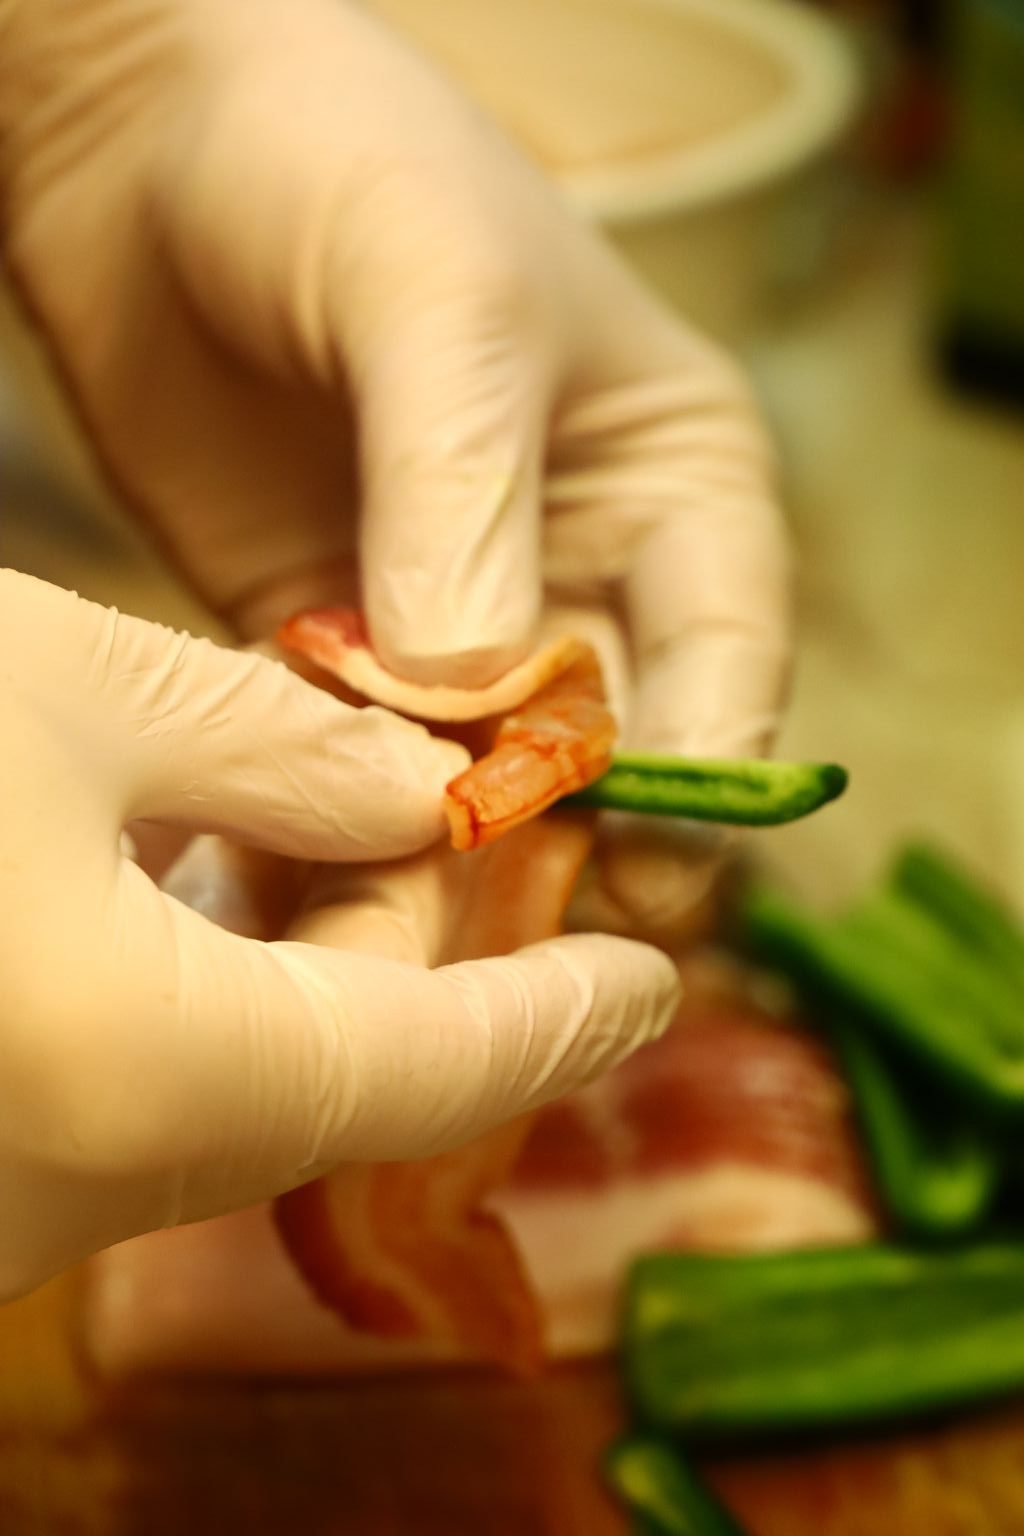

Here Gordon is taking a Shrimp and a Jalapeno strip and wrapping them in Bacon and securing with a toothpick.
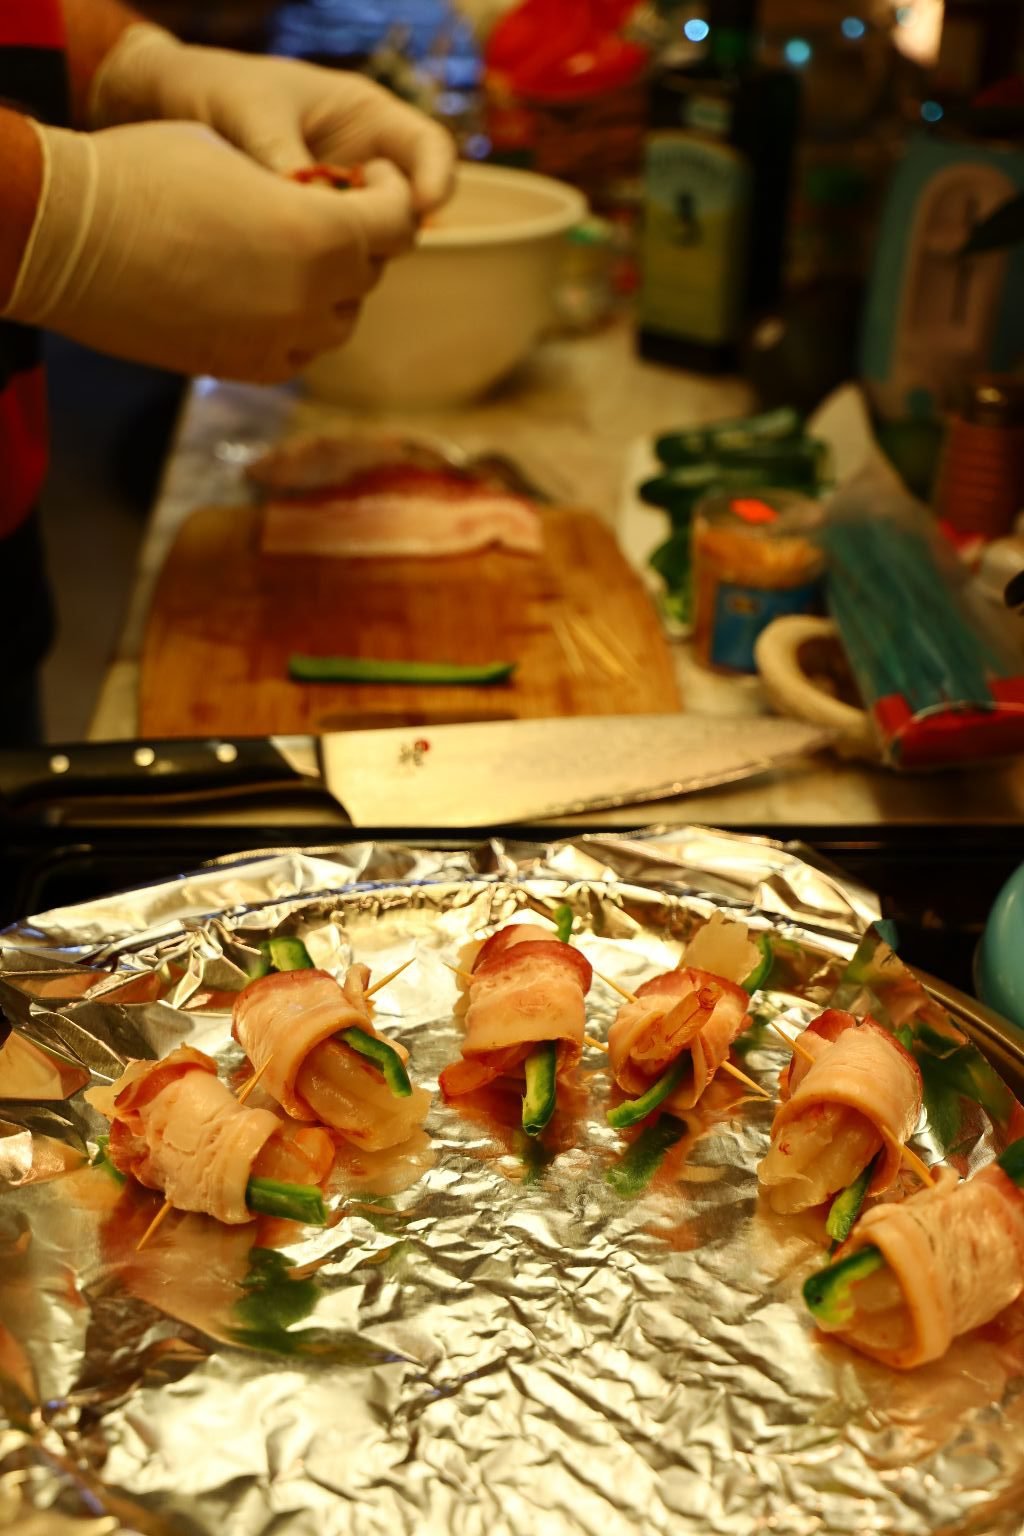

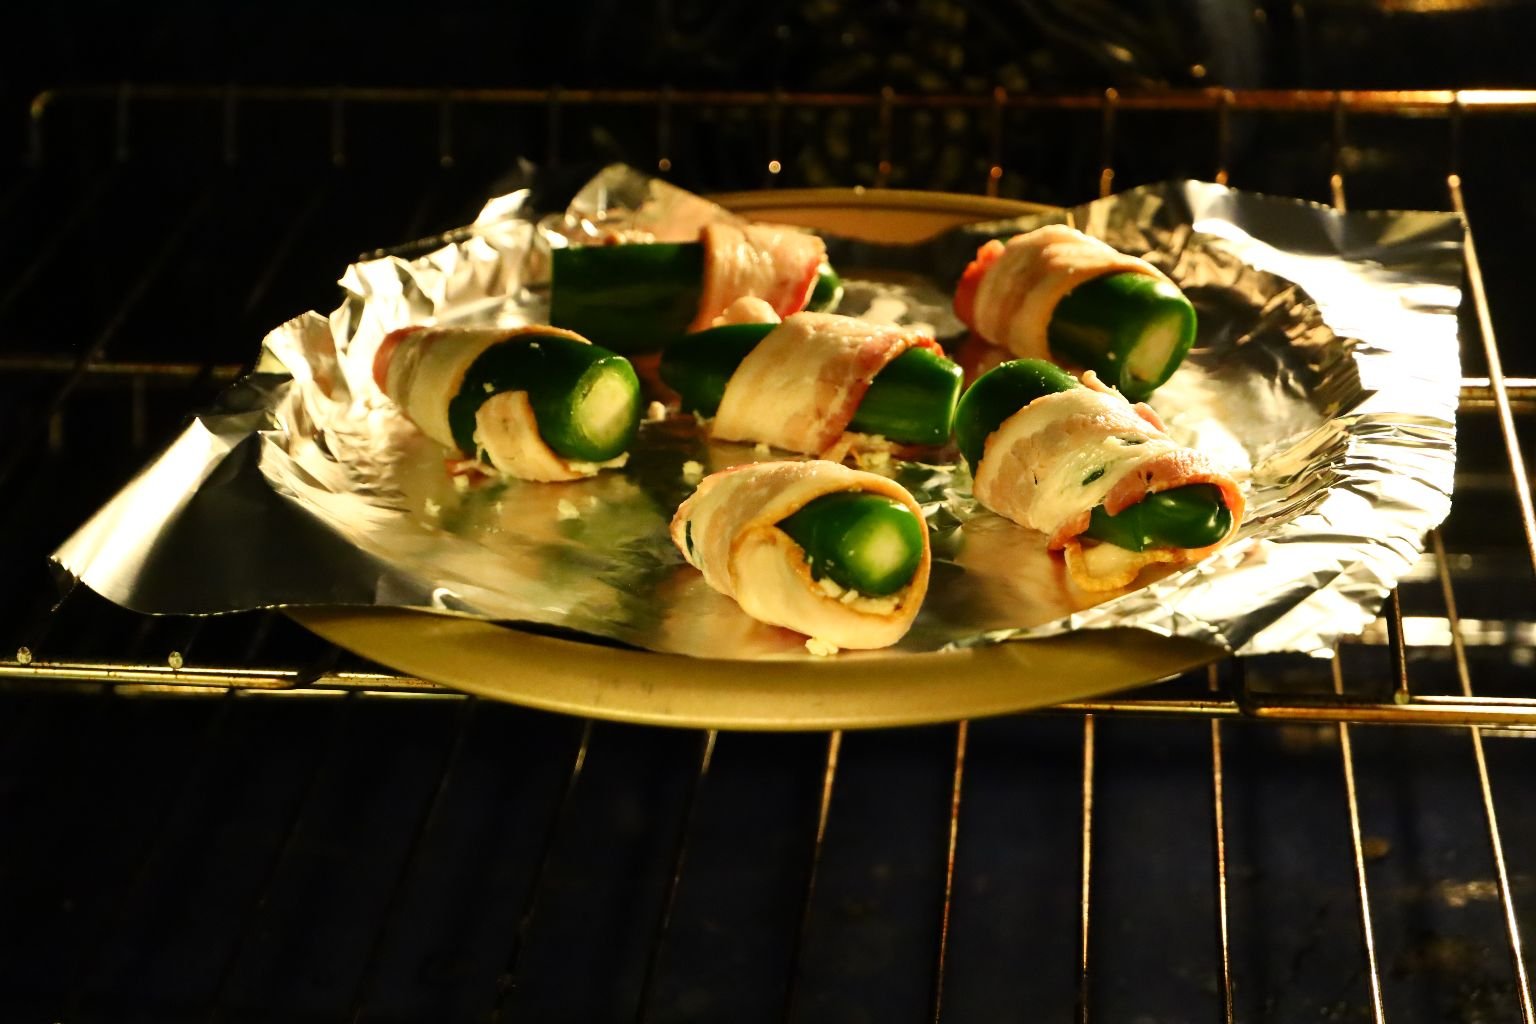
Here Gordon is placing the Bacon Wrapped Shrimp and Jalapeno’s onto an aluminum foil lined pan. Even though we are using bacon sometimes it still sticks to the pan so lightly spray a cooking oil onto the foil before placing the food onto it.

All Ready for the Oven
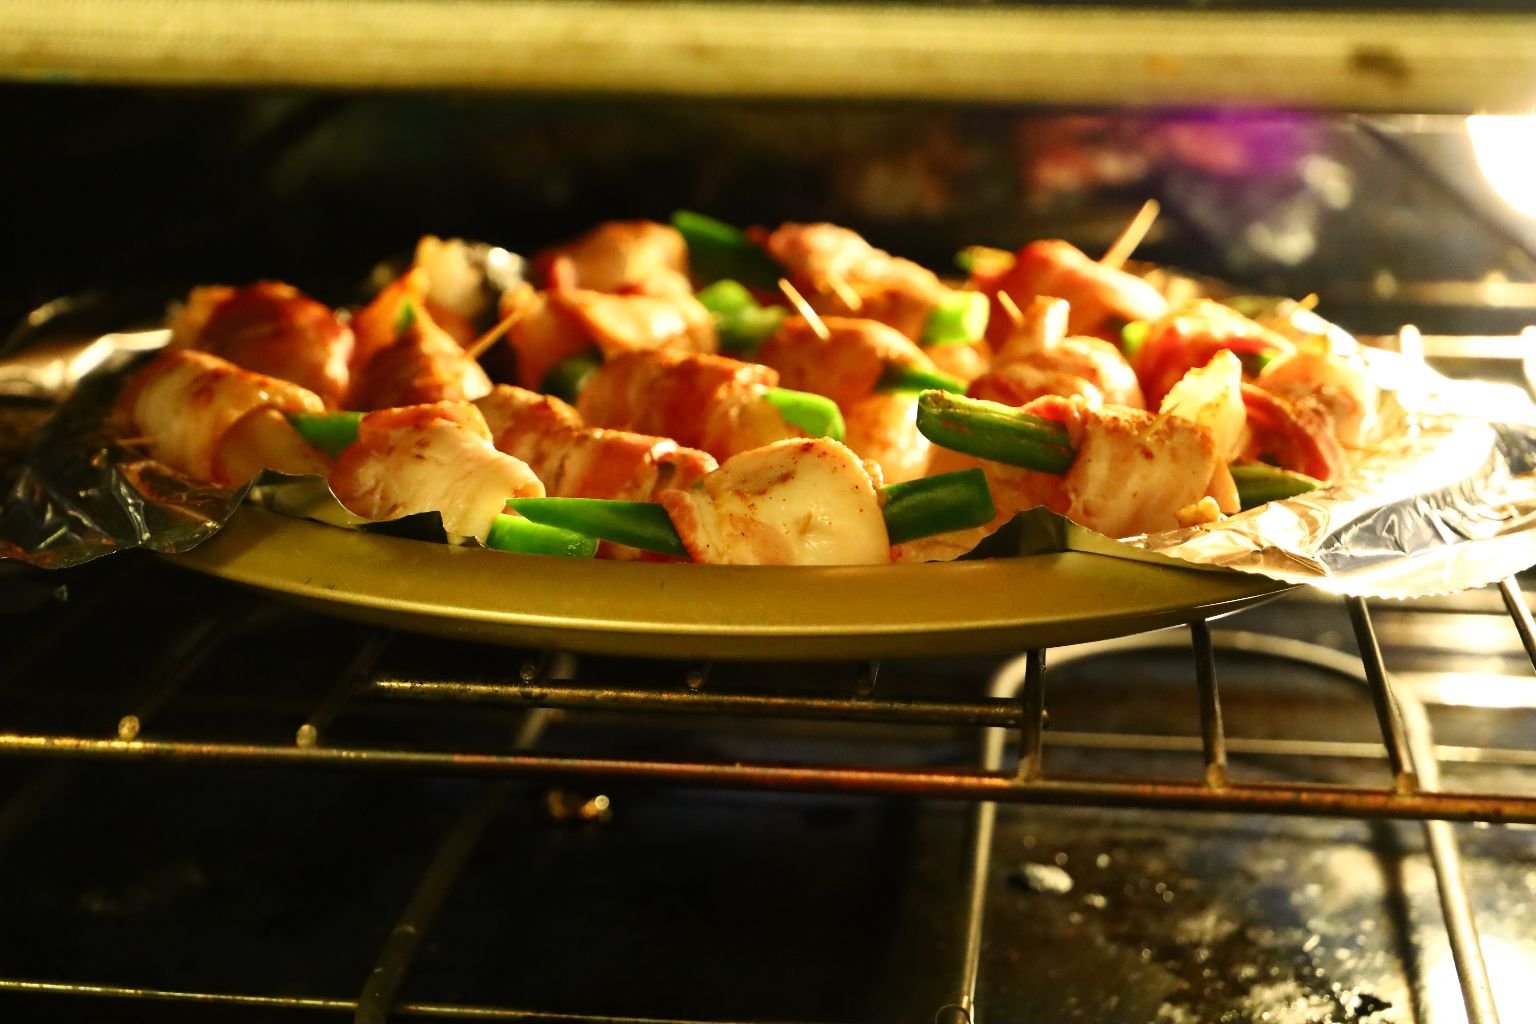
Place into a 400F Oven for 20-25 Minutes.
Each oven varies so you may monitor the cooking.
You want the bacon to get a bit crispy.


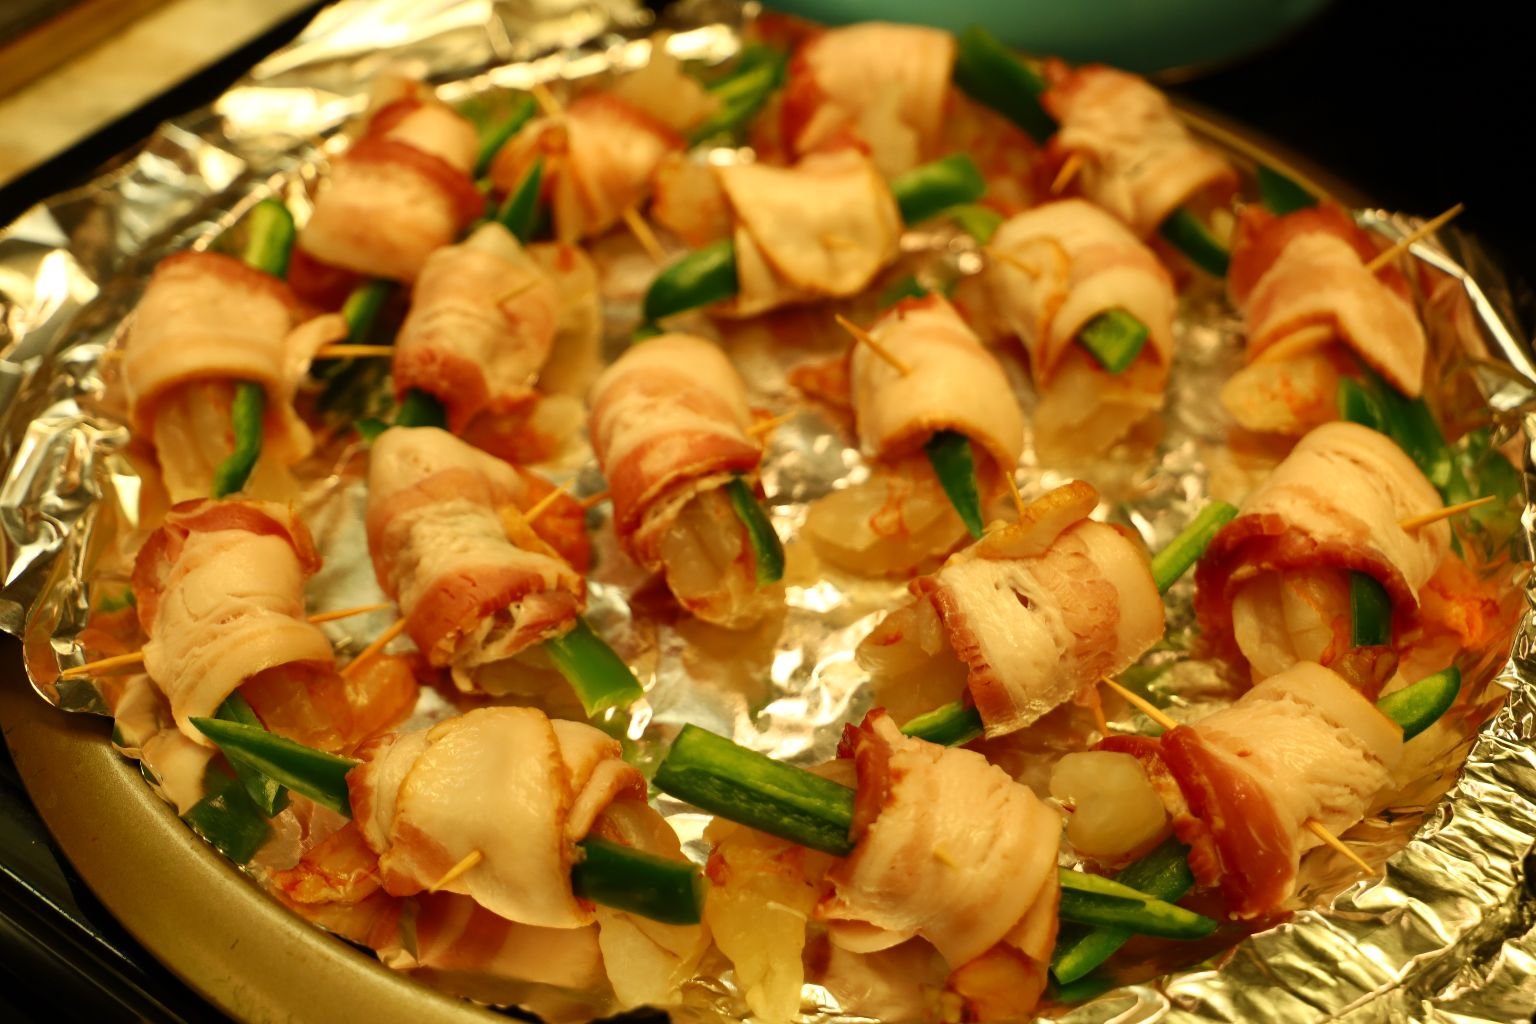
Looking Delicious!
In the photo below Gordon is adding a sprinkling of Chili Powder.
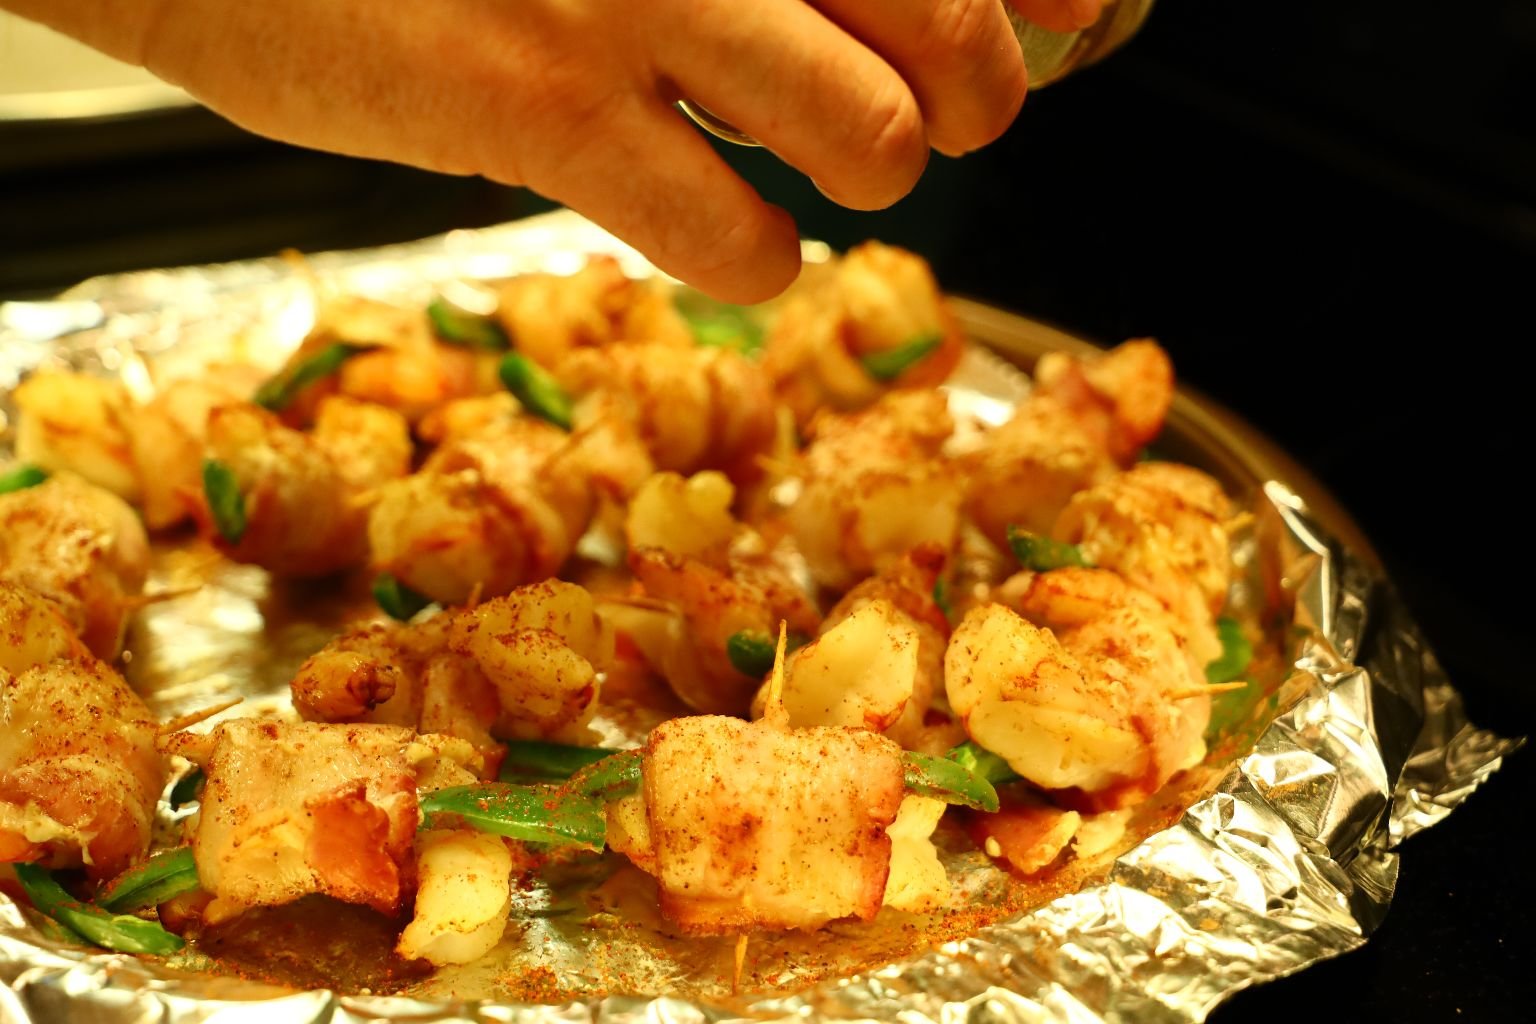

I suppose this batch needed a few more minutes as it is going back into the oven.

Todo Listo!
—————————————————————-

This was just something that we thought we would try as an accent to our appetizers.
————————————————————–
Now It’s Time to Stuff our Jalapeno Peppers
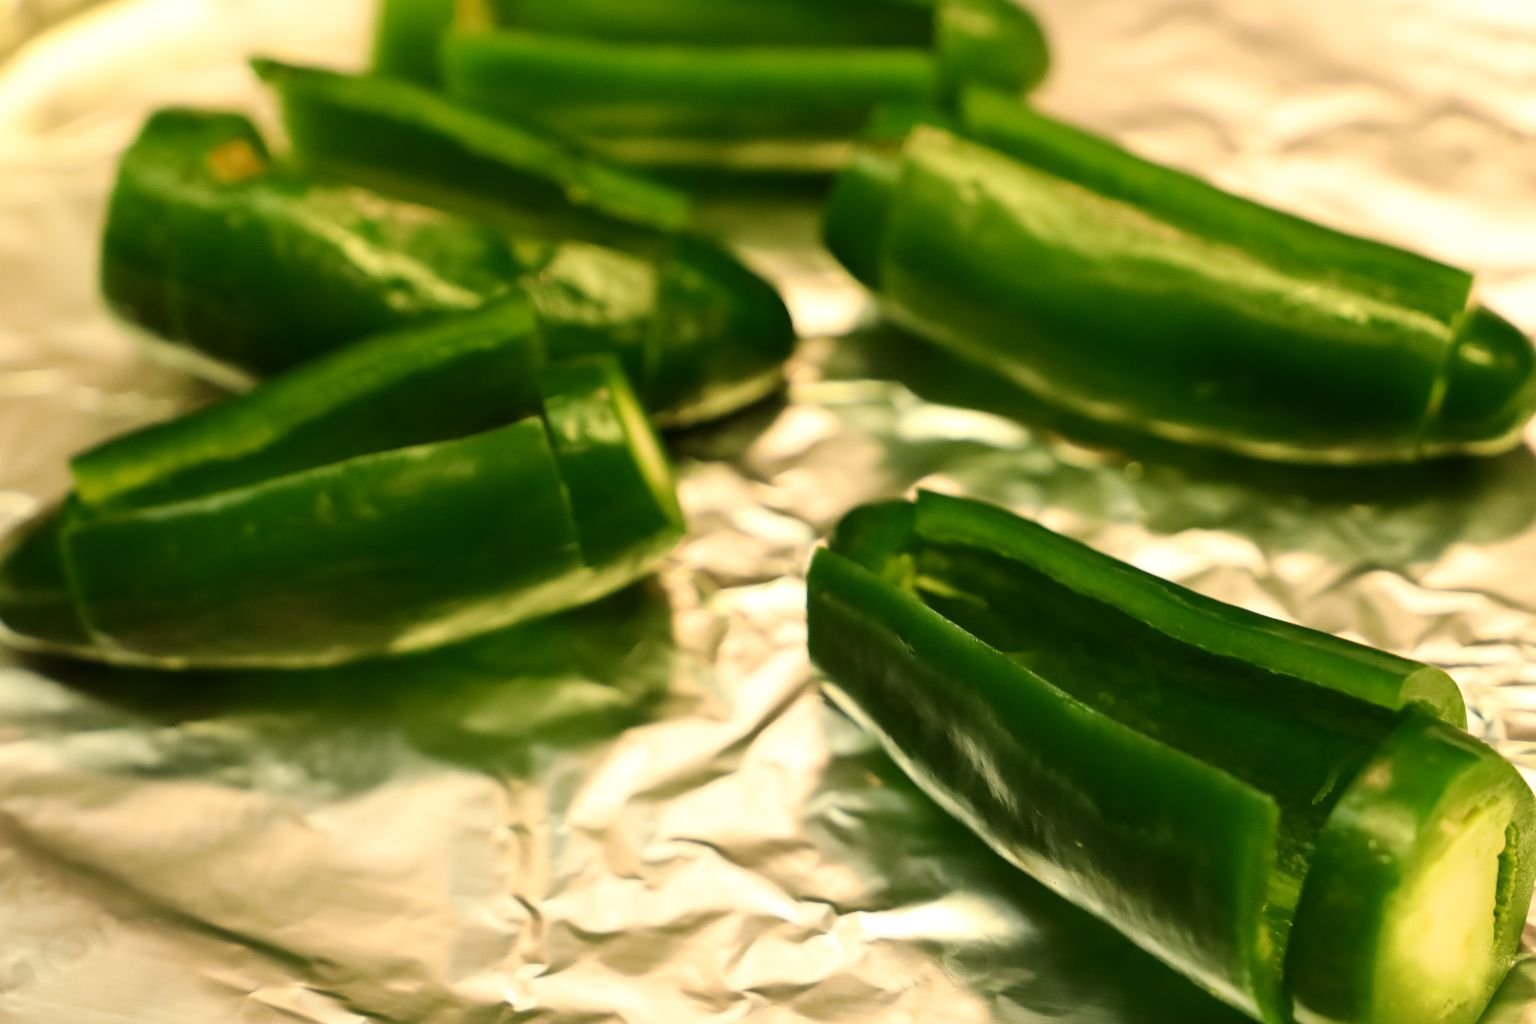
To me the hardest part of making these is slicing them into and cleaning the seeds out. The fumes really do get to me! My eyes water and my nose runs. I am constantly blowing my nose and wiping my eyes. I usually get either Gordon or Brodie to do this process for me.


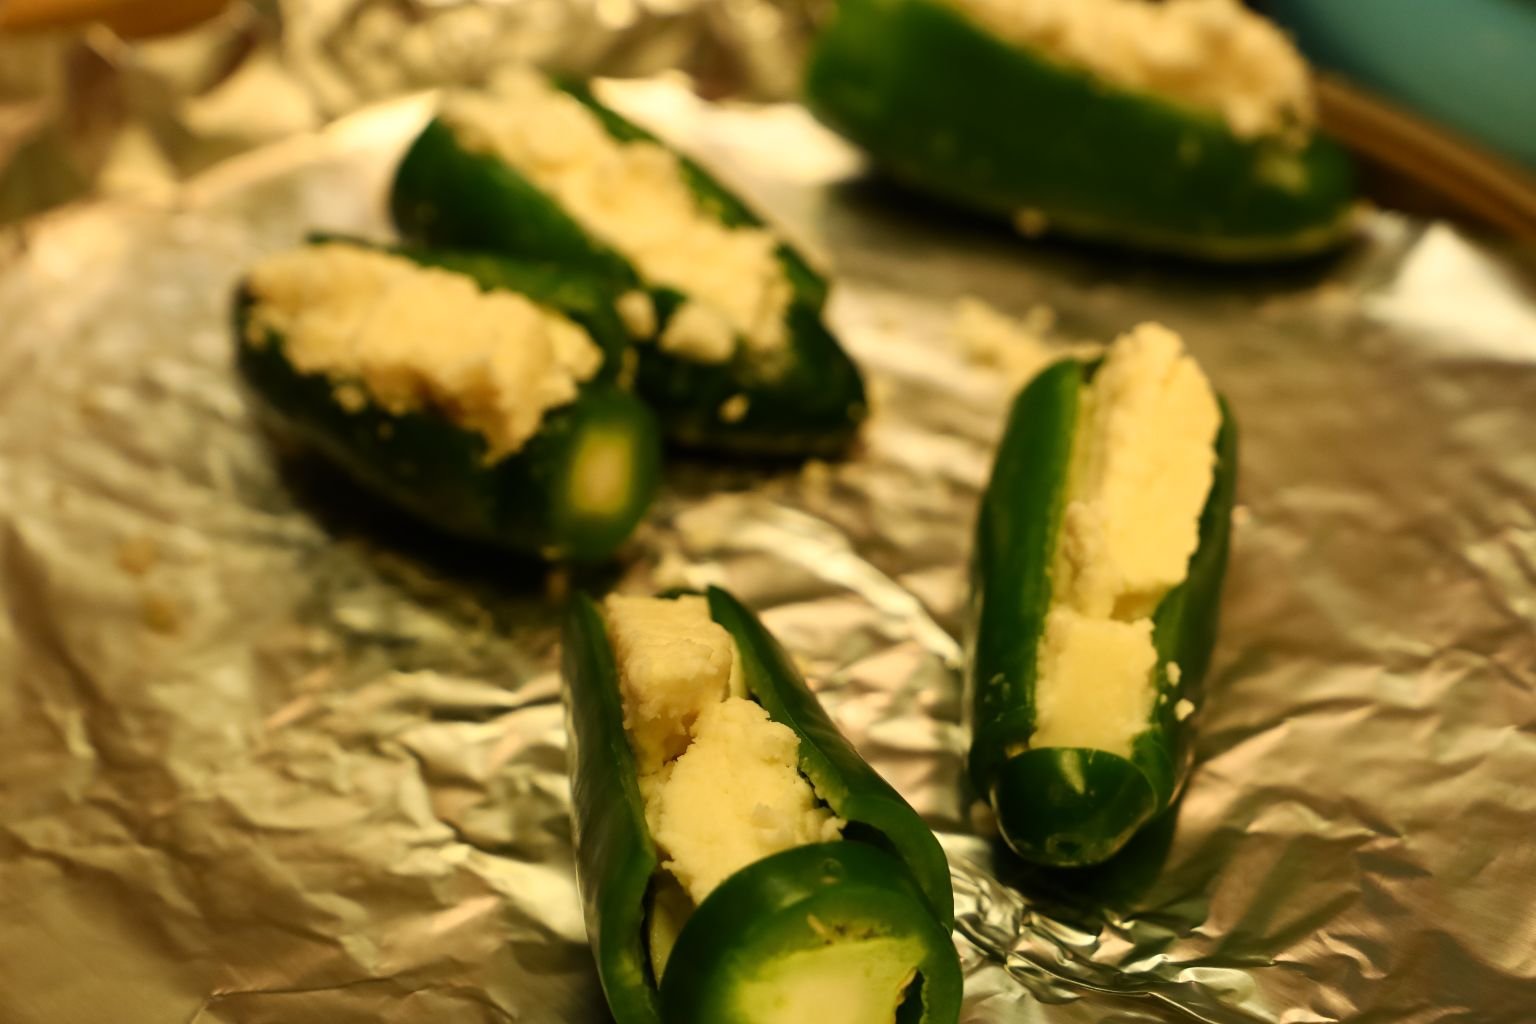
Here Gordon has stuffed the Jalapeno Peppers with Queso Fresco and/or Oaxaco Cheese and then wrapped them in Bacon, securing with a toothpick.
Placed onto a foil lined pan and placed into a 400F Oven for 15 minutes cut side down. Then remove and turn over and cook an additional 15 minutes until done.

Todo Listo!
——————————————————————-
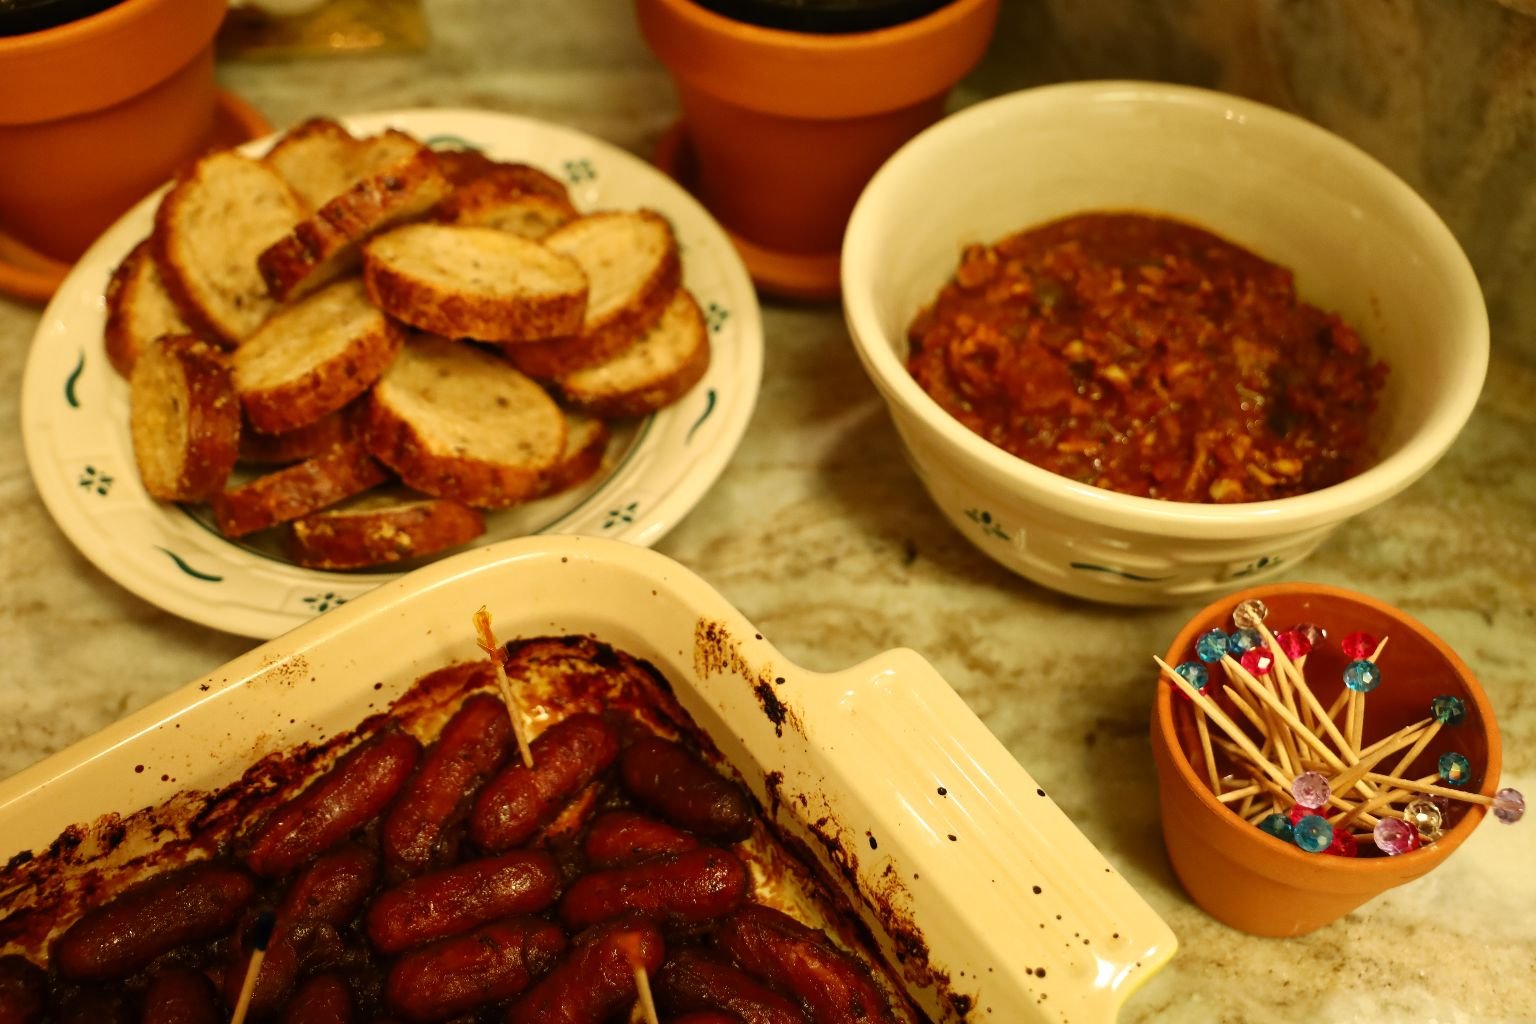
Latin Leftovers
(With the exception of 1 new recipe here.)

Our leftover Cod, Tostado Shells, Iceberg Lettuce, Cilantro, Shrimp, Guacamole, Bacon Wrapped Shrimp with Jalapeno Peppers, and Bacon Wrapped Cheese Stuffed Jalapeno Peppers, and…..
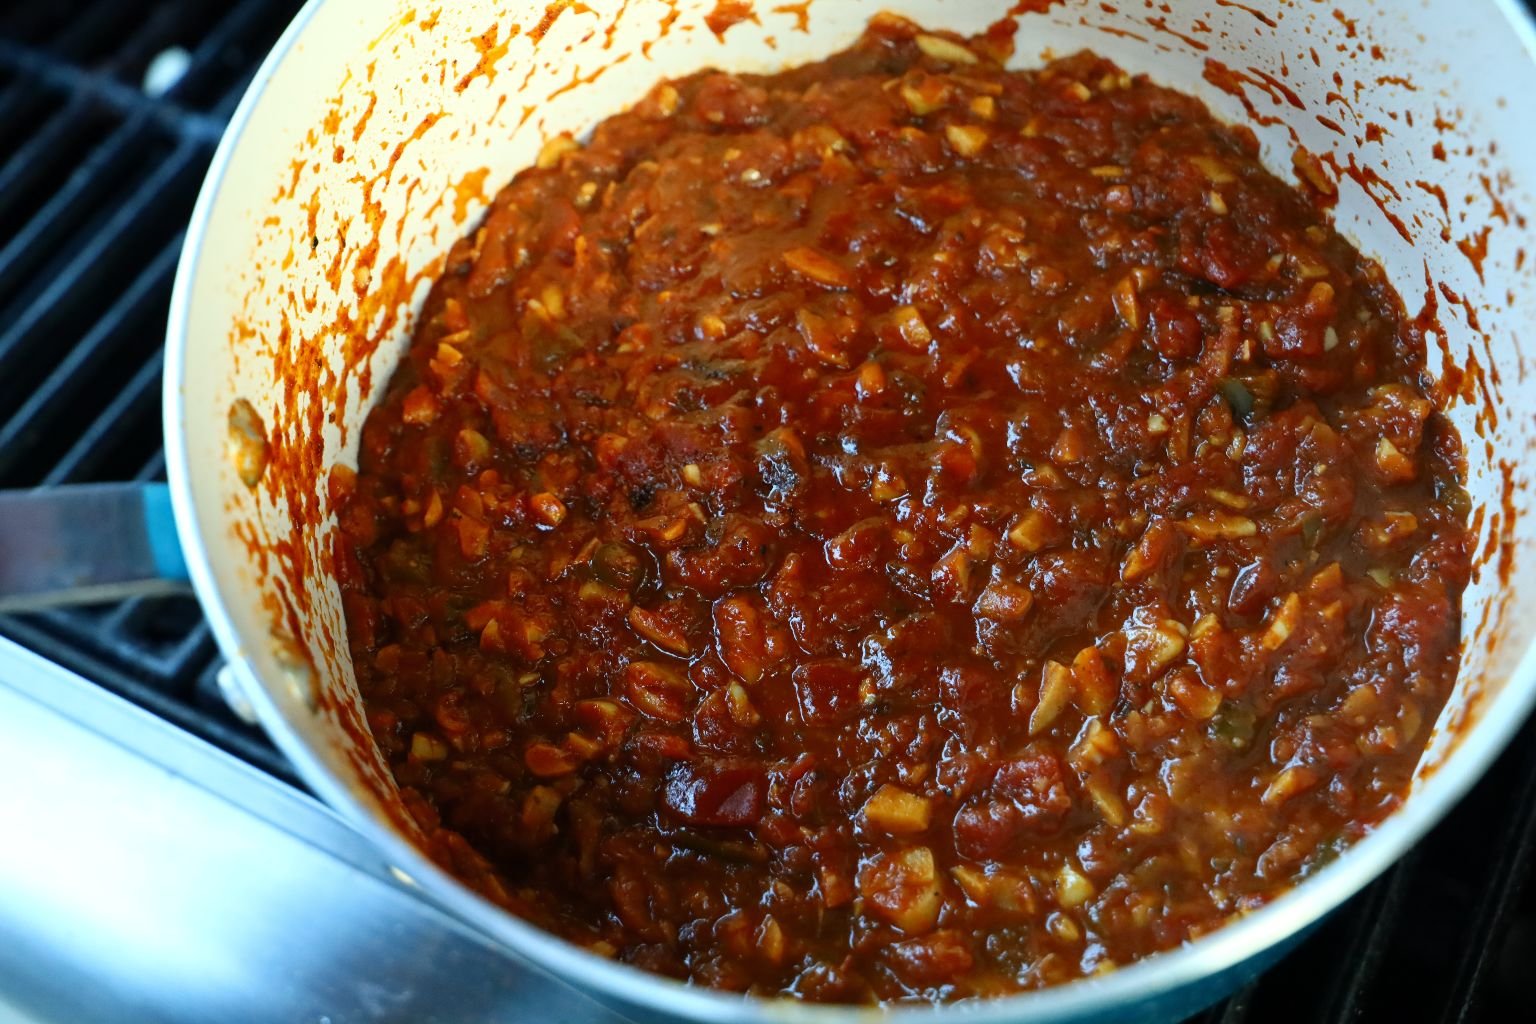
Our Leftover Poblano Grilled Salsa
—————————————————————-
Here is Where it Starts

We had some leftover shrimp and some leftover Mojo Marinade….
So….. 24 hours marinating in the fridge.
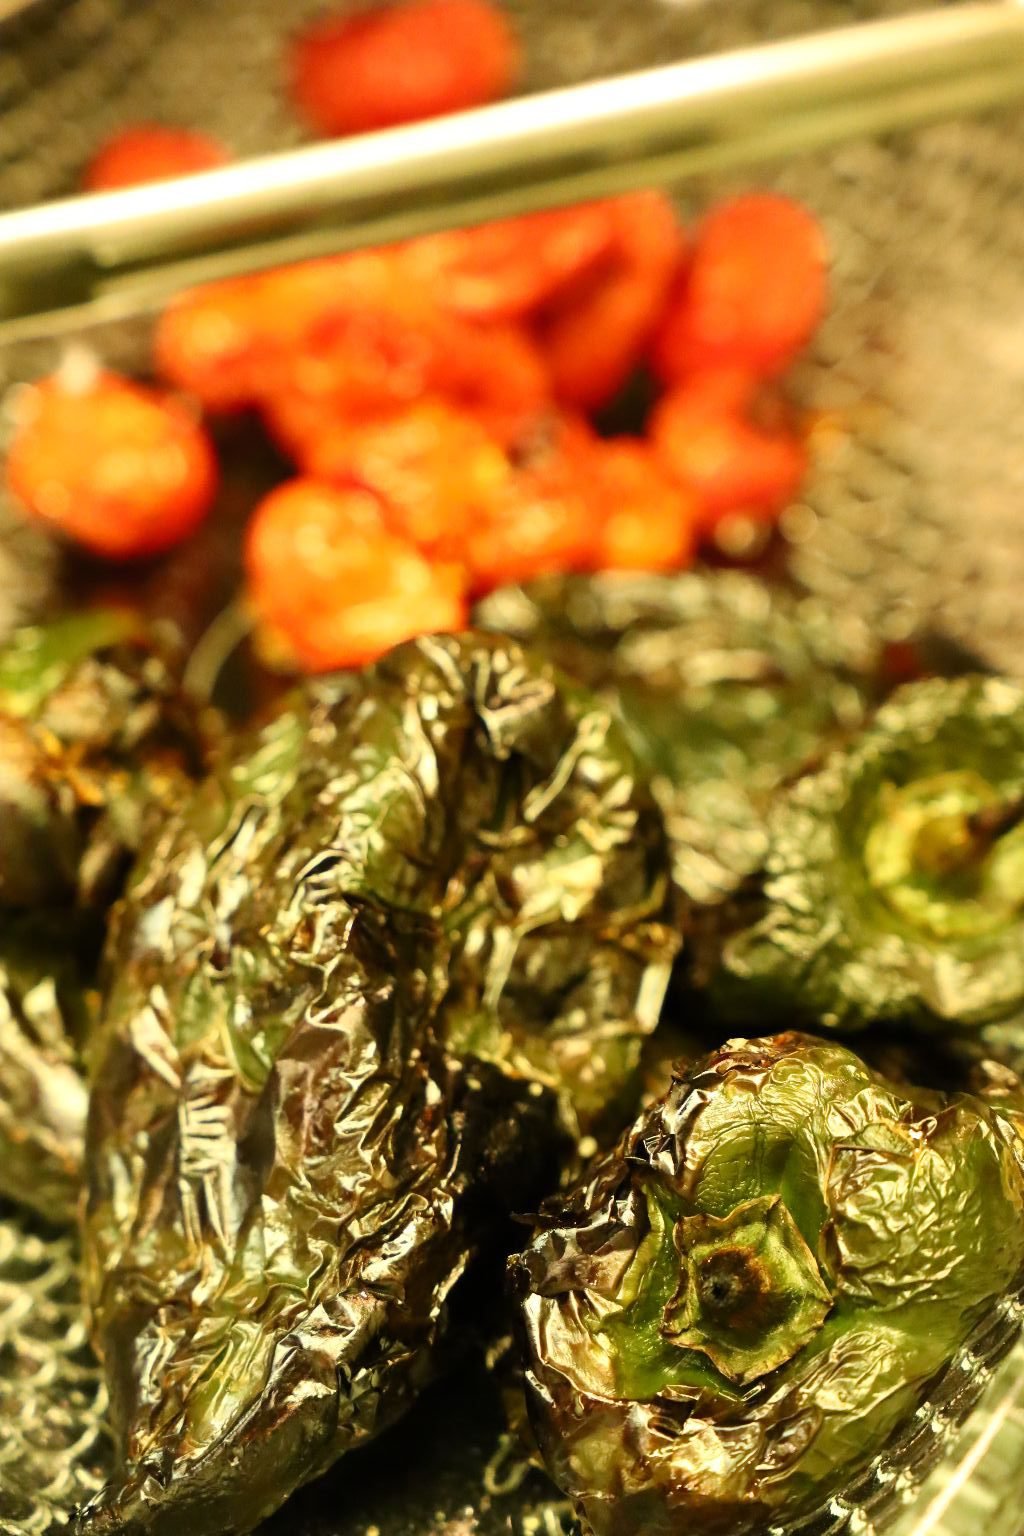
Time to Grill the Leftover Poblanos and Tomatoes


Grilling our Mojo Marinated Shrimp


Gordon Removing the Char From the Grilled Peppers

Leftover Peeled and Roasted Garlic Cloves
(Each will add a different flavor.)
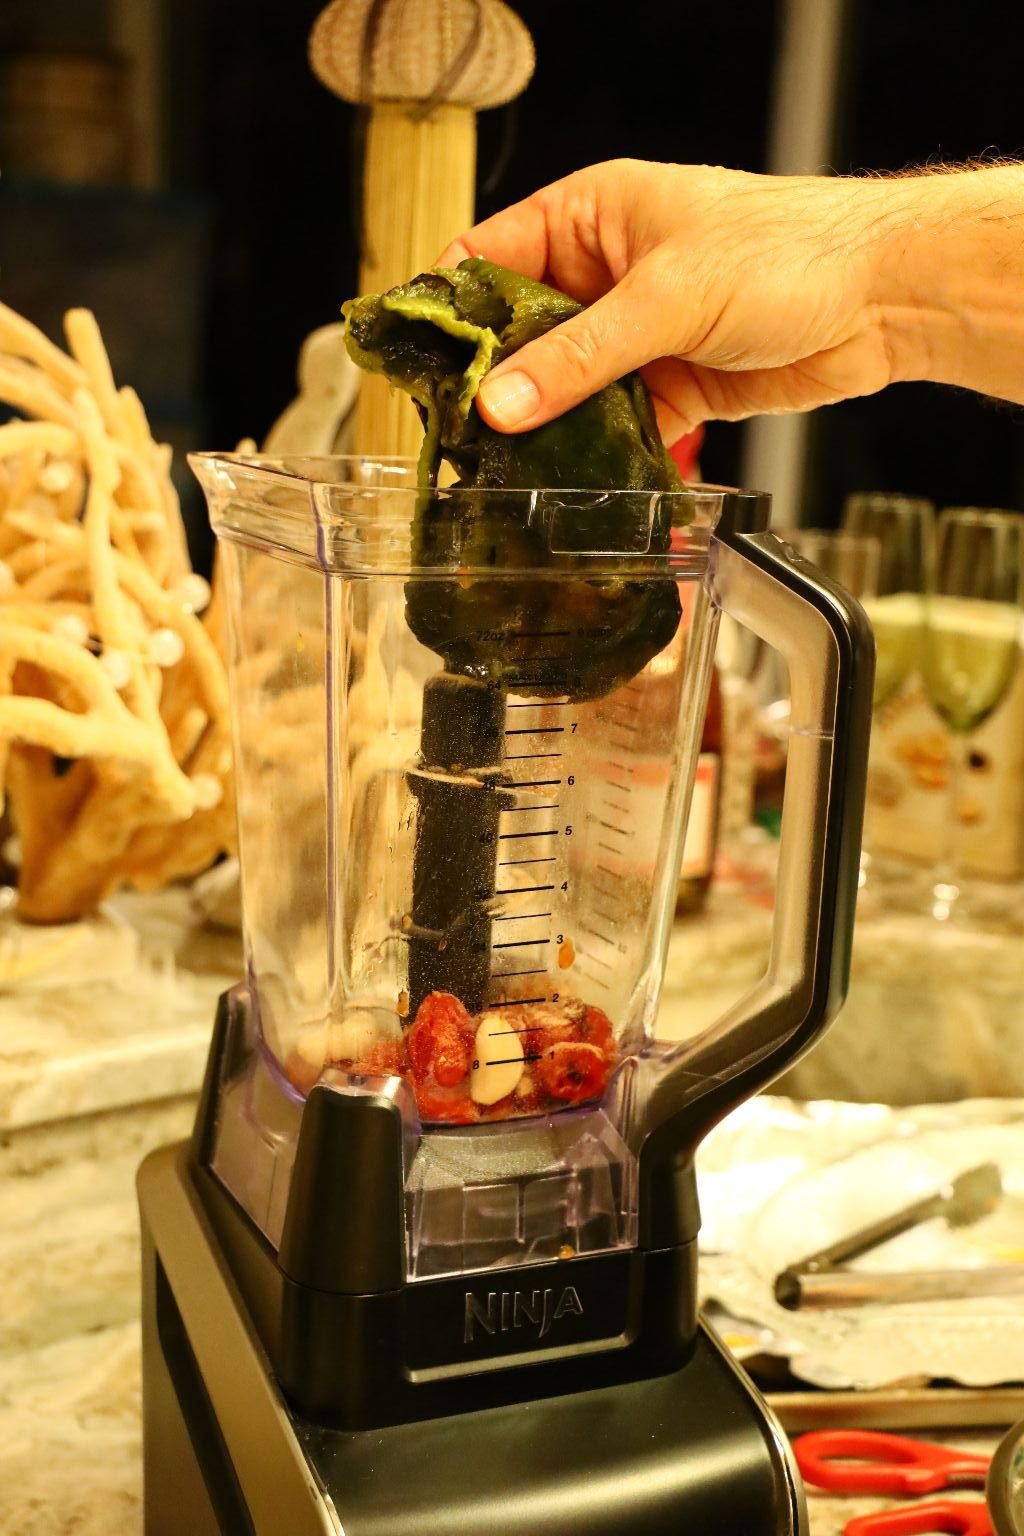
Into the Blender are a few of the Roasted Garlic Cloves, Tomatoes, and Peppers
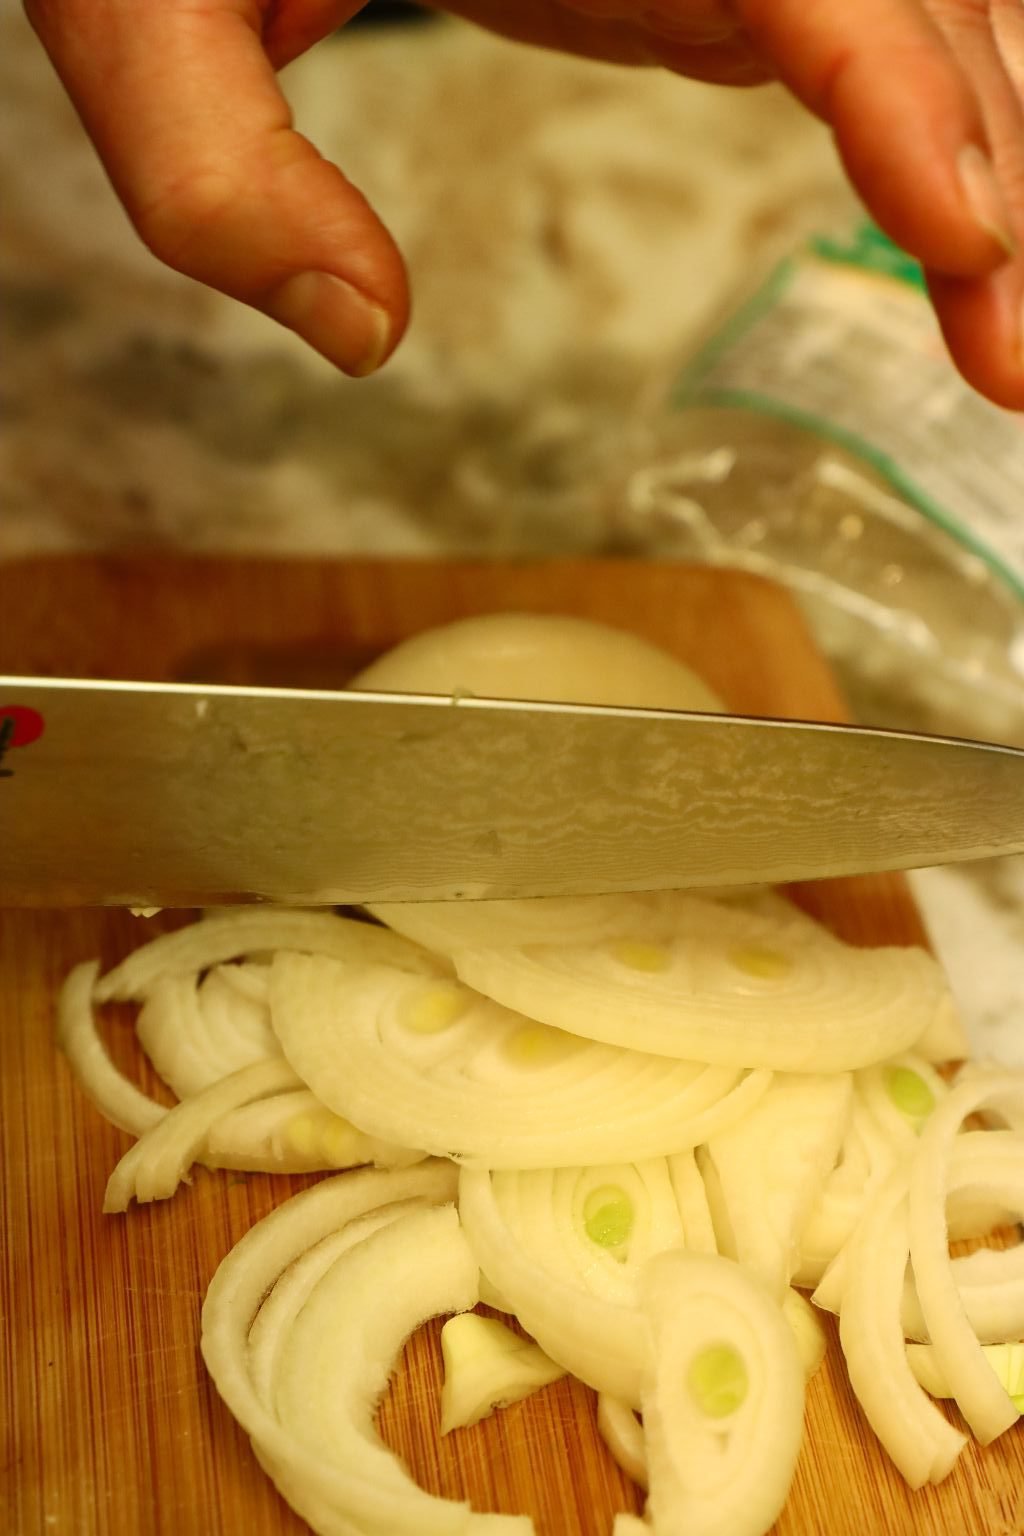

Time to Soften Some Onions on the Stove Top in Olive Oil
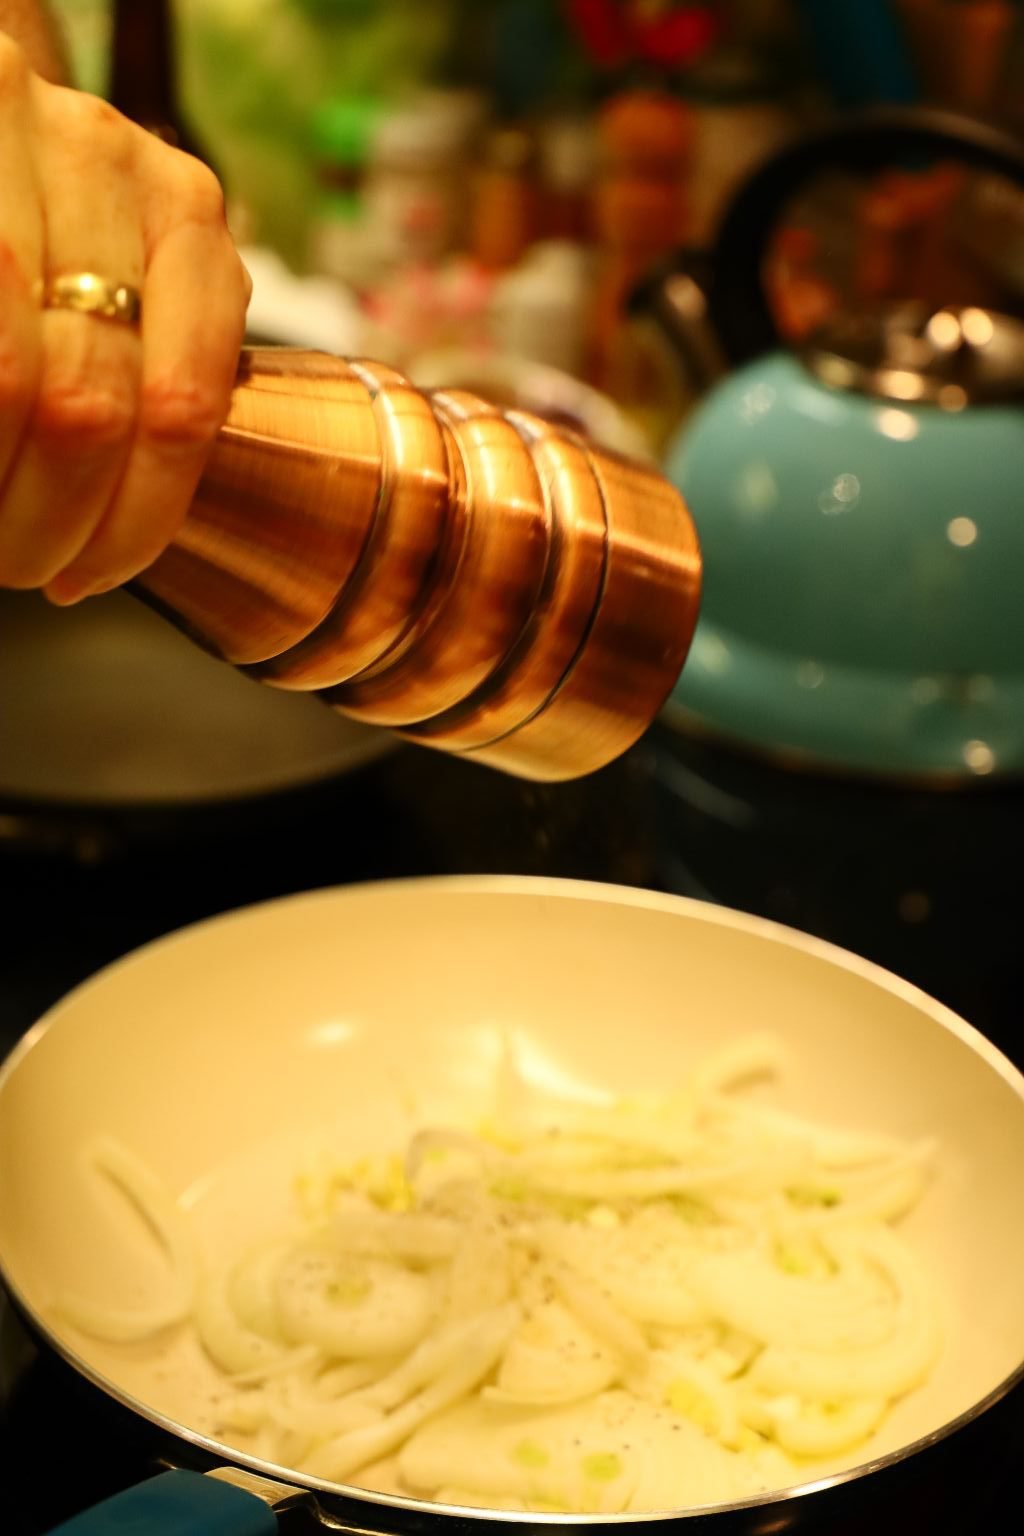

Adding Some Freshly Ground Black Pepper and some Hawaiian Sea Salt
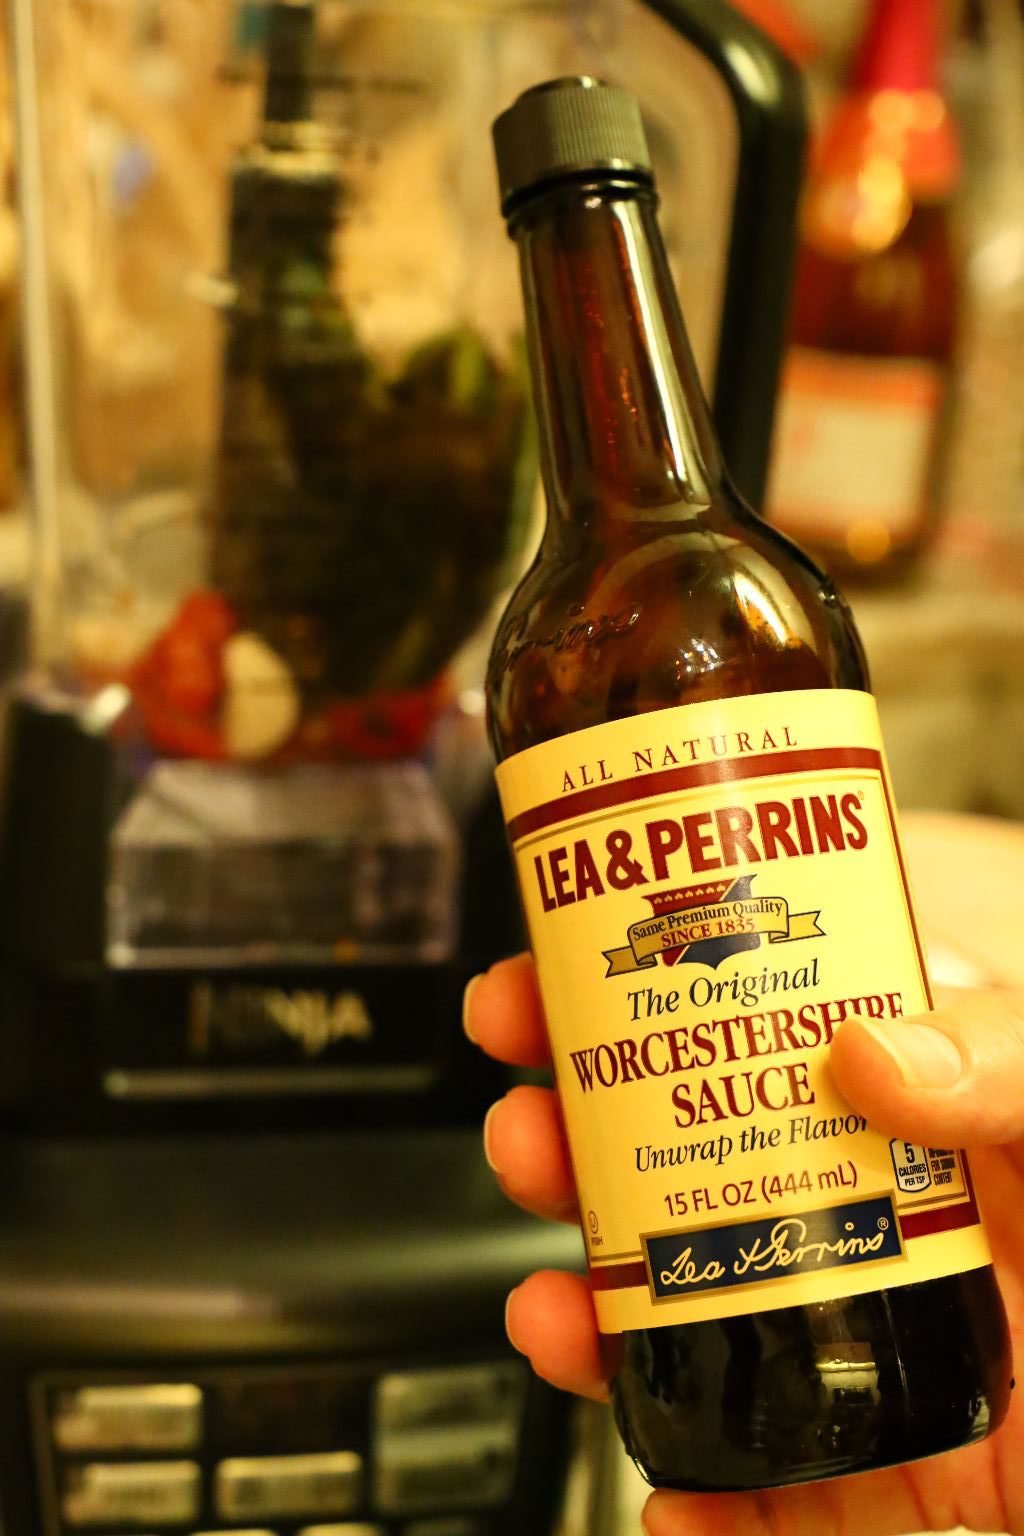
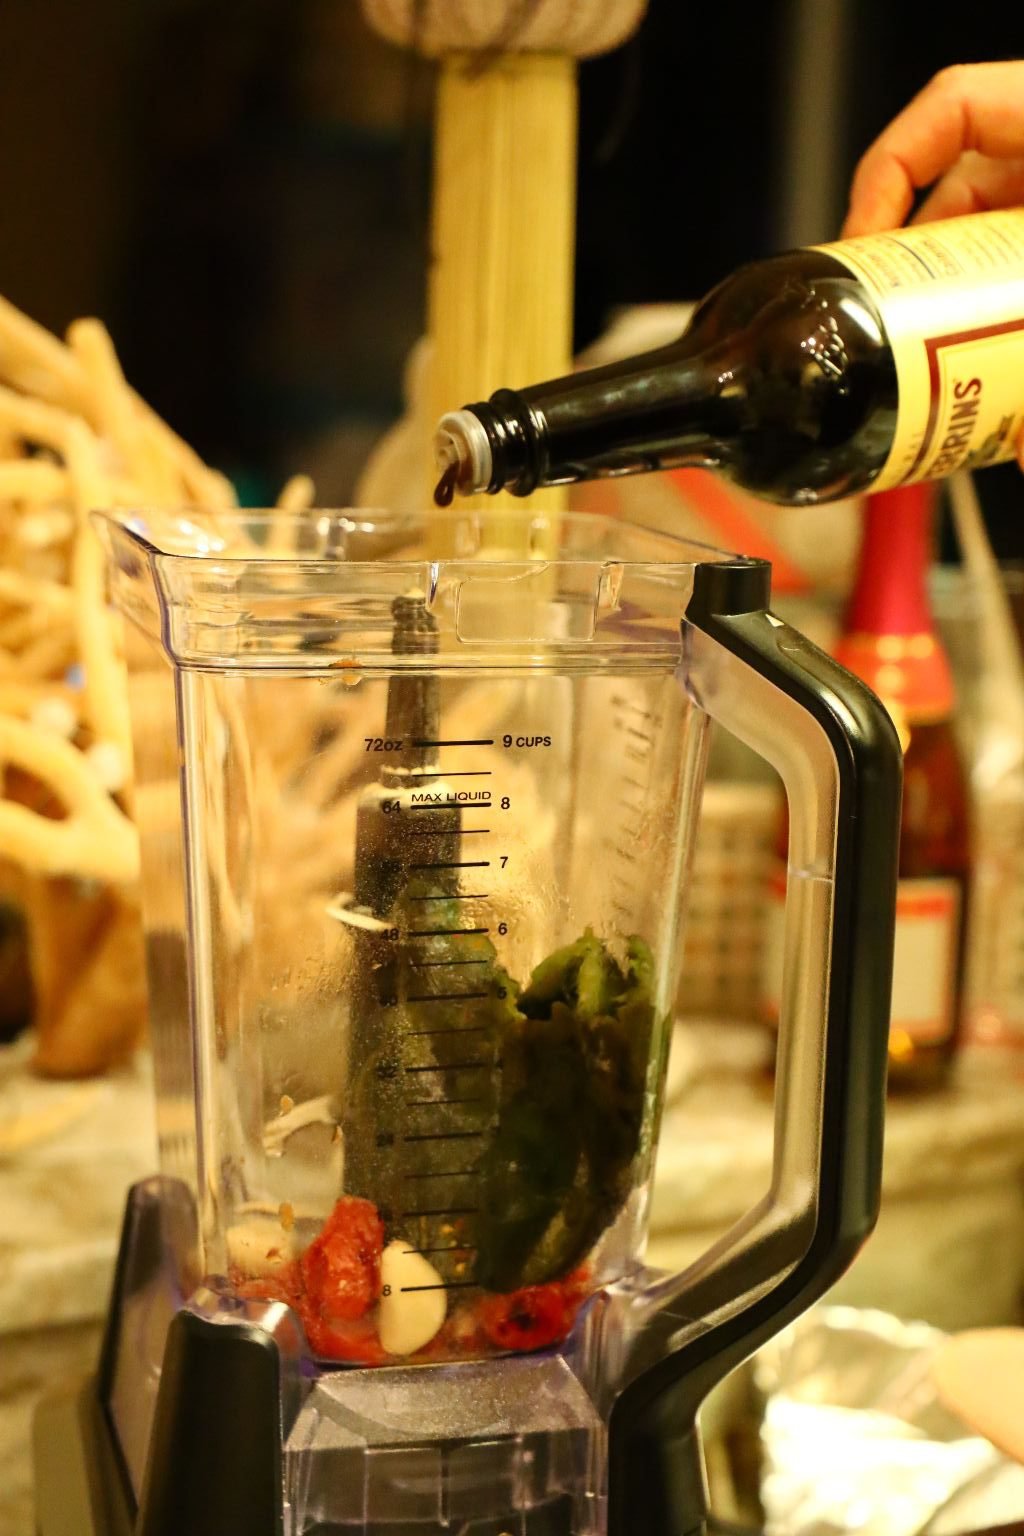
Add a touch of Lea & Perrin’s Worcestershire Sauce to the blender.


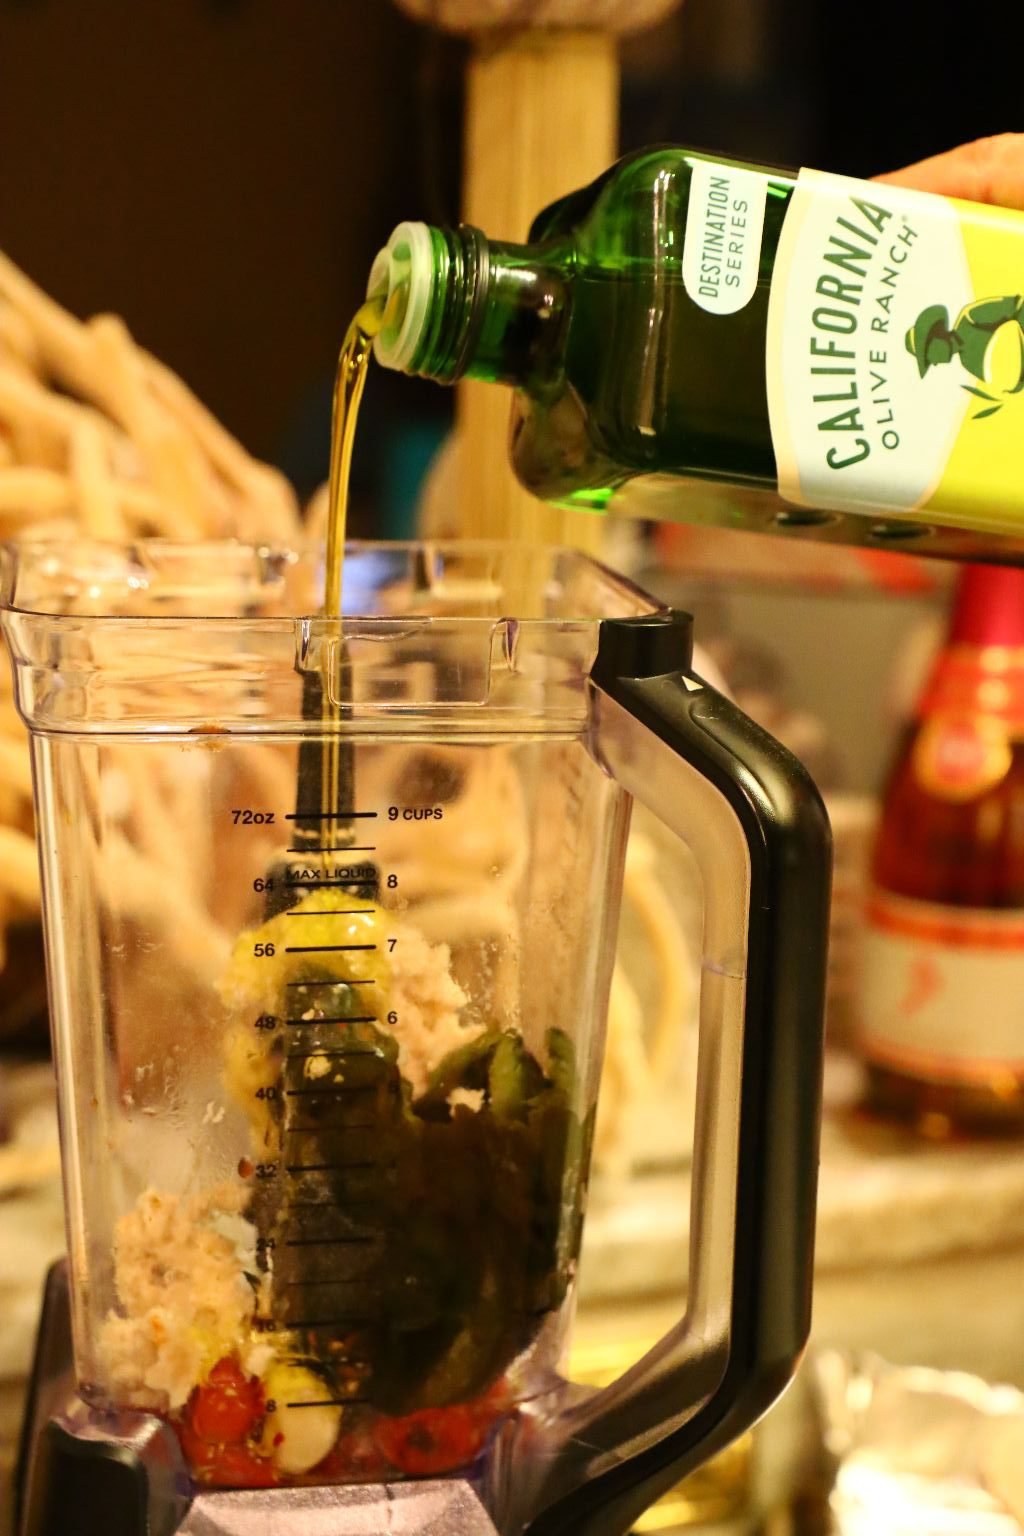
Then add a little lime juice for the acidity, then a heaping Tbsp. of Horseradish, and Olive Oil.

Saute the onions over medium heat turning often until they are slightly browned, about 10 min. time.

Also add a touch of lemon juice to add to the acidity of the dip.
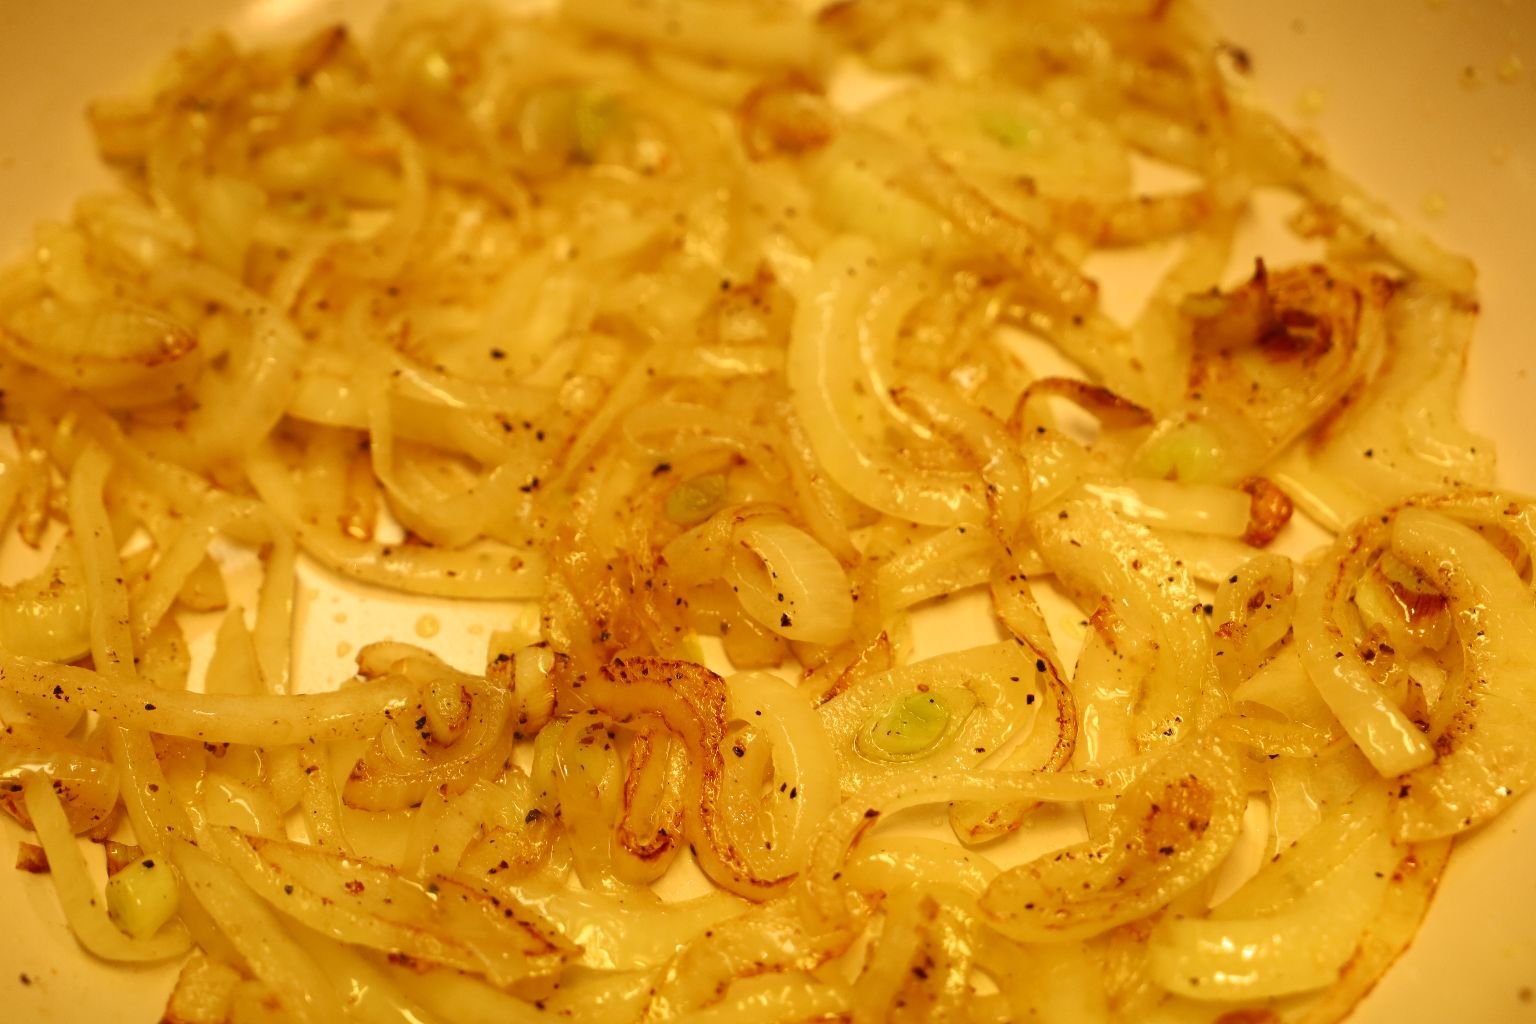

Here the onions are caramelized to my liking and now I will add them to the blender.
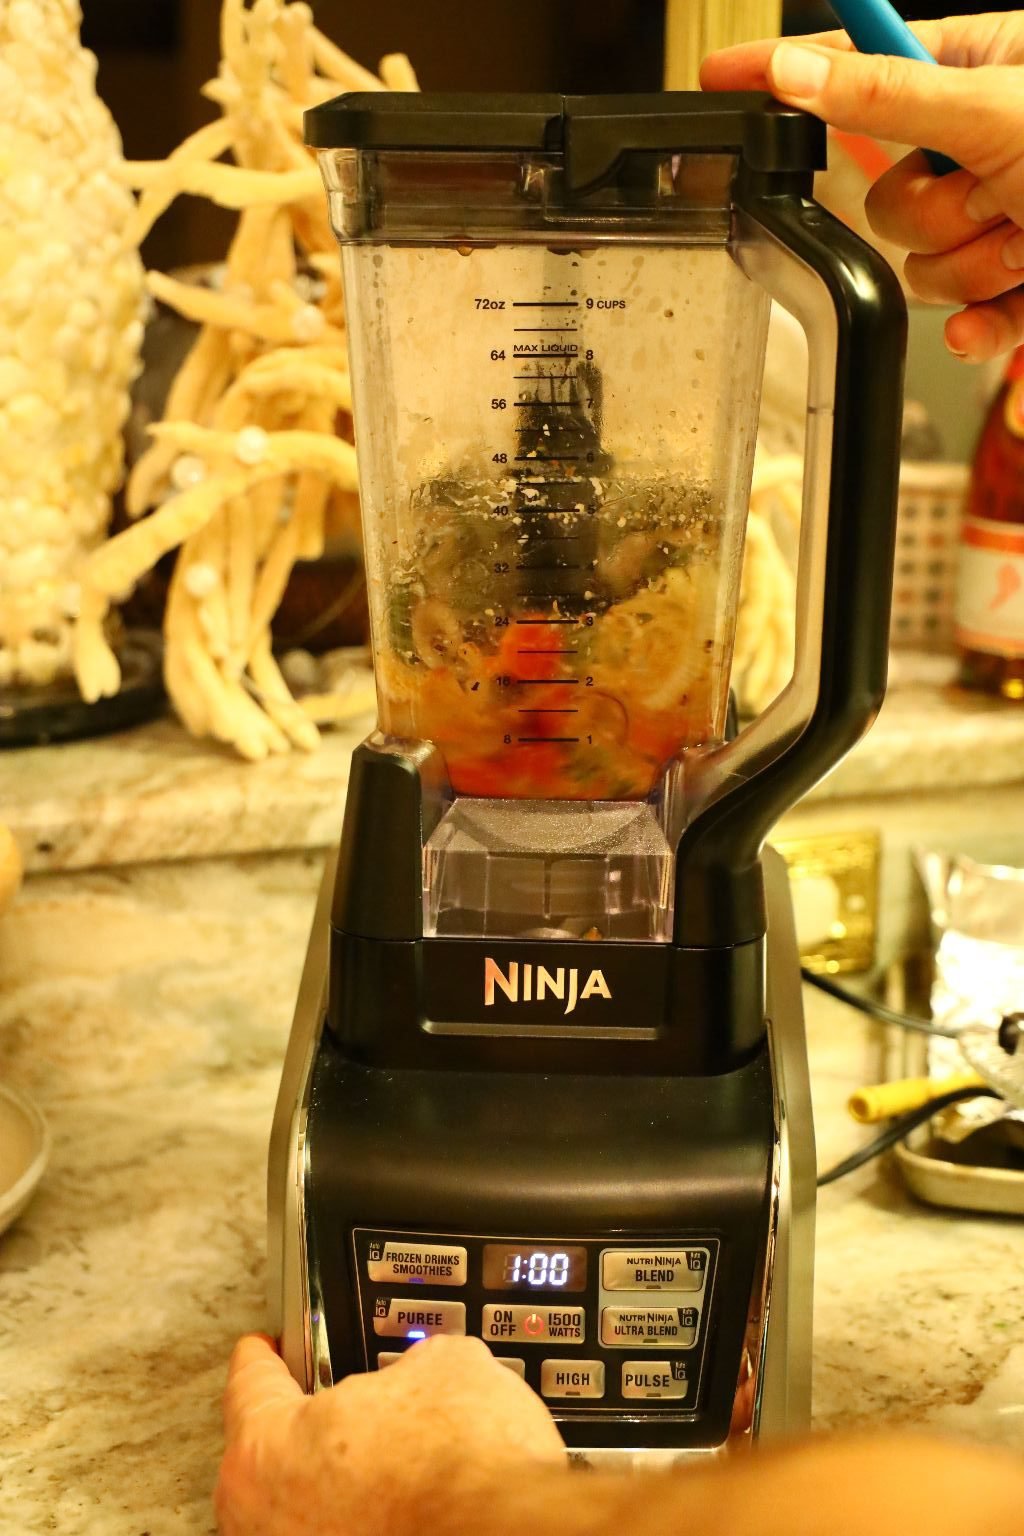

Blend to puree the ingredients to a consistency of your liking.

Using a rubber spatula, remove the blended ingredients and place into a bowl.
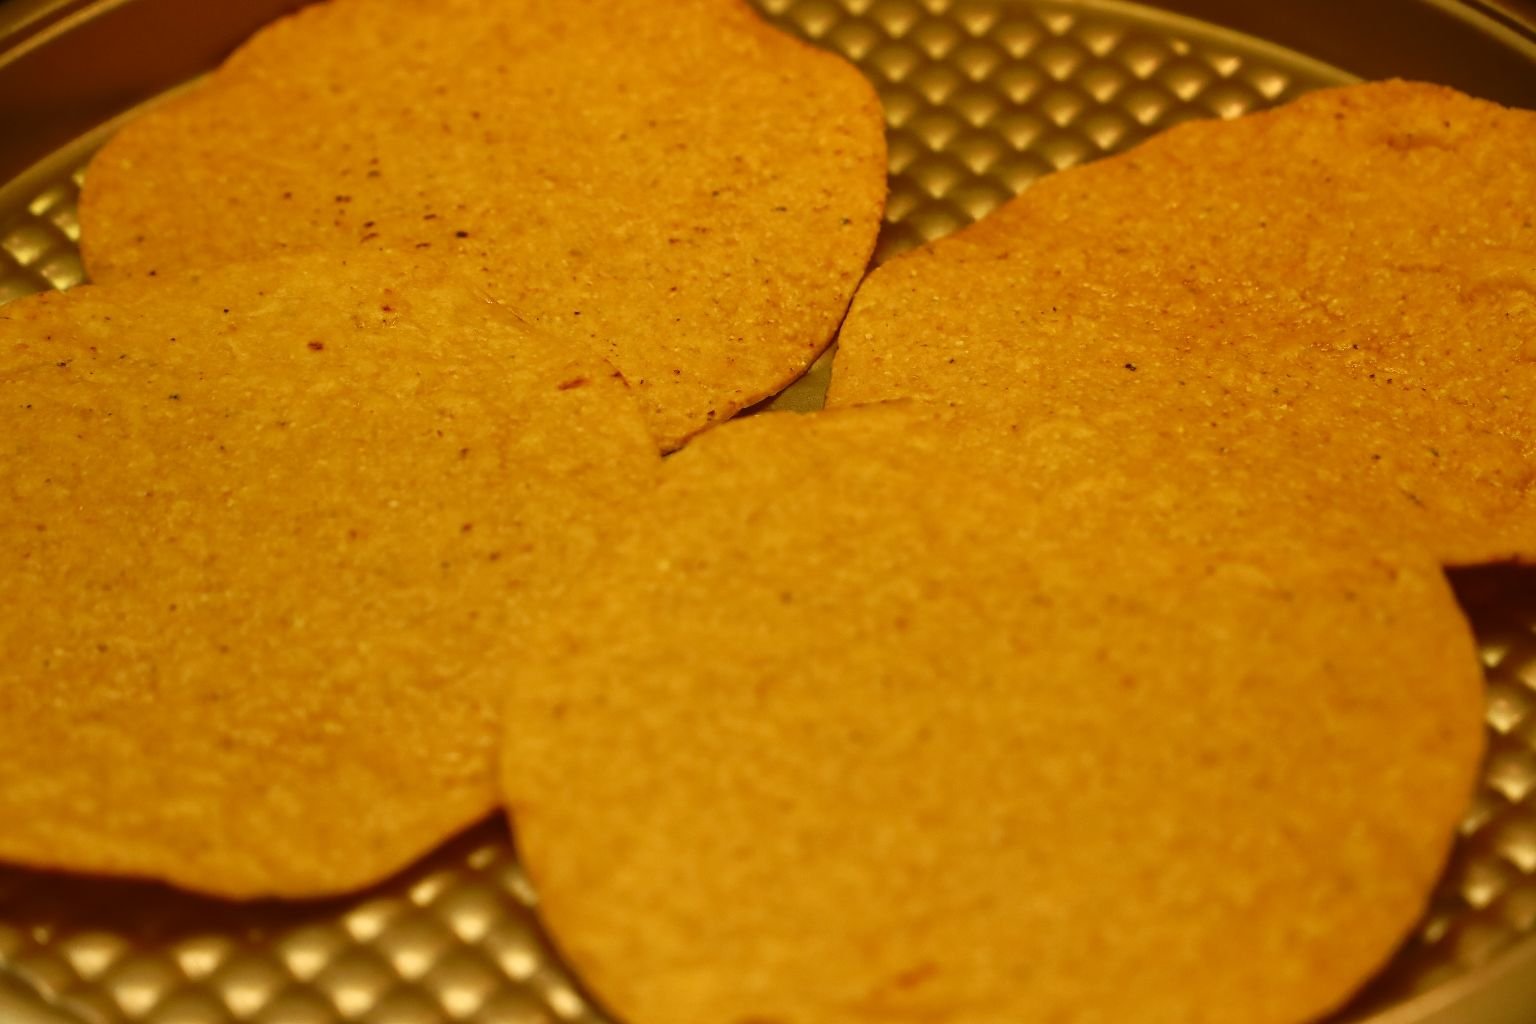
Our Baked Tostada Shells For Our Leftovers
———————————————————————
Heating Up Our Jalapeno Shrimp Apps in the Oven
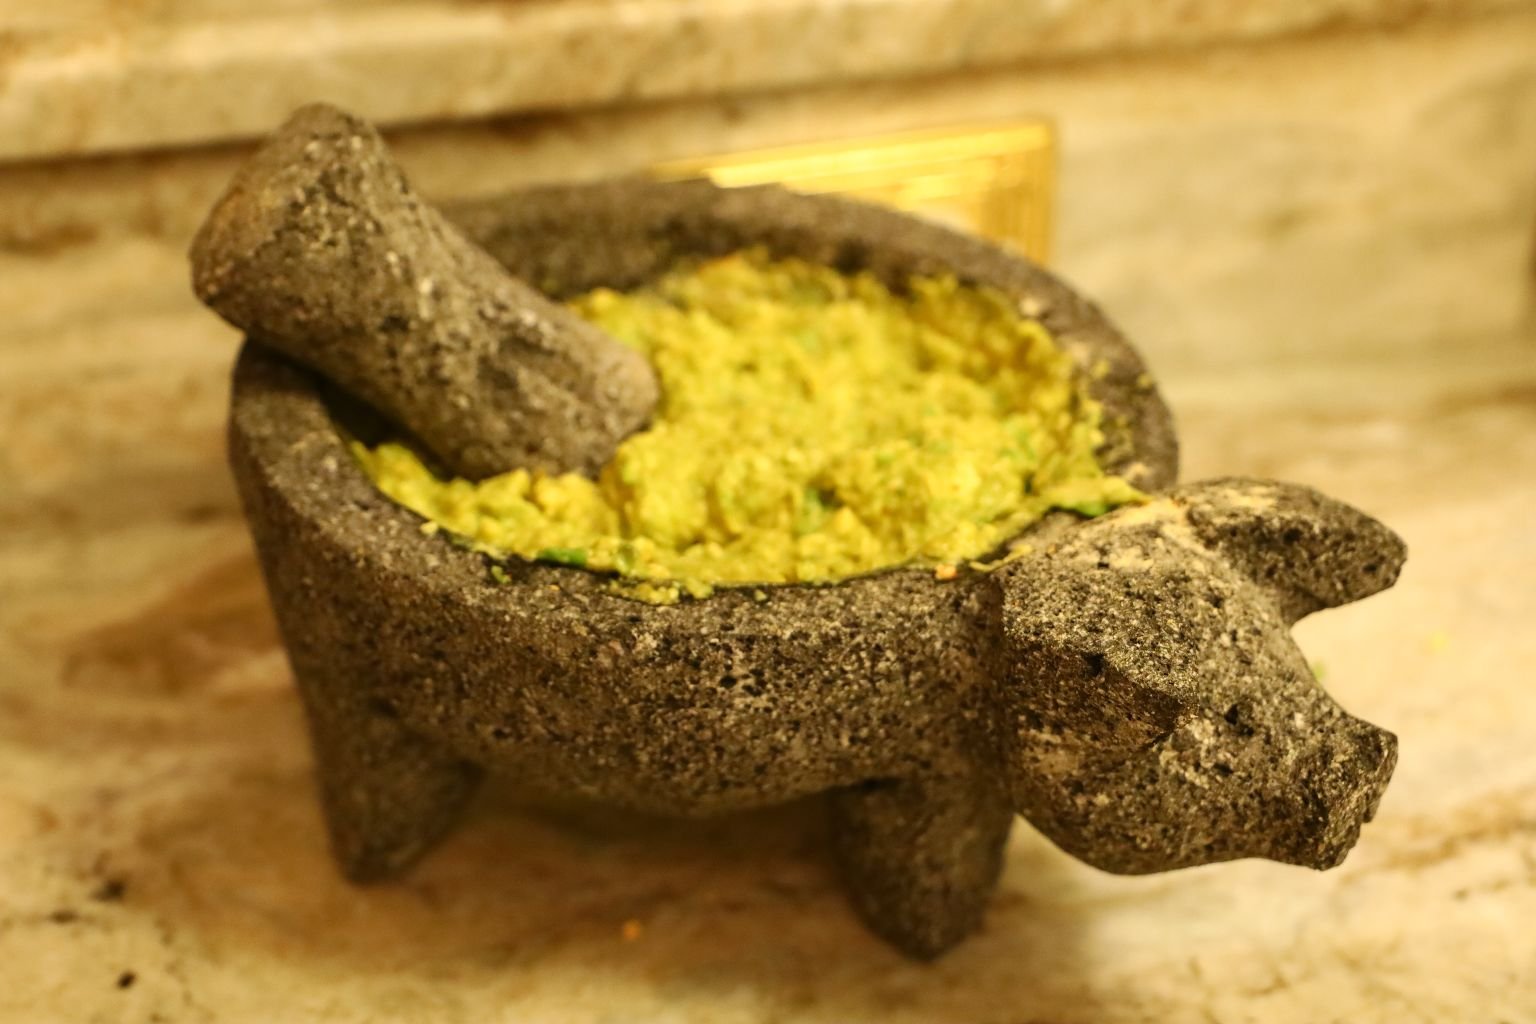
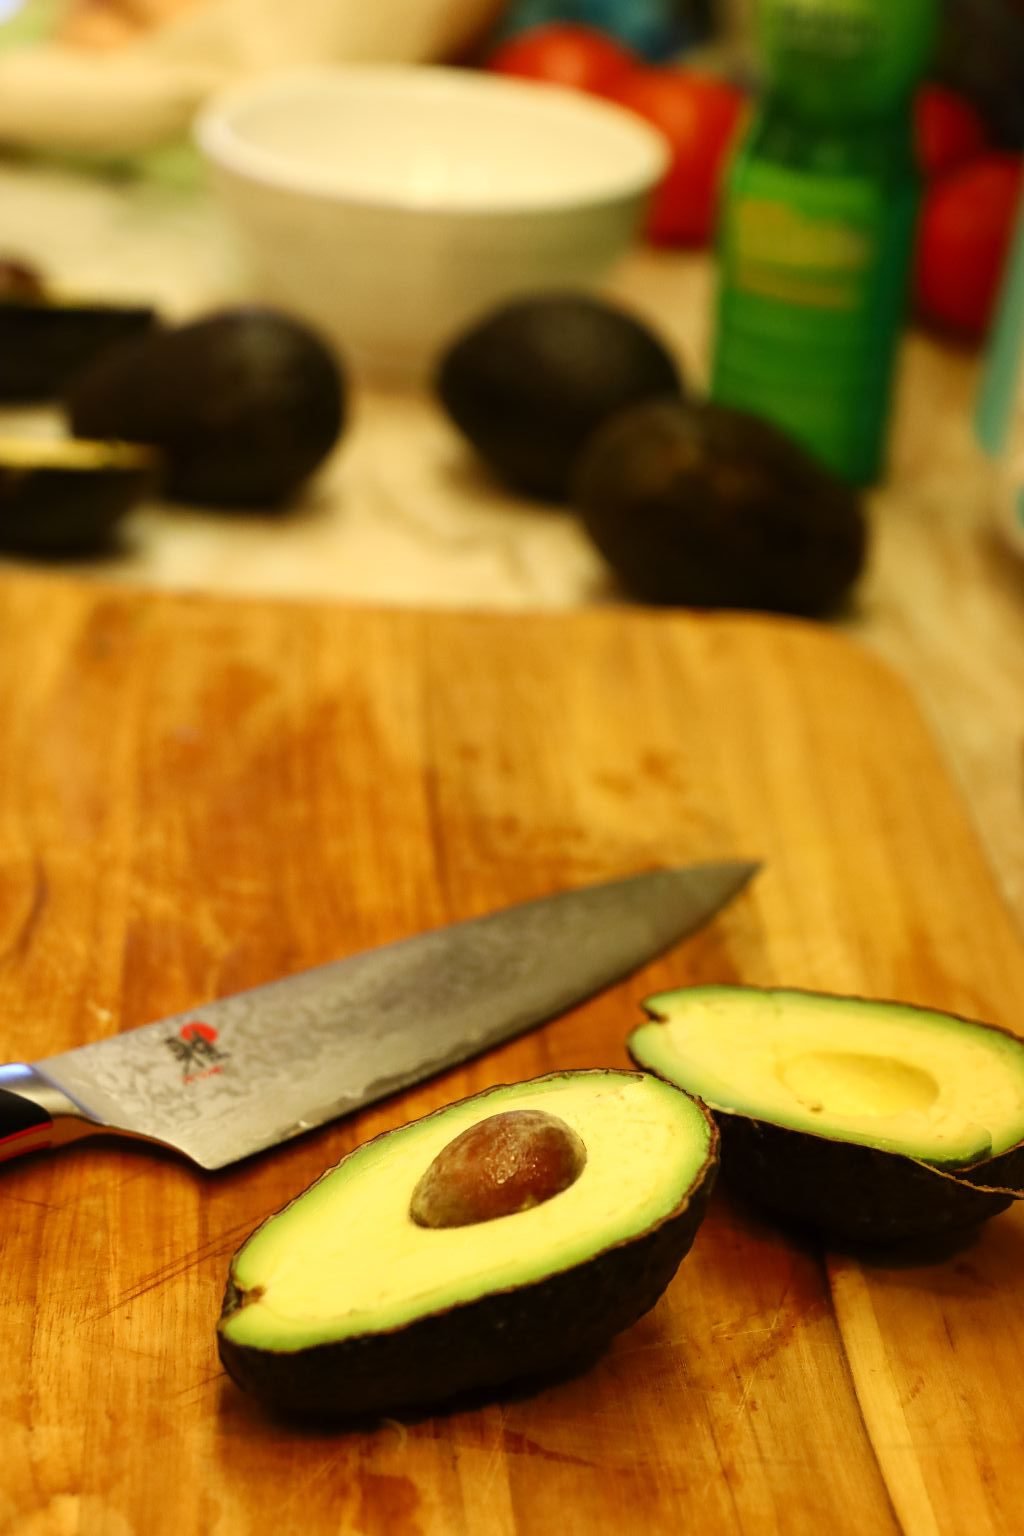
In the meantime I decided to use up our Avocados and make some Guacamole.
It was easy. I just followed the package instructions and added some Lime Juice.
Dotting the Bacon Wrapped Goodies Along the Guacamole 🙂
——————————————————————-
Leftover Cod


Add a Tbsp. or more of olive oil to a small saute pan and heat it to medium heat. Add some of your Cod fillet pieces to the pan.
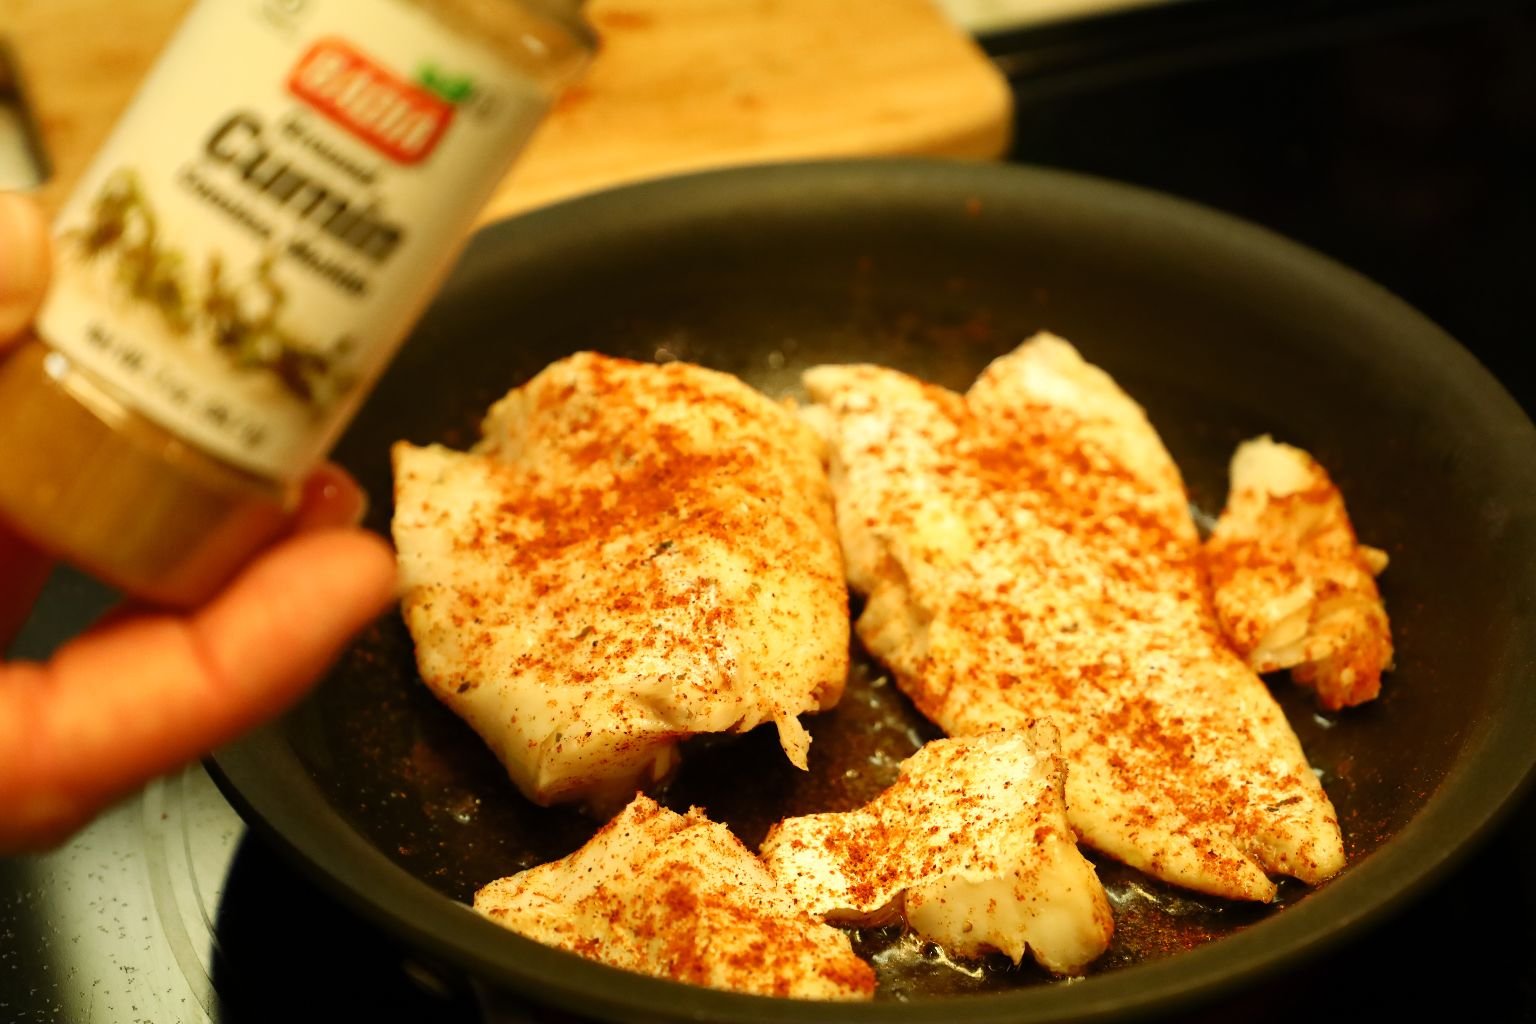
Add some Ground Cumin to the fish and saute until slightly heated cooking the fish on both sides.
Another Way to Eat the Leftovers
——————————————————————
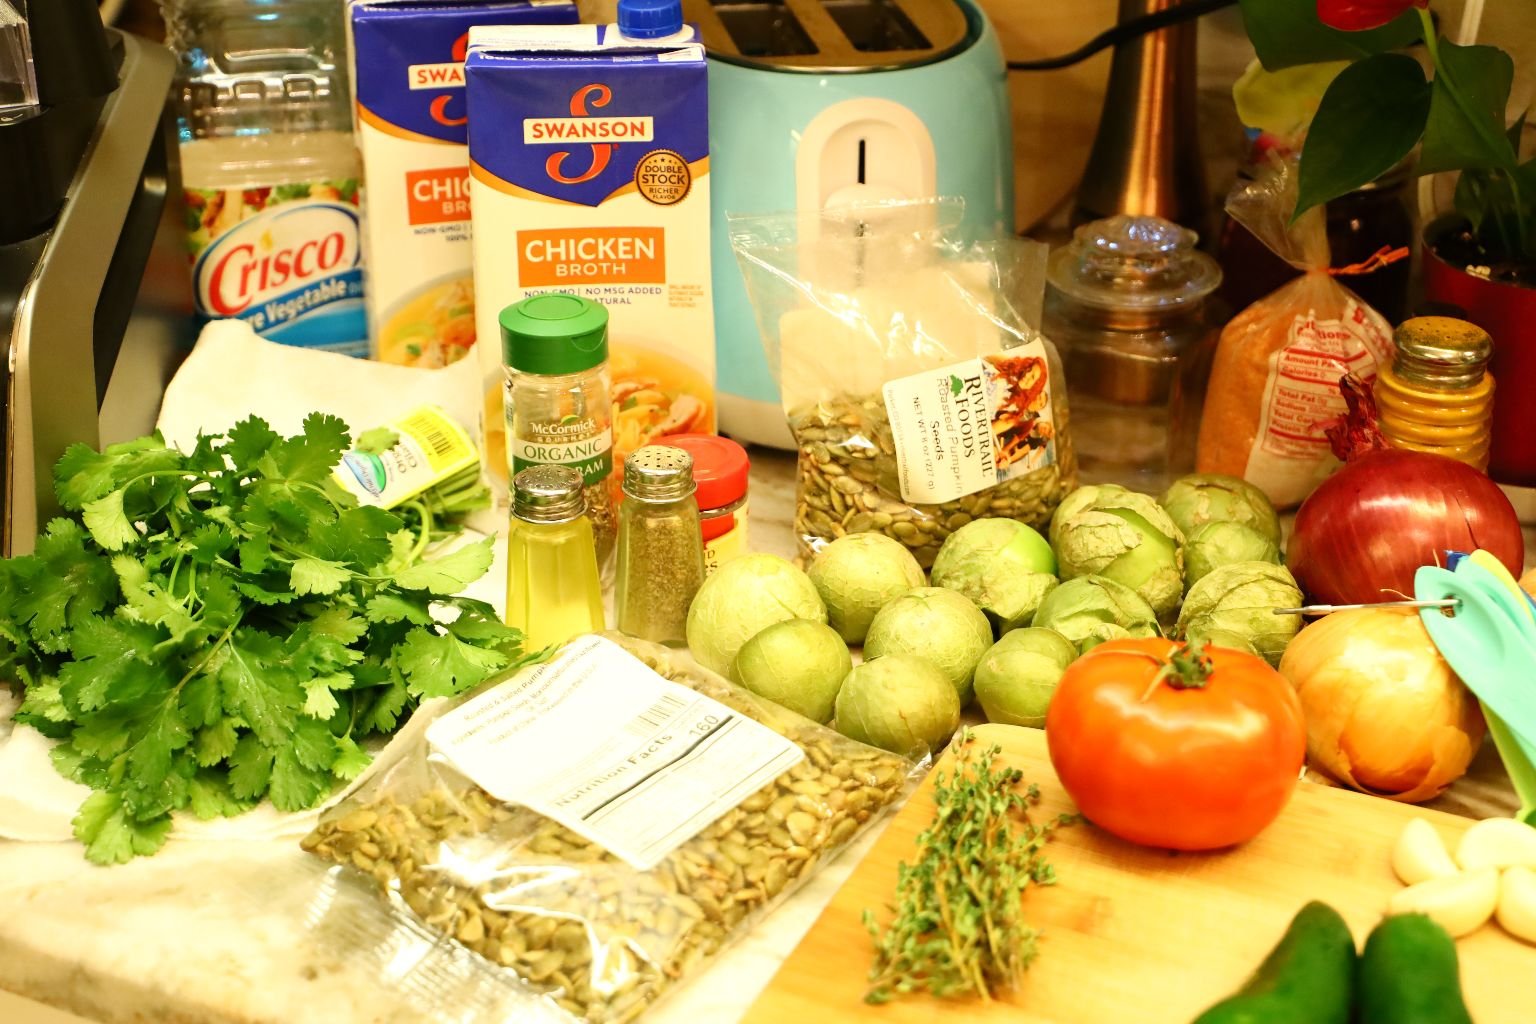
Mole Verde
——————————————————————–

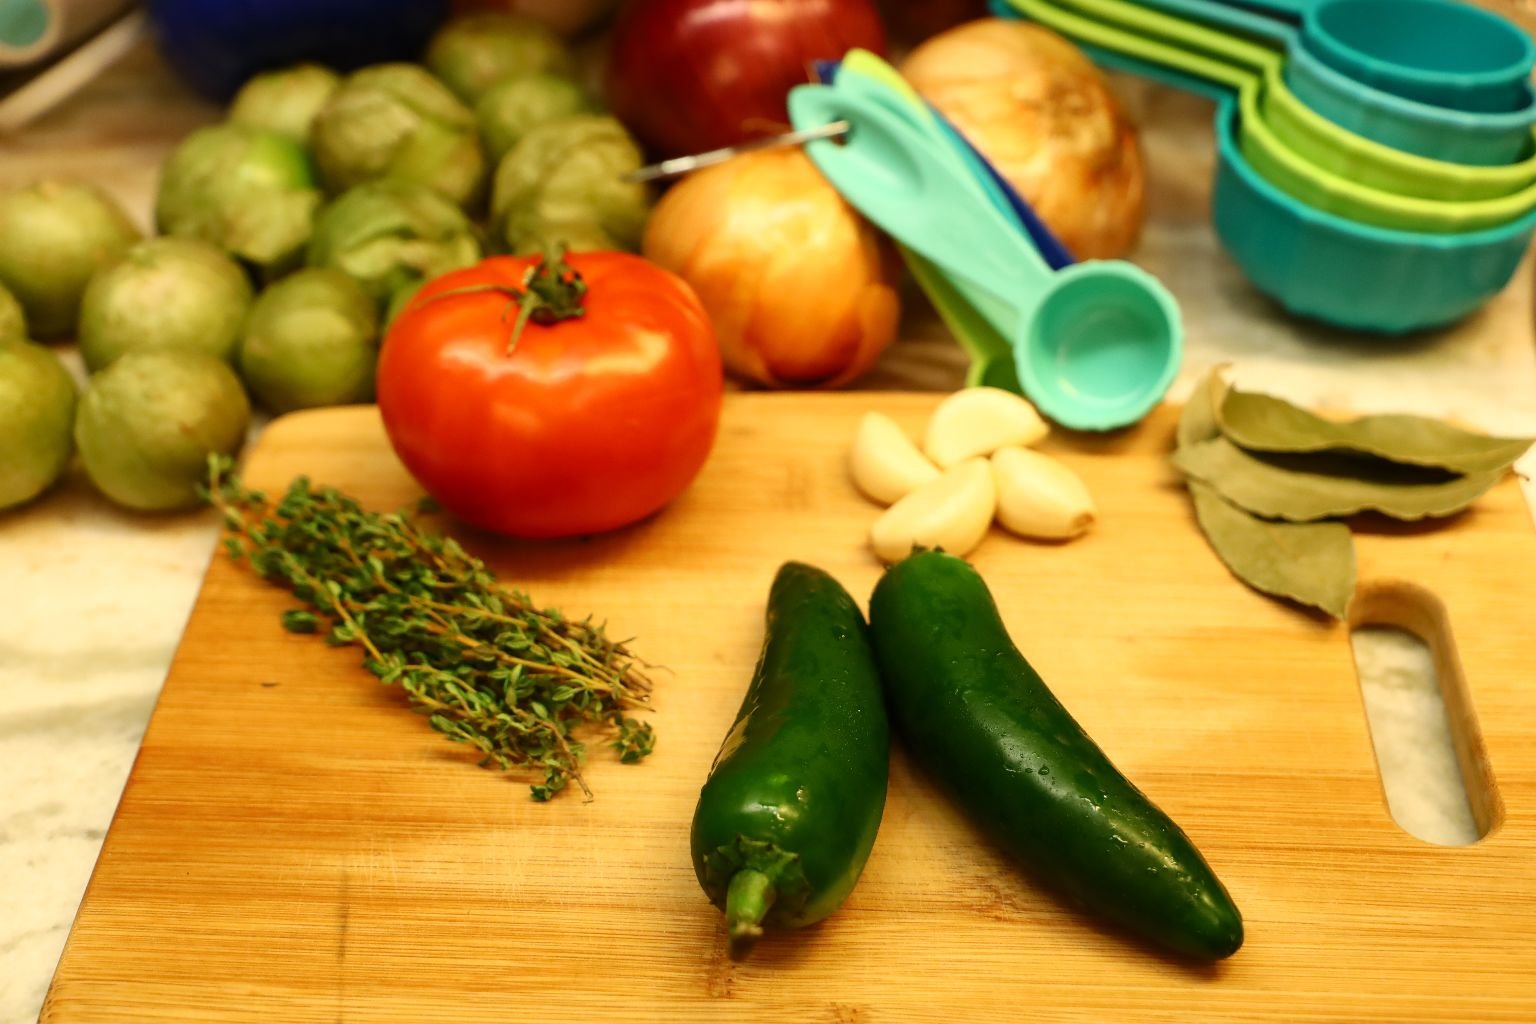
Ingredients:
2 Cups Toasted Pumpkin Seeds
2 1/2 to 3 Cups Chicken Stock
Ground Cloves – large pinch
7 Tomatillo – sliced in quarters
1/2 Red Onion – diced
1/2 Yellow Onion – diced
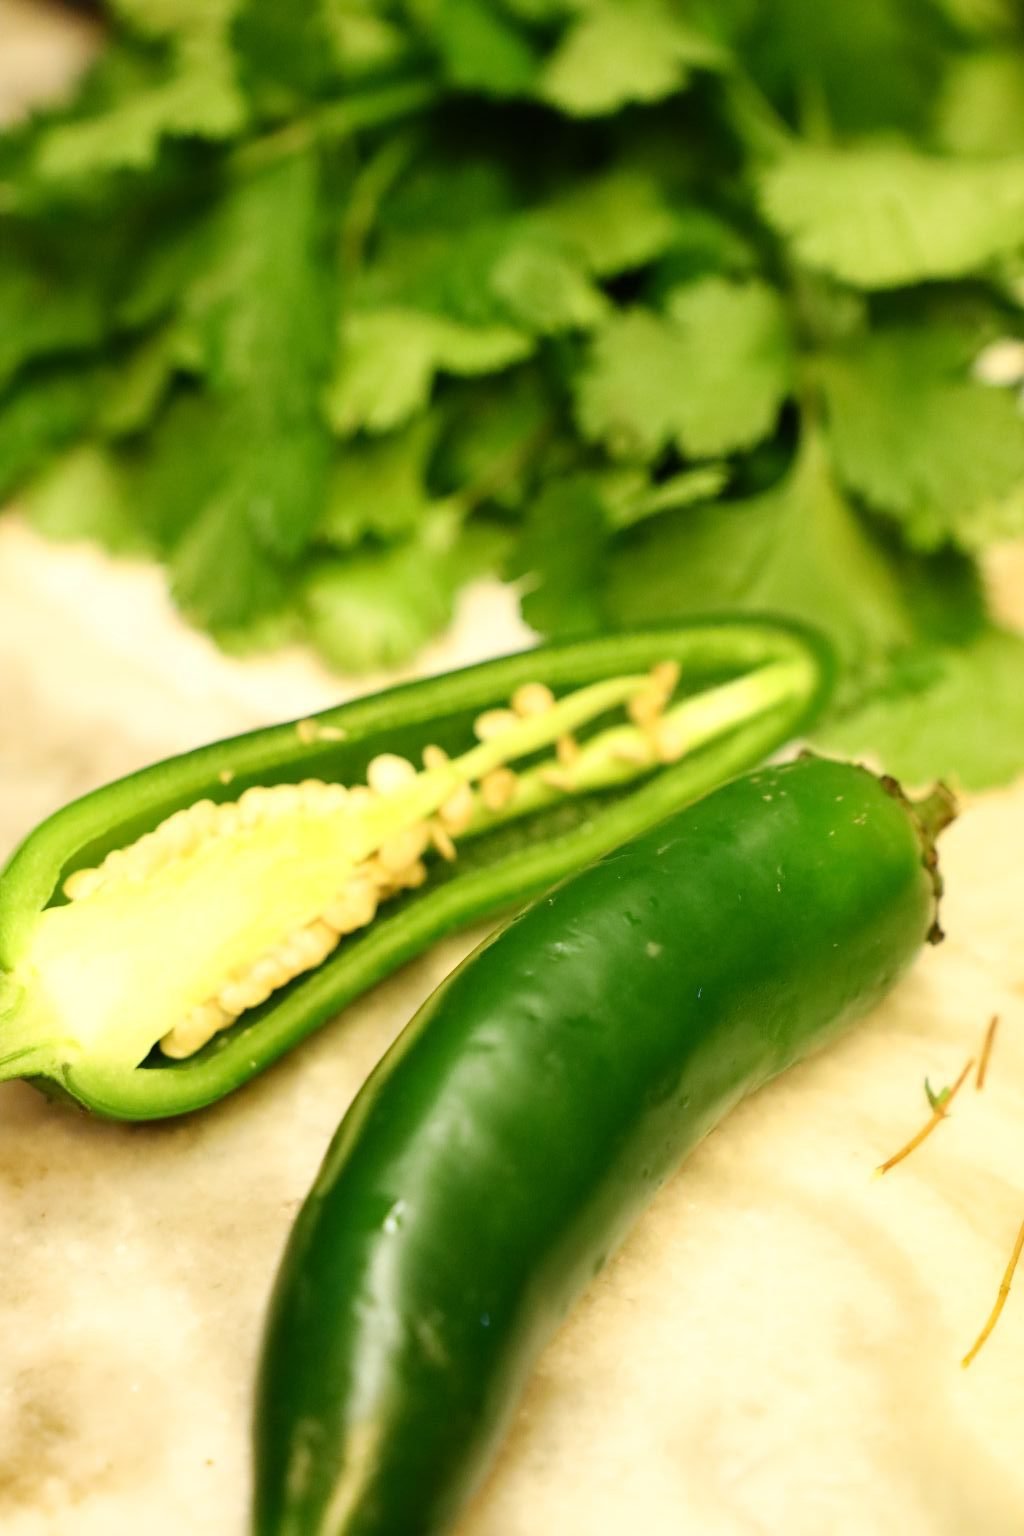
2 Jalapeno Peppers – One seeded and sliced, the other one sliced into rounds.
4 Garlic Cloves – sliced
5-6 Thyme sprigs
1 Tbsp. Dried Marjoram
1 Red Tomato – quartered
2-3 Tbsp. Vegetable Oil
3 Bay Leaves
4 Tbsp. Fresh Cilantro – chopped
Freshly Ground Black Pepper to taste
1/4 tsp. Turmeric Powder
Salt to taste
——————————————————–
Garnish with:
Cilantro Leaves
Jalapeno – sliced in rounds

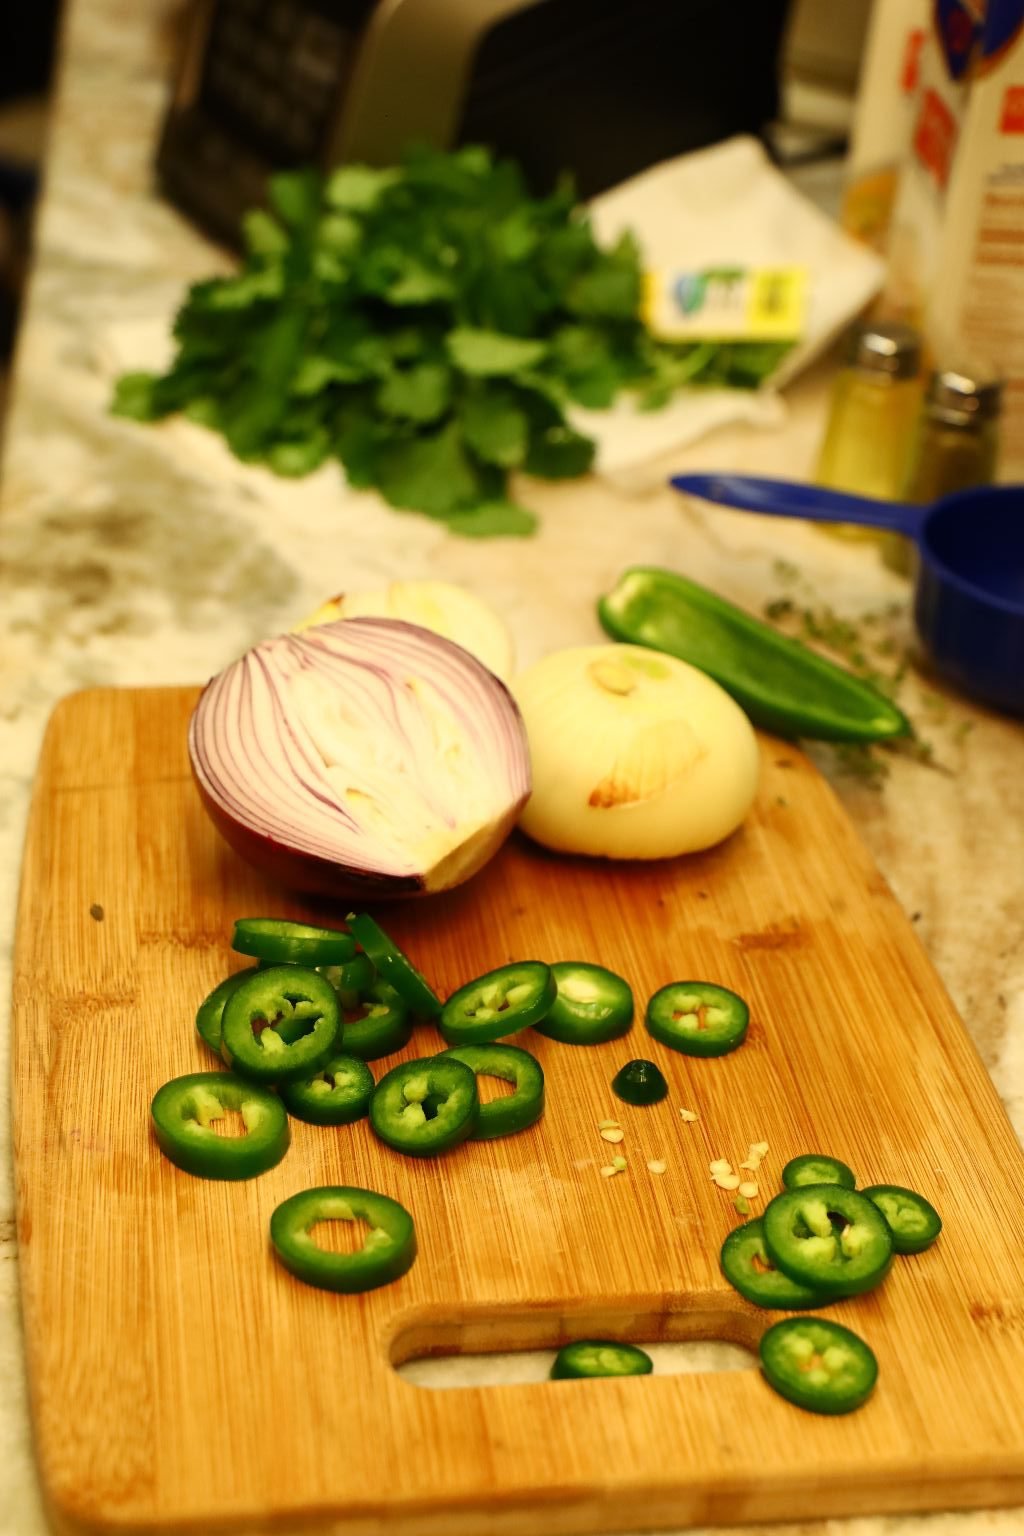
Fresh Ingredients
Ready to be Chopped
—————————————————————-

You will need a large saucepan for this as well as a blender.
—————————————————————-


Place your two cups of pumpkin seeds into the blender.


Add ~ 1 Cup of Chicken Stock to the blender and blend until mostly smooth.


Add a pinch of ground cloves.

Our Tomatillos
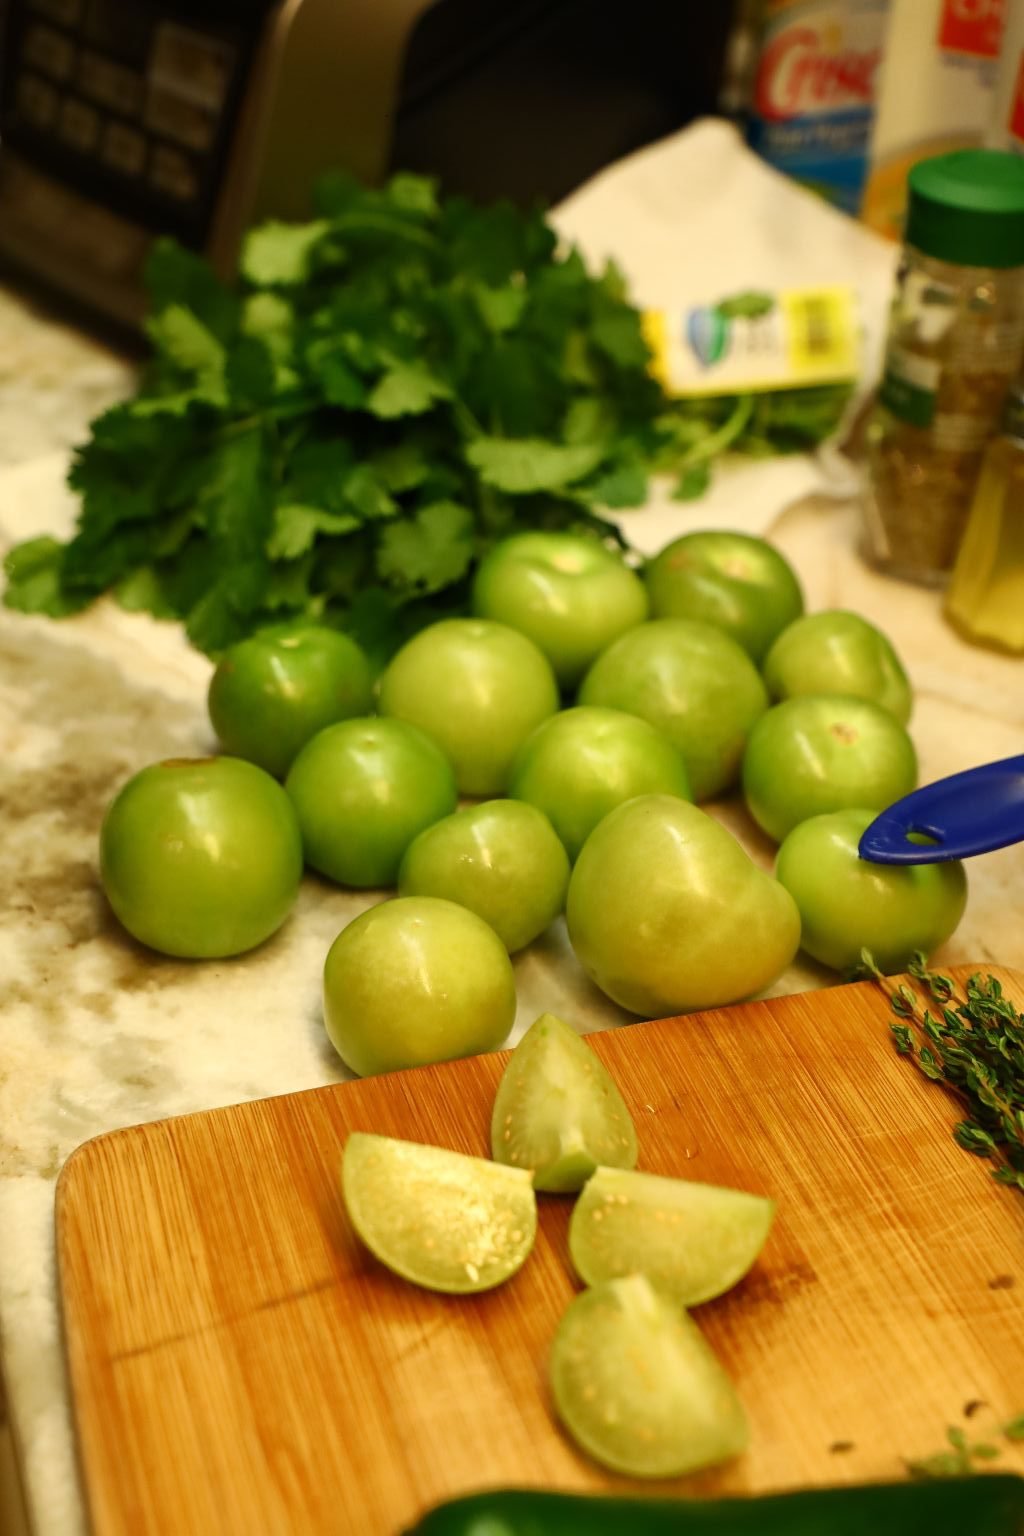
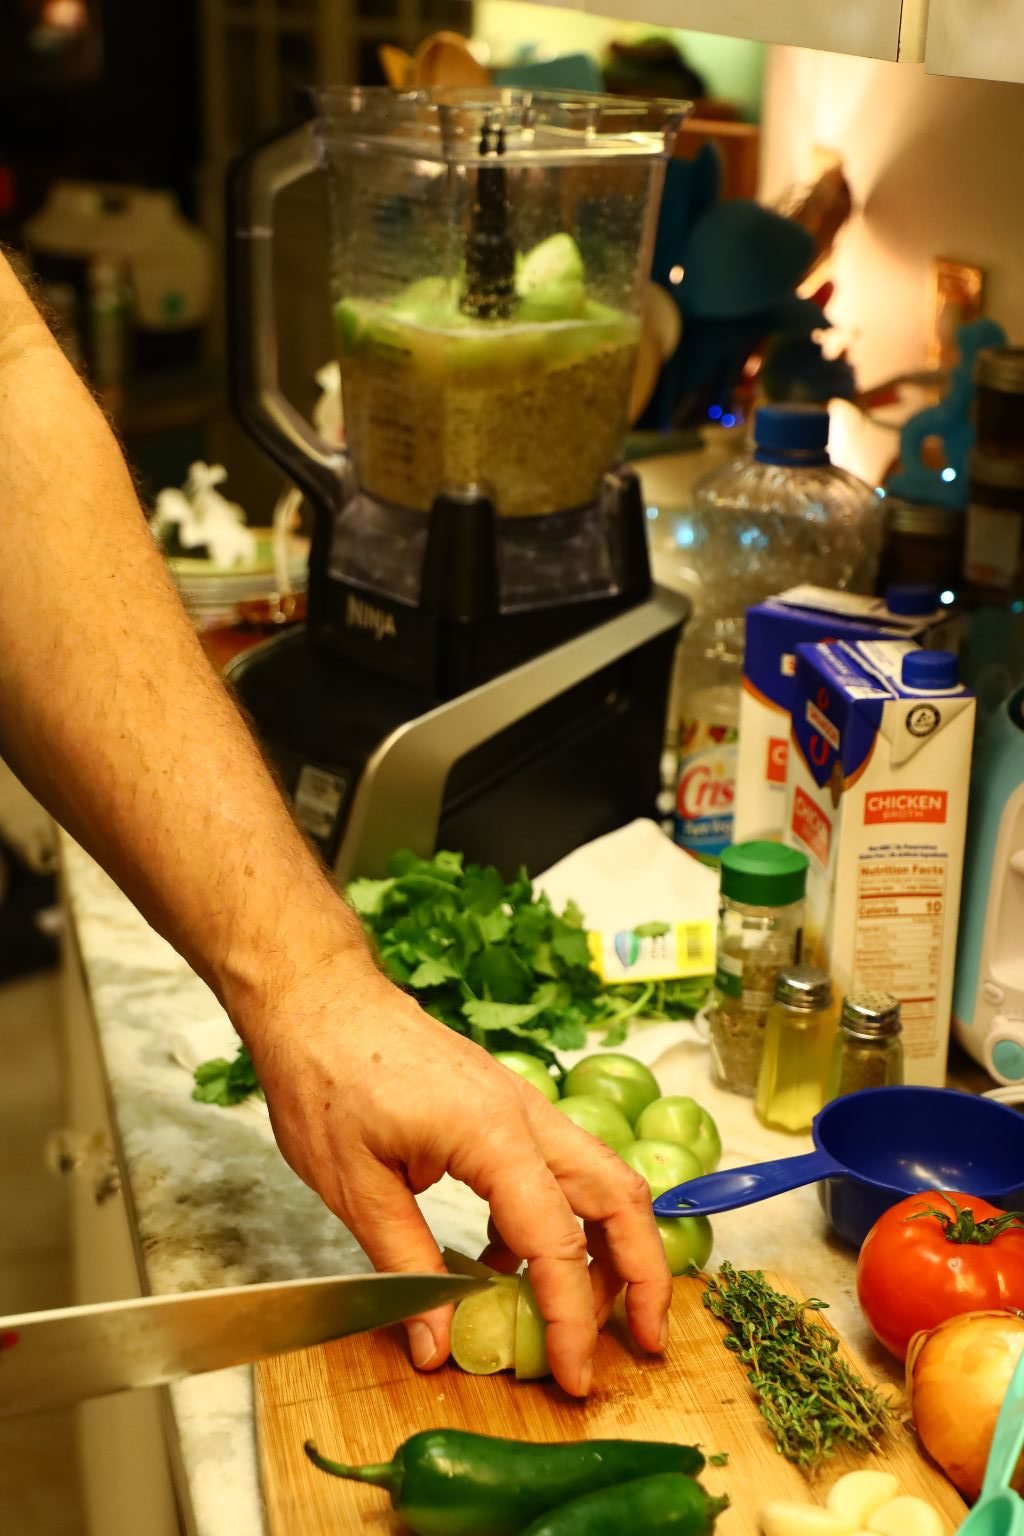
Slice your Tomatillos into quarters as shown and place them into the blender.

————————————————————


Now peel and slice your red onion as shown,

and add it to the blender.

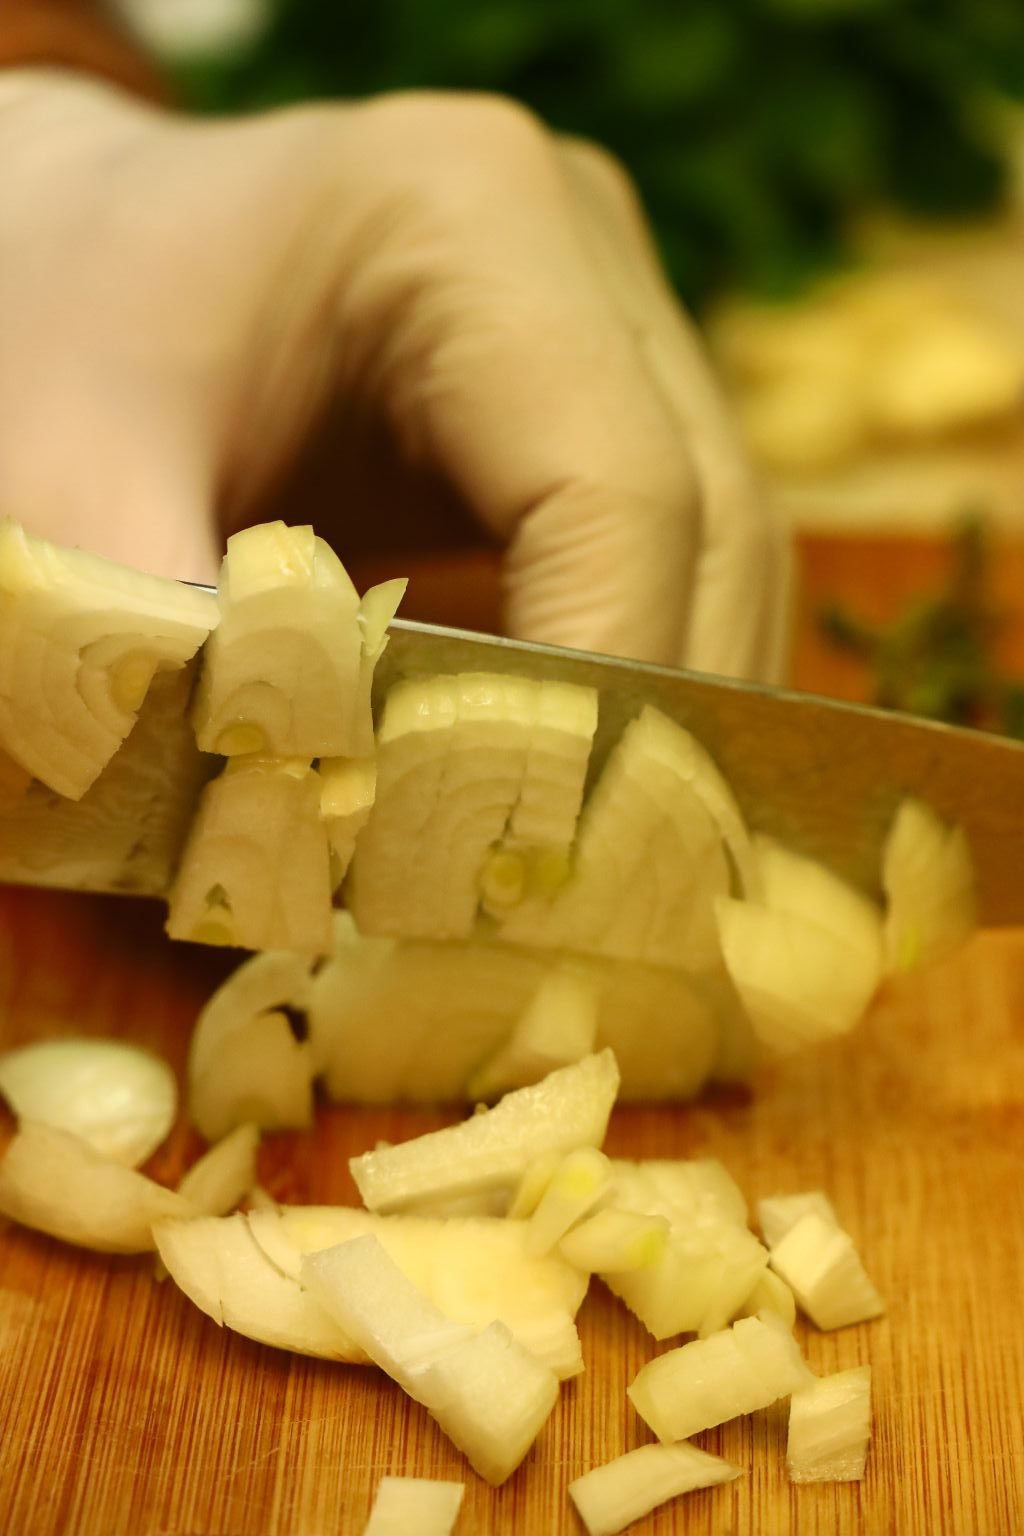
Peel and slice your yellow onion,
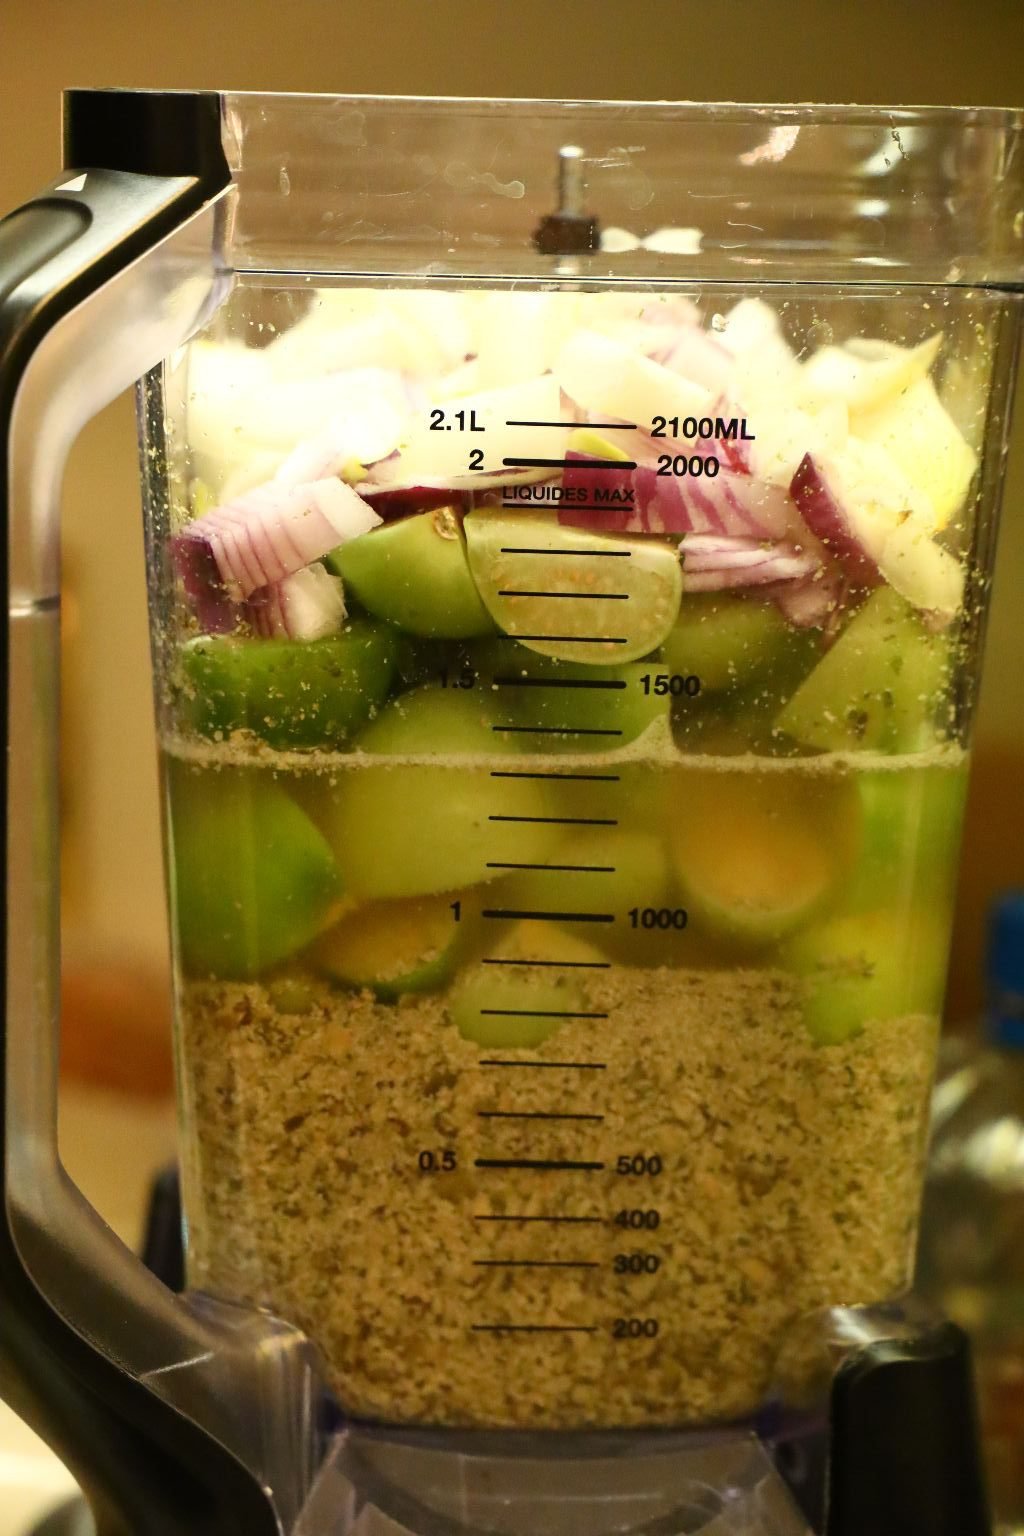
and add it to your blender.
Slice your jalapeno in half and remove the seeds.
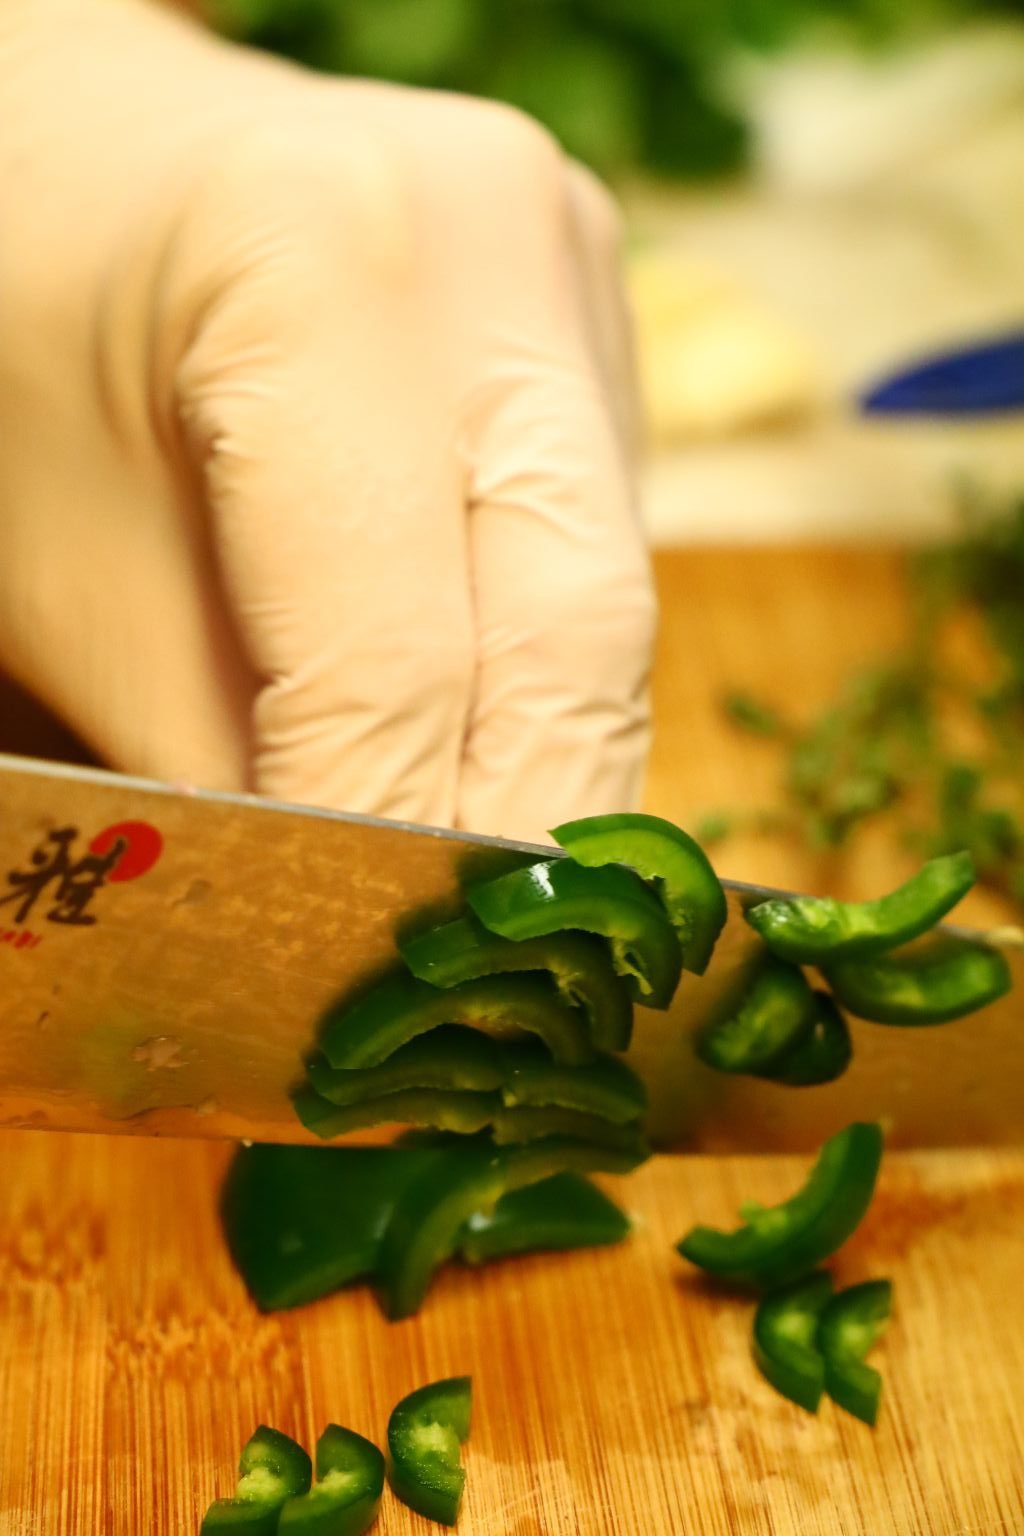

Now, slice the jalapeno into half rings and add them to the blender.

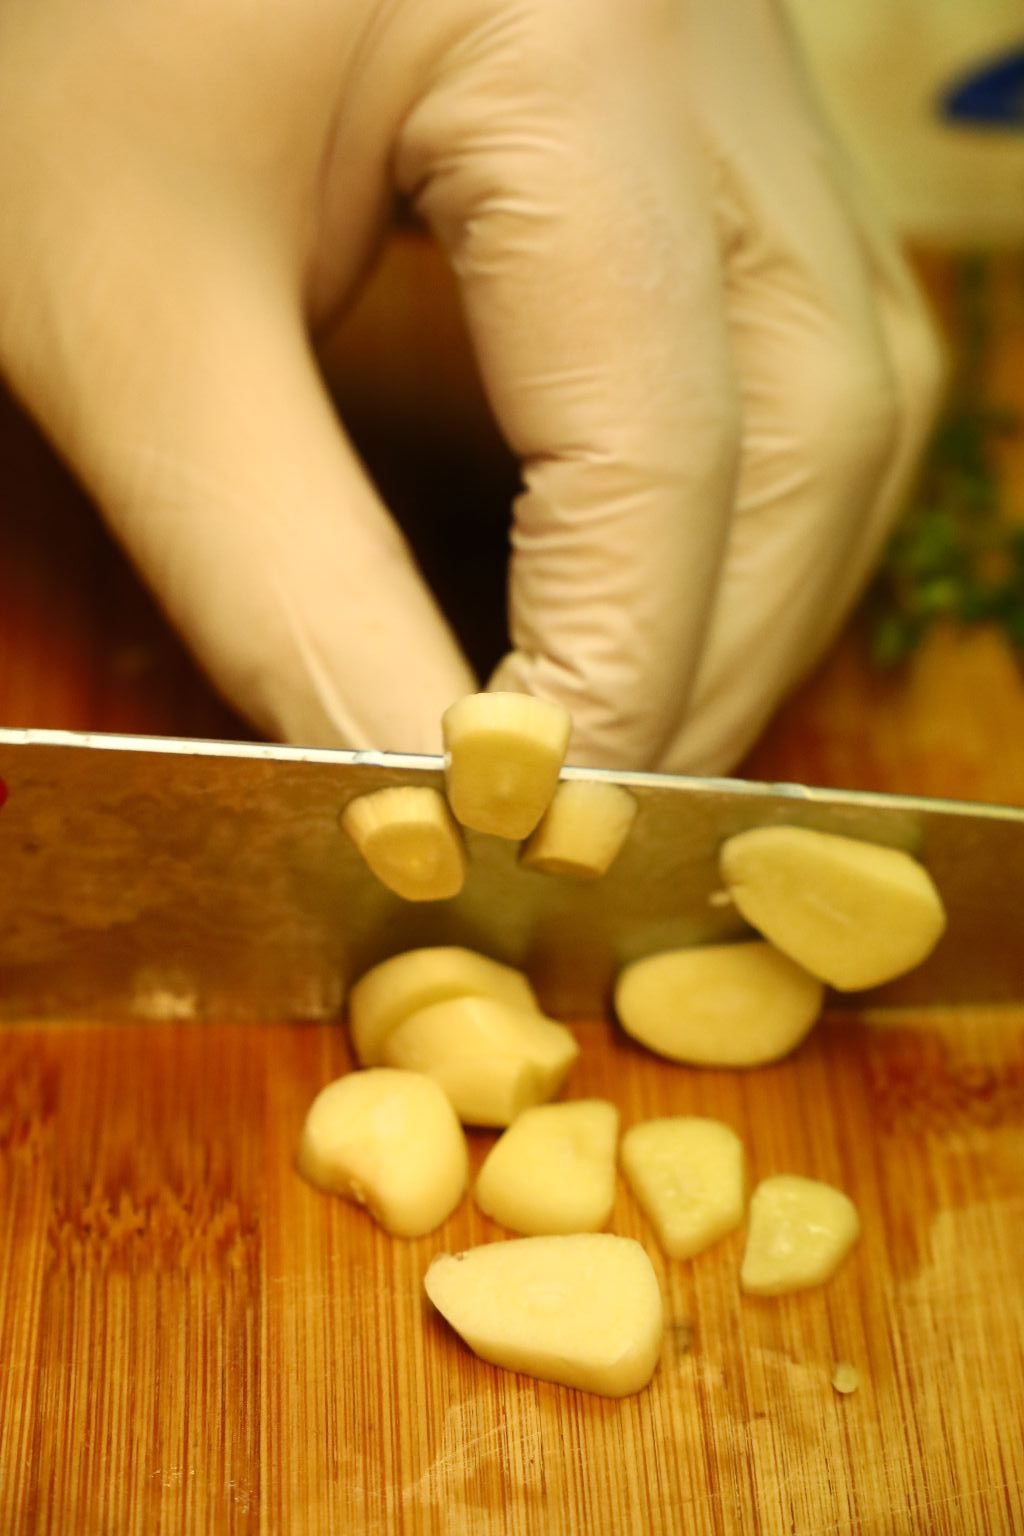
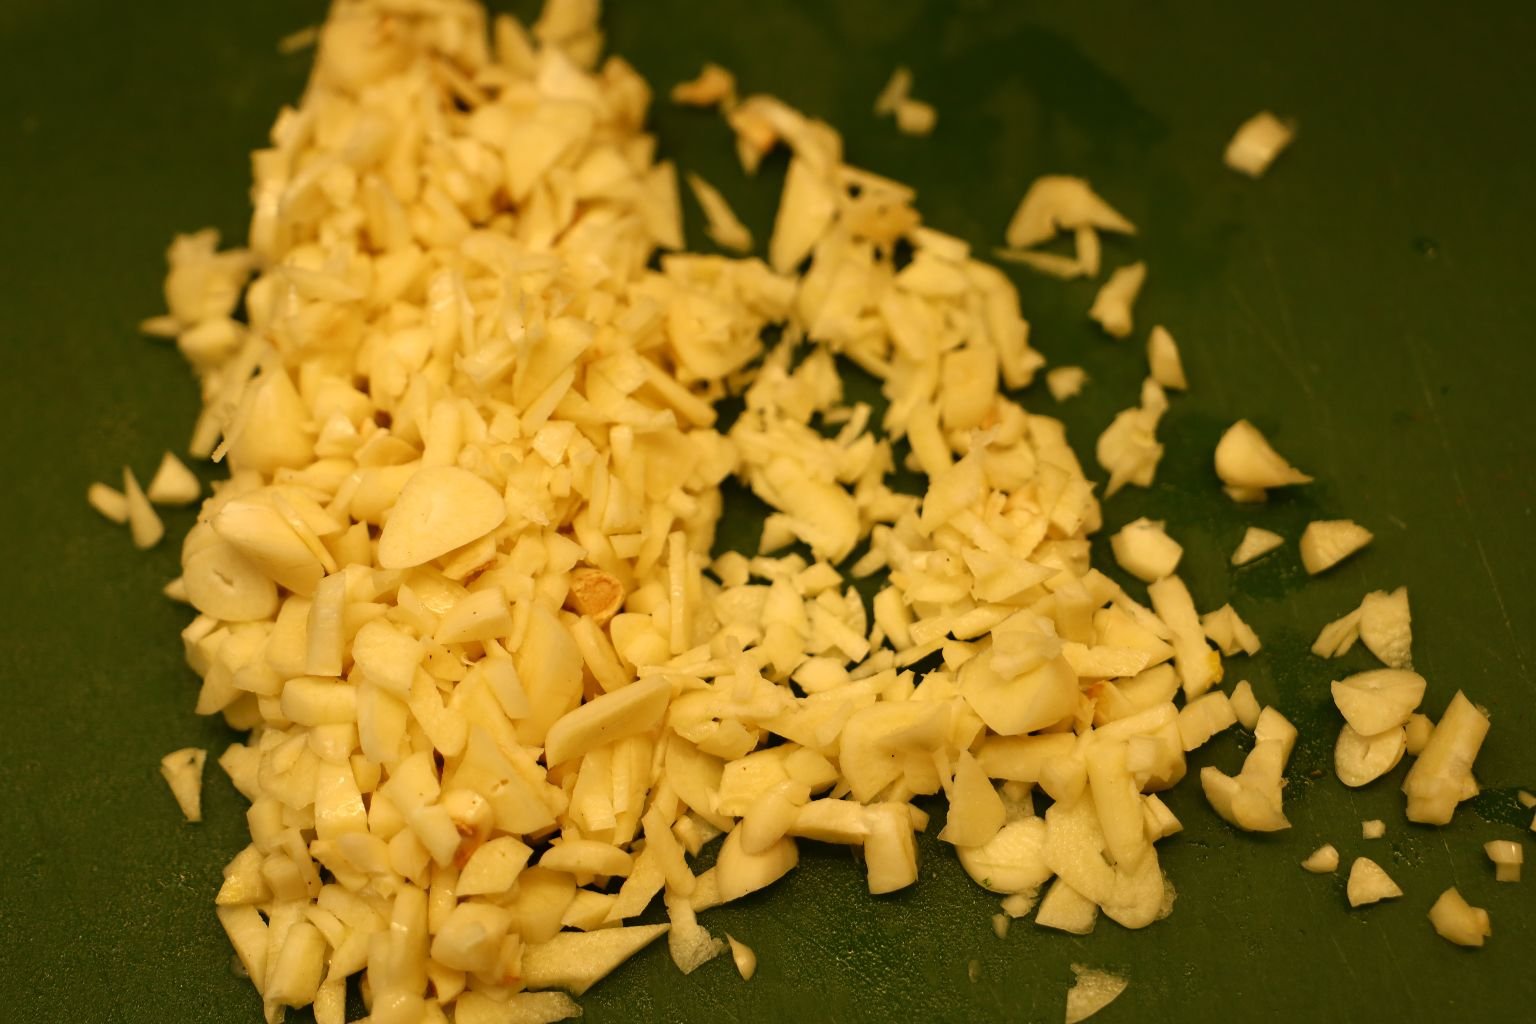
Slice your Garlic as Shown
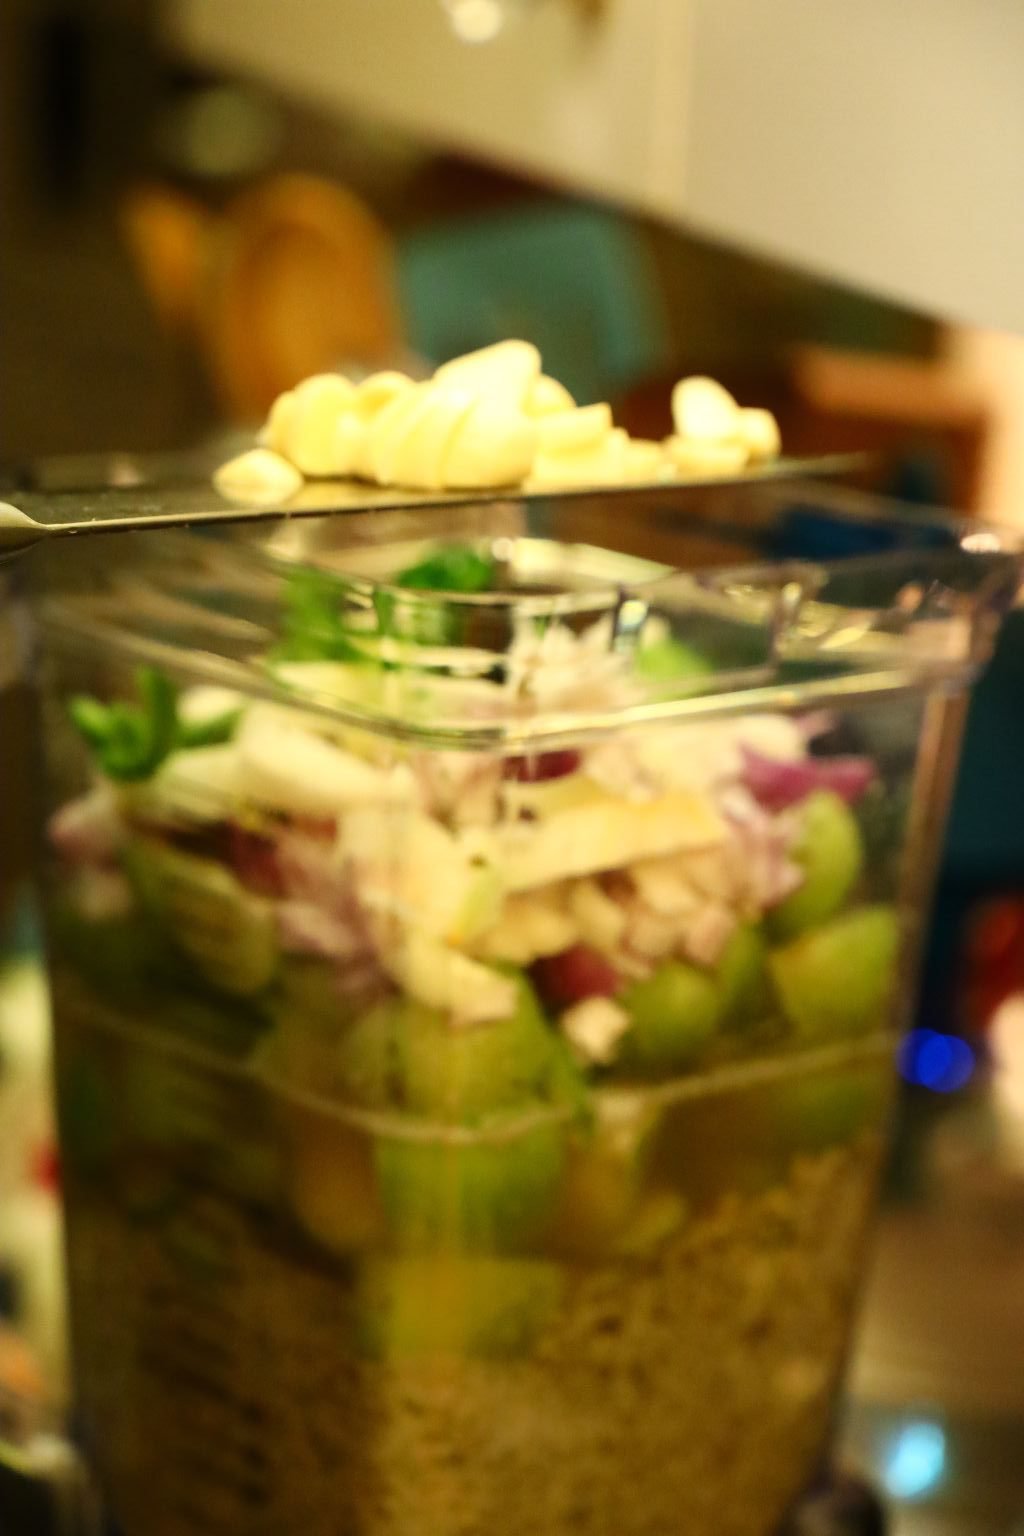
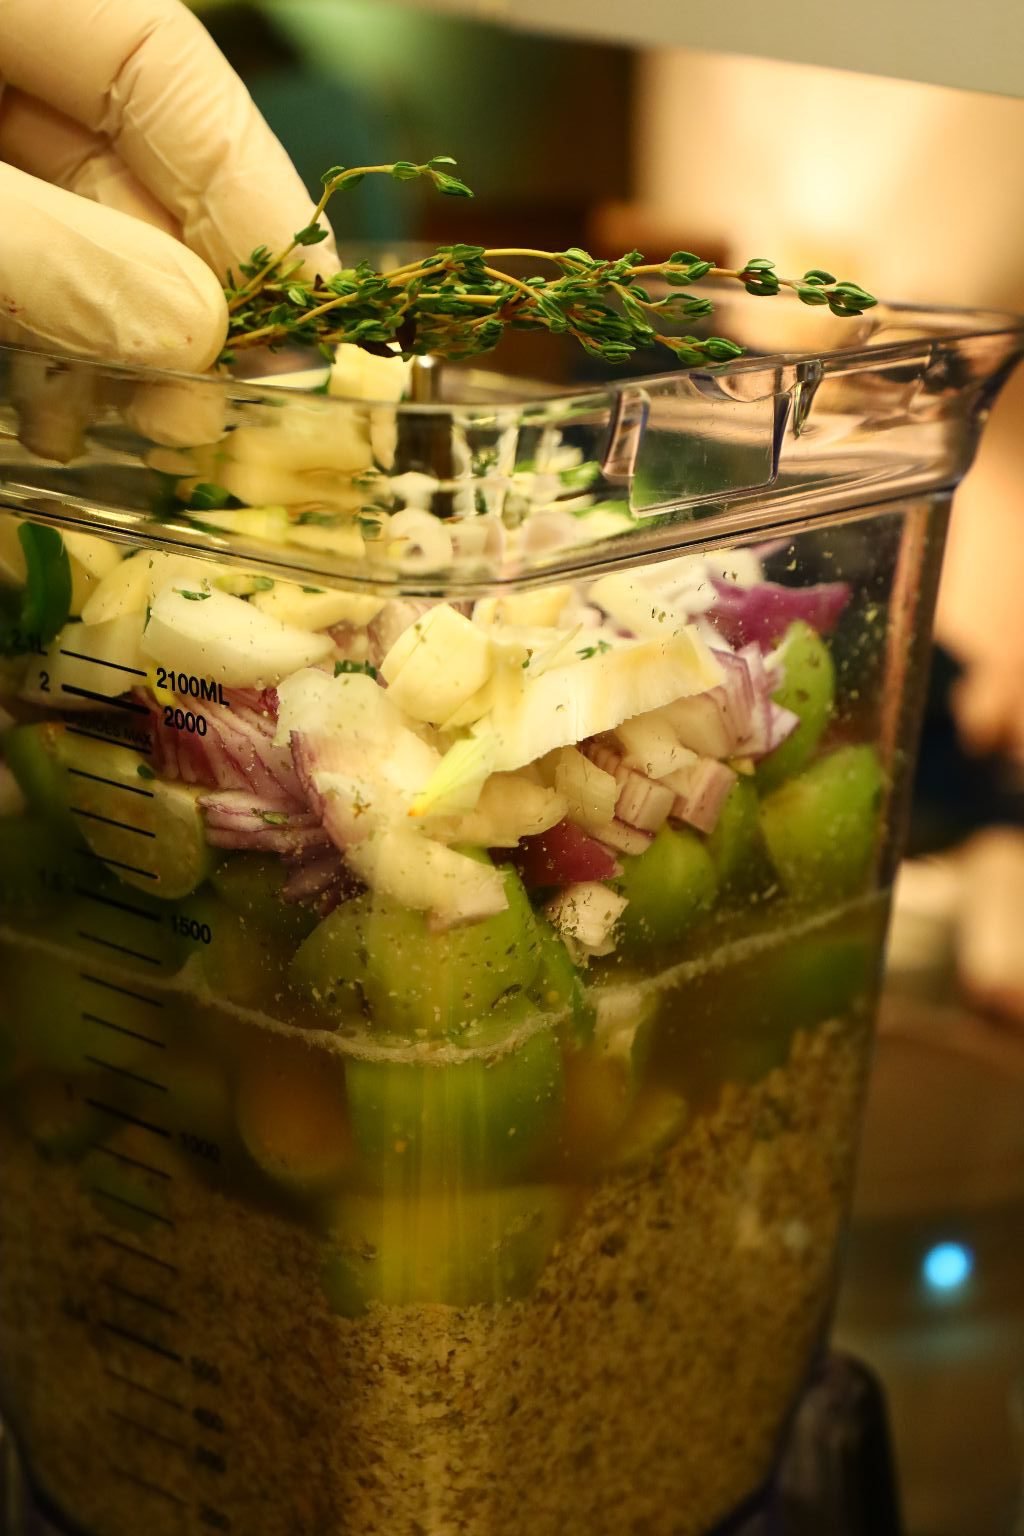
Adding the Garlic and Thyme


Add your marjoram to the blender.

RED TOMATO
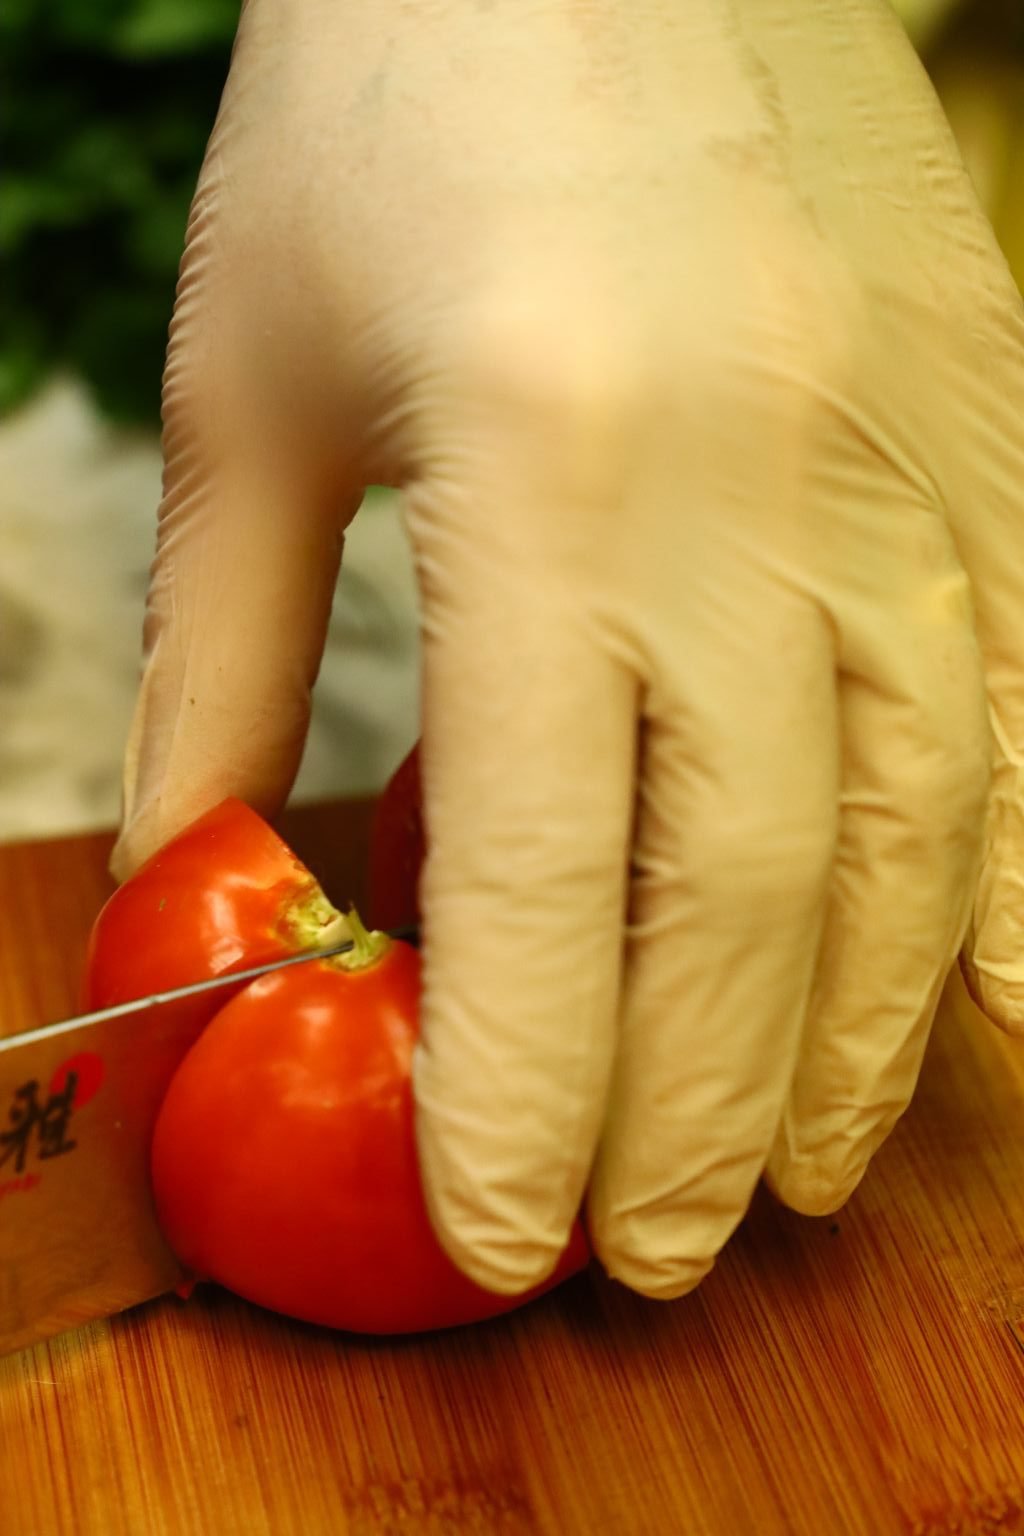
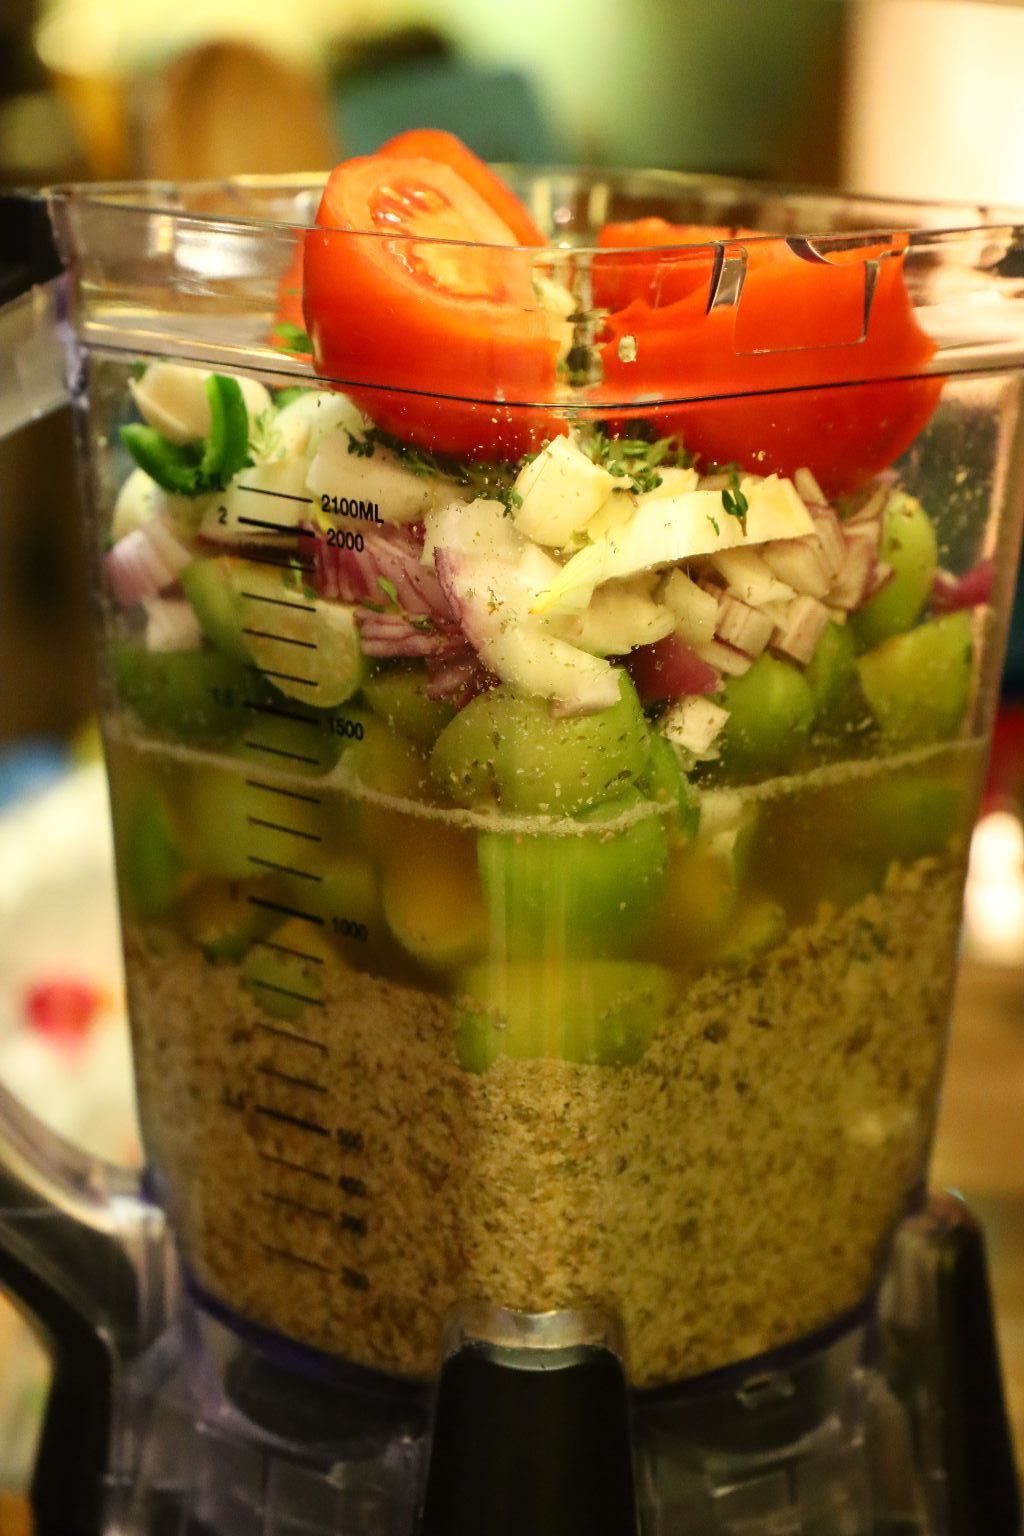
Slice your red tomato into quarters and add it to the blender.

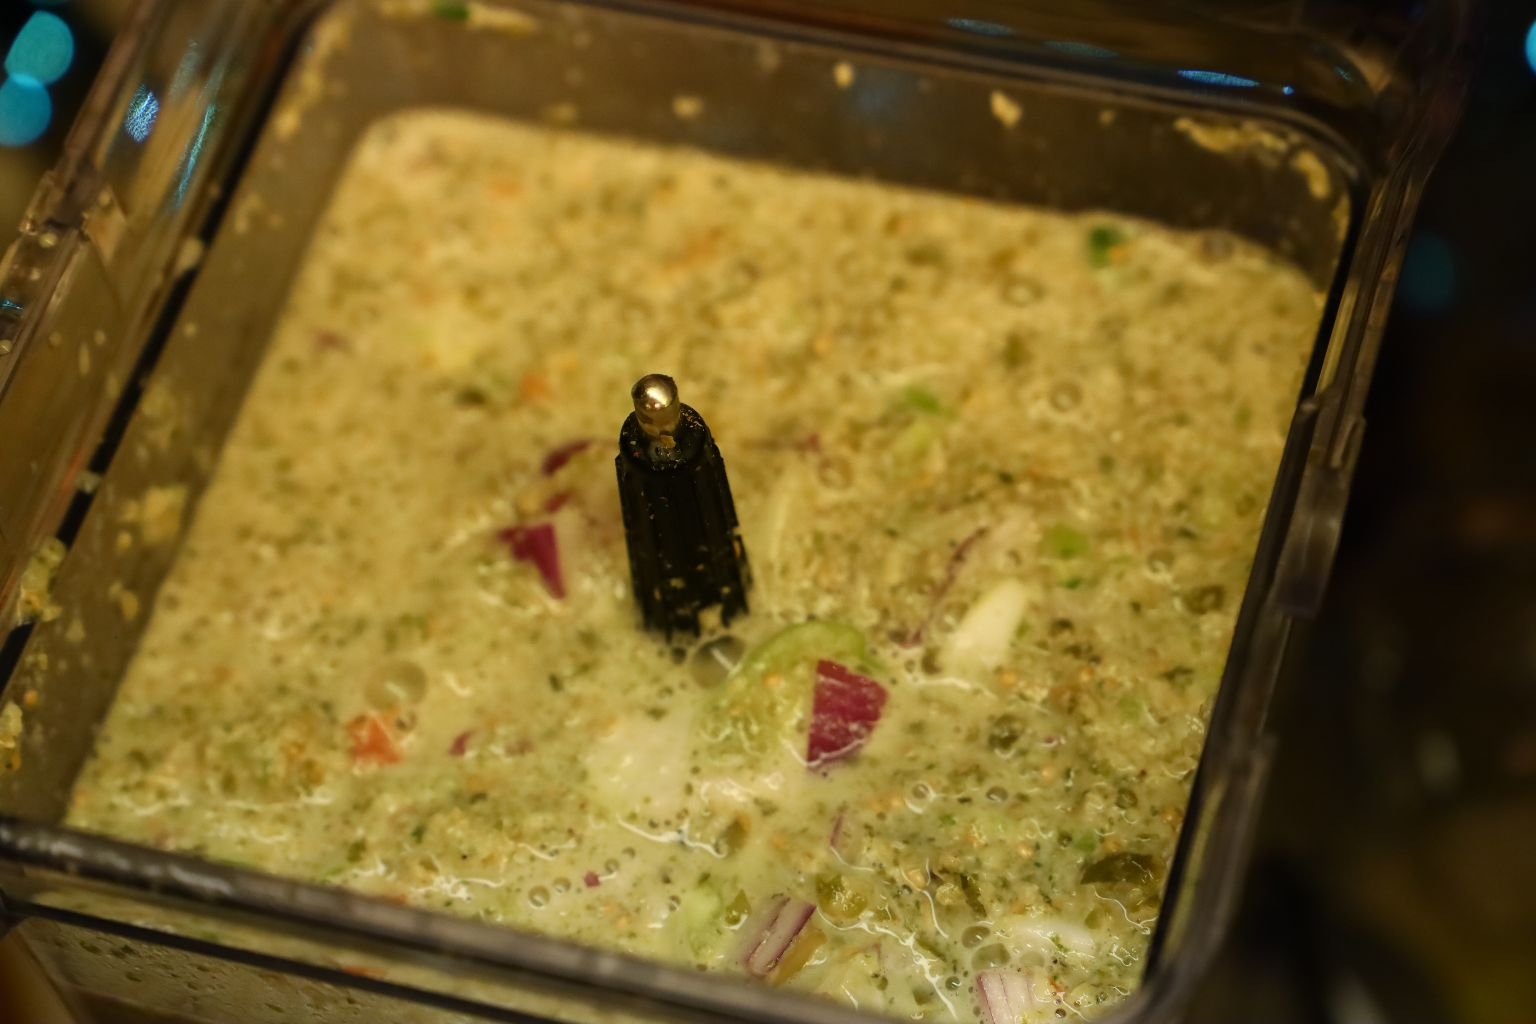
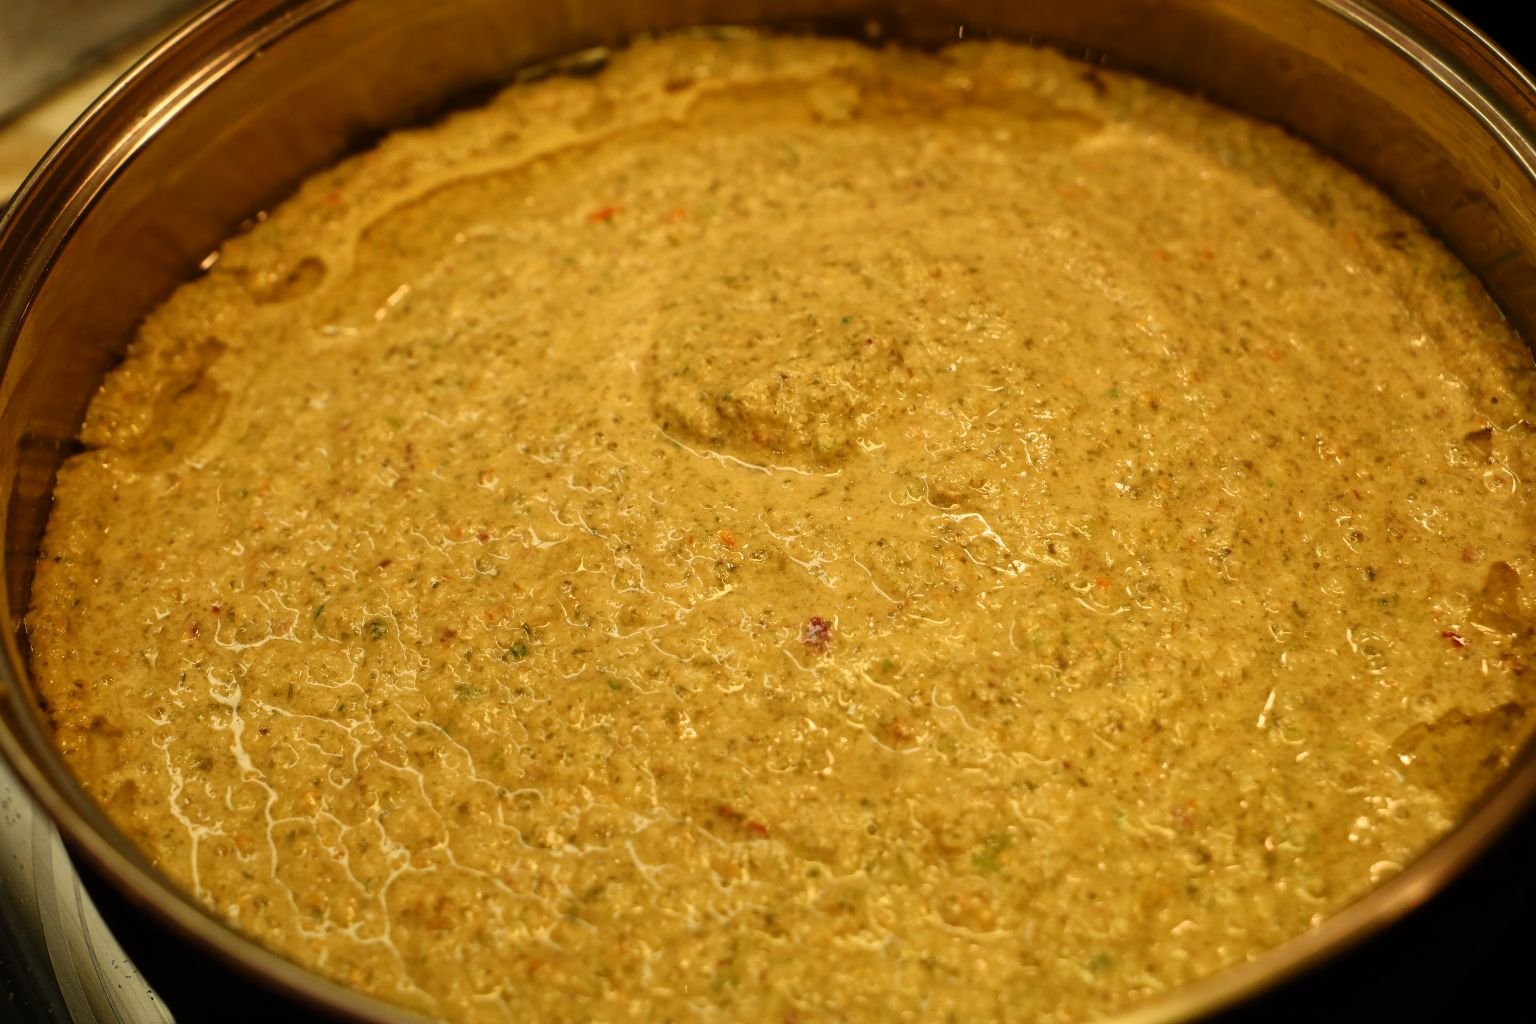
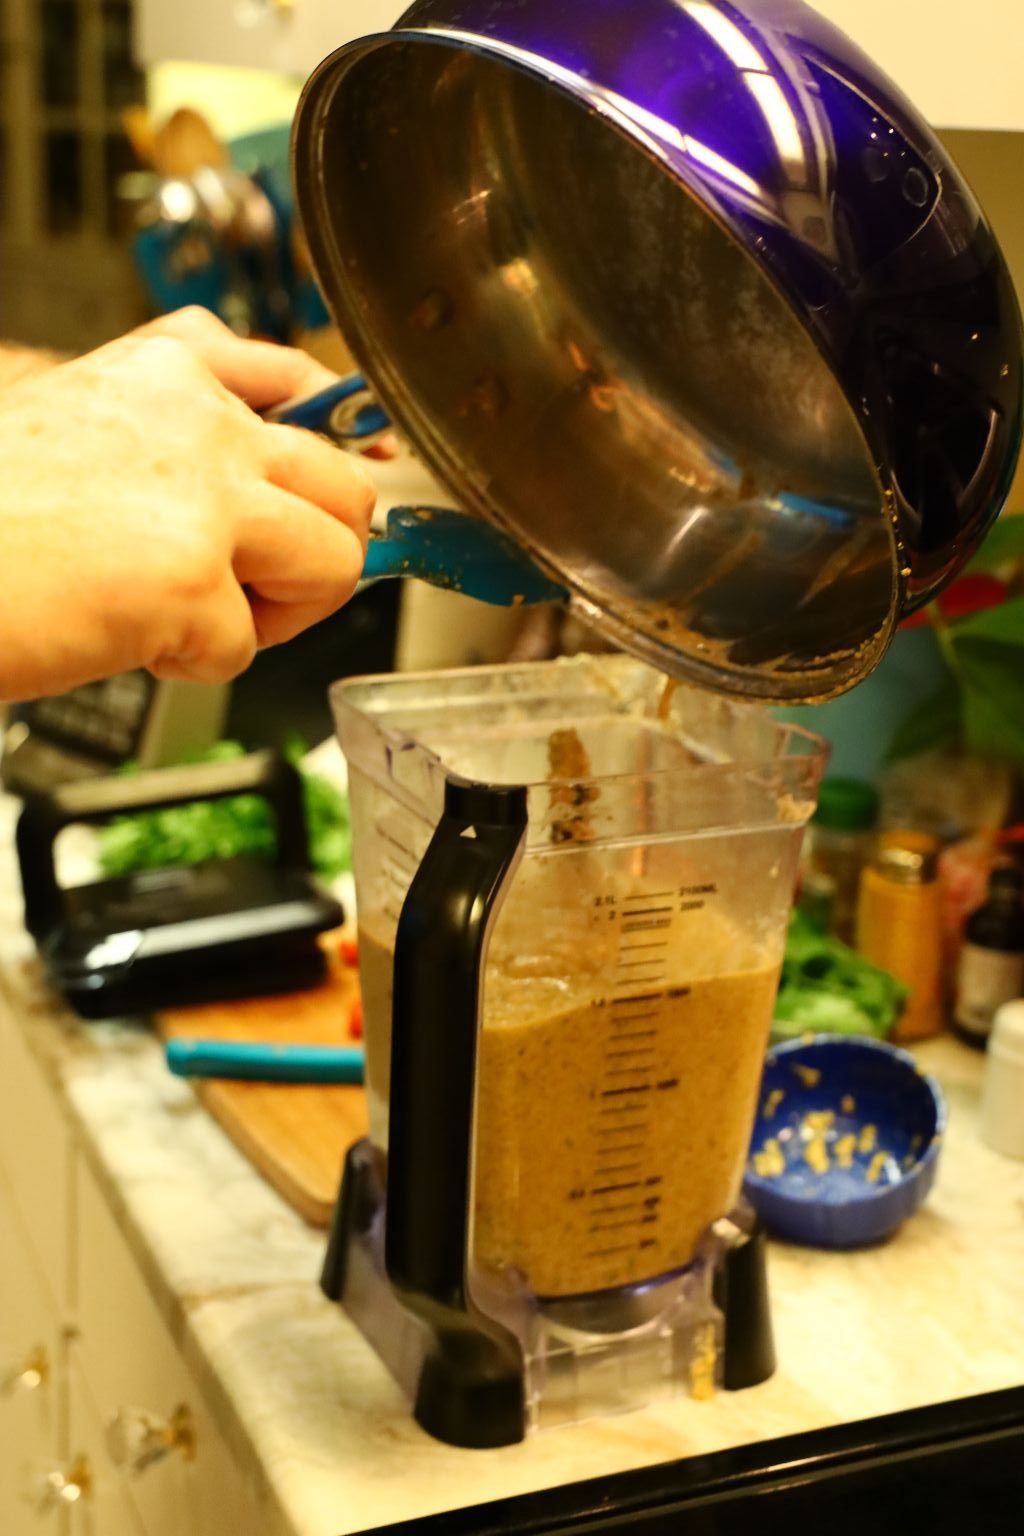
Blend all the ingredients until they are almost smooth.

———————————————————————


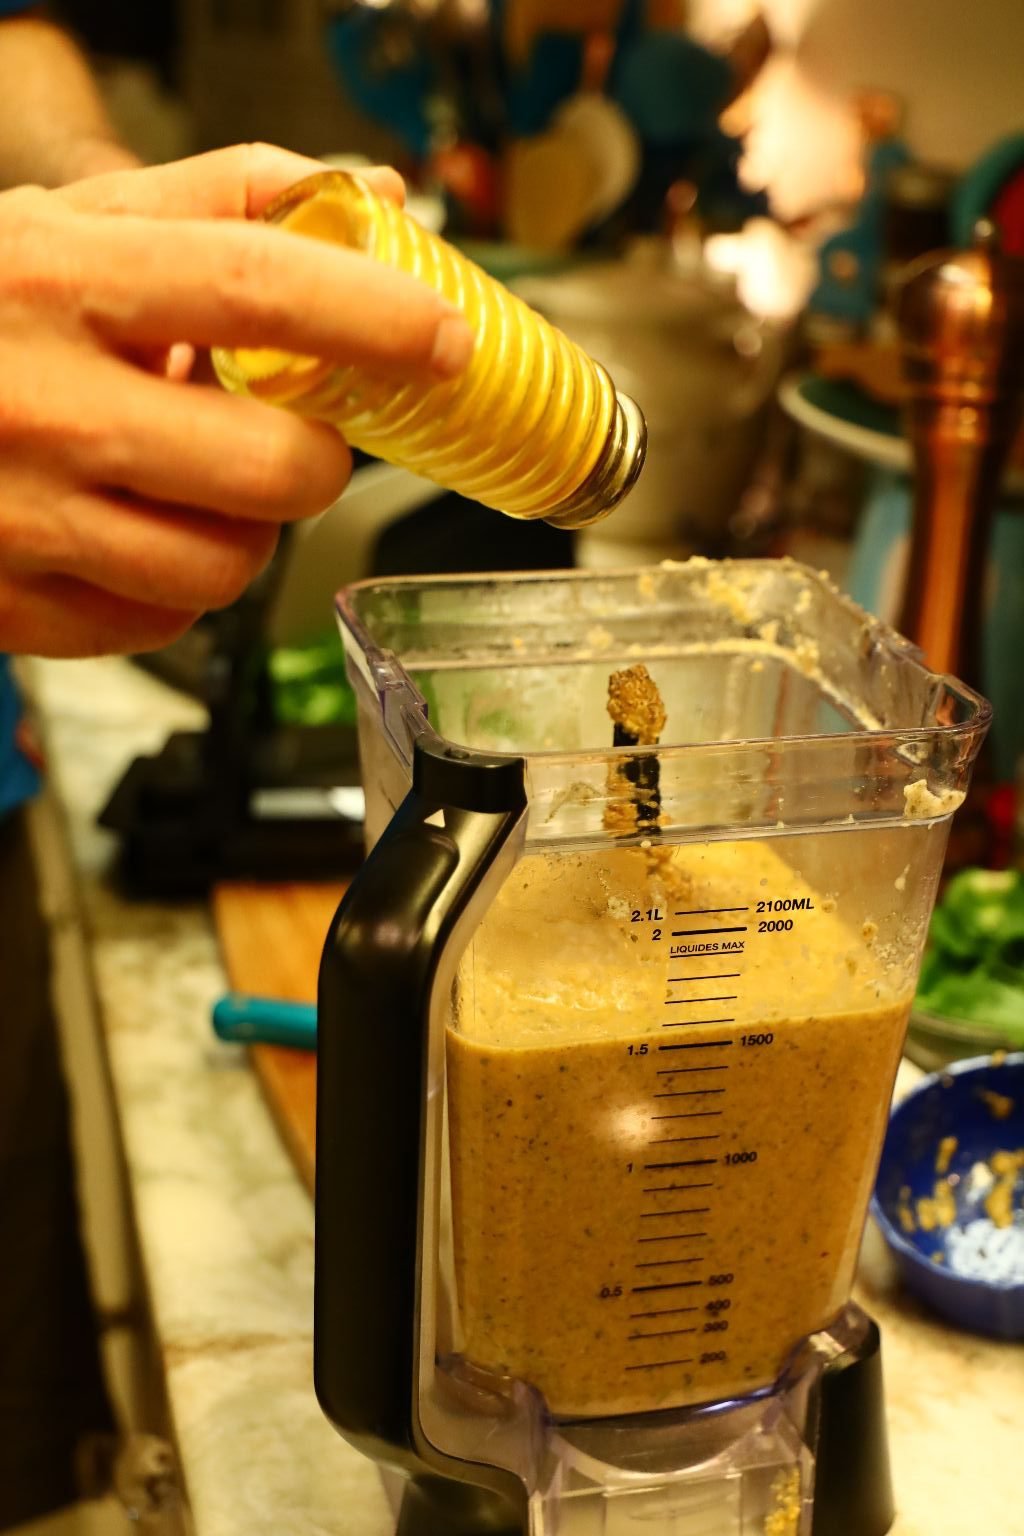
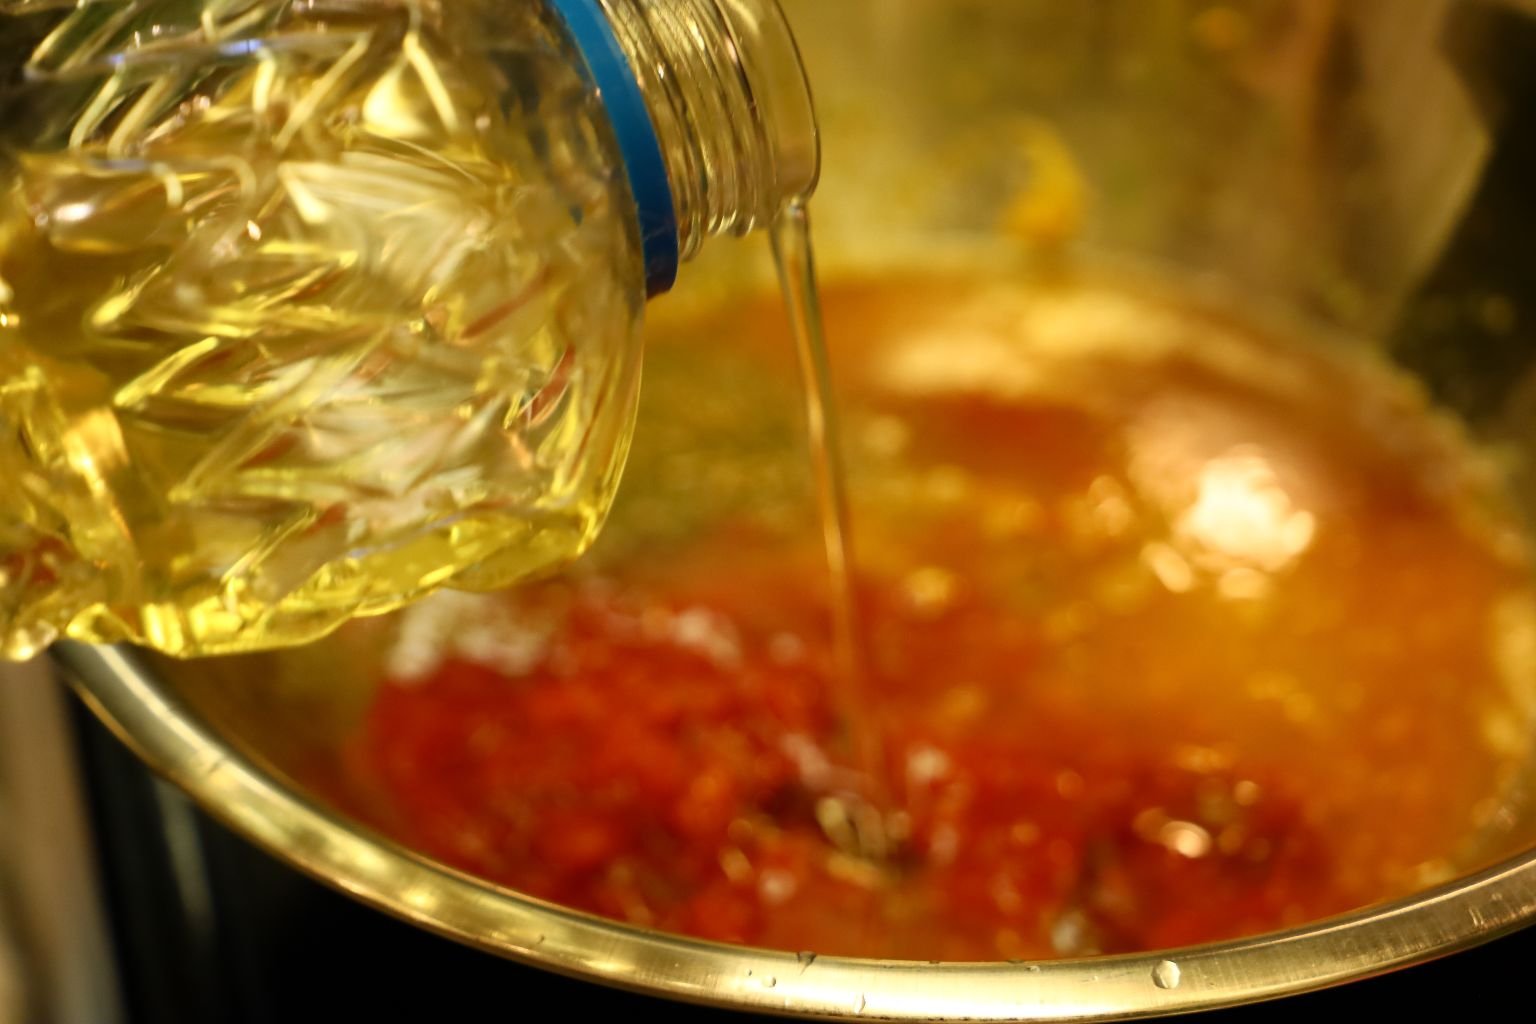
Add your vegetable oil to a large saute pan. Once heated to a medium-high temperature, then add the blender ingredients.
————————————————————
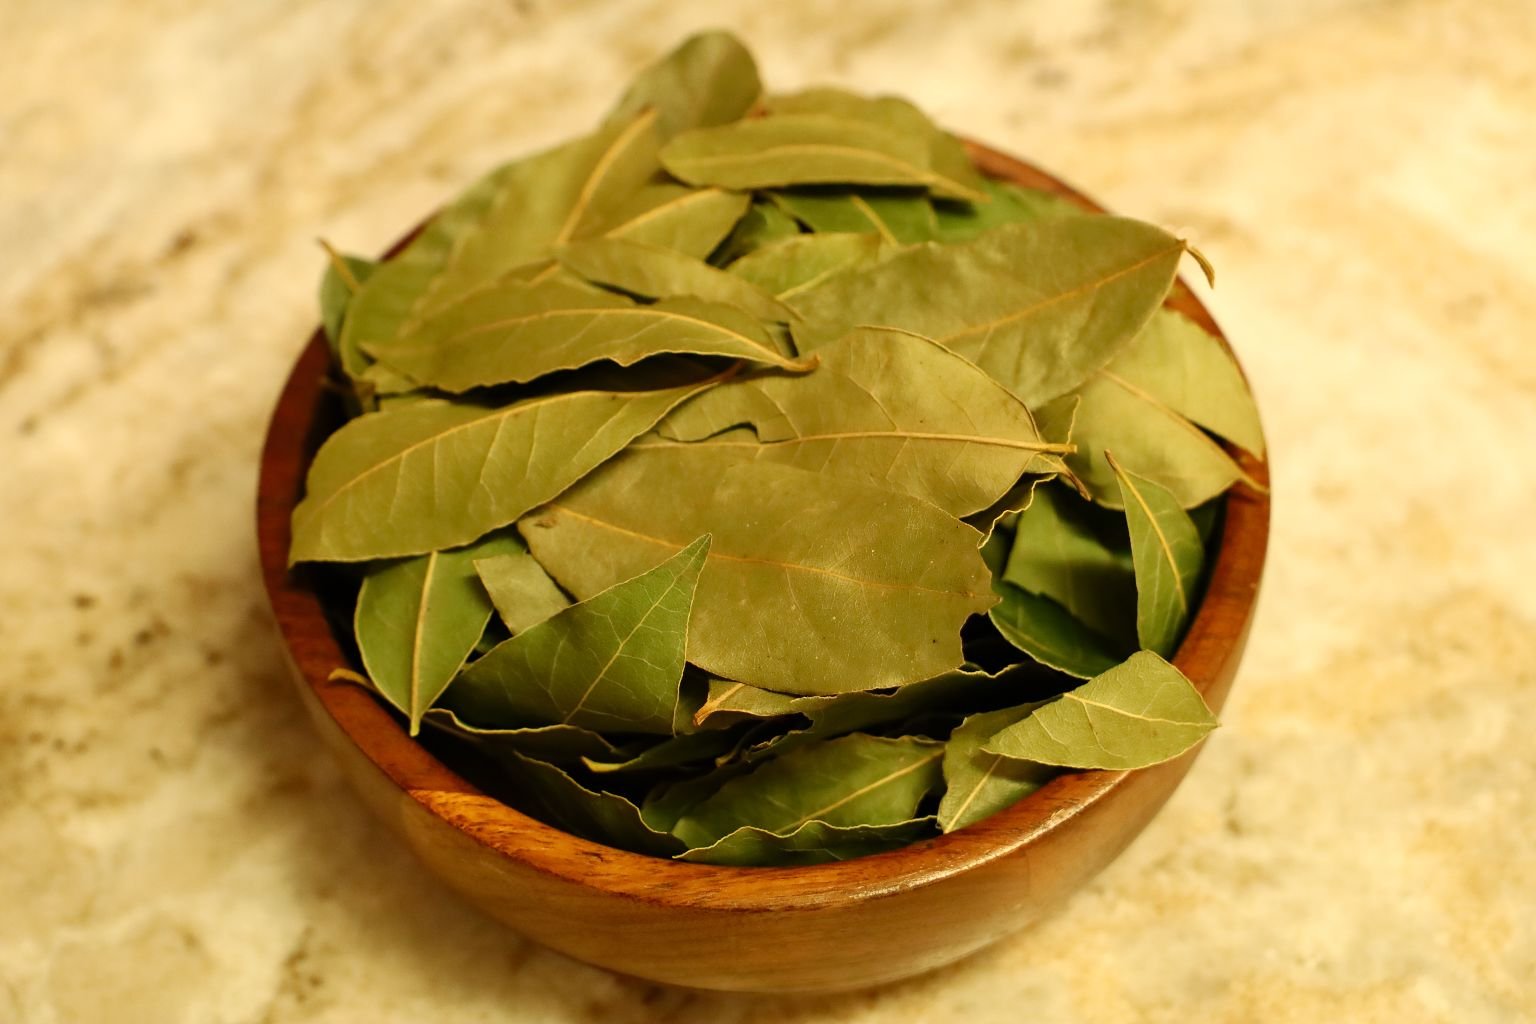
Bay Leaves From Gordon’s Sister Heather’s Backyard Tree

Add your bay leaves to the mixture and saute over medium high heat to cook the seeds and vegetables.

Here I am slicing the jalapeno rounds for the garnish.

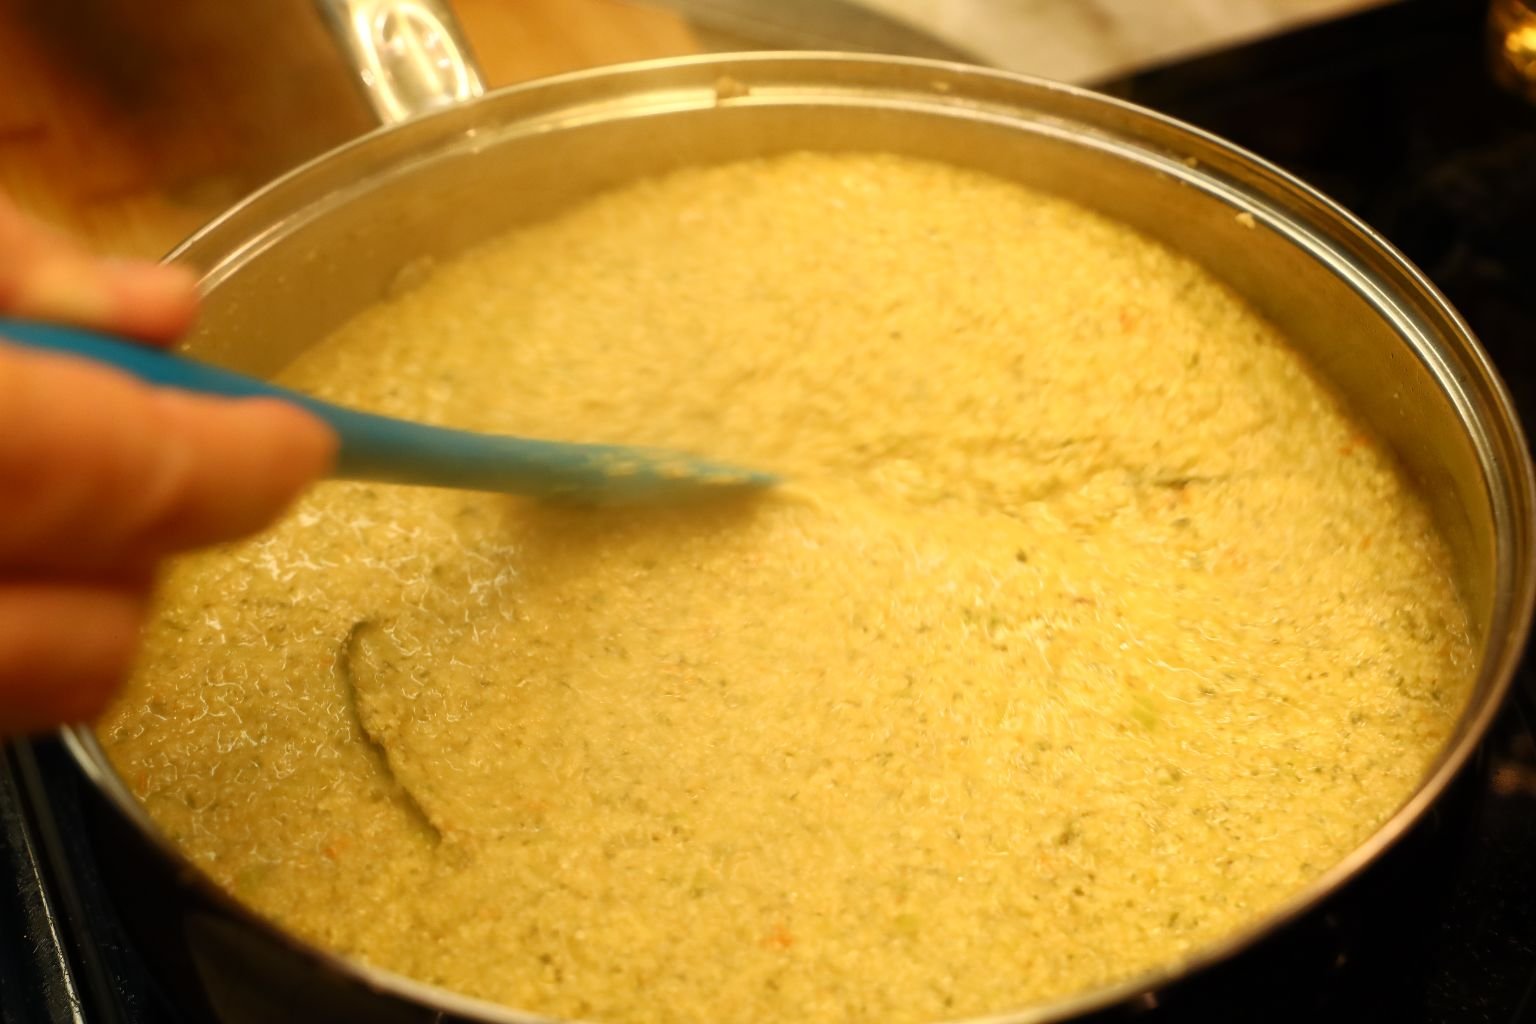
Continue to cook the ingredients while stirring.
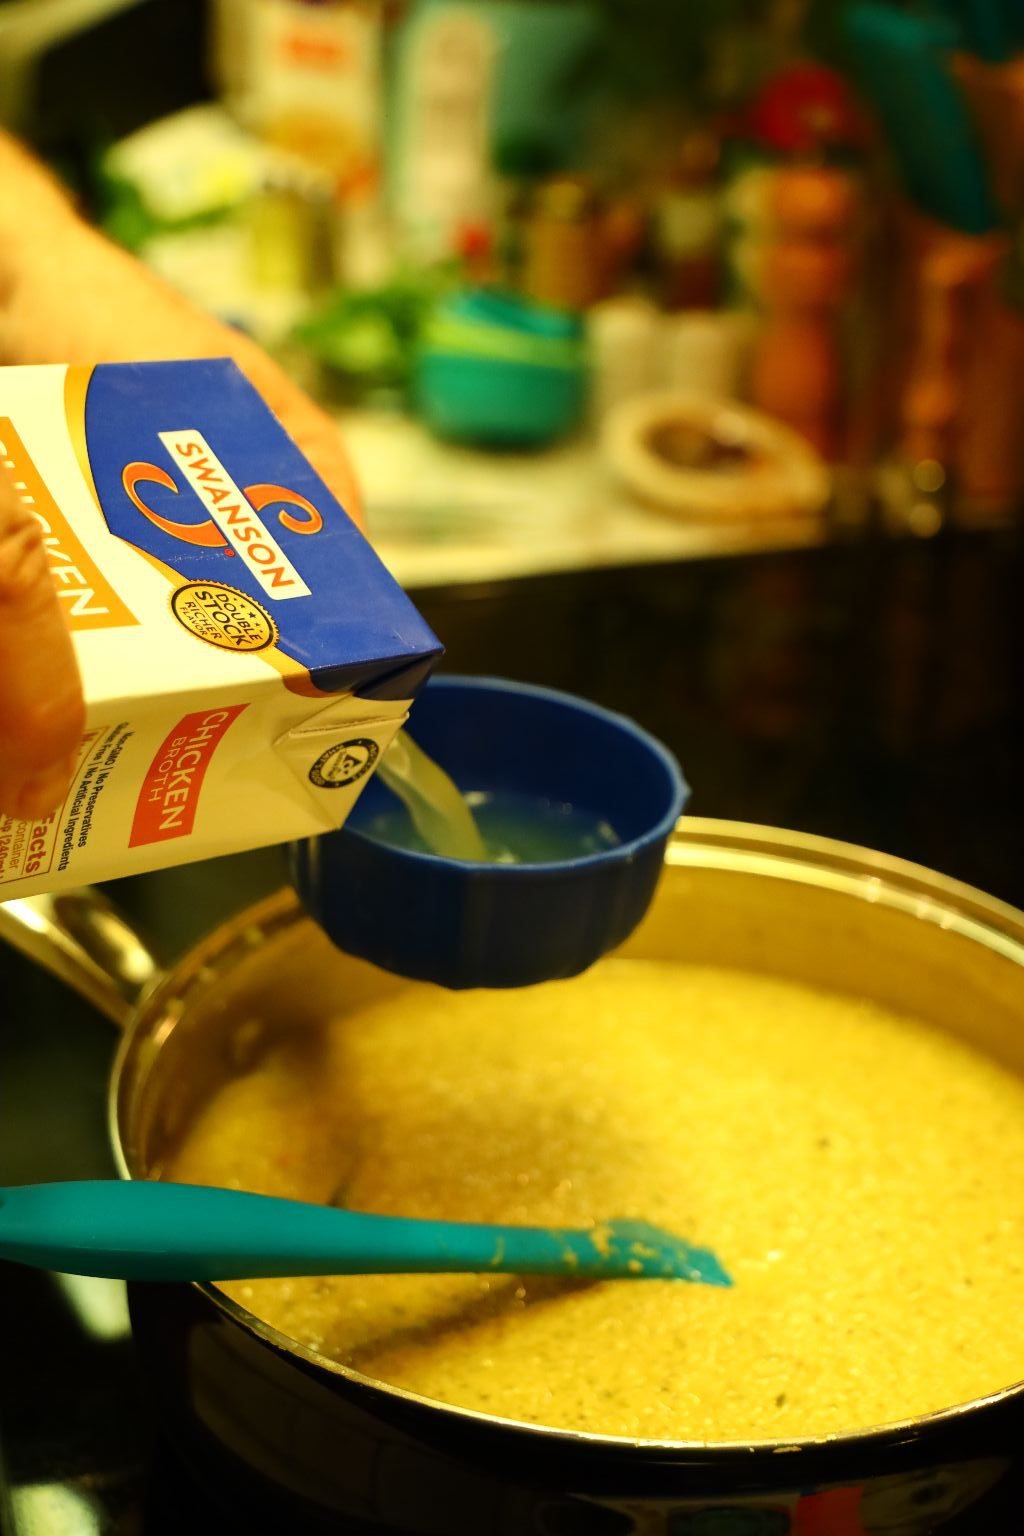
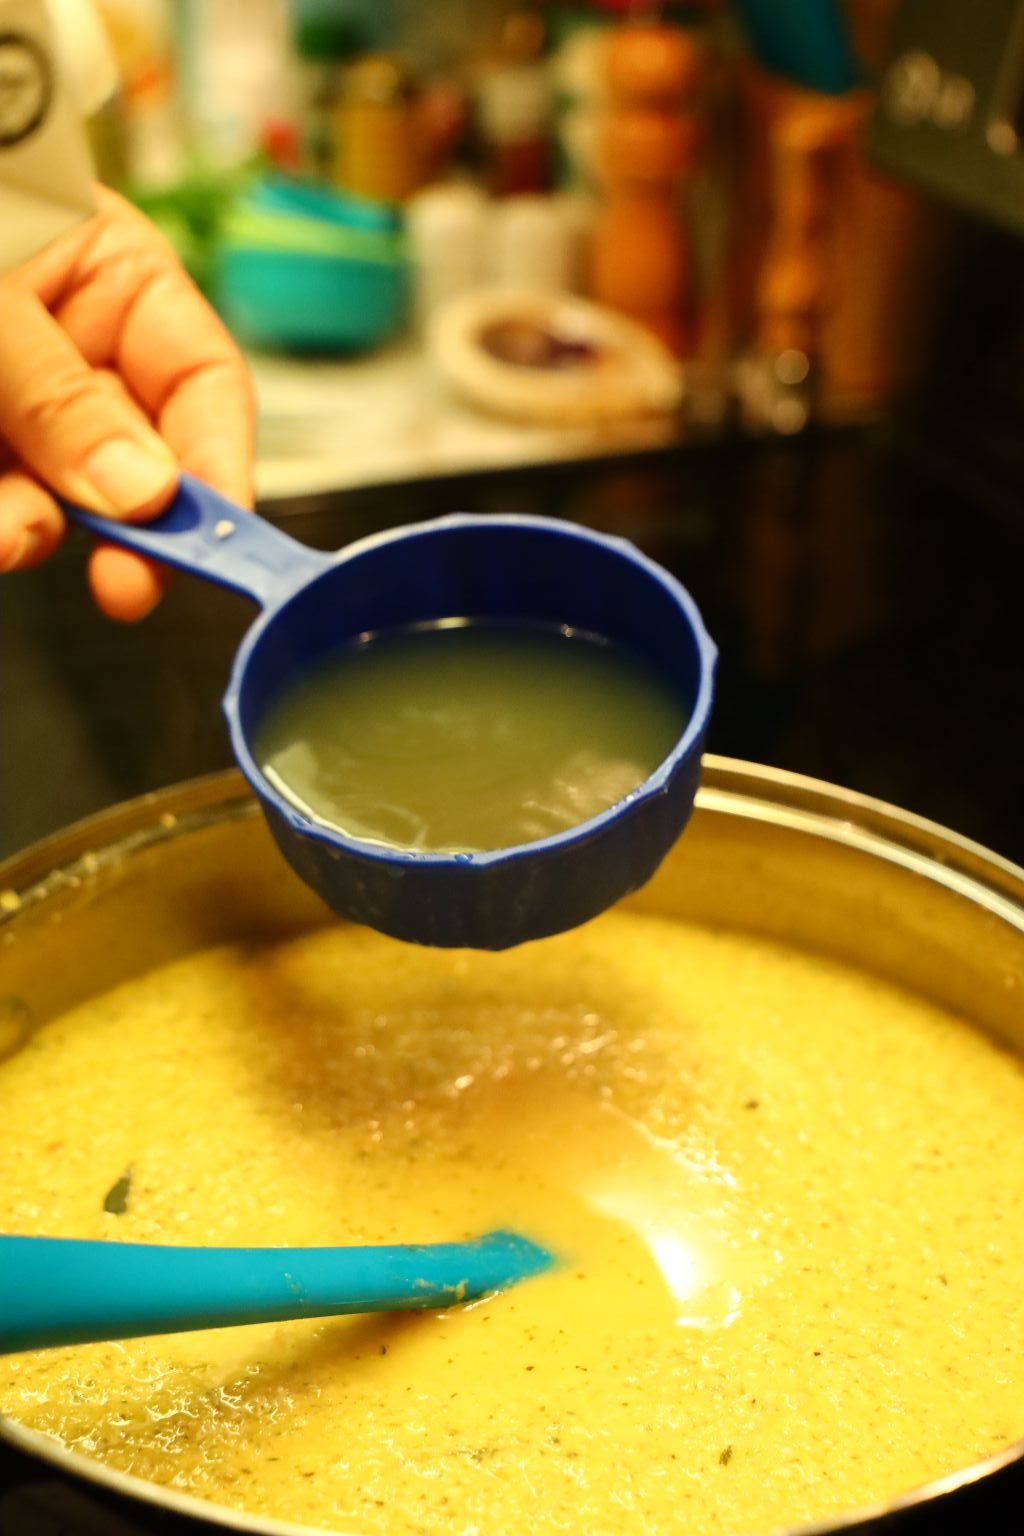
Here I am adding more stock to the pan to help further cook the seeds until they become tender.

Again, continue to stir the ingredients so they don’t stick and burn.
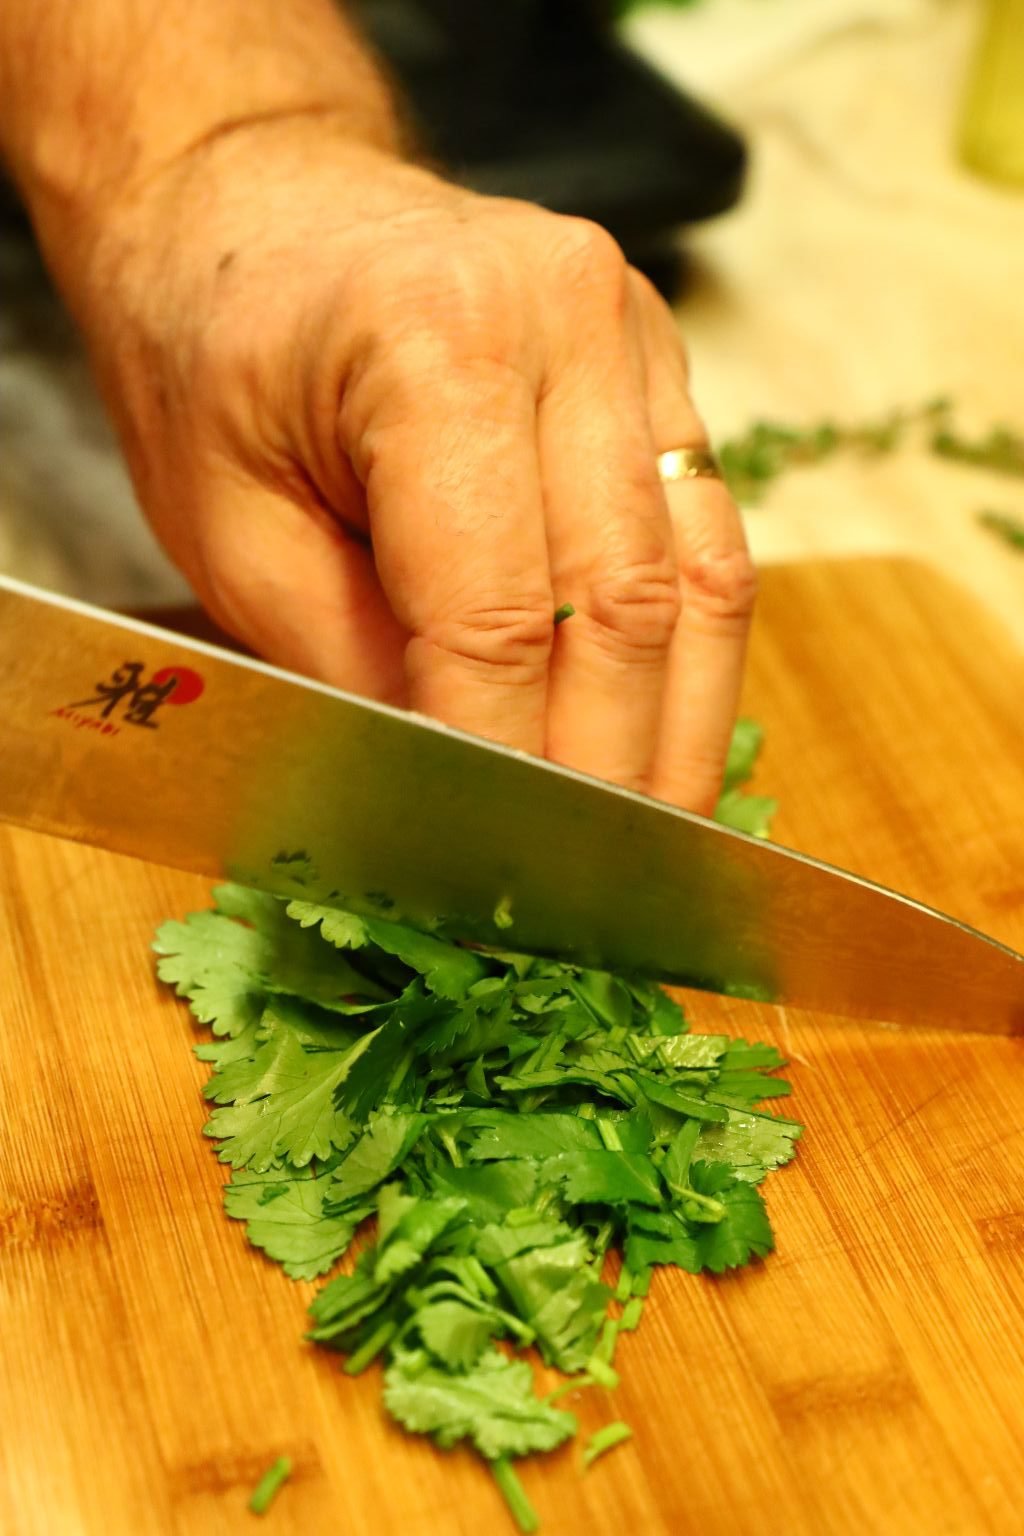
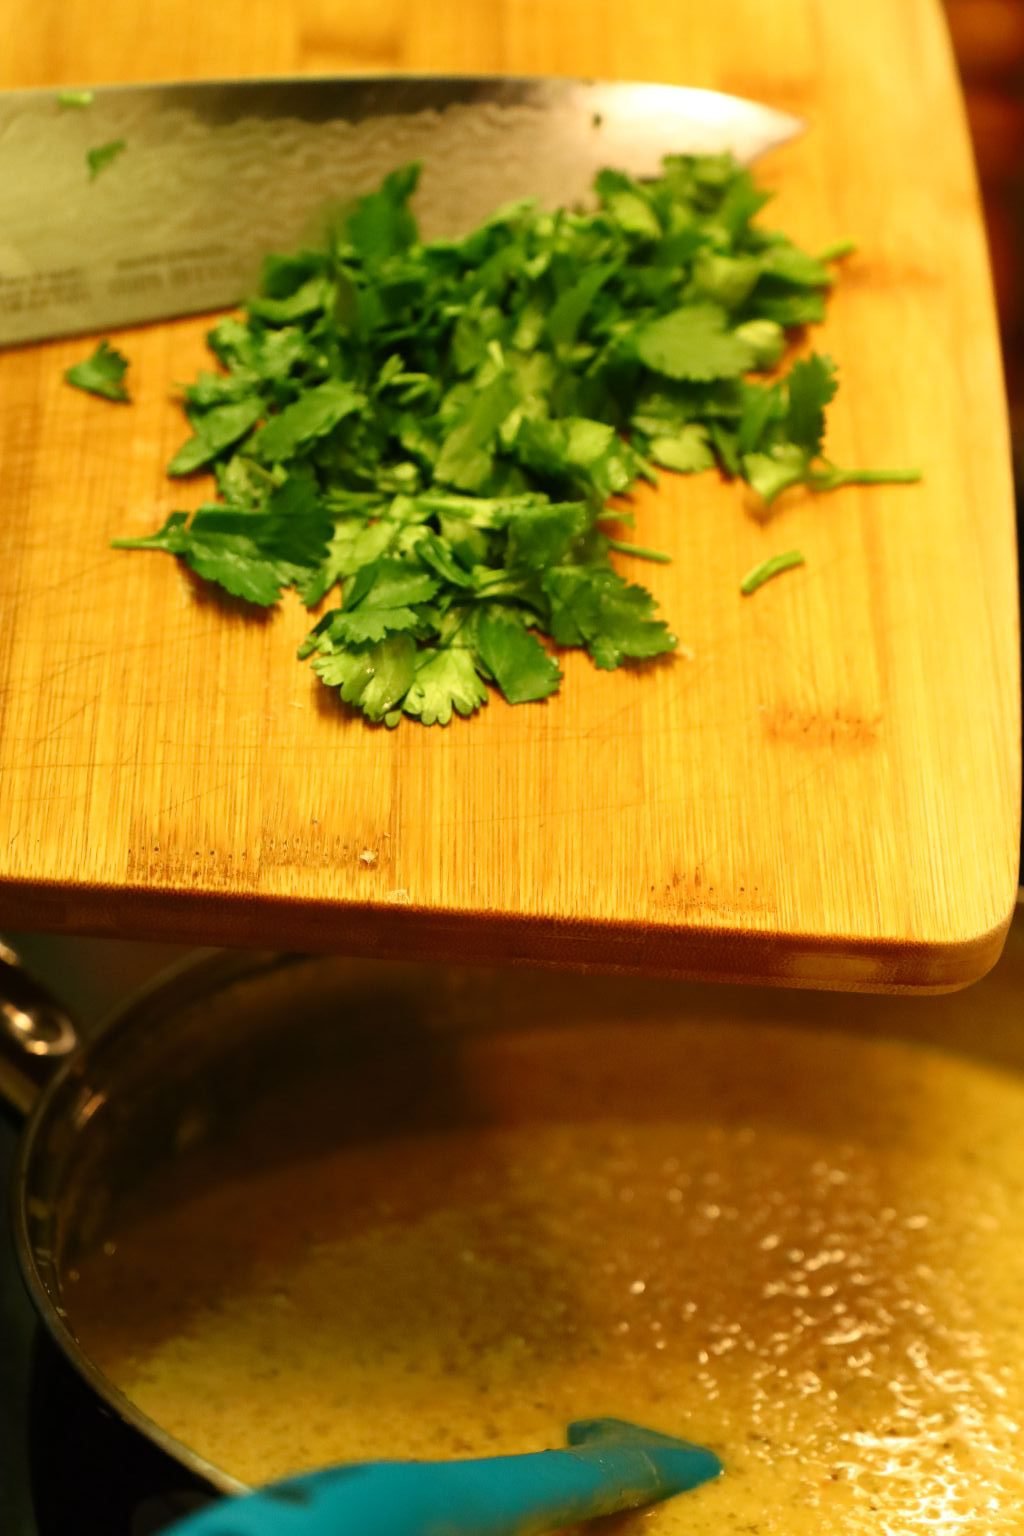
Here, I am chopping the cilantro leaves.

When the Mole Verde is almost fully cooked, add the chopped cilantro.


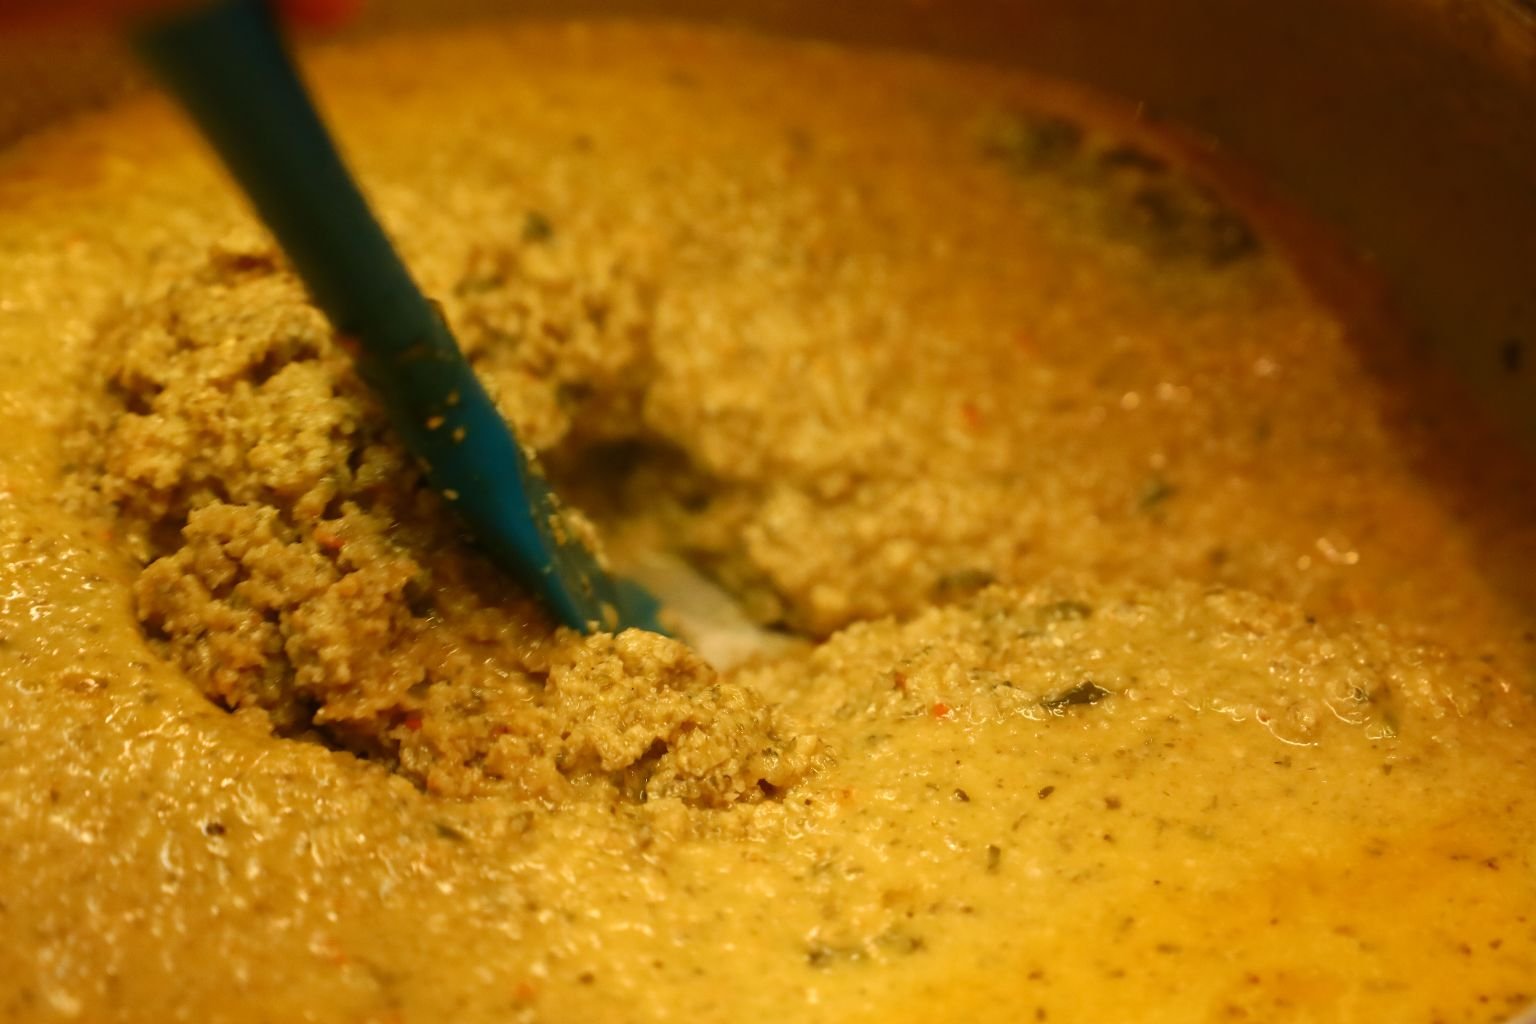
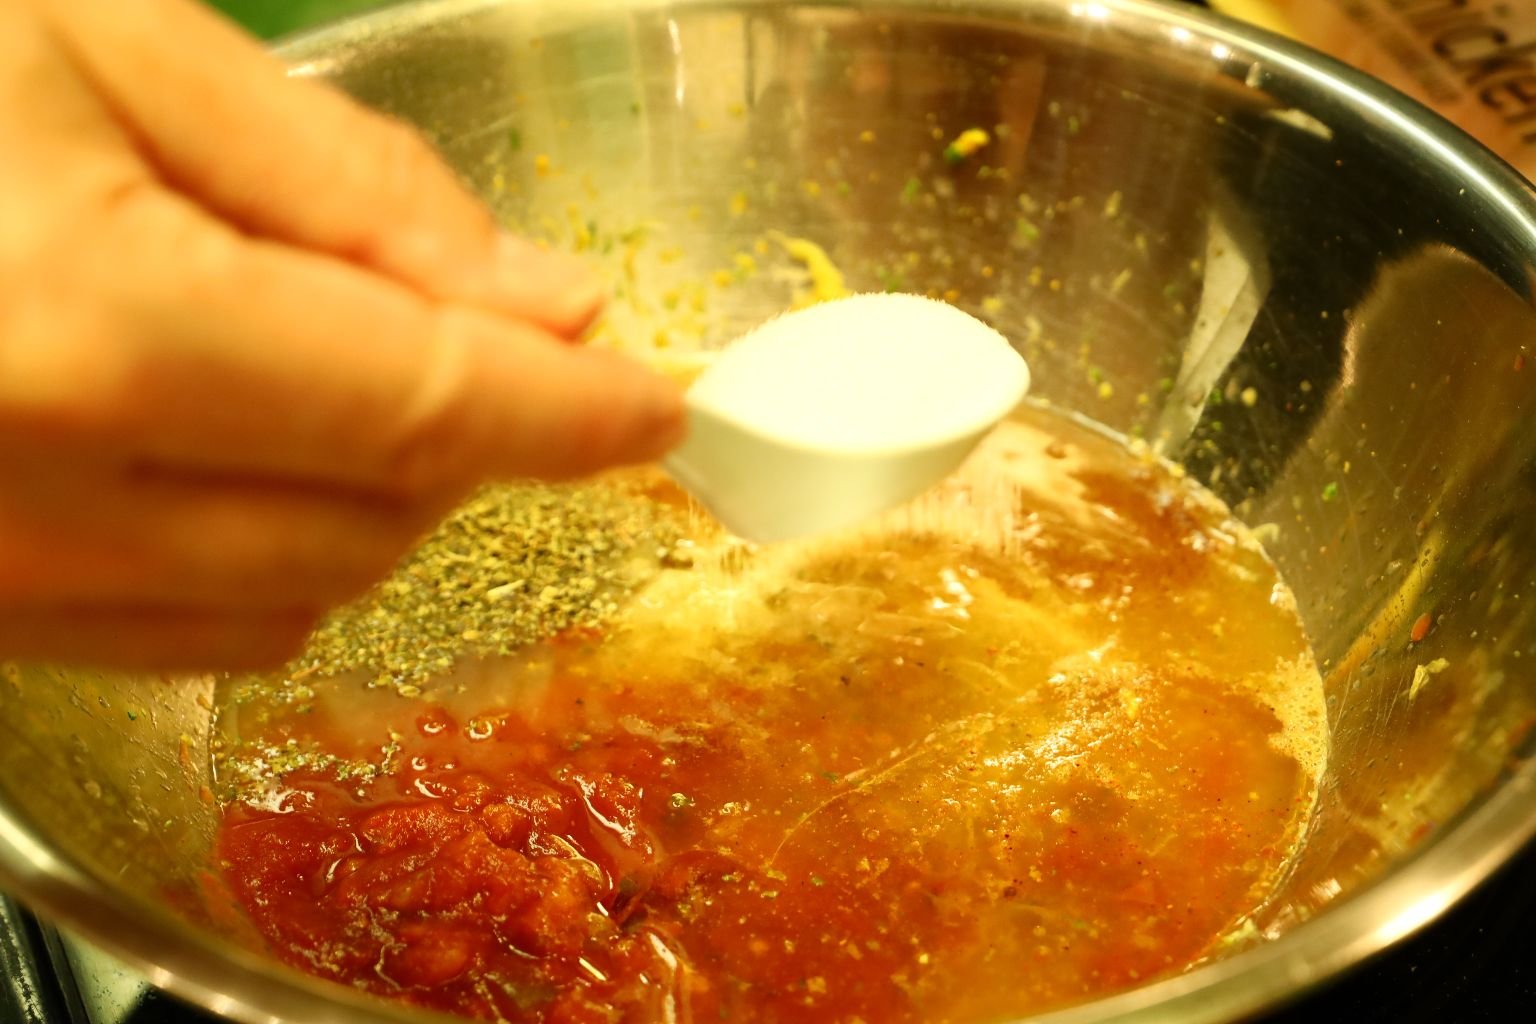
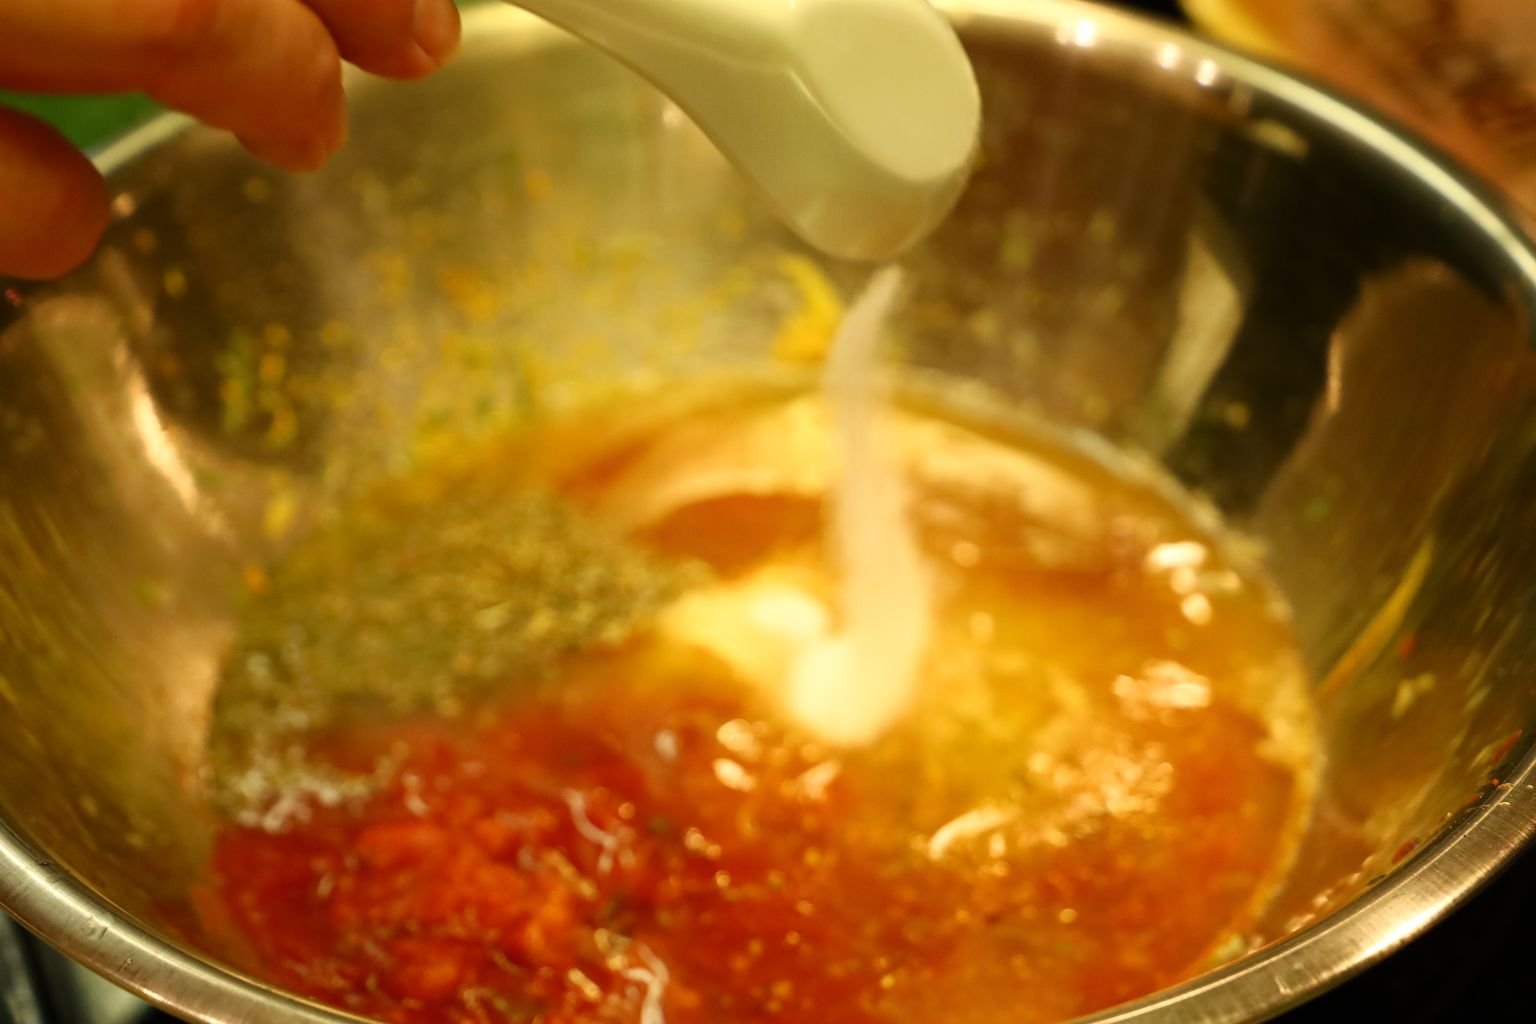
I wanted the mole to be a little more smooth, so I placed it back into the blender.

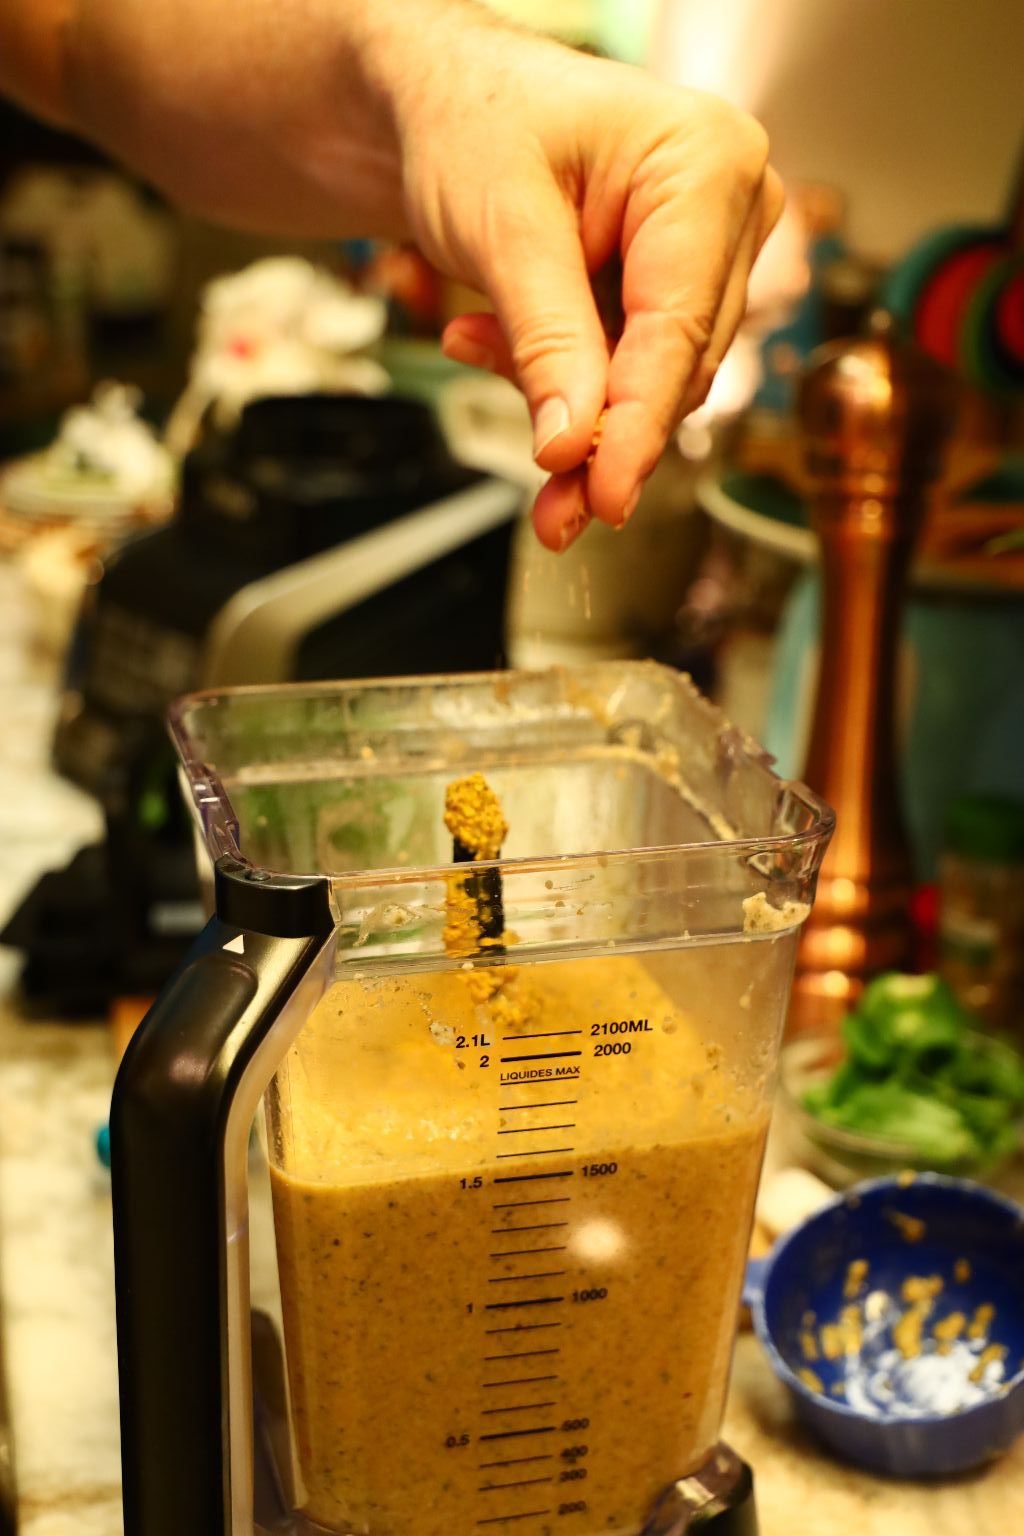
Now, add your pepper, turmeric, and salt to the mole.

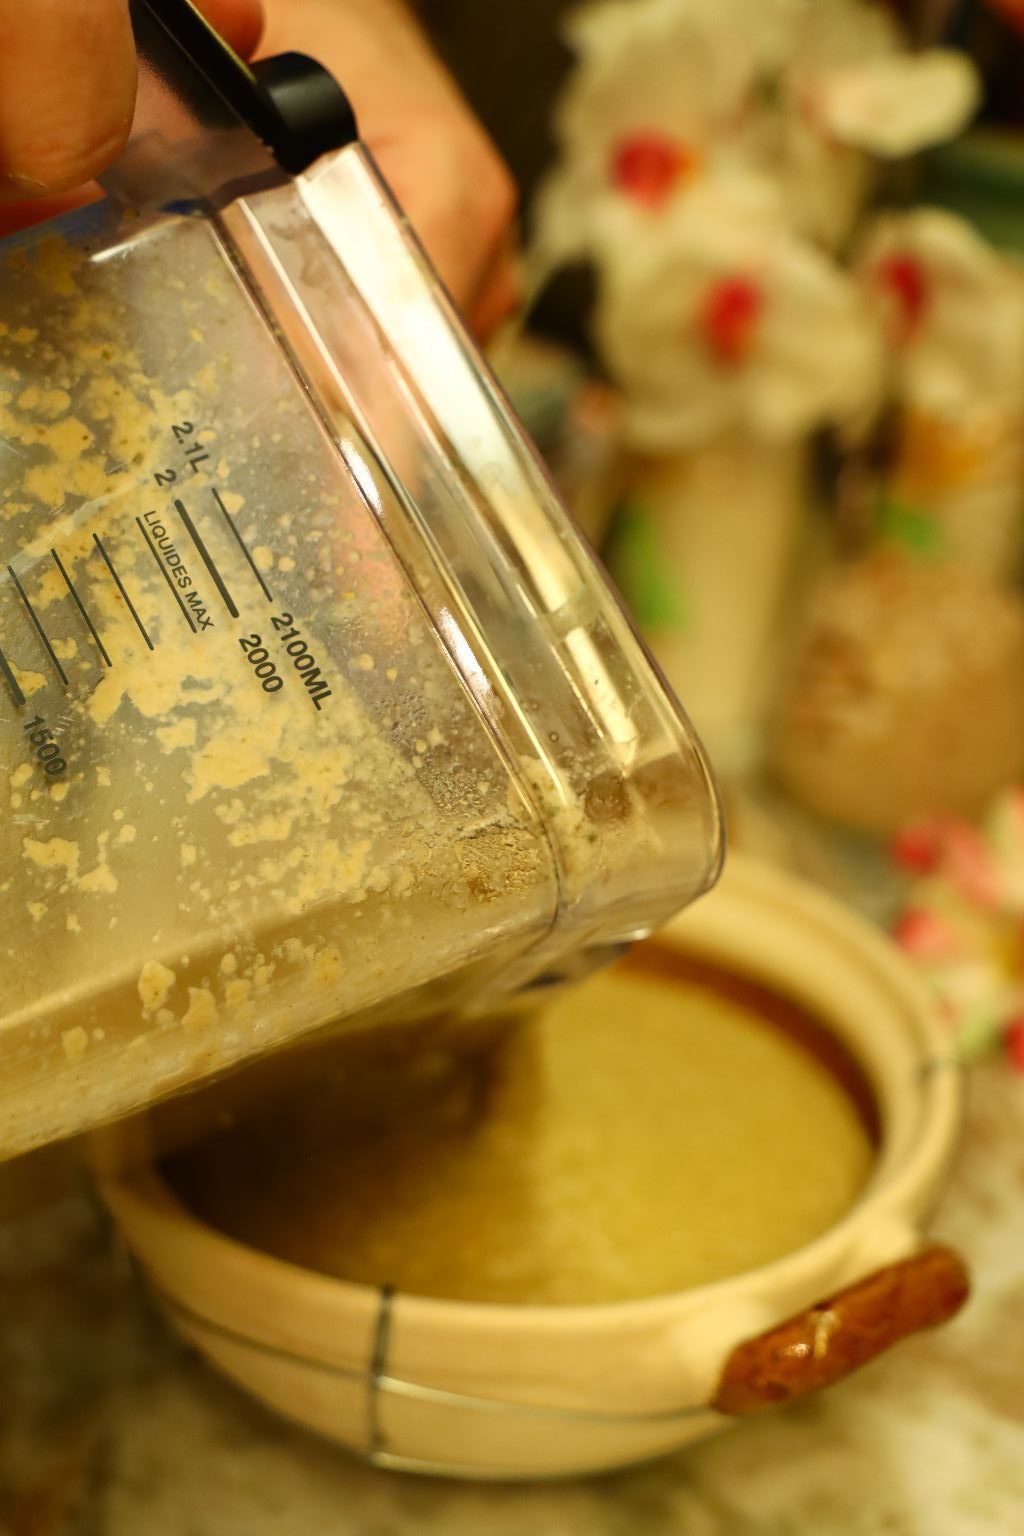
Blend until very smooth then add them to your serving dish.

Garnish with some of your sliced jalapeno rings and whole cilantro leaves.
Enjoy!
———————————————————————
How to Eat the Mole Verde
You can eat it as a dip with tortillas chips like I am here or…
you can eat it on a Tostada Shell with Chicken, tomatoes, lettuce and herbs.
———————————————————
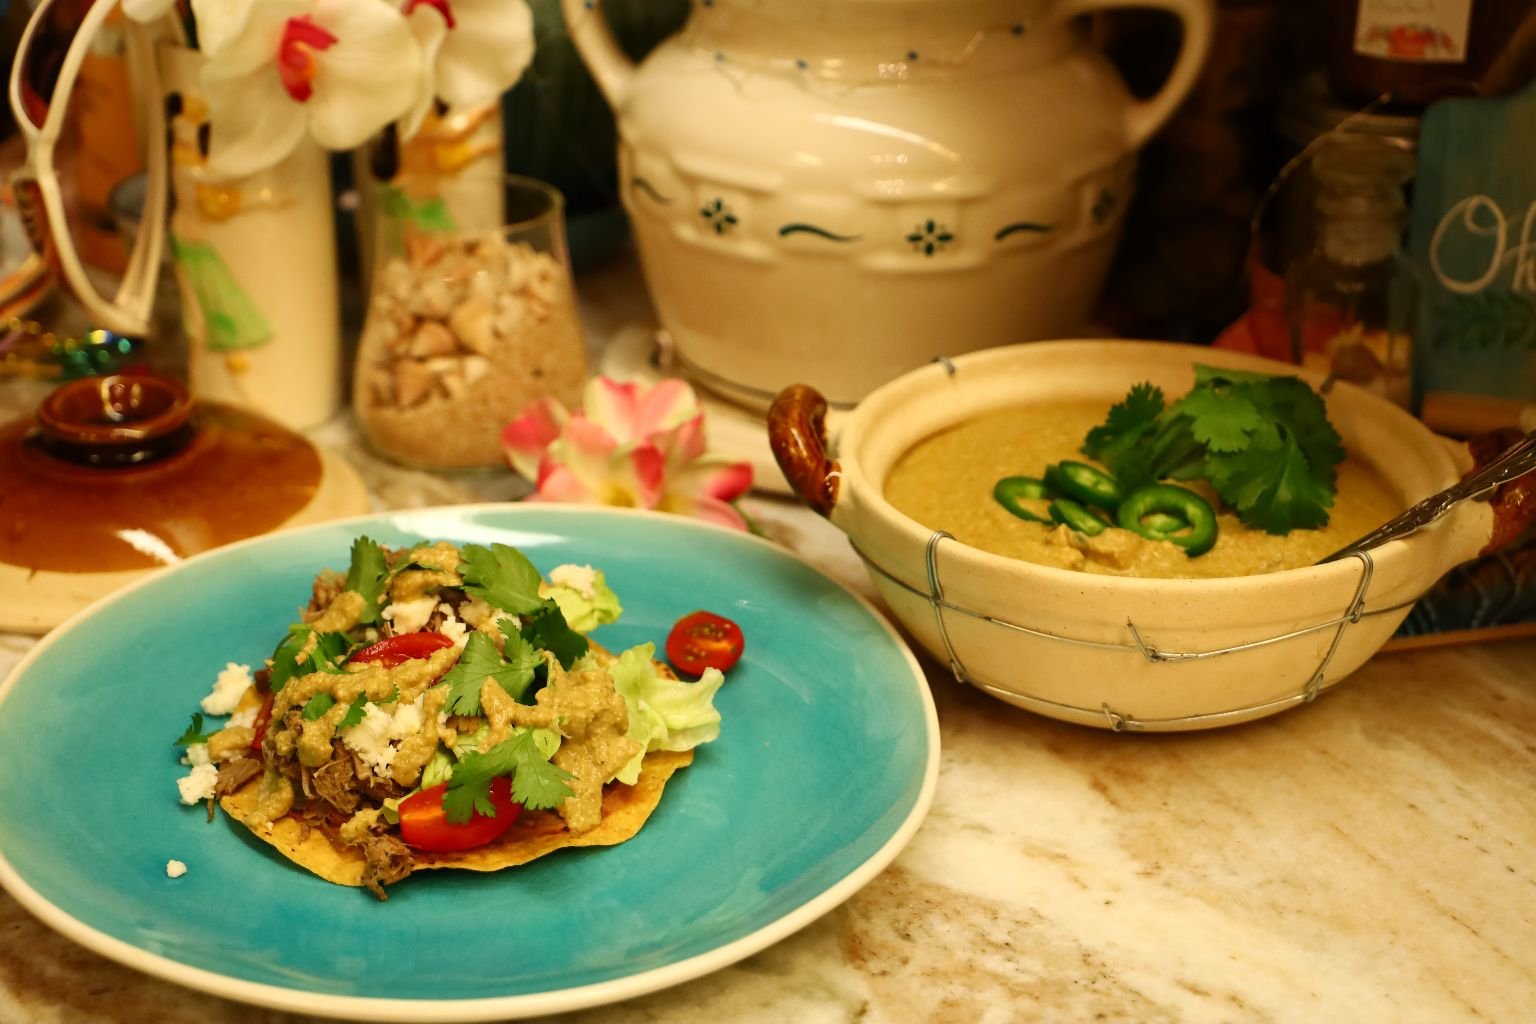
Mole Verde to Top my Tostadas
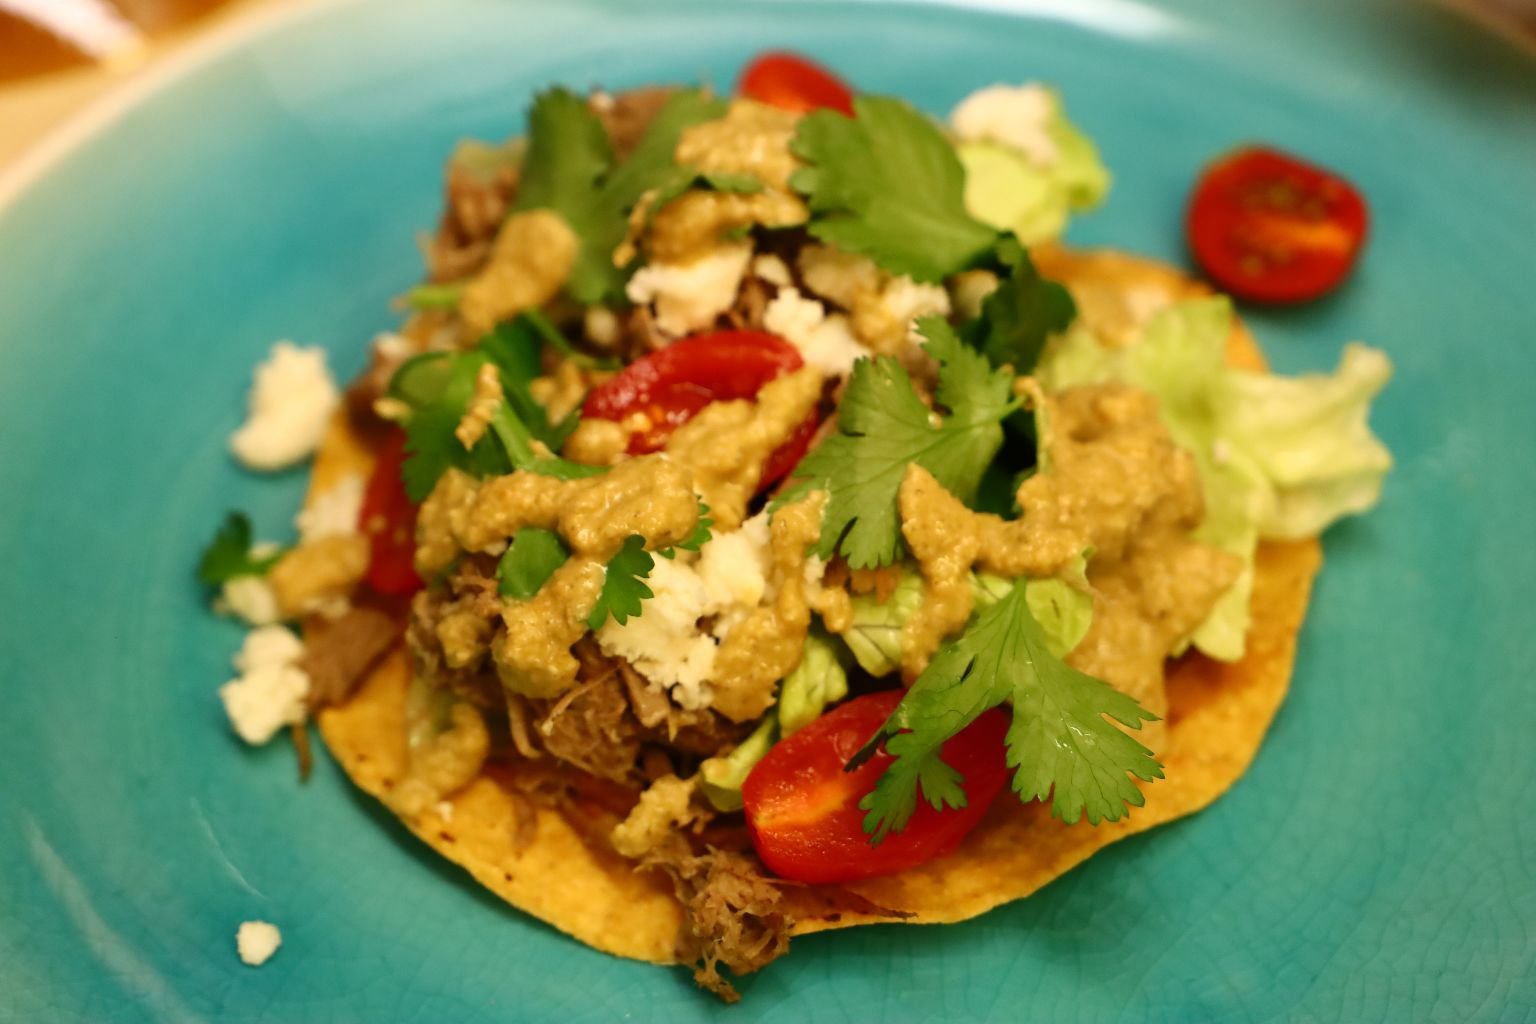
Delicioso!
———————————————————————-
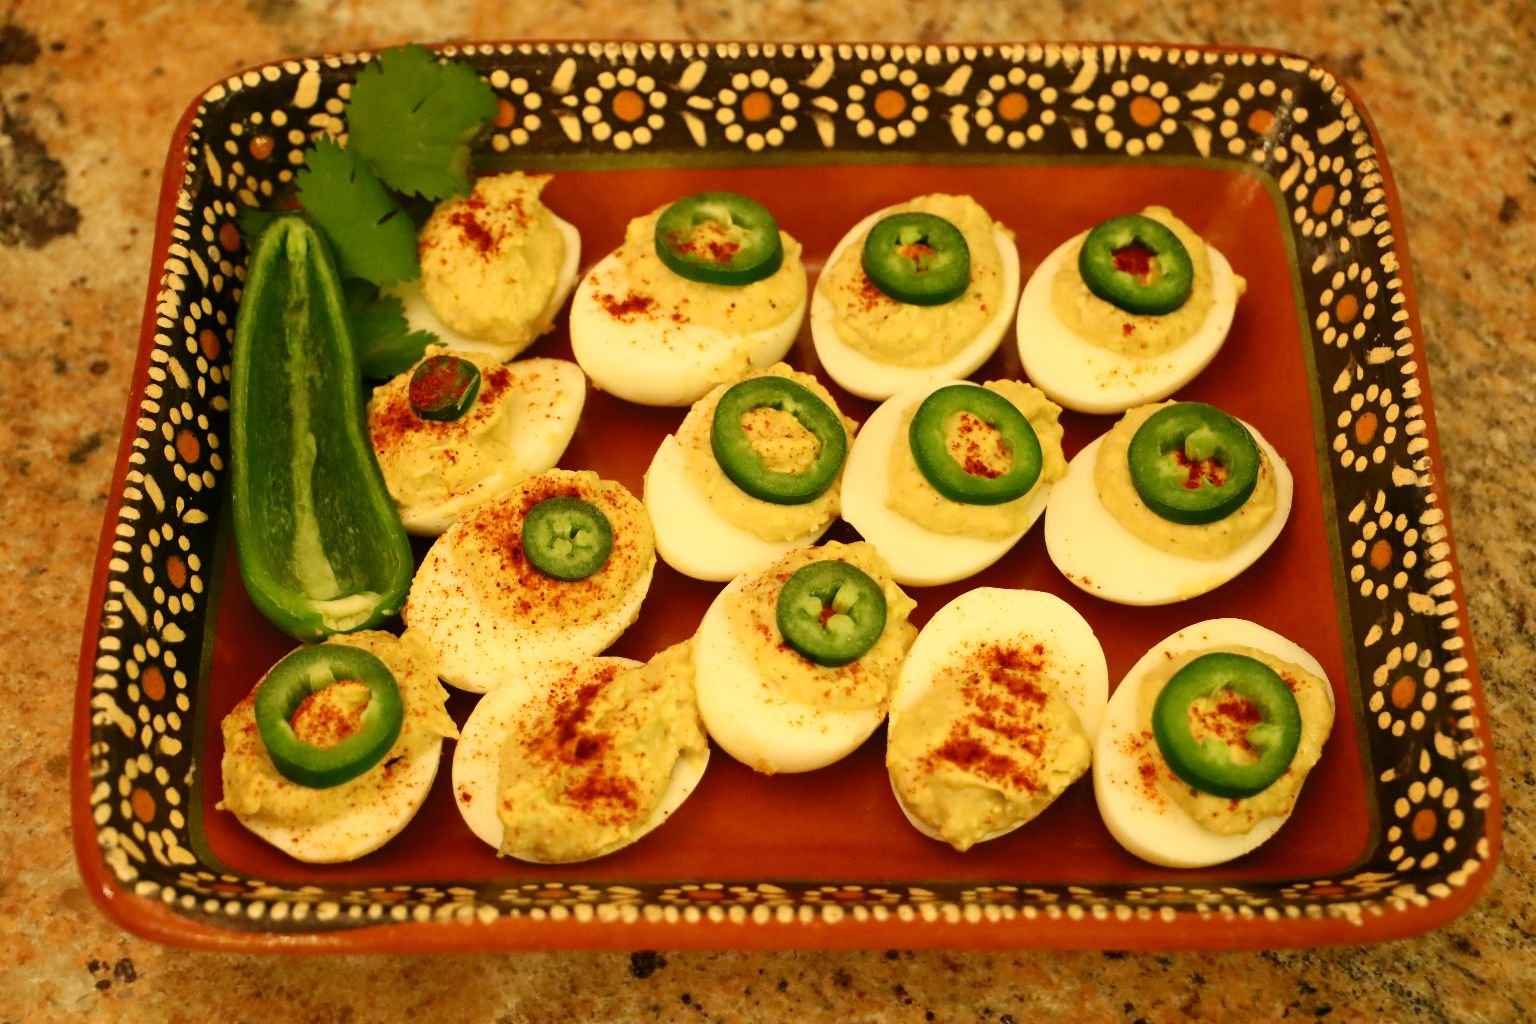
Another Way to Eat the Mole Verde
Julie’s Mole Verde Deviled Eggs
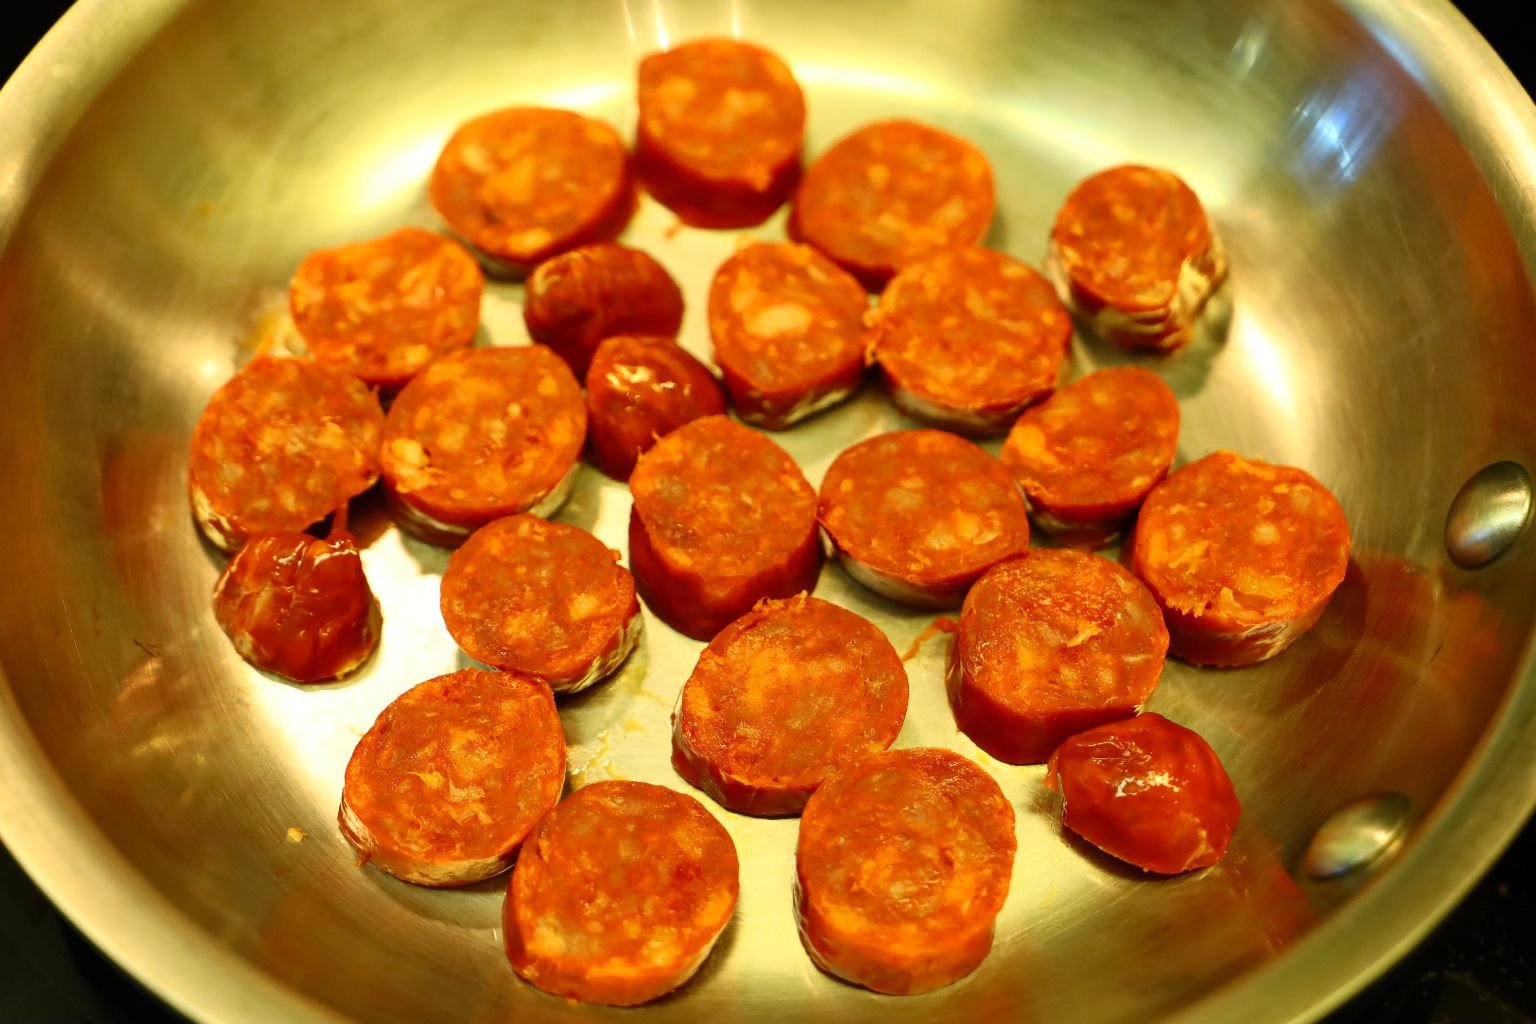
Browning Some Chorizo

So Excited to Bring to You MY Chorizo and Mole Verde Deviled Eggs
The first thing that I did was to hard boil a few eggs. If you don’t know how, all you have to do is to fill a large pot with water and add a bit of salt to it. Bring the water to a boil with as many eggs as you wish to boil in the water. Turn the burner on high and when it starts to boil turn it down to a medium-high and boil for a total of about 10 minutes.
Remove the eggs from the water and place into a bowl and place into the sink filled with cold water to stop the cooking process. Once cooled then place the eggs into the refrigerator into a bowl to allow the eggs to cool. Sometimes I leave them overnight. Other times I do this a few hours before I am ready to make my Deviled Eggs.

Now I start by adding my ingredients:
I am just eyeballing this.
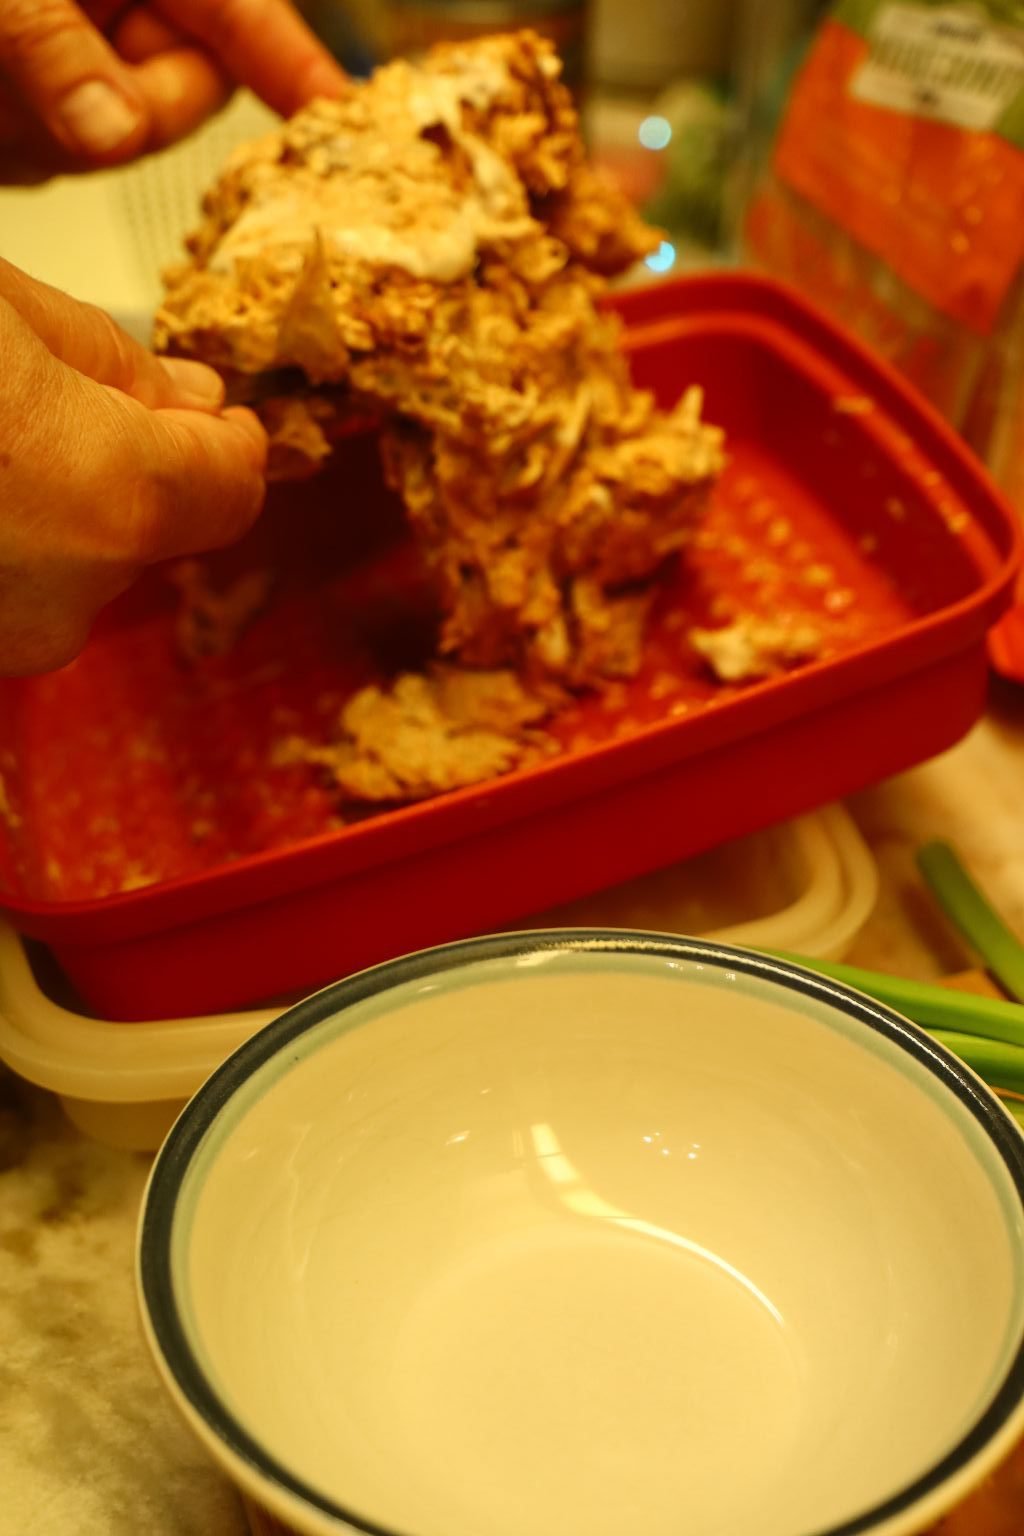
But first you remove the shells from the cooked eggs and discard them. You next want to slice the eggs in half and remove the yellow yolks and place them into a bowl.
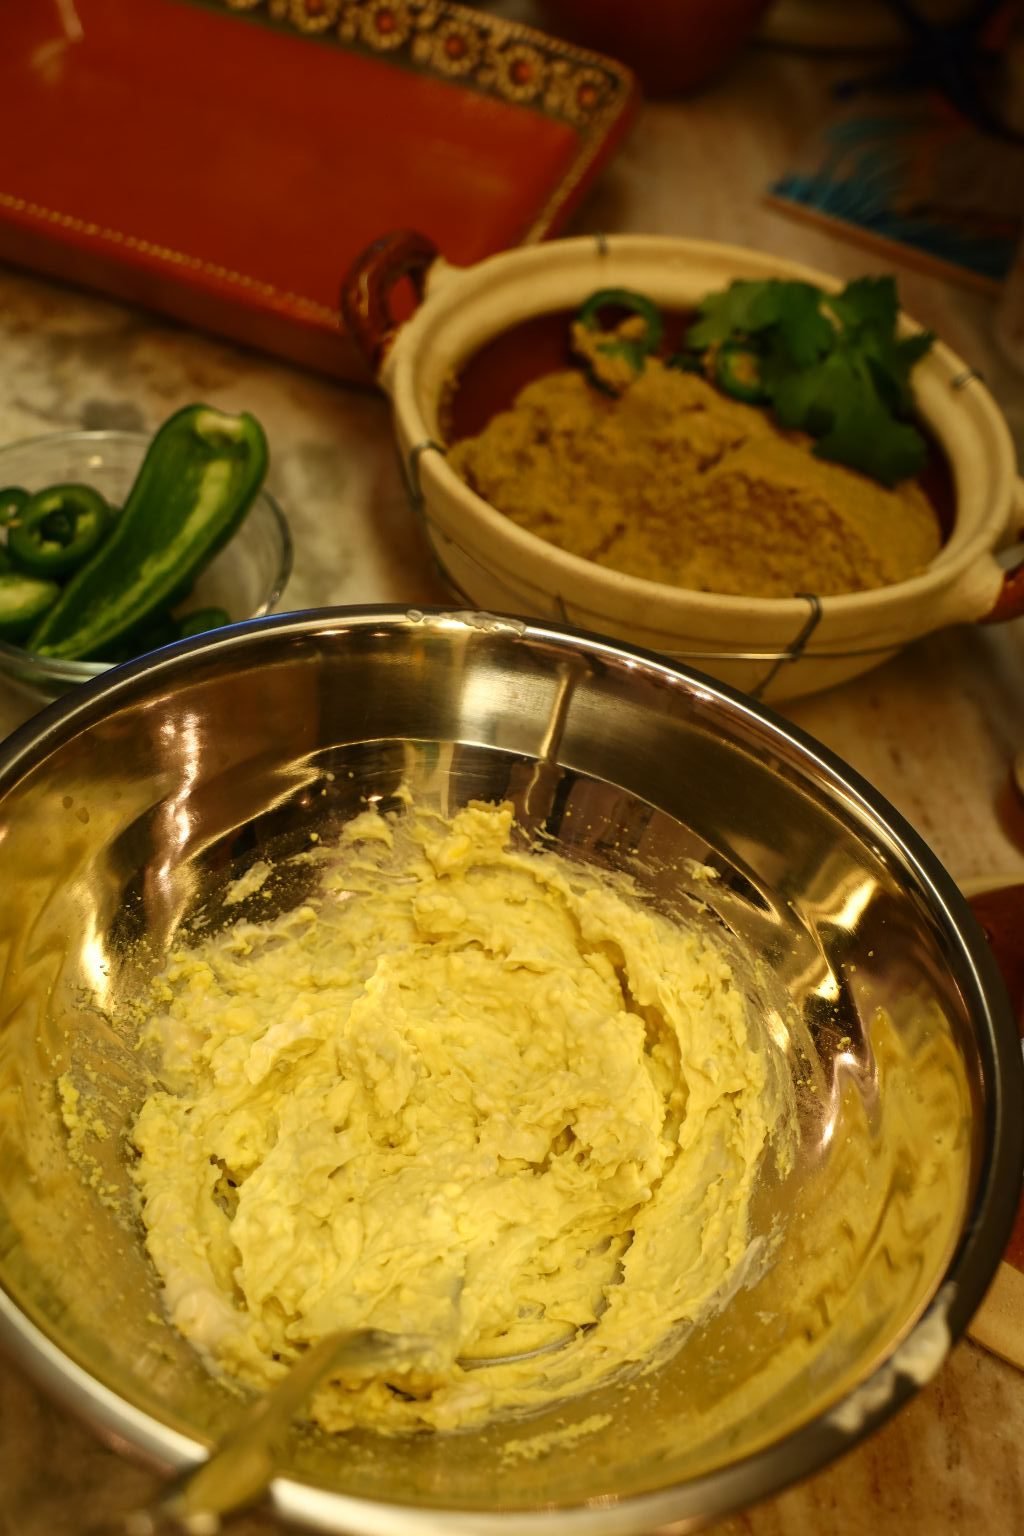

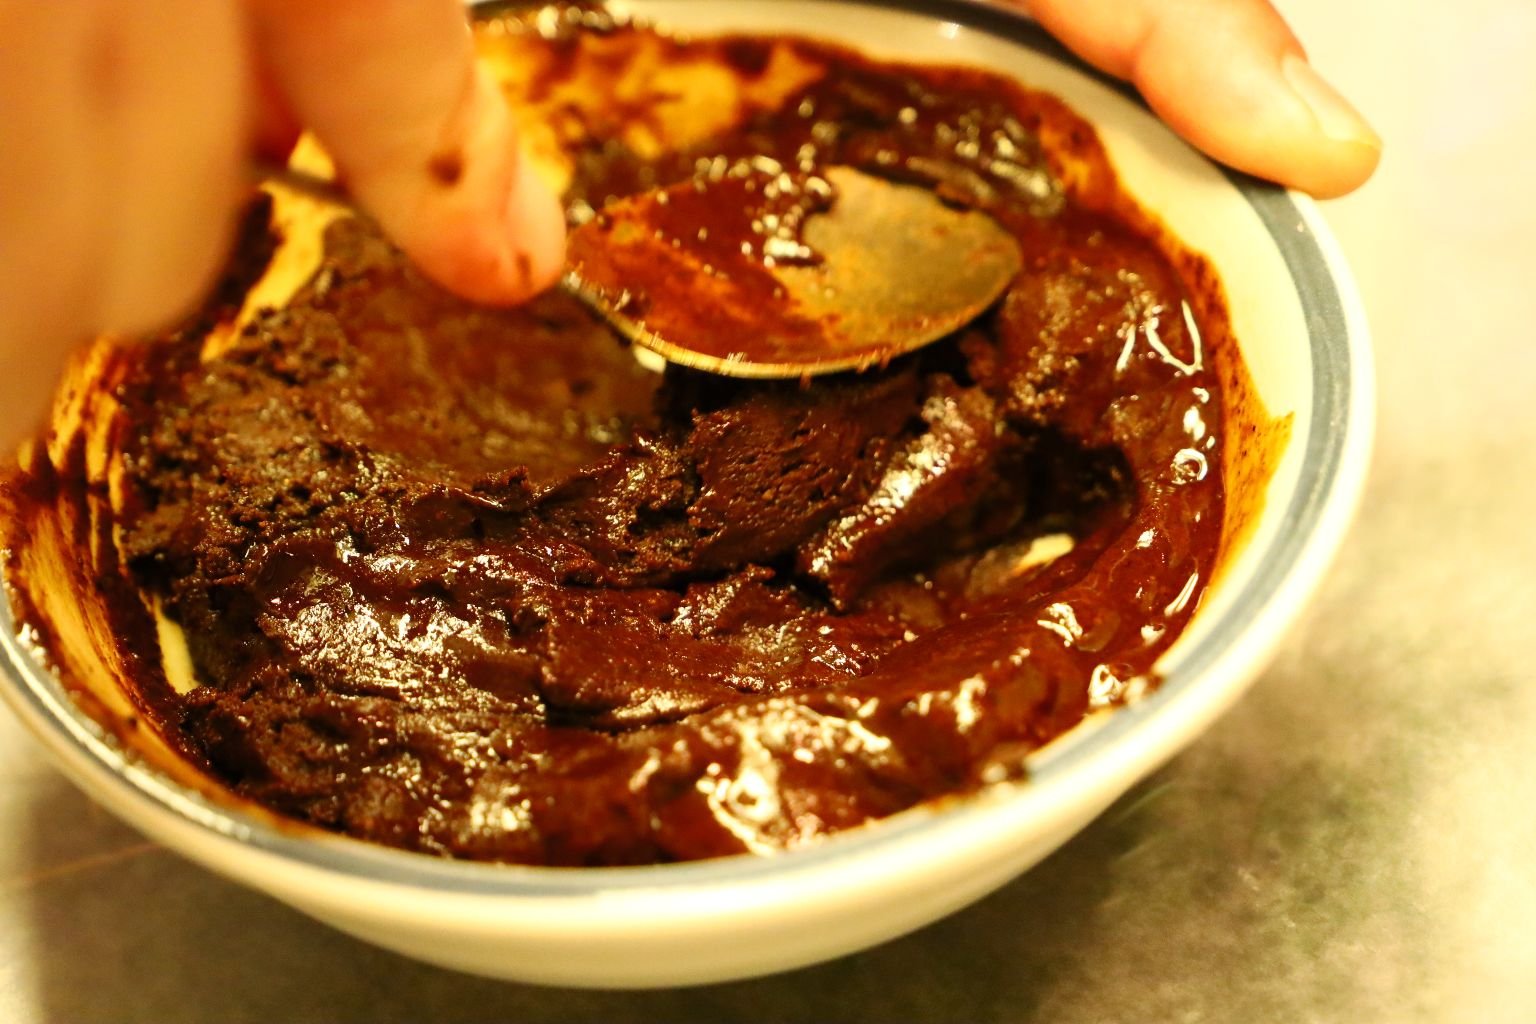
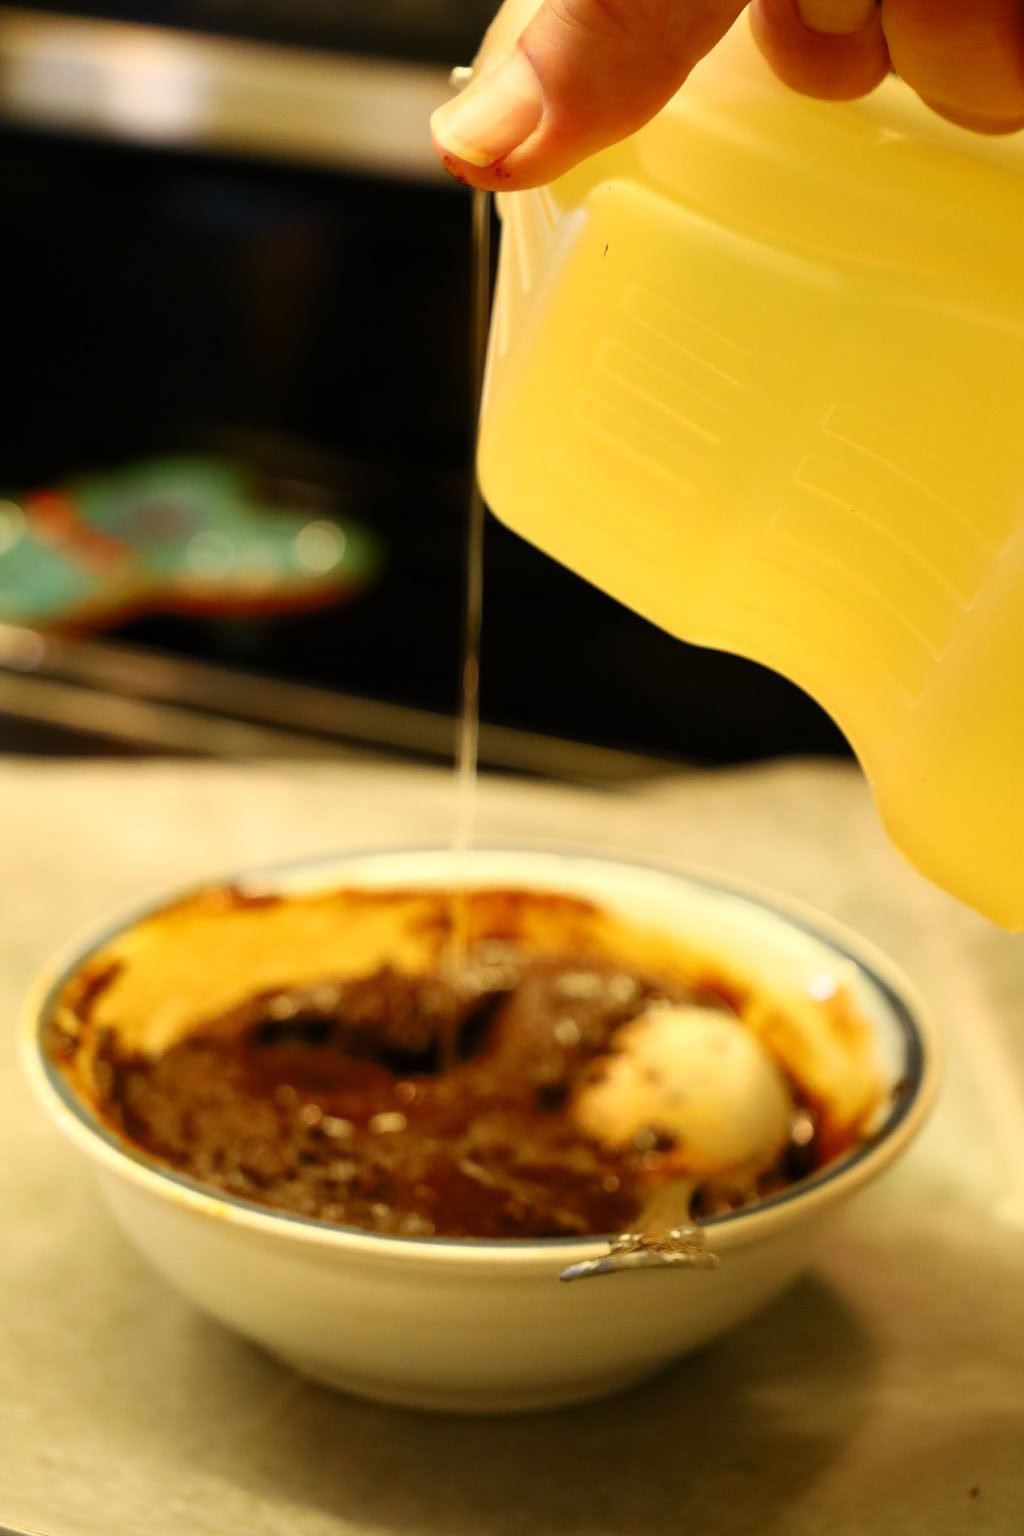
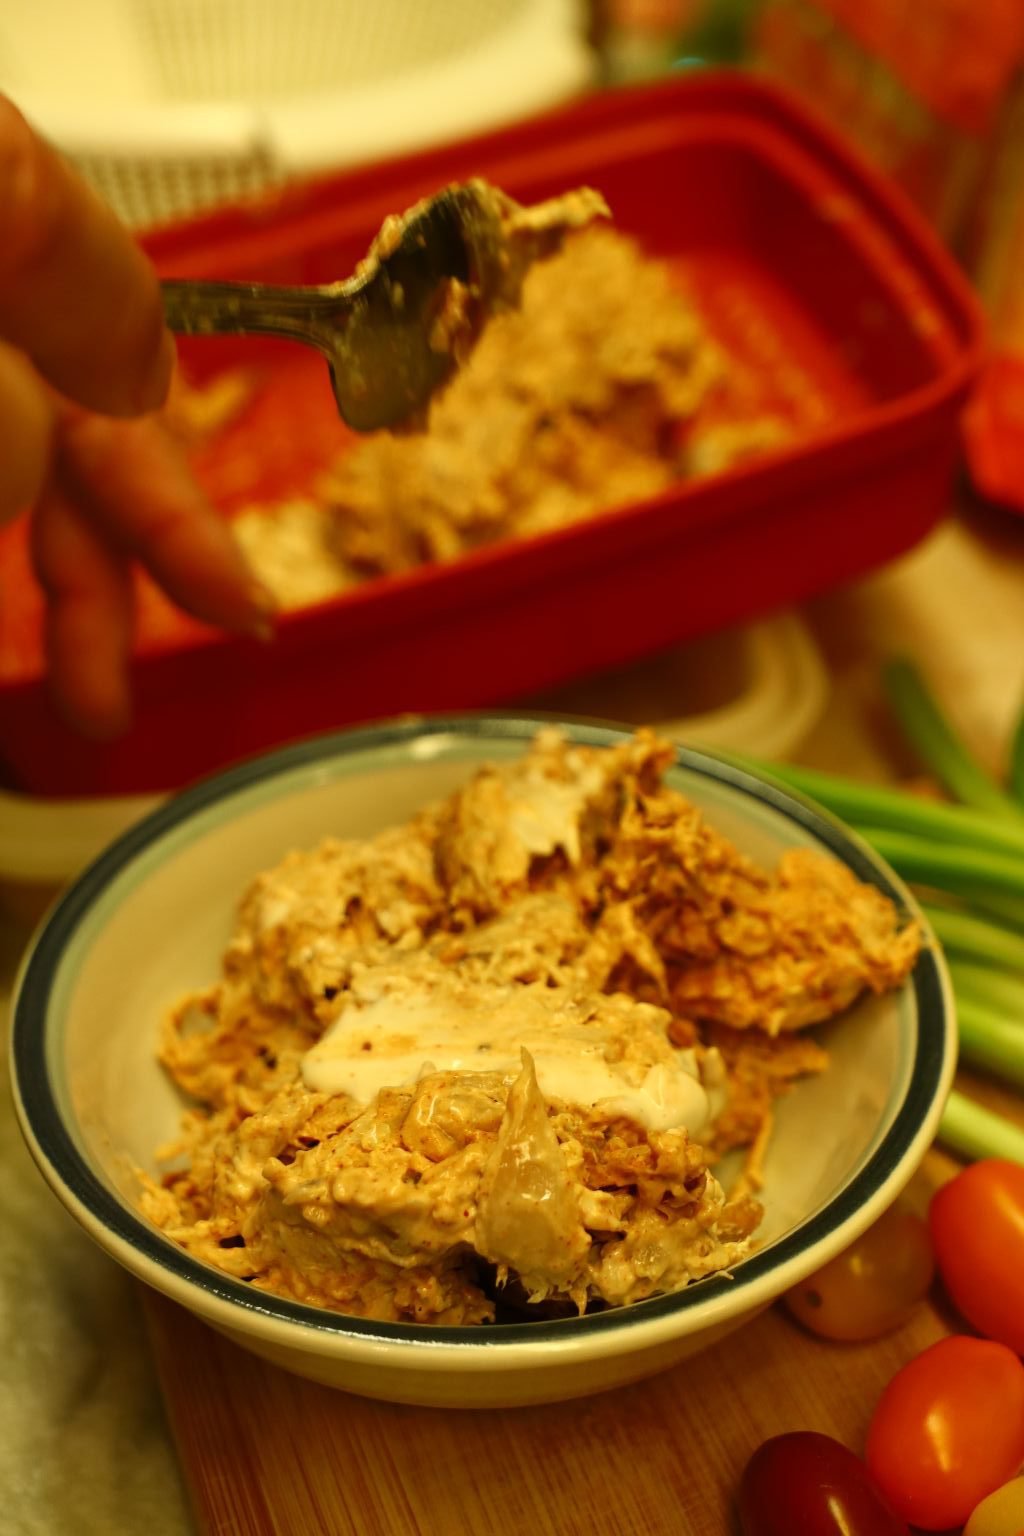
Here are the yellow yolks, I have added Mayonnaise and Yellow Mustard. Now I am adding some Salsa Verde and some Green Chili Hot Sauce. I also added some freshly ground black pepper. I then added some of our leftover Mole Verde, maybe about a half a cup.

Just Mix Together
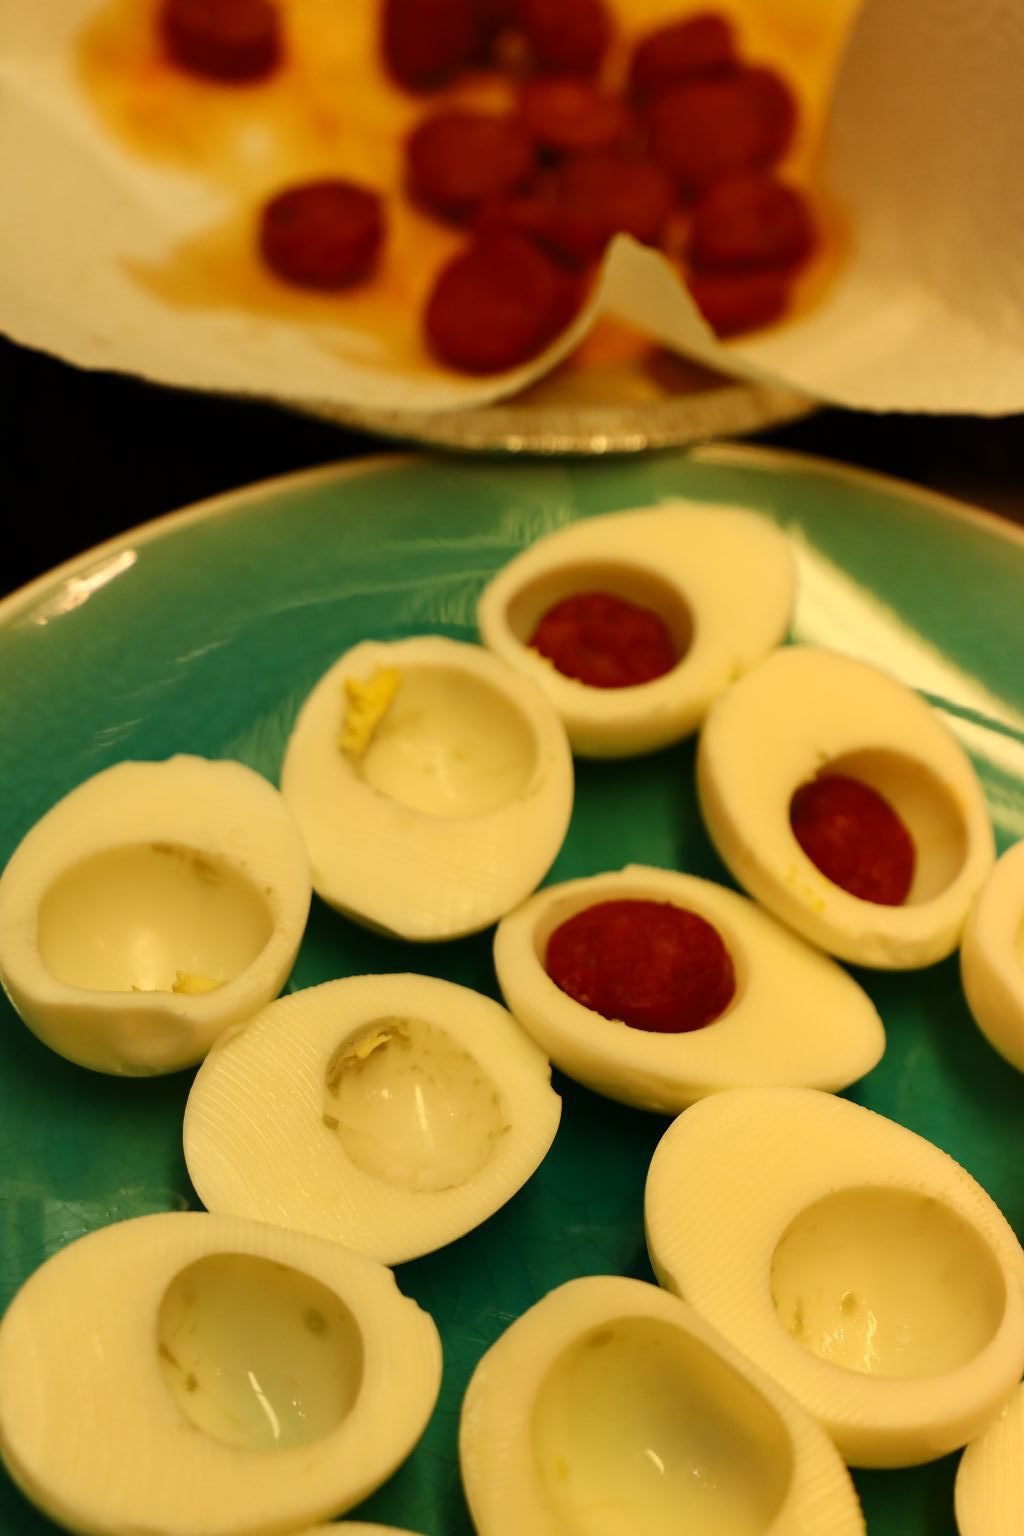
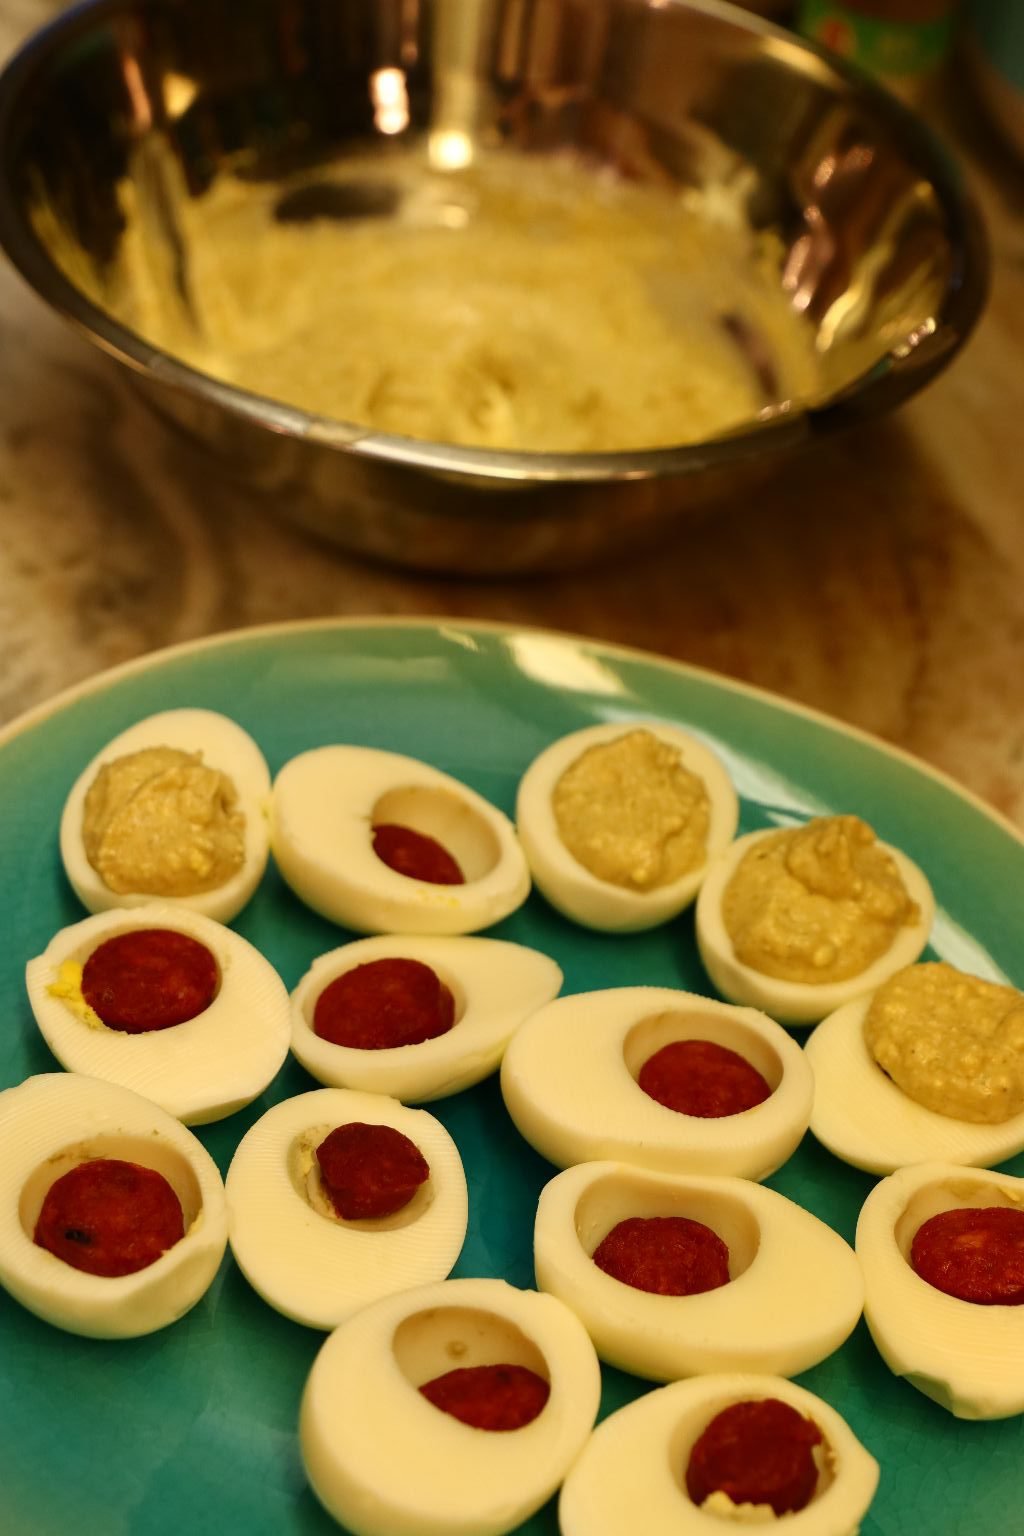
I had the best time placing the cooked Chorizo Sausages into each little Egg. As if there is a hidden surprise when you bite into them.

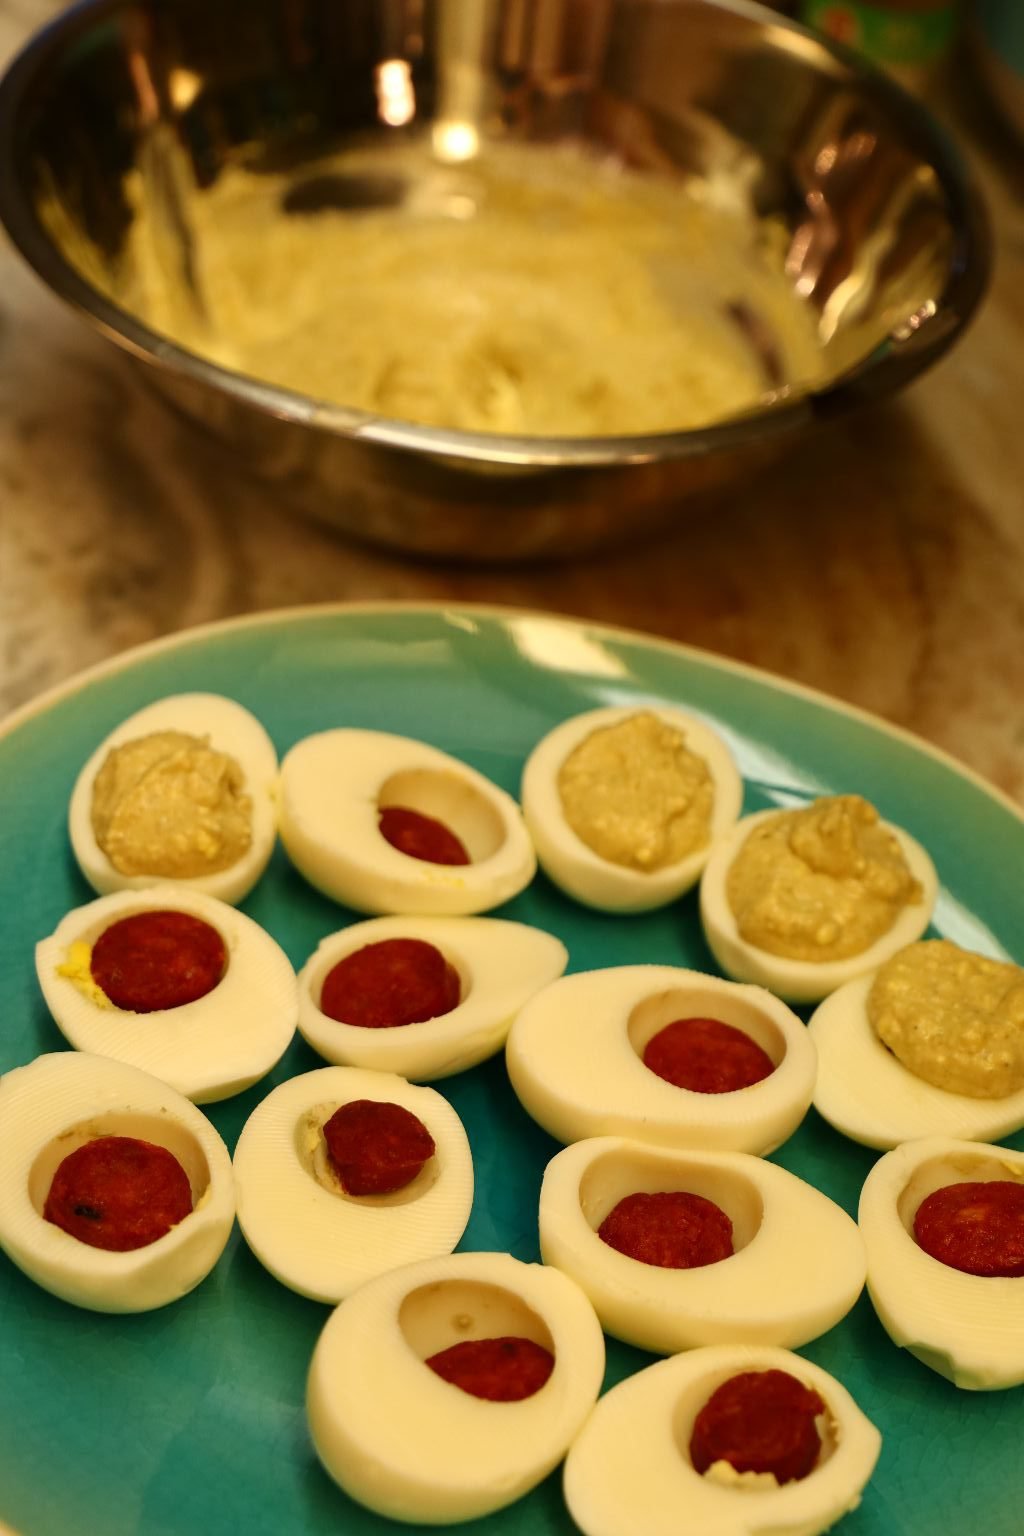
Now It’s time to place the egg mixture over each sausage and then top with some Chili Powder and a sliced Jalapeno Pepper.
Excelente!
———————————————————————
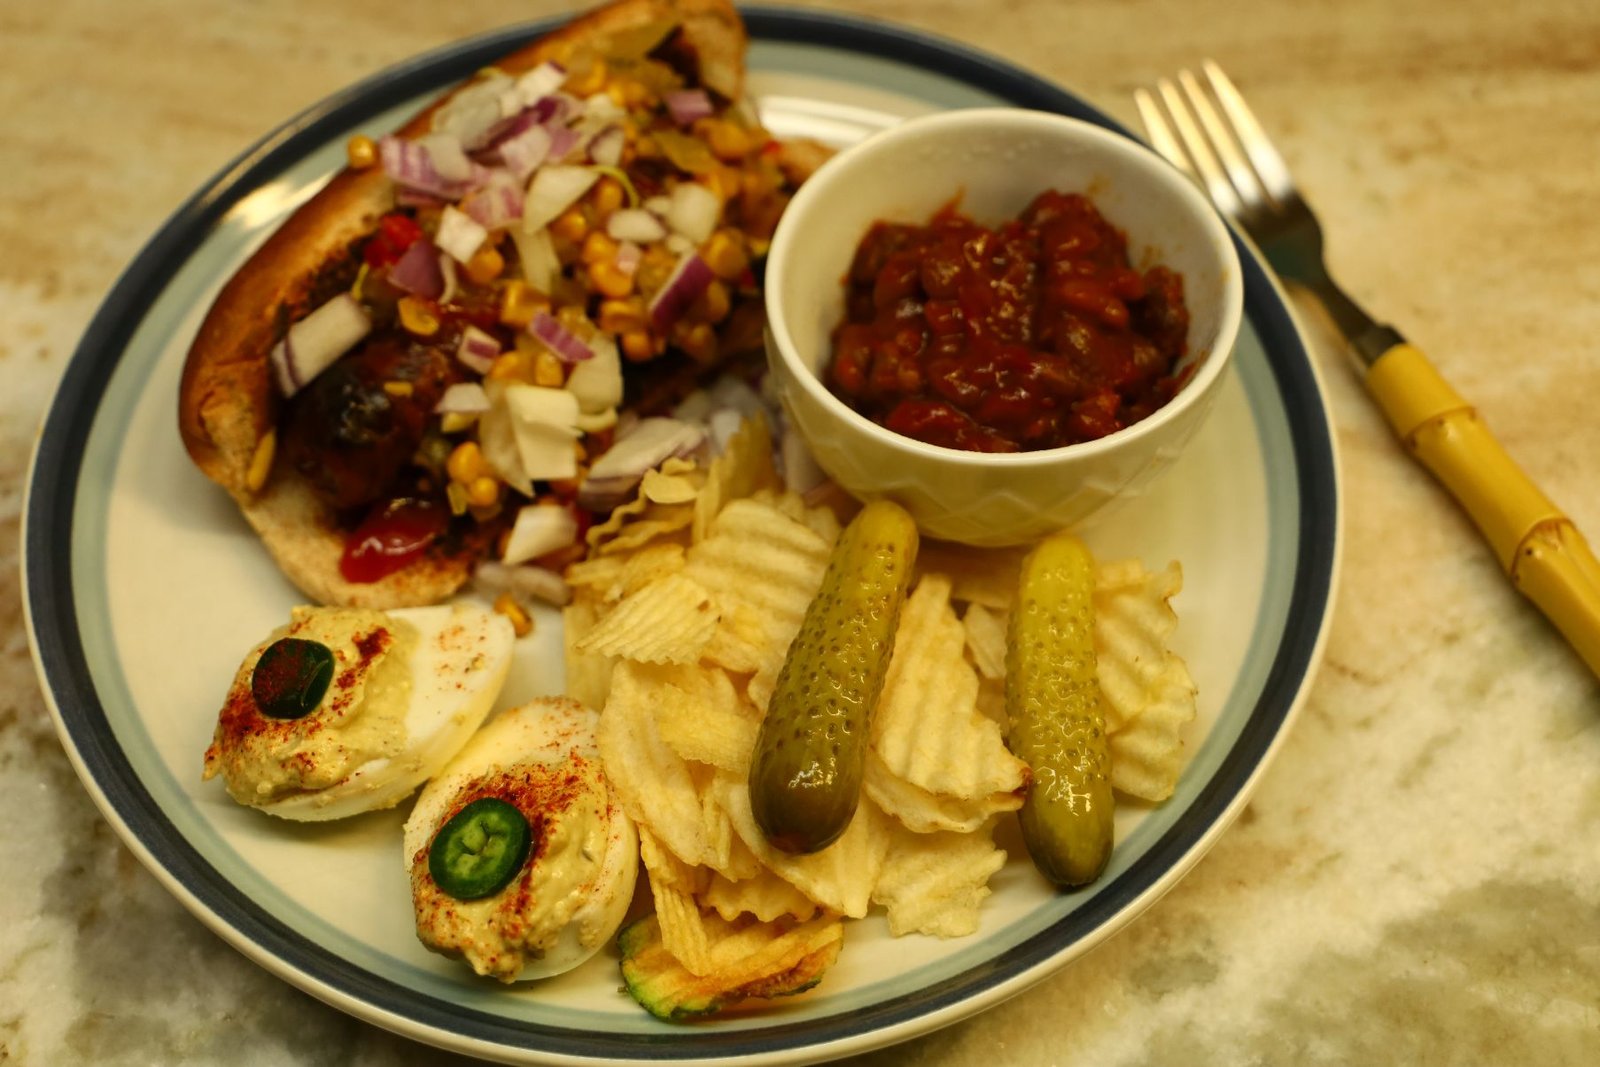
A Chili Dog on one of my Mexican Pottery Plates
(It serves no purpose other than that I just wanted to photograph it.) 🙂

Just Showcasing The Mole Verde Deviled Eggs Here
————————————————————————-
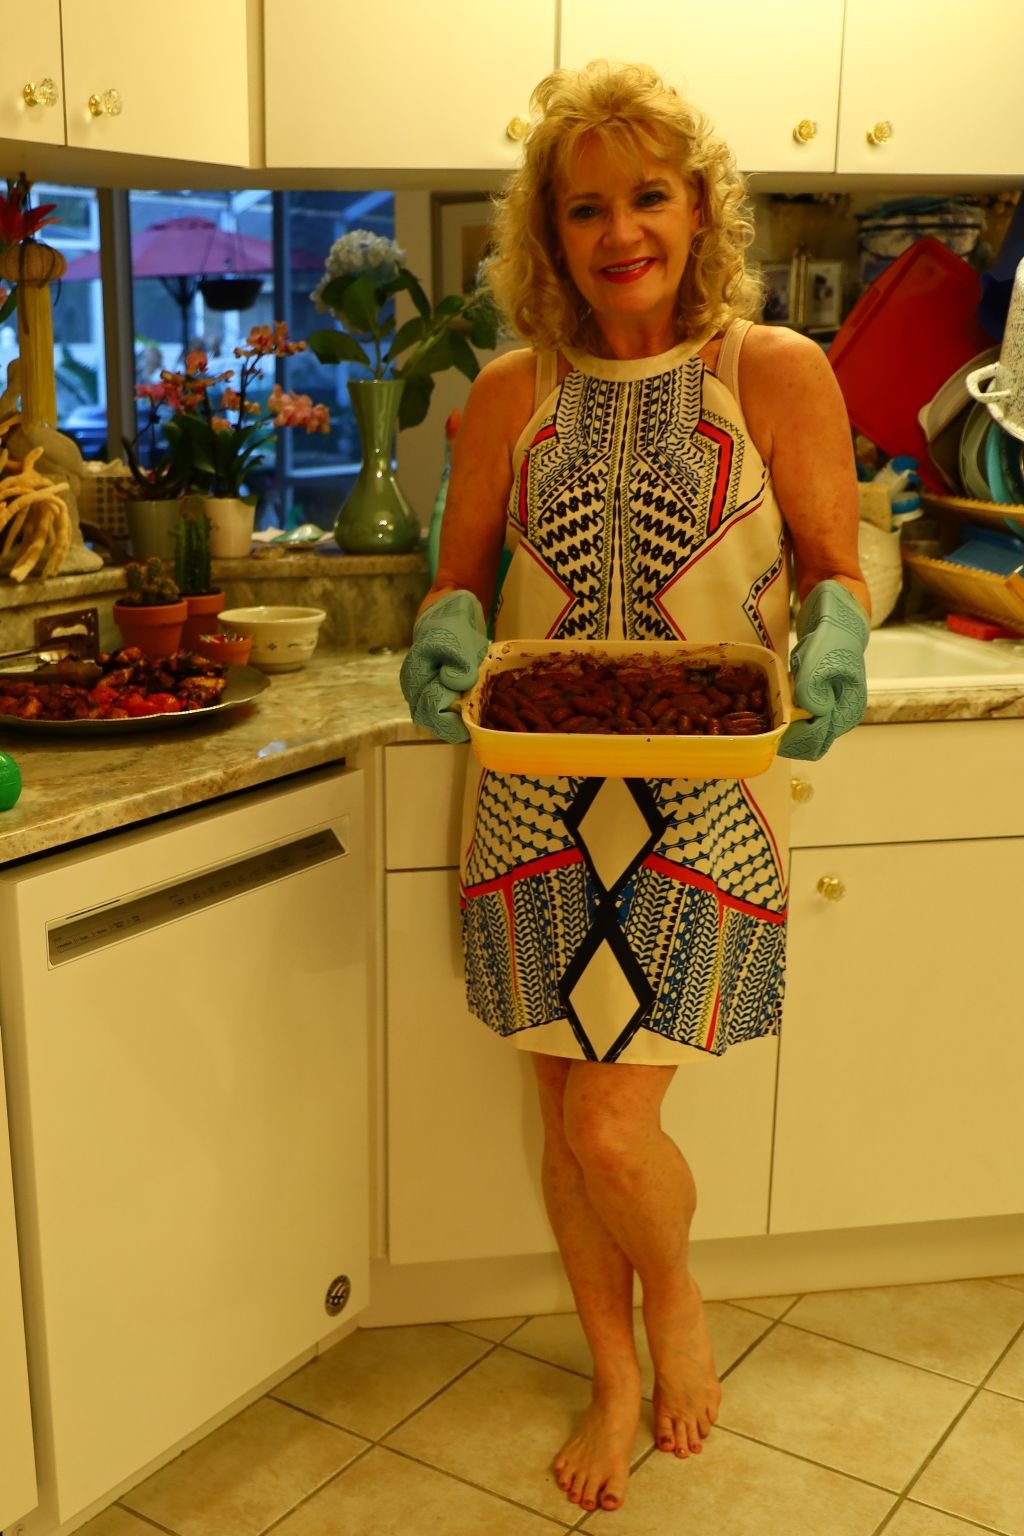
Mexican Inspired Cocktail Sausages
This is a more detailed explanation of my sausages that I write above.
Before the Oven, After the Oven
You always look for the sausages to be plump when done.
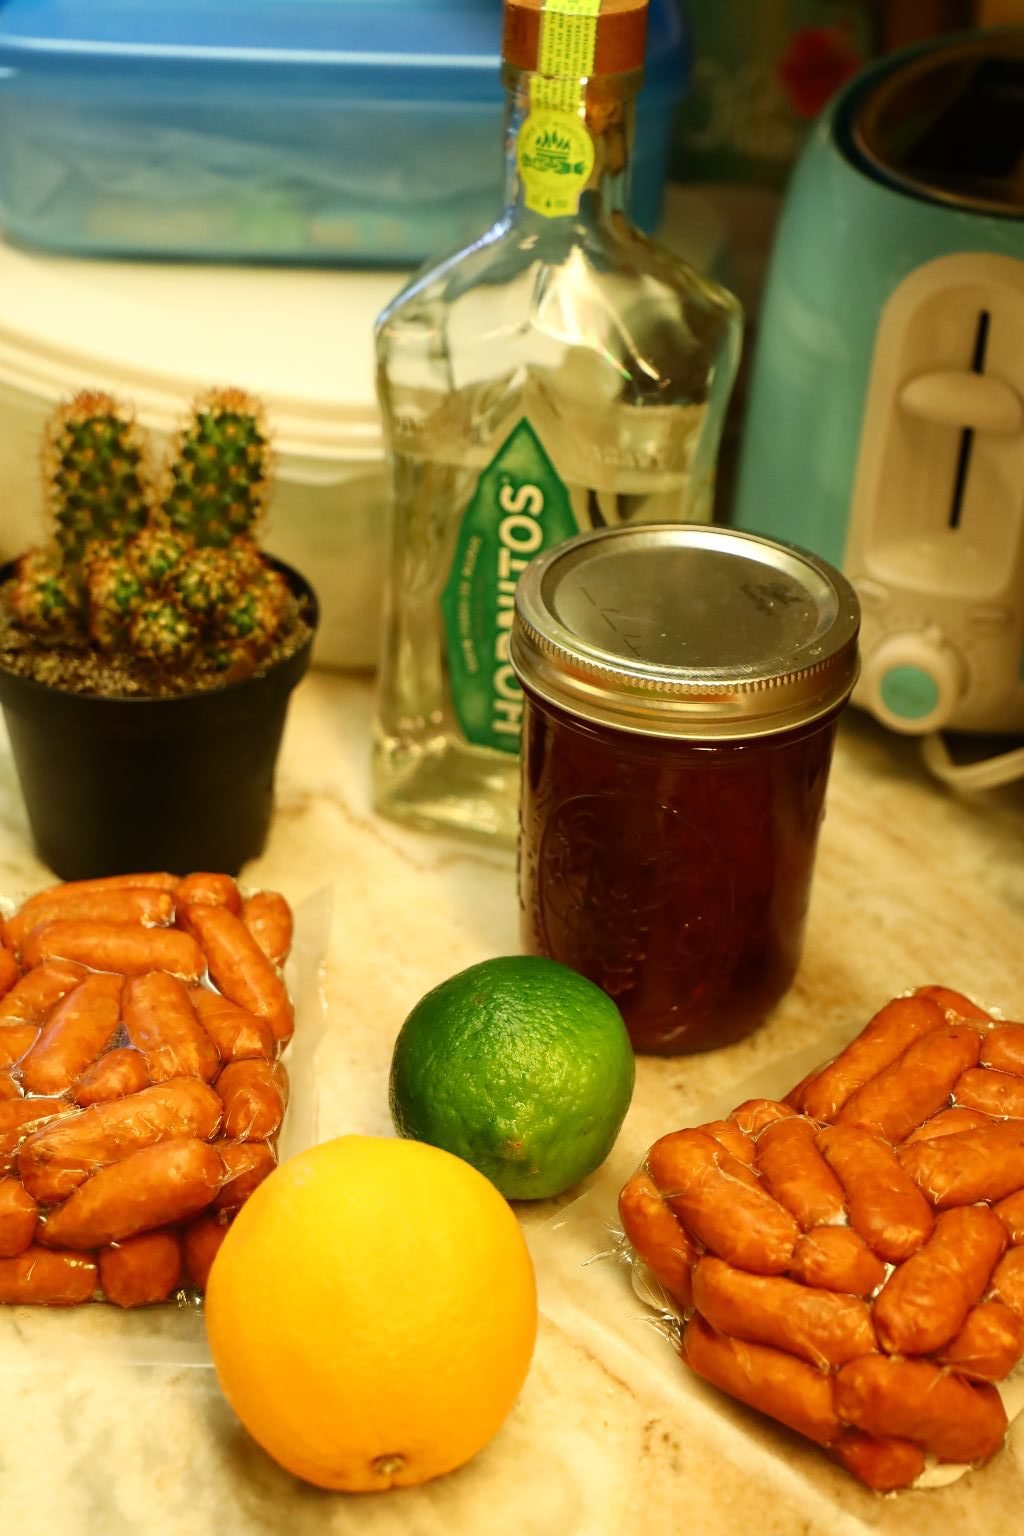
My Ingredients:
2 Packages of Chicken Sausages
Small Jar of our Mexican Cranberries
One Orange, Rind, Juice and Pulp
One Lime, Rind, Juice and Pulp
A Few Shots of Hornitos Tequila
————————————————————————-
You first want to drain the liquid from your sausages.

——————————————————————–
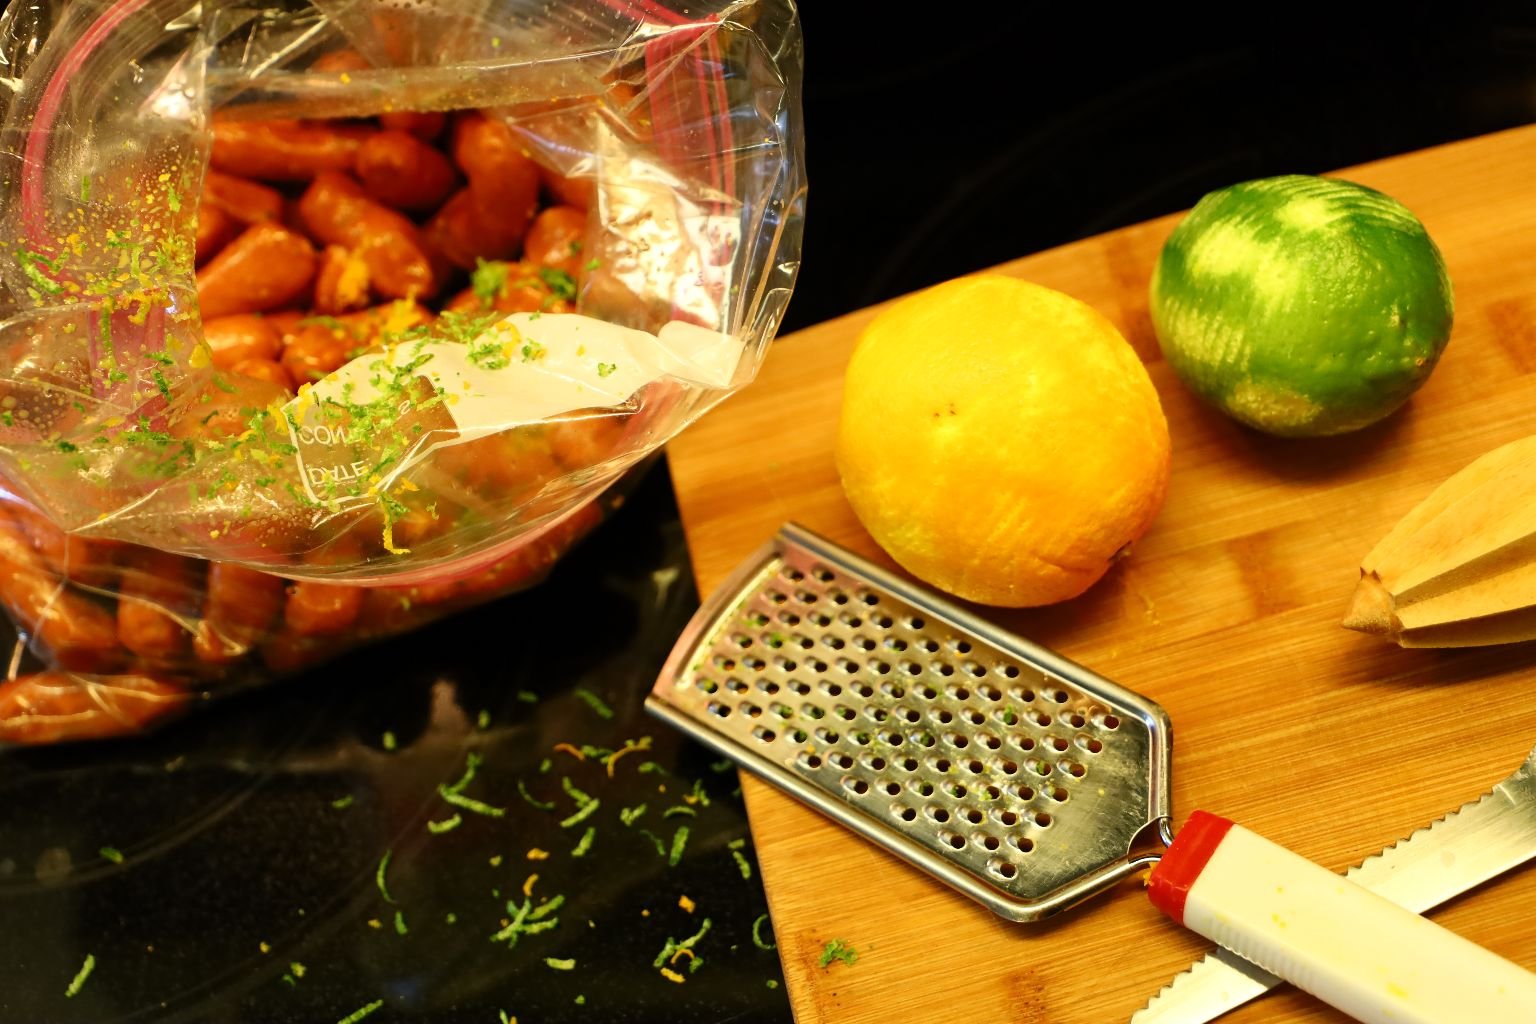

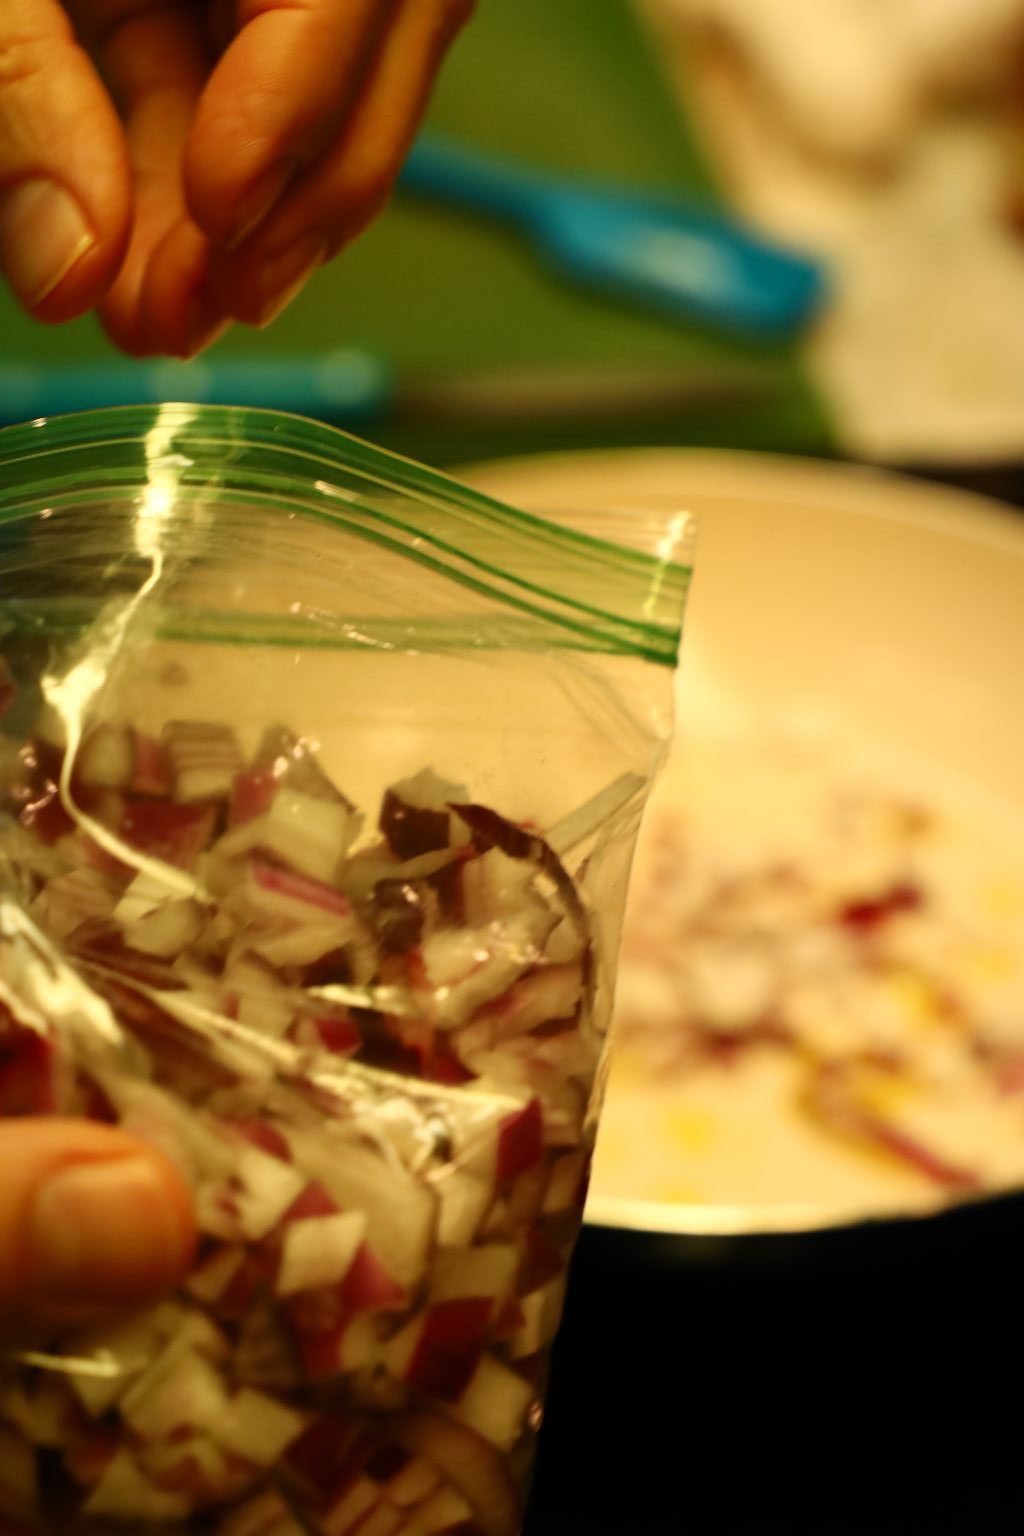
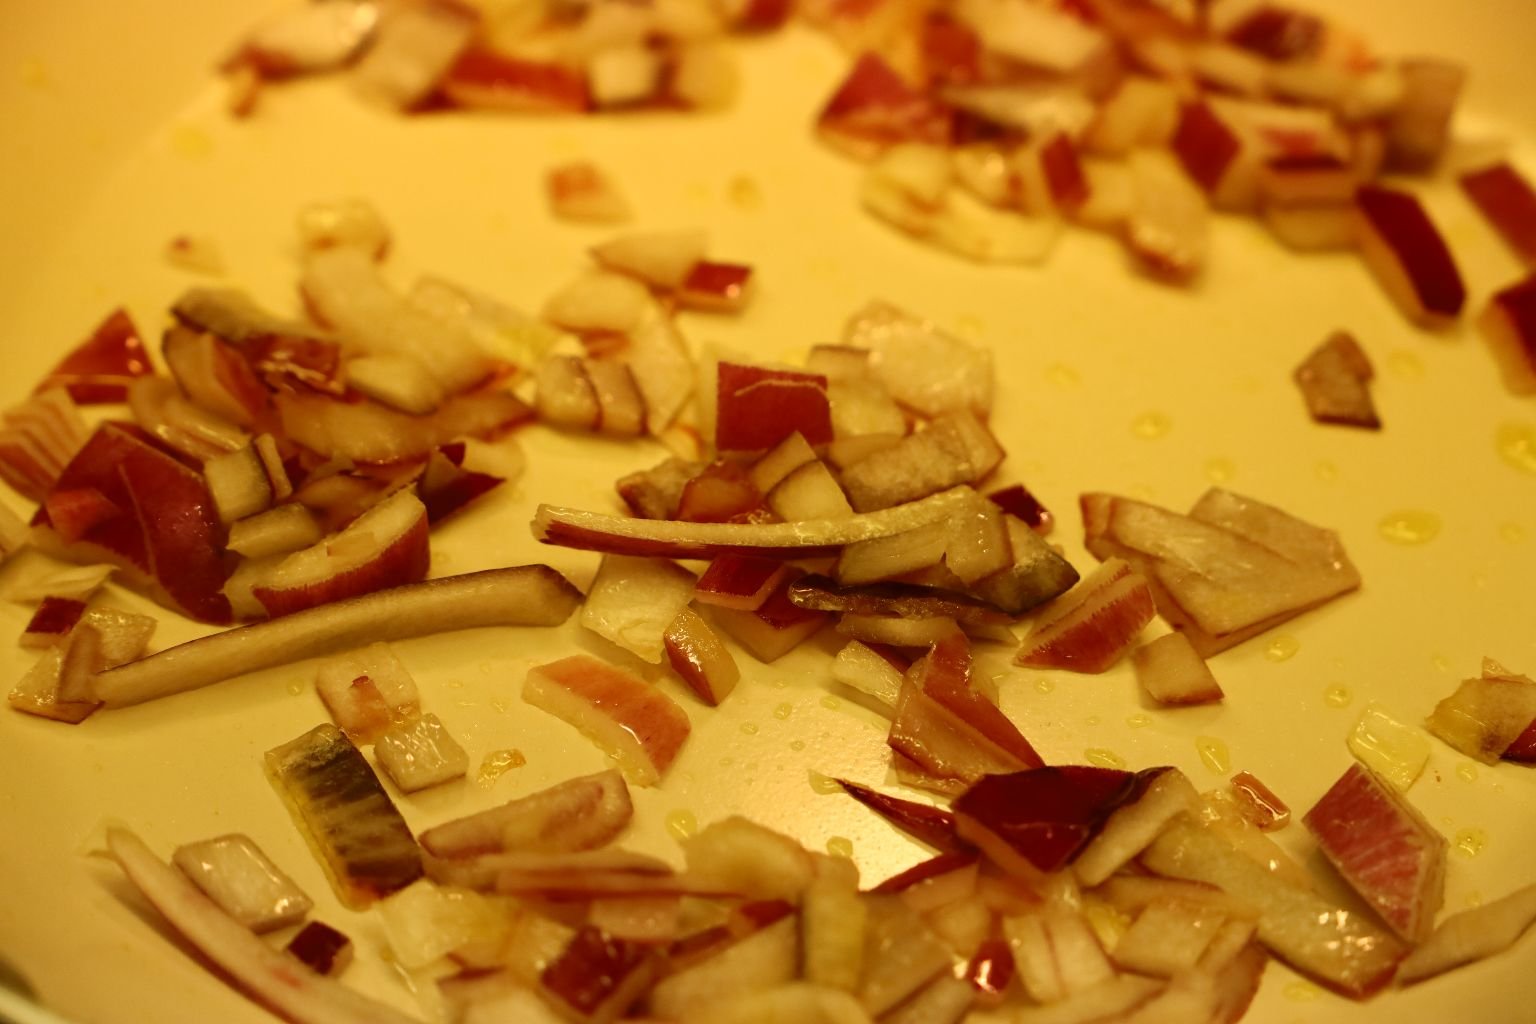
Place the sausages into a large baggie and grate onto them your orange and lime rind zest. Now, slice in two and squeeze the juice and pulp from each half of the Orange and Lime.

Now add a few shots of Hornitos


Next I am adding quite a bit of our Mexican Cranberries to the mixture.
(I have the link for our Mexican Cranberries listed above when I originally talk about this recipe.)


You want this to marinate in the refrigerator overnight, or 24 to 48 hours prior.
My Sausages Ready for a 400F Oven

I just placed them into a casserole dish.

Into the Oven They Go!
These sausages took about 45 minutes or so until they were all nice and plump. I did remove them and stir them around every 20 minutes. Just watch them for when you prefer their doneness.
———————————————————————–
Mexican Spiced Grilled Scallops, Grilled Tomatoes, Mexican Cheese, and Tequila Wings

Grilling the Scallops, Tomatoes, and the Chicken Wings
The Sauce to the left above is the marinade for the Tequila Wings simmering down.
This is that Sauce!
We Decided to use it as a Bruschetta on little Toasts

Our Great Light Dinner
I, Julie, am NOT a wing person. However, these are my new favorite wings and I told Gordon that I am all for Wing Night as long as they are these. 🙂
———————————————————————-
Recipe For Our Grilled Tequila Wings
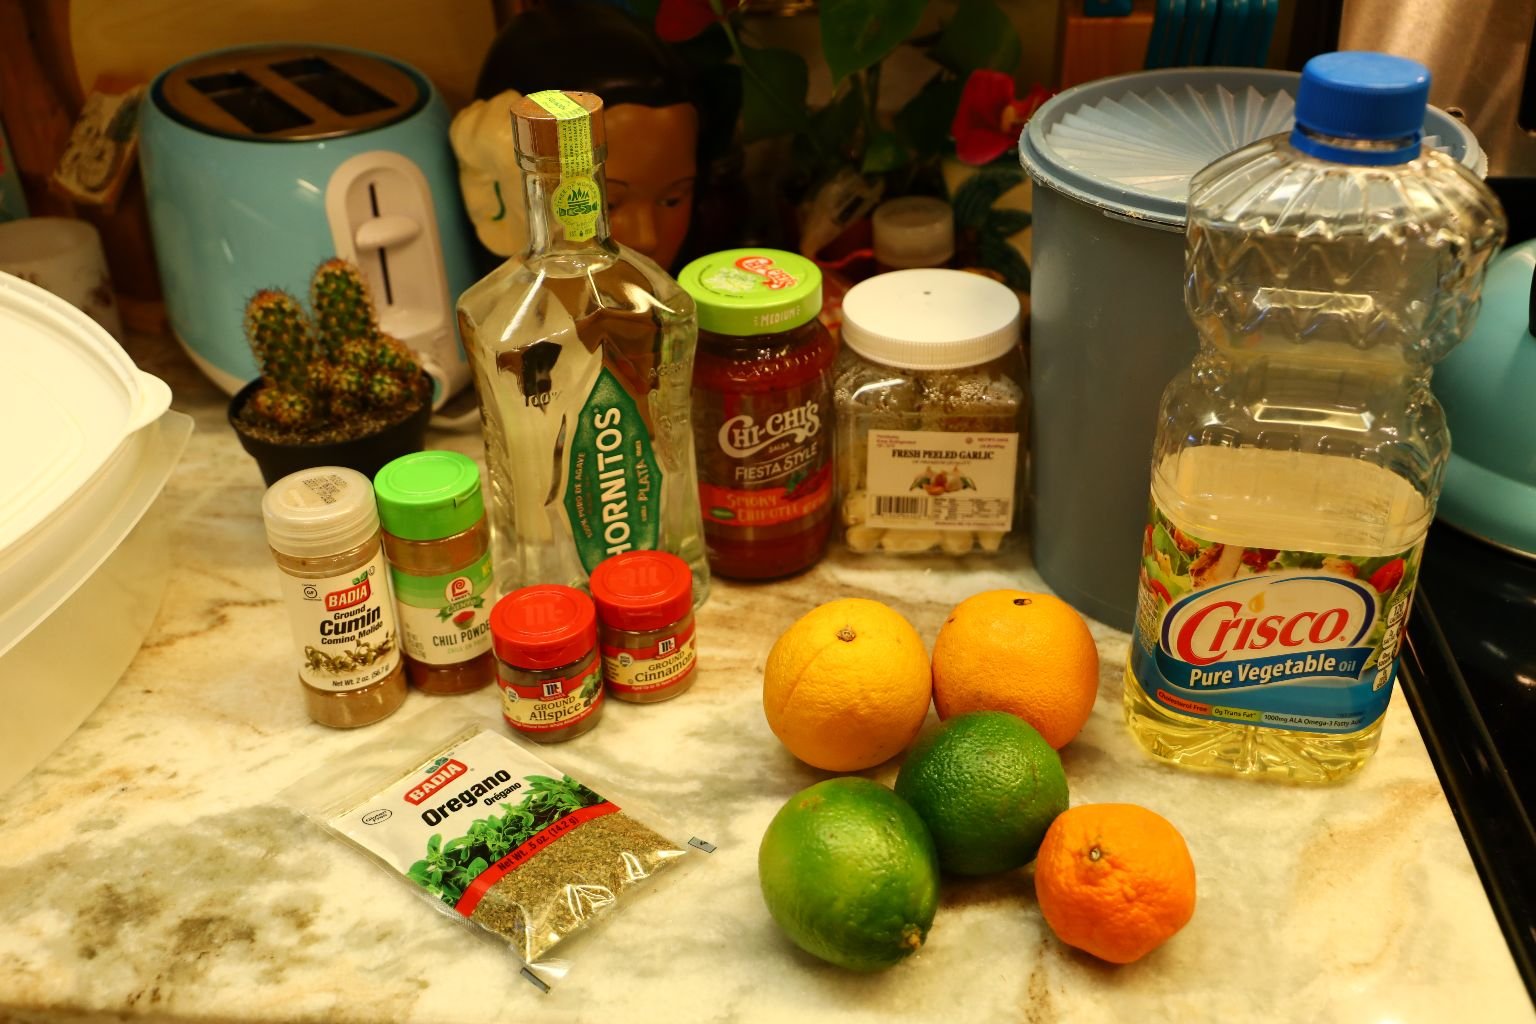
Ingredients:
1 Family Pack of Chicken Wings – cut into sections
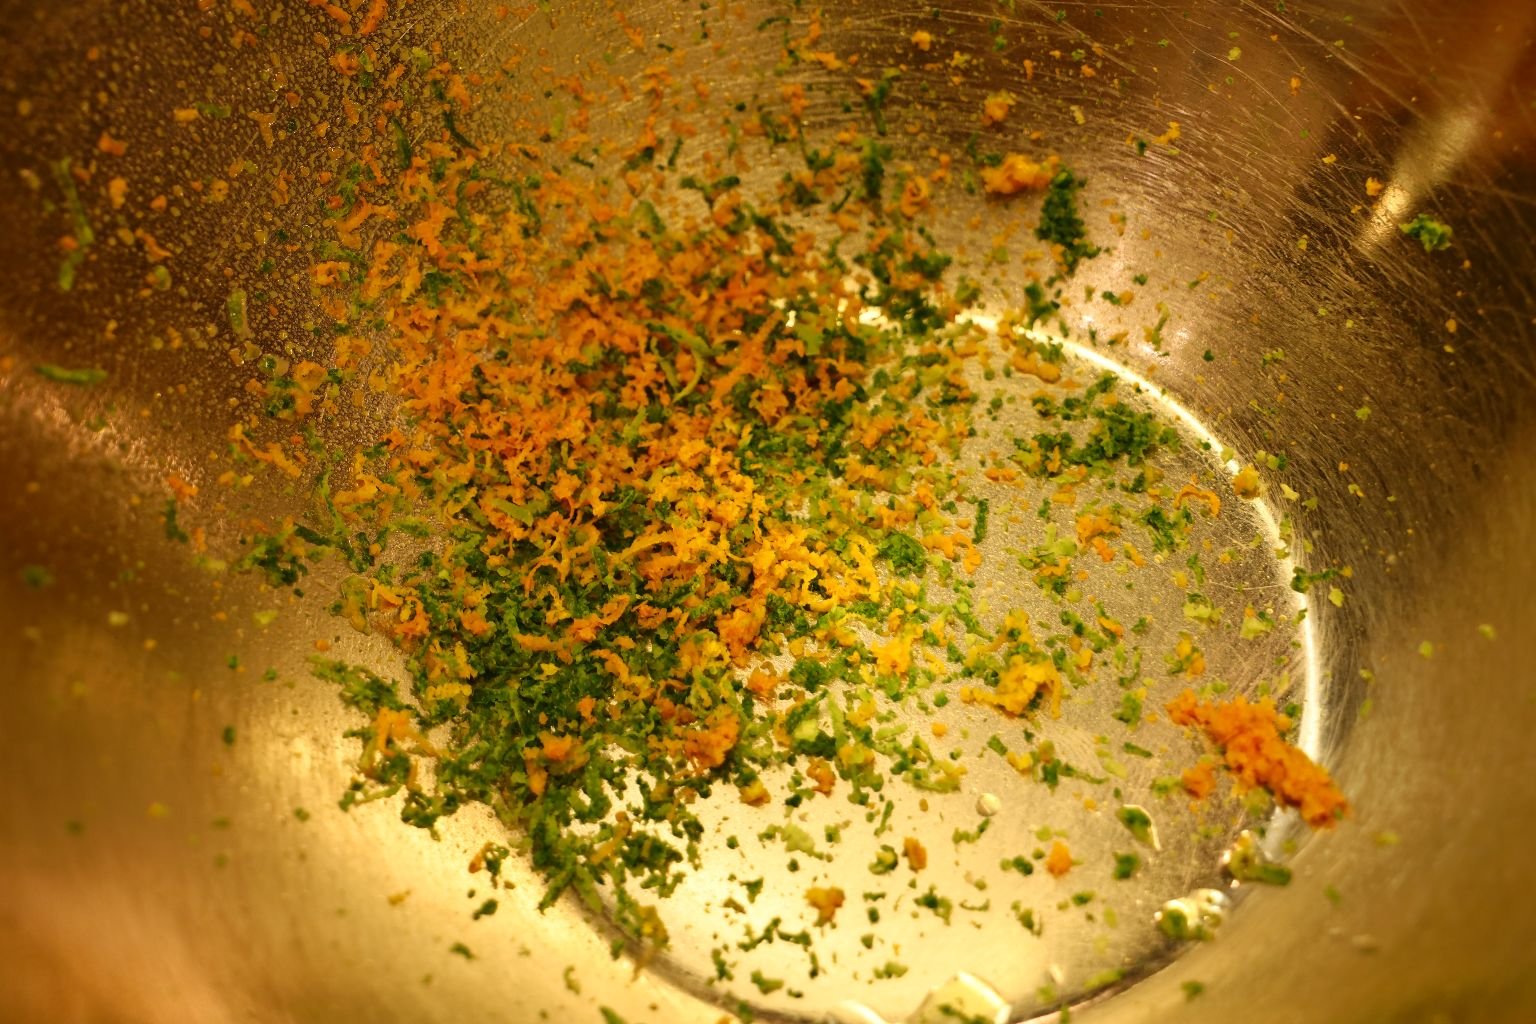
Zest of 2 Limes
Zest of 1 Orange
Juice of 1 Mandarin Orange
Juice of 2 Limes
Juice of 2 Oranges
1 tsp. Ground Cumin
1 1/2 tsp. Chili Powder
1/2 tsp. Ground Allspice
1/2 tsp. Ground Cinnamon
1 1/2 tsp. Dried Oregano Leaves
2 shots Hornitos Tequila – to your taste
~ 3/4 Cup Smokey Chipotle Salsa – we used Chi-Chi’s Fiesta Style
2 Tbsp. Vegetable Oil
1 – 2 Tbsp. sugar – to your taste
~20 Garlic Cloves – chopped thinly
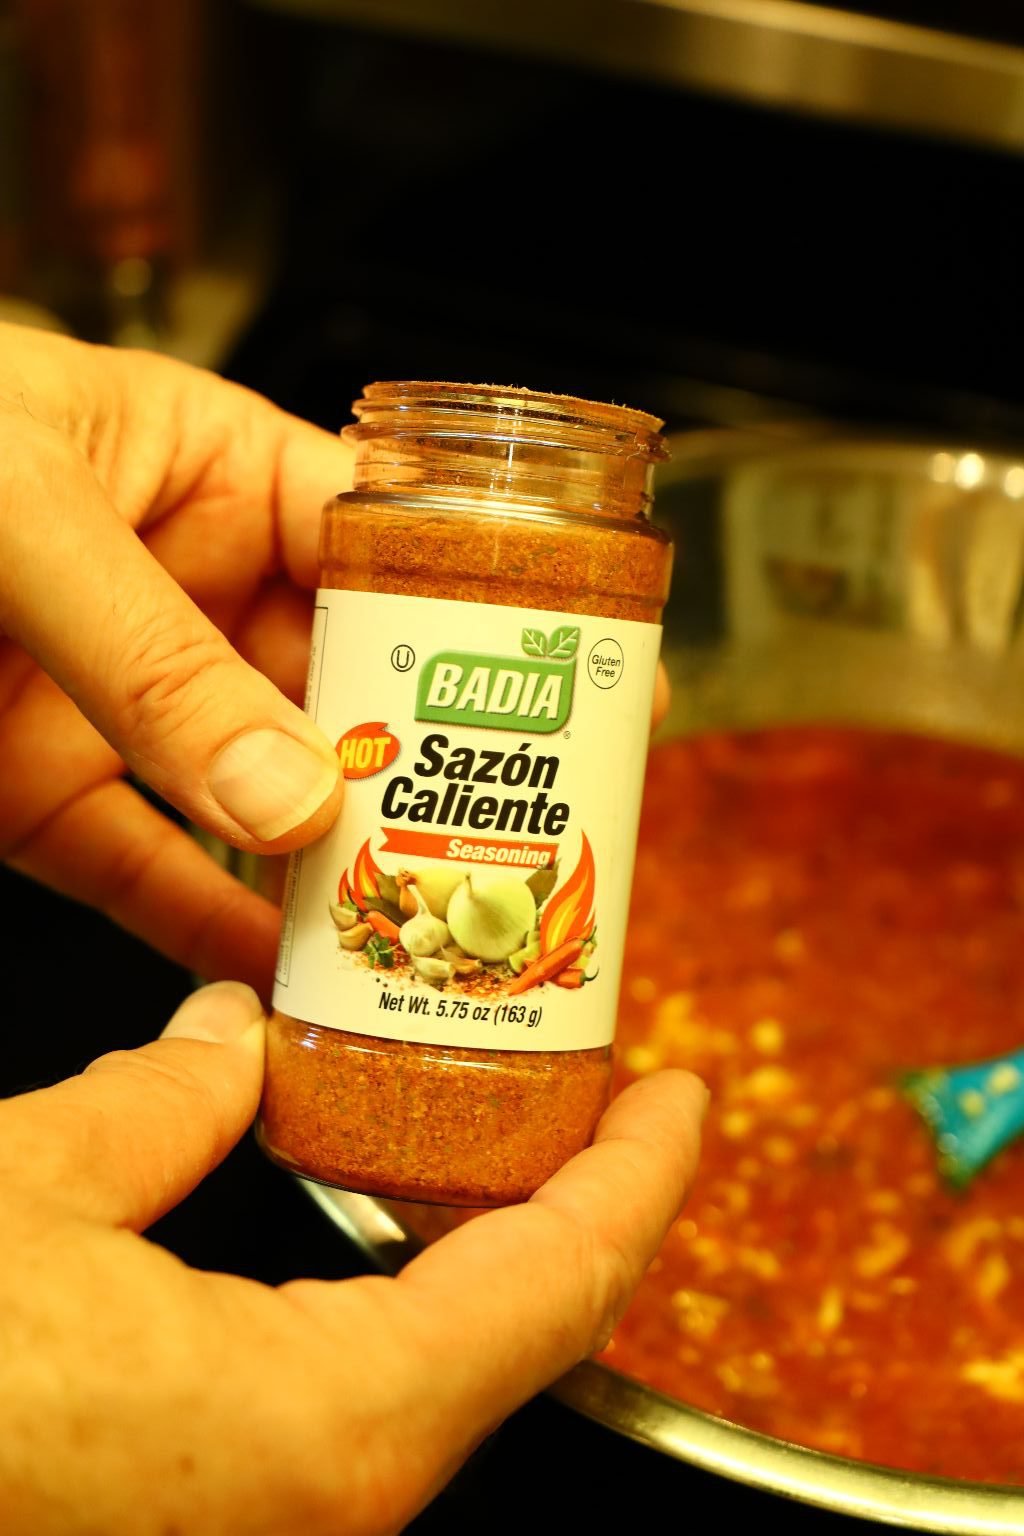
1/2 tsp. Hot Sazon Caliente Seasoning – Badia brand
1/2 tsp. Ground Chipotle
1/2 tsp. Sazon Complete Seasoning – Badia brand
—————————————————————-
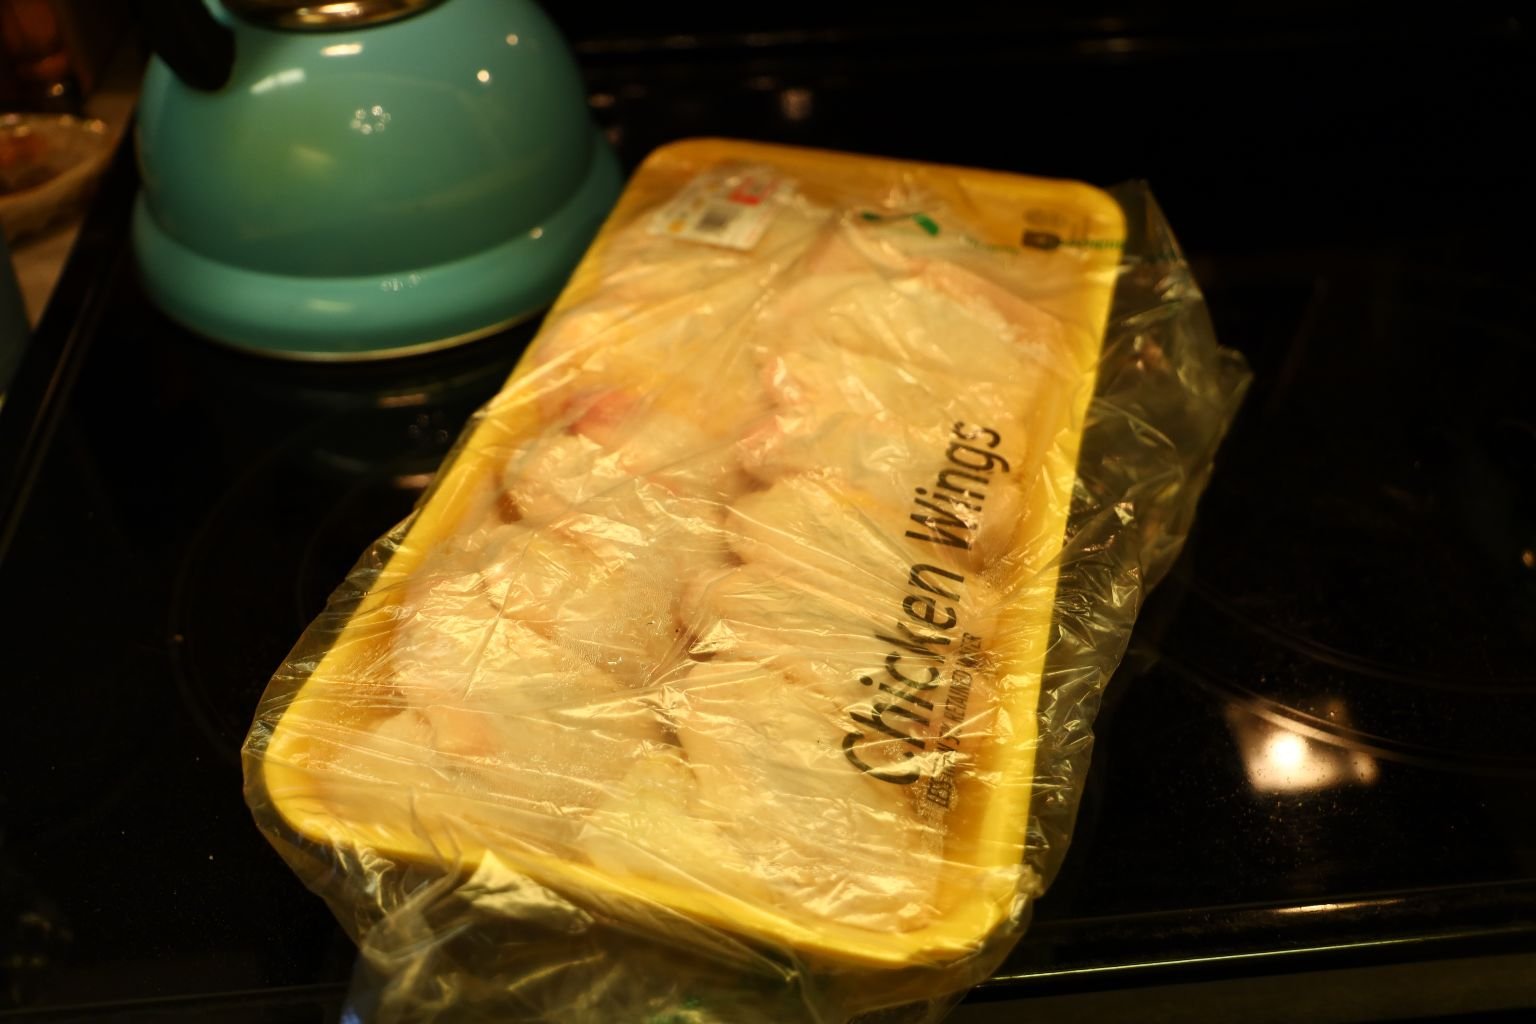
Chicken Wing Family Pack
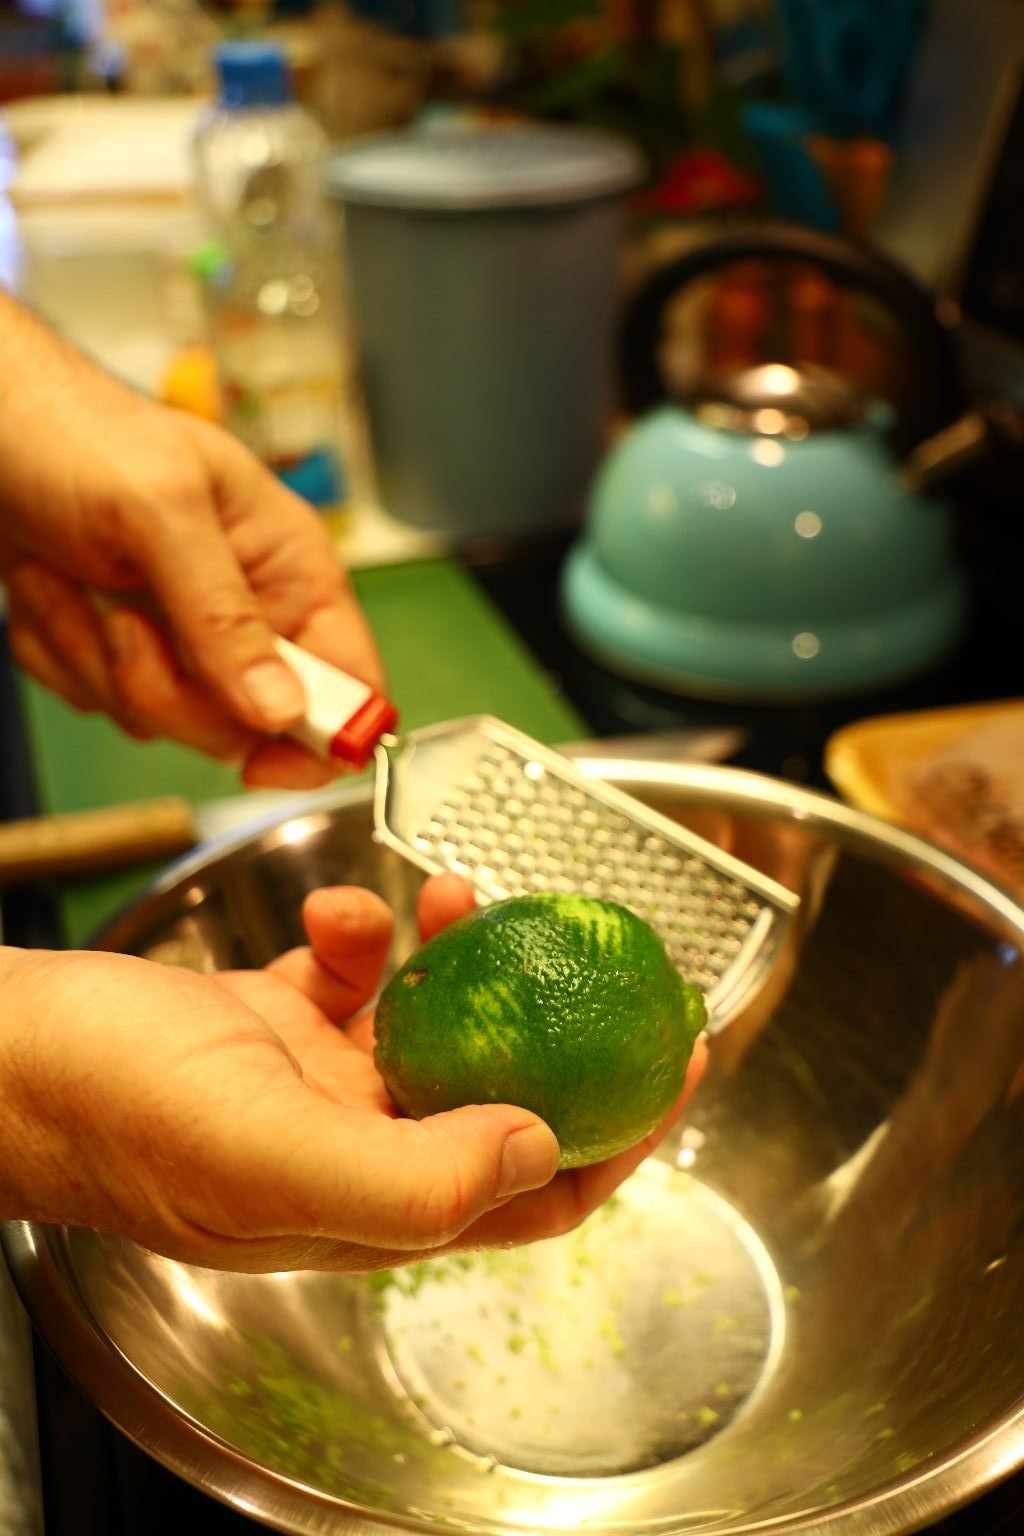
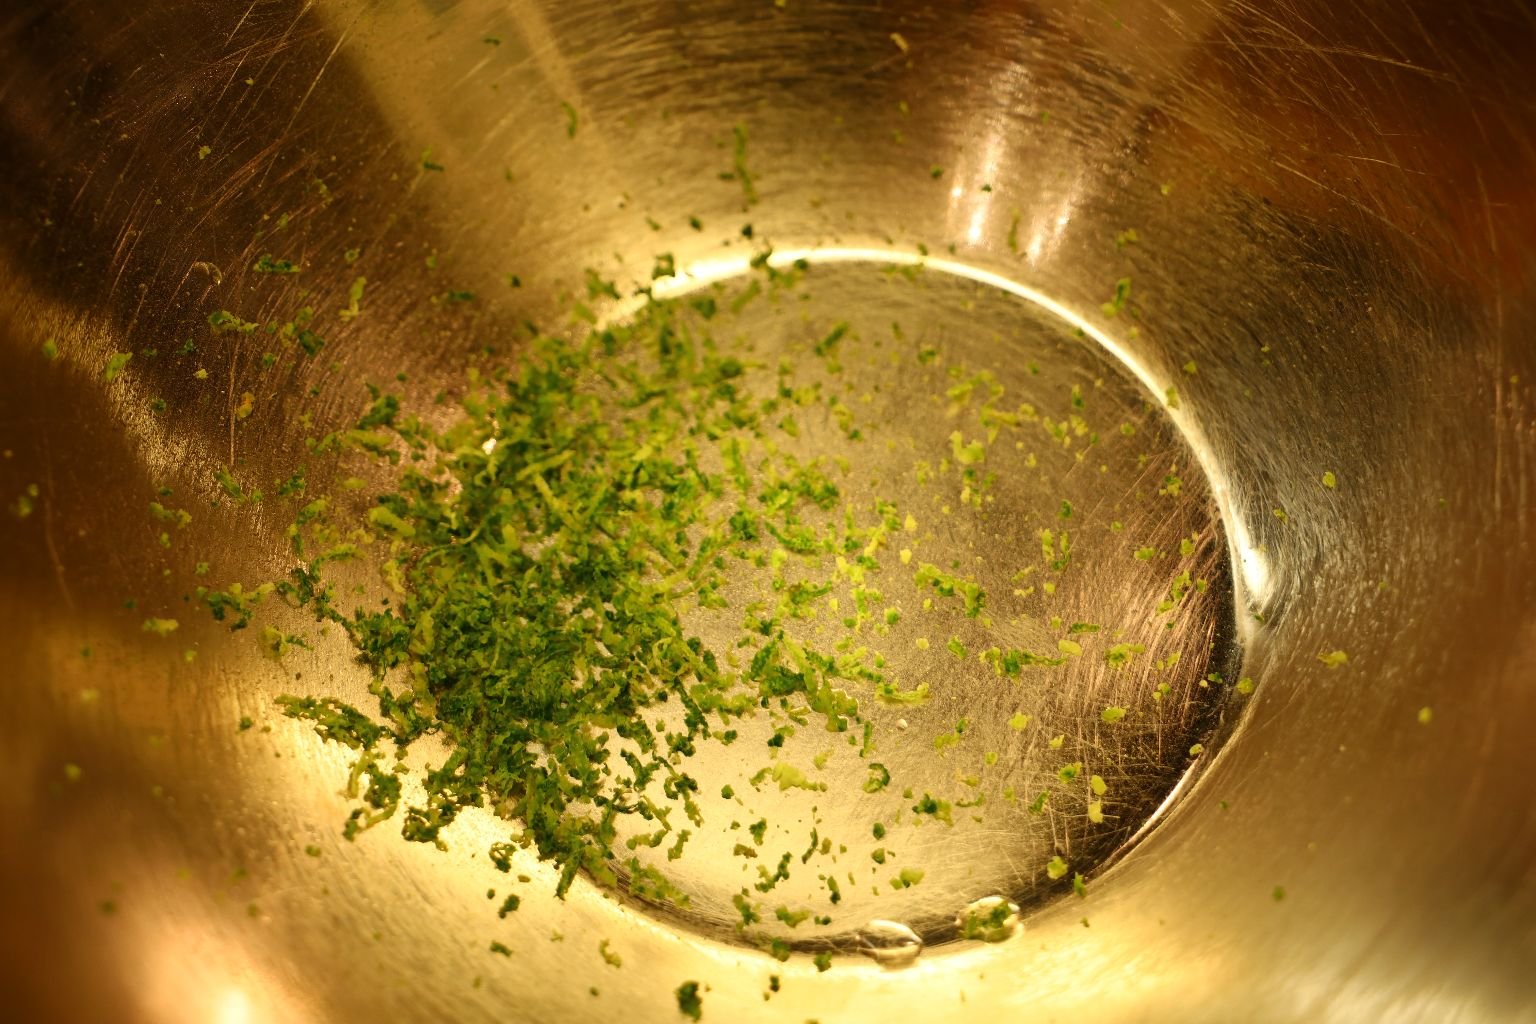
Zest your Lime into a large bowl.
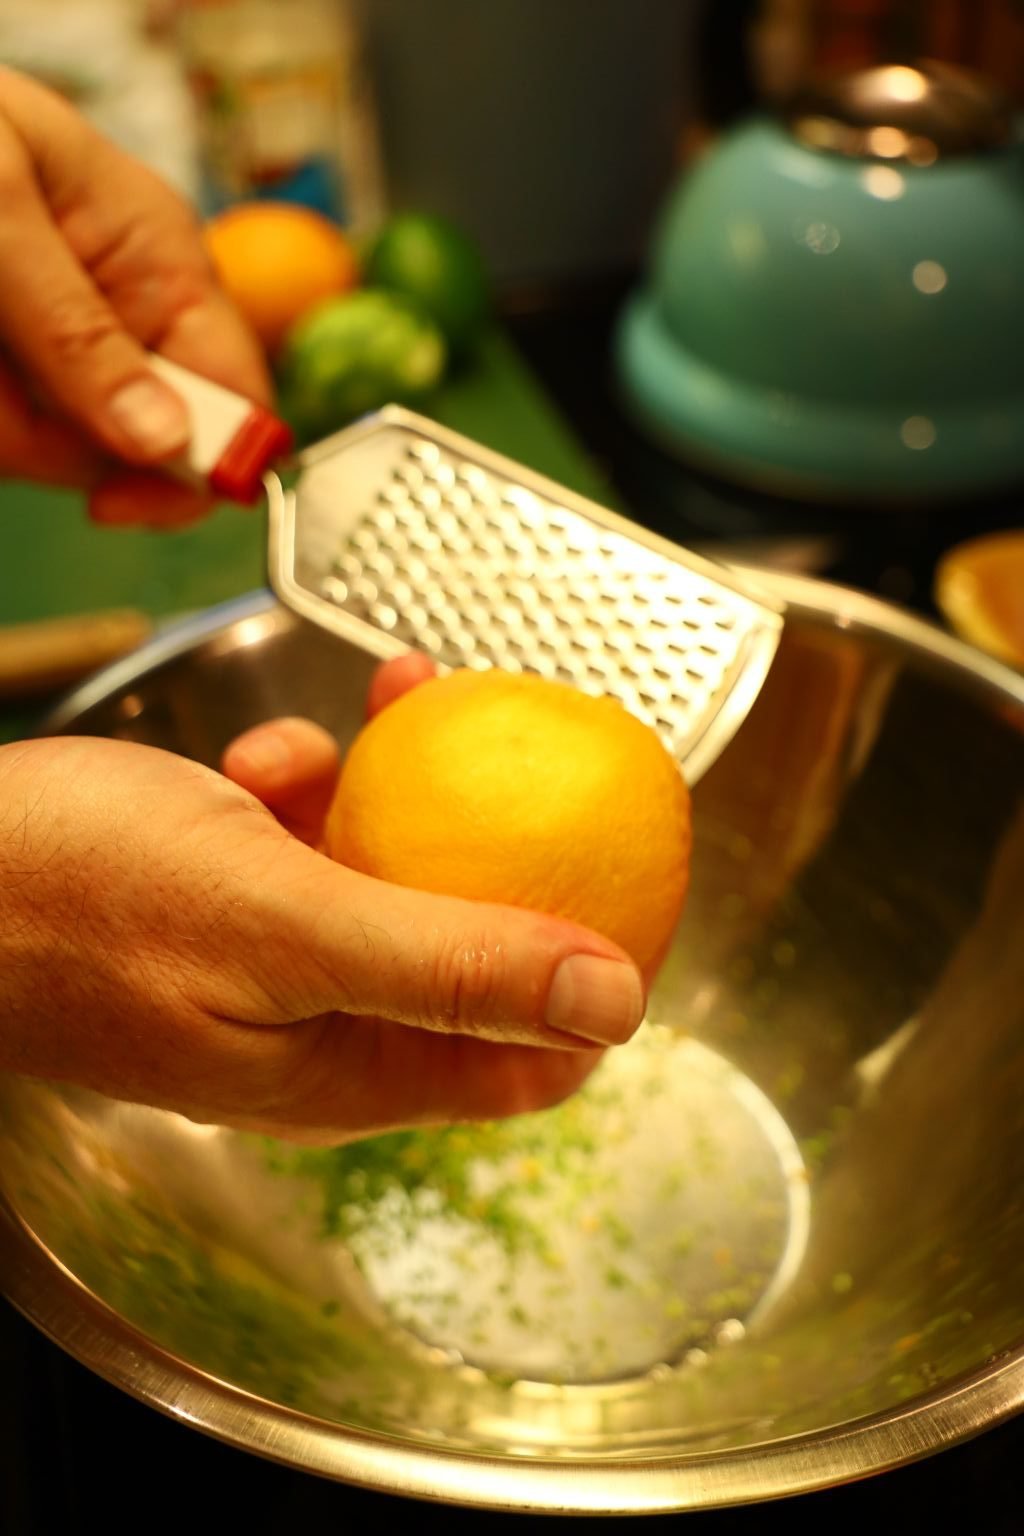
Now, do the same with your Orange.
—————————————————————
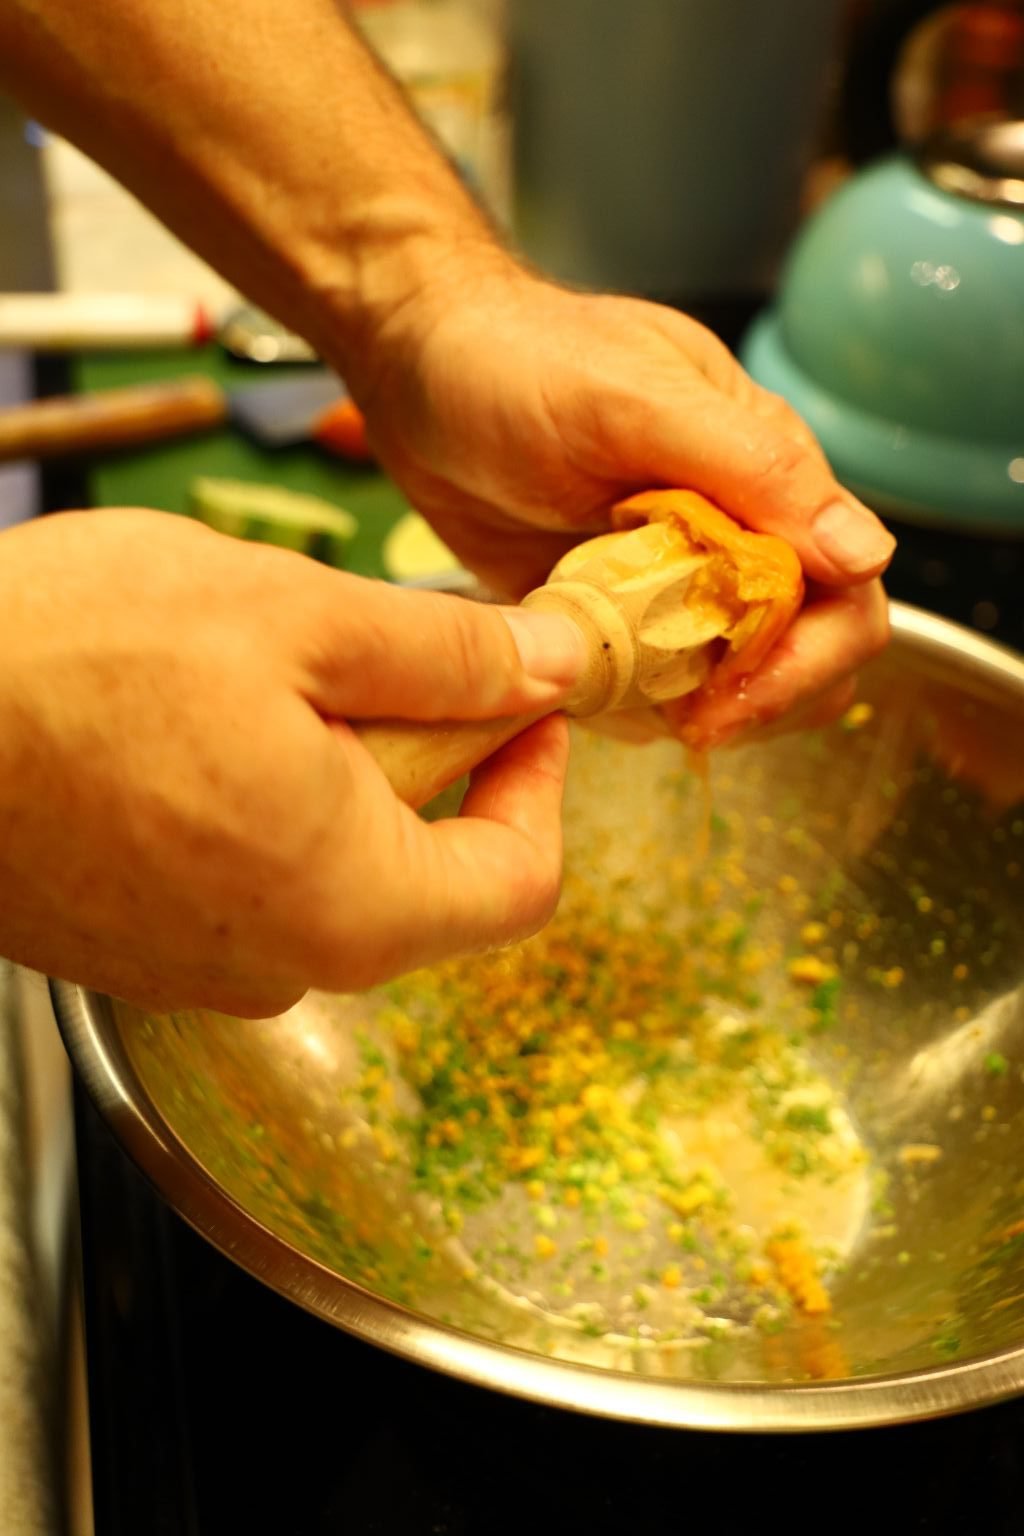
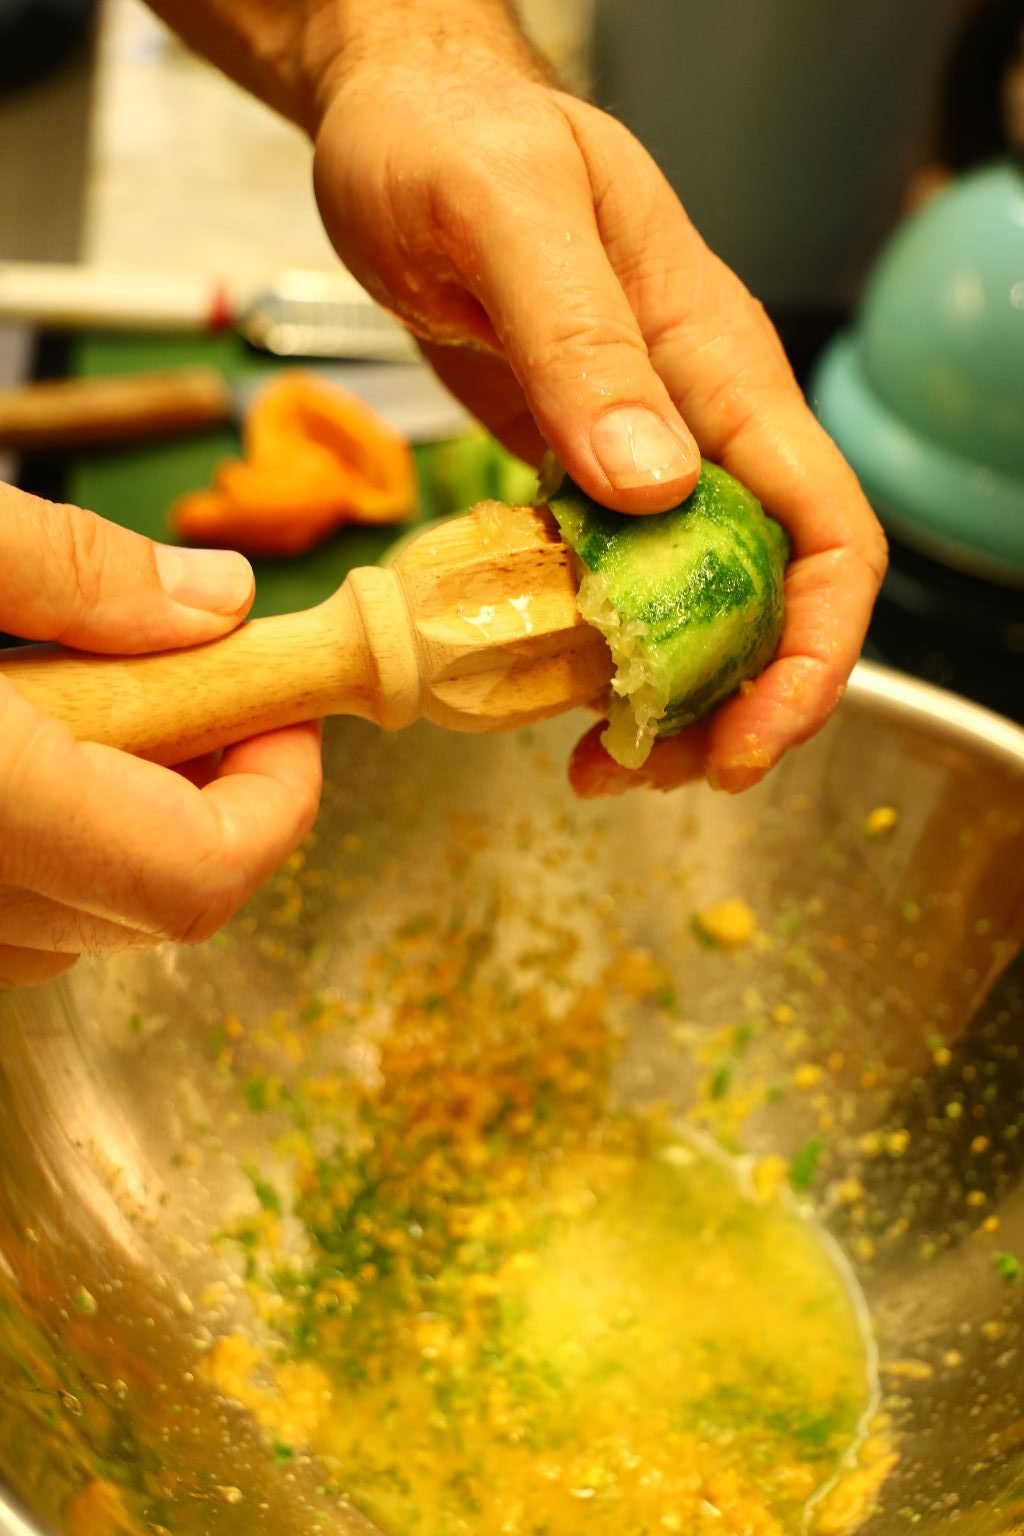

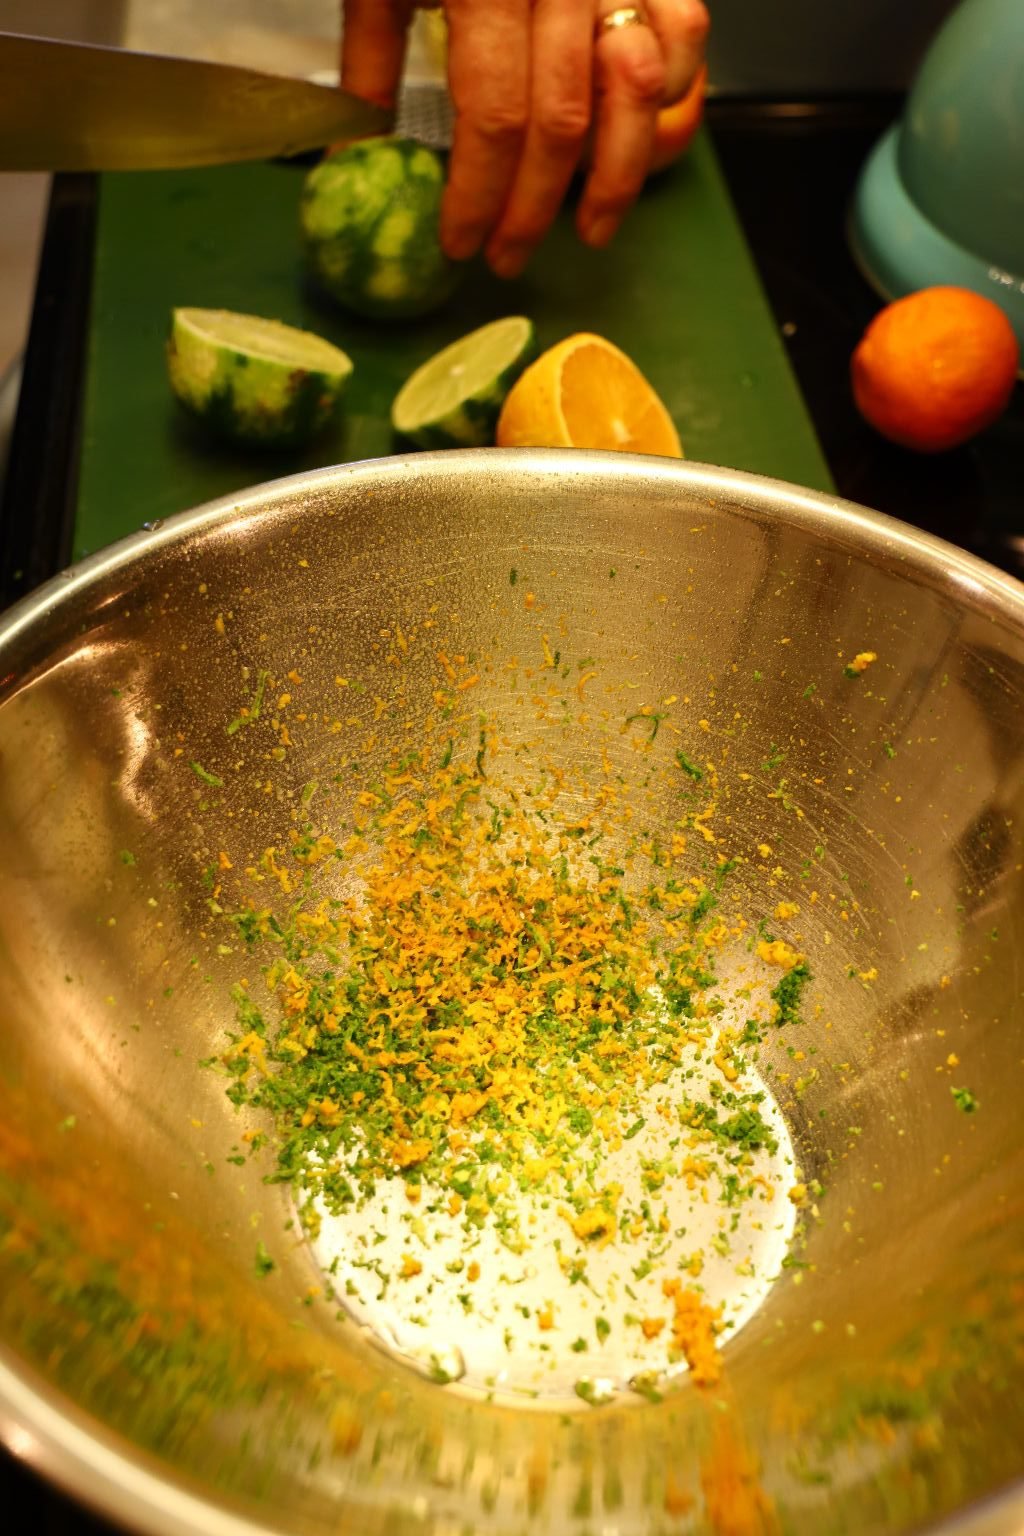
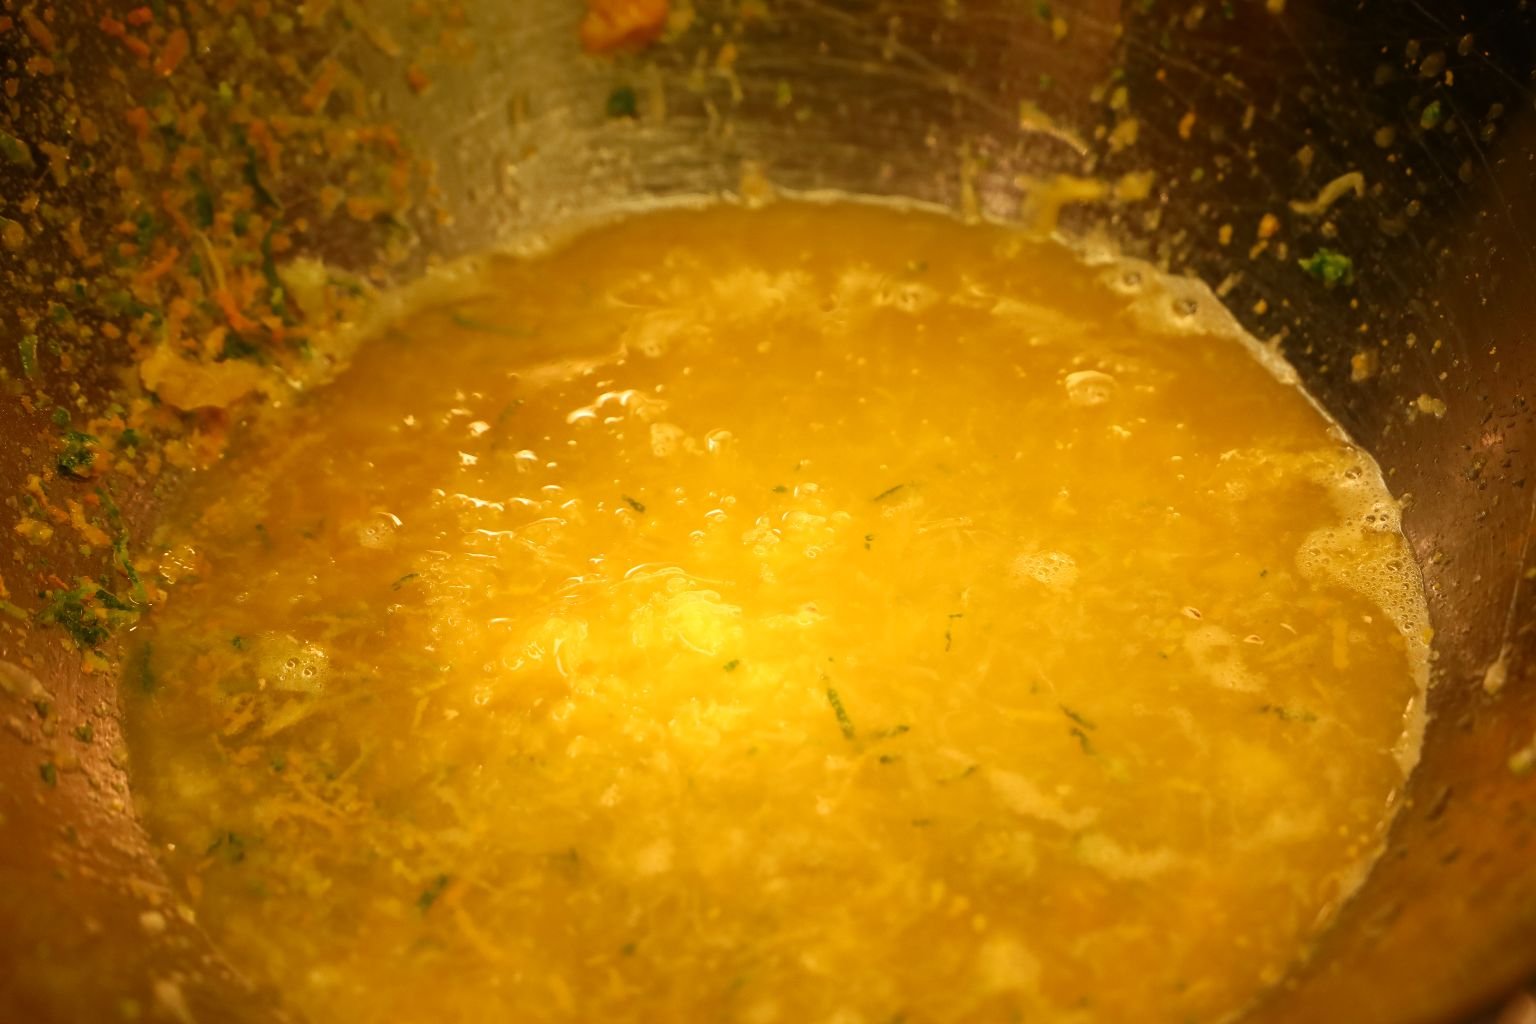
Juice your Mandarin Orange, Limes, and Oranges into the bowl.
——————————————————————

Add your Ground Cumin and Chili Powder to the bowl.
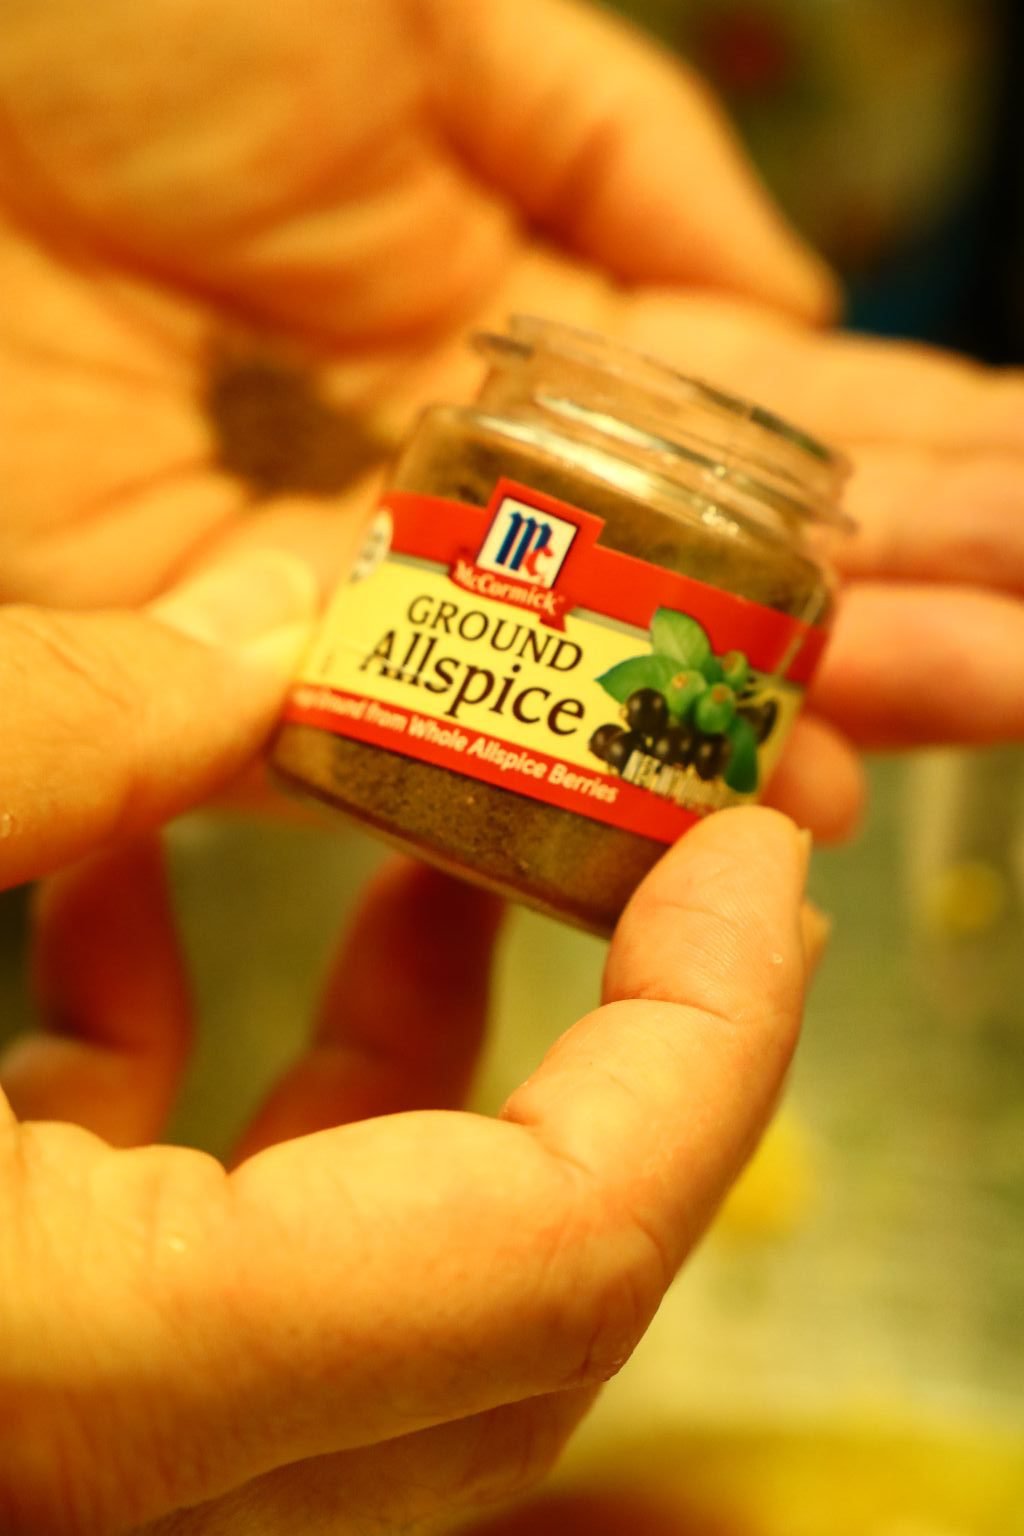


Then add your Ground Allspice, Ground Cinnamon, and Oregano Leaves to the bowl.
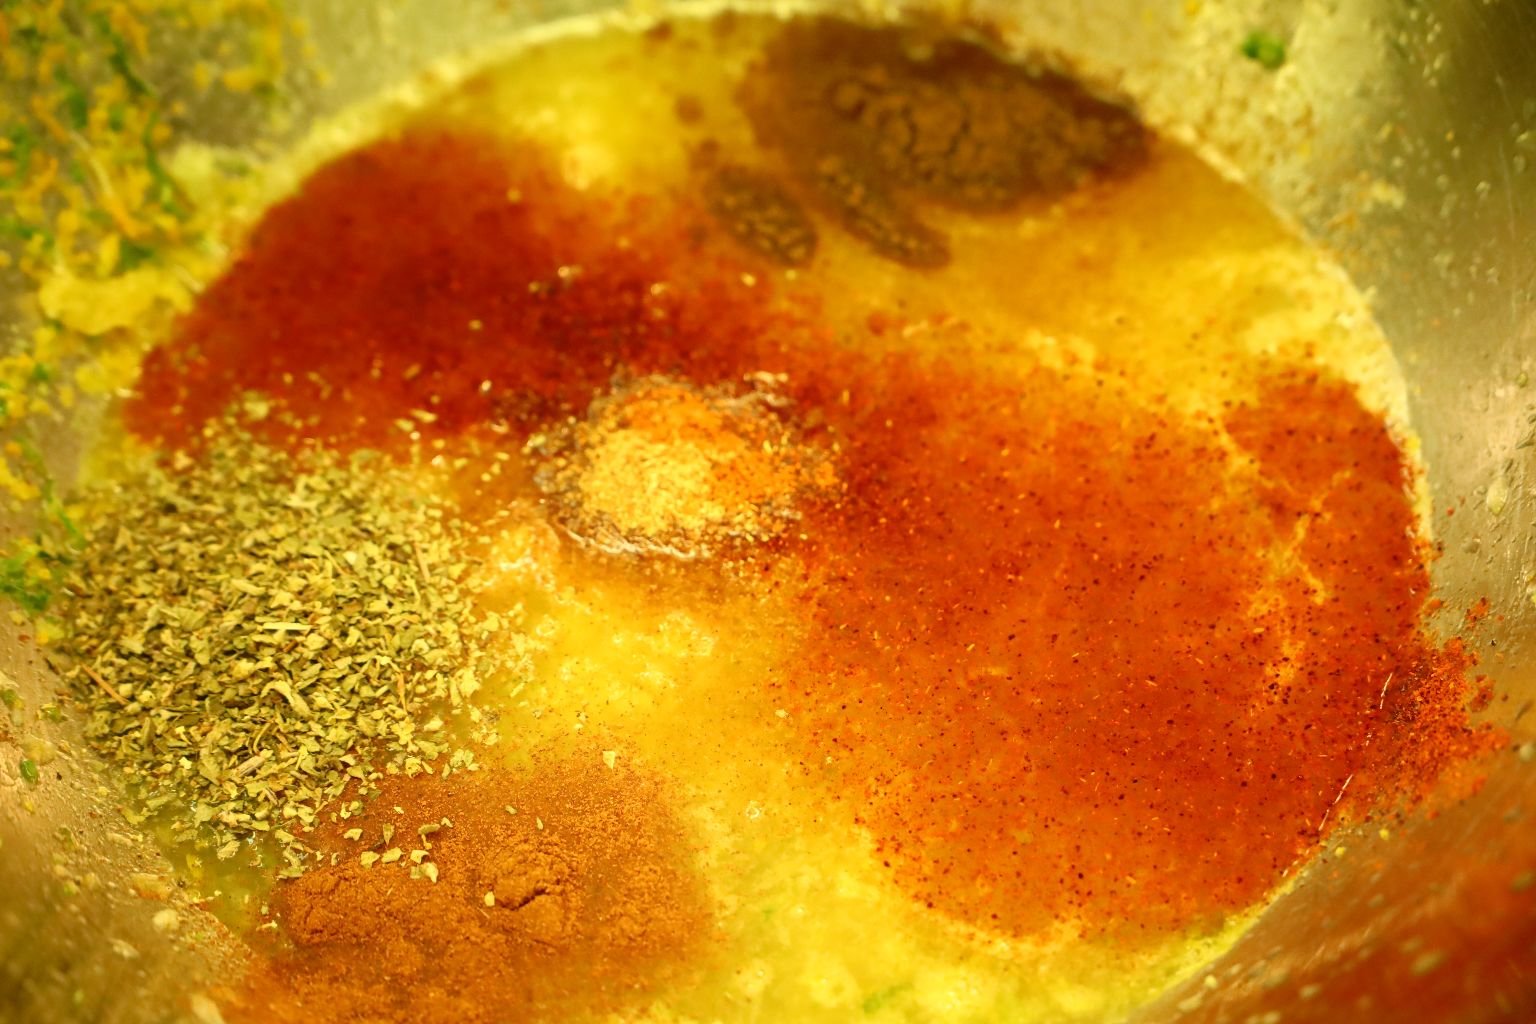
Here you can see the amounts I used. Use a much or as little as you like.
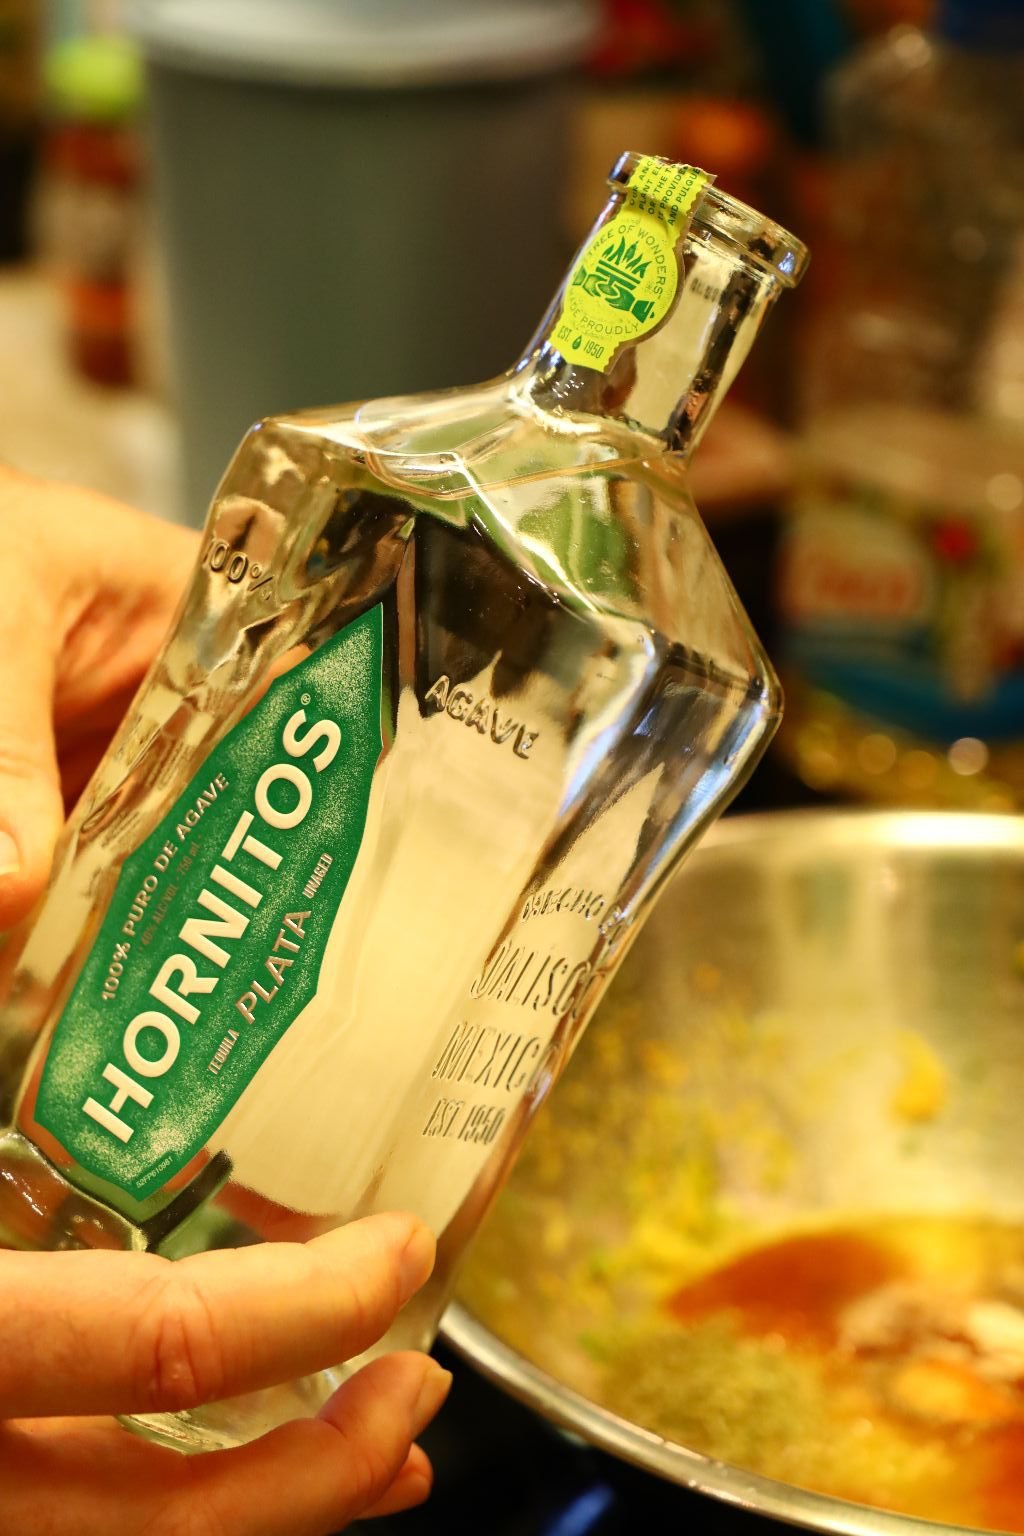
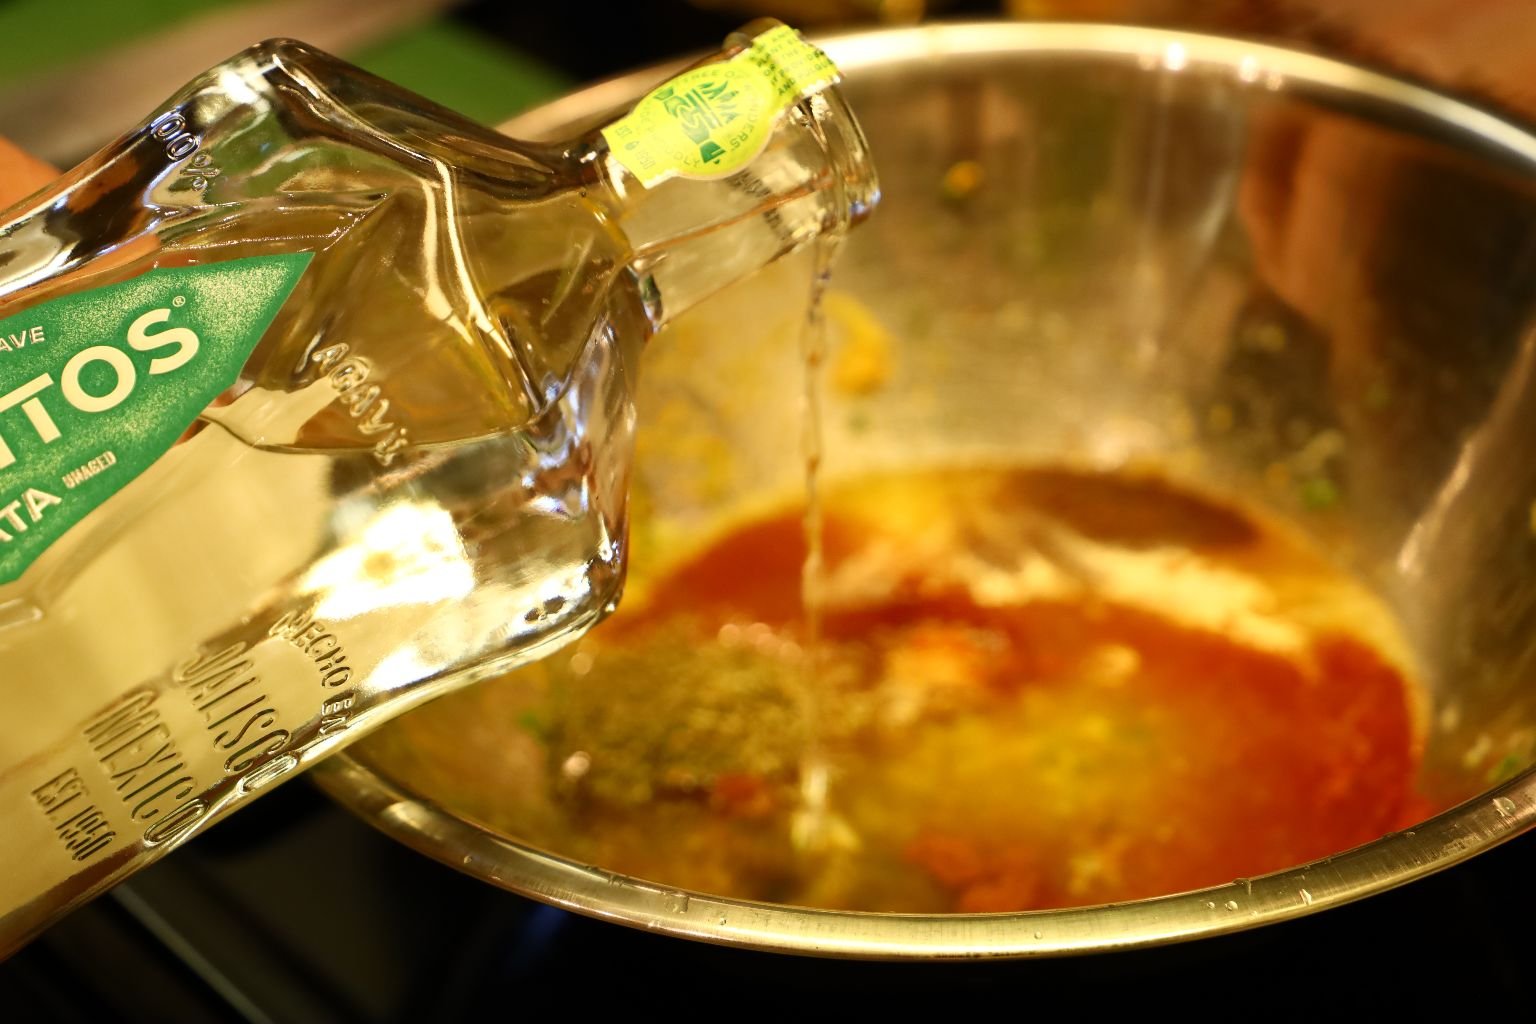
Here I am pouring the tequila into the bowl. Again use a much or as little as you like… but they are called Tequila Wings. 🙂
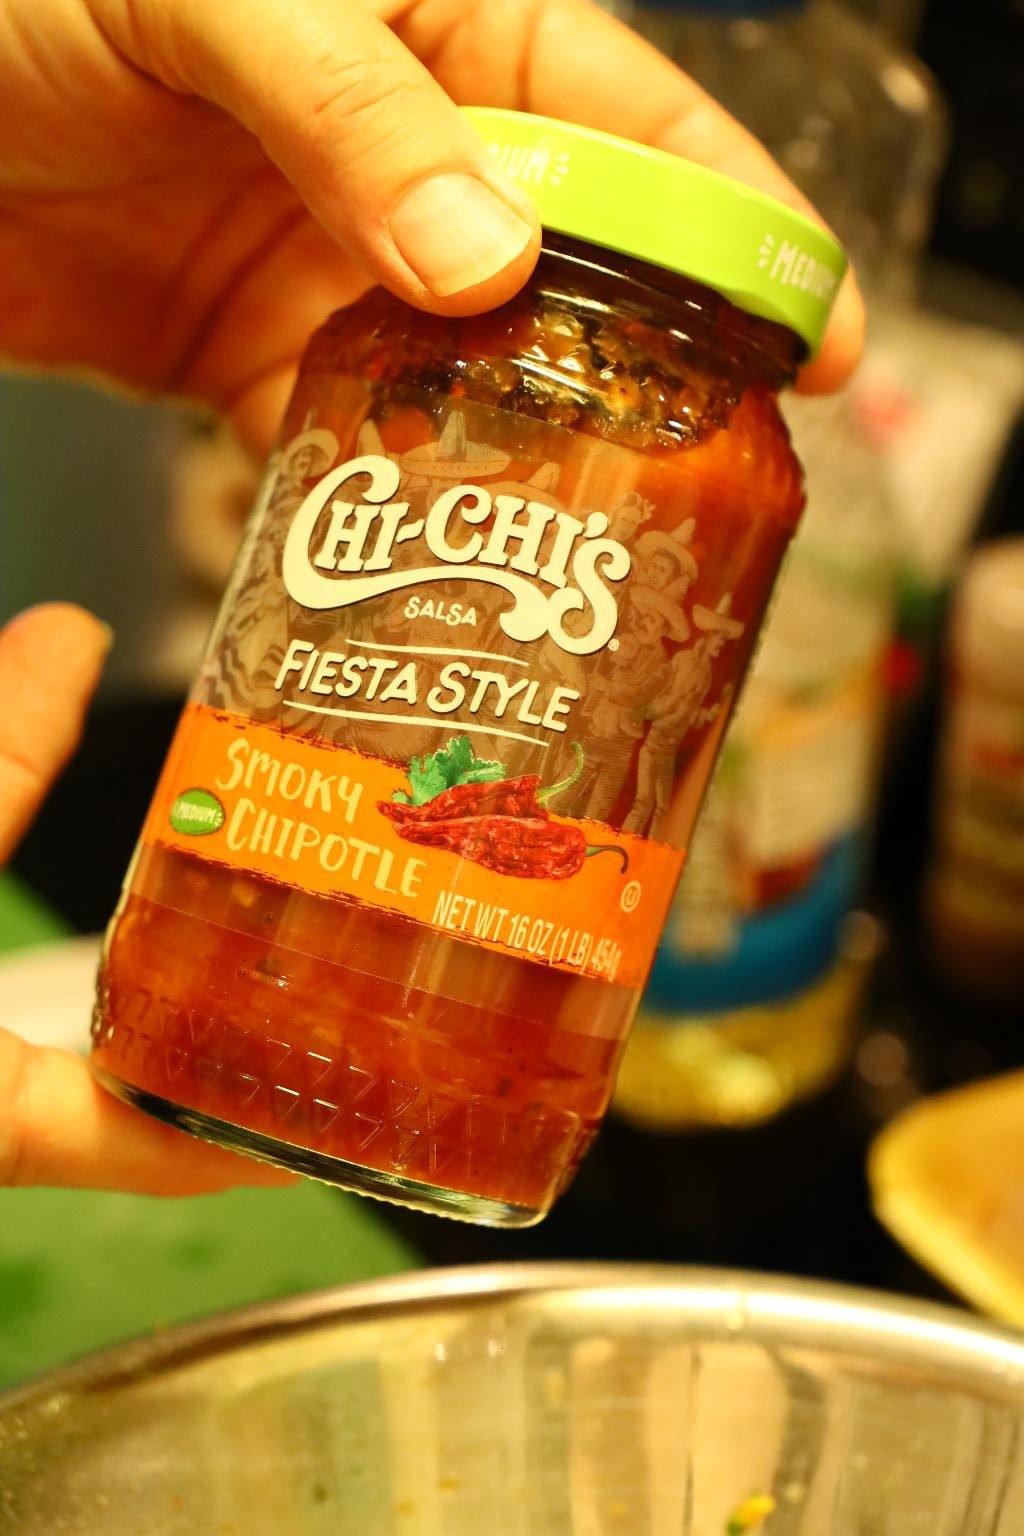
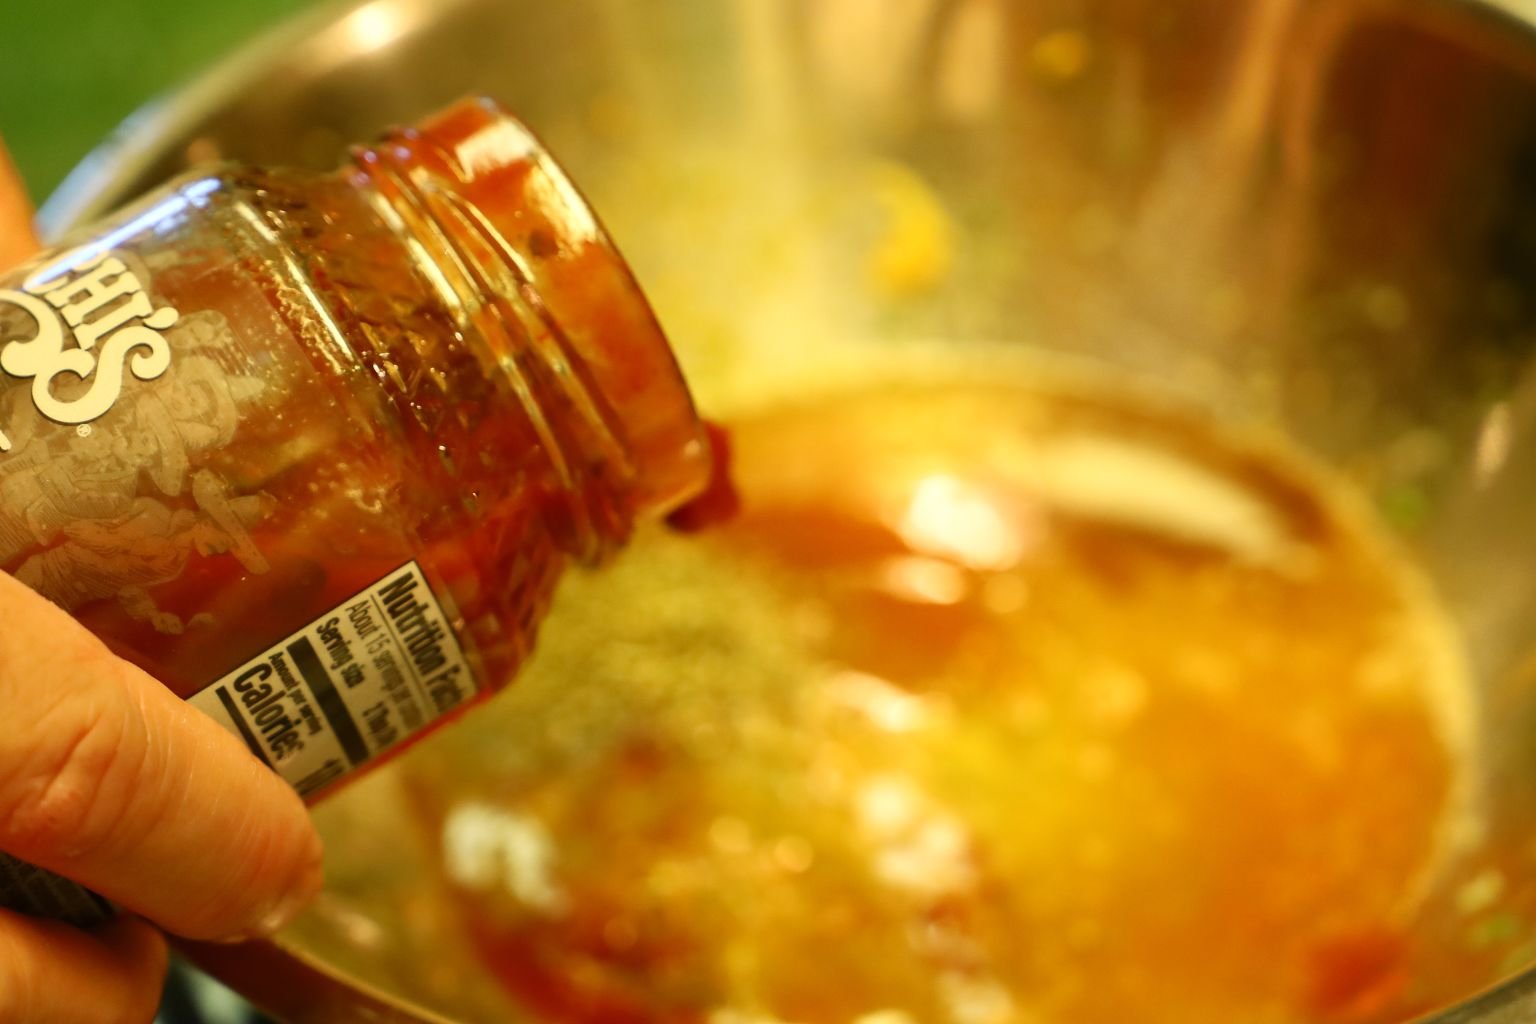
Now, add your chipotle salsa.
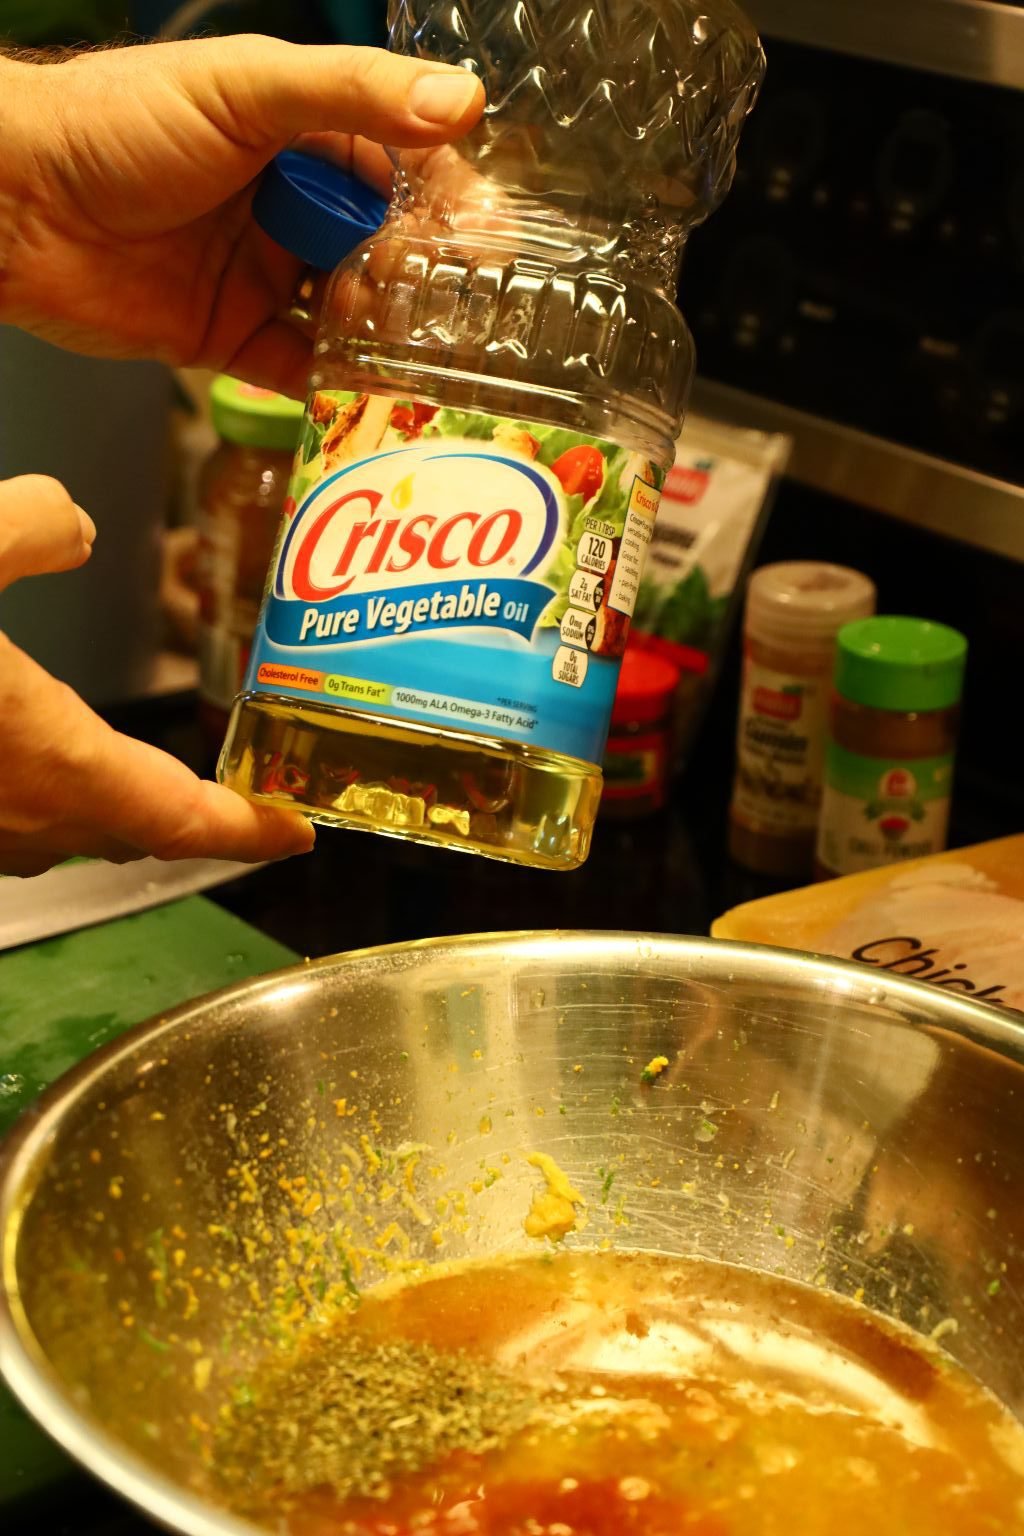
Then add your vegetable oil to the bowl.

Add your sugar to the bowl.

—————————————————————

Now, chop all of your garlic.

ADD, and..
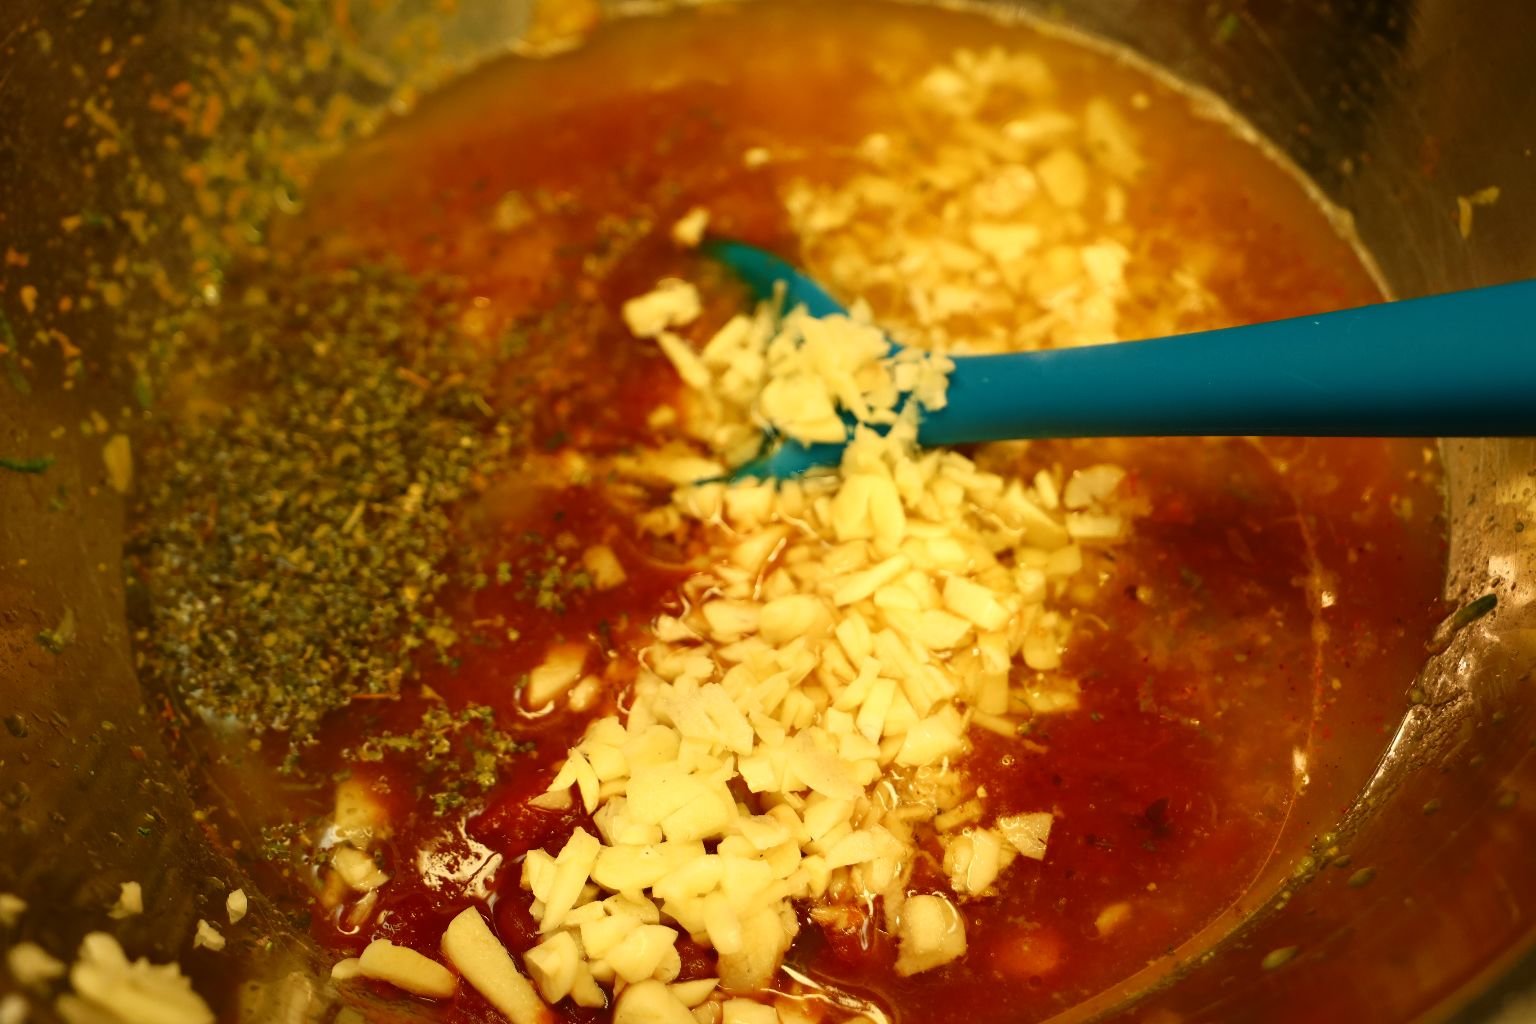
mix all the ingredients, and taste.
———————————————————-
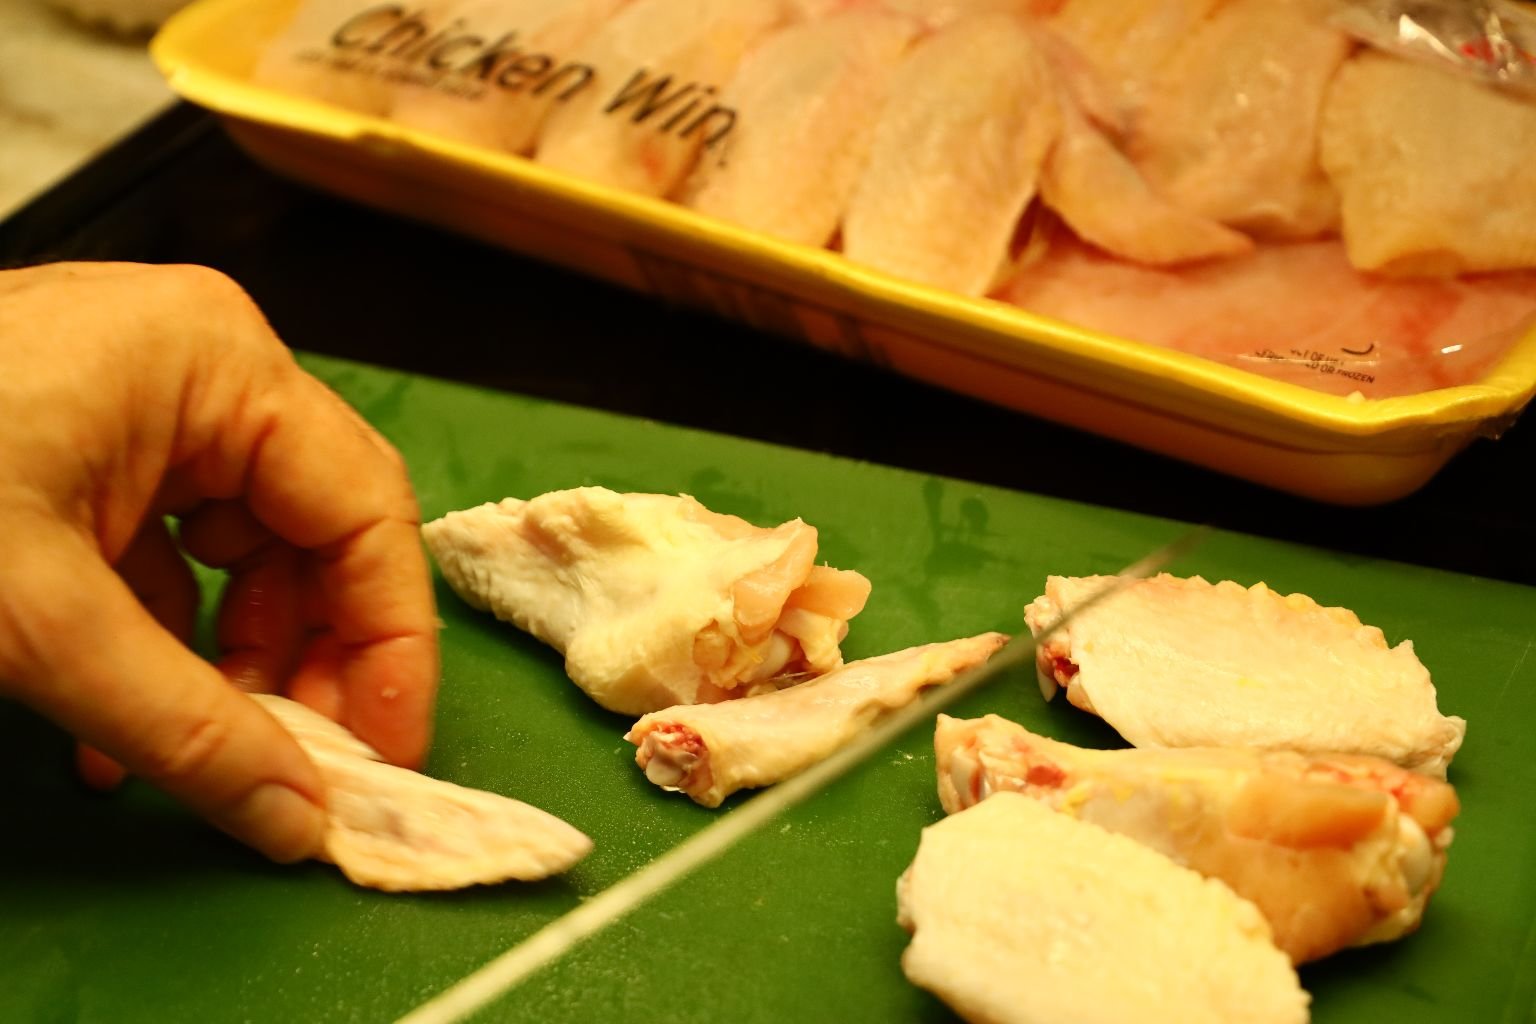
Slice your chicken into sections as shown and place them into a sturdy zip lock bag.

Here, after I tasted the marinade, I felt it could use some more seasonings…
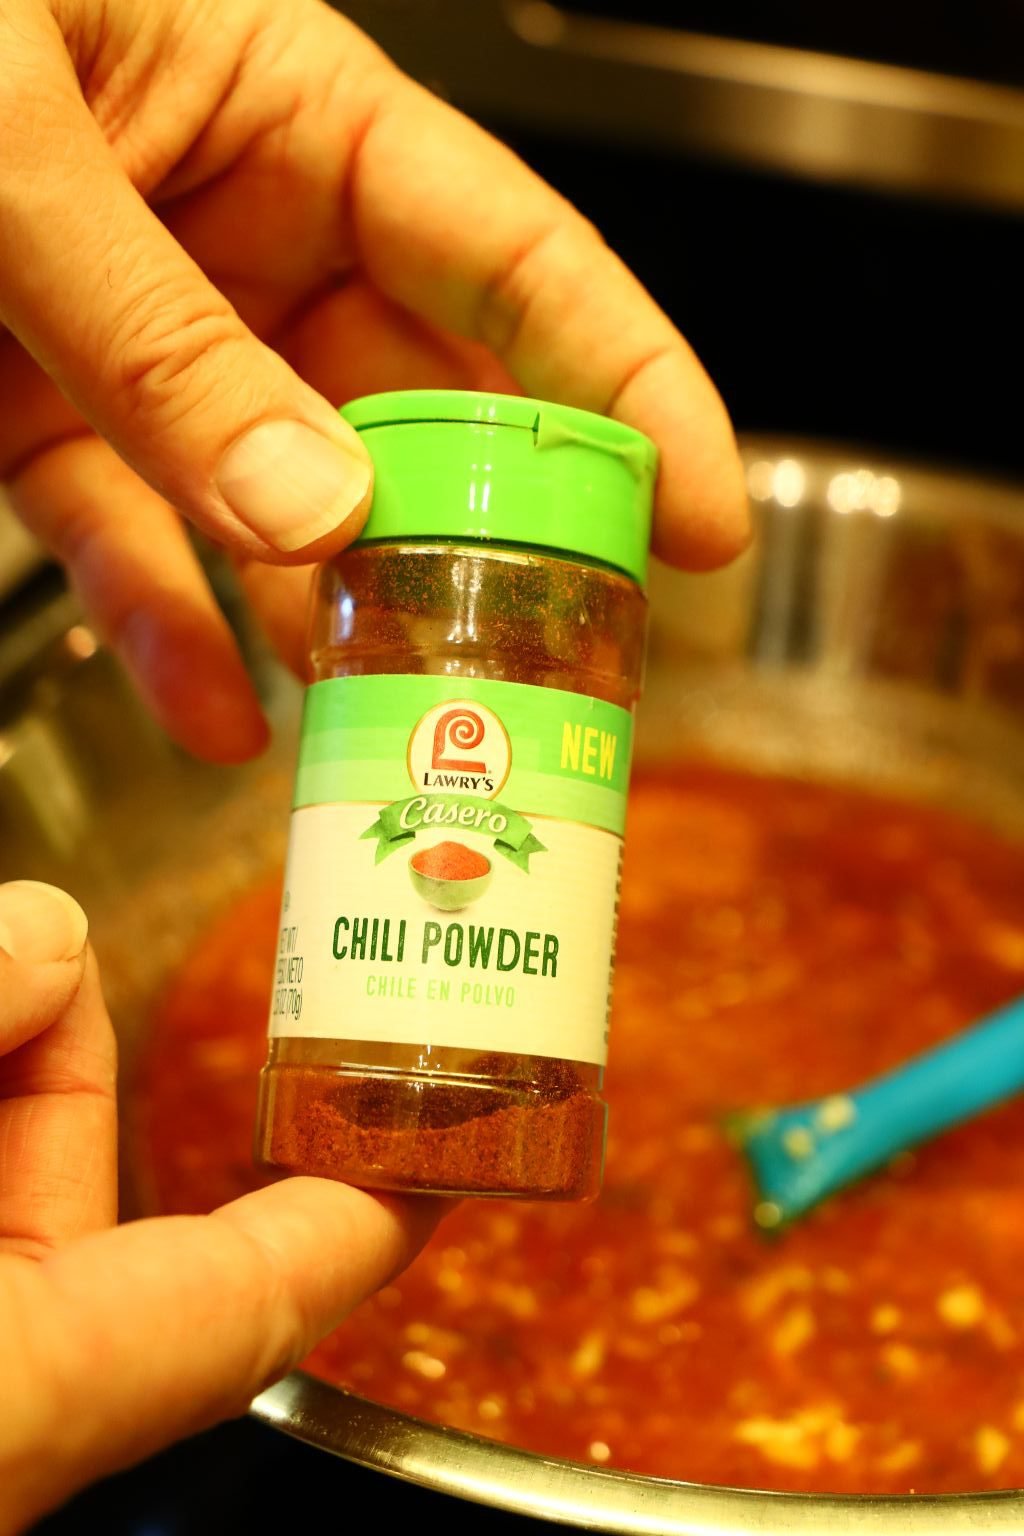
Here I added some Hot Sazon and more Chili Powder…

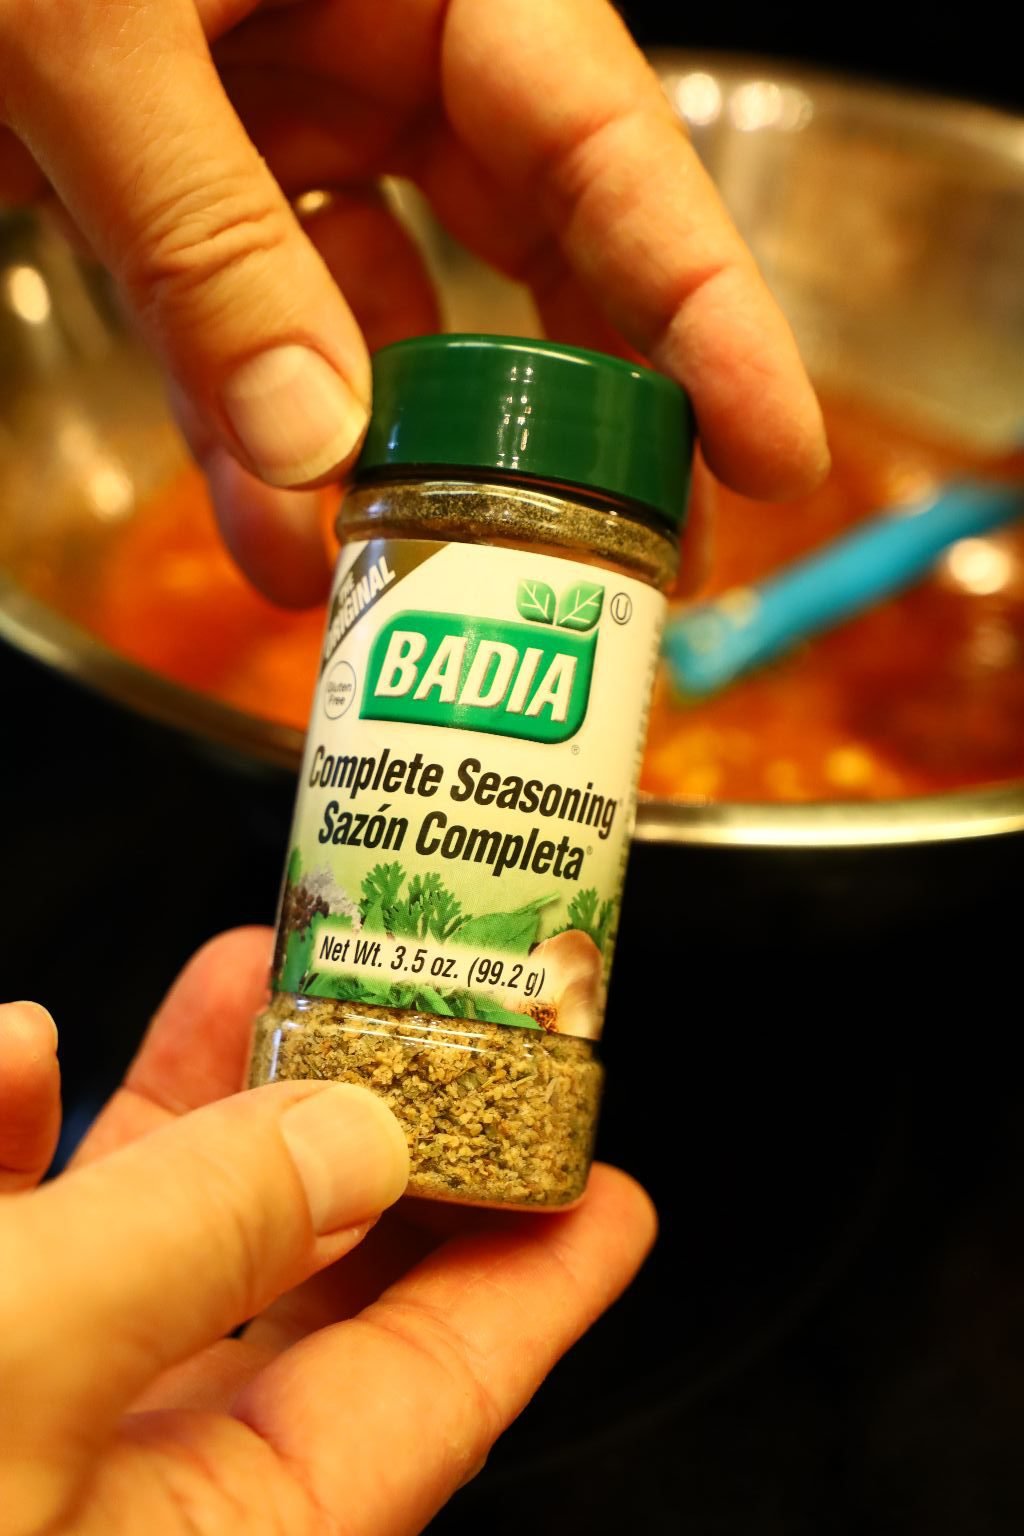
then some Ground Chipotle and some Sazon Complete Seasoning.

—————————————————————–

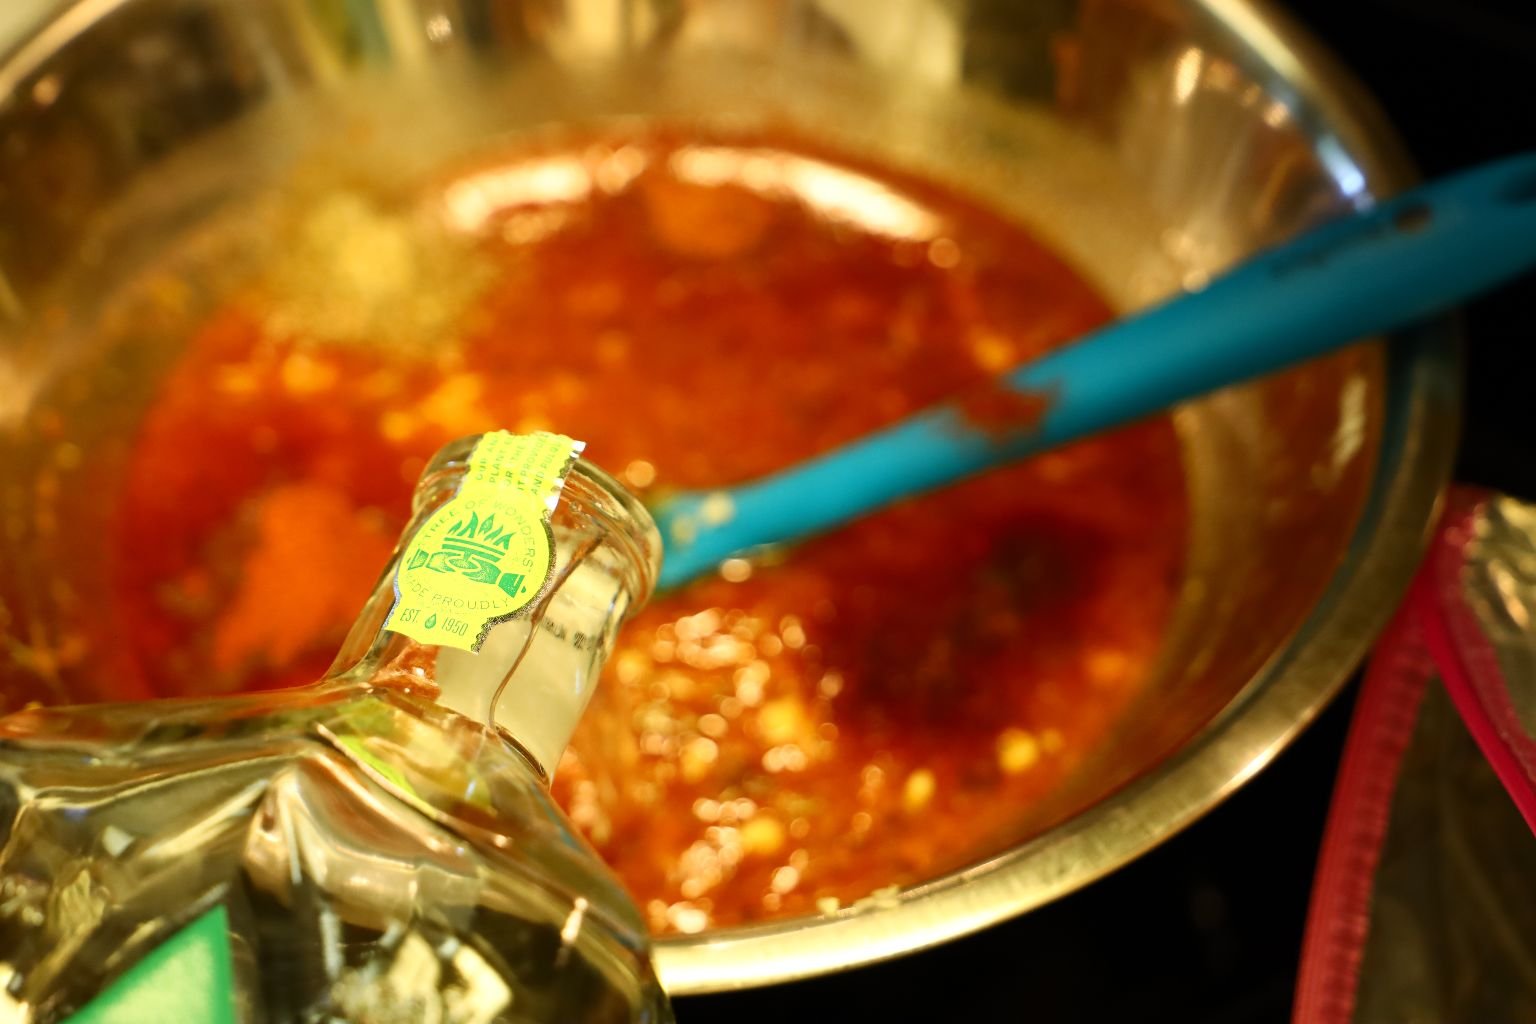
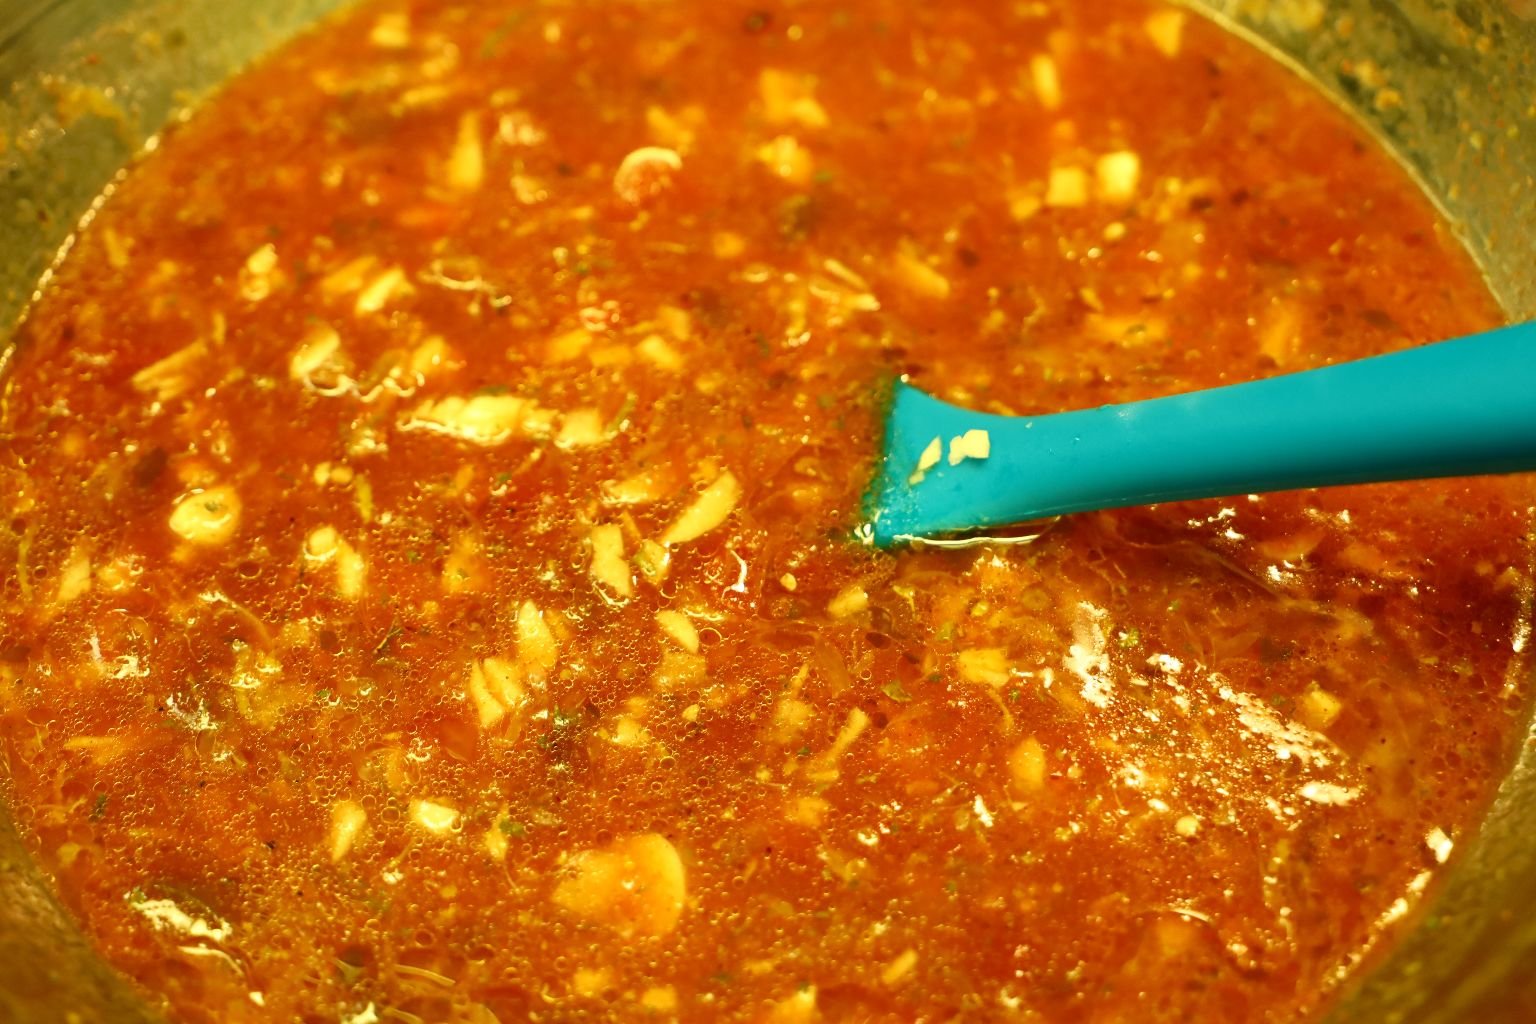
Then it needed some more tequila!
Stir and taste again.

With adding those other ingredients, I felt it needed more sugar.
Stir it all up again to dissolve the sugar and taste again….
Perfect!
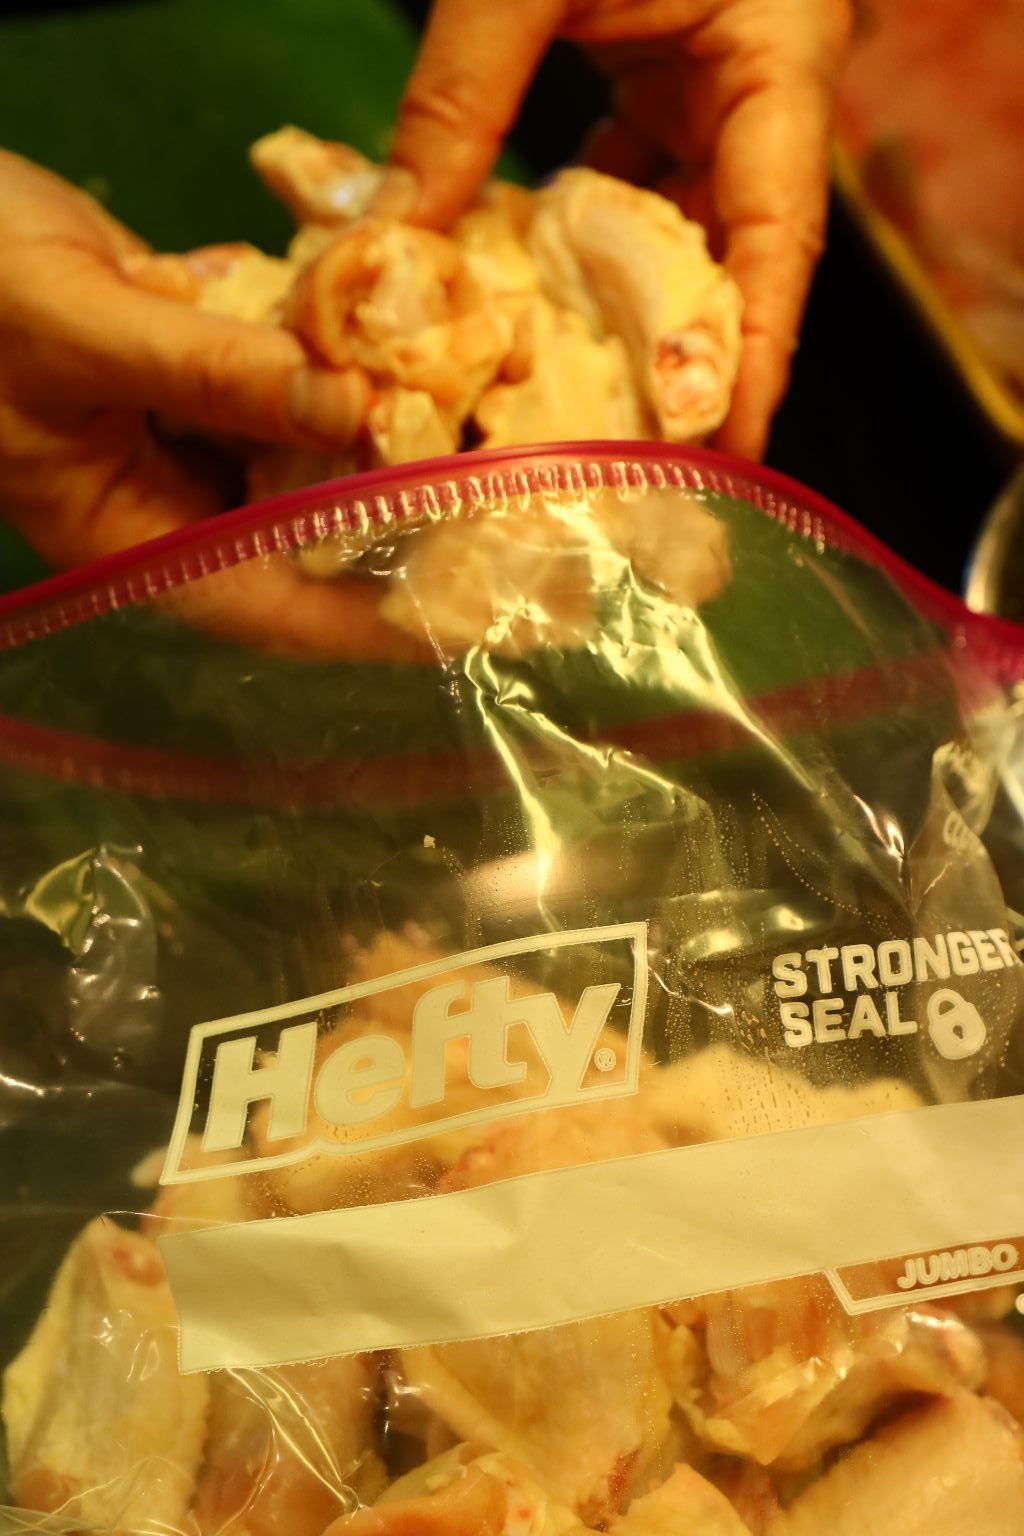
Pour the marinade into the bag with the chicken.
Place the closed bag of marinating chicken into a large clean bowl just in case the bag rips. Let the wings marinade in the refrigerator overnight or longer if desired.
—————————————————————
Meanwhile……
The Grilled Scallops

Ingredients:
~ 40 Sea Scallops
2 Tbsp. Extra Virgin Olive Oil
1 Tbsp. Ground Chipotle
1 tsp. Ground Pimenton Picante
1 Tbsp. Roasted Garlic Powder
1 Tbsp. Sweet Paprika
2 Tbsp. Chili Lime Rub – Weber brand
11 Thick Wooden Skewers
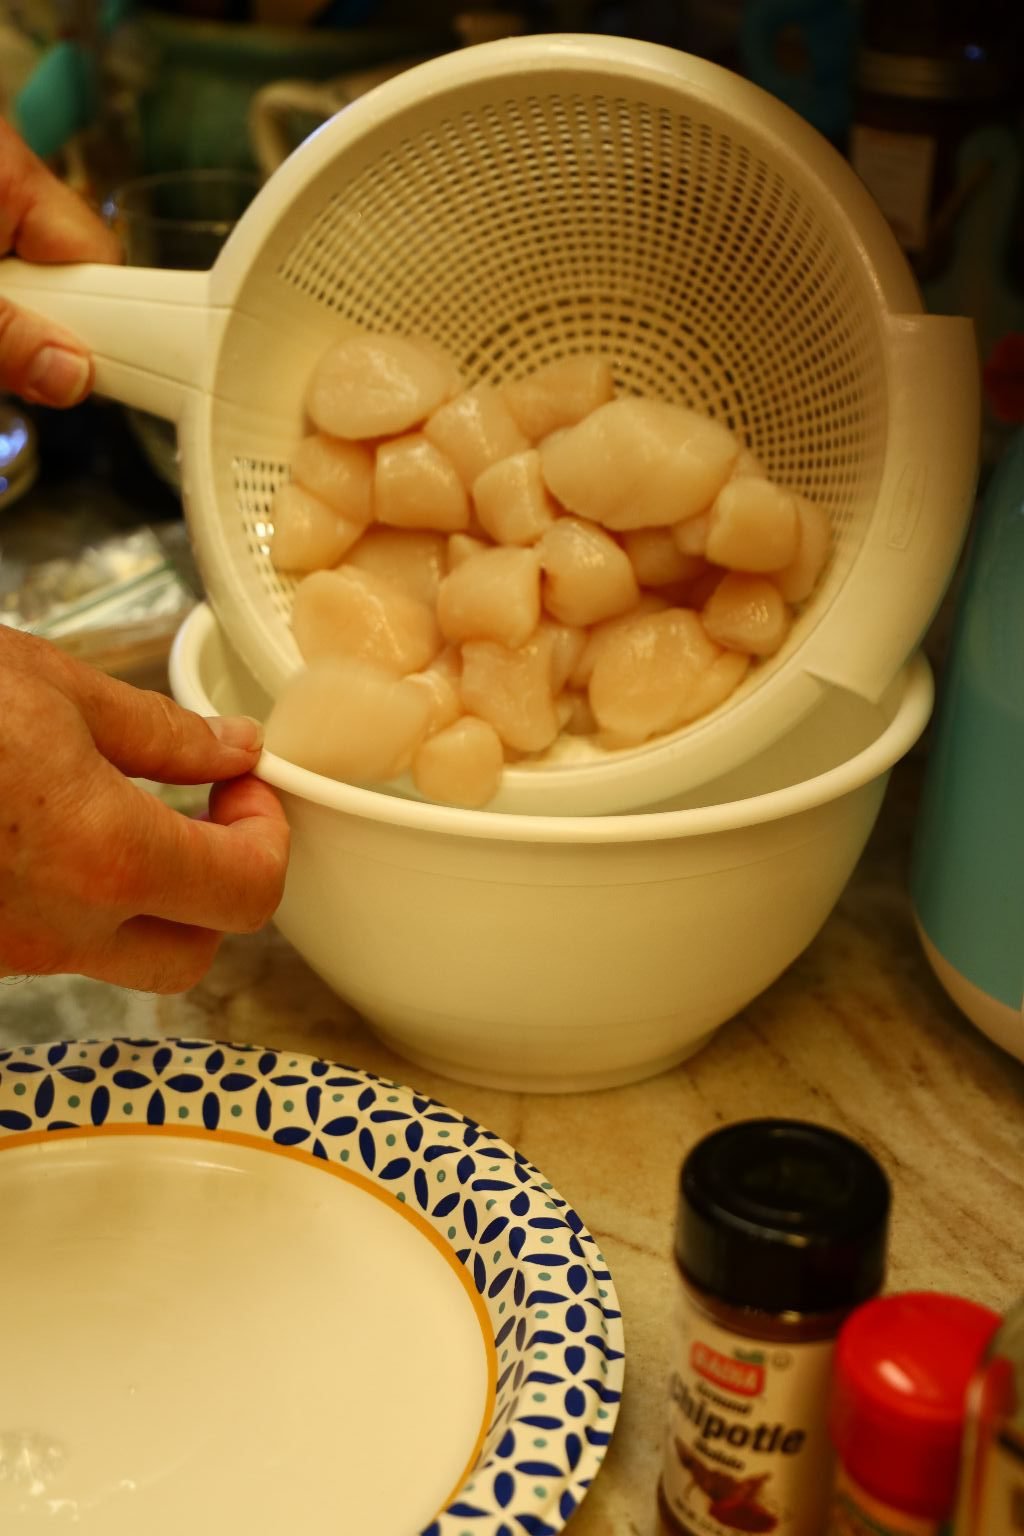

Rinse your Scallops and drain them well.
Pat them dry if needed and place them in a large bowl.

Our Ingredients

Add your olive oil to the Scallops.
The olive oil helps to adhere the spices to the Scallops.

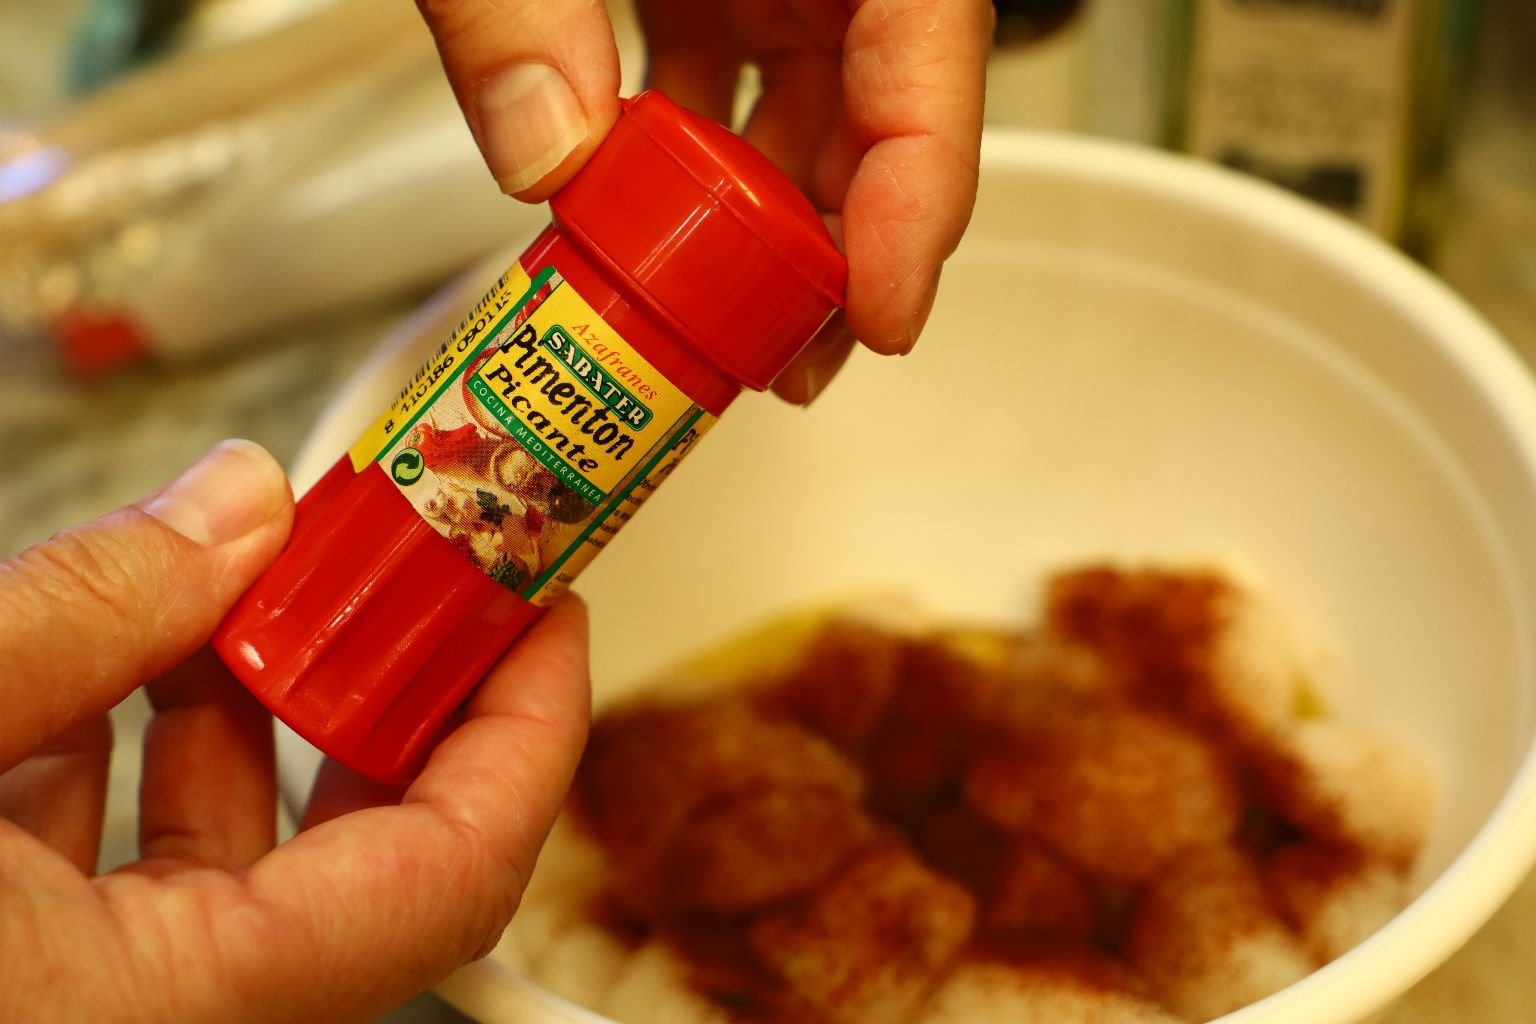
Add your Chipotle and Picante seasonings to the Scallops.


Then add your Roasted Garlic and Sweet Paprika to the Scallops.
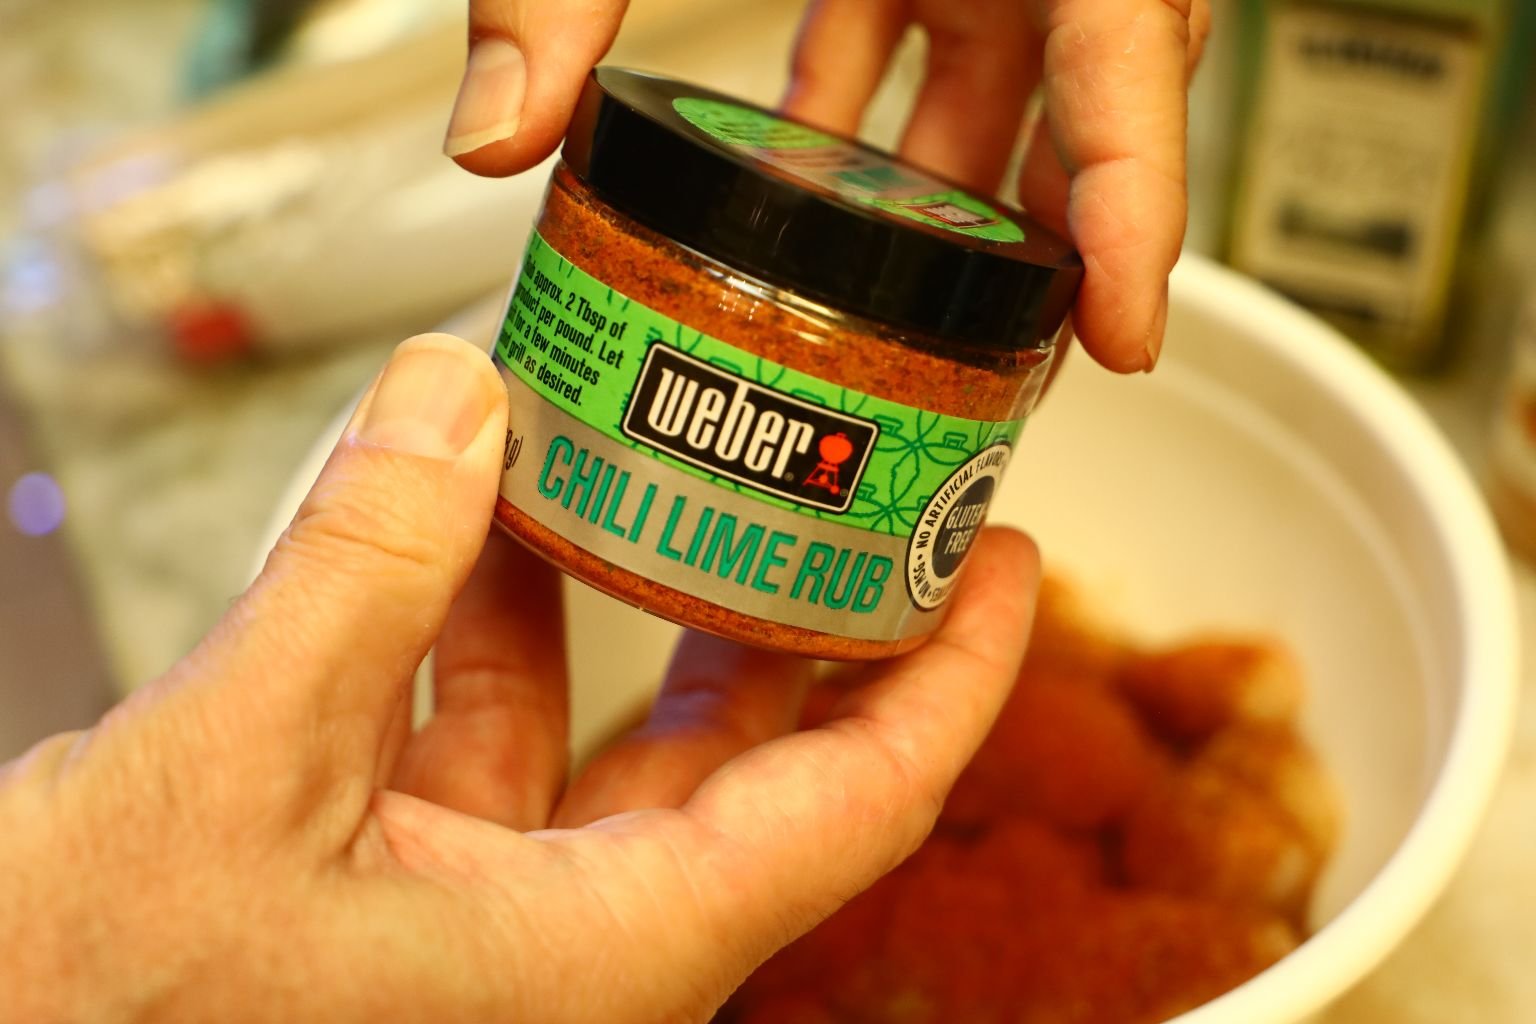


Lastly, add in your Chili Lime Rub.

It may look like a lot of seasoning, but once you mix it all over the Scallops it disperses nicely.

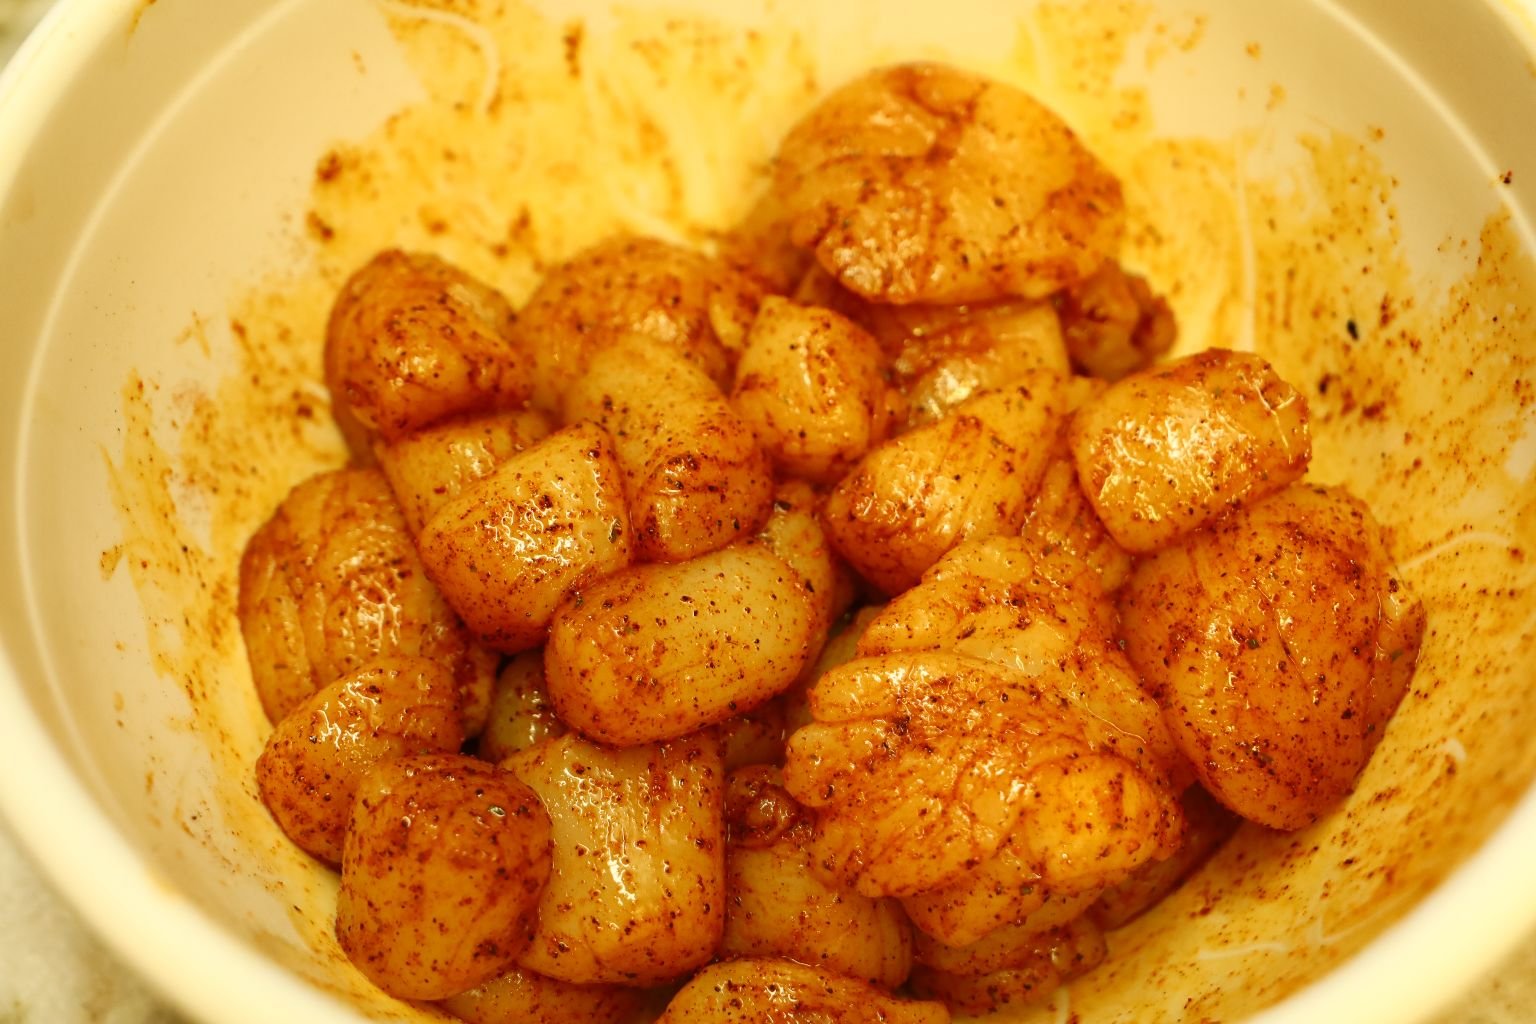
Use your clean hands to mix the Scallops and Spices.
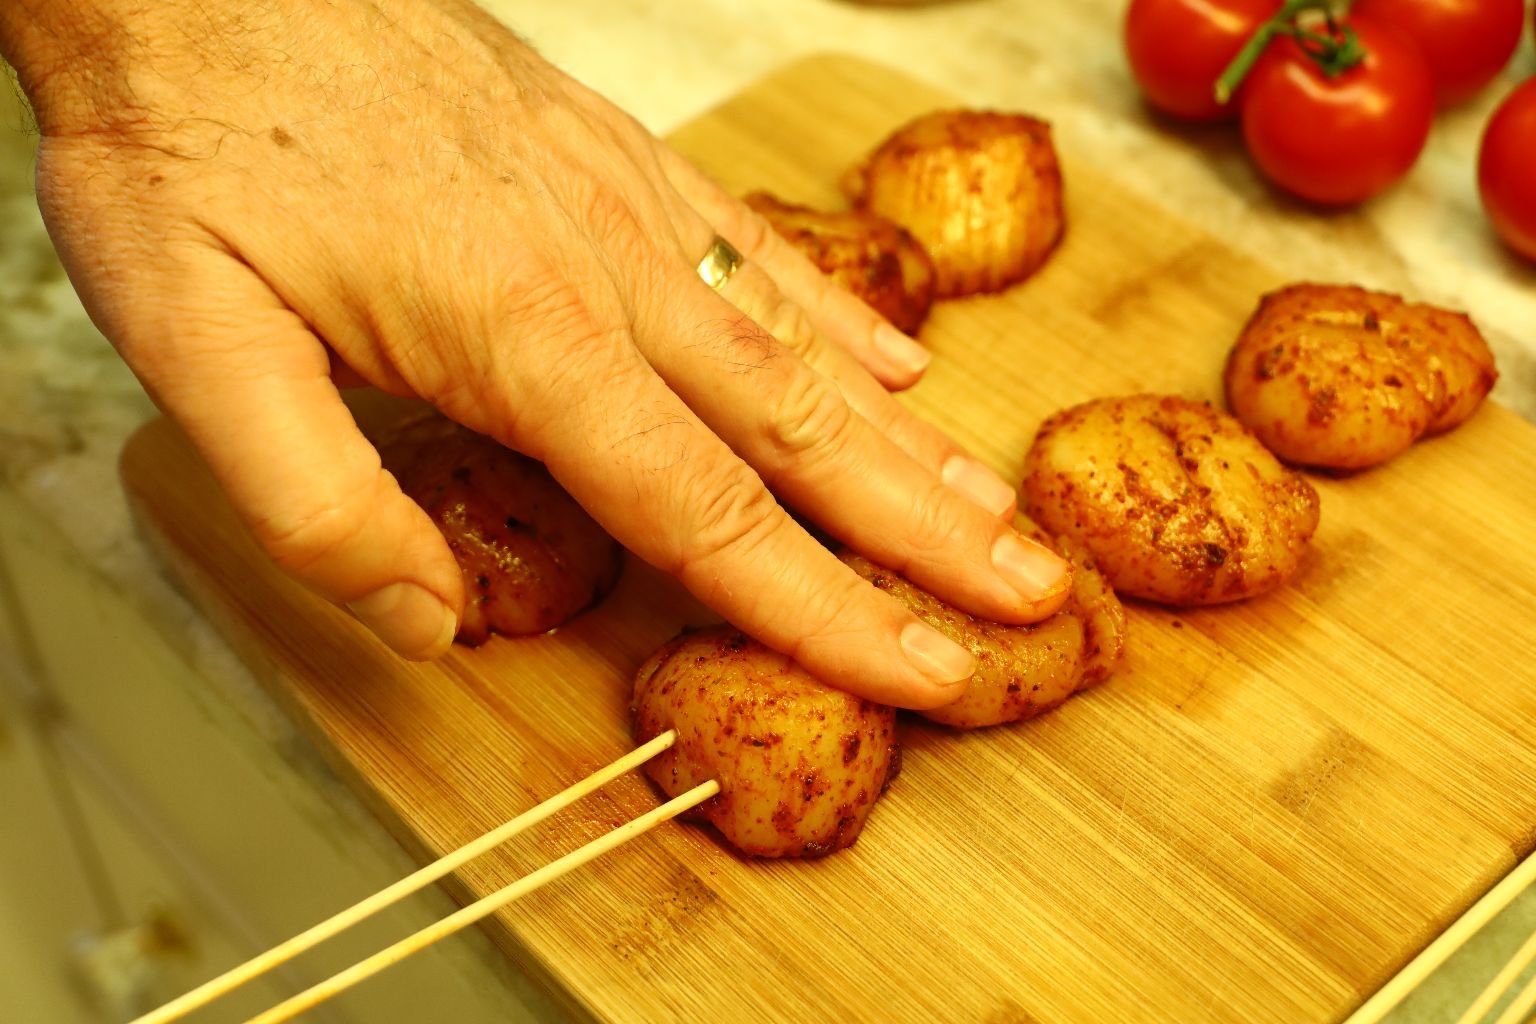
Use two skewers for the larger scallops as shown. I like to push them in at the same time holding the scallops down firmly. Using two skewers prevents the scallops from rolling on the skewer when turning them.


The scallops will shrink when cooked, which is why I don’t use two skewers on the smaller ones.

Place the skewered scallops on a plate to easily transfer them to the grill.
————————————————————–
Grilling the Tequila Chicken Wings
Ready to Grill the Scallops
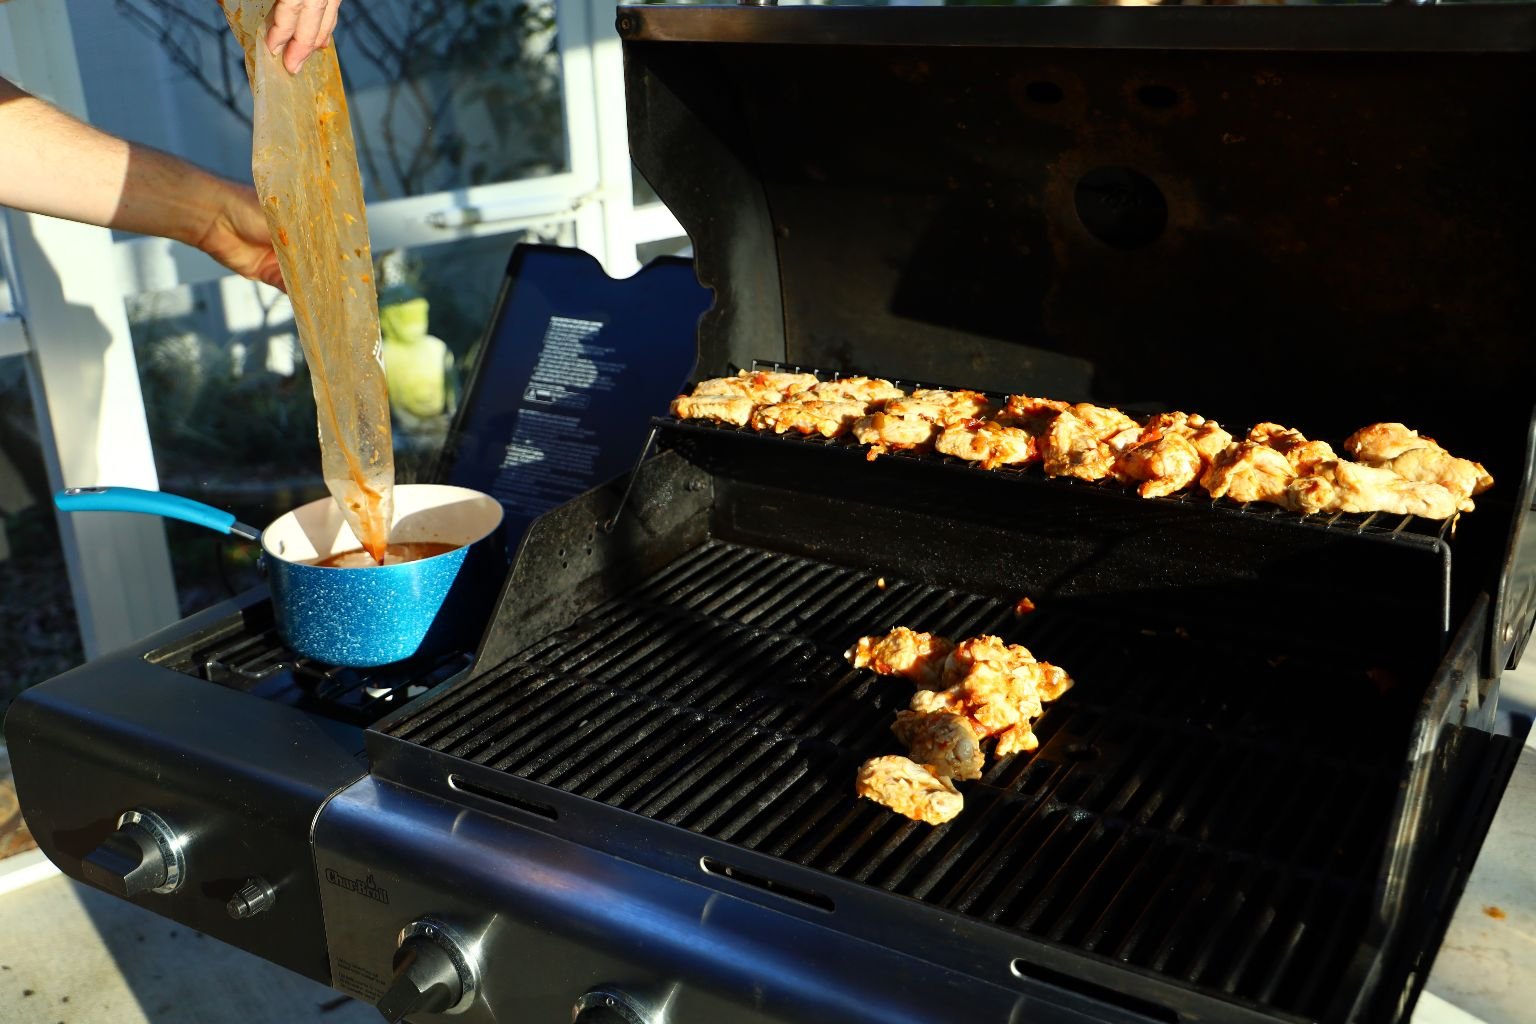
Here I am grilling the Tequila Chicken Wings where I started them out on the upper shelf of the grill as the scallops won’t take long to cook. The grill was first heated on high using all four burners for 5 min. Then I turned the grill down to medium. Doing this gives the meat a nice sear and cooks off any leftover bits from the last grilling. I also use a wire brush to remove the cooked on items from the grill before placing any food on it.
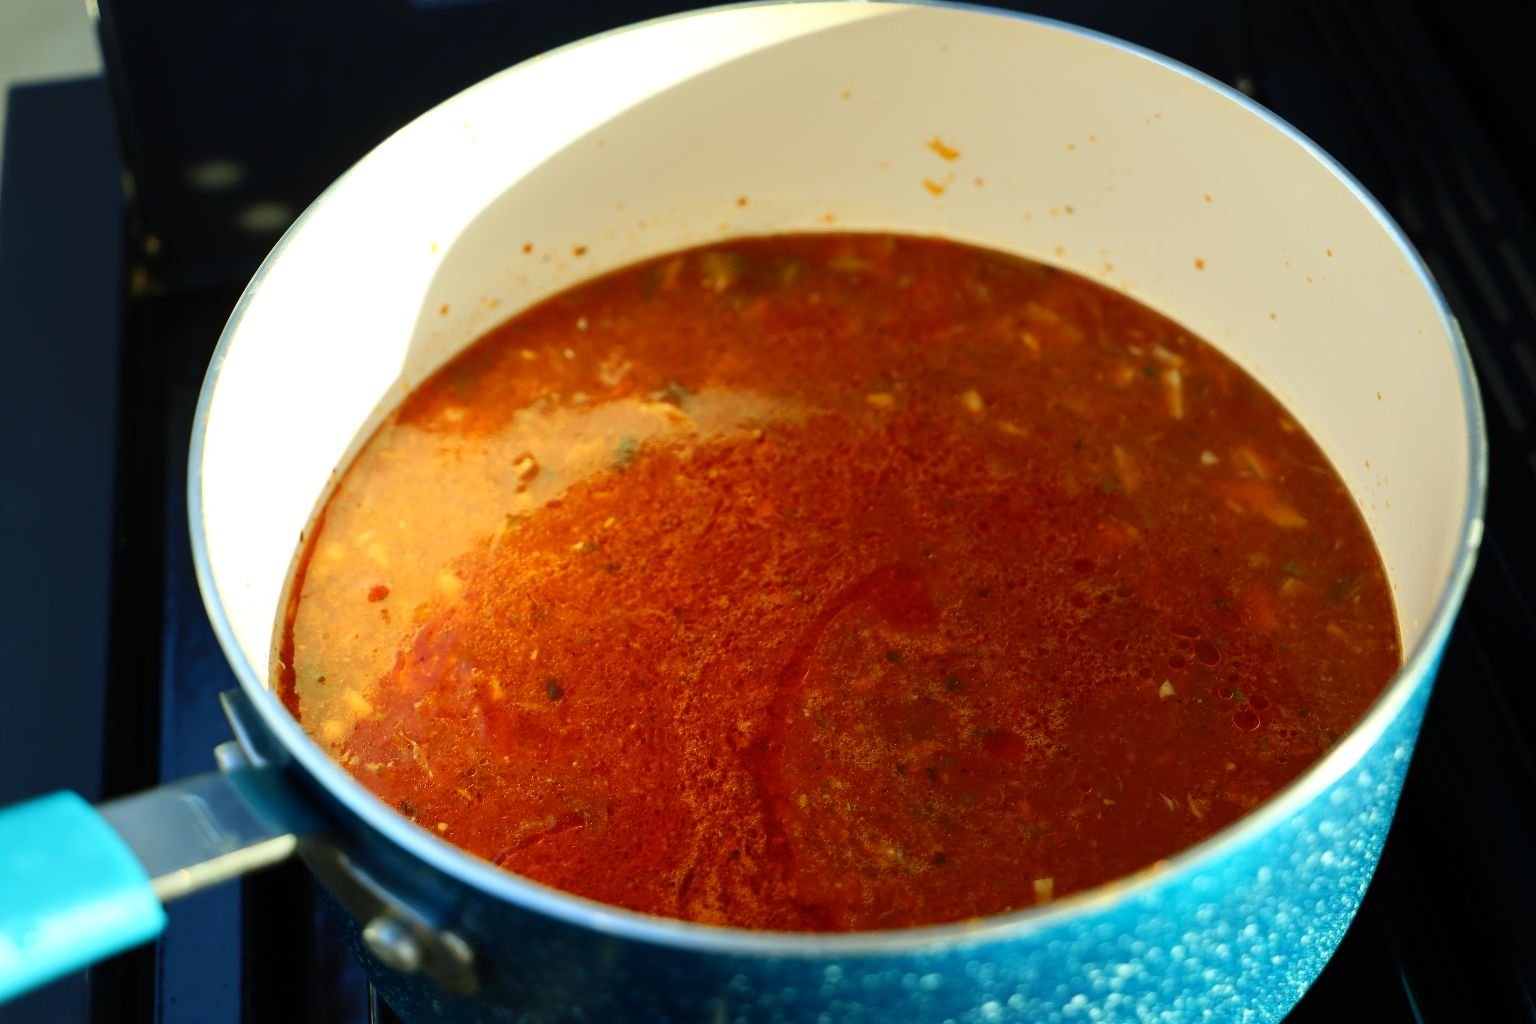

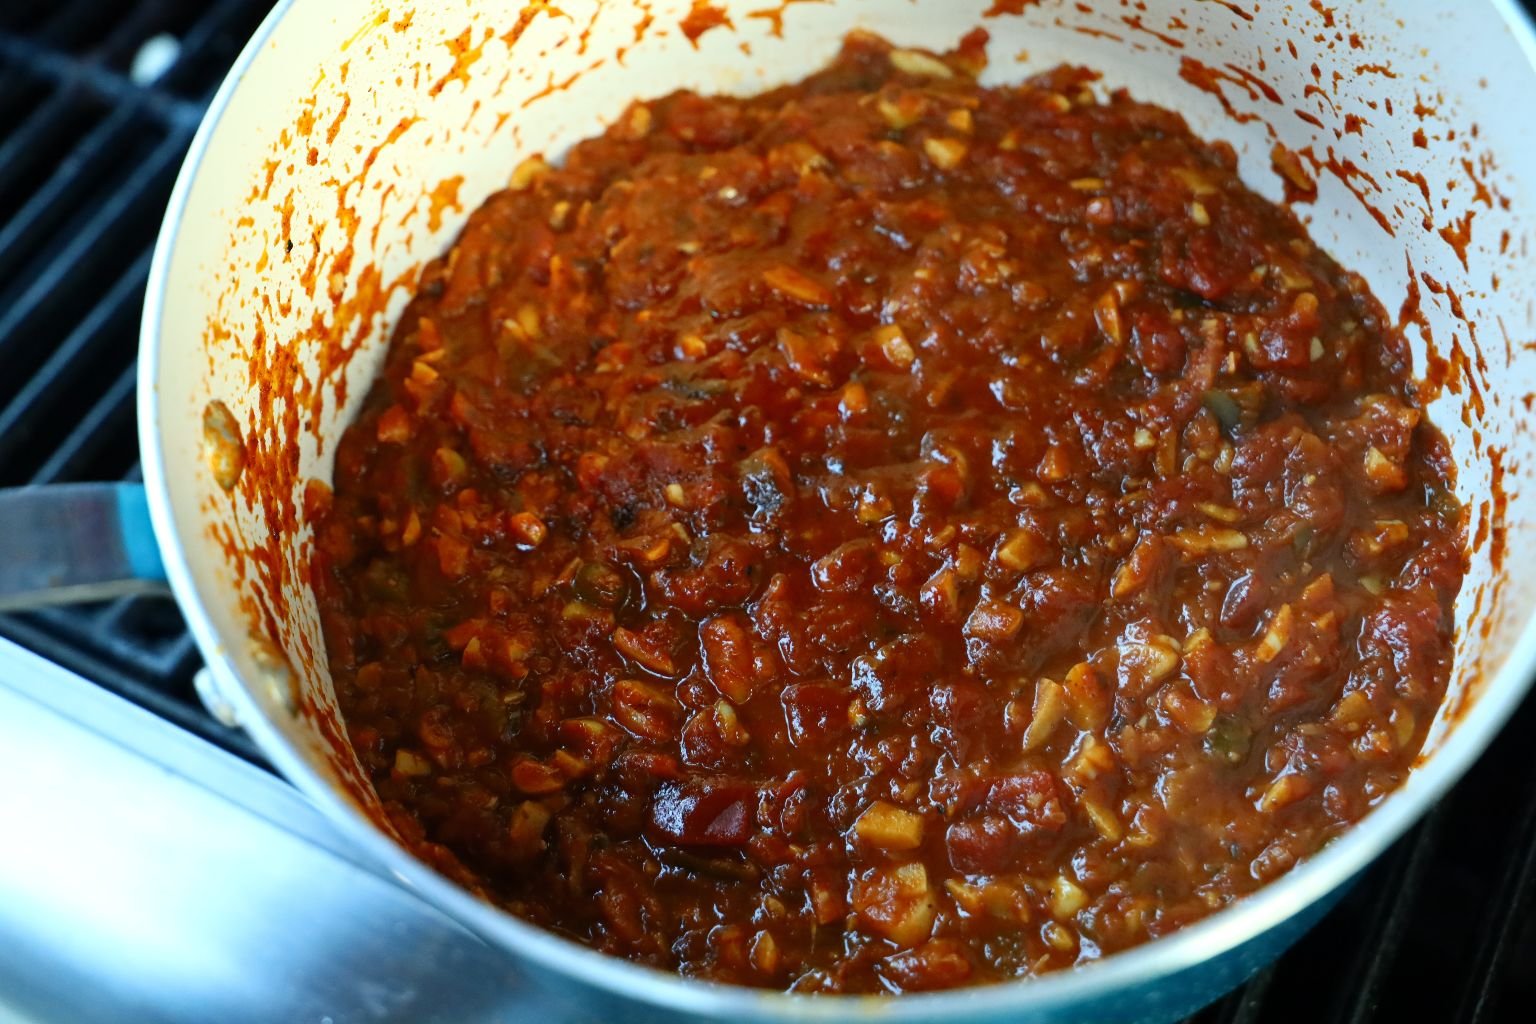
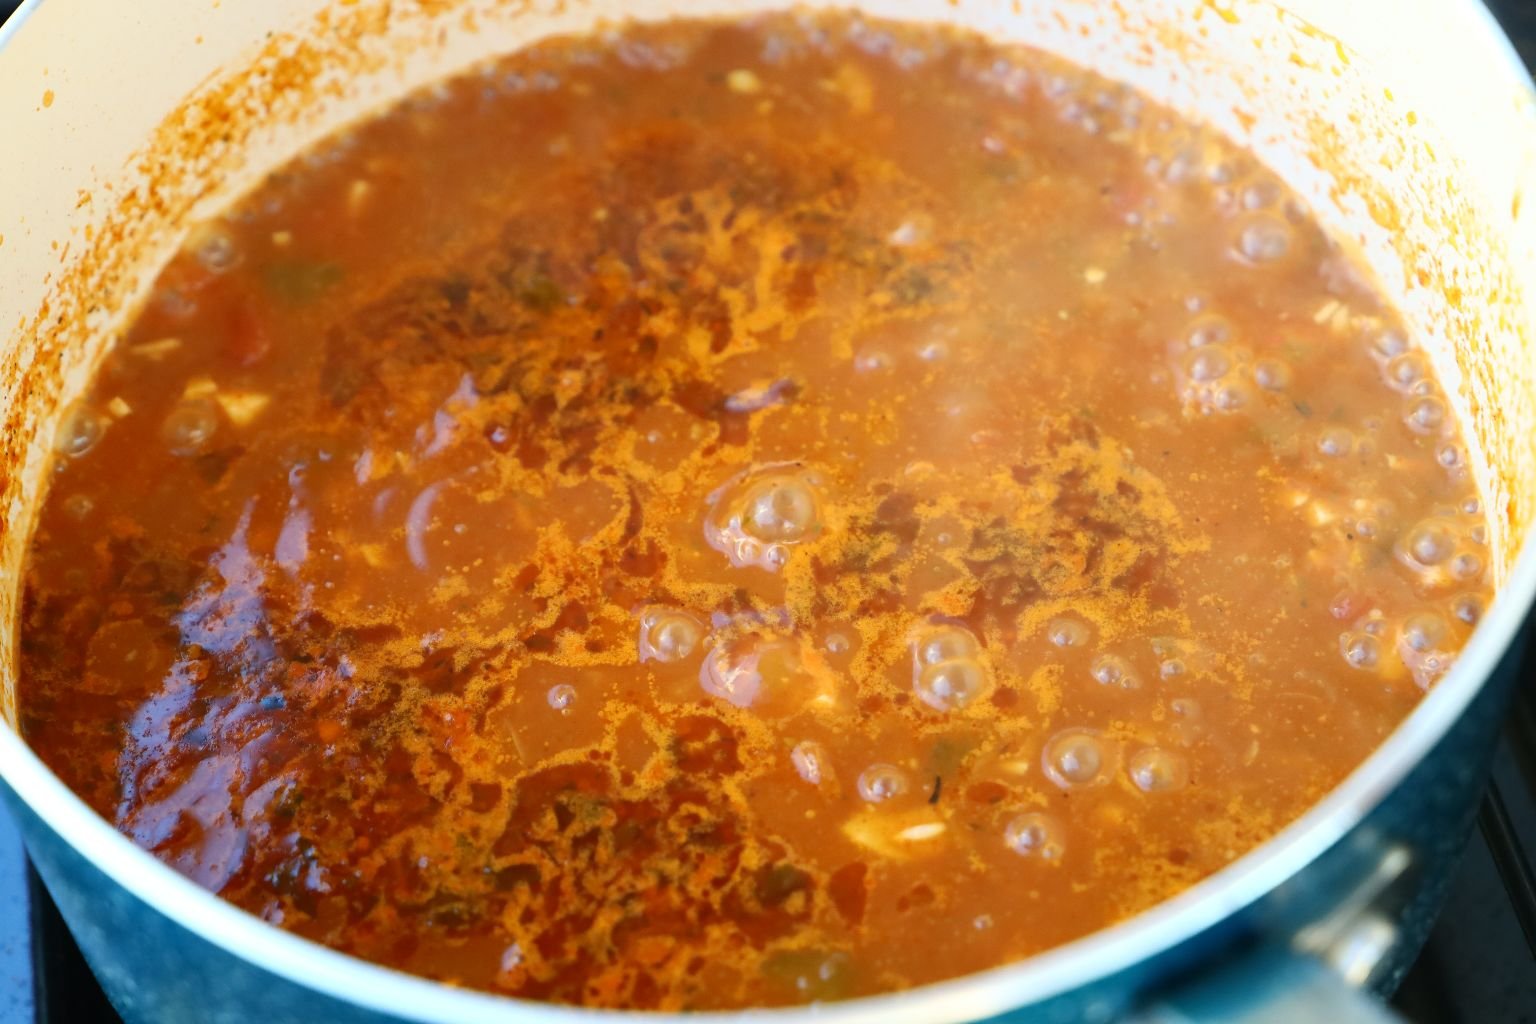
I placed the Marinade in a large pot and cooked it to a boil to make it safe to eat. We will use it like a hot salsa later on once it cooks down and becomes thick. I add some more of the seasonings like the Chili Powder, Chipotle, Sazon, and Paprika to the Wings.


Here is a close up of the wings from Julie… Nice!
Here, you can see the Marinade boiling on my grills side burner.

The Scallops and Tomatoes ready to go onto the grill with the chicken.

—————————————————————-


Here you can see the nice char I got onto the Wings.

—————————————————————–
Now that the Wings are mostly cooked, I can place on the Scallops.
As the Scallops cook, they will season the Wings above them.
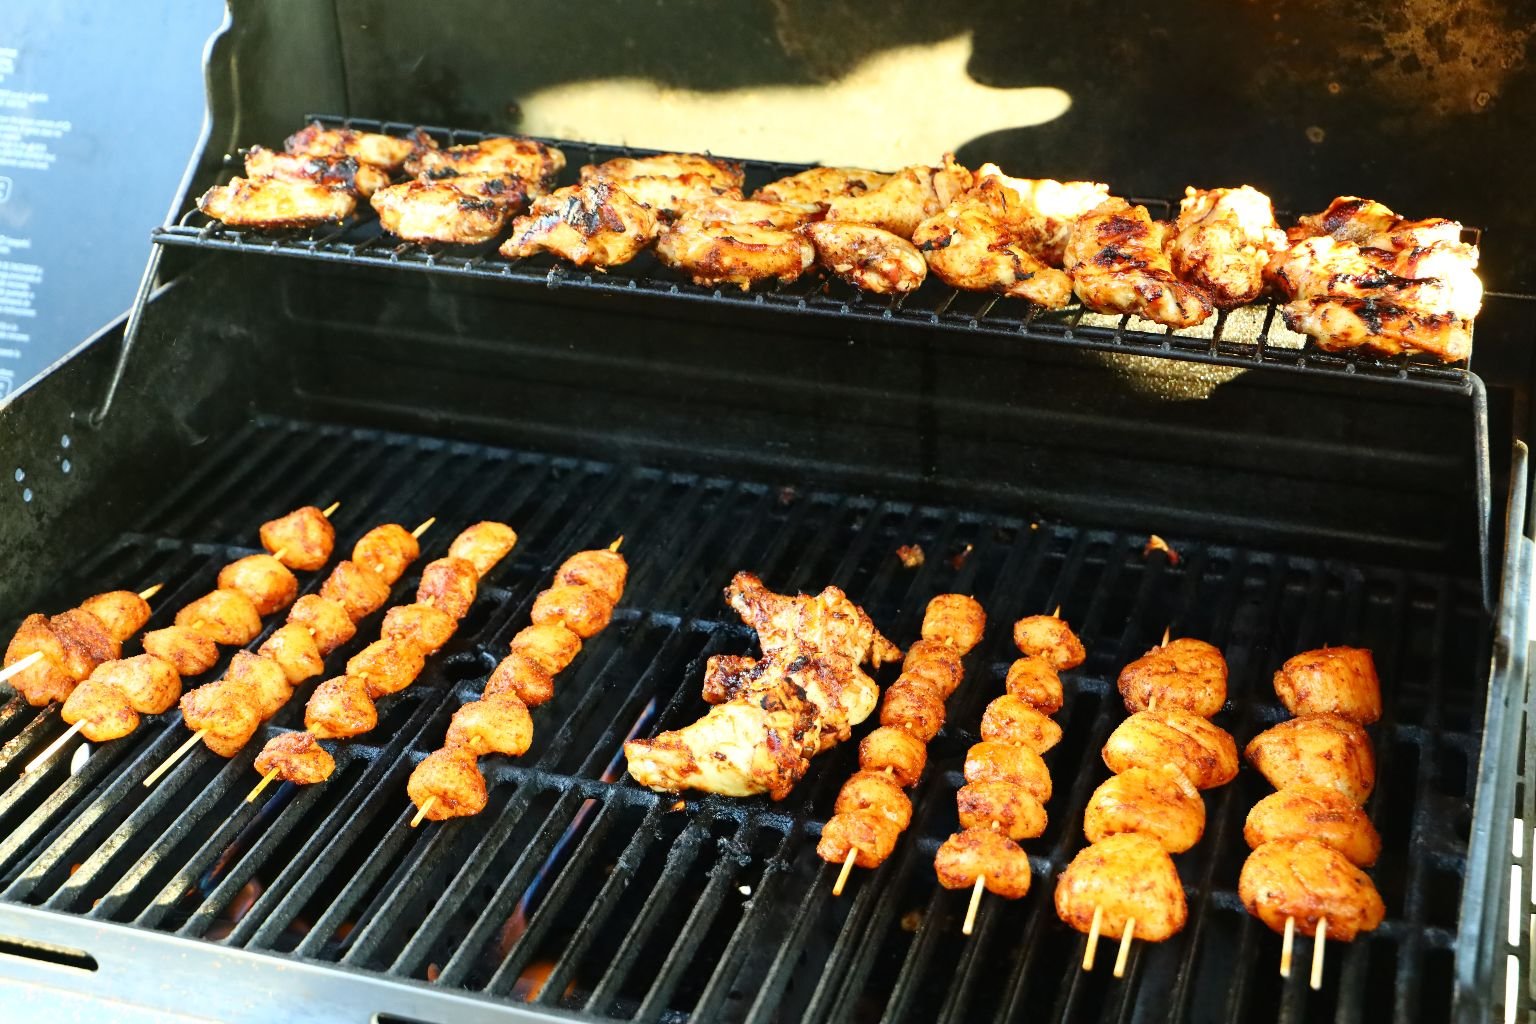
Here you can see how I loaded my grill up with all the items.
The grill is still on medium heat.


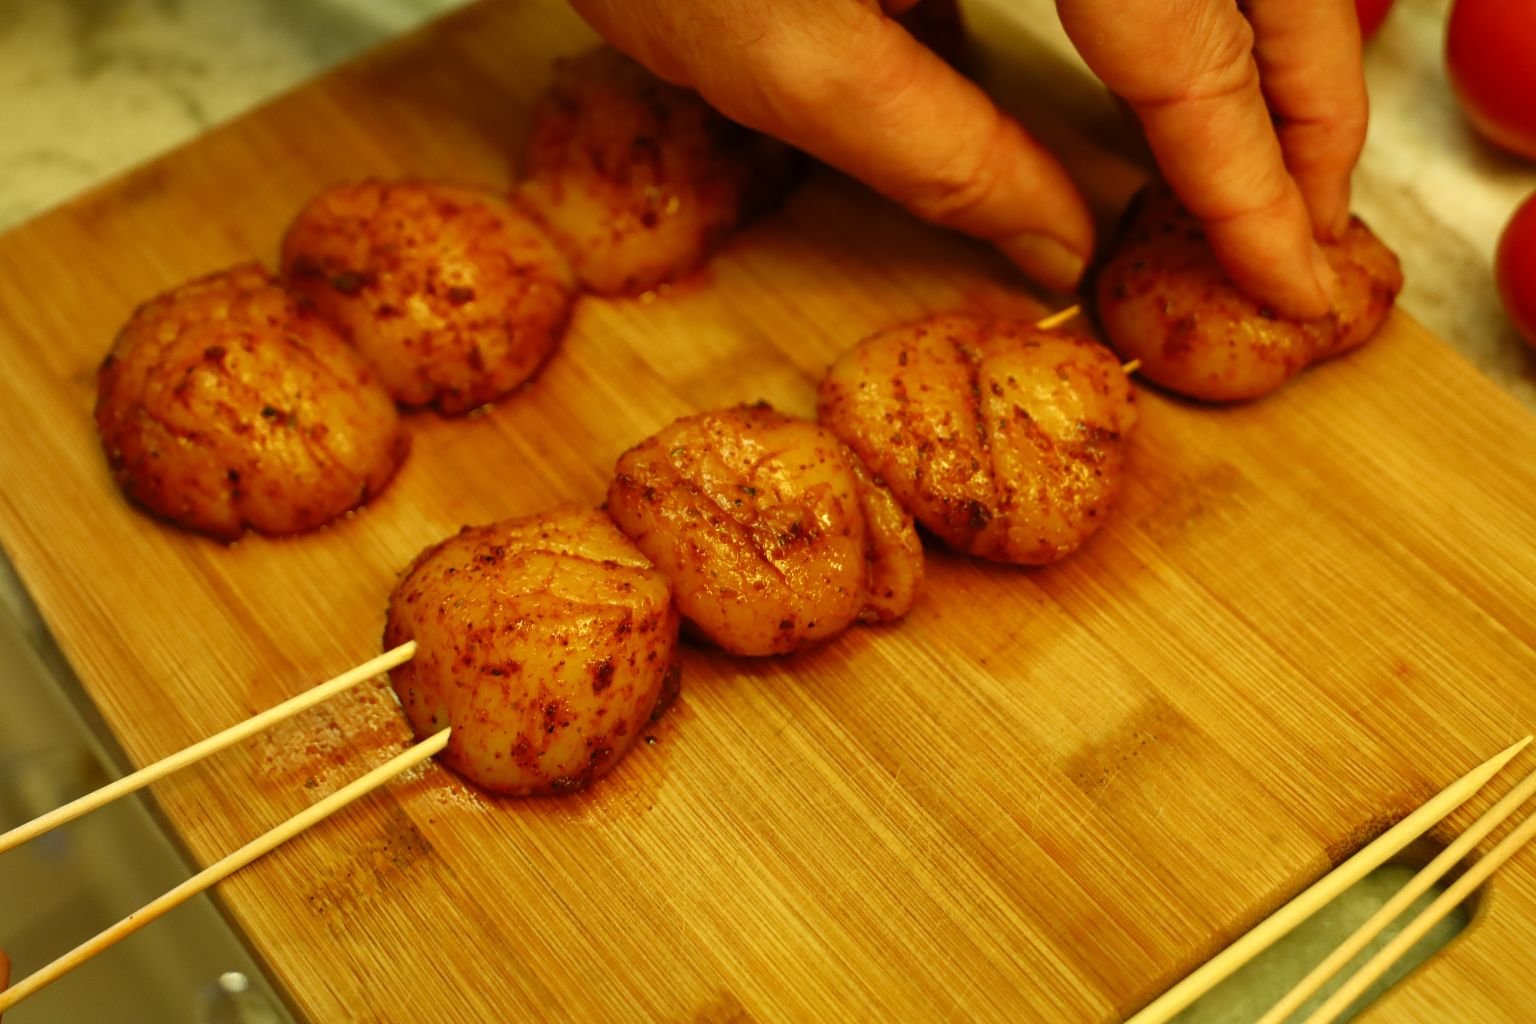
Add your Tomatoes to the grill and spray them with a touch of Olive Oil. Grill the Scallops for about 5 min. on each side or until each side turn slightly white and the Scallops get a little char on them.


Here I plated the Scallops, grilled Tomatoes, and Chicken Wings on a large platter.
You can also see the thickened Marinade.
——————————————————————-
Now It’s Time to EAT!

Here, we added some Queso Fresco Cheese to the platter. The Marinade/Salsa is served with some crispy Toasted Bread.
———————————————————————–
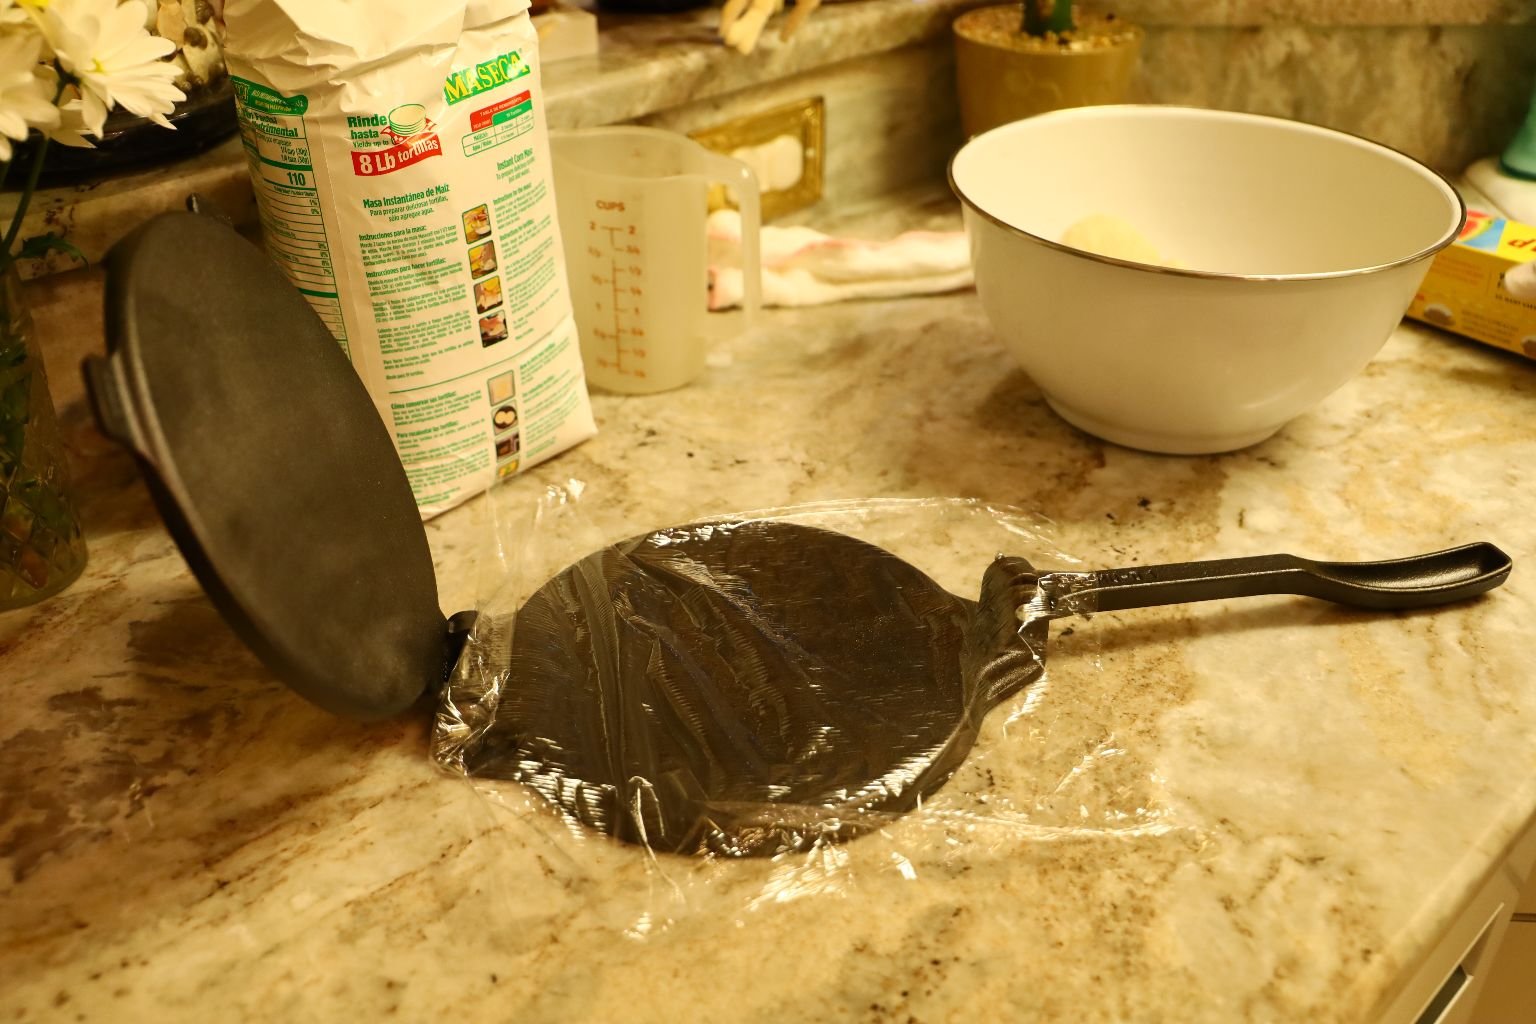
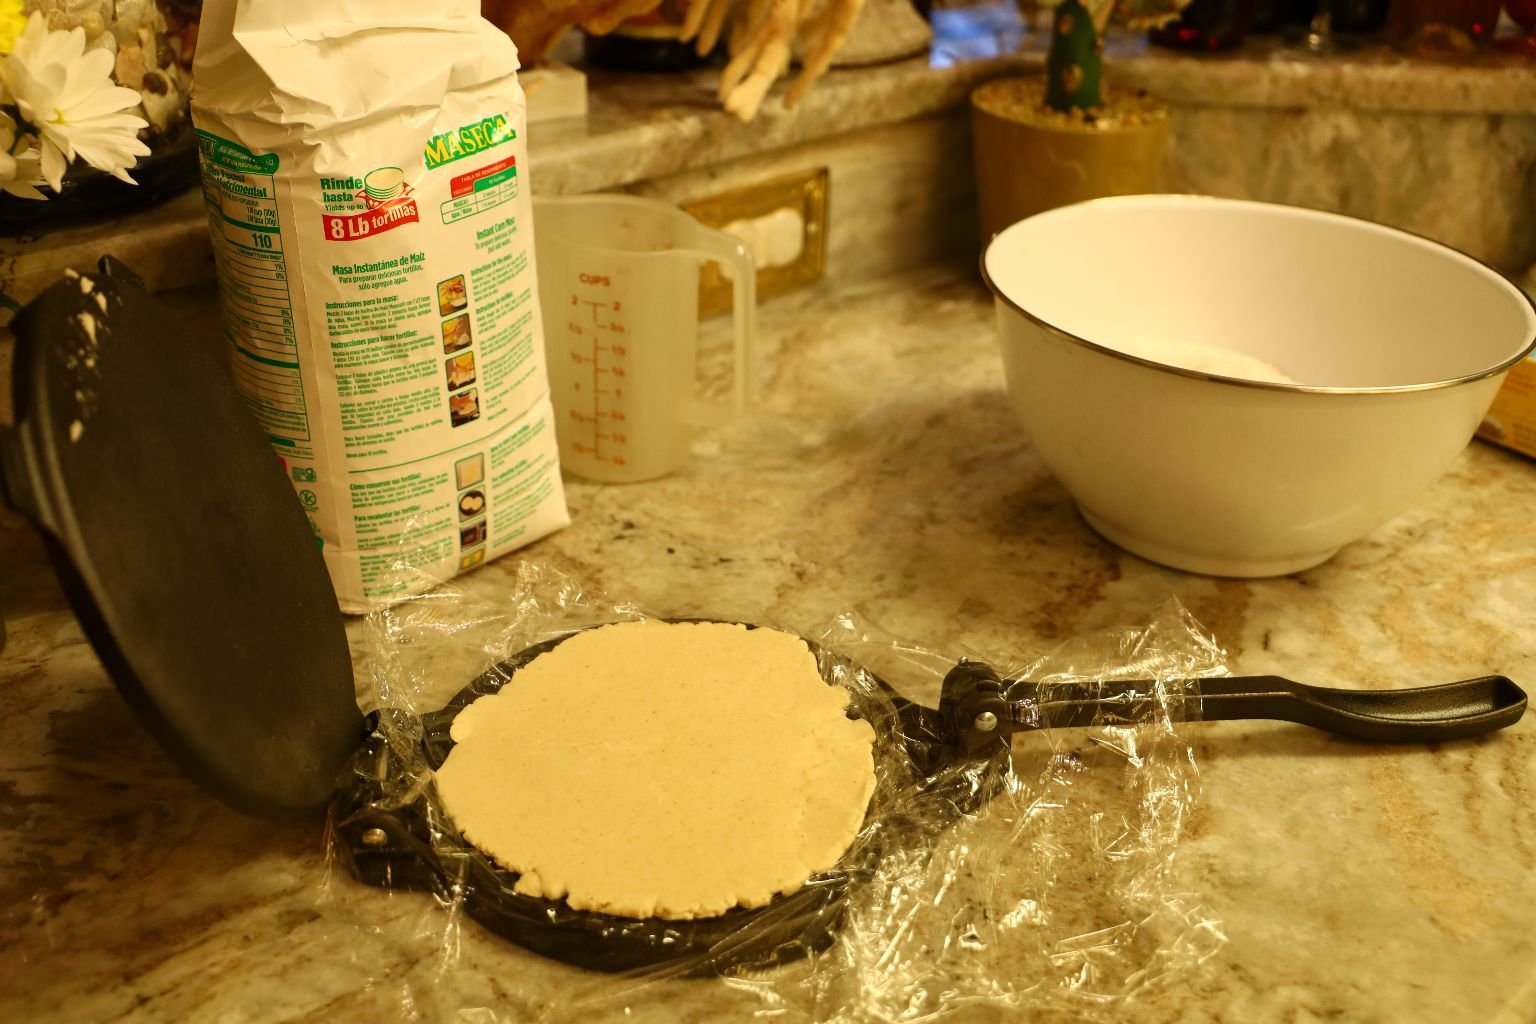
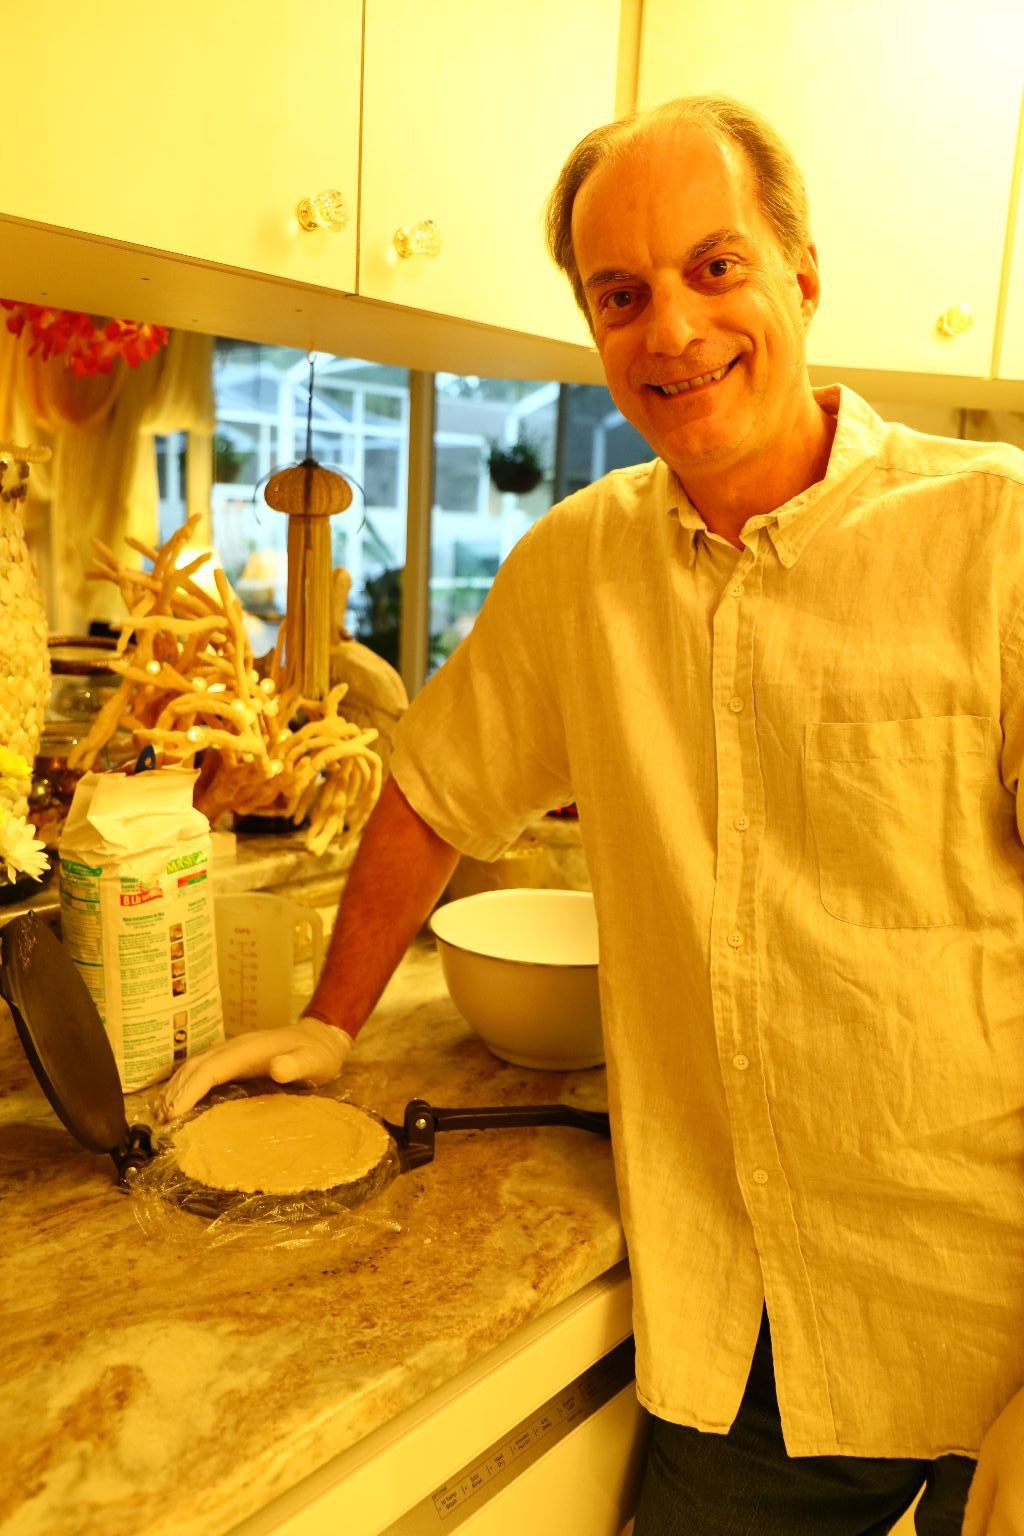
Our Authentic Tortilla Maker
Our Homemade Tortillas

Here are the tools and ingredients we used to make the tortillas. This was our first time making these and it was very easy to do.

———————————————————————

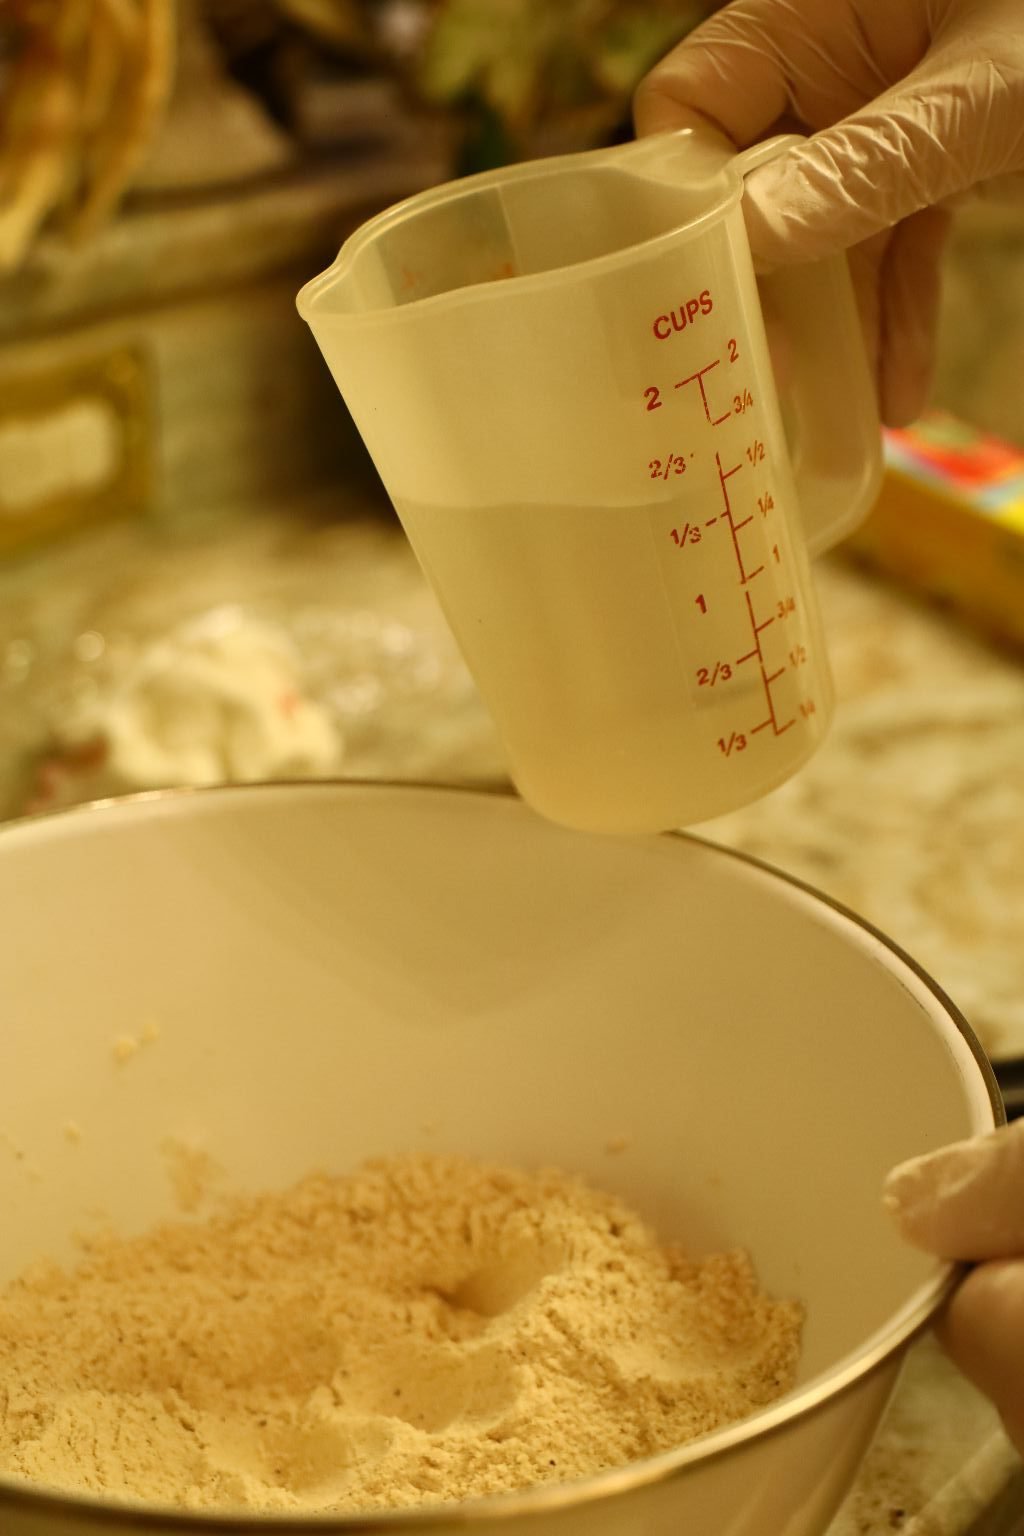
Here is the Maseca we mixed with water to make the tortilla’s.
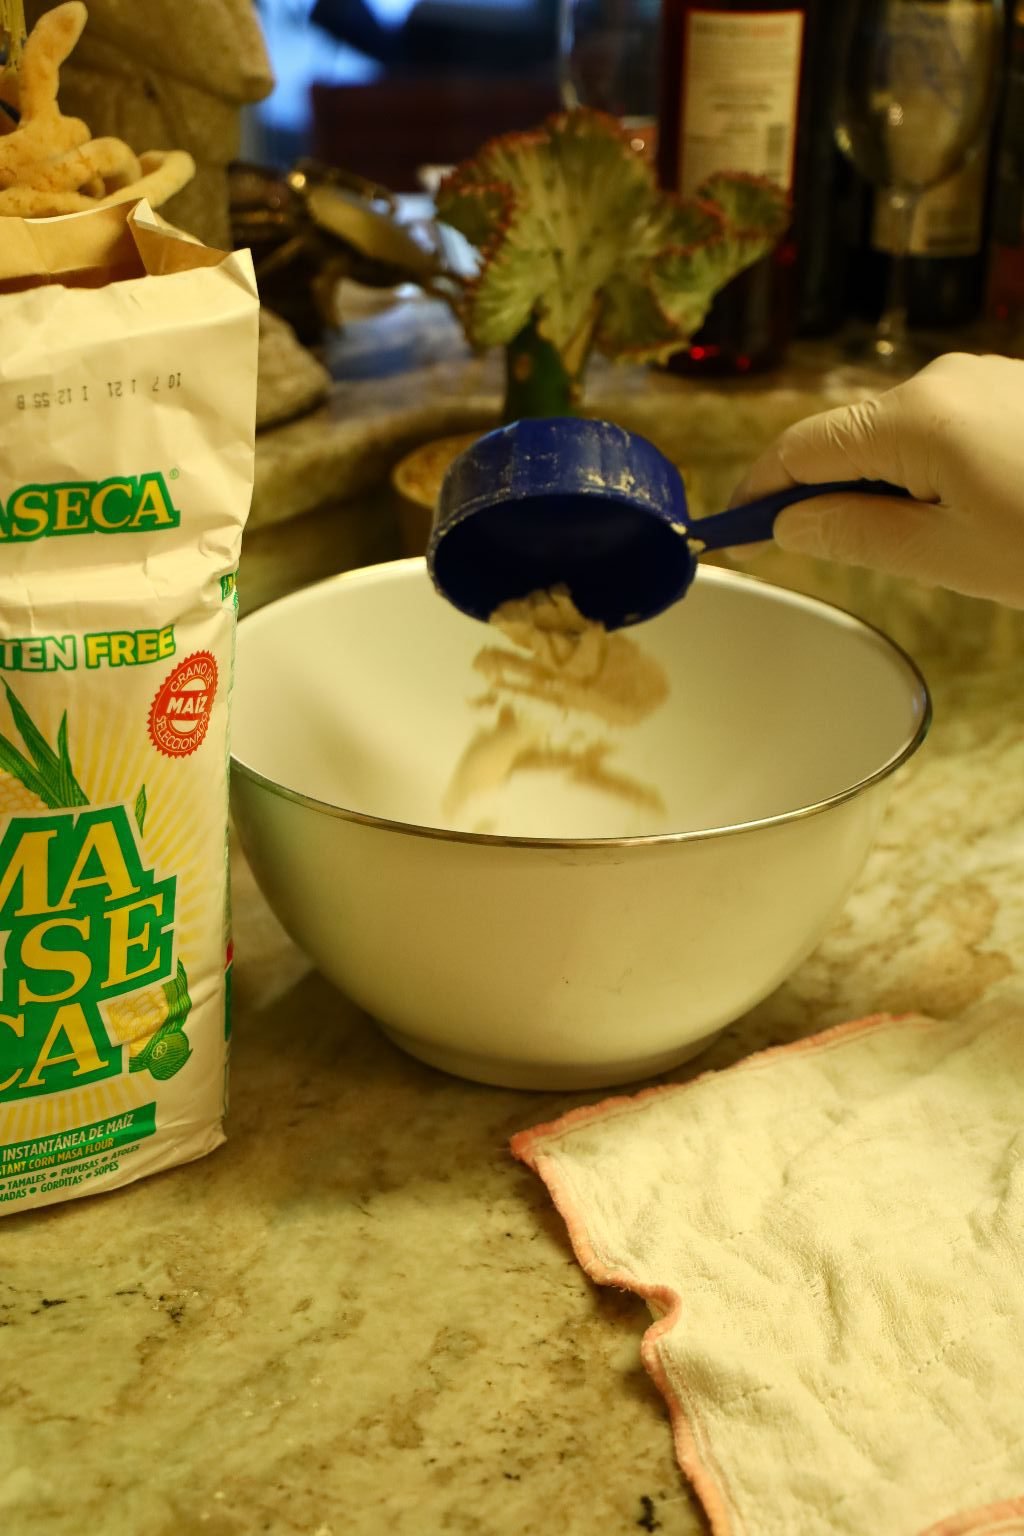

Here I used a large bowl and made the tortilla’s as the mix described.
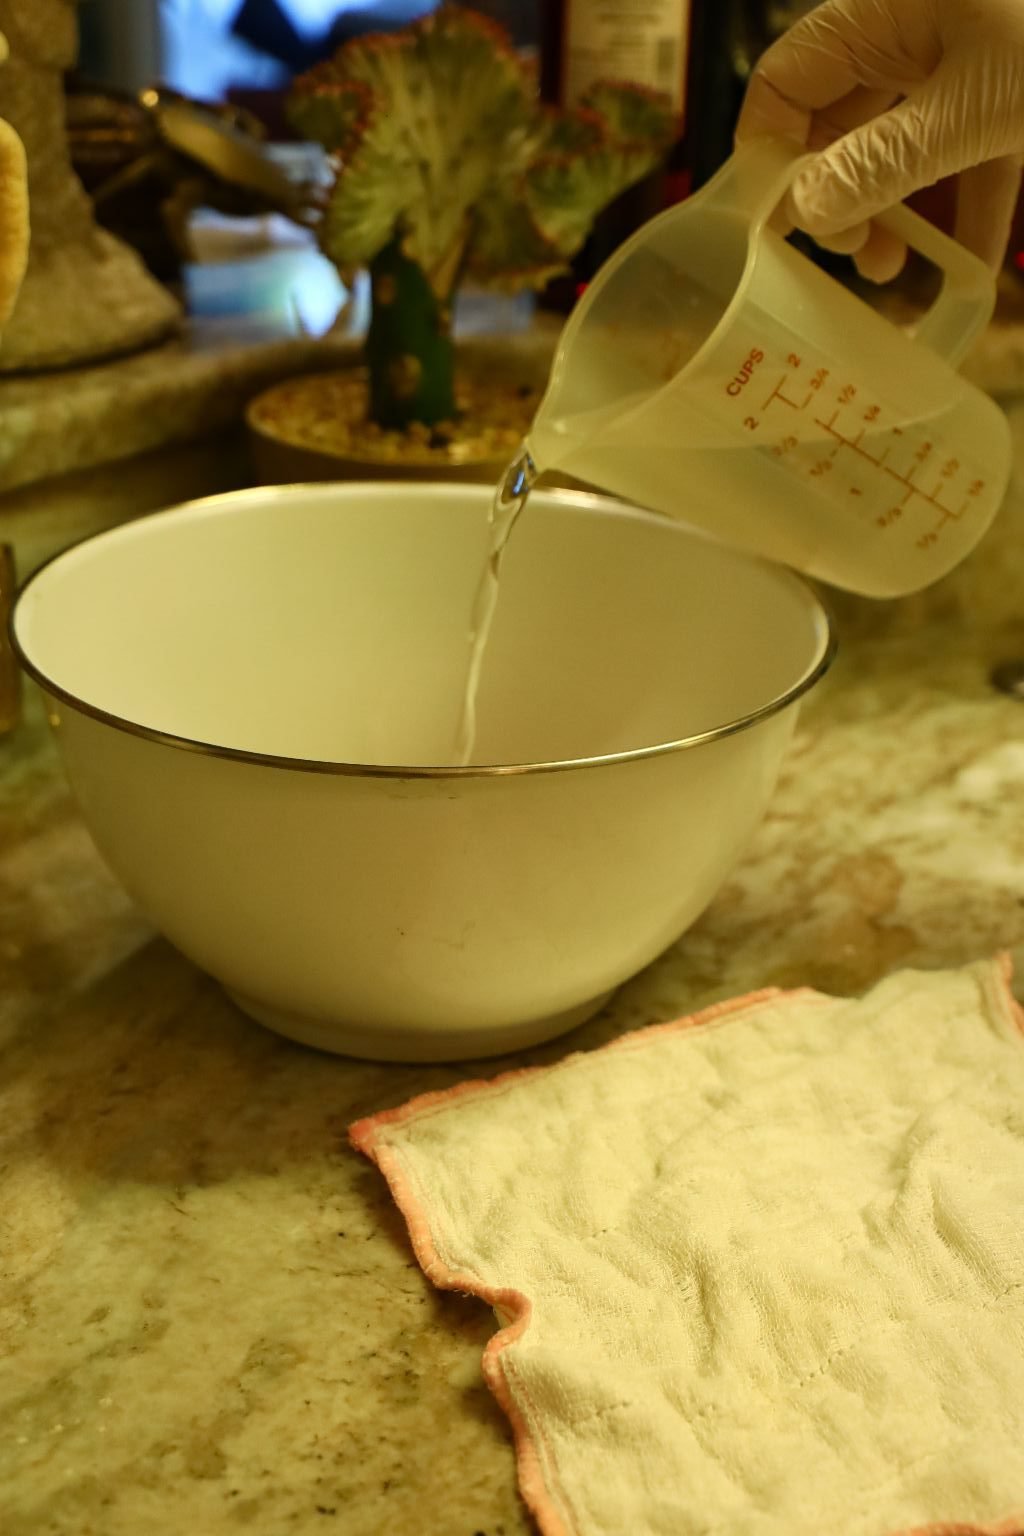
Now, add the cold water as the mix called for.
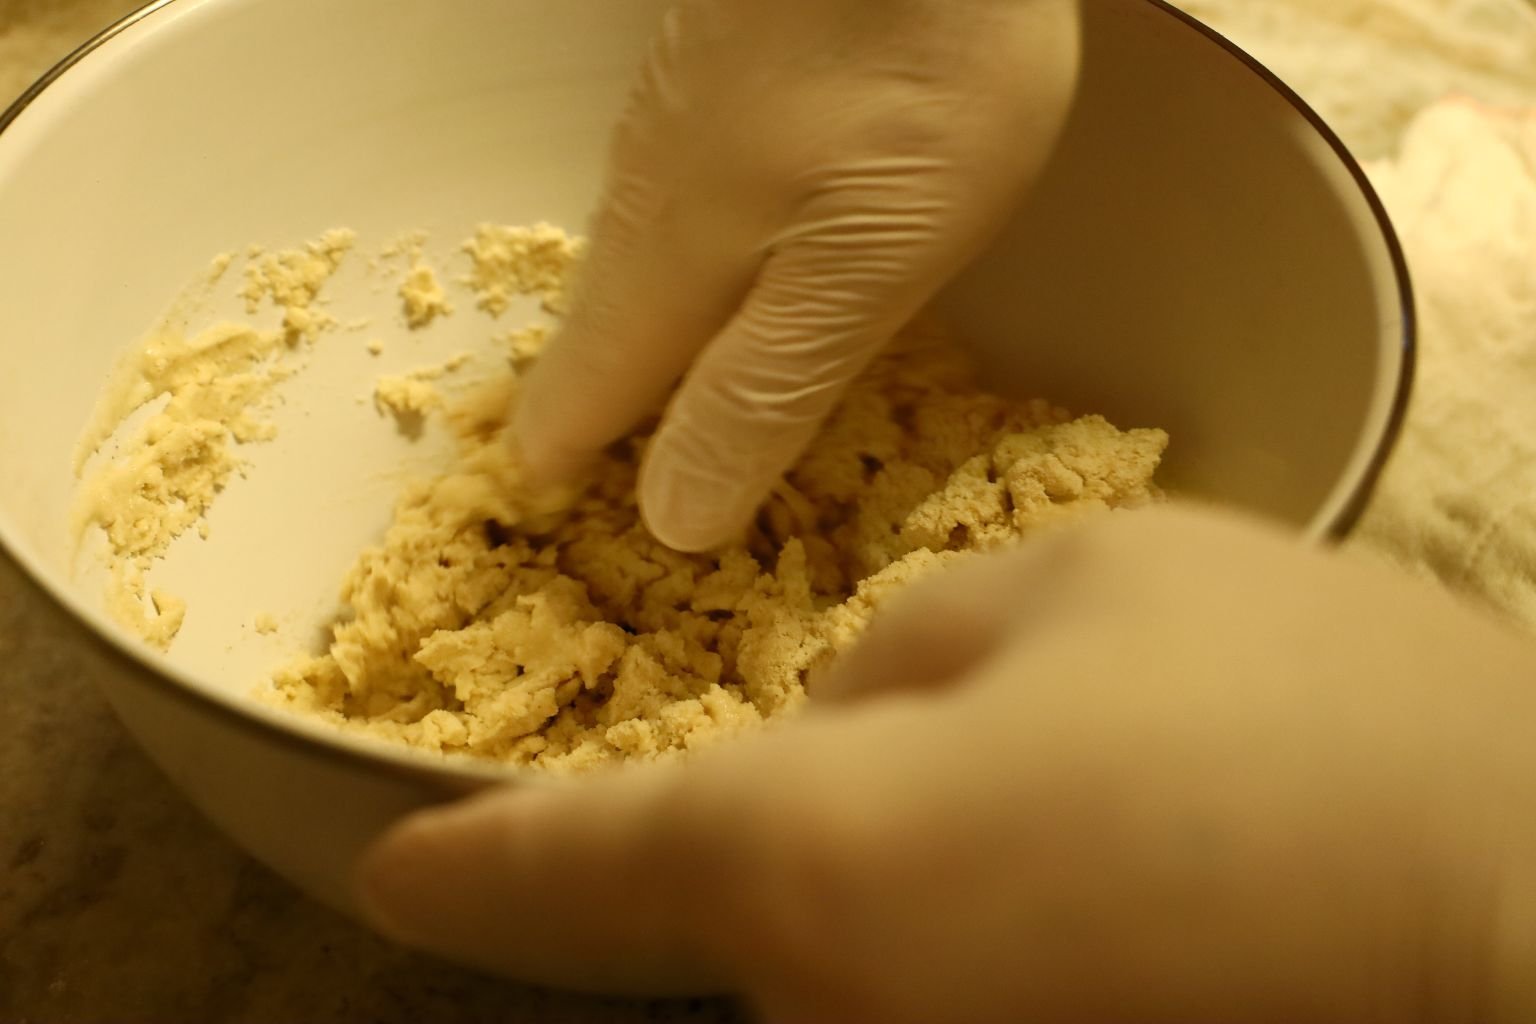
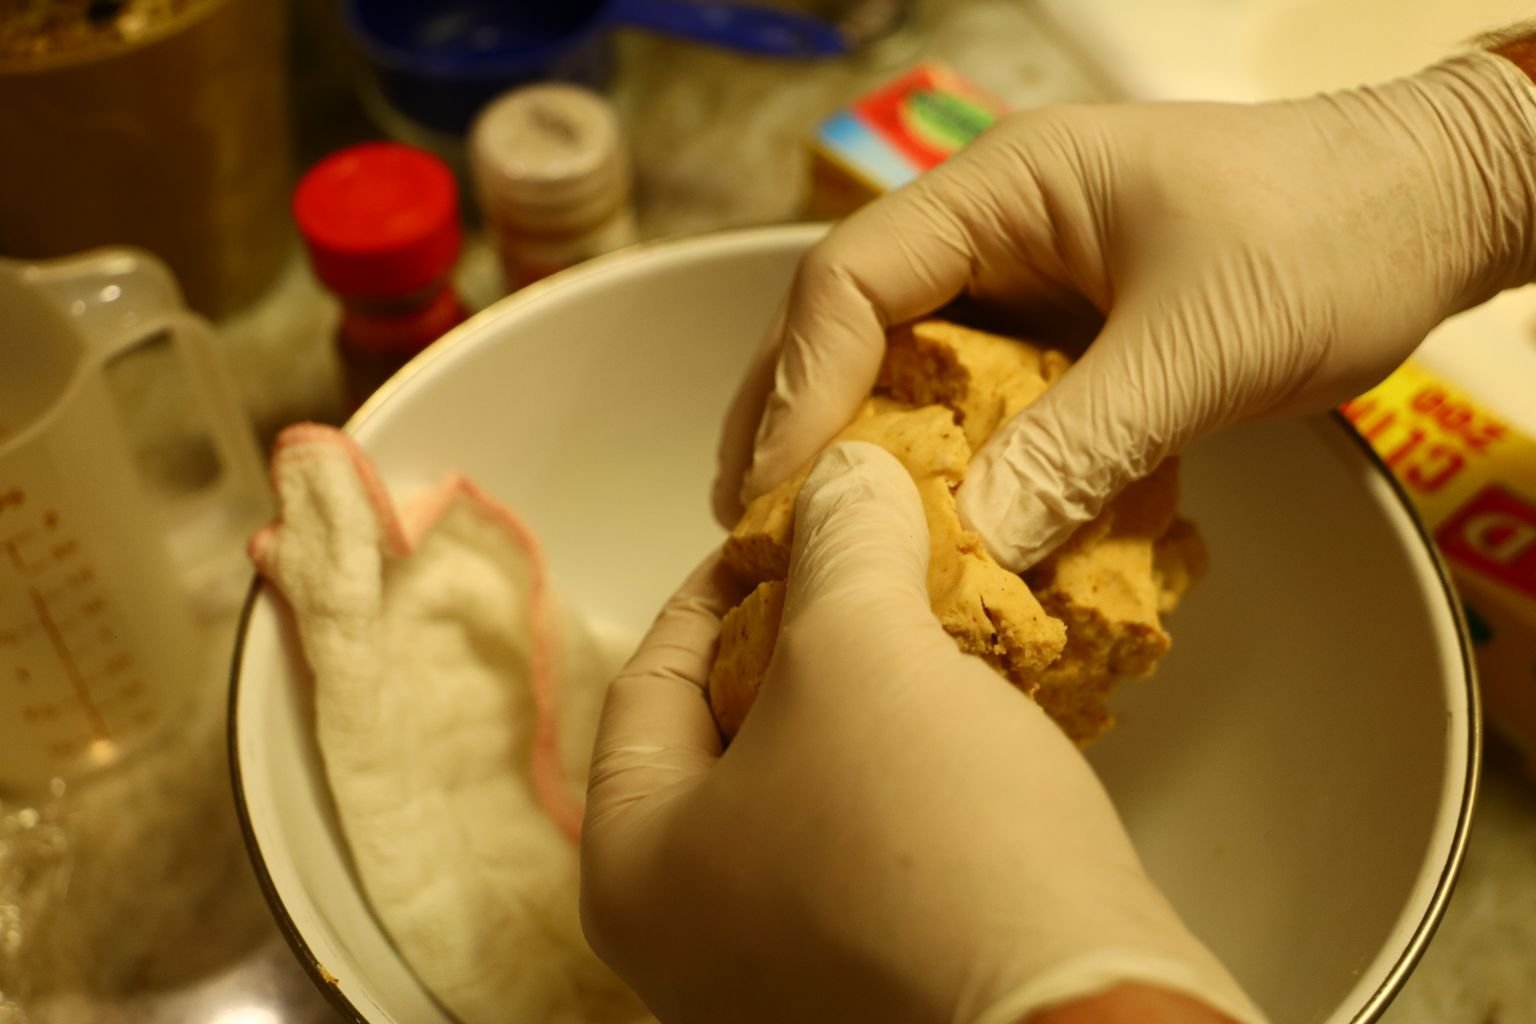
I used gloves to keep the mix off of my hands as I mixed it. The mix didn’t feel like dough, but had the consistency of play dough the children’s modeling compound.


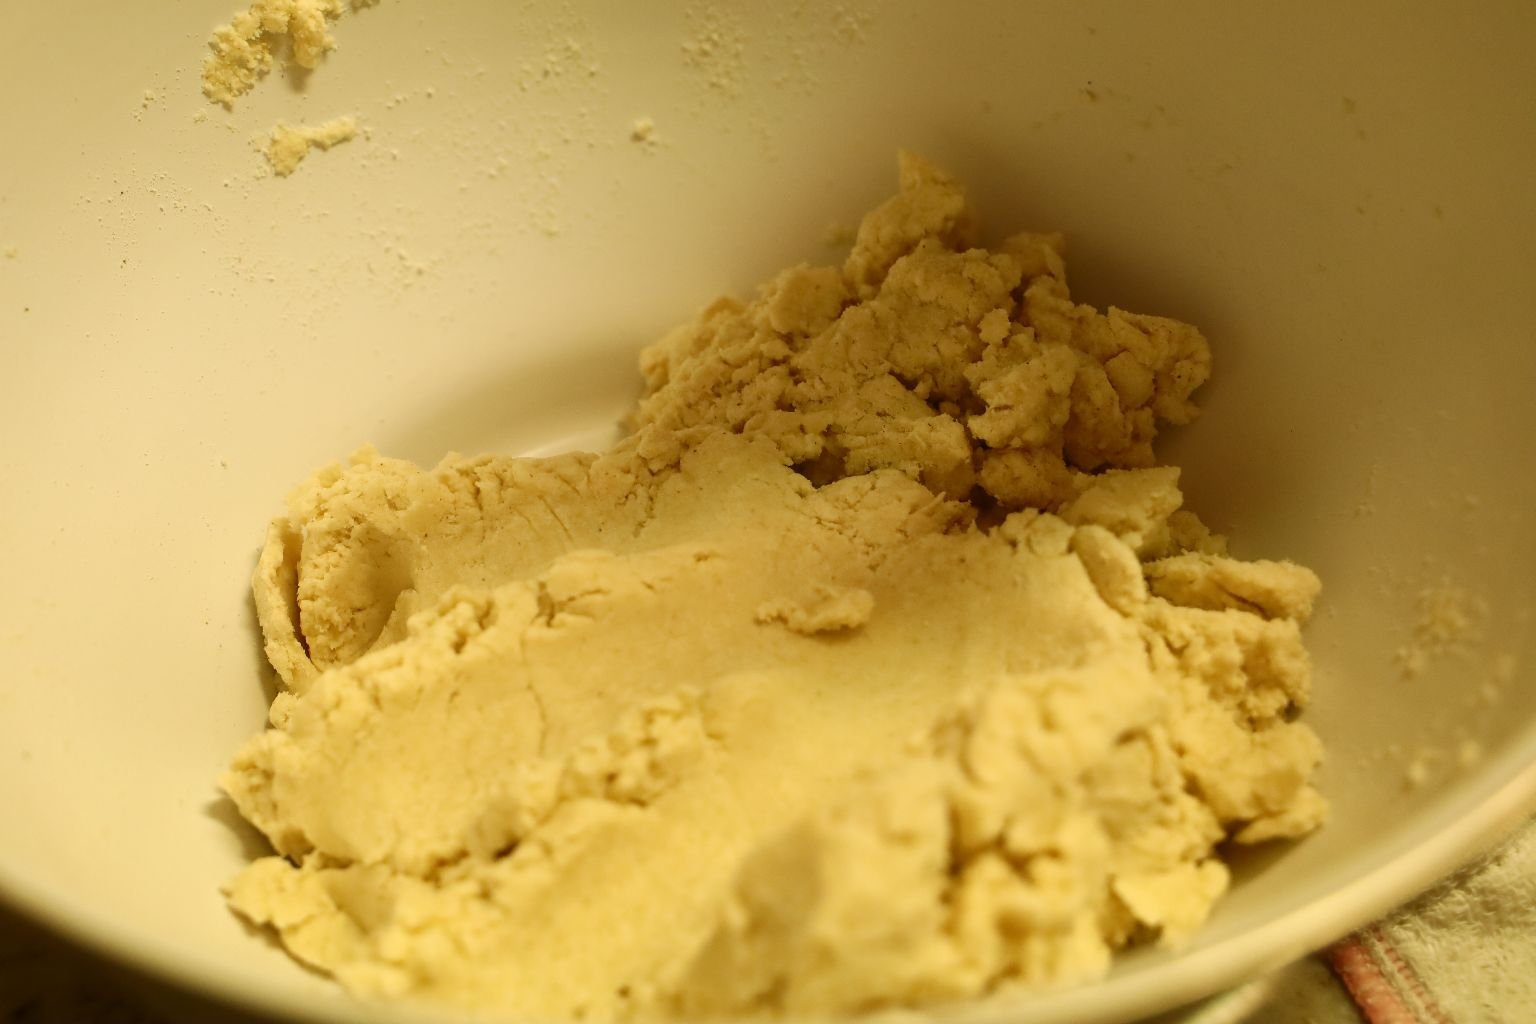
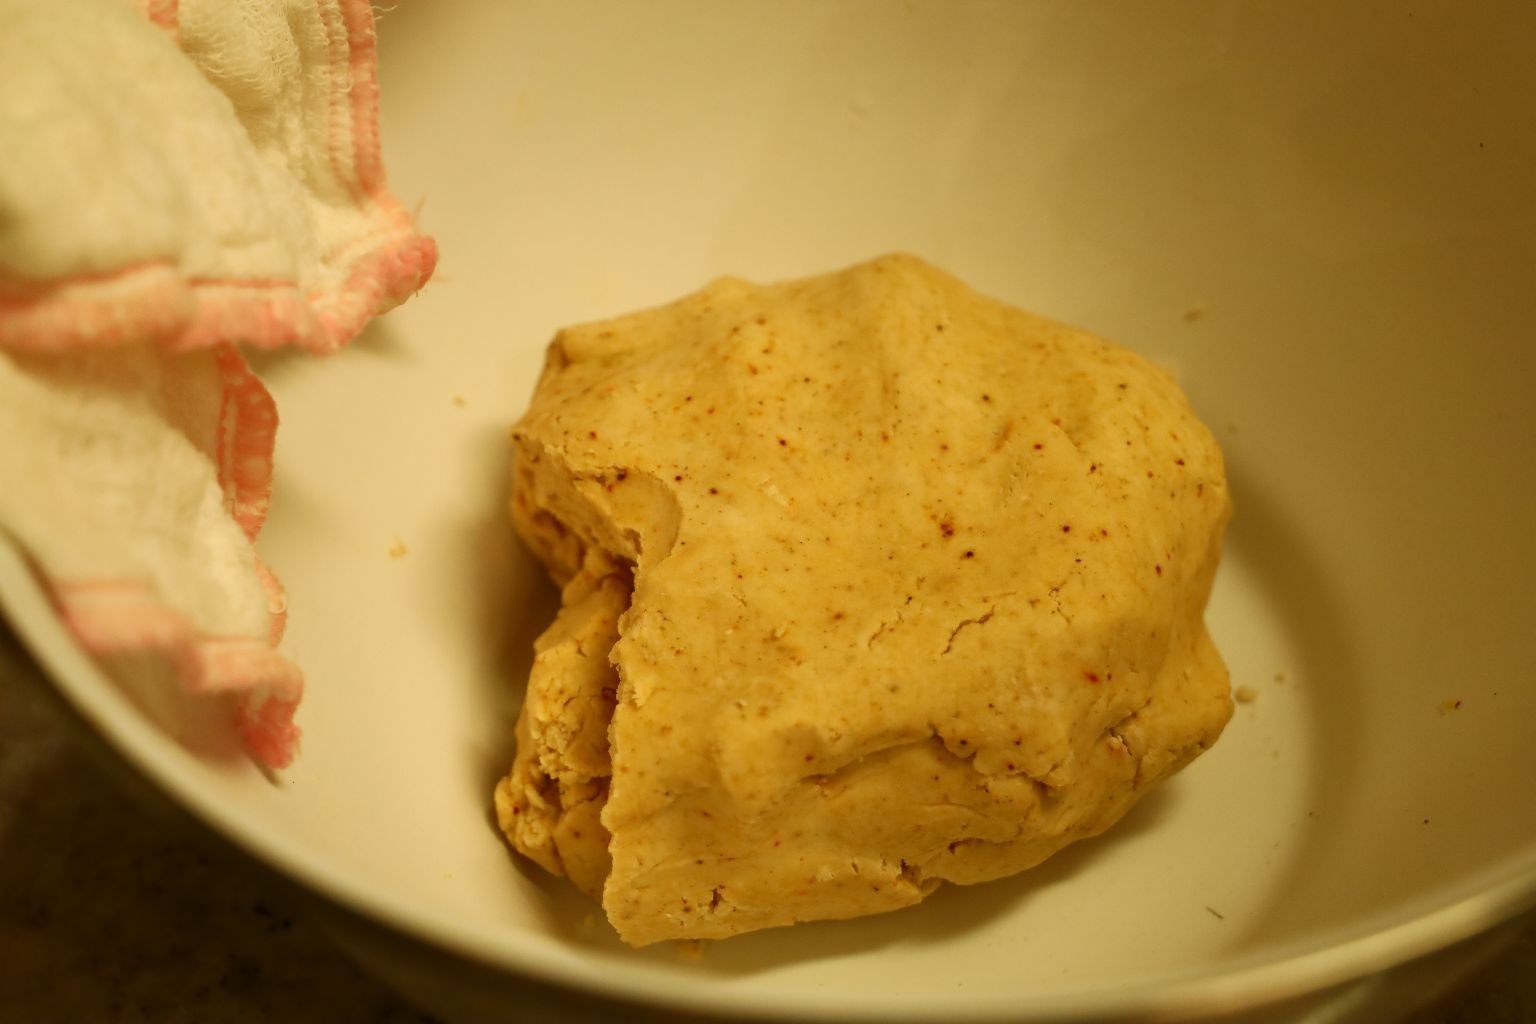
Once mixed, you let the dough rest with a damp towel over it to keep it moist.
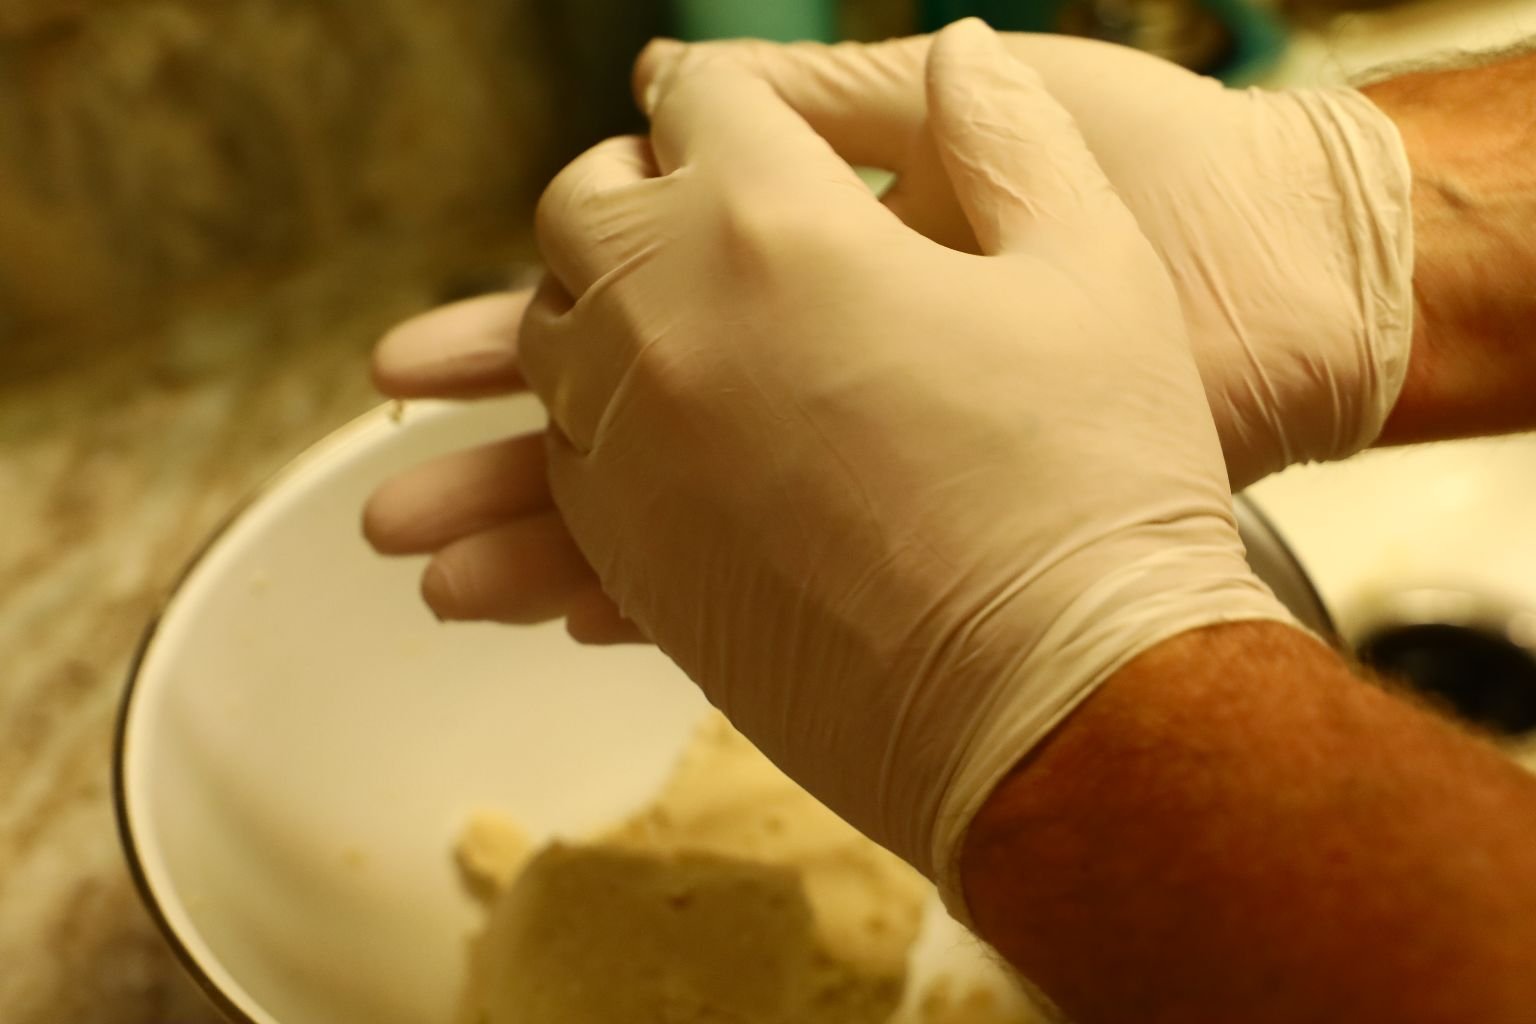
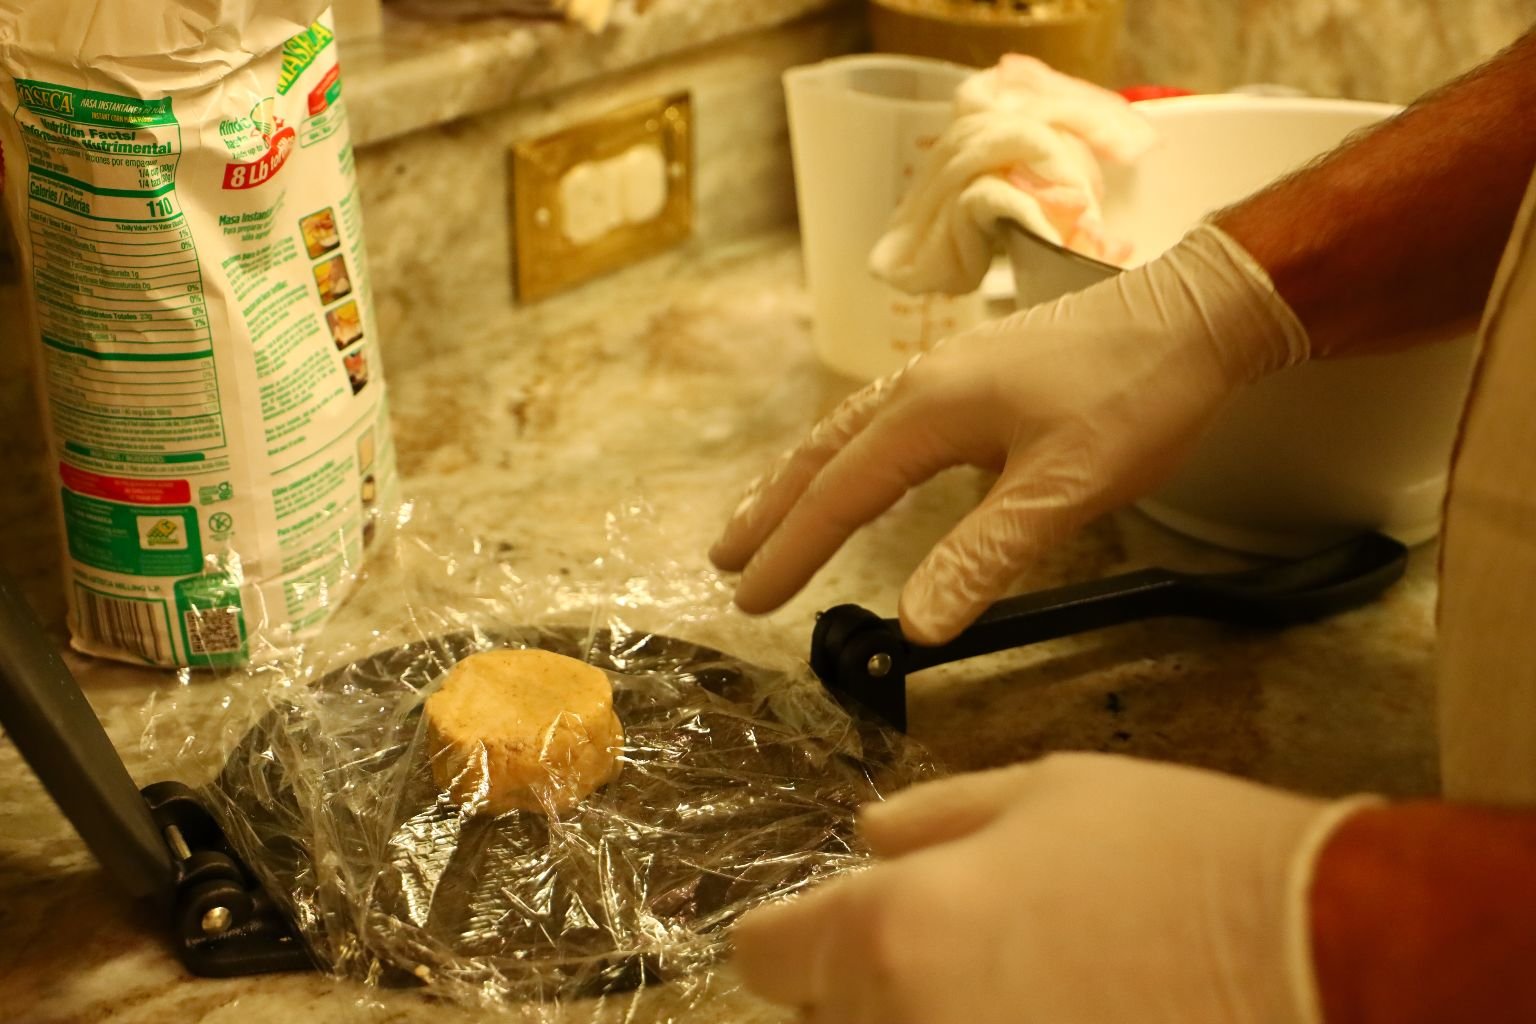
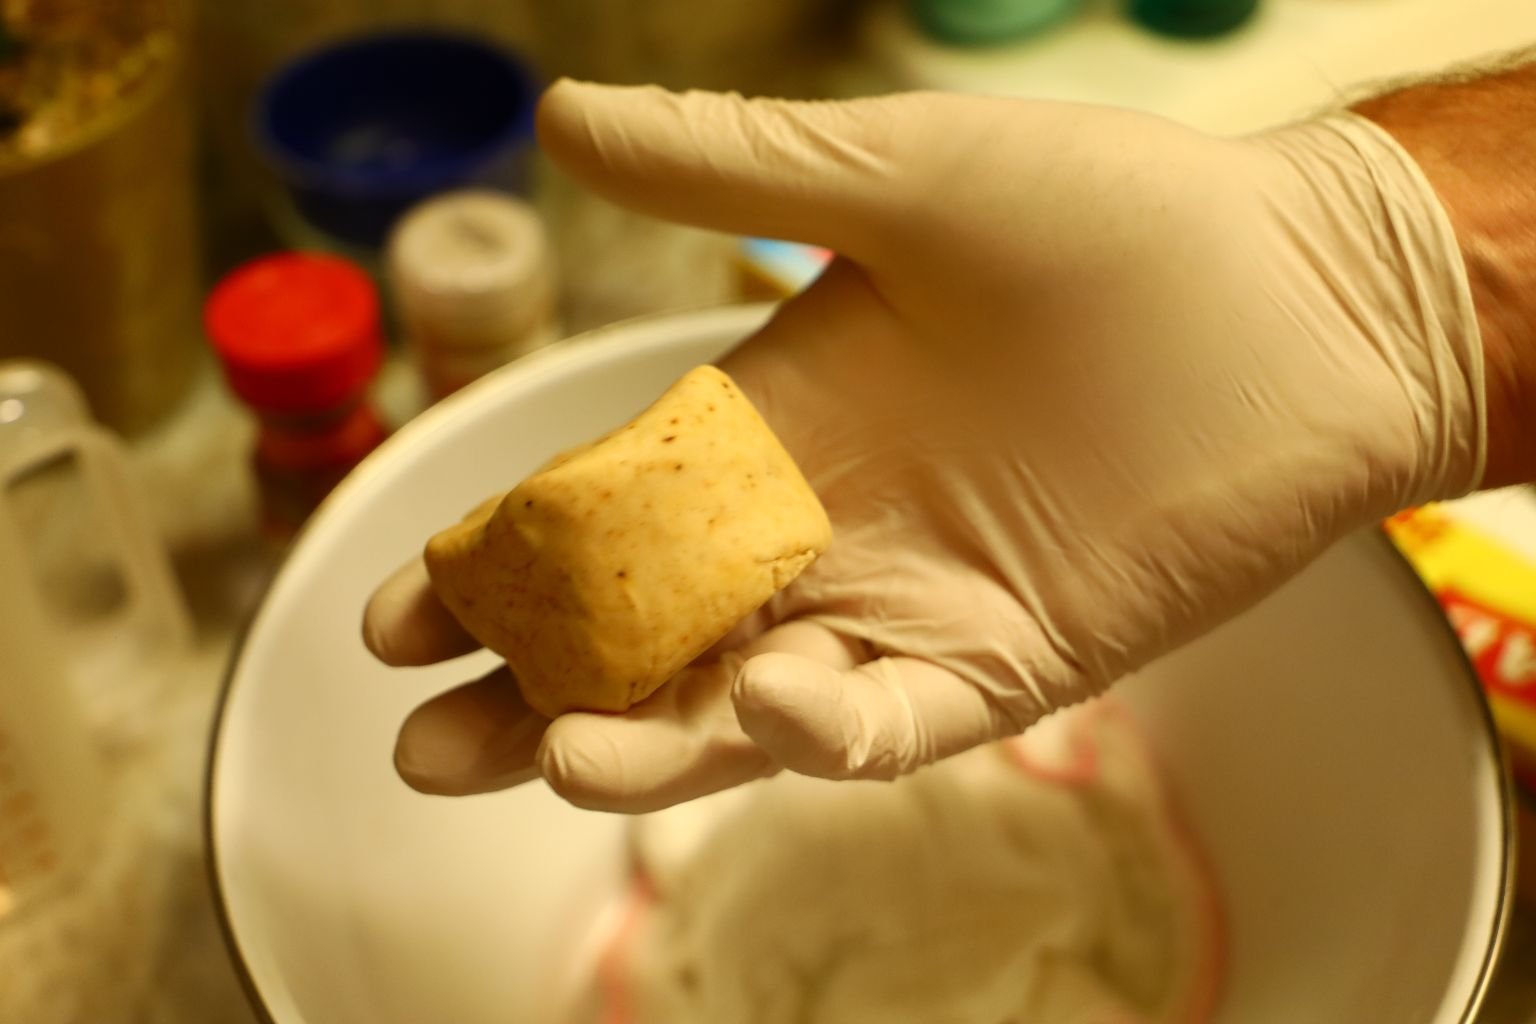
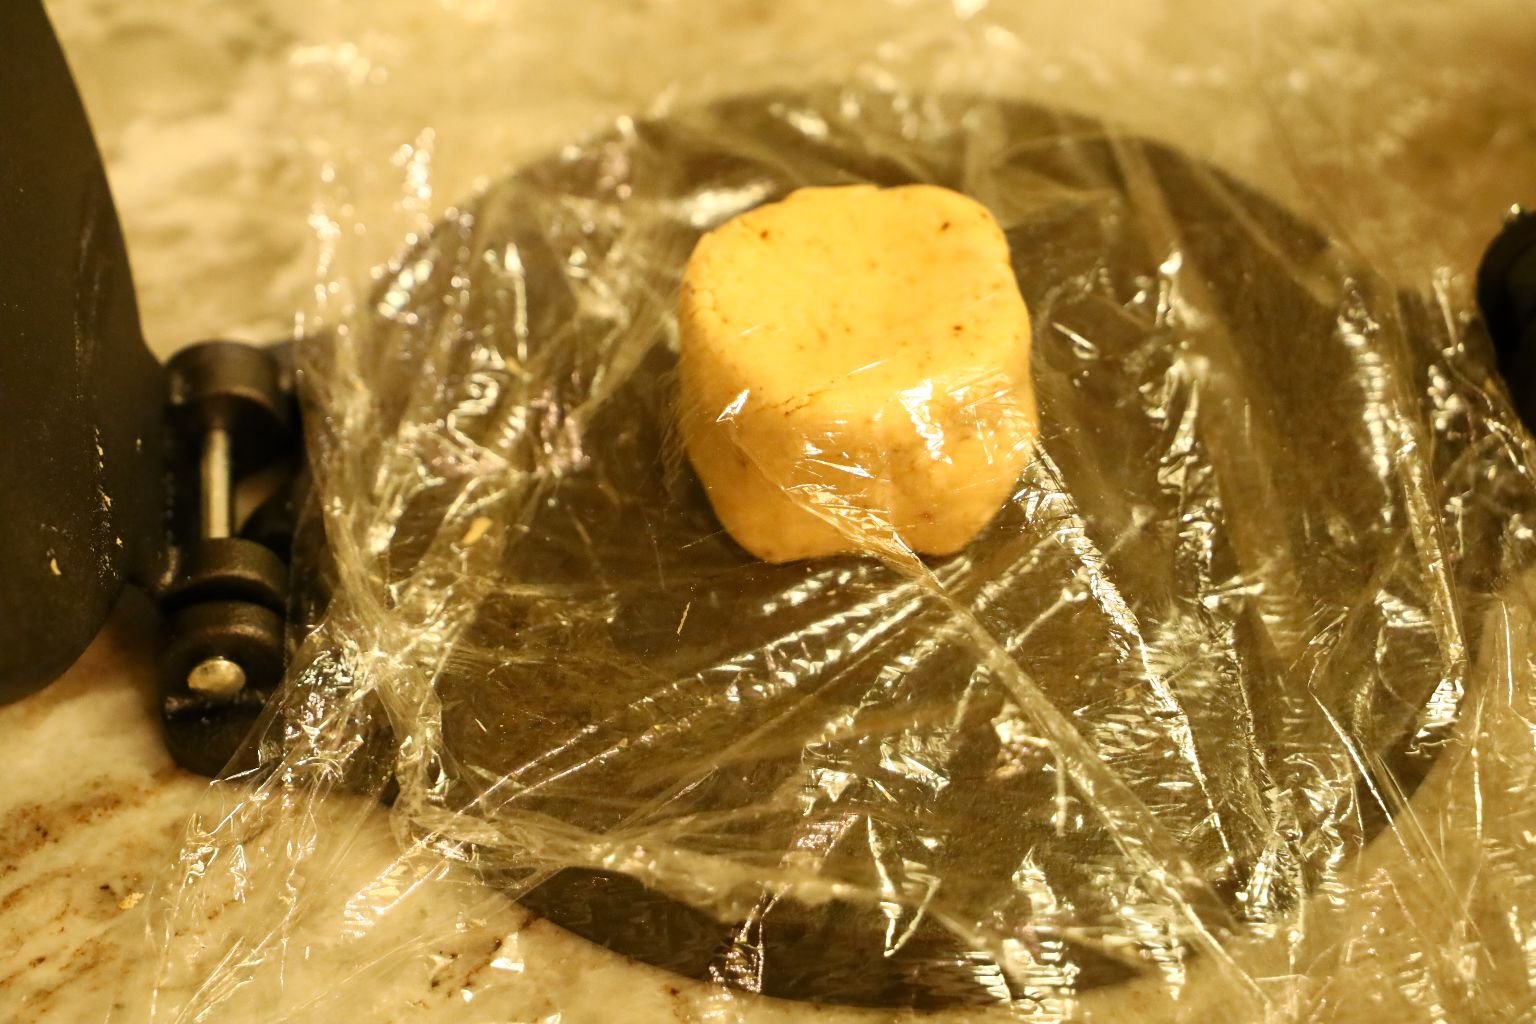
Now, I am making a ball out of the dough which is larger than a golf ball. I found that if I make it look like a hockey puck, the tortilla came out more round. We are using an 8 inch press.
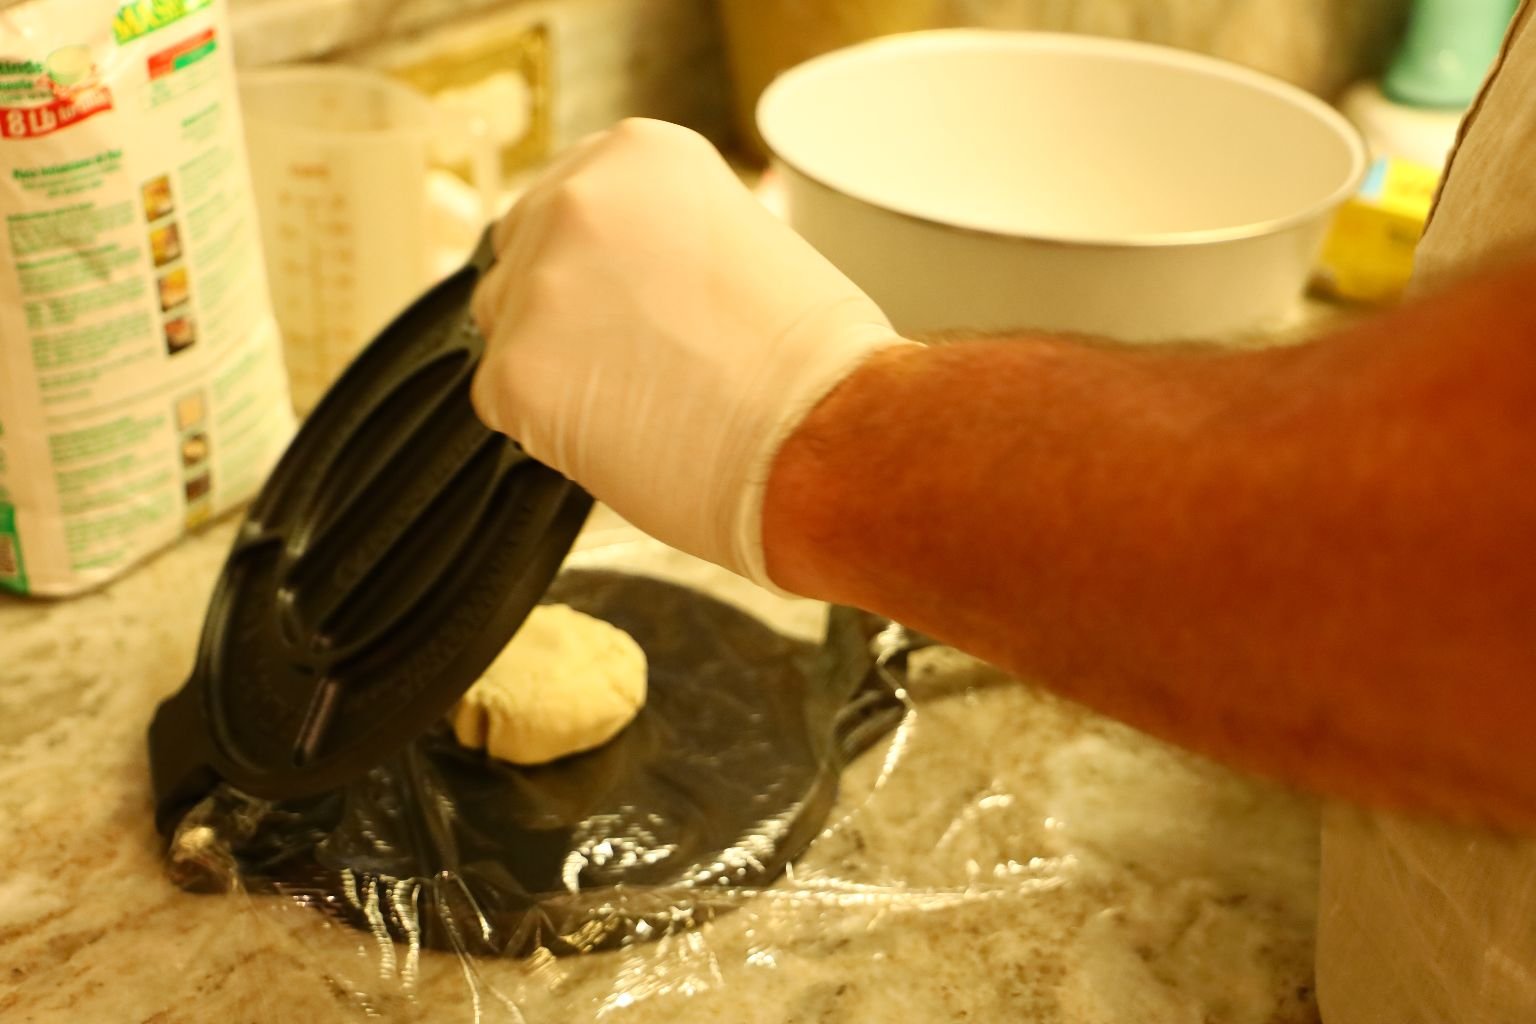
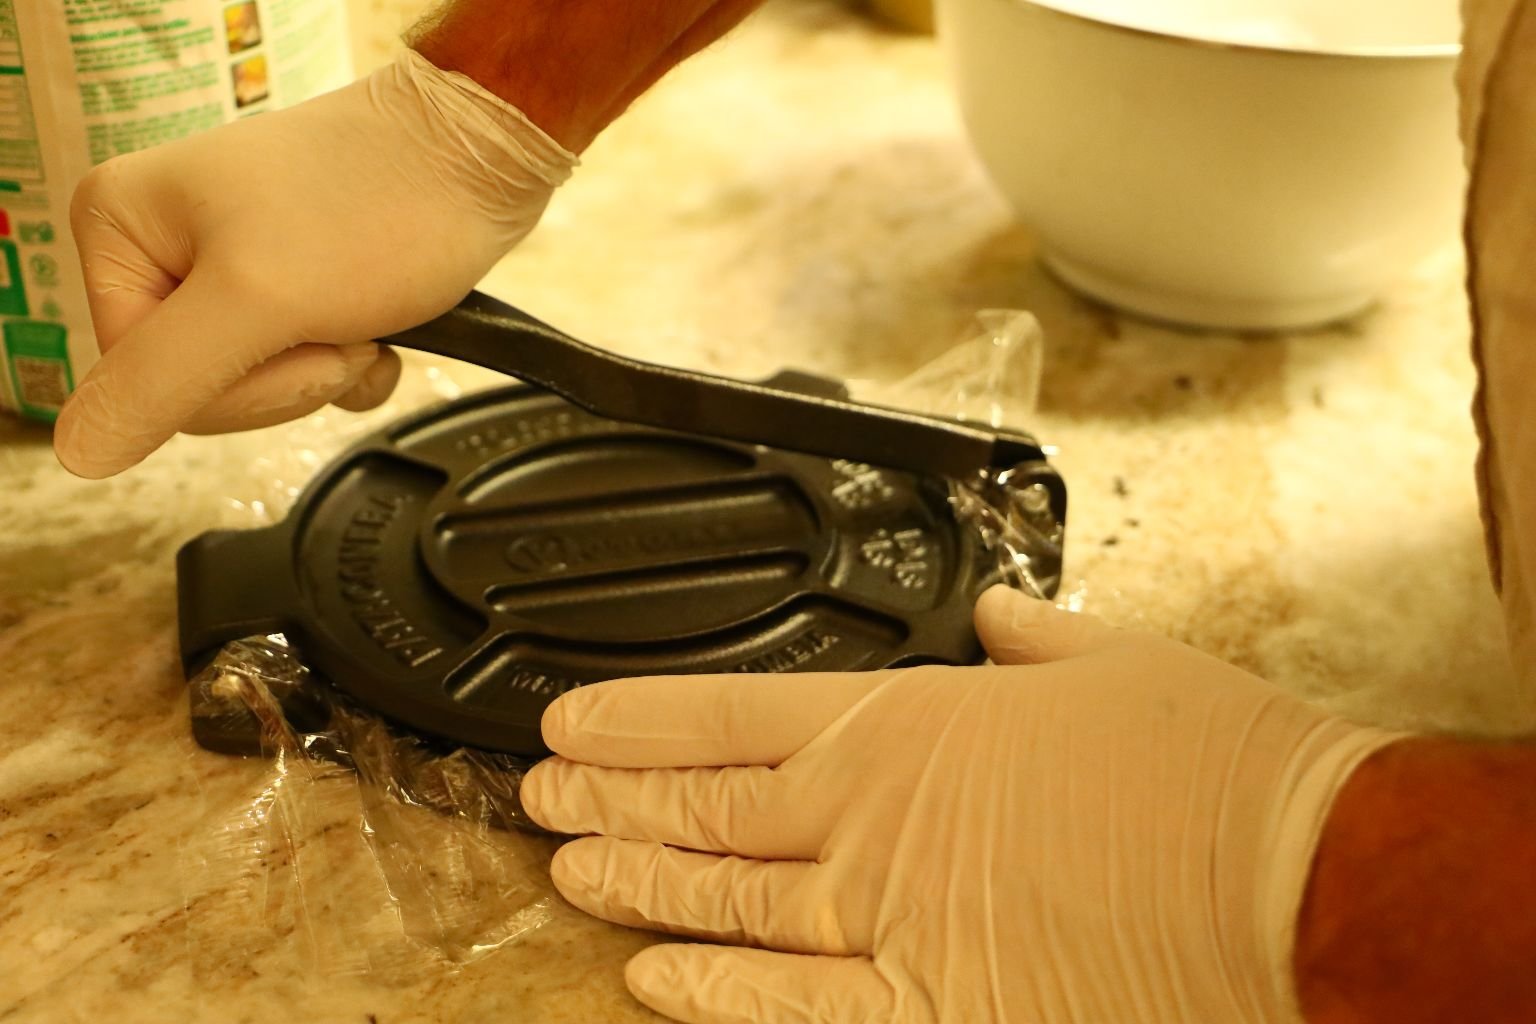
Use plastic wrap over the top and bottom of the tortilla press, so the tortilla won’t stick to the press.

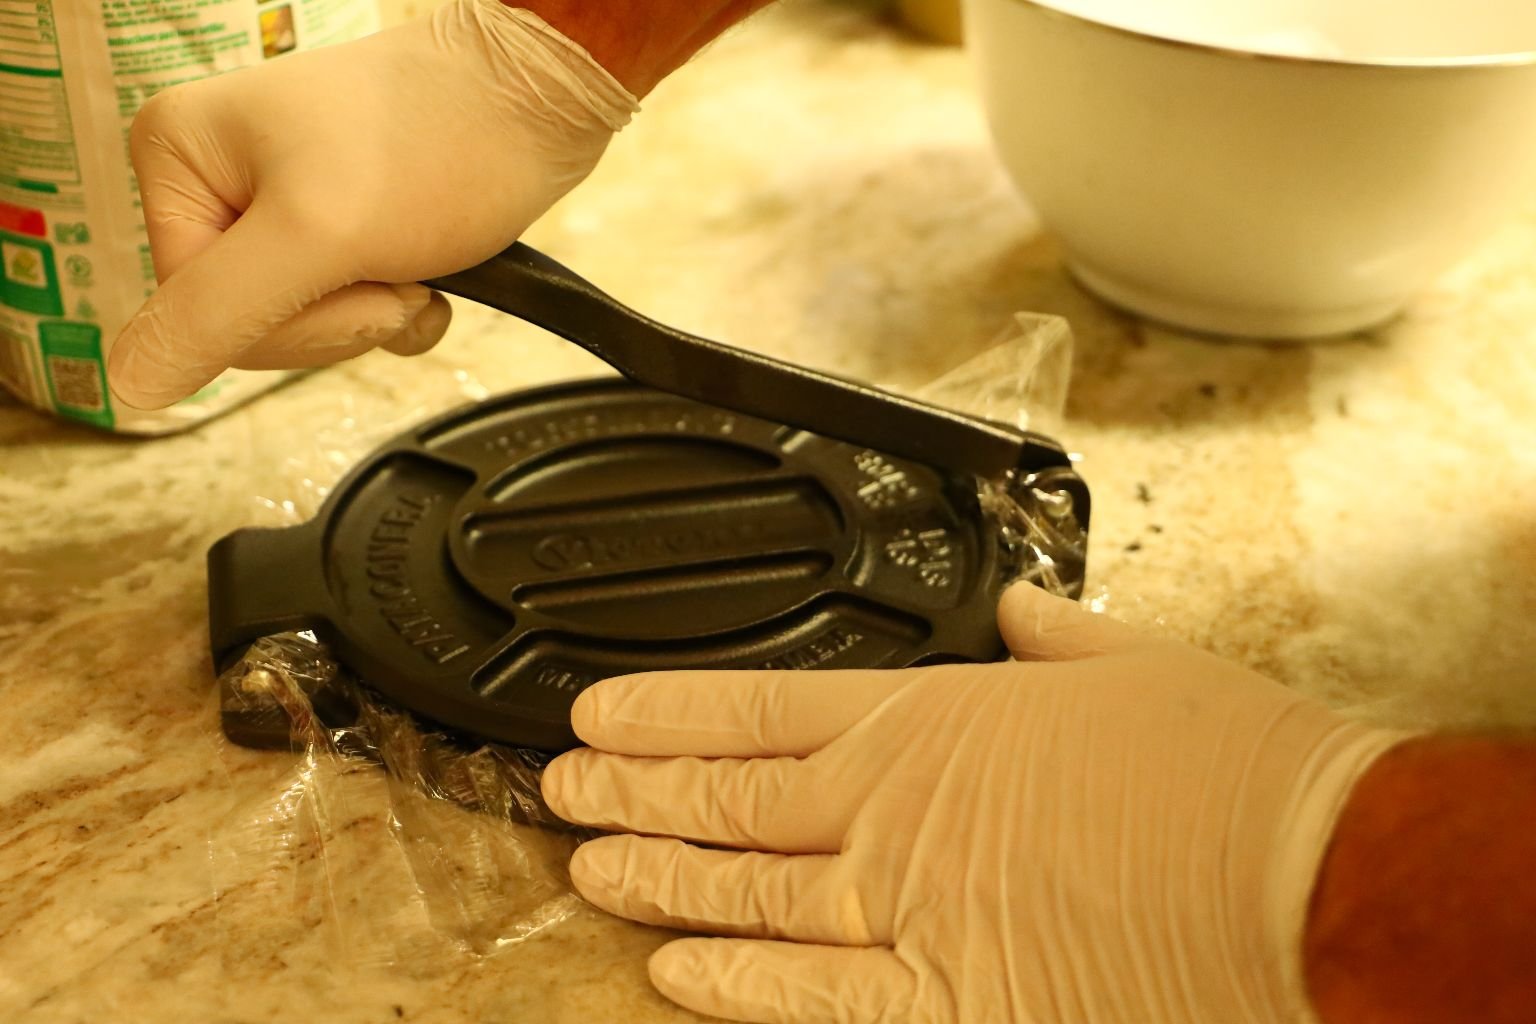
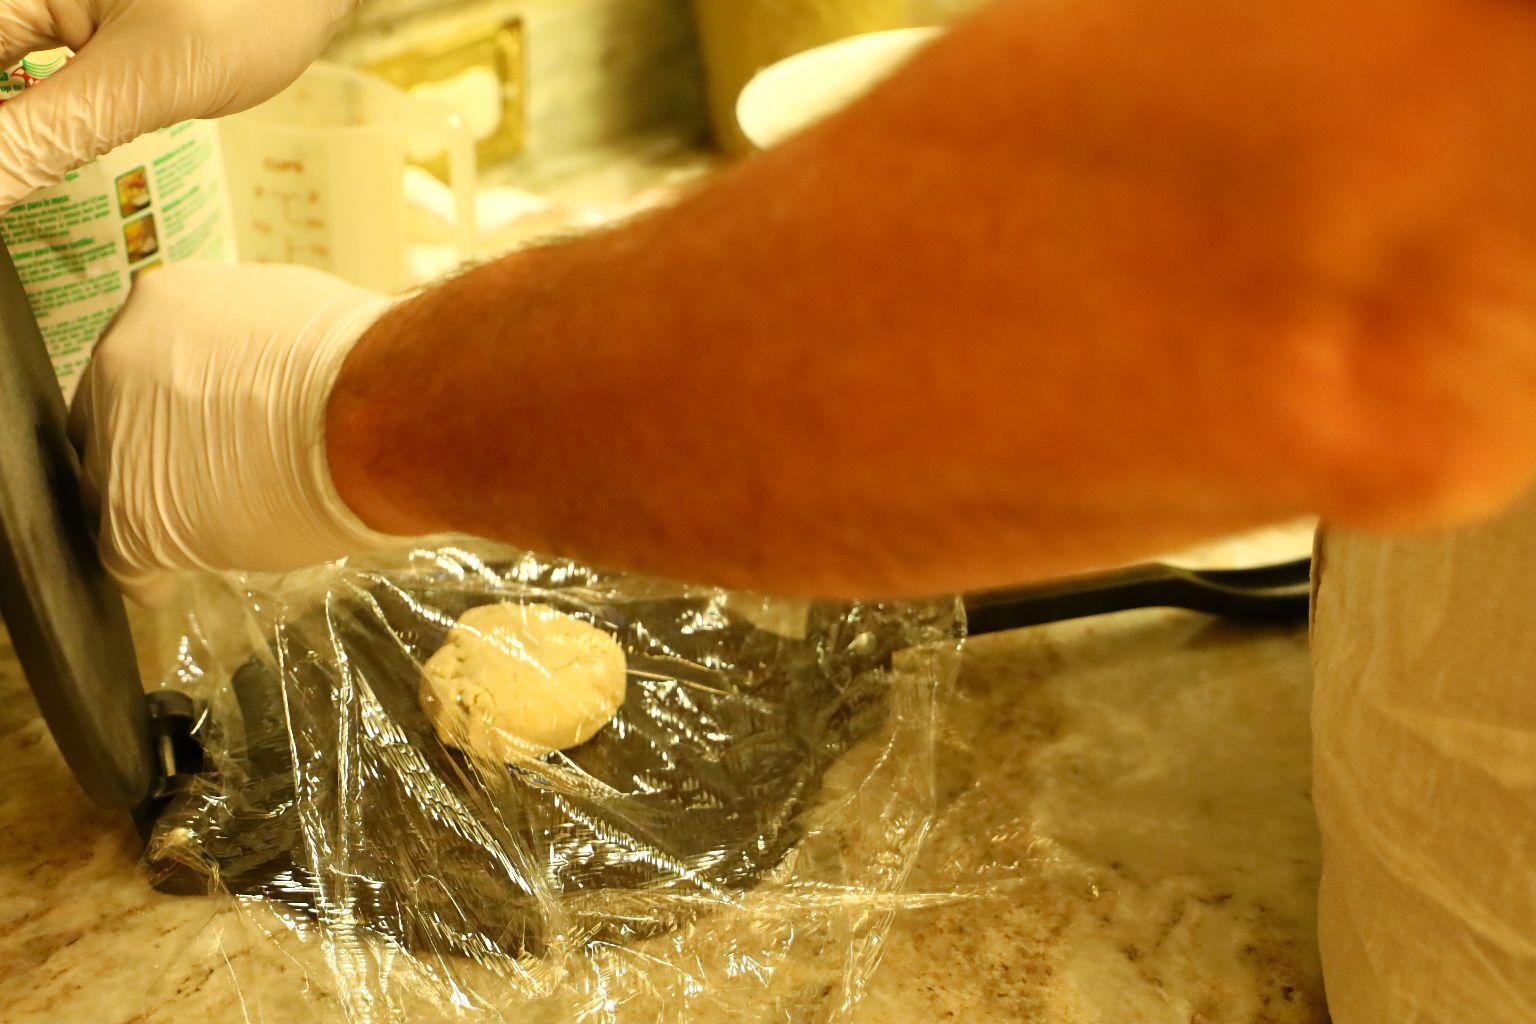
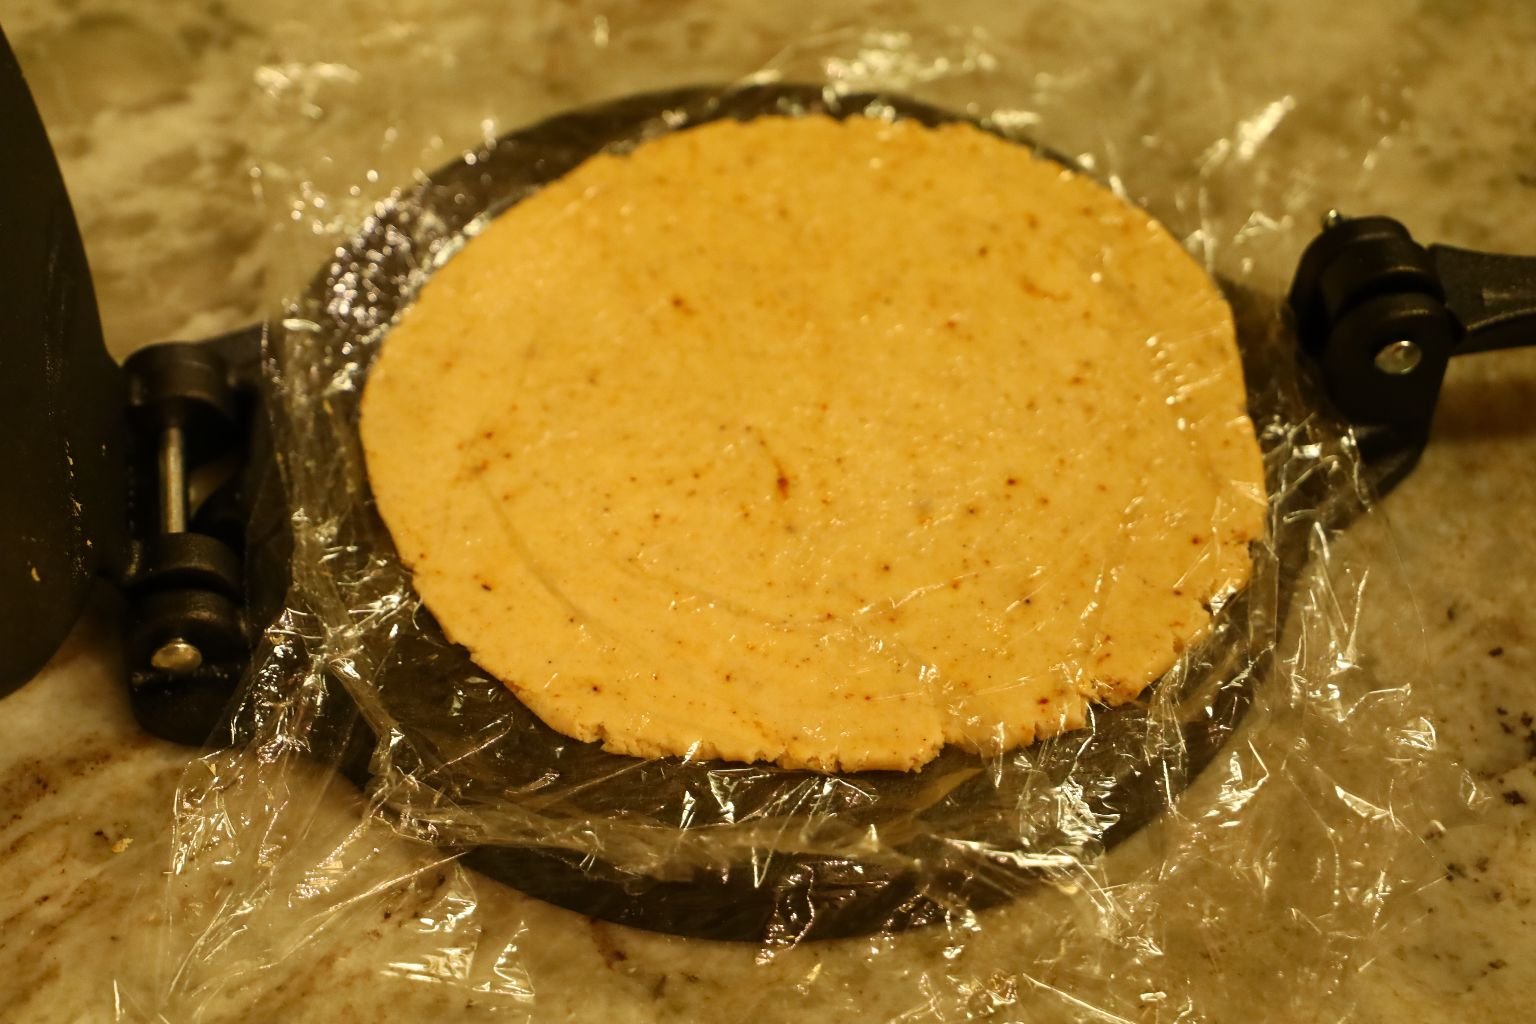
Fold the top of the press down then move the handle forward and press it down firmly. I pressed down until I saw the dough start to peak out of the side of the press.
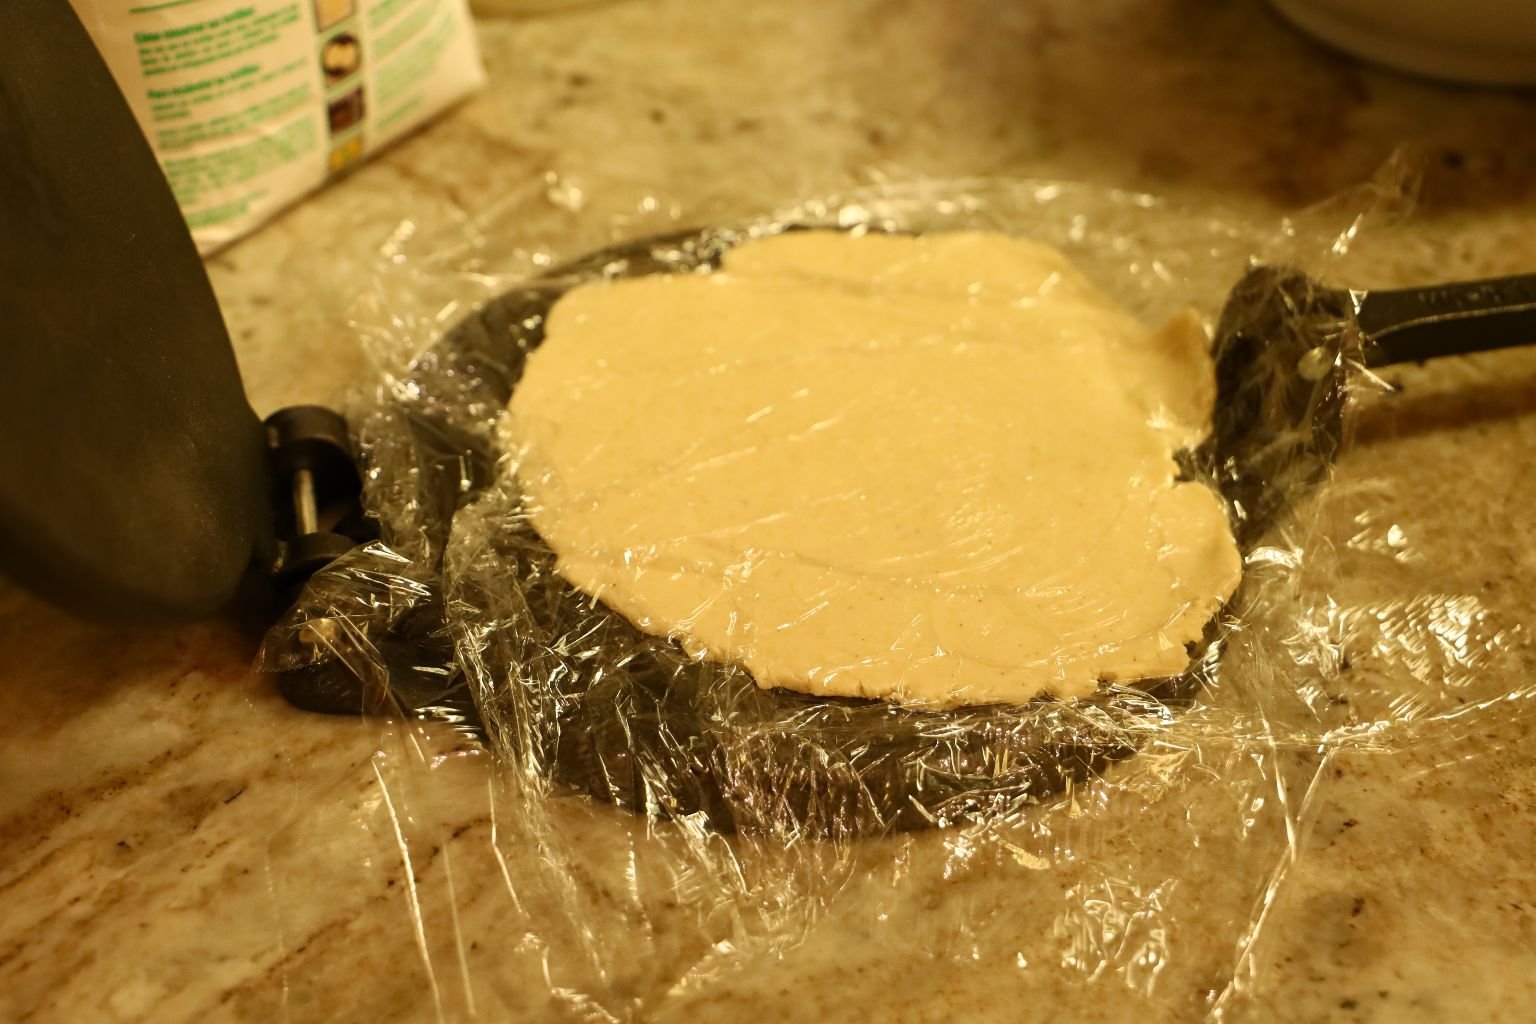
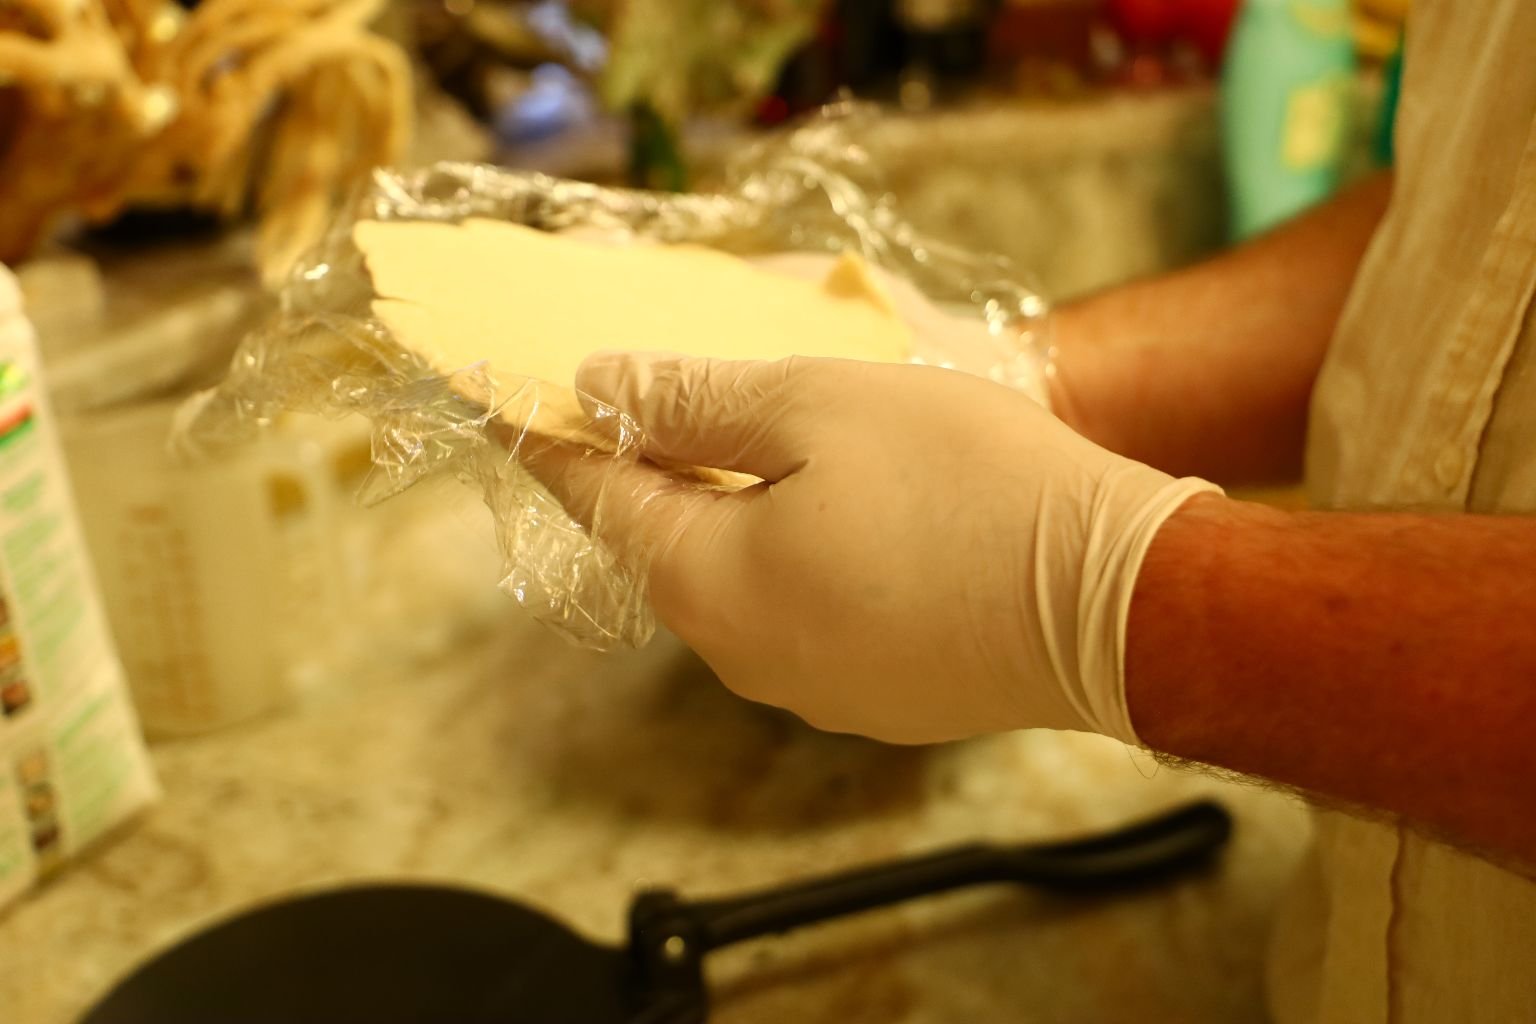
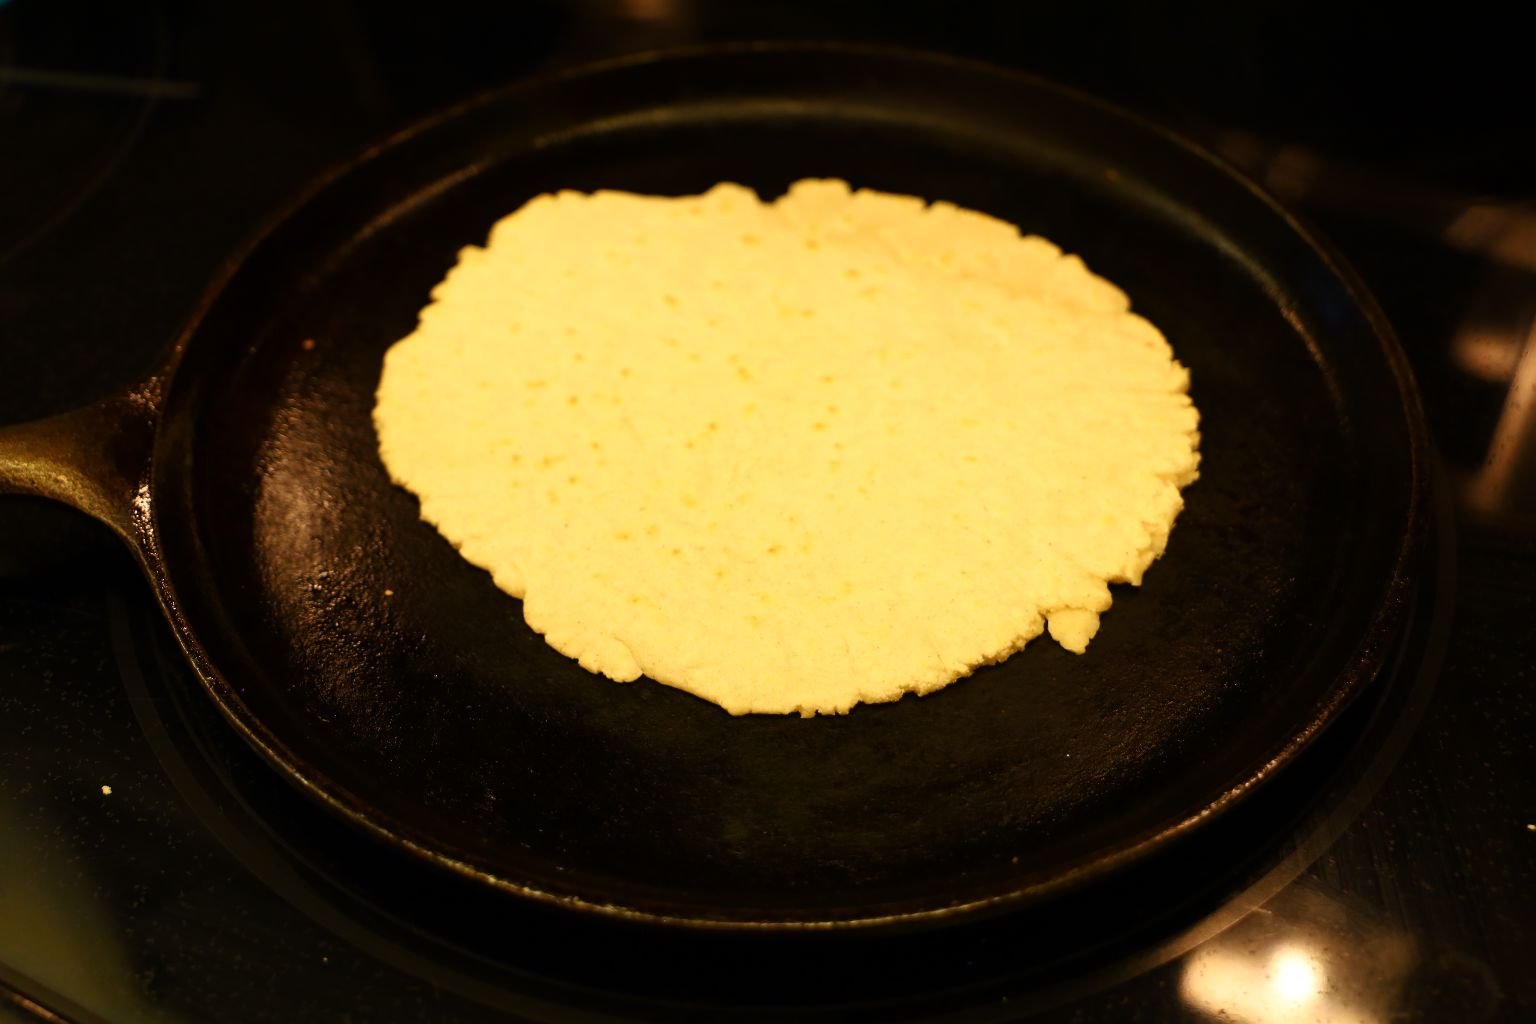
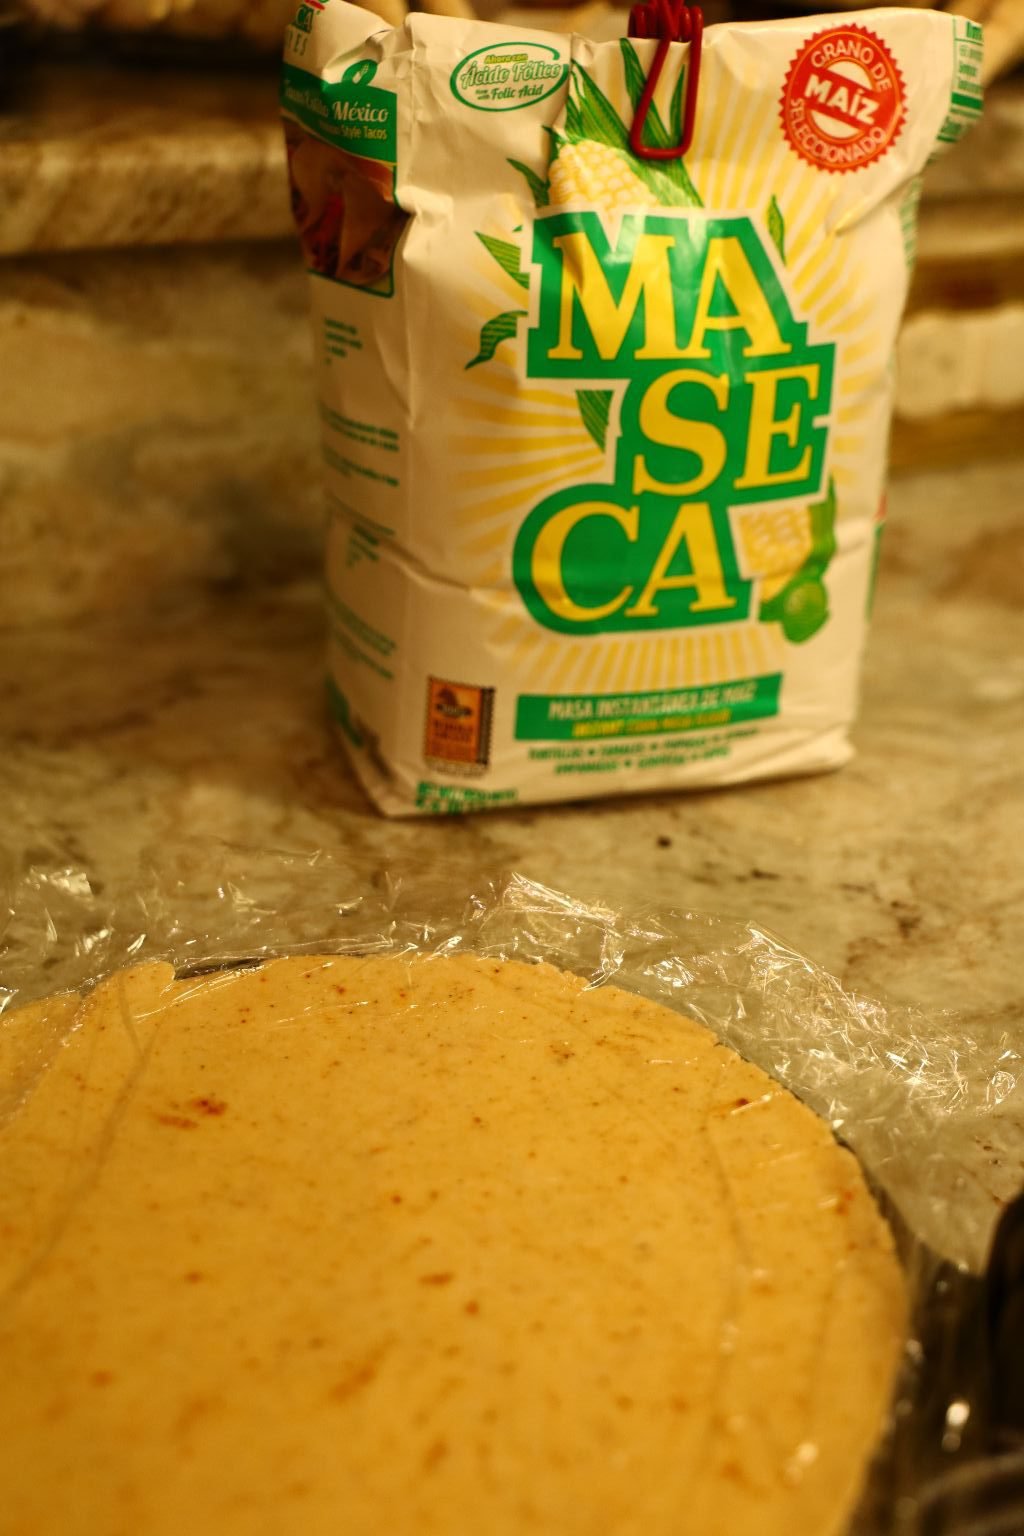
Here you can see I made a somewhat round tortilla. Carefully remove the top piece of plastic wrap the carefully remove the bottom piece.

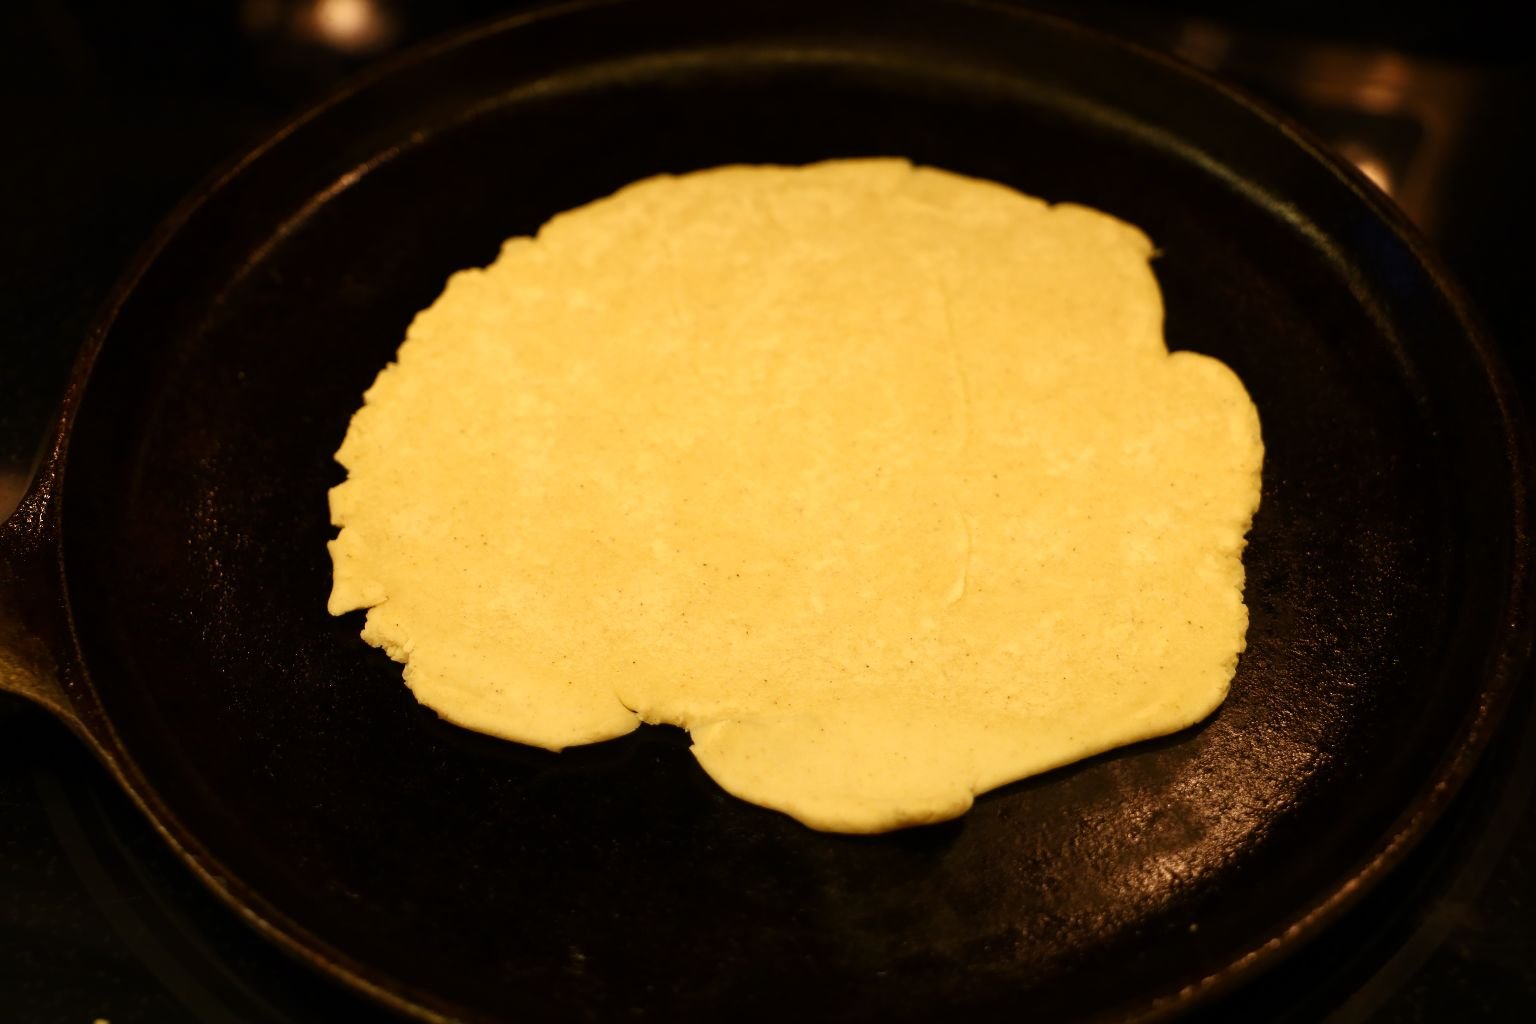
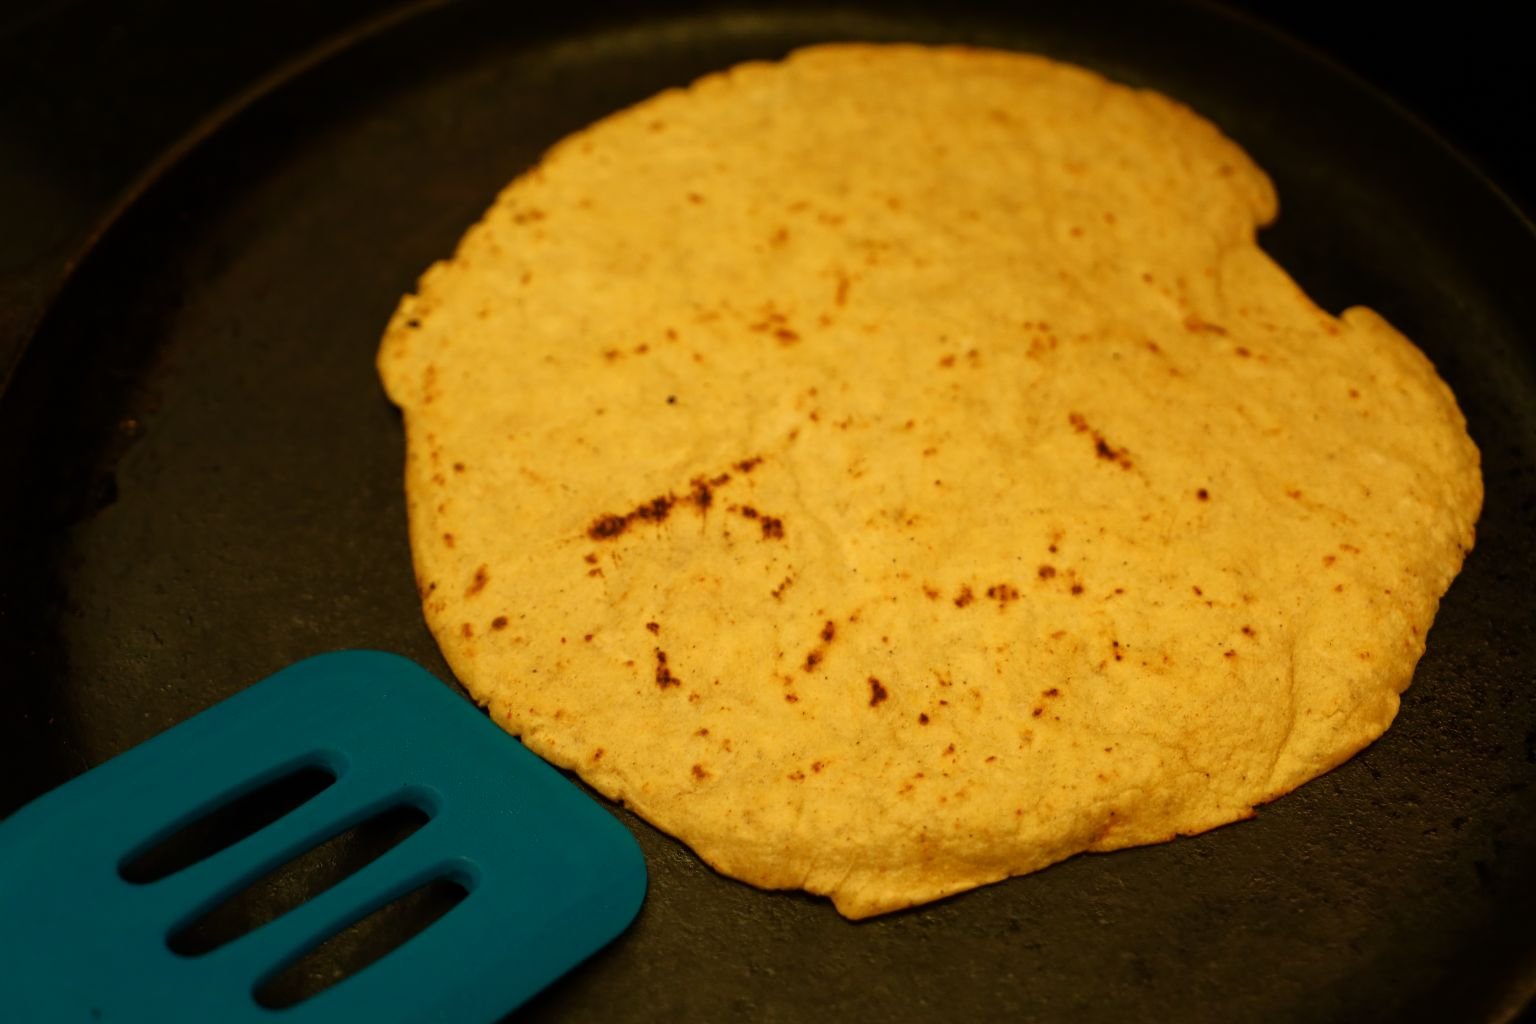
Place the tortilla in a hot cast iron skillet and cook for a few minutes on each side until slightly brown.
—————————————————————-

Here is the hockey puck I found which worked out well for me.
————————————————————–
After a few times I got the hang of it and they came out a little better each time.
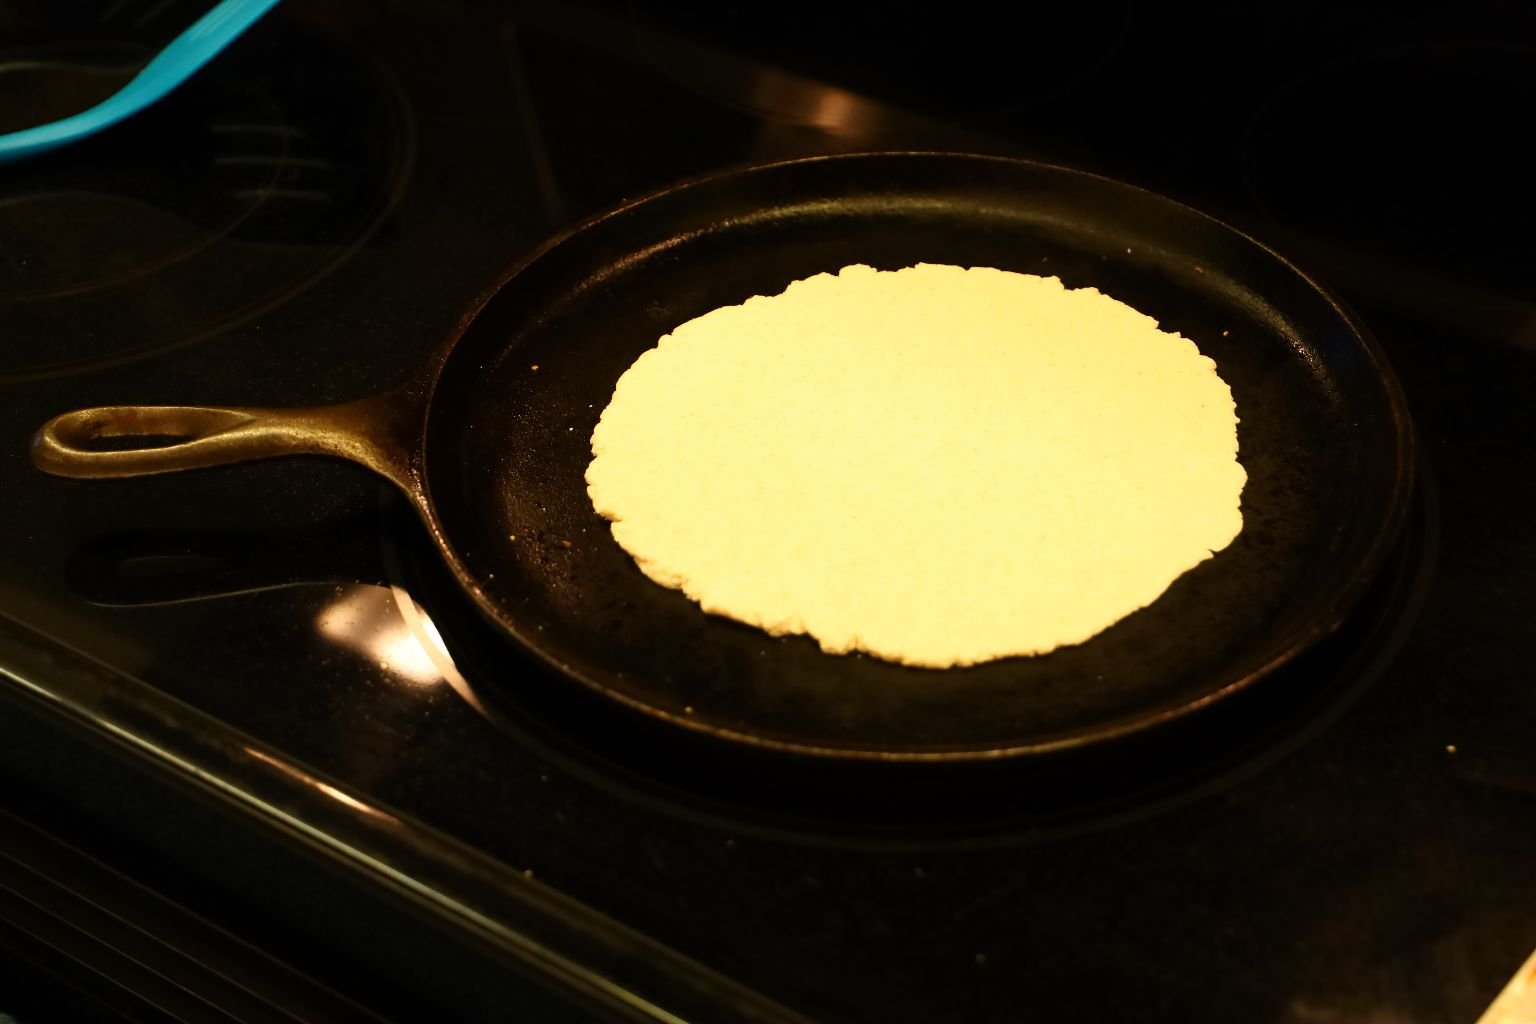
Here is another nice one! Nice picture Julie!!!
————————————————————-

I found the size of dough I was making used more than the direction called for using our 8 inch press.
————————————————————

After a few, you will get in a rhythm and they turn out pretty quickly.
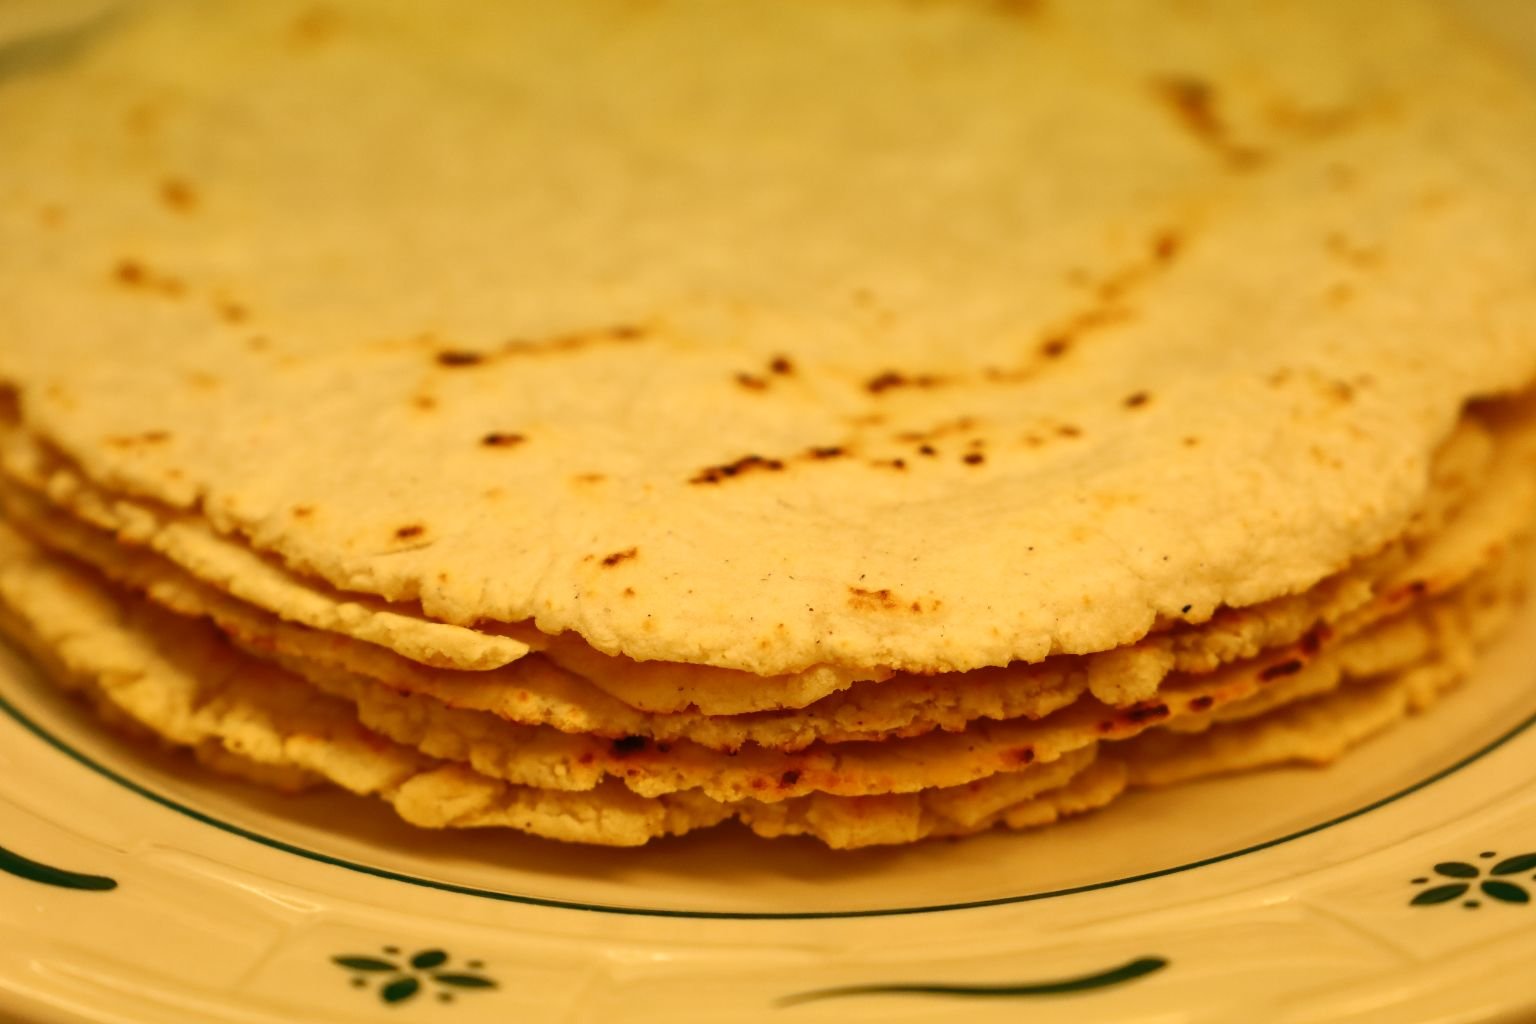
Here is a nice stack of them.
————————————————————–

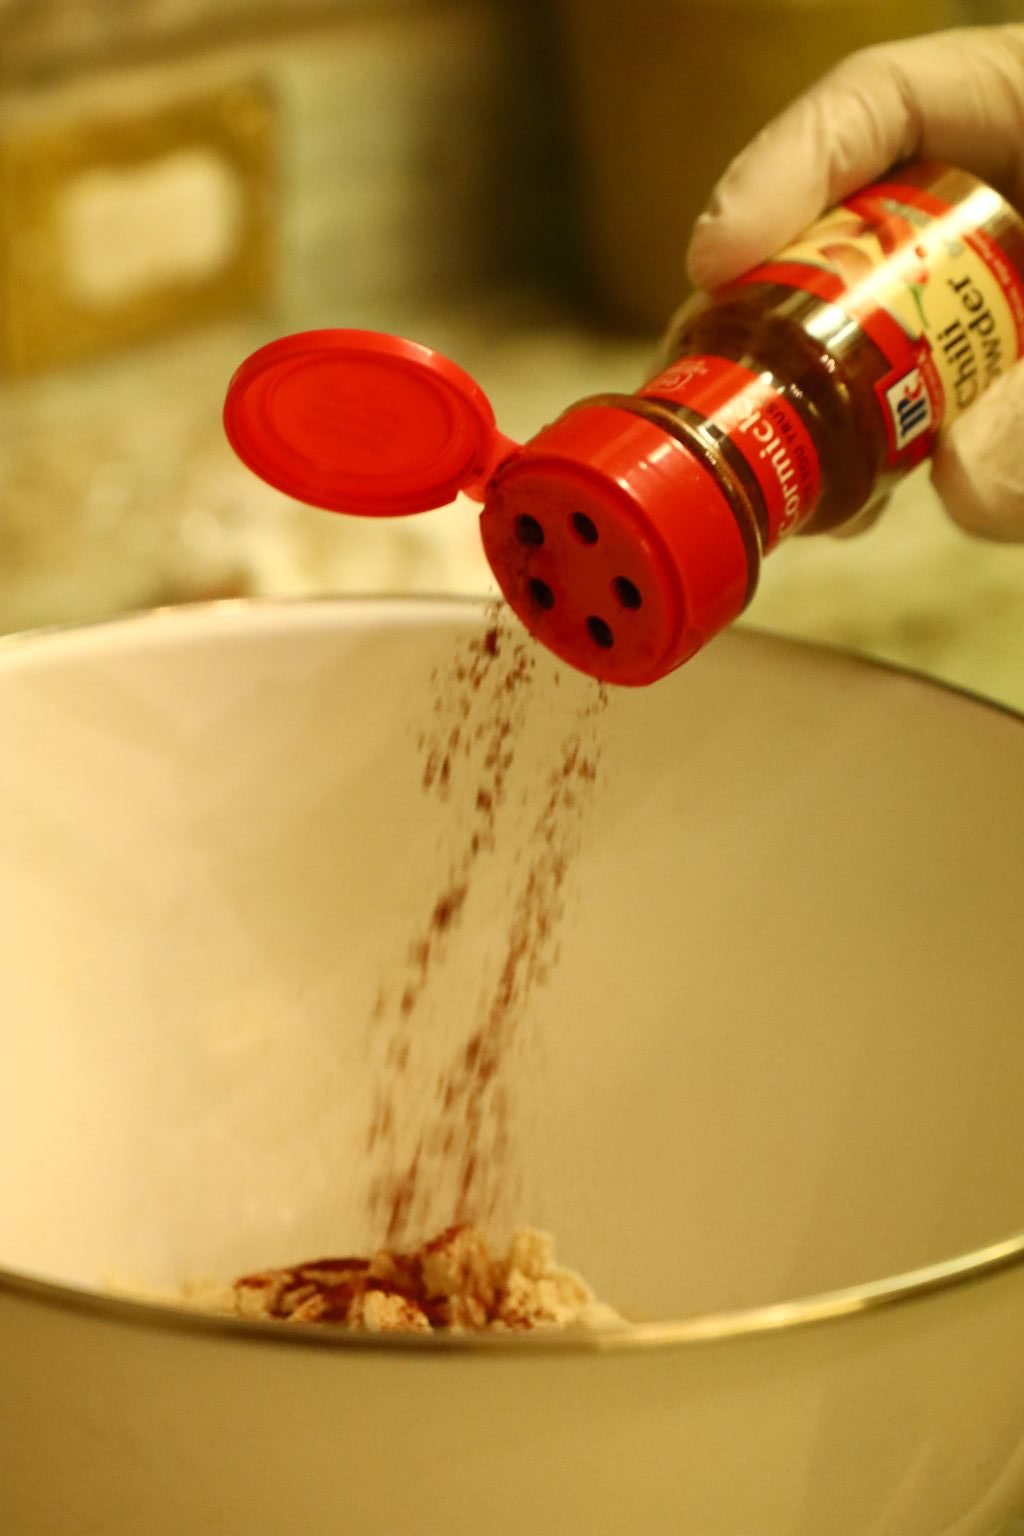
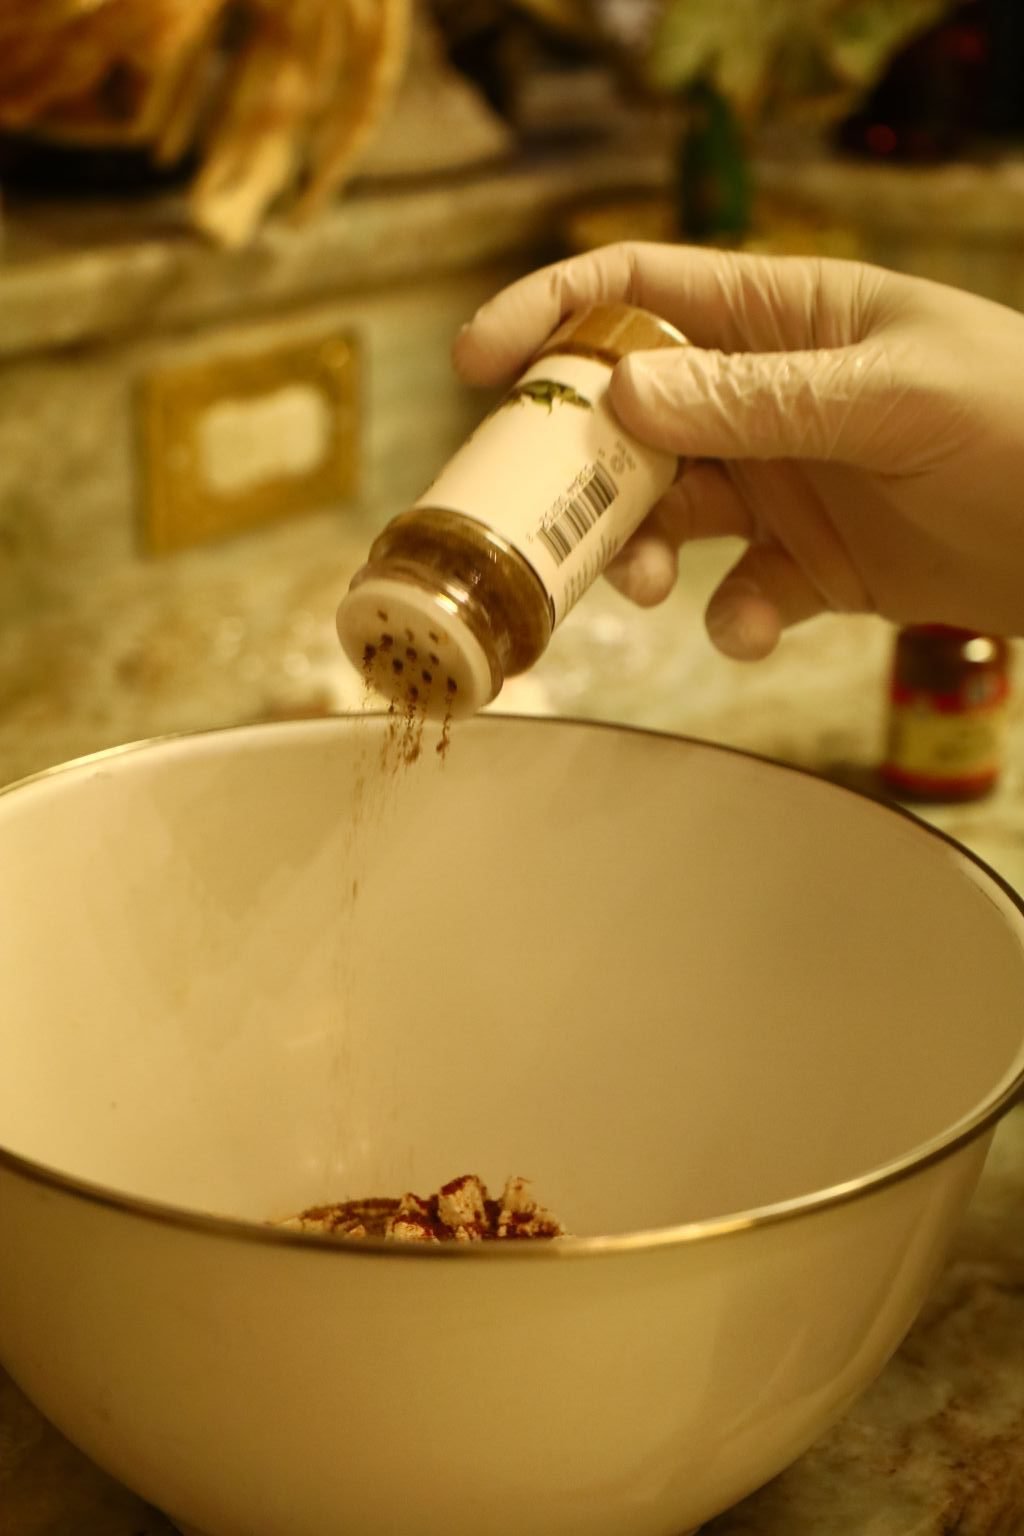
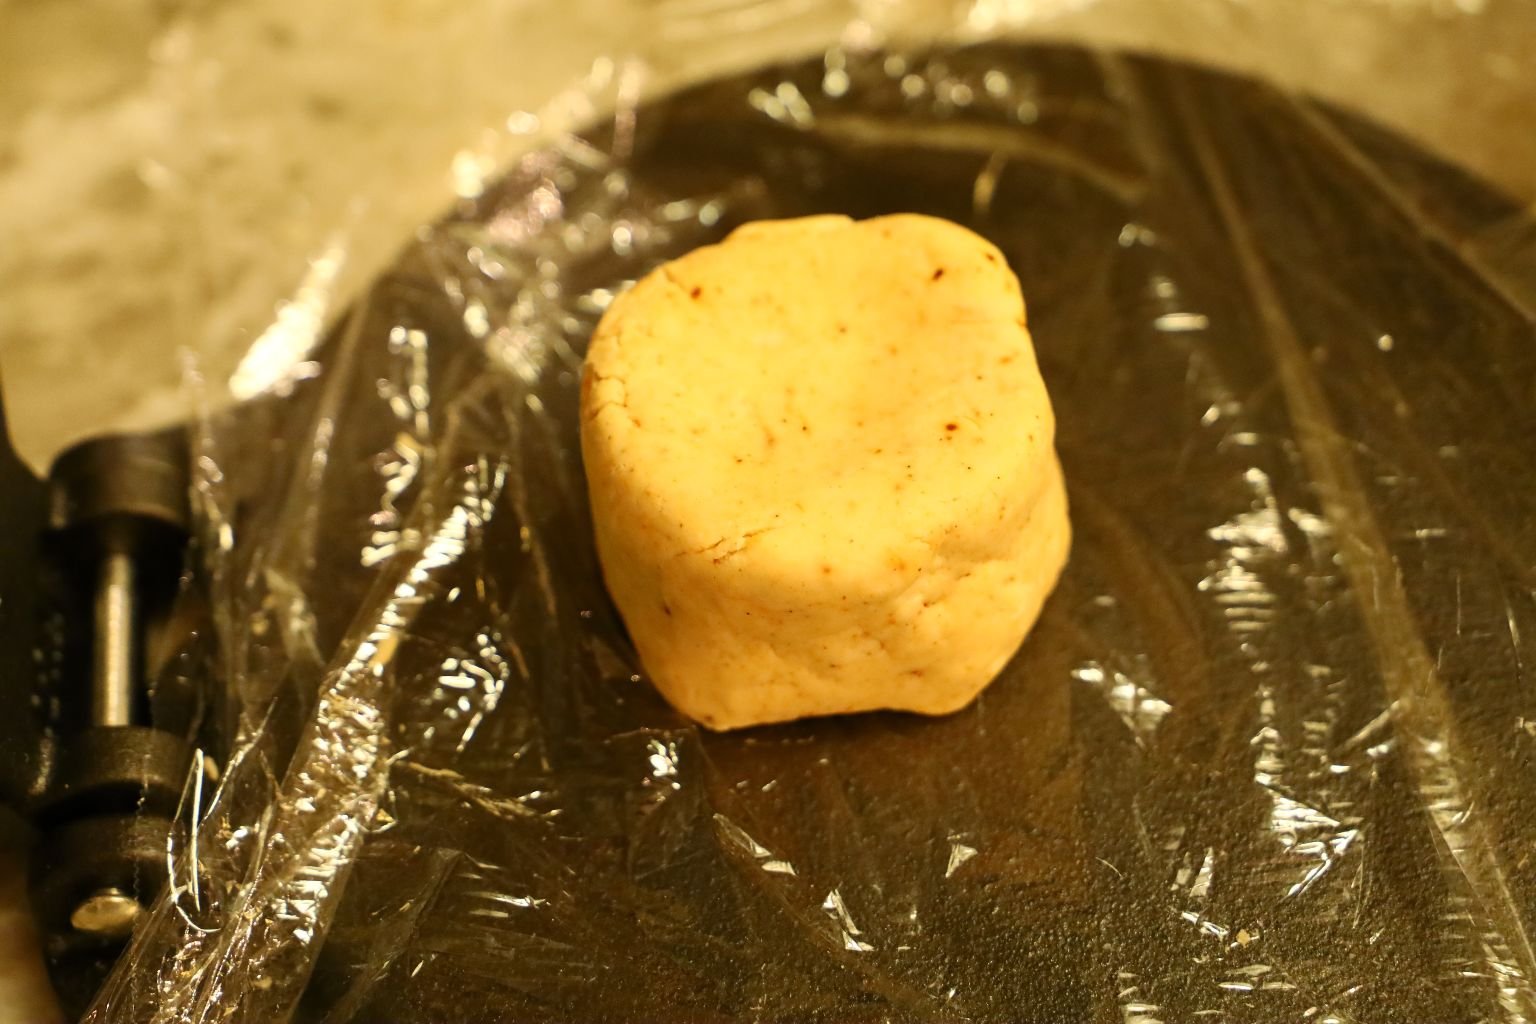
Julie had the great idea to place spices into the basically bland dough. We thought Chili Powder and ground Jalapeno would be nice.
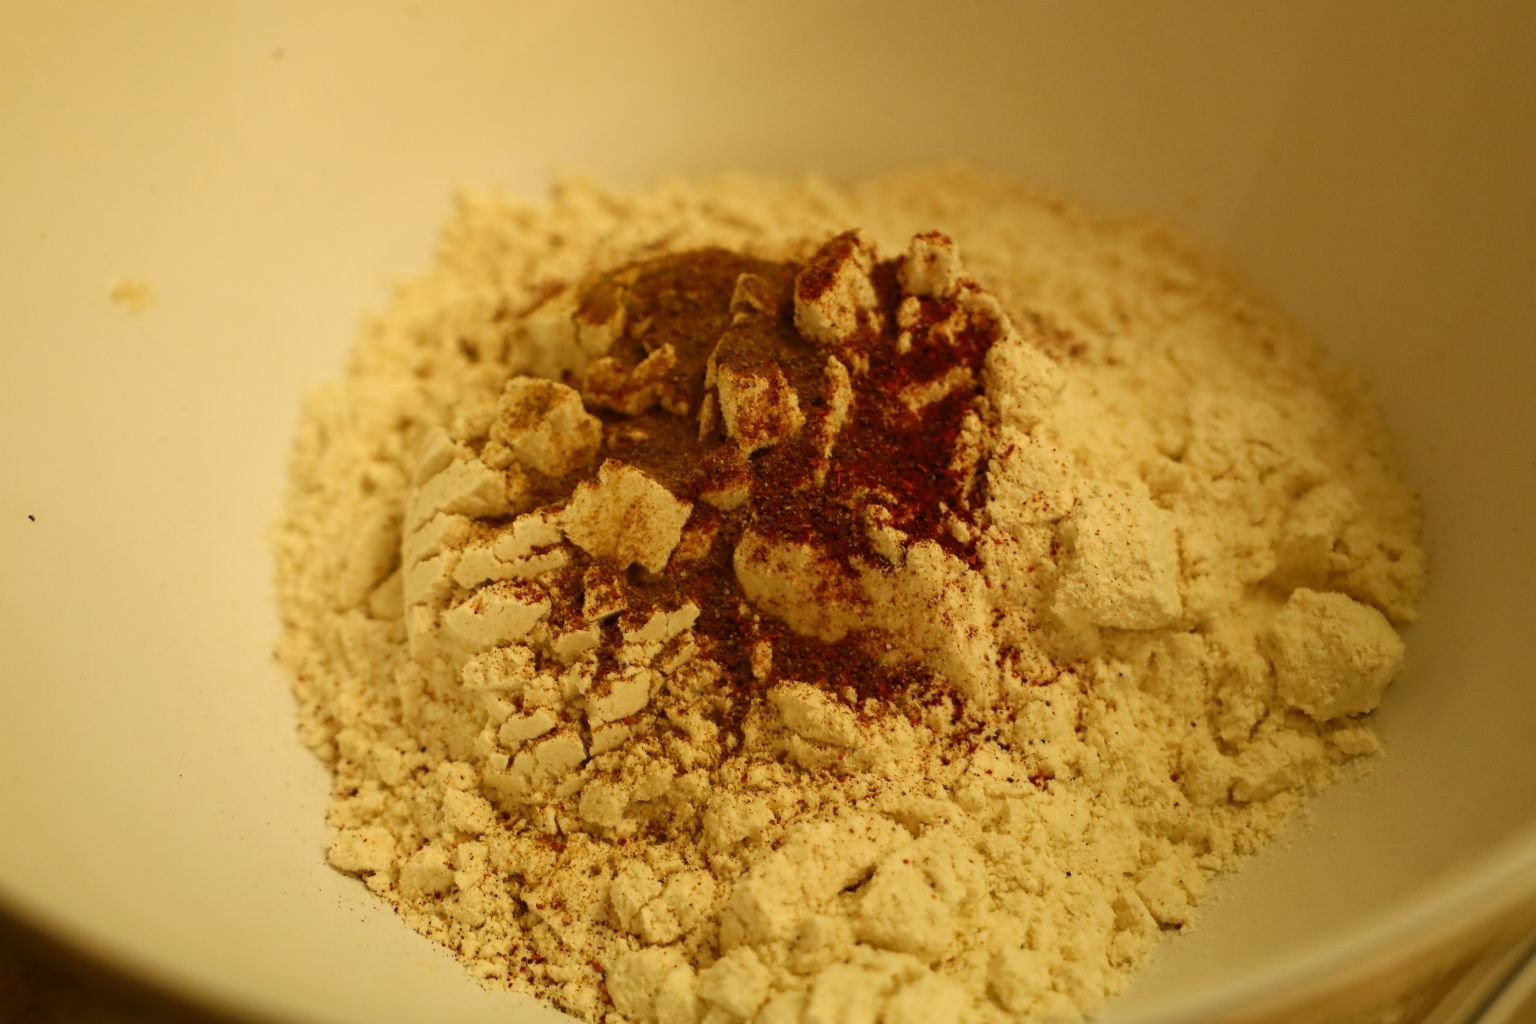
I added a few good shakes of each in the dough.

Again, add the Maseca and water as directed.

Mix the dough and let it rest topped with a moist towel.
Here again, I am using my puck shape to make the round tortillas.


Cook them for a few minutes on each side to brown.

Nice!
——————————————————————
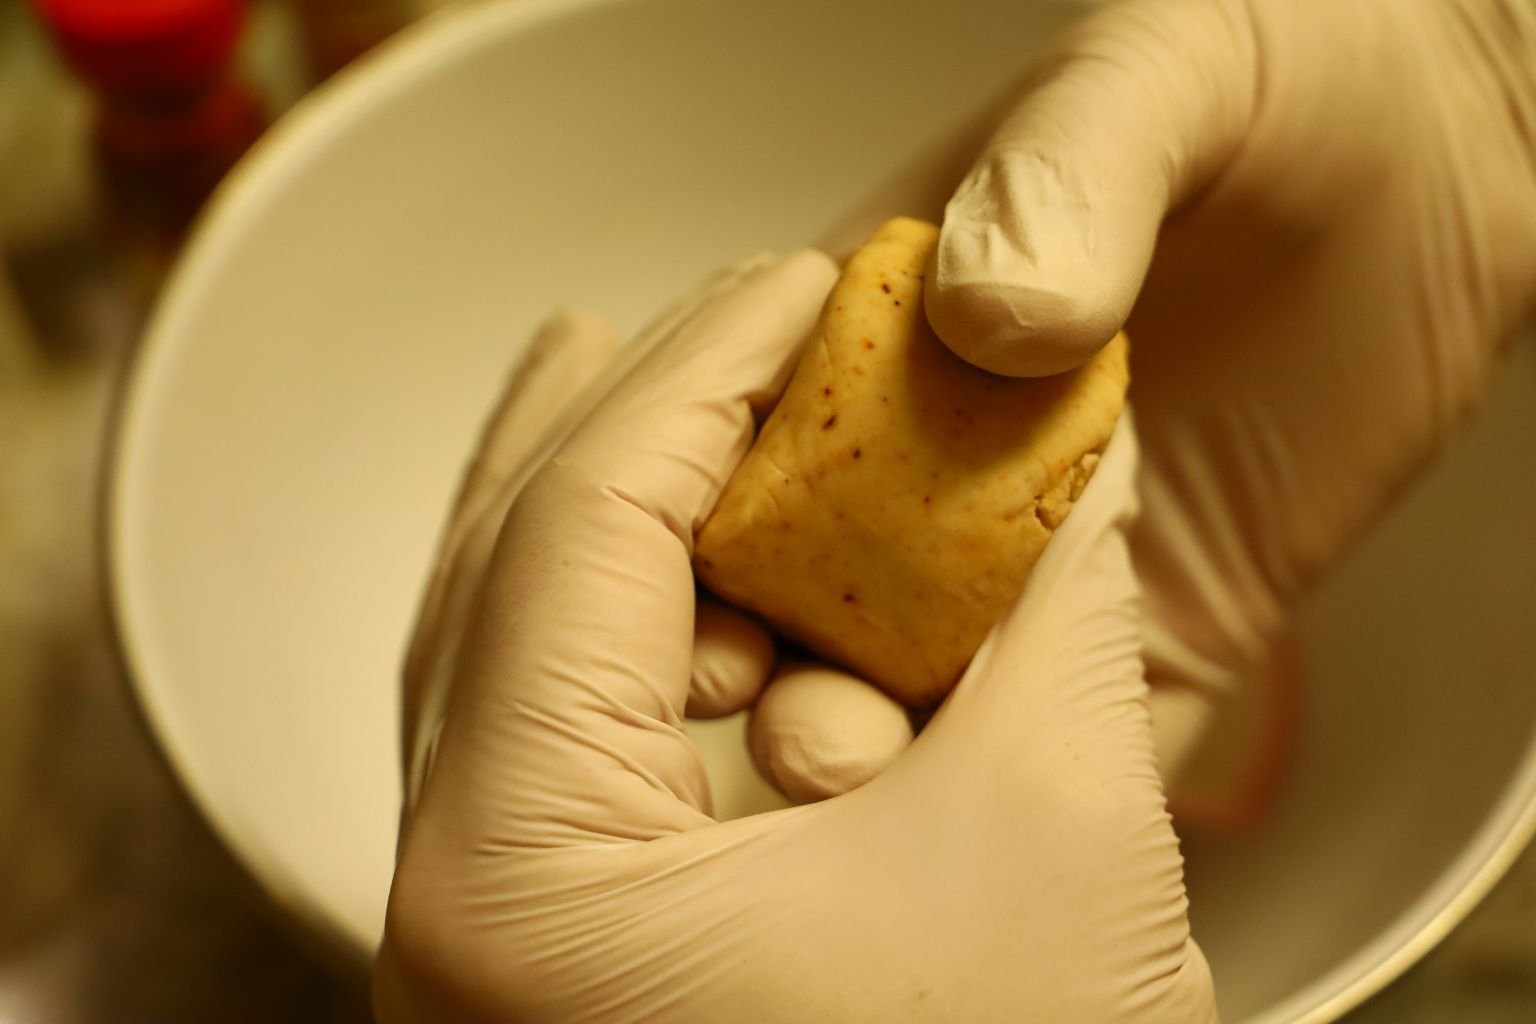
Here I show you how to make the puck using my fingers and thumbs and turning it as I work the dough.
Again, place plastic wrap under and on top of the dough.

Press down firmly until you see the dough just peak out the sides of the press.
I used a rubber spatula to turn the tortilla.
————————————————————–
Here are our two types of tortilla’s. Enjoy!
(We bought the Tortilla Press and the Tortilla Mix at the Latin Supermarket.)
——————————————————————–
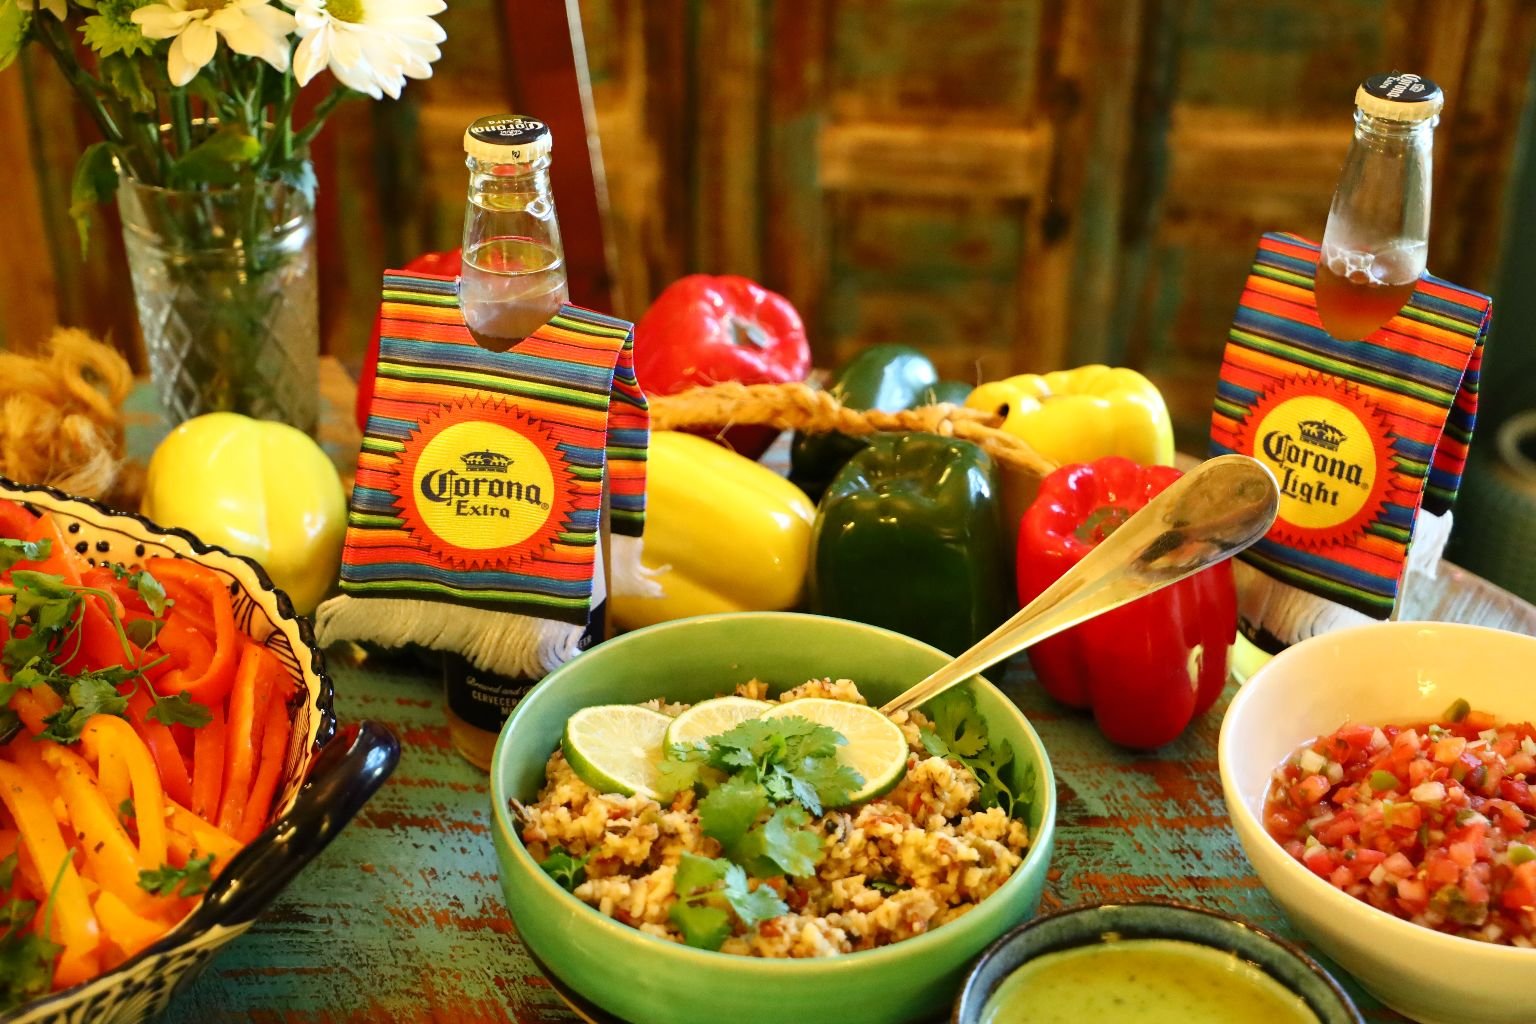
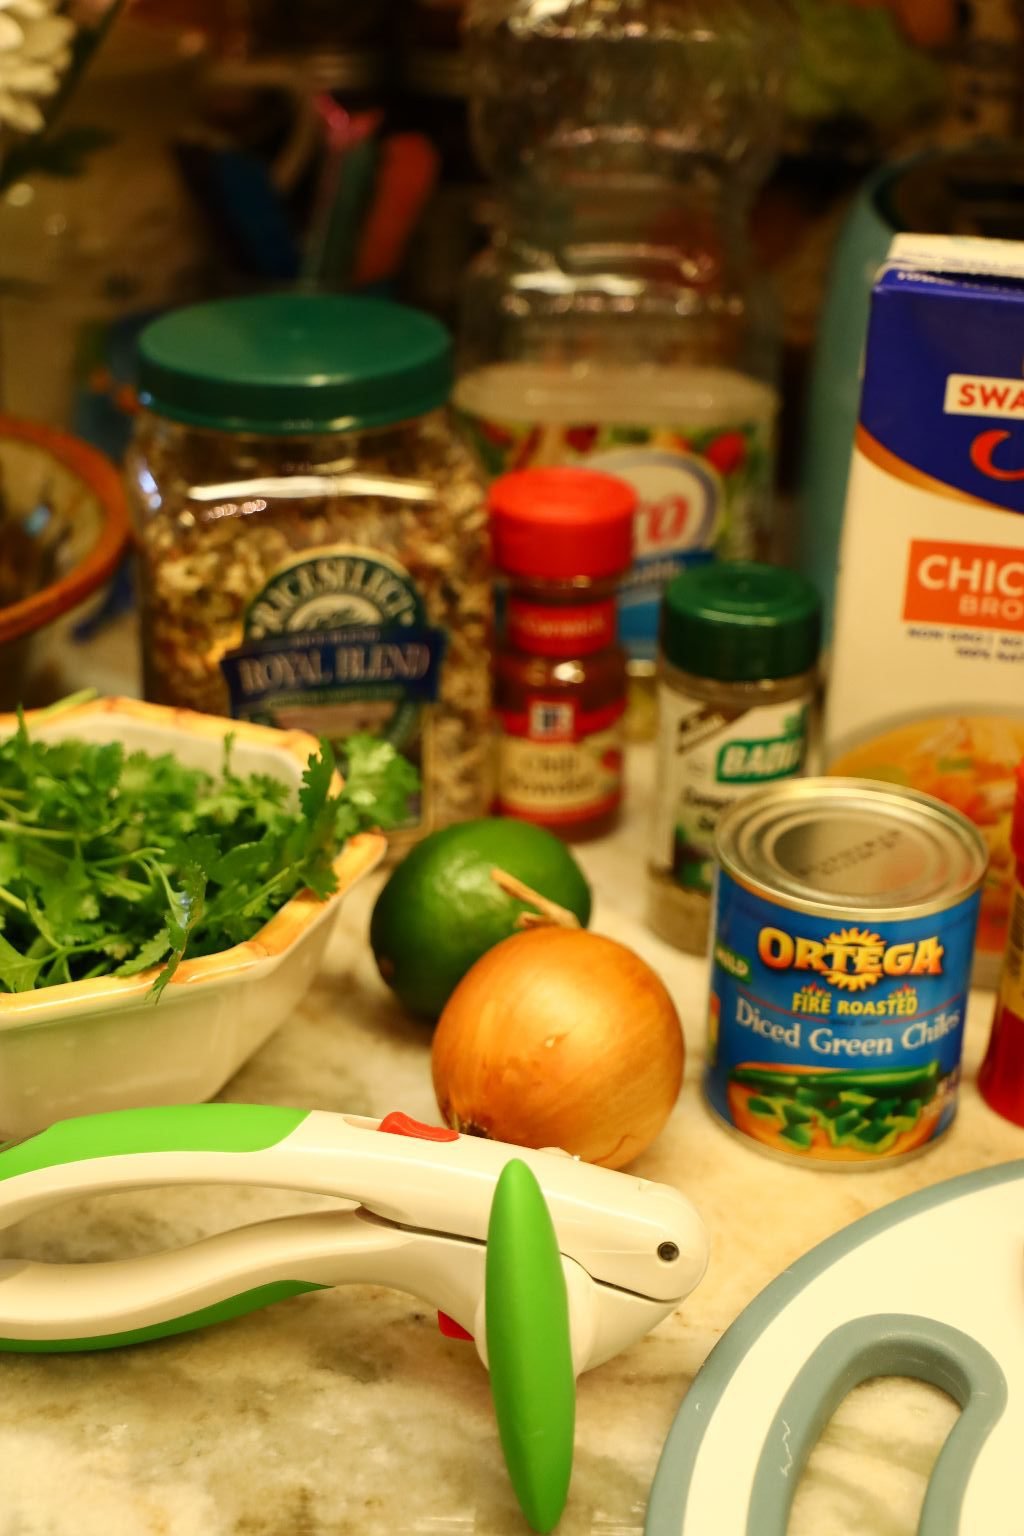
Julie’s Wild Grain Lime Rice

This is my version of ‘Rice a Roni, The San Francisco Treat!’
Most American’s know the rice dish, and the jingle that is sung with it. A lot of us have probably made Rice a Roni in our lifetime. Well, this is my Mexican version of Rice a Roni. I had the best time making it!
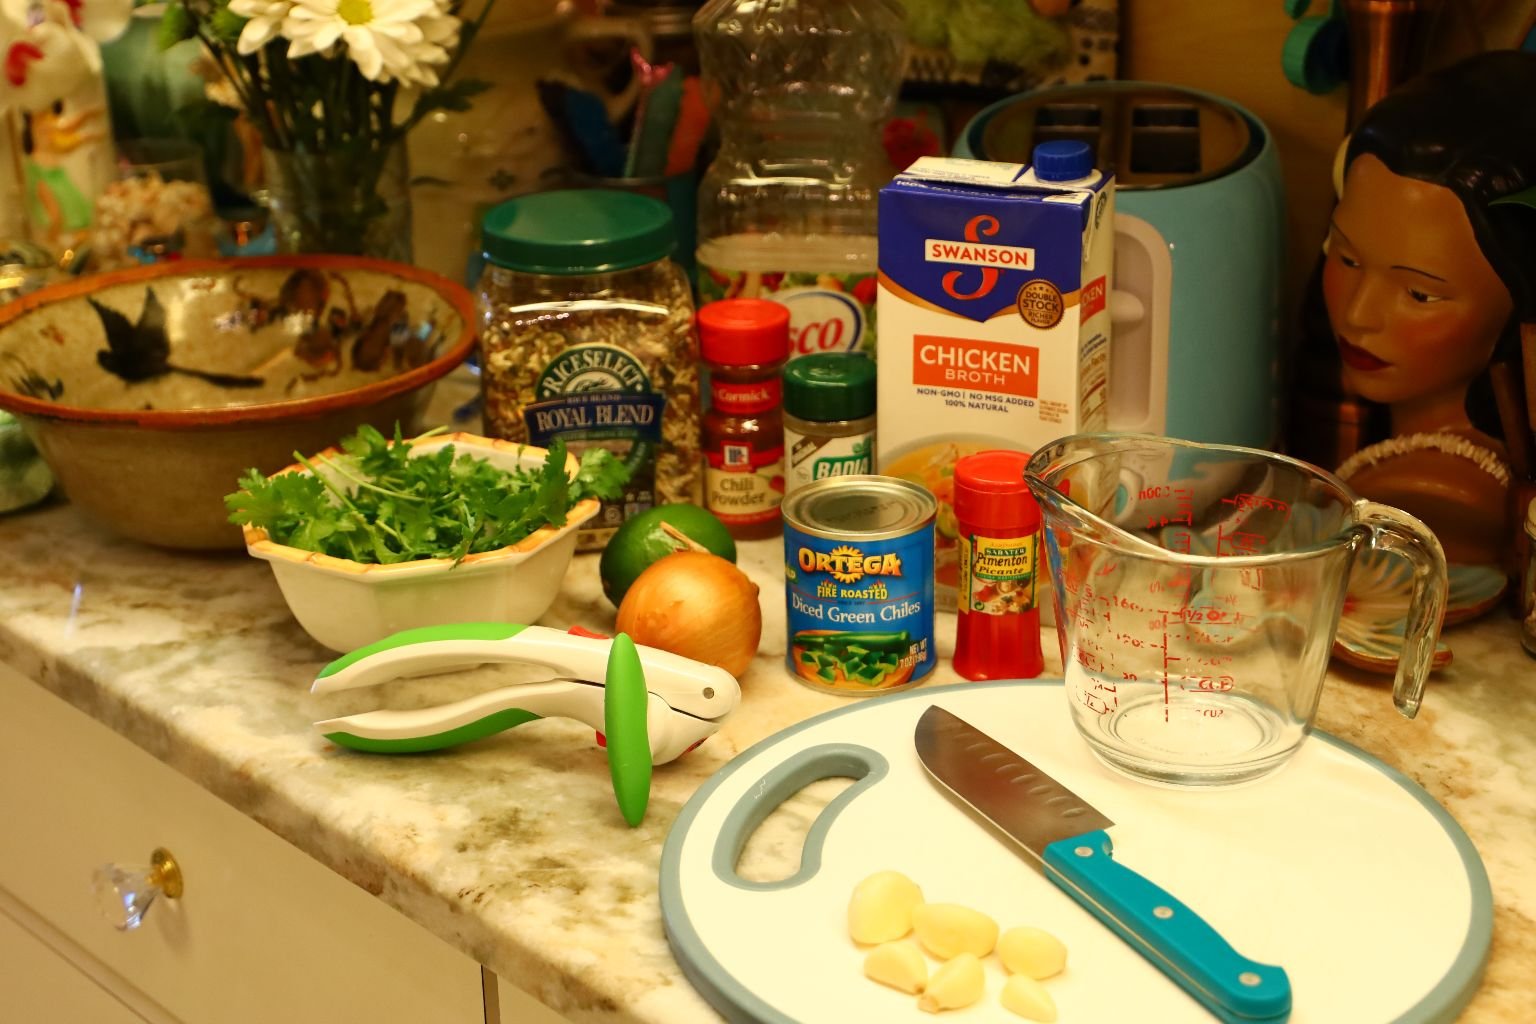
Ingredients:
12 oz. Wild Rice
1 Medium Onion, Chopped
6 Garlic Cloves, Diced
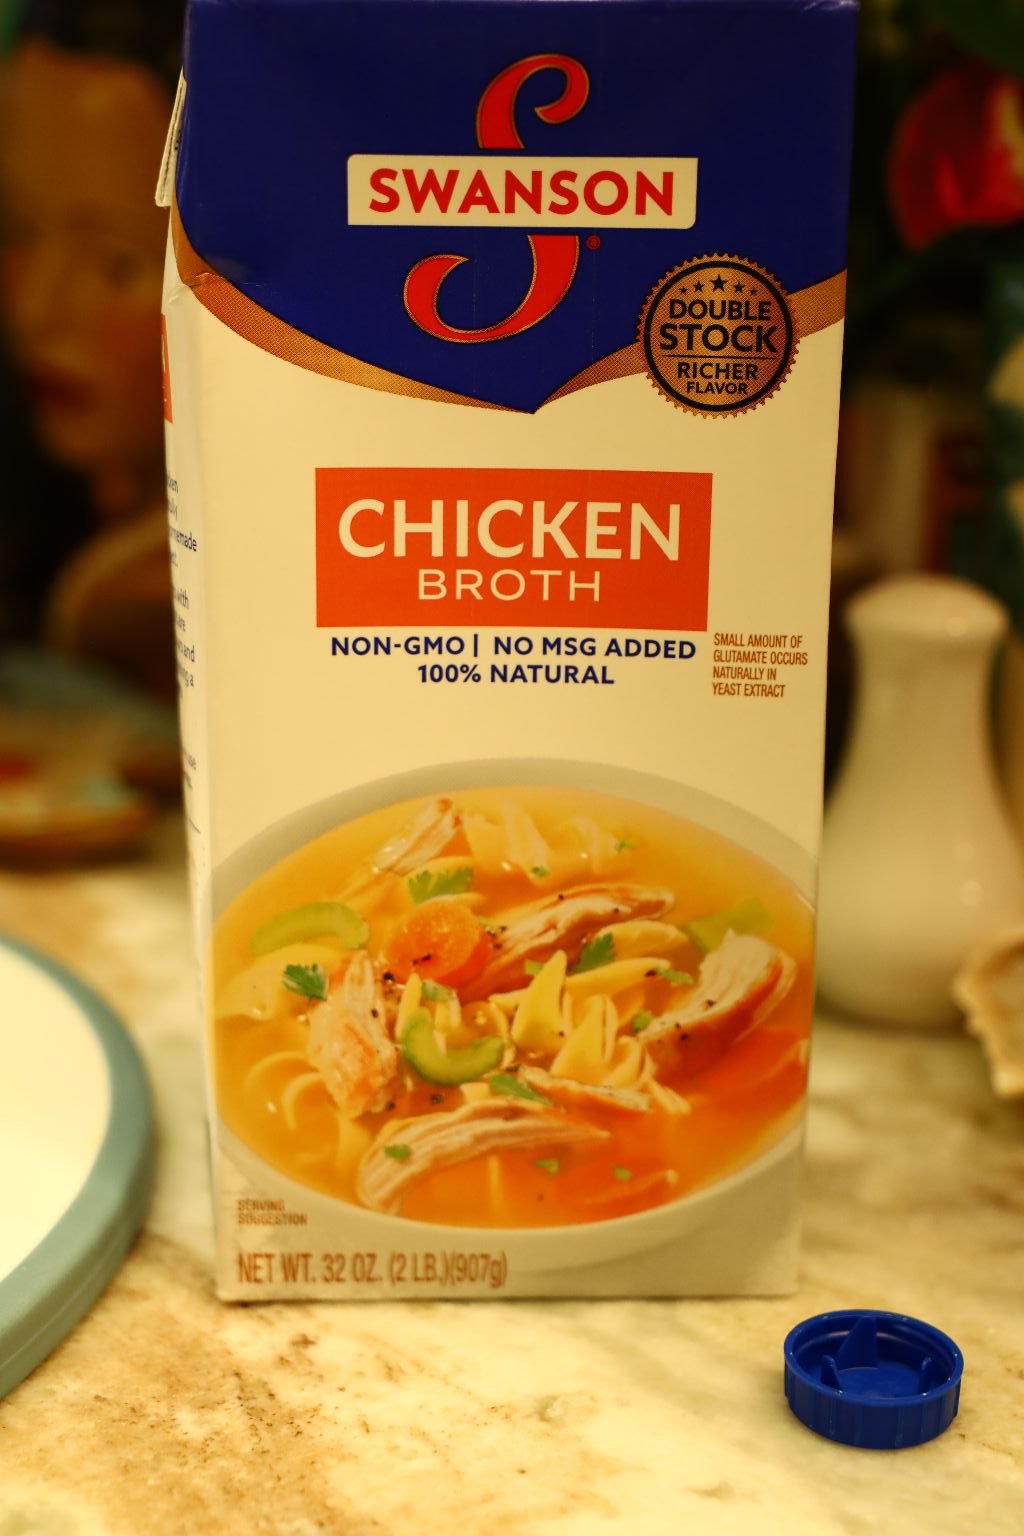
32 oz. Chicken Broth
2 Limes, Zest, Juice and Pulp
1 Can Fire Roasted Diced Green Chili’s
1 t. Chili Powder
1 t. Sazon Completa
1 t. Pimenton Picante
Bunch of Fresh Cilantro
Vegetable Oil
One Lime Sliced into Rounds
———————————————————————–
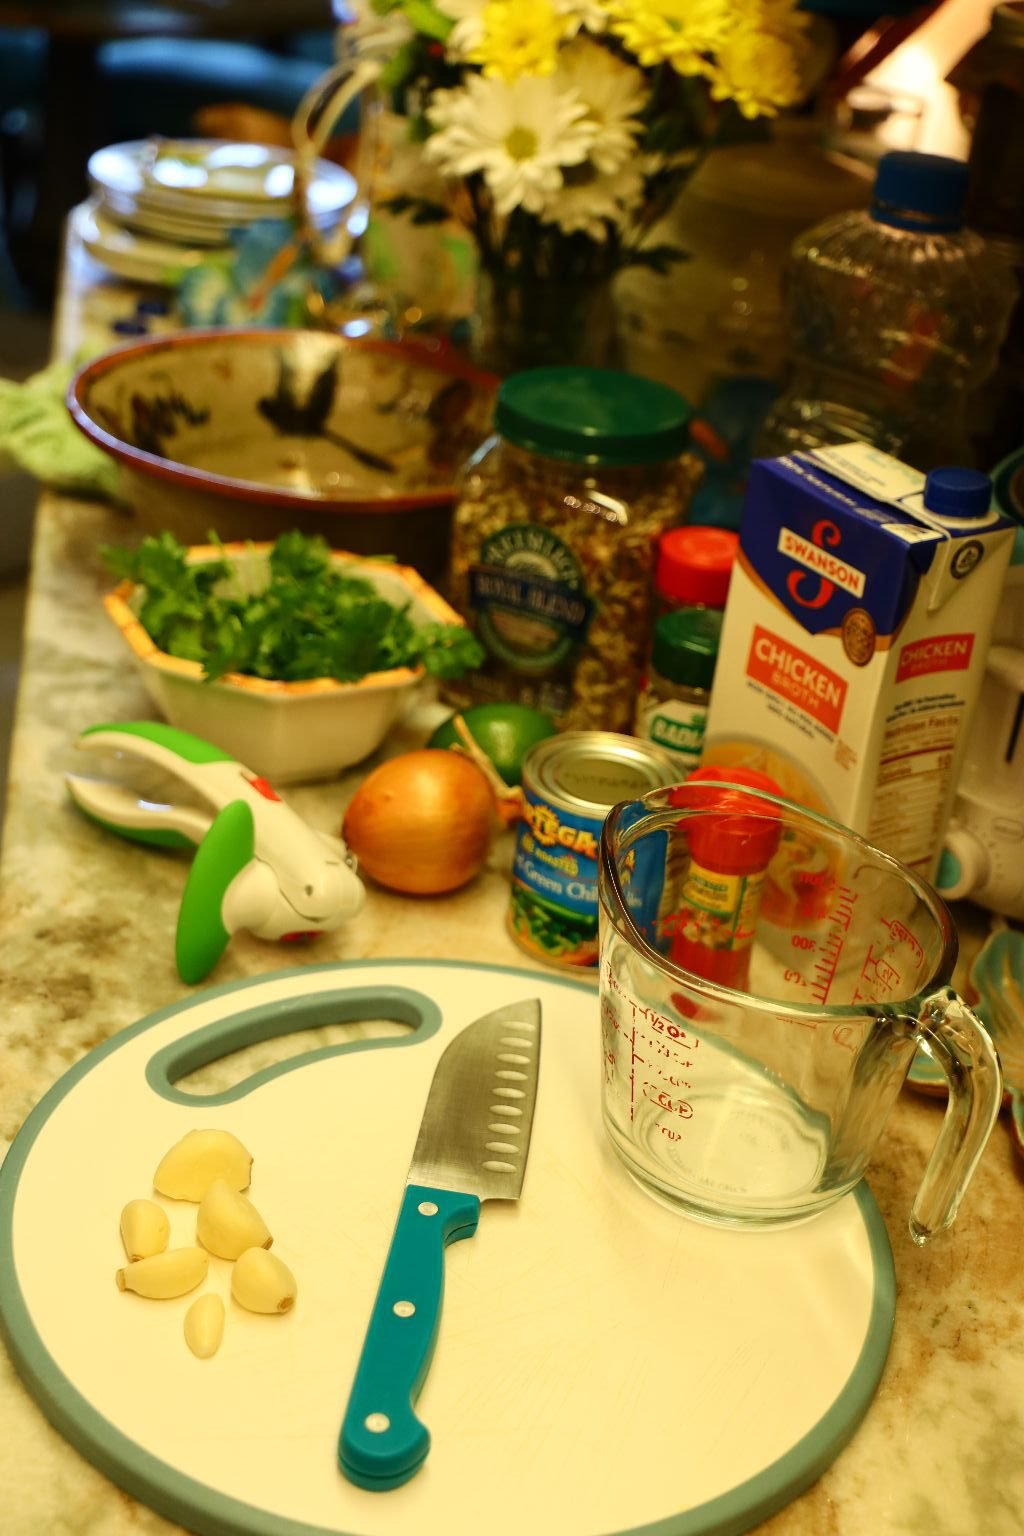
All of my Ingredients Ready
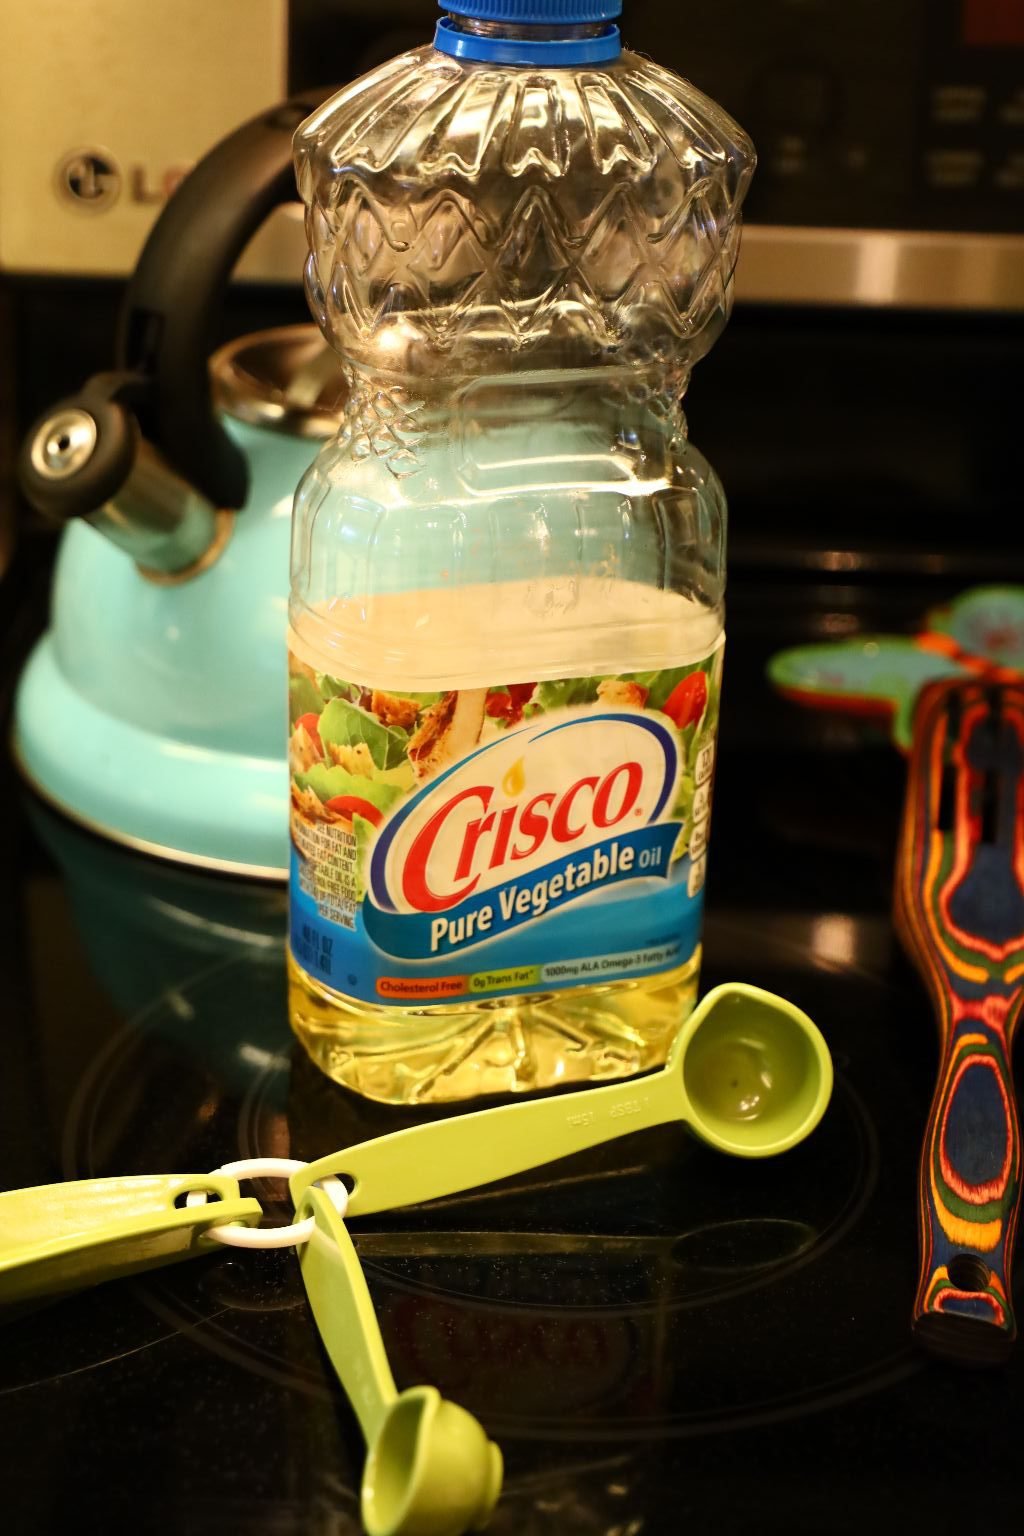

The first thing that I did was to get out our heavy cast iron pot and placed a few tablespoons of vegetable oil in it.
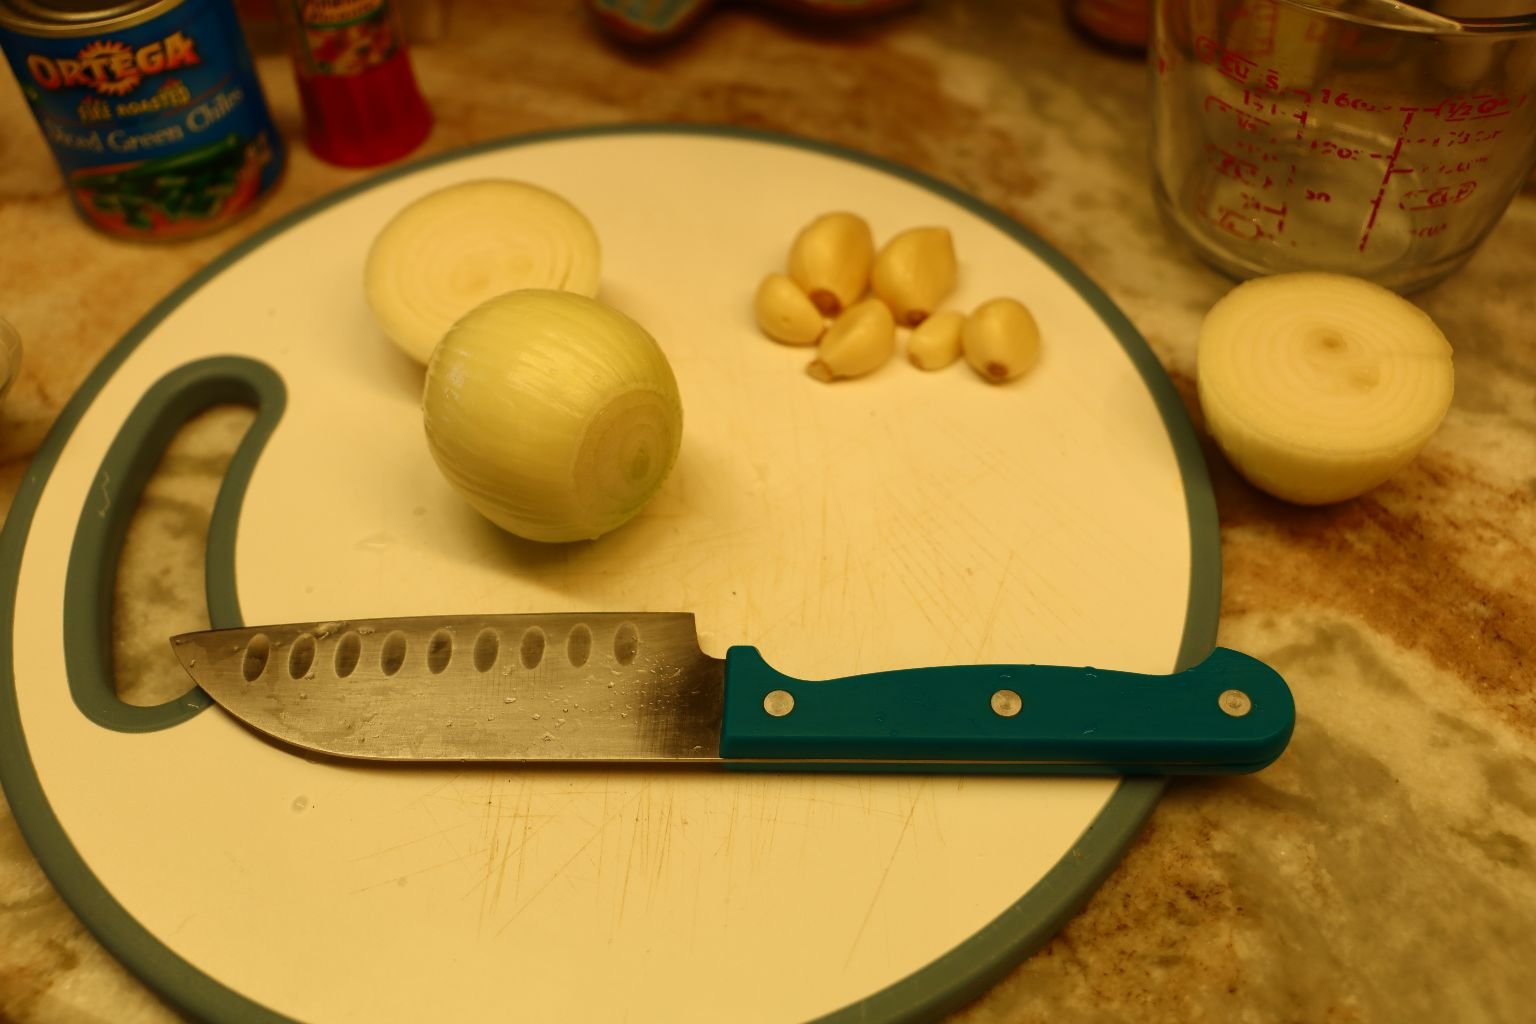
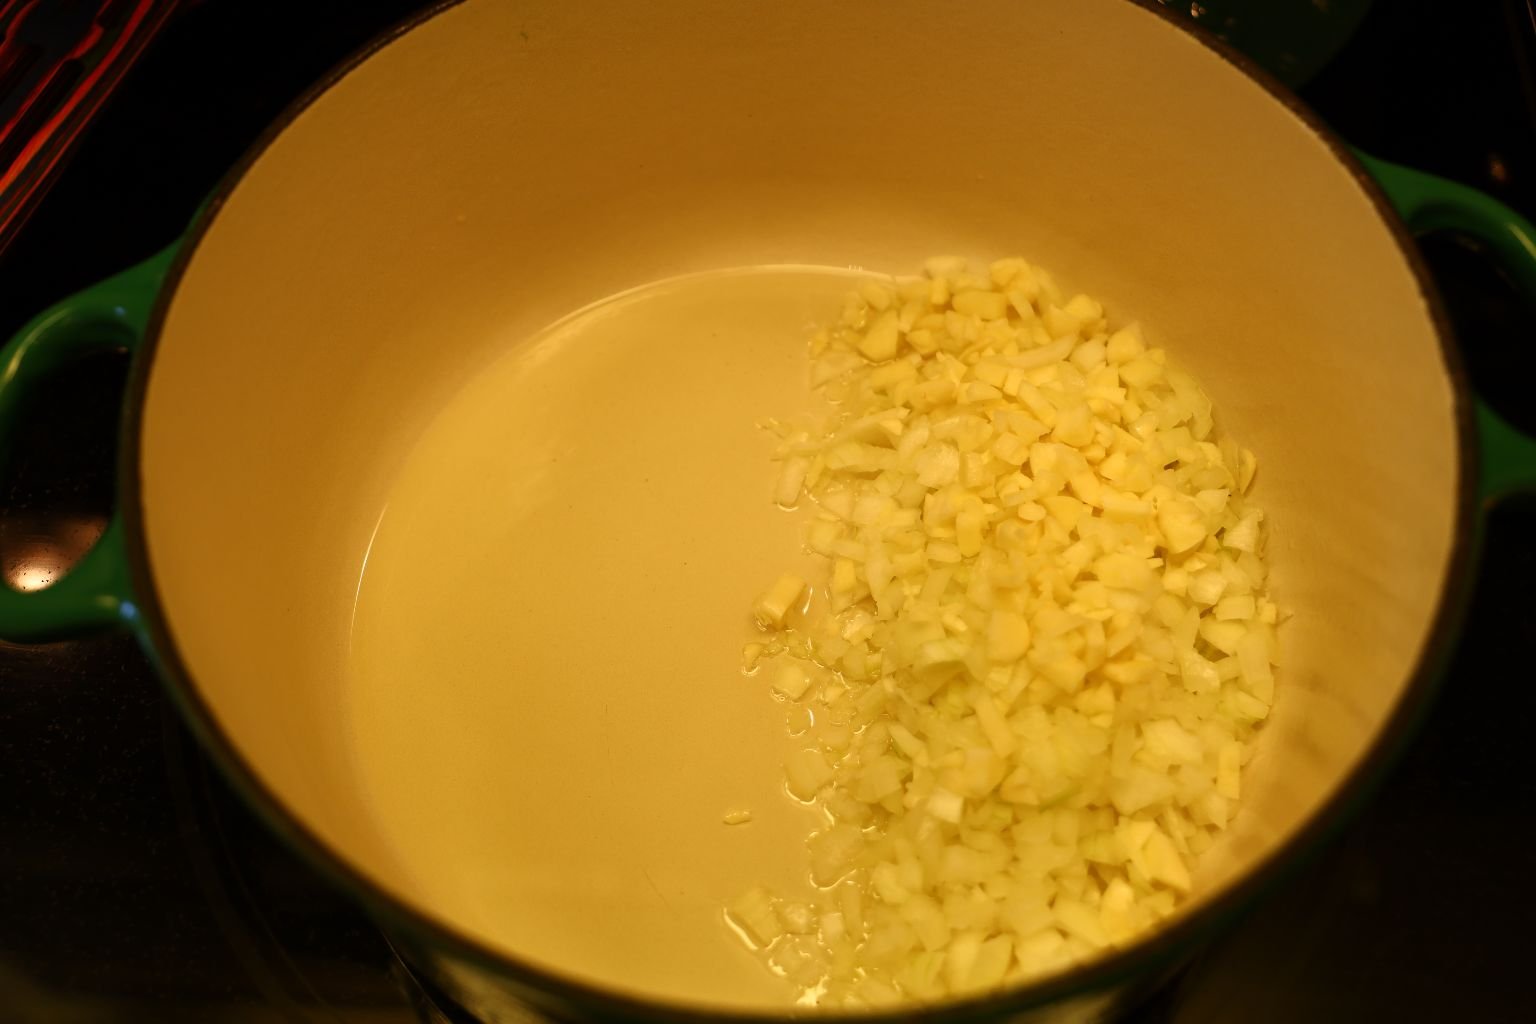
Next, I chopped a Medium sized Onion and placed it in the pot.
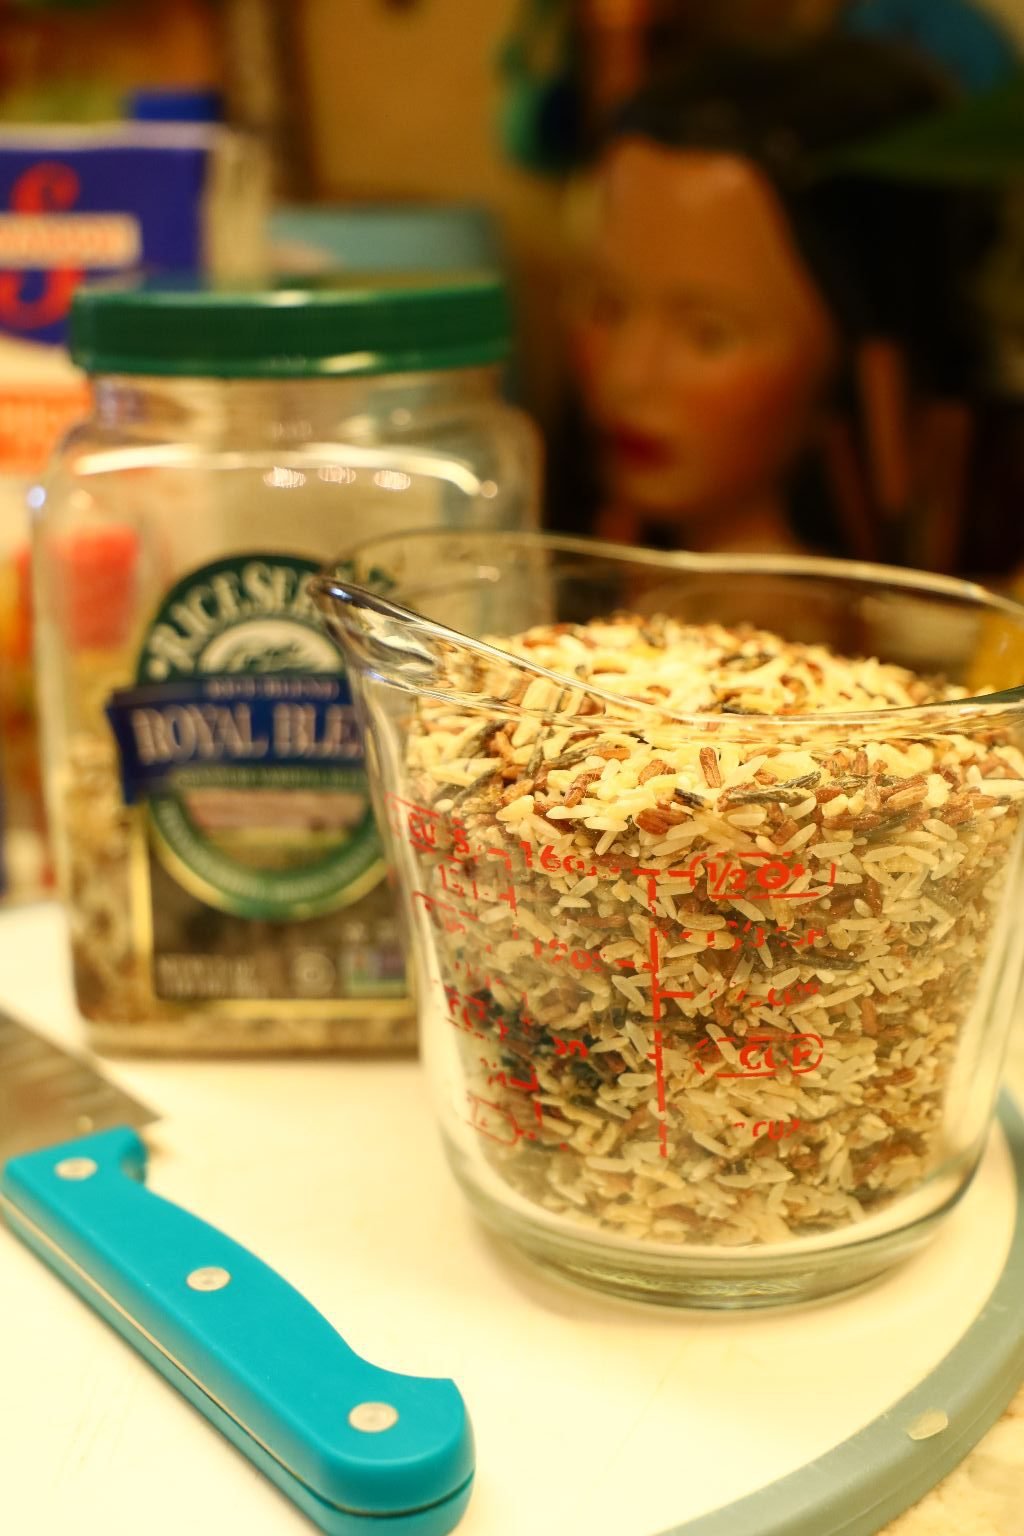
12 Ounces of Wild Grain Rice
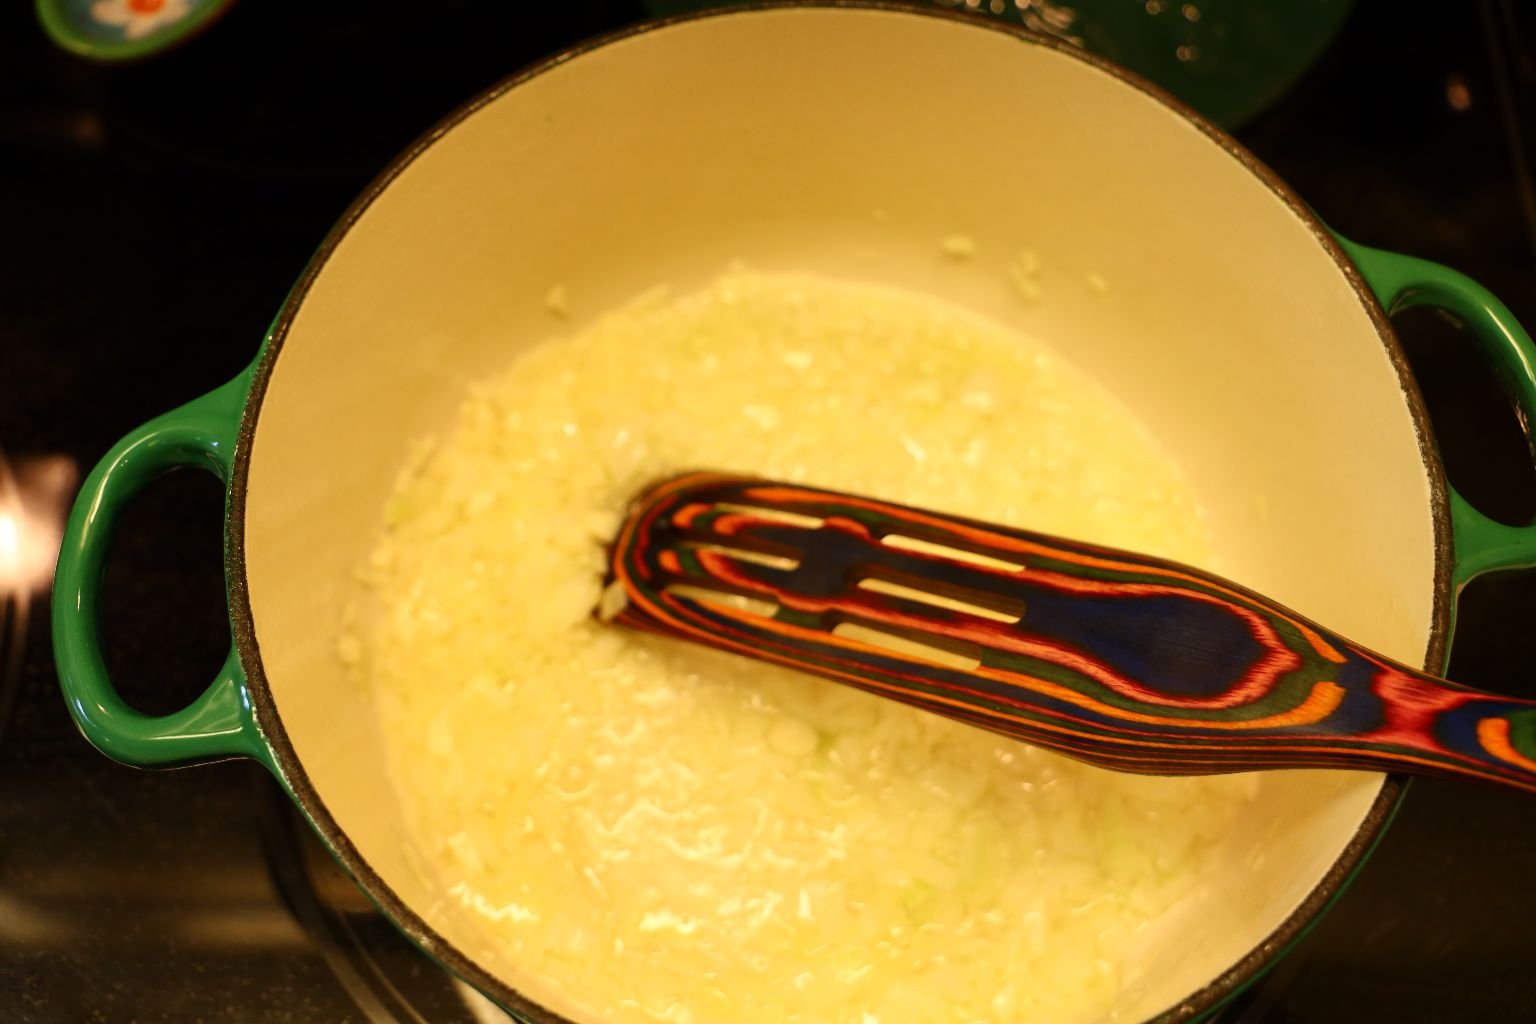
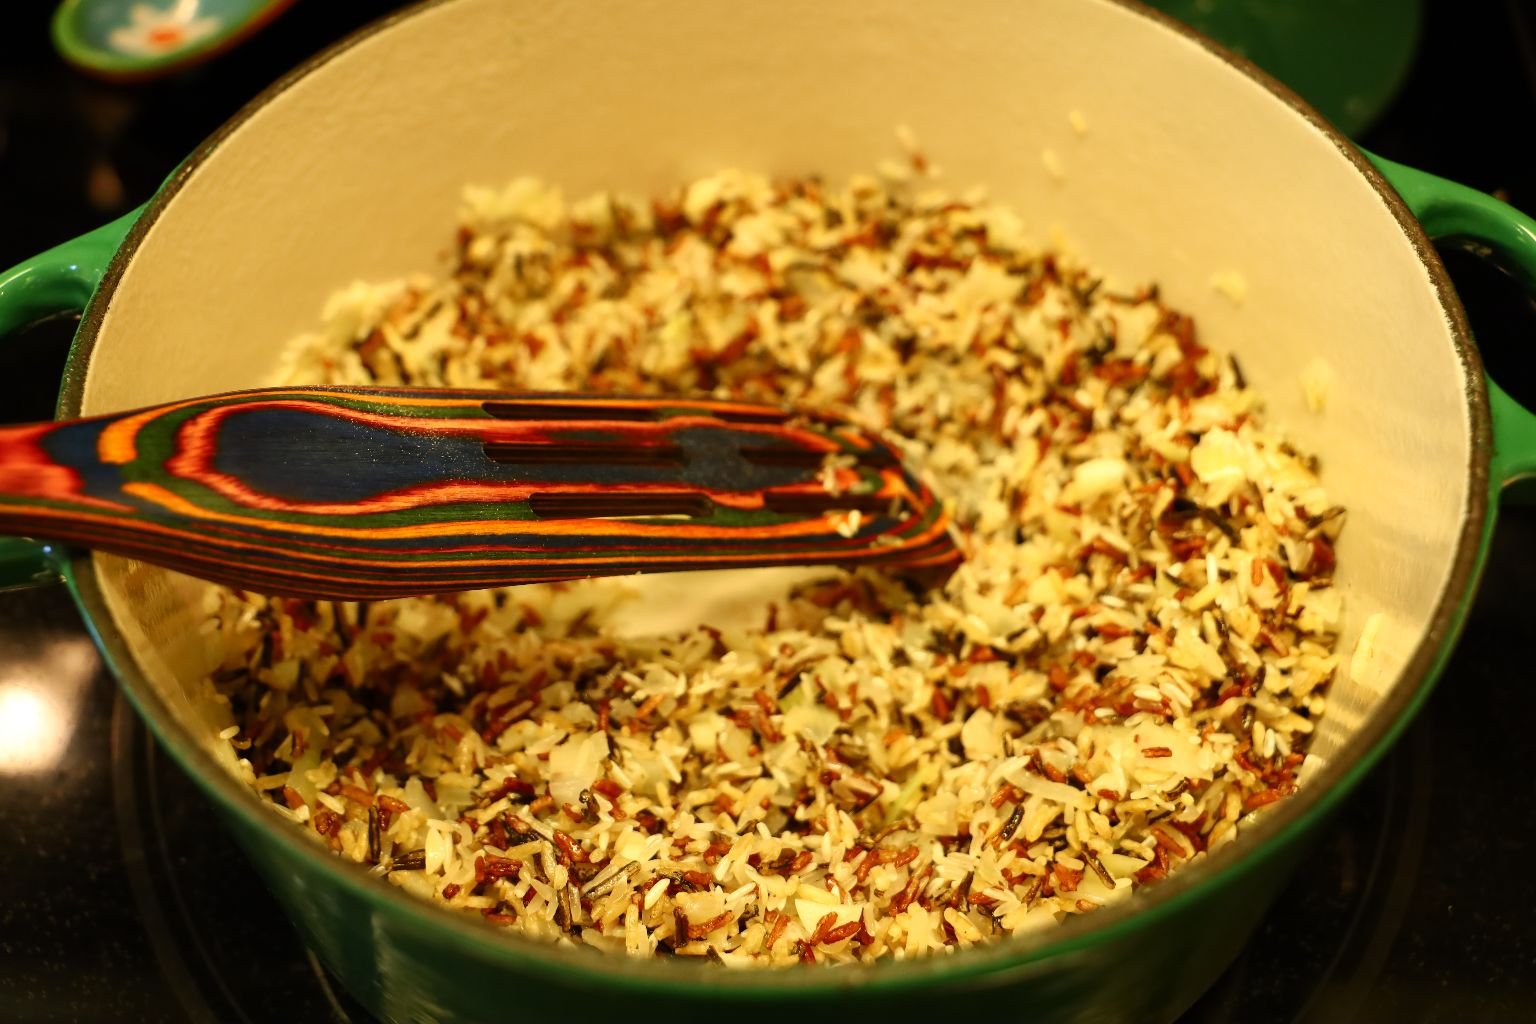
Vegetable Oil, Onion, Diced Garlic Cloves, and Wild Grain Rice
You want to stir around in a medium-high heat constantly in order for the lighter rice to turn a brownish color. This will take 7 – 10 minutes, or until browned.

Now you want to add the Chicken Broth to the Rice.

You want to bring the rice to a boil. Stir constantly.


Now, reduce the heat to a medium and add the Diced Green Chili’s.

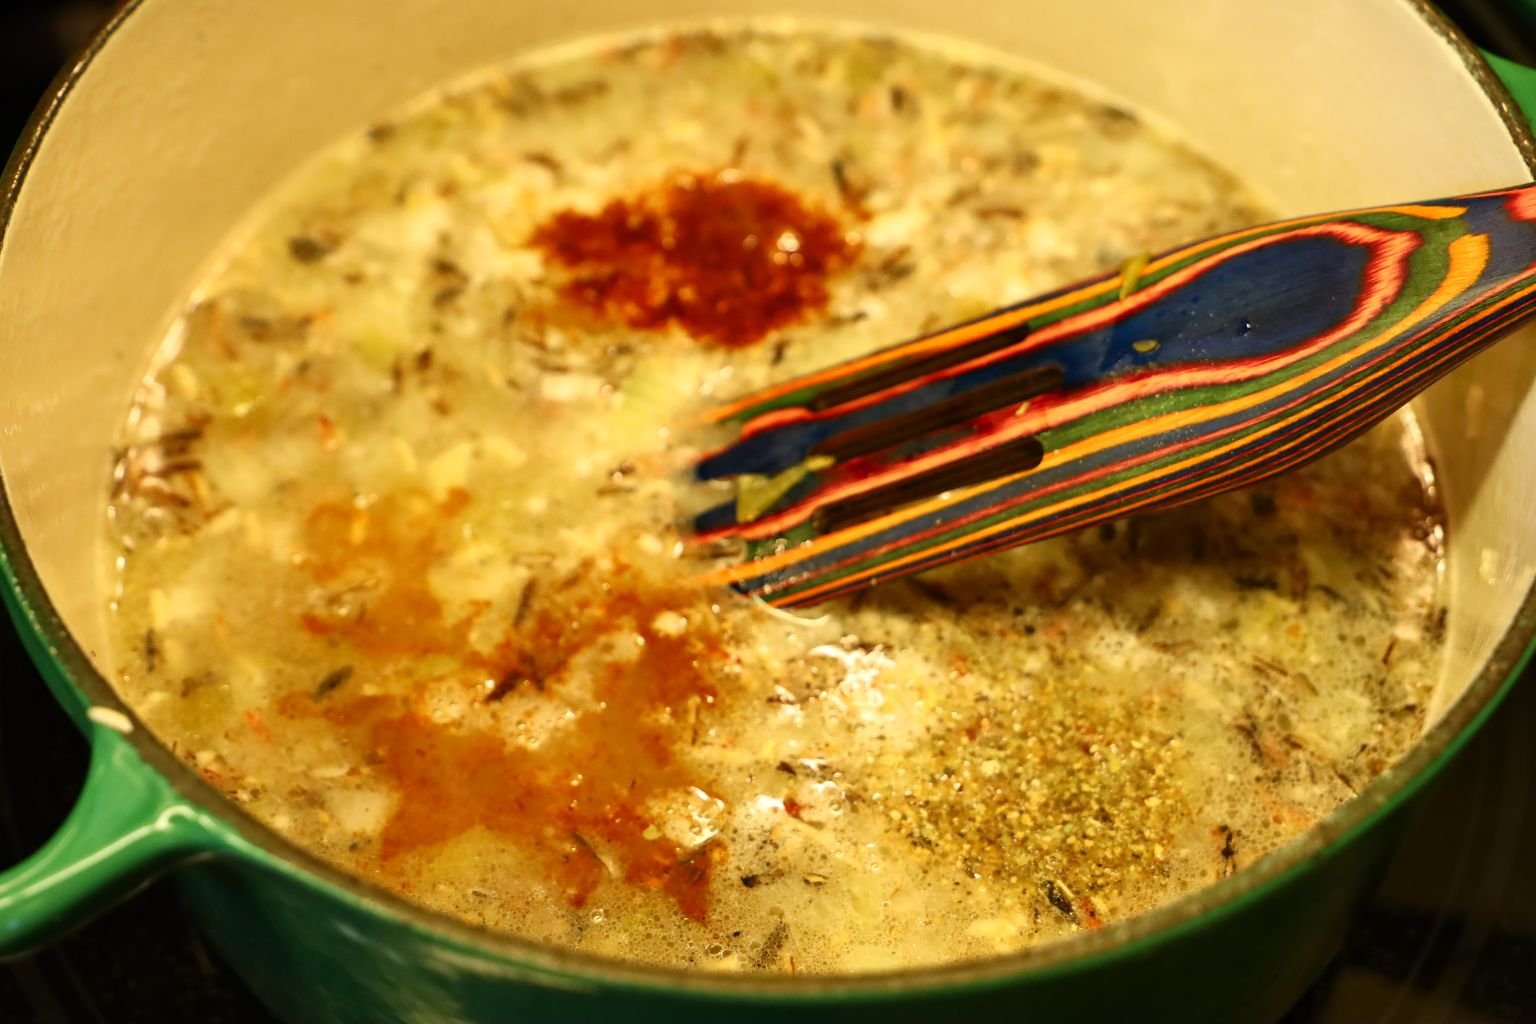
Adding the Spices to the Pot

Allowing the Pot to Simmer with all the Ingredients

Next, Adding all the Limes. Zest, Juice and Pulp.


That Zest is Key!

Just Slice a Lime and add some Cilantro
————————————————————–
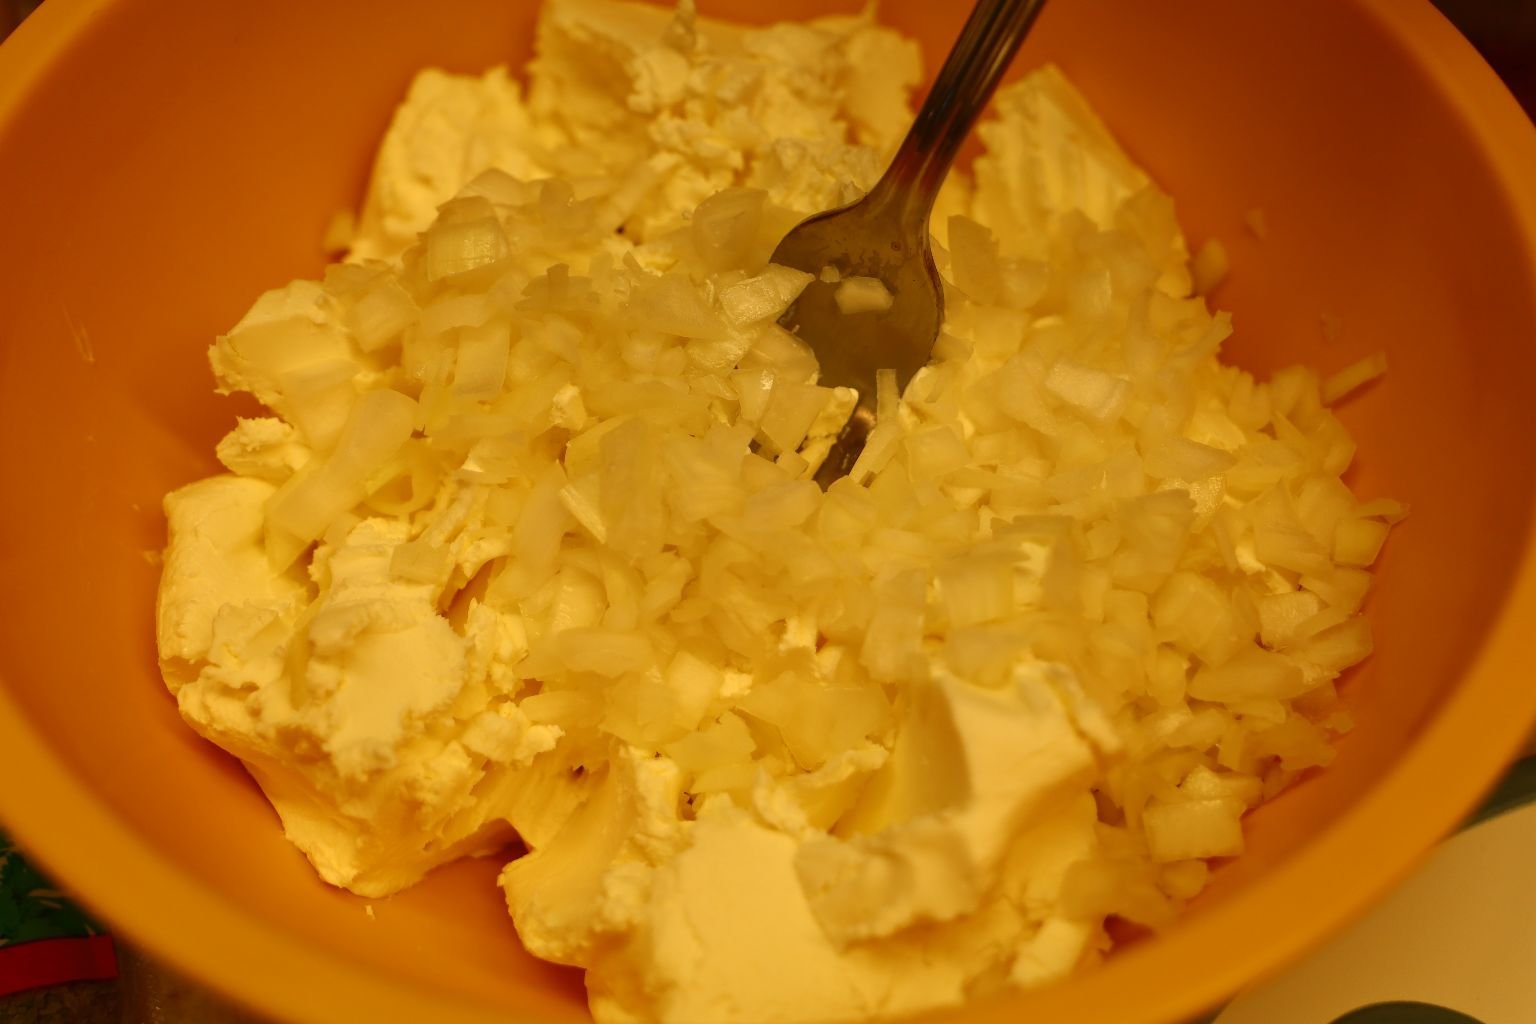
Our Mexican Spiced Cheese Ball
Rolled in Dried Cilantro and Served with Cuban Crackers
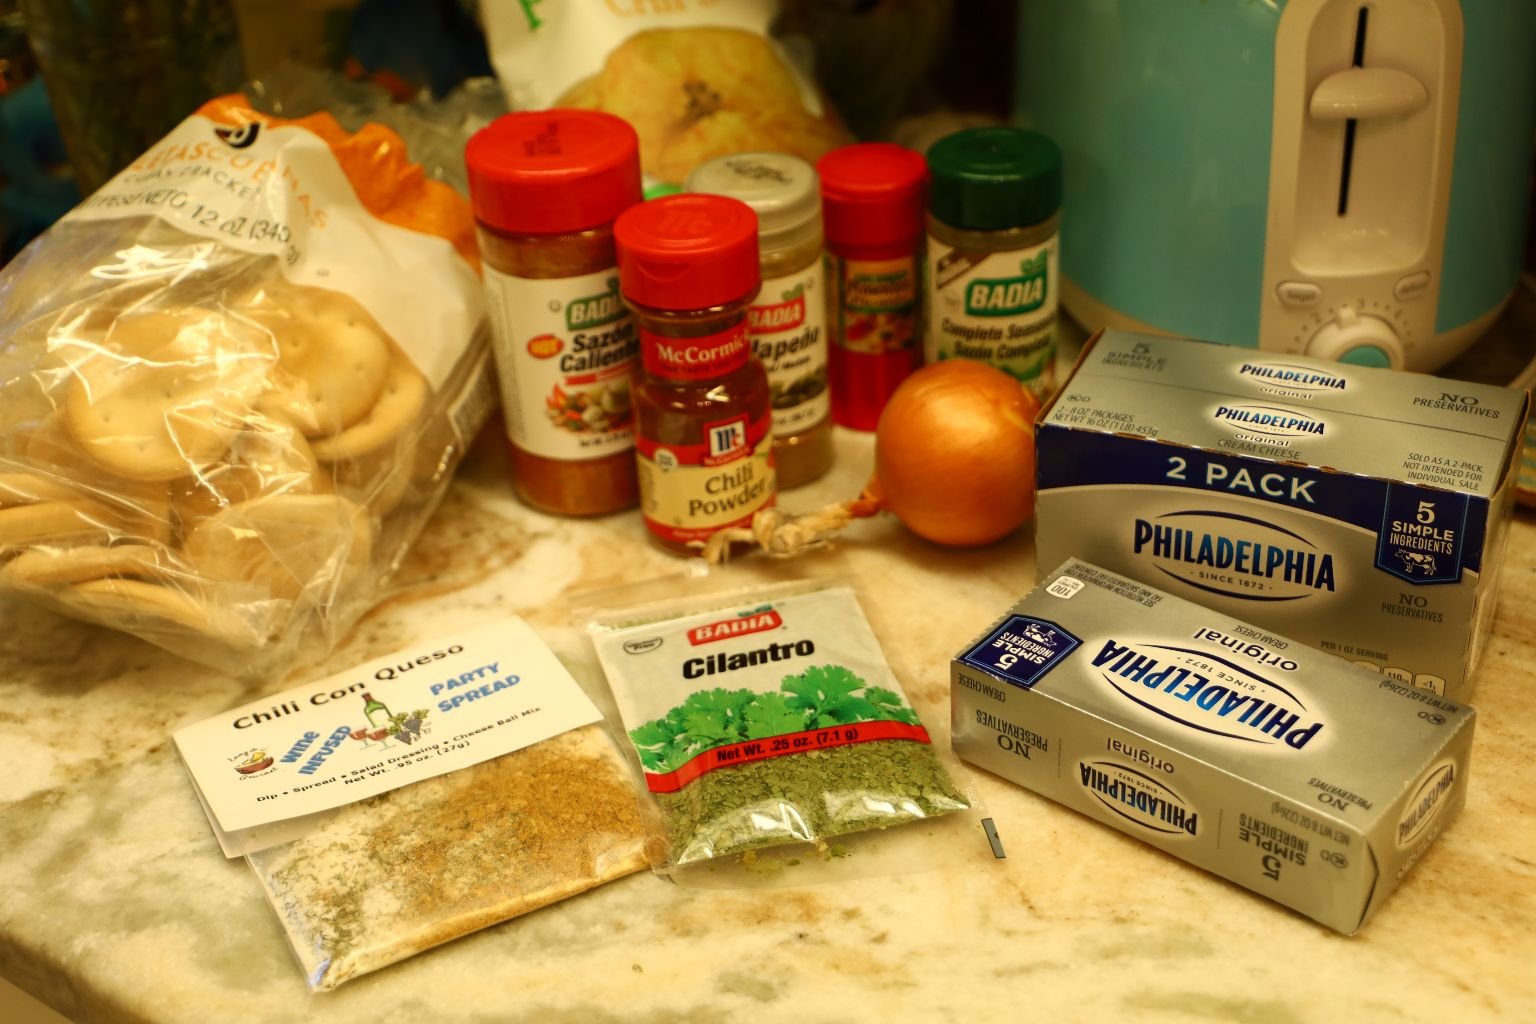
This Cheese Ball was born from the Chili Con Queso spice packet I bought a few years ago at a food fare.

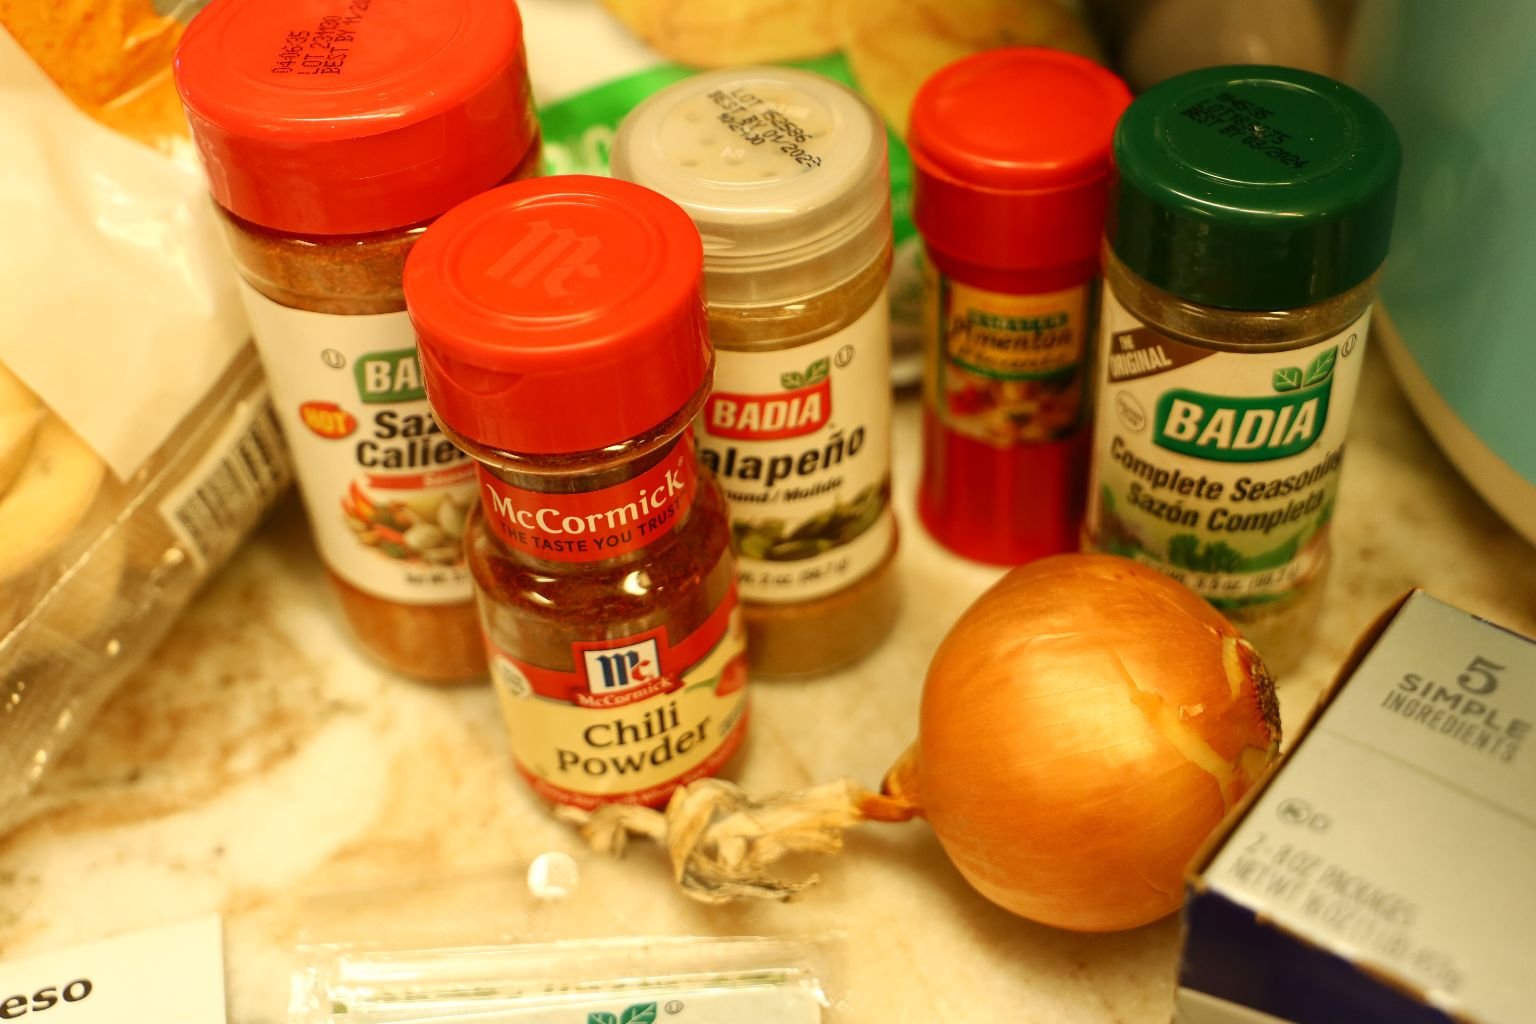
I then added some Cream Cheese, chopped onion, and many spices of Chili Powder, Sazon Completa, Sazon Calliente, Pimenton Picante, and Jalapeno.


Mix Everything Together and Chop the Onions
—————————————————————


Adding the Chili Con Queso
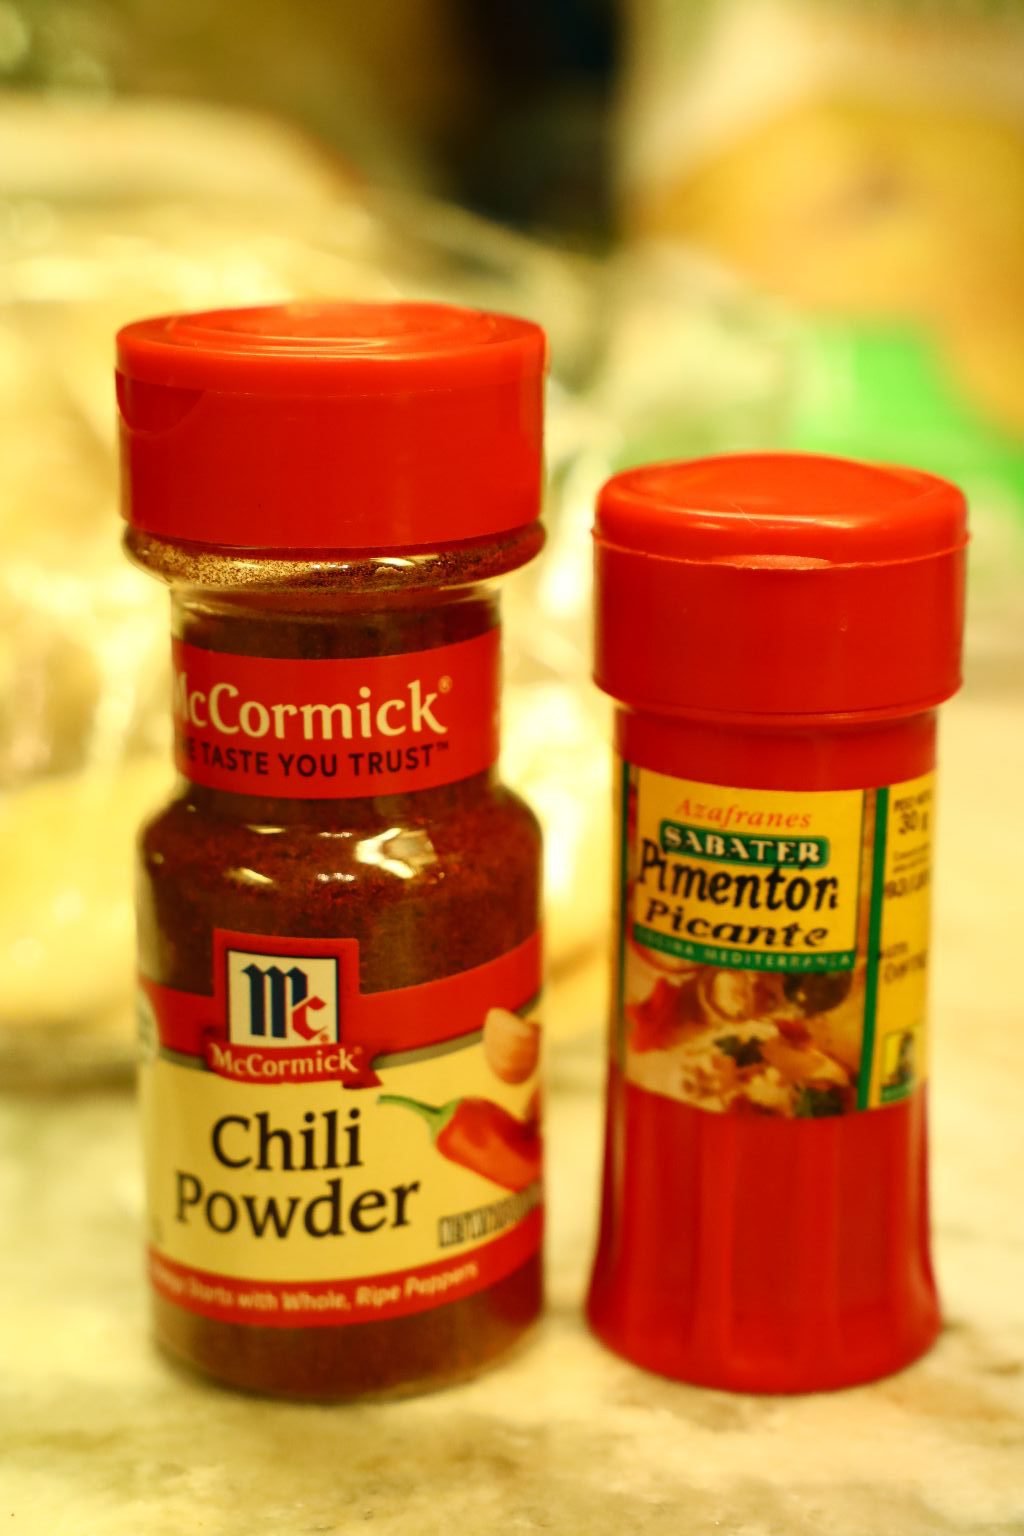

Adding Some More of the Spices
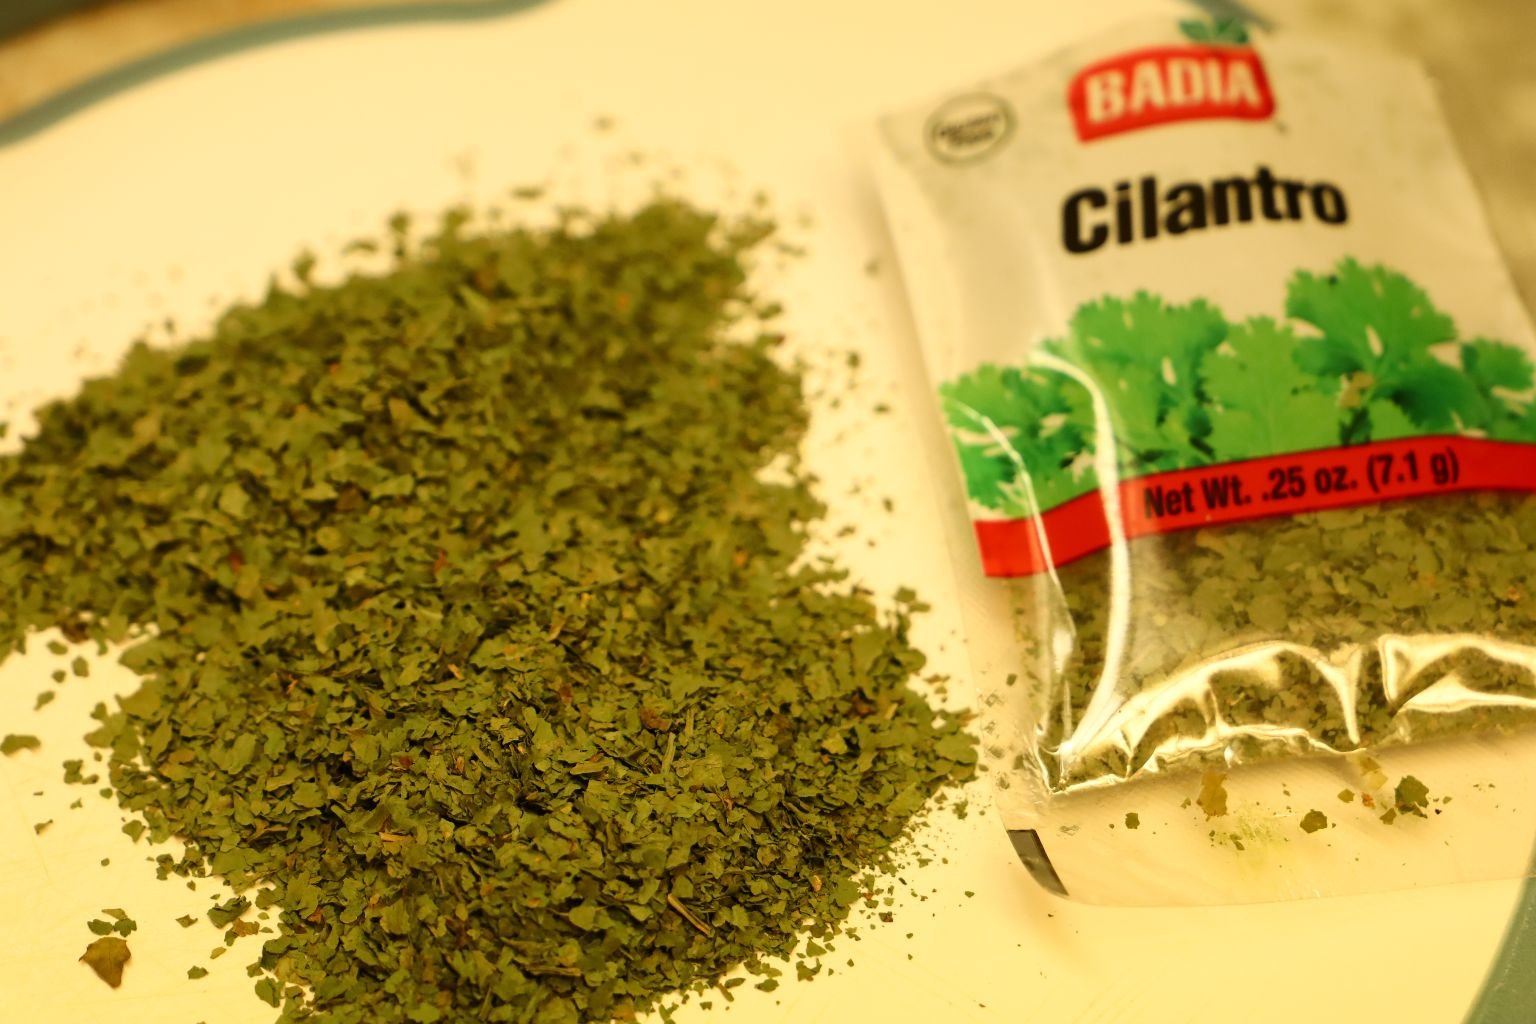
Dried Cilantro
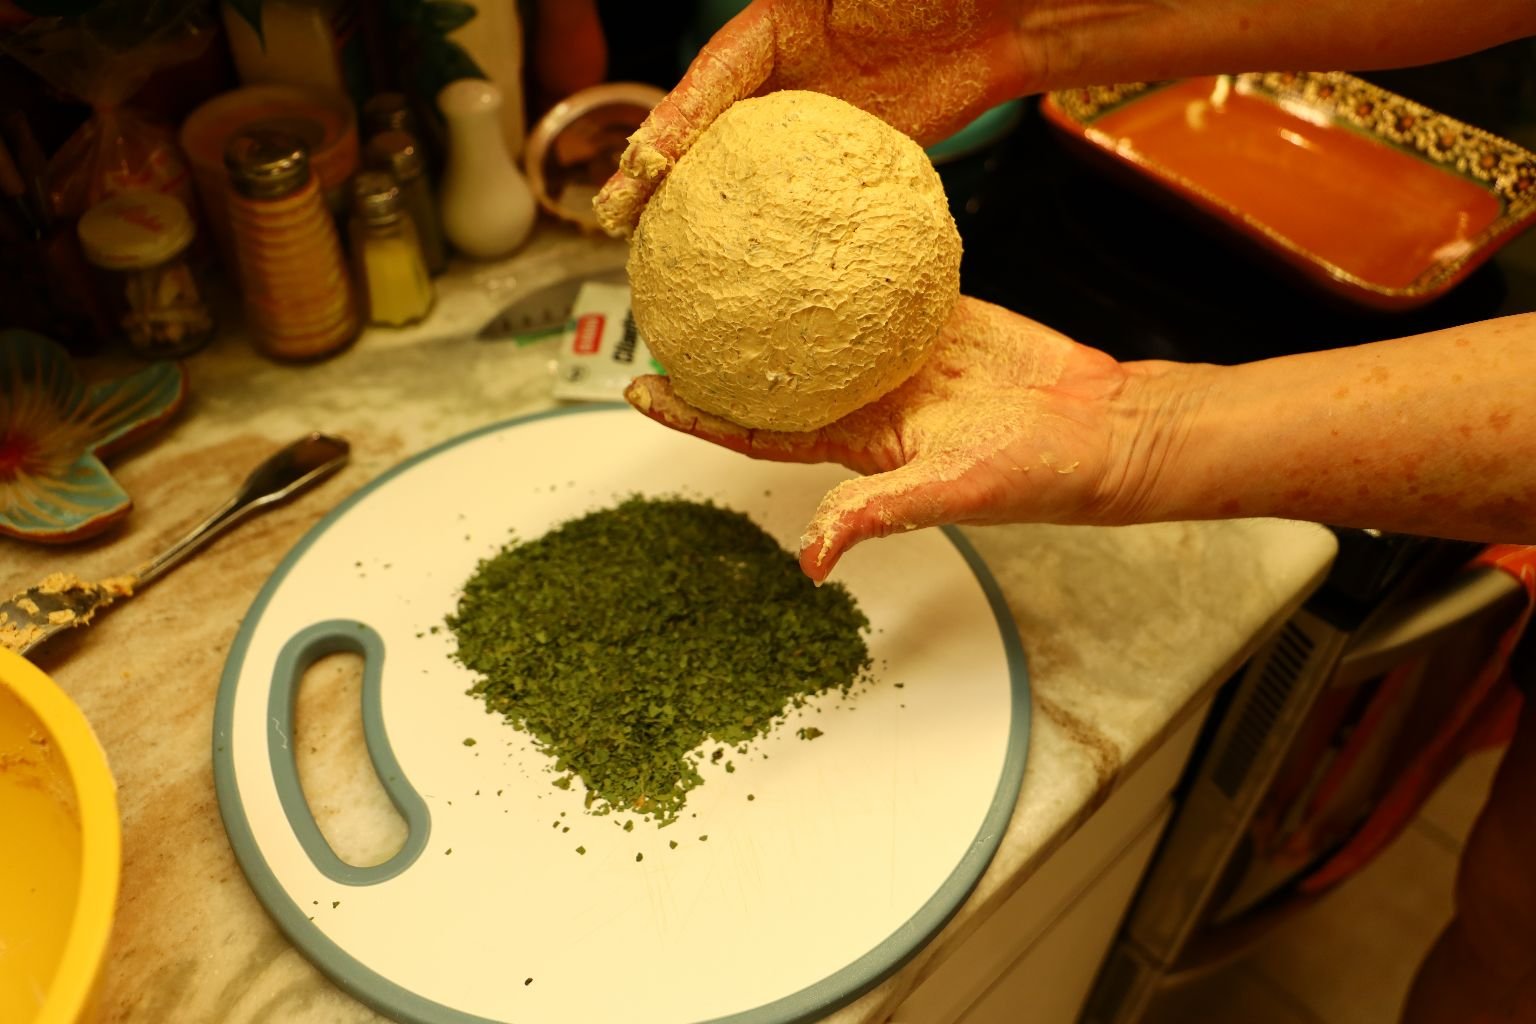

Rolling My Cheese Ball into Dried Cilantro
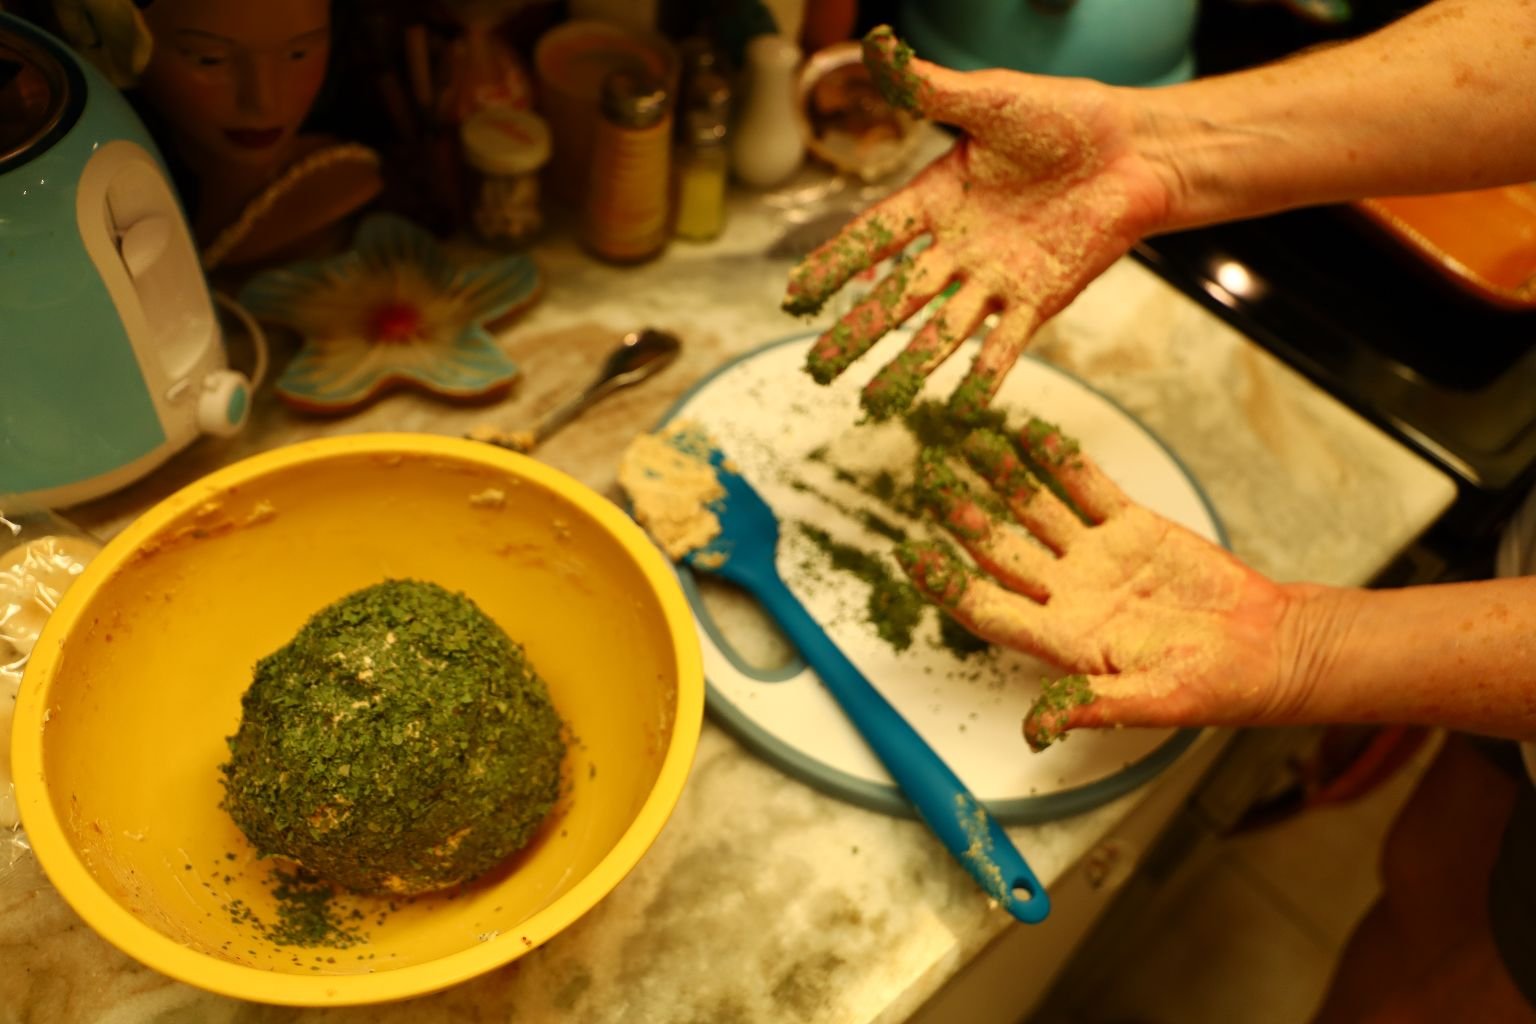
Now It Goes Into the Refrigerator to Harden
To Be Eaten With Cuban Crackers and Plantain Chips
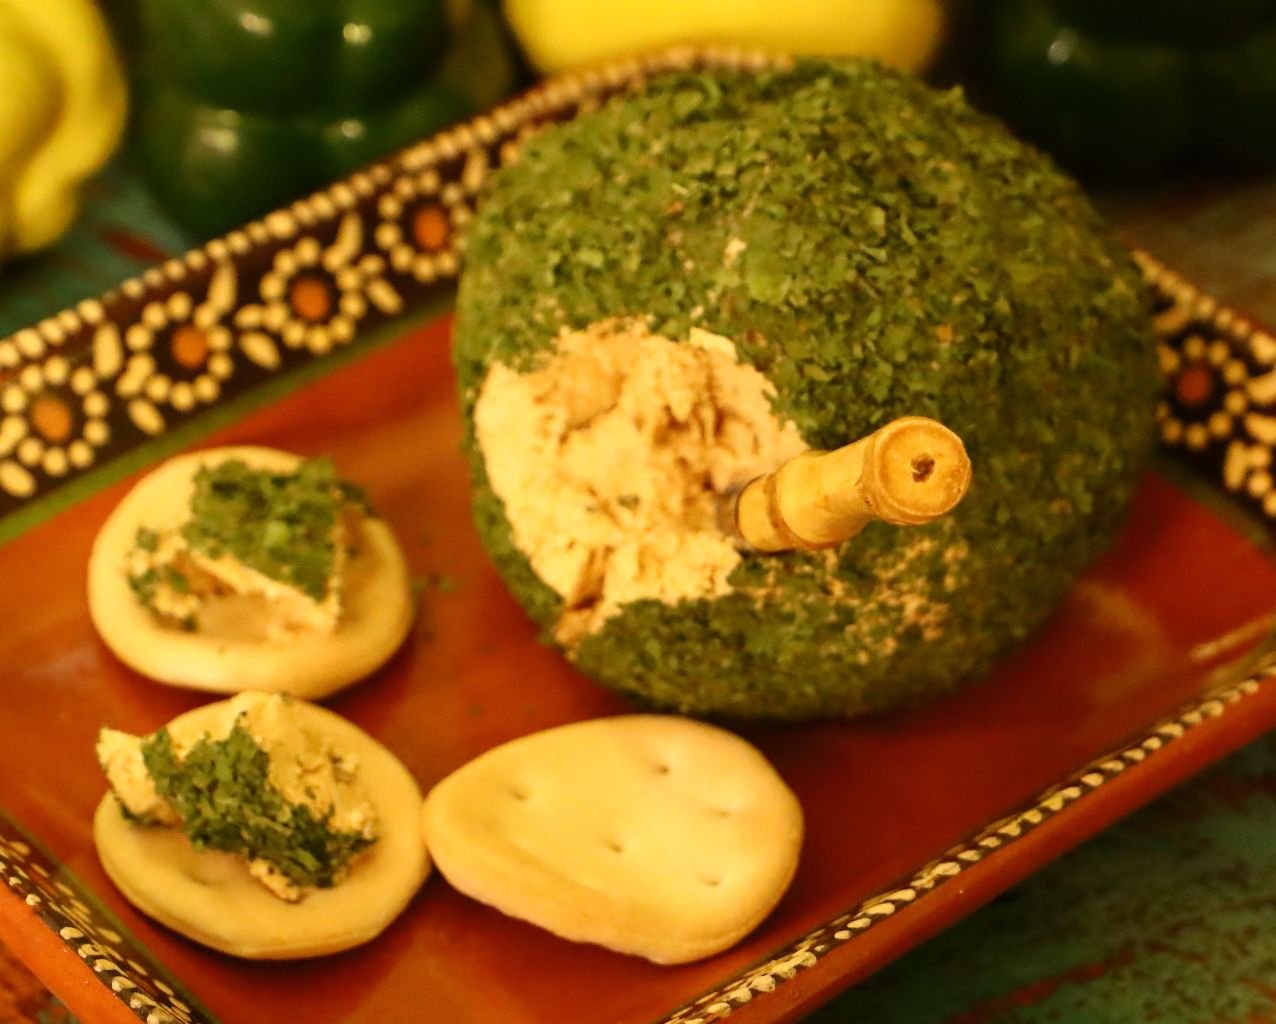
Delicious and a Great Appetizer
————————————————————————————
Our Cinco de Mayo Grilled Chicken Mole Fajitas
(My colorful pottery Bell Peppers that you see at the top of the photo were bought in Mexico from Gordon and brought home to give to me. We also have another set similar somewhere else that I can’t locate.)
We wanted to do something special for Cinco de Mayo. It being Mexico’s Independence Day. America has a very large Mexican population and their food has played a big roll in the lives of many different cultures here in America. Interestingly enough, Cinco de Mayo is celebrated more here in The United States than it is in Mexico. Our own 4th. of July celebrations probably have something to do with that fact.
Here is OUR Cinco de Mayo Feast
Pictured above are our Grilled Mole Chicken Stuffed Breasts, Julie’s leftover Wild Grain Lime Rice, Our Homemade Tortillas, Pico de Gayo, Guacamole Salsa, Tomato Salsa, Sliced Avocados, Queso Fresco Cheese, Sliced Limes, Sour Cream, and Chopped Spring Onions.
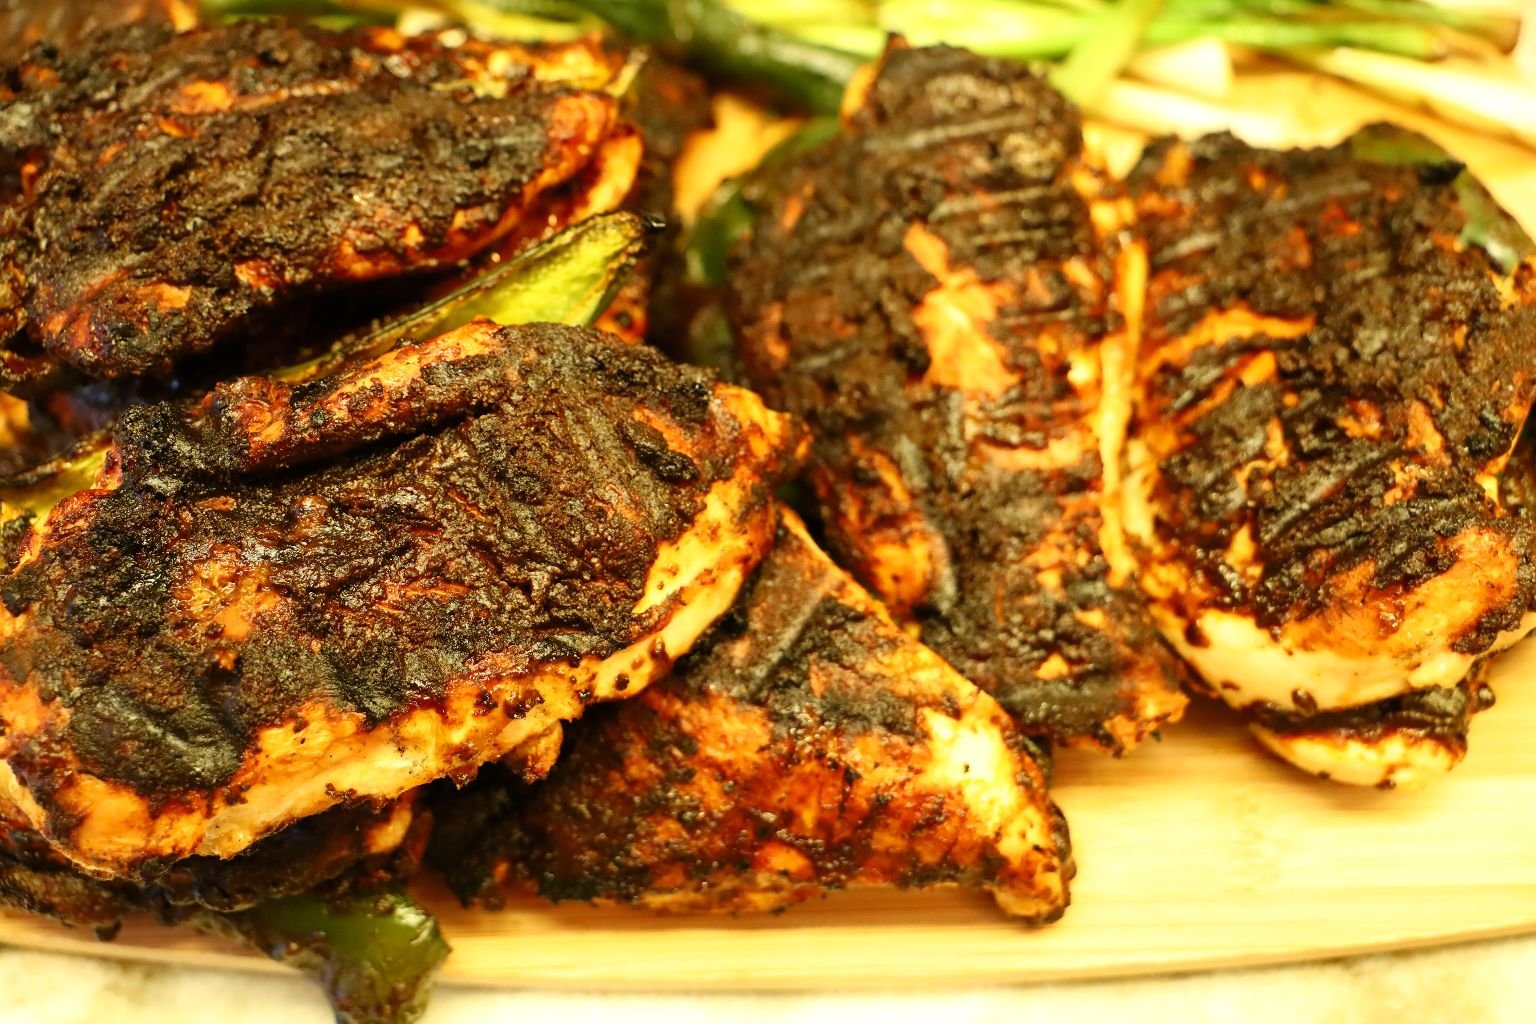
Our Delicious Grilled Mole Chicken Stuffed Breasts and our Roasted Colorful Bell Peppers with Cilantro
This was so delicious!
We also ate them in more ways than you see.
I, Julie will explain further below and give you other examples than just the Fajitas here.
——————————————————-
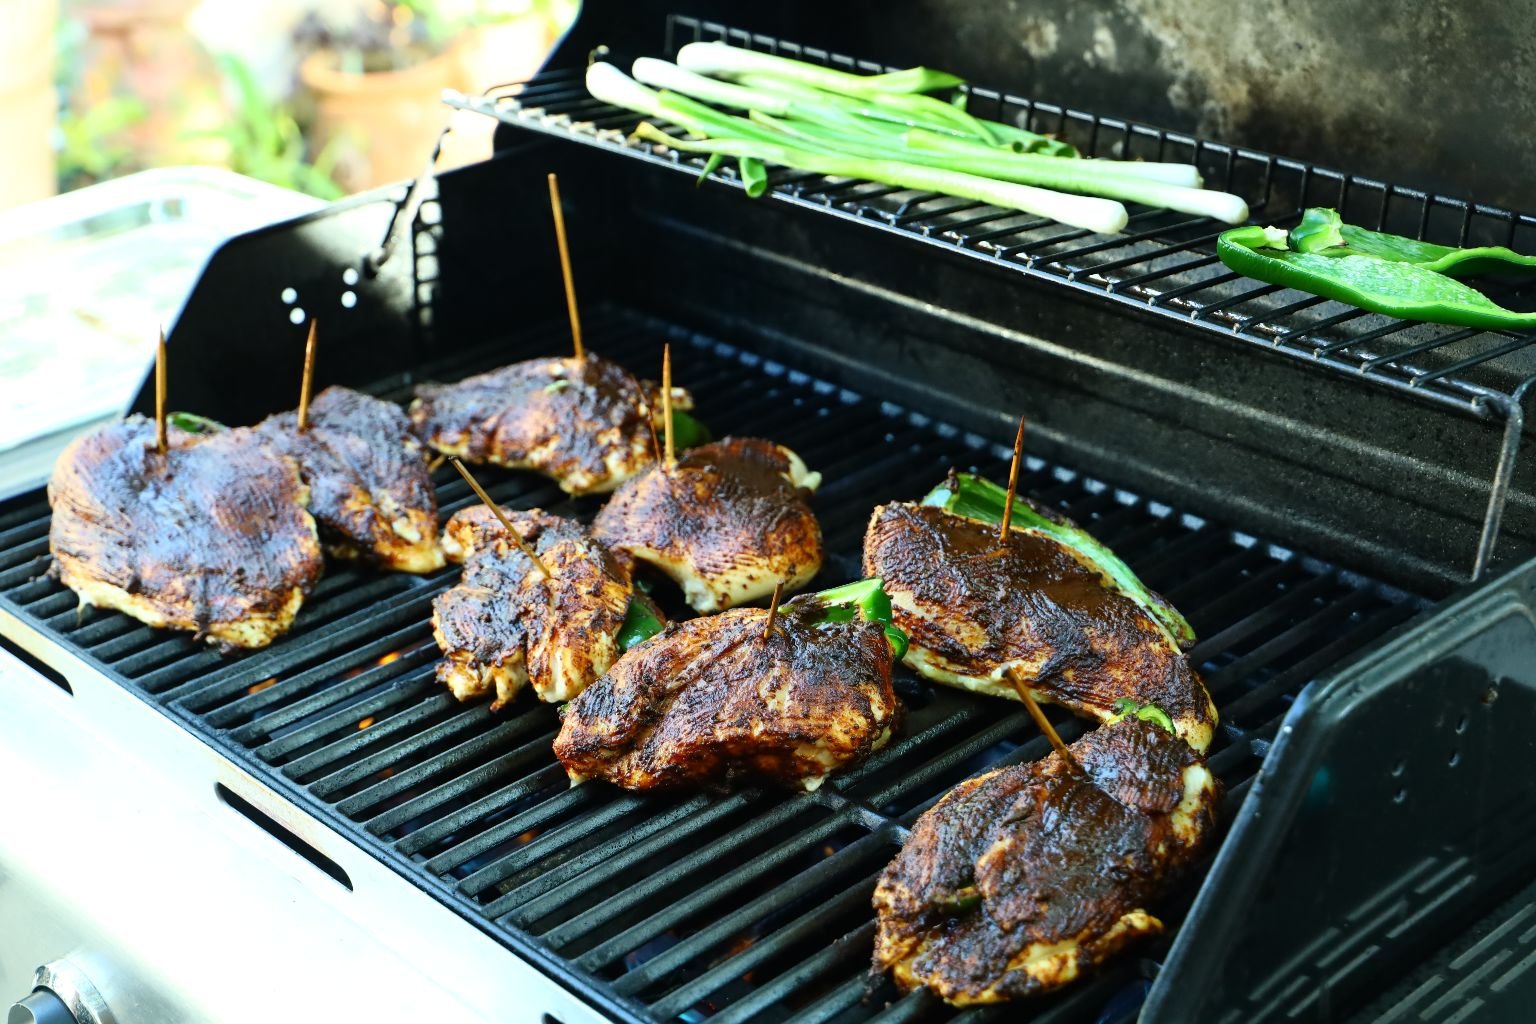
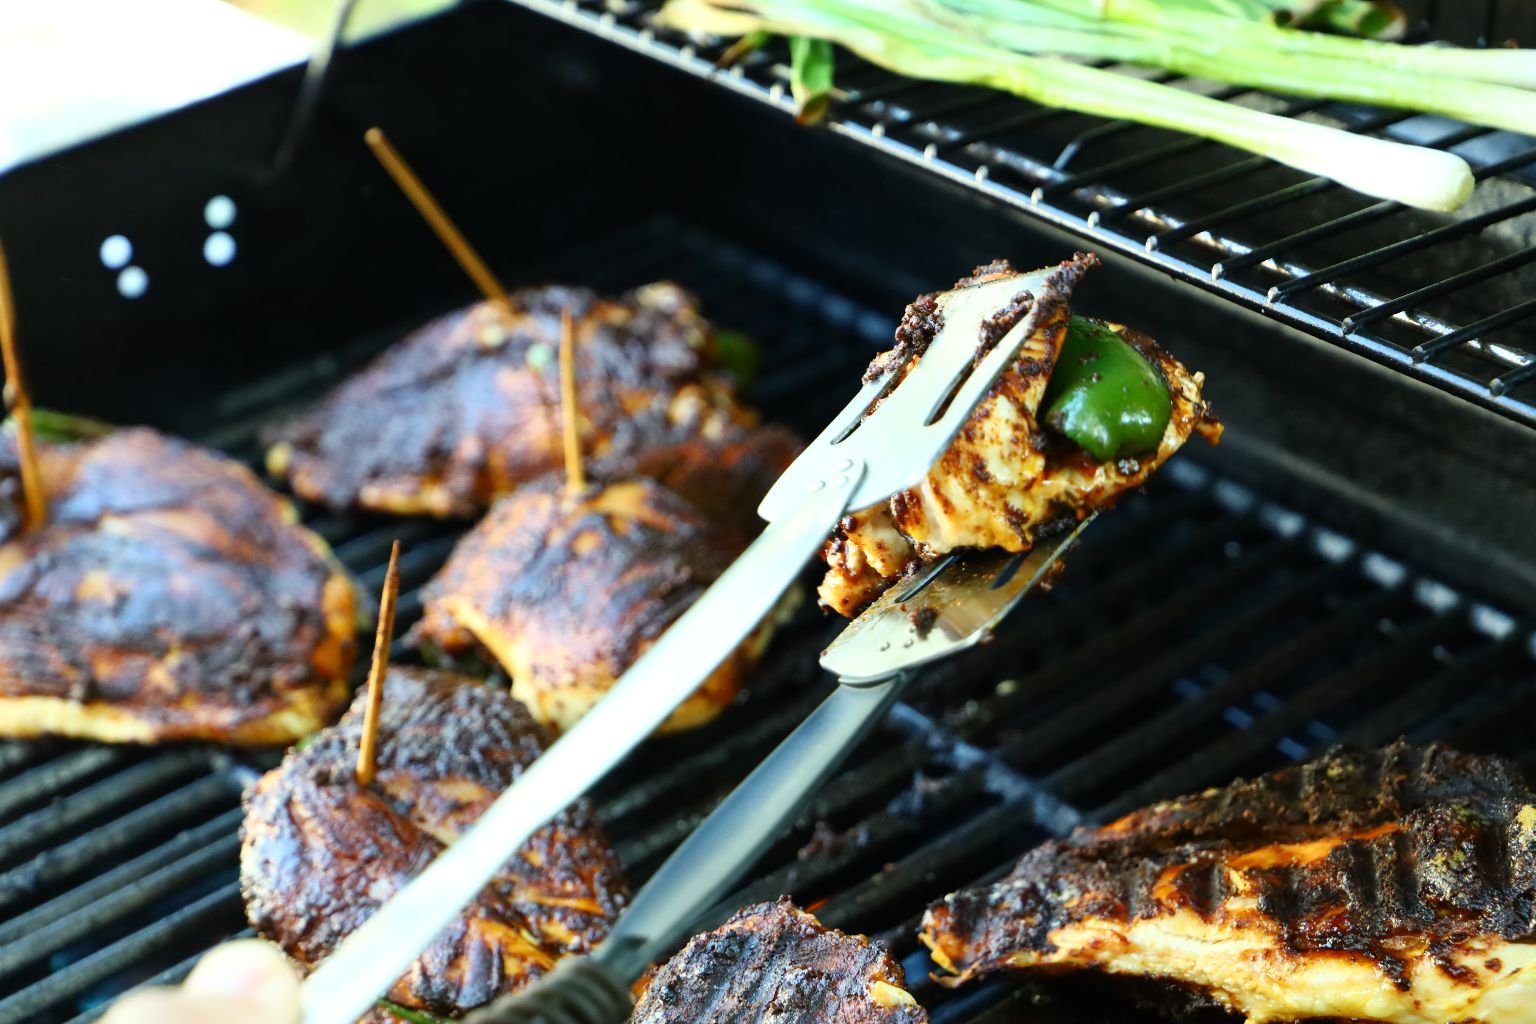
Grilling our Mole Stuffed Chicken Breasts
Grilling Spring Onions as Well
The Chicken isn’t Burnt, the Mole is Black
Off the Grill and Ready to be Sliced into Longs
—————————————————————-
The Recipe Starts Here:
Food Prep
Whatever you can do ahead to save time, then do.
I, Julie did all of this the day before.
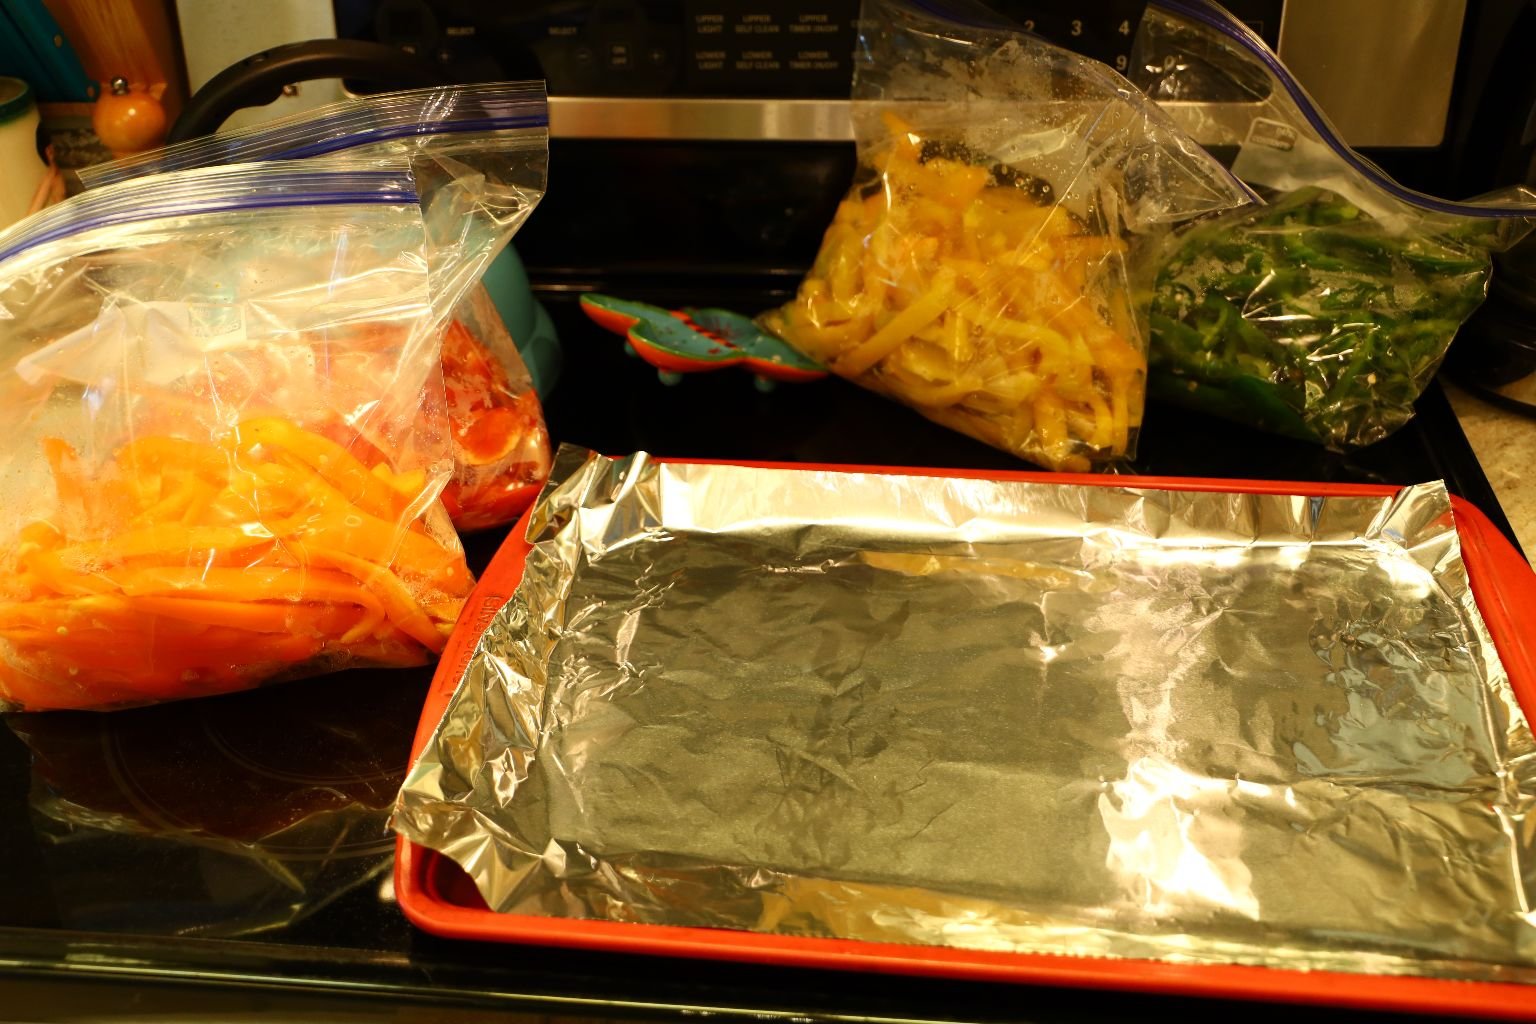
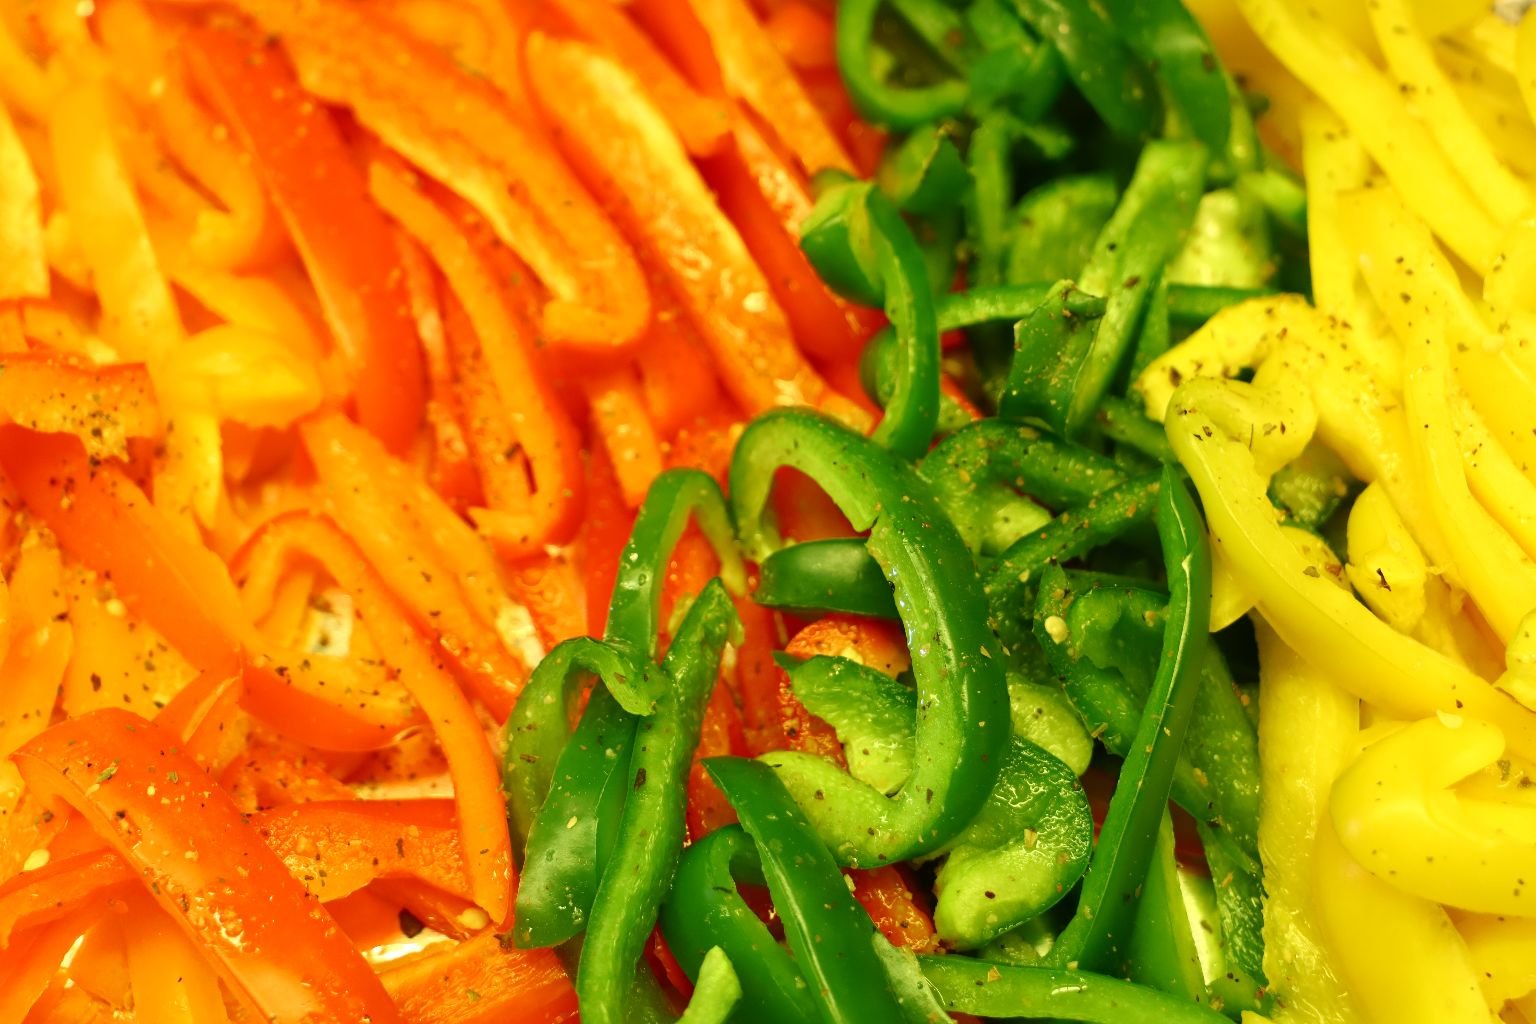
I washed all of the Poblano and Bell Peppers, here they are drying.
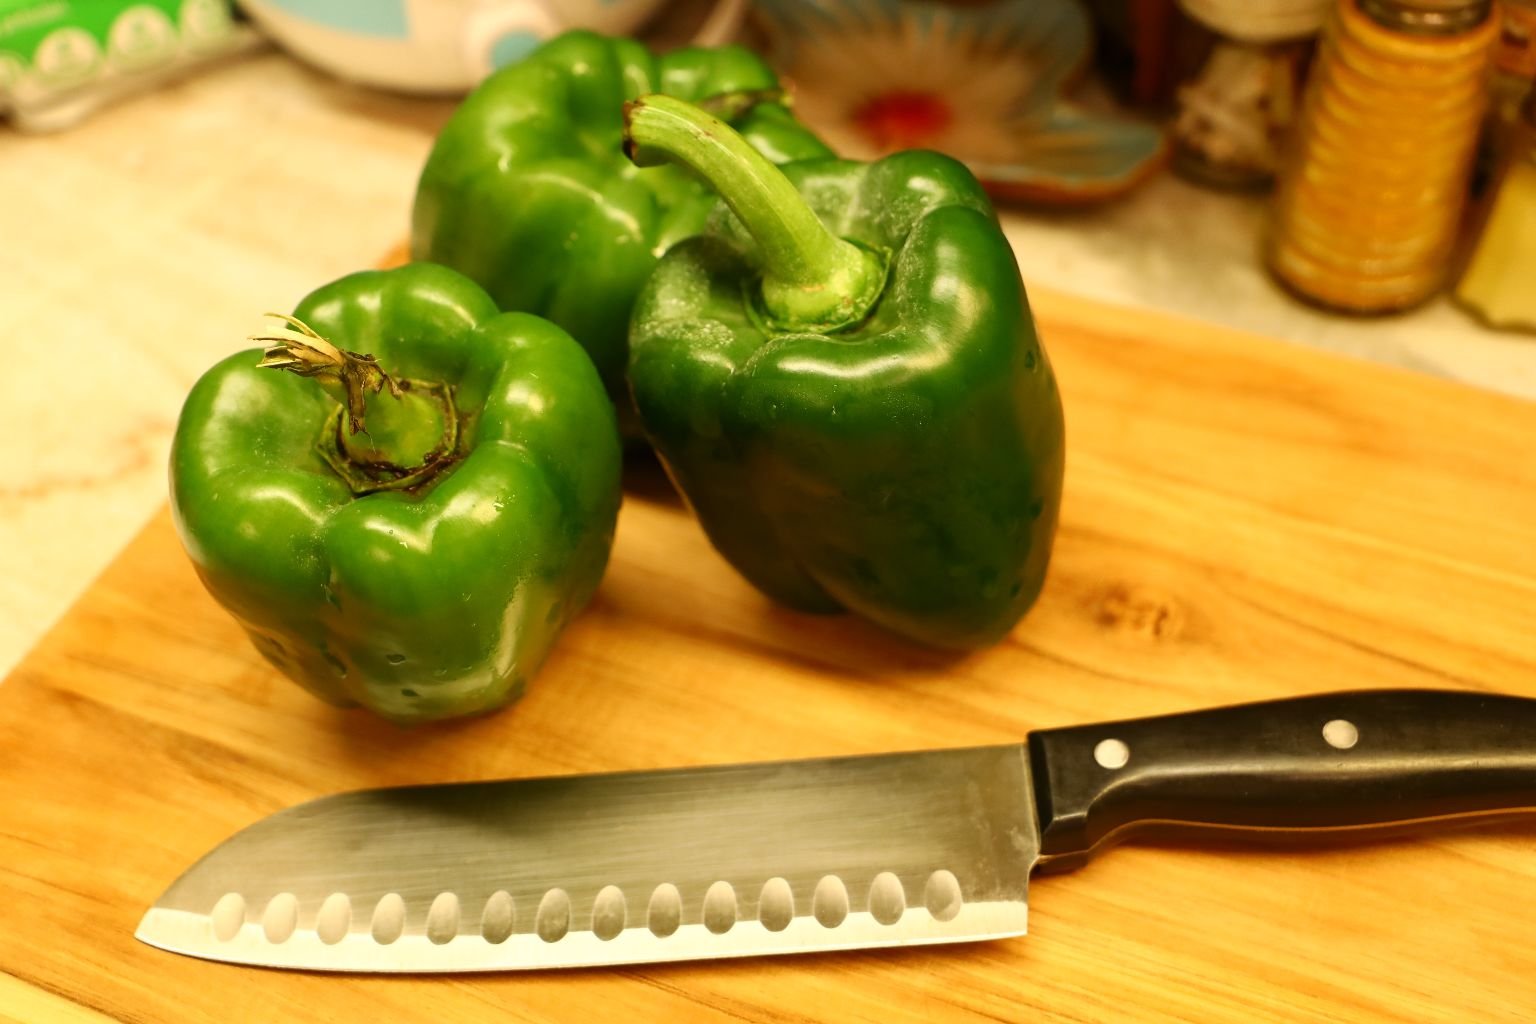
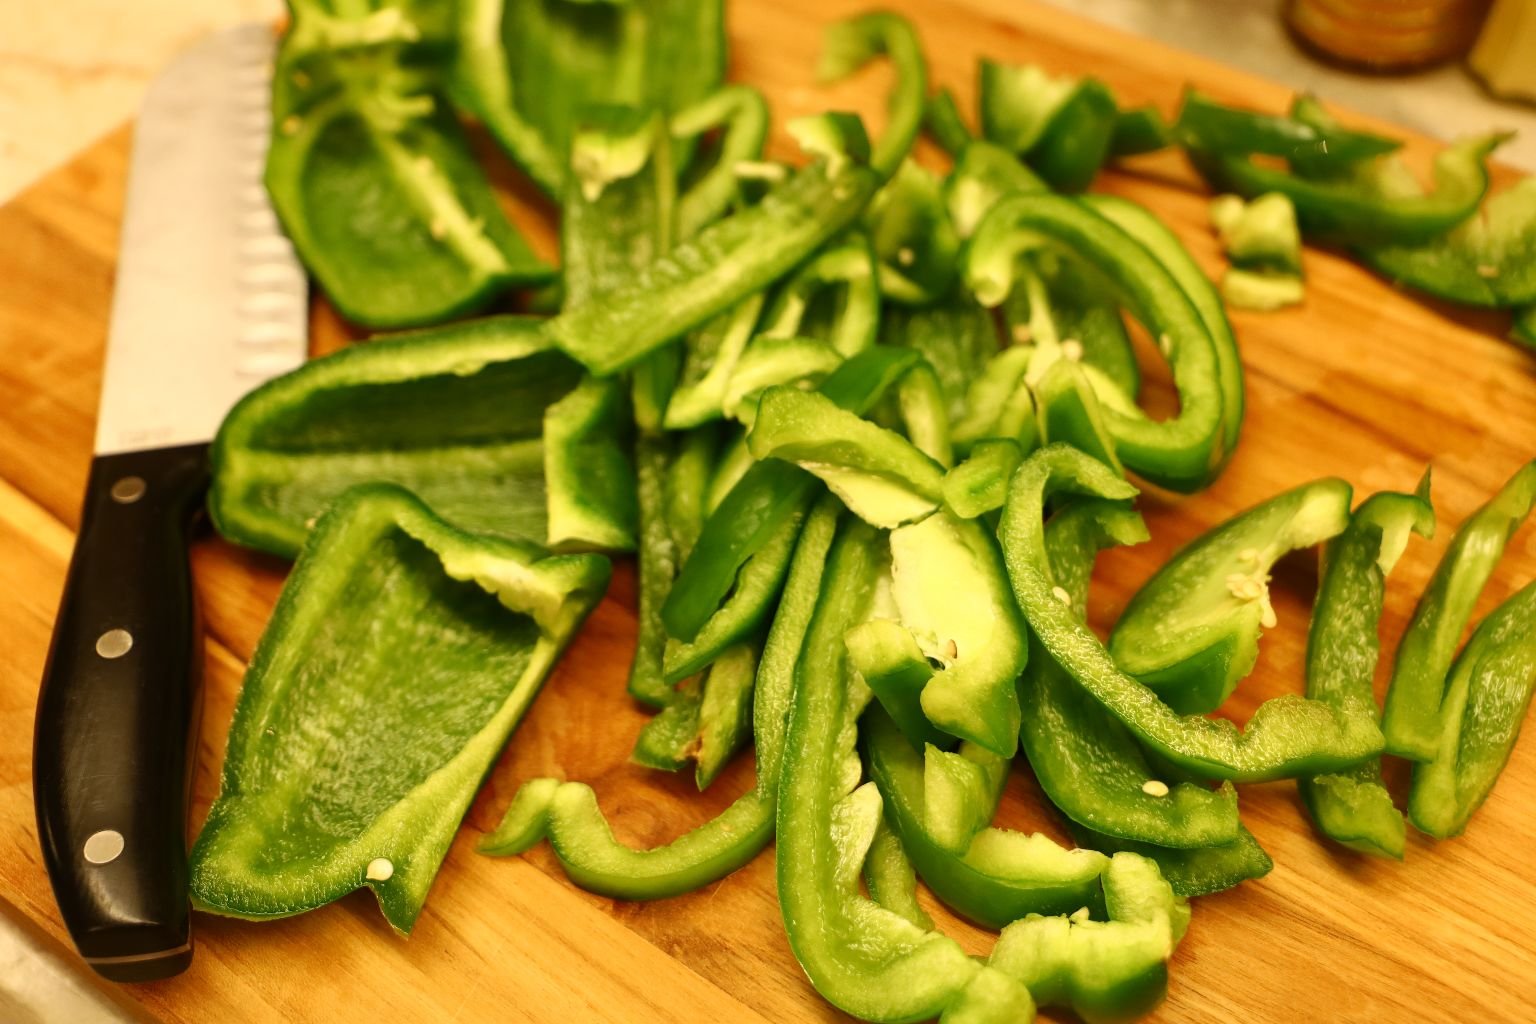
I wanted everything cut into long strips.

Of course I de-seeded the pretty Bells, but if a few seeds remain that is fine too.

I wanted to use every color of the Bells that I could find.
After all, the Mexican culture is very colorful.


——————————————————————
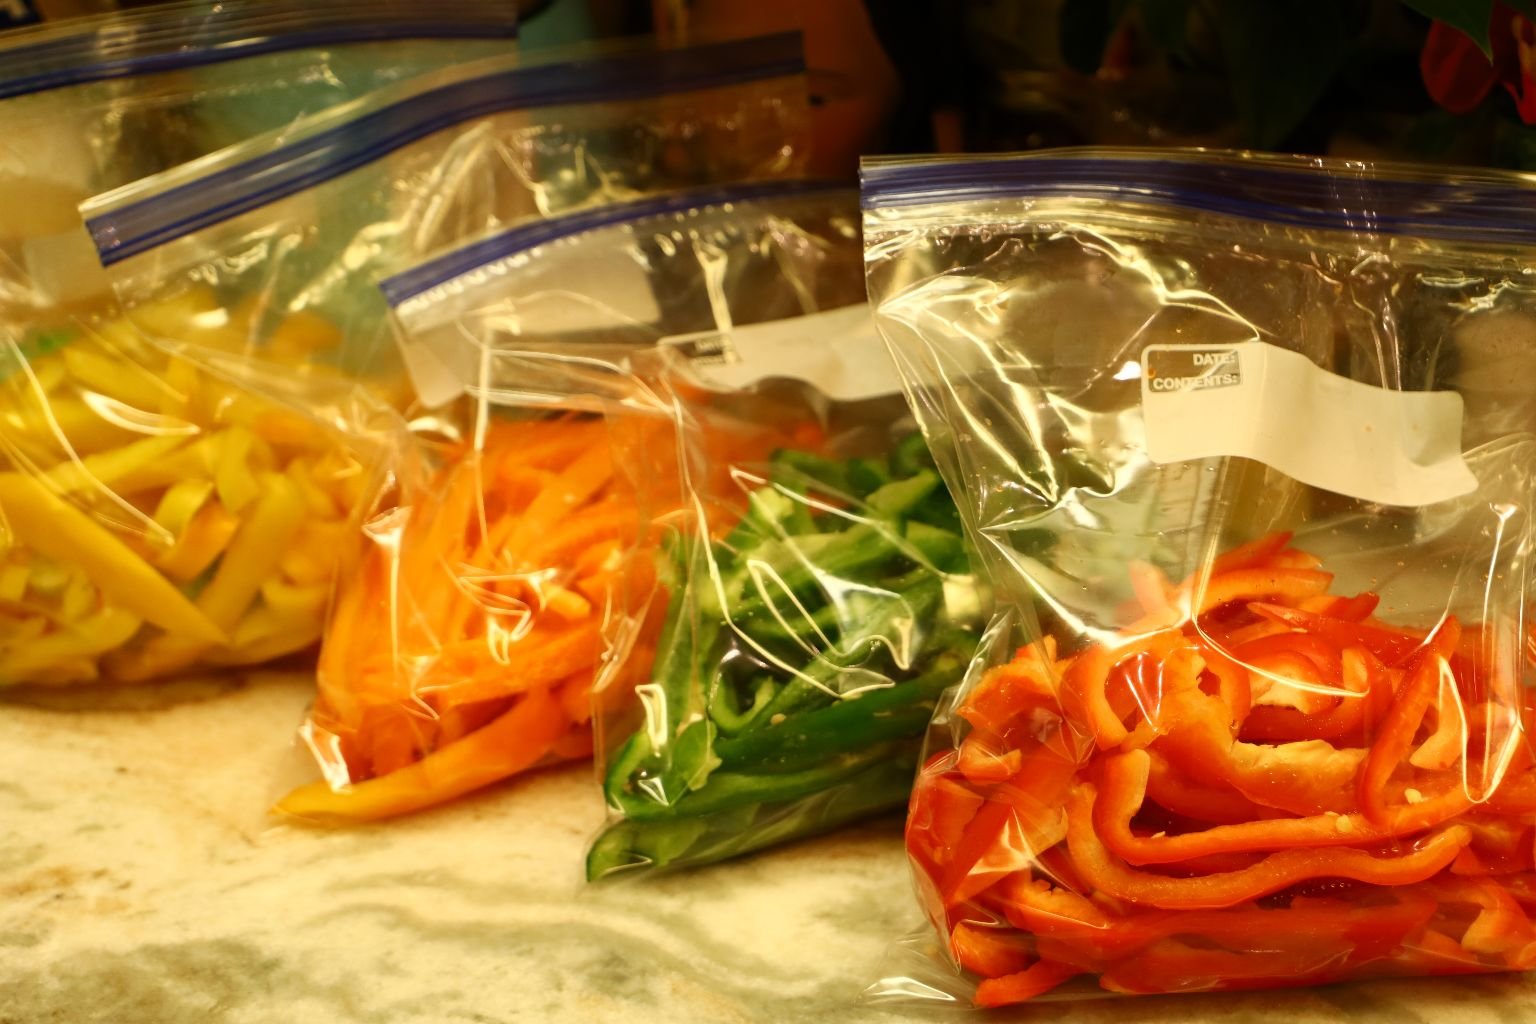
I placed all the Bells into their own baggies and put into the refrigerator until the following day. But for now, that is one job out of the way.
——————————————————————-
Now For The Chicken, and Gordon’s Write Up
Pablano Pepper Stuffed Mole Chicken

Wash your boneless chicken breasts and remove skin and the excess fat.

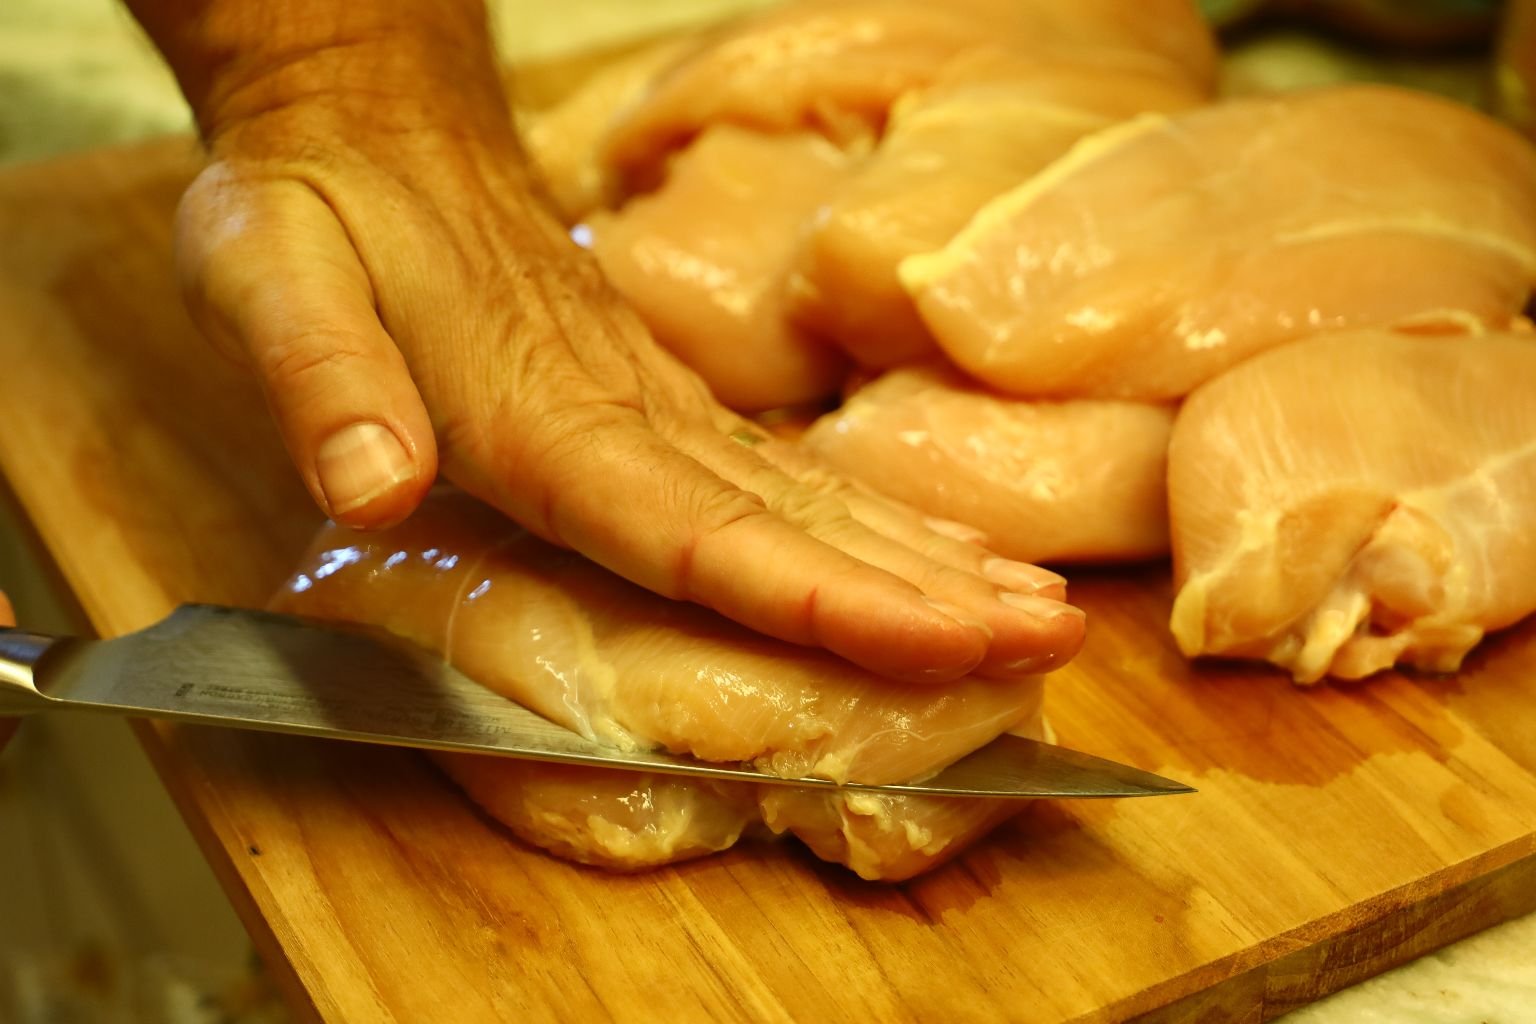
Pat the chicken dry, then using a sharp knife butterfly your chicken. To do this, place the chicken breast on your cutting board with the rounded side out. Slice the chicken in half keeping your blade tip about 1 inch away from the straight edge of the breast.
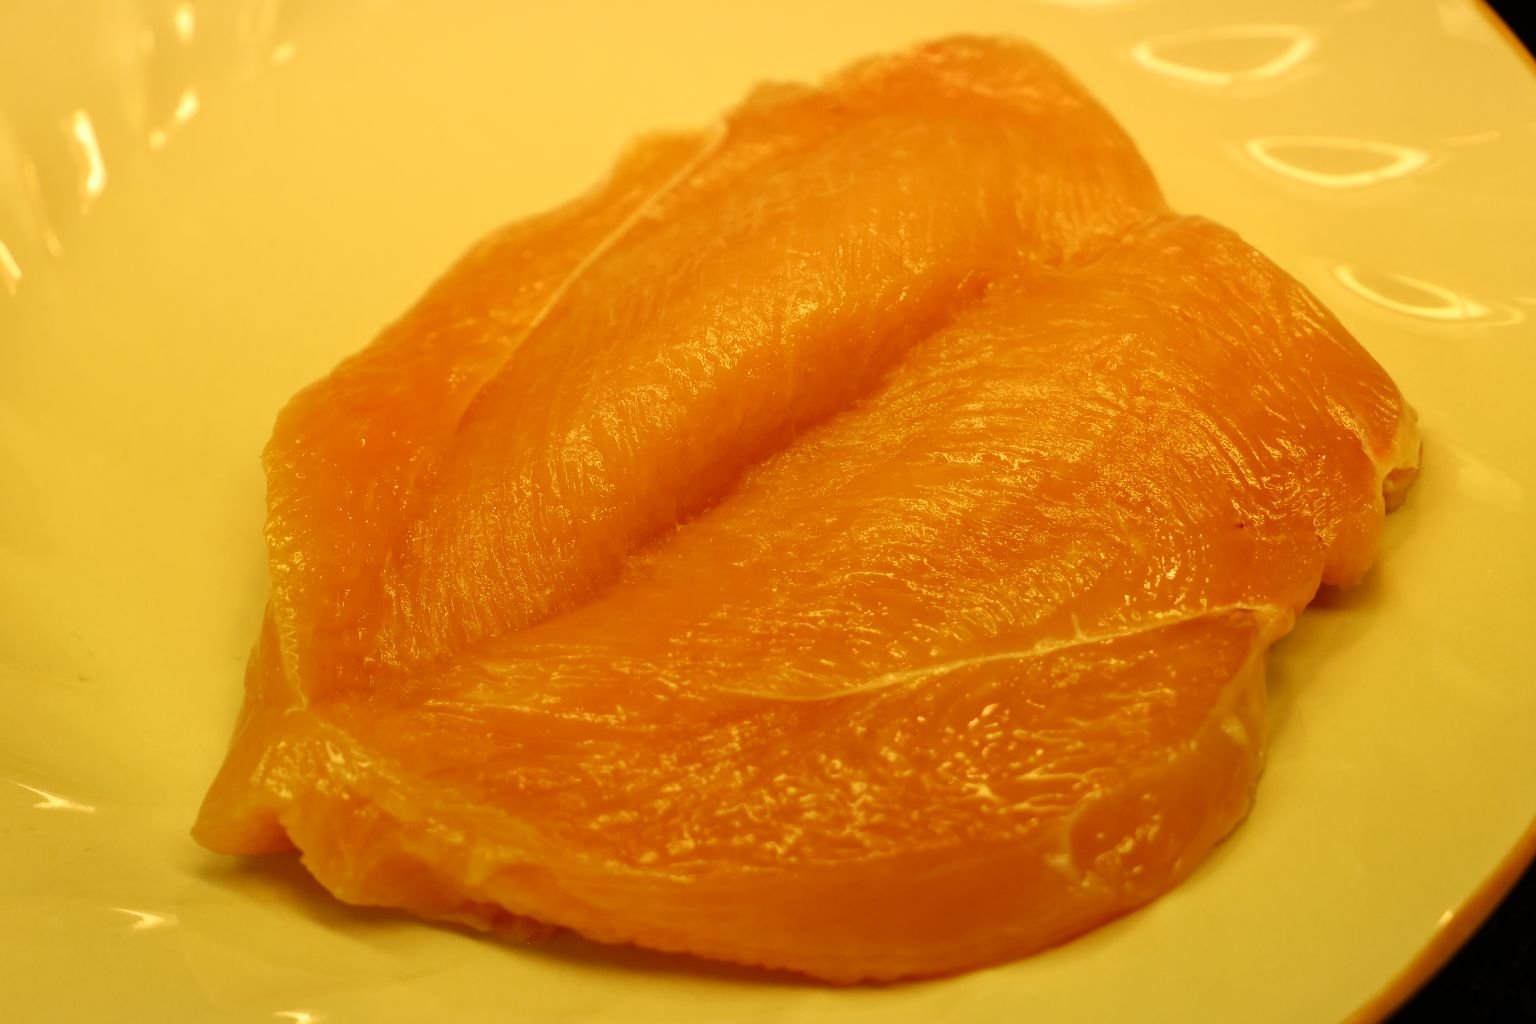
When butterflied, the breast will open up and look like this.
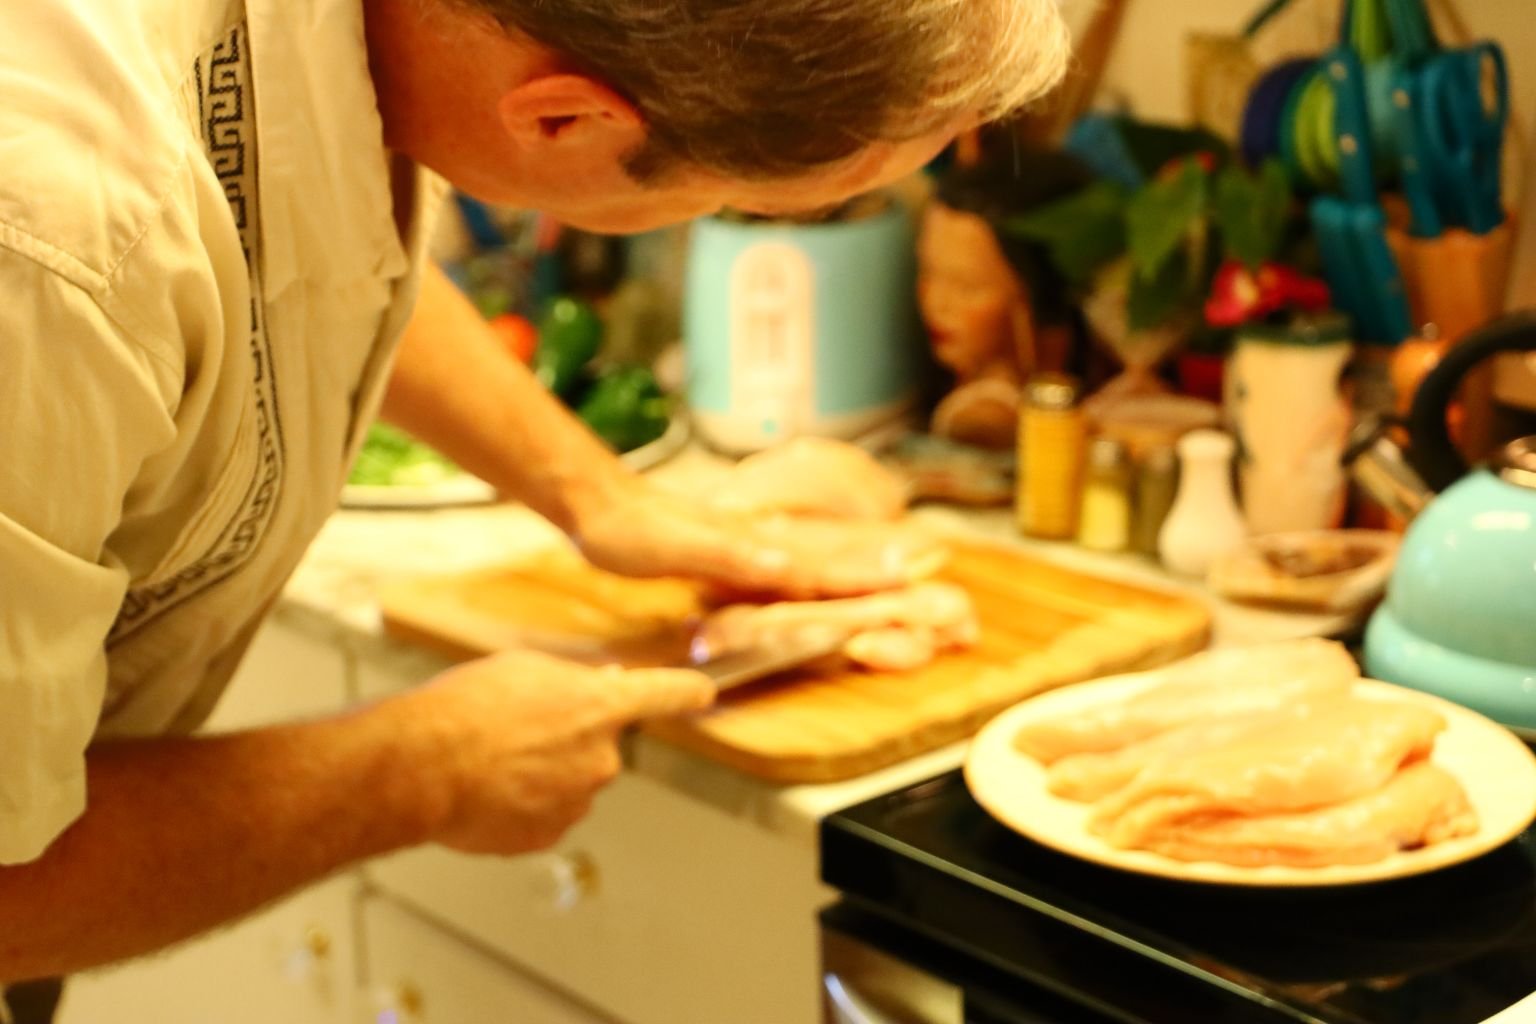
Butterfly all the breasts your are using.

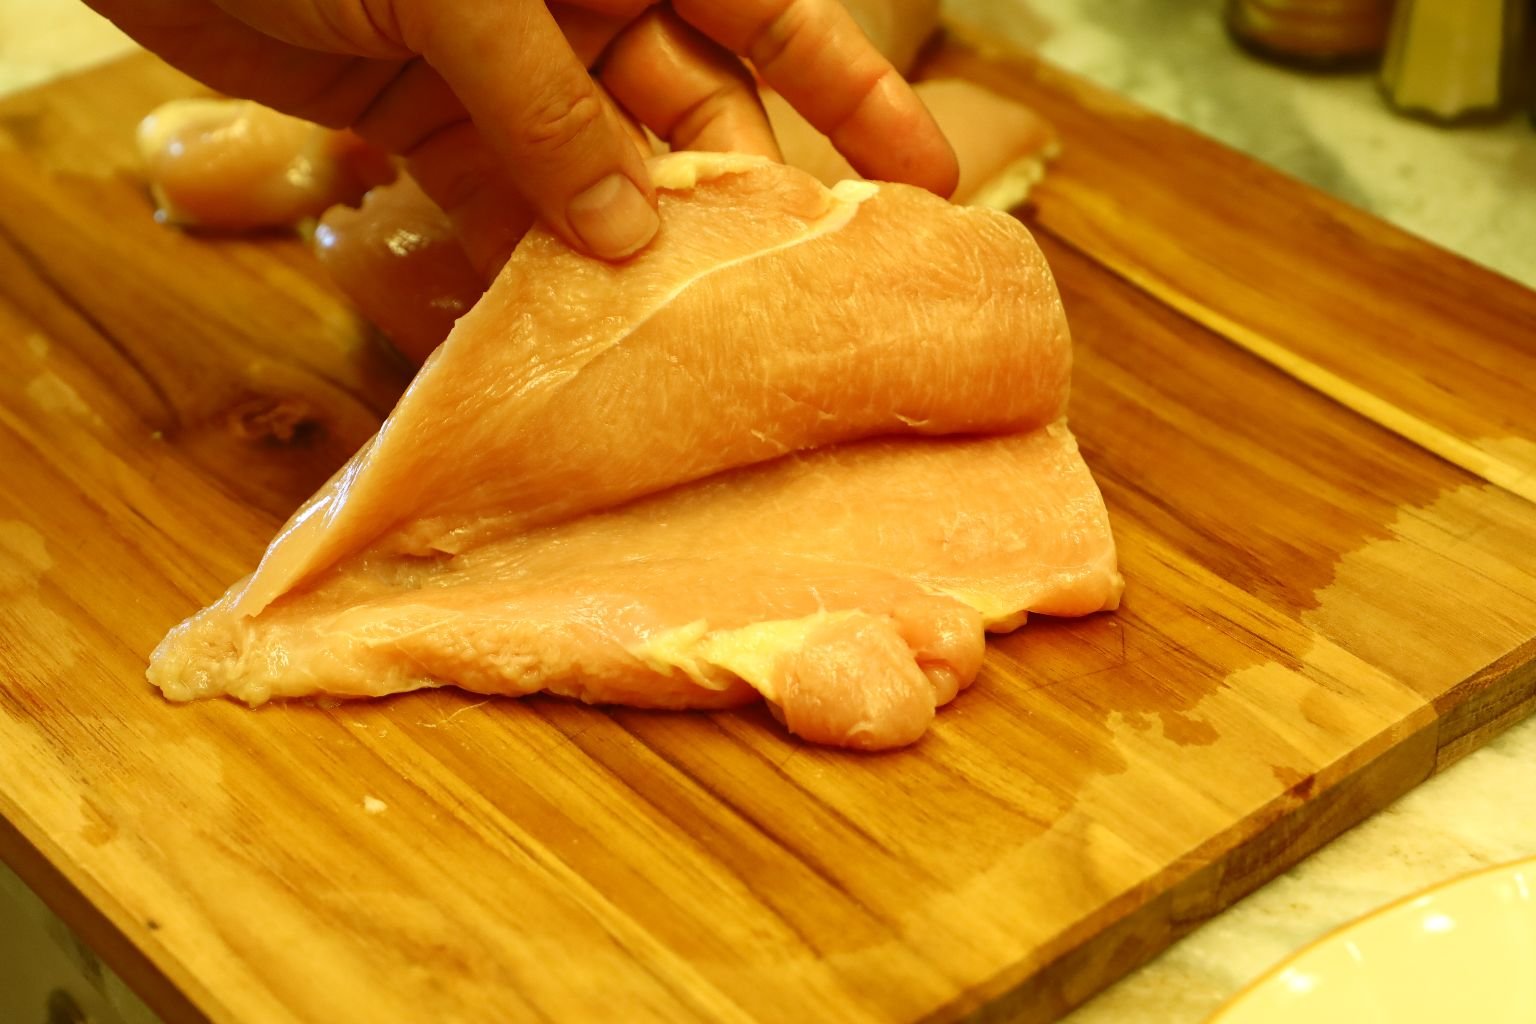
Here is another picture of a butterflied chicken breast.

I place all the butterflied breasts on a plate to keep them out of the way.
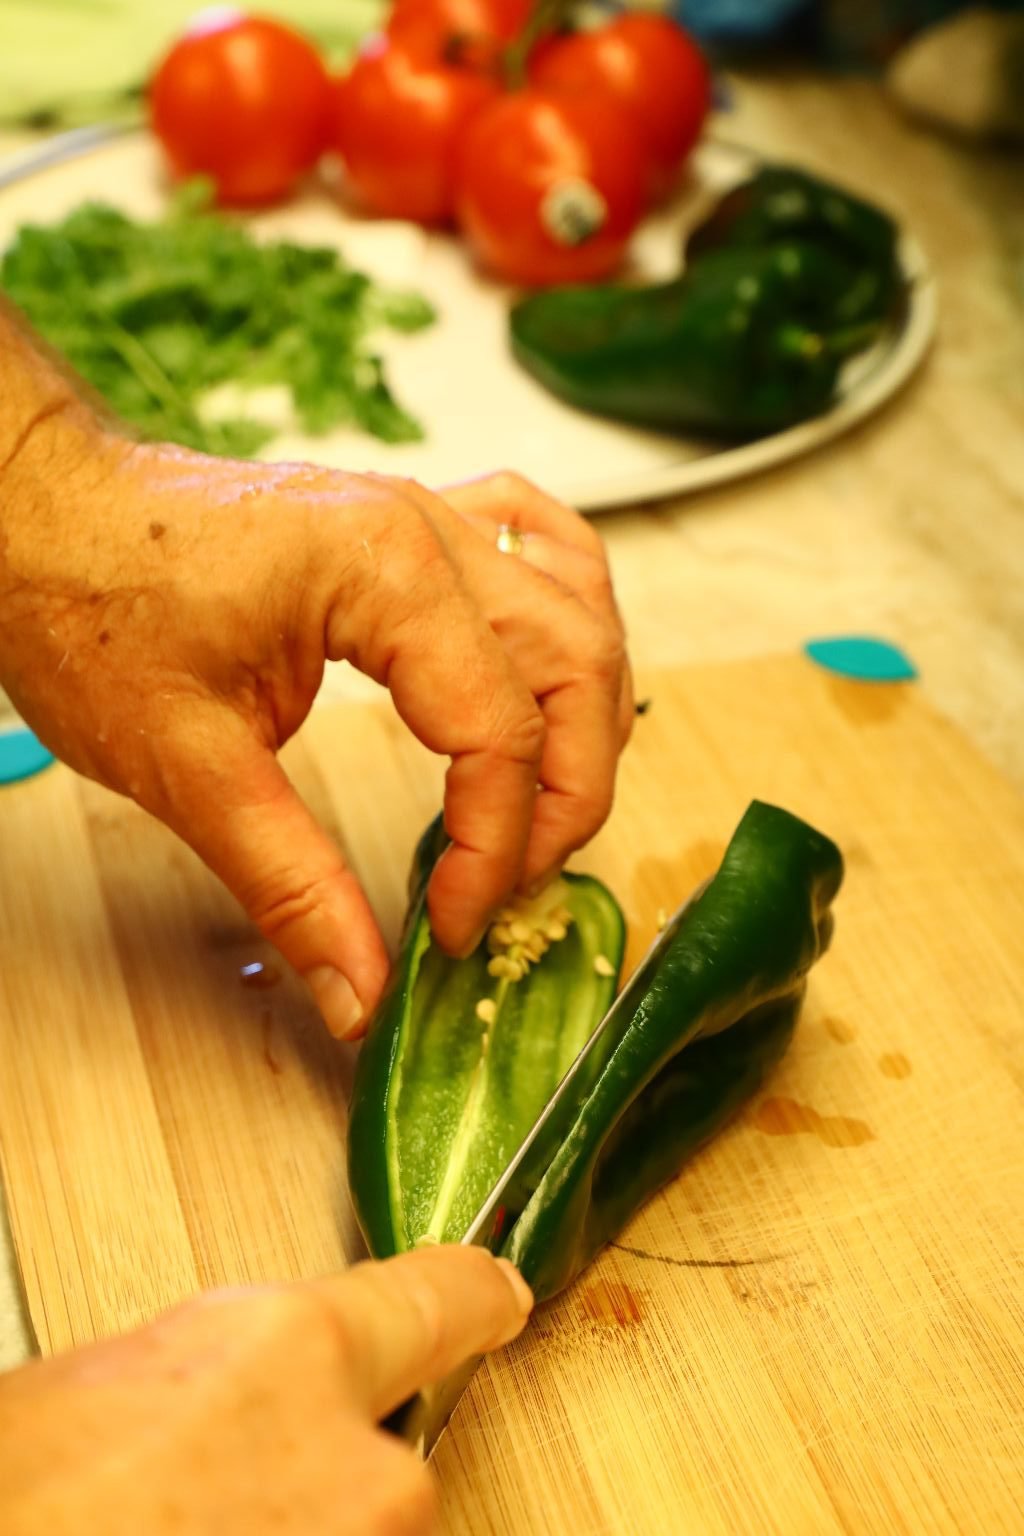
Slice your pablano peppers in half as shown.

Now, remove the seeds.

Pictured is the Mole we used. I really enjoyed the flavor of this brand. The mole did come out of the jar a little thick even after mixing with a spoon and would not allow me to spread it over the chicken in this condition.

Once I added a little bit of peanut oil, I was able to get a smooth saucy consistency.


Here, I placed some of the mole inside the butterflied chicken breast…
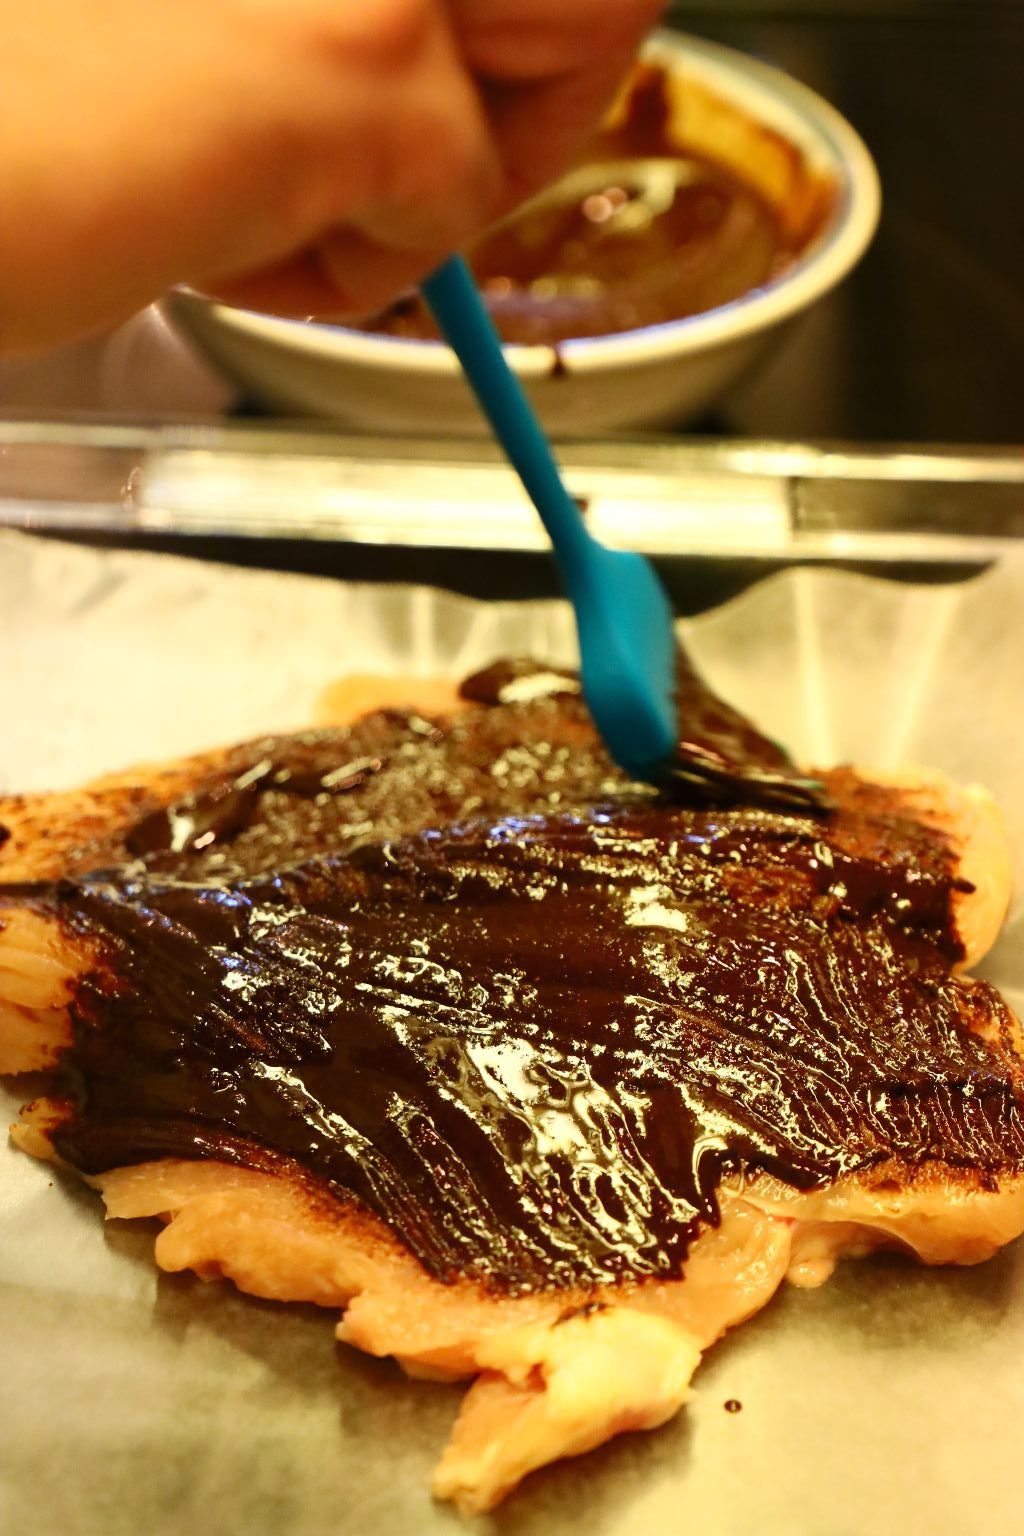


then brushed it evenly all over the breast. I then place half of a pablano pepper inside the breast.
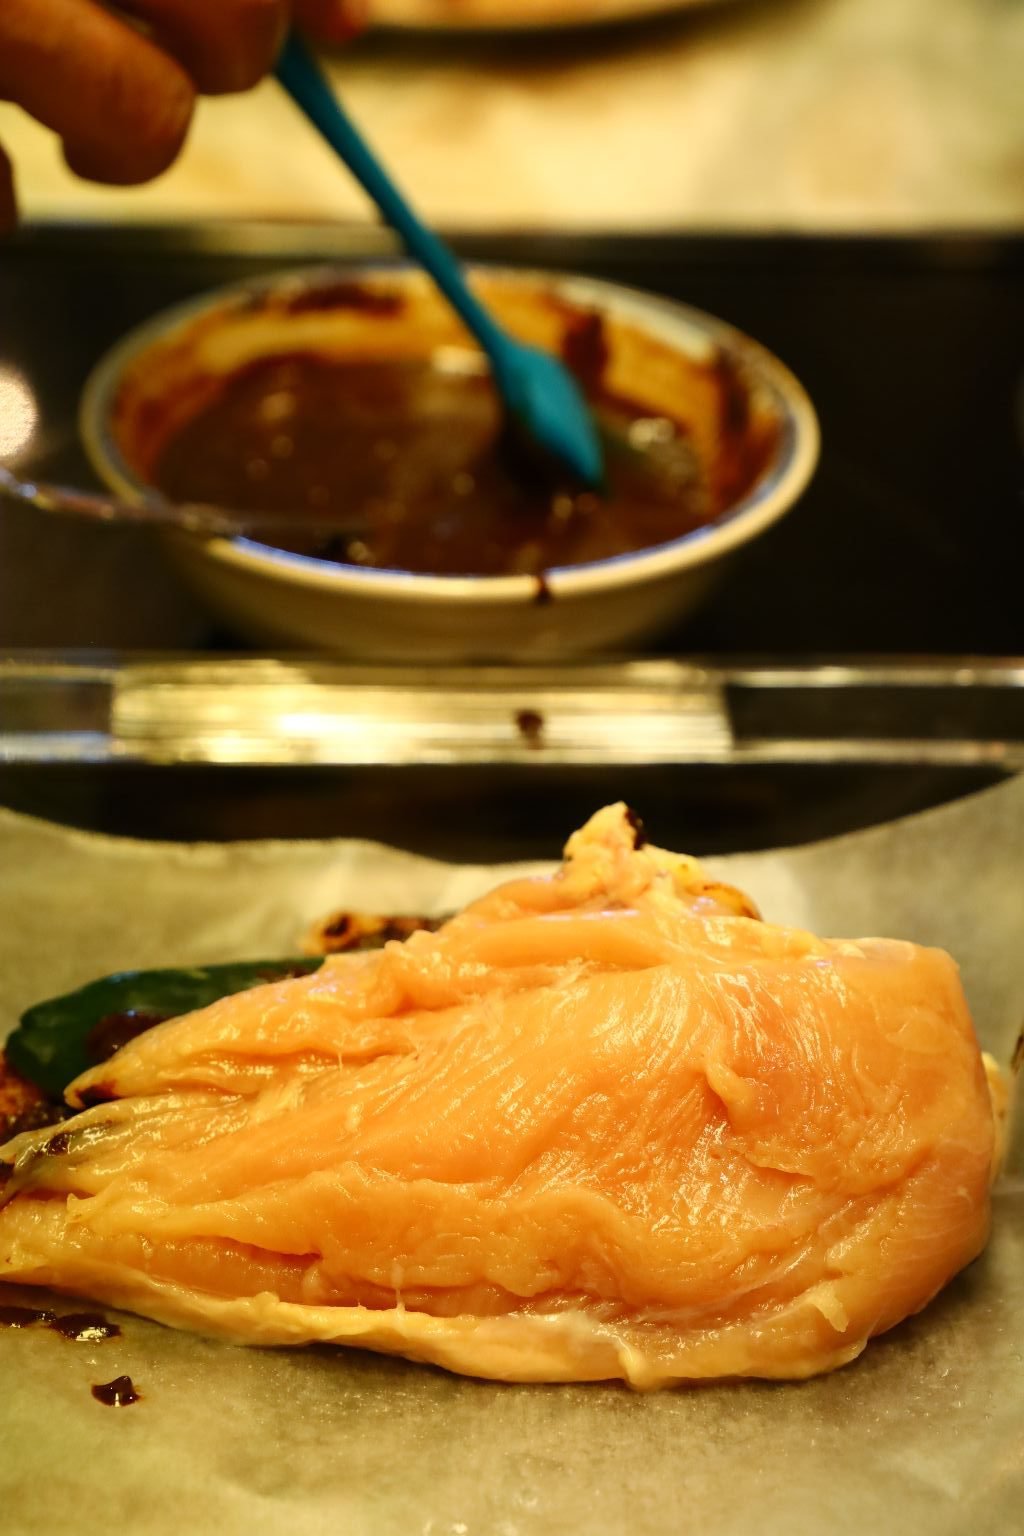
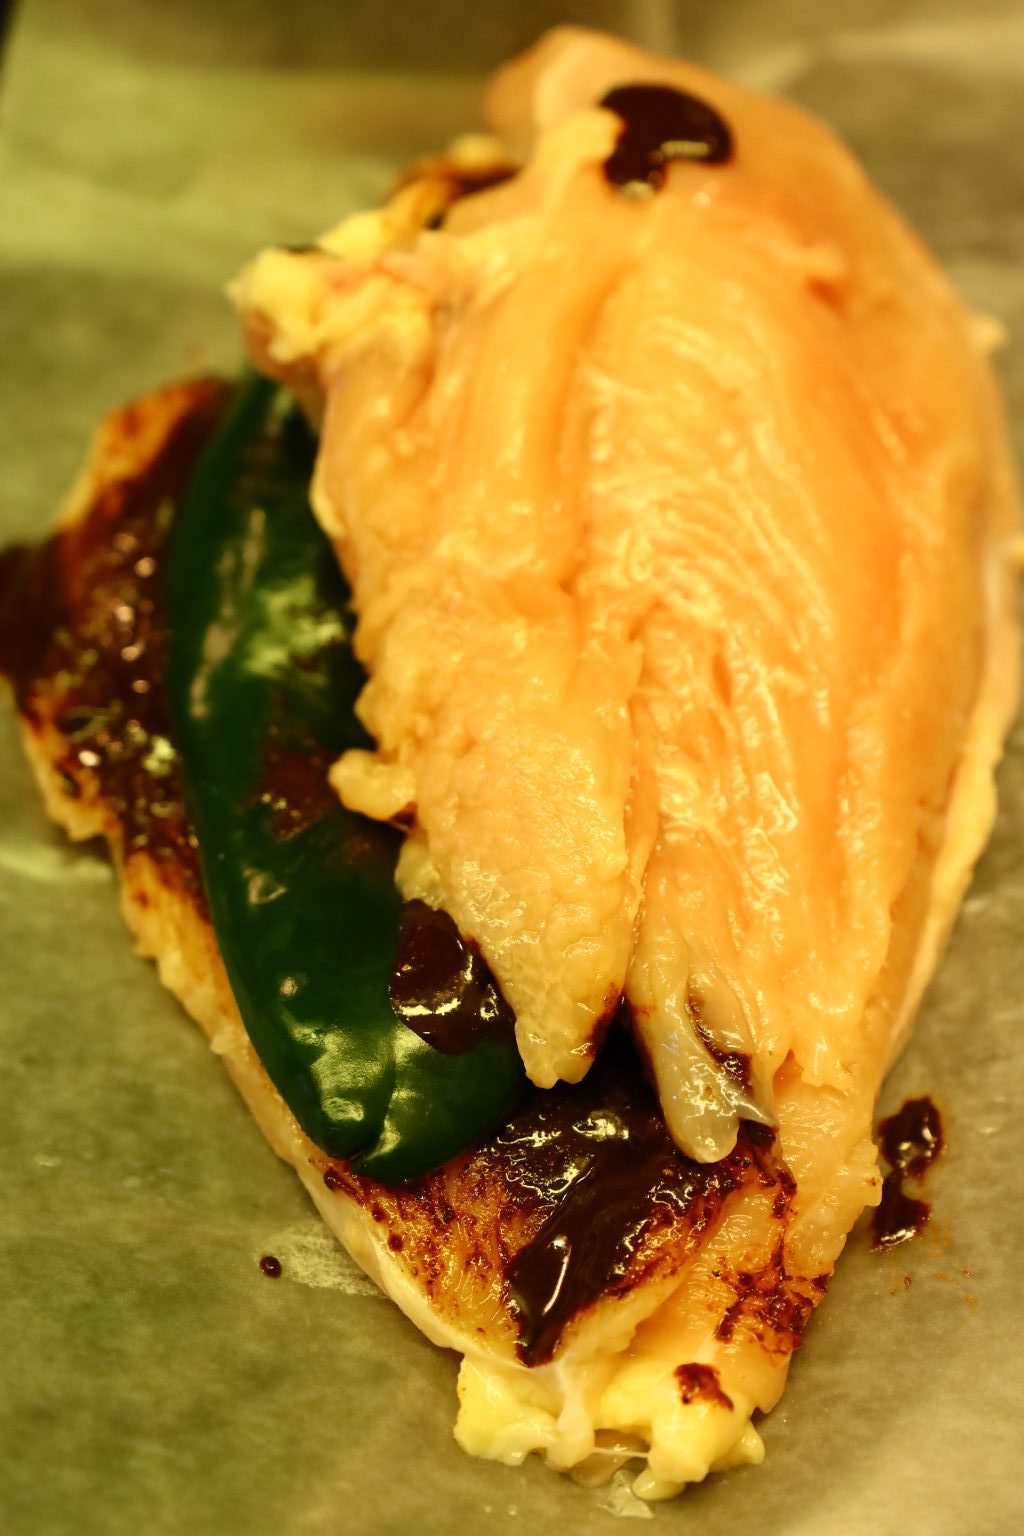
Now, fold the breast together as shown.

Then brush the outside of the breast on one side with the mole.
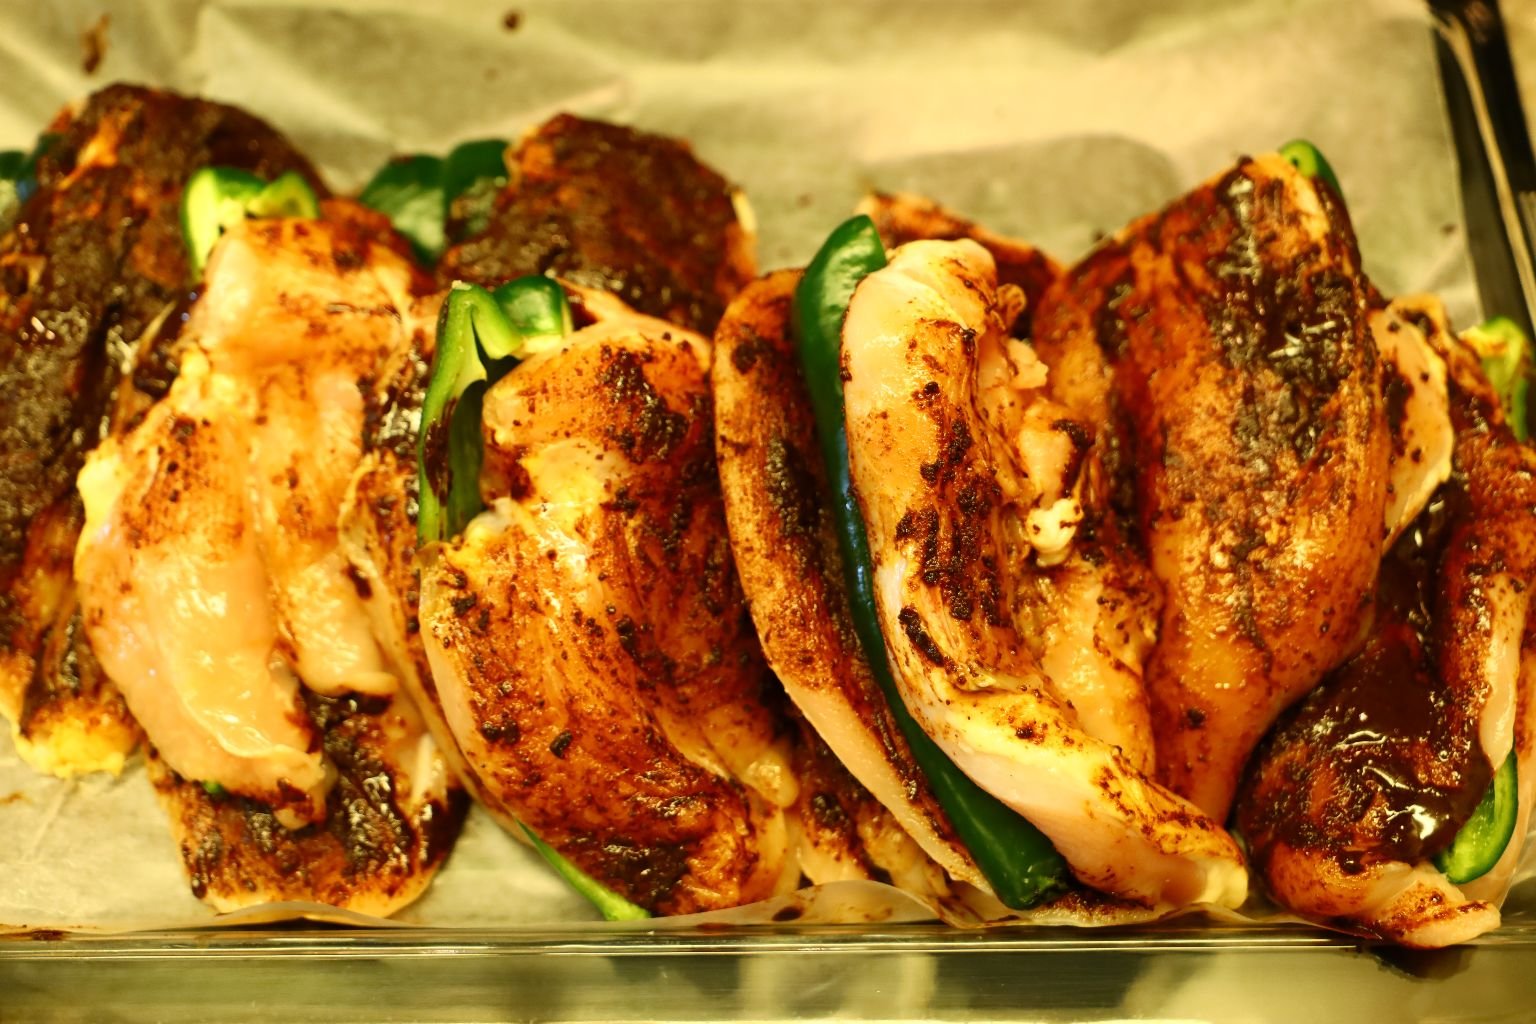
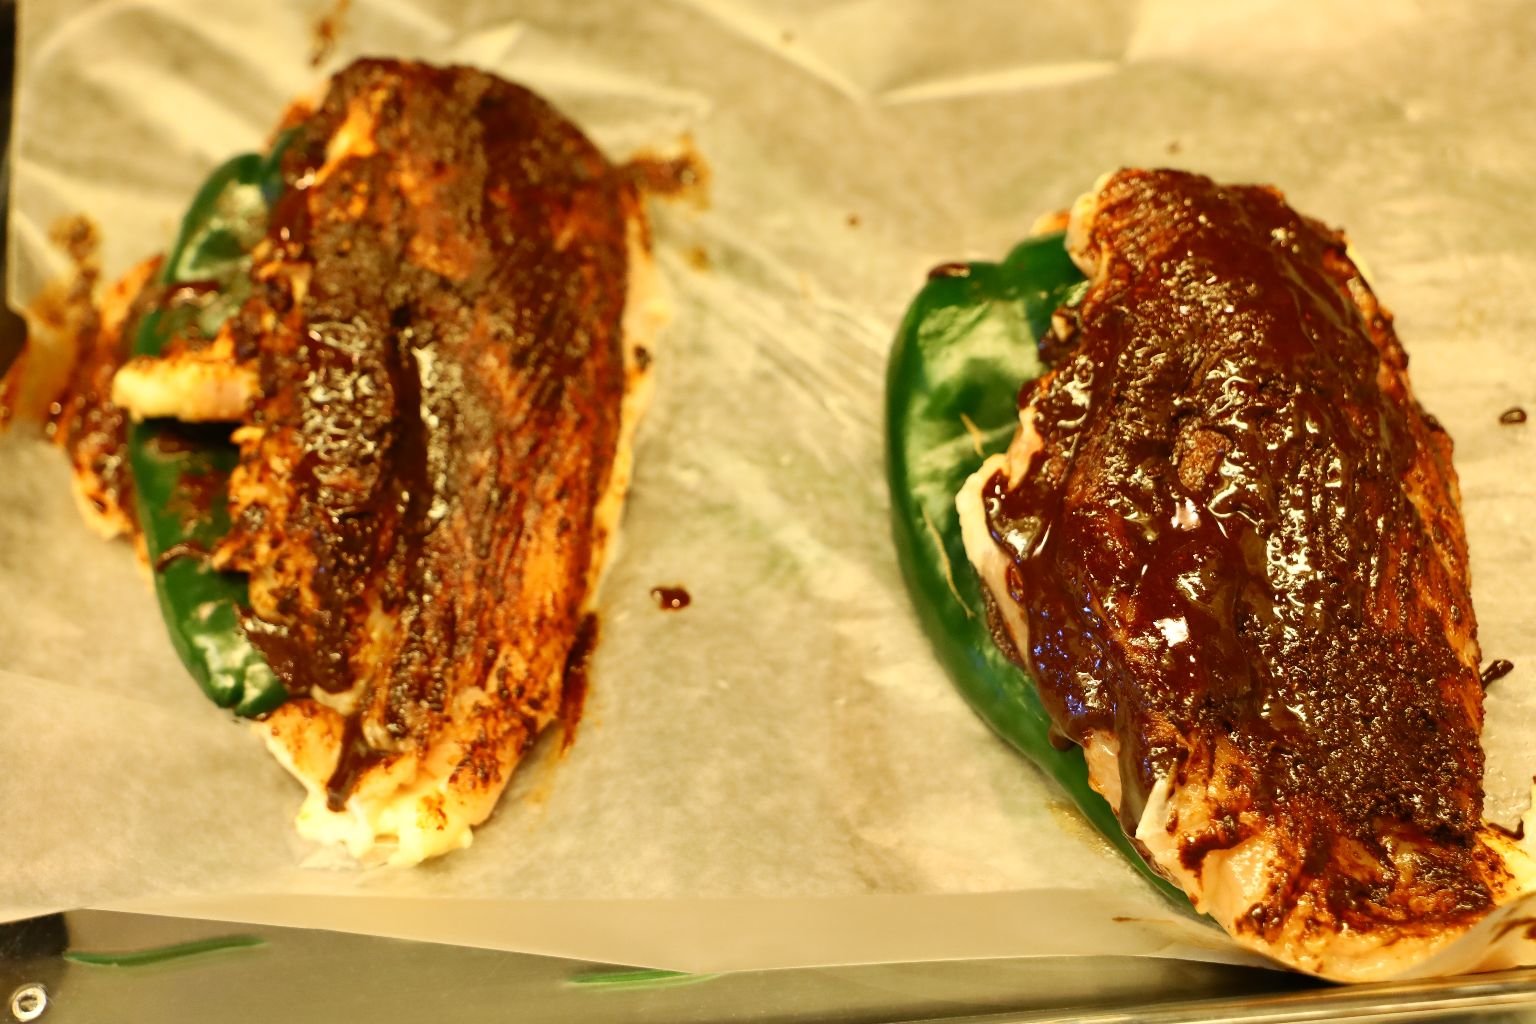
Here are all the breasts with the mole brushed on them.

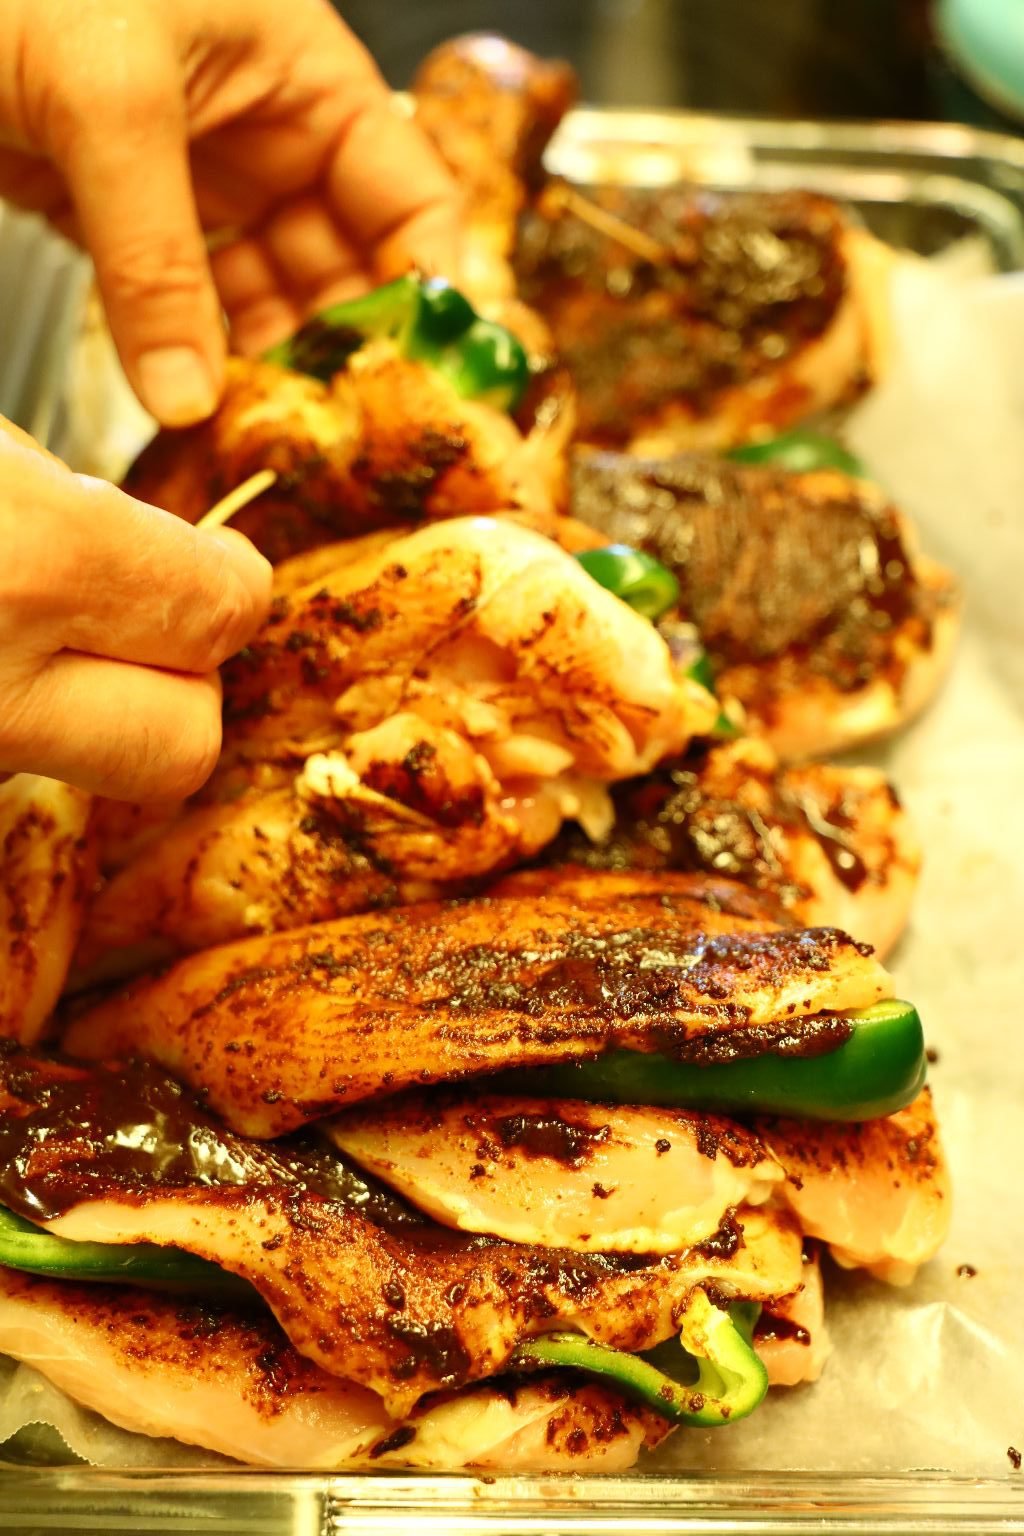
I used long sturdy skewers to keep the breast together making sure I punctured the pablano pepper to keep it in place.
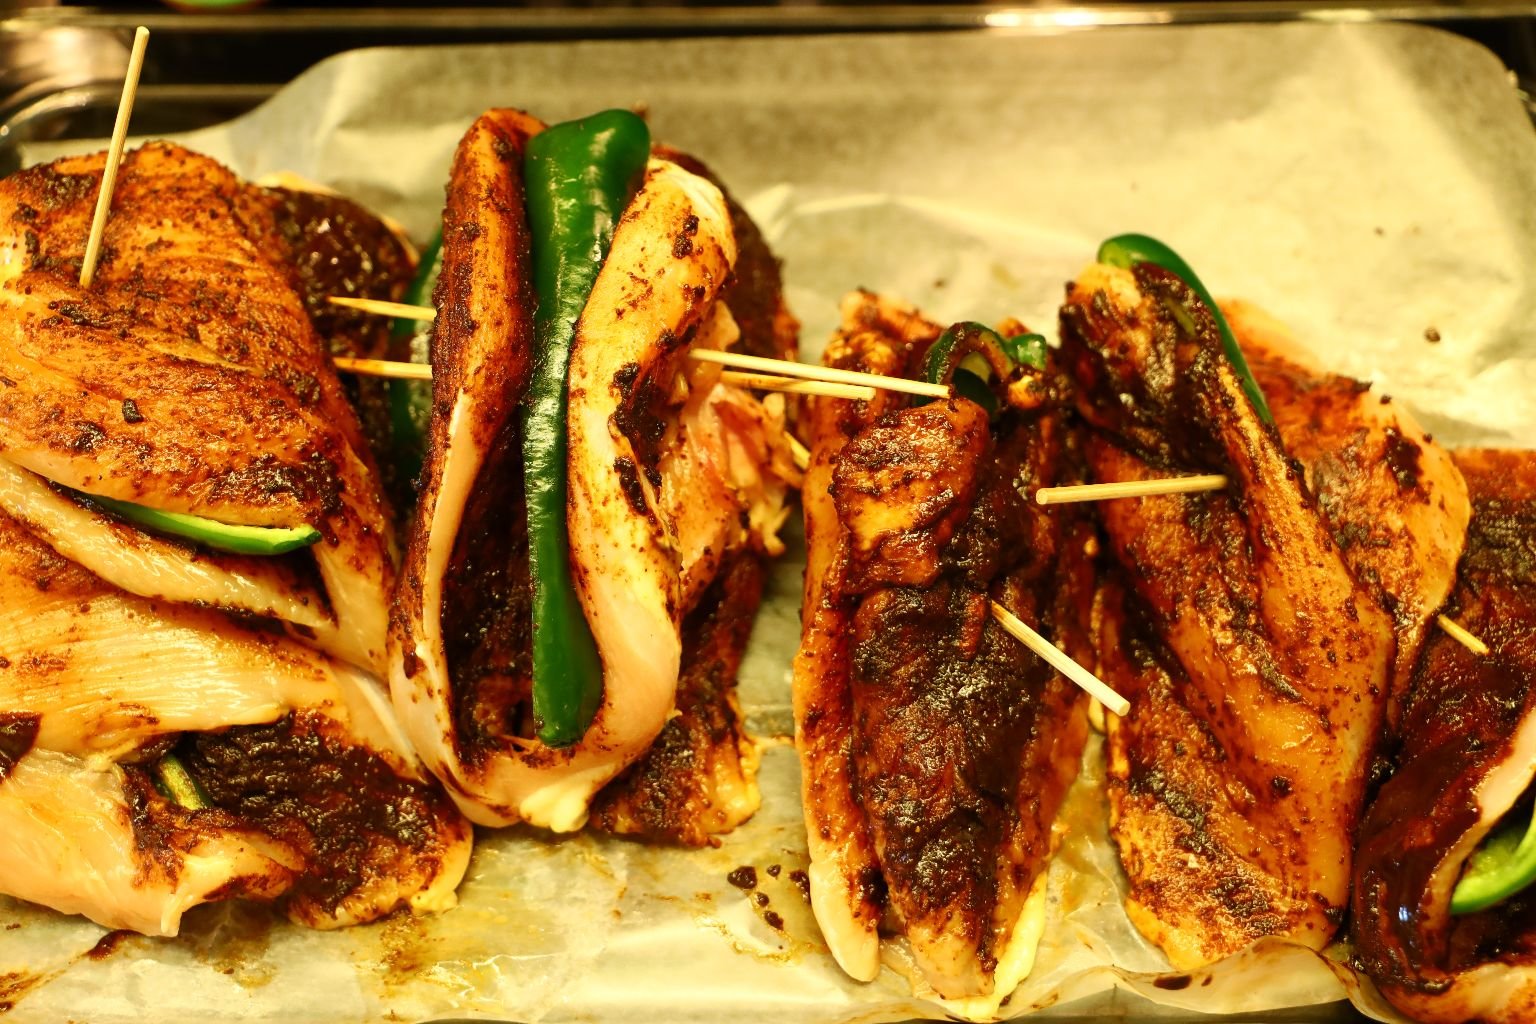
Here, all the breasts are now ready to be grilled.
—————————————————————
Now back to me, Julie. 🙂
I got out a large baking sheet and placed aluminum foil over it.
I placed in a long row all of the Bell’s that I had sliced the day before.
I then drizzled some Vegetable Oil over top of the Colorful Bell’s and then a nice sprinkling of this Sazon Compete to give the Bell’s some flavor. Here you can add whatever you like even if it is just some salt and pepper.
I did place them into a 350F oven for about 10 – 15 minutes just to soften the Bell’s.
I didn’t want them to be so cooked that they would lose their crispness.


Now They are Ready for the Oven
—————————————————————
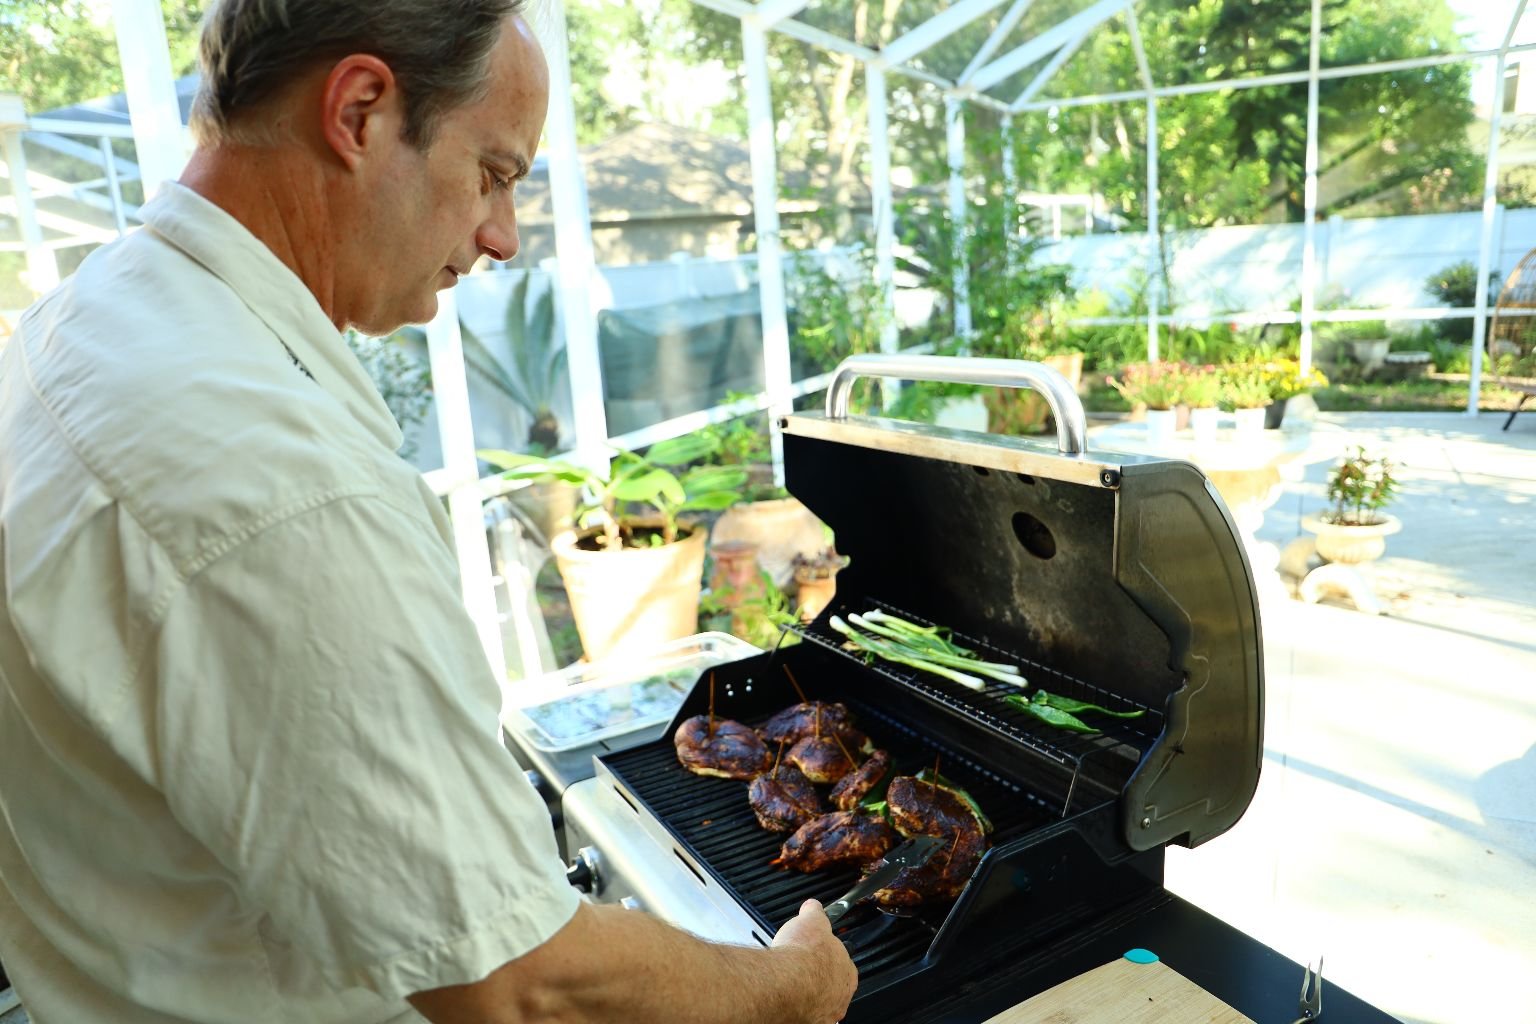
Grilling The Chicken Breasts
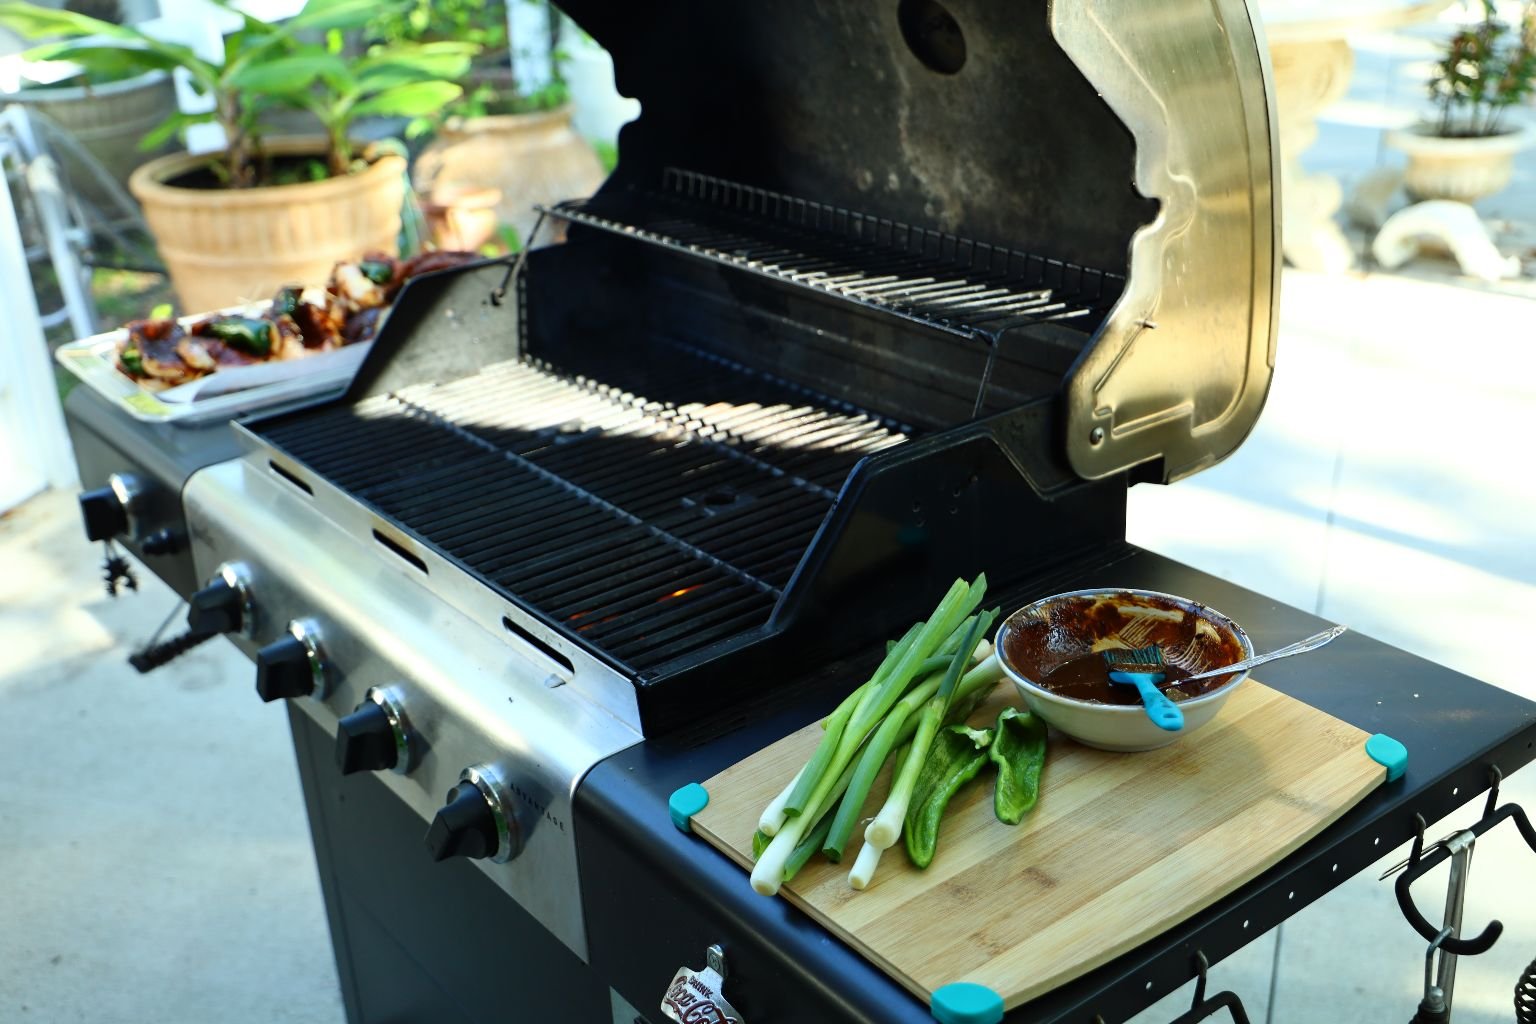
I turned all four of my grill’s burners high and let it heat for 5 min. This will cook off any leftover previous grilled items, plus heat the grill providing a nice initial sear on the meat. Then turn your gill’s heat down to medium. I also grilled some green onions on the grills upper section.

Space the chicken breast evenly all over the grill. Once you place the chicken mole side down on the grill. Don’t move the chicken as this will mess up the grill marks and cause the tears in the meat as it will likely be stuck to the grill.

—————————————————————————
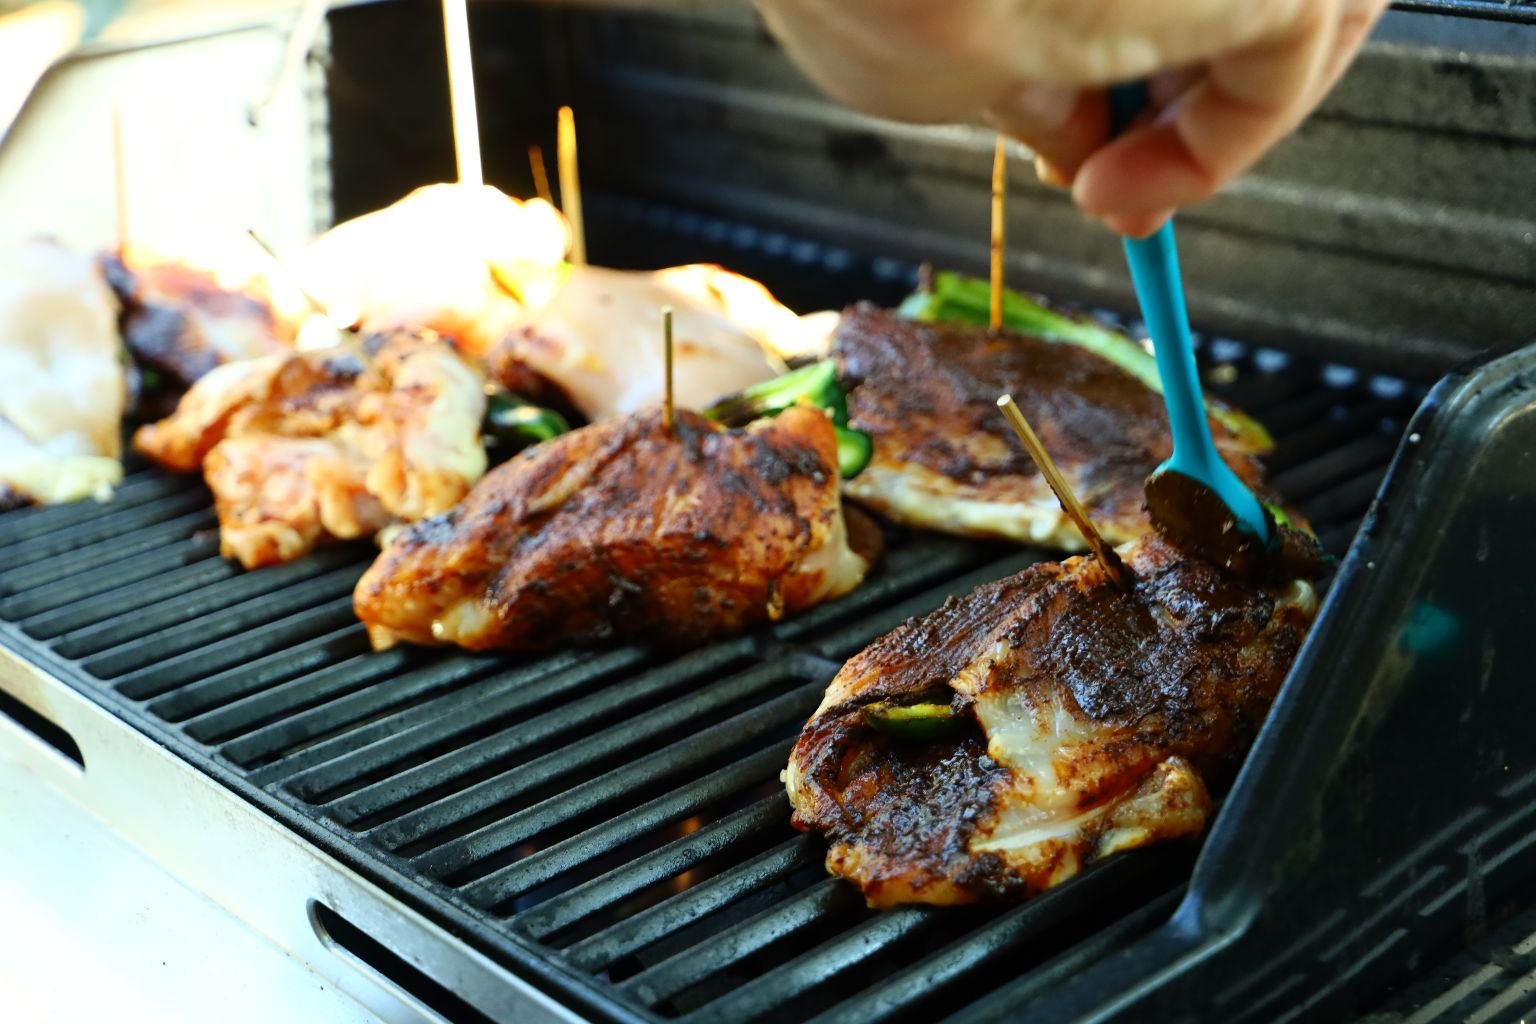
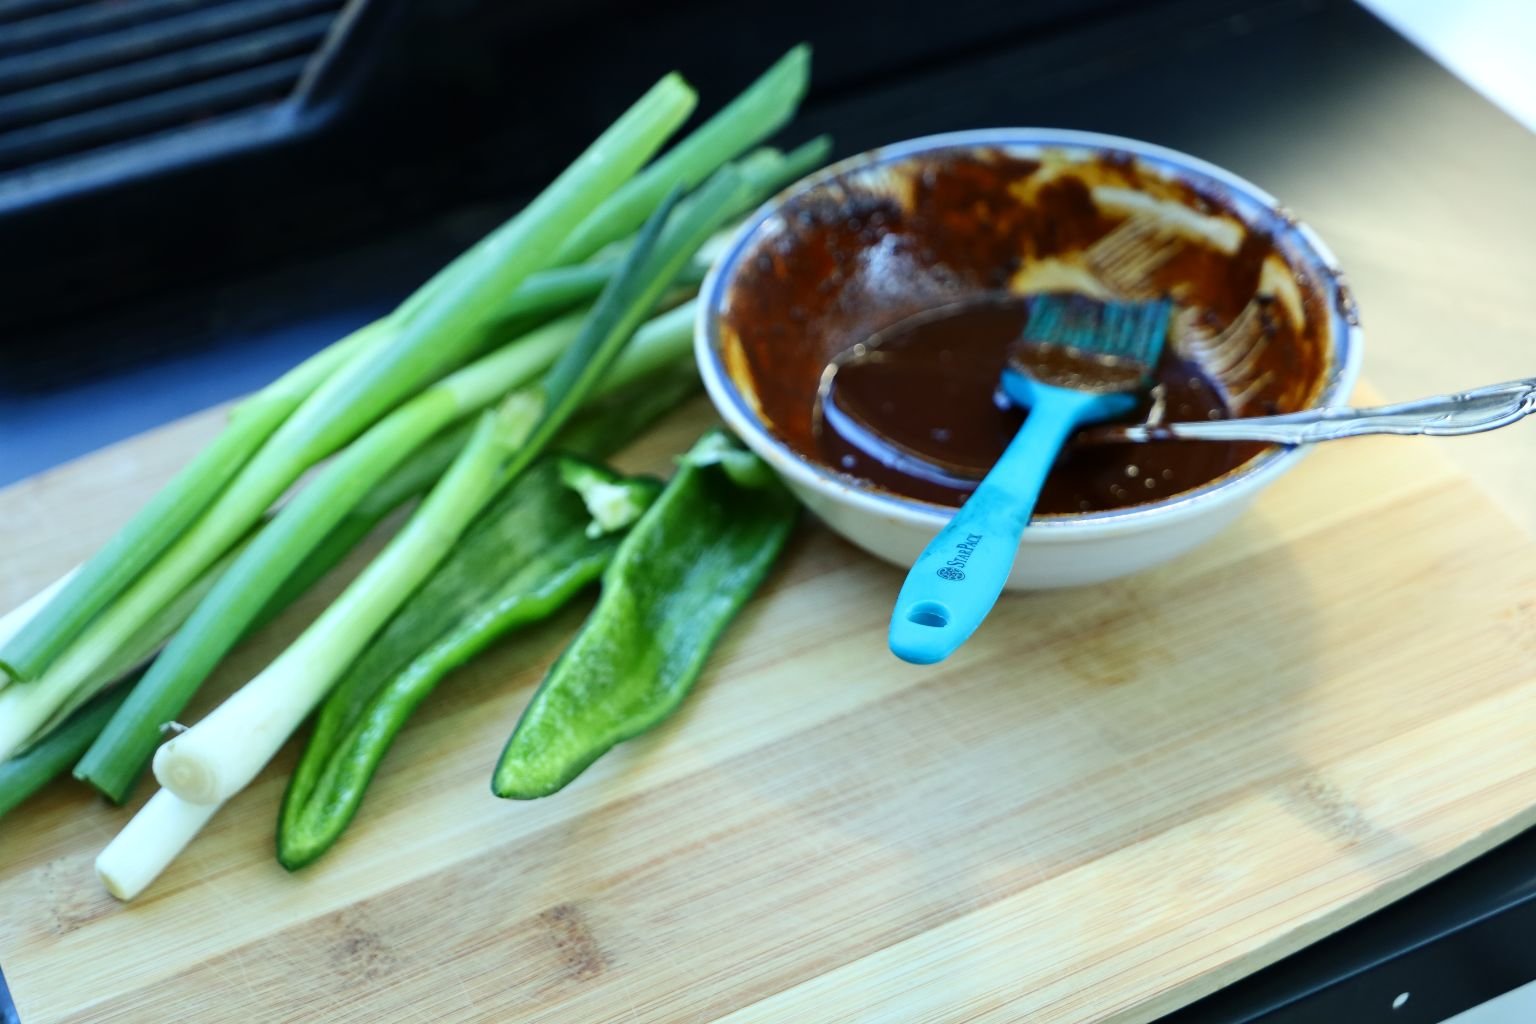
Brush on the remaining mole on the upper side of the breast as shown.
Close the lid of your grill and leave the breasts alone to cook.
———————————————————————
Meanwhile…..

I, Julie placed my beautiful Bell’s into the oven to soften for about 10 minutes.
———————————————————————
The Chicken is Looking and Smelling Wonderful!

Here, I grilled the breasts for about 6 min. or until the meat was firm on the heat side down. This could change as per the temperature of your grill. The temperature of this side of the breast, if using a meat thermometer, should be ~160 ‘F. Turn the breast over onto another hot section of the grill. This will provide a nice sear to the chicken. Also take note of any hot and cool spots on the grill and adjust the chicken accordingly.

Now that the chicken has had an initial cook, you can remove the skewers as the meat will stay together around the pepper.
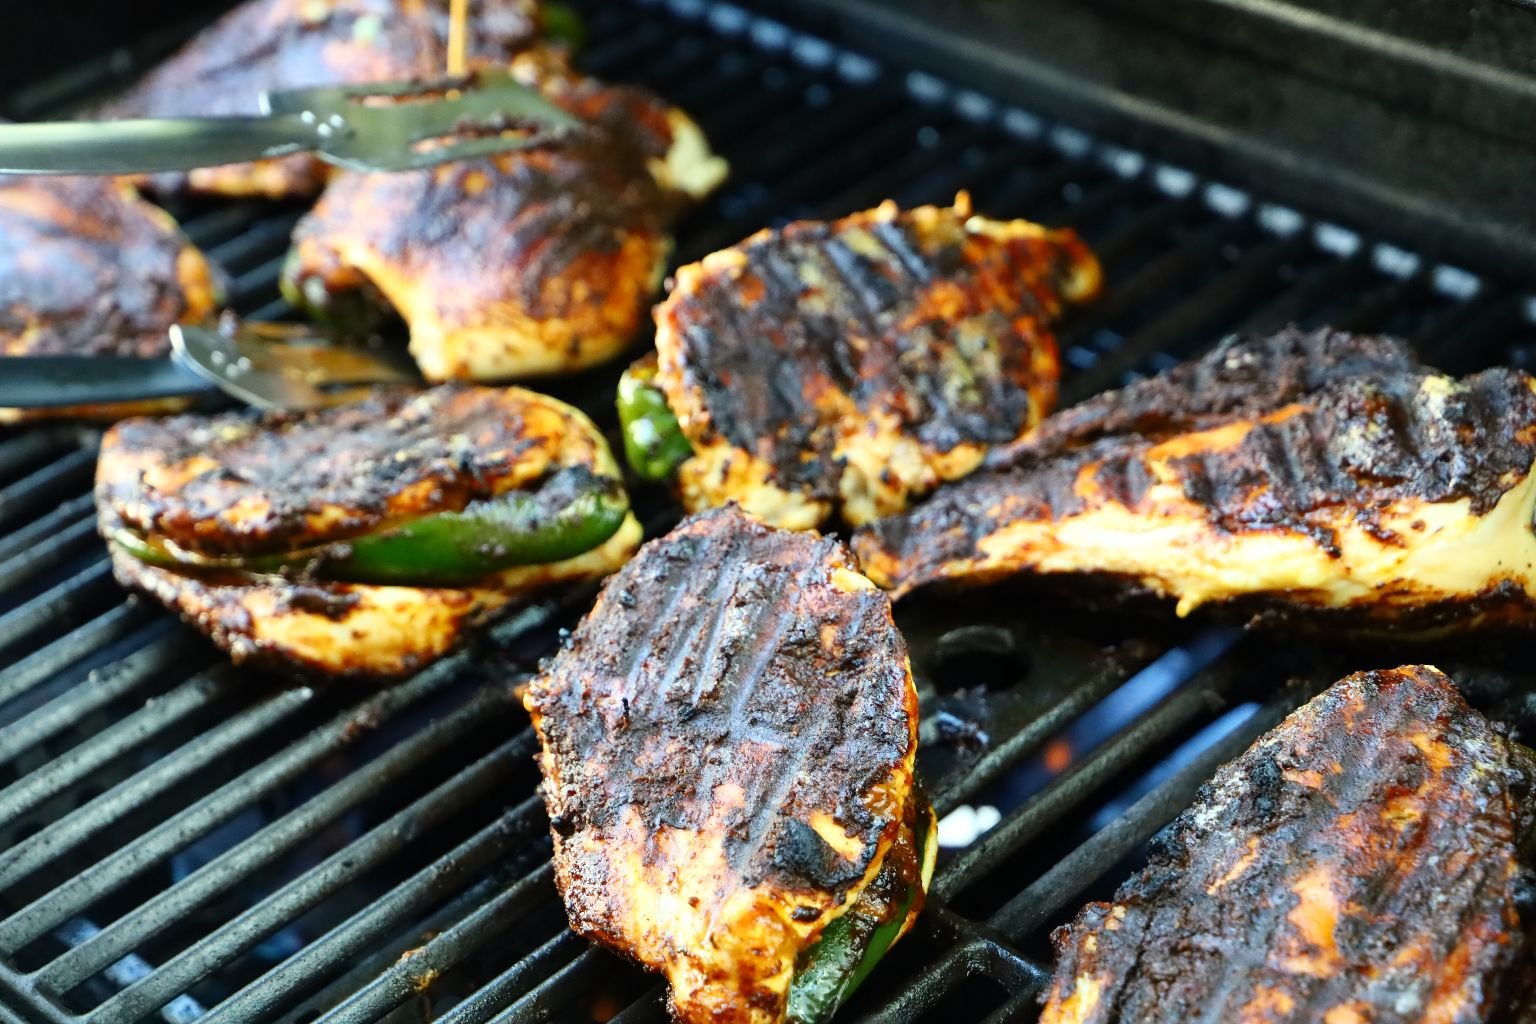
As the chicken cooks, it will also heat and soften the Poblano Pepper inside. Grilling the chicken’s other side will take about half the time as the initial grilling baked the chicken’s upper side when the grill’s lid was closed.
——————————————————————
Once the Chicken is Removed From the Grill

When the chicken is firm on the other side or it has reached 160 ‘F, let the chicken rest for about 5 min. or more to allow the juices to return to the center of the meat, cooking the inside of the breast to 165’F. Doing this will give you juicy chicken.
You Can See The Grill Marks

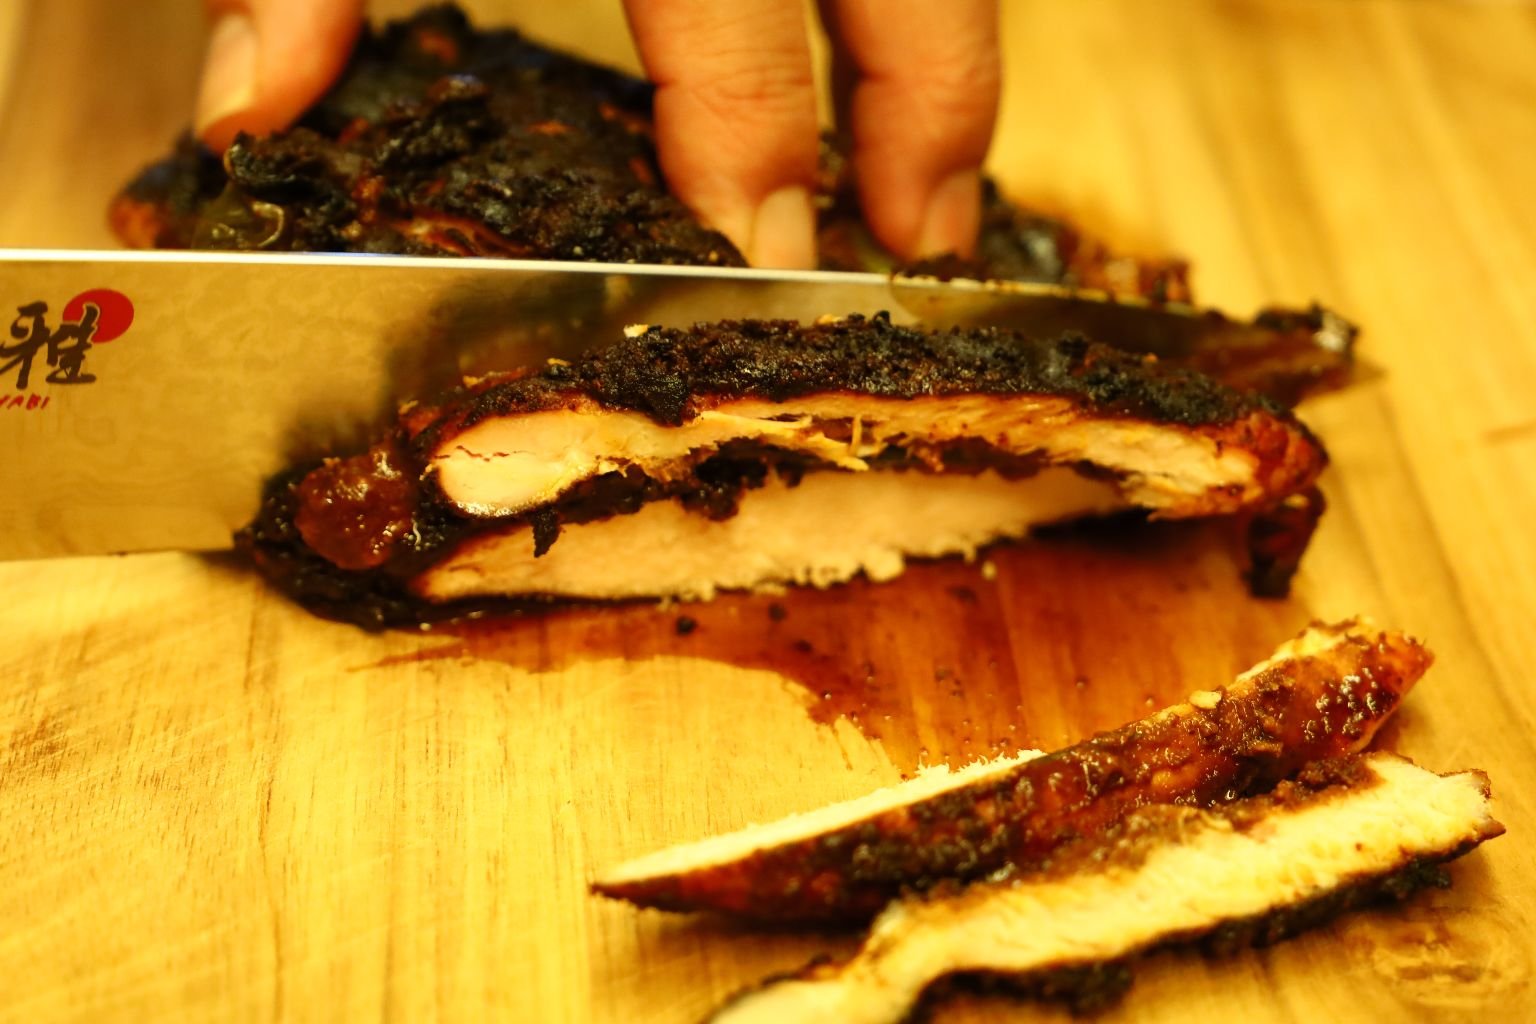
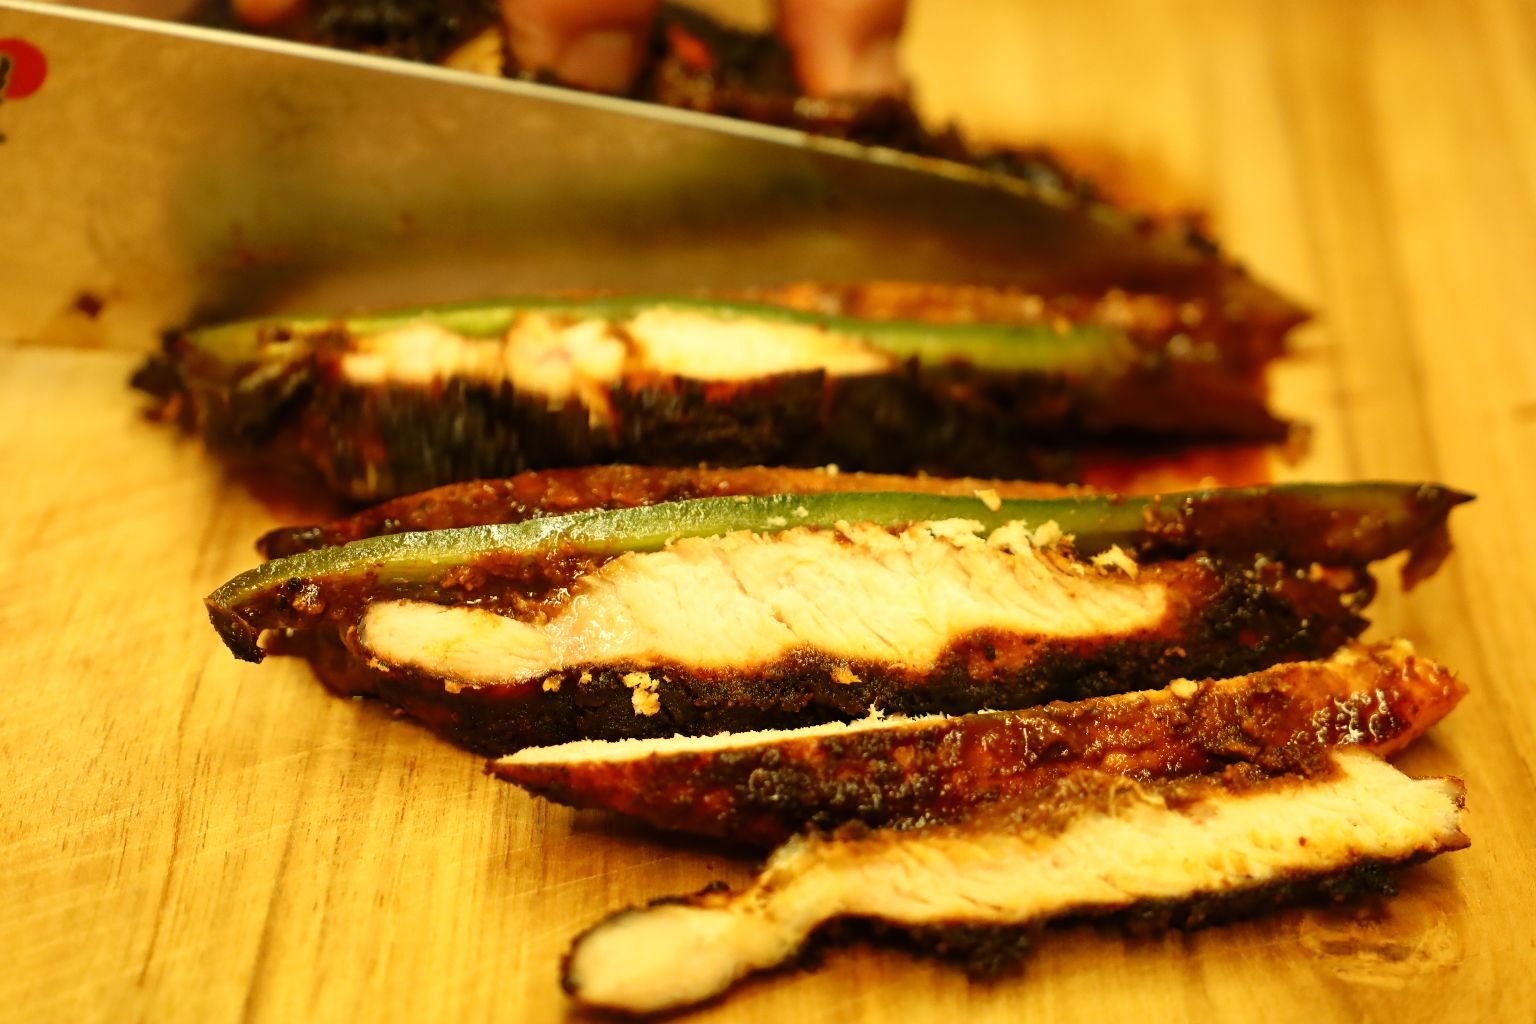
Here you can see the juices come out of the chicken as I am slicing it for our tortillas. The juices are clear and the meat is white, meaning that I cooked it properly.
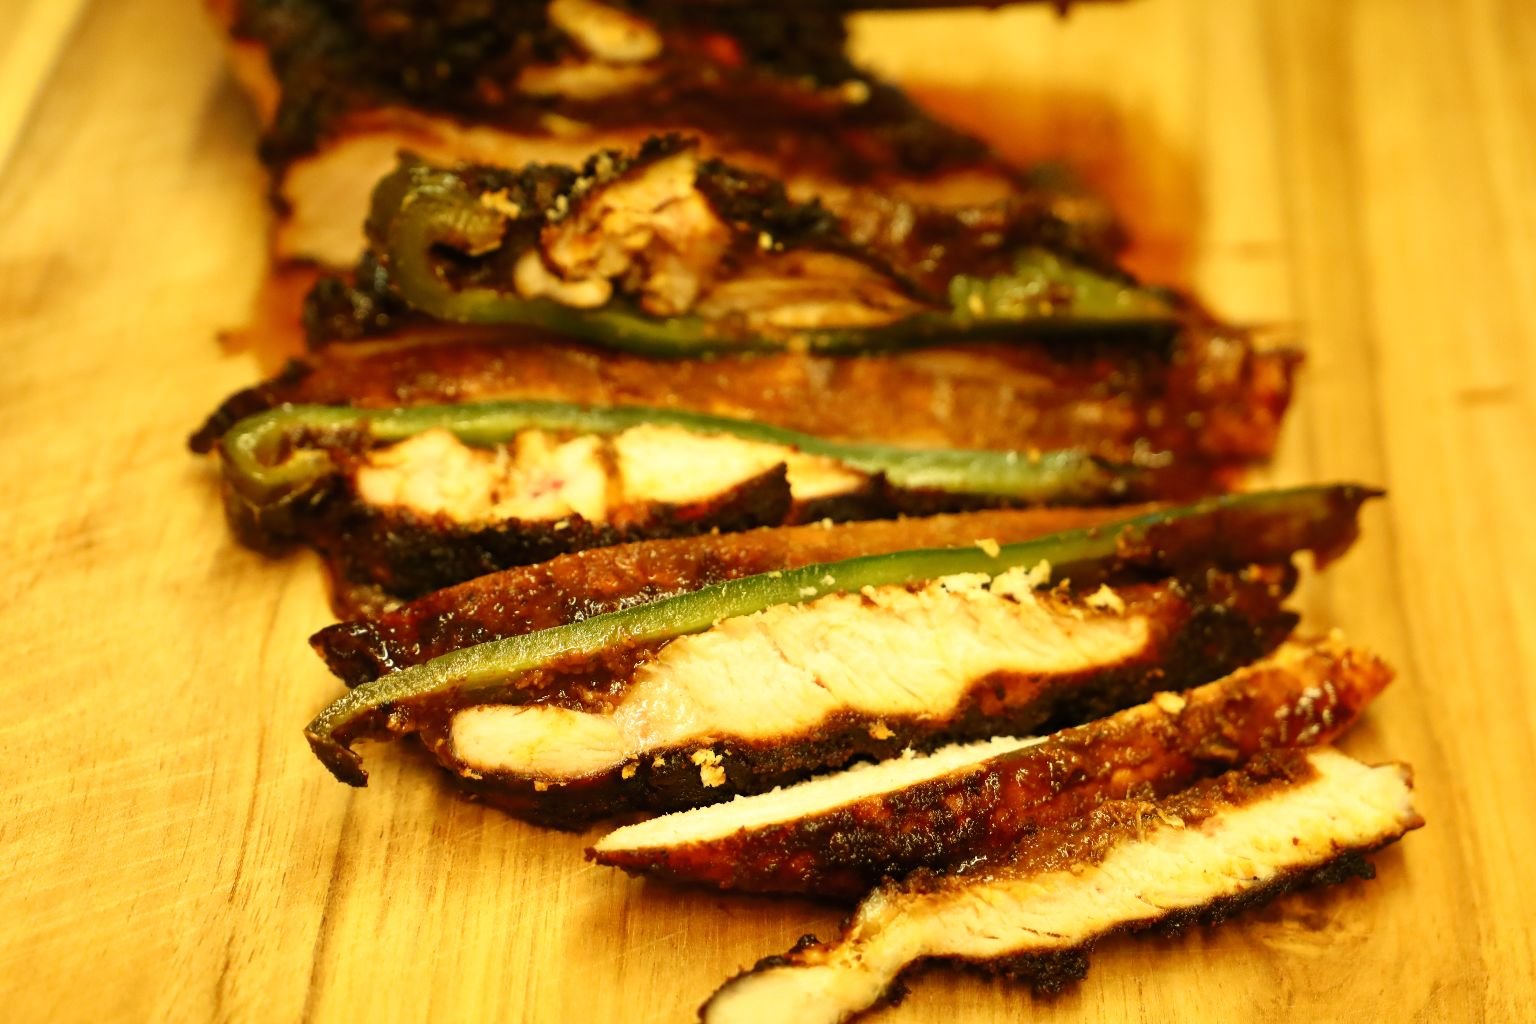
We love the look of the Green Poblano sliced alongside the Chicken.
Now The Chicken is Ready
————————————————————
More Slicing Before we are Ready to Eat
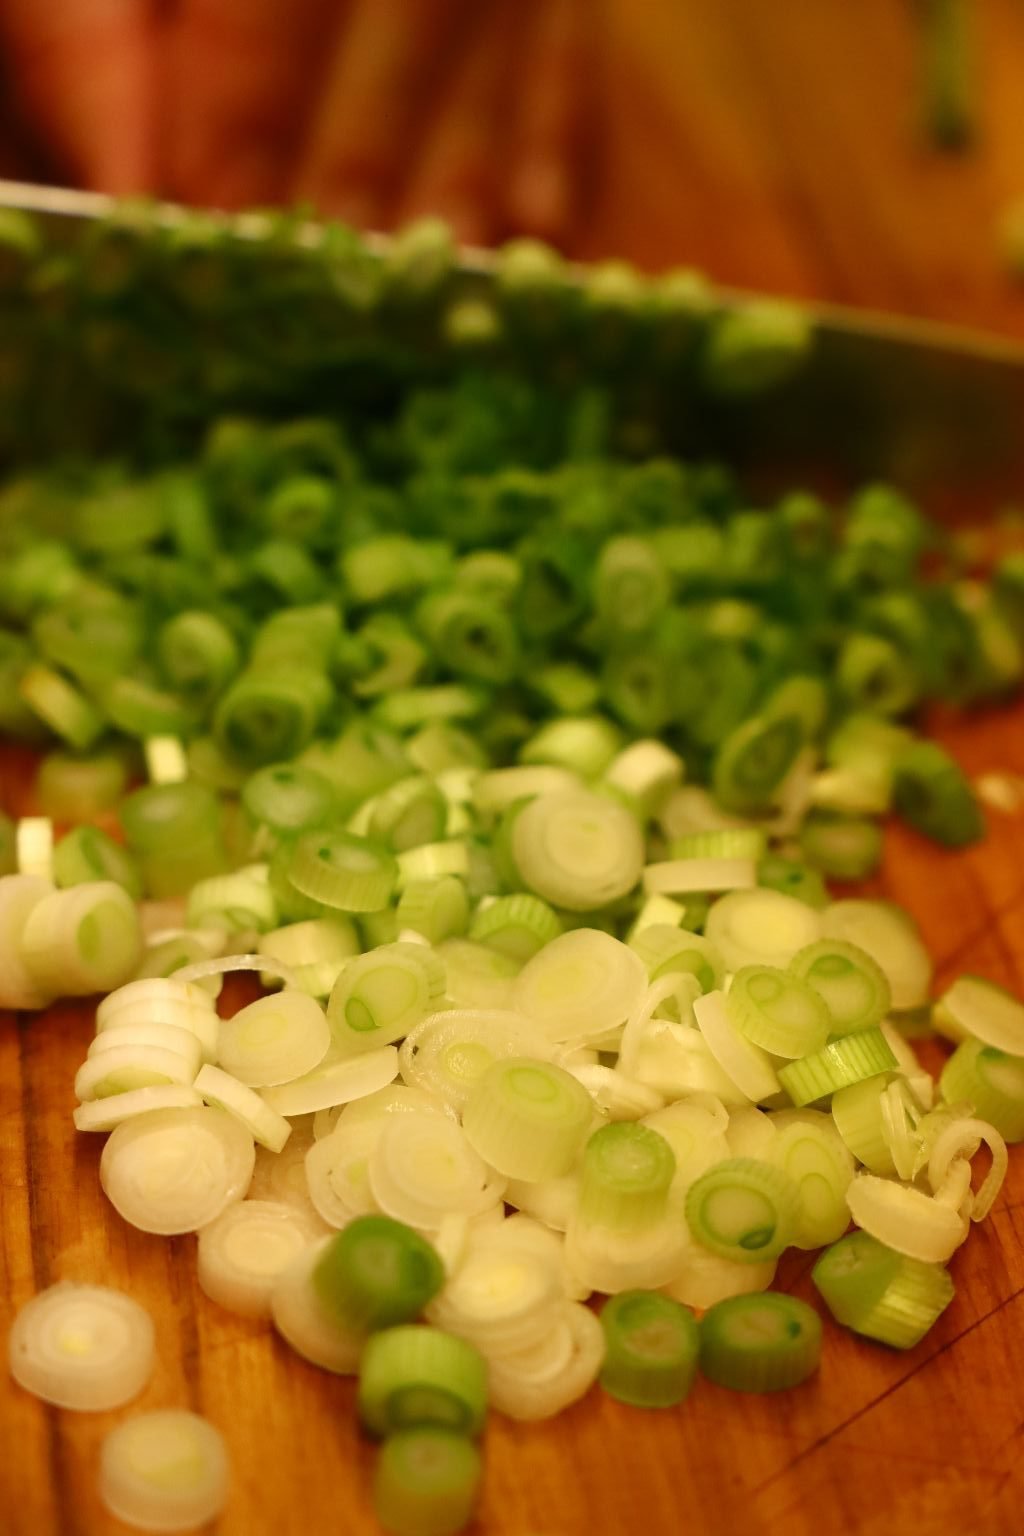
Spring Onions
Avocados From Mexico…

..sliced nice.
————————————————————–

Our Colorful Table

Fajitas with the Works! 🙂
——————————————————————-
Next Up:
Our Grilled Mole Stuffed Chicken Breast Sandwiches
This was my, Julie’s Idea:
I told Gordon to reserve two of our Grilled Mole Chicken Breasts and we can make sandwiches out of them.
Just another delicious way to eat them.
Sour Dough Bun, Iceberg Lettuce, Pico de Gayo, the Mole Stuffed Chicken Breast, Tomato, Guacamole Salsa and Sour Cream
Topped with some Mango and Leftover Bell Peppers with a sprinkling of chopped Spring Onions, Cilantro and Lime 🙂
———————————————————-
Assembling the Sandwiches
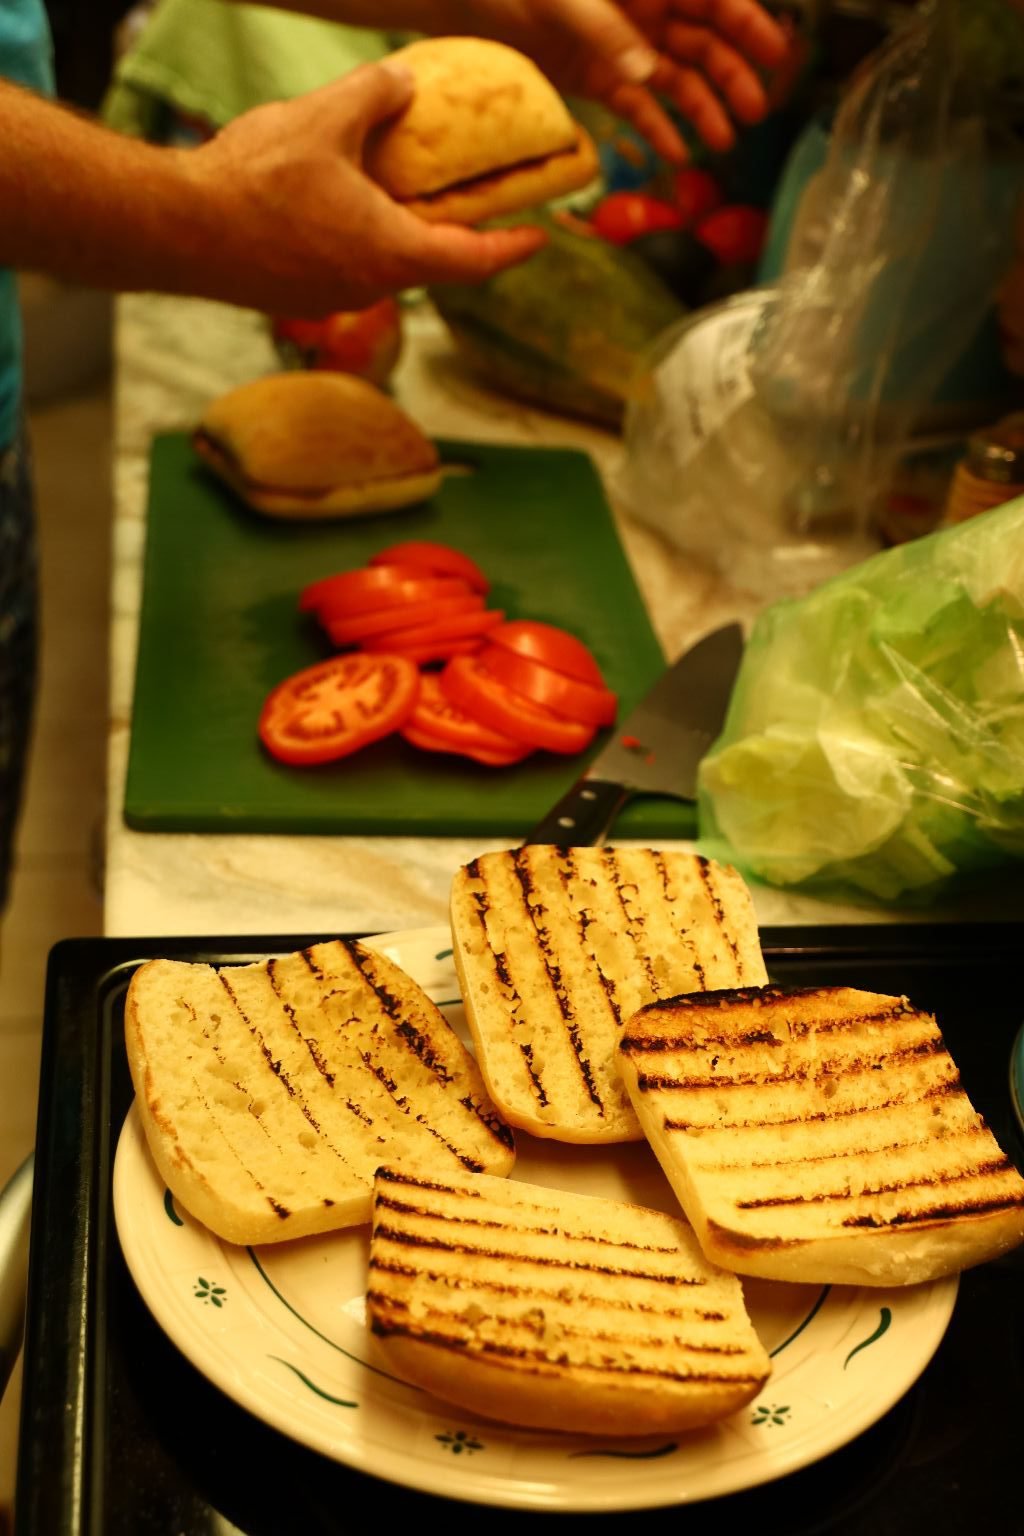
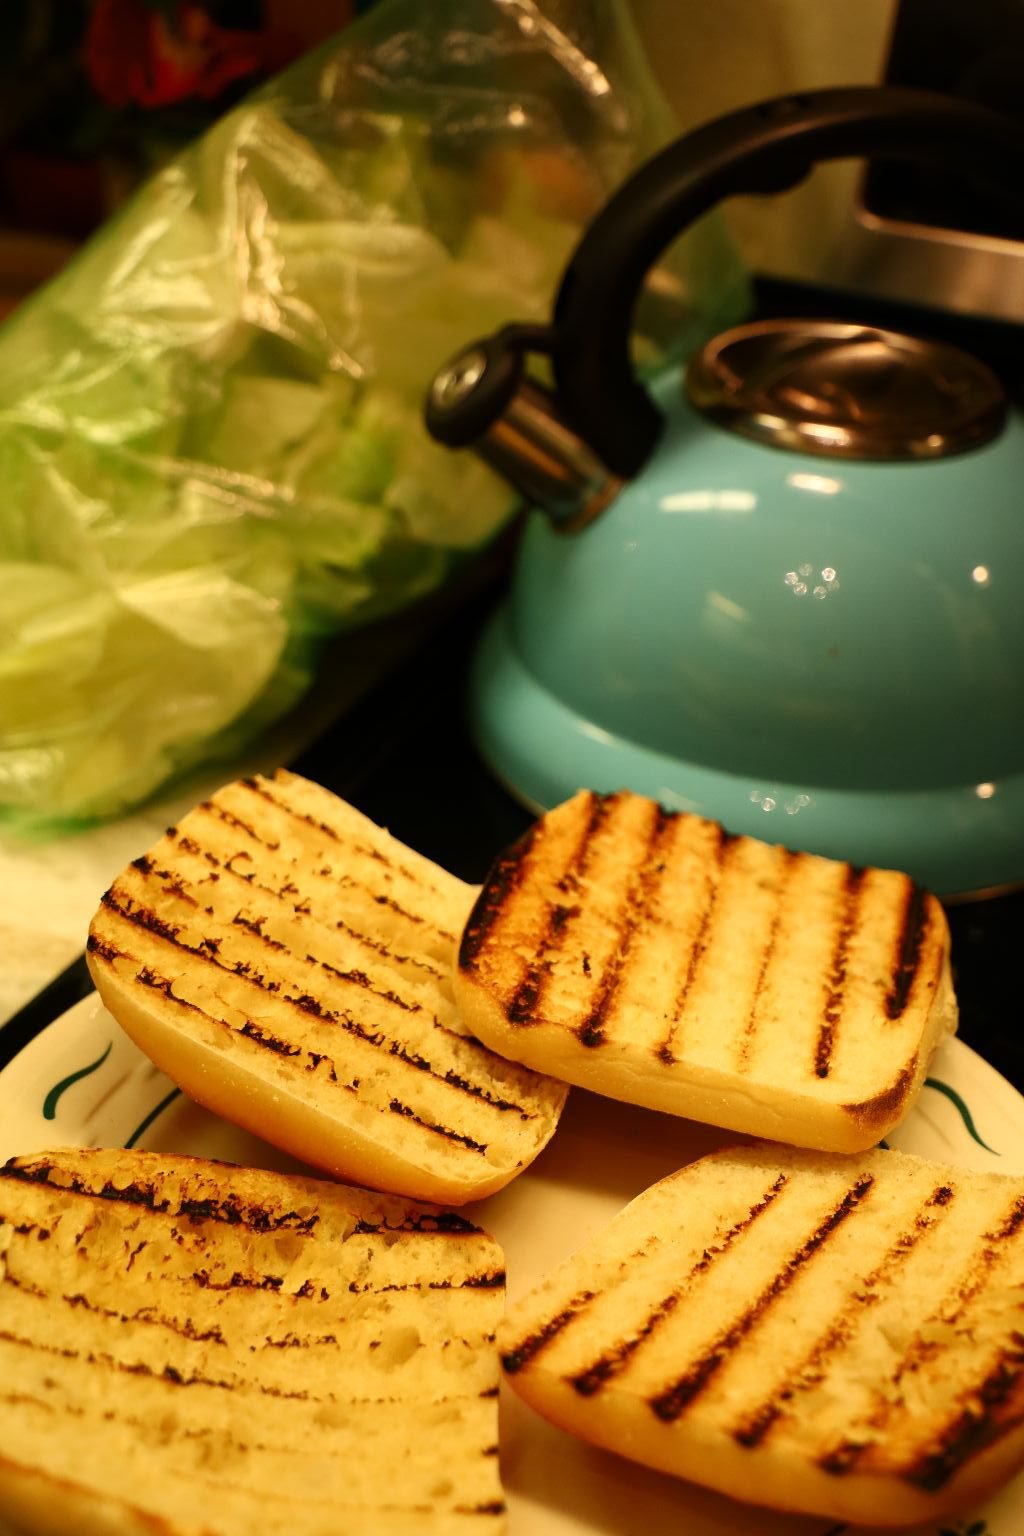
Gordon Grilled the Bread First

Heated up our Breasts in the Oven

Slicing up some Mango
We originally wanted Mango on our Sandwiches but they were already packed full enough so we had it on the side.


Pico de Gayo, then Iceberg Lettuce
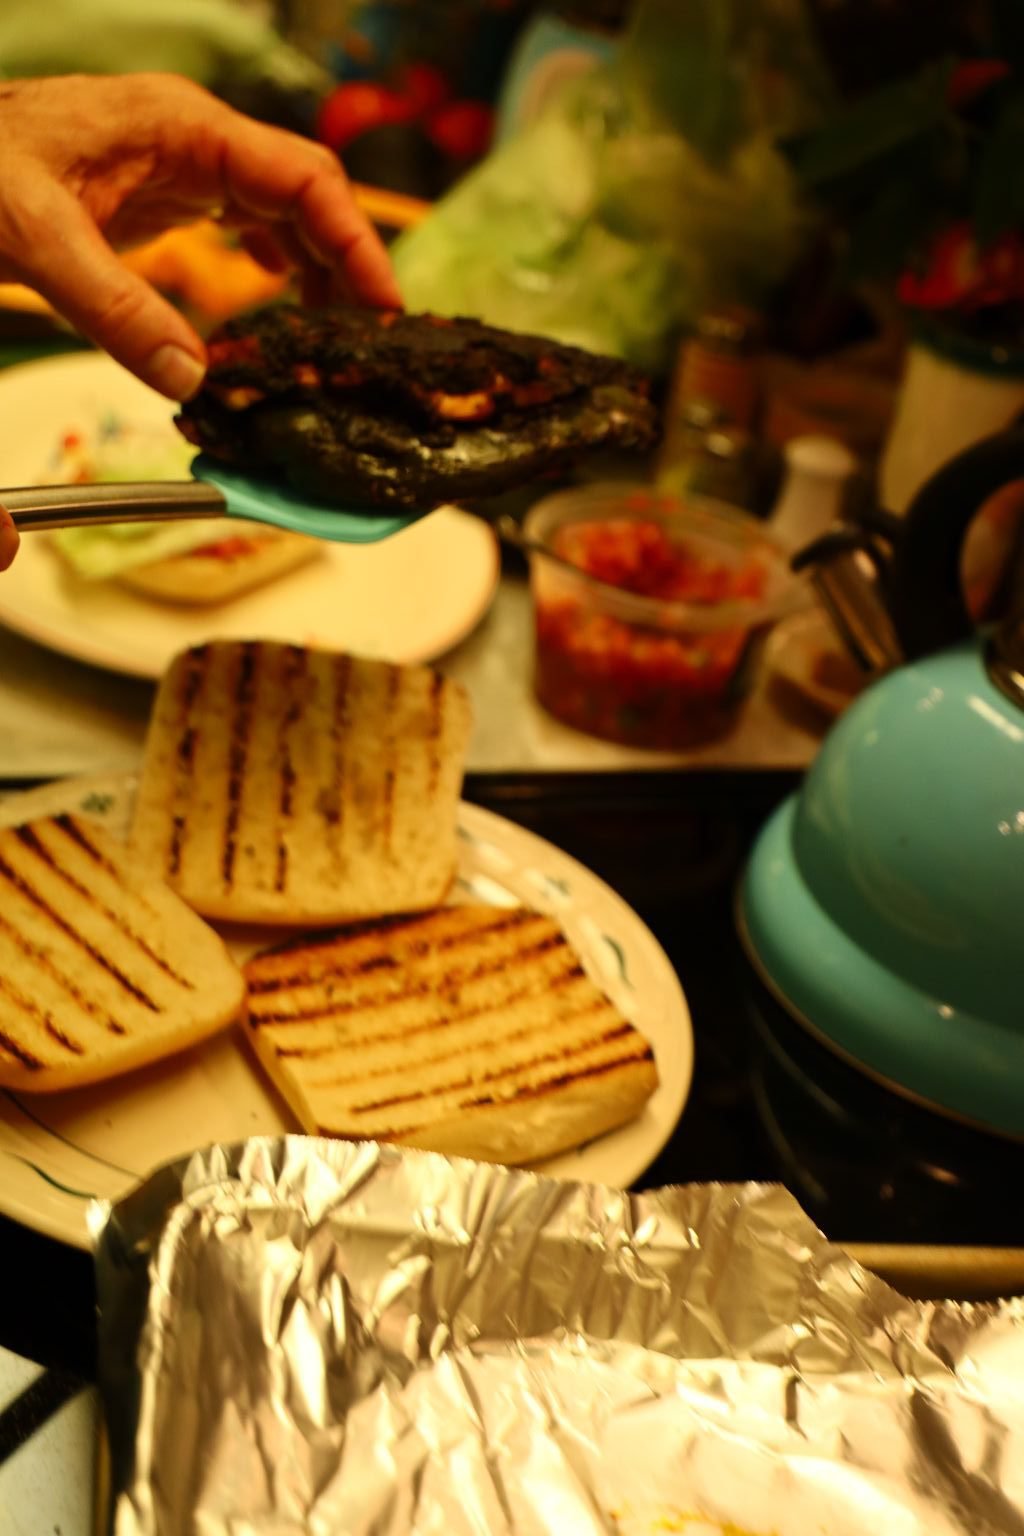
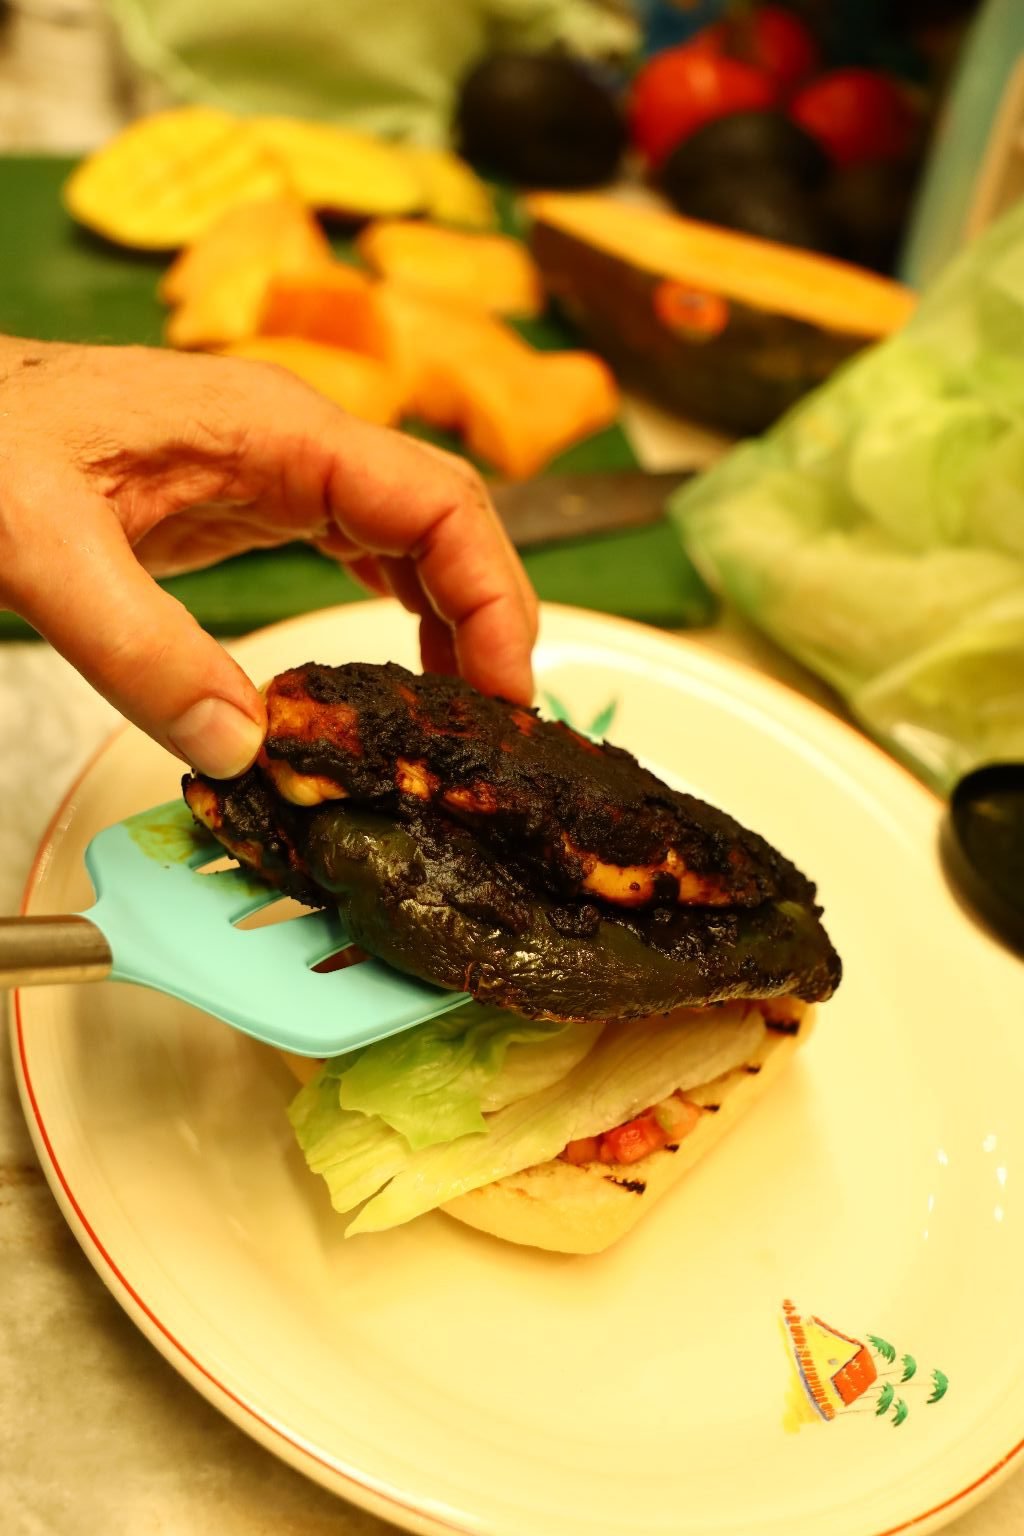
Mole Chicken Breast
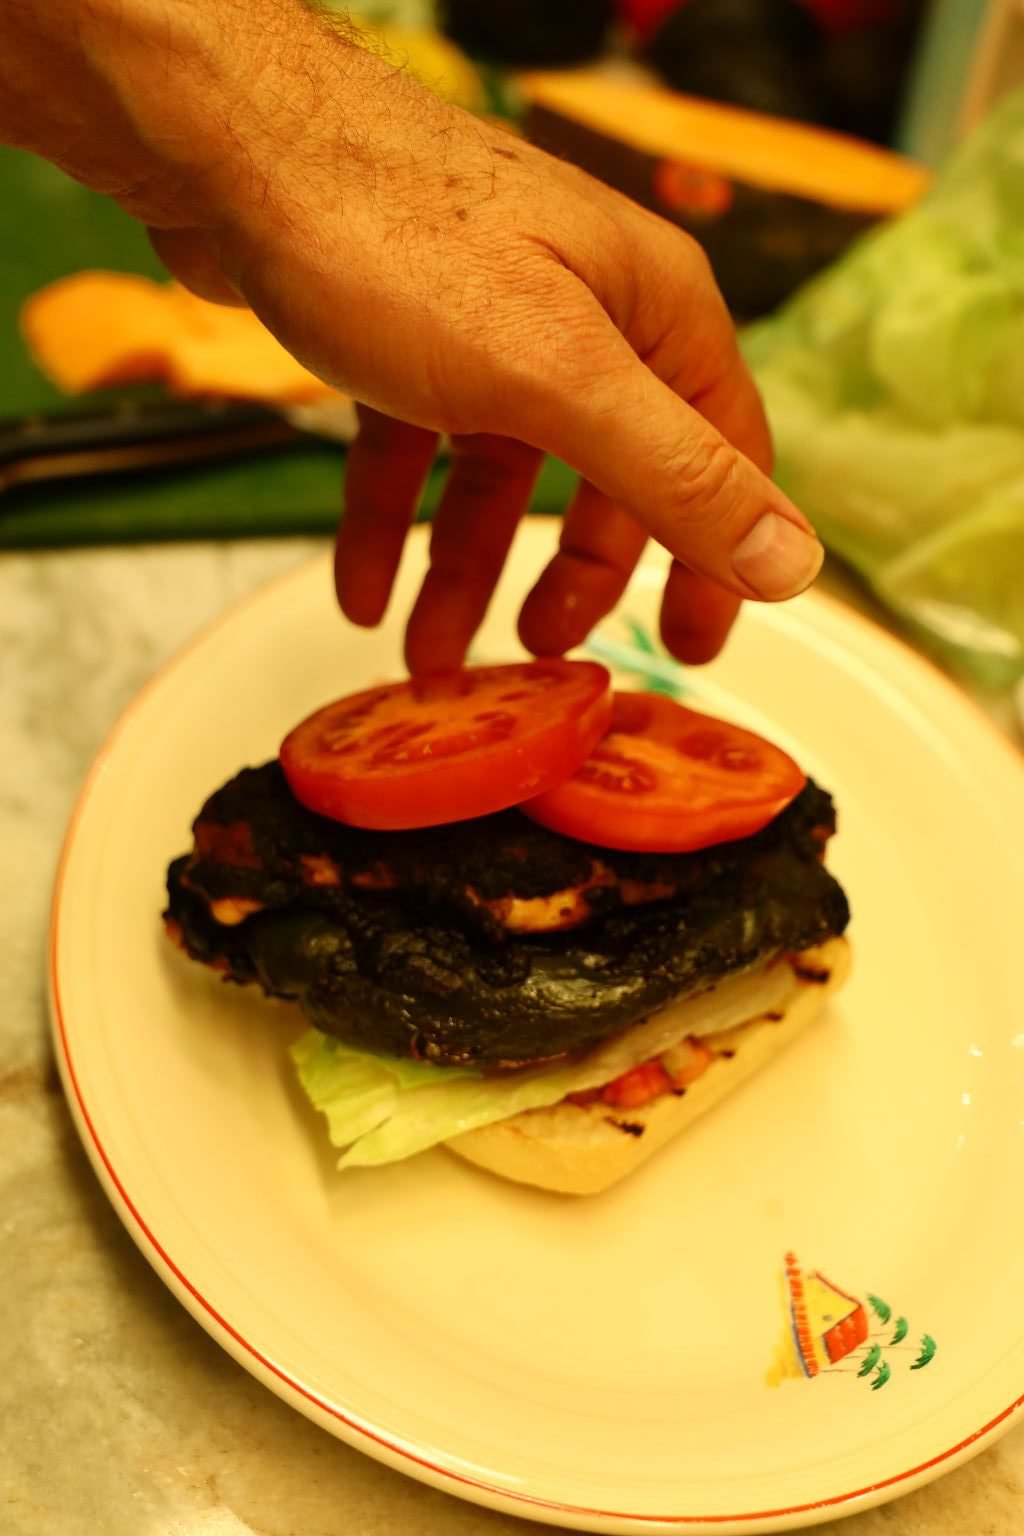

Tomato, then Guacamole Salsa
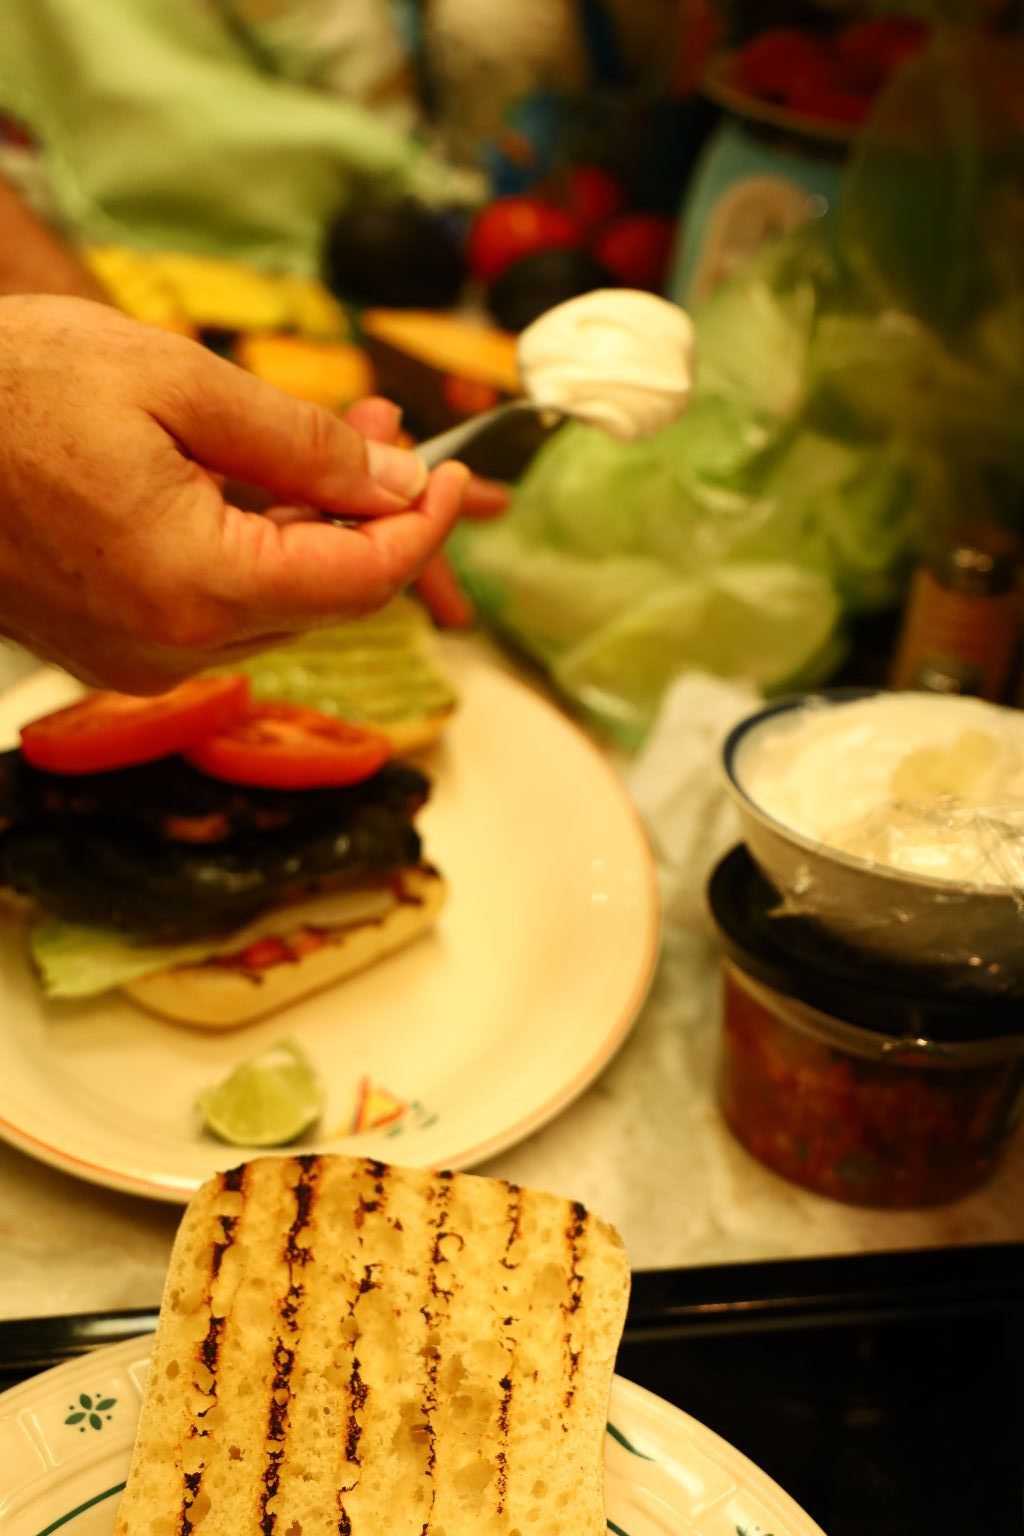
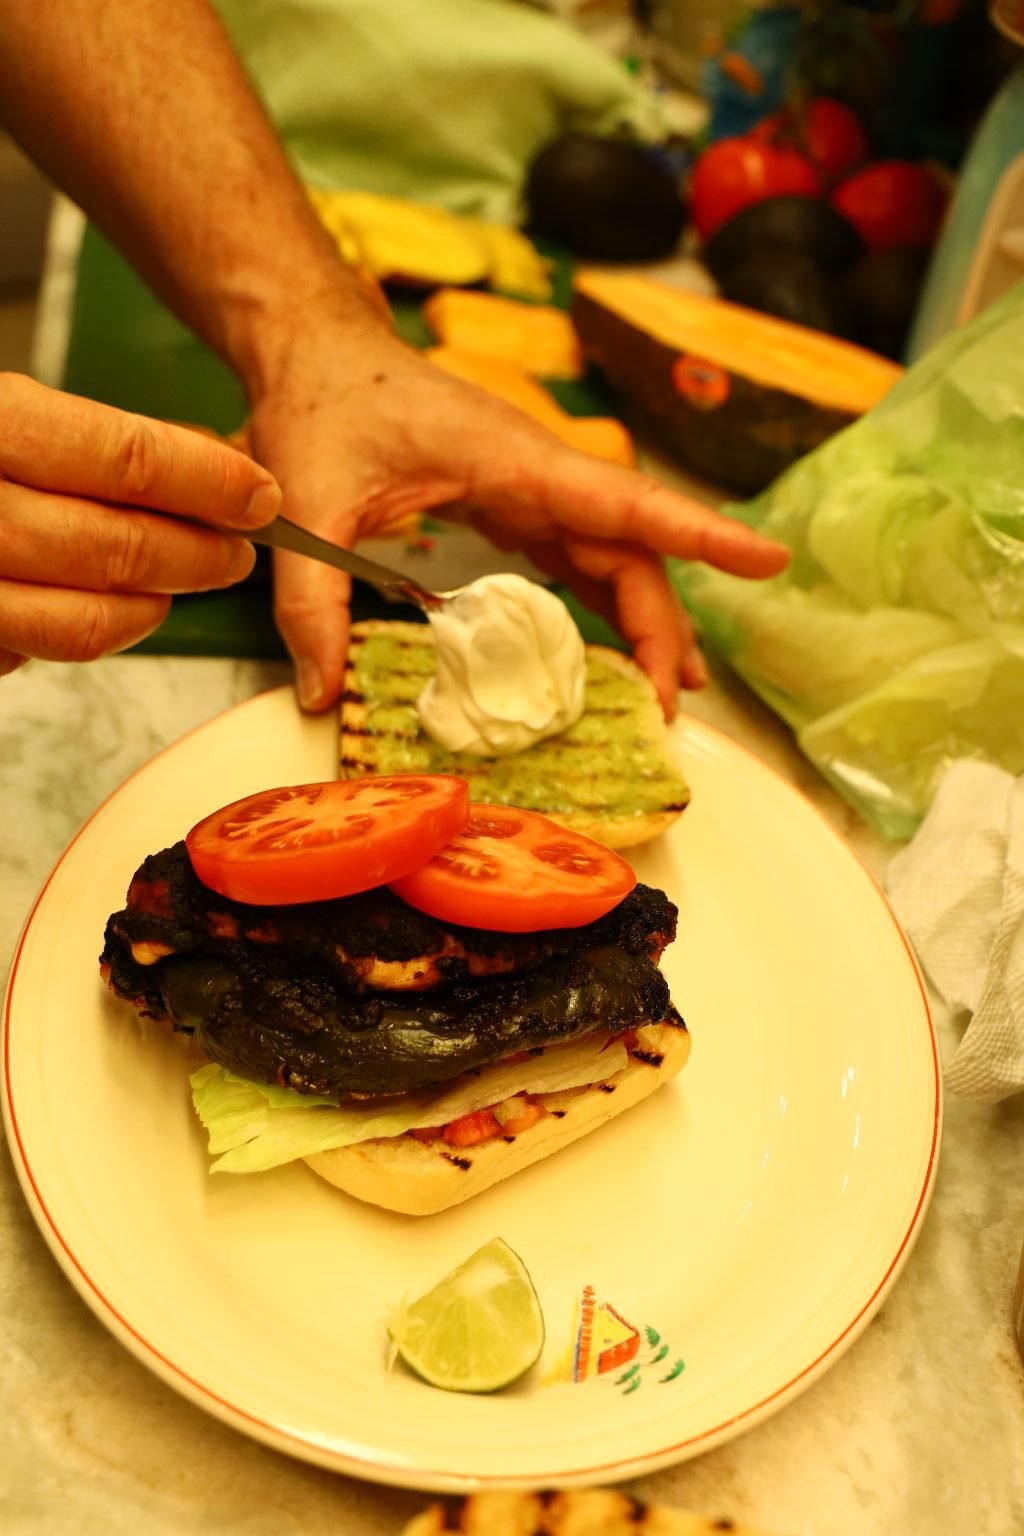
Next, a Dollop of Sour Cream
Excellente!!

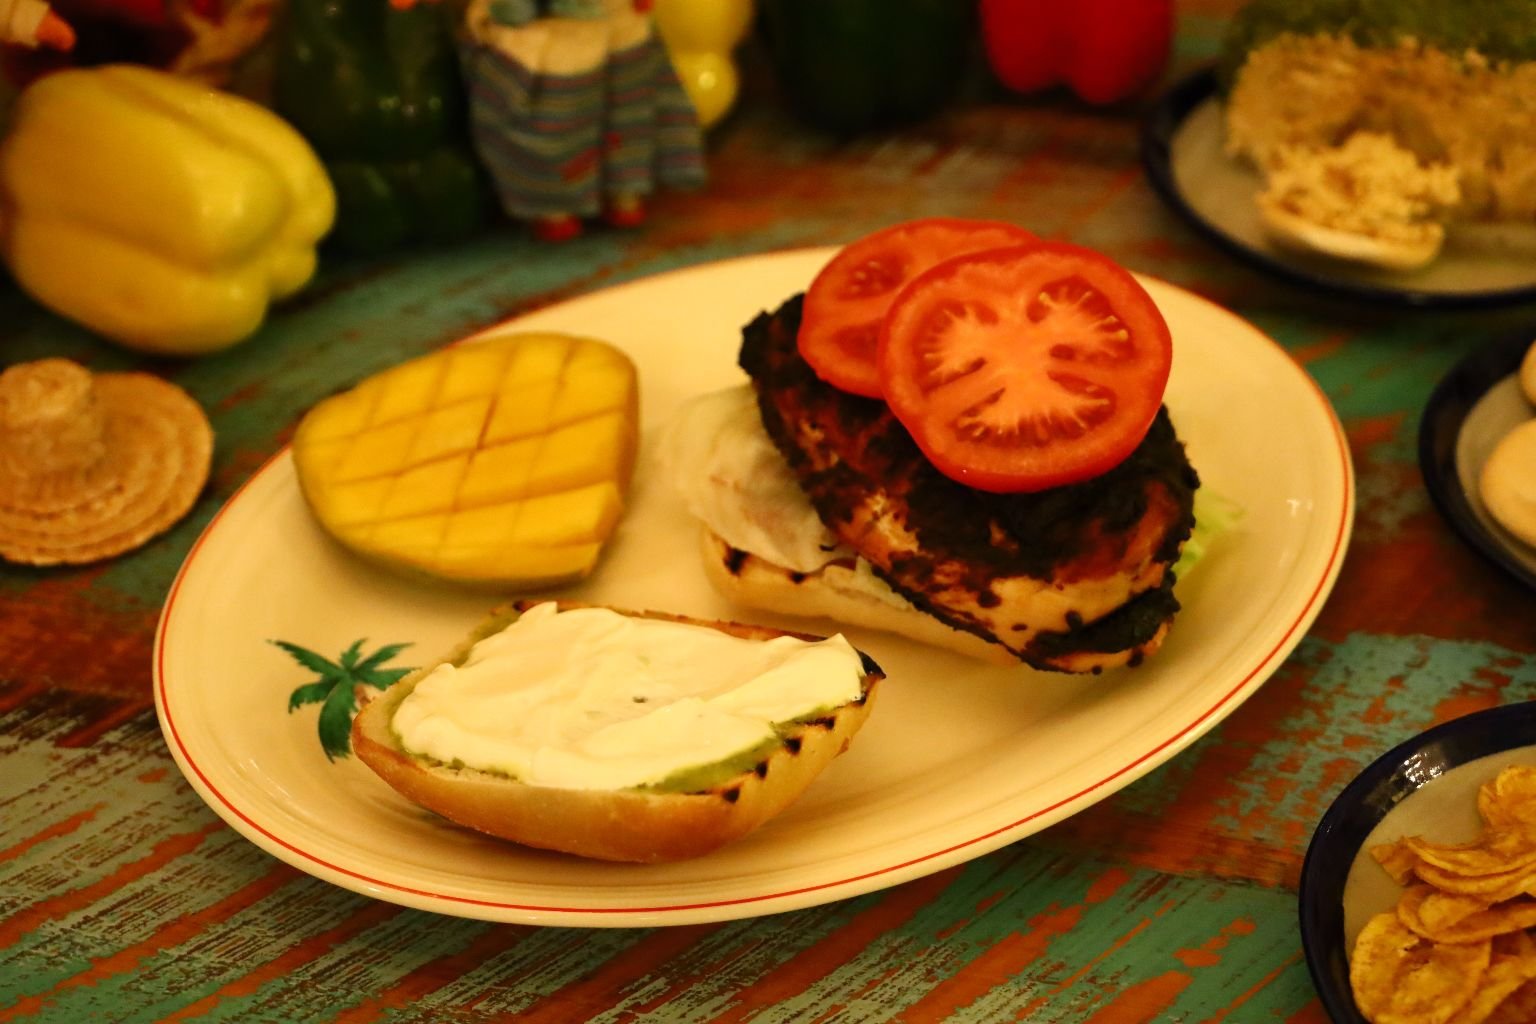
We ate these with some Plantain Chips and our leftover Mexican Cheeseball and Crackers.
———————————————————————–
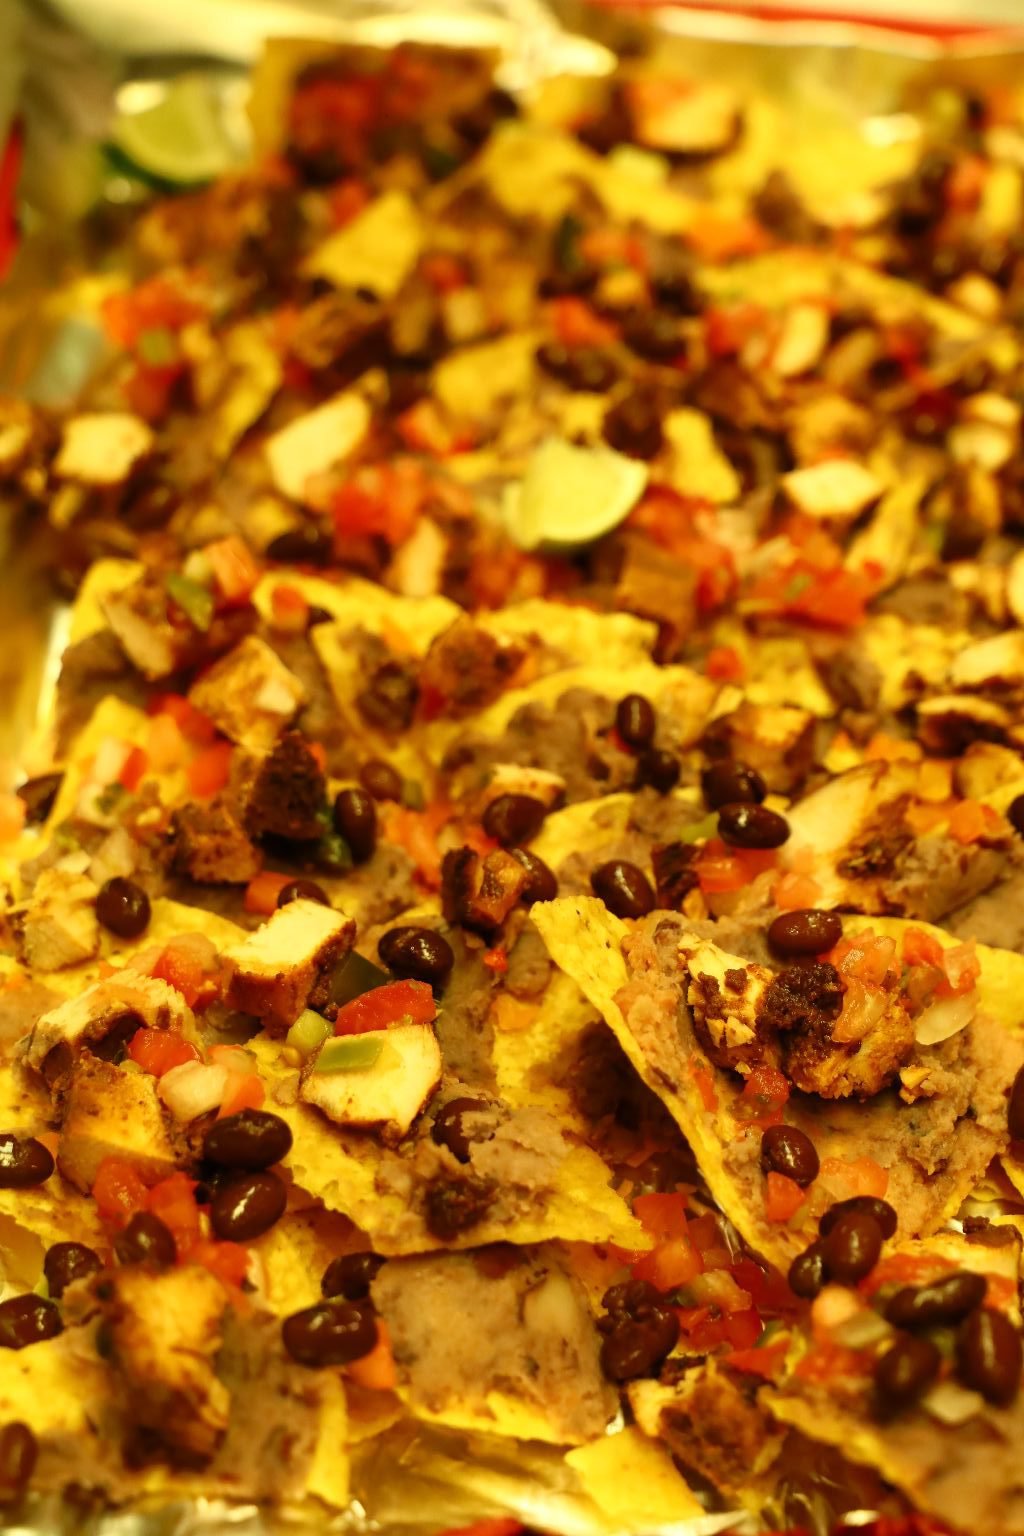
Our Leftover Chicken Mole in Nachos
I wish that you could see the ingredients better in these photos.
But, everything here is all the leftovers from the foods above.
Gordon and I did two separate trays of Nachos, each one a bit different.
———————————————————————–


We started out by opening a few cans of Re-Fried Beans and heating them up in sauce pans on the stove top.

We just warmed the Beans through.


We then spread the different Re-Fried Beans onto different Tortilla Chips on an aluminum lined baking sheet.

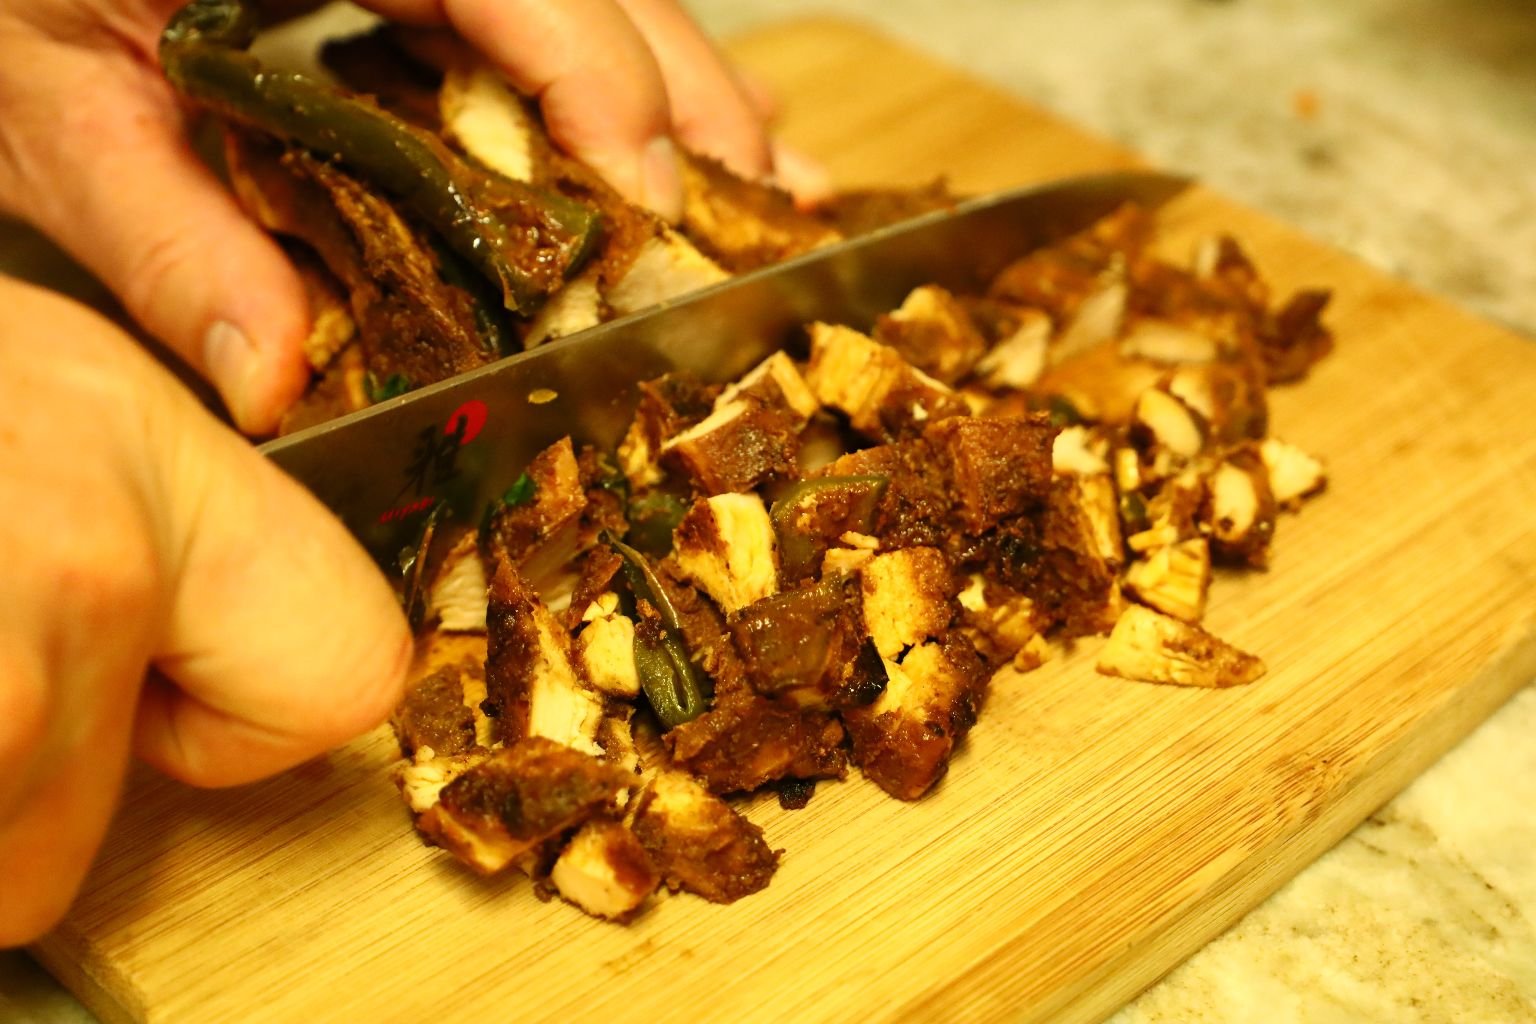
Gordon Chopping Our Leftover Grilled Mole Chicken Stuffed Breasts
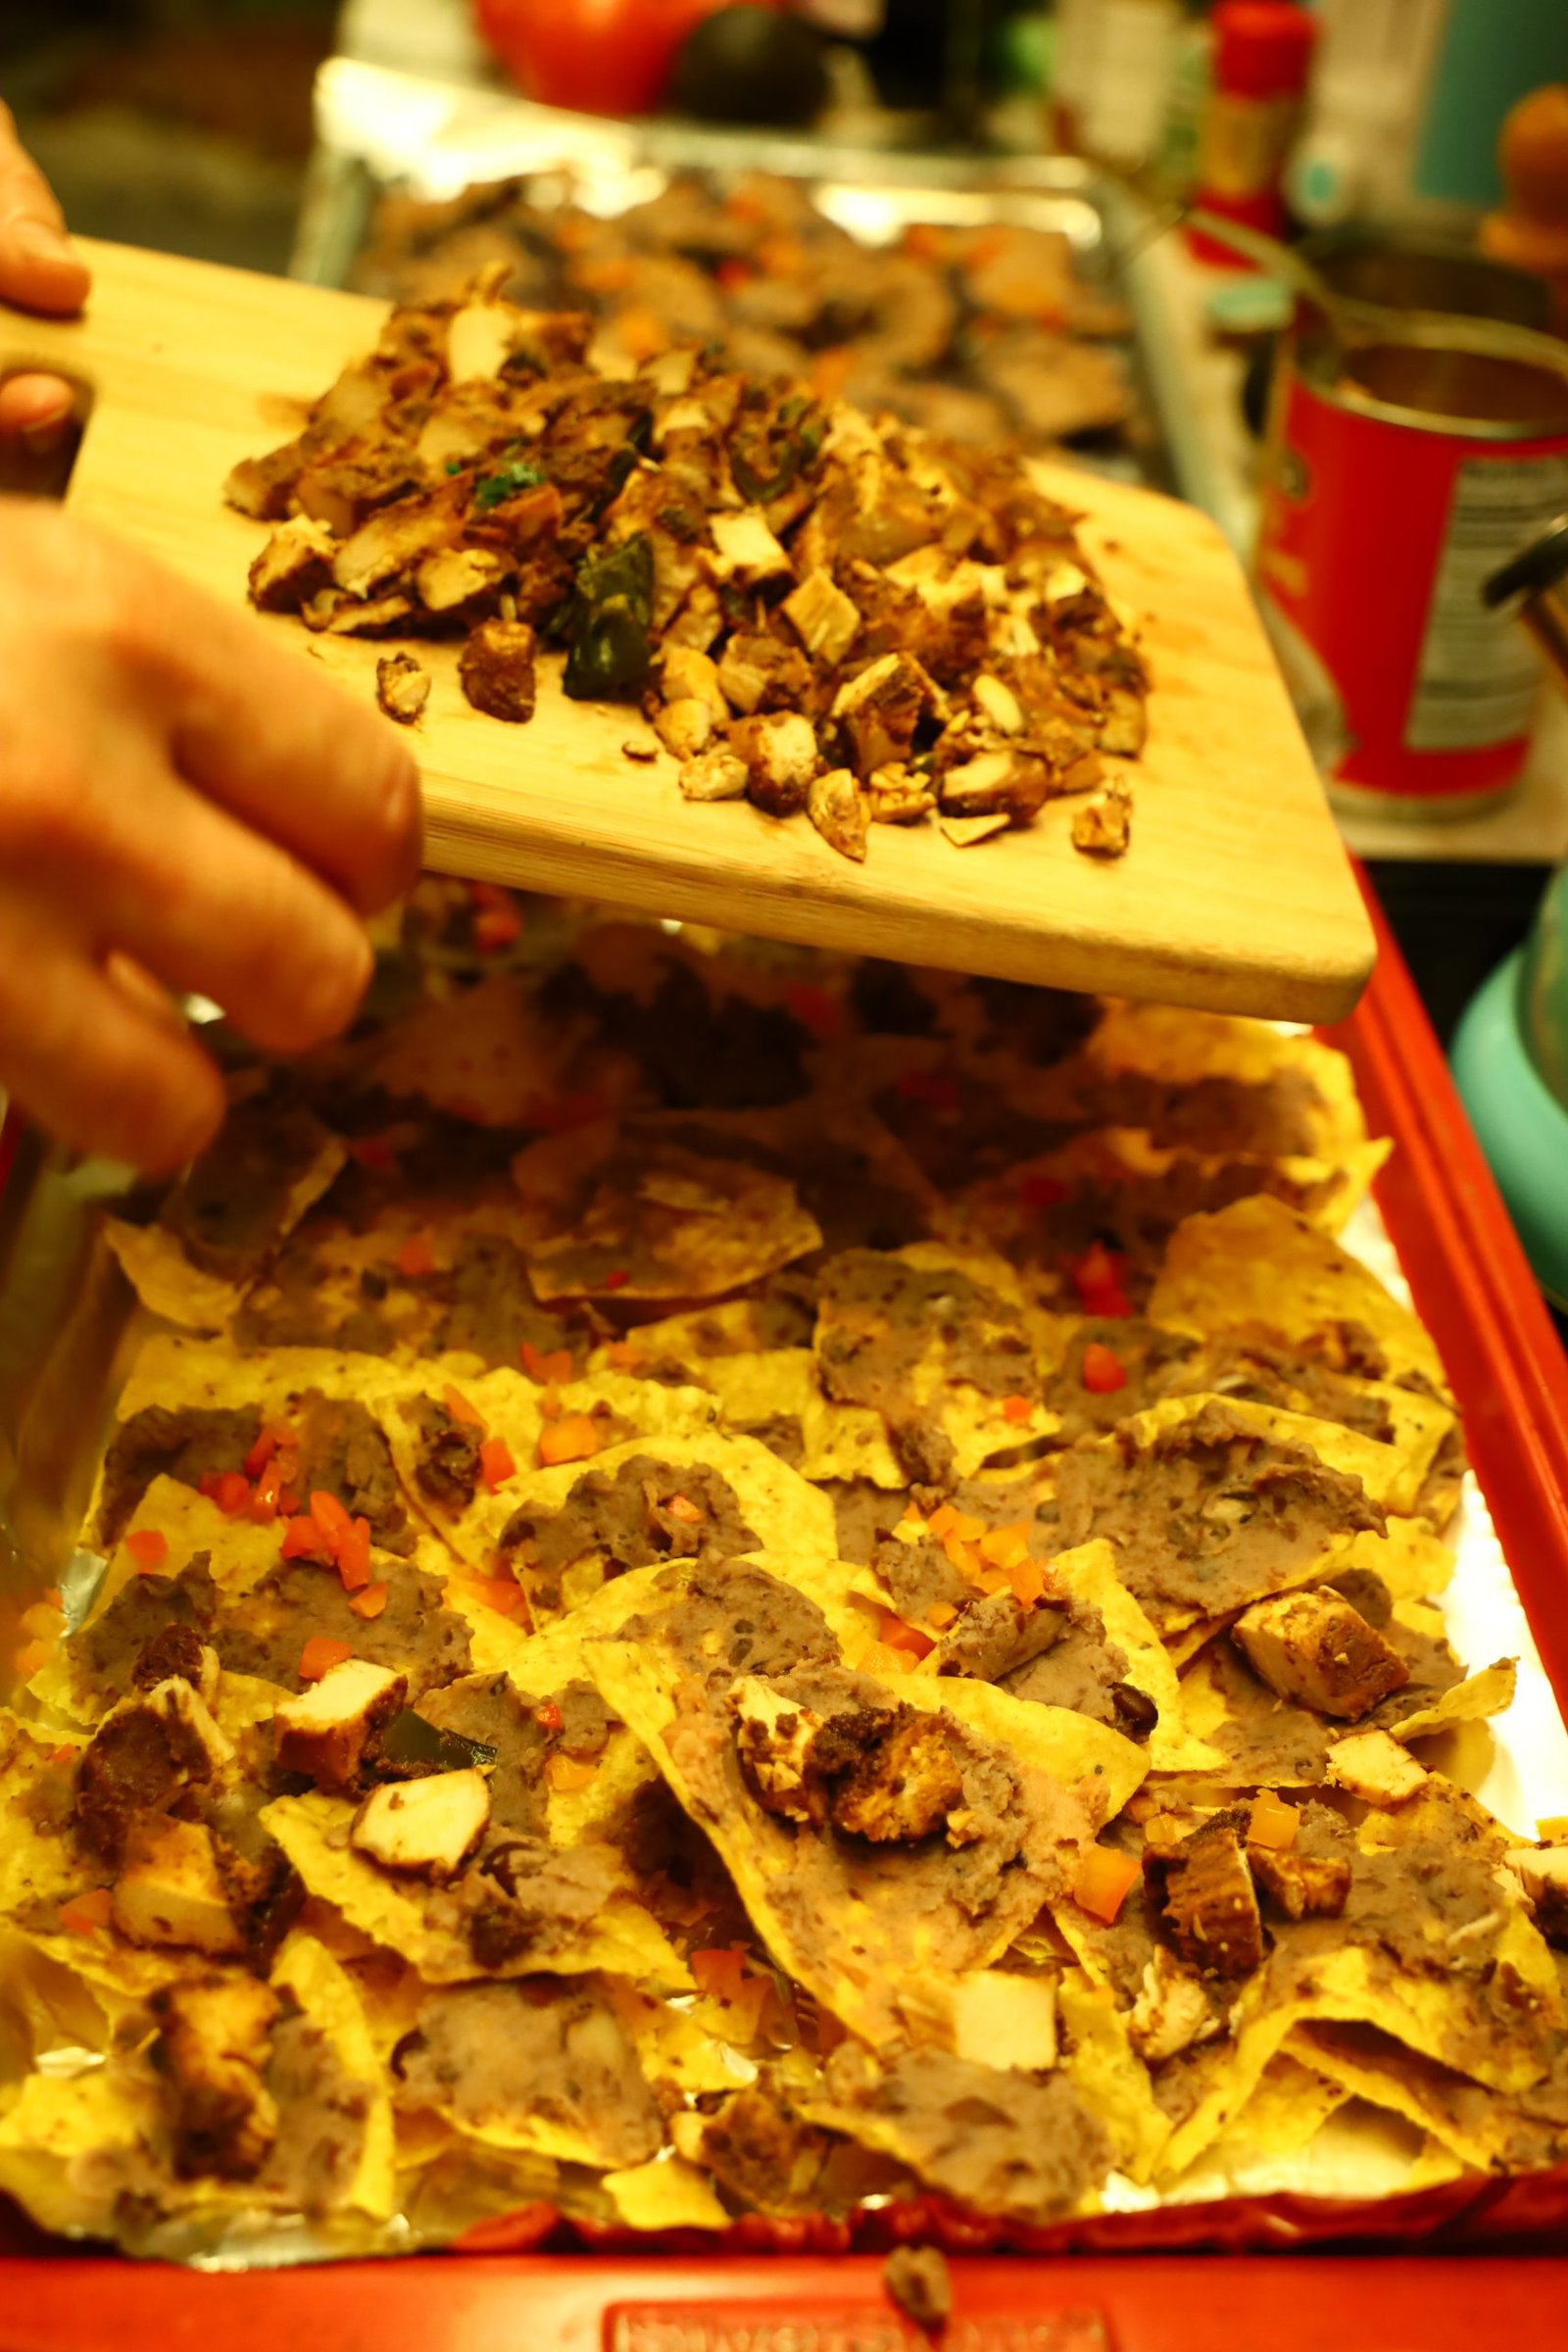
Gordon scattering around our chopped Mole Chicken, and a sprinkling of our Pico de Gayo.

—————————————————————
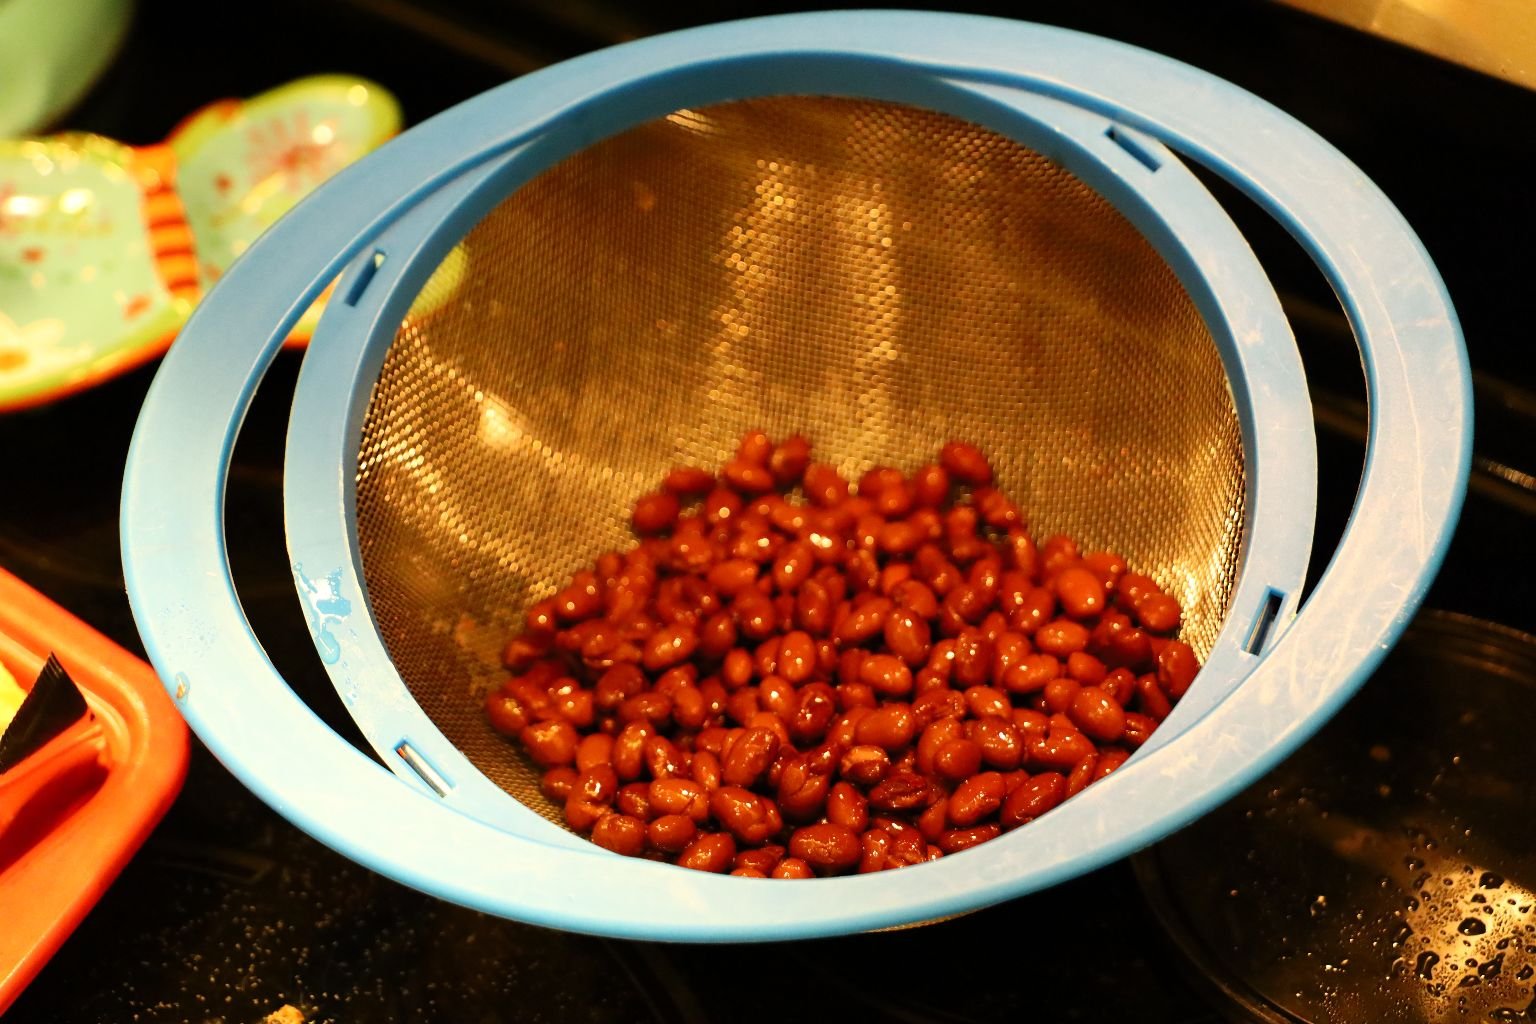
A drained and rinsed can of Black Beans.
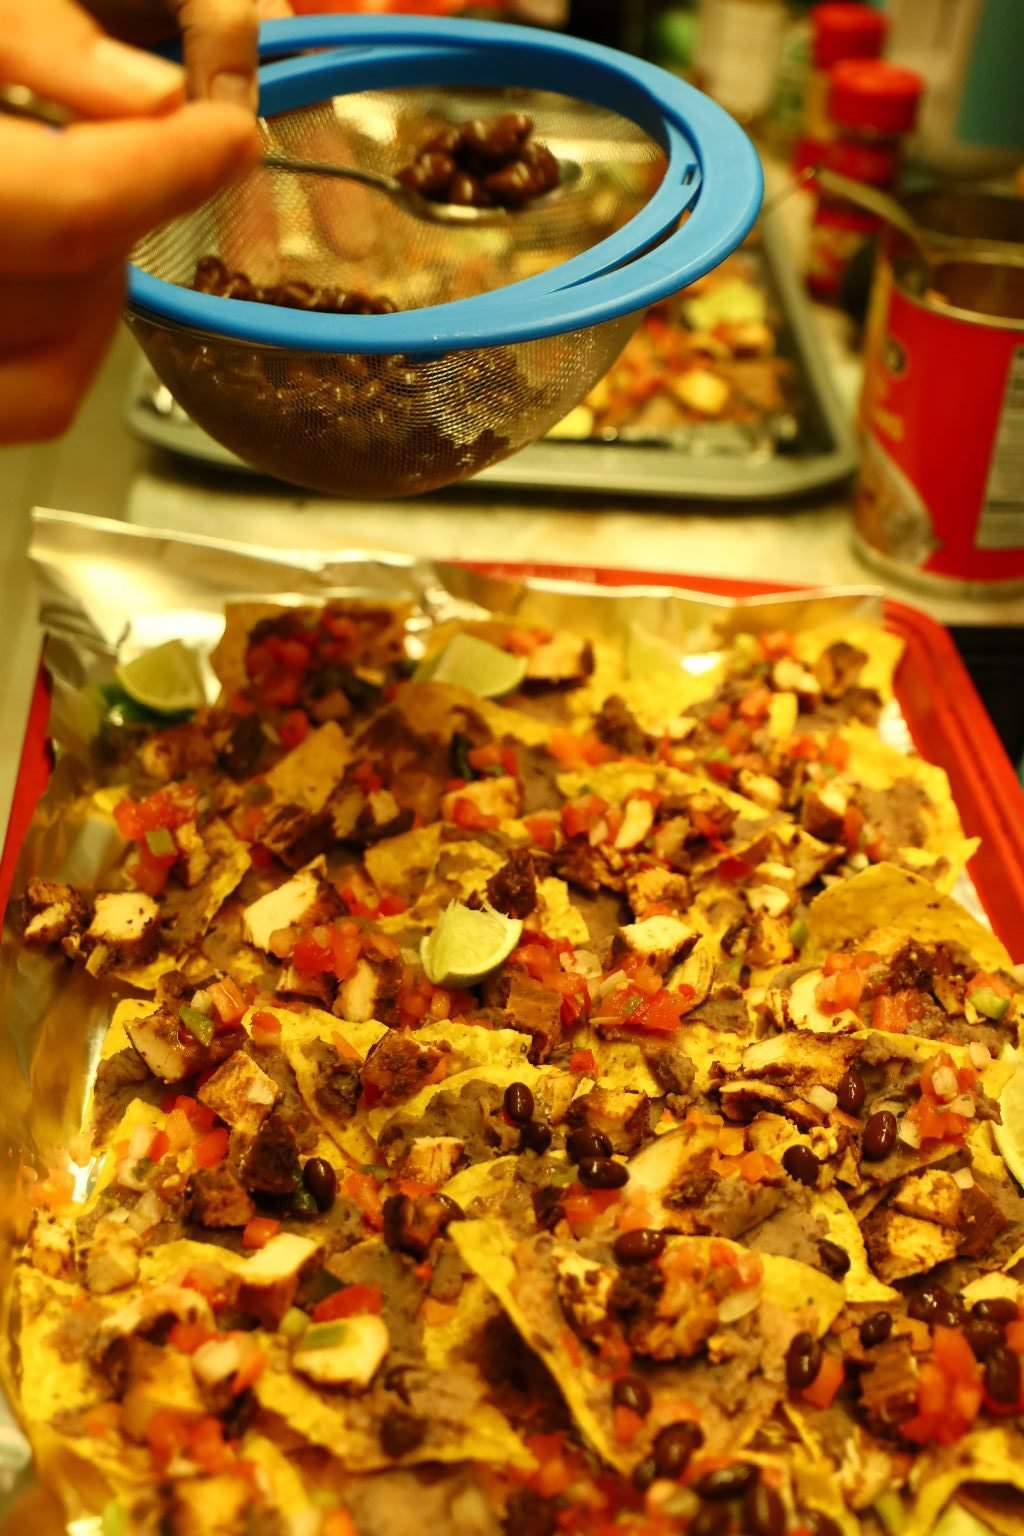

Just Scatter Them About
—————————————————————-
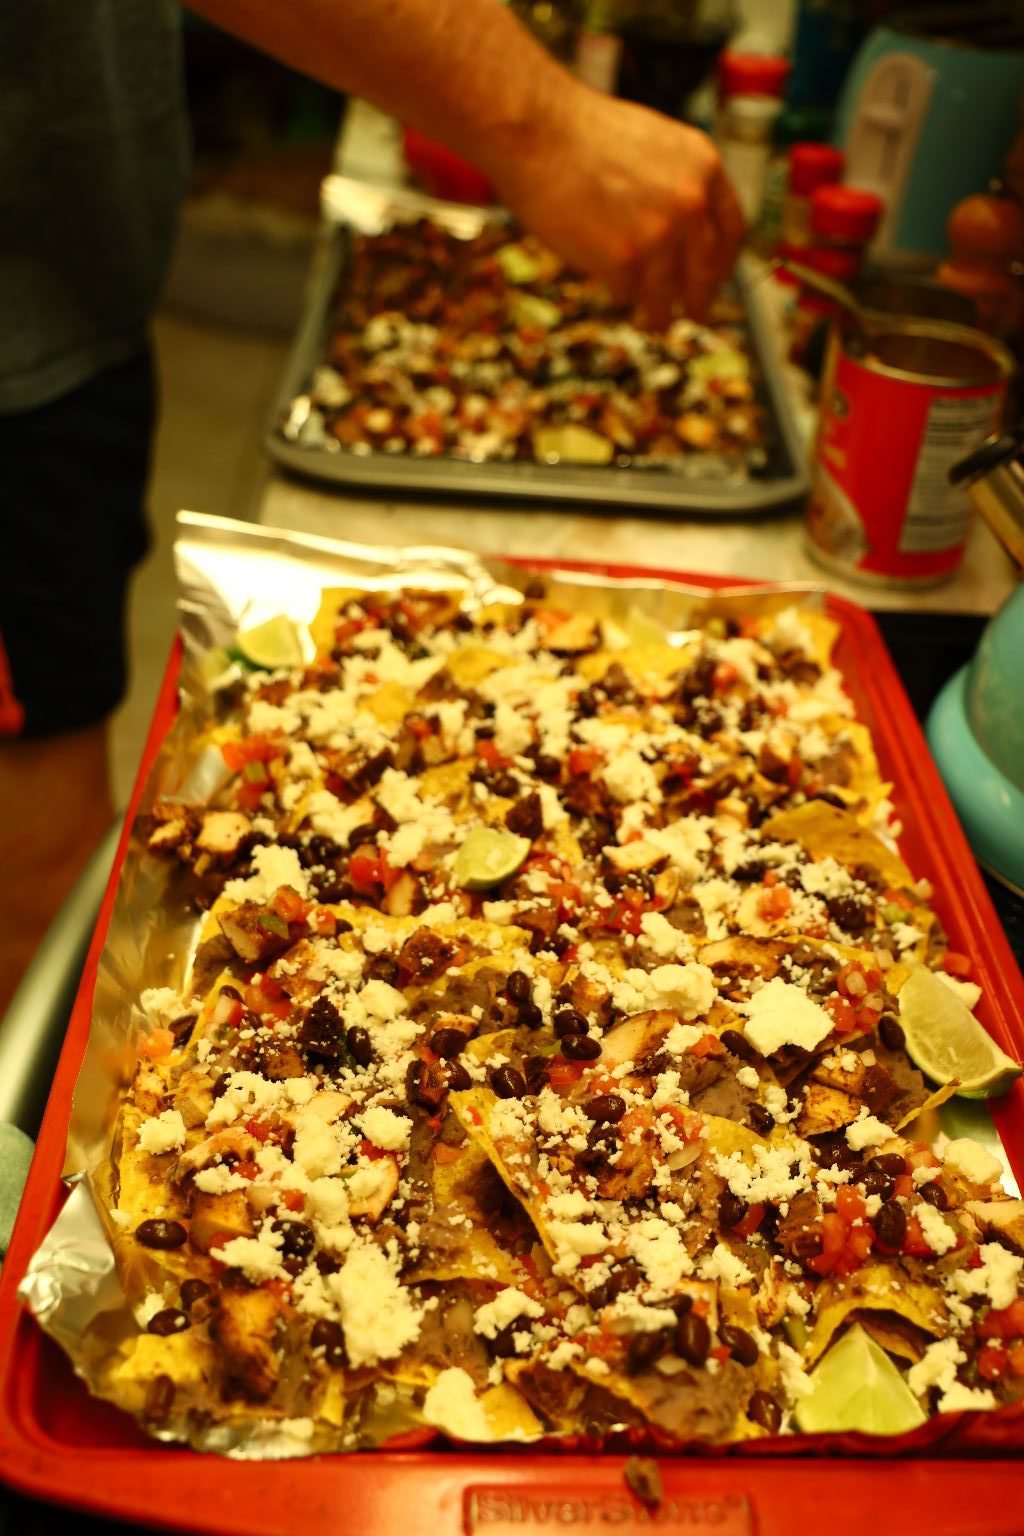
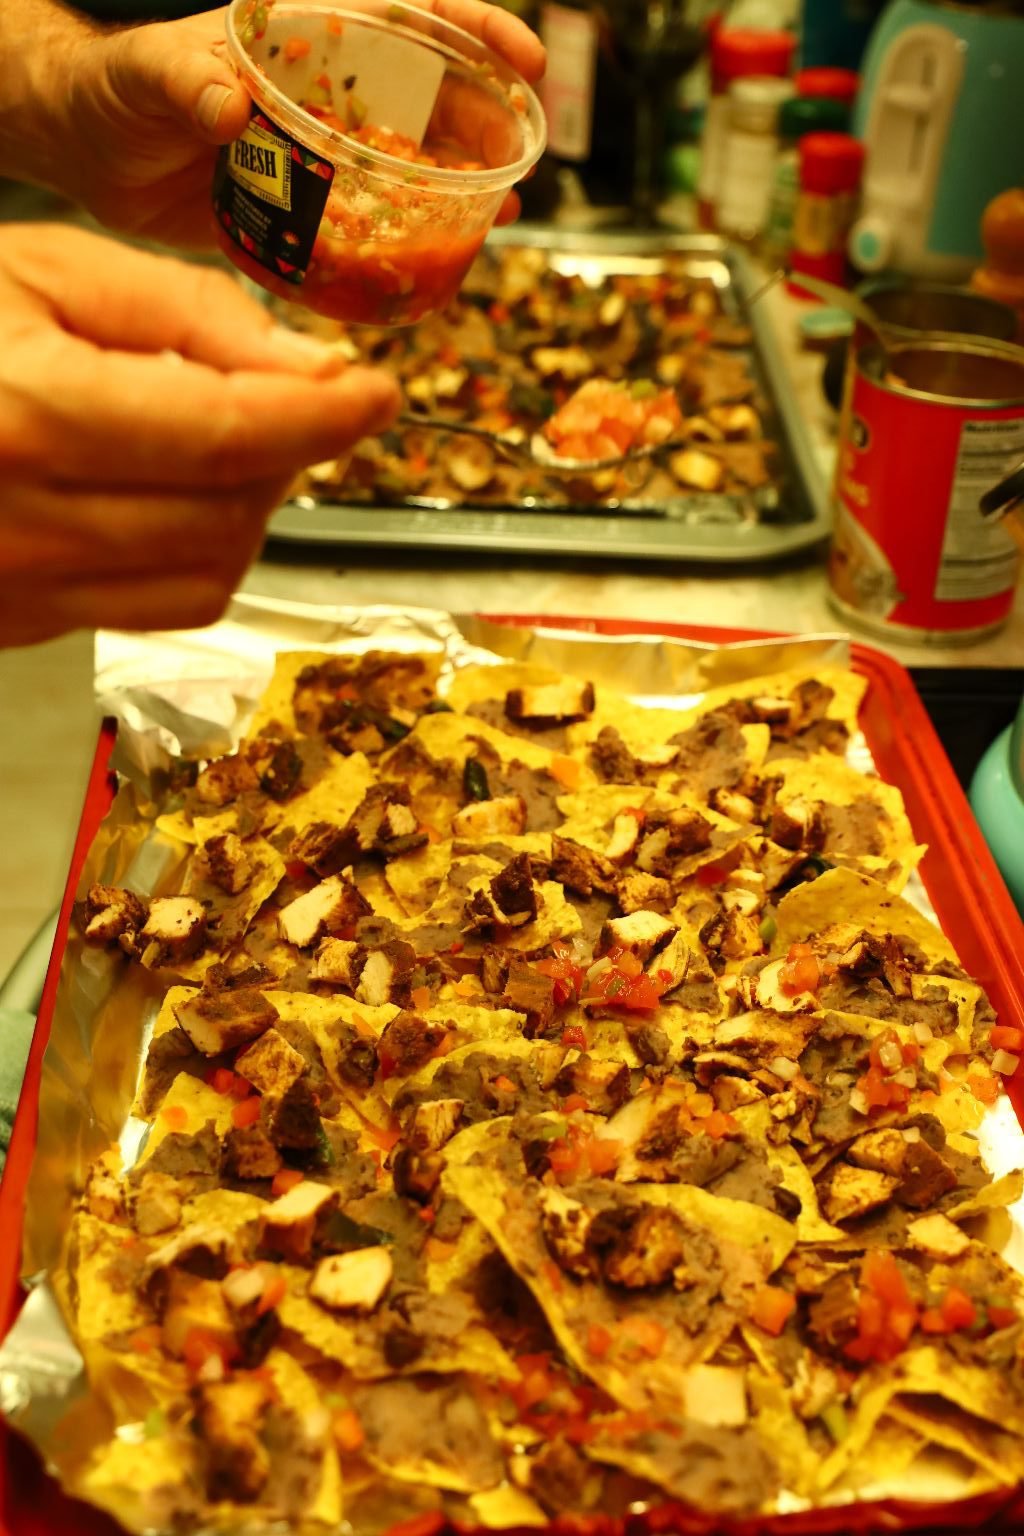
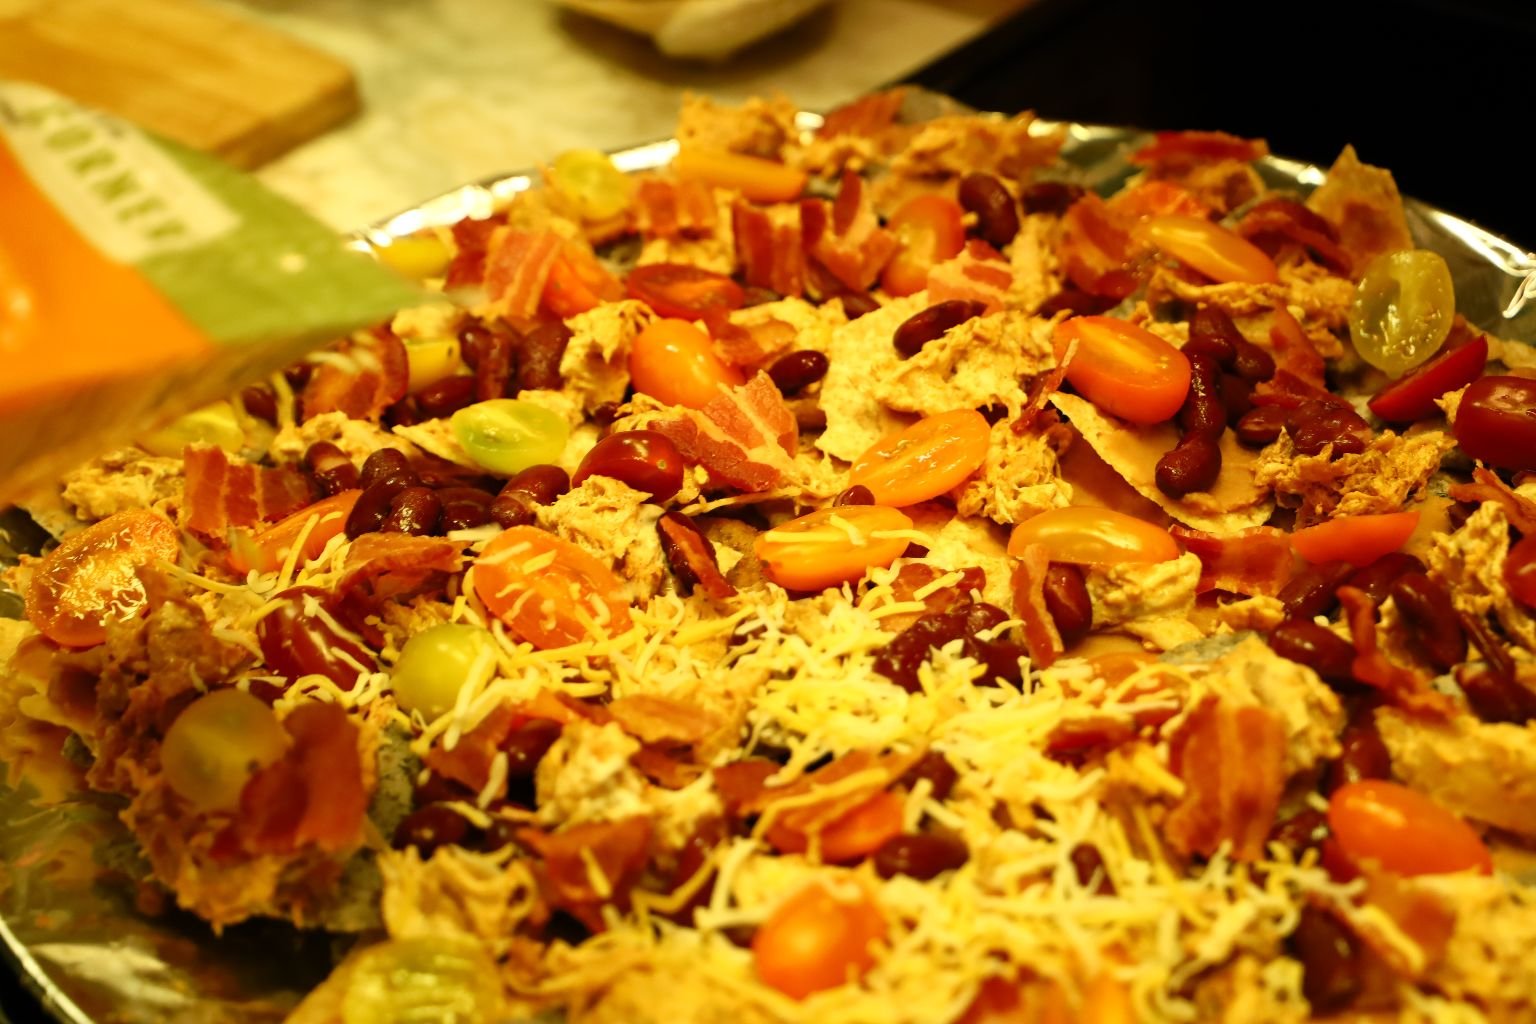
Now Add Whatever you Like

Mexican Cheeses, Limes, Sour Cream, Chopped Spring Onions, Chili Powder, etc…..
—————————————————————–
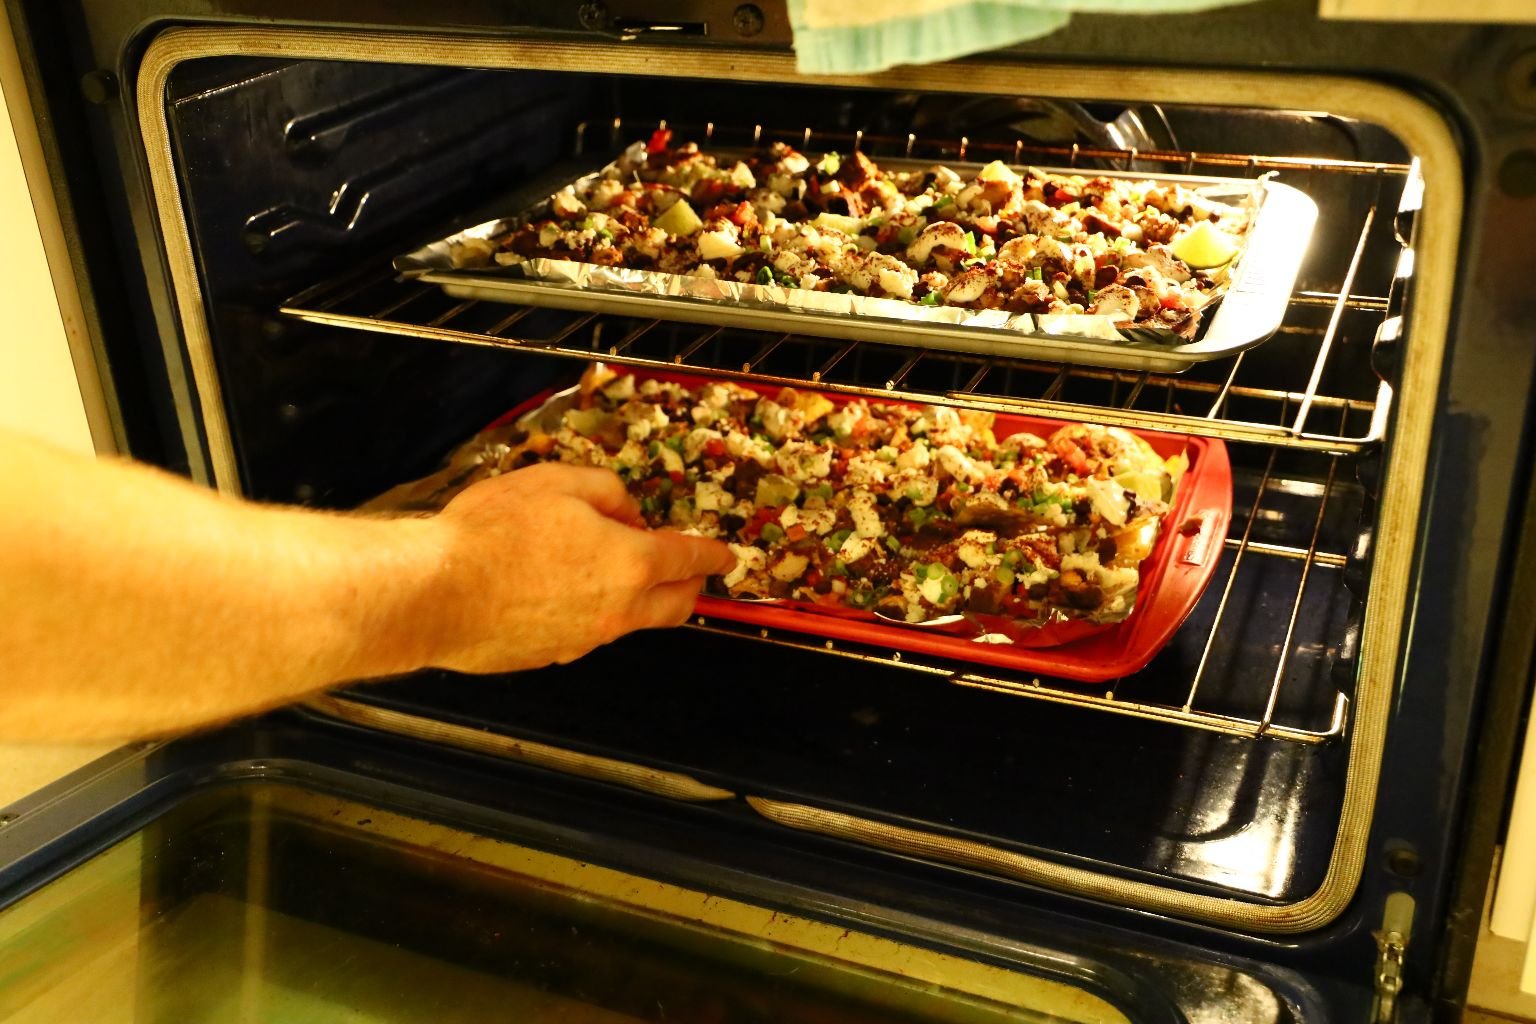
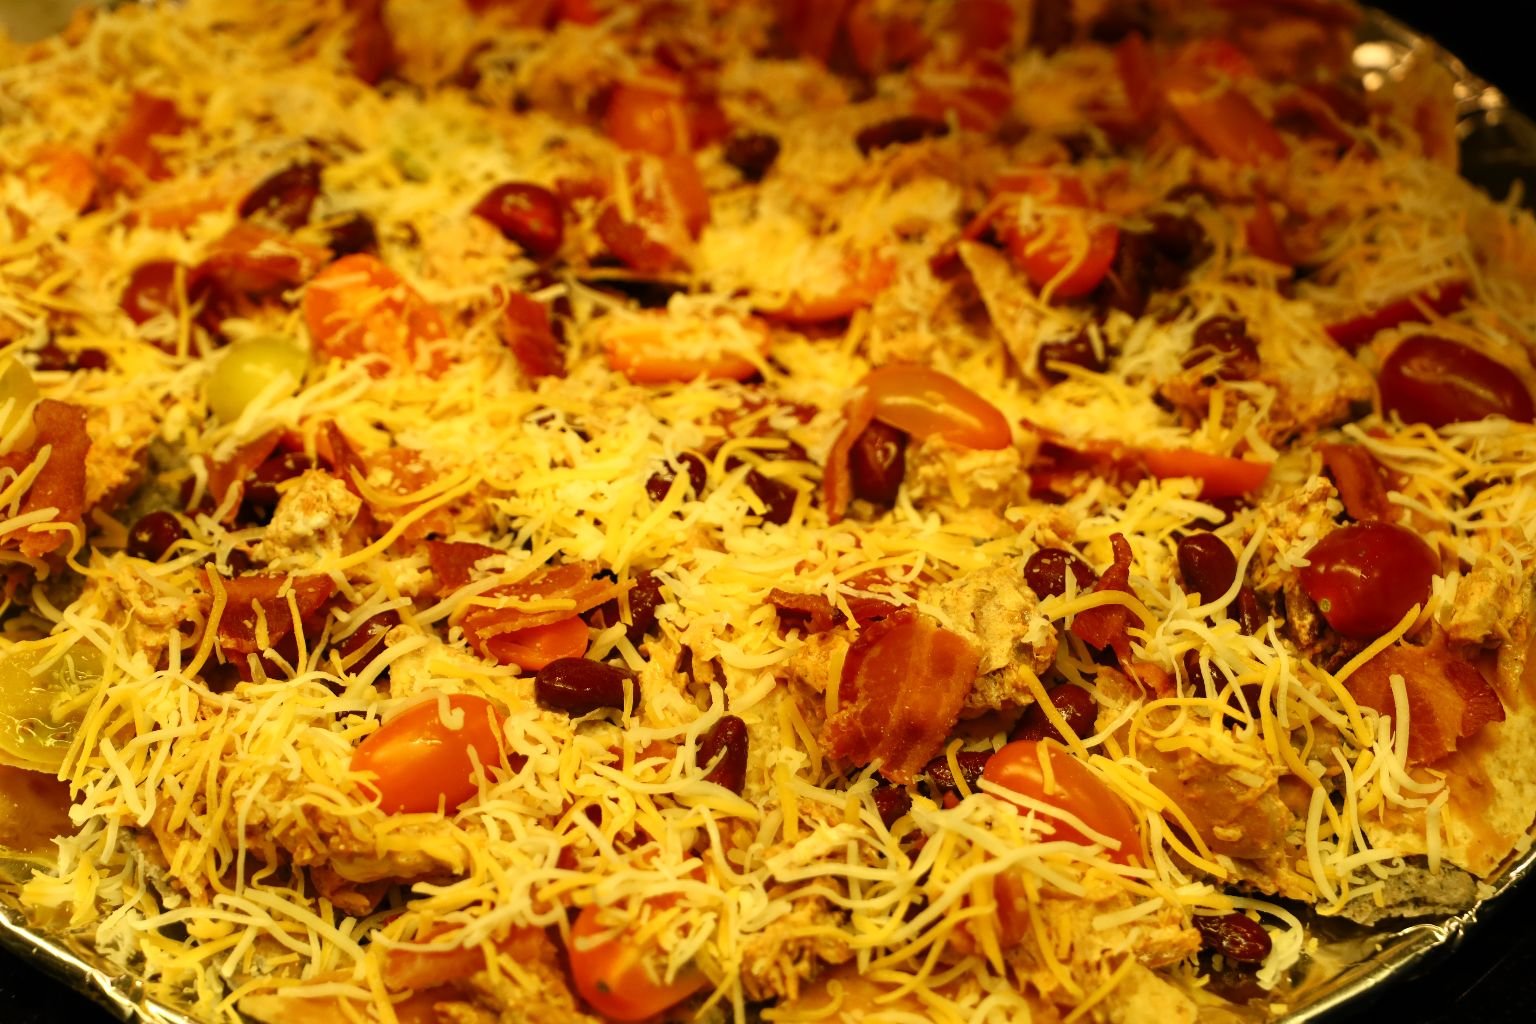
Now just place into a 350F Oven for about 10 – 15 minutes to heat everything up.
Then, turn the Oven Off and and Broiler On, and brown the Nachos. You will need to keep watch over this so that they don’t burn. When done to your likeness, enjoy!
——————————————————–
Throw Together Nachos
Gathering Foods From the Refrigerator and Pantry
Also, Our Secret Ingredient is Spiced and Sauteed Cauliflower
———————————————————
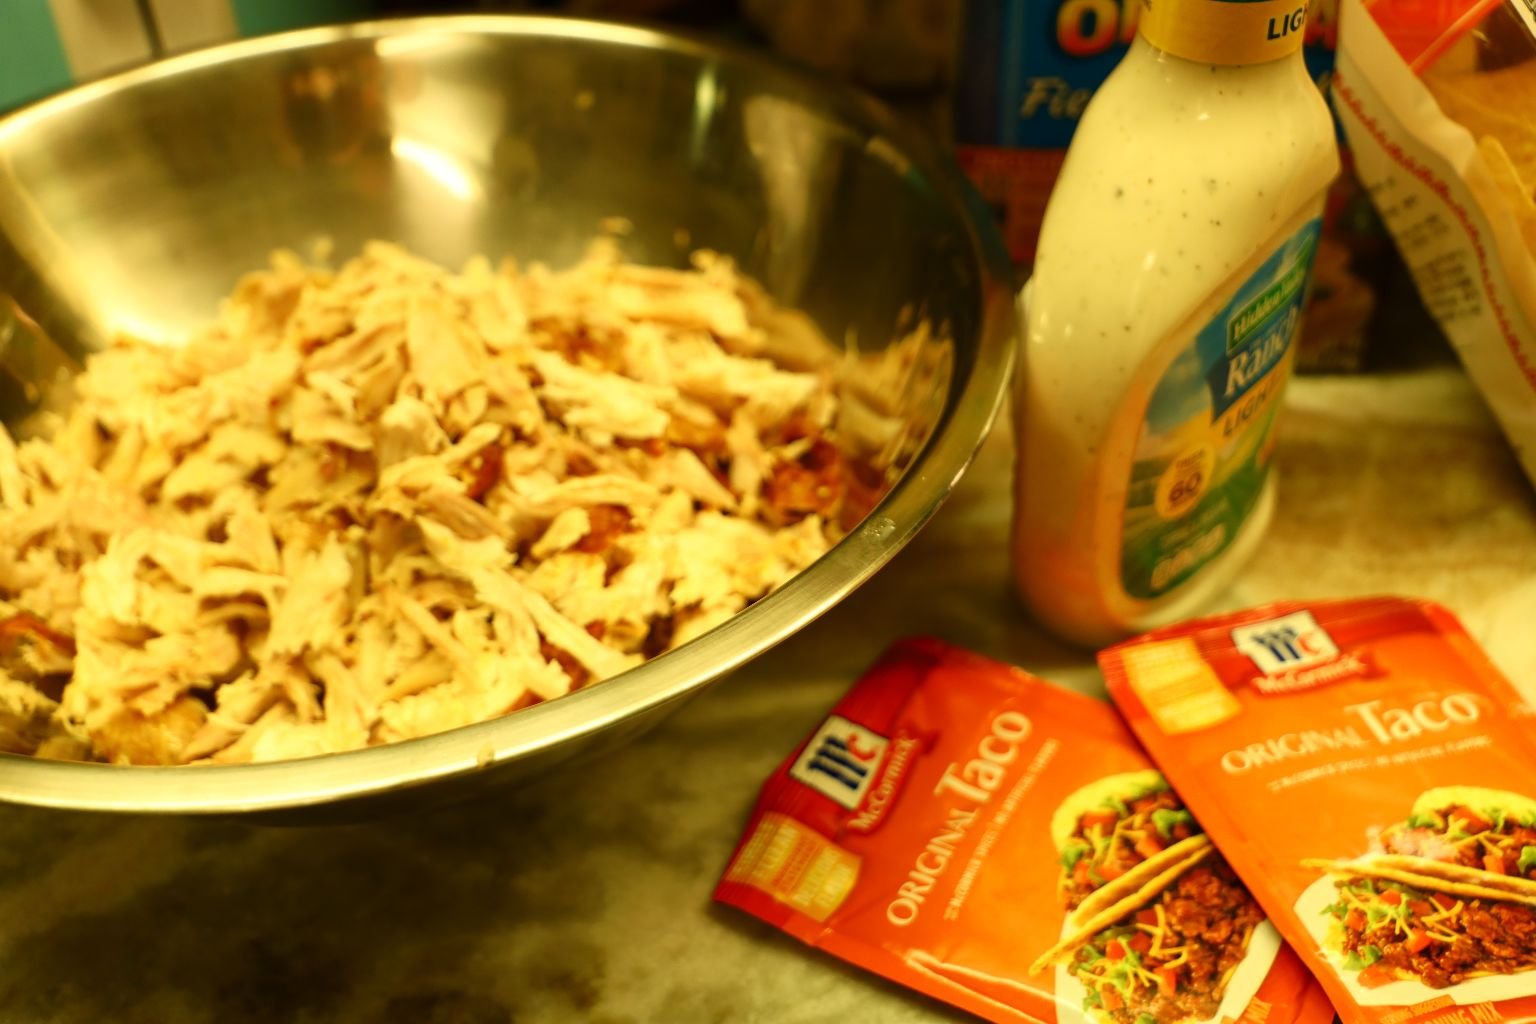
Chicken Ranch Taco Meat

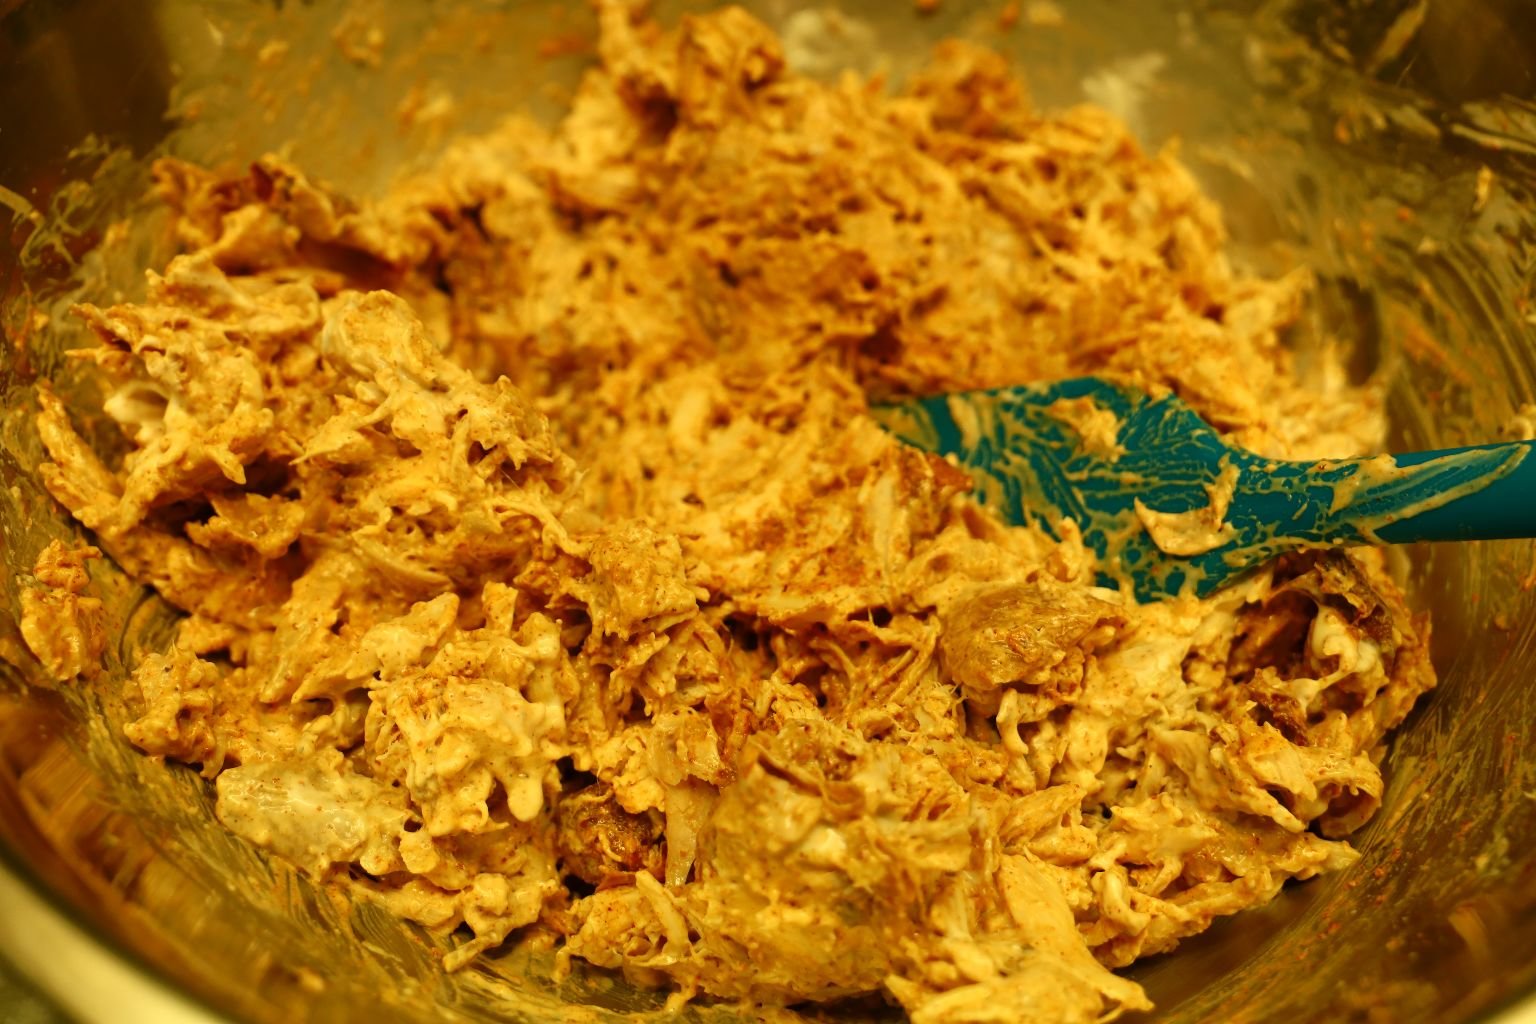
Every now and then we will purchase a Rotisserie Chicken from the grocery store, pick it clean, place it into a bowl and add some Ranch Salad Dressing and a few packets of McCormick’s Original Taco Seasoning Mix.
We then eat it in Taco Shells with all the fixin’s that we love.
Then, as that last little bit of Chicken Taco Meat lingers in the refrigerator, we usually find some way to eat it up.
Hence, Our Throw Together Nachos

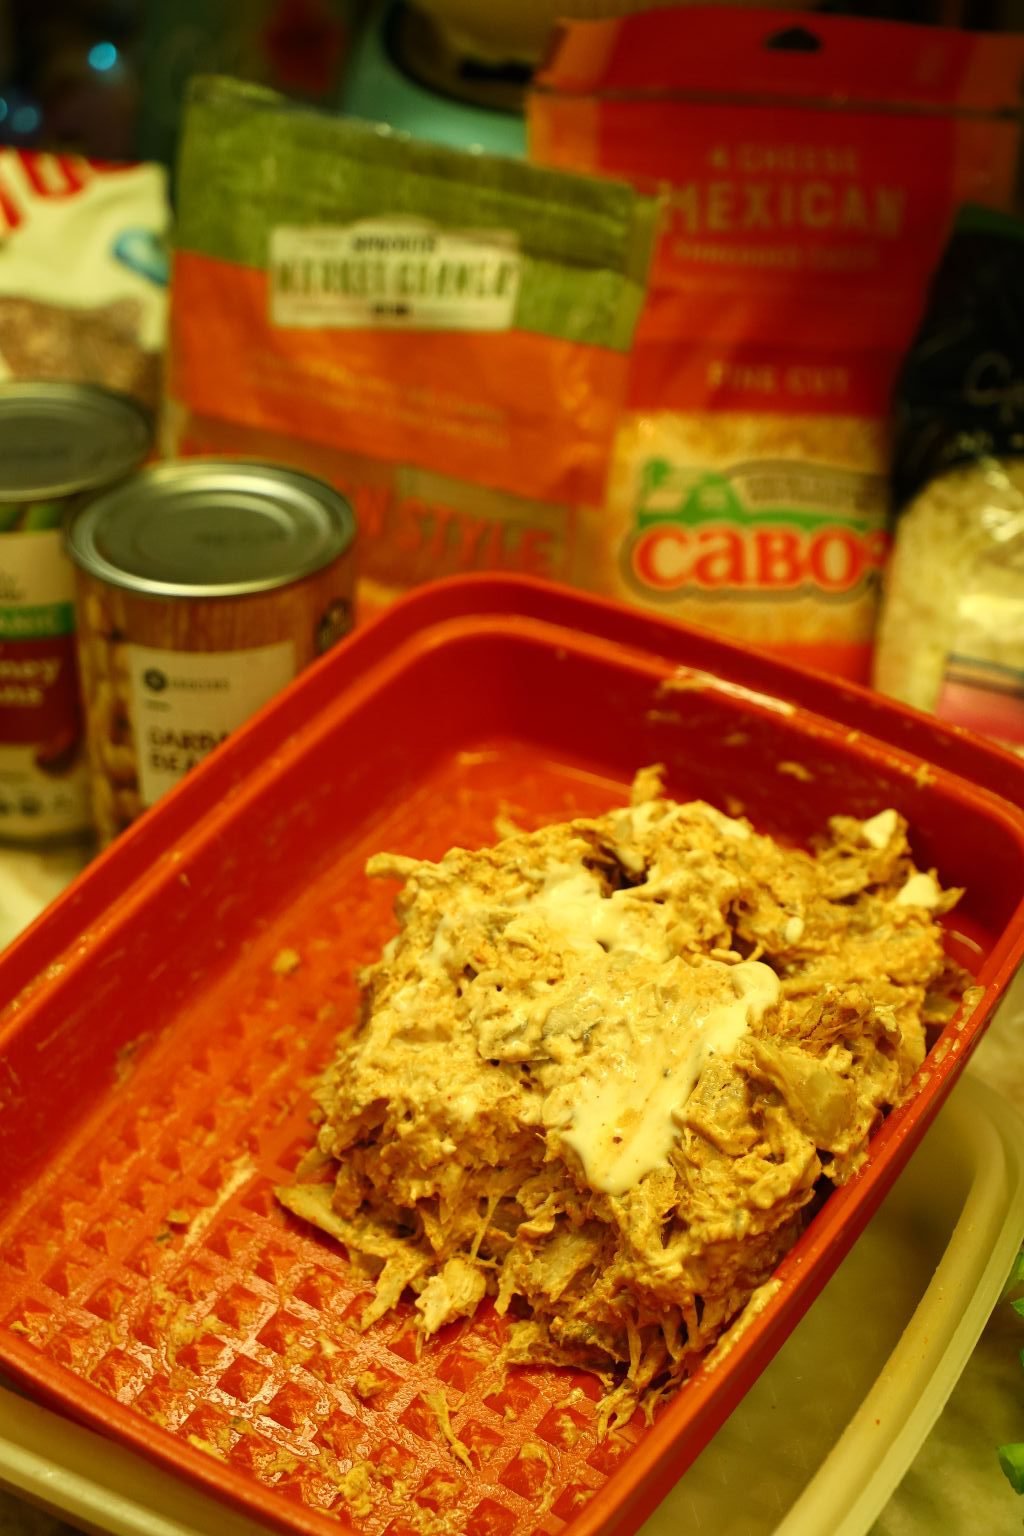
We pretty much just gathered some open bags of Tortilla Chips that we keep on top of our refrigerator, and some spices from our cabinet, a few cans from our pantry, the leftover Chicken Ranch Taco Meat, and some leftover Bacon, Spring Onions and Grape Tomatoes.
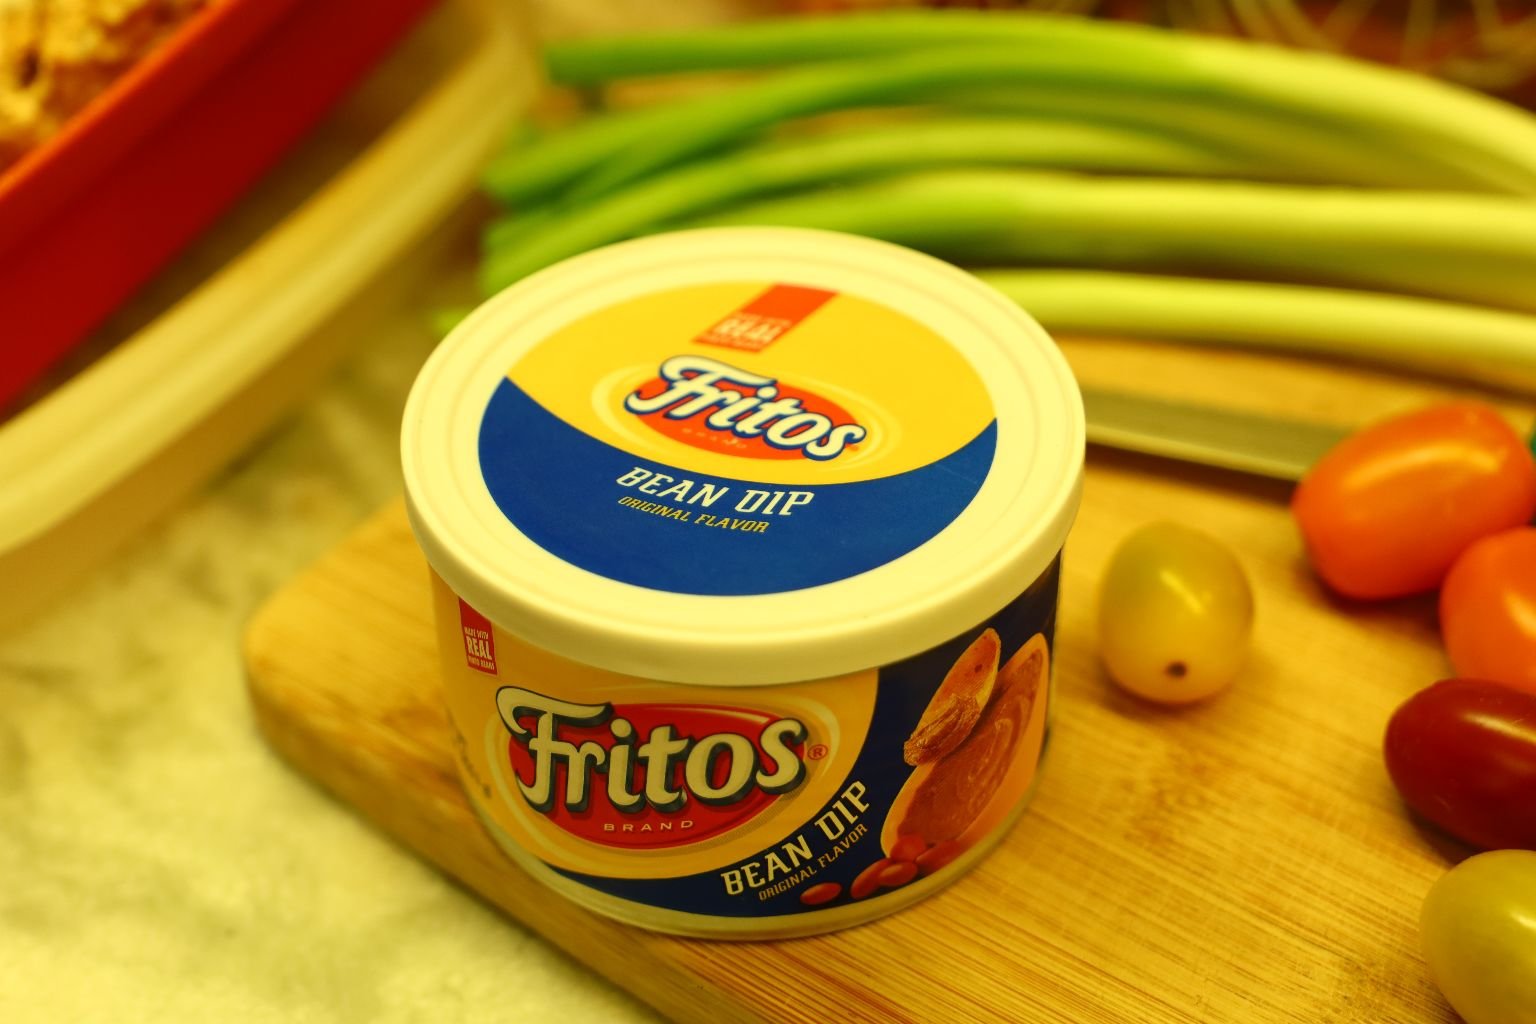
Oh! Let’s not forget the Bean Dip!
——————————————————————
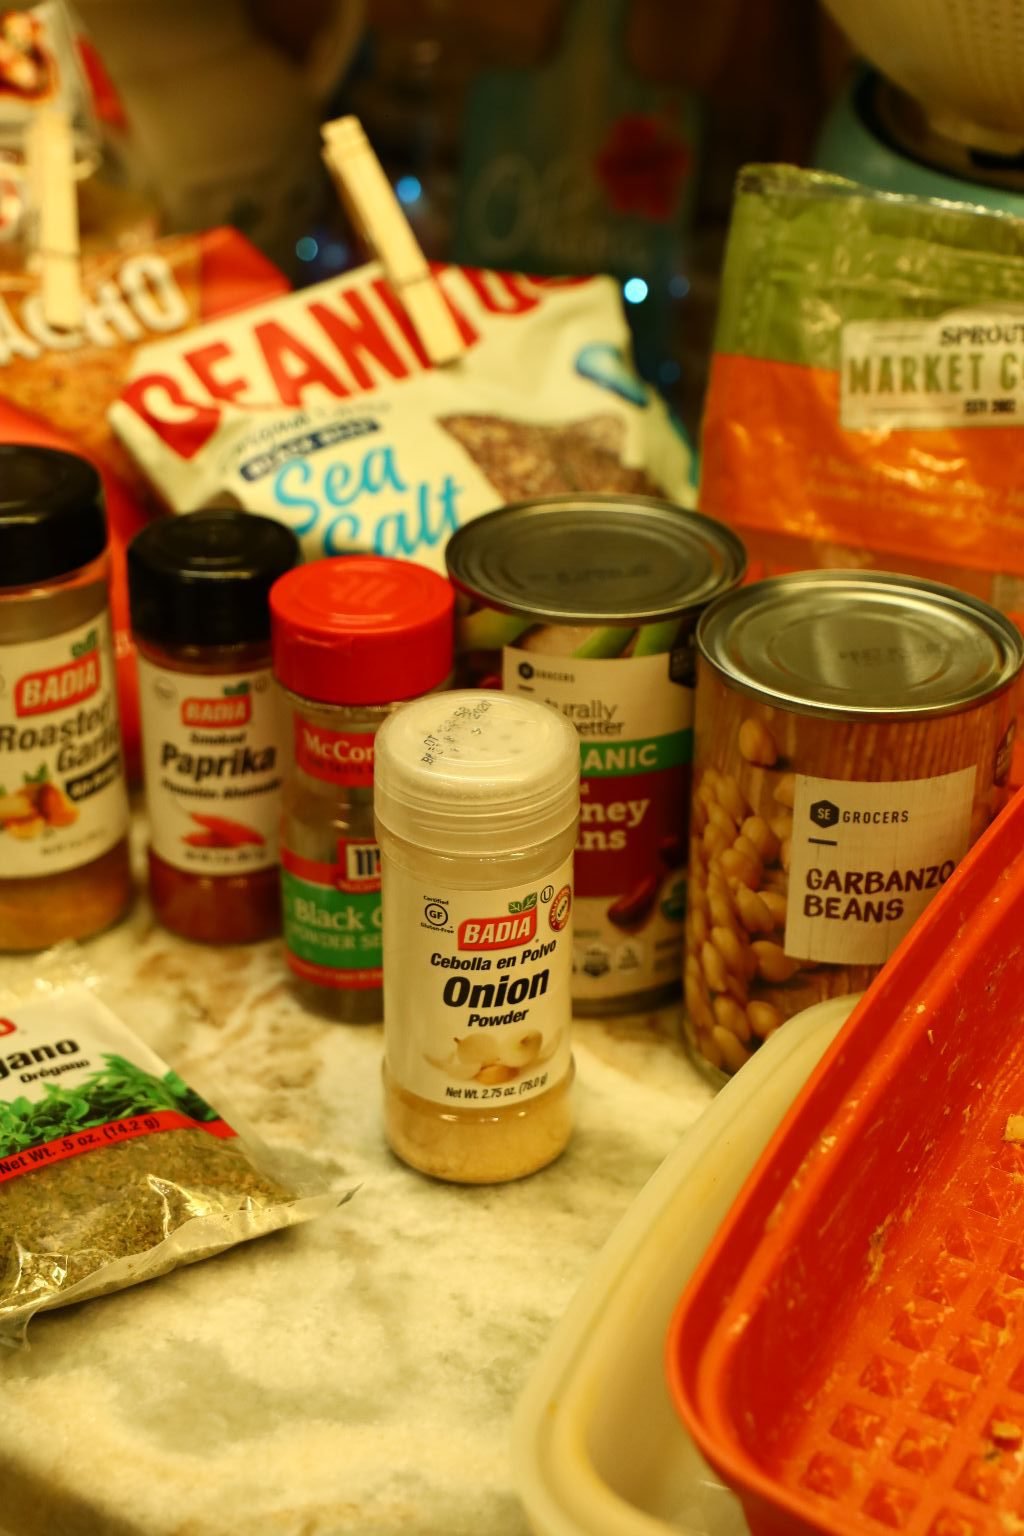
But first, time to saute the Cauliflower.
Ingredients:
1 Bag Cauliflower Pearls
~2 Tbsp. Olive Oil
1 tsp. Roasted Garlic Powder
1 tsp. Black Garlic Powder
1 tsp. Onion Powder
1 tsp. Smoked Paprika
1 tsp. Chili Powder
1 tsp. Dried Oregano
——————————————————————


Add your olive oil to a large skillet, turn the heat to medium high and add the Cauliflower Pearls.
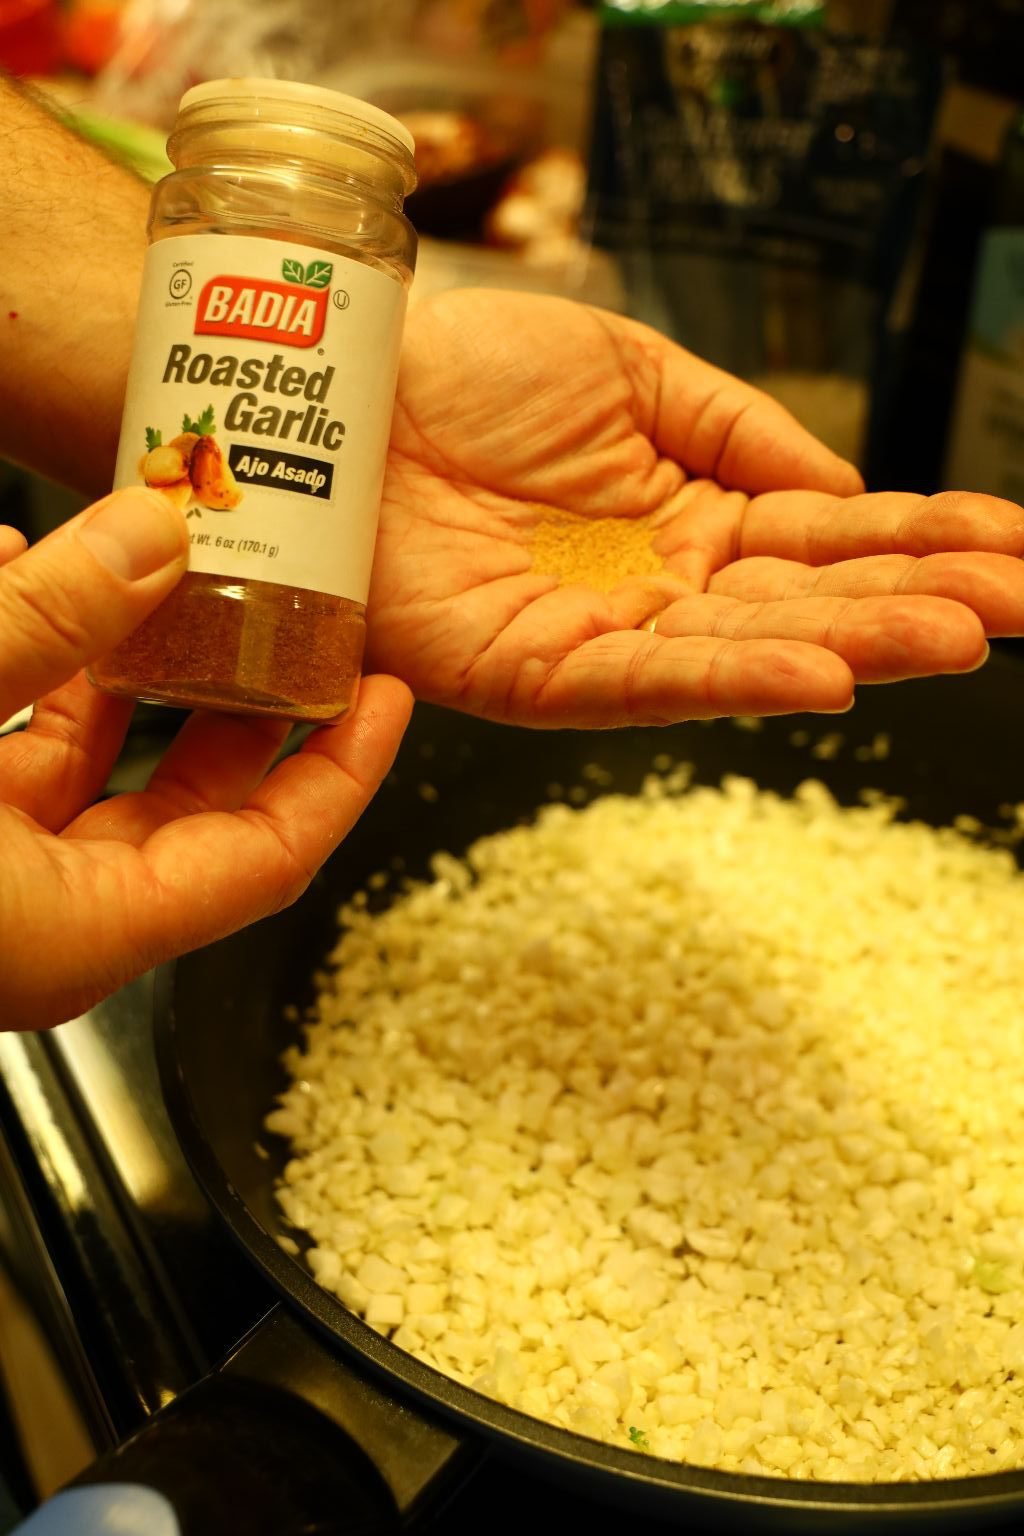
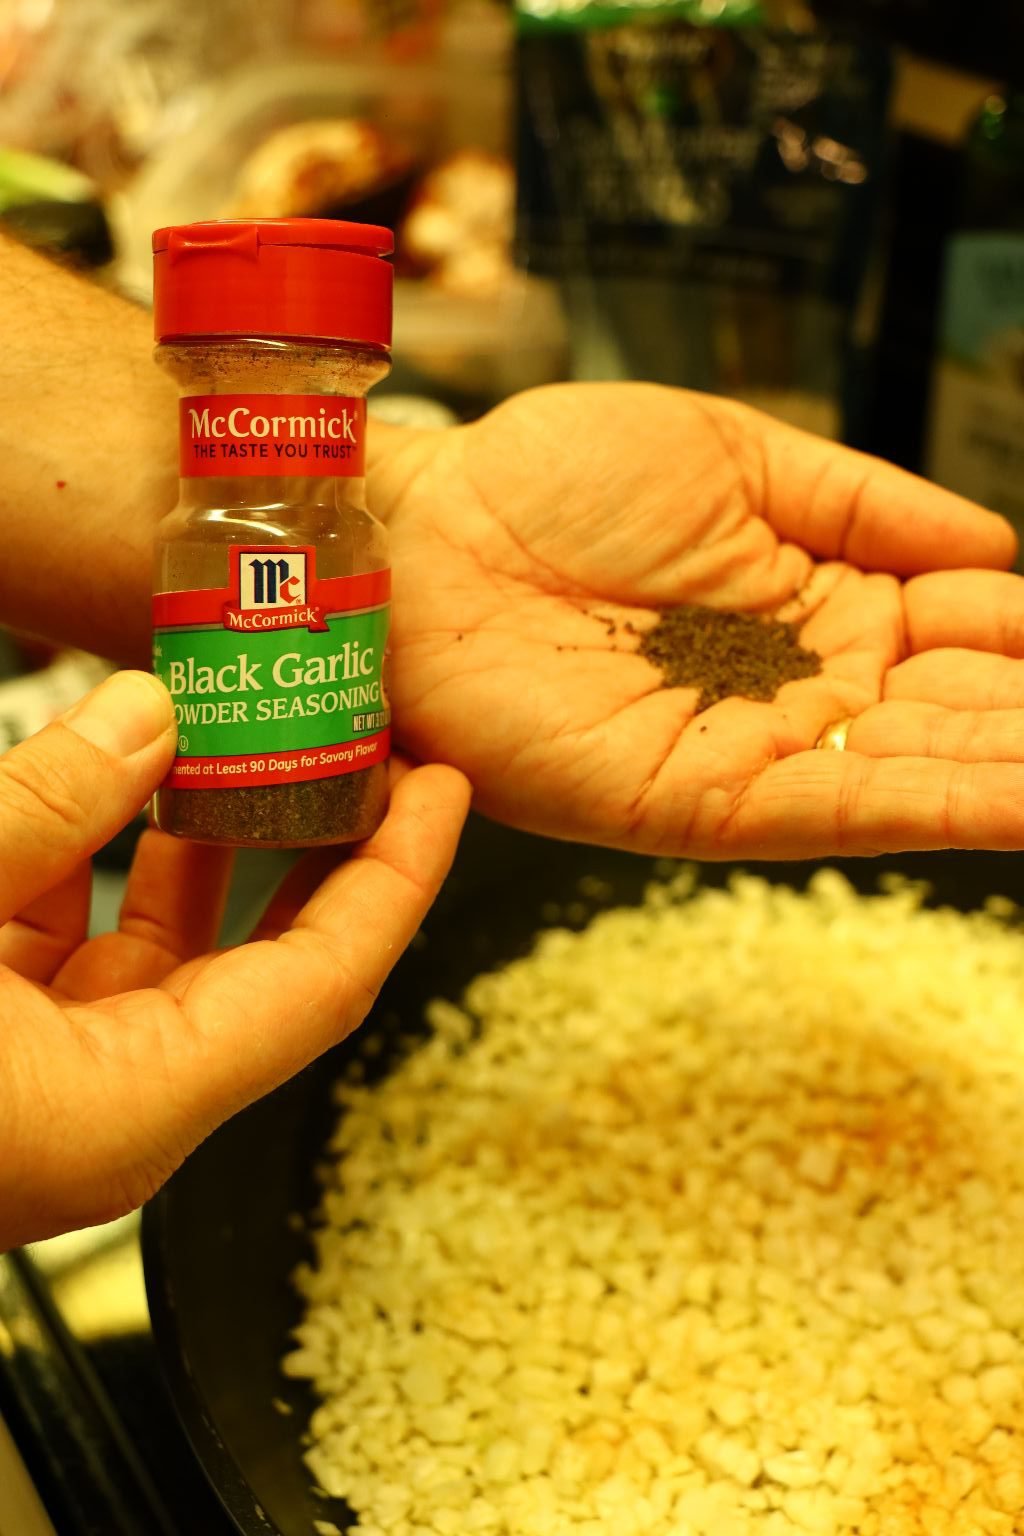
Now add your Roasted Garlic and Black Garlic Powder…
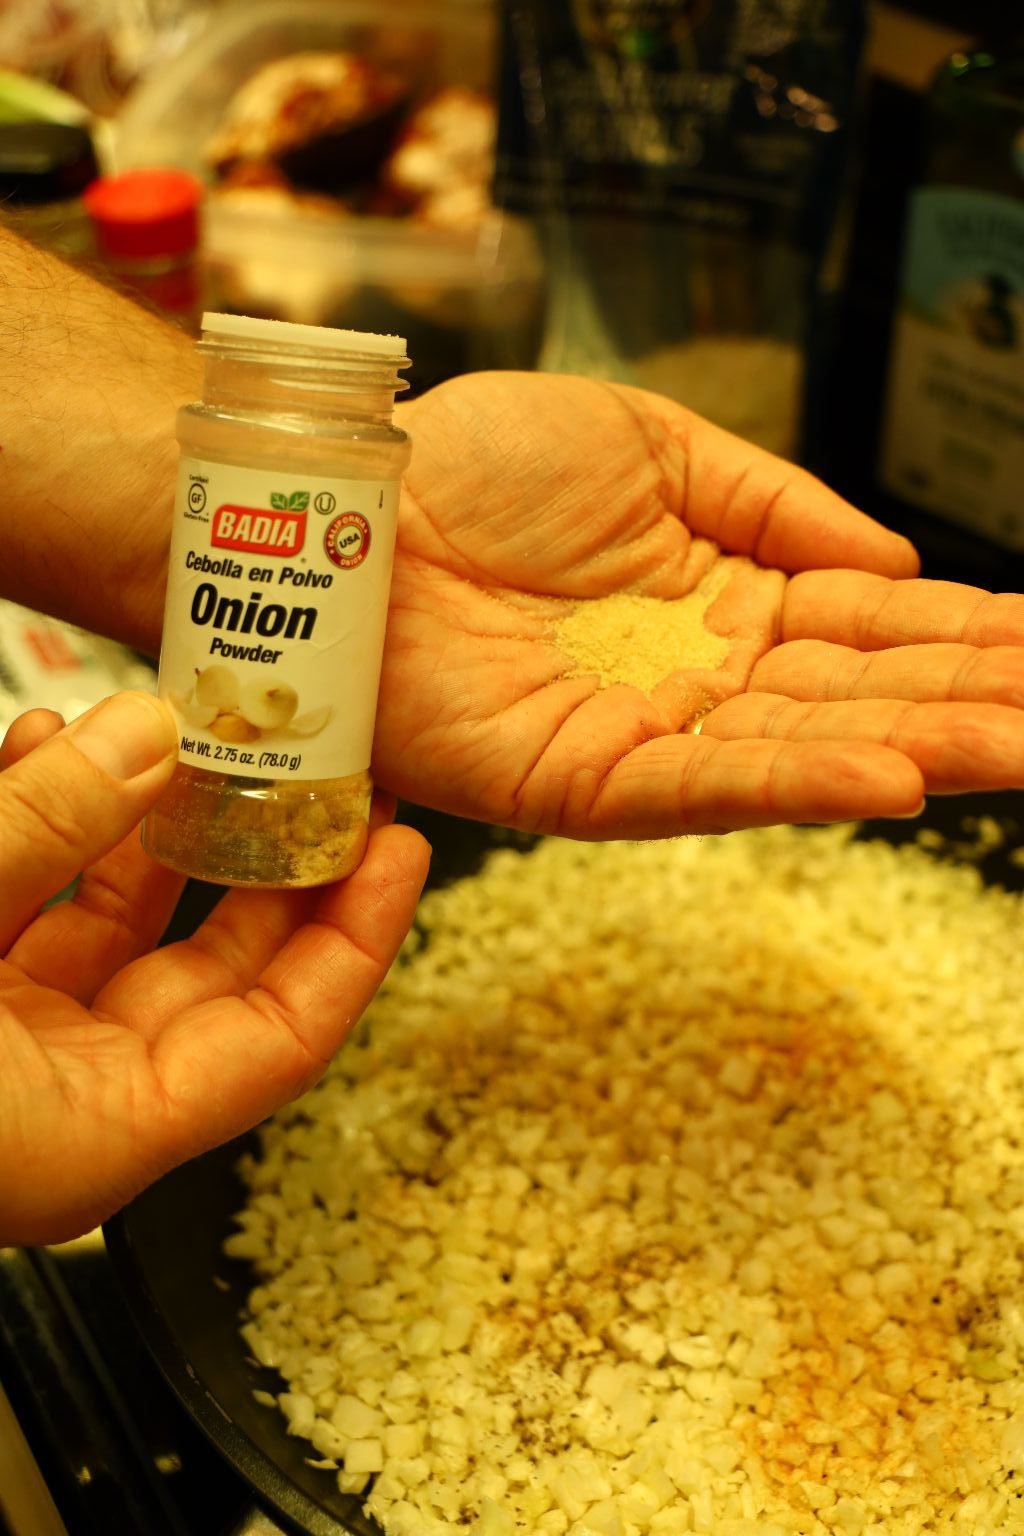
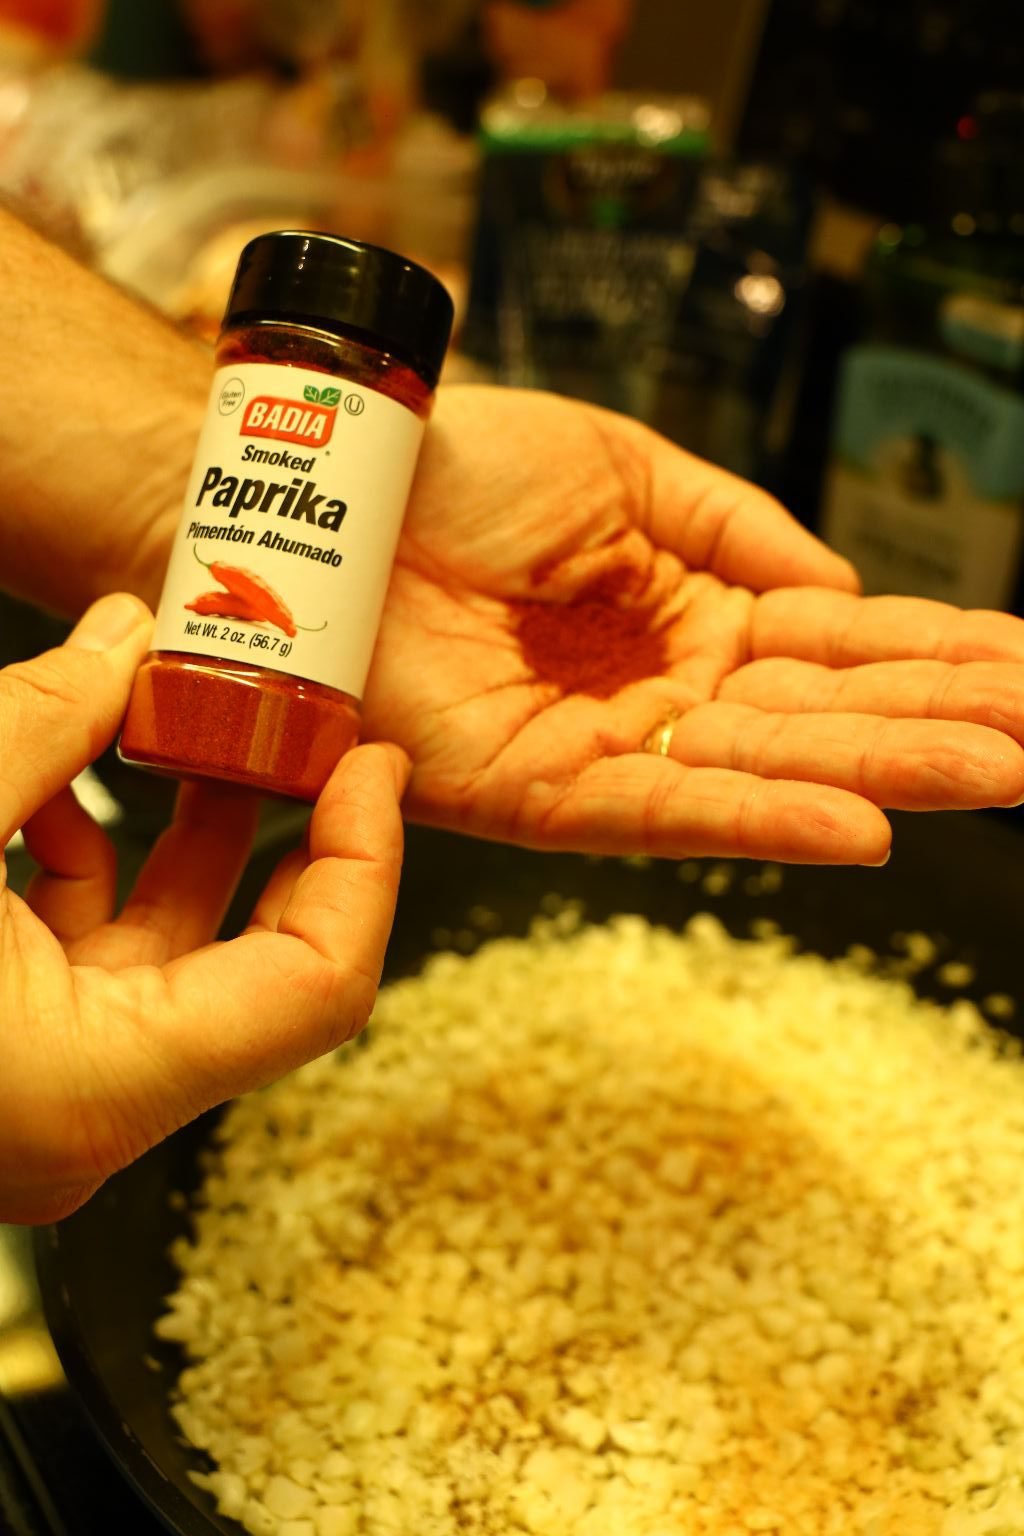
then add your Onion, and Smoked Paprika Powder…


and then your Chili Powder and Dried Oregano to the skillet.
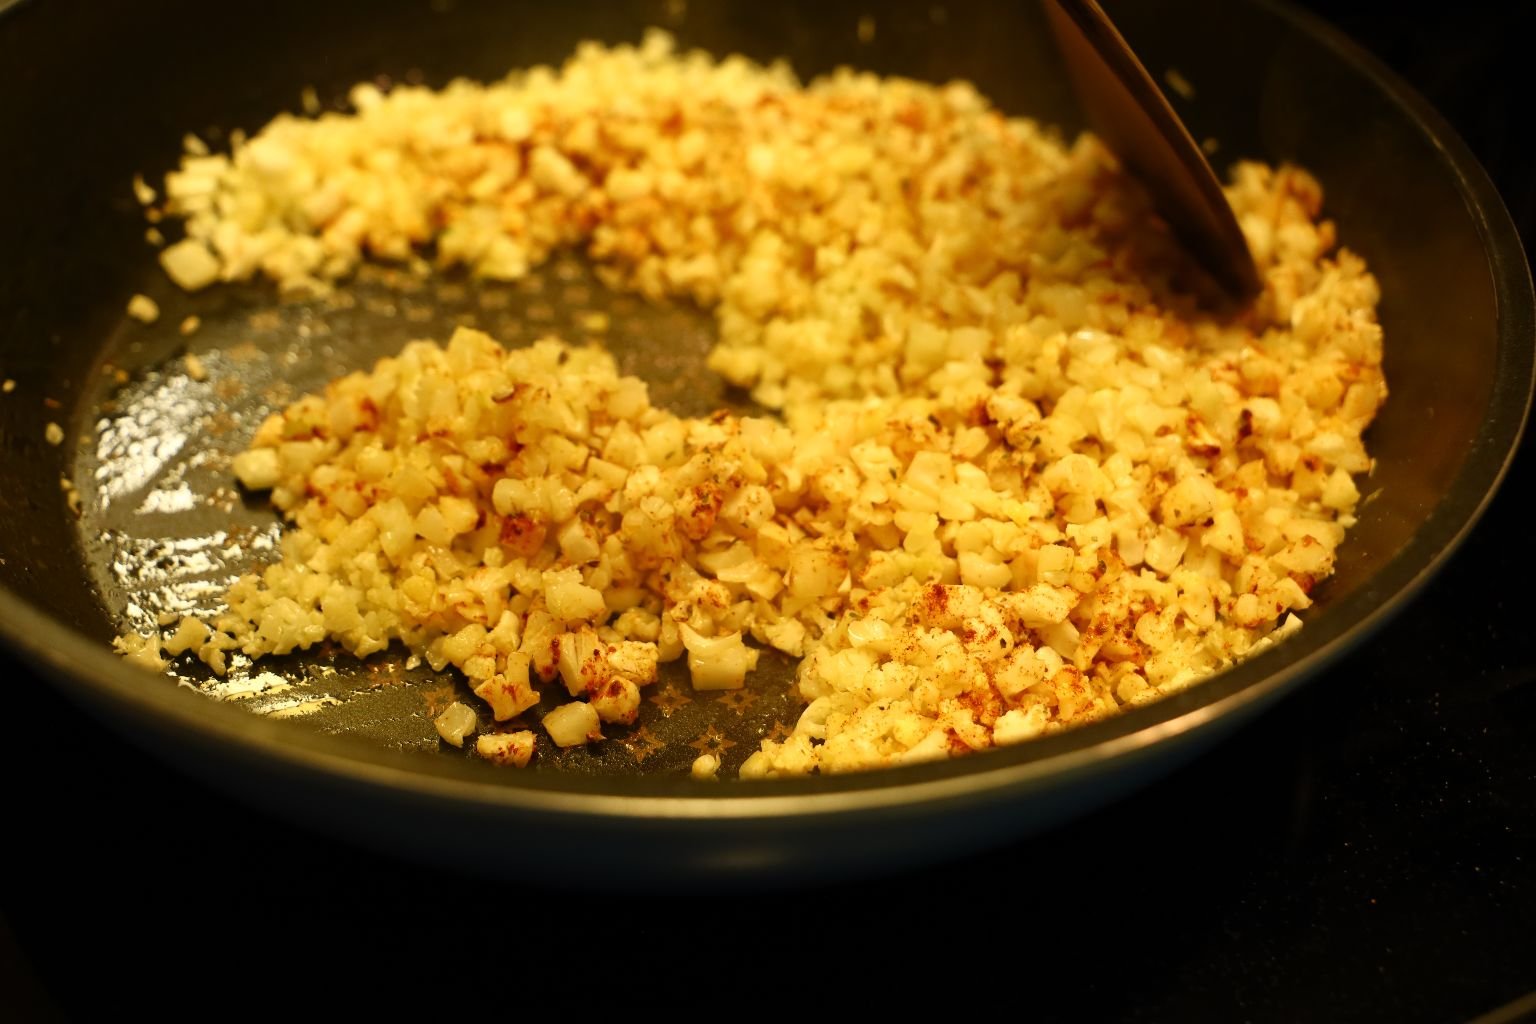
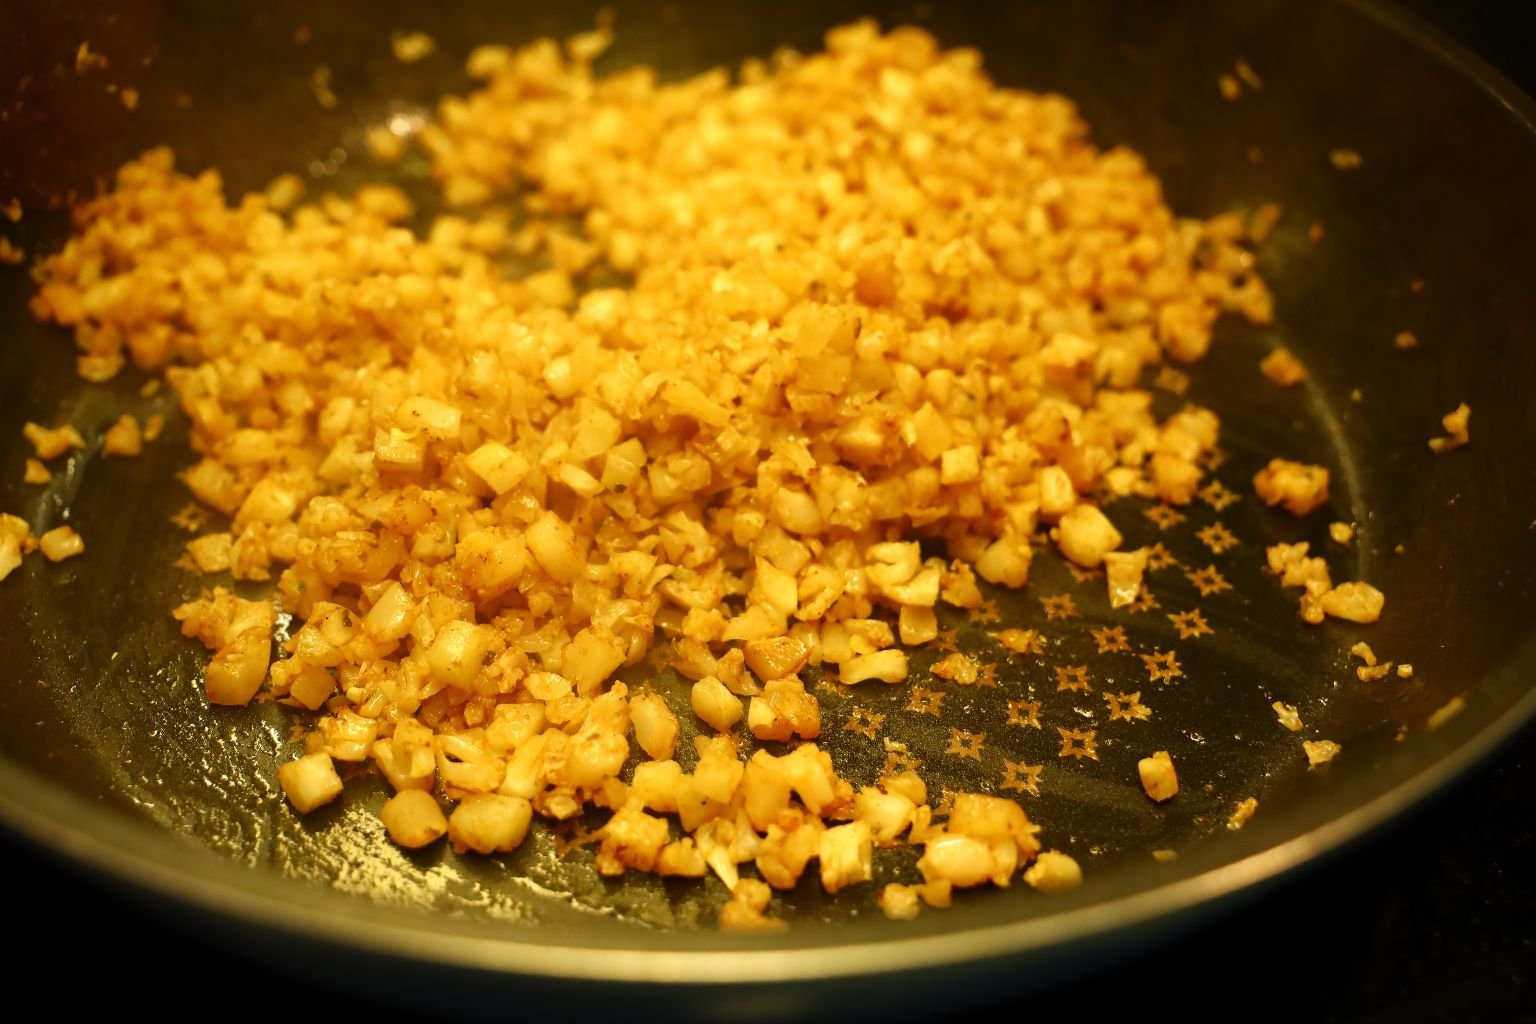
Toss the ingredients together well and cook until the cauliflower is tender stirring occasionally. This should take about 10 min.
——————————————————————

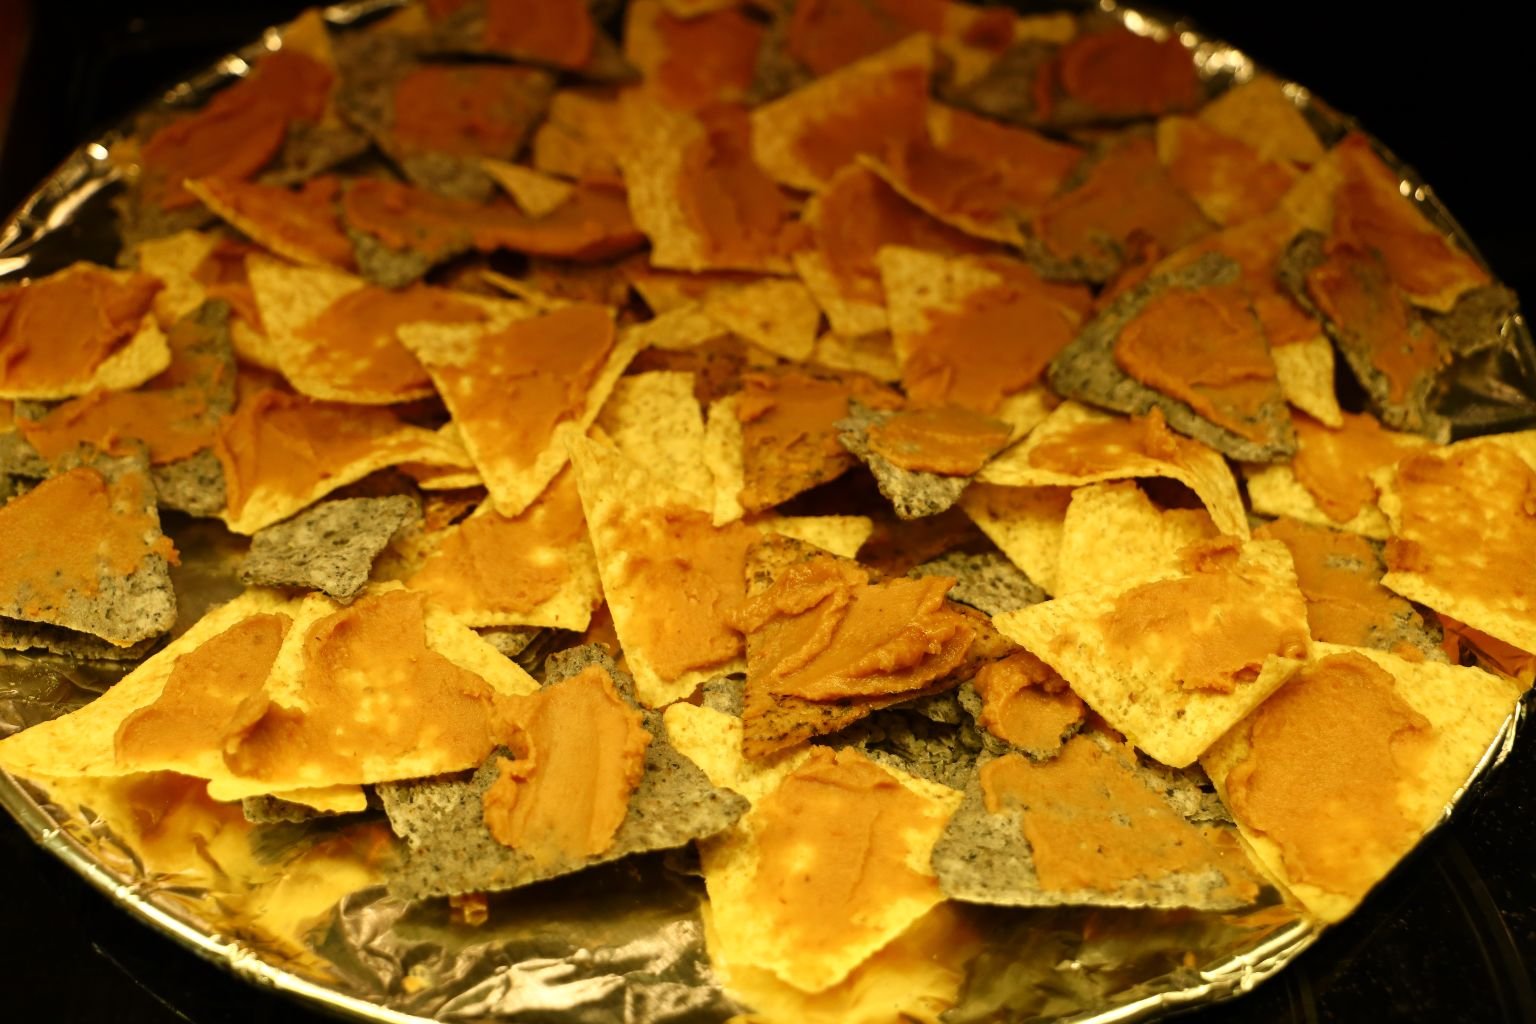
Here we splayed our various Tortilla Chips onto a baking sheet and spread some of the Bean Dip onto them.
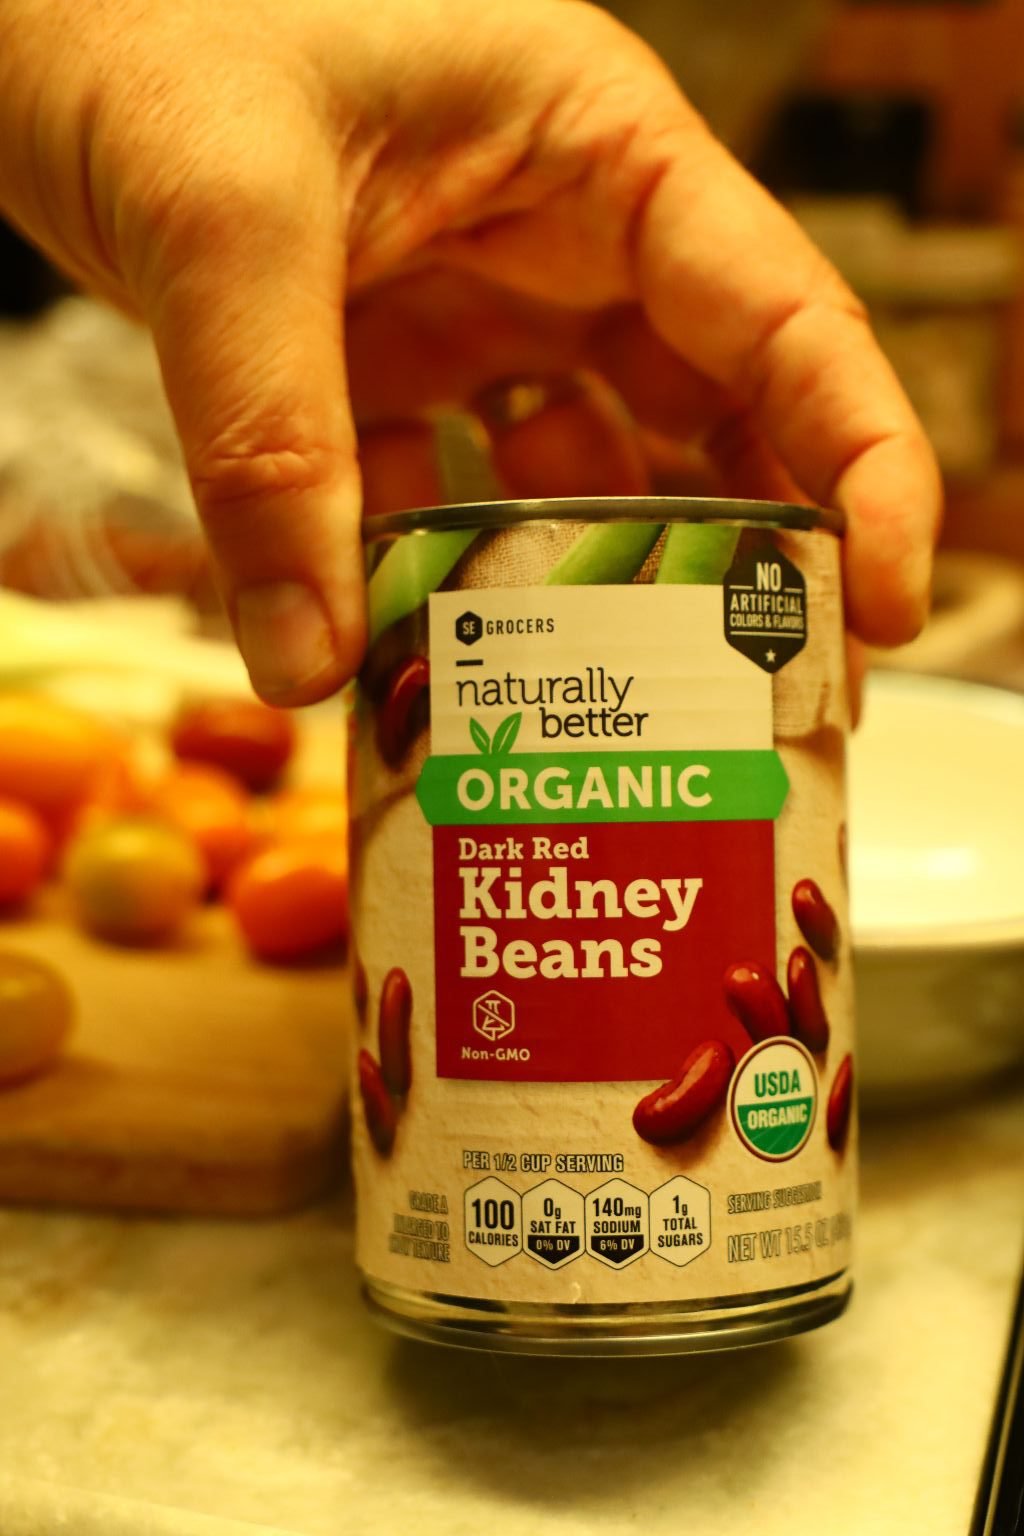

Here, we are heating some Kidney Beans in a sauce pan on the stove top.
Just to warm them through.
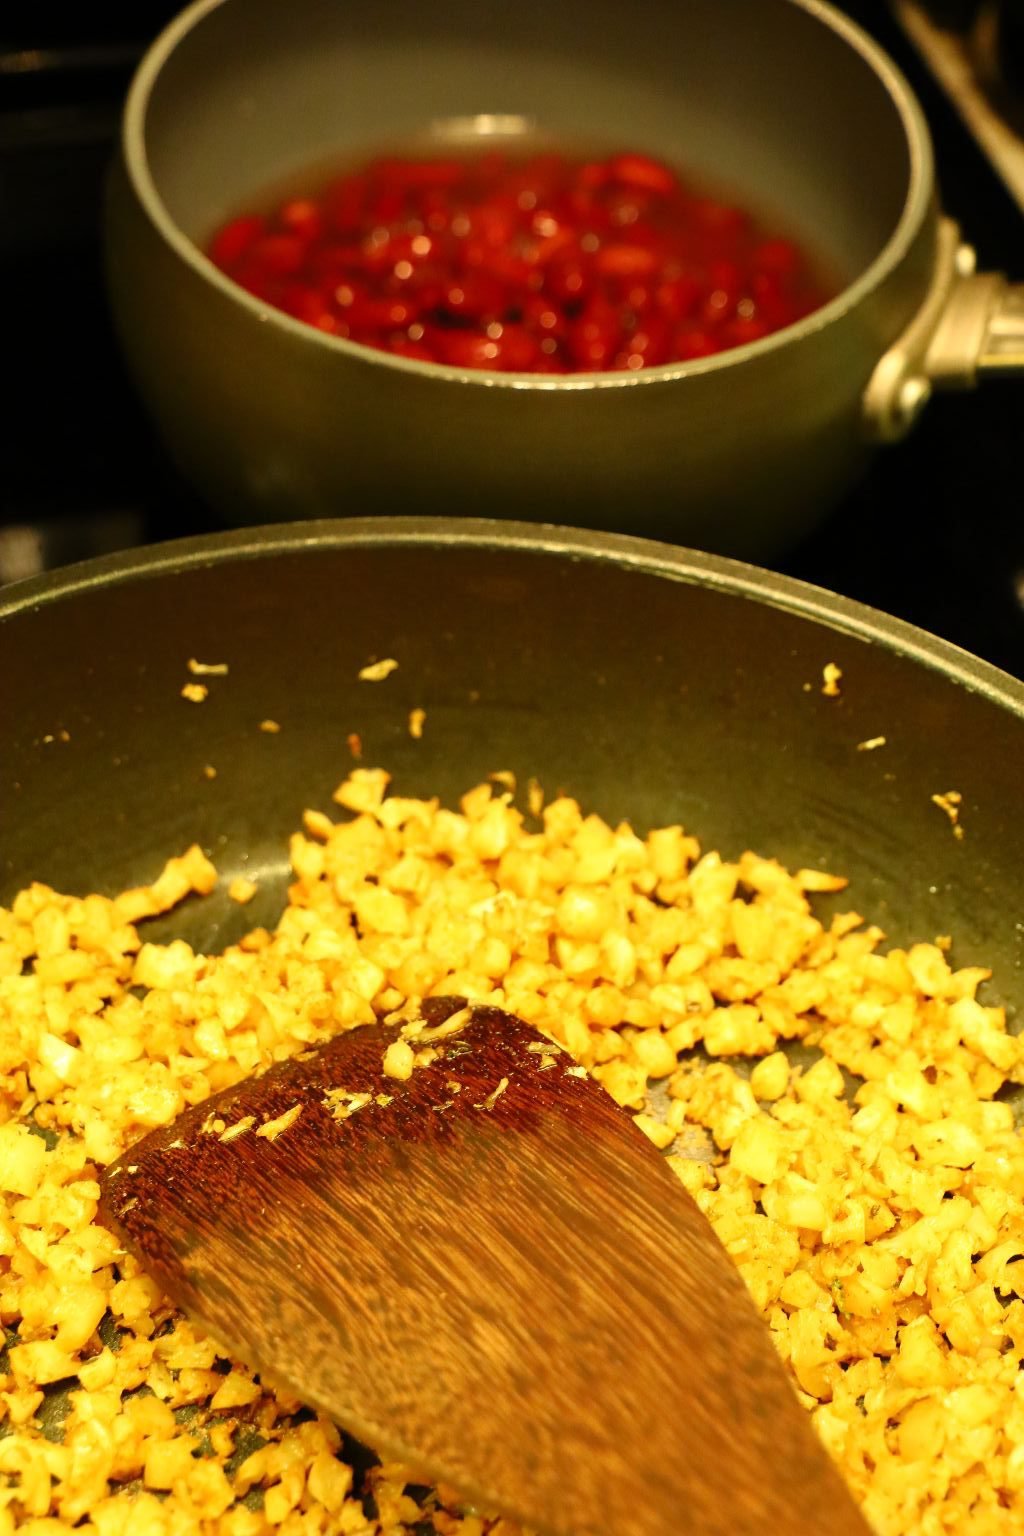
Our Kidney Beans and Spiced Cauliflower Warming
Now It’s Time To Heat Up Our Chicken Ranch Taco Meat
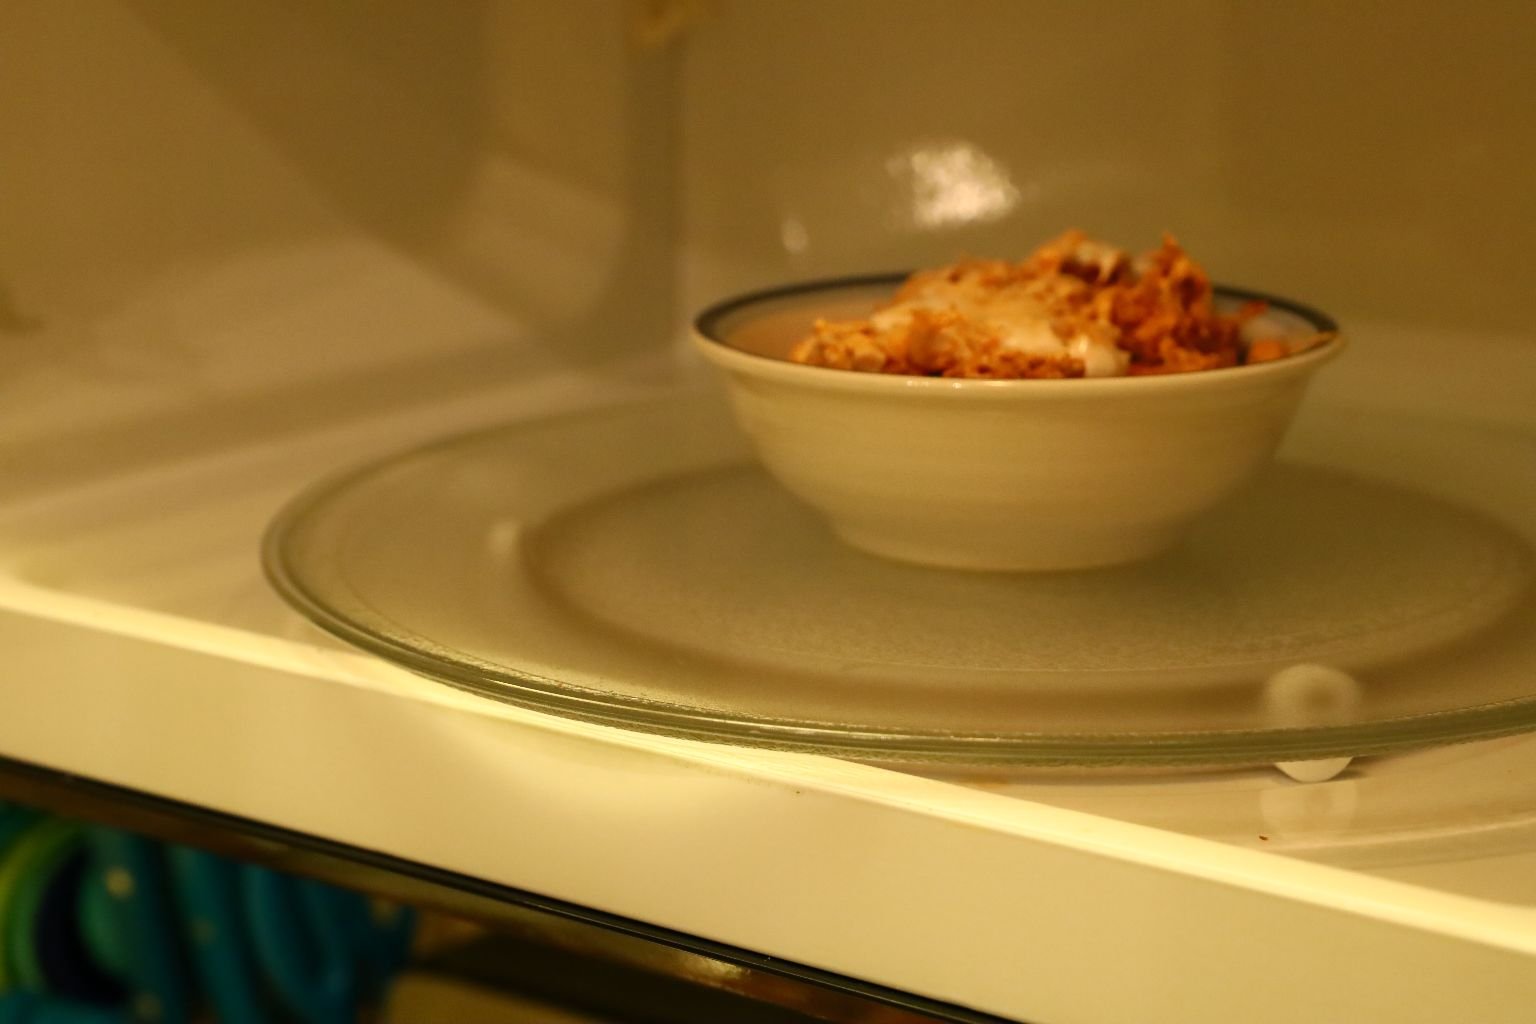
Just Place Into The Microwave For A Minute Or Two
———————————————————-

Just Place Some of the Chicken Ranch Meat onto the Chips
Next, Add Some of the Kidney Beans and Sliced Grape Tomatoes


Now Comes the Leftover Bacon
Now, Sprinkle Over Any Grated Cheese You Like,
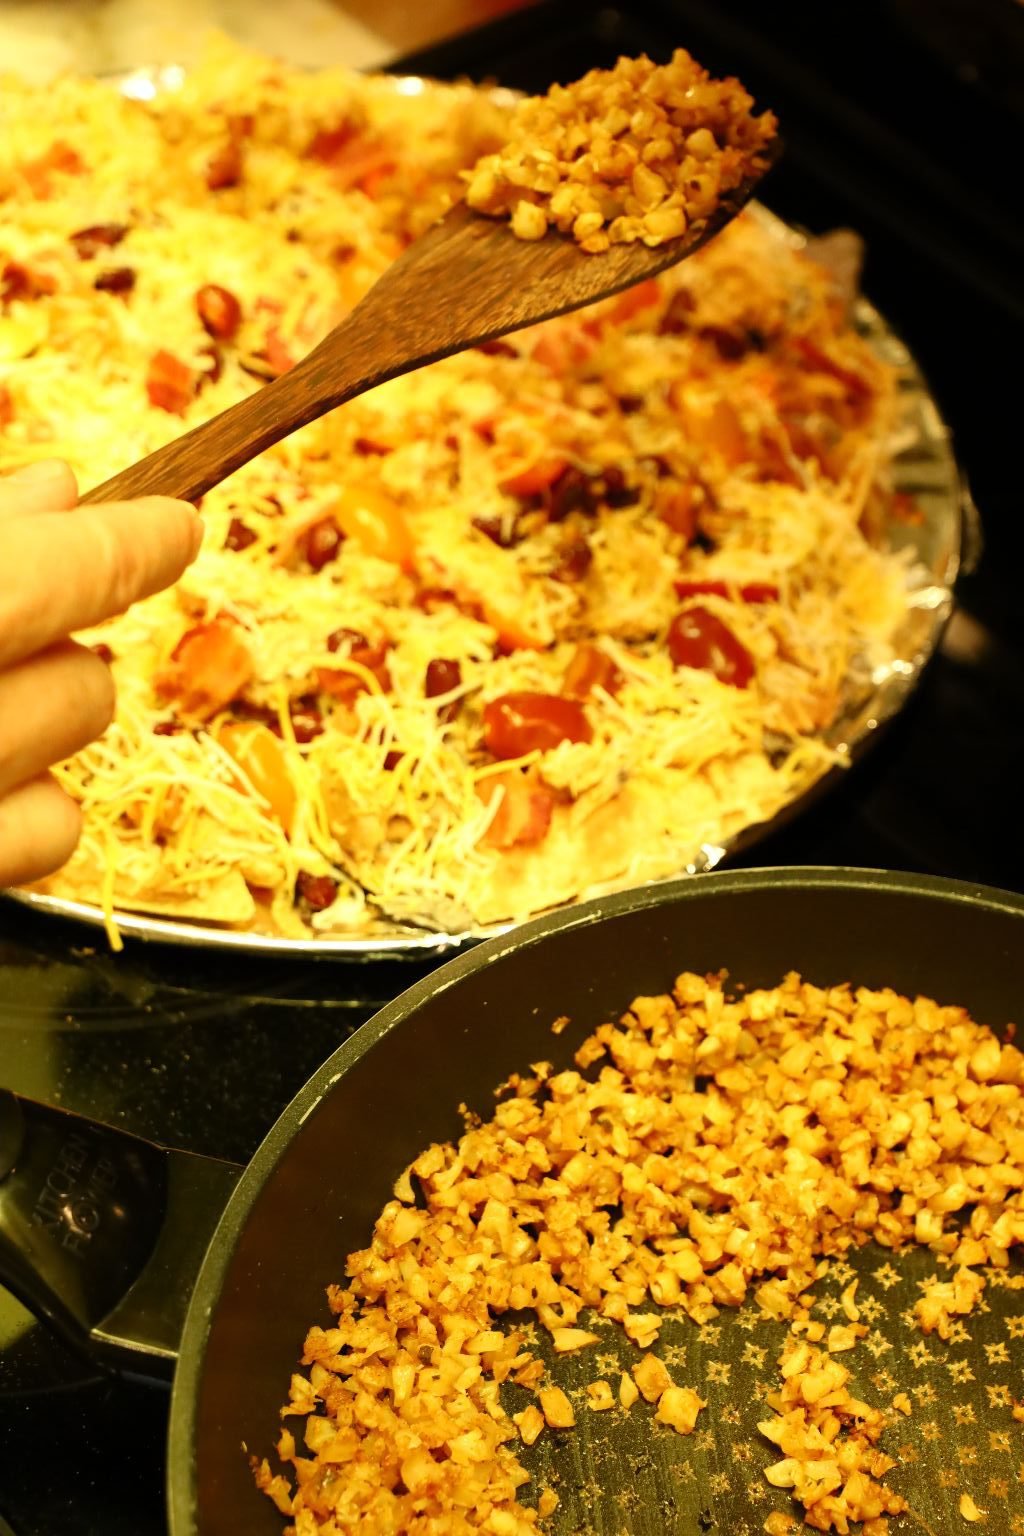

and then top with the Spiced Cauliflower.

——————————————————————-

Topped With The Cauliflower
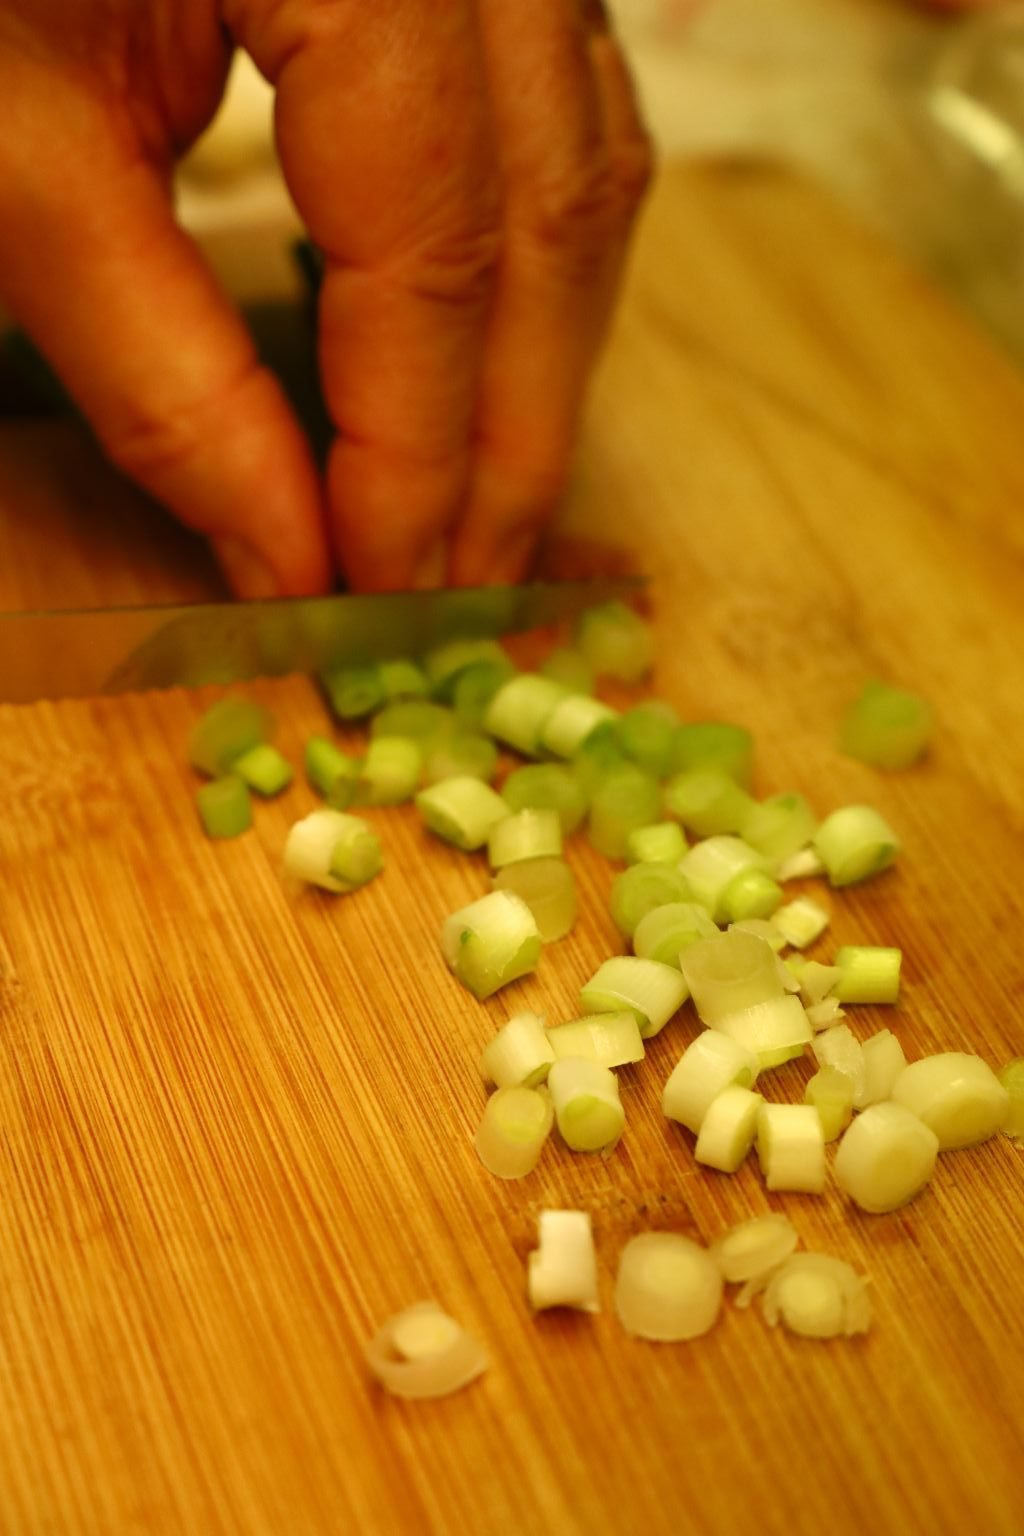
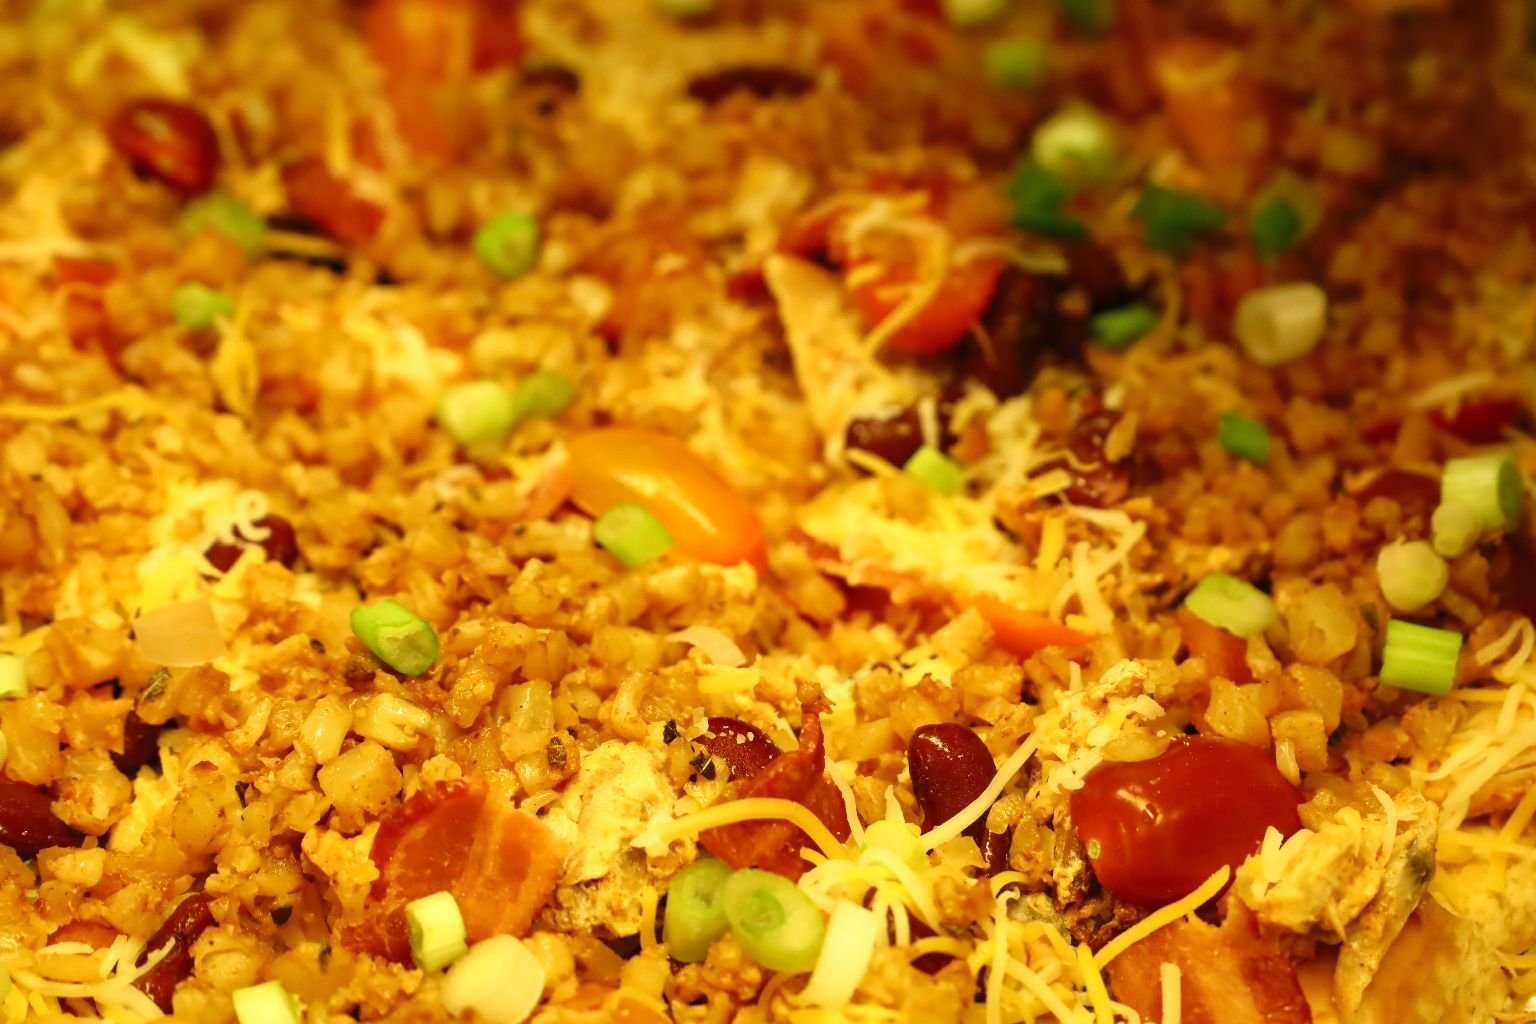
We then added some chopped Spring Onions….

a few blobs of Sour Cream….
and then a bit of spice from Chili Powder.

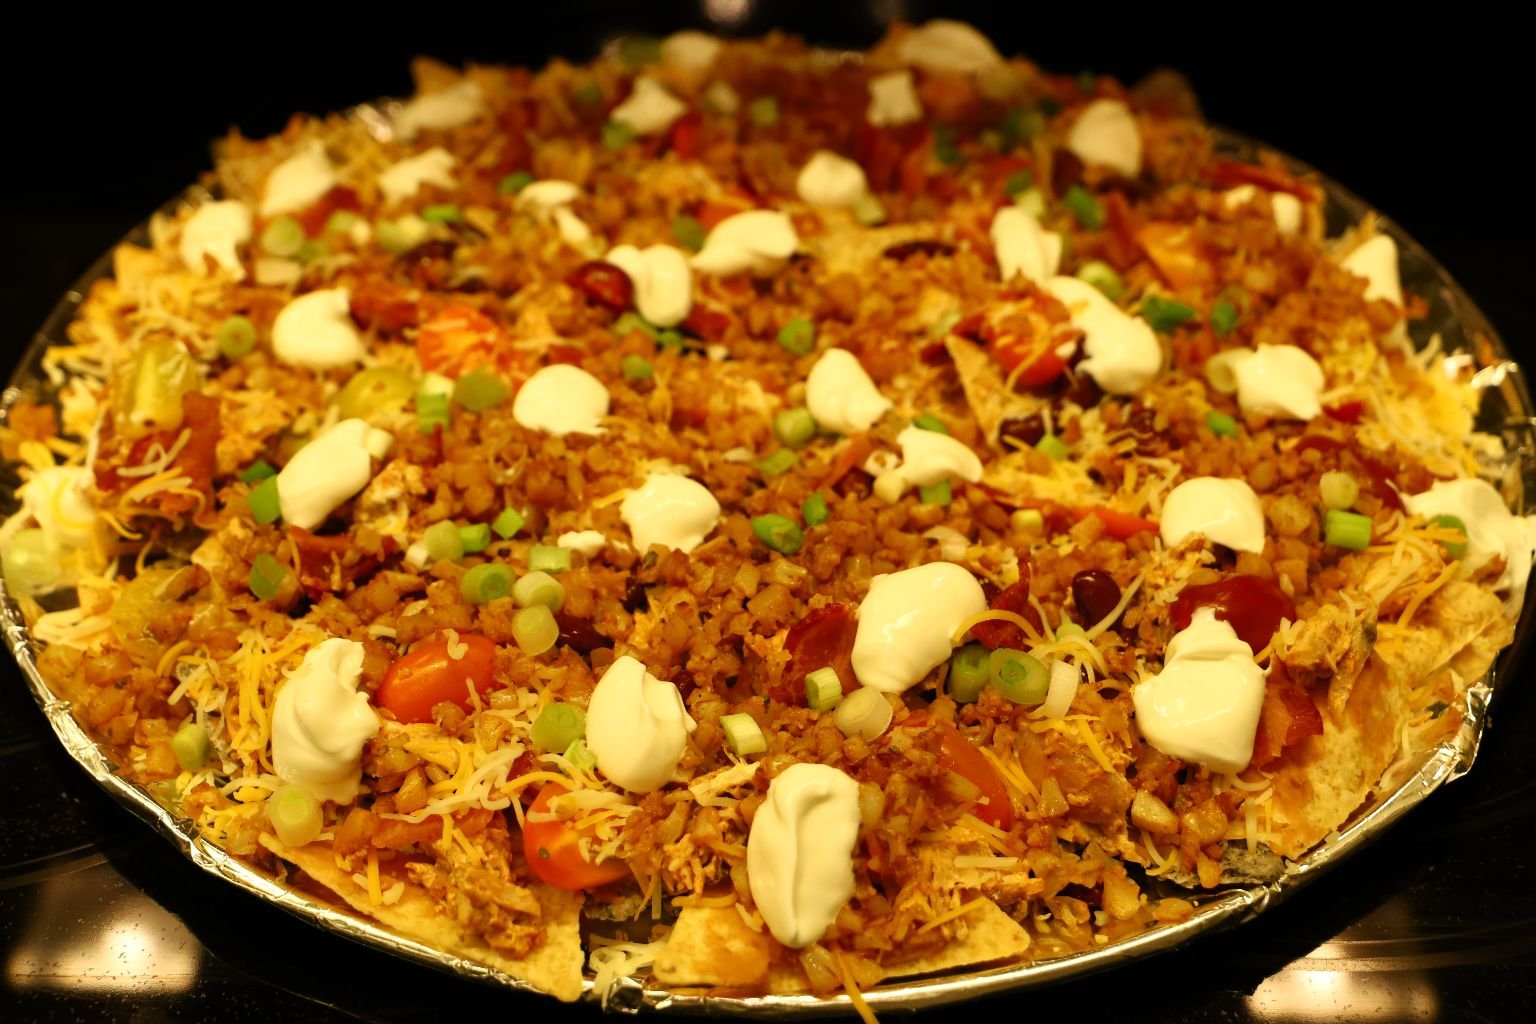
Into a 350F Oven for about 8 Minutes.
Then turn the oven off and turn on the broiler to brown the nachos.
You want to watch and monitor this. You only want the nachos to brown, not burn.

Perfect! Place onto a Plate and Enjoy!
Leftovers go into Aluminum foil for Tomorrow
—————————————————————
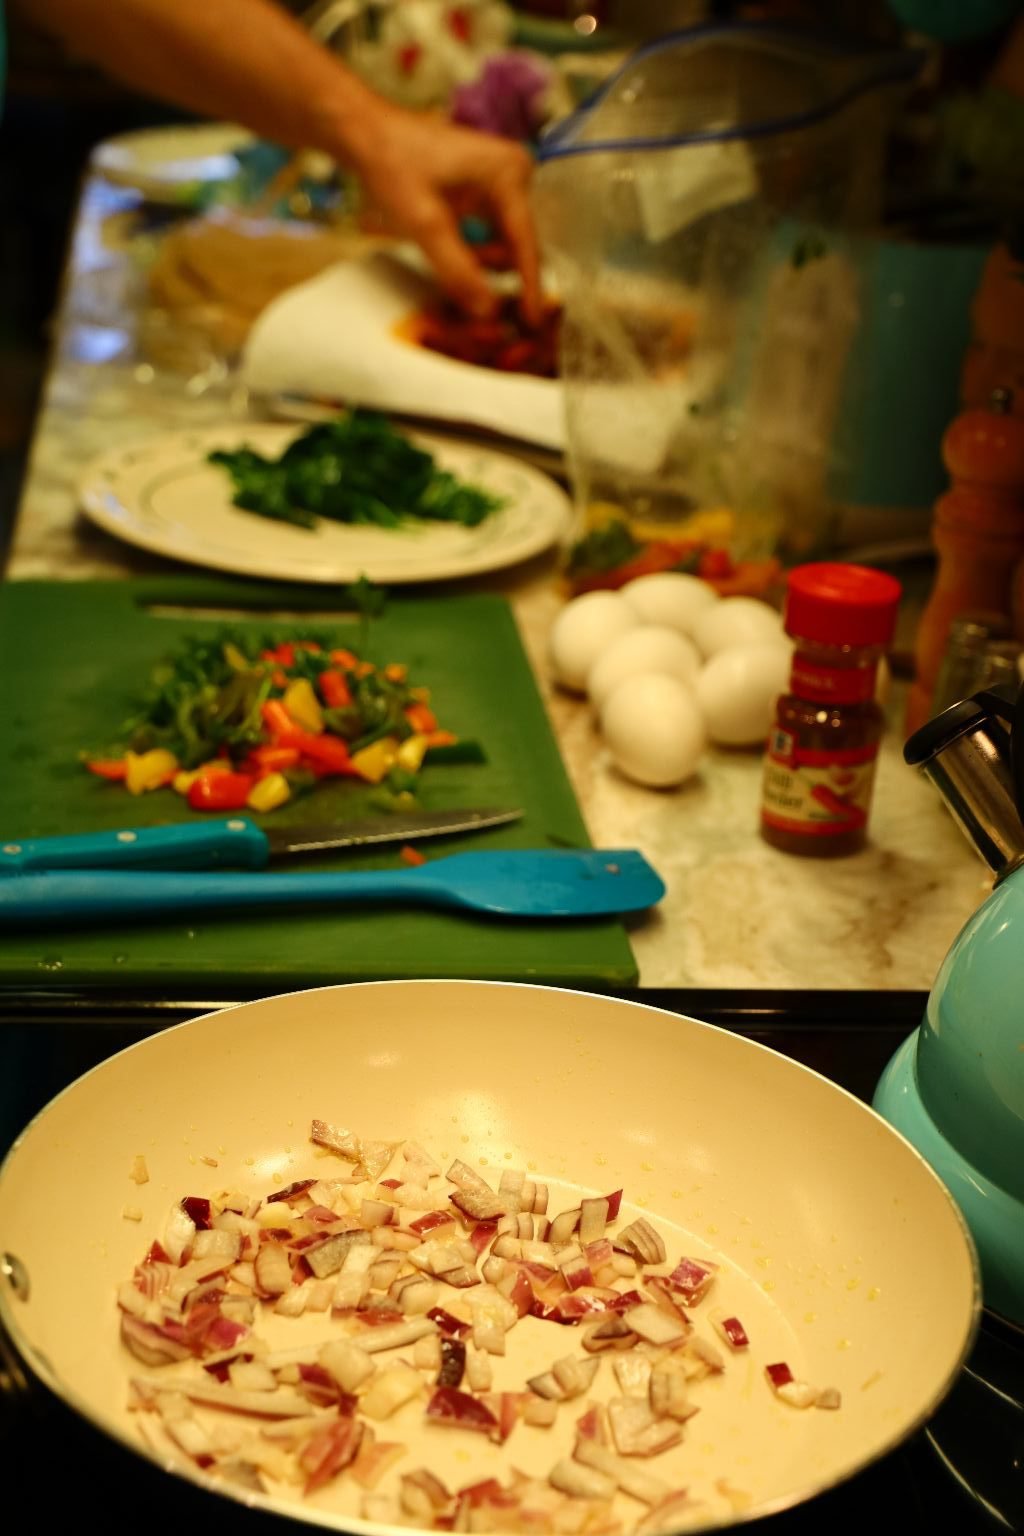
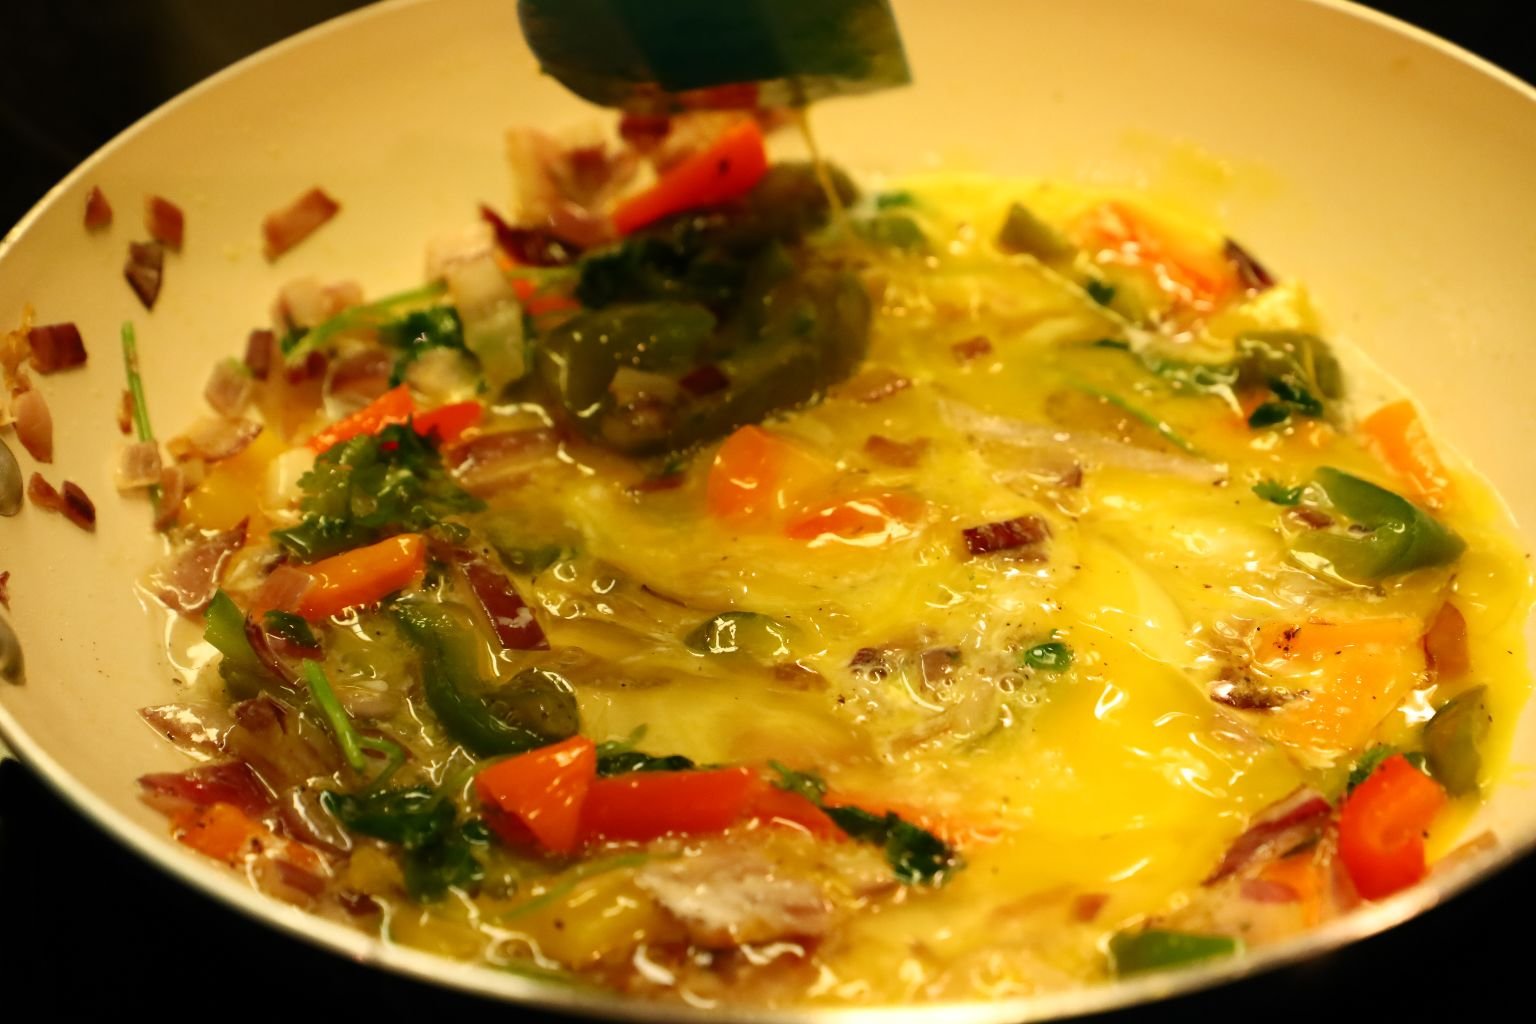
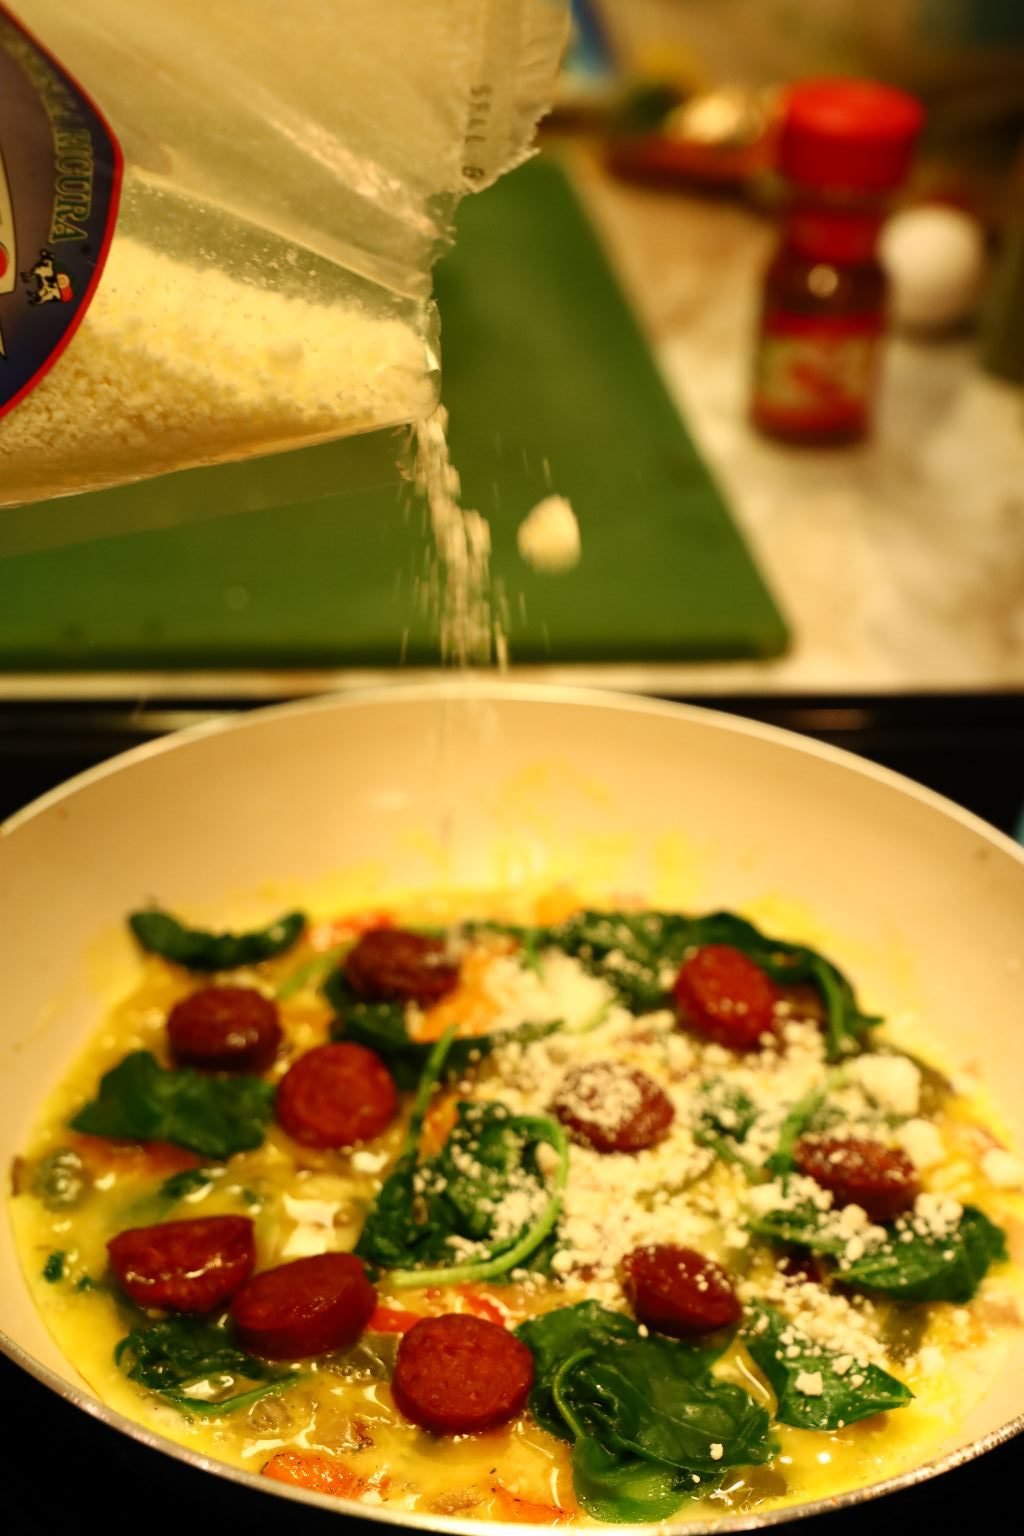
Mexican Tortilla Omelets
The idea for these Omelets came from me, Julie. We had leftover Tortillas as well as other ingredients and I wanted to use everything up so I suggested to Gordon that we make these.
They were so PERFECT!


We had some Chorizo in our pantry.
Gordon chopped them up into rounds.

———————————————————————-
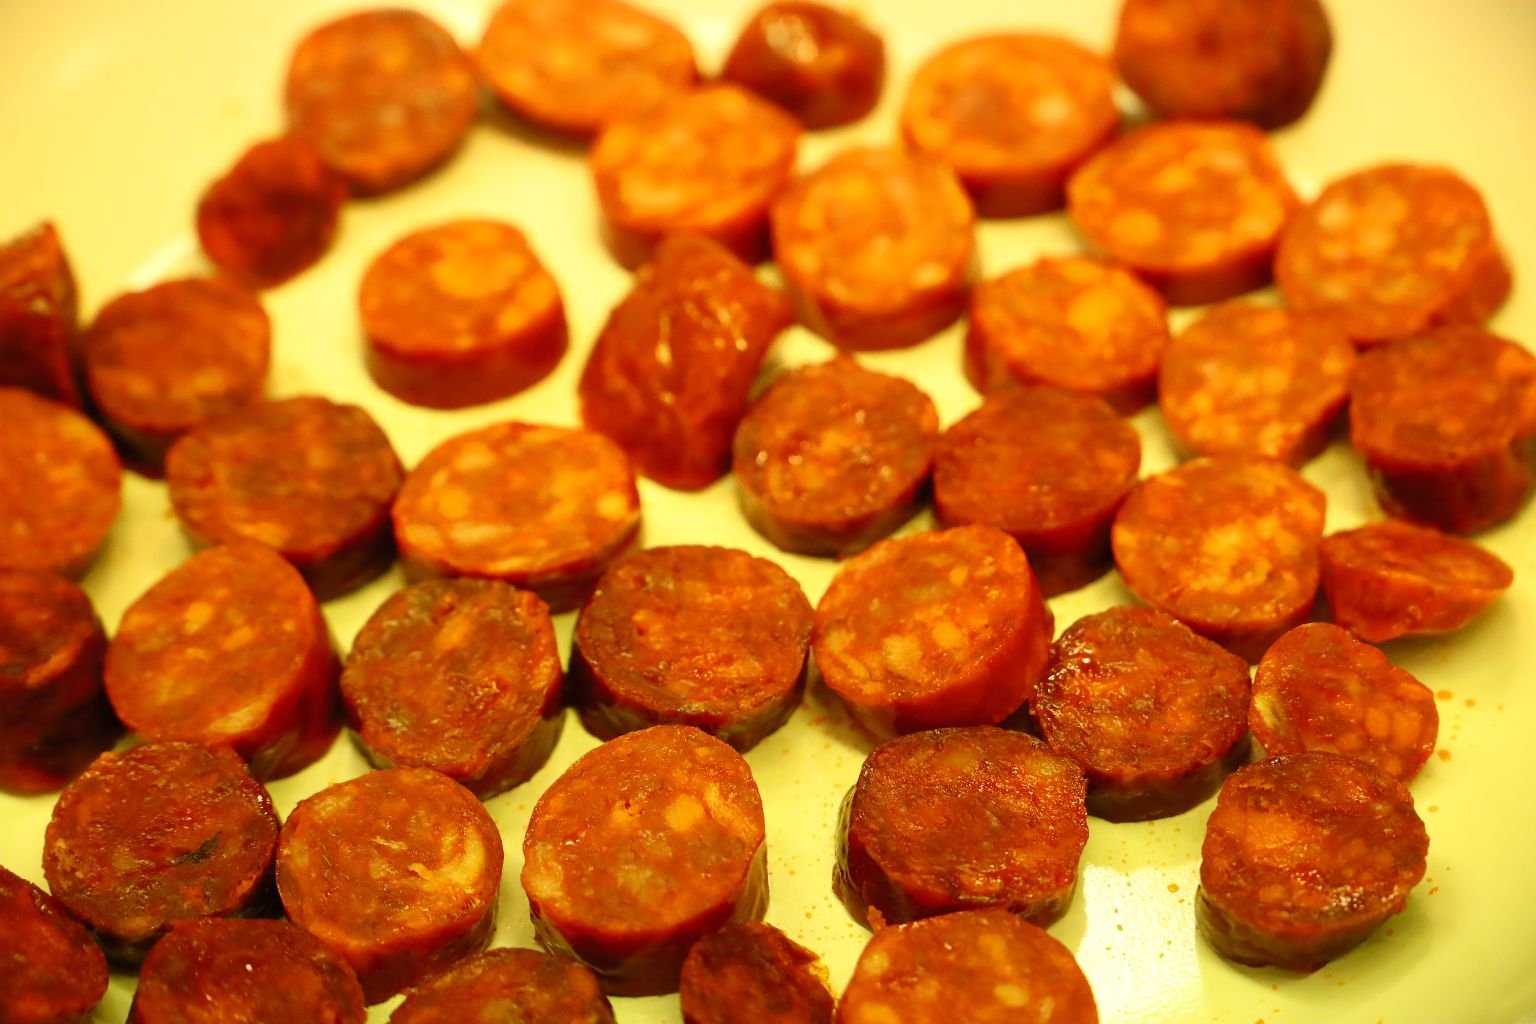
Gordon did add a little bit of our Chili Oil to the pan and just browned the Chorizo.
Just place onto paper towels and set aside.
Here Gordon is adding more of our Chili Oil to a saute pan.

Gordon is now adding our leftover Spinach Leaves.
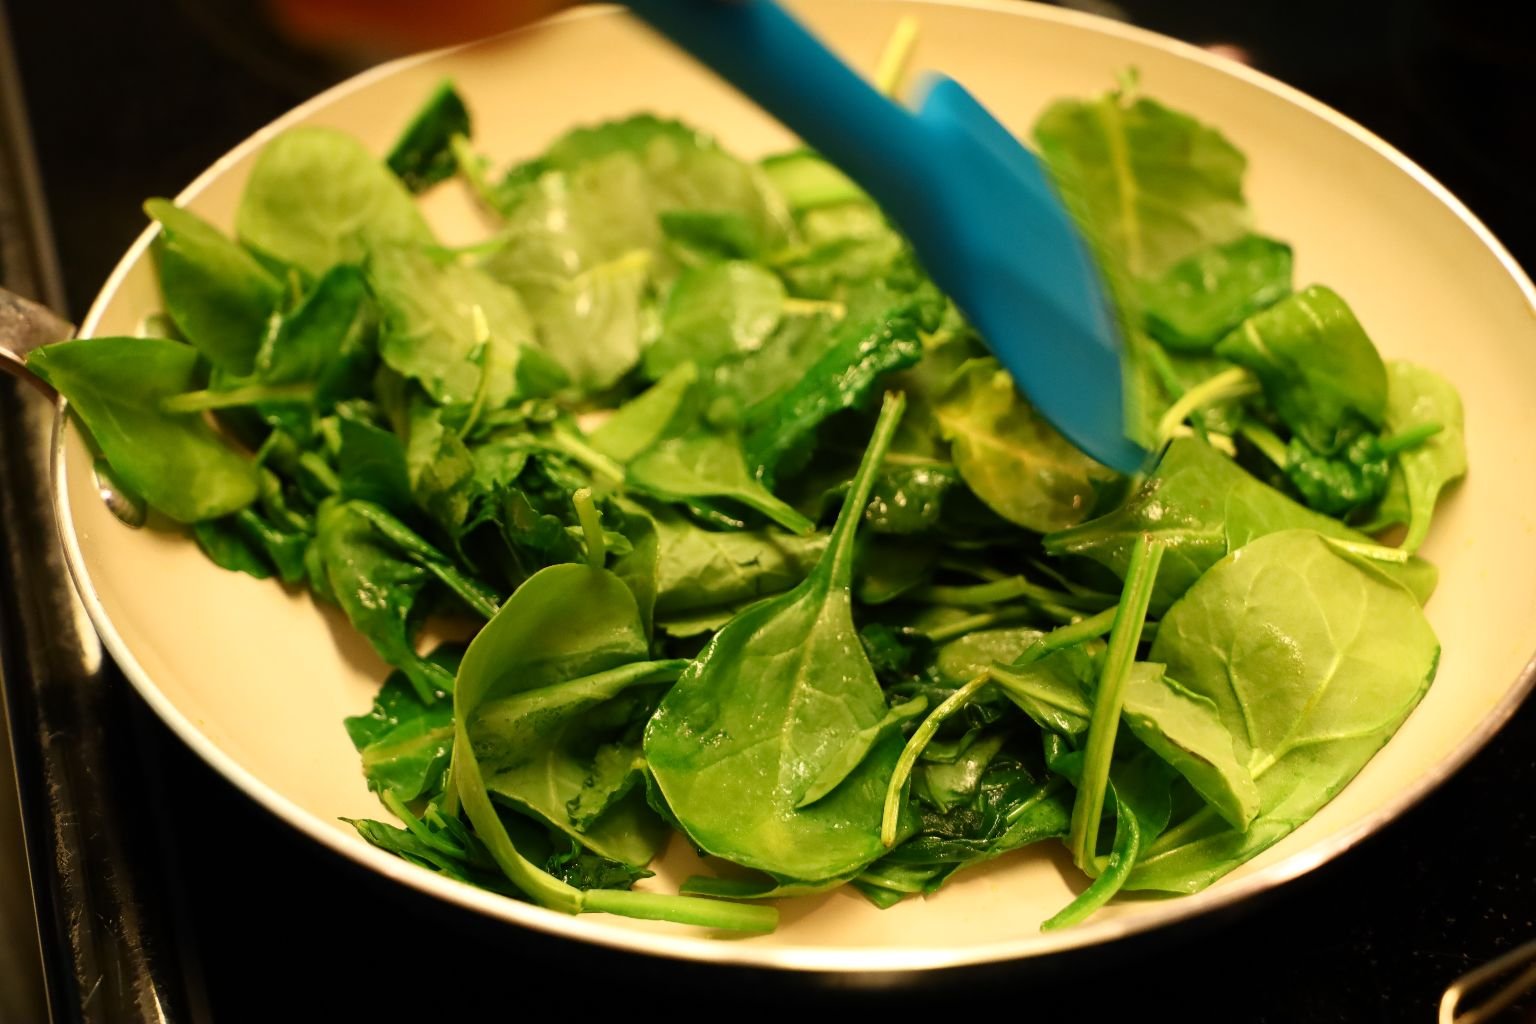
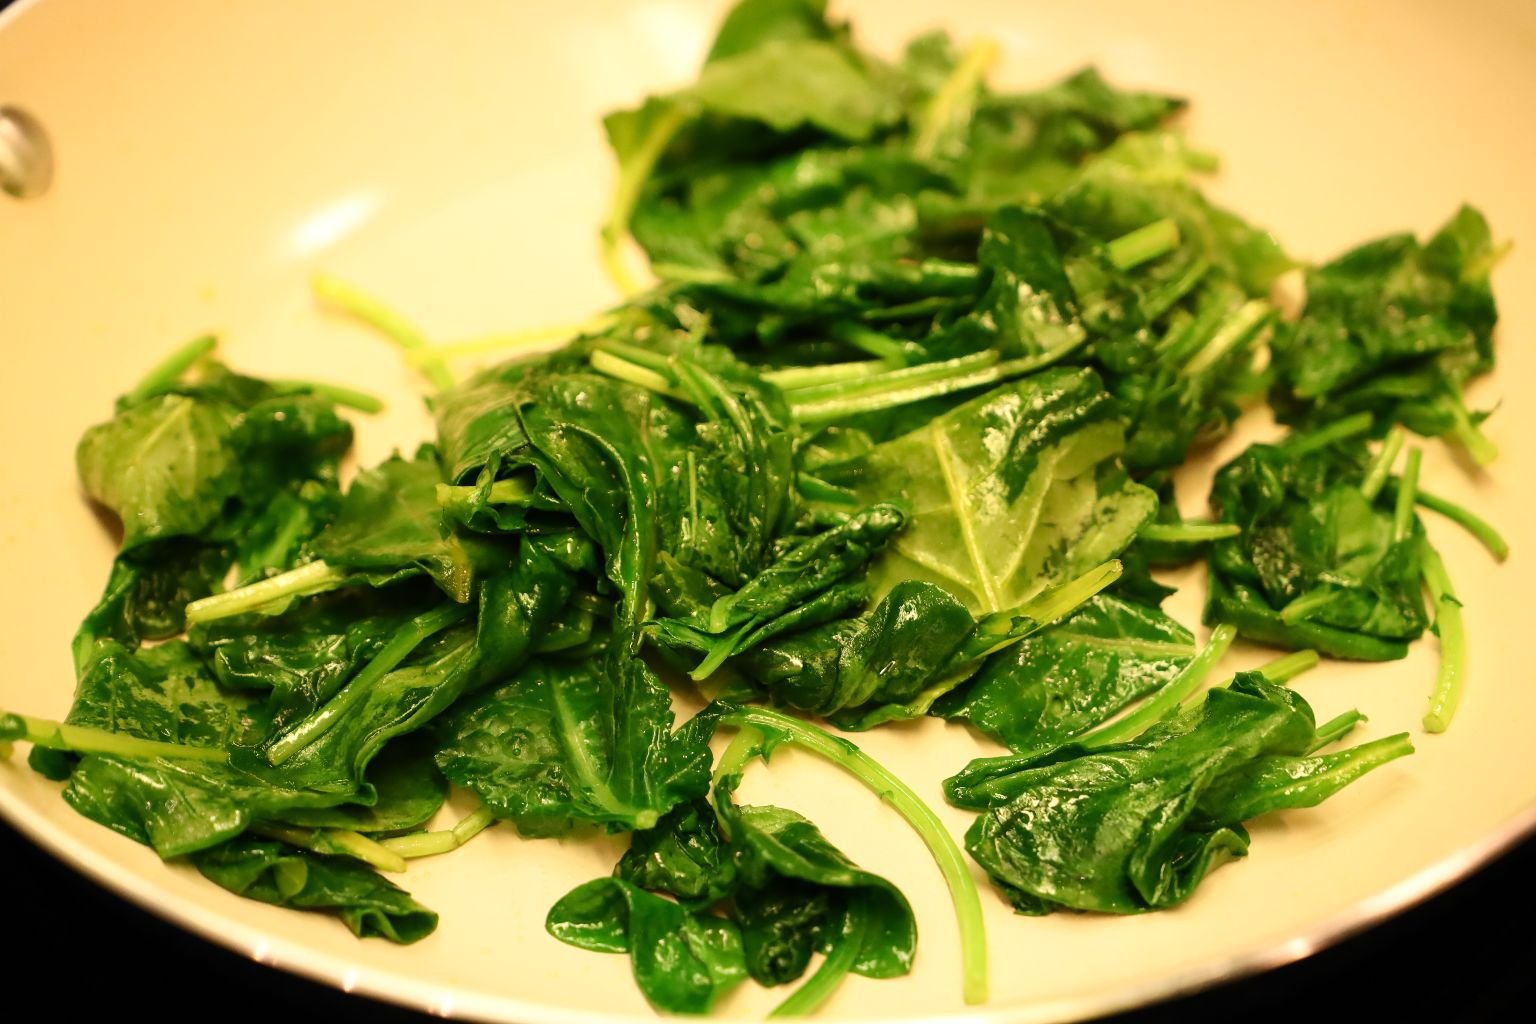
They are Wilting Down
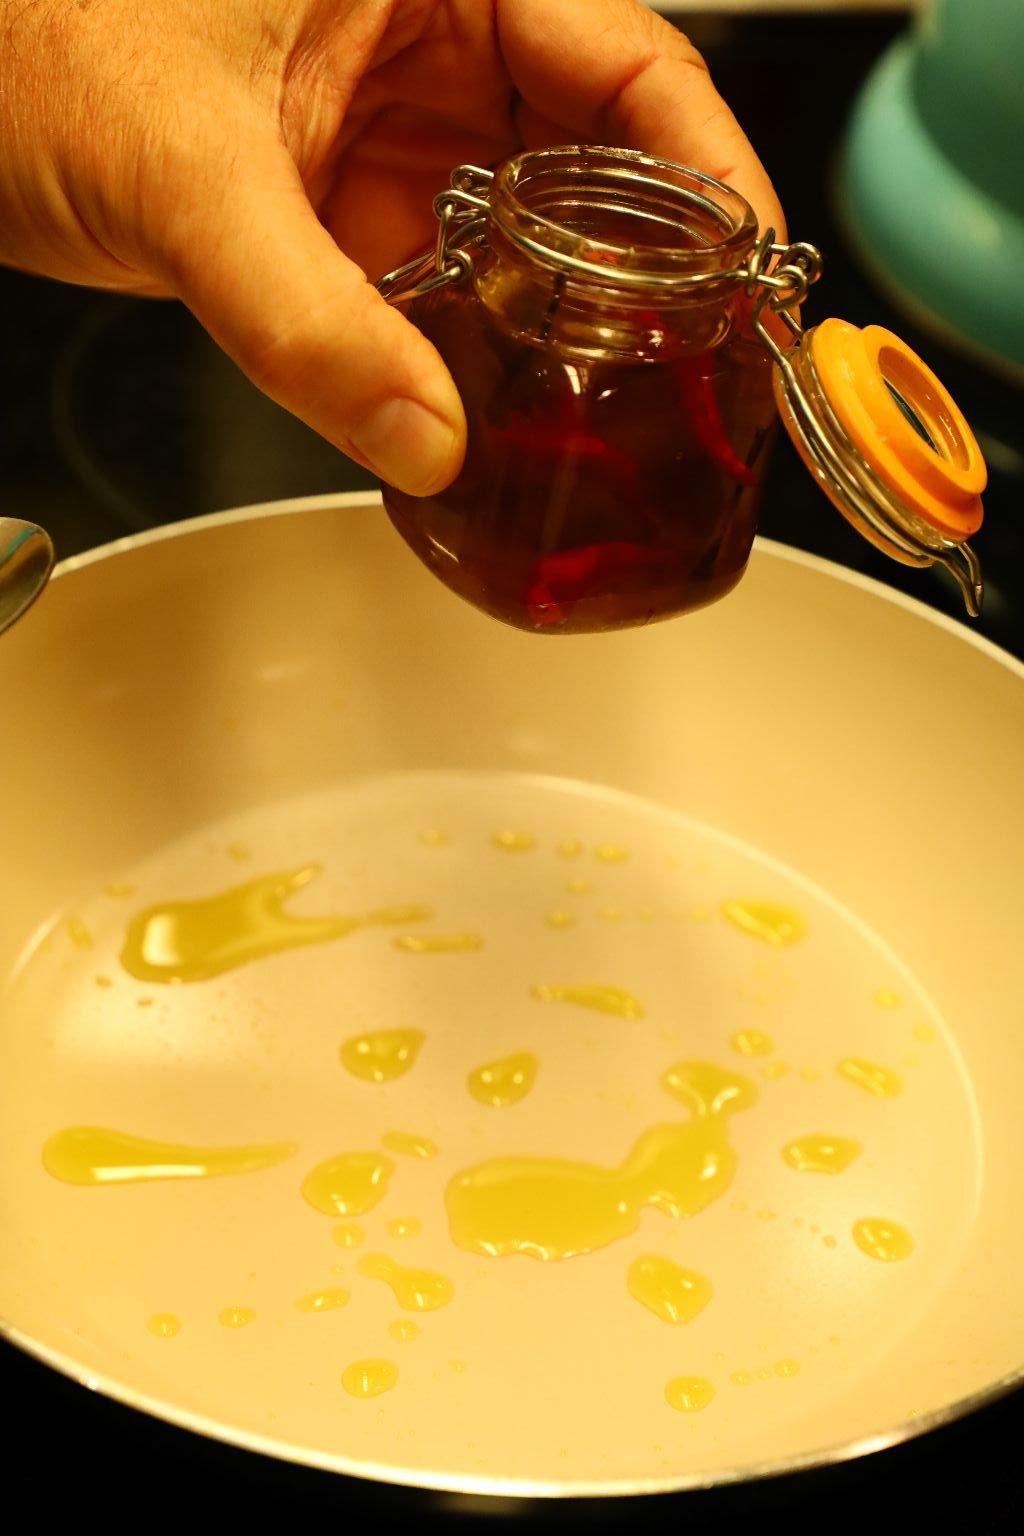
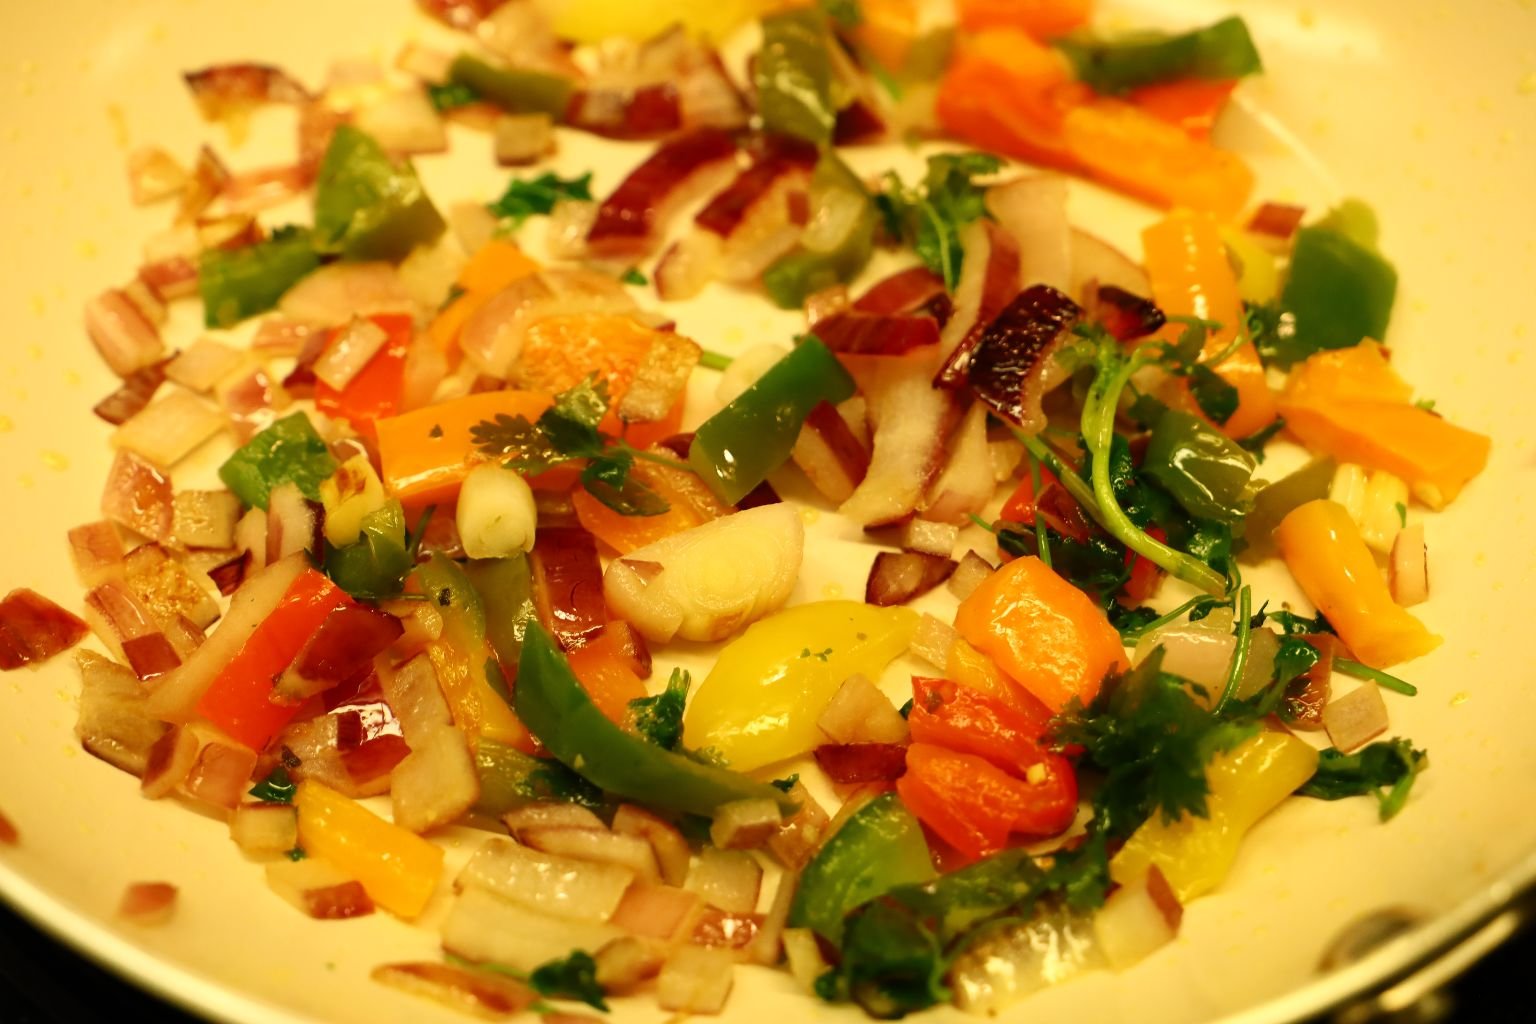
Now It’s time to add some more of our Chili Oil to a sauce pan and add some of our Red Onions to soften.
I’m not giving you exact measurements because of personal tastes. Some prefer more onions, some prefer more Spinach, and some prefer more Oil.

These are our leftovers from above.
Remember our leftover Bell Peppers from our Fajitas? And some of our Cilantro? Well, here it is again! Gordon doing some chopping.
Sauteeing Some of the Leftover Red Onion

———————————————————-

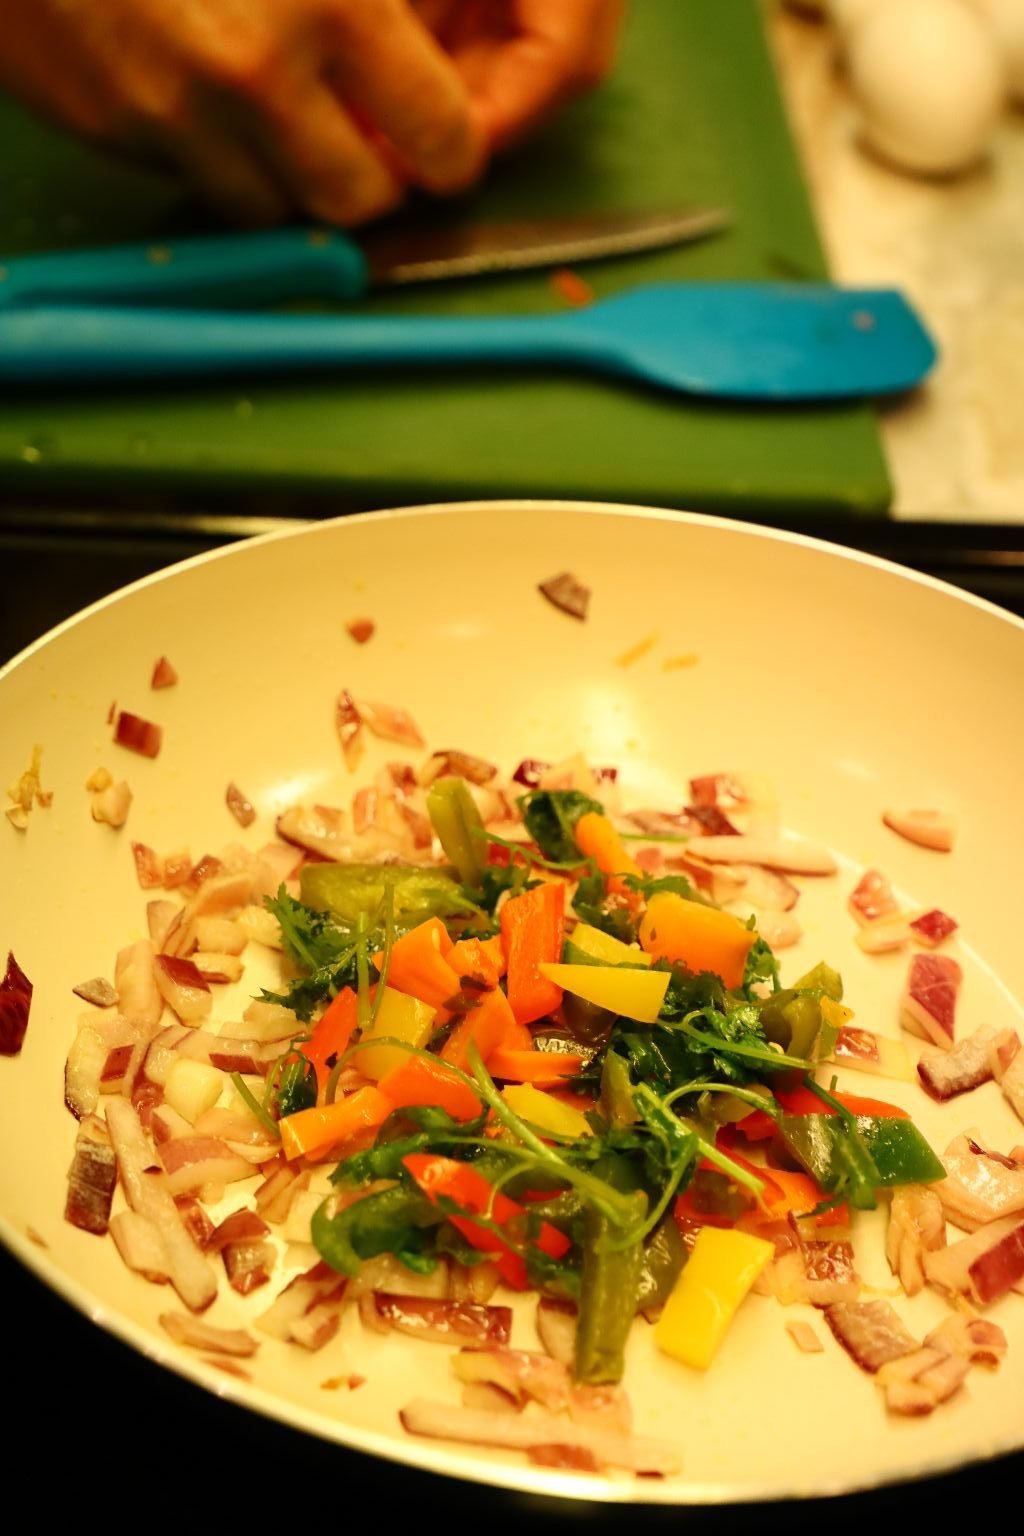
Here Gordon is Adding our Chopped Veggies

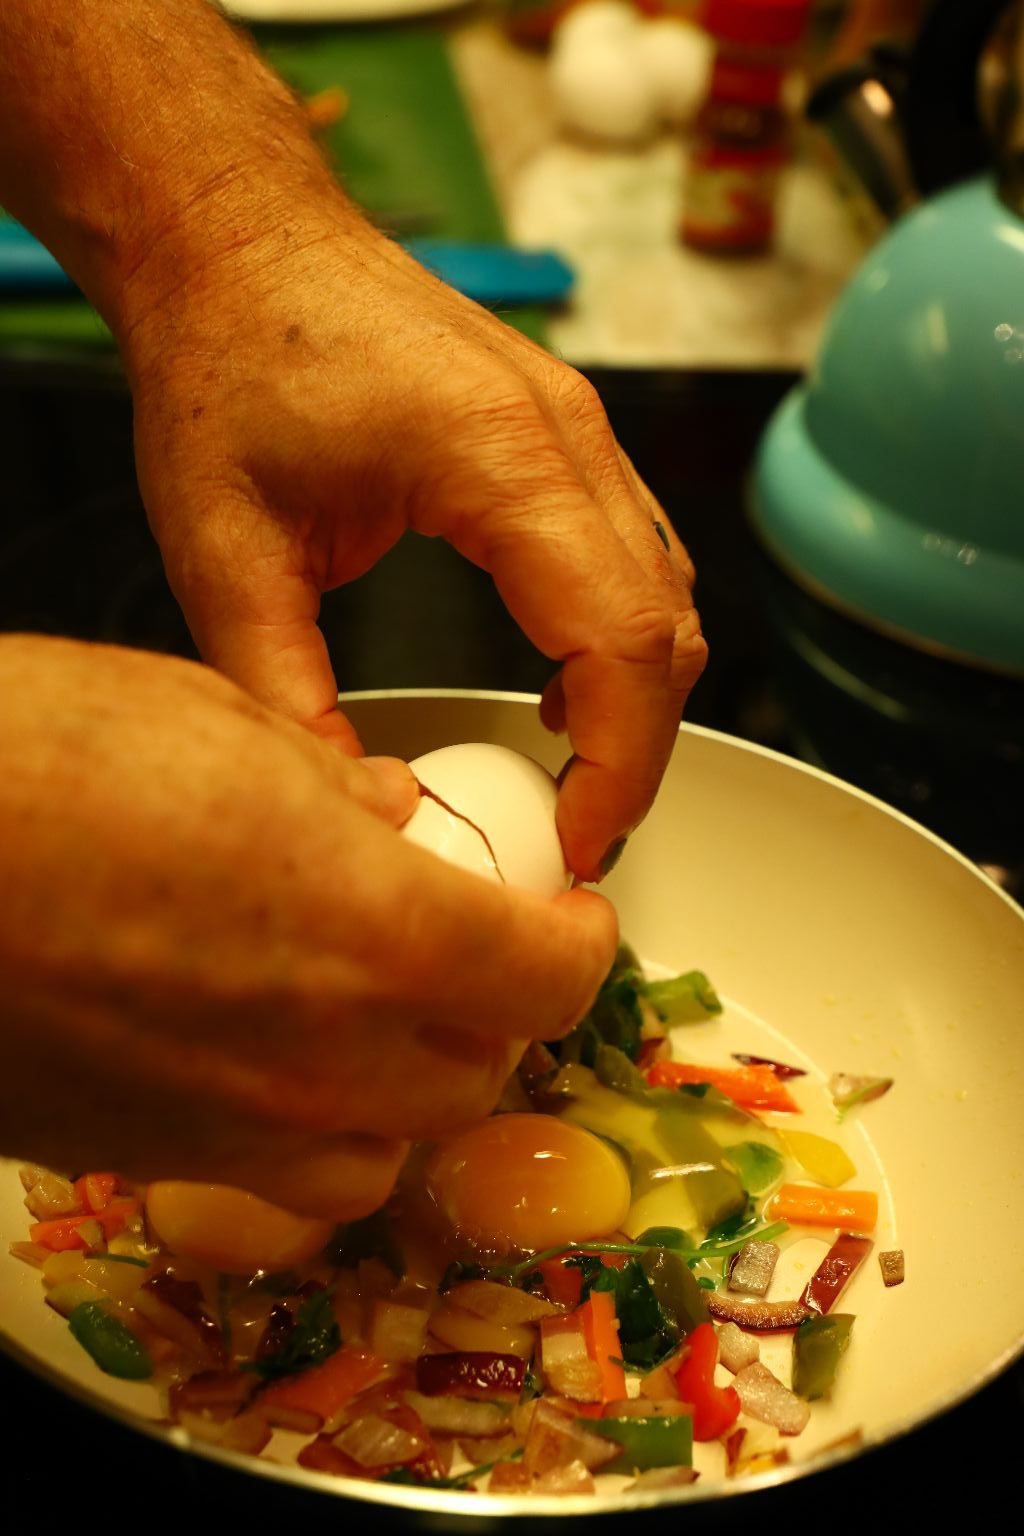
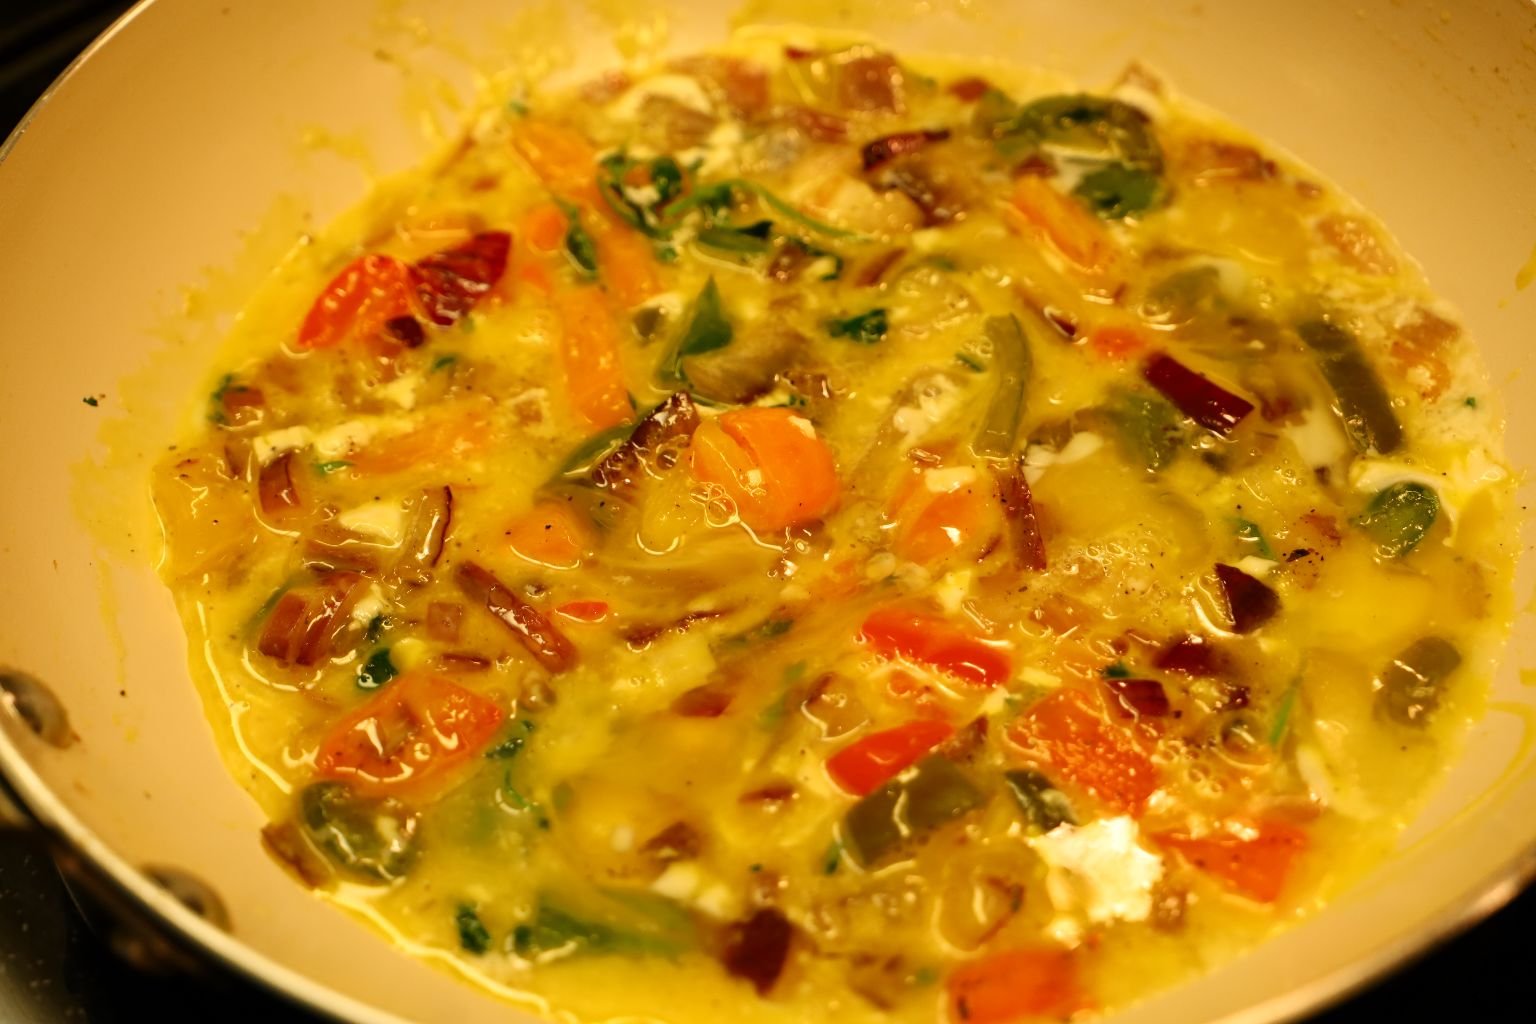
Now For the EGGS

1., 2., 3.
(Uno, Dos, Cuatro)

Now for some Freshly Ground Black Pepper

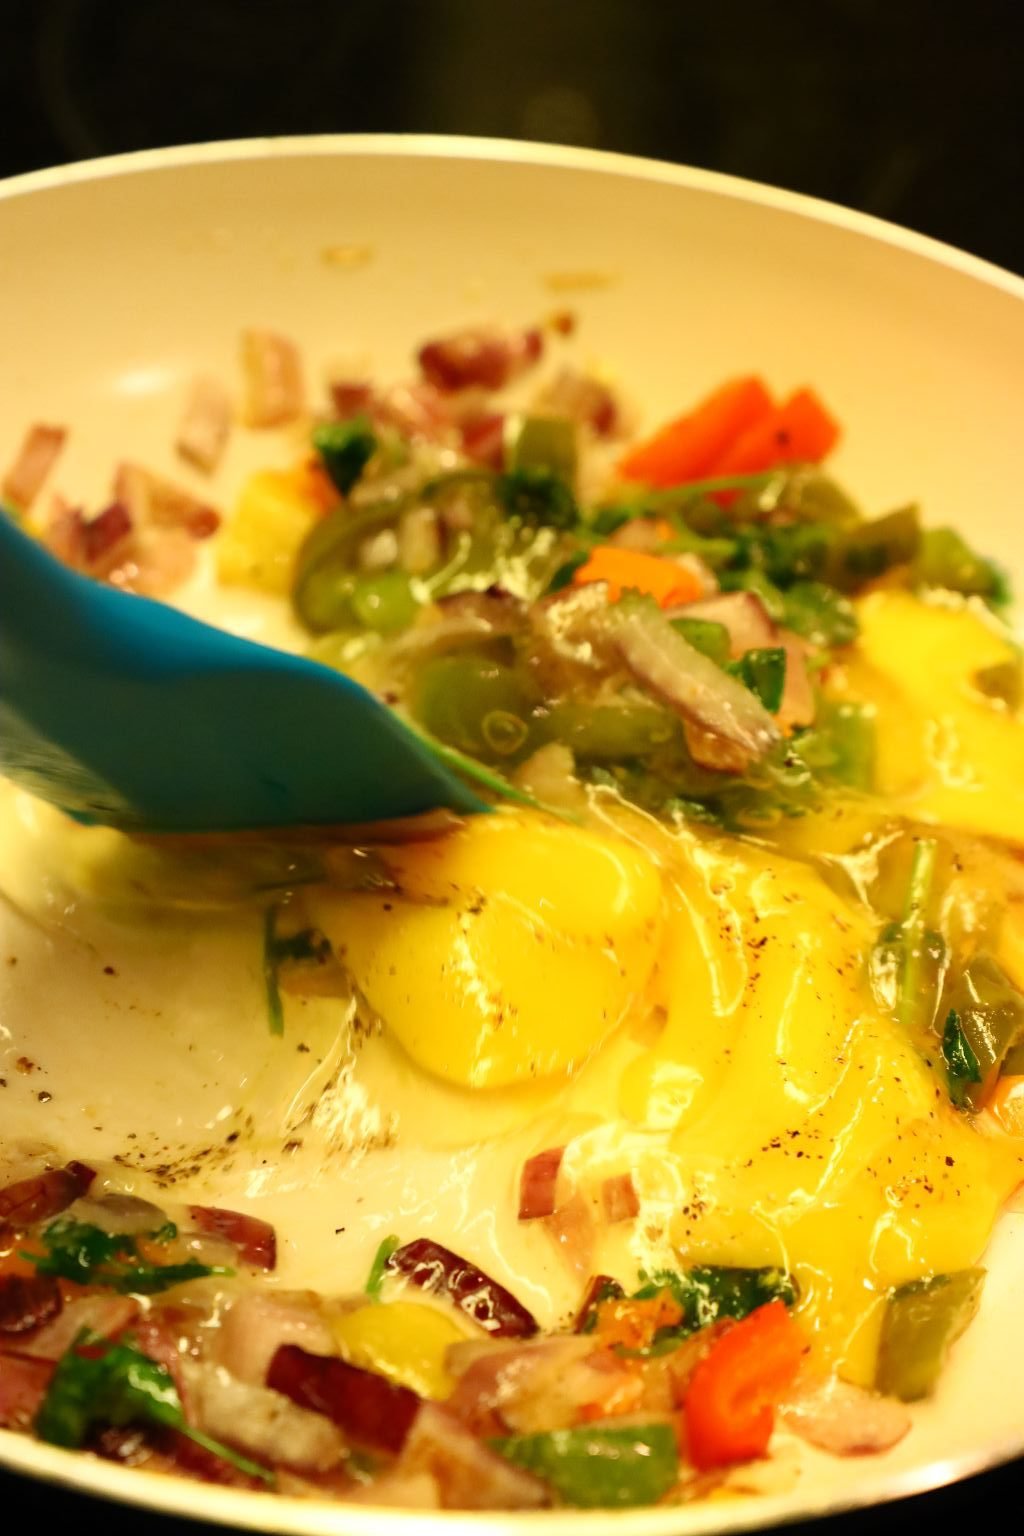
Mixing Together on a Medium-High Heat
——————————————————————-
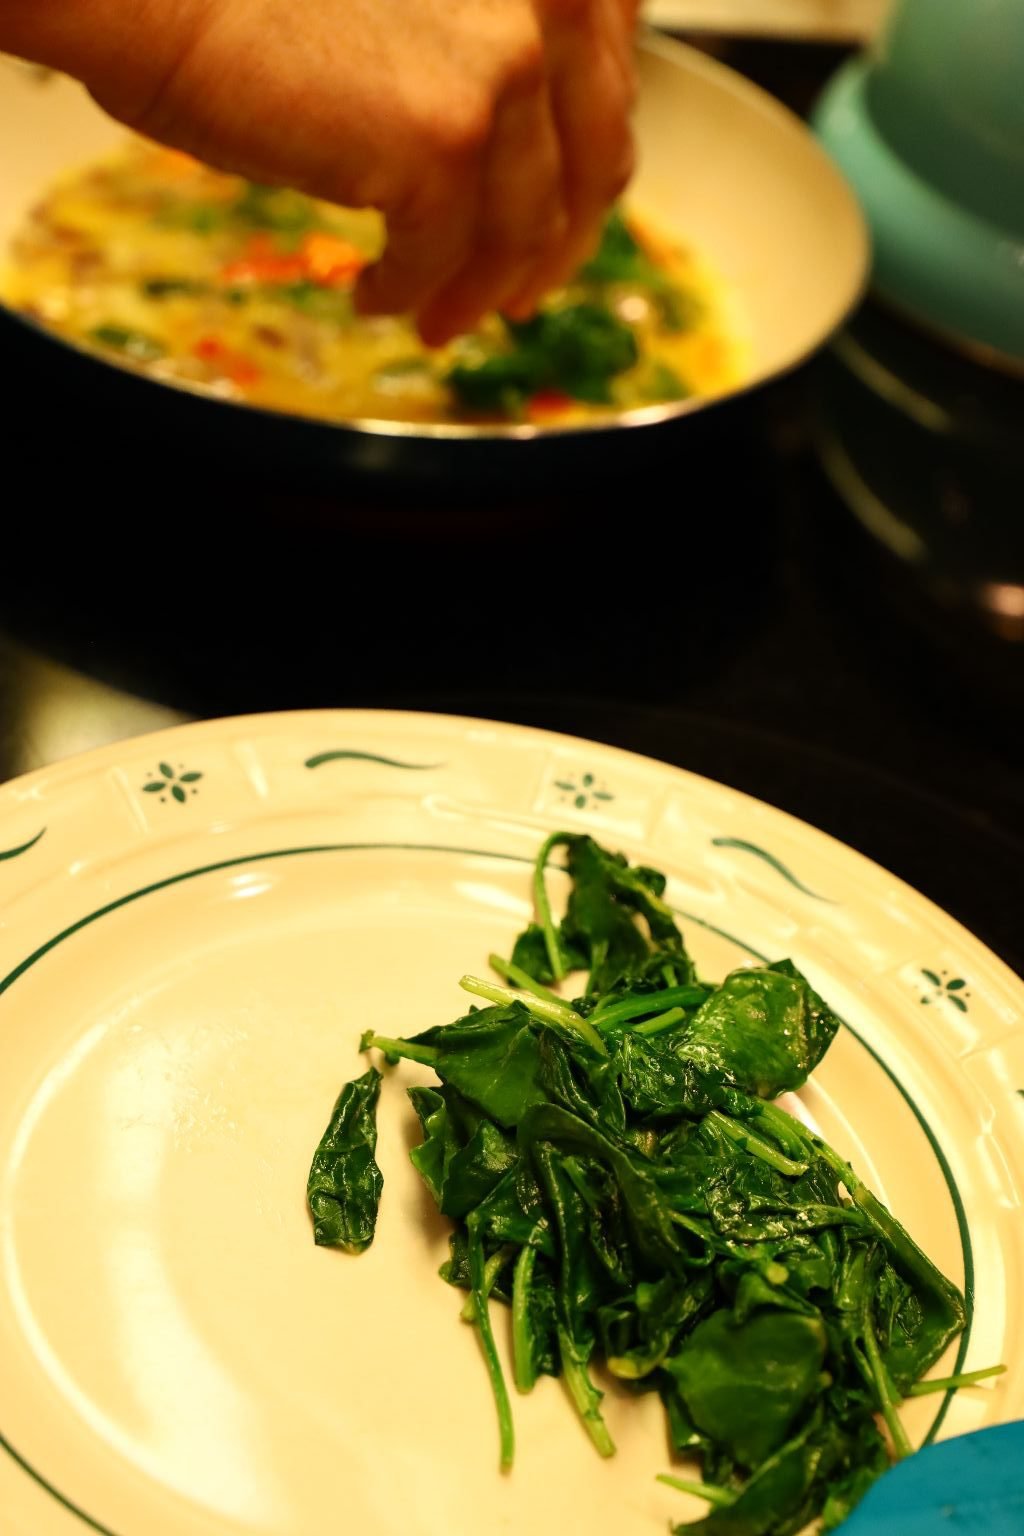

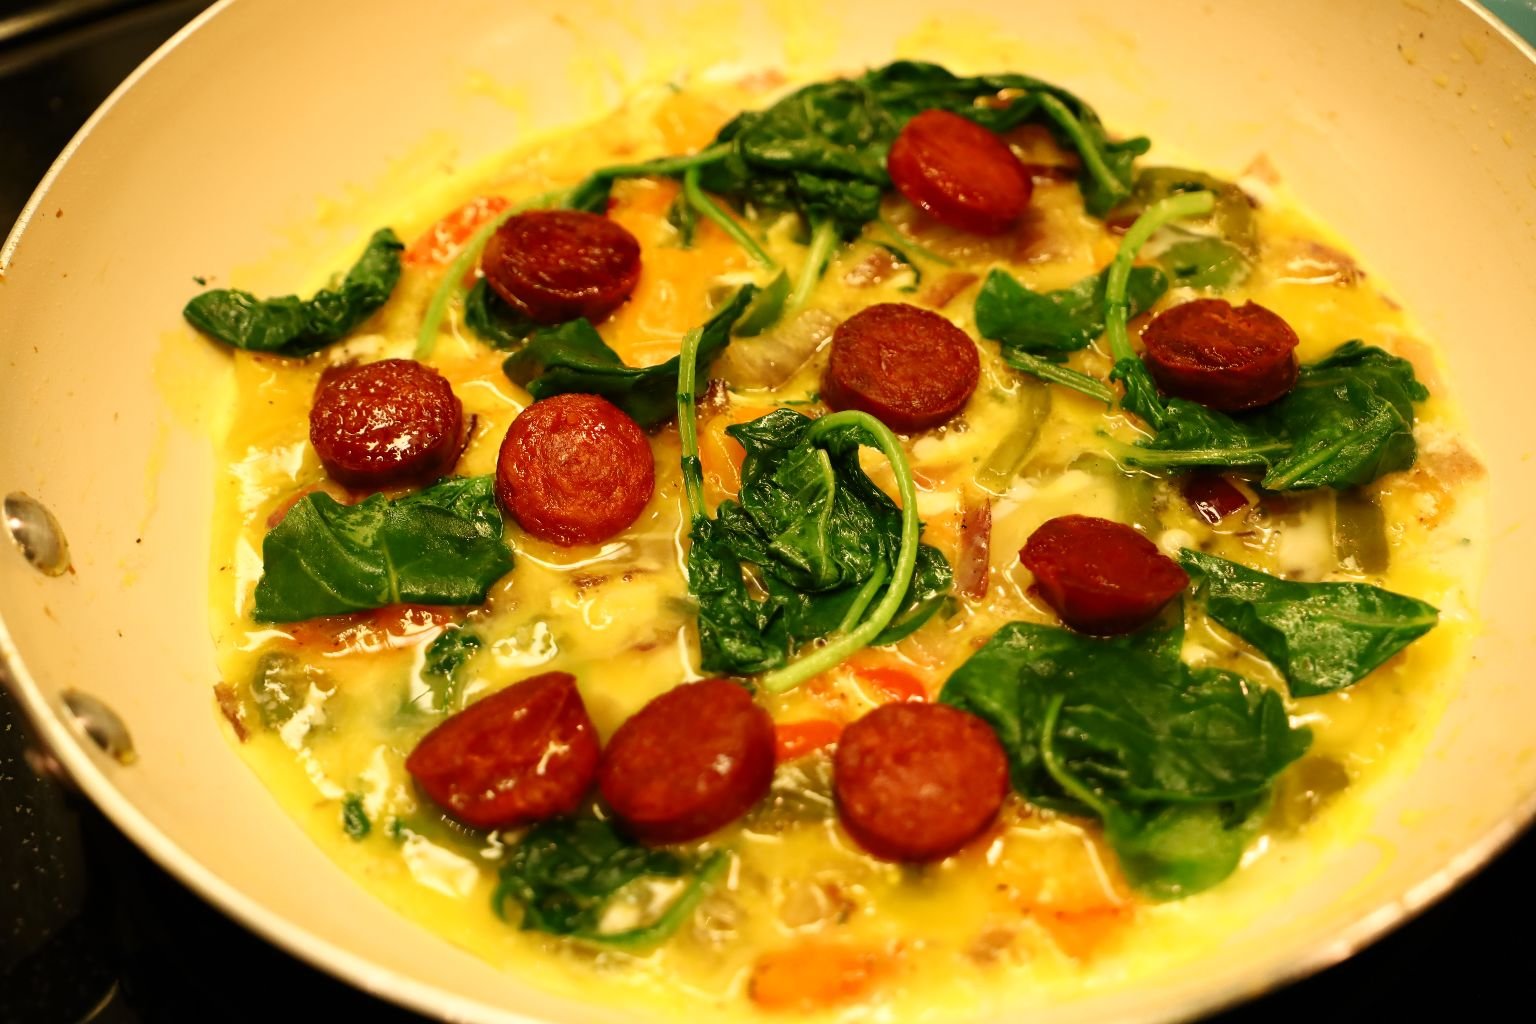
Now It’s Time to Add our Wilted Spinach
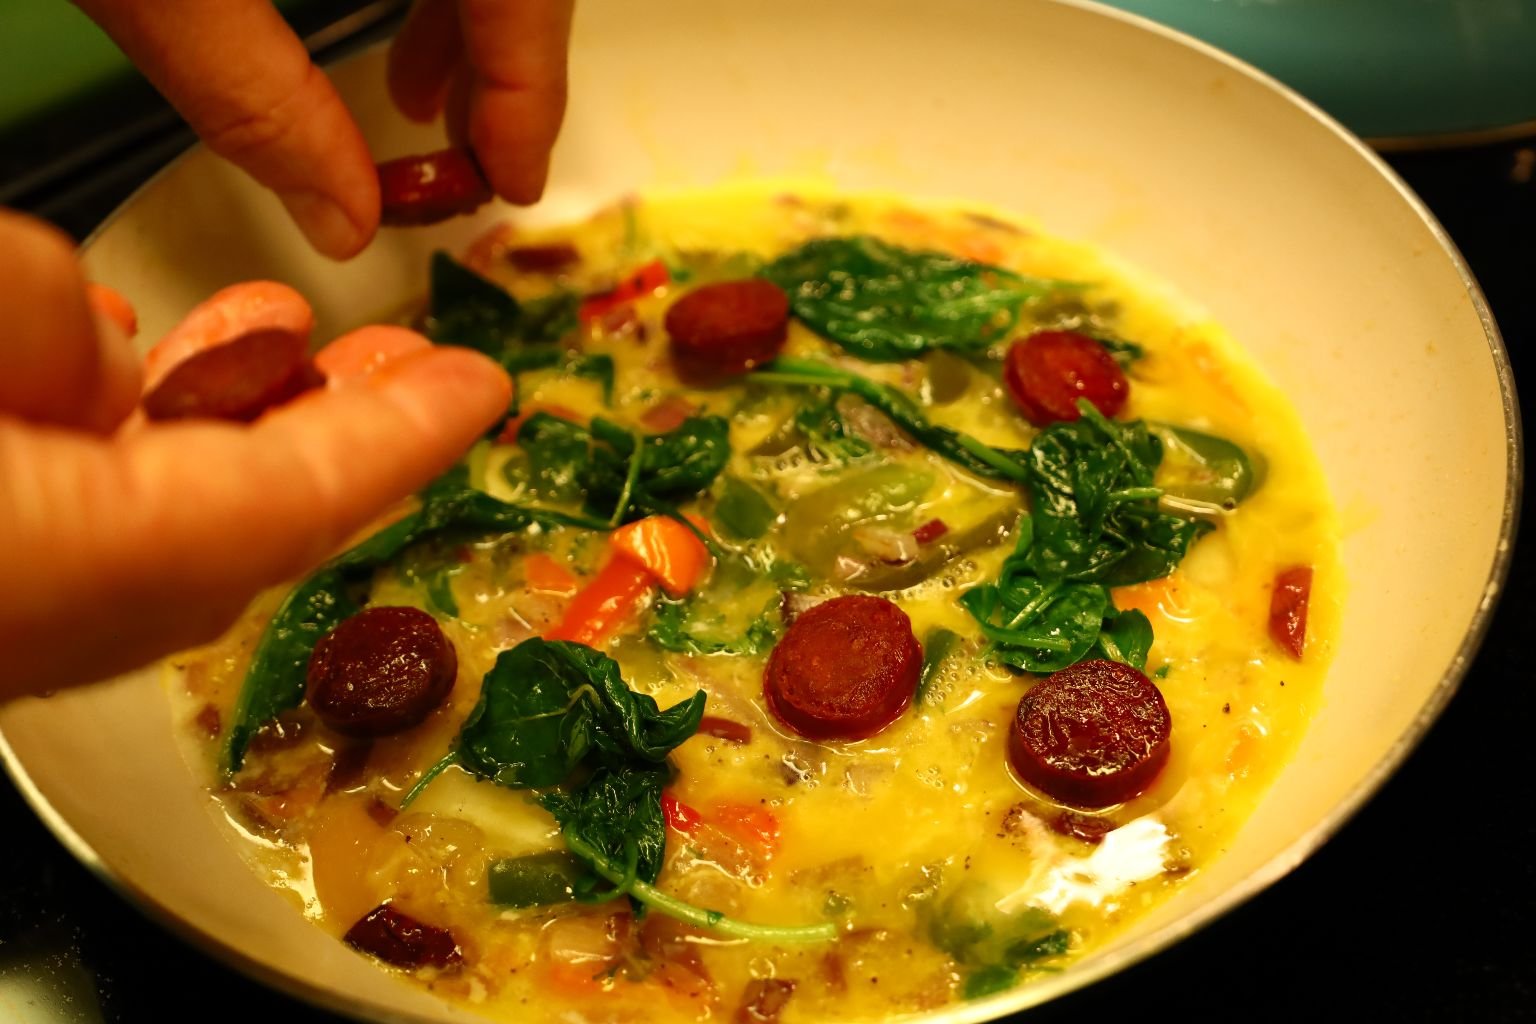
Here Gordon is Placing in our Chorizo
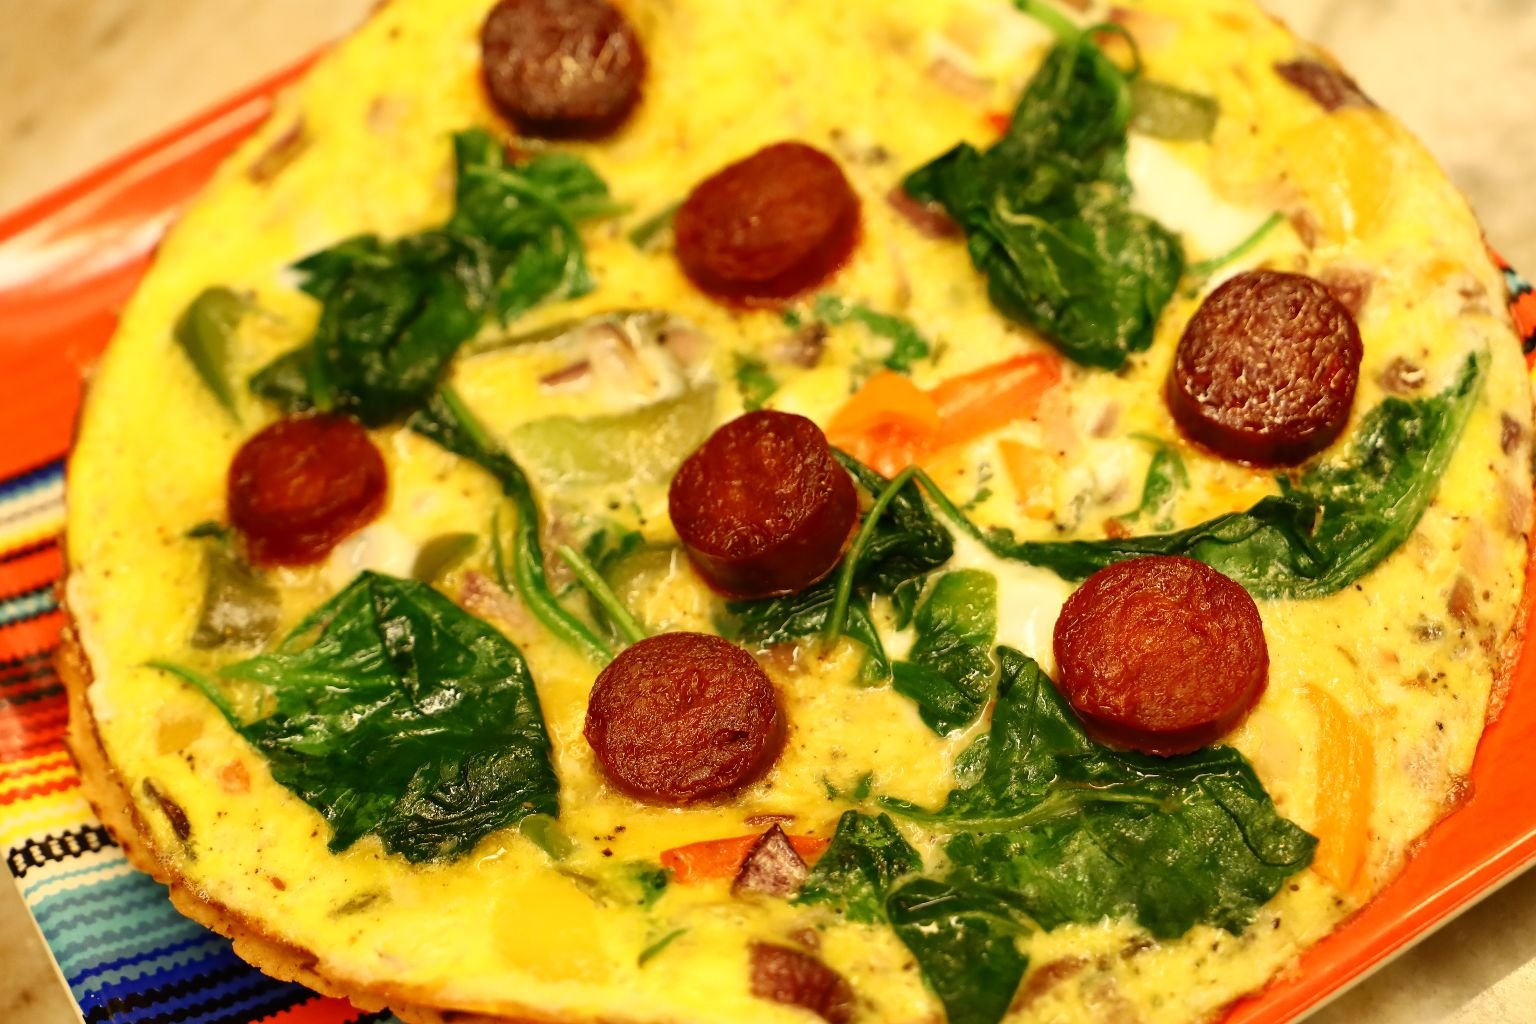
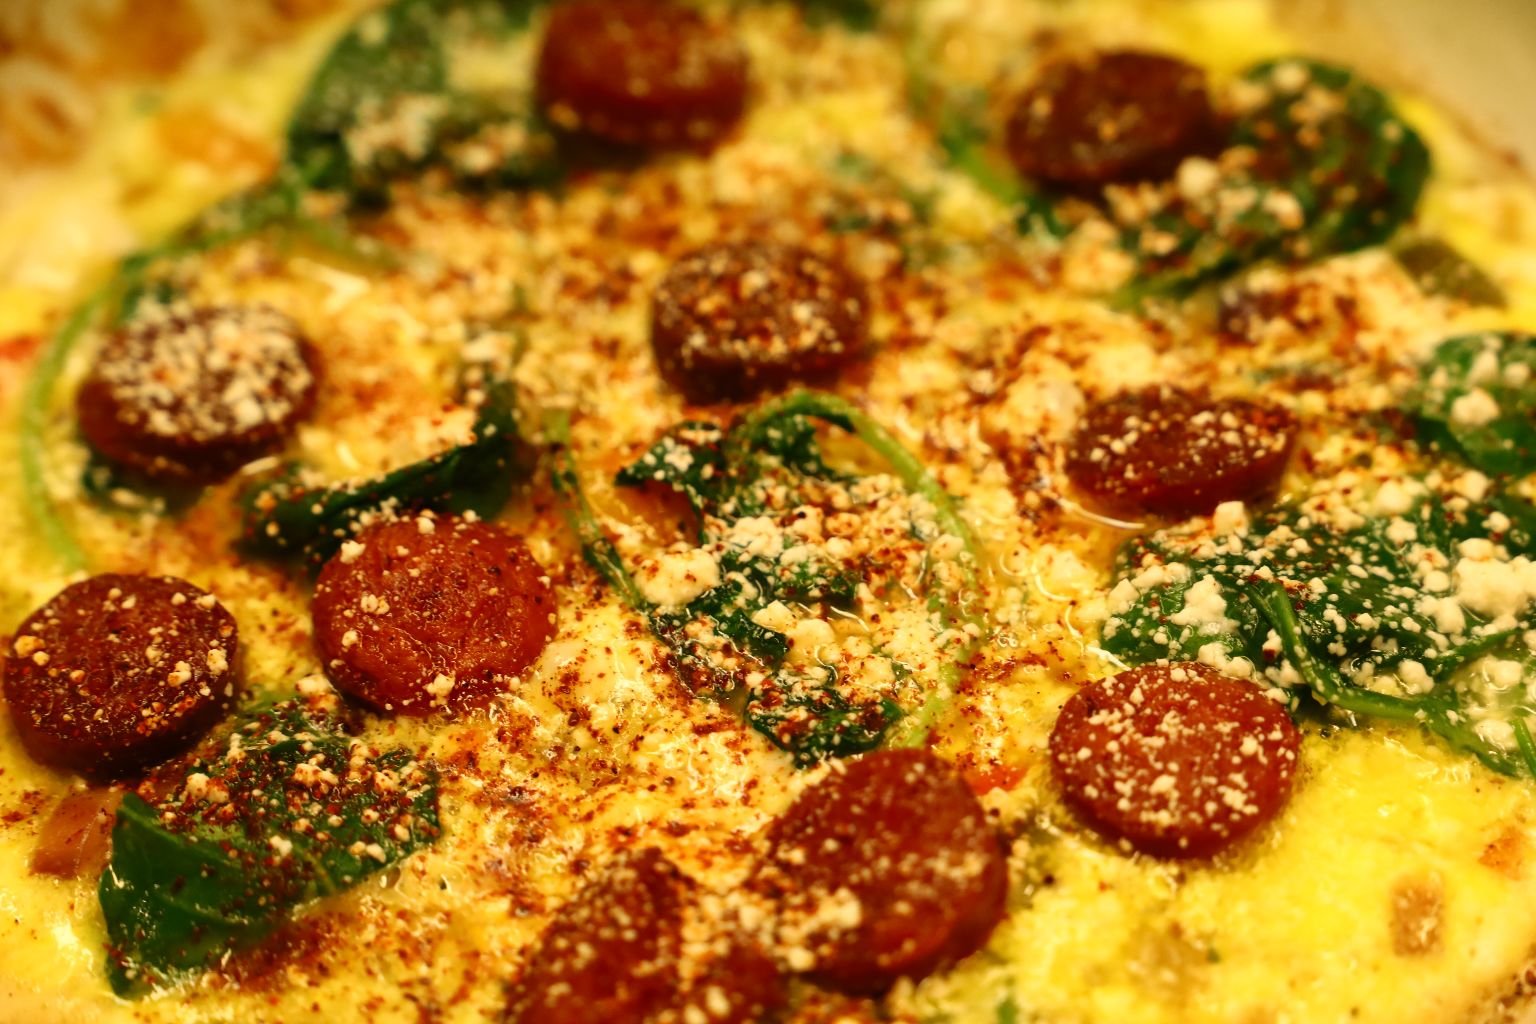
Just allow it to continue to cook and then turn out onto one of our Tortillas for an excellent Omelet.
———————————————————————
Next One:
Mostly the same as above with the exception of a few new ingredients.


——————————————————————-
———————————————————–

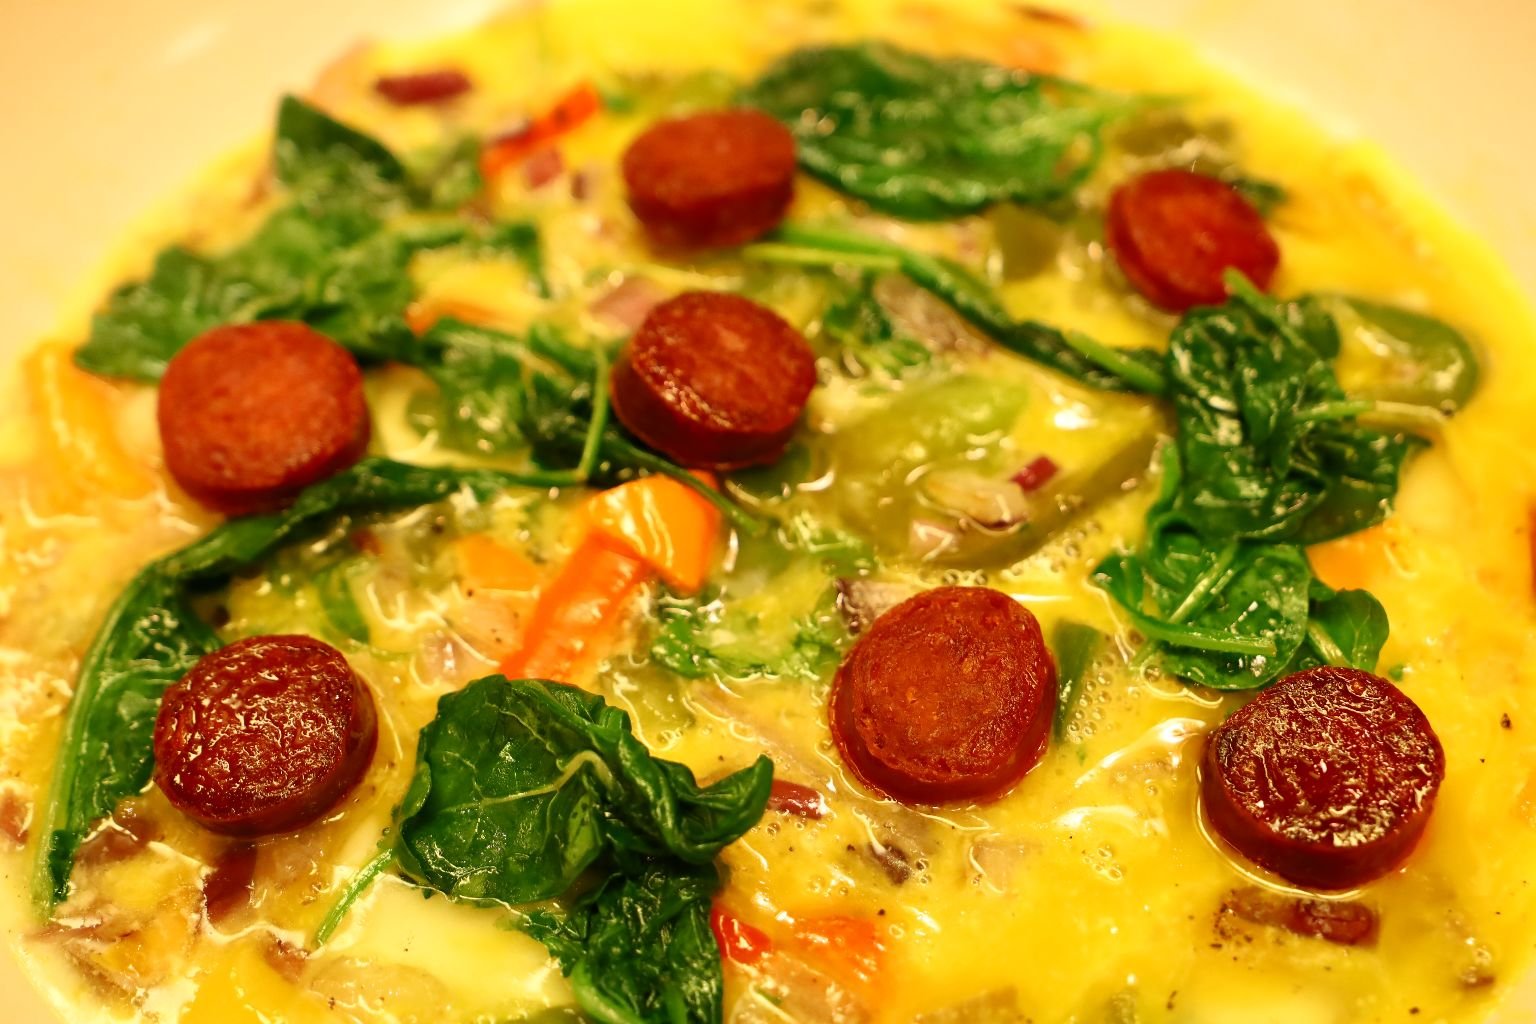
Spinach and Chorizo

A Sprinkling of this Mexican Cheese
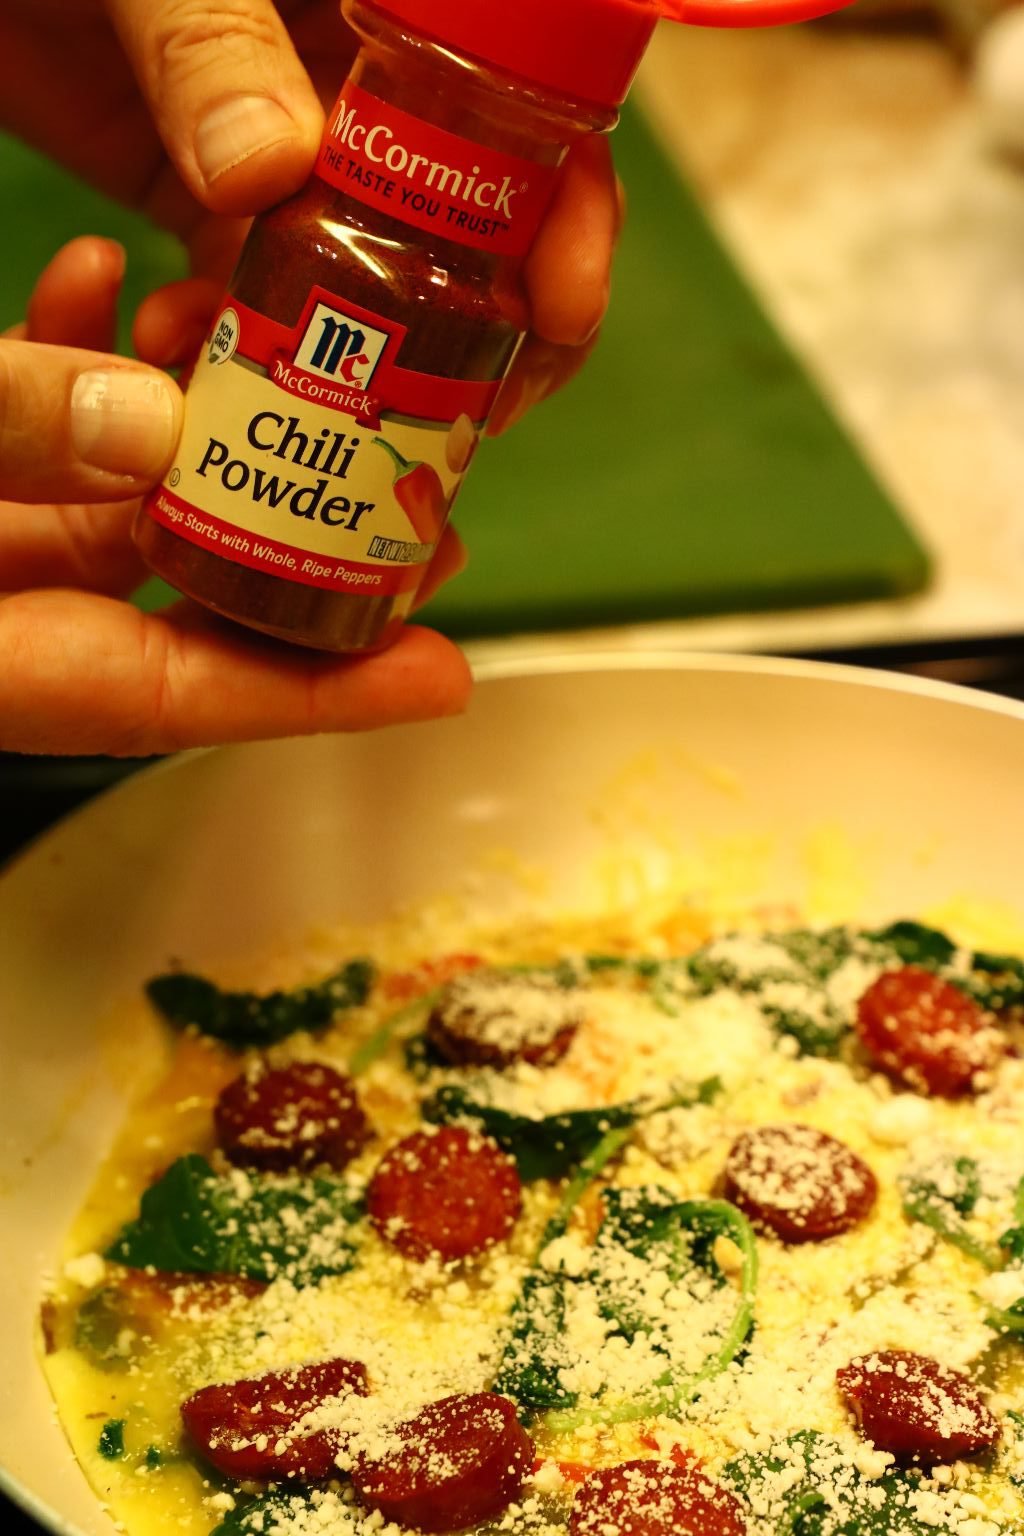
Some Chili Powder

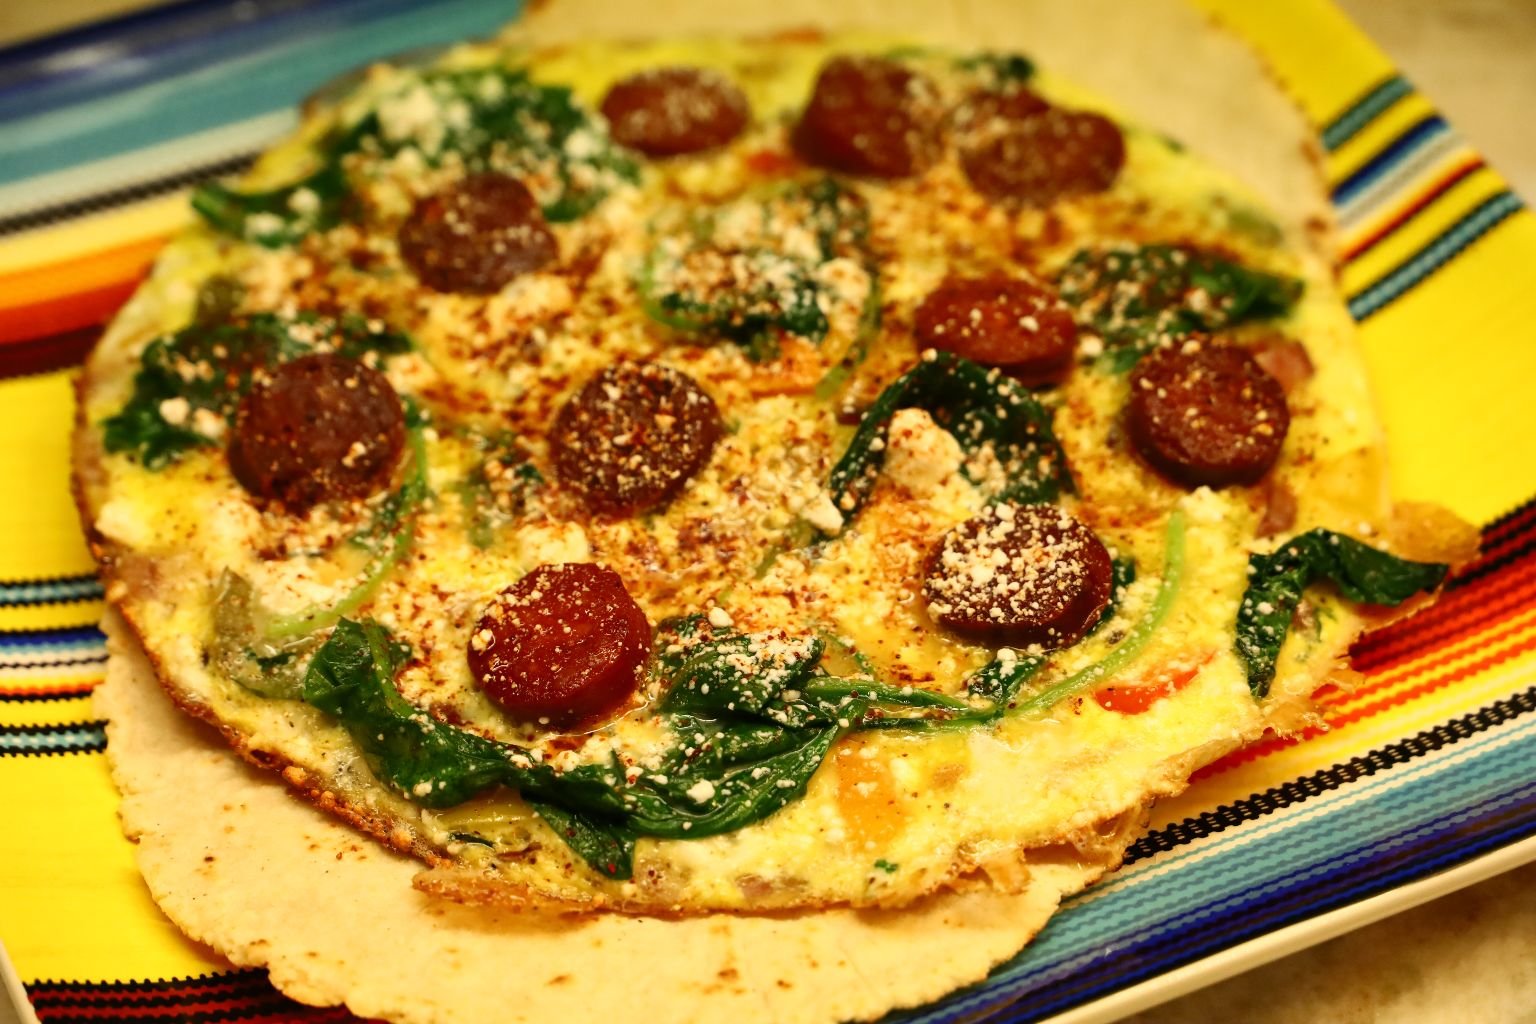
Just Turn Out Onto a Tortilla Lined Plate
————————————————————–
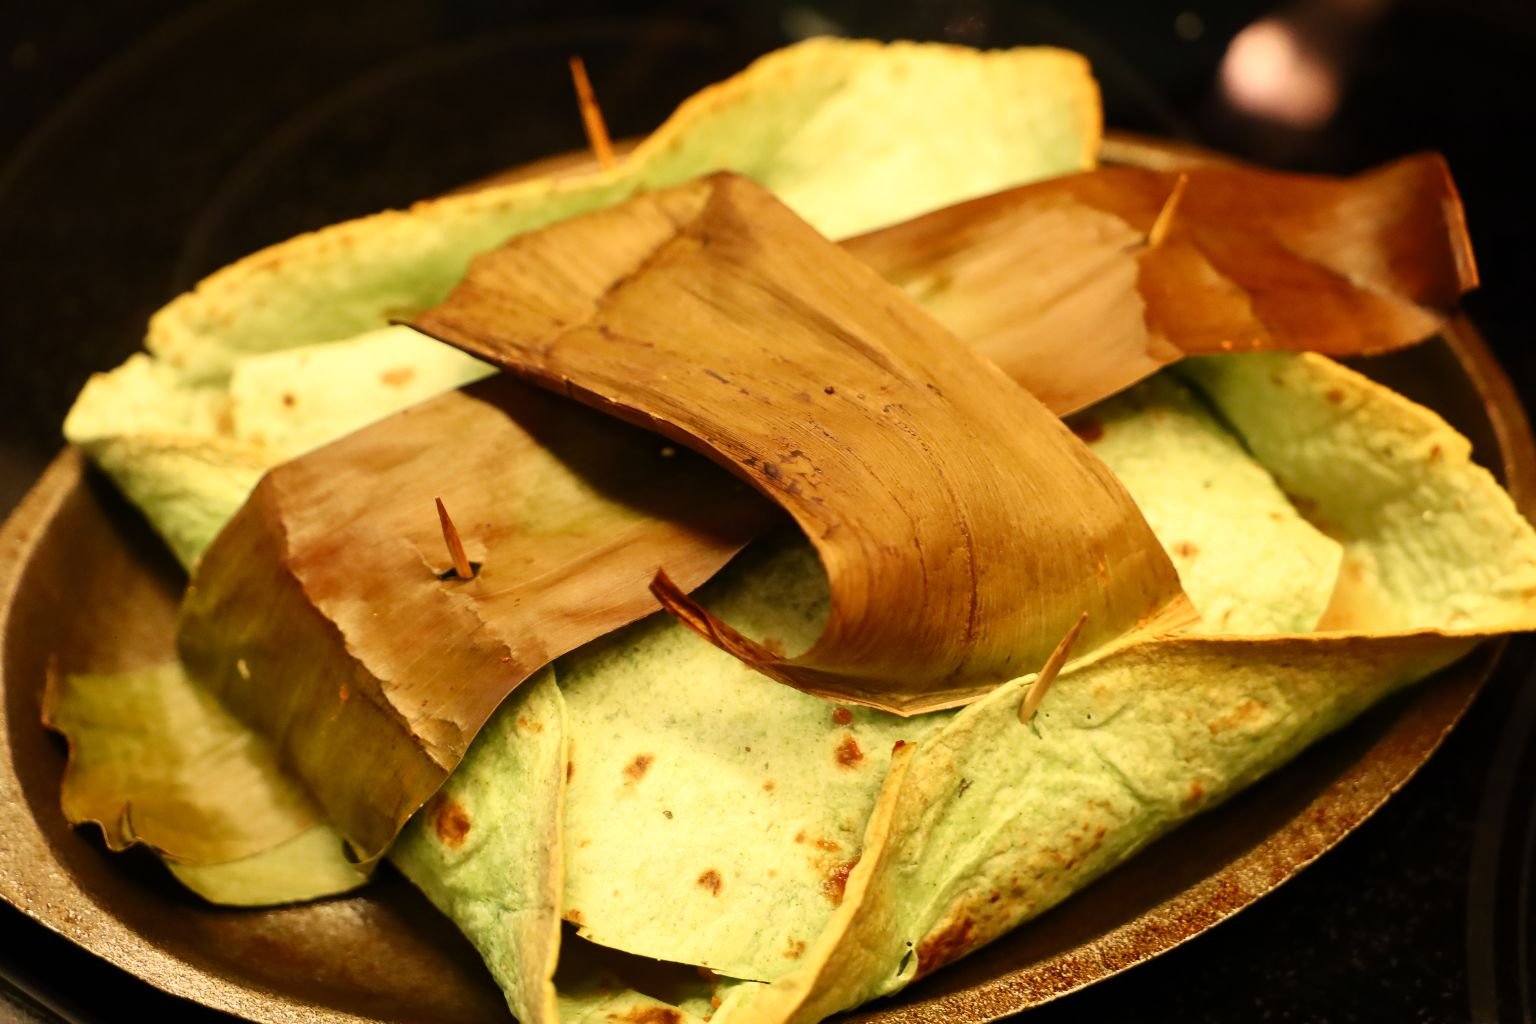
Our Queso Fresco Cheese Baked in a Tortilla and Banana Leaves
——————————————————————-

Gordon picked this up at the Latin Supermarket one day for us to try. It is draped in a Banana Leaf and the presentation is actually quite nice. We didn’t know what we would be eating with it, but we knew it would make a nice appetizer for one of our Latin Inspired Dinners.
I, Julie kept looking at it every time I opened the refrigerator door wondering when and how we would eat it? I then was looking around Instagram when I saw someone posting a photo of Brie Cheese wrapped in bacon or some such nonsense as that, but it inspired me and made me think of this Queso Fresco that we had in our refrigerator and I got the idea to somehow wrap it up and bake it as some kind of Mexican Brie Cheese.
That is when Gordon suggested that we use one of our Tortilla’s to wrap around it and bake it and just experiment with it.

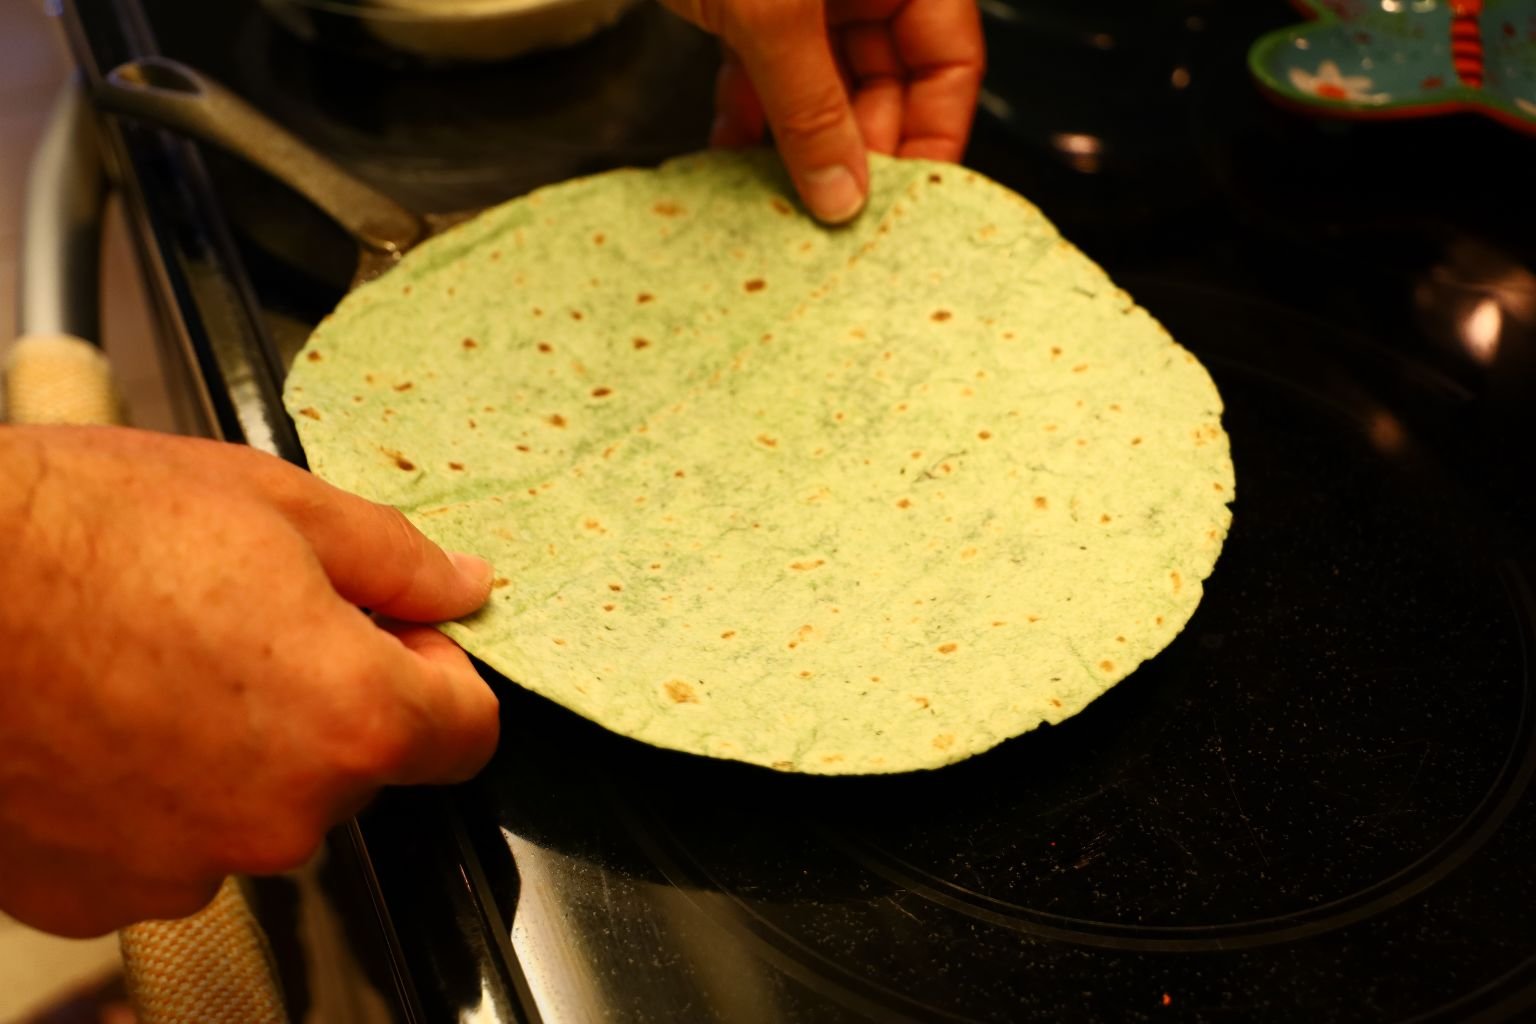
So, we got to work placing some Vegetable Oil onto a Cast Iron Skillet of ours and placed one Tortilla down on top of it.
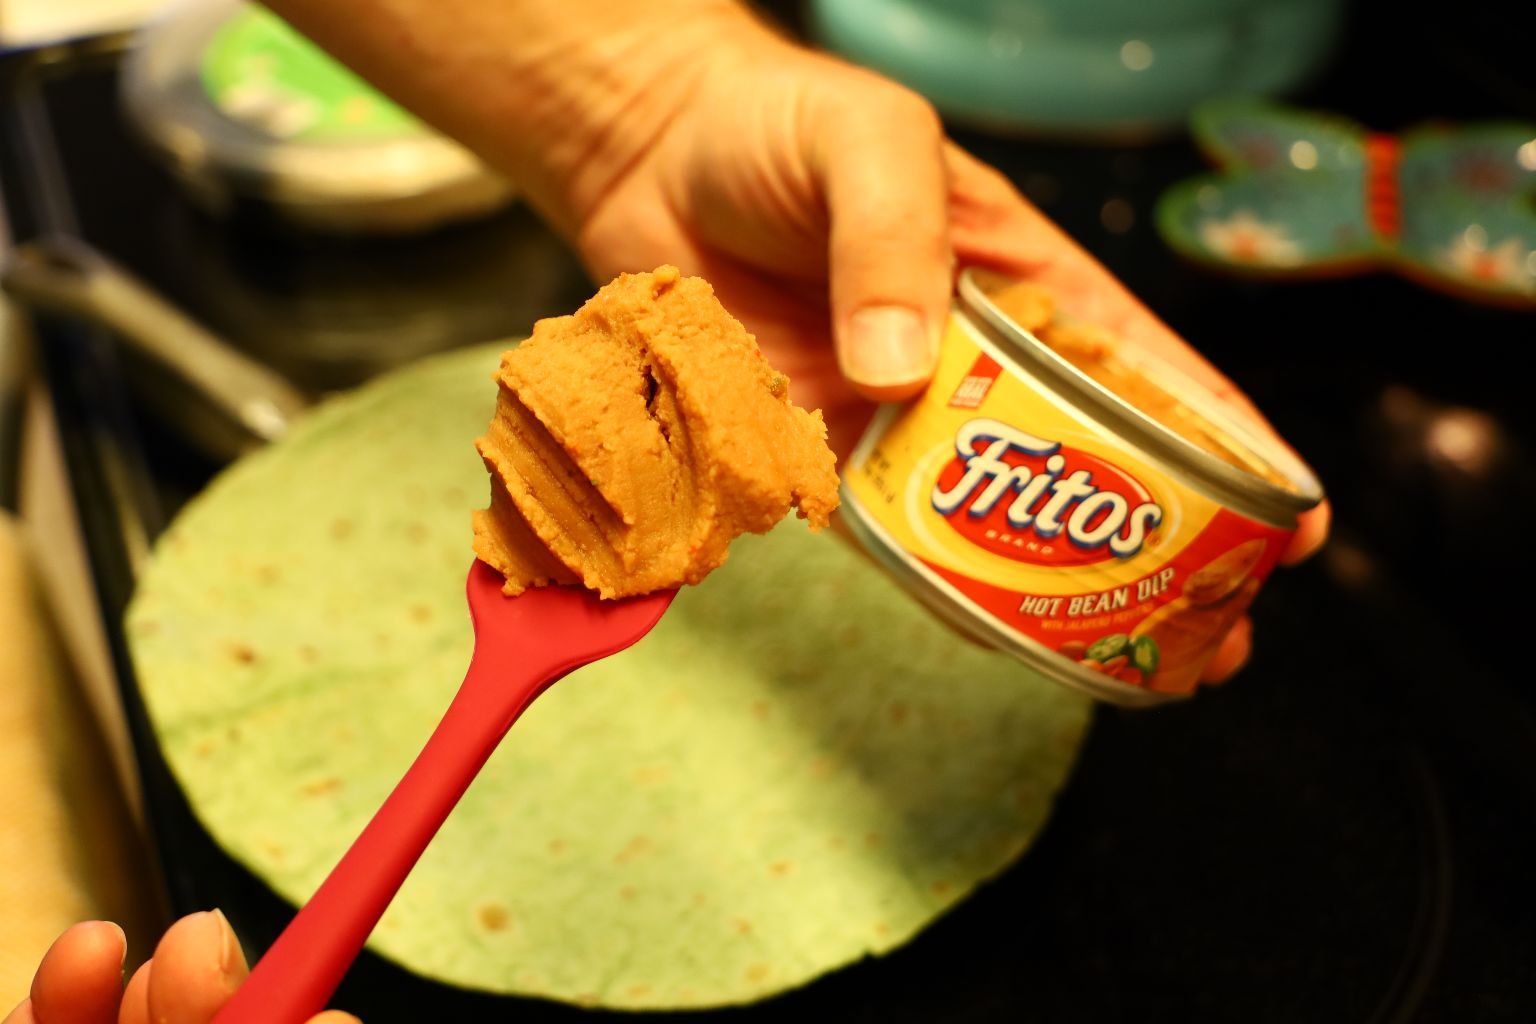

I got the idea to place some of our Bean Dip in the center of the Tortilla and then to add a few spices to it.

Each Chili Powder Has a Different Taste


All Spiced Up!
Now It’s Time to Open the Container with our Cheese,

and place on top of the Bean Dip.

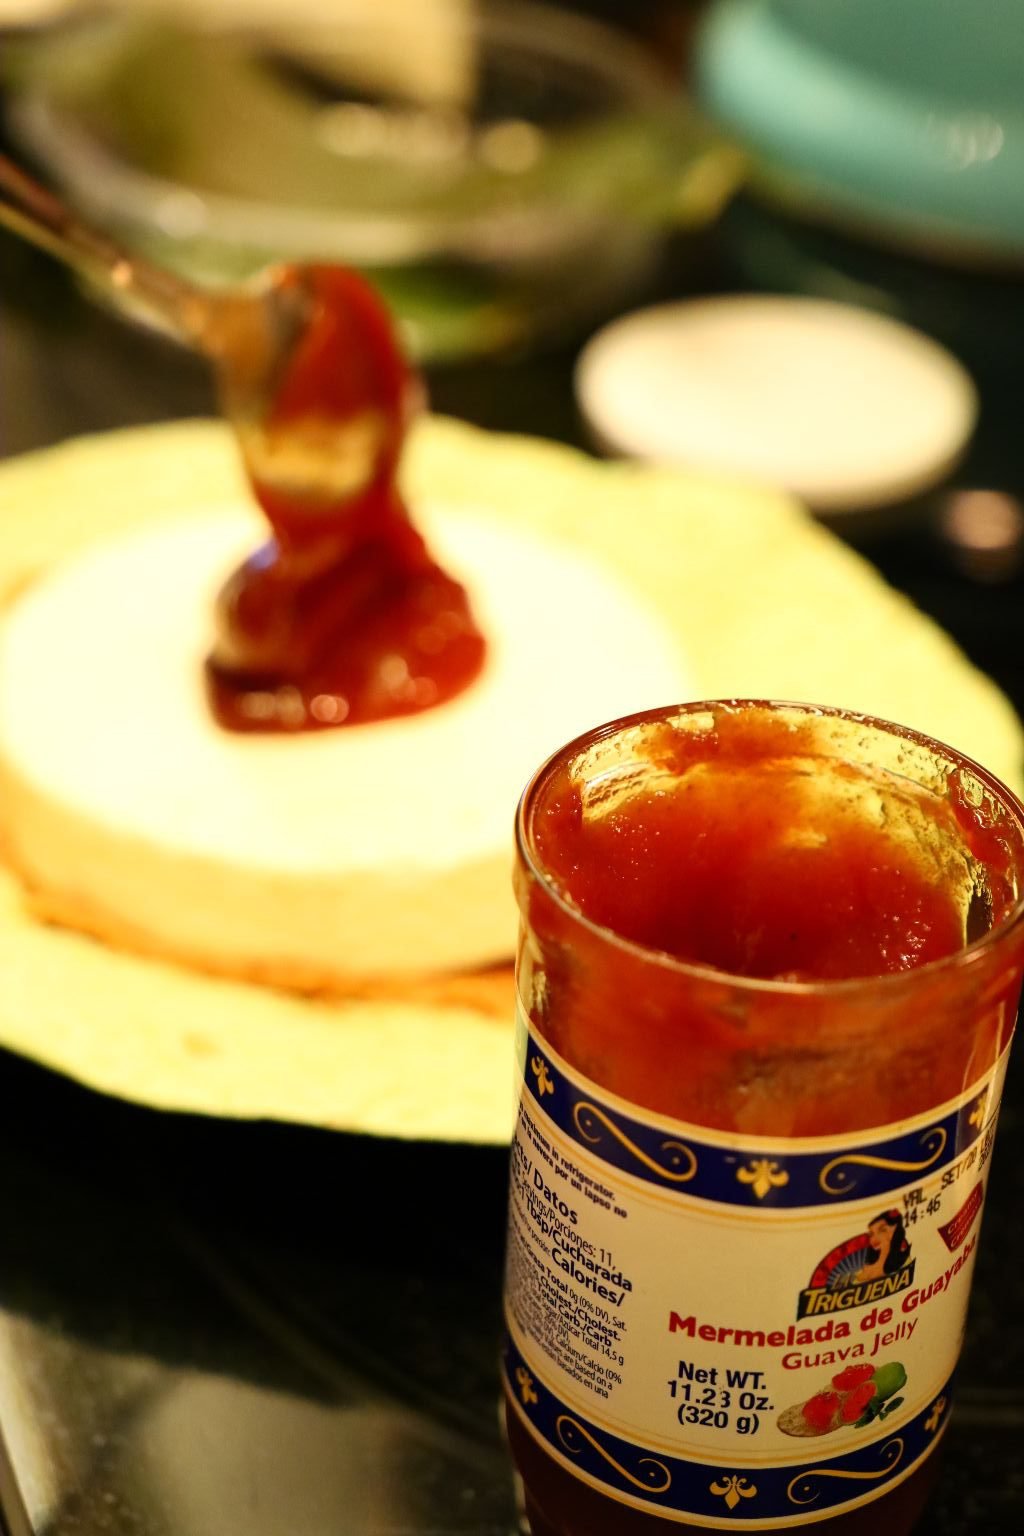
We had this Guava Jelly in the pantry and I suggested that we place some on top of the cheese.
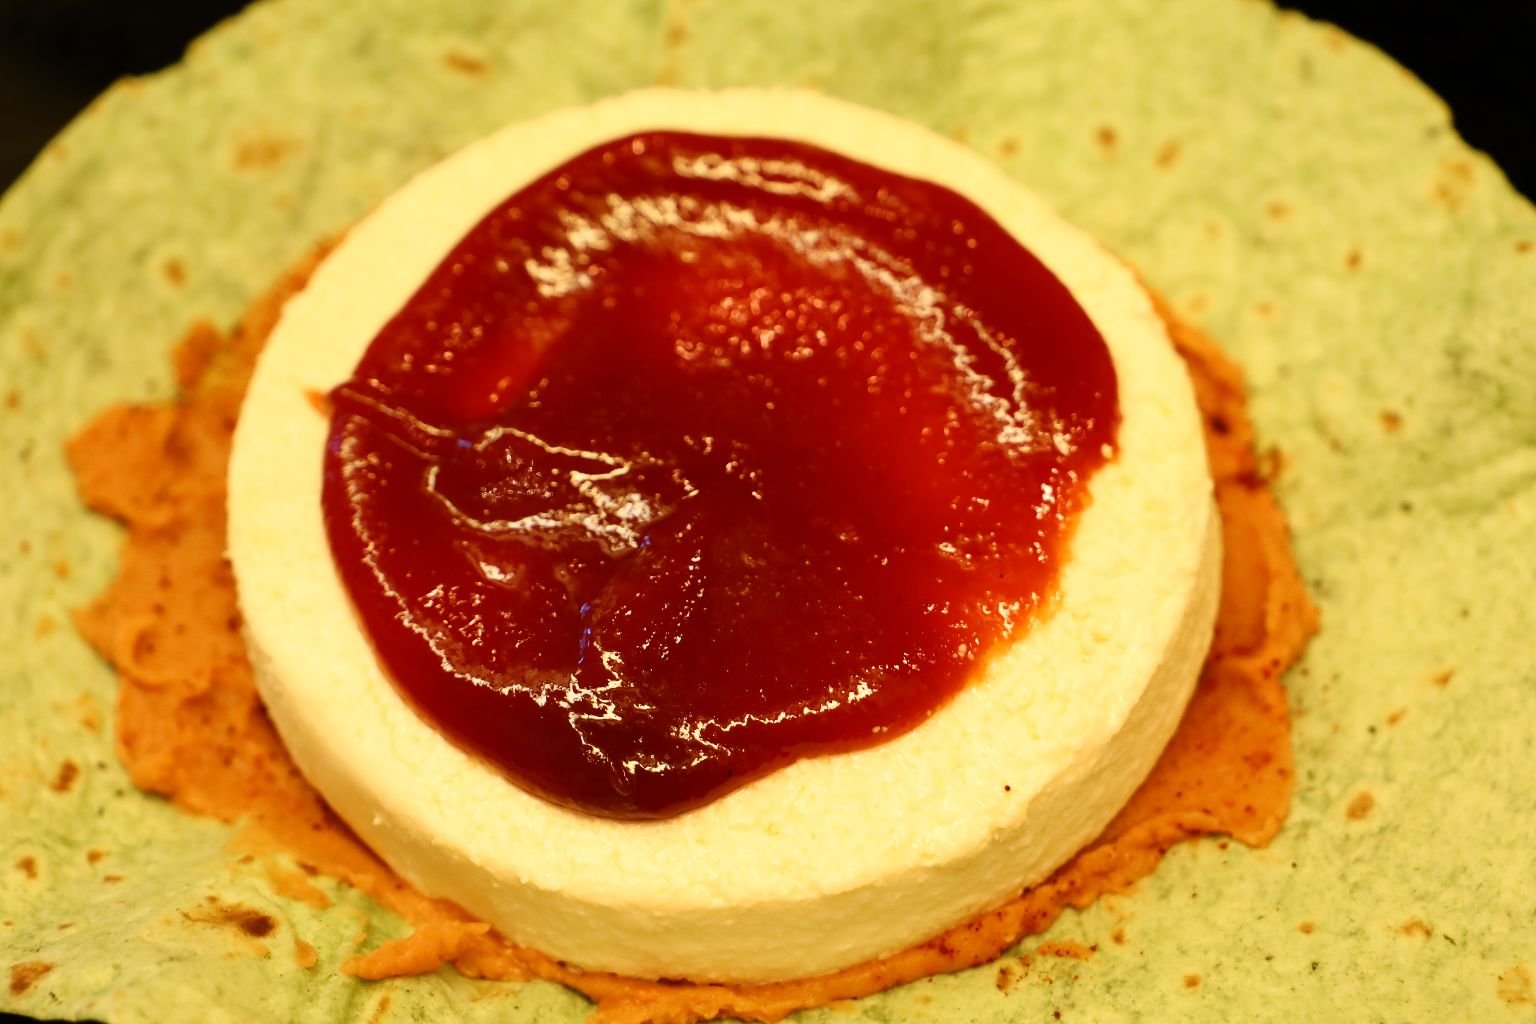
Beautiful!


Gordon suggested we top it even further with this Mexican Cheese.
It is a bit powdery.


Gordon then cut a Tortilla to fit over the top of the cheese,
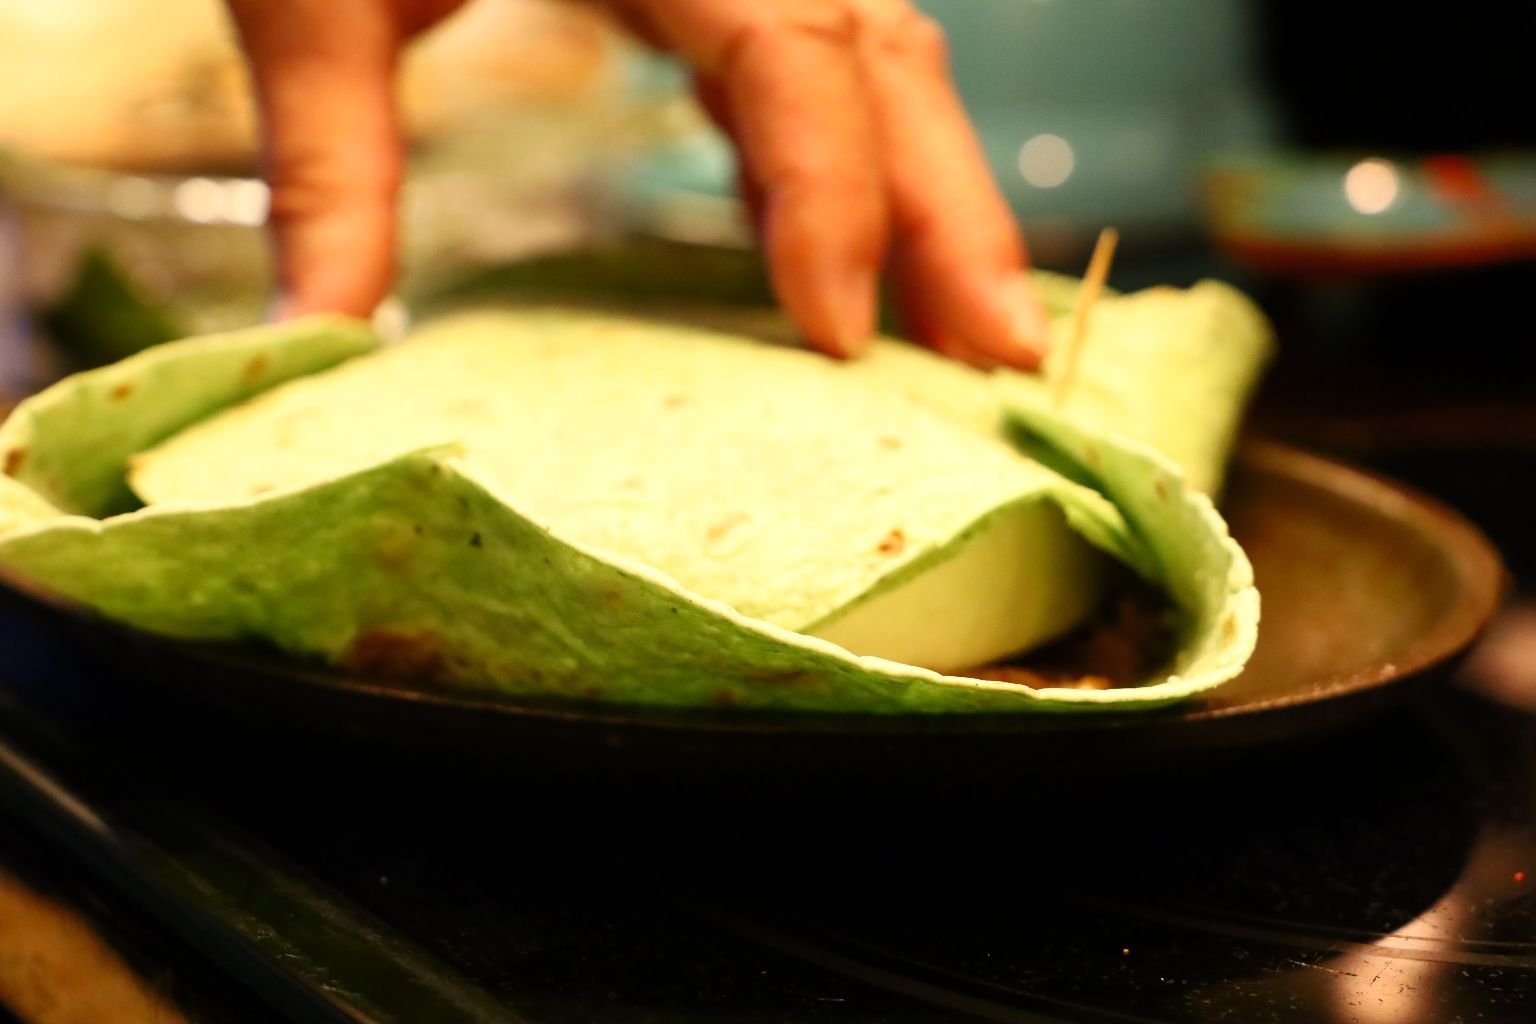

and then brought the sides up and secured with toothpicks.

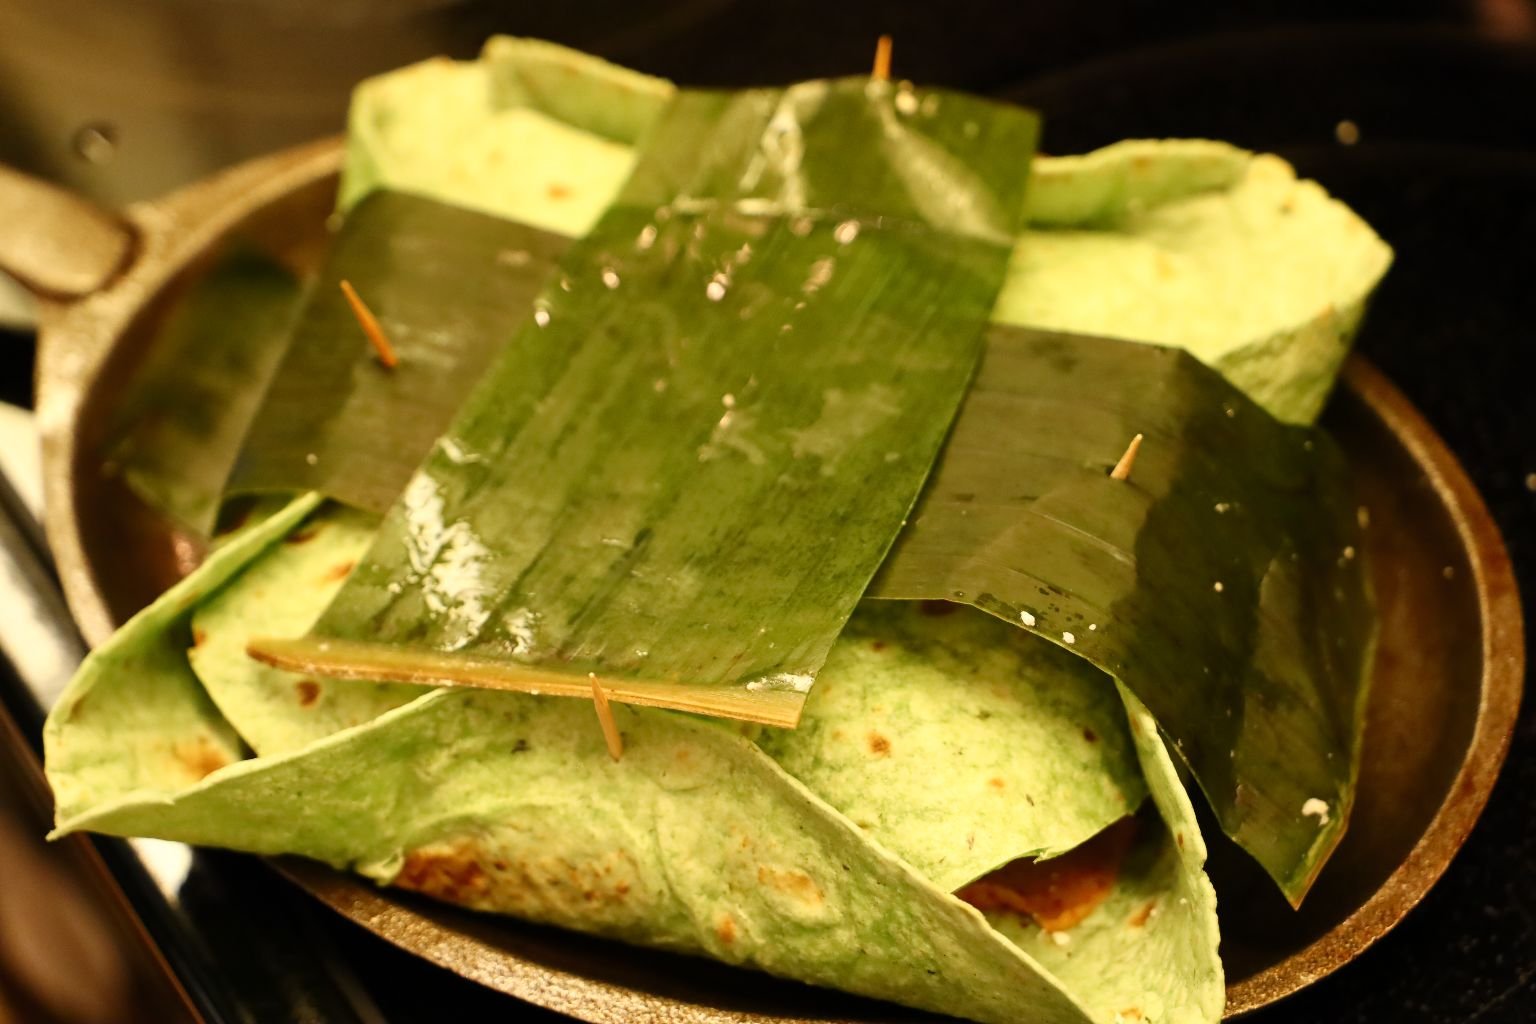
I didn’t want the beauty of the Banana Leaves to go to waste so I suggested they be draped around the top just to make it look festive.

Now into a 350F Oven for about 30 minutes.
We kept checking on it to make sure it wasn’t burning.
It actually cooked quite nicely.

We then just sort of sliced it like a pie and ate it by spreading it on Tortilla Chips.
We can experiment with this some more but it was quite nice.
A Spicy Sweet Treat!
———————————————————-
Gracias,
Gordon and Julie
———————————————————-
If you would like to check out our other Mexican posts:

AND,
AND,
AND,
Julie and Gordon Whann Way Mexicana Cuatro
AND,
Uno, Dos, Tres, Cuatro, Mexicana Cinco!
AND,

AND,

AND,
Our Mexican Inspired Thanksgiving Roasted Chicken and Vegetables

AND,
Our Mexicana Thanksgiving Dishes

AND,
AND,

Adios Amigo!