Julie Whann Way Mexicana Dos
Bienvenido a Julie Whann Way Mexicana Dos
This is my Part 2 of my first Mexican foods blog posts.

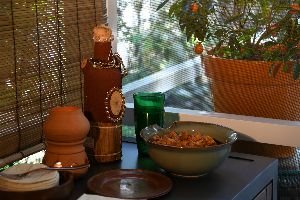
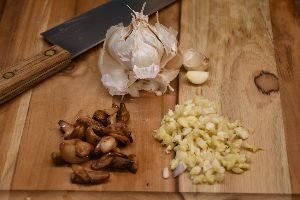
Charanda
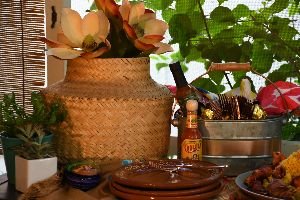
All Decorar with some Bonita Joyeria.
——————————————————
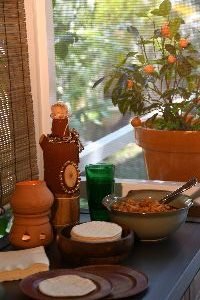
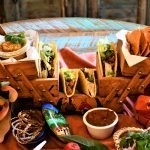
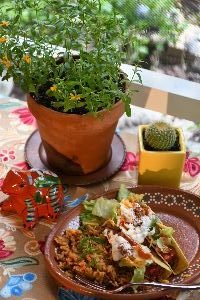
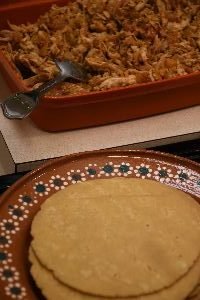
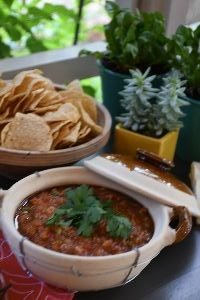
Out on our Lanai with some Charanda, a rum derived from Sugar Cane, and my un poco Chicken Taco wraps.
——————————————
A nice Sunday afternoon siesta of sorts.
———————————————
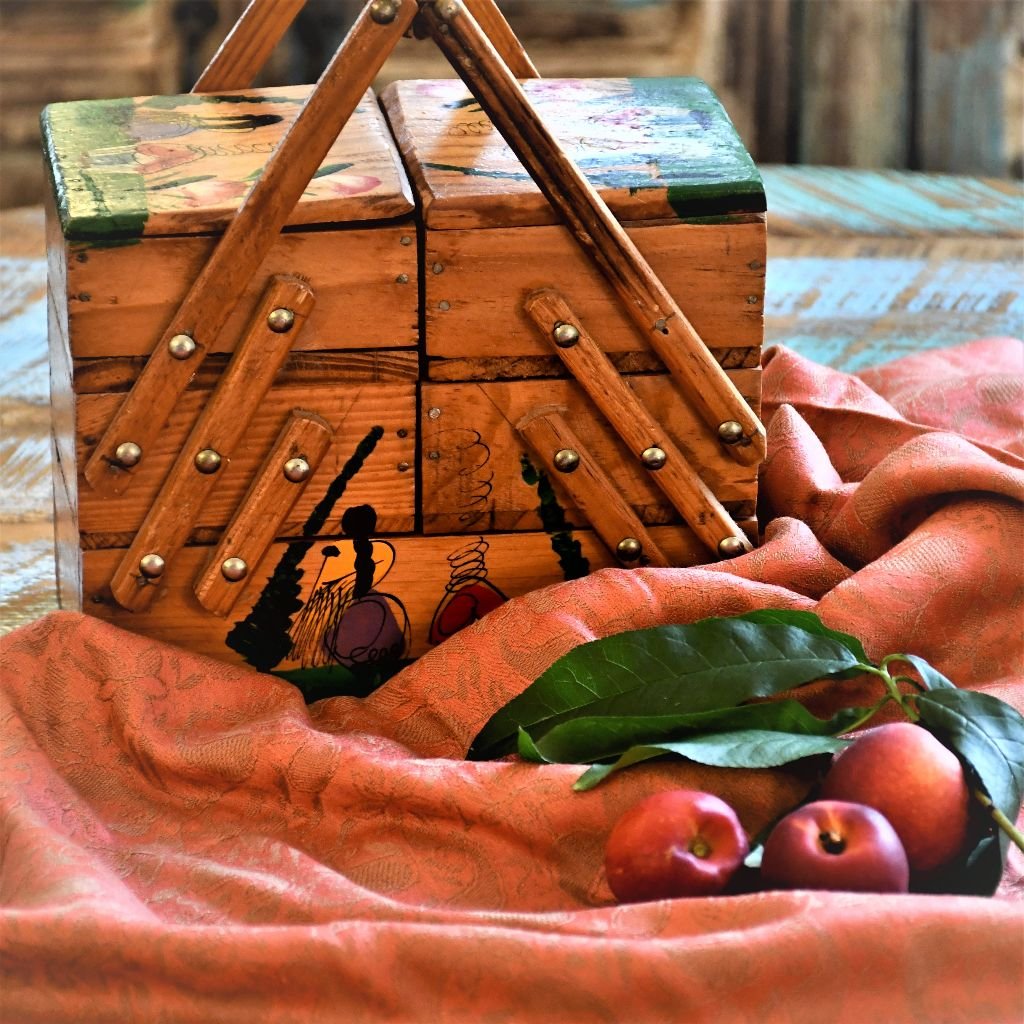
This Hand Painted Mexican Sewing Box acts as my Lunchbox
And those are my peaches grown from my very own tree.
Here is an amalgamation of some of my Mexican food recipes on this post and my very first Mexican foods blog post as well.
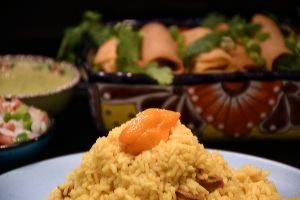
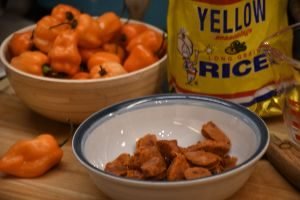
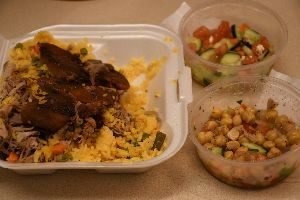
What a great lunch!
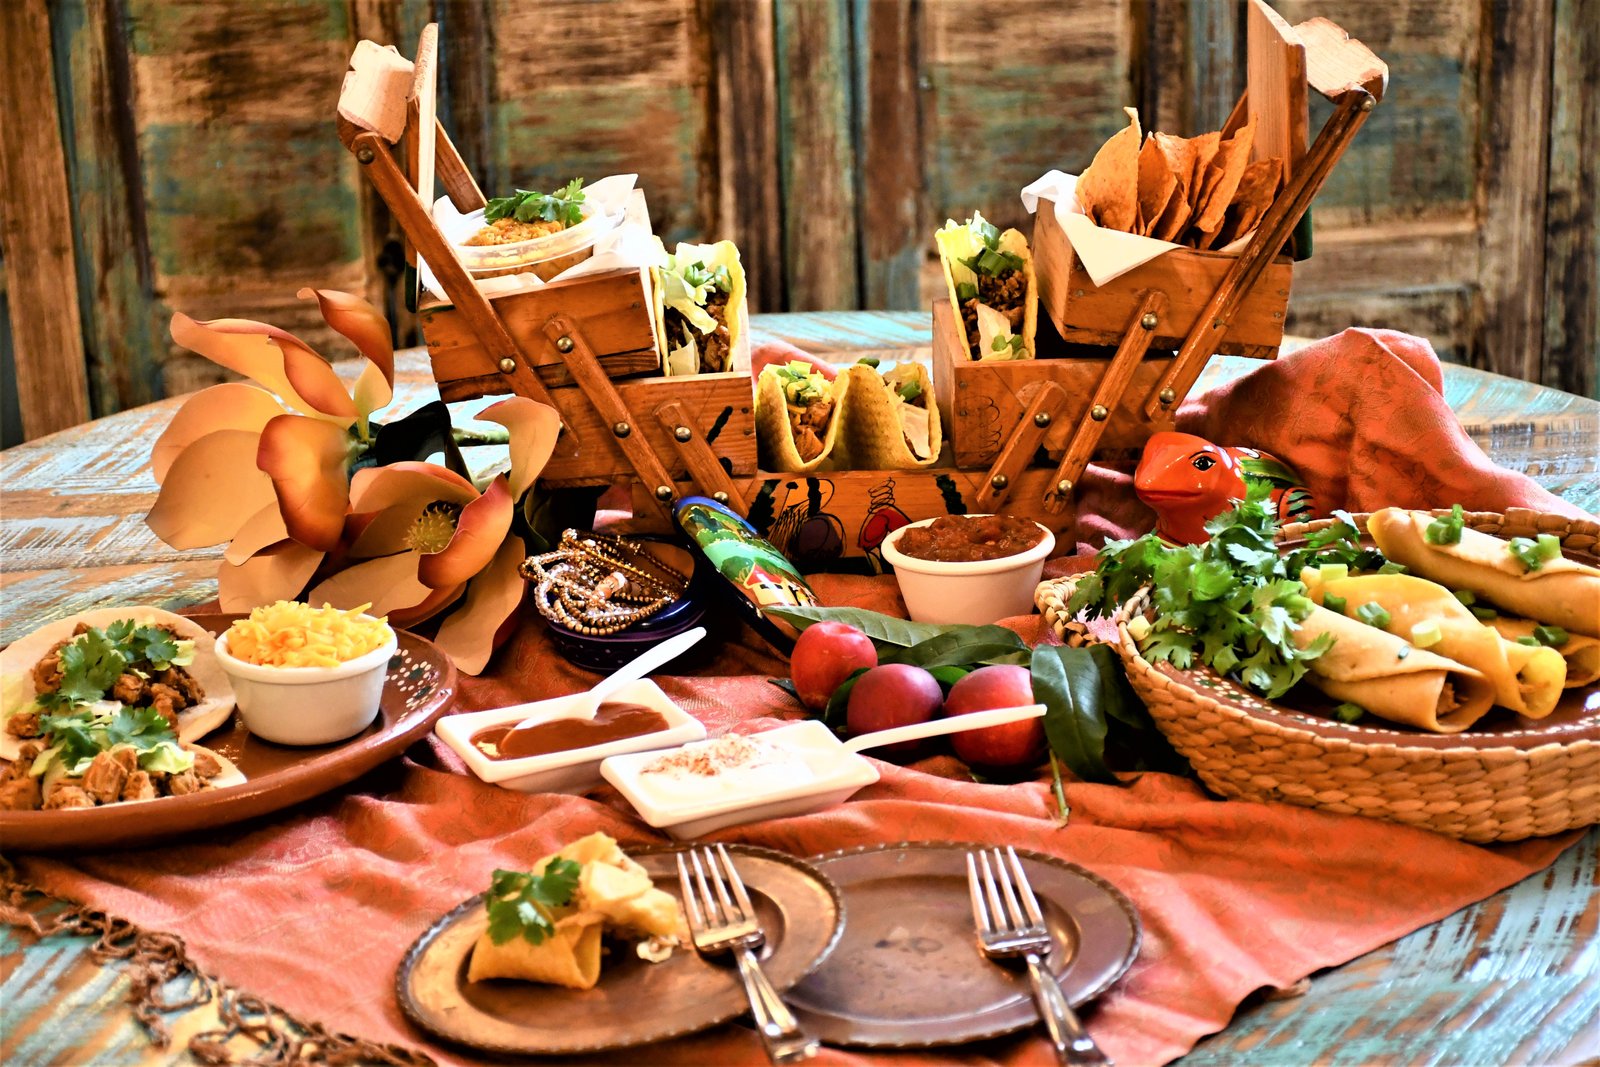
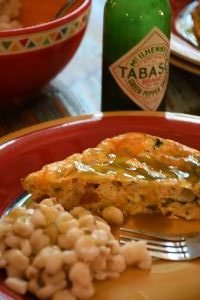
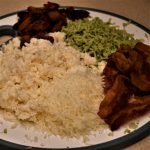
Chicken Tacos, Ground Chicken Tacos, Iceburg Lettuce, Sharp Cheddar Cheese, Chicken Fajitas, plenty of chopped Cilantro and chopped Spring Onions, Habanero Peach Tortilla Chips, Salsa, Sour Cream, Taco Sauce, and Yellow Rice.
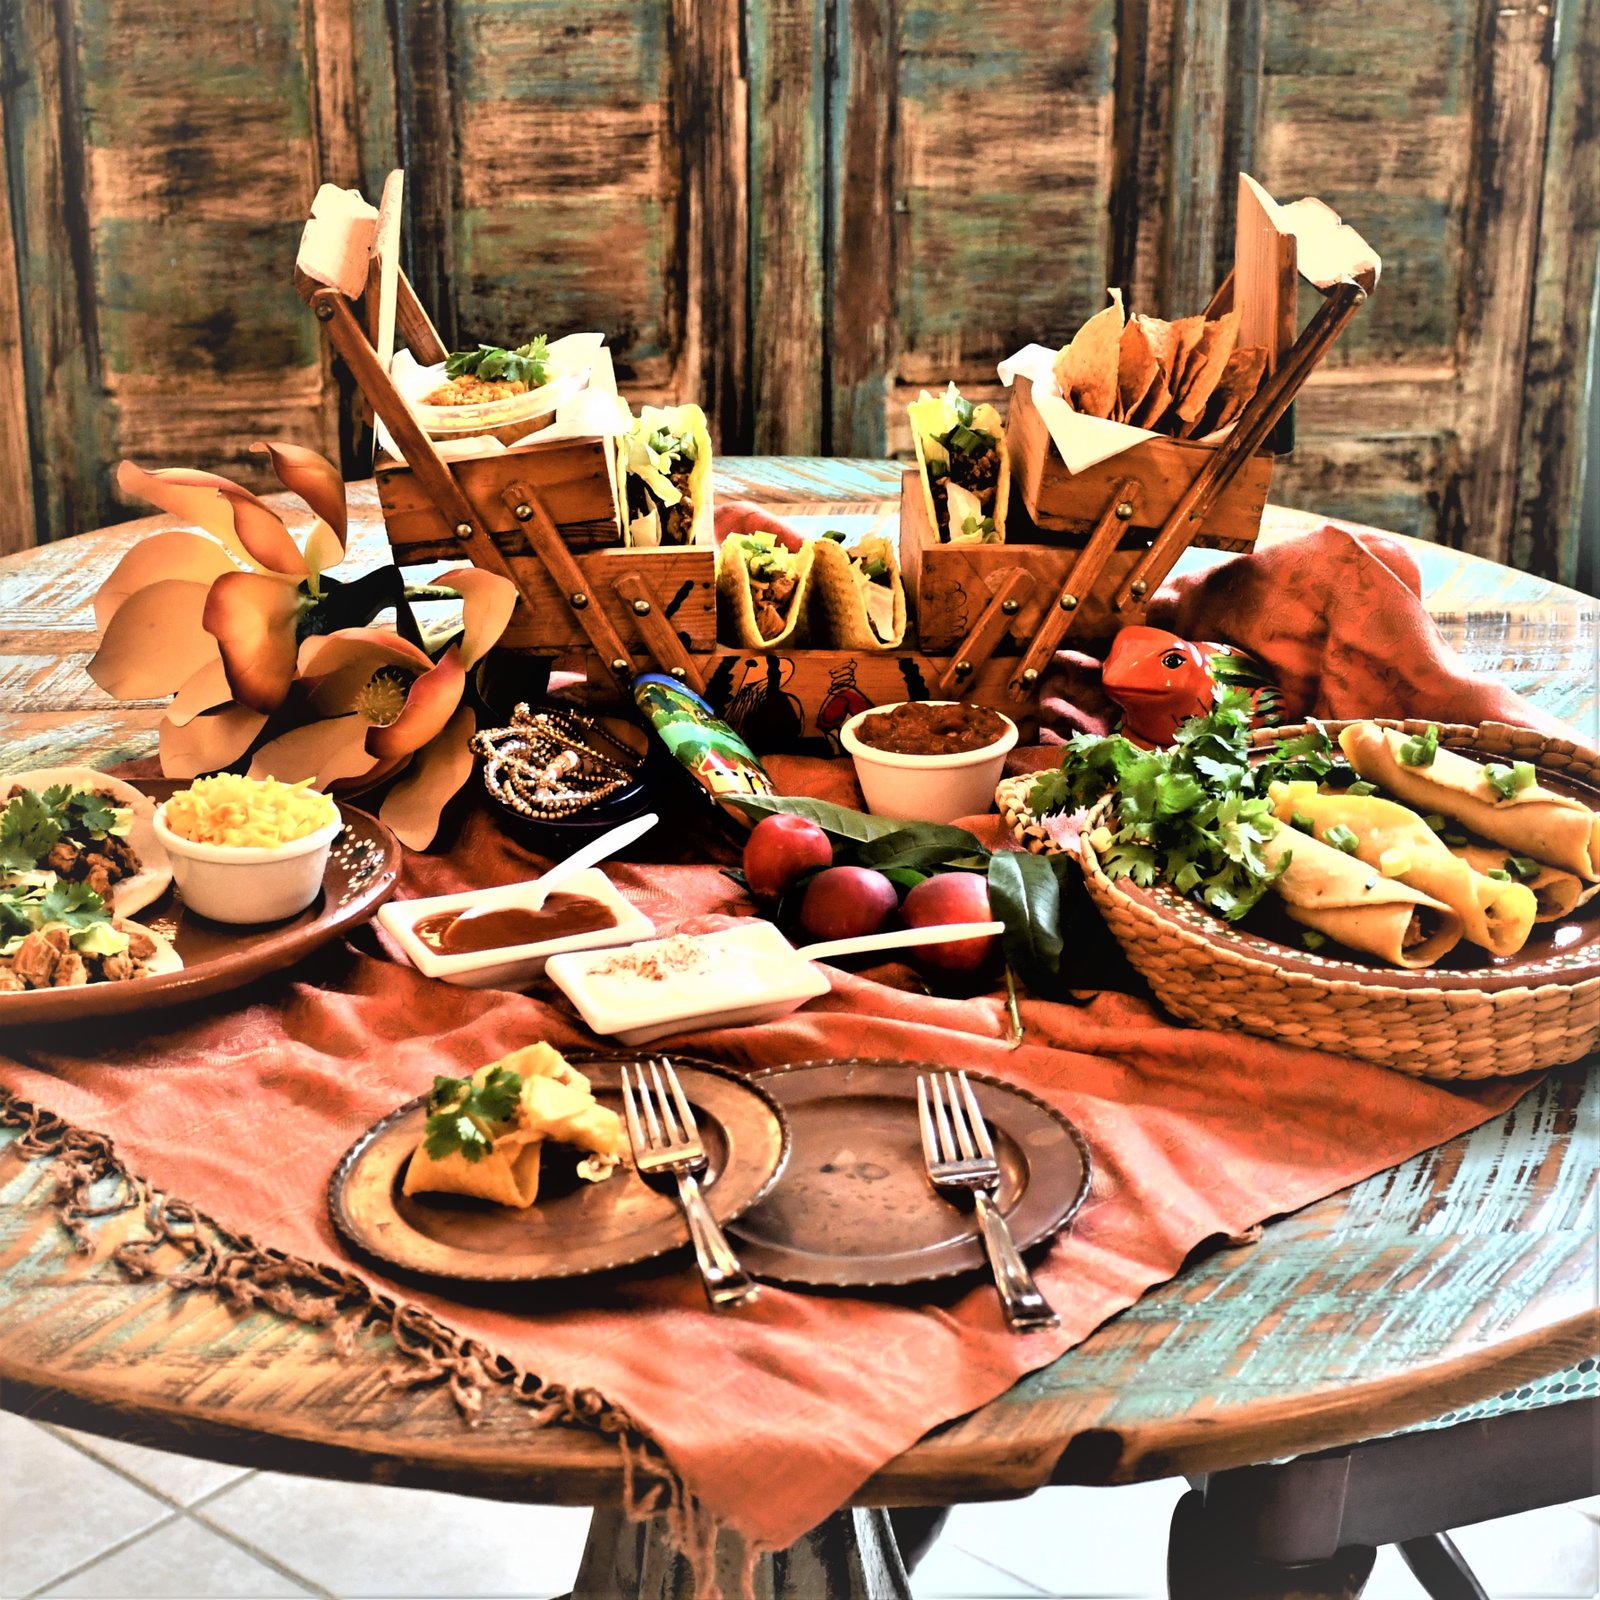
Everything Here was Made in Mexico, and Made by Julie
—————————————-
Cilantro
——————————
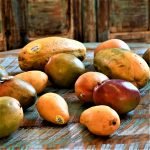
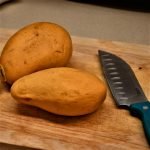
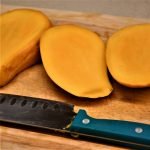
Papayas, Mango’s and Honey Mango’s
(The Honey Mango’s really do taste like honey.)

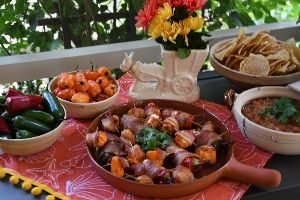
My Guava, Mango, and Dulche de Leche Ham and Fruit Appetizers
—————————————–
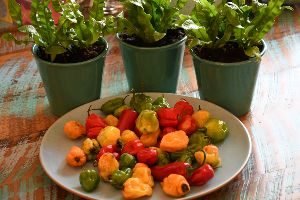
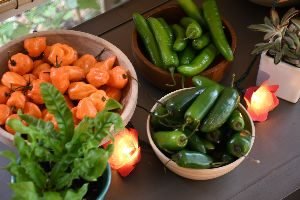
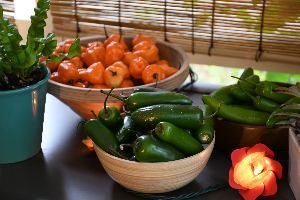
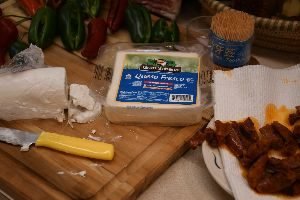
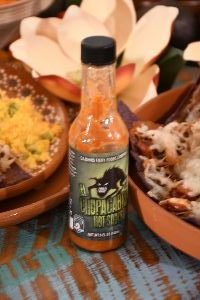
Habanero Peppers
————————————–
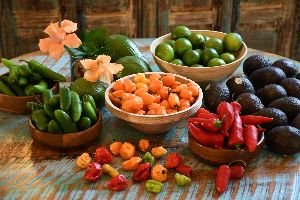
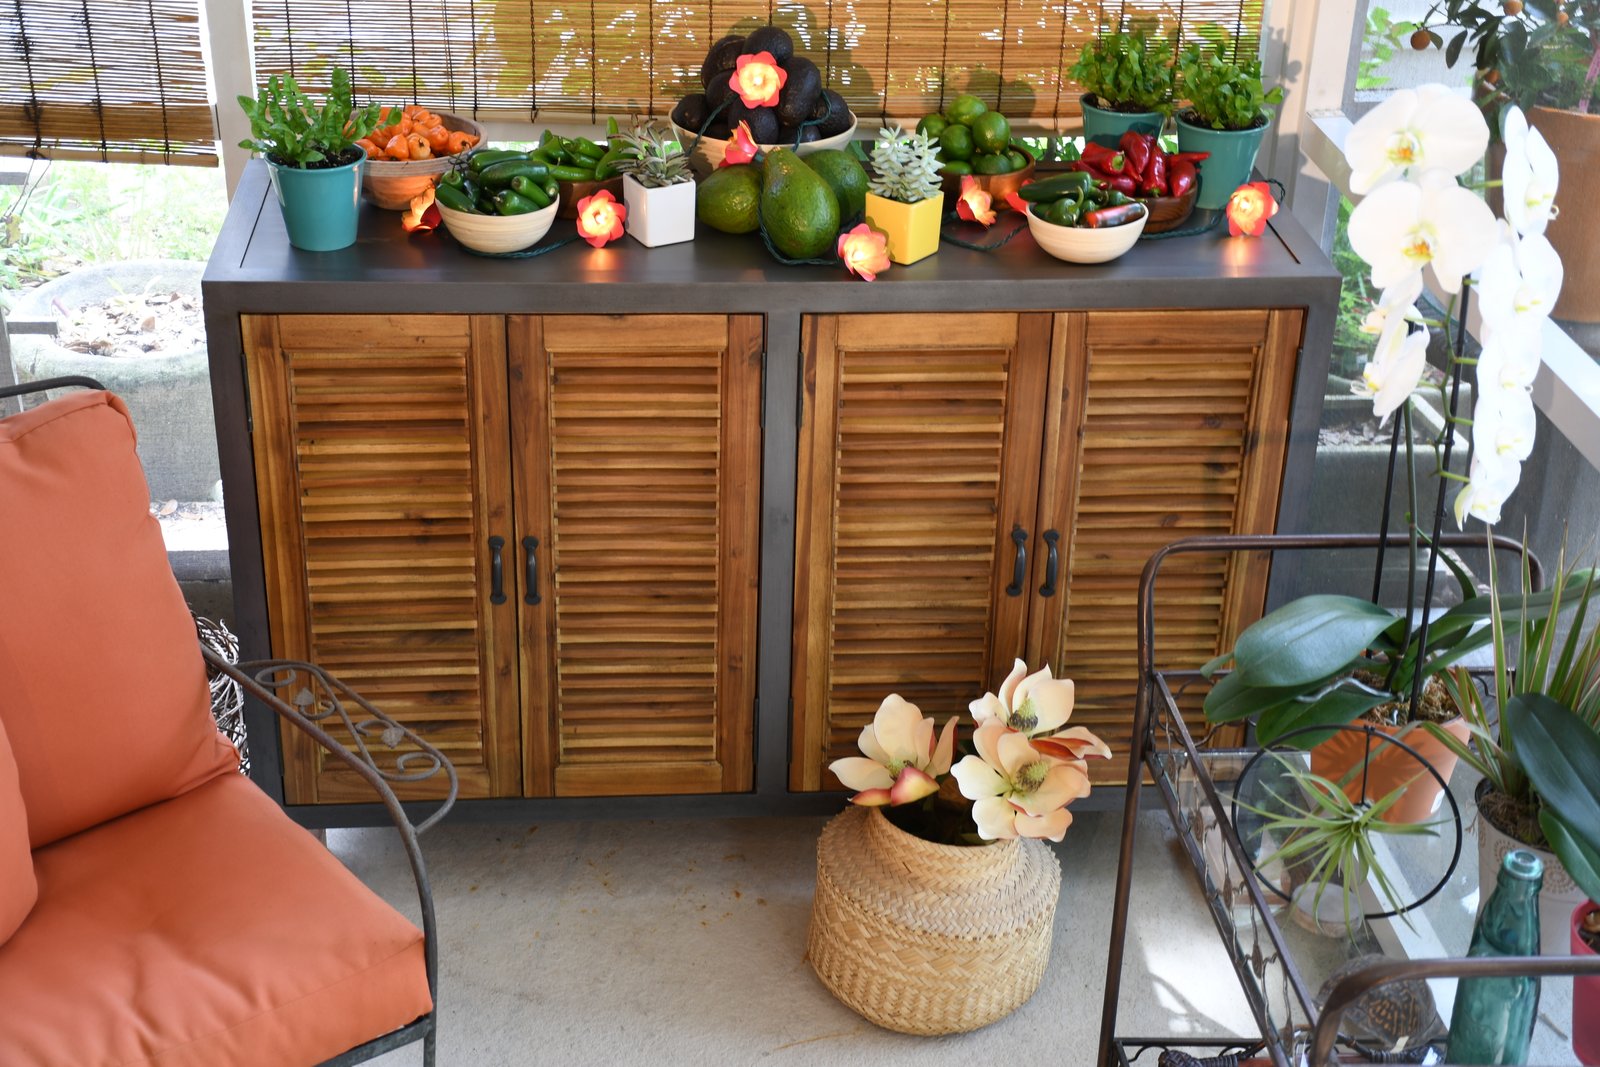
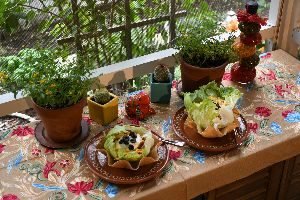
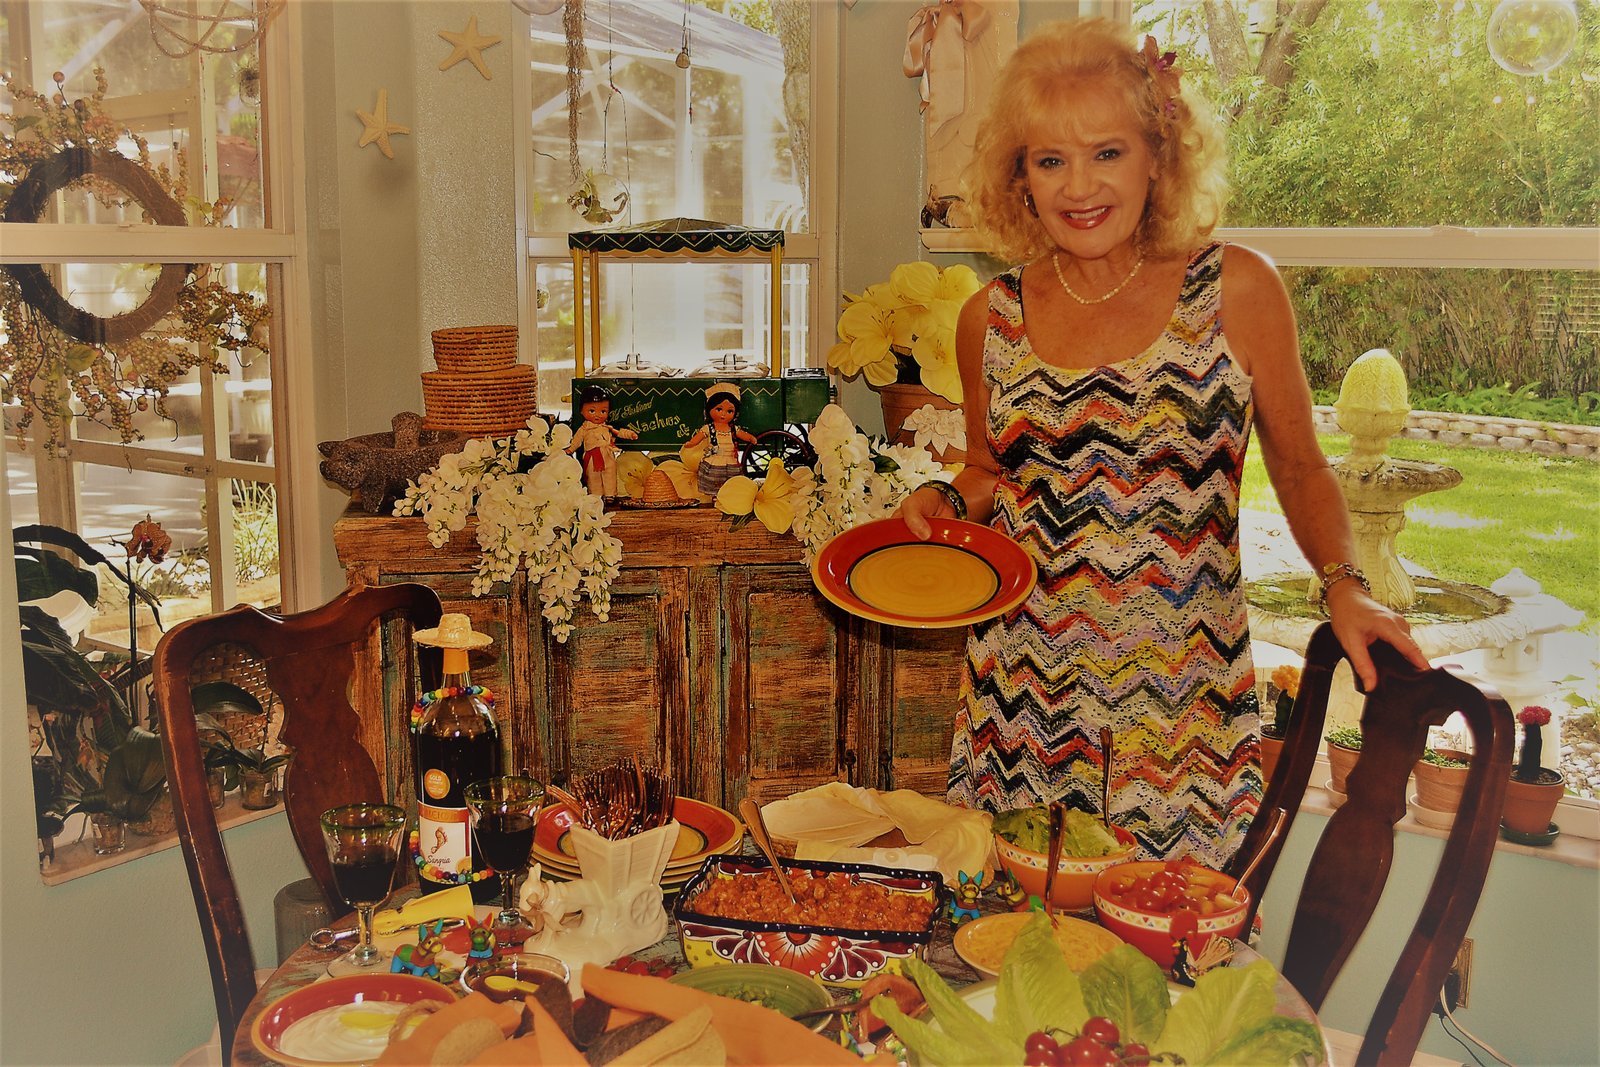
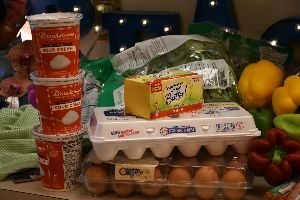
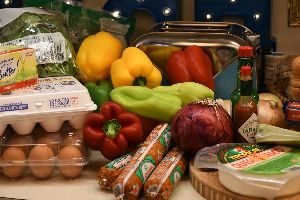
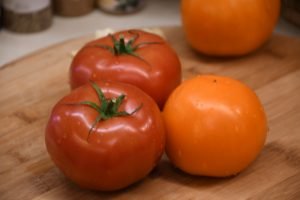
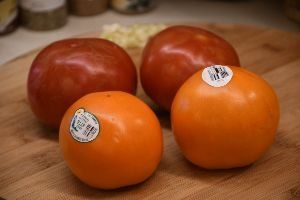
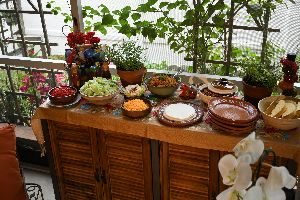
A beautiful table full of
Avocados, Florida Avocados, Limes, Habaneros, Serrano Peppers, Jalapeno Peppers, and Red Chili Peppers.
————————————————

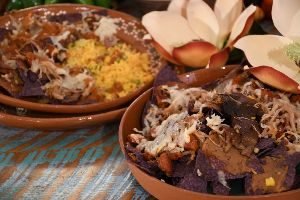
Julie’s Giant Grande Nachos
OLE!

All of this was made from leftovers.
——————————————-
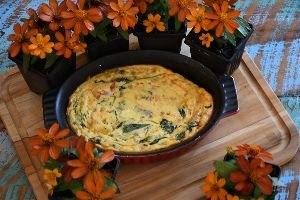
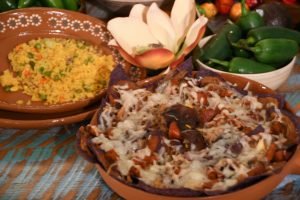
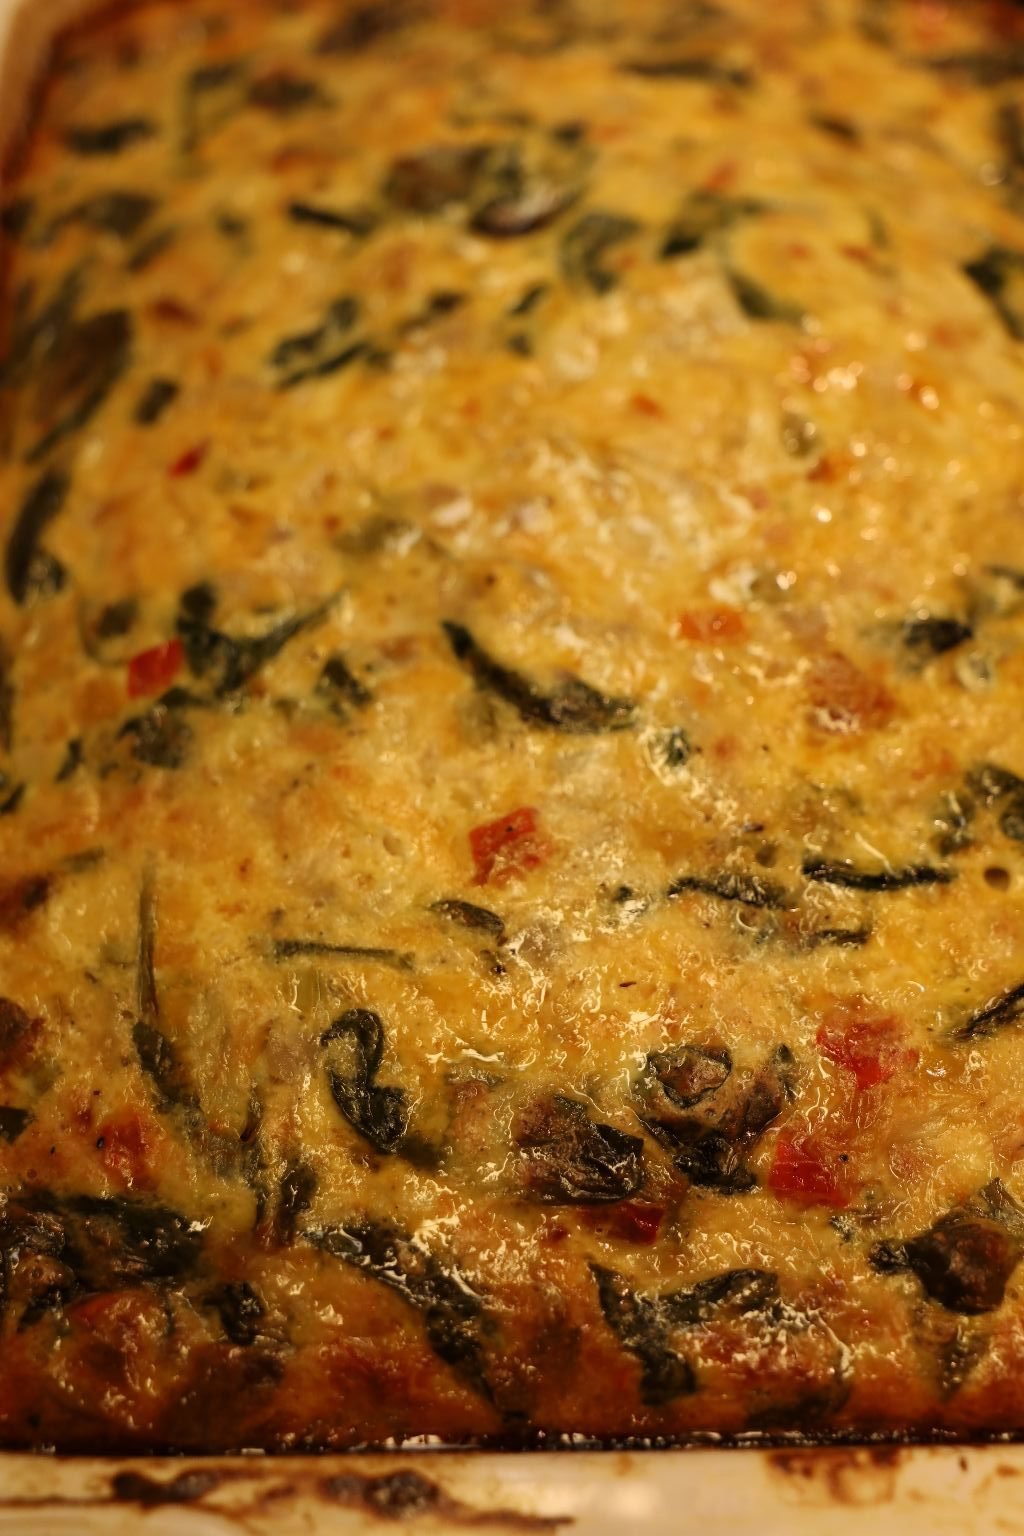
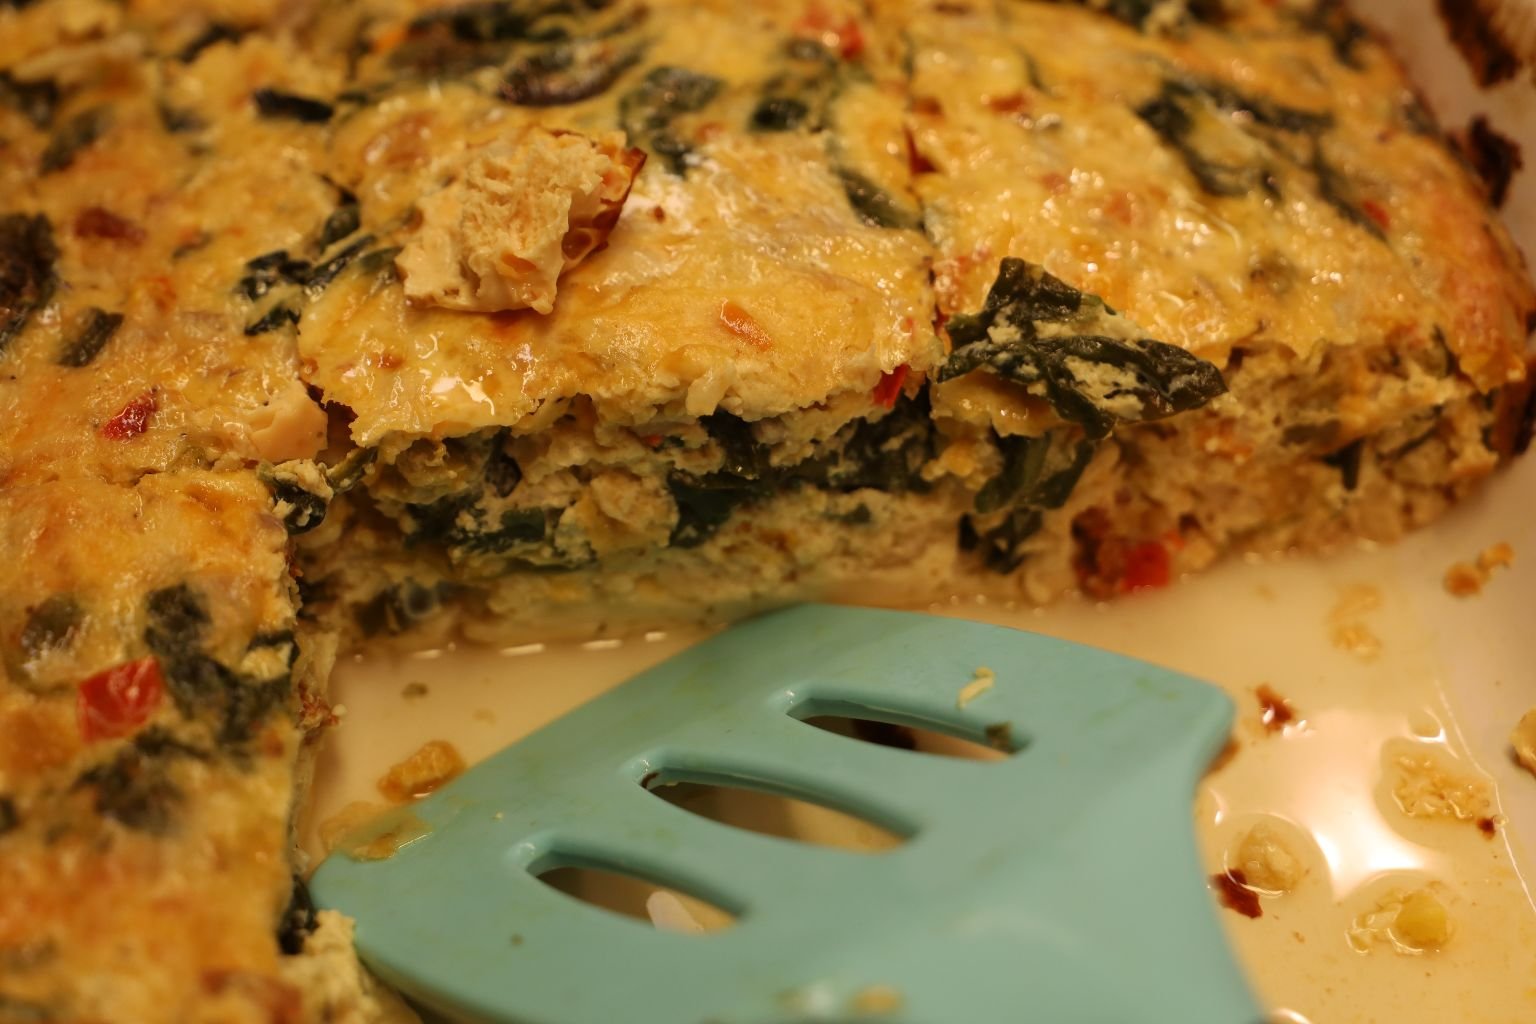
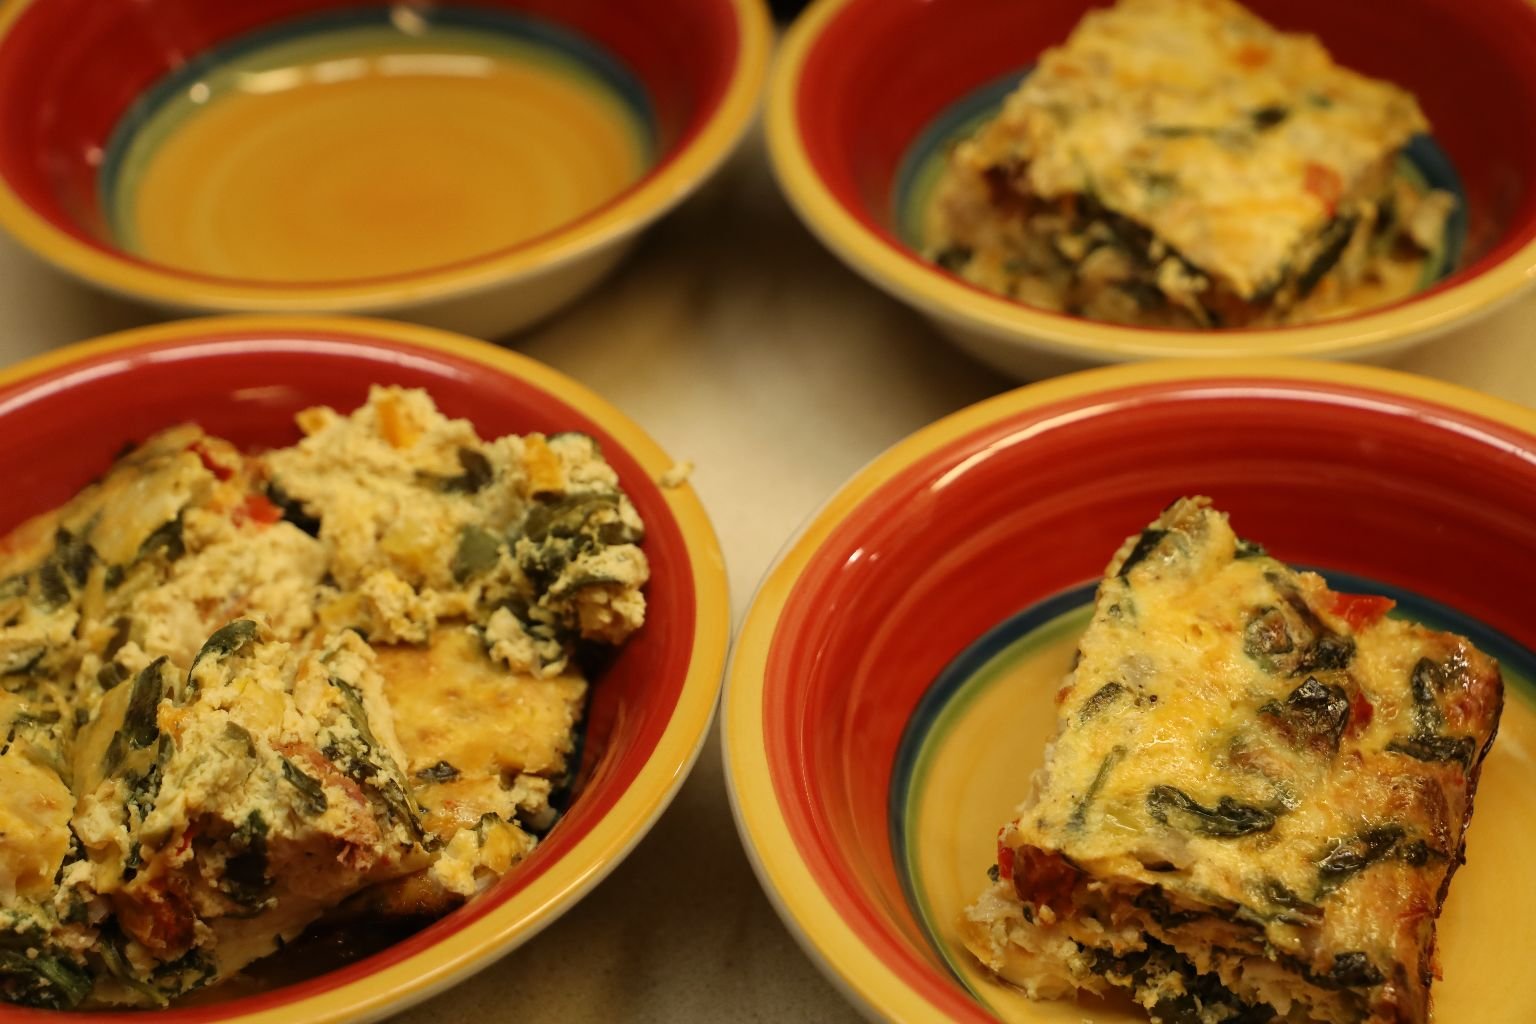
Julie’s Mexican Breakfast Frittata
———————————————-

Beautiful Spotted Bottles of Sangria

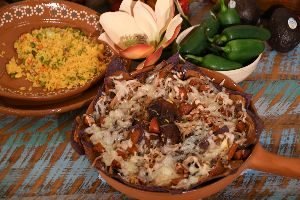
Mexican Potato Skins

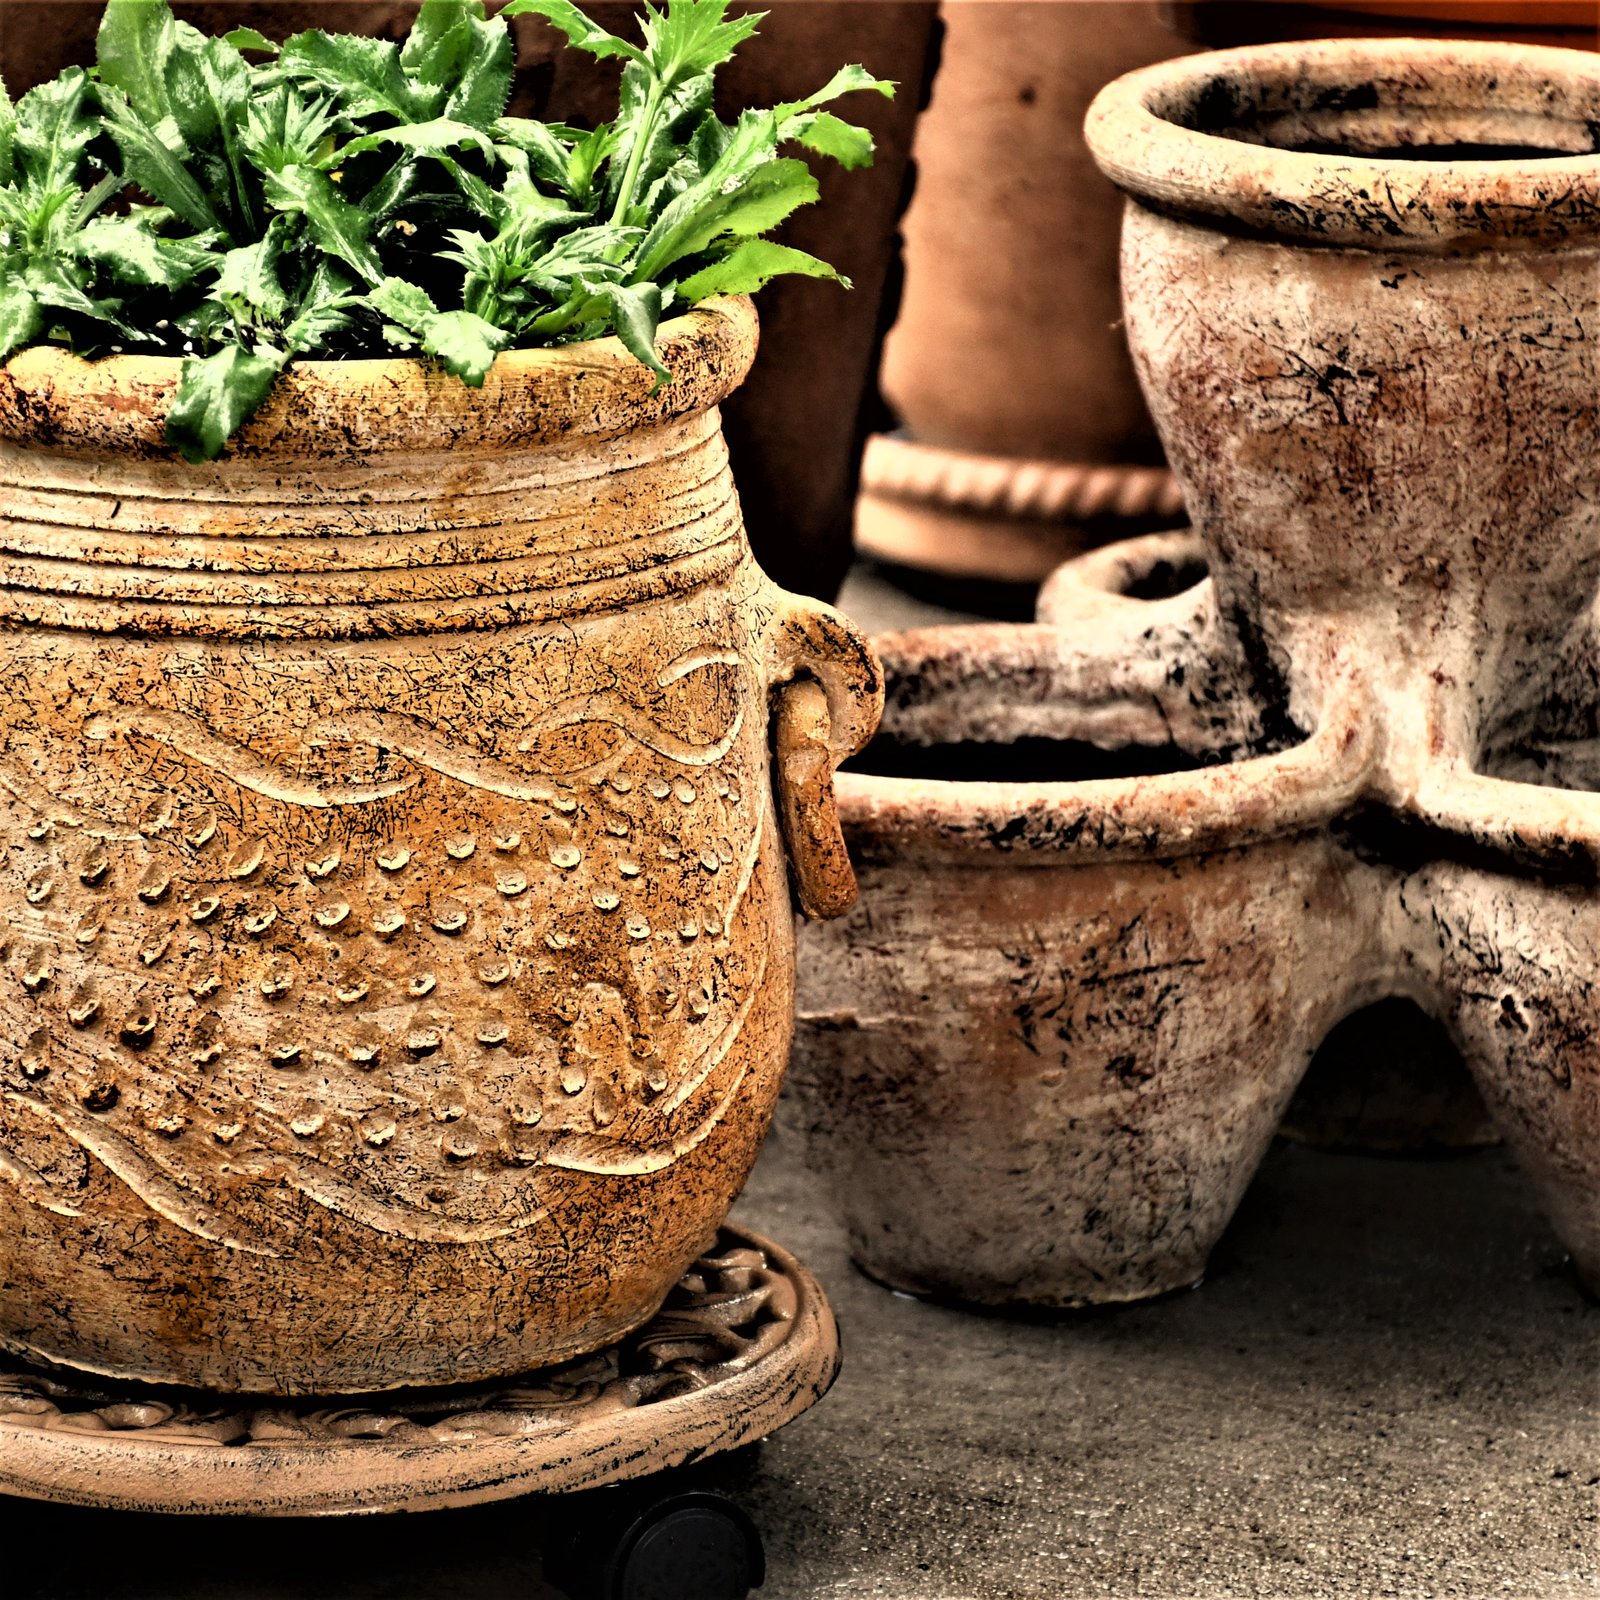
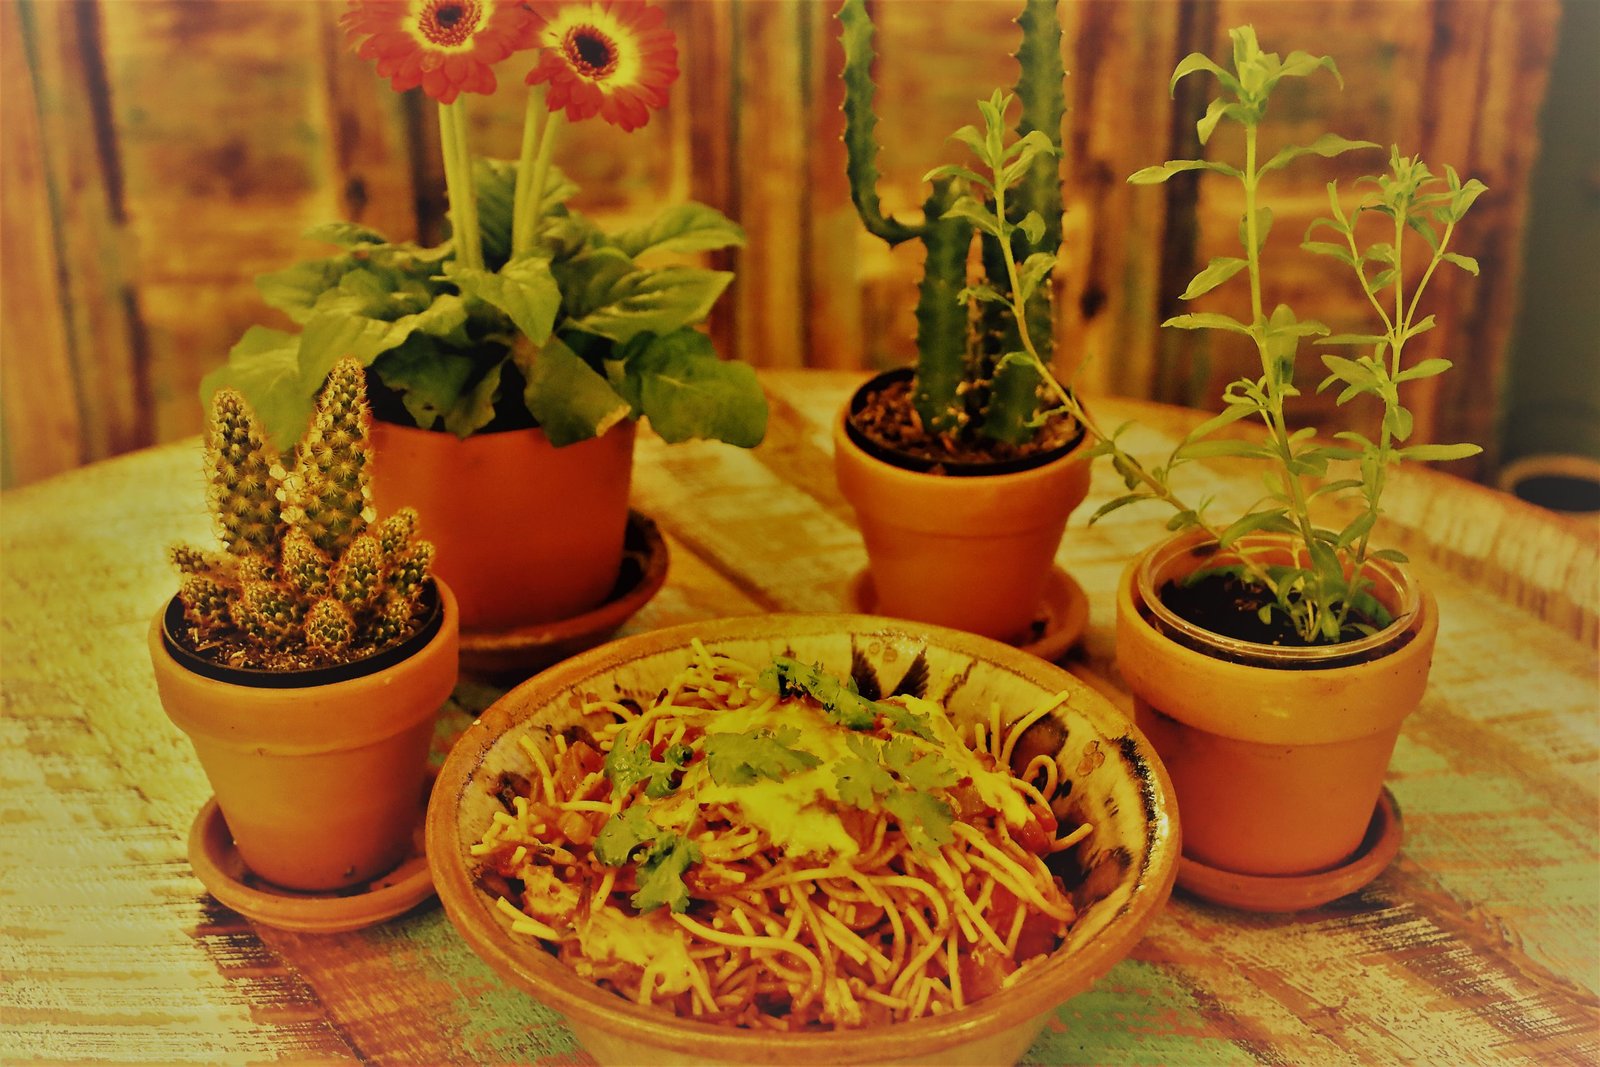
I do love these cactus plants in terra cotta pots with my Mexican made terra cotta plates.
—————————————–
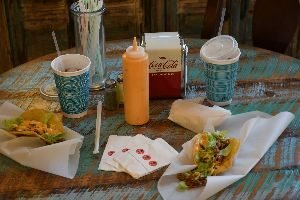
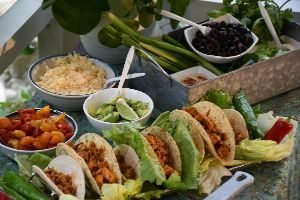
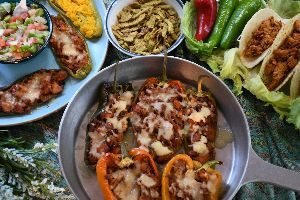
Welcome to the Taco Bar
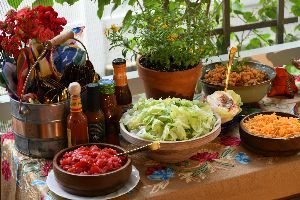
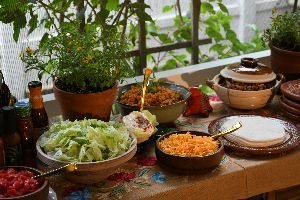

Ground Chicken, Lettuce, Tomato, Cheese, Taco Shells (soft and hard), various Sauces, and Sour Cream
Lovely exotic Terra Cotta dinner plates from Mexico…..
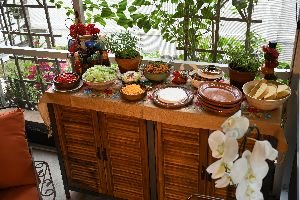
Eaten out on our Porche el Aparador
——————————————–
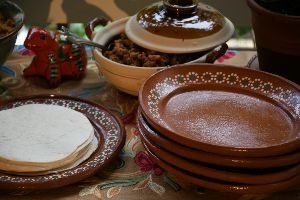
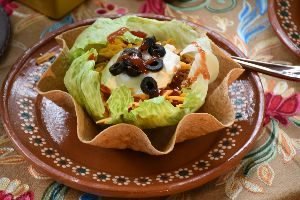
Or, perhaps you may prefer to make a Taco Salad with the leftovers?
These are just a few of the foods that I have posted here, along with the recipes, most of which are located at the bottom of this blog post. There is nothing authentically Mexican here. It’s more of a Mexican inspired array of foods. When I go to the Latin Supermarket and stop off in the buffet to grab dinner to bring home none of my food is on the menu. And that is fine. Latin’s can cook Latin food far better than I can. But, I do have some tasty and fun recipes that you might just enjoy.
Mucho Gusto,
Julie
Por Favor mi any mistakes I may make in my Spanish/English writings.
——————————————-
Click Here for: Julie Whann Way Mexicana, Si!
This is my Uno Mexican Foods Post
AND,
Click Here For: Julie Whann Way Mexicana Tres
—————————————————–
And,
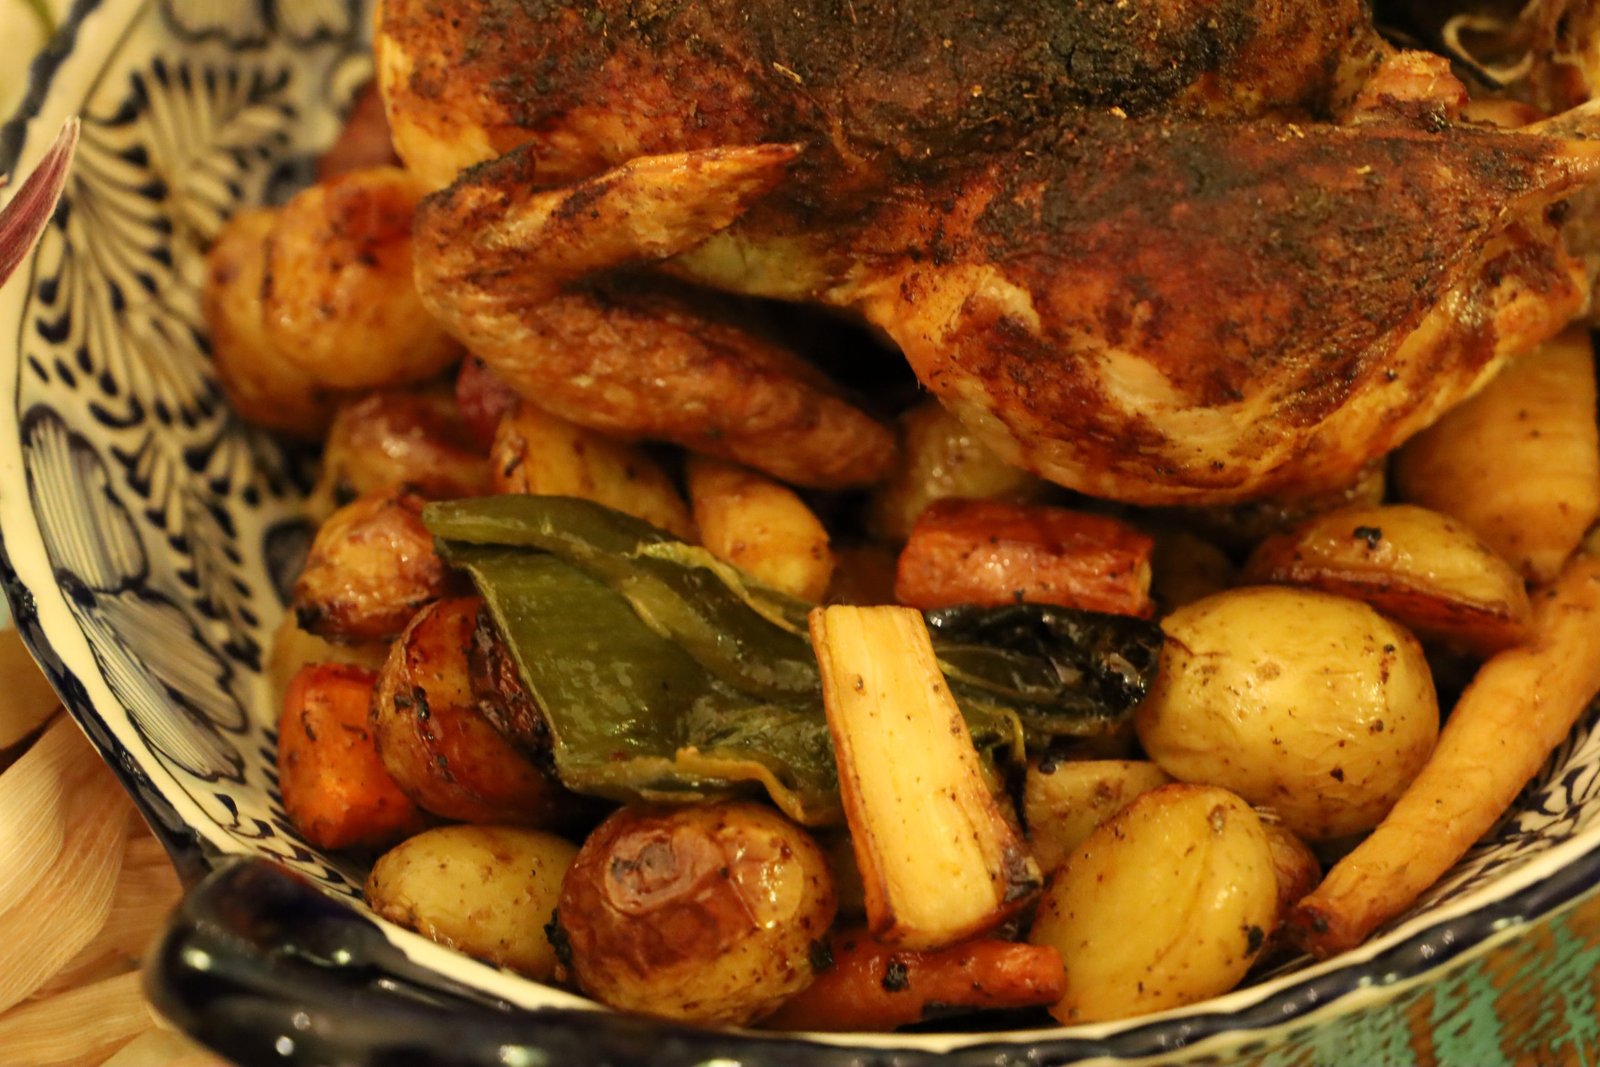
Our Mexican Inspired Thanksgiving Roasted Chicken and Vegetables
——————————————————-
Click Here For Our: Feliz Navidad a Casa Whann

—————————————-
Be sure to also check out our Dia De Los Muertos Post:

Click Here for our: Dia De Los Muertos
——————————————
My love of Mexican foods started right here……
a recreation of my very first Taco I ever ate!

We lived in Roanoke, Virginia when I was about 10 and entering into the 5th. grade. We lived there for 2 years before moving to Charlottesville for about 6 months, and then moving back to Roanoke for an additional year and a half. But, while we were in Roanoke I met a girl named Alliceon Gardner. Alliceon’s father was an oral surgeon. My step-father was going to school to become a general surgeon at the time and we were living in the Doctor’s Housing. Alliceon was one of my closest friends. Alliceon was tall and slender with long brown hair. She was beautiful, funny, smart, and sometimes a bit of a snob and very condescending of me, but we were friends none the less. We would sometimes go to the mall on Saturday’s just to hang out, have lunch, shop at Spencer’s Gift’s to buy some novelty item, and just wander the mall talking and laughing and giggling. It was always a lot of fun.
But one Saturday Alliceon wanted to have lunch at this little eatery that sold taco’s. She told me that I would love one! And because Alliceon was always the boss and got her way, I relented and so we did. And, I thank her for it!
The taco shells were made in this way.
Deep fried in vegetable oil.
The cheese for the taco’s was in a squeeze bottle that we squirted all over the top of our taco. It was wonderful!
I have been in love with Mexican food ever since. 🙂
And as for Alliceon, because we moved twice from Roanoke, Virginia, Alliceon was always there to throw me a going away party. Probably more so because she loved to throw parties and not necessarily because I was moving. 🙂 But I do look back on those parties with very happy memories. When we left Roanoke for good in 1975?, I think, I was 14 and entering into 9th. grade in my new hometown of Sevierville, Tennessee, Alliceon threw me a costume party. I was a flapper and Alliceon gave me a puzzle box that I loved. Sadly, that puzzle box was ripped open from my car in college when someone broke into my car and assumed there must be pot inside the puzzle box so the idiot couldn’t figure out how to open it so they pried it open only to find some little trinket that I had hidden inside it.
Joke’s on YOU, thief! 🙂
When we did move to Sevierville, Tennessee that summer and I started school that fall, it does take a while to meet, and make friends so when my birthday rolled around in February 13th., of 1976 the following year, my brother Ben and I shared a birthday party of Taco’s. His birthday is February 11th. He was turning 2. We had our cousins to come and visit, Joe and Susan. Susan is extremely funny and noted that when some of the taco juices landed on her hand it stained her skin and she remarked that no wonder Mexican’s have dark skin. 🙂 (She’s not racist, she is a democrat but I think that statement could be construed as inappropriate today. But it was funny at the time. I adore Susan!)
So, to continue with the food…….
————————————————
Julie’s Chorizo, Pulled Pork, Bean Dip Nachos
————————————————-
Julie’s Bean Dip, Black Bean, and Corn/Queso Nachos
(Are you starting to understand my love of Nachos?)
———————————————-

Beautiful Siesta Outside

Habanero, Serrano, Jalapeno, Red Chili Peppers and Limes

Florida Avocados, and Succulents
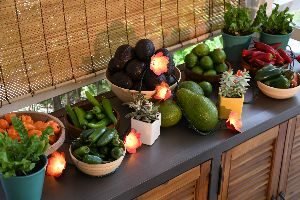
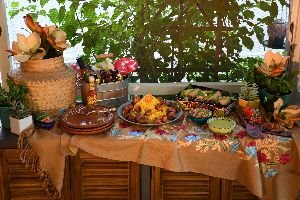
Loving our new Buffet outside
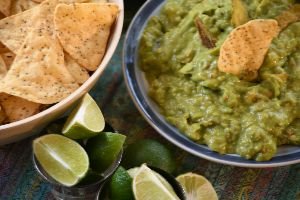
What a great place to have some Guacamole and Chips with some Limes.

———————————————
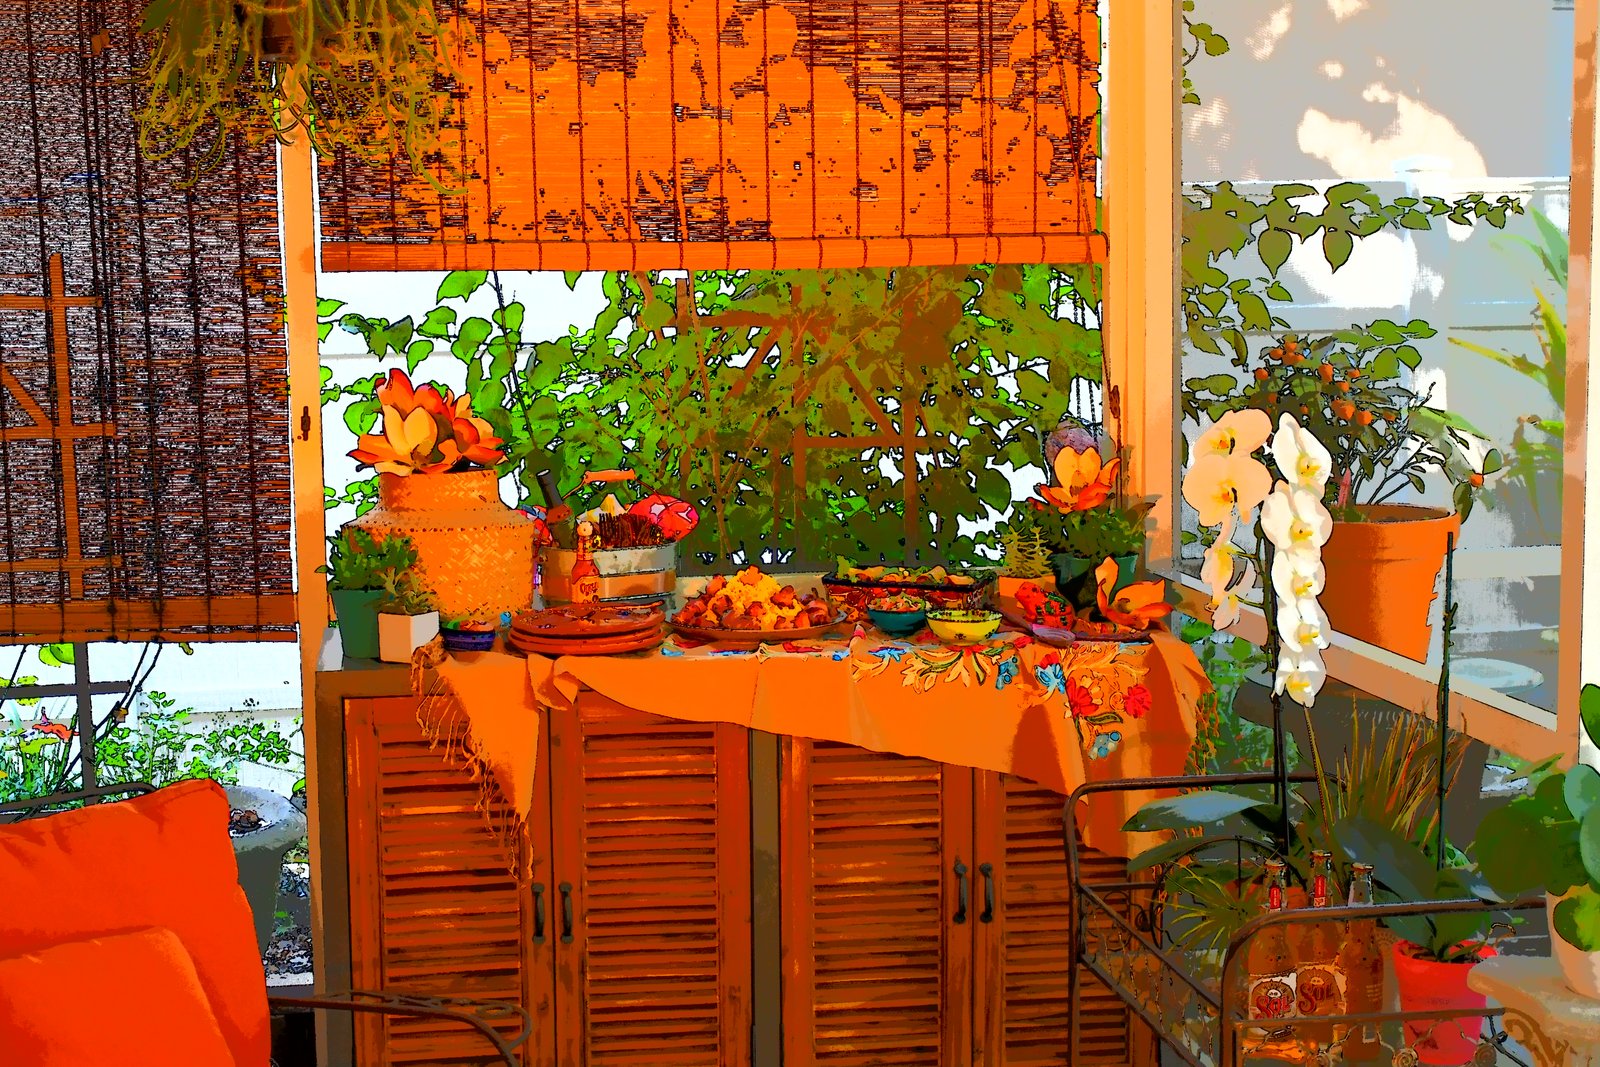
Enjoying our New Buffet on our Outside

Me, with our delicious Chicken Taquitos Bar

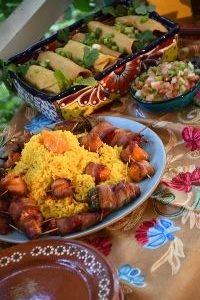
I do love my Volcano of Yellow Rice, Stuffed Jalapeno Peppers, and Stuffed Habanero Peppers, wrapped in Bacon.
I based my Volcano Rice on the Volcano at Disney’s Epcot in the Mexican section.
I have been to Mexico a few times and I have enjoyed myself. But Disney’s Mexico at Epcot is loaded with happy memories too.

Disney’s Epcot Mexico
———————————————-
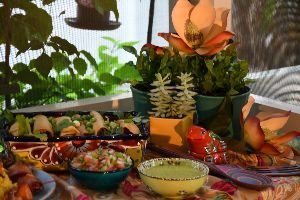
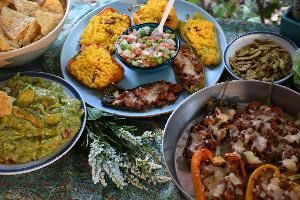
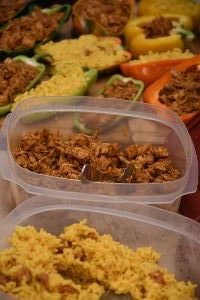
Chicken Taquitos, Yellow Rice with Habanero Peppers and Chorizo, Stuffed Habanero and Jalapeno Peppers wrapped in Bacon, Salsa, Green Guacamole Dip.
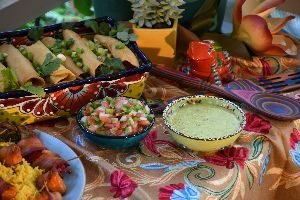
The Salsa I purchased ready-made as a nice topping.
The beautiful green Guacamole Dip I purchased as well.

Sol, Mexican Beer


Beautiful Taquitos Bar, Help Yourself to the Goodies
Mexican Food is not only Delicious, but it is Beautiful and Colorful!

Me, Outside

My Dinner Plate
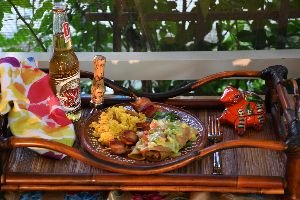
Fixing a Tray
——————————————
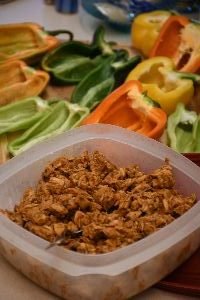
Julie’s Chicken Taquitos
——————————————
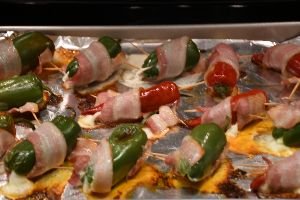
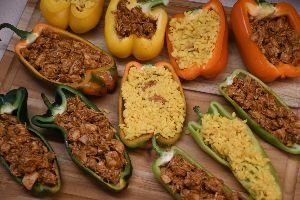
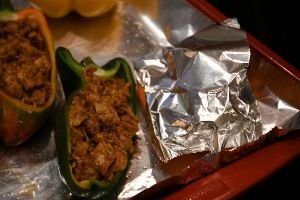
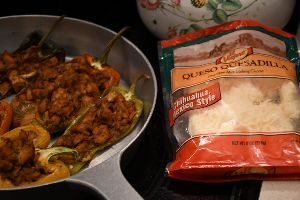
Stuffed Peppers Wrapped in Bacon
———————————————-

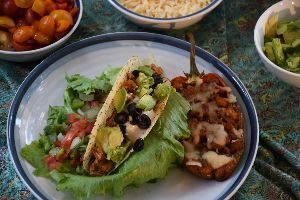
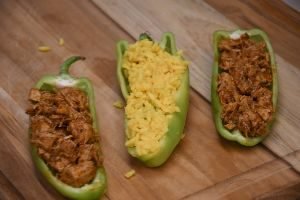
Chicken Taco Stuffed Peppers, Yellow Rice Stuffed Peppers
——————————————–
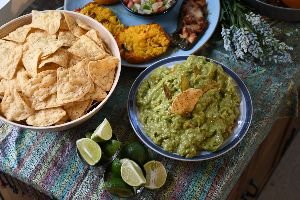
Guacamole, Chips and Limes
————————————————
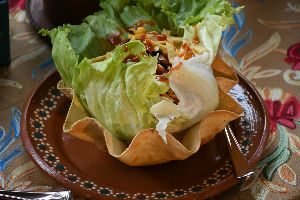
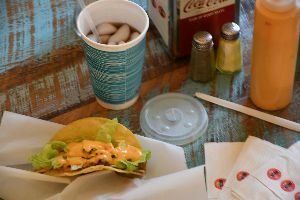
Chicken Taco’s with Iceburg Lettuce, Chopped Tomatoes, Chopped Avocado, Shredded Milk Queso Cheese
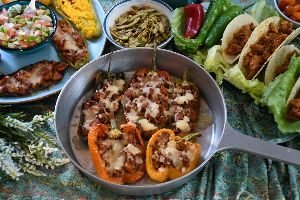

Chicken Taco Stuffed Peppers, and Chicken Taco’s
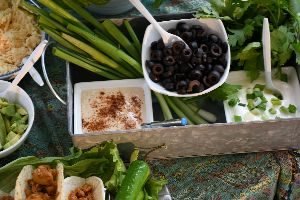
Condiment Tray:
Sliced Black Olives
Spring Onions
Sour Cream with Spring Onions
White Cheese Sauce with Red Chili Powder
Fresh Cilantro
——————————-
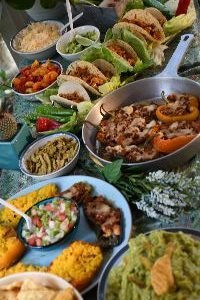
A Great Mexican Inspired Dinner
Julie’s Dinner Plate
—————————————–
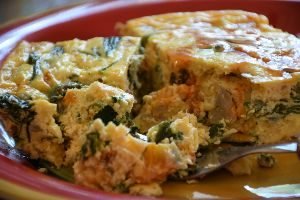
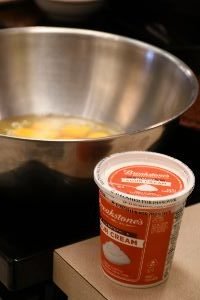
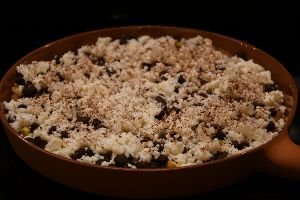
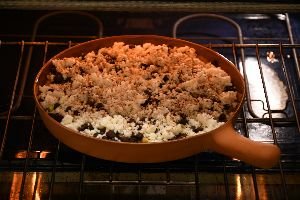
Julie’s Mexican Breakfast Frittata
———————————————-
————————————————
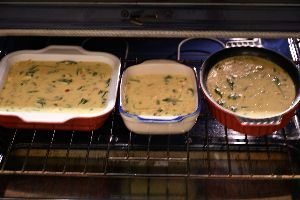
I made 3 of them.
One to eat and two to freeze.
I baked these in a 350F oven for about 20 minutes or so. I wish that I had baked them in a 300F oven and covered them in foil to help prevent the browning that you see. Doing that, would mean that I would extend the cooking time as well. Probably to 25 – 30 minutes. Regardless of the browning, this was delicious!!
————————————————-

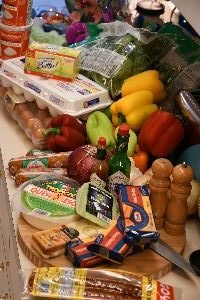
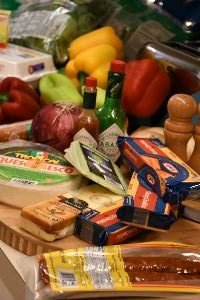
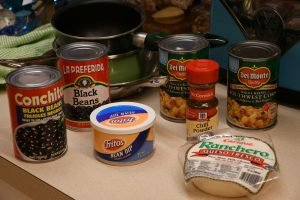
The Ingredients:
(This will make a lot, and that is how I like it. I love to freeze some. But I will give you the one batch recipe and you can double it if you like. But all the ingredients that you see above I probably made around 3 casserole dishes.)
——————————————-
16 eggs
Bell Peppers: One Green, Yellow, Orange, and Red, chopped
1 light green Hungarian Pepper, chopped
1 Poblano Pepper, Chopped
1 large Red Onion, chopped
1 large White Onion, chopped
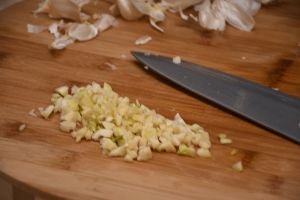
4 Fresh Garlic Cloves, diced
8-12 Roasted Garlic Cloves, smooshed
1 lb. Chorizo Sausage, chopped into rounds and baked, (I used 2 different flavors of
Goya Chorizo, Sarta and a regular Chorizo.)
1 1/2 Pints Sour Cream
1- 1 1/2, 9 oz. Bags of Baby Spinach, Fresh
Freshly Ground Black Pepper, to taste
Hot Sauce–any–(Tabasco,) as many shakes as you like!
8 T. Butter/Margarine
2 lb. Sharp Cheddar Cheese, grated
(Although you do see other ingredients in the photos, such as Queso and Pepperjack Cheese, and even Gouda, I didn’t use those cheeses in the main recipe. I considered it but changed my mind.)
———————————————
—————————————————
I eventually had so many leftover ingredients that I doubled the recipe again and froze that one.
————————————————
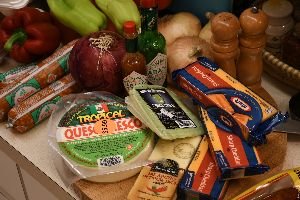
You can use whatever cheeses that you prefer. That is one reason which I am showing a variety here.
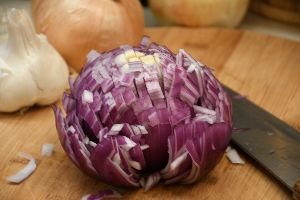

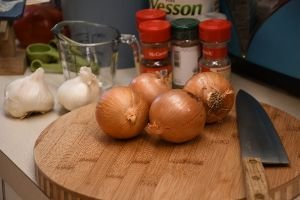
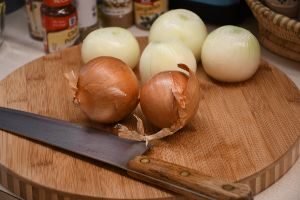
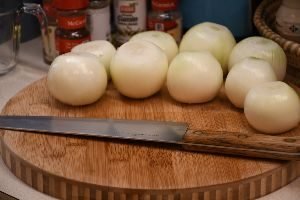
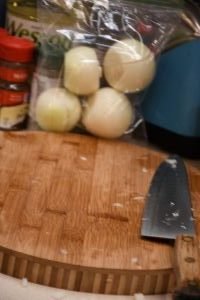
I started by chopping a large Red Onion into small pieces.
I then chopped a large White Onion into small pieces.
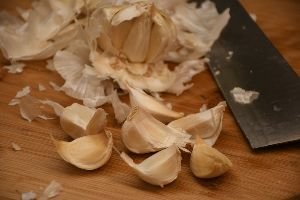
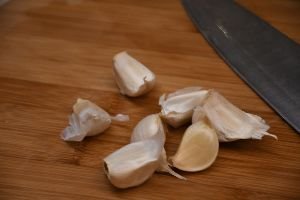
And I chopped about 4 garlic cloves, and smooshed about 12 roasted garlic cloves.
(These will be different flavors blending together.)
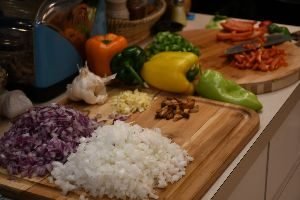
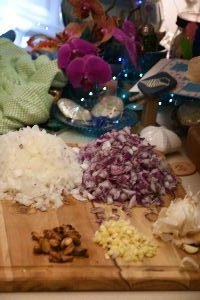
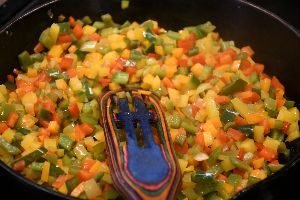
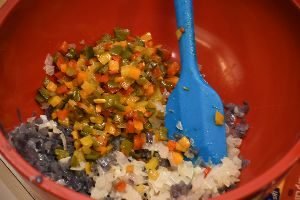
Chopping all of my Ingredients

Washing and Chopping the Bell Peppers……
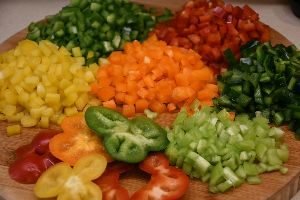
and the Hungarian and Poblano Peppers
————————————————-
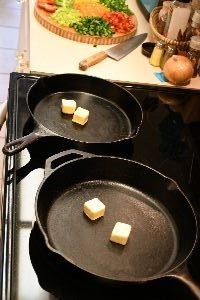
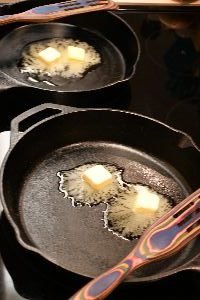
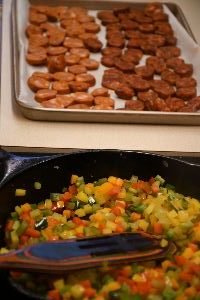
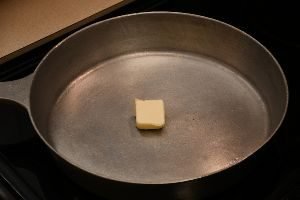
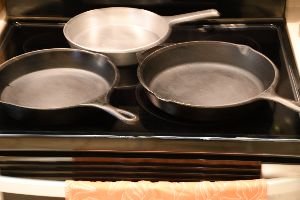
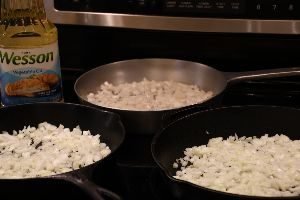
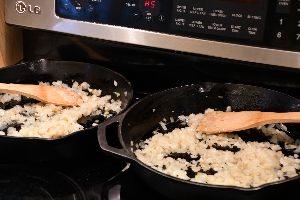
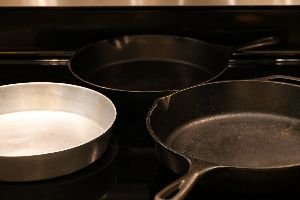
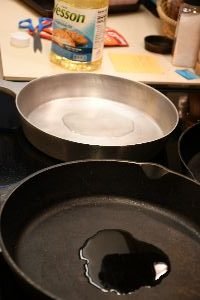
Melting about 4 Tablespoons of Butter/Margarine into 2 different Cast Iron Skillets
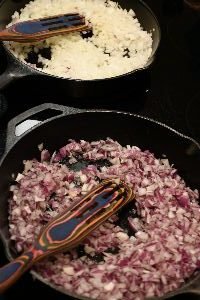
I am sauteeing the Red Onion in one, and the White Onion in the other.
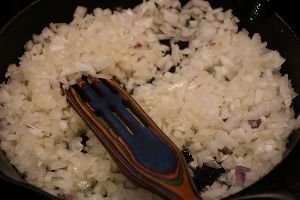
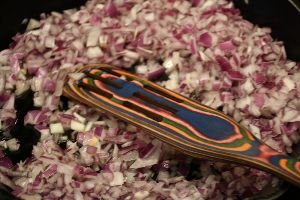
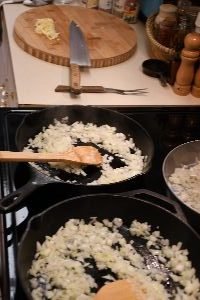
Softening the Onions
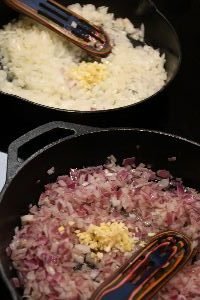
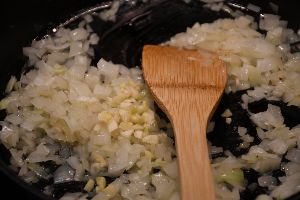
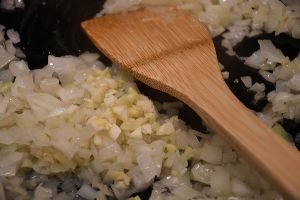
About 5 or so minutes into the sauteeing of the onions you want to add the freshly chopped garlic to each skillet so that it can soften as well. Just divide between what you have already chopped.
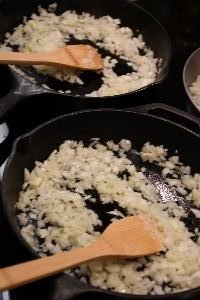
When done, I placed the red onion mixture into one bowl, and the white onion mixture into the other bowl.

Now I am softening the Peppers in the Cast Iron Skillet.
You may need to add a tablespoon or so of Butter/Margarine to the skillet first.
————————————–
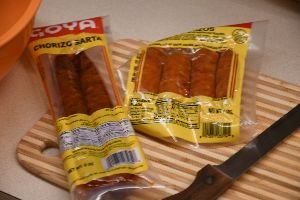

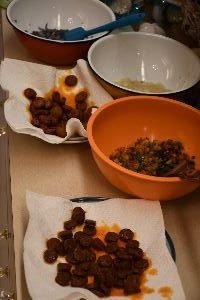
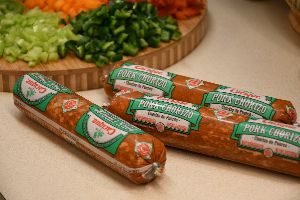
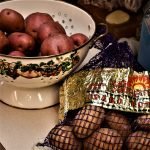
Goya Chorizo, 2 Different Flavors
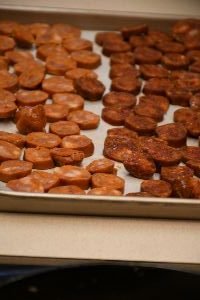
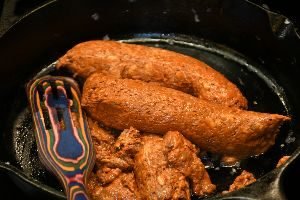
I chopped all the Chorizo into rounds and placed onto a baking sheet that is lined with Parchment Paper.
Chorizo is very greasy. Delicious, but greasy.
So you want to place the cooked chorizo onto paper towel lined plates or bowls when done. See photo below.
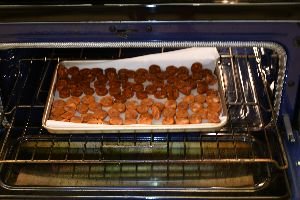
I baked the Chorizo in a 350F oven for about 15 minutes or so. Just watch it.
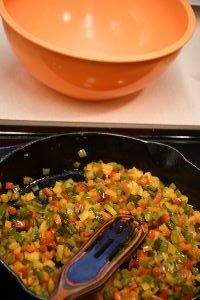
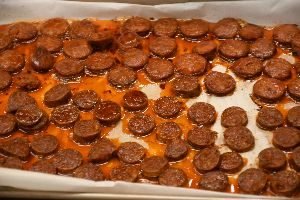
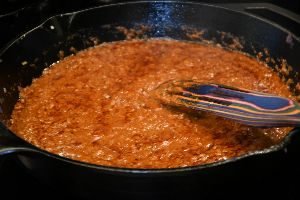
You can see the Peppers softening here in the skillet. That means they are almost ready.
You can also see the Chorizo paper towels soaking up that oil here. I also placed the softened peppers into a separate bowl as well.
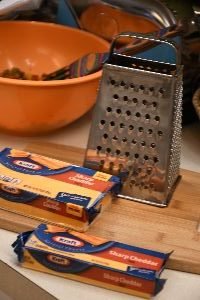
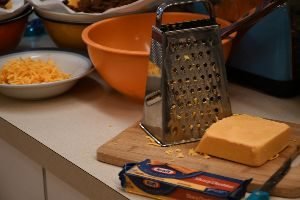
Now I am going to grate 2 pounds of Yellow Sharp Cheddar Cheese.
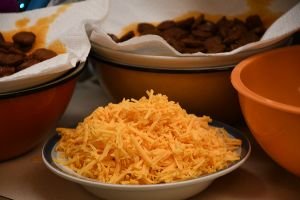
Just Set Aside
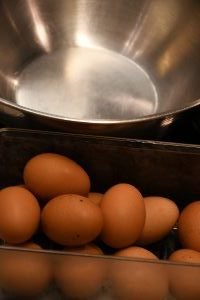
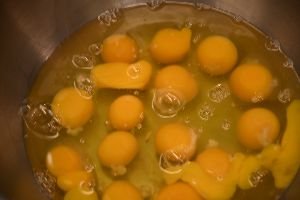
Now it’s time to add all the eggs to a very large bowl.
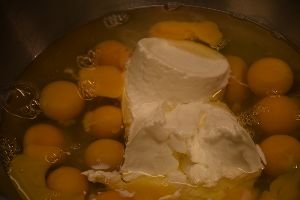
I ended up using about a pint and a half of sour cream. Adding it here.

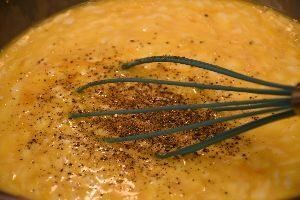
Mixing up the eggs and sour cream with a whisk. And adding about 50 shakes of freshly ground black pepper. But you can add as much or as little as you like. I just happen to like lots of freshly ground black pepper.

Chopping the Chorizo and Smooshing the Roasted Garlic Cloves
I just wanted to chop the chorizo into smaller chunks.
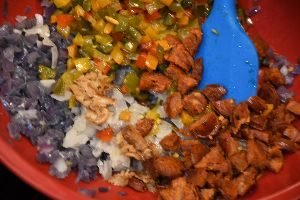
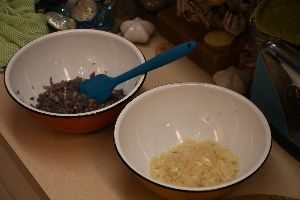
I placed the Red Onion Mixture, and the White Onion Mixture together, along with the Softened Peppers, and Chorizo, and the Roasted Garlic together.
——————————————-
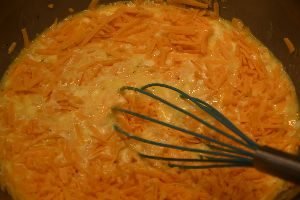
Here I added all the grated Cheddar Cheese to the Egg and Sour Cream Mixture.
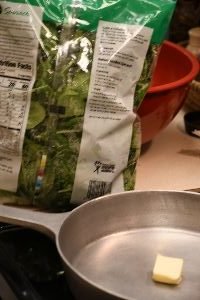
Next I need to soften the Baby Spinach. Place about 1-2 Tablespoons of Butter/Margarine into a saucepan to melt.
In the Meantime……
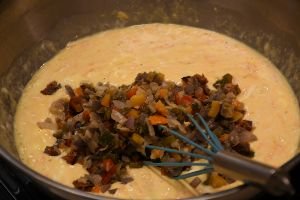
Me, adding the softened onion/garlic/peppers into the eggs and sour cream bowl.
——————————————
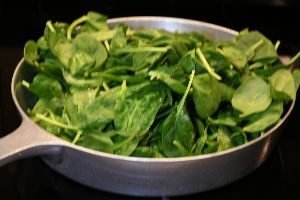
Here I am wilting the baby spinach leaves. I had added about a tablespoon of butter/margarine into the saucepan and then added the fresh baby spinach for it to wilt down.
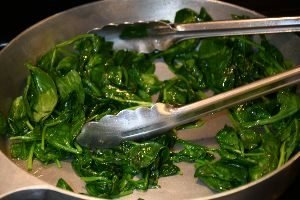
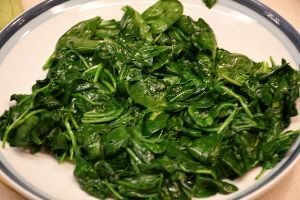
You can see it wilting here.
You just need to constantly turn it over and over with some tongs.
—————————————————

The Frittata Ingredients All Ready to Blend here.
(I believe I added more grated sharp cheddar cheese here. But, I didn’t use more than the 2 lb.’s I mention above in the ingredients.)
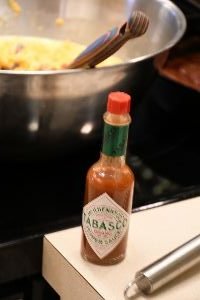
Tabasco Sauce
(add as many shakes as you like.)
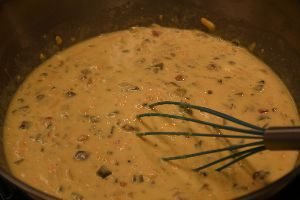
All Blended and ready for the Wilted Baby Spinach.
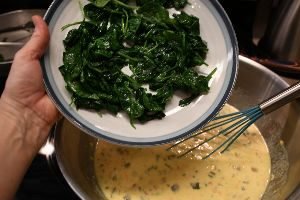
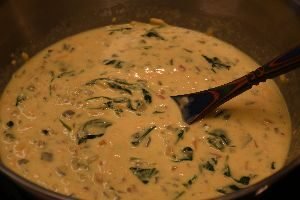
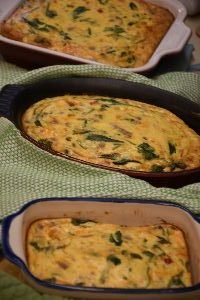
Now it’s time to place it into casserole dishes to either freeze, or to bake. But first you want to spray them with a cooking oil spray so as not to stick to the dish.
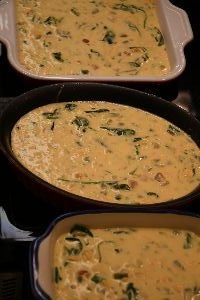
I made 3 here with this batch.
Bake into a 300F oven for about 25 minutes or so, depending on how quickly your oven cooks, and how crowded your oven is. Check it half way through and if you see it start to brown then place some aluminum foil over top. To check if it is done you want to place a toothpick or wooden skewer in it to make sure it isn’t runny. It should be firm.)
————————————————-
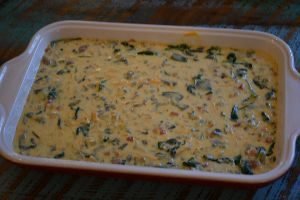
When I made more of this Frittata I placed it into a casserole dish to freeze and bake for a future time. This is a large casserole and should bake a good 45 minutes or so before being ready to eat. But how simple and easy is it to get something out of the freezer for breakfast for a large group of guests?

This is my small one that I made just for me!
—————————————————


I do love an Hola Champagne Breakfast

I added some Hominy here to go with the Frittata, along with some Green Pepper Tabasco Sauce.

Great Morning Breakfast, or Breakfast for Dinner
—————————————————————————–
This is one of the casserole’s that I froze and reheated at a later time.
Perfect to have in the freezer ready for any occasion.
———————————————
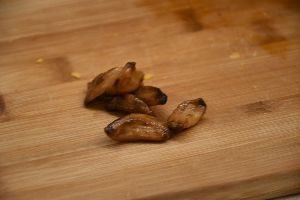
This was an experiment that did not go well at all! When I saw these Chorizo sausage casings at the grocery store they look soooo good! However, when I opened them up they look as they do below.
Granted, they still look good here. But when I cooked it down it all turned to mush. I was hoping that it would act like our ground sausage. I thought it would be great to add to the frittata above. But I ended up throwing this mush out.
I’m sure this would be perfect in the right recipe. But I can’t figure out what to do with it? But, I did want you to see an experiment and how I did try to incorporate it into the frittata. But I do believe it would have turned my beautiful colorful frittata an ugly brown. But, perhaps it would have tasted good? 🙂
————————————————
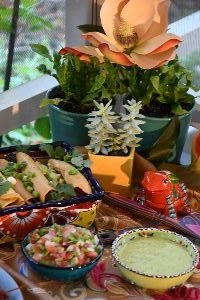
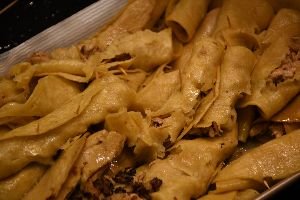
Chicken Taquitos
This is an old recipe that I cut out of a magazine decades ago and taped to an index card and filed away into my recipe box. Gordon originally made them in the 80’s and they truly were delicious! I found the recipe when I was flipping through my box and I decided that I would make them again, but that I would change the recipe up a bit.
———————————————
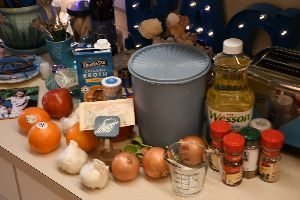
Chicken Taguitos Ingredients:
( This is a large recipe because I will freezing some of it. The way I have the ingredients listed I am obviously doubling it. But everything you see listed here will make 2 good sized skillet’s full.)
4-6 lb. Chicken Breasts, boiled
5 Sm.-Med. Spanish/Yellow Onions, chopped
5-7 Garlic Cloves, minced
2 Large Tomatoes, chopped
1 and 1/2 Cups Chicken Broth
4 Tablespoons Flour
2 Tablespoons Oregano
4 Tablespoons Cumin
2 Tablespoons Chili Powder
1 teaspoon Sea Salt
Vegetable Oil
——————————————–

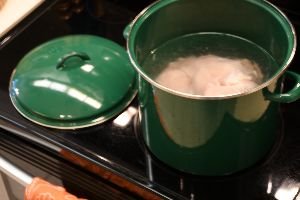
You first want to boil the chicken breasts on the stove top in a pot. Add a little bit of salt to the water, it is supposed to speed up the boiling time. And I assume it does flavor the chicken here as well.
Boiling the Chicken
All the other ingredients waiting their turn.
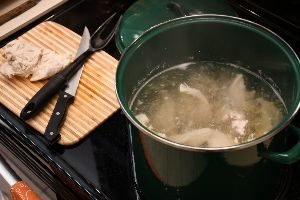
When the chicken breasts are finished boiling remove them and place onto a cutting board to cool a bit.
3 Sauce Pans
I don’t mean to confuse you but I’ve got 3 pans here because this recipe is doubled, and I also need somewhere for the ingredients to overflow to.
Chopping the Spanish/Yellow Onions
I ended up using only 5 of these onions. The other 4 I placed into the fridge for other recipes.

GARLIC!
I used about 5-7 garlic cloves here.
Mincing Them
Distributing the Chopped Onions into 3 Pans
——————————————
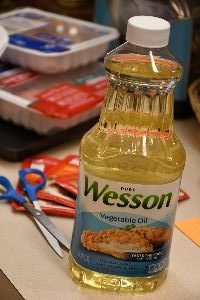
I poured a few Tablespoons of Vegetable Oil into each Skillet and then added the Spanish/Yellow Onions to Sautee on a medium heat and stirring often.
At this point I have divided all the onion that I had originally in 3 saucepans, down to two of them. I realized I only needed the two cast iron skillets for this amount of onions as they do cook down.
———————————————–
After about 5 minutes of sauteeing the onions, add the minced Garlic to the onions to soften for an extra 2 minutes or so.
When done turn the heat down to low, then remove the skillets from the burners and set aside.
———————————————–
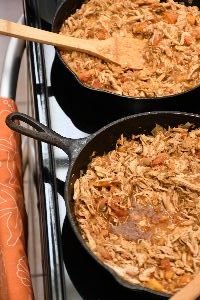
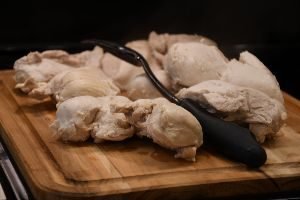
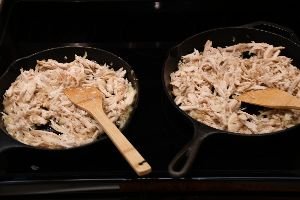
Now we Turn our Attention to the Chicken
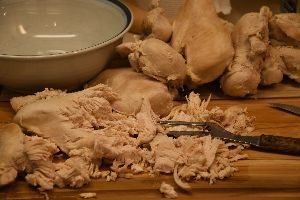
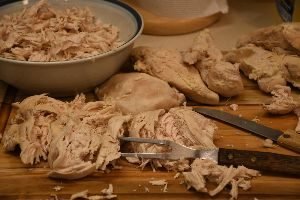
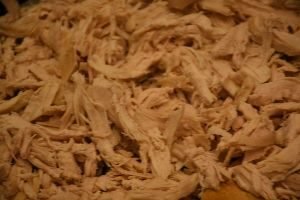
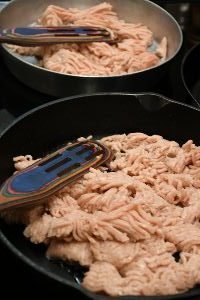
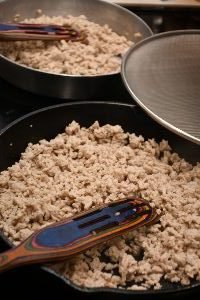
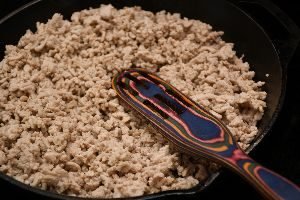
Shredding the Chicken
Once the chicken breasts have cooled a bit you want to take a fork and shred the meat. You just drag the fork over the meat and it turns into shreds. I’m very picky about my chicken so I like to remove any little fat and chewy bits and discard them.
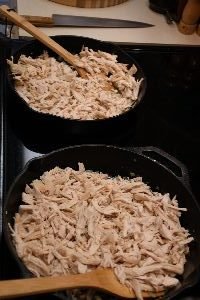
When the chicken is shredded you want to divide it between the skillets with the onions and keep on a low heat.
While that is simmering away………
———————————————
The Tomatoes
I probably chopped about 2 large tomatoes here.
One Red, and one Yellow.
Back to the Chicken and Onions and Garlic in the Cast Iron Skillets….
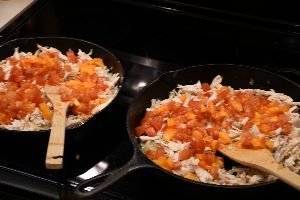
Now you want to divide all the tomatoes between the two cast iron skillets.
Keep on a low heat.
———————————————

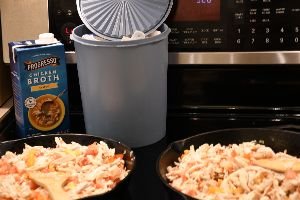
The Spices….
Dried Oregano, Cumin, Chili Powder and Sea Salt
Here I am blending the Flour, Cumin, Oregano, Chili Powder and Sea Salt into the Chicken mixture.
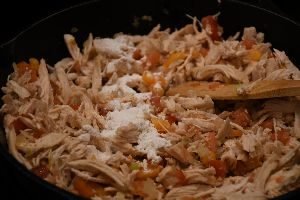
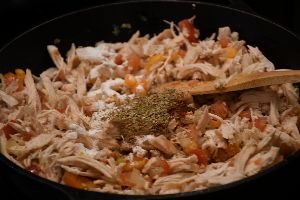
Blending and Stirring

Divide the Chicken Broth Between the Two Cast Iron Skillets
I kept adding more and more Cumin to this recipe. The flavor just kept asking for it. So, I probably ended up adding about 8 Tablespoons instead of the 4 that I list in the recipe ingredients above. But, I do love lots of Cumin here.
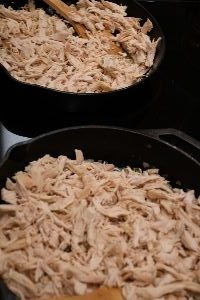
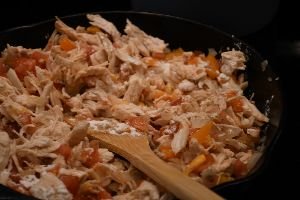
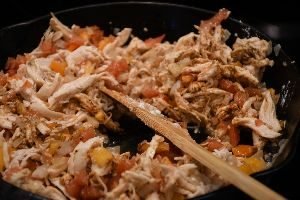
Everything Simmering Away as it Should
I probably let all of this simmer away for an hour on a very low heat. I wanted the tomatoes to cook and all the spices to blend together. I did watch it and I stirred often.
When cooled, I froze about half, and placed the other half into the refrigerator overnight.
The spices continued to meld overnight as well making the mixture taste even better the following day.
I made the Chicken Taquitos mixture the day before I made the Chicken Taquitos. It’s great to sometimes make things ahead of time. That worked out well here.
——————————————–
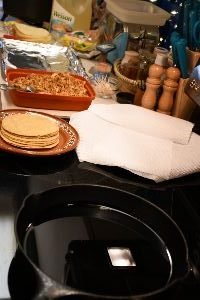
Ready to Cook the Chicken Taquitos
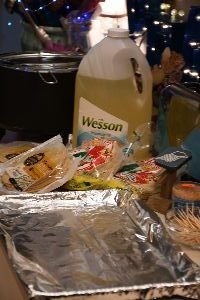
Of course you will need some Vegetable Oil and I’m using Gordon’s Fry Daddy/Fry Baby here, I forget what it’s called. But it is a deep fryer.
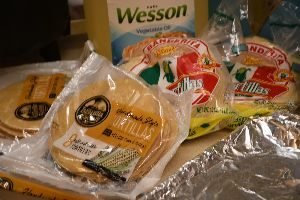
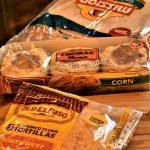
I also bought some small corn tortillas. I bought two different brands. One looked very authentic and homemade, and the other resembled a flour tortilla. I bought two different kinds because I wanted to experiment with which one would be best.
These are the Corn Tortillas
(Don’t they look beautiful? As if they were homemade by someone named Maria.) 🙂
Everything Lined Up in a Row
I’ve got a foil lined baking sheet. My chicken taquitos mix. Corn tortillas. A round pizza pan lined with paper towels. And my cast iron skillet with some vegetable oil warming.
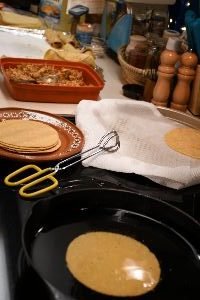
My cast iron skillet has a shallow amount of Vegetable Oil, about an inch. Heated on a medium heat. It is recommended that the tortillas cook a little bit in this oil first, just to soften them, then remove and place on paper towels to absorb the oil. It will make them more pliable to roll up.
My Taquitos Mixture, and some Corn Tortillas
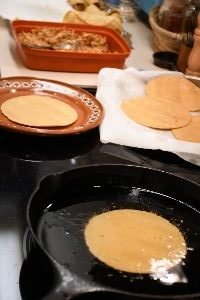
You just want the tortillas to soften up a bit. So don’t cook them more than 30 seconds.
Then place onto paper towels to cool and drain.


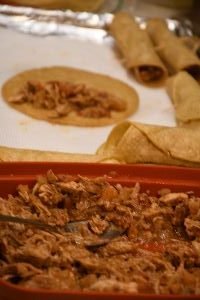
Rolling them Up
I’m not good at this at all. I’m only showing you the nice ones that I rolled. 🙂 But you want to take one of the corn tortillas and add about a few teaspoons of the taquito mixture and then roll them up as tightly as you can. Then insert some toothpicks to secure them. When ready place them on the foil lined baking sheet.
Mine are not very tight at all. I did the best I could.
The tighter you roll them the less meat mixture will fall out during the frying process.

So, good luck!
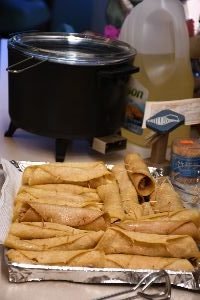
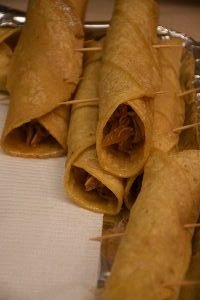
When you have them all rolled up and ready it’s time to fry them.
If you do have a deep fryer as we do then you want to add as much oil as recommended by the instructions and start to heat that oil to 375F. If you don’t have a deep fryer you can use a cast iron skillet with some vegetable oil, about a half an inch or so, and just turn them as they cook. You really just want to brown them a little.
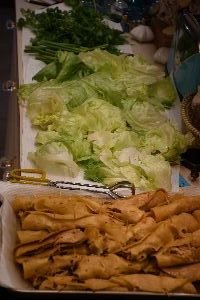
Make sure you have plenty of Iceburg Lettuce cleaned and washed.
Iceburg is my preferred lettuce with anything Mexican food related. Probably because it was the only lettuce we could get in the south in the 70’s.
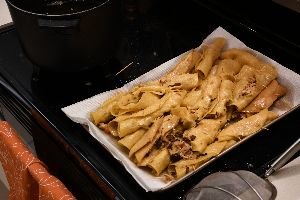
As you can see some of mine didn’t turn out so well. However, that didn’t detract from their taste.
You can place them into a warm oven while you prepare the rest of the meal.
They do taste great on a bed of iceburg lettuce topped with some guacamole.
Or……
Eaten with a side of Habanero flavored Yellow Rice.
——————————————
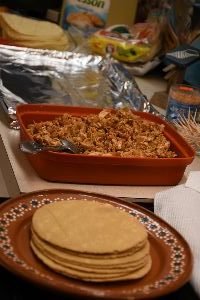
How to Make my Volcano Habanero Flavored Yellow Rice with Chorizo
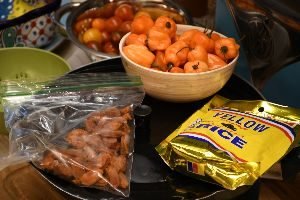
Yellow Rice Mix
Leftover Cooked Chorizo, Chopped
1-2 Habanero Peppers
A great way to eat some of your leftovers.
I bought a ready made yellow rice mix and followed the cooking instructions. I made this in a Wok. I love my Wok. I think it makes so many foods nicer than using some flat skillet. But you can use whatever you like.
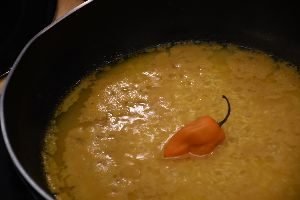
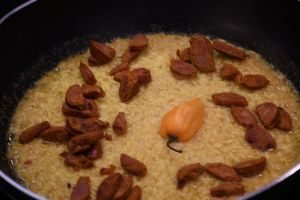
About half way through the cooking time I added my leftover Chorizo.
——————————————–
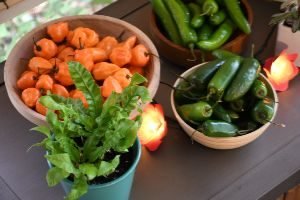
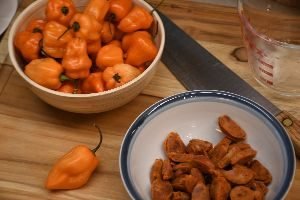
Habanero’s and Jalapeno’s, also Serrano Peppers
(Next up on our Menu)
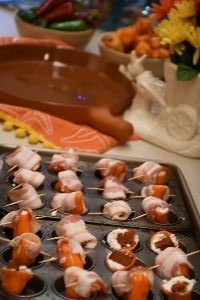
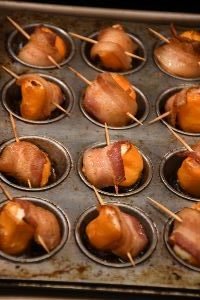
Stuffing Peppers
———————————–
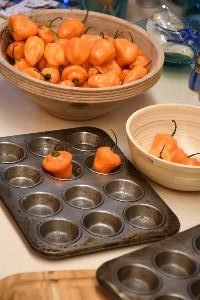
I LOVE Stuffed Peppers!
I know that we are all familiar with the stuffed Jalapeno, and the stuffed bell peppers, but I wanted to stuff these cute little orange habanero ones. I just needed to figure out a way that I could stuff them without the stuffing oozing out all over the baking tray. That is when I remembered the cute little muffin tins that I have. PERFECT!
I did lightly spray them with a cooking oil spray.
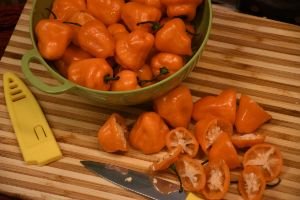
I also cut the tops off each habanero pepper and cleaned out the seeds and the insides.
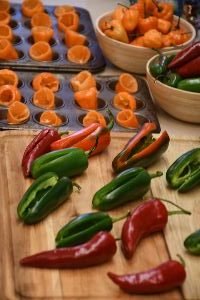
I also wanted to stuff the Jalapeno and some Red Chili Peppers.
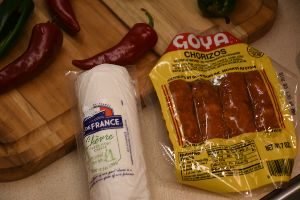
Goat Cheese and my preferred Goya Chorizo.
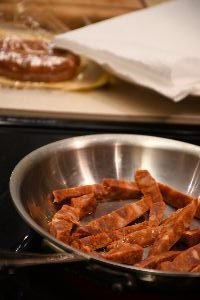
I chop the Chorizo in length’s and cook on the stove top to brown up a bit and then drain onto paper towels.
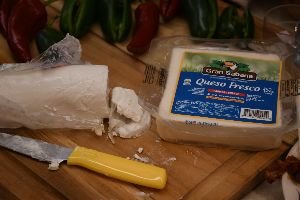
Some Queso as well……
What I don’t show here is how I prepared the peppers for stuffing. I simply slice them in half and clean out all the seeds and the insides while wearing gloves so as not to irritate my skin or anything that I will then touch. Such as my eye, the hot residue would be horrible!
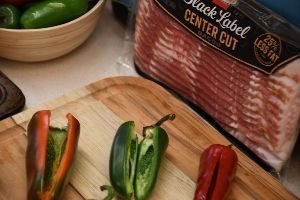
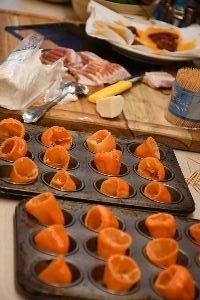
The Bacon!!!!!!!! 🙂
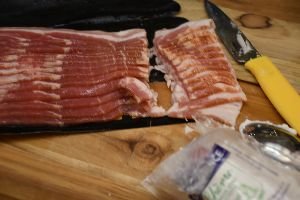
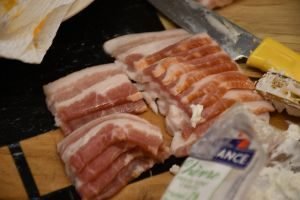
I’m cutting the bacon in such a way as to have enough to wrap around the Jalapeno and Red Chili Peppers, and some little bits to top off my orange Habanero Peppers.
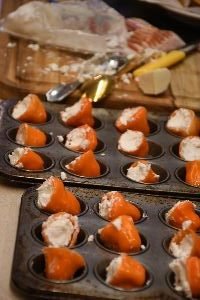

The Orange Habanero’s I stuffed some with Goat Cheese and some with Queso.
I also added some Chorizo to a few as well.
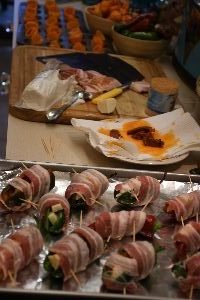
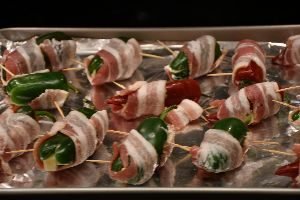
These peppers are stuffed with either goat cheese and chorizo, or queso cheese and chorizo.
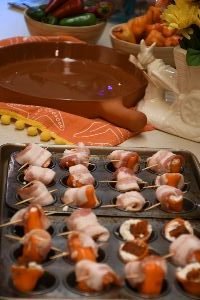
Then wrapped in bacon and secured with toothpicks.
Be sure to place them face down on a baking sheet that you have lightly sprayed with cooking oil.
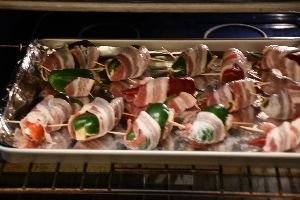
Put the oven on 400F and bake for about 15 minutes.
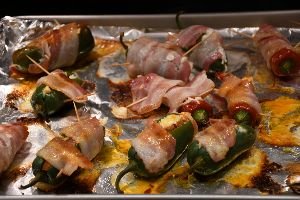
Then remove from the oven and turn them over and bake an additional 15 minutes or so until they are done.


The Habanero Peppers only took about 15-18 minutes to cook on a 350F oven.
——————————————–

You want them to look just like the photos above.
Crispy bacon, beautiful peppers.
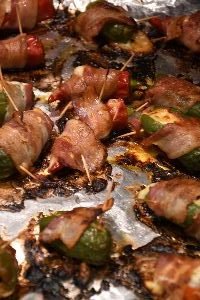
Perfecto!!!
————————————————-
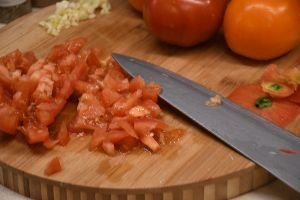
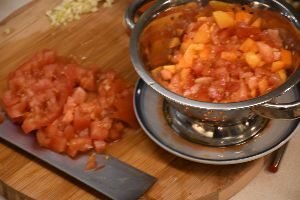
Making Salsa
My Salsa recipe is written on my first Mexican food blog, Julie Whann Way Mexicana, Si! post so I’m not going to repeat it here. I just wanted to show that I am making salsa for this meal.
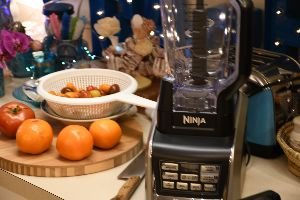
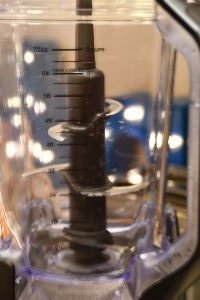
This is the NINJA Blender our daughter Veronica, and son in law Brian, gave to us one year for Christmas. It looks dangerous, doesn’t it? I’m even afraid to wash it for fear of slicing my wrist!
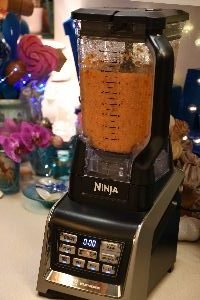
I do like using many different colors of tomatoes when I do make salsa.
I think it looks prettier and tastes very nice.
——————————————–
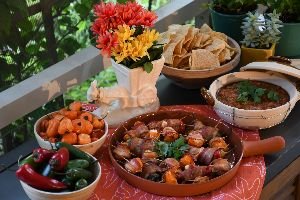
Nice Mexican Aperitivos (Appetizers)
My Salsa Topped with Fresh Cilantro
————————————————
Traditional 70’s American Taco’s
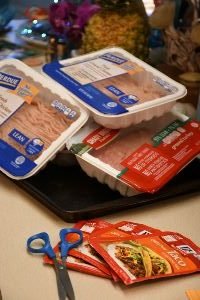
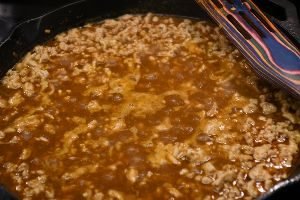
I write above about my very first taco that I ever ate. Of course, it was with ground beef, or hamburger meat, if you prefer, but I no longer eat red meat thanks to more healthy alternatives such as ground chicken and ground turkey.
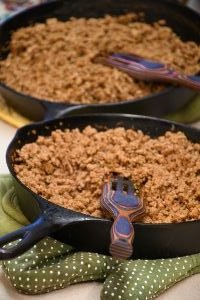
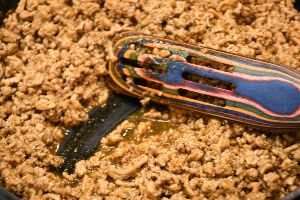
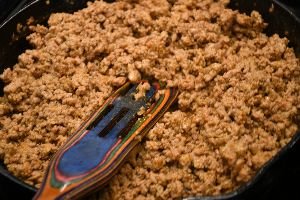
Taco Meat
(Ground Chicken in one, Ground Turkey in the other.)
———————————————
The Taco Bar out on our Porche
(That’s Mexican Tarragon in the terra cotta pot.)
What I love about a Taco Bar is that all the food is delicious. You can make your own and make it to your own specifications. You control the portions. I also think that children enjoy creating their own dinner and even serving themselves.
And I know that teenagers love a good taco bar too. 🙂
——————————————-
It was nice to recreate a tasty memory from my childhood.
———————————————–
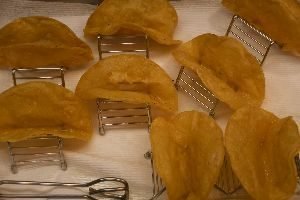
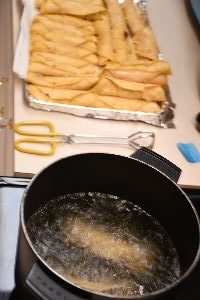
Frying the Taco Shells
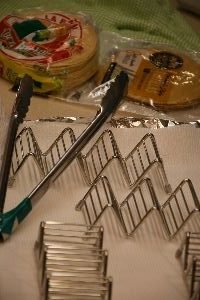
In order for me to recreate my very first taco I had to fry the taco shell’s myself. It wasn’t that hard, but it was something of a greasy mess. The ready made taco shell’s do take that hassle away from us. But there was just something very unique and special in frying up my own.
Forming them are the problem!
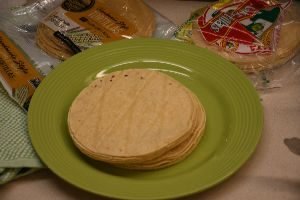
I already had the flour tortilla’s that would be the Taco Shell’s.
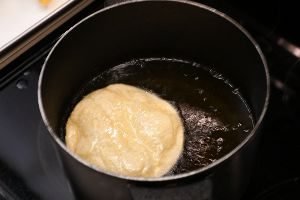
I just needed to fry them up in the vegetable oil, and then form them onto something in order to make the taco shape.
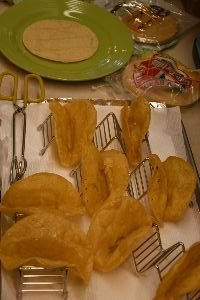
I had these wire taco holders and decided that they would probably work.
And they did!
Letting the Shell’s Cool
—————————————
Making Traditional American Taco’s
I do wish that I had some special secret recipe to give you, but I don’t.
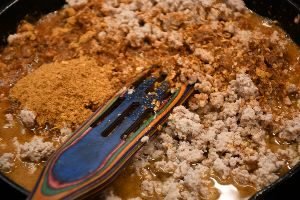
But these are the taco’s that most of us grew up with and they were all flavored by McCormick Taco Seasoning Mix.
Our mother’s would get out their cast iron skillets…..
Place some Hamburger Meat in it.
(Here I am using ground chicken in one skillet, and ground turkey in the other. About 2 lb.’s in each skillet. We never had to use any sort of cooking oil due to all the fat in hamburger meat. But, here I did add about a tablespoon or 2 to each skillet to fry the meat in.)
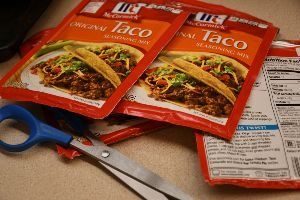
Once the meat has been fried and drained of any liquid, add the McCormick’s Taco Seasoning Mix. Because I used 2 lb’s of meat in each skillet that would be at least 2 packets. However, I usually like it seasoned more so I do add a total of 3.
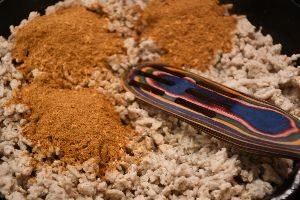
Adding the Taco Seasoning Mix and Water, following package directions.
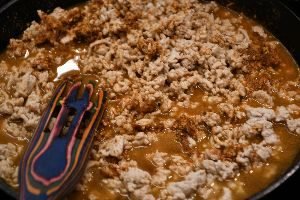
Ground Chicken and Ground Turkey do have a similar consistency, but yet they are a bit different.
The trick is to simmer and stir often until all the water is gone and the meat is a bit thick.
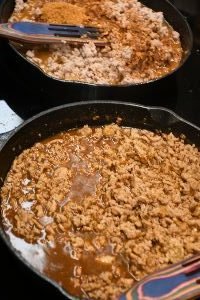
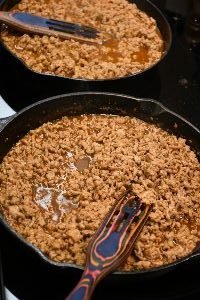
I love it when the meat mixture gets so thick and the liquid has absorbed into the meat making it very rich and tasty.
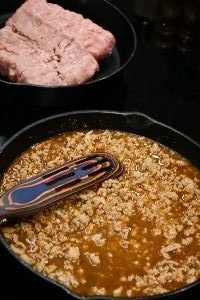
Now it’s just a matter of keeping the meat on a low simmer while you get everything else ready.
——————————————–
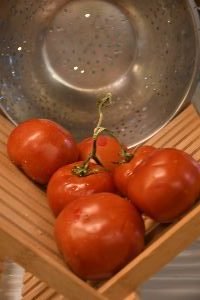
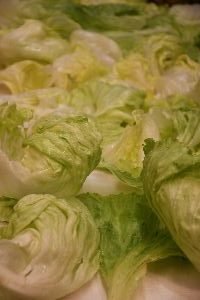
Tomatoes and Lettuce…..
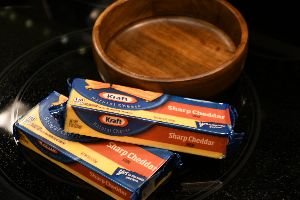
And Sharp Cheddar Cheese, grated
———————————————
Julie’s Taco Dinner
A good Taco Bar has ground meat, lettuce, tomatoes, cheese, sour cream, taco sauce, hot sauce, cilantro, soft and hard taco shell’s.
Get in Line!
——————————————
You can also make a Taco Salad
Toppings of Black Olives, Sour Cream, and Corn
———————————————
Tortilla Shell Molds
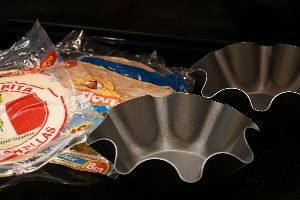

I bought these Tortilla Shell Molds years ago for our daughter Veronica, I believe. It was during her big Mexican food phase. I suppose I should pass them onto her now that she is married and has a home with her husband Brian. But, I did love making these! And it was so easy too. You just need to use a cooking oil spray on the pans first. Then fit a large tortilla shell and form it around the mold.
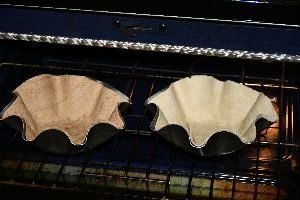
Then place it in a 375F oven temp for 8-10 minutes.
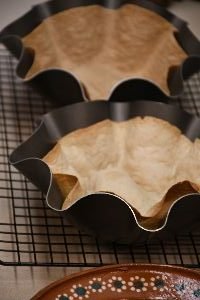
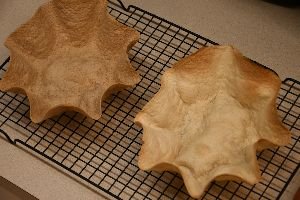
Remove from Oven and Let Cool
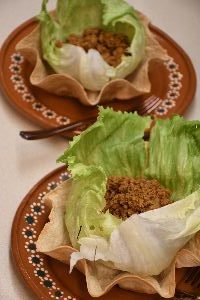
Now add whatever you want to your tortilla shell creating your own meal. It’s a bowl full of food and the good news is that you can also eat the bowl. 🙂
My grandmother loved taco salad’s and she ate them quite often.
—————————————
Julie’s Chicken Tacos, and Chicken/Yellow Rice Stuffed Peppers
This isn’t about a Chicken Taco recipe.
This is about other ways to use your Chicken Taco meat mixture.
I do have 2 Chicken Taco recipes on my other Mexican blog foods post: Julie Whann Way Mexicana, Si!
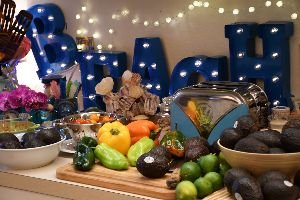
B-E-A-C-H
My Crowded Kitchen Counter
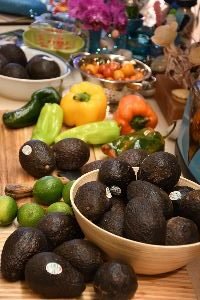
Ignore all the avocados.
They are in the photo because I was eating, and making lots of other foods. I know that my son grabs at least 2 to take with his lunch to work. He just peels them and eats them that way. No other preparation needed. I enjoy eating them on tortilla chips. I’m not really an ‘Avocado Toast’ kind of person, but I am an ‘Avocado Chip’ kind of person. 🙂
——————————————
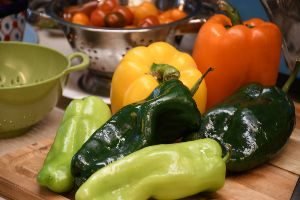
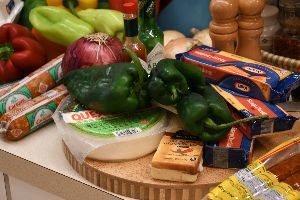
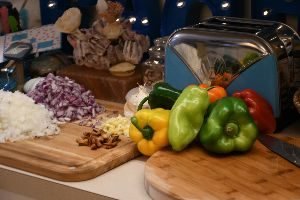
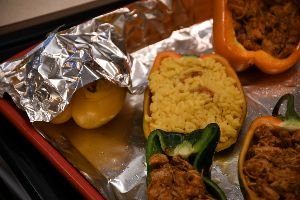
Beautiful Peppers for Stuffing
Bell, Poblano, and Hungarian Peppers
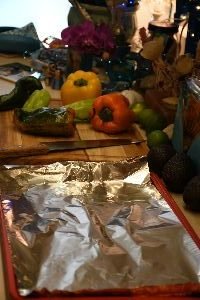
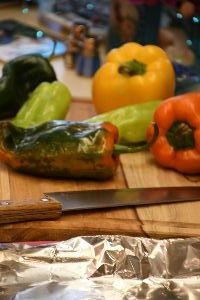
Foil Lined Baking Sheets
Sprayed with a bit of Cooking Oil Spray
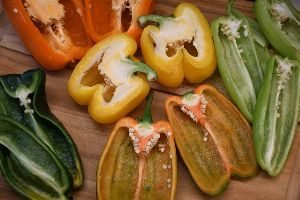
I cut the peppers in half and scooped out their innards. I then placed my leftover Chicken Taco mixture into the center of a few, and some leftover Yellow Rice in a few others.
The Assembly Line

Because of the different thickness’s of the peppers I had to cook some first, (the Bell Peppers,) then after about 15 minutes, I added the Poblano Peppers, then after another 15 minutes I added the Hungarian Peppers.
The Thinner the Skin, the less Cooking Time
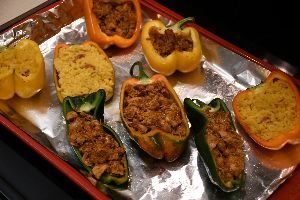
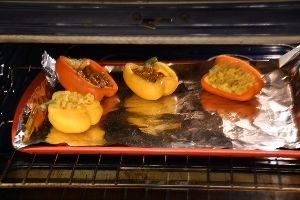
Bell, and Poblano Stuffed Peppers Cooking
I baked them in a 350F oven.
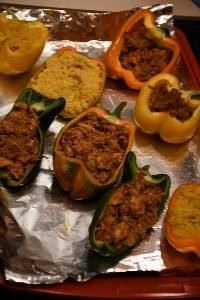
The thing is that you will need to cover the ones that have been cooking the longest so that they don’t burn. So, I cut little squares of foil and covered up the ones that needed covering. They still needed more cooking time but I didn’t want them to shrivel up and burn.
I did monitor the cooking of these very closely. The ones with the rice dry out very quickly so you want to cover those up after about 5 minutes so that the pepper can continue to cook without the rice becoming all tough and chewy.
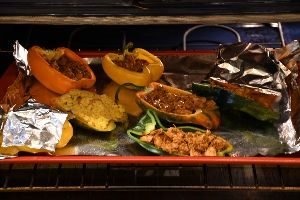
It’s like I said, the thicker the pepper the longer the cooking time, but to prevent burning you do need to cover them with foil.
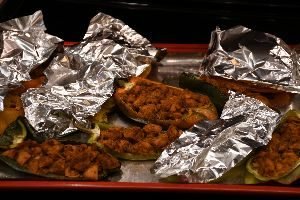
All Ready!
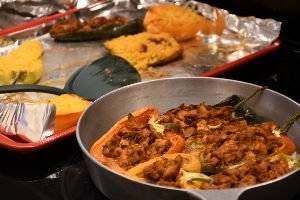
I did place a few into this pan and added some shredded Queso Cheese to melt over top, and then placed it into the oven for the cheese to melt.
Perfecto!
(My best advice for you in making the recipe above is to monitor everything very closely so that it all turns out nicely.)
————————————-
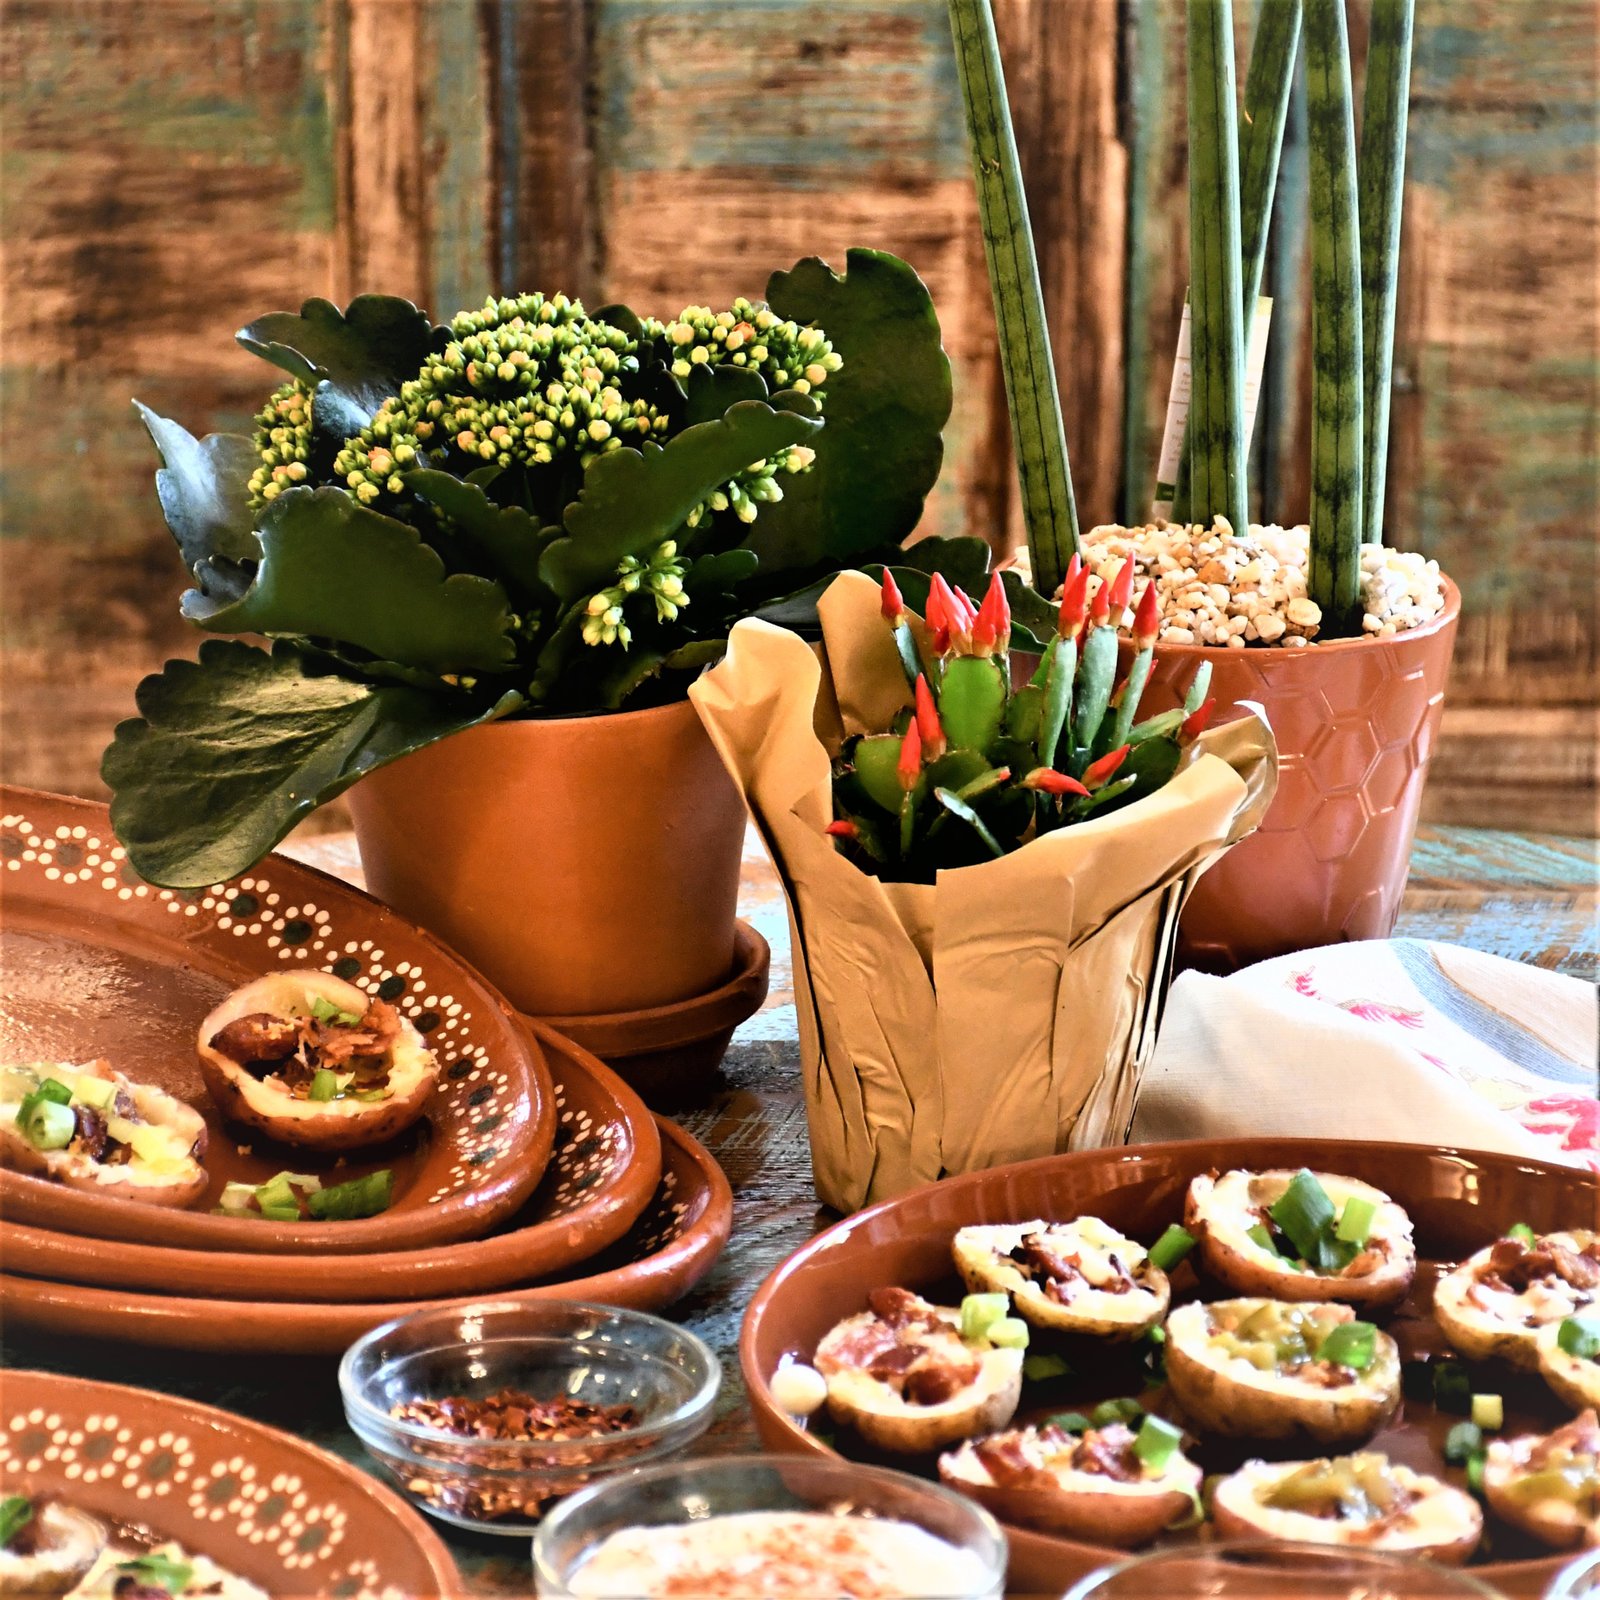
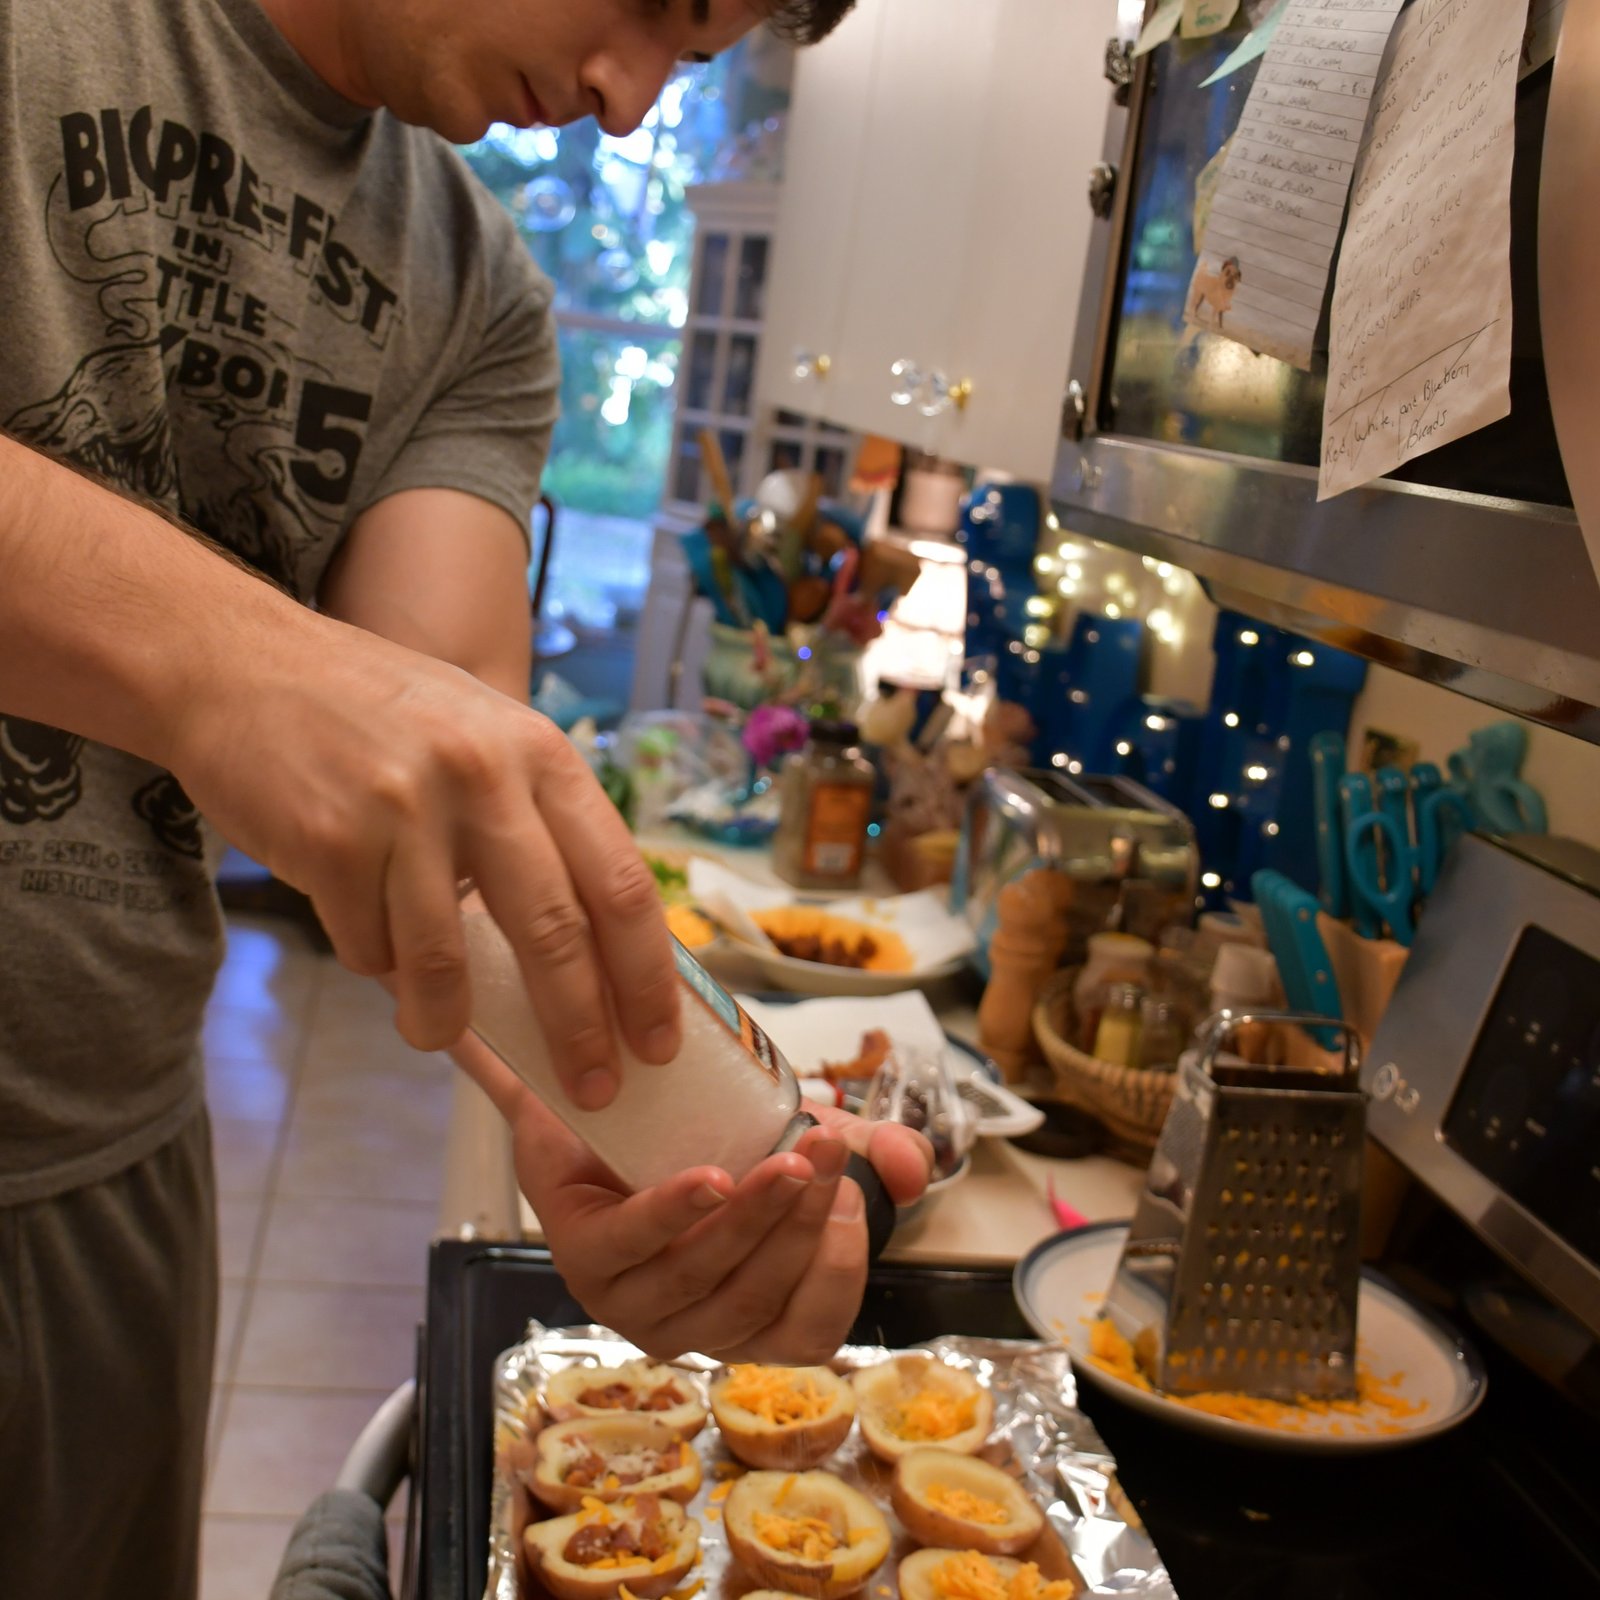
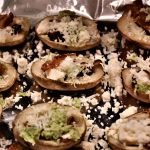
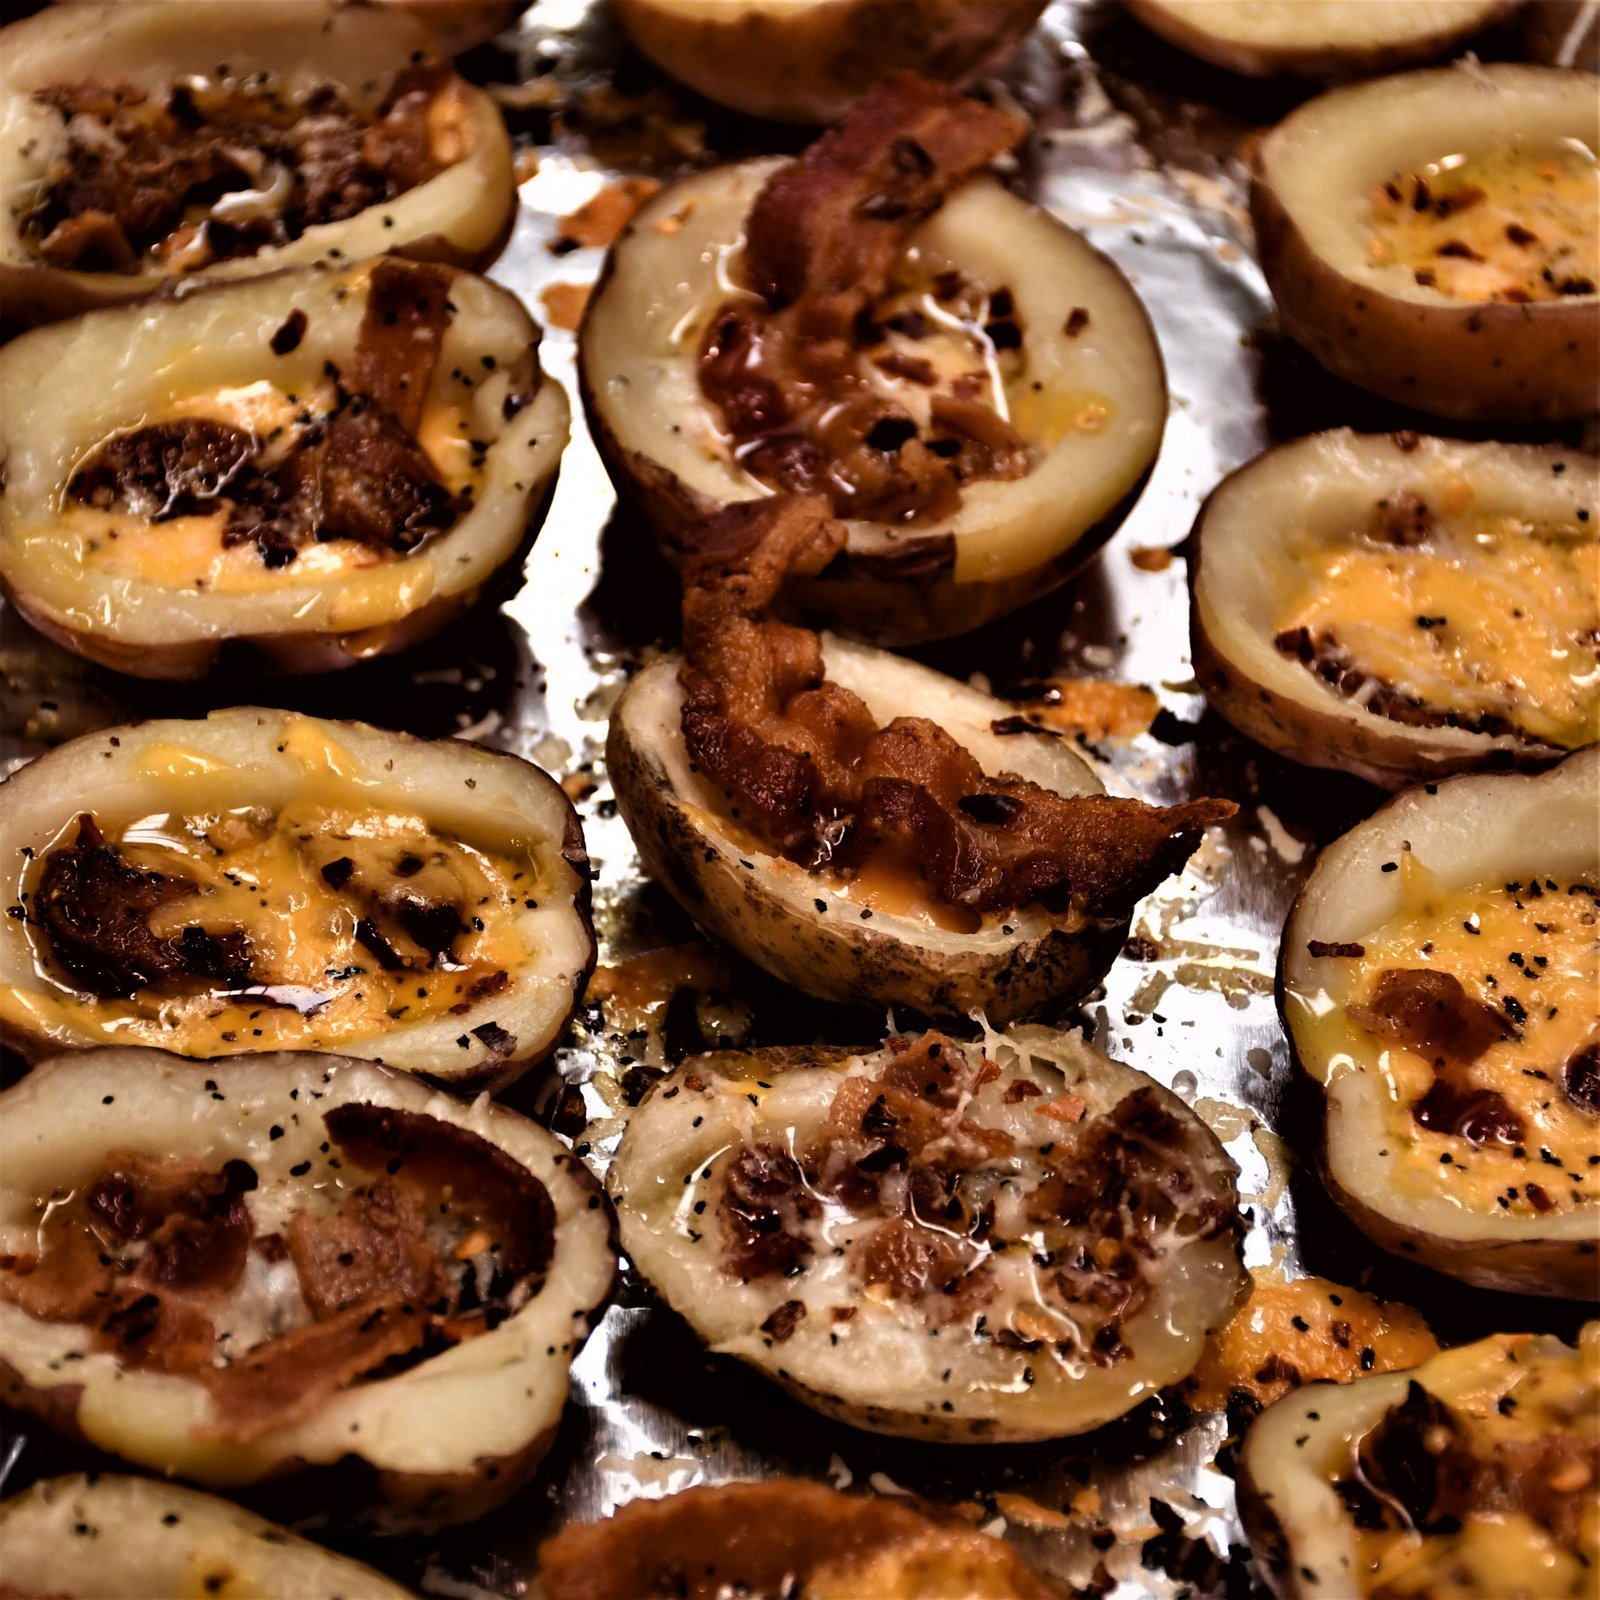
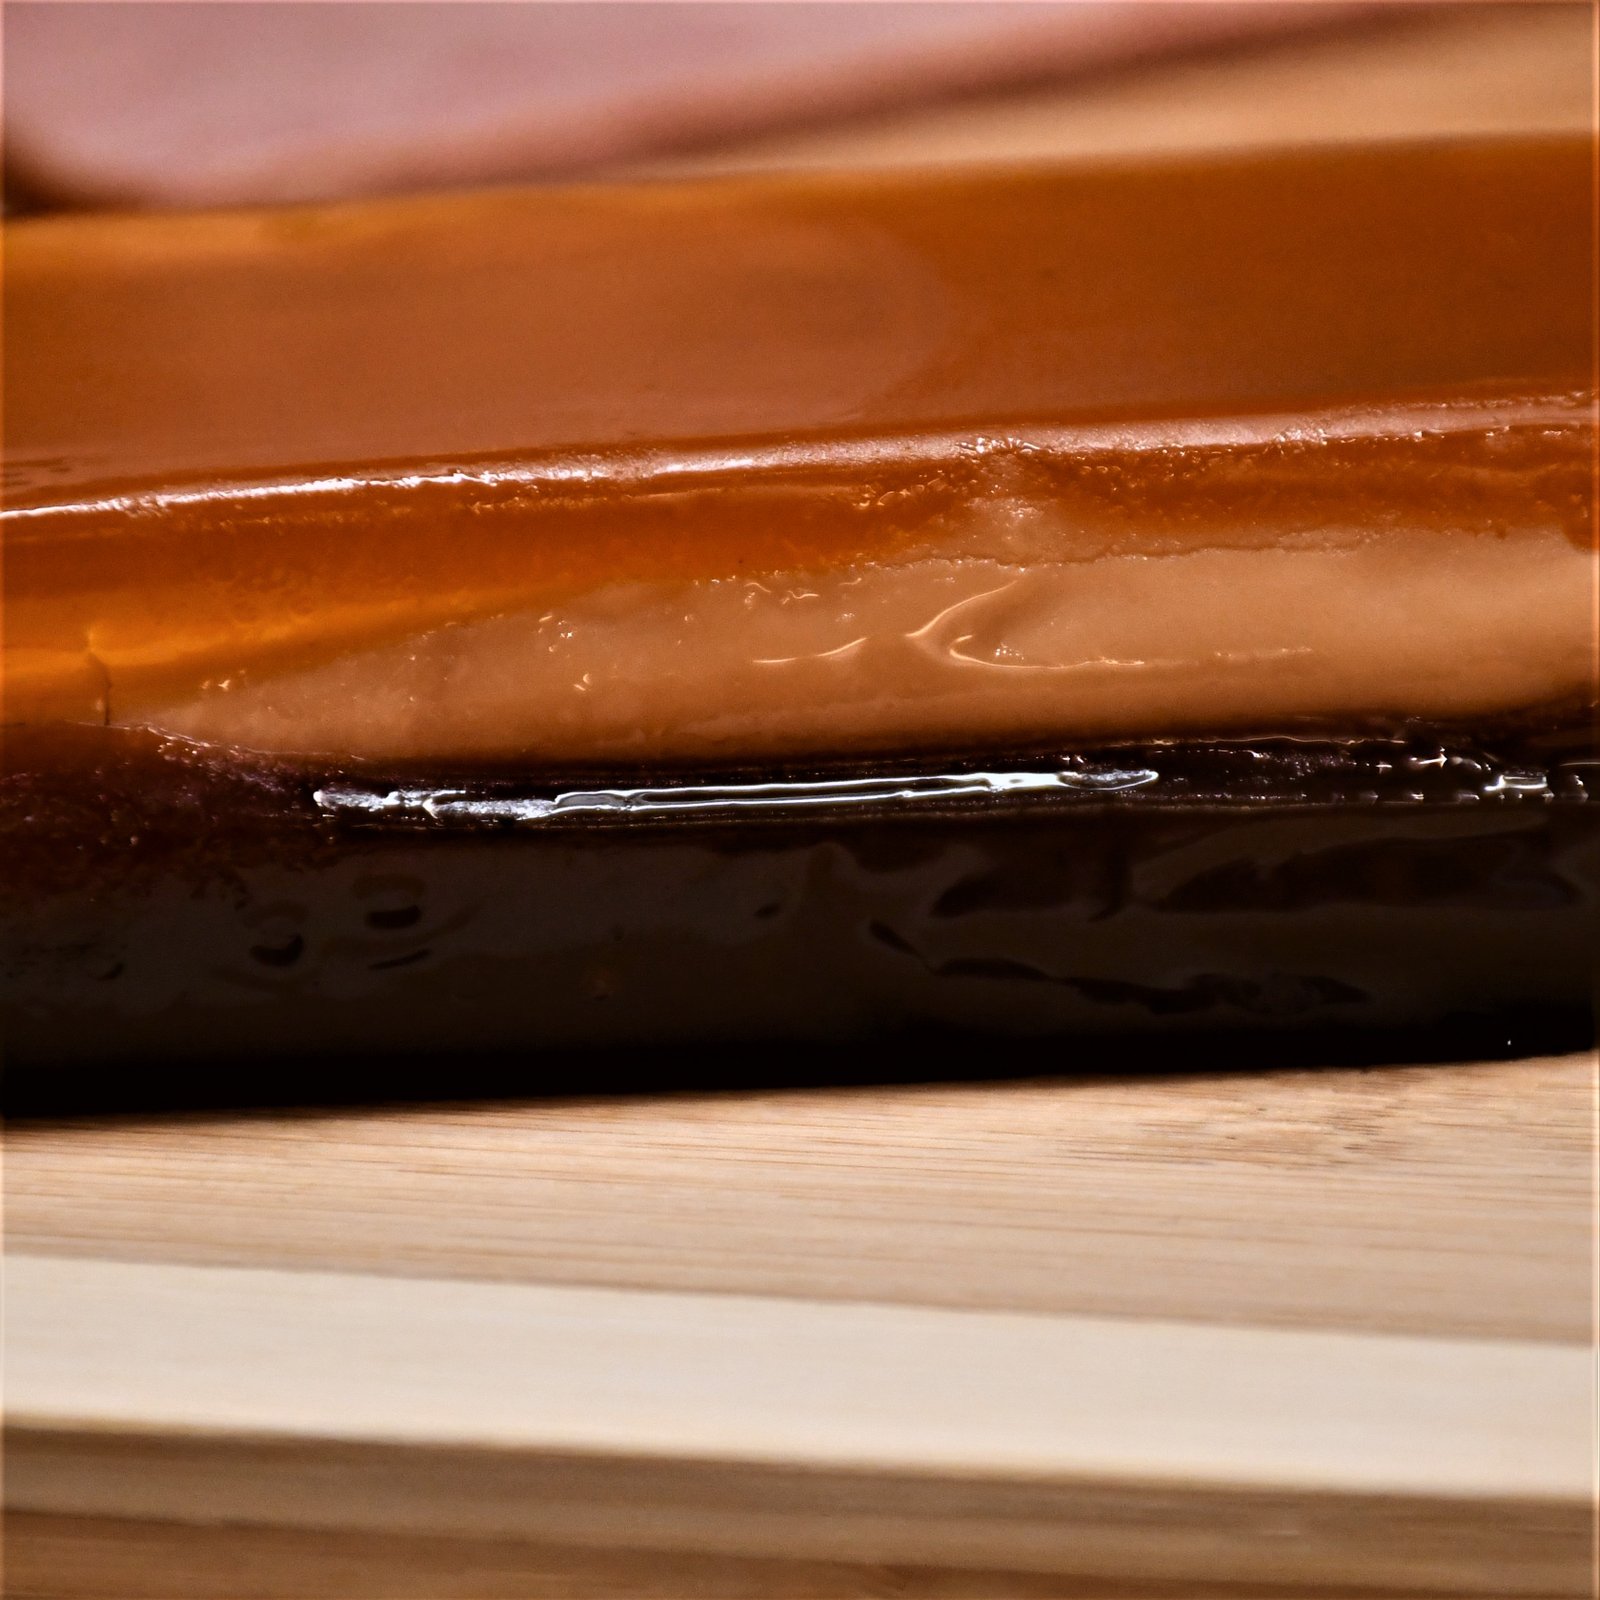
Mexican Potato Skins
I LOVE Potato Skins! And I have since I first tried them in the 80’s. But as I was working on my Mexican food blog post I was craving potato skins and realized that I could make them with a Mexican twist.

I’m using Dos different potatoes. One batch Red and One batch Idaho.
As a borderline diabetic I choose the red potato’s as they are more wavy and less starchy. The Idaho potatoes turn to sugar in your stomach. Just eating a medium Idaho potato will turn into a half cup of sugar in your stomach. That is not good for a diabetic or borderline diabetic.

You first want to bake all of your potatoes in the oven. After washing the potatoes, I placed each potato in foil, but not before poking holes into the potatoes with a fork, then wrapping them tightly in foil and placing them into a 400F oven for about 45 minutes.

When done you want to remove the potatoes from the oven and set aside to cool a bit.
To determine if they are done just insert a fork into the potato. If it slides in easily then it is done.


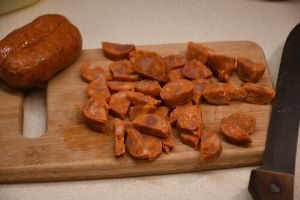
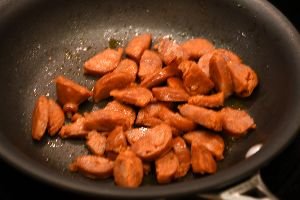
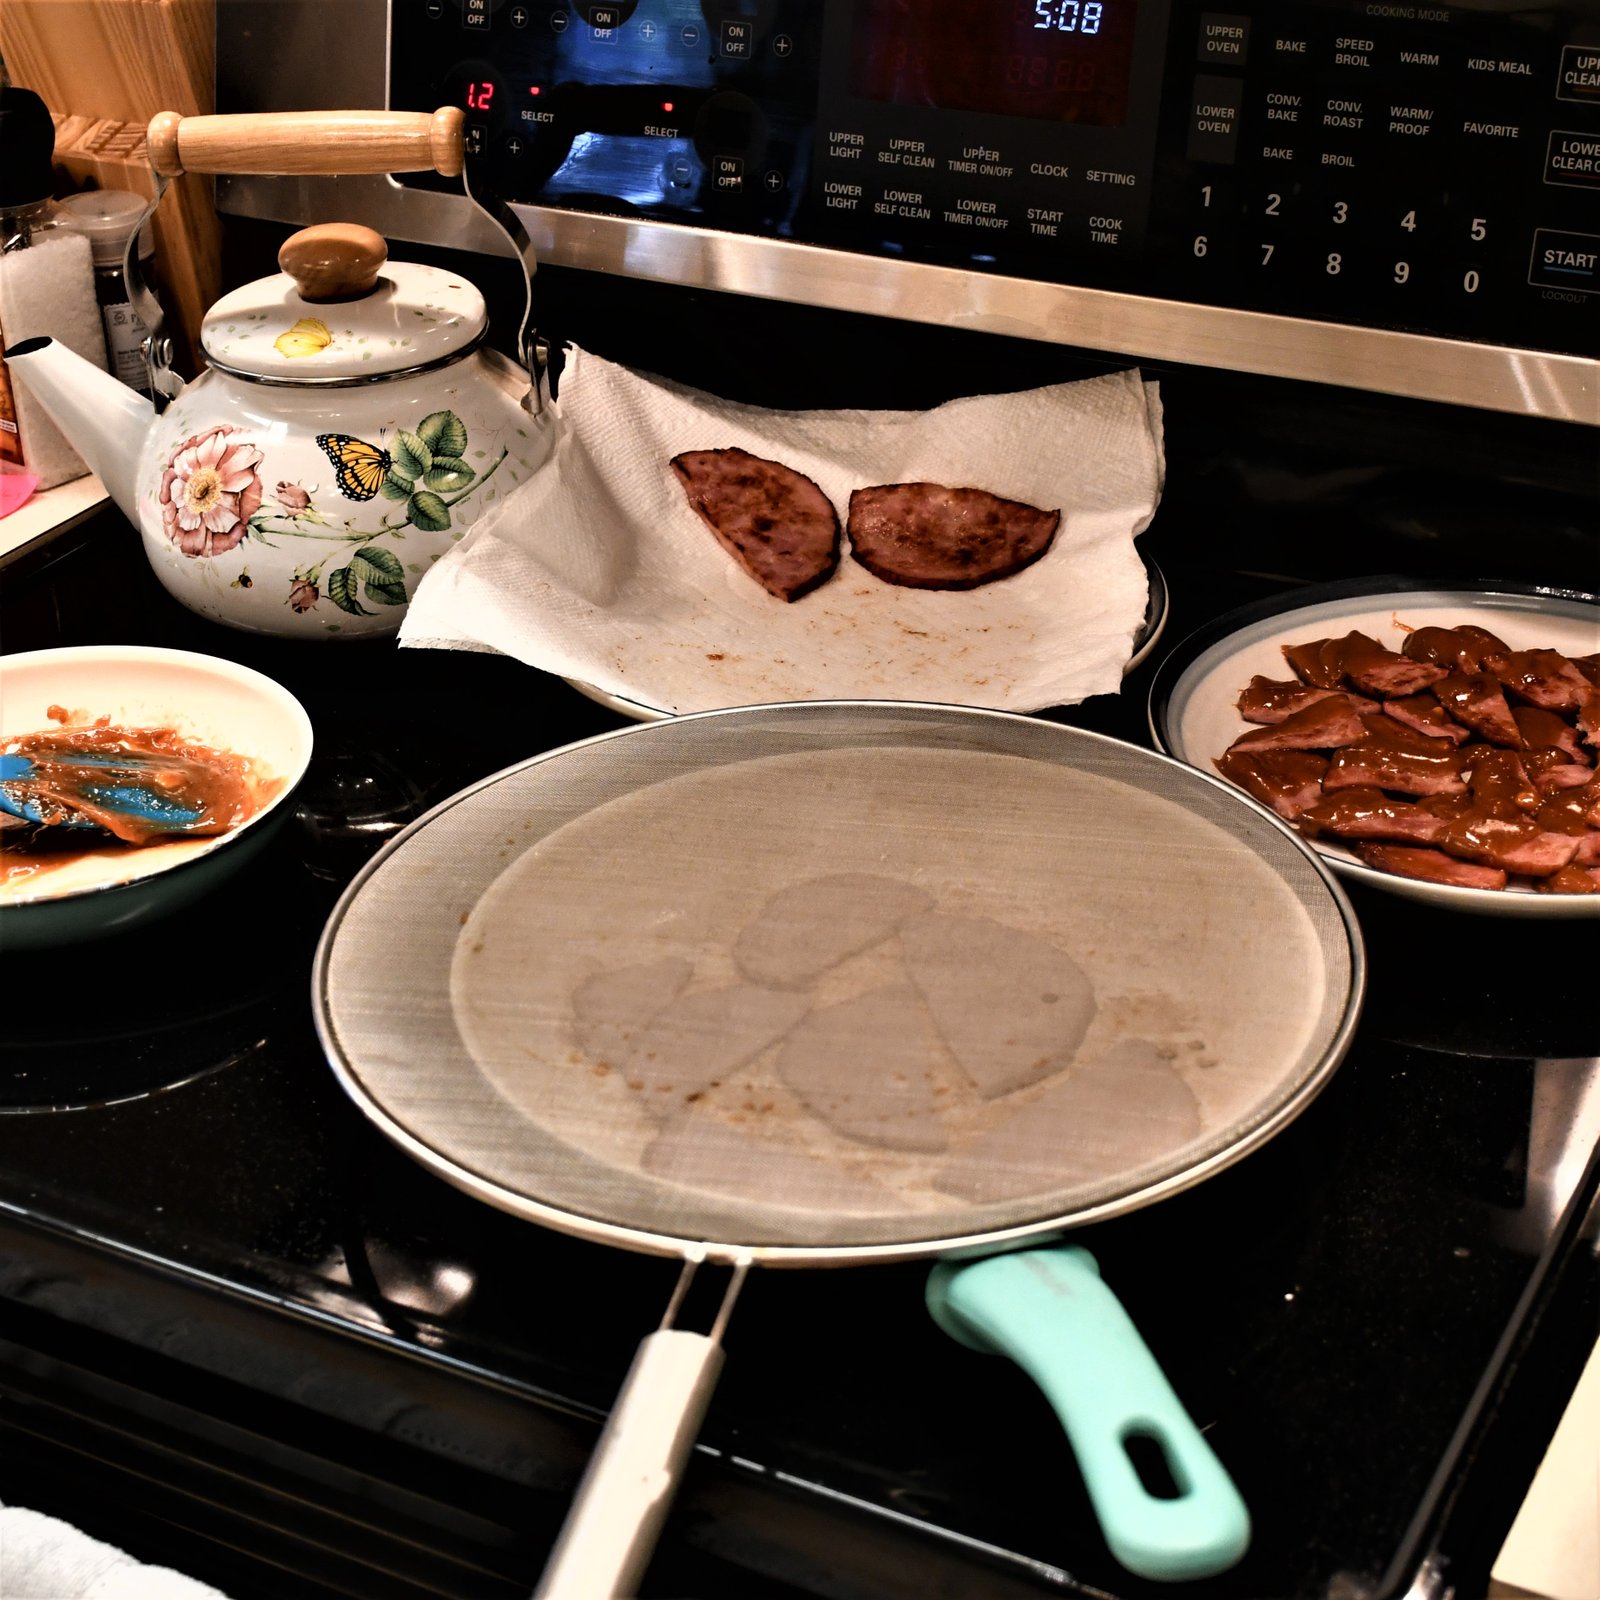
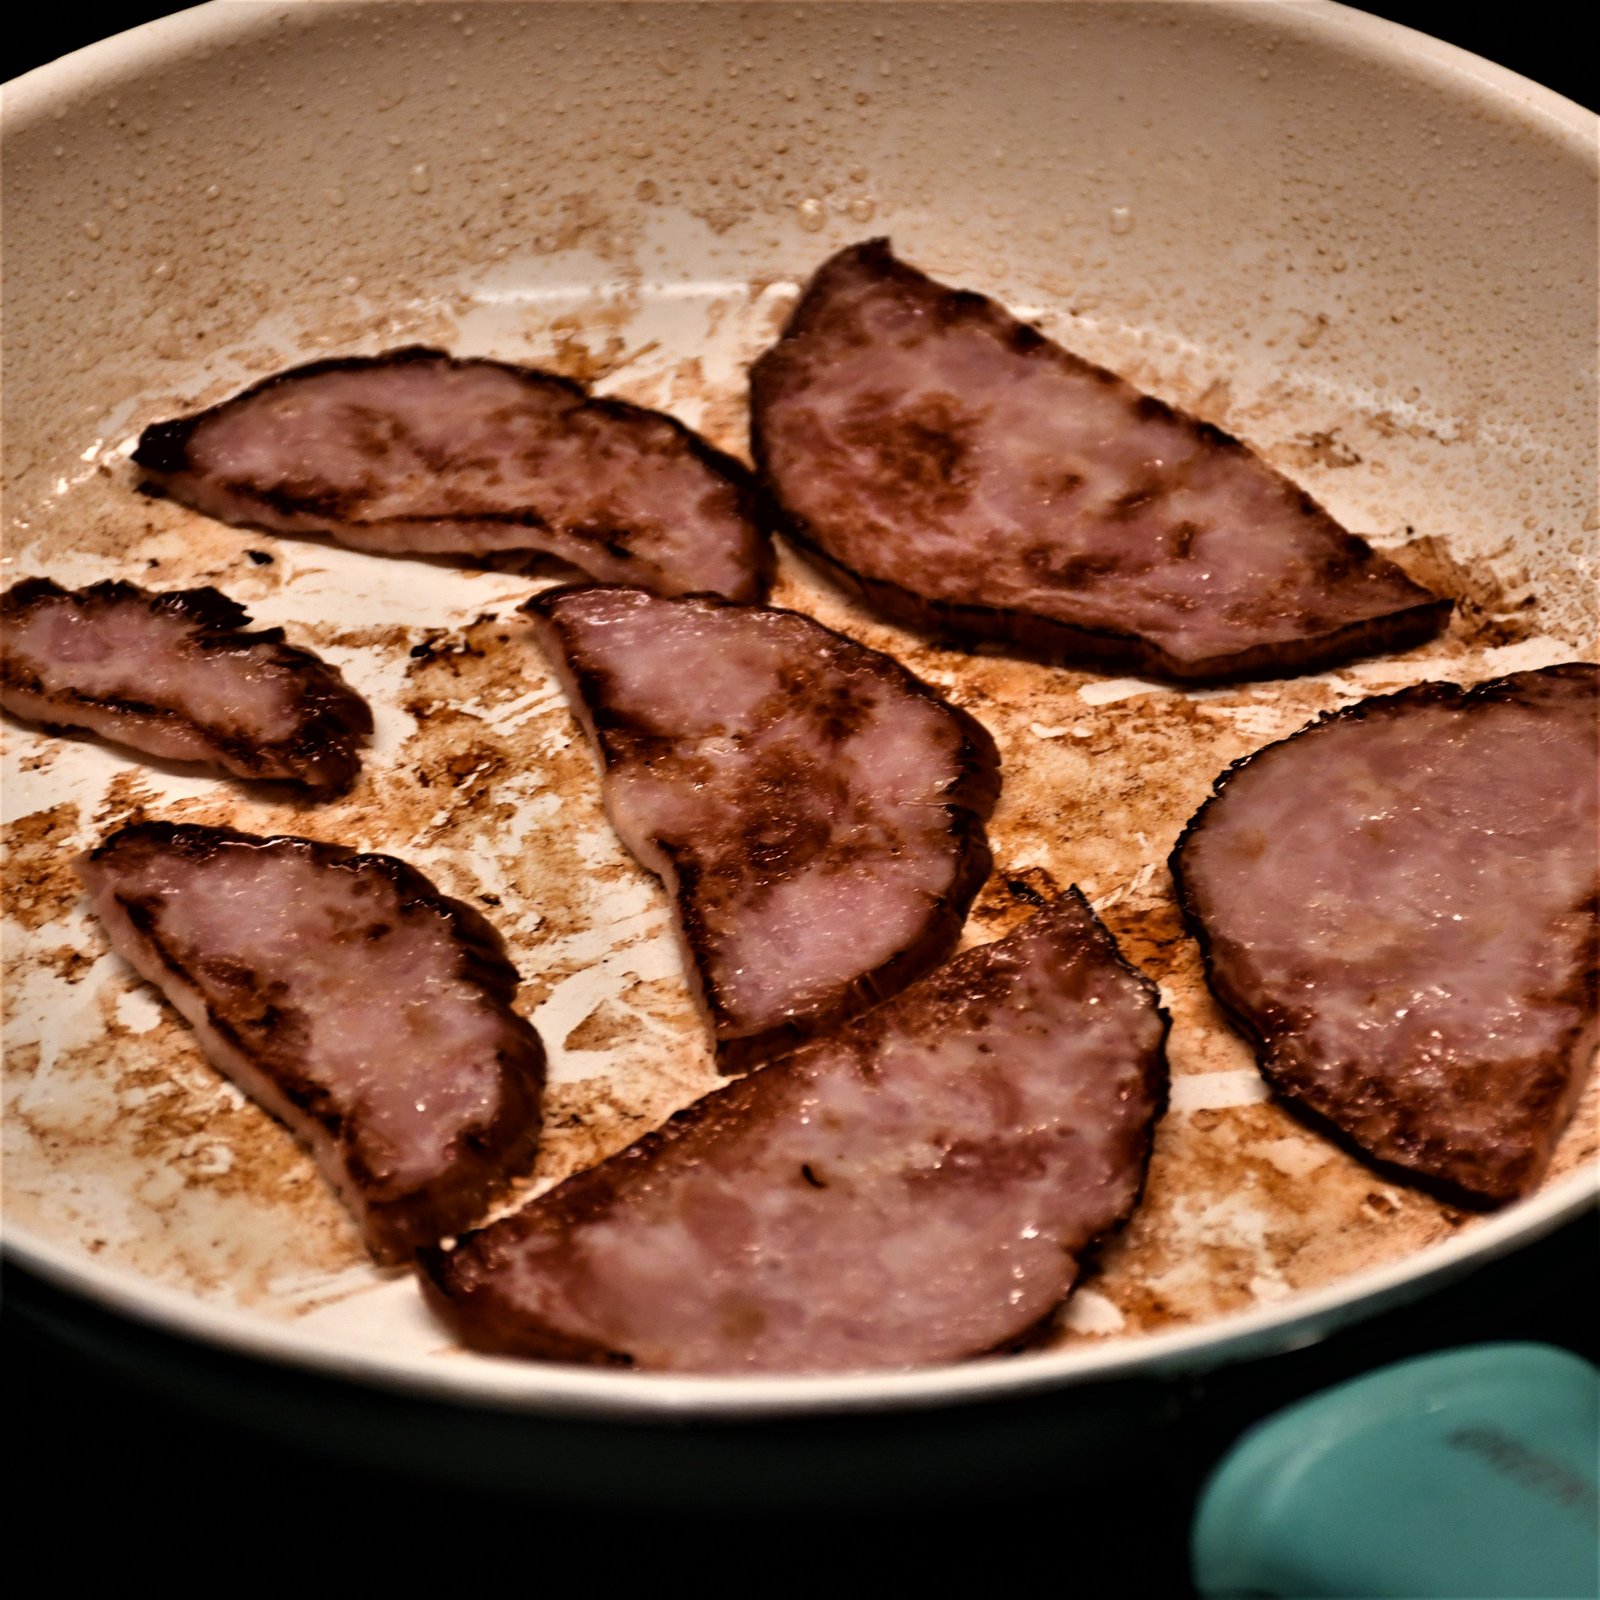
Bacon and Chorizo

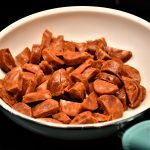
We love the Goya brand of Chorizo. We just cut it up into smaller pieces and fried it up on the stove top.
Just to brown up a bit.

When done you want to place the Chorizo on paper towels to absorb the grease. Chorizo is very greasy.
I’m also frying up some bacon here, and placing on a paper towel lined plate as well.
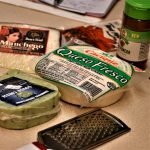
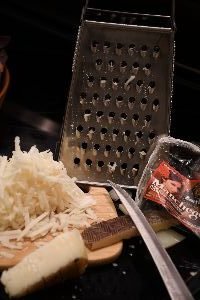
The Cheese’s, and the Chorizo, and Bacon
Queso Fresco, Manchego, Gouda, all grated.
————————————–
There are some photo’s missing in this Mexican Potato Skin story so I will just have to fill you in here.
When the potatoes are finished cooking, you of course, remove them from the oven to cool.
When cool enough for you to touch, you want to slice them down the center so that you have 2 halves that can lay flat on a baking sheet. You then want to scoop out some potato of each half to make a crater. You can have a bowl handy to deposit the excess potato in it and use it in another recipe. Don’t waste food!
You now have 2 halves ready for you to add some goodies to.
You can see Brodie in the photo below adding his favorite things to his and Mackenzie’s potato skins.
Brodie is a great cook without any instructions from me!
——————————————
Before the Oven……
Right outta the Oven….
Now sprinkle with some Chili Powder, and a sprinkling of Chili Flakes and you have Mexican Potato Skins. Also try adding some sour cream and some chopped spring onions.
————————————————–

Spanish Rice and Spanish Olive Oil
You know, not everything has to be homemade to taste great.
Our time is worth something. I like shortcuts in cooking.
————————————
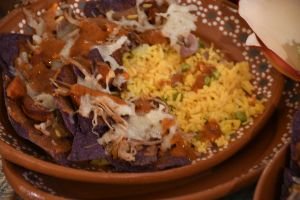
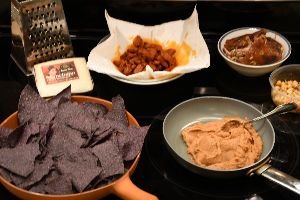
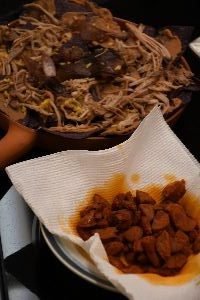
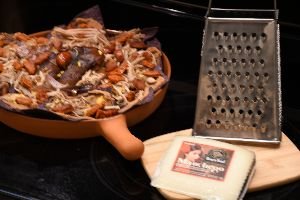
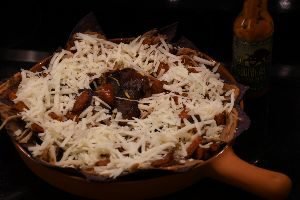
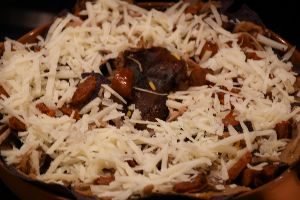
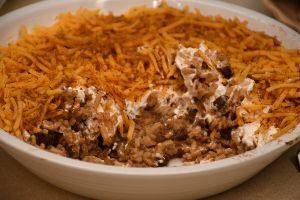
Julie’s Giant Grande Nachos

To me, Nachos are something great to do with Leftovers.

Everything you see here was leftover Mexican cooking.

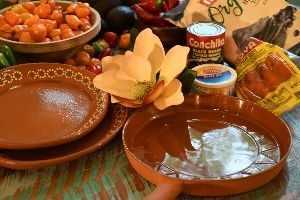
The very first thing that I did was to take a lovely scarf of mine and place it on the table. I then placed a long rectangular white platter over the scarf. I then place a round blue platter on top, in the center of the white platter. I knew what I wanted to do inside the blue platter, and the white platter so I focused on the outside first, where I could place some flowers, peppers, plants, and Maracas that I bought in Mexico.
When it came to the Nachos, I placed all the tortilla chips on the white platter all around the blue platter. Blue corn chips, and sweet potato corn chips. I also placed some spring onions front left, as well.
In the very center I placed a bowl with some leftover Spanish rice, and some leftover Chorizo.
Then I built up everything around the center bowl. I had some leftover ice burg lettuce that went all around the bowl.
In the photo above do you see this blob of white with some green dots? That is my sour cream dolloped onto a round ice burg lettuce bowl and I sprinkled some chopped spring onions on top of it.
On top of the ice burg lettuce around the bowl, I added the leftover ground chicken taco meat that I had. I also added some leftover chicken taquitos mixture. I had of course, warmed them up first. I then added some chopped tomatoes and some black olives. Also some cilantro, and some shredded Jalapeno Pepper Cheese.
I think that is all, but there is always room for more!
Gracias!
Nachos can be messy, just grab extra napkins.
Perfecto!
———————————————–
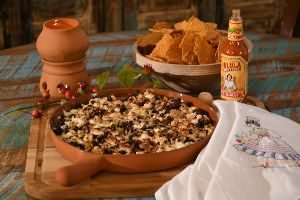
More Nachos
Julie’s Chorizo, Pulled Pork, Bean Dip Nachos
With some leftover Spanish Rice with Chorizo
See the terra-cotta plate with the handle, above right?
I think my mother bought that for Veronica during her Mexican Food Phase. But when I came across it I decided to use it before I passed it on to Veronica. It is quite the handy baker. I love it!
I had some Chorizo, Black Beans, Bean Dip and plenty of Tortilla Chips…..
I also had some leftover goodies from the Latin Supermarket Buffet.
As is Pulled Pork and Pork Skins.

I first cut up and fried some Chorizo.

Be sure to absorb the fat from the chorizo into paper towels.
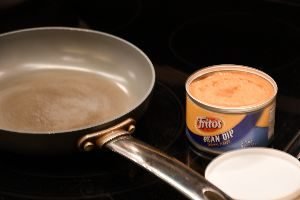
Frito Lay Bean Dip
Probably my most favorite thing in the world! 🙂
My Ingredients:
Blue Corn Chips
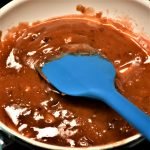
Bean Dip, warmed through in a sauce pan.
Fried Chorizo
Leftover Pulled Pork and Pork Skin warmed through.
Manchego Cheese, grated.
(The Garbanzo Beans I ended up eating myself.) 🙂
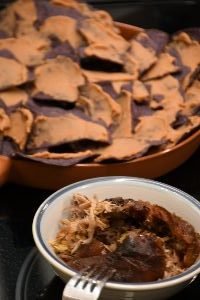
I first placed the blue corn chips into the terra-cotta pan and spread some bean dip over each chip. I had warmed through the pulled pork and pork skin. I also fried the chorizo into chunks, and let drain.
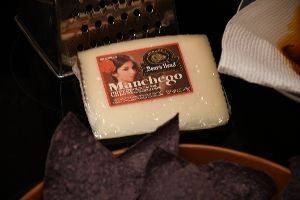
MANCHEGO
My Nachos are Assembled, Left
Grating the Manchego

Grated Manchego
Distribute the Manchego Cheese all around the Nachos with the Pork Skin’s in the center.

You now want to place into a hot oven on BROIL, just for a few minutes.
Keep an eye on it!
Add Some Hot Sauce…..
And you are there!
—————————————————-
Julie’s Bean Dip, Black Bean, and Corn/Queso Nachos
The Ingredients:
Tortilla Chips, any
Can of Black Beans
Can of Frito Lay Bean Dip
Queso Cheese
Mexican Corn Canned (Although fresh is better)
Chili Powder
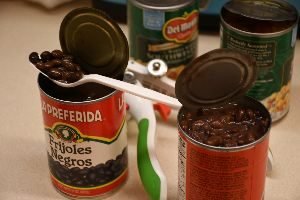
When you are using canned black beans you want them to look like the can, left. The can right the beans are a bit swooshy. Gross. You want them a bit firm.
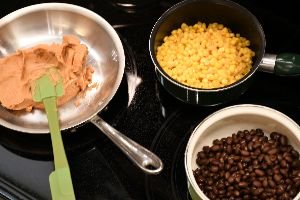
I am warming everything through.
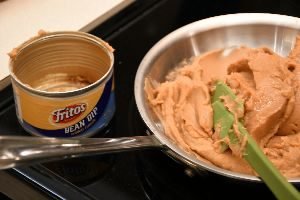
I ended up using TWO cans of Frito Lay Bean Dip.

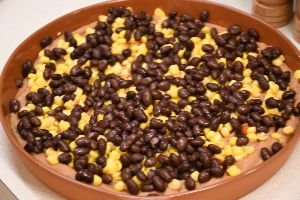
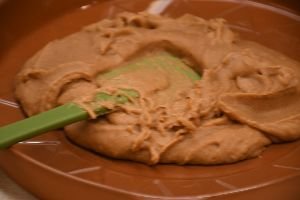
I spread the bean dip on the bottom of the terra-cotta plate.
I then added the drained Mexican Corn on top of the bean dip.
Then I placed the black beans from the can that I had drained, and rinsed.
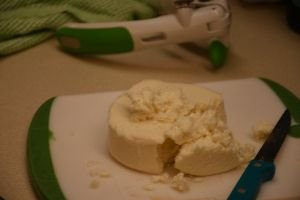
The Queso Cheese Ready to Crumble
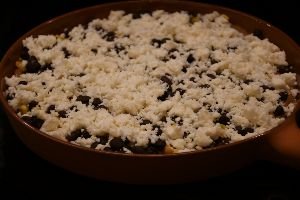
Crumbling the Cheese Over the Nachos
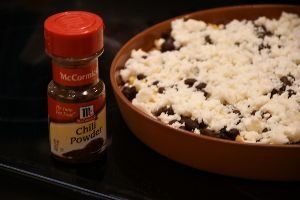
Now Sprinkle with a bit of Chili Powder
Place into a hot oven on Broil for a few minutes for everything to melt together.
Nacho Ready!
HINT: The reason I suggest using fresh corn is that canned corn can be a bit watery and can douse your nachos with too much water. Fresh is best. But when using a canned corn, bake them quickly, and serve them quickly. My advice. 🙂
———————————
Mango’s, Honey Mango’s, and Papayas
This turned out to be a successful experiment but not for these appetizers that I created. I have literally discovered a way to make the most delicious Christmas Ham with a tropical flair. (Bear with me.)

My Mexican Inspired Appetizers

———————————————

La Cubanita
This is a Mango, Guava and Dulche de Leche Tri Paste

My Mexican Inspired Appetizer Experiment

I had purchased the La Cubanita from the Latin Supermarket late last year and I knew that I wanted to do something with it but I didn’t know what? I had in my mind that I wanted some ham and cheese appetizer where I could add this paste to the cocktail pick trio. (My original thinking.)
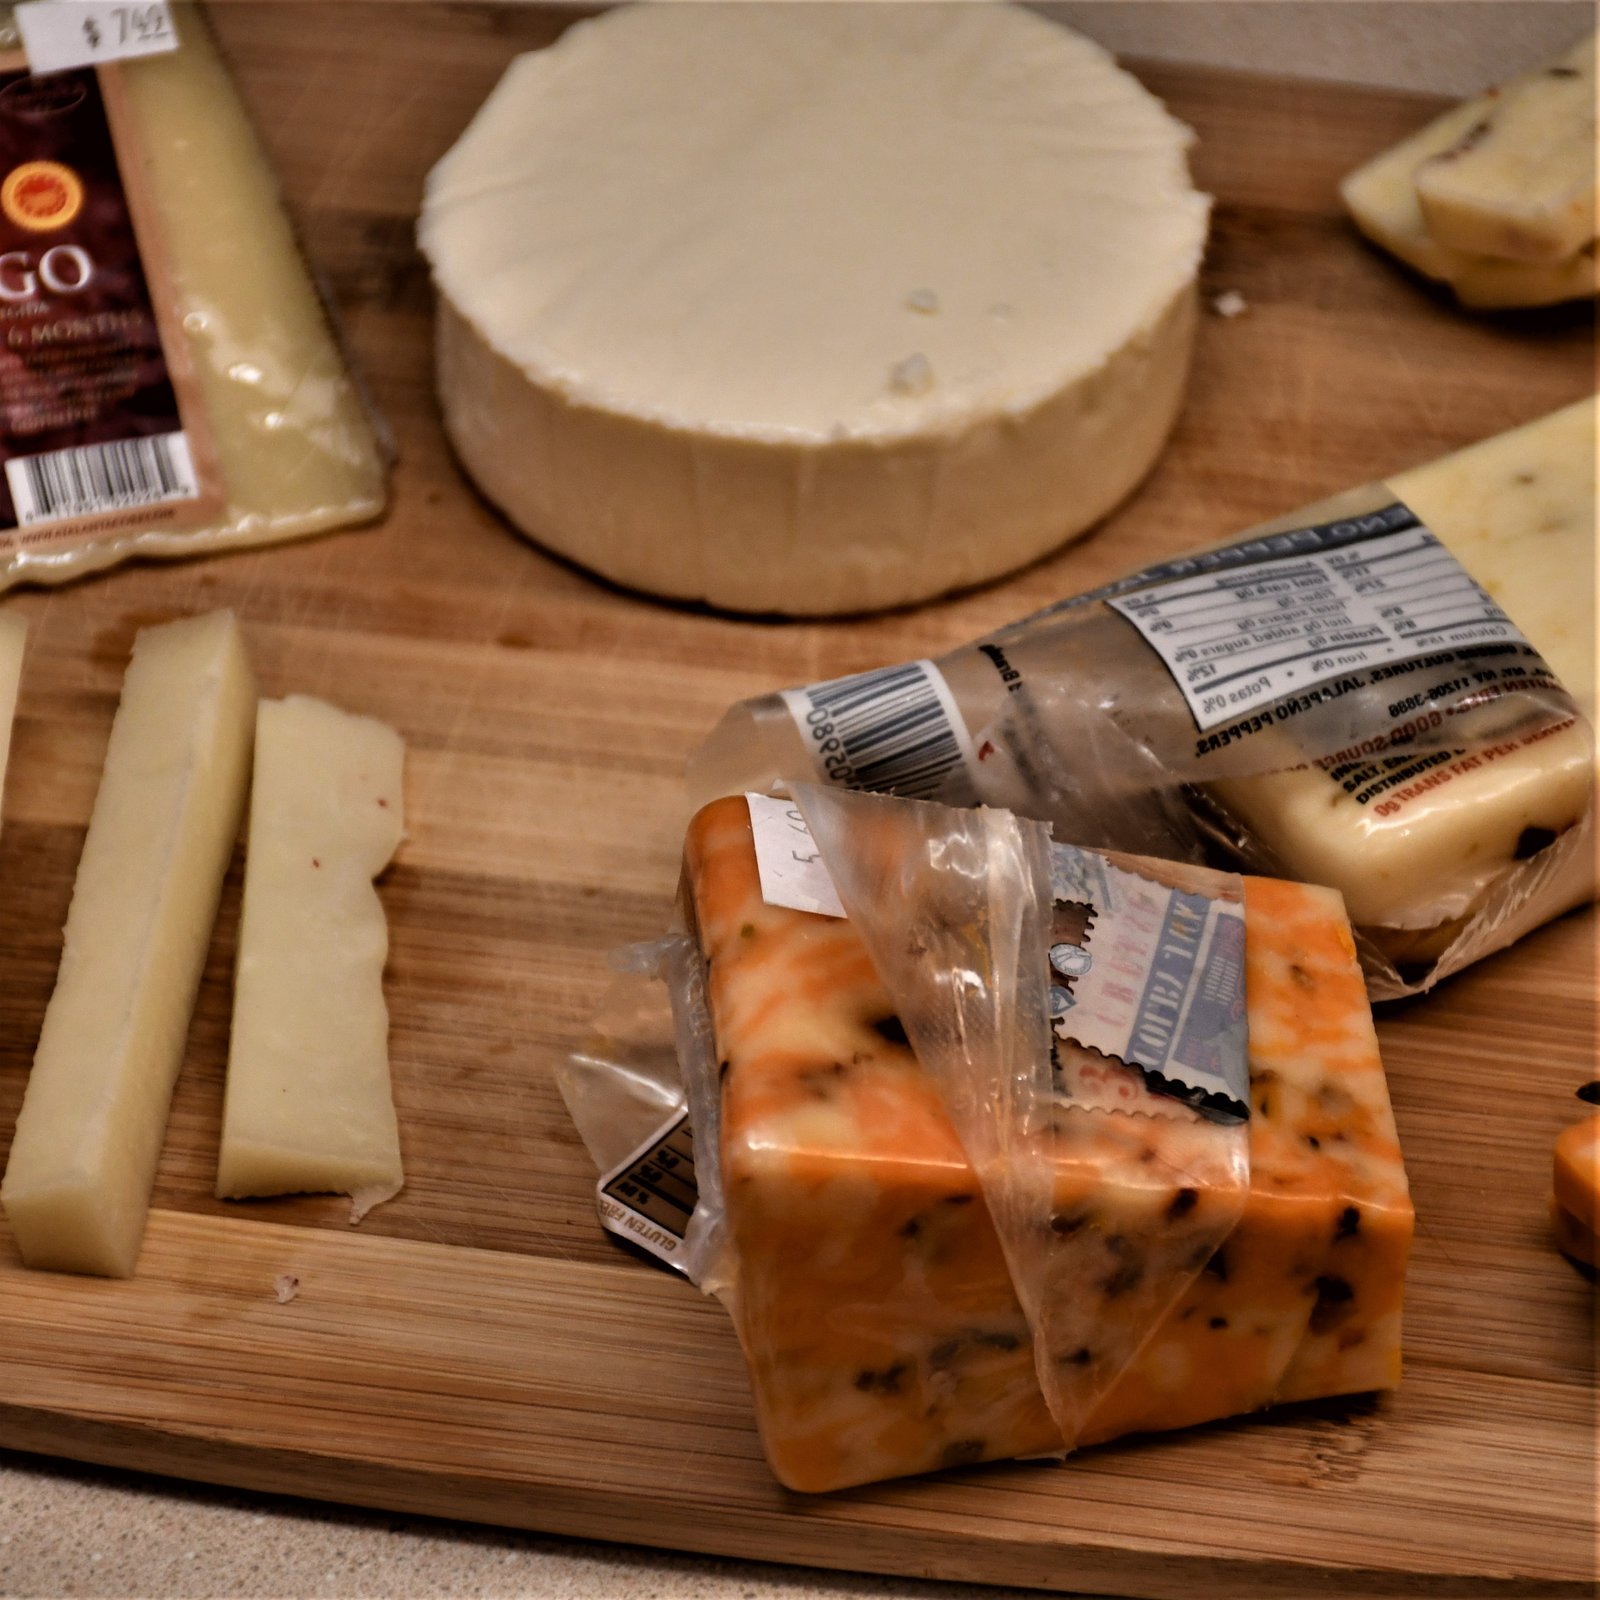
I thought that some cheeses would be nice but I just didn’t know which ones, so I bought a variety. Manchego, Queso, Pepper Jack, Jalapeno variety…..


I also knew that I wanted some Ham. But not just a cooked ham. But ham that had been a bit fried on the stove top in some oil so that it was a bit browned and perhaps caramelized, that would give it a different flavor.

Frying some of the Ham on the Stove Top in some oil.
———————————————-

This is the TRI-La Cubanita Mango, Guava, and Dulche de Leche Paste.
It’s beautiful just as it is!


So, I cut it up and placed it into a saucepan on a low heat to melt.
In the meantime……
I’m also frying up some of the ham in some oil on the stove top on a medium heat.
—————————————————–

I wanted to thin out the TRI-paste by adding some juice to it. I had a Cran-Mango Diet juice so I added a few tablespoons to the melting mixture and it worked quite nicely. It was still a thick sauce but the juice did thin it out a bit to make it more workable. If you know that I mean?

I added some ham to the melted TRI-Paste, and other pieces of ham I just dipped it into the sauce.

THIS WAS DELICIOUS!!!!!
This glaze will be on our upcoming Christmas Ham!
————————————————

Papayas, Mango’s and Honey Mango’s
I knew that if I was using a Mango, Guava, Dulche de Leche paste that I would probably want some real fruit to go with it…..
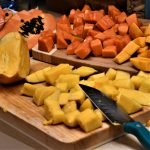
Hence the chopped Papaya, Mango, and Honey Mango
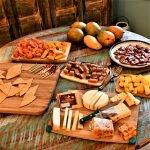
The Assembly of my Appetizer’s


I cut some soft tortillas into triangles…..
I then started to layer the ingredients for my Mexican Inspired Appetizers
Tortilla-Ham-Cheese-Fruit
or
Ham-Fruit-and Fruit
or
Ham-Cheese-Fruit
———————————————–

Pick Up Sticks, Cocktail Picks

What I learned from this experiment is that our Christmas Dinner is going to be spectacular!
A Latin Inspired Christmas awaits us. 🙂
—————————————————-
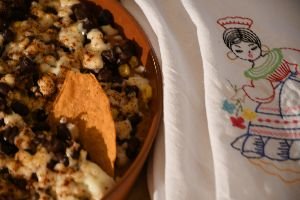
Red Beans and Rice Nachos
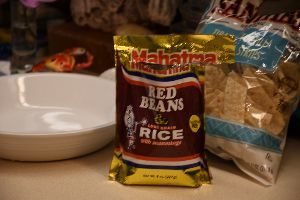
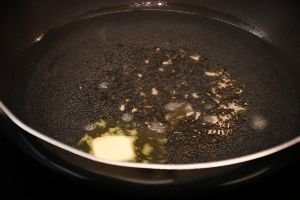
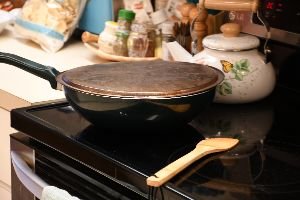
This is another old favorite of our family. I just buy the Mahatma Red Beans and Rice and cook according to package directions. Except I do prefer to cook in a Wok.
————————————-
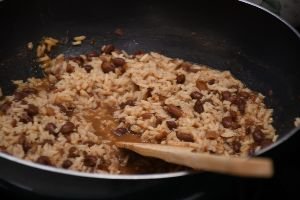
When done I place the red beans and rice into a pie plate, or shallow casserole bowl.
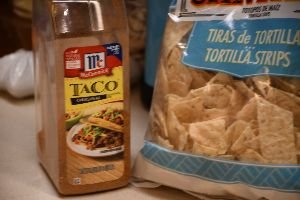
McCormick’s Taco Seasoning Mix and Tortilla Strips

This is one of our most favorite things to eat!
Just spread the red beans and rice mixture onto the plate, then add a layer of sour cream, then a sprinkling of any cheese you like. We used sharp cheddar. Then a sprinkling of McCormick’s Taco Seasoning Mix.
Dip with Tortilla Chips!
———————————————–
I do have Quesadilla’s on my other Mexican foods blog post, with recipes, but I did buy a new Quesadilla maker that has the cutest imprints when you cook one. Brodie calls it a “child’s quesadilla maker.” I told him that I don’t think many children would see it that way. But what a great lunch, or light dinner, to make a Quesadilla?
—————————————-
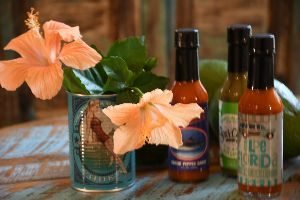
I always have to hide the hot sauce from my son and his friends.
They literally drink it like water.
———————————————-

Weekend Treat
Barefoot Sangria, and Queso Red Chili Nuts
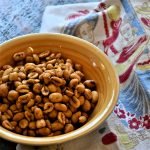
It actually makes for a great Friday night Deleite!
Gracias,
Julie
There will be TRES Mexican Food Blog Post! 🙂
———————————————————
If you would like to check out our other Mexican posts:

AND,

AND,
AND,
Julie and Gordon Whann Way Mexicana Cuatro

AND,
Uno, Dos, Tres, Cuatro, Mexicana Cinco!
AND,

AND,

AND,
Our Mexican Inspired Thanksgiving Roasted Chicken and Vegetables

AND,
Our Mexicana Thanksgiving Dishes

AND,

AND,

Adios Amigo!