Making our Alice in Wonderland Cookies

The Making of Our Alice In Wonderland Cookies
For Easter we did an Alice In Wonderland theme. It was so much fun to do. Kind of like reliving your childhood favorites. If you would like to take a look…..


No Fail Sugar Cookies
(The magnet that our niece Erin gave us of a drawing she did of a butterfly in 1996.)
Our Fancy Flours Cookie Recipe


Topsy, Turvy Wonderland Cookies

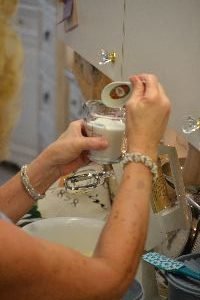
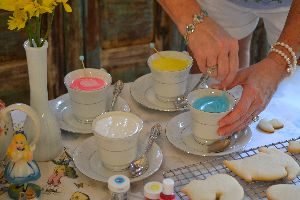
The Tea Pot, The Cups and Saucers, of Candles
(Also the gifts of pretty pill boxes with floral designs. I thought to myself, what gift would be given to ladies in the late 1880’s/early 1900’s? I know, a pill box!)


One year as a fun project I made candles in tea cups/saucers, I had bought at an antique mall in Georgia. Melting the wax and adding crayons to create the different colors of the candles was so much fun!
——————————————-

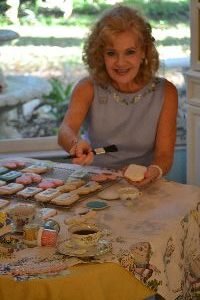
Me, Waiting to Start Decorating the Cookies

The Alice in Wonderland Cookies

This recipe is from a company called, Fancy Flours, I had ordered some cookie cutters from them and the recipe was included. I do have to say that this recipe is one of the best I’ve ever eaten.
————————————
Take Home Gifts of Cookies

I love having gifts to give to guests as they leave.
The cookies in some lovely tins are perfect!


I love collecting tins that I find at thrift stores. Some of them can be quite nice.

Alice Tins with Cookies and Butterflies
———————————–
Time to Make the Cookies
.

The Edible Waffer paper I ordered from the company, FancyFlours as well.

The Ingredients:
(This recipe makes 8 dozen.)


-6 Cups Flour
-2 tsp. Vanilla
-3 tsp. Baking Powder
-1 tsp. Salt
-2 Cups Sugar
-2 Cups Butter (4 Sticks)
-2 Eggs
*All Ingredients Should Be At Room Temperature


Me, Combining all the Ingredients into My Vintage Mixer.


This is a great recipe when using cookie cutters. It doesn’t spread! Your cookies will be the same shape after you bake them as they were before. Makes up to 8 dozen. (Taken from the FancyFlour recipe card.)


Directions:
Cream sugar and butter until fluffy, about 5 minutes. Add eggs and flavoring. Mix dry ingredients in separate bowl and add to butter mixture, a little at a time. Mix until flour is completely incorporated and the dough comes together.
Put a handful of the freshly made dough between two sheets of parchment paper and roll to desired thickness. Repeat with the rest of the dough. Put the rolled dough, including the parchment paper, on a cookie sheet and refrigerate for 10 minutes or longer. Your dough will be chilled and ready to cut and bake with no wait and no added flour! Repeat scraps after cutting cookies.
Bake at 350F for 8 – 10 minutes. Let cool on rack.


Here I’m Adding the Vanilla to the Creamed Butter and Sugar

Adding the Flour to a Bowl


Now for the Baking Powder

And the Salt


Whisking the Dry Mixture


Adding the Flour to the Wet Mixture in the Mixer


Mixing the Batter for the Cookies


All Ready

Mold into a Ball


Now Wrap in Plastic and Place into the Freezer or Refrigerator

———————————-

Later on that night…….

I do tend to get silly and goofy when I’m tired.
We’ve been at this all day and I am a bit goofy.

I’ve Rolled out the Cookie Dough and used the Cookie Cutters.

I like using a “Clean Sheet” to roll out the cookie dough, which is a reusable plastic sheet that can be rolled up and stored away when not in use, or I just lay some wax paper down on the counter, sprinkle some flour, then place the cool dough down on top of that, sprinkle some flour on top of it, then place another sheet of wax paper on top of it and roll the dough that way.
It’ll keep your rolling pin clean from any dough sticking to it.


When you roll out your dough and use the cookie cutters, remove the shapes and place onto a cookie sheet that is lined with parchment paper. Then take the remaining dough scraps and wrap them back up in the plastic wrap then put them into the freezer to harden a bit. The dough can then be reused so that you can make more cookies.
Don’t Waste Any of It!


The cookies are on the cookie sheet ready to go into the preheated oven.

When they come out of the oven place onto a cooking rack until totally cool.
For us, baking this many cookies is usually a two day process. The first day is about making the cookie dough, rolling the cookies out, and baking them. The following day is always about the decorations.
————————————-

The Sugar Sprinkles Ready for our Cookies


This time we also wanted to use some edible waffers on our cookies. This is something that we have never done before.
I ordered the waffer’s from Fancy Flours. I got their Alice in Wonderland collection.

As you can see the cookies are all ready to decorate.
All I need to do now is to make the icing.

Royal Icing
Royal Icing Ingredients:
Depending on how much you need, which I always make a lot of it, the ingredients are Powdered Sugar, Water, and Meringue Powder.
THAT’S IT!


You can use egg whites in place of the meringue powder but I prefer the meringue powder. If you use egg whites they must be eaten within 5 days or you have to throw the cookies out. We don’t gobble our cookies down in a few days, and the thought of throwing out such lovely delicious cookies just breaks my heart. So I recommend the meringue powder.
We also tend to mail cookies as gifts so the meringue powder will work best for shipping.

My Vintage Mixer my Grandmother Gave Me
You just want to mix the powdered sugar, water and meringue powder for just a minute or so until nice and thick and creamy. The instructions are on the meringue powder container.


Because this is our Alice In Wonderland Cookie Baking….
Of course, I had to use tea cups and saucers to hold the frostings.


I just poured the plain white frosting into each tea cup, then I added the food coloring to the tea cups.
Always keeping one white.
Me, Stirring the Frosting


Now you just want to start covering your cookies with the different colored frostings.
This is the FUN part!


Of course, I am going to use teaspoons in my tea cups of frosting. 🙂

Now I just need all the frosting on the cookies to harden before we go to the next step.

I do have the prettiest work station!


Cheshire Cats, Mushrooms, Hearts, Cards, humm….. Sounds like Alice in Wonderland!


Look at all that Frosting!
Gordon got the great idea to place a giant cookie underneath the cooling rack where the frosting falls through, in order to catch the extra. That would be wise, don’t you think?

What a Beautiful Table!


Pretty Cookies and Pretty Frostings

I try to use up all my frosting as I don’t like to waste any of it.

The Edible Waffer Paper


This is something that neither Gordon or I had ever done before. Placing edible paper onto a cookie.
To start, I first had to cut out all the shapes from the paper and placed them onto the cookie that I had in mind for them.

I wanted a lot of our “card” cookies to have white icing. I thought that the shapes would look a bit better that way.


In order to adhere the edible paper waffers to each cookie Karo Syrup does the trick.

Just place some of the Karo Syrup into a bowl and use a cooking paintbrush. First spread the Karo Syrup over the cookie, then place the paper waffer on top of it.

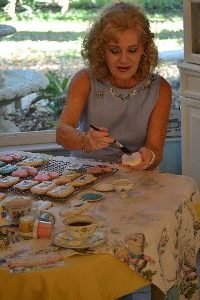
Placing the Paper onto the Cookie


You could also paint the back of the waffer with the Karo Syrup if you like.

Once you adhere the paper waffer to the cookie, you can sprinkle some colored sugars all around the edges of the cookie. It can help hide the “edges” of the waffer, it also looks very “frosted” and pretty.


It’s a messy business with sugar all over my hands.

Can you see that the rectangle cookies kind of resemble playing cards?


As usual Gordon helps and actually does it better than I do.


Gordon is Always a Big Help!

Viola!
——————————–
If you would like to view our other Alice in Wonderland posts,
Also check out our:
Click here for Our Alice in Wonderland Tea Party Easter
———————————–

Click Here for Our Alice in Wonderland Easter Dinner
——————————–

Click here for Our Alice in Wonderland Croquet Game with the Tweedles
———————————–

Click here for Our Alice In Wonderland Eat Me Cakes
Making Our Alice in Wonderland Cookies,
—————————————
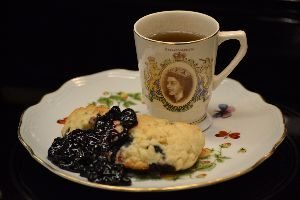
Click here for Our Alice in Wonderland Blueberry Scones
————————————-

Click here for Who Stole My TARTS!!!
——————————-

Click here for Our Down the Rabbit Hole Drinks and Mushroom Appetizers
—————————
Click Here For: Our Alice In Wonderland Christmas

—————————

See you in Wonderland……