Our Alice In Wonderland Tea Party (Easter)
Happy Easter
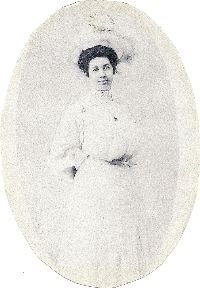
Lillian ALICE Miller Haskin Lone
Dedicated to MY Alice
My mother called her Hone, and I called her Honnie, she is my Great-Grandmother from Vincennes, Indiana.
(My Yankee Family.)
I adored her!
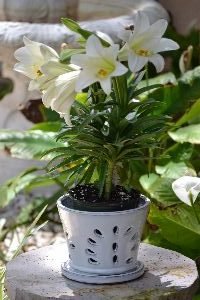
A Lily for My Lillian
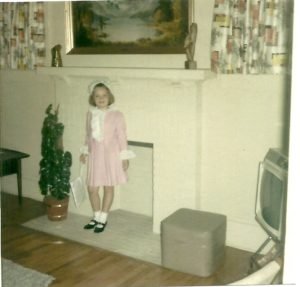
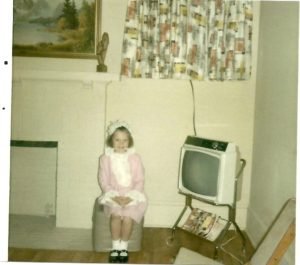
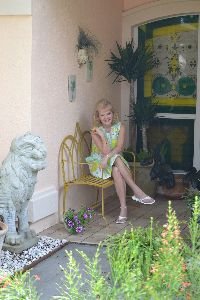
Julie aged 6, Rome, Georgia, Easter
————————————-
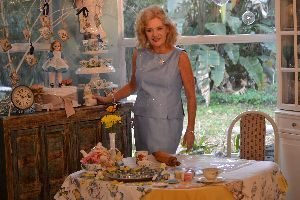
Welcome to our Alice in Wonderland Easter

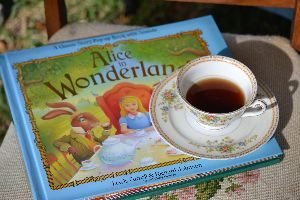
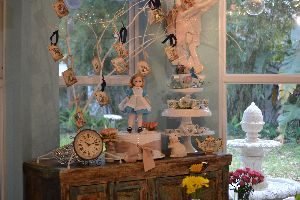
My Alice Vintage Books
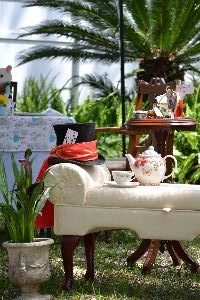
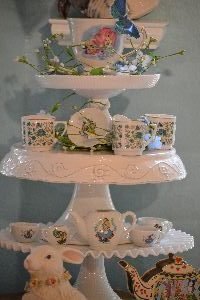
Here is a Sneak Peek into our Easter

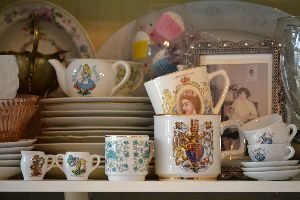
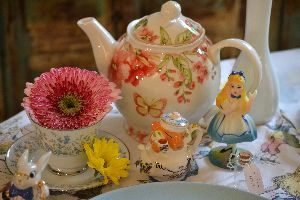
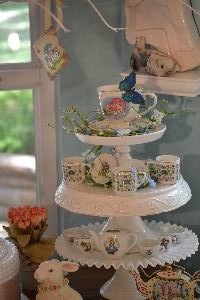
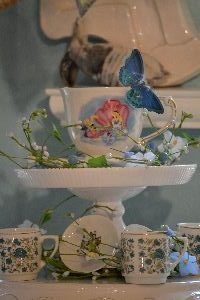
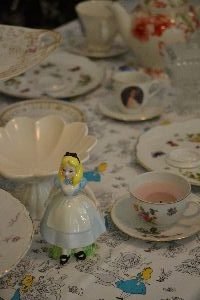
My Alice Cups and Saucers
I’m so happy that Easter is “late” this year, as in “I’m late for a very important date.”
I adore Alice, I think this will be a lot of fun to do. What I love the most about her is her imagination.
——————————

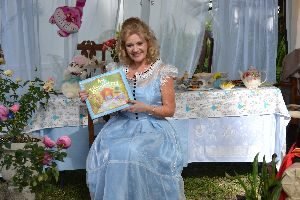
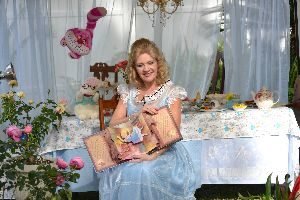
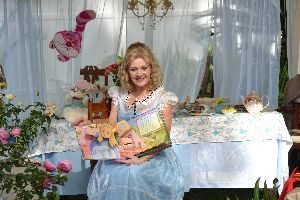
I’ve been wanting to do this now for the past year and finally it all came together. I was originally hoping that my Irish nieces would come over for a visit and help participate in the fun, even playing the role of Alice, but that didn’t happen so I went ahead with my plans and I decided to play Alice myself. I realize that I am a bit old to be playing Alice but I figured that who is to say that Alice quit visiting Wonderland? I’ll bet she continued to come around for visits to see the Hatter and the rest of her friends as she aged.
Besides, this is my imagination so anything goes.
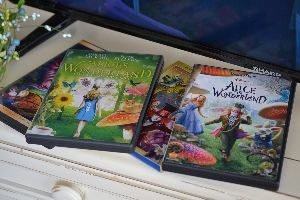
My Alice DVD’s
———————————-
“Imagination is more important than knowledge. For knowledge is limited, whereas imagination embraces the entire world, stimulating progress, giving birth to evolution.”
Albert Einstein
—————————————-
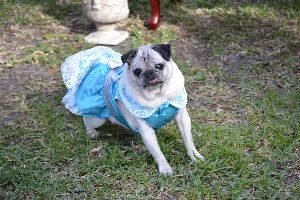
Our Sweet Sugar
RIP SUG we will miss you forever.
(She died June 19, 2017)
Julie and Sugar on our Backyard Alice in Wonderland Set
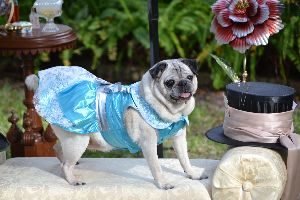
Sugar as Canine Alice
————————————
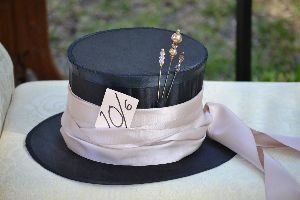
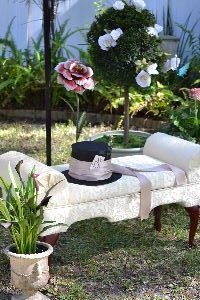
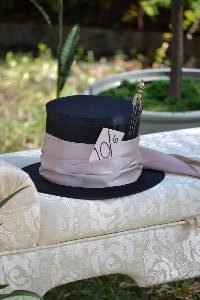
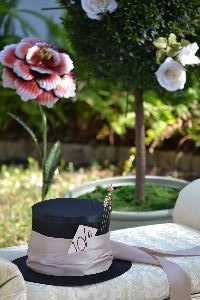
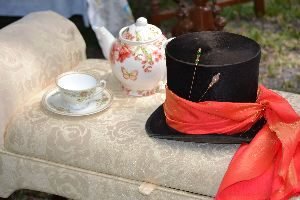
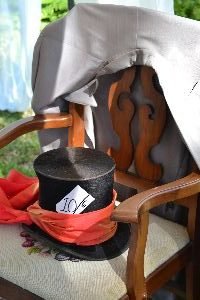
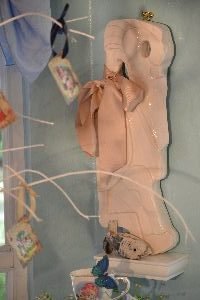
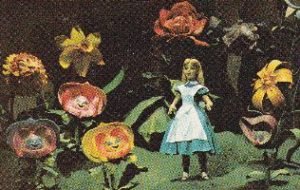
Looks Like the Hatter Left One Behind
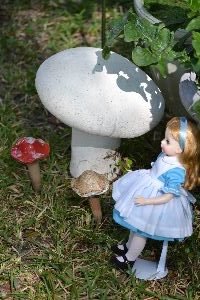
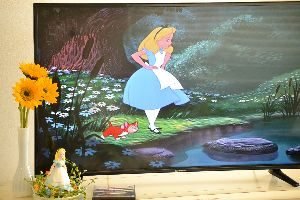
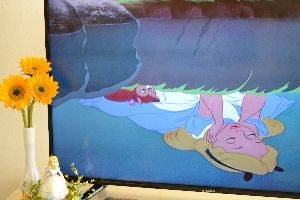
The scene to the left with a young Alice beside the mushrooms takes me back to the Disney cartoon Alice in Wonderland made in 1954, with Kathryn Beaumont, as the voice of Alice.
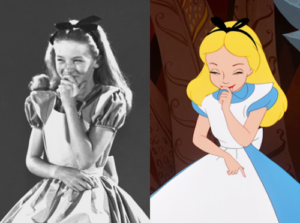
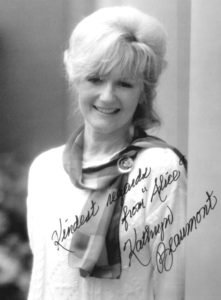
Kathryn Beaumont as Alice in Disney’s Alice in Wonderland, 1954
Kathryn Beaumont’s IMDB Profile
Kathryn was born in London, England in 1938.
———————————–
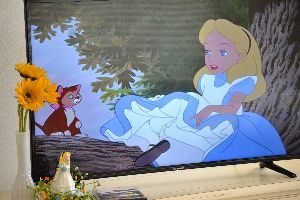
Julie Reading Alice in Wonderland
“This girl named Alice fell down a rabbit hole. Met some amazing creatures….
Ate some cake, drank some liquid, grew, shrunk…..

Went to a tea party, grew and shrunk some more…..”

The End
(That pretty much sums it up.)
————————————–
Avril Lavigne
The Official Alice In Wonderland Music Video
———————————–
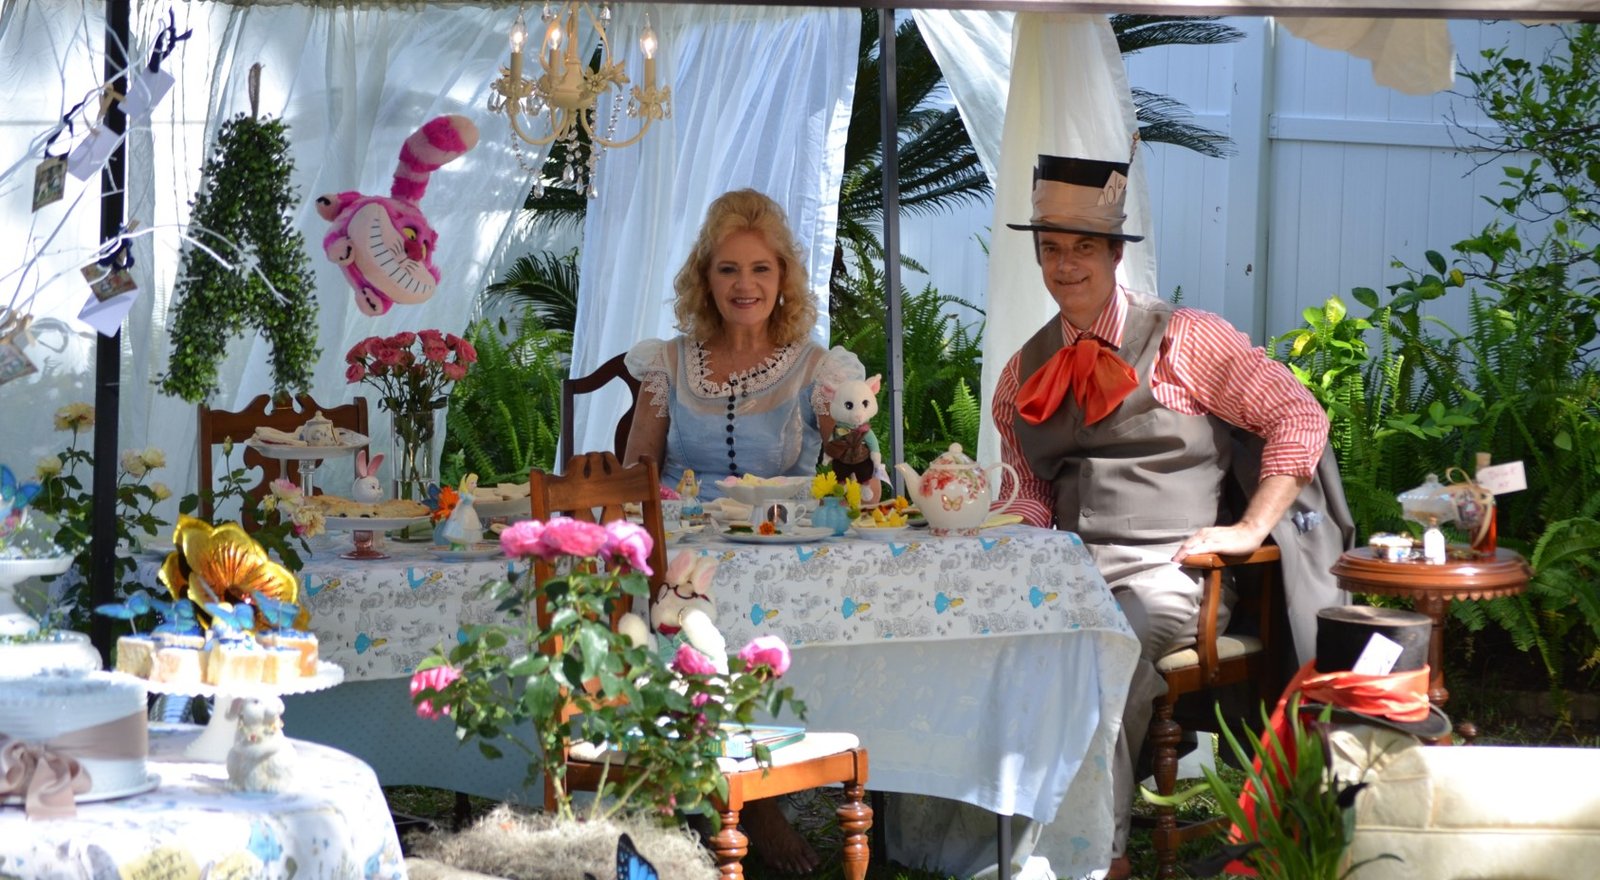
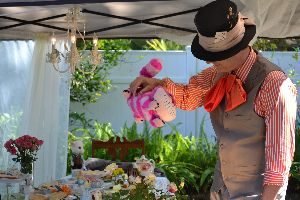
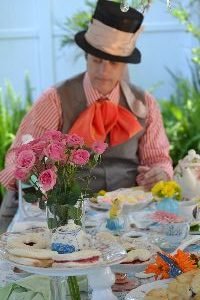
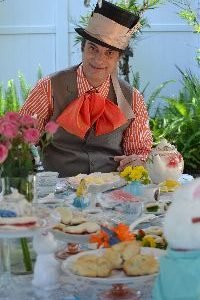
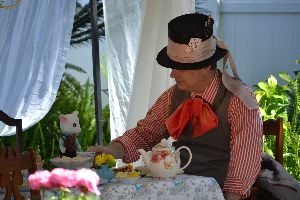
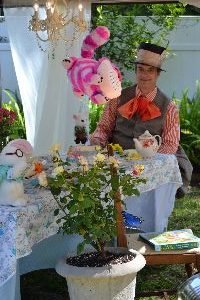
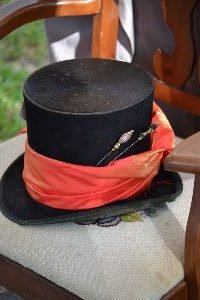
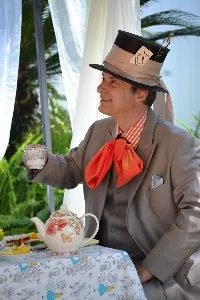
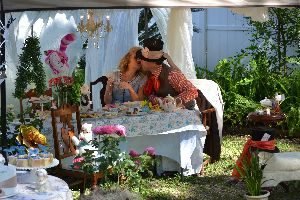
Gordon as the Hatter
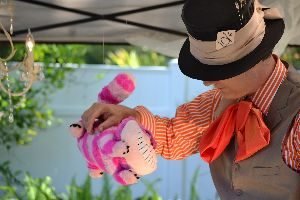
Playing the role very well.
It wouldn’t be Alice in Wonderland without a tea party, now would it?
All of our ‘Tea Party’ recipes are listed below.

It was a lot of fun putting all this together.
My imagination was in overdrive!
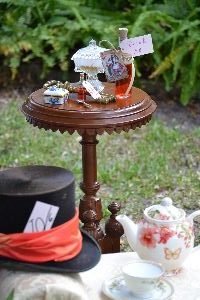
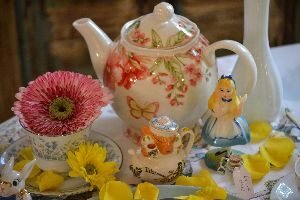
There are some things that are a must. You can’t have a tea party without a tea pot and plenty of cups and saucers.
Also a hat and hat pins are those little touches that can make it special.
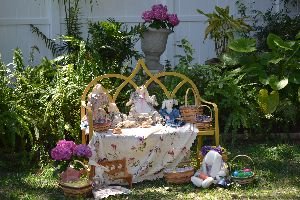
Alice Approaching the Tea Party
Tea Time for Alice
Oh, the tea looks lovely. I think that I shall have some.
Julie as Tim Burton’s, Alice
I tried to honor a few Alice’s here at our party.
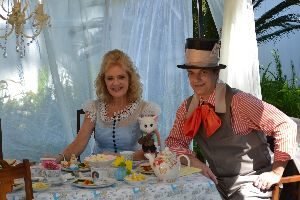
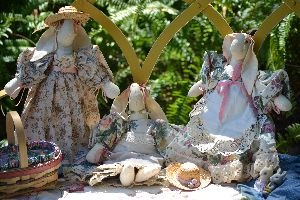
The Hatter and the Dormouse Enjoying Their Tea

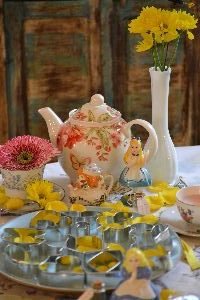
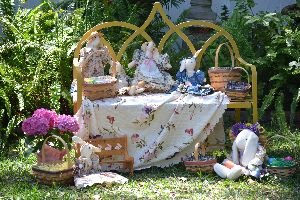
The Tea Party
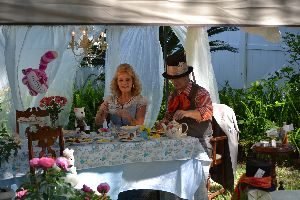
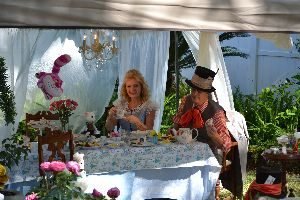
Oh, isn’t having a tea party fun? Look, all our friends have arrived……
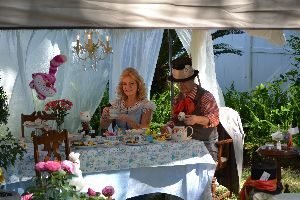
Cheshire Cat, Dormouse, and the March Hare shall be along soon.
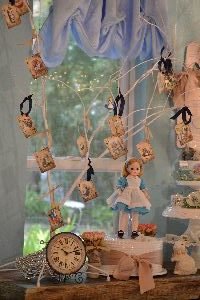
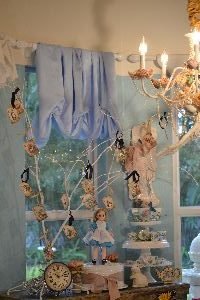
Joining us in our Tea Party
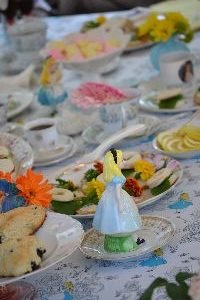
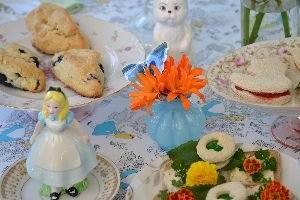
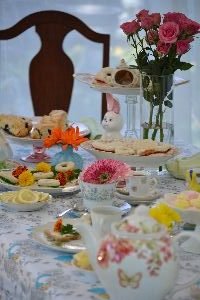
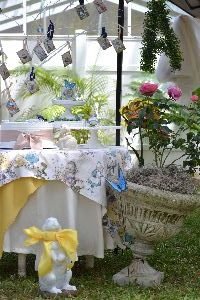
The Table
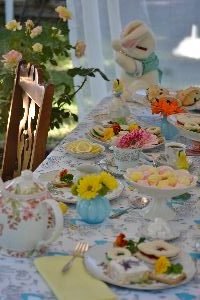
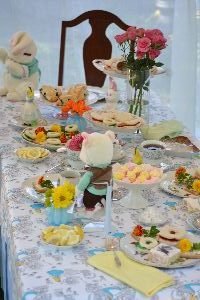
Tea Sandwiches, Blueberry Scones, and Sweets
Also Lots of Flowers
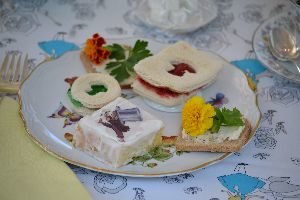
The plate to the left is mine, the plate to the right is Gordon’s.
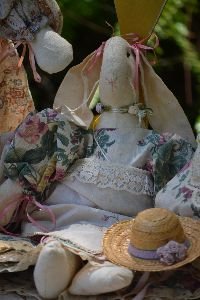
This plate belongs to the Dormouse

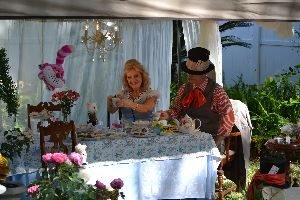
“Alice” Having Tea

Setting up the Sweets Table

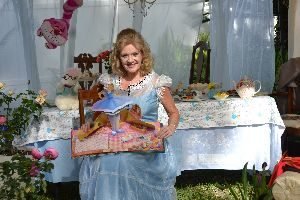
The “Eat Me” Cakes


I wanted one large cake and smaller cakes of various sizes.

All the pretty blue butterflies represent Absolum.

What a Lovely Tea Table


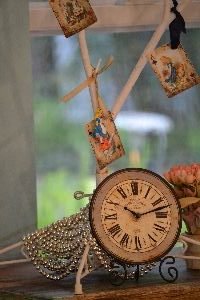
And of course there had to be a clock somewhere.

I do wish that I had set the clock to tea time, but I didn’t think about it at the time.


The Tea Time Table and White Rabbit

————————————–
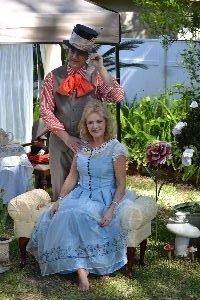
Hatter and Alice Posing for Pictures
————————–
The Table With the Keys, Cakes, and Drinks

The table is important to the story.
As you know Alice finds the key and the “drink me” potion on it.


I placed both large and small keys, large and small cakes, and large and small “drink me’ potions here.
The key we borrowed from one of Gordon’s co-workers. It’s a key from England about 200 years old. It belonged to a church door.
——————————
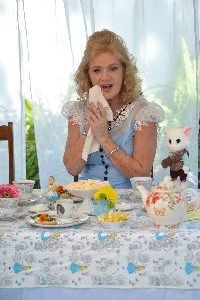
And now for my acting debut…..


Oh Dear, What Shall I Do?
I’m too small to reach the key!


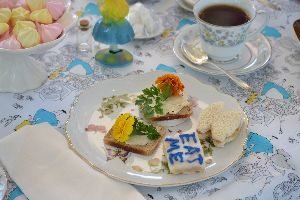
DRINK ME
Wait! What is this? Drink me? Well, I don’t see a “poison” sign on it. Perhaps it is safe for me to drink? And here is a tea cake that says, “Eat me.” Well, here goes.


Oh, my goodness! I’m growing!


Well, this is not good!

At least I have the Key!
——————————–
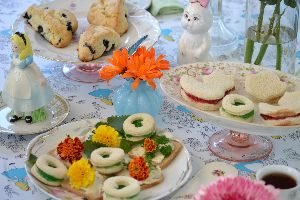
Now for some of our Tea Party foods.


Alice’s In Wonderland Cookies
———————————————-
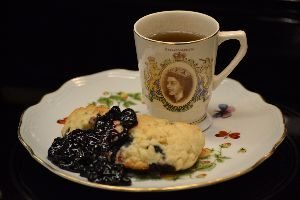
Blueberry Scones with the Queen
For the Recipe:
For Tea Sandwich Recipes Scroll Down Below

—————————————————-

Gordon having his tea cake, Eat Me.
It was simply delicious!
———————————————
The Hatter Has Left the Table
————————————–
How We Did It

Alice reminds me of butterflies, tea pots, cups and saucers, daisy’s, and anything spring and yellow.
I suppose that I think of yellow because of the color of Alice’s hair, which is quite lovely.
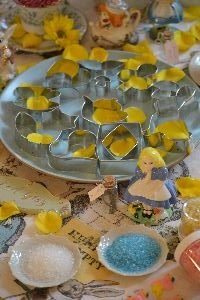
Lots of Cookie Cutters and Colored Sugars
Instead of sugar cubes why not use sugared daisy’s?
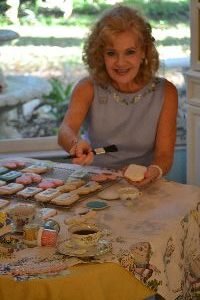
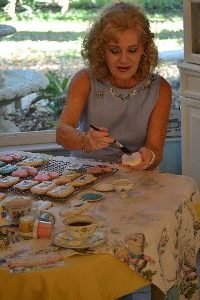
Me, in my nook, ready to make the cookies.
To me the inside of my house, where the planning, decorating, baking, and creating, is just as important as the outside where we have the tea party.
I love to set an atmosphere where I really immerse myself into whatever I may be working on.
I do love my nook! It’s my most favorite room in my home.
Time to make the cookies! We’re late!
I put together a 3-tiered cake stand pedestal as to showcase my vintage Alice in Wonderland tea set, and my pretty vintage tiny cups and saucers.
Also, the pelican my daughter, Veronica, made for me kind of resembles a DoDo Bird.
I would like to dedicate this Alice In Wonderland to my childhood self. As an empath I’ve always been something of an Alice in Wonderland myself. Having one foot in this world and the other, in another. Being able to travel to other places in my dreams and meeting the most interesting people and hearing all about their ideas.
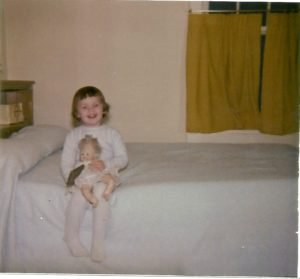
Julie Aged 2
————————————–

Reading Alice’s Adventures in Wonderland and
Through the Looking Glass
by Lewis Carroll
You know, I’ve never read it before. I’ve probably seen every version of Alice in Wonderland on television throughout my life. I’m sure that it has been on some “required reading list” program when I was growing up but I never actually read it. So I decided that this book is going to be my Easter reading. As I see it I am over 50 I had better get to those things that I want to do before my time is up.
Fact: Lewis Carroll is the pseudonym of Charles Lutwidge Dodgson. He was born January 27, 1832 and died January 14, 1898 of pneumonia. His family was predominantly northern English, with Irish connections.

Lewis Carroll
It is said that Queen Victoria loved the book so much that she asked that his next one be dedicated to her. According to Lewis Carroll that never happened. It’s amazing how gossip ends up in history notations as “facts”. Similarly to Marie Antoinette’s famous quote where she says to the starving peasants (Why do we have to call them peasants anyway?) of France when there was no more bread, ‘Let them eat cake’. There has never been any evidence that she said such a thing. That quote was alleged by the wife of her husband’s rival. History is filled with so many unsubstantiated quotes by rivals. Remember that.
—————————————-
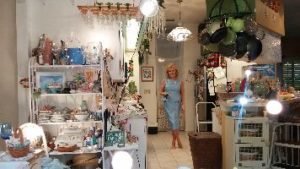
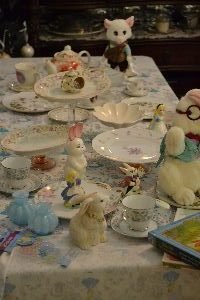
My Vintage Tea Sets
Me, Ready to Start on this Fun Project.
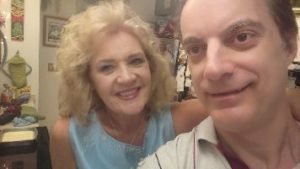
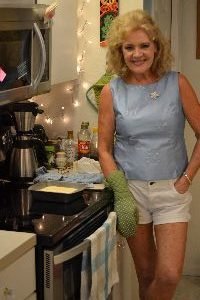
Gordon and I Taking a Kitchen Selfie.
Our Behind the Scenes, Kitchen Set.
You can see all the spotlights and the fun mess of it all.
————————————-

The Alice in Wonderland Cookies

This recipe is from a company called, Fancy Flours, I had ordered some cookie cutters from them and the recipe was included. I do have to say that this recipe is one of the best I’ve ever eaten.
————————————
Take Home Gifts of Cookies

I love having gifts to give to guests as they leave.
The cookies in some lovely tins are perfect!


I love collecting tins that I find at thrift stores. Some of them can be quite nice.

Alice Tins with Cookies and Butterflies
———————————–

The No Fail Sugar Cookie Recipe on our Fridge
The butterfly magnet was a drawing our niece Erin did in 1996.

The Edible Waffer paper I ordered from the company, FancyFlours as well.

The Ingredients:
(This recipe makes 8 dozen.)


-6 Cups Flour
-2 tsp. Vanilla
-3 tsp. Baking Powder
-1 tsp. Salt
-2 Cups Sugar
-2 Cups Butter (4 Sticks)
-2 Eggs
*All Ingredients Should Be At Room Temperature


Me, Combining all the Ingredients into My Vintage Mixer.


This is a great recipe when using cookie cutters. It doesn’t spread! Your cookies will be the same shape after you bake them as they were before. Makes up to 8 dozen. (Taken from the FancyFlour recipe card.)


Directions:
Cream sugar and butter until fluffy, about 5 minutes. Add eggs and flavoring. Mix dry ingredients in separate bowl and add to butter mixture, a little at a time. Mix until flour is completely incorporated and the dough comes together.
Put a handful of the freshly made dough between two sheets of parchment paper and roll to desired thickness. Repeat with the rest of the dough. Put the rolled dough, including the parchment paper, on a cookie sheet and refrigerate for 10 minutes or longer. Your dough will be chilled and ready to cut and bake with no wait and no added flour! Repeat scraps after cutting cookies.
Bake at 350F for 8 – 10 minutes. Let cool on rack.


Here I’m Adding the Vanilla to the Creamed Butter and Sugar

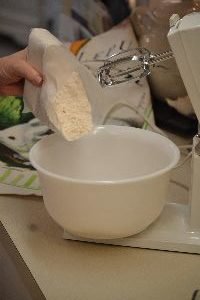
Adding the Flour to a Bowl


Now for the Baking Powder

And the Salt


Whisking the Dry Mixture


Adding the Flour to the Wet Mixture in the Mixer


Mixing the Batter for the Cookies


All Ready

Mold into a Ball


Now Wrap in Plastic and Place into the Freezer or Refrigerator

———————————-

Later on that night…….

I do tend to get silly and goofy when I’m tired.
We’ve been at this all day and I am a bit goofy.

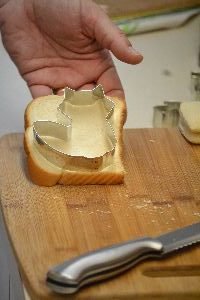
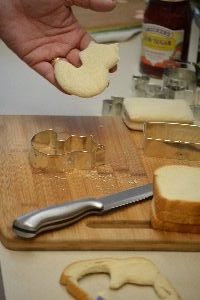
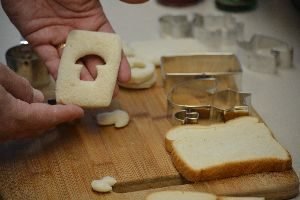
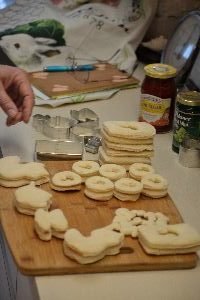
I’ve Rolled out the Cookie Dough and used the Cookie Cutters.

I like using a “Clean Sheet” to roll out the cookie dough, which is a reusable plastic sheet that can be rolled up and stored away when not in use, or I just lay some wax paper down on the counter, sprinkle some flour, then place the cool dough down on top of that, sprinkle some flour on top of it, then place another sheet of wax paper on top of it and roll the dough that way.
It’ll keep your rolling pin clean from any dough sticking to it.


When you roll out your dough and use the cookie cutters, remove the shapes and place onto a cookie sheet that is lined with parchment paper. Then take the remaining dough scraps and wrap them back up in the plastic wrap then put them into the freezer to harden a bit. The dough can then be reused so that you can make more cookies.
Don’t Waste Any of It!


The cookies are on the cookie sheet ready to go into the preheated oven.

When they come out of the oven place onto a cooling rack until totally cool.
For us, baking this many cookies is usually a two day process. The first day is about making the cookie dough, rolling the cookies out, and baking them. The following day is always about the decorations.
————————————-

The Sugar Sprinkles Ready for our Cookies


This time we also wanted to use some edible waffers on our cookies. This is something that we have never done before.
I ordered the waffer’s from Fancy Flours. I got their Alice in Wonderland collection.

As you can see the cookies are all ready to decorate.
All I need to do now is to make the icing.

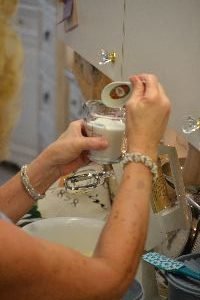
Royal Icing
Royal Icing Ingredients:
Depending on how much you need, which I always make a lot of it, the ingredients are Powdered Sugar, Water, and Meringue Powder.
THAT’S IT!


You can use egg whites in place of the meringue powder but I prefer the meringue powder. If you use egg whites they must be eaten within 5 days or you have to throw the cookies out. We don’t gobble our cookies down in a few days, and the thought of throwing out such lovely delicious cookies just breaks my heart. So I recommend the meringue powder.
We also tend to mail cookies as gifts so the meringue powder will work best for shipping.

My Vintage Mixer my Grandmother Gave Me
You just want to mix the powdered sugar, water and meringue powder for just a minute or so until nice and thick and creamy. The instructions are on the meringue powder container.


Because this is our Alice In Wonderland Cookie Baking….
Of course, I had to use tea cups and saucers to hold the frostings.


I just poured the plain white frosting into each tea cup, then I added the food coloring to the tea cups.
Always keeping one white.
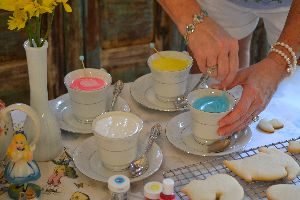
Me, Stirring the Frosting


Now you just want to start covering your cookies with the different colored frostings.
This is the FUN part!


Of course, I am going to use teaspoons in my tea cups of frosting. 🙂

Now I just need all the frosting on the cookies to harden before we go to the next step.

I do have the prettiest work station!


Cheshire Cats, Mushrooms, Hearts, Cards, humm….. Sounds like Alice in Wonderland!


Look at all that Frosting!
Gordon got the great idea to place a giant cookie underneath the cooling rack where the frosting falls through, in order to catch the extra. That would be wise, don’t you think?

What a Beautiful Table!


Pretty Cookies and Pretty Frostings

I try to use up all my frosting as I don’t like to waste any of it.

The Edible Waffer Paper


This is something that neither Gordon or I had ever done before. Placing edible paper onto a cookie.
To start, I first had to cut out all the shapes from the paper and placed them onto the cookie that I had in mind for them.

I wanted a lot of our “card” cookies to have white icing. I thought that the shapes would look a bit better that way.


In order to adhere the edible paper waffers to each cookie Karo Syrup does the trick.

Just place some of the Karo Syrup into a bowl and use a cooking paintbrush. First spread the Karo Syrup over the cookie, then place the paper waffer on top of it.

Placing the Paper onto the Cookie


You could also paint the back of the waffer with the Karo Syrup if you like.

Once you adhere the paper waffer to the cookie, you can sprinkle some colored sugars all around the edges of the cookie. It can help hide the “edges” of the waffer, it also looks very “frosted” and pretty.


It’s a messy business with sugar all over my hands.

Can you see that the rectangle cookies kind of resemble playing cards?


As usual Gordon helps and actually does it better than I do.


Gordon is Always a Big Help!

Viola!
———————————
Making the EAT ME Cakes


This was simple and easy. Actually more about the presentation than it is the recipe.
I bought two sugar free yellow cake mixes, followed the package directions.
I used three square pans, spraying them first with a baking spray with flour in it.

Spraying the Pans, and Pre-Heat the Oven
Making the Cakes According to Package Directions


When the cake mix is ready then add the batter to the sheet pans.


Bake According to Package Directions


The two cake mixes made me 3 9×9 sheet cakes.

Remove from the oven and let cool on a rack.


I want one LARGE Eat Me cake, and several SMALL ones.


Sometimes the cake rises uneven on the top, just take a knife and cut a layer of the cake off in order to have them look more even.


You can see that some of the smaller cakes are of various sizes, that’s how I wanted it.
Once the cakes are cut and ready, it’s time for the frosting.

The frosting that I’m using here is the Royal Icing, same as the cookies above.
Just Confectioner’s Sugar, Water, and Meringue Powder.
Recipe is on the meringue powder container.

This took several layers of icing, but I wanted them to look a bit rustic and not “perfect.”


This was lots of fun!


I just kept ladling, and ladling, and ladling…..


I must have made 3 batches of the icing.


Once again, I get very silly and goofy when I’m tired.
(But it was a fun tired.) 🙂

This is how I wanted the cakes to look, with icing just running down them.

When you think you have put as much icing on them as you want, then just let the icing harden on the cakes.


Now comes the Wording


EAT ME


I have to admit, this was the fun part! 🙂


As usual, I enlisted Gordon to help….

While I take Photos

EAT ME

————————————-
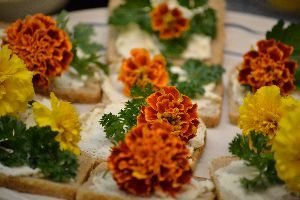
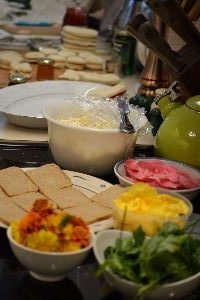
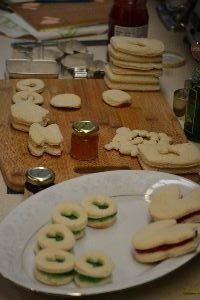
Tea Sandwiches
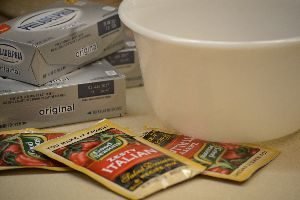
The main focus on this Alice in Wonderland Tea Party was the cookies and the cakes and the blueberry scones. The tea sandwiches were something of an afterthought and I didn’t want anything grand. So I whipped up my old favorite of cream cheese and Zesty Italian dry mix salad dressing. Easy, fast, delicious!

I just use about 3, 8 ounce containers of cream cheese, and add about 3 packets of Zesty Italian Salad Dressing Mix, dry. Stir together, then spread onto bread, add some fresh edible flowers and some fresh herbs.
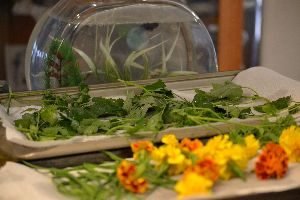
Here I washed the herbs and edible flowers for the tea sandwiches.
I wanted to use a rye bread, this bread is pre-cut so all I have to do is adorn it.

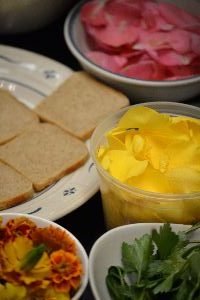
The pretty pink and yellow rose petals are for decoration, NOT for eating!
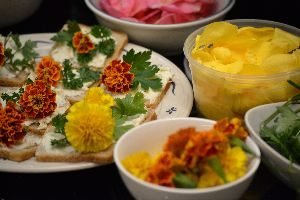
Rye Bread, Cream Cheese Spread, Fresh Parsley, Edible Flowers
————————————–
Our Fresh Mint

I wanted to incorporate our fresh mint into these sandwiches. Below I used a mint jelly along with our fresh mint.
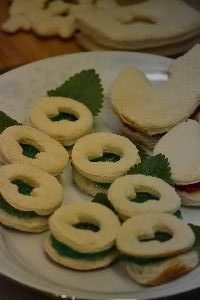
Tea Sandwiches are so Easy to Make!
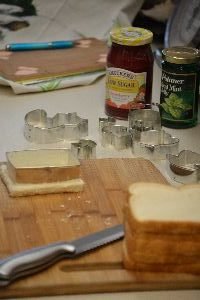
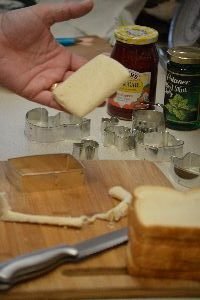
All you need is fresh bread and cookie cutters, and something to place inside of them.


All the sandwich shapes pertain to Alice in Wonderland
Cats, Mushrooms, and Cards

Just use your imagination and create something beautiful.
Some pretty jelly’s will go very well inside of them.
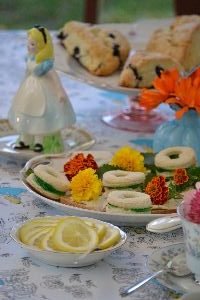
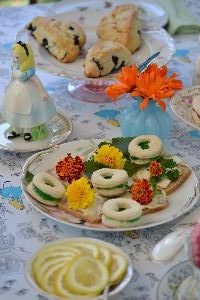
Pretty Tea Sandwiches and Some Lemon for Tea
————————————-
The Tea
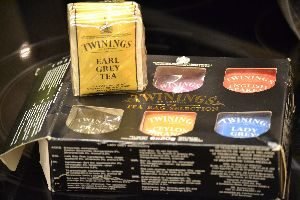
It wouldn’t be a tea party without the tea.
————————————
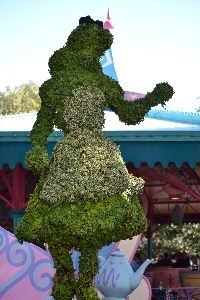
Walt Disney’s Magic Kingdom
The White Rabbit
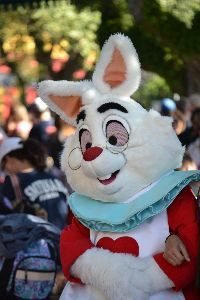
Living here in Florida as we do means that we spend time in Orlando at the Disney Parks. The Magic Kingdom’s Tea Cup ride is a favorite. I love that they fashioned Alice in shrubbery.
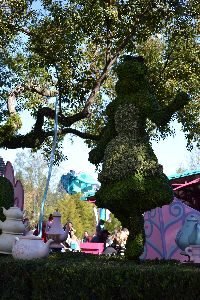
The Tea Cup Ride
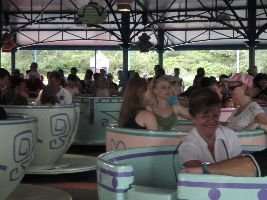
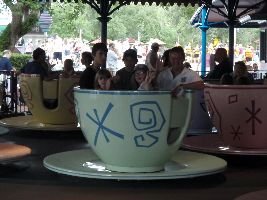
Our son Brodie, Nephew Joseph, Niece’s Kate and Lola, and my Brother Johnny
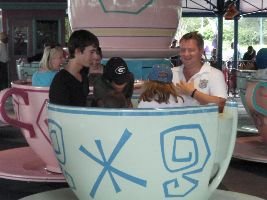
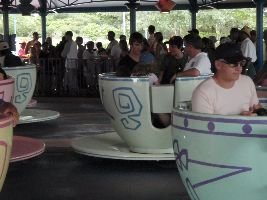
It spins, and spins, and spins…..

———————————————-
How We Put All of This Together
I first knew that I wanted an Alice in Wonderland Easter a few years ago I just didn’t know how far I wanted to take it. But as with most everything I do, I tend to go hog wild, or as my grandmother would say, “You know Julie, she’ll go all out with it.” (I’m certain she meant that lovingly.) And that is pretty much what I always do. My mother was always trying to get me to “tone it down” but I’ve discovered through the years that asking me to “tone it down” is like asking me to be less than I am capable of being or doing. My parents and brothers would always make me feel as if there was something wrong with me because I am the way that I am. Well, then so be it! Guess I’m a bit ‘Mad’ but then again, “All the best people are.” 🙂
So here is how we put this together.
You really can’t do anything with Alice in Wonderland unless you somehow acknowledge the ‘Tea Party’ scene. It’s classic Alice in Wonderland, it’s also where Alice meets The Mad Hatter.
I already had a nice collection of tea cups and saucer’s, pretty plates and platters, and a tea pot or two, of course.
I set everything up in our dining room on the portable table that we would be using for our tea party. This gives you an idea of where everything will go and you can decide on which pieces you will be using and which one’s you won’t.
If you don’t have any tea cups or china plates you can always find pieces at thrift stores, Goodwill, antique malls, etc. for just a few dollars.
I did buy the fabric on Ebay, several yards of it. First I placed two blue tablecloths that I had purchased at thrift stores on the table, then I just draped the Alice fabric over top so that it looks more like a table runner.
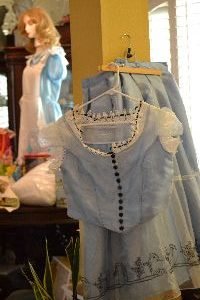
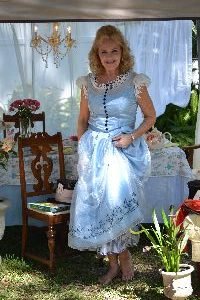
My Alice in Wonderland Costumes
I did put some money in the clothing that I wore for this. I purchased the traditional Alice dress from The Disney Store online, (adult size), and I found this beautiful Tim Burton’s version of Alice’s dress from a shop online. It is so beautiful!!
Believe me when I say that these clothes will be worn again a few times. We put a lot of effort into our Halloween’s, also Disney’s Magic Kingdom has Halloween nights where people go to the park in costume. So, why not?
—————————–
Alice With Me Everywhere
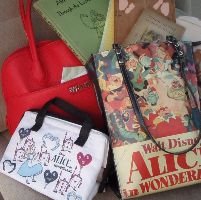
A few of my Alice things. When I am working on a project and it requires lots of planning and shopping, I tend to immerse myself into it. My Alice tote bag above houses some of my Alice in Wonderland books, an old Easter bunny clip board that I painted that holds my lists of things I need to purchase, as well as reminder notes. Also, seeing as how I always take food with me, I have some goodies in my small Alice lunch tote. I must have carried these things with me for over a month while I planned everything.
————————–
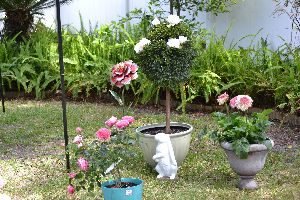
Roses and Flower Shopping

Of course everyone that knows the story of Alice in Wonderland knows about the white roses that needed to be painted red. Well, I looked and looked at several garden stores and the white and red roses just looked horrible but the pink ones looked lovely, so I bought the pink.


(I did end up finding some nice RED one’s though, that were perfect for our project.)
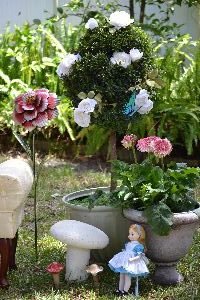
I was thrilled to find the metal yard stake flowers of a pink one and a yellow one. They reminded me of the flowers from the movies, and story.
I love my metal flowers as much as my real ones.
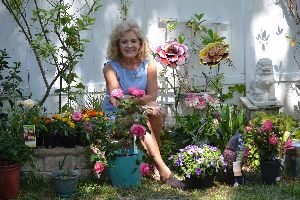
Some of my flowers for my Alice in Wonderland Easter.


Pink Roses, White and Pink Roses, and Lollipop Flowers

These are now my favorite, Lollipop Flowers
—————————————–
Setting Up Our Backyard
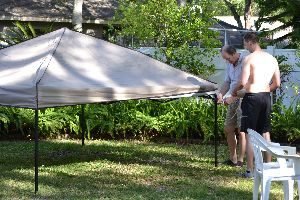
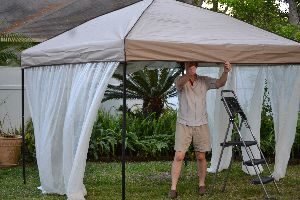
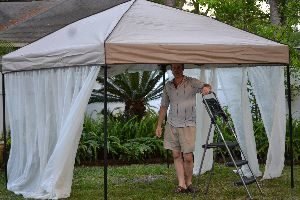
Here Gordon and Brodie are setting up our backyard canopy. This is a canopy that we bought to take to the beach, or wherever, that we may need some portable shelter.
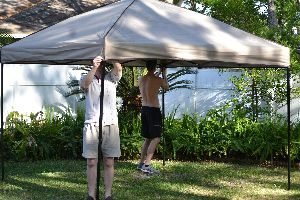
Gordon and Brodie Setting up the Canopy
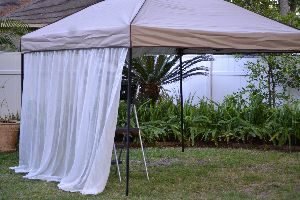
All of the shears you see belonged to my grandmother. I’ve kept them all these years and have used them for various projects, but they were perfect here! I suggested to Gordon that he have a rope going all along the bottom of the canopy, and string the rope through the sheers, kind of like draperies.
The Sheers are on all sides, except the front.
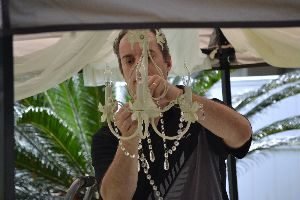
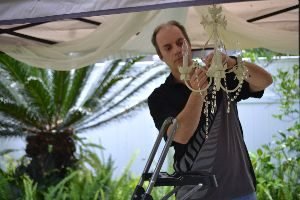
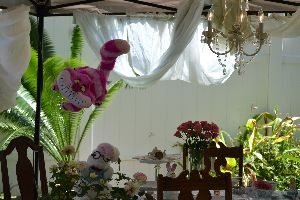
Here Gordon is installing my chandelier to hang inside the canopy. He wired it so that it would work as well.
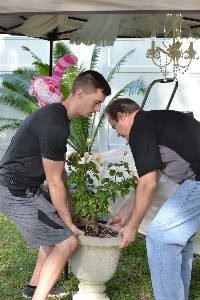

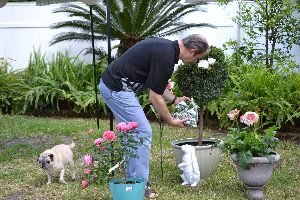
Gordon and Brodie moving some heavy cement pots with roses around.
The Letter A, for Alice
I actually found the “A” at Michael’s craft store in the sale section. It’s artificial and it was leftover from their C-h-r-i-s-t-m-A-s items. All I needed was the “A.”
I love this section. This will be the photo gallery section.
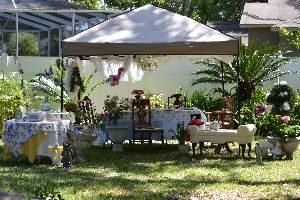
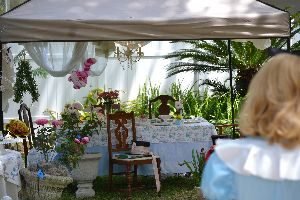
Not the best photo but you can see our entire tea party scene.
Inside the Canopy
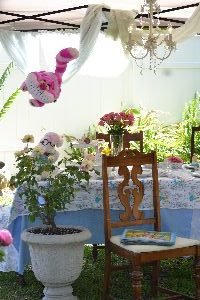
We have Cheshire Cat on fishing line, looking as if he is floating.
Gordon Looking up at Cheshire Cat
Notice the wonky pot with the pink roses?
I never throw anything away that I can use again, and again. The pot broke but is still together and I knew it would be perfect for our wonky Alice in Wonderland.
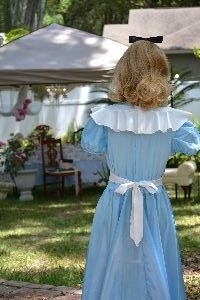
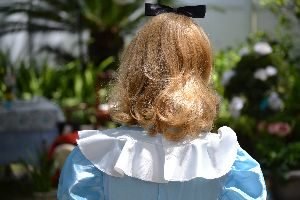
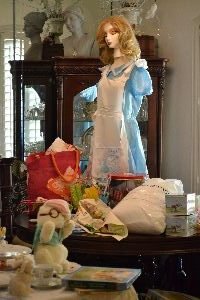
Our Alice approaching the tea party is my mannequin with an Alice in Wonderland costume, syrofoam head with a wig and black bow on it.
You can see she has no arms. 🙂
———————————–
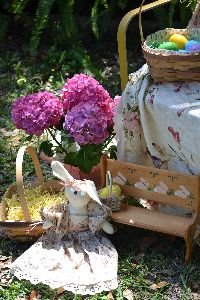
I just wanted to feature some of my Easter things, especially the “white rabbits.”
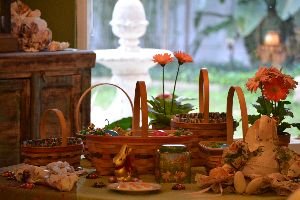
Pretty Easter Baskets
(Note the Gerber daisies above. I’ve featured them in so many of my spring and Easter photos. I’d say that I’ve gotten my money’s worth out of them. Now it’s time to plant them in the garden).

Pretty Bunnies all in a Row
And me, sitting on the other side of the window, or through the looking glass. Sort of.
Julie
————————————
Pink Singing Just Like Fire From Alice Through the Looking Glass.
—————————————
Easter Bunnies in the Backyard
Welcome to the bunny photo shoot. Above are just a portion of mine, and my daughter, Veronica’s, bunnies. I decided to get them out and enjoy them for Easter. Many years ago when we were living in Hawaii and Veronica was in pre-school I sewed her a bunny as an Easter gift. Actually, I sewed the clothing on the bunnies. The bunny itself was a rag doll that I bought at a craft store. It was one of the first things that I sewed as an adult and I was very proud of myself. Seeing as how the only other time I had ever sewn anything was in Home Ec. in high school and I got a ‘D’ on my vest. It was that damn piping around the vest that blew it for me.
Rag Doll Bunnies
So pretty.
Makes me want to go on a picnic.

It’s the accessories that make this so very cute. The little floral and silk choker around my bunny’s neck. The little flowers glued to the straw hat. I actually painted that purple ring around the hat.

The bunny above, I made for my grandmother many years ago. When she died I brought it home with me.
I wish she were still here.
——————————————-

——————————-
The bunny in photo left, the “Easter Bunny” I gave to Veronica when she was about 10 or so. She never liked it. I adore it and I’ve always gotten it out to enjoy every year. She even has her own watering can.
The little bench in the photo at right above, I stenciled a long time ago during my crafting years. You know I really enjoy making things with my hands. That is when I am most at ease and at my happiest. In my opinion, working with your hands is far more rewarding.
Happy Easter!
Julie
—————————————
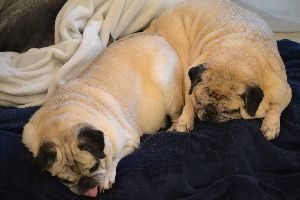
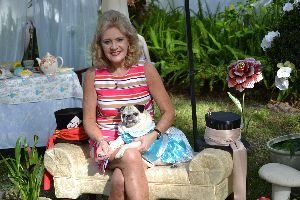
Sleepy Pugs
They worked so hard today. Our Easter babies, Monk and Sugar.
—————————————
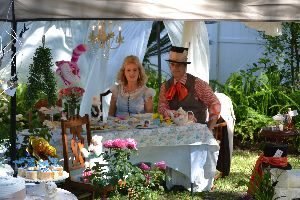
Me, Giving Directions to our Photographer, (Brodie).
Alice and Hatter are a “thing”, ya know. 🙂
The End
————————————-
If you would like to view our other Alice in Wonderland posts,
Also check out our:
Click here for Our Alice in Wonderland Tea Party Easter
———————————–

Click Here for Our Alice in Wonderland Easter Dinner
——————————–

Click here for Our Alice in Wonderland Croquet Game with the Tweedles
———————————–

Click here for Our Alice In Wonderland Eat Me Cakes
Making Our Alice in Wonderland Cookies,
—————————————
Click here for Our Alice in Wonderland Blueberry Scones
————————————-

Click here for Who Stole My TARTS!!!
——————————-

Click here for Our Down the Rabbit Hole Drinks and Mushroom Appetizers
—————————
Click Here For: Our Alice In Wonderland Christmas

—————————

See you in Wonderland……