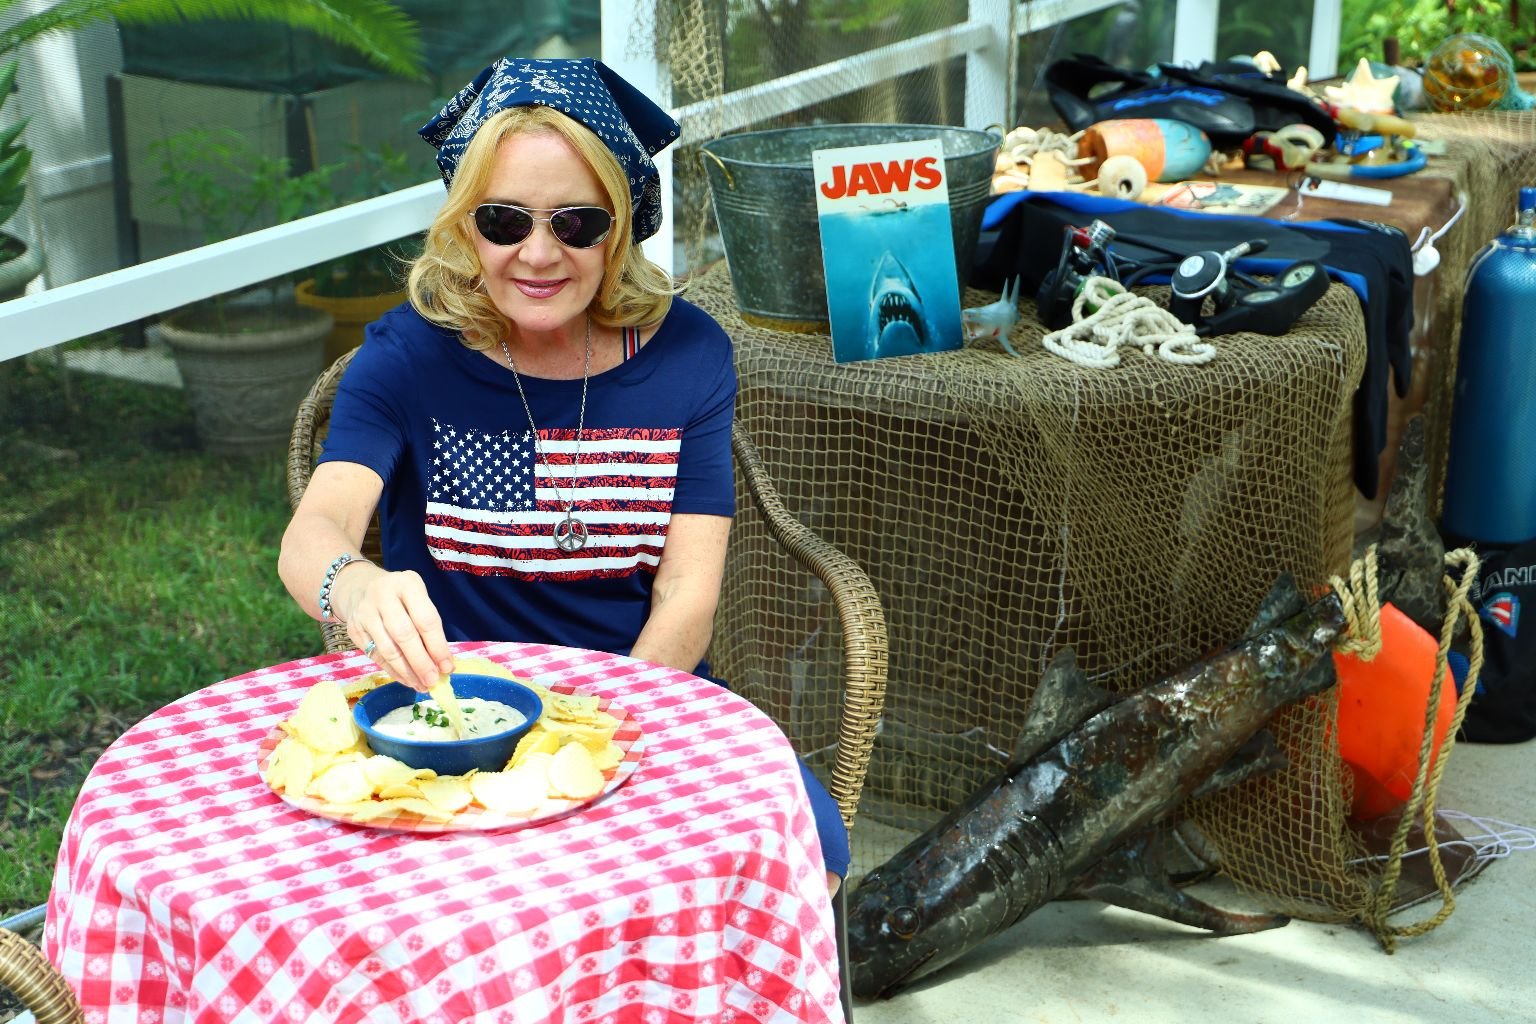
Our July 4th. Tribute to the Movie JAWS (1975)


Amity Island Welcomes You


We are Gordon and Julie

1975
———————————————————-


Enjoying my Shark Tea and a good book.
——————————————————

Salt Water Taffy
I have had a love affair with Salt Water Taffy at the shore my entire life. It’s tradition. No matter which shore I may be on, I always buy Salt Water Taffy.
————————————————————
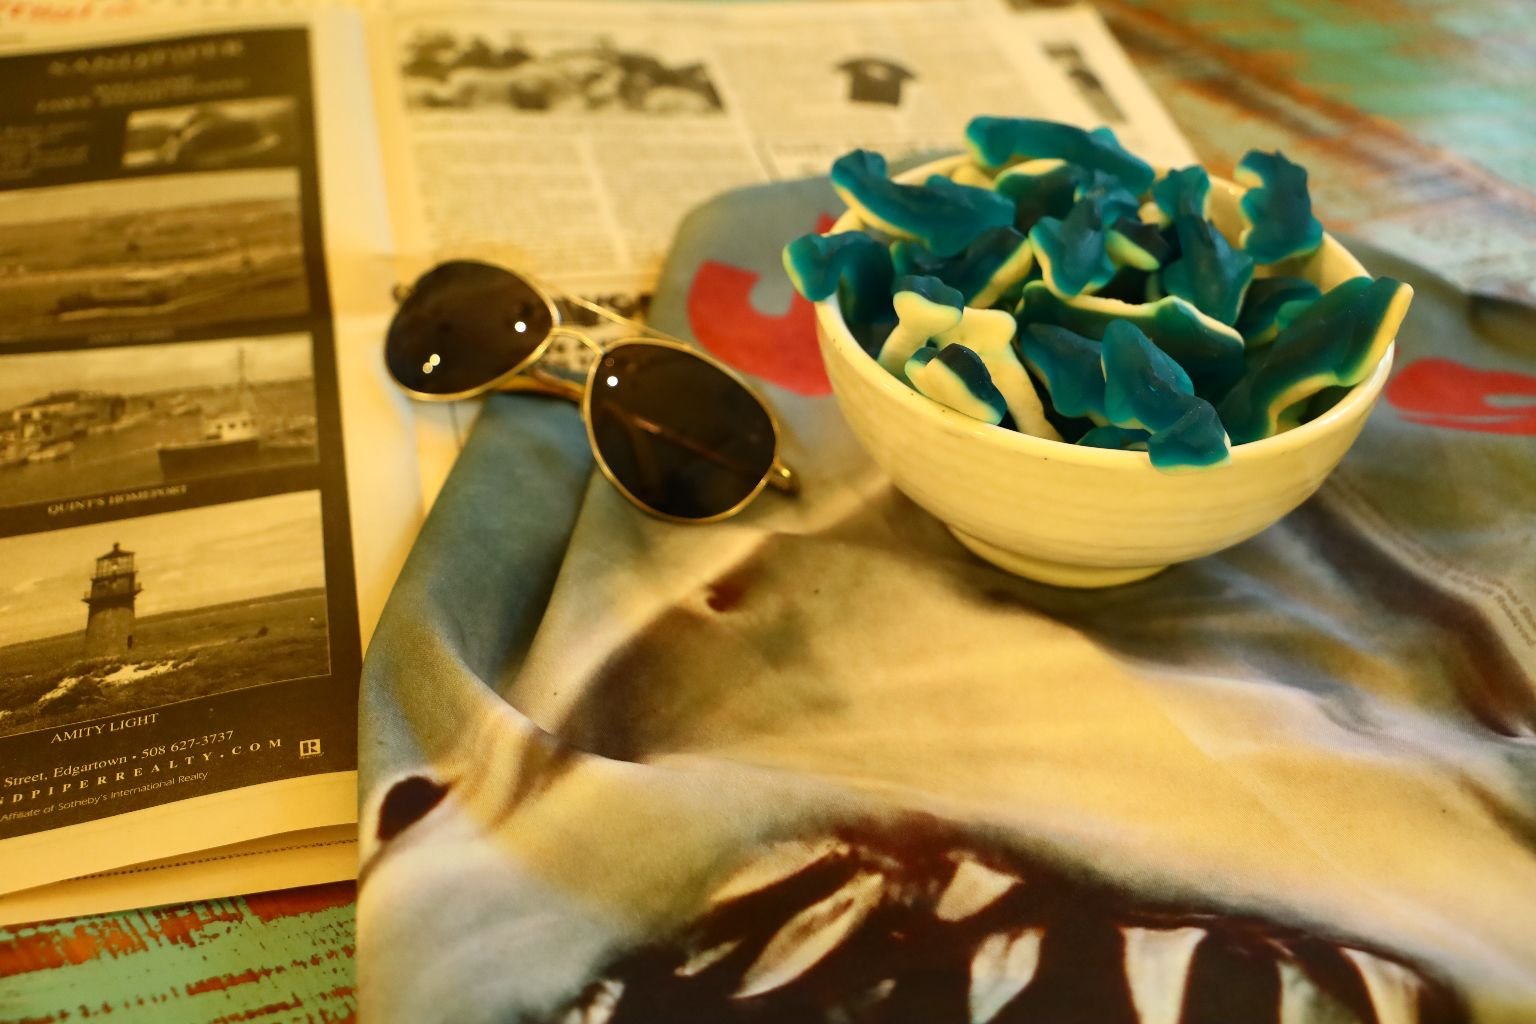
Gummy Sharks fighting to get out of the bowl. 🙂
——————————————————————-
The Brody Beach House

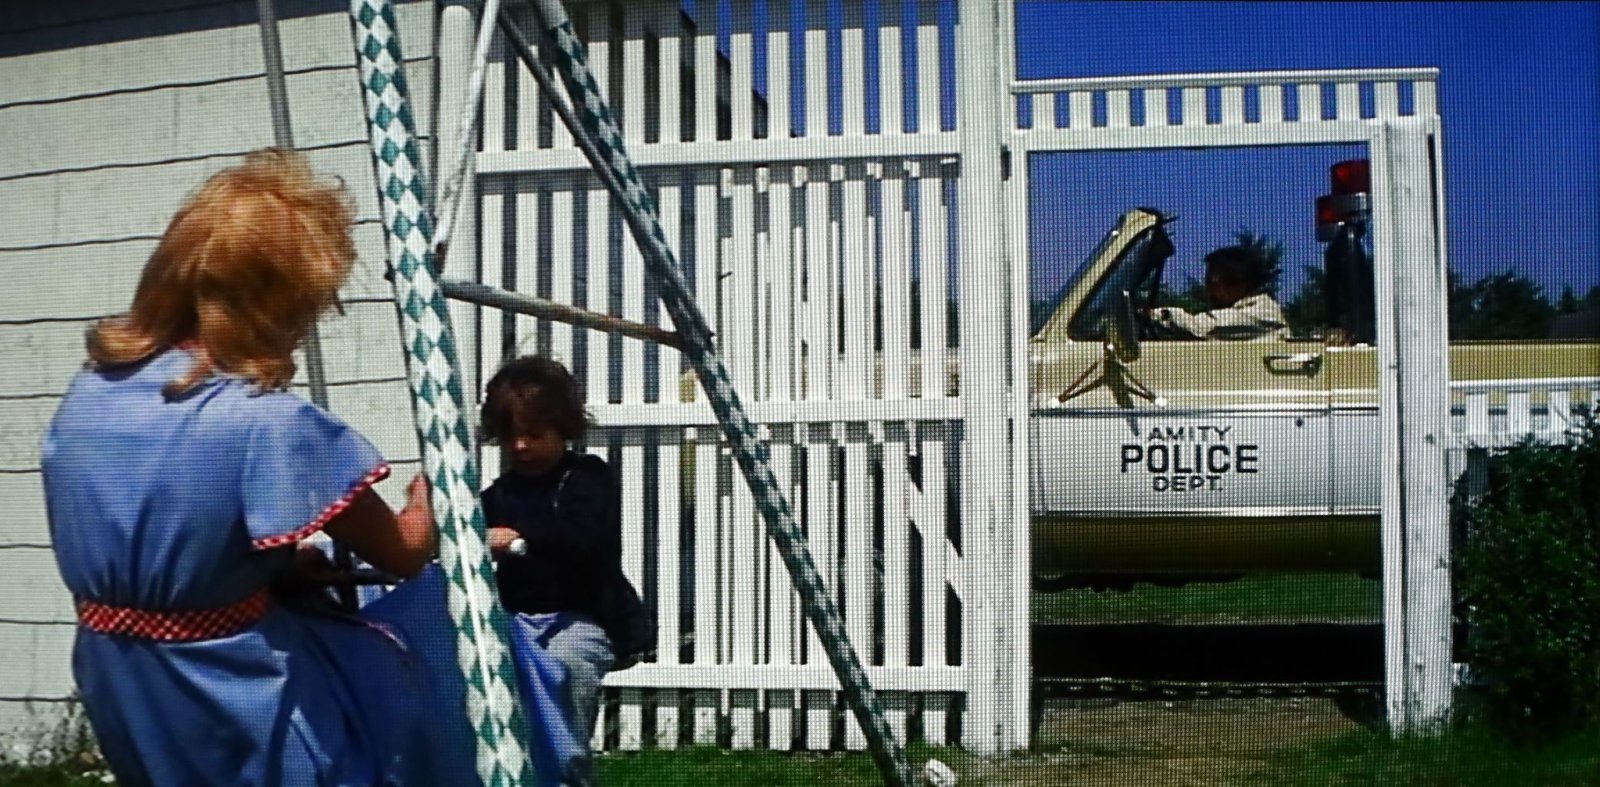
Sheriff Brody responding to a call of a missing swimmer.


The Swimmer’s Personal Items

It was a Shark Attack!
————————————————————–

THE BEACHES ARE CLOSED!

BY THE ORDER OF THE AMITY POLICE DEPARTMENT
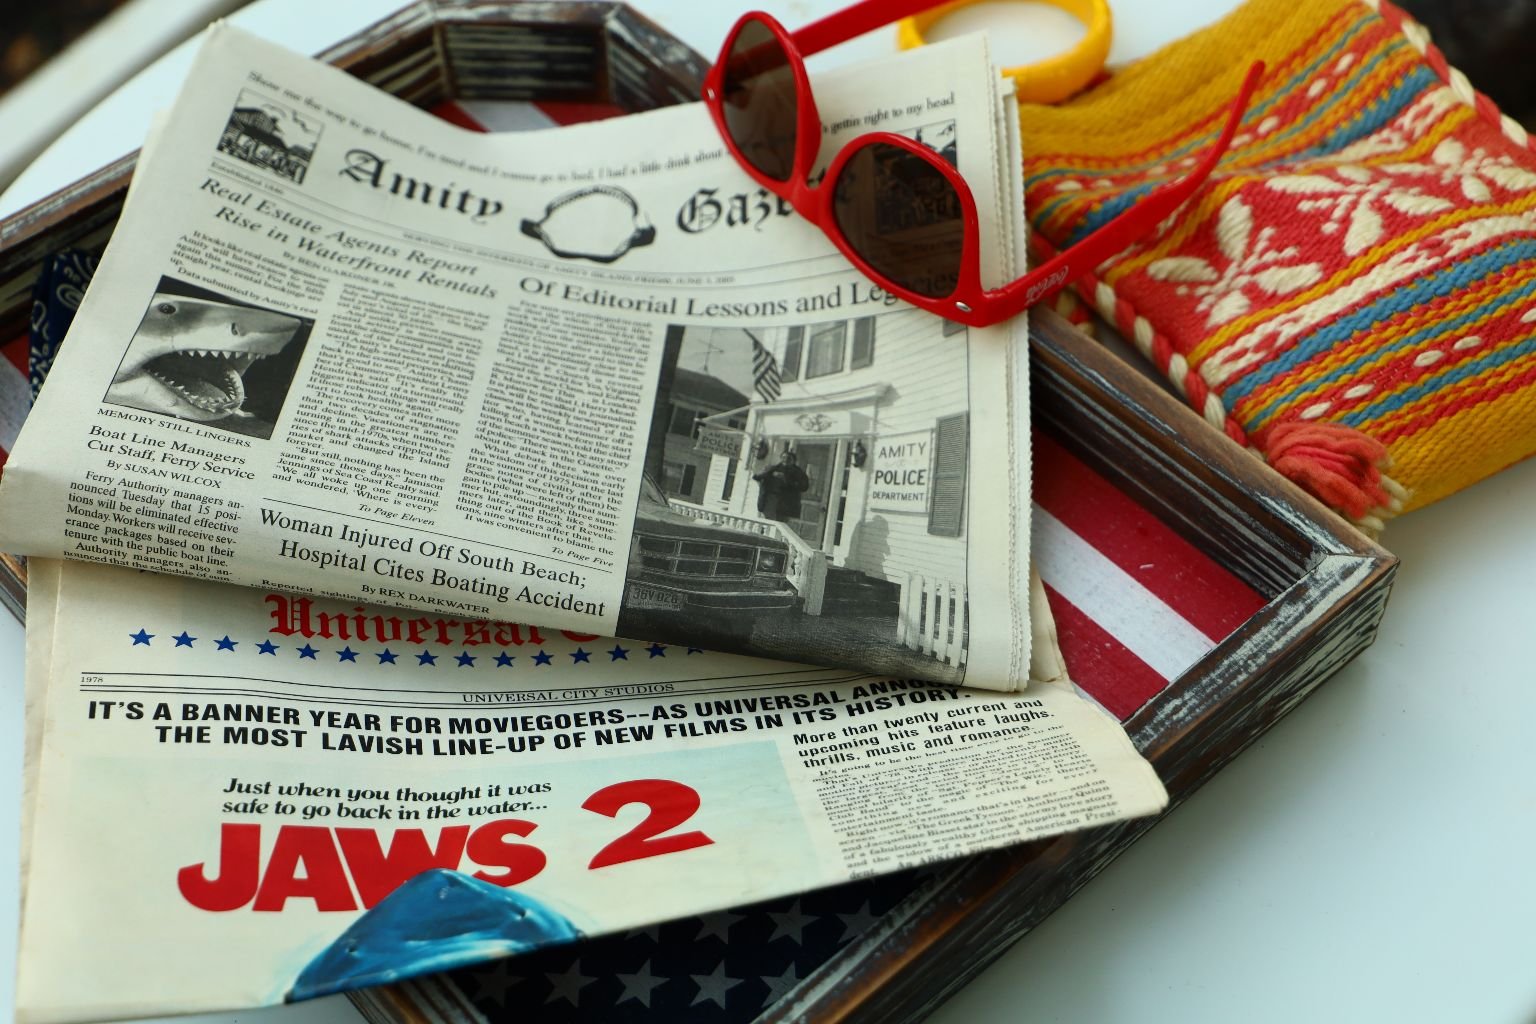
The Amity Gazette
Stay Tuned for Further Developments

It looks like there have been some shark attacks lately.

Looks like Sheriff Brody is on it.

Amity Police

—————————————————————


Happy 4th. of July
————————————————————-

The Brody’s at Home in Amity
(Gordon and I love their house and could very easily see ourselves living there and enjoying that island life.)

Michael, who is turning 12 gets a sailboat.
————————————————————–

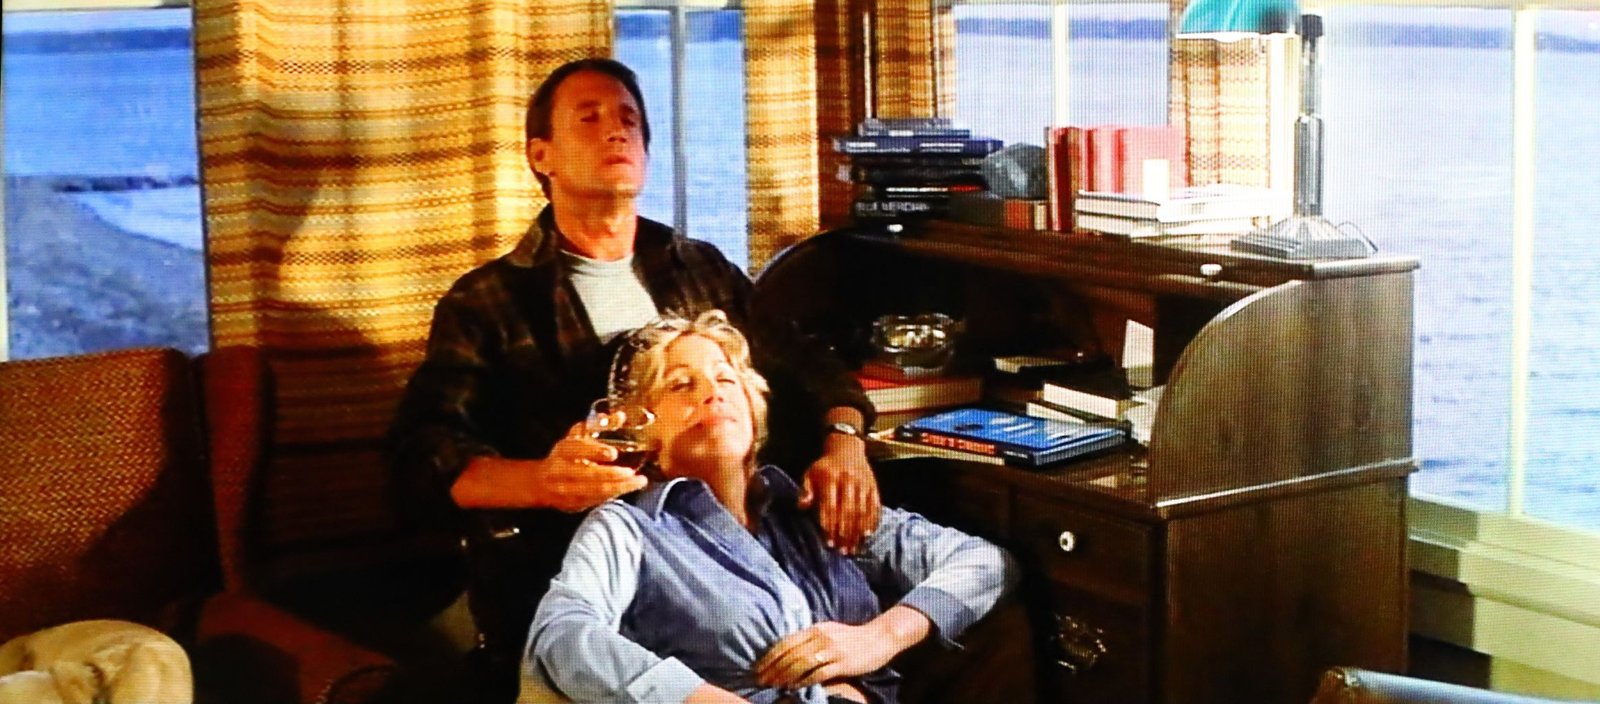
Ellen and her husband, Martin Brody
———————————————————–
![]()
1975
Directed by: Stephen Spielberg
(He was only 26 when he directed this movie.)

—————————————————————

Veronica and Brian, JAWS Ride, Universal Studios, Orlando, Florida


Veronica and her friend Sarah, with JAWS, 2009

They Caught A Shark, just not THE Shark
————————————————————-

Sadly, Gordon and I didn’t get to Universal Studios until after they retired the JAWS Ride. WE would have loved to have ridden it though.
Here it is if you would like to take a ride right now.
———————————————————–
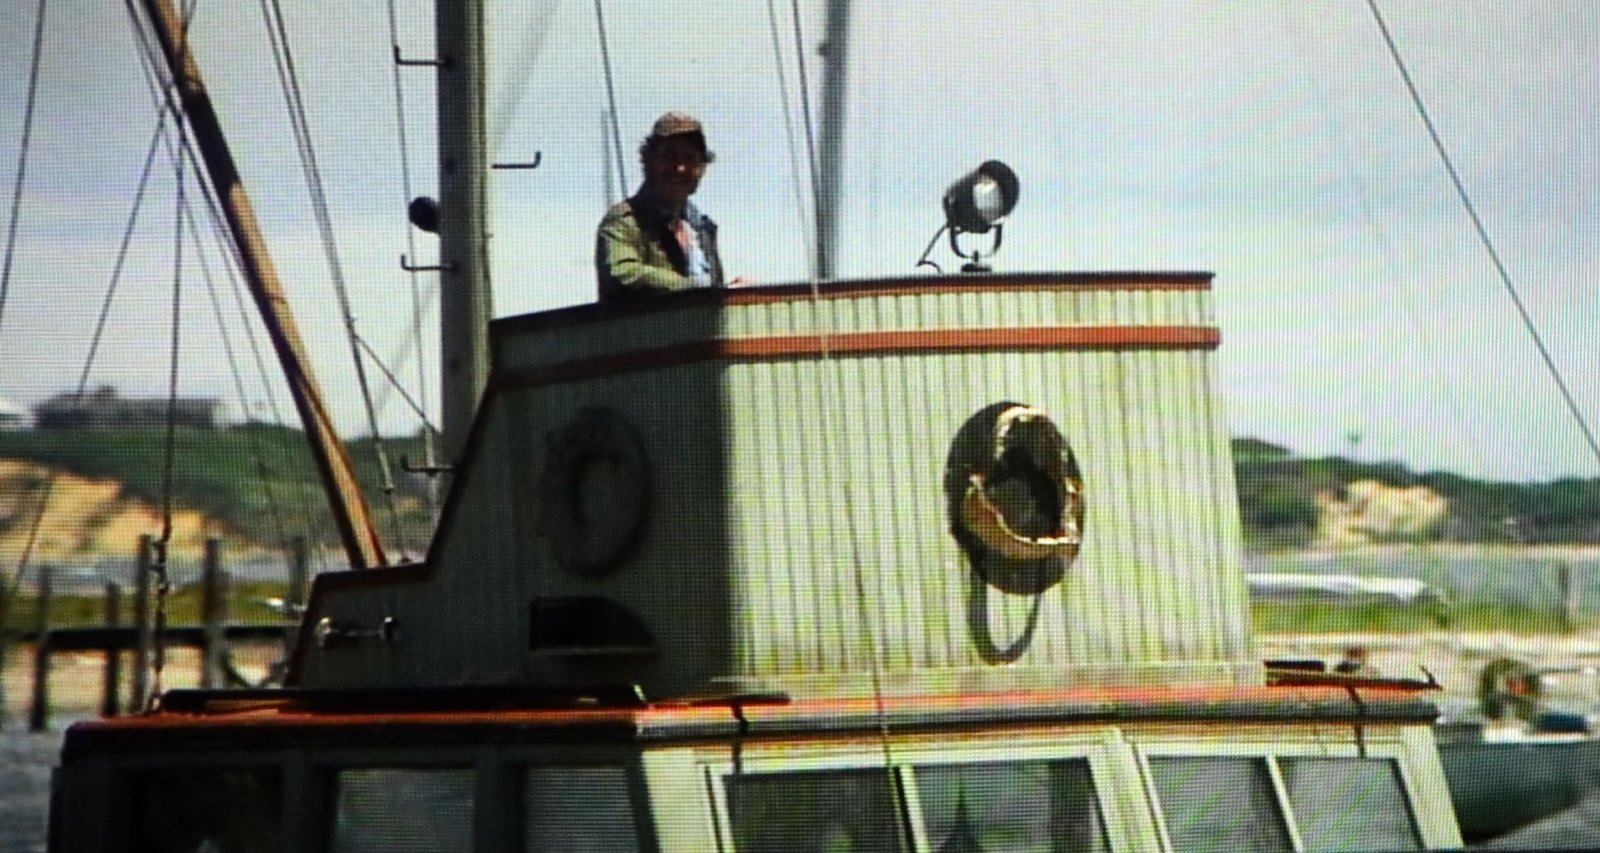
Quint’s Boat, The ORCA
FYI: The most famous line in JAWS when Martin Brody says,”Your gonna need a bigger boat” was ad-libbed on the set.


Some of our Nautical Things.
I told Gordon that I think we need lots of fish nets and HOOKS!
—————————————————–

—————————————————————-

Looks like you have a shark problem on your hands.
—————————————————————
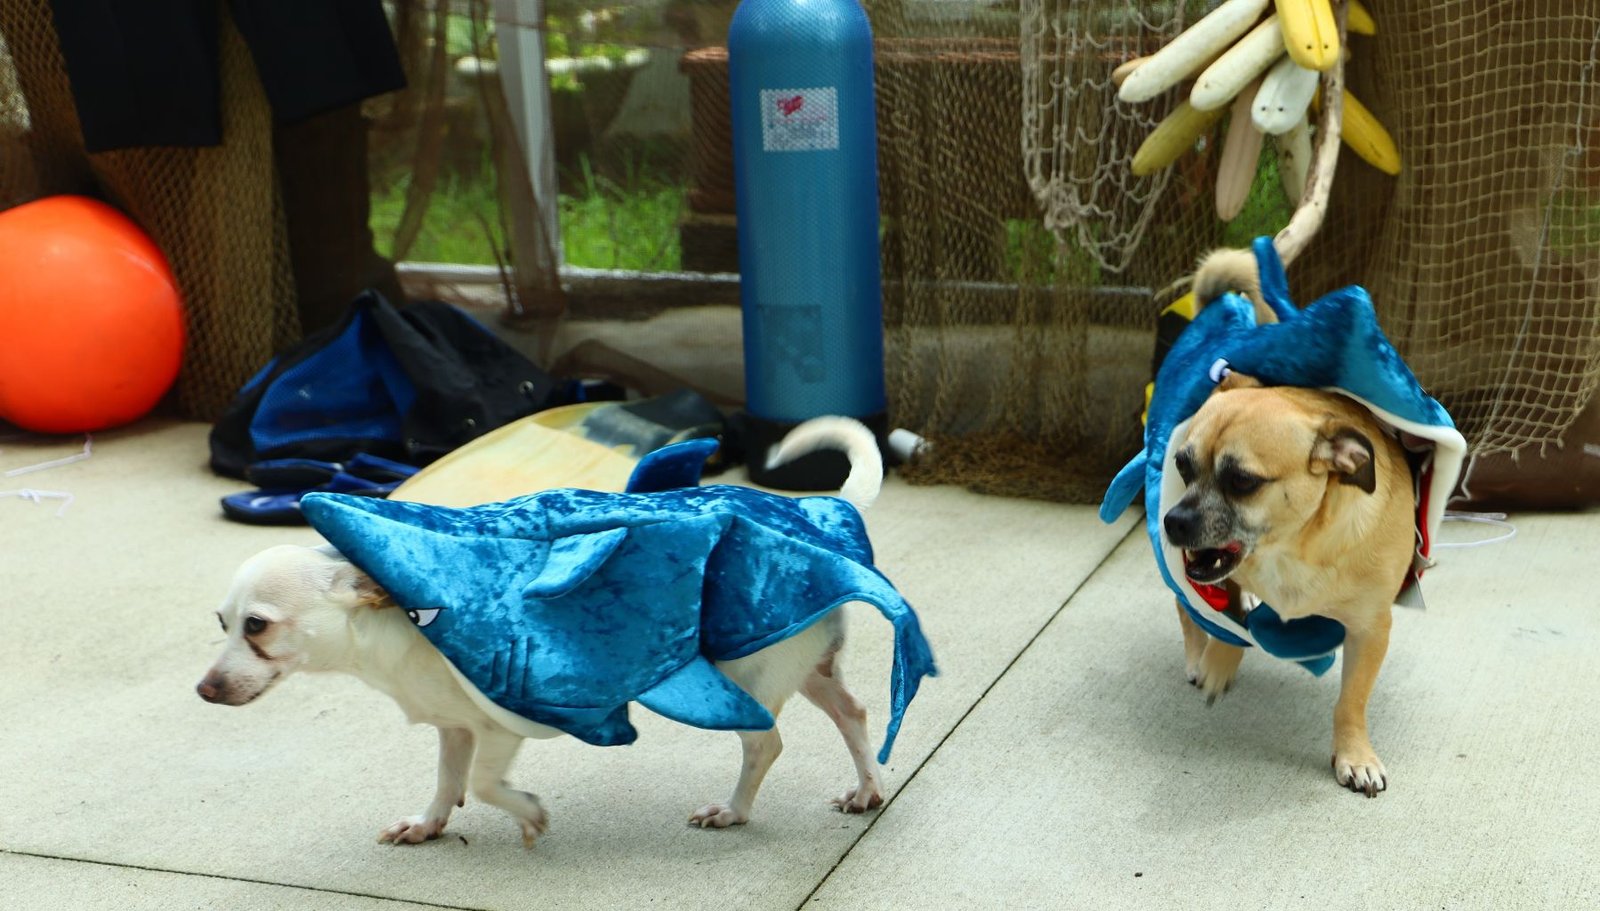
Our Cute Little Land Shark Problem
———————————————————-

Spooky and Sparky Dressed in their Shark Costumes
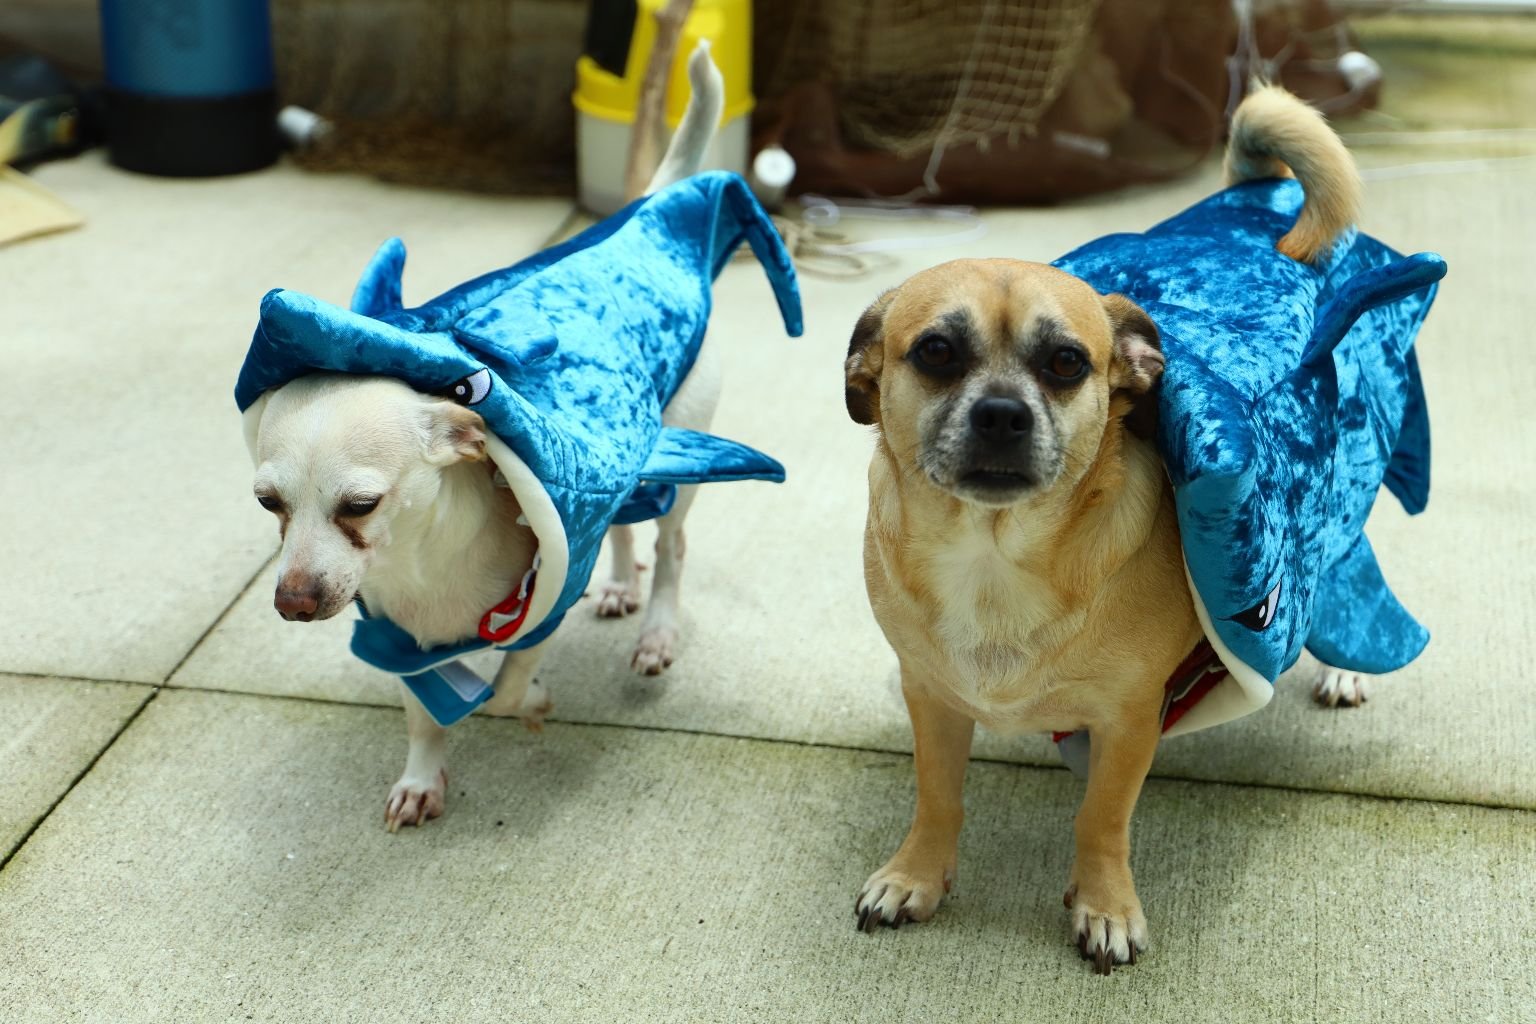
Getting Ready for Shark Week
————————————————————
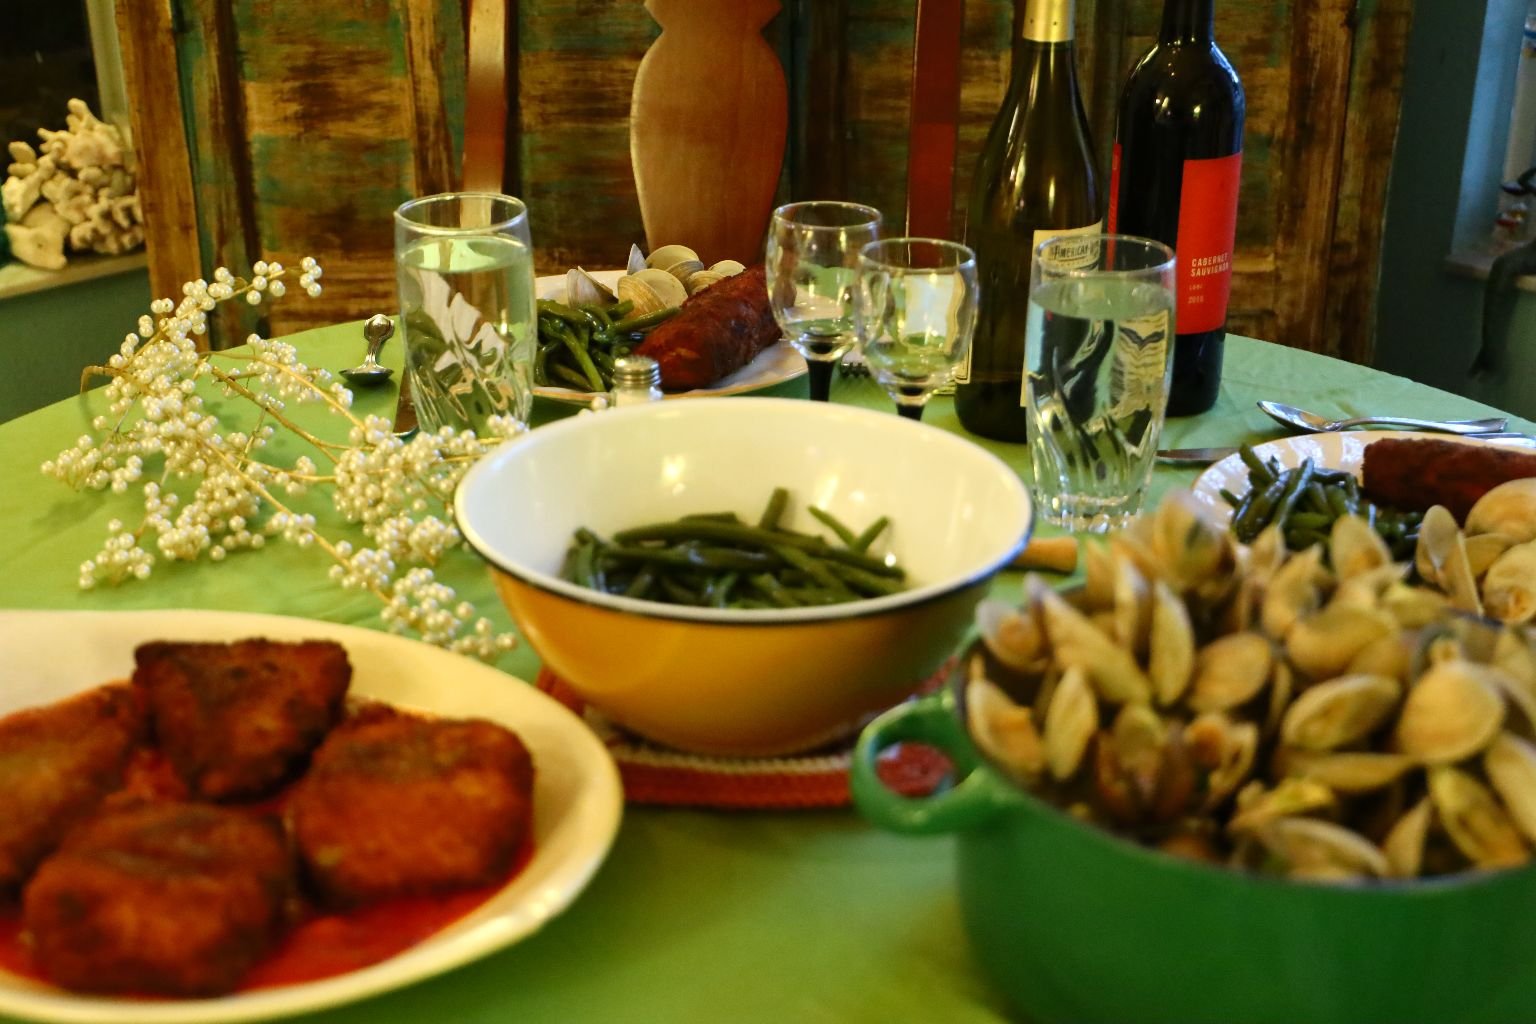
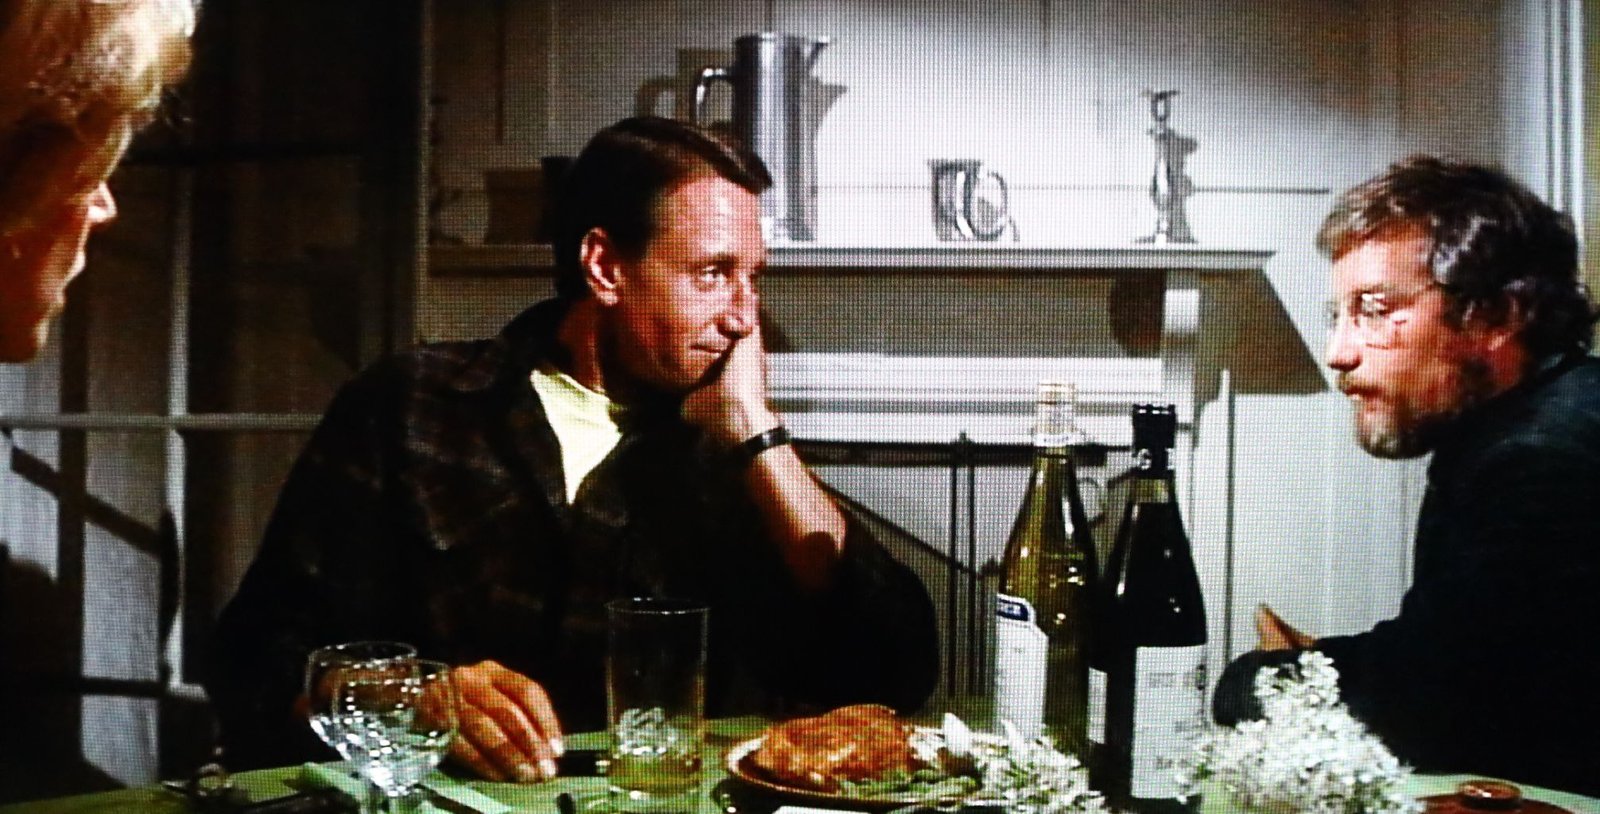
JAWS Dinner Recreation
(We believe this dinner to be some sort of fried fish, clams, and green beans. Recreating this dinner was fun.)
Gordon and I love recreating scenes from our favorite movies, especially where food is concerned.
We wanted to recreate this meal as this dinner scene takes the time to describe the situation that Sheriff Brody is helpless to stop this Great White Shark from terrorizing the island residents of Amity. He then turns to Richard Dryfuss’s character Hooper to come to the island and help stop this predator. Hooper then shows up at the Brody home unexpectedly with two bottles of wine. Red, and White. He also proceeds to eat the food off Martin Brody’s plate.
At first we thought they were eating a fried chicken breast because that is what it looked like. But, when you look at other photos of this meal the “chicken” looks flat on top. That is when I told Gordon that I bet it’s fried fish. We don’t know what kind of fish but we decided to use Cod here. Along with the Green Beans and Clams we cooked for this meal.
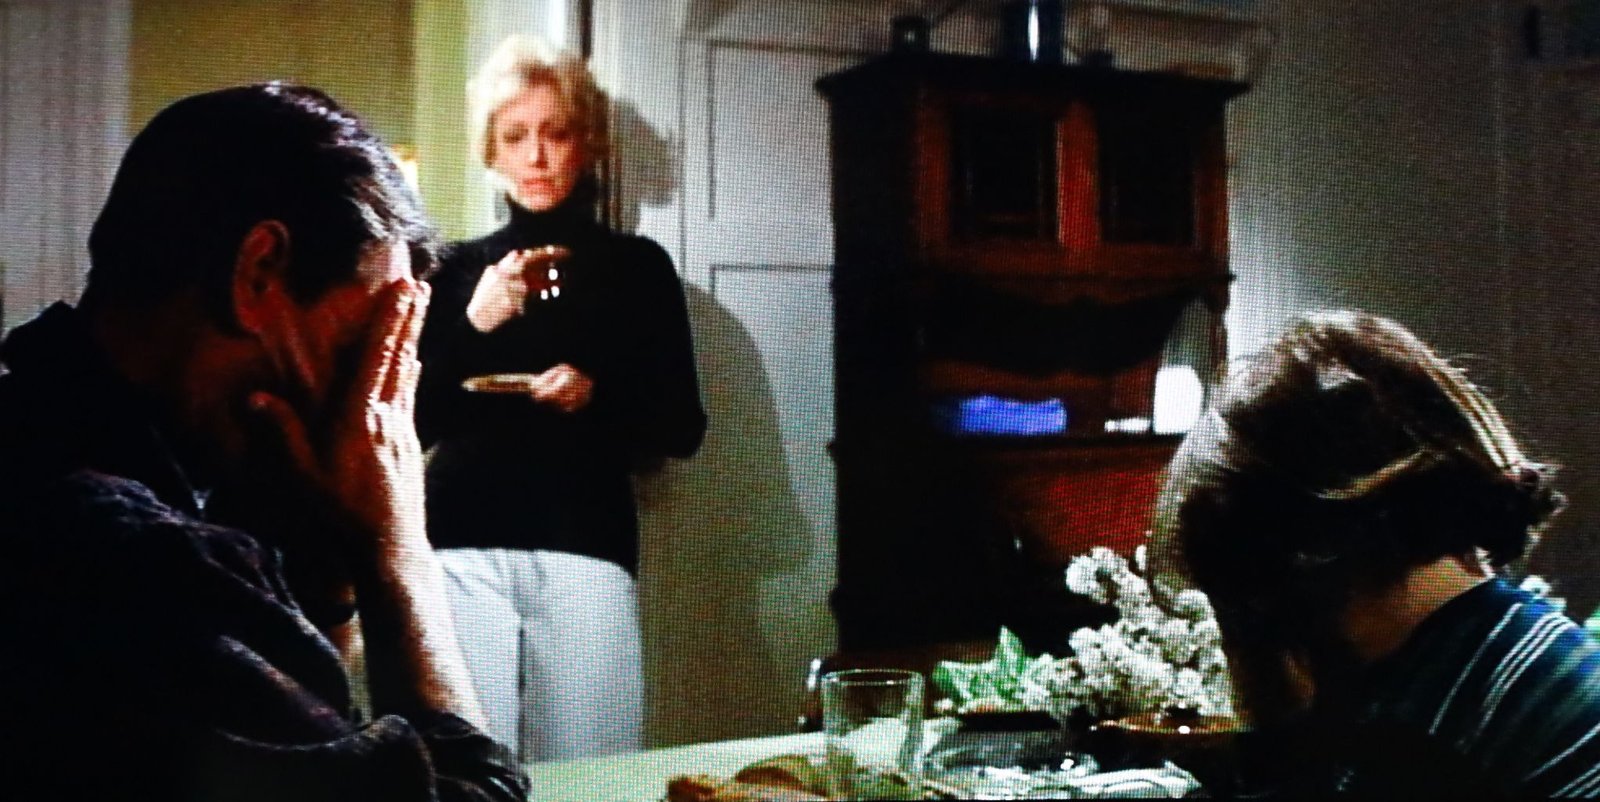

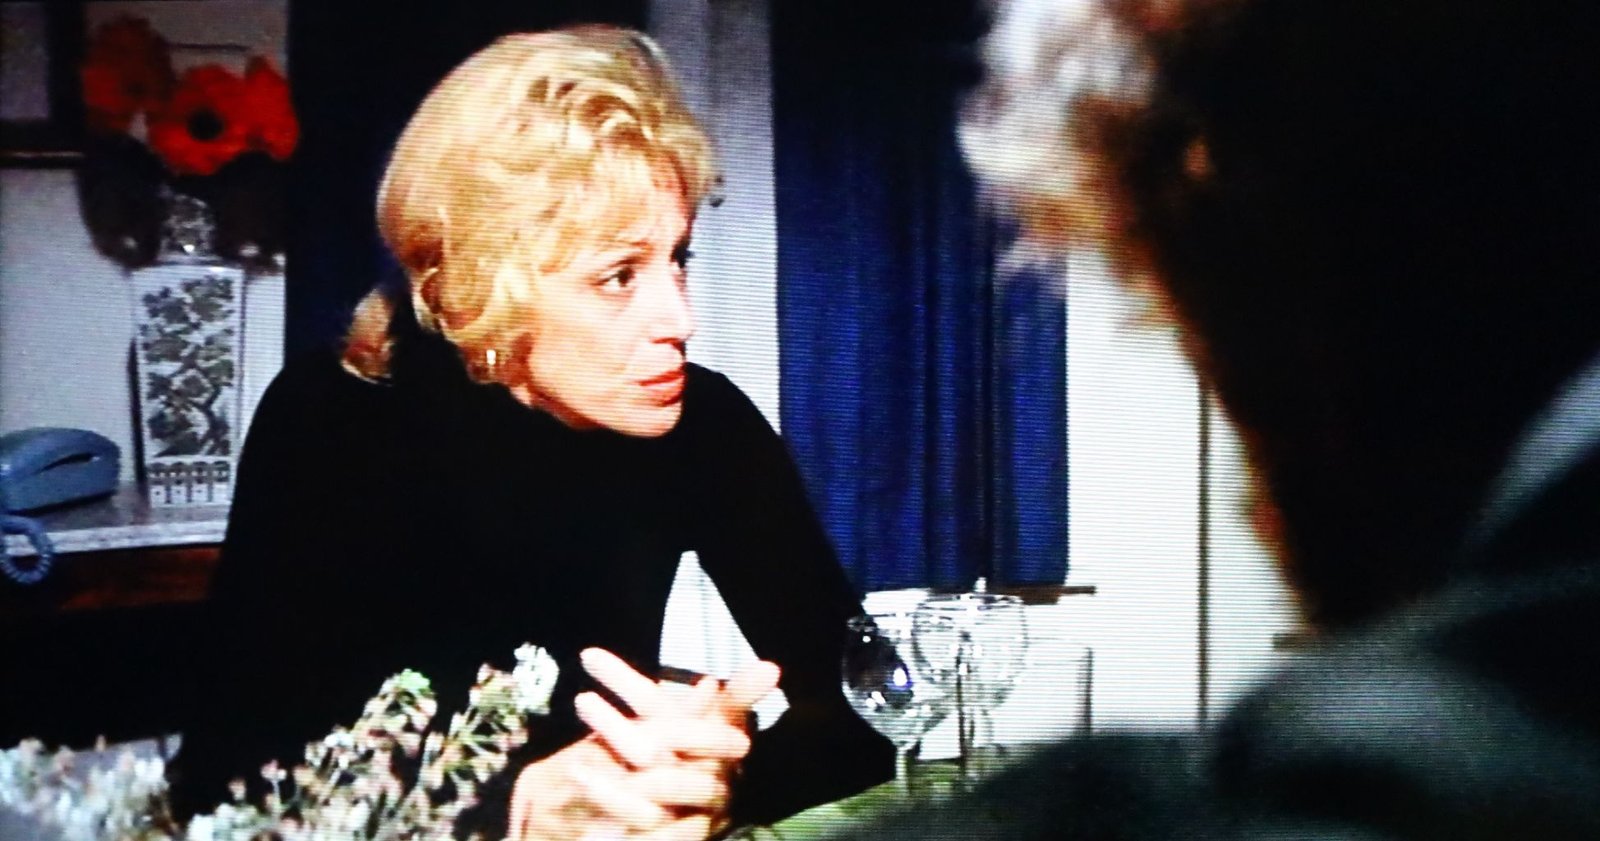
Martin and Ellen Brody with their youngest son, Sean.
The casting of Roy Scheider and Lorraine Gary in the role as the married couple Martin and Ellen Brody, was excellent. They are very believable as a married couple. Interestingly enough, the first actor cast for this movie was Lorraine Gary because she was married to Universal head, Sid Sheinberg. Charlton Heston wanted to play the part of Martin Brody but 26 year old Stephen Spielberg said No.
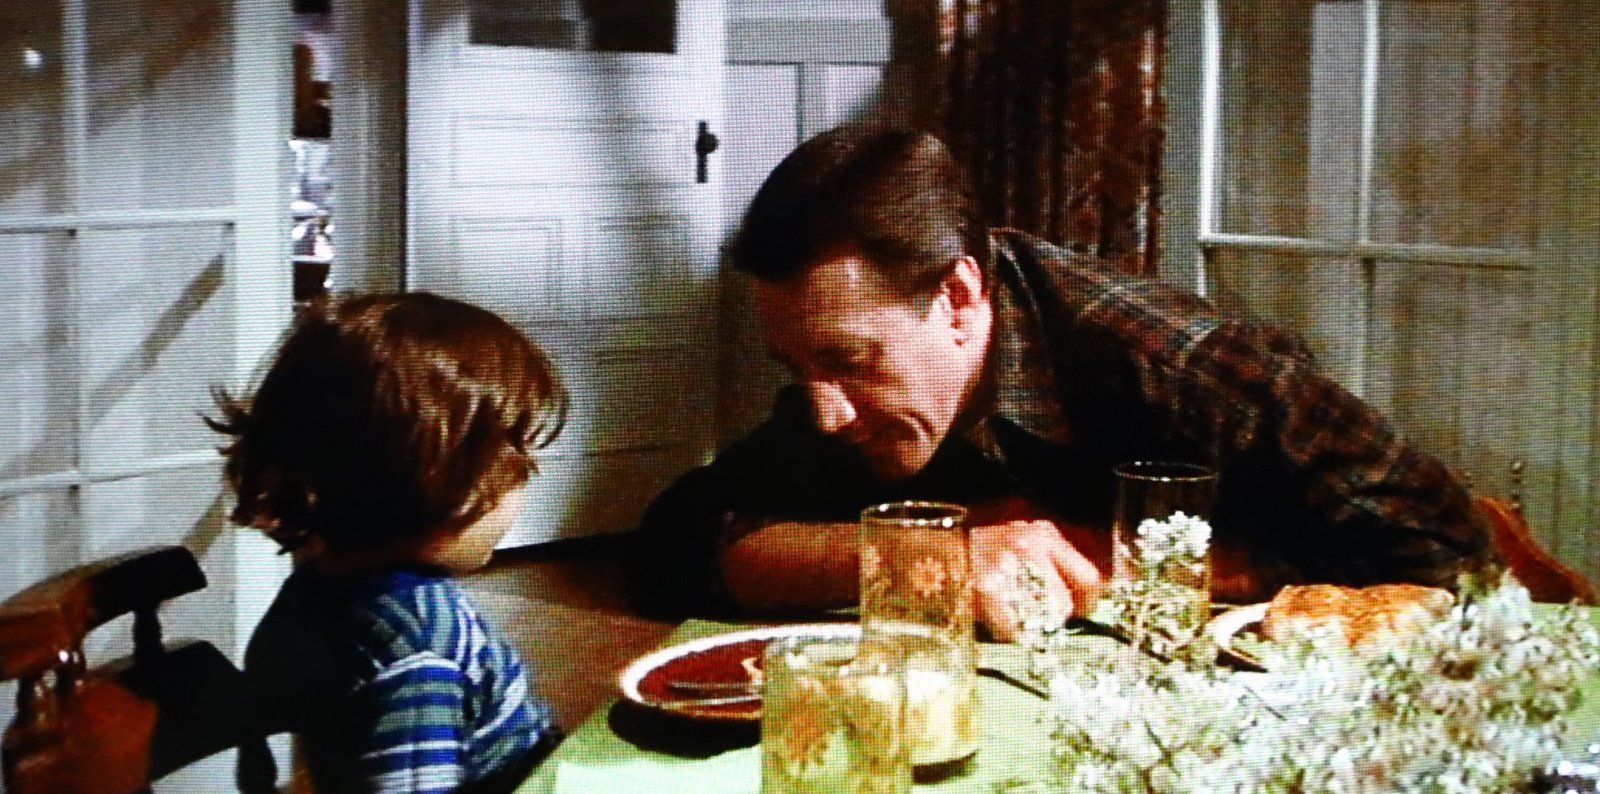
In some photos the fish looks as if it is sitting in a pool of a red sauce. There are a few recipes from the 70’s where fish was cooked and served in a red sauce. So, we decided to go with that regardless.
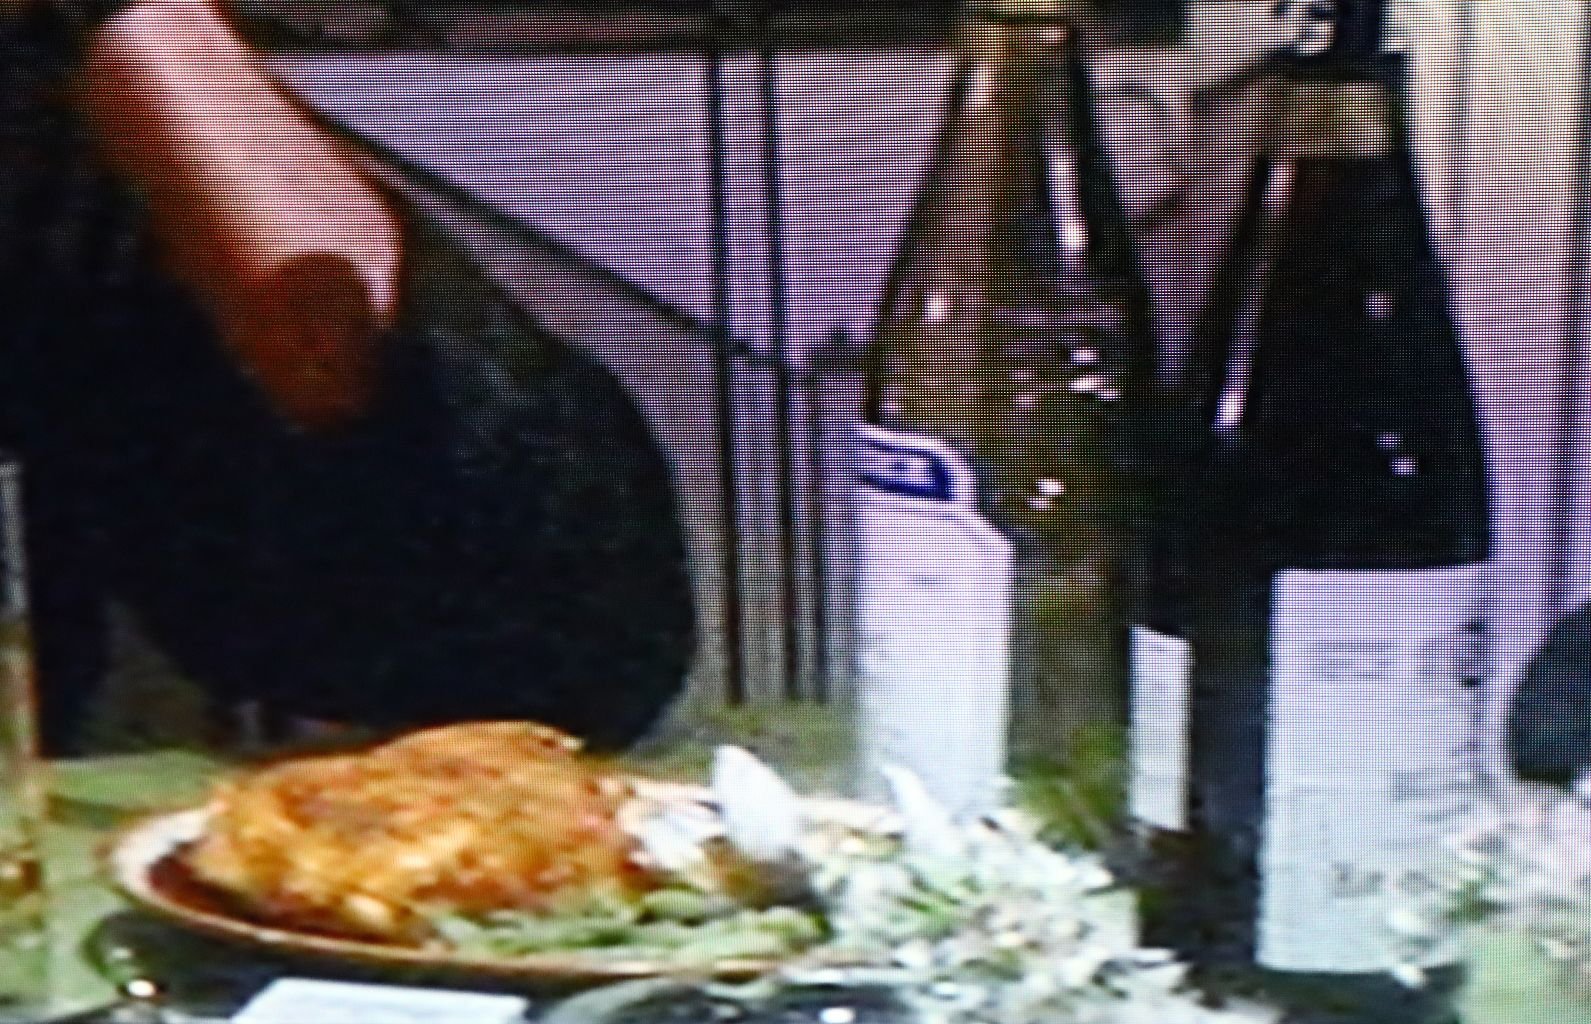

Served with Red and White

Our Fried Fish, Green Beans, and Clams


Where our CLAMS were concerned we did them our way.

When it came to the Green Beans we did do them our way as well.
With lots of Onion Powder, Salt, Pepper, and Clam Juice.
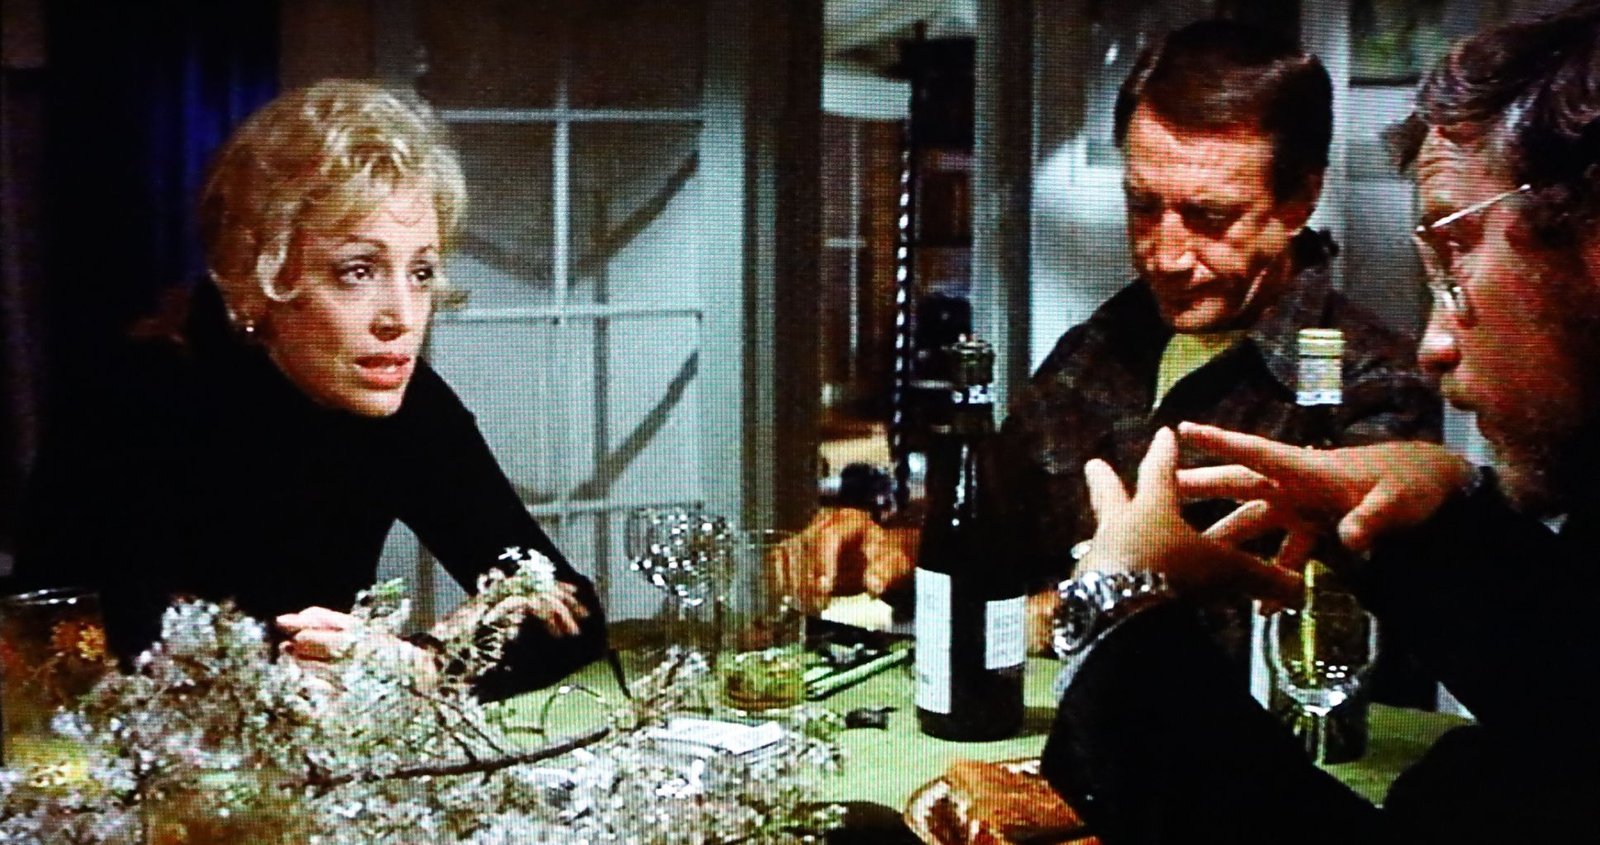
Ellen, Martin and Hooper discussing the shark.
I did my best with what I have here at home to recreate that table scene from above.

Our Fried Cod in Red Sauce
The Shark Plot Thickens

(Recipes for this dinner recreation are listen down below in this post.)
—————————————————-
Our Menu for Our 4th. of July

I, Julie, have the worst handwriting. Sorry.
————————————————-
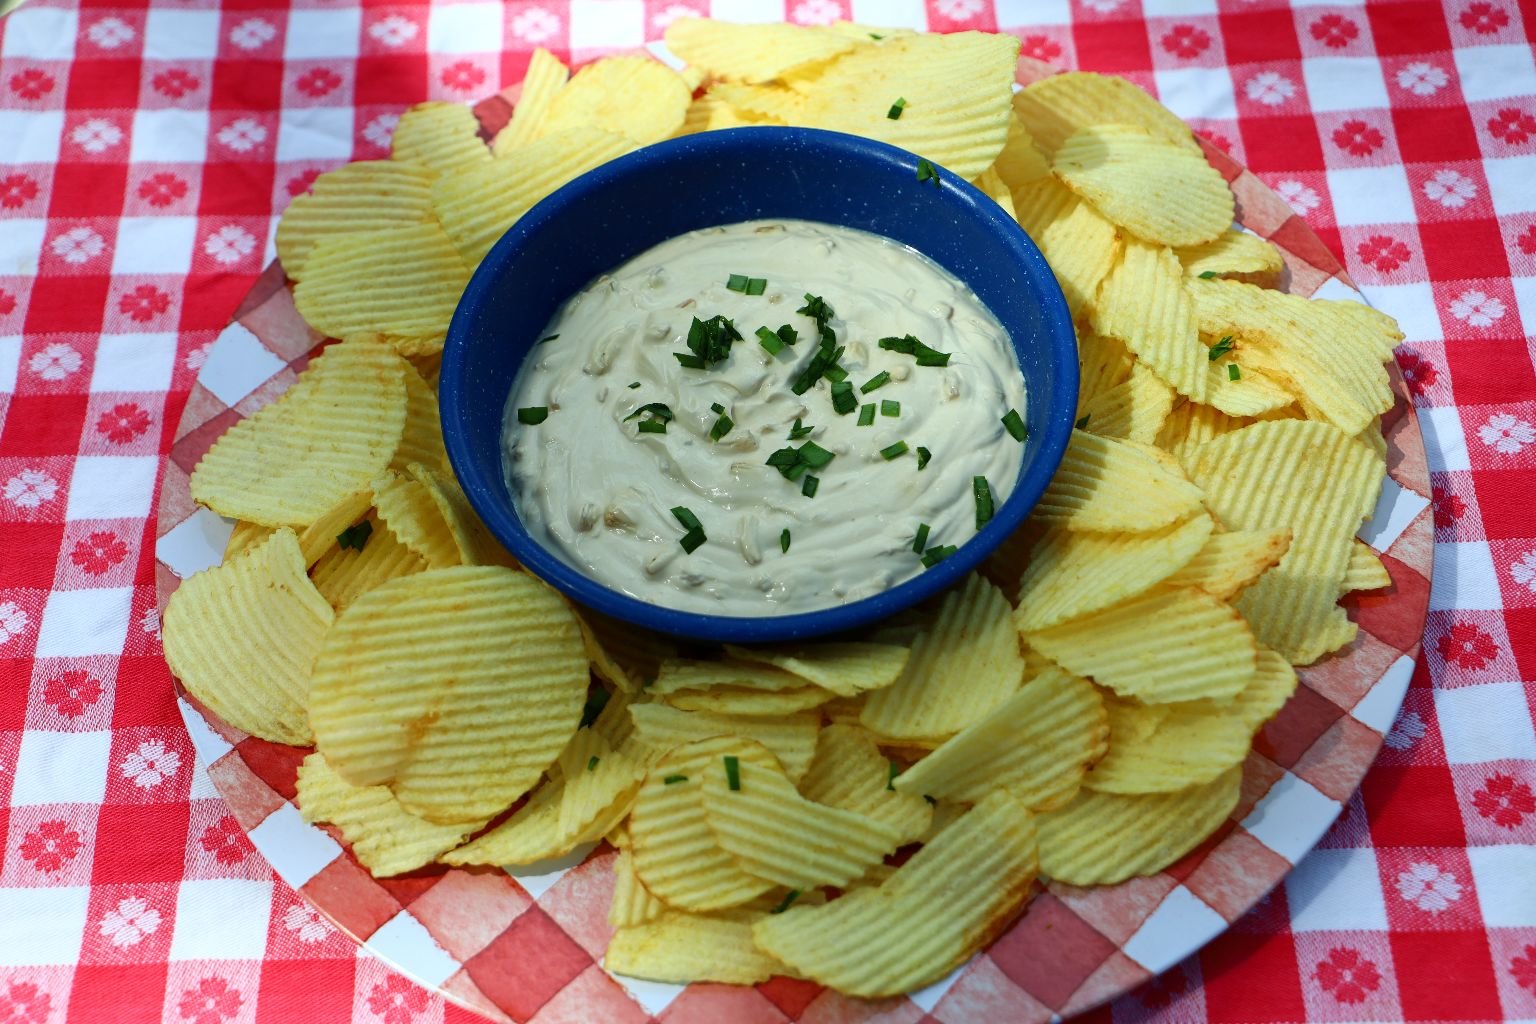
Onion Dip with Chips
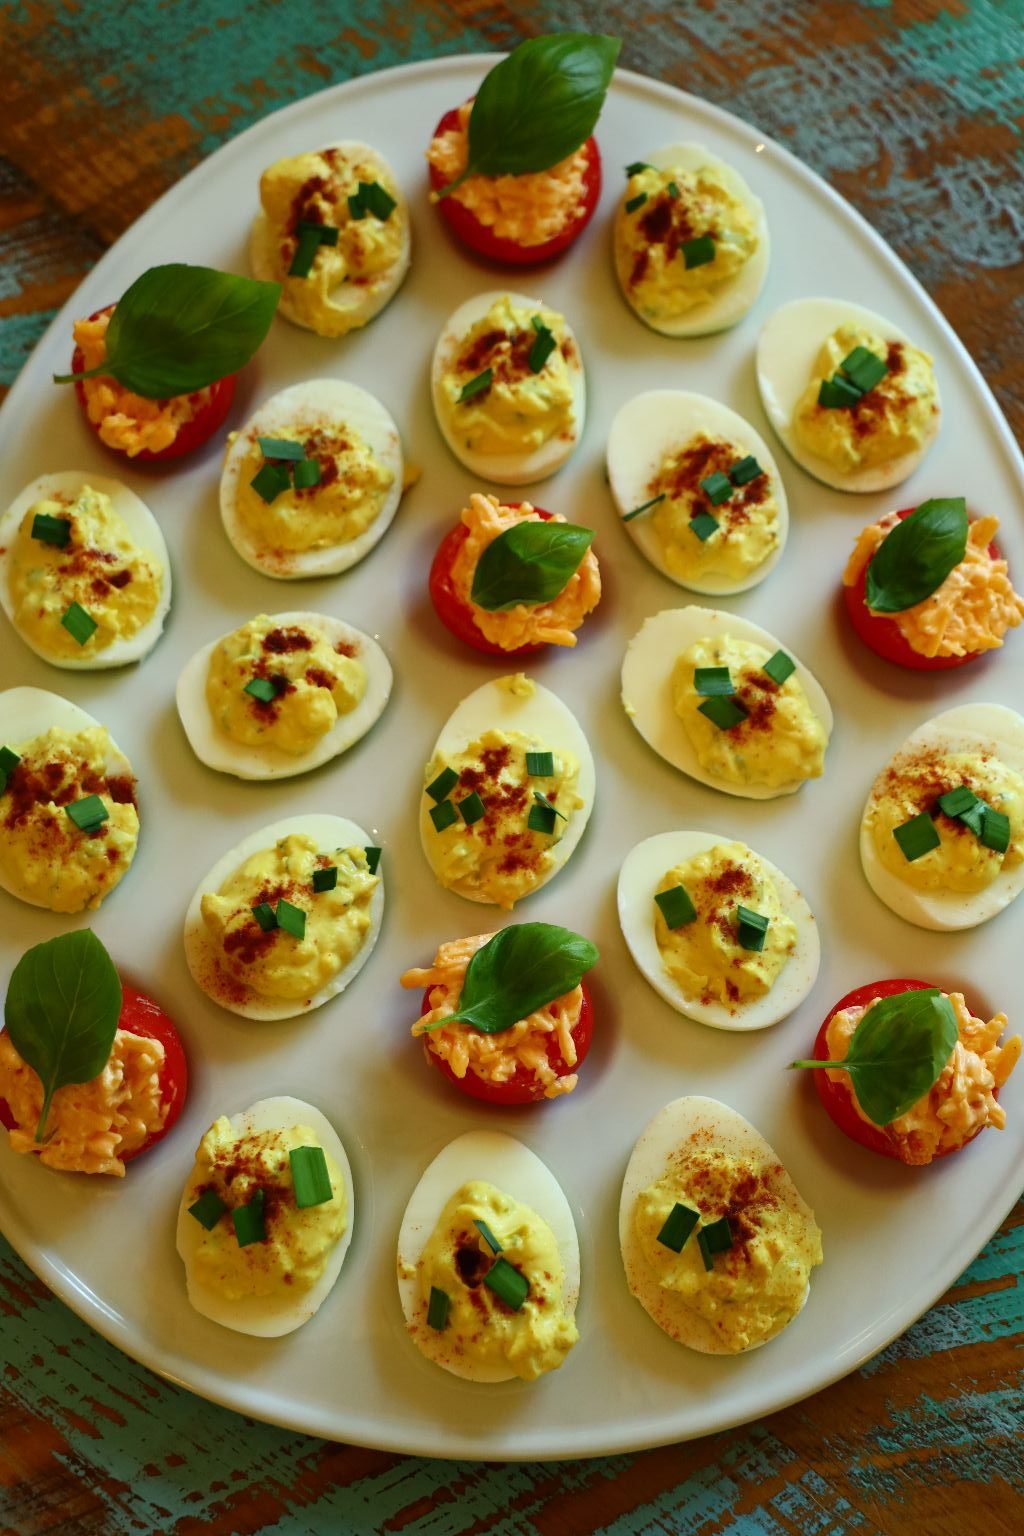
Deviled Eggs and Pimiento Cheese Stuffed Campari Tomatoes

Crock Pot Boston Beans
————————————————–
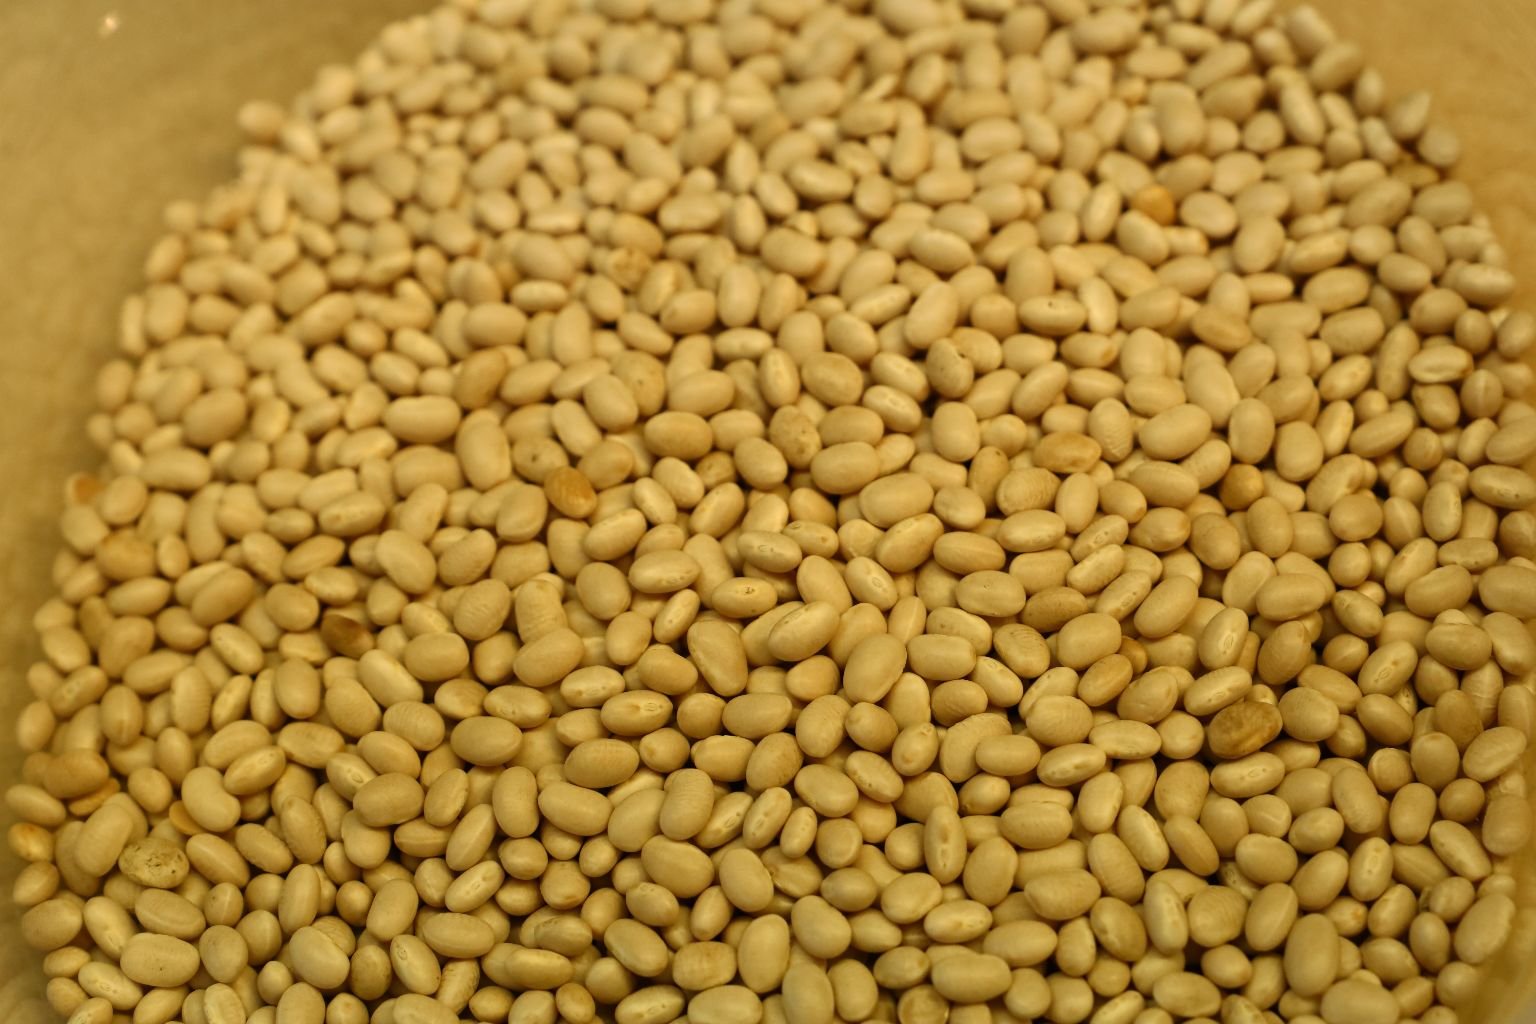
Navy/Northern Beans

——————————————————–

Scalloped Potatoes and Carrots Casserole

Pork Shoulder Picnic Roast with roasted RED Grape Tomatoes
Delicious BBQ Sandwich with Pickle Condiments

Watermelon with Berries
(Recipes All Down Below.)
——————————————————–
First Let’s Start With…..
Onion Dip with Chives and Chips
Taking it back to the 70’s when Onion Dip and Chips were all the rage!
This is very easy. Just add sour cream to a packet of Lipton Onion Soup Mix. Top with some fresh chives and dip with Ruffles Potato Chips.
——————————————————–

Retro JAWS
——————————————————————-

Captain Quint’s
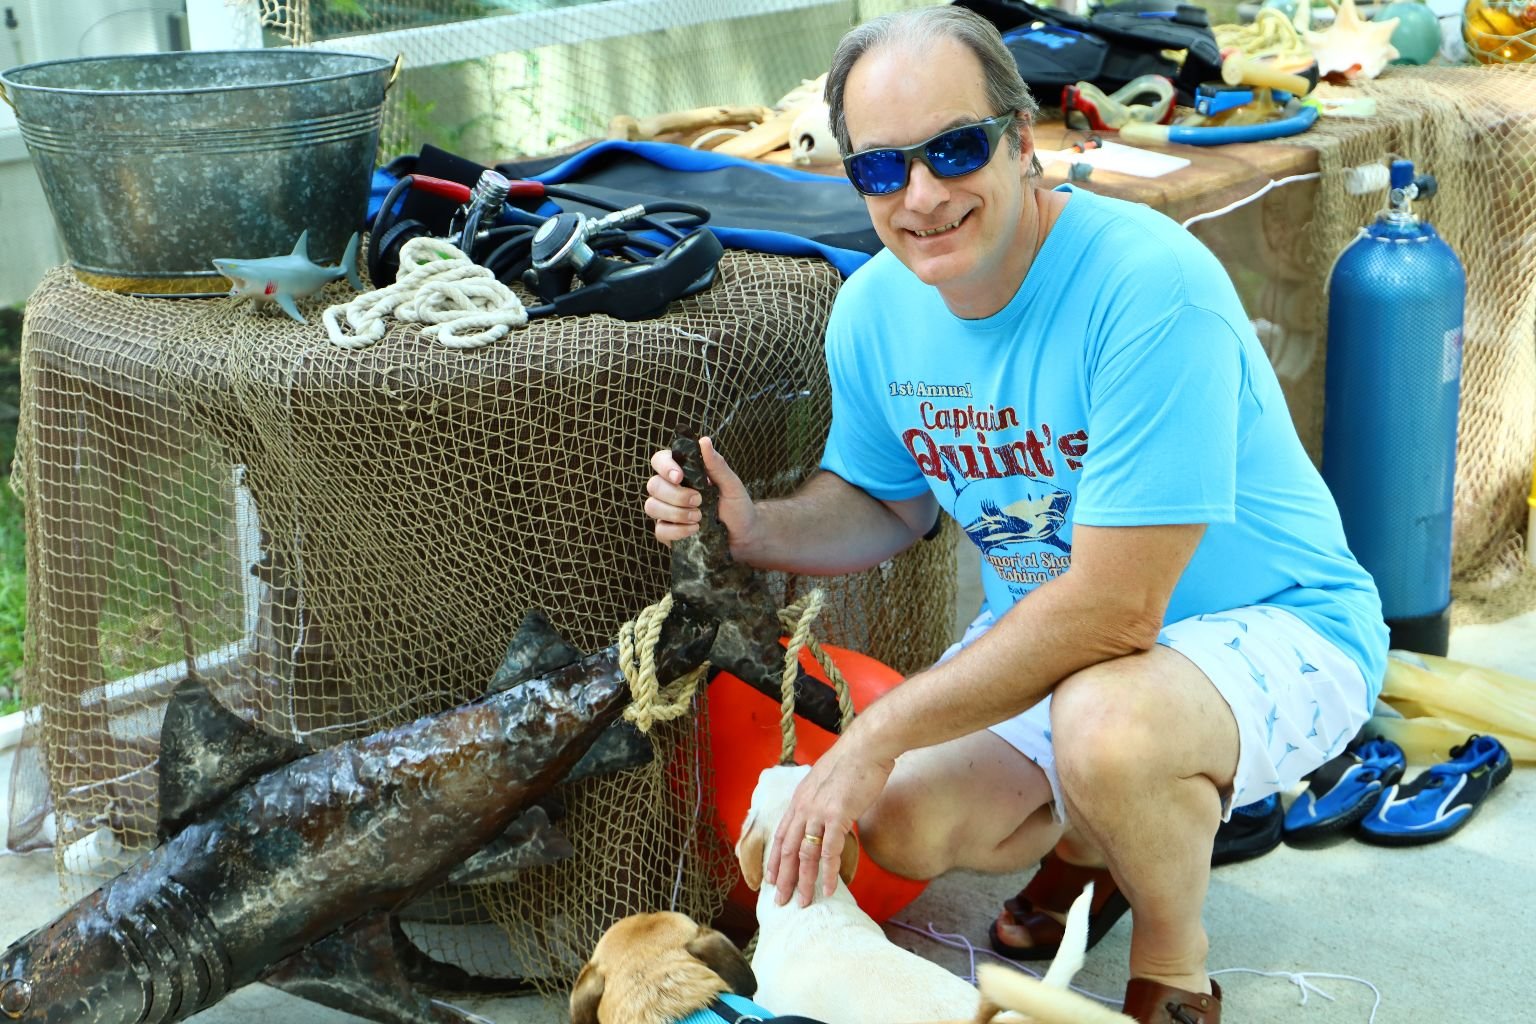
Gordon’s Father’s Day gift from me, a metal Shark.
————————————————————-
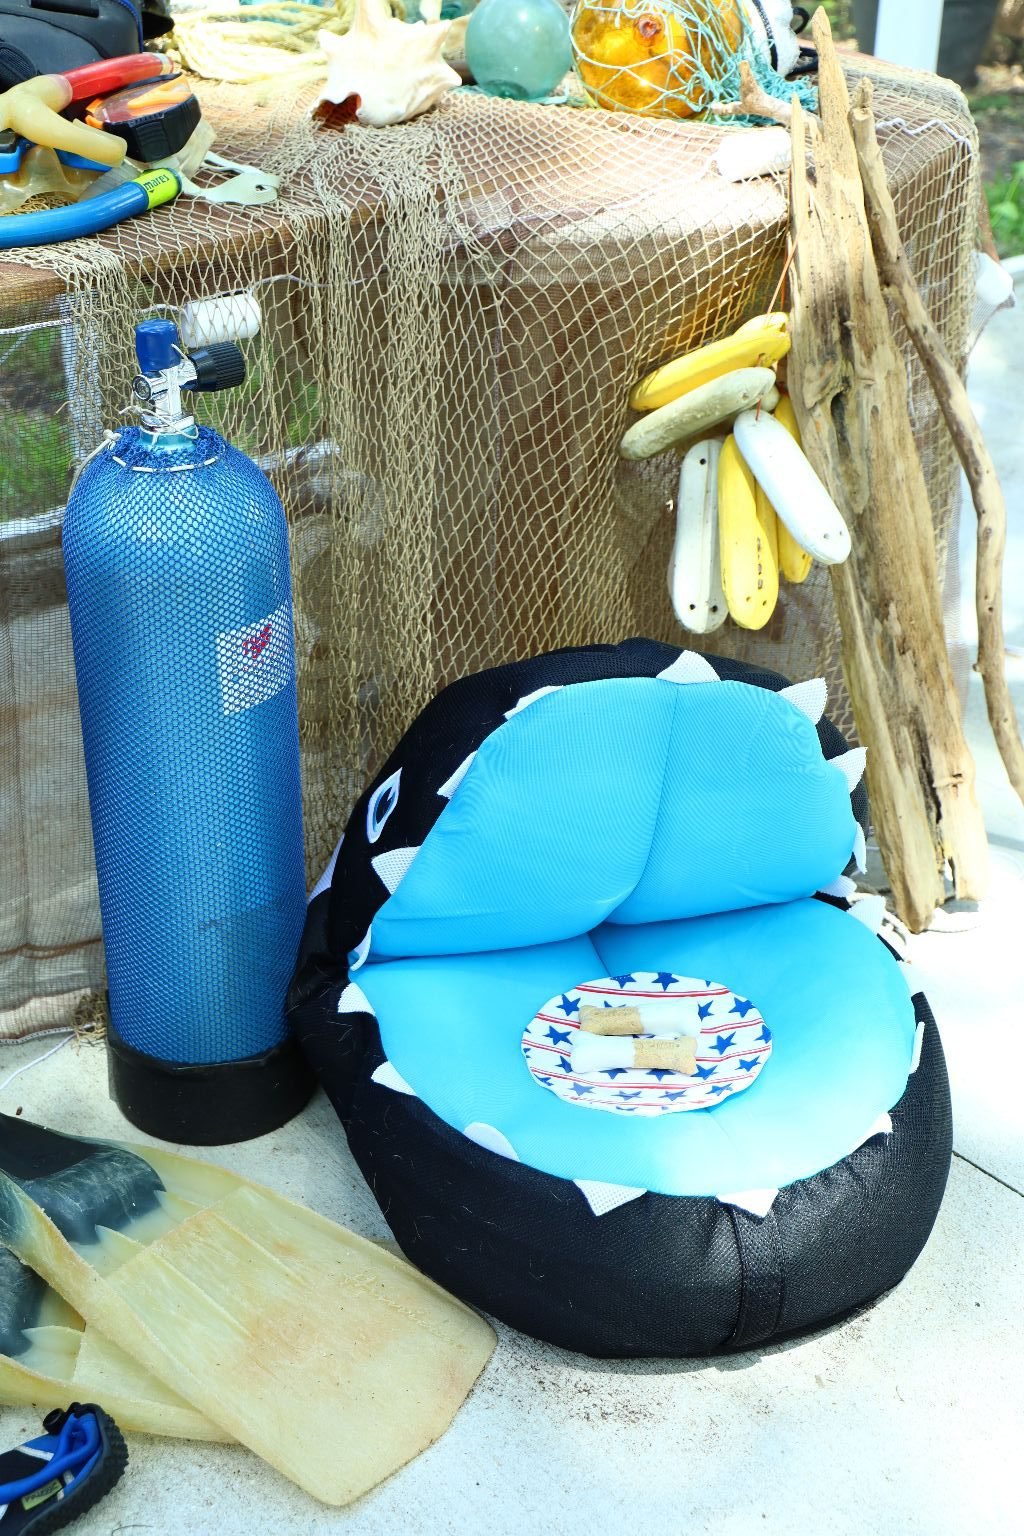

Spooky and Sparky

What’s this? It smells delicious.
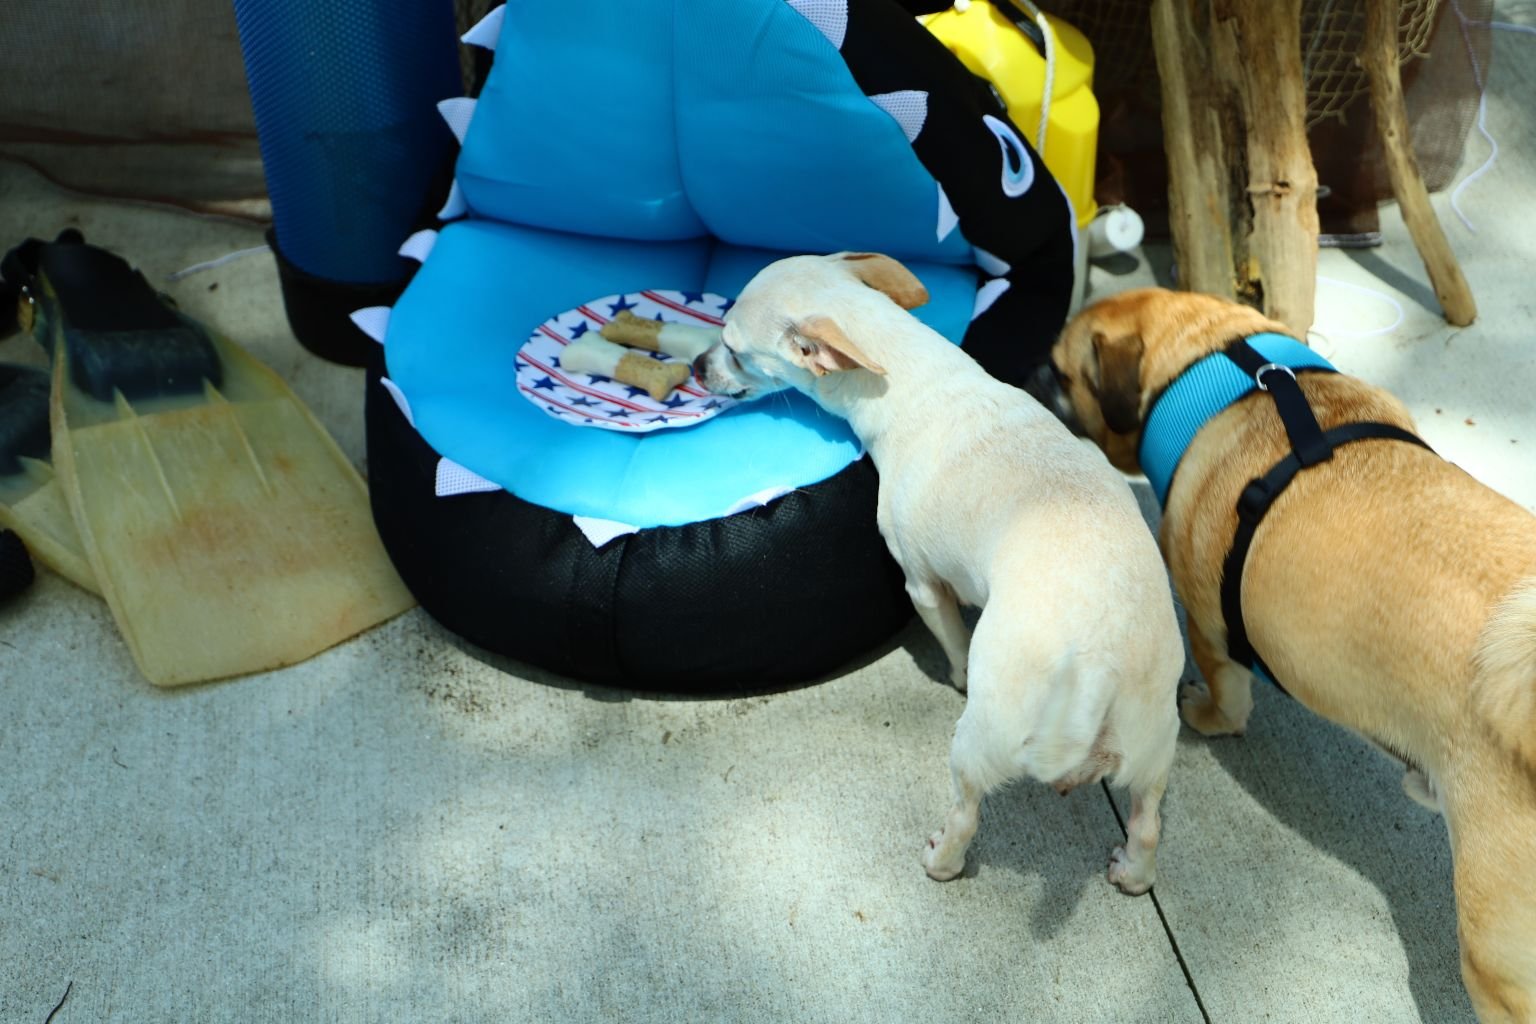
Into The Mouth of JAWS they go!
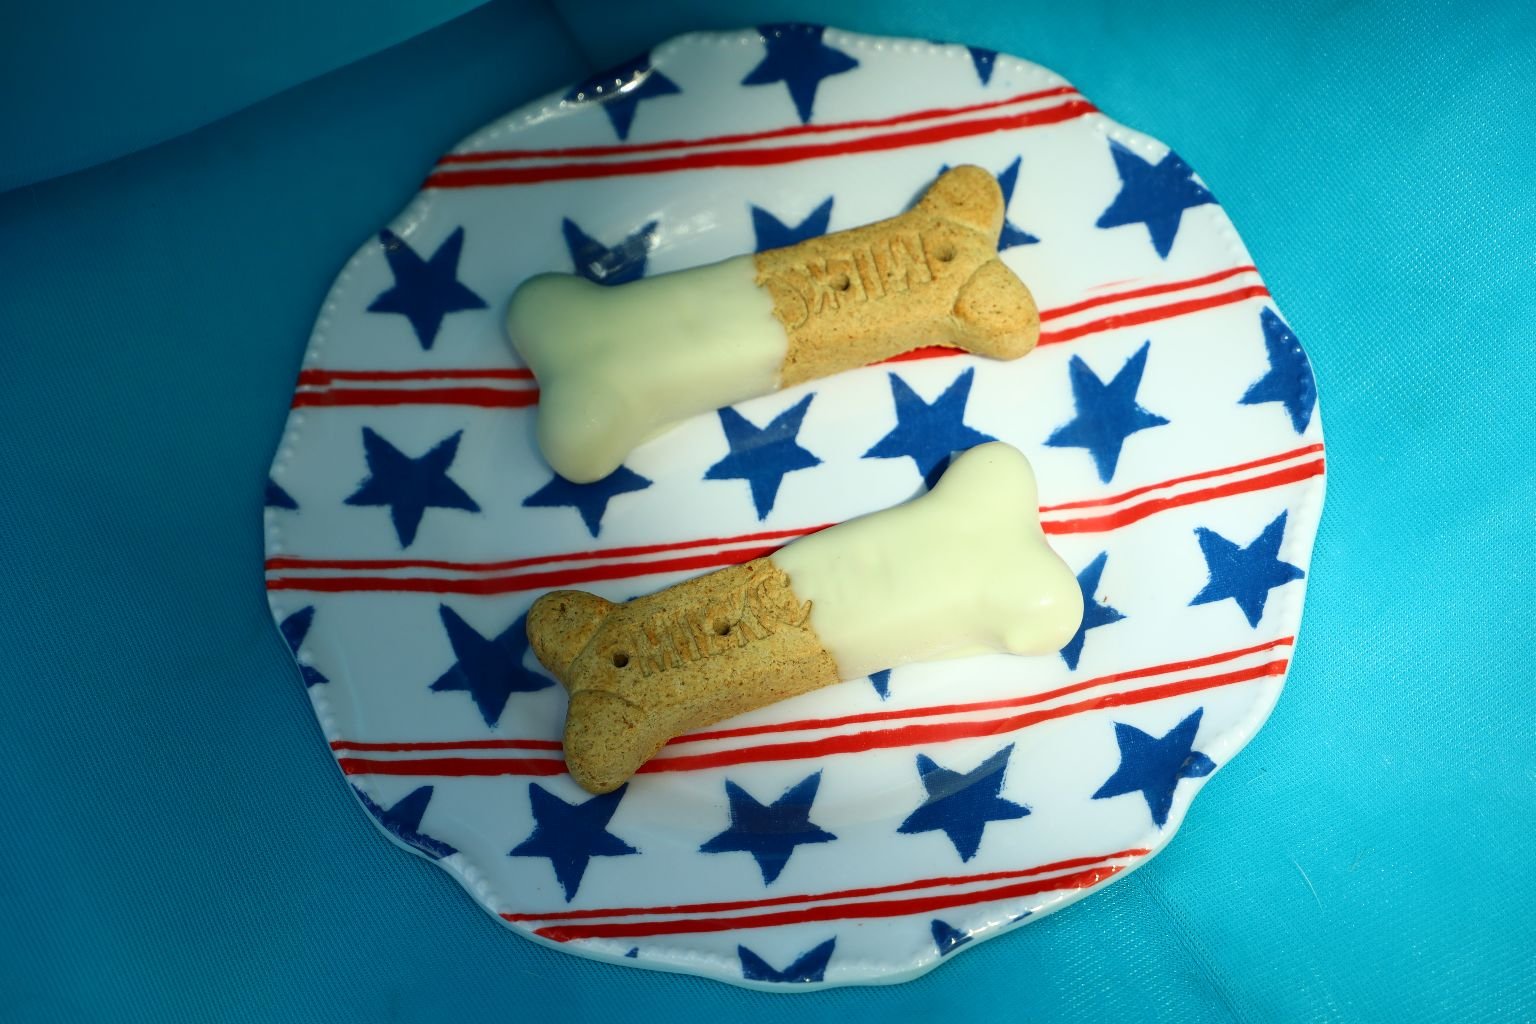
The Temptation of a good Dog Biscuit
——————————————————-
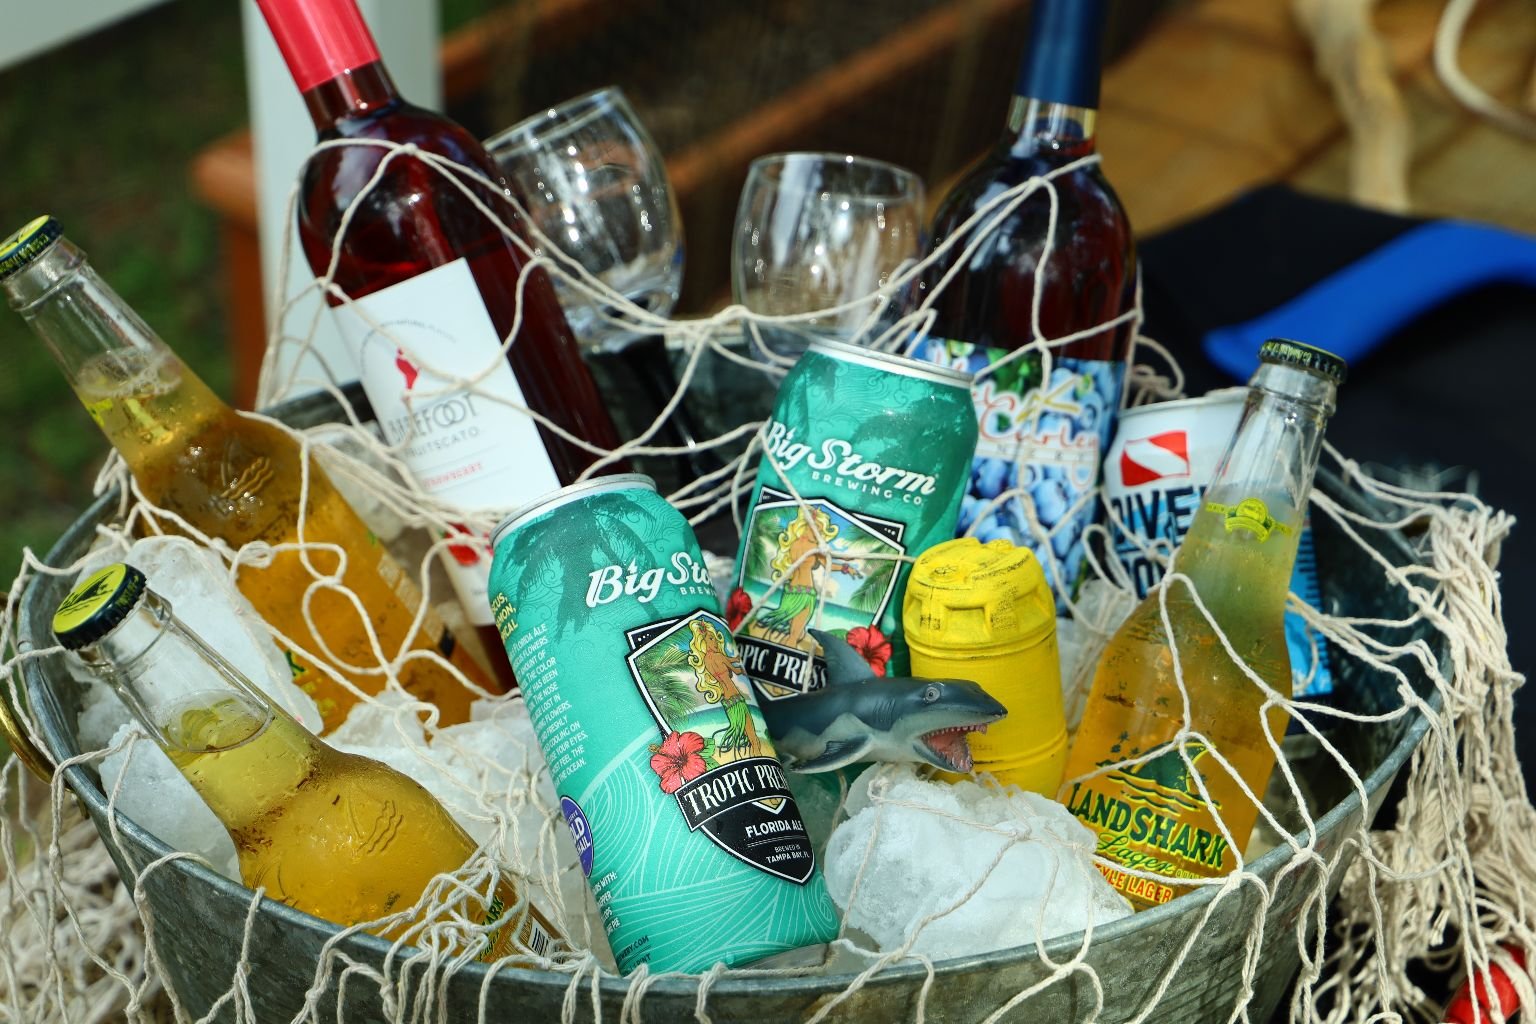
Nautical Refreshments on ICE

Beer, Wine Cooler’s, Wine
(Note the YELLOW barrel.)

Cool and Refreshing
————————————————————
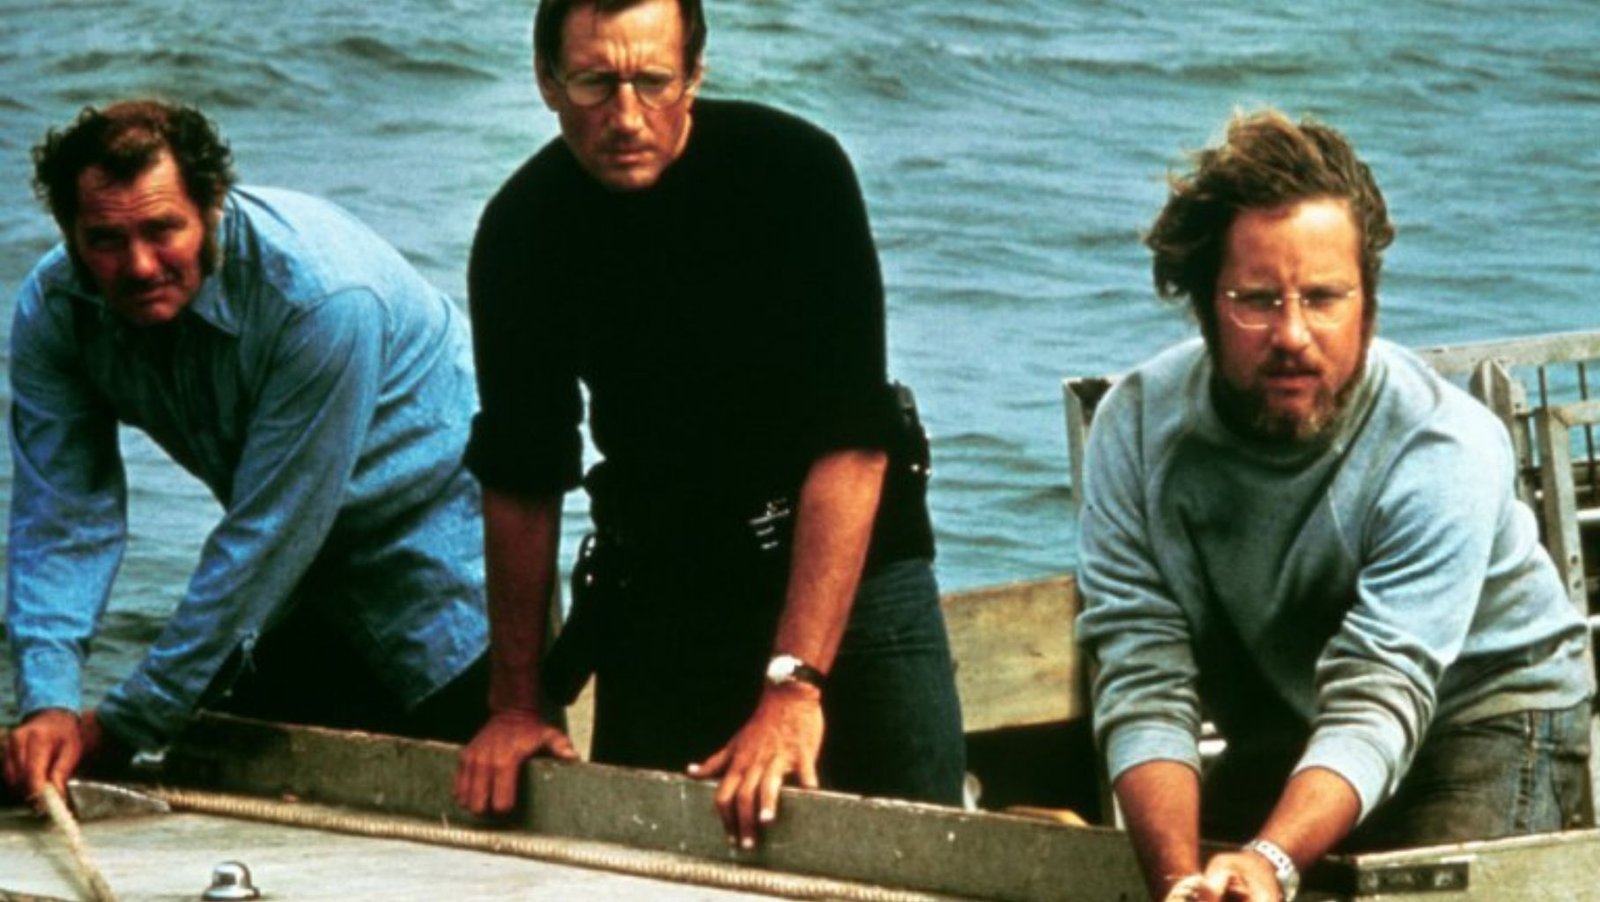
Robert Shaw, Roy Scheider, and Richard Dreyfuss
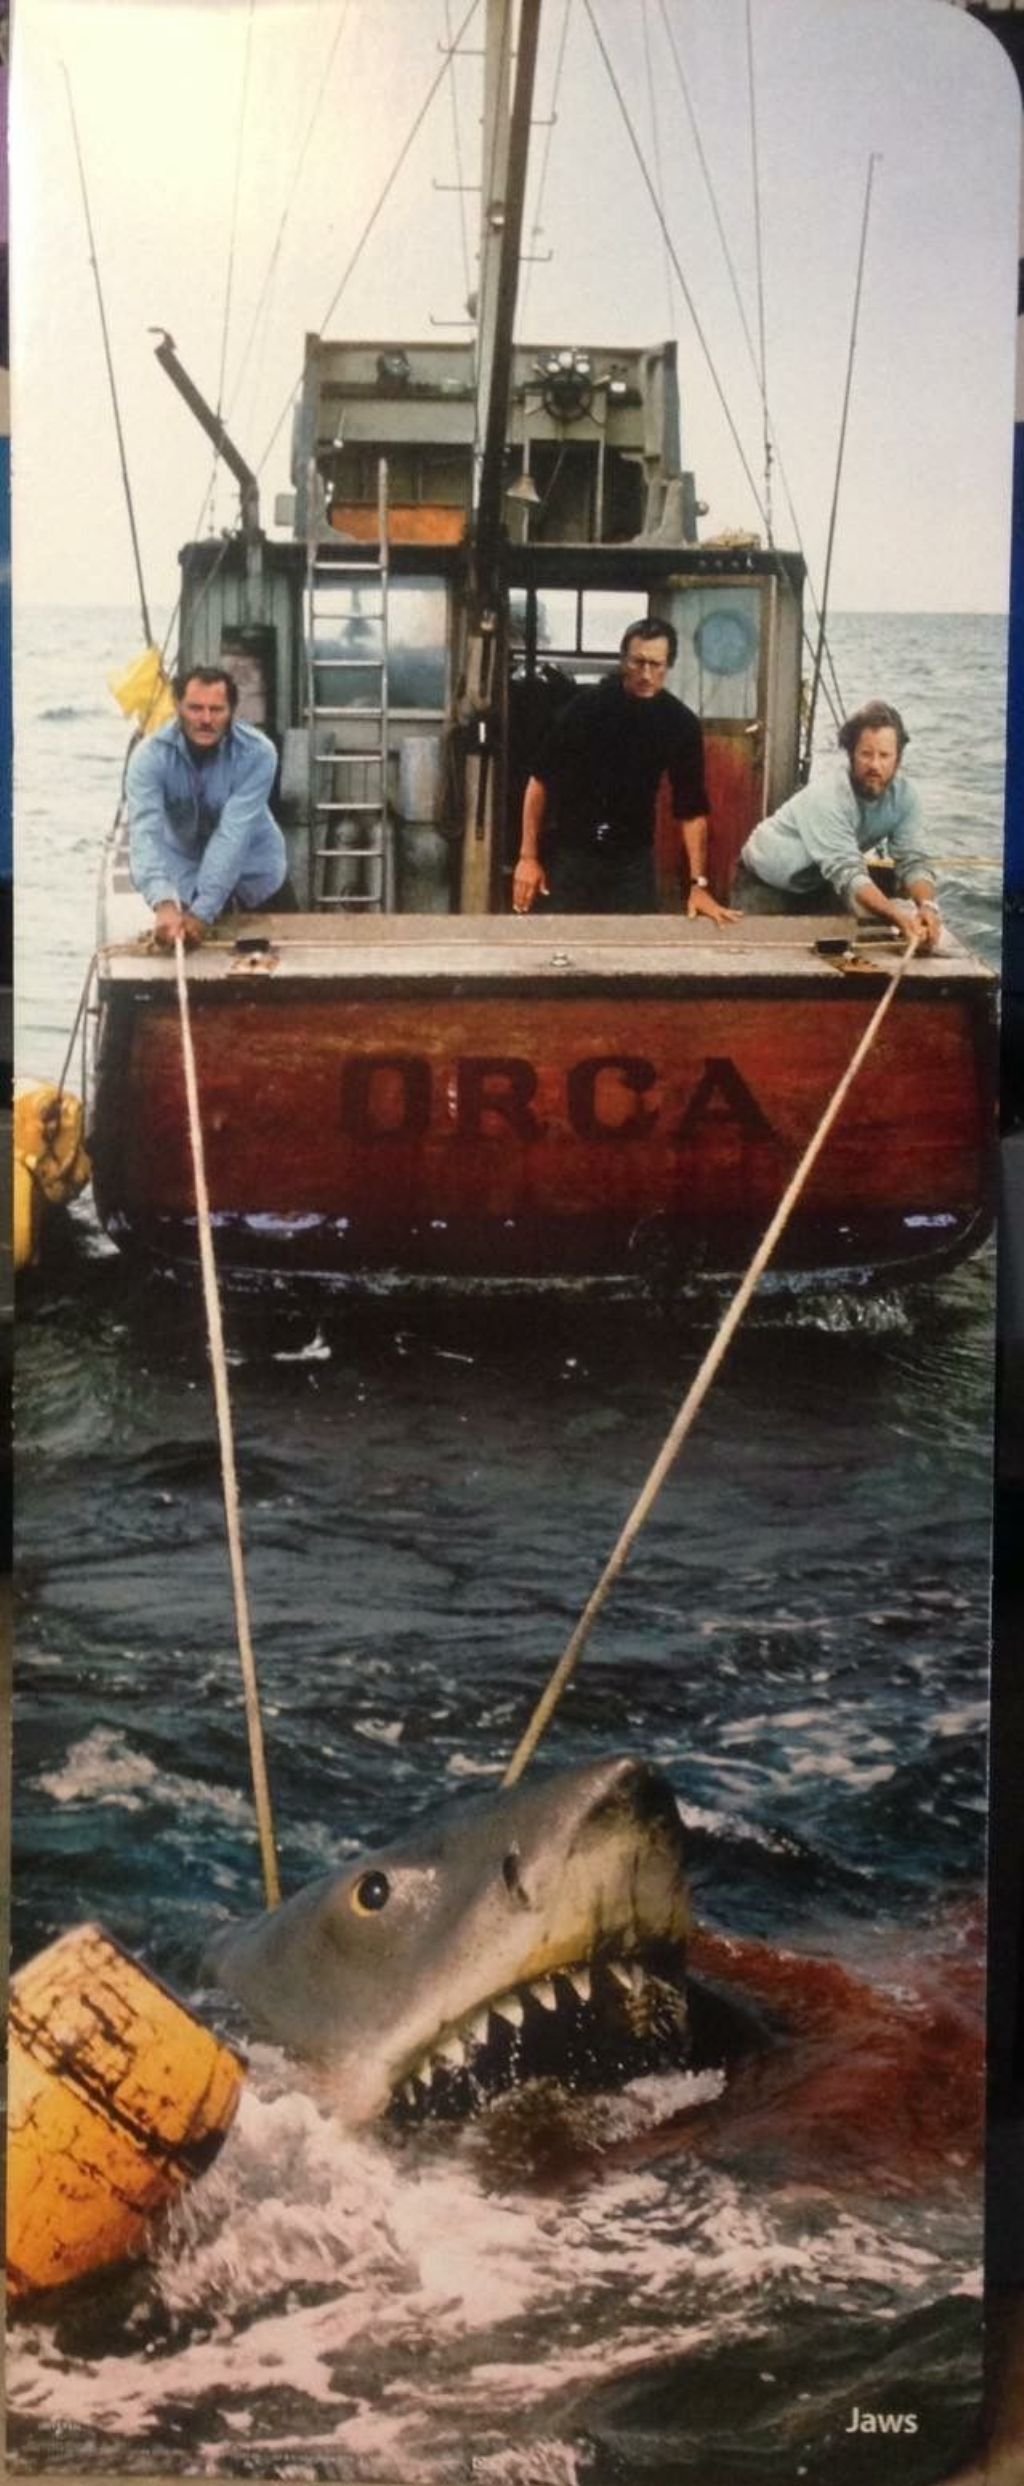
The ORCA, JAWS, And, The Yellow Barrel
———————————————————–


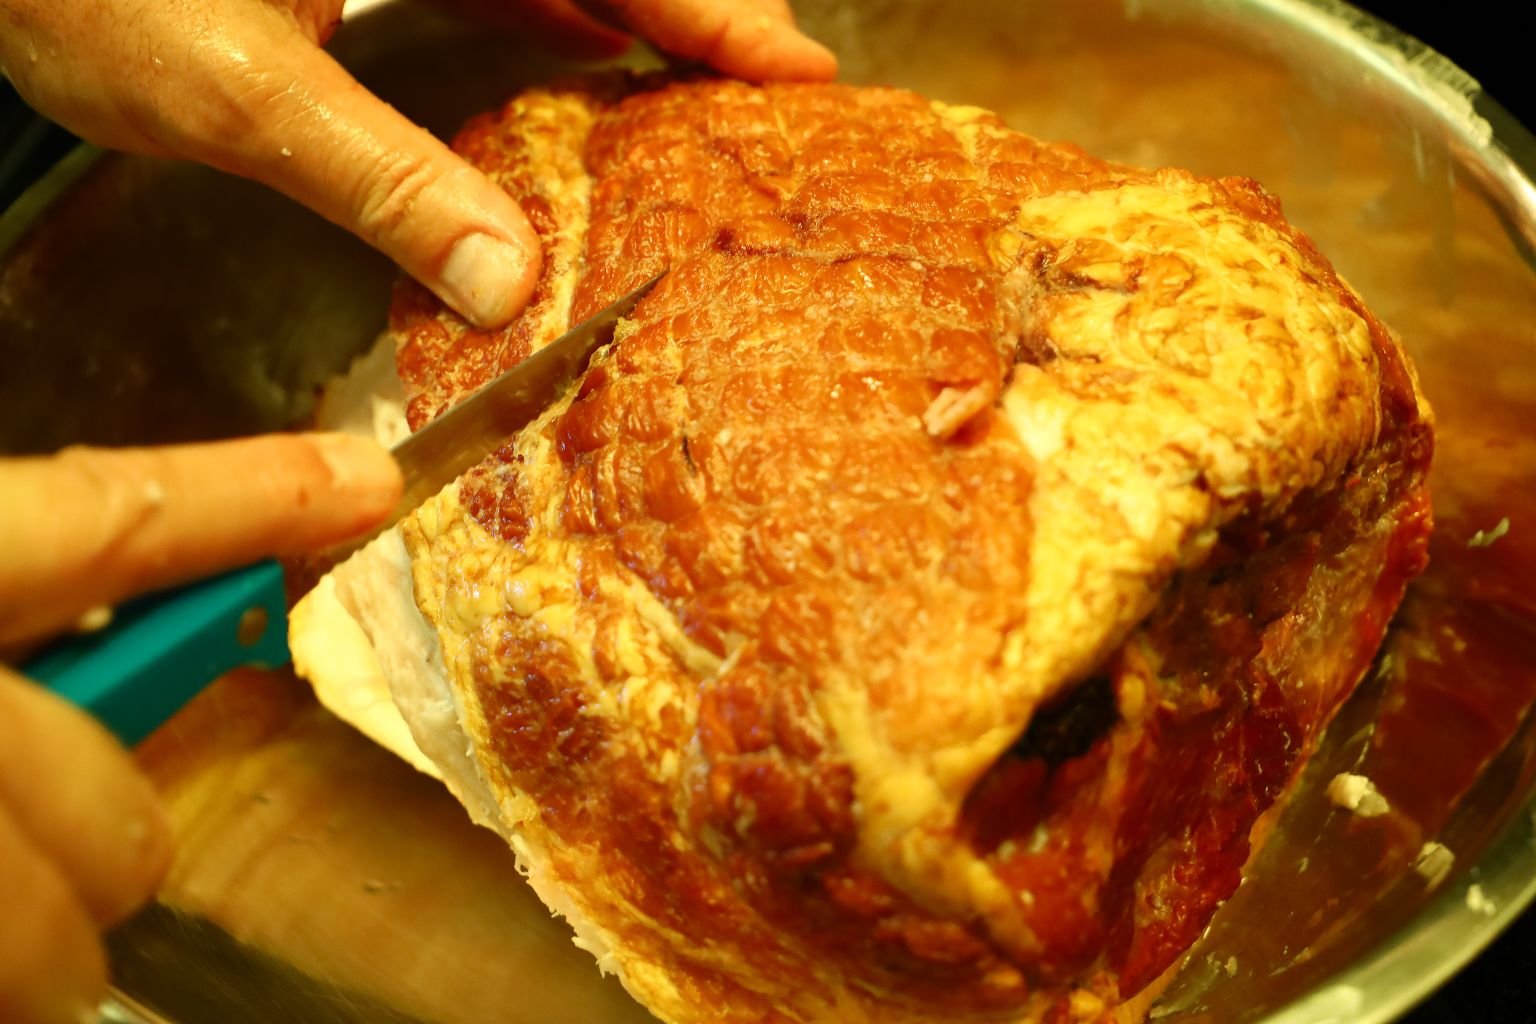
Our Meat on the Hook


Amity Island Grocery Holiday Roast $1.79 a pound.
Come and Get it!
(If you are a JAWS fan then you will understand Gordon’s t-shirt above.)

I suppose that I, Julie, should explain the Hook.
This was my idea to cook some large piece of meat on a hook and then use a knife to slice off chunks of it, as needed, by our various guests. However, with the pandemic there were no guests. Just Gordon and Myself. We did make lots of food to share with our kids and their partners. They just got their food the following day.
My original idea was to place a large hook through the meat and have Gordon to grill it on the grill. Then when ready to string it up for us to admire and of course, EAT!
—————————————————————-

Ringing
THE Dinner Bell
Pork Shoulder Picnic Roast with Delicious Bark
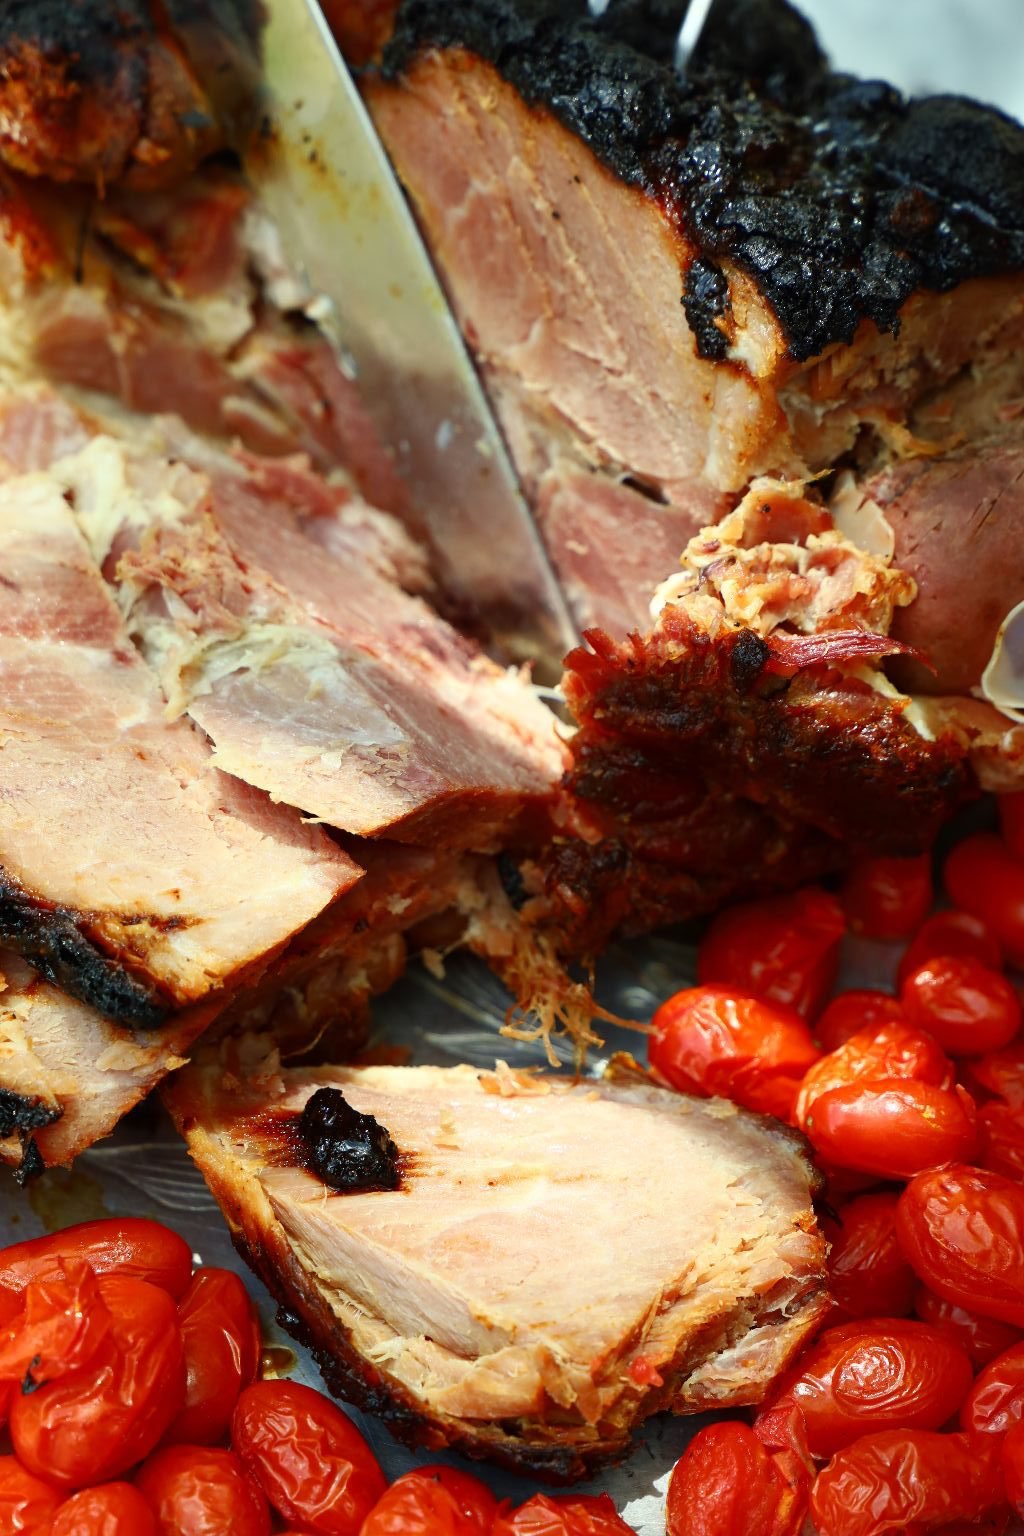
…..and Roasted Grape Tomatoes.
————————————————————-

Our Plate, Cutlery, and Condiment Table


Paper Plates, Cutlery, Napkins, our Homemade Almost Yellow Mustard, and Pickles and Peppers

My new favorite, cheese stuffed Pepperoncini.
——————————————————————-
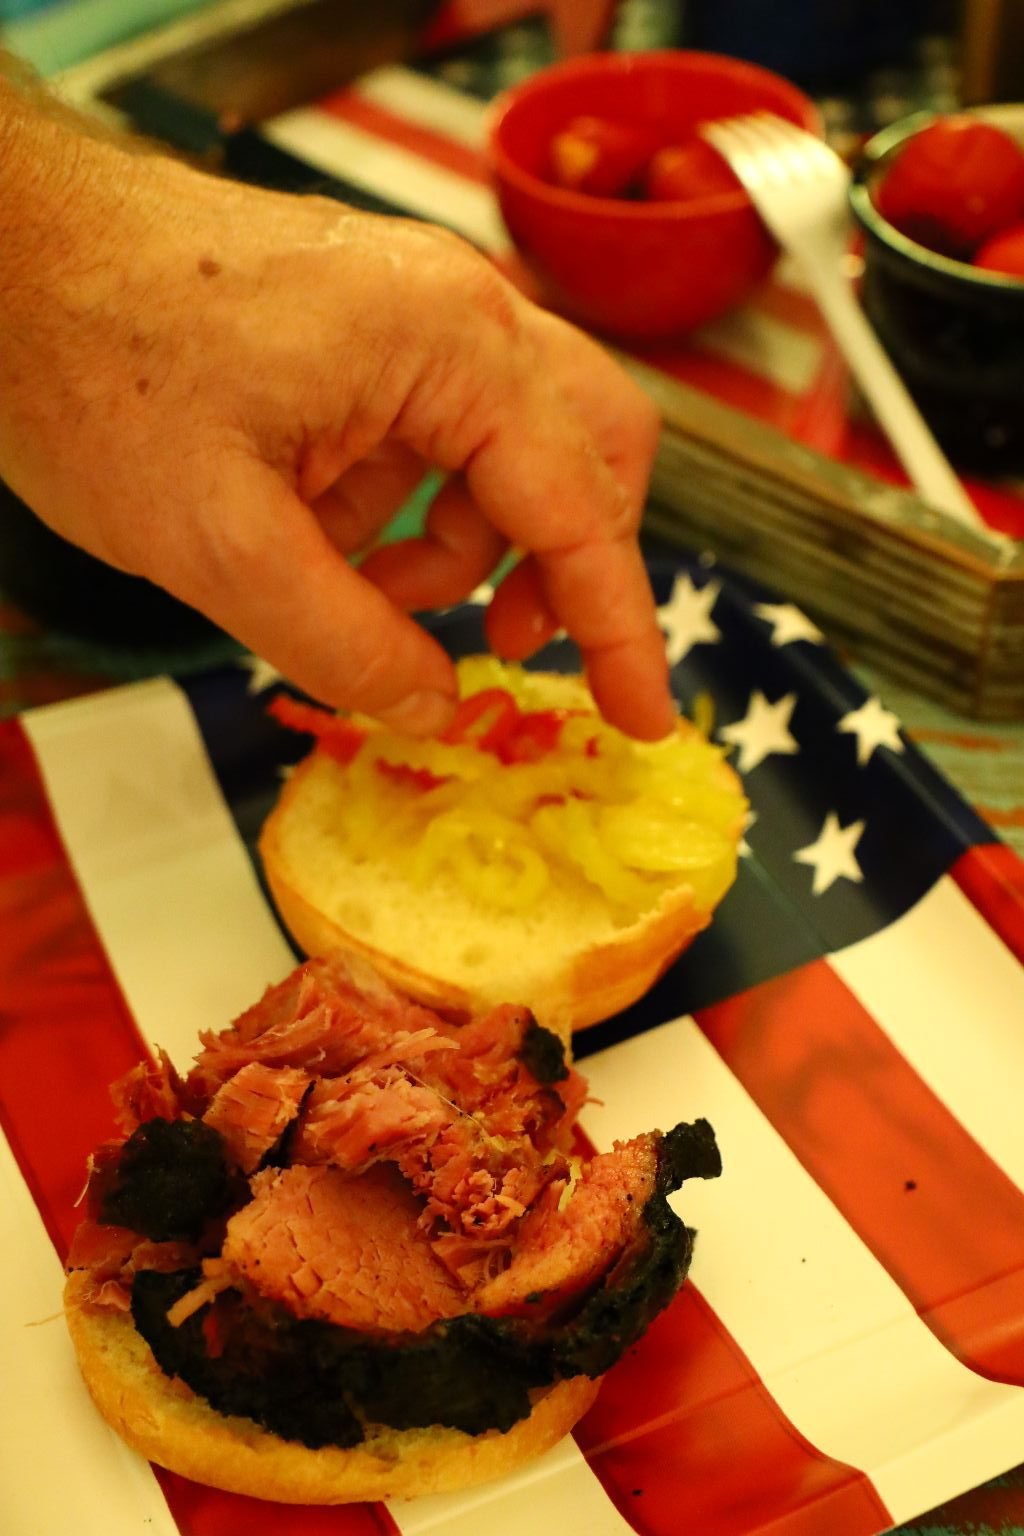
The Day After


Our Delicious Leftover Dinner
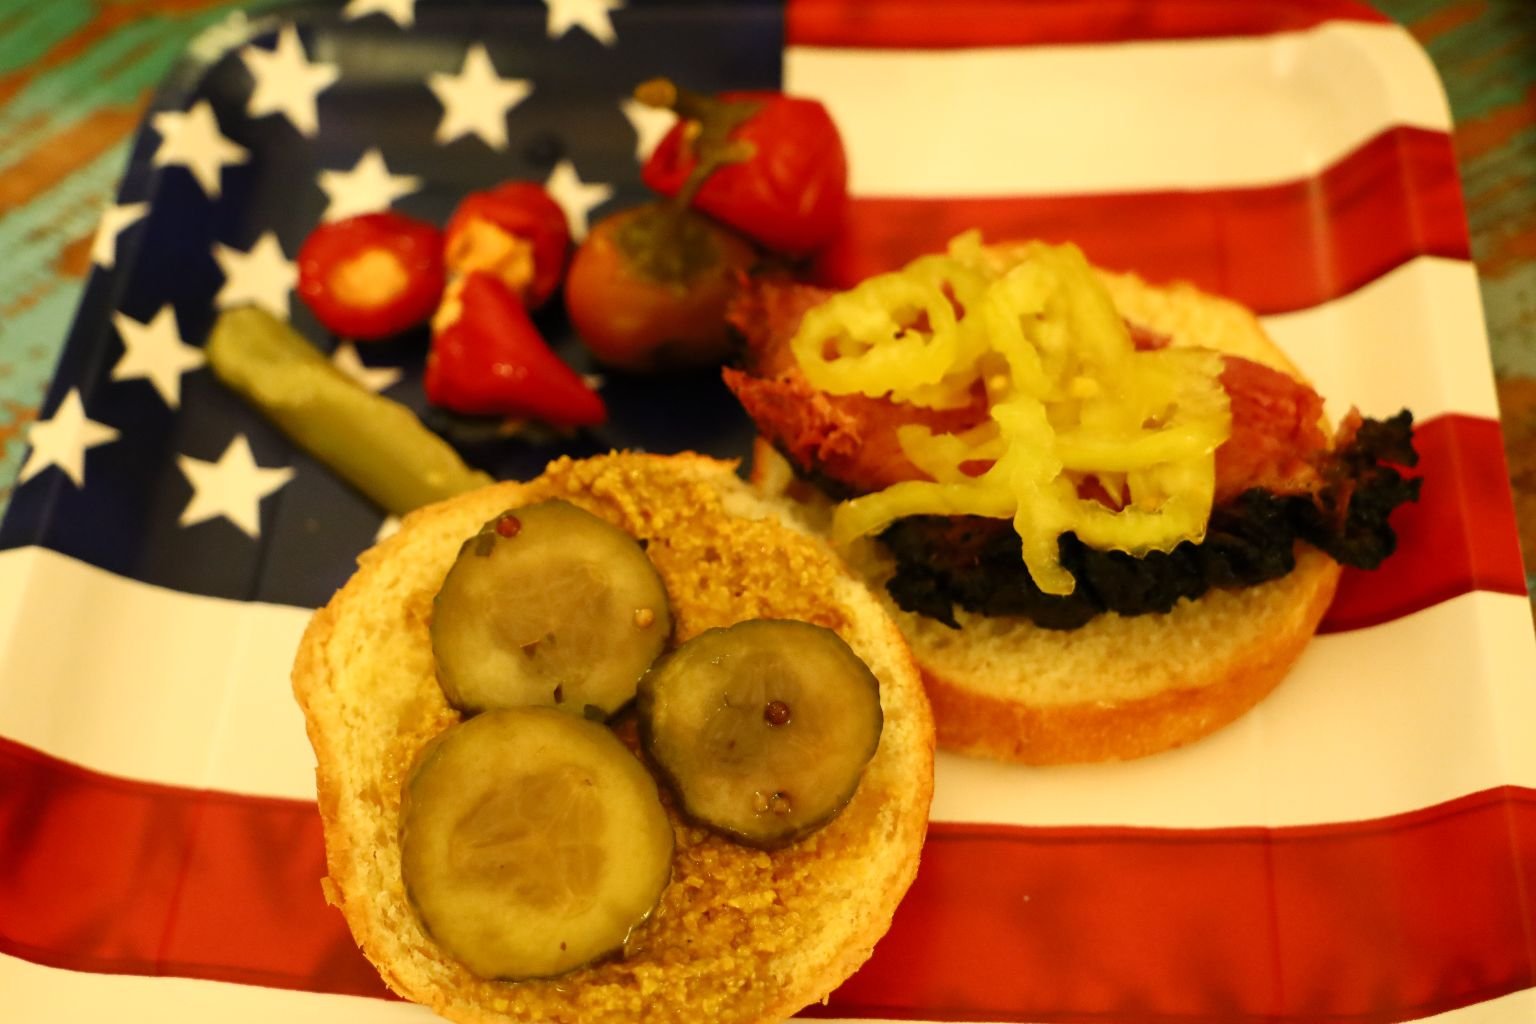
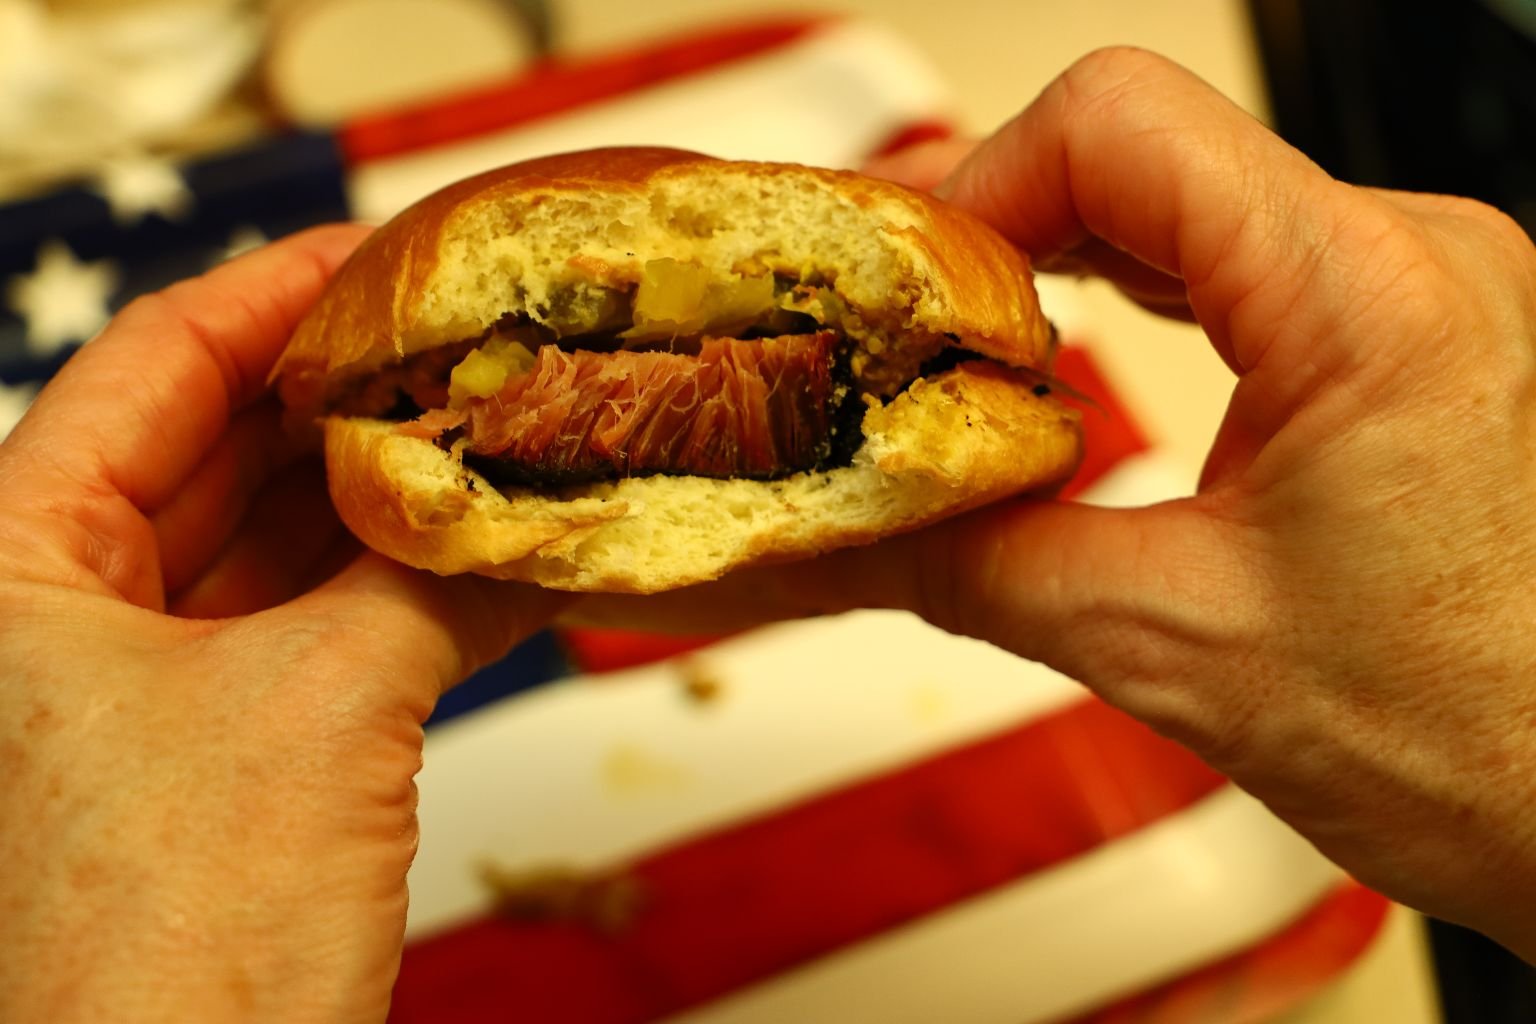
I told Gordon that I didn’t want our usual shredded BBQ 4th. of July sandwich.
I wanted large chunks of meat in our sandwiches.
—————————————————–

A Leftover 4th. Lunch of Boston Beans and Northern Beans
And,
Watermelon with Berries
——————————————————————-

My JAWS Cookbook Inspiration
When I was planning our JAWS 4th. of July for the past 2 years, I also have in mind other projects to go with this one. Actually, I haven’t been planning this for the past 2 years. I have been wanting to do it for the past 2 years and we finally got around to Phase 1 of the project. I wanted to focus on foods from the 70’s to mid 80’s here so I consulted some of my old cookbooks. I also purchased The Melting Pot cookbook as a reference of New York summer foods that may have been served at the time JAWS was filmed in 1975.

My Statue of Liberty souvenir bank that I bought at Ellis Island when I was about 19 years old in New York City. I bought it the day Ronald Regan was shot because when we got off the ferry we were told that Regan had just been shot.
———————————————————–
I actually have 4 Phases planned to go along with this post. We just need to implement them as time goes by in this pandemic of Coronavirus.
—————————————————————–

My Homage to the Artist
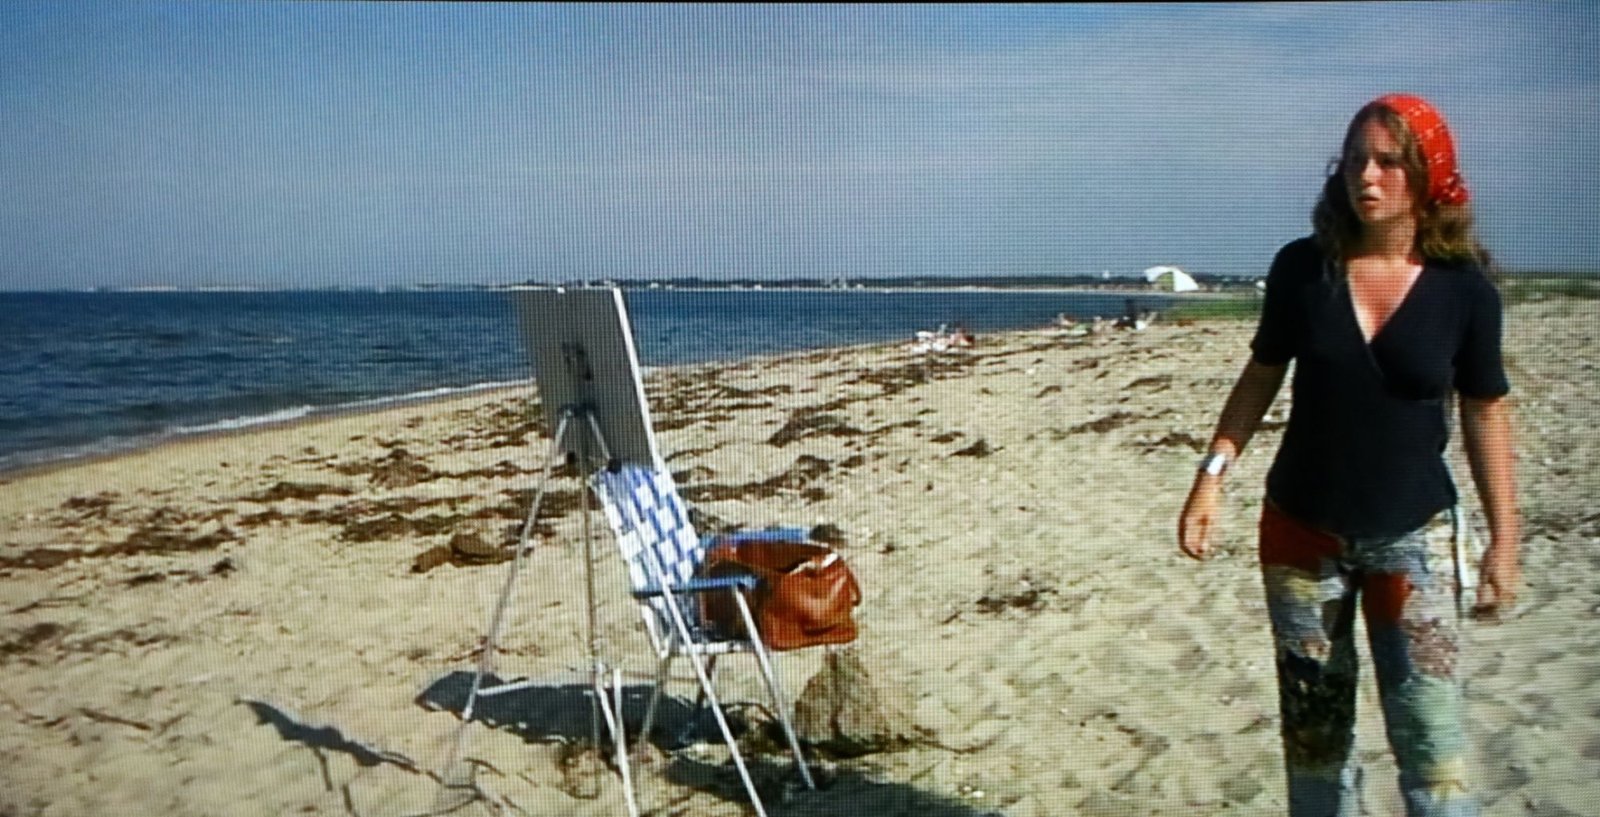
Although I am not a jeans person. I love her jeans!

The easel, the painting, the chair, the bag, on the beach.
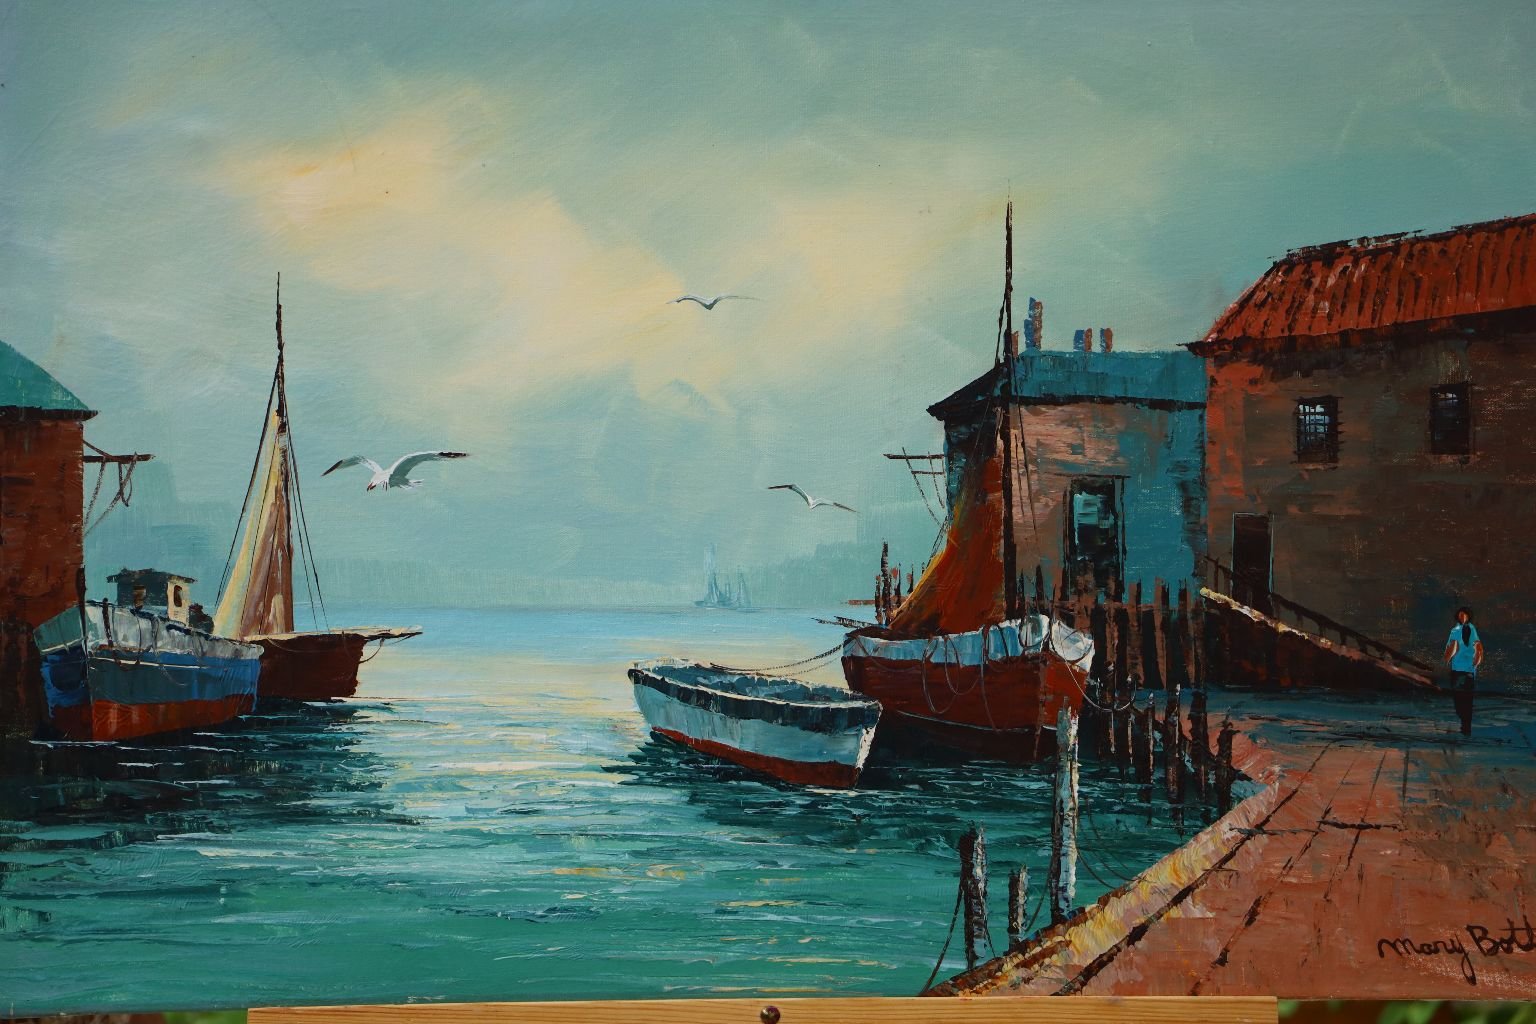
Our Mary Botto Painting
1913-2002
(We bought this painting from a thrift store for $25.00.) 🙂
————————————————–
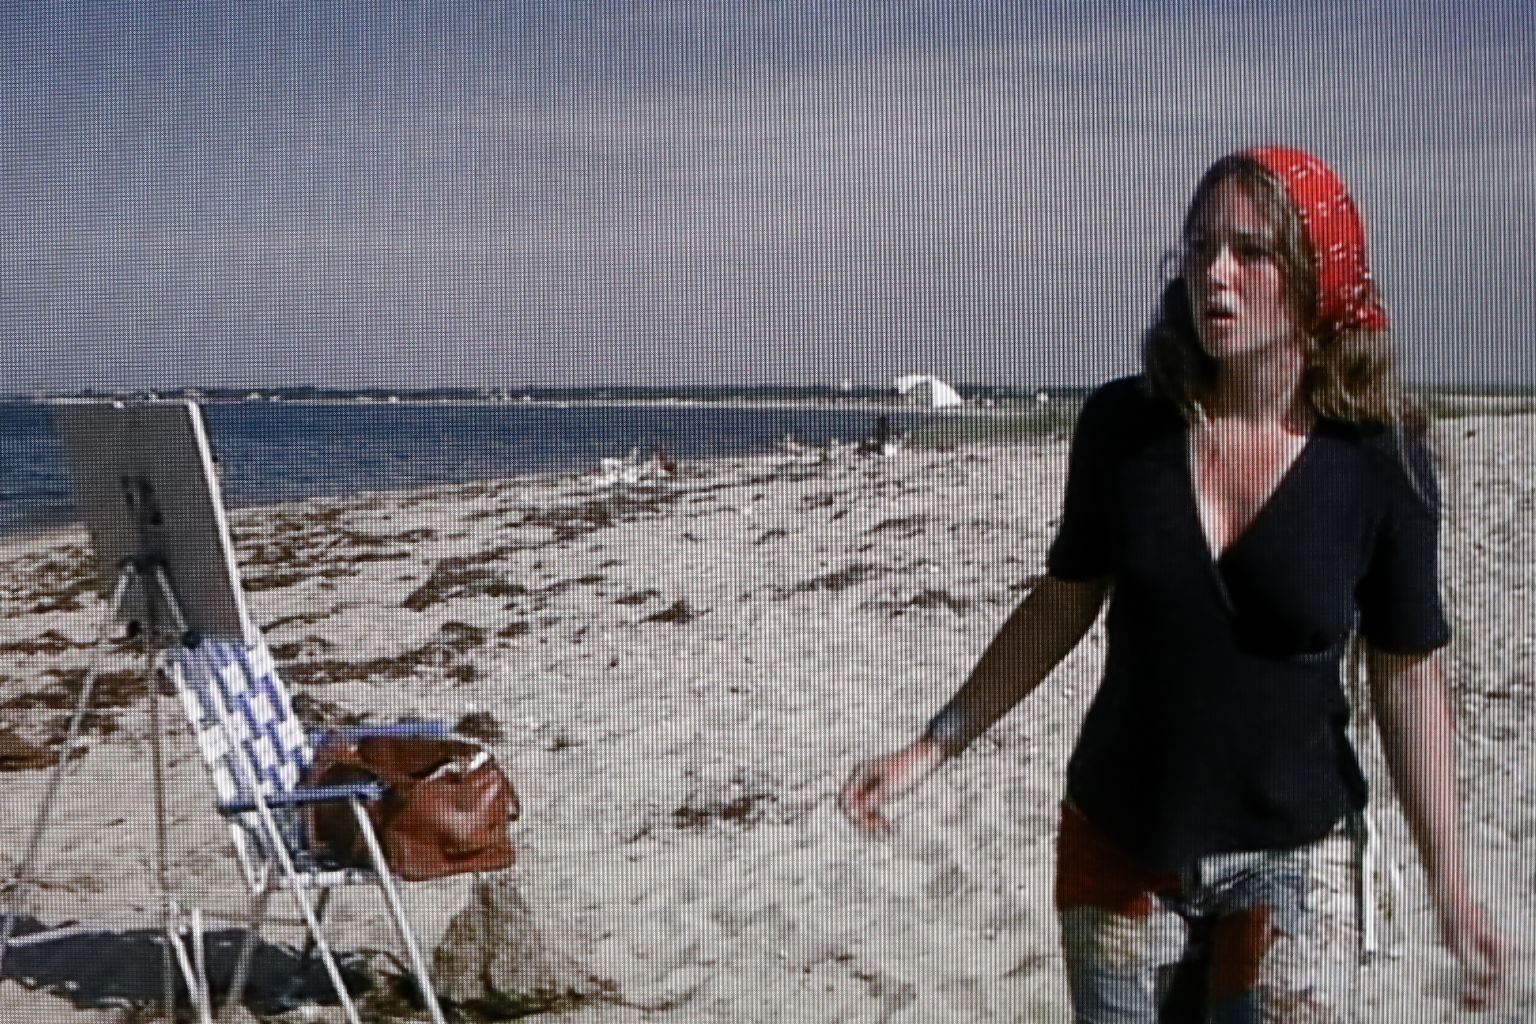

I love that artist on the beach and if you’ll notice she is the only one that spots the shark in the water headed into the pond. Why? Probably because she is an artist. Artists notice things that other’s don’t. So, while everyone else is splashing around having fun in the moment, she is just more observant. I like her because my daughter is also an artist. I also grew up taking art classes, and she just resembles all the older girls that I knew and admired when I was in Junior High School in Roanoke, Virginia when I first saw JAWS in 1975. Her fashion, her hair, and her bandana. Everything that I remember.


My Homage, and My New Camera

————————————————————

This guy photographing the shark has my camera!
——————————————————————-
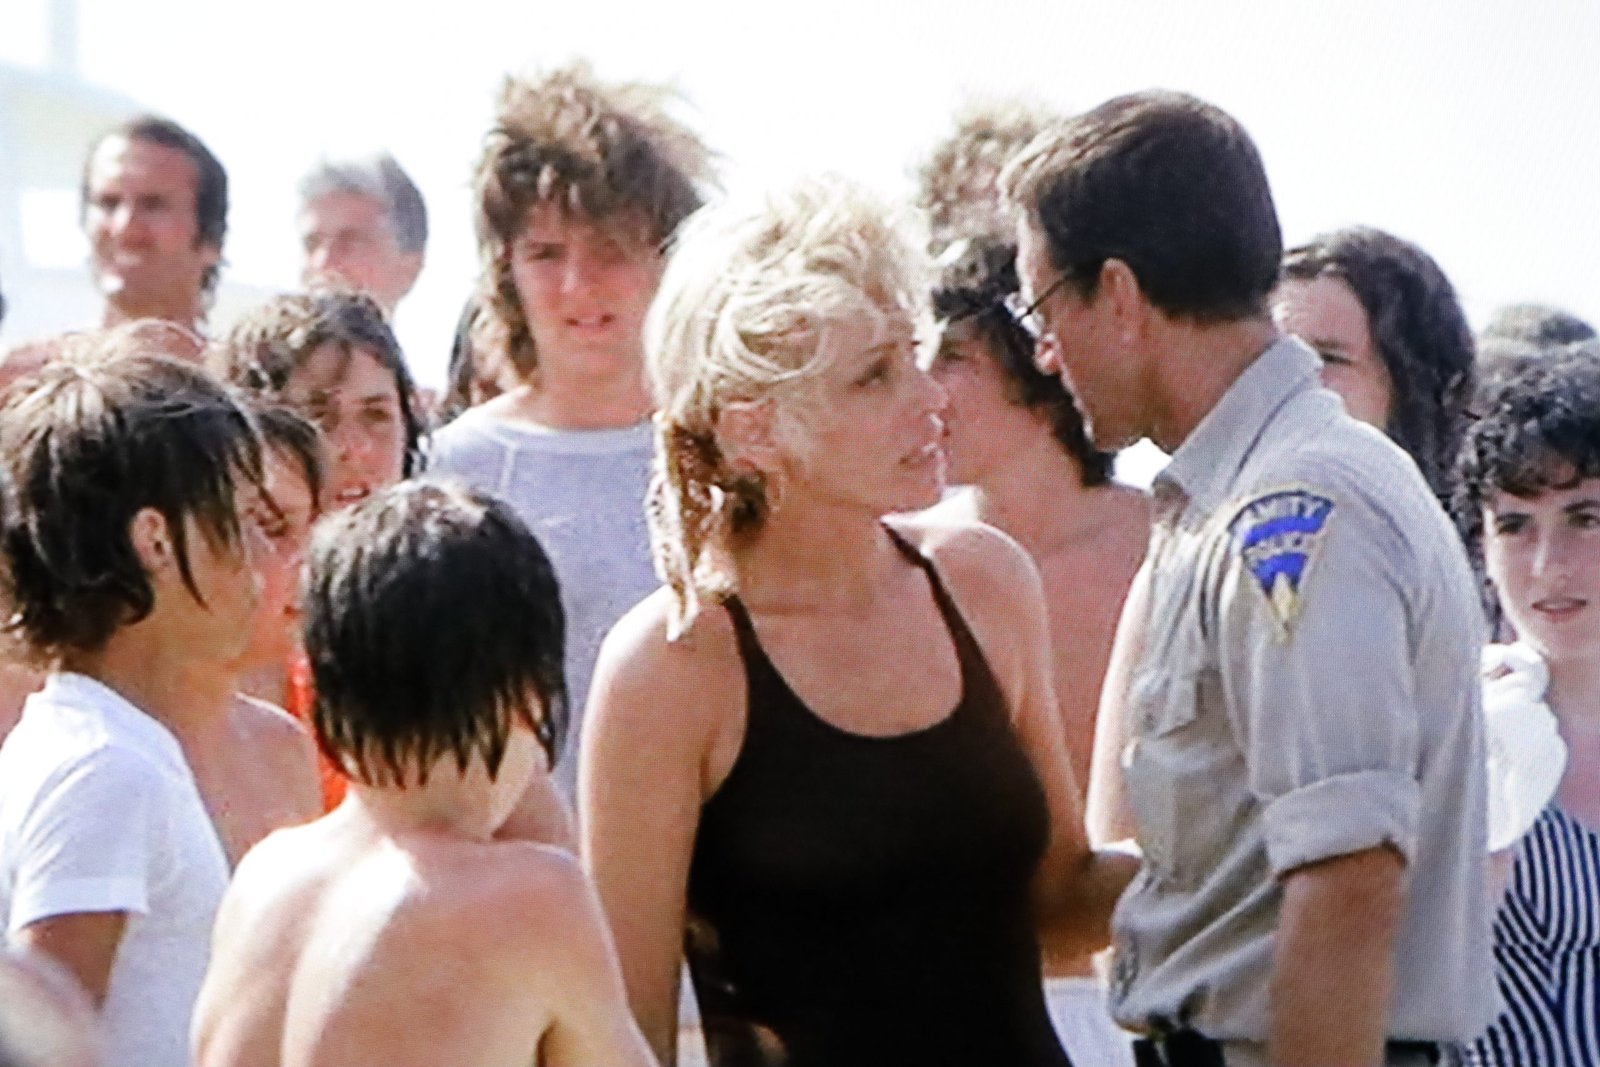
Ellen Brody and Sheriff Brody on the beach in Amity with other bathers.
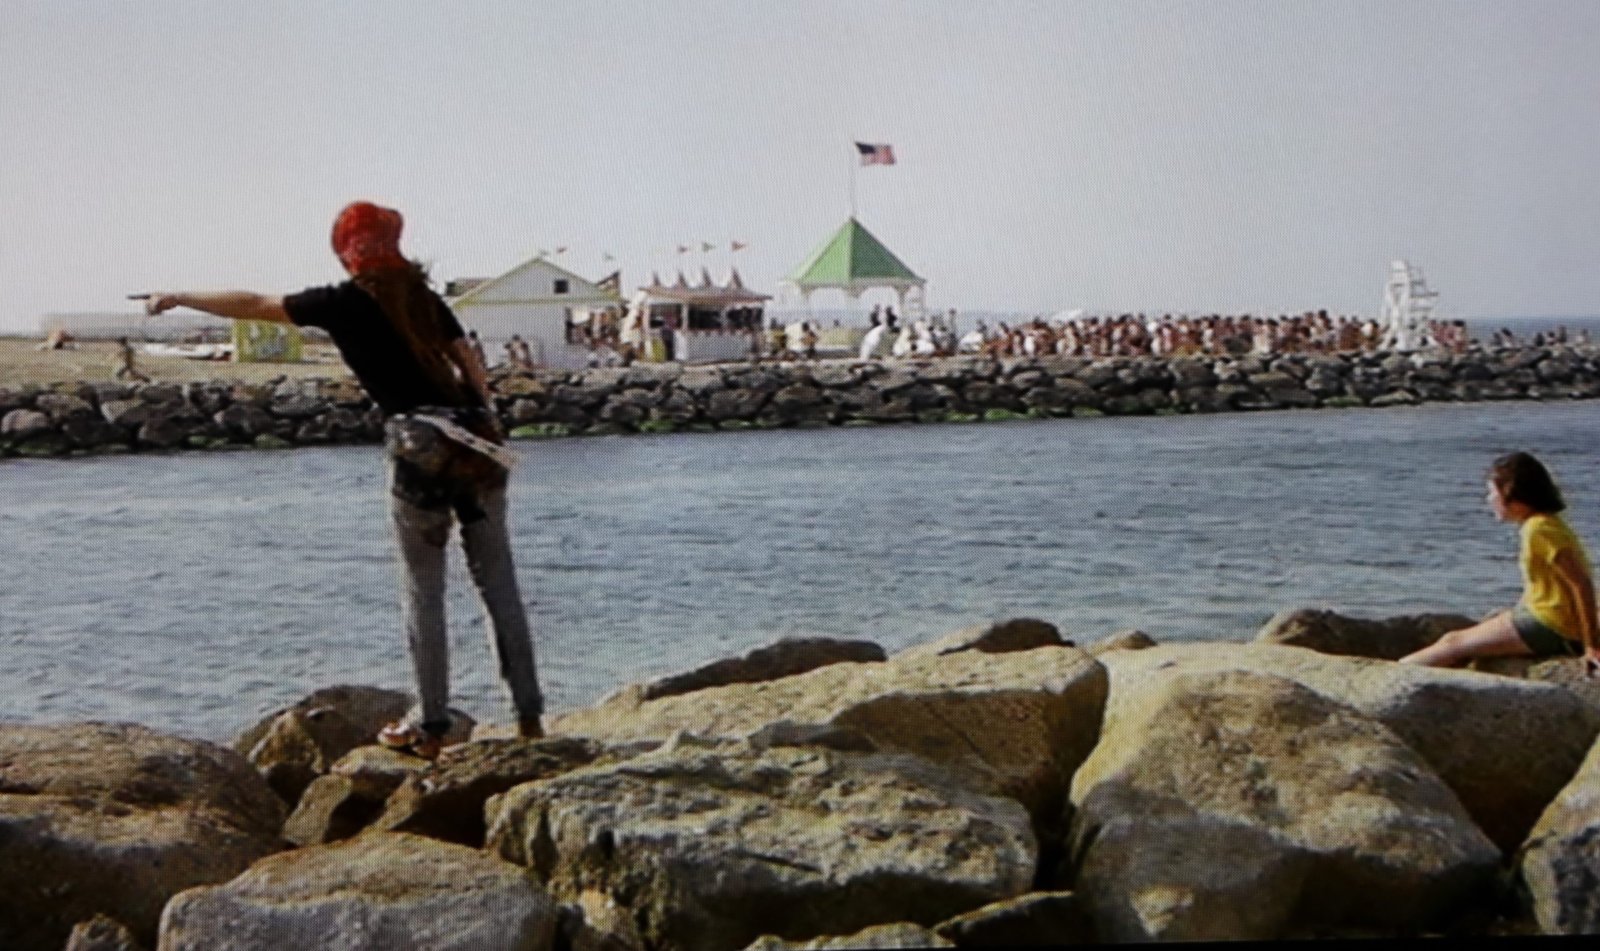
The Artist Pointing The Way

Sean Brody Playing on the Beach with JAWS Swimming By
————————————————————–


Gordon Demonstrating his Nautical Knot Skills
(of which he has plenty.)

OUR HOOK
(For placing our holiday roast on which we will catch JAWS with.)
——————————————————-

This scene was my inspiration for our July 4th. Picnic Shoulder Pork Roast Dinner.


The Chain, The Hook…..

I believe this is Mr. Denherder’s wife’s holiday roast that he took out of her freezer to take to a dock to try and catch JAWS.

———————————————————–

———————————————————


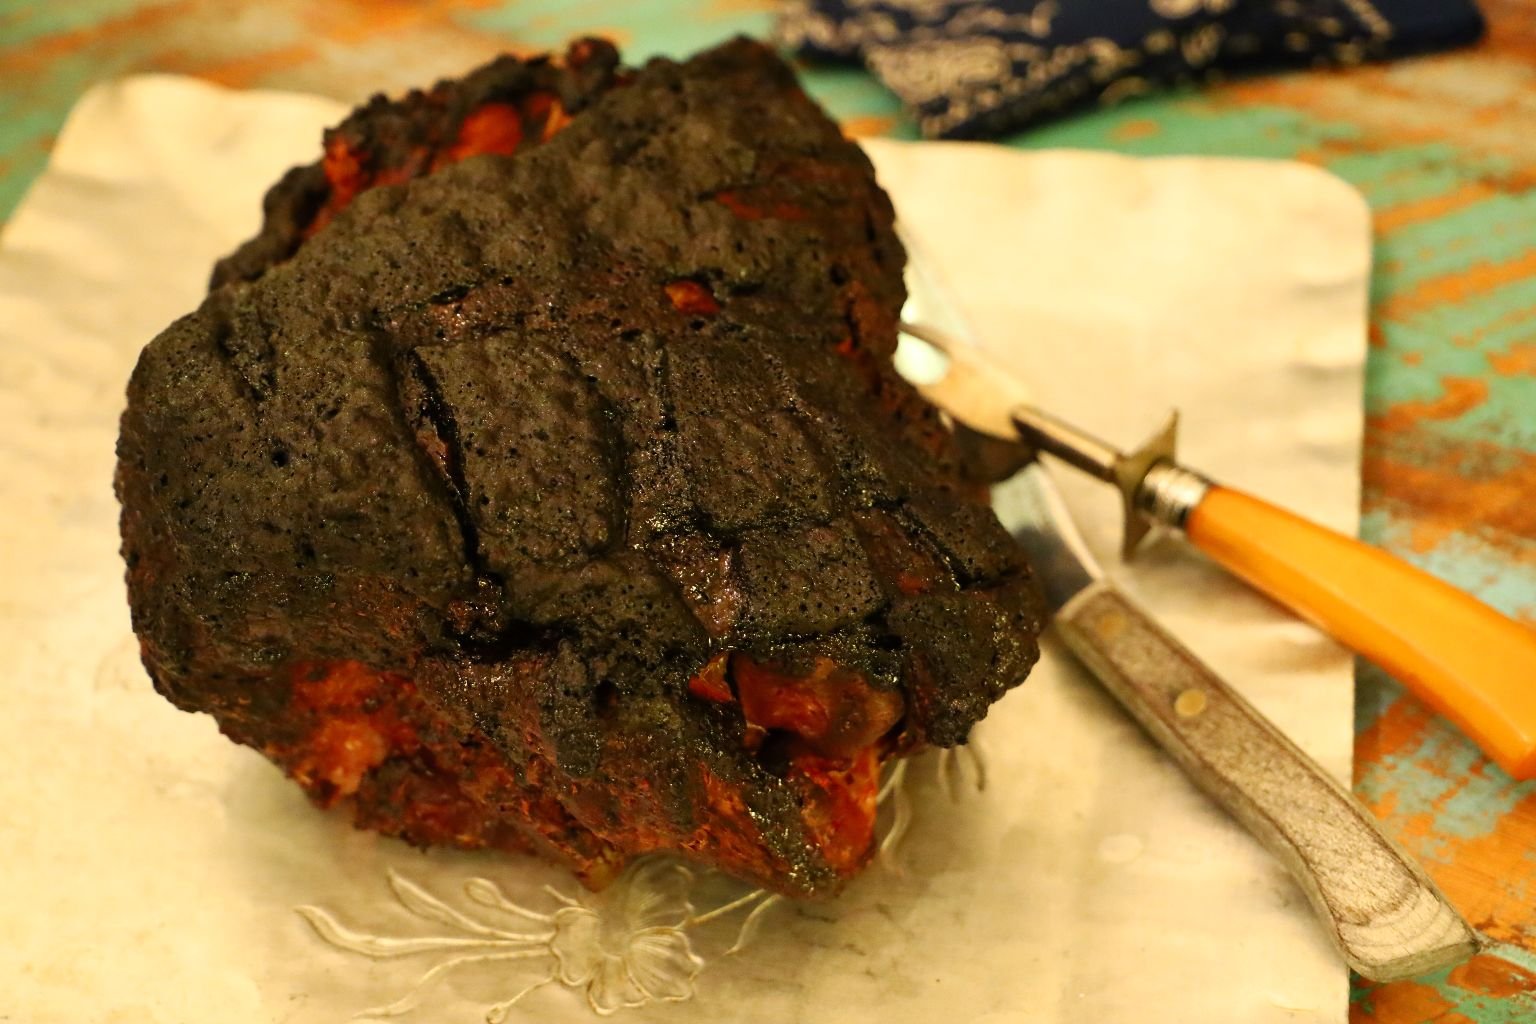
Gordon Roasting OUR Pork Picnic Shoulder on the Grill


A Beautiful Looking Roast


The grill was sitting at a stable 275-300’F for about eight hours.
This is where the temperature of the Pork Picnic Shoulder is at an internal temperature of 135’F You can wrap it in foil now or let it continue to grill like this producing that great bark seen below. I cooked the pork until it reached an internal temperature of 190’F.

Roasting Grape Tomatoes on the Grill

Look at That BARK!
Making a sandwich with pickles and condiments.
————————————————————-
Watermelon With Berries

I, Julie, had the idea that I wanted Watermelon on the 4th., of course, but I wanted something that had the red and blue colors. I also thought that just carving holes in the watermelon and placing berries inside would be a nice touch.

In the south we grew up eating a big watermelon for dinner outside on a picnic table. That was all we needed! Of course, I do remember having to get up throughout the night many times to urinate. But, I guess it’s a southern thing.


Just grab a spoon, or fork, and eat up!
——————————————————

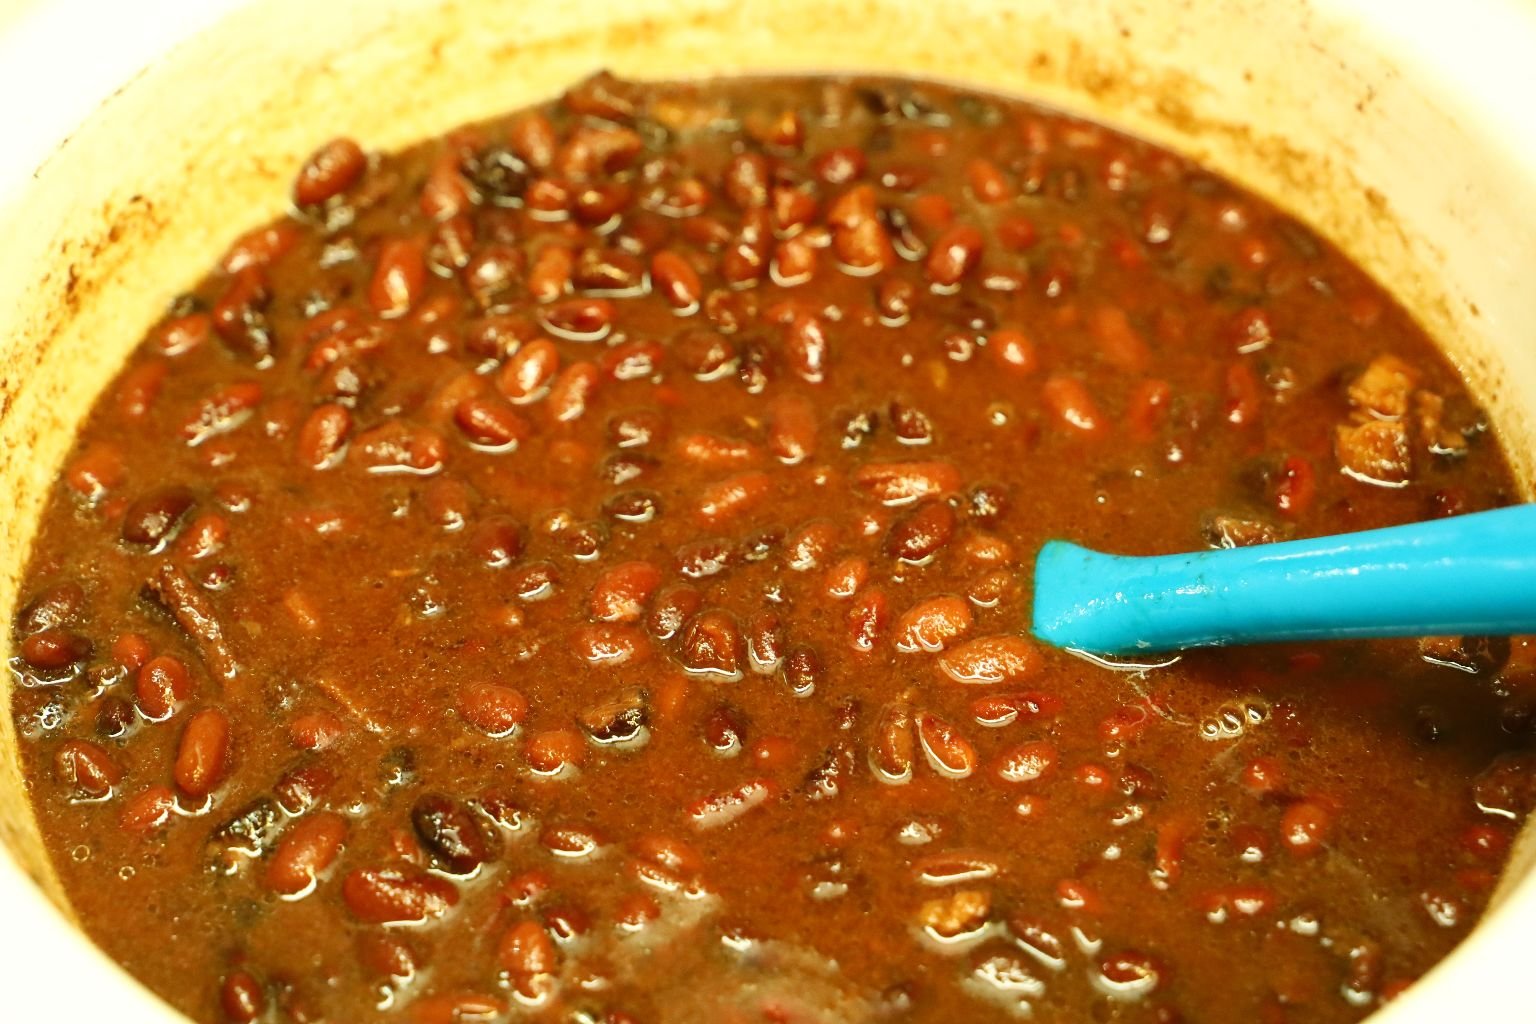
Crock Pot Boston Beans
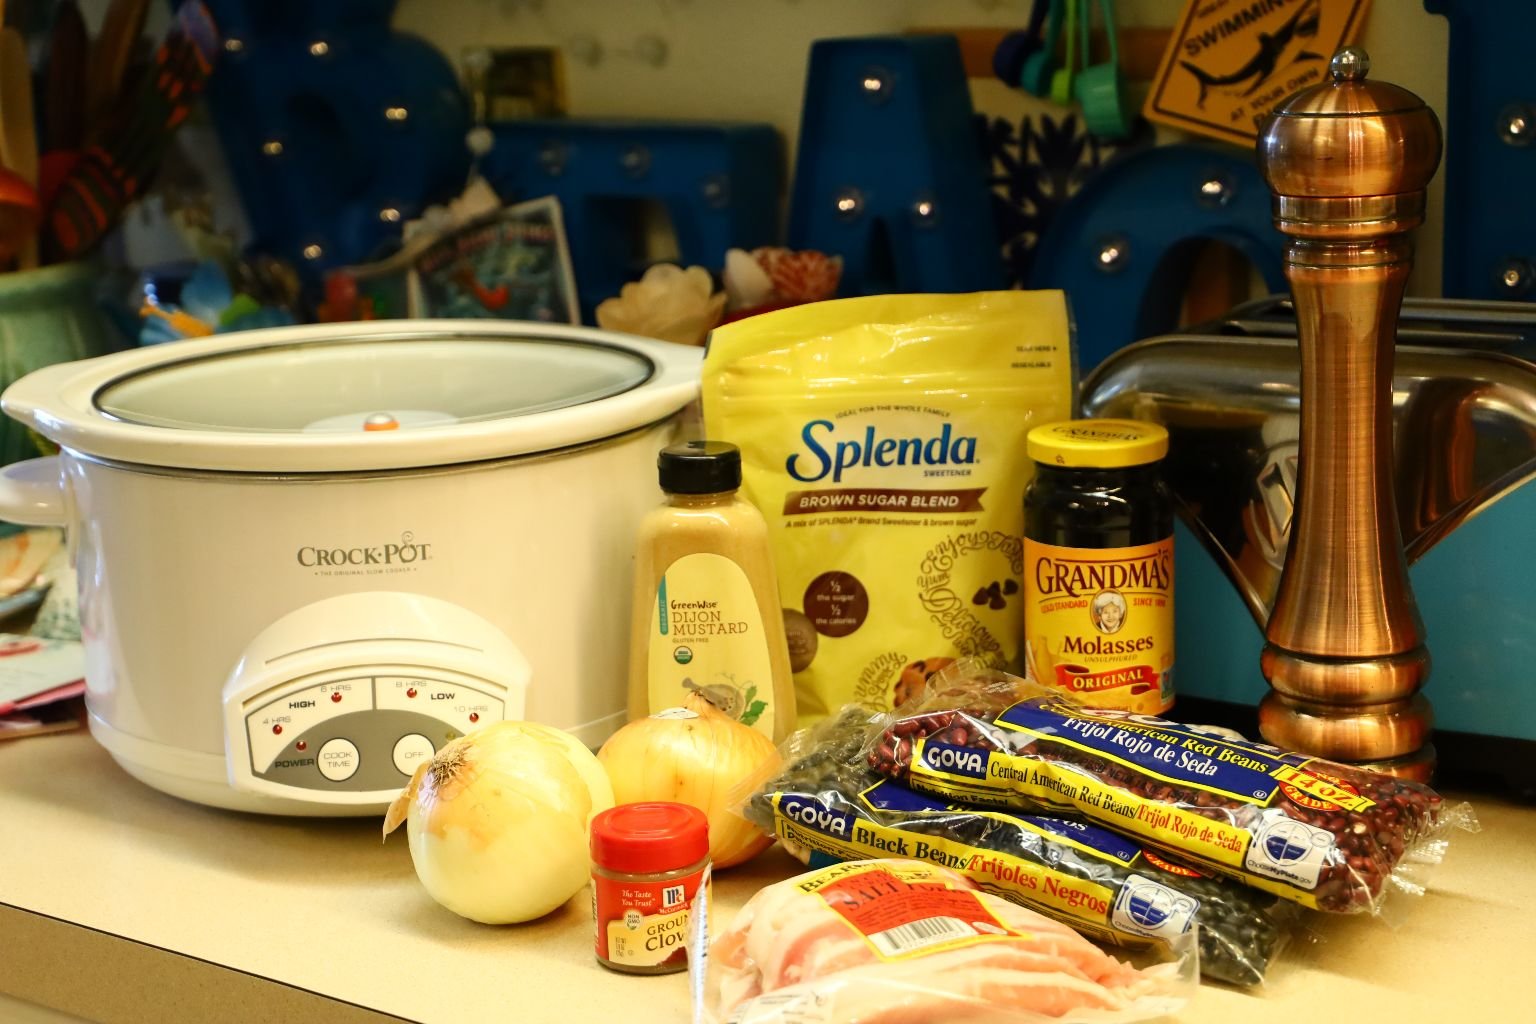
Boston Beans
Ingredients:
1 Bag Red Beans
1 Bag Black Beans
5 Cups Water – for soaking
1 Cup Hot/Boiling Water for cooking
1 1/2 Onion – Chopped
1/2 Package Salt Pork ~ 1/2 Lb. – Chopped into Chunks
2/3 Cup Splenda Brown Sugar
1/2 Cup Molasses
1 Tbsp. Dijon Mustard
1/4 tsp. Ground Cloves


(With the CEO of Goya supporting Trump we will no longer be buying their products.)
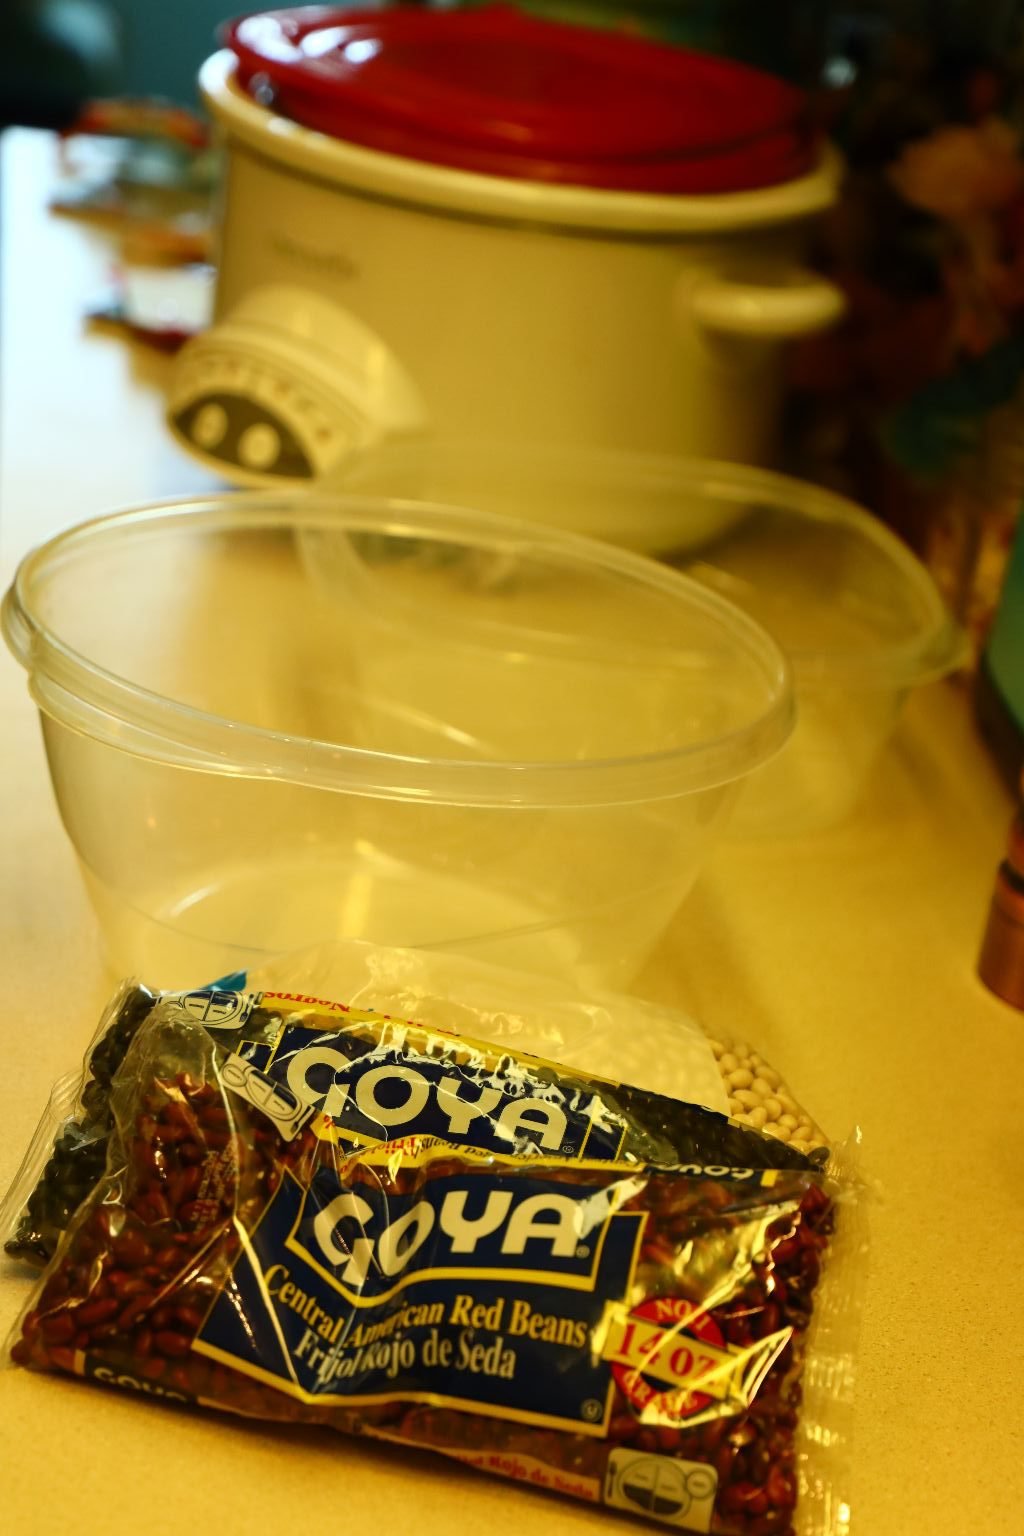
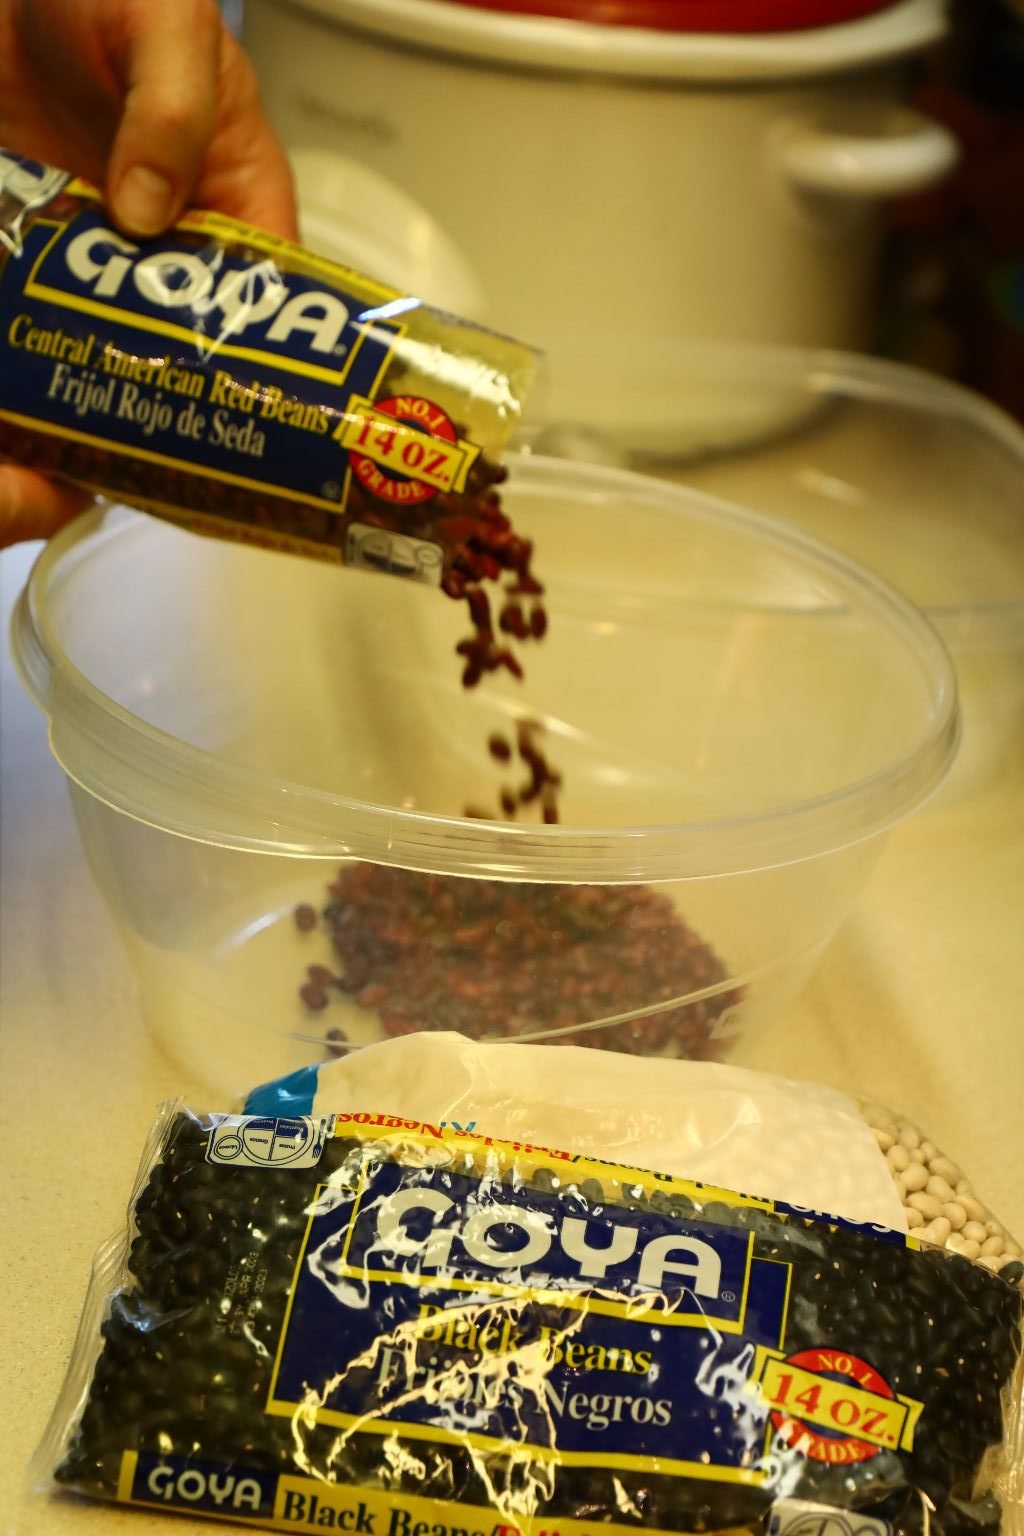

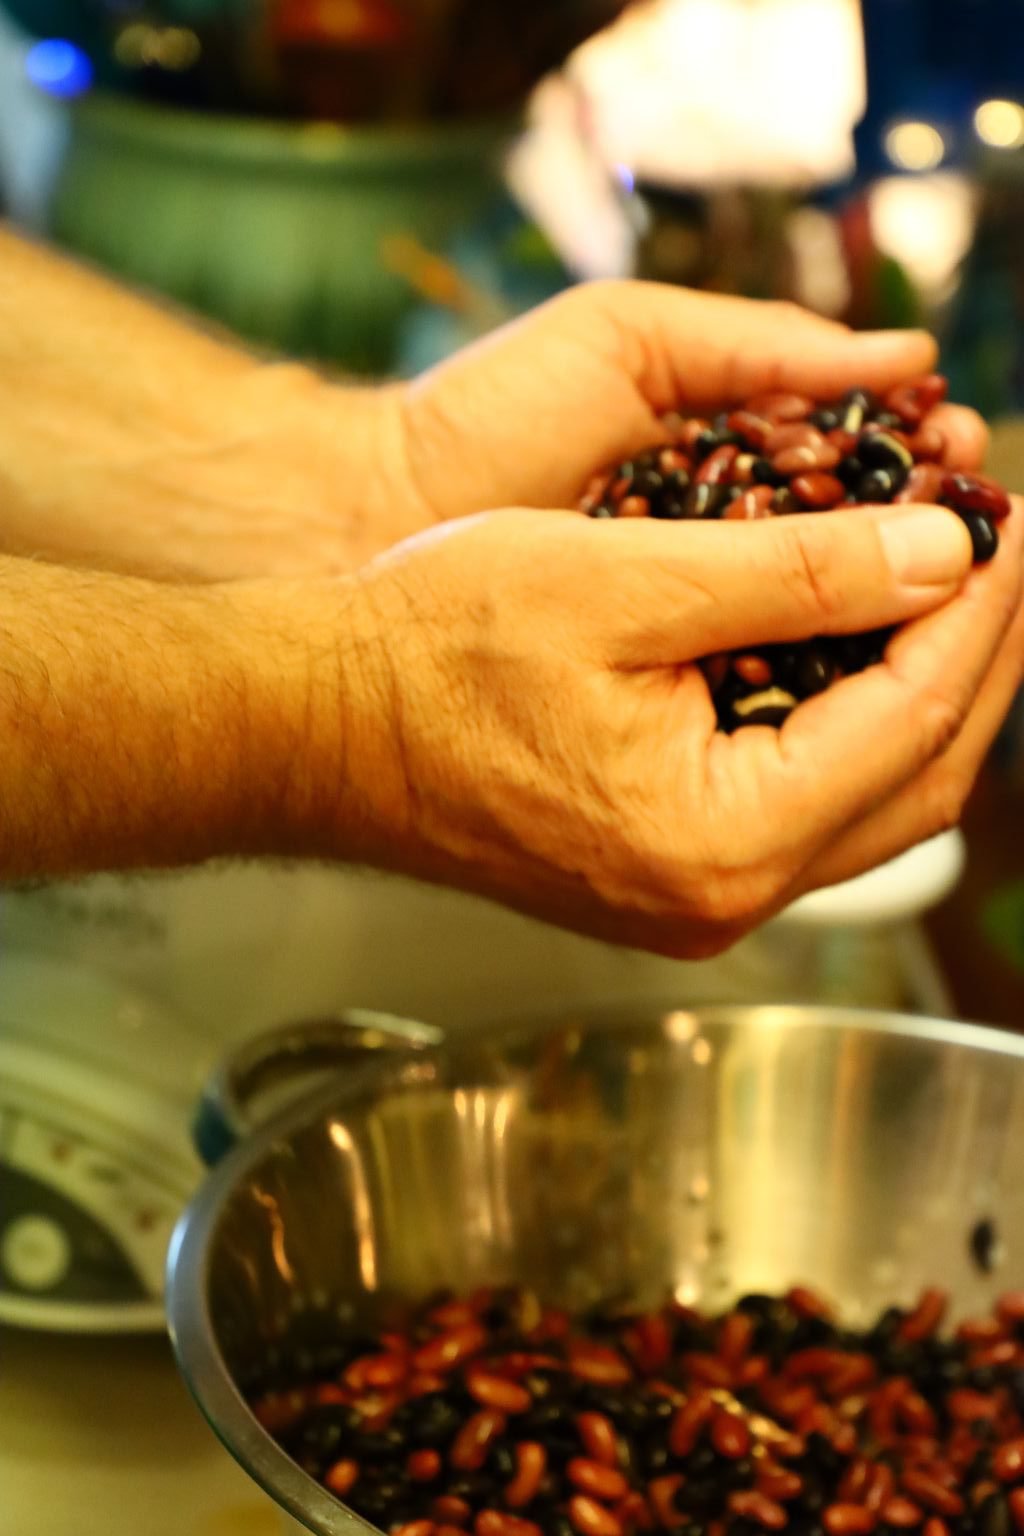
In large Tupperware bowl add your red and black beans.

Mix the red and black beans together. Place the Navy (white) Beans in a separate container as well.


Add your water to the beans as seen in the pictures above.

Let the beans soak for at least 48 hours. You may want to let them soak even longer to lesson the cooking time. We noticed the red and black beans took longer to cook and never really became soft after all this soaking. More about this will be talked about further down in this write up.

After 24 hours, I felt the beans were still a little hard and needed more soaking time.


———————————————————————

Here you can see the red and black beans get a little frothy over time. That is normal.


After about 48 hours…
Pour the beans in a colander…

and rinse them well.

————————————————————-

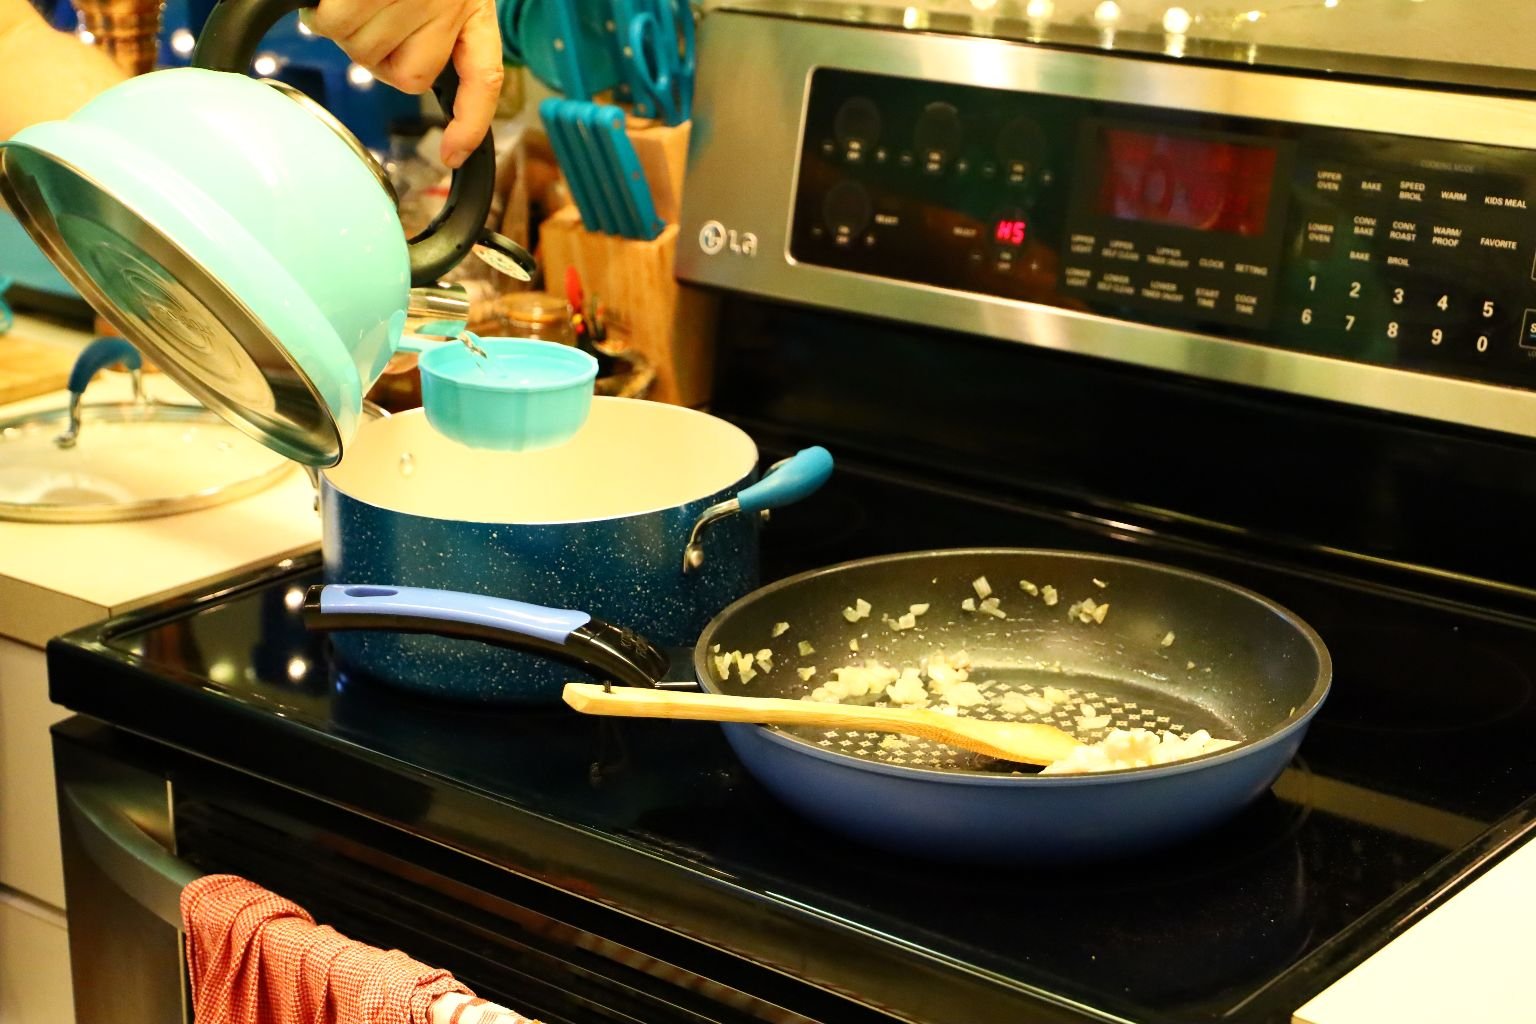
Here we are heating up our hot water for the cooking of the beans.


Slice your onion in half, then slice the onion in small chunks as shown above. I chopped up both onions for both pots of beans. The Boston Beans and the Navy/Northern Beans.

This is the brand of Salt Pork we used which came pre-sliced like bacon.


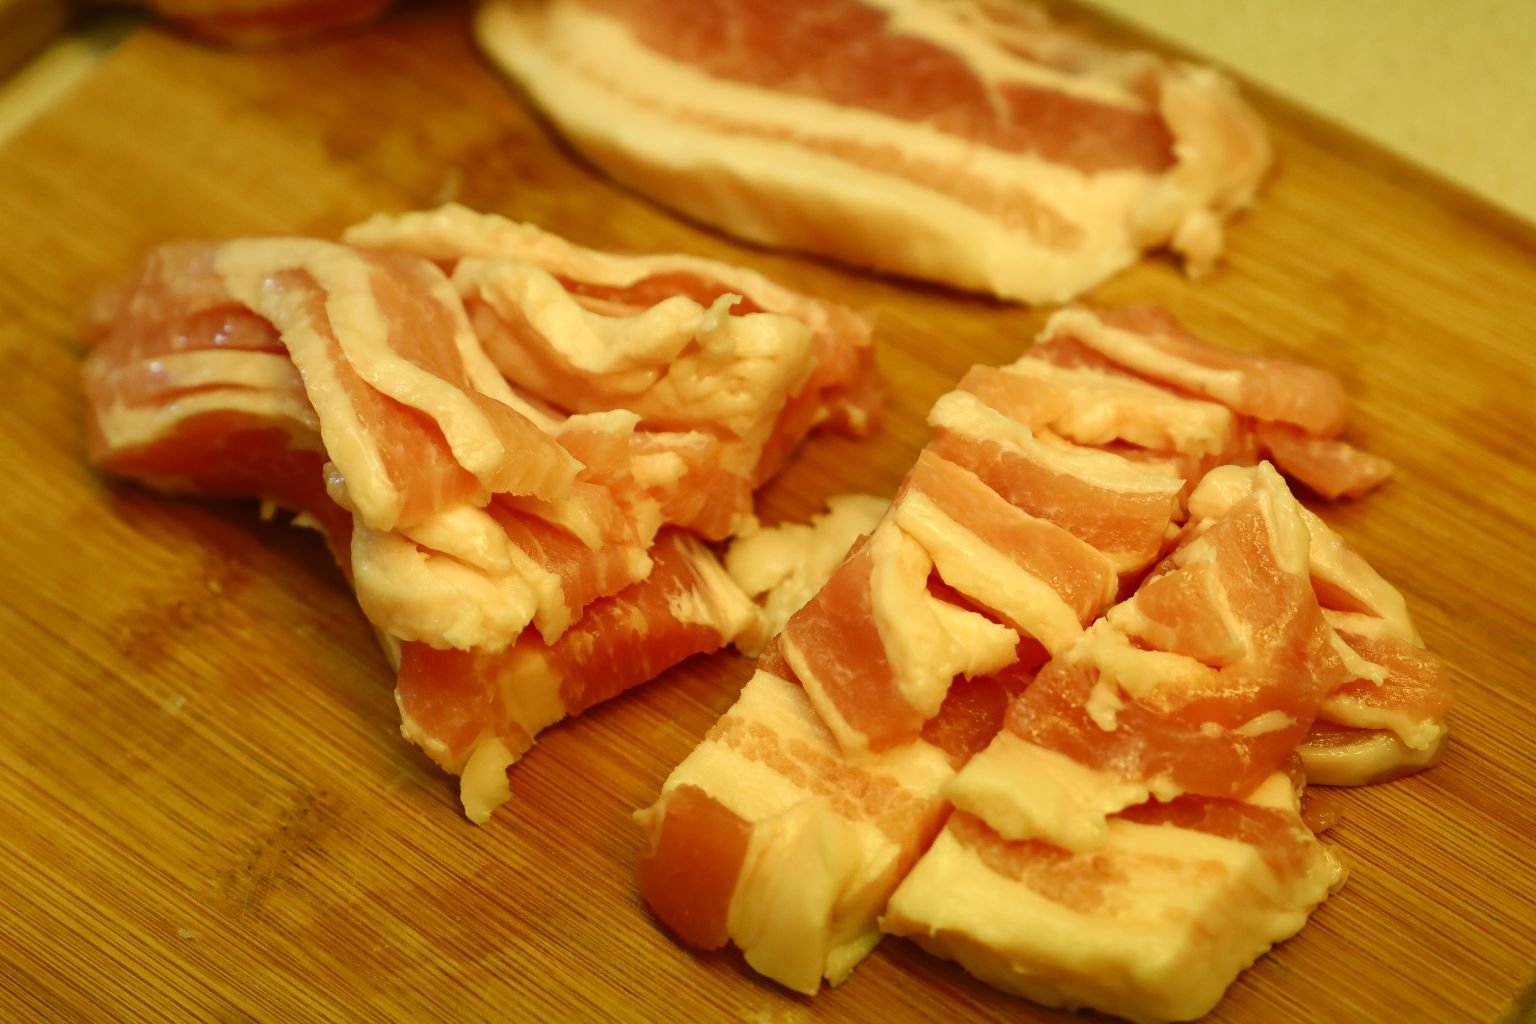
I sliced it all into chunks. I also used this pork in the other bean recipe as well. Just saving time by cooking this all together.
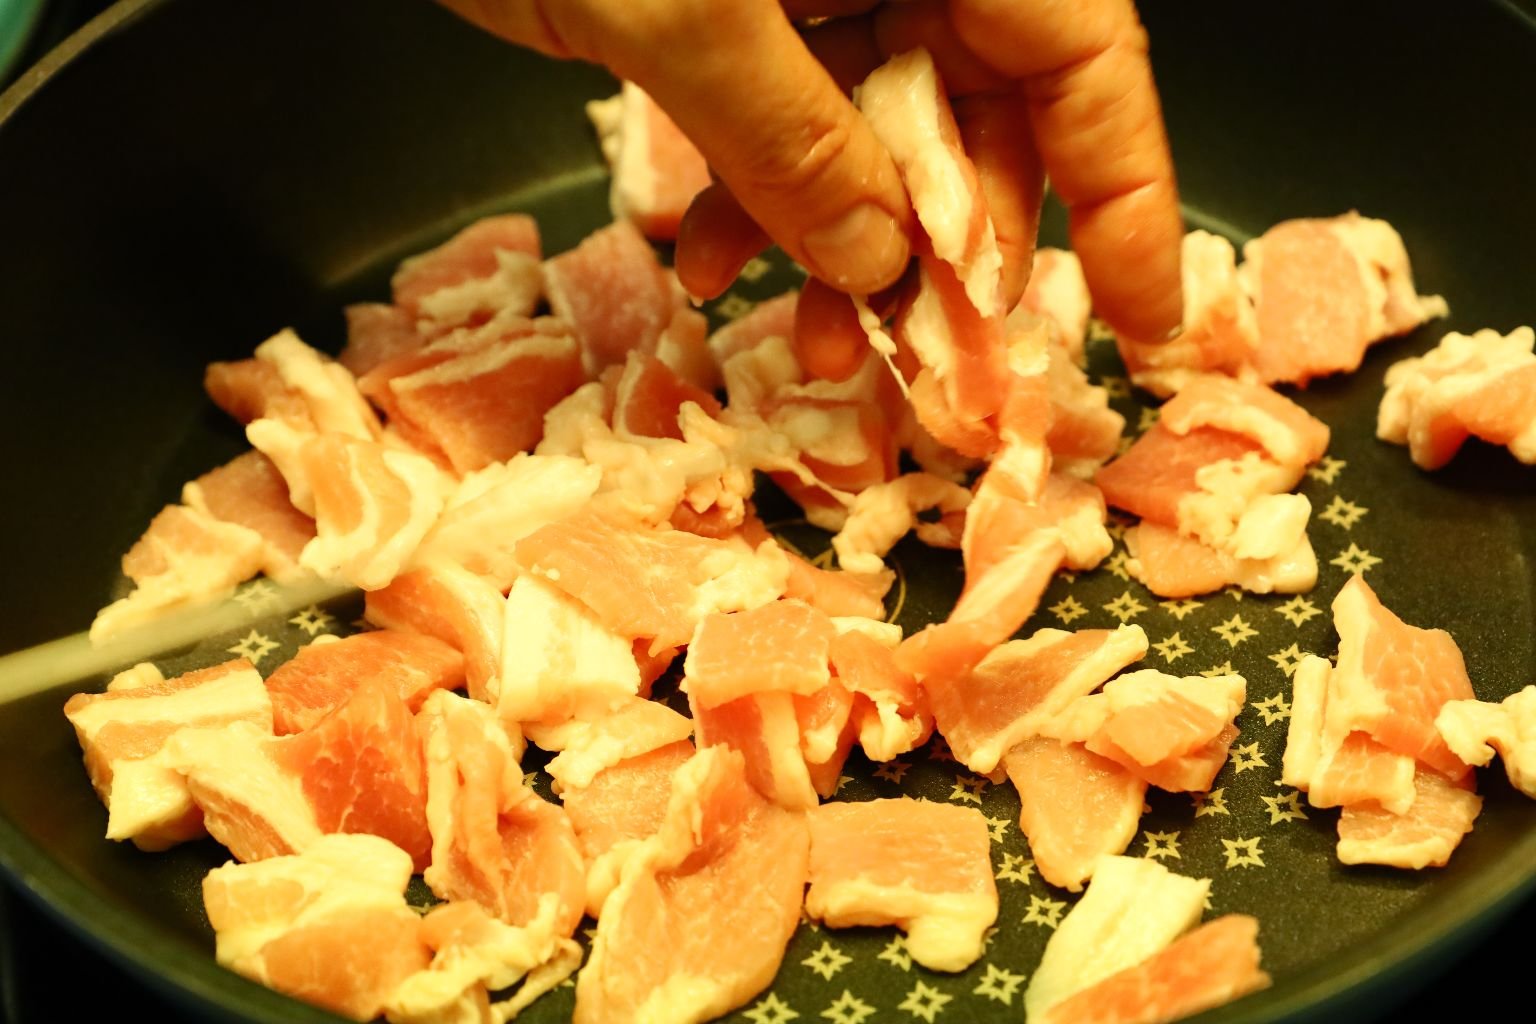

Here I am cooking the salt pork in a large saute pan on medium high heat, rendering out the fat and getting it slightly brown. You may need a mesh to stop the hot grease from splattering all over.

(I, Julie, just wanted to add that it was Gordon’s idea to fry up the pork and the onions before adding them to the crock pot for cooking. He wanted to add a different taste to this recipe.)
Cook the salt pork until it becomes the consistency you like. Just remember that this pork will also be cooking in the crock pot.
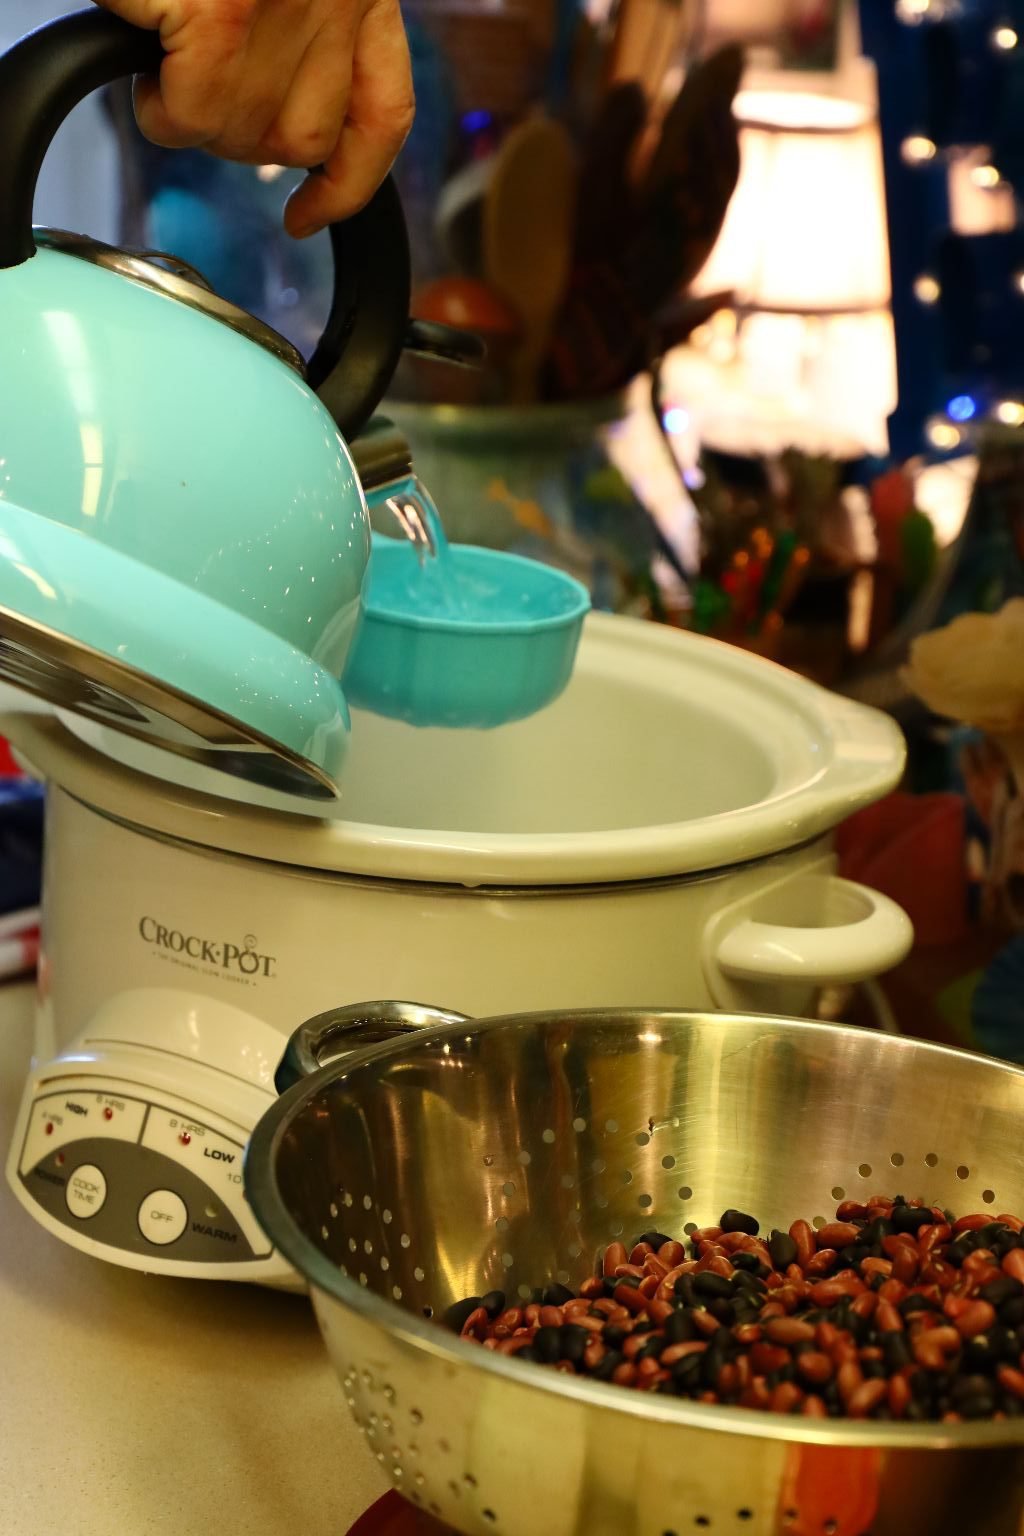
To begin the cooking process, add 1 Cup of boiling water to your crock pot.
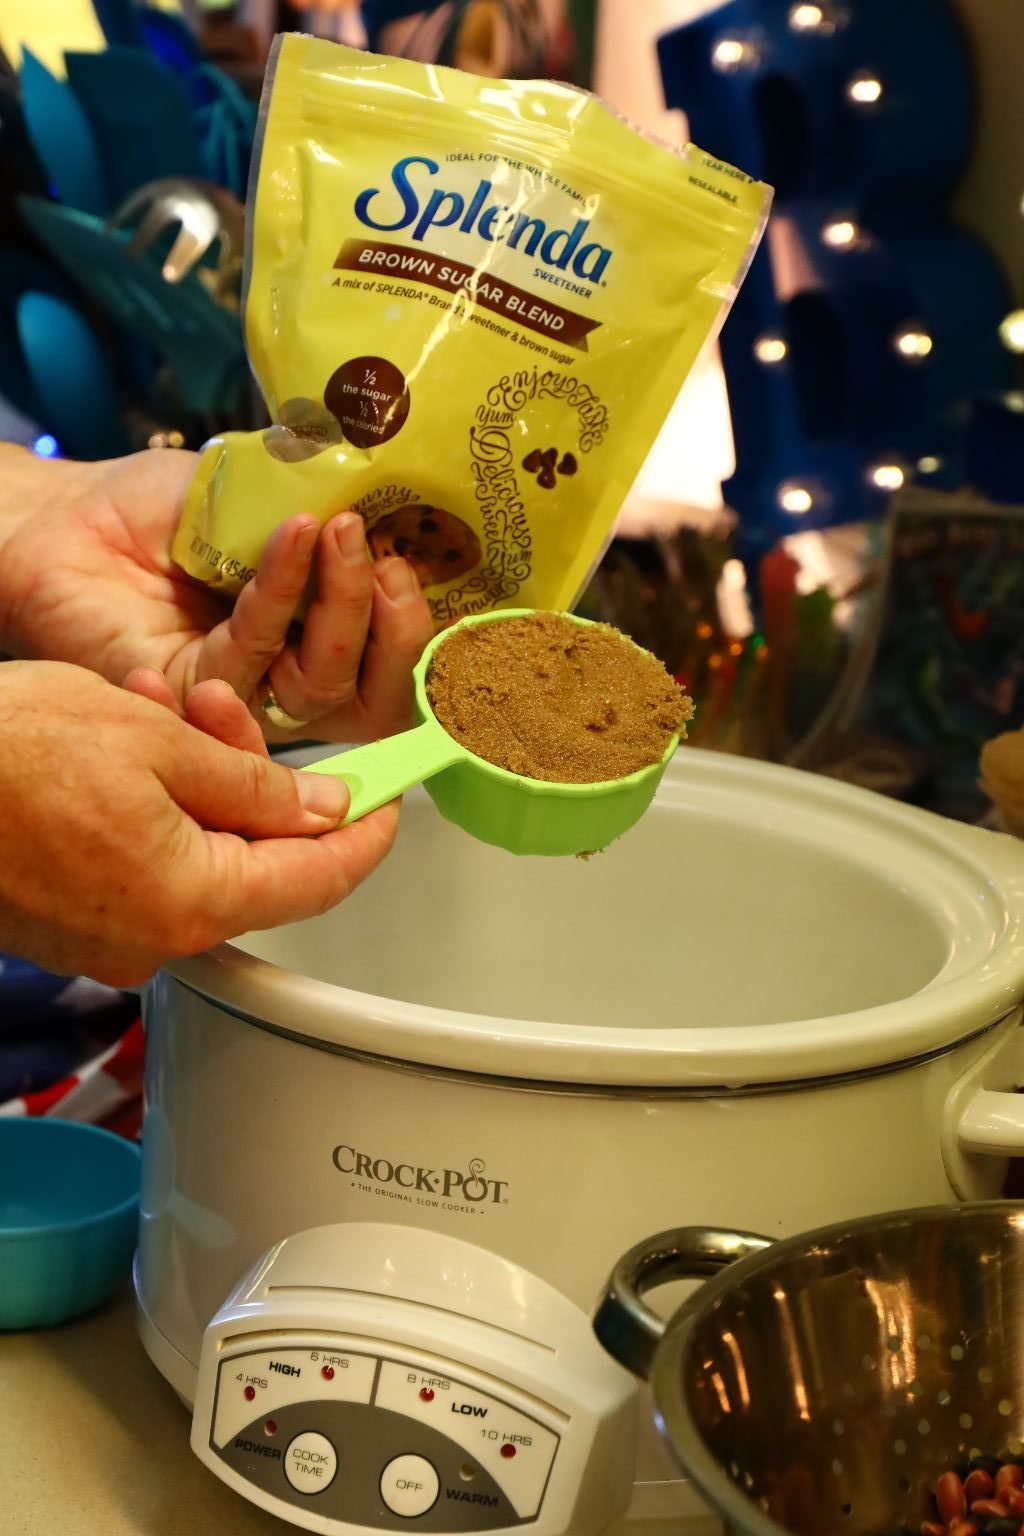
Then add your brown sugar to the crock pot.


Before adding the molasses, spray your measuring cup with a light oil to prevent the molasses from sticking to it.


Add your molasses to the crock pot.

After about 5 minutes of cooking the pork I added the onion to the pan.


Add your Dijon mustard to the crock pot.

Cook the onion with the salt pork until it becomes tender.
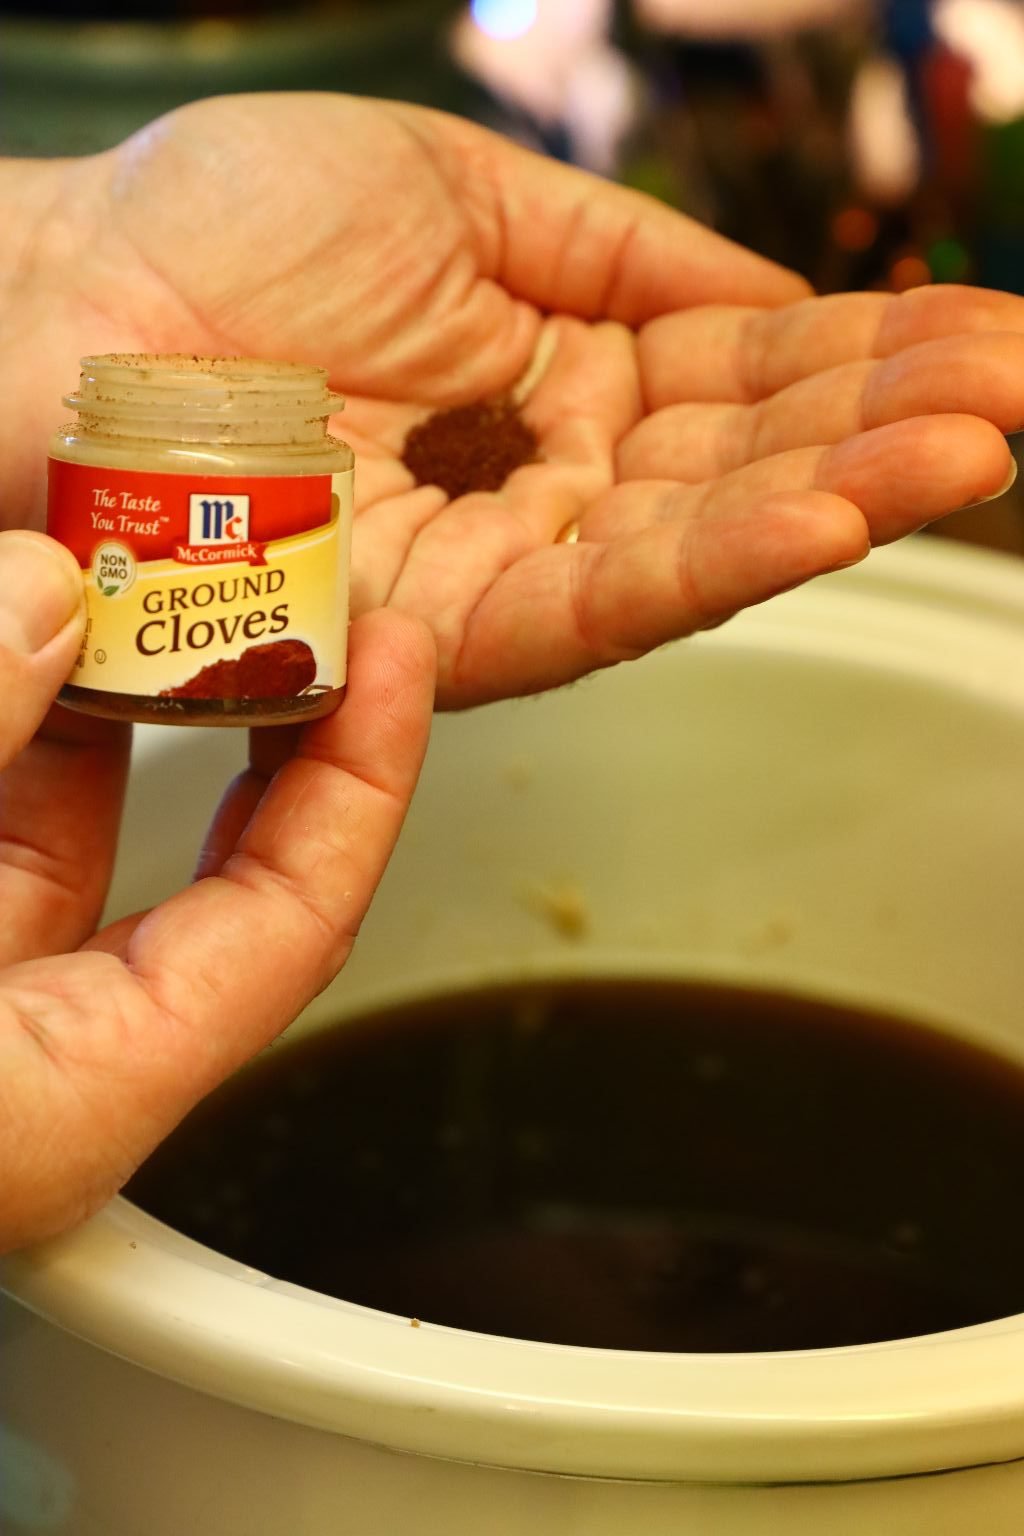
Add your ground cloves to the crock pot mixture.

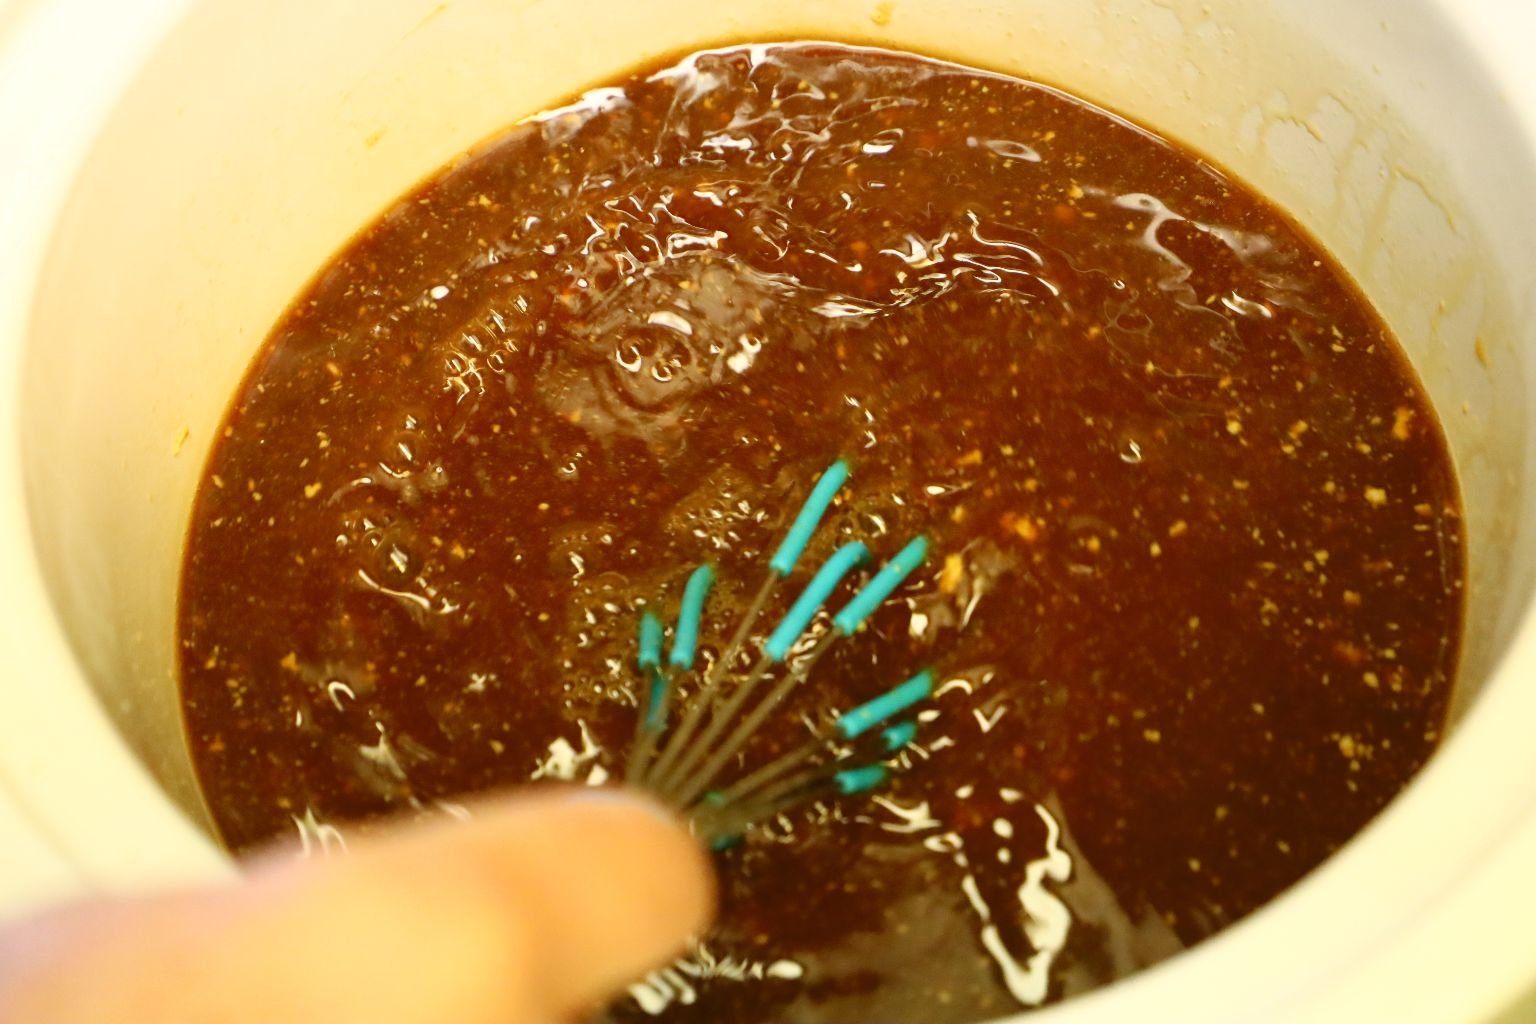
Mix all the crock pot ingredients together using a whisk.

Now, add your mixed soaked and rinsed beans to the crock pot.

Turn on your crock pot for high heat.

Here is a great picture of the sauteed onions and salt pork. Remember, I cooked all the onions and pork together to be divided up between two bean recipes.

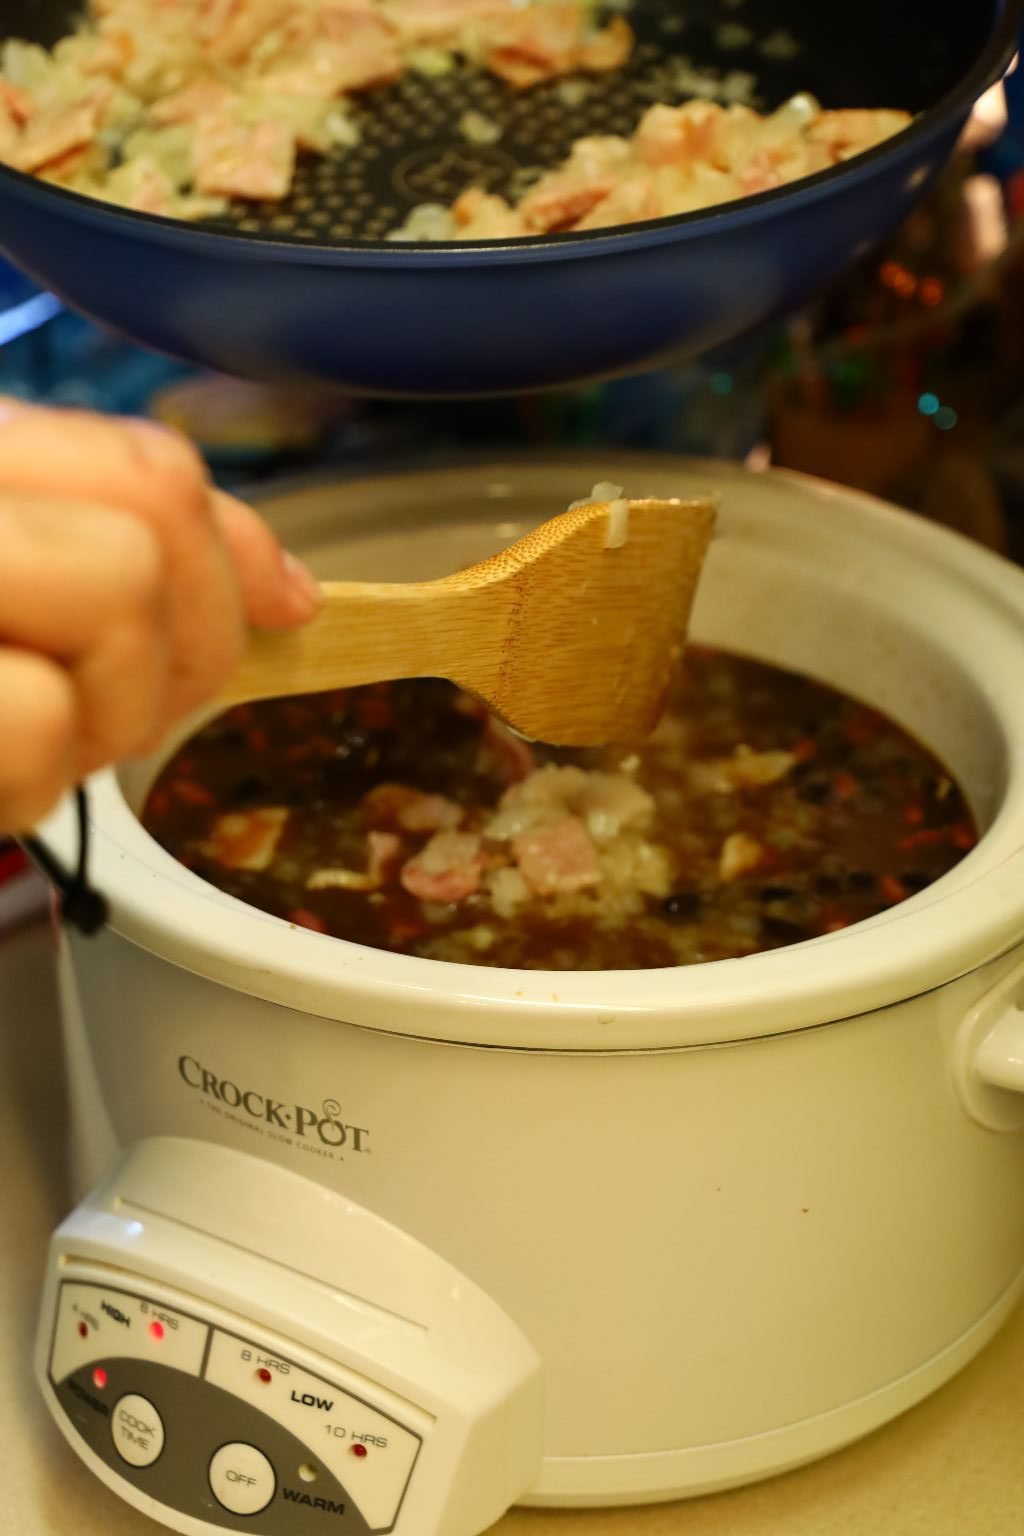
Add half of your sauteed onions and salt pork to the crock pot. Save the other half for your Navy/Northern Beans.

Stir all the ingredients together.

——————————————————
Cooking the beans for almost 10 hours still didn’t make them as tender as we would have liked. I believe what happened was the molasses, though, is that it significantly slows down the rate at which beans soften during the cooking process and we should have cooked the beans for even longer. The slightly acidic pH of molasses, according to Harold McGee a food scientist, makes the pectins and hemicellulose in the beans’ cell walls more stable and less prone to dissolving. Sugar in the molasses strengthens the beans’ cell walls and slows down the rate at which their starch absorbs water. Finally, he says the calcium within the molasses further strengthens the beans’ cell walls.
These sweet and pork flavored Boston beans were absolutely delicious, but just not as tender as we would have liked. To correct this in the future, I will let the beans soak even longer. I could also bring them to a boil in water then cover them until the water is cool again. Then add them to the crock pot with the other ingredients.
This is definitely a recipe that we will be making again in the future.
—————————————————————–
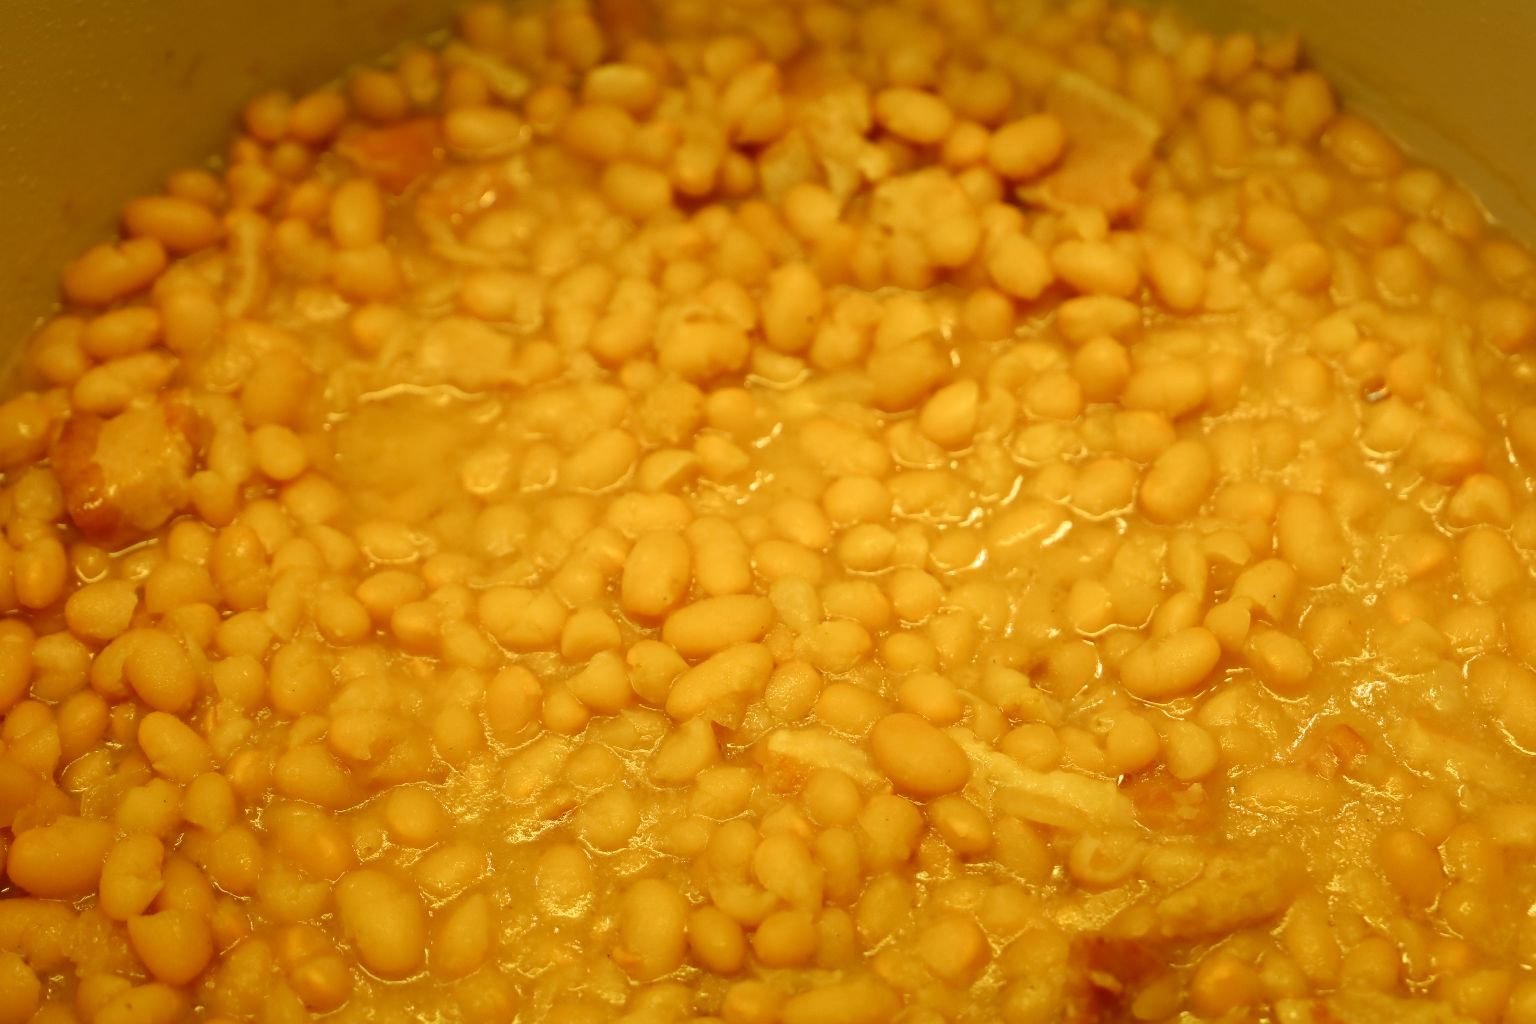
Navy Beans/Northern Beans
Ingredients:
1 Bag Navy Beans
5 Cups Water – for soaking
1 Cup Hot/Boiling Water – for cooking
—————————————-
1 Onion – Chopped
1/2 Package Salt Pork ~1/2 Lb. – Chopped
(The onion and the salt pork were sauteed above when we did the Boston Beans.)
——————————————-
1/2 Tbsp. Garlic Powder
1/2 tsp. White Pepper
———————————————————-

Here I have a large pot on the stove and I am measuring out my boiling water to place in it. I then have the sauteed onion and salt pork mixture next to it.


Now it’s time to unveil the beans from soaking.

Here these Navy/Northern Beans soaked for 48 hours.


Pour them into a colander and rinse them with fresh running water.


Add the rinsed Navy beans into the pot and then add the sauteed onions and salt pork.

Stir all the ingredients together and turn the pot onto medium heat.
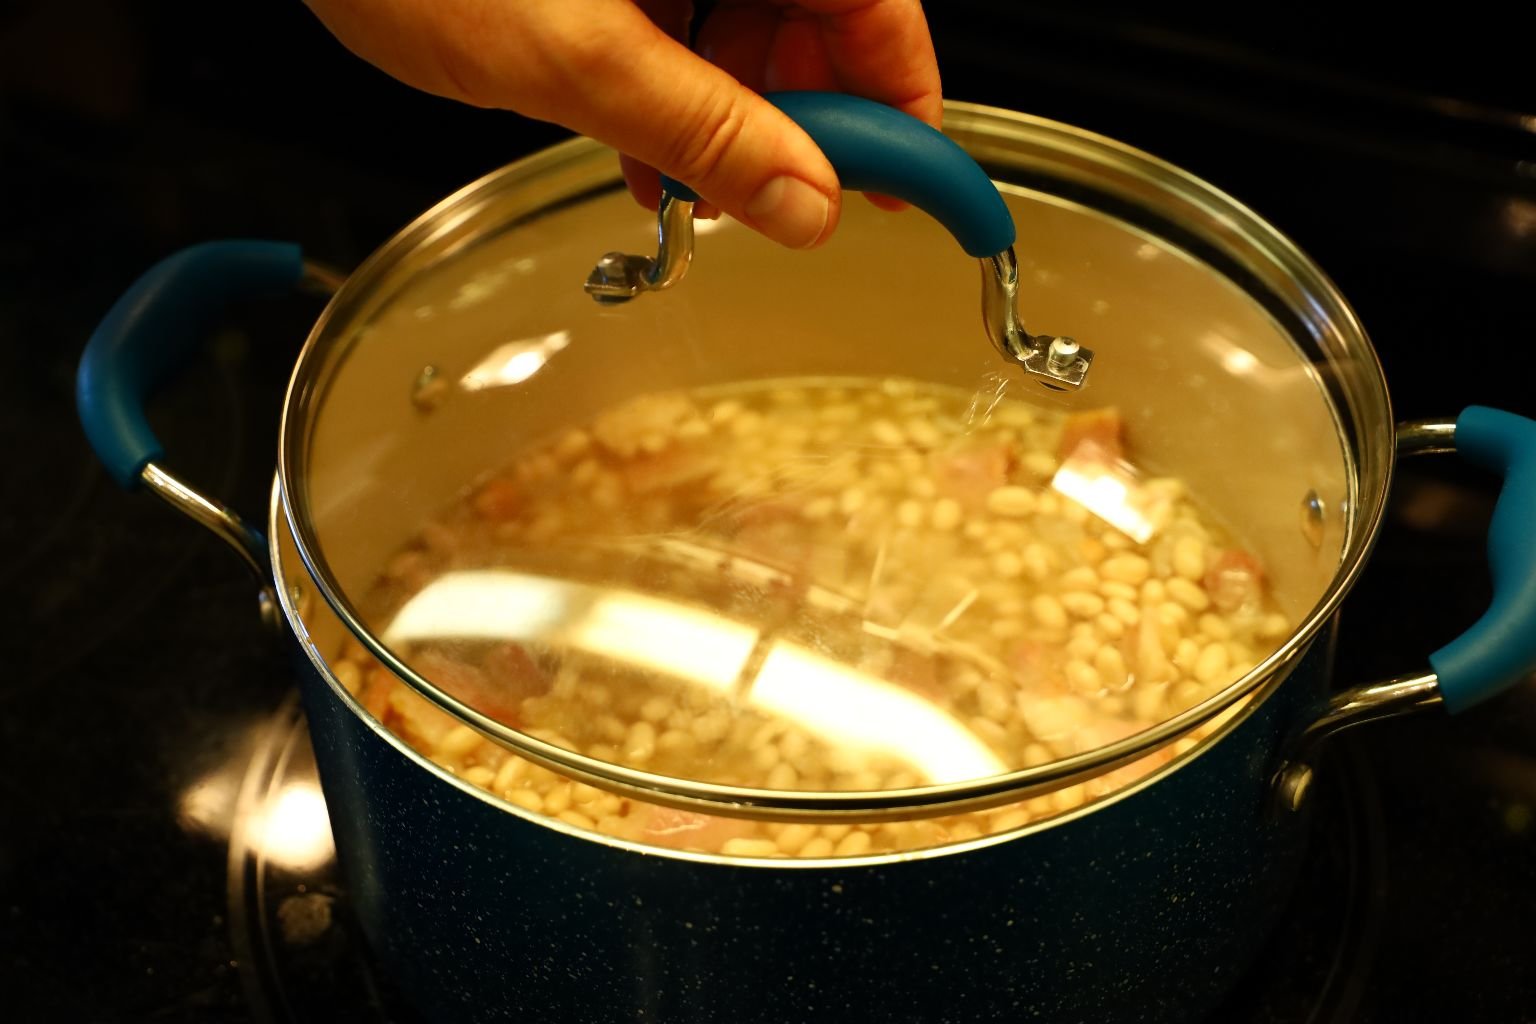
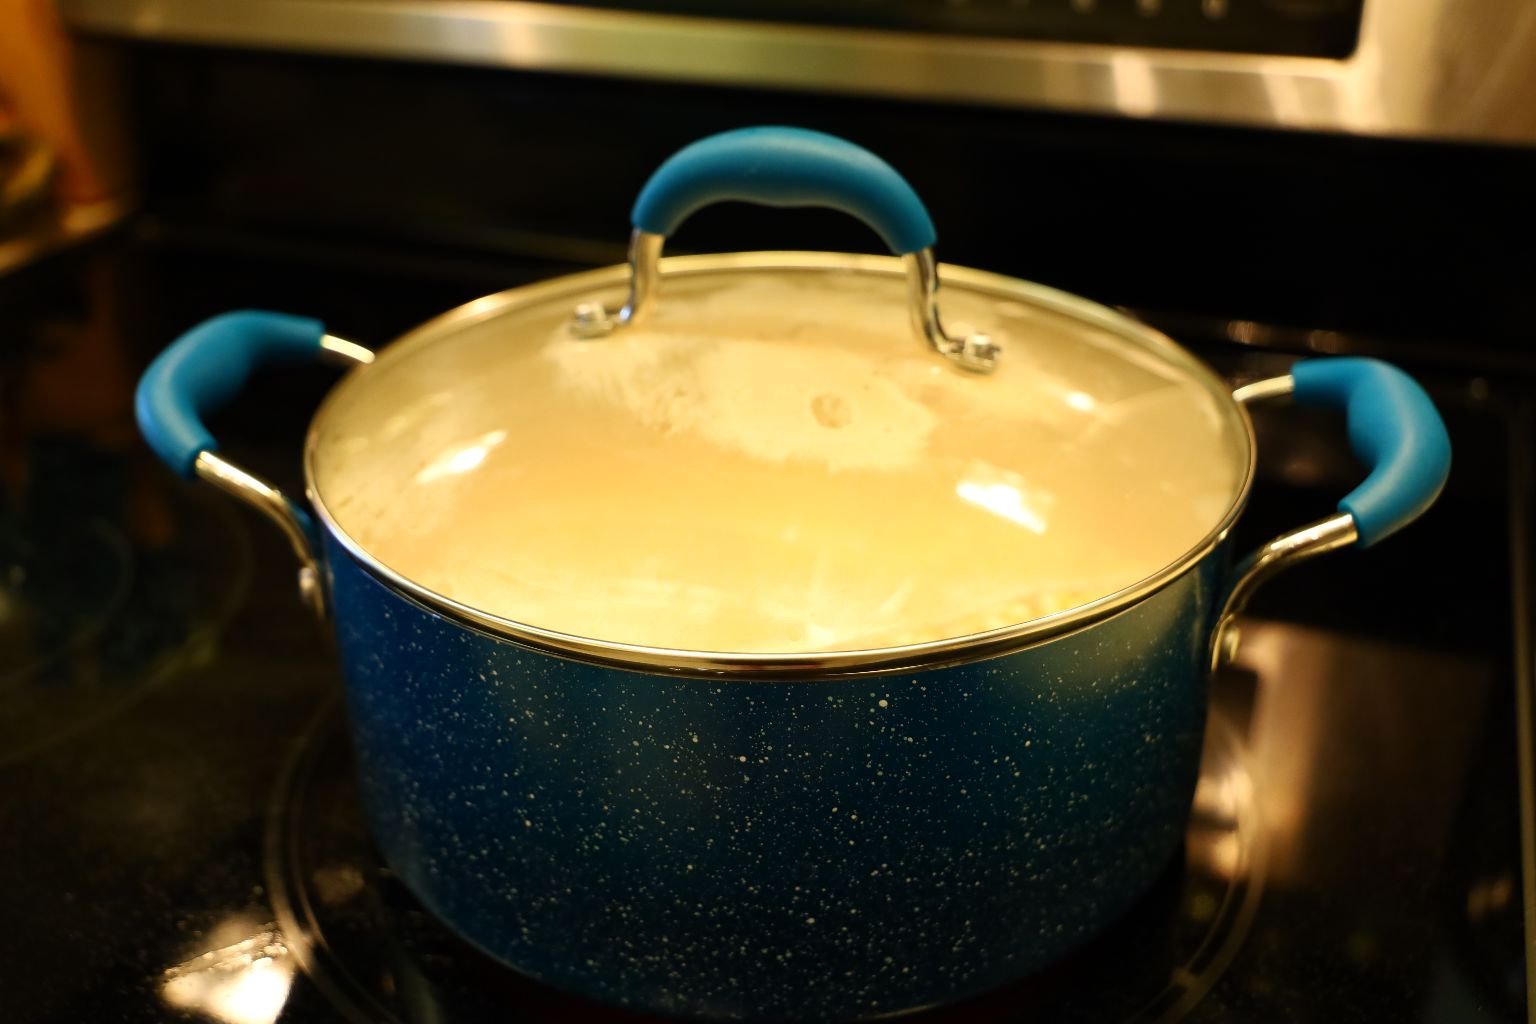
Cover the pot with a lid.
After cooking for a while, stir the ingredients so they don’t stick and burn.


Add your garlic powder and white pepper to the mixture, and taste the beans after an hour or more. This is good for testing the tenderness and flavor of your bean. Add more seasoning if needed to obtain the flavor you like. You will note I didn’t add any salt as the salt pork provided it.
Continue to cook and stir the beans until they are at your desired tenderness… likely about 2 1/2 hours of total cooking time.
These beans become tender and cook much faster than the Boston baked beans as they don’t have the sugar and molasses in them. As I mentioned before, those sweeteners strengthen the beans’ cell walls. These beans were very flavorful from the onions, spices, and salt pork.
——————————————————————-

Julie’s Deviled Eggs, and Pimiento Cheese Stuffed Campari Tomatoes
Great Make ahead Food!
I did both of these the day before the 4th.
————————————————————–

Stuffing Tomatoes
I, Julie, love Pimiento Cheese and I am always trying to find, or come up with new ways of eating it.
I decided that I wanted something else to sit with my Deviled Eggs in their plate, that I seem to prepare for most every occasion. I am not going to give my Deviled Egg recipe as I have it written on so many blog posts and pages as it is. But, I will happily give you my Pimiento Cheese Stuffed Campari Tomatoes.
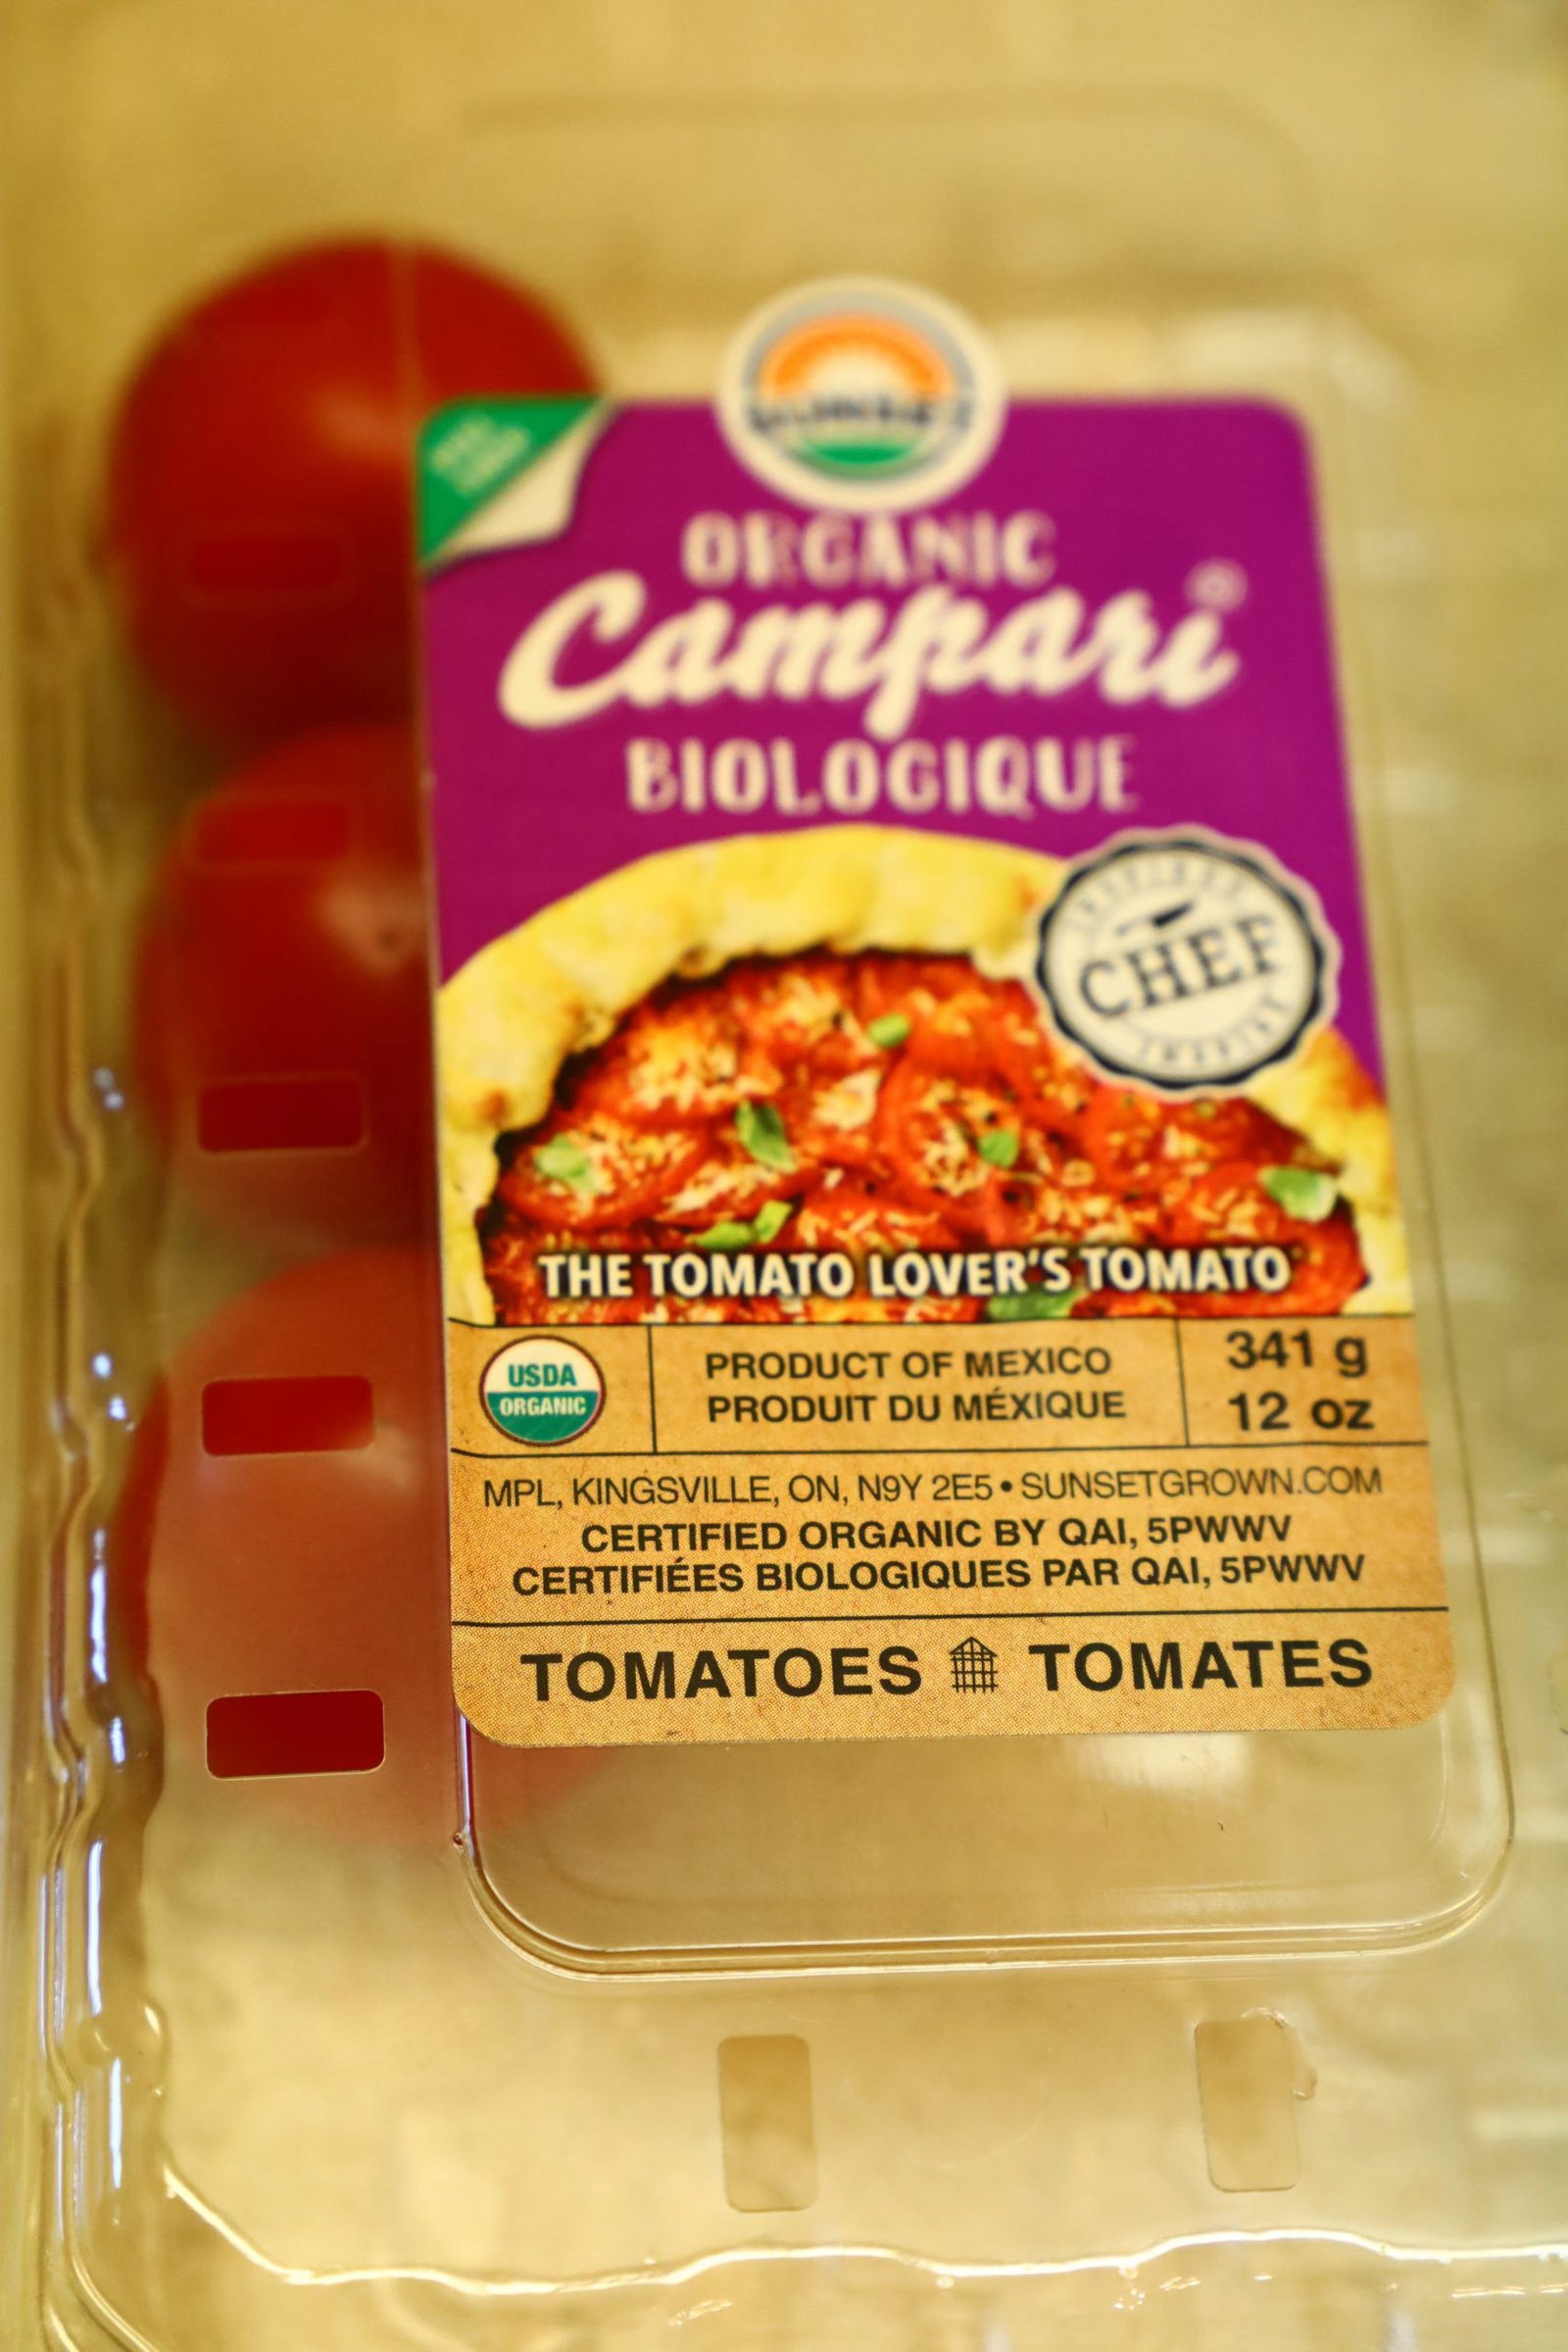
I chose the Campari Tomatoes because they are about the same size as an egg, and I knew they would hold up well to the carving out of them that I would need to do before I stuffed them. They are a very nice sturdy little tomato.


Making them were simple really. I just cut the top off of each of these little tomatoes, and then with this mini whisk I was able to remove the insides of each tomato and place all that into a bowl.


I also had a few little knives handy just in case the little whisk wasn’t enough.
As you can see they are all carved out. I saved an old egg carton to use to set them in so that they wouldn’t fall over.

The tomato innards that I have here in this bowl would be nice added to a soup or a sauce.
That way they won’t go to waste.


This is an excellent brand of Pimiento Cheese. One is a Palmetto Cheese that I love. Before I stuffed the tomatoes I did try and remove as much moisture as possible from them by using paper towels. I didn’t want to spoon pimiento cheese into a wet tomato.
I did save some of their tops to place on top of them.
Kind of like a hat.

Because we do live in the age of Covid 19 I did wash this egg carton thoroughly before I placed any tomatoes inside of it.

You can see how pretty my tomatoes look alongside my Deviled Eggs.
Each one topped with a Basil Leaf. And I have Chives on my Deviled Eggs.
———————————————————-
We made this the day before.
Which helped tremendously as all we had to do was to cook it for our July 4th. dinner.

Retro Scalloped Potatoes (and Carrots)


We had to try out the new toy that Brodie gave Gordon for Father’s Day!
Just in case you don’t know what it is, it is a Mandolin. (A vegetable slicer.) Makes things much quicker than having to slice everything yourself by hand.

Ingredients:
12 Russet Potatoes – sliced 1/4 inch thick
8 Carrots – peeled and sliced in 1/4 inch thick rounds, we used multi colored carrots
6 Tbsp. Butter
6 Tbsp. Flour
2 1/2 Cups Milk
3 Cups Sharp and Extra Sharp White Cheddar Cheese – grated
1/2 tsp. Salt
1/2 tsp. White Pepper
Cooking Spray for the baking dishes
1 Cup Yellow Cheddar Cheese – grated for topping

Here are the cheeses and butter we used.
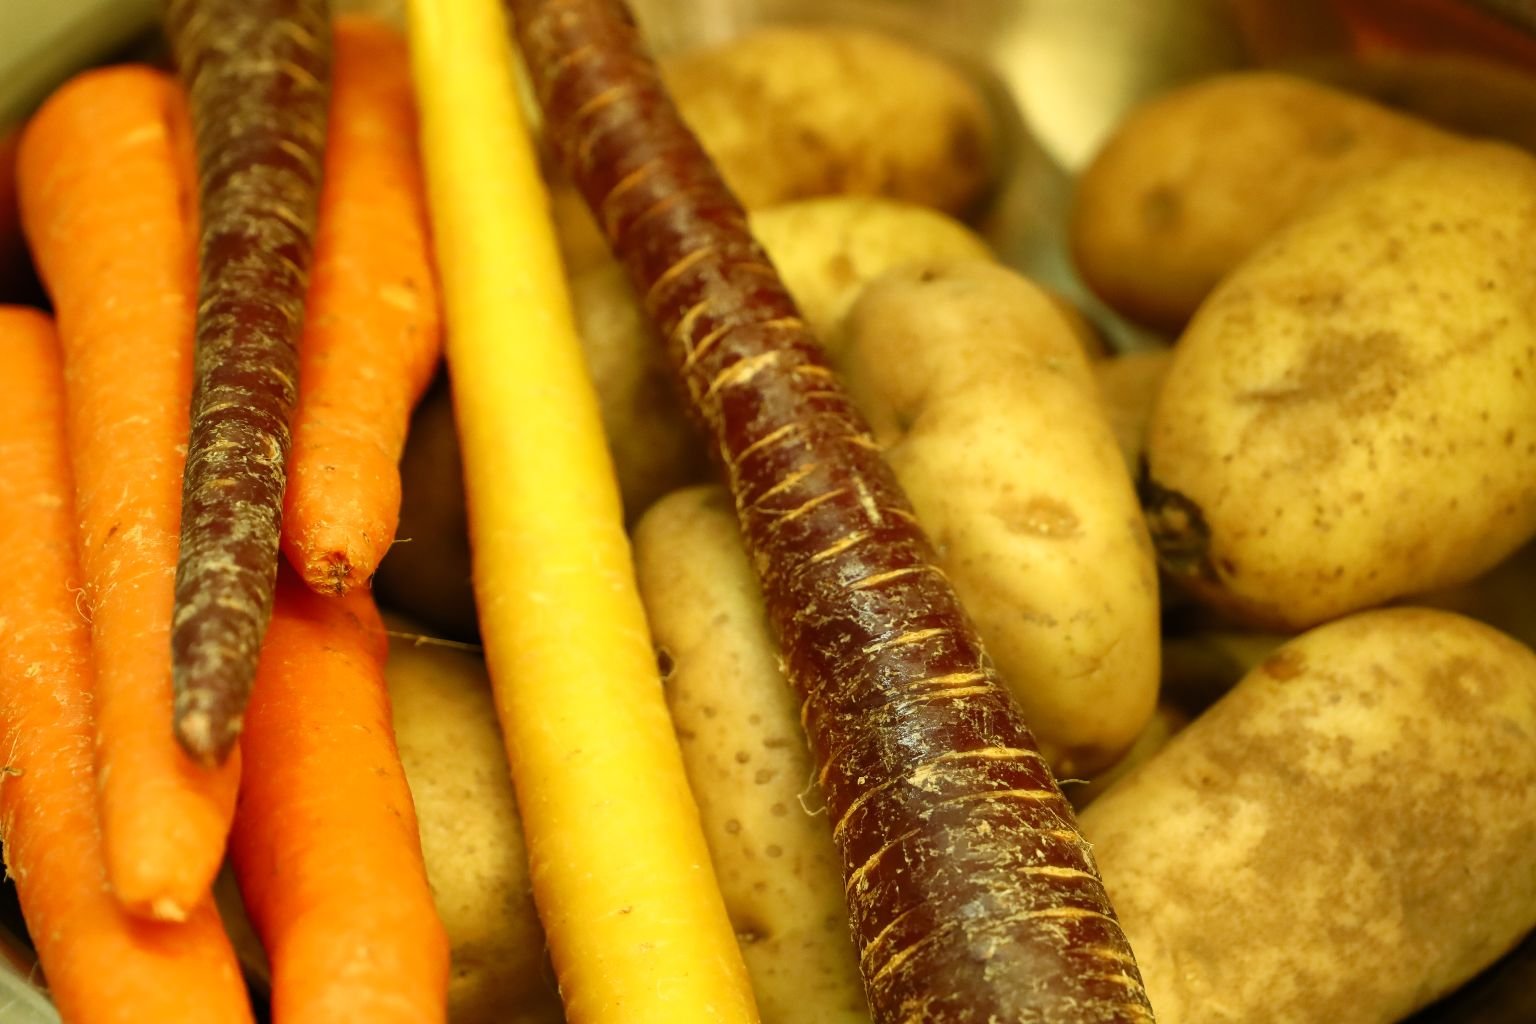

Wash and peel your carrots.

Then peel your potatoes.


The Mandolin Brodie bought me, so this was a great time to use it to slice the potatoes.

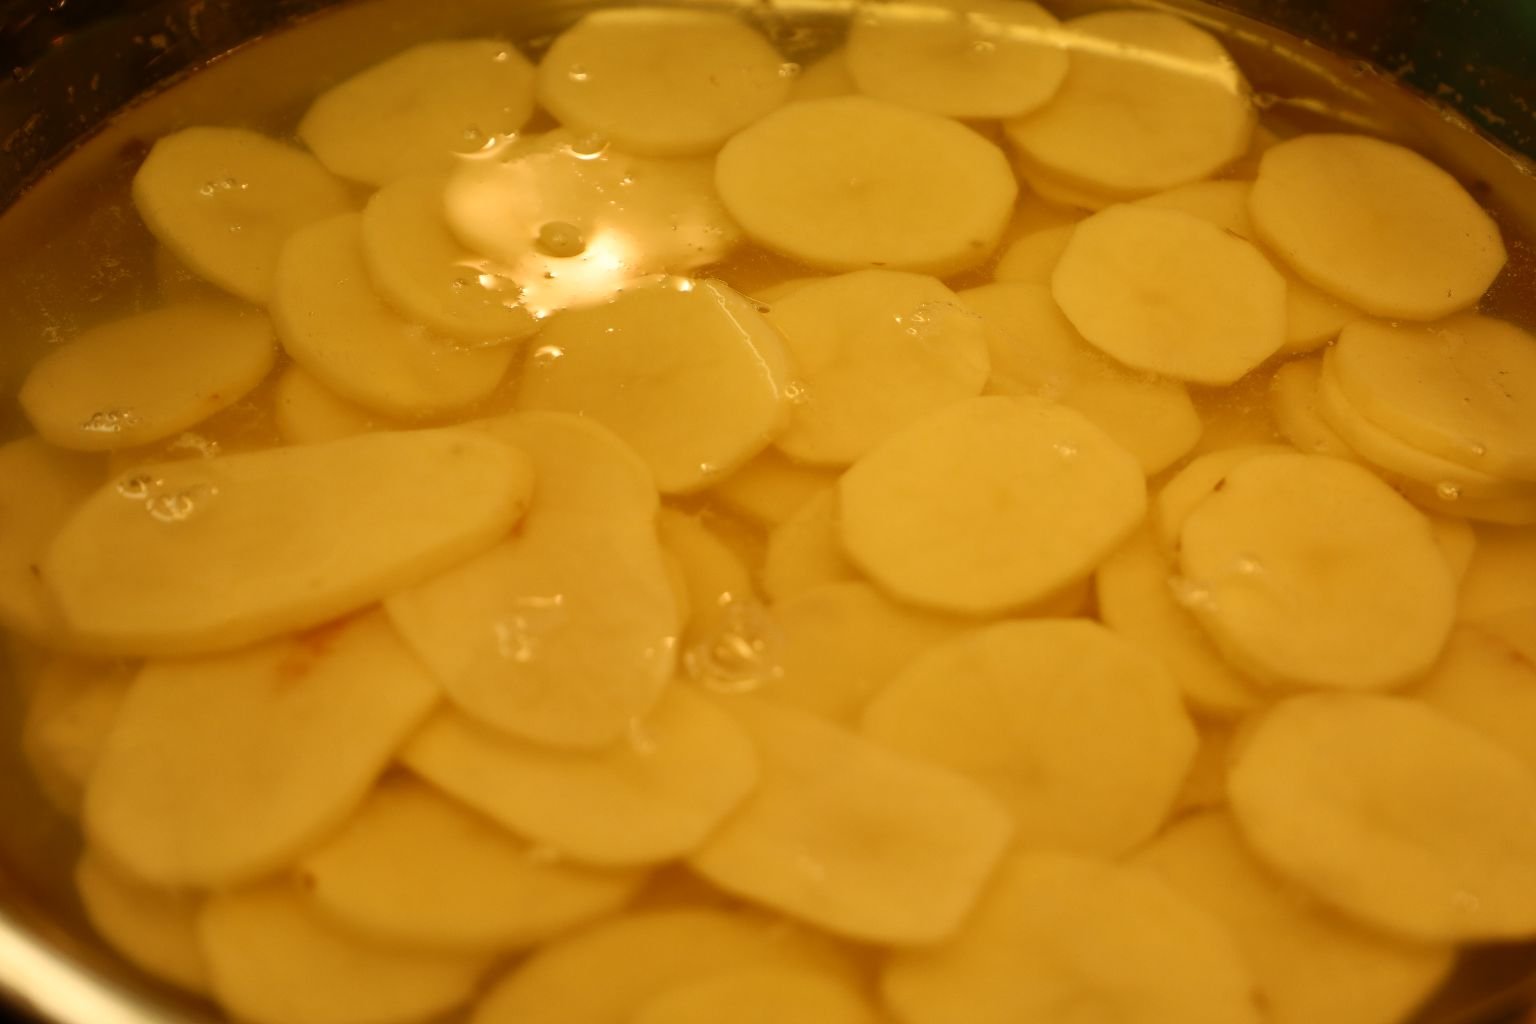

Place the sliced potatoes in a large pot of water so they will release some of their starch and not turn brown.

I can slice pretty fast with my Chef Knife, but using the Mandolin was much faster and more accurate.


It didn’t work though in slicing the carrots, so I had to do them by hand.

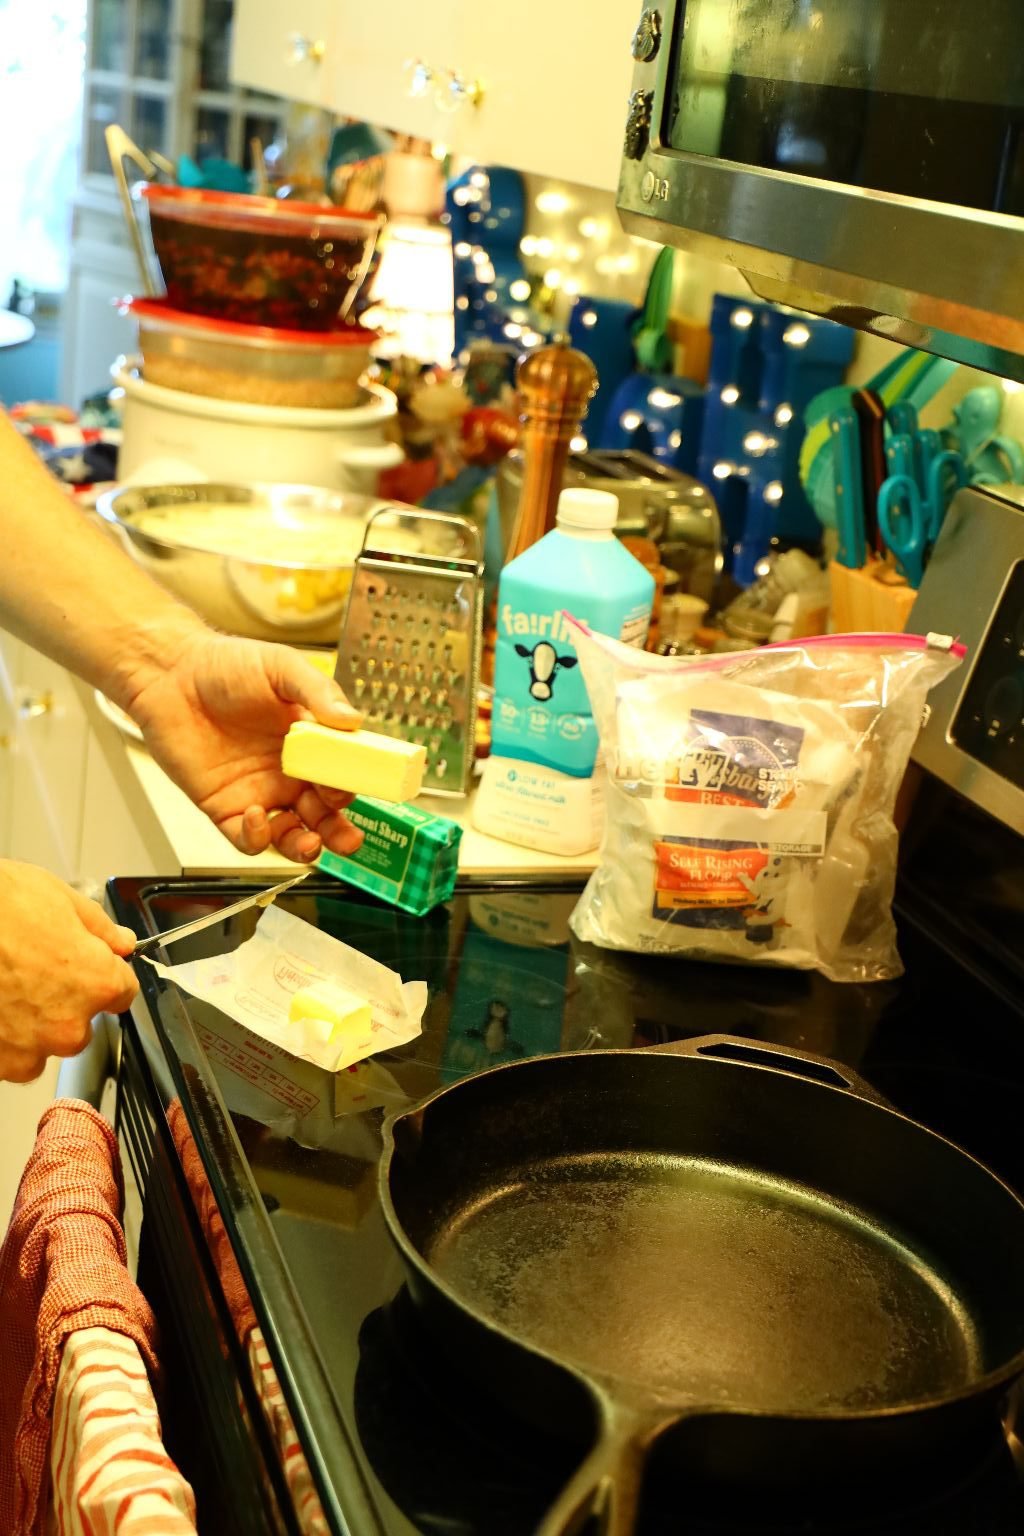
Place your butter into a large cast iron skillet over medium heat.

Let it melt down all the way.


Then add your equal amount of flour…


so that you get a wet sand consistency when mixed together.


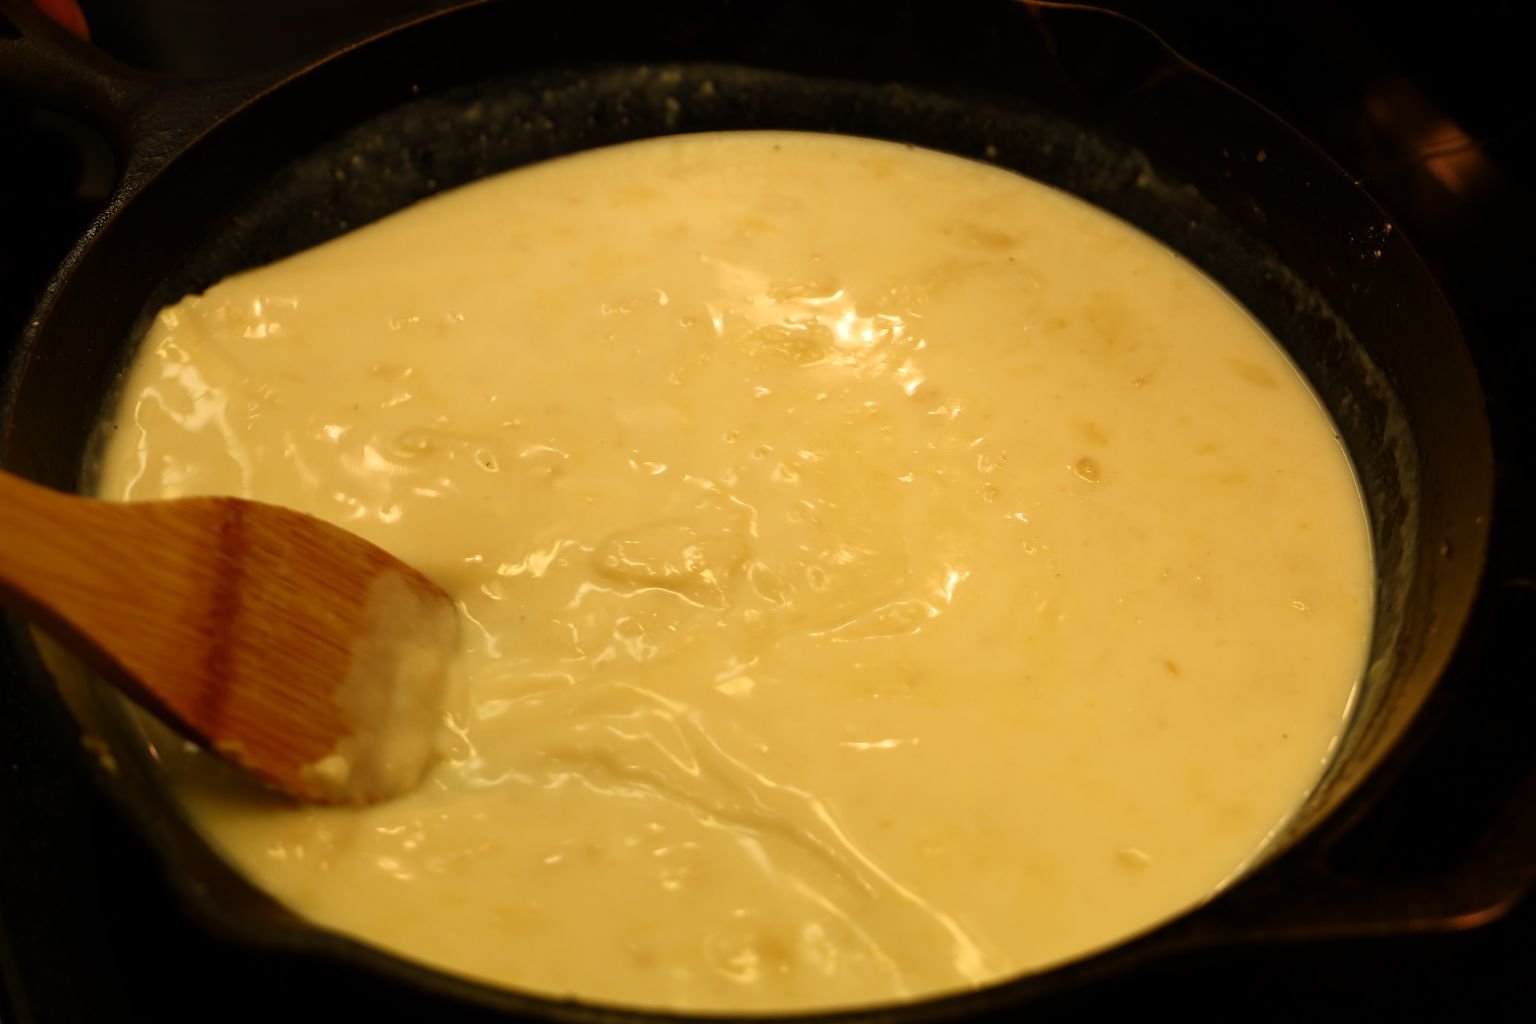
Cook the flour and butter mixture or rue for about three minutes to rid it of the four taste. Then add about 1 cup of milk to the rue and lower the temperature of the mixture to low.


Stir the milk into the rue and cook until thick… this is now called a Bechamel sauce or white gravy!

Add more milk if the sauce becomes too thick.

Use a whisk to help get out any lumps.


Grate your cheese into the sauce.


When you add cheese to a Bechamel sauce you now have made a Mornay sauce. Add more milk if needed to loosen the sauce.


Here once a good portion of the cheese melts into the sauce, I will add more cheese and stir it in to obtain a creamy consistency.


Make sure your temperature is on low, so you don’t burn the sauce.


Add more sharp cheddar cheese…


and then some salt and white pepper. I used white pepper in this so you wouldn’t see the little black flecks.

Taste the sauce and add more seasoning if needed.


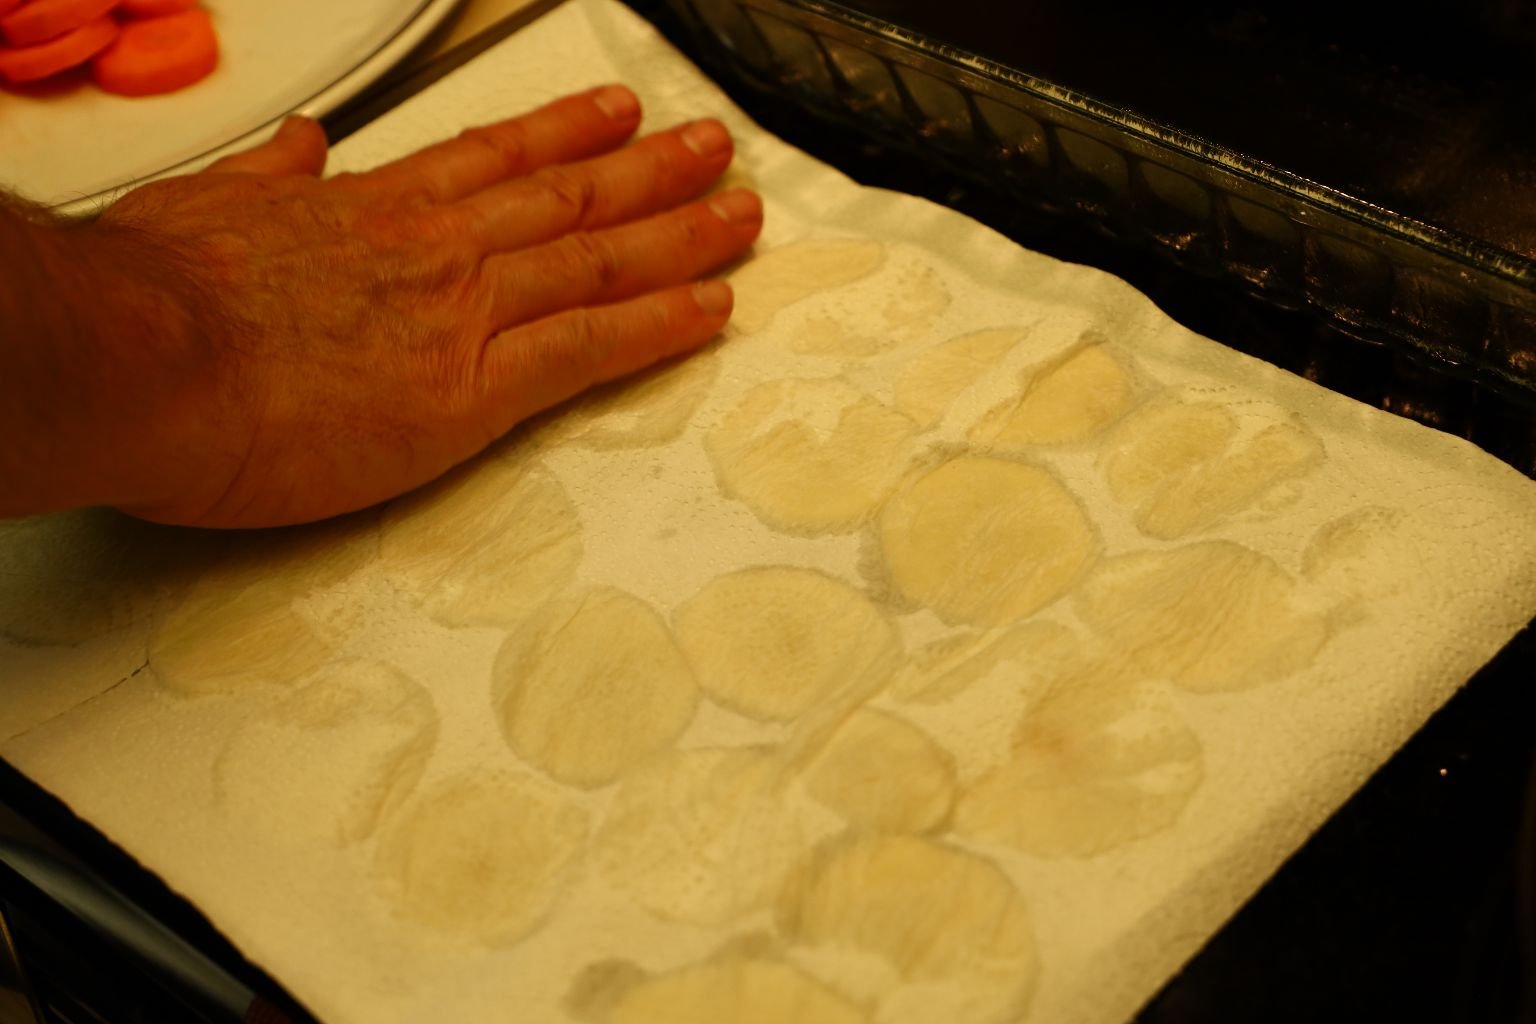
Pour your sliced potatoes into a colander and drain them well.

————————————————————–


Spray your baking dishes with cooking spray.

Spread your sliced potatoes out on paper towels to soak up more water.

————————————————–
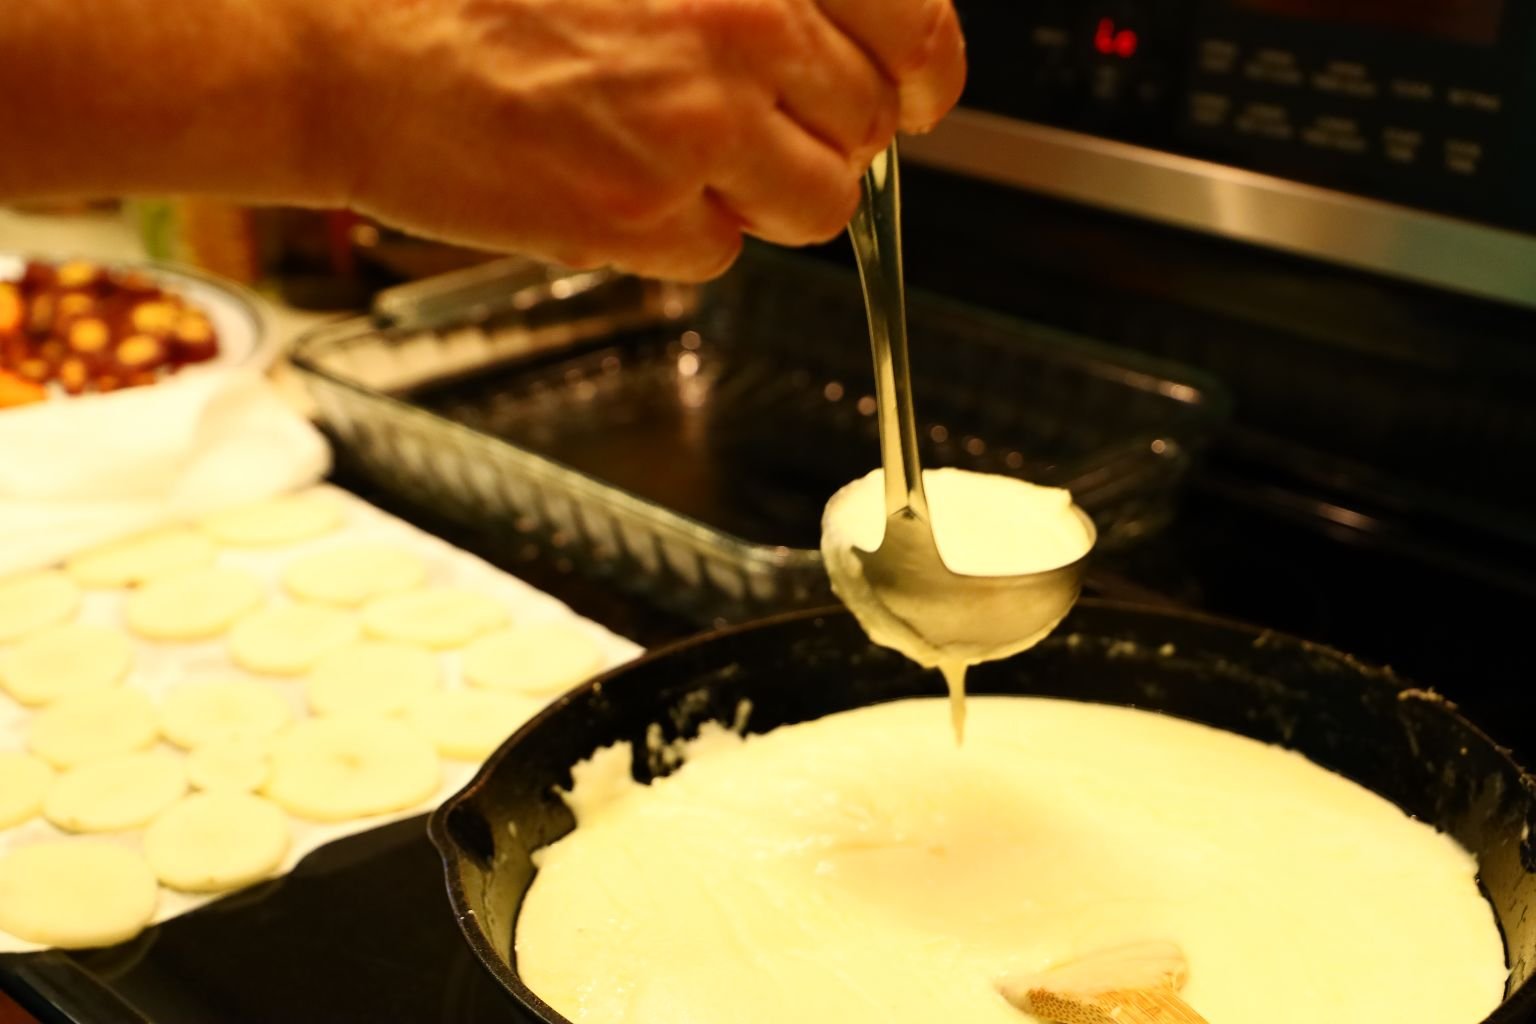

Ladle out a cup or so of your Mornay sauce into the baking dish. We are using two baking dishes as we are taking one over to our daughter and son-in-law. (They get the small green one.) 🙂

——————————————————————


Now, layer your sliced potatoes and carrots evenly into the baking dish then top with more sauce.

Continue to add more potatoes, carrots, and sauce into the pan ending with a thin layer of sauce covering the potatoes and carrots.


——————————————————————-

I , Julie, placed some pretty carrots along the sides of the glass dish for a pretty presentation.

Here is the last layer of potatoes and carrots with a thin amount of Mornay sauce over top.


Grate your Yellow Sharp Cheddar Cheese…
(This step is optional. I, Julie, do not recommend that you do this because the Cheddar Cheeses are very oily and it left an oily residue on top. We had to use a few paper towels to remove it. It was delicious! But it wasn’t needed.)

….and top the mixture with tablespoons of this Cheese in a decorative pattern.

Here, we are covering the Scalloped Potatoes and Carrots to place into the refrigerator to cook tomorrow. You can see the different colored carrots on the side of the dish and how pretty they look.
—————————————————————-


Next Day…..

When you are ready to cook your scalloped potatoes and carrots, place them in a 400’F oven covered with aluminum foil (not shown) and bake for 90 minutes, then uncover and cook for another 20-25 minutes until nicely brown and bubbling.

Here is our version of Scalloped Potatoes and Carrots!
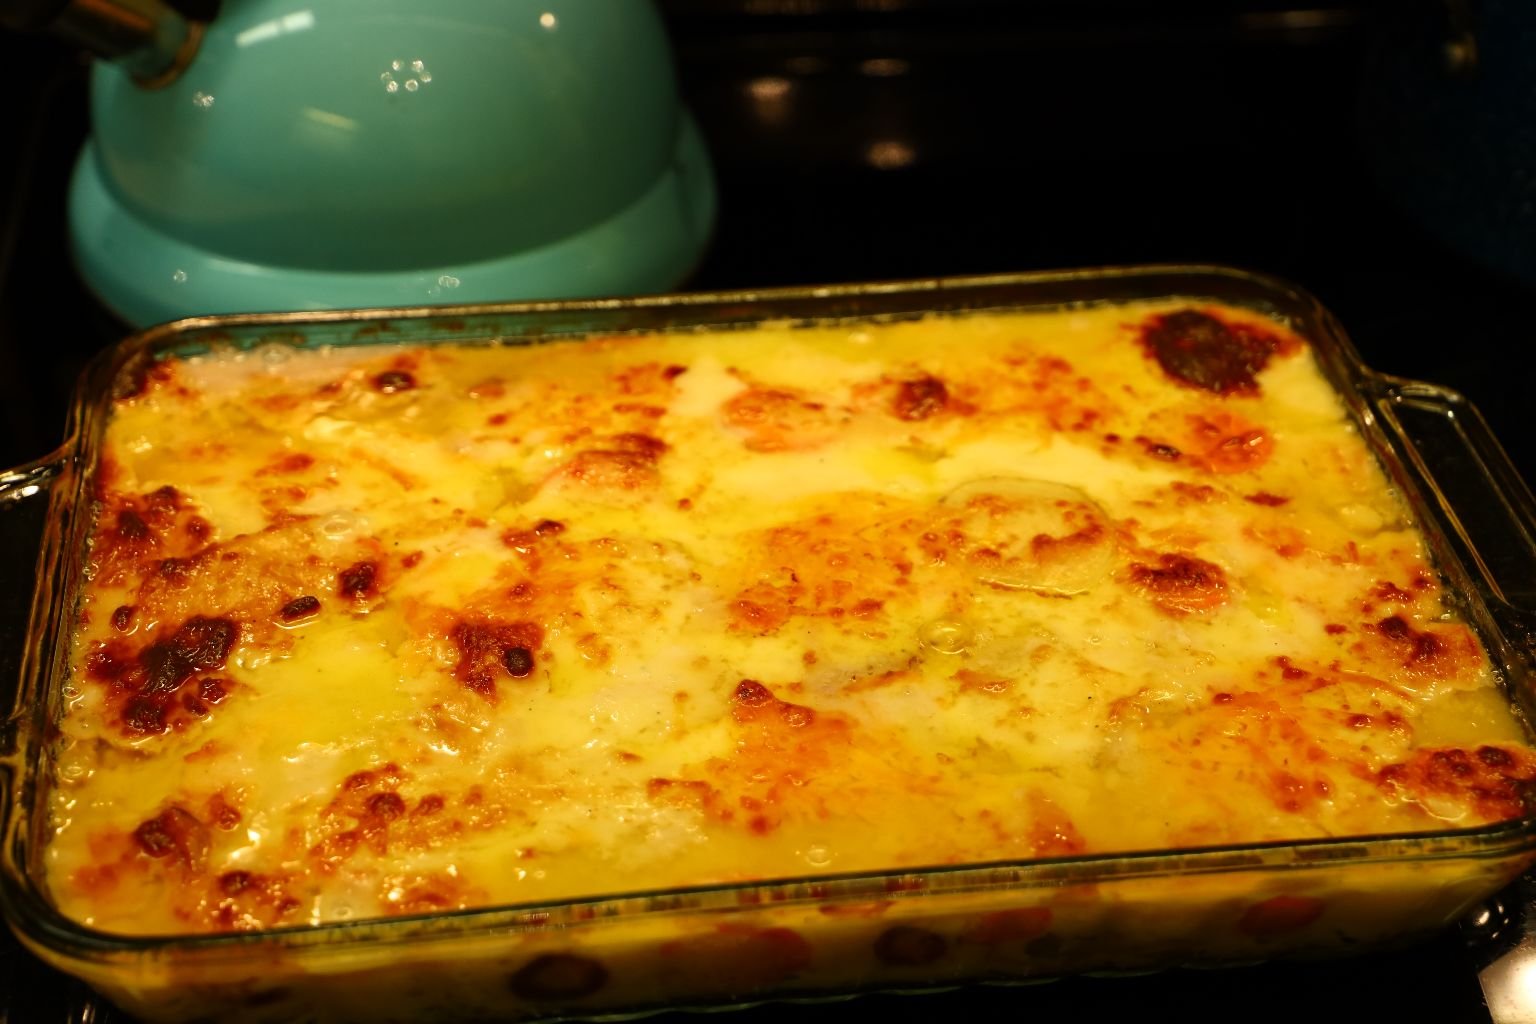
Delicious!
———————————————————
Pork Picnic Shoulder on the Grill

Ingredients:
~9 Lb. Smoked Pork Picnic Shoulder
3/4 Cup Turbinado Sugar
3/4 Cup Splenda Brown Sugar
2 Tbsp. Bad Byron’s Butt Rub BBQ Seasoning
2 Tbsp. Grill Mates Sweet & Smoky Rub
1 Ciderboys Pineapple Hula

————————————————————


Remove the pork from the wrapper and rinse well with water.

On one side of the shoulder, remove the skin as shown revealing the thin layer of fat.

Leave the skin on the other side of the meat to protect it from the heat of the grill

Using a sharp knife score the shoulder fat.
That is make horizontal and vertical cuts into the fat about 1/8 inch deep.


Pour your Turbinado sugar into a medium sized bowl.
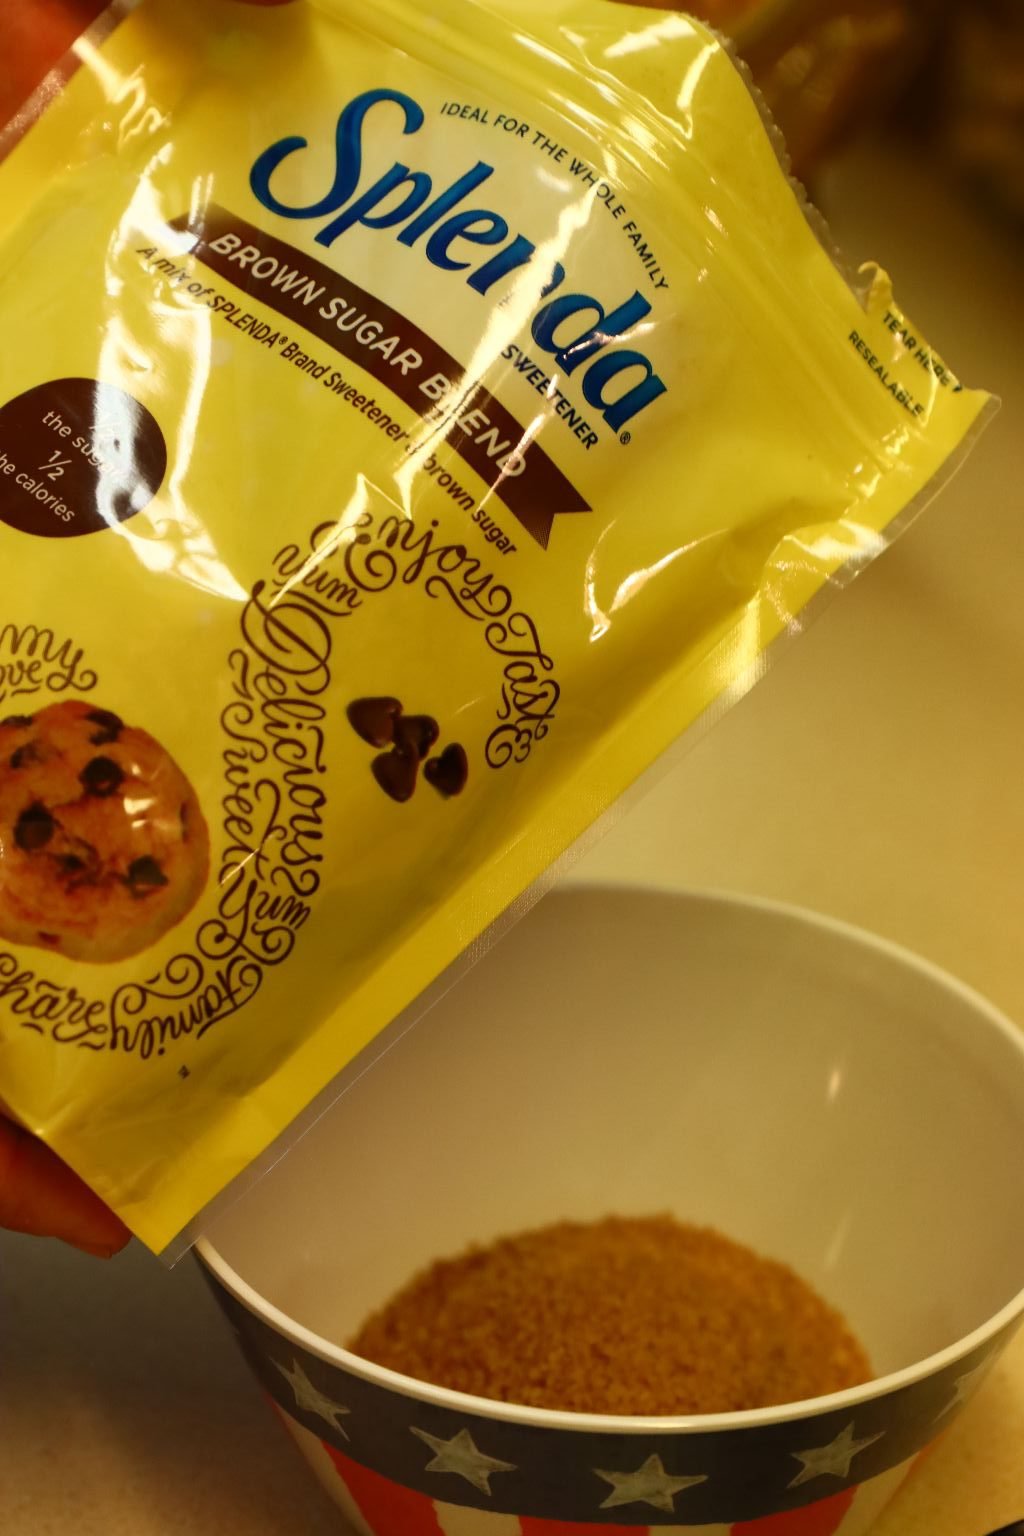
Then add your Splenda brown sugar.


Now, add your Butt Rub to the bowl…
(Who doesn’t love a good Butt Rub?)


…then your Sweet & Smoky rub to the bowl and mix all the ingredients well. Taste the mixture to see if it is the flavor you desire. If not, add more of the ingredients you feel it needs.

Place your pork shoulder into a large bowl and pat the rub seasonings into the fat side of the meat.


Turn the meat over and continue to push the seasonings all over the meat until well coated.

Here you can see the meat is well coated with the seasonings.

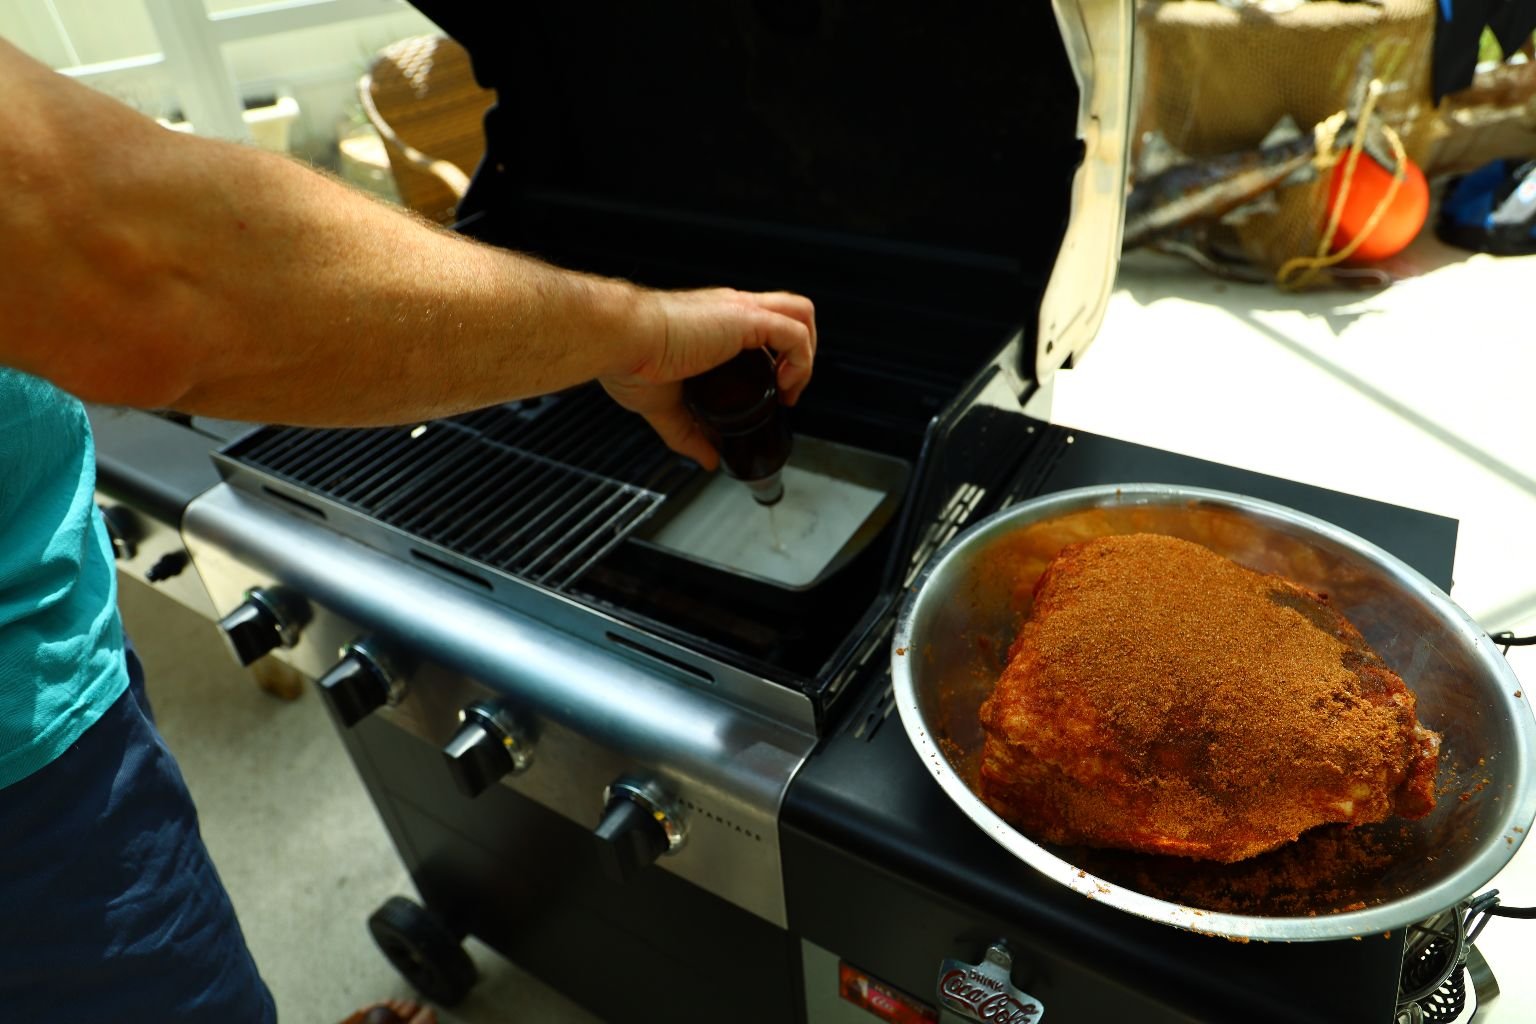
Pour your Pineapple Cider into an 8 x 8 inch pan which is then placed below your grill grates. This will serve two purposes, it will steam releasing moisture and flavor in the meat as well as catch any drippings.

I have four burners on my grill. I turned on the left two burners and kept the others off.

————————————————————-


Place the pork shoulder on the right side of the grill and turn the grill on for a constant temperature of 275-300’F

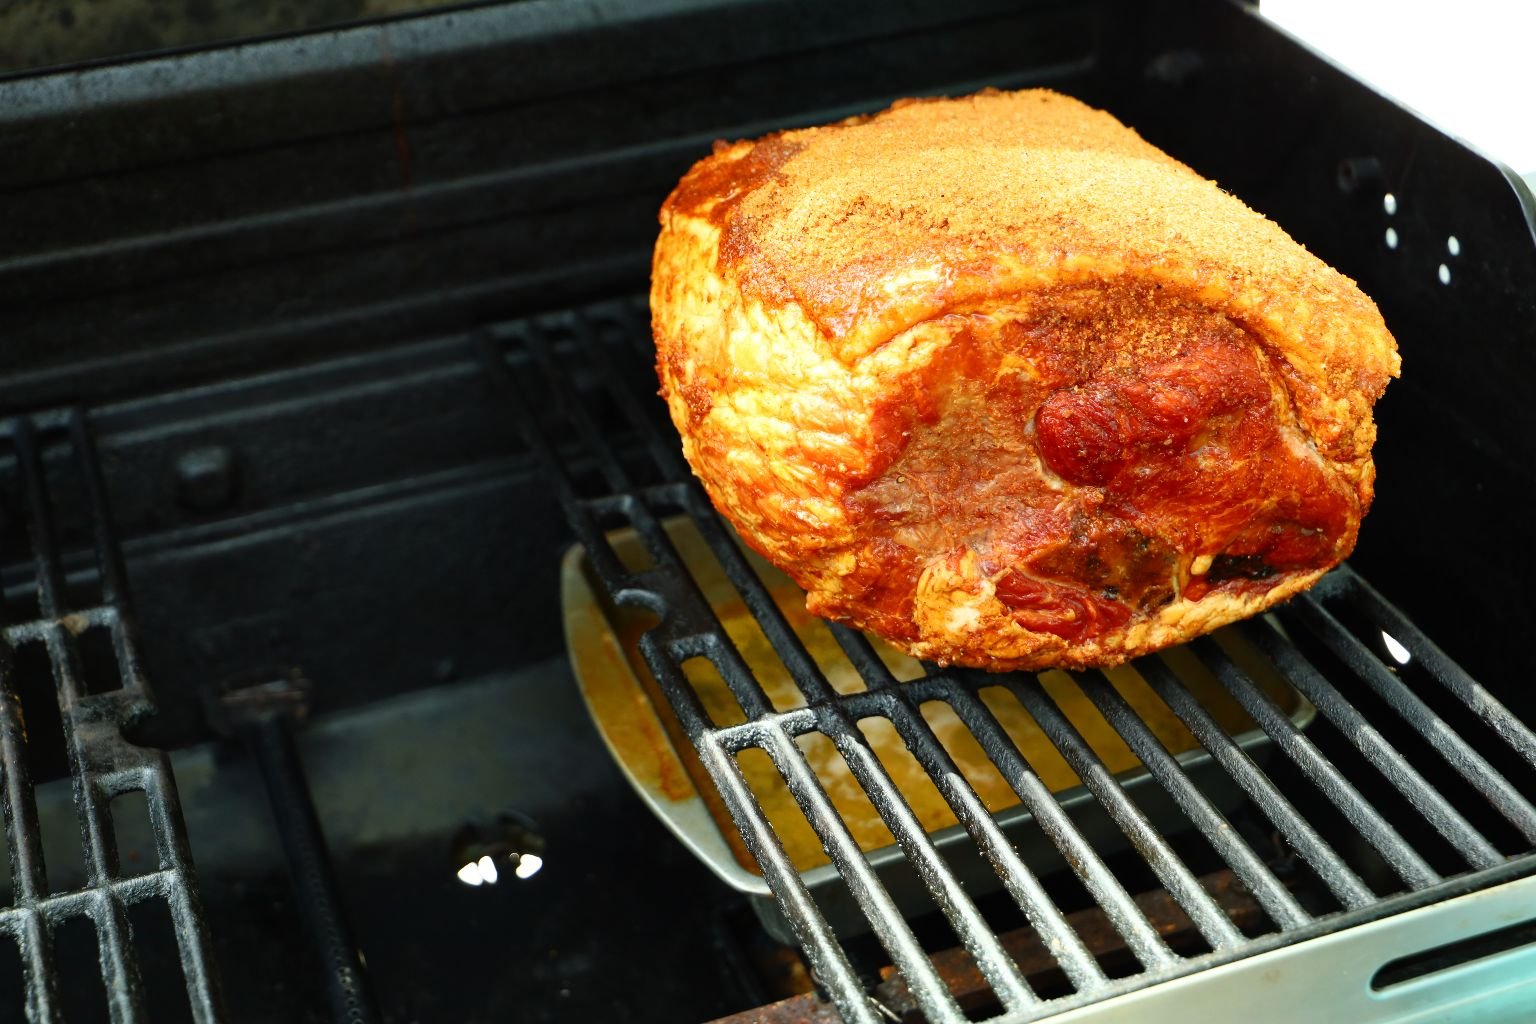
Here you can see the pan under the pork. Cook the pork for about 8 hours or until you reach an internal temperature of 190’F. When the pork reaches 135’F you may want to cover your pork with foil if it is getting too brown. When the pork reaches 190’F, remove it from the grill and let it rest. The internal temperature will rise as the super heated pork juices retreat back into the center of the meat, where it will continue to cook the shoulder to around 195-197’F.

————————————————————-

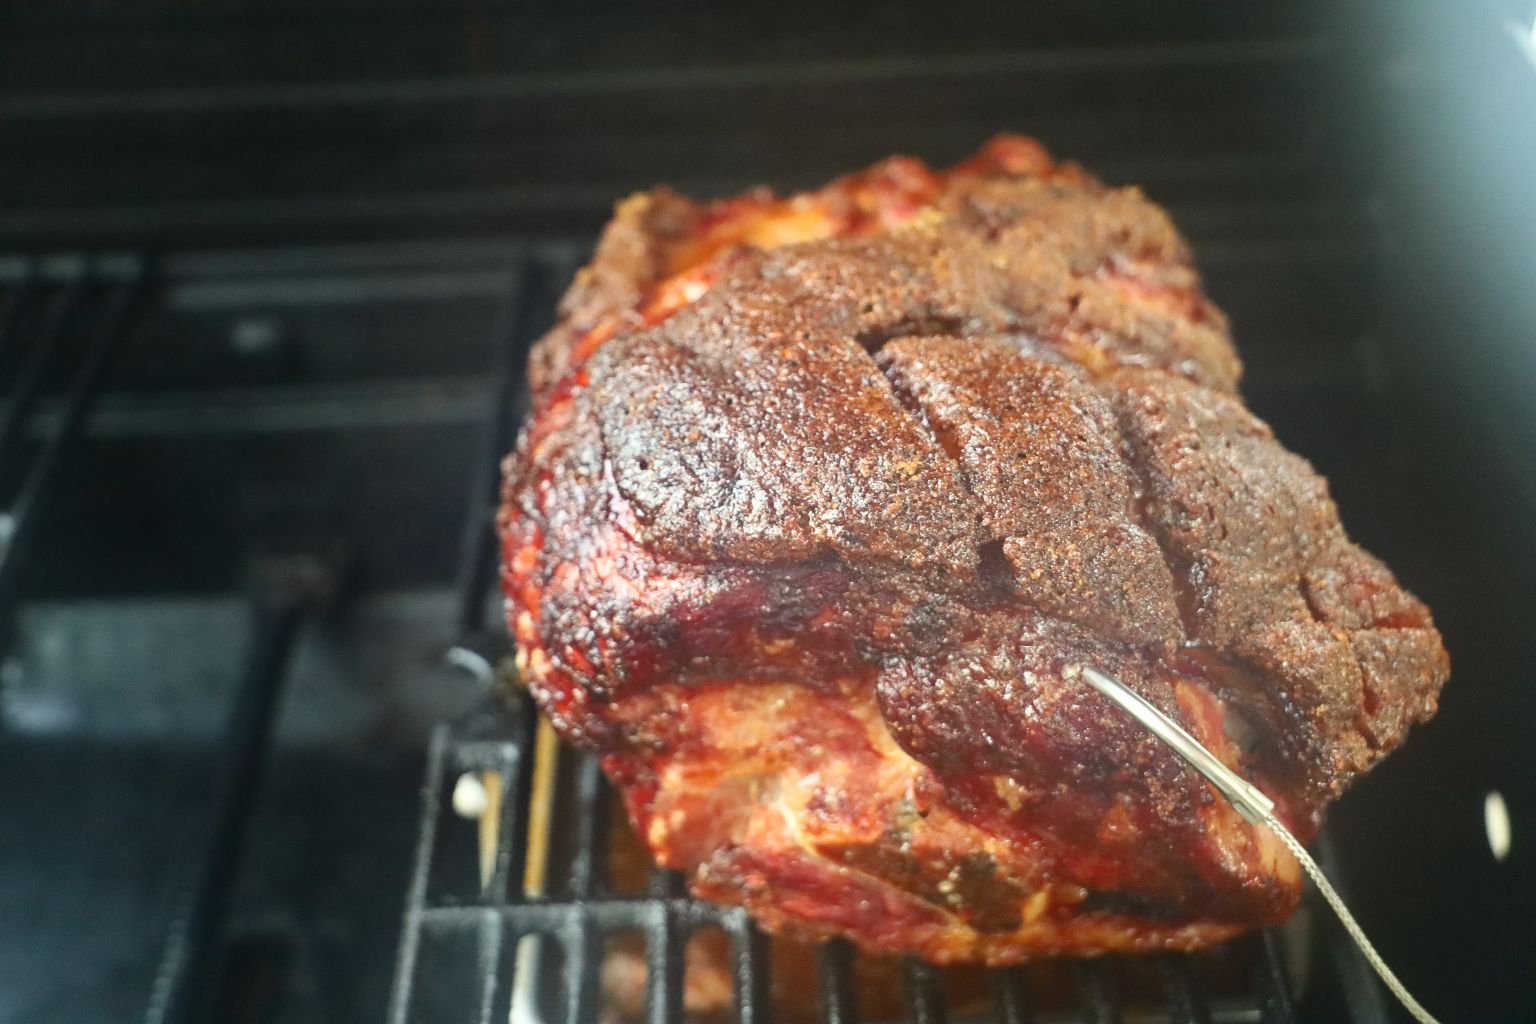
I set my digital thermometer into the grill opening where it is testing the internal air temperature. For at least 6 hours there is really no need to have your thermometer in the meat.
—————————————————————–
When ready, slice as is……
Or, place on a hook and have your guests cut slices off it.
Or, place onto a nice board or platter and carve.
Pork Shoulder Picnic Roast with Delicious Bark
One of the best we have ever eaten.
—————————————————————–

Our JAWS Recreation Dinner
Fried Cod in Red Sauce, Green Beans, and Clams
Red, or White?
——————————————————-
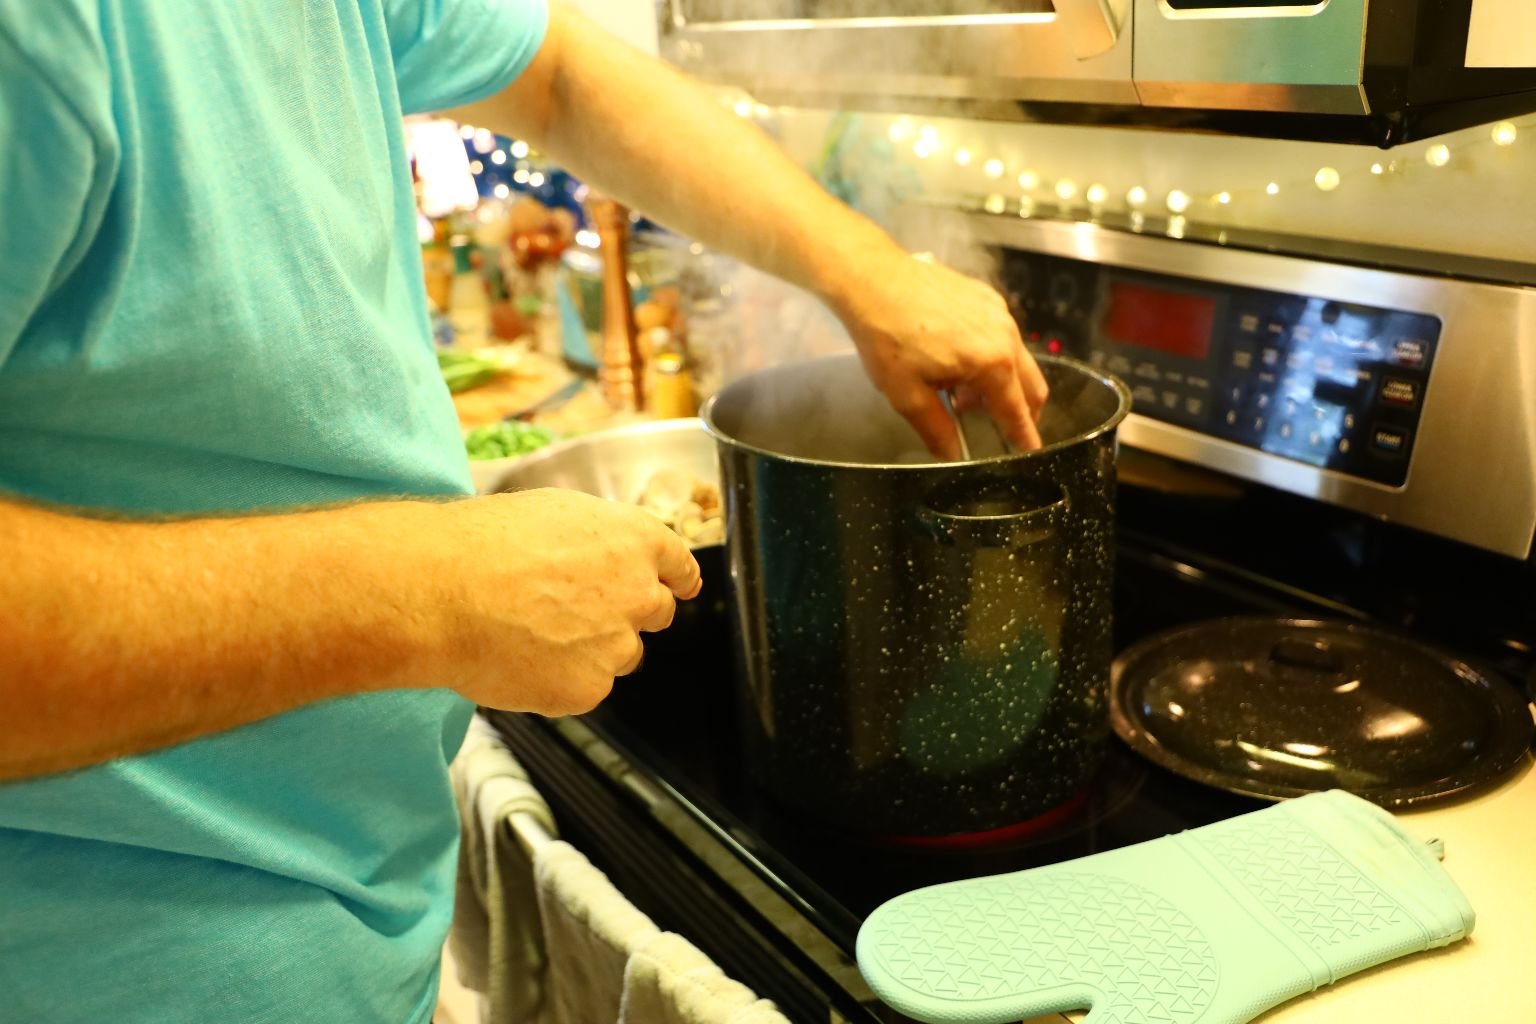
Steamed Clams in Butter, Garlic, and Herbs

Our clams came in small mesh bags which were placed on ice and I then placed more ice over them.
Ingredients:
~ 8 Lbs. of live clams
4 Tbsp. Butter
~ 1 Cup Garlic – nearly minced
1/2 Tbsp. Roasted Garlic Powder
8 oz. Clam Juice
2 Tbsp. Chives – sliced
1/2 Cup Green Onions – sliced
1/4 Cup Lemon Juice
——————————————————–

Here are the clams on ice.


We buy our garlic at times all ready peeled, so I placed them in a colander and rinsed them off.

I placed ~4 Tbsp. of good Irish Butter in a saute pan and heated it to medium.

Here you see the green onions, chives, and garlic ready to be sliced on our large cutting board.
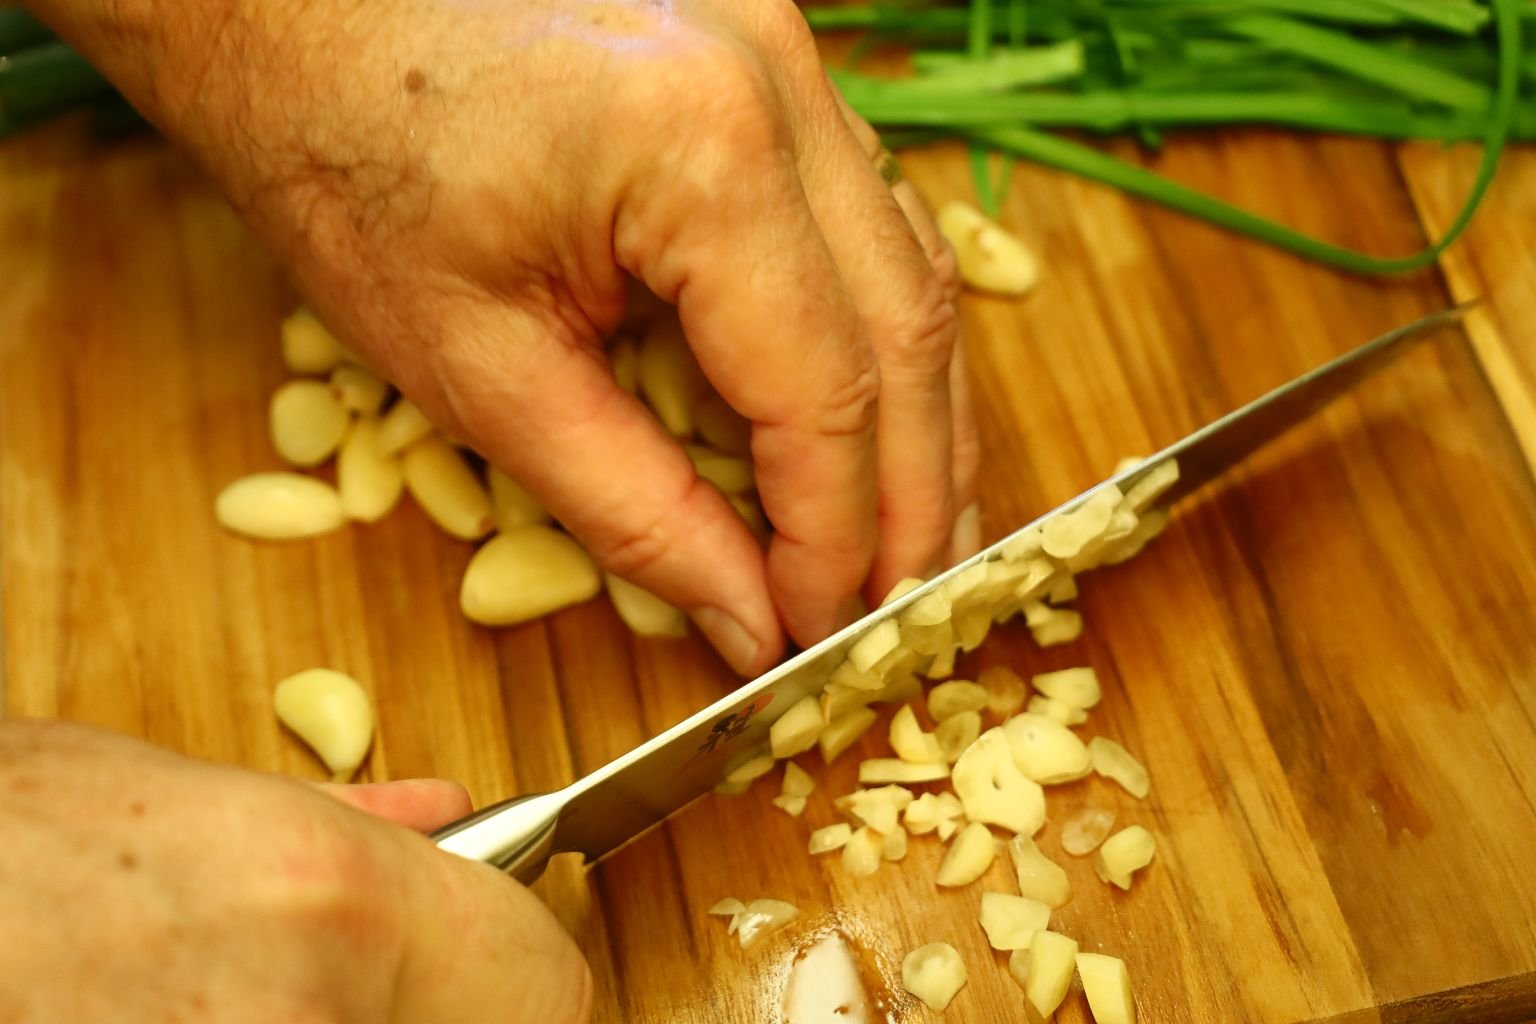

As the butter is melting I sliced ~ 1 Cup of garlic cloves to almost a mince.


Place the sliced garlic into the melted butter and saute the garlic until tender… about 10 min.

Rinse your clams well to clean off the sand and other debris.
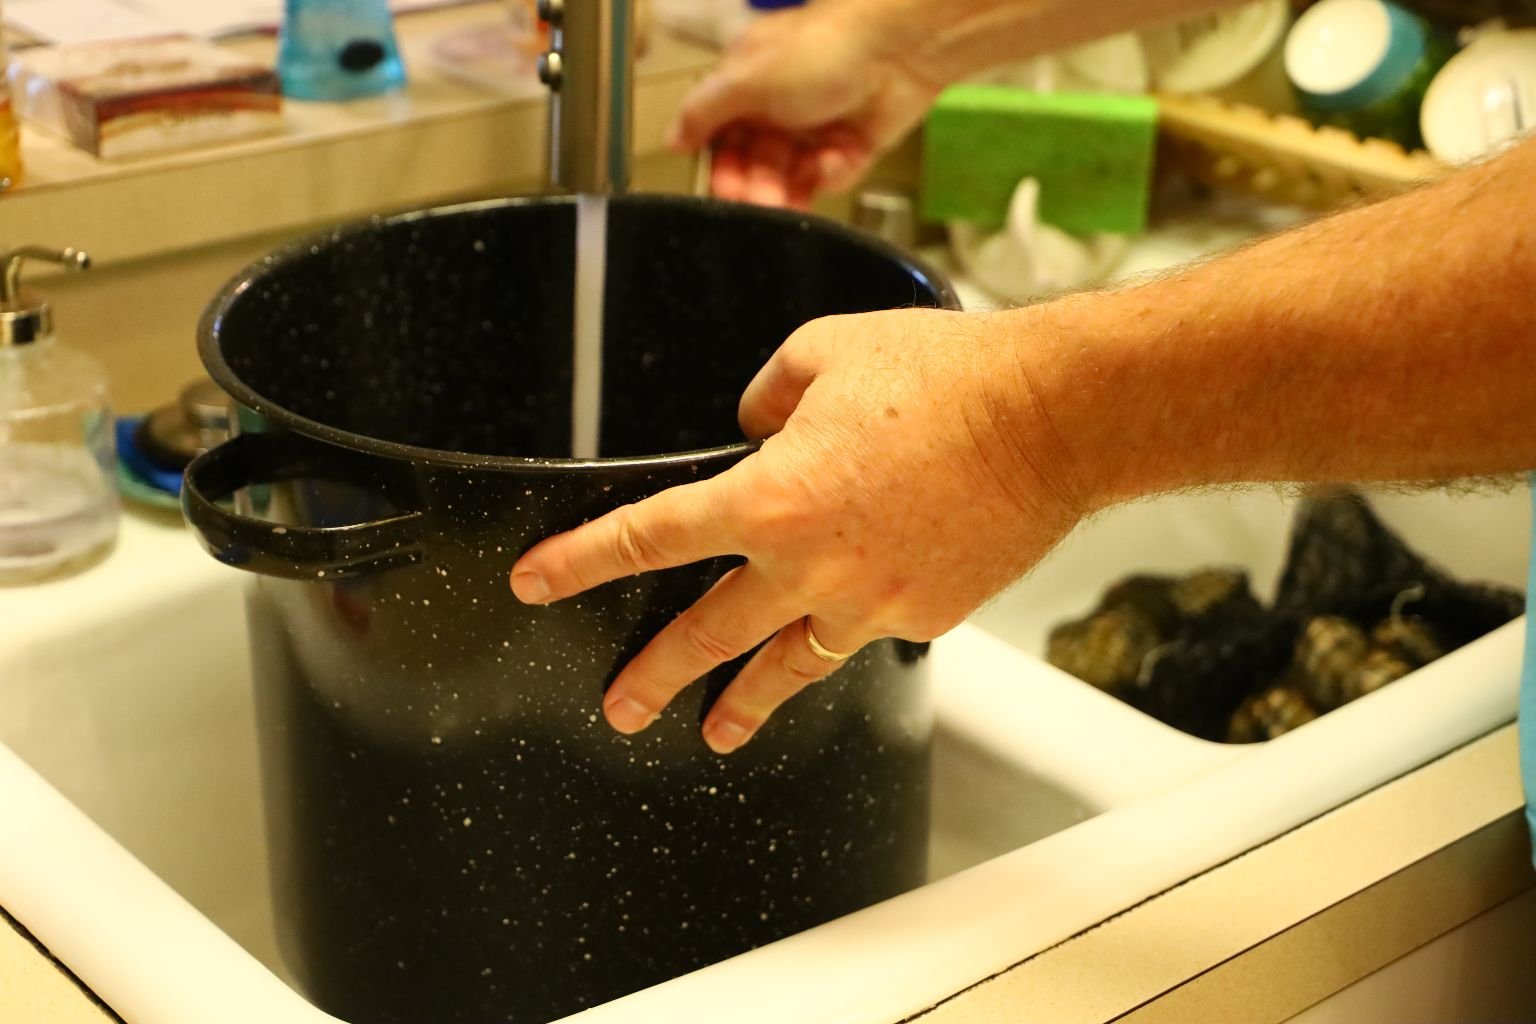
In your steamer, place about 1 inch of water into the pot. Place your pot on the stove and heat the water to a boil.


As the garlic is cooking, I added the roasted garlic to up the garlic flavor.

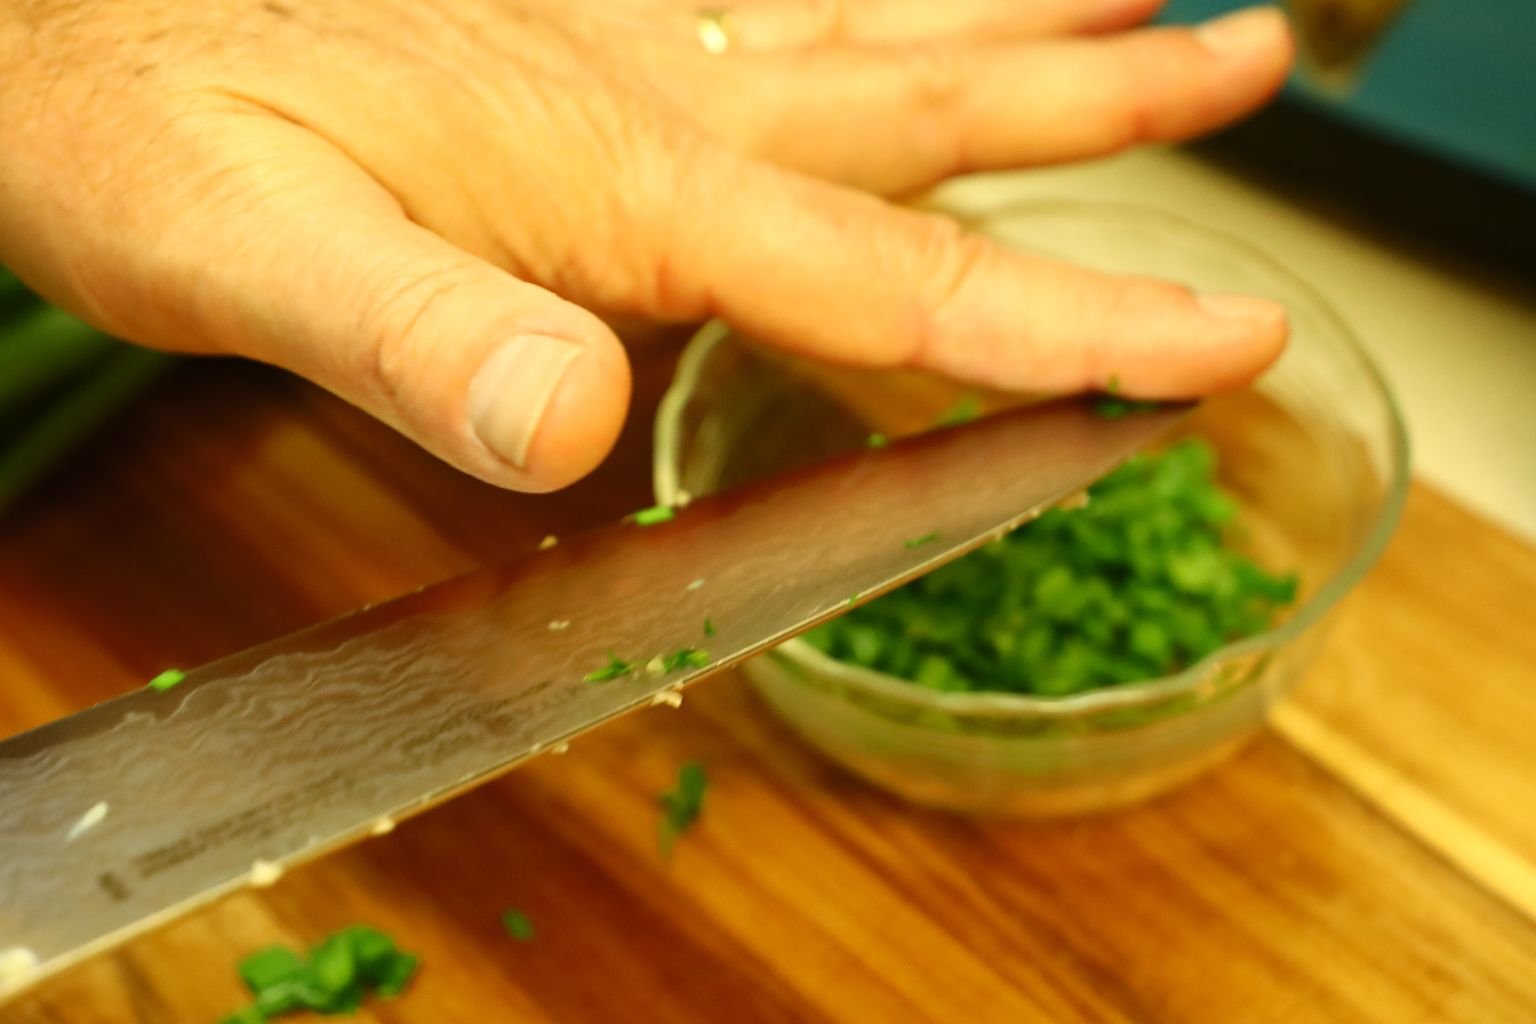
Slice your chives… and yes, these are from our garden!
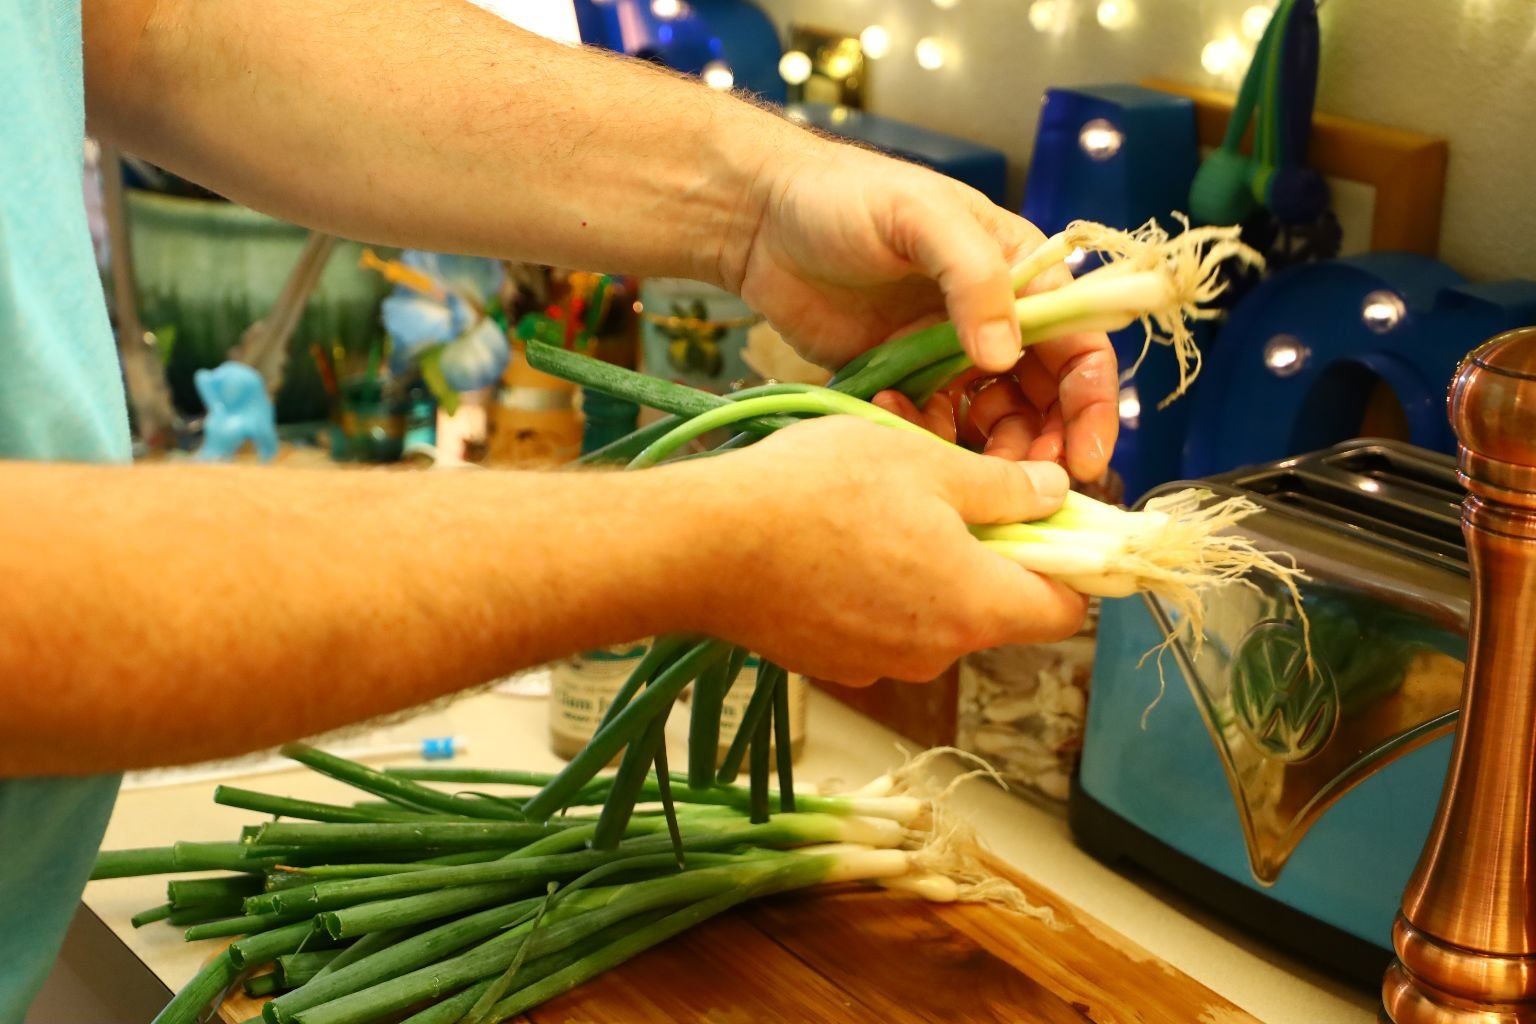

Line up the green onions in a row and slice off the root ends evenly. Then slice the rest of the onion finely saving the root ends.
TIP: Take those root ends and plant them leaving about 1/2 inch of the white section above the ground and water them in. In just a few days, you will see them start to grow again. After about a month, they will grow enough to harvest… then just plant the root ends again!

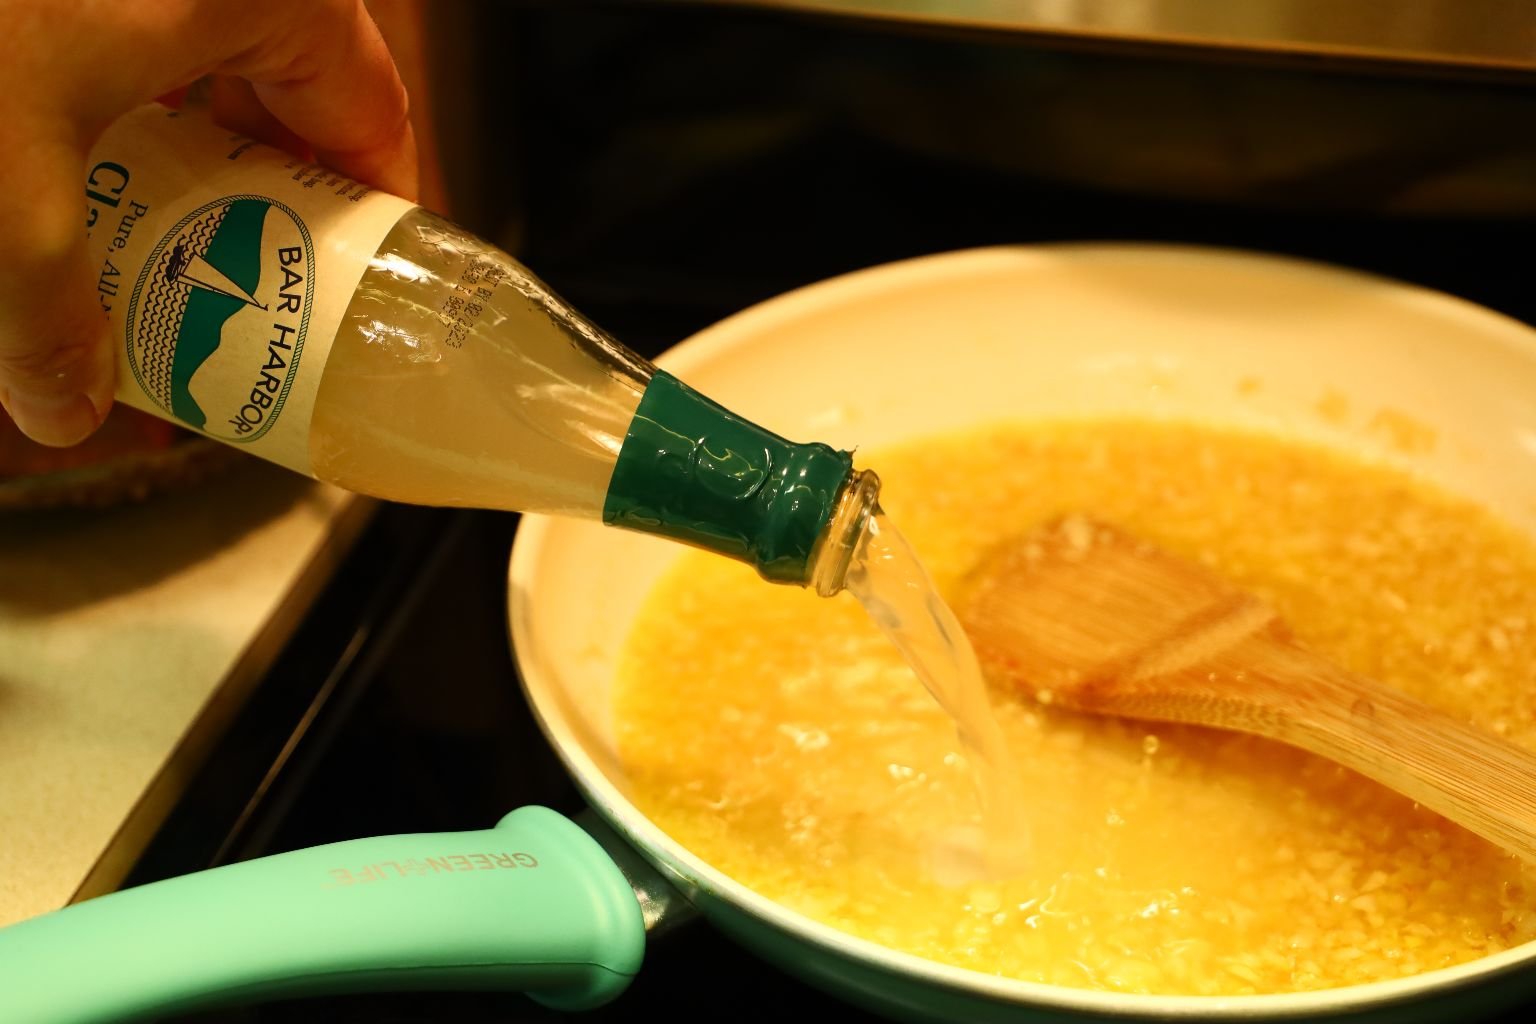
When the garlic is tender, add your clam juice to the pan and stir all the ingredients together well. Cook the mixture for another 5 min. and then set the pan aside.


Here I am slicing the green onions as I talked about above.


Rinse your clams well in the ice water.
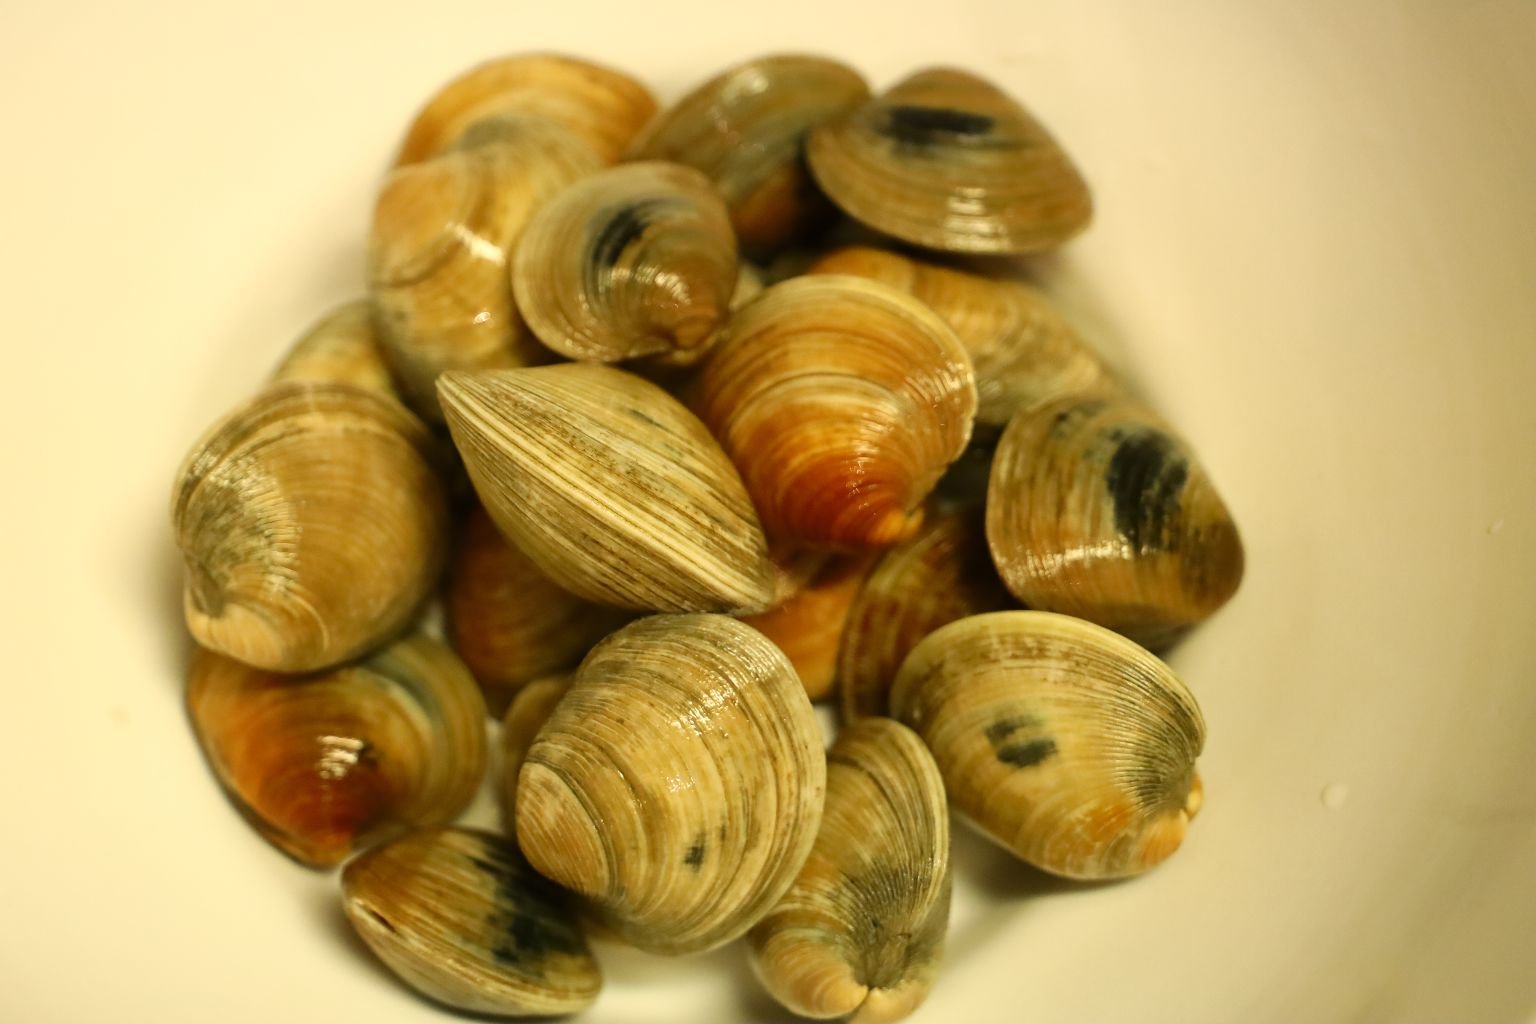
Once clean, I placed the clams into a bowl. Now, check the clams to ensure they are still alive. This is done by seeing if their shells are closed. If they are closed the clam is alive. If they are not, slightly squeezing their shells together and if they then close on their own, they are still alive. If they don’t close, don’t throw them away just yet!

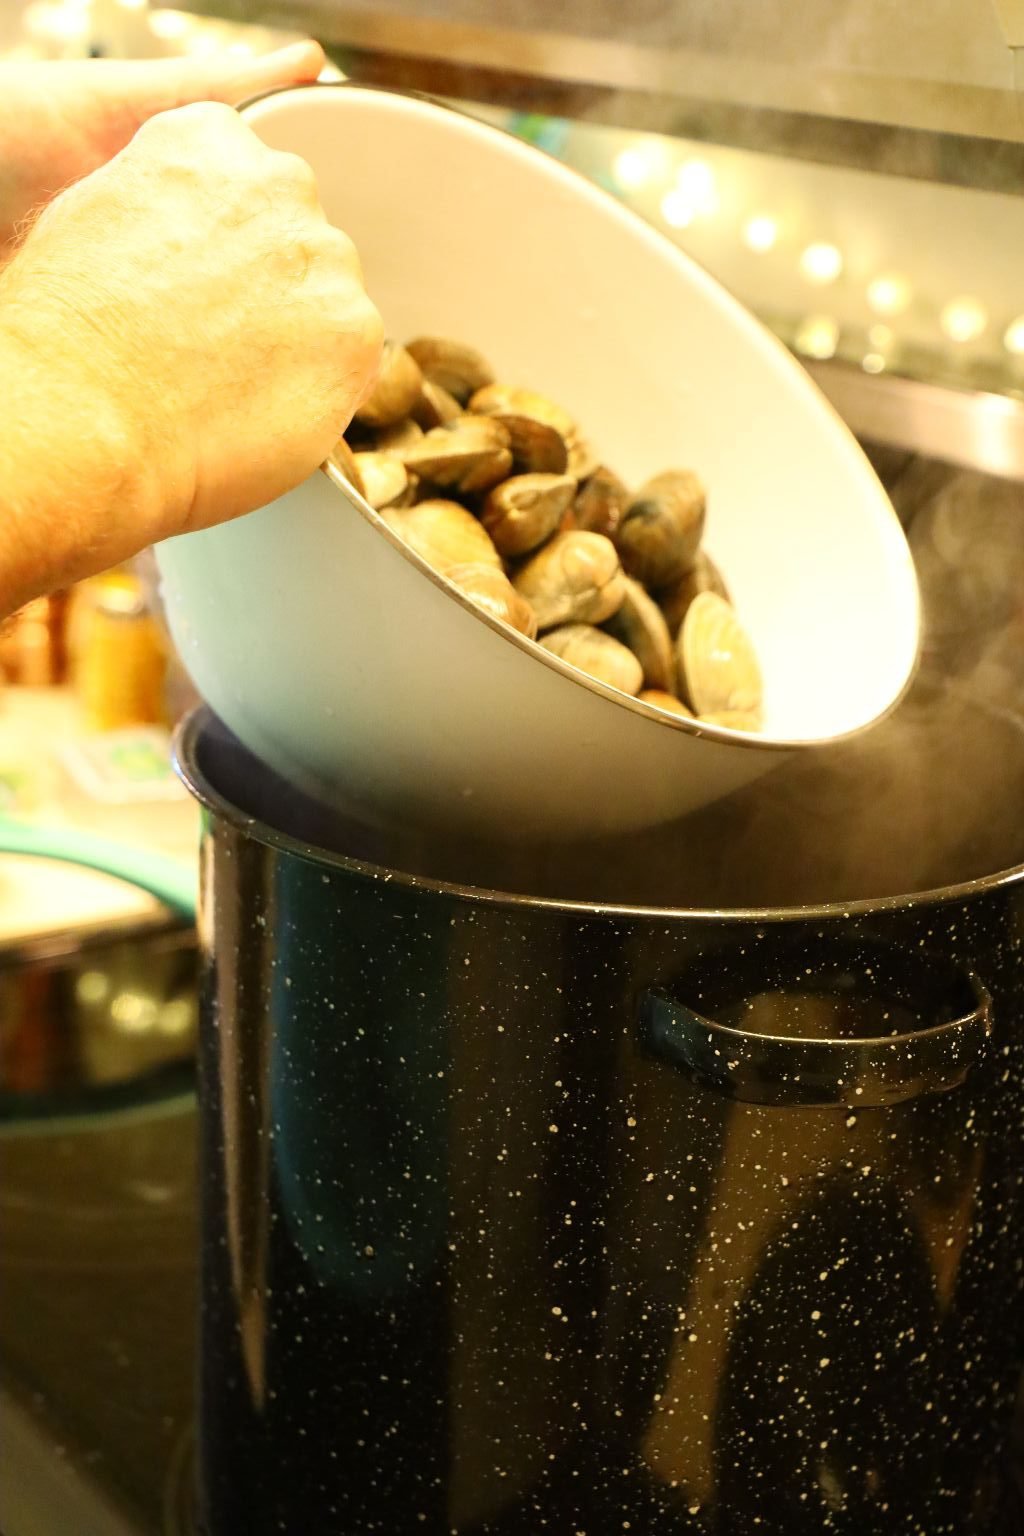
Place the live clams into your steamer when your water has begun to boil.

Place the lid on your pot and steam the clams for about 5 min.
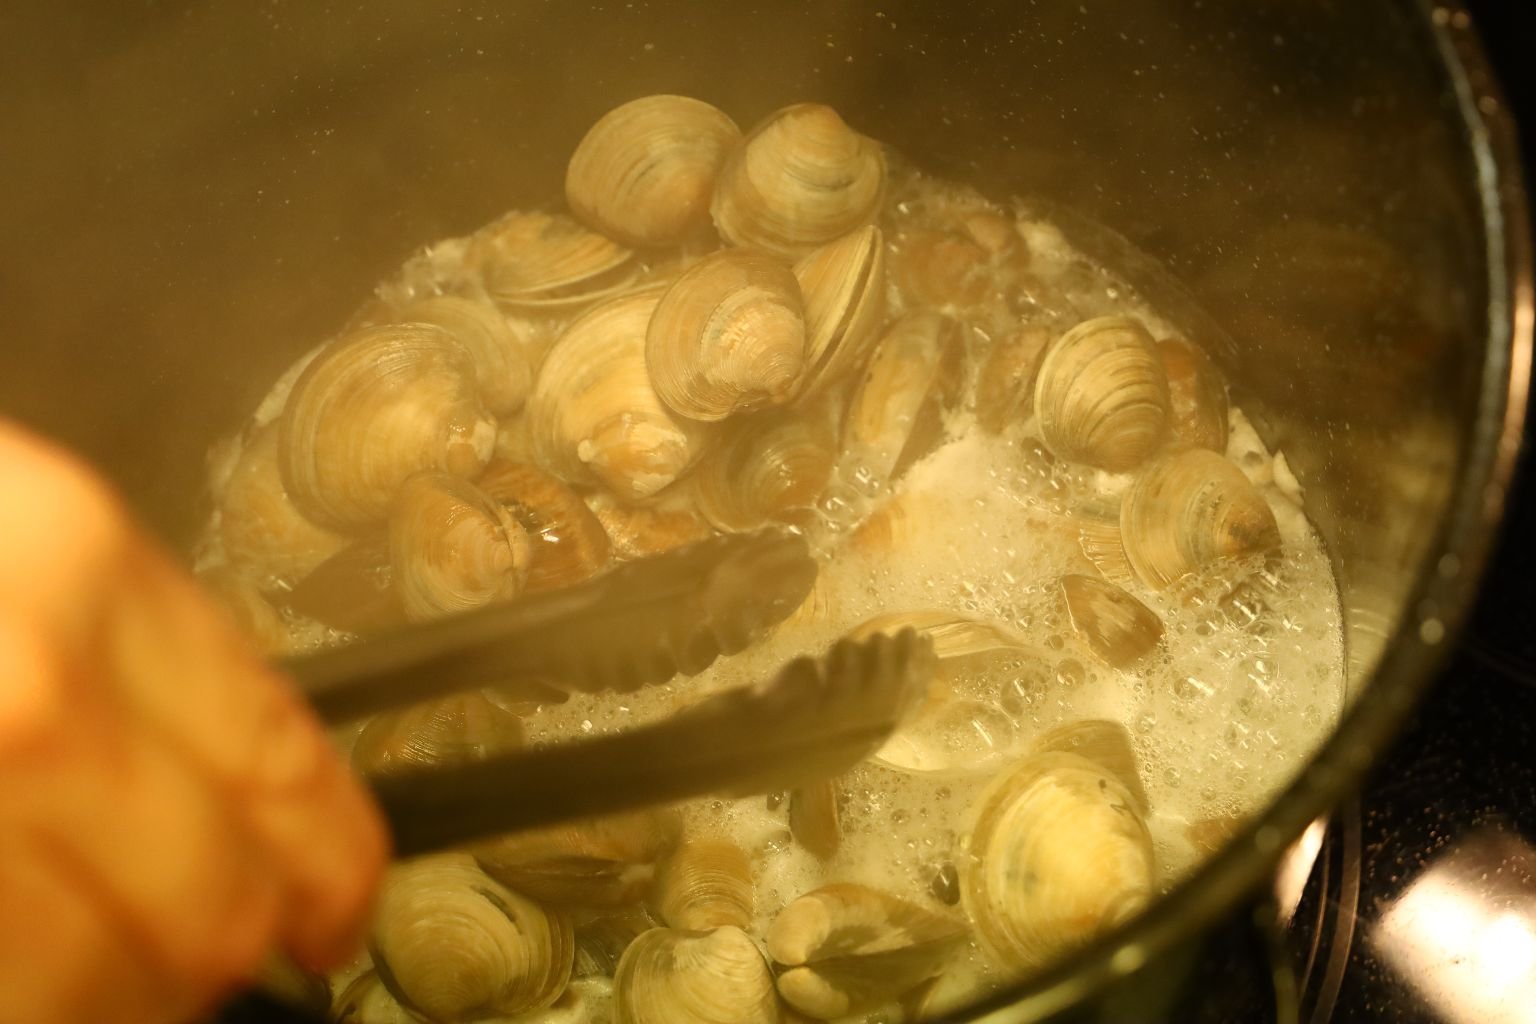
Remove the lid and using long tongs, remove the clams that have fully opened.

When they are fully opened, they are properly cooked and need to be immediately removed from the pot, so they don’t over cook and become chewy.
When you have a chance, look at the clams that didn’t close again. When Julie did, she found many of the clams had closed on their own and were still alive, much to my surprise. I thought most of our total purchase were dead and wasn’t too happy with our grocery store. I believe this happened because they were too cold from being in the ice. Of the 7 dozen clams, we had about 10 that were actually dead.
——————————————————————–
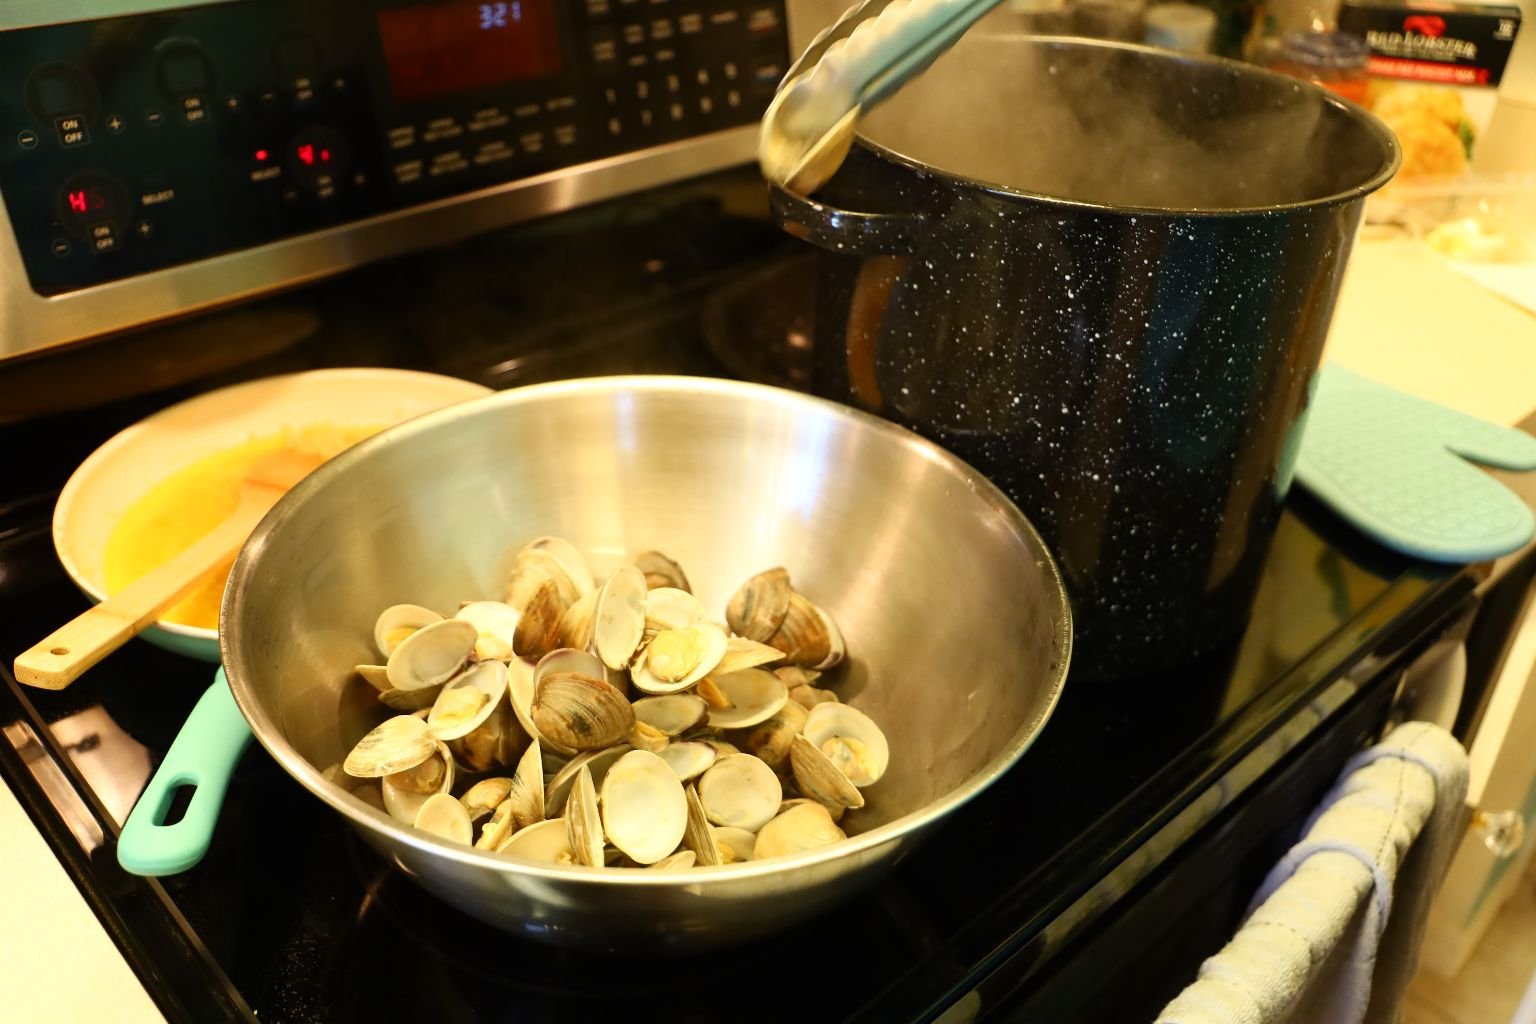
Place the cooked clams into a large bowl. You can use the clam juice left over in the pot in your sauteed garlic, but I find it to be watered down. Be sure not to pour all of that juice into your clams as there will be a great deal of sand at the bottom of the pot.
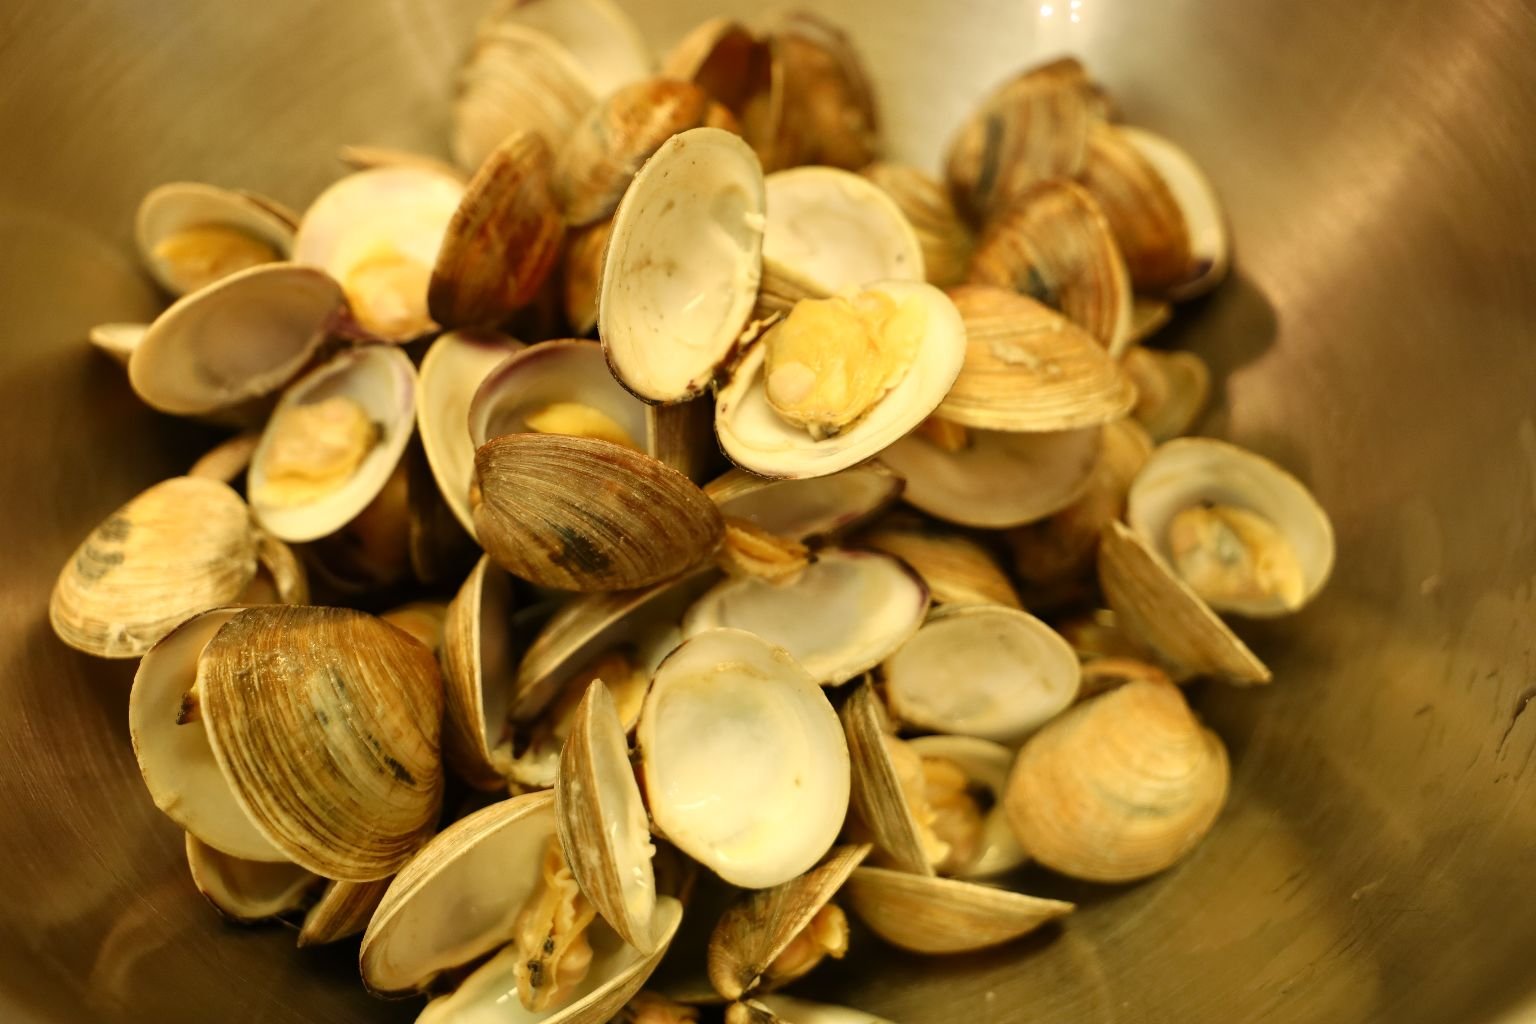
Here is a great picture from Julie showing the fully opened clams.
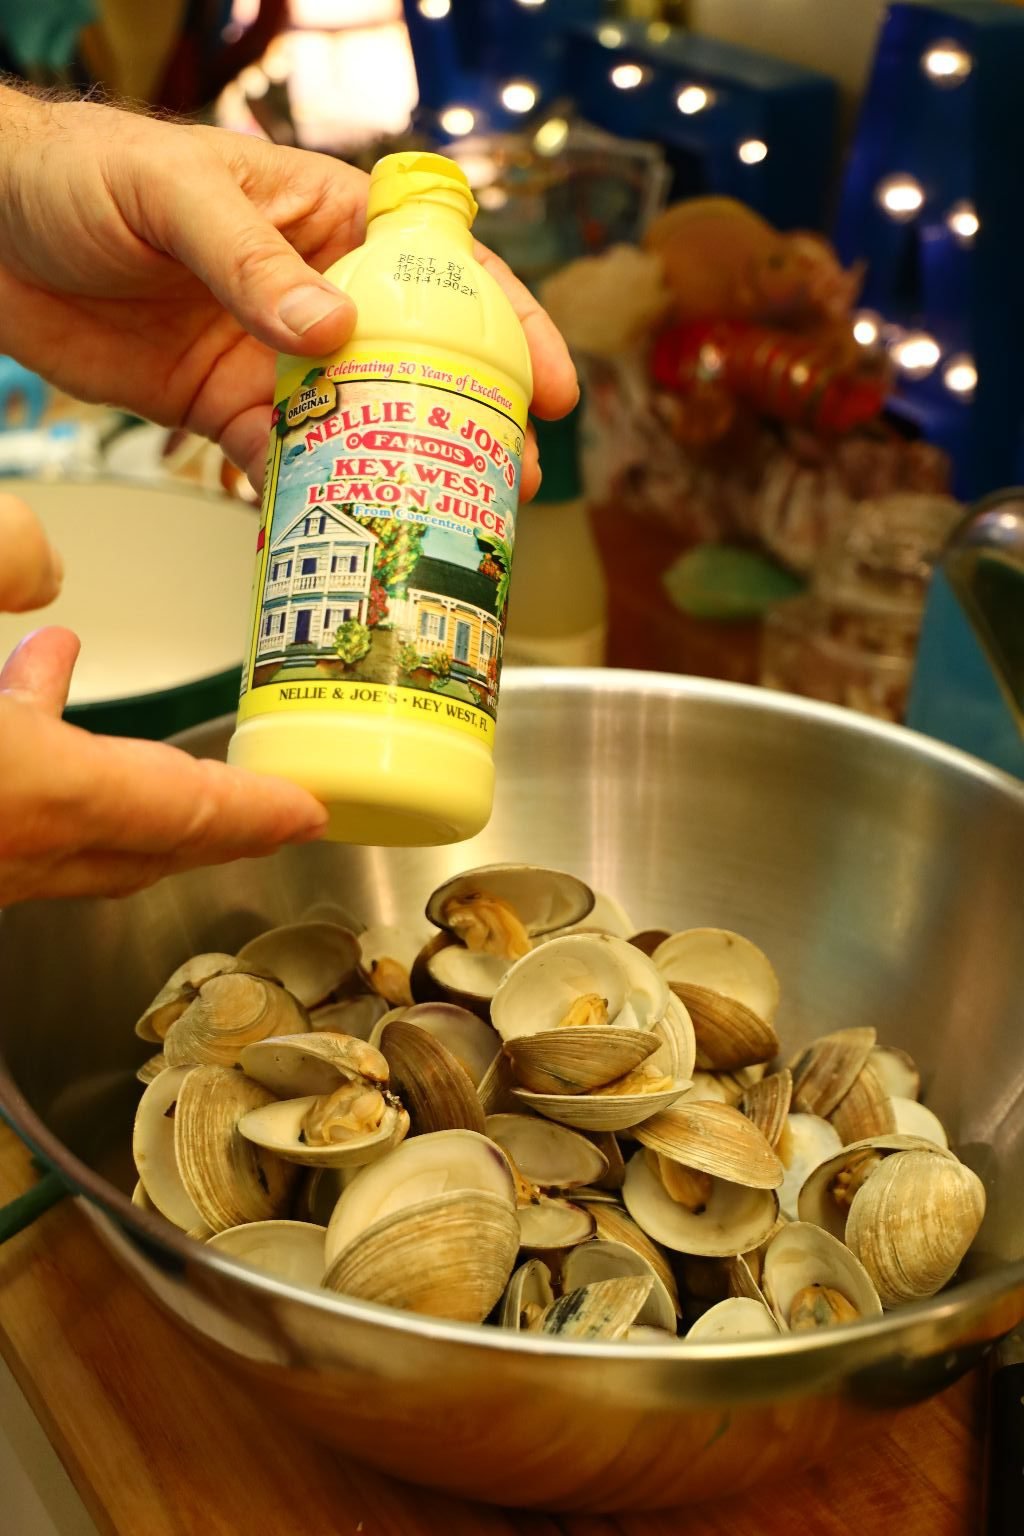

Now, sprinkle your lemon juice over the clams.
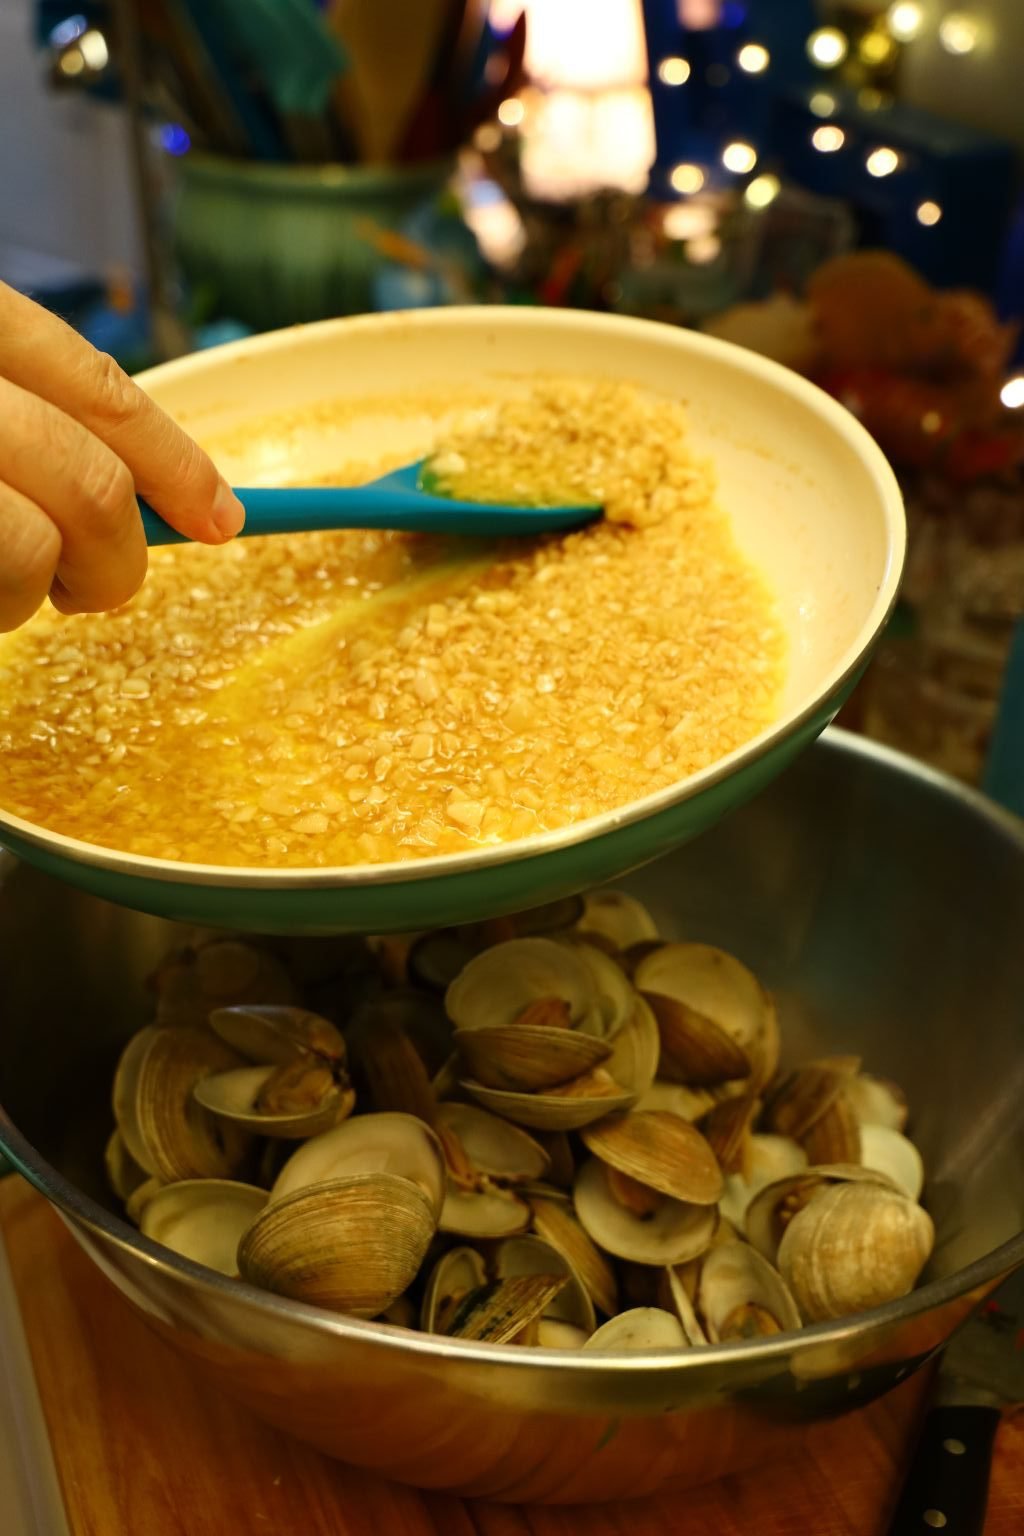


Then, spoon your sauteed garlic butter and clam juice over your clams.


Then add your chives and green onions to the clams.


Mix all the ingredients well.


Using your tongs, remove the clams from the bowl and place them into the bowl you want to serve them in. Lastly, pour the leftover butter, garlic and other ingredients from the bowl over the clams.

Enjoy!
————————————————————–

Fried Cod in Red Sauce

Ingredients:
4 Lbs. Cod Fish Fillets – we received two fillets of equal size
1/2 Cup Flour
1/2 Cup Corn Starch
1/2 tsp. Salt
1/2 tsp. Pepper
2 Large Eggs
1/4 Cup Water
1 Cup Plain Bread Crumbs
1 tsp. Roasted Garlic Powder
1 tsp. Lawry’s Seasoned Salt


This fish was uneven in thickness, so slicing the fillet into sections of the same thickness makes for even cooking. Now, slice your Cod fillets into even portion sizes if needed.

Here, I laid out the matching fish fillets sections. I will fry each cod portion of equal size together as they will both be done at the same time.

Here is my set up for the three dip process… flour and cornstarch, eggs and water, bread crumbs and seasoning!

I used a plate to hold the flour and cornstarch. In culinary school, I learned you can use corn starch on its own to give fried items an nice crispy crust. Many Asian restaurants fry their meats in only cornstarch, then toss the fried meats in sauce.


Add your pepper and salt to the flour and cornstarch.

Using your fingers, mix all the ingredients together.
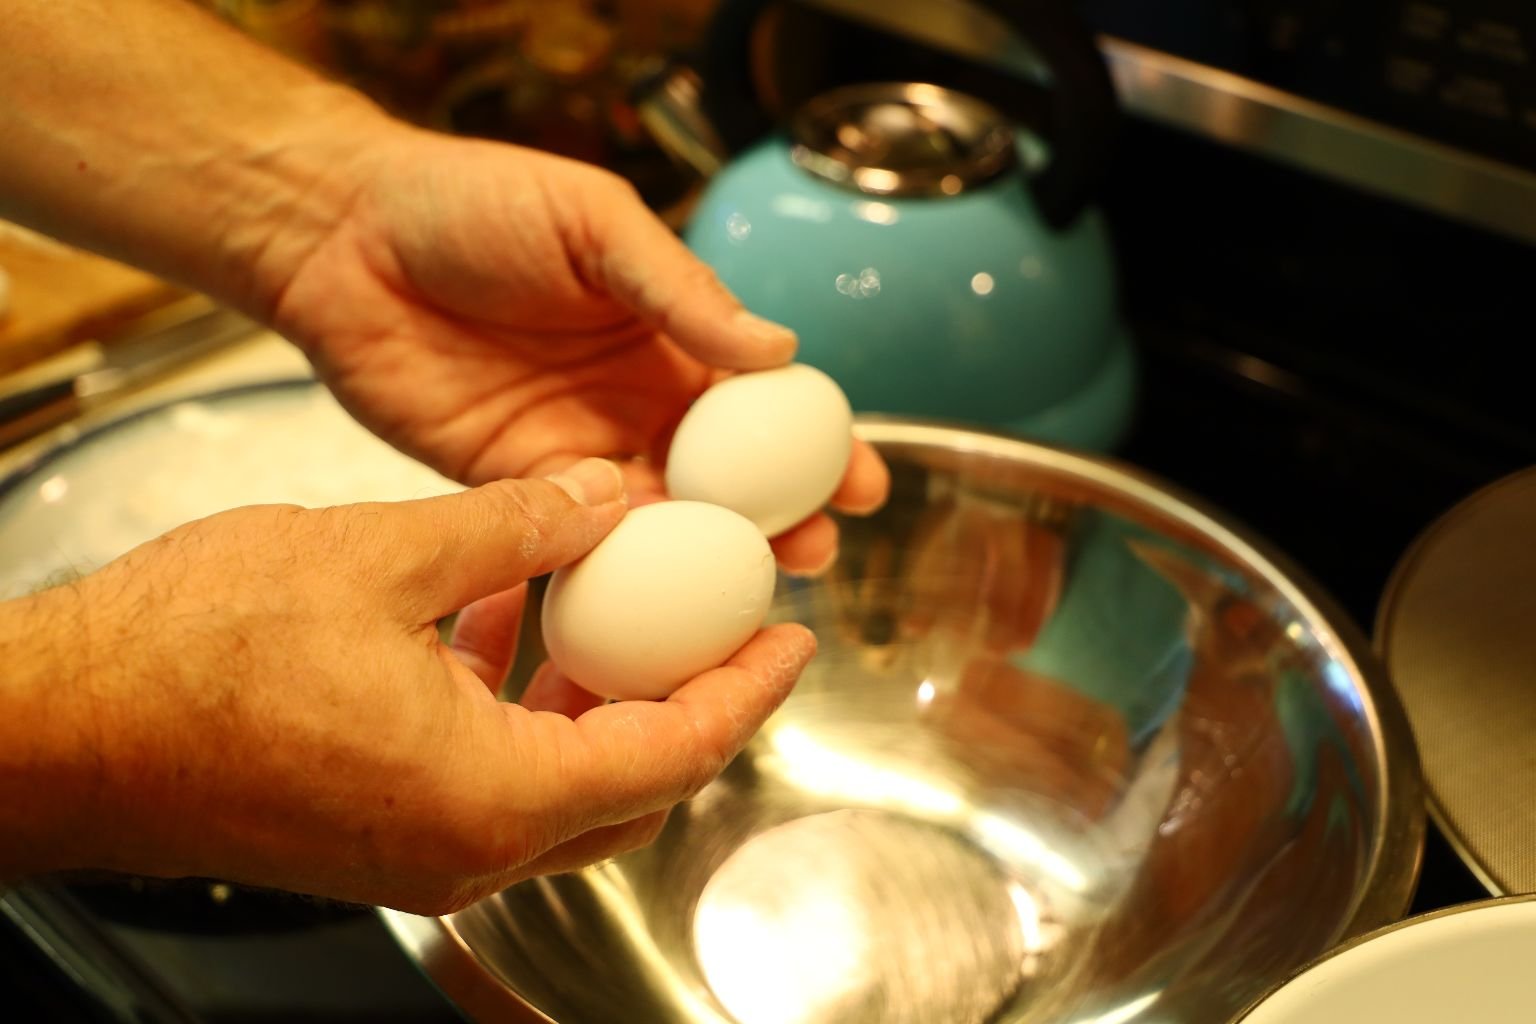


Crack both your eggs into a large bowl …


then add the water and whisk together well.

Lastly, use a large bowl to place in your bread crumbs…


roasted garlic powder, and seasoned salt and mix all the ingredients well.


Here you can see the three step process… flour and cornstarch, eggs and water, bread crumbs and seasoning!
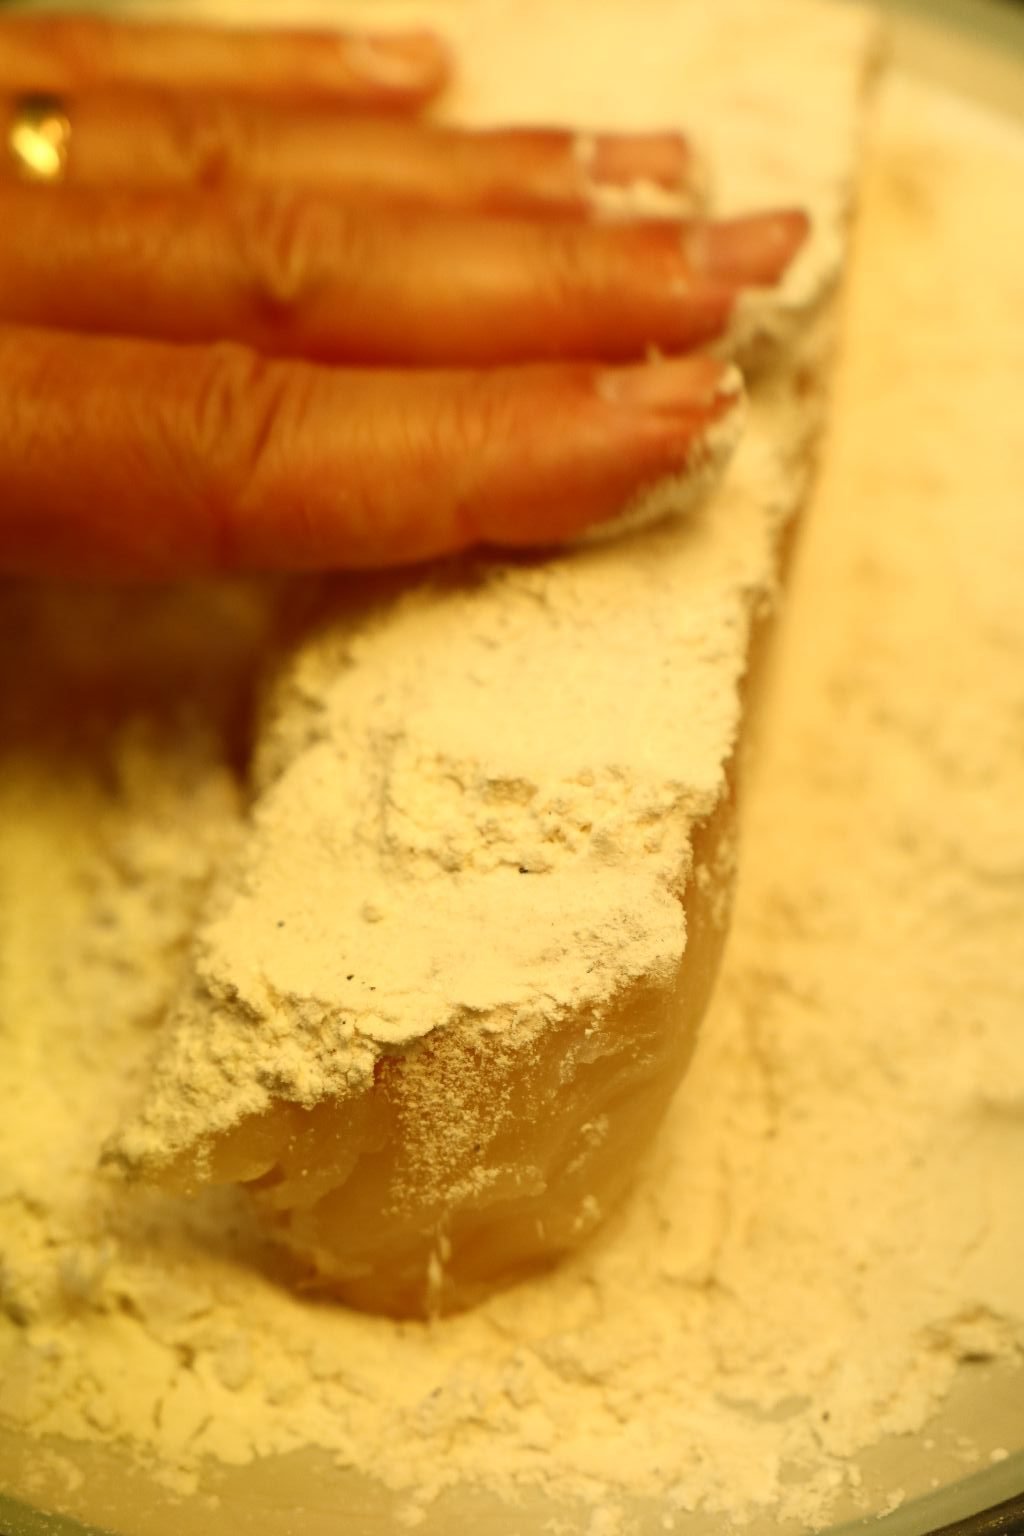

Place a fillet section first into your flour and cornstarch turning to coat it evenly, then shake off any excess.
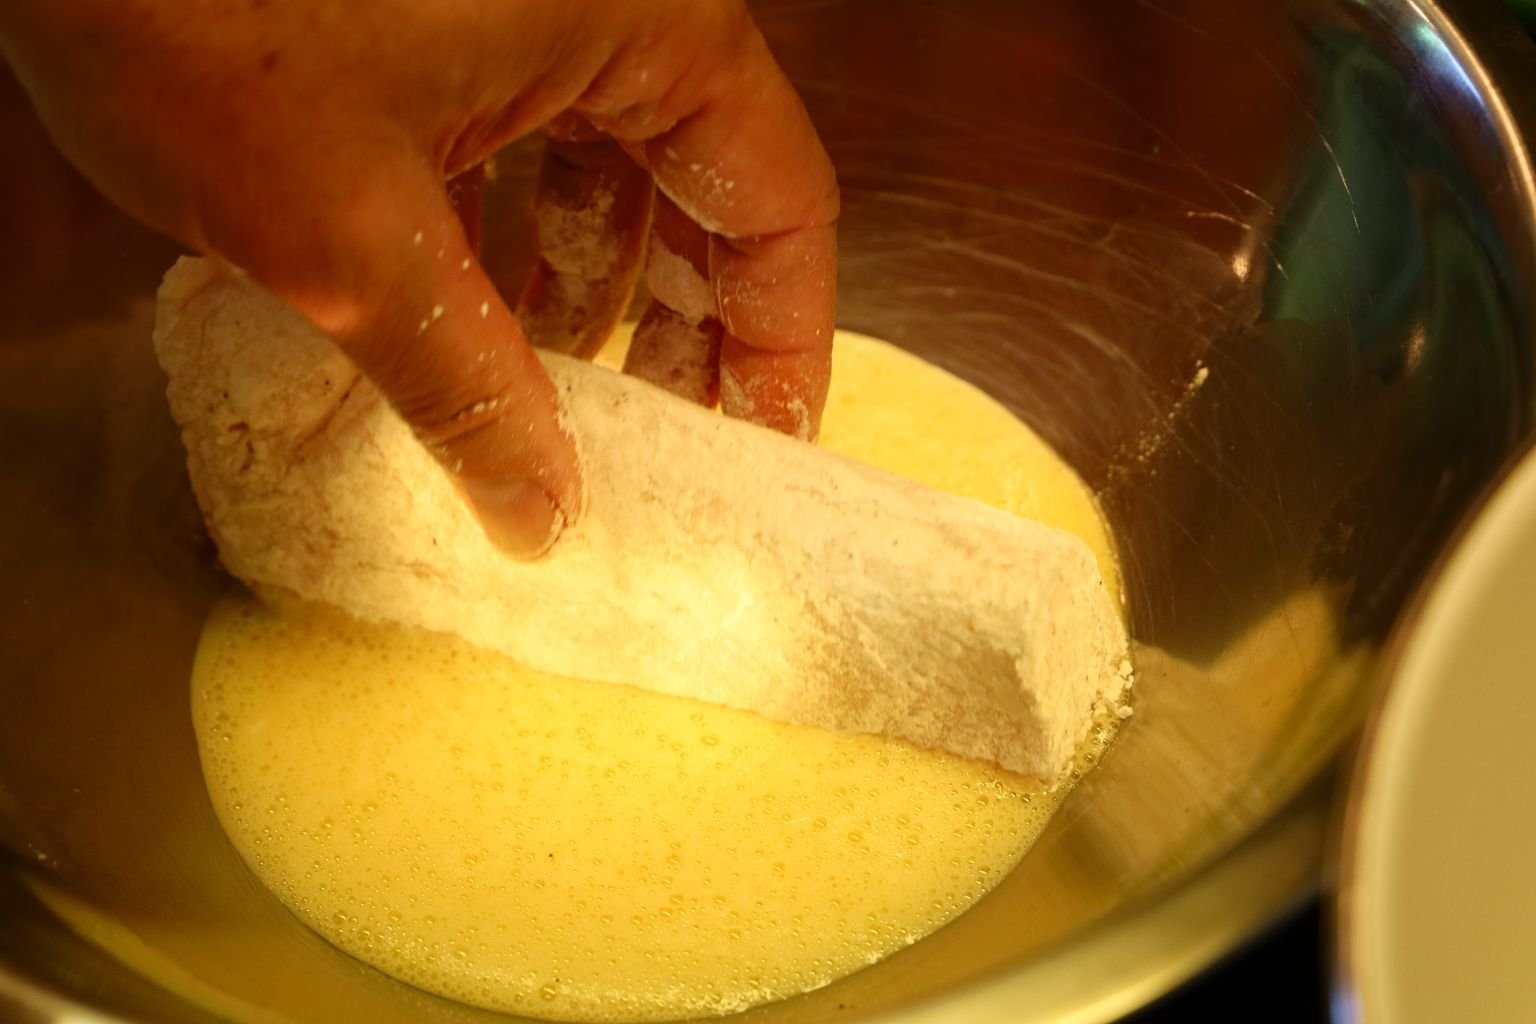

Now, coat the fillet with your egg mixture coating it evenly, shaking off any excess.


Lastly, dip the fillet into your breadcrumb and seasoning, coating the fillet evenly, then shake off any excess. Place the breaded fillet on a plate and continue the same process with all the other fillets.


Here, I and coating the other fillets in the three mixtures.

The Fish are Ready to Fry and,
Time to Clean up the Area.
————————————————————-
Now, Lets Get the Green Beans Going


Ingredients:
2 Packages of Fresh Green Beans – ~ 4 Cups
3 Cups Water
8 oz. Clam Juice
1 tsp. Onion Powder
1/4 tsp. Salt
1/2 tsp. Pepper
2 Tbsp. Olive Oil
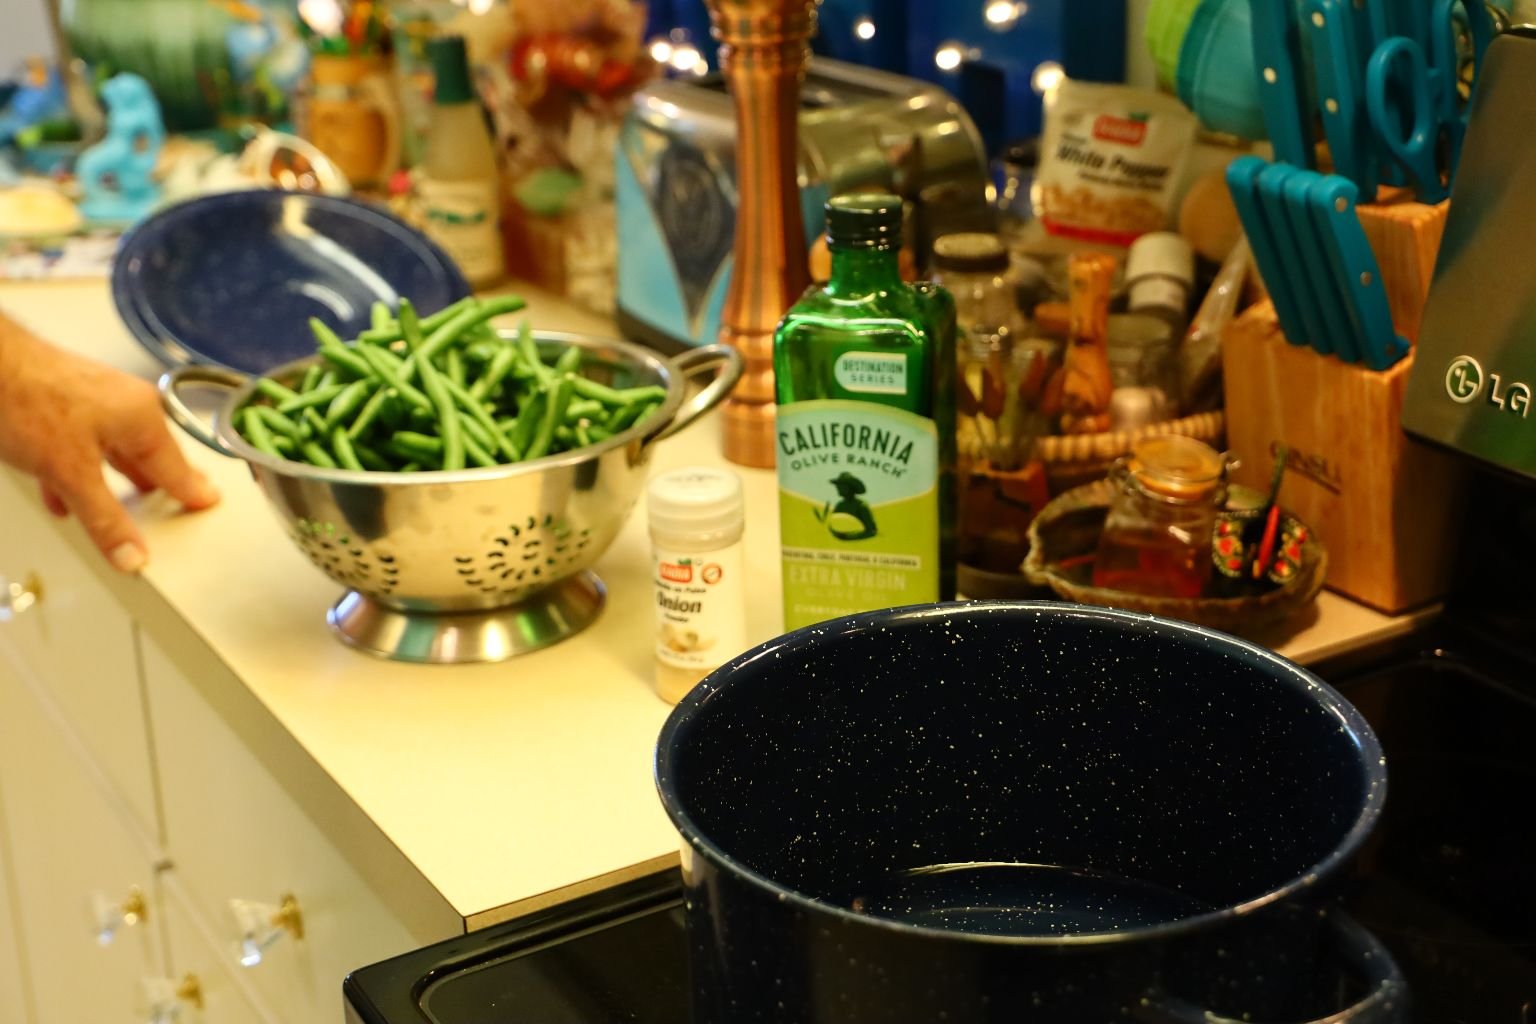
——————————————————————-

Here you can see all the ingredients and the pot I used.
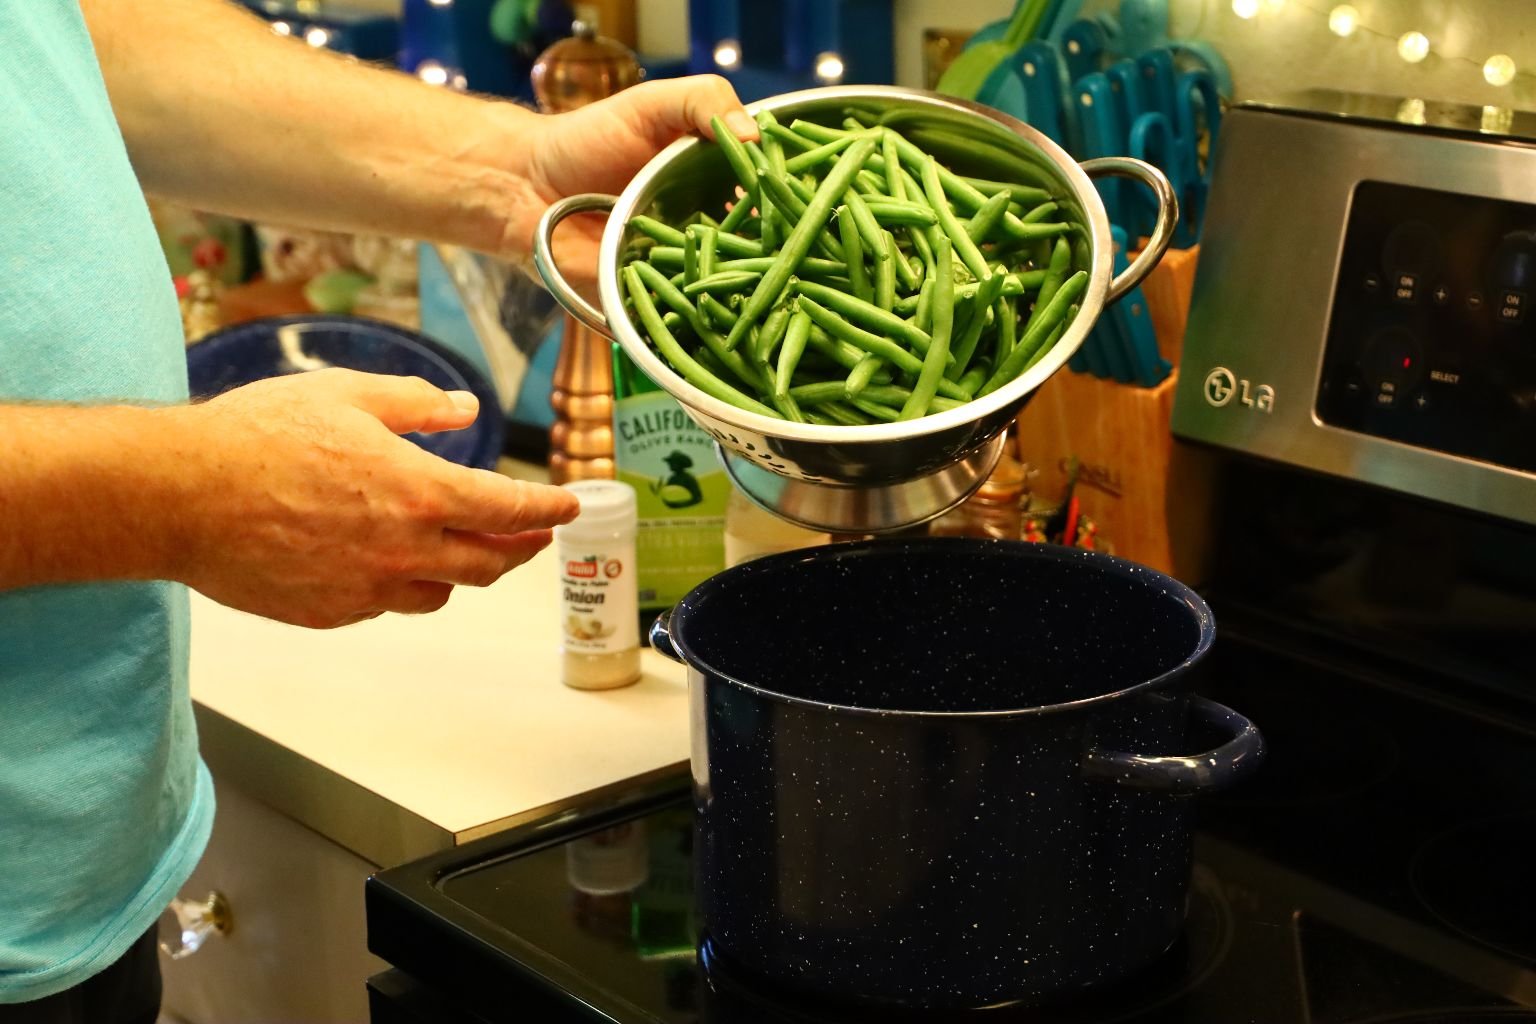

Add your water to a large pot. Rinse off your green beans in a colander then place them into the pot.


Now, add your clam juice to the pot.
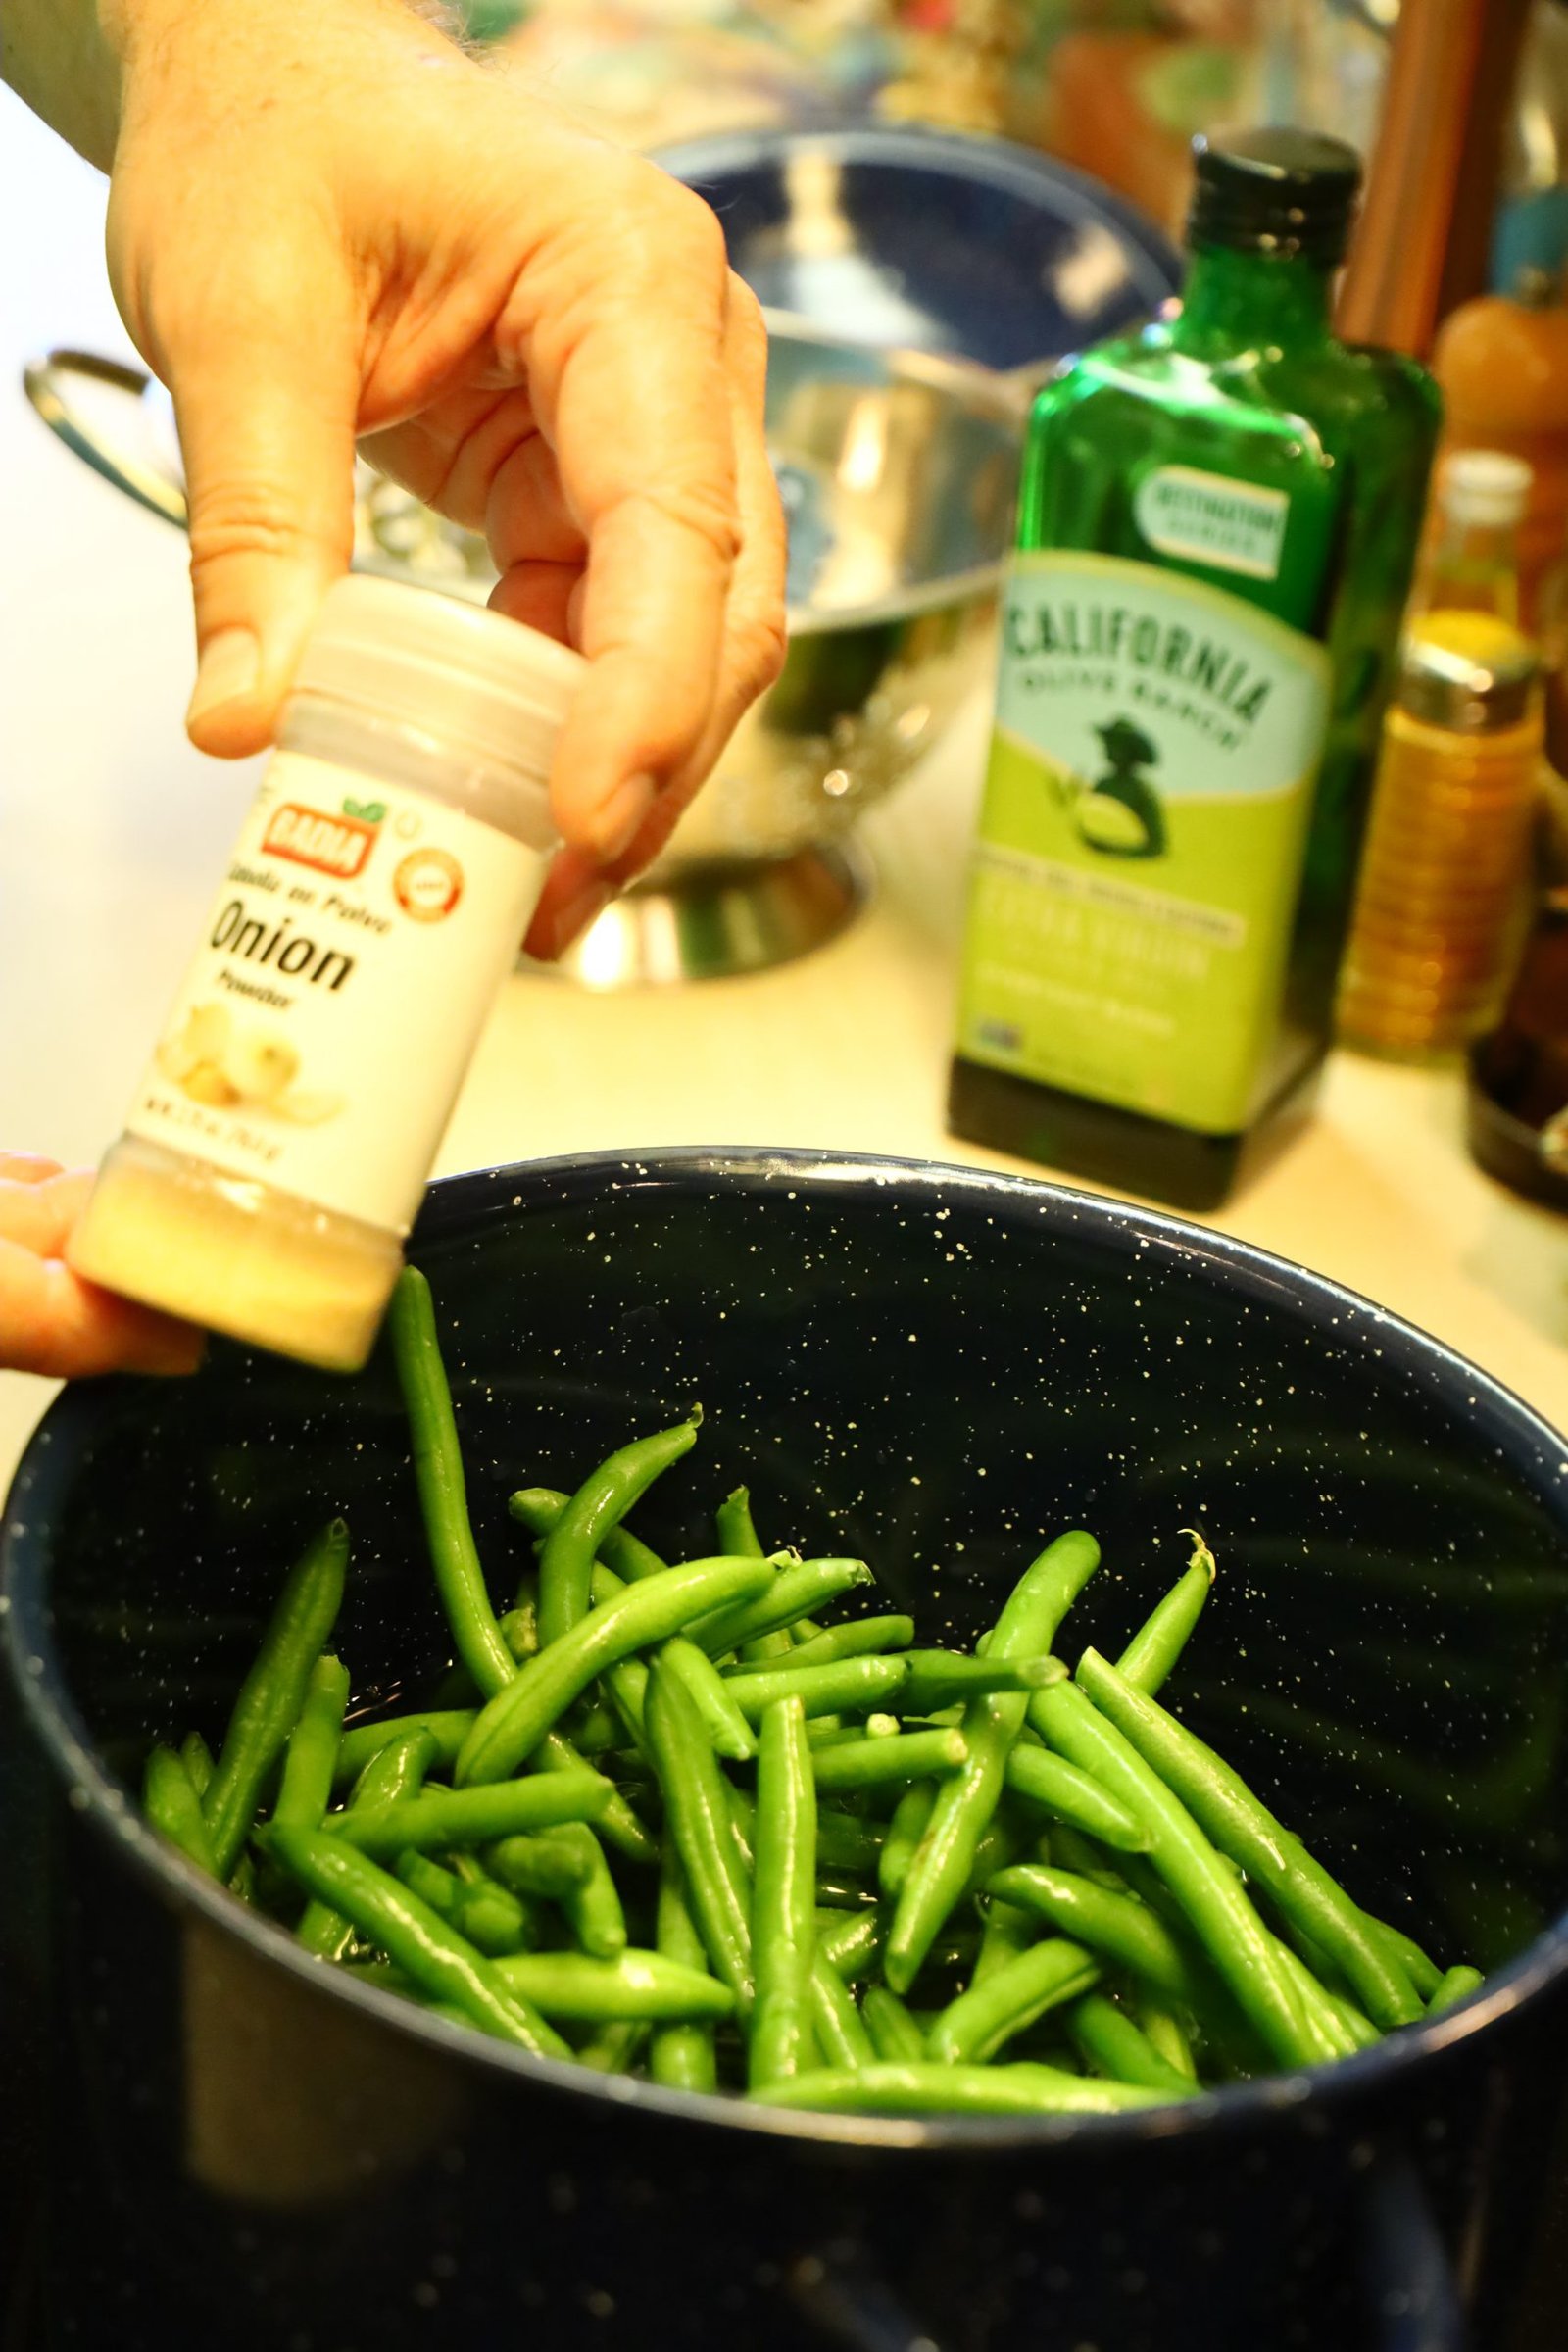

Then add your onion powder and salt…

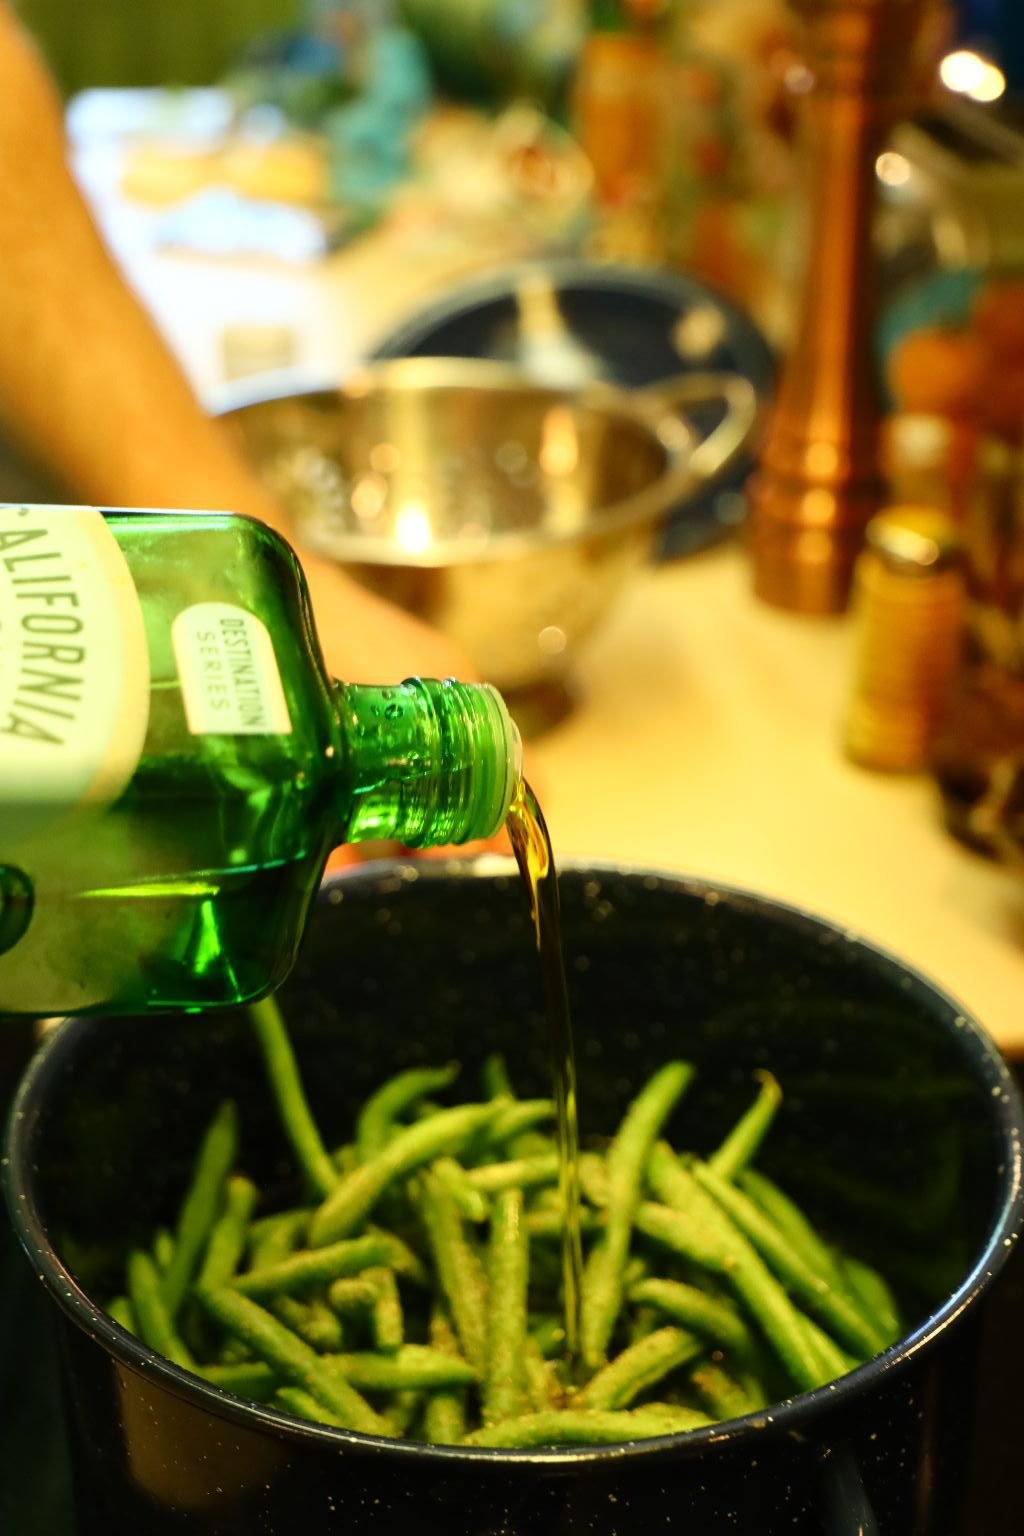
and your ground pepper and olive oil to the pot.
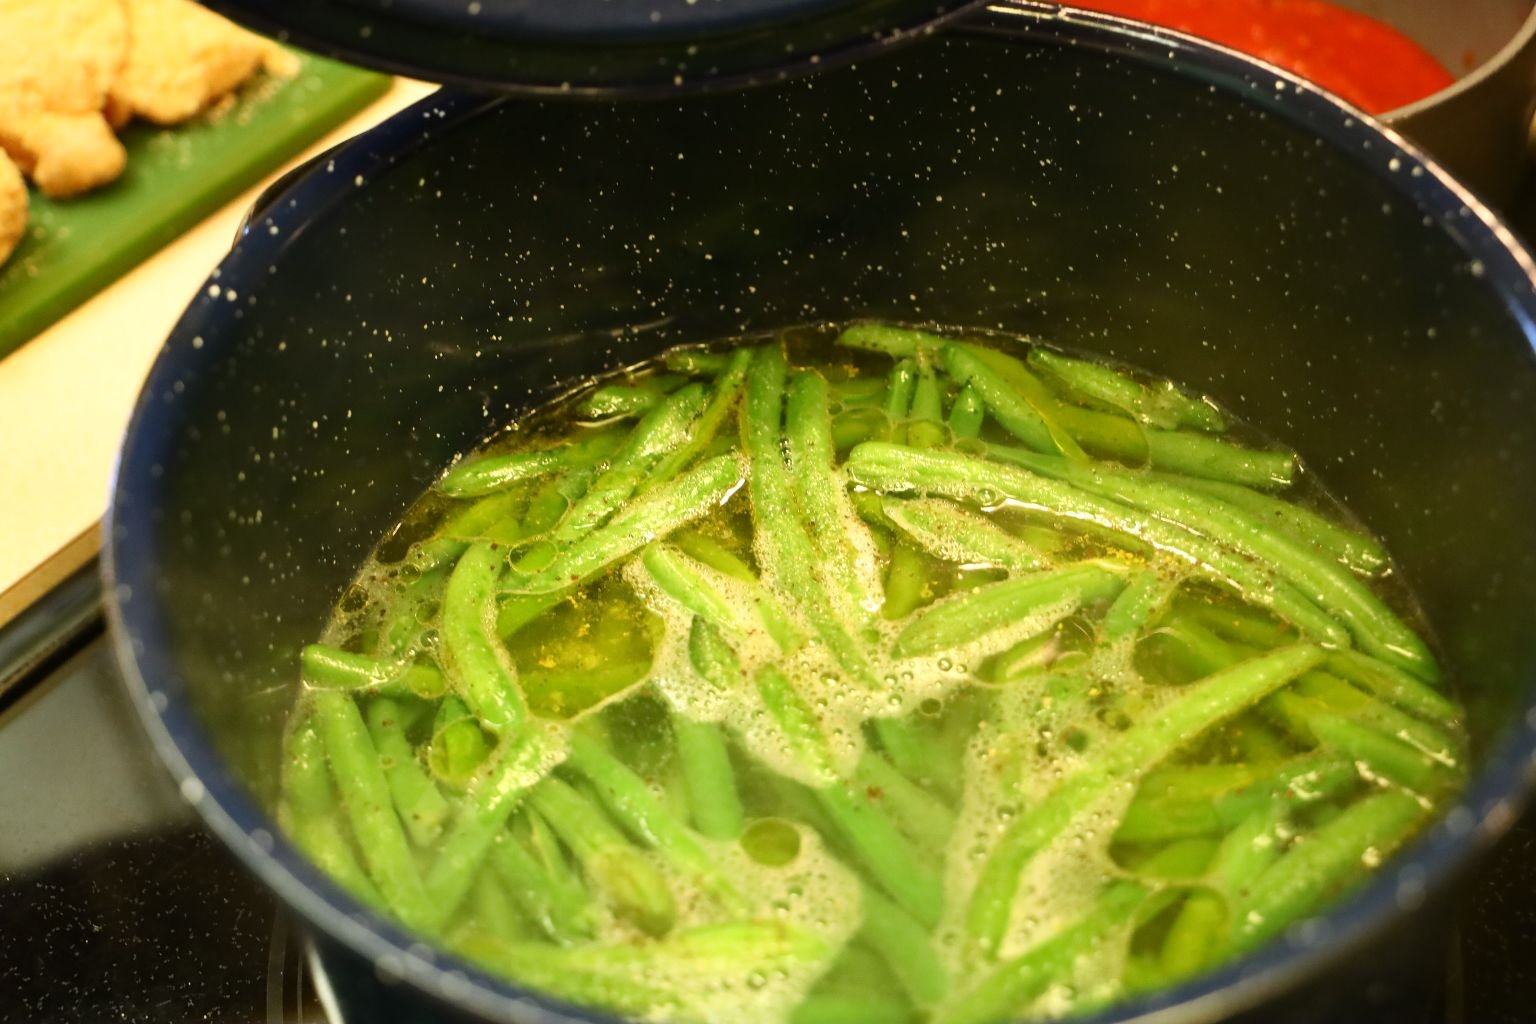
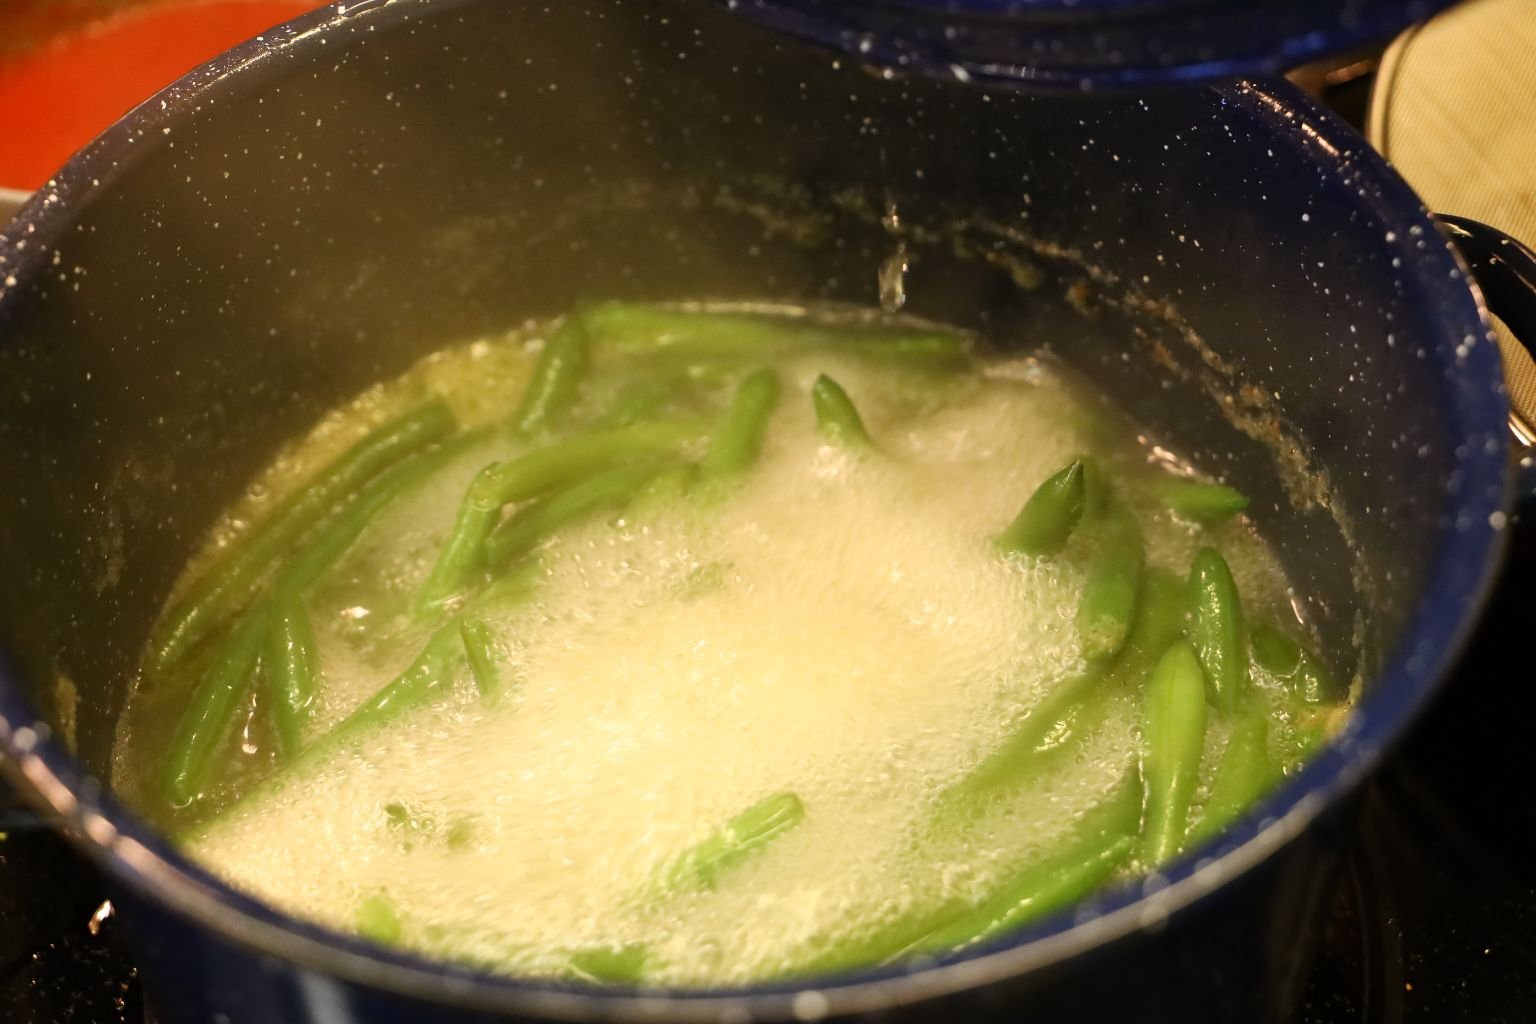
Turn your pot onto high and cover with a lid. Cook the green bean for about 20 min. or until tender.
—————————————————————–
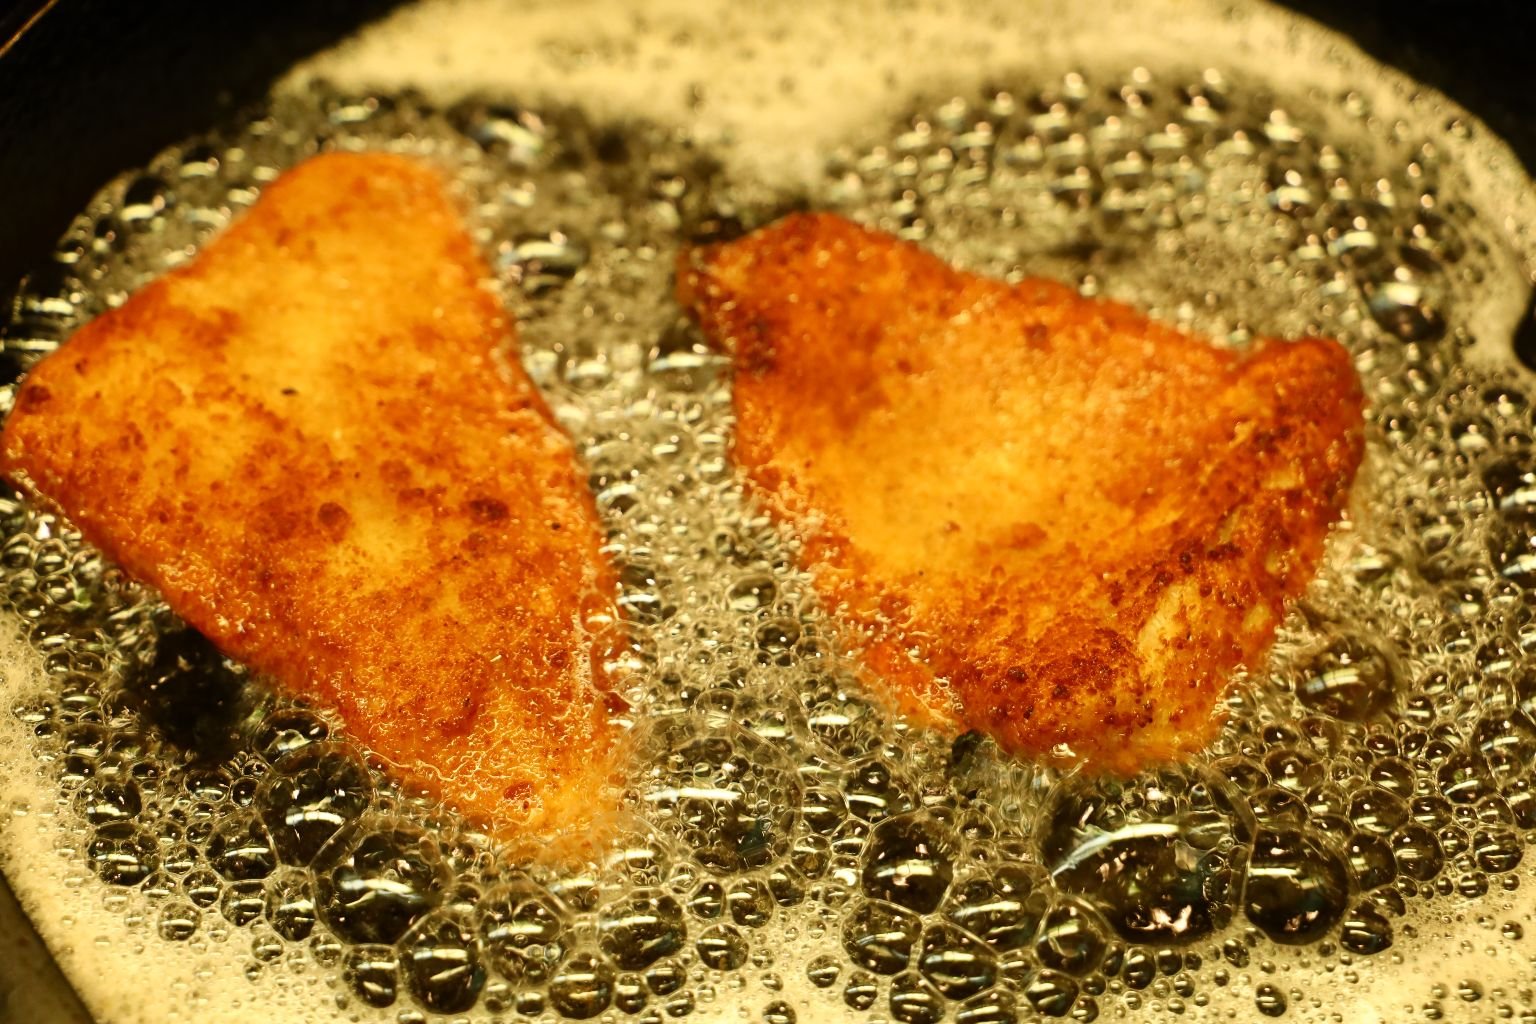
Time To Fry The Fish
Green Beans are Cooking

————————————————————-


Heating up this Barilla Tomato Basil Red Sauce

This is a picture of our oil heating with a splatter screen over our cast iron skillet.
The Vegetable Oil Heating Up
———————————————————-
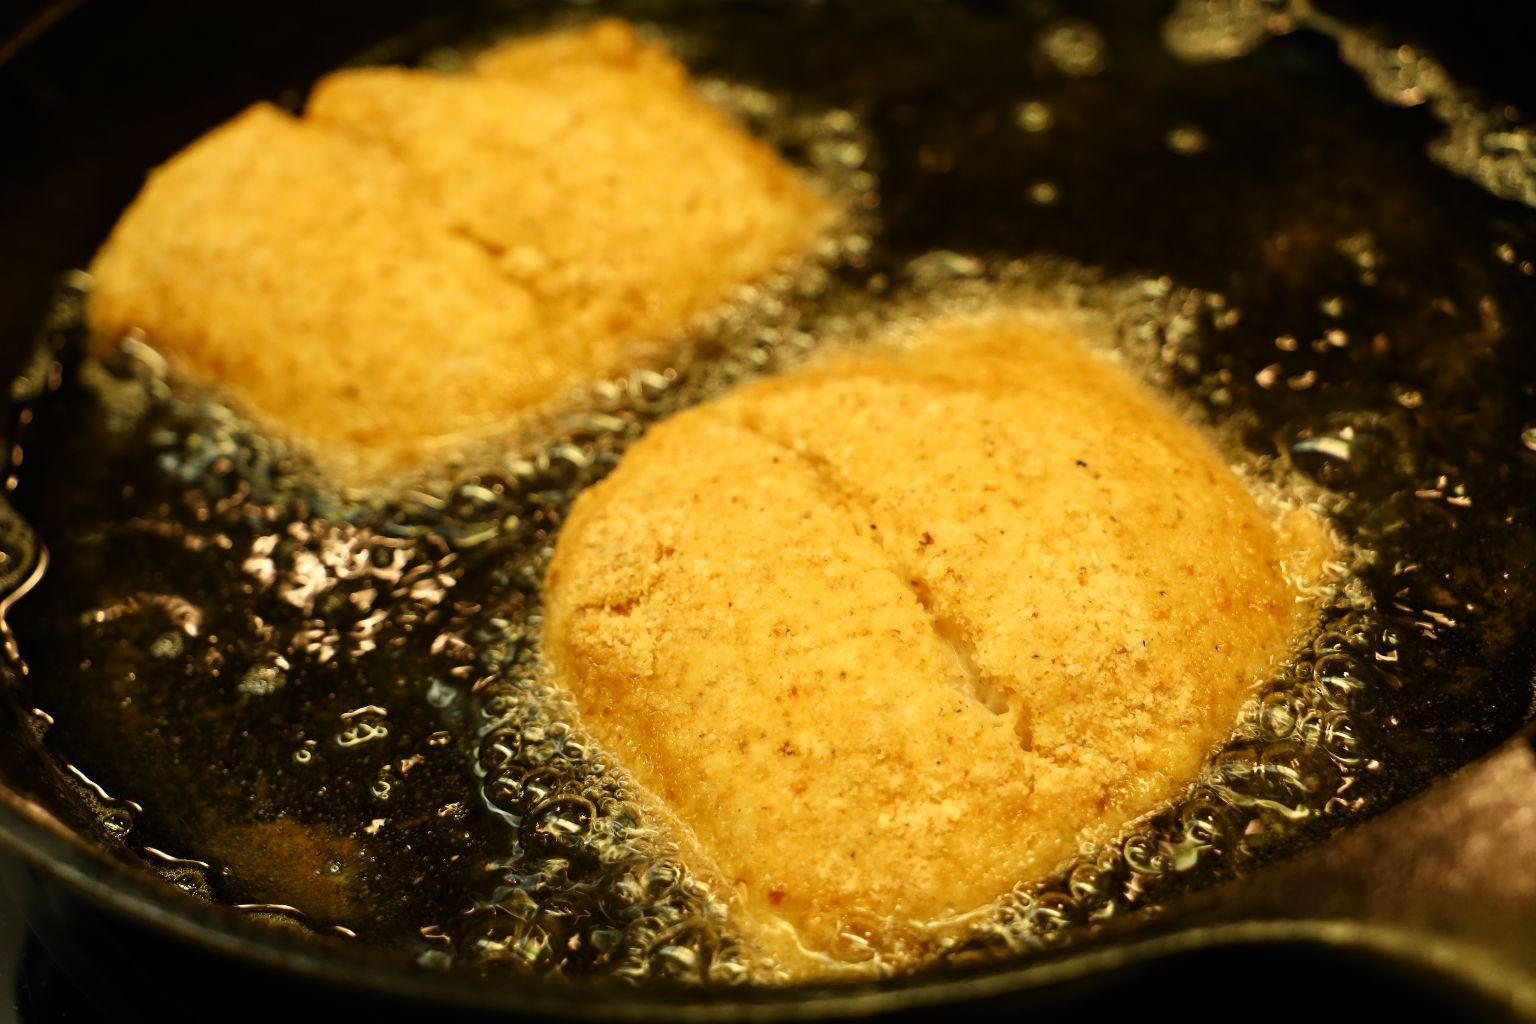
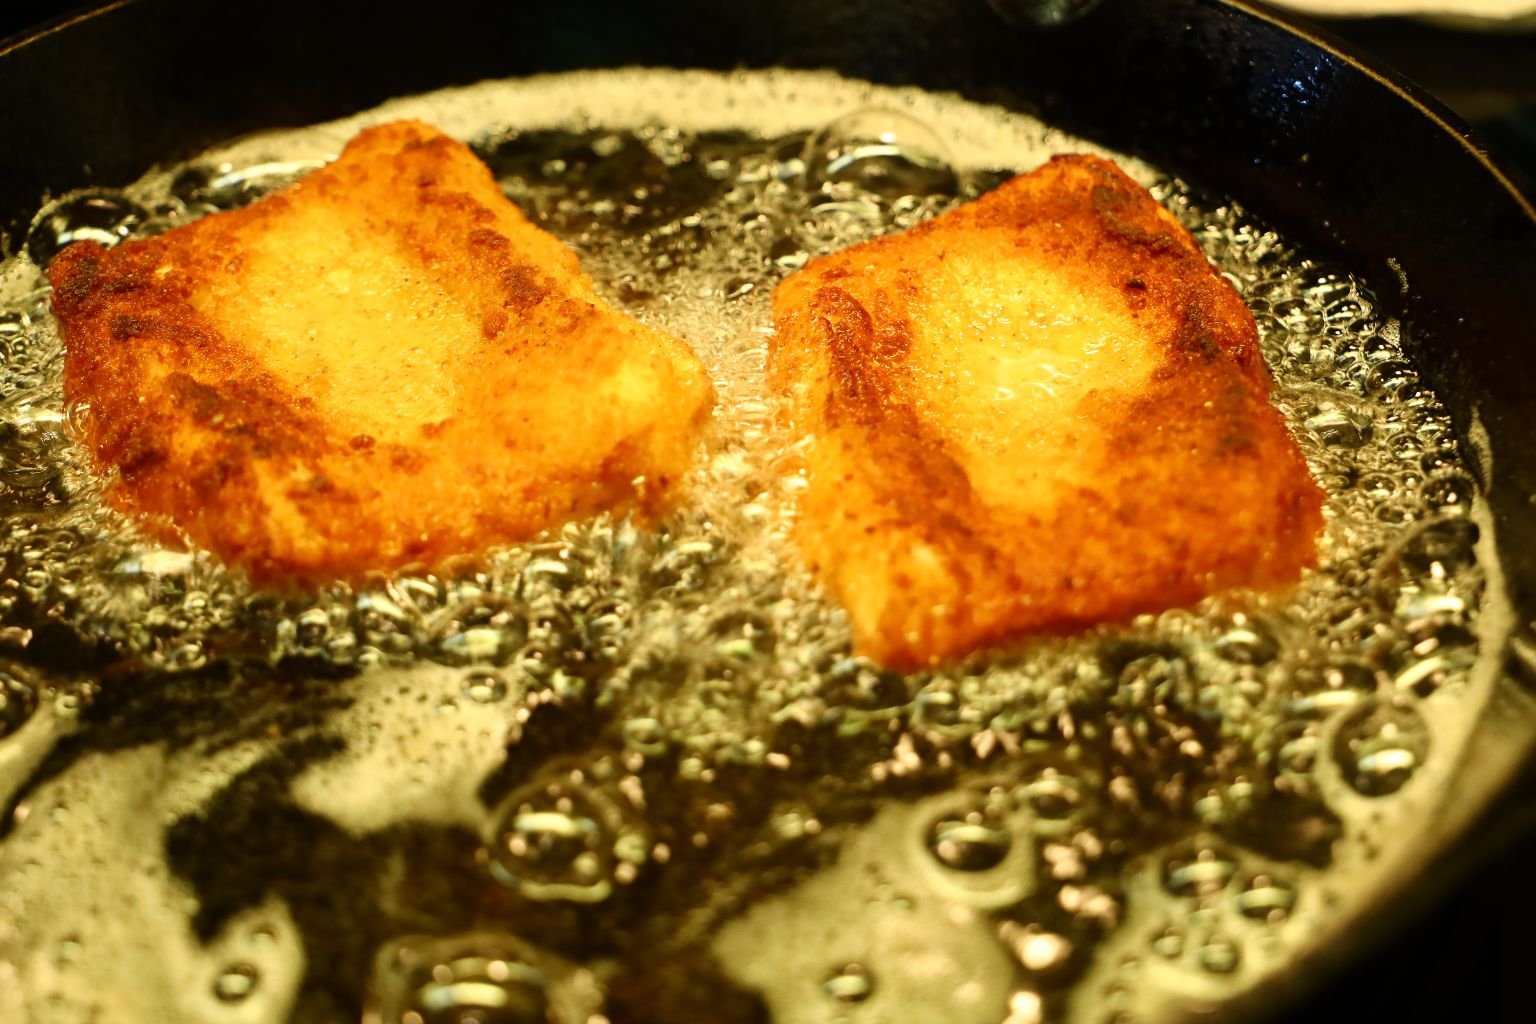
Heat the oil to medium high heat. When the temperature is reached, gently place two fillets into the oil. Fry the fish until well browned about 2 min. then turn over and fry the other side.

Here you can see I am frying the same sized pieces together as they will be done at the same time.
When done place onto paper towels to absorb the oil and lightly salt the fillets.

The Cod is Ready to Plate
We just placed some of the red sauce onto our serving plate, and then placed the fried cod on top of it.
————————————————————————-

The Green Beans are Ready
————————————————————–

This dinner was delicious.
It was also very nice to revisit our 1975 past.
I was 14 at the time while Gordon was a mere boy of 10. 🙂

———————————————————-
Behind the scenes tip from Julie:
How To Adjust a Large T-Shirt To Your Body

The T-Shirt I am wearing is just too large for me, so in order to make it fit better I used one of my hair barrettes to pull both straps together in the back and it fits me better in the front. Just a tip!

—————————————————————

Happy Nostalgic 4th. of July to ALL,
Gordon, Julie, Spooky and Sparky
P.S. STAY OUT OF THE WATER!!!
———————————————————-
Also Take a Look at our Other JAWS Themed Posts:
Our July 4th. Tribute to the Movie JAWS (1975)

AND,
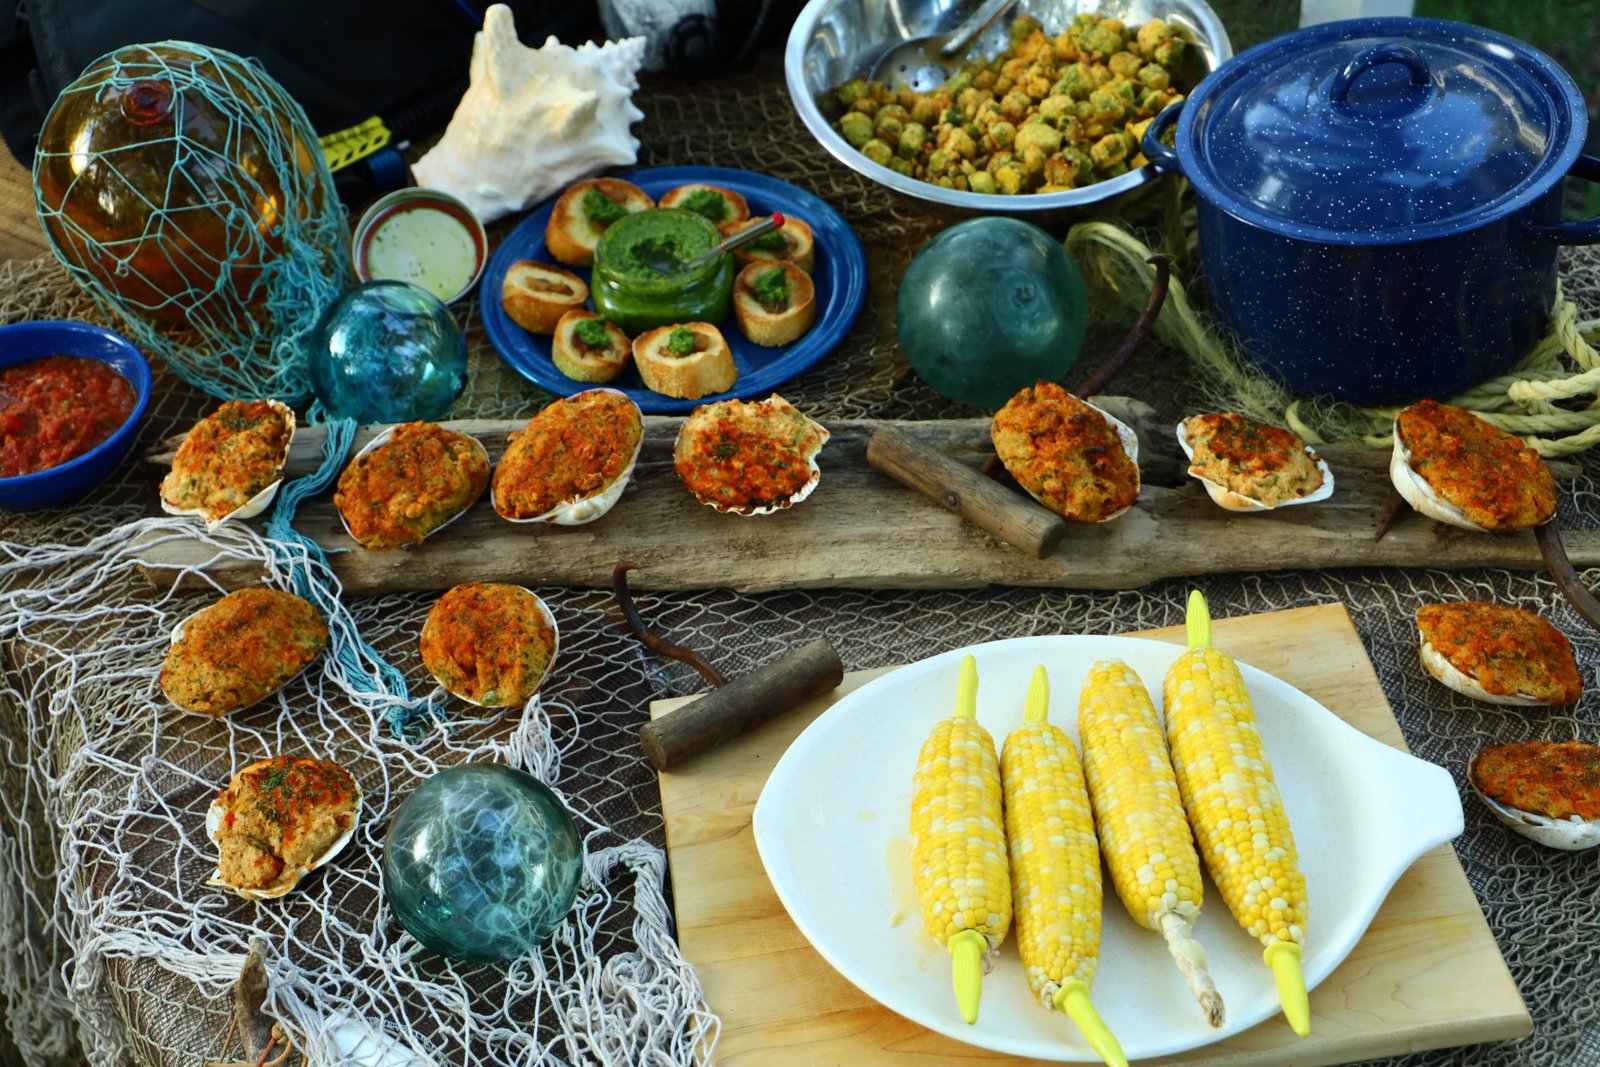
Check Out Our: Summer Seafood, Sides, and Salads

And,
AND,
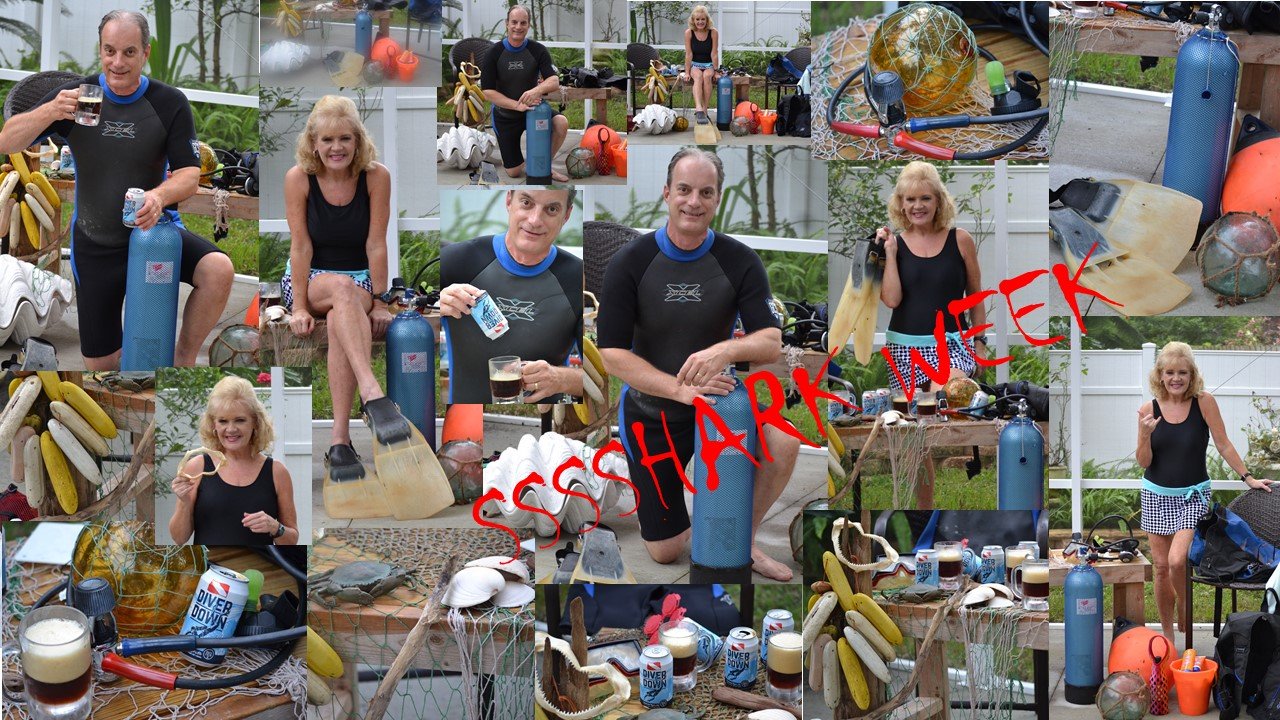
Stay Out Of The Water! JAWS Week
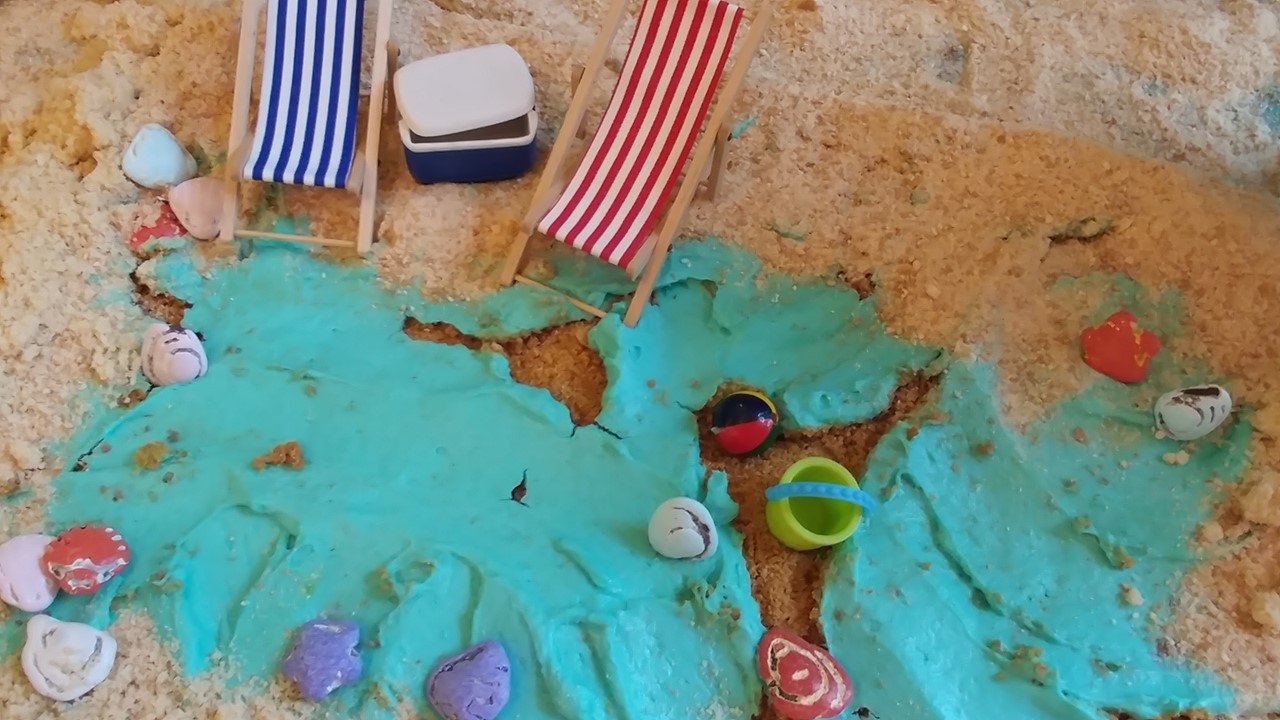
How to Make a Beachy Cheese Cake
———————————————————–
You can also view our Sh..sh..sh..sh..SHARK!!! Week here……..
————————————————————————————–
AND,
Click Here For: Our Southern Shark Week Table

Just a few great recipes that you can make for Shark Week as well.
Also Check Out:

AND,
