Italianate Tre

Ciao e Benvenuto

We are Gordon and Julie.
We live in Florida and we love Italian food.

Although I believe ours is more Italian/American.

To me, Julie, Italian food is a lot of work. A lot of cooking. But also, a lot of pleasure.

Every Italian dish that we make is an elaborate creation. But, it’s an elaborate creation that is worth the work and the wait. Especially when we are able to share our foods with other people. Even freeze some for the future when we entertain, or just for a night in.
The Pasta, The Red Sauce, The Herbs, The Cheese, The Bread……
It is all so very prefetto!

And nothing beats eating outside, al fresco.
Some wine, flowers, ambiance, good company…..

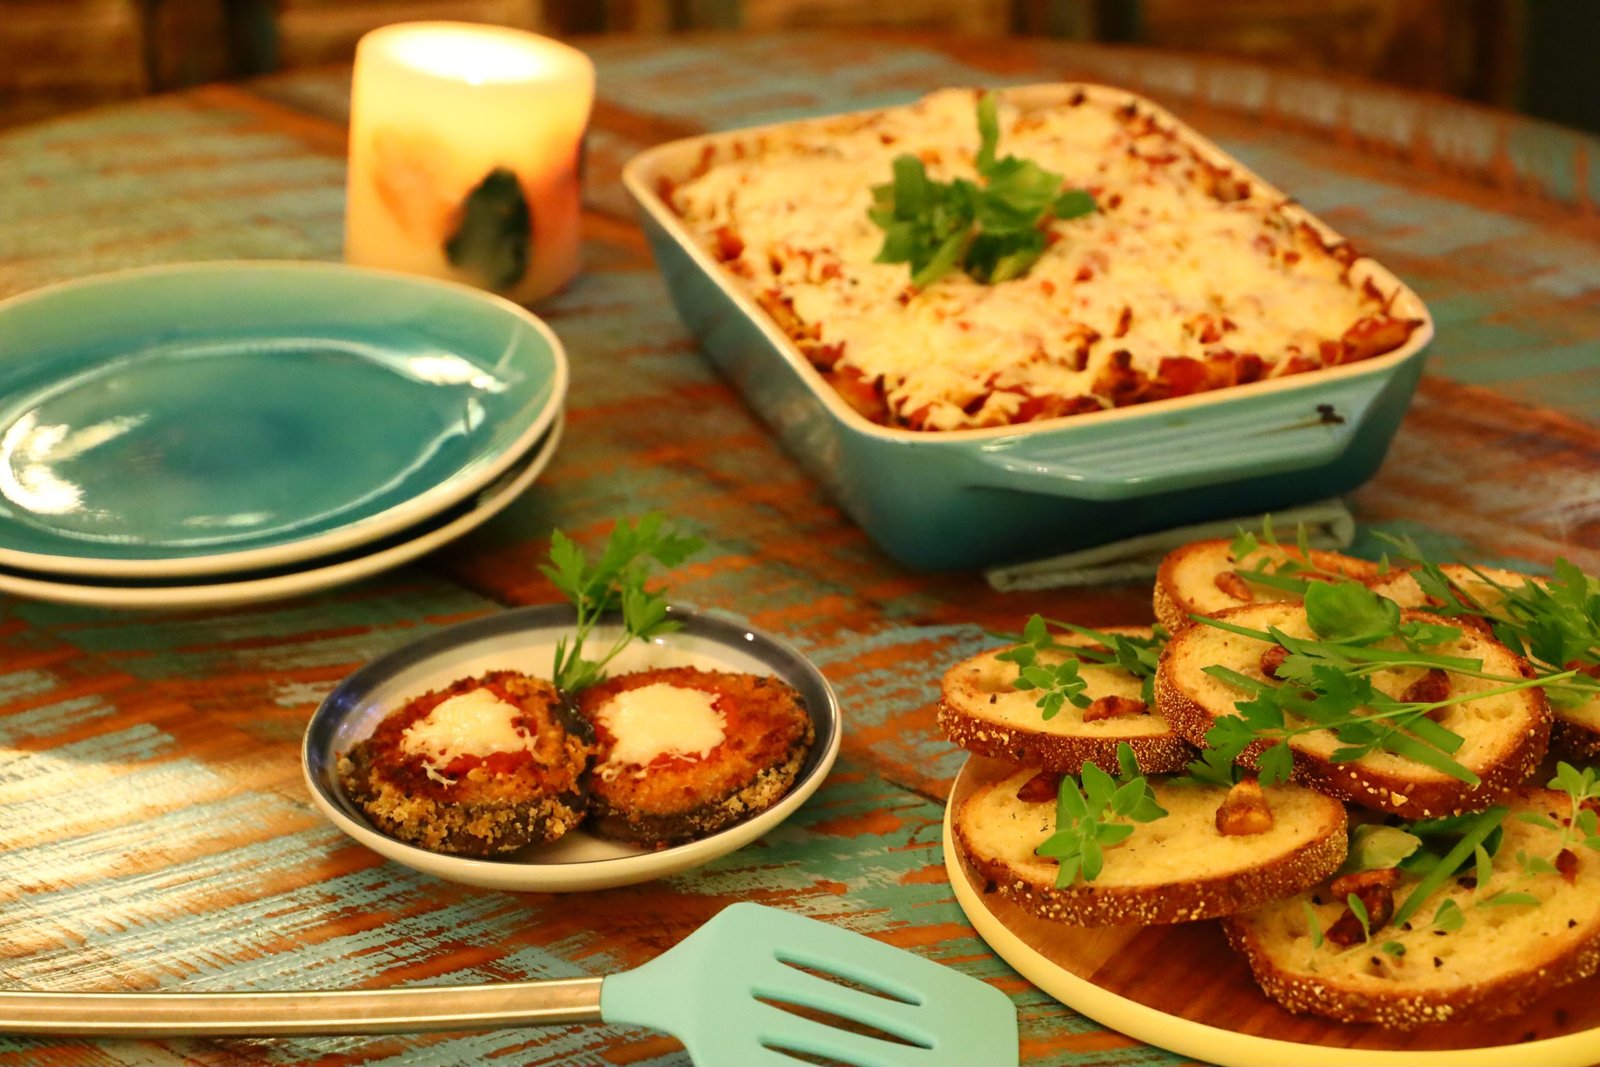
A Beautiful Al Fresco Setting

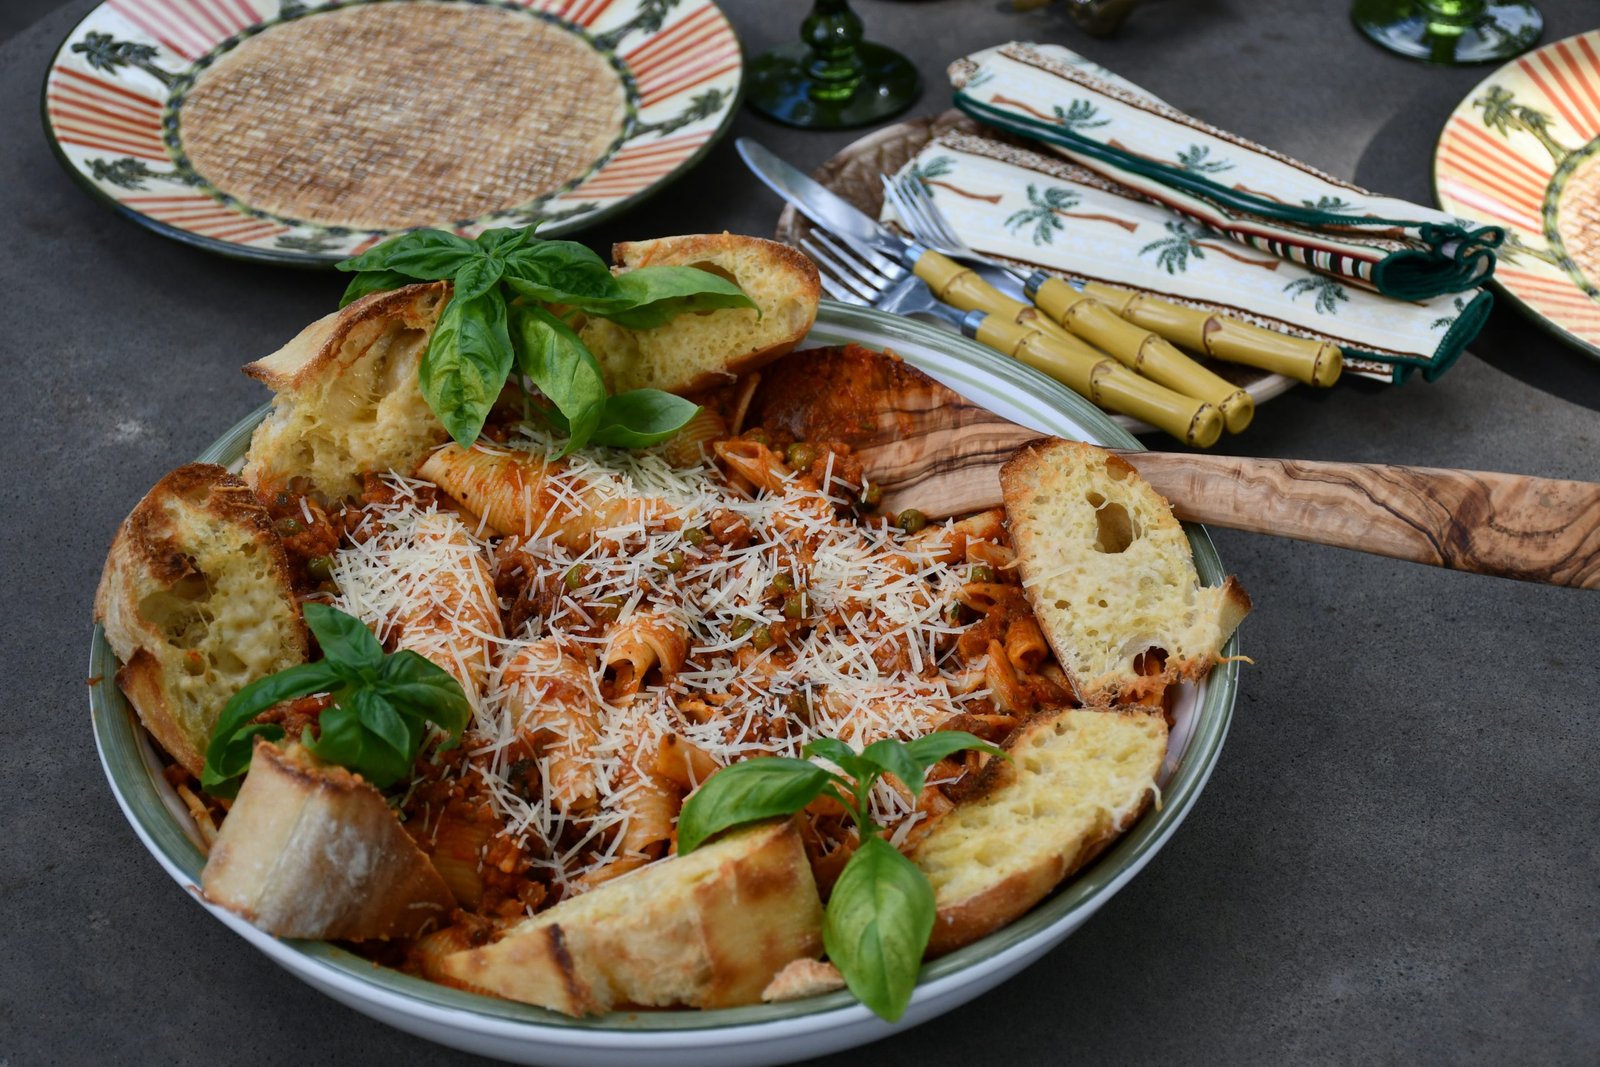
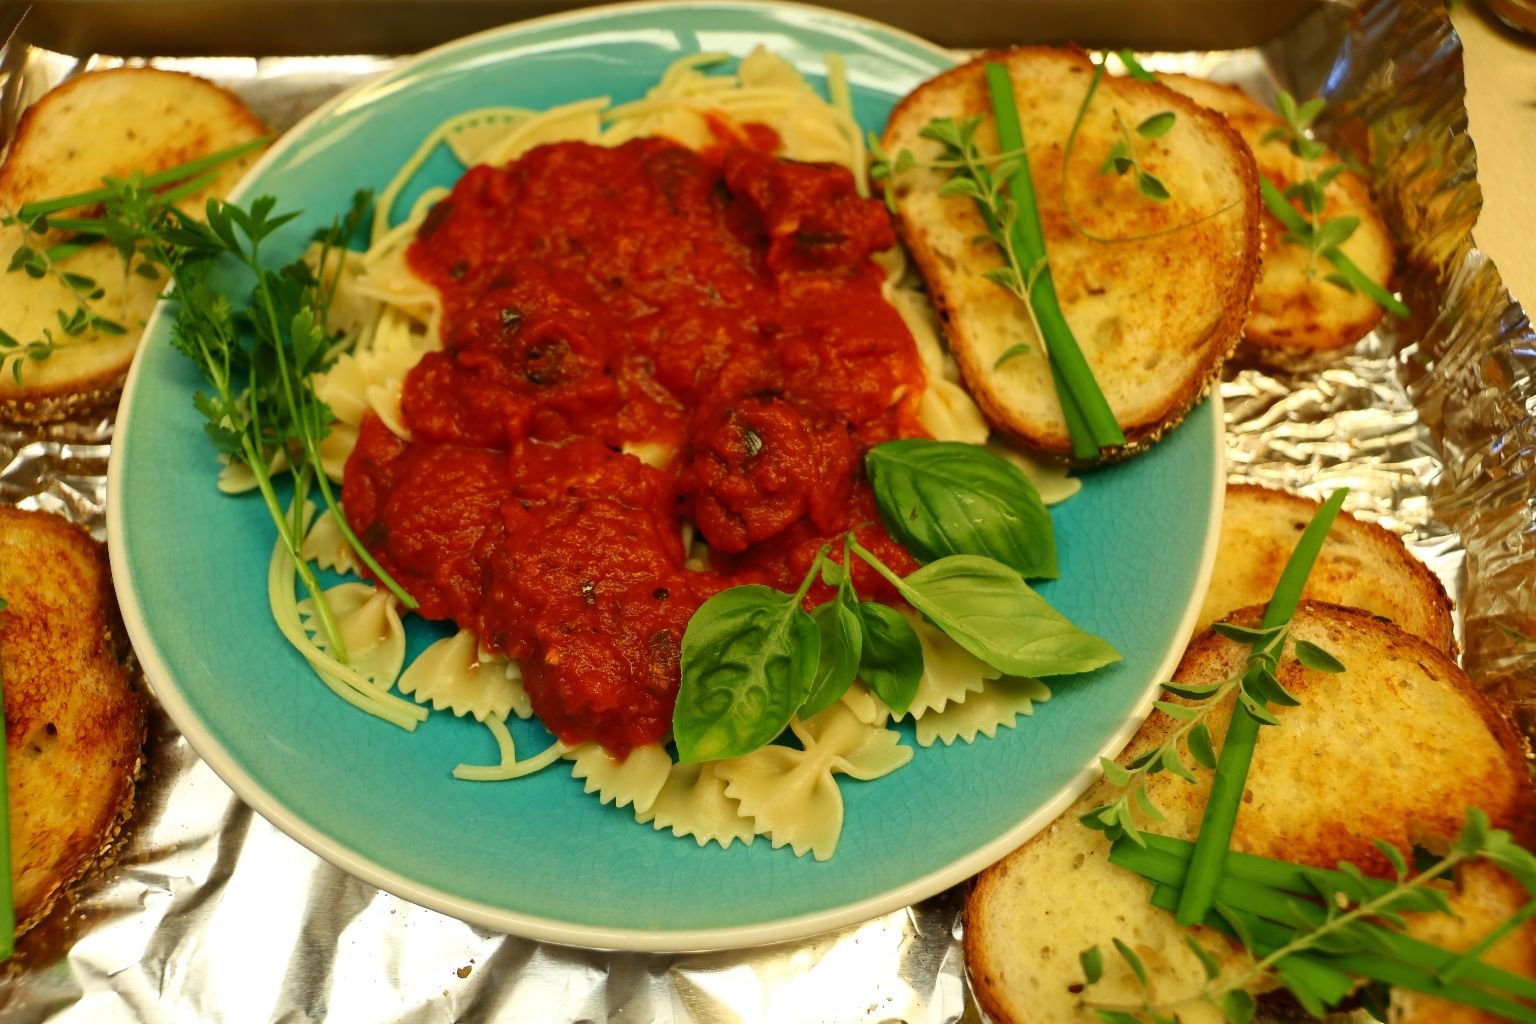
Chicken Parm on Pasta

Our son Brodie made the Chicken Parm, I made the Pasta and Red Sauce.
(See Brodie’s Chicken Parmesan Recipe Down Below.)
———————————————-
I, Julie, wanted to create a post that would act as a hub with links to all of our Italian food blog posts.. I also wanted to list on this post, recipes of our favorite Italian foods that we cook often, and even to bring you a few new recipes here for you to try as well.

Grazie Per Esserti a Nito Noi,
Julie and Gordon

——————————————————
Let’s Start With:

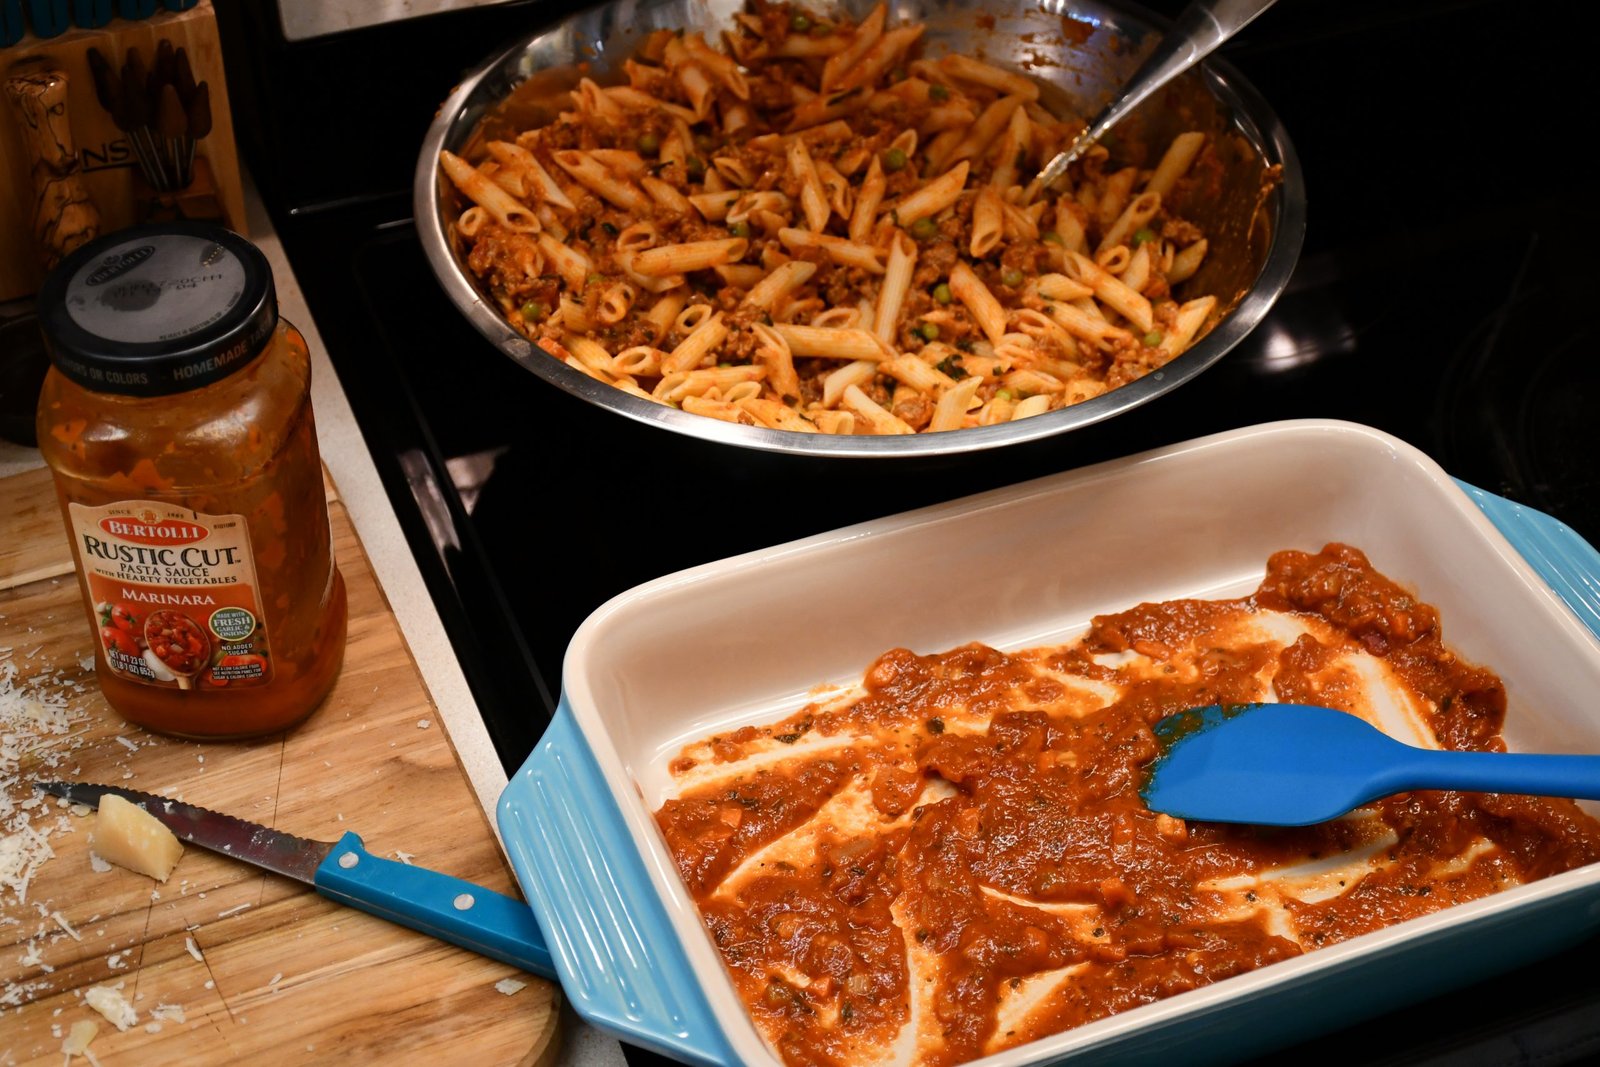
Julie’s Baked Ziti’s
(A favorite of ours.)


————————————————————————–
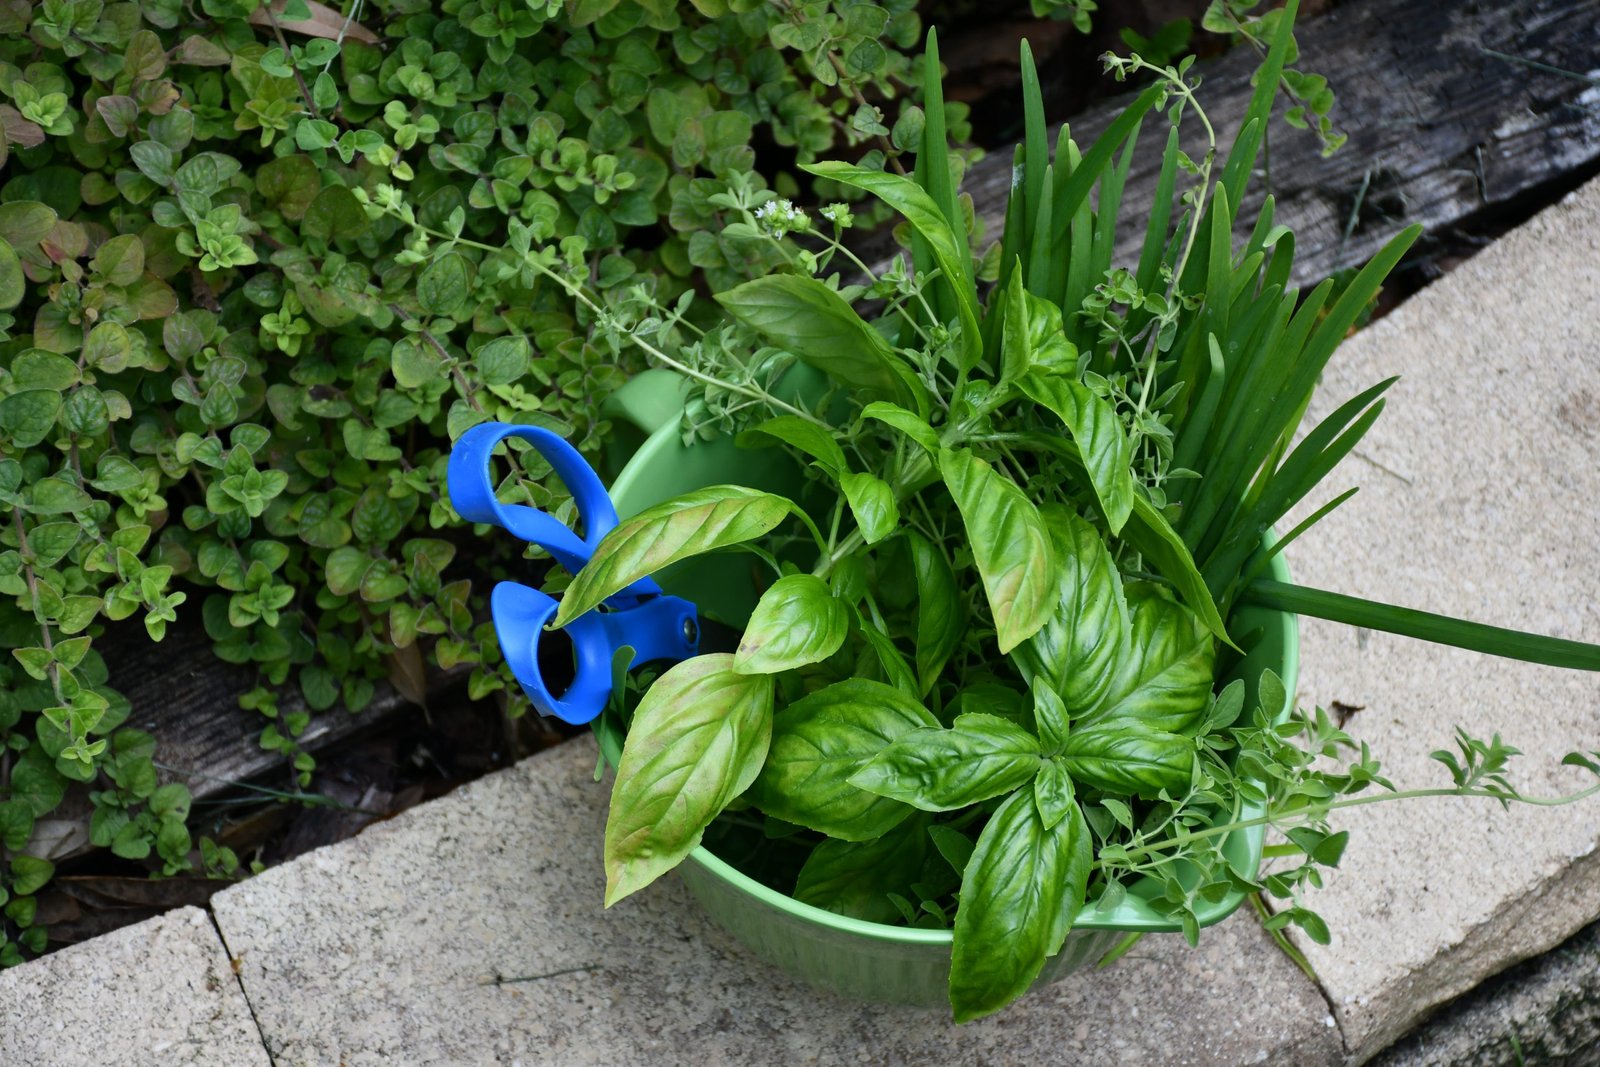
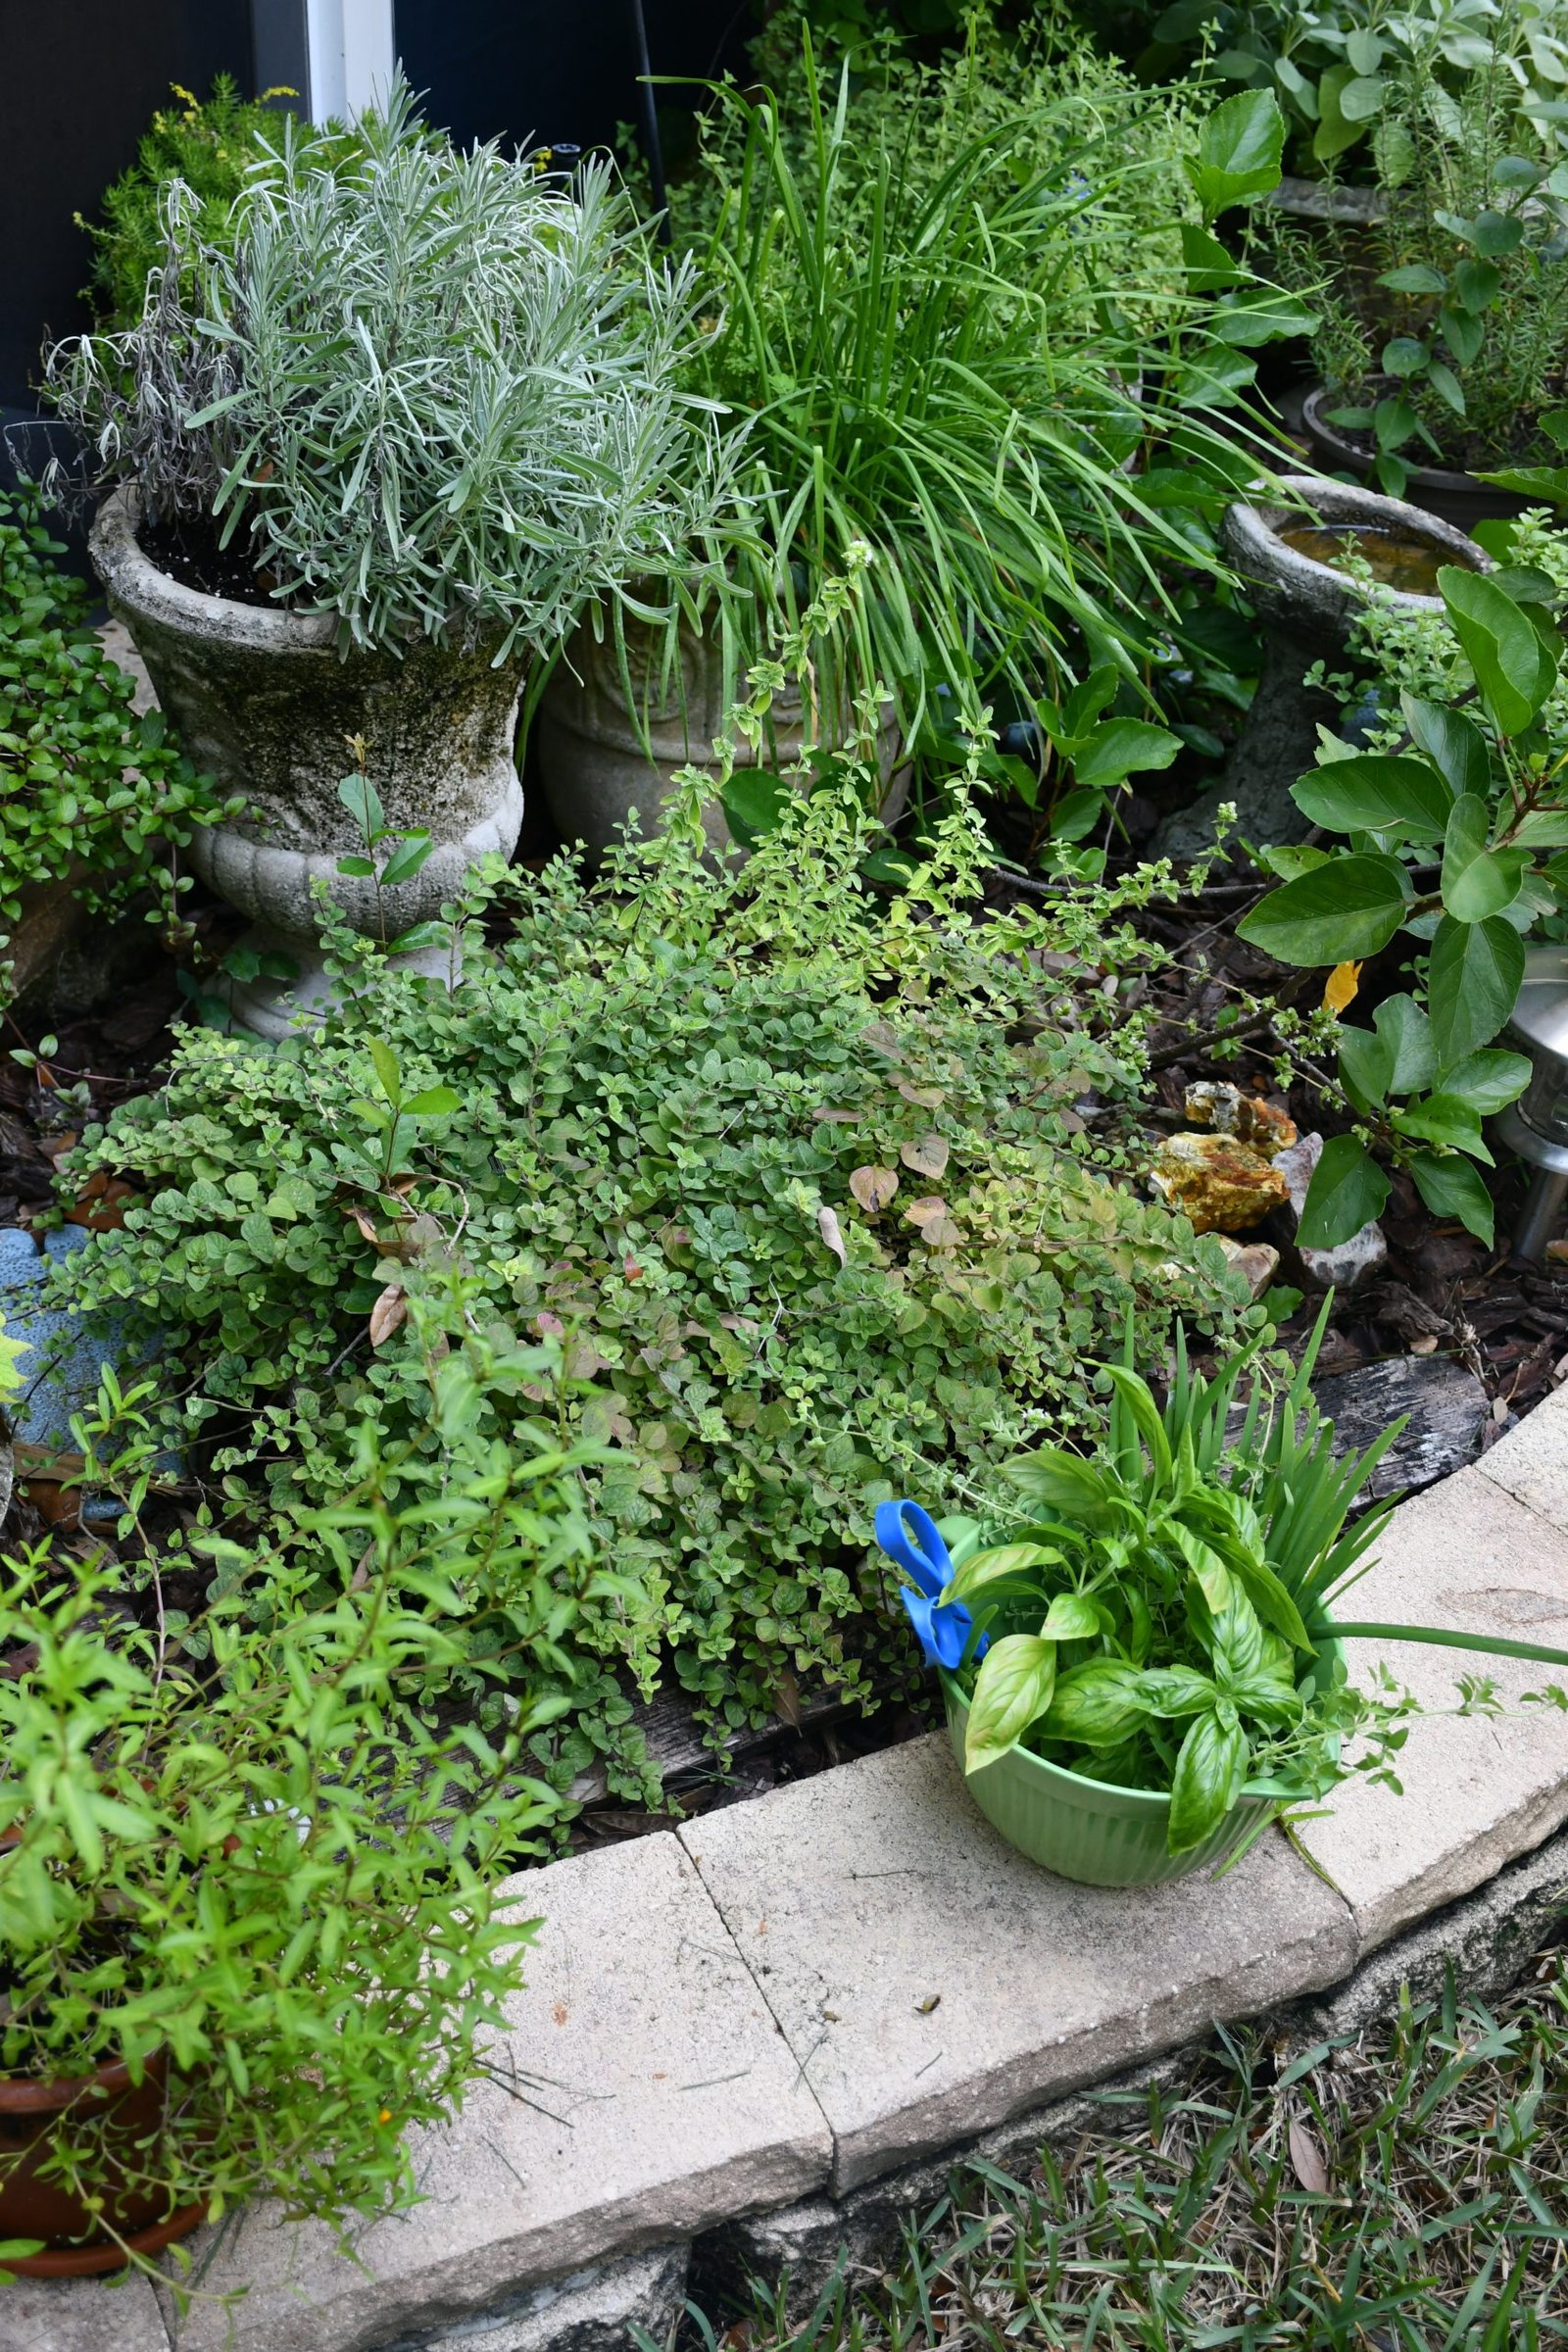
Herbs from our Garden
Click Here For: Julie’s New Herb Garden
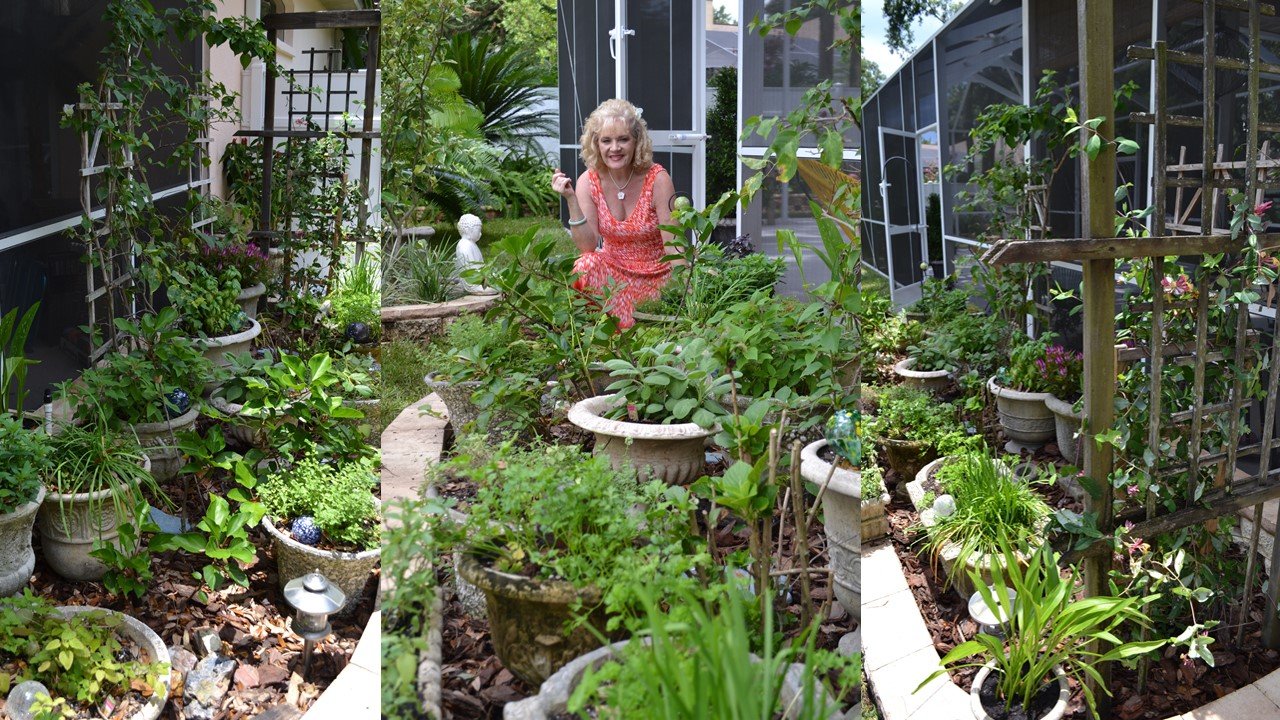
Herbs play a big role in Italian food.
We have our own herb garden if you would like to take a look. Fresh herbs are very healthy and good for you. They also kill certain cancers, so eat up! They also add a great taste to Italian foods.
—————————————————-
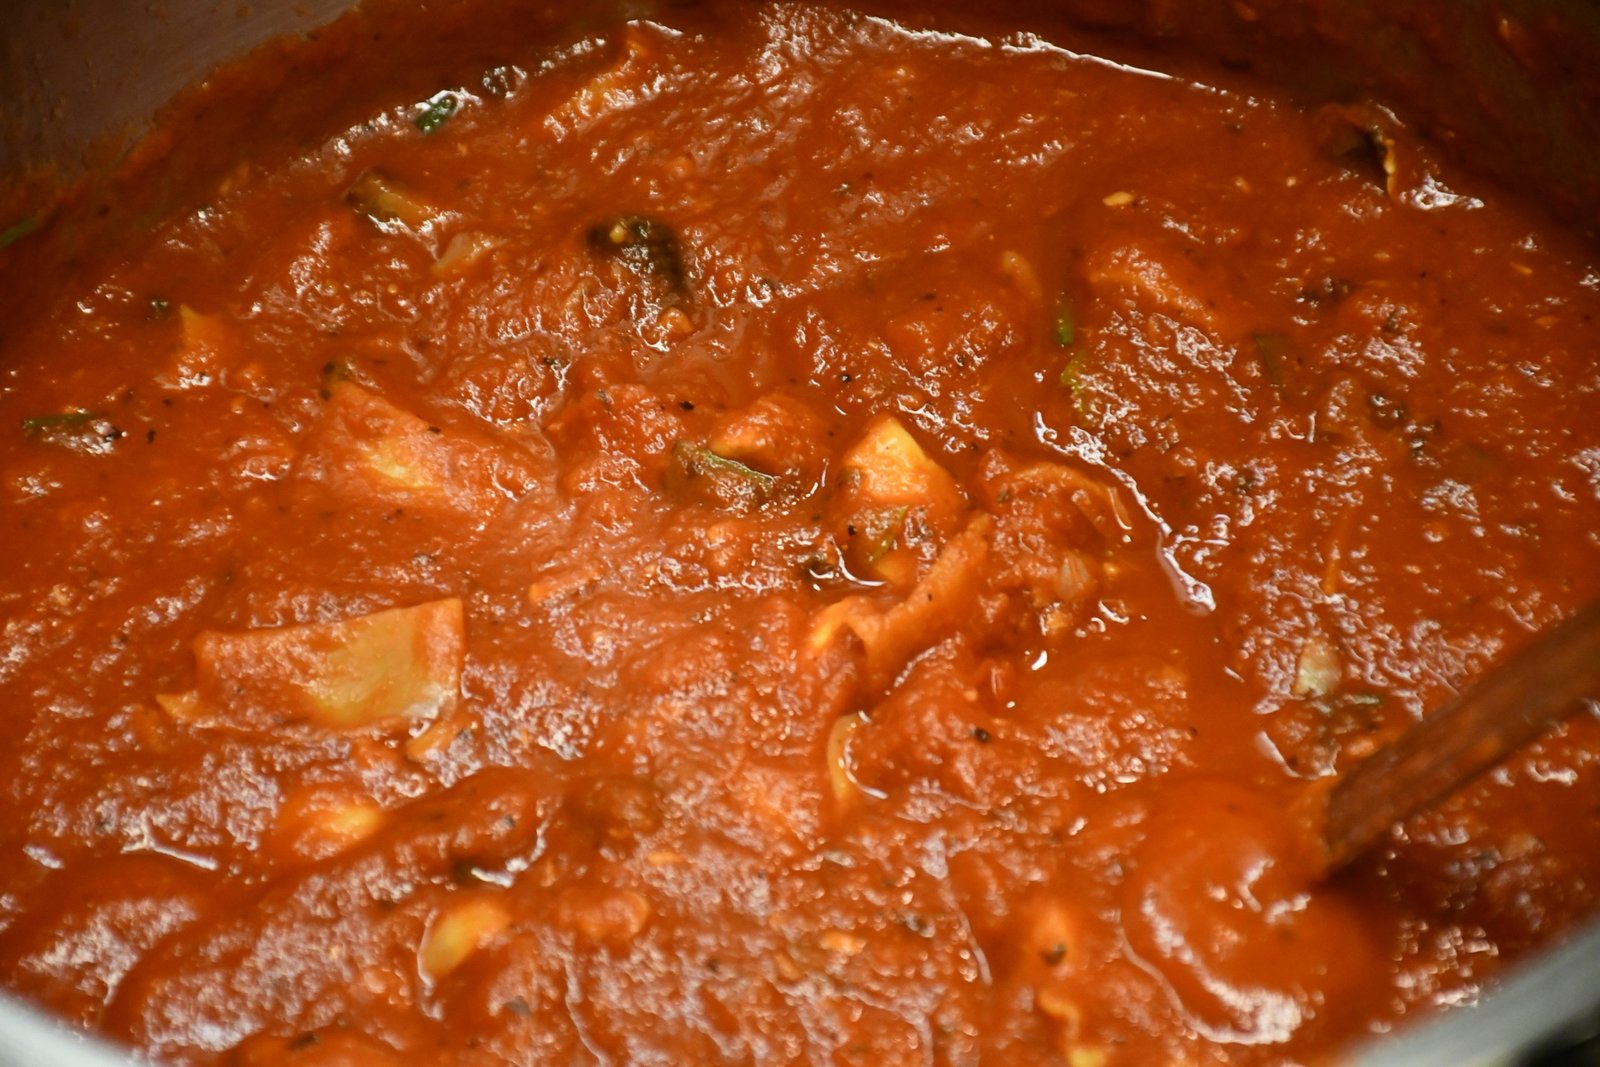
Julie’s Red Sauce
(I am quite proud of this.) 🙂
If you would like the recipe for my Red Sauce/Spaghetti Sauce…..
Click Here For: Julie’s Italian Appetizers and Edible Gifts
Just click on the link above and scroll down the page until you come to it.
—————————————————


It all equal’s to the best Baked Ziti/Rigatoni ever!

Some we baked, Some we gave away, Some we froze.
We love to share!
(All that is needed is to place them into the oven on 350F for about 45 minutes. Then remove from oven, top with cheeses and bake an additional 10 minutes or so. On the ones that I froze however, I didn’t add any cheese to the top whatsoever.)
If you would like the recipe:
Baked Rigatoni
(Otherwise known as Baked Ziti)
I never use Ziti pasta for this, I would always use rigatoni so there is no reason to call it ‘Baked Ziti’ now is there?
1 16 oz. box of Ziti or Rigatoni pasta
2 pounds of Ricotta Cheese
4 cups grated mozzarella cheese
3 eggs
2 Tablespoons dried parsley (or Fresh)
2 cups Parmesan cheese
3 jars of spaghetti sauce
(We use our own homemade spaghetti sauce here).
Boil your pasta till al dente and then drain. Set aside. In a separate bowl combine ricotta cheese, mozzarella cheese, eggs, and parsley. Stir in pasta , combine. In a large baking dish spread one layer of the pasta, cheeses, eggs and parsley, then top off with your tomato sauce. (Whether you make it yourself or use a spaghetti sauce from a jar). Then add another layer of your pasta and cheeses, then another layer of tomato sauce. Top the mixture with a final layer of tomato sauce and then add your grated Parmesan cheese. Bake at 350* for 30 – 45 minutes depending on your oven.
Enjoy!
P.S. This is the recipe that I base my Baked Rigatoni on. To me it is a template. I also hope it will serve as a template for you to add and create your very own recipe. In the spirit of every Italian household that has their own Red Sauce, I say every household has their own Baked Rigatoni.
————————————————————–

A Big Pot of Red Sauce

To me, this is the most comforting food there is.
It satisfies every fiber of my being. And I always make it a bit different every time.

Also, Bread, Herbs, and Garlic play a big supporting role.


All The Little Extras
Leftovers of my bread with roasted garlic and herbs, topped with some fried goat cheese and some vegetarian meat balls.
—————————————————————

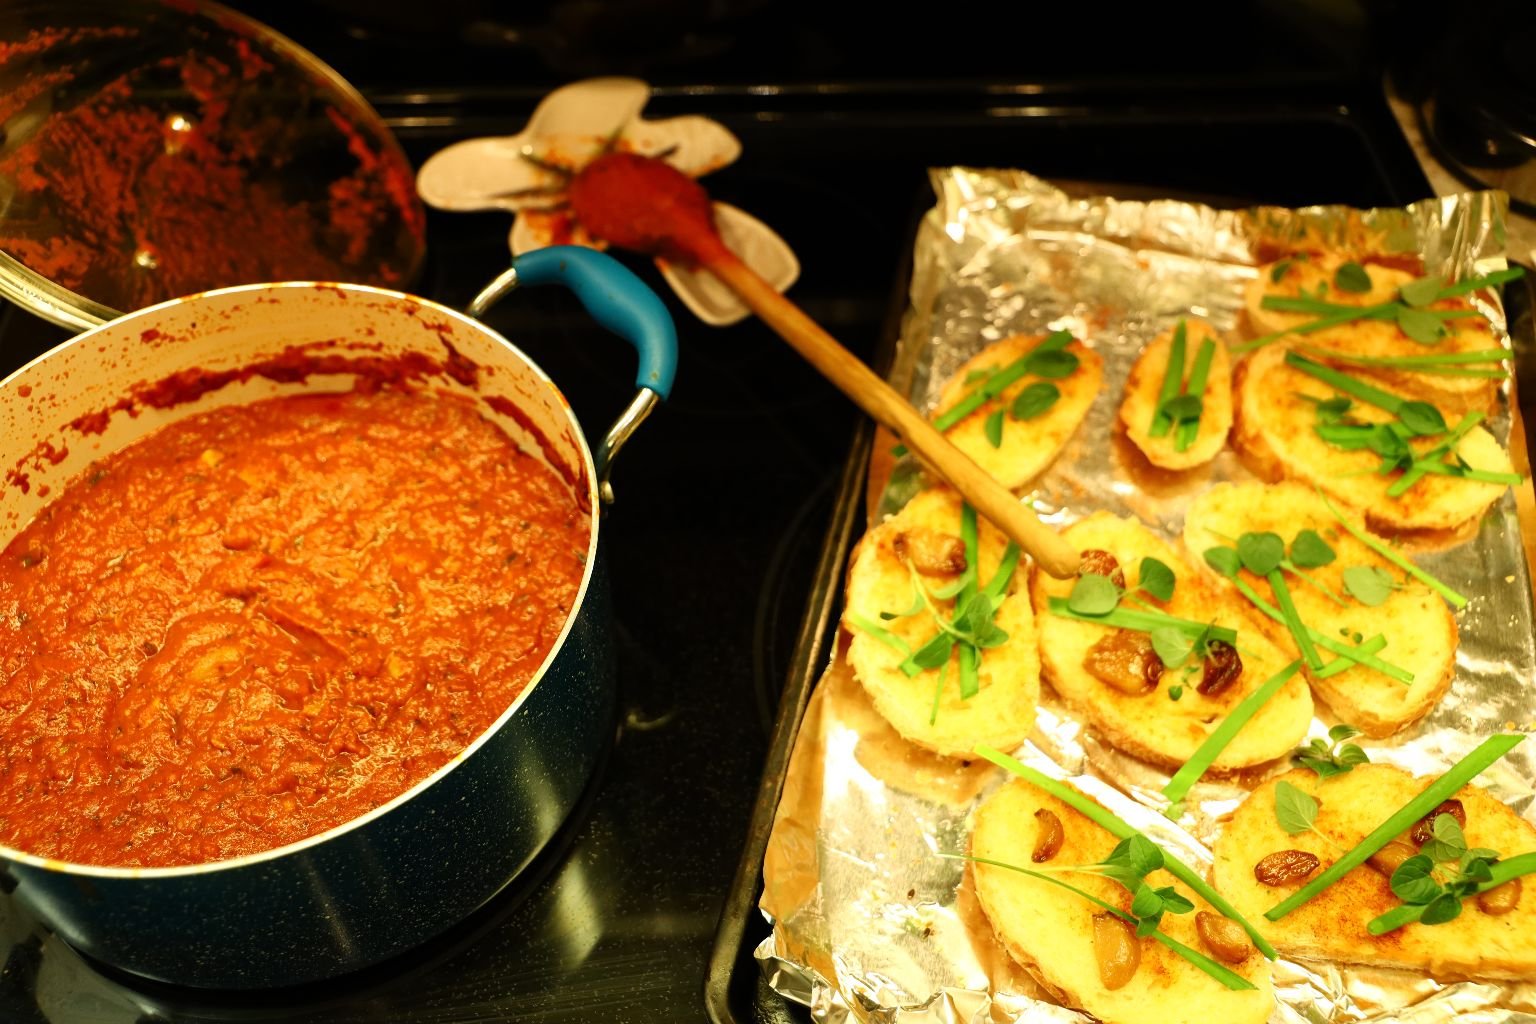
Just a Few Photos of my Spaghetti’s and Breads


Does This Not Look Like The Most Delicious Meal?
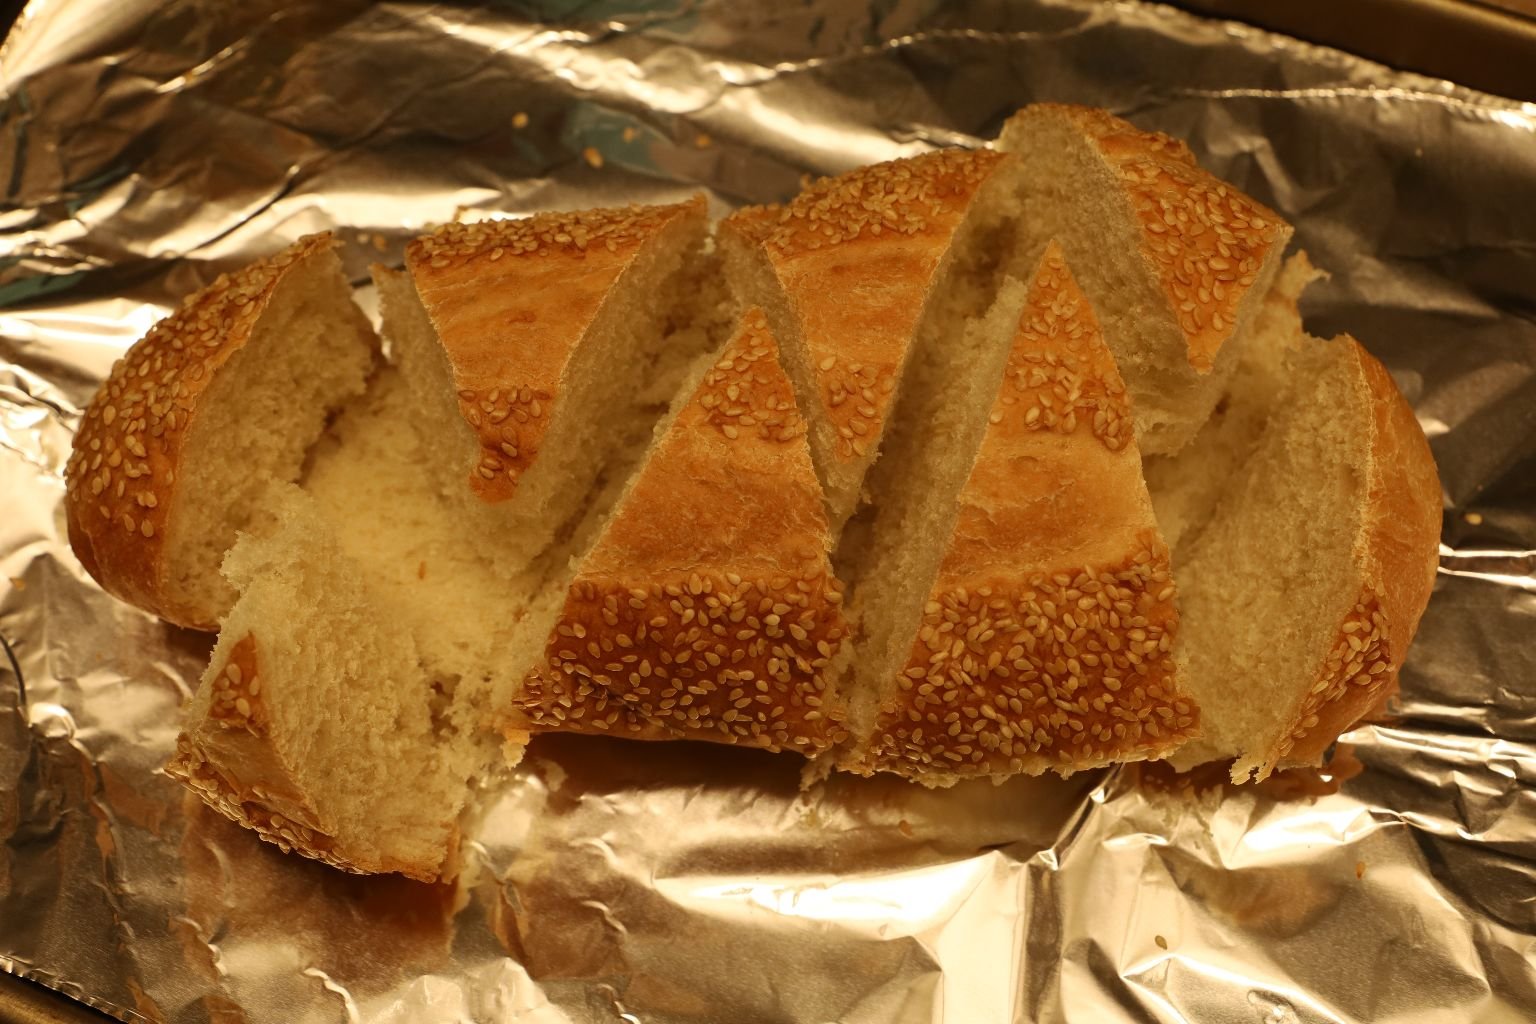
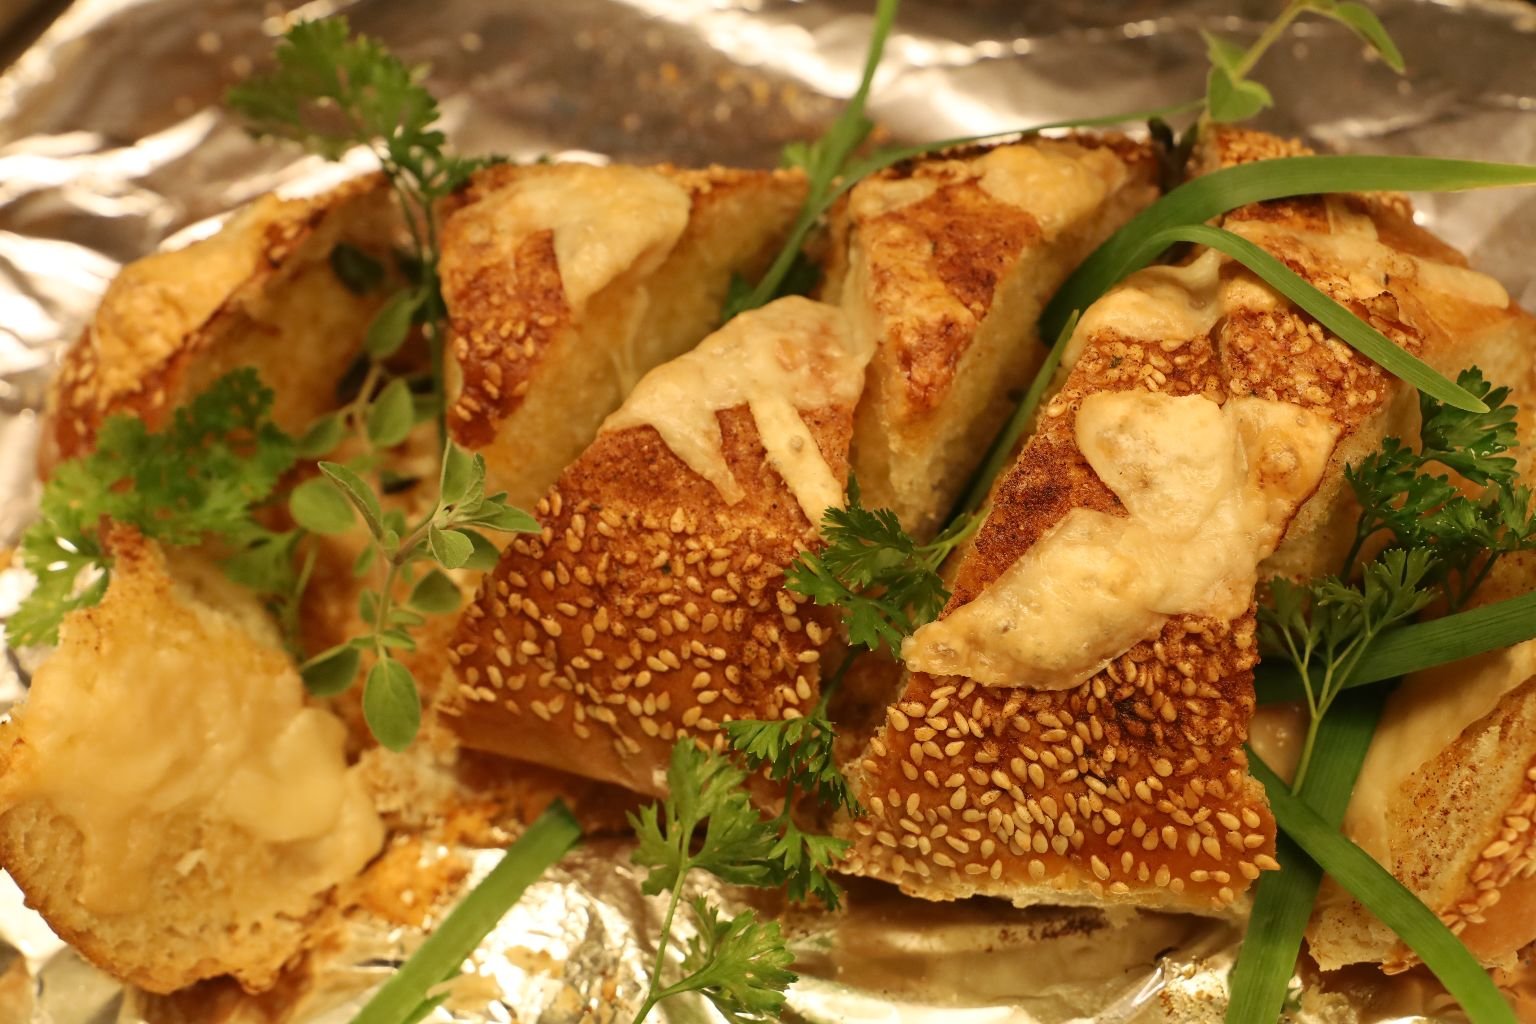
What is unique here is how I cut the bread to be baked. I wanted the slices to look a bit like cake slices.
I buttered the inside and sprinkled cheese in and out. Baked the bread for about 8 – 10 minutes on 350F, and then turned the Broil setting on and let it brown a minute or two. I then removed it and placed some of our fresh herbs inside and all around.

Little Parm Crunchies
(When Parmesan Cheese melts together in the oven.) 🙂
———————————————————————–

Fresh Herbs From Our Garden

Gardein Meatless Meatballs
We actually eat these quite frequently as a side with our Spaghetti Dinners.
We enjoy them!
I just wanted to recommend them as I believe they are worth it. 🙂

Sometimes we will cook a few Pastas with our meals.
You just need to boil them in separate pots.
Their different sizes and textures require different cooking times.

Leftovers are always Spectacular!
————————————————————————-
An Italian Salad with Cheesy Bread Sticks

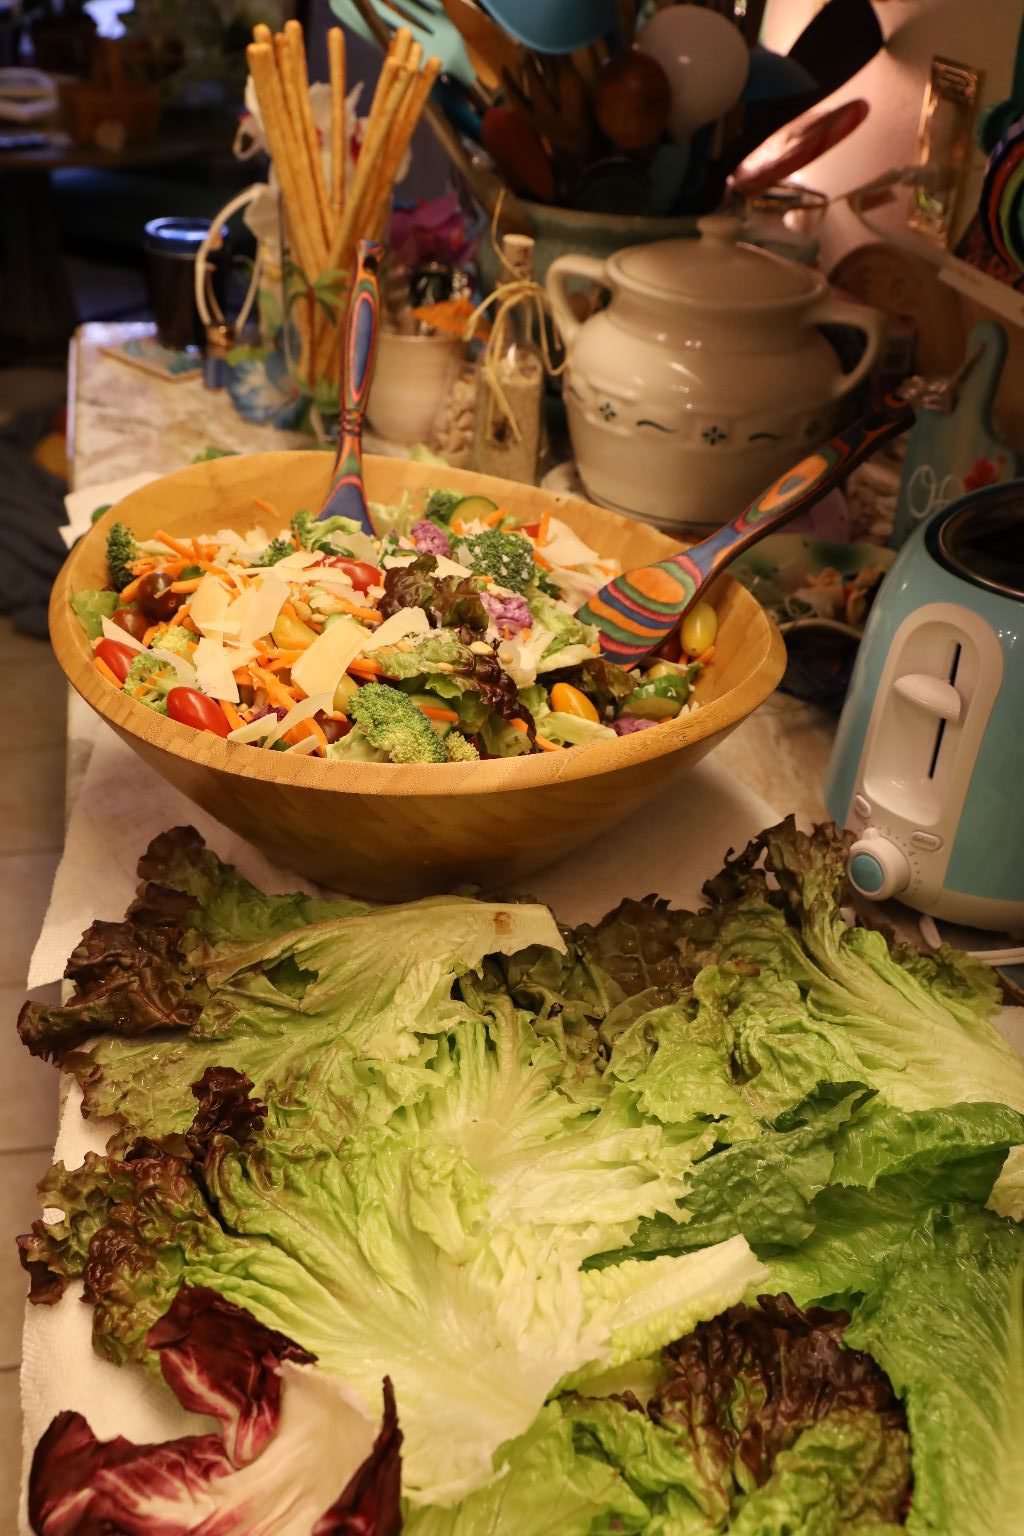
I believe that everyone knows how to make a salad, so I am not about to insult your intelligence by giving you instructions. However, I can tell you what I put in this one to make it more Italian than just some garden salad variety.
I used some lovely Artisan Salad Greens, Colorful Purple Cauliflower, Broccoli, Red Onions, Sliced Mushrooms, Toasted Pine Nuts, Pumpernickel Croutons, and Shaved Parmesan. The dressing is up to you. There are many store bought variety’s that are quite delicious, or you could just make a vinaigrette on your own. Whatever you so desire. I believe that I had a bit of Catalina Dressing that I was wanting to get rid of, so that is what is pictured above.
———————————————————
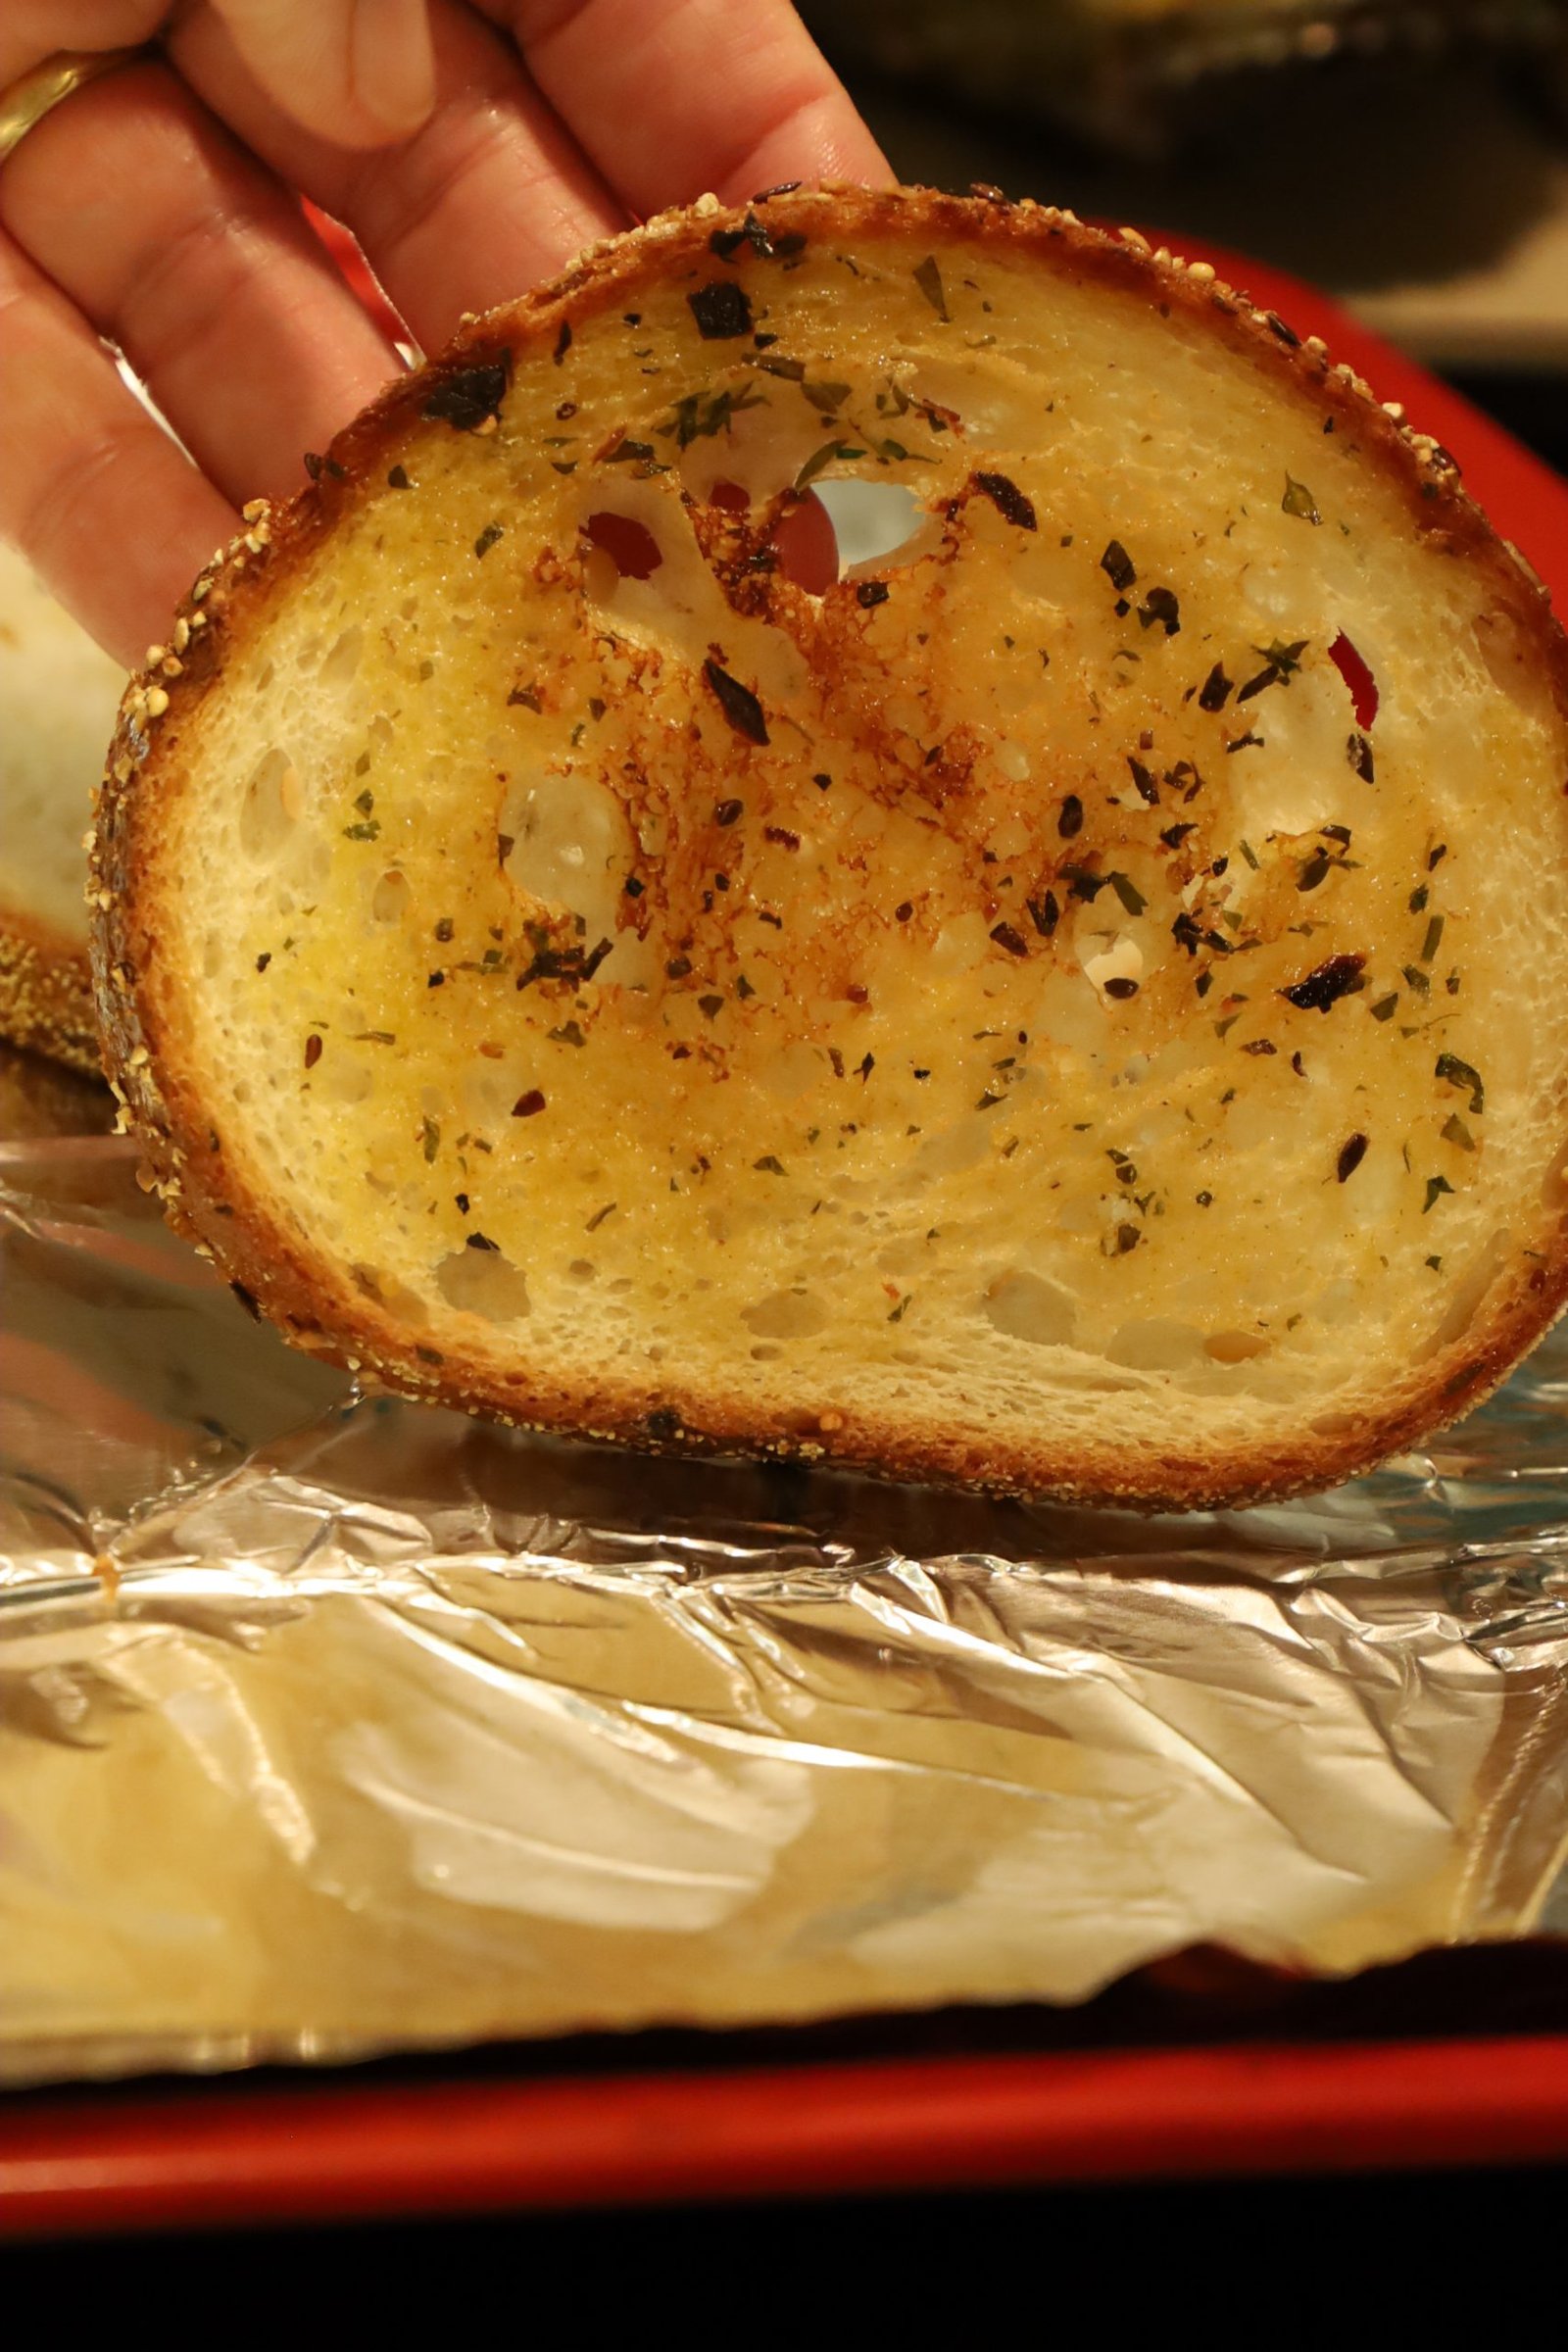
Cheesy Bread Sticks


I was tired of the same old round slices of bread that we would always eat. I wanted them cut into lengthwise sections. Like bread sticks, but by using real bread. So, that’s what I did. I sliced a baguette into long length’s. That is Gordon buttering them in the photo above.
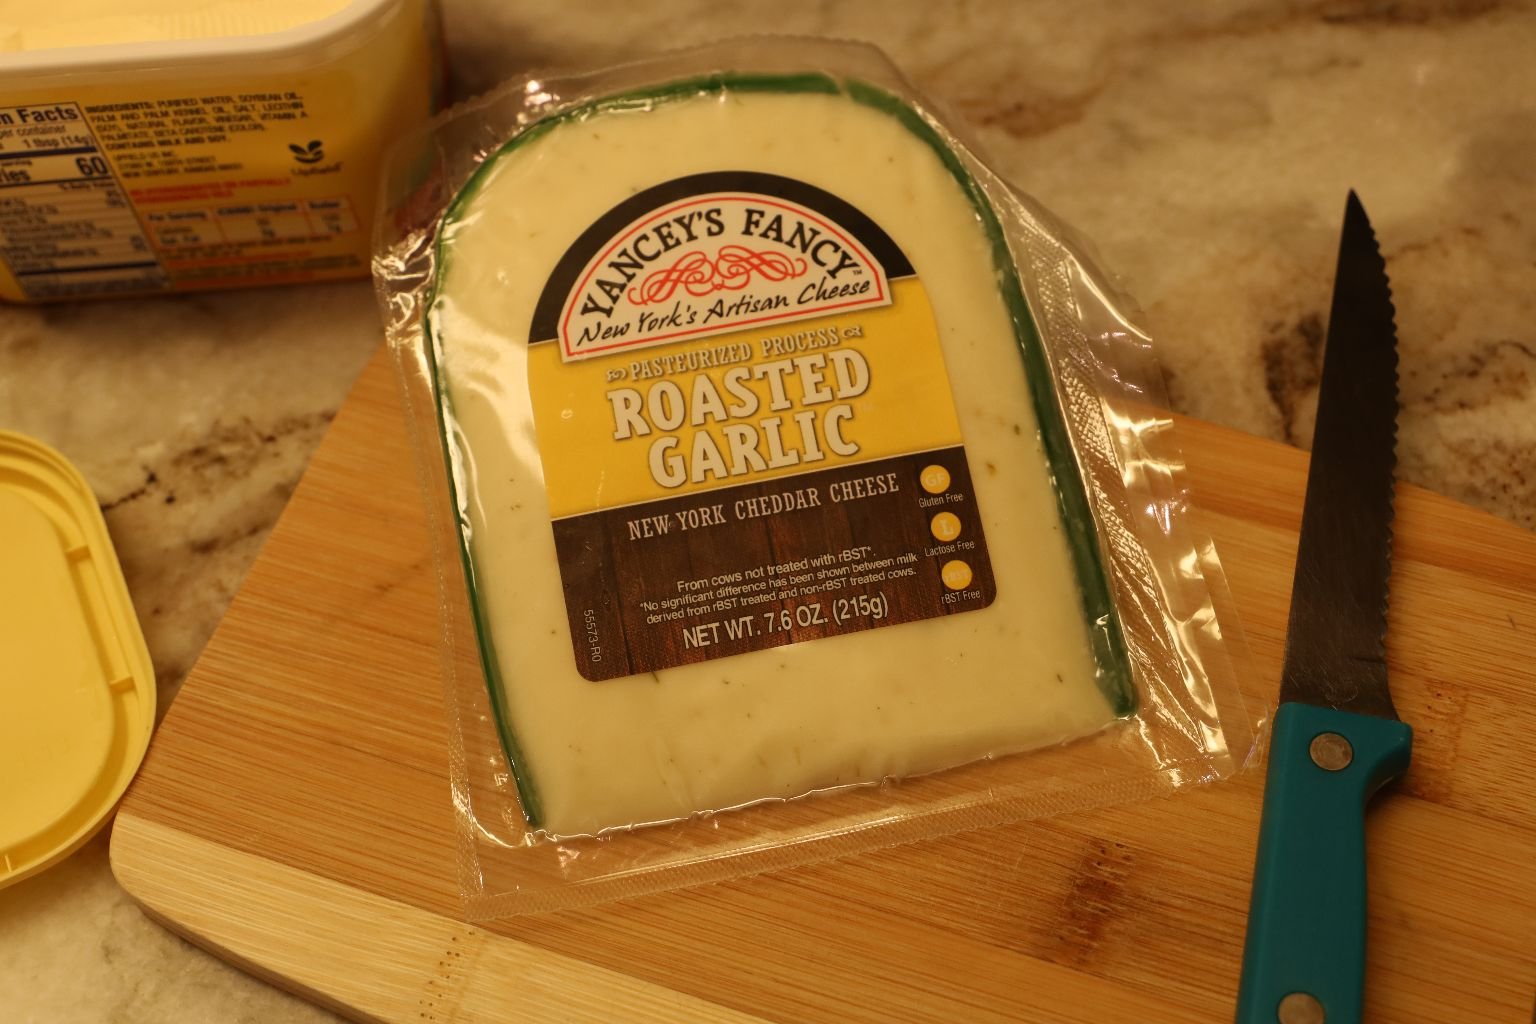

We then sliced some Roasted Garlic Cheese into slices and placed them on top of the bread sticks.

Baked them in a 350F oven for about 8 – 10 minutes.
Then turned on the broiler for an additional minute or two until browned.

Eaten With a Salad is Perfection!
——————————————————————-
Cooking Italian/American

Julie in the Kitchen

This is my Timbale Mixture
Timbale is yet another favorite Italian food of ours. We also vary every time we make it.
We also vary in how we stuff it, every single time. We’ll show you.

Extremely Beautiful and Tasty
In the photo above I added Penne Pasta to my Timbale mixture. Here it is ready to top with an array of Italian Cheeses and then baked until the cheeses melt in a 350F oven for about 10 – 15 minutes.


Here we topped the Timbale mixture with Red Sauce and Cheeses.
———————————————————
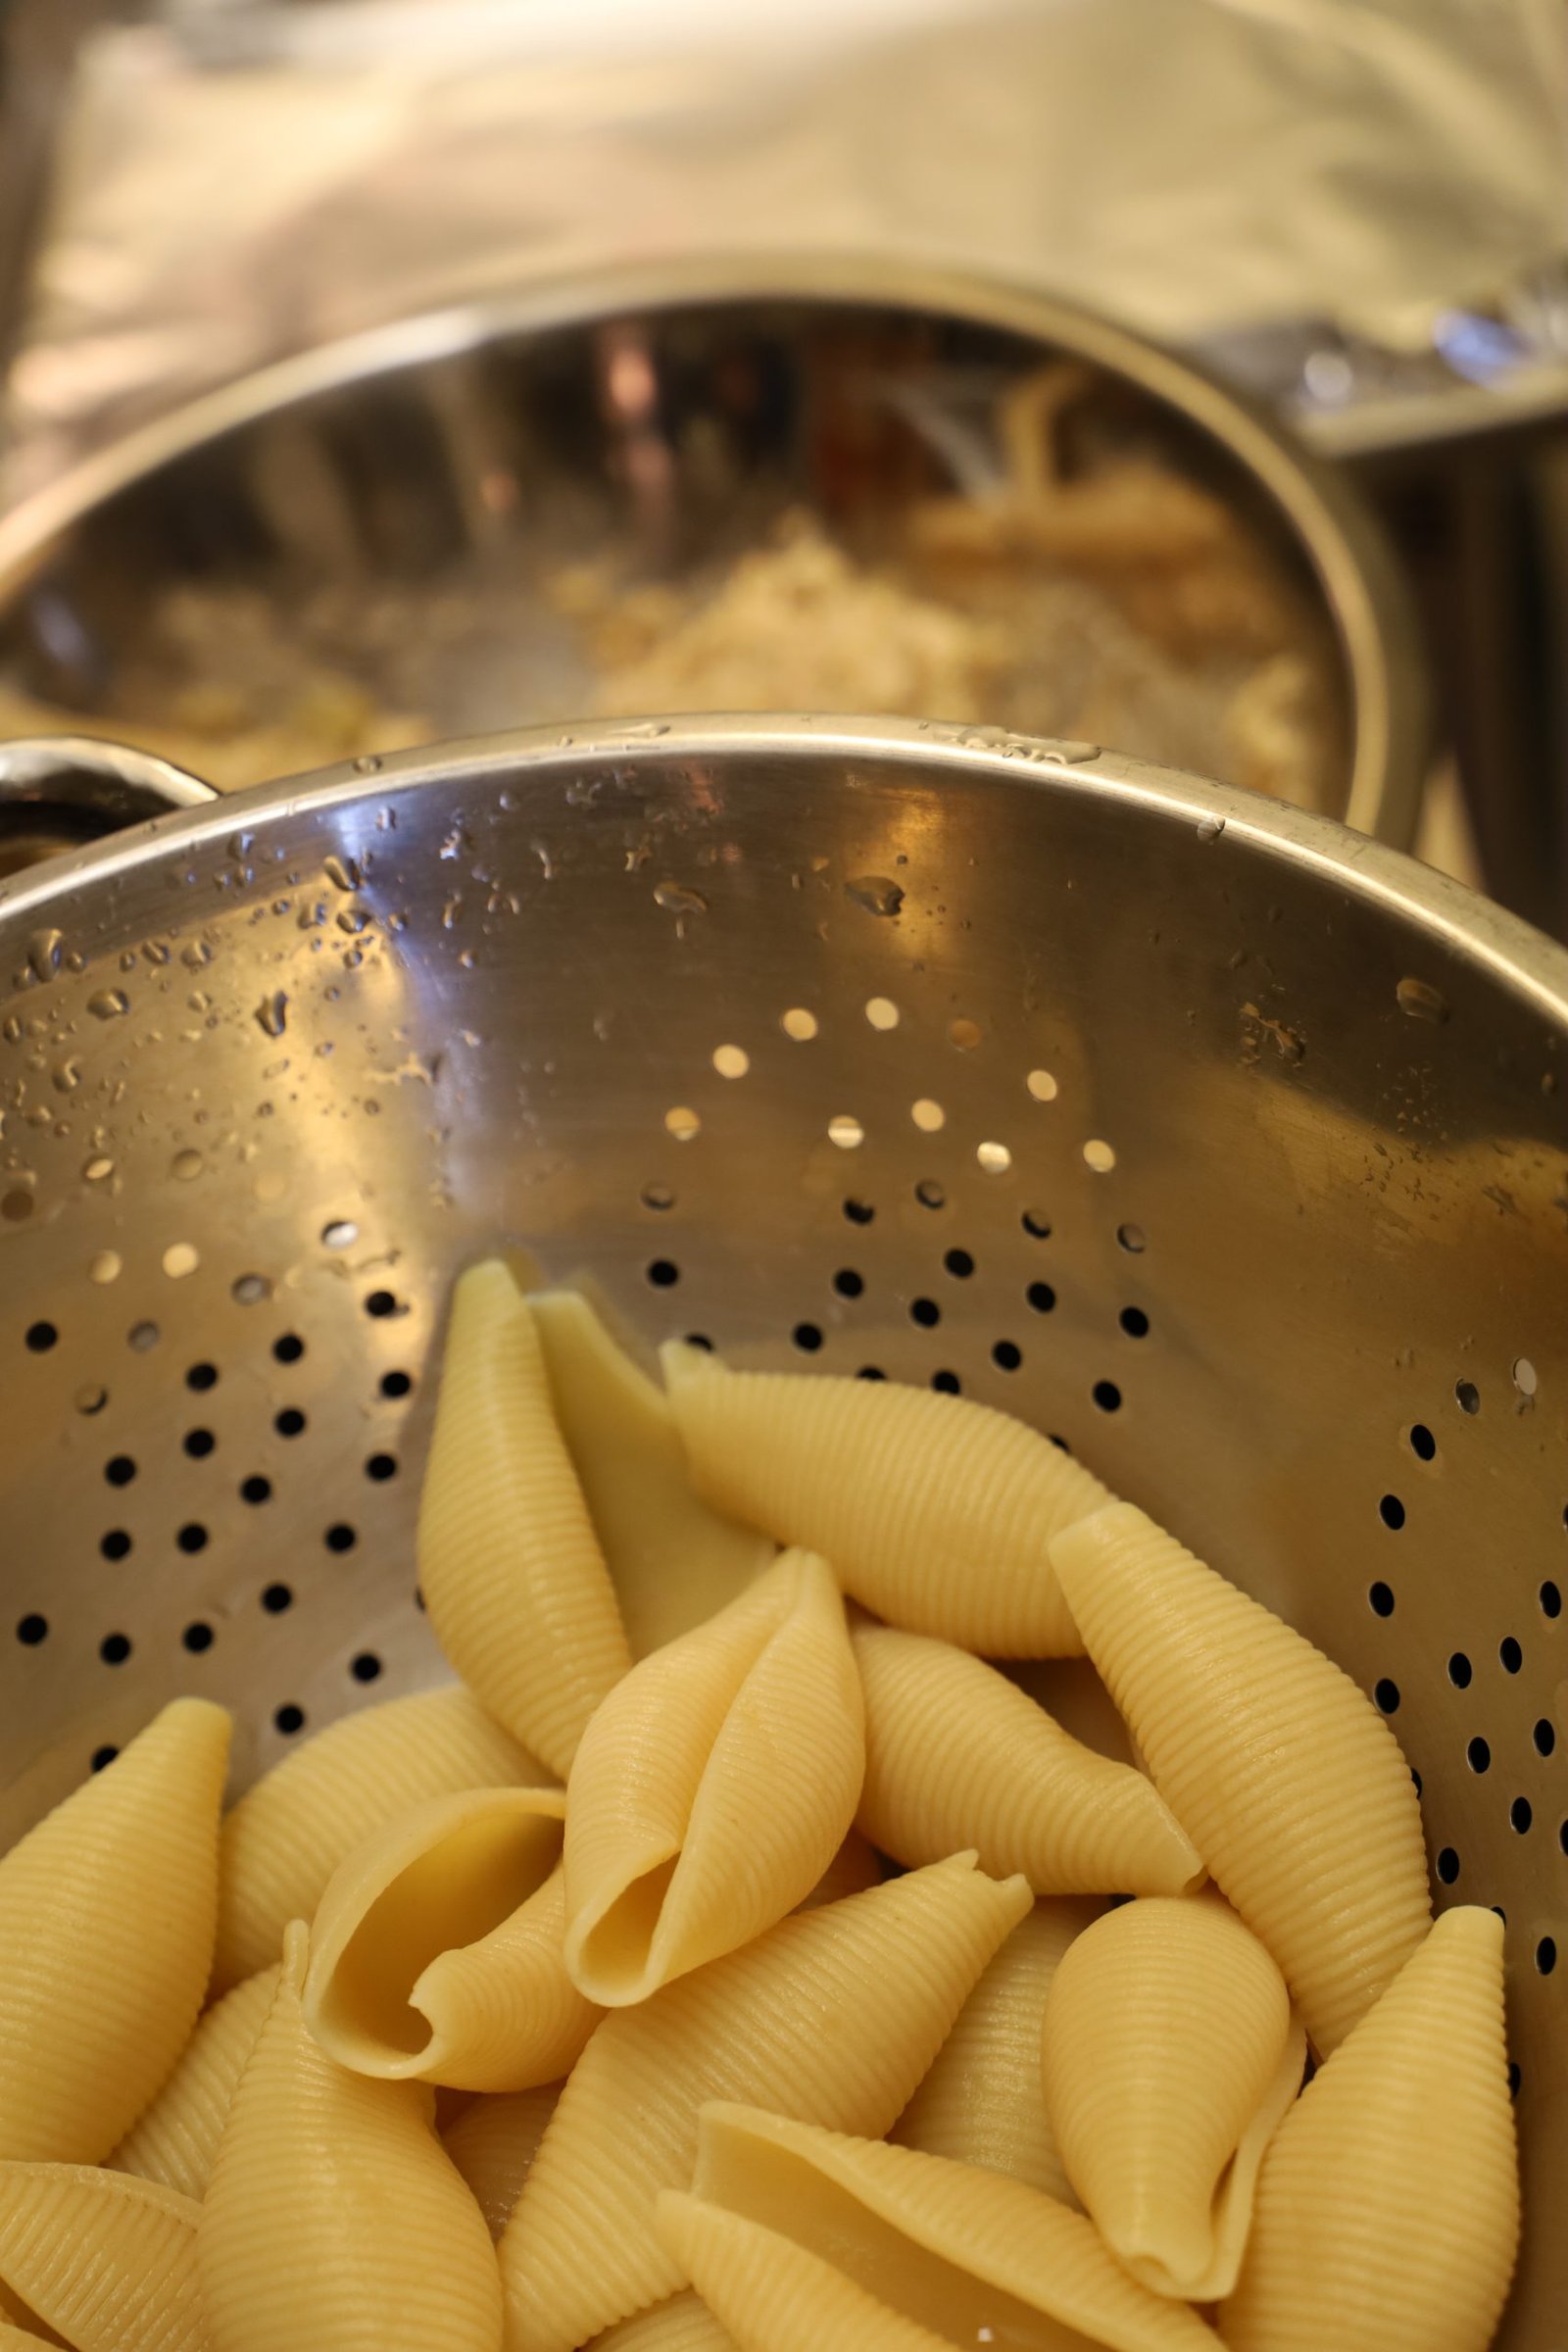
In the photos below I added my Timbale mixture to some large Pasta Shells and baked them topped with some of my Red Sauce and Cheeses.


(Recipe’s Down Below.)
———————————————————

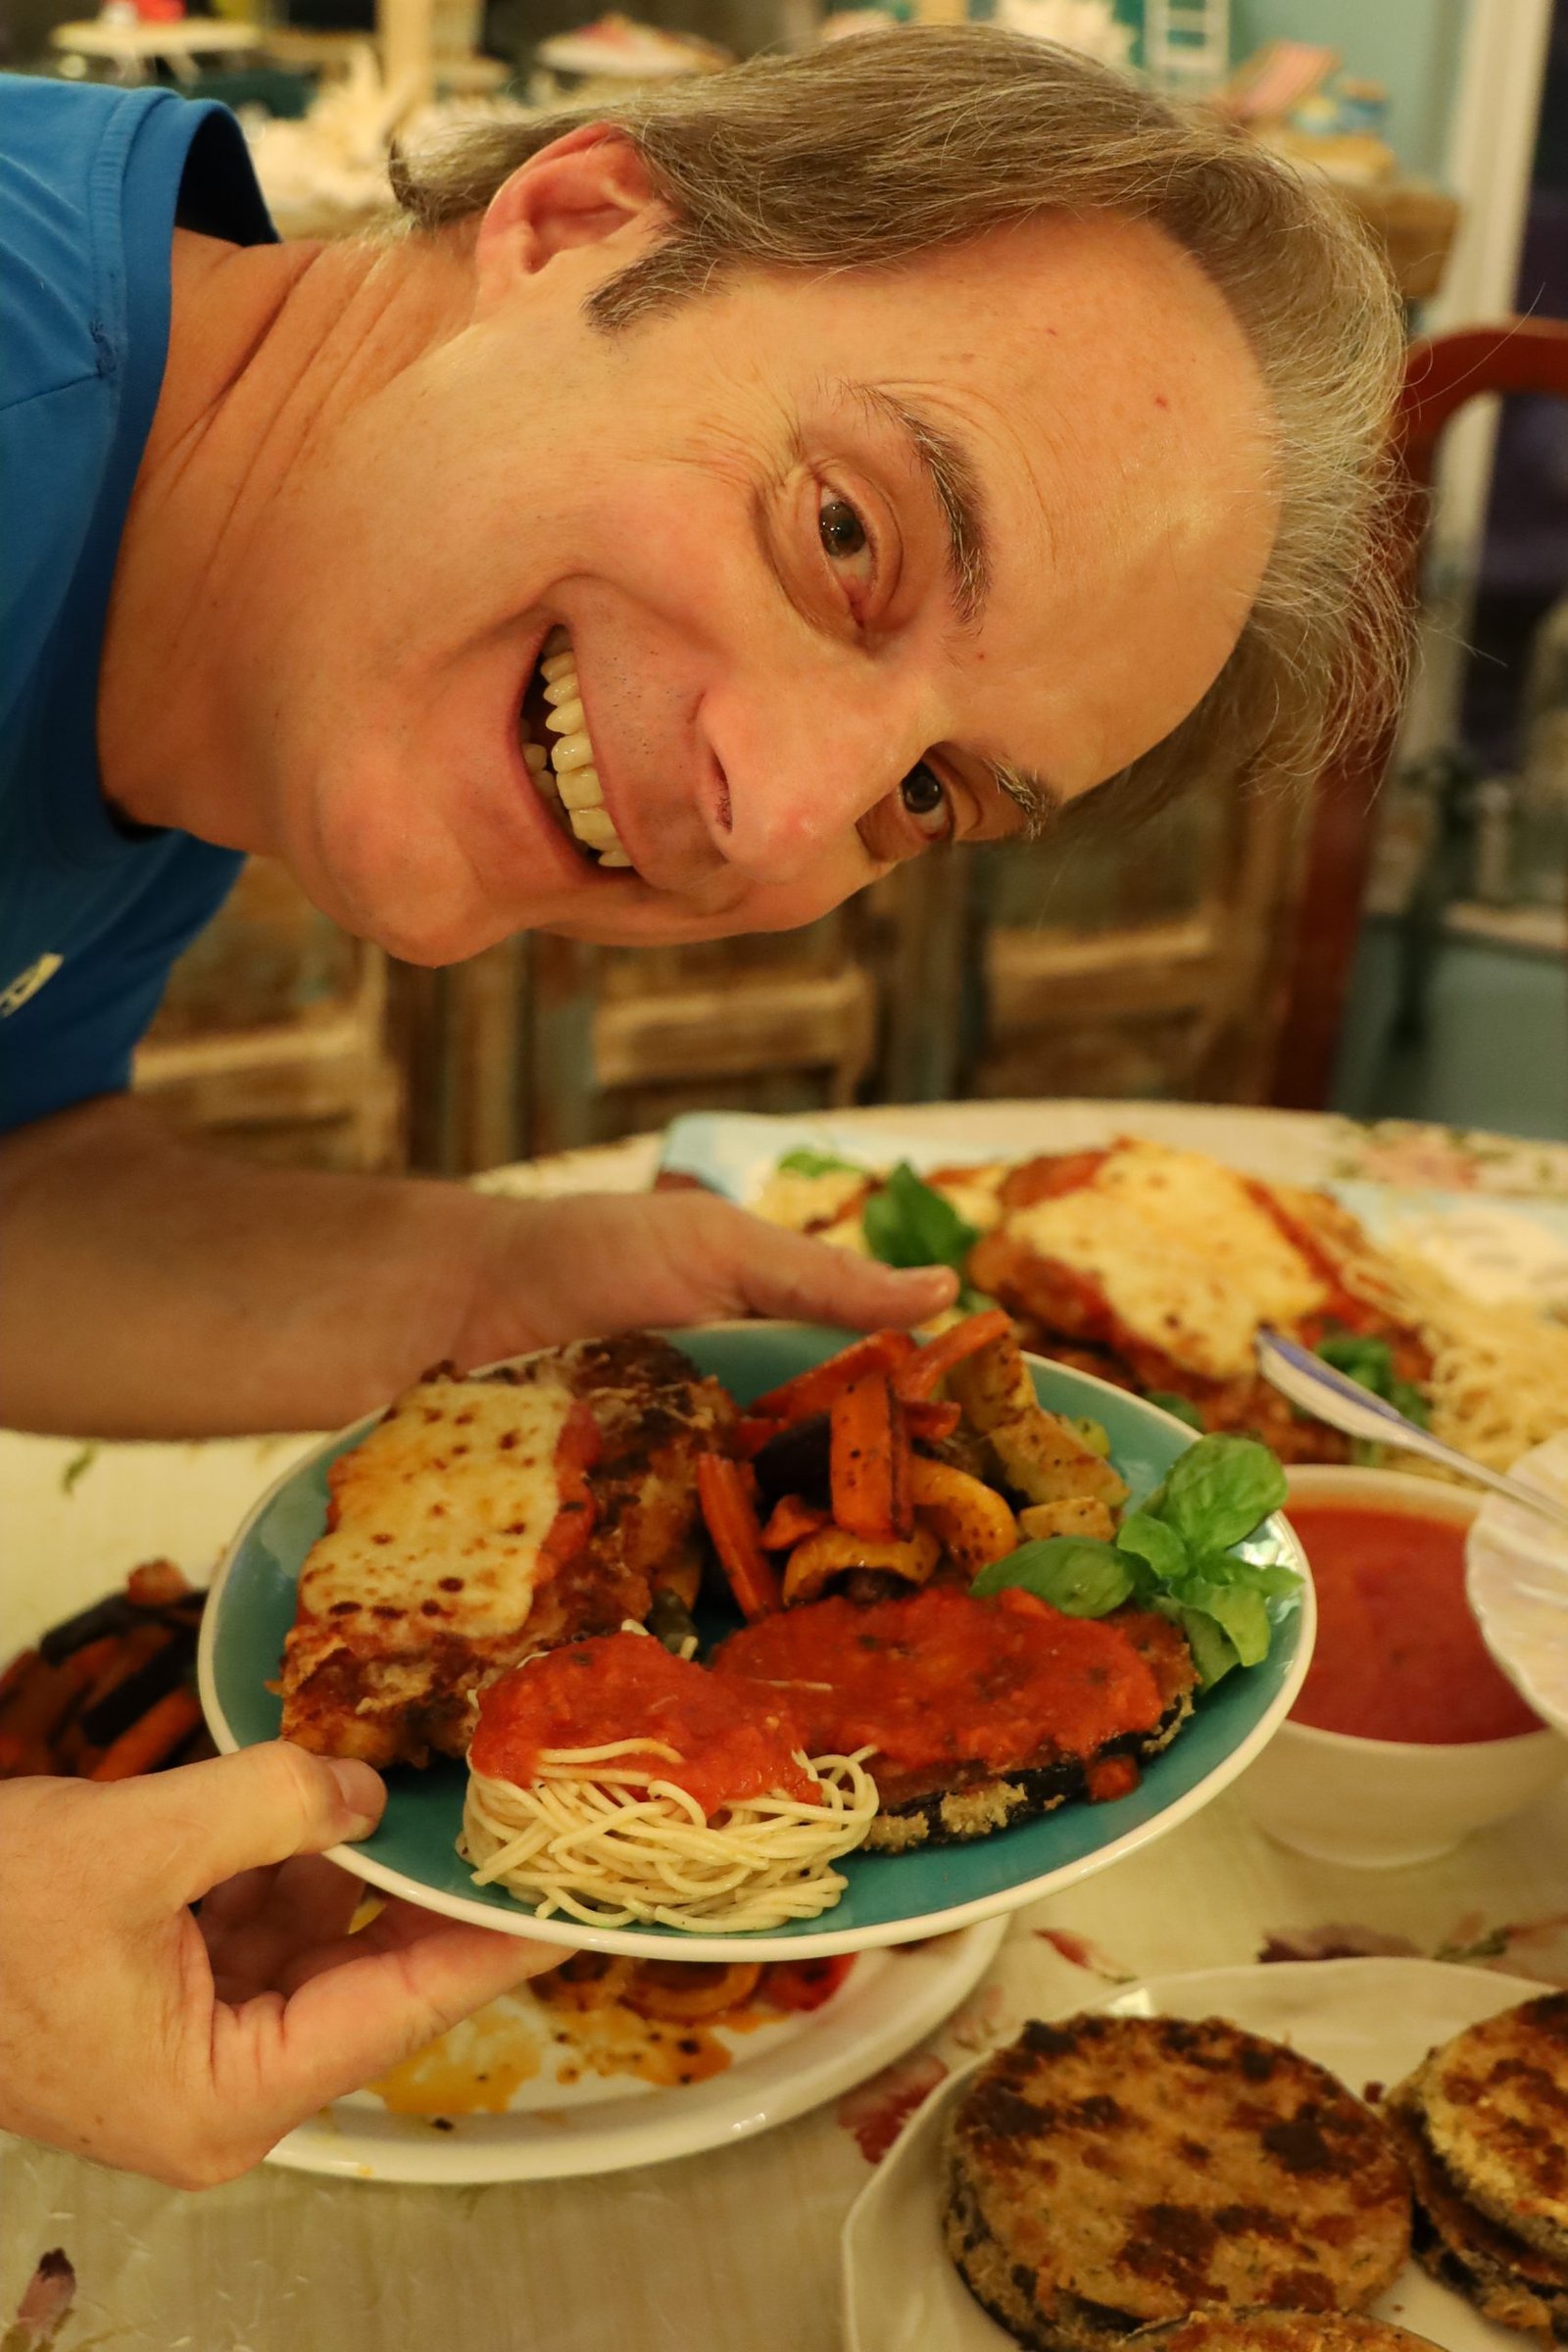
Brodie’s Chicken Parmesan Spaghetti w/ Red Sauce


Gordon’s Fried Eggplant and Julie’s Chicken Parm (Takes up the entire plate.)


Gordon’s Grilled Vegetables
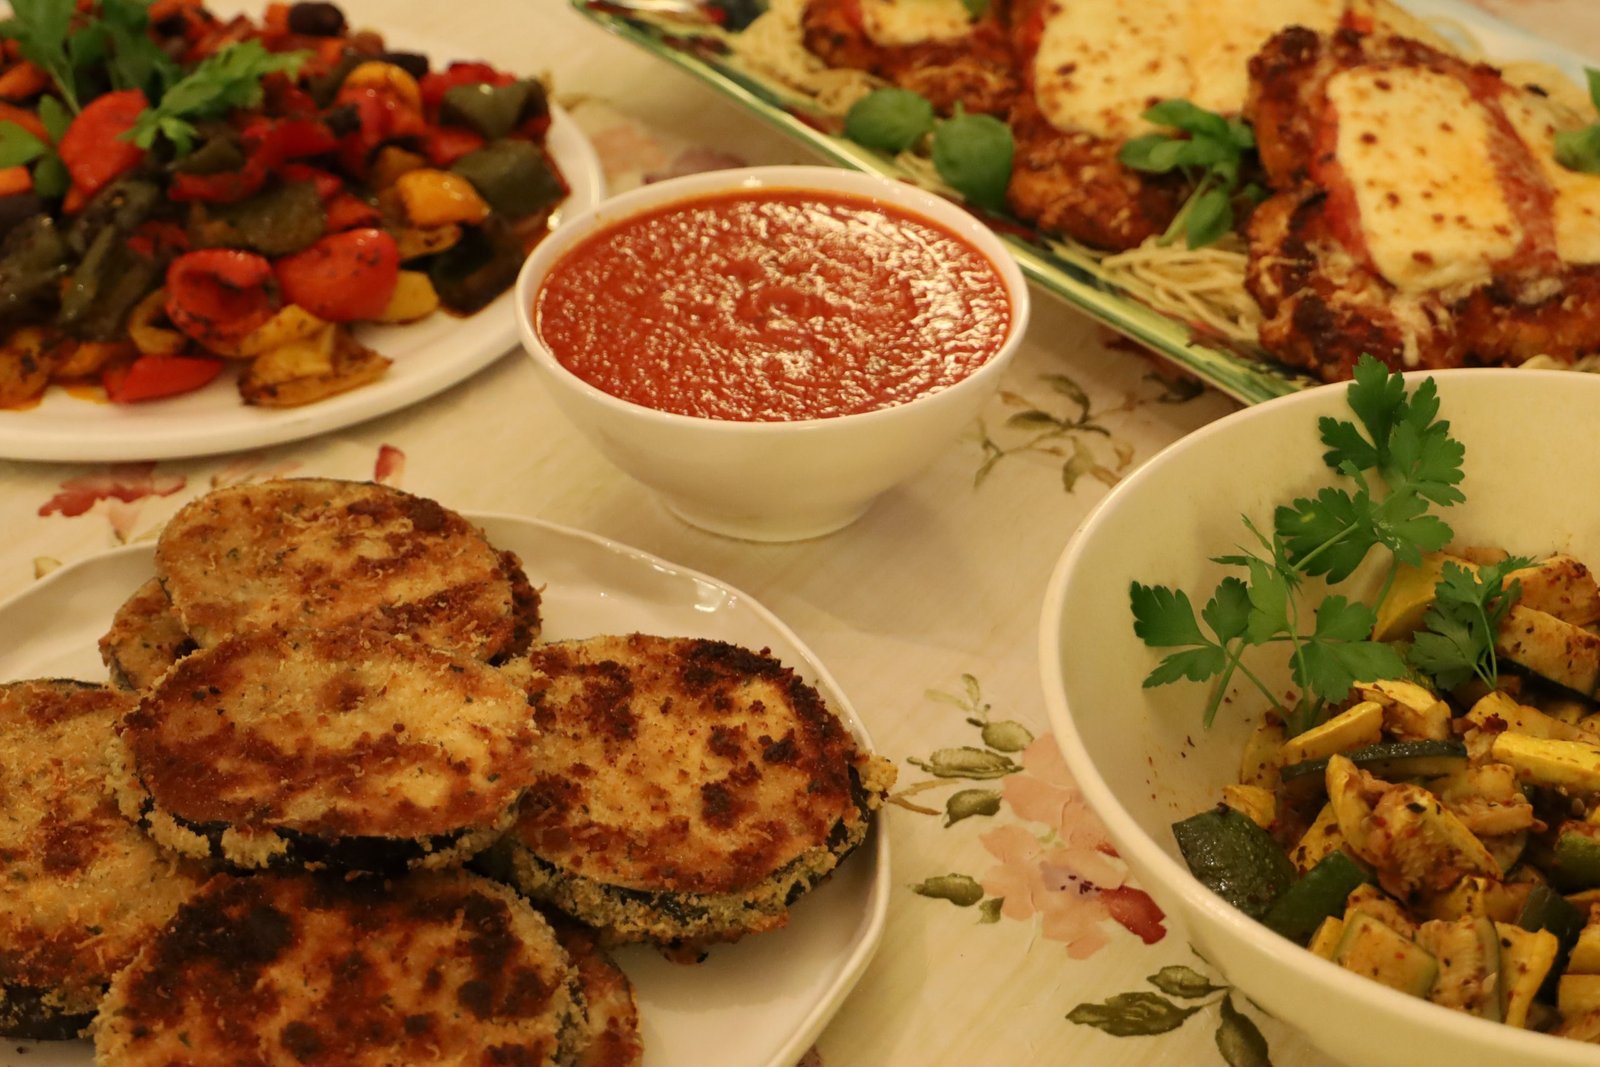
Our Delicious Dinner
———————————————————–

Fried Eggplant Sandwiches w/ Basil Butter
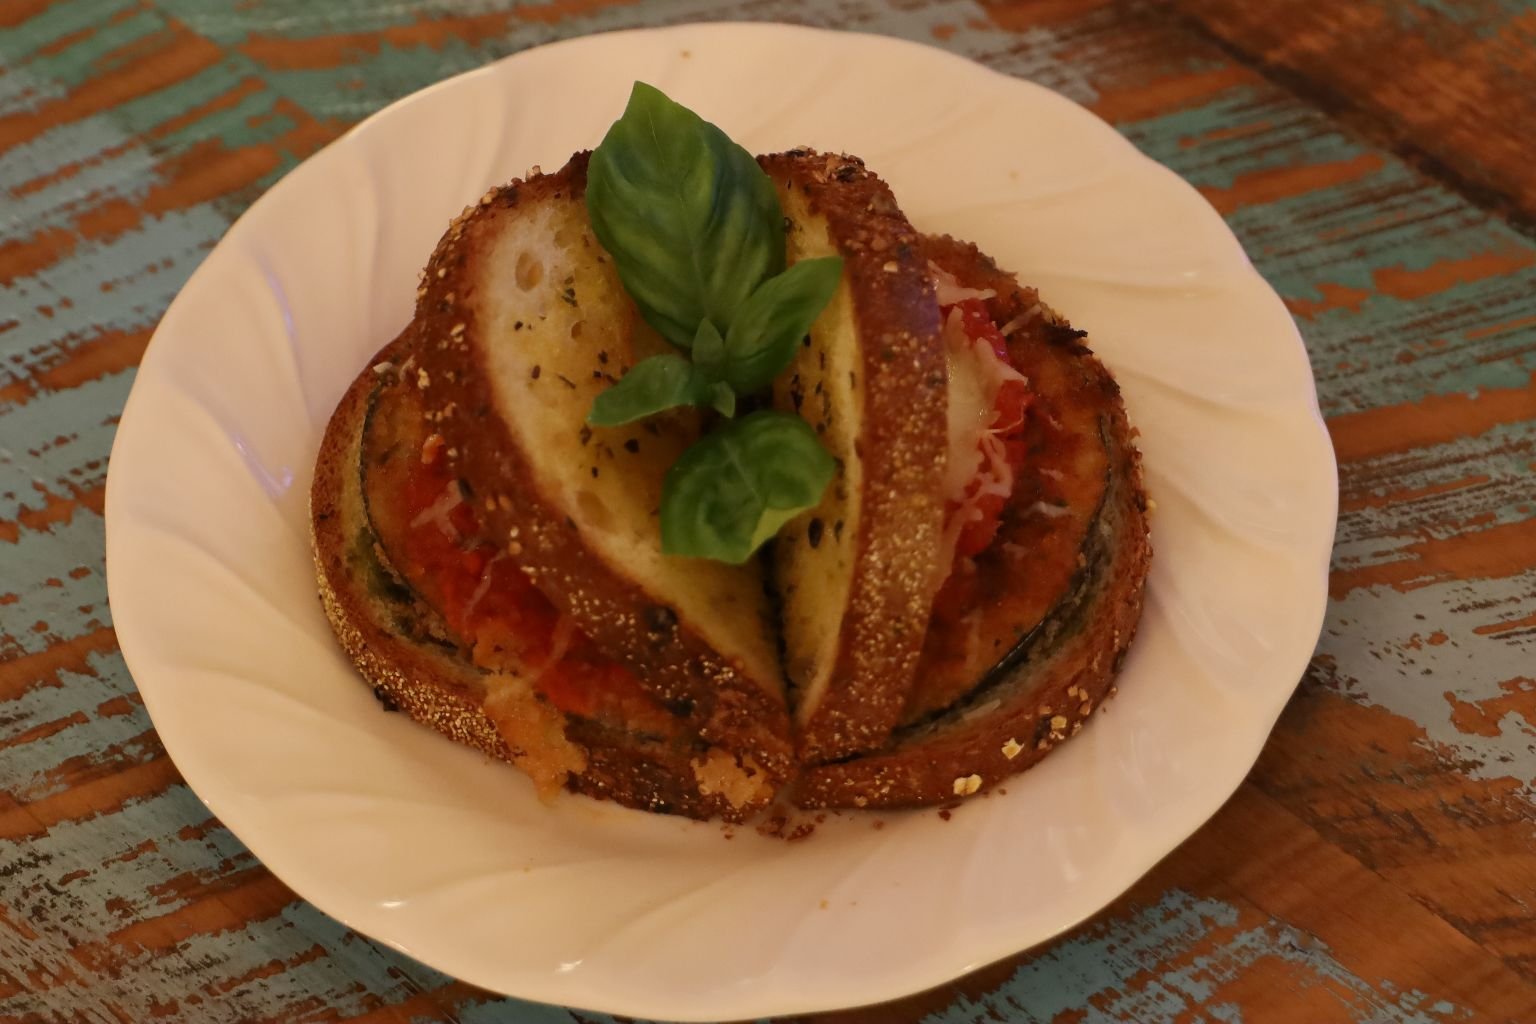
This is my, Julie’s, Fanned Sandwich…

and Gordon’s served here with the Roasted Vegetables from above.
—————————————————–
Basil Butter
(See Recipes Below)
———————————————————-
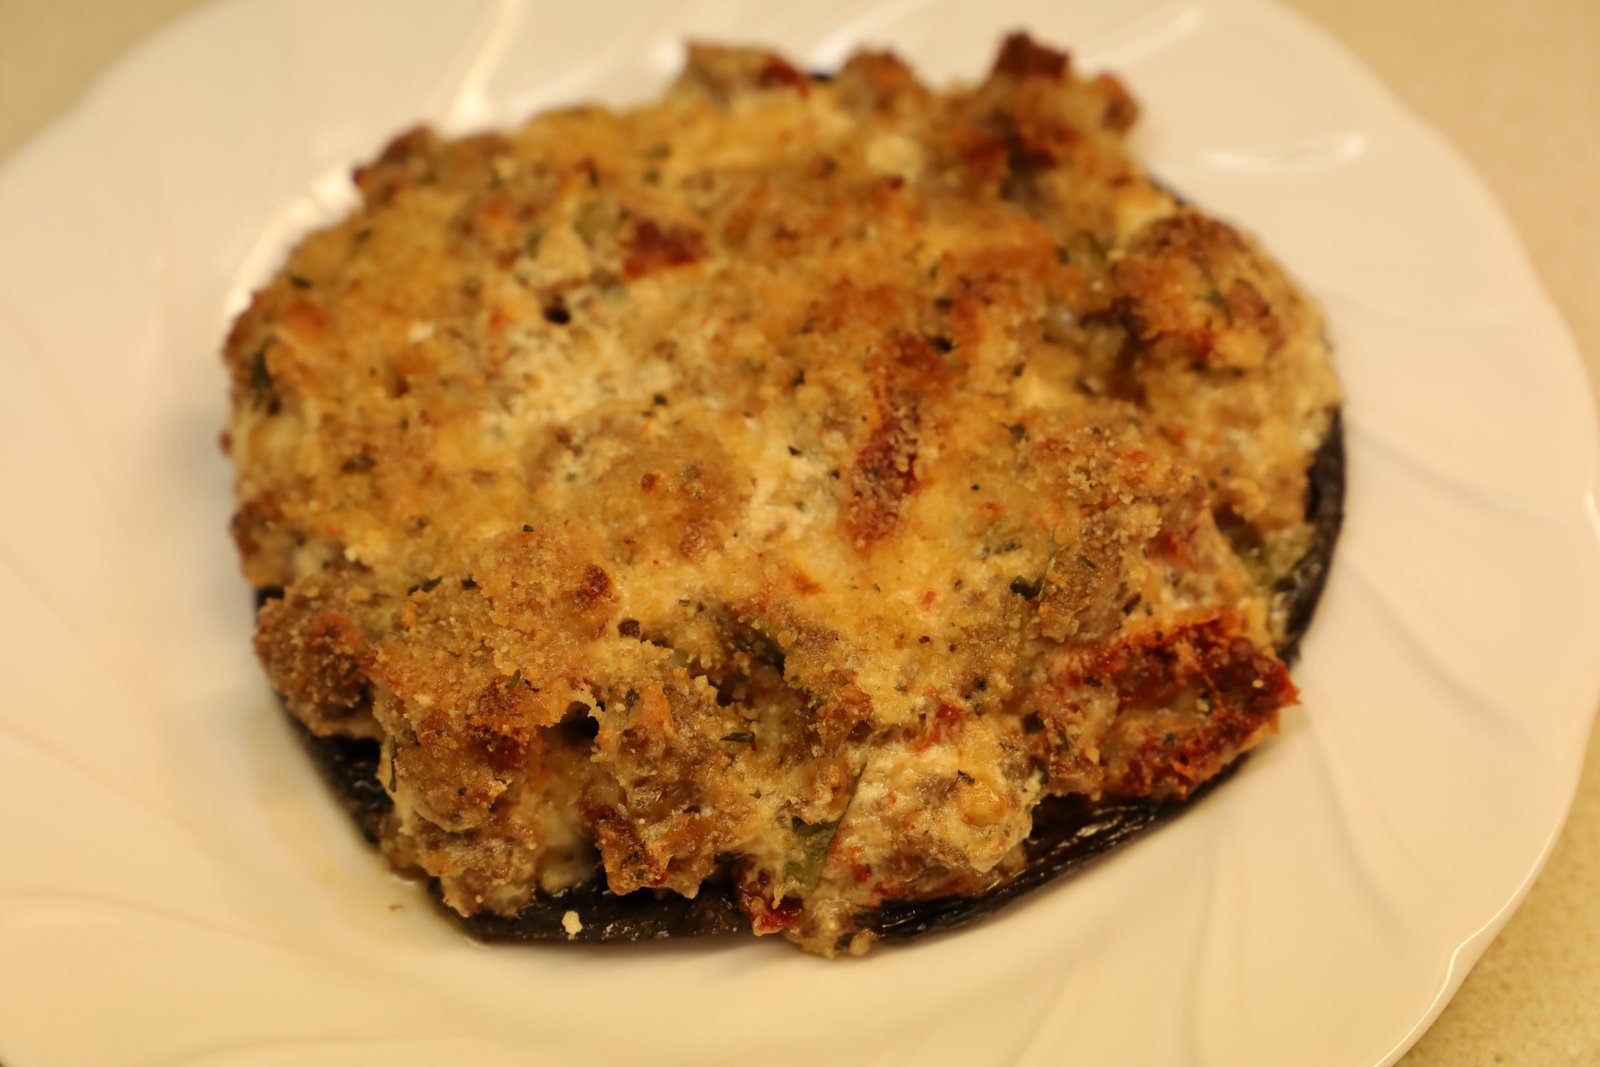
Stuffed Mushrooms
———————————————————-

Portobello Mushrooms Ready for the Grill

(Recipe Down Below.)
———————————————————
Our Mex-Itali Cookies

Half Mexican/Half Italian
(Recipe Down Below)
————————————————–

Our Sloppy Italian-American Panettone French Toast with Mascarpone and Pumpkin Butter with a Glazed Pasta Topping and Pancetta. Whew! That was a long one.


I know, I know, it looks like a 5 year old made it. 🙂
But it is delicious! I assure you!

(See Recipe Down Below)
——————————————————–


Italian Sausage Hoagies
(Recipe Down Below)
————————————————————————–


Onions, Bell Peppers, and Spices


Brats and Bell Pepper Apps
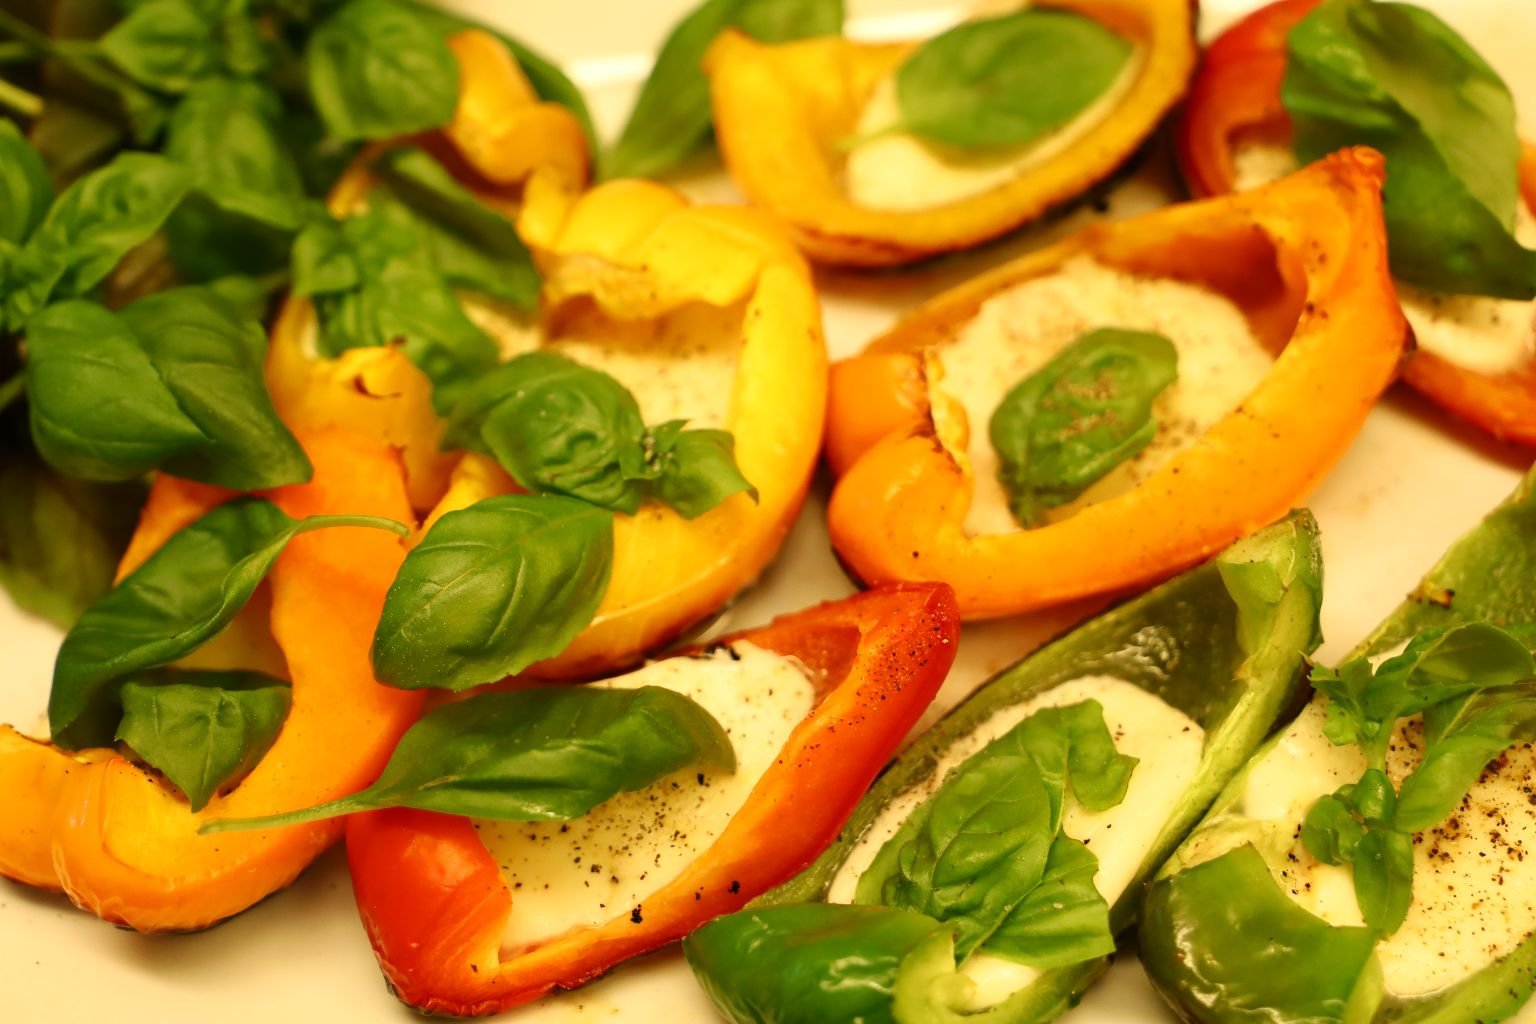
Here we added some sea salt and black pepper to the Mozzarella cheese then added a fresh Basil Leaf.

(Recipes Down Below)
——————————————————-

A Pretty Italian Table


Napkins Folded into Origami


Our Timbale Stuffed Eggplant Pie


Our Bow Tie, and Baked Rigatoni Pasta’s
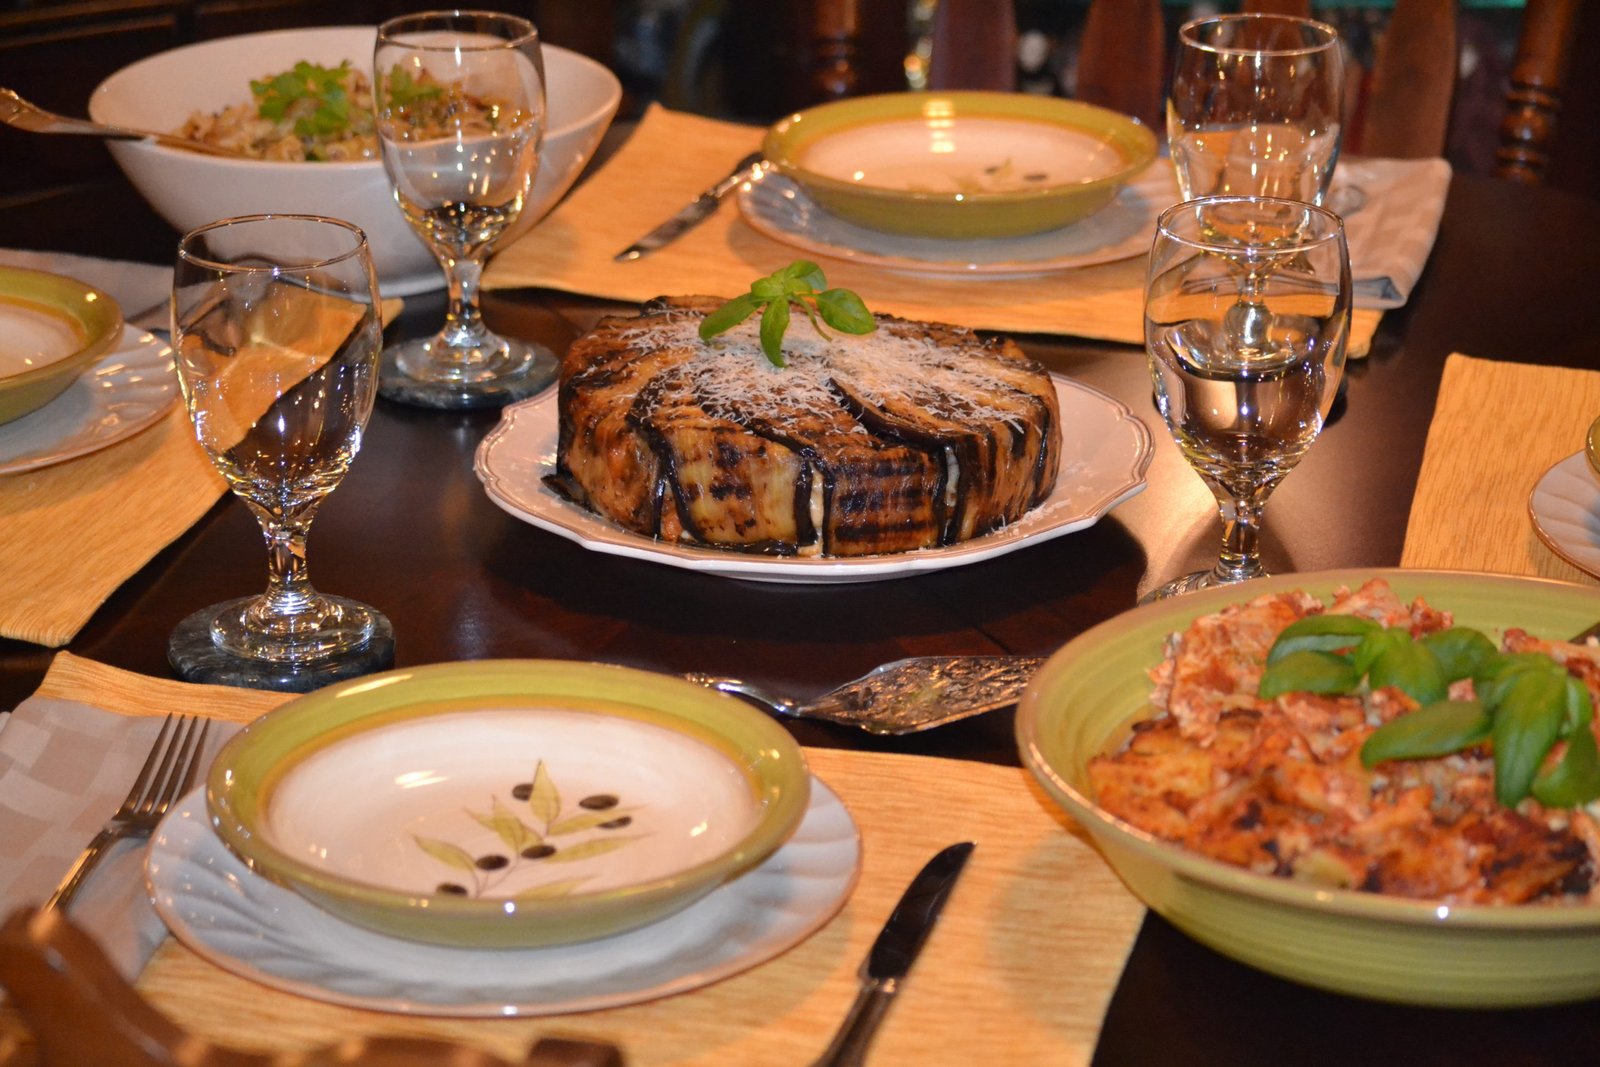
A Delicious 3 Pasta Dinner

Whether Inside or Outside, Prefetto!
——————————————————-

——————————————————————————-
Recipes Located at the Bottom of This Post
—————————————————–
Grazie,
Julie and Gordon
——————————————————–
Recipes Start Here
Timbale Mixture
All that is required here is to grate some nice Italian cheeses over top and then place into the oven for a good 10 minutes or so just for everything to melt together. Then top with some fresh basil, and serve.


Before The Pasta is Added
Whenever I make this recipe I always double and sometimes even triple the recipe.
It is a favorite of our family.

This Timbale Mixture can be placed into anything that you like….
For Example:

You can eat it as you see here, and as I explain above…..
OR,
You can eat it stuffed in cabbage leaves as I have pictured below.
We had this Timbale for Easter one year and it was one of our very best! We had placed it in a bowl to form the shape of it.
If you would like to take a look:
Click Here For: Outdoor Pre-Easter brunch and our Easter Dinner

—————————————————————–
We also enjoy eating the Timbale in a preformed pan that is lined with grilled slices of eggplant that encase the ingredients to create a pie.

Topped with Grated Parmesan

Slices Up Just Like a Pie

Serve With Some Seasoned Bread
——————————————————————-

——————————————————

The Mixture is Delicious Just as it IS!


This is also another example of our Eggplant Timbale for a more formal occasion.
If you would like the recipe for the Eggplant Timbale:
Click Here For: Gordon and Julie Italian
——————————————————-
The Kitchen is Ready for THIS Timbale

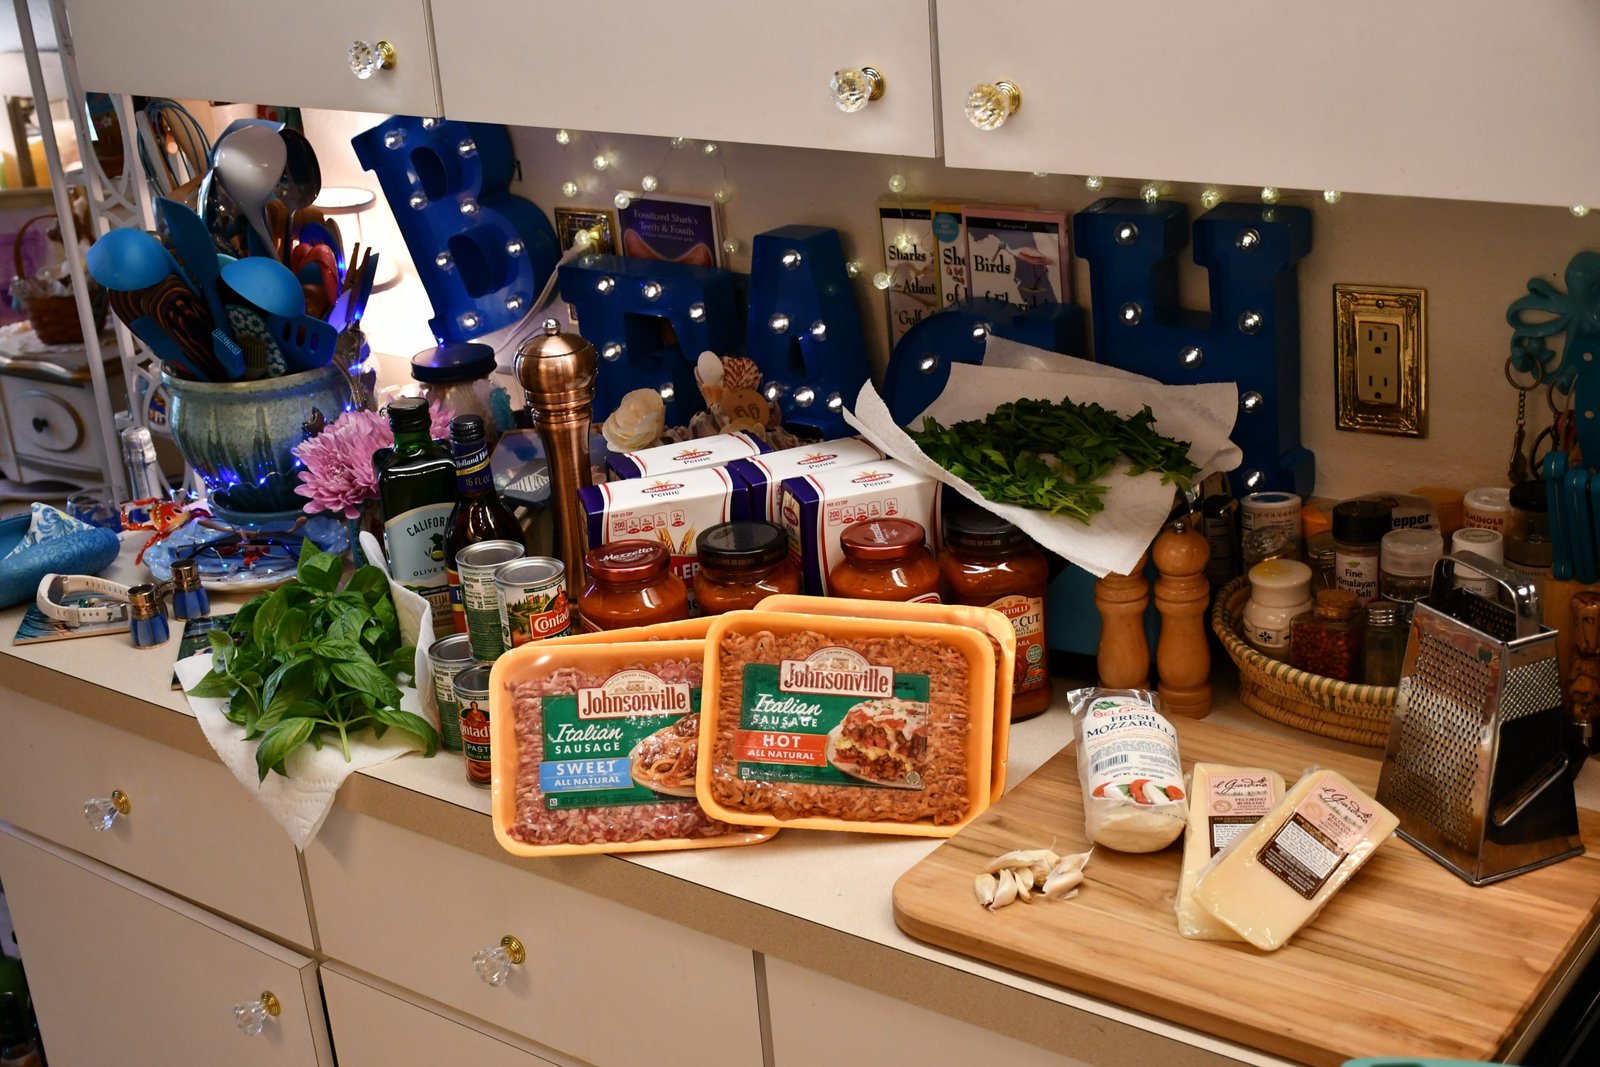
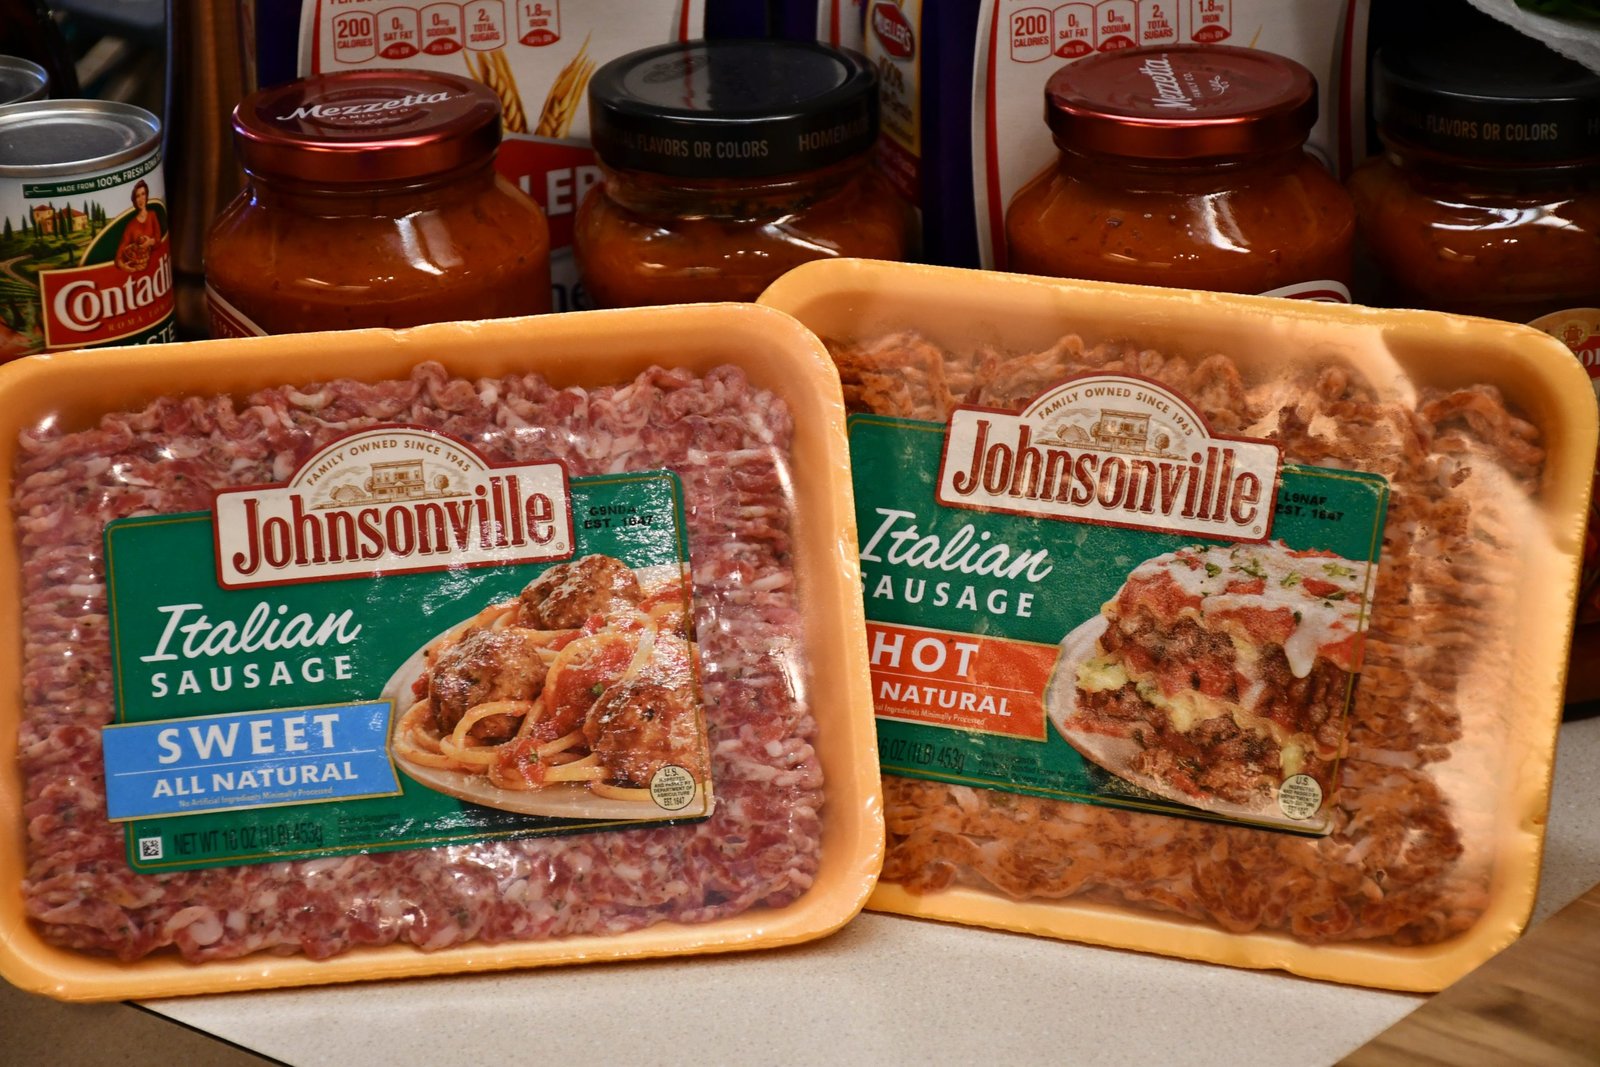
Although I’m sure it will frustrate you. I will do my best to talk you through this recipe. It seems that every time I make it, I make it a little differently than the last. The first ingredients are Ground Sausage, and Ground Turkey or Ground Chicken. You can also use Ground Beef if you like but I don’t eat red meat so I steer clear. I’ve also tripled this recipe here and I’m sure that will confuse you. I really don’t mean to, but when I cook Italian food I always make extra to give away and to freeze for later eating.

Italian Sweet and Hot Sausage


My other ingredients that I have listed below, including fresh herbs from our herb garden.


Fresh Garlic and Italian Cheeses
Ingredients:
(Remember I am tripling this recipe.)
2 Packages of Ground Italian Sweet Sausage
2 Packages of Ground Italian Hot Sausage
2 Packages of Ground Turkey
3 Large Onions, Chopped
10 Garlic Cloves, Minced
Olive Oil for Cooking
1 Cup or so of Marsala Cooking Wine
2 Packages of Frozen Green Peas
2, 1 lb. Jars of any Tomato Sauce/Spaghetti Sauce/Marinara Sauce
2, 6 oz. Cans Tomato Paste
2 Bunches (Handfuls) of Fresh Parsley, Chopped
8 ounce to16 ounce Pecorino-Romano Cheese, Grated
Or,
Parmesan Cheese, Grated, Or Both
Mozzarella Cheese, If Desired, Chopped into Small Pieces
2, 1 lb. Boxes of Penne Pasta
————————————————————-


Ready to Chop Some Onions
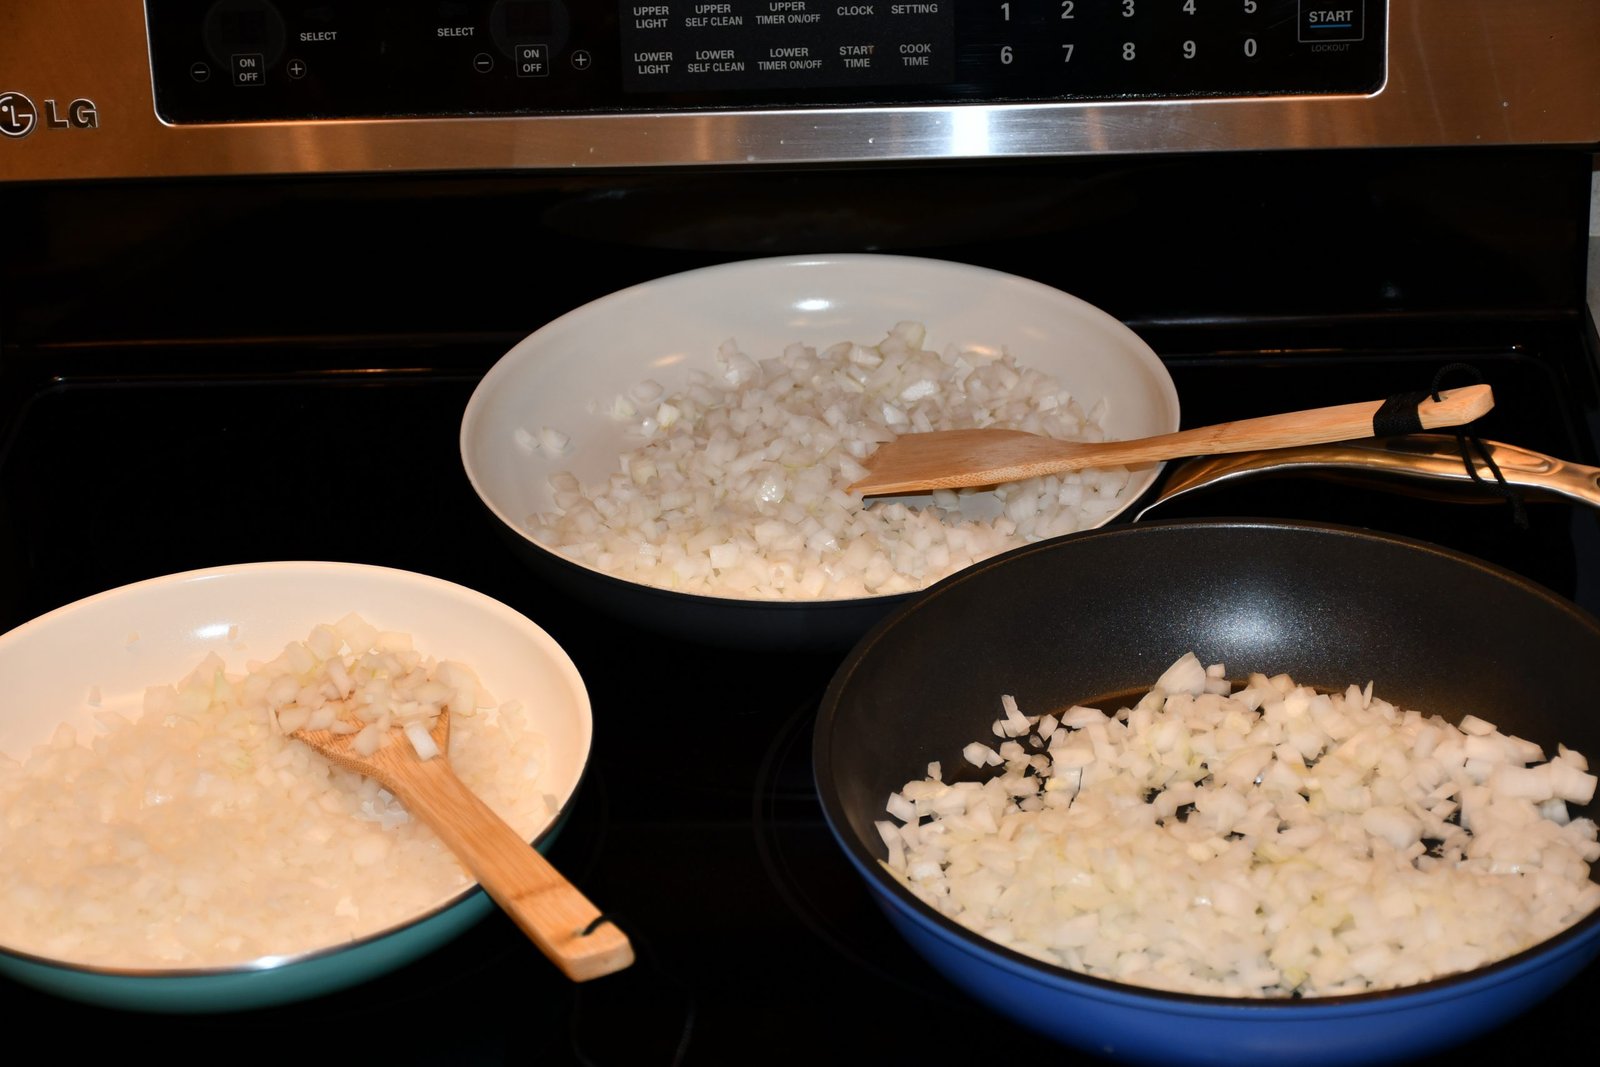
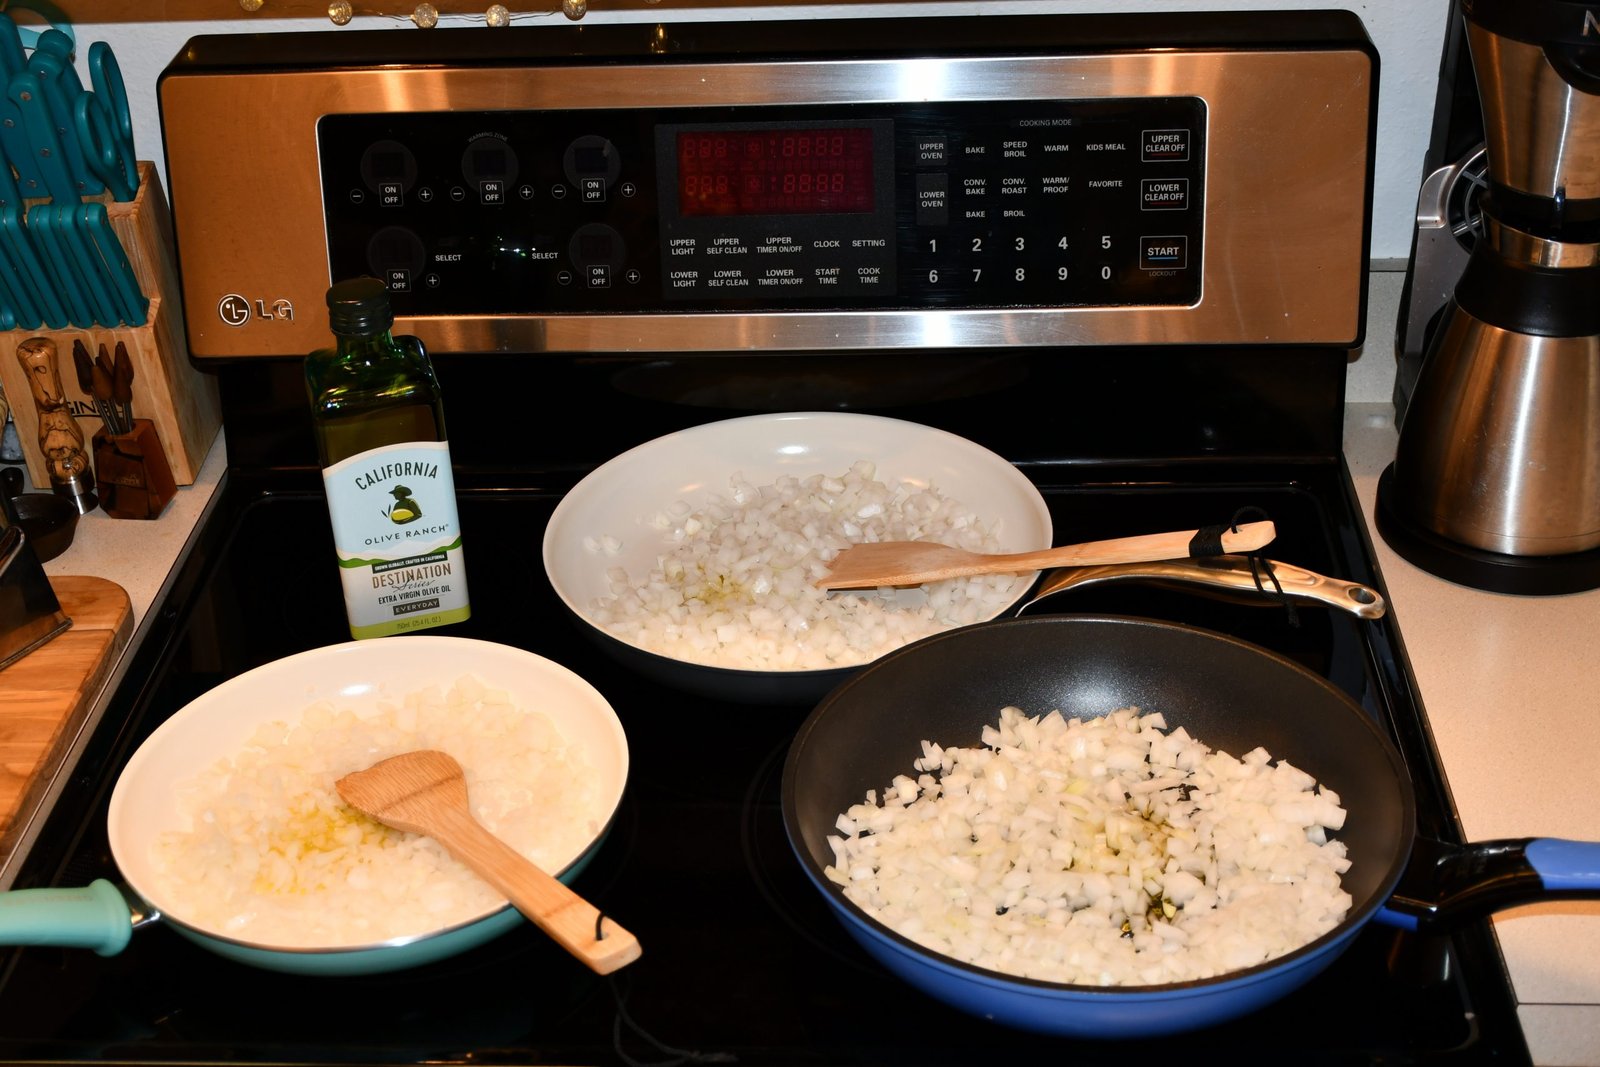
I started out with 3 saucepans here.
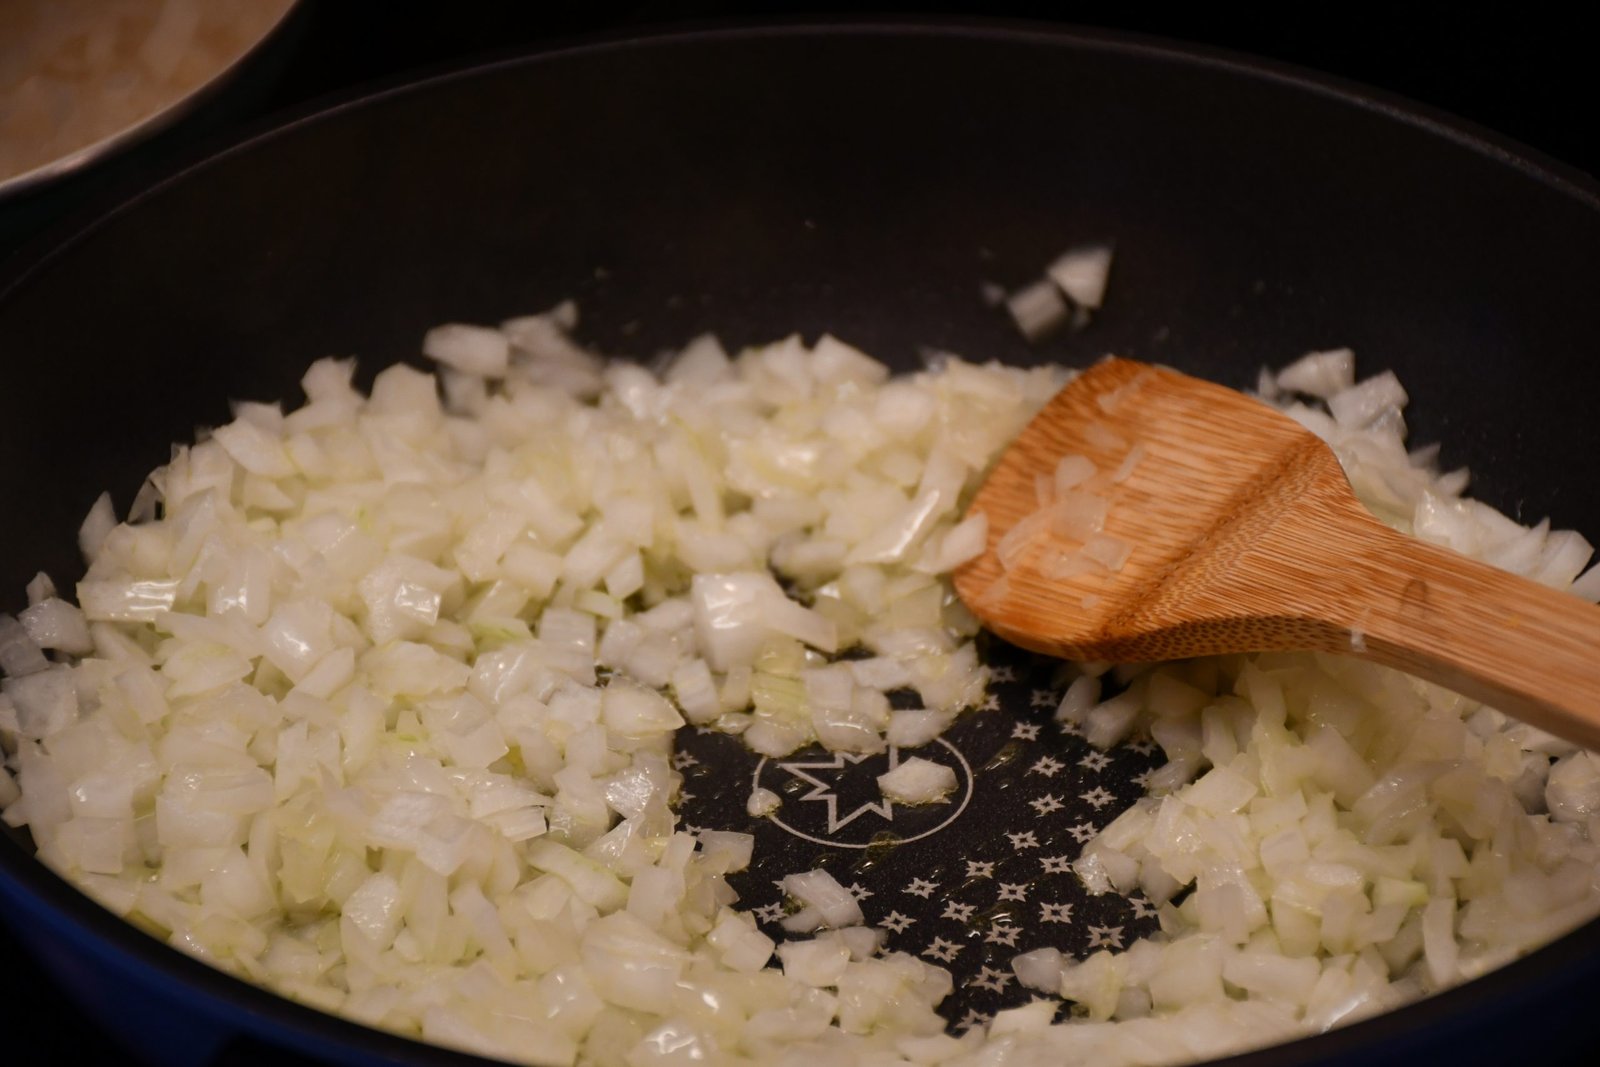
I’ve added the chopped onions on the olive oil in the pans.
Just enough to saute them into softening for about 5 minutes.

———————————————————–
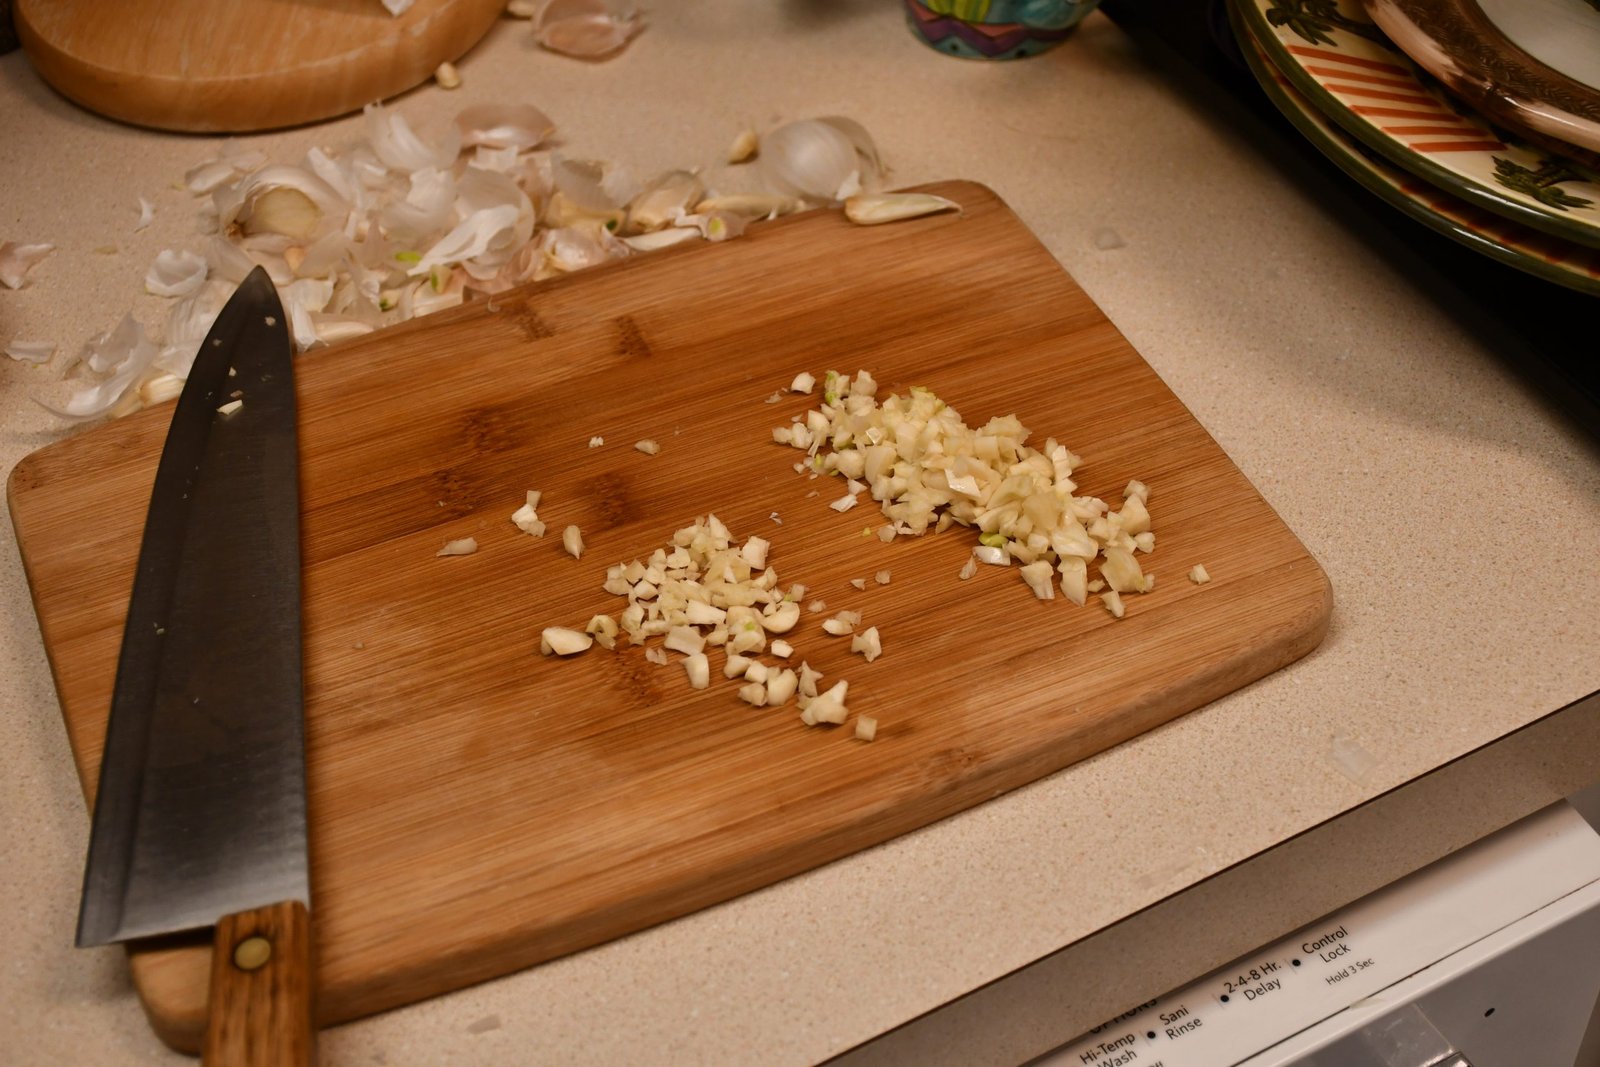
Mincing Some Garlic

I minced about 10 garlic cloves which I distributed between the 3 saucepans.

You want to saute the garlic for about 3-4 minutes with the onions.
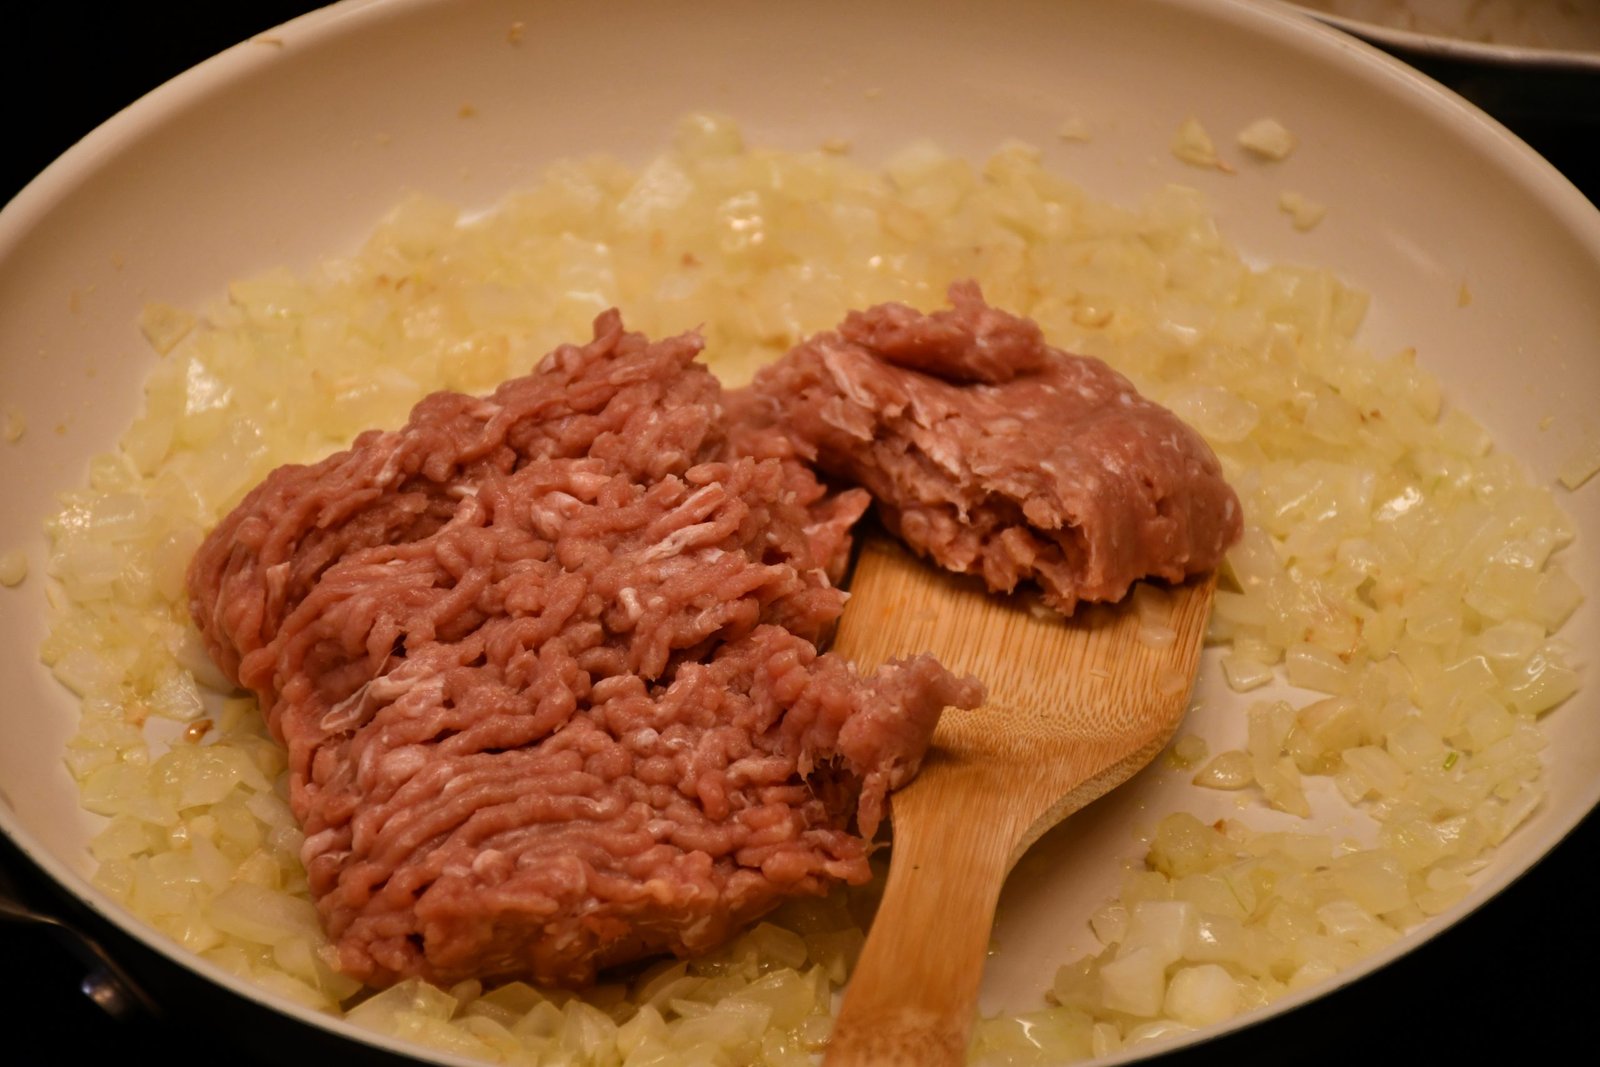
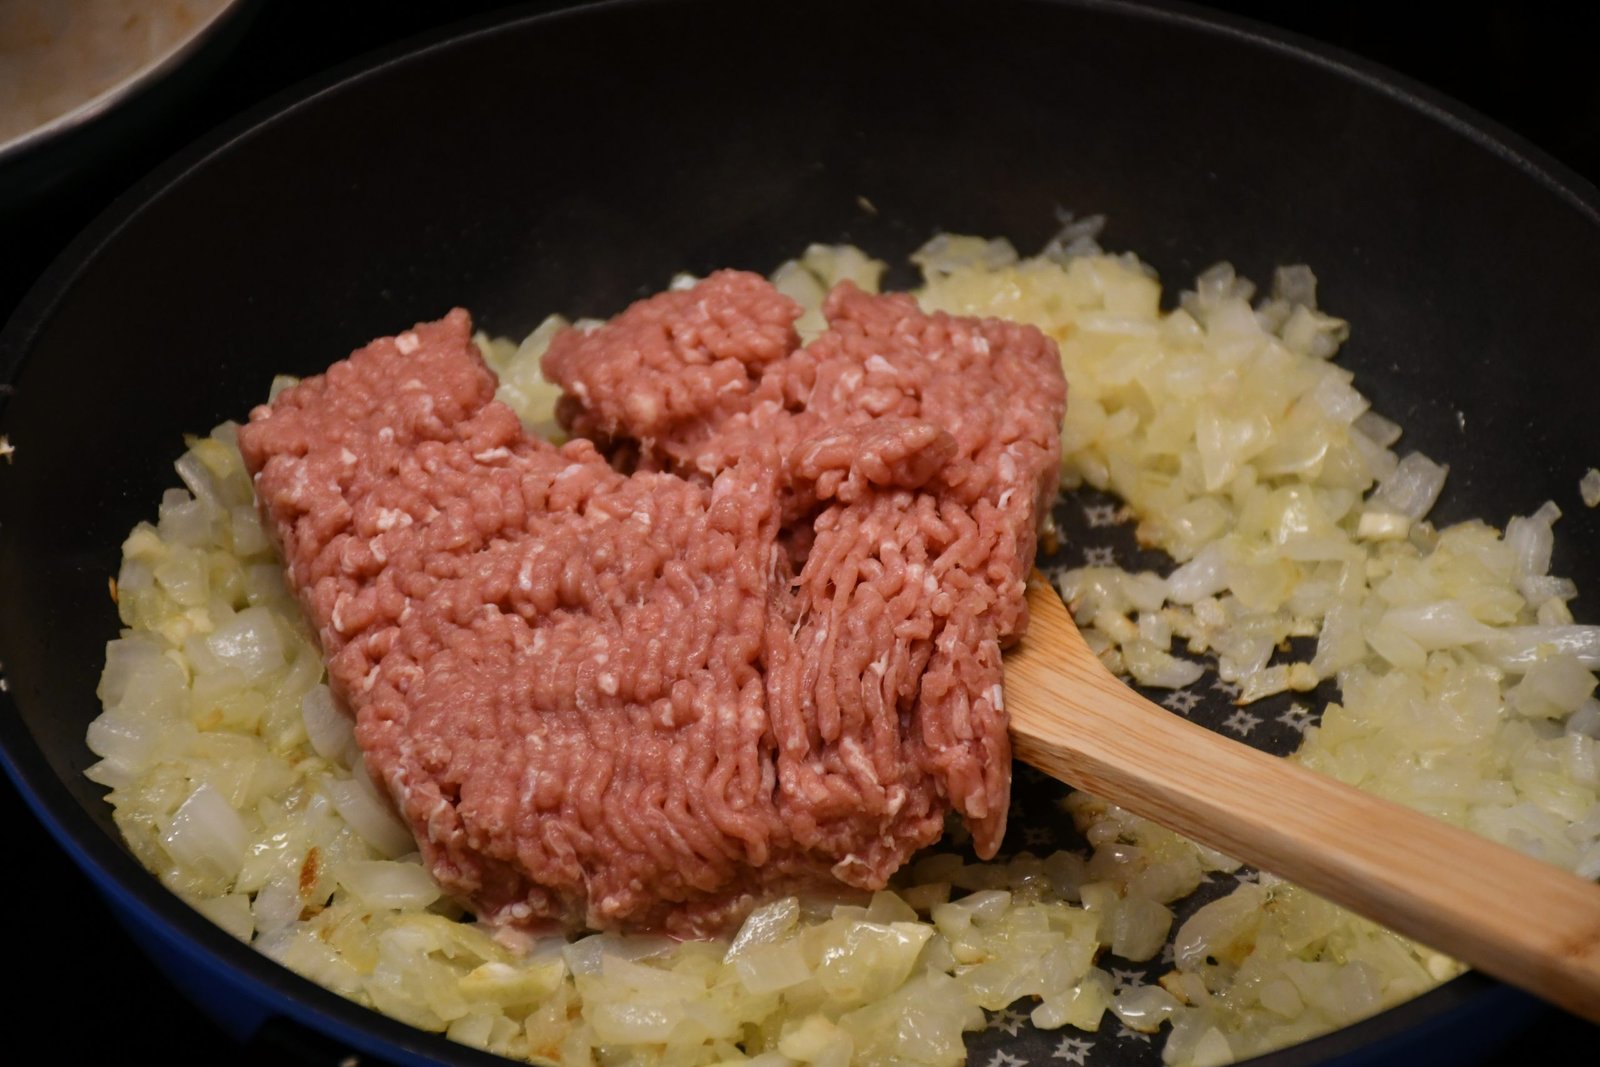
Now it’s time to add the Ground Sausage in order to brown it.

I would like to add that when I sauteed the onions in the small saucepan, top, in the photo above, that I distributed it’s contents into the larger saucepan in the lower right.
——————————————————————
It’s time to add the other Ground Sausage in order to brown.

————————————————————


It’s at this point that I change pots because I need them larger.
So, I got out my 2 woks!


In my two woks I added some olive oil and then the Ground Turkey in order to brown the meat. If I have extra fat in the pan, I drain that off into the sink.


Marsala Cooking Wine
I added about 1/2 Cup of Marsala Cooking Wine to each of my woks.
You can add a little more if you like. Taste as you go.
It’s at this point that you want to reduce the heat to simmer.

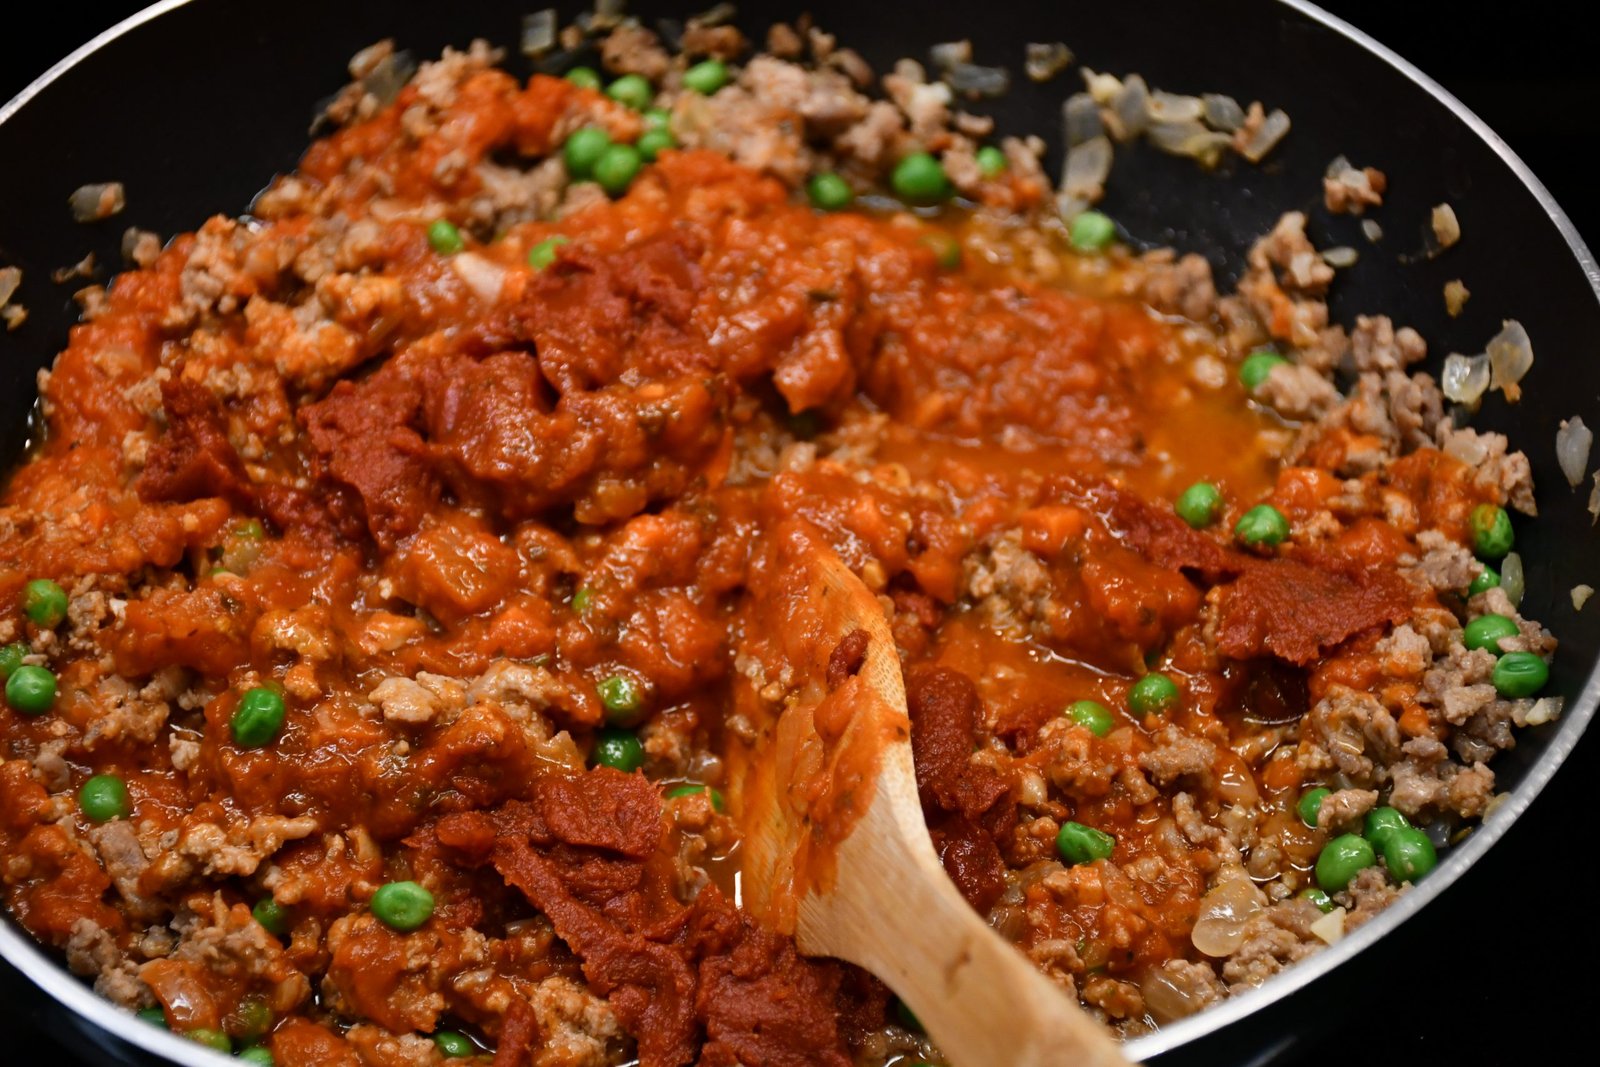
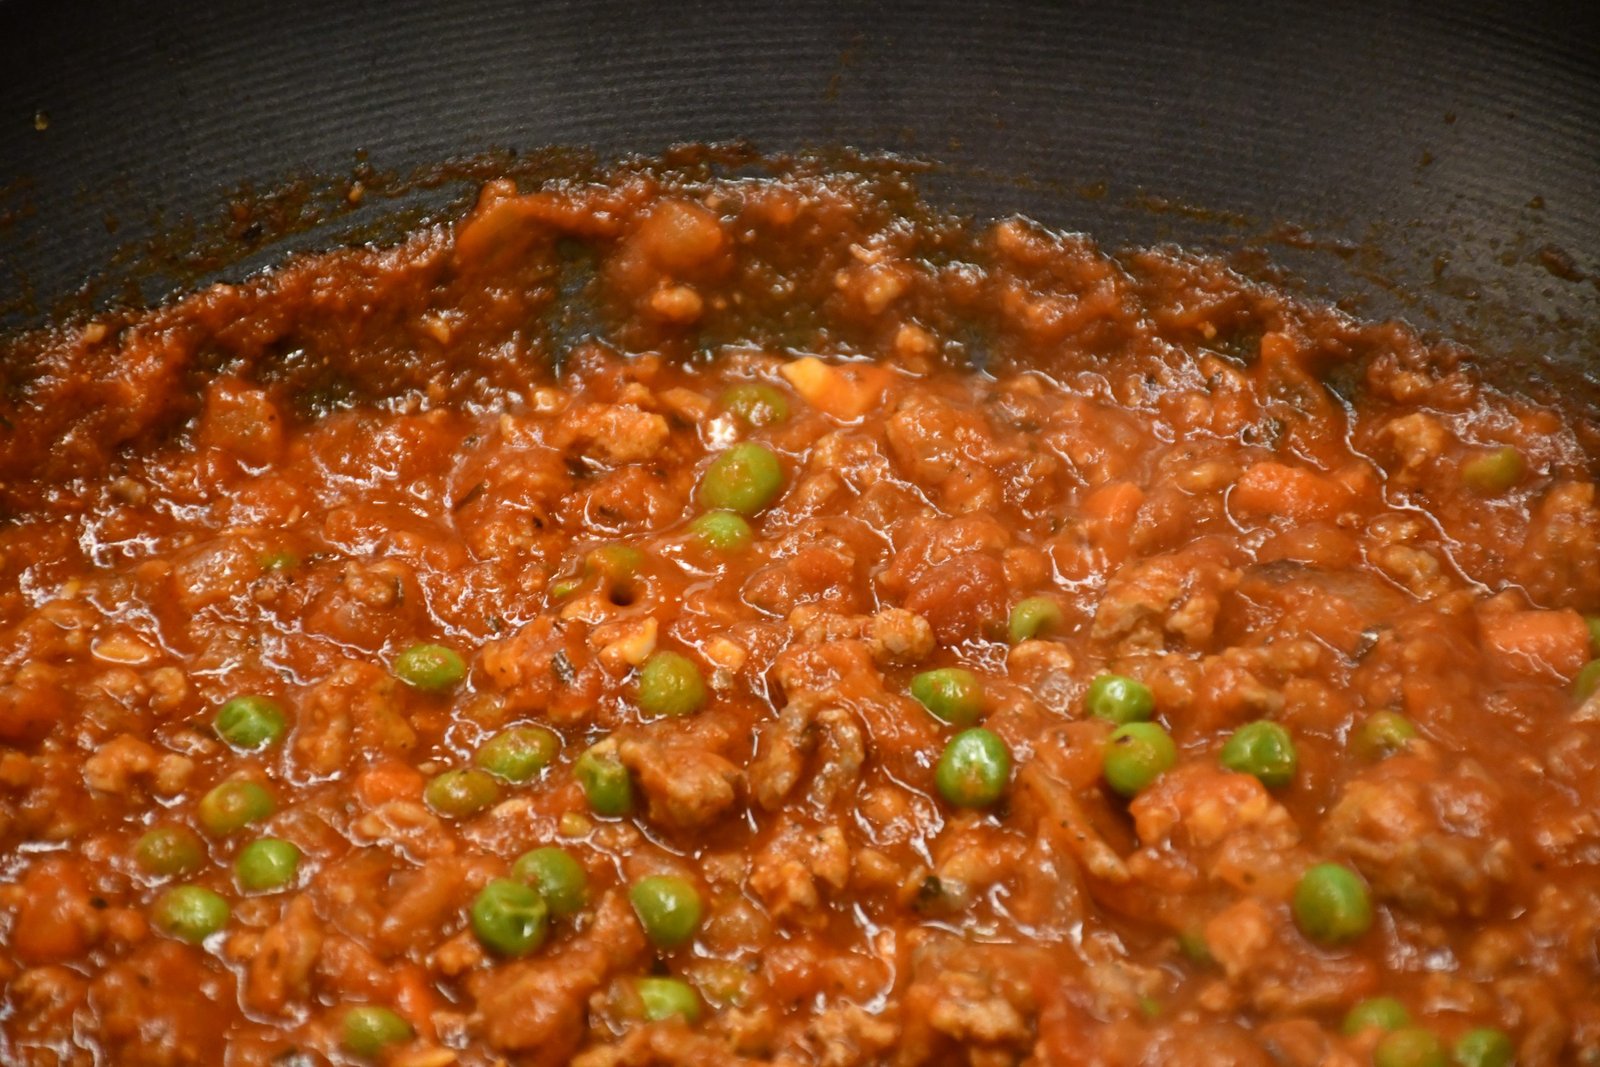
Now Add Frozen Green Peas

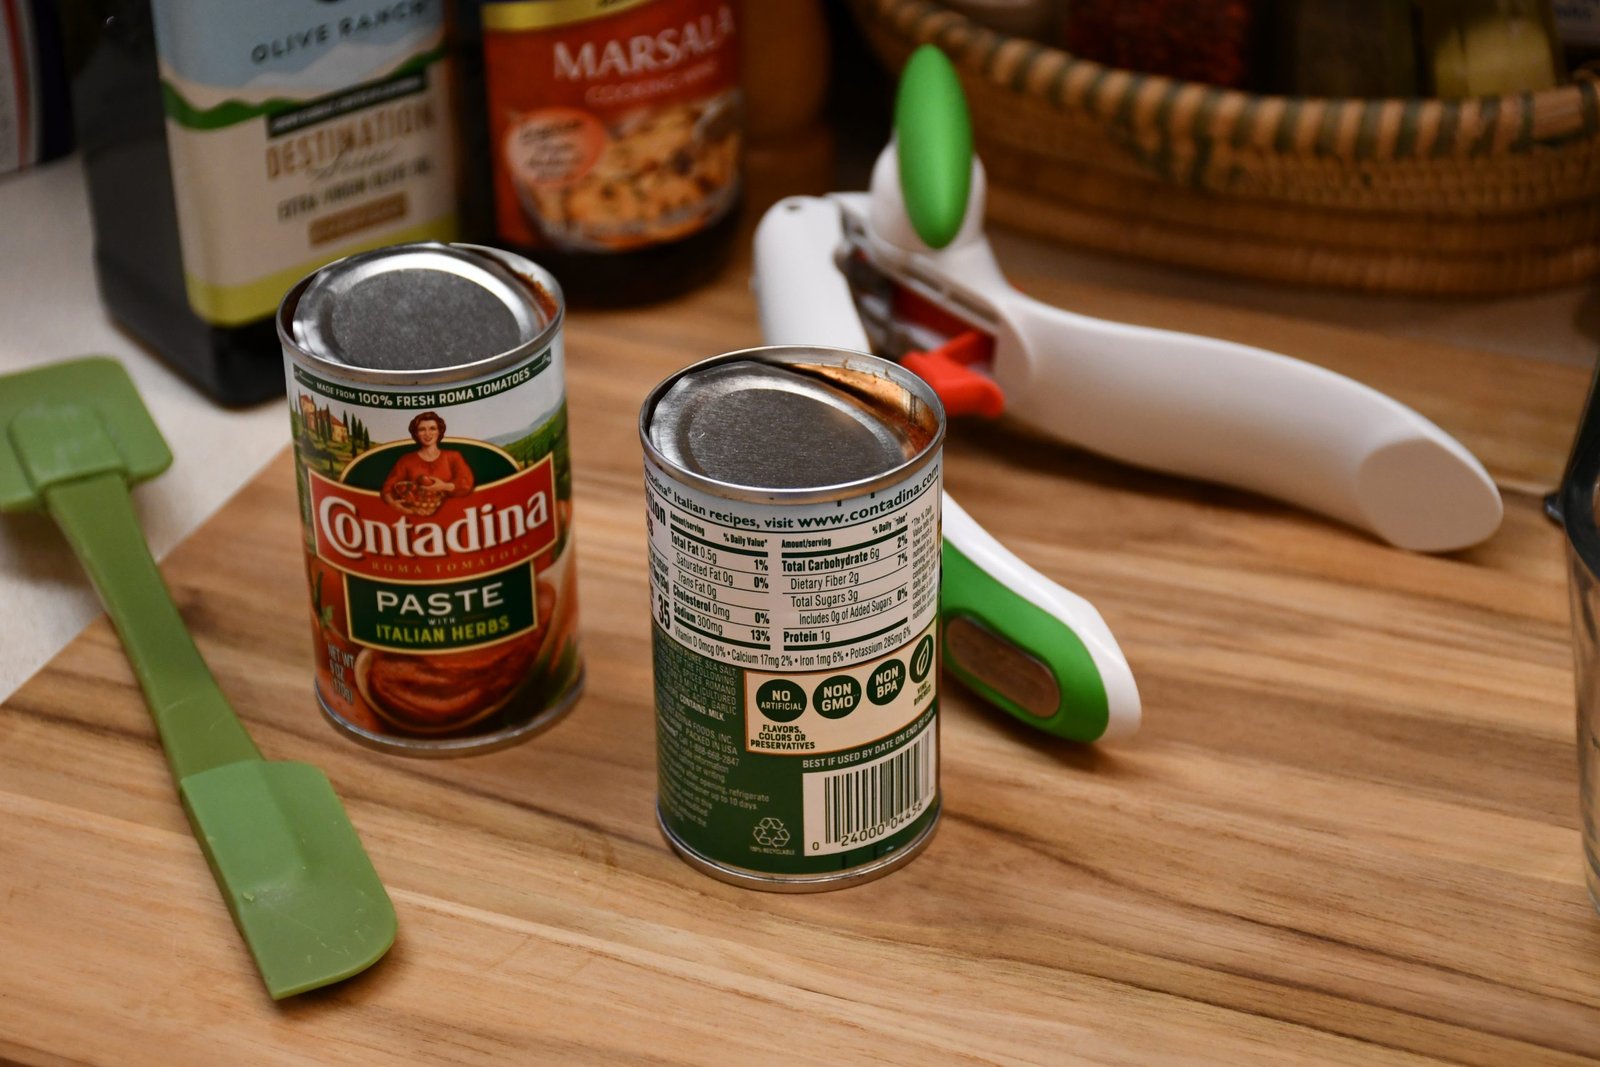
It is at this point that it is time to add my tomato sauce products.
I pretty much just went through our pantry and pulled out what we had. But any tomato sauce products you have will work here whether they are jarred spaghetti sauces or marinara sauces. But definitely you want to use the 2 jars of tomato paste in each wok. One in each.

Just place one jar, and one can, in one wok.
And then the other jar, and can, into the other wok.
You can eyeball this here. If you want more sauce, add more sauce. It’s up to you.

You just want to stir together and simmer on the stove top.
I happen to love the way that a wok distributes heat as opposed to a saucepan.

———————————————————


Chopping Parsley (Chiffonade)
That just means rolling the herbs up in a bunch and then chopping them into small pieces.
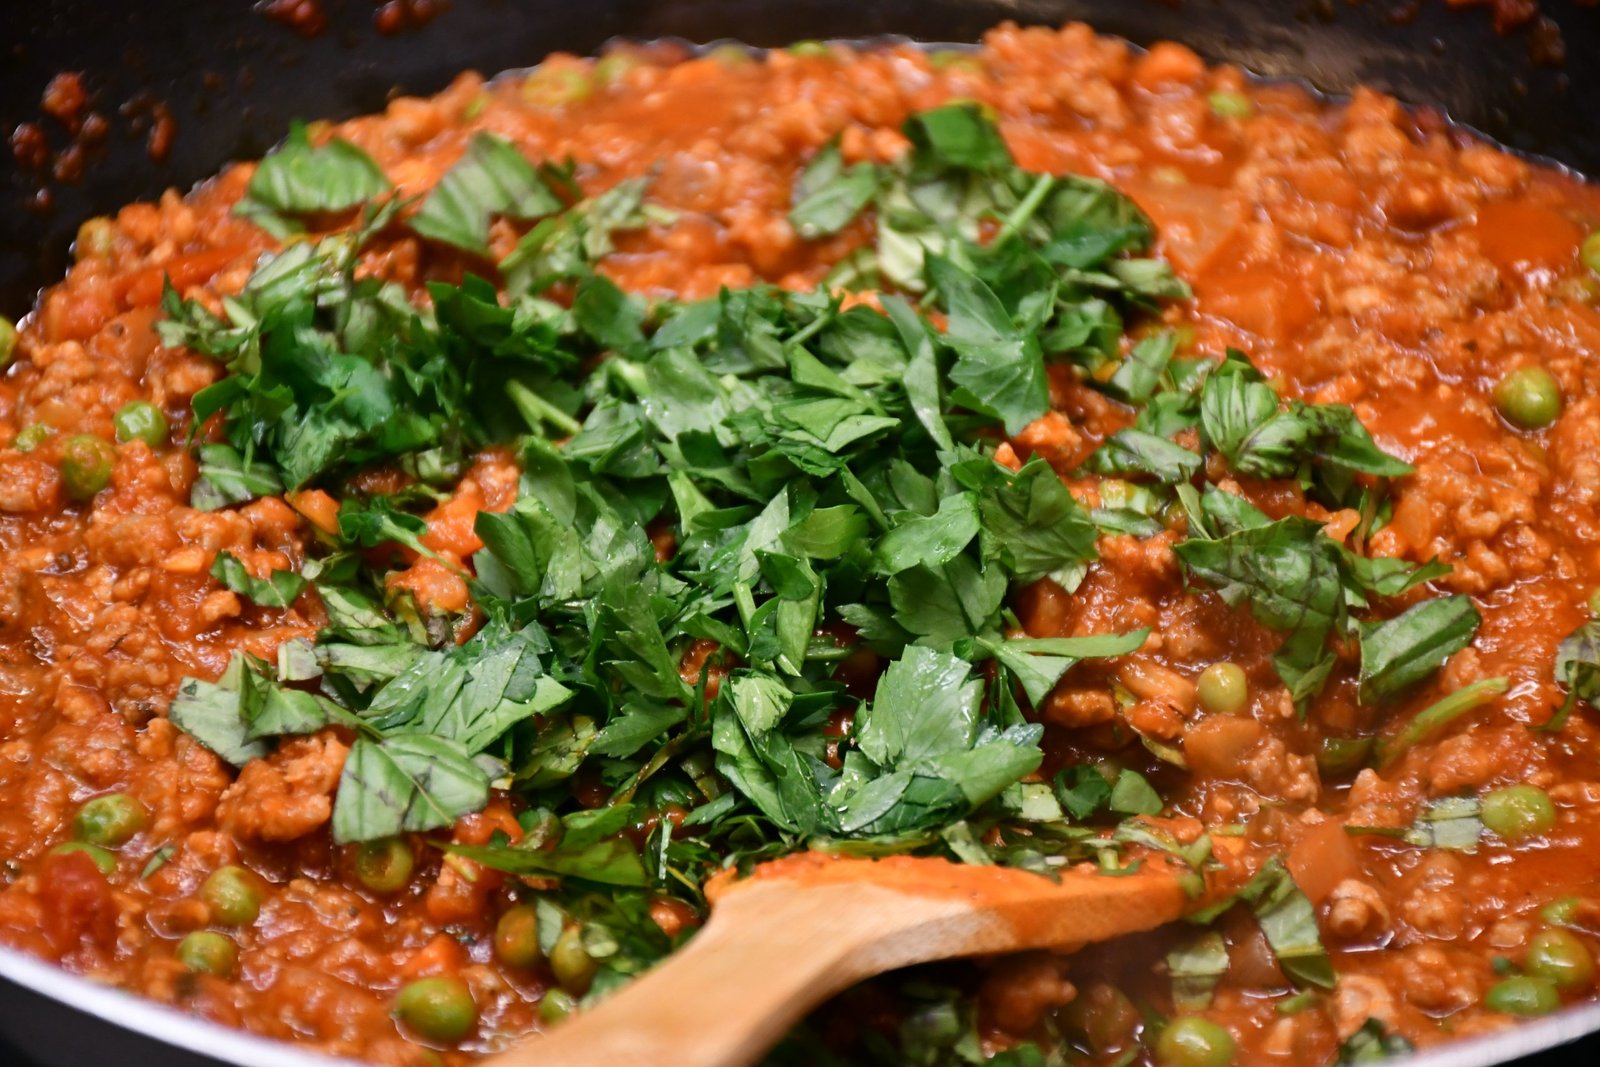
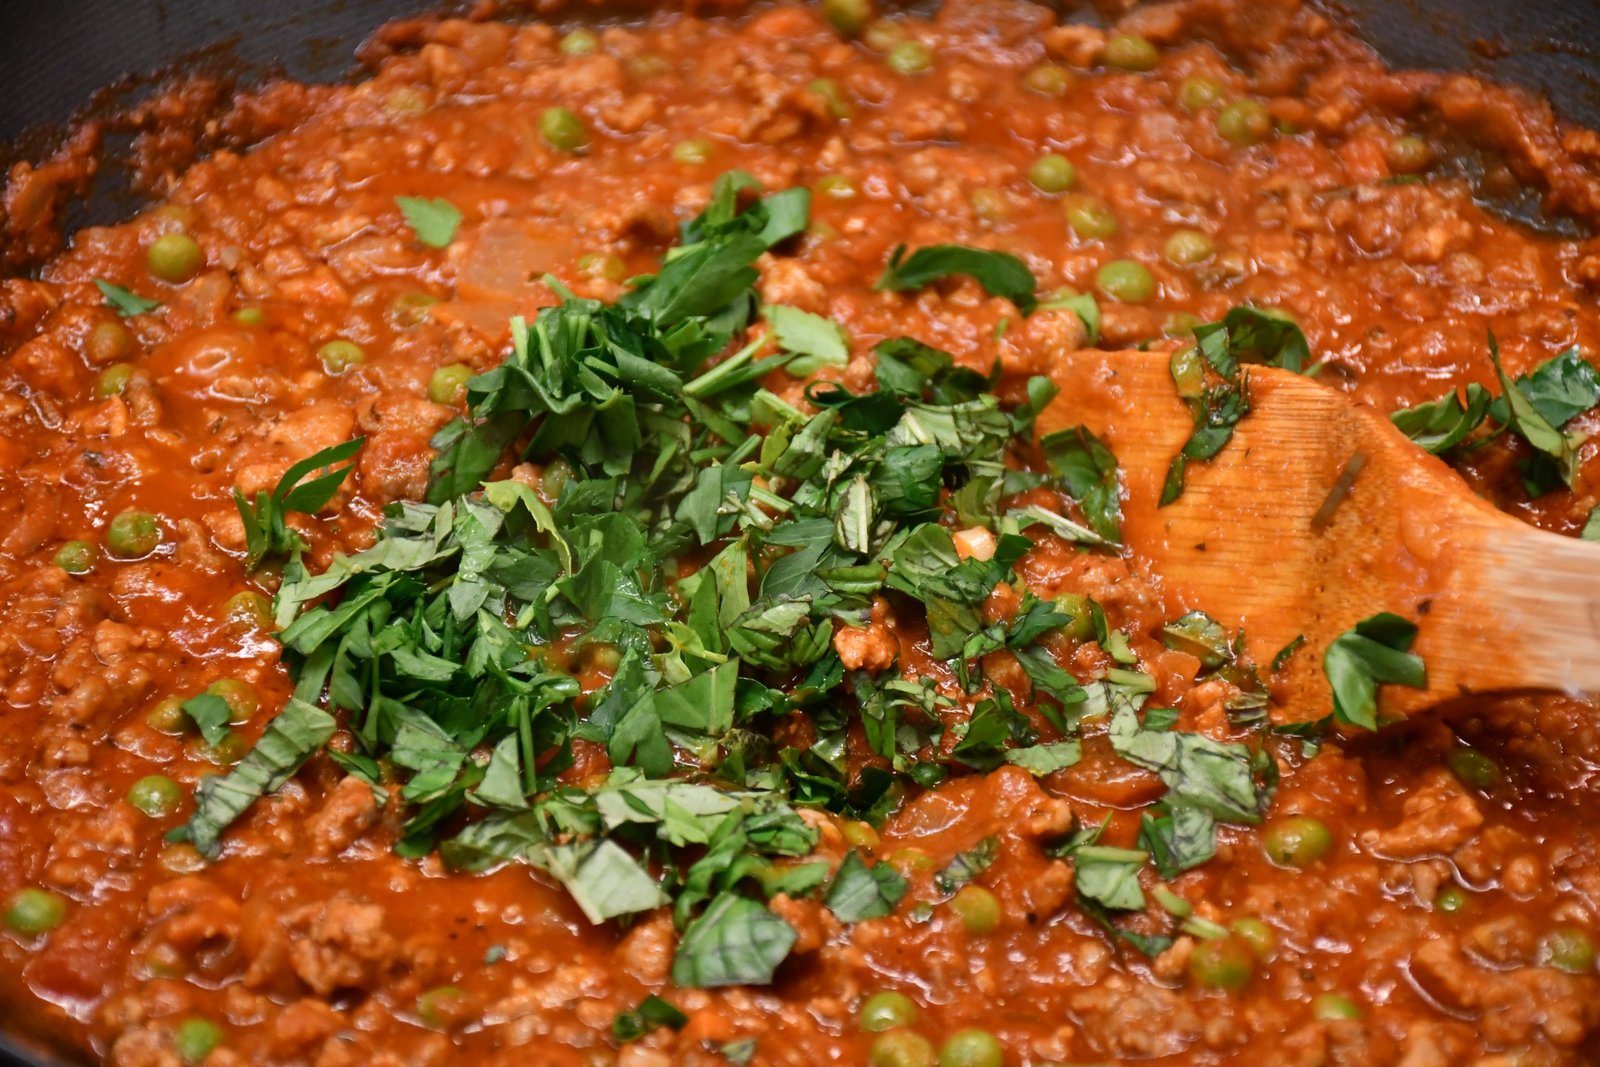
Now Add the Chopped Parsley to the Mixture in Each Wok

I love to have the woks simmer away on the stove top on a low heat creating such delicious caramelization.
Keep Stirring Occasionally
—————————————————————–


Now It’s Time To Add My Cheeses
Here I grated some Pecorino-Romano Cheese and added the grated cheese to each wok.

You can add as much or as little as you like.
The cheese will melt into the meat mixture. Still keep the heat on low, stirring occasionally.
Although I don’t have a photo of it, you can chop some Mozzarella into pieces and place into the mixture in the woks to melt as well.
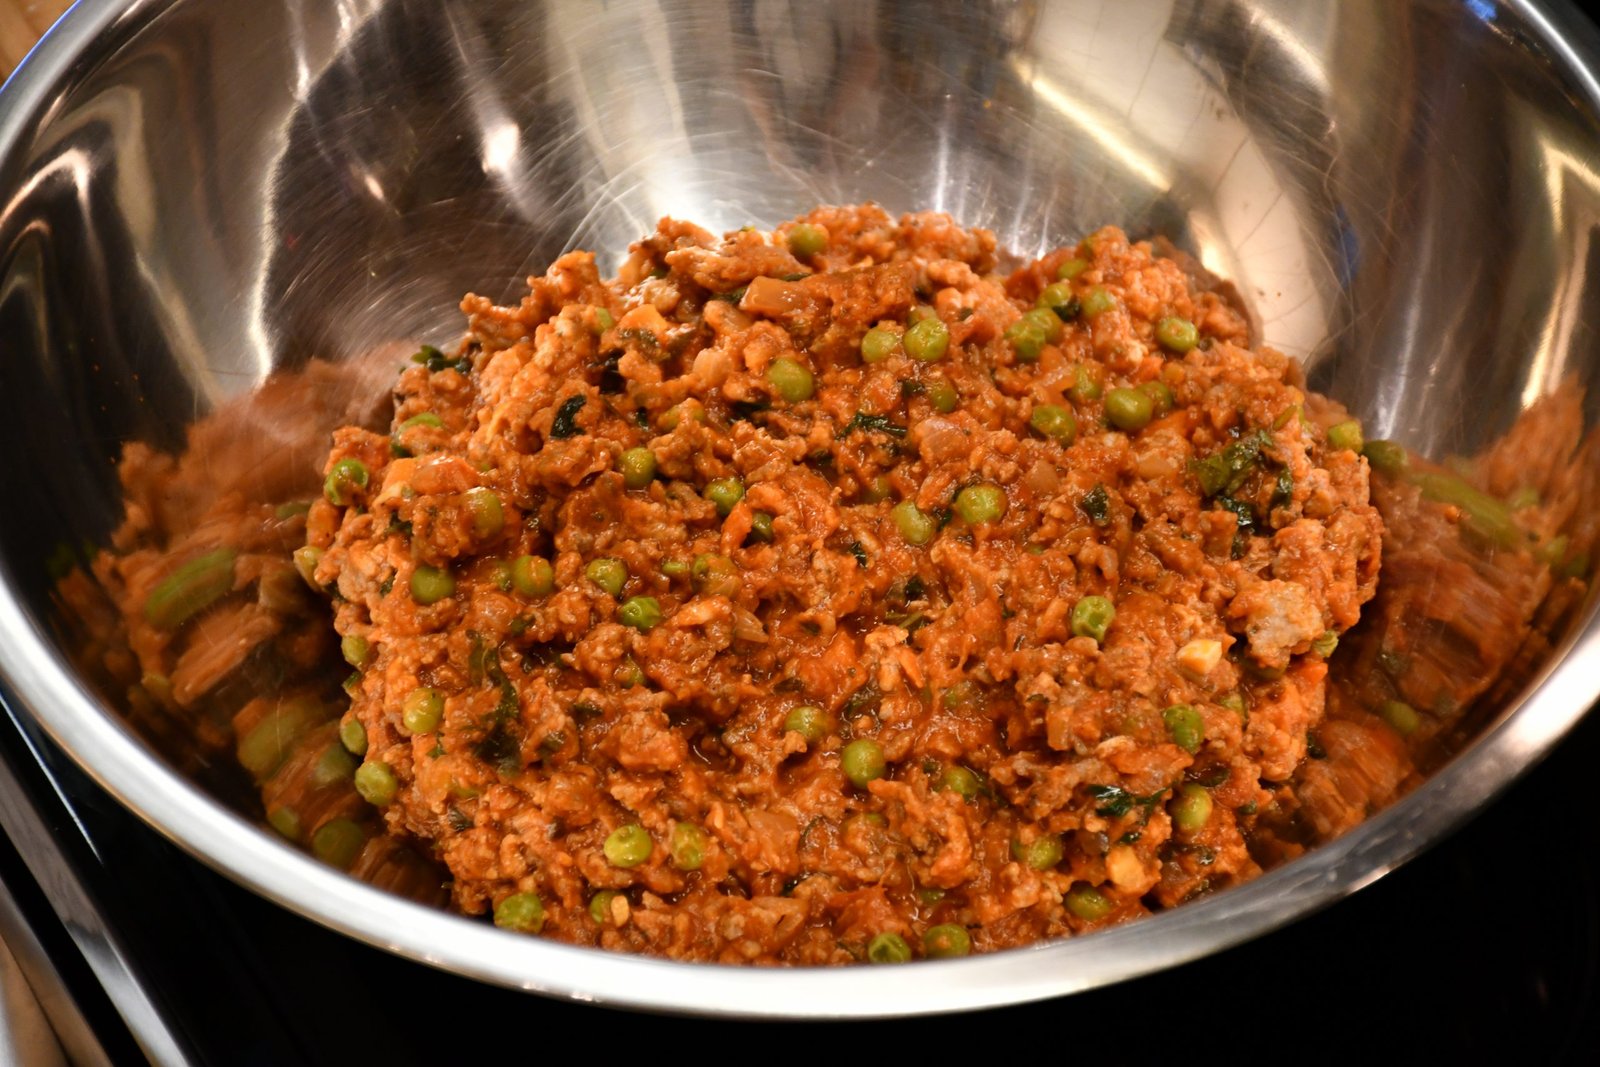
Here is the mixture of one of my woks of Timbale.
I ended up freezing this to thaw out for another day in the future.
———————————————————
Now For Our Dinner:

Boiling the Penne Pasta
I always place a little bit of Olive Oil in the water. I also always add some Salt whenever I boil pasta.
When I finished boiling the pasta I drained it into a colander and then added it to the Timbale mixture from the second wok and stirred together.

It looks delicious, doesn’t it?
Now you can add this mixture to whatever you want, or just eat it as it is.
This is my Timbale Mixture
I like to reserve a little bit of my tomato sauce to place in the bottom of my casserole dish so that the Timbale mixture won’t stick to it.
Extremely Beautiful and Tasty

I even took some over to my daughter and son-in-law for their dinner.
Brian made some delicious bread to go with it.


Leftover Timbale Mixture, minus the penne pasta, and stuffed into large Pasta Shells, drizzled with tomato sauce, and topped with cheese, then placed into a 350F oven for about 20 minutes, also makes another great meal.
There are so many ways to eat this mixture. 🙂
————————————————–
Brodie’s Chicken Parmesan Spaghetti w/ Red Sauce
Gordon’s Fried Eggplant and Julie’s Chicken Parm. (Takes up the entire plate.)
Gordon’s Roasted Vegetables
Our Delicious Dinner

All of Our Ingredients

Ingredients:
6 Large Chicken Breasts
1/2 Lb. Wedge of Parmesan Cheese – Shredded
5 Eggs – Whisked
2 Cups Flour
2 Cups Italian Seasoned Bread Crumbs
2 Cups Panko Bread Crumbs
1 Tbsp. Sweet Paprika
1 Cup Grapeseed Oil
2 Jars Tomato Sauce
1 Lb. Block of Mozzarella Cheese – Sliced Thinly
Spaghetti Noodles – enough for you and your guests
Salt and Pepper to Taste
Garnish: Basil Sprigs
————————————————————–

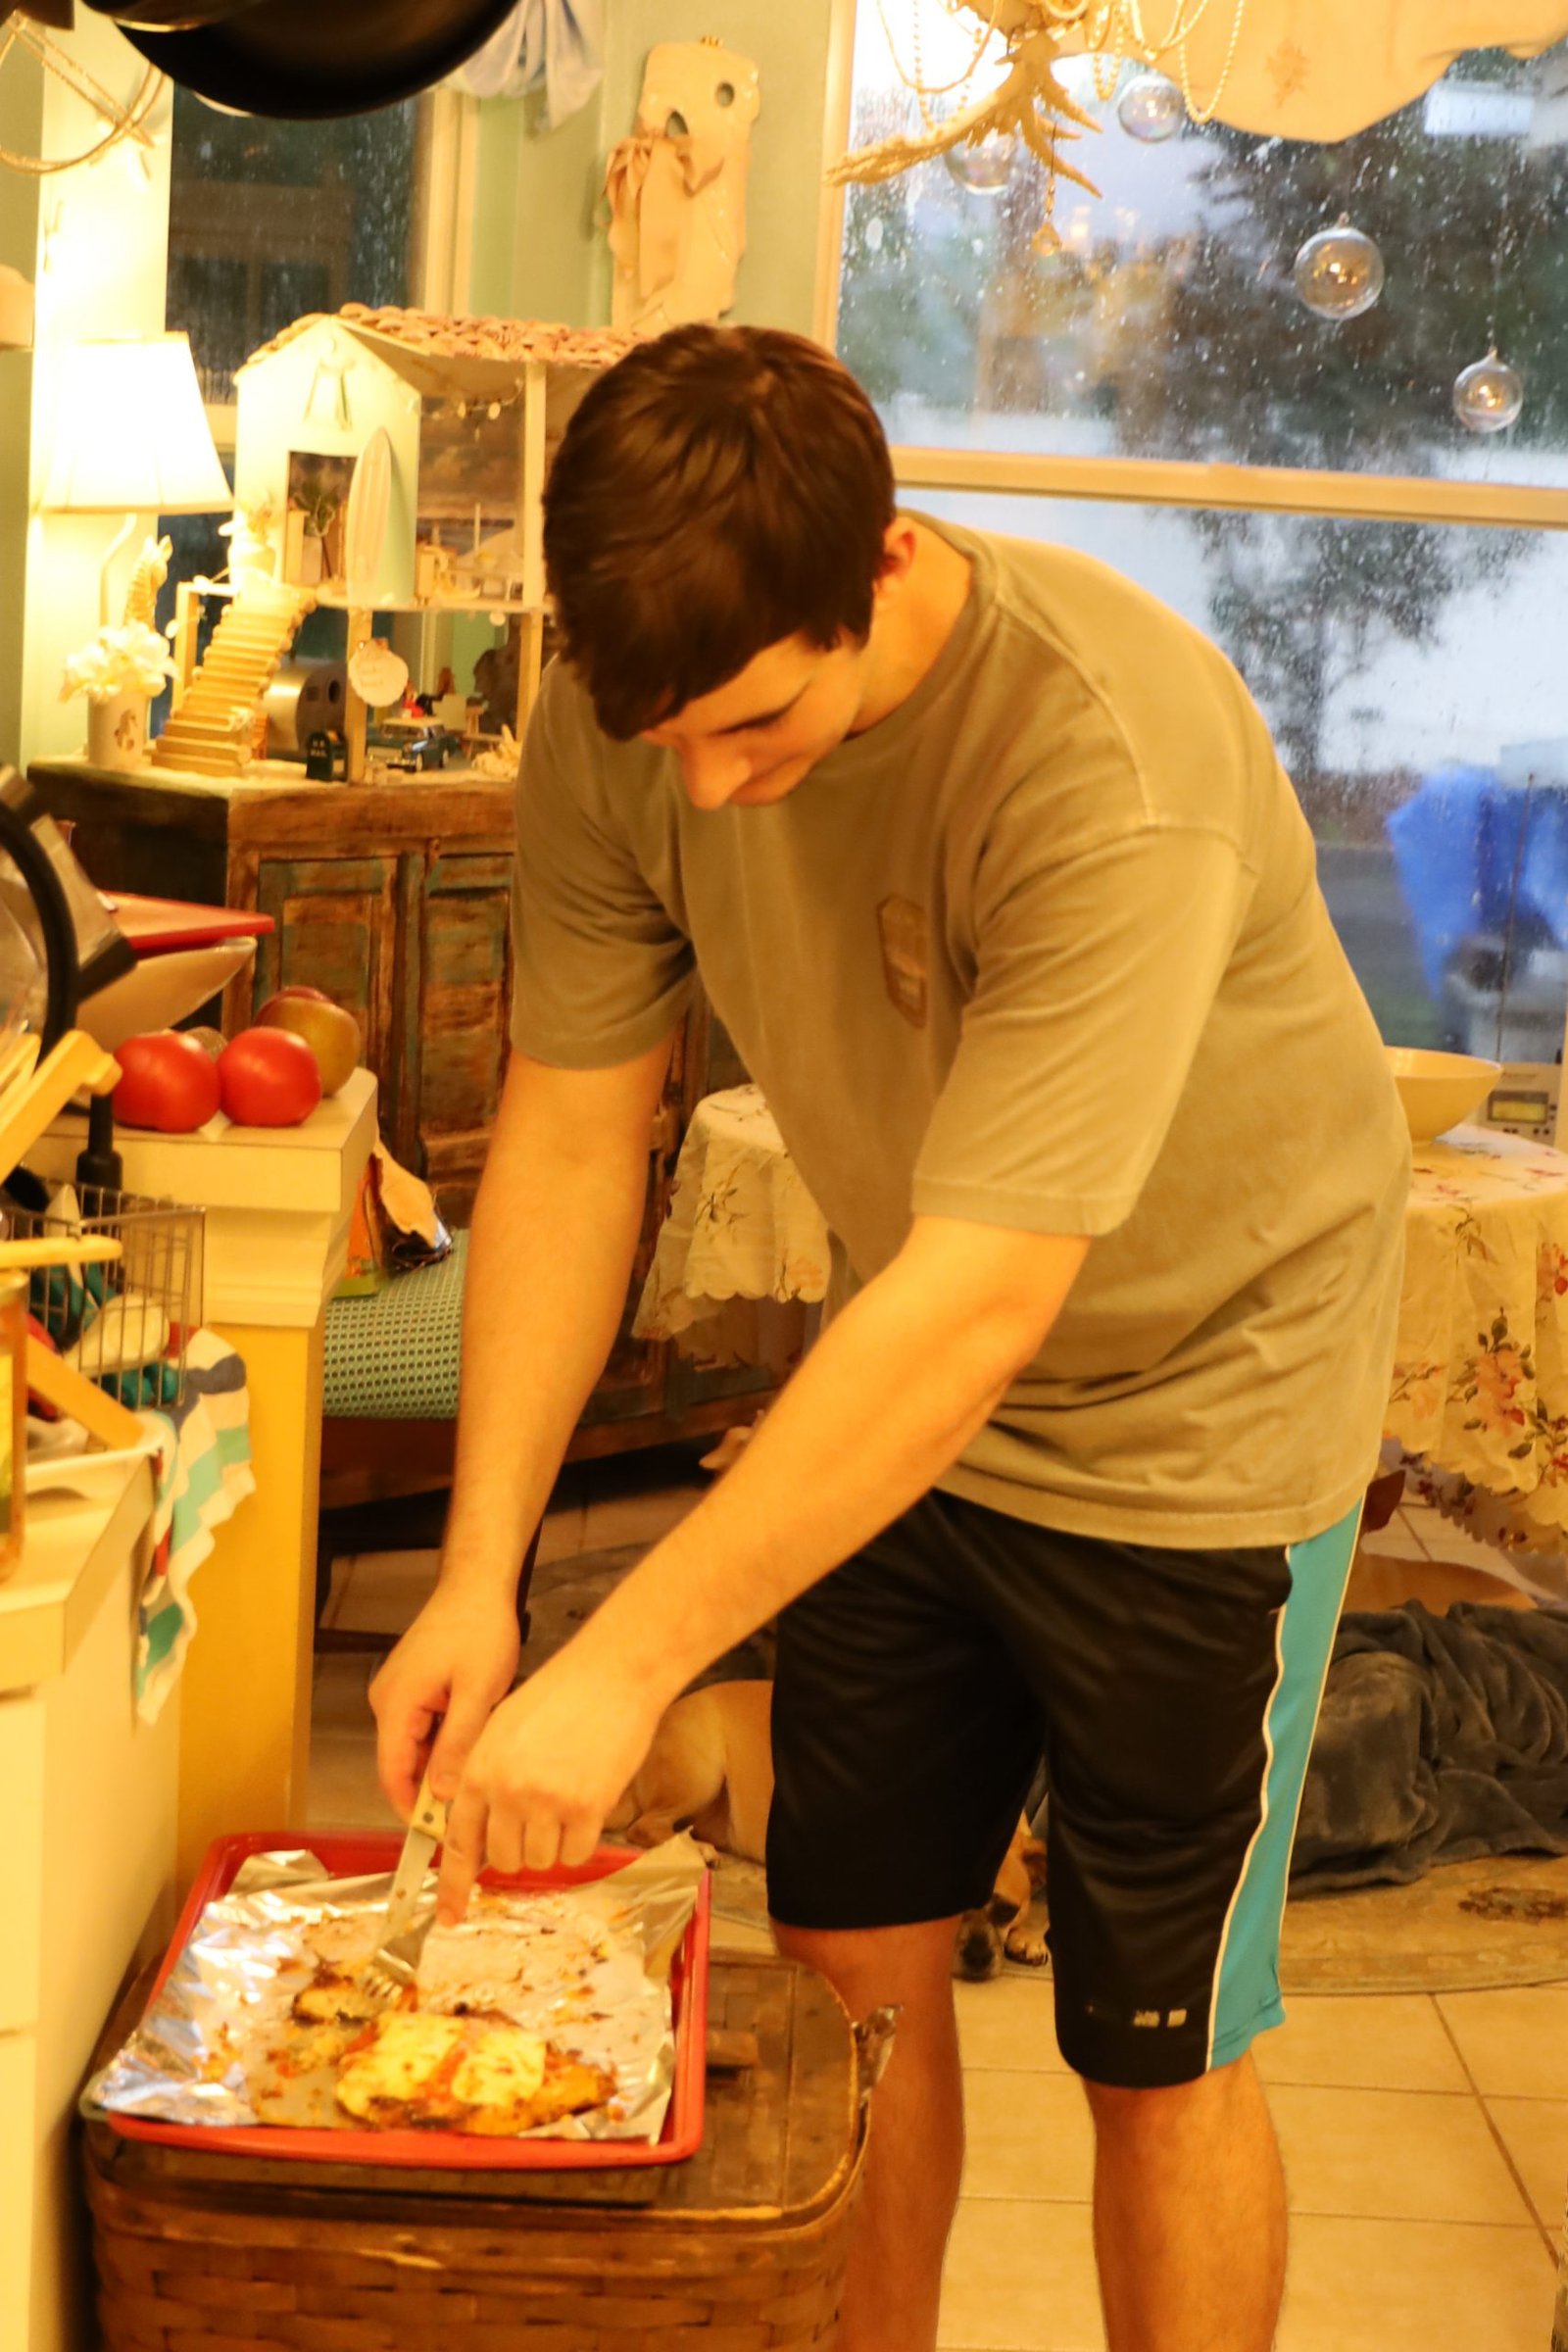
This is our son Brodie’s recipe, and these are his hands shown cooking this recipe. I “Gordon” am doing the write-up for him. (Because he HATES write-up’s. This is Julie checking over Gordon’s write-up.) 🙂
Wash and clean the chicken breasts, removing any excess fat or cartilage. Use paper towels to remove any excess moisture.
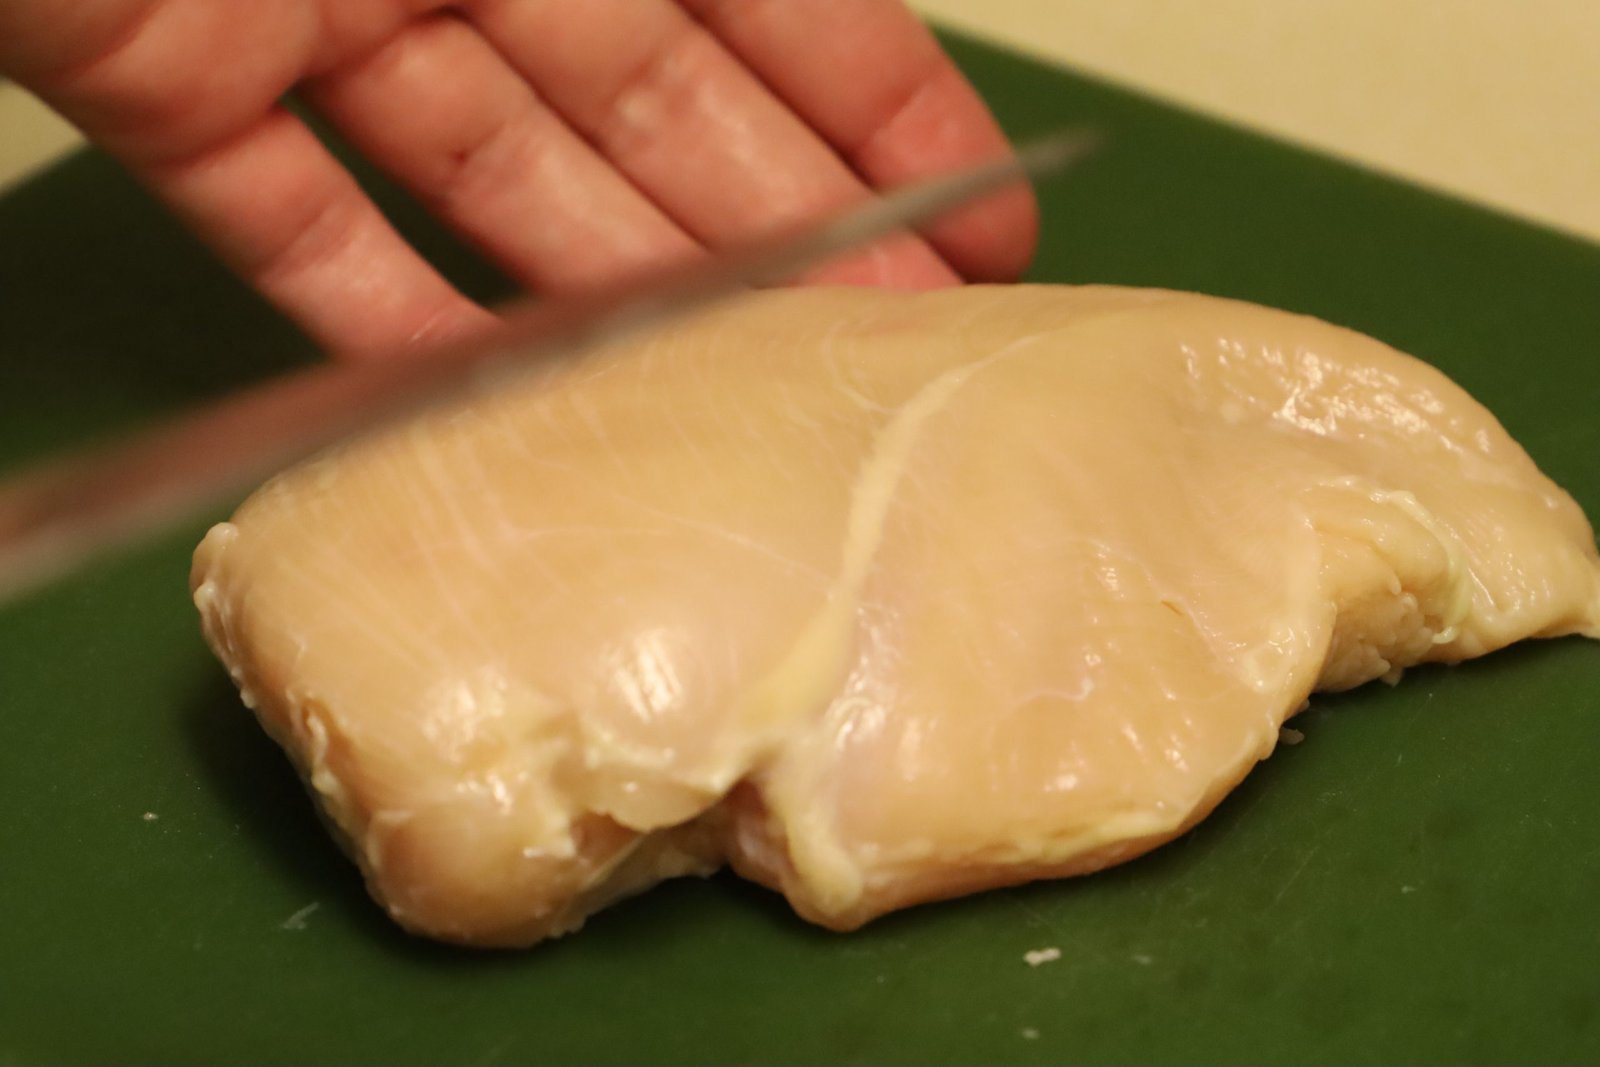


Place one chicken breast on a cutting board with the thin point of the breast facing upwards and the thick somewhat rounded part of the breast to the left. Here you see Brodie flatten the breast with his hand and uses a very sharp Chef’s knife to slice the breast in half, stopping ~1 inch away from the end at both the top and bottom of the breast. Watch carefully that your knife is flat or parallel with the cutting board and that you don’t go too far with your slice at the top and bottom of the breast.
This is what is called Butterflying the Breast.
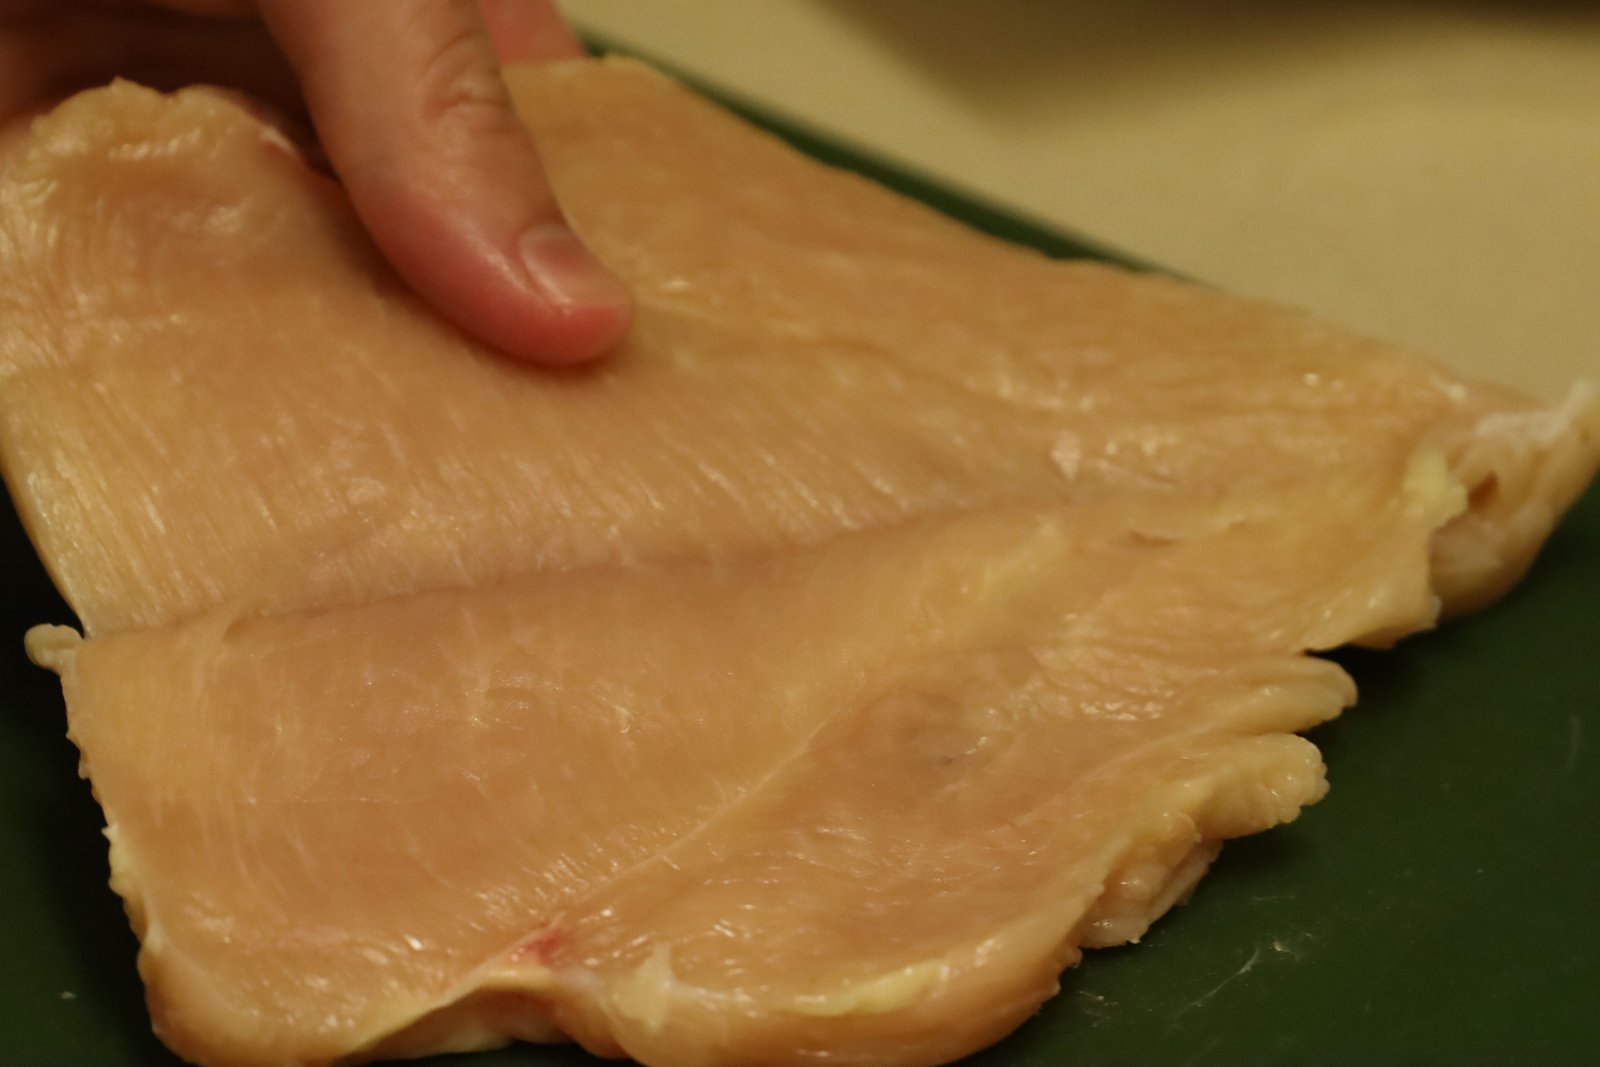
Open the breast and flatten it out as shown and slice more if needed. This is a great illustration of how the breast should look after it has been sliced. Brodie can do this very well. Repeat this process with the other breasts.


Place the sliced breast between two pieces of plastic wrap and using a sturdy pan, pound the breast to flatten it to an even thickness just under 1/2 inch. Placing a little bit of oil on the breast will help the breast move between the plastic wrap while being pounded with the pan. Having the breast at an all around even thickness will allow it to be cooked evenly and not overdone in one area. Repeat these above procedures with the other five chicken breasts.

Here are Several Butterflied Breasts Finished
——————————————————————-


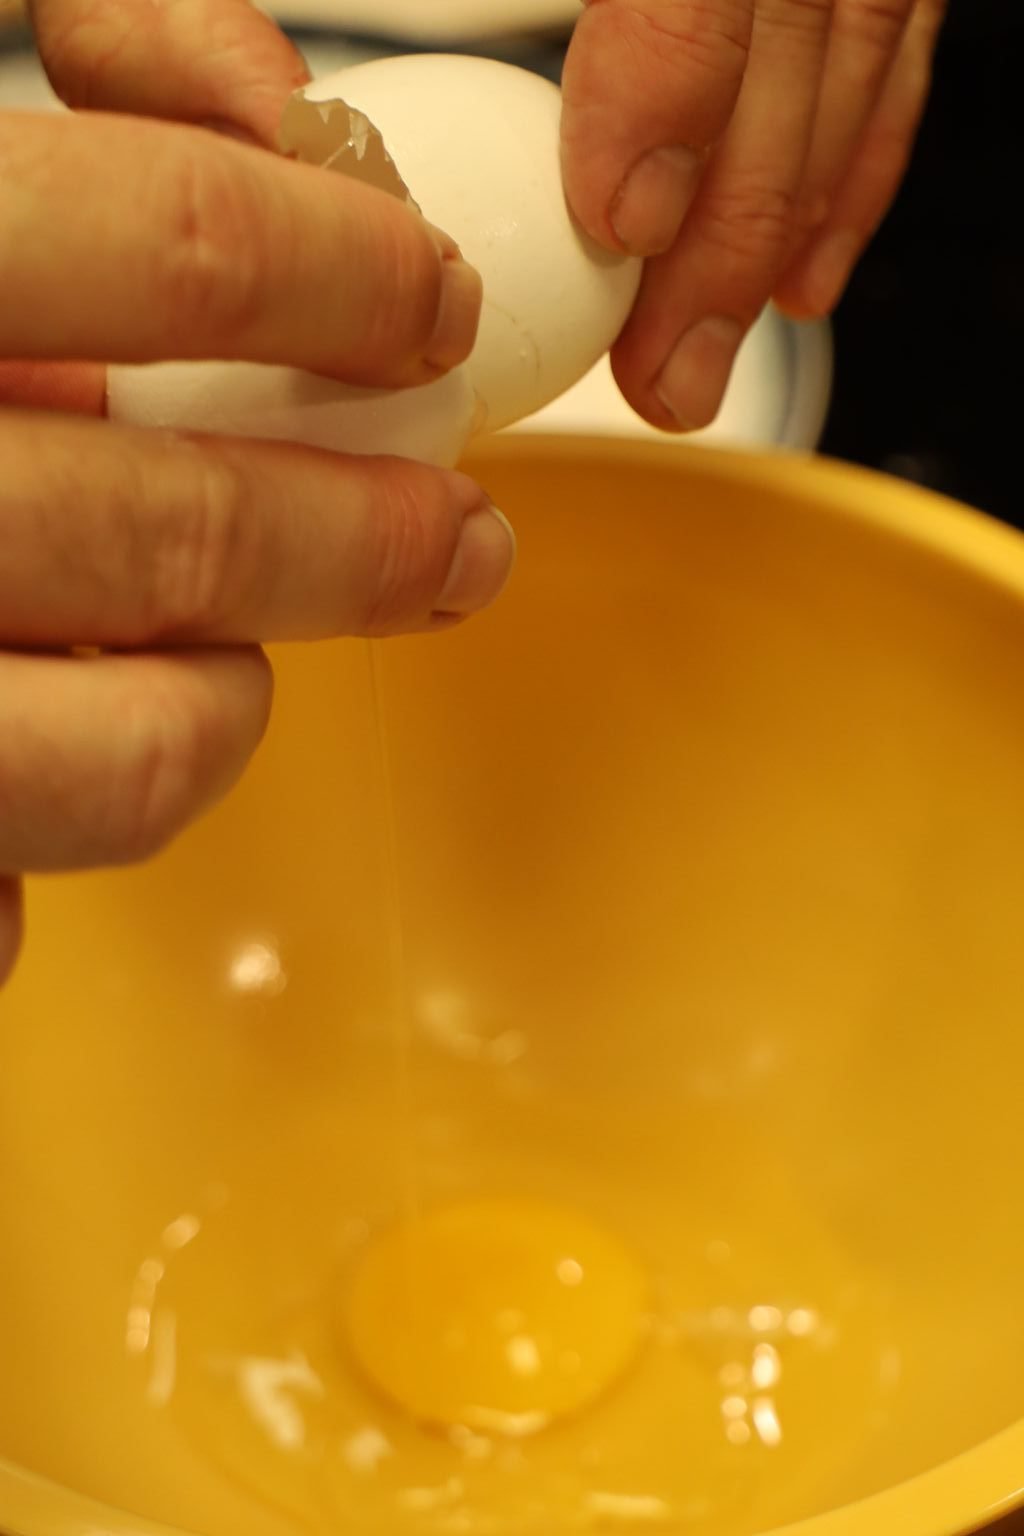
Crack the eggs into a medium sized bowl adding a touch of salt and pepper.

Here, Brodie is whisking all the ingredients well with a fork.

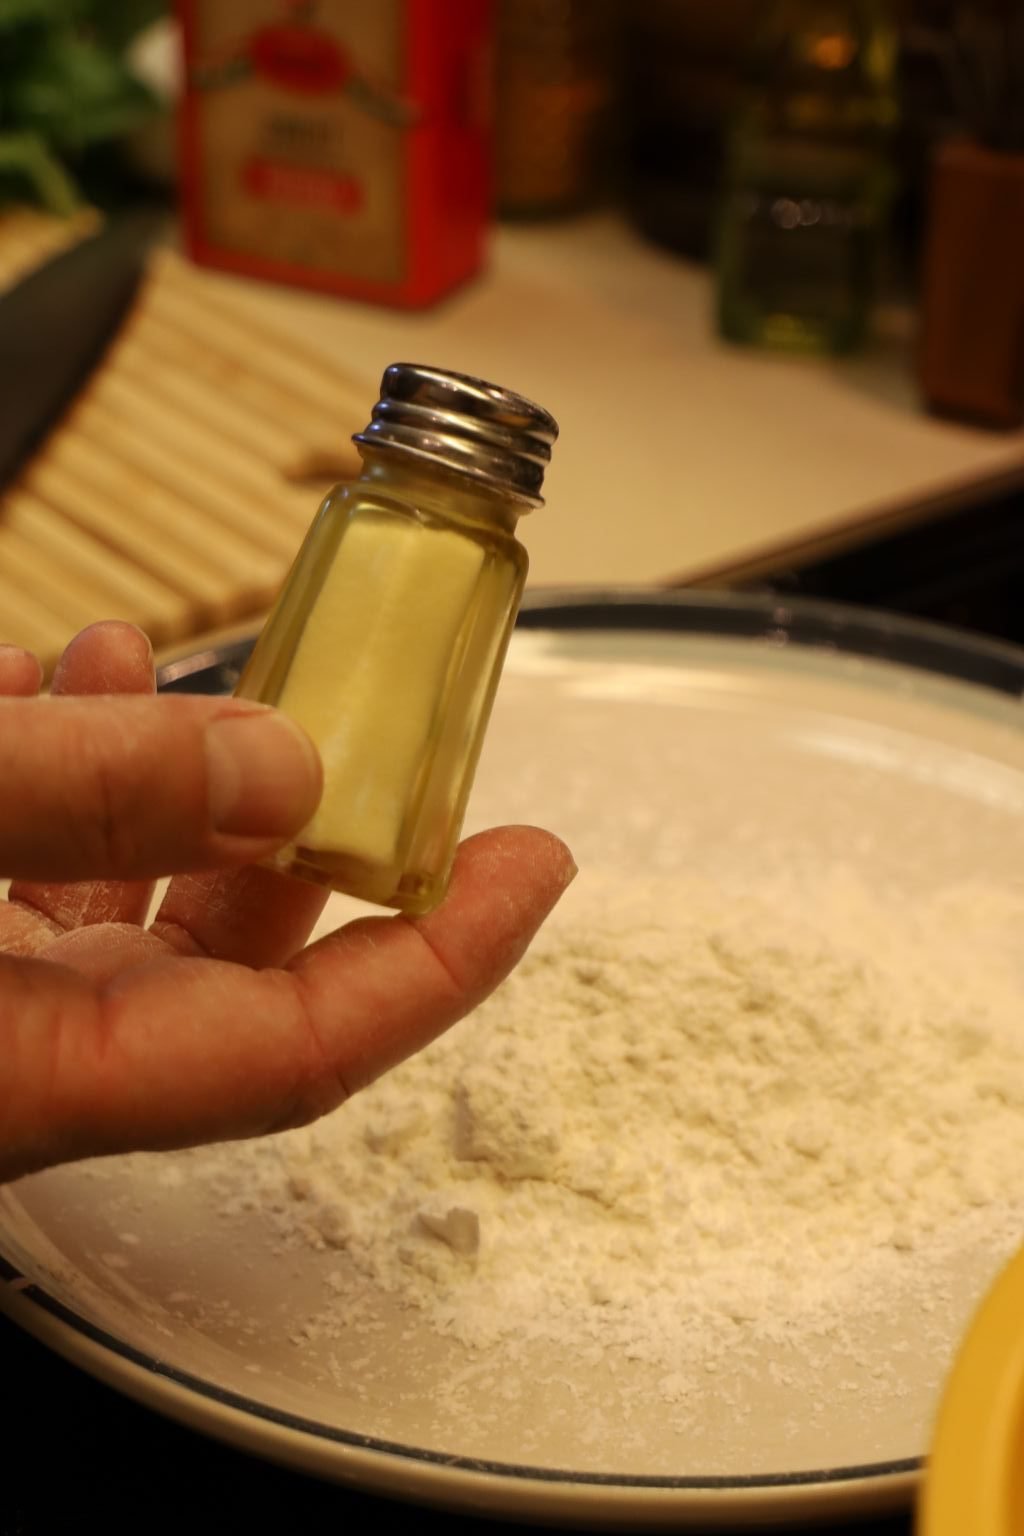
Using another bowl, add your flour and salt.
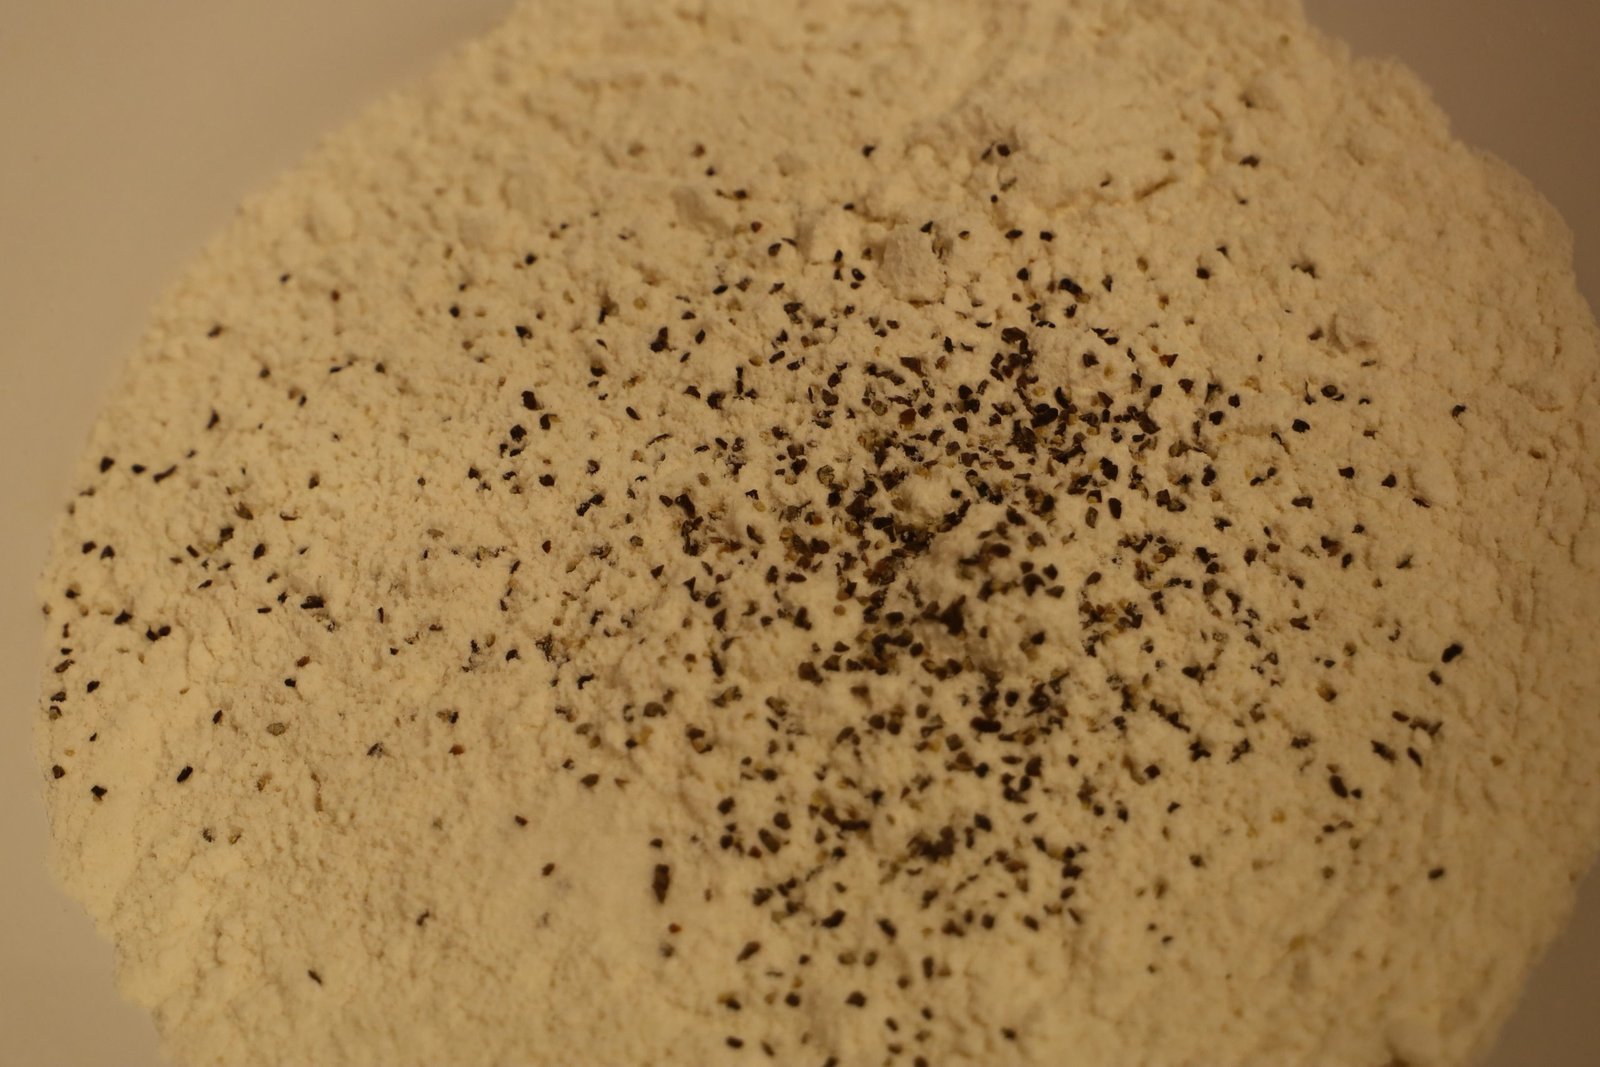
Then add your pepper to the flour and salt mixture and mix well.
About 1/4 – 1/2 teaspoon depending on your tastes.
—————————————————————-

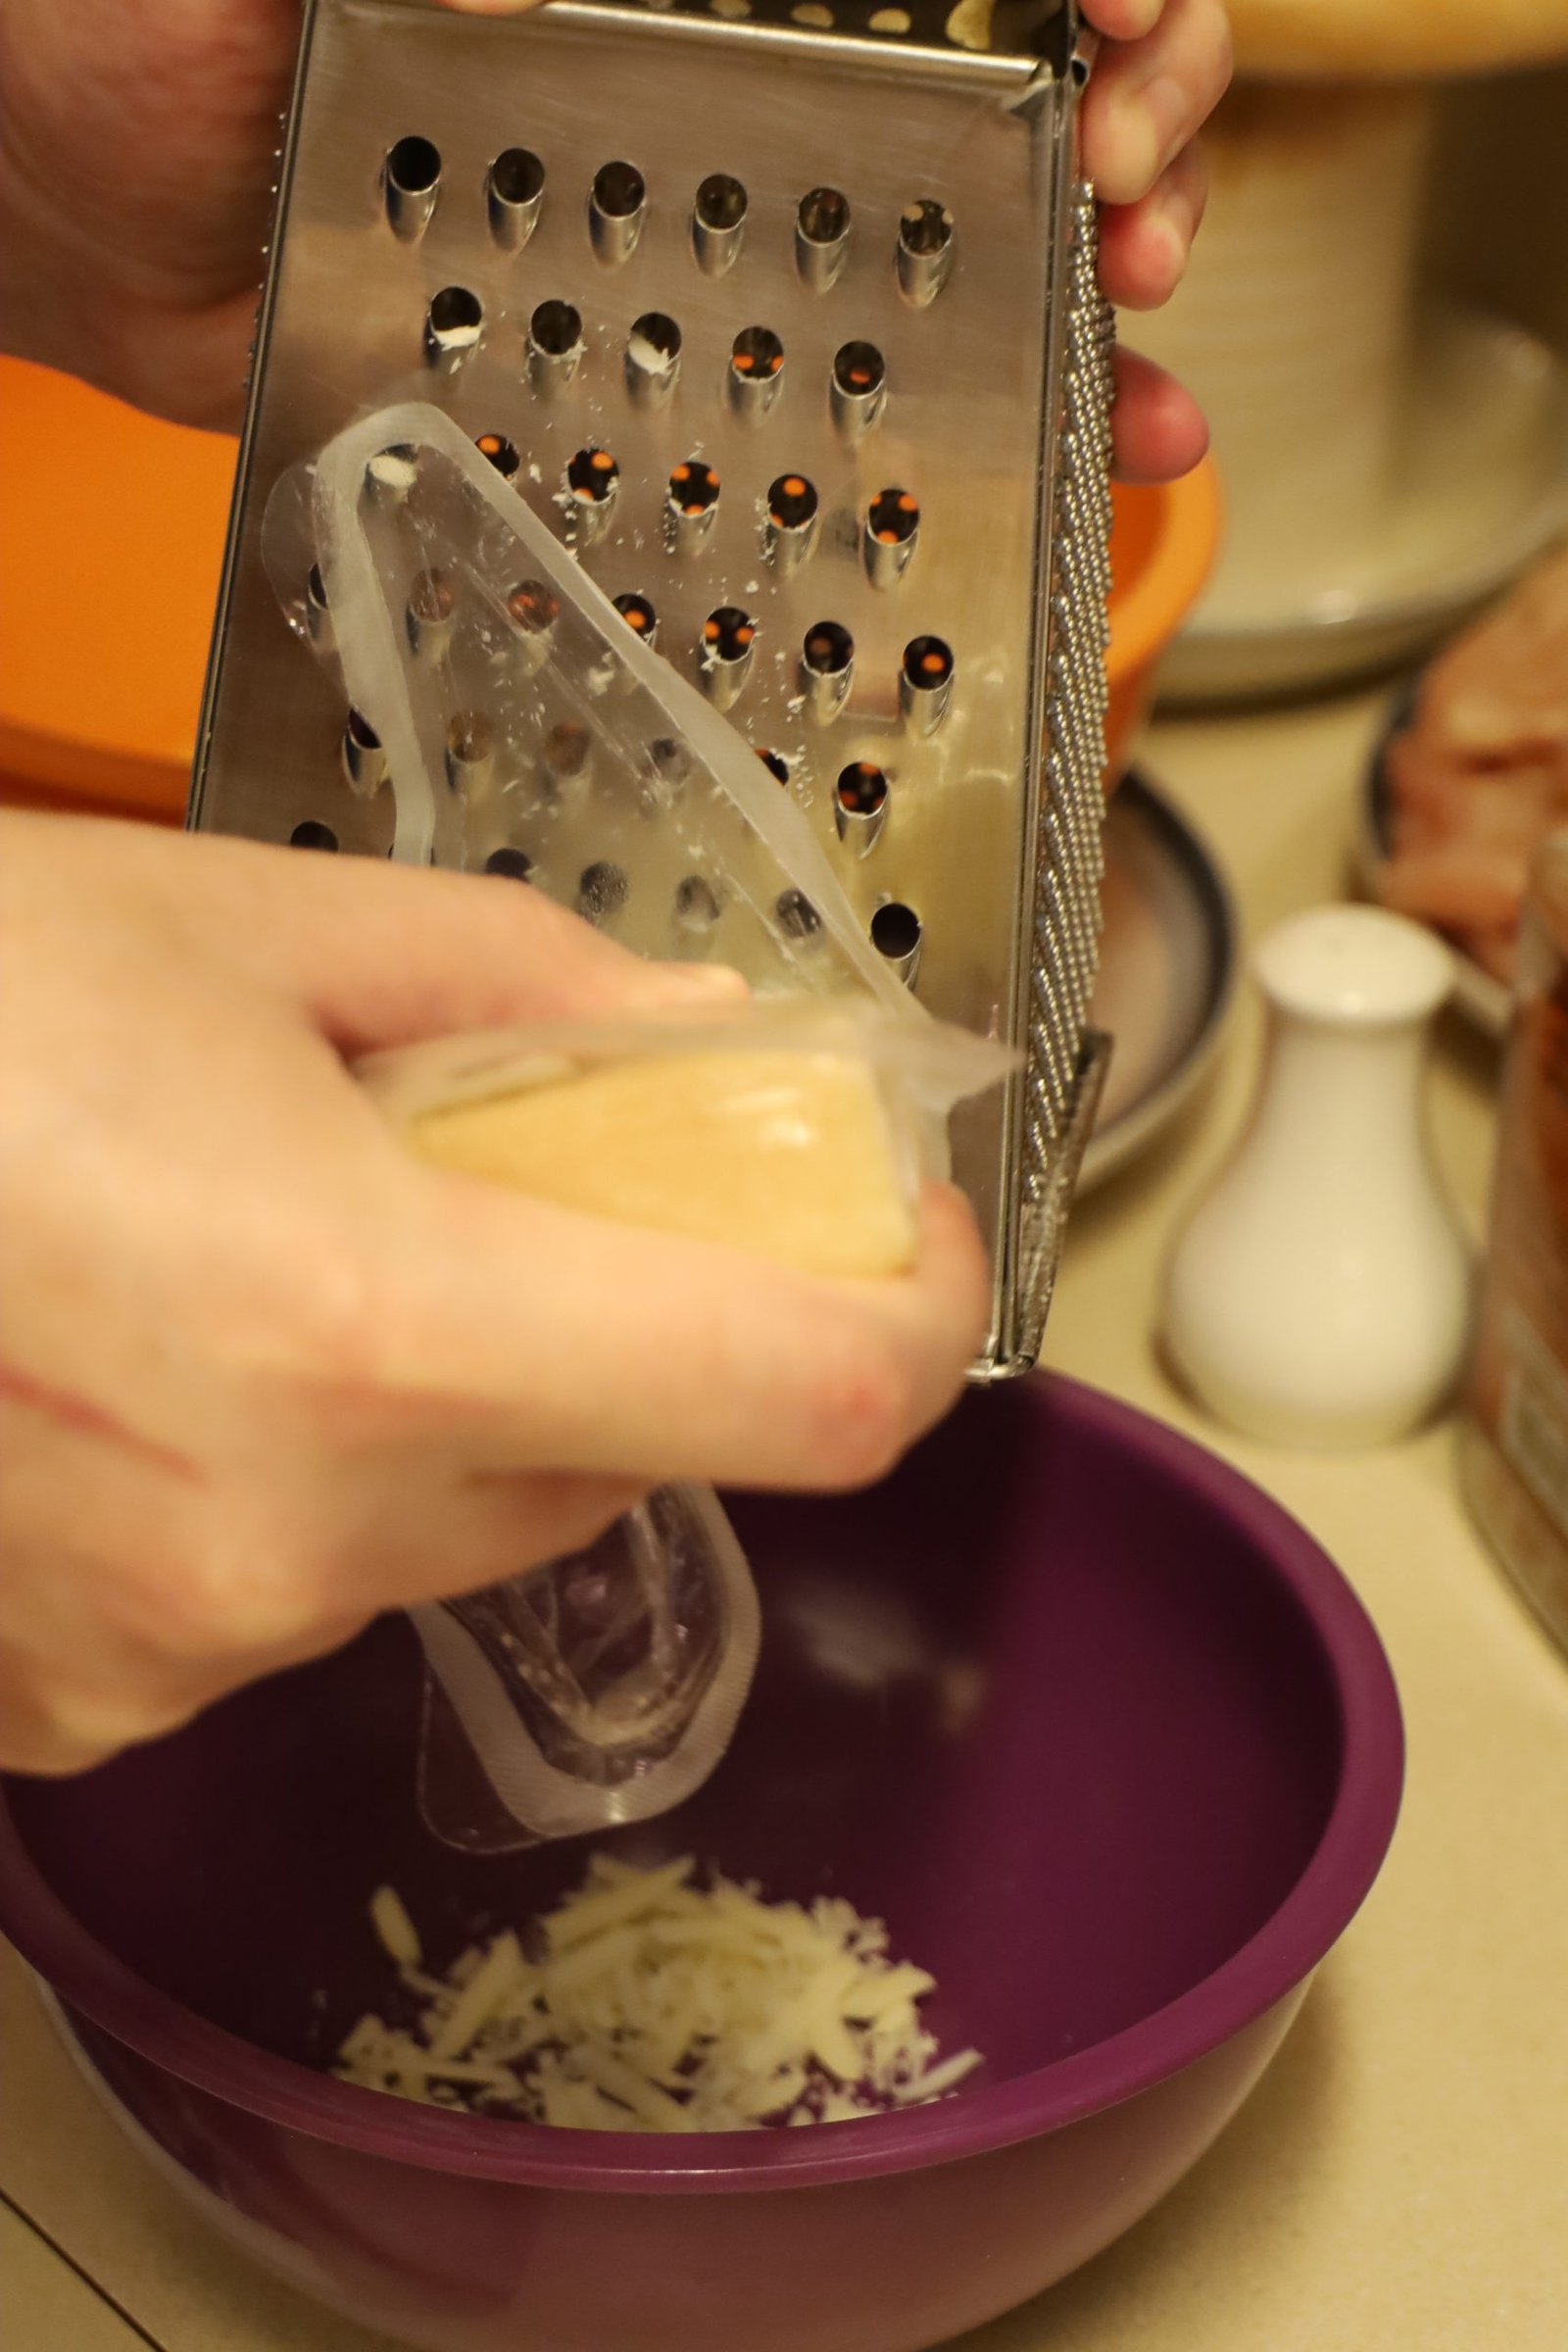
Grate your Parmesan Cheese into a bowl.

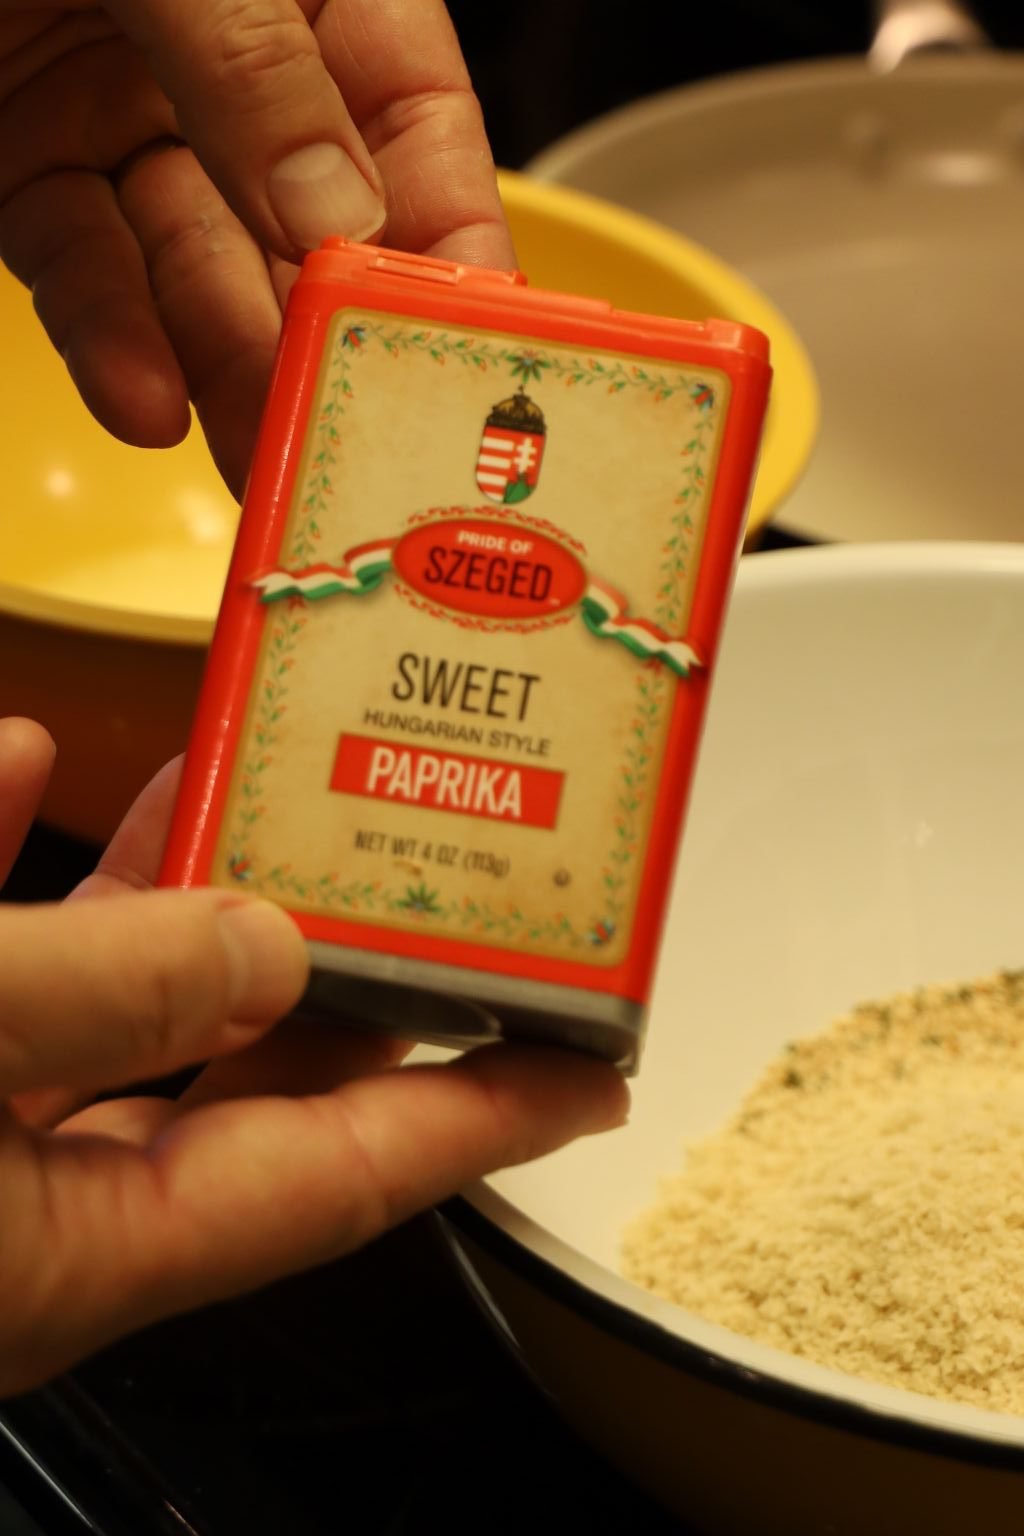
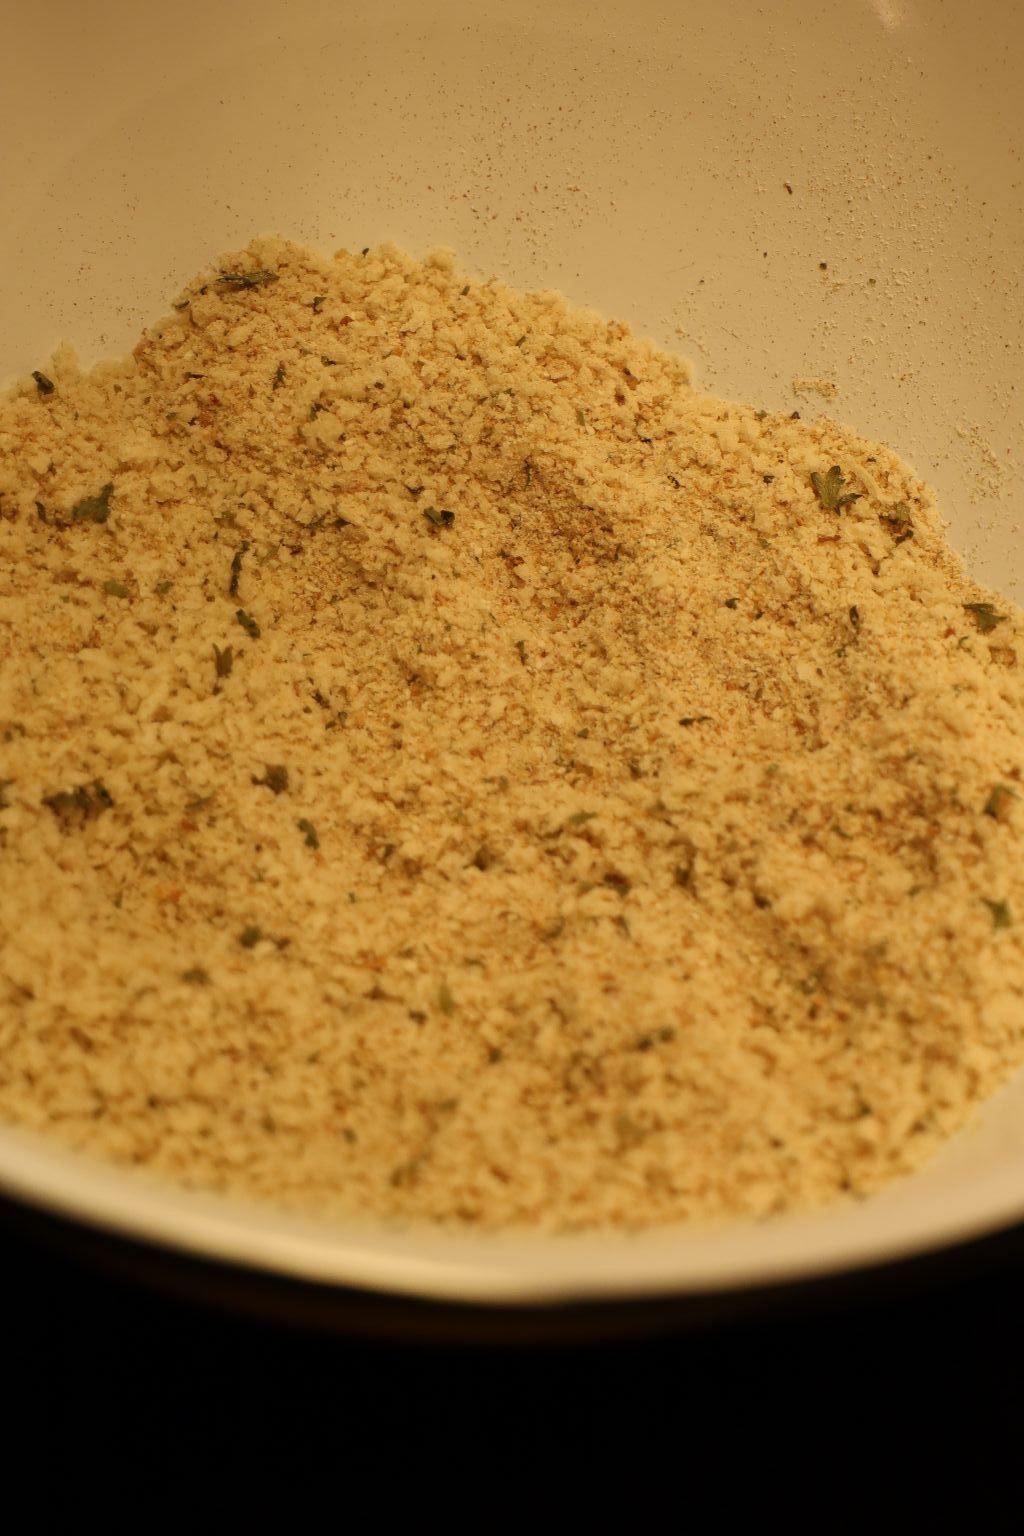
Combine your Italian Seasoned Bread Crumbs, and Panko Bread Crumbs to another large bowl.


Like so…


Add your pepper and salt to the bread crumb mixture.
About 1/4 – 1/2 teaspoon depending on how much you want.


Then add your sweet paprika to the bread crumbs.

————————————————————————–


Lastly, add ~2/3 Cup of the grated Parmesan Cheese to the bread crumb mixture and mix all the ingredients well.
————————————————————
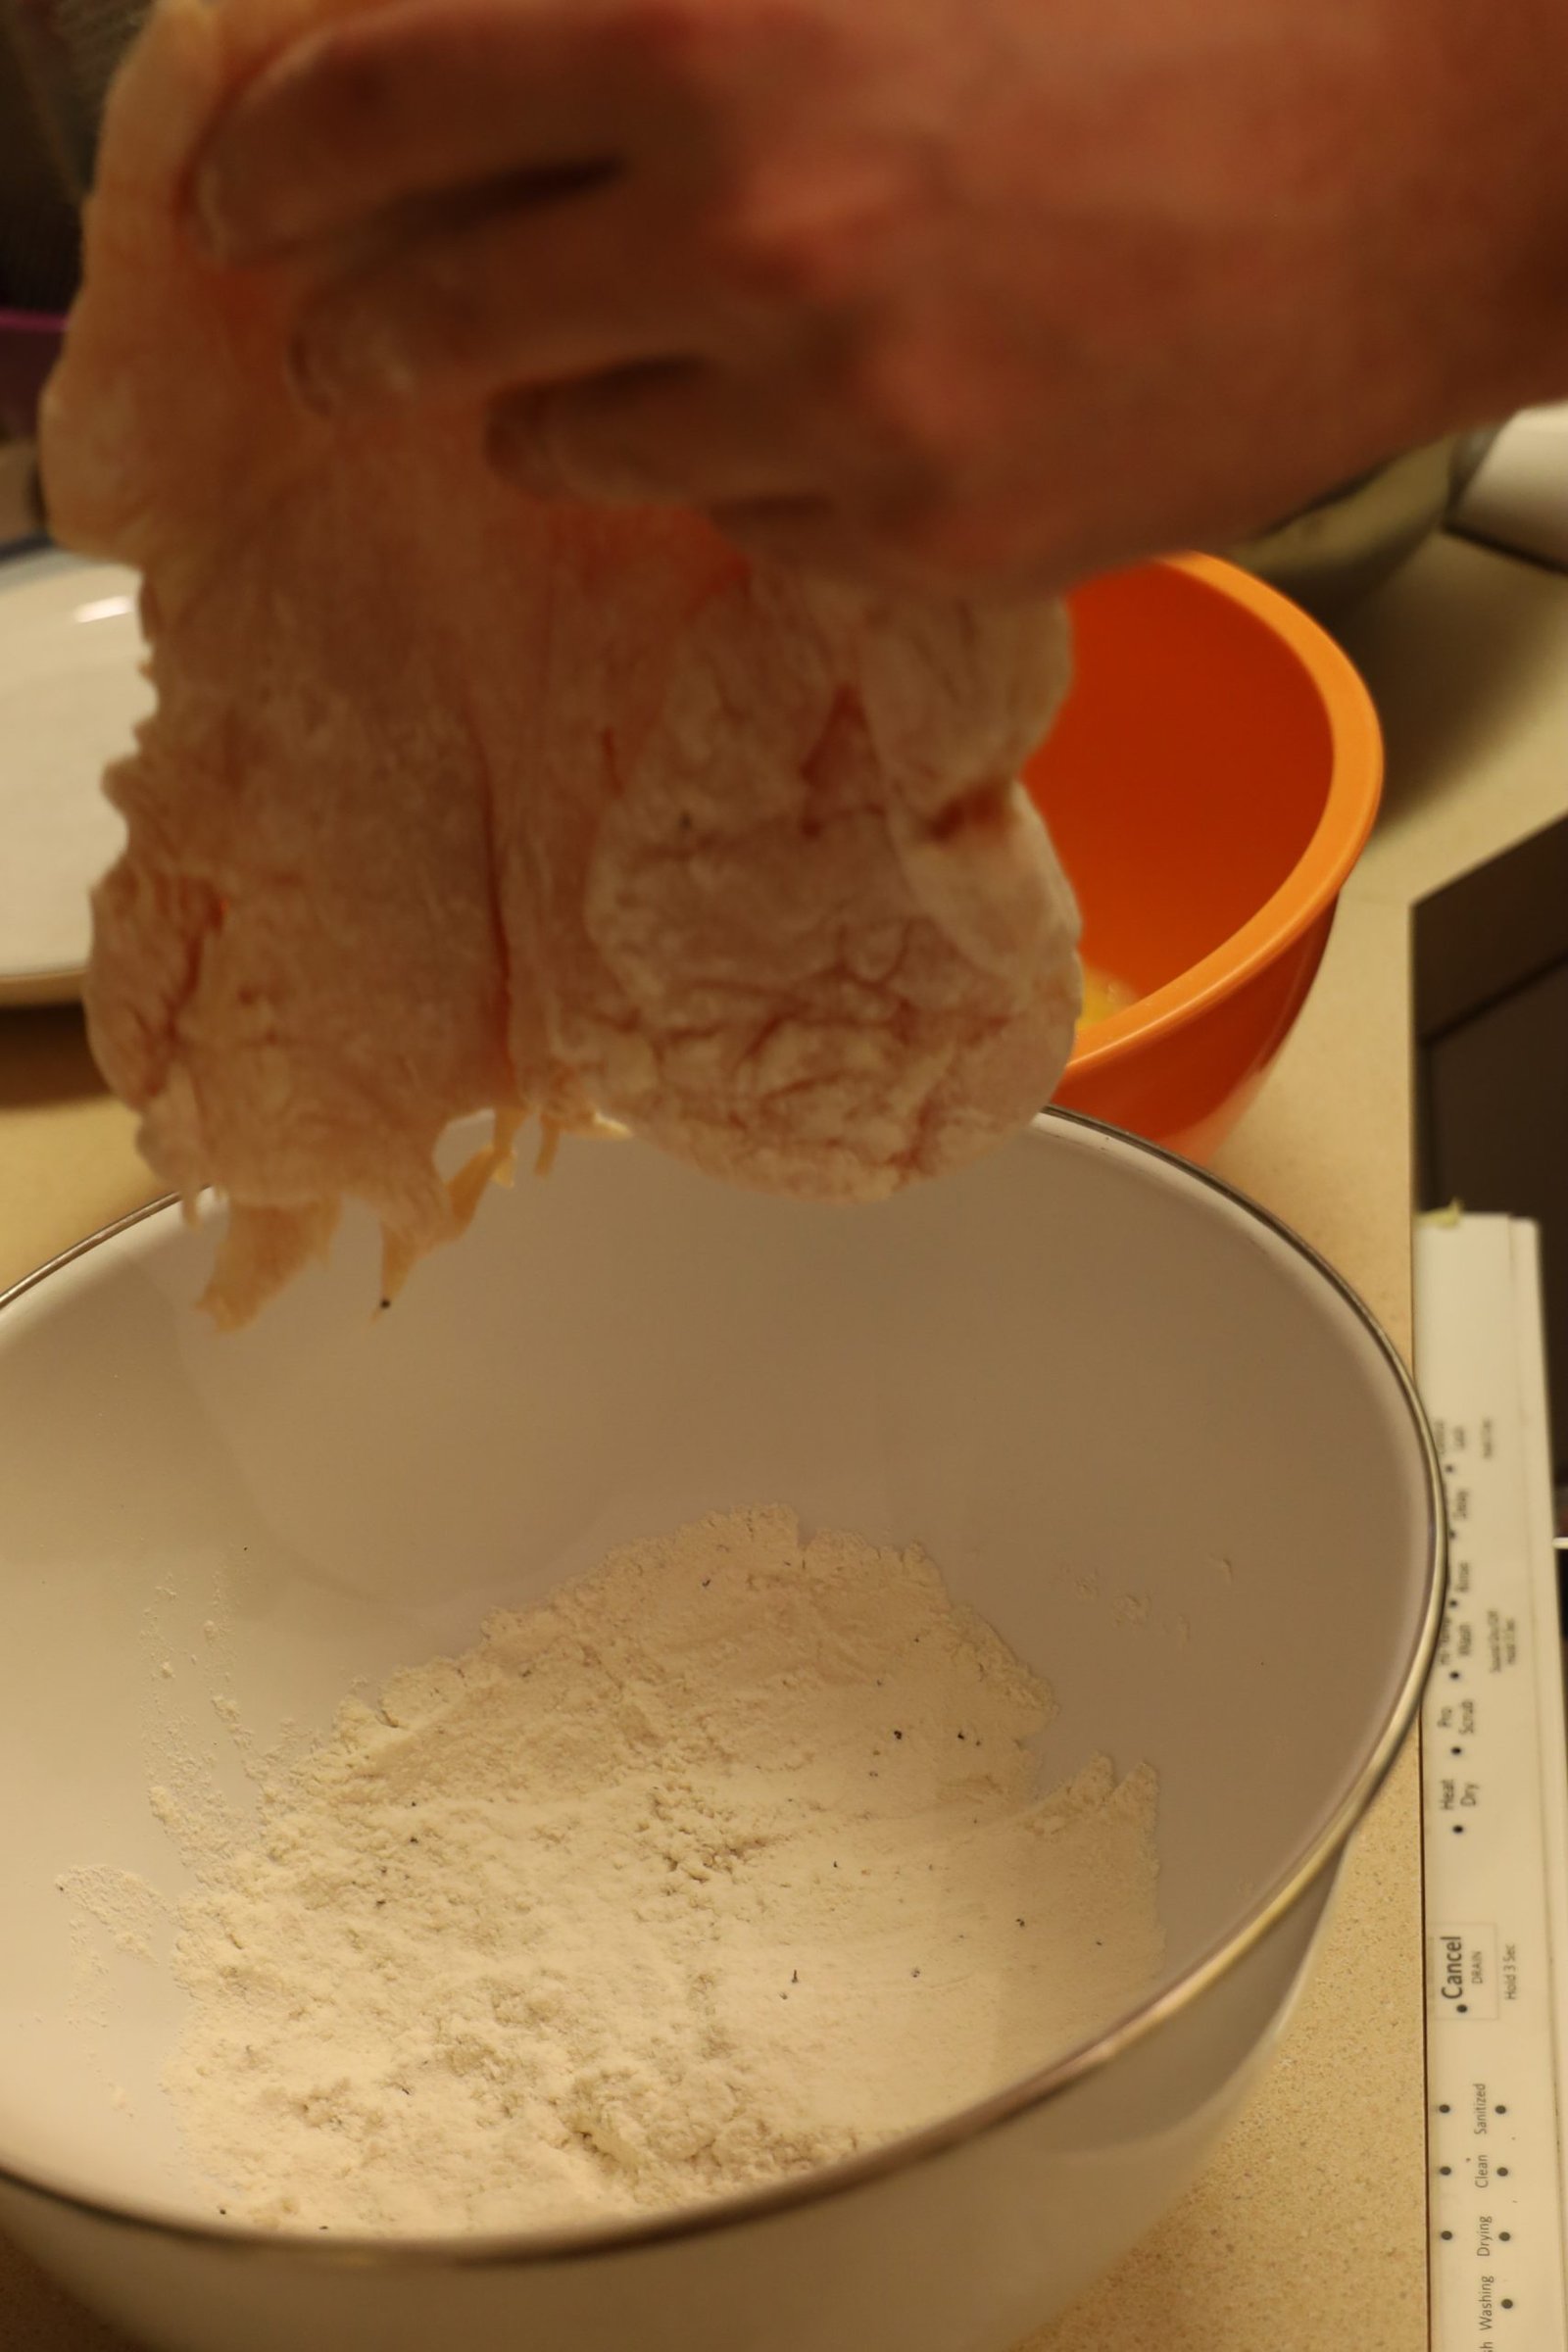

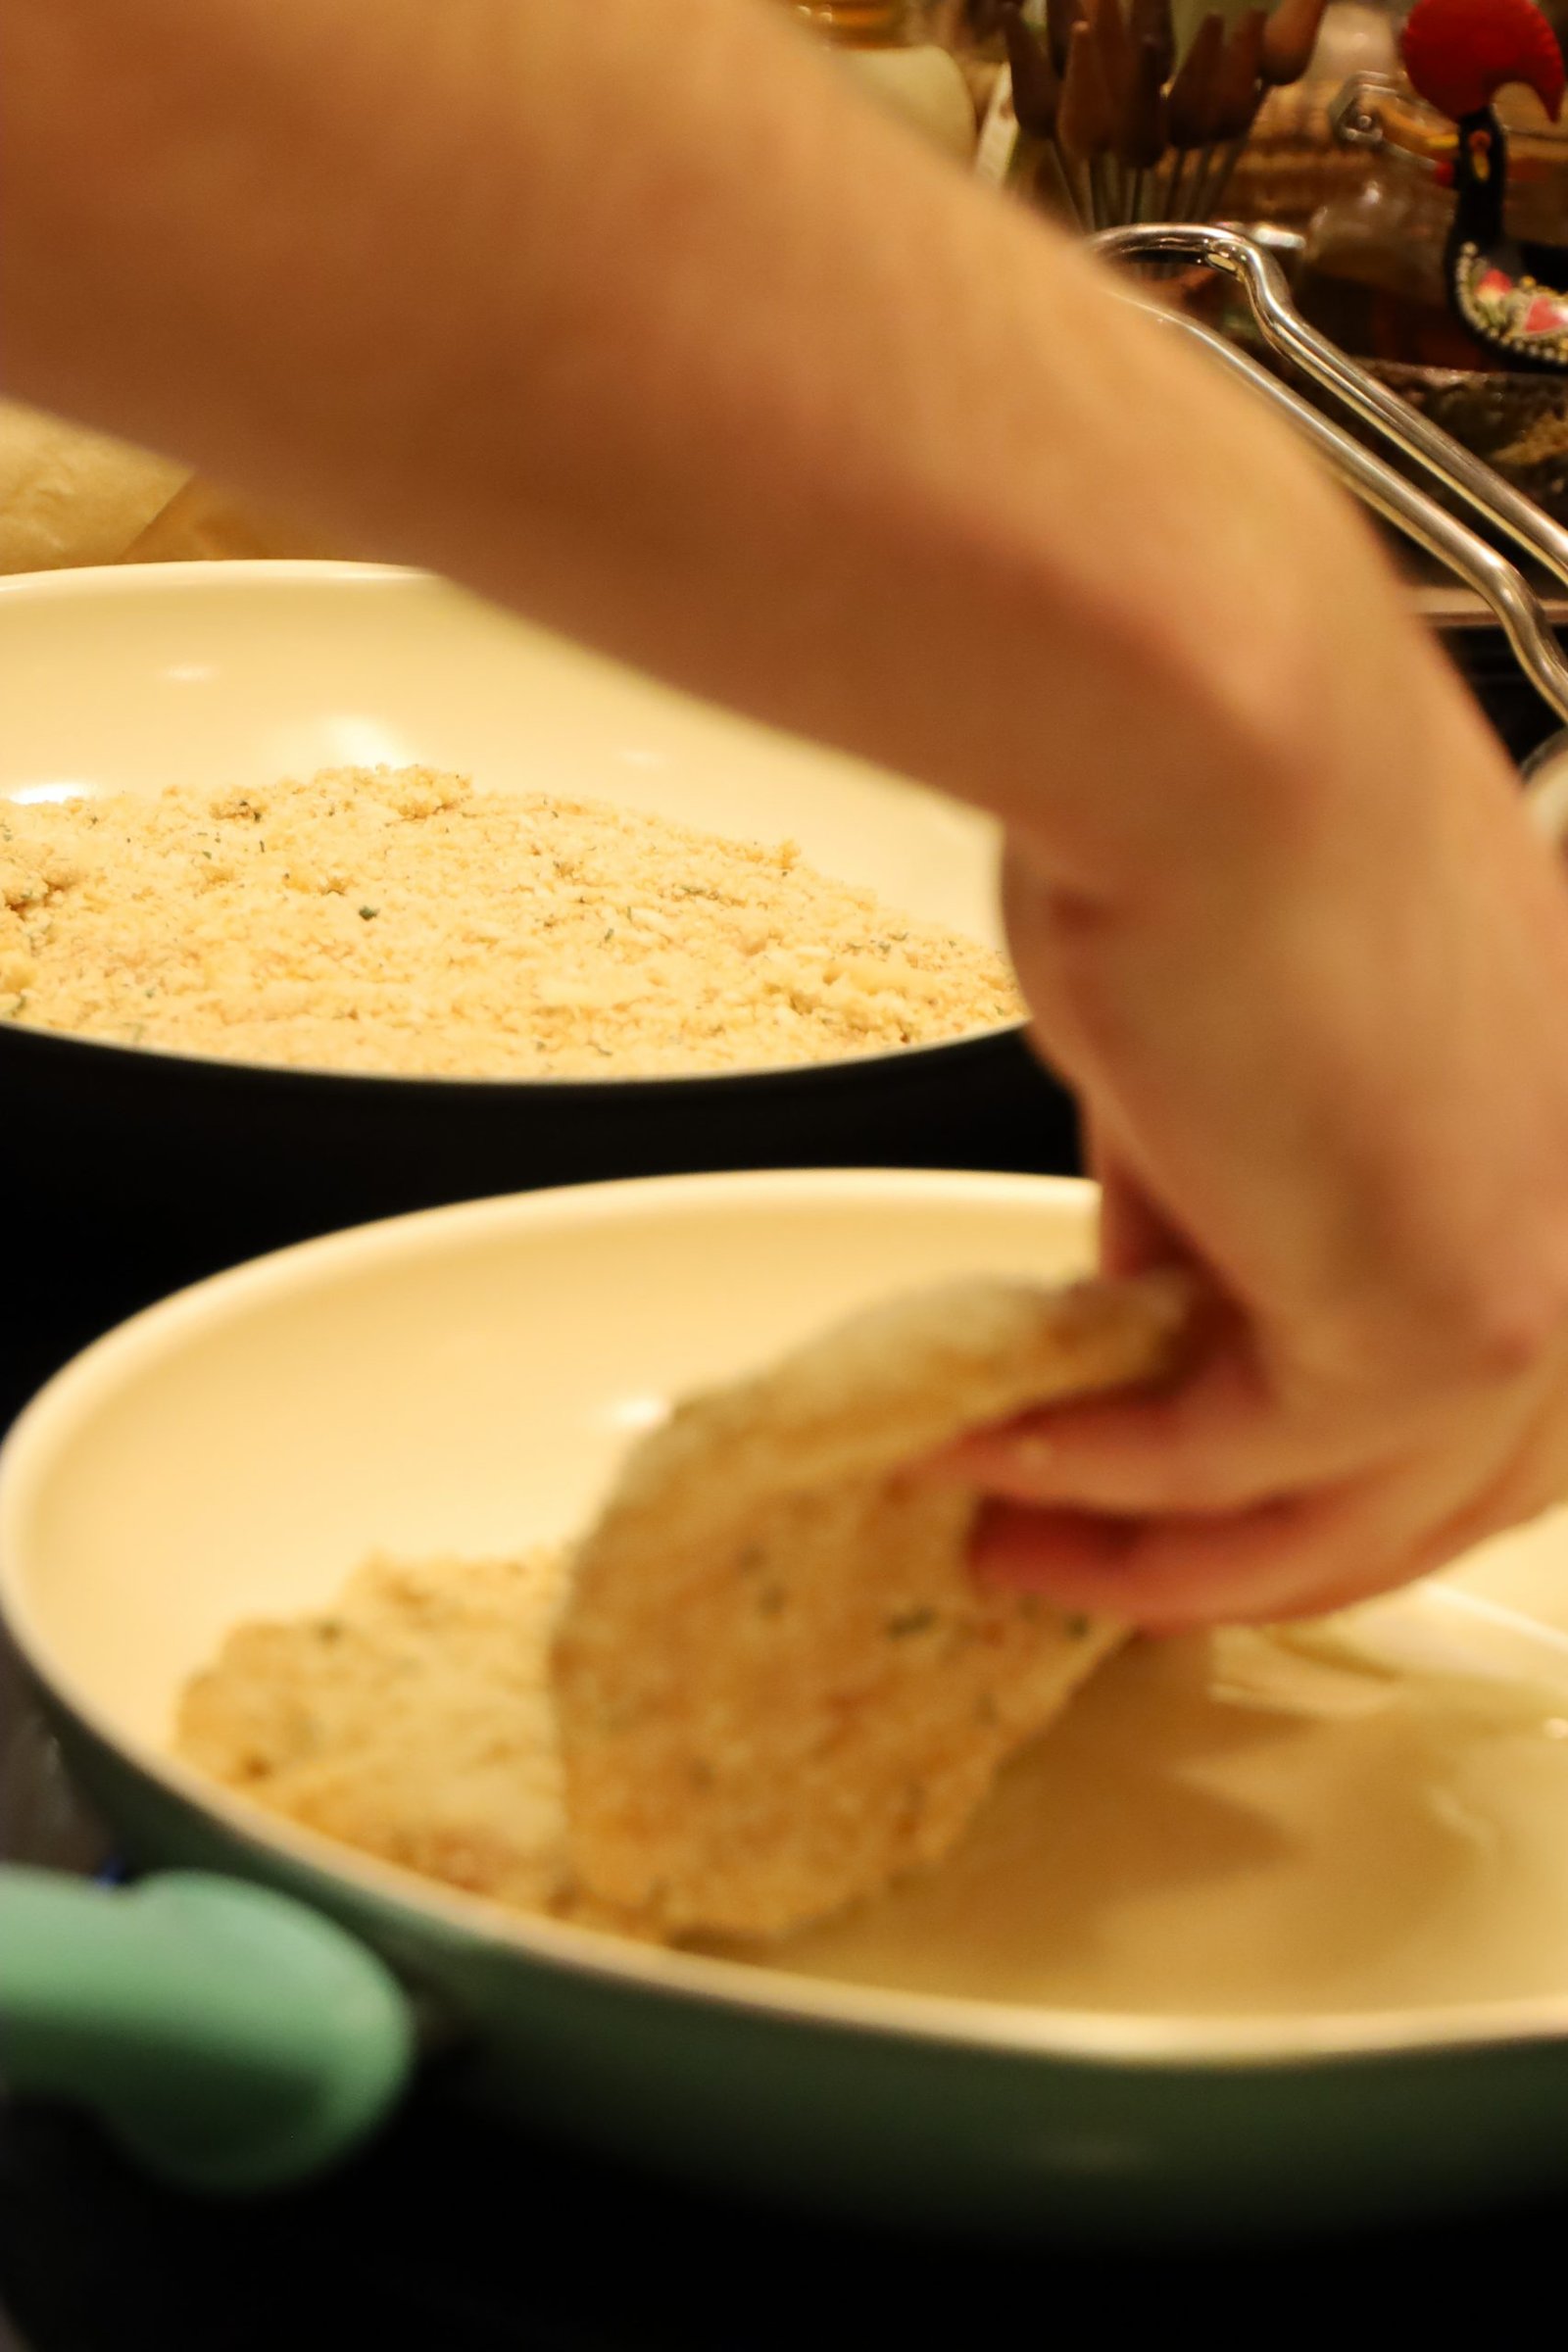
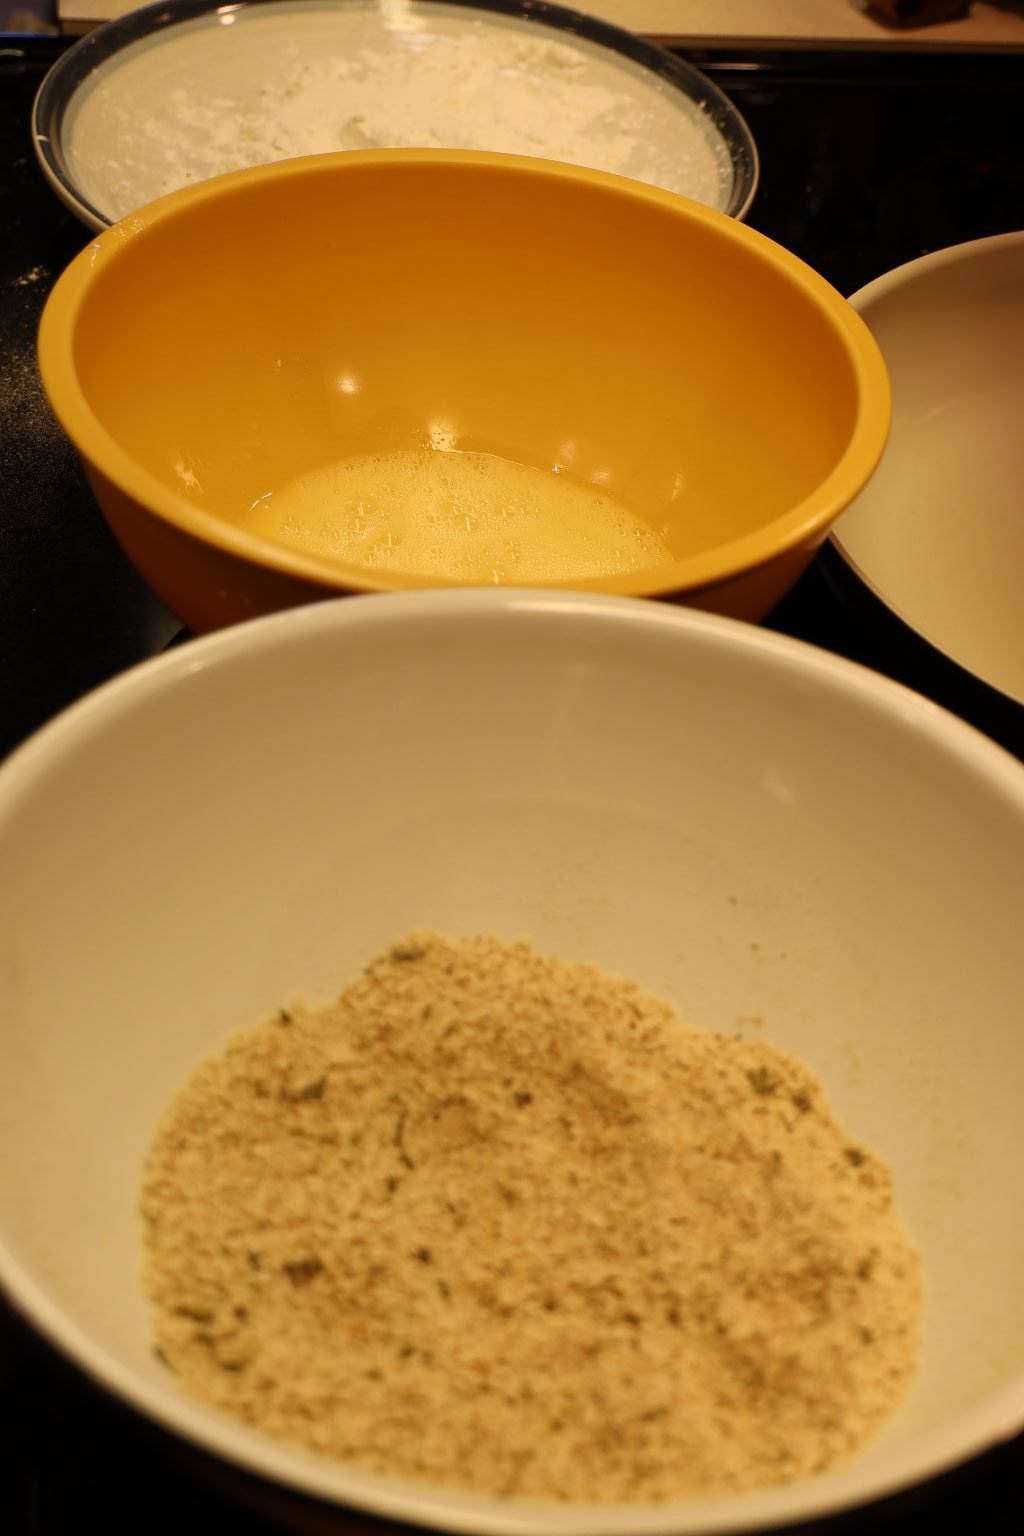
Line up your bowls in this order… flour, eggs, and bread crumbs.
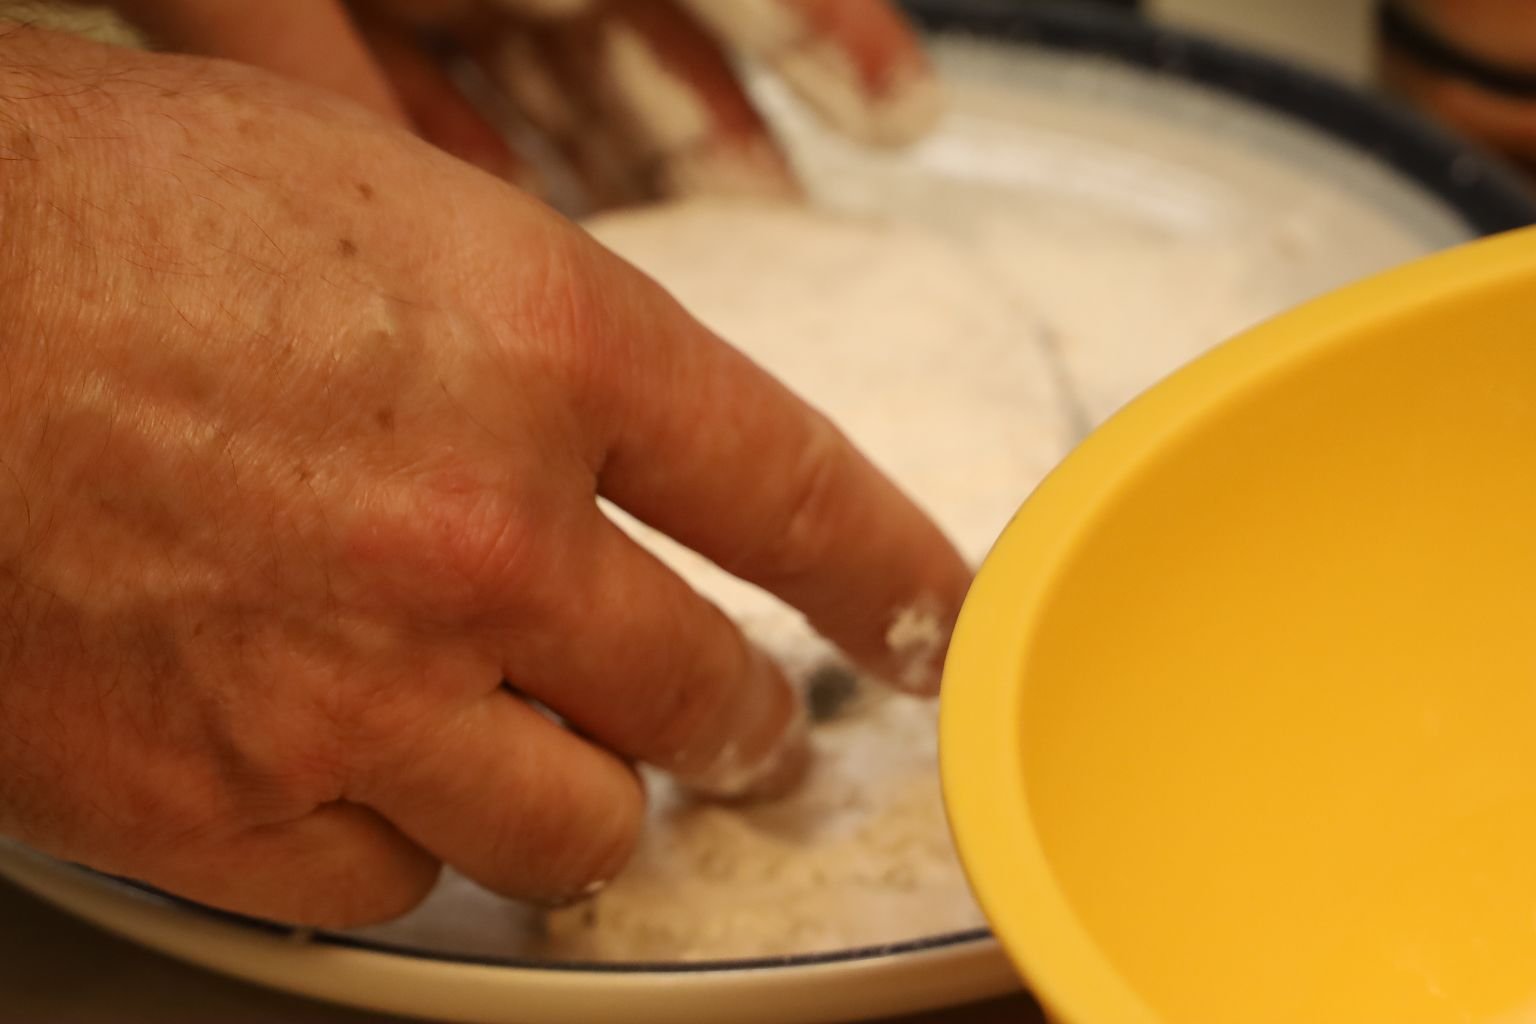
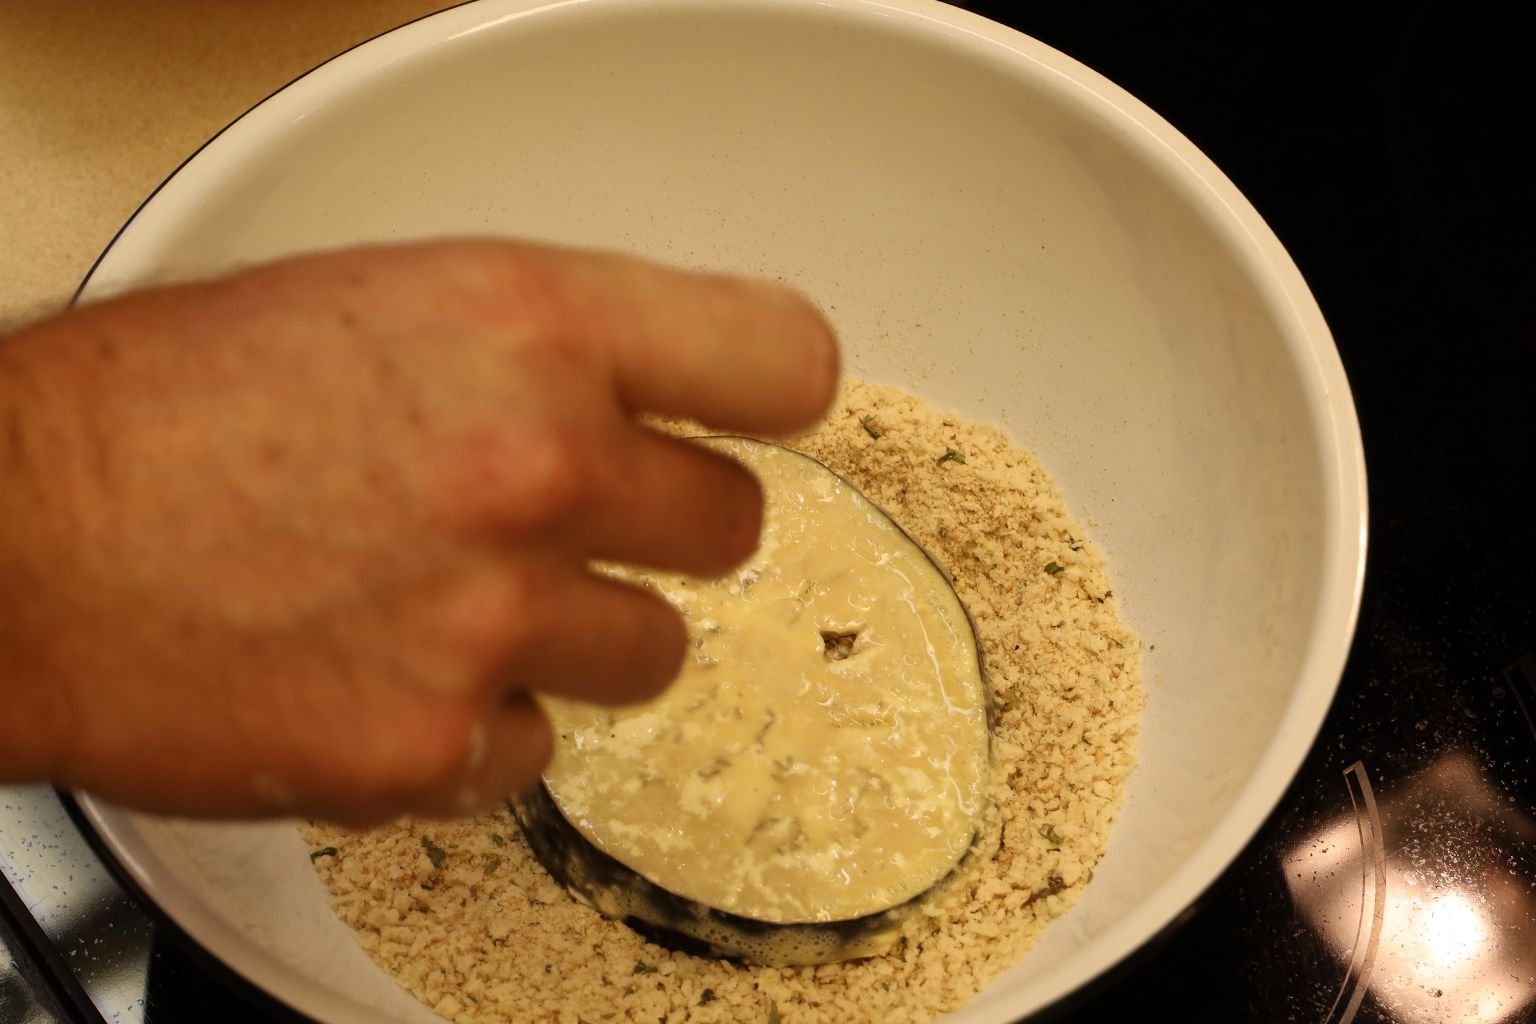
These next steps are called the three step process. Take one of the flattened chicken breasts and place it into the flour bowl, ensuring the breast is thoroughly covered in flour. Shake off the excess then dip the breast into the eggs.


Here, Brodie is submerging the chicken breast into the eggs. Remove the breast and let it drain a bit, removing any excess egg, then place the breast into the bread crumbs.
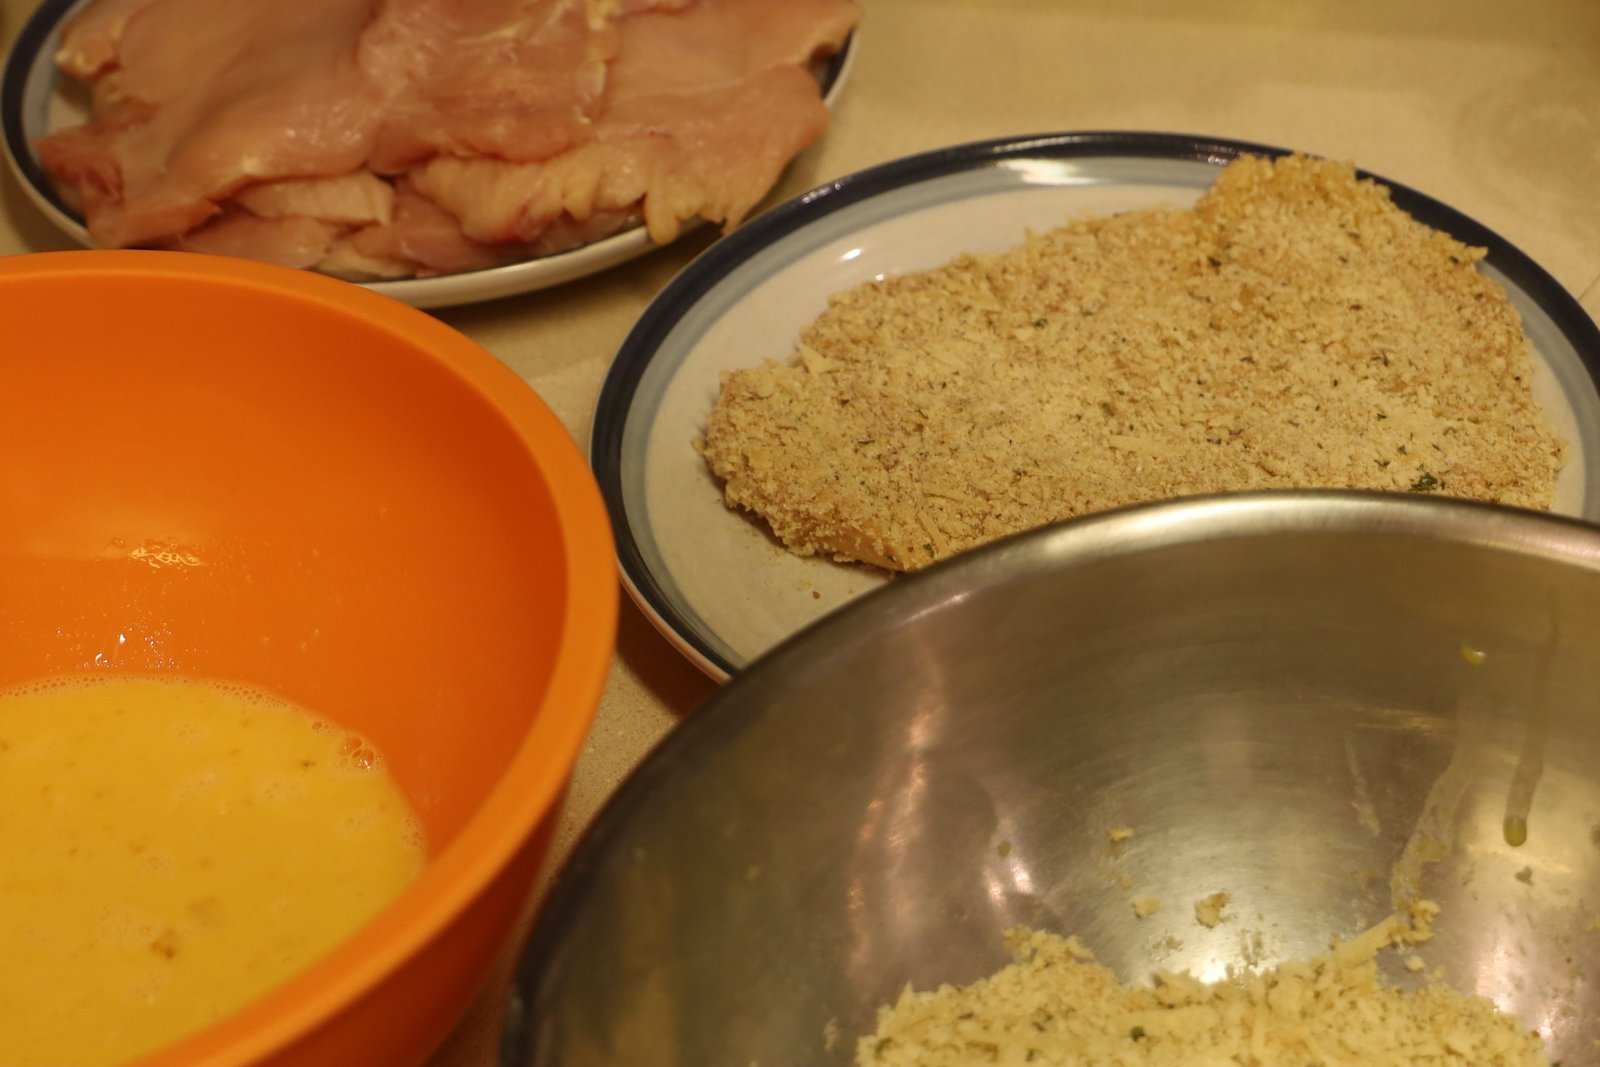
Press the breast into the bread crumbs being sure to coat the breasts with the crumbs on both sides. When done, place the breast on a plate and repeat this procedure with the other breasts. Separate each breast with a sheet of parchment paper, so they don’t stick together.

Here is a picture of the Grapeseed Oil we used to fry the breast. It is worth noting Grapeseed oil has a high cooking smoke point, is a good source of omega-6 polyunsaturated fat and it contains a decent amount of vitamin E. All oils have a smoke point which is in reference to where the oil begins to break down and burn making it unusable.
——————————————————————–


Here, Brodie simply opened the Red Sauce and poured it into a medium sized pot and is heating it on low.

Brodie is using two pans in order to fry two breasts at a time in order to save time.
He is also warming the tomato Red Sauce and heating the water for the spaghetti noodles. Multi-tasking at its best!


Add 3 Tbsp. of Grapeseed Oil to each pan and turn the pans up to medium heat.
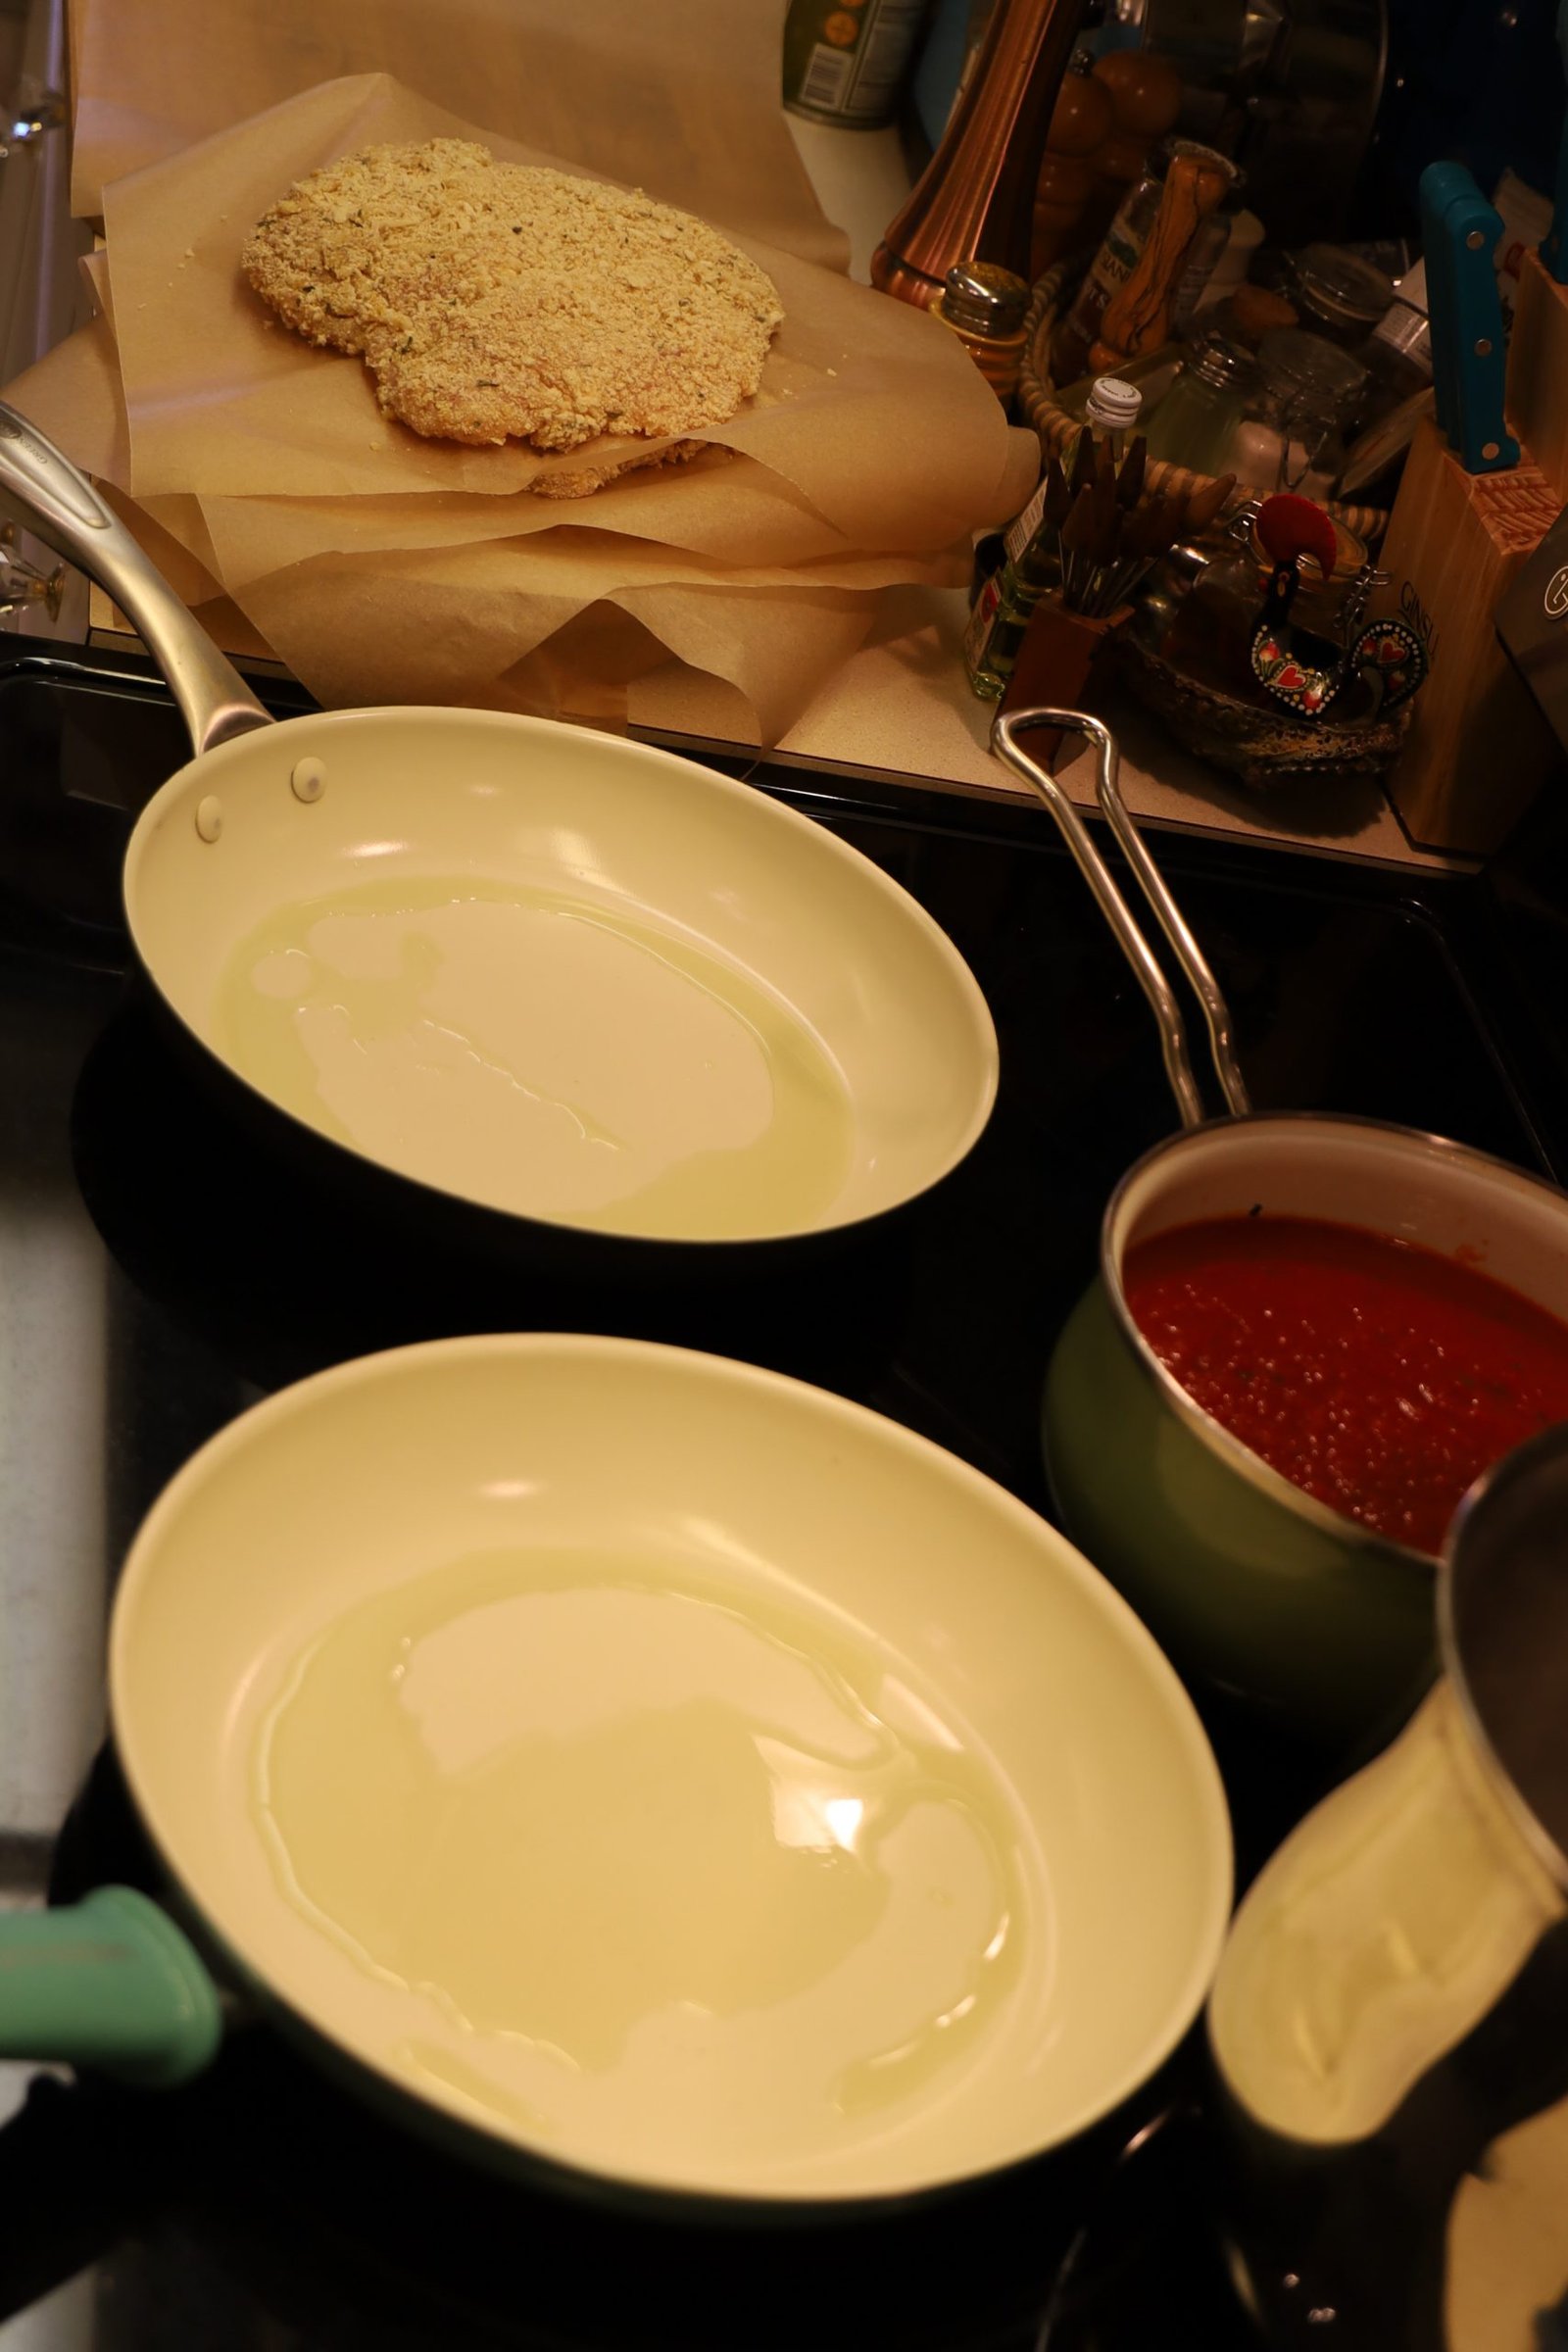
Here, Brodie is letting the oil in the pans come up to temperature.

When the oil is heated to medium heat, add the chicken breast to the pan.

You should hear the slight sizzle of the oil touching the breast as they come together.

Brodie, then fry’s the chicken in the oil until golden brown which takes about 7 minutes on each side. Check this using tongs during the cooking process. He then uses tongs to flip the breast over and using a touch more of oil if needed, fry’s the other side to golden brown.

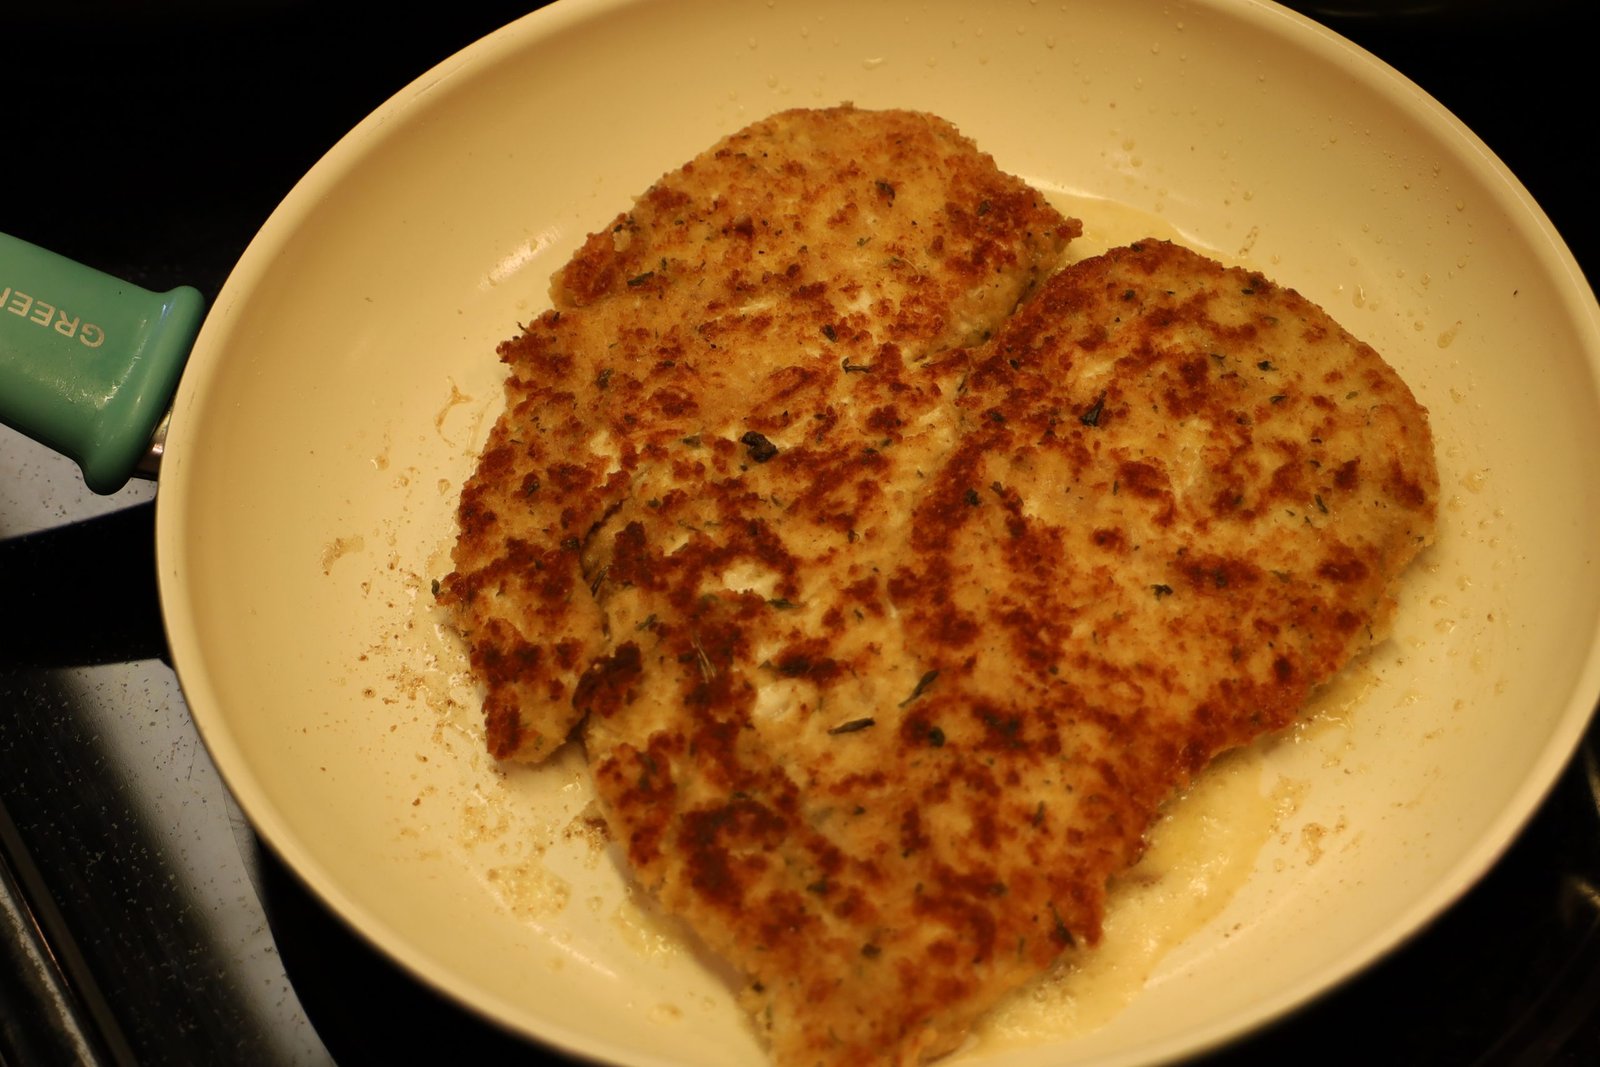
Here, the breast looks like a heart as we love Chicken Parm!
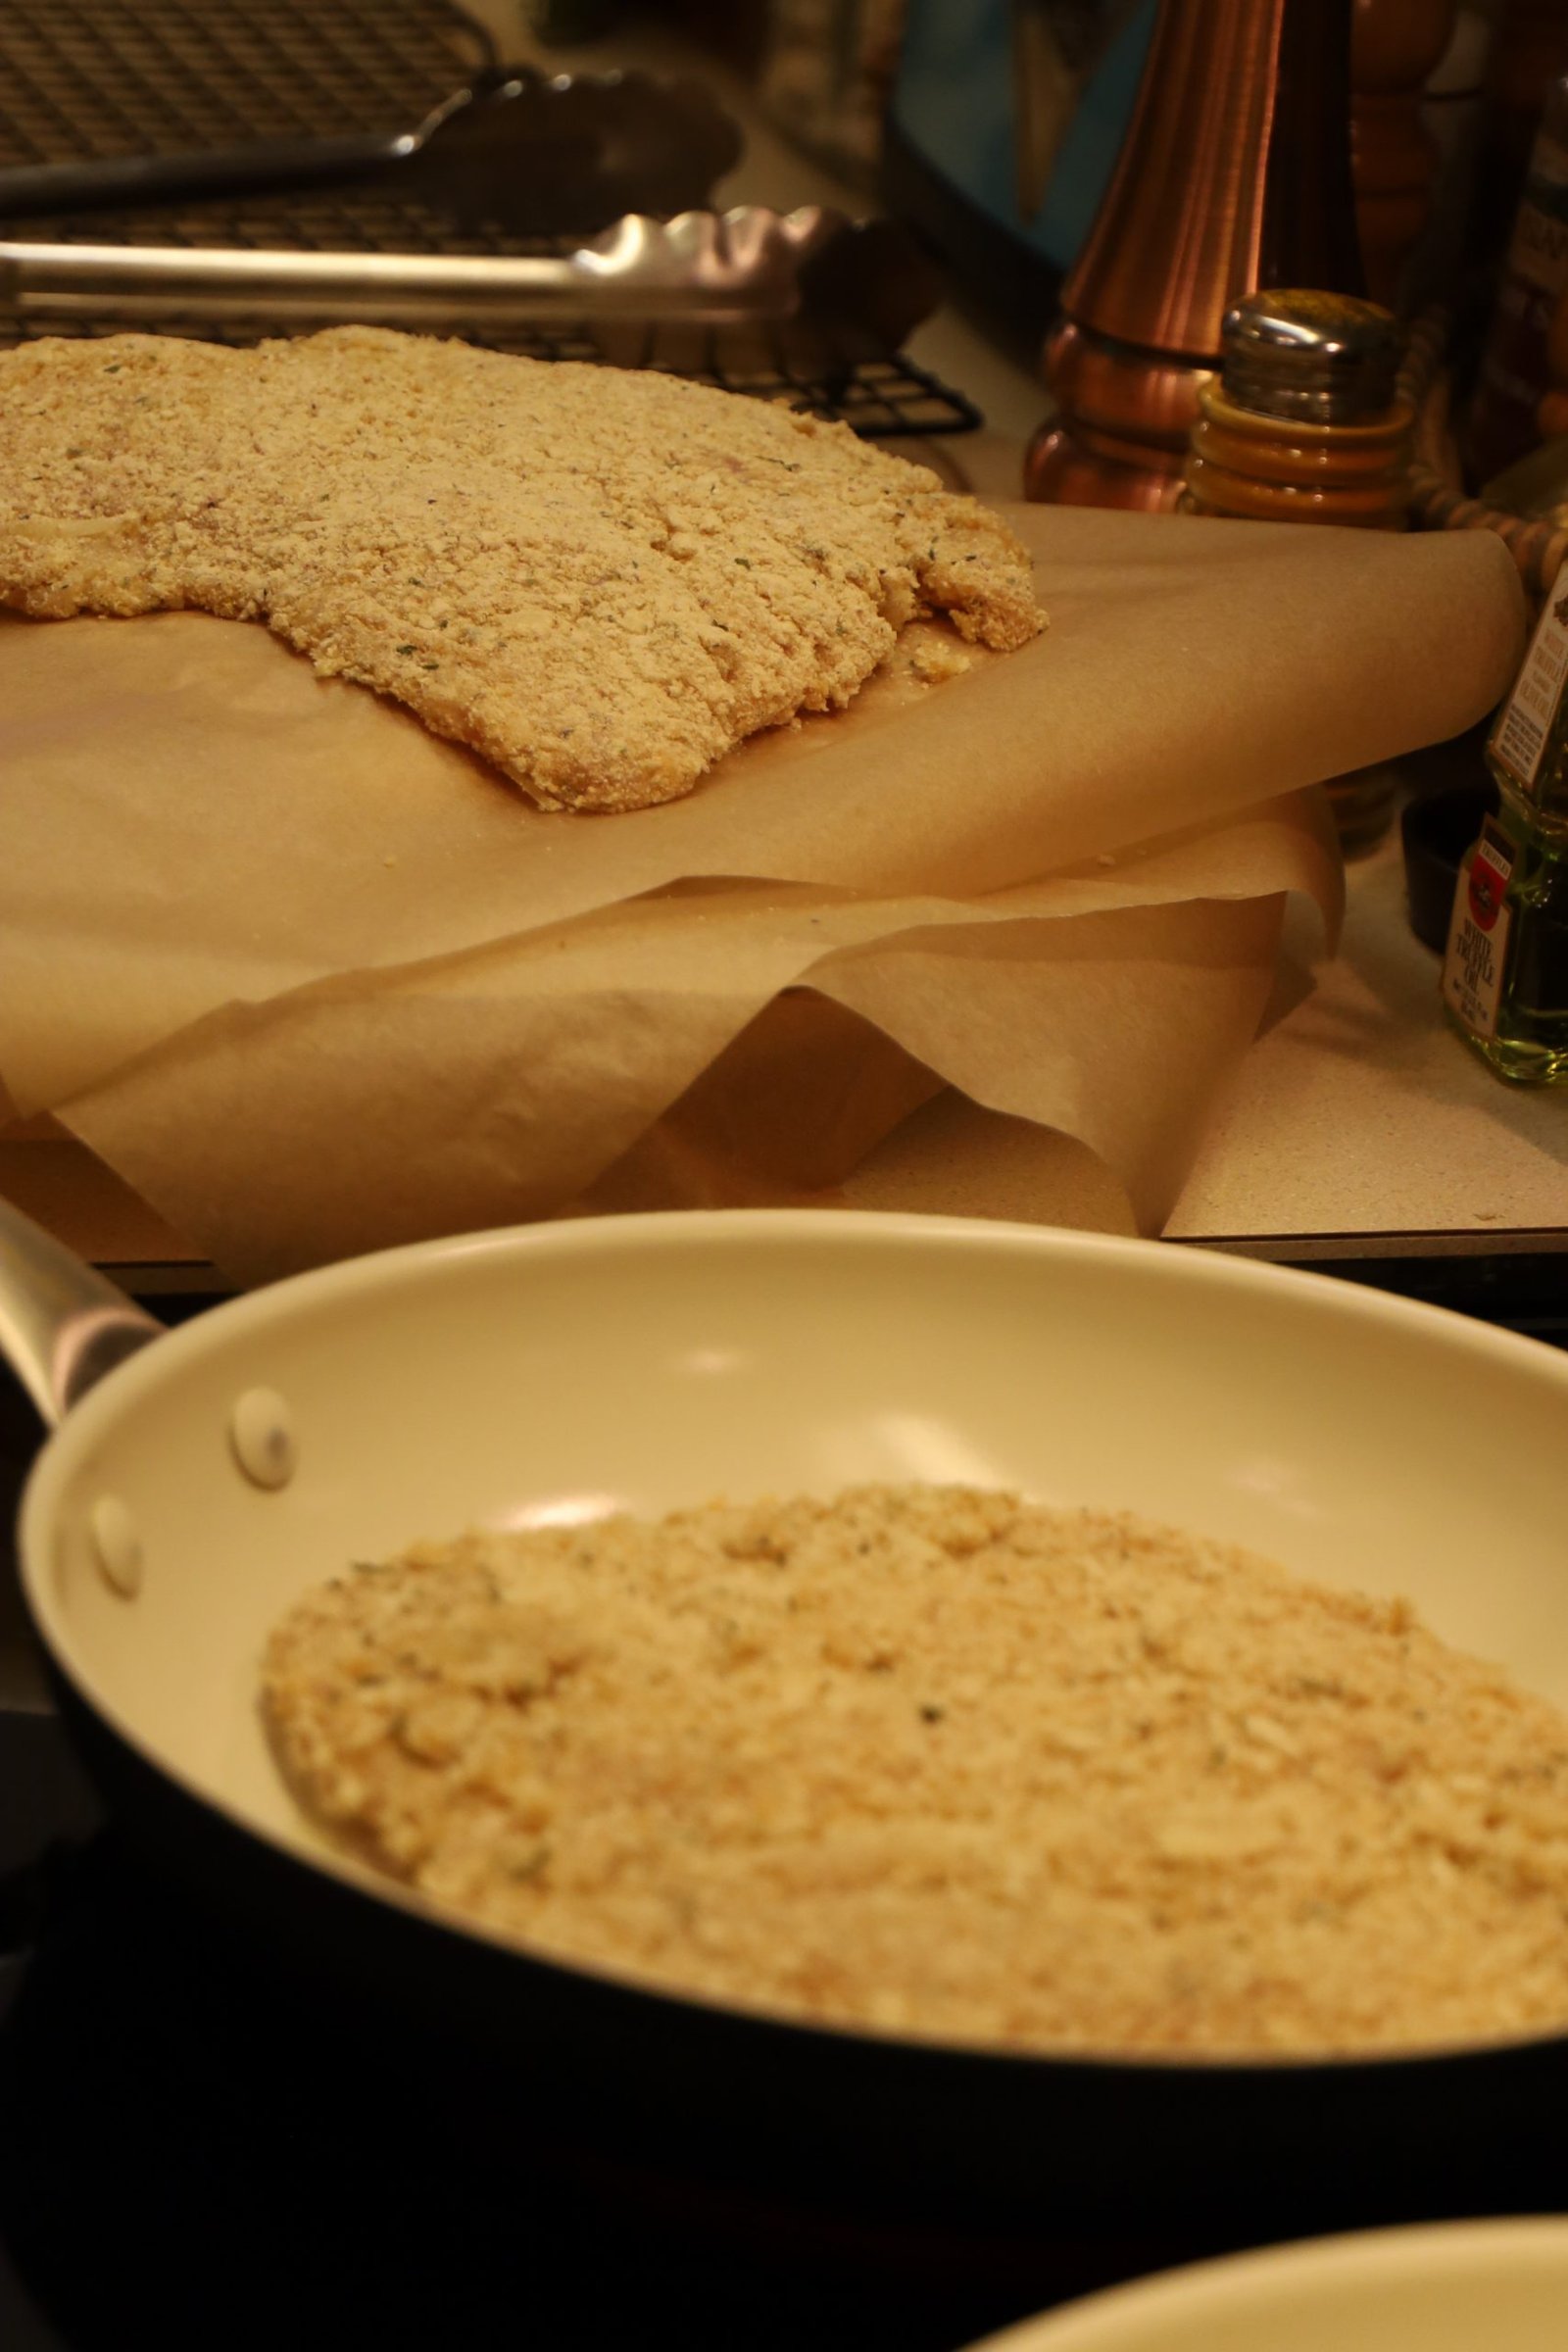
After each breast is cooked, clean the pan with a towel, removing any excess bits, and oil. This is done so the leftover items don’t burn while the next chicken breast is being fried.

Lightly salt and pepper the breasts when they have completed frying. Place the fried chicken breast on a rack as shown to drain any excess oil. Place parchment paper under the rack to catch the oil.
————————————————————-

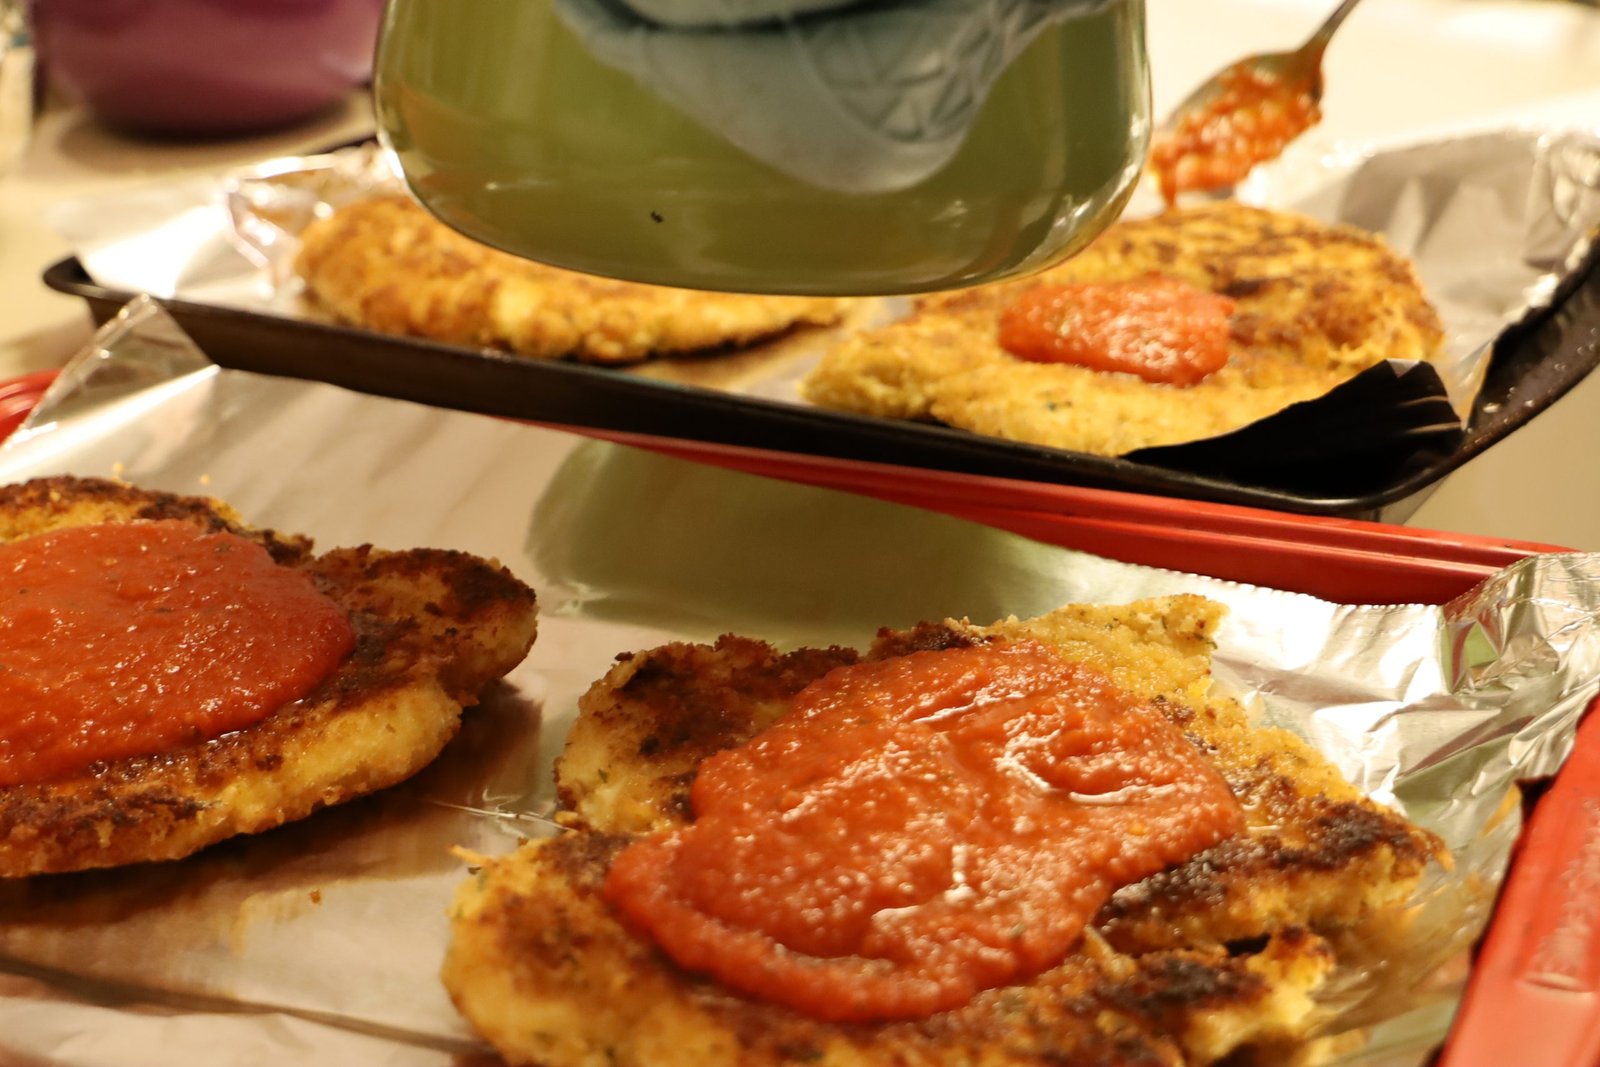
Place the chicken breasts on a cookie sheet lined with aluminum foil and top with a good helping of red sauce as shown.


Place your Mozzarella slices on top of the sauce then sprinkle the entire breast with some grated Parmesan Cheese as shown.
————————————————————
Time to Cook the Spaghetti Pasta

Use enough spaghetti pasta to feed your guests and cooks as directed on the box.
We always add some salt to the water to bring the water to boil. Once boiling we add about a teaspoon or so of olive oil to help prevent the pasta from sticking together.
————————————————-

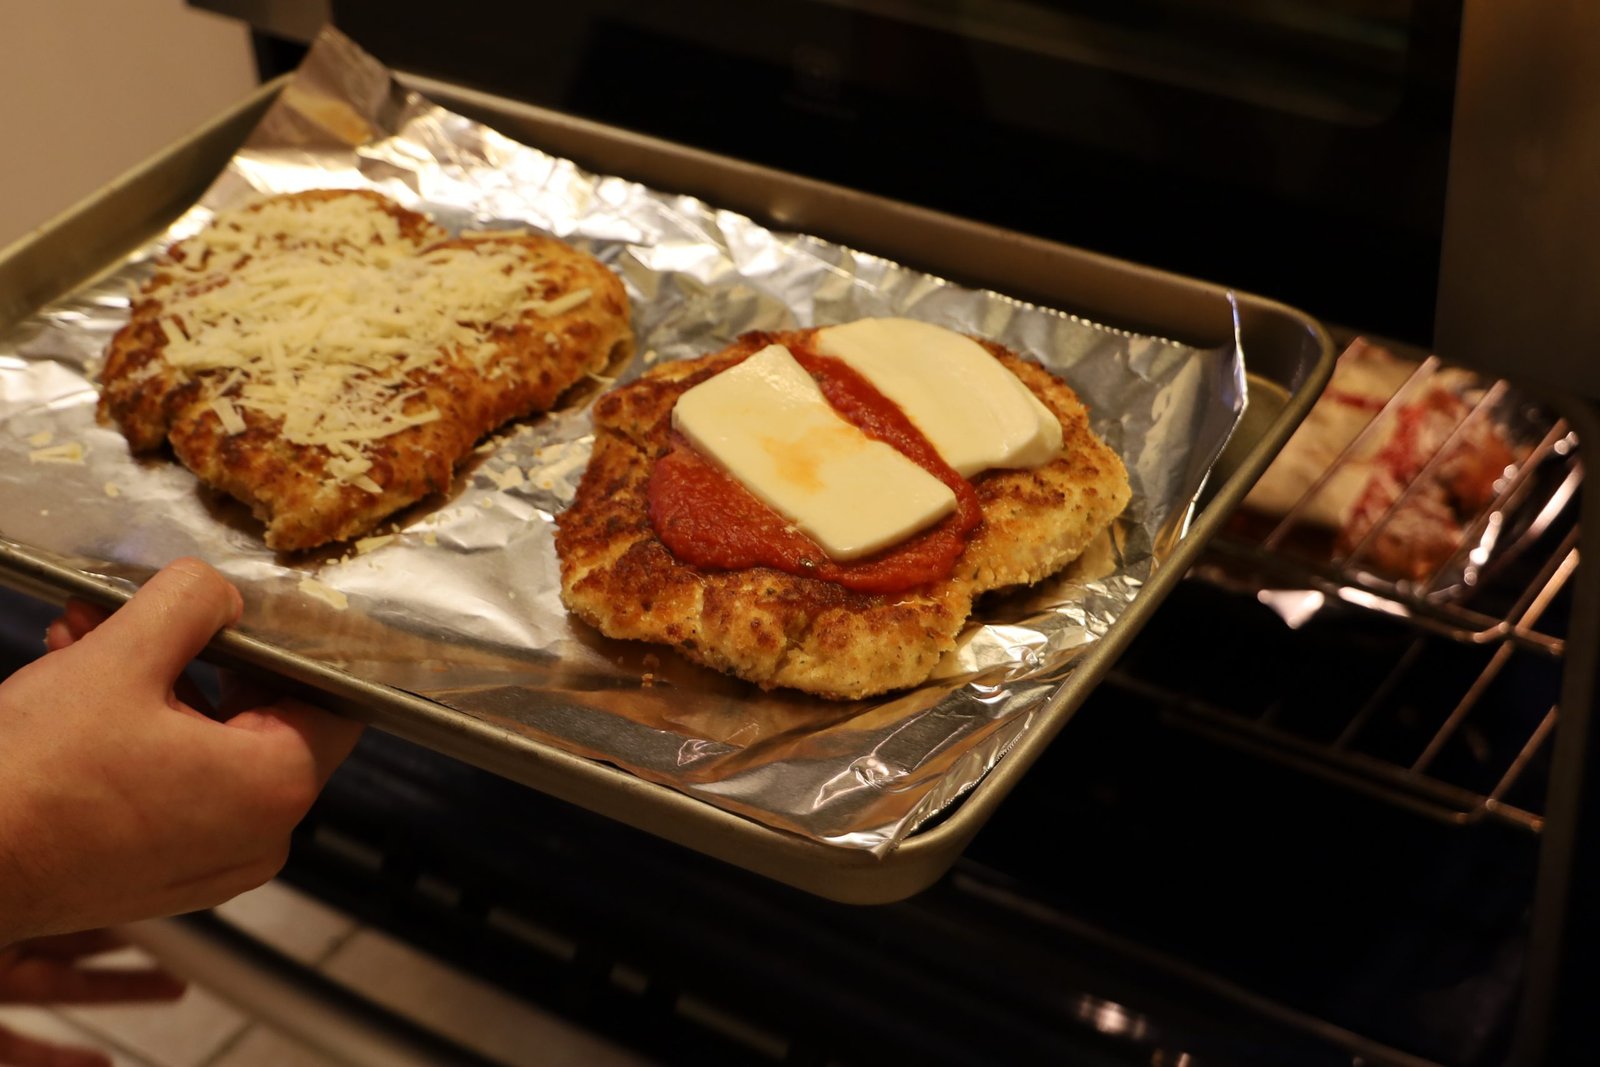
Bake the breasts in a 300’F oven for about 8 to 10 minutes to melt the cheese. Brodie also used the oven’s broiler to brown the cheese giving it some nice color.

To plate, mix your cooked spaghetti with some extra virgin olive oil and add a touch of garlic powder to taste. We also thought some prepared Pesto mixed into the spaghetti would be nice, but that would be used next time. Evenly place the spaghetti on a large plate, then top with your Chicken Parmesan, adding some fresh Basil sprigs from our garden as a beautiful garnish. Place some tomato sauce into a bowl for your guests to use as they wish.
Bon Appetit!
——————————————————————-
Gordon’s Roasted Vegetables

Here I wanted to roast a medley of vegetables, but not have them all taste the same, so I split them up into three groups. One group was the carrots, then the bell peppers, then the squash.
————————————————————–
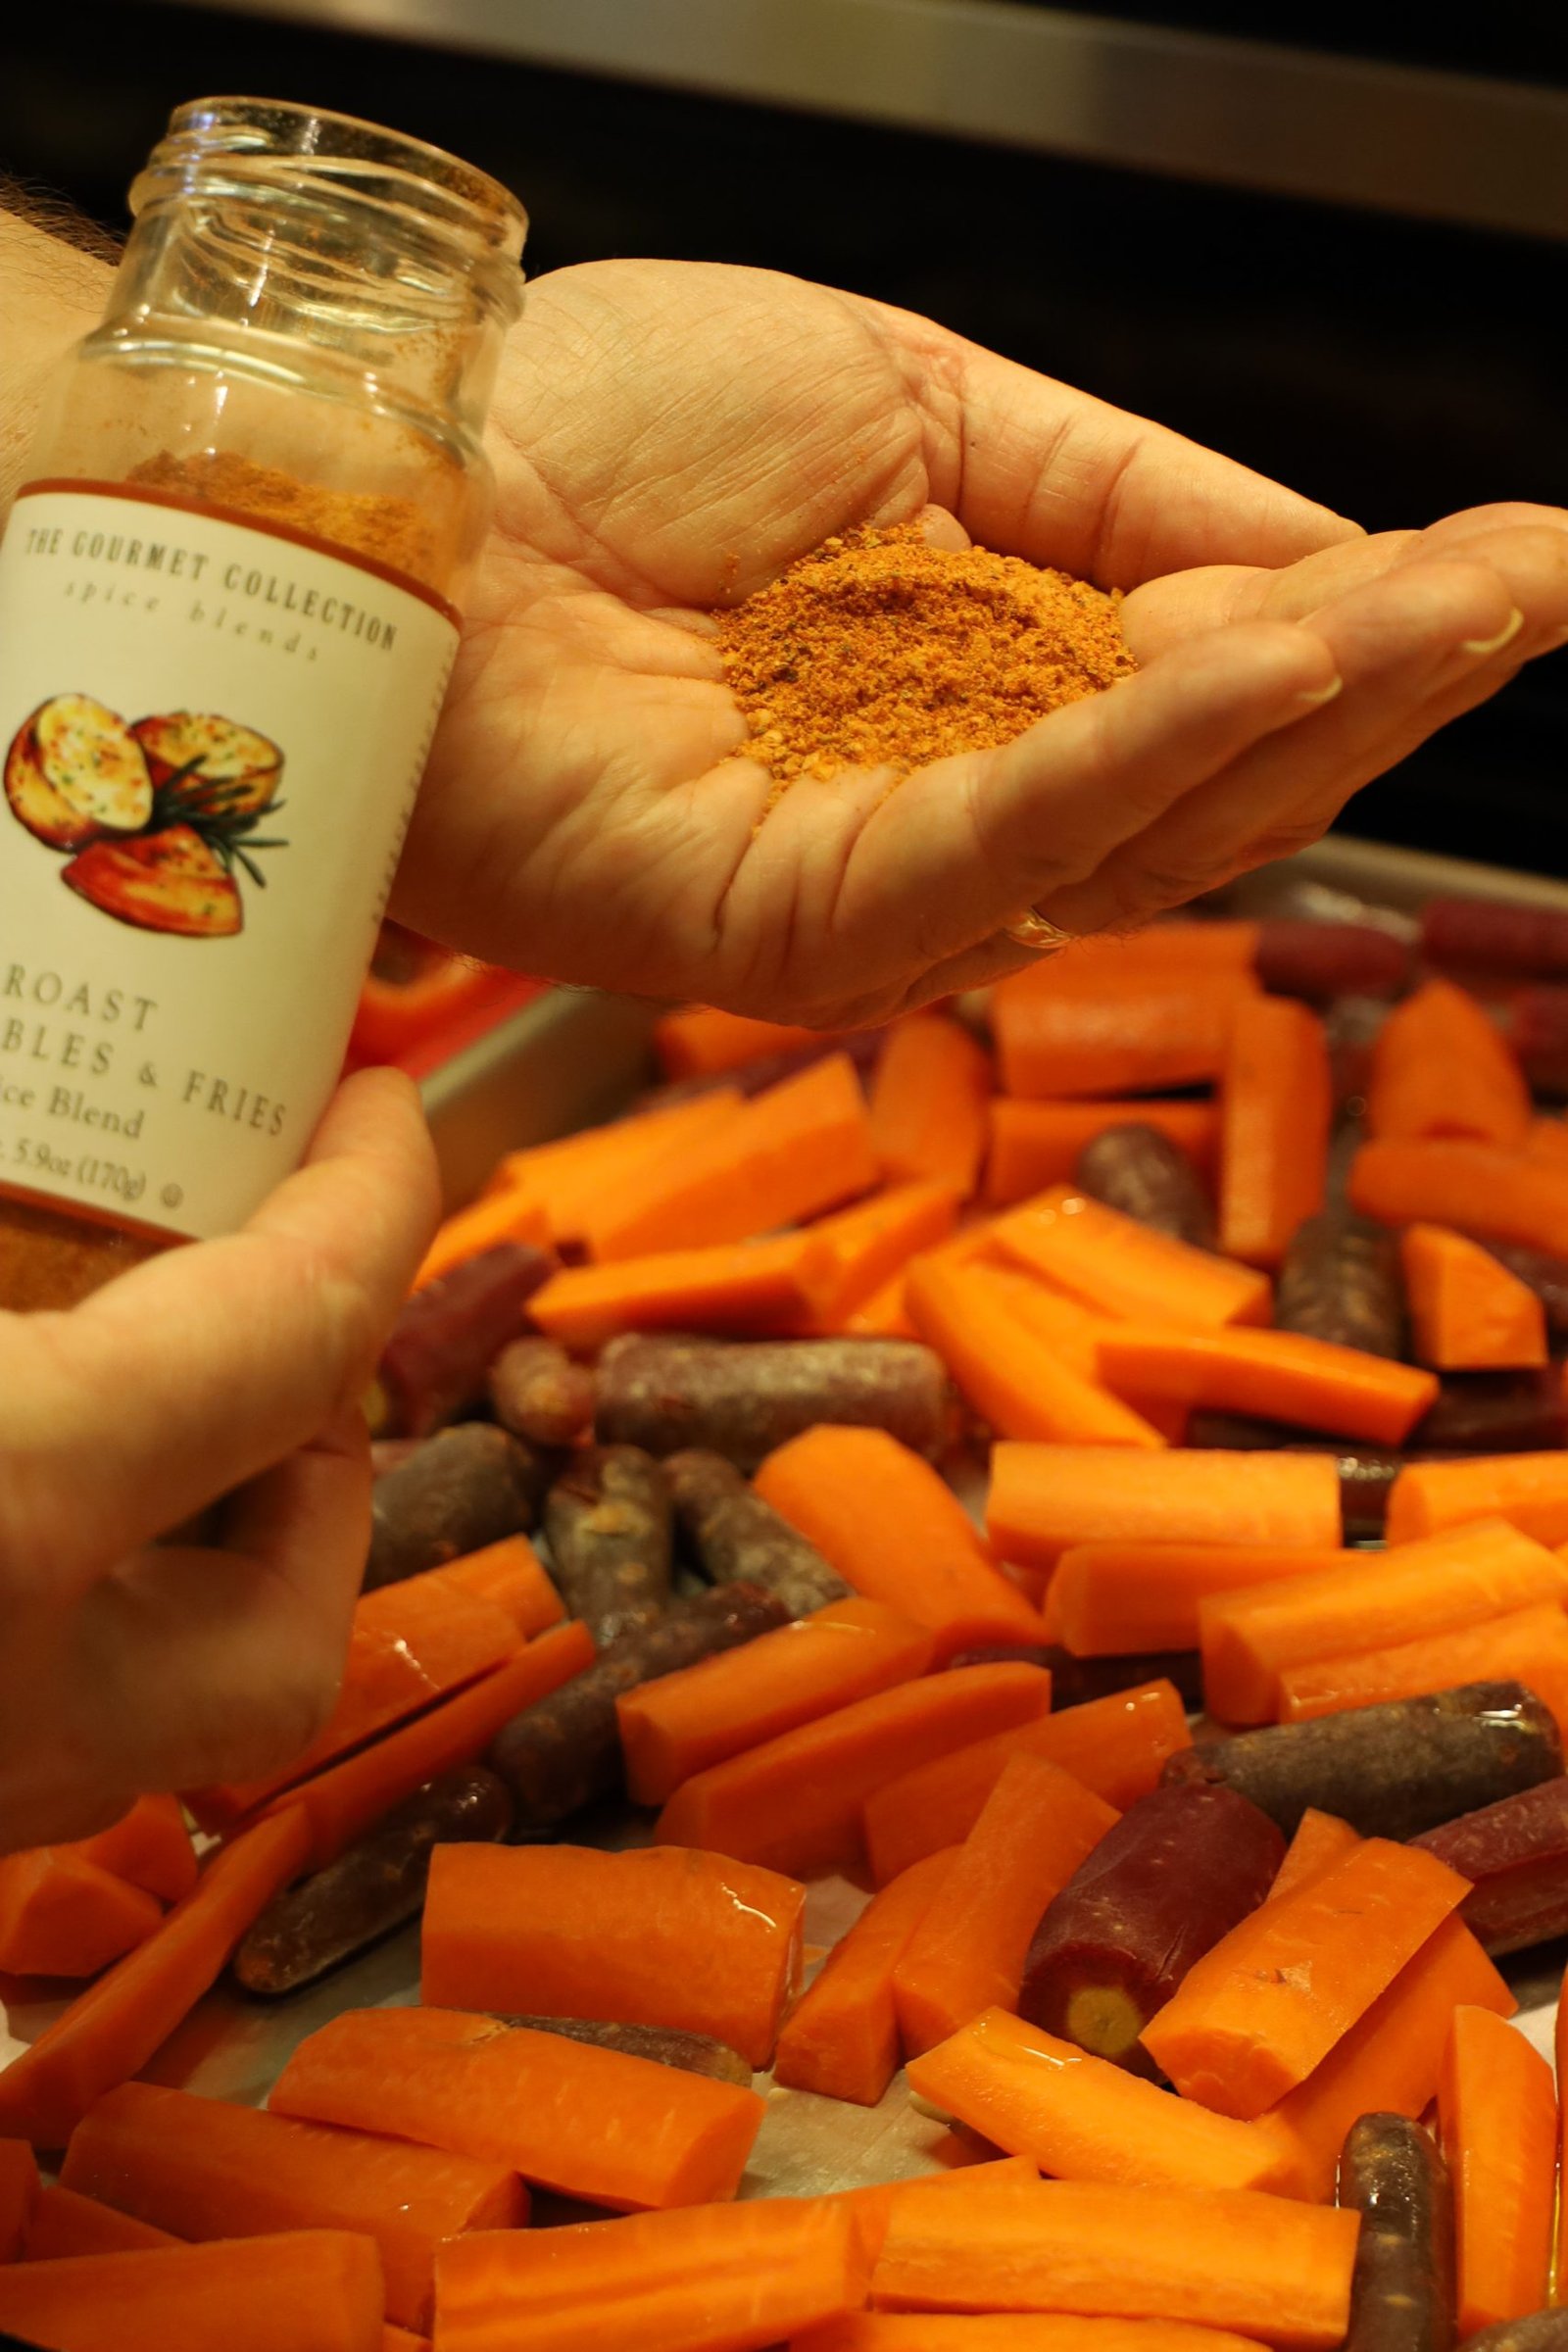
Roasted Carrots Ingredients:
Purple Carrots – sliced and quartered – enough to fill up half a cookie sheet
Orange Carrots – sliced and quartered – enough to fill up half a cookie sheet
3 Tbsp. Olive Oil
7-8 Whole Garlic Cloves – Peeled
2 Tbsp. Roast Vegetables & Fries Spice Blend
Garnish with fresh parsley
——————————————————————-
Roasted Bell Pepper Ingredients:
2 Red Bell Peppers – sliced into even 1 1/2 inch chunks
1 Orange Bell Pepper – sliced into even 1 1/2 inch chunks
1 Yellow Bell Pepper – sliced into even 1 1/2 inch chunks
1 Green Bell Pepper – sliced into even 1 1/2 inch chunks
3 Tbsp. Olive Oil
2 Tbsp. Pizza Palooza & All Things Italian Spice Blend
Garnish with fresh parsley
———————————————————–
Roasted Yellow and Zucchini Squash Ingredients:
3 Zucchini Squash – sliced and quartered
3 Yellow Squash – sliced and quartered
3 Tbsp. Olive Oil
2 Tbsp. Pizza Palooza & All Things Italian Spice Blend
Garnish with fresh parsley


I began by peeling the large carrots then slicing them into ~2 inch sections.

I then sliced those sections into quarters so they would match the size of the smaller carrot pieces. You want all the various pieces to be the same size so you achieve even cooking. I placed all the carrot slices on a sheet pan lined with aluminum foil and set it aside.


I then halved the bell peppers, removed the stem and seeds and sliced them into 1 1/2 inch chunks and placed them on a sheet pan lined with foil.
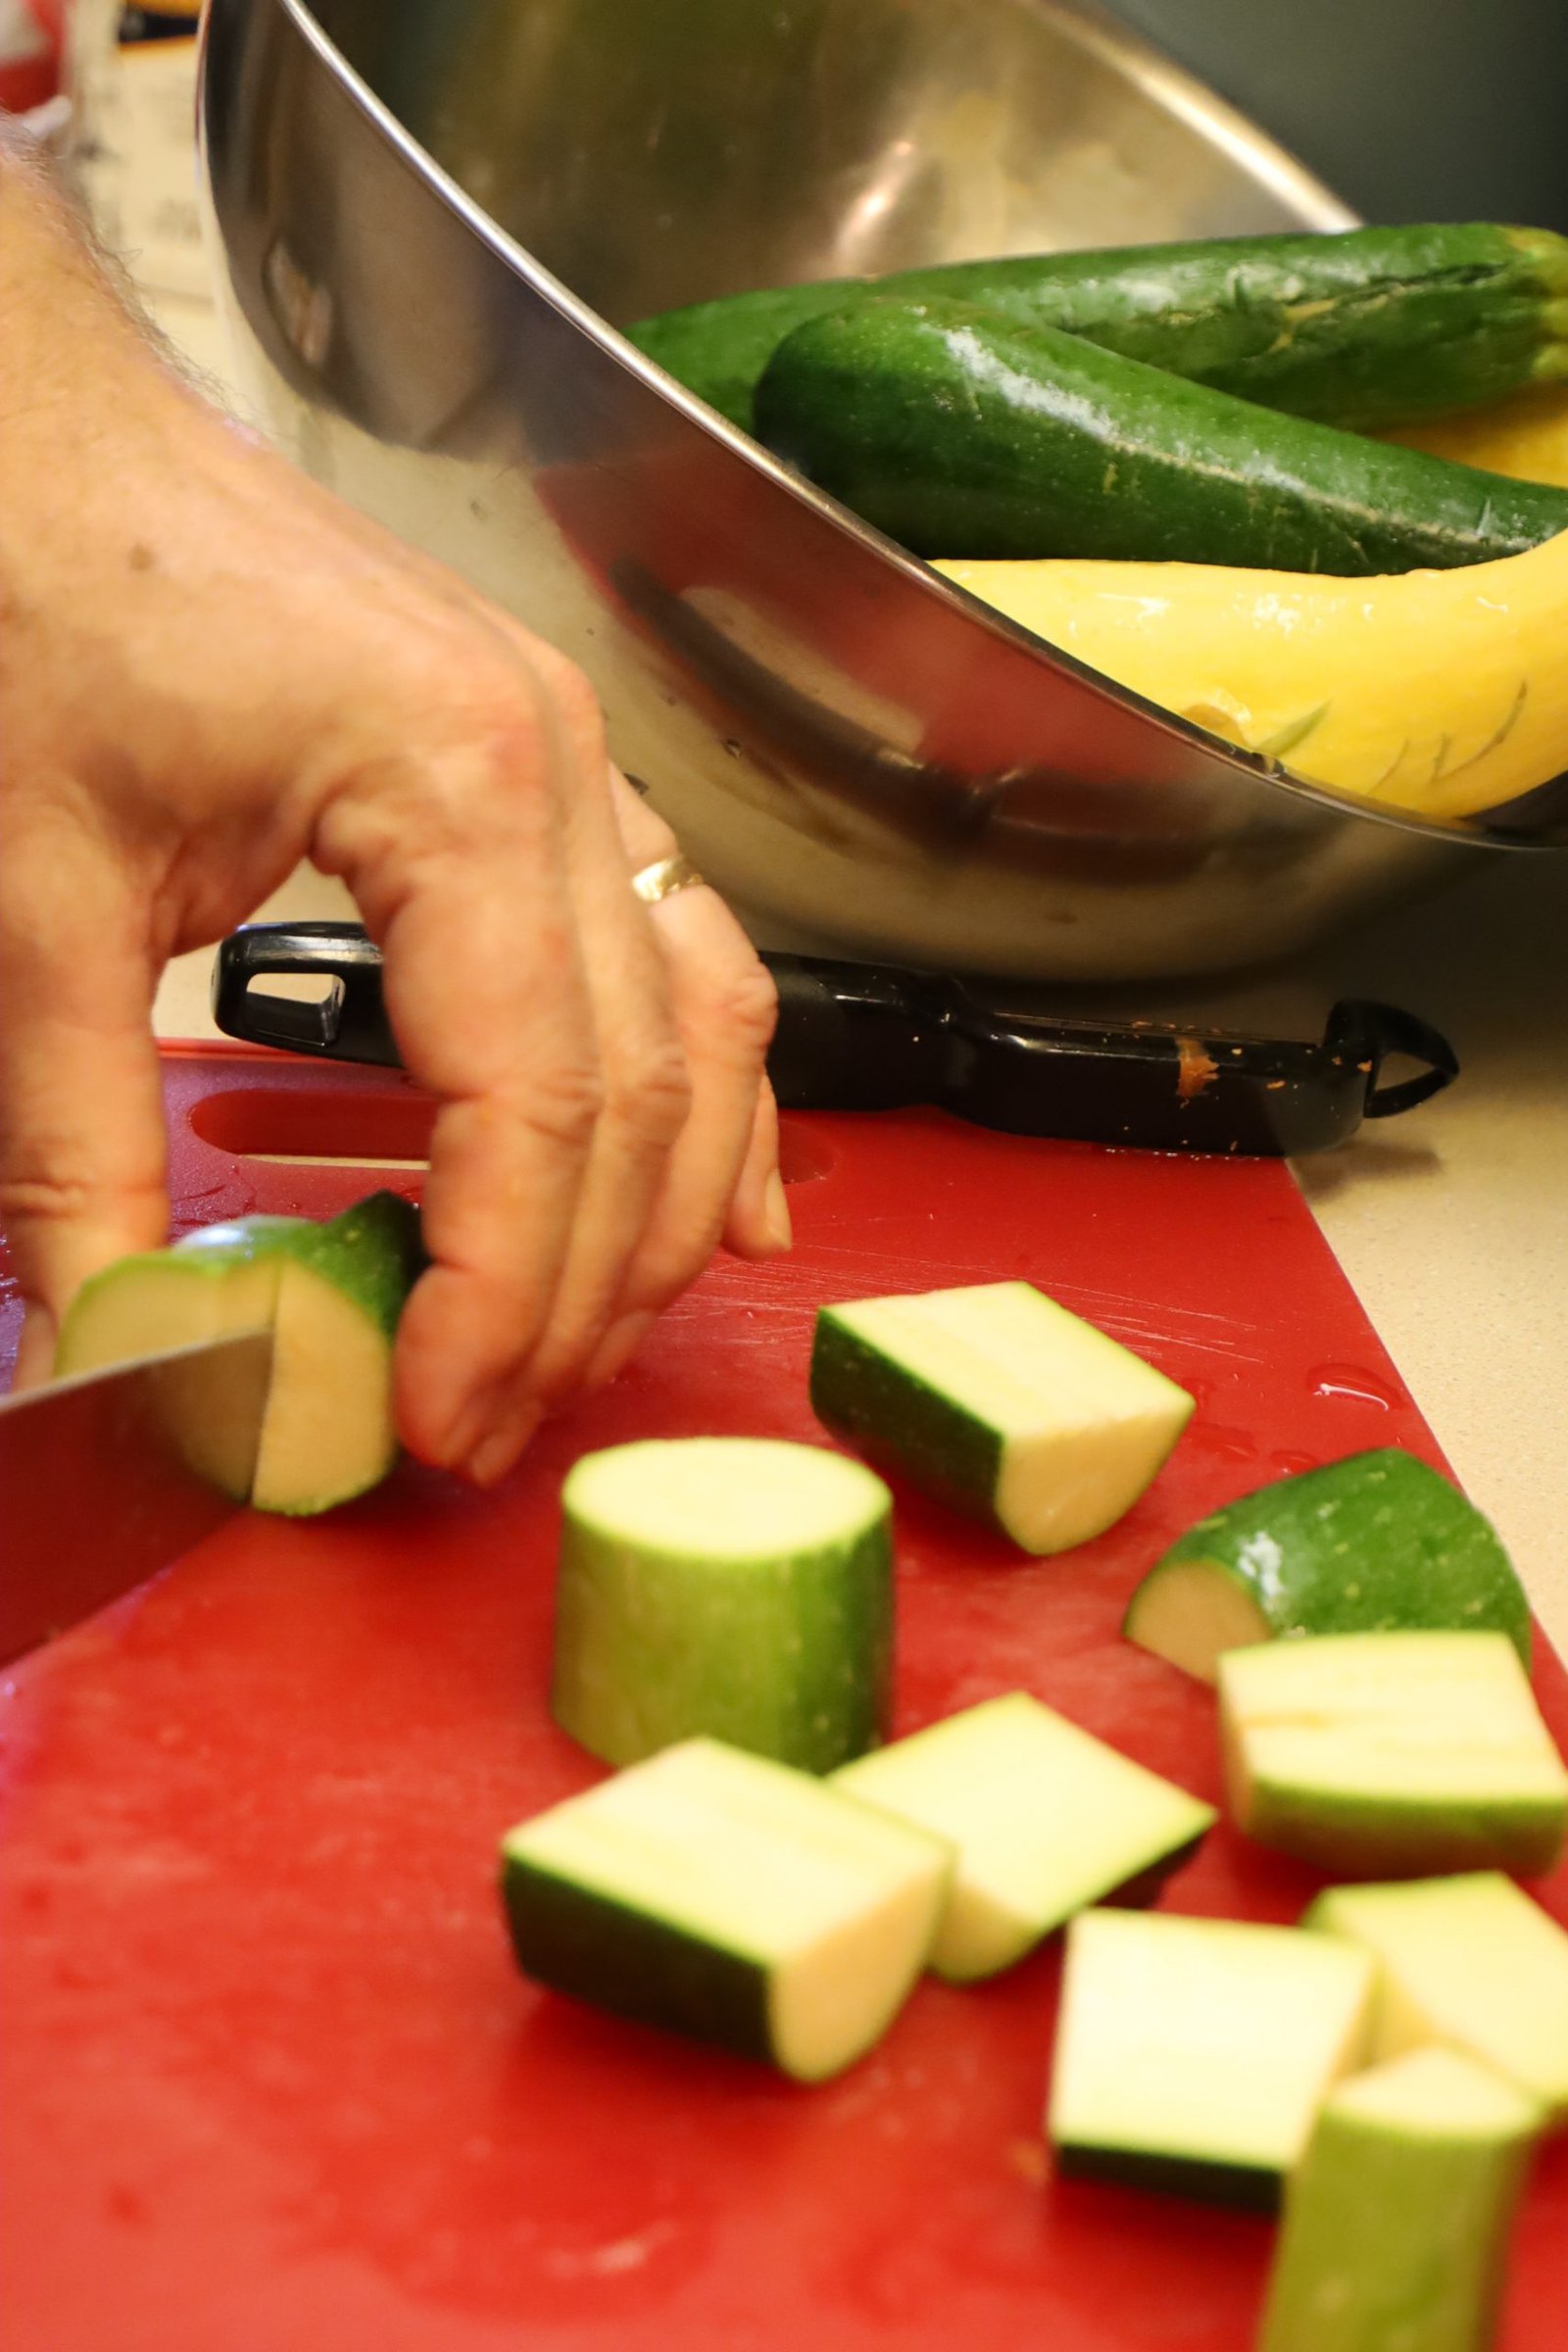

I did the same with the Zucchini and Yellow Squash, making sure all the slices were in even chunks and placed them on a sheet pan lined with foil.

Here is a great picture of all the vegetables on their separate sheet pans ready for the next step.


I tasted these pictured seasonings and thought the Vegetable one would go well with the carrots and squash and the Pizza Palooza would go well with the bell peppers.
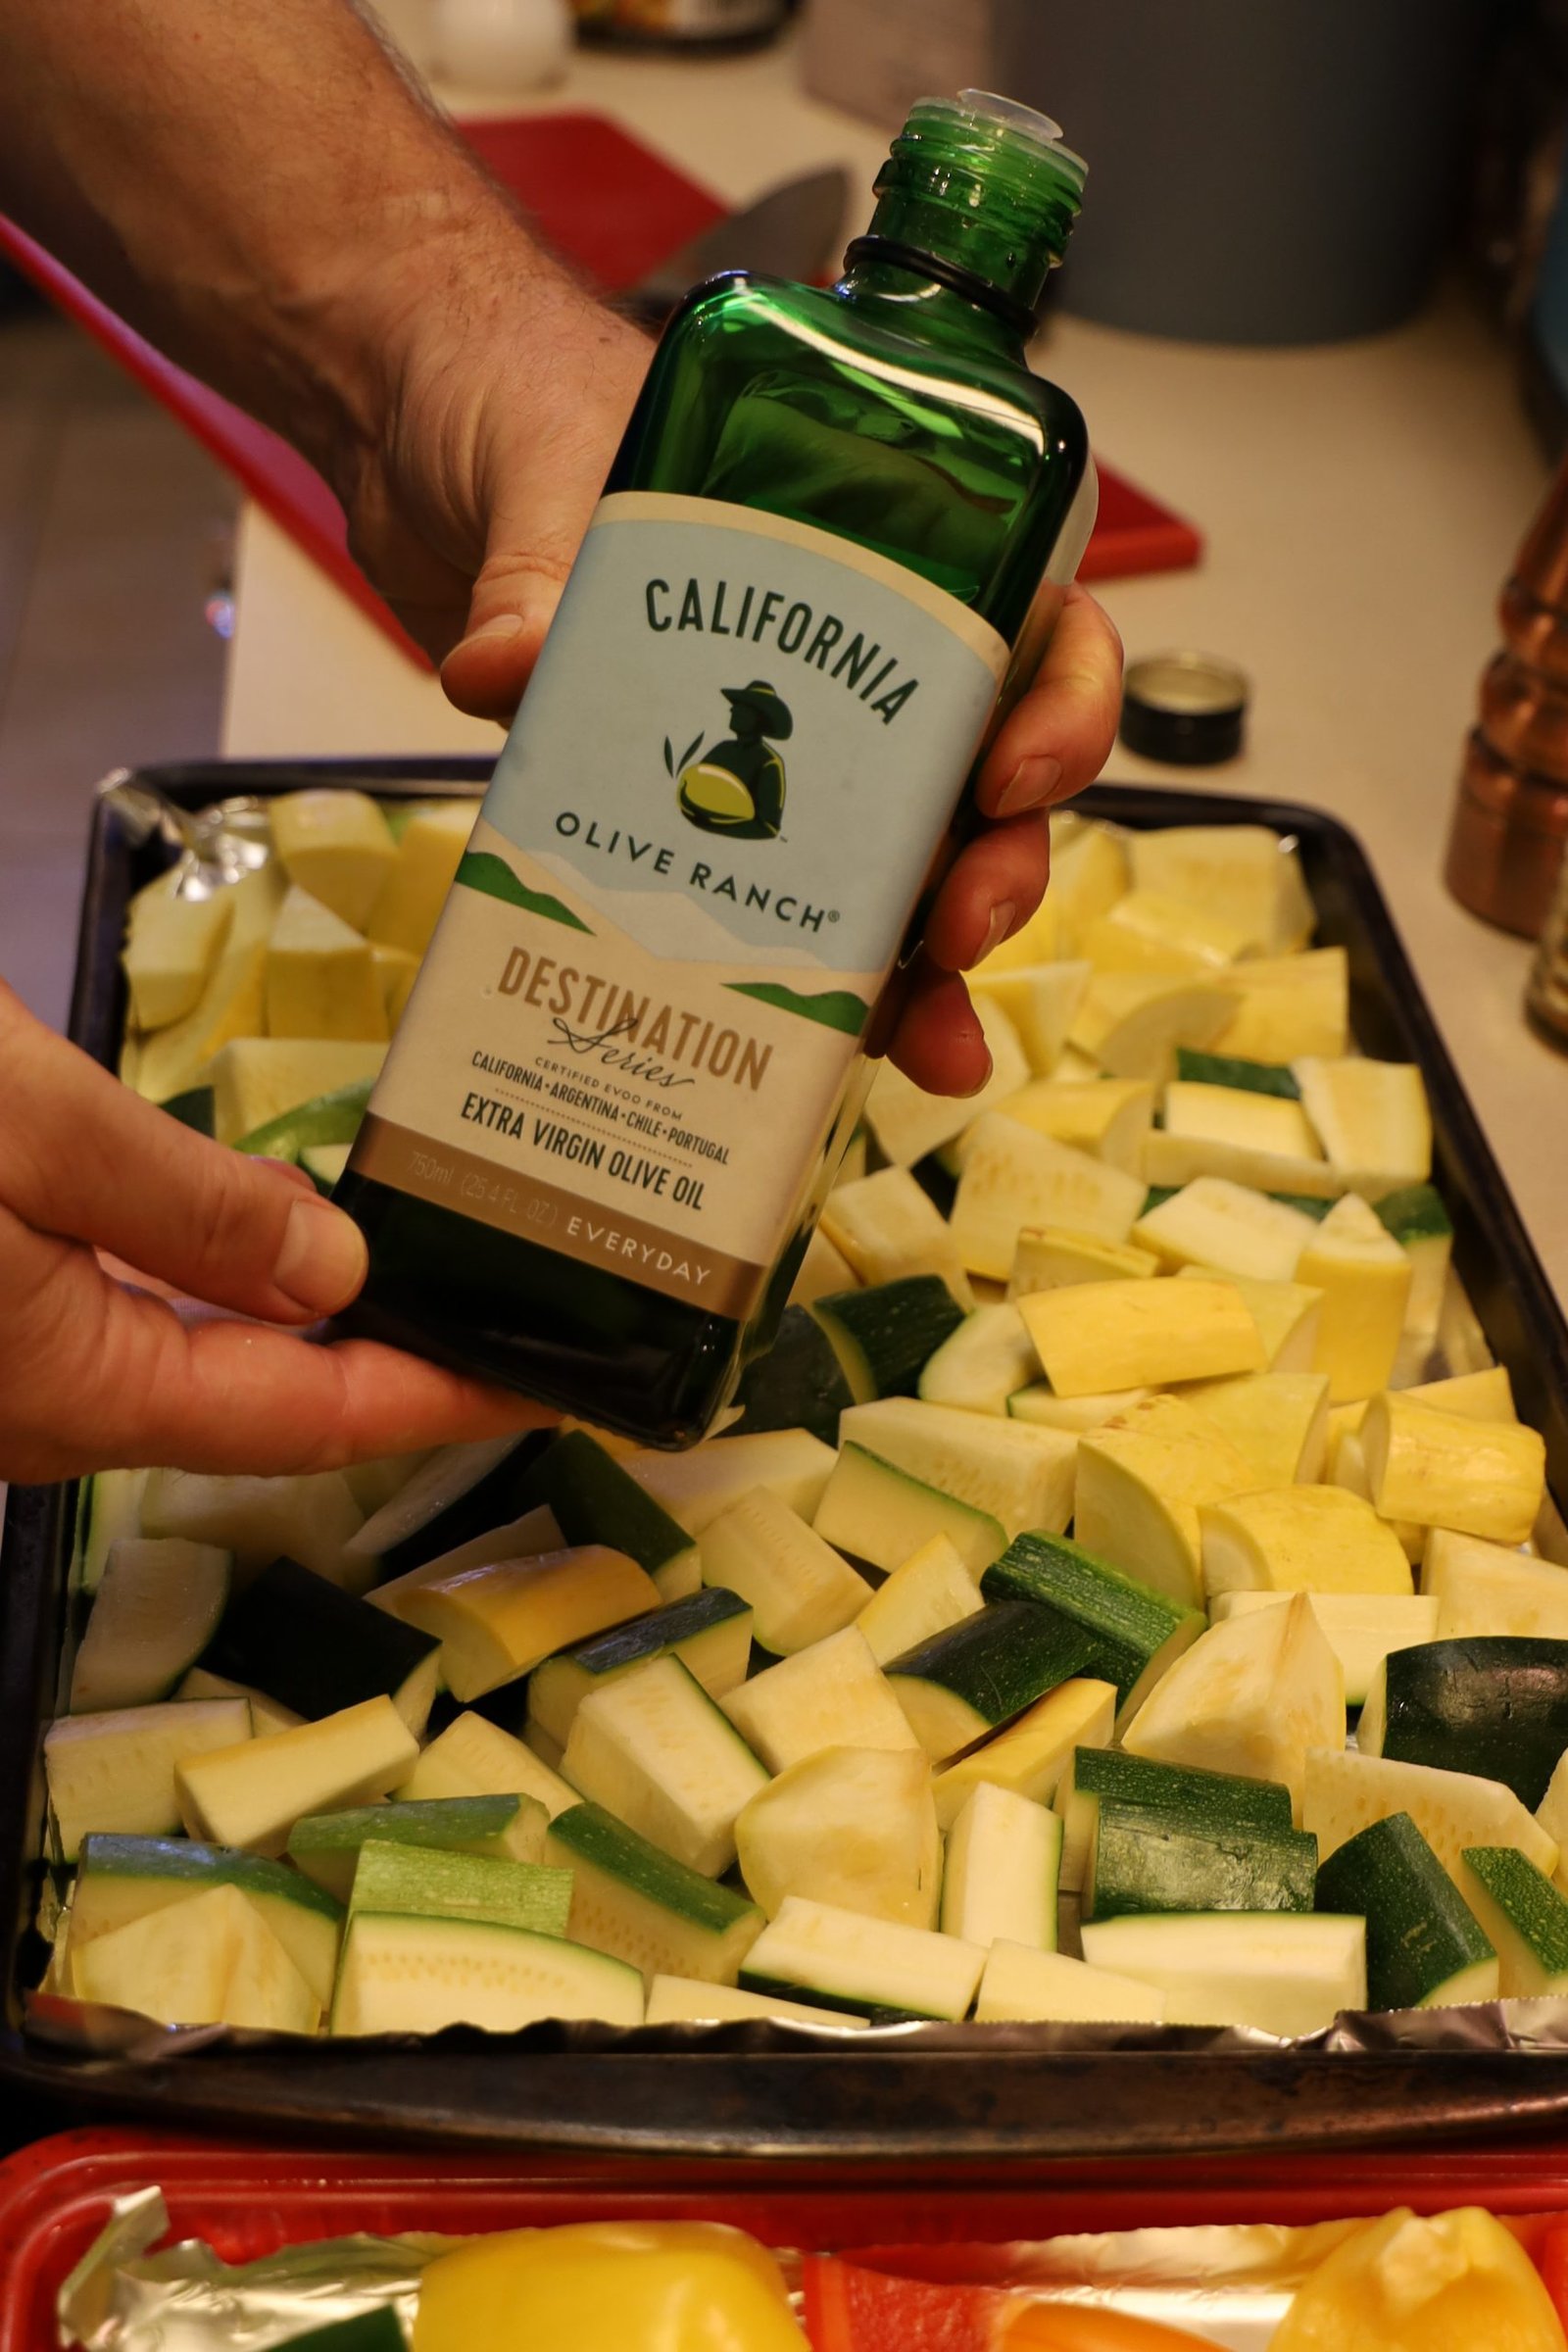

I poured about 3 Tbsp. of olive oil onto each of the three pans.

————————————————————-


Then I sprinkled the seasonings over the various vegetables and using my hands, mixed the pan ingredients together.

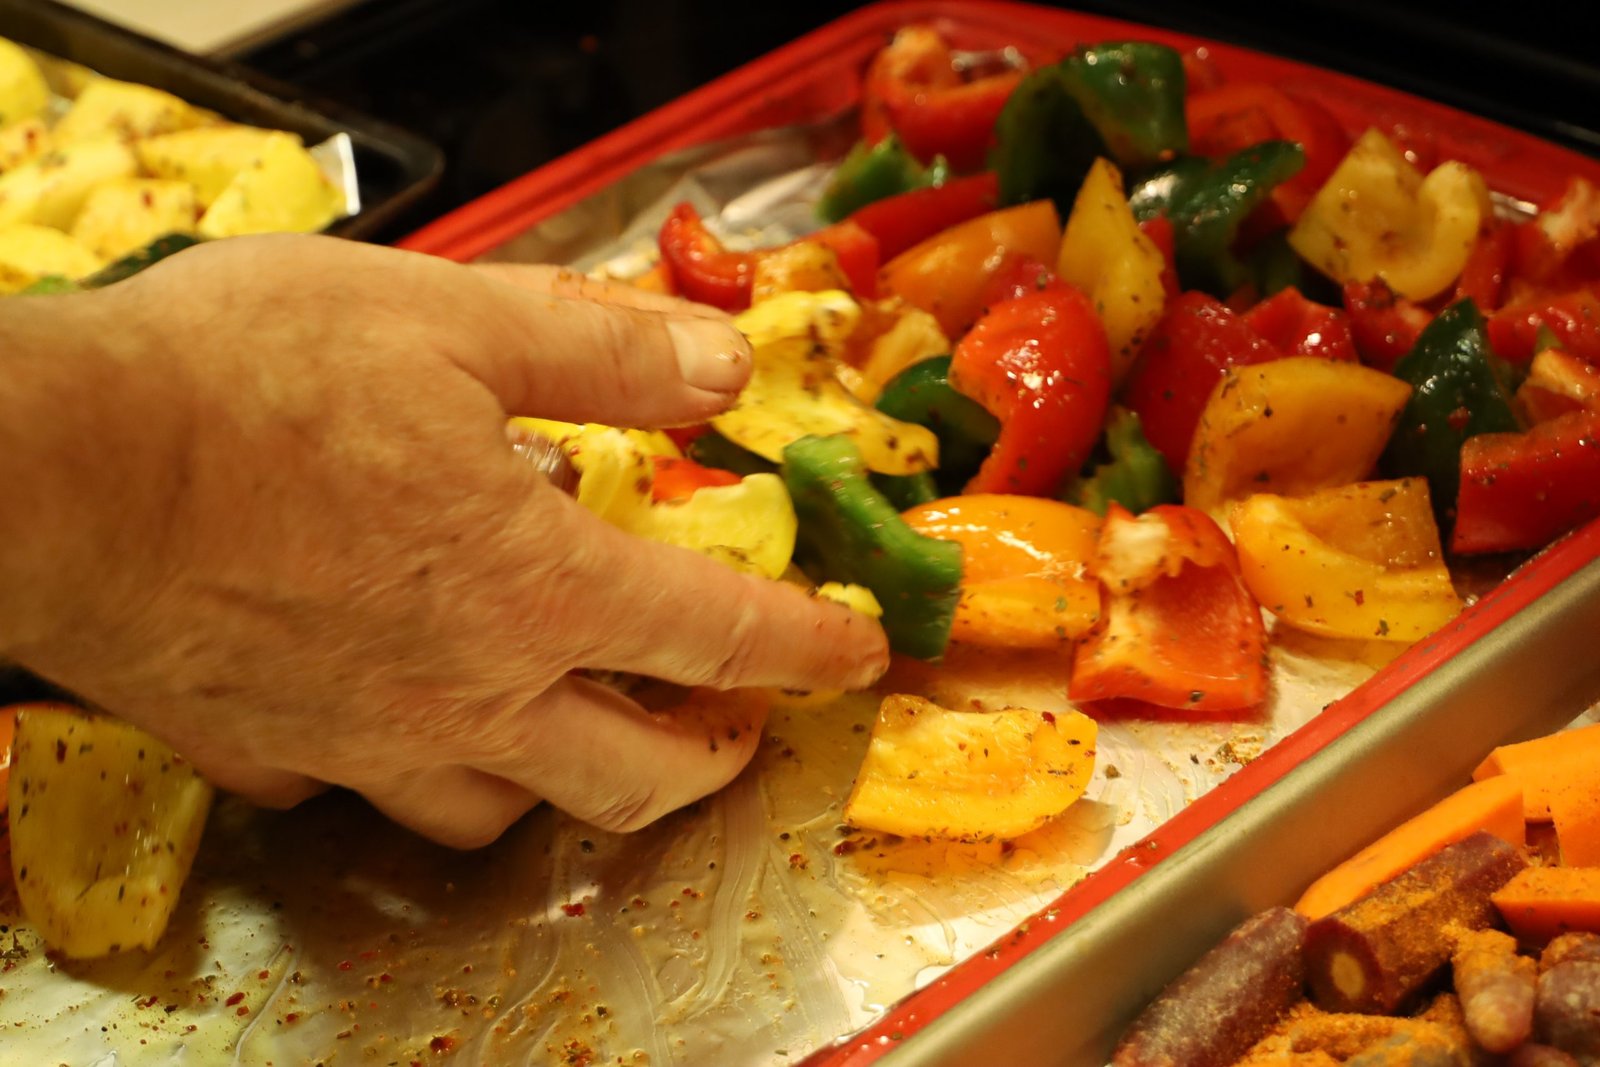

Here, I am mixing the bell peppers with the oil and seasonings.

——————————————————————

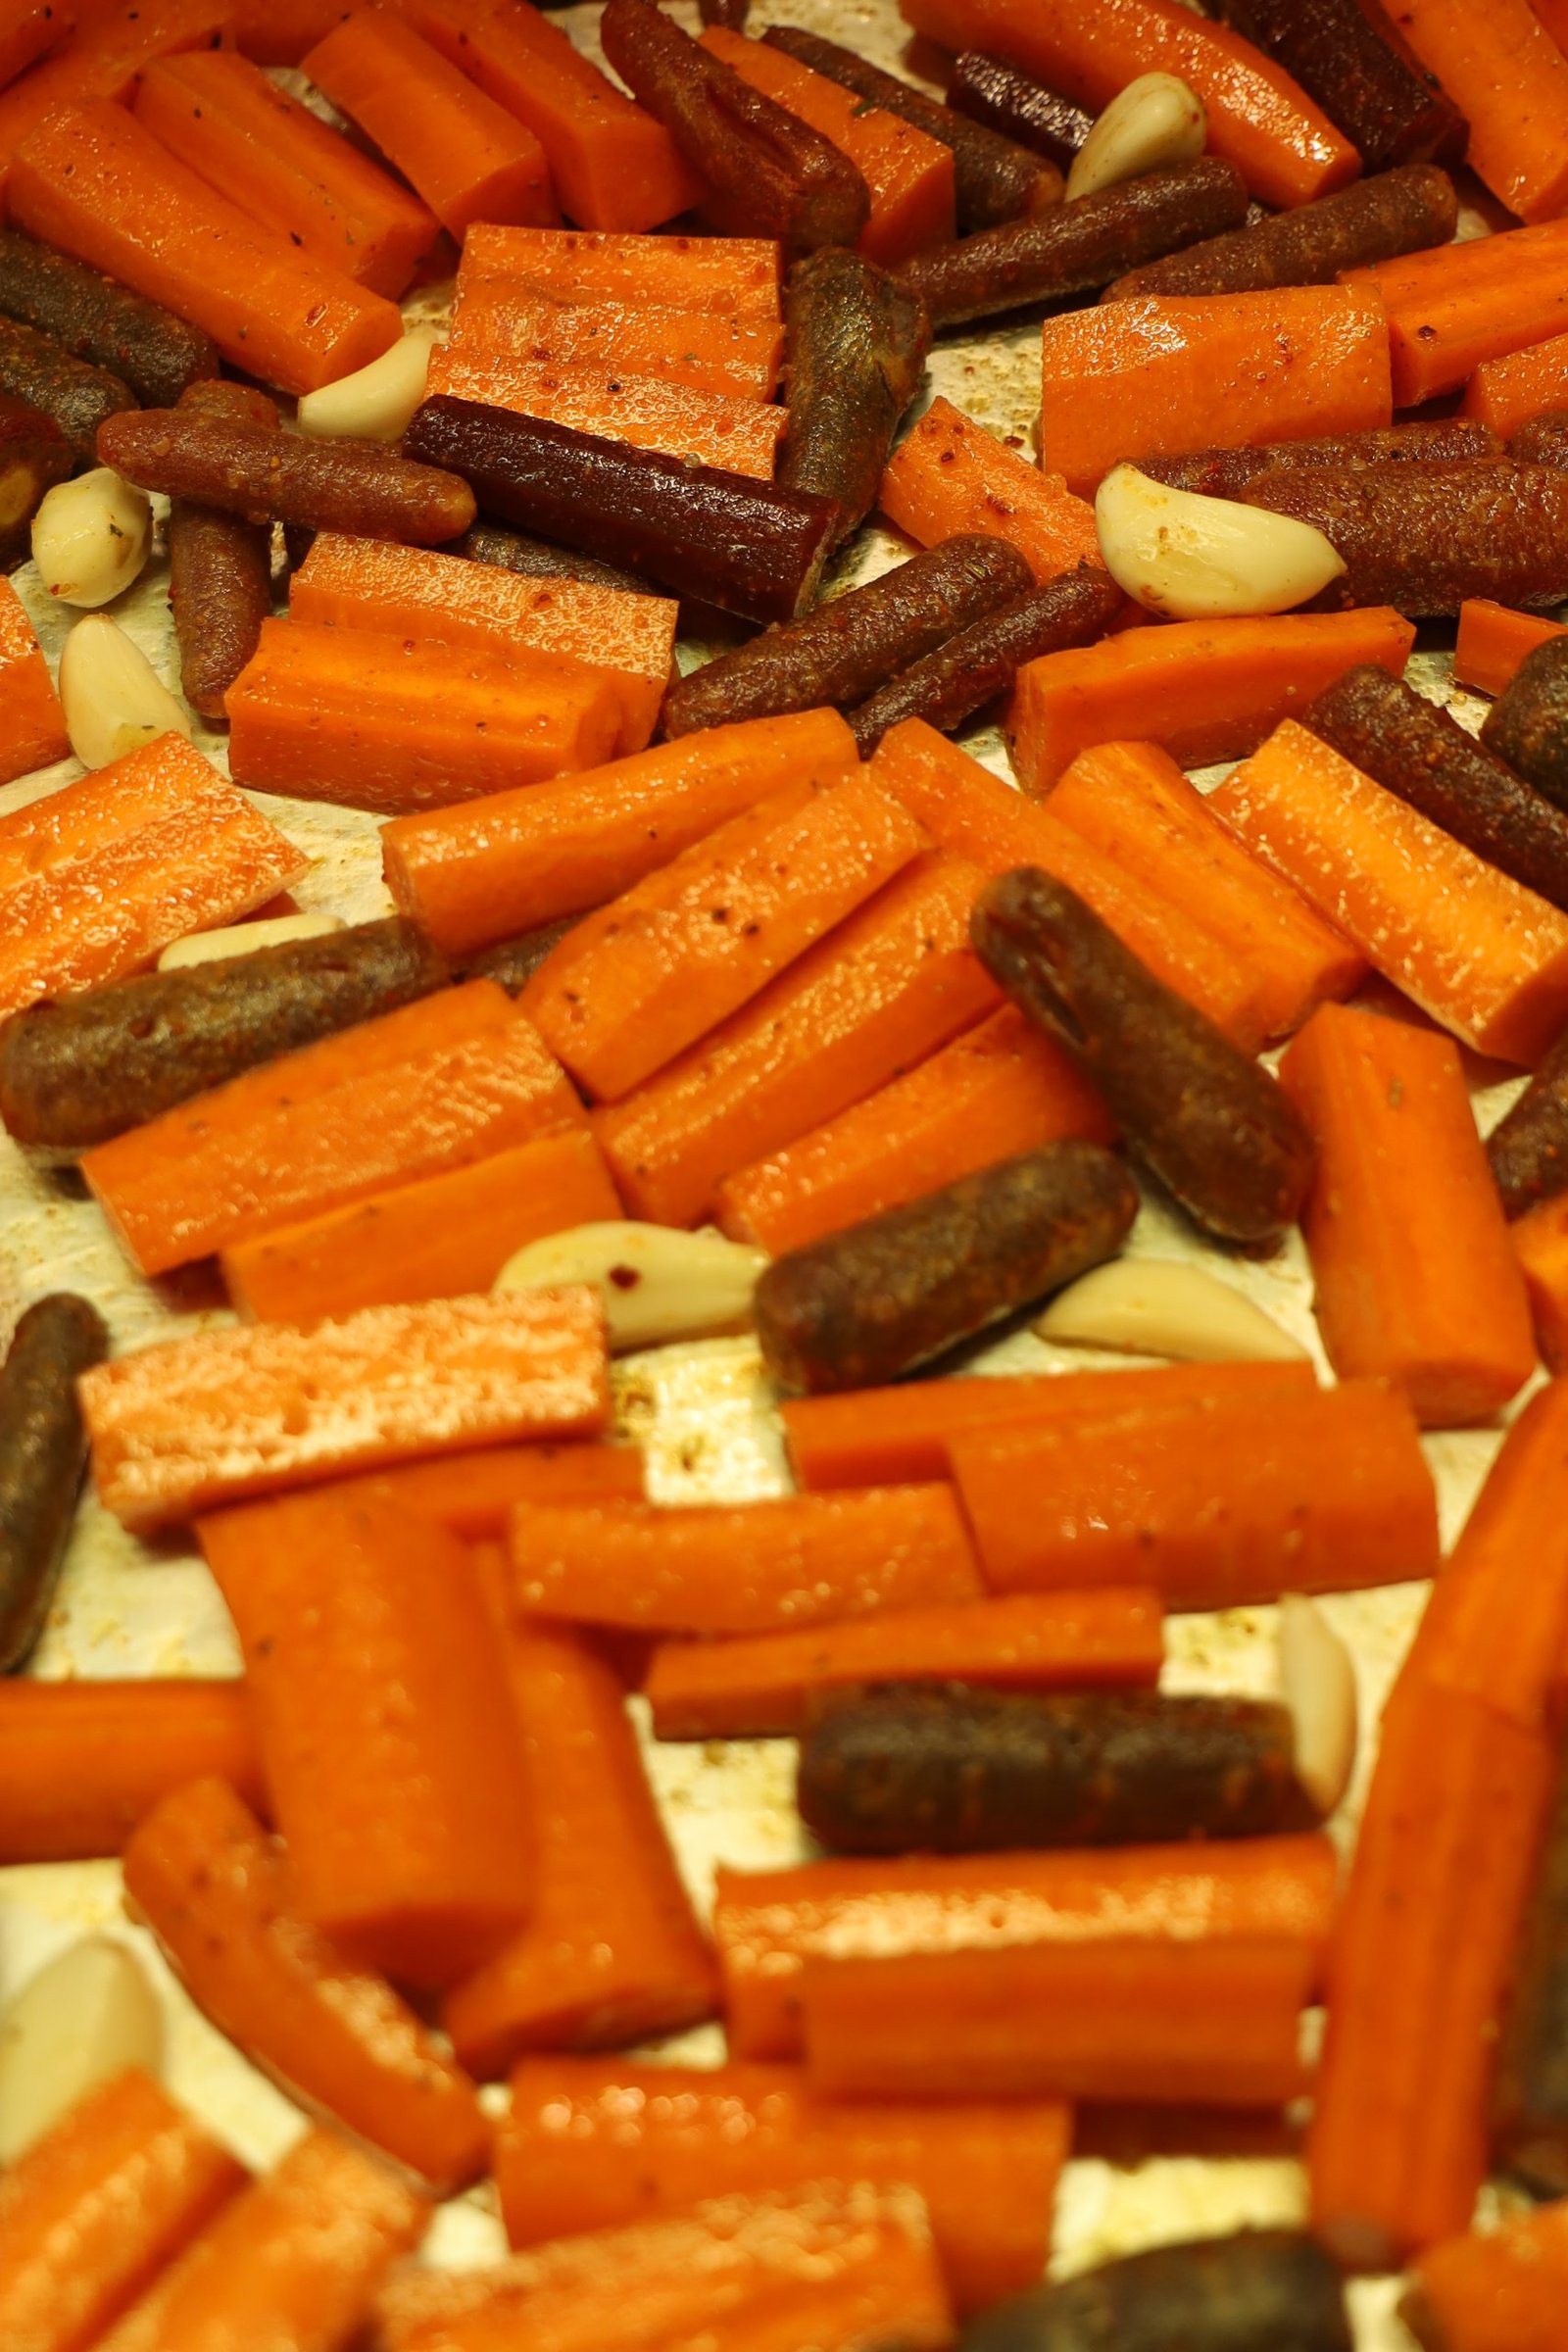
Again, adding the seasoning, oil, and whole peeled garlic cloves to the carrots and mix with your hands.

Roast the pans of vegetables in a 400’F oven for ~20-25 minutes or until the vegetables have just a little bite to them. I didn’t want them to be fully cooked and mushy. Turn the vegetables over half way through the cooking process. This is also a good time to check their tenderness and taste, adding more seasoning if needed.

——————————————————————
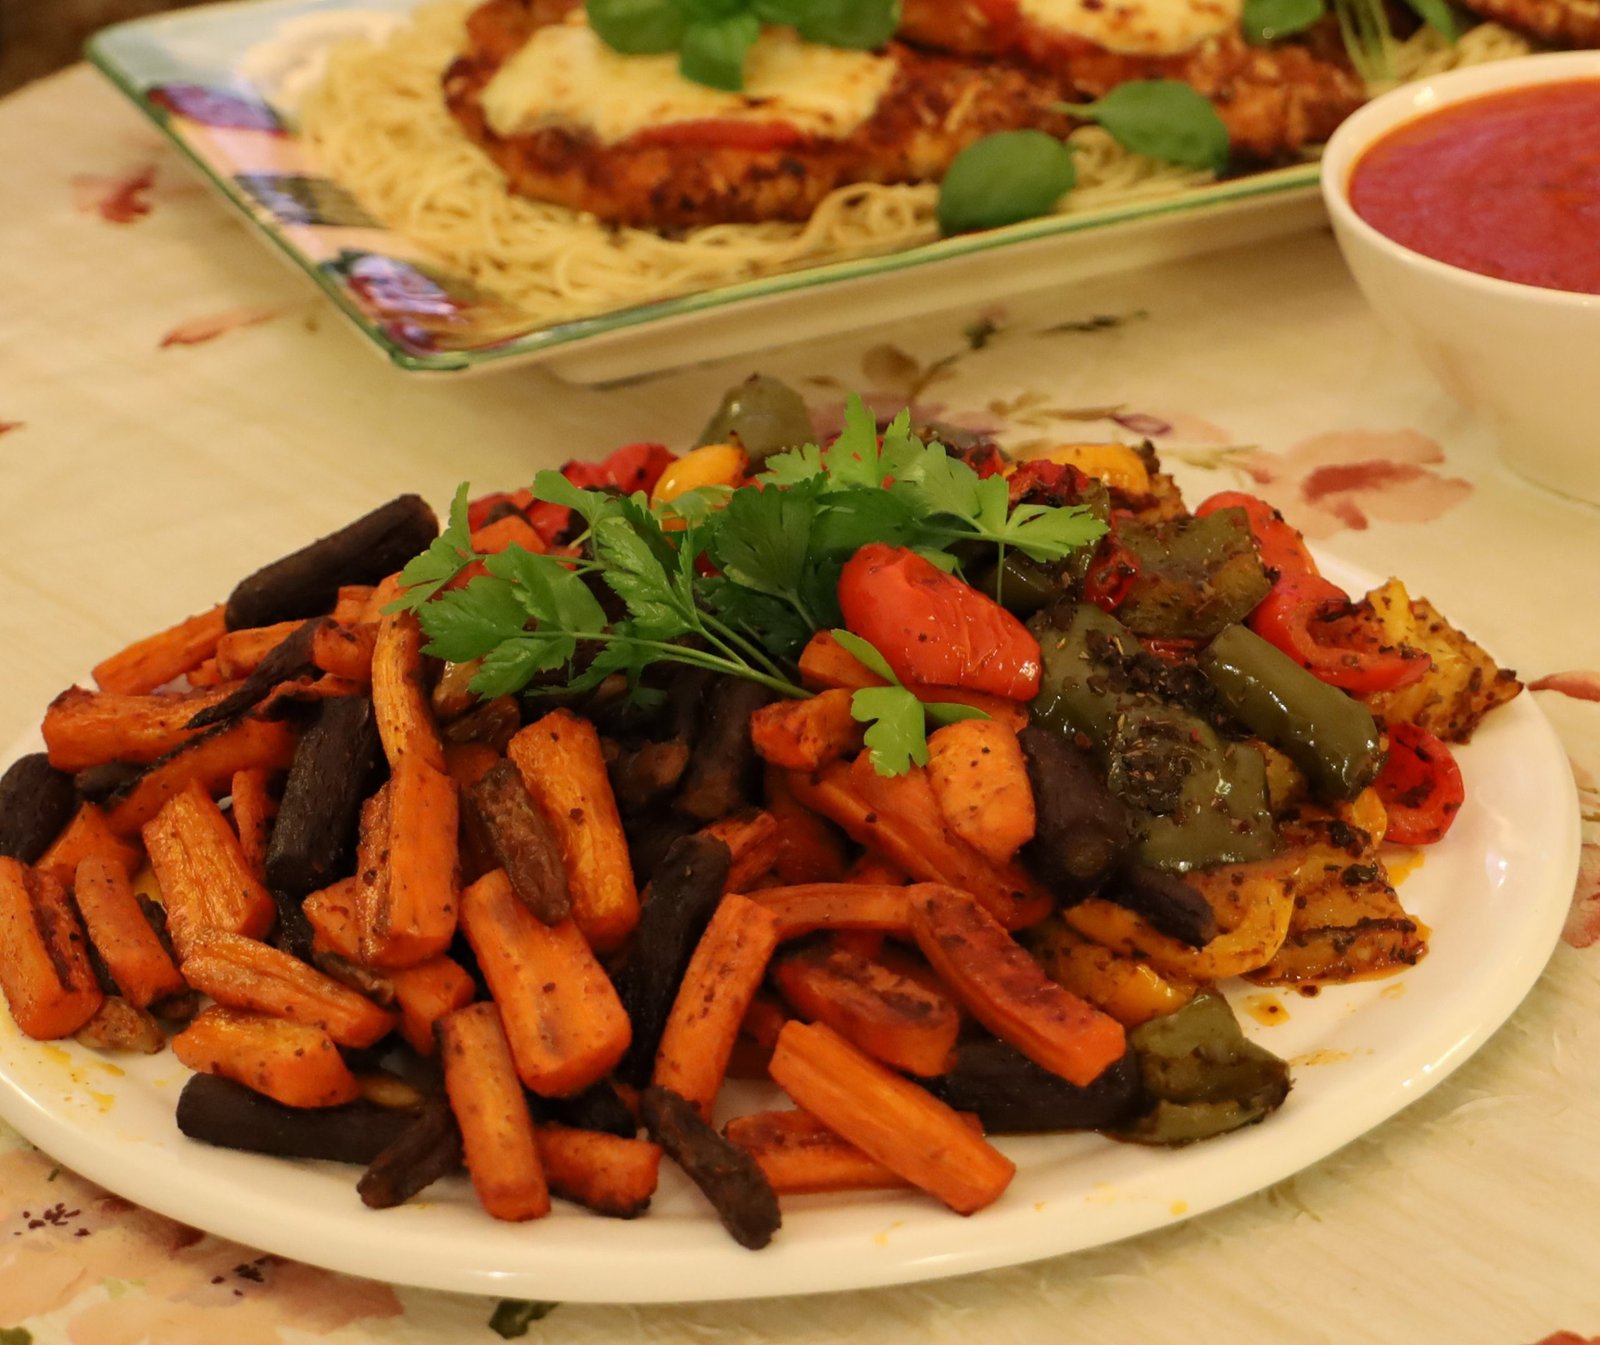
When done, add the vegetables to your platters. Here we split one platter in half between the roasted carrots and bell peppers. The different seasonings on them gave the dish some nice all over flavor. We place the roasted squash in a bowl, photo top right. Garnish the platters with some fresh parsley.
————————————————————————-
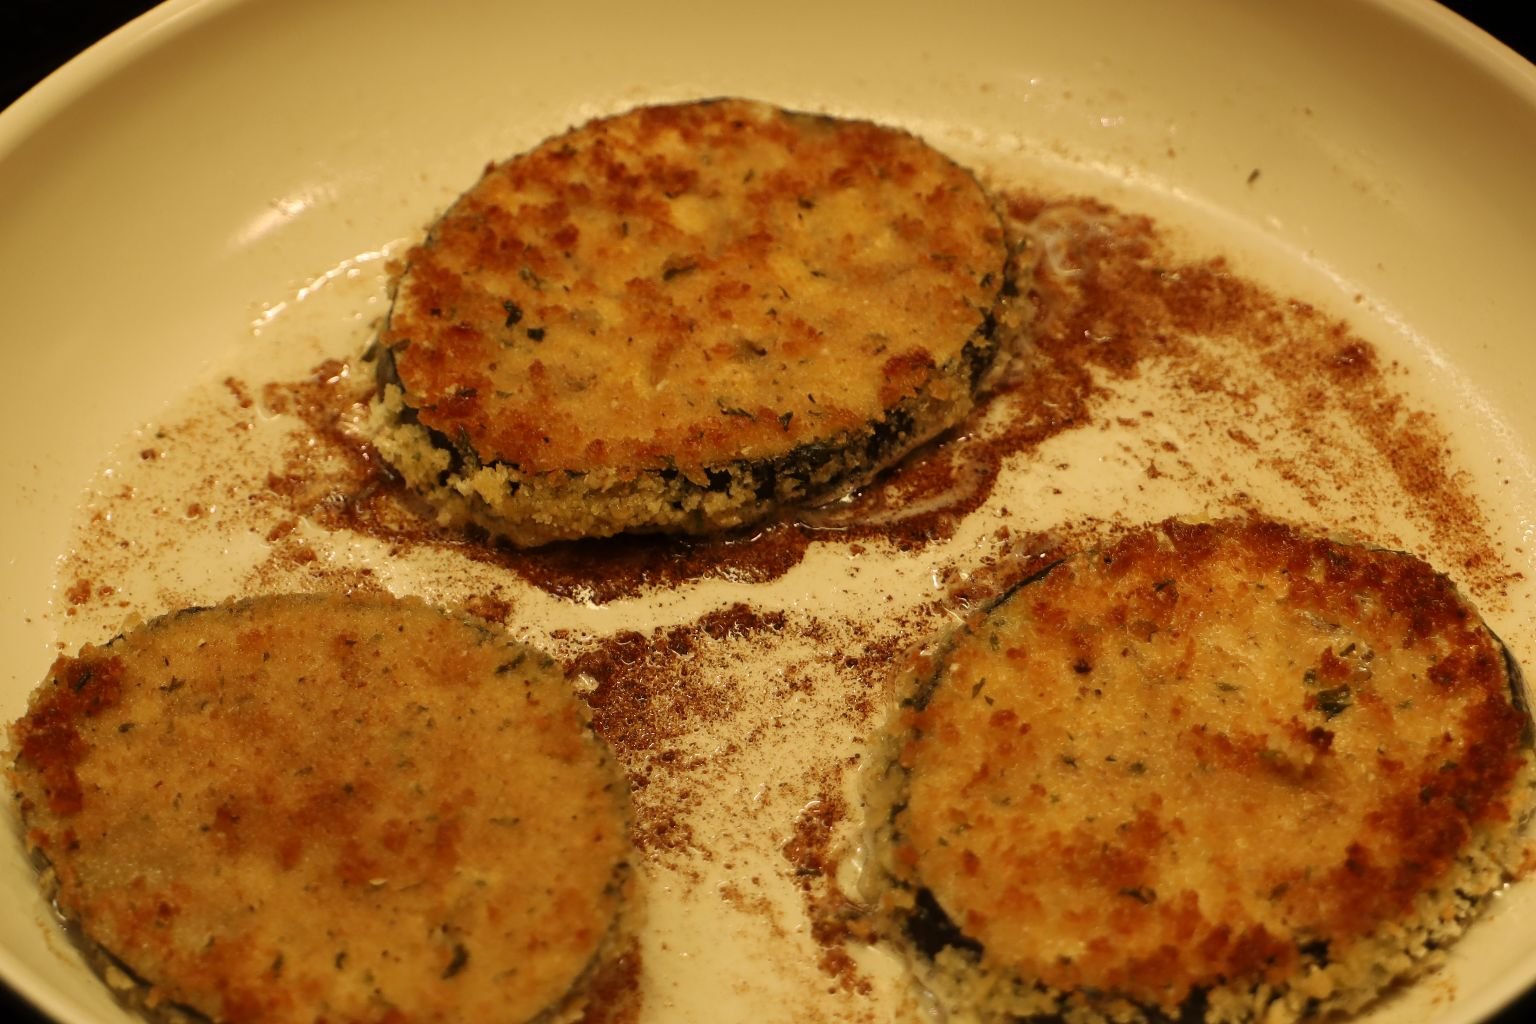
Gordon’s Fried Eggplant

TIP: Only slice enough eggplant that you can fry in your saute pan as the eggplant will become brown while it is exposed to air. This browning isn’t attractive, but doesn’t hurt the overall taste of the eggplant. Place the exposed slice of the eggplant down on the cutting board to help prevent its exposure to air.
Ingredients:
1 Large Eggplant – sliced into 1/2- 3/4 inch rounds
3 Eggs – whisked
1 Cup Flour
1 Cup Italian Bread Crumbs
1/2 Cup Panko Bread Crumbs
1/2 Cup Grated Parmesan Cheese
Salt and Pepper to taste
1/2 Cup Grapeseed Oil
—————————————————————-


Place 3 Tbsp. Grapeseed oil in a large saute pan and turn the pan up to medium heat.


Using the three step process, dip one slice of eggplant into the bowl of flour, salt and pepper. Remove the excess flour, then dip it into the egg to fully coat and drain off the excess. Lastly, place the eggplant into the Panko, Italian seasoned bread crumbs, Parmesan Cheese, salt and pepper mixture and coat the slice evenly on both sides.
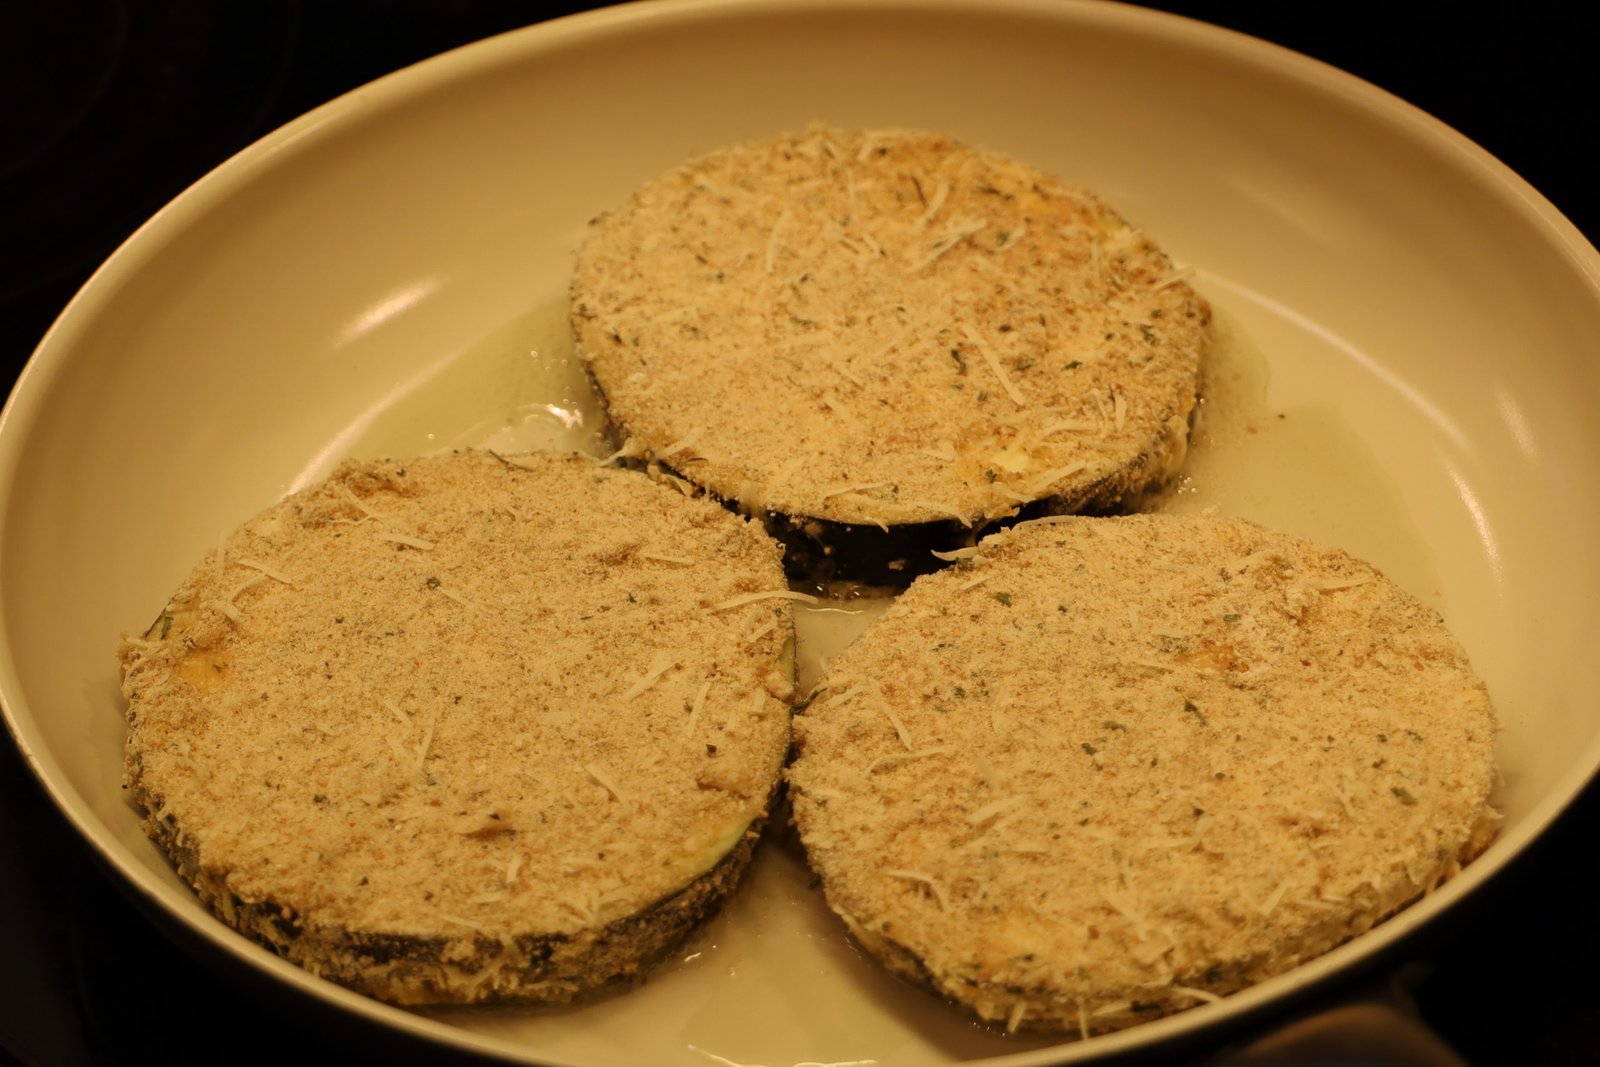
When the oil is heated, place enough slices of coated eggplant into the pan to fill it.

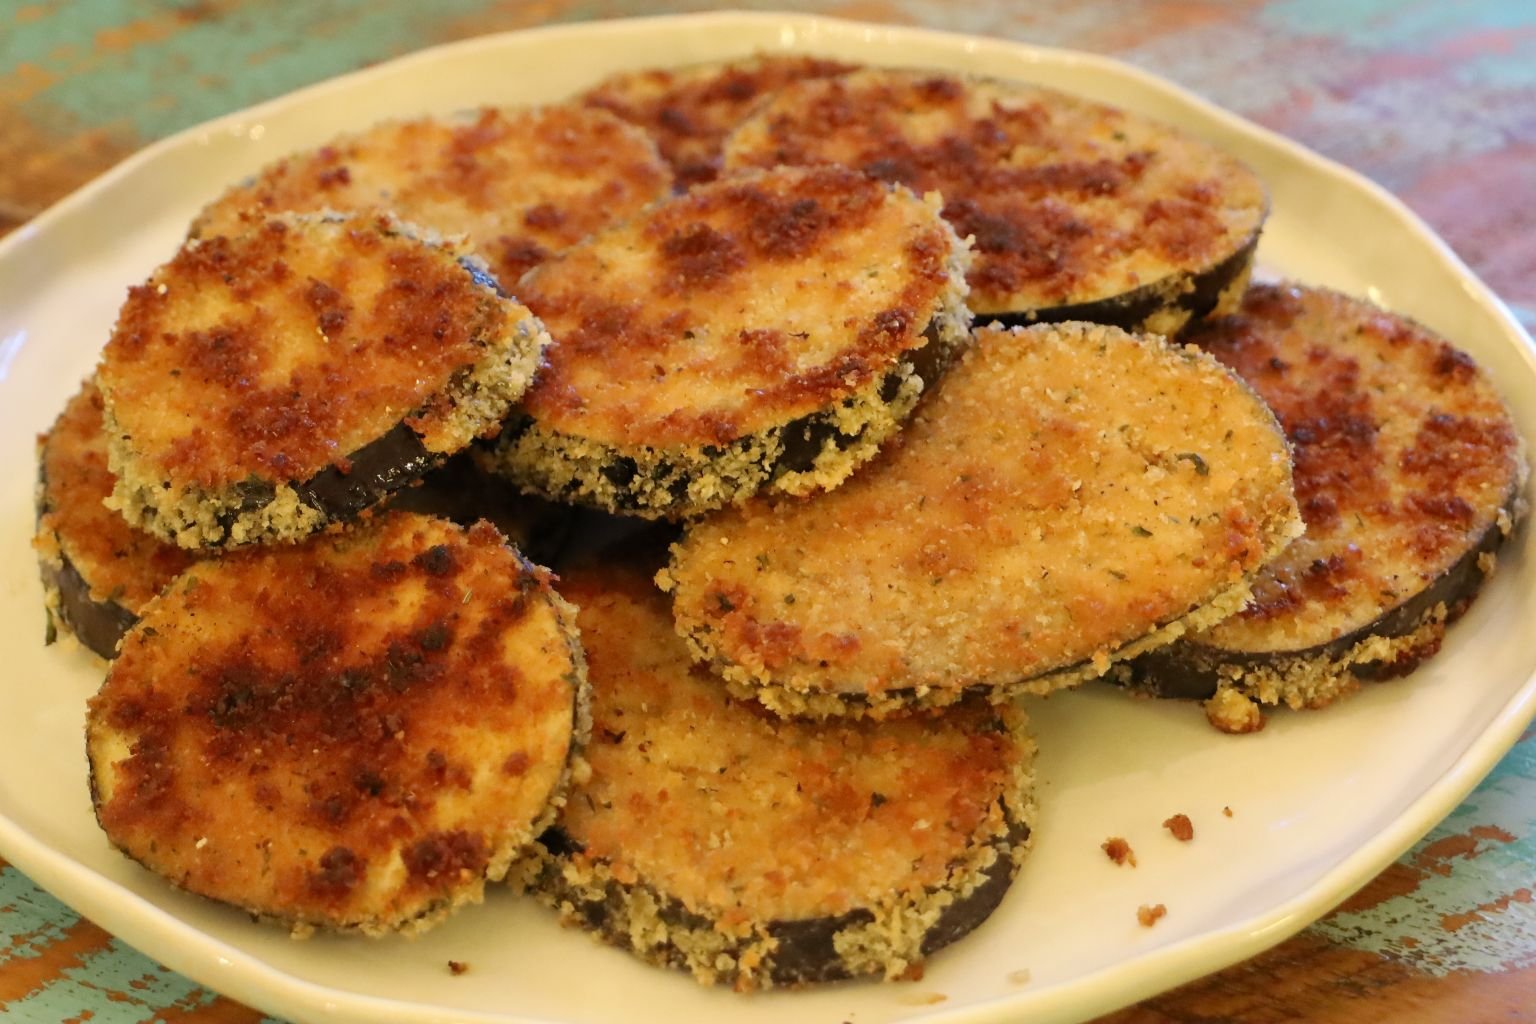
Pan fry the eggplant on both sides to golden brown. This step will take about 5 minutes on both sides. Turn using a rubber spatula as each slice of eggplant is properly cooked. I kept the slices in a warm oven on a sheet pan which also helped the eggplant to release any excess oil. If you want, you can then top the eggplant with some tomato sauce, Mozzarella and Parmesan Cheese… and there you have it, Eggplant Parmesan!
———————————————————————

This one is for me, Julie. I didn’t want all that sauce and mozzarella on mine.
I just wanted some grated Parmesan.

Gordon Fixing His Plate

Bon Appetite!
———————————————————–
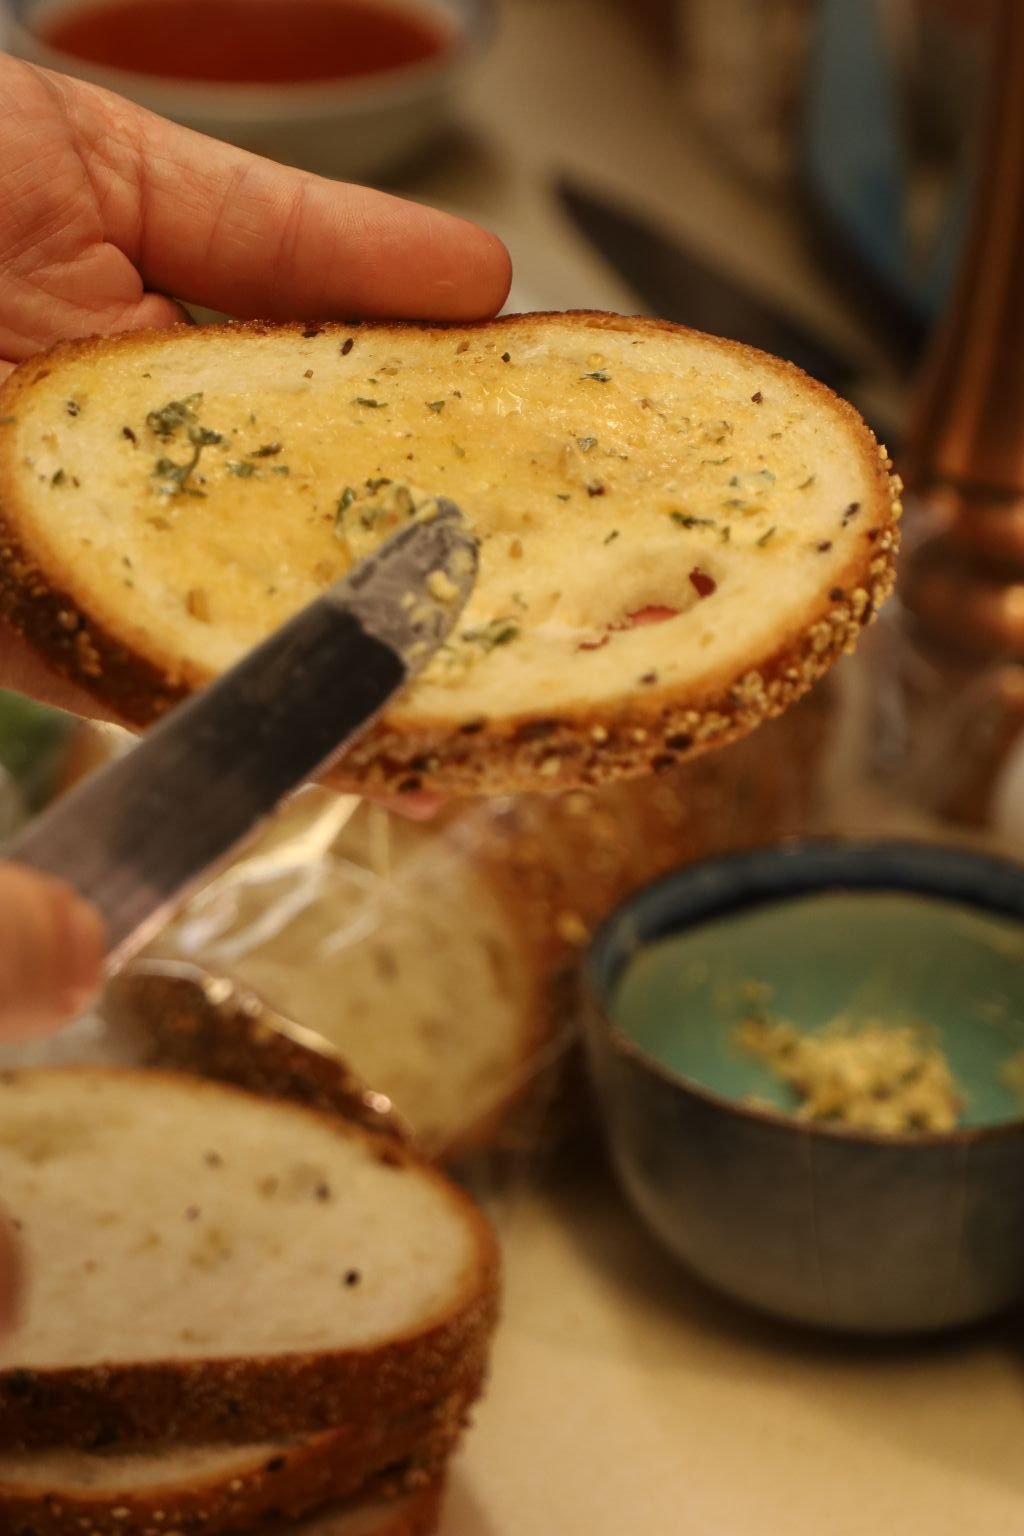
Fried Eggplant Sandwiches w/ Basil Butter
Sliced into a Fan and Topped with Basil
Or, Served with our Roasted Vegetables from Above
——————————————————–
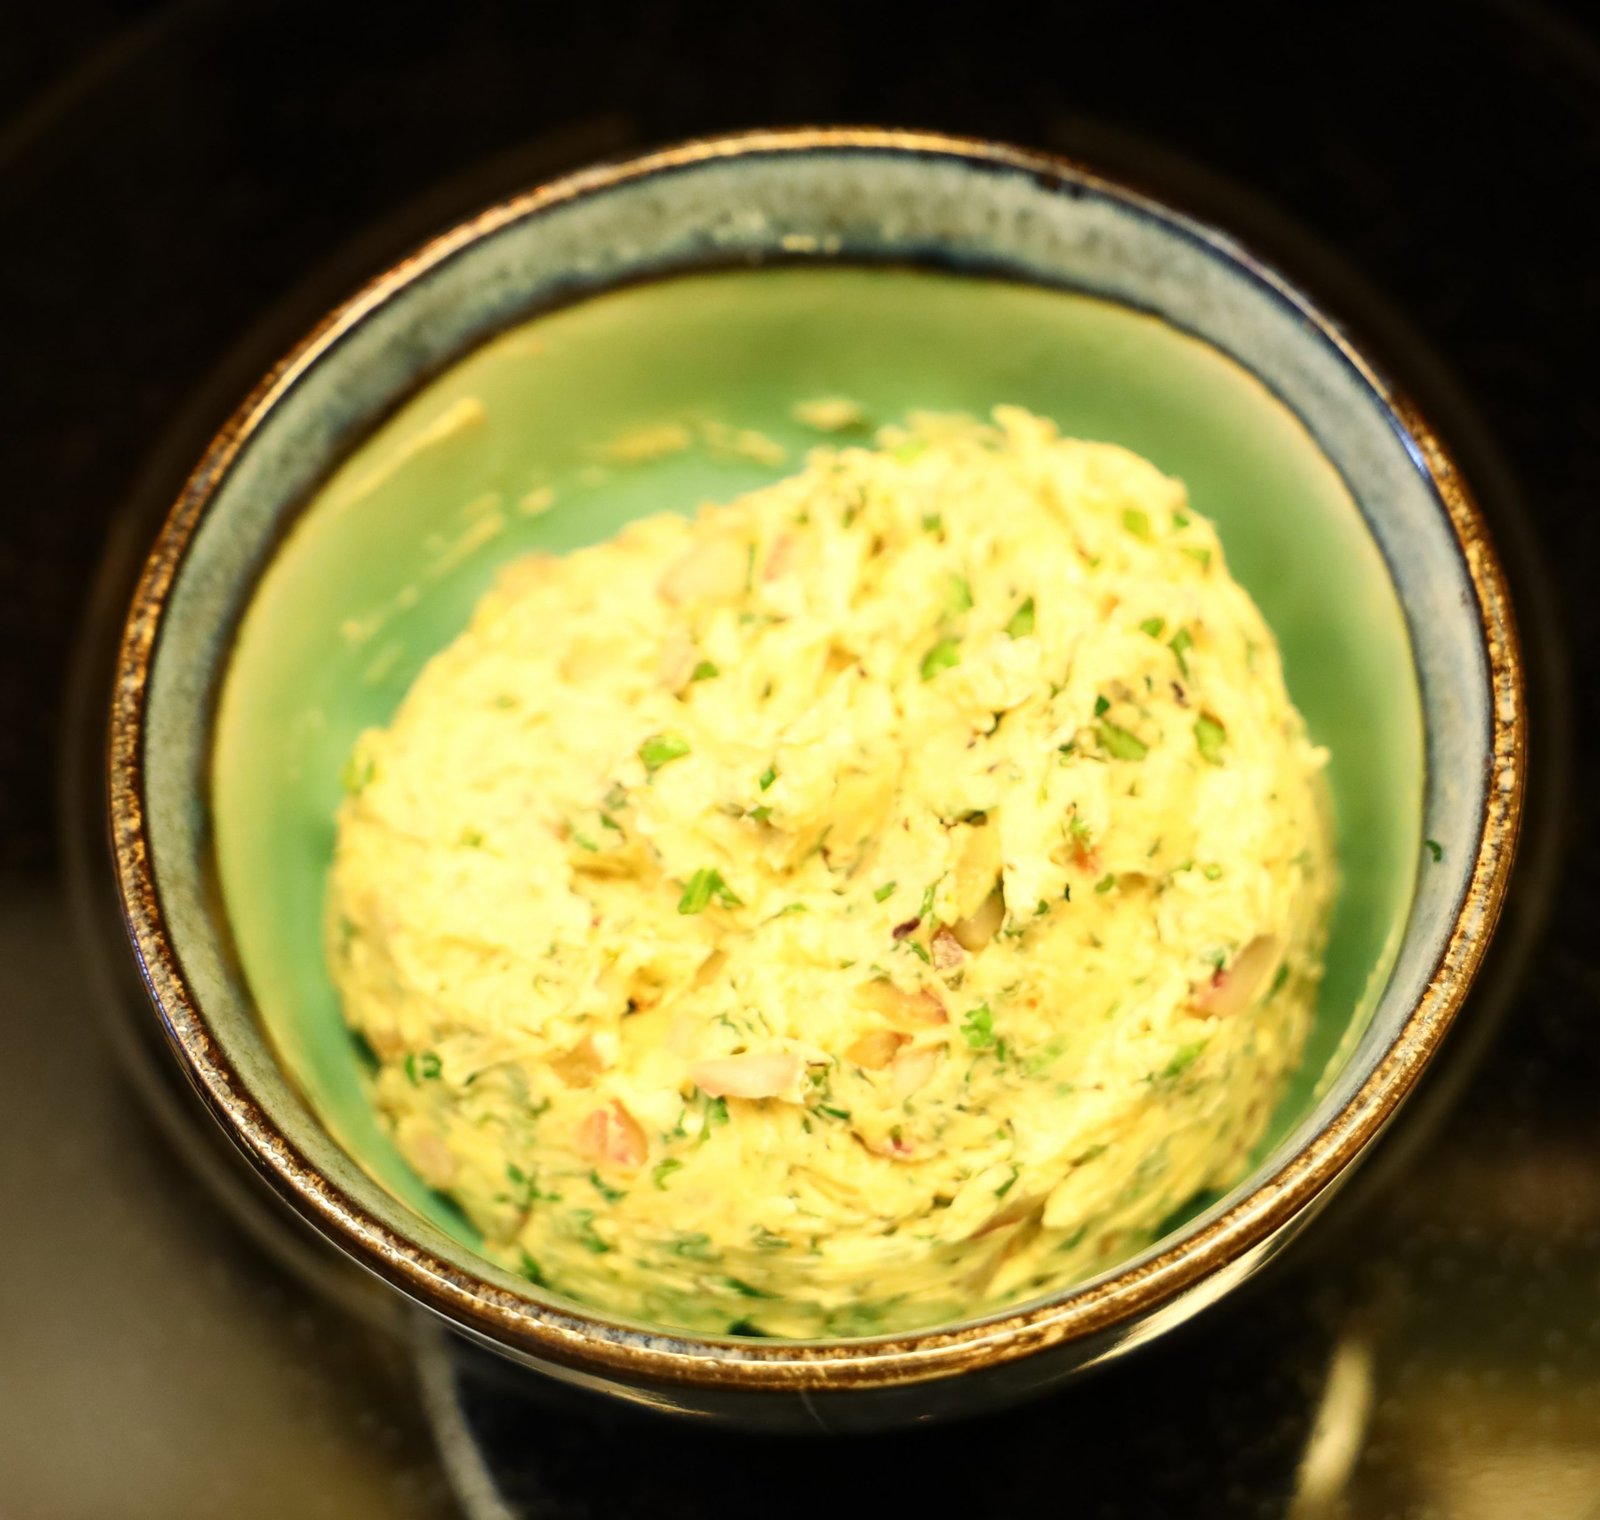
Making Basil Butter
This gave the sandwich a very nice buttery herbal taste.


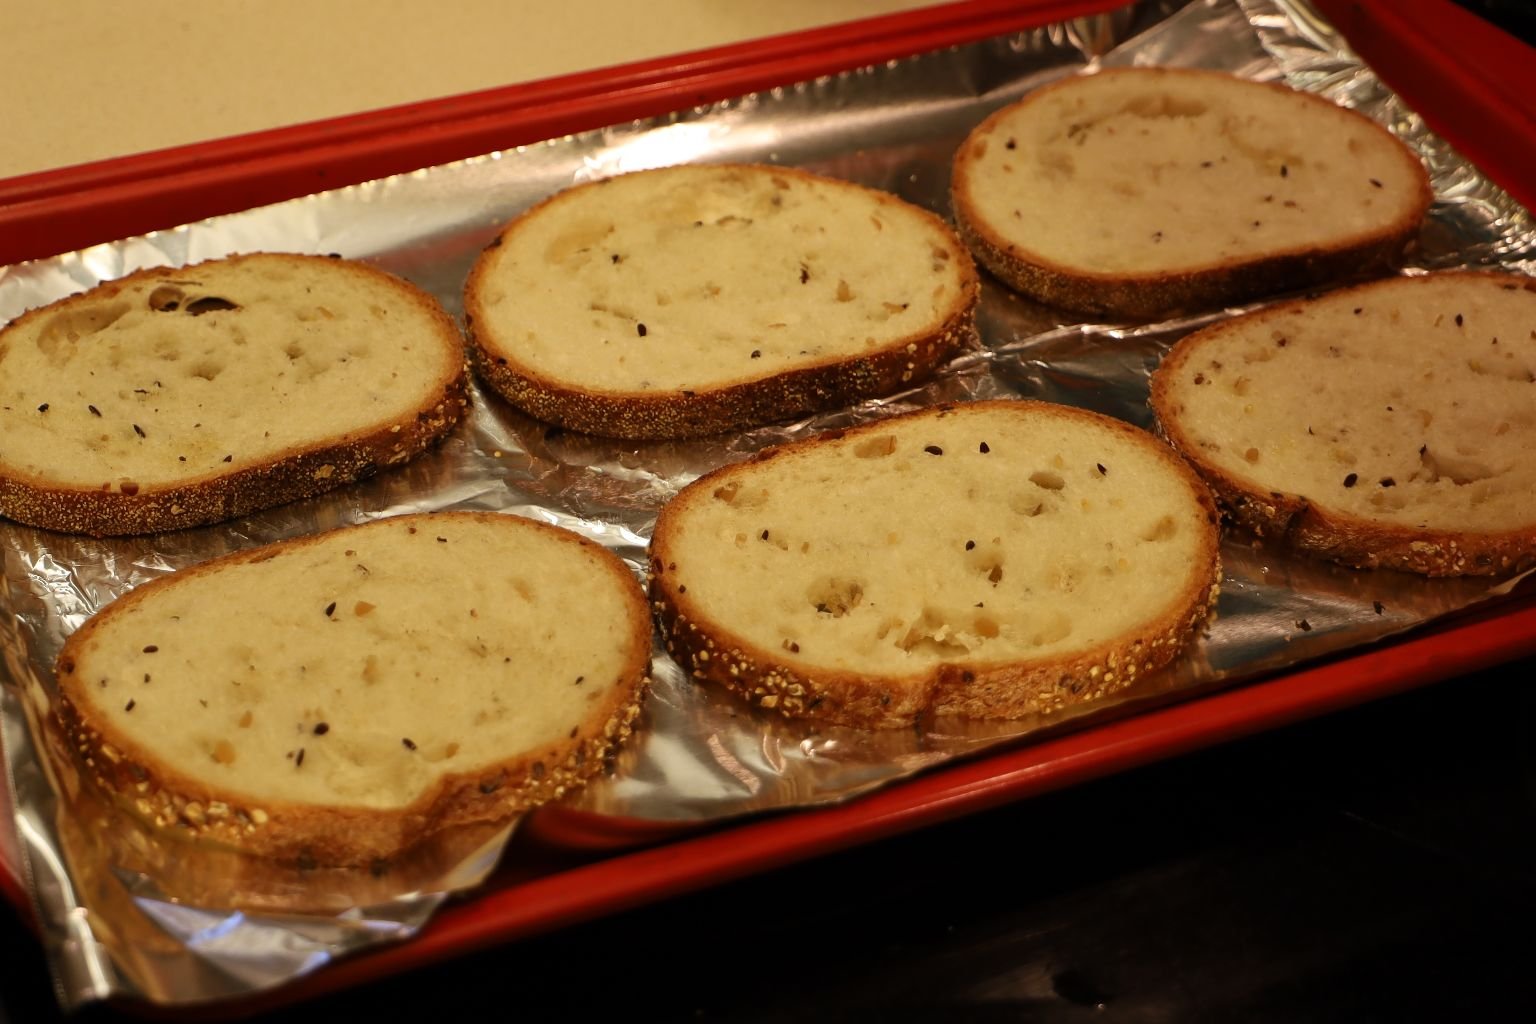
We had some 5-grain Italian Bread where Gordon spread one side of the bread with the Basil Butter and then browned it a little bit in a sauce pan on a medium heat.
———————————————–
You can also make this ahead of time.

Ingredients:
2 Tbsp. Red Onion – finely chopped
1 1/2 Sticks Butter – at room temperature
1/2 Cup Basil – finely chopped
1/2 Cup Parsley – finely chopped
1/4 Cup Oregano finely chopped
Hot Sauce – we used (Old Florida) to taste
Lemon Juice – 1 Tbsp.
Sweet Paprika – 1/2 Tbsp.
Ground Black Pepper – 1/2 Tbsp.


Finely chop 2 Tbsp. of Red Onion


Place your room temperature butter and red onion into a small bowl.


Finely chop your fresh Basil leaves.


Now, finely chop your Parsley and Oregano and place them both into the bowl.

—————————————————————–


Add to taste your hot sauce, then the lemon juice and the Sweet Paprika to the bowl.

—————————————————————–


Then, add your ground Black Pepper to the bowl.

Mix the ingredients well and refrigerate until ready to use.

I used a fork to mix the ingredients.
Use a rubber spatula to form the compound butter into a more attractive ball shape.
————————————————————
Fried Eggplant Sandwiches


Ingredients:
1 large Eggplant – sliced into 1/2 inch rounds
1/2 Cup Flour
1/3 Cup Corn Starch
Salt and Pepper to taste
2 Eggs – Beaten
1 Cup Italian Style Bread Crumbs
1/2 Cup Panko Bread Crumbs
1/2 Tbsp. Sweet Paprika
1 Cup Peanut Oil
Artisan Bread Slices – two for each sandwich
1 Tbsp. Basil Pesto for each sandwich
Provolone Cheese Slices – one for each sandwich
2-3 Tbsp. Red Sauce for each sandwich
Shredded Italian Cheese – 2 Tbsp. for each sandwich


On a plate or in a bowl, mix your corn starch and flour…


then add a touch of salt and pepper…

then mix all the ingredients together.

Crack your eggs into a medium sized bowl and whisk with a fork.


In another bowl, add your bread crumbs and Panko…

then add your sweet paprika to the bread crumbs…


then add some salt and pepper and mix all the ingredients together.

Now you have your three step process… flour, eggs, and bread crumbs.


Add a few Tbsp. peanut oil to a large pan and turn it to medium-high heat.

Slice your eggplant into 1/2 inch rounds.

Dip a slice of eggplant into the flour mixture and coat on both sides…


then place it into your eggs and coat on both sides…

lastly into your breadcrumbs and coat on both sides. Repeat this process with the other slices of eggplant.


Place the coated eggplant slices into your heated sauce pan.


Cook them for a few minutes or until golden brown, then turn them over and cook the other side until golden brown. When done place onto paper towels to help absorb the oil. After one set of rounds are cooked, clean out your pan removing any and all pieces. Start each new set of eggplant using a clean pan.
Eggplant Ready for our Sandwiches

5-Grain Italian Sliced Bread
Adding Our Basil Butter
This gave the sandwich a very nice buttery herbal taste.
Spread your compound butter on one side of each slice of bread.
Cook the bread butter side down in your pan over medium heat until browned.

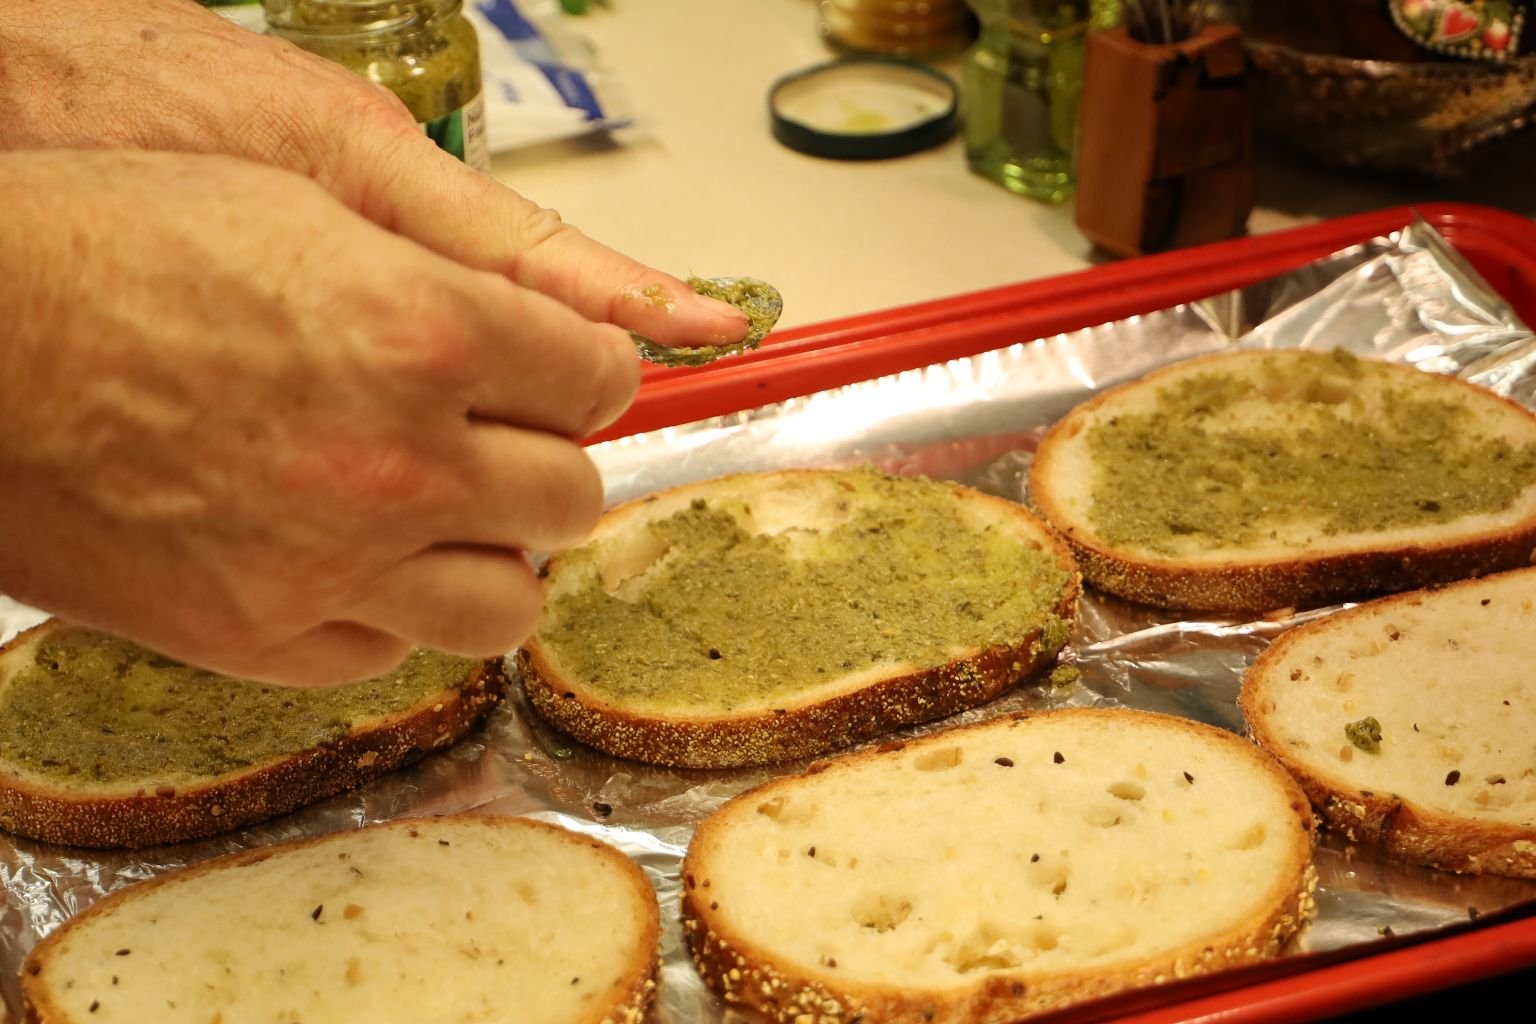
Basil Pesto
When all the slices of bread are browned, spread 1 Tbsp. of Basil Pesto on the non-buttered side of one side of the sandwich. Place sliced bread buttered side down on a cookie sheet lined with aluminum foil.

Place a slice of Provolone Cheese on the other slice of bread.

Place a slice of fried eggplant on top of the pesto then top with some red sauce.

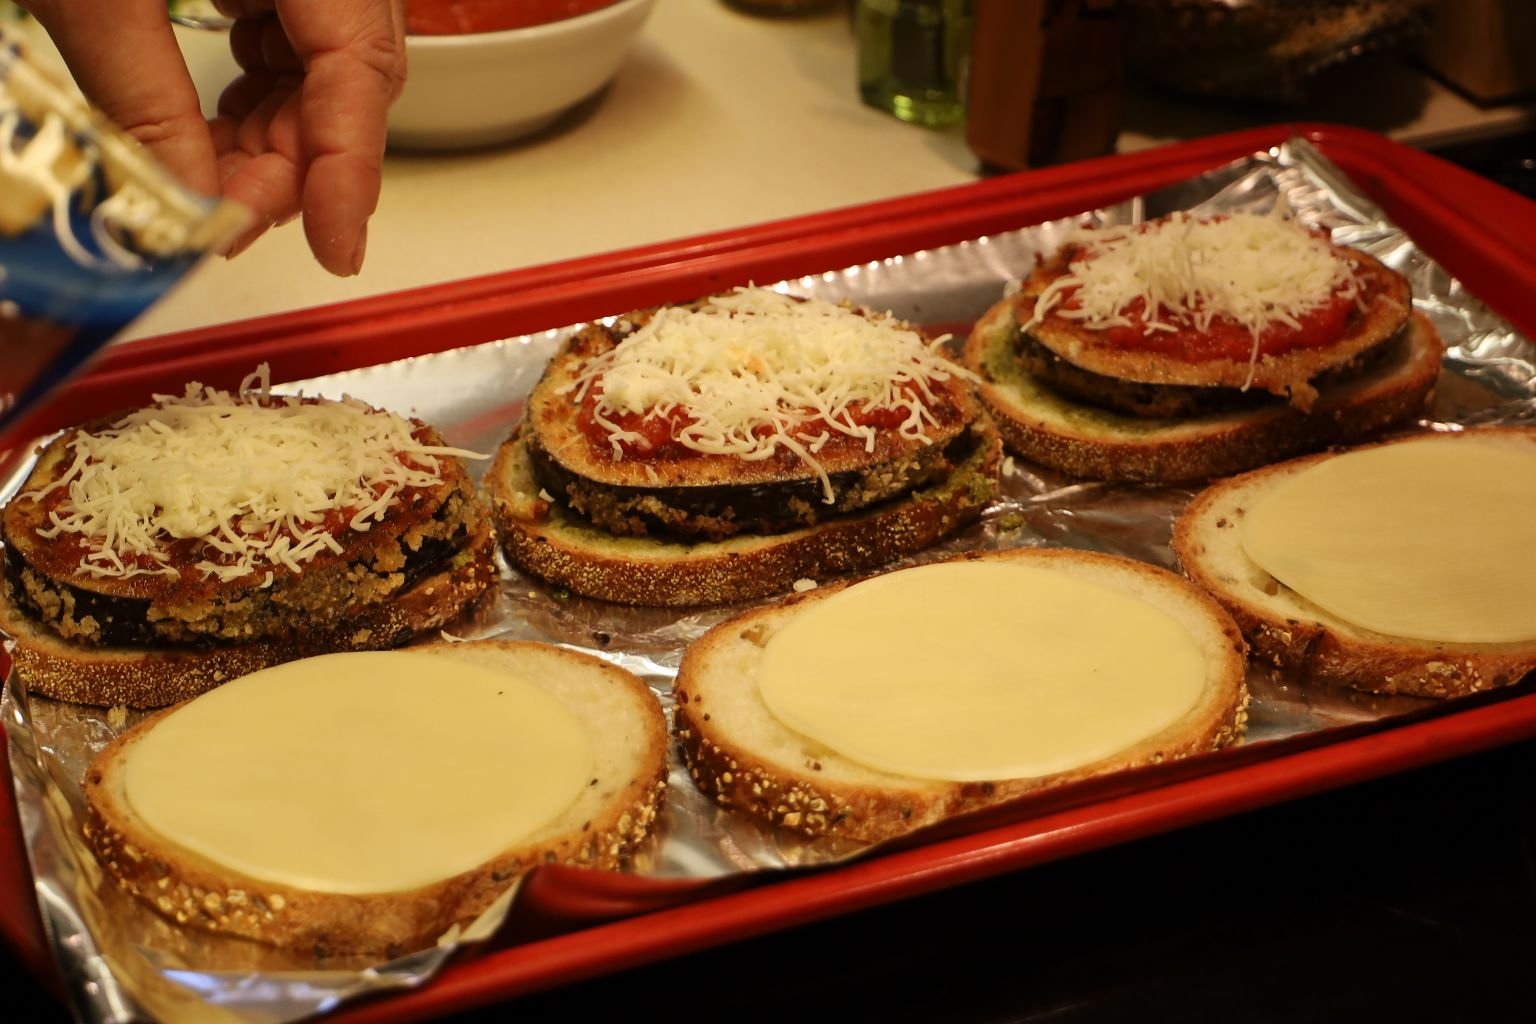
Now top the red sauce with the shredded Italian cheese.
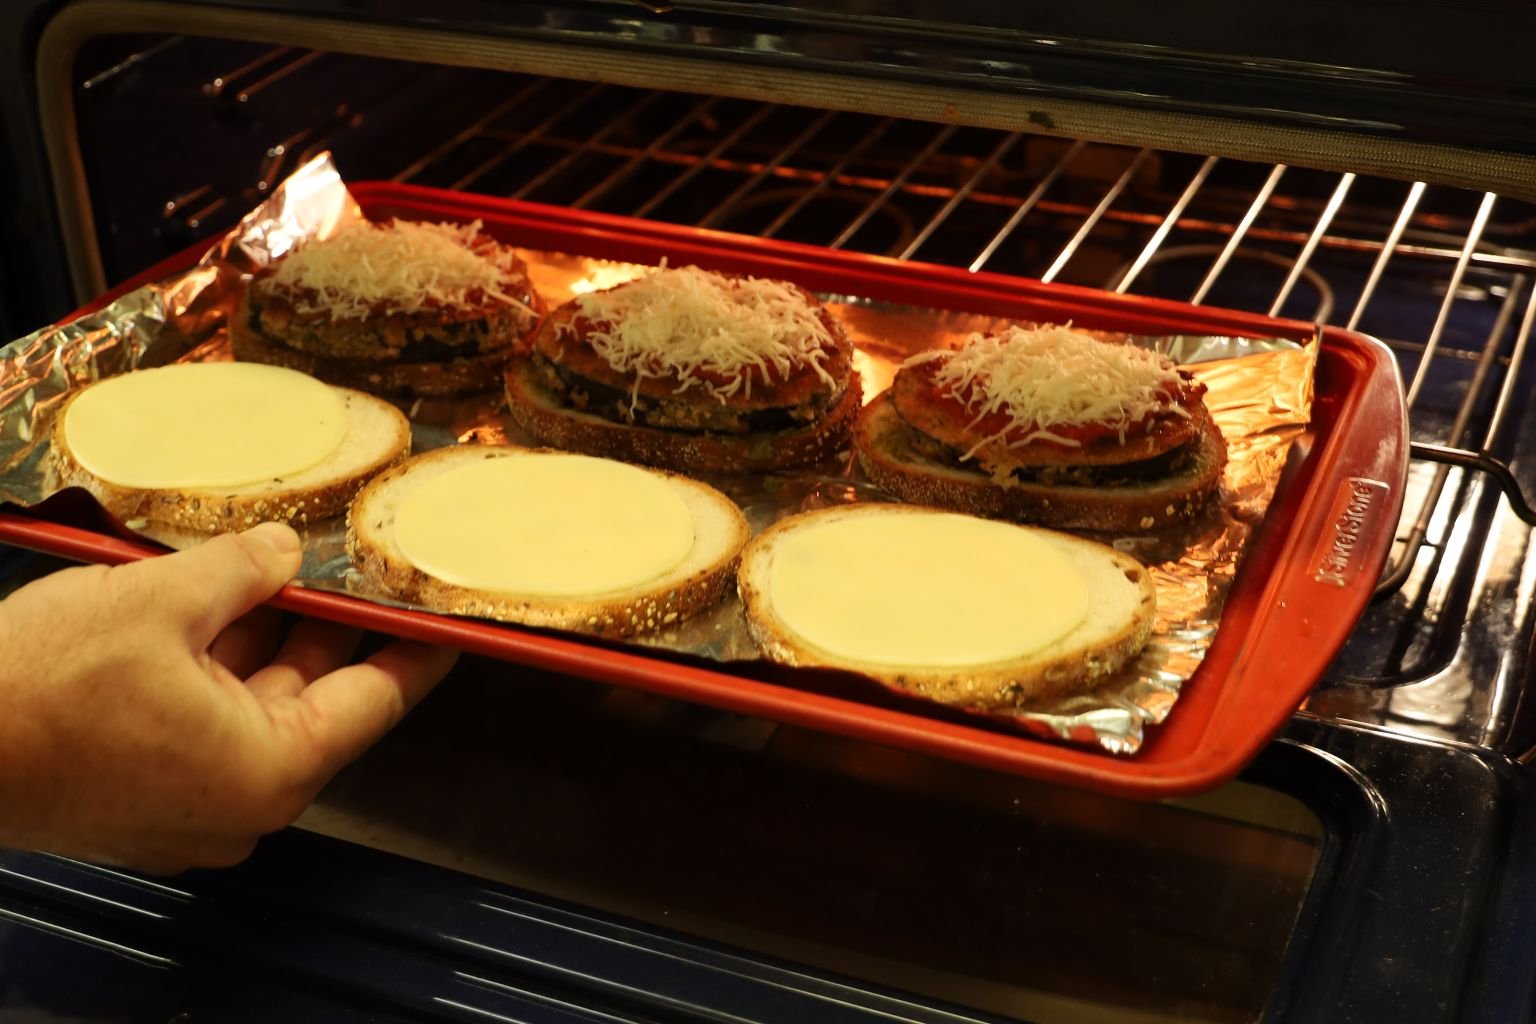

Broil the sandwich until the cheese melts and the bread is starting to brown.
I loved that when I went to slice my sandwich it fanned up this way.
I think it is a lovely presentation.
———————————————————————
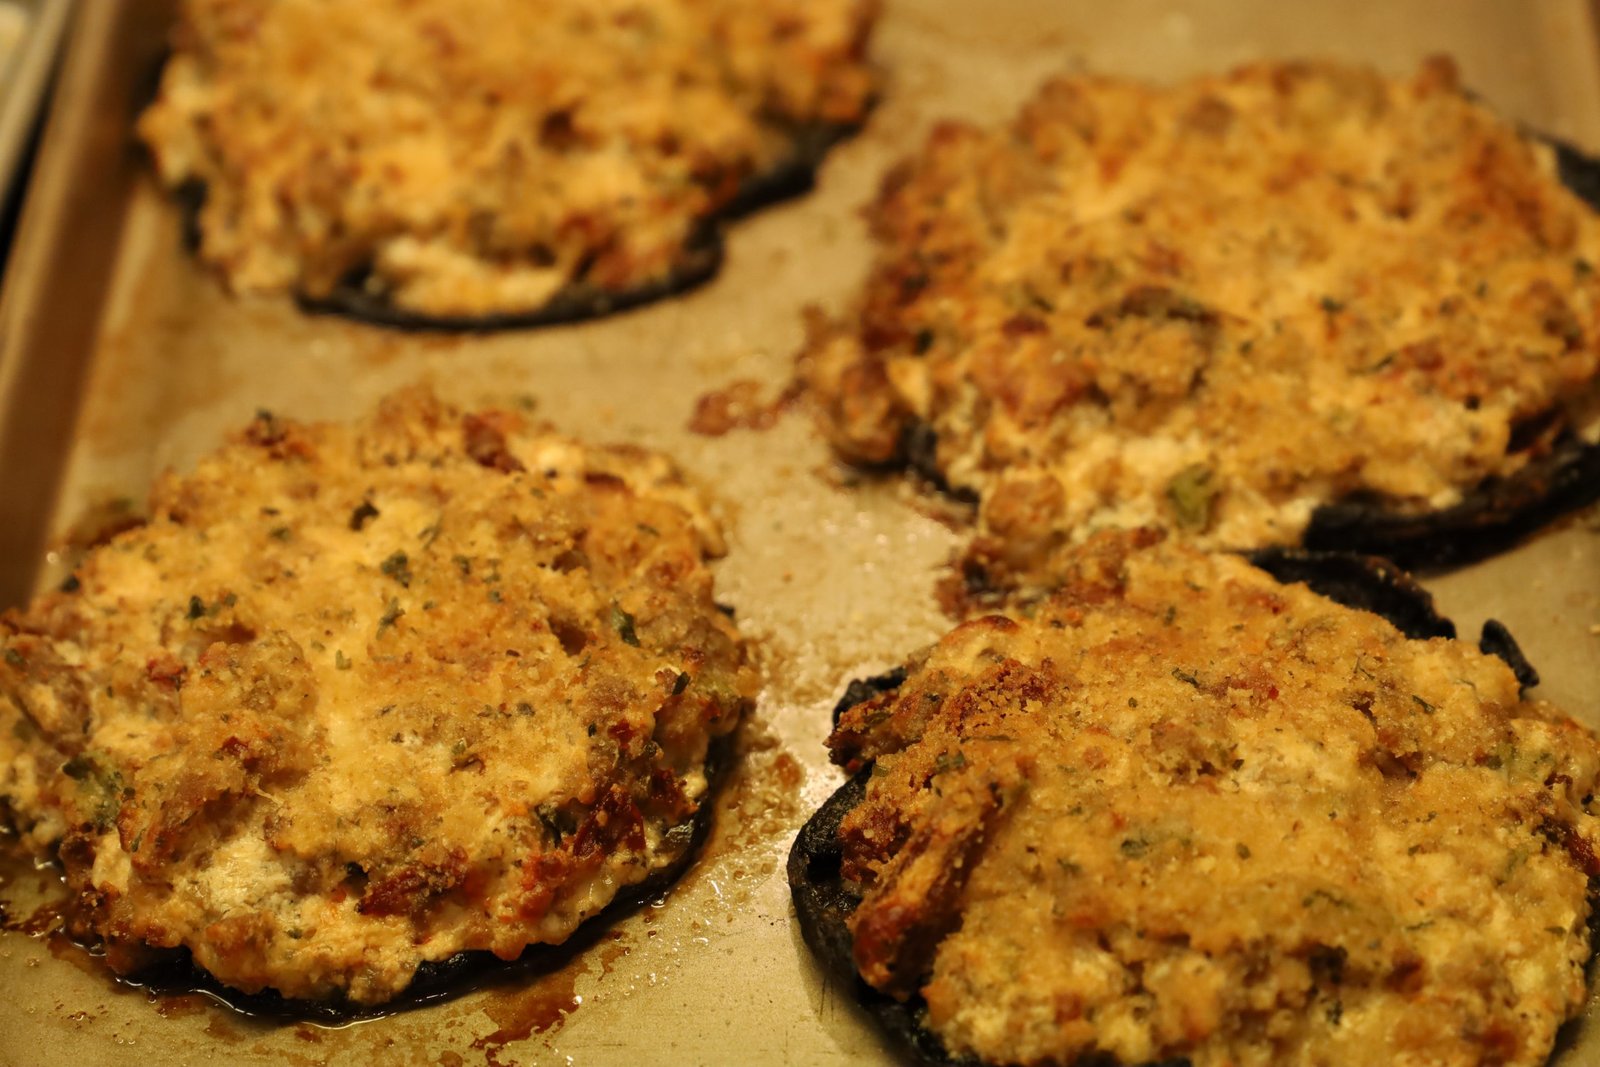
Stuffed Mushrooms
This is another favorite of ours.
The stuffing mixture is so delicious that it can be stuffed into mushrooms or large pasta shells.
Portobello Mushrooms
(The larger the mushroom, the better.)
Although we grilled the mushrooms outside on our grill, we did stuff them/bake them/cook them, in our oven.


Mackenzie was a big help with these.
Here, she and Gordon are sauteing some onions and browning some Italian sausage.
In one pan cook/sautee your onions for about 5 min then add your sausage and garlic. Cook the mixture until the sausage is lightly browned then add your Marsala and Merlot wines.
Cook the mixture until the wine is about gone (3-4 min).

———————————————————-
Ingredients:
Olive oil
1 chopped onion
2 cloves of garlic chopped
2 T. Sundried Tomatoes, chopped
1 lb of Ground Italian Sausage
1/4 cup Marsala Wine
1/8 cup Merlot Wine
1 1/4 cups Ricotta cheese
1/8 cup Fresh Oregano leaves
1/4 cup Italian bread crumbs
1/2 cup grated Asiago and Parmesan Reggiano cheese
Salt and Pepper to taste
————————————————————-
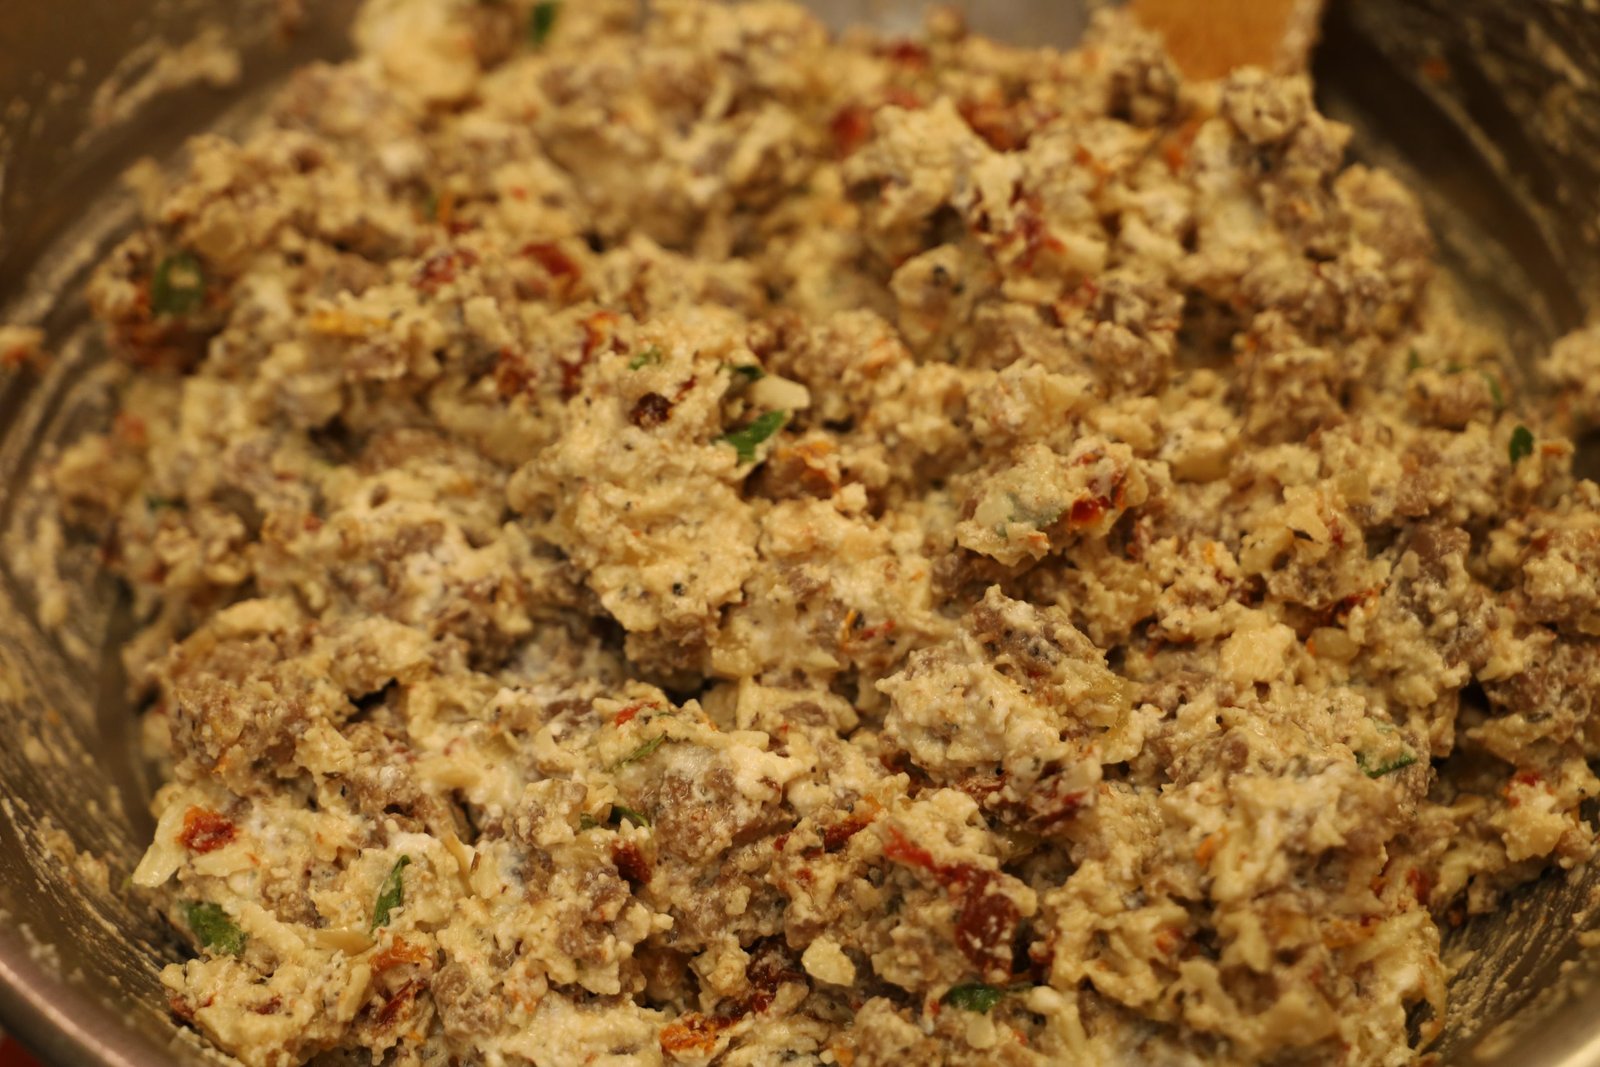
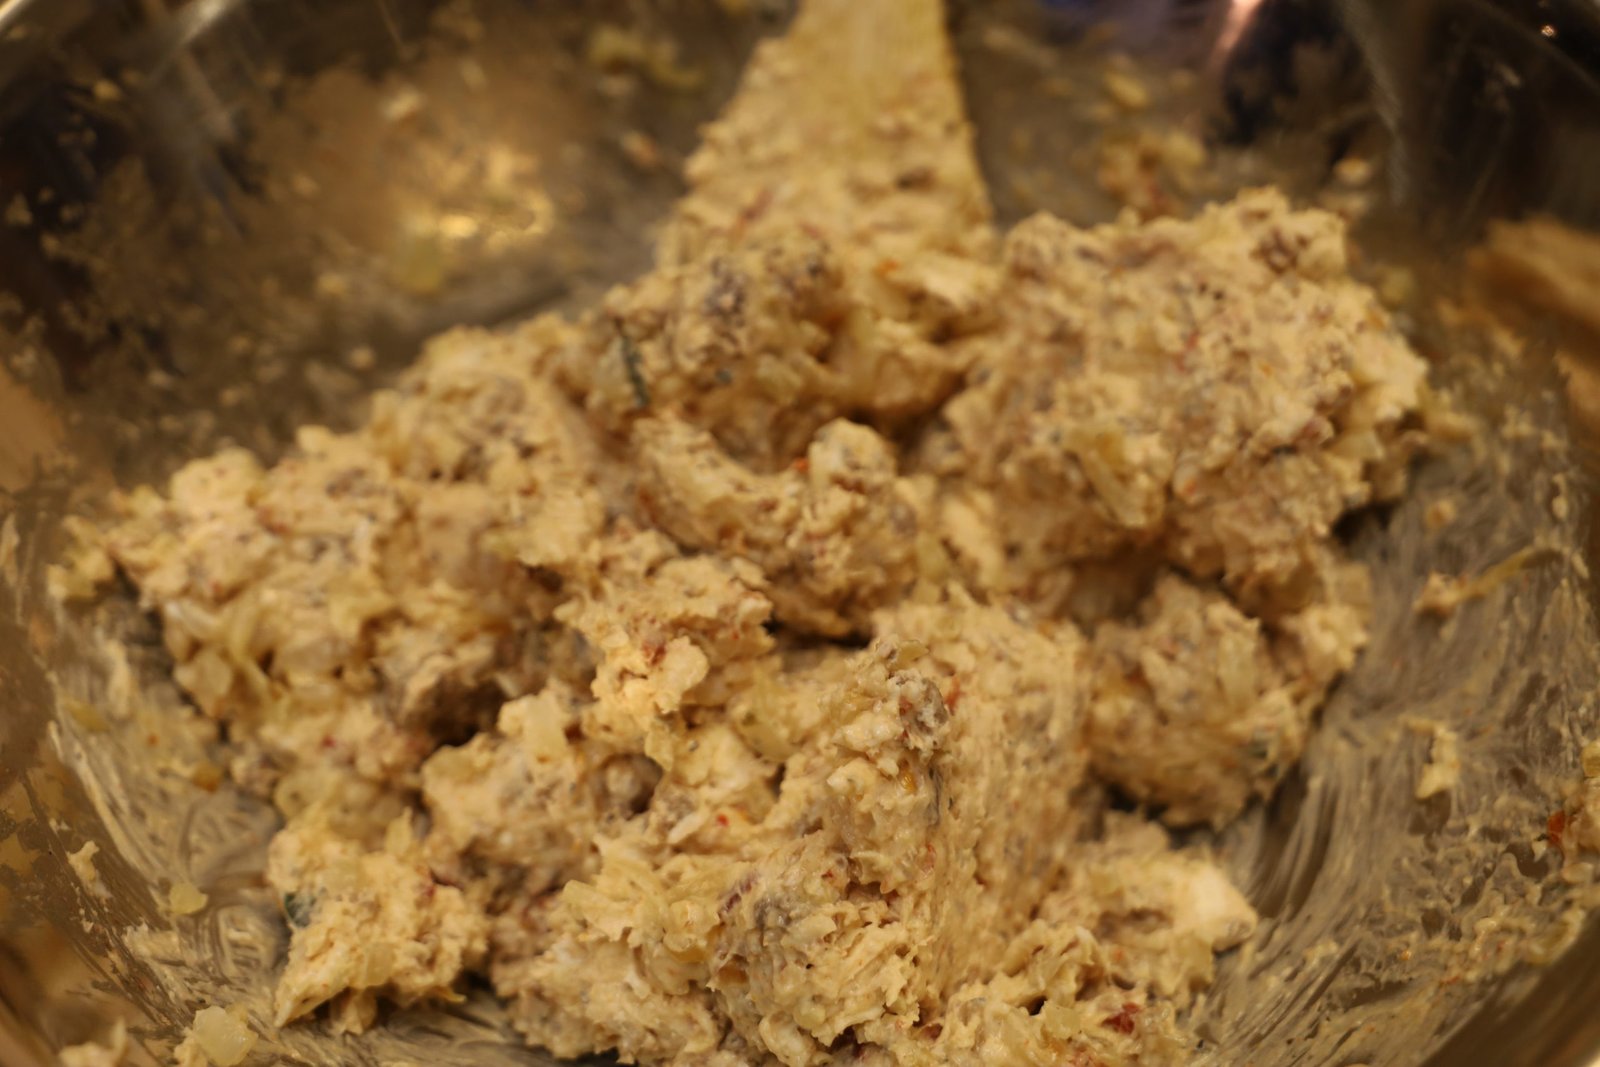
All of the other Ingredients go into the Bowl.

Then Blend in Your Sausage Mixture

————————————————————-

Gordon Grilling our Portobello Mushrooms after brushing them with Olive Oil, Freshly Ground Black Pepper, and a Seasoned Salt. Simply take off the stems of the mushrooms and lightly pour some good olive oil on both sides with a little salt and pepper to taste. Now, cook the mushrooms either on a grill as I did or other large pan on medium heat in the oven until wilted. I would say about 6-8 min. on each side.
The Stuffing Mixture

The Grilled Mushrooms Ready for Stuffing


Spray a baking sheet with an olive oil spray and then place the stuffed mushrooms on it and place into a 350F oven for about 20-25 minutes.
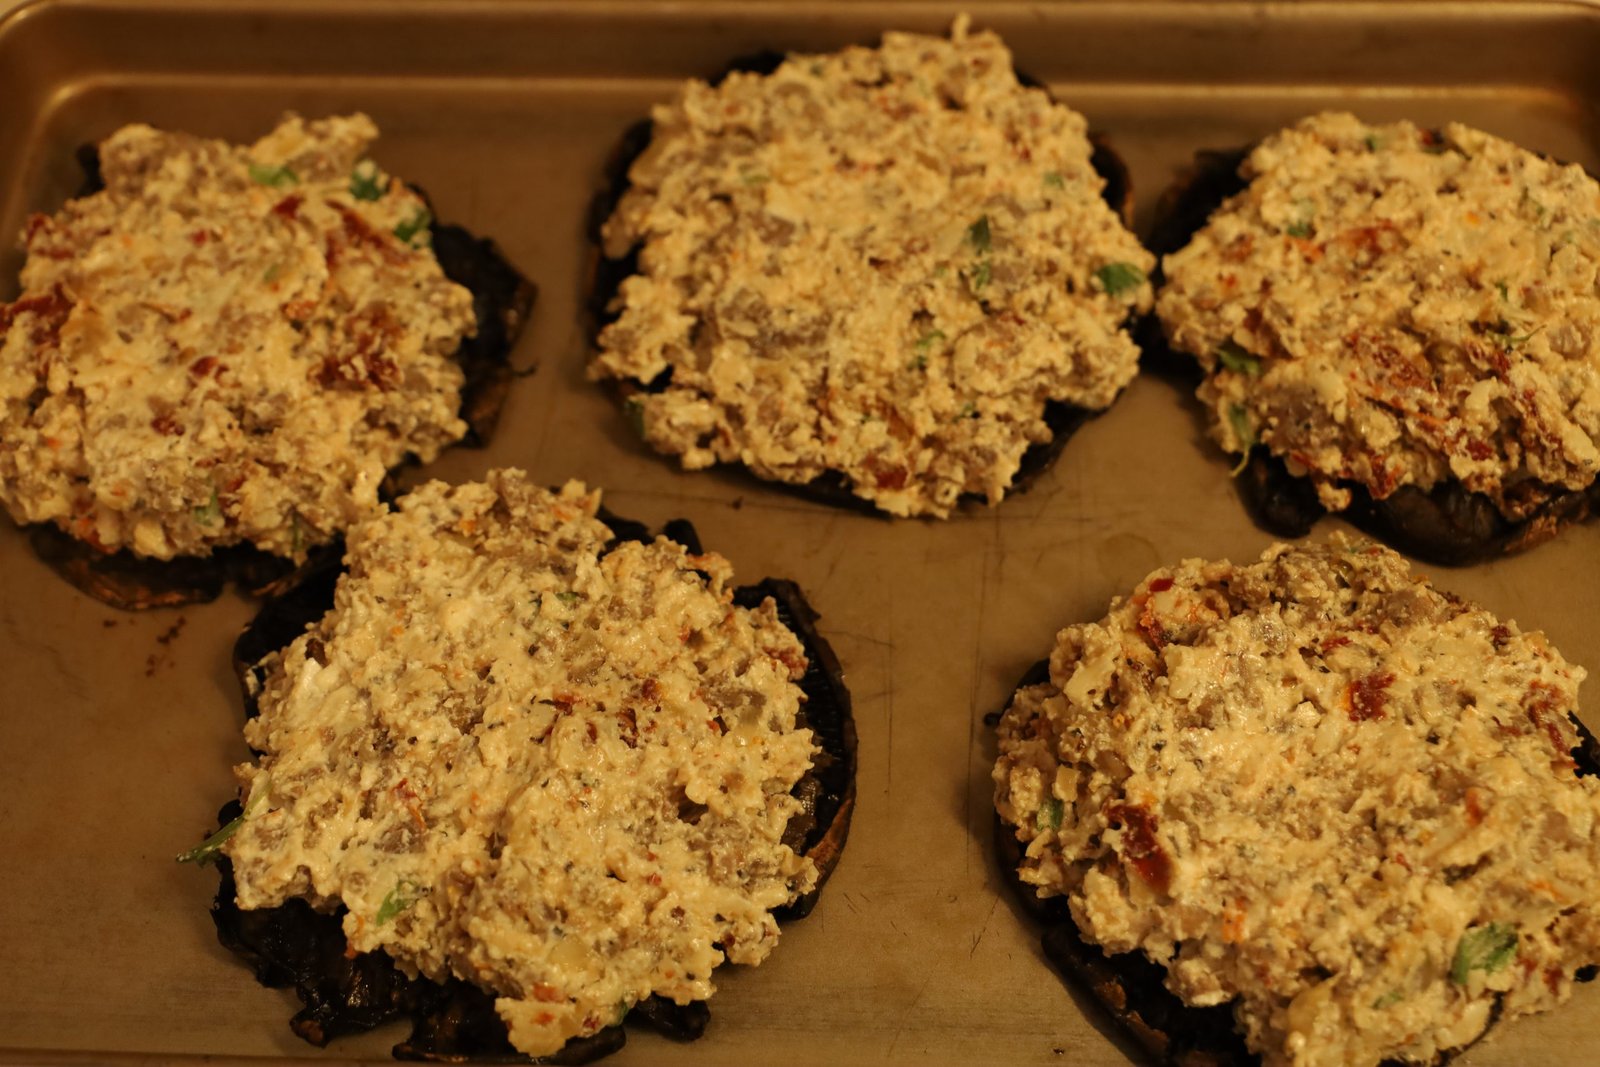
Stuffed and Ready for the Oven

350F Oven
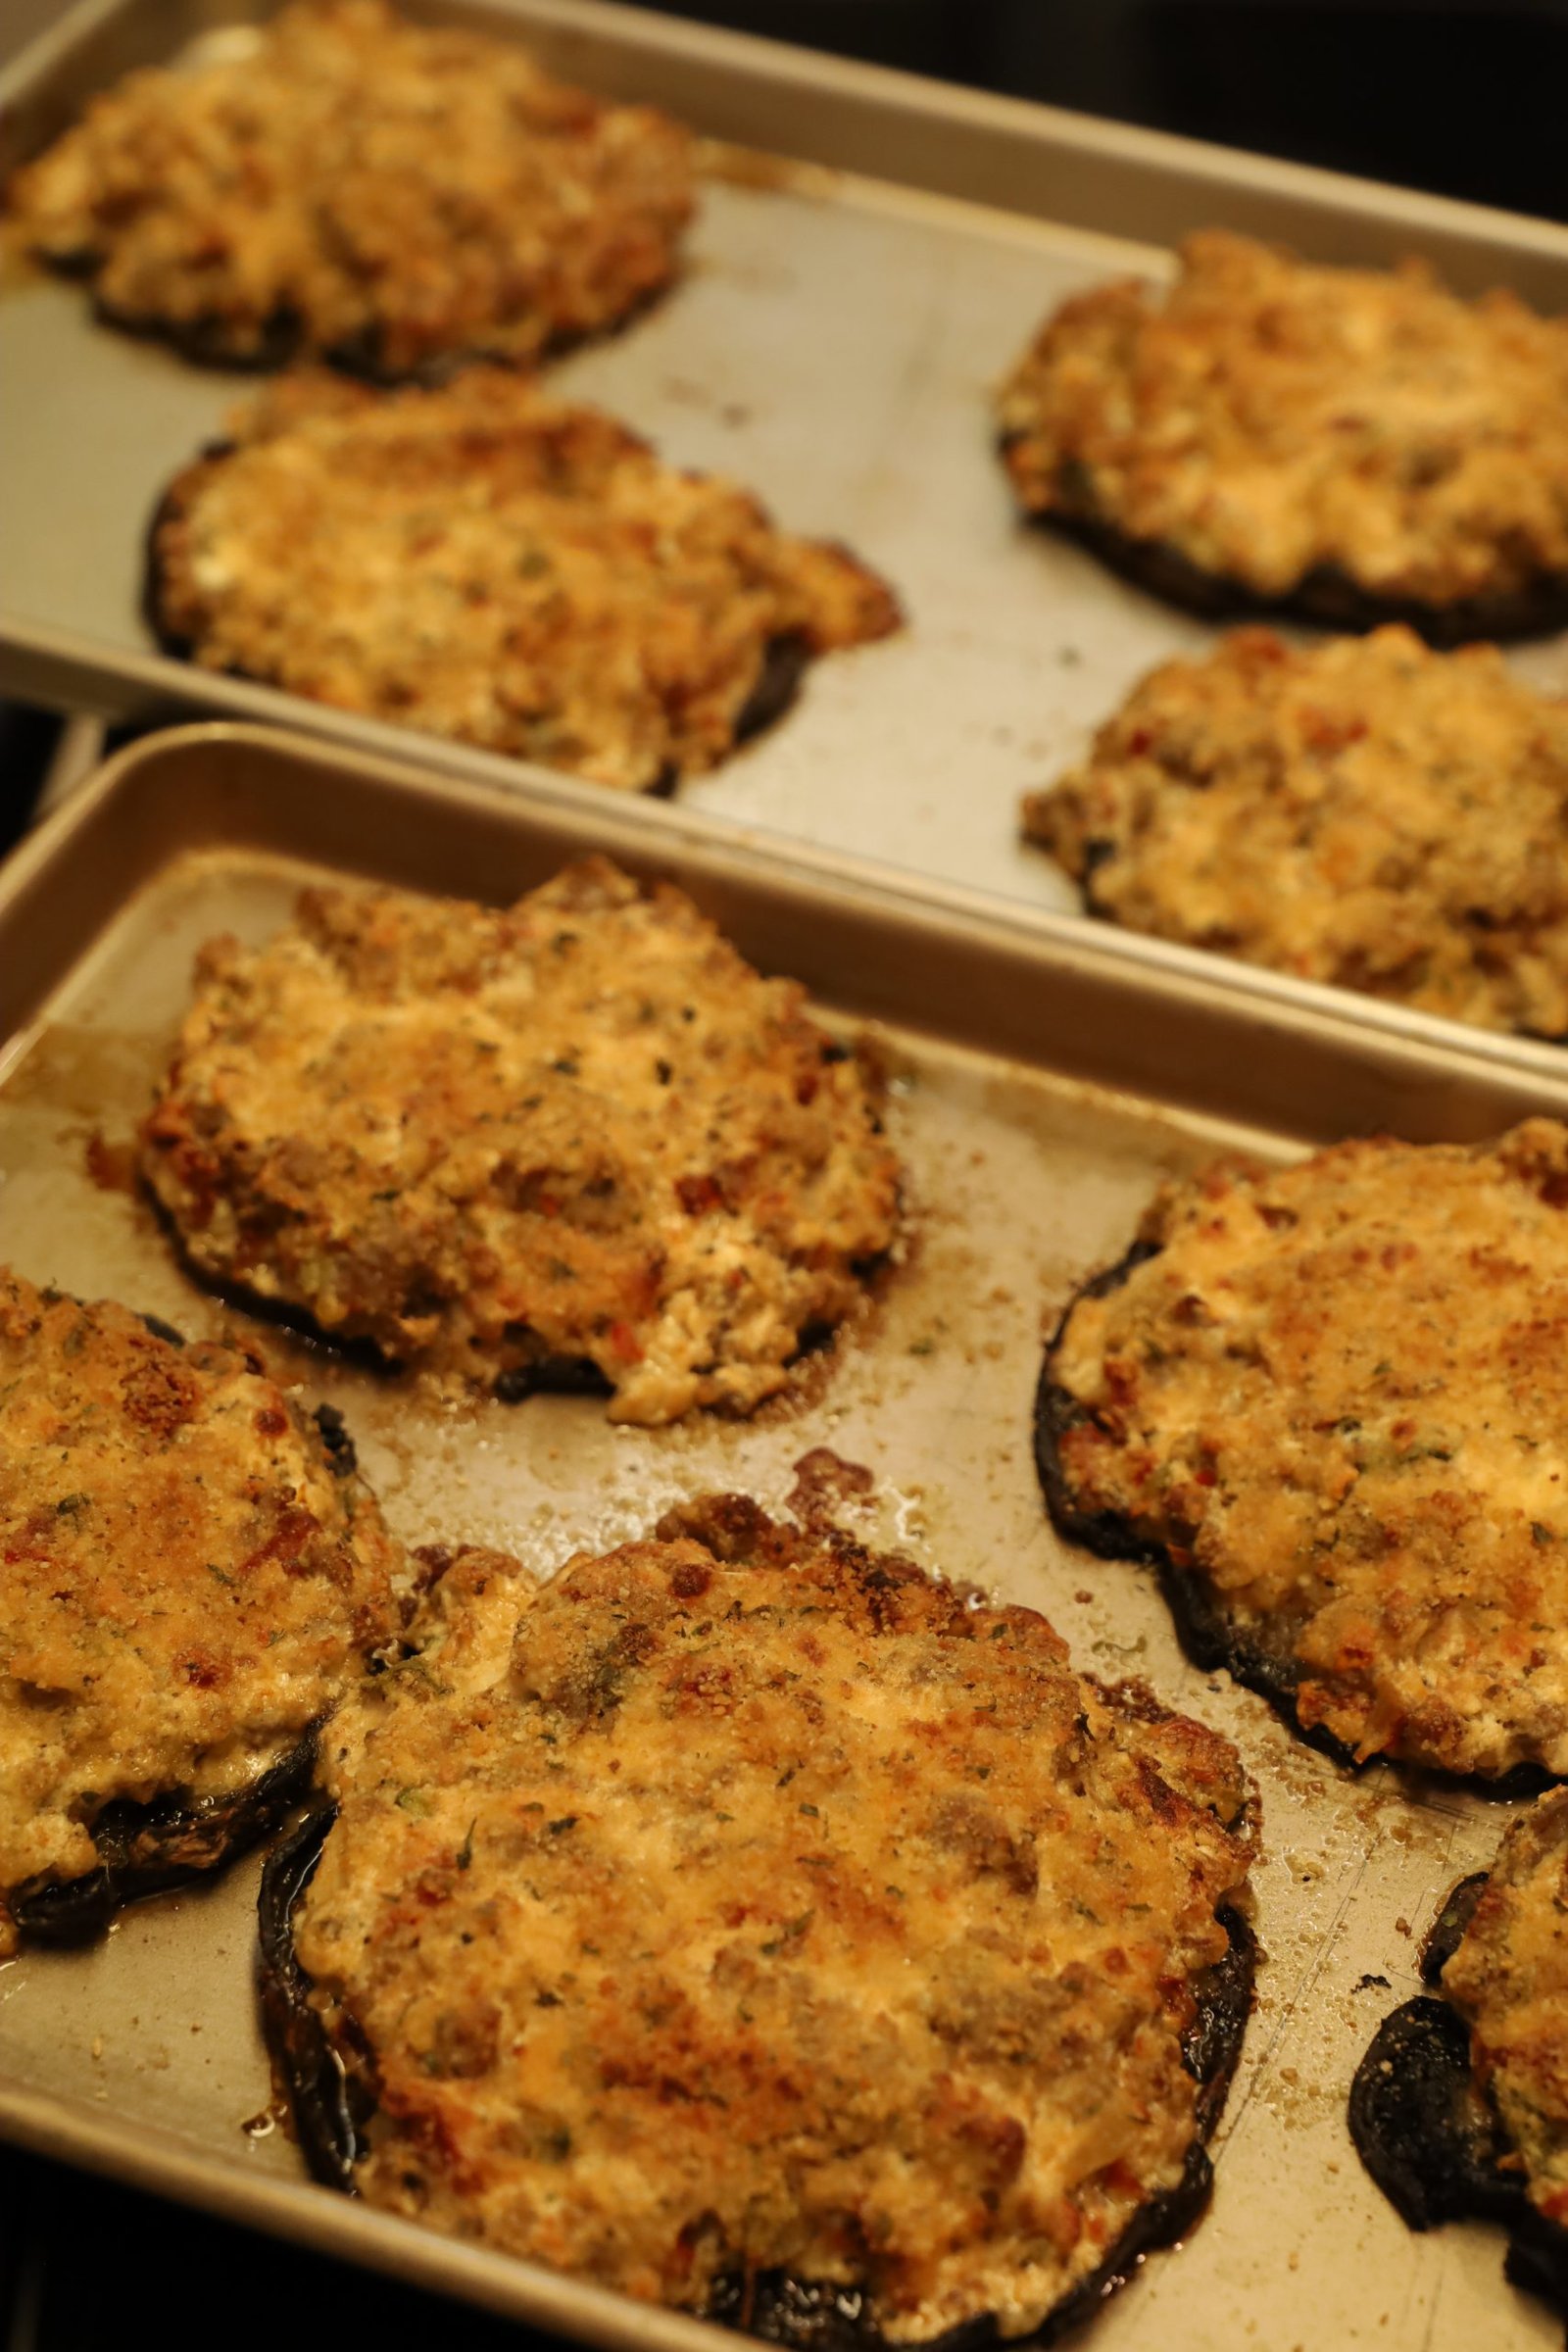
Ready and Delicious!
————————————————————–

Along with my Garden, and Pasta Salad
————————————————————–

Roasted Stuffed Shells
We had some leftover stuffing mixture from our Portobello Mushrooms, above.
So we decided to boil some large pasta shells and stuff them with it.

Boiling Large Pasta Shells
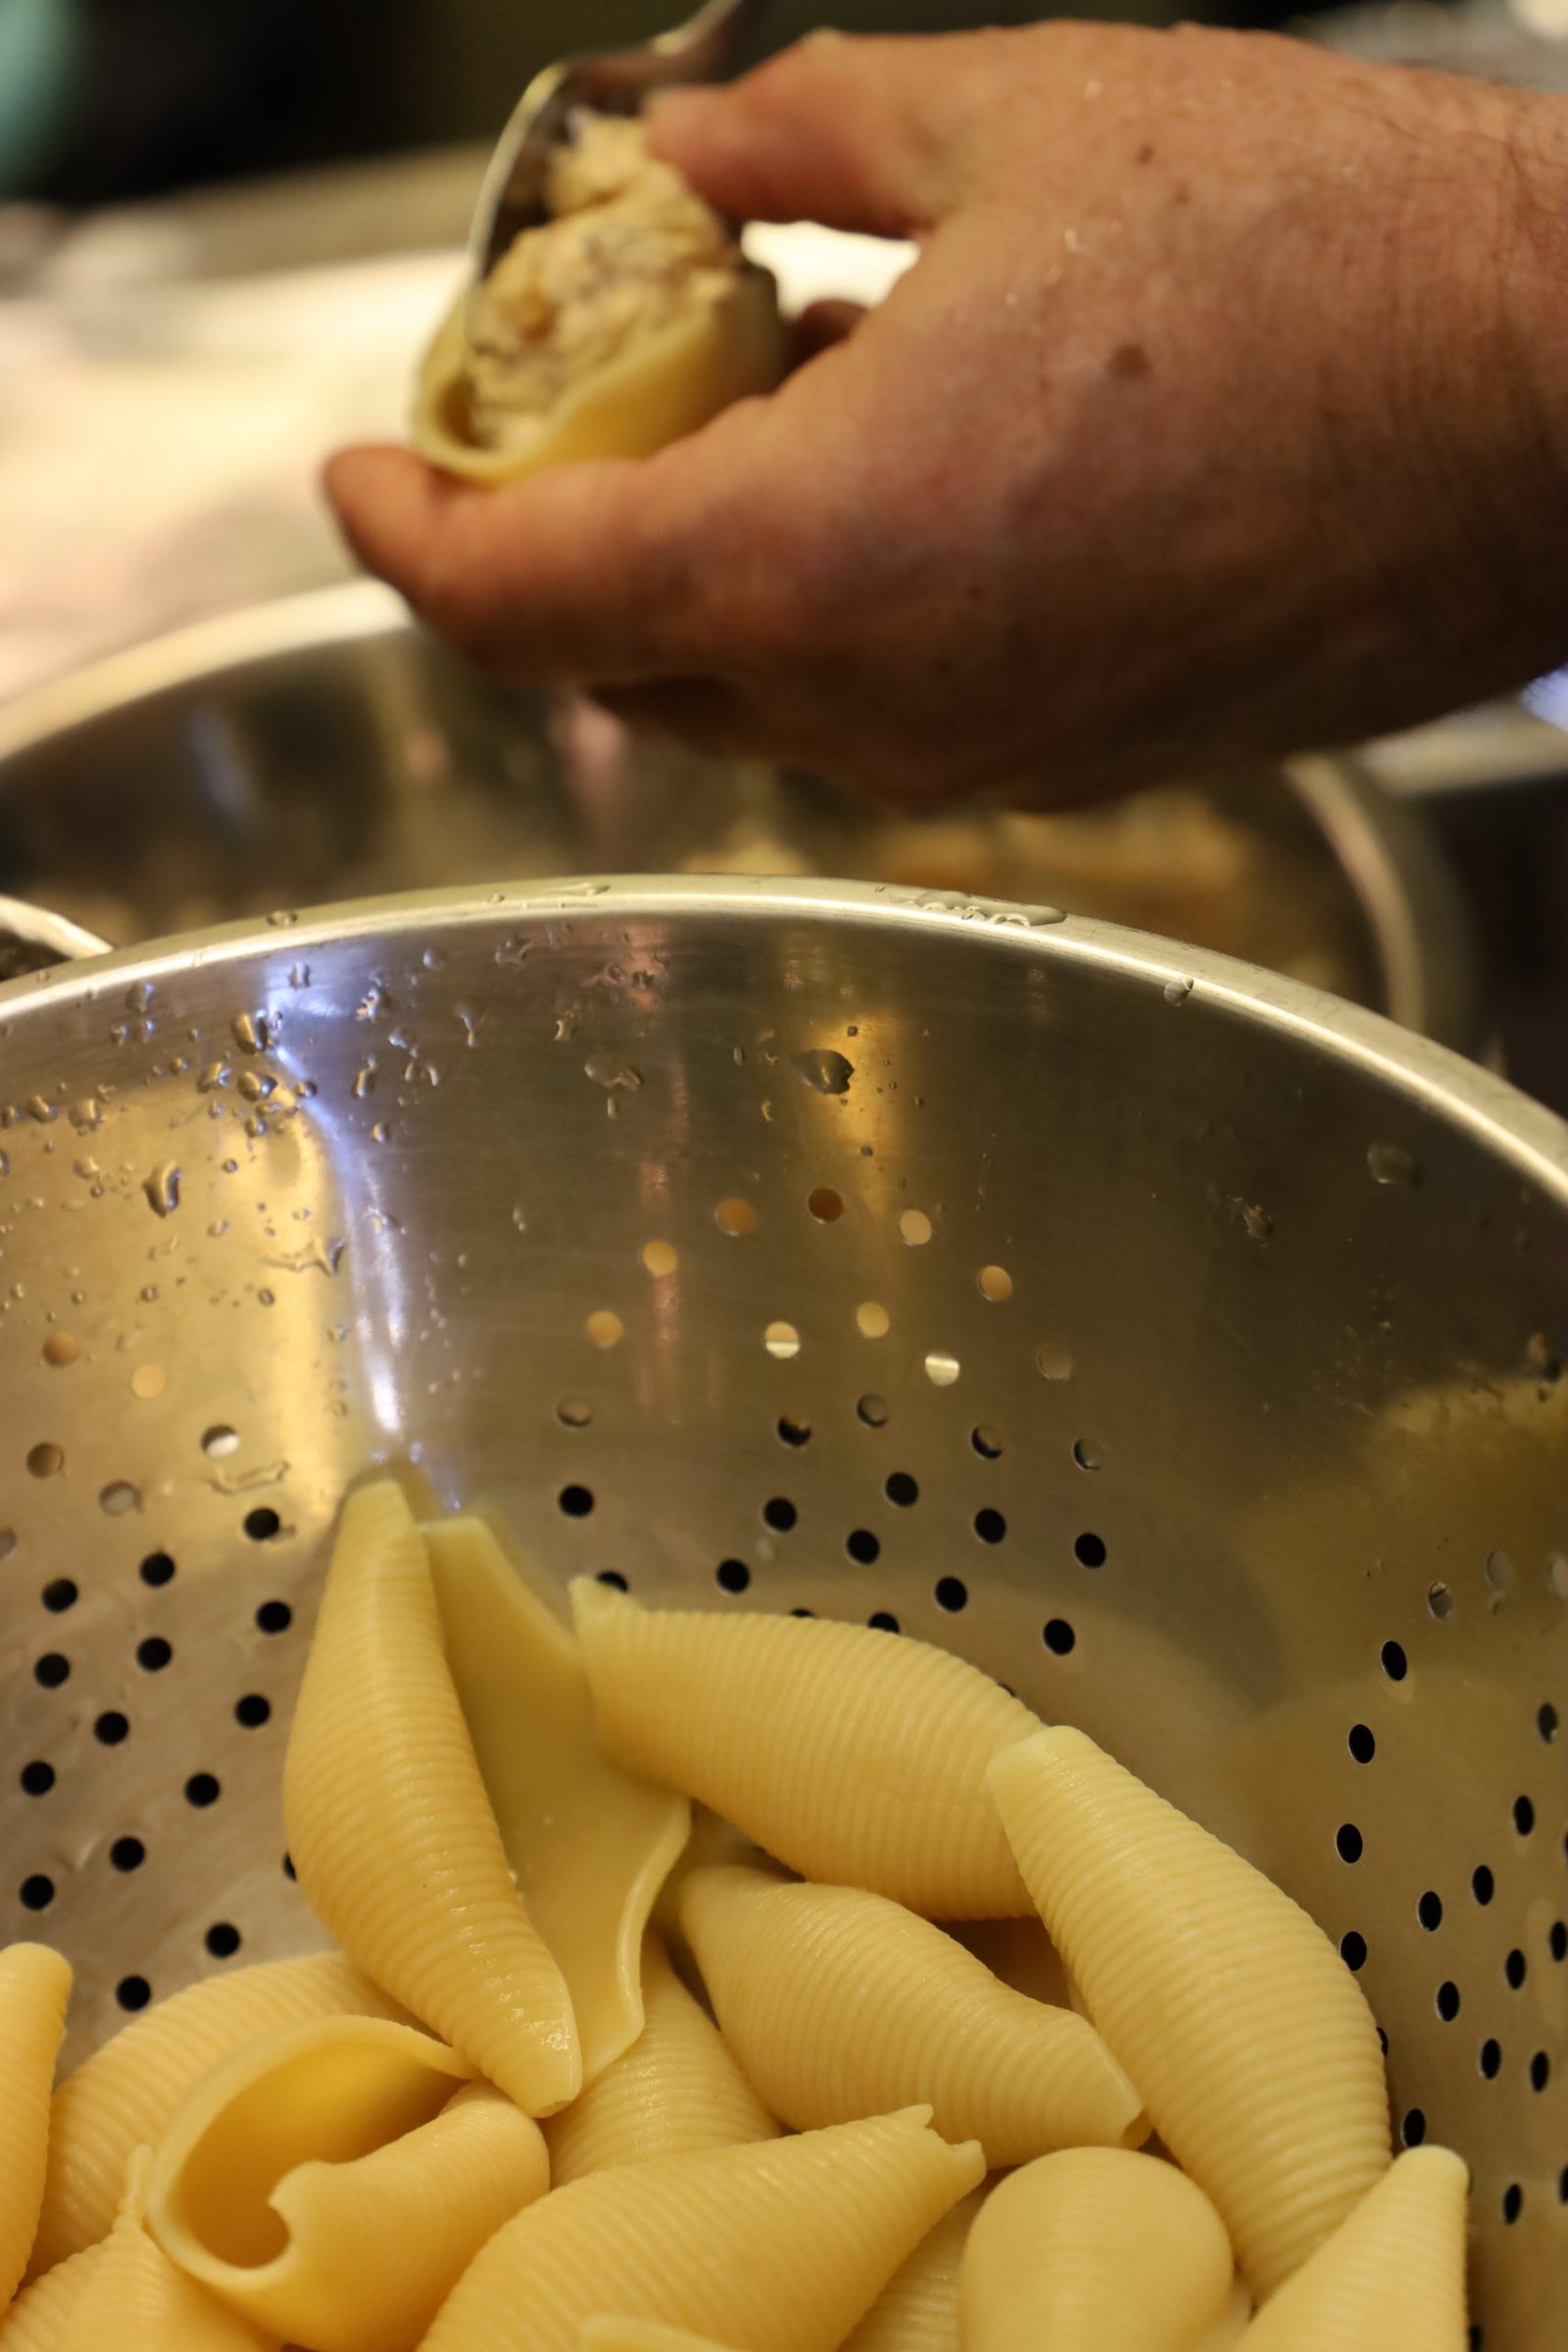

Here Gordon placed some aluminum foil onto a baking sheet, sprayed it with an olive oil spray, and is stuffing al dente pasta shells with our leftover mixture from our stuffed mushrooms.

STUFFED!


Here Gordon is placing some Parmesan Cheese on top of them.


Now he is sprinkling some Paprika on top.

You want to place them into an oven on broil.
Just to melt the cheese and brown them a bit.
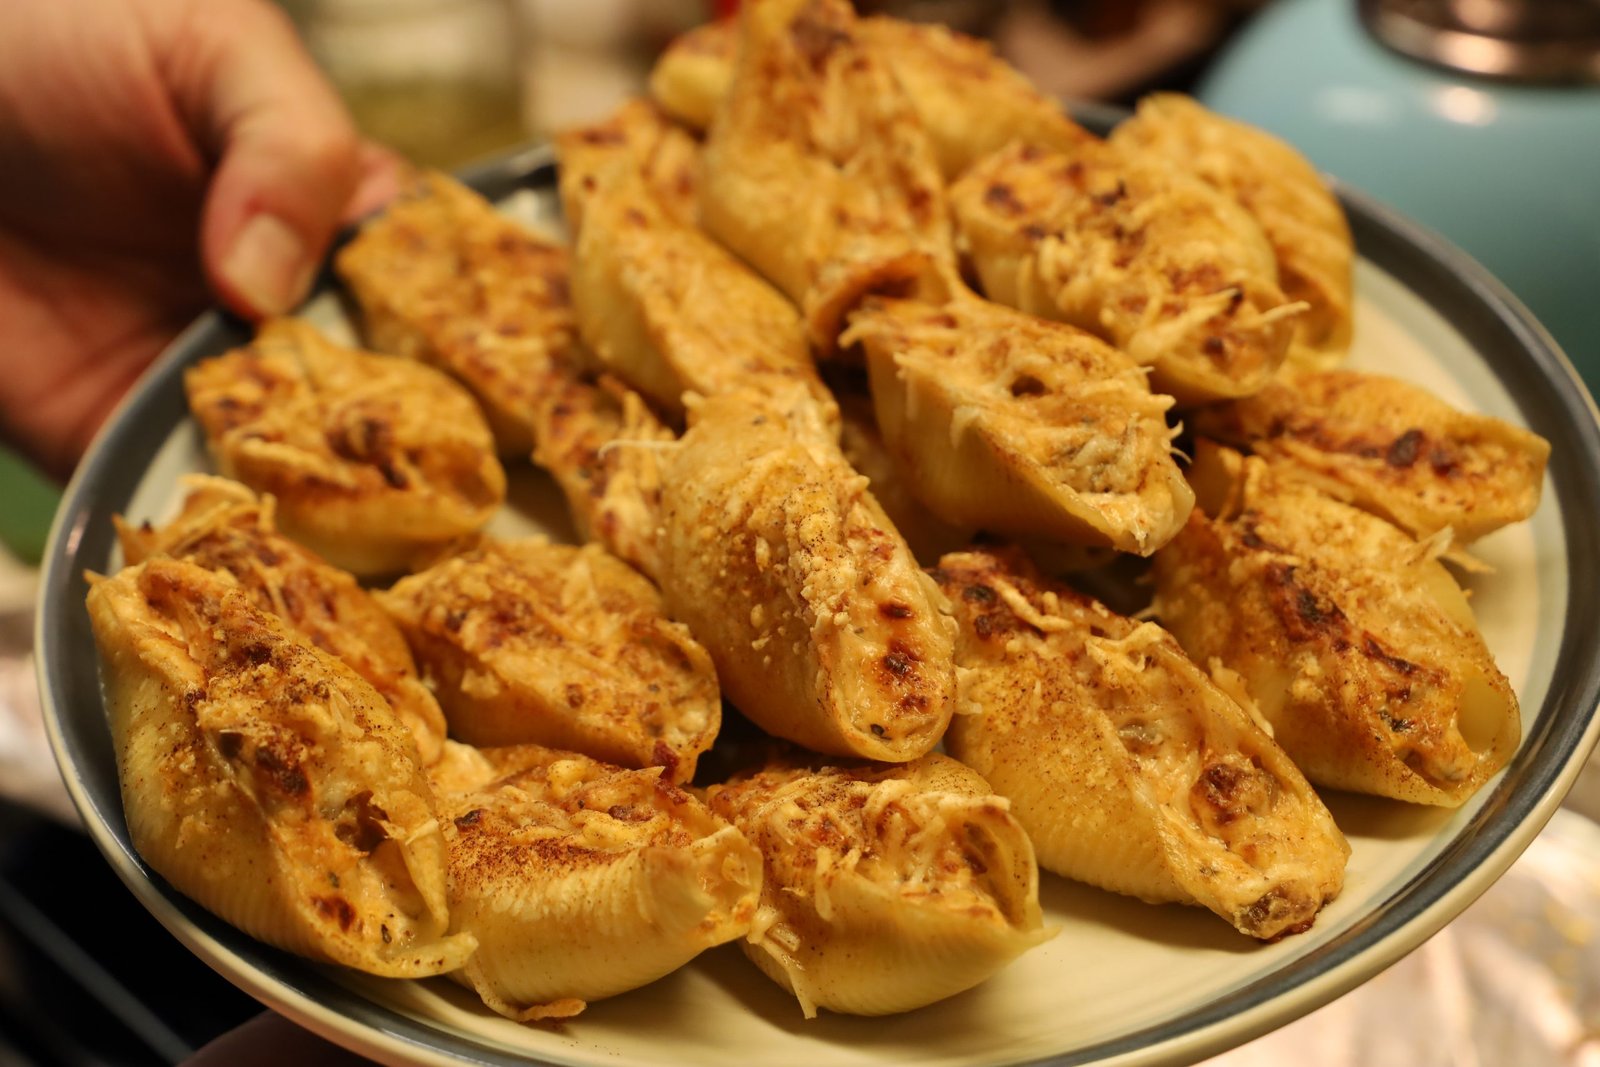
Ready and Delicious!
I love that you can pick them up and eat them with your hand.
——————————————————————
Our Mex-Itali Cookies
Half Mexican/Half Italian
This recipe was born out of my need to not waste our leftover Ricotta Cheese from our mushrooms and stuffed shells recipes, above. So, as I was laying out in the sun in the backyard during Coronavirus lockdown, I came across a ricotta cheese cookie in one of my cookbooks and I was intrigued. We had all of the ingredients but I still wanted to make them different. I didn’t want the cookie itself to be very sweet, but I wanted to drizzle something over top of the cookie to add that extra sweetness.
Hence, our Mexican Dulce de Leche.
Done! My Mex-Itali Cookies were born!

Getting out all of the Ingredients


Ingredients:
(We did double this recipe but here is a single version.)
2 Cups All Purpose Flour
1/2 t. Baking Soda
1/2 t. Salt
1 Cup Butter or Margarine, Room Temperature
1/2 Cup Ricotta Cheese
1 Cup Sugar
1 1/2 t. Vanilla Extract
1 Egg, Beaten
Pine Nuts, Slivered Almonds, Pepita Seeds (Optional)
8 – 16 ounces La Cubanita Dulce de Leche Milk Cream Bar
——————————————————-
Mackenzie Wanted To Help

Here She is Placing our Dry Ingredients Into our Makeshift Sifter in our Bowl.


You want to sift together the All Purpose Flour, Baking Soda, and Salt together.
Here we are using our Mesh Strainer as a Sifter.

—————————————————————


You next want to beat the butter/margarine and ricotta cheese together in a mixing bowl until creamy.

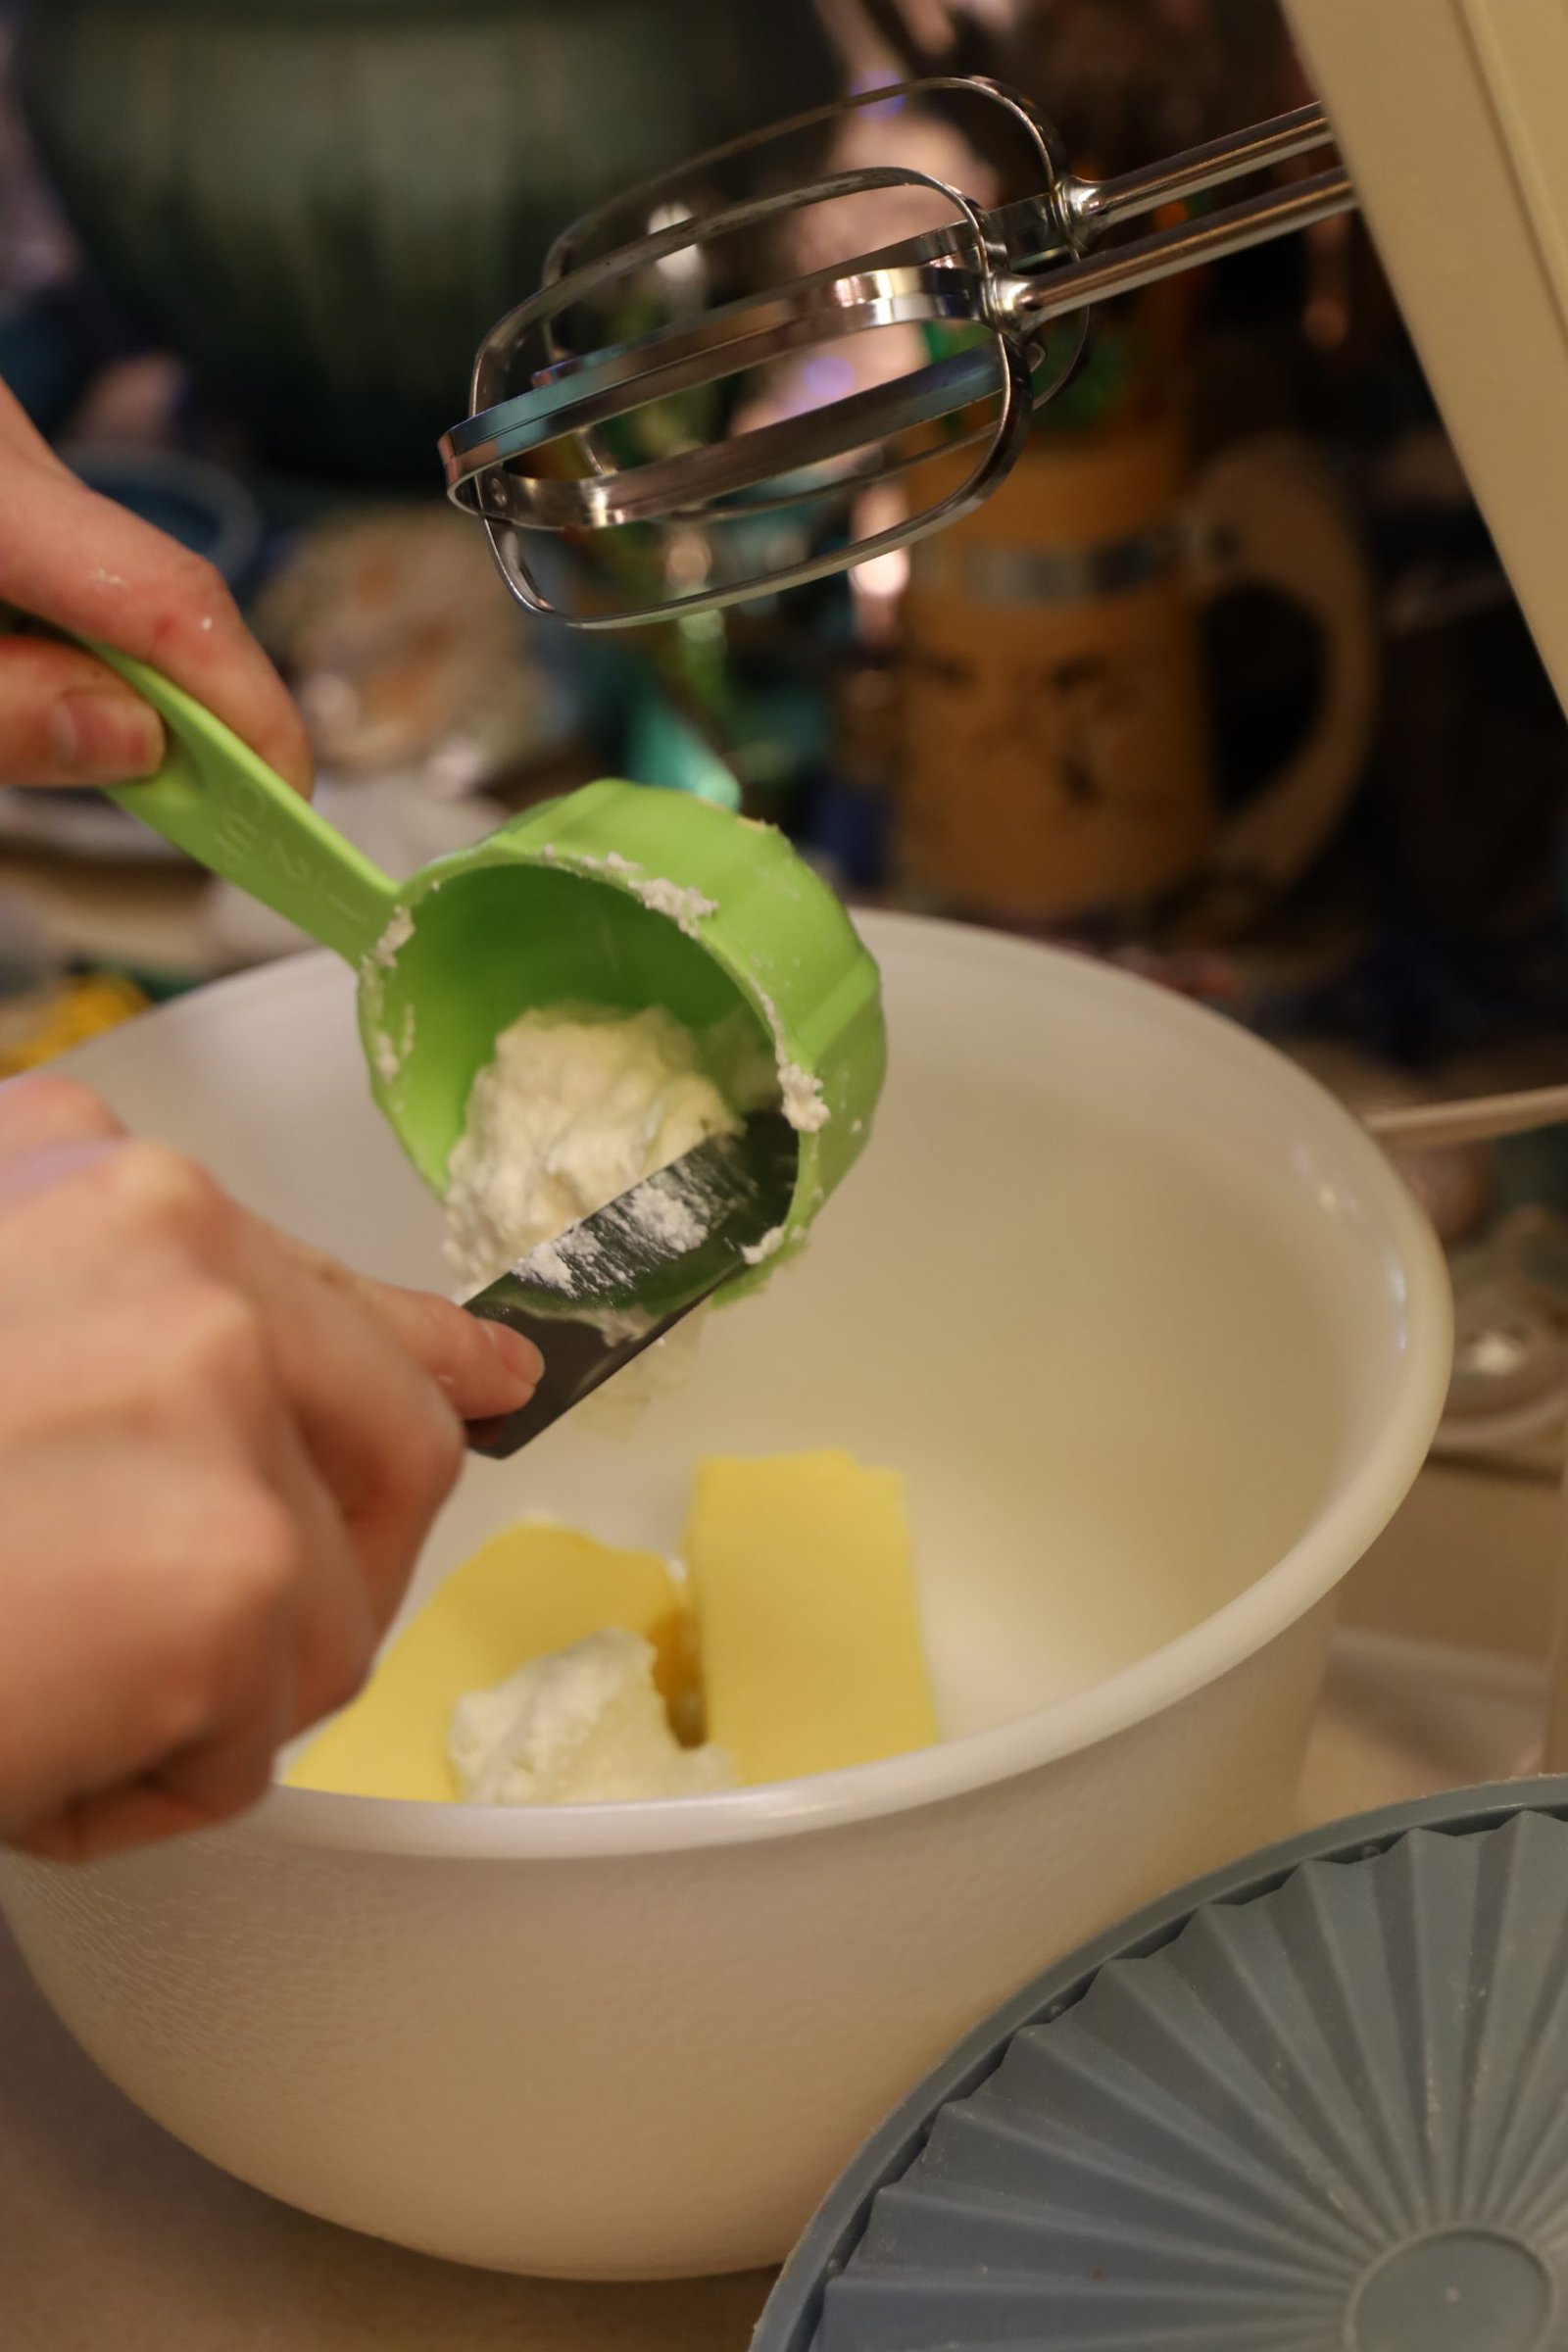
Mackenzie placing the butter and cheese into the mixing bowl.

She did find it a challenge in using a vintage mixer.
(In another recipe Mackenzie and Brodie were working on, she asked if we have a dough hook? We pretty much laughed and told her that our kitchen still lives in the 70’s.) 🙂


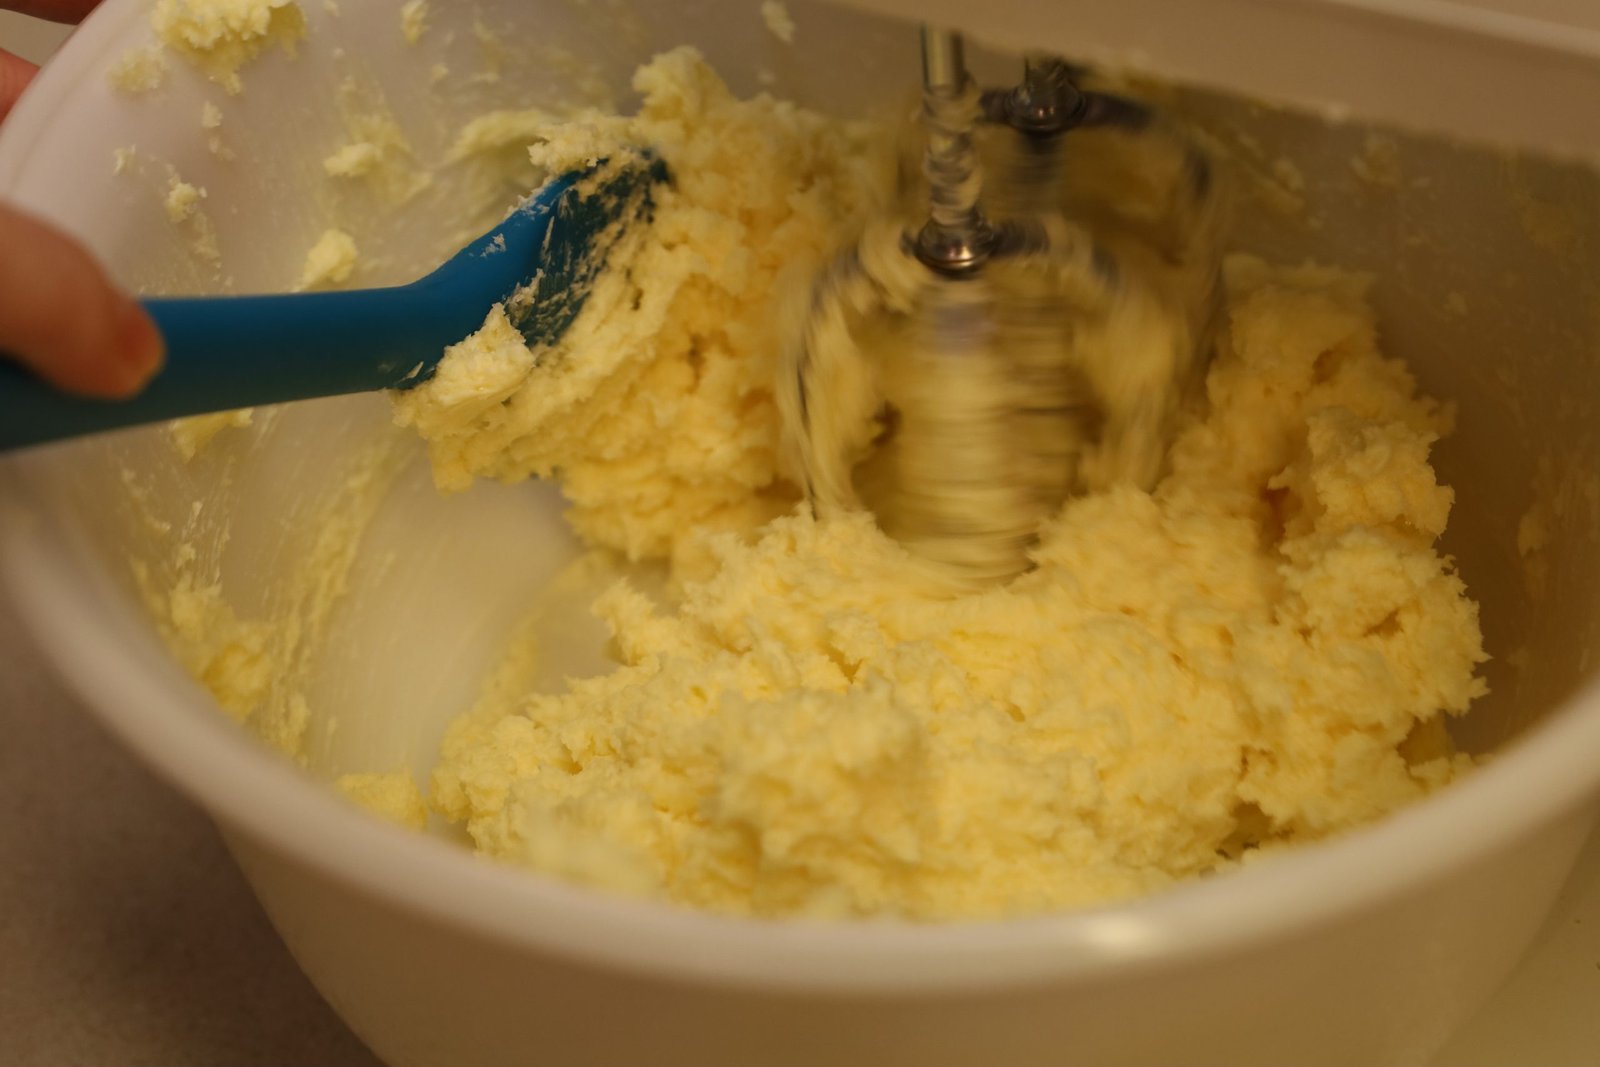
Here Mackenzie is adding the sugar to the mixer and beating until light and fluffy.

——————————————————————-


Now you add your Vanilla to the mixture.


Beat One Egg

Add the Egg To Mixture and Mix Together

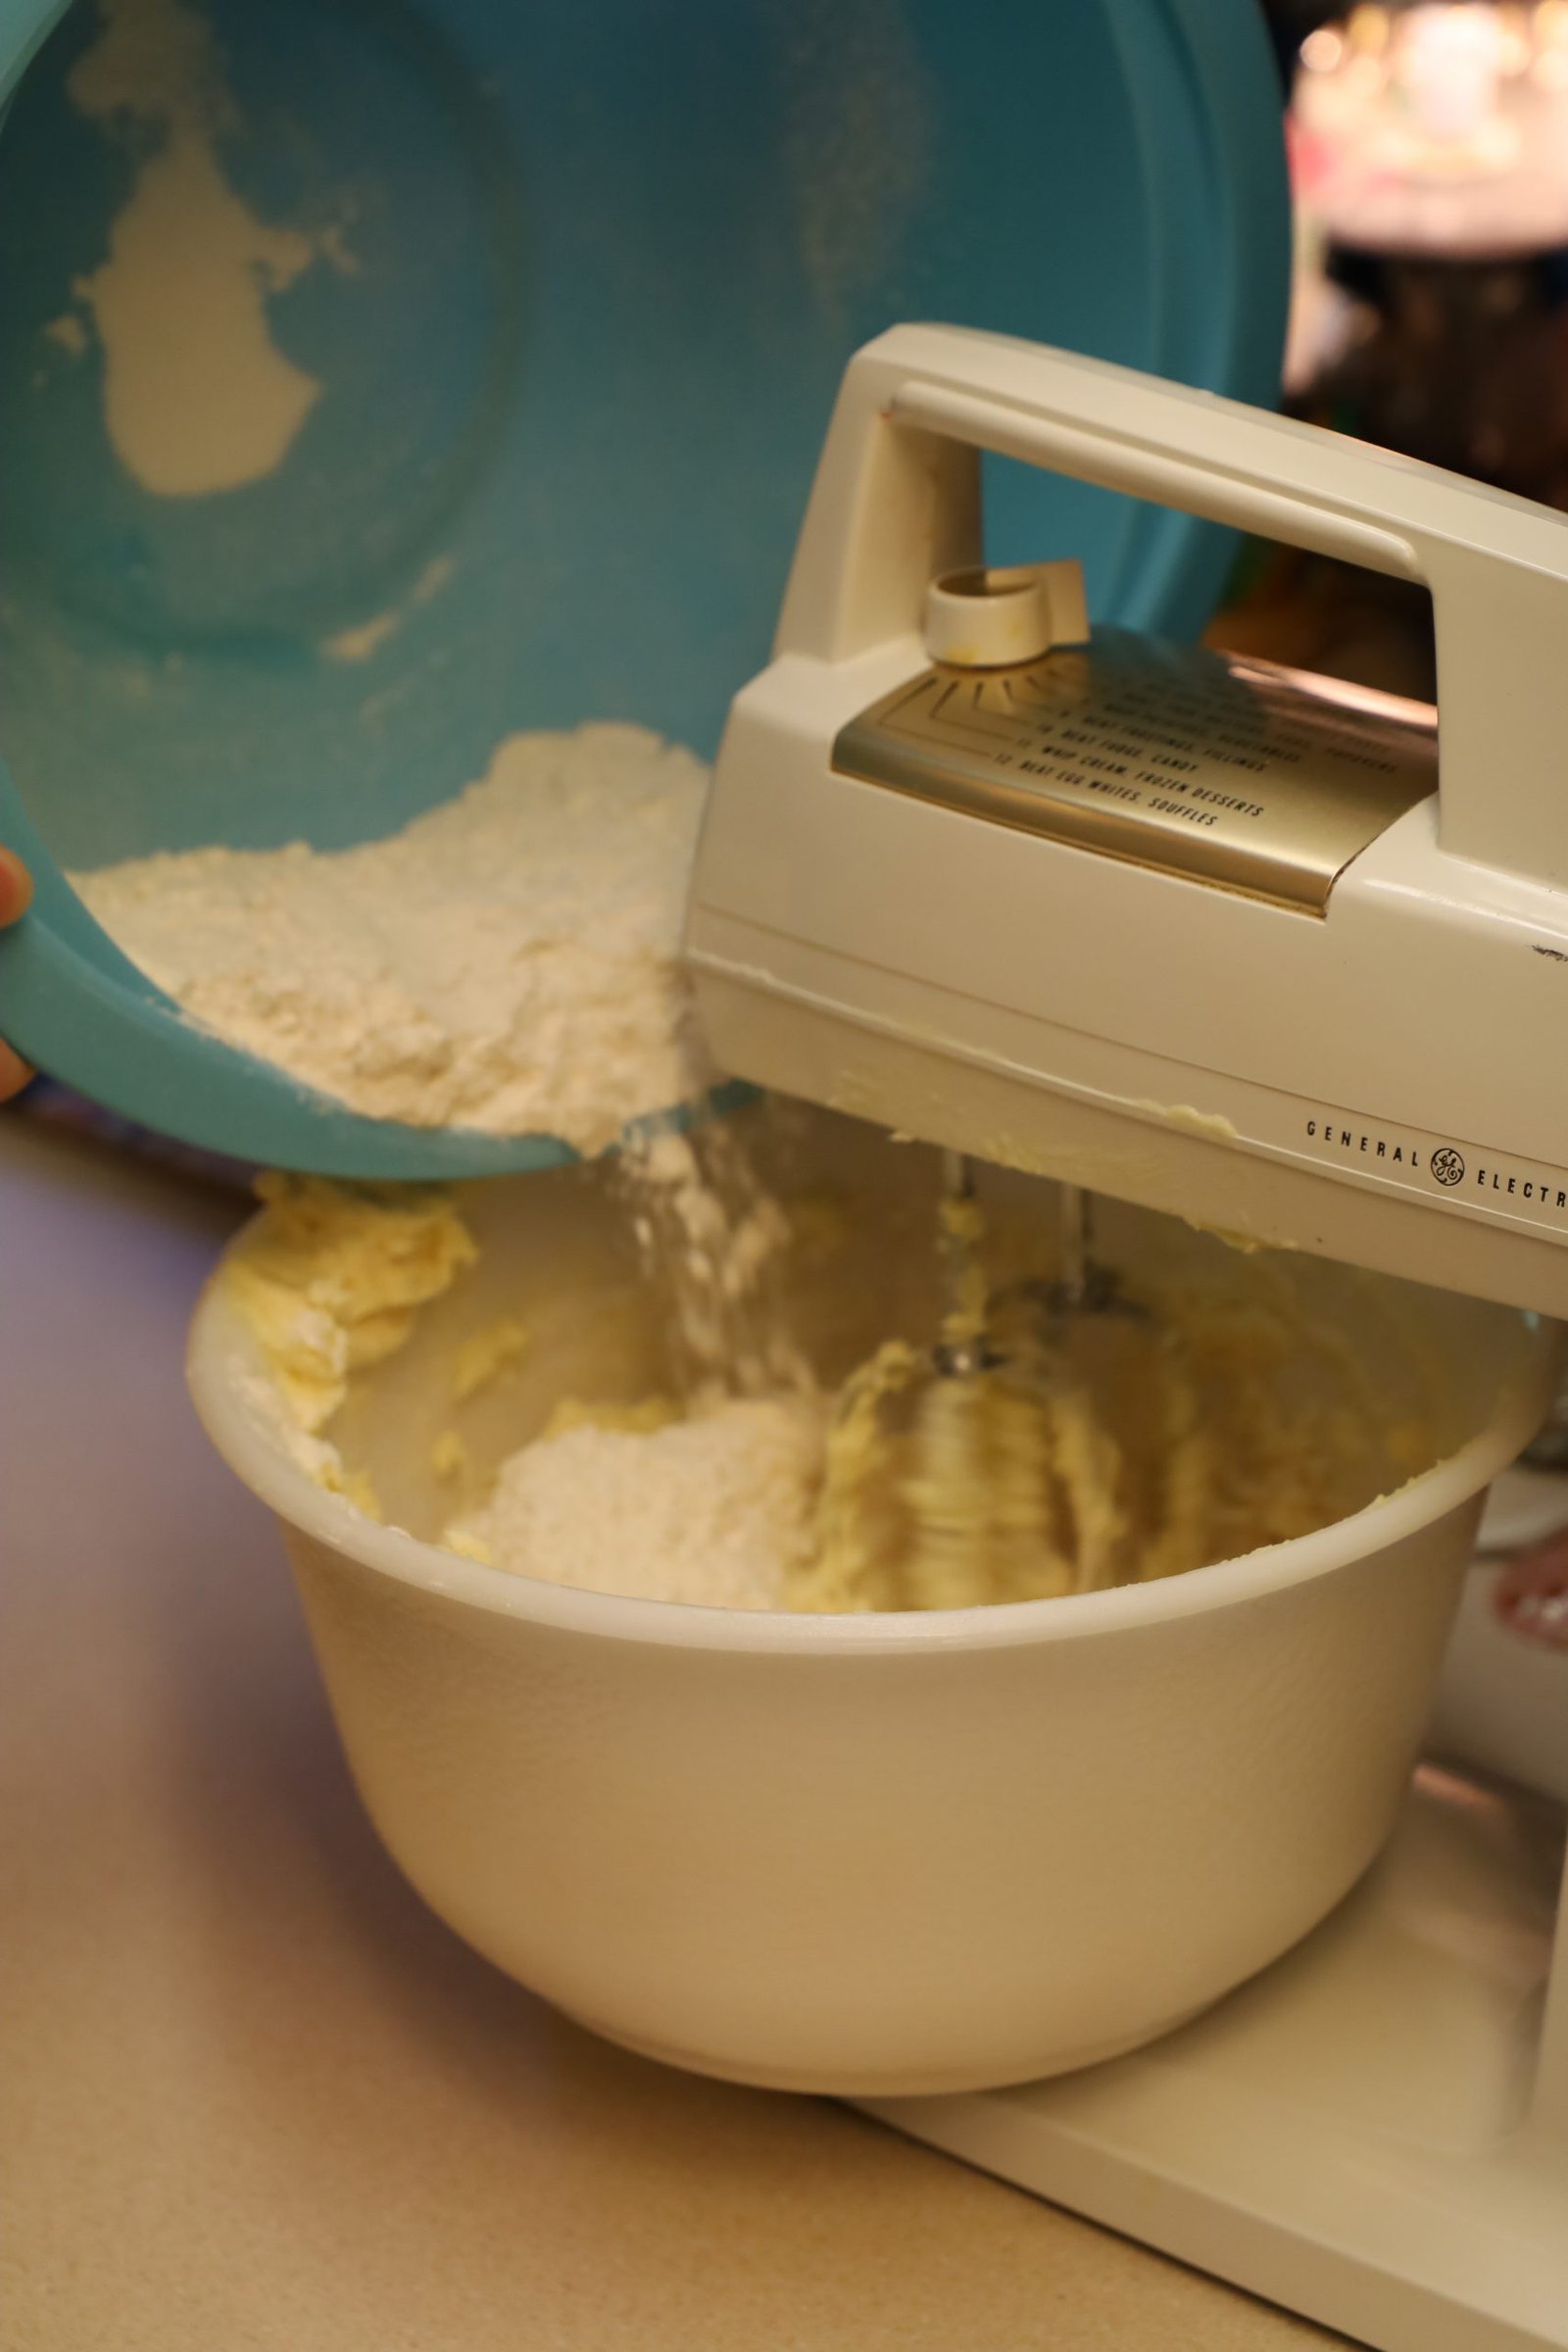
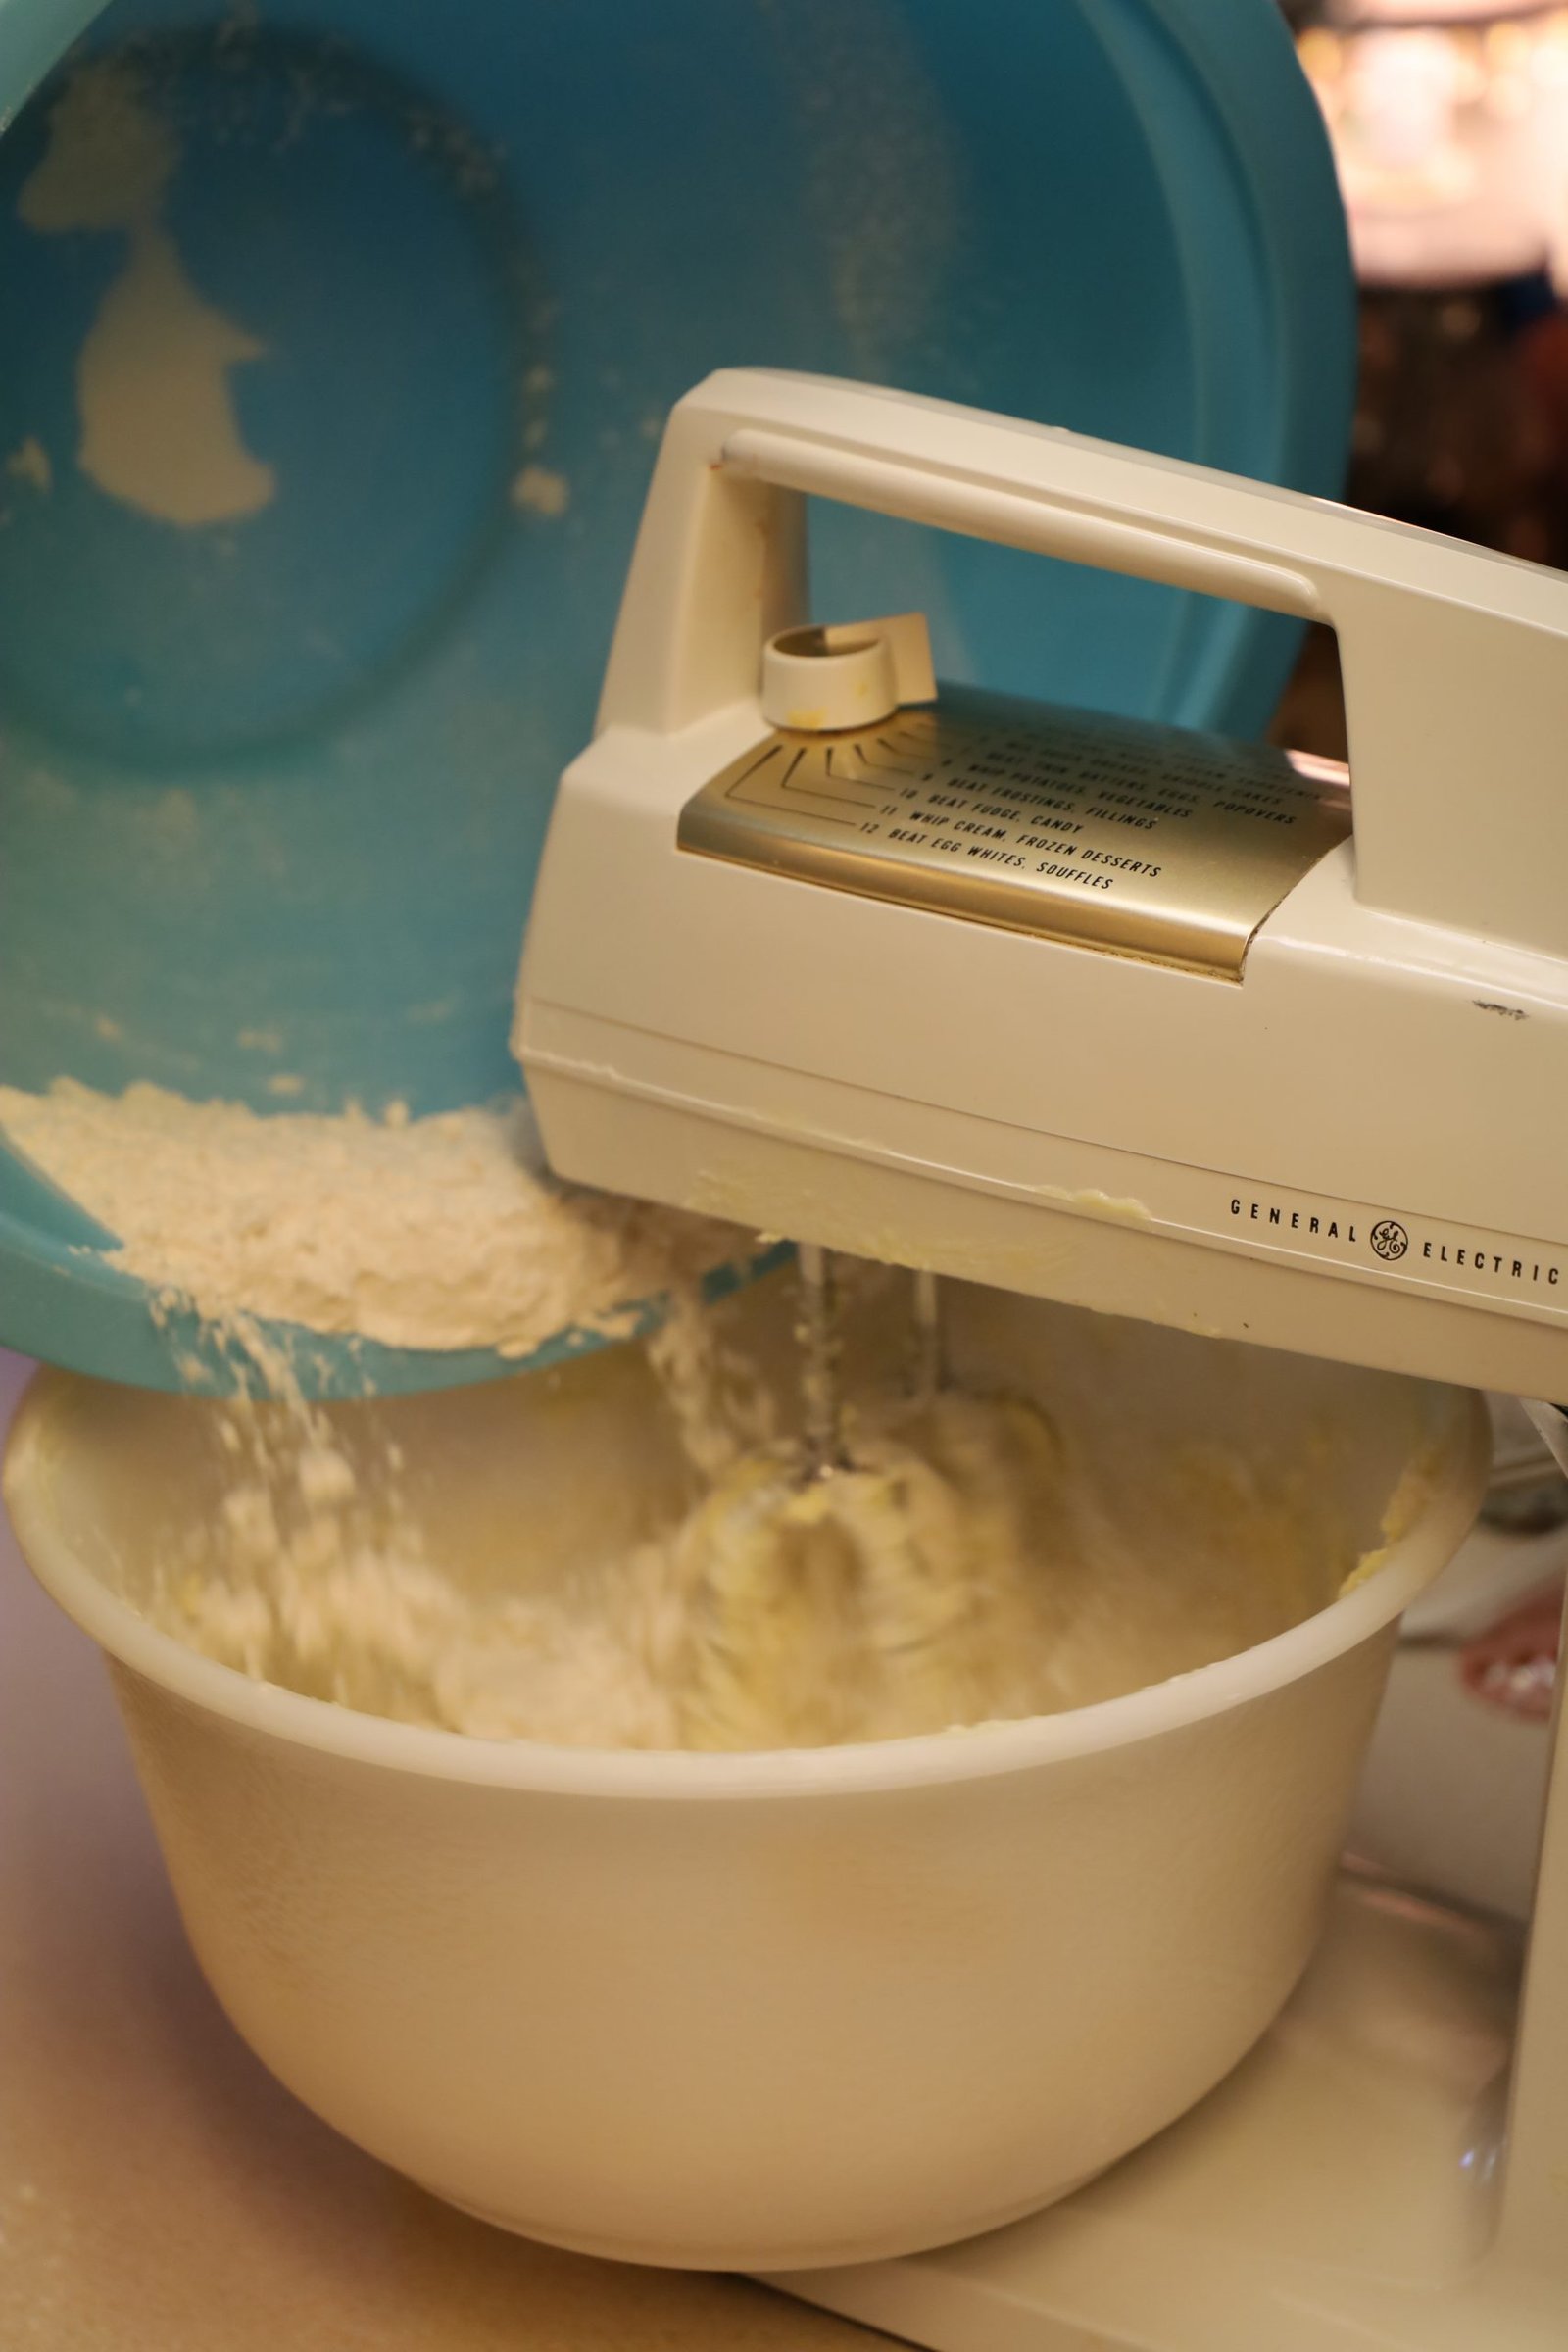
Now we want to add our dry mixture gradually. First add a little bit. Then mix together. Then add some more. Then mix together, etc. until it has all been incorporated.


This Mixture is Delicious When Eaten RAW!!! 🙂
(But, because there is a raw egg in it, you really shouldn’t. But it was good!)


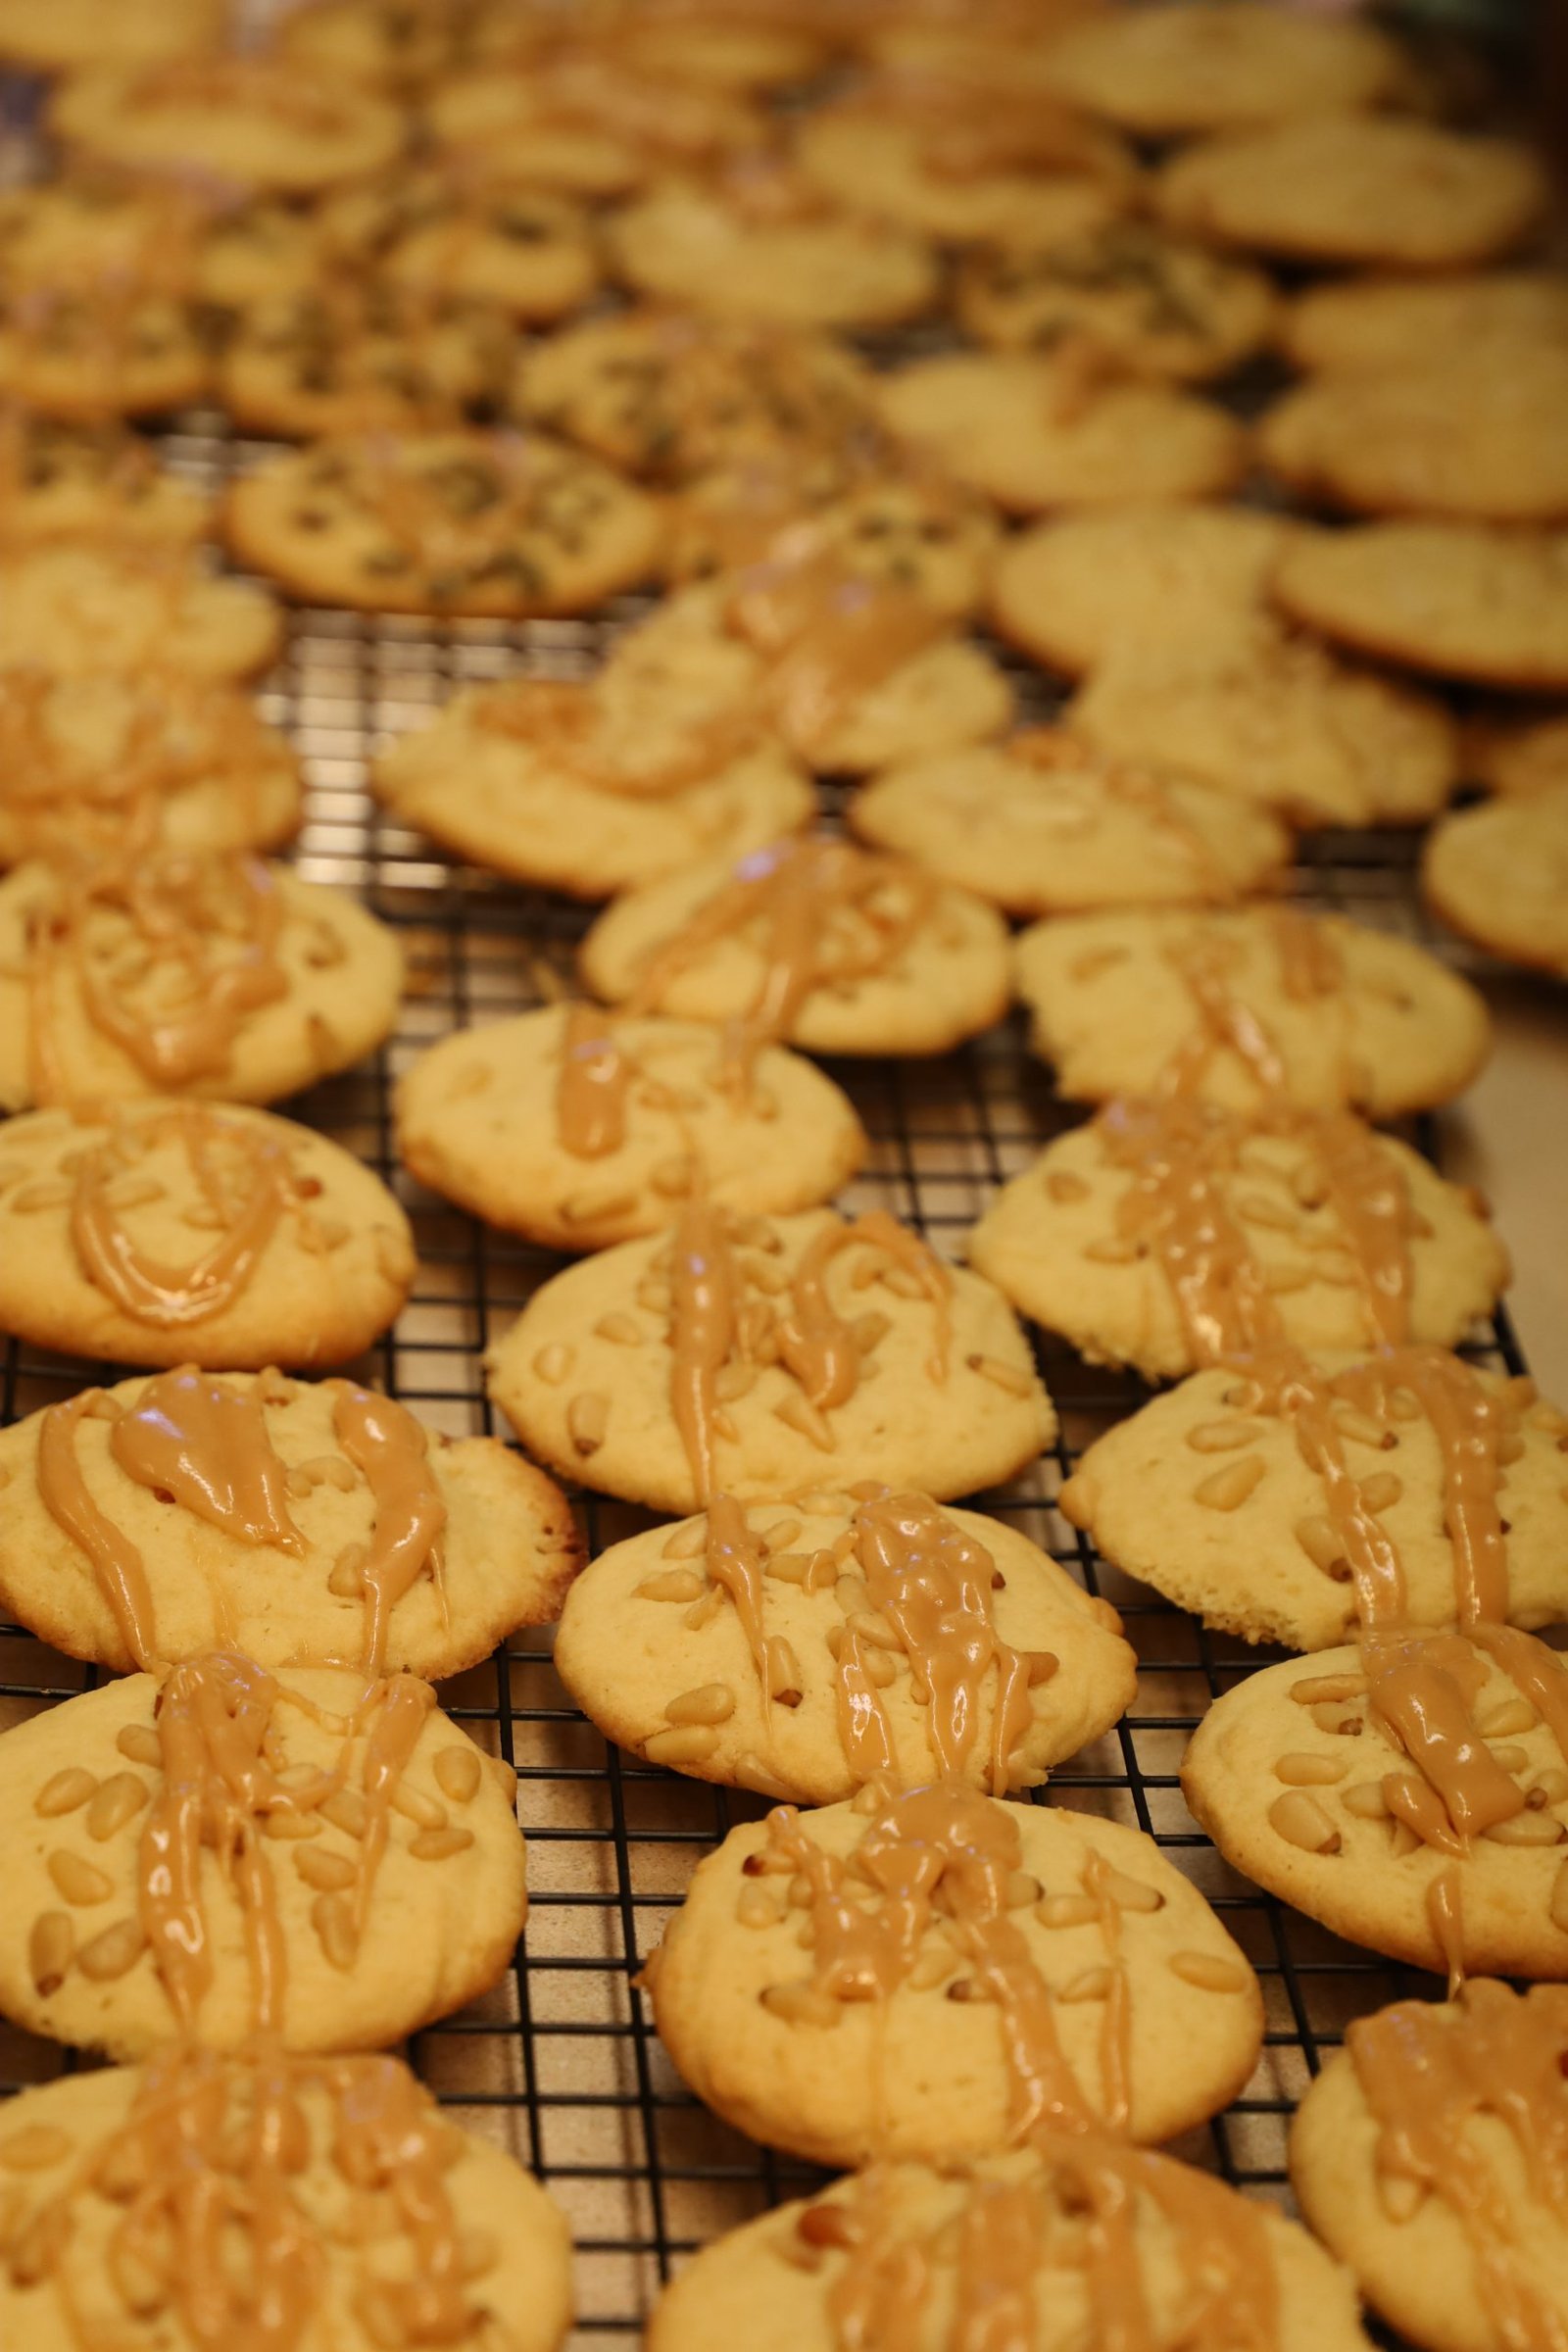
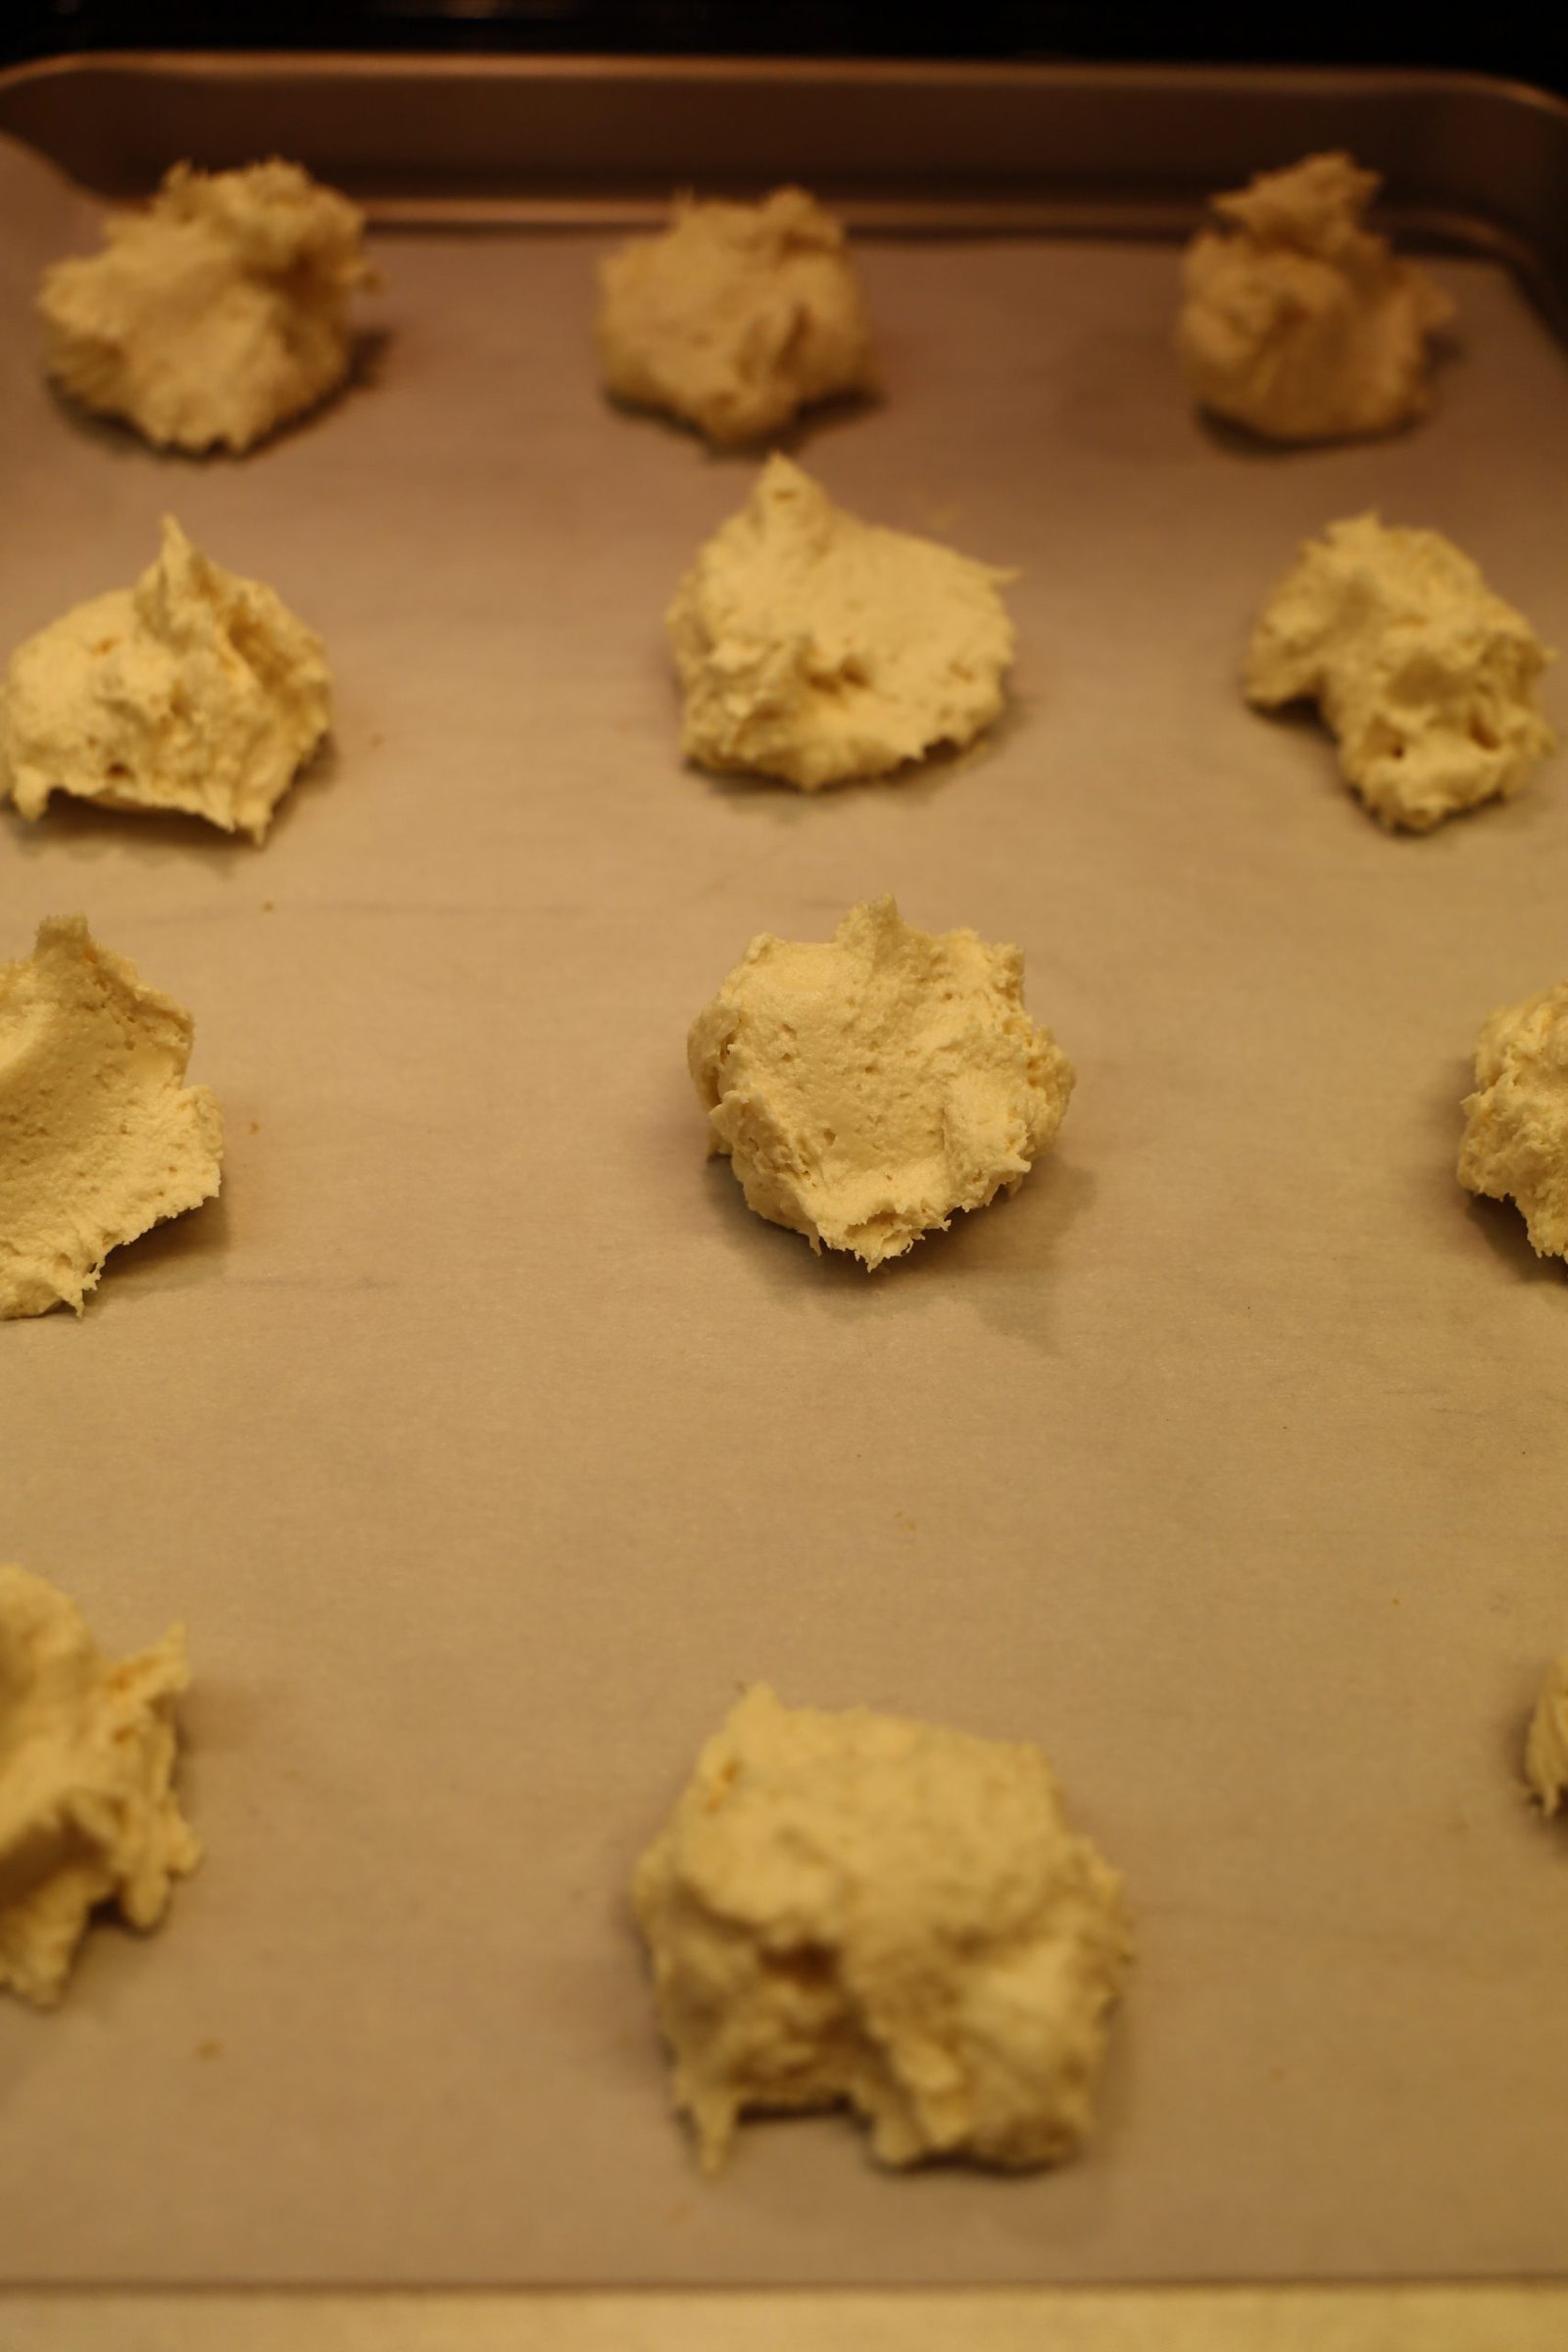
Now that the cookie recipe is made you want to place a spoonful of the batter onto a parchment lined baking sheet.

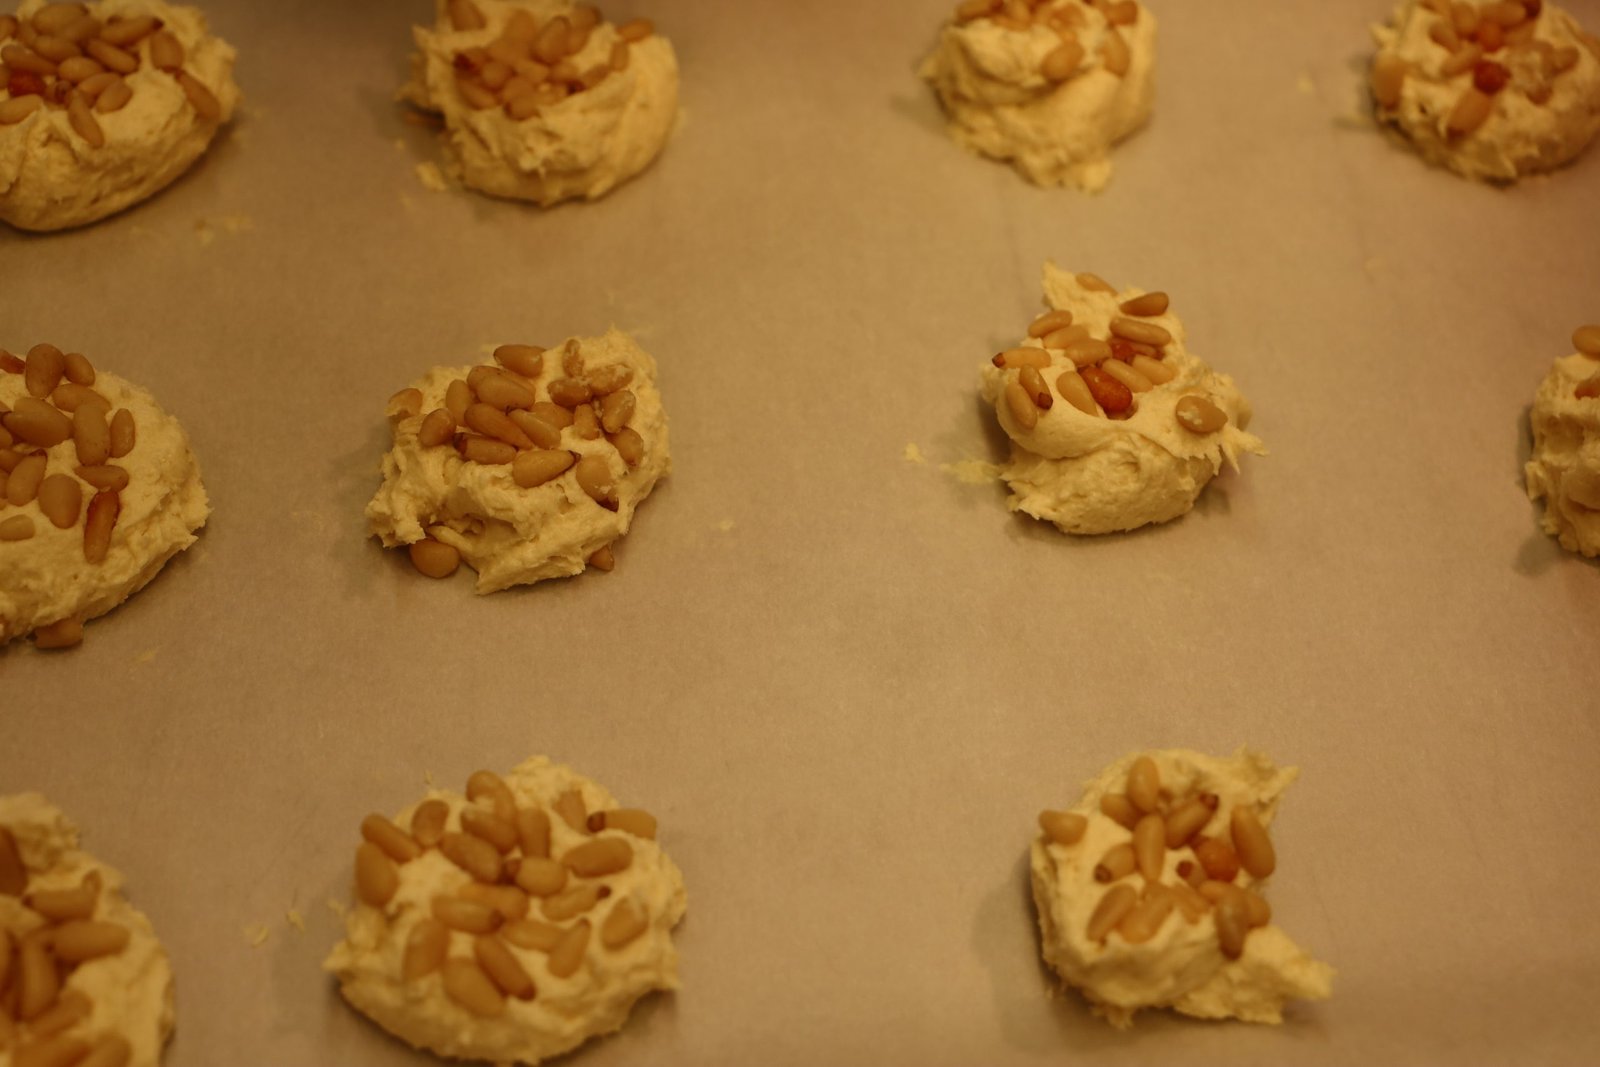
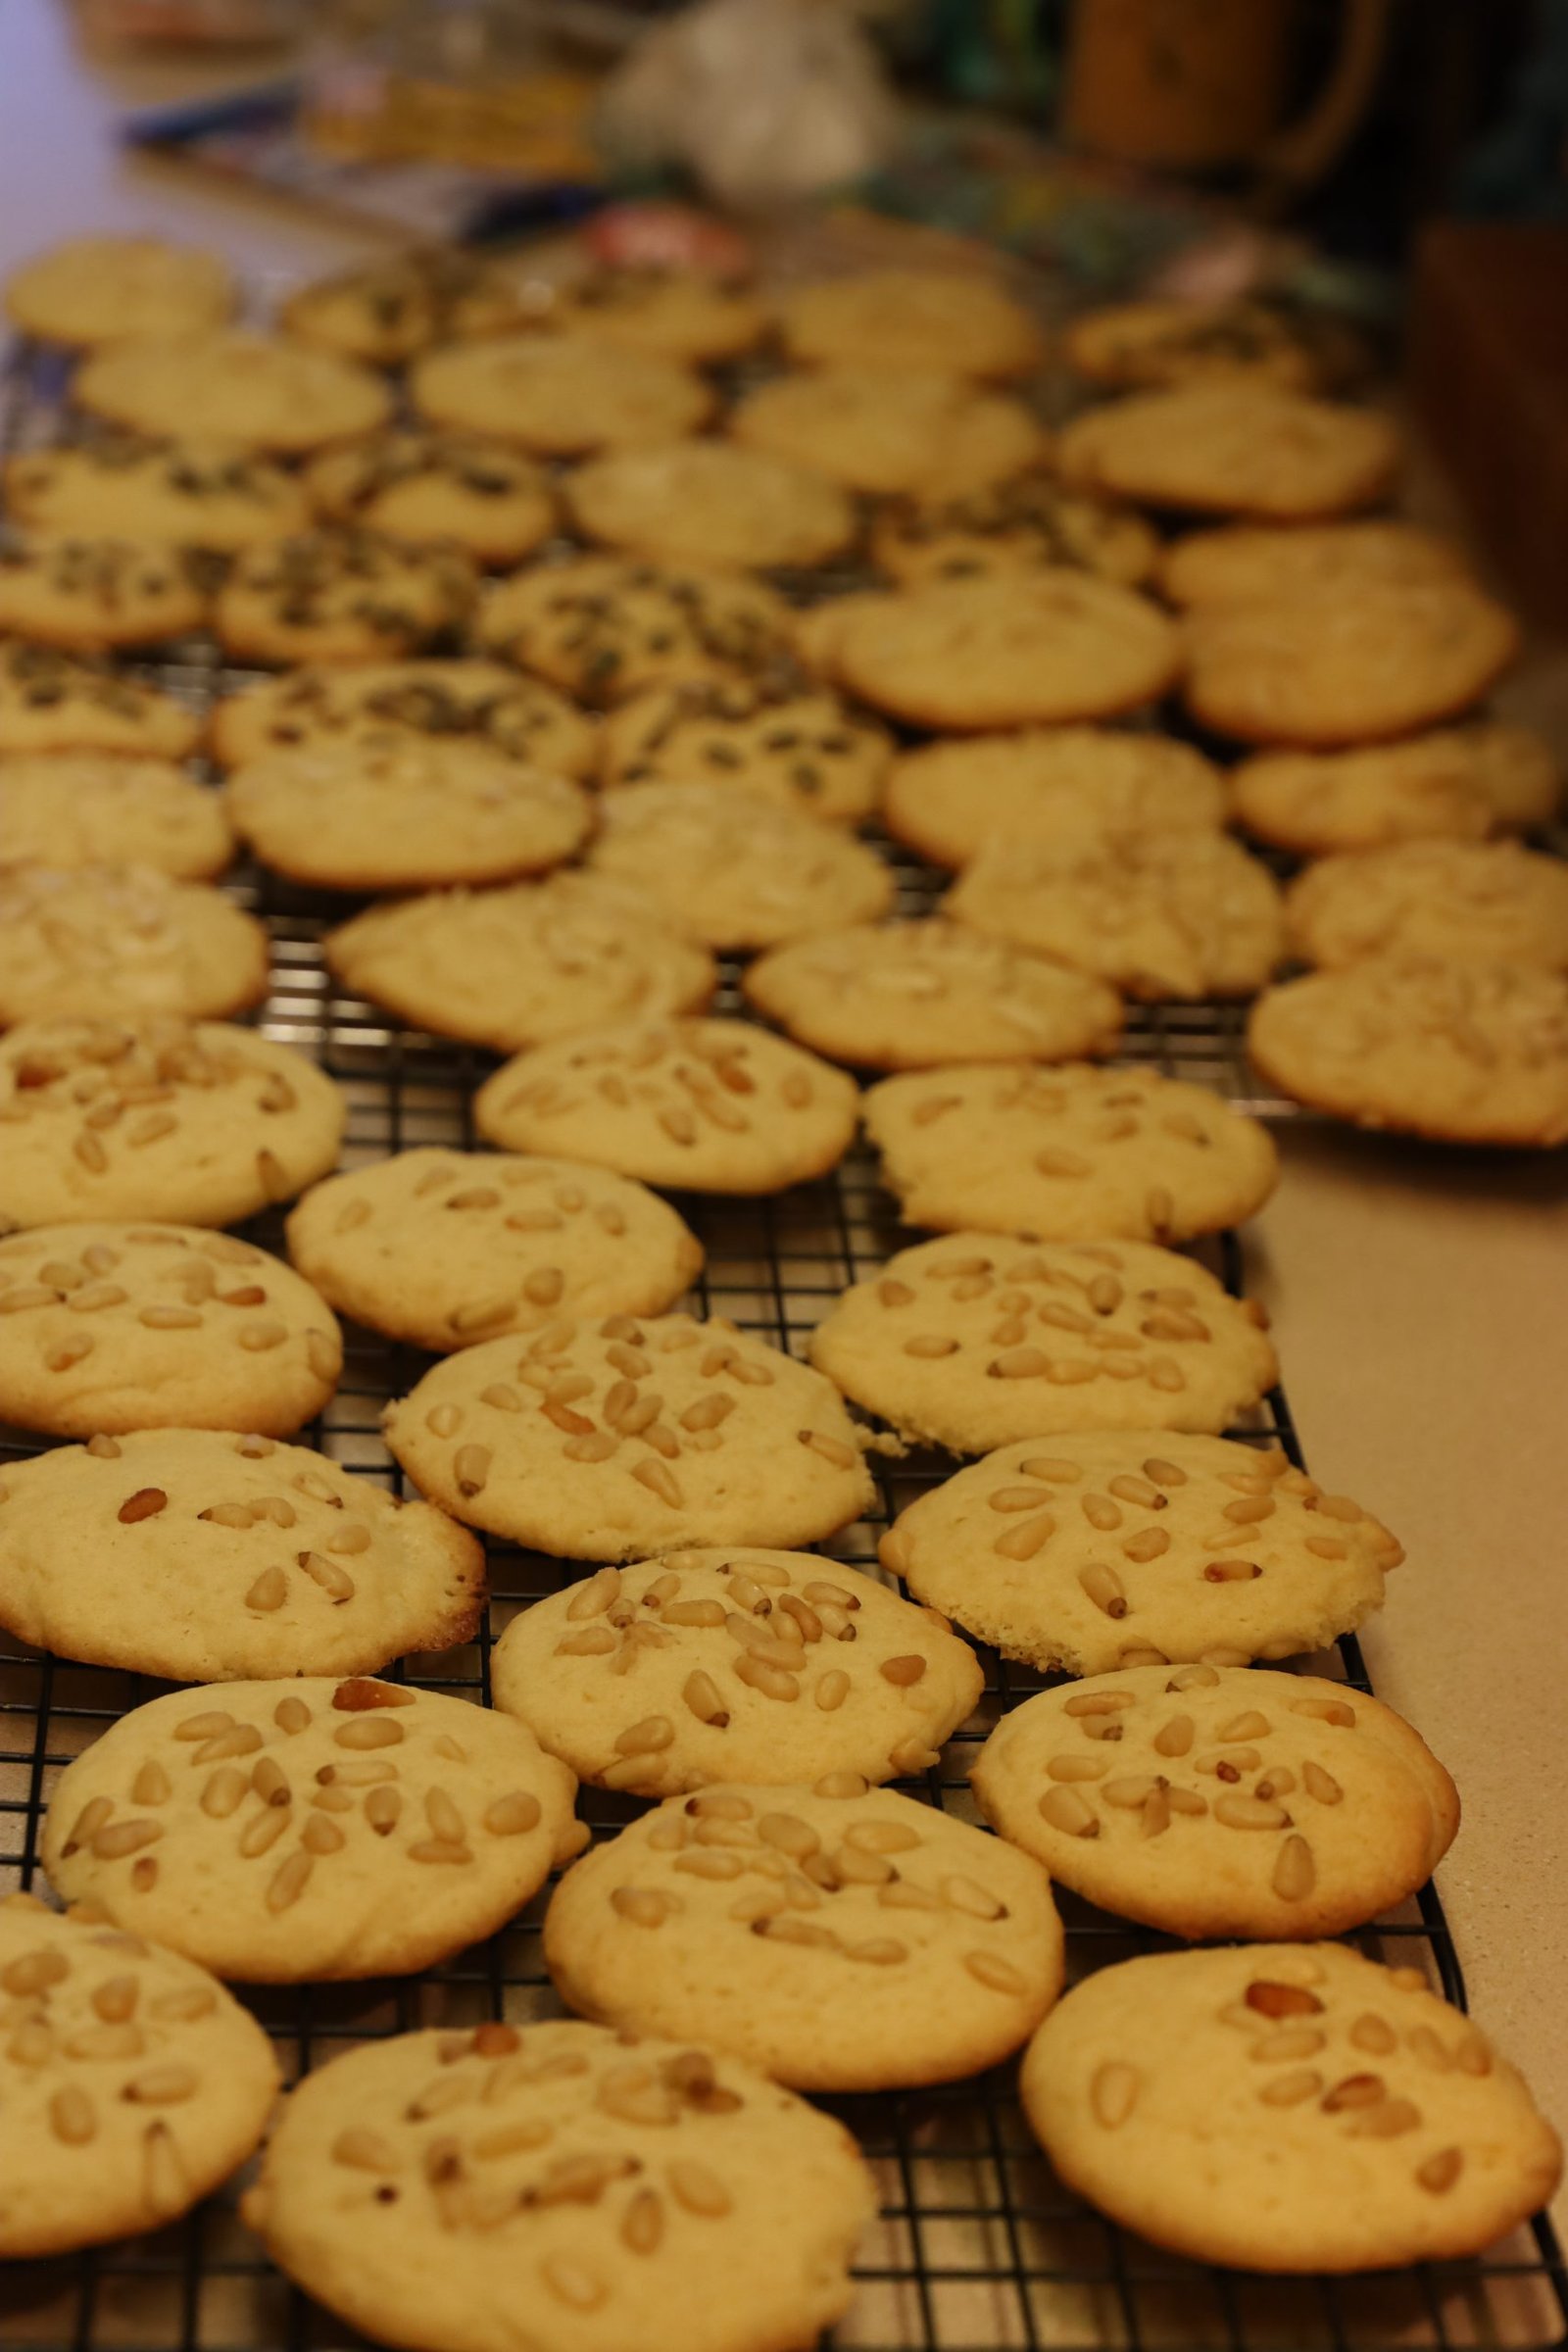
Here I am pressing Pine Nuts into each cookie.
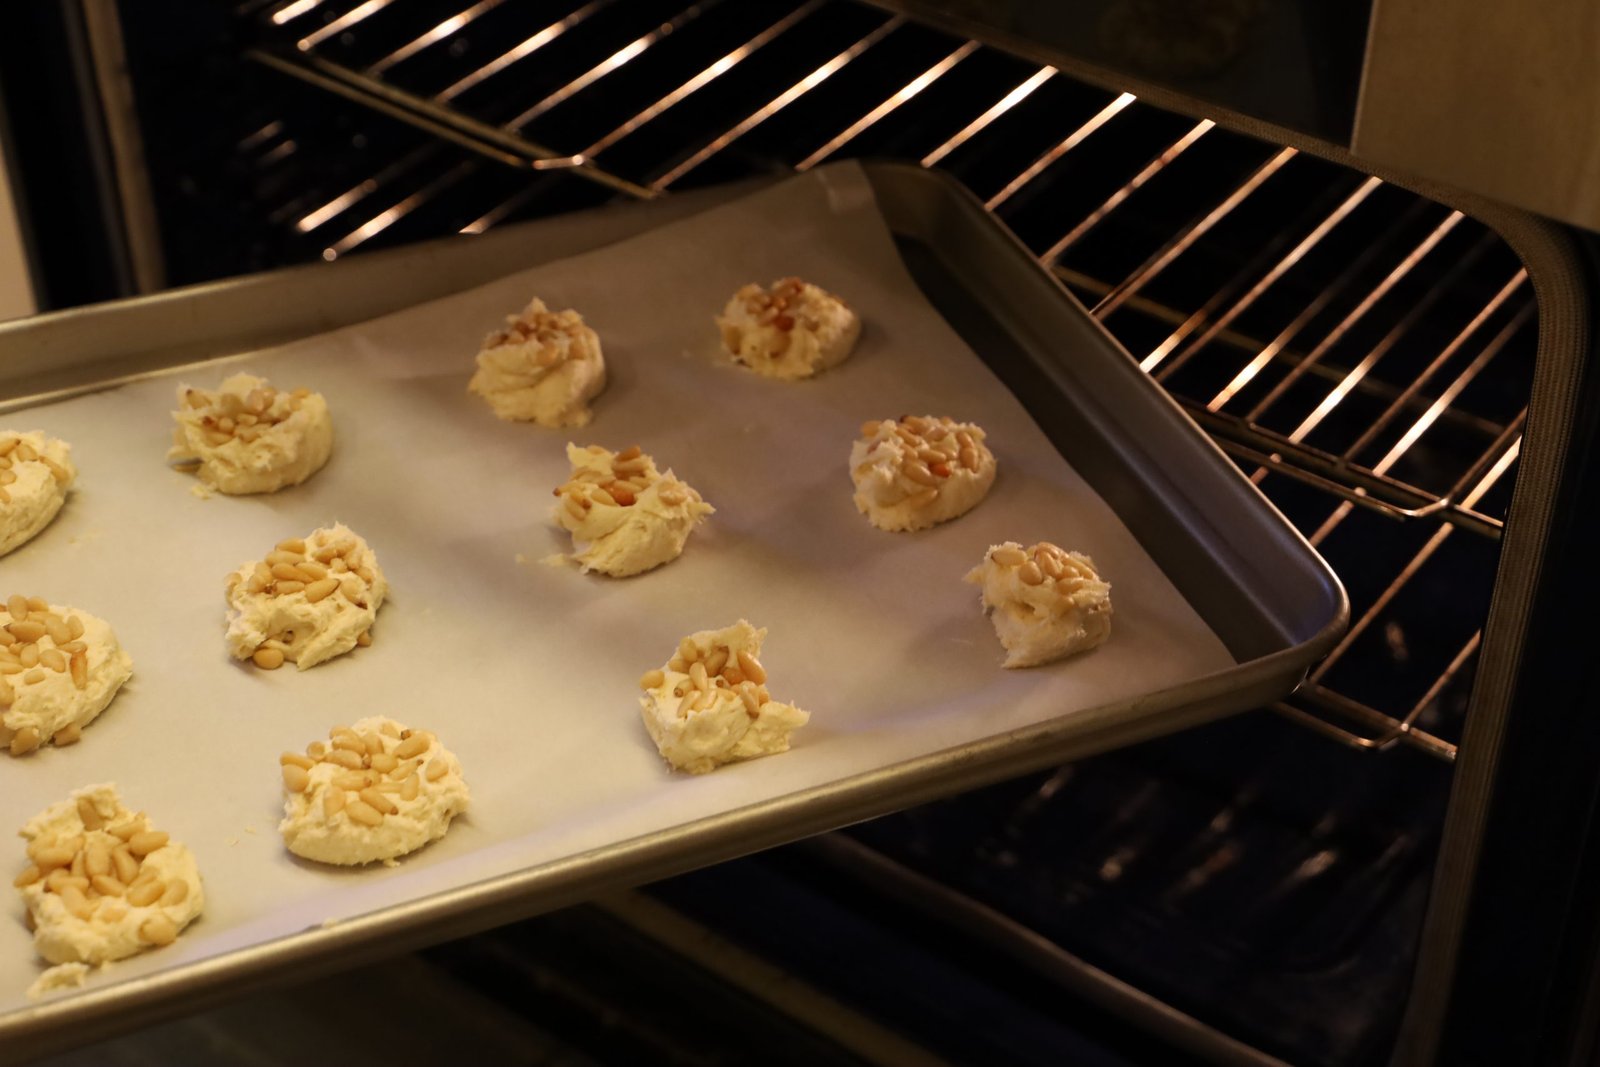

Place into a 325F oven for about 8-10 minutes until done.
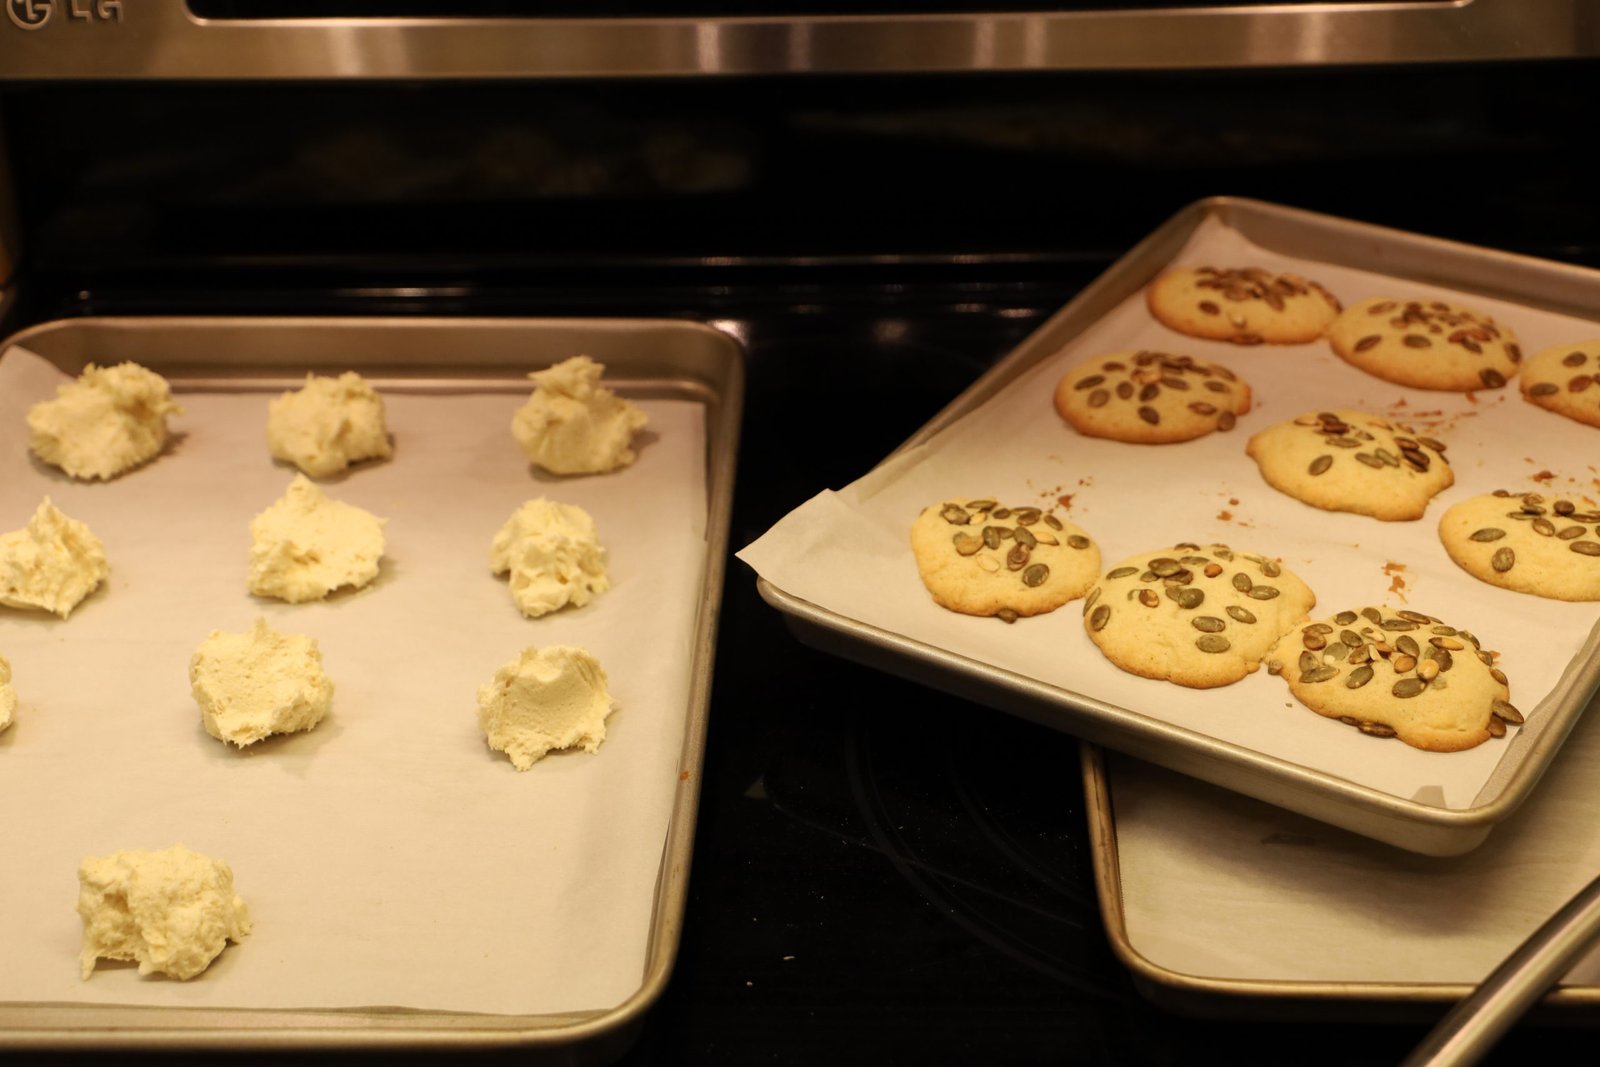
We also used Pepita Seeds and Slivered Almonds as well as Pine Nuts.
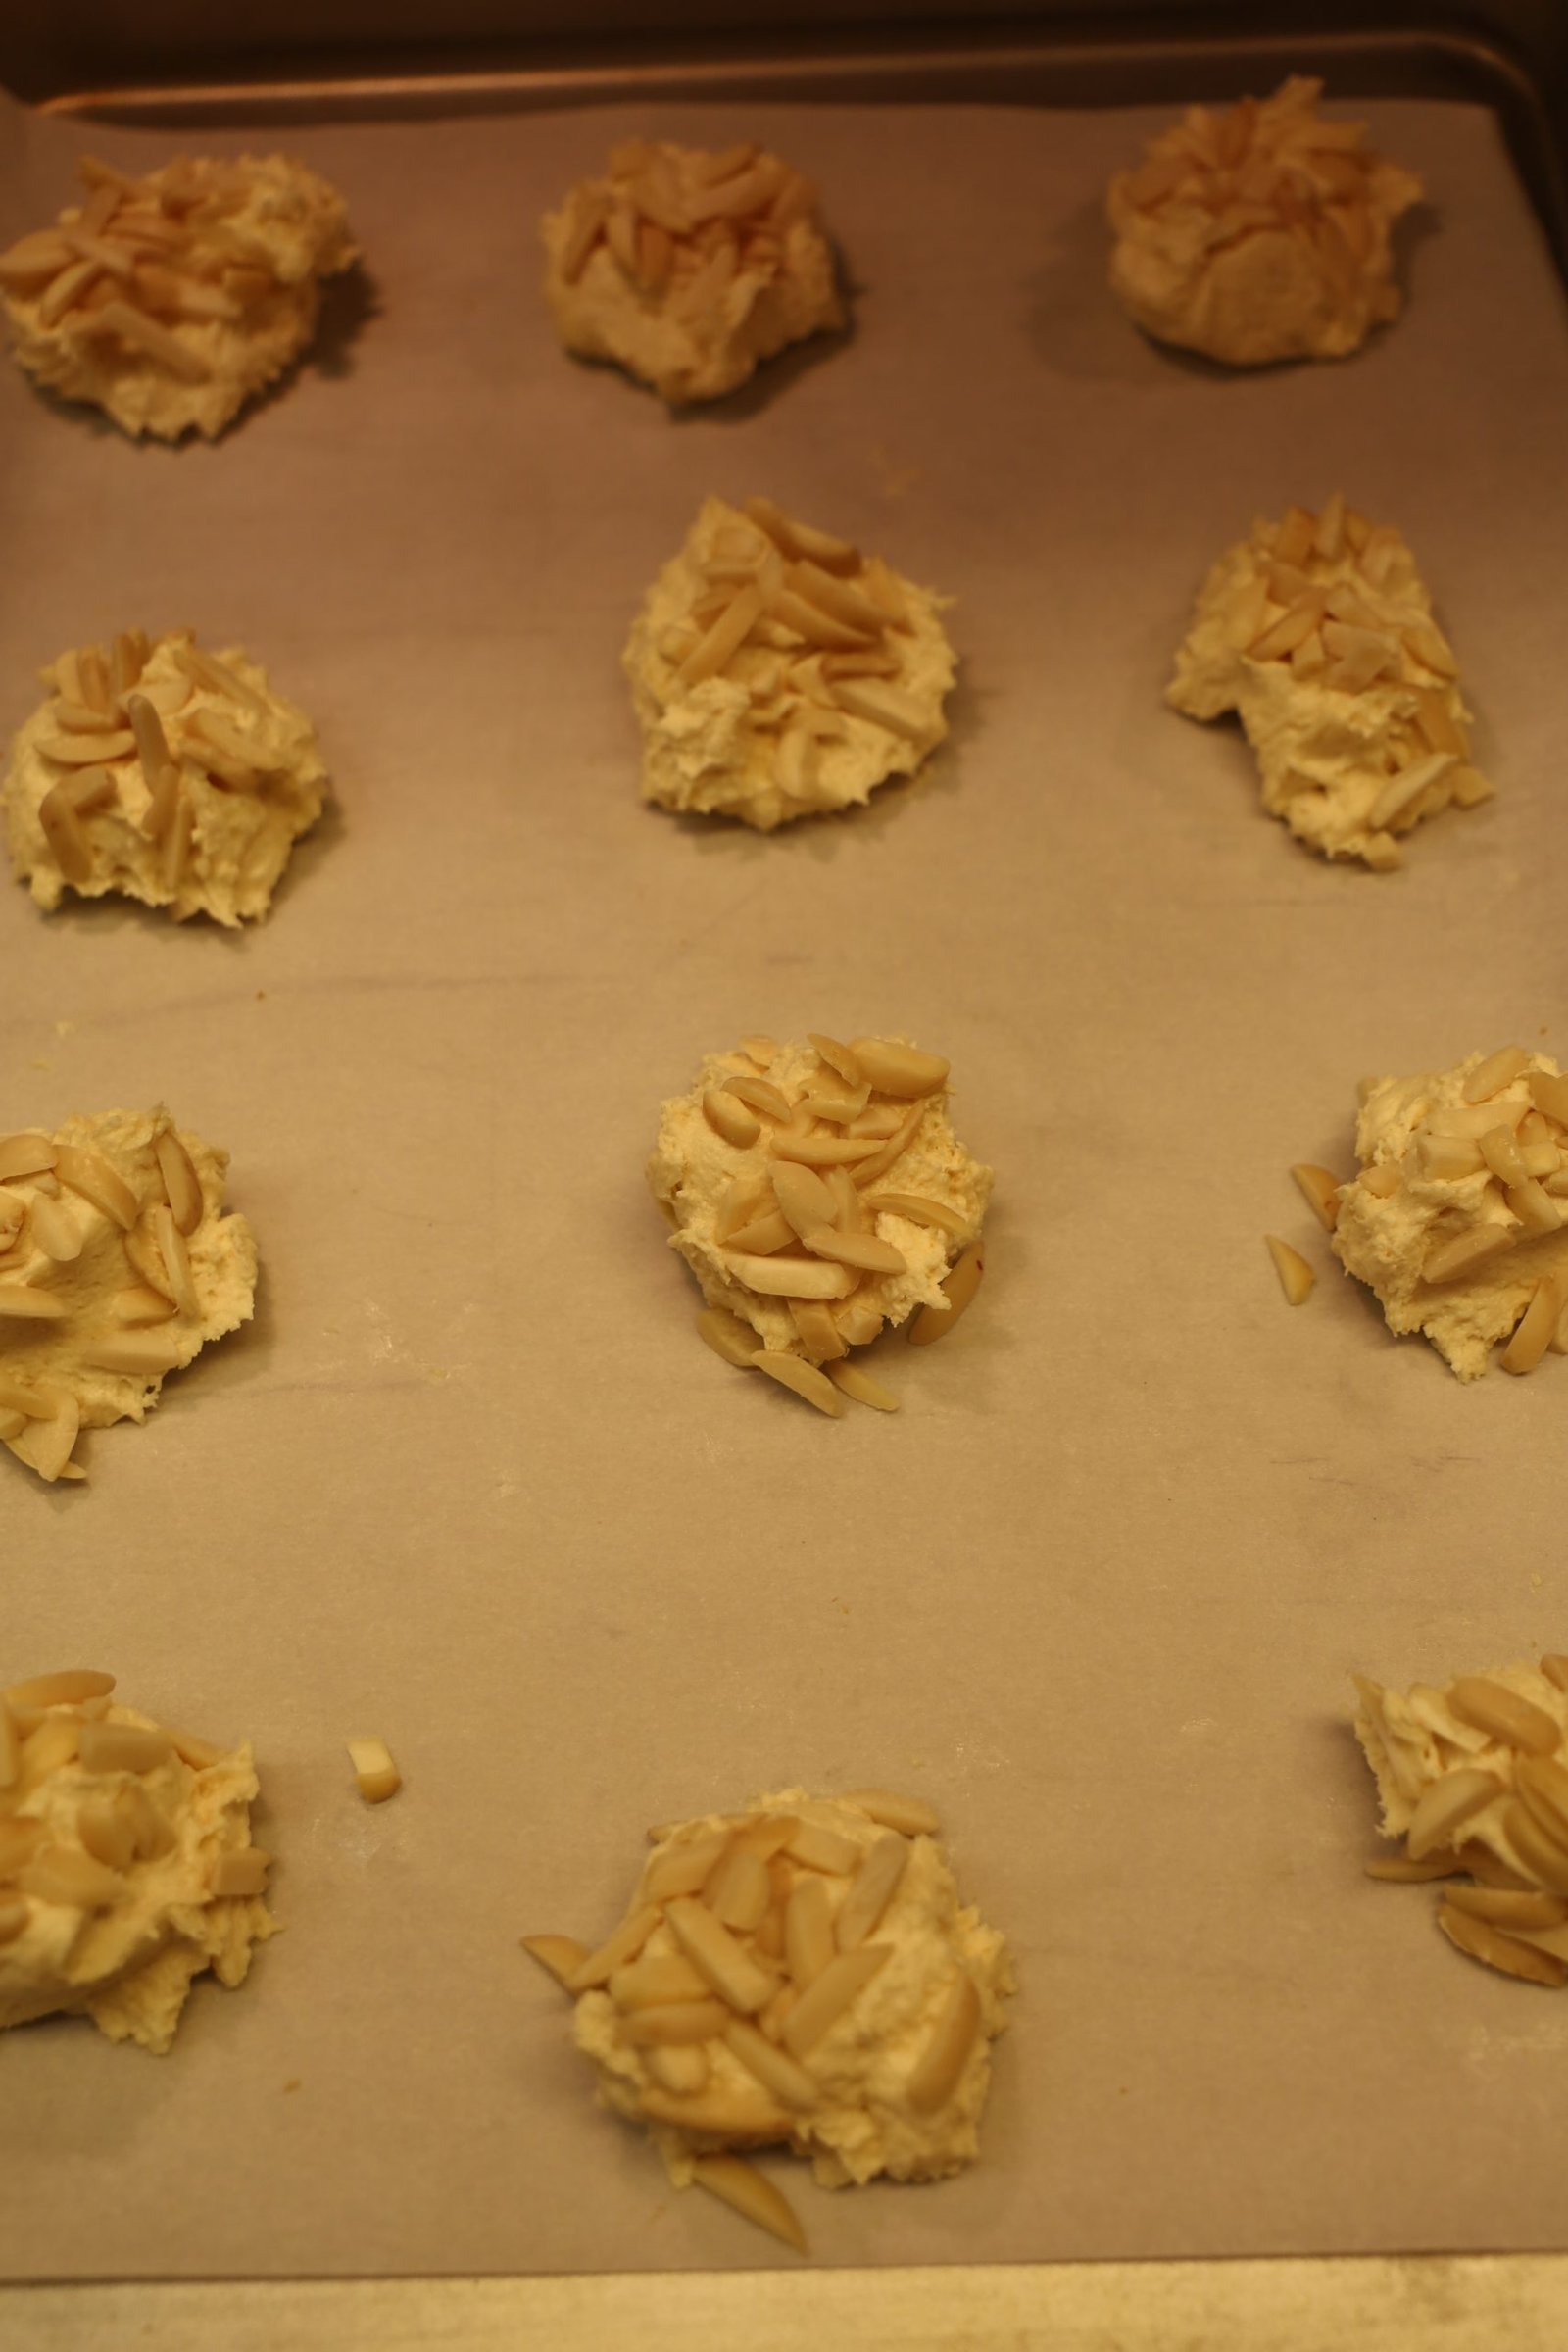
You want the cookies to be light brown or brown on the bottom of them.

—————————————————————–


When the cookies are done you want them to cool on a rack.
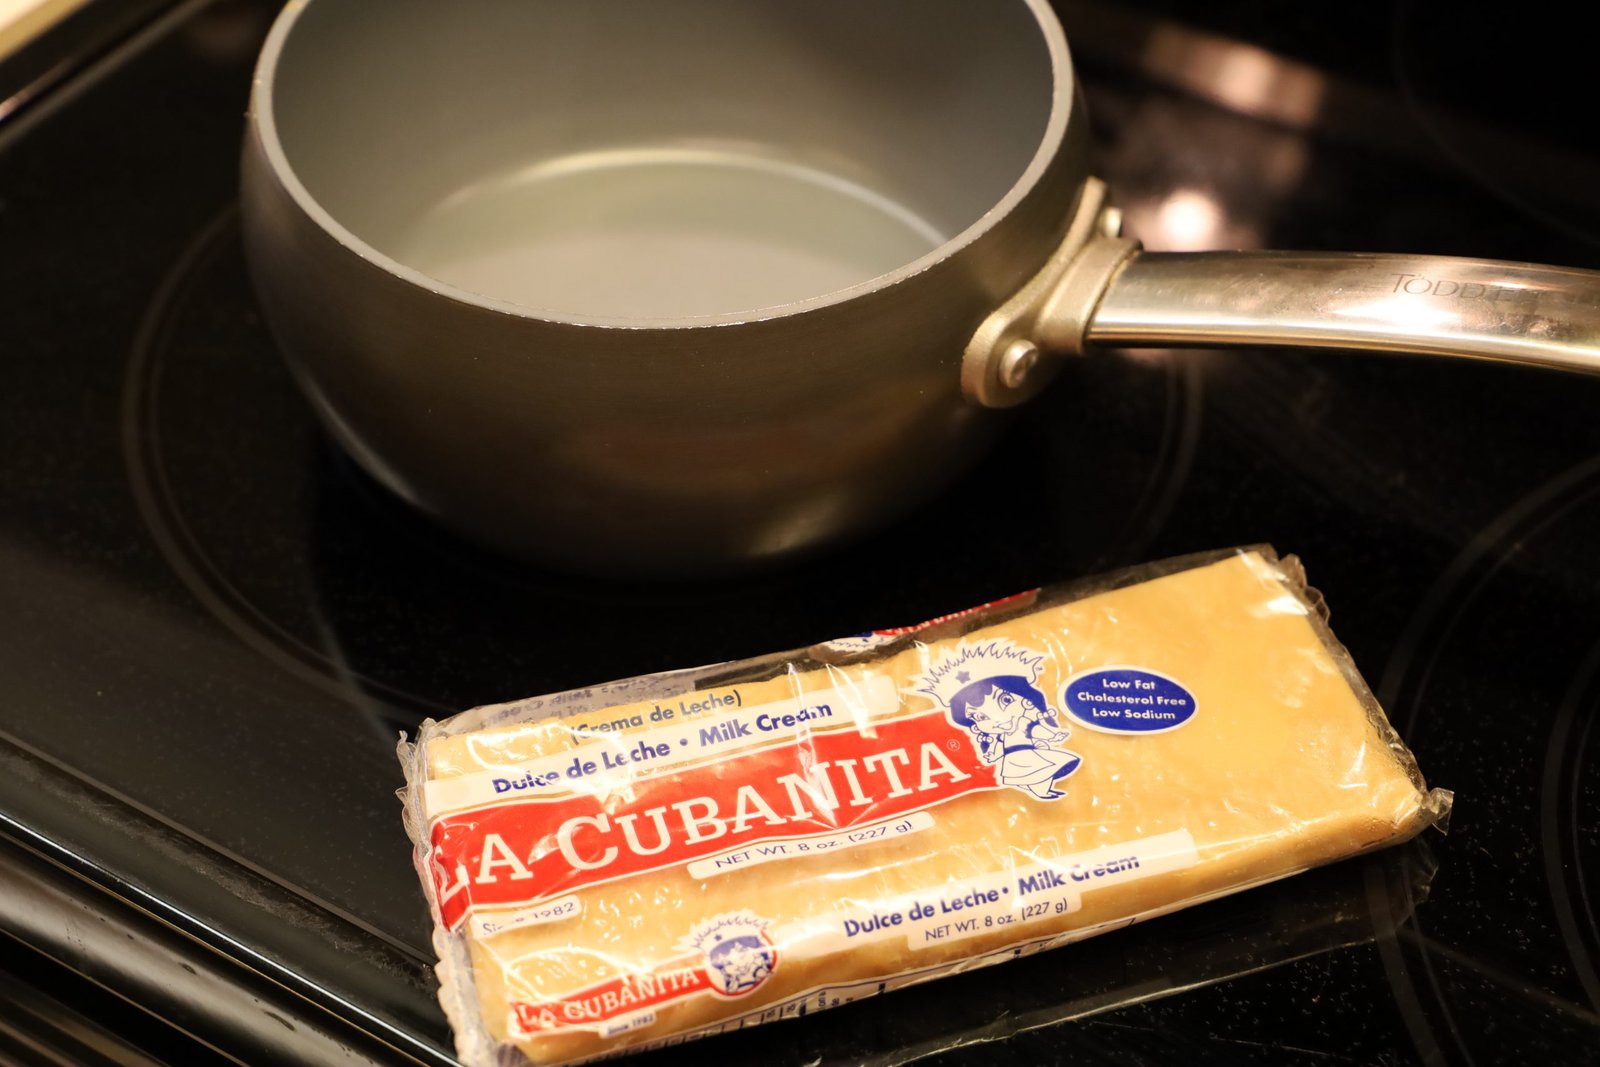
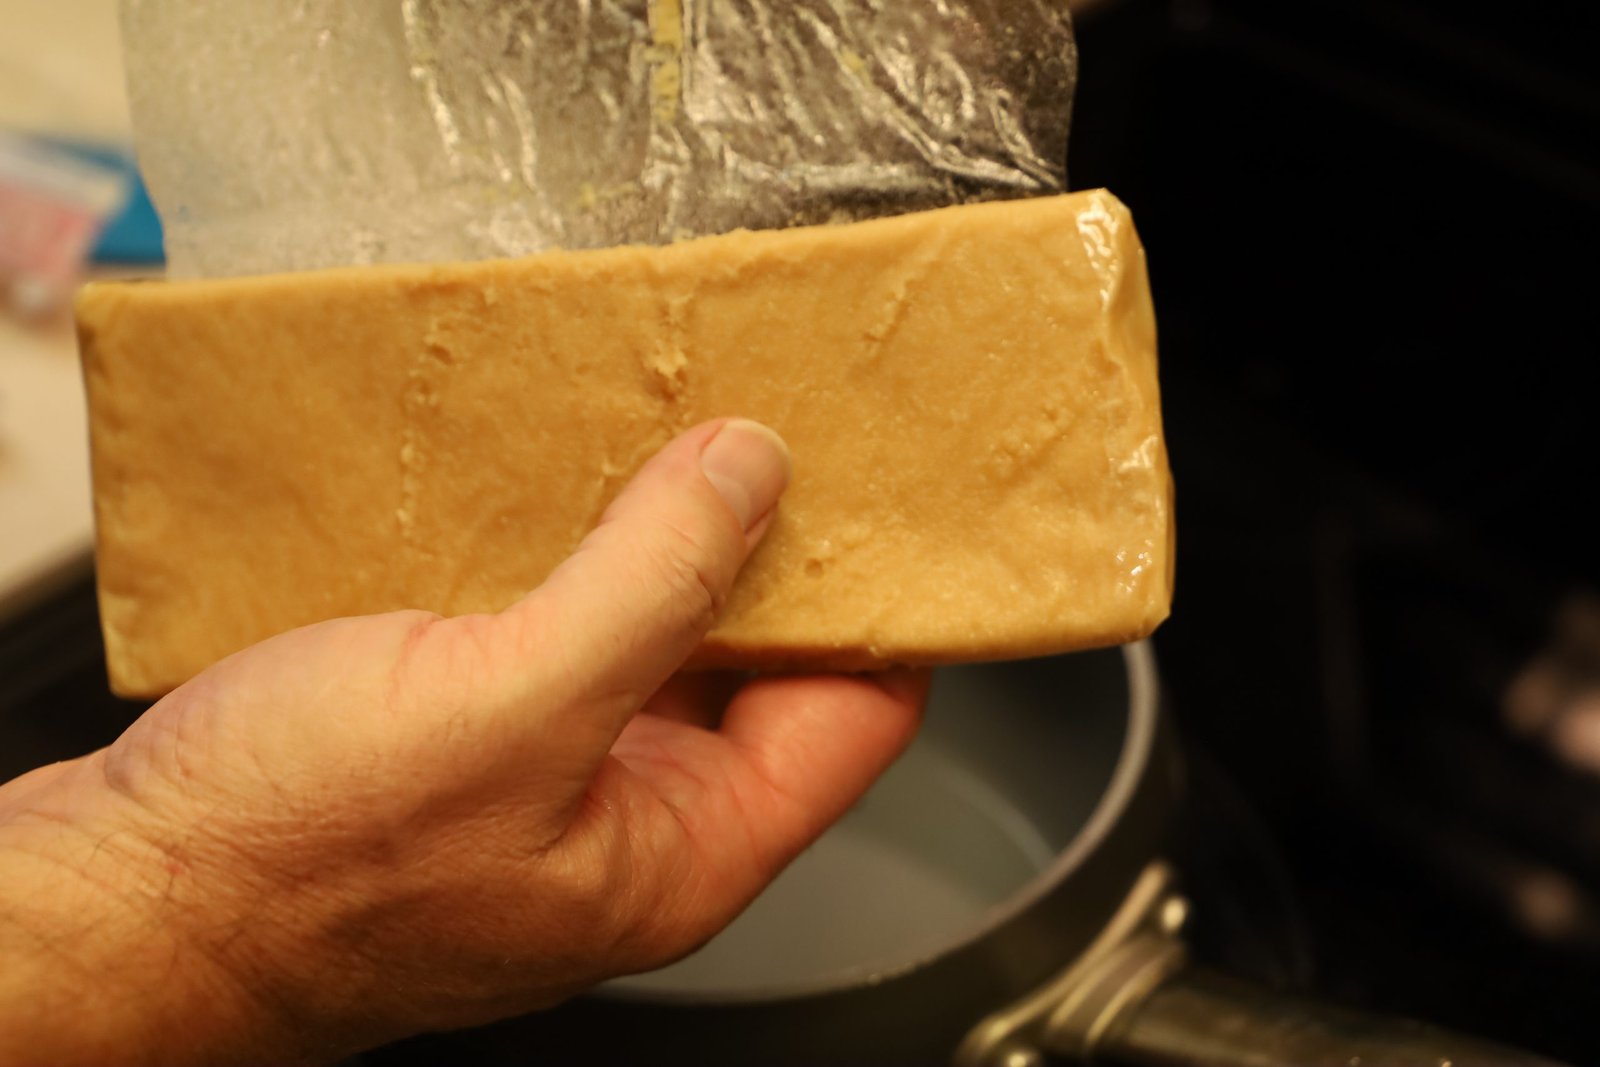
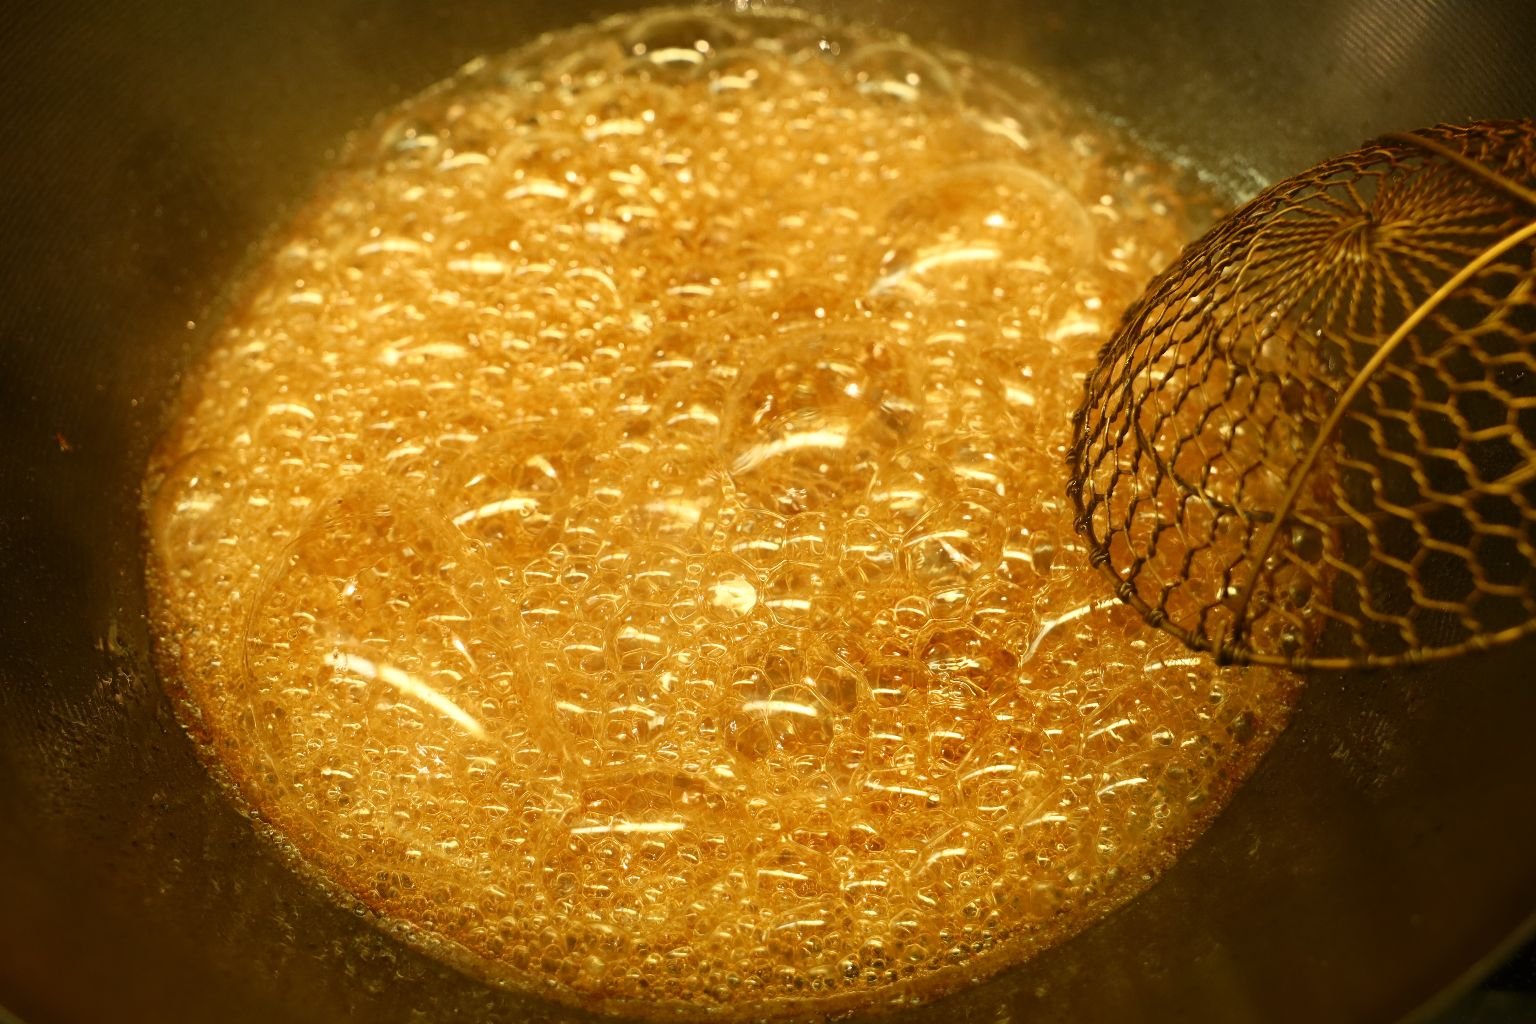
Now it is time to take your Dulce de Leche Milk Cream and place it into a saucepan on the stove top on a medium low heat.
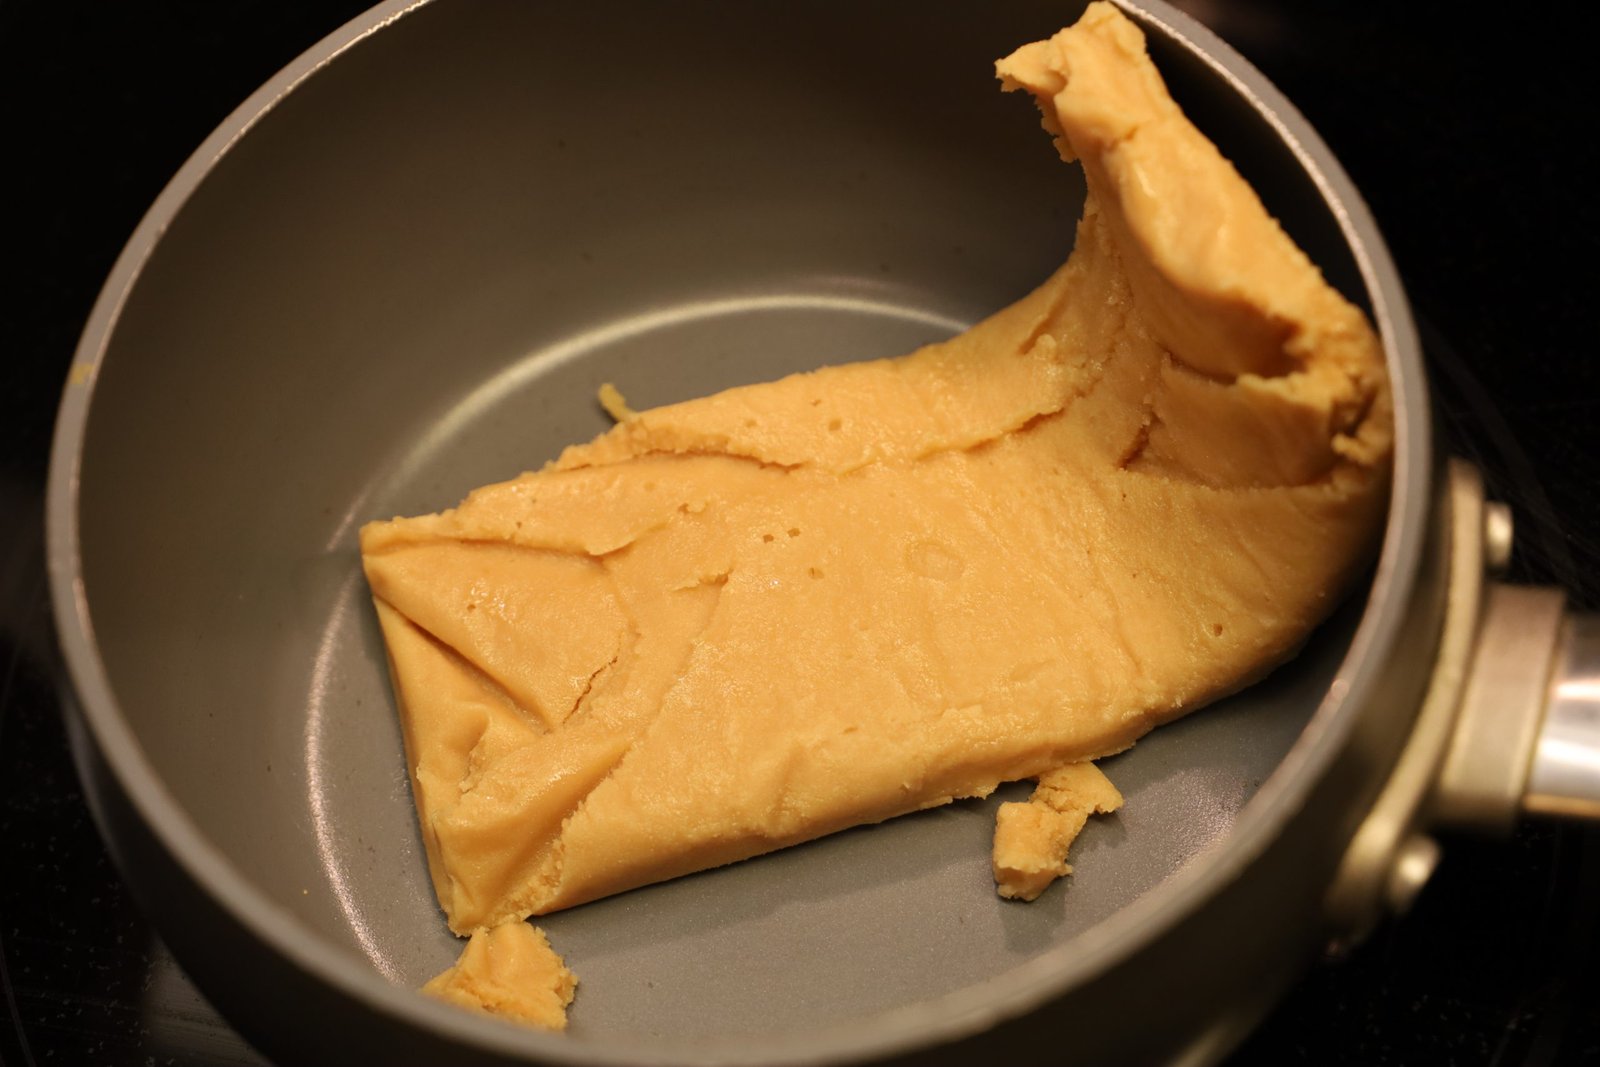

You can see it melting here.

When it is melted and all nice and creamy…..

Drizzle Over Your Cookies

LIKE SO…..

—————————————————————

———————————————————–
A Nice Dessert Treat, and an Edible Gift
————————————————————-
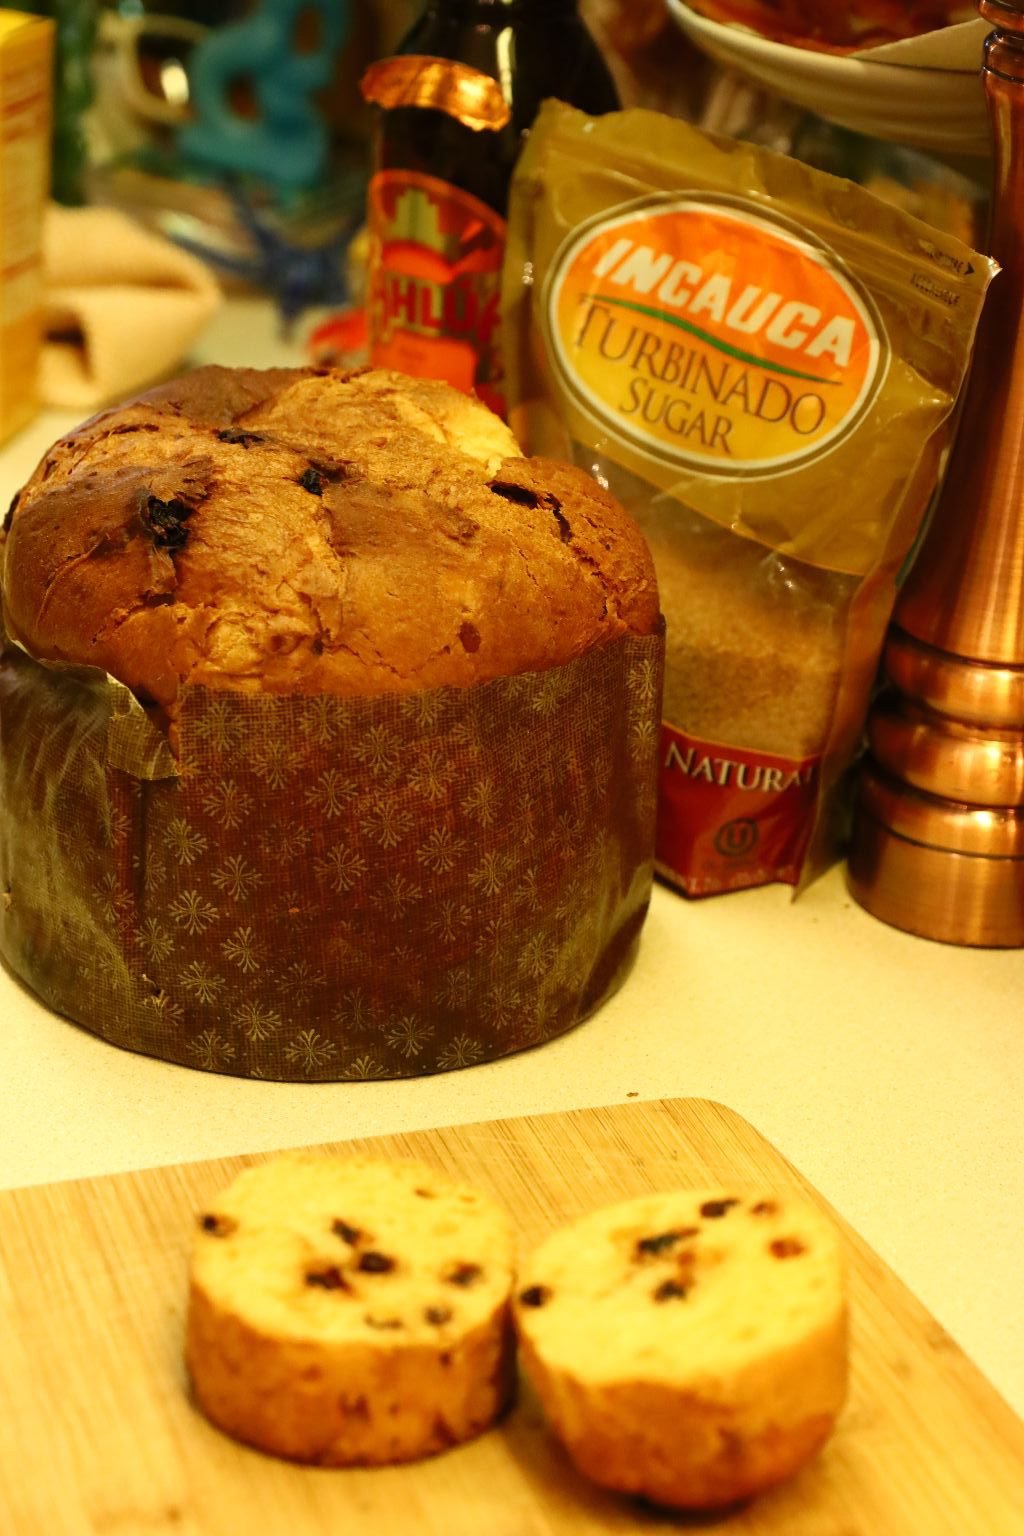
Our Sloppy Italian-American Panettone French Toast w/Mascarpone Cheese and Pumpkin Butter w/ a Glazed Pasta Topping


Yours does not have to be as sloppy as ours is.
You can cut back on some of the filling and toppings.
——————————————————————–

Ingredients:
12 Thick Slices Pancetta
Filling:
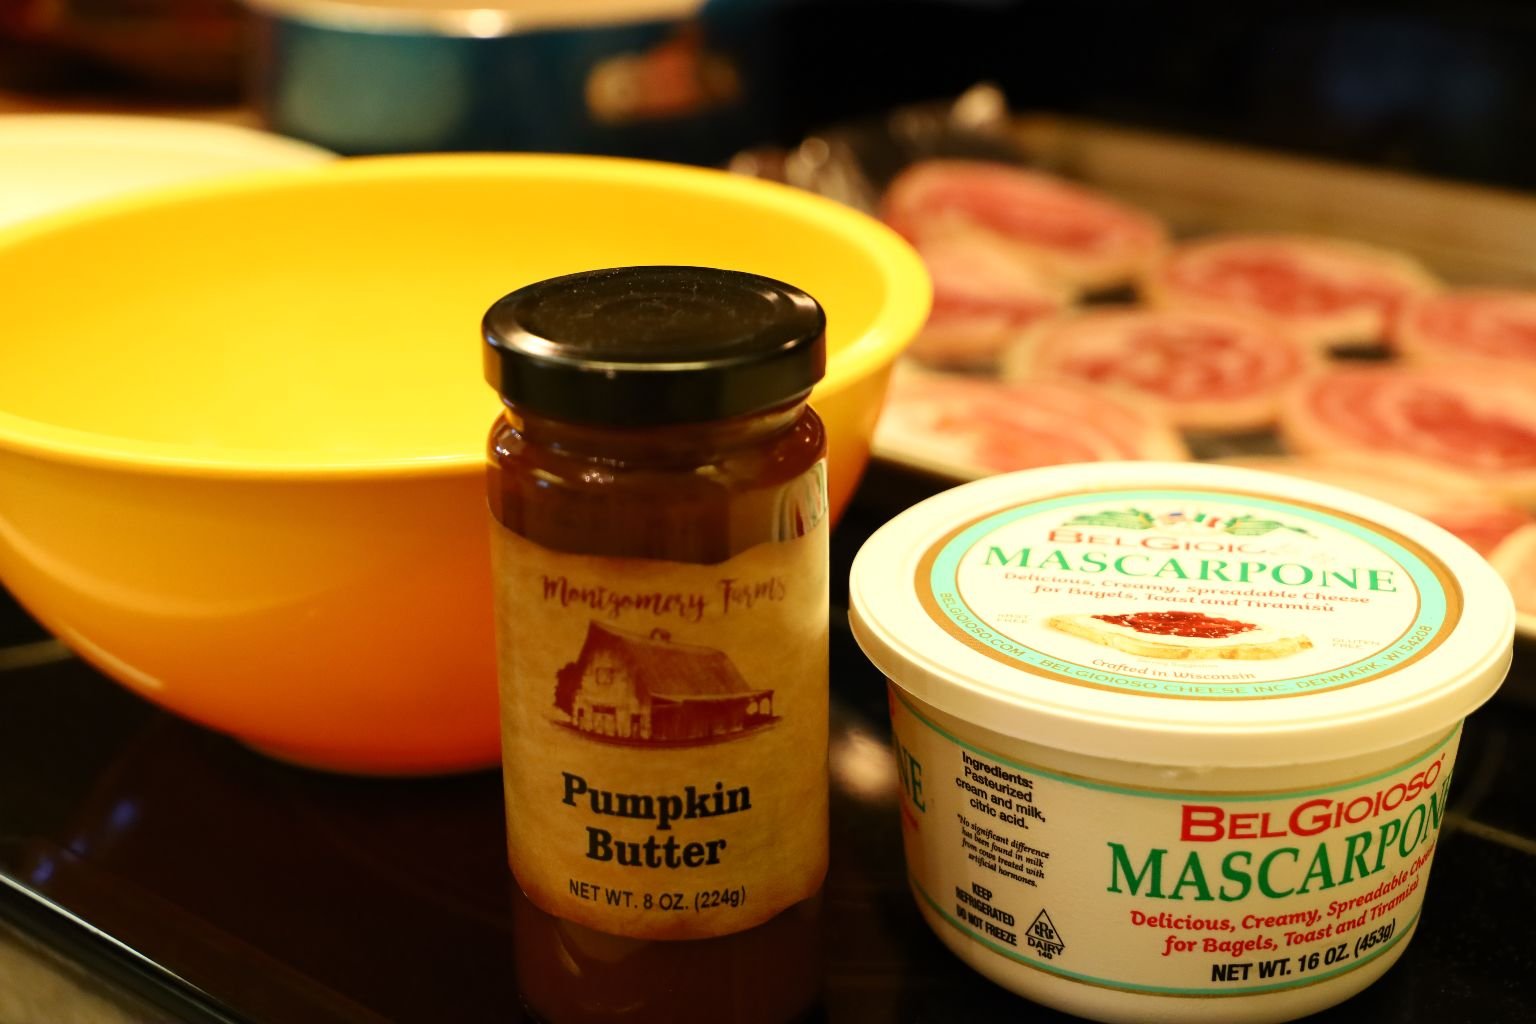
1 1/2 Cups Mascarpone
1 Cup Montgomery Farms Pumpkin Butter (or any you desire)
1/2 tsp. Cinnamon
1 Tbsp. Pumpkin Spice Kahlua
Panettone French Toast:
Pumpkin Spice Panetone Bread
5 Eggs
5 Cups Milk
3 tsp. Cinnamon
2 tsp. Splenda Sugar Blend
6 Tbsp. Butter
Sweet Pasta Topping:
1/2 Cup Multi-colored Strigoli Pasta
1 Cup Water
3 Tbsp. Turbinado Sugar
1/2 Tbsp. Cinnamon
1/4 Cup Pumpkin Spice Kahlua
1/4 Cup Sun-Maid Golden Raisins
Panettone Toast Accent:
1/2 Tbsp. Powdered Sugar – to sprinkle on top the finished toast

———————————————————-

Place a sheet of non-stick aluminum foil on a sheet pan and evenly spread out your Pancetta slices.

Turn your oven onto 400’F.

Now to make the creamy filling.
Using a rubber spatula, remove the Mascarpone from the tub and place it into a medium sized bowl.

Time to place your Pancetta slices into the oven when it is up to temperature and cook for ~15 to 20 minutes until crispy.

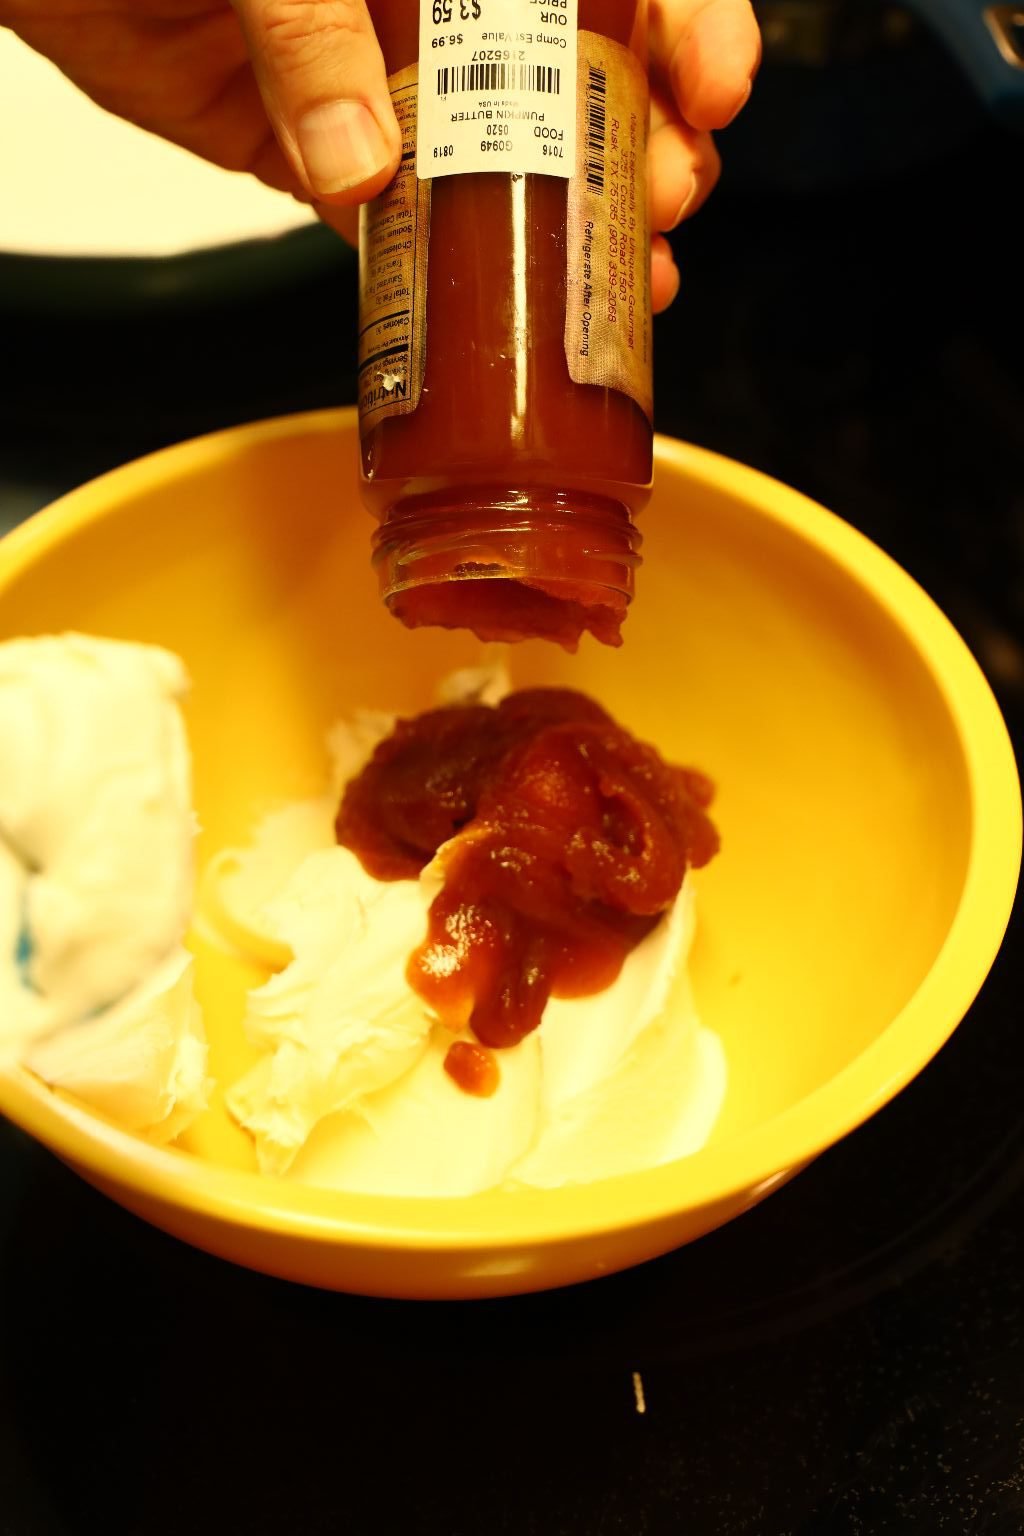
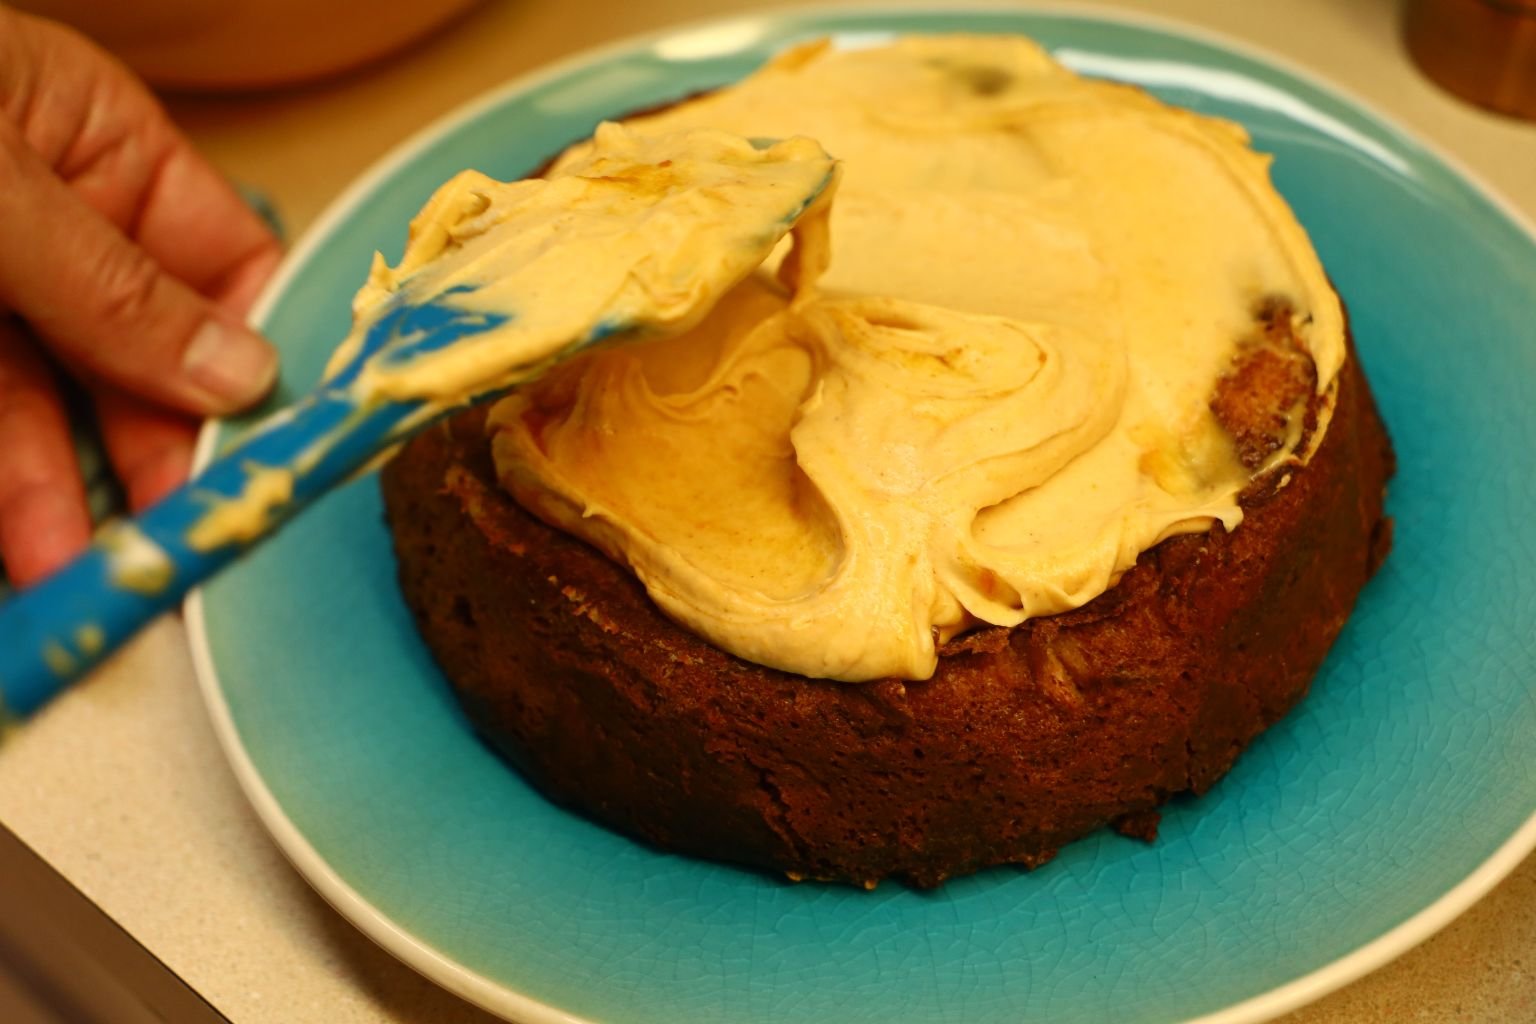
Back to the filling… add your Pumpkin Butter into the bowl with the Mascarpone. We ended up using this entire jar as it was delicious!


Mix the ingredients with your rubber spatula as much or as little as you want. The swirls in this make for a beautiful display.


Now add your Cinnamon to the bowl…


…and then your Pumpkin Spice Kahlua and mix all the ingredients together. Place the filling into the refrigerator for later use.


Now to make the Panettone French Toast.
Start by using a medium sized bowl and crack at least three eggs into it. Then add as many cups of milk as you have eggs into the bowl.
——————————————————————-

Hey, the Pancetta is ready… try not to eat too many of them. Place the Pancetta on a plate lined with a paper towel to absorb any excess grease.

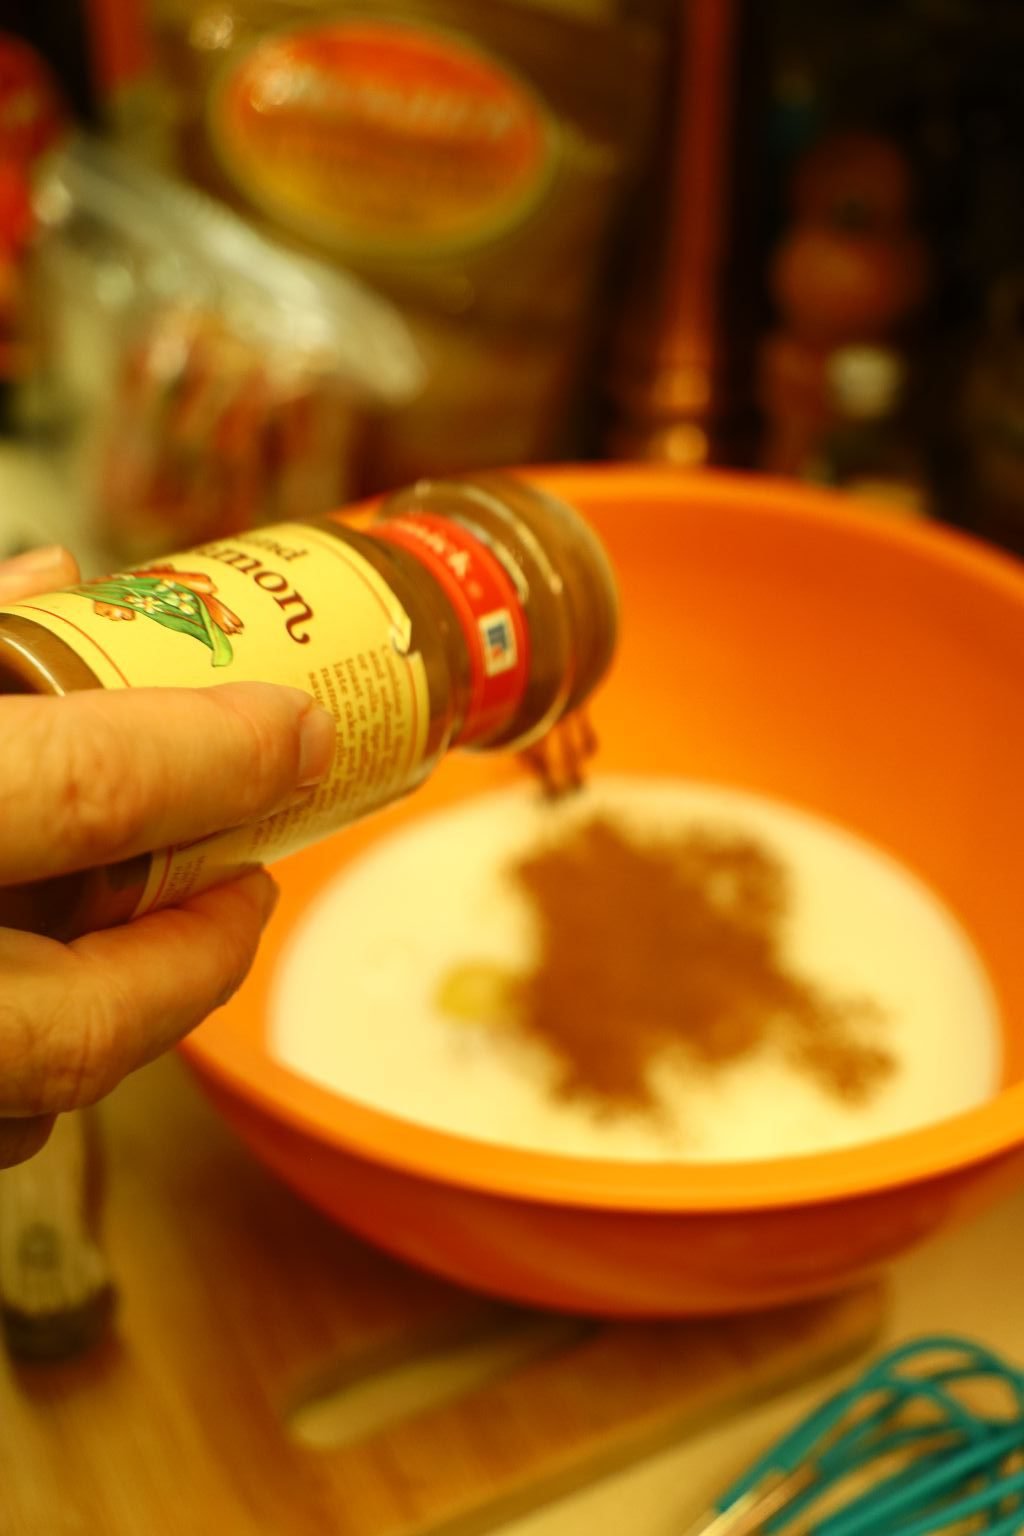

Back to the egg mixture… add your cinnamon then one tsp. of sugar to the eggs and milk.

Use a whisk to mix all the ingredients well.

Here is one of the types of Panettone we used. It is about the size of a large muffin.


We sliced it in half as shown and then removed the wax paper attached to it. Here you can see the raisins inside.

Here is the larger Panettone bread we have.

While still in the wrapper slice it into thirds as shown.


Now remove any wrappings attached to the bread. This too has many raisins in it.

——————————————————————

Start your sweet Strigoli pasta by boiling it in ~ 4 Cups of water.
————————————————————–

Here you can see our Pancetta on the paper towel… count them, we only ate one!
—————————————————————


Seeing the size of our larger Panettone bread, we found we needed a larger bowl to be able to dip it into the egg and milk mixture. I then also added another two eggs, 2 cups of milk, a touch of cinnamon and sugar to the bowl and mixed them well before adding them to the larger bowl.

Panettone and Butter
—————————————————————
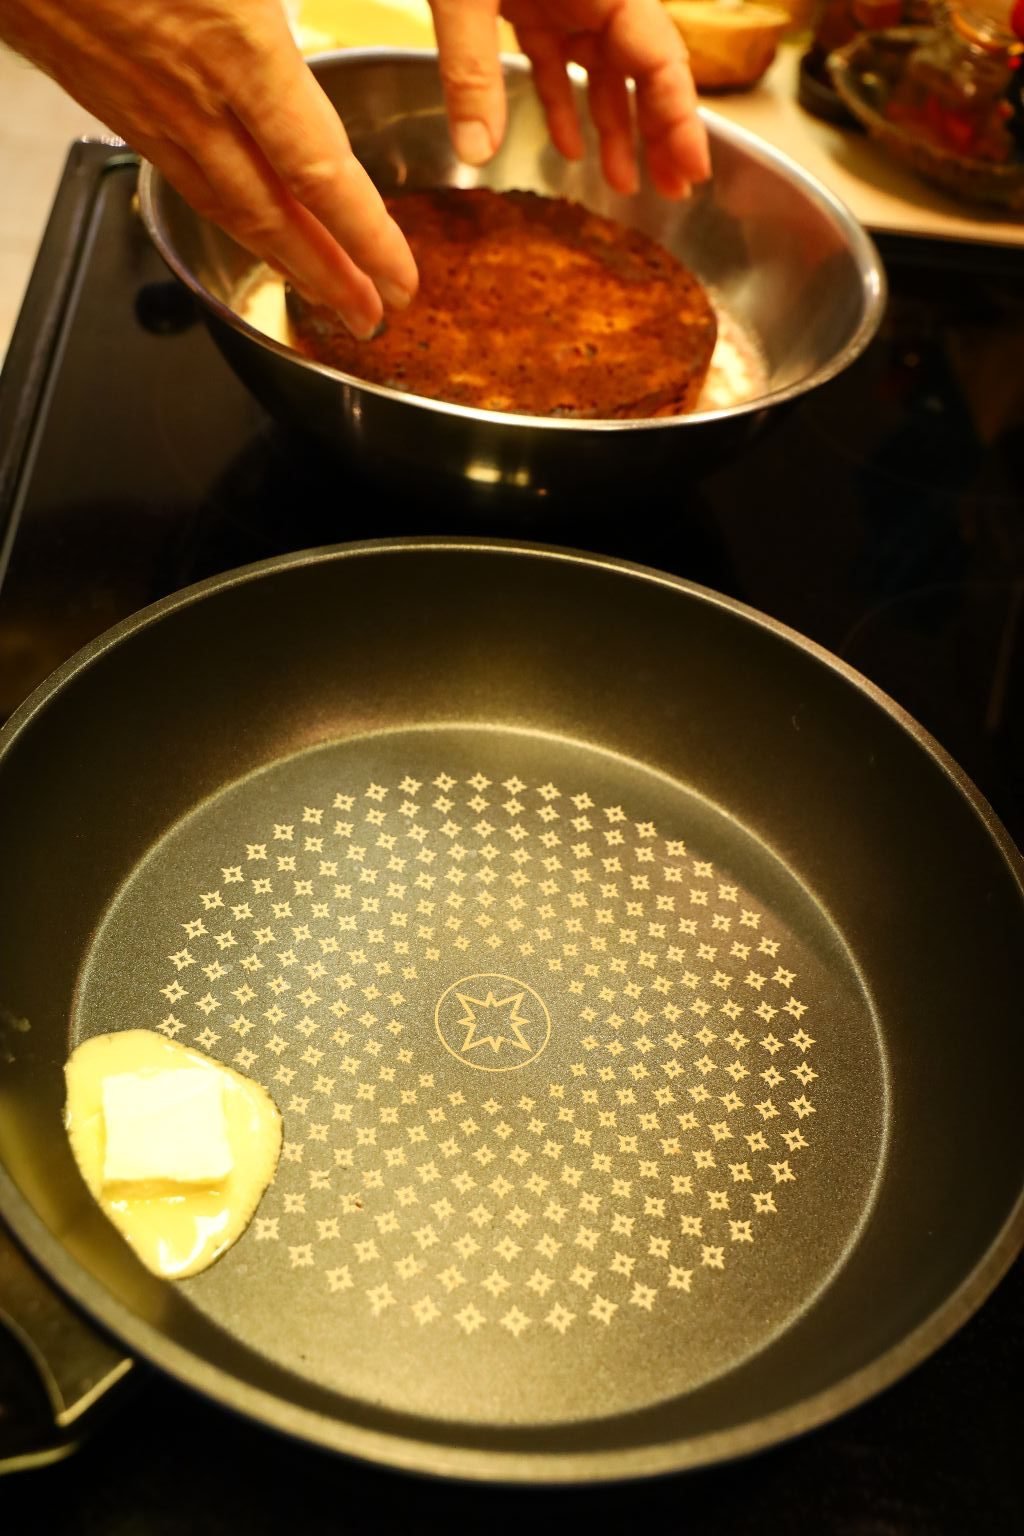

Place a large slice of your Panettone bread into the egg and milk mixture, when it starts to absorb the liquid then turn it over. The bread should still be firm and not lose its shape. Then add about two Tbsp. of butter to a large saute pan and melt it on medium high heat.

Fully melt your butter in the pan.


Drain your bread slightly to remove any excess liquid before placing it in the heated pan.


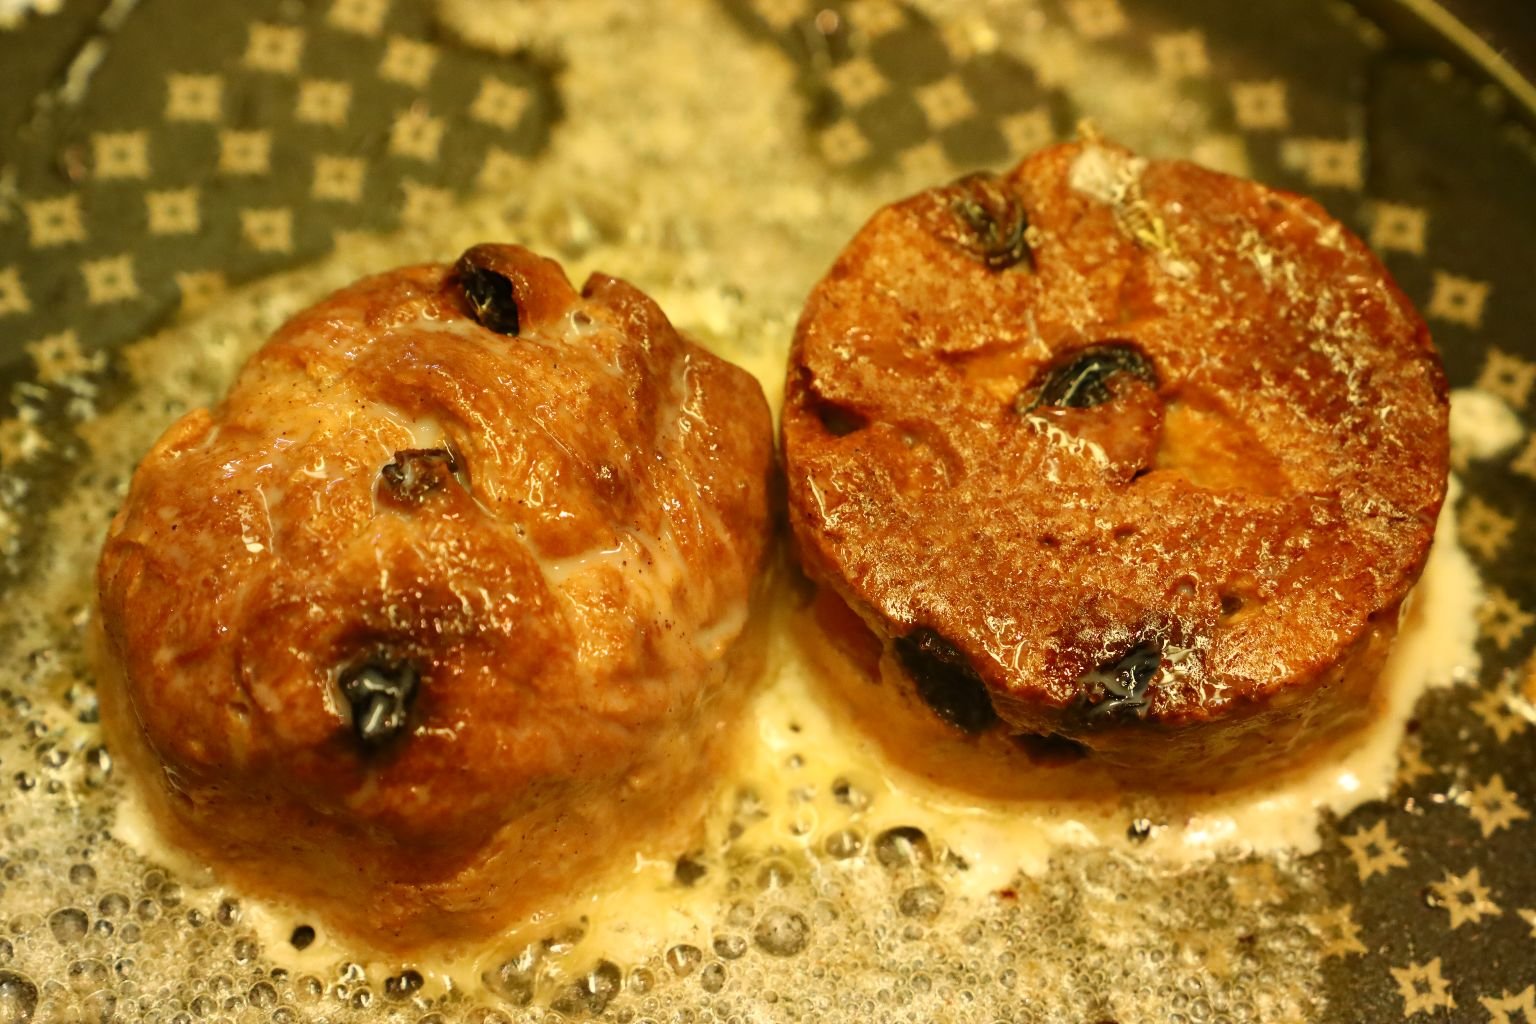
Here you can see I am getting another slice of the Panettone ready while this one is cooking.


Flip over the Panettone bread in the pan when it is browned as shown which takes about 5 minutes. You can use a large spatula to peek at the breads coloring or you can also move the bread around in the pan listening for a scratchy sound. This scratchy sound is the cooked bread hardened from the heat.


Again is another piece of Panettone in the egg and milk mixture. You can add a sprinkling of cinnamon to the bread if needed.
Here we are cooking the smaller muffin sized slices of Panettone in the pan after they were dredged in the eggs and milk.


You can also flip the bread to cook the other side as shown. Place the cooked slices onto a sheet pan lined with aluminum foil in an oven set at 250’F. This will ensure the inside of the thick bread slices are fully cooked while keeping them warm until ready to eat.

——————————————————————


Here you can see we have a full oven of Panettone French Toast.
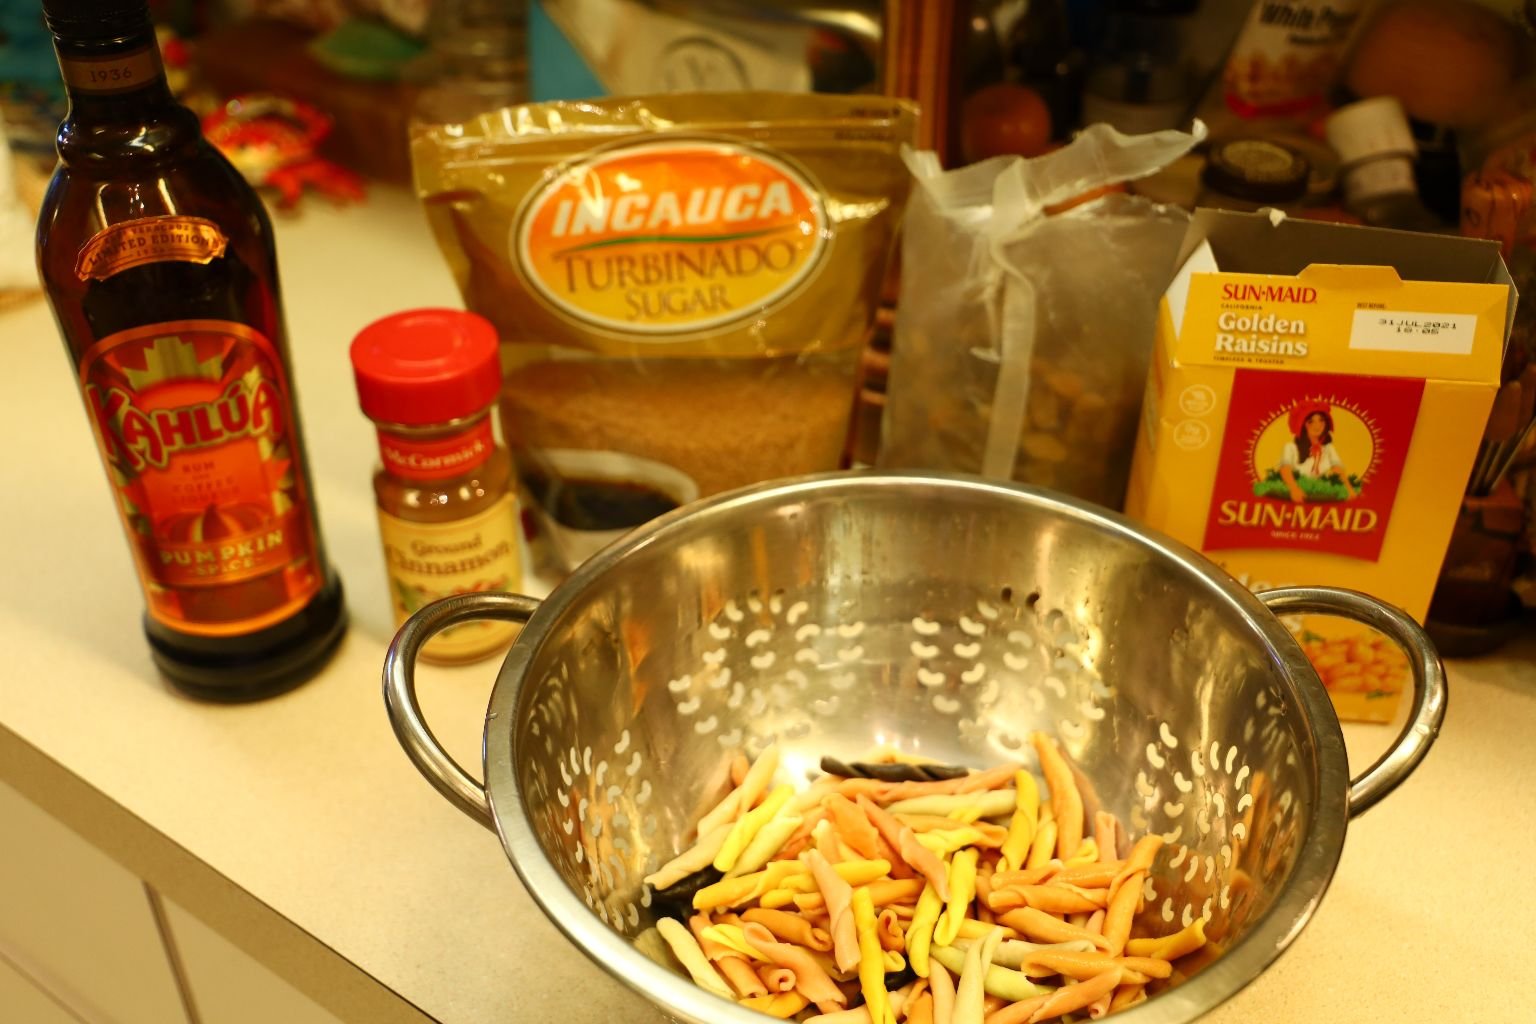

Now to make the Sweet Strigoli Pasta.
Boil the pasta until about 3/4 of the way cooked which took about 5 minutes time.

Drain the pasta well in a colander and stop the cooking process by running it under cold water.
—————————————————————–
Now For Our Sugar Glazed Pasta

Add your water to a wok and turn it to medium heat.


Now add your Turbinado sugar to the water.


Then add your cinnamon and Kahlua to the wok.

——————————————————————–


Stir all the ingredients together and when the mixture is boiling add your golden raisins.

As this mixture reduces you will see the bubble get larger and larger. This is due to the sugar and water reducing creating a syrup. When you see these large bubbles…


…remove the wok from the heat and add your cooked Strigoli and gently toss them in the syrup. Set them aside for later use.
——————————————————————-

———————————————————————

This will also plump the raisins as they absorb the sweet flavorings.
—————————————————————
Our Idea was to Make a Panettone French Toast Cake


Remove the chilled Pumpkin Mascarpone filling from the refrigerator and spread it between the Panettone French Toast slices as you would a cake.

—————————————————————–

You Can See Our Various French Toast Slices Here

Stacking The Cake

Plating our Panettone French Toast then Topped with our Glazed Pasta and Surrounded by our Pancetta

Slice the cake like stacked Panettone French Toast as you would normally and add some of the sweet pasta and Pancetta slices.
This Truly was Delicious!
What a tasty way to use Panettone which can be eaten for any meal. 🙂
——————————————————-
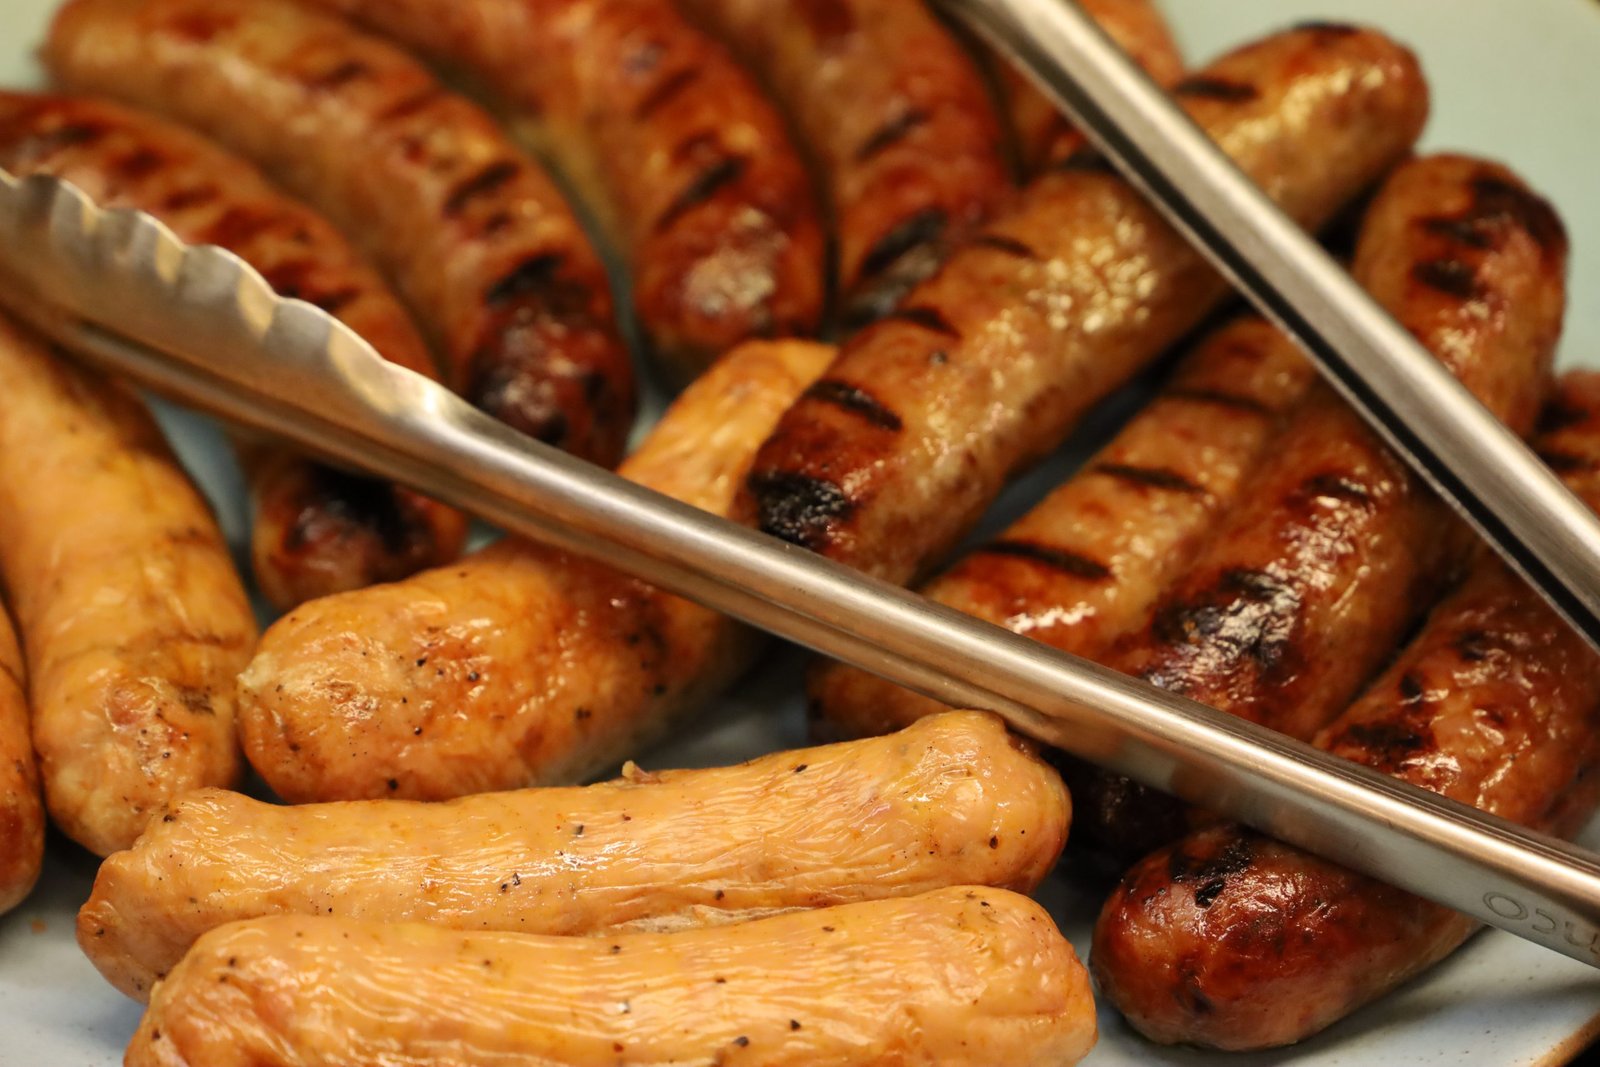
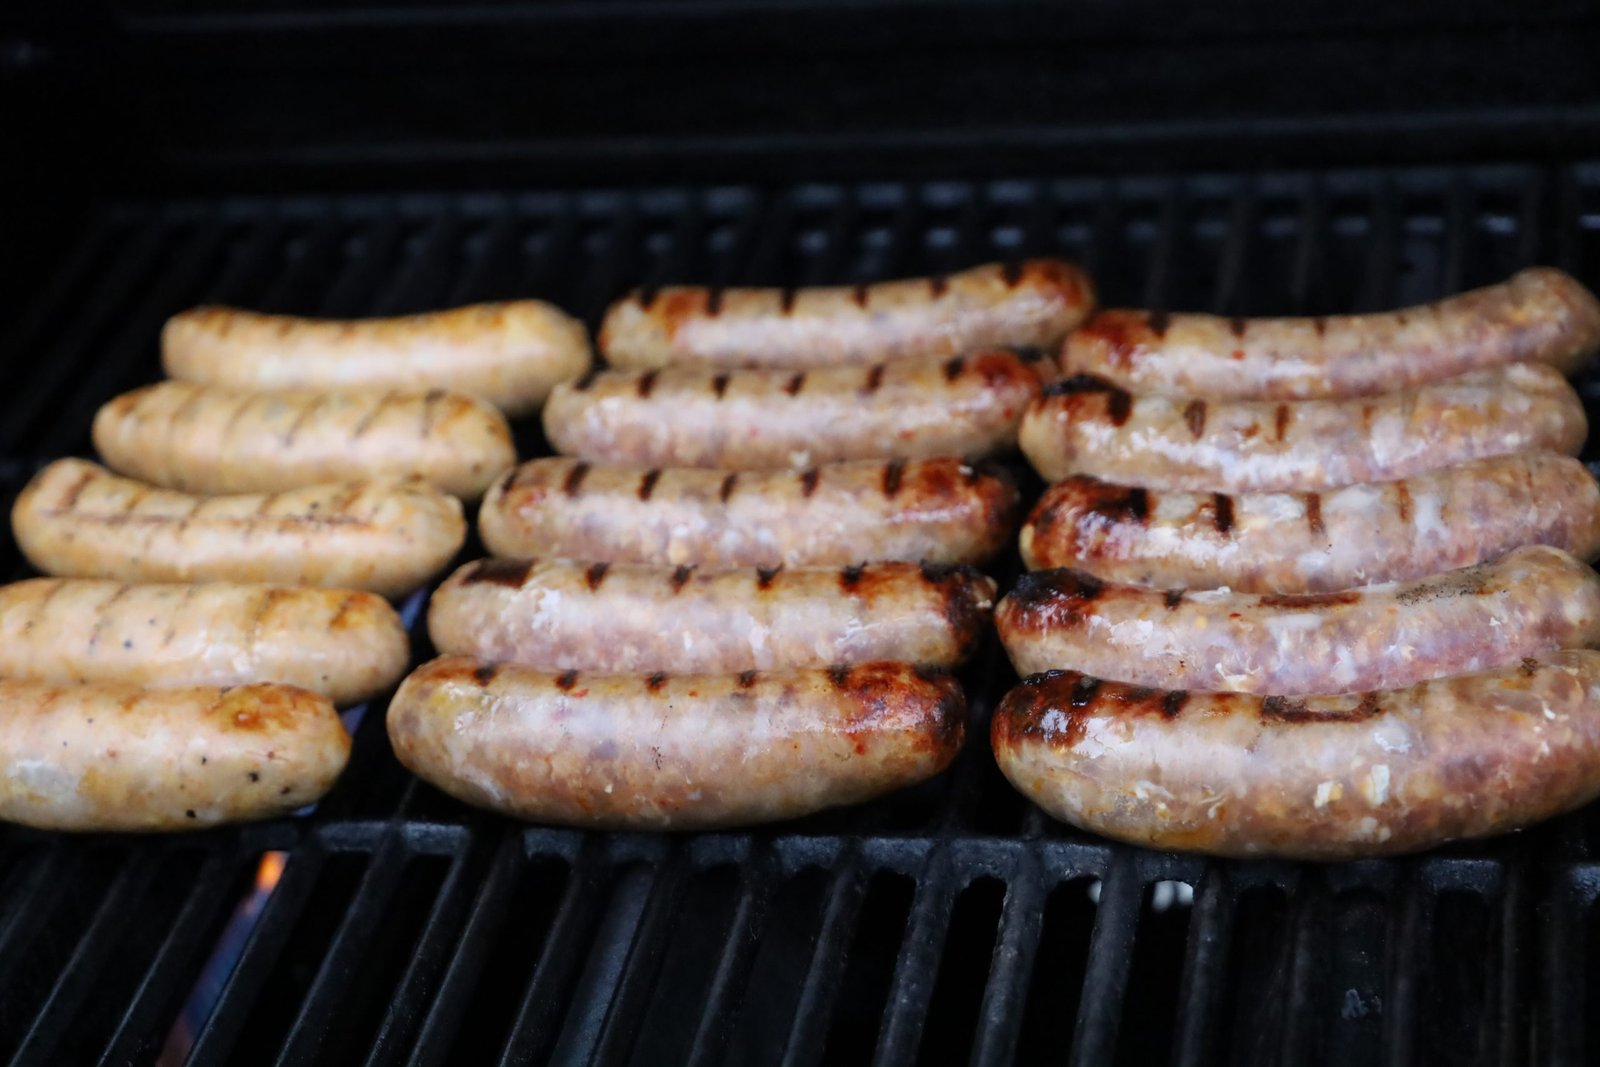
Italian Sausage Hoagies
Gordon and Brodie are huge Italian Sausage Hoagie fans! I tend to prefer my Apple/Chicken Hogs as they are a bit healthier. But we love them on the grill, and we love them with lots of onions and bell peppers, sauteed in olive oil. Sometimes with a carrot, or pickle relish, and a good Hoagie Spread.

Here Brodie is chopping some Red, Orange, and Yellow Bell Peppers and Onions to saute in olive oil.
Gordon Grilling all the Sausages on the Grill
——————————————————————-
YUM!!!!!
——————————————————————
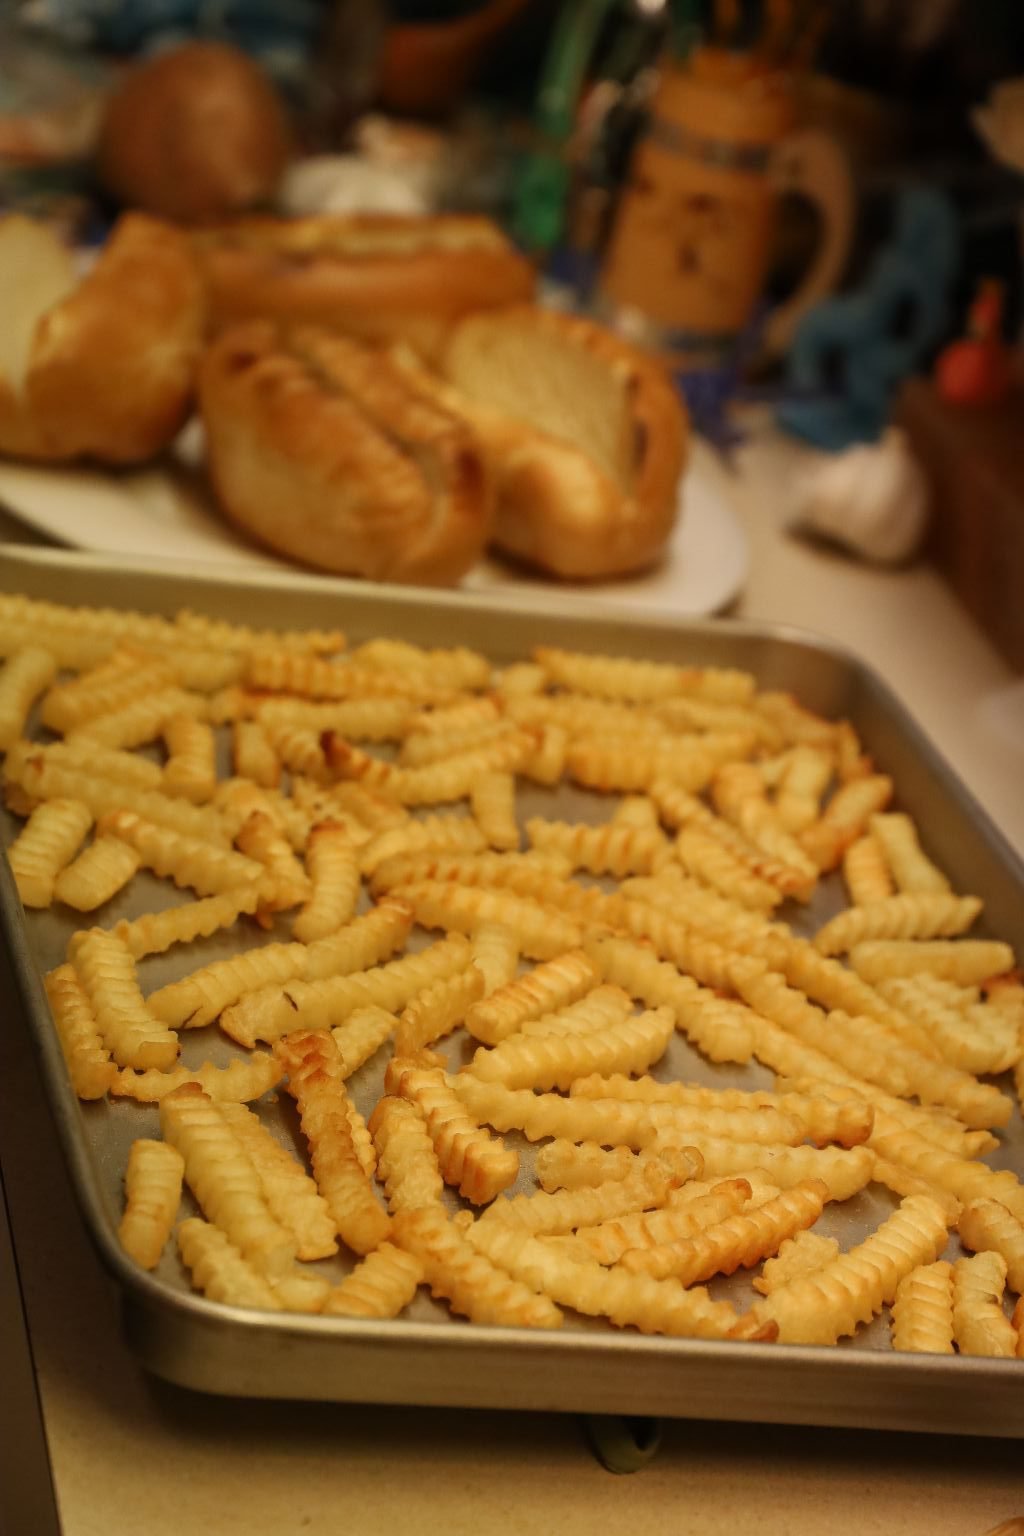
Don’t forget the FRIES!

Now For The Assembly
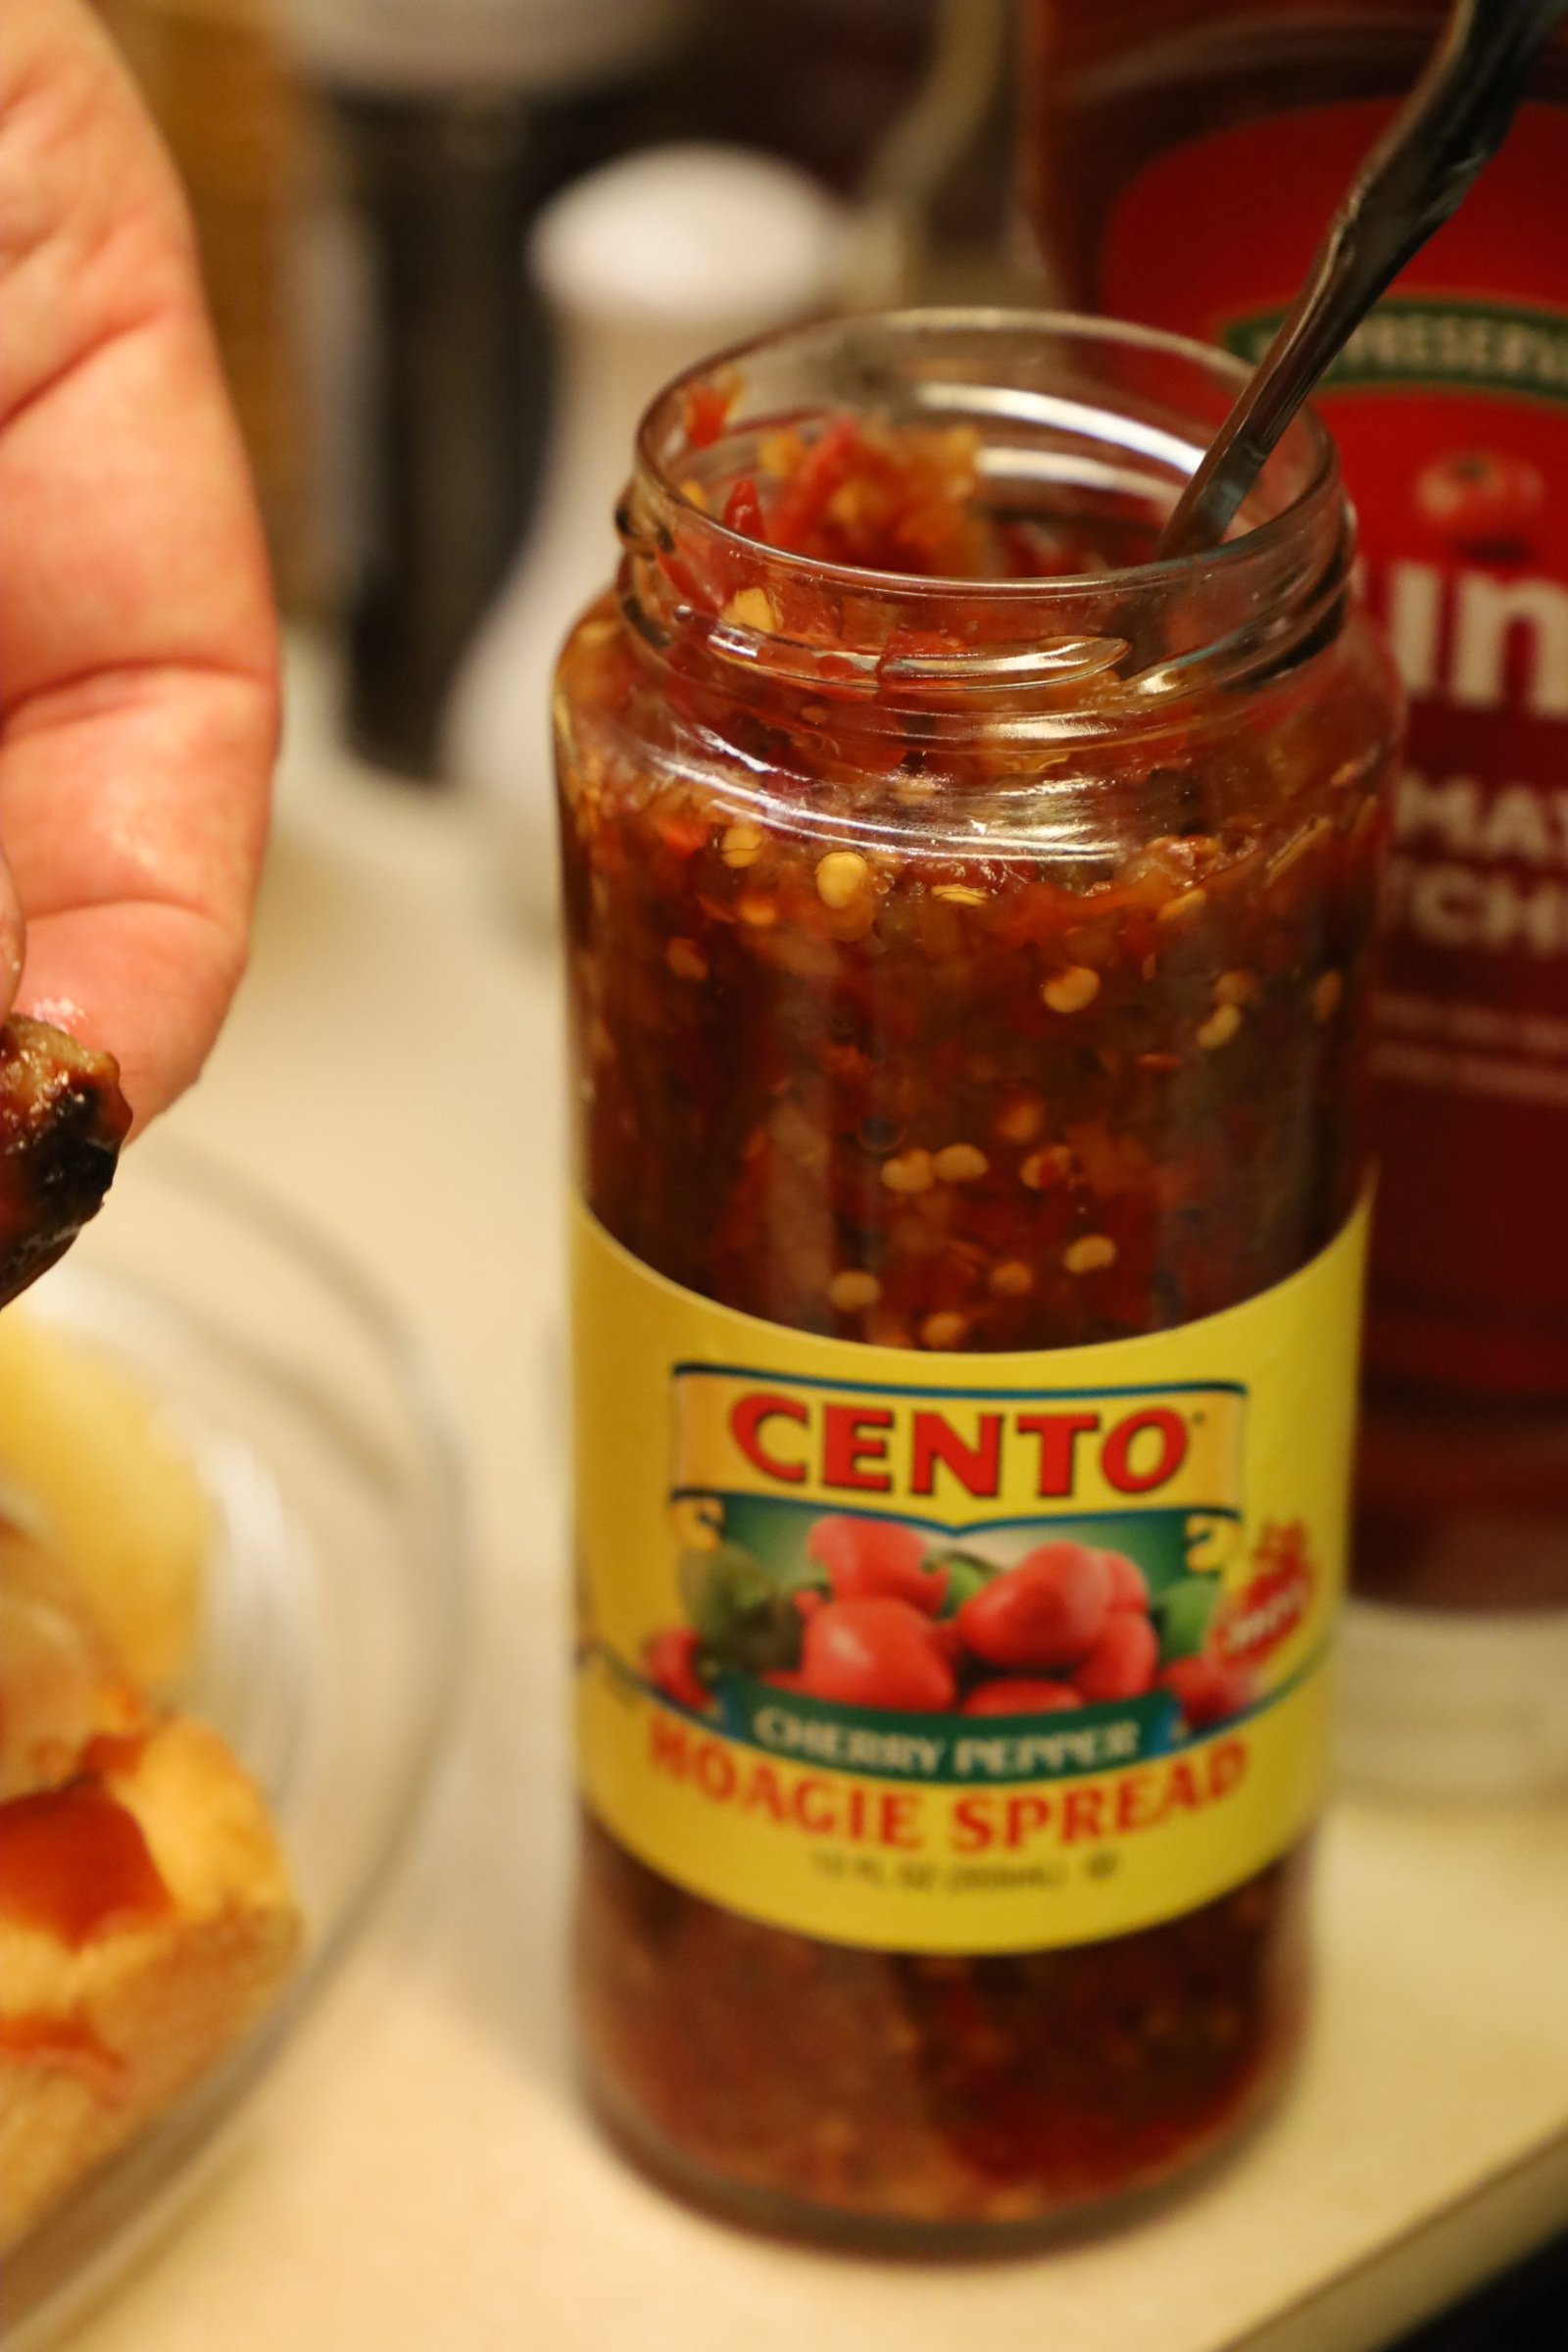

Good Buns Toasted on the Grill with Hoagie Spread

—————————————————————-

Pile IT ON!
Godere, and Grazie!
——————————————————————


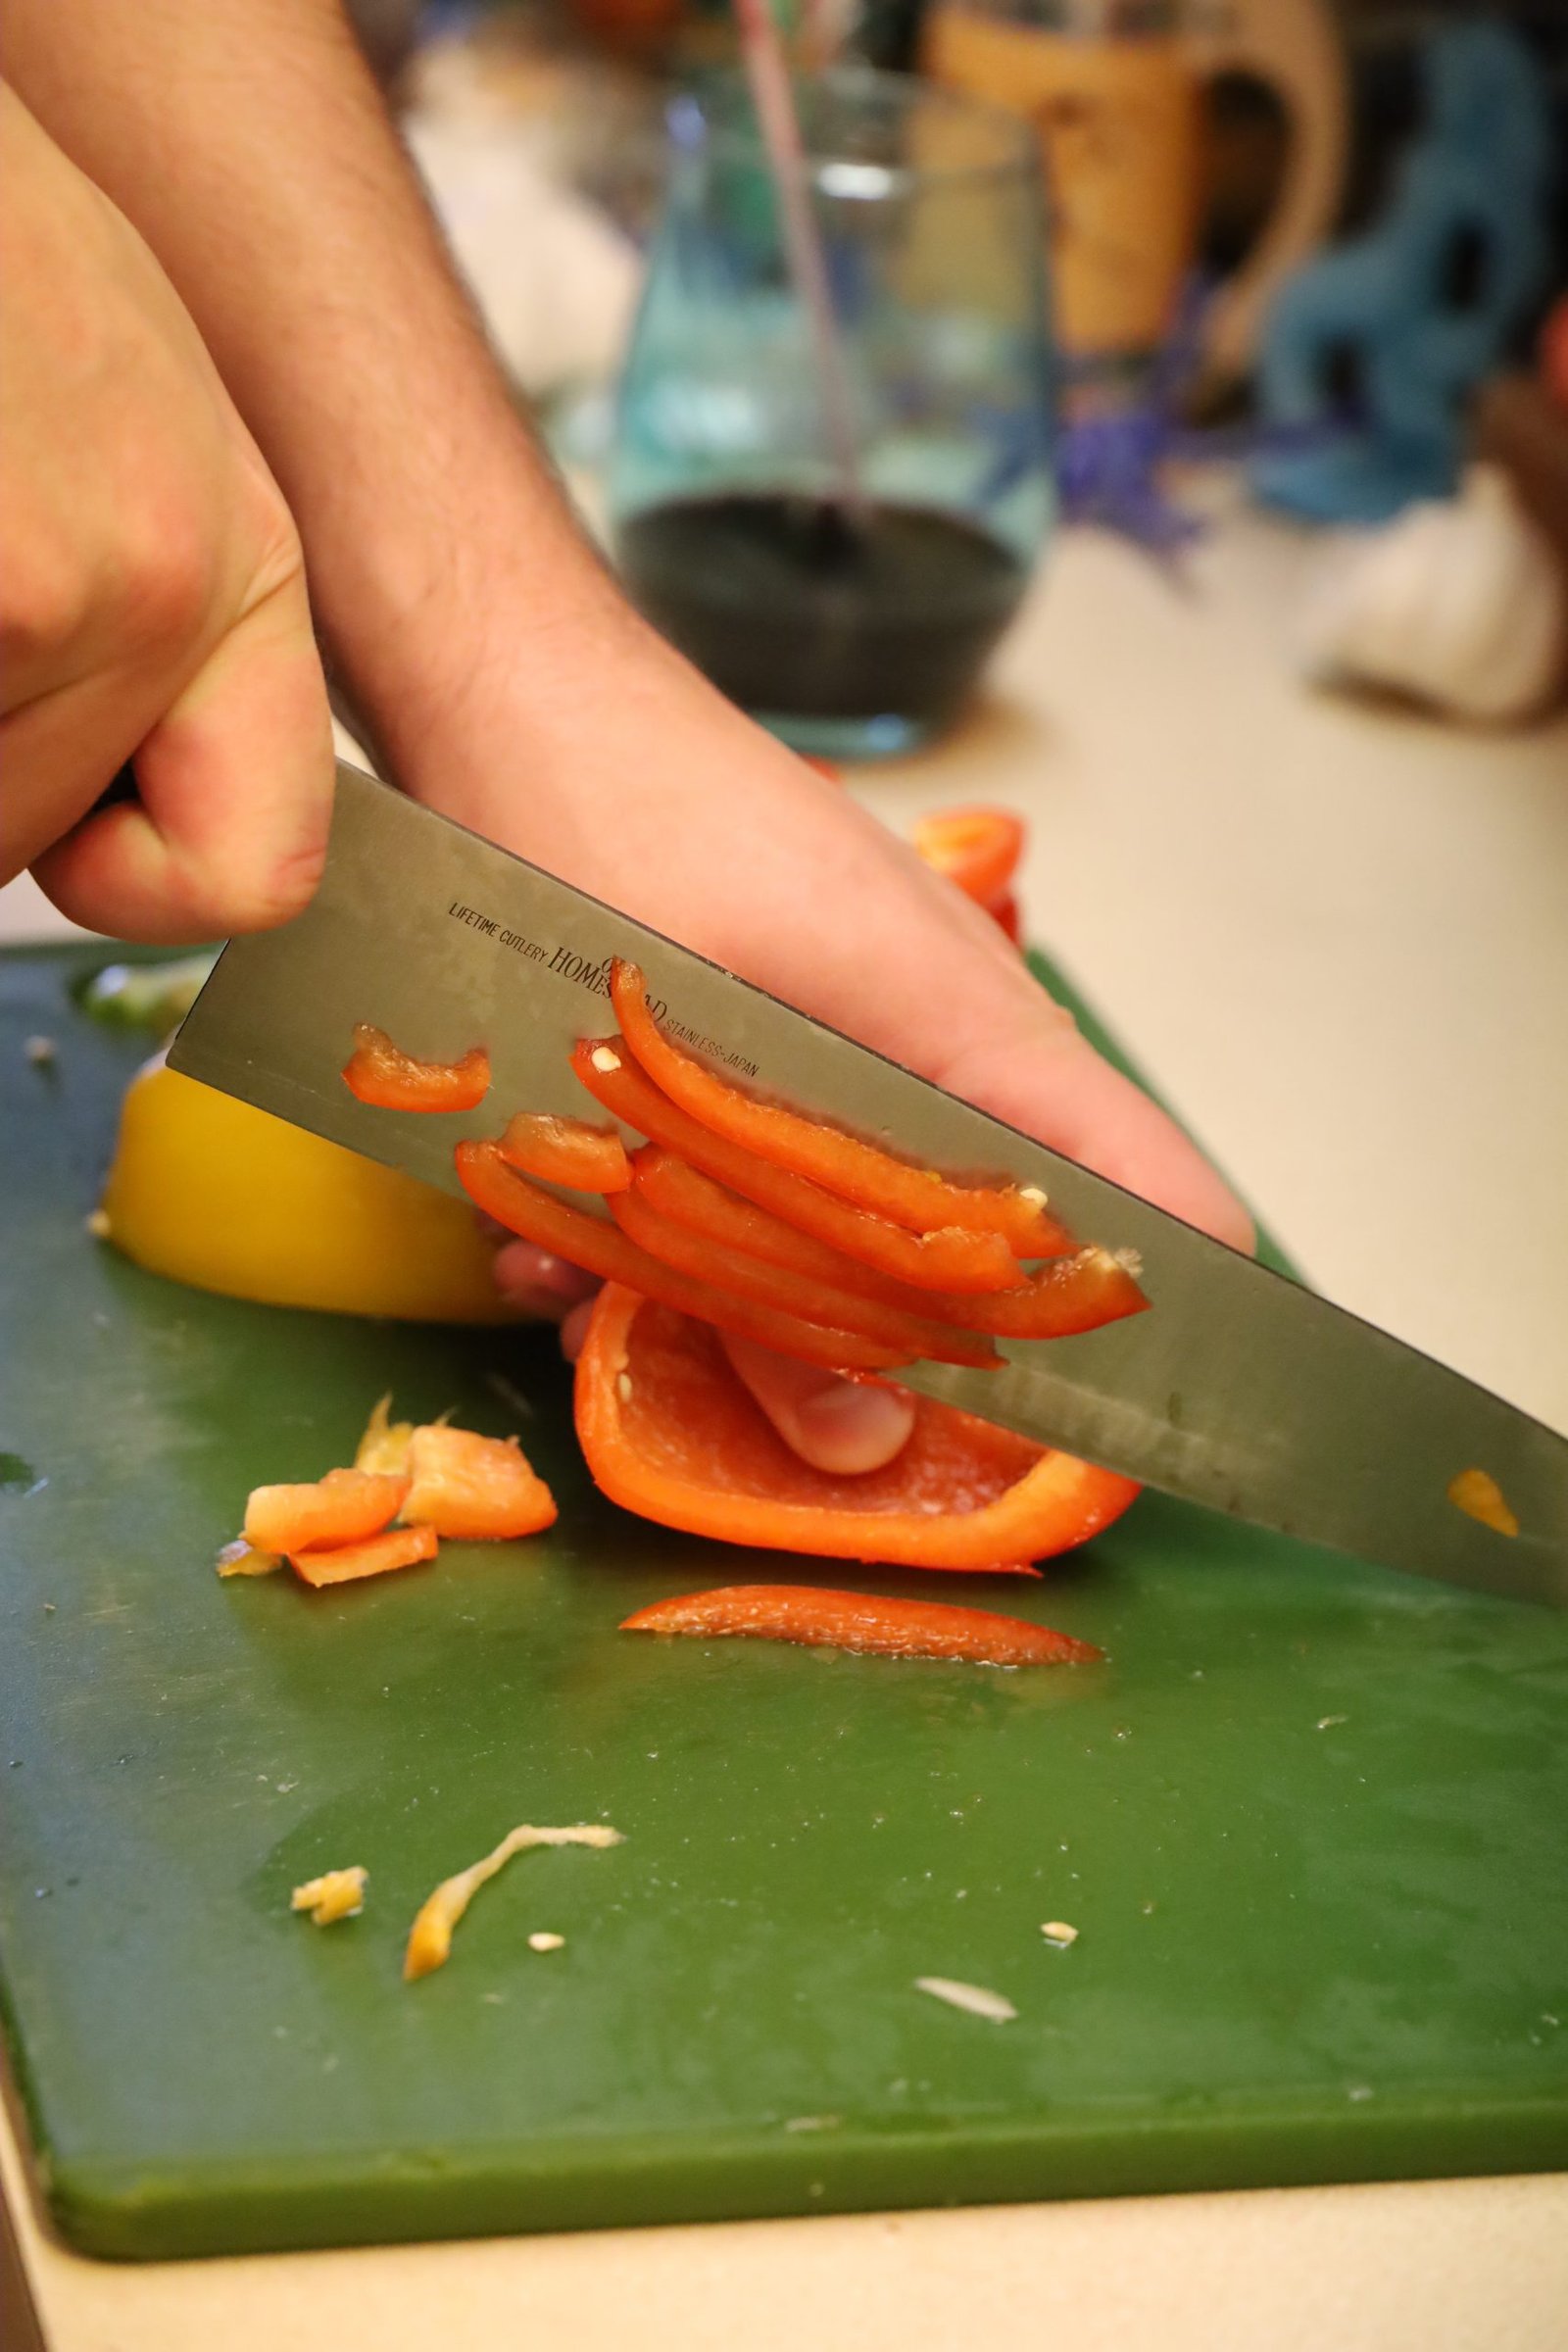
Here you can see we have plenty of beautifully colored Bell Peppers for these next two recipes. Slice some in long stripes and the others use the peppers own divided sections to hold the cheese.
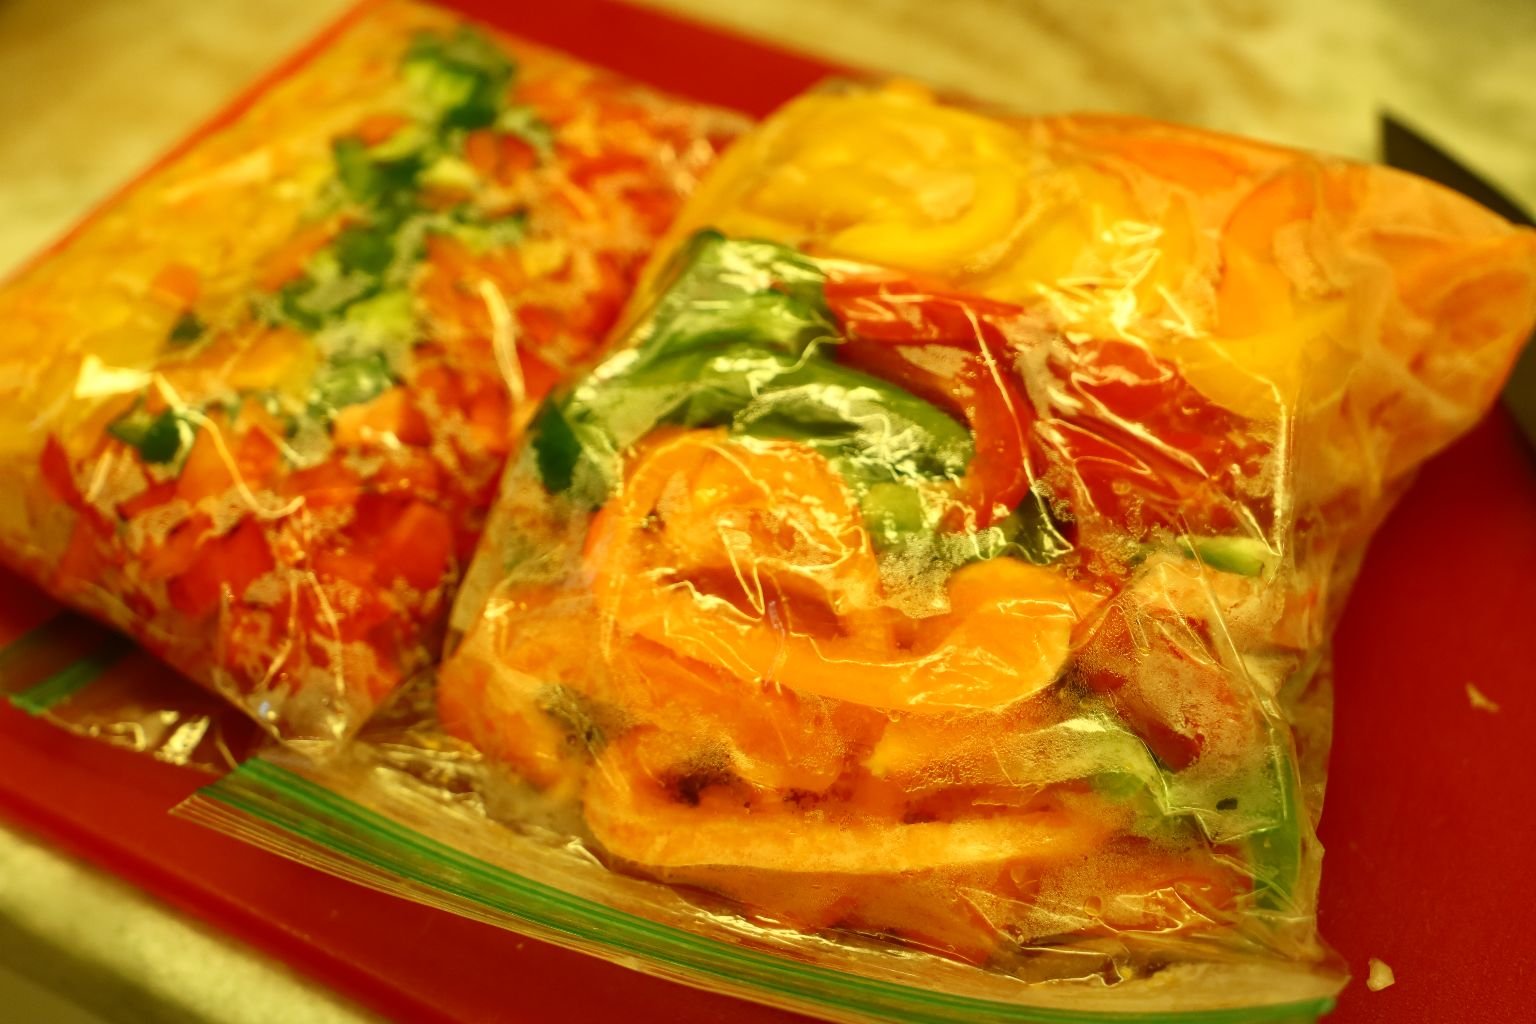

What you don’t use you can store in a zip-lock type bag and freeze them for later use. To the sliced Bell Peppers add some thinly sliced Onions.


Here I placed the Onion and Pepper mixture into a large cast iron skillet, added some Ground Black Pepper and a few Tbsp. of Olive Oil, then turn the heat to medium high.


I had some chopped Onions so I added them as well. Now, add some Sea Salt to taste. I am sauteing this mixture on the burner next to my grill.

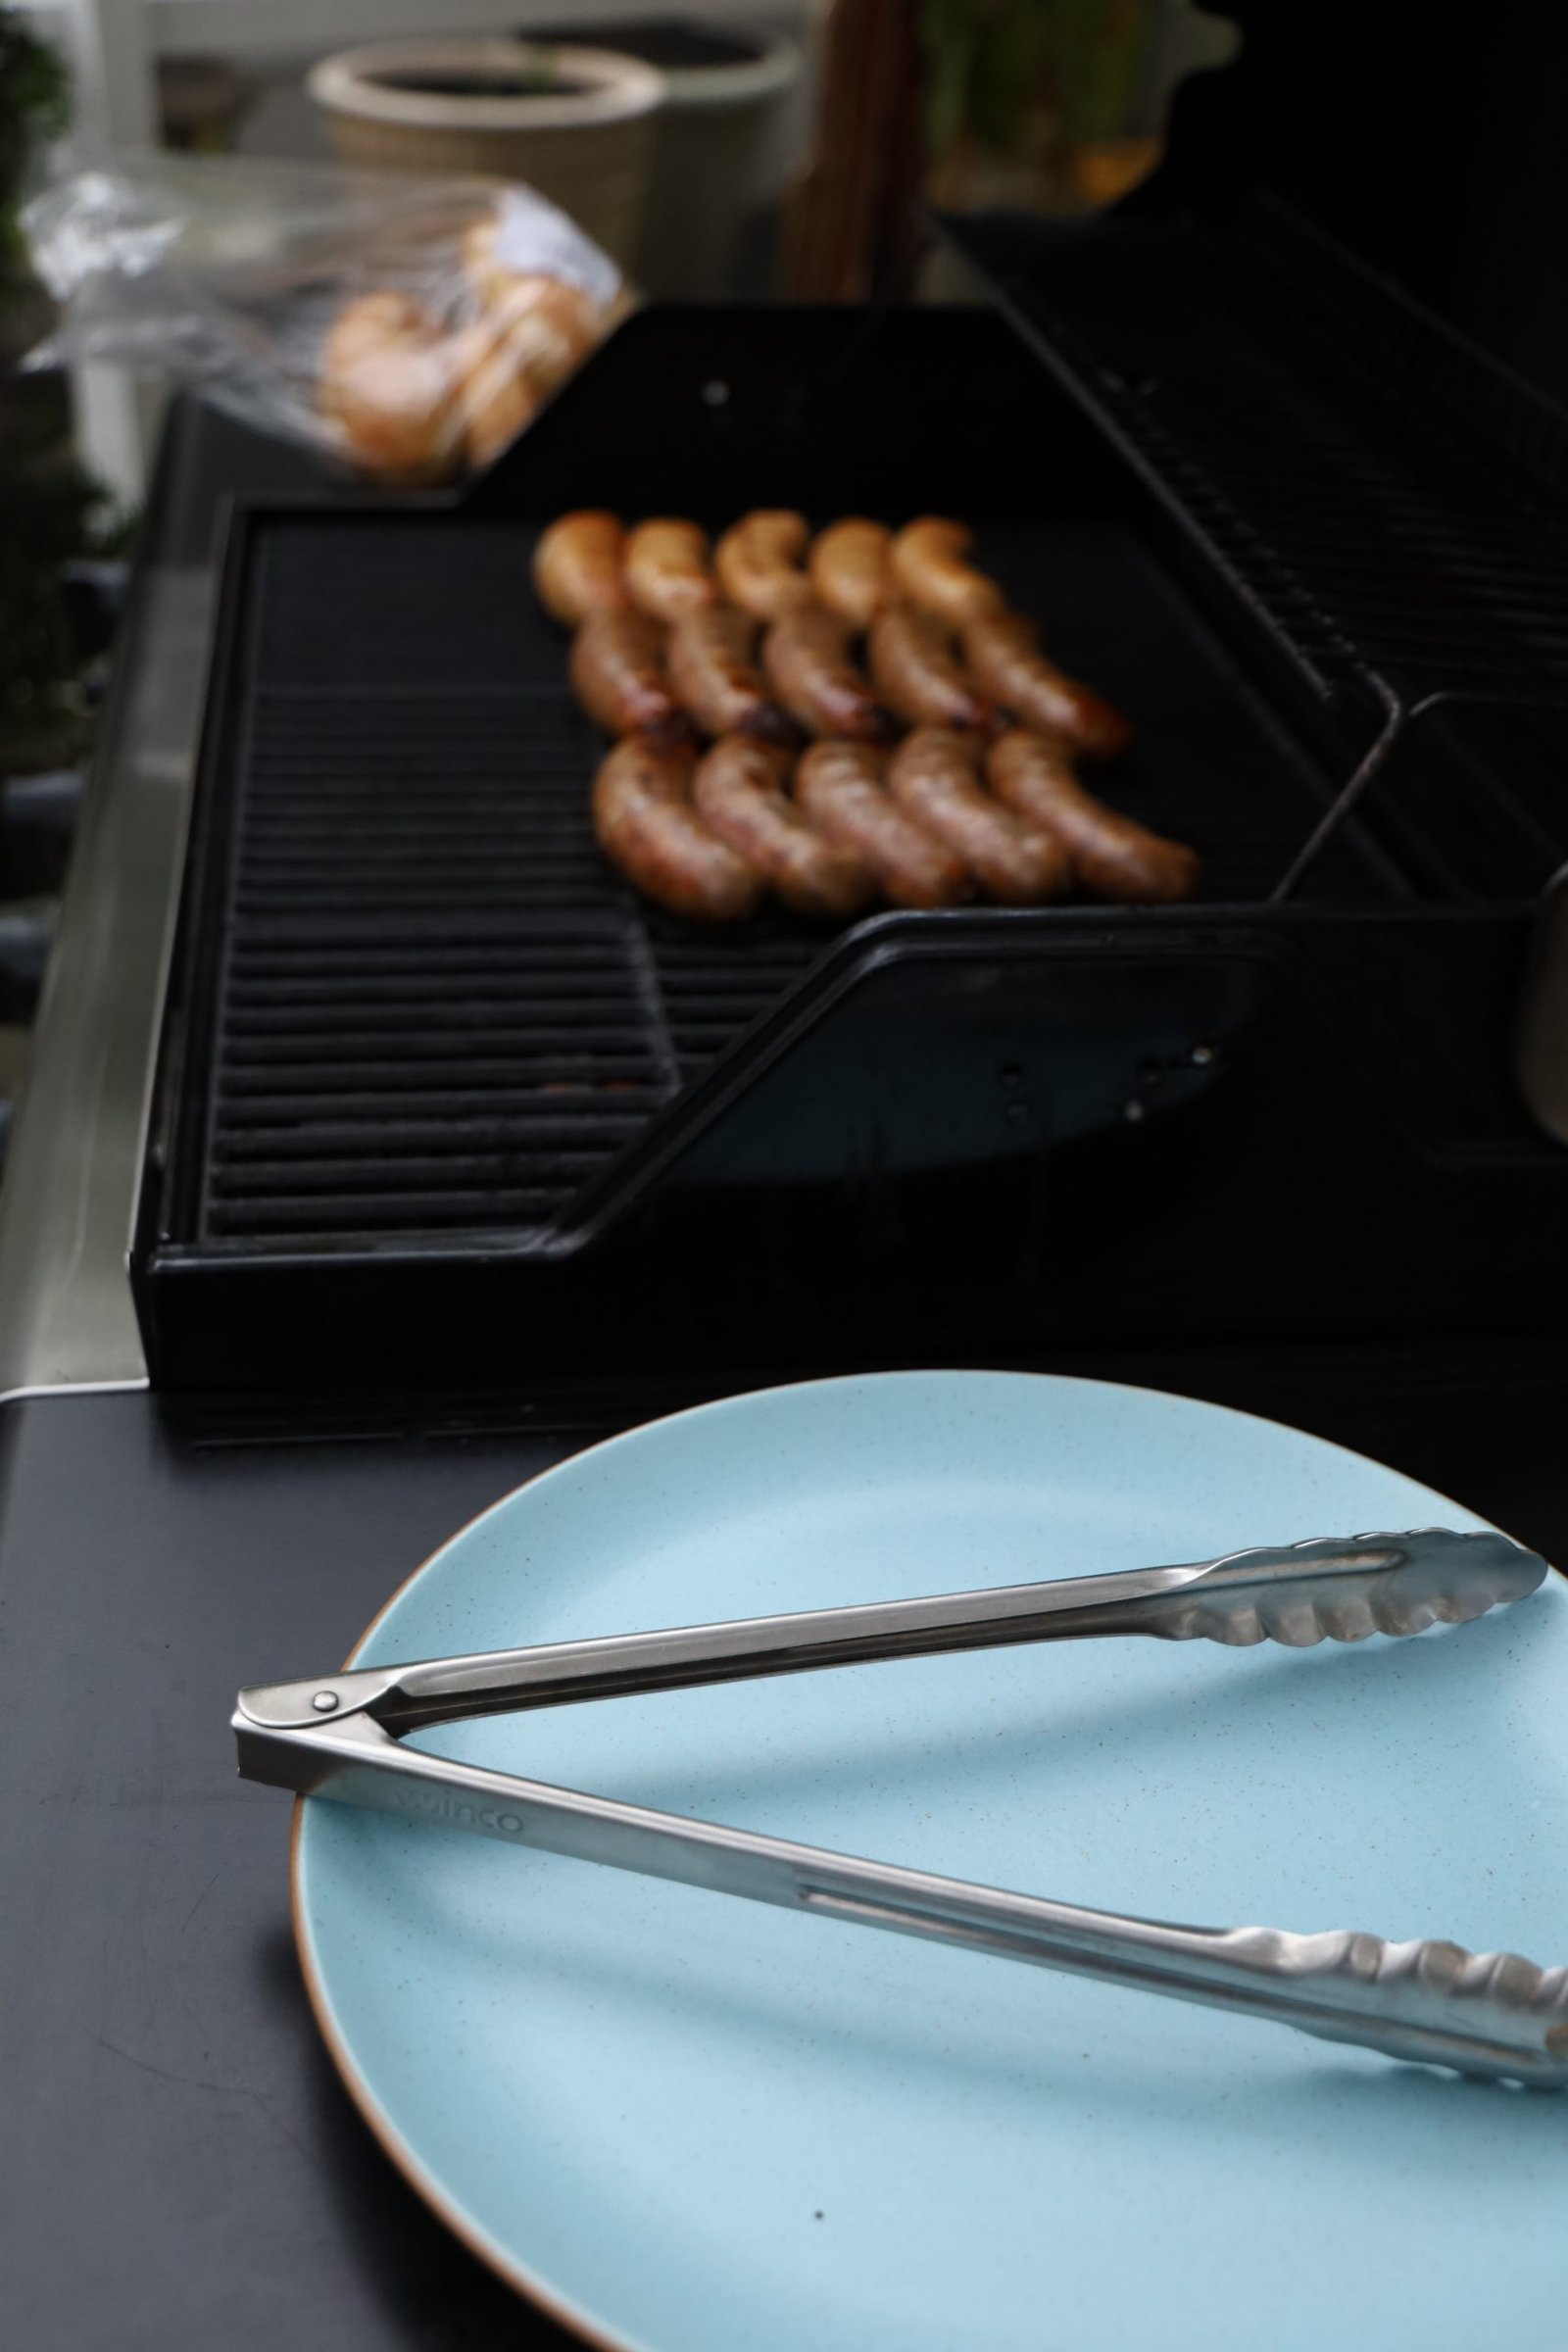
In the mean time, I heated my grill to high for about 5 min. I then cleaned the grill with a wire brush then sprayed it with some high temp. oil. Now, turn the grill down to medium temperature and place the brats on the grill. In the upper section I placed some corn on the cob that I partially shucked.


After every few minutes, turn the Onion and Pepper mixture over for even cooking.


Using the sectioned Peppers, place a Mozzarella Ball into the peppers cavity and place them on your grill.
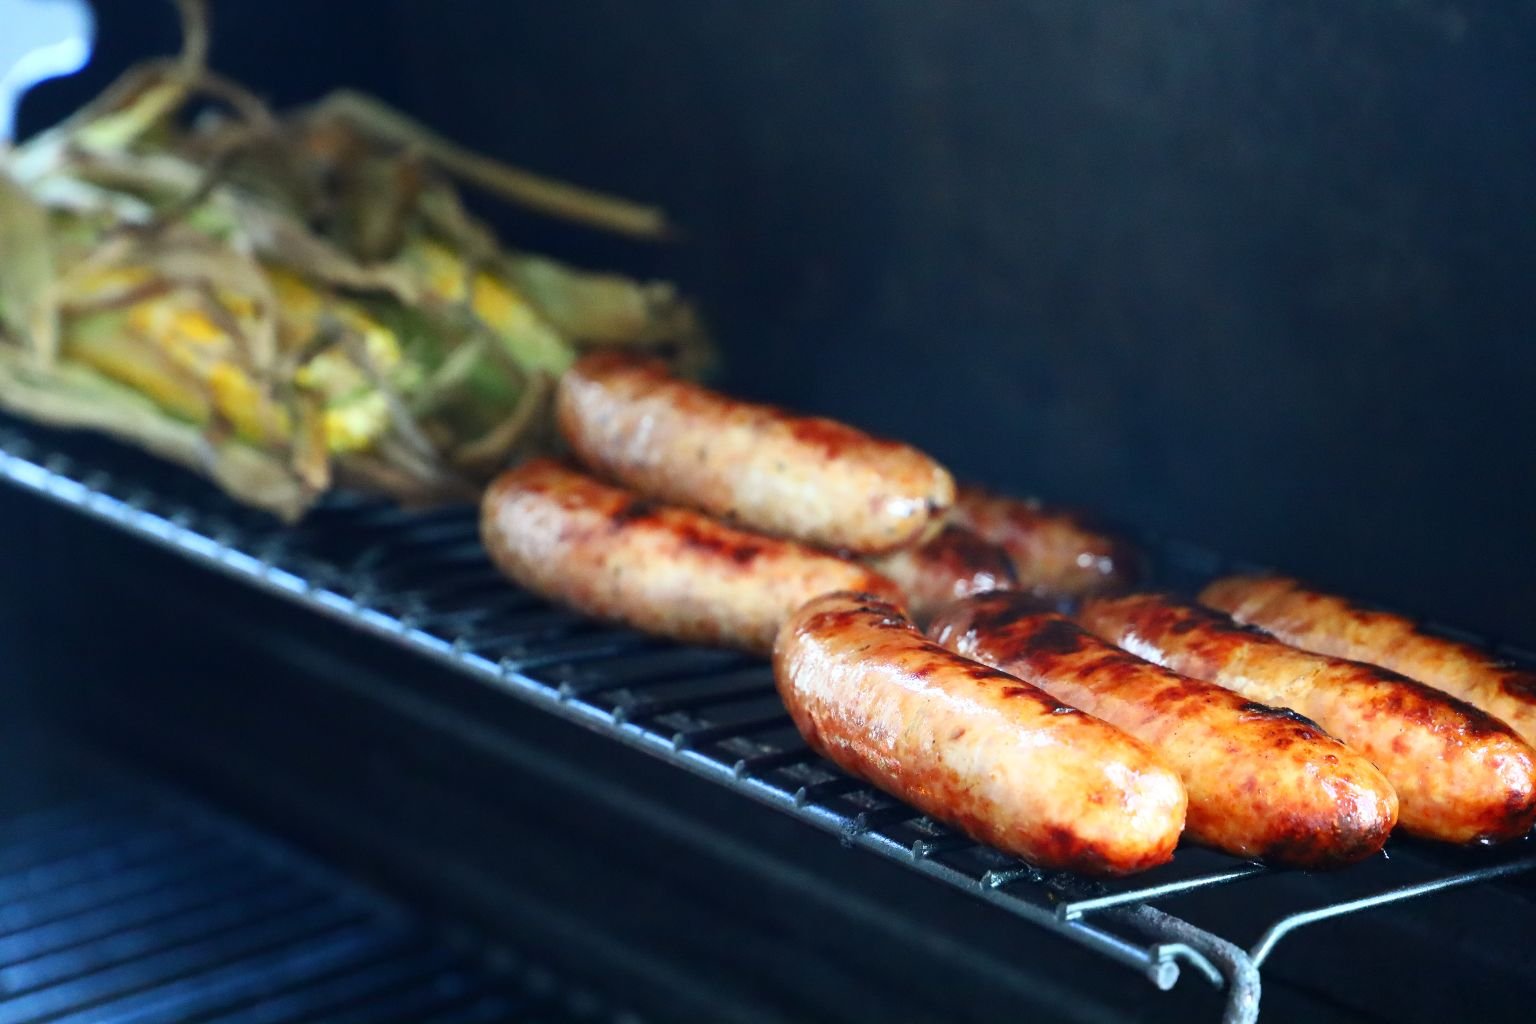
Turn your prats over for even cooking (about 5 min. per side) and when marks appear on both sides, move them to the upper section of your grill to basically bake for another 5 min. or so.


Continue to turn your Peppers and Onions until they are softened and the Onions are slightly browned. Try to keep the lid down on your grill to melt the cheese within the Peppers.
Here the Onions and Peppers are fully cooked to my liking.
Now that the brats have cooked fully, I added them to the cast iron skillet. Here you can see the Mozzarella cheese melted inside the pepper sections, so remove them from the grill.
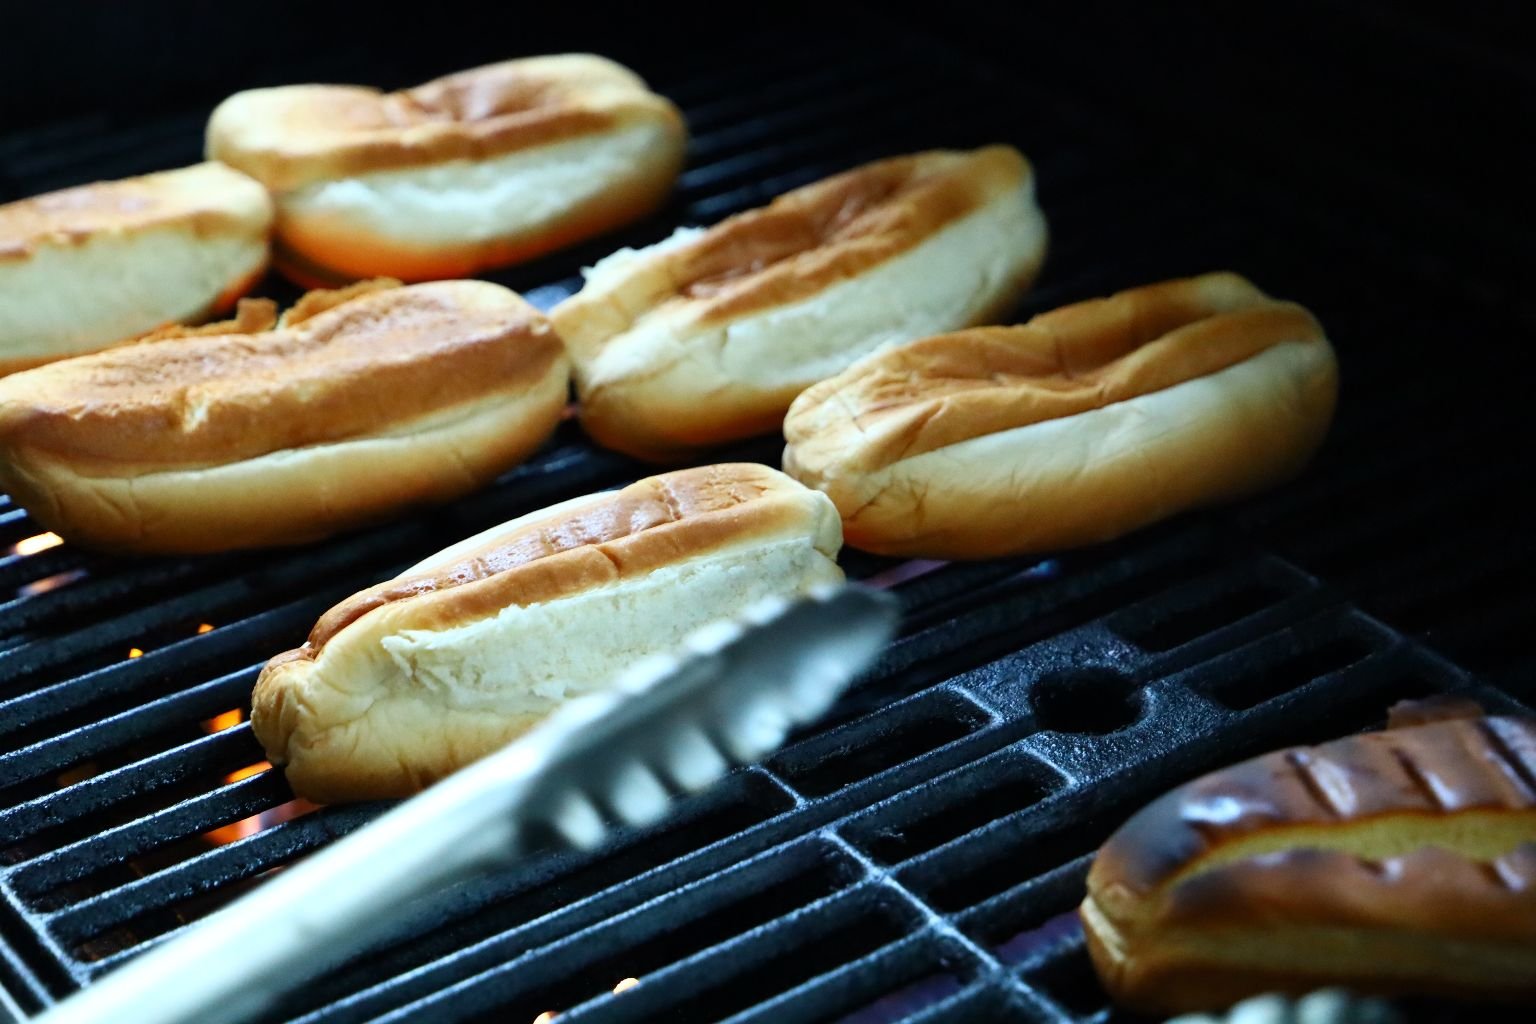
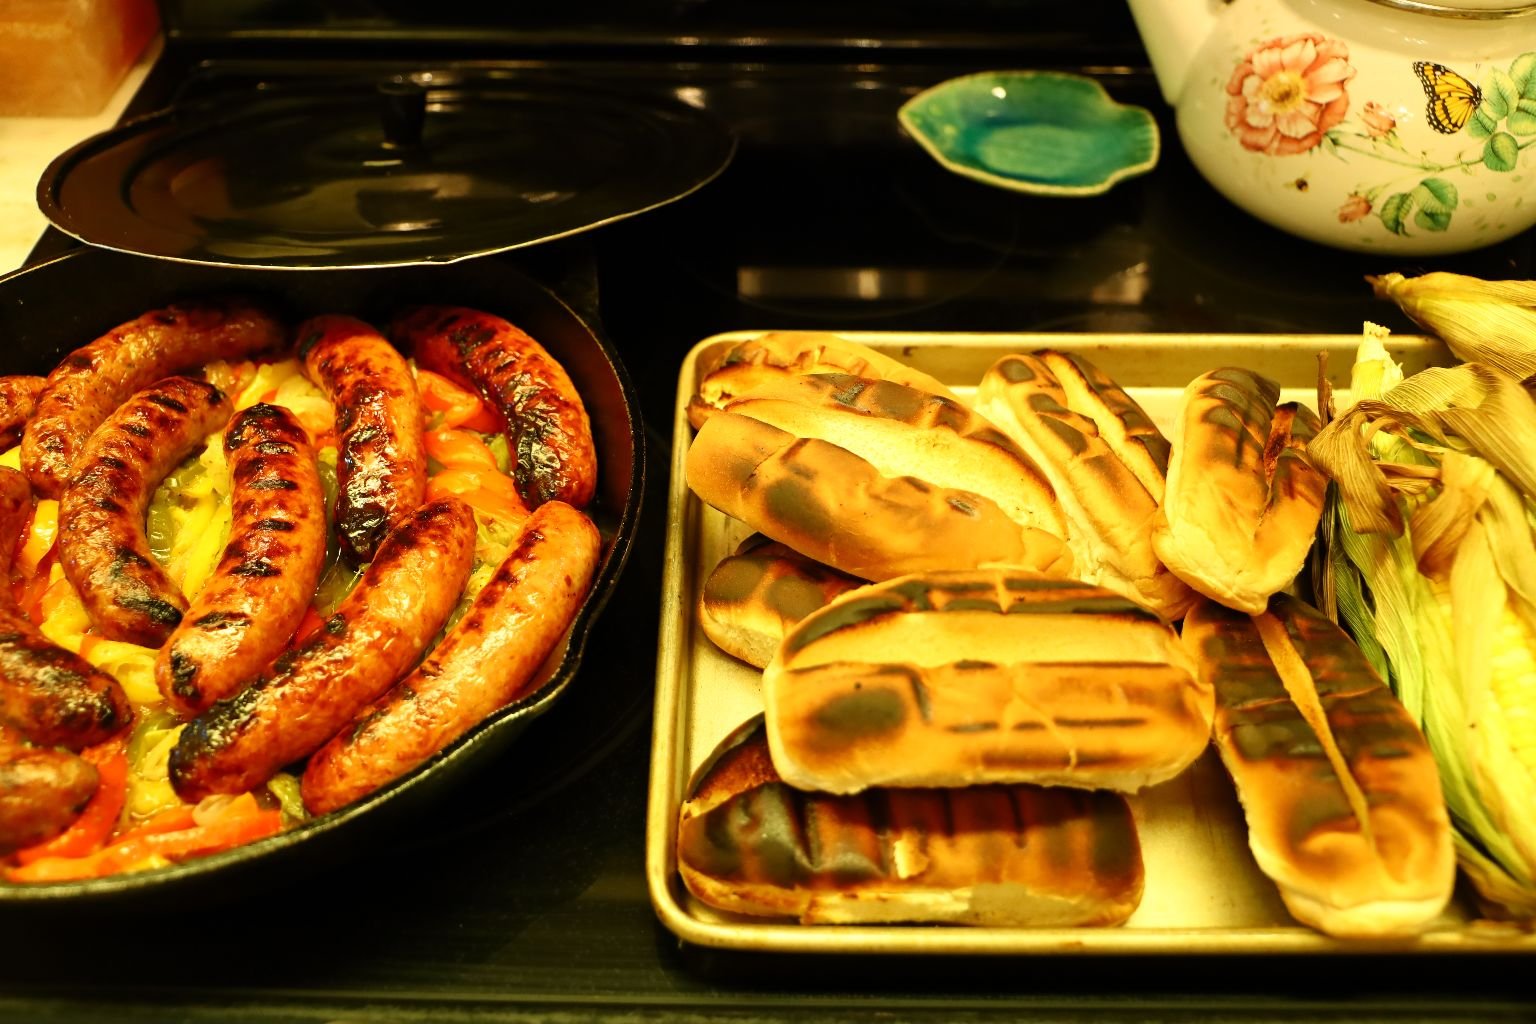
We like our buns toasted, so open them up and place them on the the grill. They only take a few minutes to brown, so be sure to check them often.
Here we added some sea salt and black pepper to the Mozzarella cheese then added a fresh Basil Leaf.
These were a great meal starter, taking advantage of Springs bounty and our own herb garden.

Now tell me THAT doesn’t look good!
———————————————————

Brodie
When counter space isn’t always readily available we aren’t above eating on top of the trash can. 🙂

Goof! 🙂