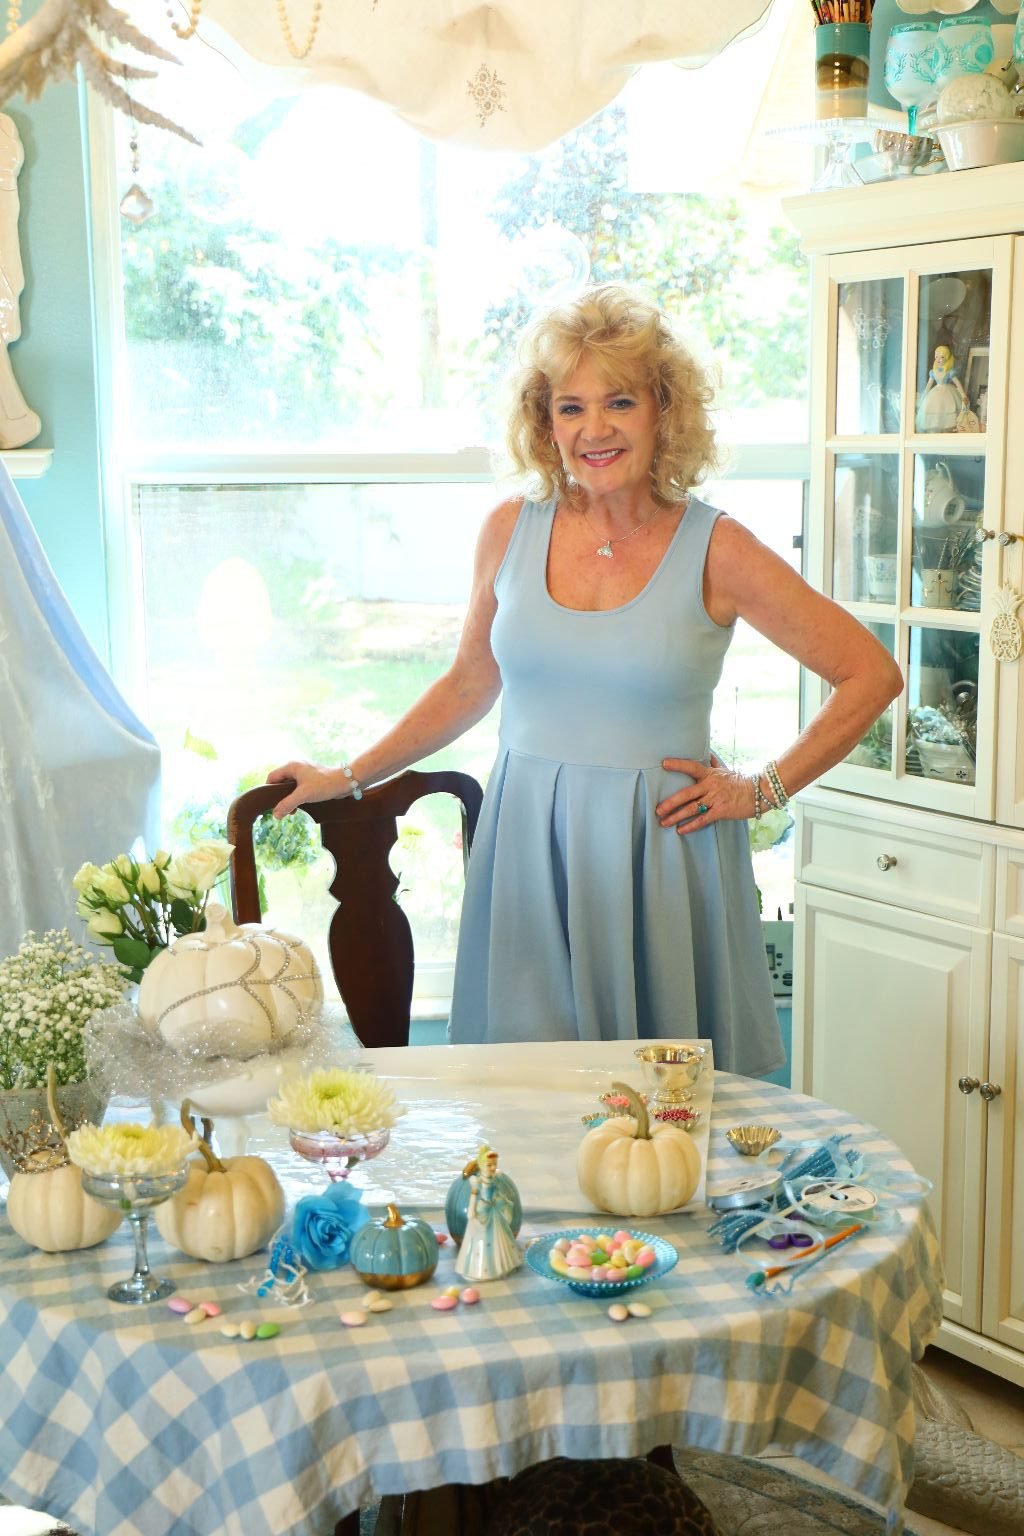
Cinderella Party Foods and Ideas

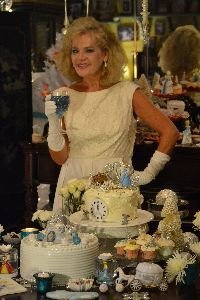
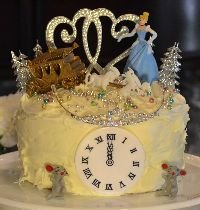
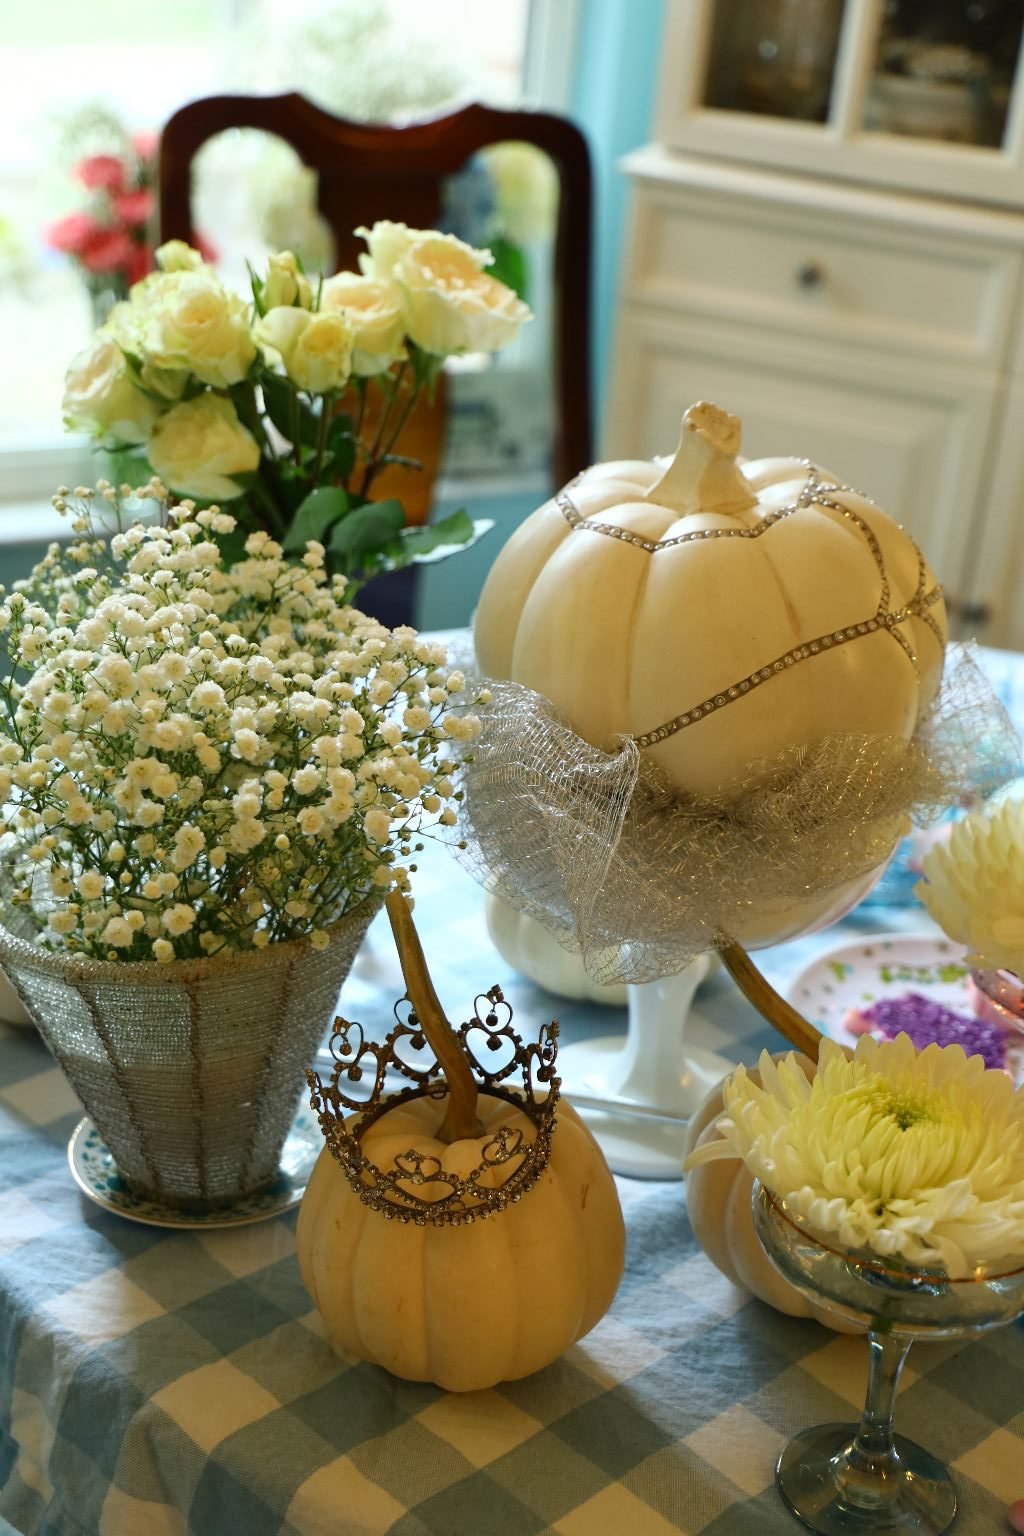
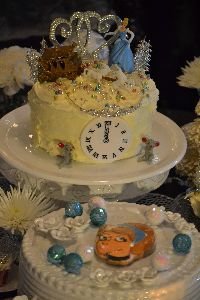
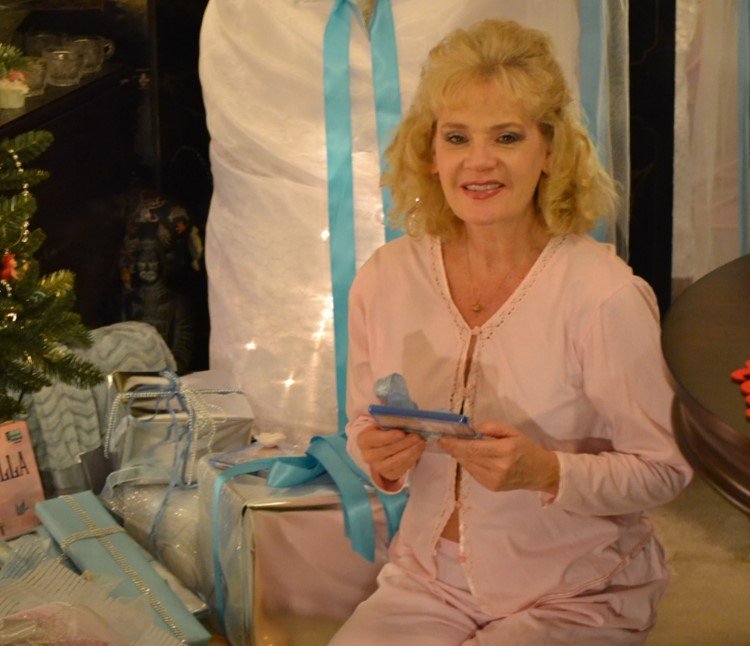
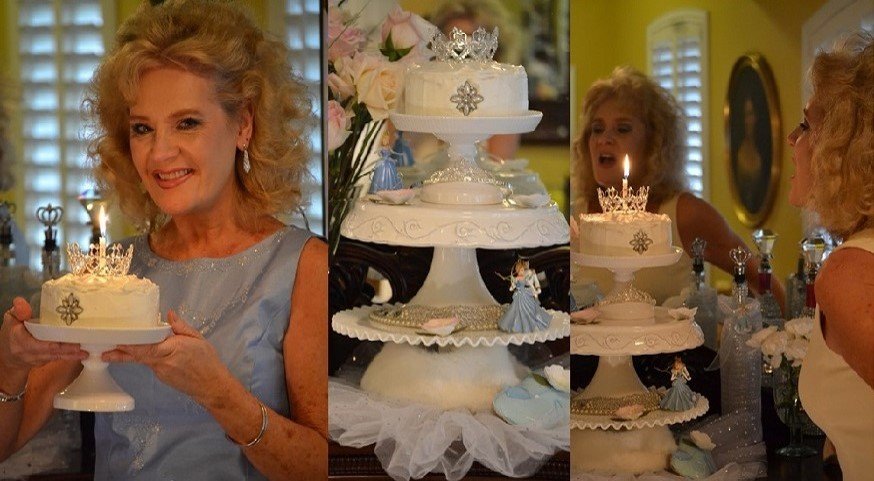
Vintage Cinderella Planter with roses, and my Birthday Cake
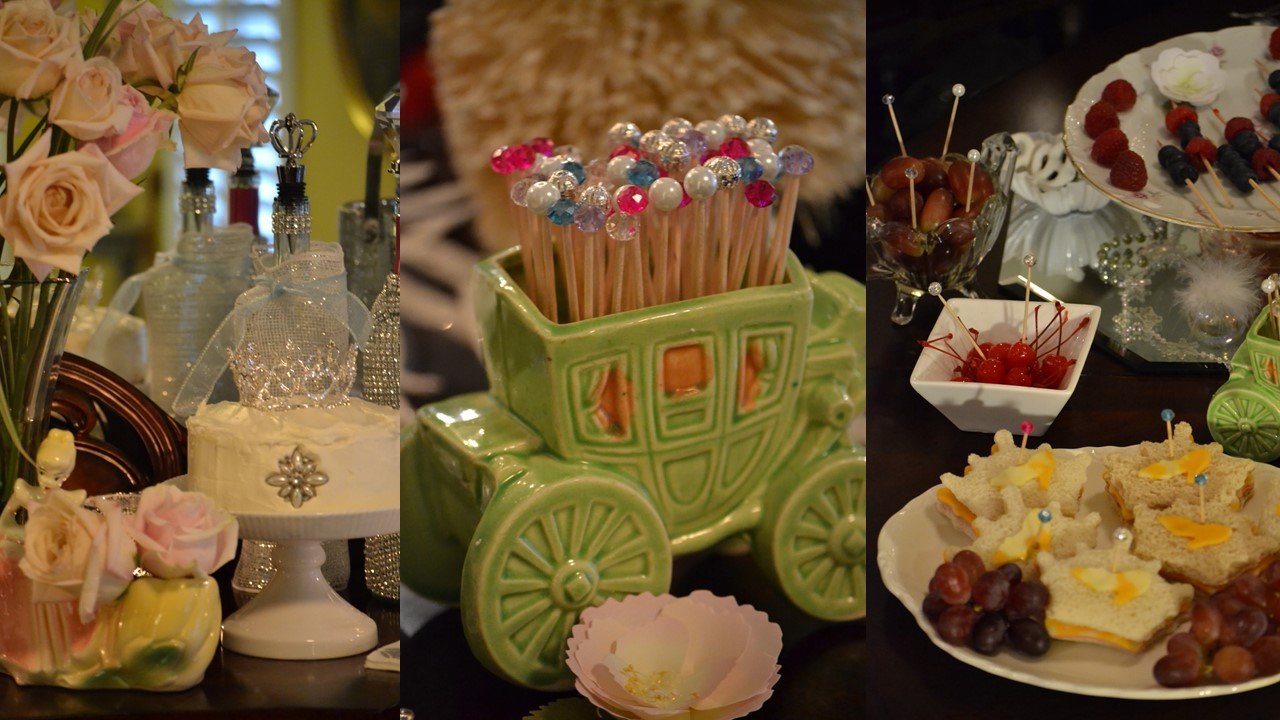
These photos were taken around Christmas for my Julie’s Cinderella Christmas
I had such a fun Cinderella Christmas that I wanted to extend it into my birthday so this page is a merging of the two. Here are a few party food ideas that you may like to try yourself. They are all simple. I don’t do anything complicated. I have also since added a few more things for our little, or big Cinderella’s that I think you just might like.

But remember this, most every country has their own version of Cinderella. I believe that is because that is how young women were treated. Therefore, Cinderella is not a color, or a race, or a country. She is anyone. I just happen to be paying tribute to our most famous Disney Cinderella. The one that I grew up with.
Julie Lancaster-Whann
————————————————————————–
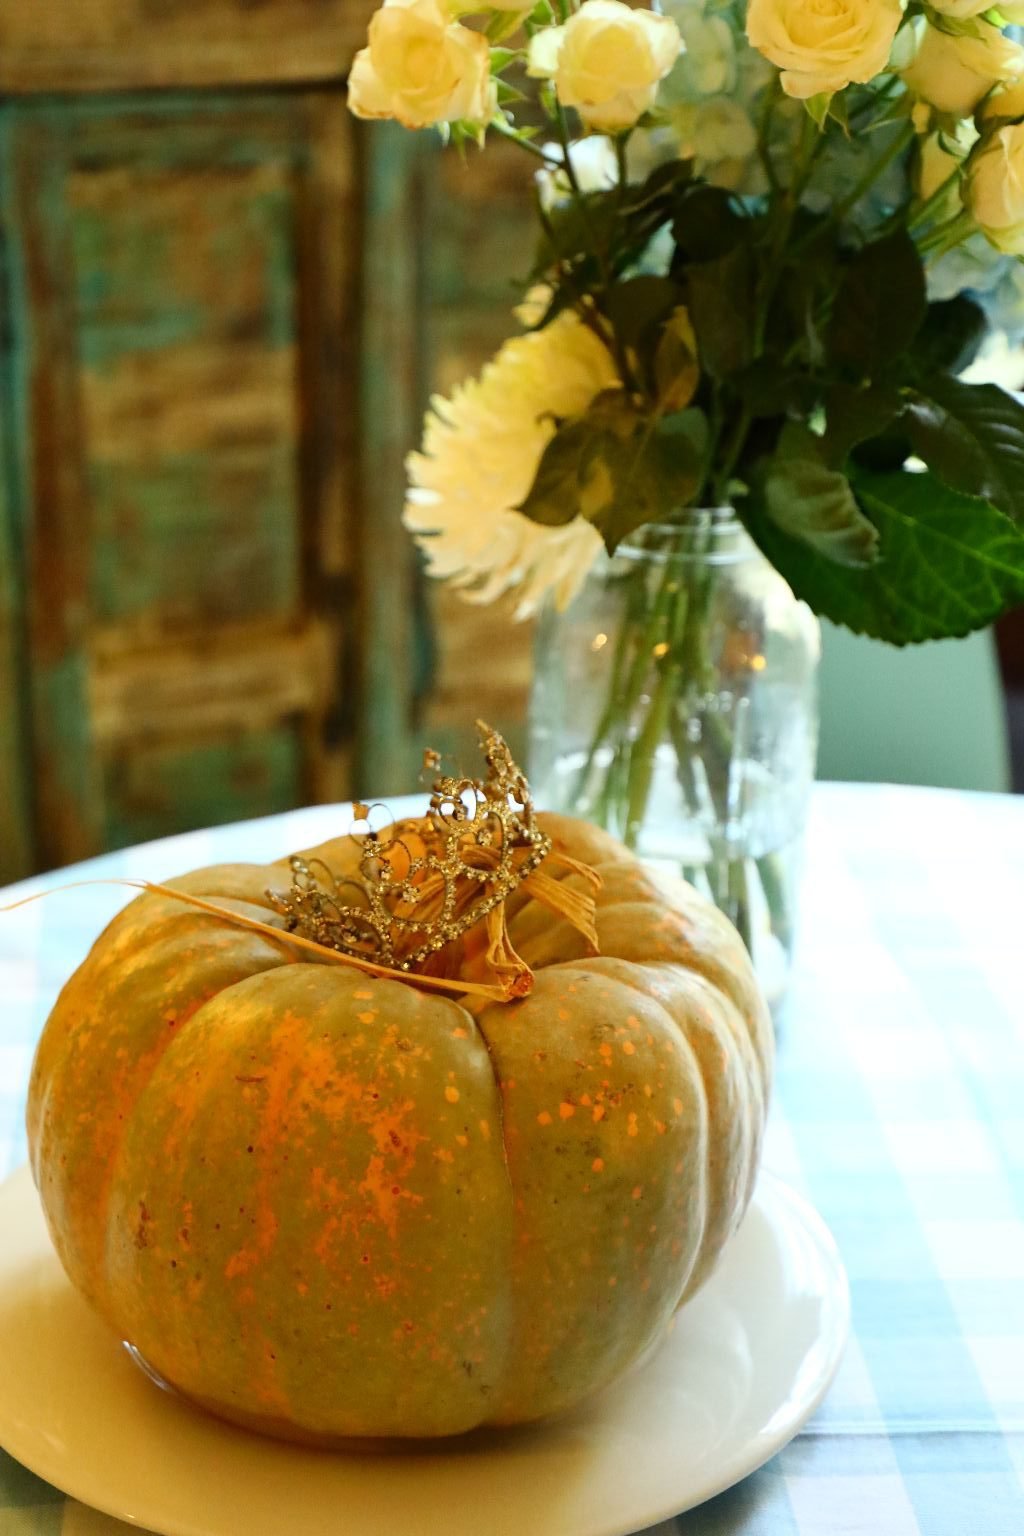
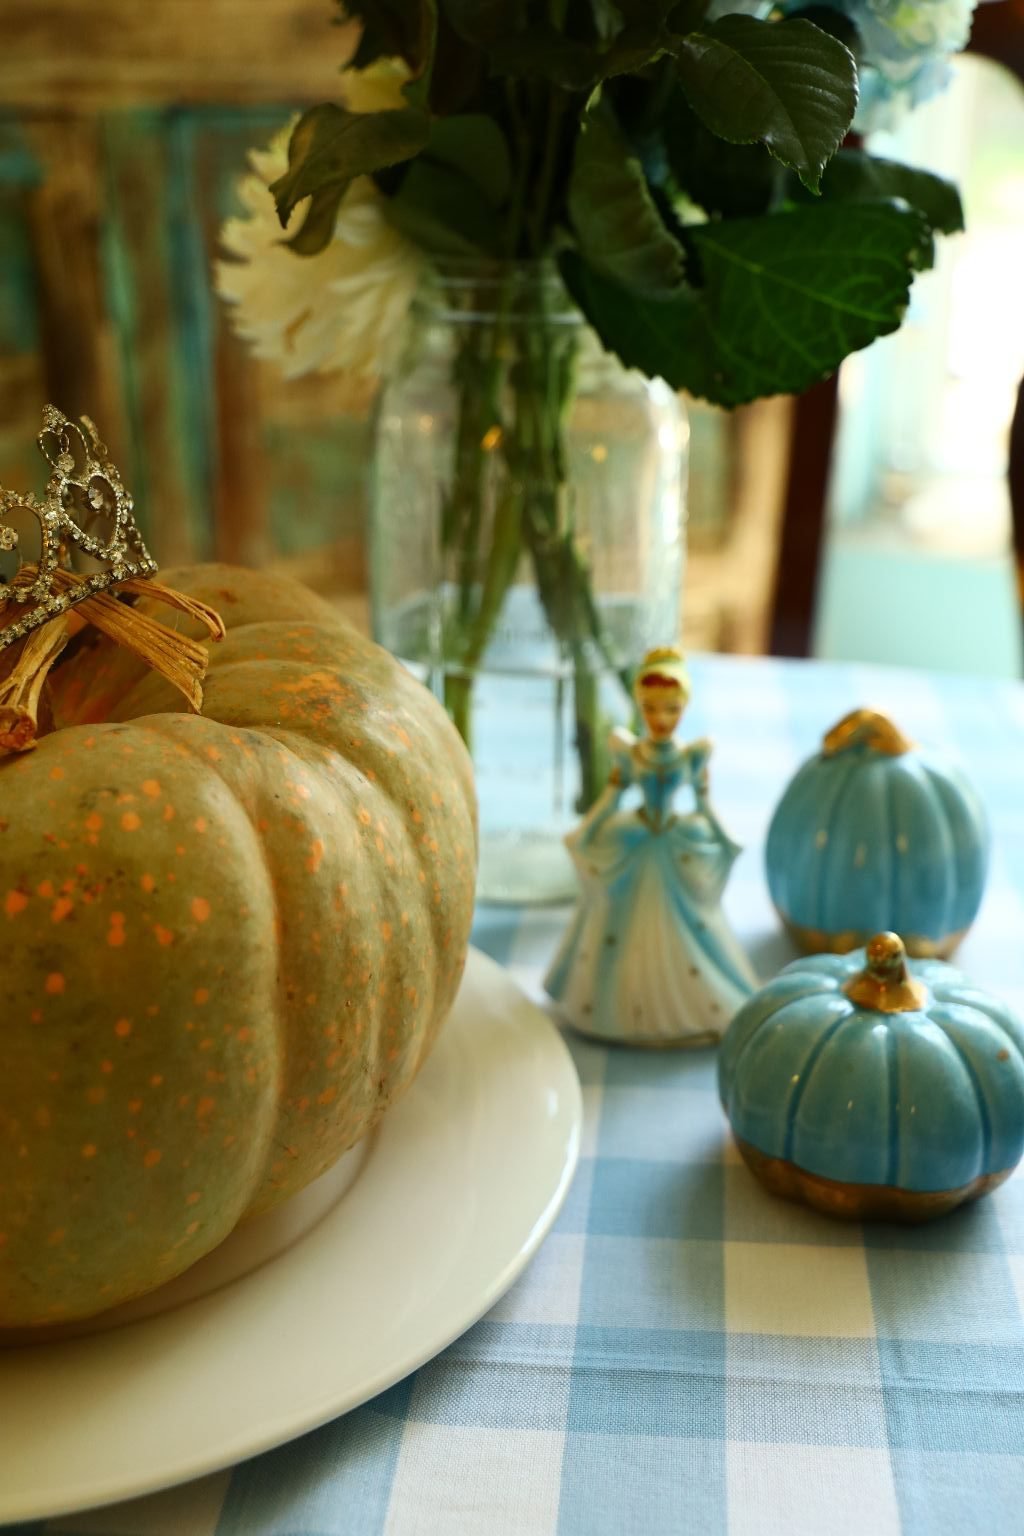
Our Royal Pumpkin
(It wouldn’t be Cinderella without a Pumpkin, now would it?)
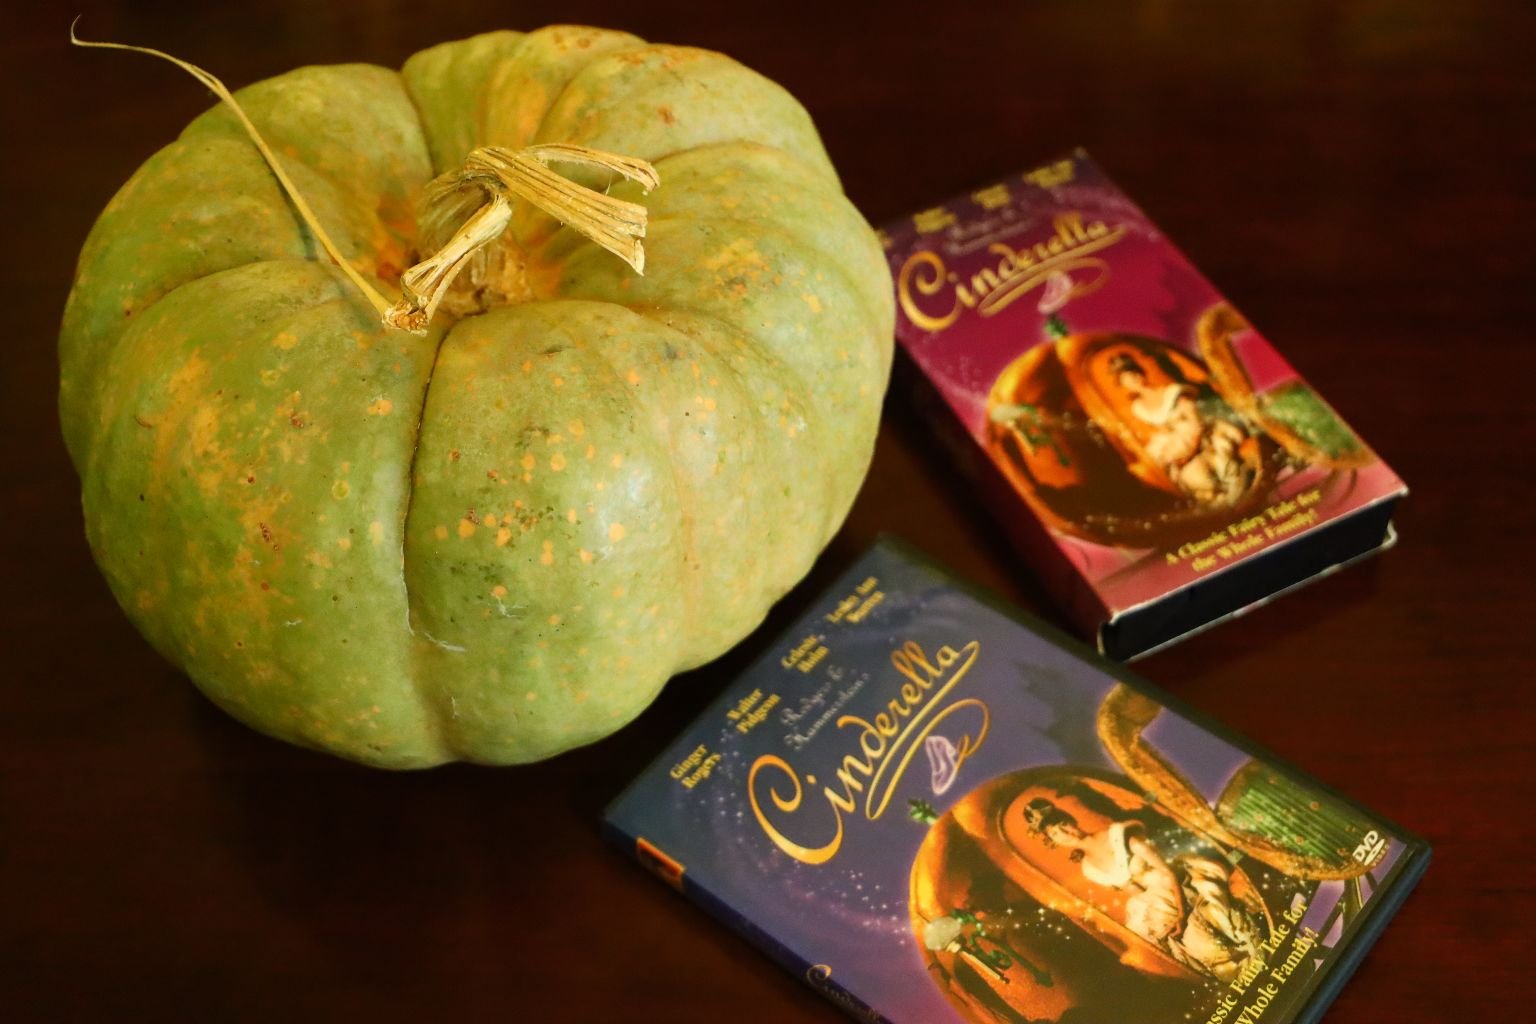
1965 Rodgers and Hammerstein’s Cinderella
Starring a 16 Year Old Lesley Ann Warren
(A favorite movie night of mine.)

——————————————————-
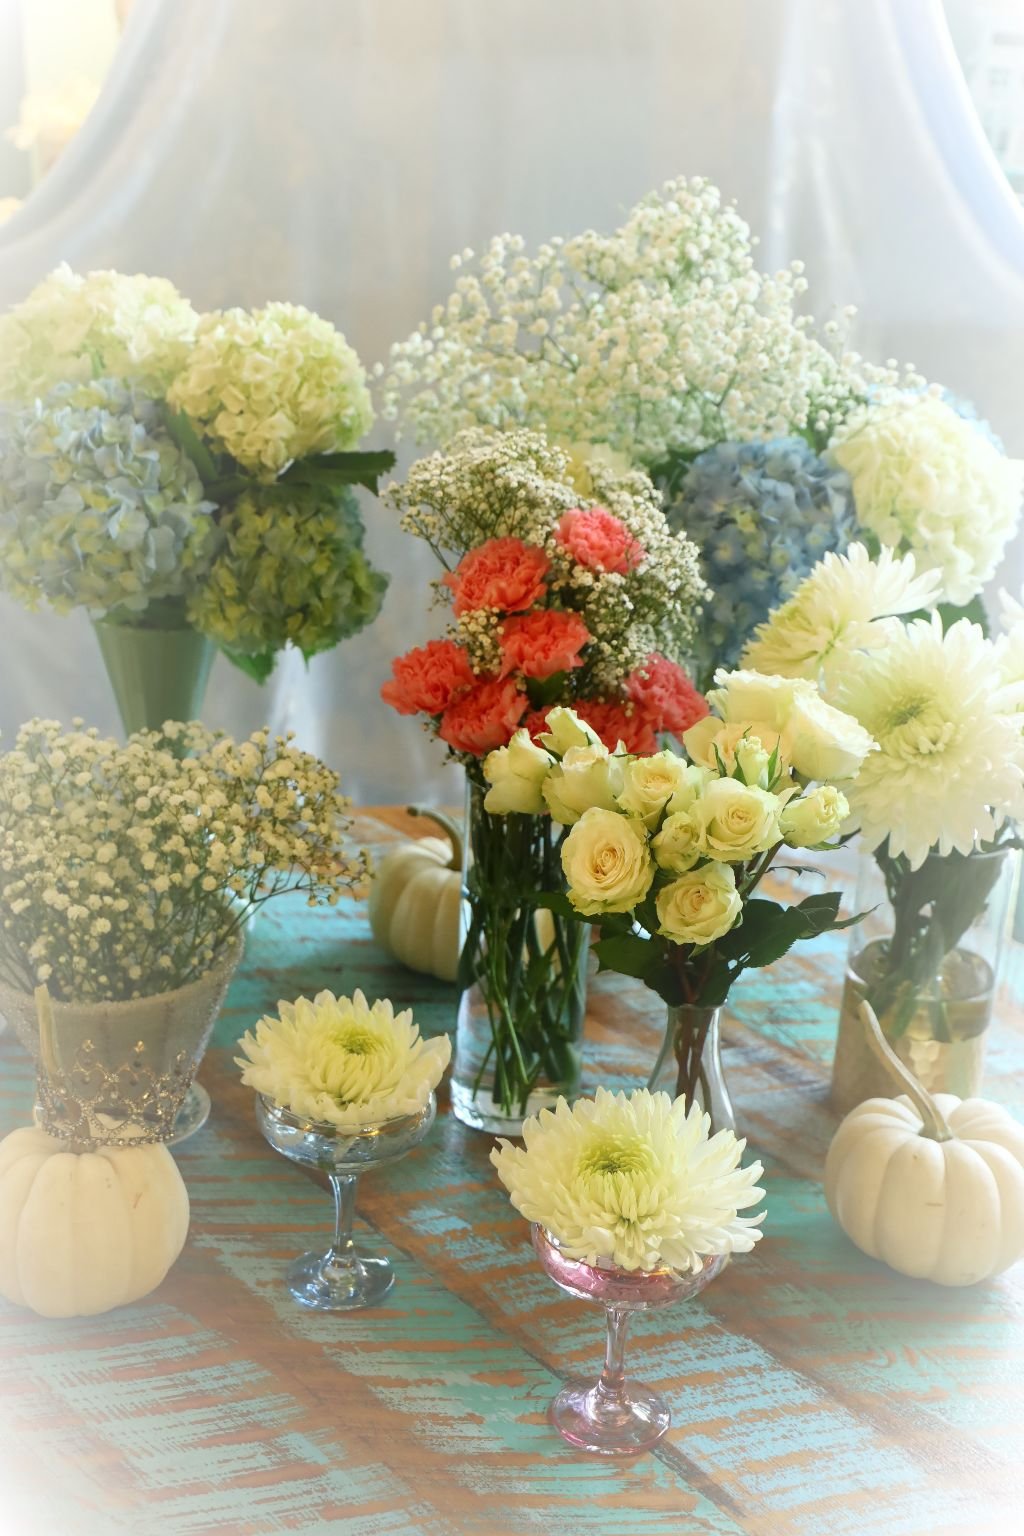
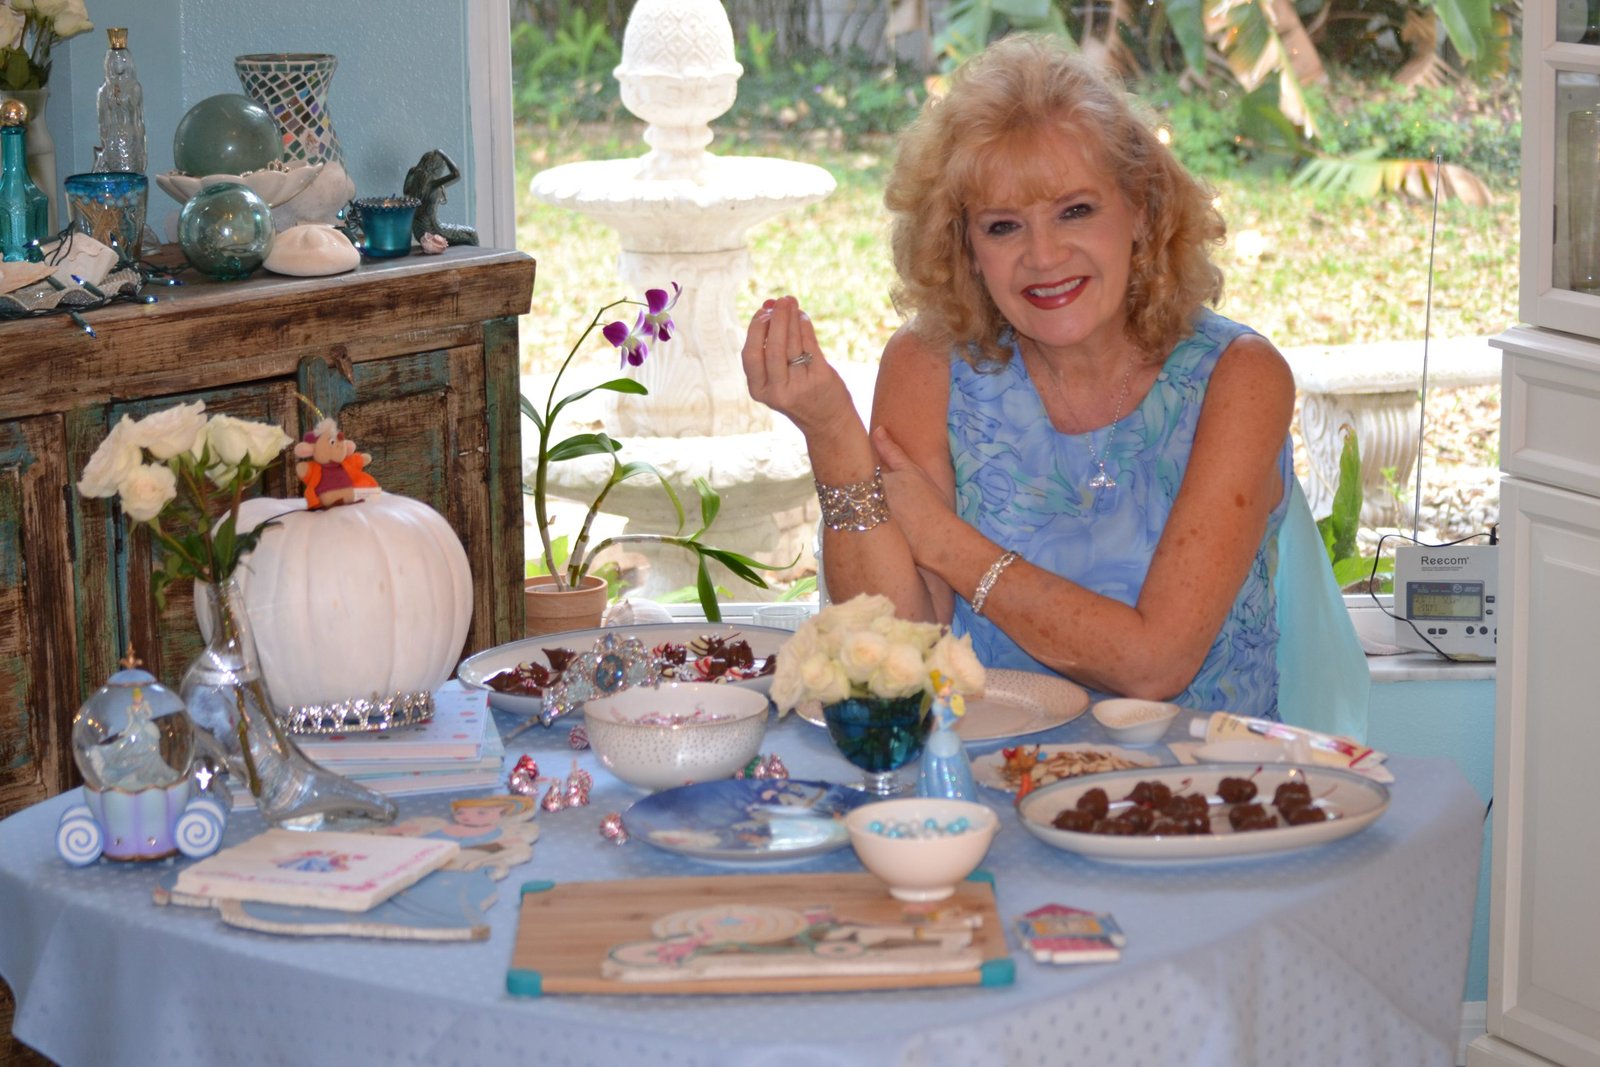
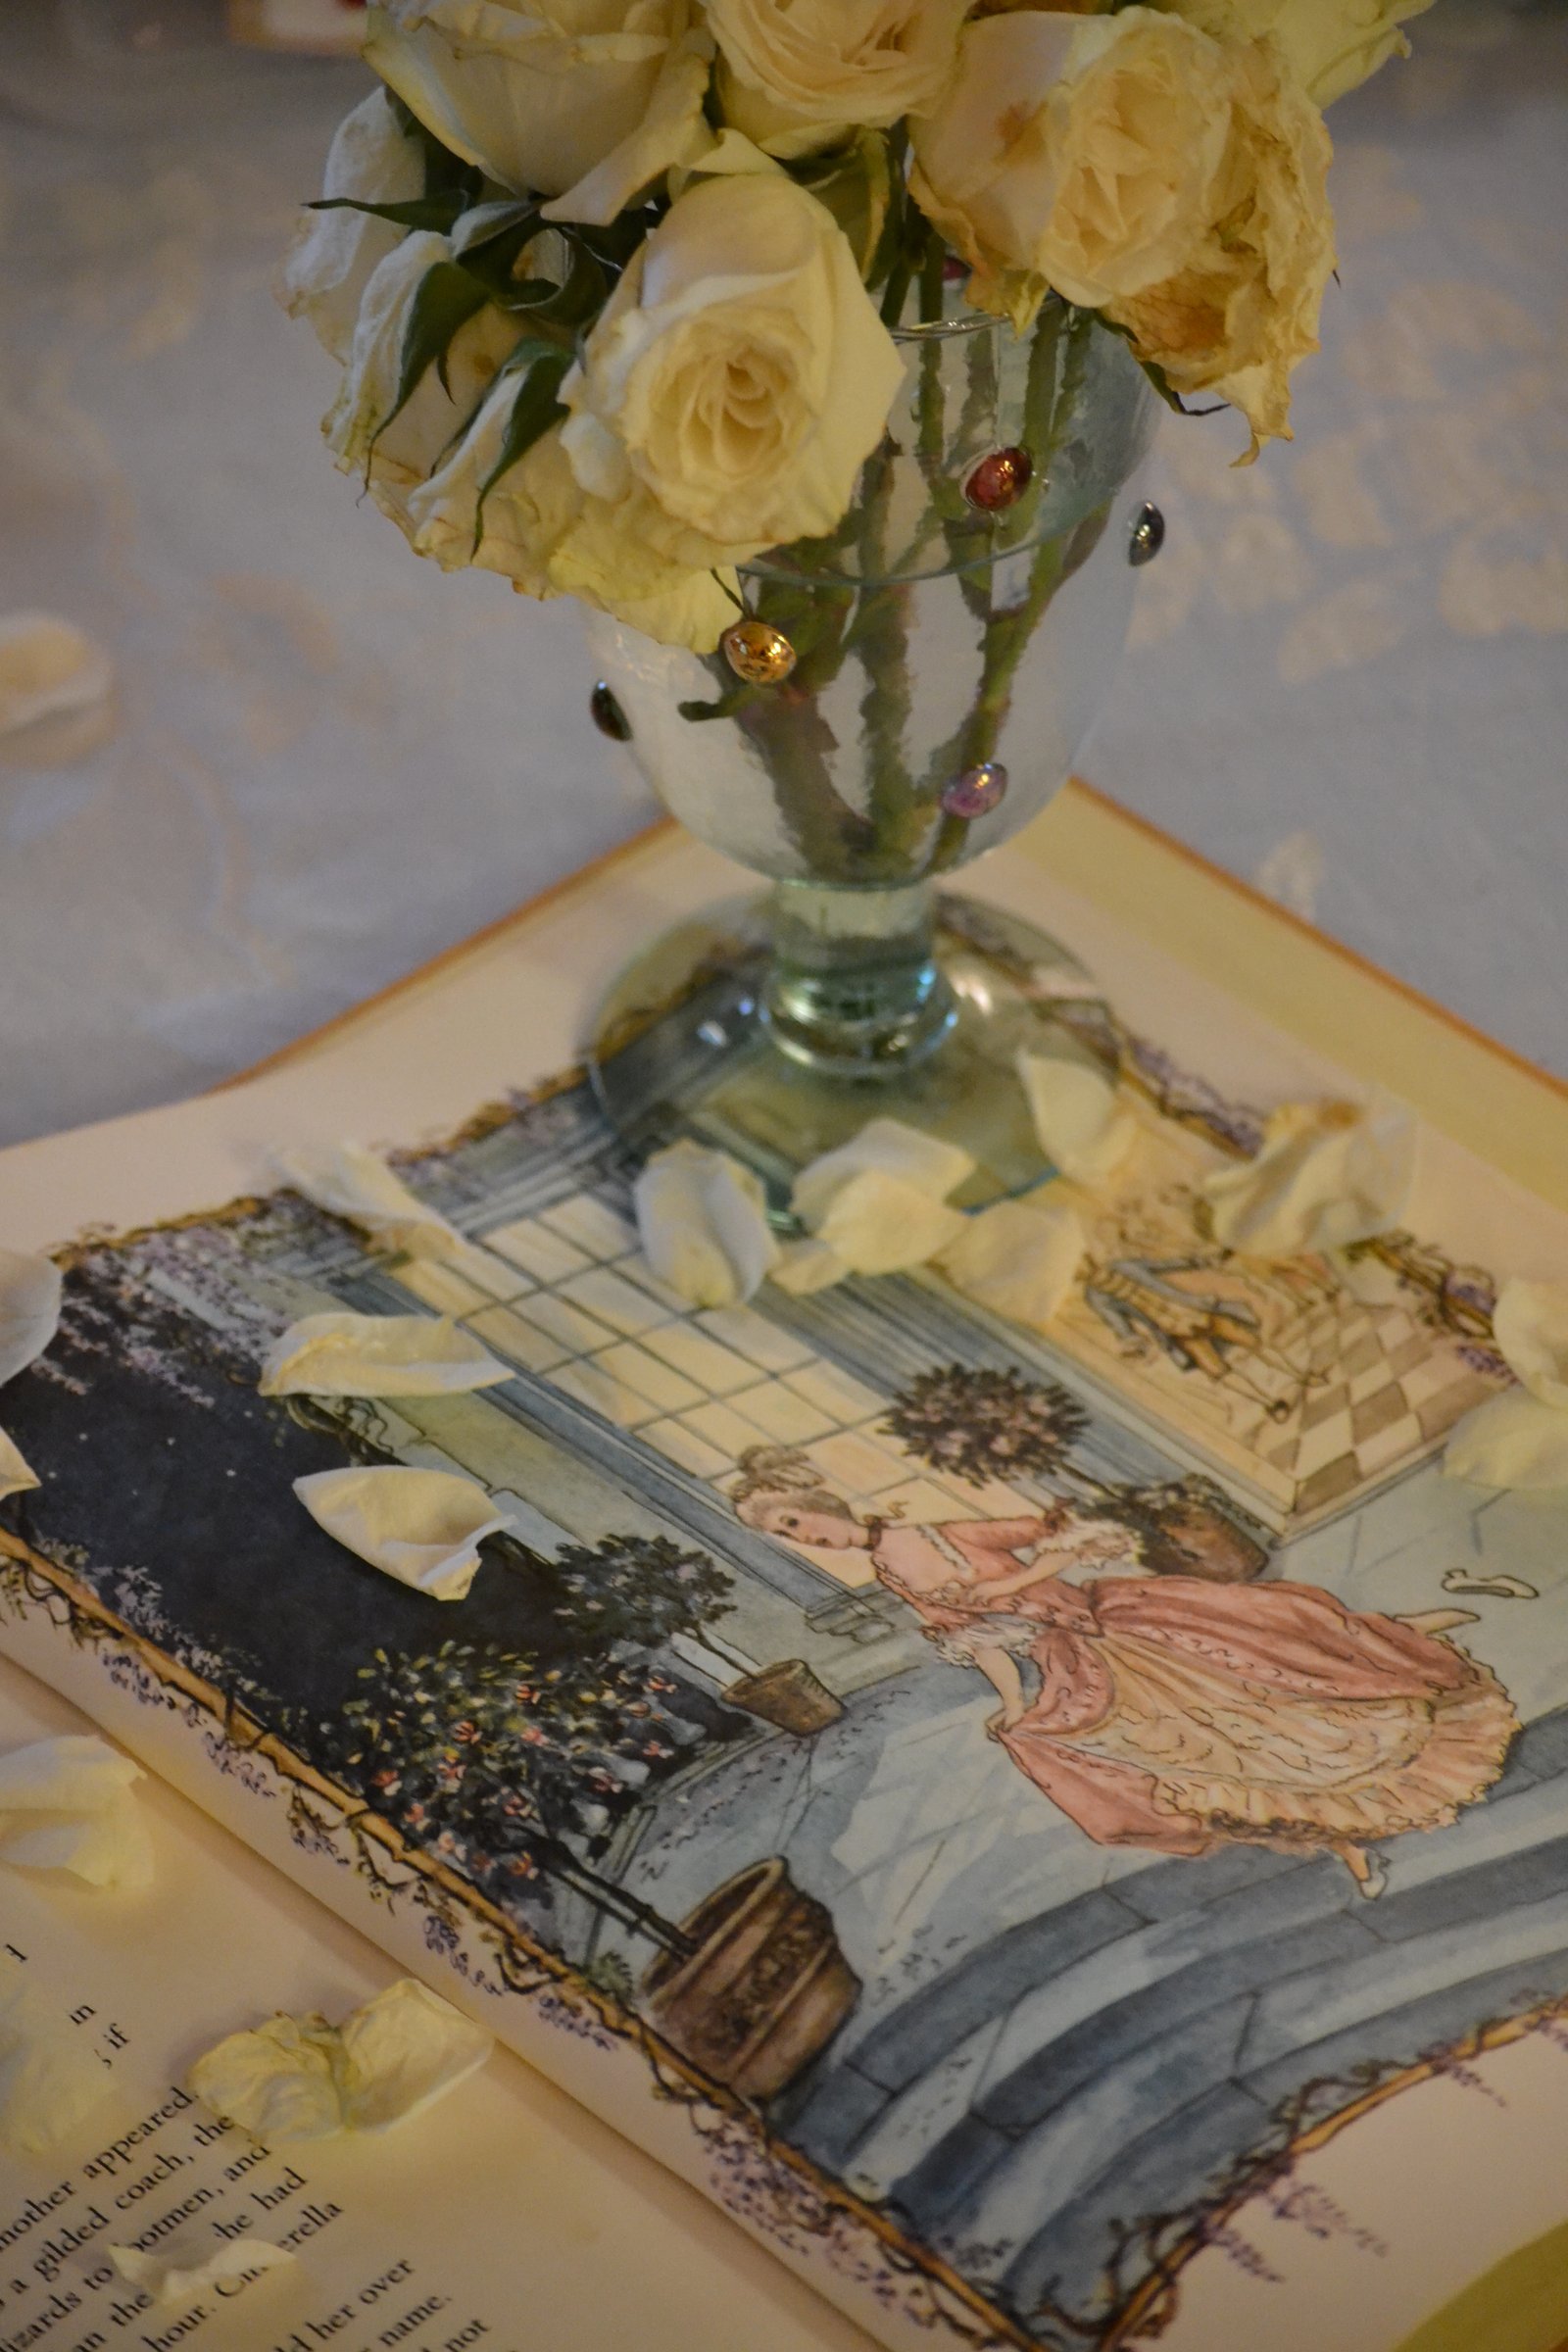
For those of you thinking about having some sort of Cinderella Party then I have a few ideas for you to try. And as always, nothing will be costly. All of the beautiful flowers you see here probably totaled about $30.00 from my local grocery store. And all the vases and wine glasses you see, I purchased from thrift stores for just a few dollars each.
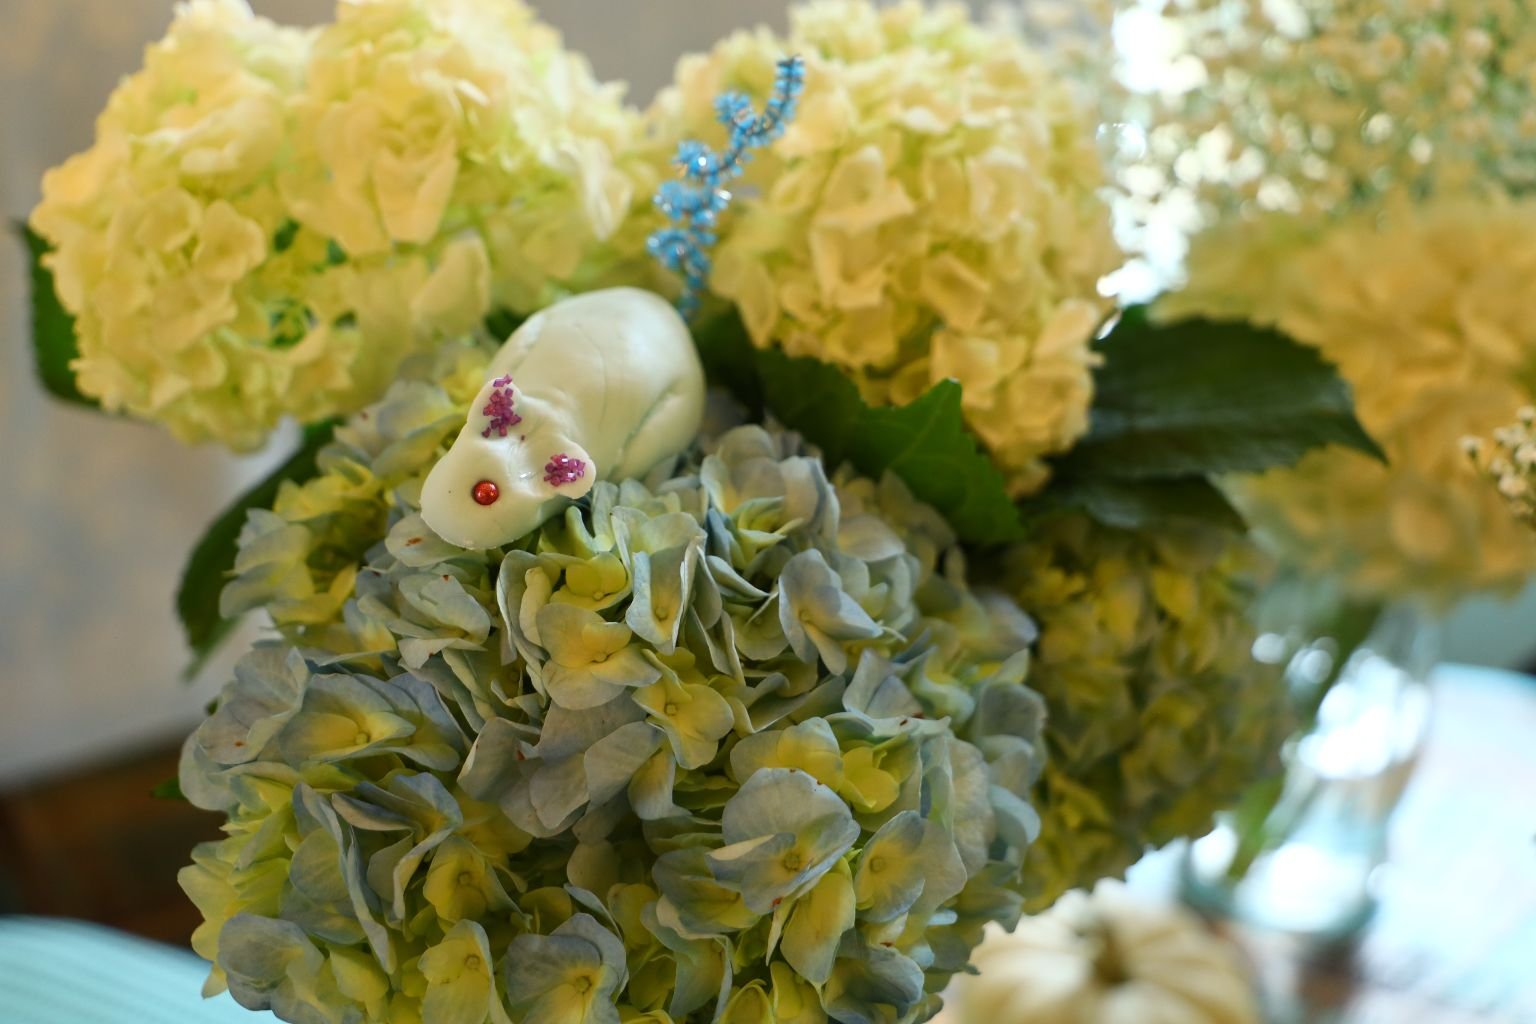
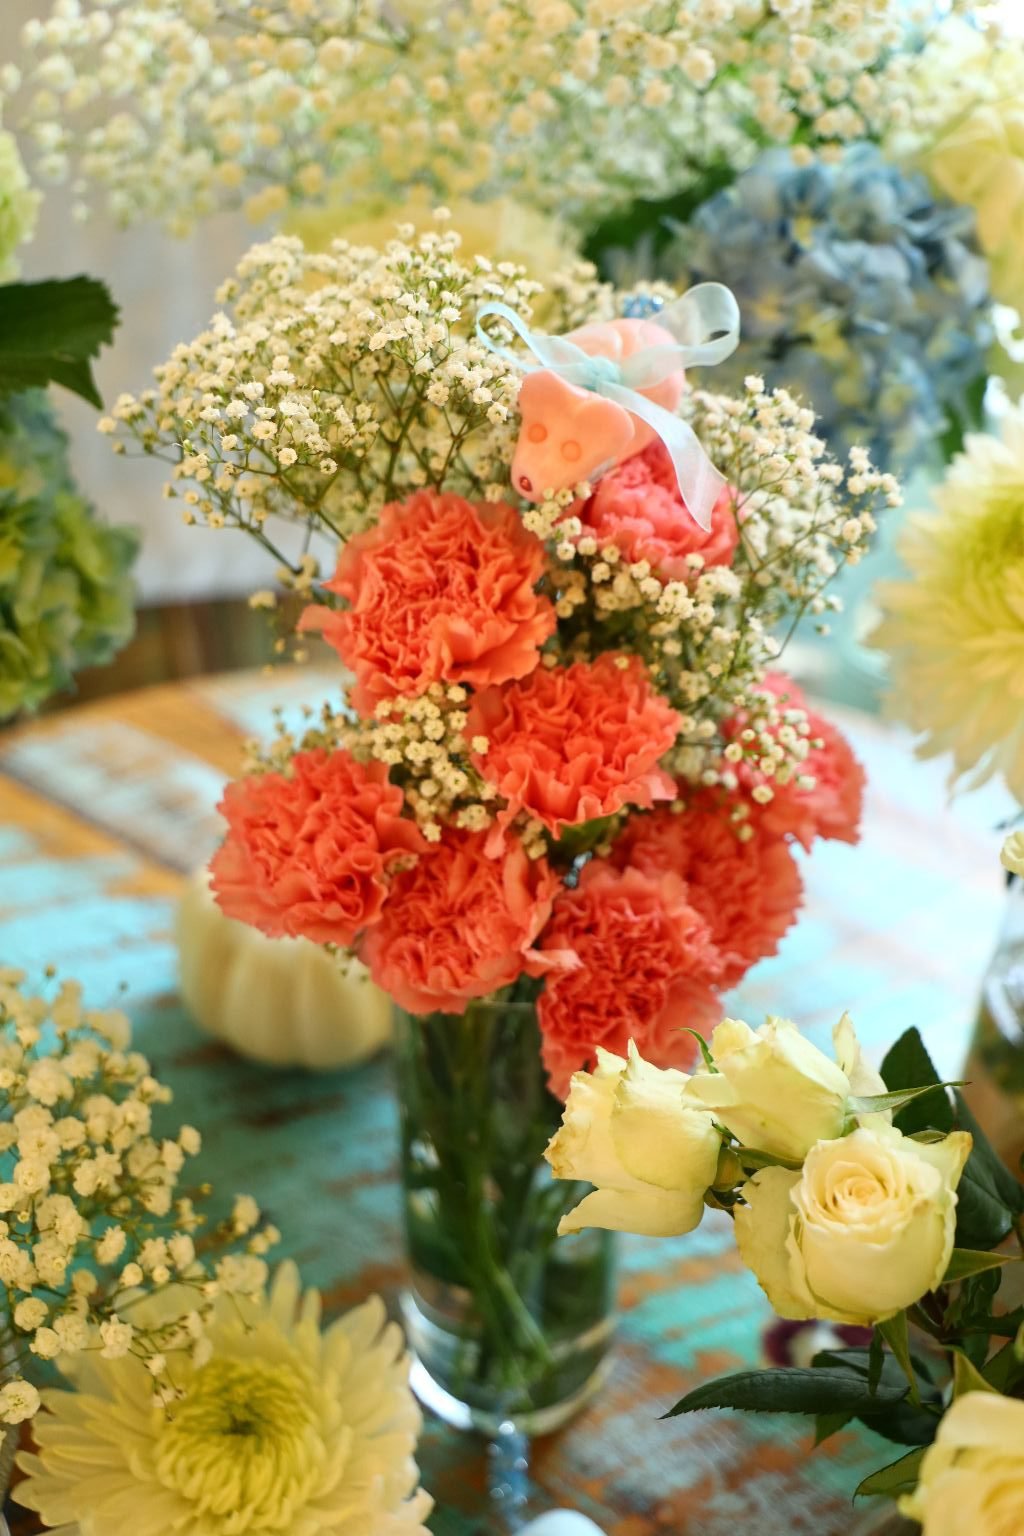
Find the Sugar Mice Hiding in the Flowers
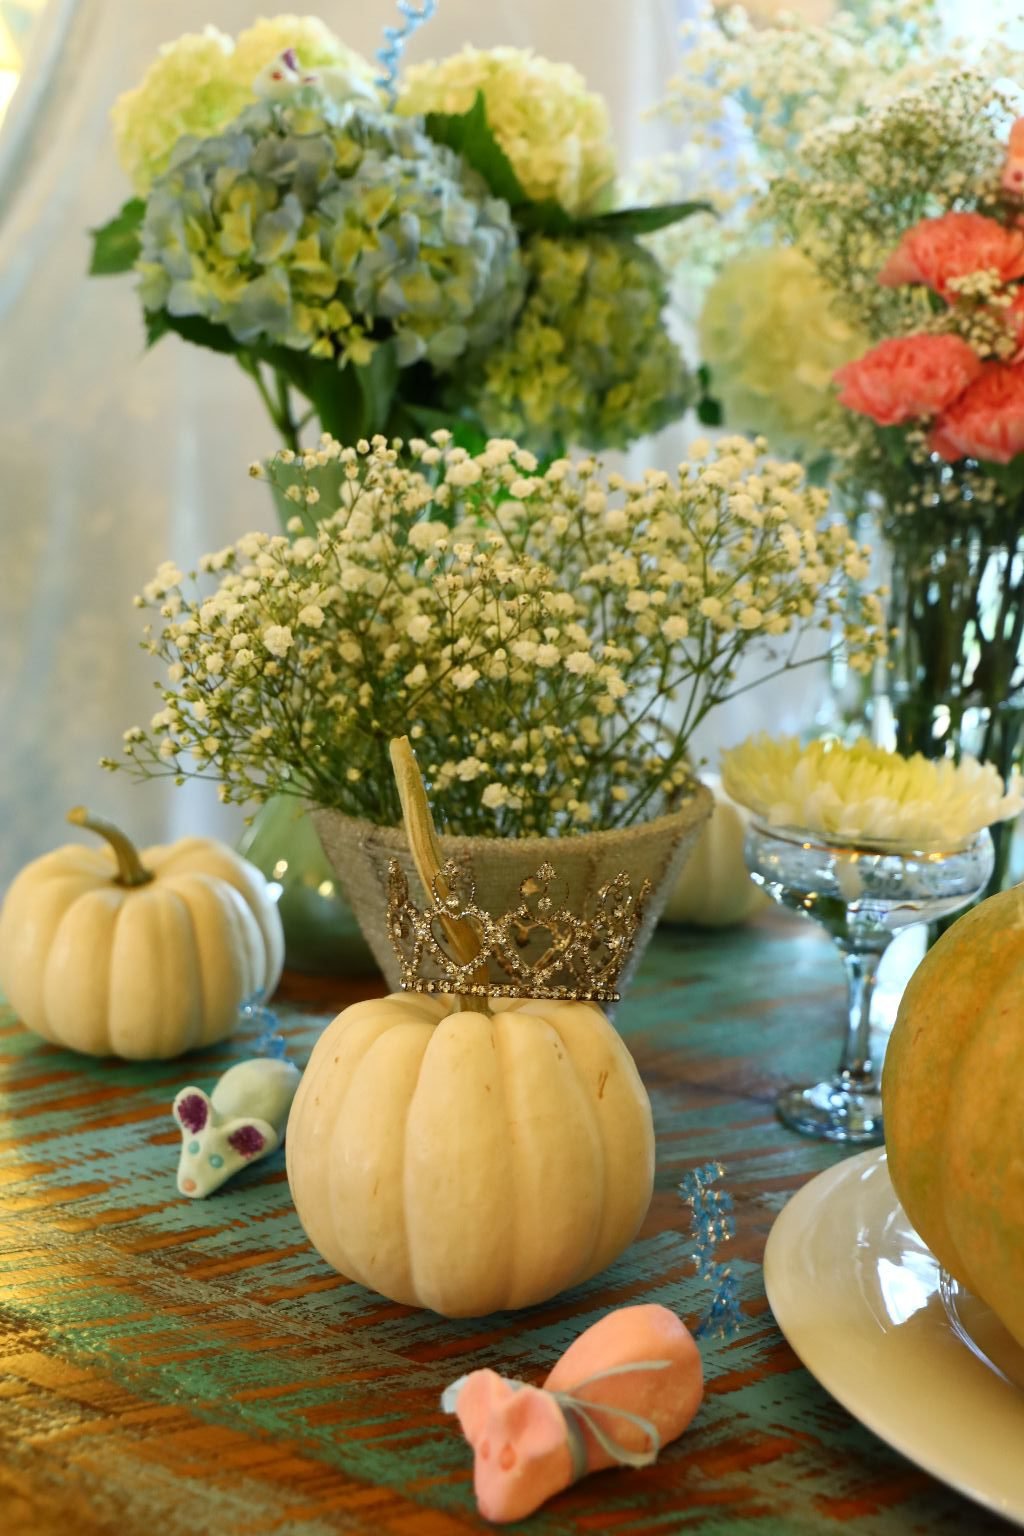
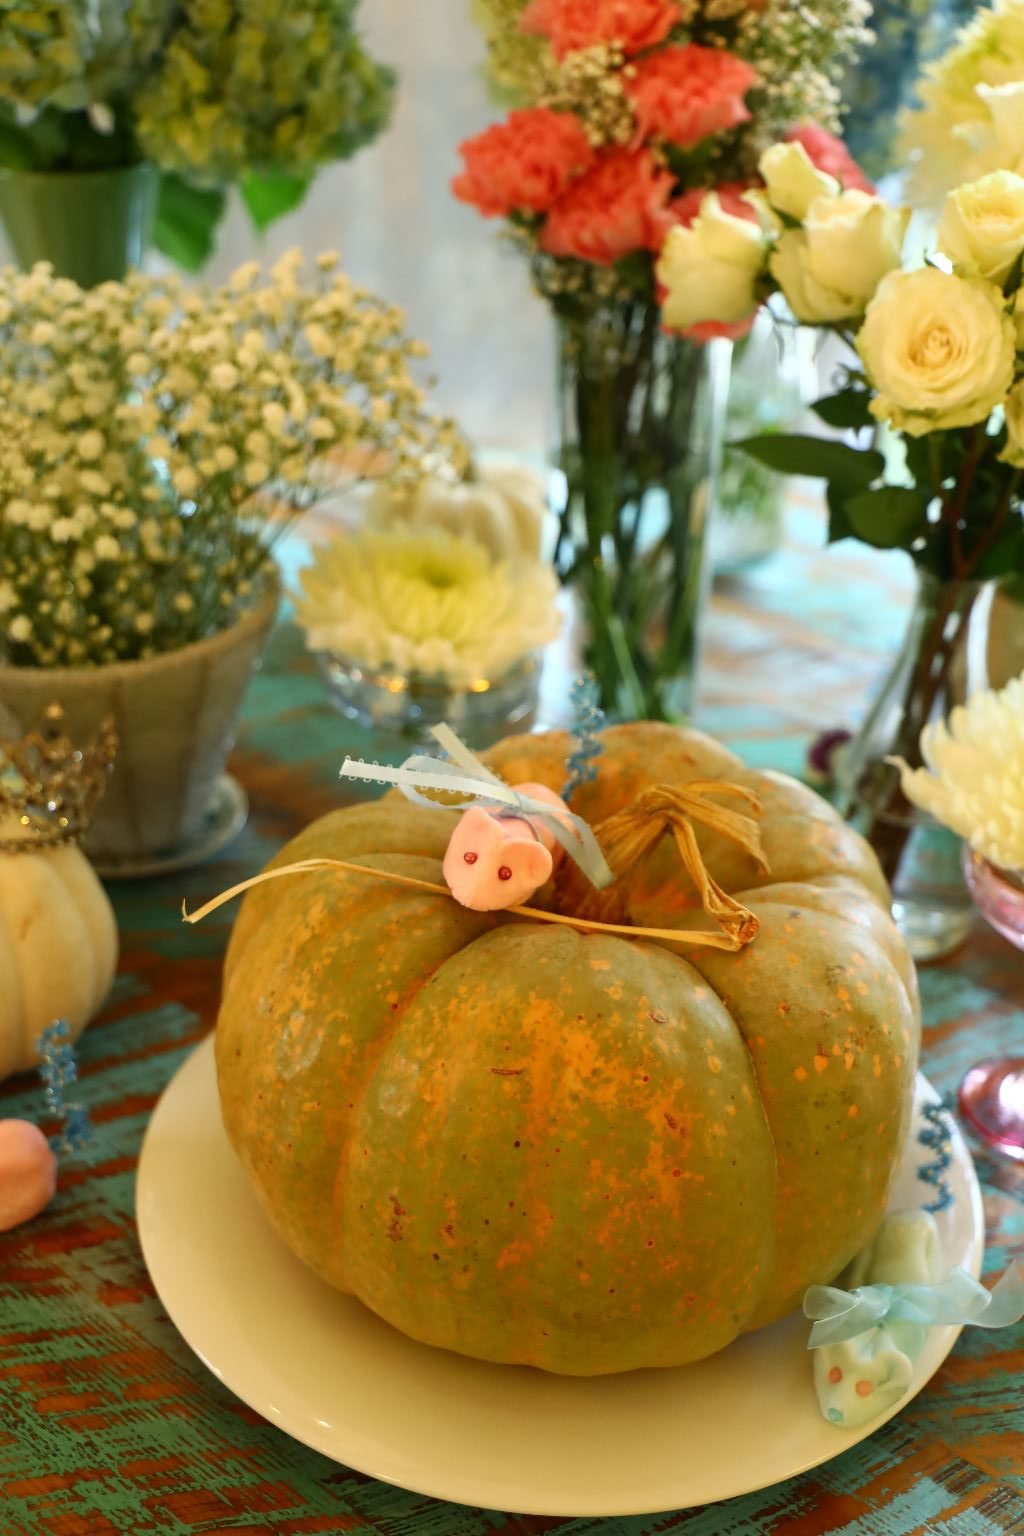
And yes, we will be making Sugar Mice. I’ll show you how.


As always I like a nice presentation of a craft or food table.
It really does put me in the mood for the project.
Just a few of my favorite Cinderella things.
JULIE
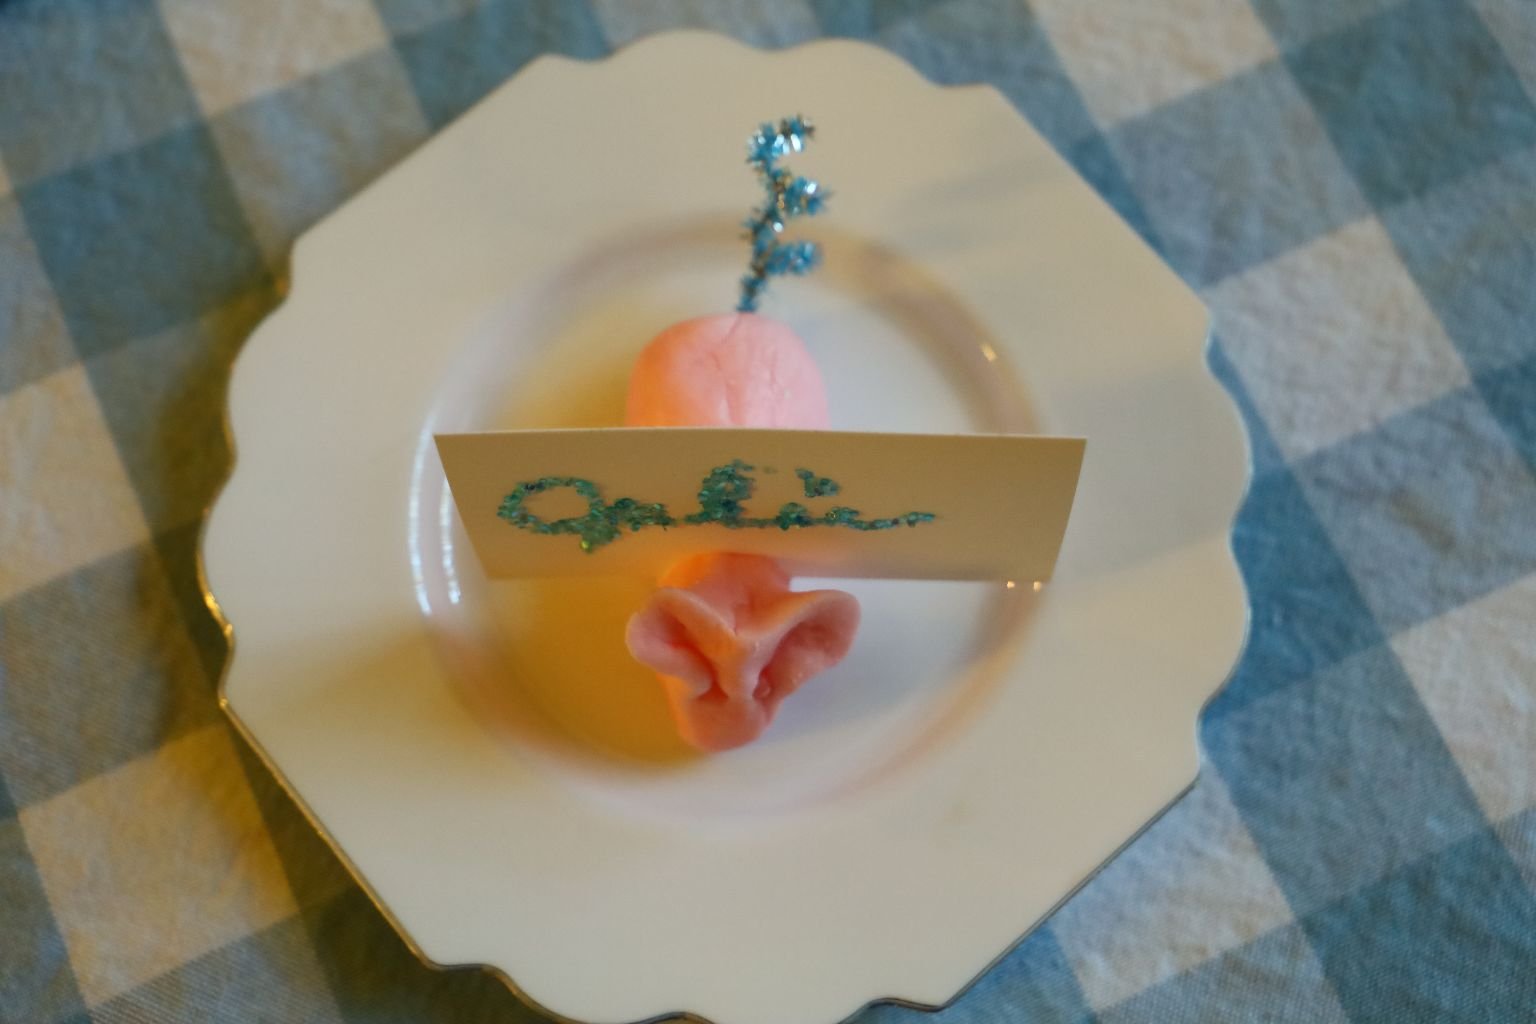
My Sugar Mouse Place Card Holder

Making the Sugar Mice
They are so cute!
I will show you how to make them. Recipe is at the bottom of this post.
(Notice the V-shaped ‘vase’ in the photo above, left? It is actually a beaded lampshade that I bought for about $2.00 at a thrift store. I simply placed a small bowl inside of it with water and placed the Baby’s Breath in it.
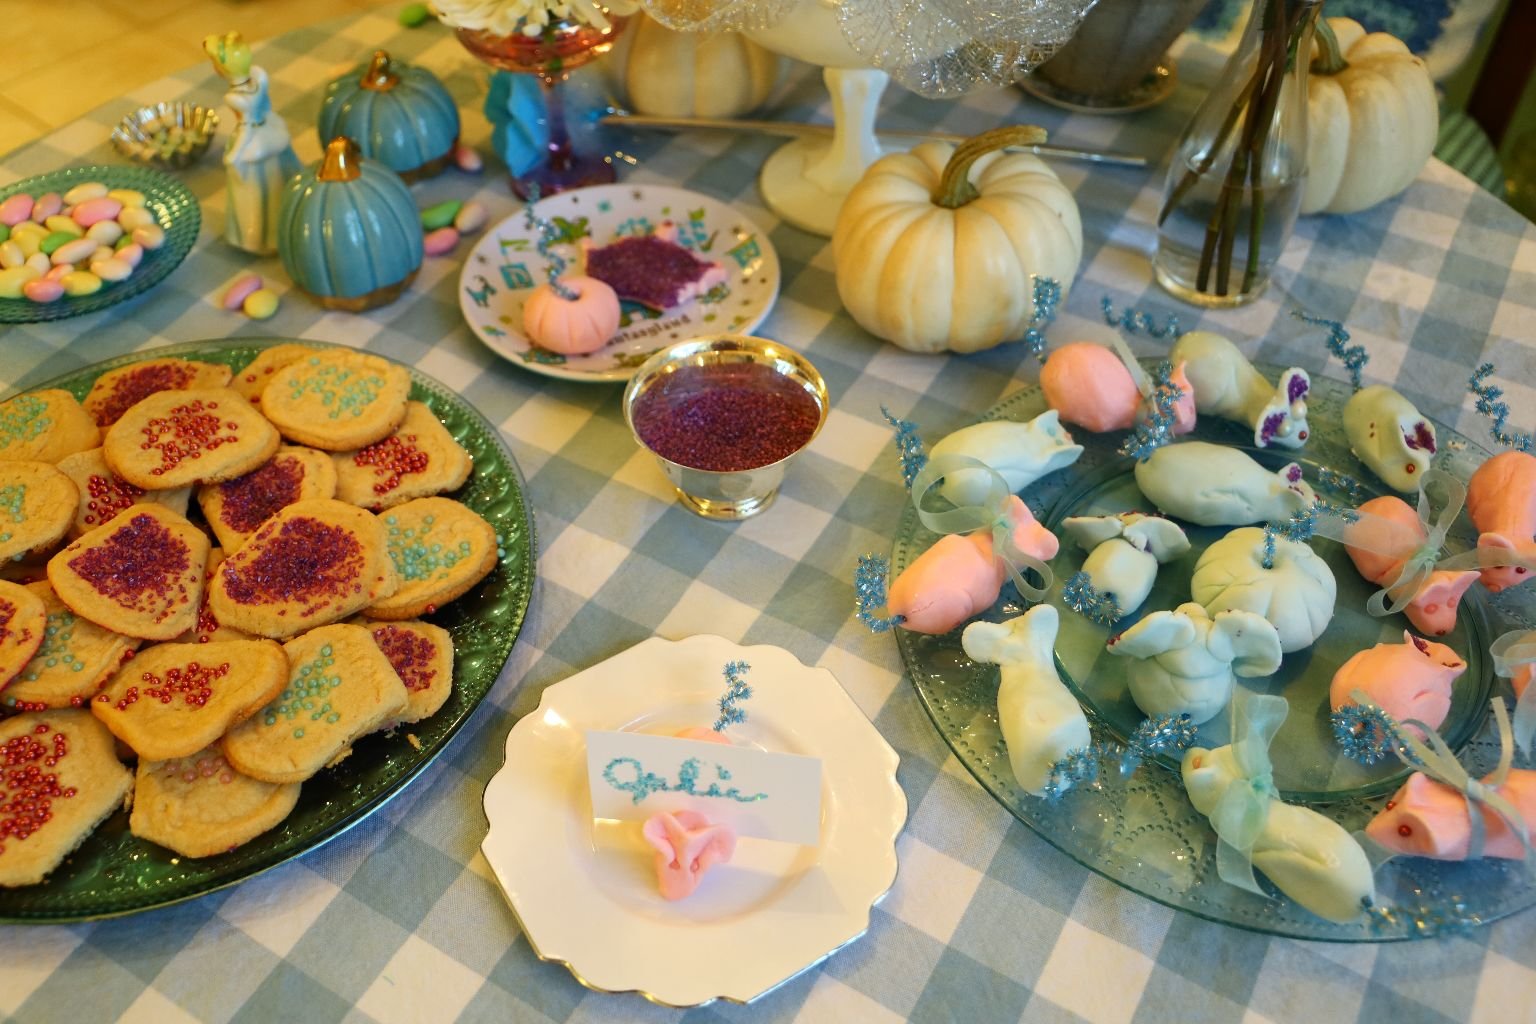
I also made very misshapen cookies.
I never said I was a perfect baker. 🙂
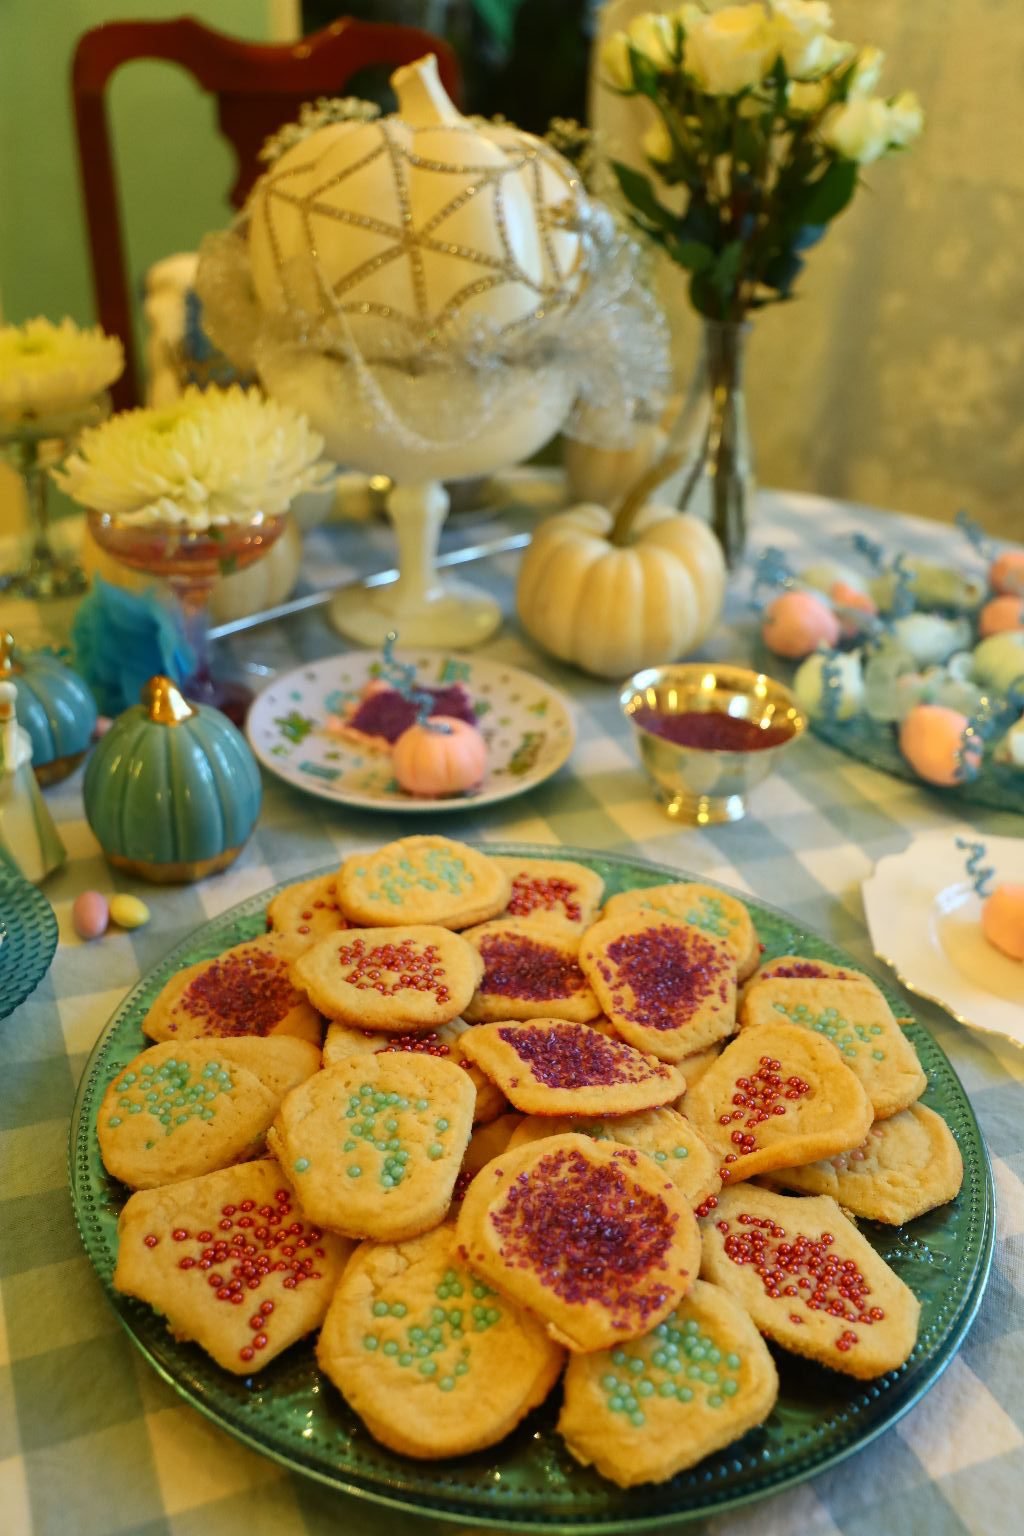
Who Says Cookies Need to be Round Anyway?
———————————————————
I have many Cinderella pages that you just might like:
Click Here For: Julie’s Cinderella Christmas

And….
Click Here For: Julie’s Cinderella Sequel

(See Bottom of Page for More Cinderella Pages.)
———————————————
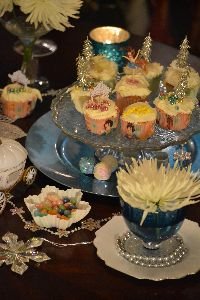
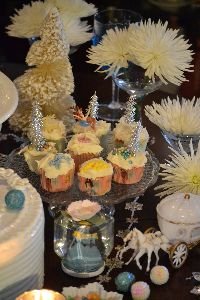
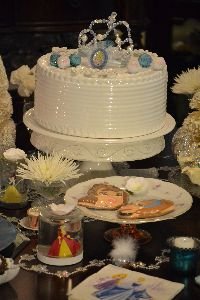
Cinderella Cupcakes, and Cinderella Appetizers
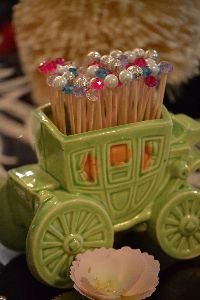
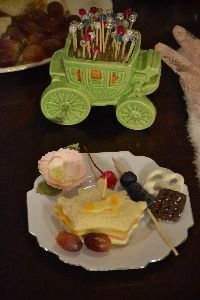
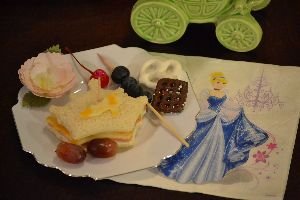
Beautiful Carriage Cocktail Picks
The party picks are just beads glued to the ends of toothpicks.
The cute carriage is a vintage planter of mine.
My plate above I bought a set of them at Tuesday Morning.
They are very pretty and reusable plastic as well.
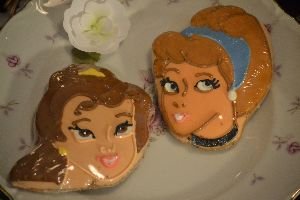
The Belle and Cinderella cookies I did buy at The Magic Kingdom park at one of the sweet shops.
————————————————————-
These are some photos from my Cinderella Christmas
——————————————————–
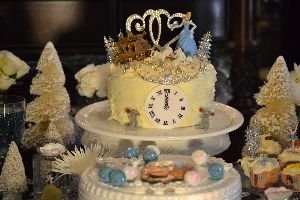
Don’t forget Cinderella, the party is over at Midnight!
——————————————————————
Cinderella Appetizers
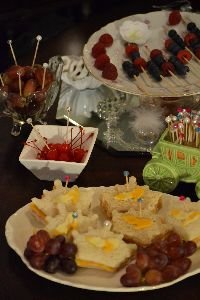
Princess tiara sandwiches, with healthy delicious fruits.
Grapes, Blueberries, Raspberries, Cherries
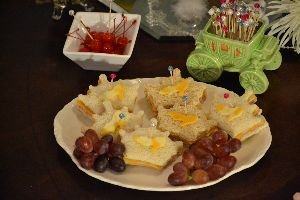
Princess Sandwiches
(easy to make)
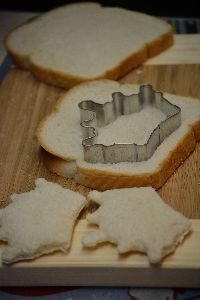
You just need a tiara or crown cookie cutter, or anyone you would like to use, and some sandwich bread.
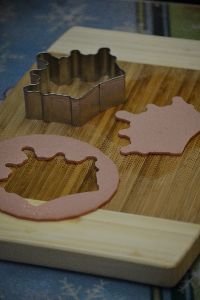
Use the same tiara cookie cutter to cut out tiara shapes in some turkey bologna, like so.
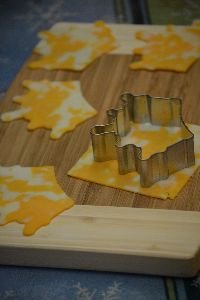
I also used the tiara cookie cutter to cut slices into some cheese.
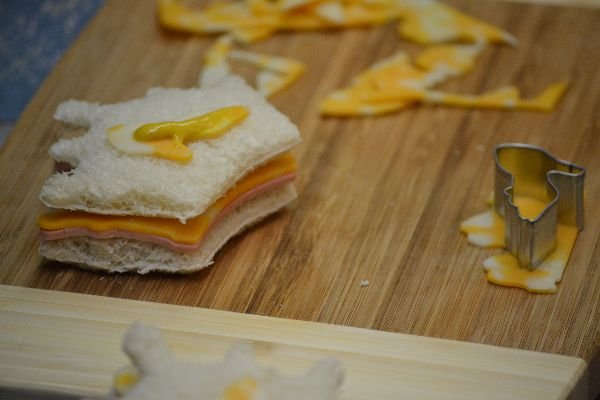
All you then have to do it to put all three together. The bread, bologna, and the cheese.
They are all the same size after all.
I used a small glass slipper cookie cutter to cut out a small piece of cheese to add to the front of the sandwich, adhered to by yellow mustard.
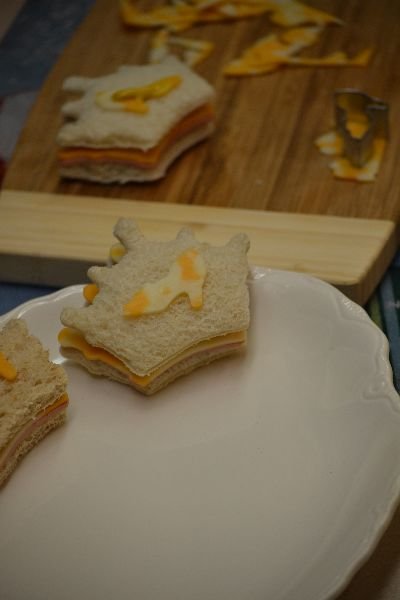
Now Plate Them All
—————————————————————-
—————————————————————————
Also Check out Julie’s Cinderella Birthday: Click Here!

———————————————————-

Click Here For: Julie’s Cinderella Sequel
If you would like the recipe for these delicious cookies.


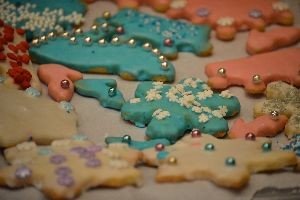
Cinderella Cookies
Colorful Frosting’s and Dragees

———————————————-
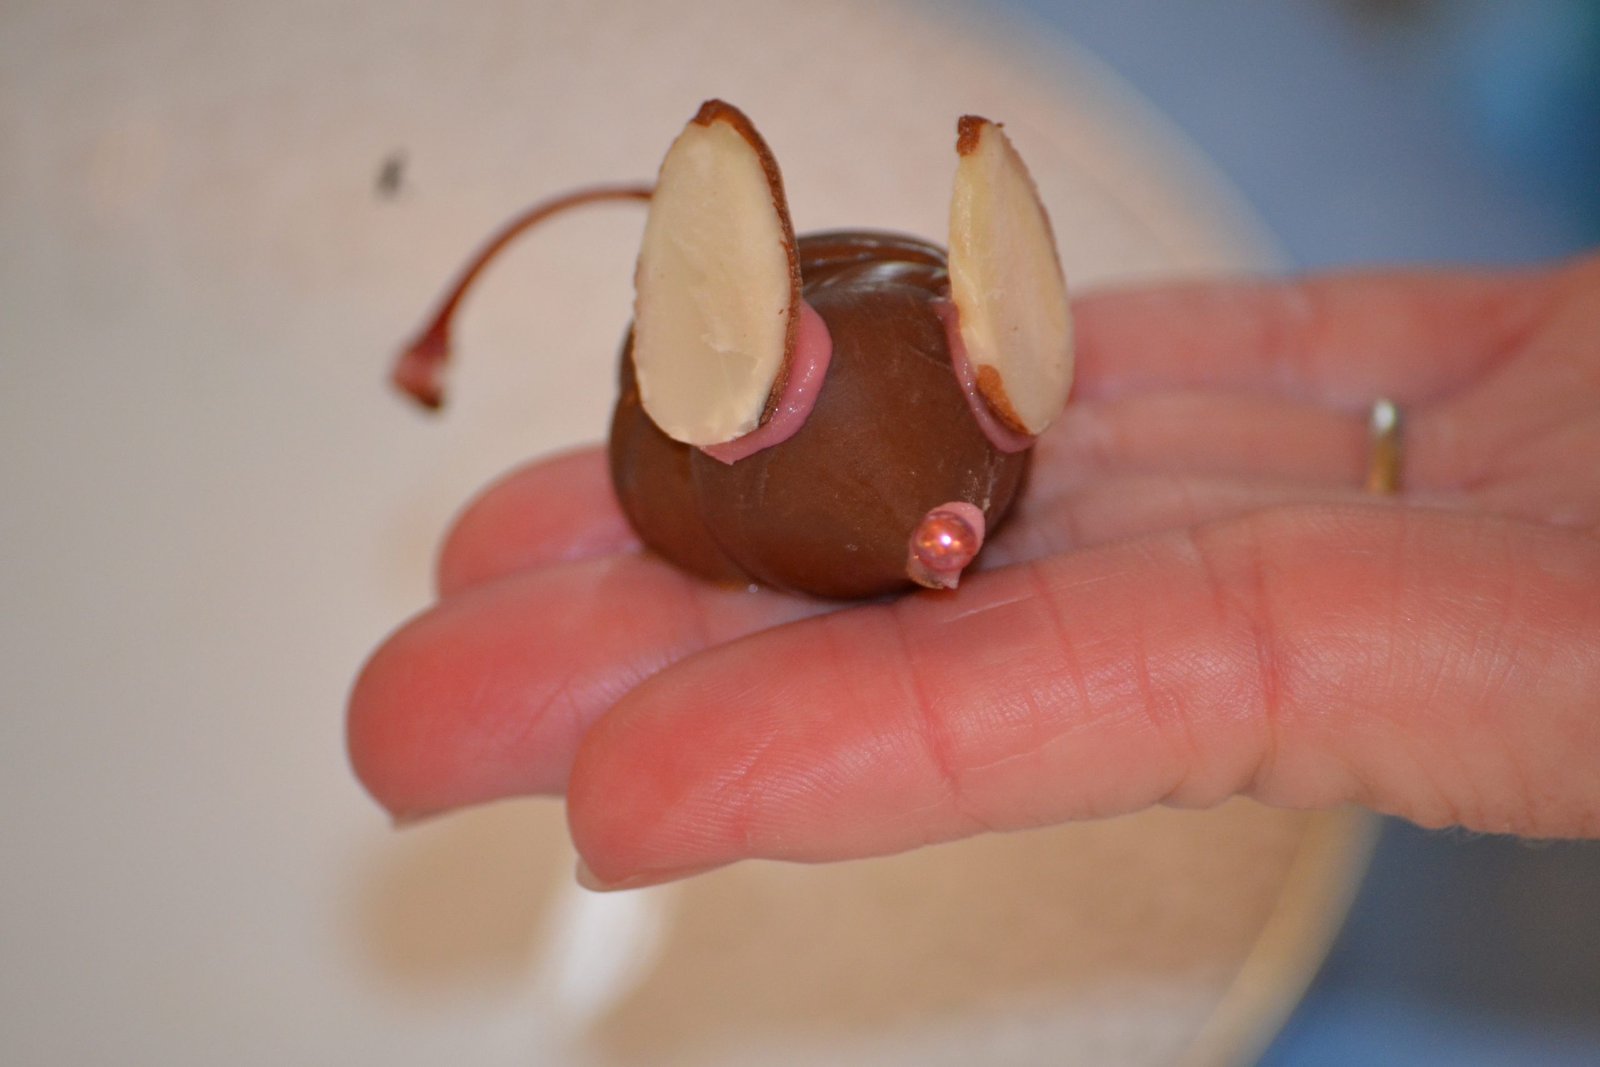
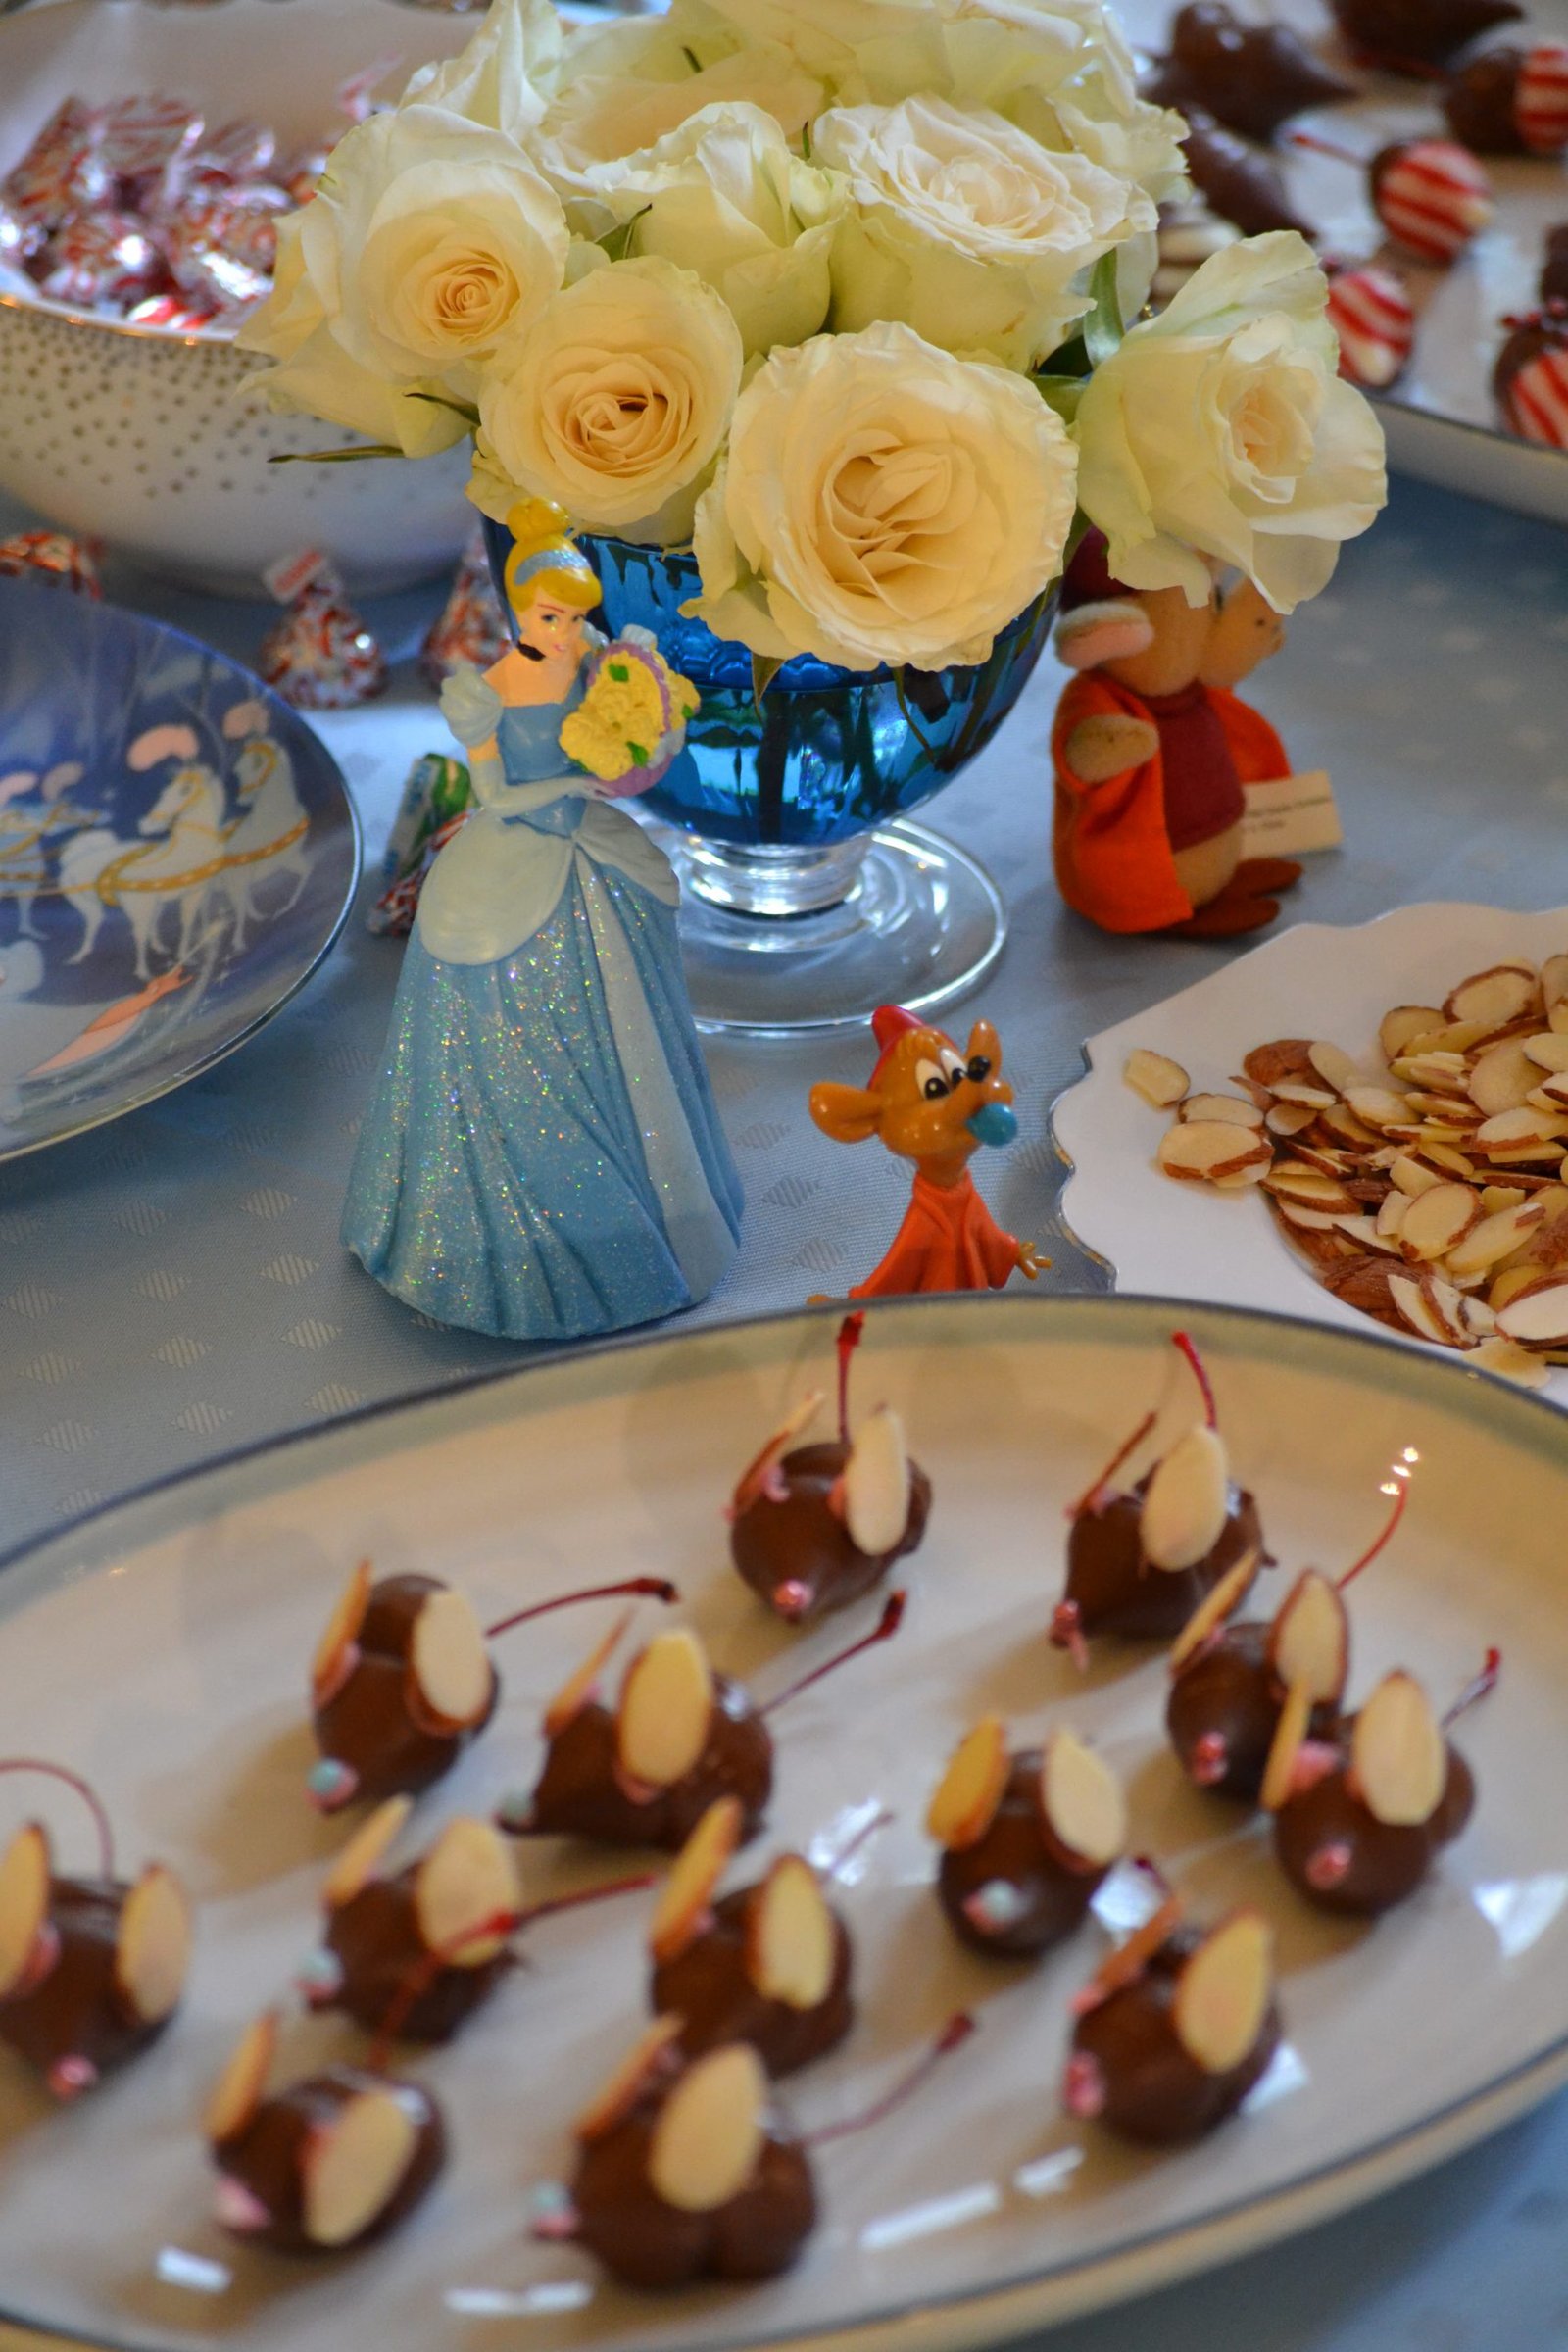
Cinderelli’s Chocolate Mice


Cute Little Mice w/ a Hot Chocolate (Yum!)


This is Sooooo Cute!

——————————————————-


Setting the Table for my Chocolate Mice Project

I do so love to set a table with pretty in theme items to help put me in the mood for whatever project I may be working on. I was so excited to be working on this.


Here I am removing all the paper from the individually wrapped Hersey Kisses.

Also on my table are some sliced almonds for the ears of the mice. Some pink and white dragee’s. Depending on how you wish to decorate your mouse’s face. The white beads could be the eyes. The pink beads can be the nose.


Unwrapping My Kisses

——————————————————

Eating the Hersey Kisses 🙂

The Blue and White Chocolate Beads I didn’t use in this project.
They were just too big.

Maraschino Cherries, or Fresh Cherries act as the mouse’s body and tail.

If you are using the Maraschino Cherries then you need for them to be a bit dry so that the chocolate will adhere to them. Here I am drying them on a few paper towels.

Nestle Chocolate Pieces
This is the chocolate that we are using. Milk Chocolate or Dark Chocolate. But, you can use Nestle White Chocolate pieces for White Chocolate Kisses to make White Mice.

I am using a Double Boiler to melt the Chocolate.


For those that don’t understand the concept of a Double Boiler it is a pot that sits over another pot that has some water in it so that the chocolate doesn’t burn by being directly placed onto the hot burner.
Here I have it on a Medium-Low Heat.


Just keep stirring until all the chocolate is melted.

Here I am placing some of the melted chocolate into a bowl so that I can start my mouse assembly.


You first take one of your Maraschino Cherries and roll it around in the melted chocolate to coat it. Then while the chocolate is still a bit melted press one Hersey Kiss to the cherry so that it can adhere.


Then place your little mouse that you just made onto a plate lined with parchment paper.


My Little Mice are Coming Together

Like So…….
Keep making them quickly because the chocolate will start to harden.


Gordon created a very nice technique for doing this quickly and beautifully. First he places lots of the chocolate onto a spoon. Places the cherry in the middle and then rolls the cherry all around in the spoon coating the cherry.


Gordon’s mice looked so much better than mine. 🙂

————————————————–

Once the chocolate has hardened it’s time to start decorating them.

You can see their cute little cherry tails.

——————————————————

——————————————————-


I bought a small tube of frosting to use as glue to adhere the ears and noses. I did place eyes on a few of them but I decided that they really weren’t necessary. The cute ears and nose were enough.

Cute Little Army of Mice

Also an Excellent Edible Gift and Party Treat


To eat, simply hold the mouse by the tail and lower it into your mouth.
Snapping the tail off as you go. 🙂


You can also decorate the mice however you like.
A cute and delicious fun project for the kids and their friends.

—————————————————
Princess Breakfast
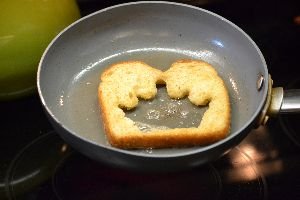
You know the leftover bread from which we used to make the tiara ‘princess sandwiches’ from above?
Well, try frying the bread in some butter/margarine and adding an egg or some egg whites to make a great breakfast treat.
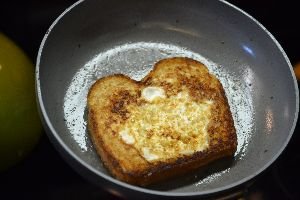
Delicious!
A Perfect Royal Breakfast
Especially for all those little princesses that may sleep over.
———————————
For The Adults
Christmas Eve
Holiday Appetizers
(Served before midnight.)
(With Cinderella’s Castle in mind I created this Christmas Eve table for adults.)

Coffee Martinis
I originally wanted to make Espresso martinis but I realized that it would take me forever to brew that many espressos so I decided to just brew a big pot of Kona coffee, it was much easier and better tasting.
To me the Kona coffee is the best in the world, grown in Kailua-Kona on the Big Island of Hawaii. These martinis are actually quite delicious. Just brew a big pot of strong coffee, add some Kahlua and some Vodka in 3 equal parts.


Our Festive Blue Light Table
Turkey sausage balls, Asian chicken cocktail sausages, various nuts, crackers and cheeses…….

I thought the table was looking pretty plain and that is when I got the idea to add lights all over it. Everyone liked it!


Everyone Helping Themselves

Drunken Devils on Horseback
It’s just not Christmas Eve anymore without Nigella’s Drunken Devils on Horseback. Gordon and I have since expanded them to include dates and figs as well as pitted prunes. The recipe calls for you to soak pitted prunes in Brandy overnight and then wrap them in bacon and place in the oven to cook for about 20 minutes until the bacon crisps up a bit.
SUPERB!!!!
Gordon came up with the idea to use dates and figs as well as the prunes. Hey, I only eat bacon about twice a year and this is one of those days so I did treat myself.
———————————————————–

Excellent Cream Cheese Pesto/Sun Dried Tomato and Pine Nut App
We tend to eat more white cheeses as opposed to the yellow ones as the white ones have less cholesterol. You know that Cinderella would only be interested in healthy eating. 🙂
—————————————————————–
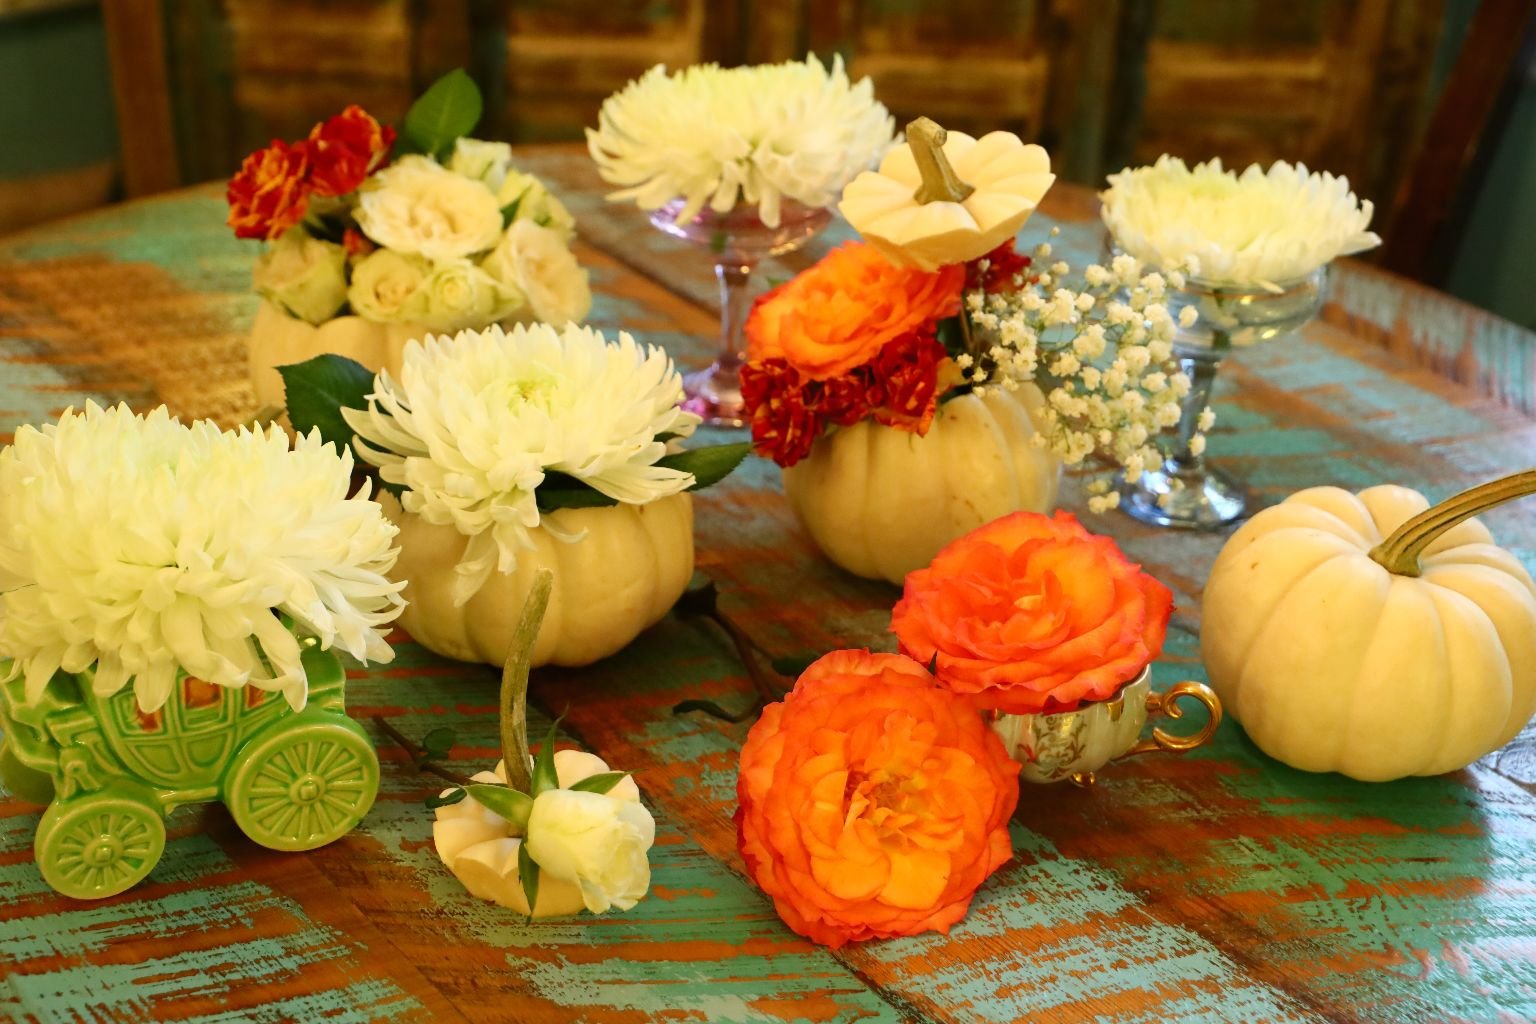
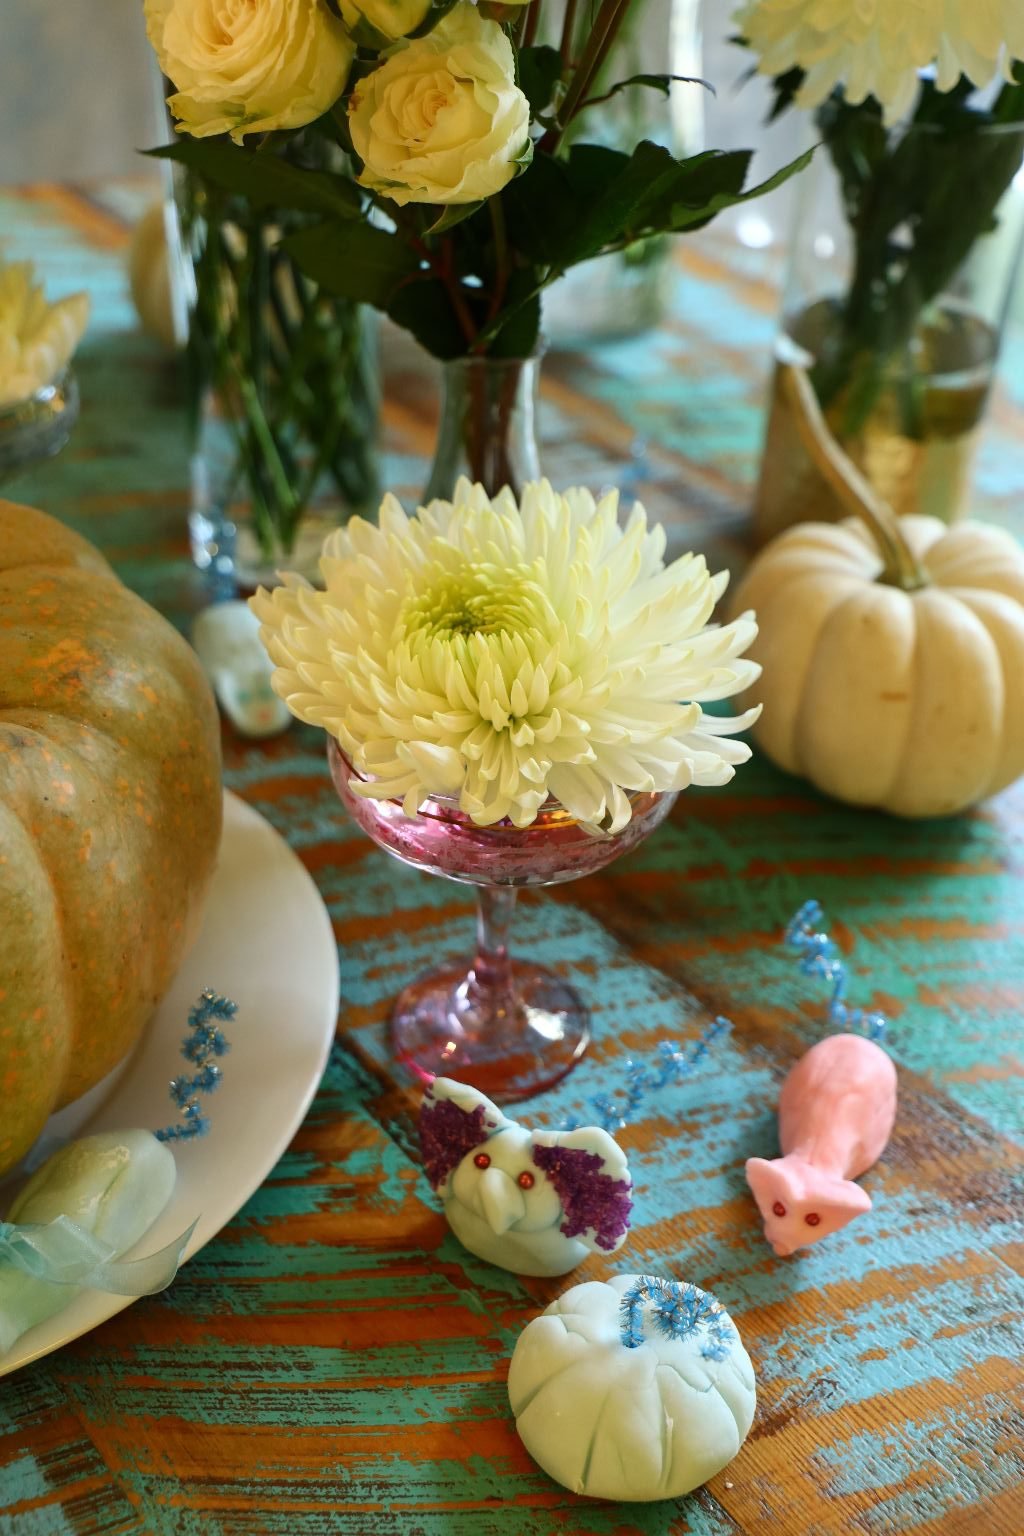
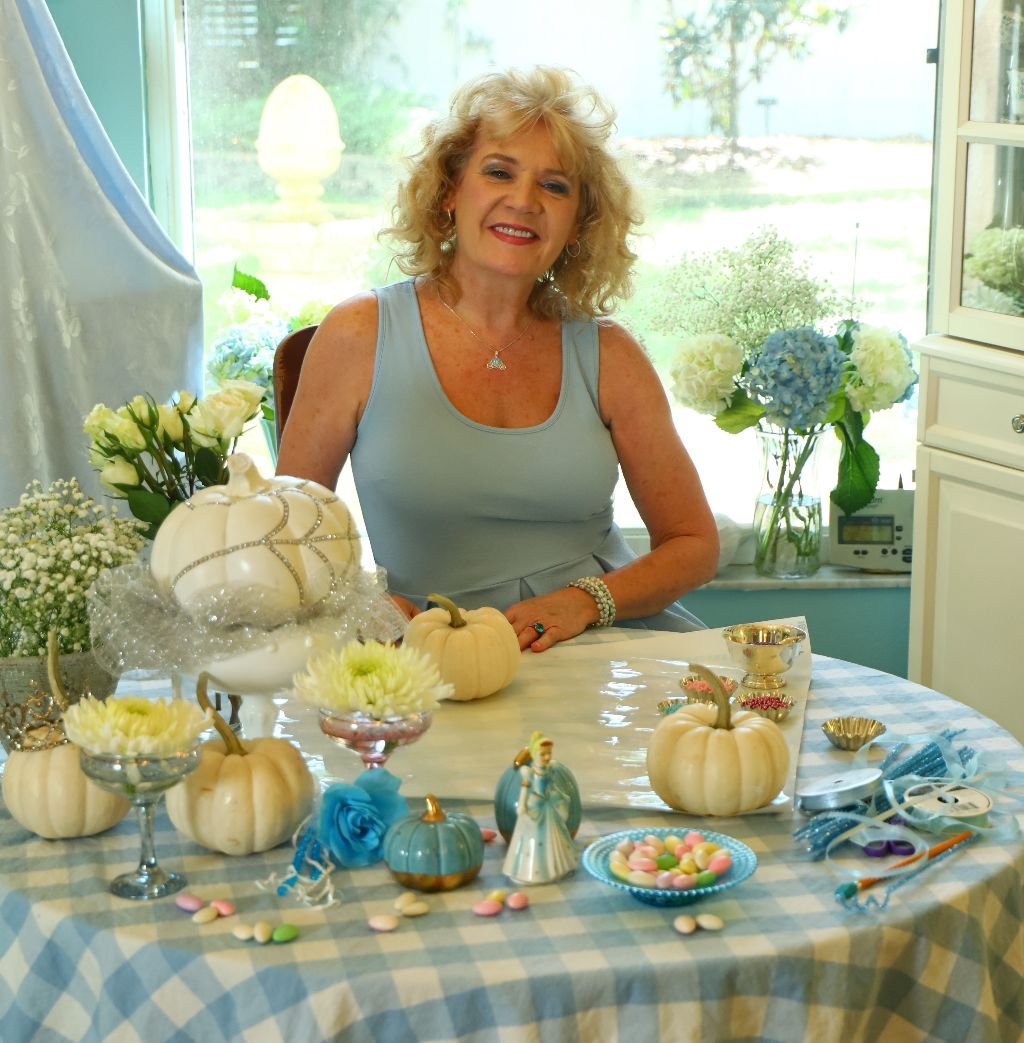
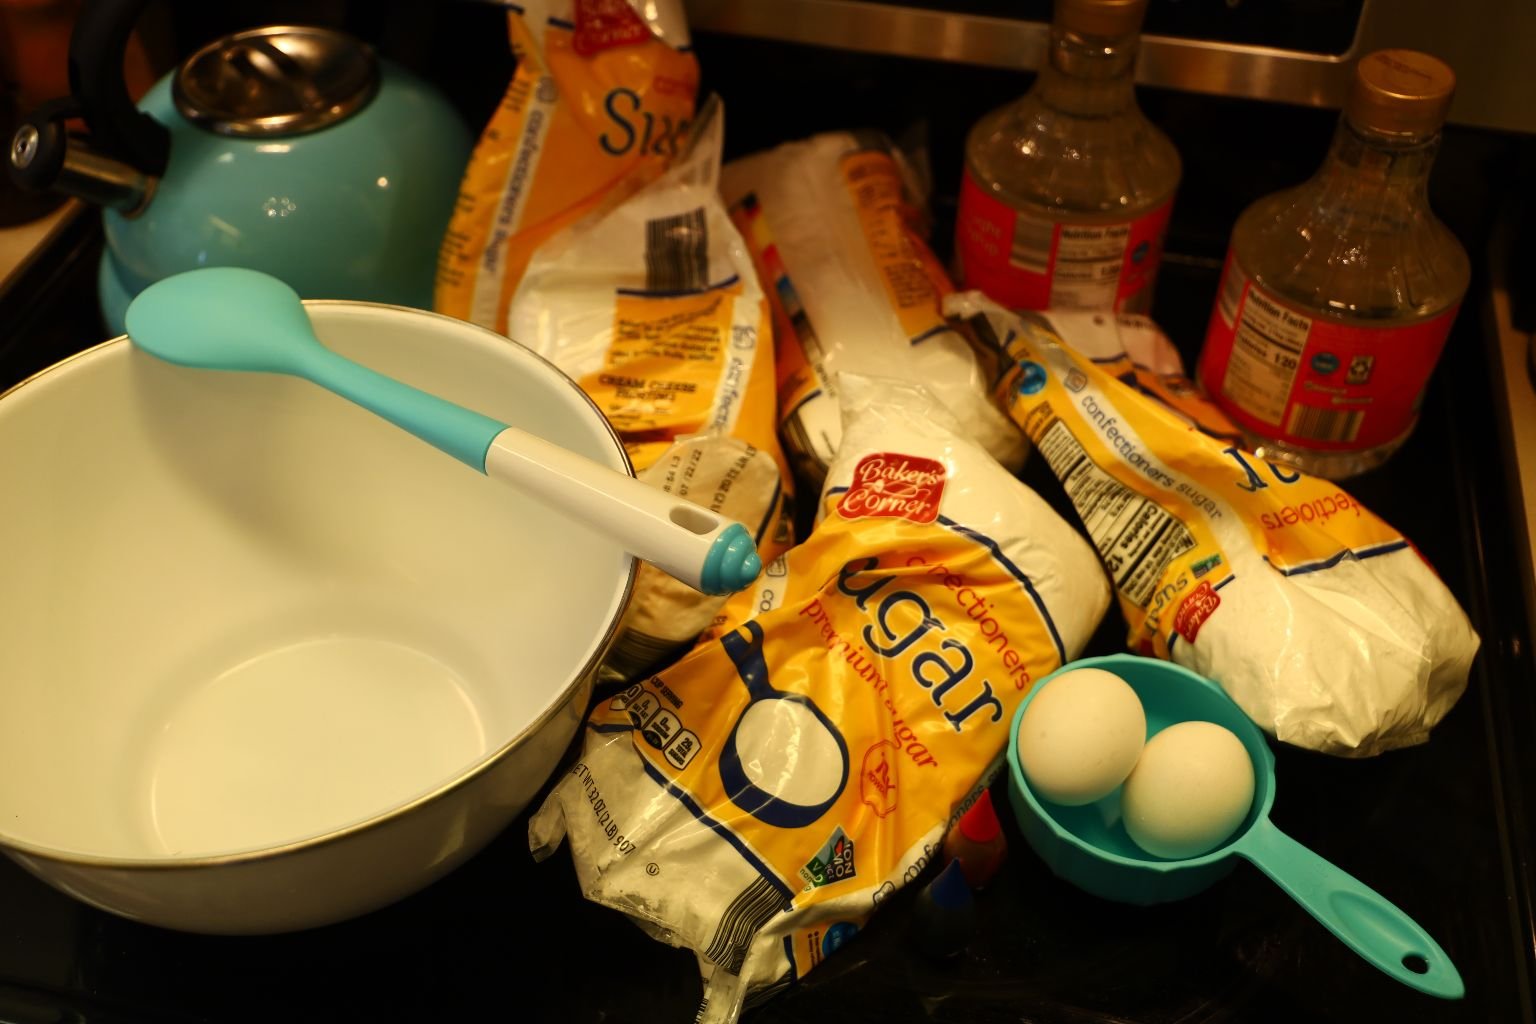
New Project: Sugar Mice
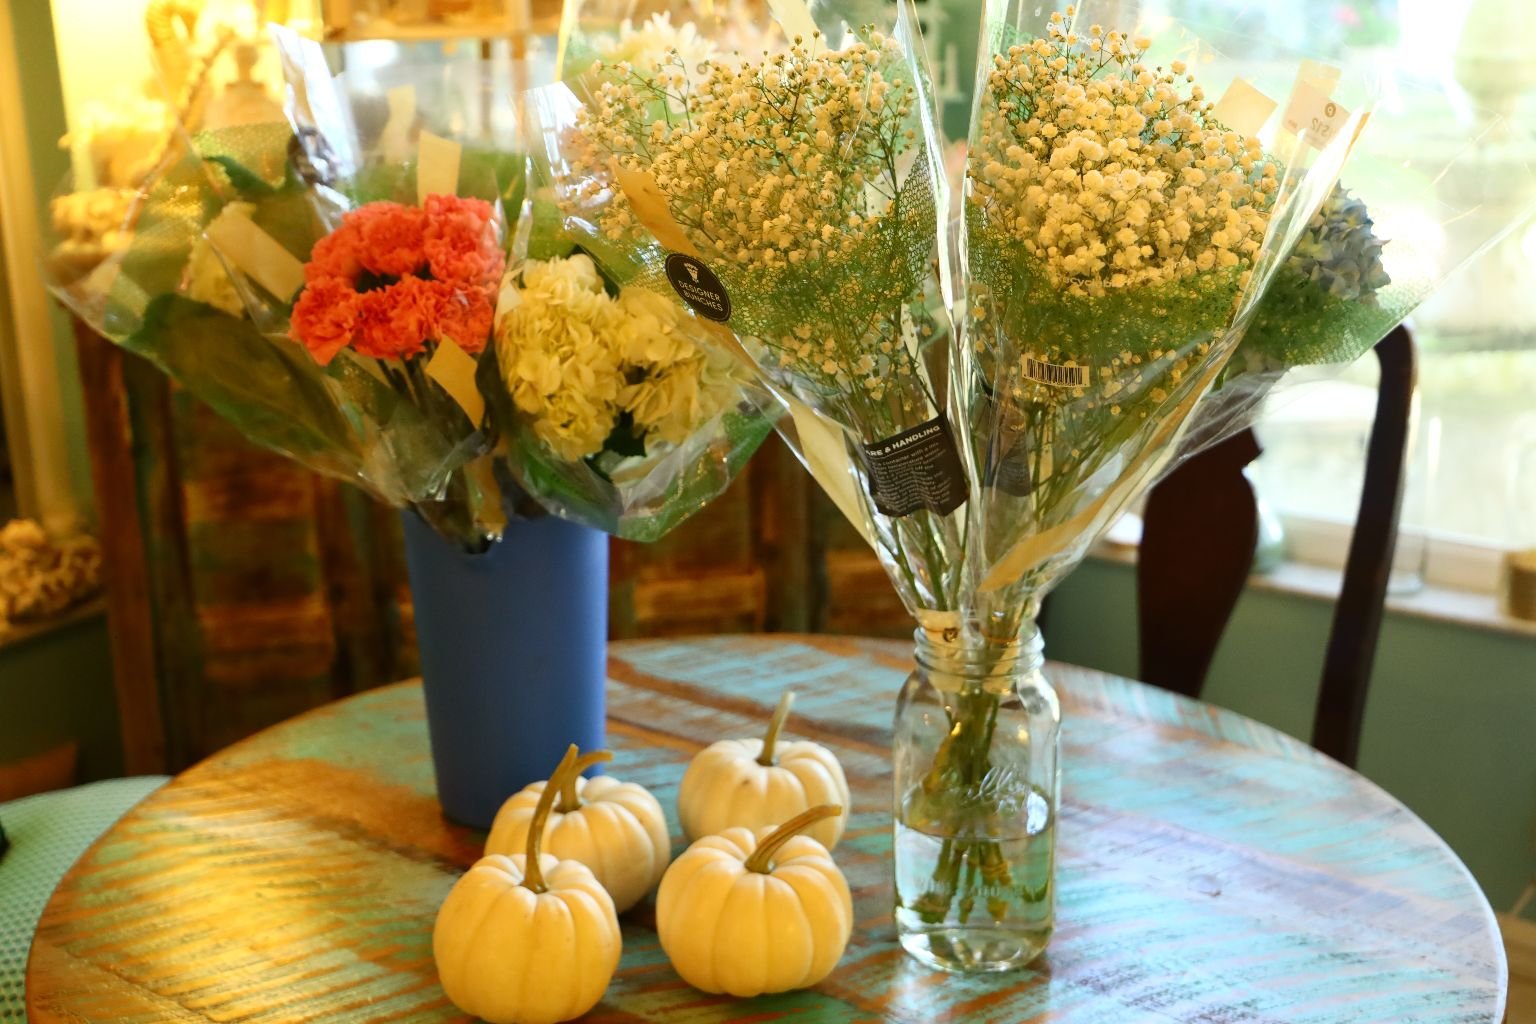
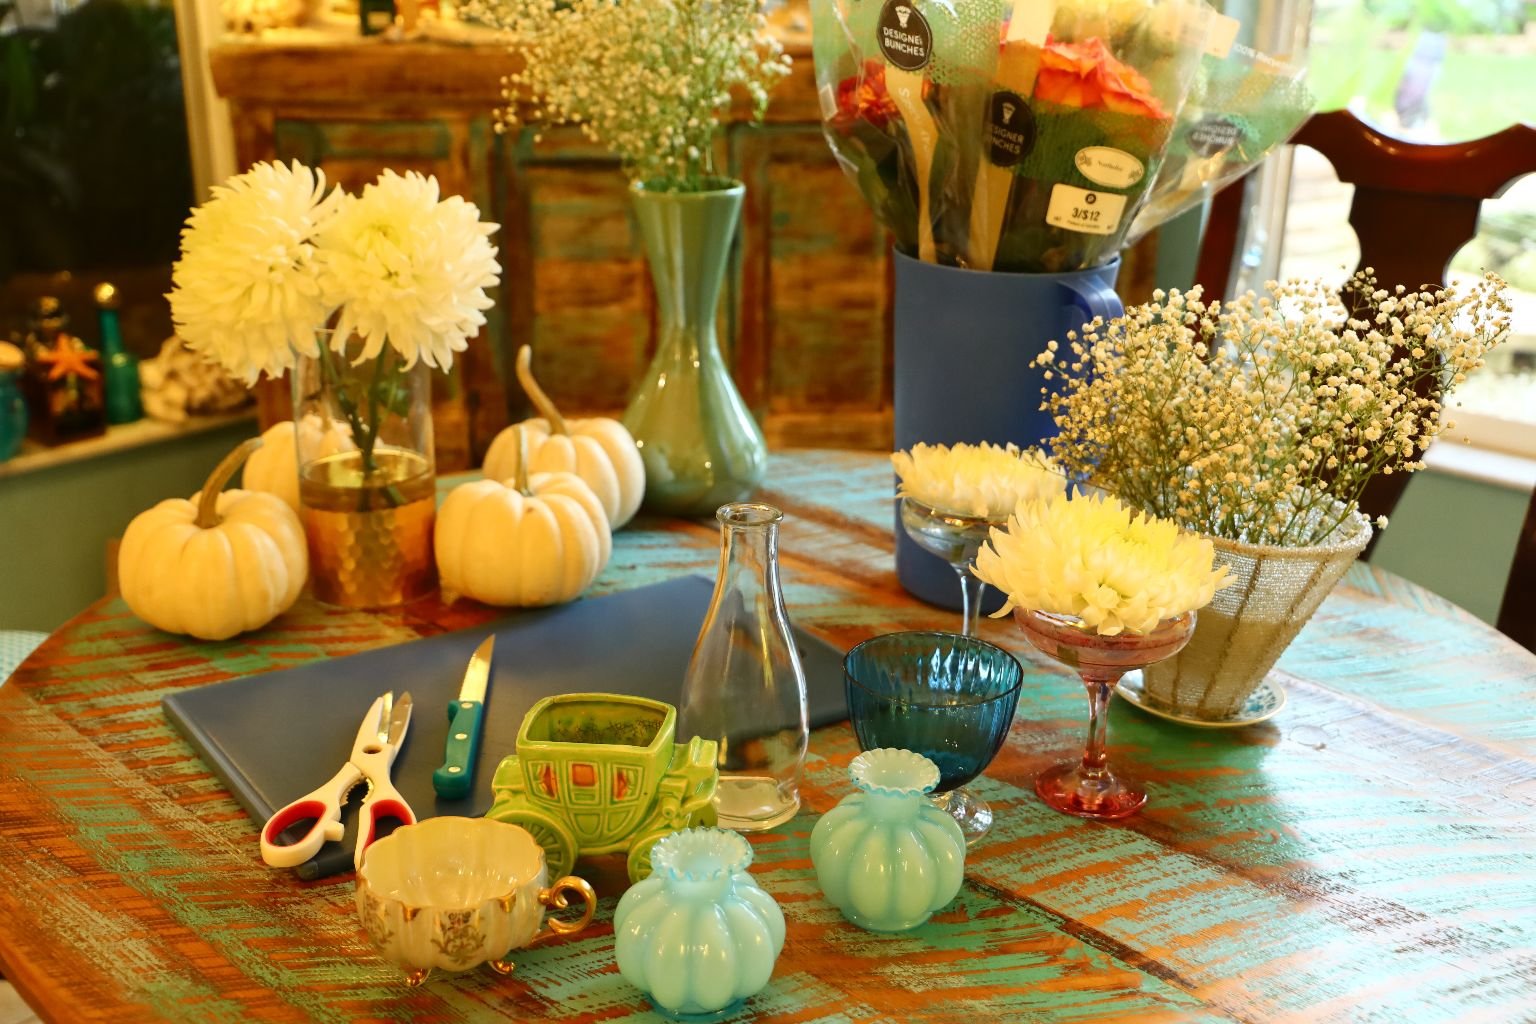
I wanted to beautify my area for this project by buying up lovely flowers and even some pumpkins.
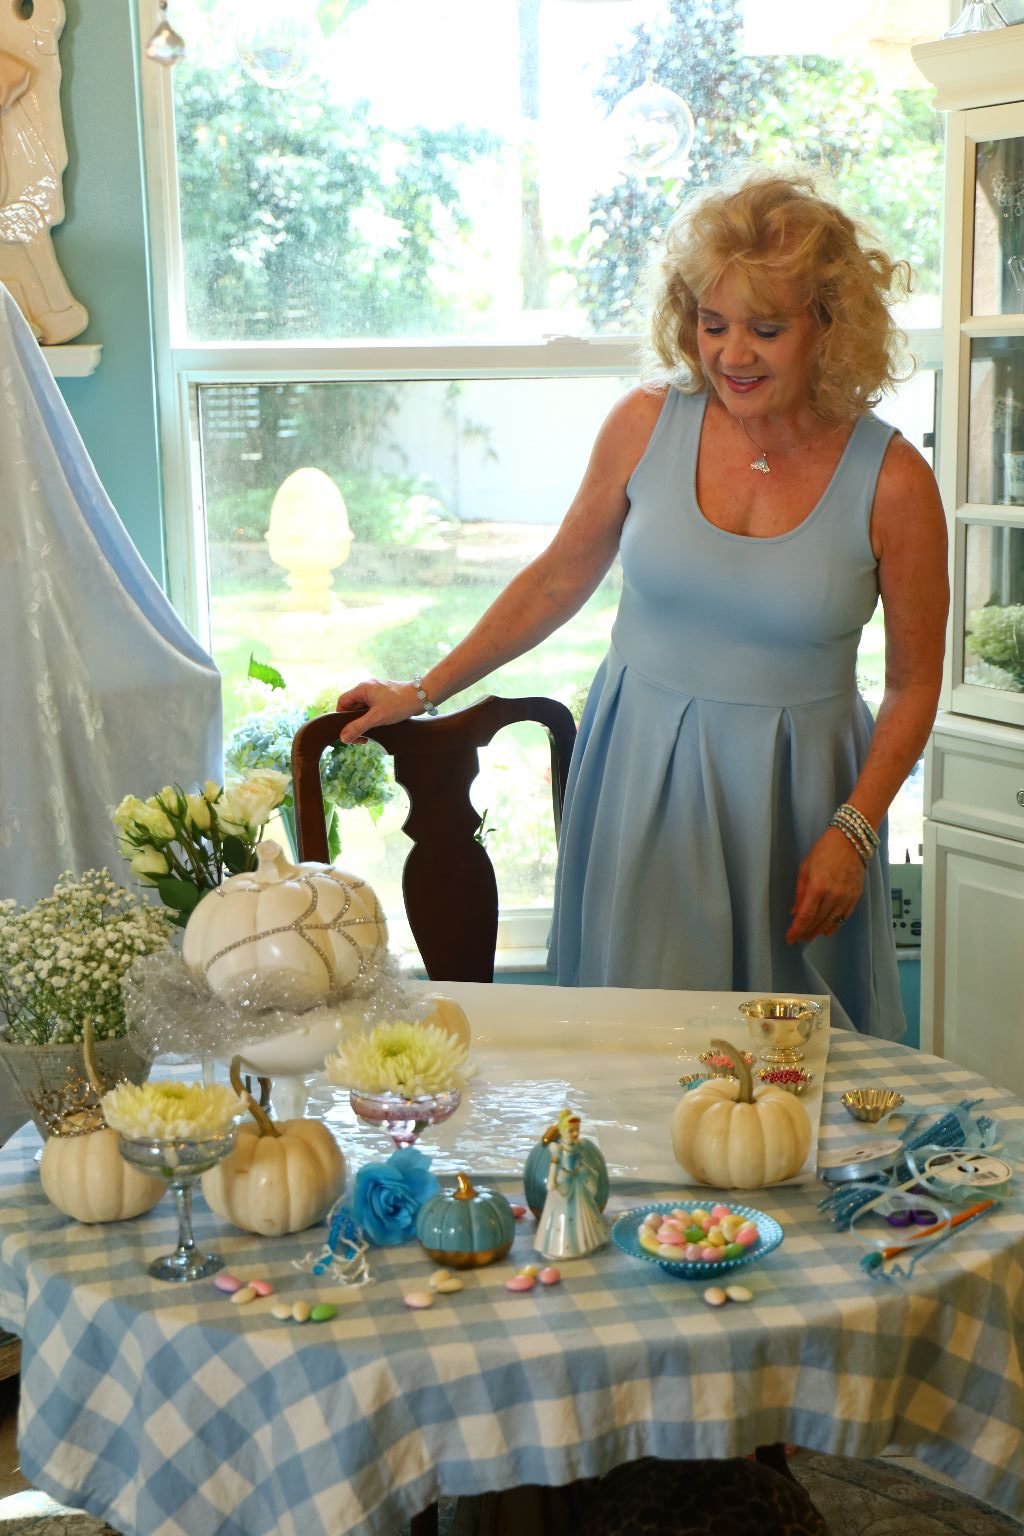
This was so much fun!
I have my area set up with everything that I will need and even a few nice Cinderella mementos.

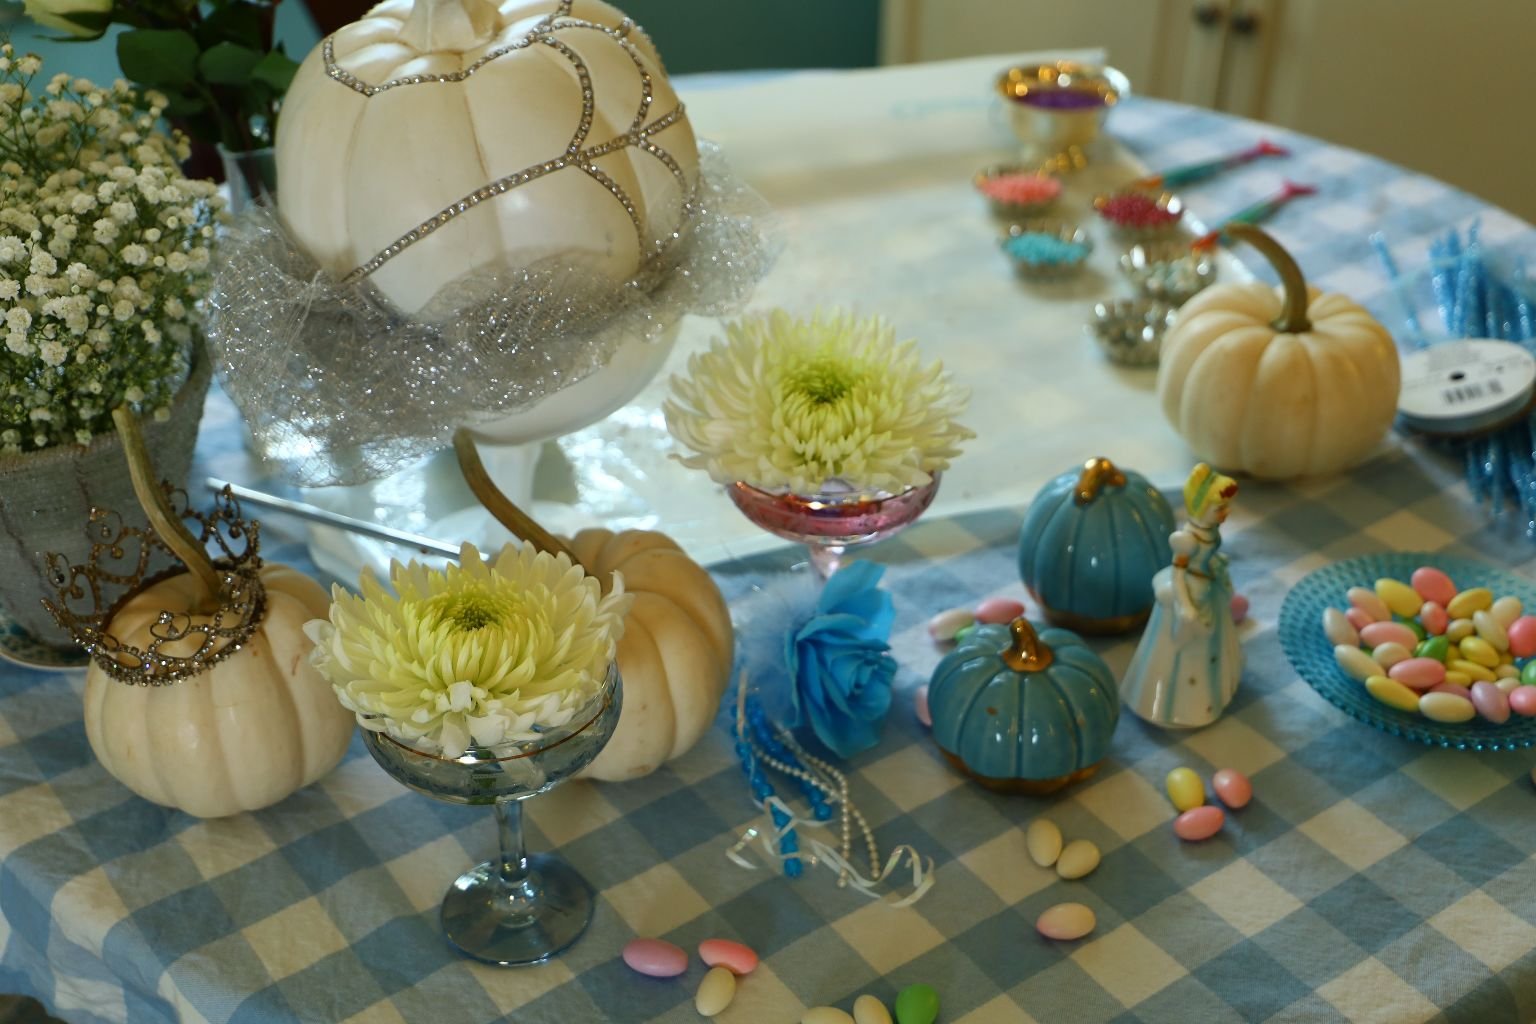
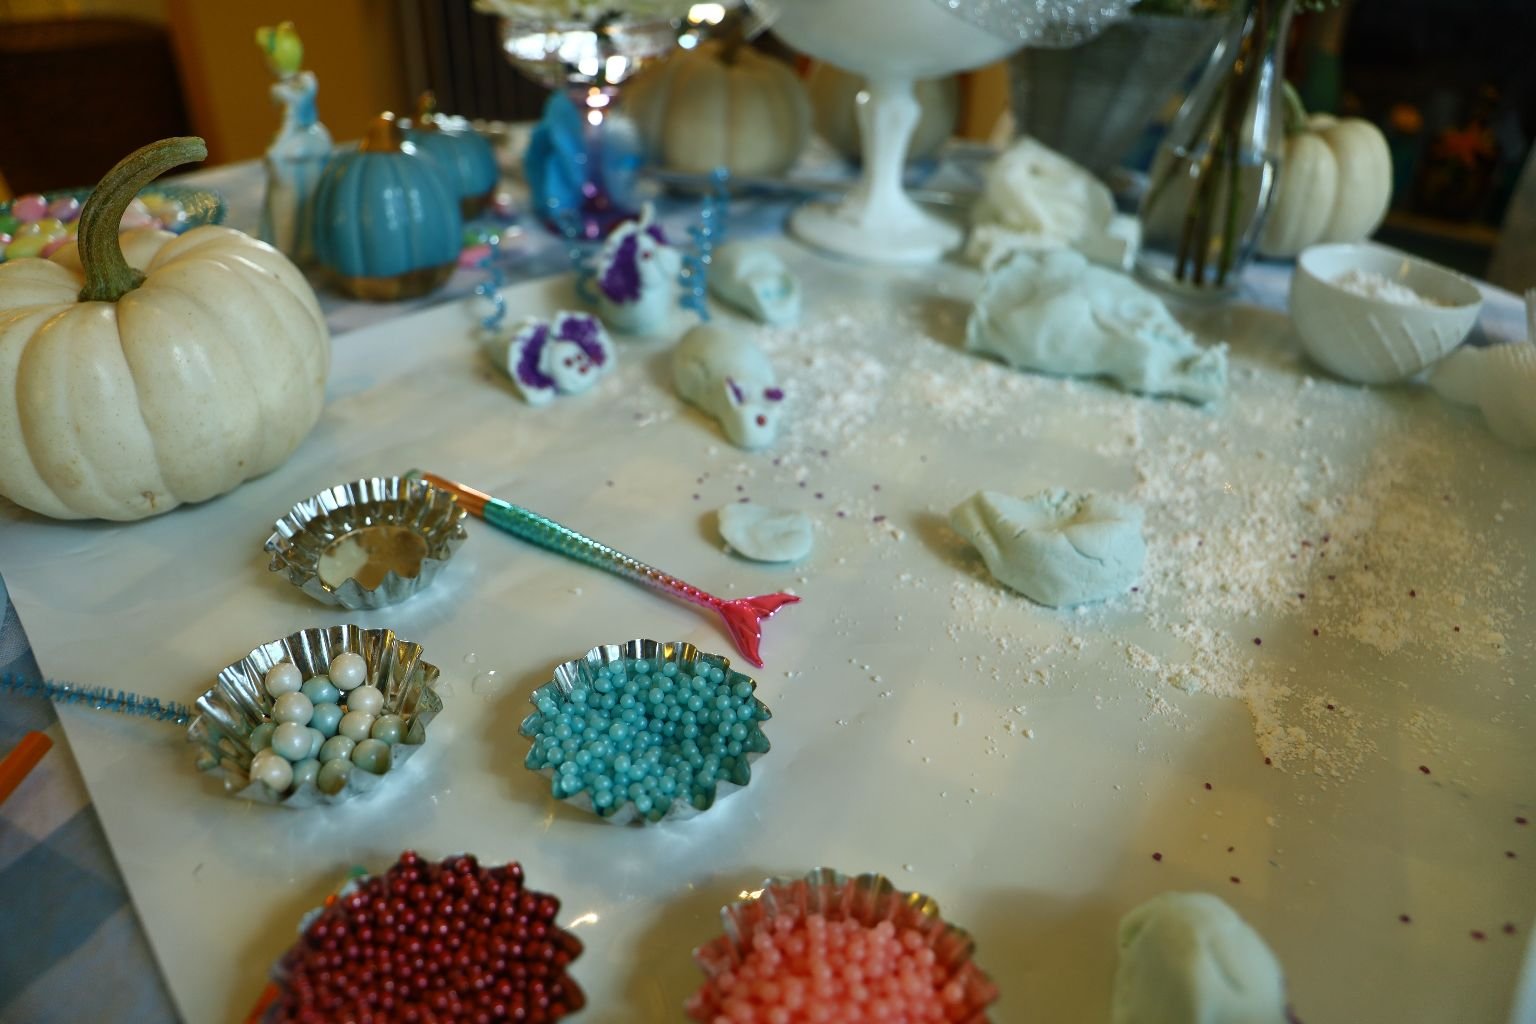
I set up a few Candied Almonds for snacking, and some lovely colored Sugars and Dragees, and White Corn Syrup for my Sugar Mice Project.
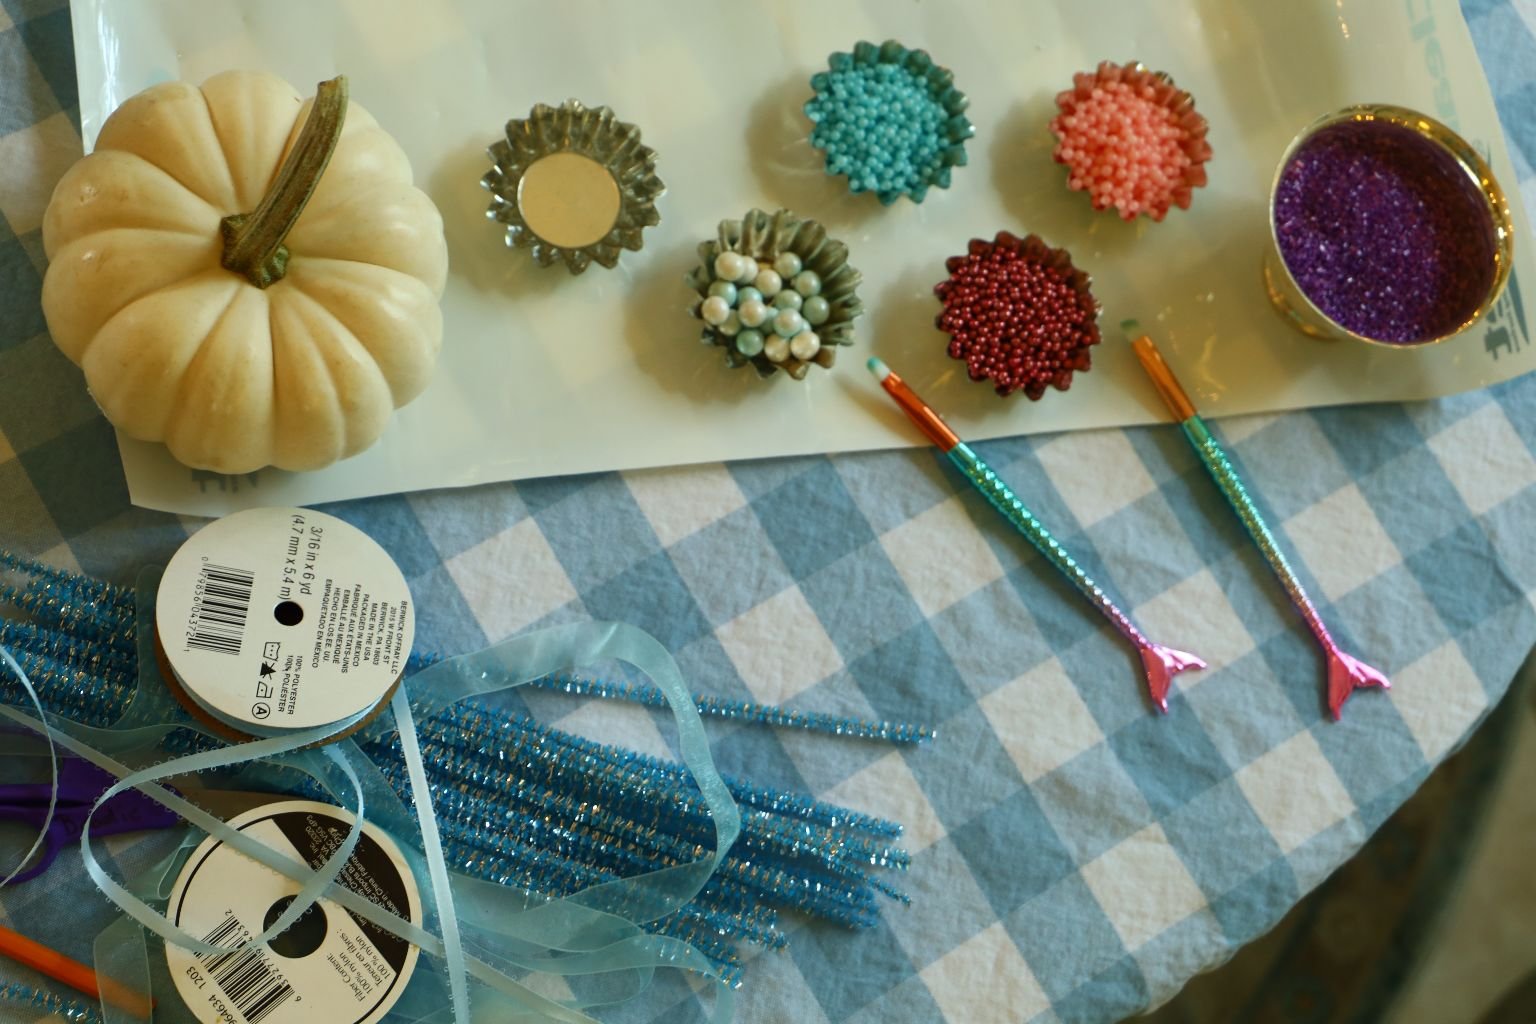
The Mermaid Make-Up Brushes you see in the photo above will be used to place the White Corn Syrup on my Sugar Mice.
Now, I’m Ready!
——————————————————————–
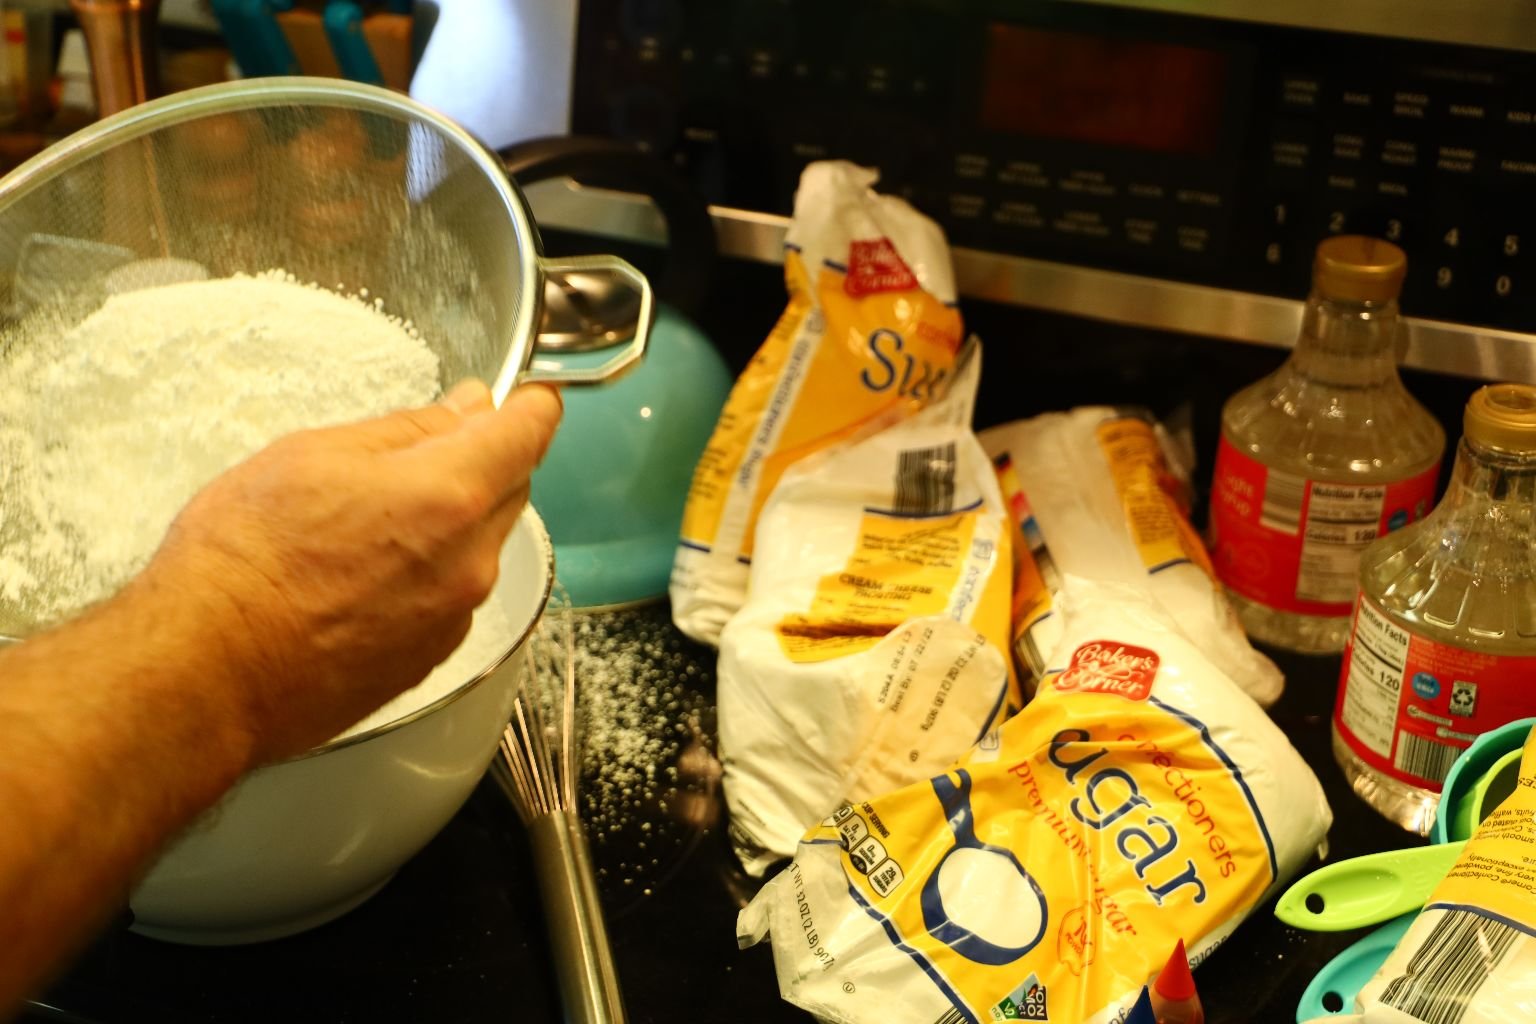
My Husband Gordon is Making the Dough
The Recipe:
(I will write this exactly as the cookbook author does.)
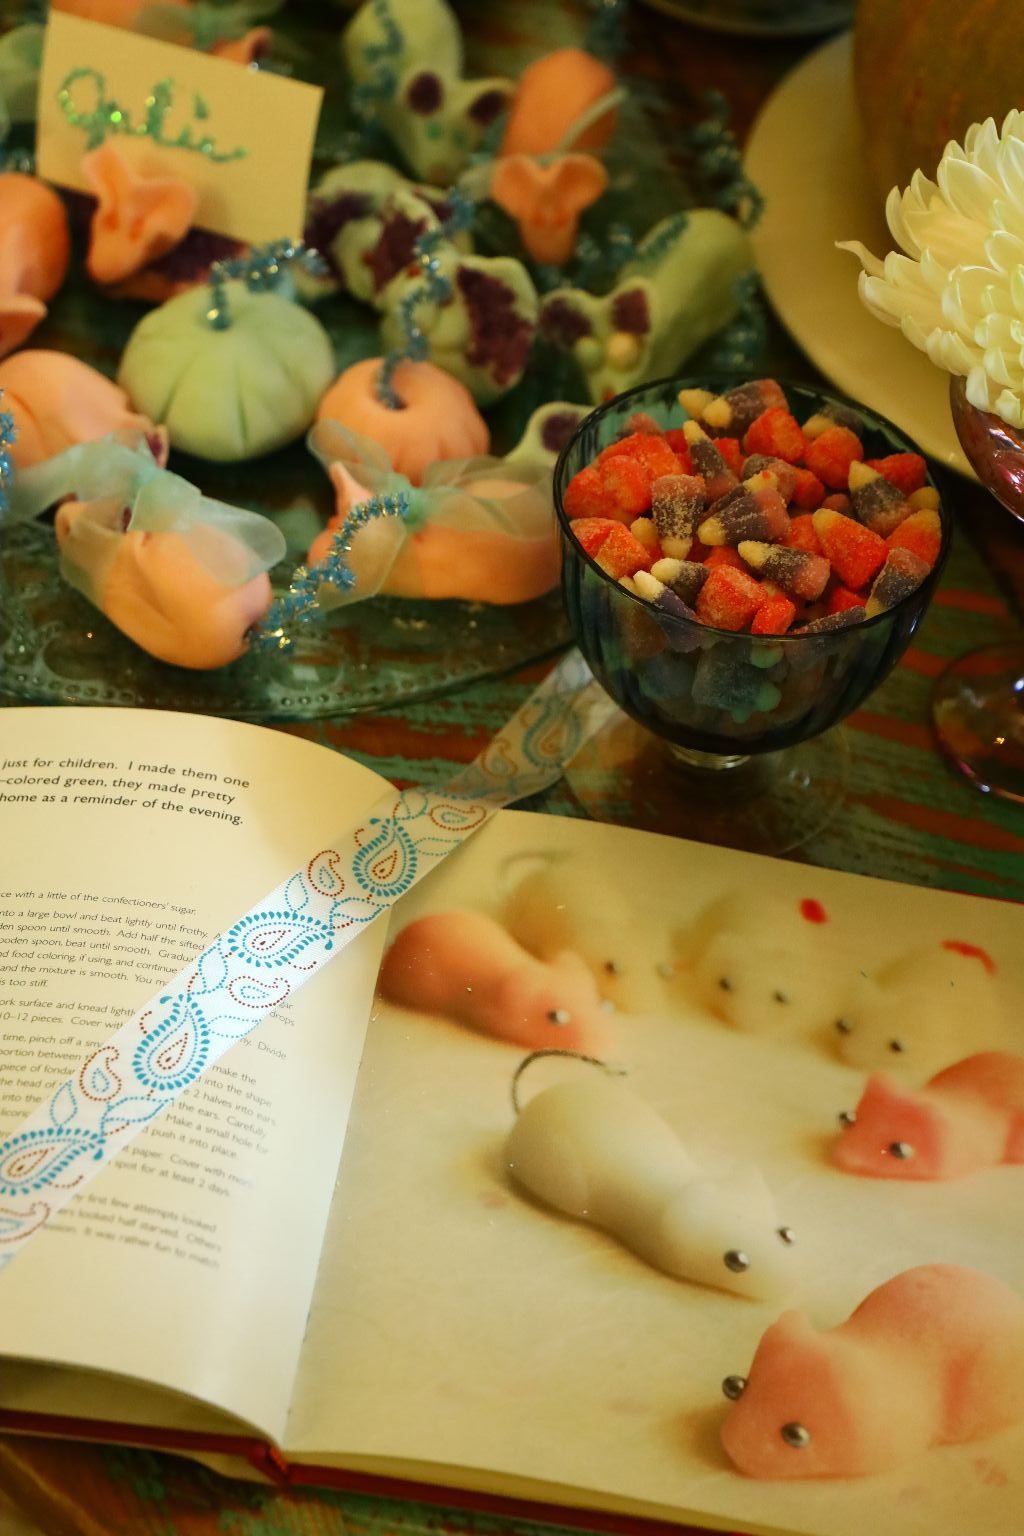
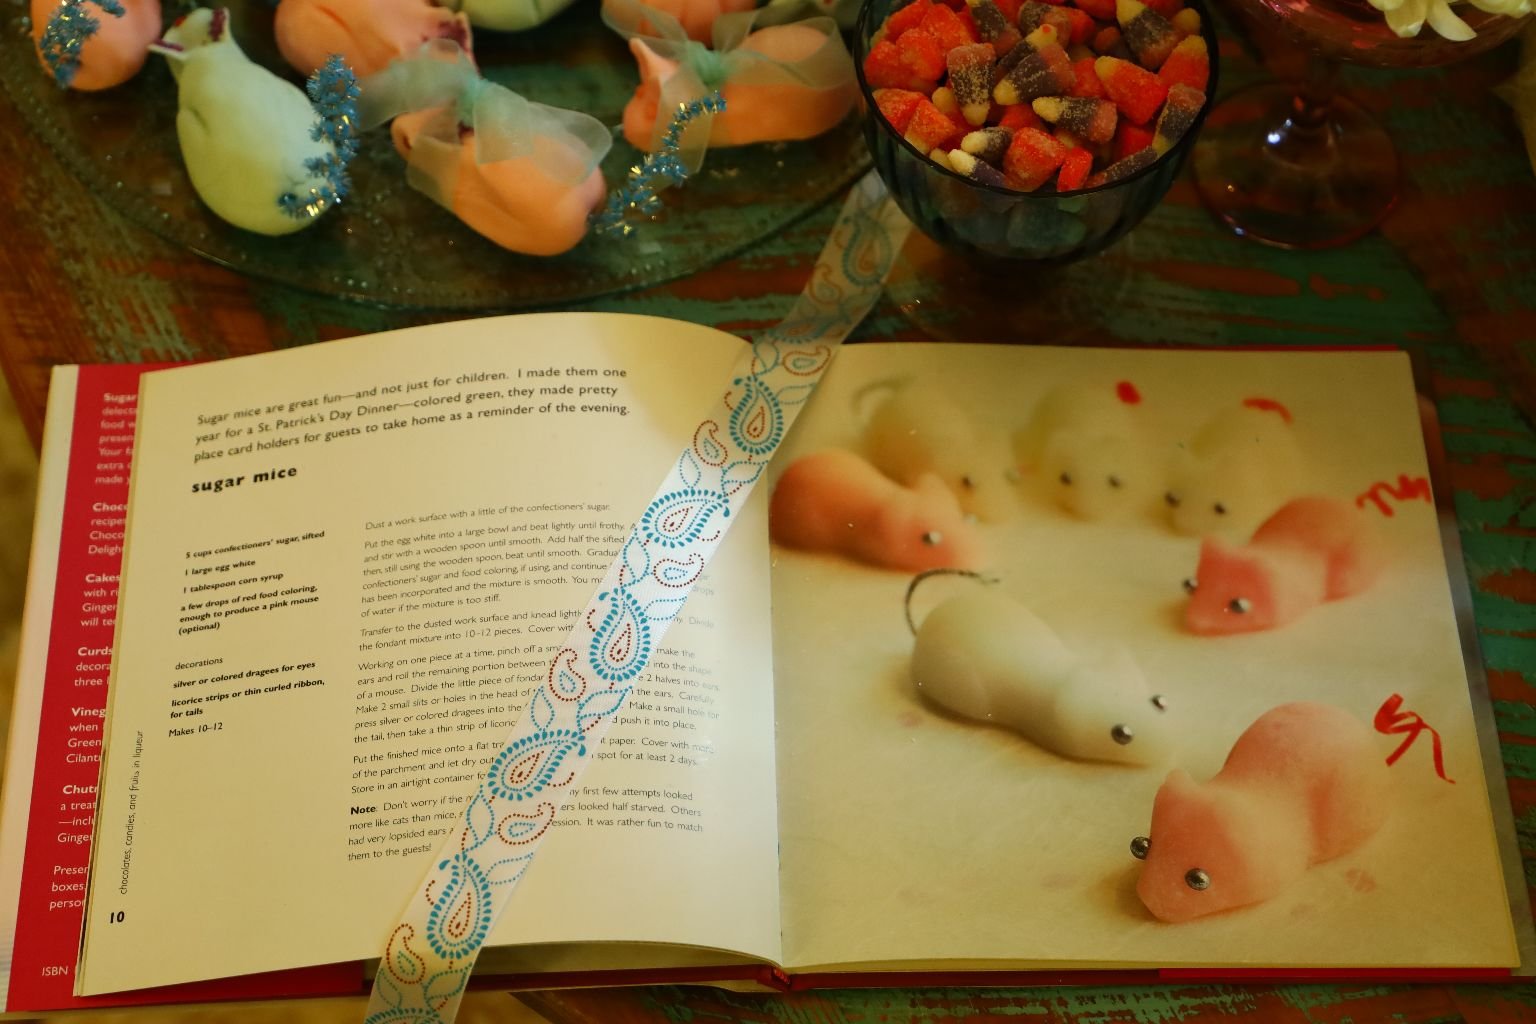
Sugar mice are great fun—–and not just for children. I made them on year for a St. Patrick’s Day Dinner—-colored green, they made pretty place card holders for guests to take home as a reminder of the evening.
SUGAR MICE
5 Cups Confectioner’s Sugar, Sifted
1 Large Egg White
1 Tablespoon Corn Syrup (we used white)
A few drops of red food coloring, enough to produce a pink mouse (optional)
(We made 2 batches. One using the red food coloring in order to make pink mice. And one batch using blue food coloring in order to make light blue mice.)
I do think that leaving them white would have been very lovely and I wish we had made a just a white batch.
Decorations:
Silver or Colored Dragees for Eyes
Licorice strips or thin curled ribbon, for tails.
Makes 10-12.
——————————————————————–
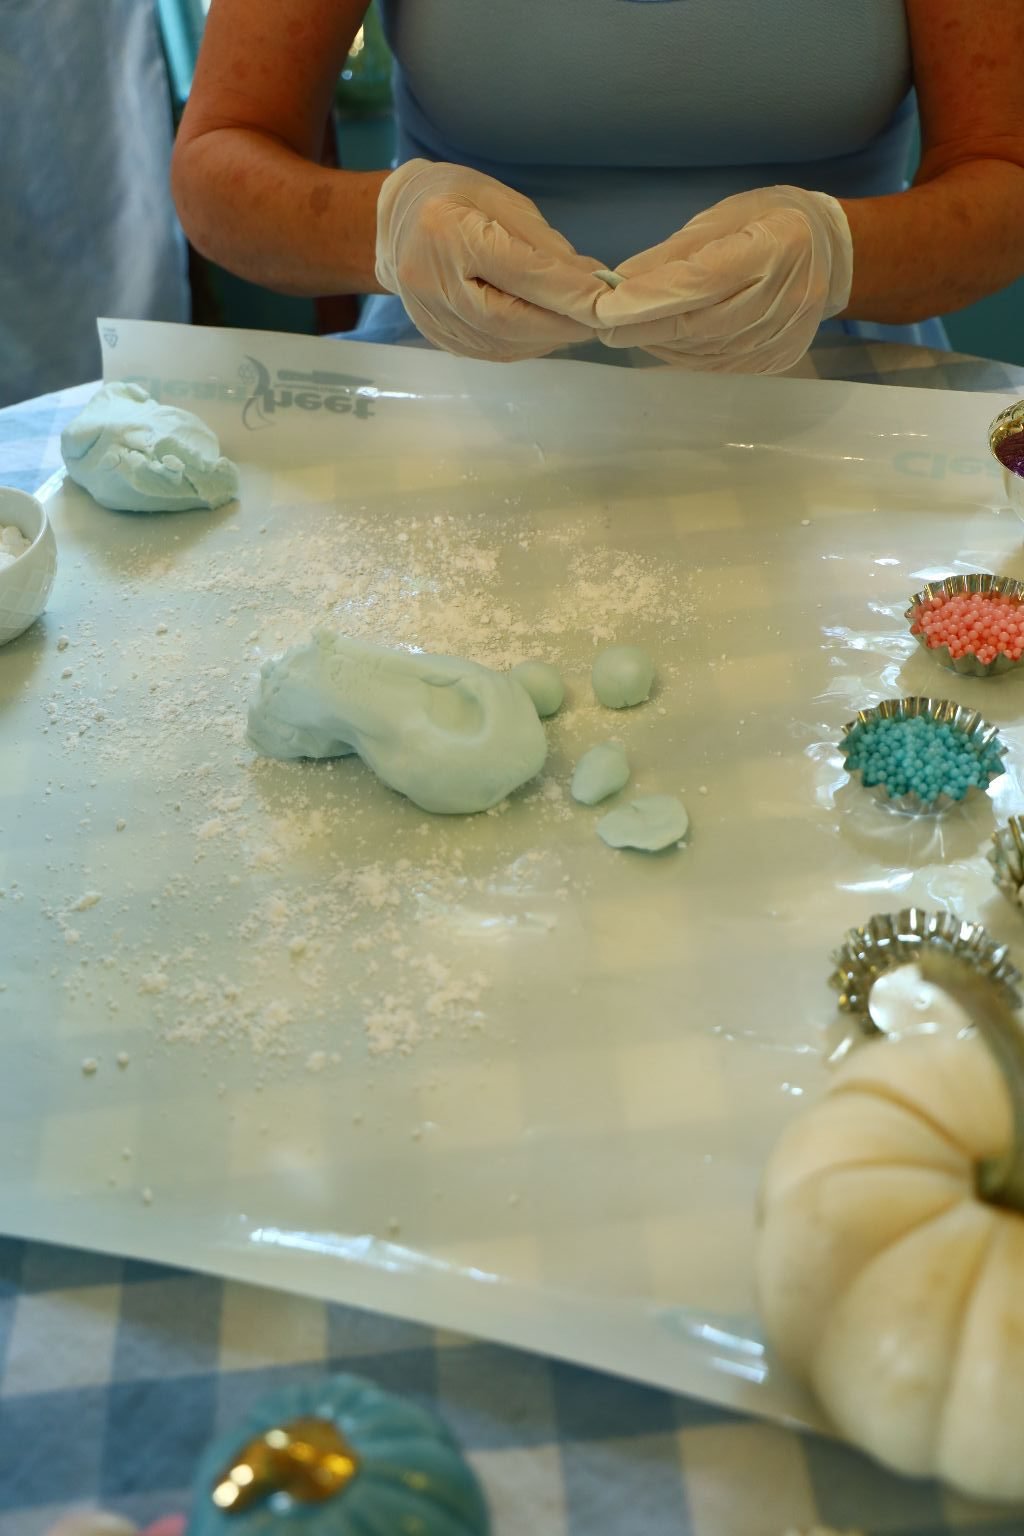
(At first I wore gloves but I then realized that I needed my hands free to mold and create. So, I don’t recommend the plastic gloves.)
Dust the work surface with a little bit of the Confectioner’s Sugar. (I got out my Clean Sheet for this project. It is a plastic sheet that can be used for all these kinds of projects that will protect the counter space. Whether you are making cookies, pies, etc.)
————————————————————–
Sugar Mice Directions
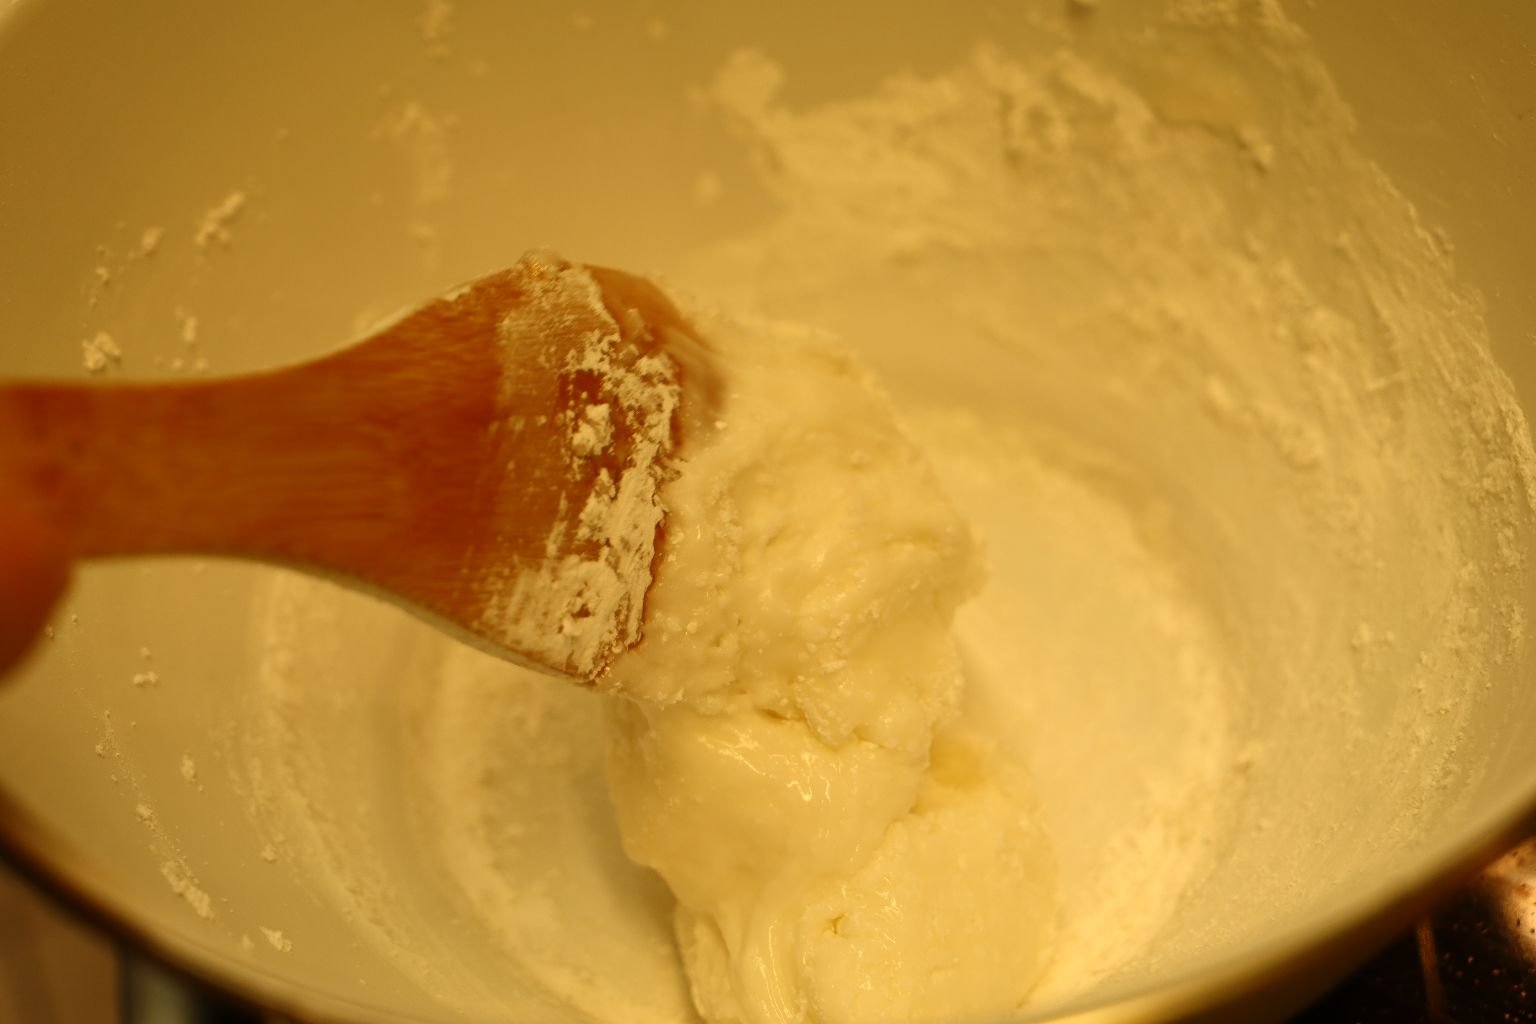
Put the egg white into a large bowl and beat the egg white until frothy. Add the corn syrup and stir with a wooden spoon until smooth.
(It really is important to use a wooden spoon as the mixture will be very hard and heavy and you need something sturdy to use.)
Add half the sifted confectioner’s sugar, then, still using the wooden spoon beat until smooth. Gradually add the remaining confectioner’s sugar and food coloring, if using, and continue beating until all the sugar has been incorporated and the mixture is smooth. You may need to add a few drops of water if the mixture is stiff. (The exact measurements from this recipe did not make a pliable mixture. We had to add more corn syrup to allow for the confectioner’s sugar to be incorporated. We found that adding water to the mixture didn’t work as well as adding some corn syrup. We added an extra 2 Tablespoons to the original ingredient measurements.)
Transfer to the dusted work surface and knead lightly until smooth and shiny. Divide the fondant mixture into 10 – 12 pieces. Cover with plastic wrap.
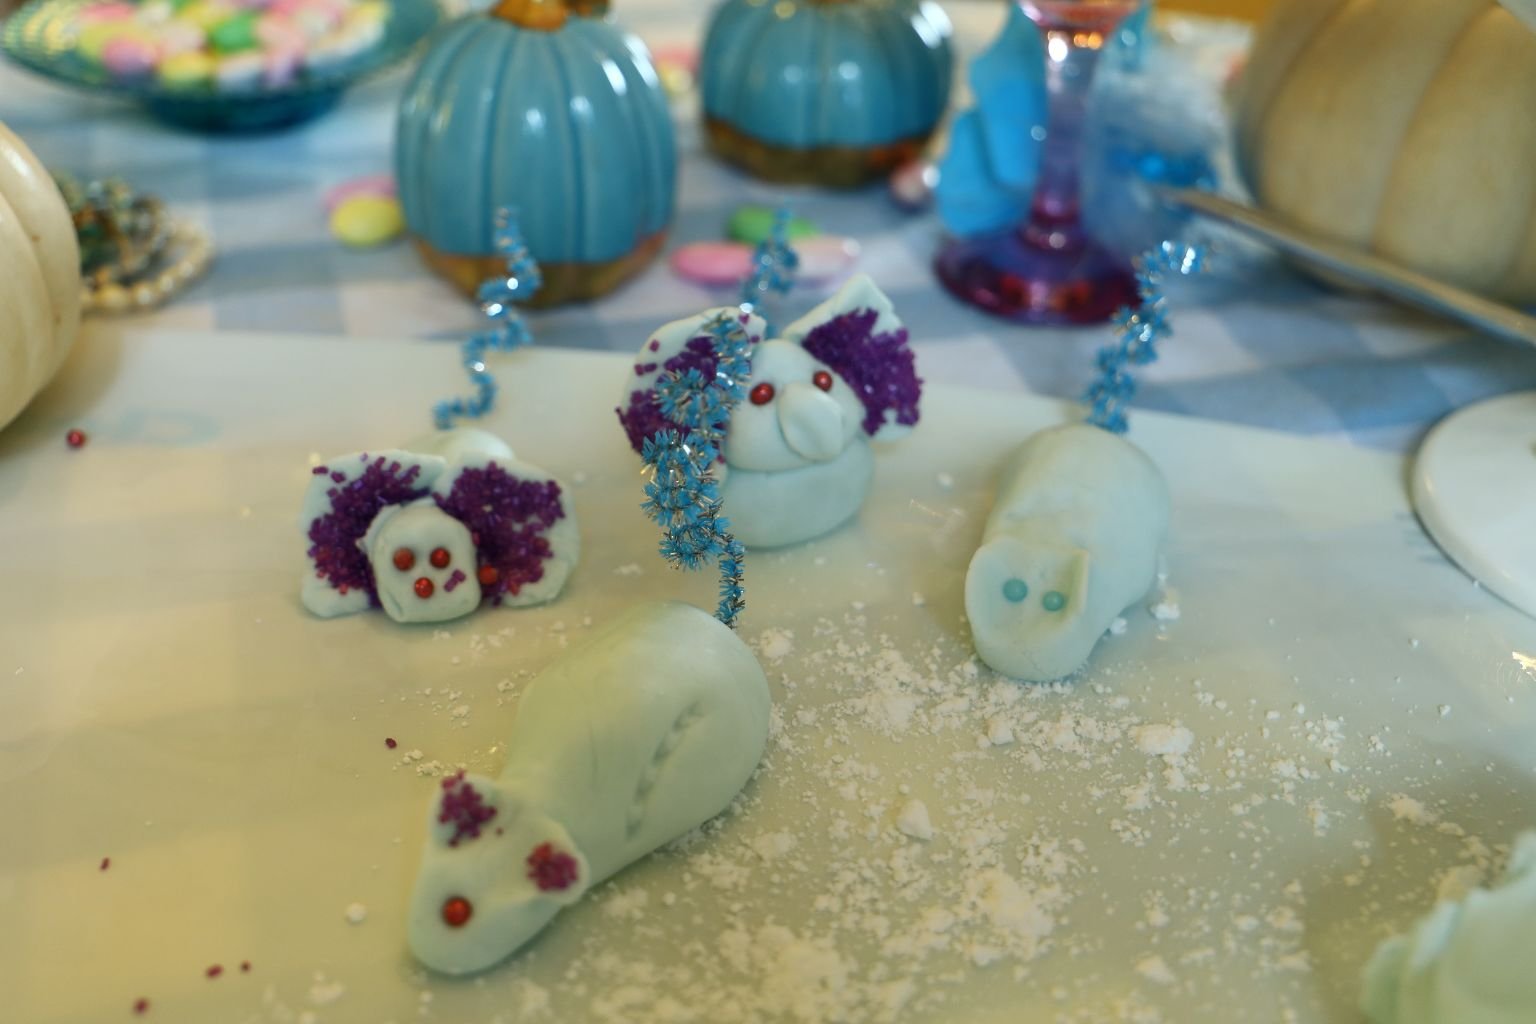
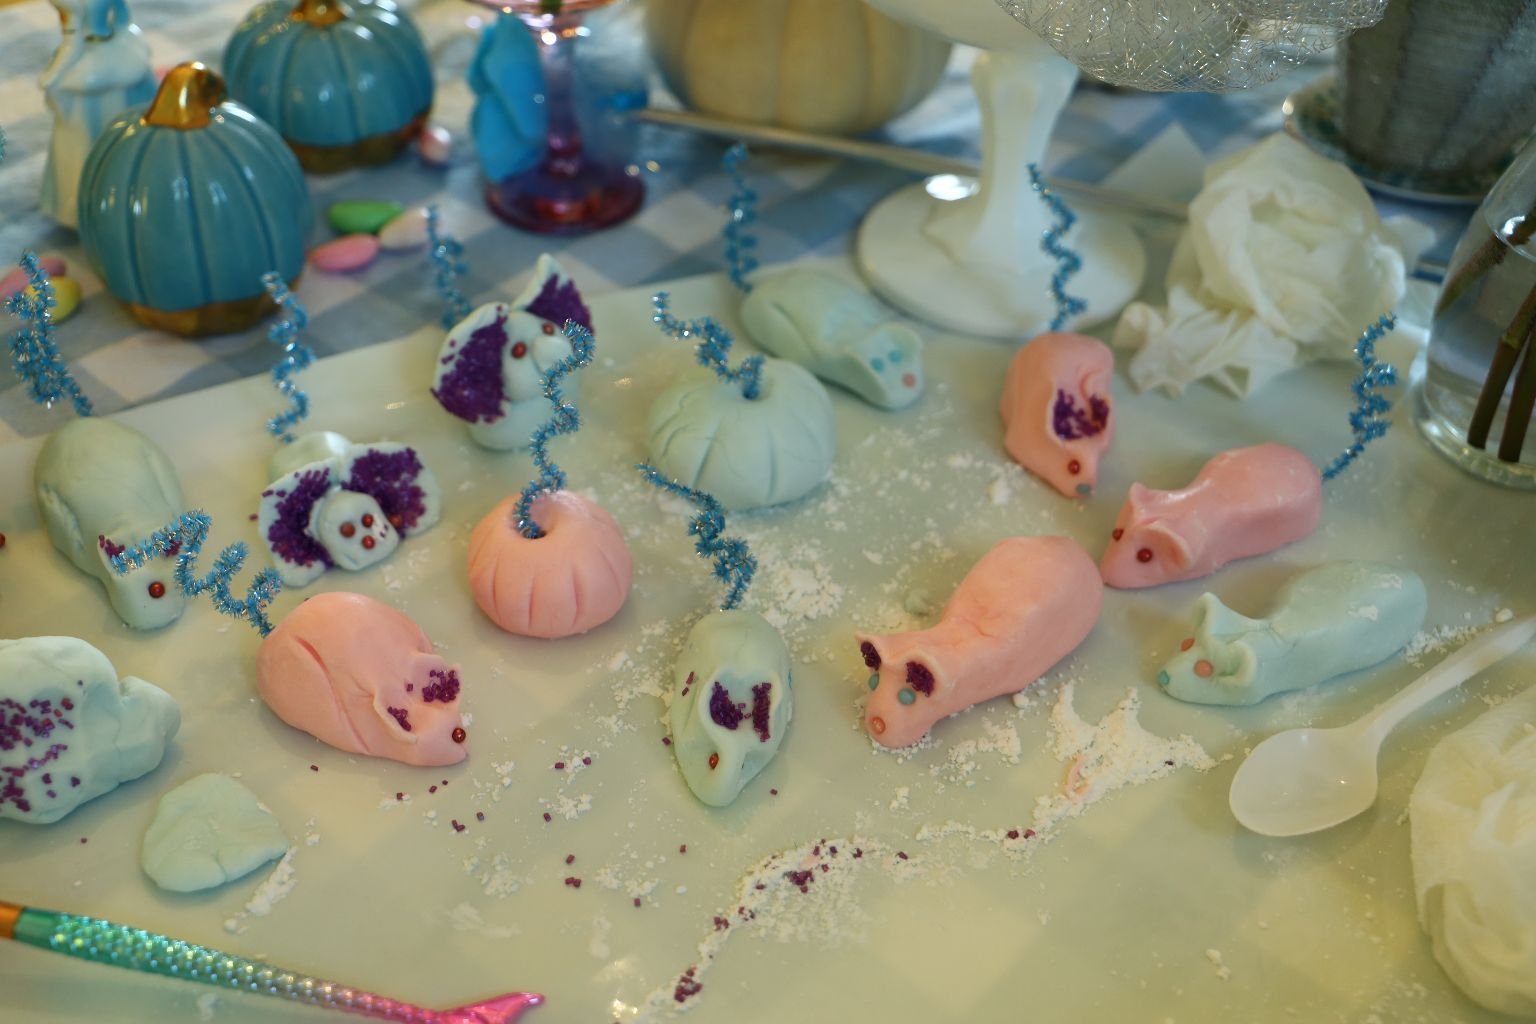
Working on one piece at a time, pinch off a small piece of fondant to make the ears and roll the remaining portion between the palms of your hands into the shape of a mouse. Divide the little piece of fondant in half and shape the 2 halves into ears. Make 2 small slits or holes in the head of the mouse and push in the ears. Carefully press silver or colored dragees into the face to make the eyes. Make a small hole for the tail, then take a thin strip of licorice or curling ribbon and push it into place.
(I just wanted to add that I did my own creative sculpting. Perhaps not as attractive as they should be but it was fun to experiment.)
——————————————————————-
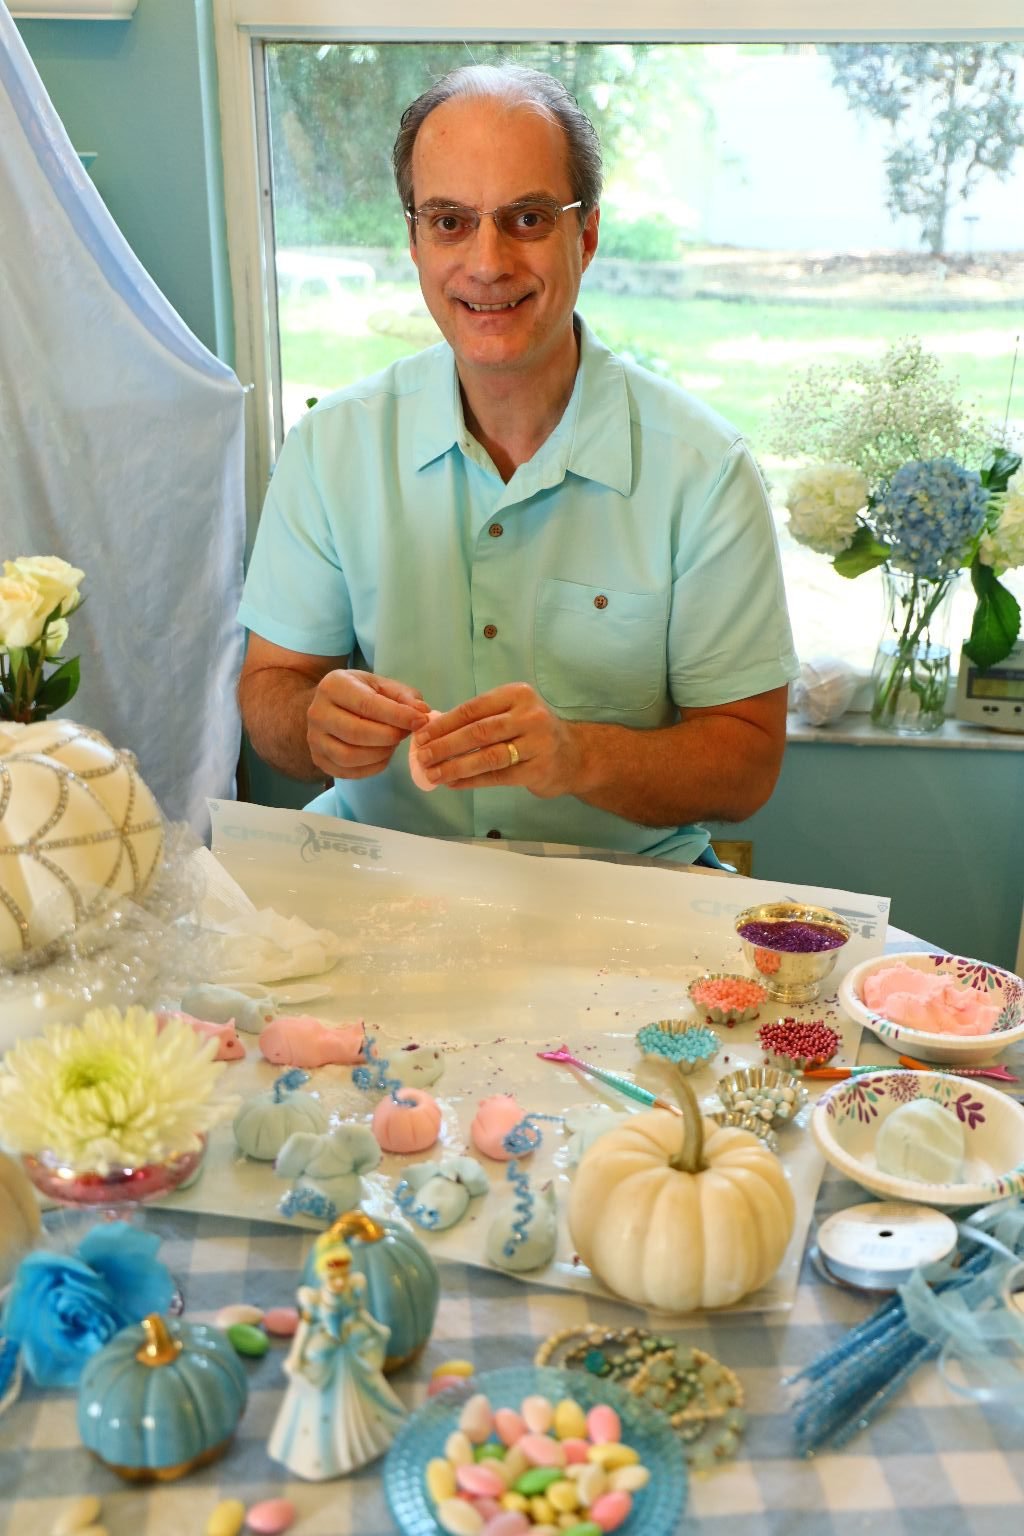
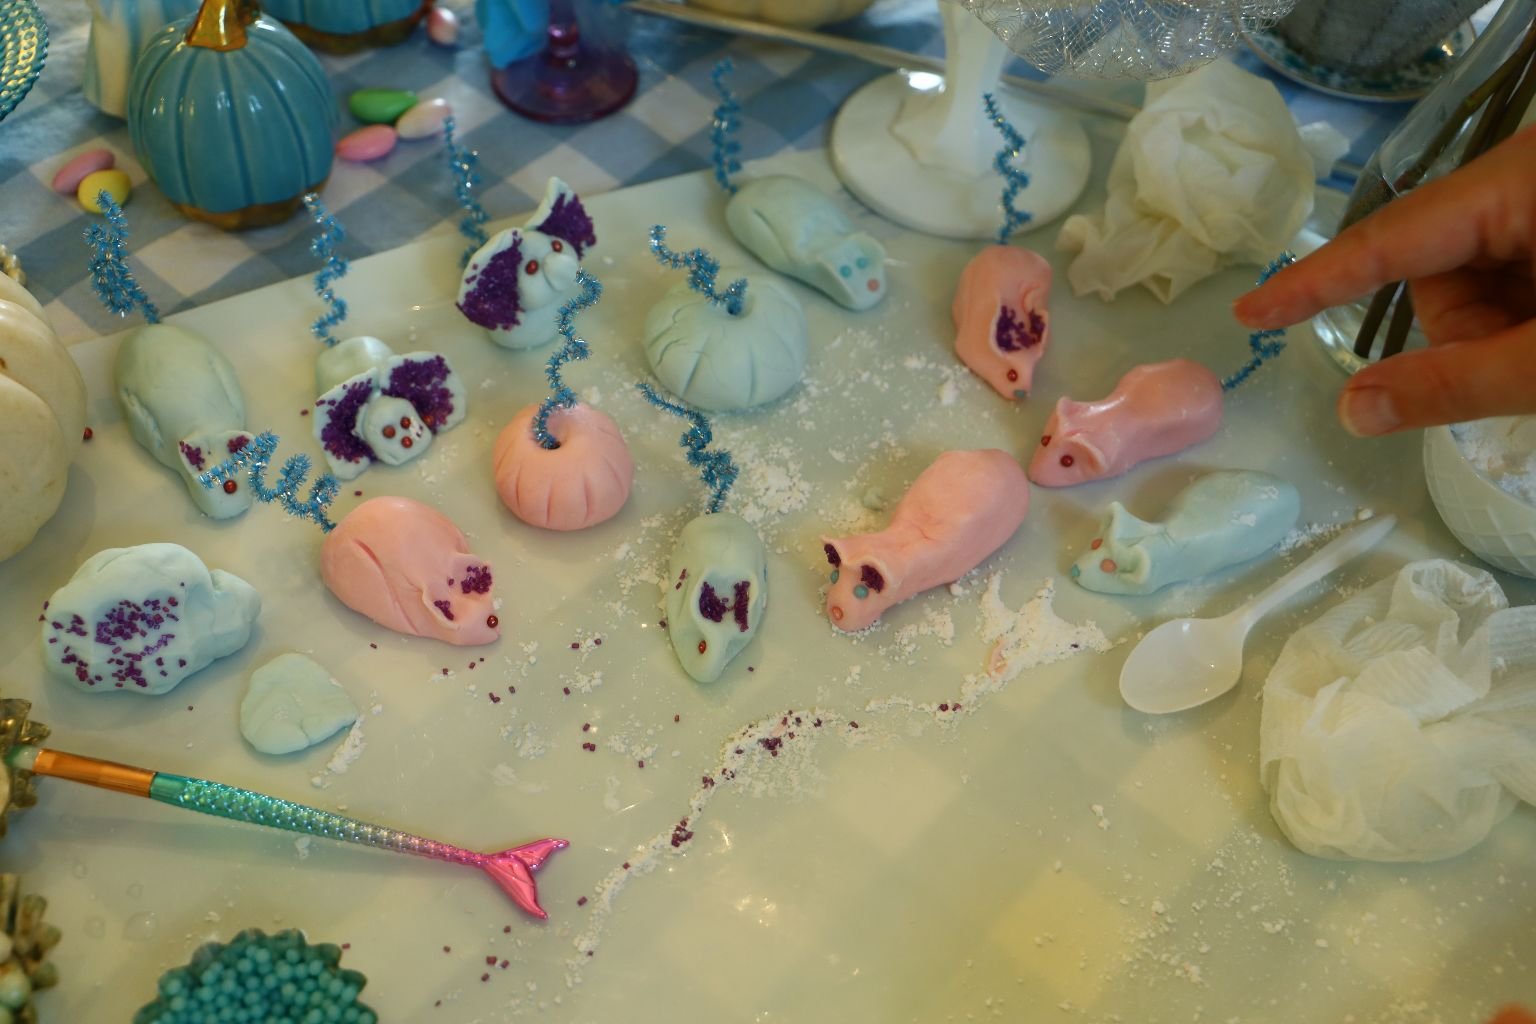
It was at this point that I asked Gordon to join in. I do have to say that Gordon can pretty much do anything and everything. He is a natural artist though untrained. His mice were much nicer than mine. 🙂
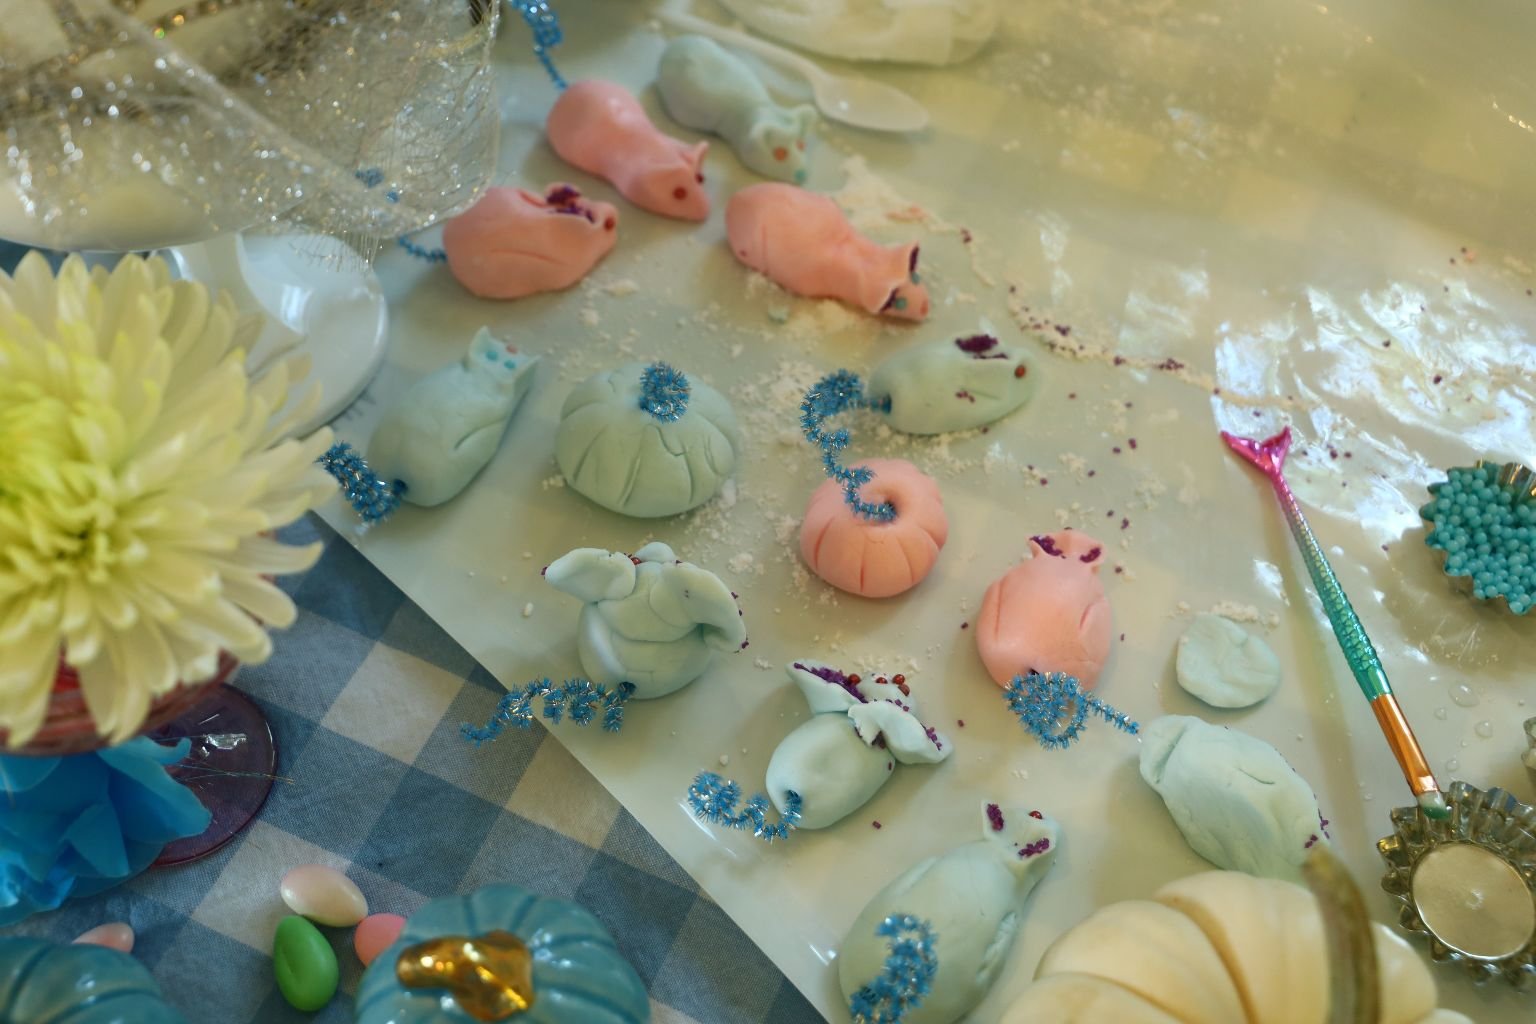
I did try my hand at making a few pumpkins and they turned out very well.
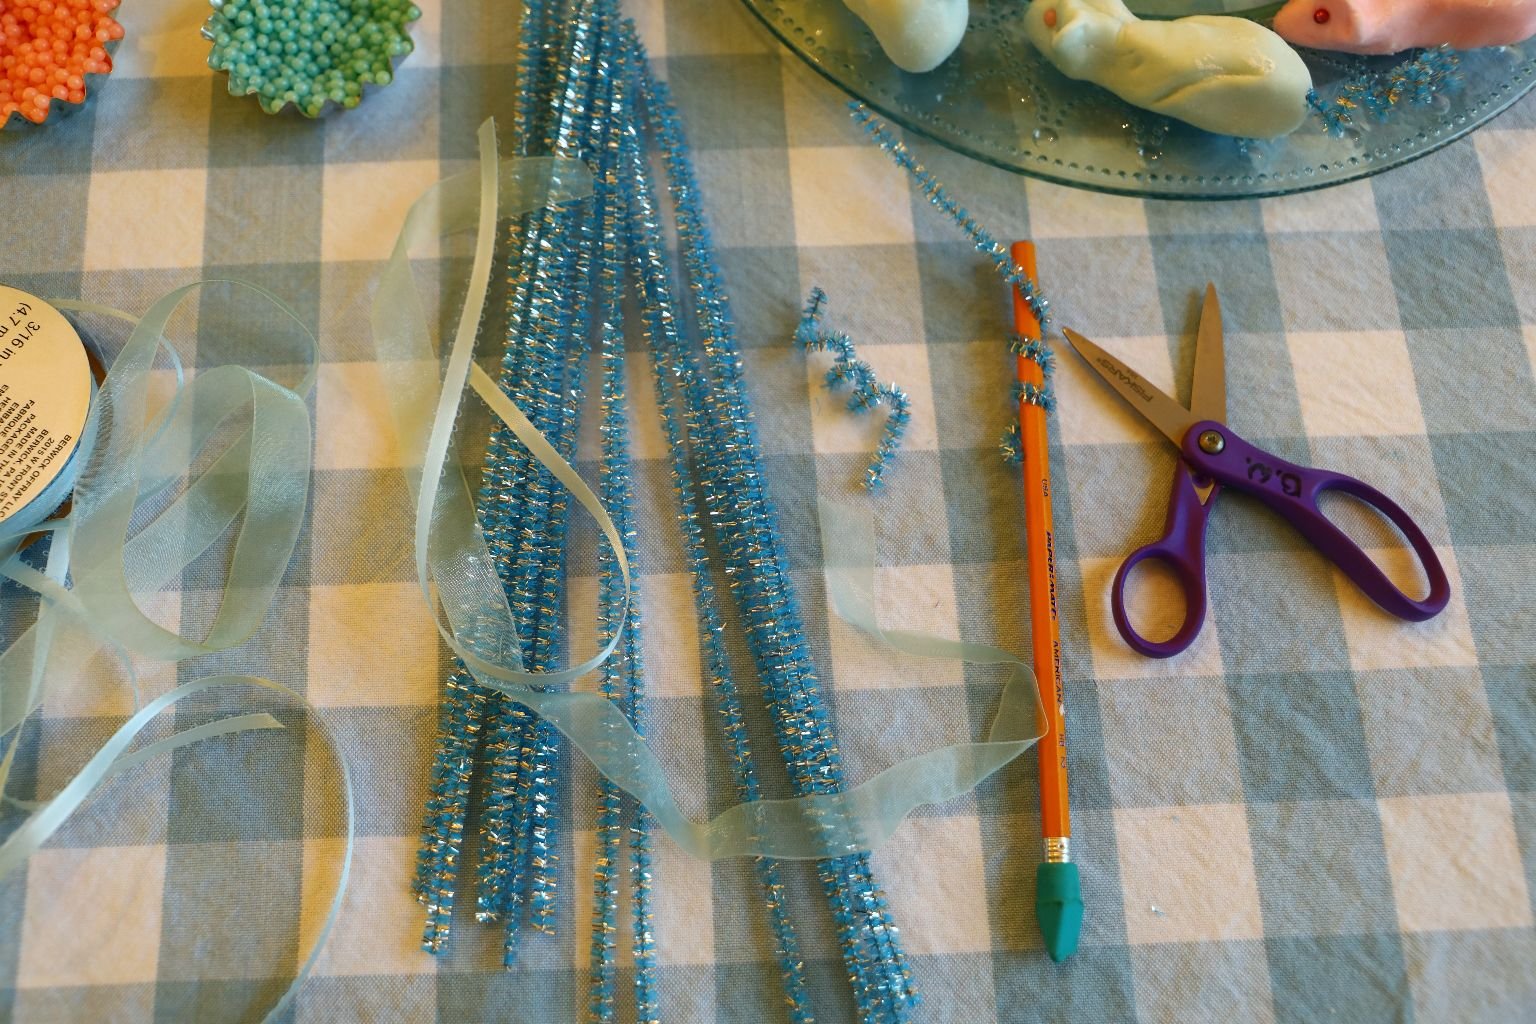
I had some old blue and silver pipe cleaners which I thought would be very nice as mice tails or as pumpkin stems.
In order to make the tails and the stems I wrapped the pipe cleaner around a pencil in order to get the curly aspect of it. I then cut it with some scissors and then inserted them into the mice and the pumpkins.
Put the finished mice onto a flat tray lined with parchment paper. Cover with more of the parchment and let dry out completely in a warm spot for at least 2 days. Store in an airtight container for up to 6 months.
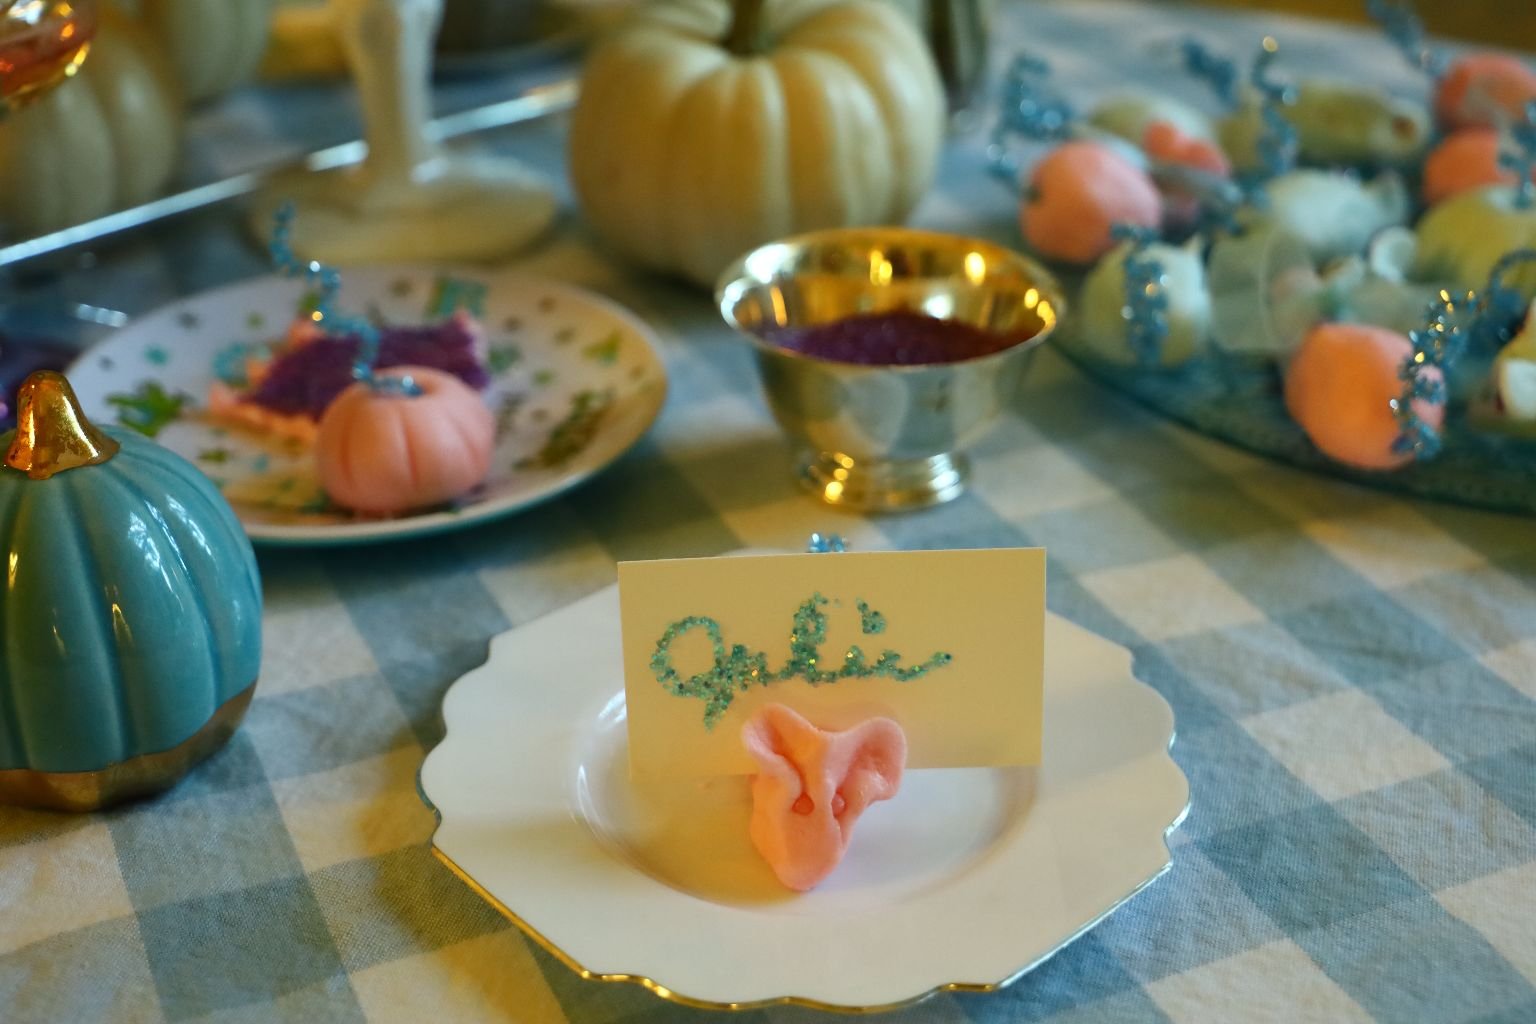
In order to make my place card mouse holder I inserted a business card with my name in glitter while the mouse was still a bit pliable. It does take a day or two to thoroughly dry.

I would like to say that if you are planning on hosting a party and having these mice at your party, that you can either make them ahead yourself and use them as place card holders and allow each party guest to take one home as a souvenir. Or, you can have this as a craft project for the kids to do while at the party. At first my mice looked like elephants. It took me a good 4-5 attempts before my ‘elephants’ started to resemble mice. I also started to make some nice pumpkins out of the clay mixture that I thought looked quite nice.
The dough does harden/break down quicker than a small child can mold them. I suggest having a few helpers to help each child create their own mouse/slipper/pumpkin, etc. Or whatever they decide to mold. Sometimes the clumsy looking ones are actually the most charming and desirable. So sometimes perfection really isn’t all that perfect.
—————————————————————–
Making Cookies w/ Leftover Colored Sugars and Dragees
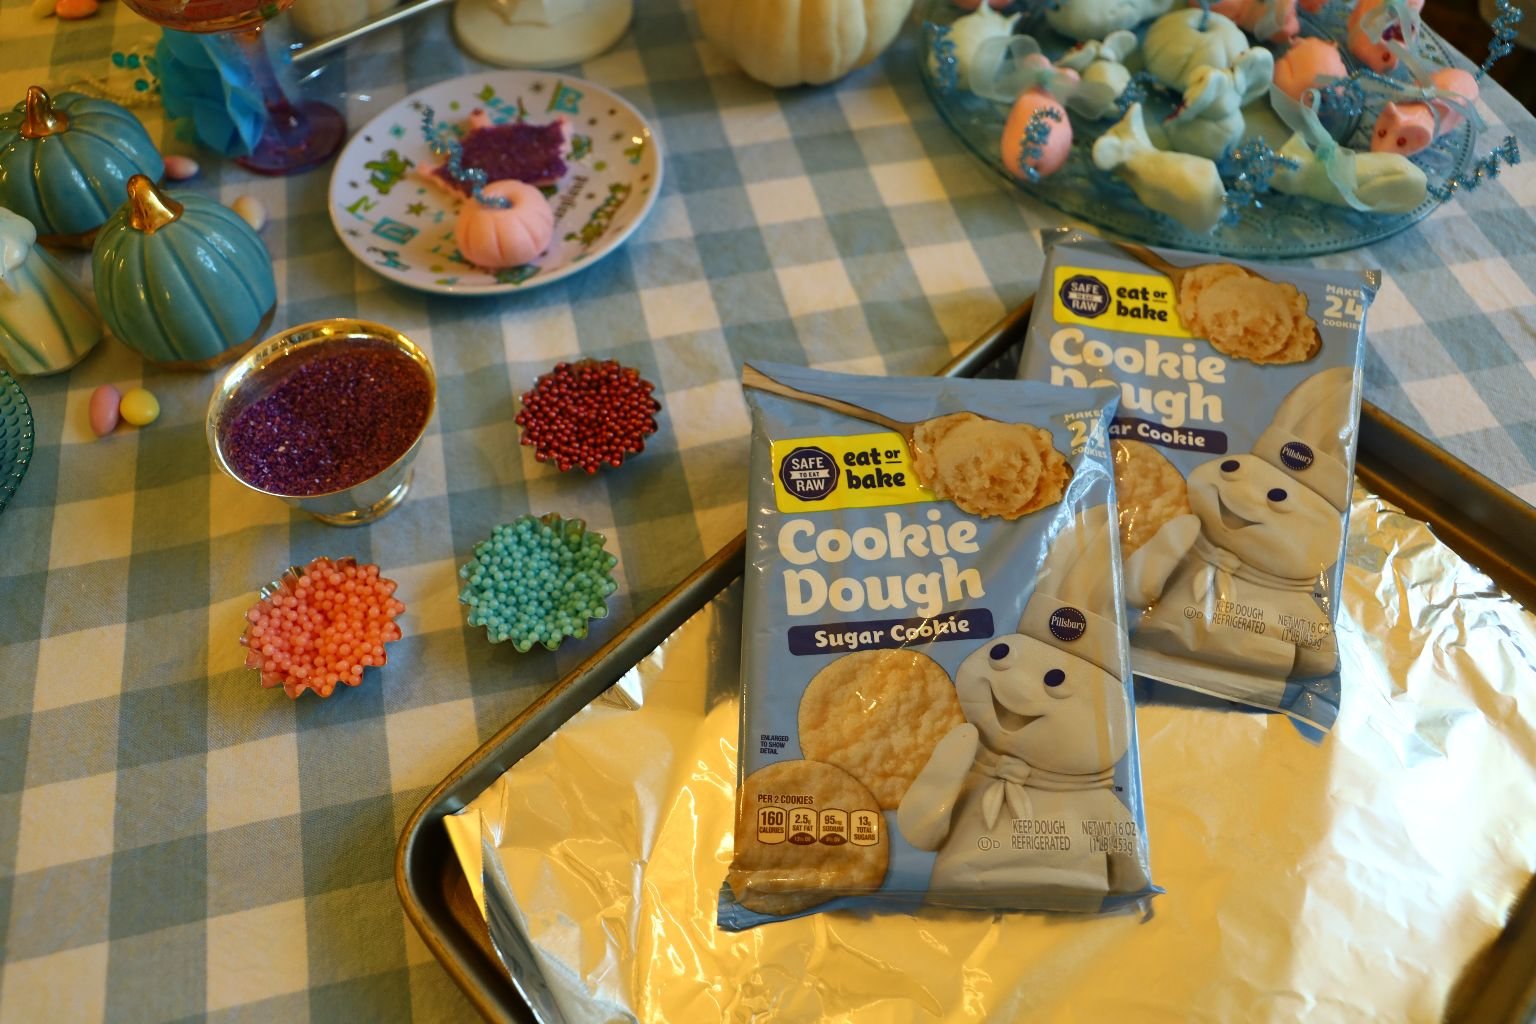
I am always looking for shortcuts especially where children’s parties are concerned.
I had this ready make sugar cookie dough in my refrigerator so I thought I would use it and make cookies with my leftover sprinkles from our Sugar Mice.
But understand that in this age of Covid 19 that it isn’t wise if many children have touched all this sugar. But if a family living together does, then that is fine.
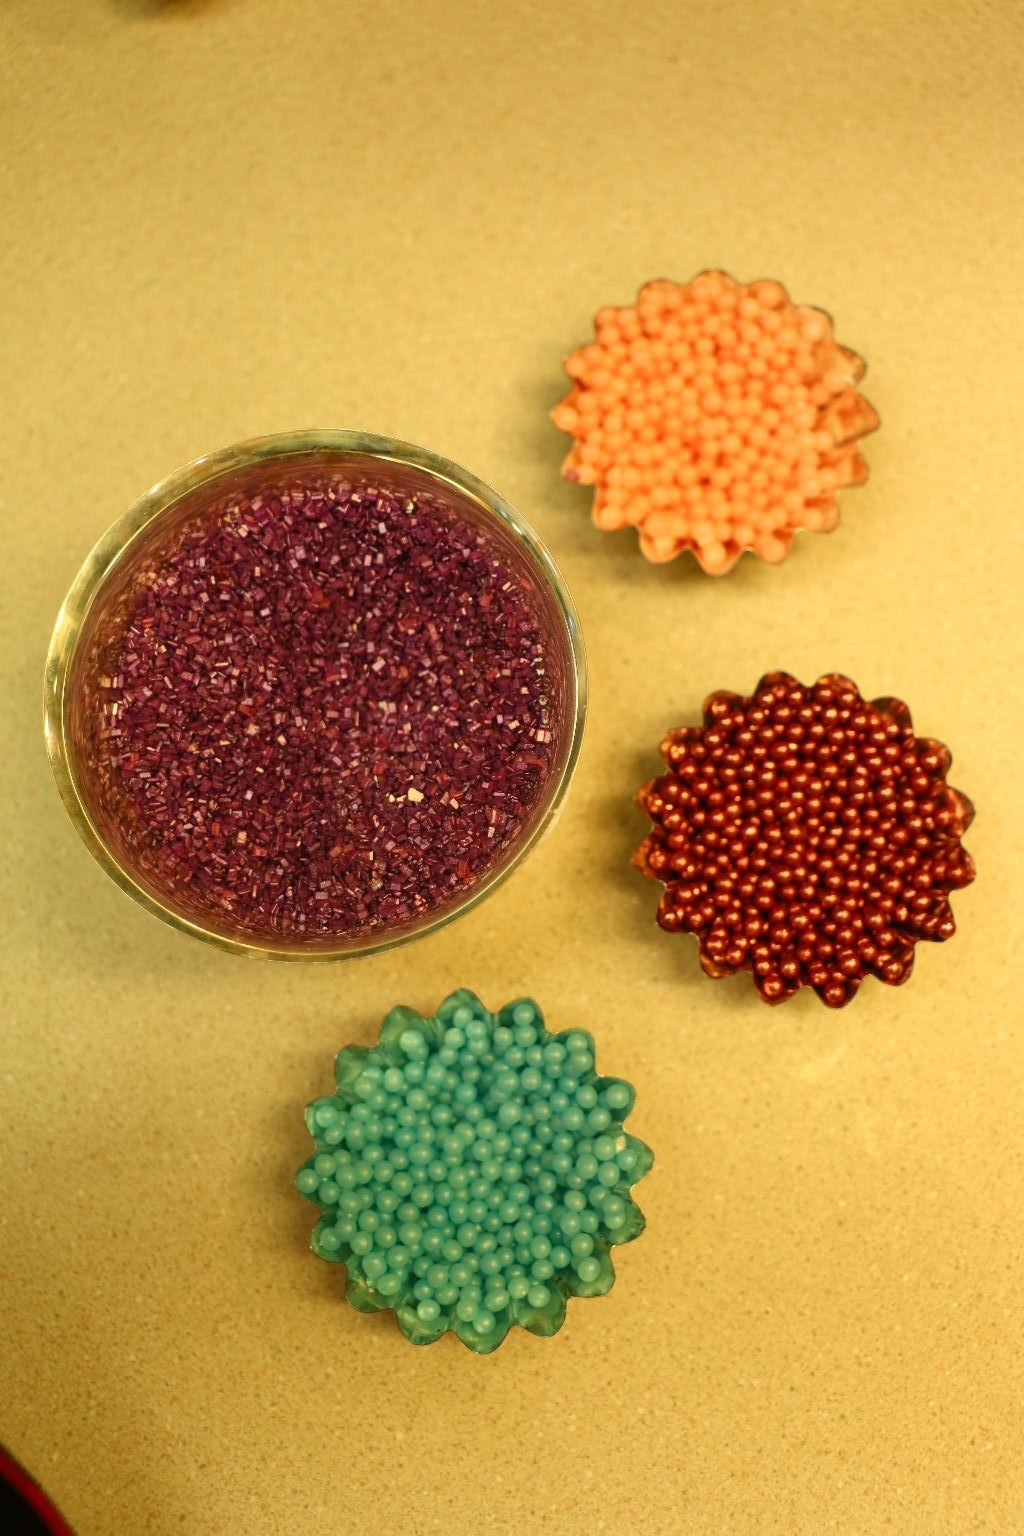
The Leftover Sugars and Dragees
What I did was to place all the cookie dough pieces onto 2 cookie sheets and then placed them into the oven according to their package directions. After about 7 minutes I removed them from the oven and added all the sprinkles and sugars and then put them back into the oven for the remaining cooking time.
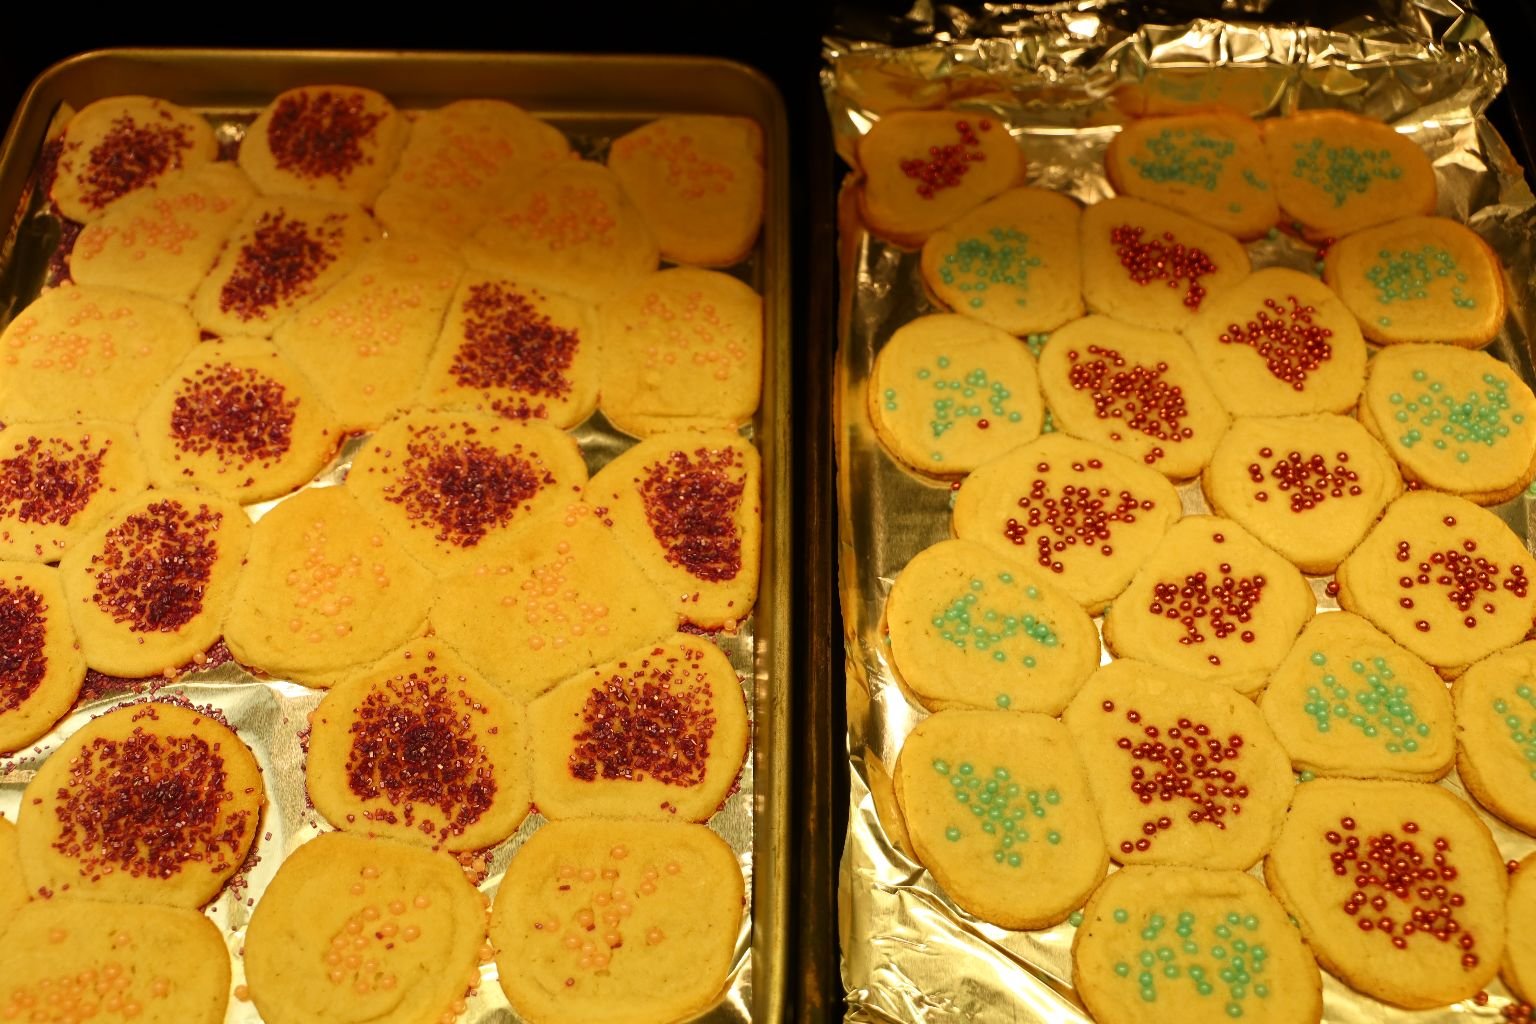
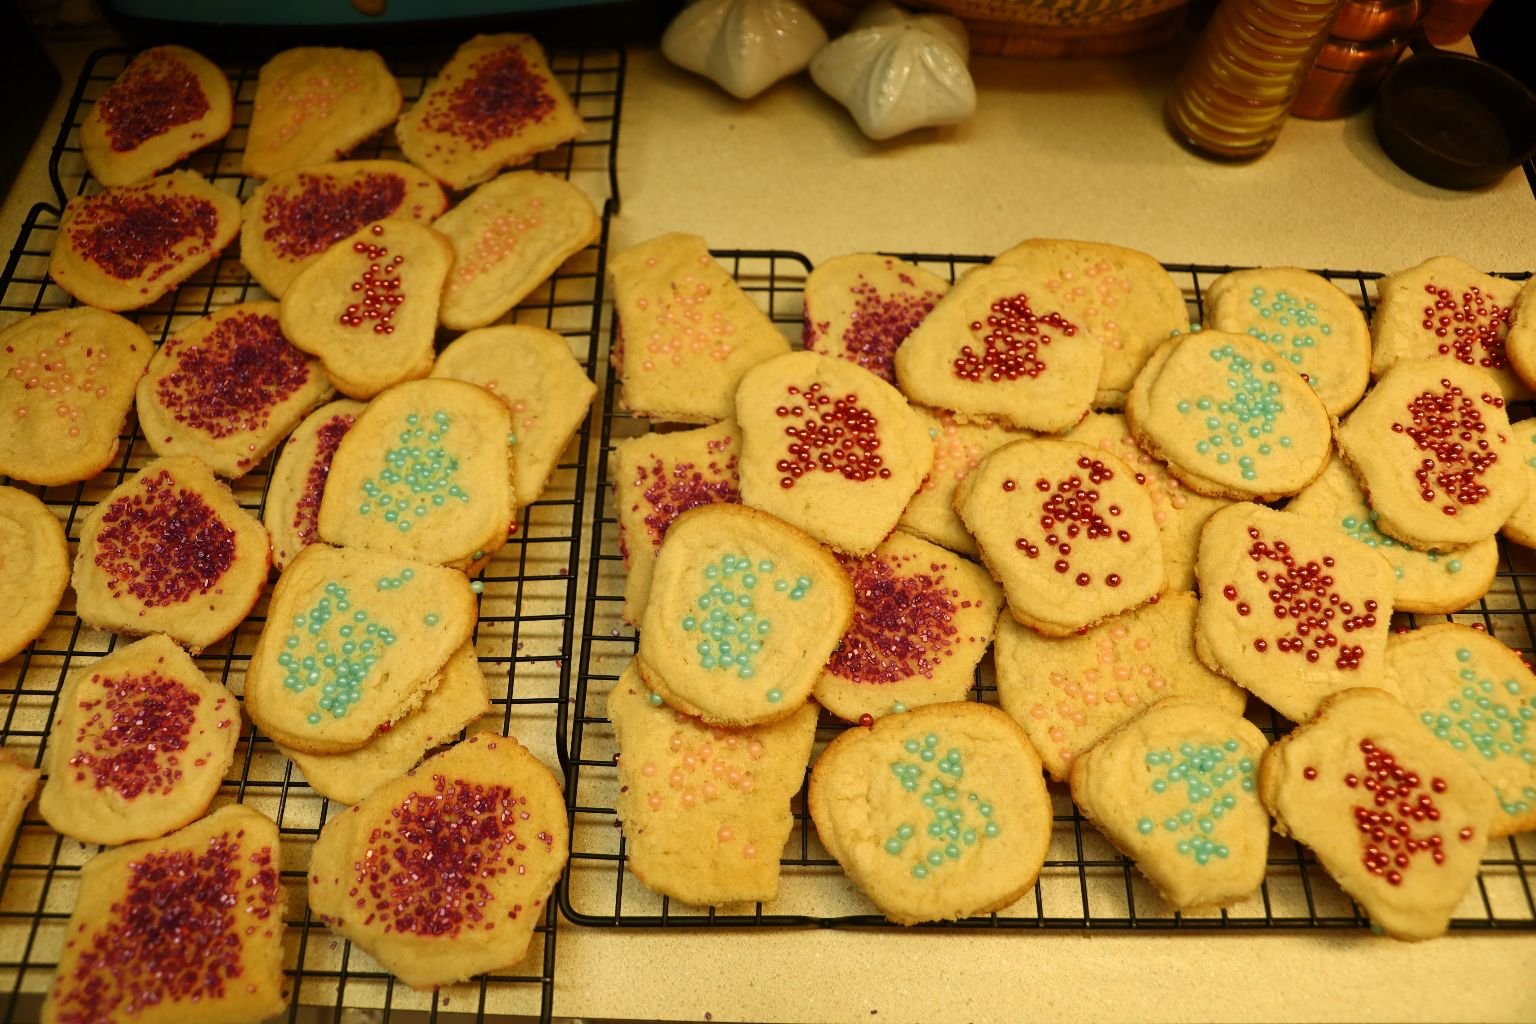
When they were done I allowed them to cool and then I had to cut them apart and place them onto a cooling rack and then onto a nice serving plate.
Even though they are uneven and flat I love them and think they look beautiful!
Besides, It doesn’t matter what they look like they taste delicious.
What little Cinderella wouldn’t love it?
————————————————————
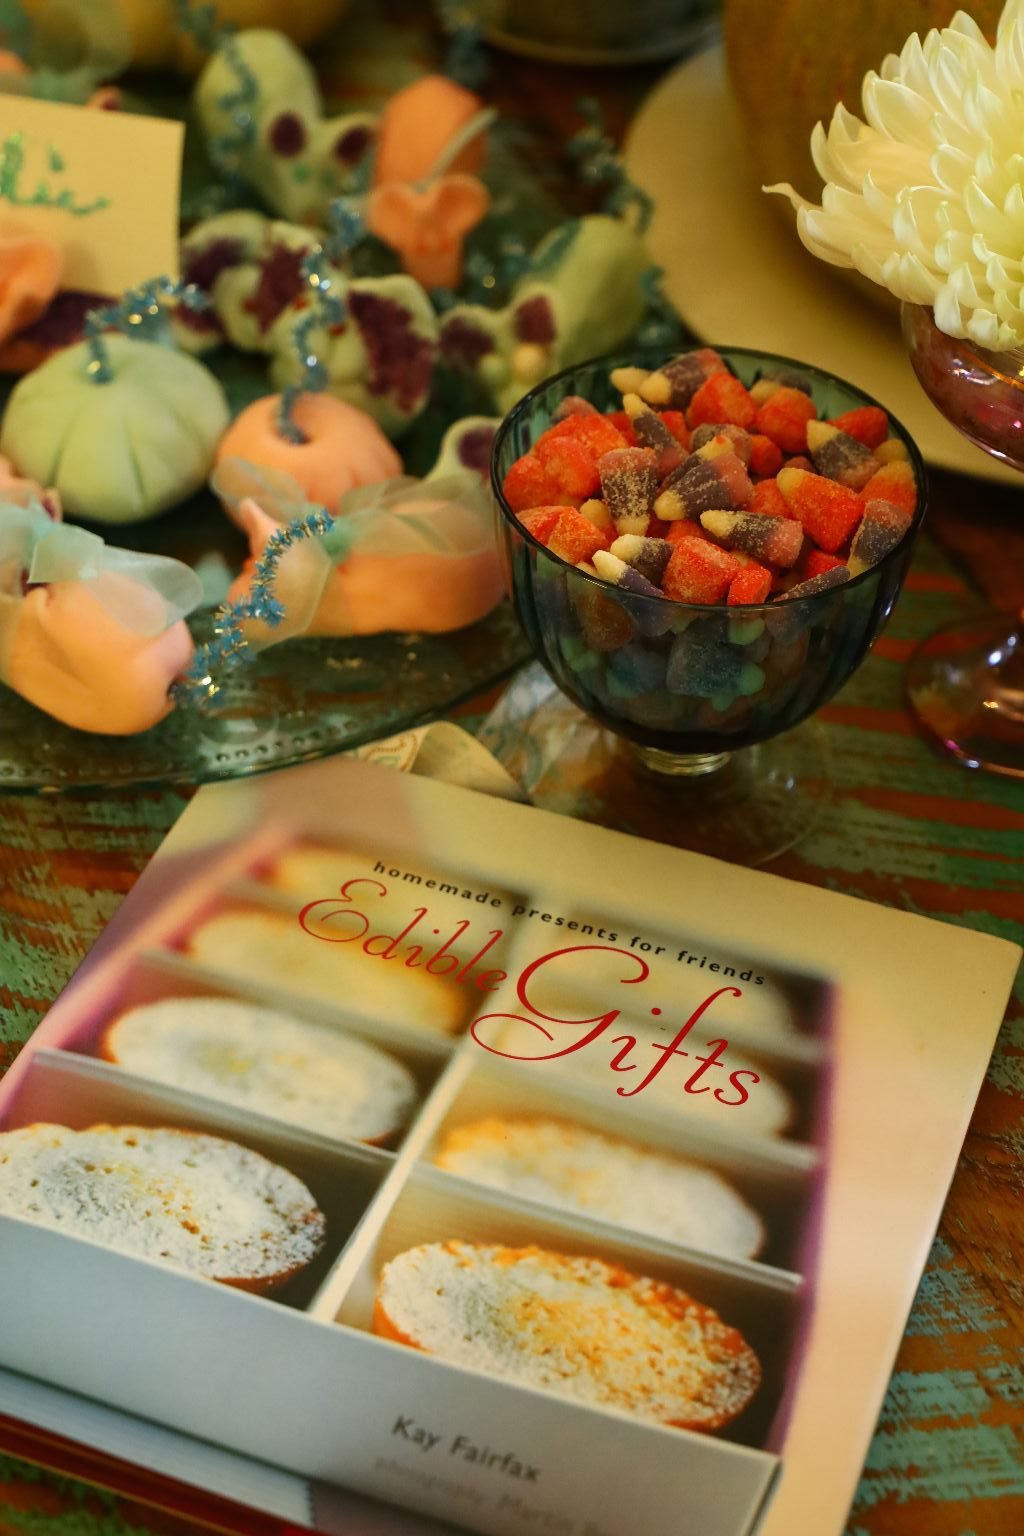
I do want to give credit where credit is due:
The book is called, Homemade Presents For Friends EDIBLE GIFTS by Kay Fairfax
They are adorable!
And I believe that with practice, we all can make them as nicely as she does.
—————————————————————–
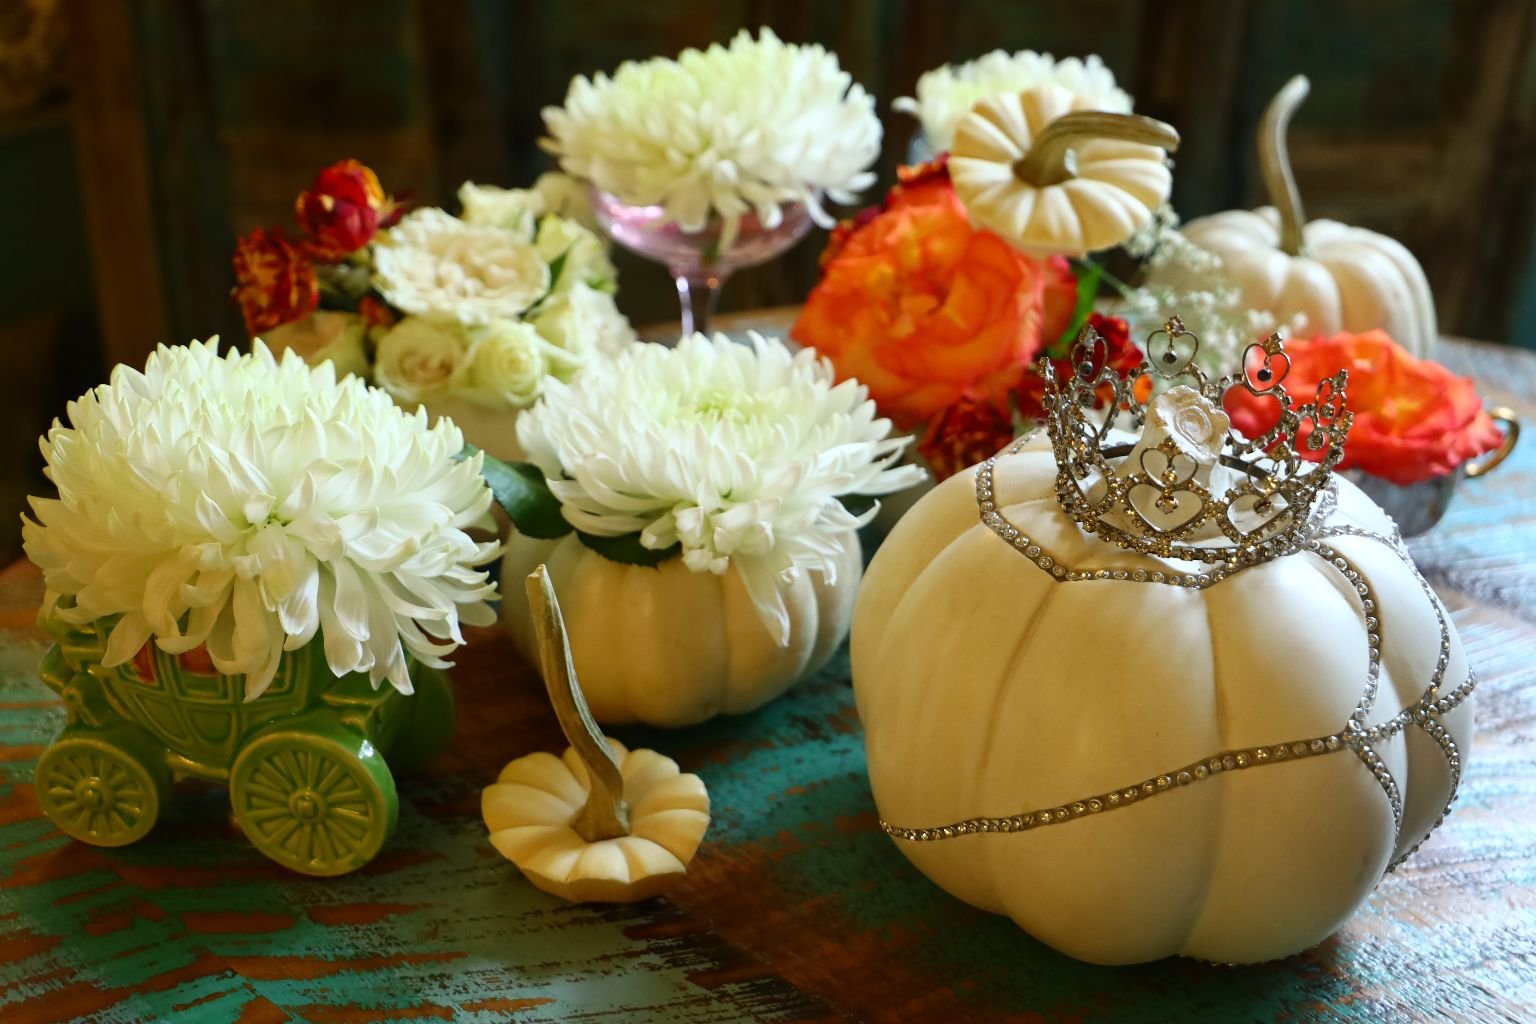
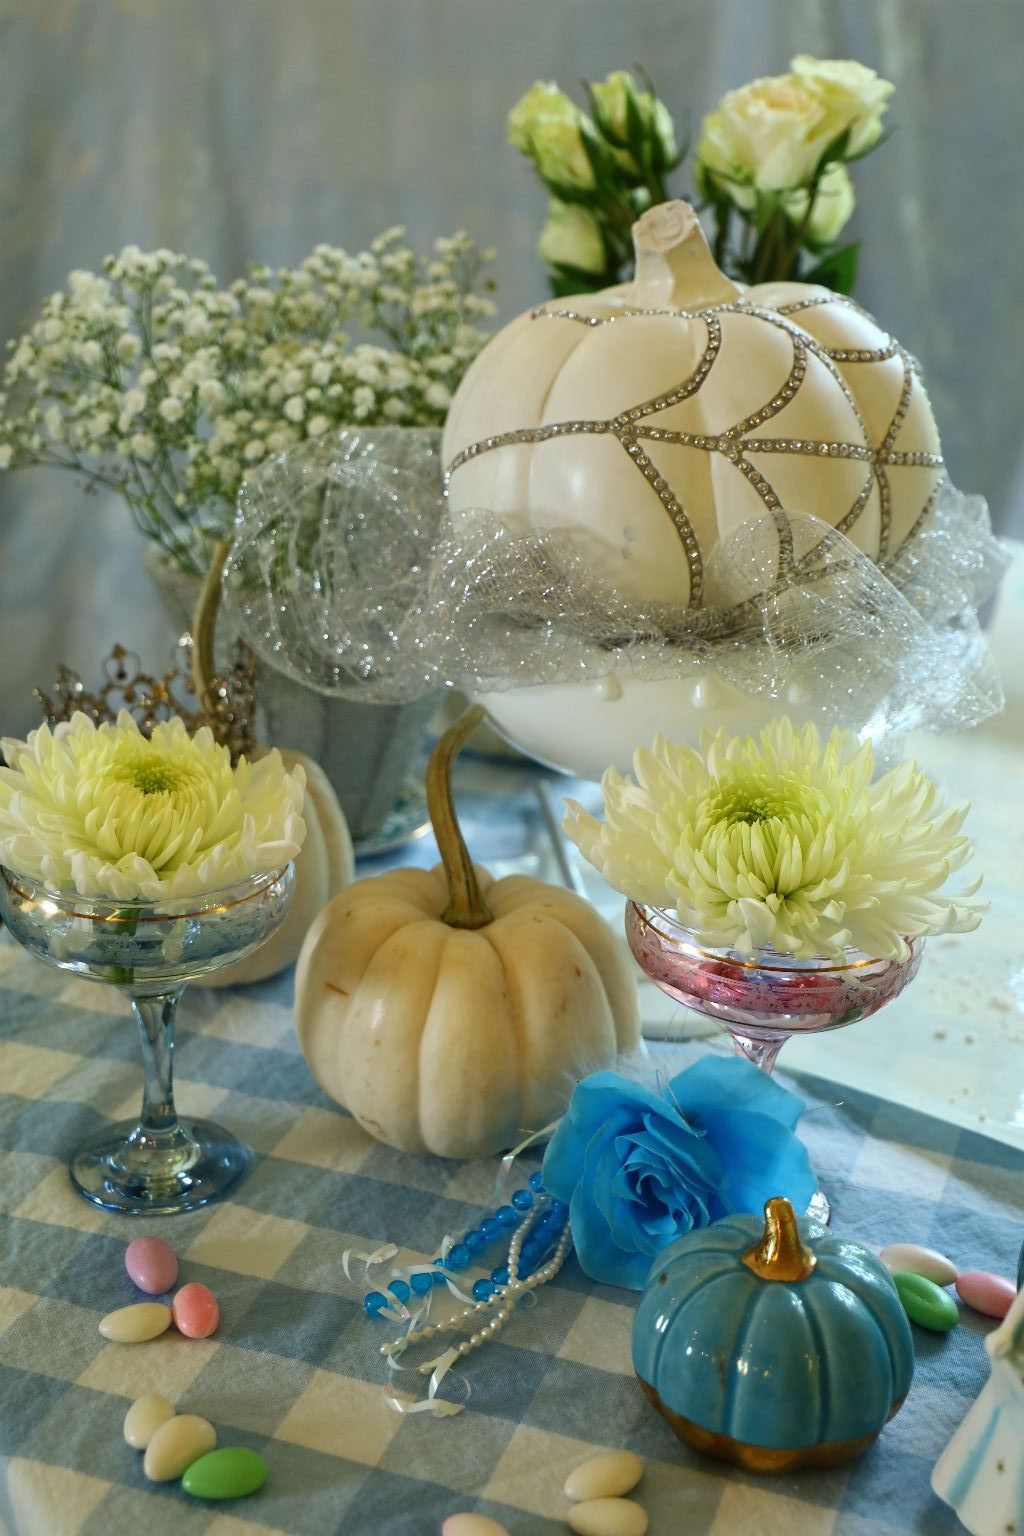
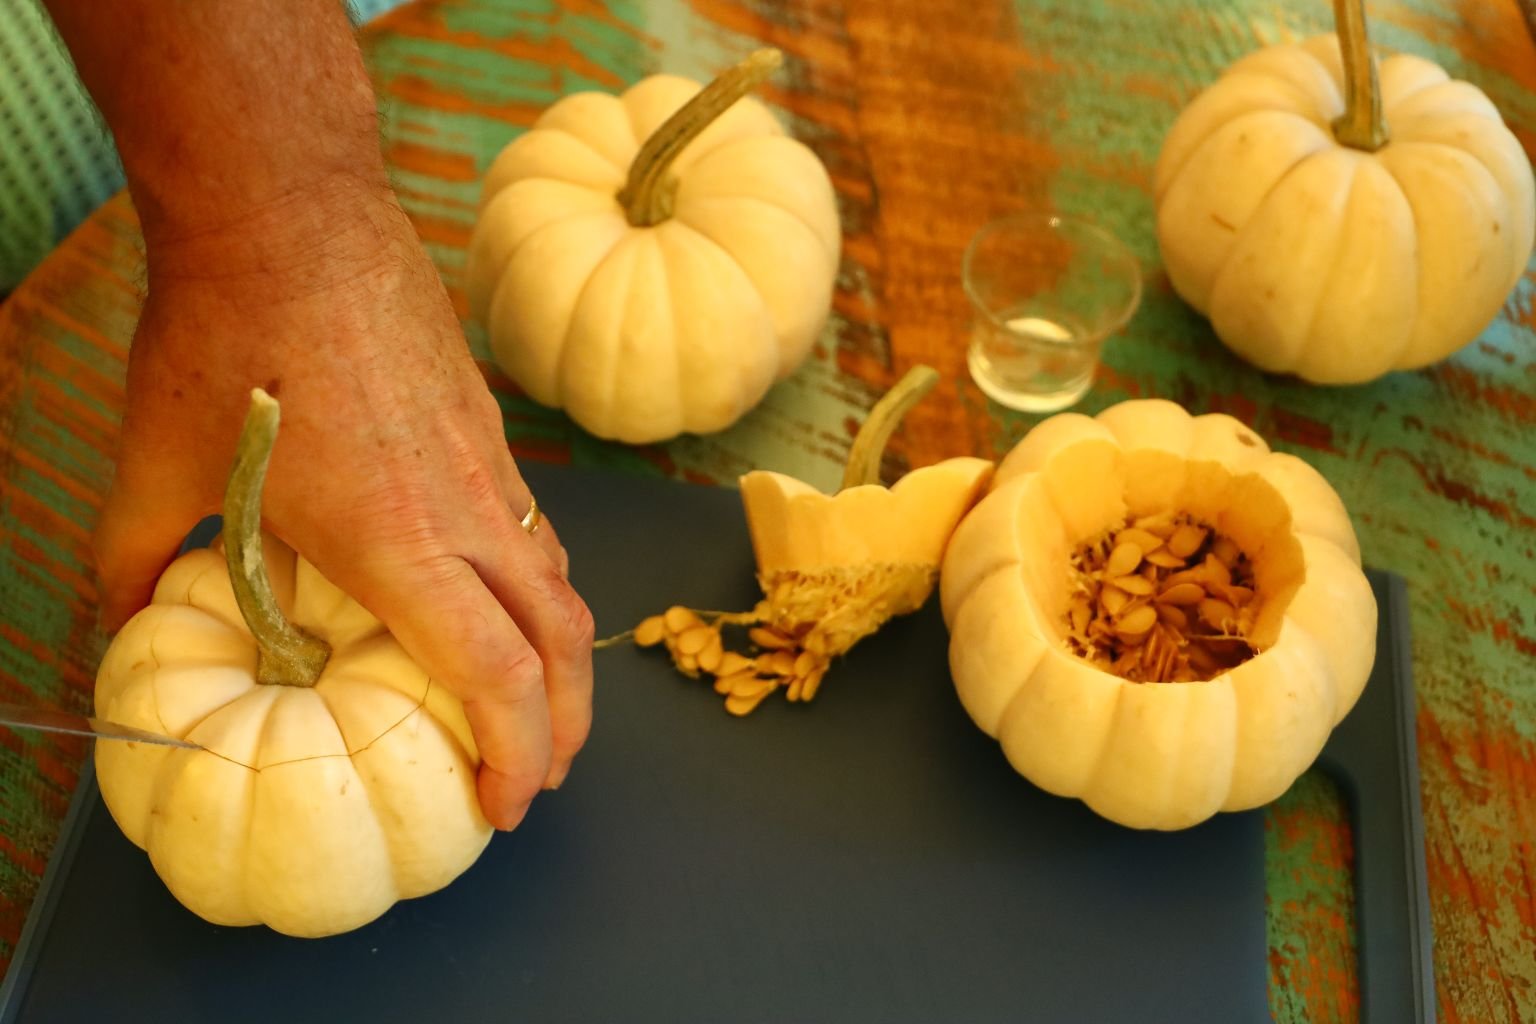
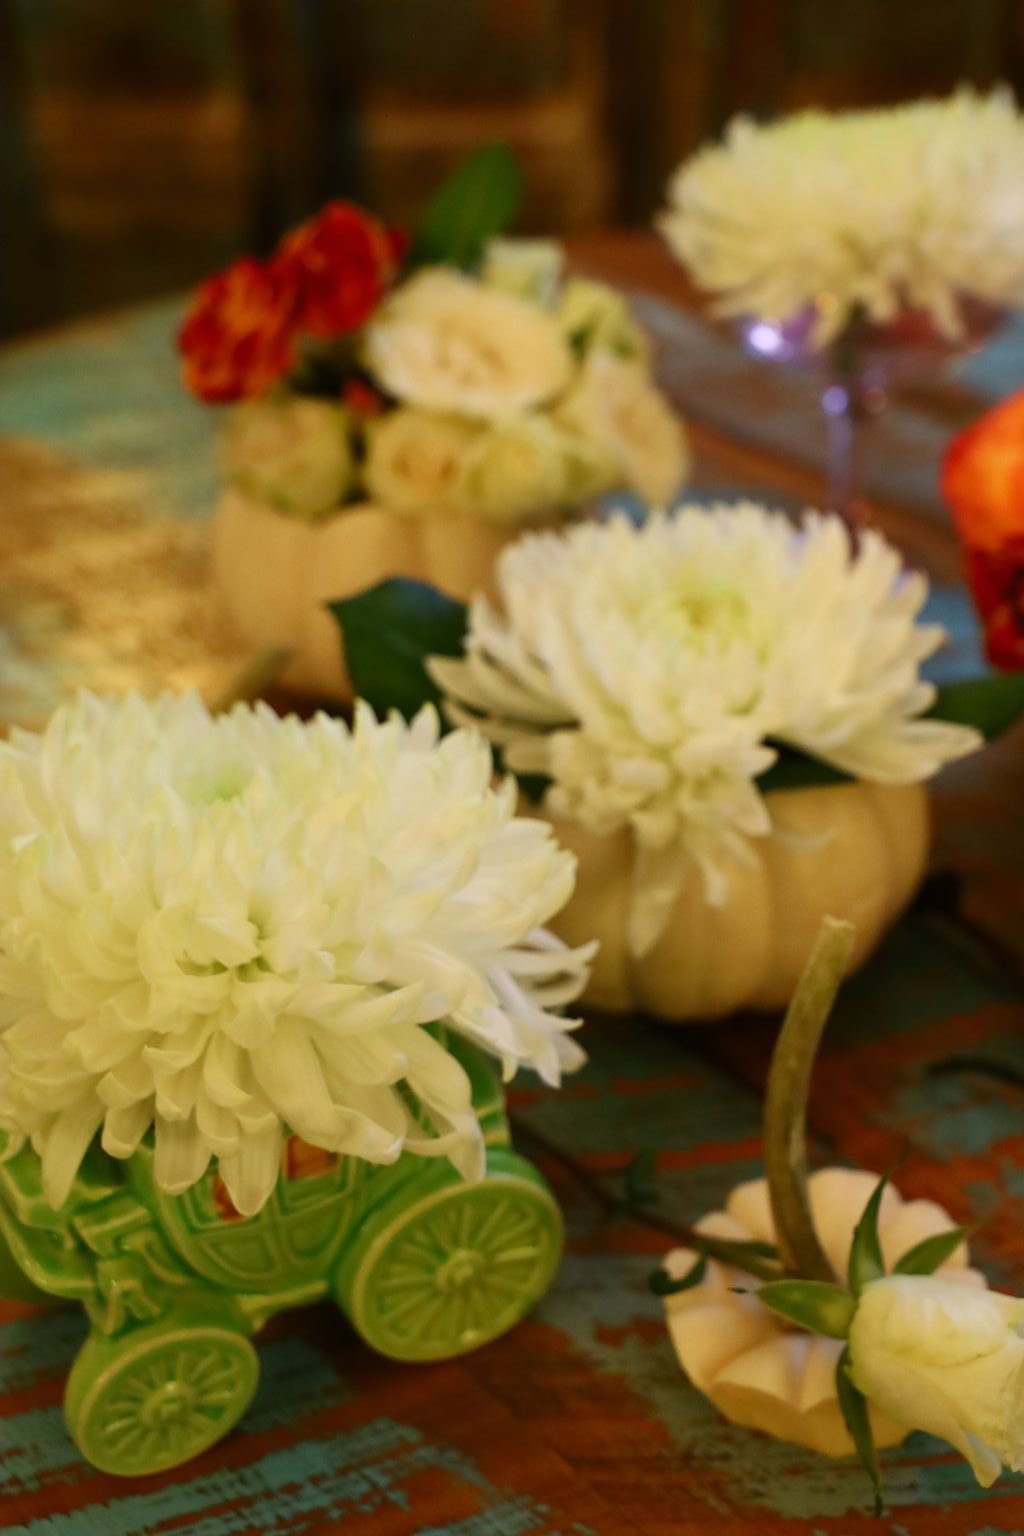
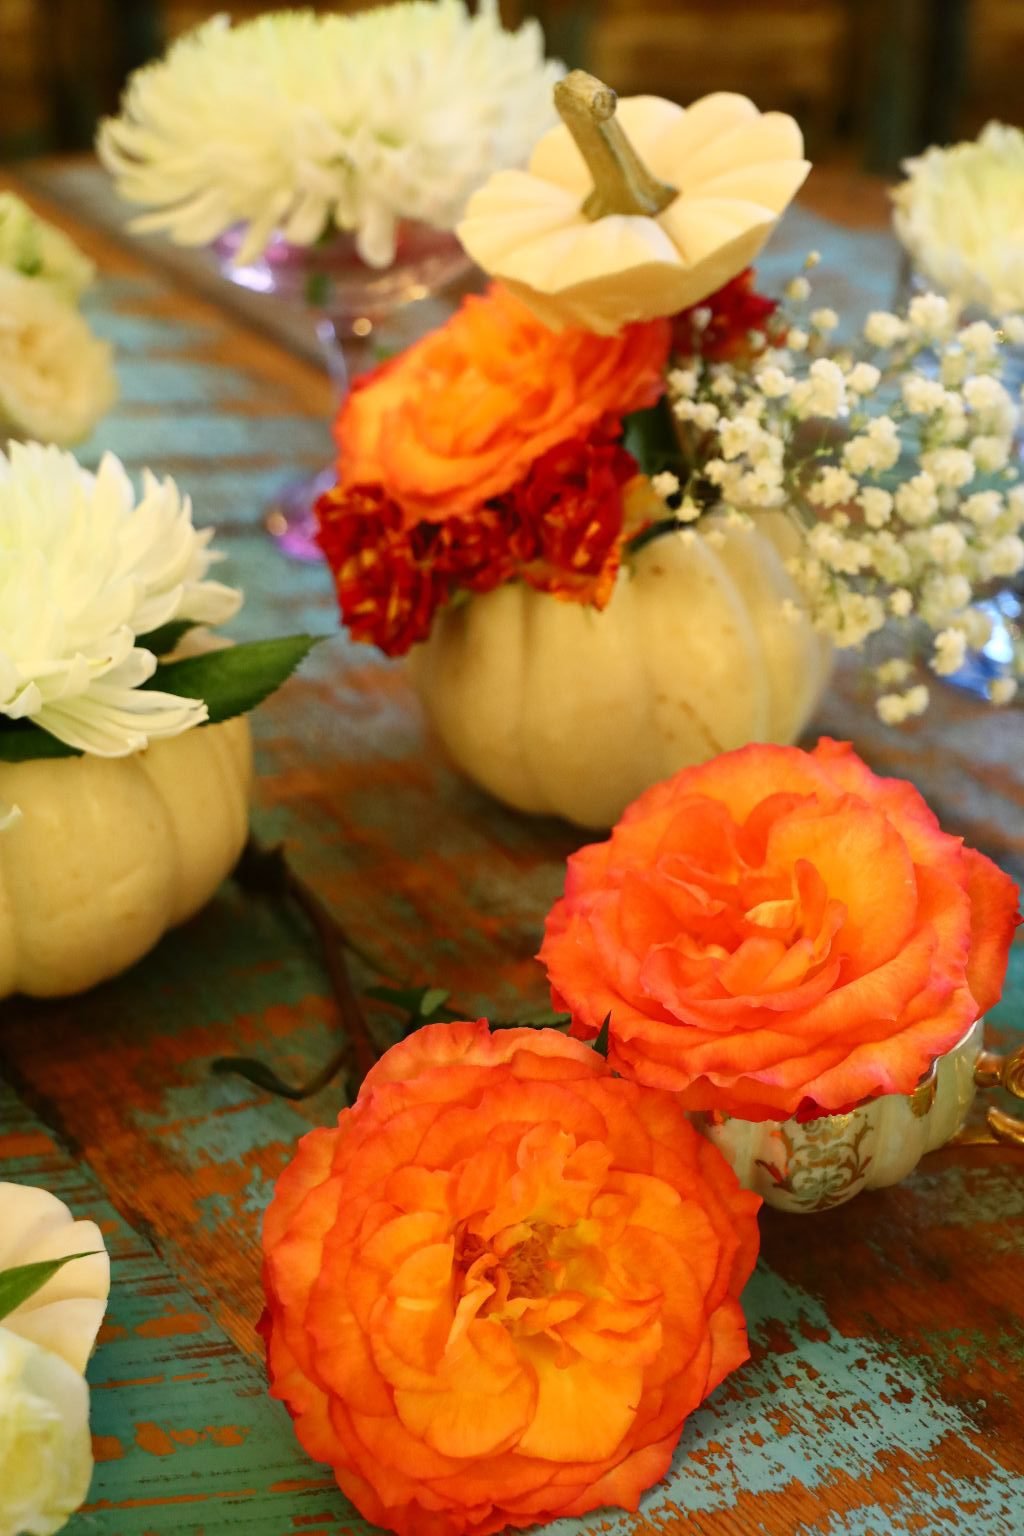
Making Pumpkin Centerpieces
A beautiful accent to any Cinderella party would be to add a few pumpkins scattered about the tables.

Perhaps Interspersed with some of the Sugar Mice, Roses, and Candy
OR, you could carve out the center of a pumpkin or two.
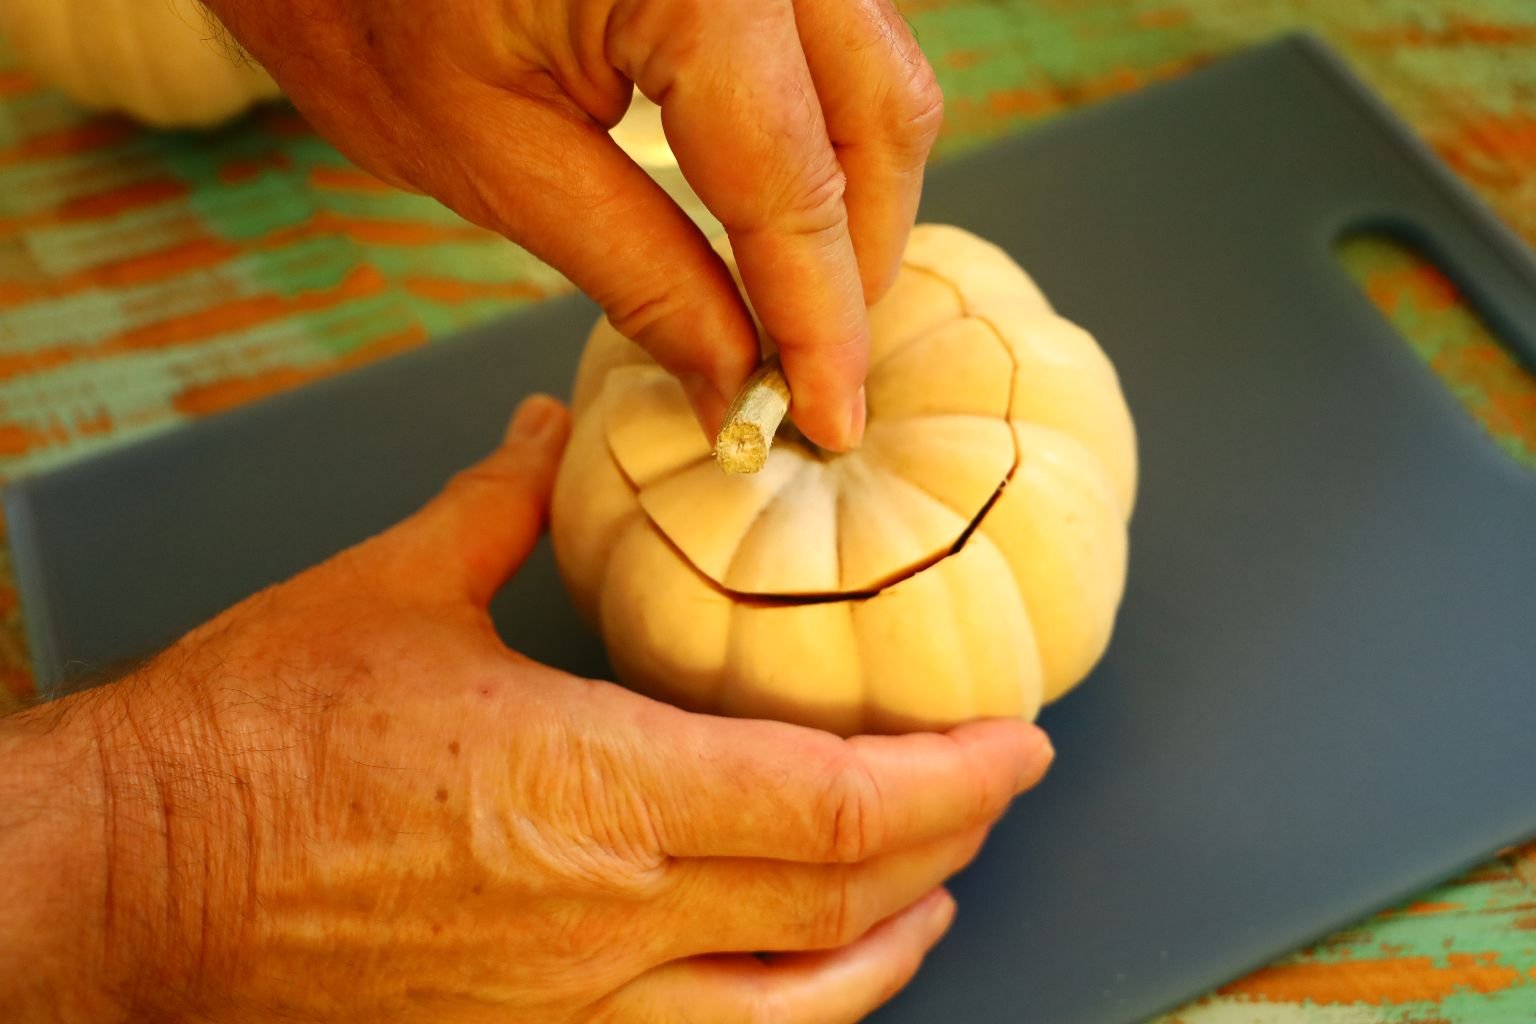
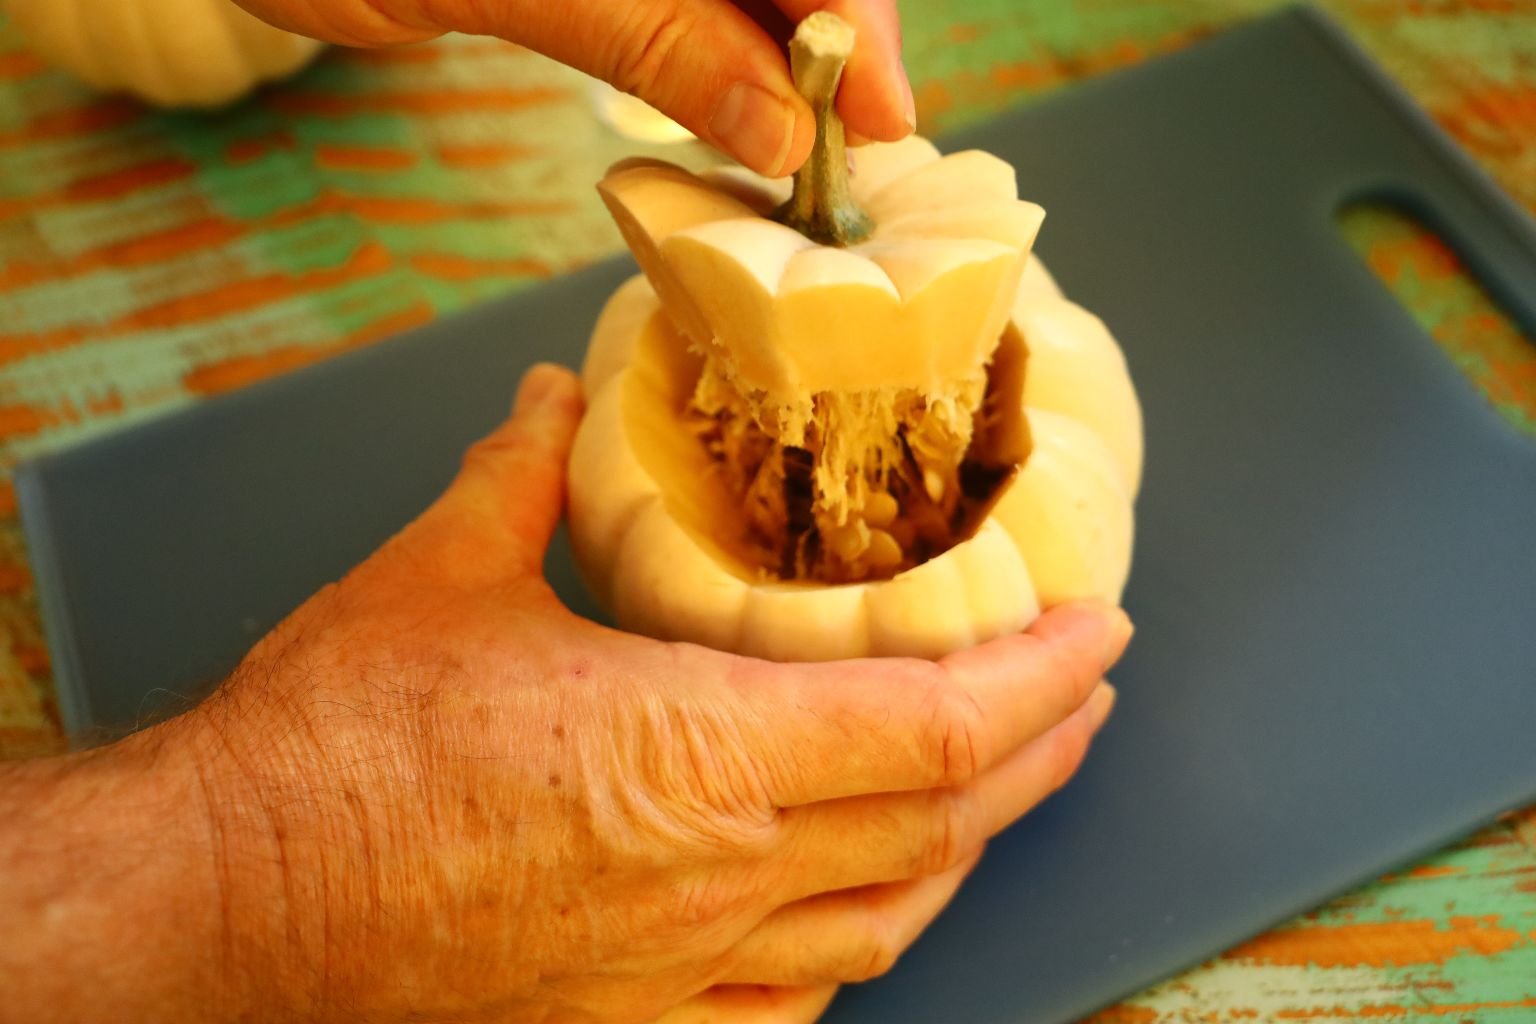
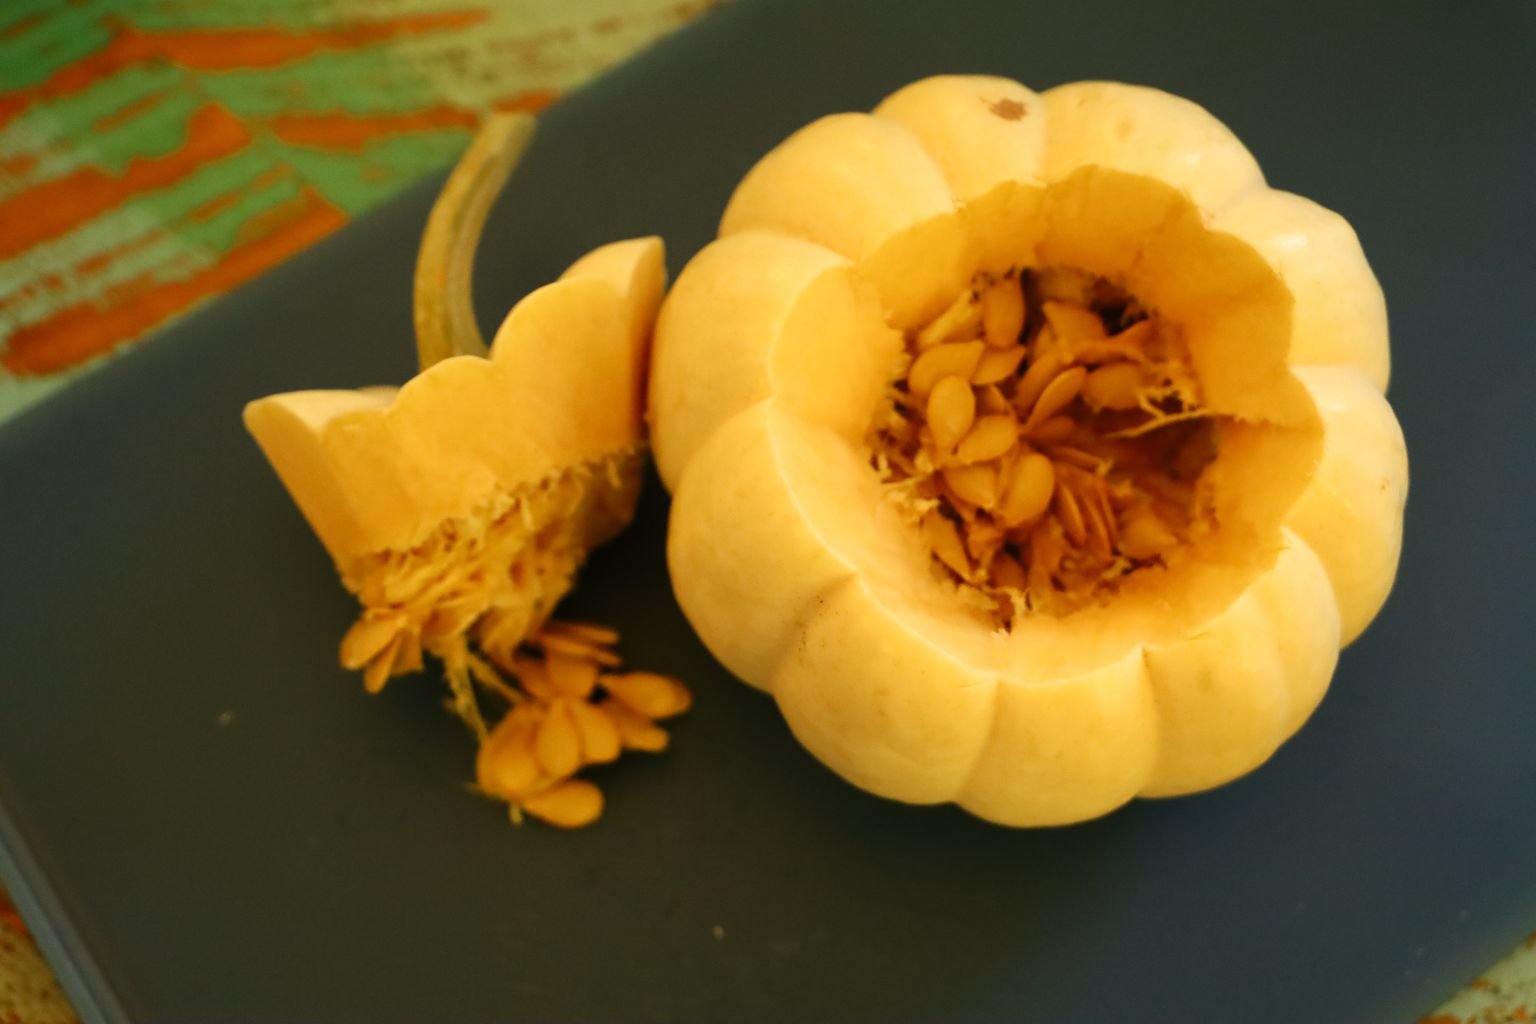
Save the Seeds for Roasting
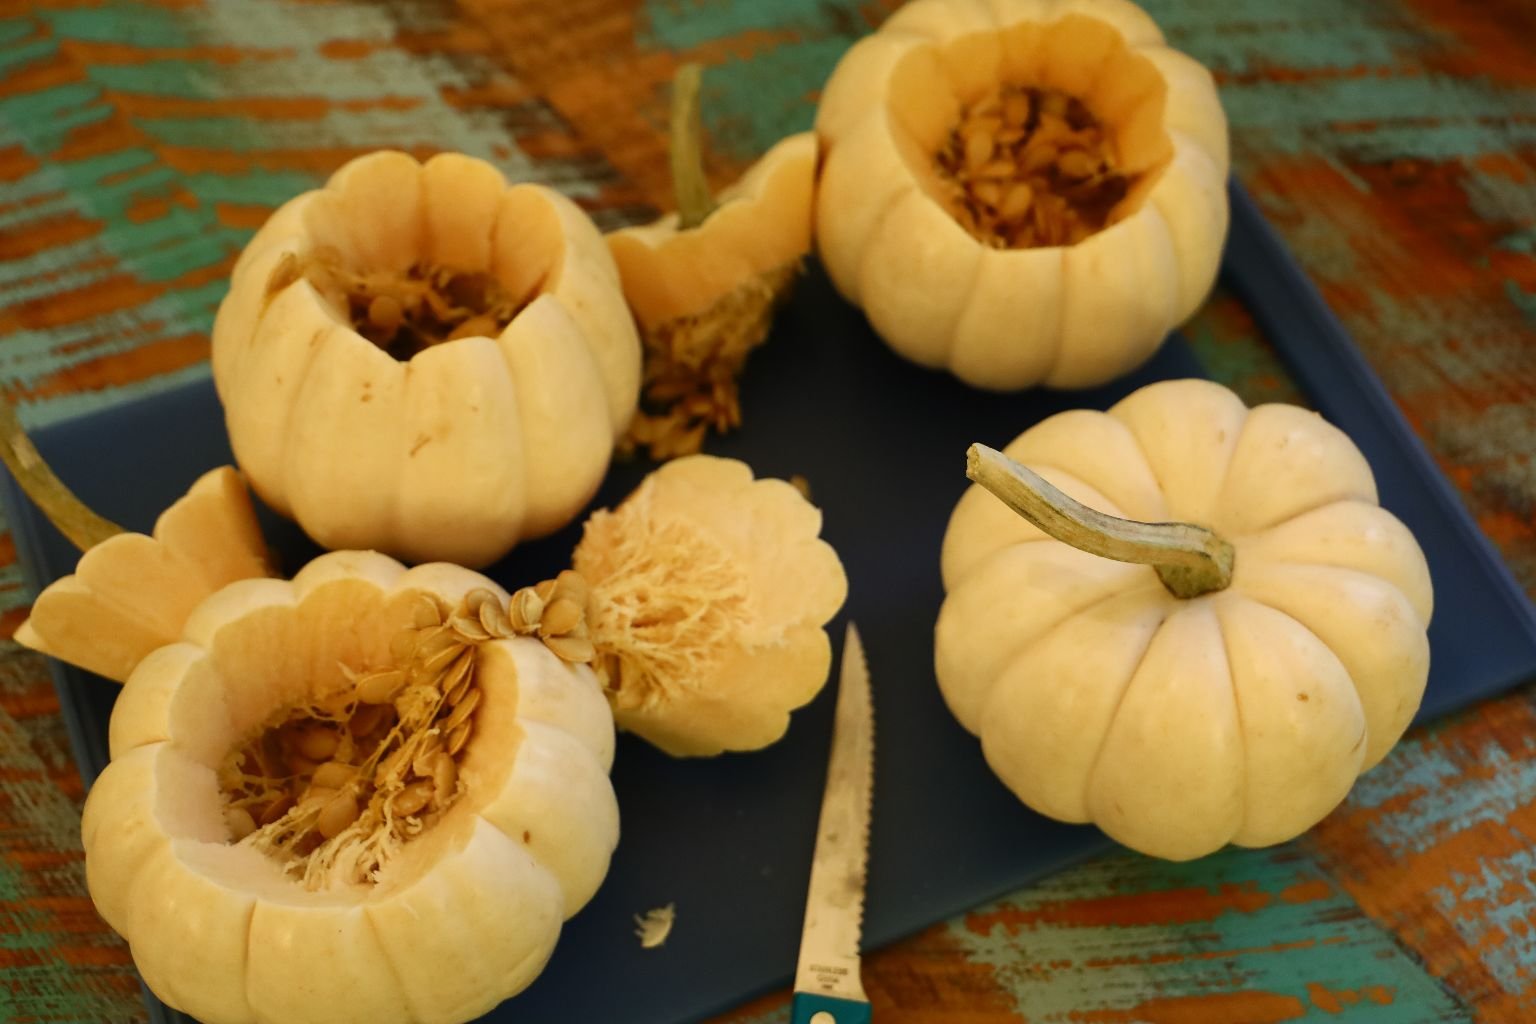
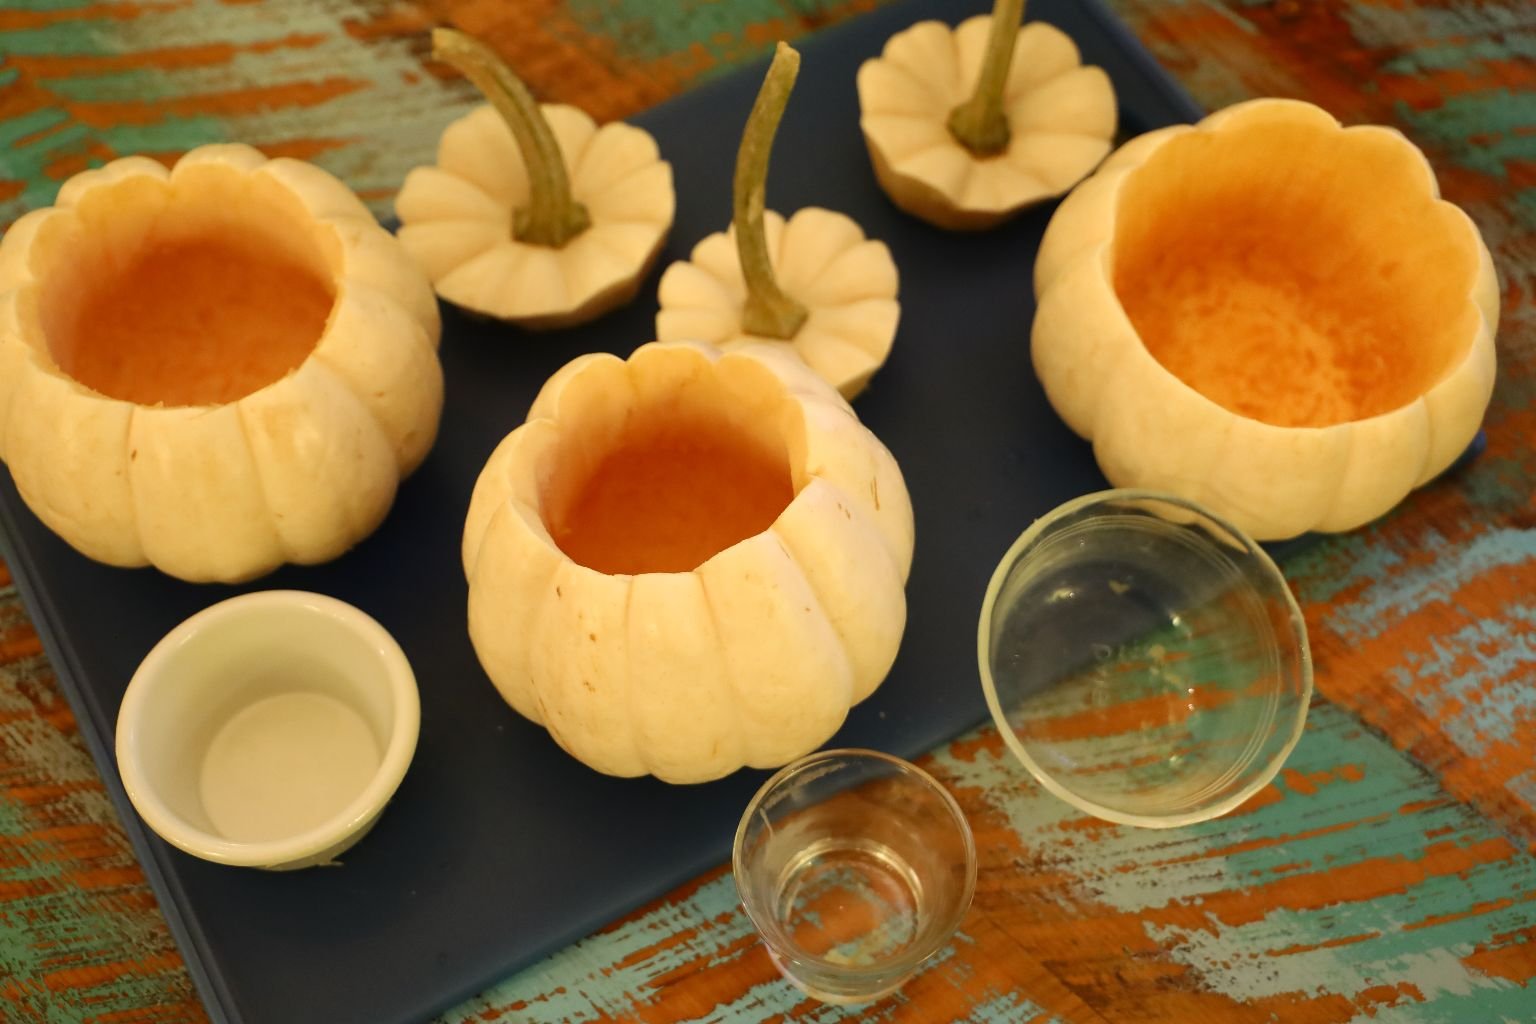
You can carve out the pumpkin centers and then add some sort of bowl or votive to use as a vase….
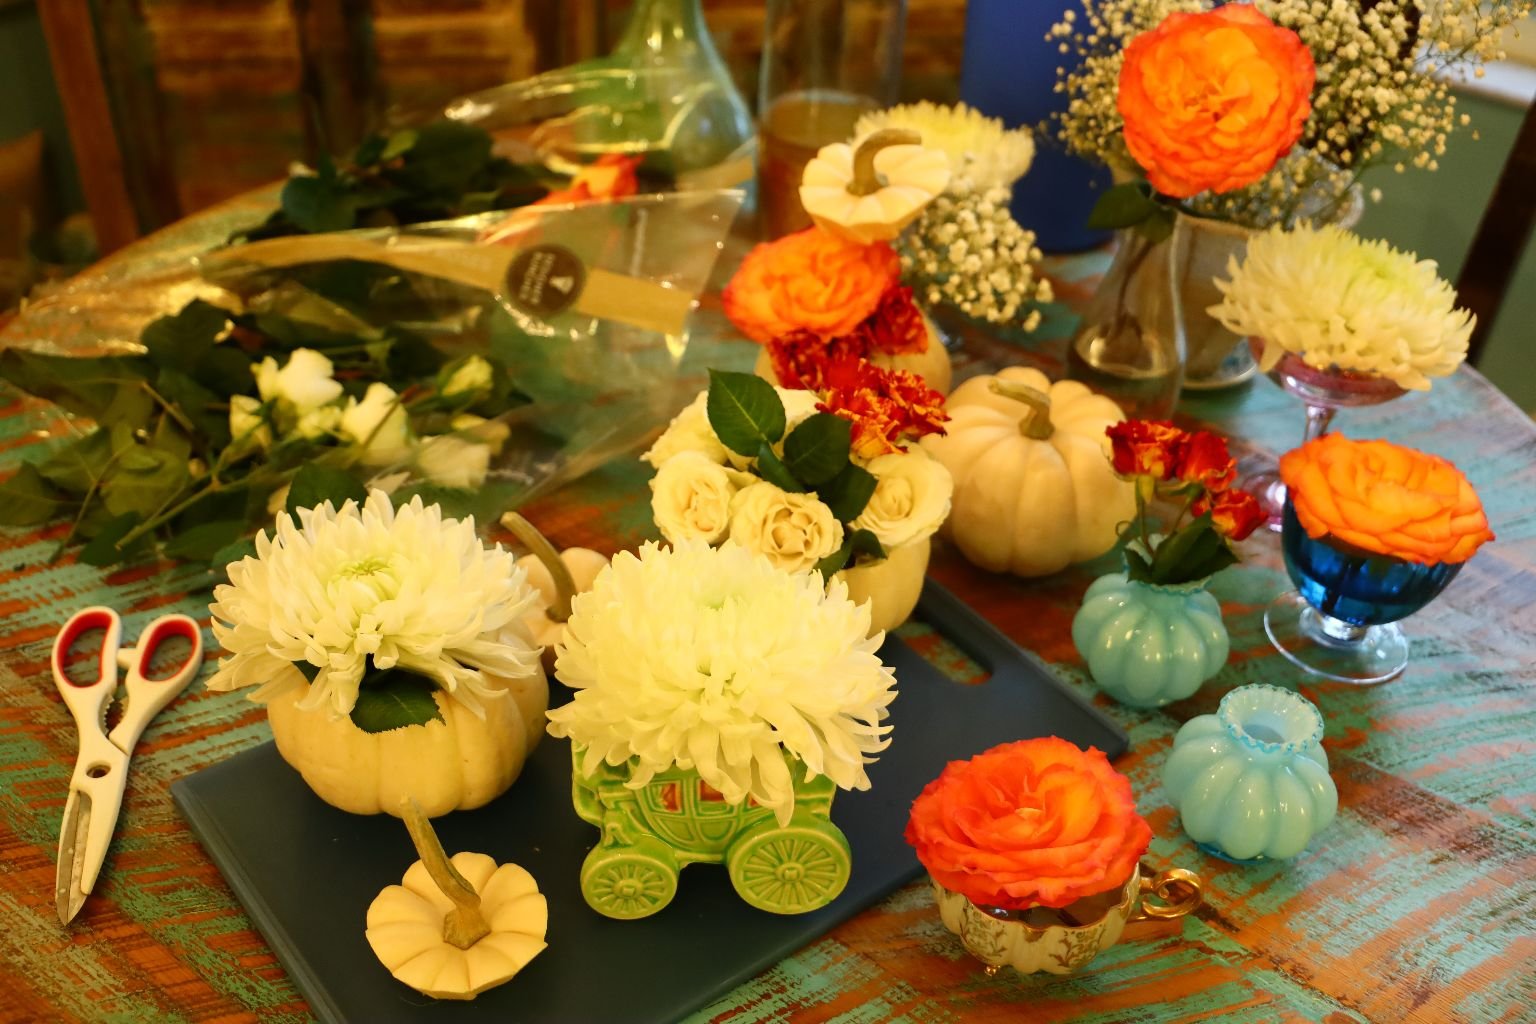
add some water, and then a flower or two, or three, or four…..
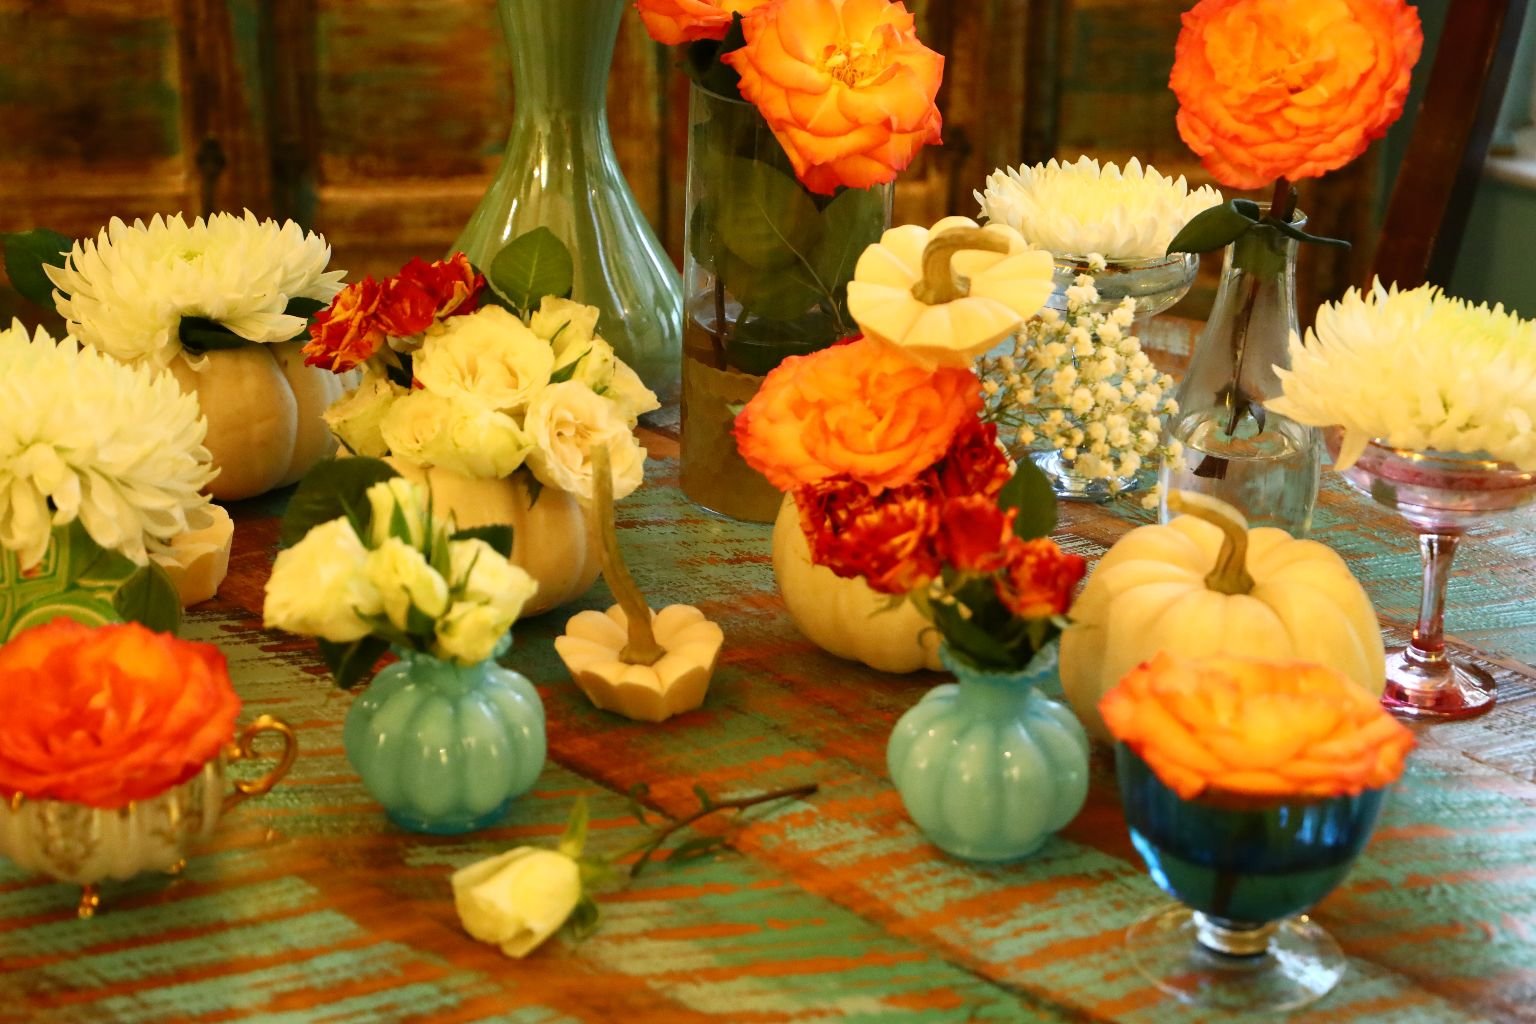
Pretty
Now you have some Excellent Cinderella Table Settings
———————————————
Click Here For: Magic Kingdom Christmas

——————————————–
Click Here For: Cinderella Bedtime Story
Hey, you forgot your shoe!
————————————————–
Here is a list of our other Cinderella posts:

Be sure to check out my Julie’s Cinderella Christmas .
AND,
Click Here For: Julie’s Cinderella Sequel
AND,
Click Here For: Magic Kingdom Christmas

AND,
Click Here For: Cinderella Bedtime Story
AND,
Click Here For: Cinderella Party Foods

AND,
Click Here For: Julie’s Cinderella Birthday
AND,
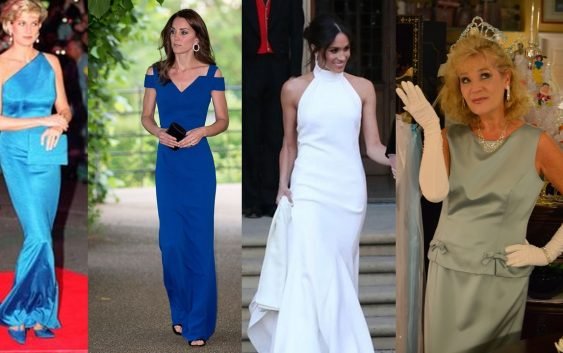
Click Here For: Diana, Kate, Meghan, and Me!
I’m sending you the Royal Wave of Farewell,
Julie