Front Yard Retaining Wall
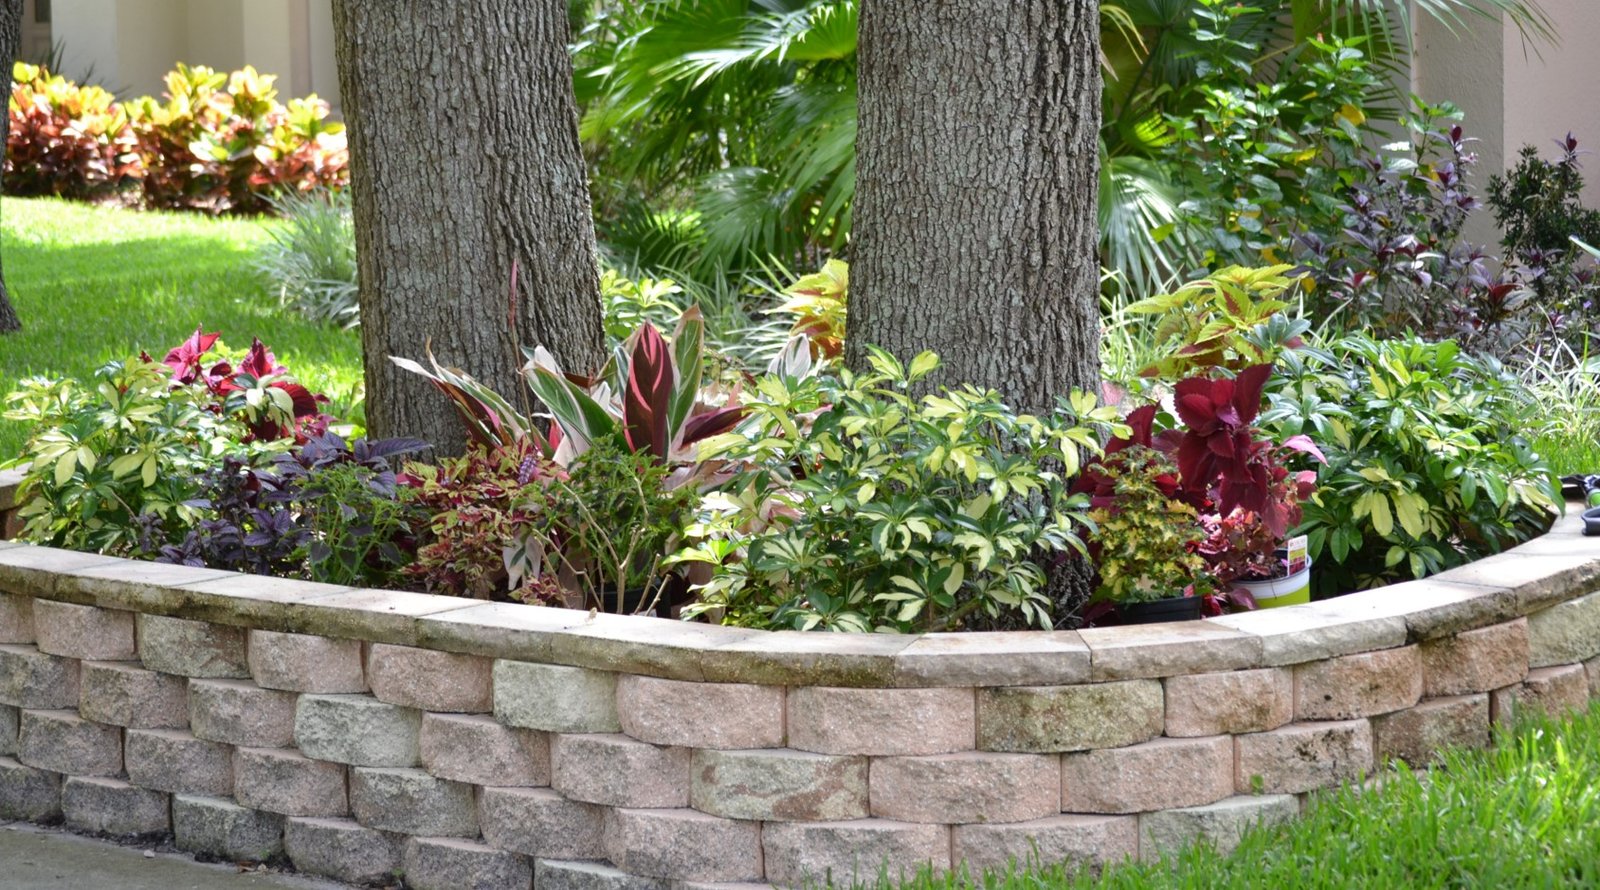
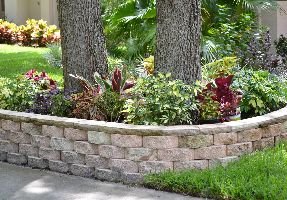
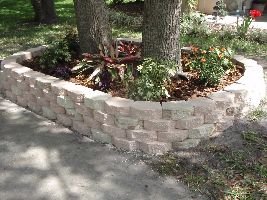
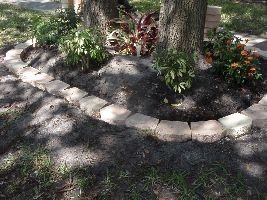
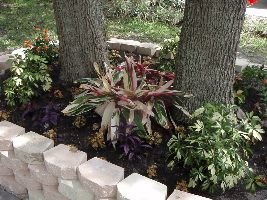
The Finished Results
A beautiful “wow” to add to your front yard that will really get noticed.

Front Yard Retaining Wall
Welcome to our Front Yard
Ever since we bought our home several years ago we have been doing our best to help raise our property value, and make our home environment more aesthetically pleasing. Building this retaining wall in our front yard has certainly upped the curb appeal to the front of our house.
There are many home improvement projects that are not that hard to do, nor expensive to do them. Building this retaining wall is one such project. We hope that you will enjoy the project and maybe even consider doing one around your own property.
Thank you for your time.
Gordon
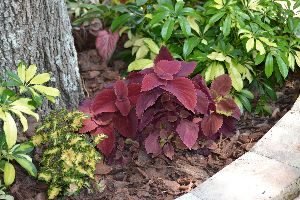
Julie chose various coleus plants for the bed.
Coleus plants date back to the Victorian era, when they were very popular at that time.
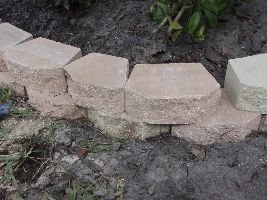
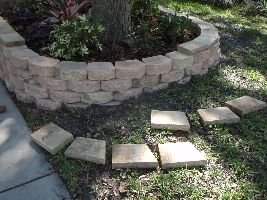
The completed wall without the cap stones. Although the wall looks nice we don’t like those “V” gaps that are visible so we prefer the cap stones. The cap stones just make the wall look a bit more professional.

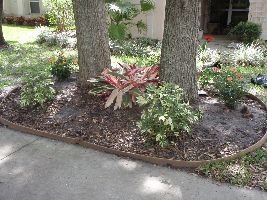
This was our flower bed before Gordon built the retaining wall. What a difference it makes.
I have to say that the idea for this retaining wall came when I told Gordon of an incident that happened one day in our front yard. A couple were walking their very large dog down our street when suddenly the dog needed to use the bathroom so he chose our flower bed to do his very large business. I was amazed that the couple allowed their dog to even enter in to the flower bed to use the bathroom. I was a bit stunned to see this total lack of respect. I realize that people do walk their dogs, and the dogs naturally have to relieve themselves, but I don’t think they should be doing it in people’s flower beds. But maybe that turned out to be a good thing in the long run. It gave Gordon the idea to build a retaining wall out front around our flower bed.
Here is how he did it. You can do it too. It was a weekend project except for the cap stones that needed to be fitted and cut and then glued. But the wall itself just took two days.
Blocks
It took a few car fulls of these heavy blocks to haul home.

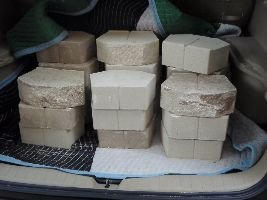
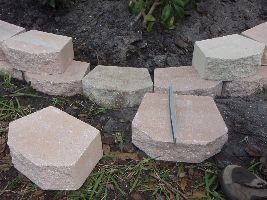
Here are the multicolored blocks which we used. Over half were coral colored to match the color of our house, then 1/4 were white and 1/4 were marbled which matched the blocks which will be used to make the top seating area, the cap stones.
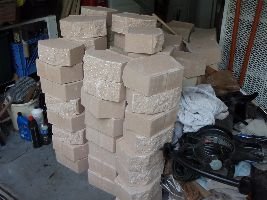
We used 123 total blocks for the wall measuring 8 feet, 5 inches wide and 11 feet, 11 inches long. We also used 36 capstones. The approximate cost of building this wall was $310.00. We bought all the materials from Lowe’s. Had we hired someone to build this for us the cost of labor and materials would have been around $1,000.00. Doing it ourselves saved us around $700.00.
Doing the Prep-Work
Here are some plants we planted in the space. Doing this now is much easier since you may run into tree roots and you are not having to contend with the wall getting in your way.

The large plants were planted before the wall was started.
I also moved some plants making the area more symmetrical.

Now, I removed the old border and all the debris so I have a clean workspace.

With the old border gone, I used a shovel to dig away the unwanted dirt and smoothed the area for the retaining wall blocks.
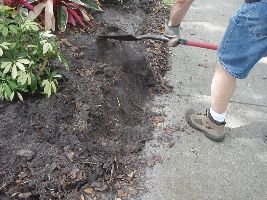

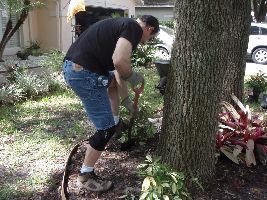
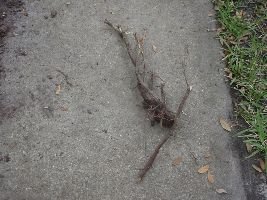
If you run into some large roots you may cut them away. I was able to use my shovel like an axe on most of them, but with some I had to use a hand saw.

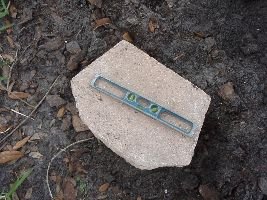
Below, I placed a block in an area of the wall which I felt would be close to where I would stop the first row of blocks. I used a small level to ensure the block was level in each direction.

The yard sloped toward the sidewalk, so I placed one level block in the front of the wall and measured back to see where I should stop the row so the second row of blocks would easily lay on top of the first. The second row will go all the way around the perimeter of the retaining wall.

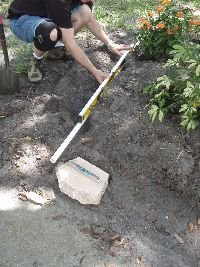
I used a longer level on top of a piece of thick PVC pipe which stretched the span of the blocks. Doing this let me find out where the top of the block would end and the next row would start. Luckily, I guessed pretty close where I leveled my block which started the second row. You can see this in the very first picture of the mostly completed wall.

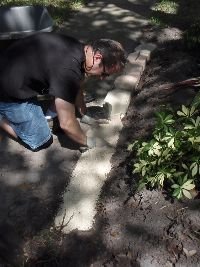
Here, I am working on the first front row by the sidewalk. I stepped on the ground making it firm them placed about 1/2 inch or so of leveling rocks. The rocks are larger than sand, but you can use sand as well. Either one makes it easier to level the blocks. Smooth the rocks down then start your front row. I eyeballed the middle of the area and placed my first block centered on that point. Use your small level in each direction of the blocks surface to ensure the block is level as shown before. Also make sure the block is stable by putting some weight on it so that I doesn’t move or rock. You also want to stagger your block colors, so you get a good random pattern if you are going to make it as I did. Giving it a natural look.
Working on the front row, I went back and forth from end to end placing the blocks in the exact same angle so each side was even. I then started the second row making the brick pattern so the blocks were placed half way on the first row. These blocks then made my second row which would go all the way around the wall. Use a garden foam knee pad which is shown at the bottom right of the above picture to help protect your knees.

Using some long handled pruners as shown to the left makes quick work of some tree roots which were in the way of the blocks.
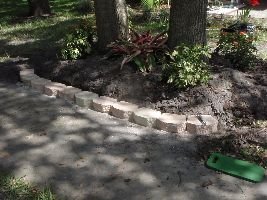
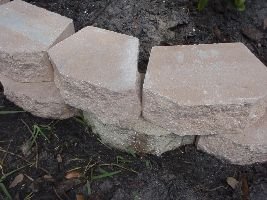
Here are some good pictures of the brick pattern I talked of before. You can also see where I stopped my first row and started my second row where the dirt was high enough to accept the block.

Here is a picture of the blocks slowly coming together on the back end of the wall making the second row complete.

No partial blocks were used to make the first complete row around the area. If you have leveled the blocks well you should come very close to matching the heights of the blocks when the ends come together. Also ensure you check the angles of the blocks so they match making the pattern perfectly symmetrical.
Below you can see where I have started the second row but losing the brick pattern. This is due to the blocks have a ridge on the back of the block which forces the block to be placed slightly back from the one it is laid on top of which then makes the circle tighter. The blocks are made this way so they won’t easily lift over the ridge which in turn keeps the dirt back. The more blocks you use this way the tighter the circle becomes. When you lose the brick pattern you need to break a block so the blocks don’t set directly upon each other making the wall unstable.

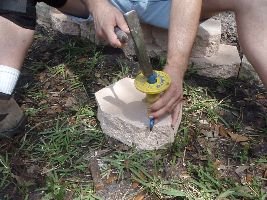
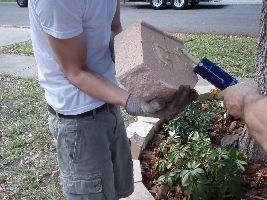
I used a rock chisel to scribe a line where I wanted the block to be broken. Use a hammer to deepen the line which in turn weakens the area below it.
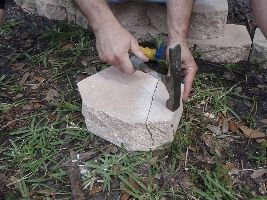
With a good whack of your hammer on the side of the block you don’t want, should break your block following your line as seen below.

Using this partial block will let you start your brick pattern over again. I broke about four blocks in each row this same way after the first complete row was laid.

Use your chisel and hammer to straighten out the side of the block.

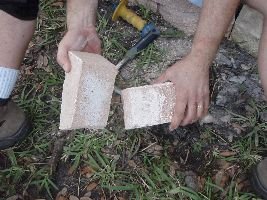
You can also use the side of the block you just broke off like sand paper to smooth out the cut edge. A nice flat straight edge helps to hide the broken block as seen in the picture on the bottom right.

Now slide the blocks together and continue around your shape.
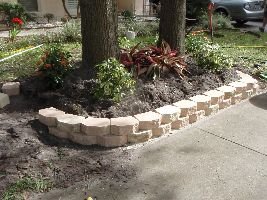
Here is another good picture of the perfect brick pattern.

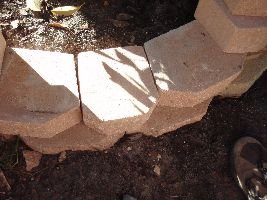
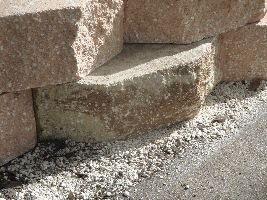
Another picture of a block which needed to be cut due to the space between the blocks shrunk as the pattern moved around the wall. I shaved the edges down some so they would match the angles of the original blocks.
Retaining Wall Plantings
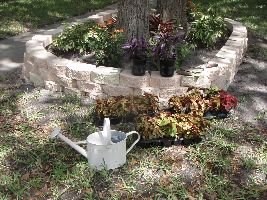
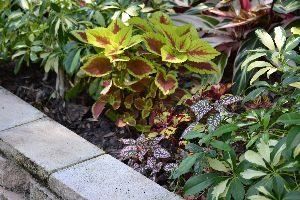
Now that the wall itself is built, and the original plantings have been moved into a more symmetrical pattern, it is time to add the “fill in” plants. Julie bought some colorful coleus and some purple Persians.

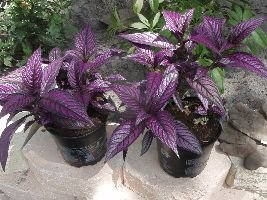
Aren’t they beautiful?
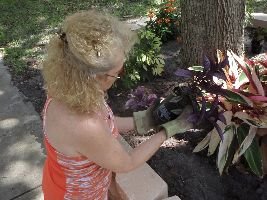
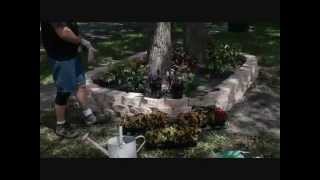
Here Julie is doing the plantings.


Don’t they look nice?
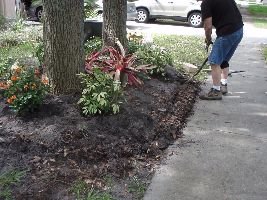
Next comes the wood chips to add to the flower bed as a nice filler to give it a more finished look.

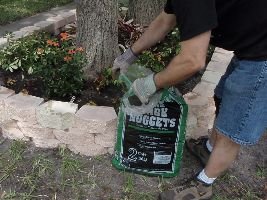

Gordon adding the wood chips.
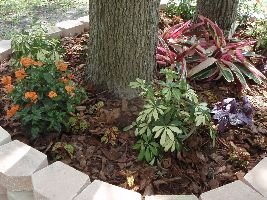
The Finished Wood Chip Results
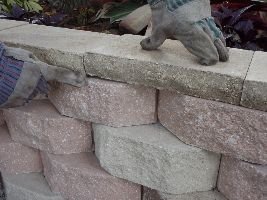
Now to glue down the top row of stones.

Here Brodie helps Gordon. This is a landscape block adhesive glue.
Once all the stones are glued and the wall itself is finished, it is time to focus on the cap stones.
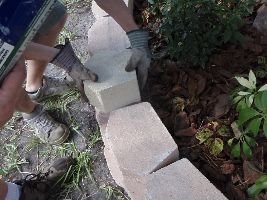
Start by placing the capstones one on top of the other all the way around the wall trying to use as much of the block as possible. The front capstones are straight, so they don’t need to be cut and can be glued down first. I glued the first capstone next to the first block which needed to be cut. This way, I knew exactly where my starting point began and it wasn’t going to move.

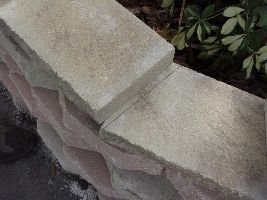

Some blocks may be made a little thicker than others so use a piece of broken concrete like sandpaper and smooth down the block so the capstone lays flat.

Here you can see the blocks underside with the numbers in magic marker. Remember to use the best side of the block since it will be the top of your wall and will be shown.

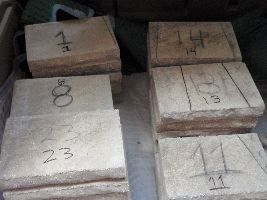
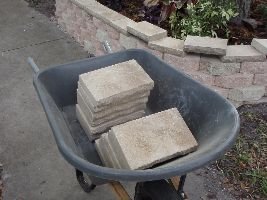
Try to get them cut by a local outdoor custom building business. I was able to get mine cut for $1.00 each.
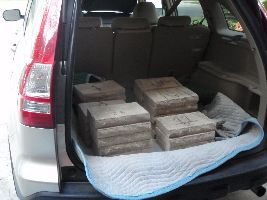
Taking the cap stones to the stone cutter.

Now that the capstones have been cut, simply place them in order back on the wall and situate them around the retaining wall to be glued.
You will have to move some of the capstones forward or backward to get them properly situated. Slight movements by any of the blocks can make a big difference in the placement of the blocks on the other side of the wall.

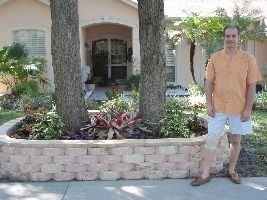
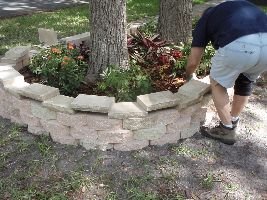
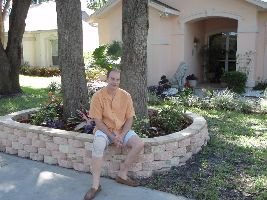
Here the retaining wall is complete and I think it turned out great!
Hope you enjoyed it!
Have a good day,
Gordon and Julie
————————————————————————————–
To View All of Our Front Yard Landscaping Projects:
Click Here For: Front Yard Retaining Wall

AND,
Click Here For: Side of the House Retaining Wall

AND,
Click Here For: Front Yard Projects

AND,
Building A Backyard Landscaping Retaining Wall And Our Lanai Extension
AND,
How To Repair And Rebuild A Retaining Wall

AND,
Click Here For: New Front Yard Landscaping Project

———————————————————————————