New Front Yard Landscaping Project

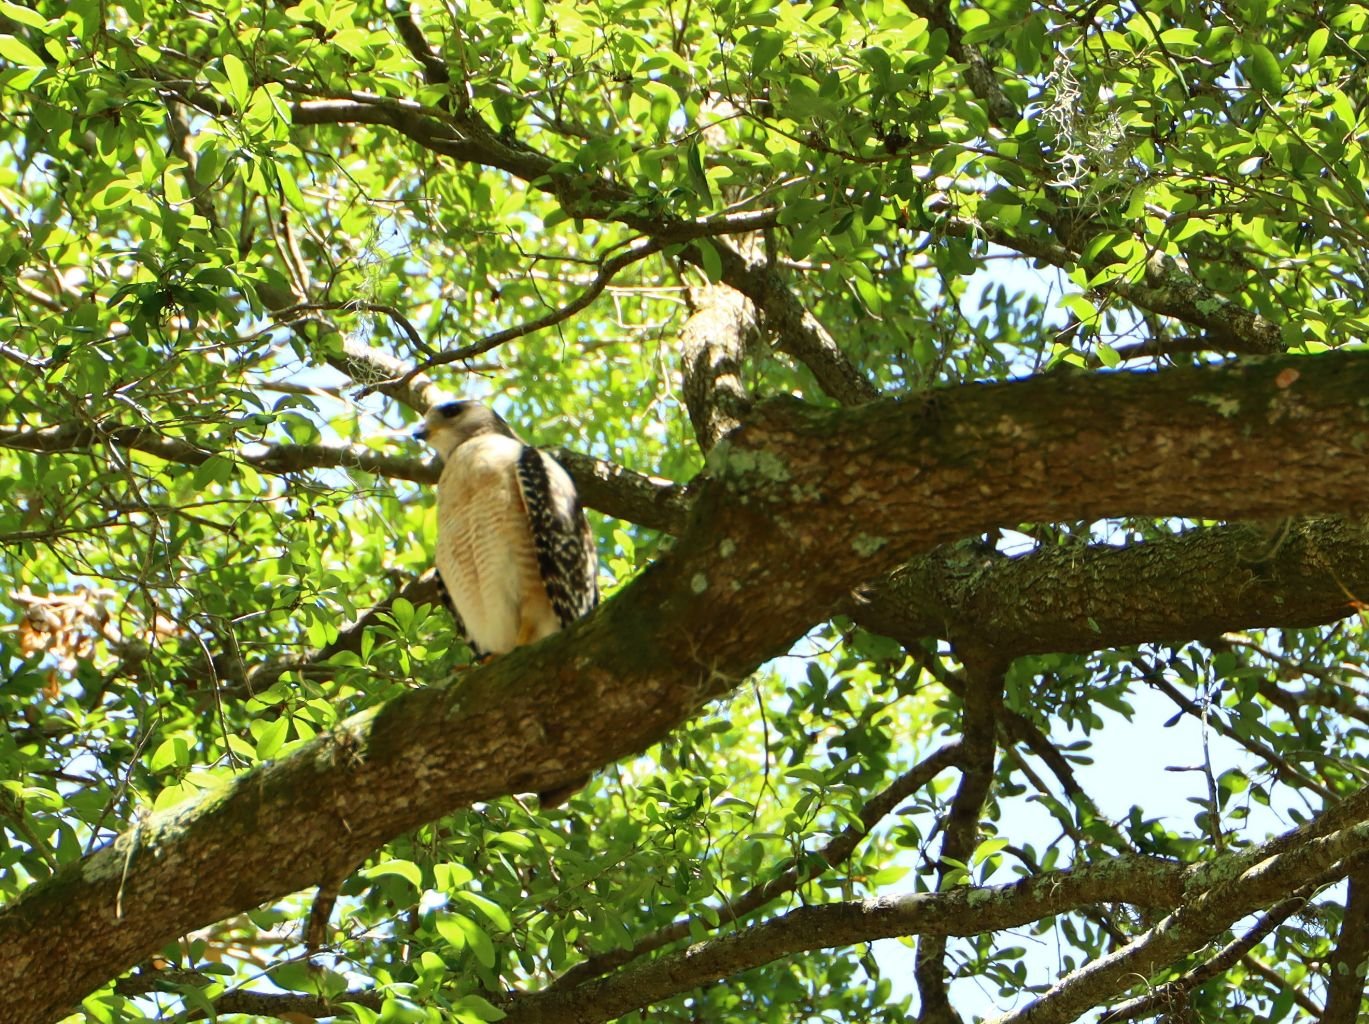
A Backyard Visitor (Osprey)
We live in Florida and enjoy pleasant weather throughout the year. Our winter’s are mild, and our summer’s can be quite harsh. We love that we can have lovely landscaping on our property throughout the year to showcase Florida’s beautiful foliage.
Creating landscaping projects that help enhance our home’s value and curb appeal. Here is one such project that Gordon built himself. He offers you instructions on how you can build your very own. It doesn’t have to be big and grand, it can be small and delicate. Utilize the space you have to create your own landscaping projects to enhance your own home. You just need an idea, or a template and then you can take it from there.
We hope this inspires you,
Julie
————————————————————————————–
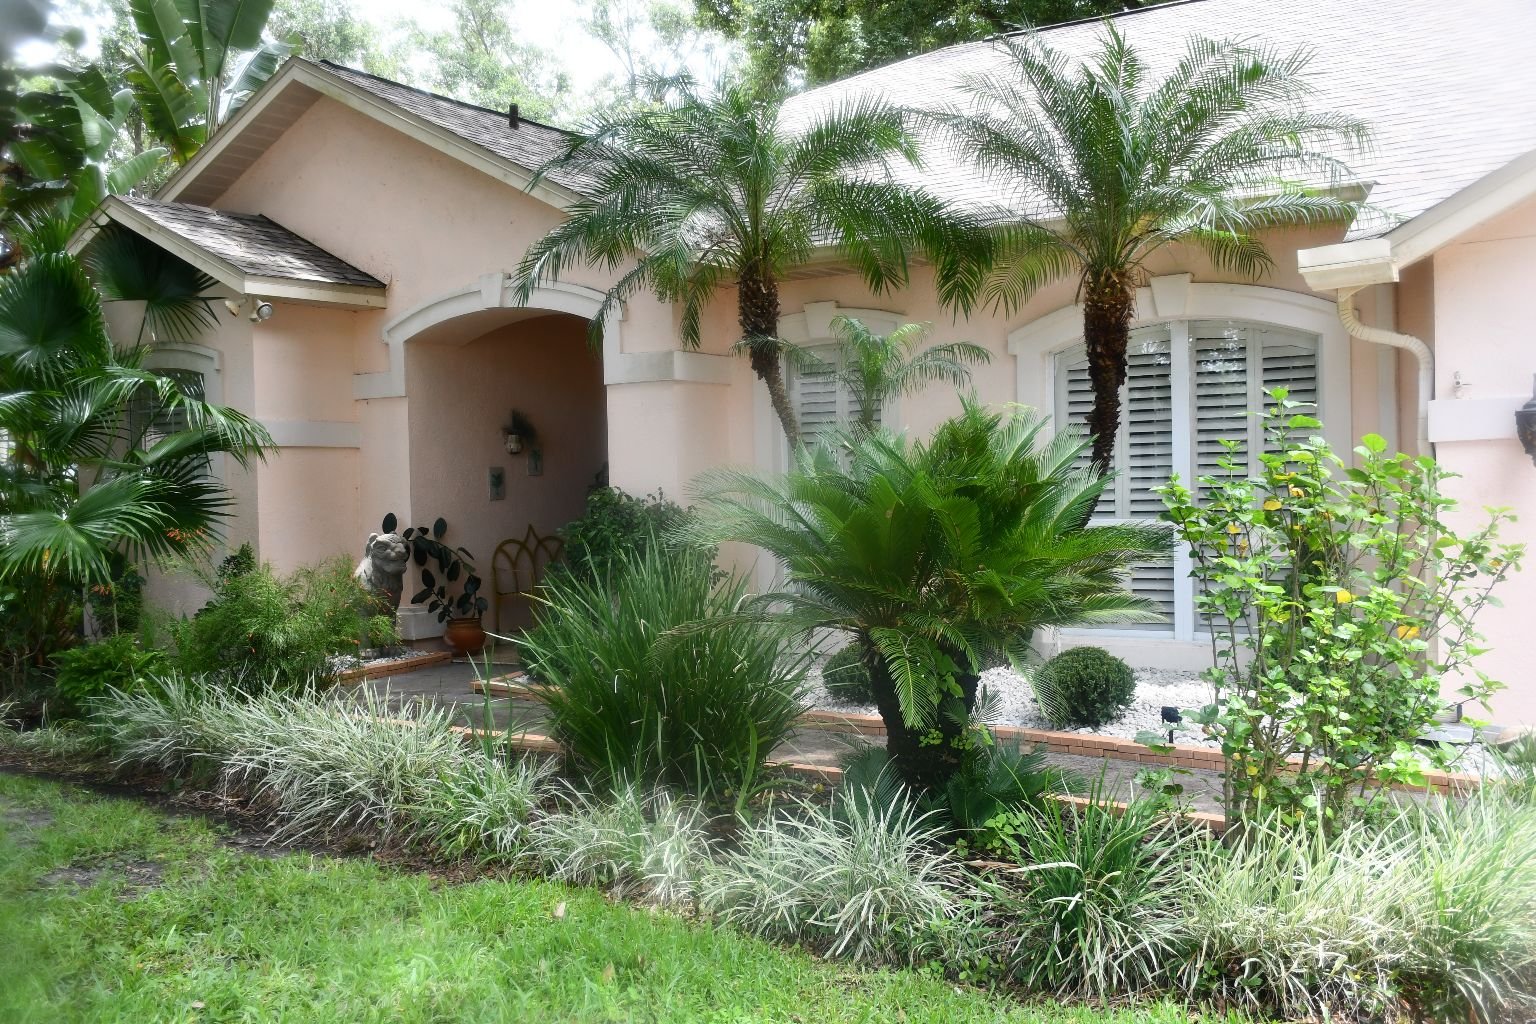
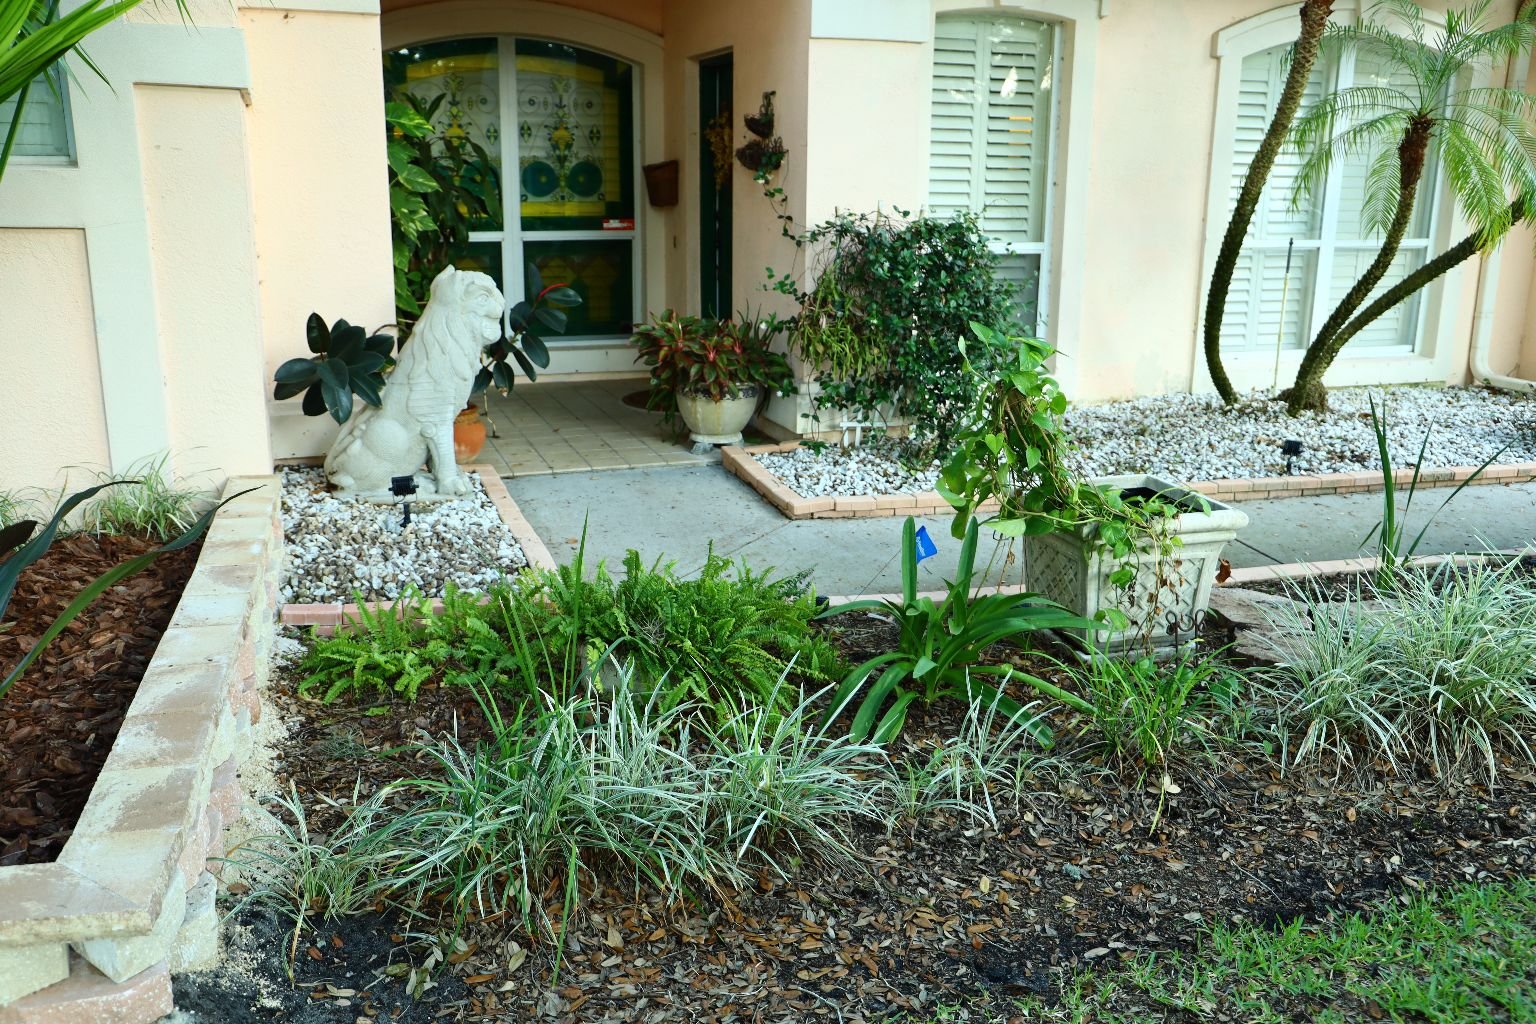
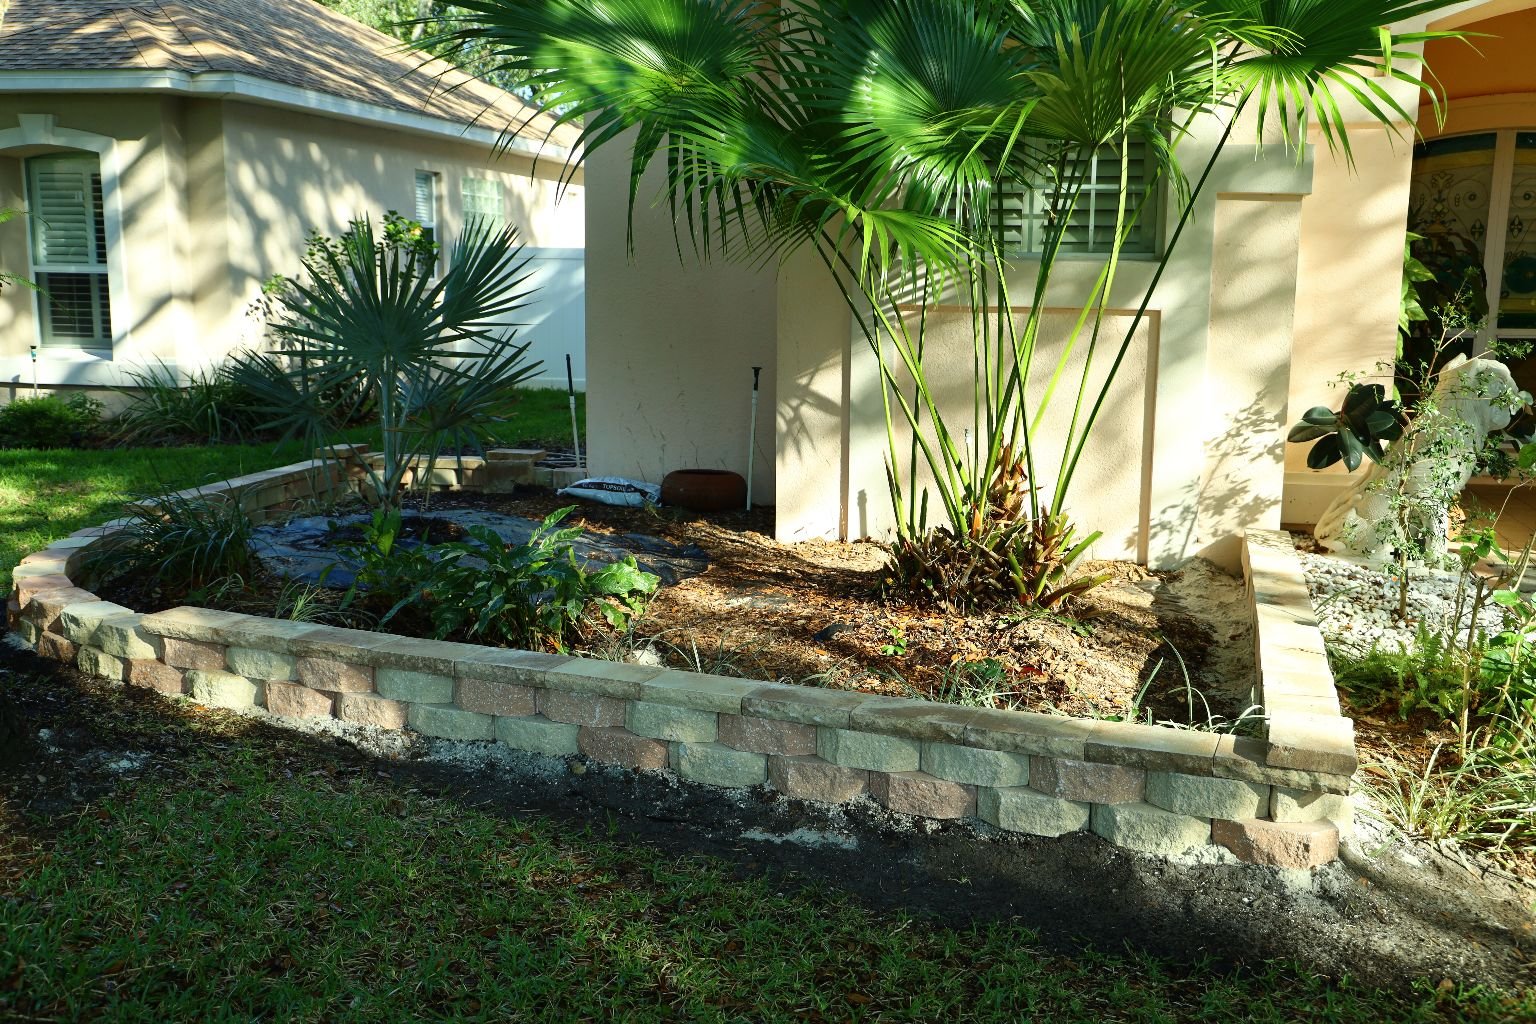
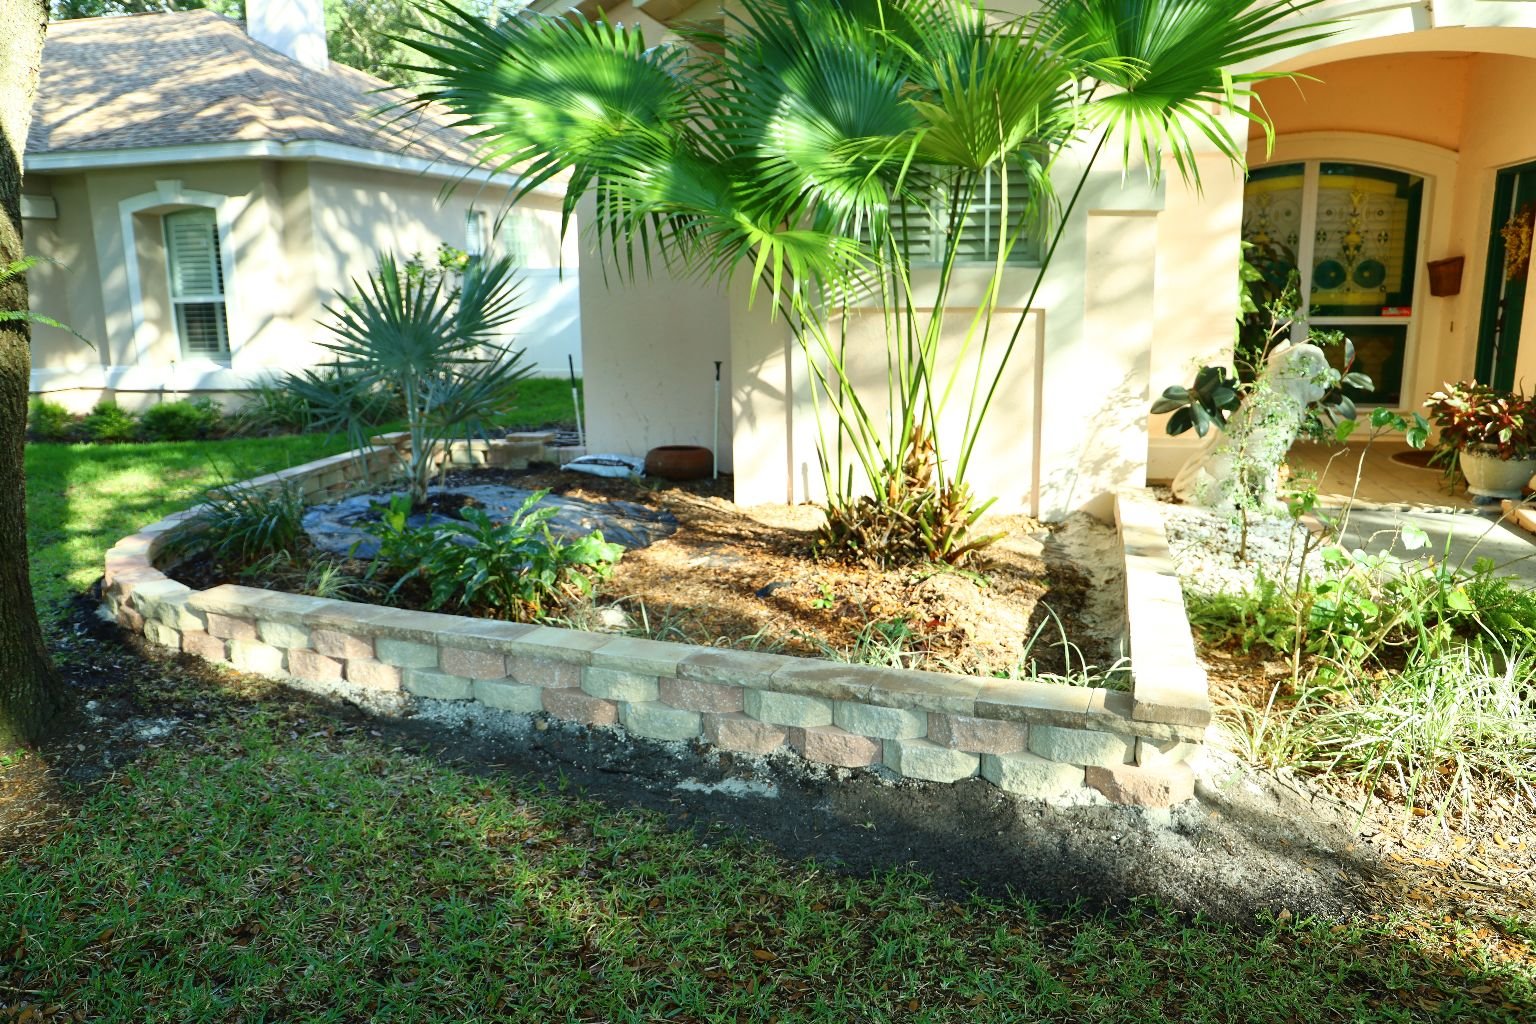
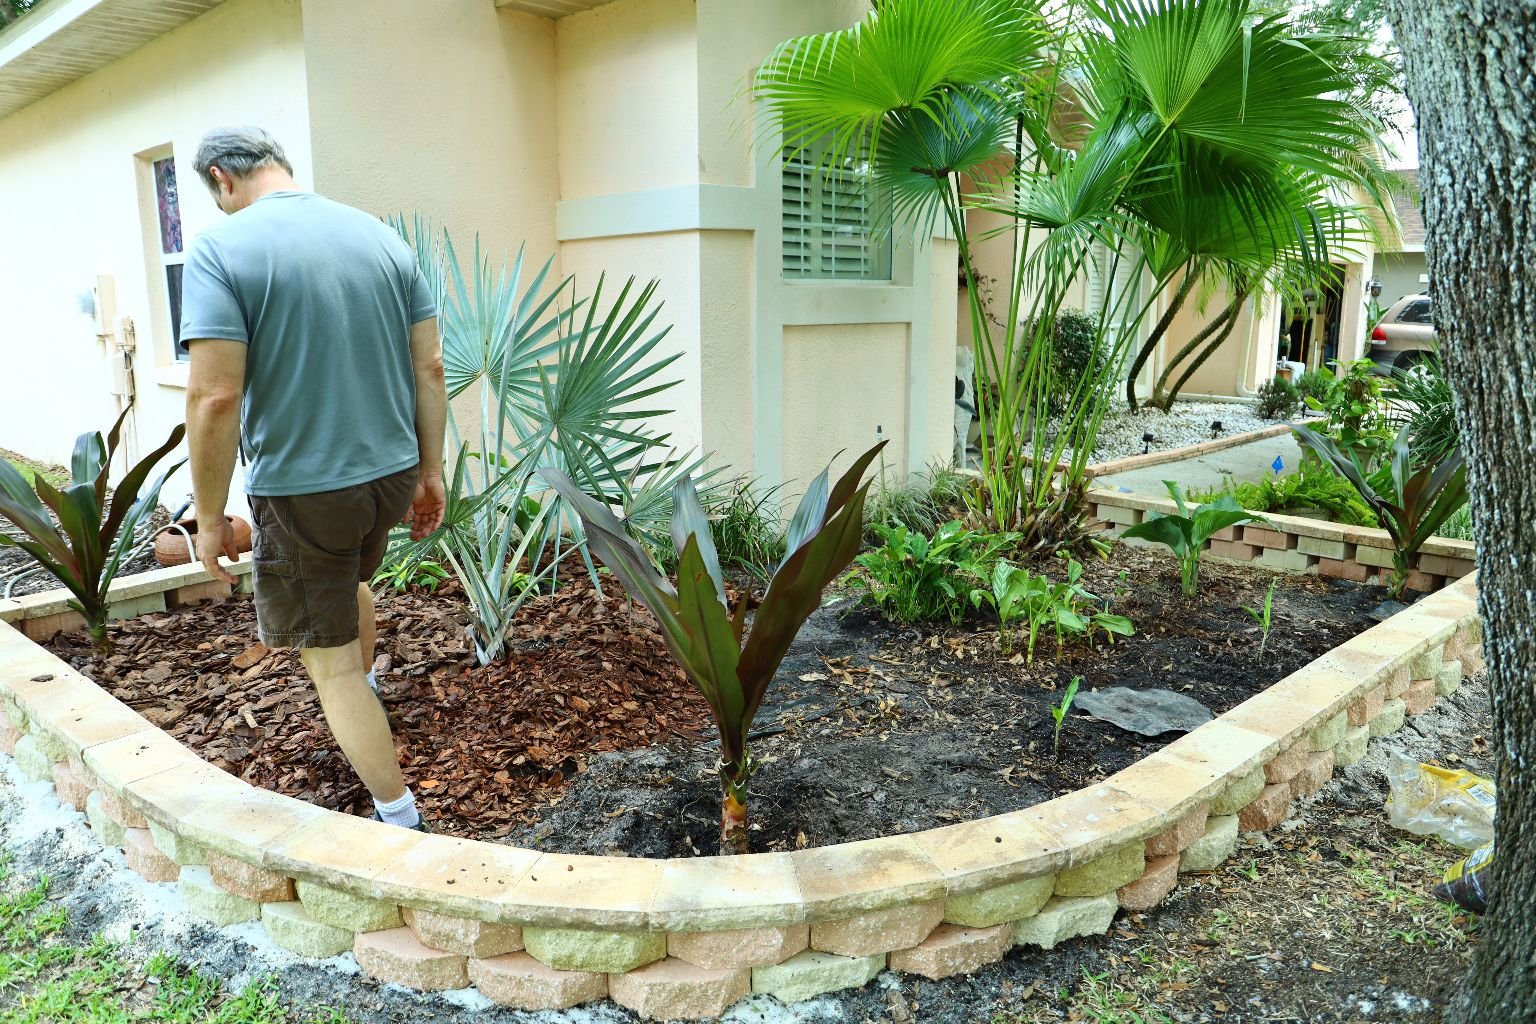
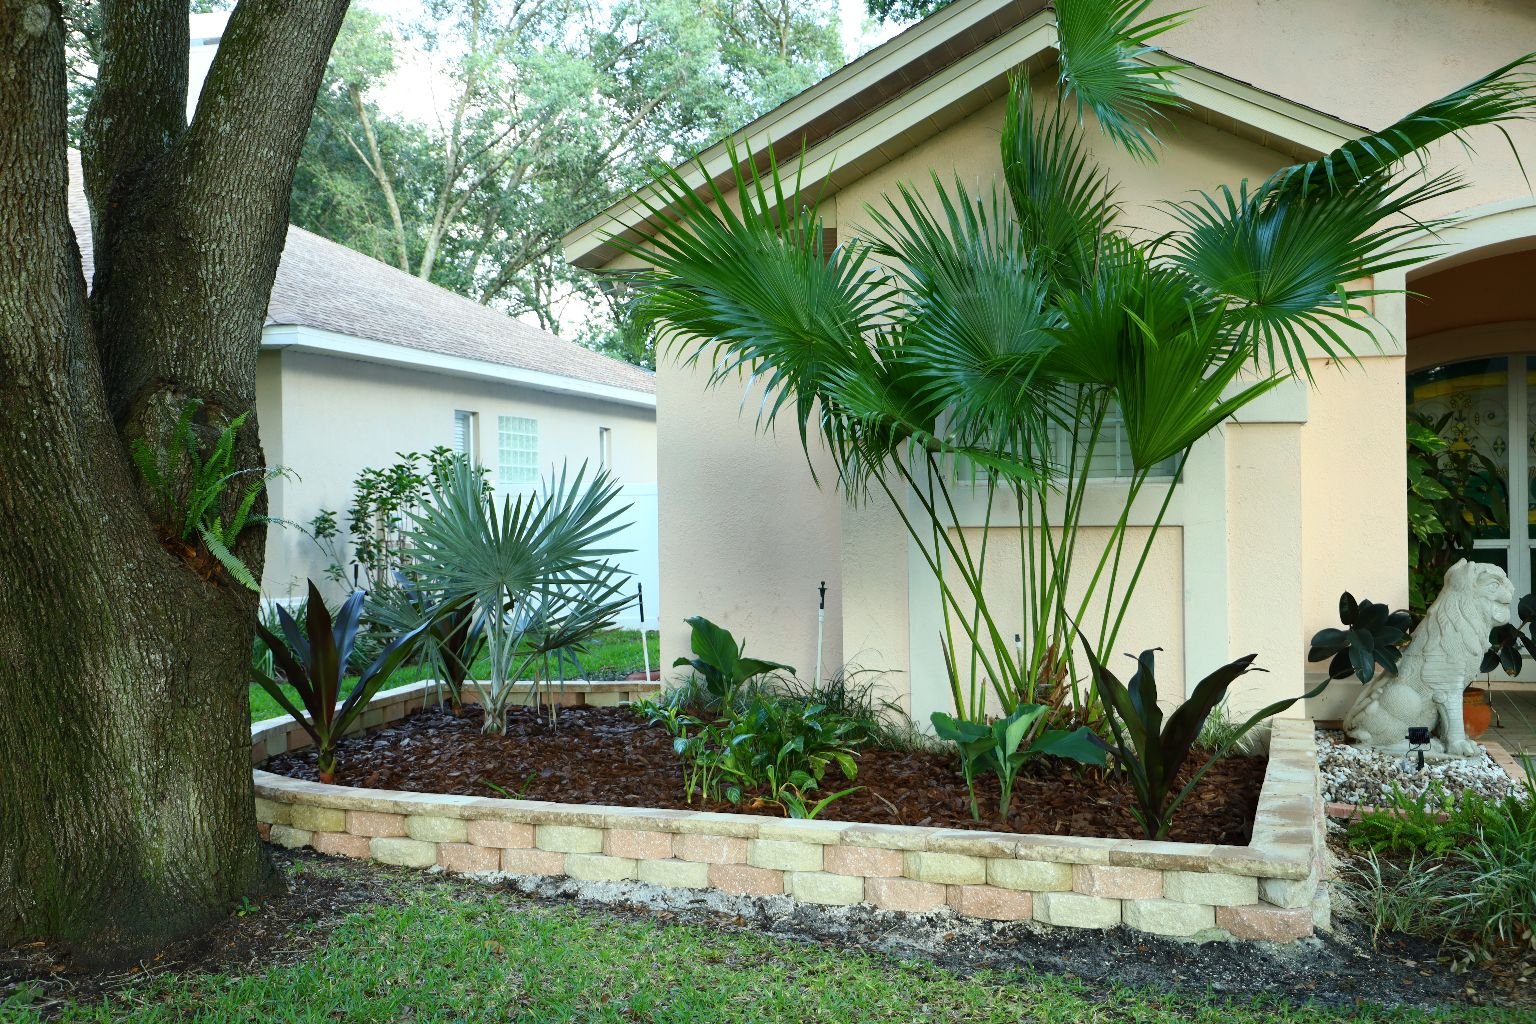
Here is a Photo of our Front Yard
Walkway Leading to our Front Door
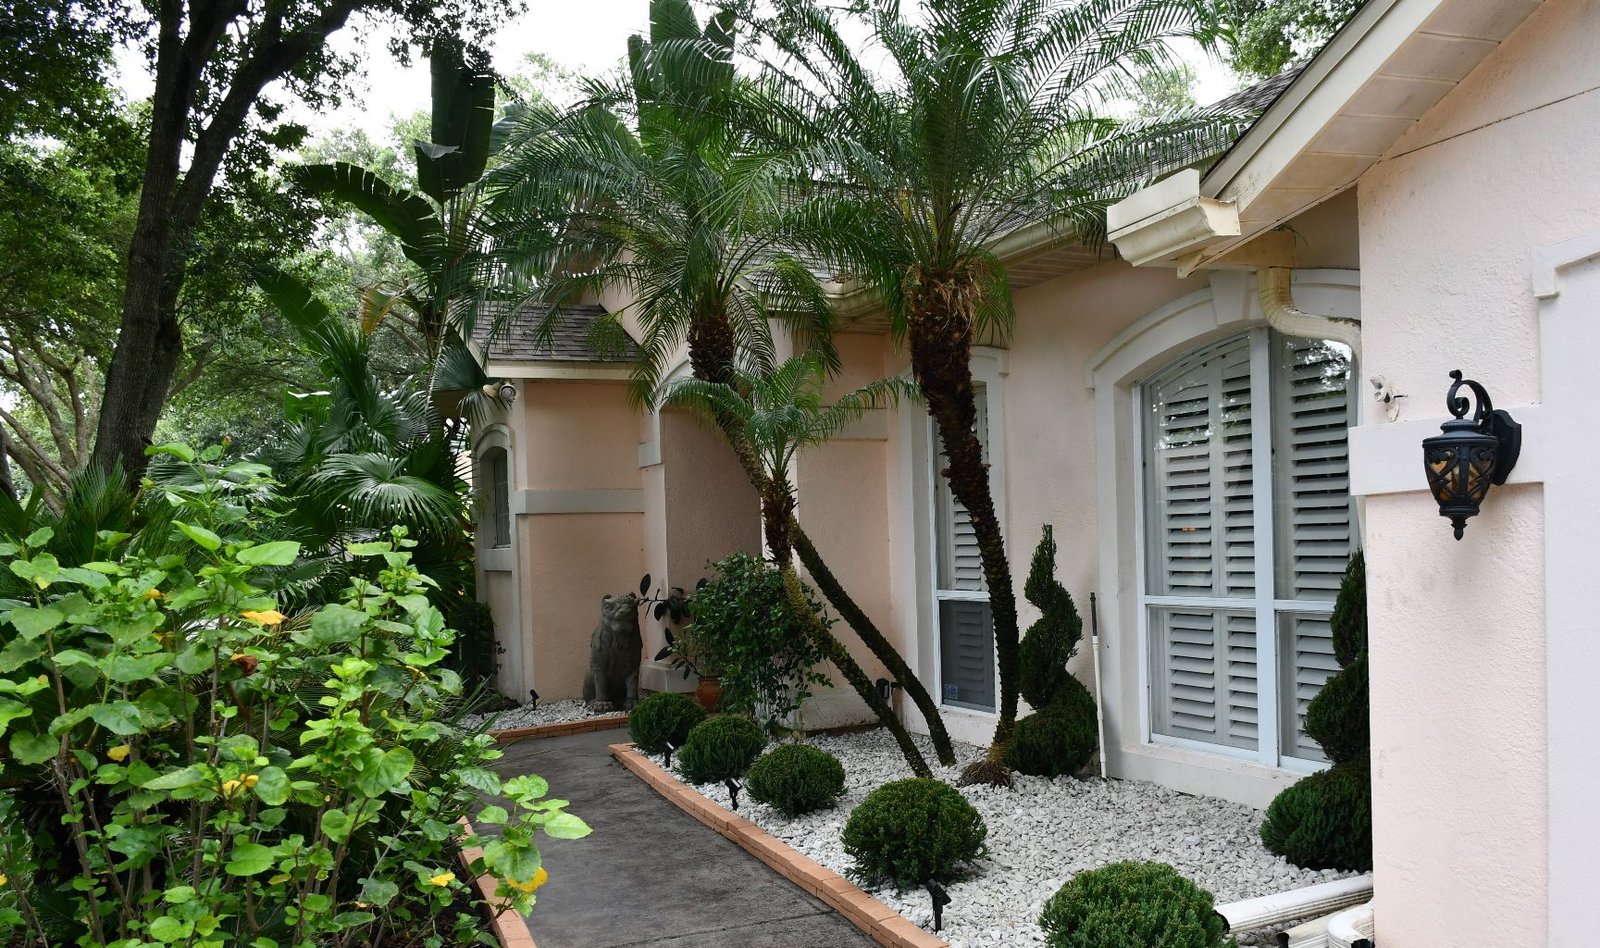
Another picture of the front showing the nice shrubs and the pavers lining the walkway.
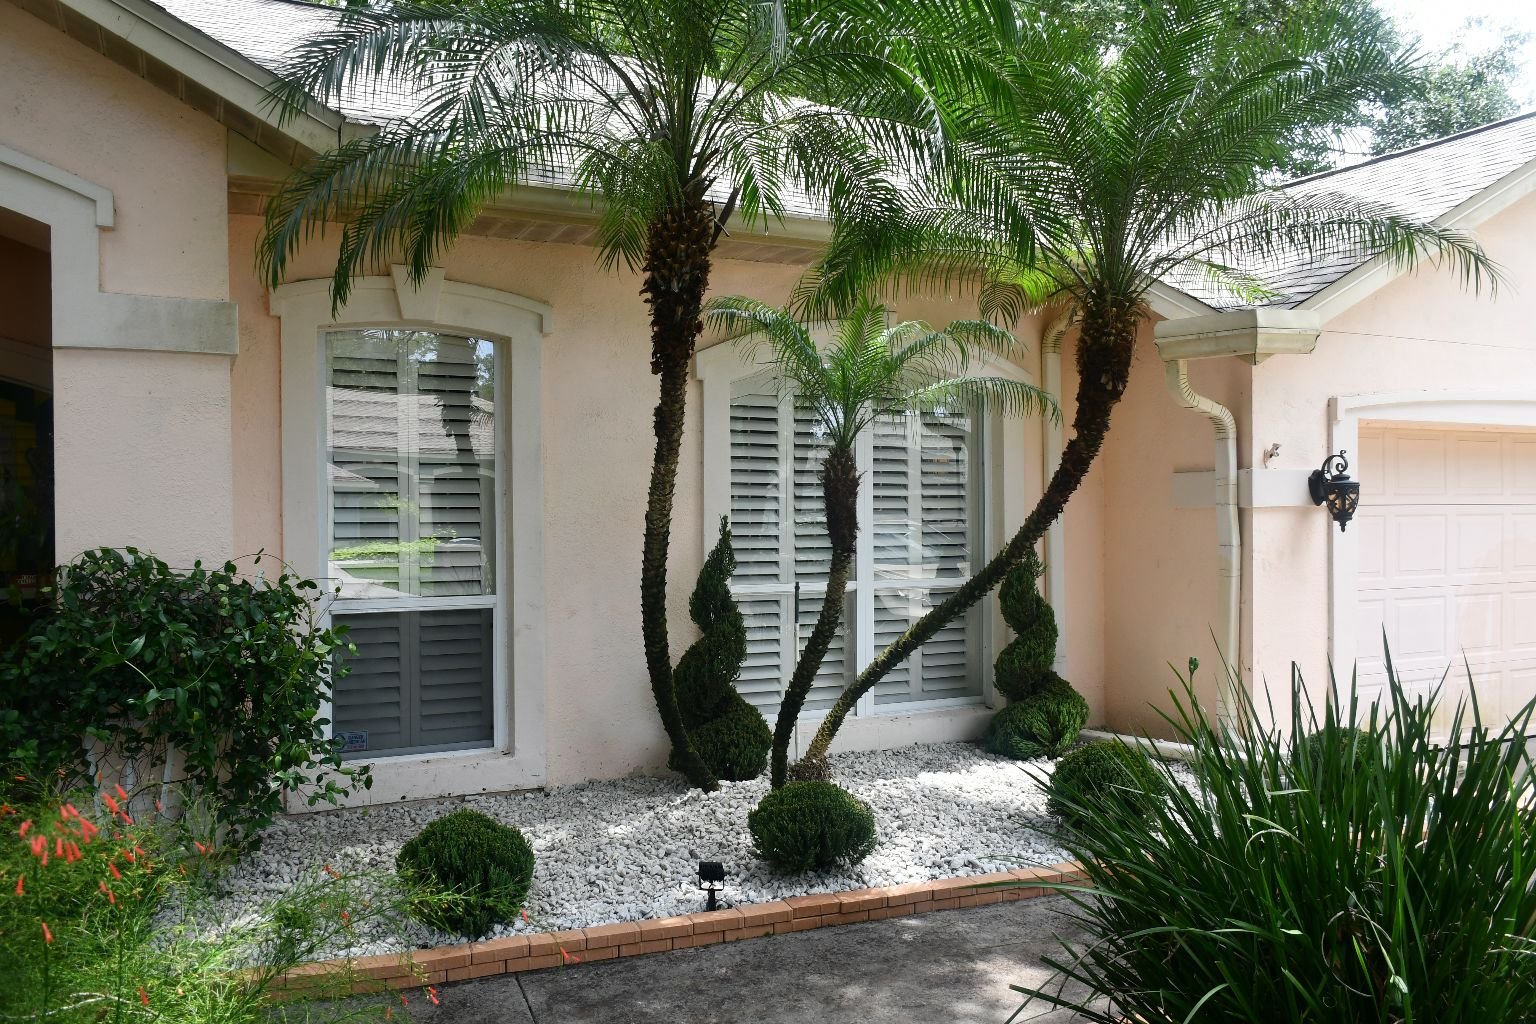
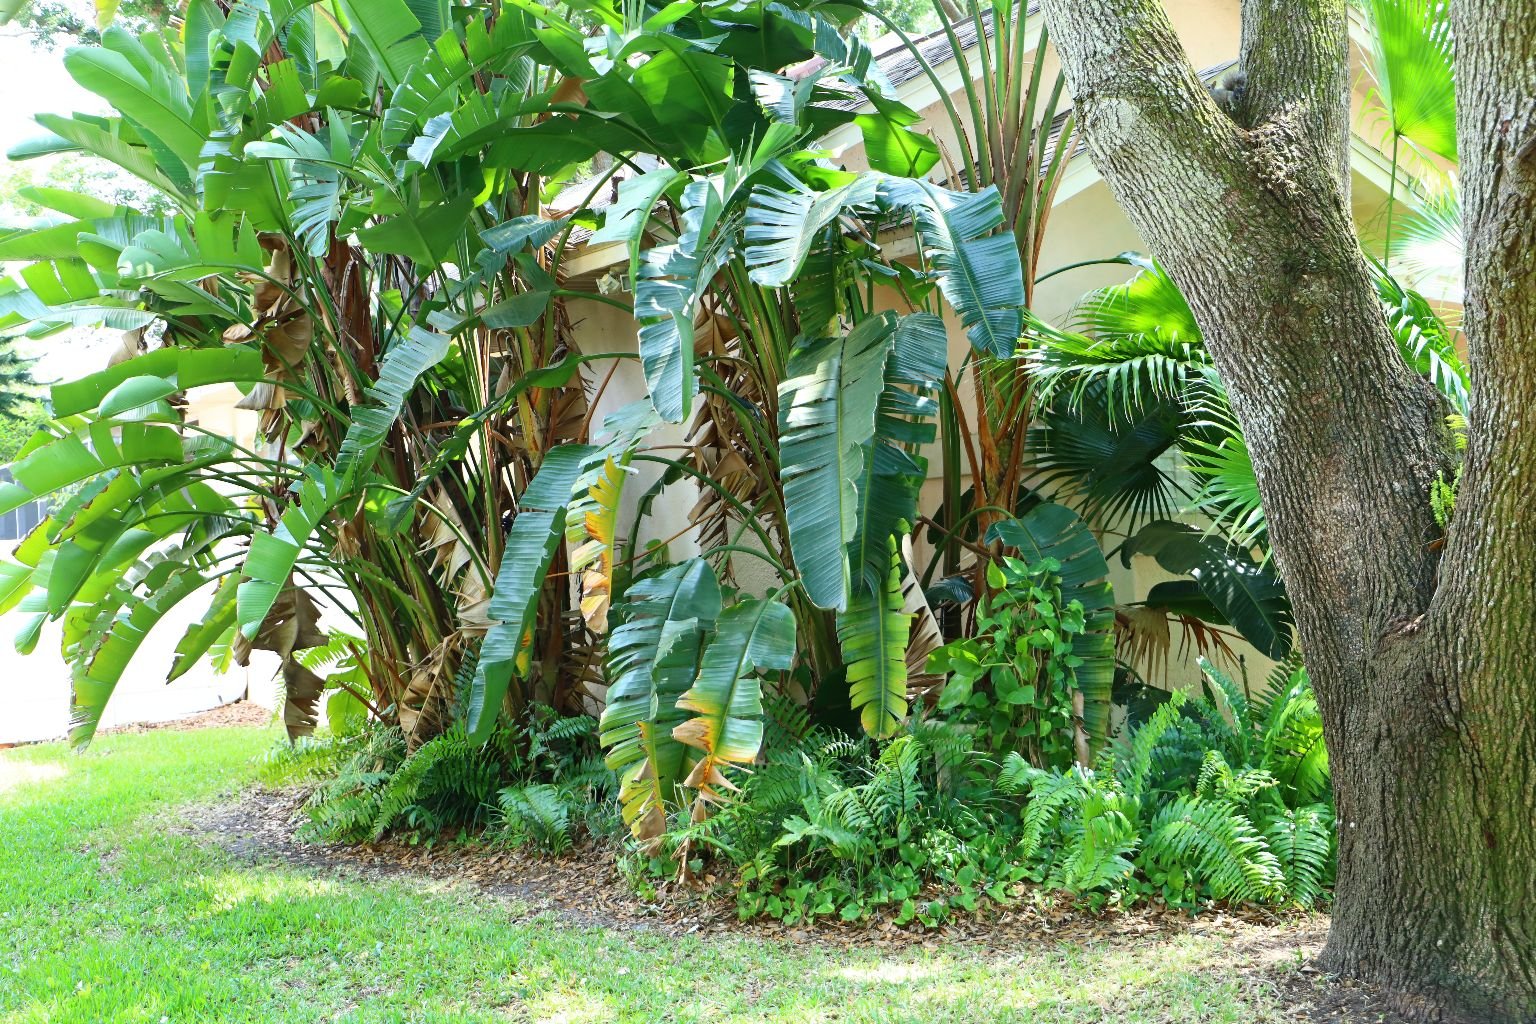
Of Course, We LOVE the Palms
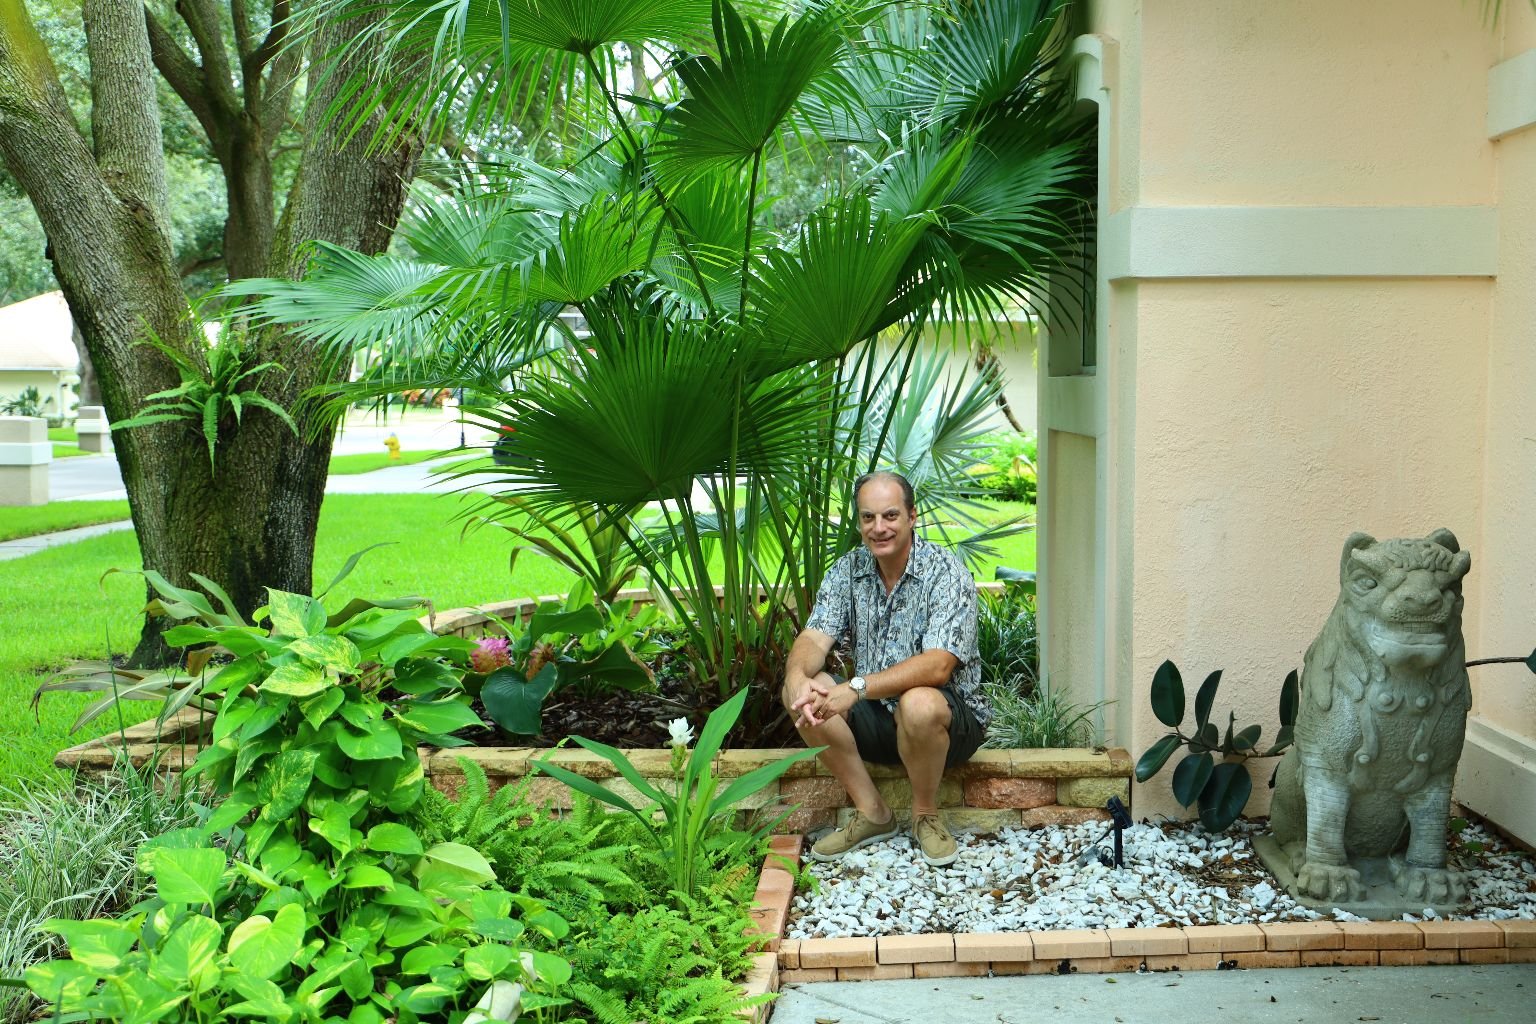
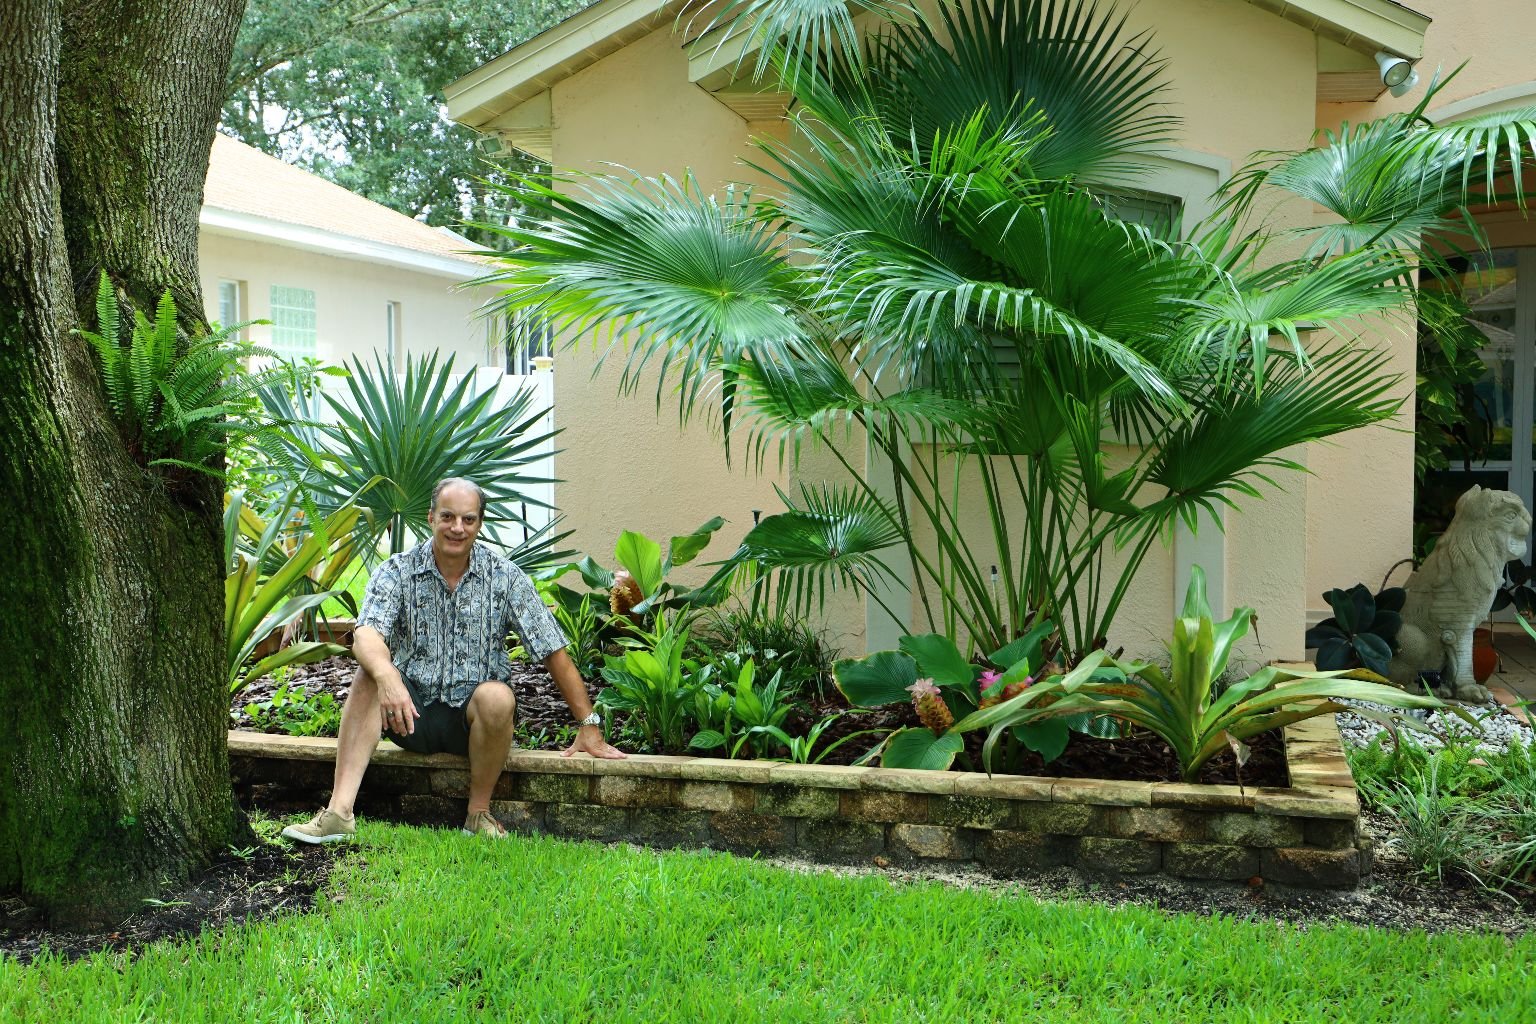
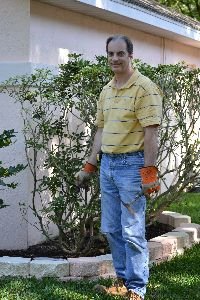
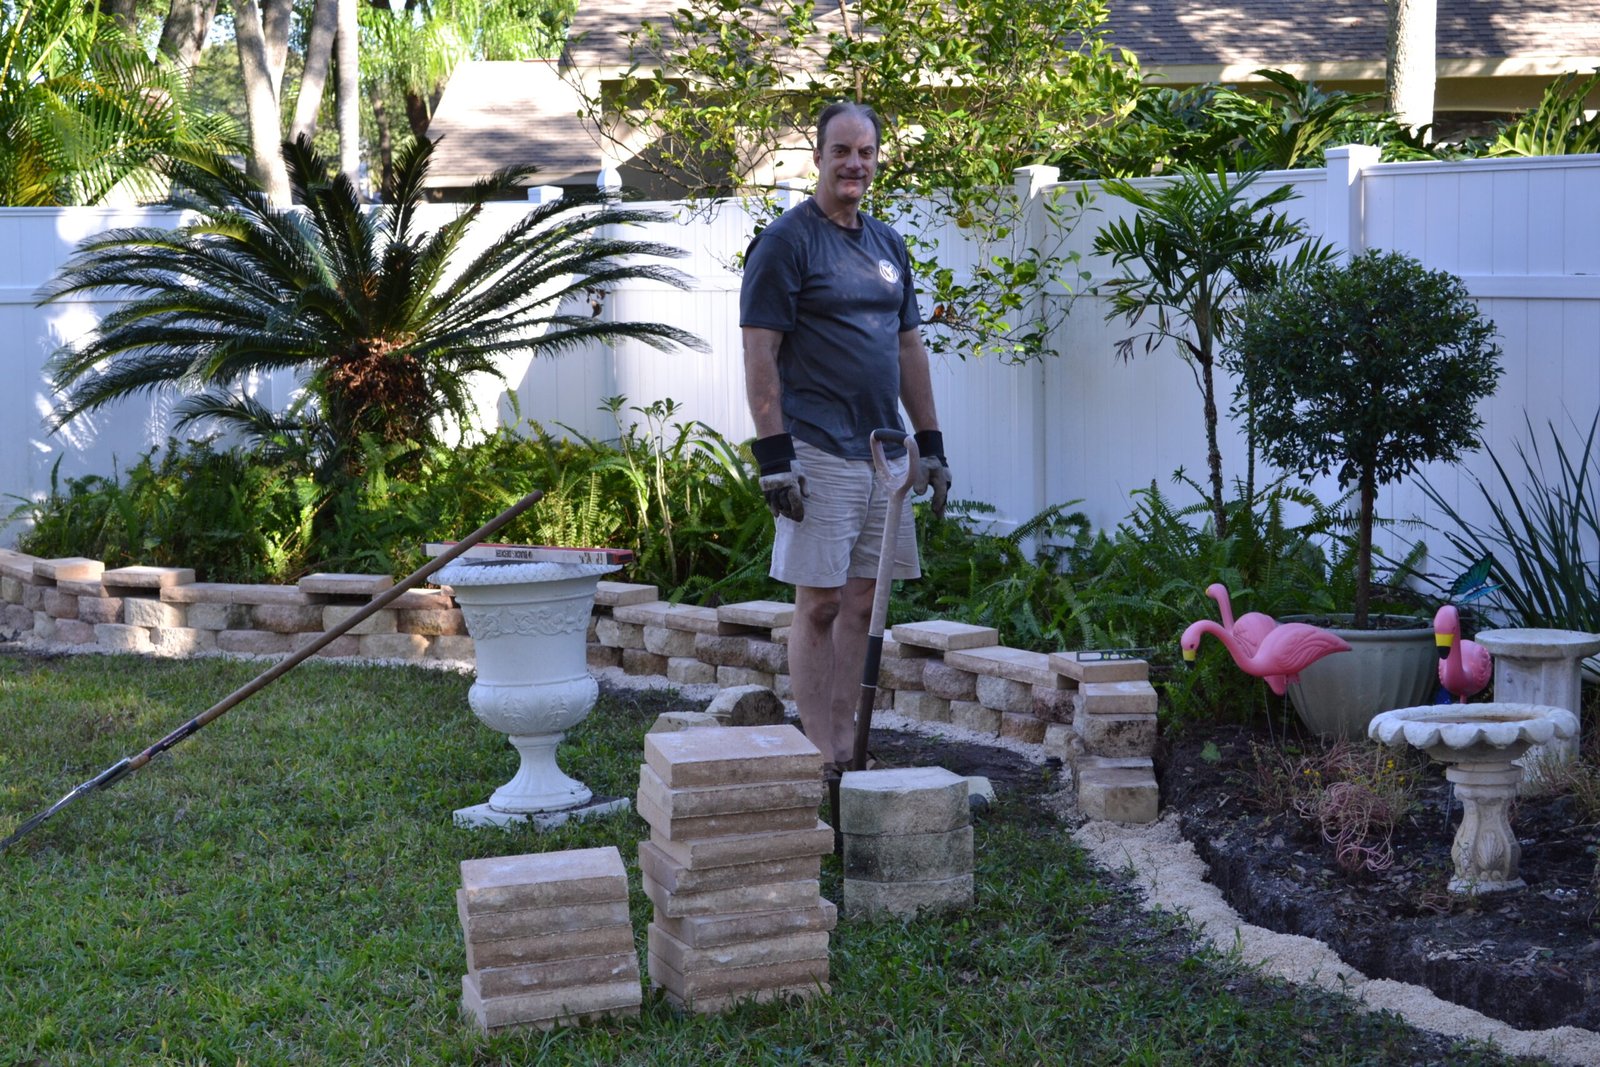
Gordon sitting on this side of the retaining wall he built.
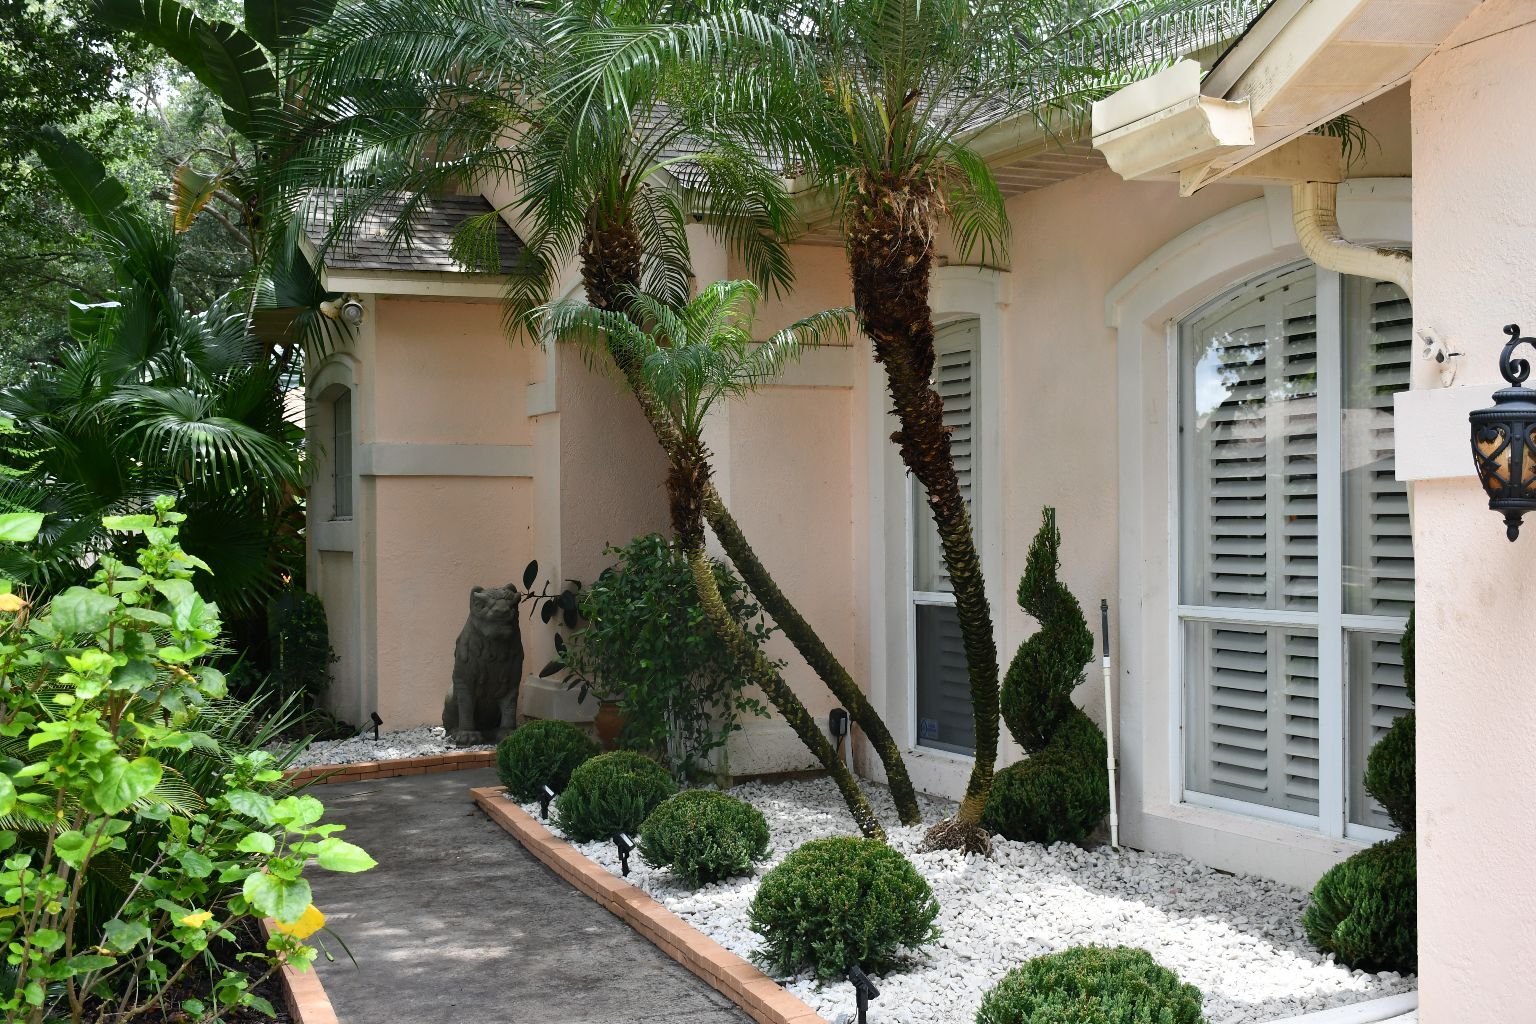
This is a View of our Front Door
—————————————————————————
This is one of my favorite landscaping projects.
This was a long time coming, but it was well worth the effort.
I really love the plants we chose, as they make our front yard pop with color and variety.

Well worth the work it took to build it.
Gordon Whann, Homeowner
—————————————————————————–
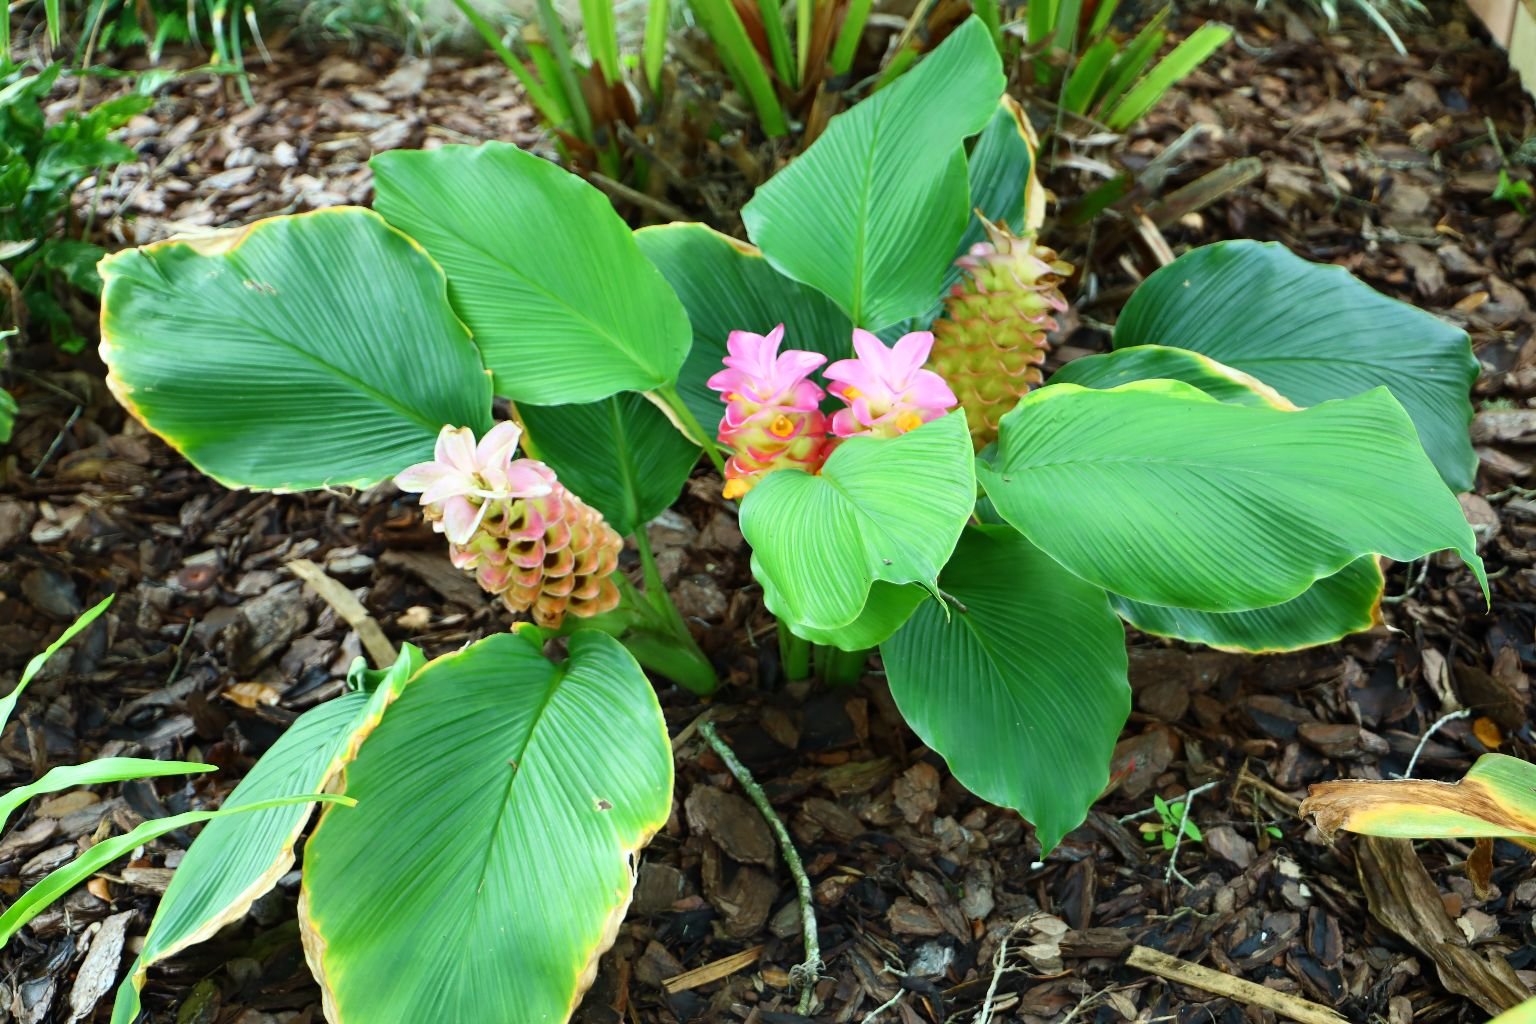
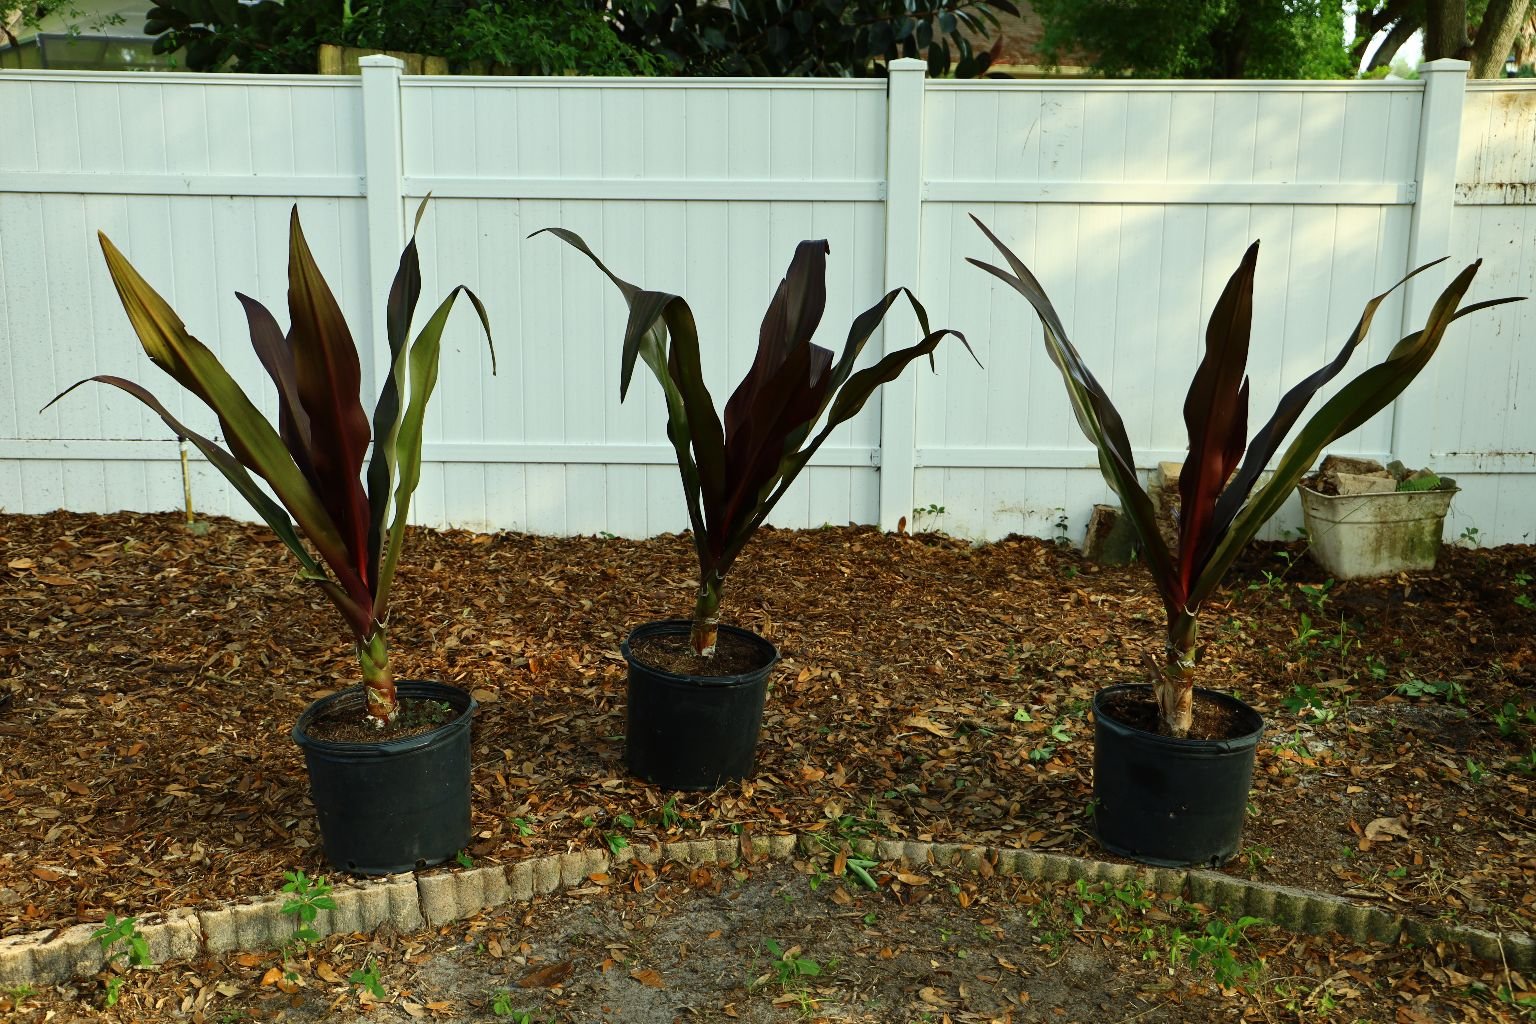
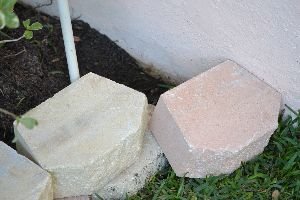
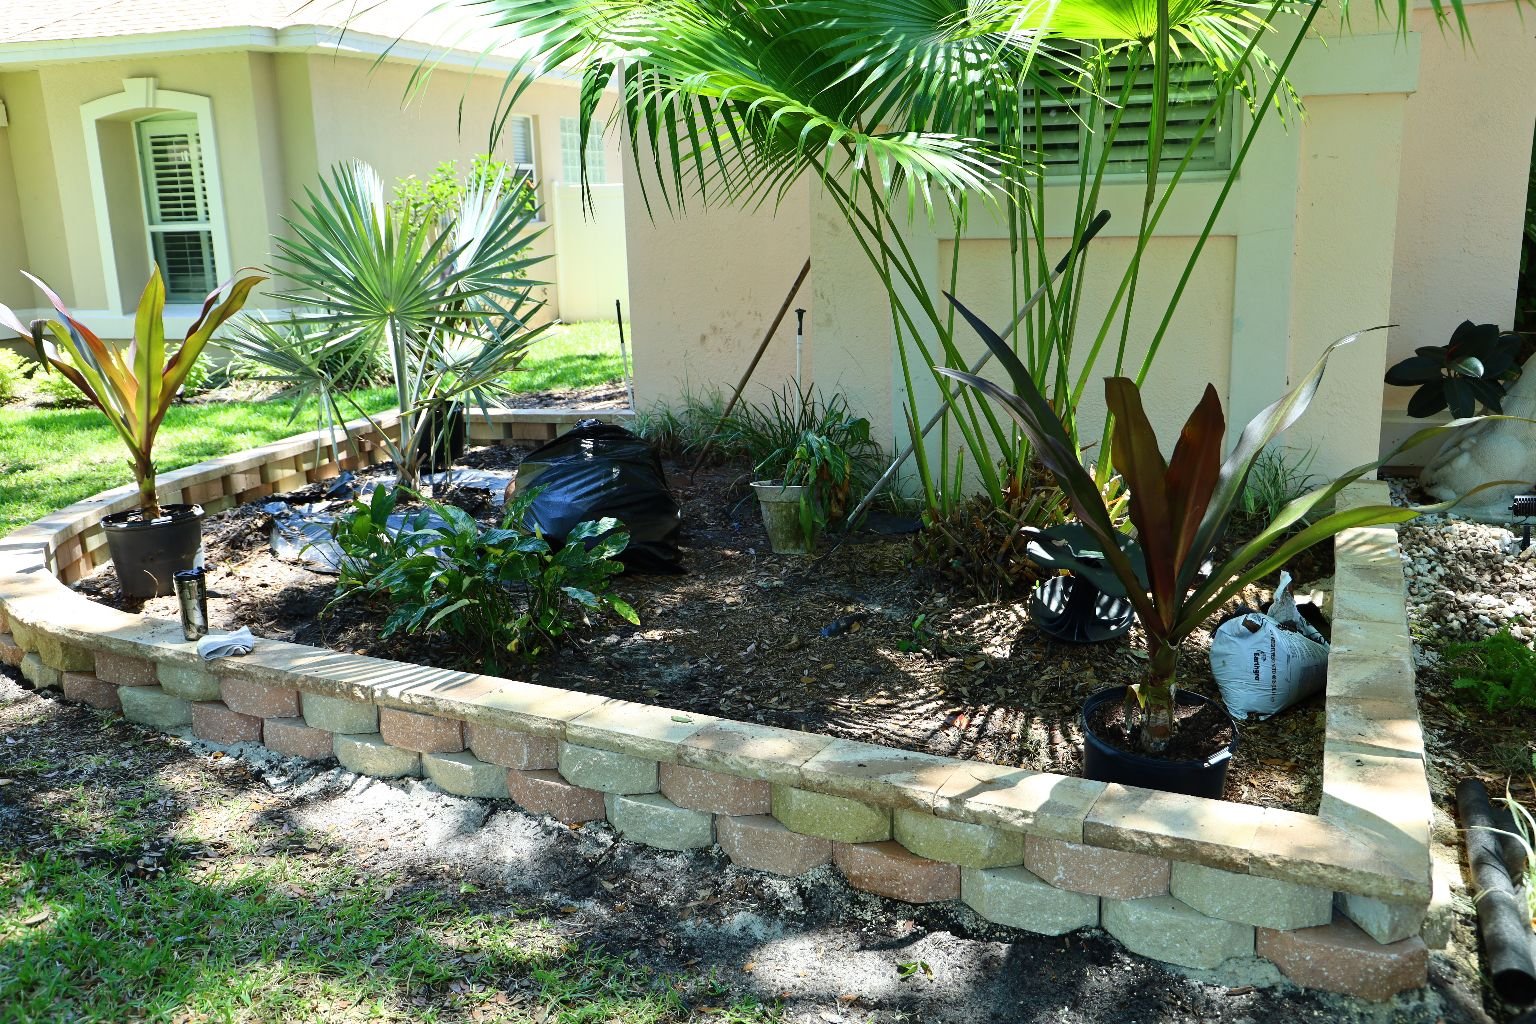
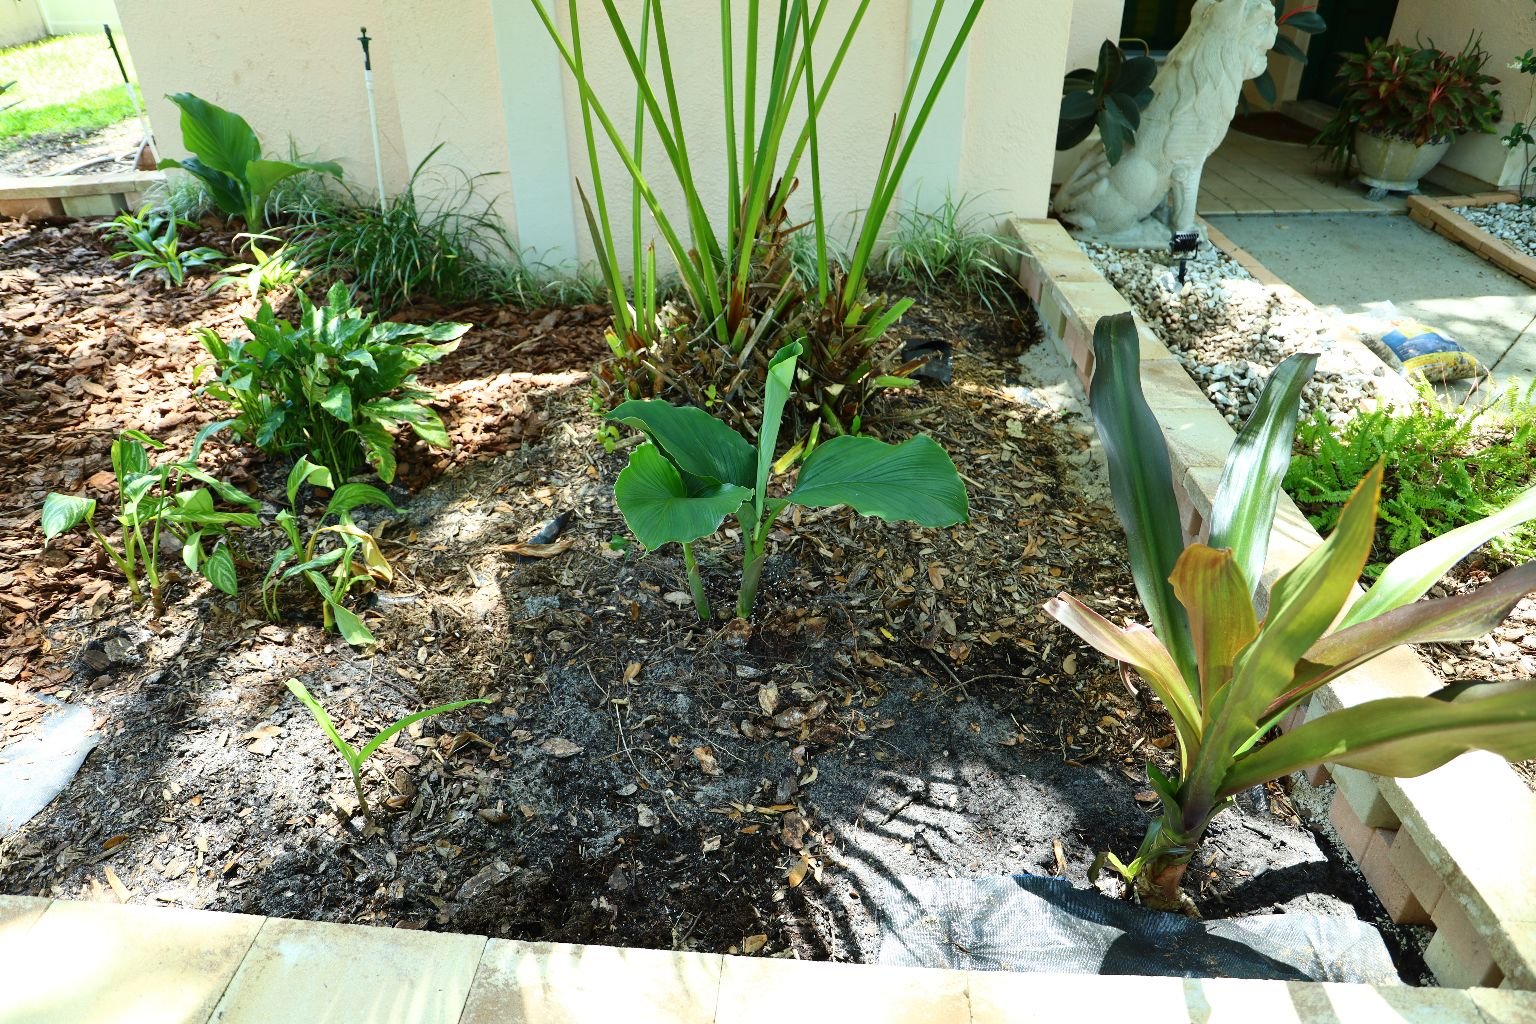
Here are some of the beautiful plants we chose for the area.
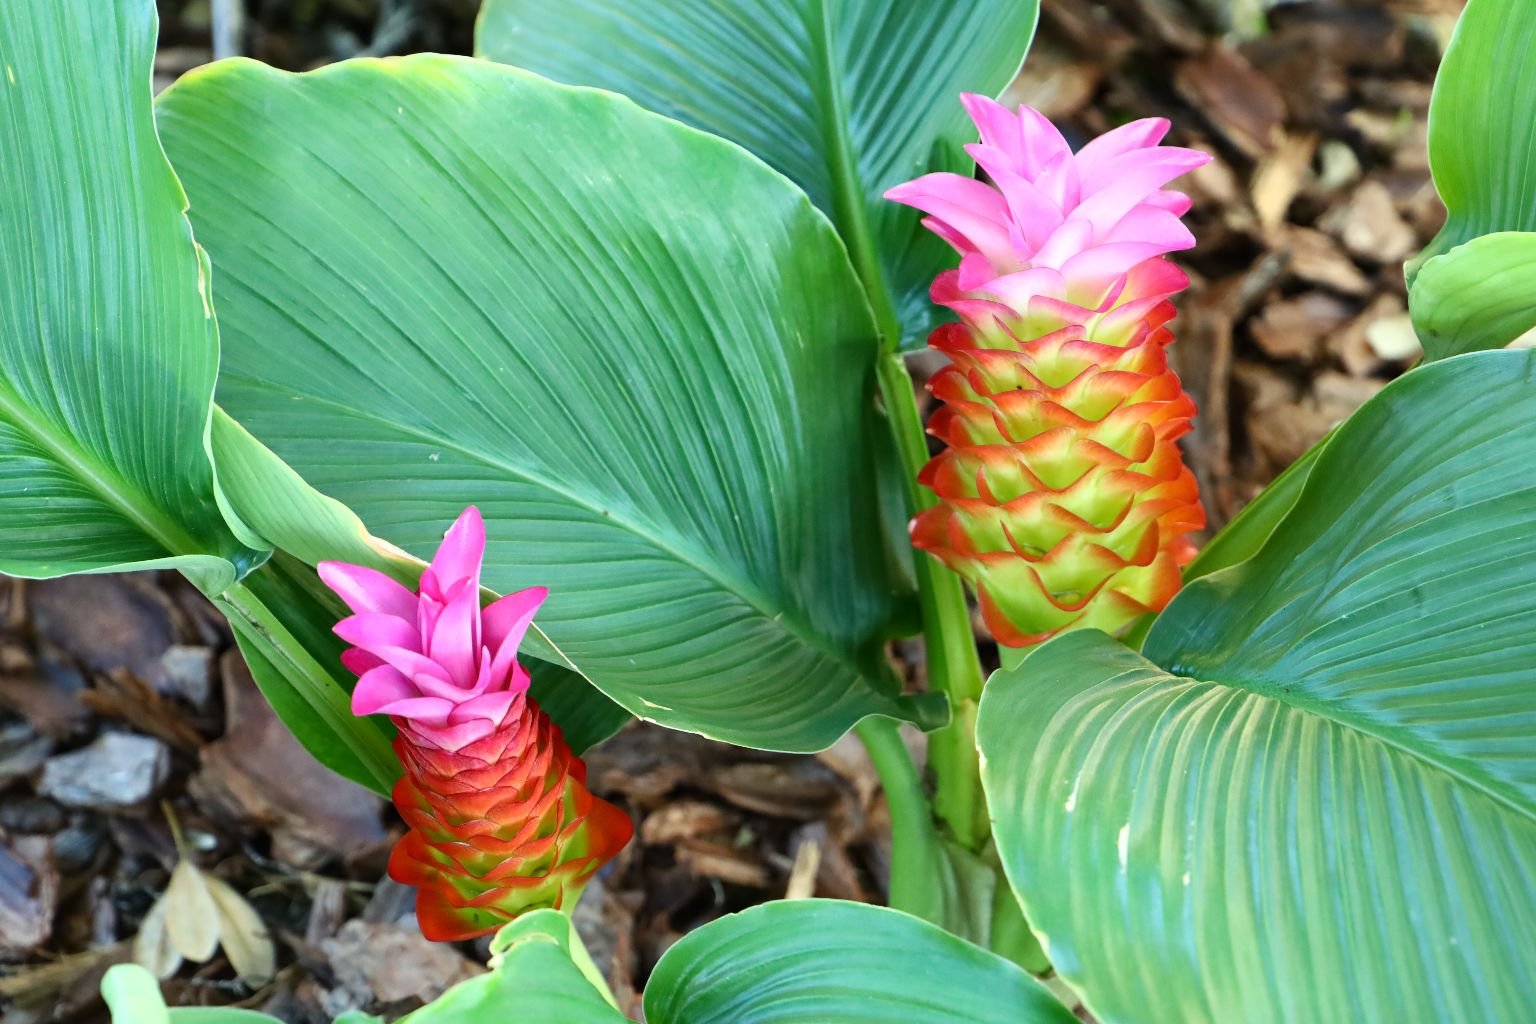
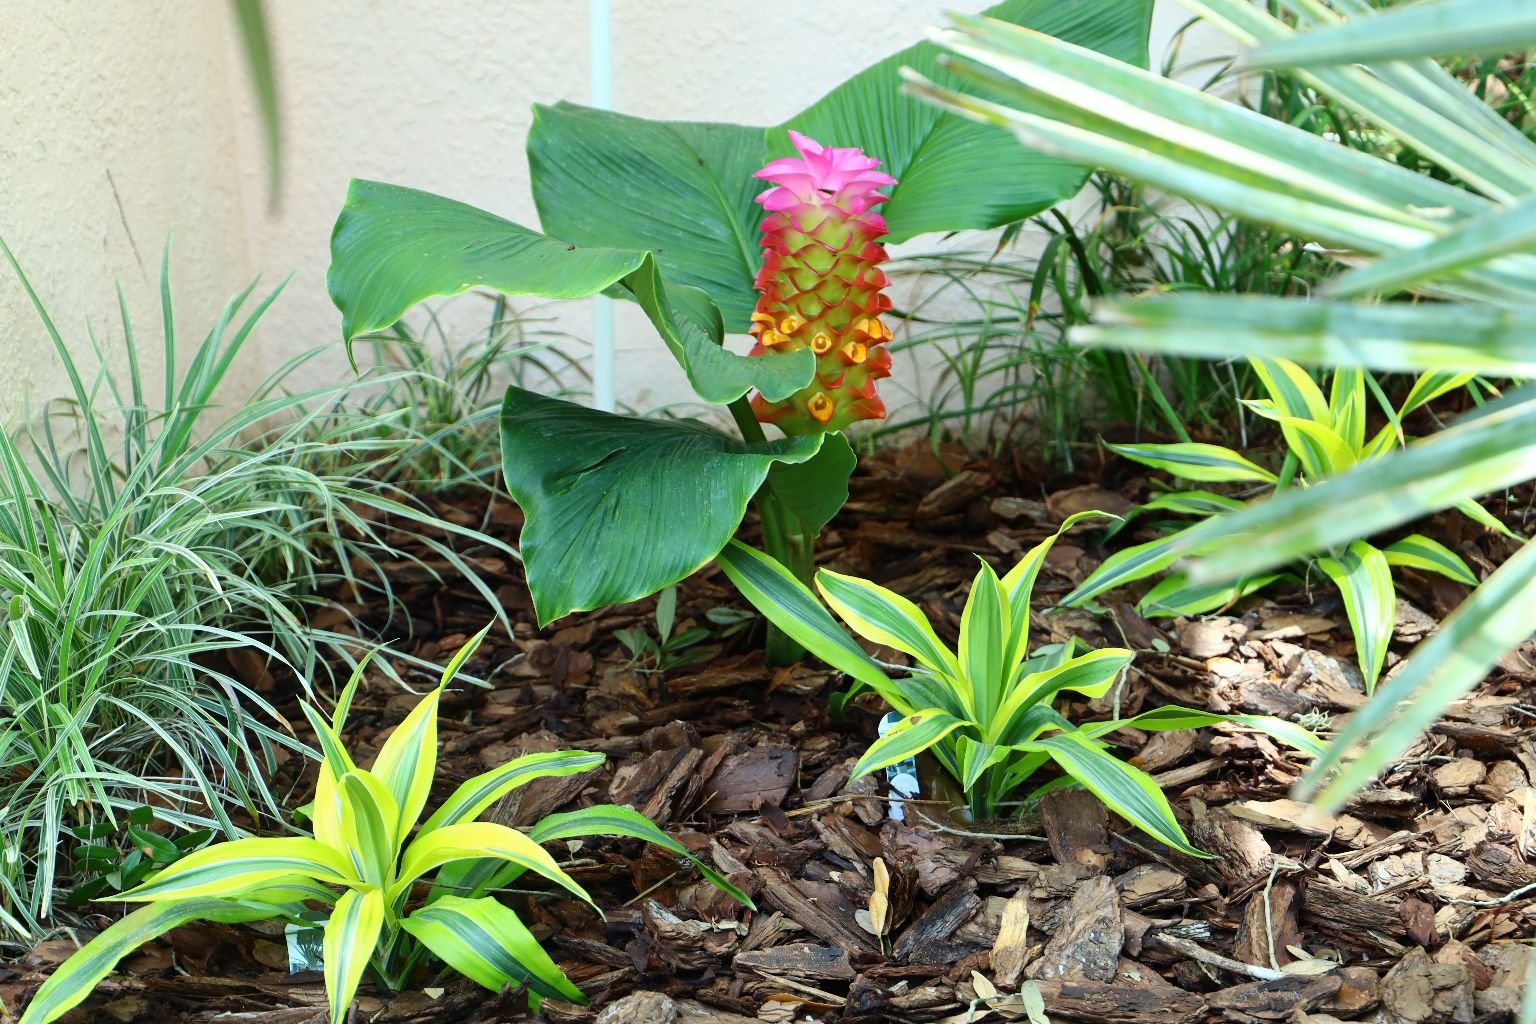
This Curcuma has beautiful unique flowers that come up every year!
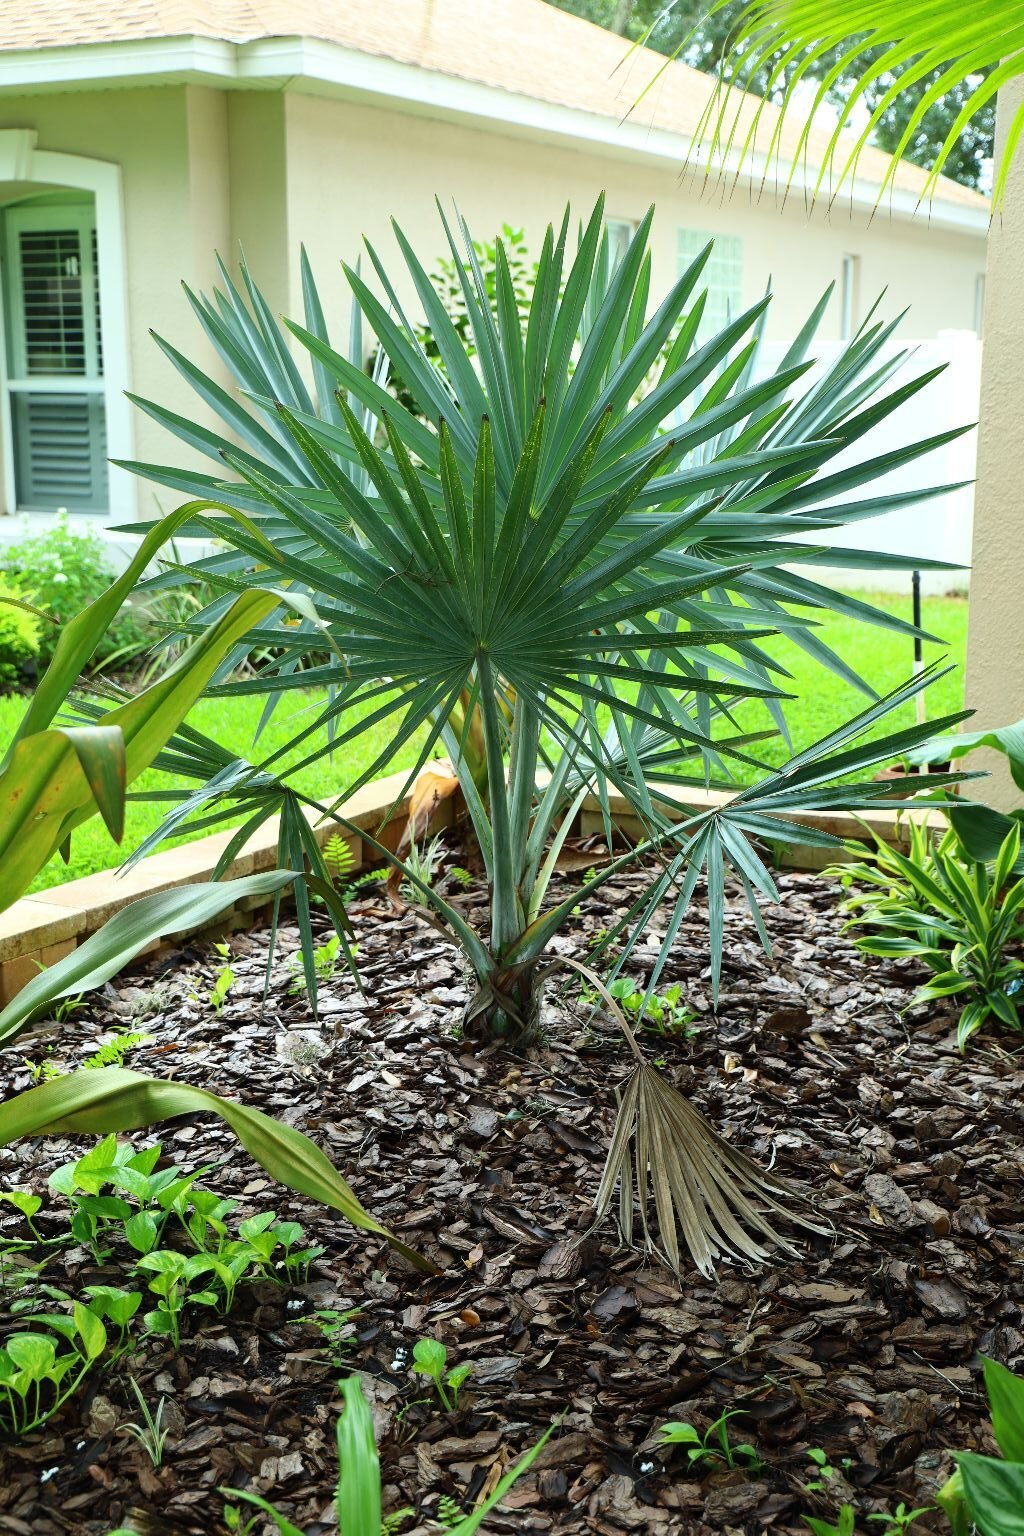
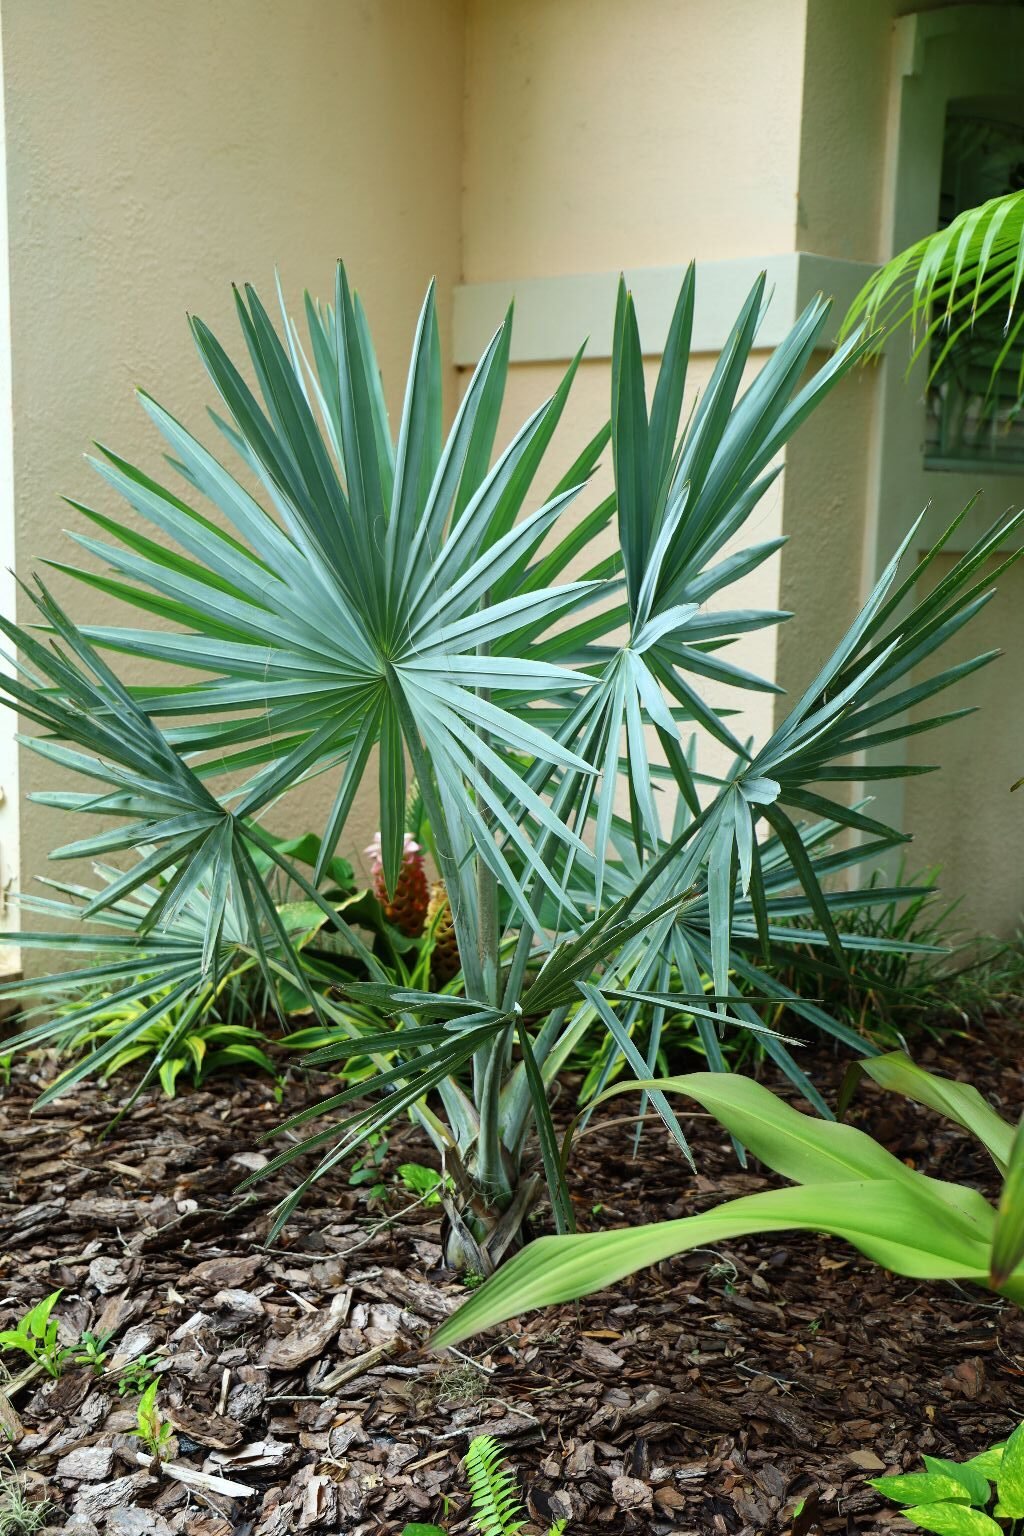
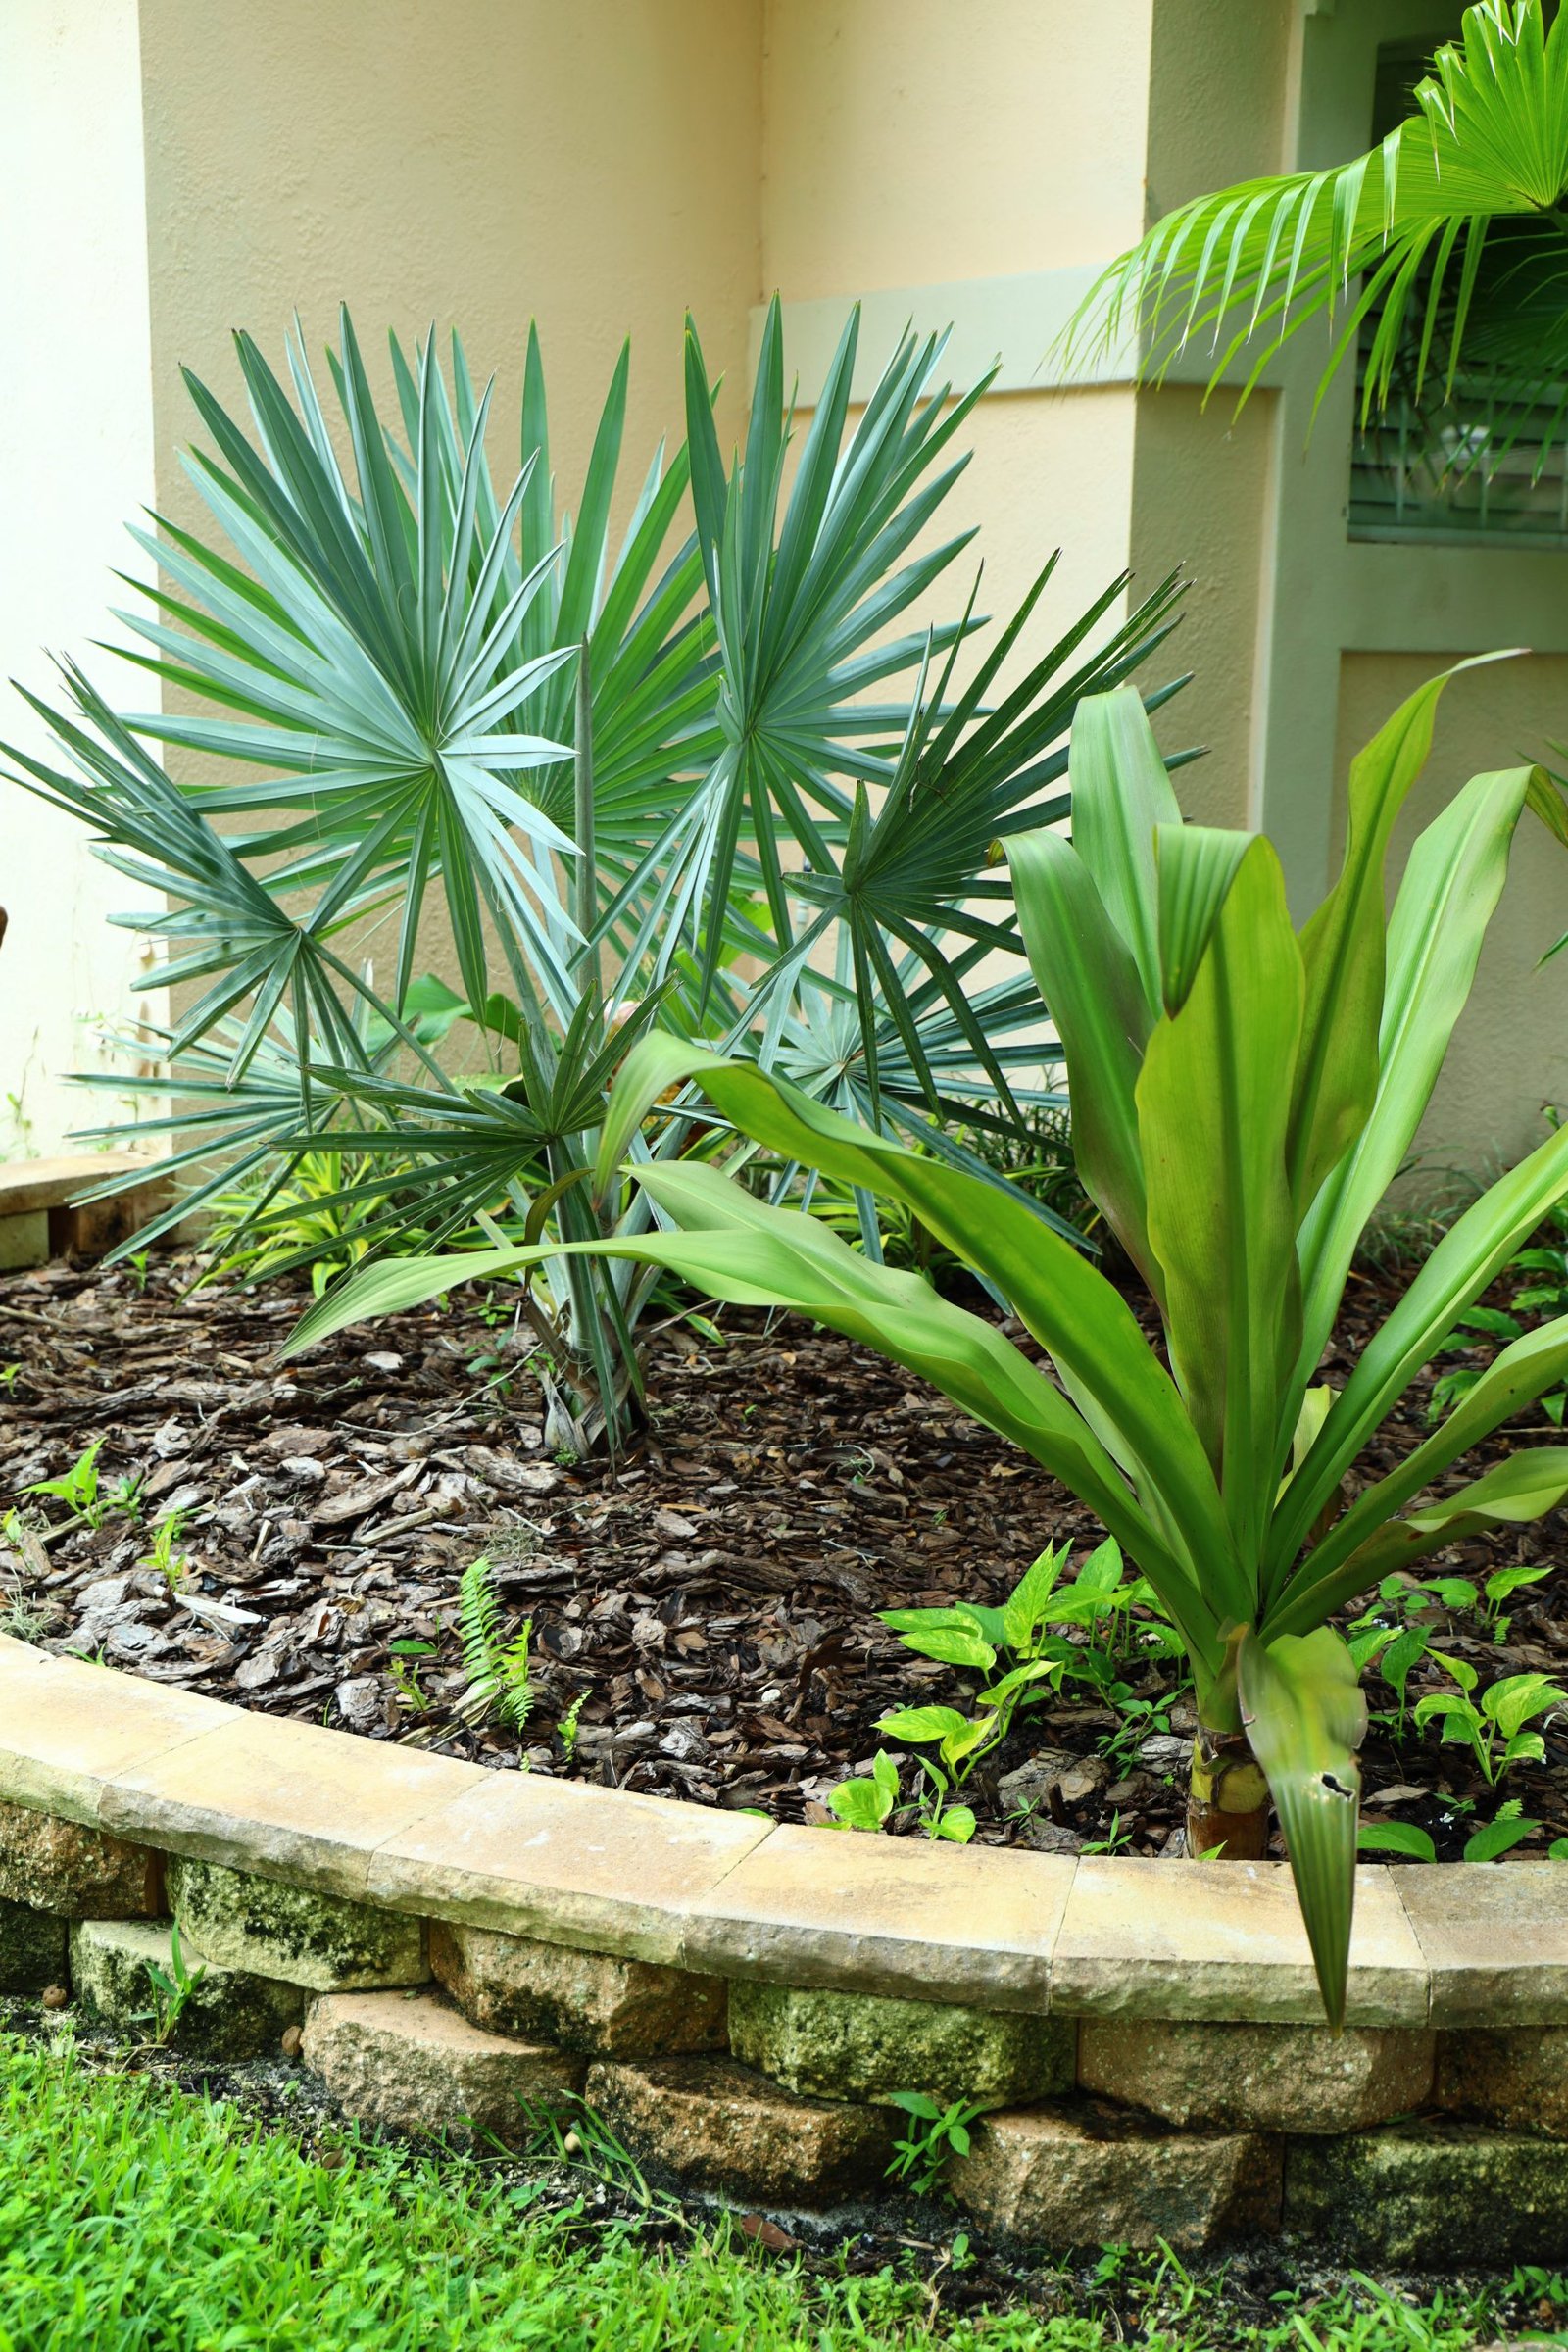
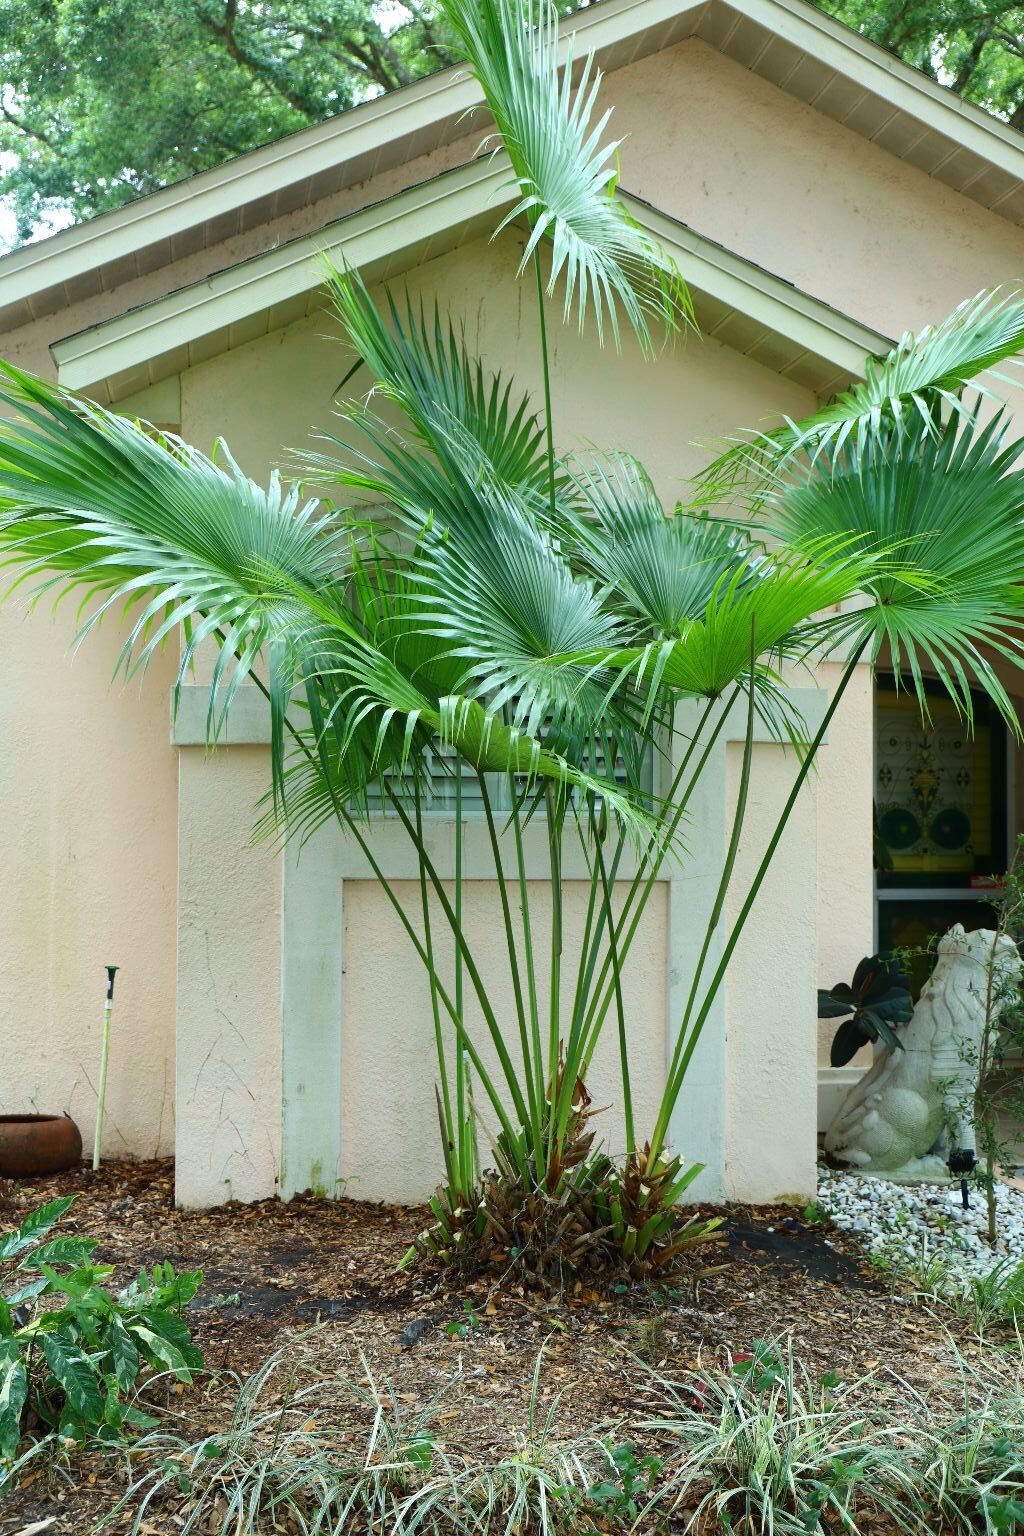
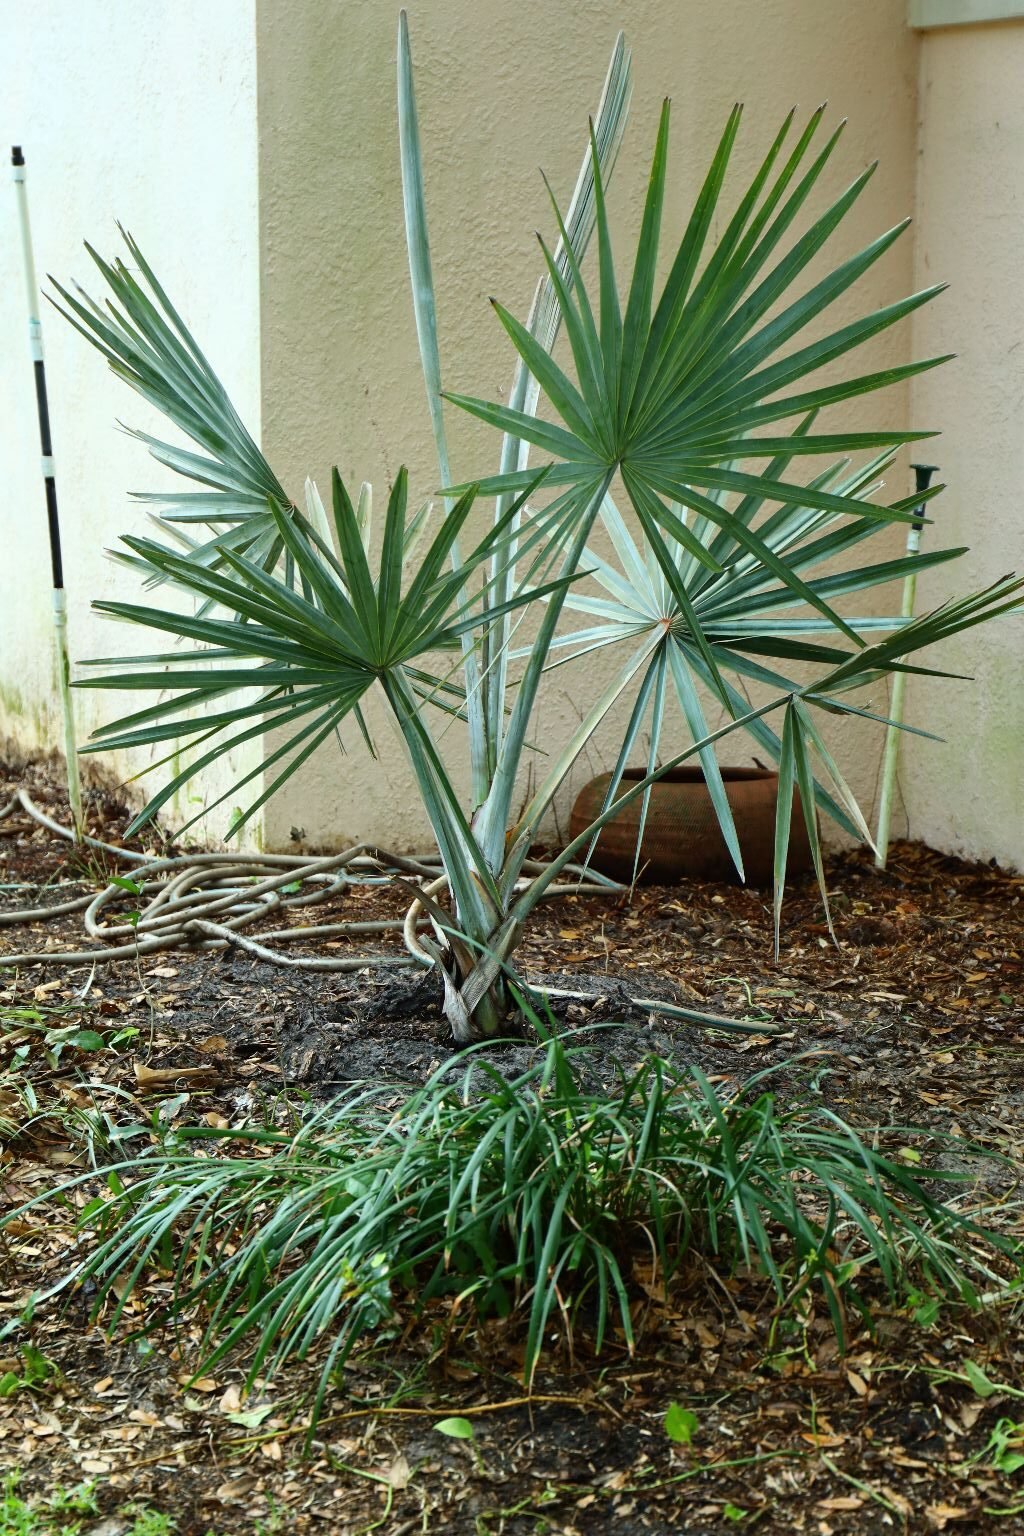
Our nice Bismark Palm.

Be sure to give it space as it will grow big.
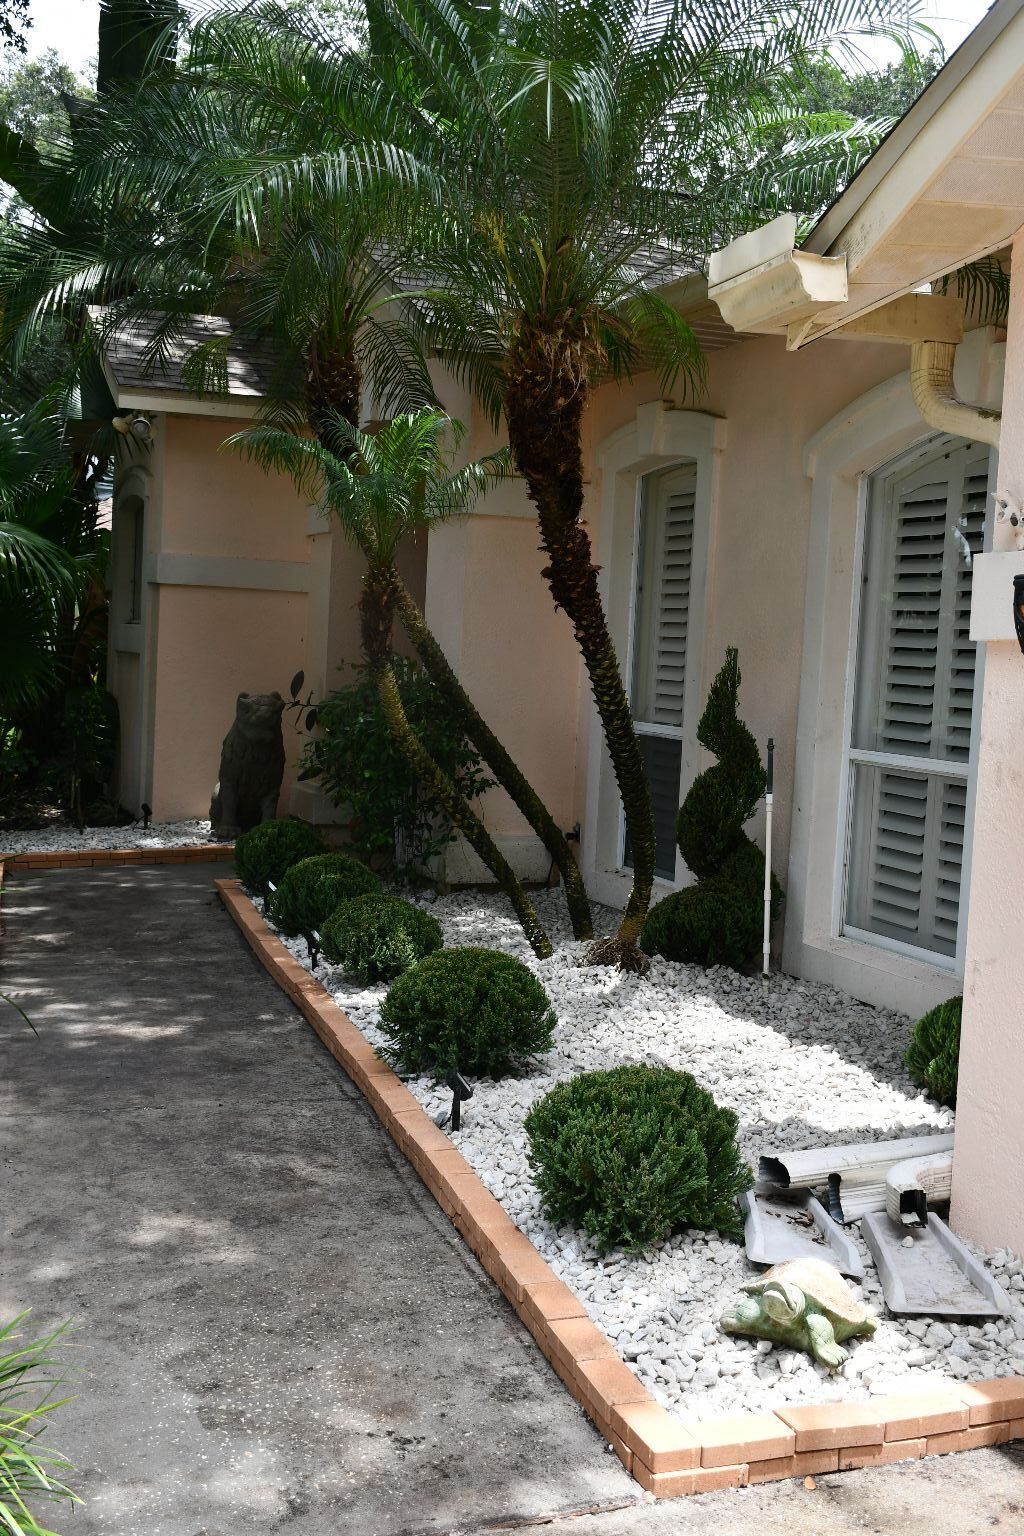
Gordon, sitting on this side of the wall facing the street. When it rains the dirt splashes on the wall which also
causes it to mold. Looking for a good solution to stop this. We do use bleach to try and combat that.
Here we just let the leaves and tree bark line the plant bed in front of our house.
————————————————————————
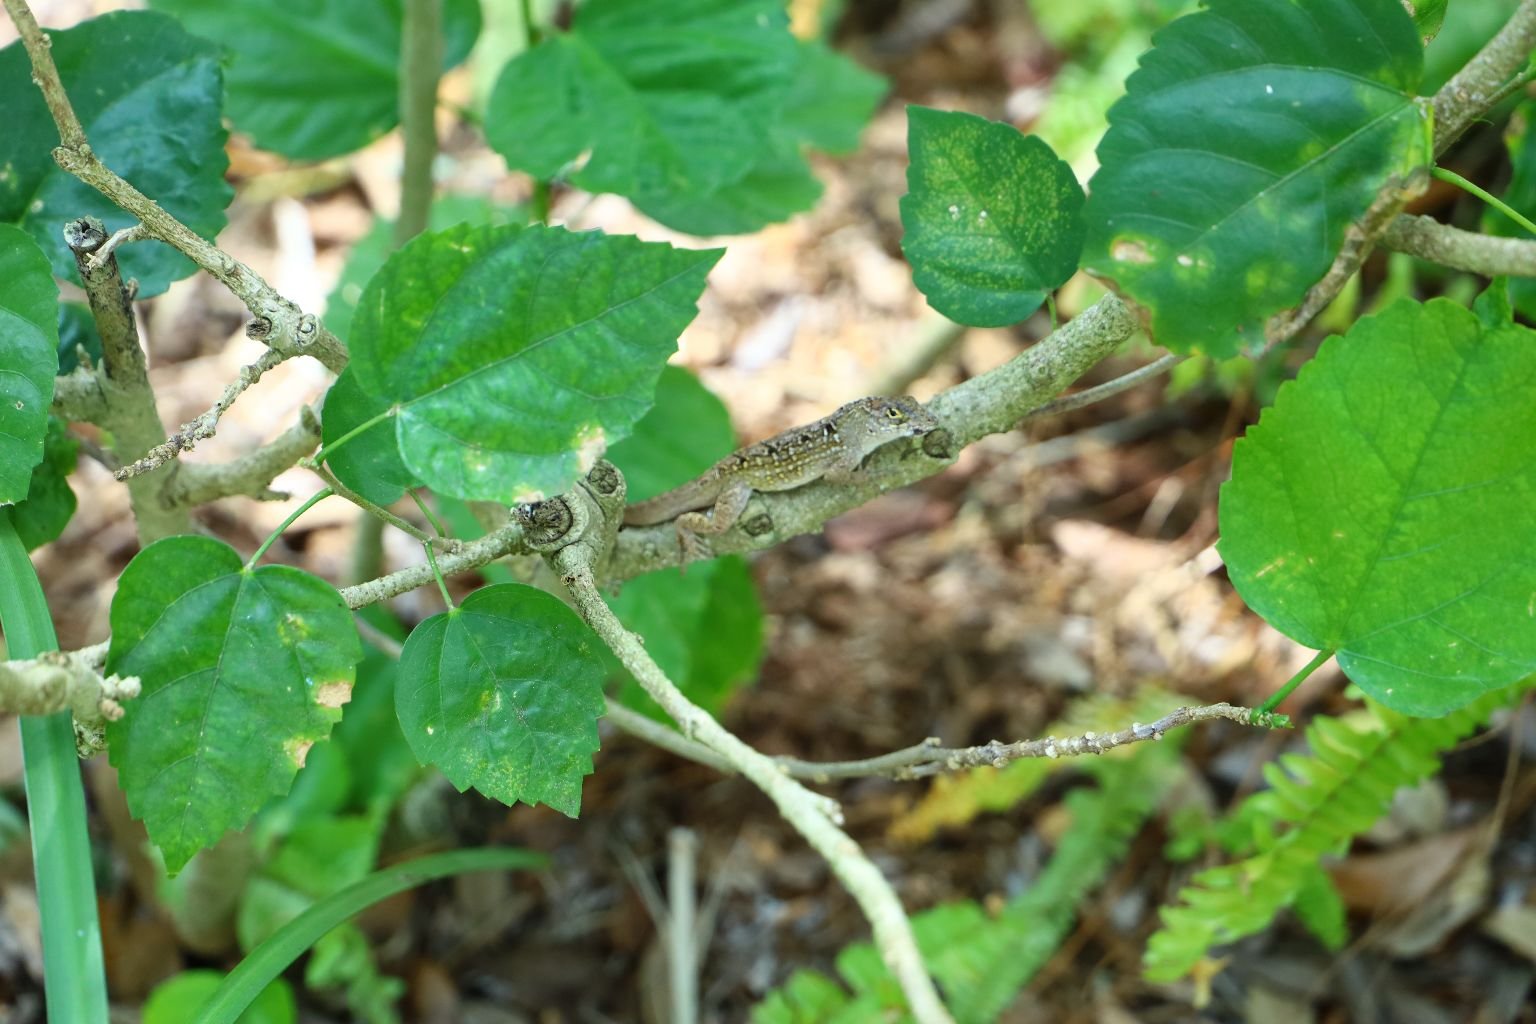
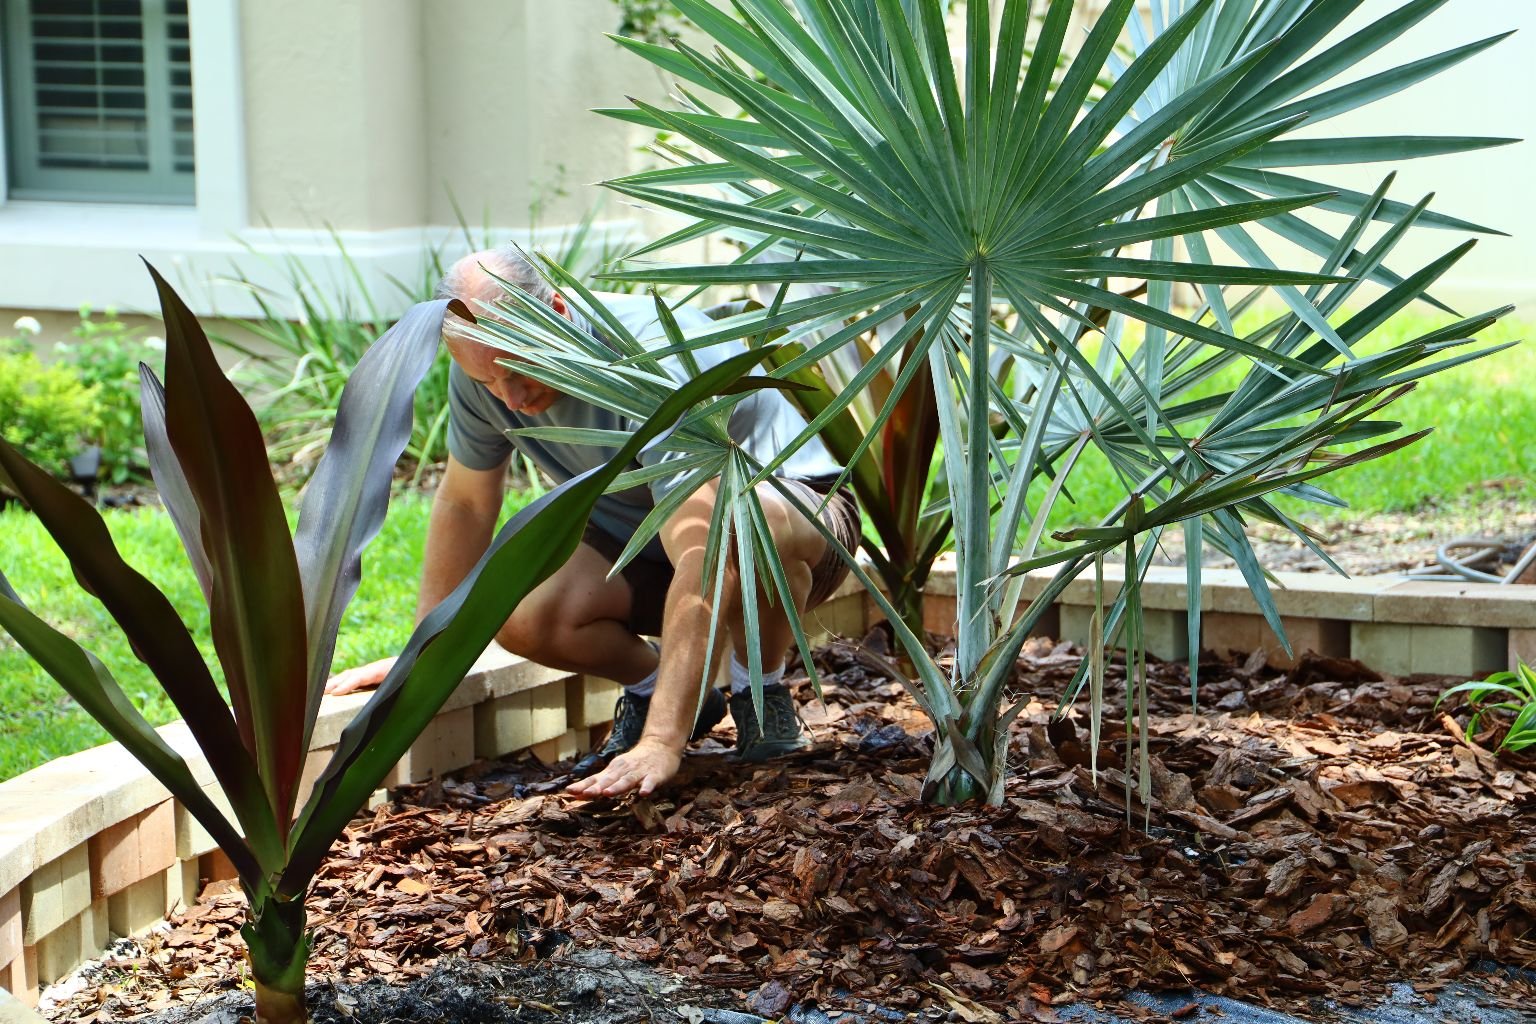
Find the Lizard? 🙂 Do you see him?
——————————————————————————-

Before Left, After Right
This was a big upgrade to our front yard from the jungle that we had to this more manicured landscaping.
———————————————————————–
Cost of Landscaping Retaining Wall
Paver Base Gravel Step 1 (52.86 Lb. bag costs $5.47) I used about 12 bags
Cost for Step 1 bags $65.64
Paver Base Sand Step 2 (50 Lb. bag costs $5.77) I used about 7 bags
Cost for Step 2 bags = $40.39
Total cost for both Step 1 and Step 2… ~$106.00 plus tax
Retaining wall block price for 1 is $2.48 (nearly 100 total blocks used)
Total price is $248.00 plus tax.
Capstone/Wall Cap price for 1 is $3.27 (around 35 total capstones used)
Total price is $114.45 plus tax.
Total block and capstone price is $362.45 plus tax.
———————————————————————
Total project price estimation is $468.45 plus tax.
Return price on your investment at least $1,550.00. This is figured at three times the cost of your
supplies plus the cost of your labor. Labor cost is by the hour, so even at minimum wage ($12.00 an
hour) for approx. 12 hours that is $144.00. What a great way to increase your property value.
——————————————————————————–

The Before Photo of Said Jungle
Now that the area has been cleared Gordon has started construction on his “border wall” as we like to call it, in order to keep out the squirrels. It’s just a joke. 🙂
It will look very nice until our yard guys blow leaves and debris into it just so they don’t have to pick anything up and cart it away. But hey, at least it will be beautiful for about 30 minutes. Just long enough for me to photograph and make everyone think it looks like that all the time.
———————————————————————-
The Sprinkler Guys
Again, if you have been following along then you know of our encounter with Lyin’ _Rian and his Extremist Landscaping LLC where he really did rip us off and not only did his crew chop through ONE of our sprinkler pipes, we discovered that they had actually chopped through THREE of them! THREE!!! That explains why he never bothered fixing the one pipe that Gordon did find out about. He knew it was a much bigger job so he kept quiet. Oh, and do you remember the cables that I told you that he chopped through when I was writing about it in my 2021 blog? We thought they were old telephone cables? They were actually sprinkler cables that had to be repaired otherwise our valves won’t open to allow water through the pipes in order to water our lawn.
The good news is that we contacted a sprinkler company through the recommendation of a neighbor, the two brother’s who own the business showed up on a Tuesday, stayed over 4 hours fixing everything. They even geared our sprinklers to water certain areas that don’t get much water. And the bill was just over $800.00. We’re just happy that everything is fixed and working. We are not going to dwell on Lyin’ _Rian, we are more interested in moving forward and completing the new front yard landscaping and making it look nice. We are also very excited about the projects that will be coming to fruition in our backyard soon.
You know, everyone has gotten ripped off during their lifetime by some con artist. We however, have been very lucky in our lives to not have encountered much of that. So, as I see it, it was just our turn. Glad our turn is over with. 🙂
Julie
P.S. When we were desperate to find a good and reliable sprinkler guy, I told Gordon to walk around the neighborhood and talk to whatever home owner he see’s outside. Then ask them who their sprinkler guys are? Ask how they like them? Ask a few questions and then that gives us an idea on who we can contact. He did. And we found our Honest Guys! 🙂
——————————————————————-
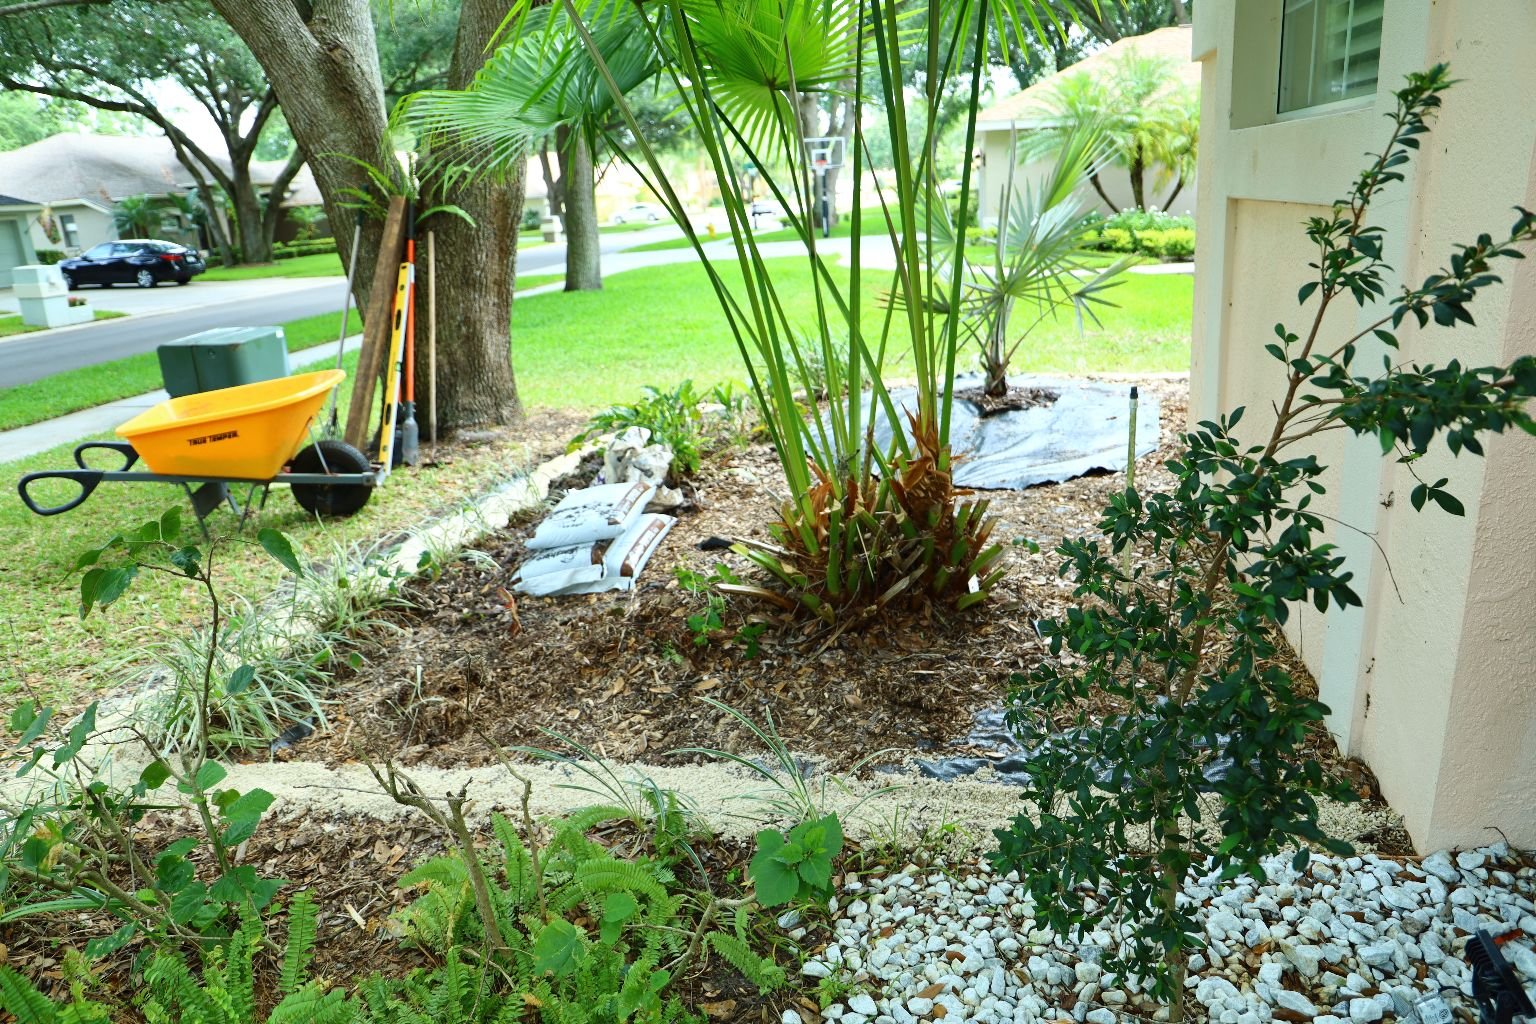
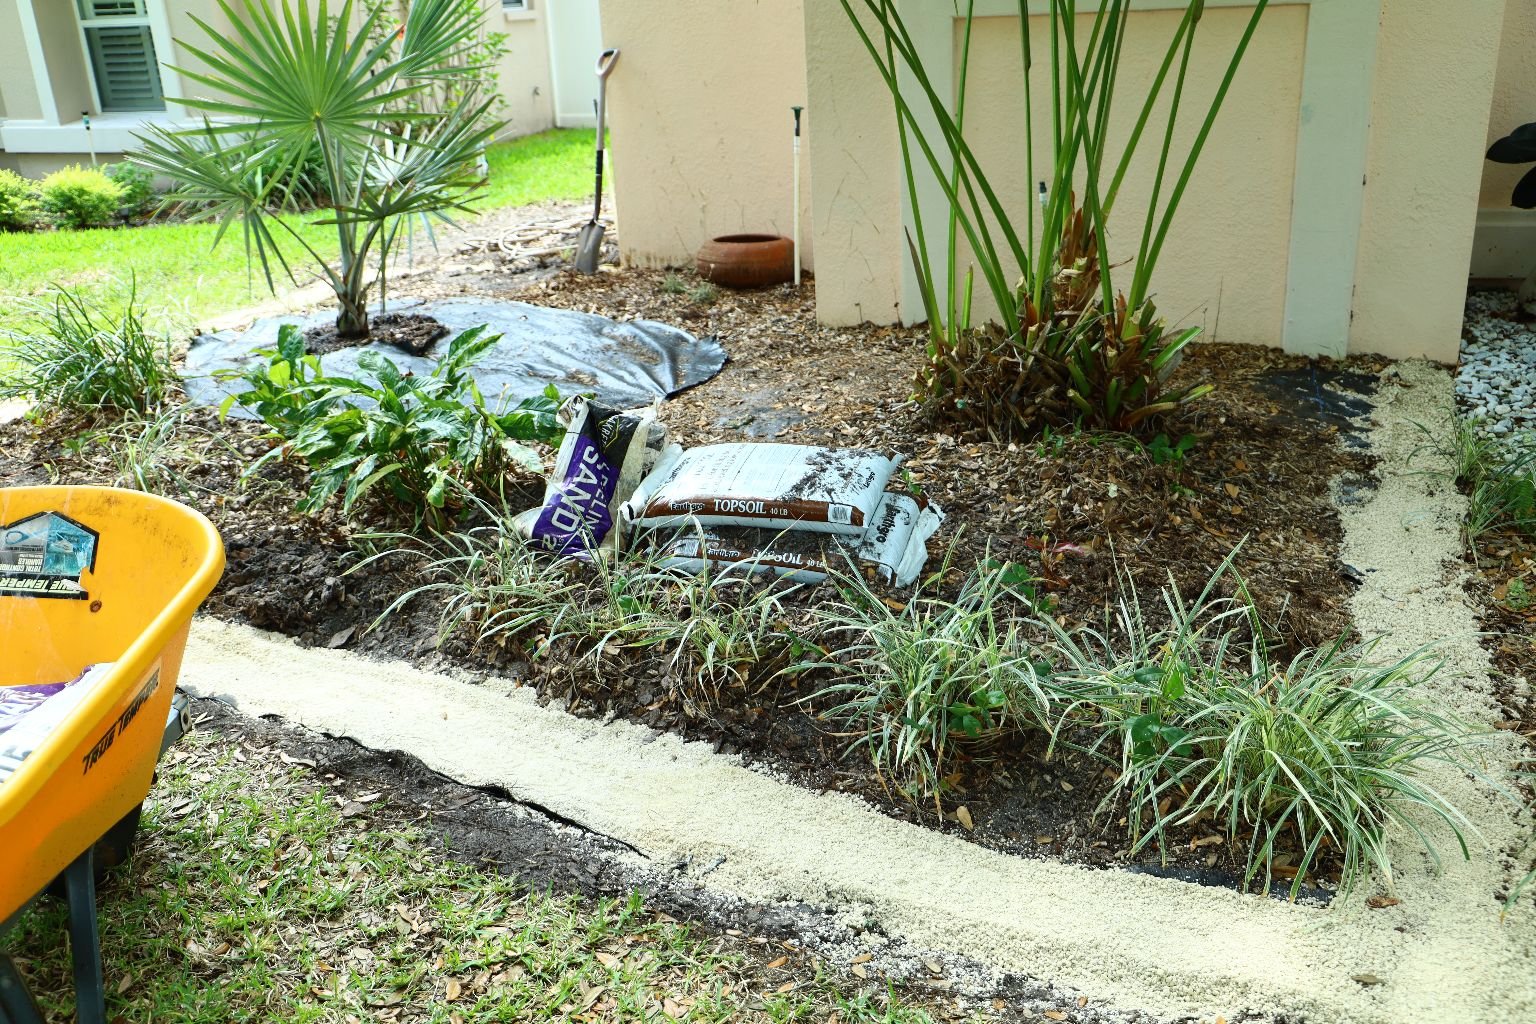
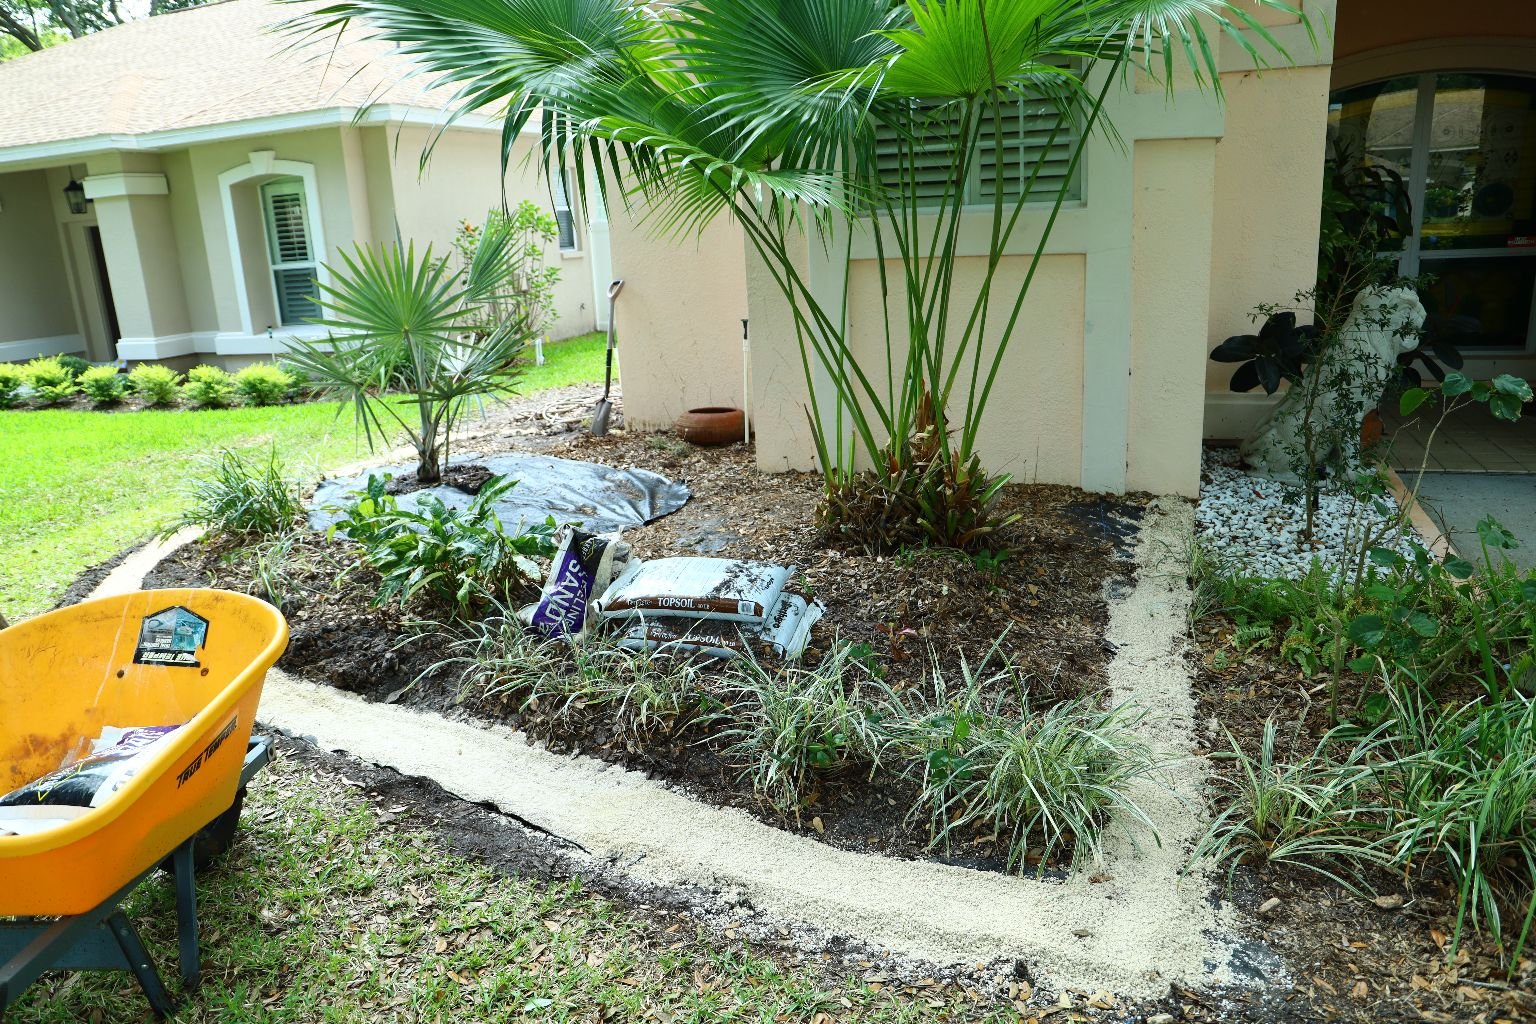
The Space
(Write Up From Gordon Starts Here)
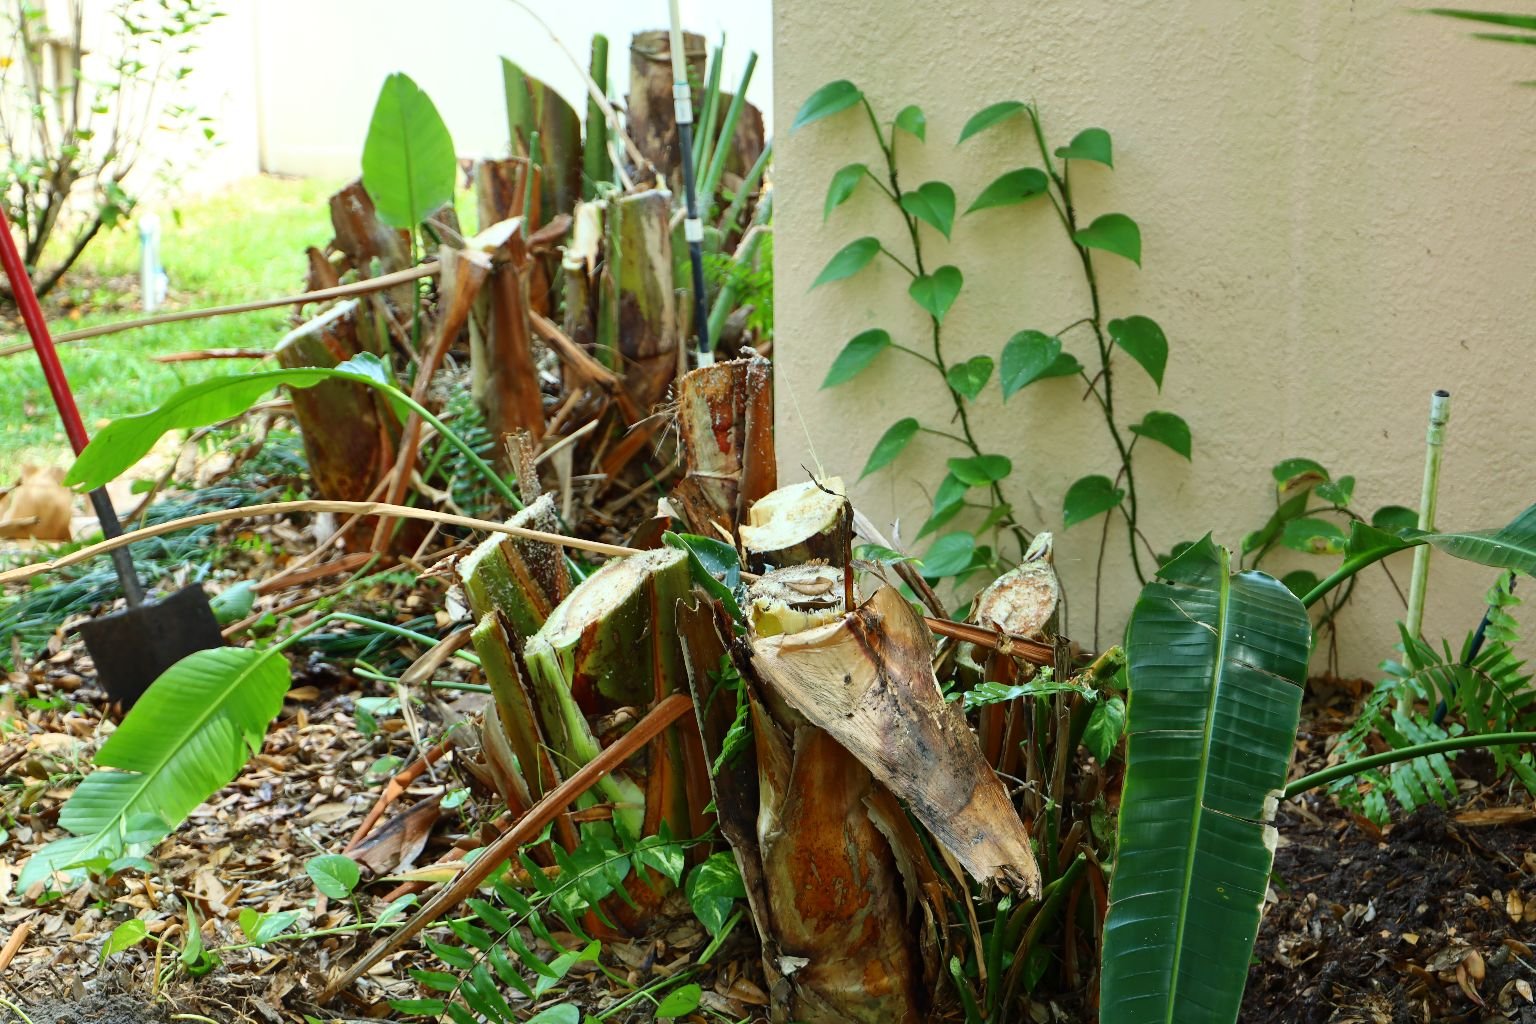
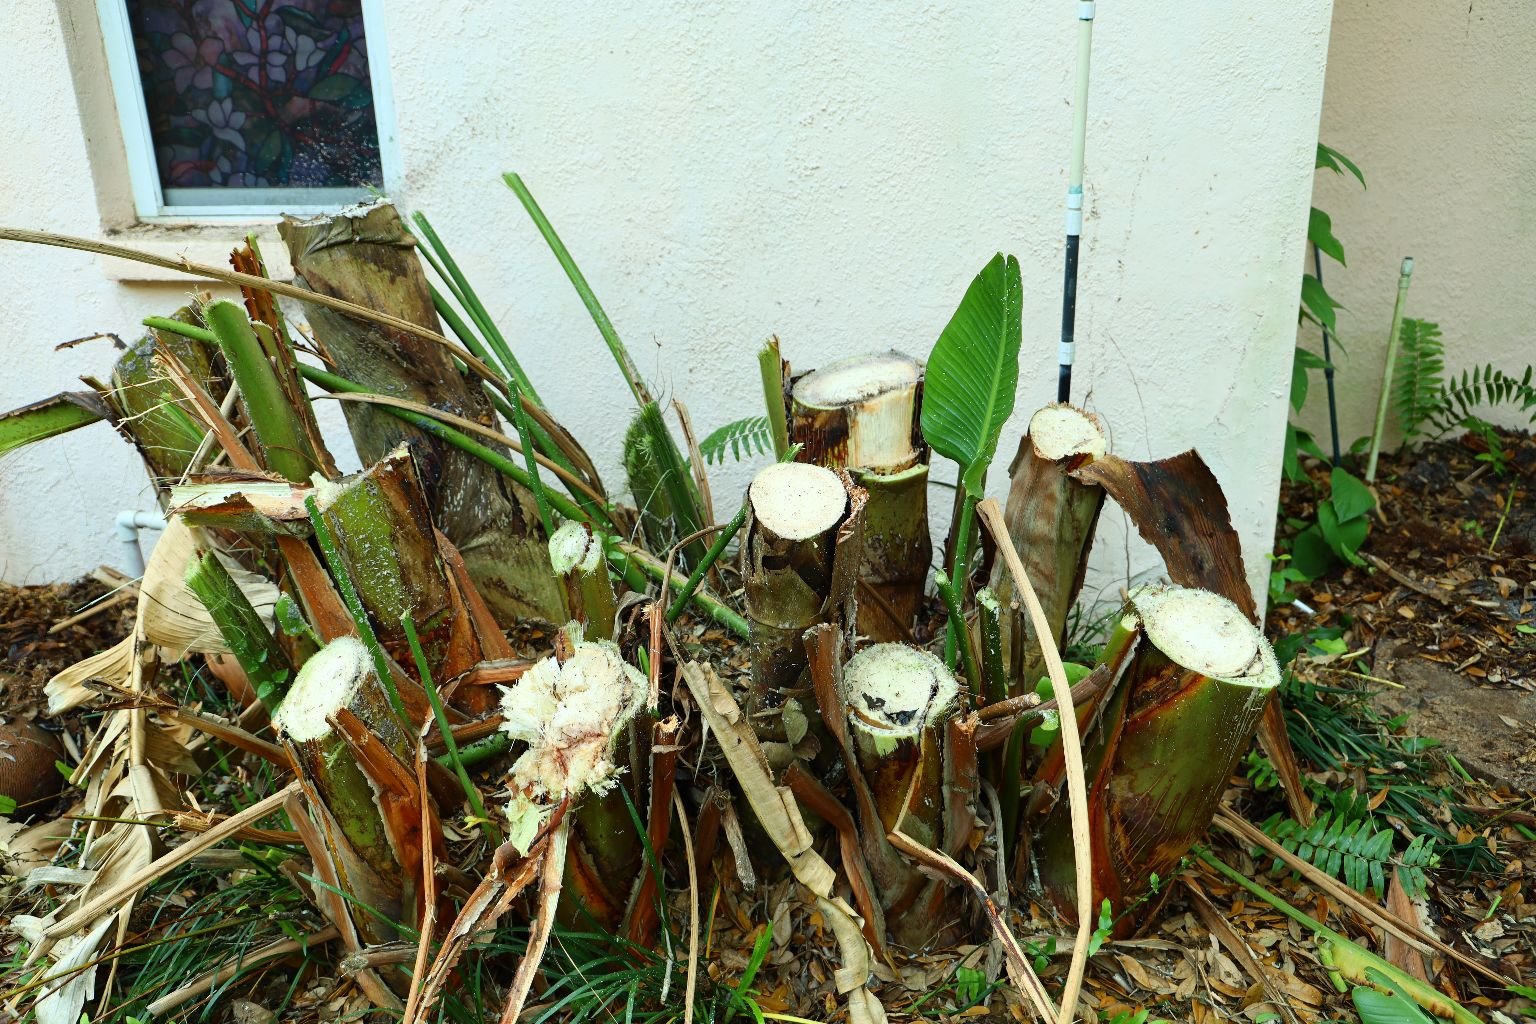
This is what I started with as we had a service to come out and cut down our huge, overgrown white bird of
paradise trees. There were many, and they grew taller than the house.
![]()
More debris that had to be all cleaned out to start the new area.
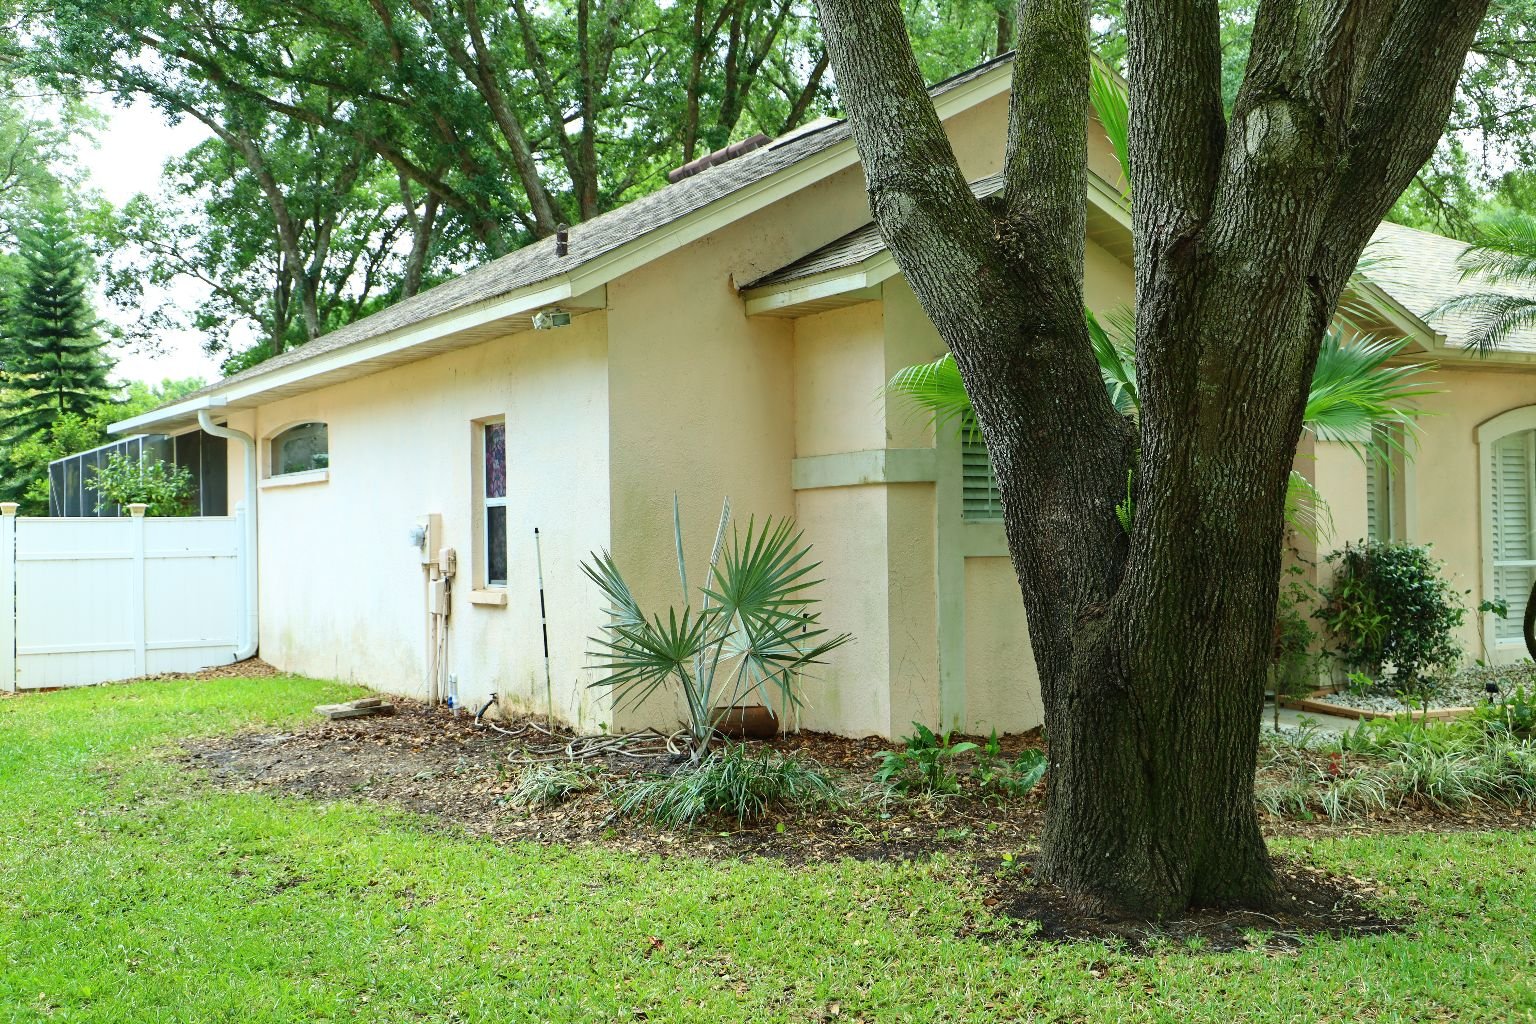
We kept the Chinese Palm
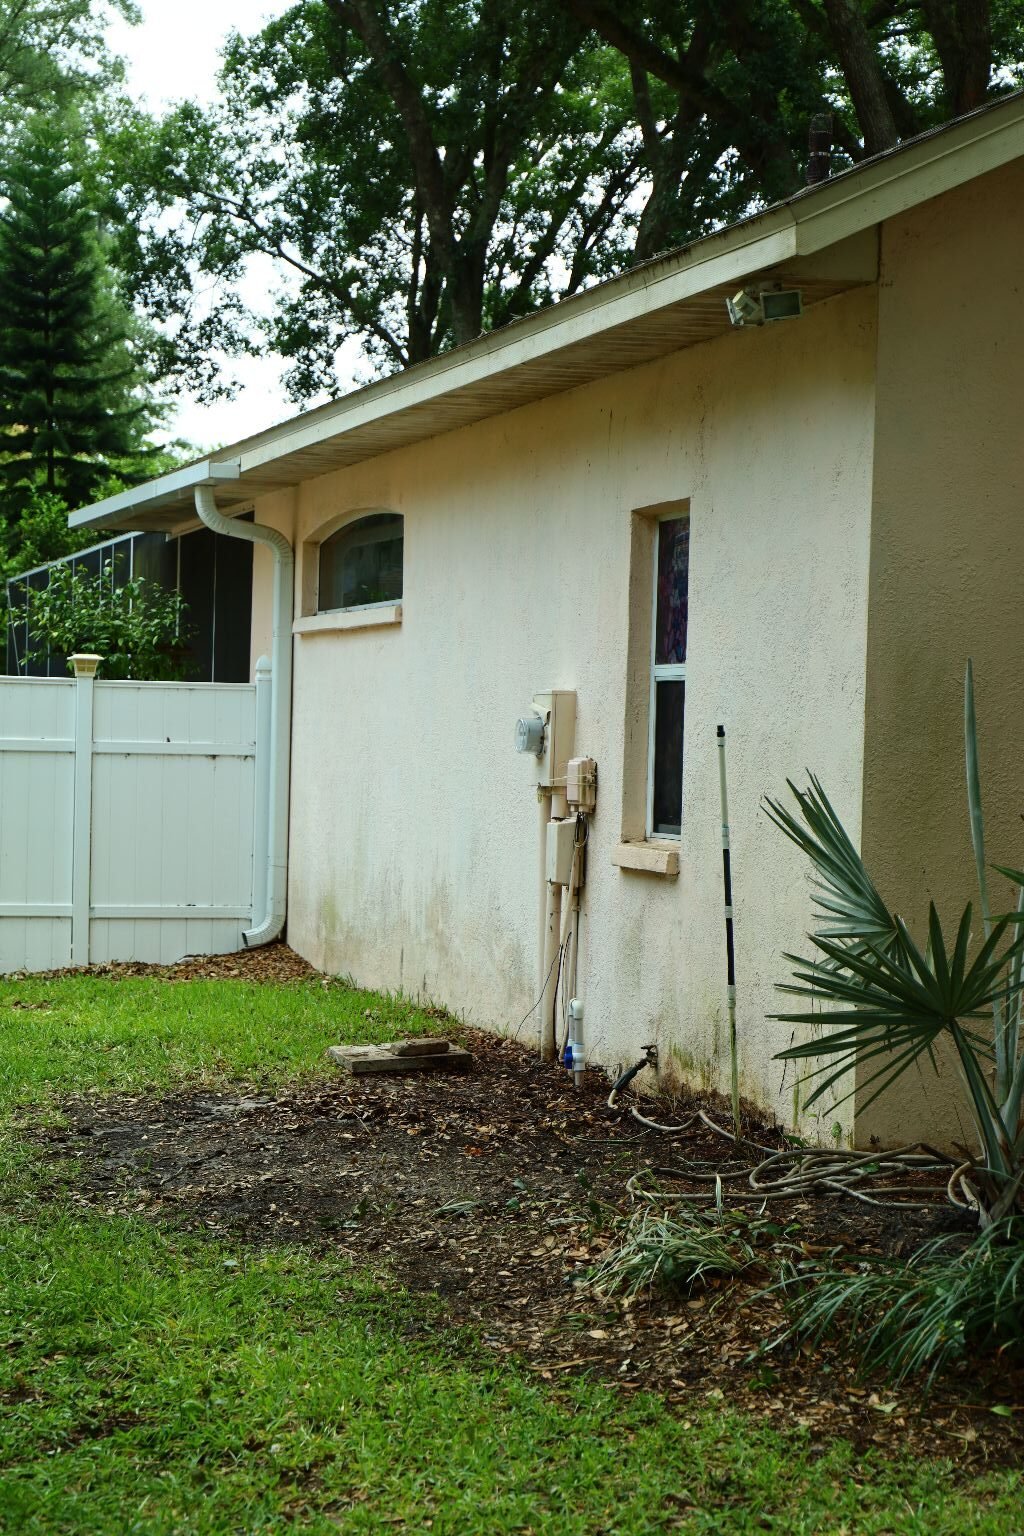
Again, not looking very good which is why I decided to install a nice retaining wall to encompass the
area.
Our “Massive” Bismark Palm 🙂
———————————————————————-
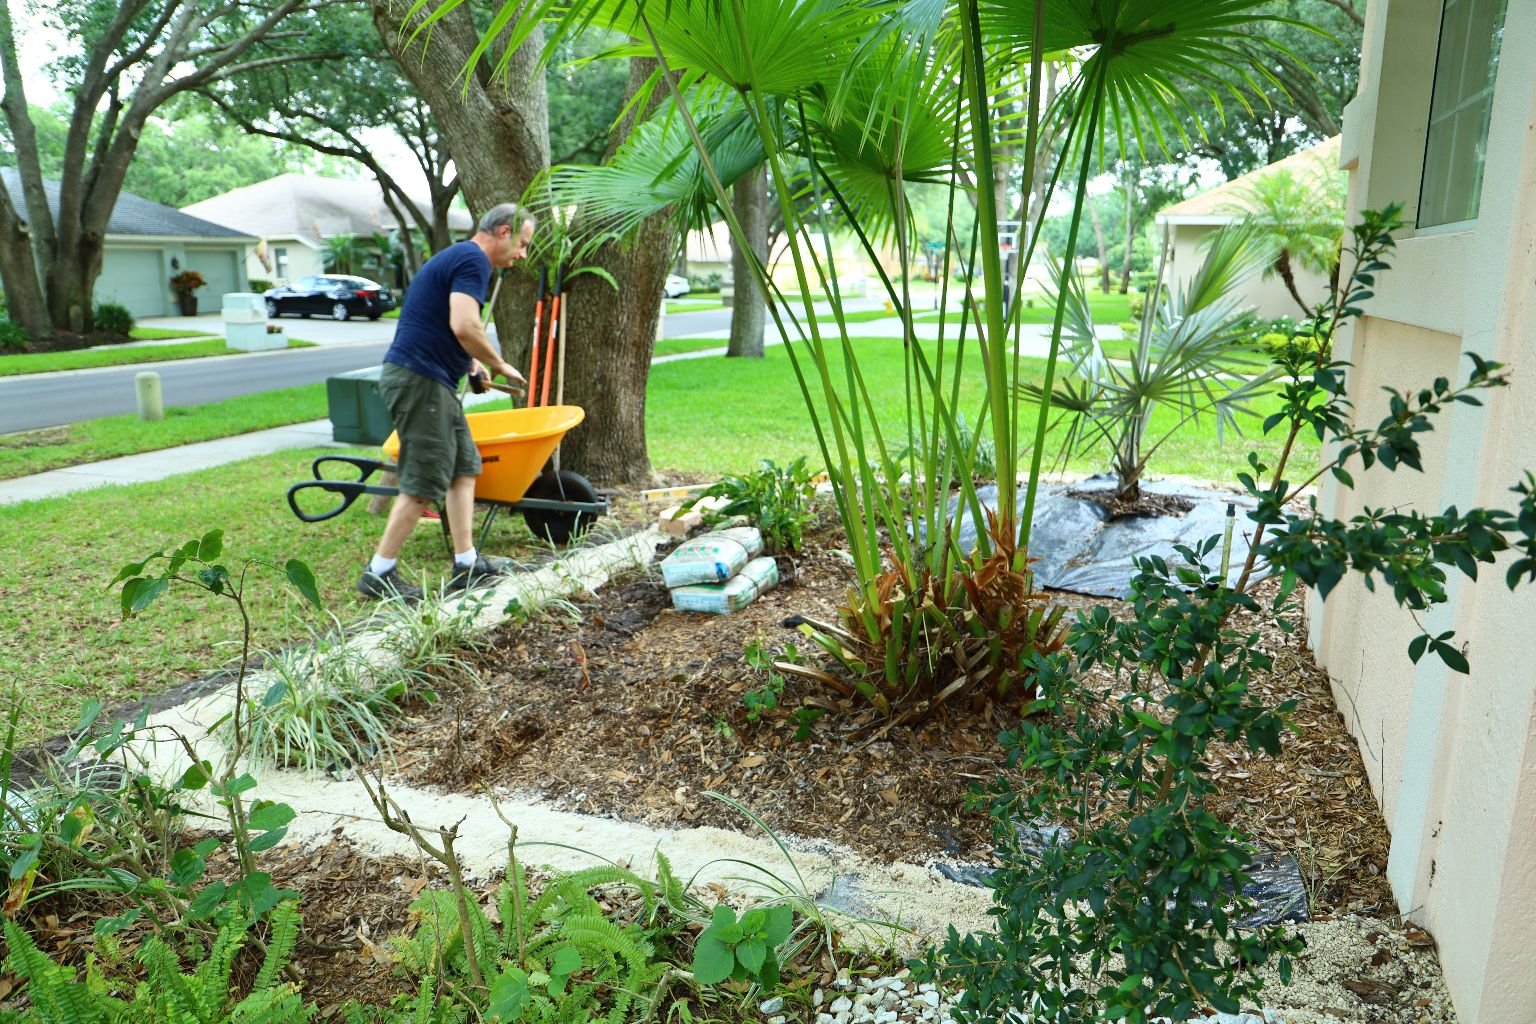
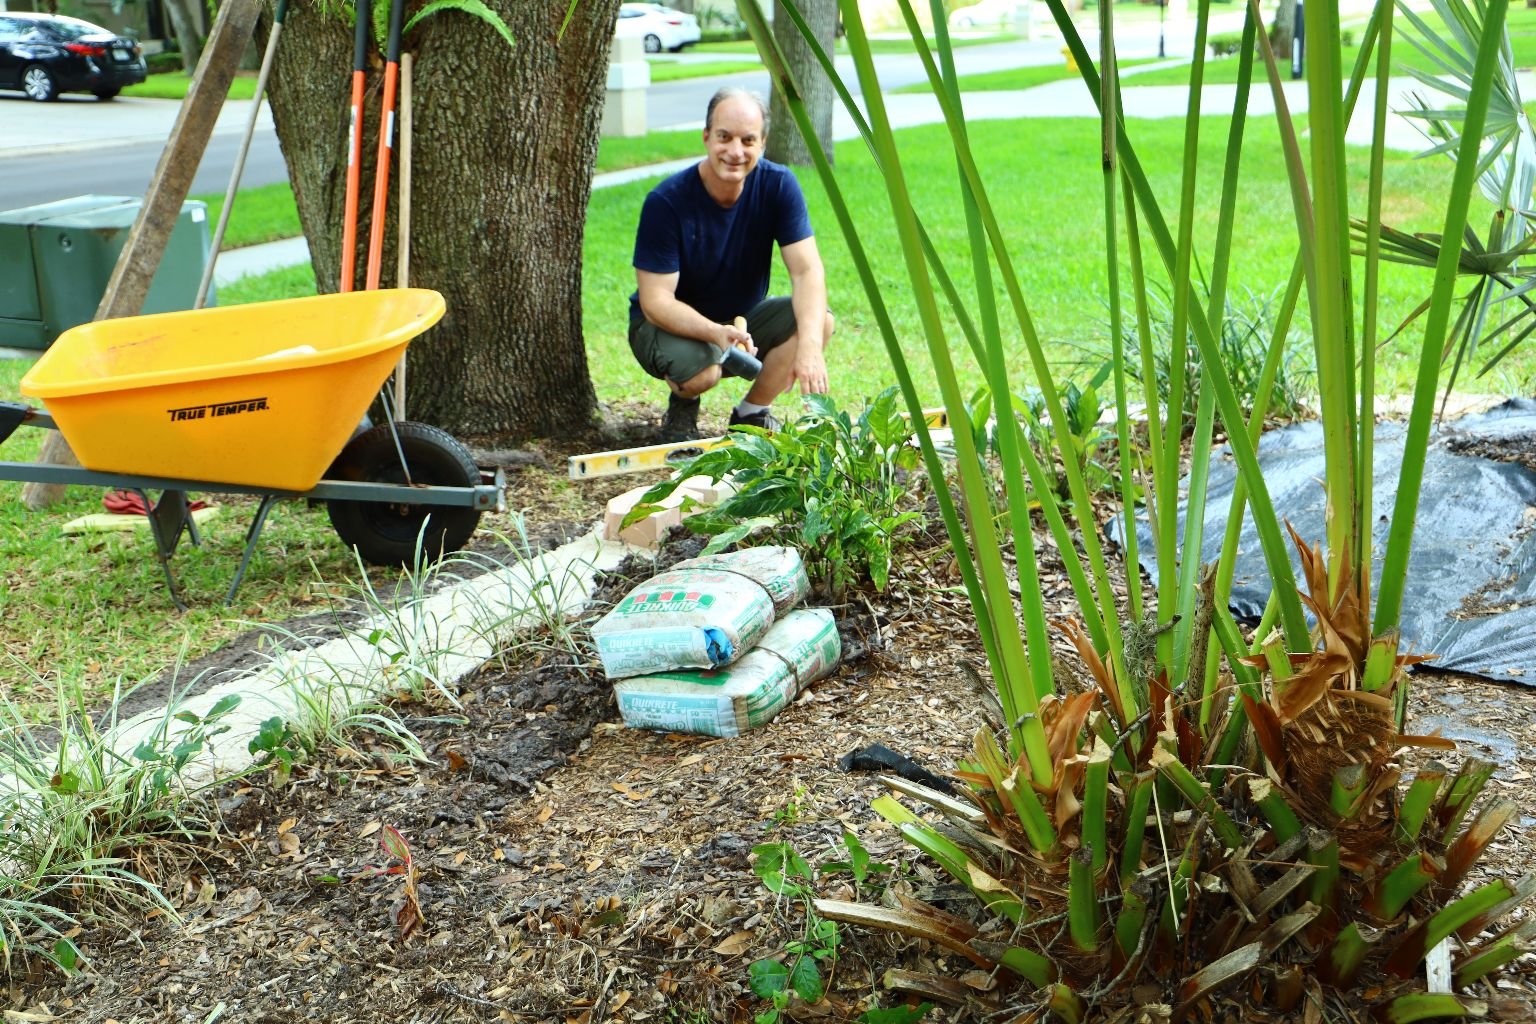
I staged these plants in the back until I was ready to plant them in the front.
—————————————————————————
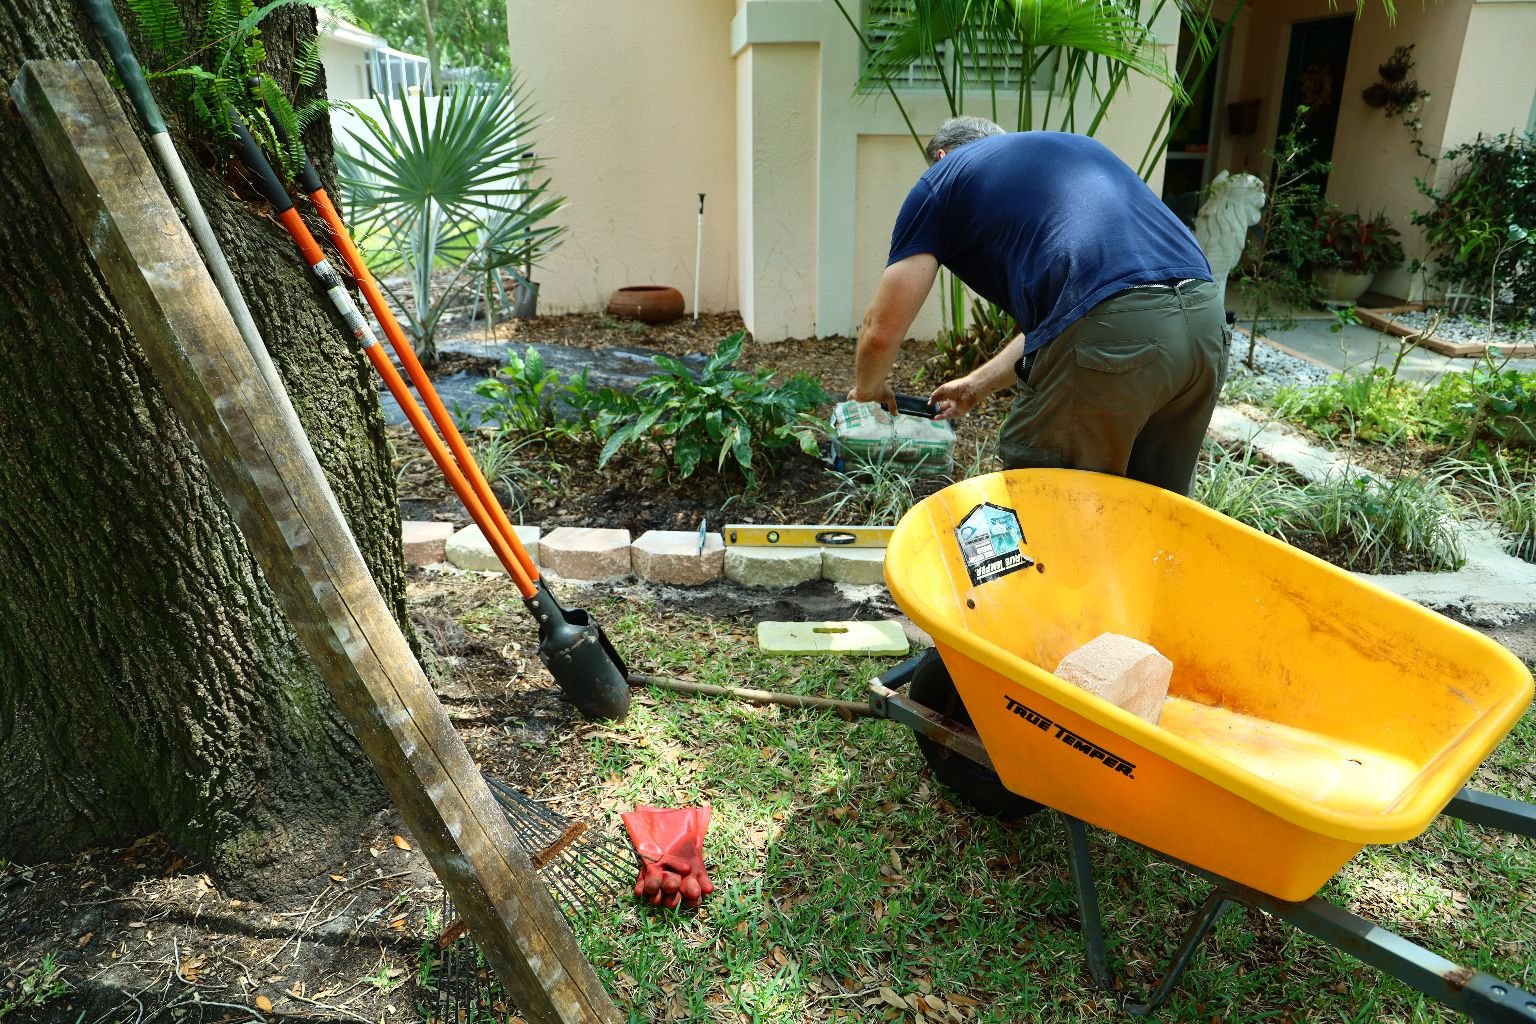
I started by cleaning out the bed of all the unwanted plants then marked the area where I wanted to
place the retaining wall blocks. I marked it by basically jumping up and down on the dirt, making sure it
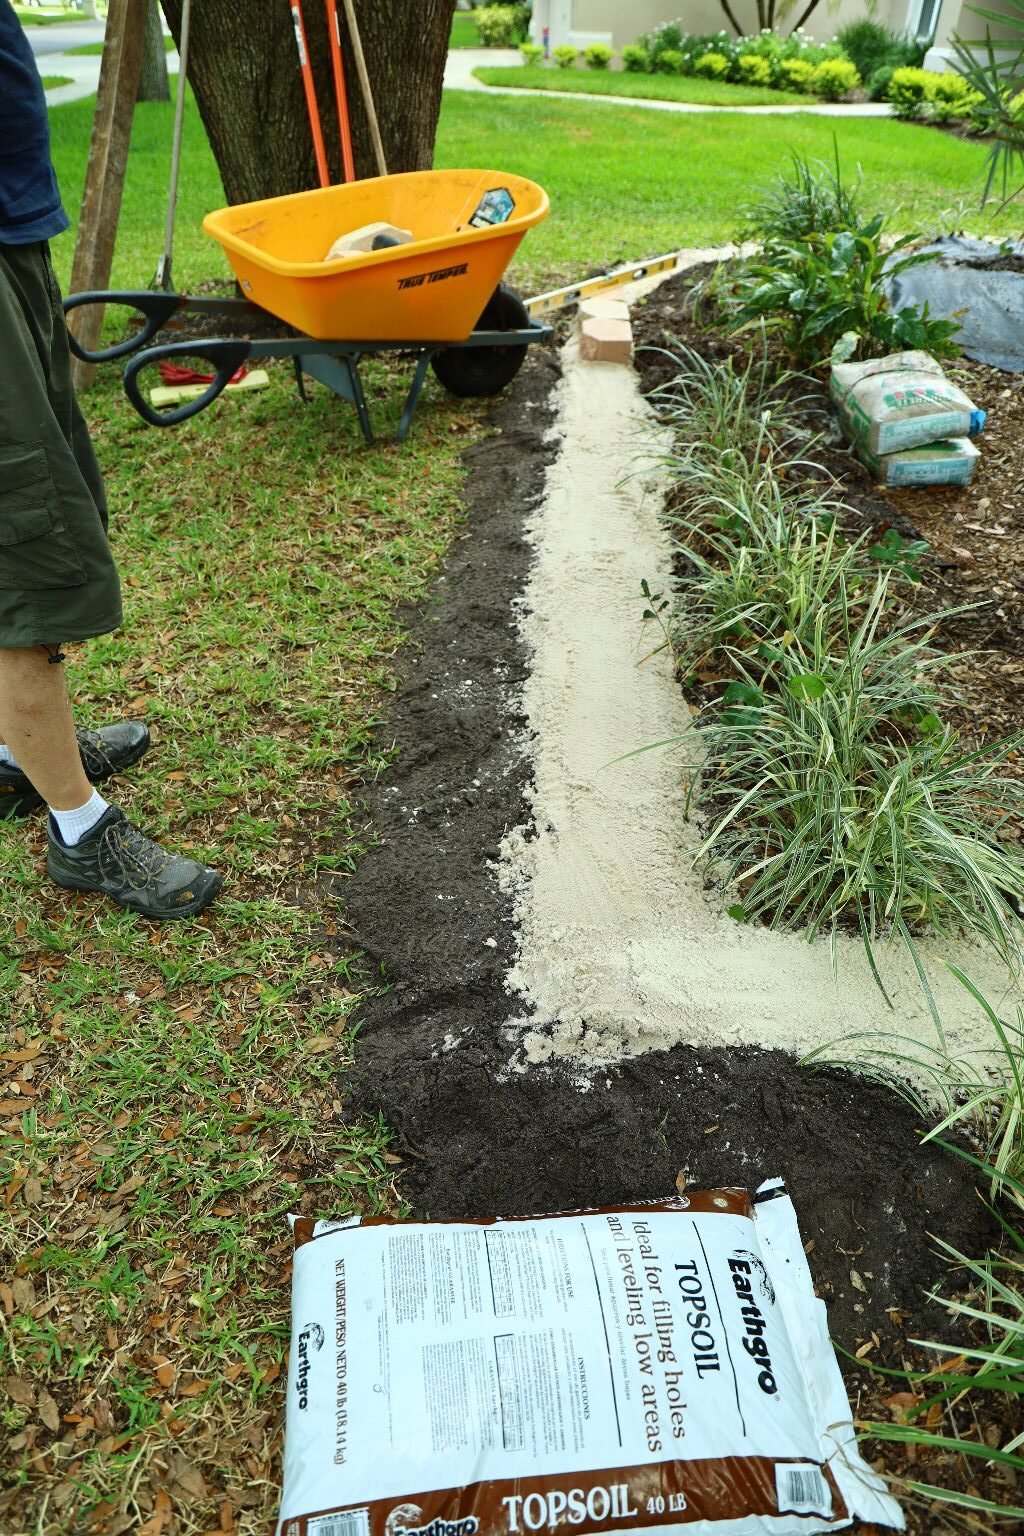
was solid and would not collapse under the pressure of the blocks. (You do need to make about a 3 inch trench though. You can do this by using any sort of digging tools.) Doing this gave me a slight ditch
around the area where I could then pour the #1 bag of small leveling stones. You can find them at your
local outdoor home improvement stores (Home Depot, or Lowe’s).
Pour them to a one-inch-thick layer then stomp/level them
off. Then pour the #2 bag of leveling sand on top of the stone to a two-inch thickness. Level these off
with your hands as best you can.

———————————————————————–
Here you can see the sand in place.
————————————————————————————

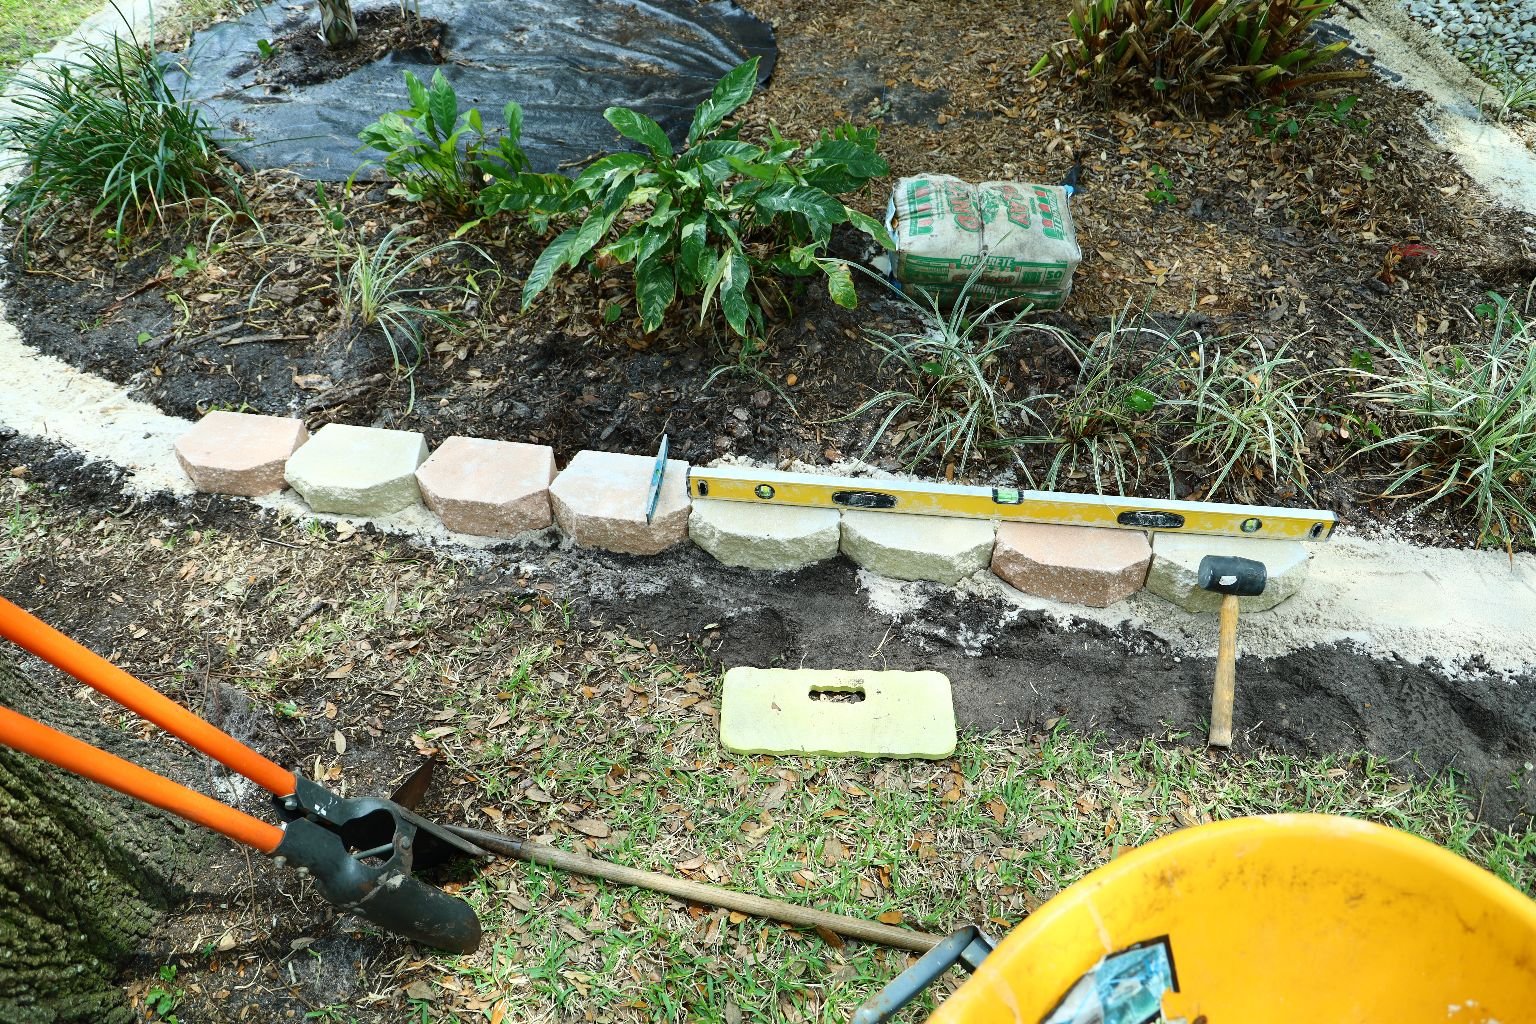
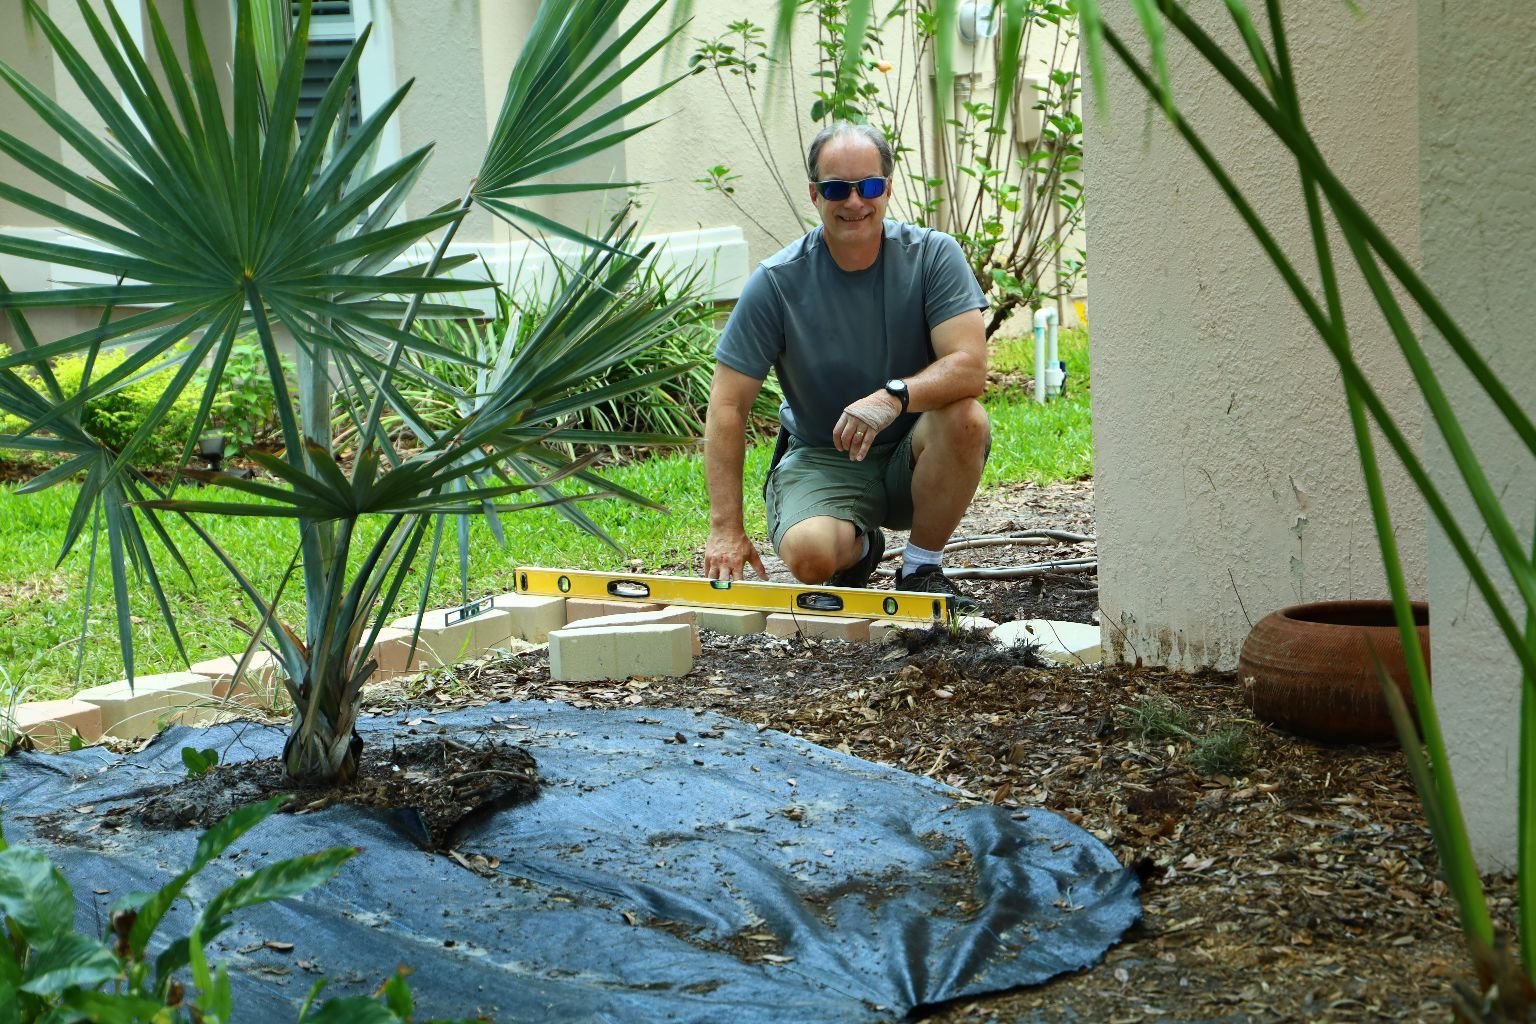
You can see I am leveling the retaining wall blocks. I started at the highest point in the yard and
leveled the block from front to back, and left to right using a small level. When done, all other blocks will
be leveled off this one. As you can see, I am using a long level to ensure they are all level as I go. Use a
rubber mallet to push and hammer the retaining wall blocks down into the three inches of material (small stone and
sand). This can go quickly once you get the hang of it.
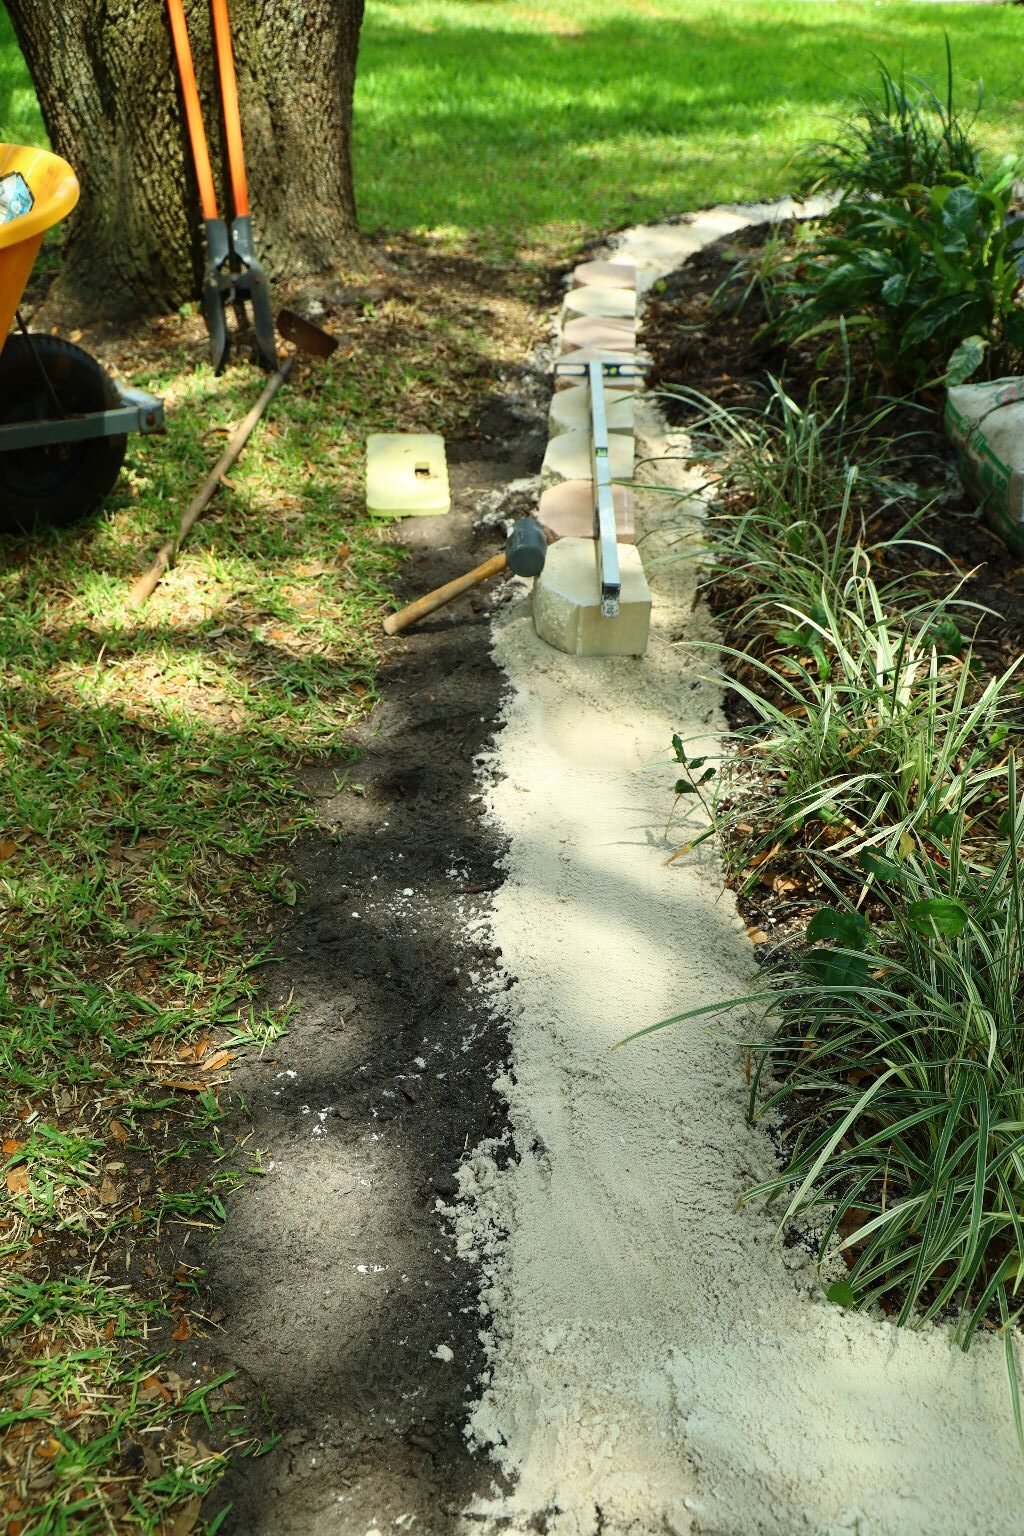
Here you can see a better picture of the wall’s first layer going down. Eight blocks down and a ton still left
to go. 🙂
—————————————————————————–
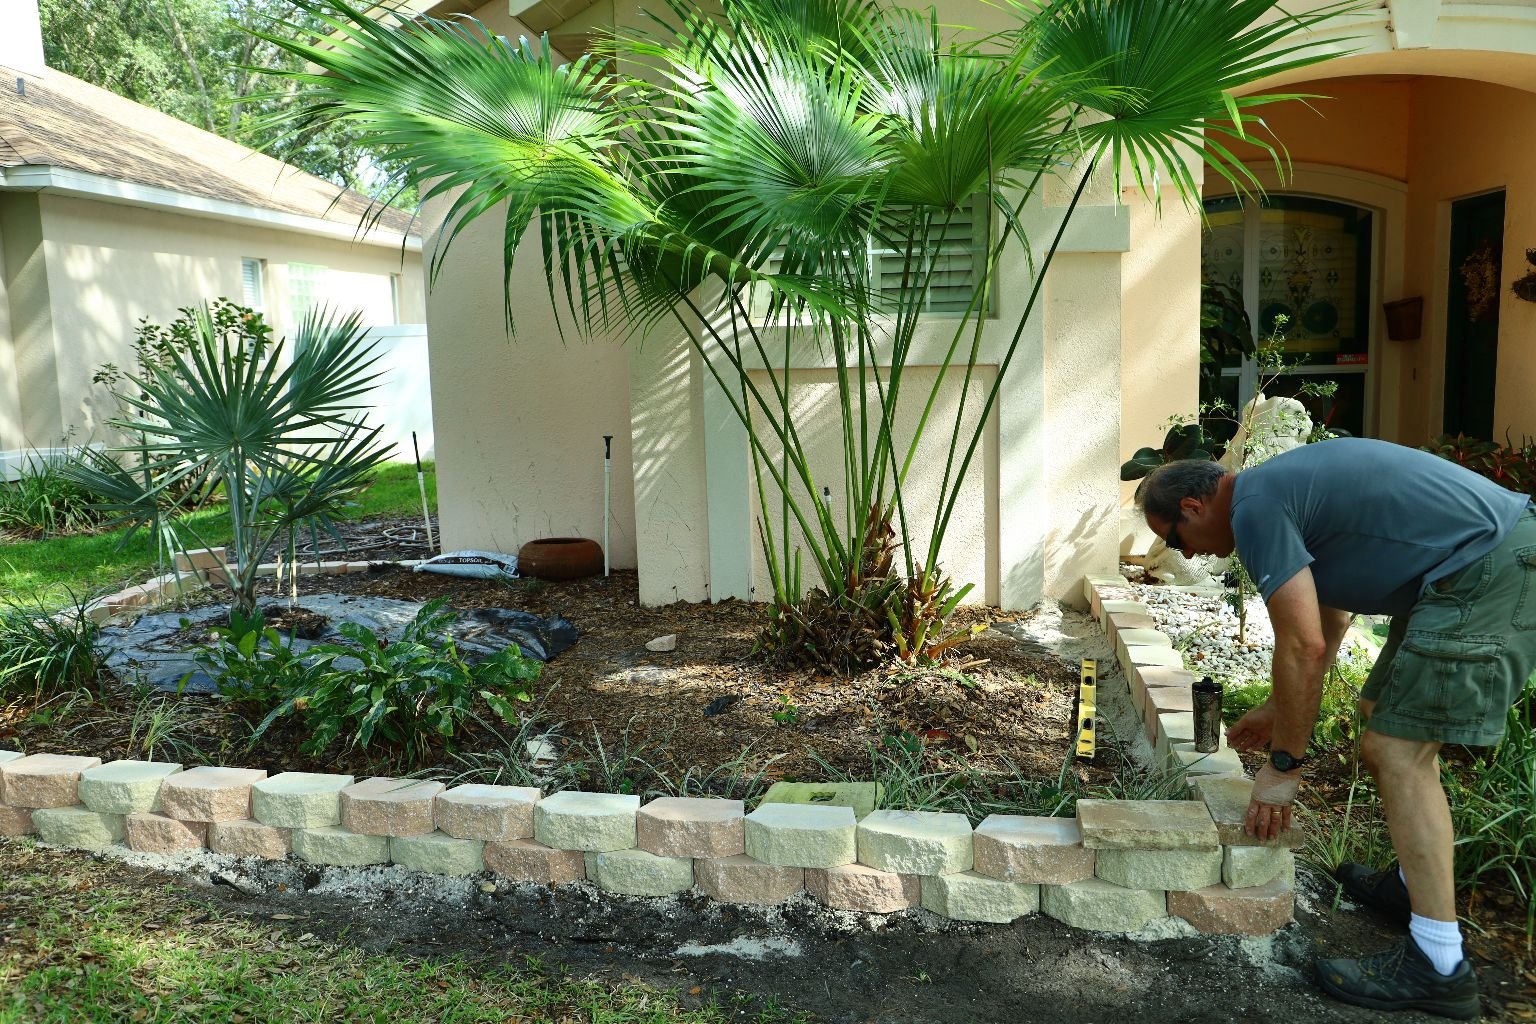
I am moving my way to the left. Yes, I also measured the distance from the wall of our house out
to the corner to ensure I would have enough room.
Here you can see the level stretched across the blocks ensuring they are all level.
I check this often.
——————————————————————-
Of note, there are many colors of blocks to choose from. I like mixing them up in a random fashion. Be
sure to check each block for cracks and other issues as there will be some that have large chips out of
them. Some of these are ok as you will purposely break some of them in half, in order to get them to fit
in the corners or to make the brick pattern. I will explain this in more detail later.

I did the straight section going to this side of the house. I also pre -measured this to ensure I had
enough space to match up with the other blocks in front of them.

You can see I measured well as the front corner matches up well. I am also back in the back corner
making it straight.
All is level in the back, and I am just about ready to start the second layer… this will be quick.
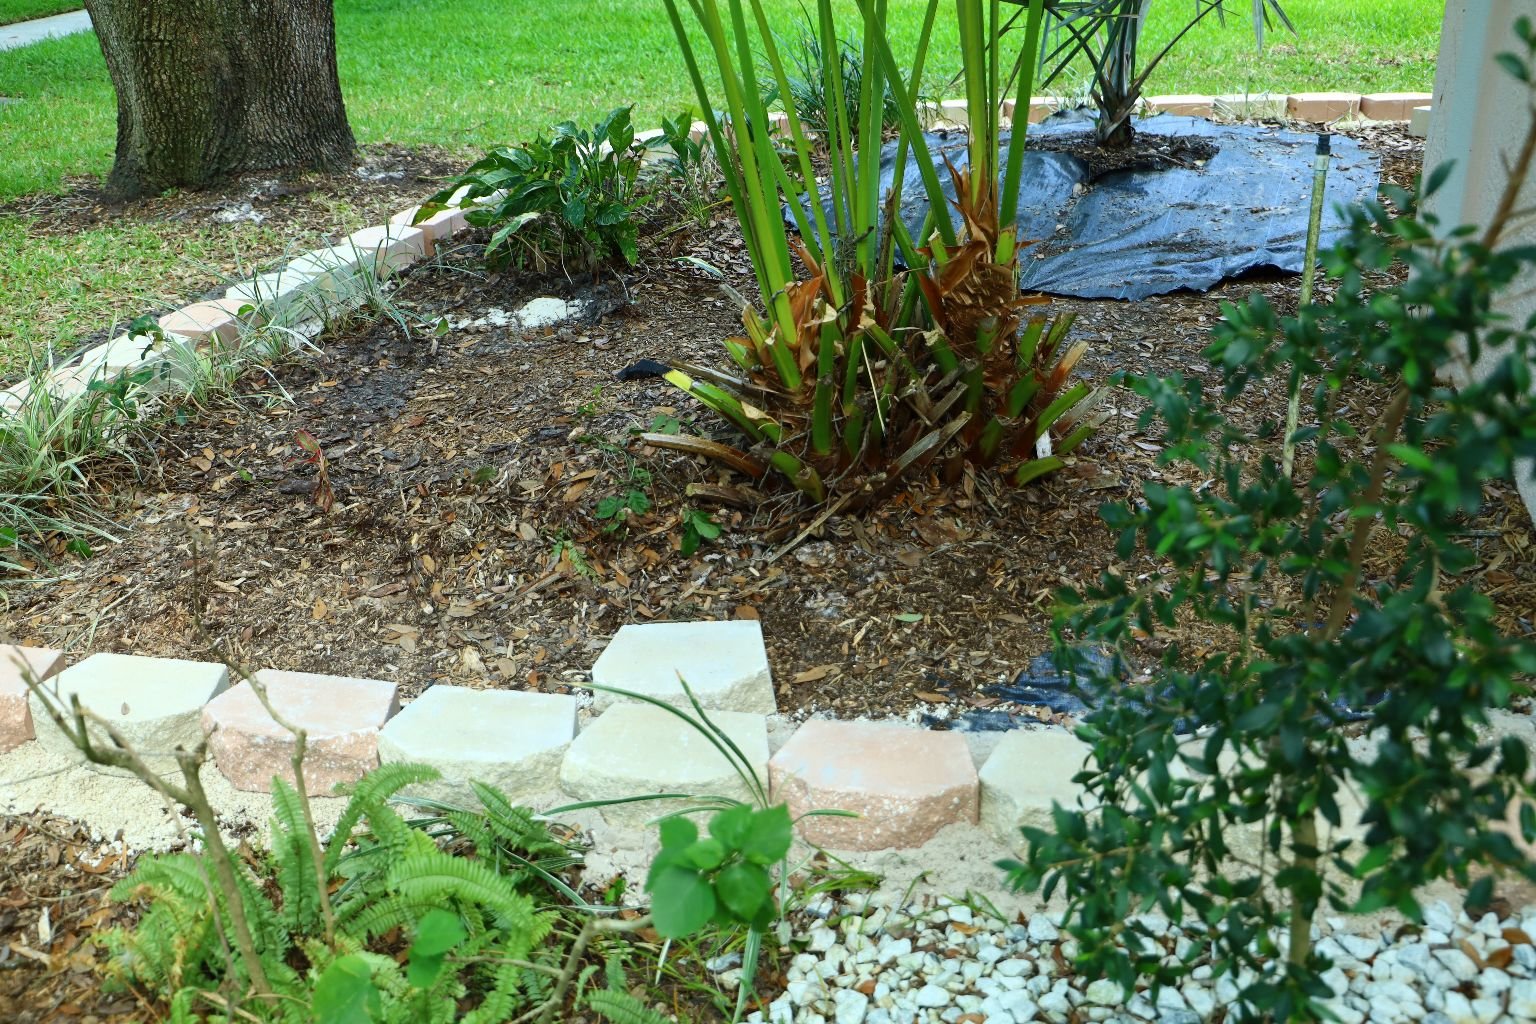
Now that you have completed the first layer of blocks, it is time to place the second layer on. These are
quick to do as your fist layer should be level all the way around. Simply stagger the blocks on as you go
using a brick pattern. That is to say that the block on top is directly on top of the lower blocks covering
the point which they meet. The intersection of those two lower blocks should be centered on the block
above it.
———————————————————————
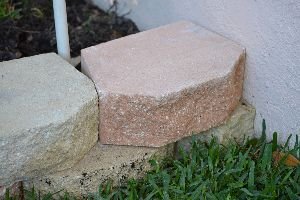
The Capstones
(Capstones are a bit longer and thinner than the blocks themselves. The Capstones go on top of the wall, as in the photos here.)
Capstones also come in a variety of colors, so while you are at your Home Garden
store, place the stone together as if you were making your wall and find the color
combination that you like.
I used my hammer and chisel to make the corner stone (not clearly seen) … just be creative with it. I
used a broken block to make this.
To start, have
the stones surrounding the corner stone in place. Place the block you will use for your
cornerstone on top of the stone to the left and right and position it at the angle you need
to complete the wall. Use a pencil or felt marker to draw a line on the underside of the
block where it hits the top of the stone to the left and right and draw your line. Turn your
cornerstone over and you should have a nice line showing you exactly where you need
to cut your block. Mark the line better if needed. See my previous instructions for
cutting a block using a hammer and chisel below. Please read all the instructions
before proceeding to cut a block. I hope my instructions and pictures make it easy for
you to understand.
Here, I am placing the capstones on top of the second layer. These
are the flat two-inch-thick blocks which make the top of your retaining wall look nice. I cut these to fit
on top of the blocks using a circular saw with a concrete cutting blade. That blade will cut through
concrete very fast.
——————————————————————————————
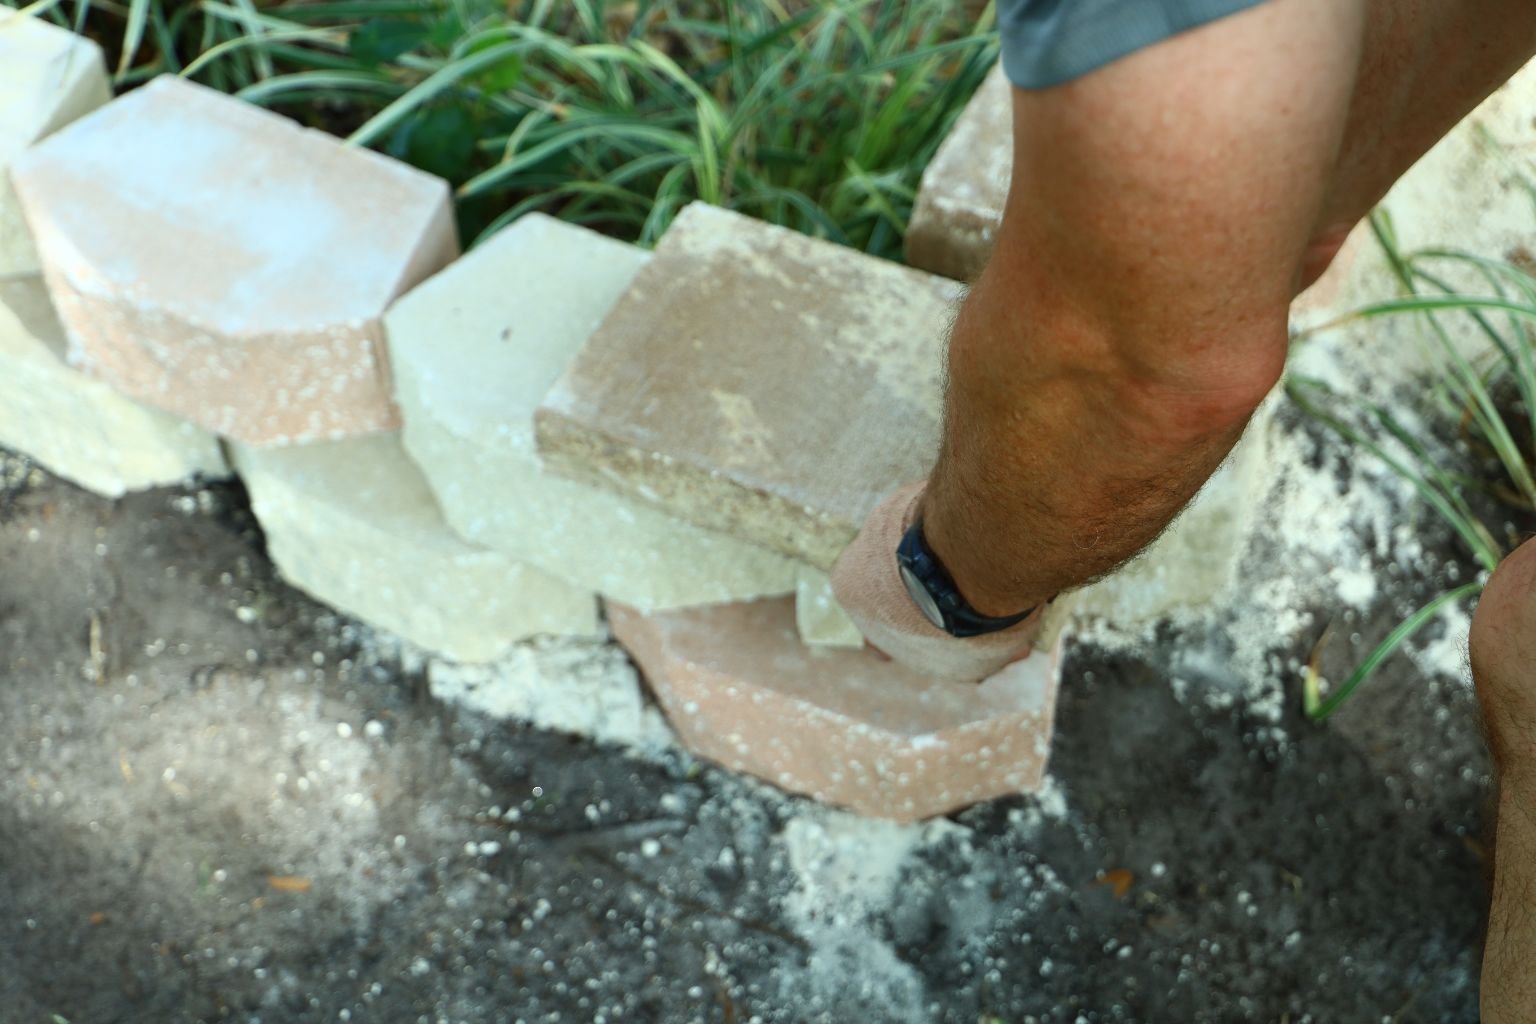
This staggering effect of the blocks also means you will have to now cut in half some of your blocks at the point to
where you start the second layer at your house. (We are still on the block section, not the capstones yet.)

To accomplish this, I use a hammer and chisel.
I Julie, copied the below information from:
Side of the House Retaining Wall

(I hope this chiseling affect can be explained by this example here below.)
———————————————————————
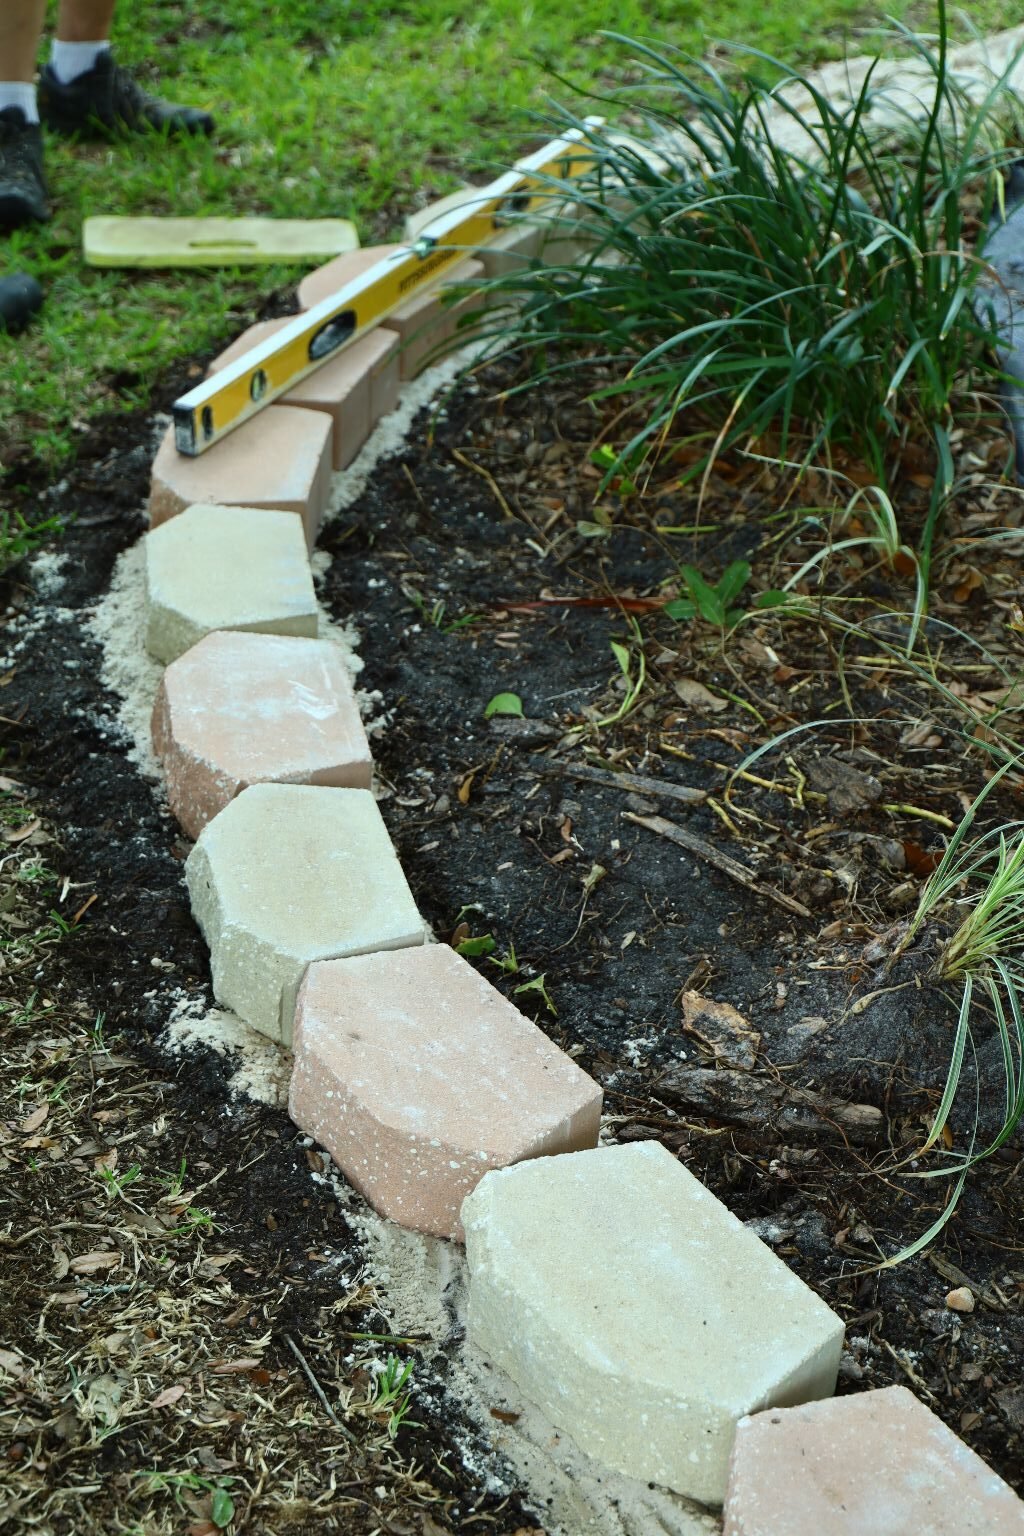
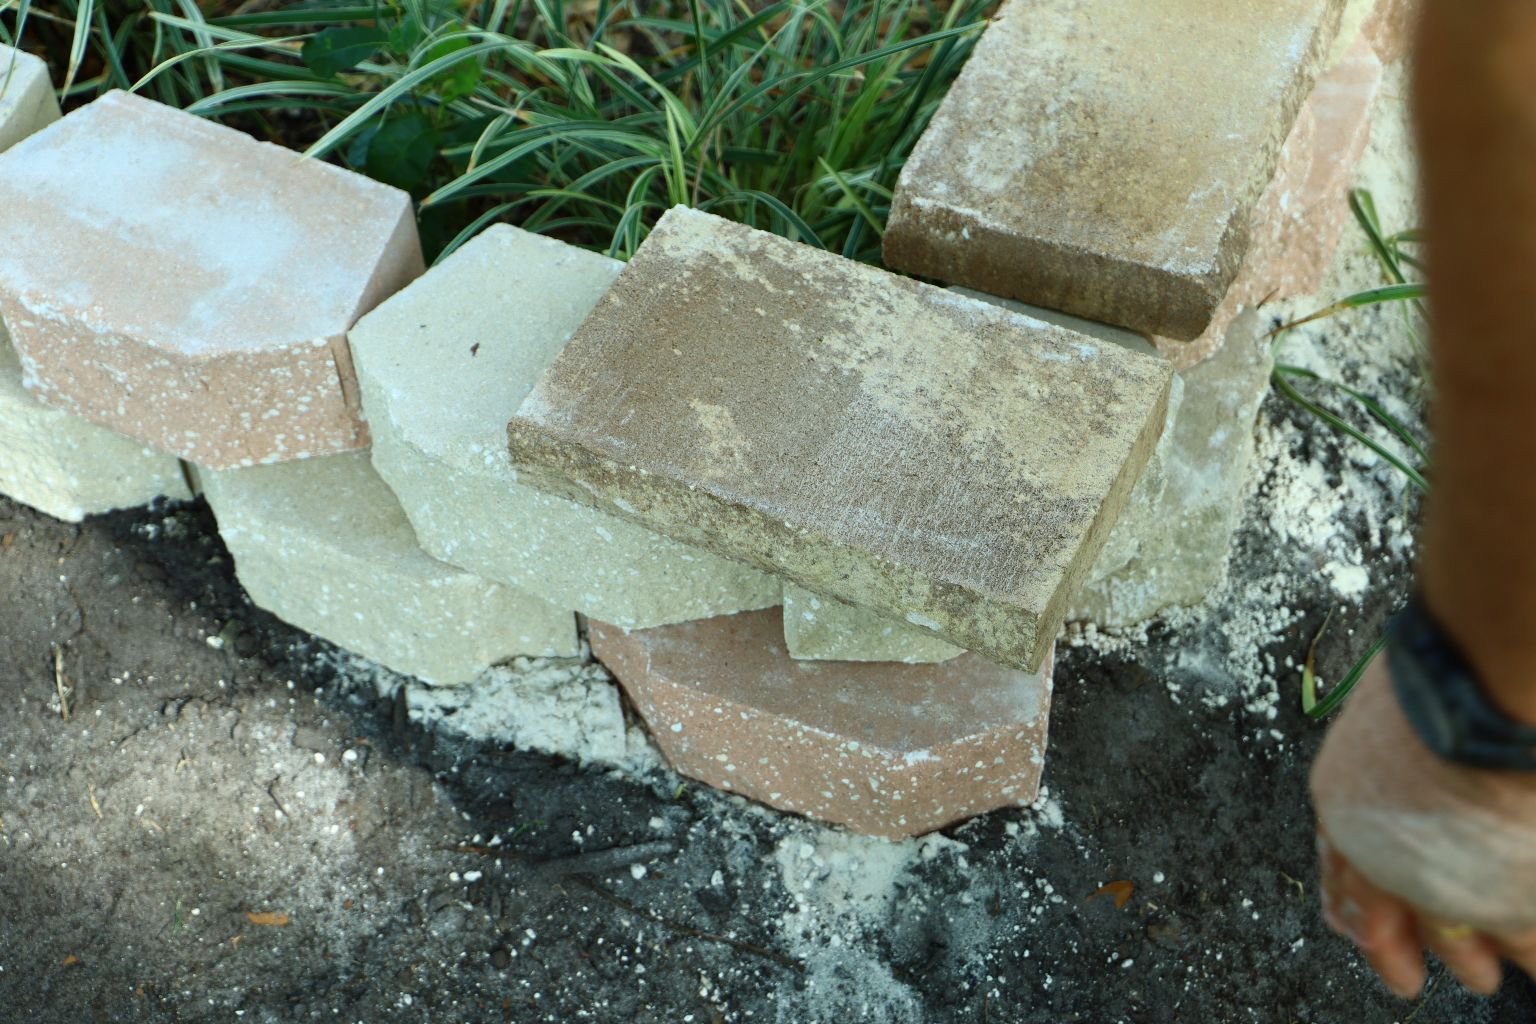
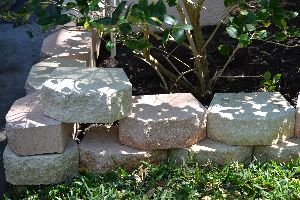
Here you can see where the block needs to be cut to fit.

Here is another block which needs to be cut to fit since the staggered pattern is starting to overlap due to the curve of the blocks. As they curve and move they create less space and need to be cut to even out the space.

Using a chisel and hammer scribe a line with an easy soft touch which you will gradually increase as you go.

You can scribe the line the entire way around the block for a cleaner cut.
Once you have a good line, increase your force with the hammer.

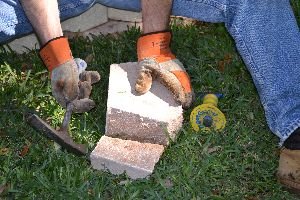
Soon the block will break!


Here I need to break a block in half to be placed at the start of the second row by the driveway. Simply scribe your line again all the way around the block and continue to hit harder as you go.
 Here you can see where the first block I broke fits perfectly!
Here at the corner I had a few options and I chose to cut the block down on the side and the back, so it would fit nicely with the next block.
Here, I also started to see where the cap stones would go and see how they looked.


I started to cut the block down to size keeping the shape of the block, so it still matched the others.
You can see it still has the basic shape of the other blocks on all sides and gives me the corner I wanted.

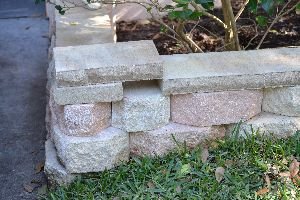
Here on the right you can see the corner block and the amount of cutting it took to get it to look that way. Here is also an illustration of how I would need to have the cap stones cut at a 45′ angle to where the points of the block meet making the corner.
———————————————————————————-
Continuing With Gordon’s Instructions:
Be sure the flat part of the chisel is on the side you want to keep, and the angled side is toward the part you
want to remove. Start by making a line with your chisel on the block to where you want to cut. Use
your hammer to somewhat softly chisel all the way around the block, taking your time as these small
cracks you are causing are slowly breaking the concrete inside the block making it weak. You should
now have a groove all the way around your block. After you have gone all the way hammering your
chisel into the block, you can hit the block a little harder all the way around again. Be sure the flat part of the chisel is on the side you want to keep, and the angled side is toward the part you want to remove.
Patience is key to making it crack straight. This will take you about 10 min. to do, but well worth the
effort. Now, give the chisel a good whack with your hammer on the line and you should have a good
split on the block where you made your initial cut. You can smooth out the crack on your driveway using
that strong concrete like sandpaper to flatten the cut surface.
(The driveway can be used as a sandpaper to smooth things like this down.)
—————————————————————————-
Everything is Coming Together Beautifully
For the curved areas of your retaining wall, you will have
to cut the capstone. I only cut one side of each block at the desired angle, then move to the next one cutting the same side of the block every time. This way the blocks look uniformly done. I used a pencil to make the line and be sure to keep the face of the block even with the one it is next to. To do this, I use three
capstones. Start with the last one in the straight row then leave space for the next
capstone, then place the third one in the row in place so that the middle capstone will
just sit on top of the other two, as in centered. Be sure to place the front of the capstone in line with the
wall blocks. Also ensure that the entire side of the capstone is sitting or positioned on
top of the entire capstone below it. This will take a little time to situate the middle
capstone properly ensuring all three edges are in the right position. Then, use your
pencil and mark the underside of the capstone where it meets the strait edge of the first
block it is resting on. Then on the top of the third capstone, mark with your pencil on the
top edge where your second capstone meets your third block. This way, the
leading/front edge/right side of the block is the one that is always being cut. Now, you
have your lines for your first two cuts of your capstones. I think if you place the
capstones down as I described, you will better understand what I mean.
———————————————————————
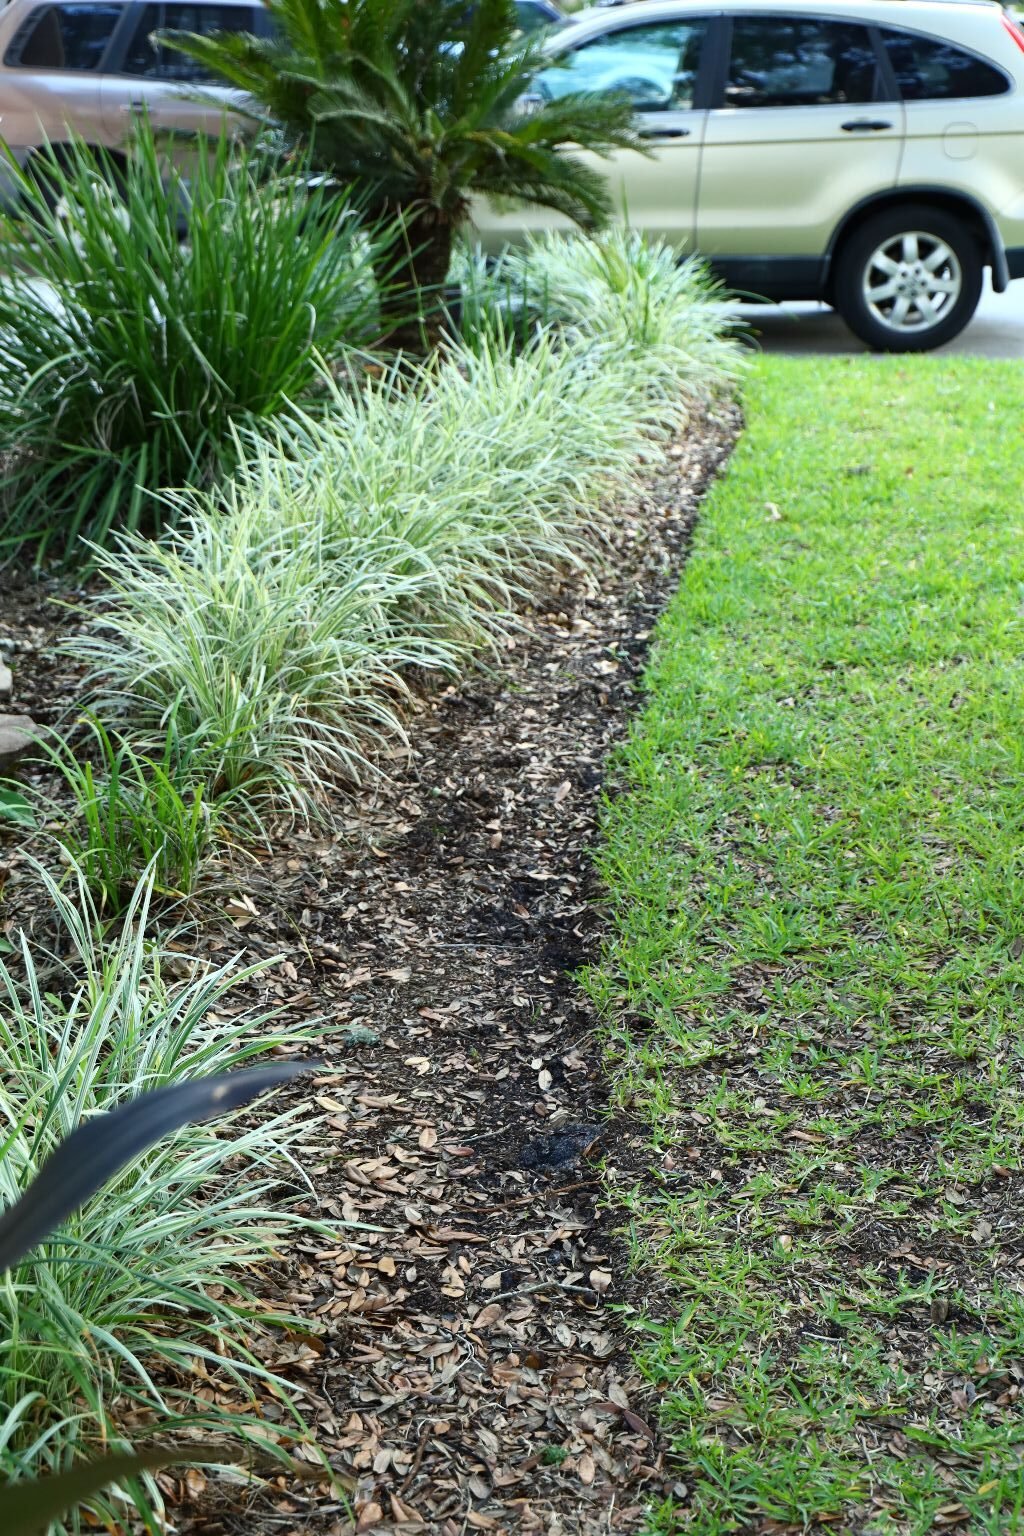
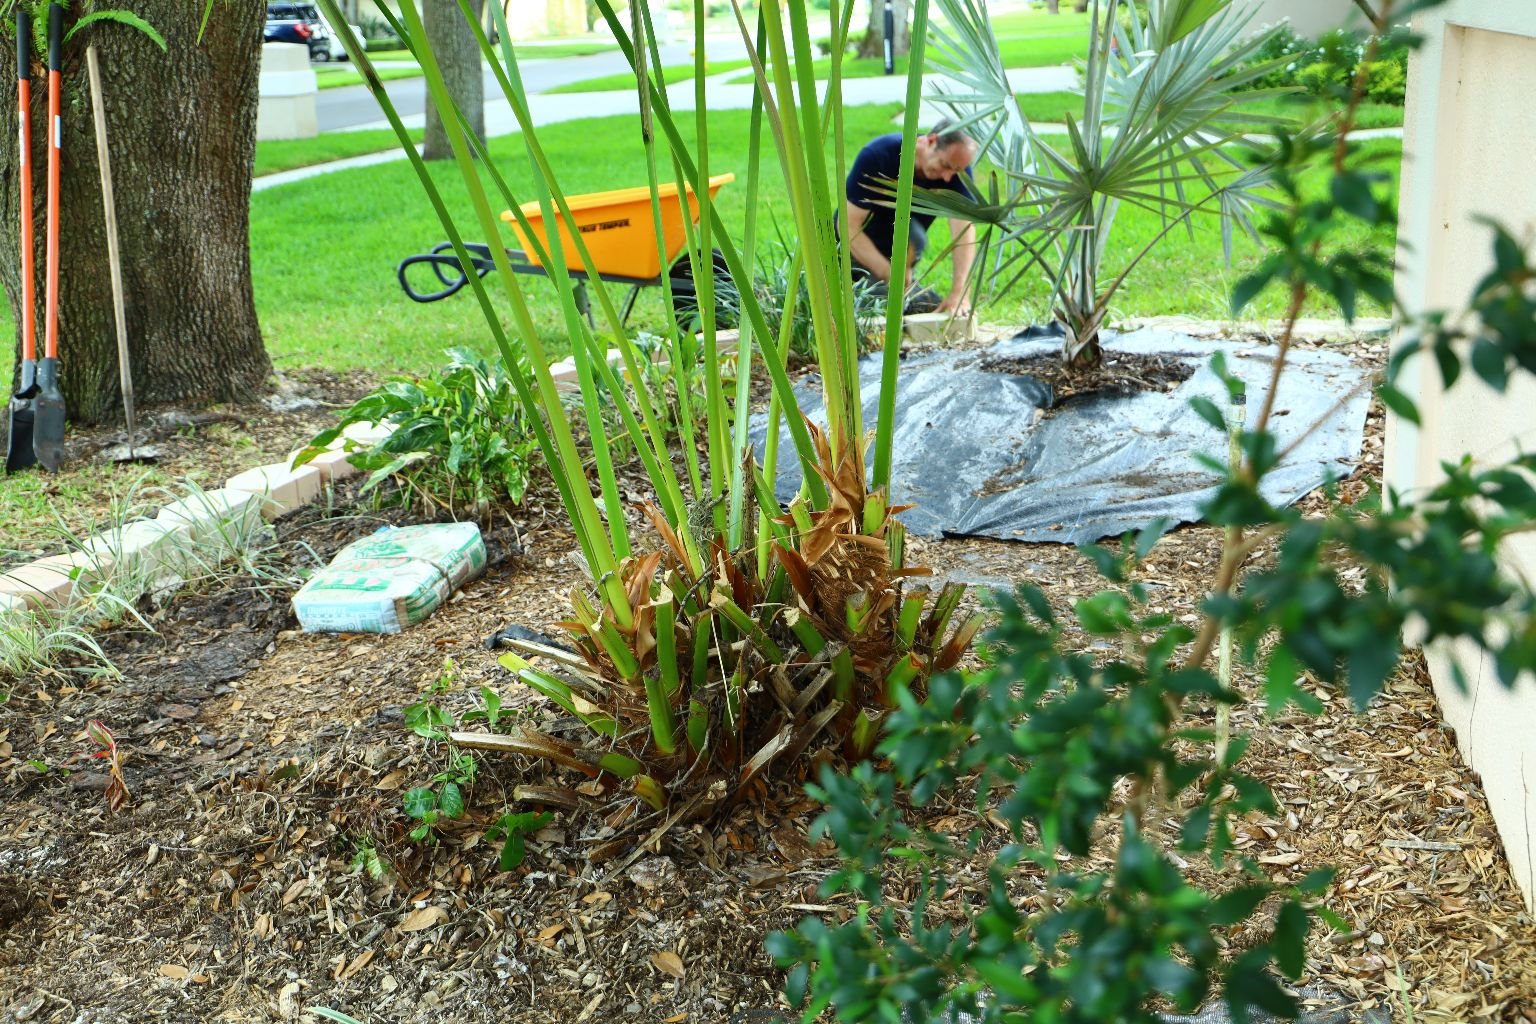
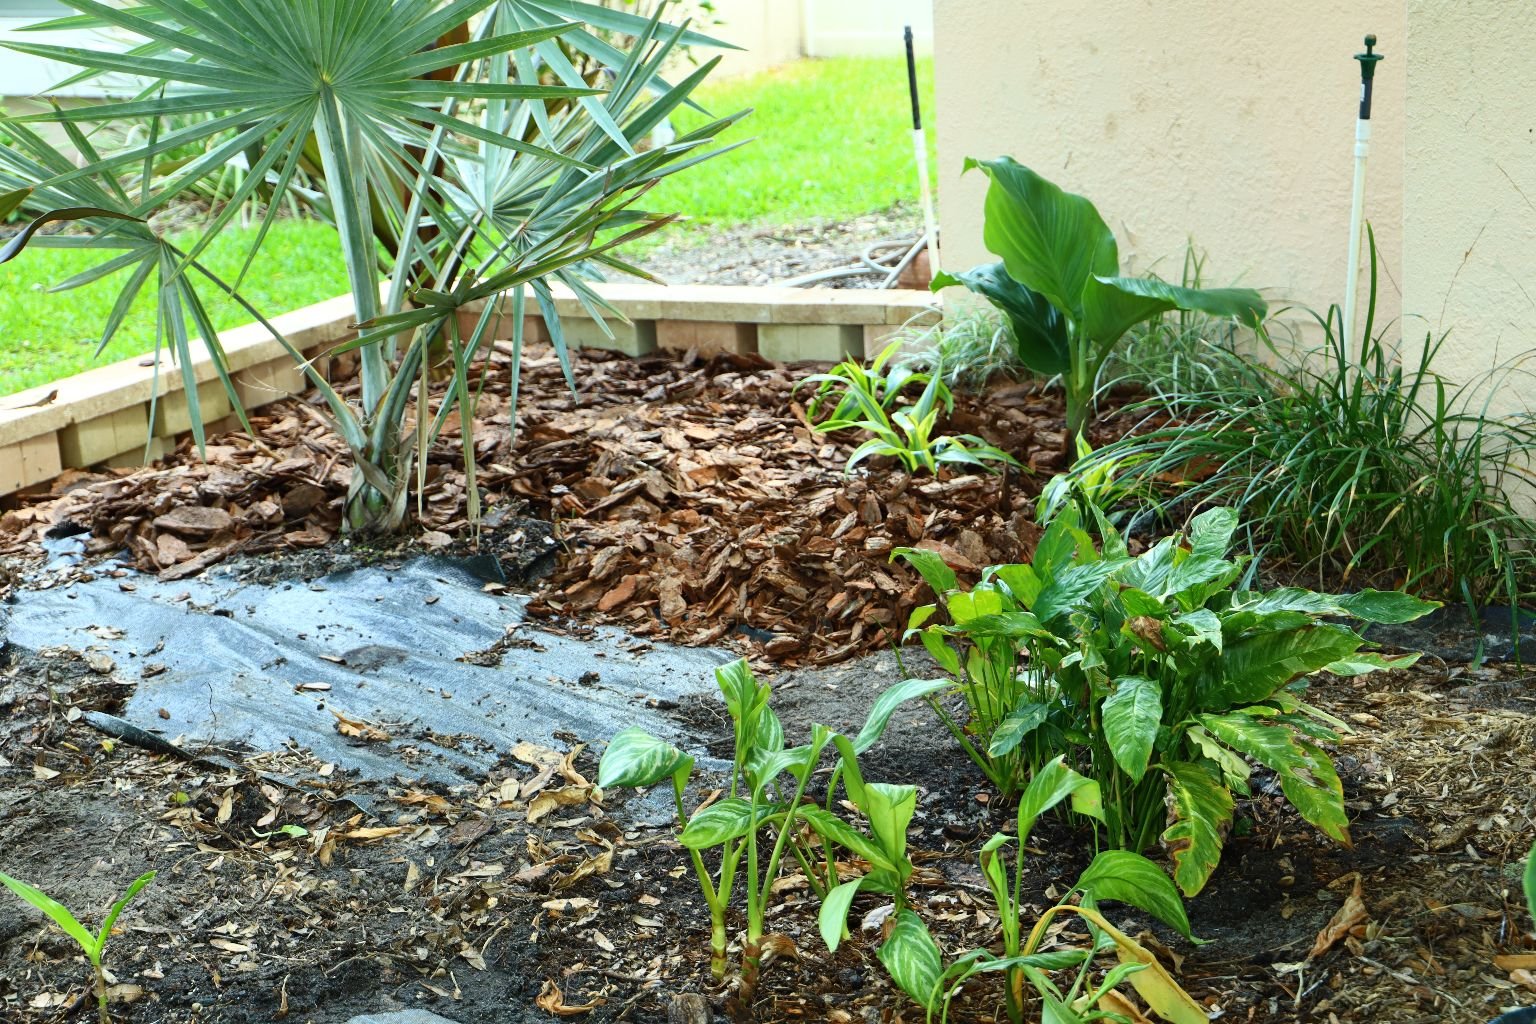
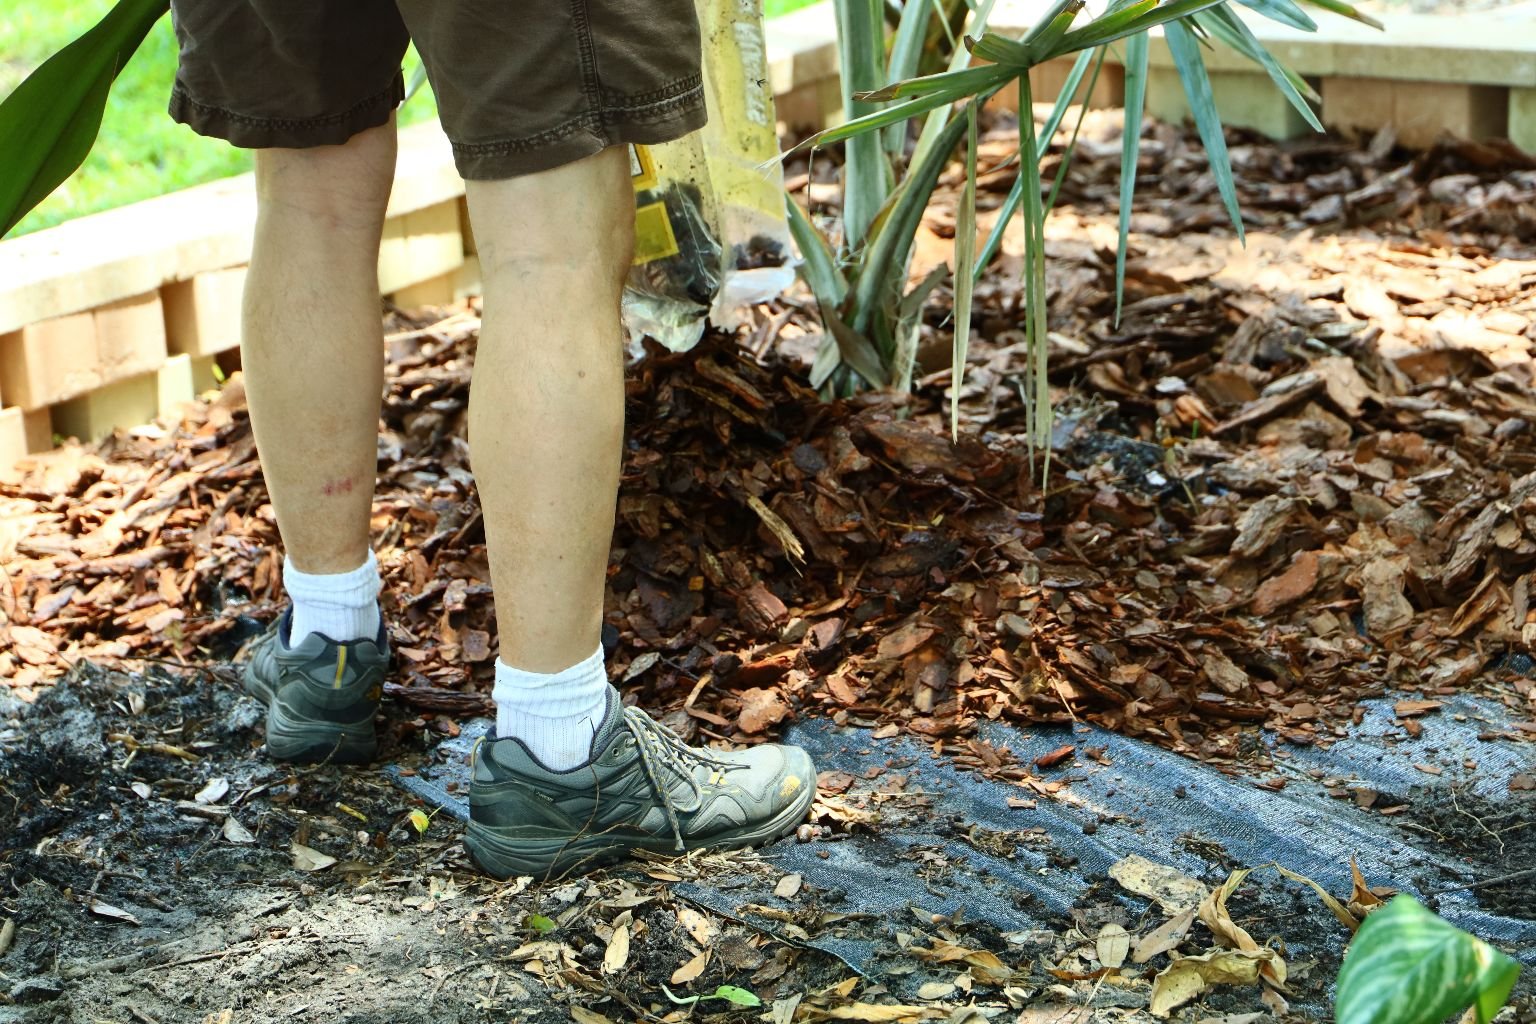
When done with your retaining wall, add your plants then place your weed preventing cloth on top of
the soil and around the plants to prevent weeds from growing. Then add a nice layer of bark on top of the
cloth to give the plantings a nice clean look.
—————————————————————————————
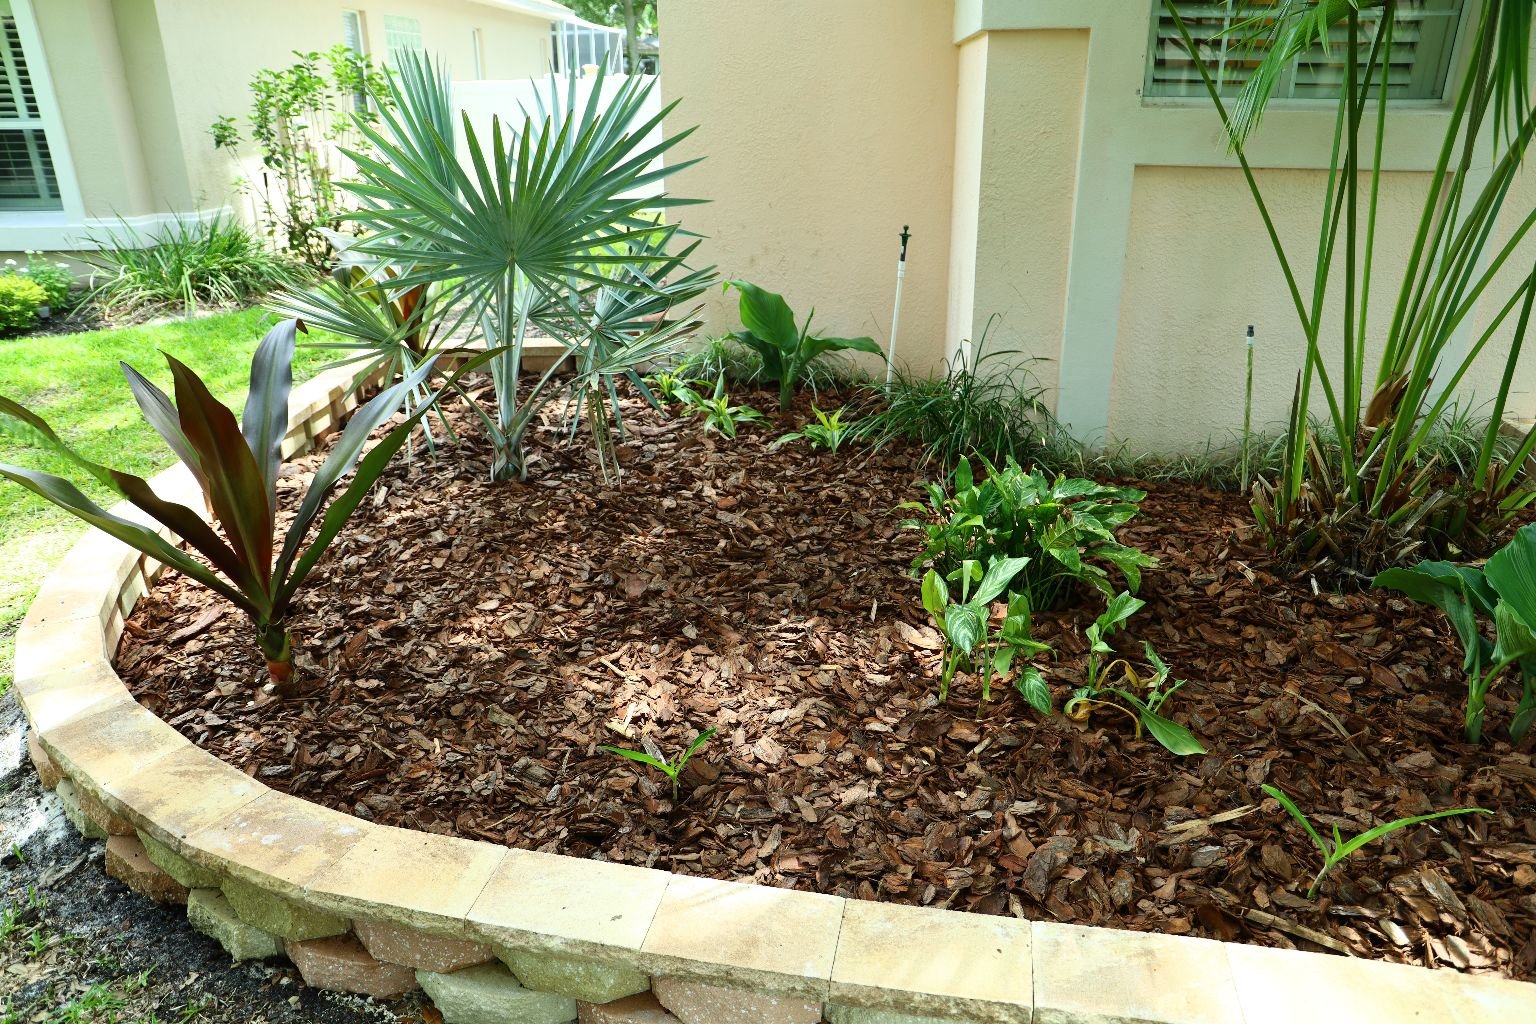
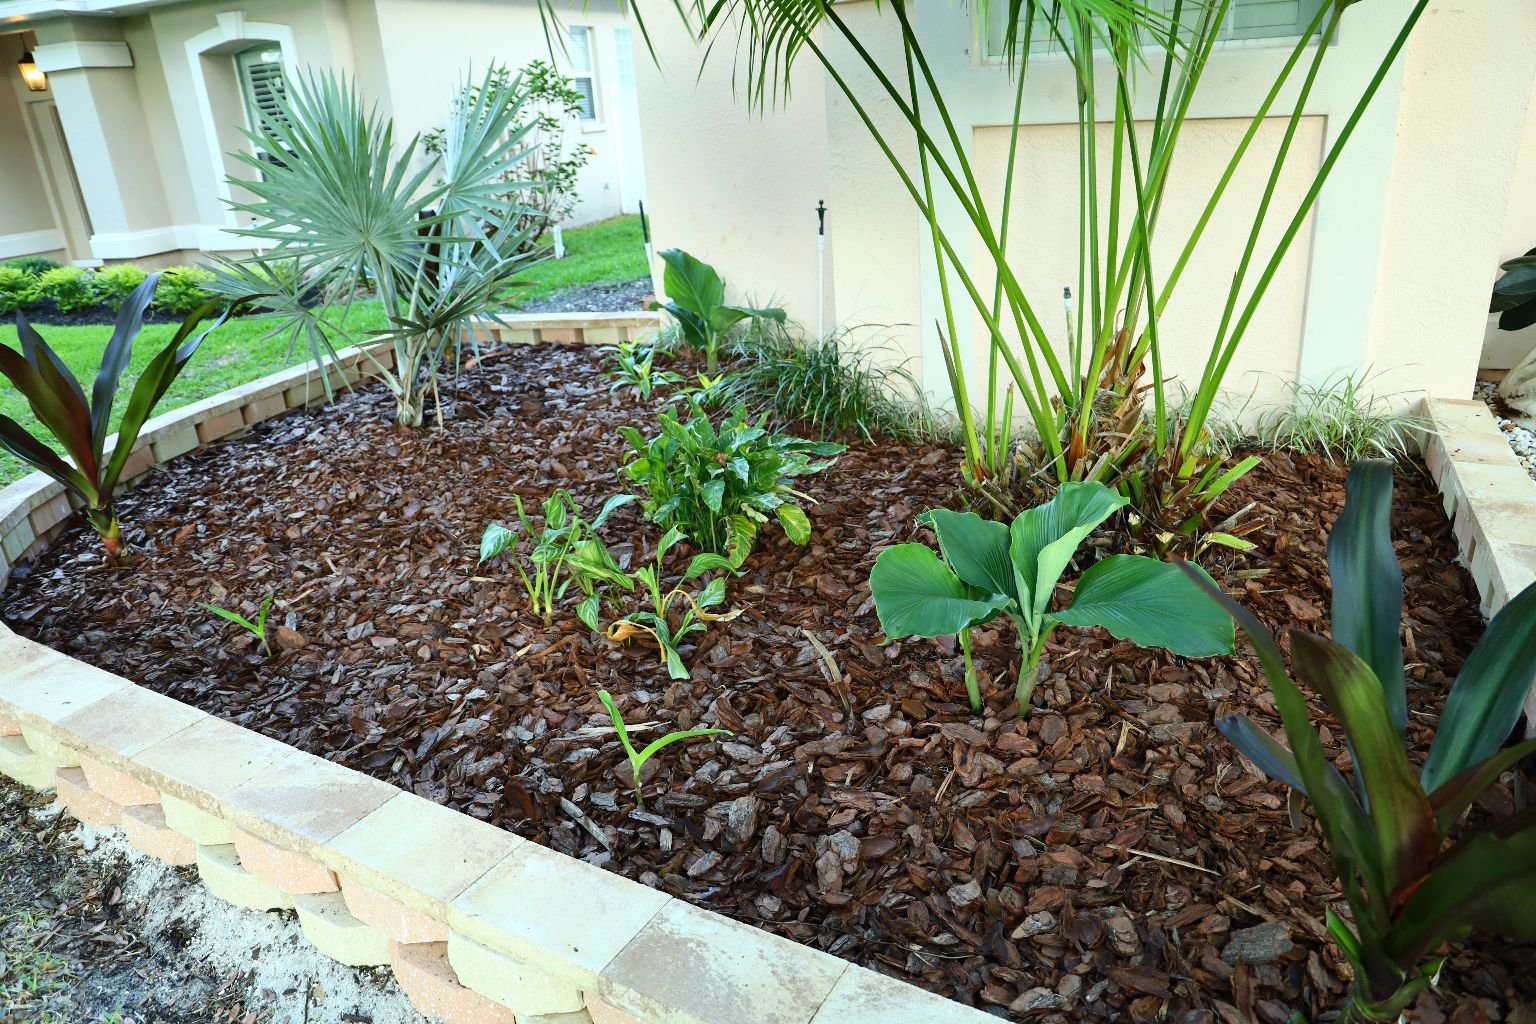
Plantings
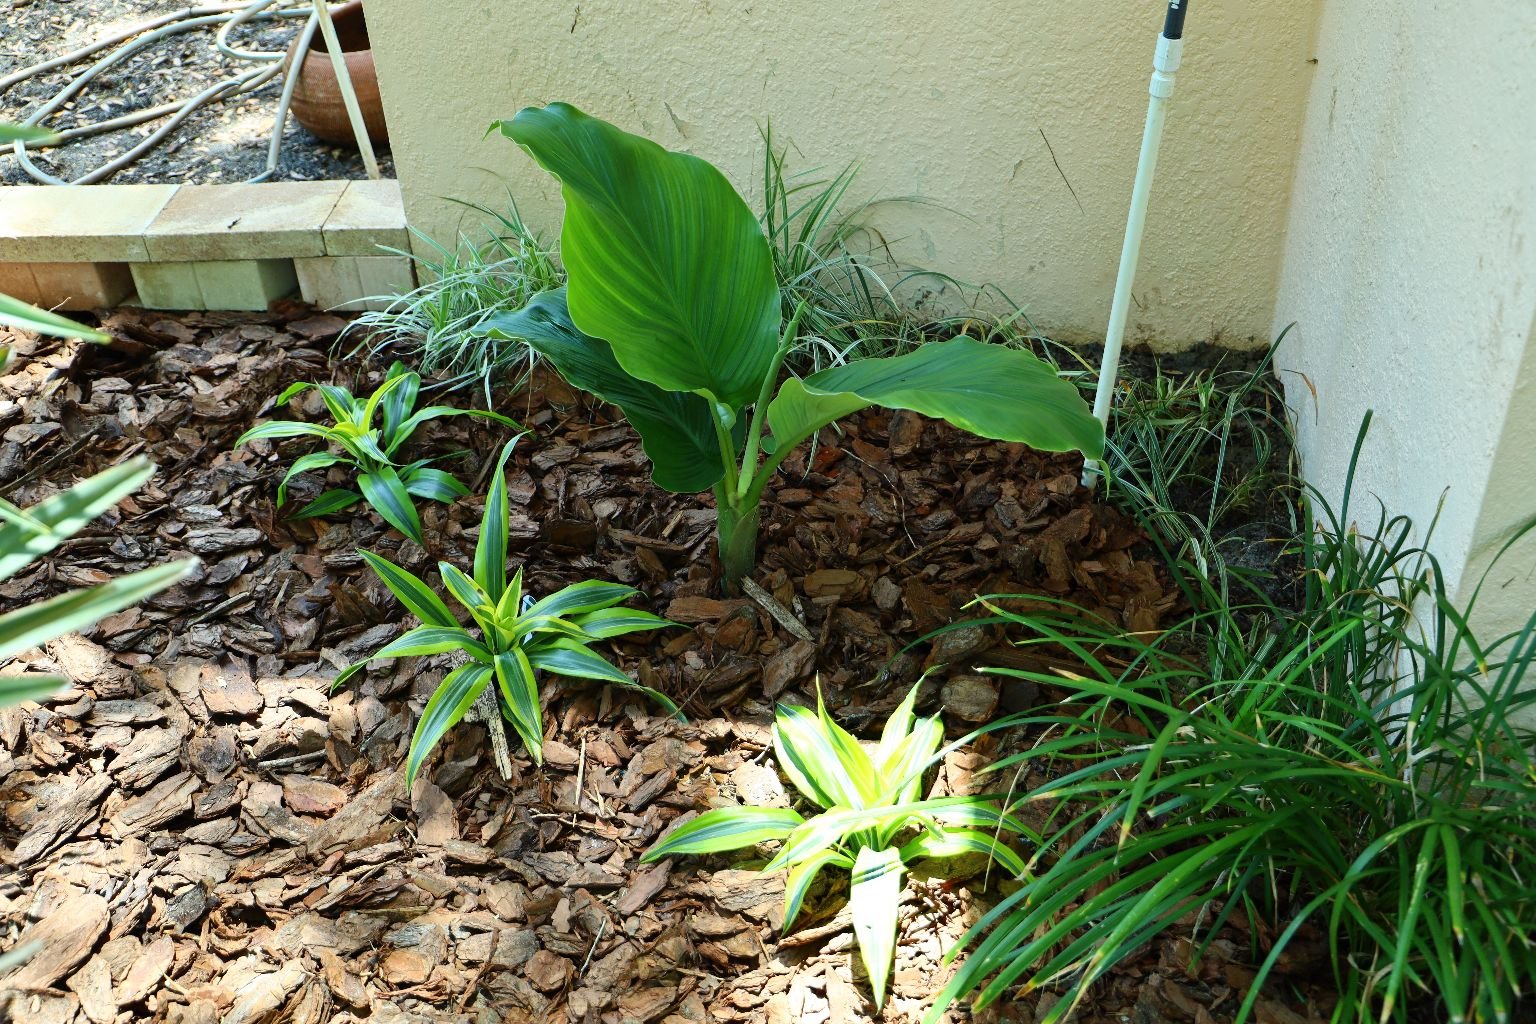
We specifically chose plantings that could take partial shade, and our Bismark Palm that takes full sun.
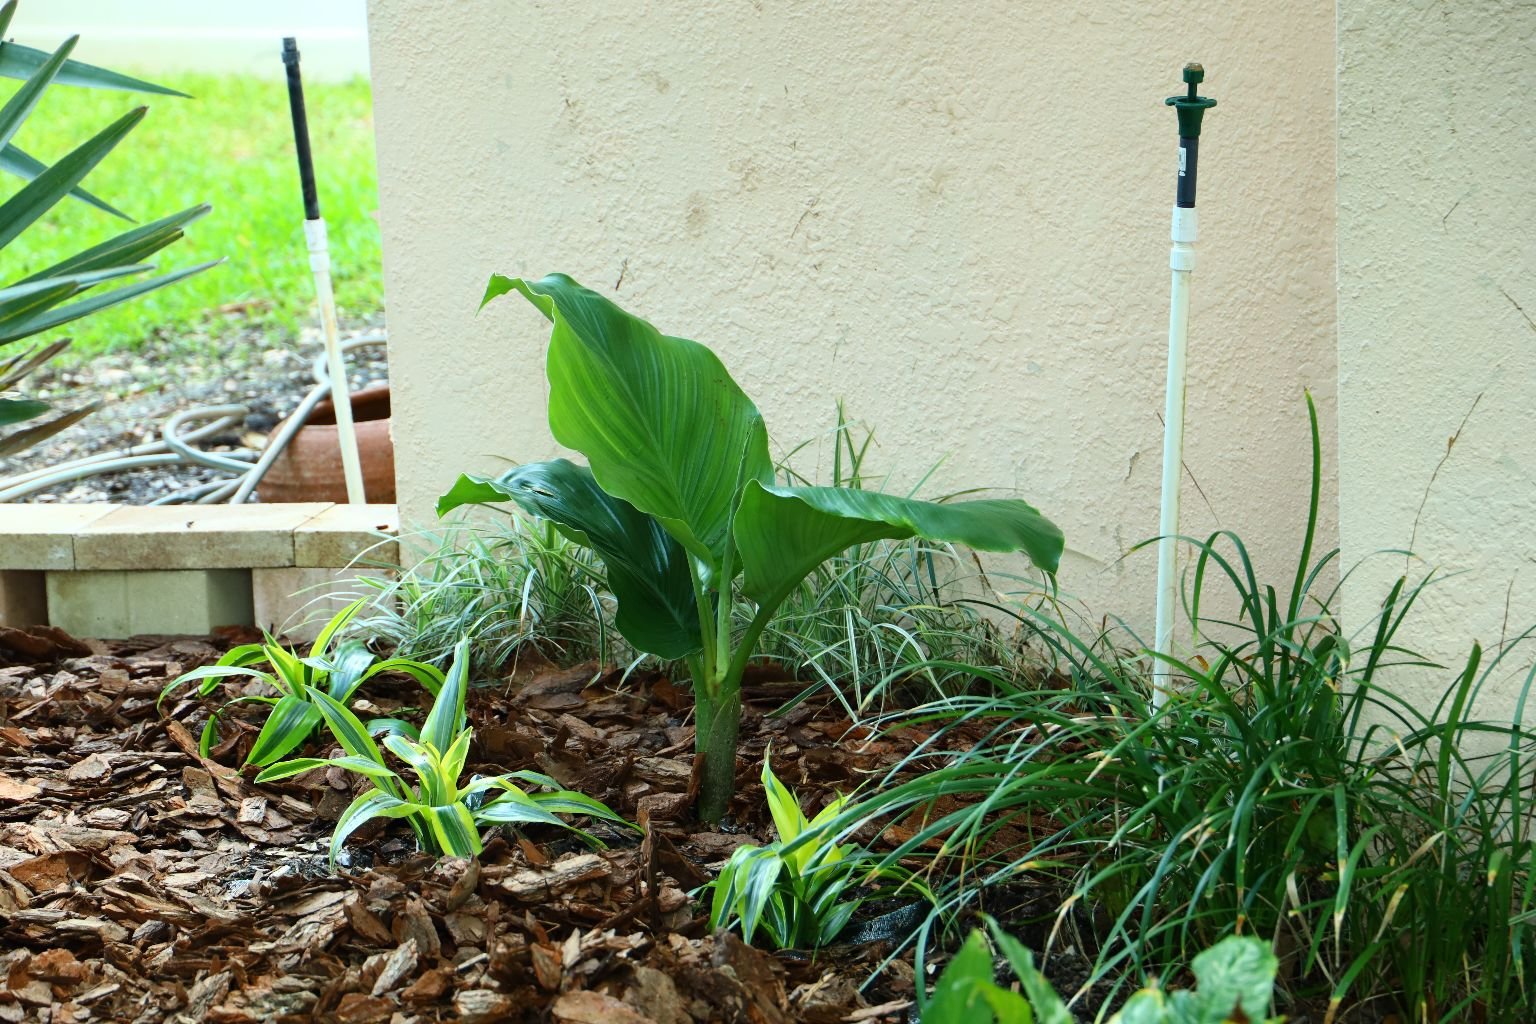
I am spacing the plants, so they have room to grow as well as making a grouping of them to highlight their uniqueness.
This way they have their own area but still look great with all the other plants.
————————————————————————————-
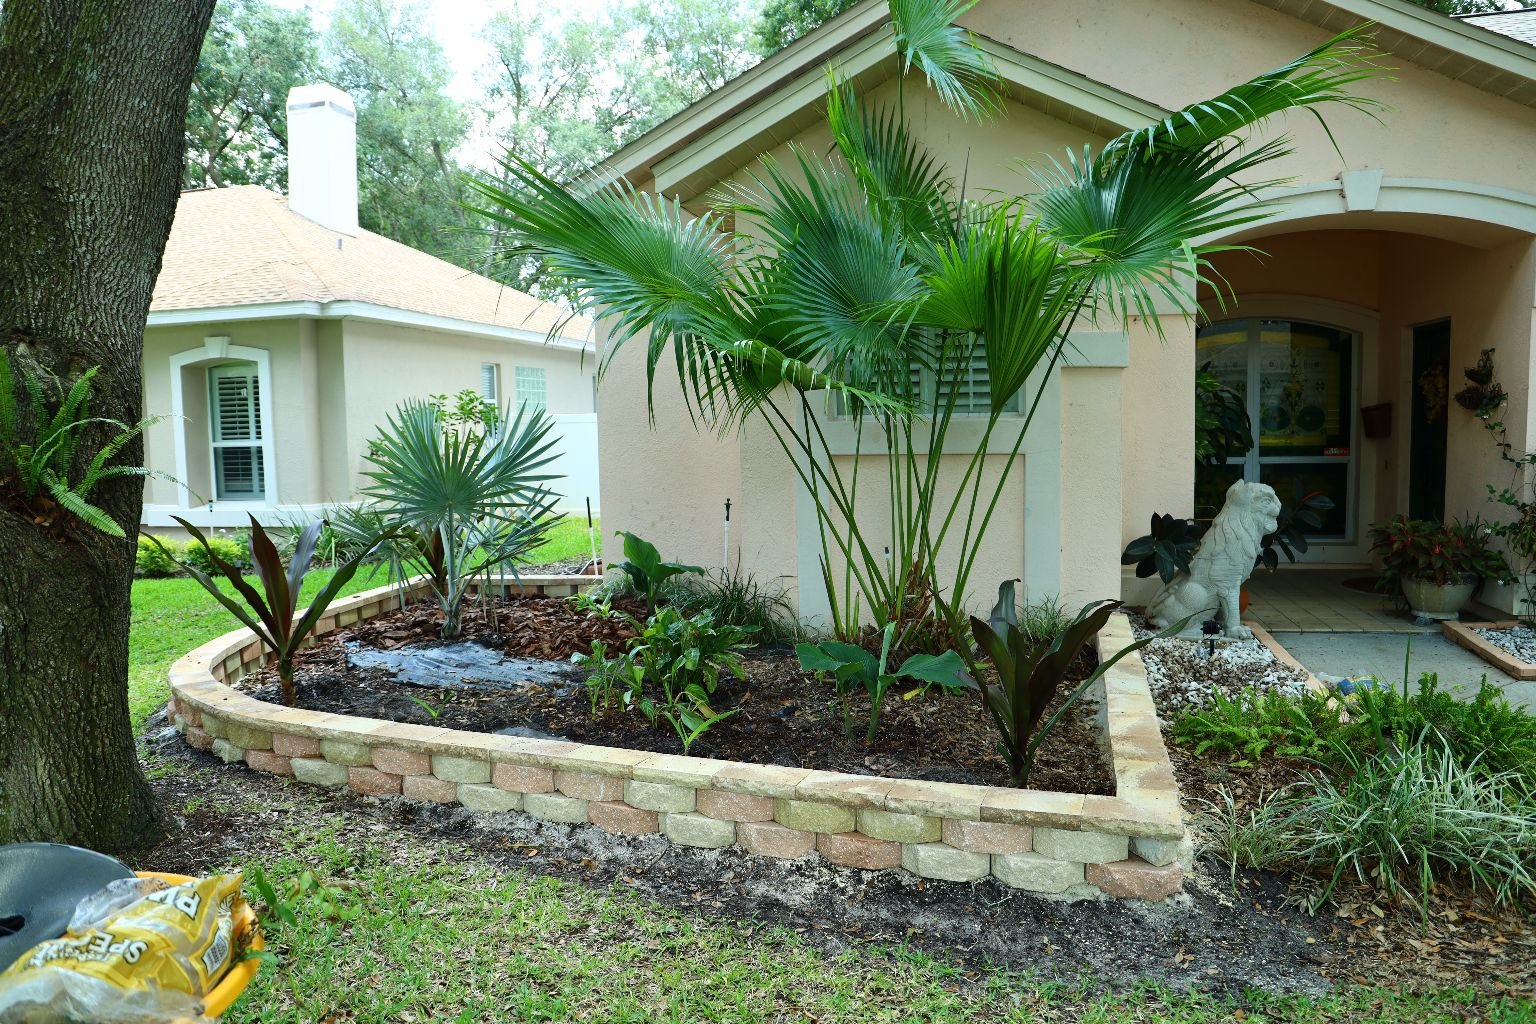
So far so good. I really like how this retaining wall turned out.
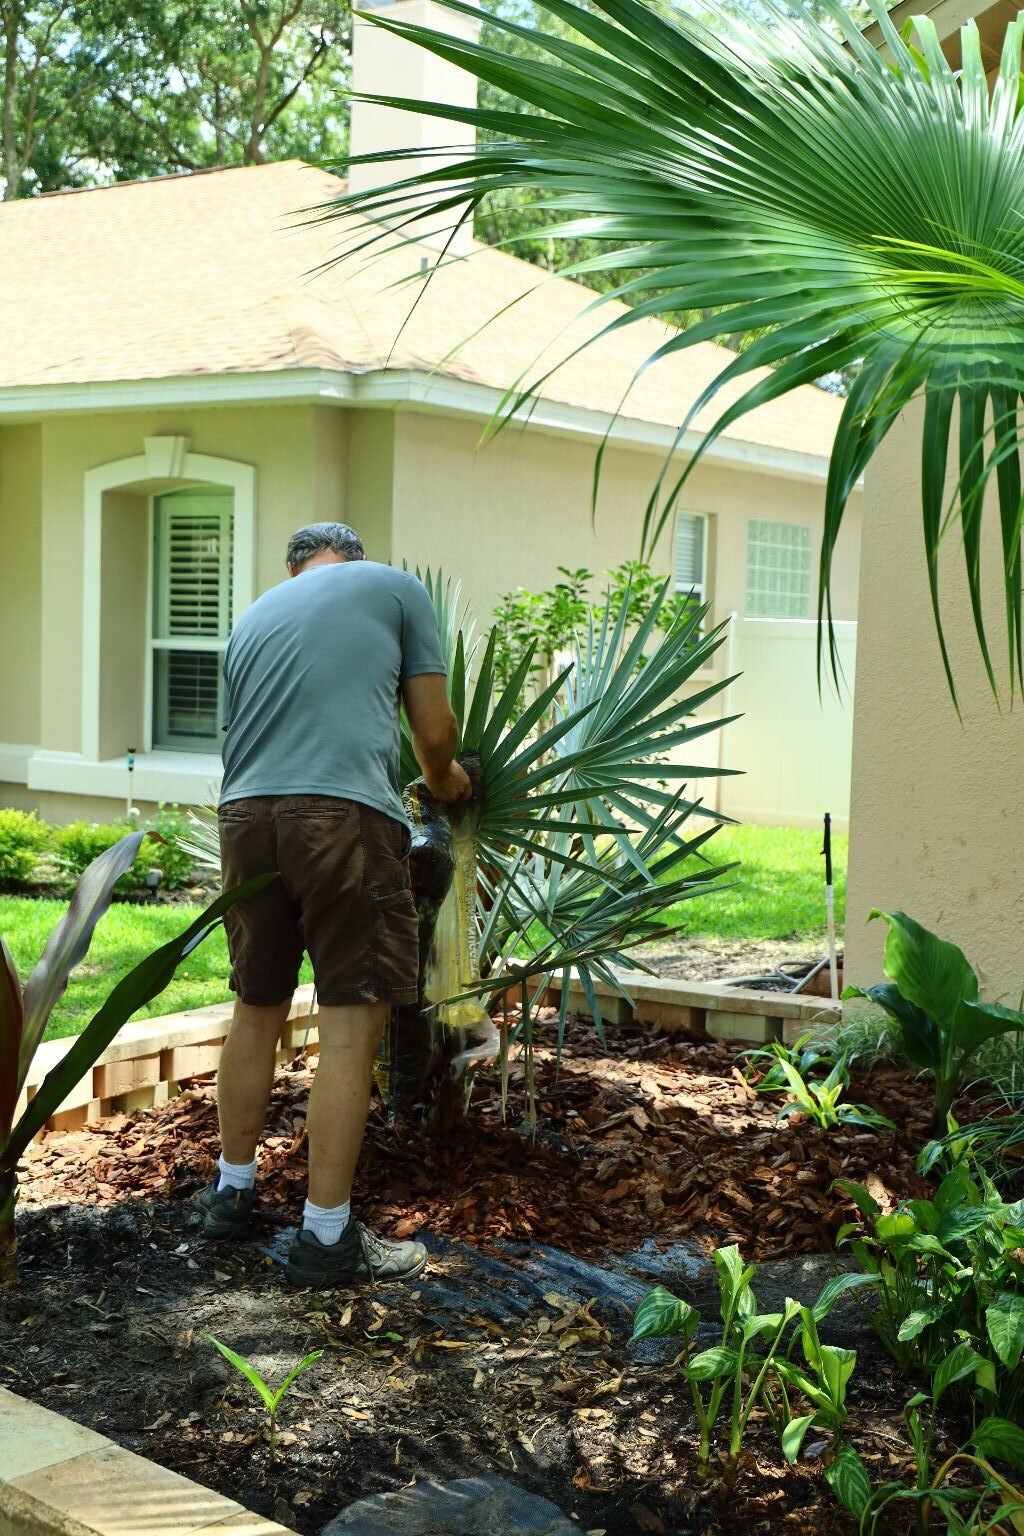
Dumping more pine bark down around the plants.
This will retain the moisture in the ground as well as inhibiting weeds.
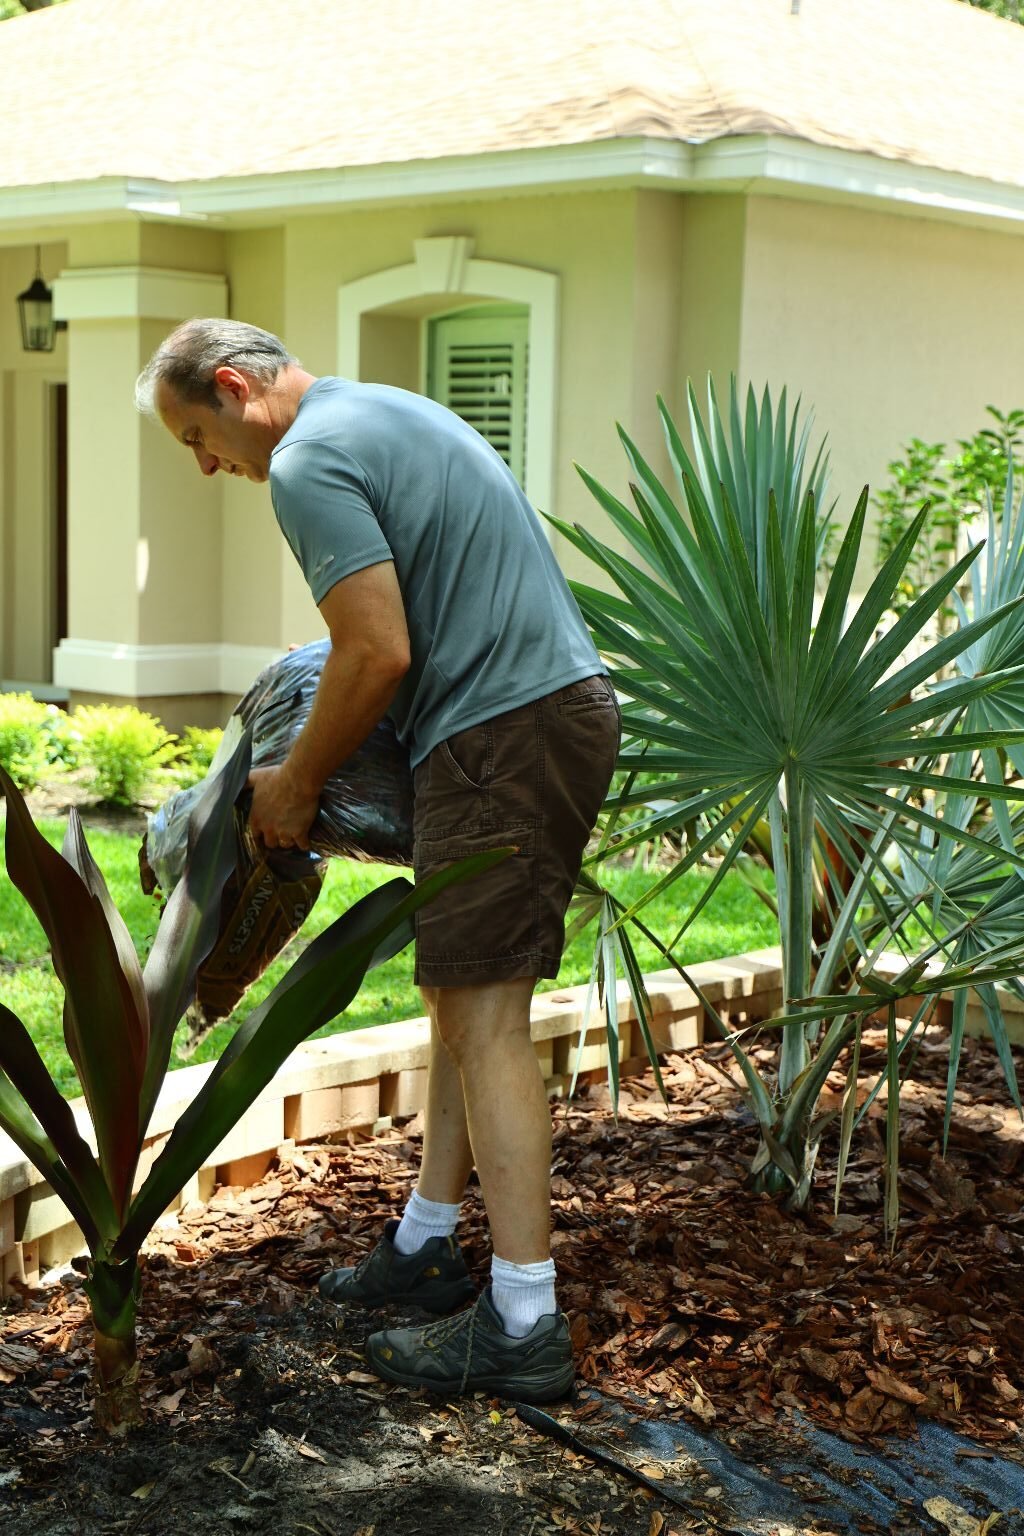
I don’t remember how many bags of bark I used, but there were many. Luckily, they don’t cost that much.

Continue to place the bark around the plants, keeping about a two-inch-thick layer.
Use your hands to maneuver the bark around the plants.
———————————————————————————-
——————————————————————————
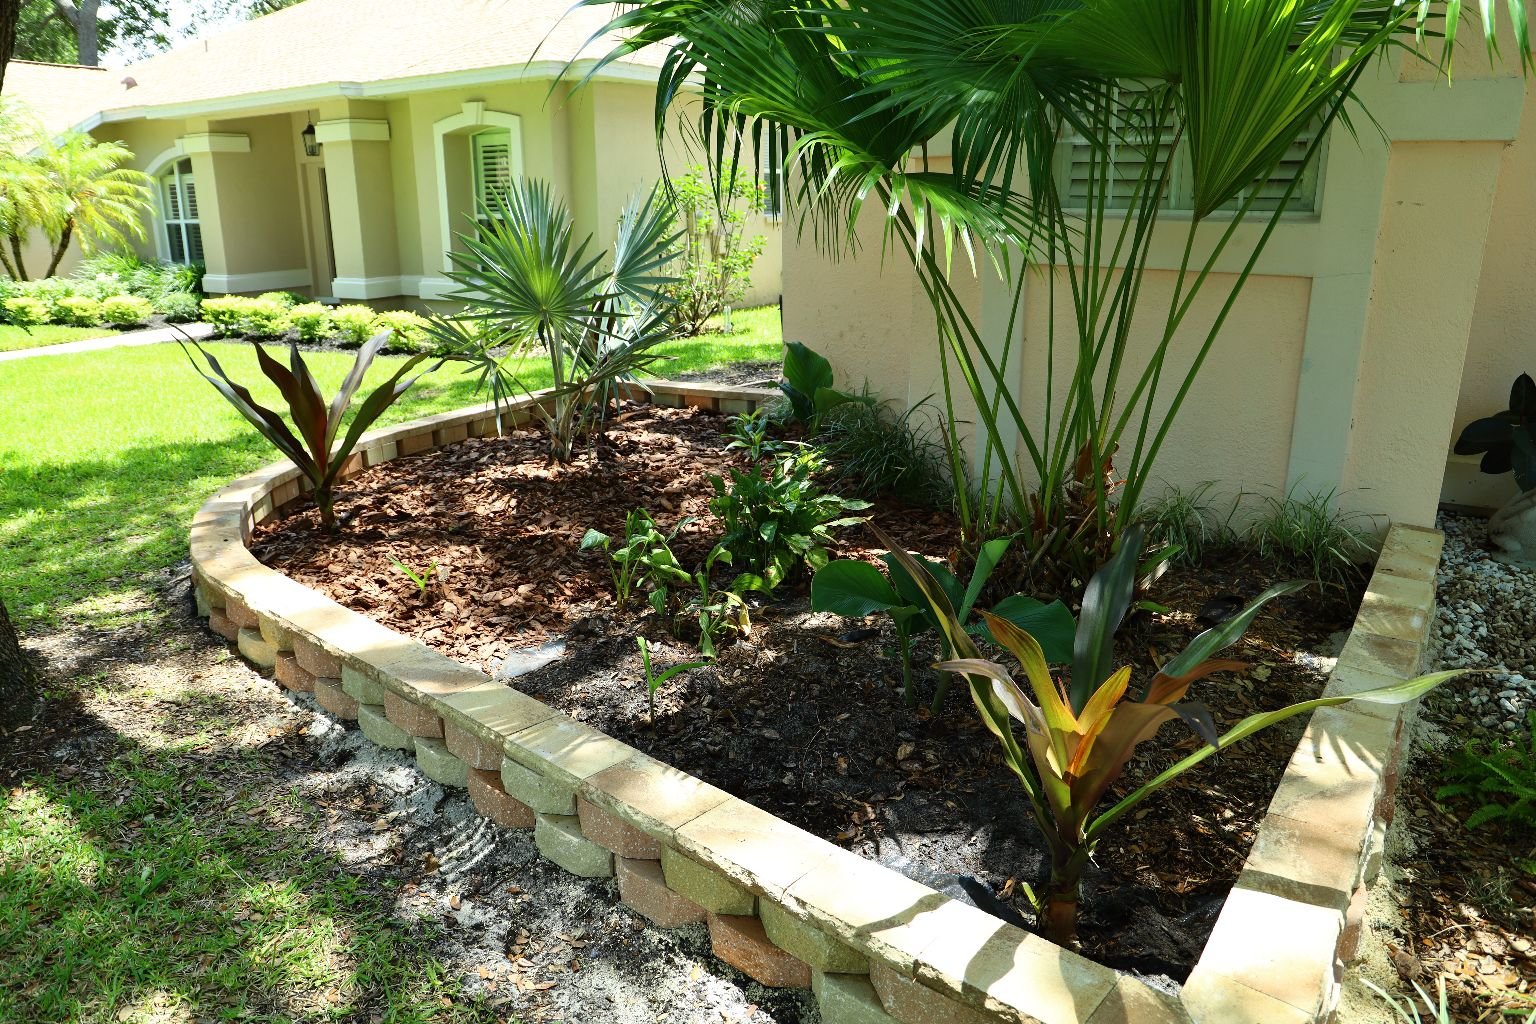
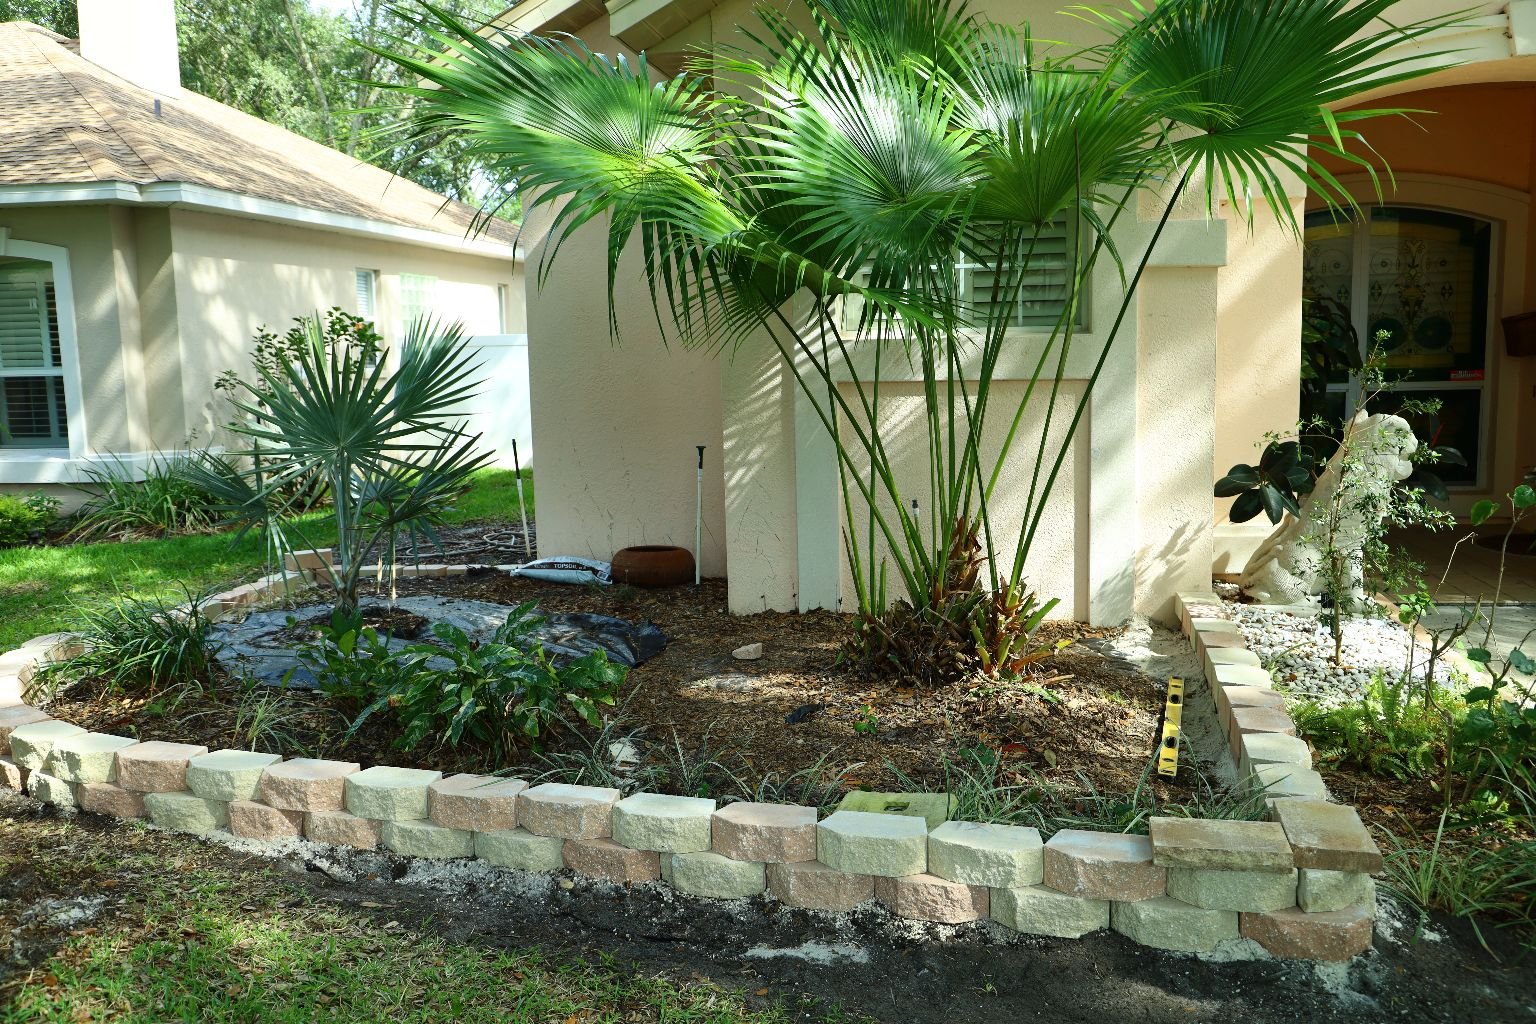
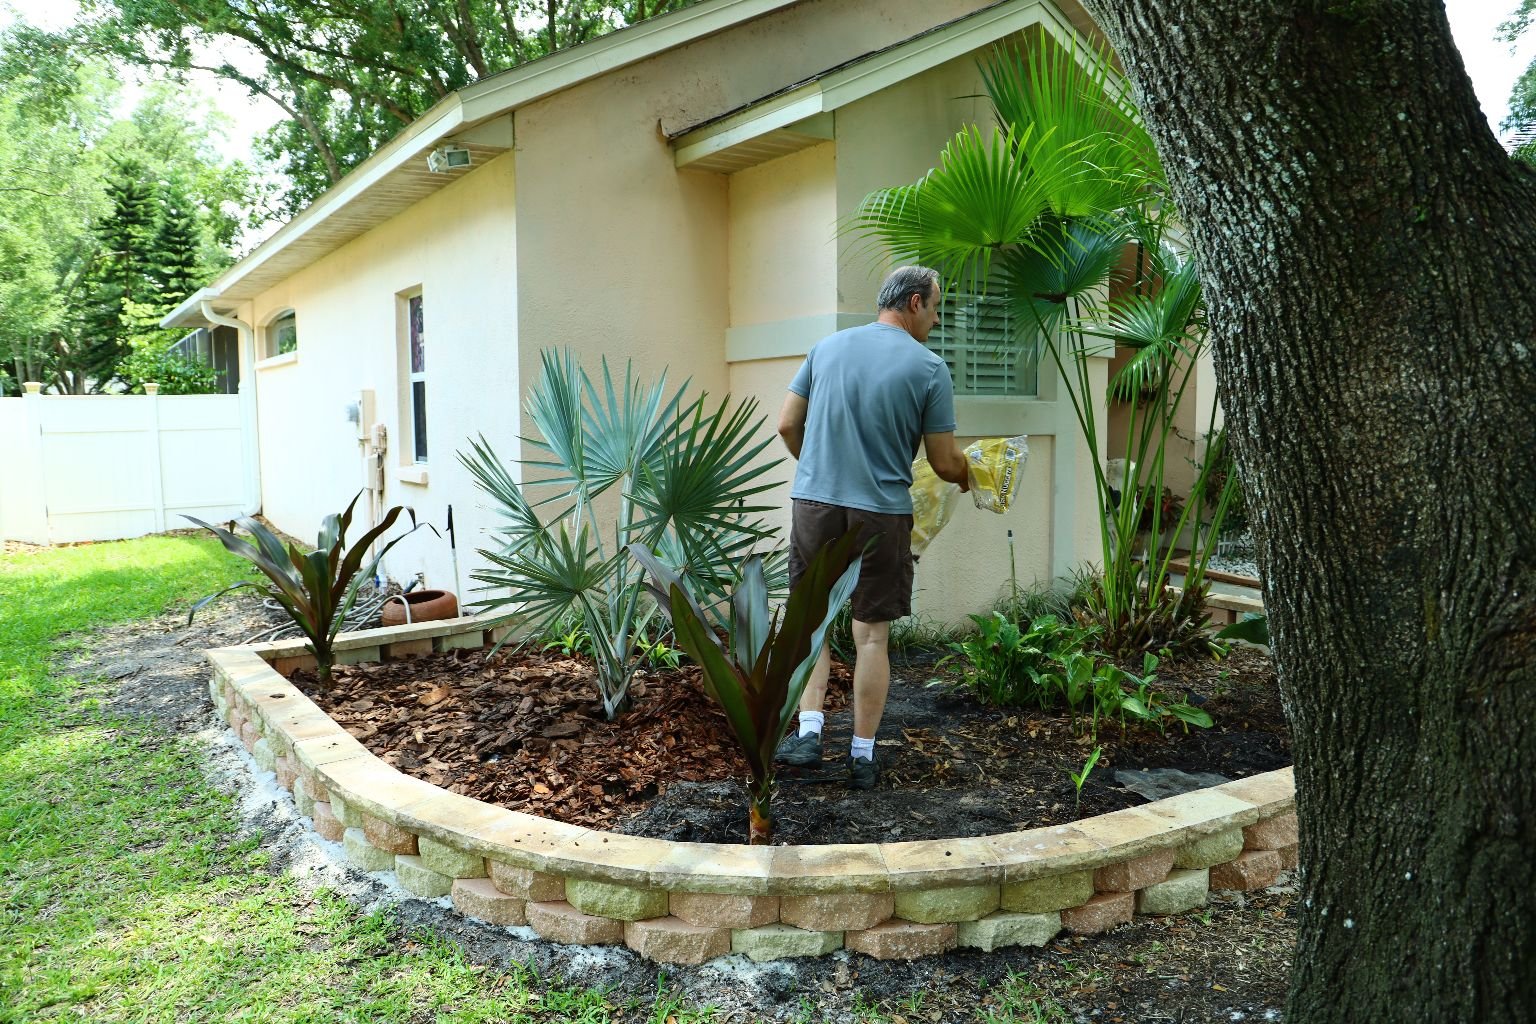
All done now and it took just a few weekends to accomplish.
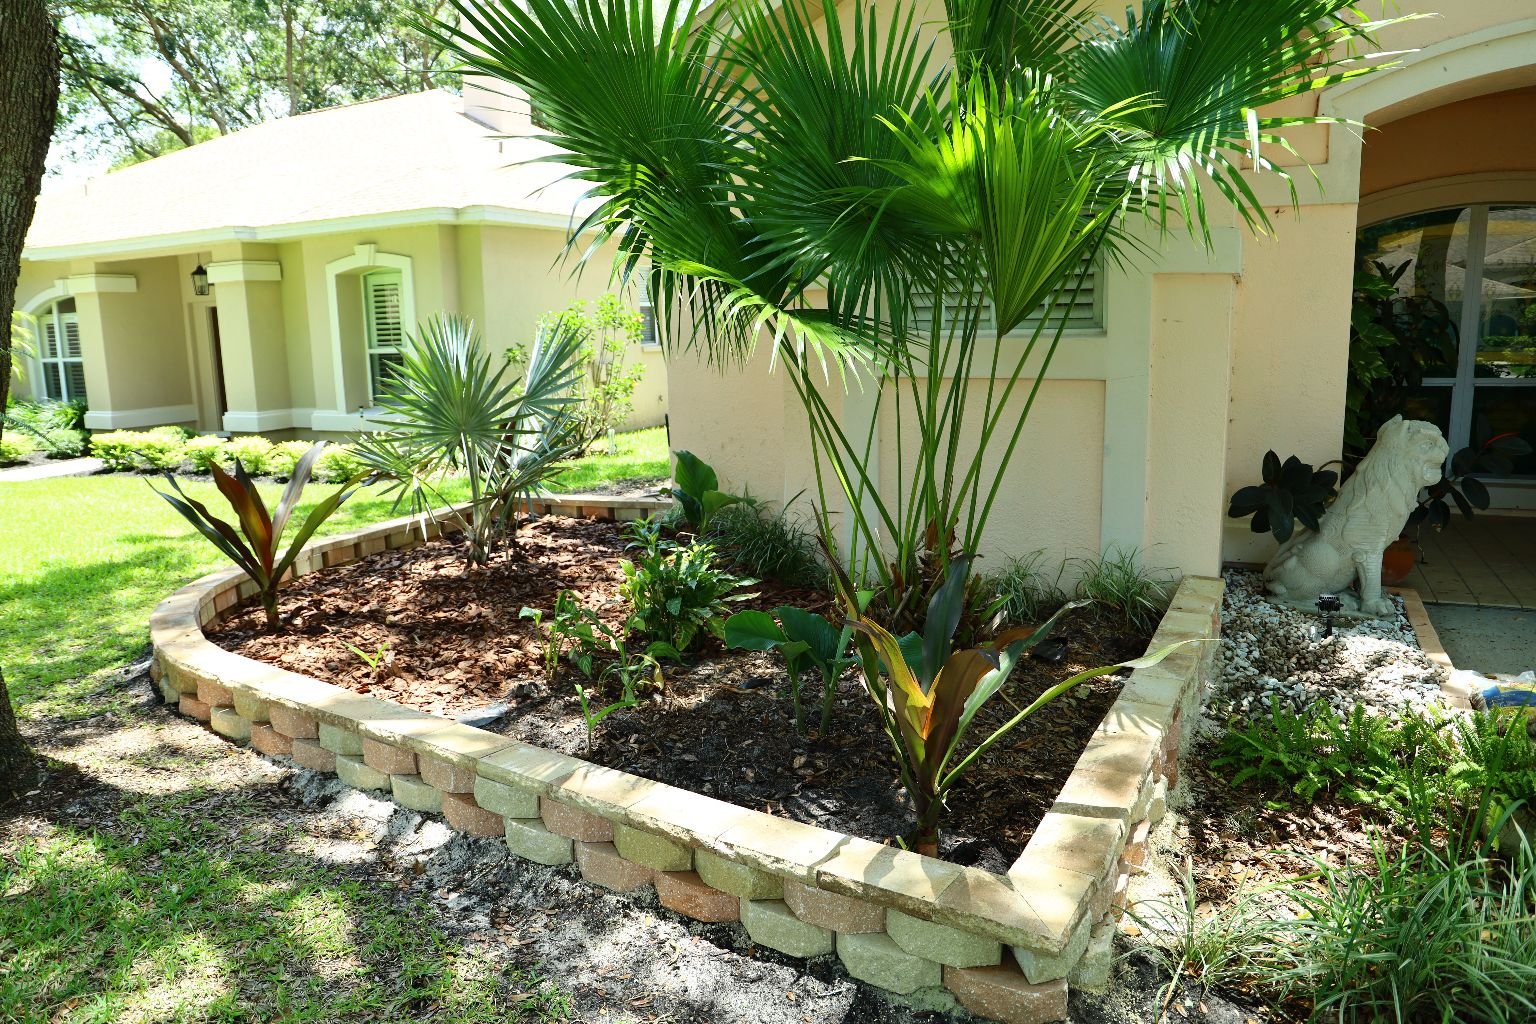
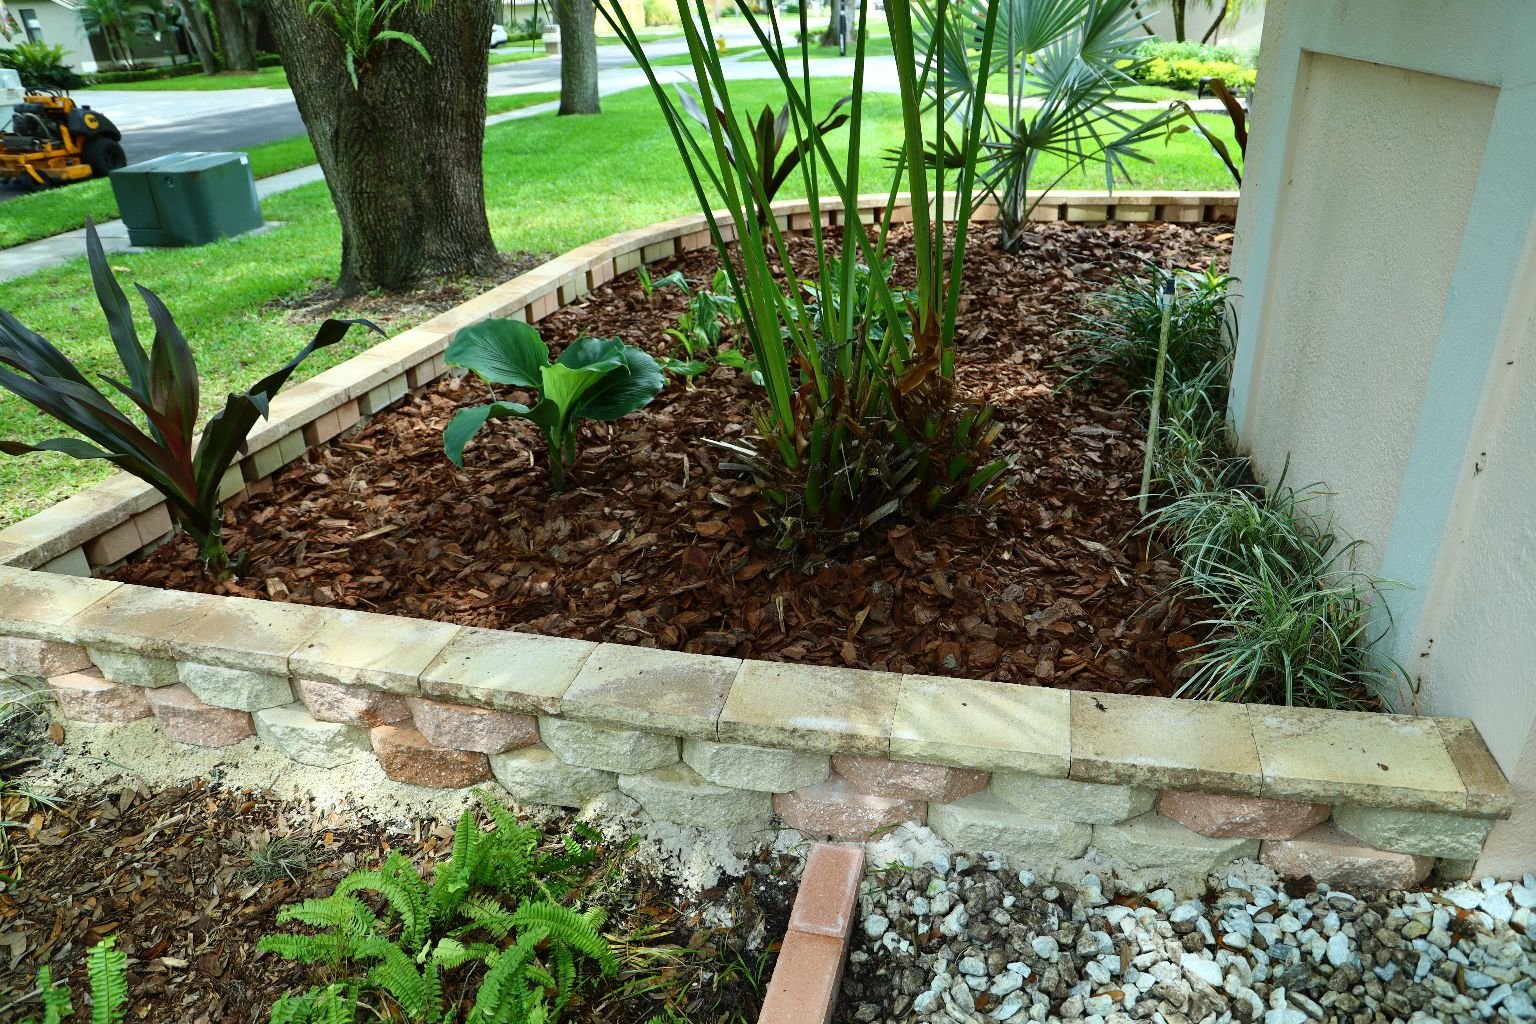
Look How Much Nicer This Side of our House Looks!
————————————————————————-
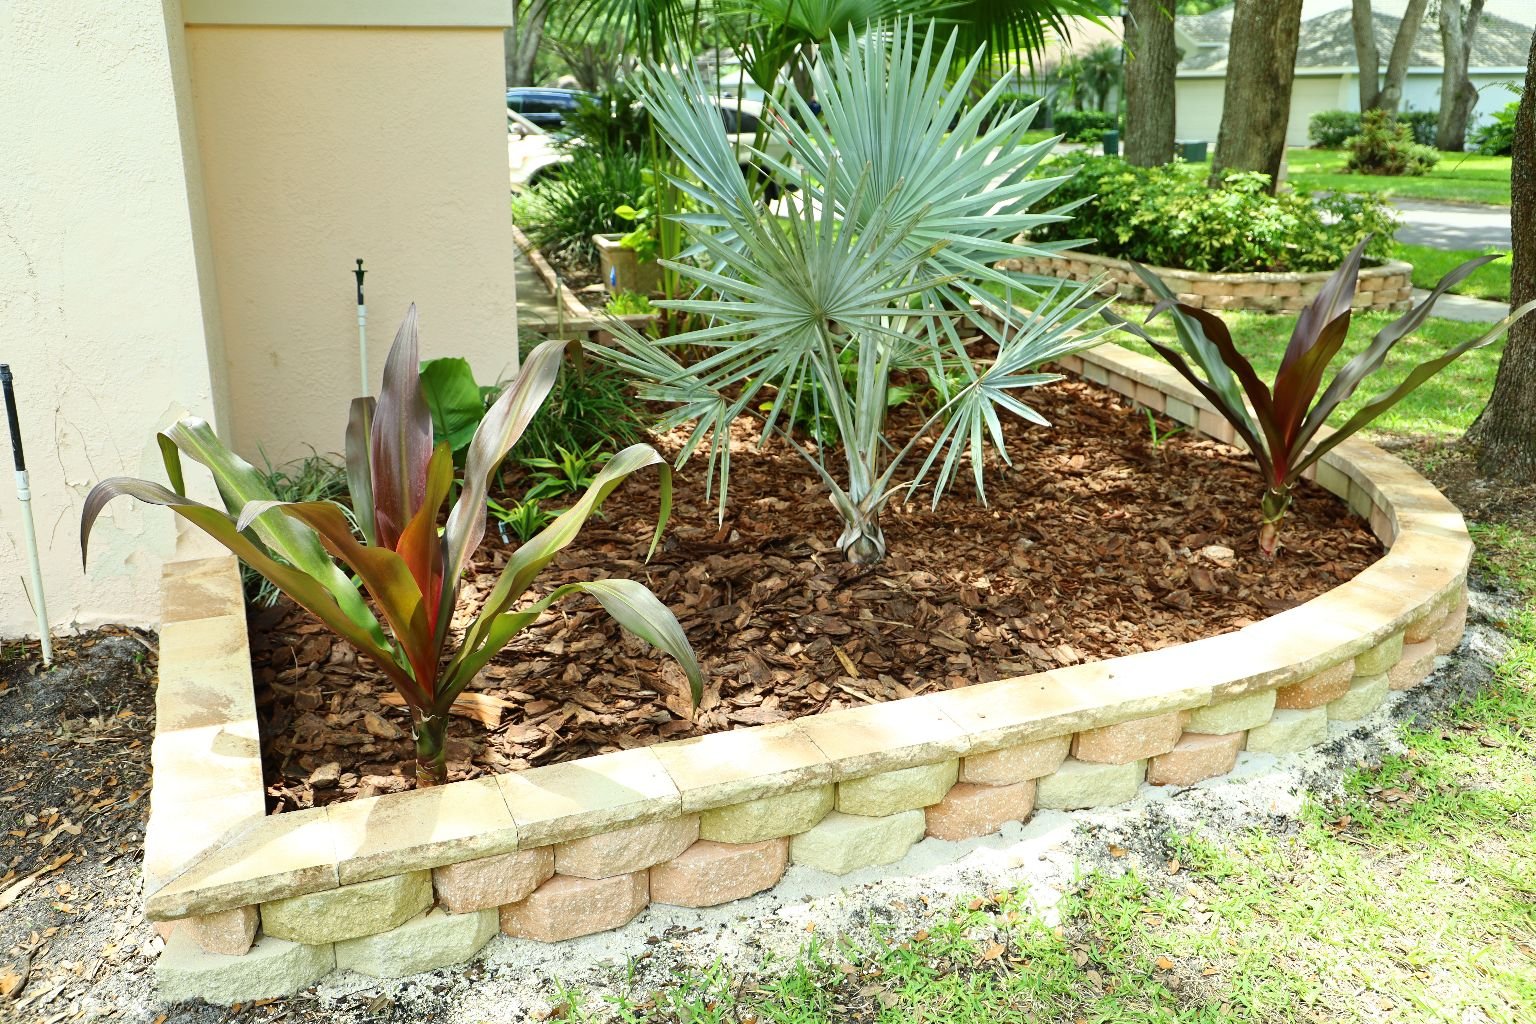
We Did Choose Stones That Would Accent our House Color of Peach/Coral
The Wood Chips Just Make it Look Richer


Front Left, Front Middle, Front Right
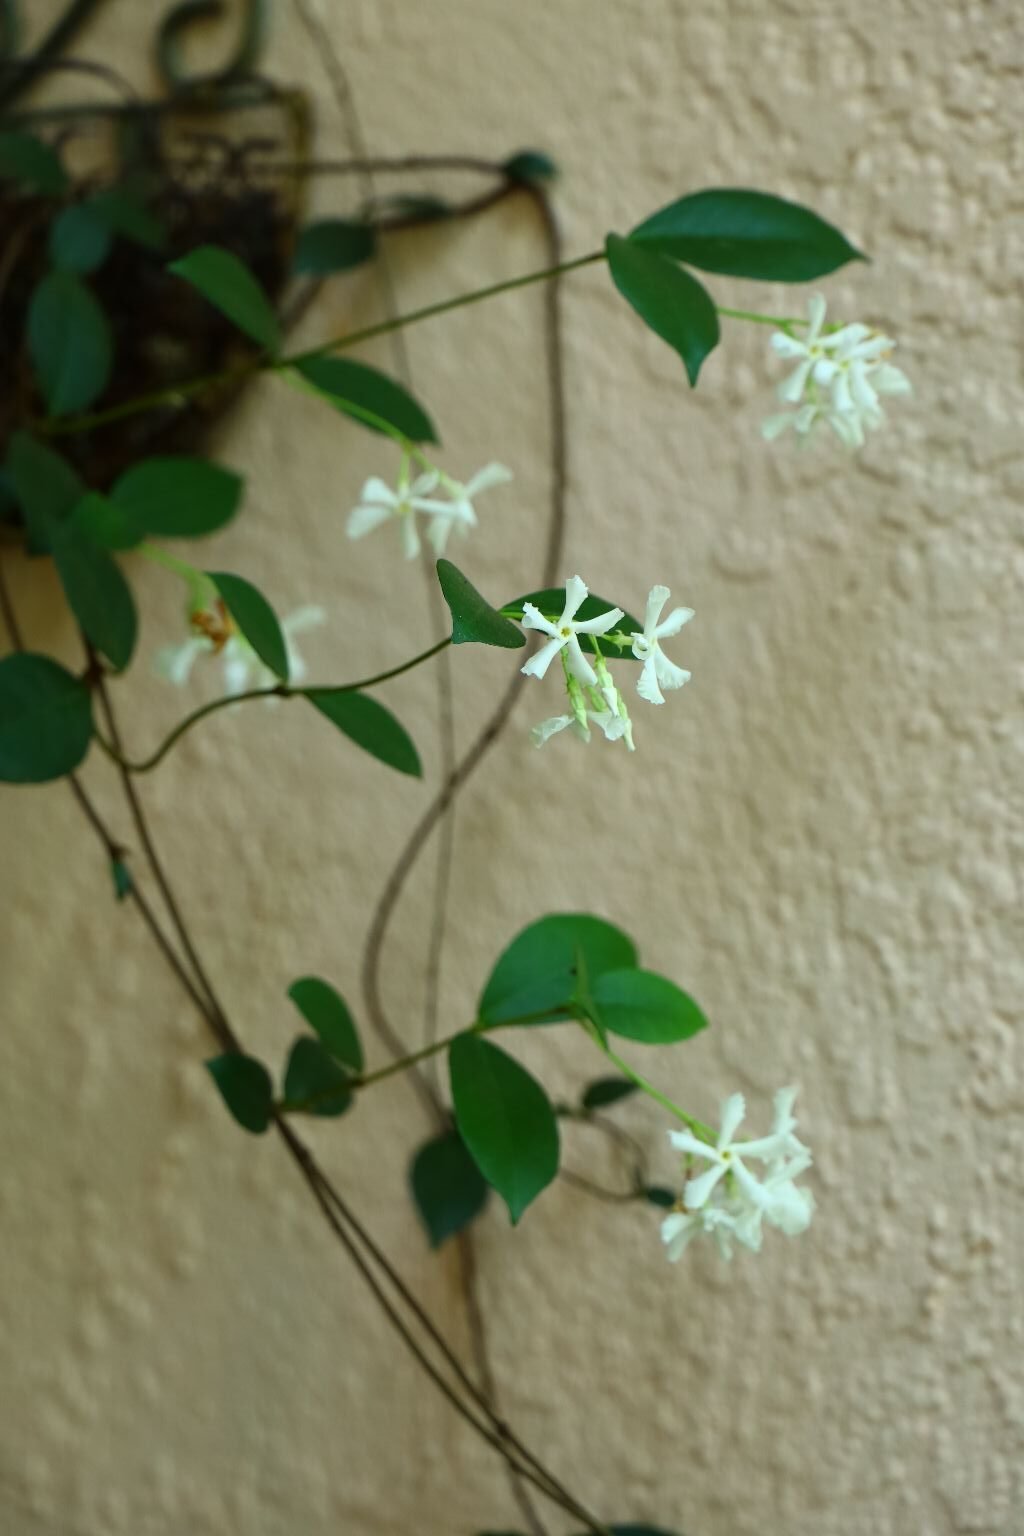
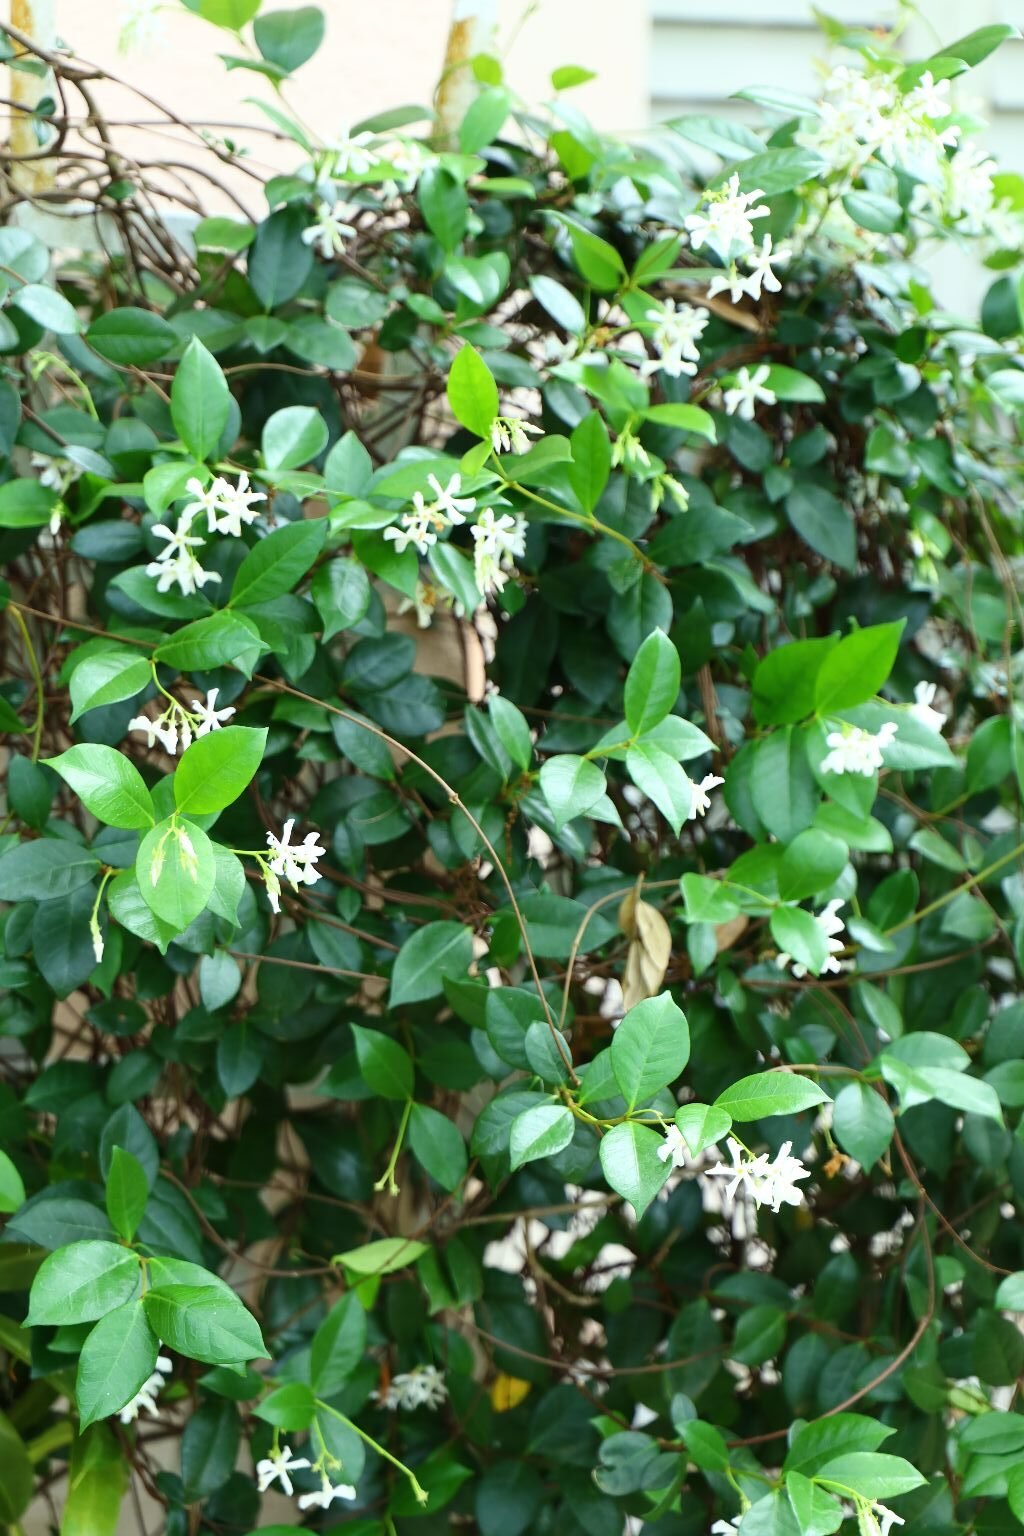
A Nice Whiff of Jasmine Entering the Front Entrance
Everything Ties Together Nicely
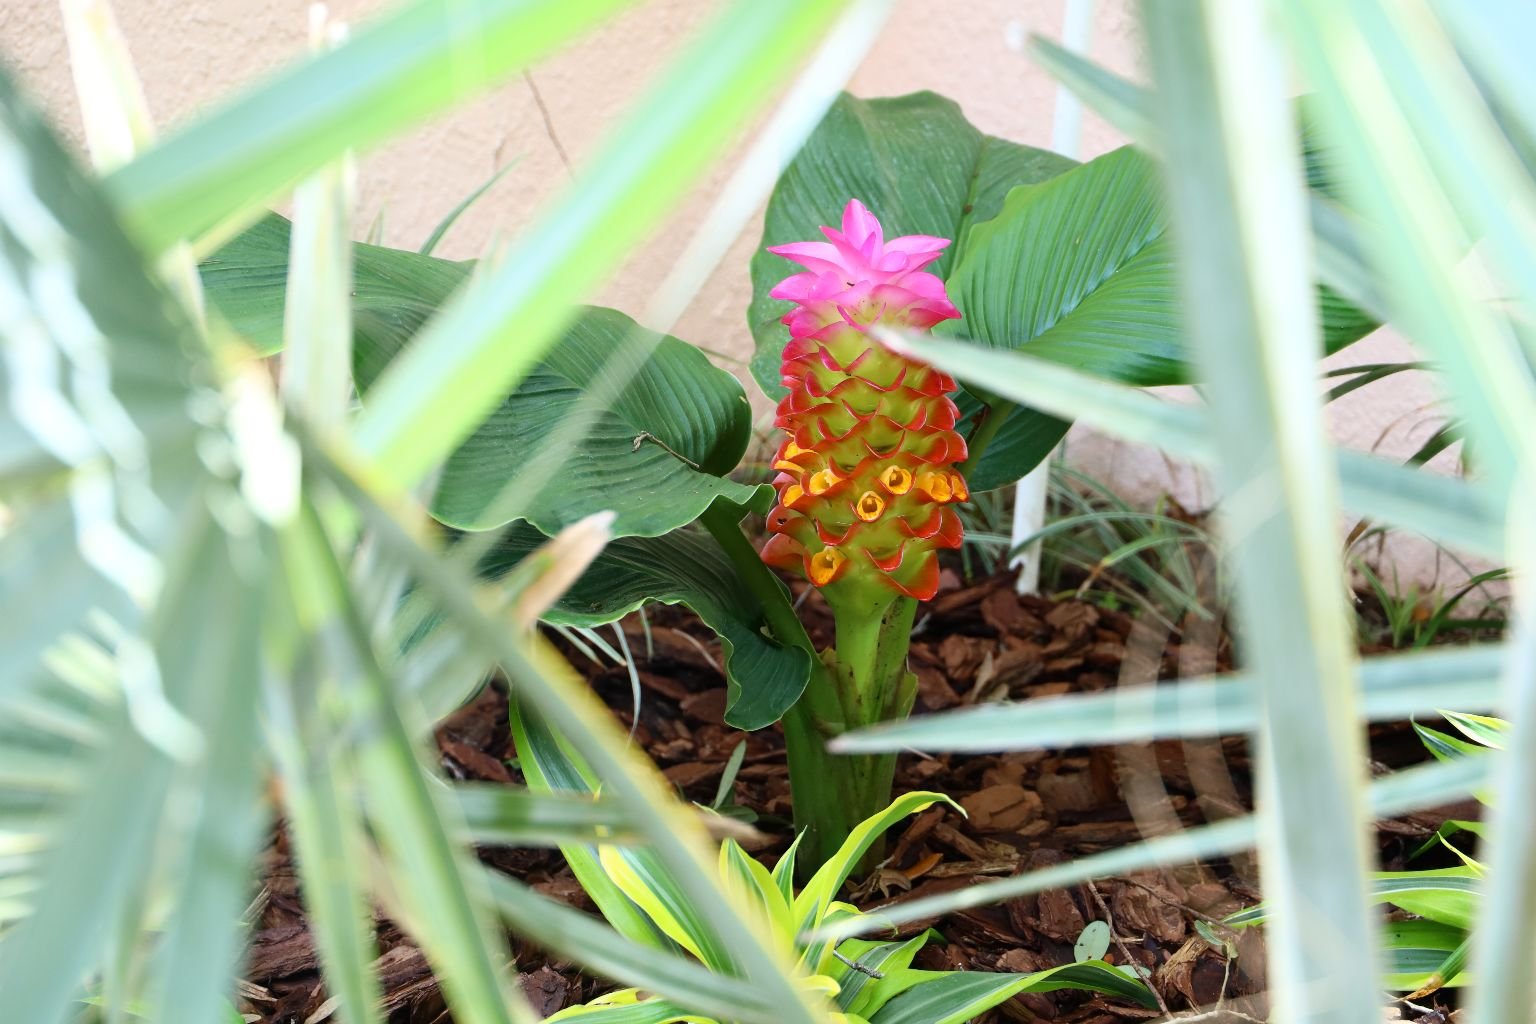
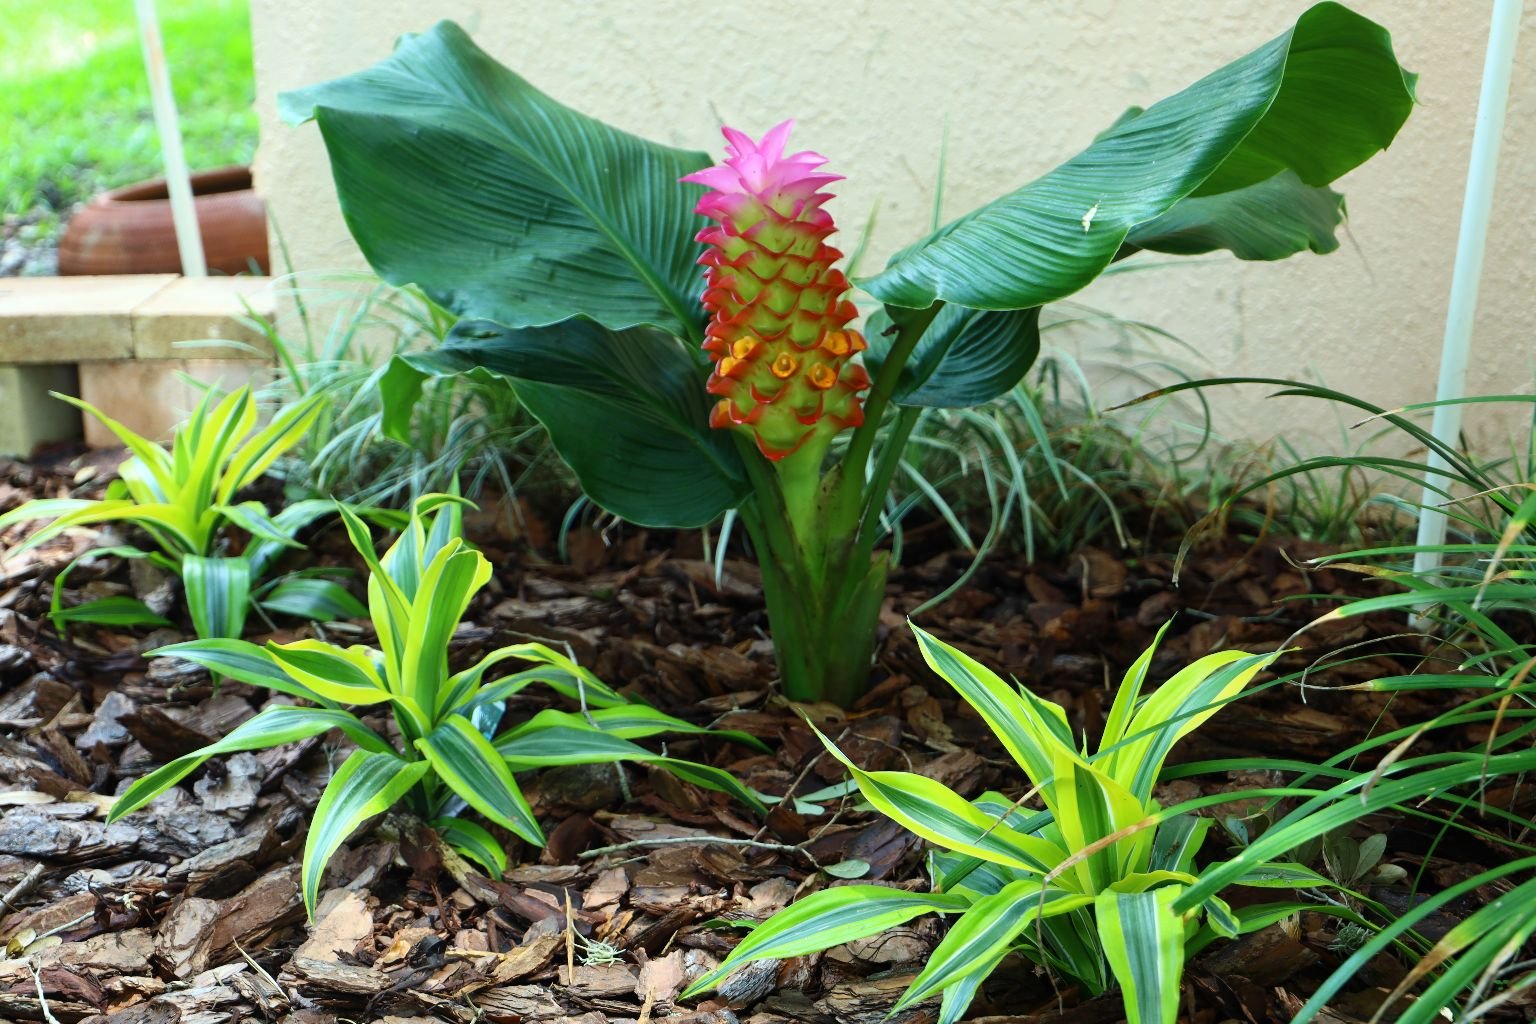
Curcuma in Bloom
——————————————————————————-
If you feel you can’t do a project like this on your own, you can always hire a professional landscaper. Just make sure you let them know exactly what you want, and make sure they do that for you. You can always get involved in choosing what plants you want as well.
Happy Spring Landscaping!
Gordon and Julie
—————————————————————————
To View All of Our Front Yard Landscaping Projects:
Click Here For: Front Yard Retaining Wall

AND,
Click Here For: Side of the House Retaining Wall
AND,
Click Here For: Front Yard Projects

AND,
Building A Backyard Landscaping Retaining Wall And Our Lanai Extension
AND,
How To Repair And Rebuild A Retaining Wall

AND,
Click Here For: New Front Yard Landscaping Project
———————————————————————————