Autumn Treats

Autumn
Once Labor Day is over with…..
There is just something special about the end of Summer and the beginning of Autumn.
To most of us it’s having the kids go back to school. Always a special time for me and Gordon when our children were young. We would high-five each other that the kids were back in school and not at home anymore. 🙂 Although we were the only ones happy about it.
While they were dragging their feet I was always up early on the 1st. day of school, full make up, hair done as if I would be strutting down a runway that very morning. (Which was pretty much me walking my kids to school in Hawaii. It was a happy strut.) 🙂
School supplies, back to school clothing, new shoes, Columbus Day/Discoverers Day, Halloween, Thanksgiving, Brodie’s Birthday….
It just got you in the mood for cooler weather and all the deliciousness that came with it. Autumn is the time of year that we all tend to start to nest and that includes cooking/baking/eating all sorts of delicious TREATS.
It’s a time that we wear beautiful Autumn colors of Greens, Oranges, Reds, Golds, Browns and Tans.
It is also a time when we need to pay attention to what we eat so as not to put on tooooooo much weight over the holidays. 🙂
Hard to do, I know. But we can do it! Let’s just work on portions.
It’s all about maintaining the weight we have through the holidays and then we’ll work on getting it off after the New Year. (Fingers crossed.) 🙂
————————————————————–
I believe in TREATS!

Treats are good for your soul. They are special. They make our taste buds happy.
And, Treats are also just that, Treats!
Eating a pie with a face on it is just much more fun!
I would like to present to you a few of our Autumn Treats.
Hope to tempt you into submission to enjoy something very easy and simple, but tasty and delicious.
Happy Autumn,
Julie and Gordon
————————————————————
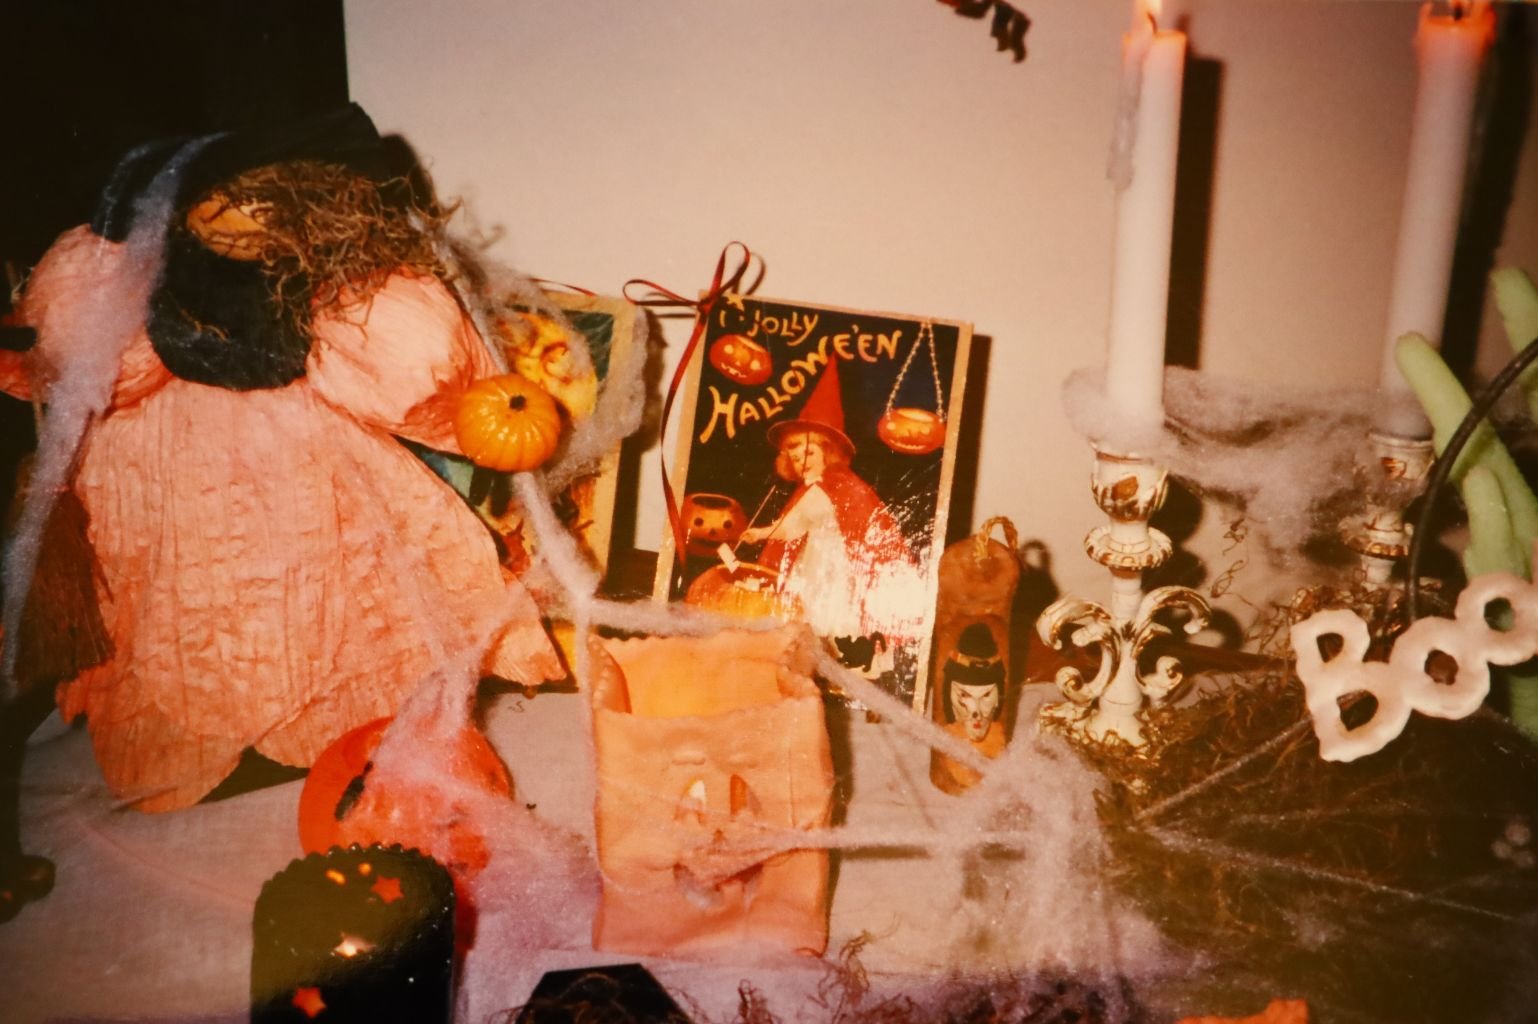
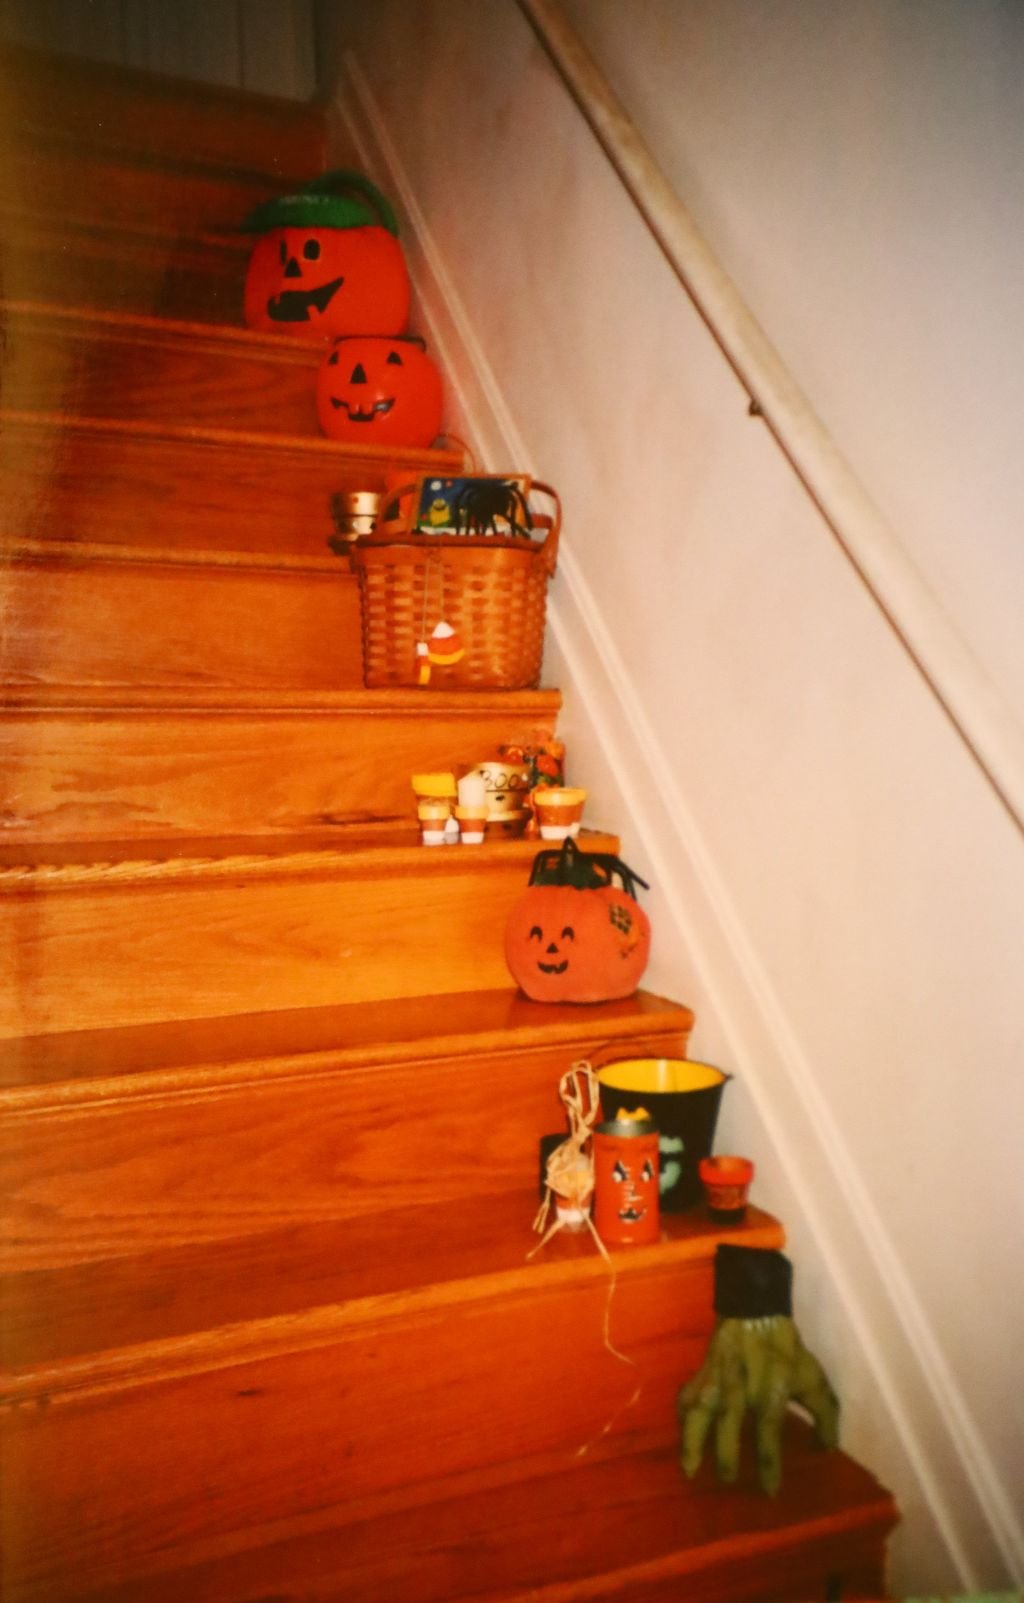
Halloween, Maryland, 2001
(I think)
Witches, Spiders, Monsters…
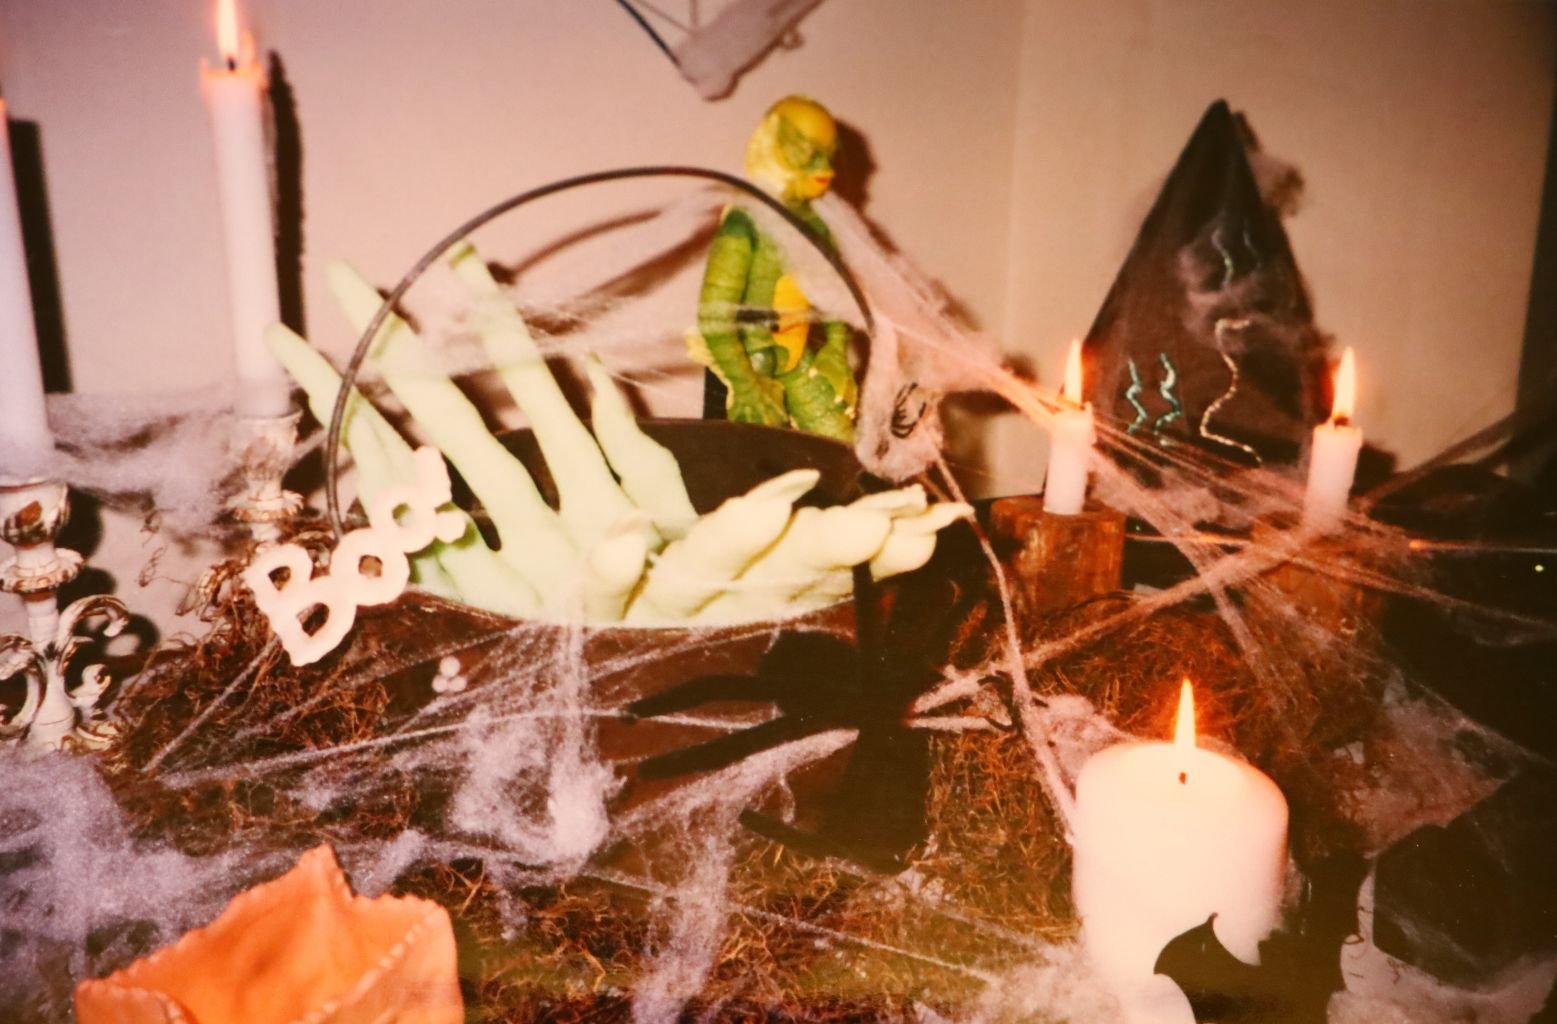
and Candles
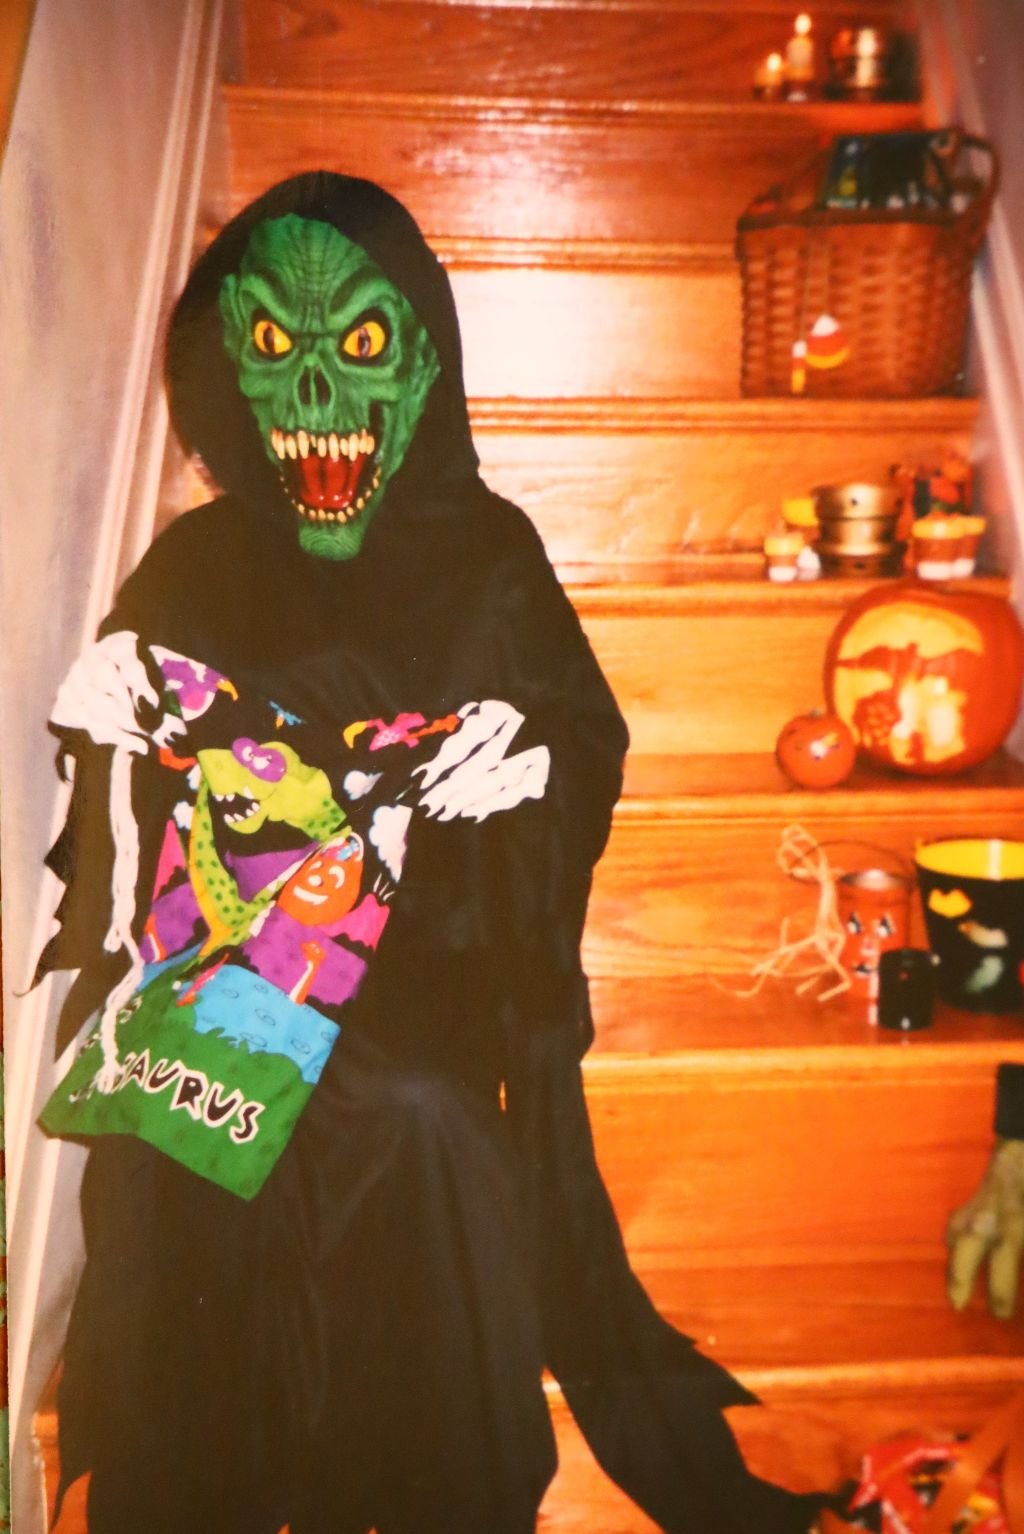
Our Brodie Ready to go Trick-or-Treating
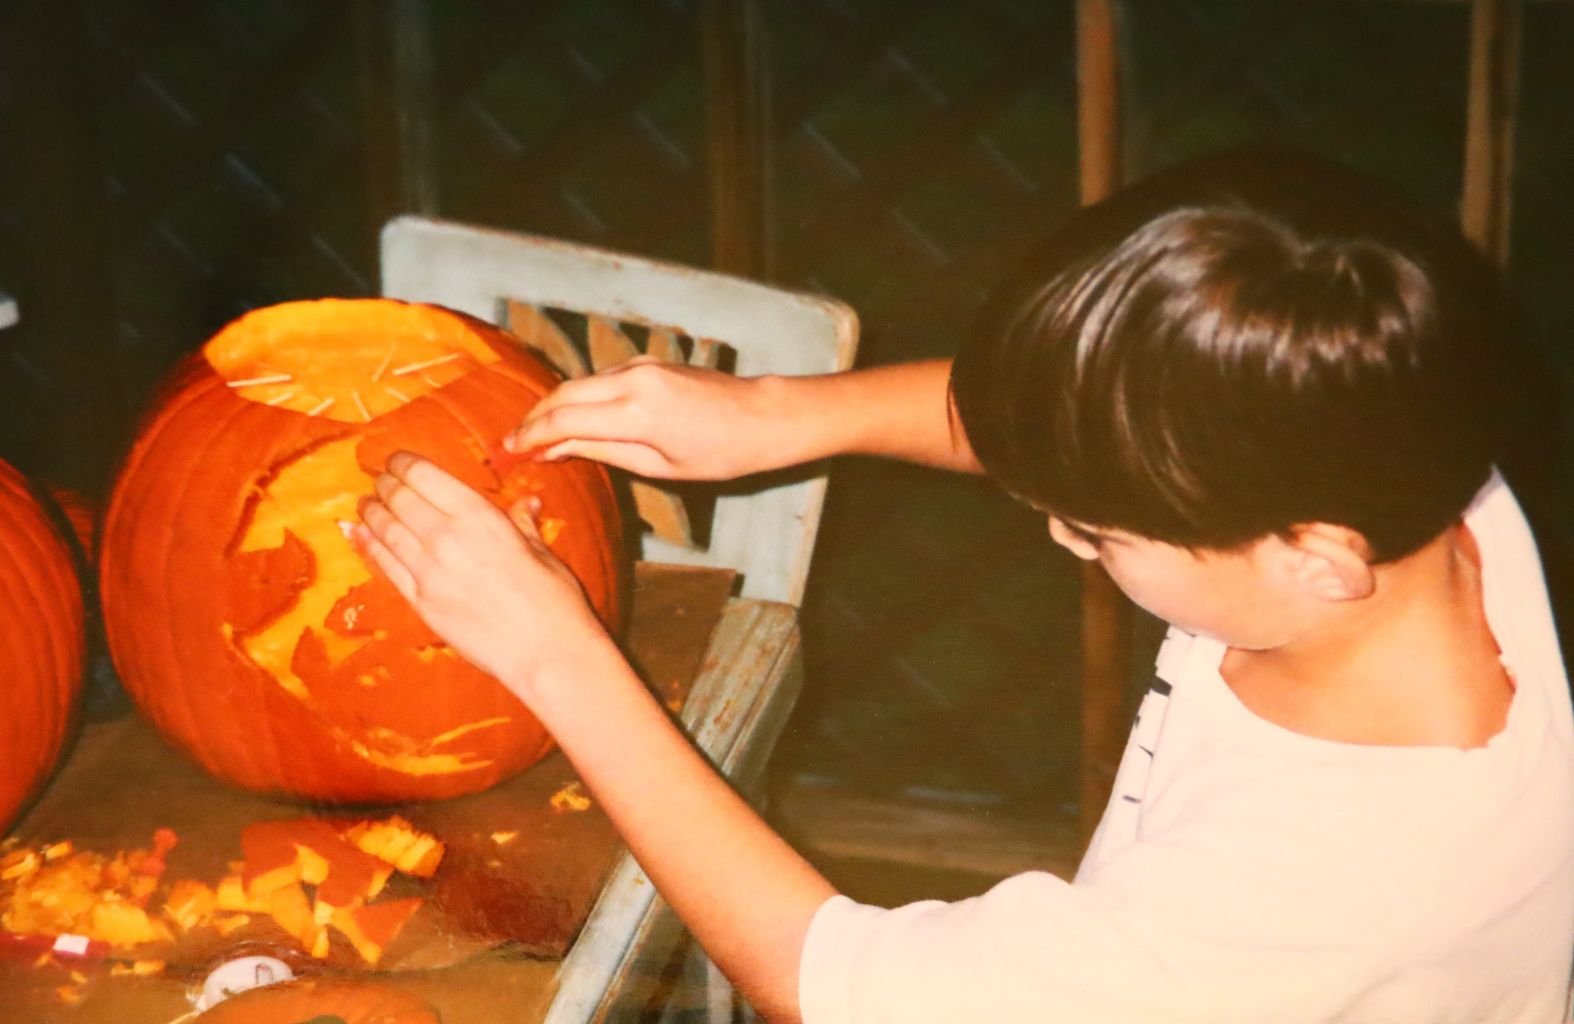
Brodie and Veronica Carving Their Pumpkins
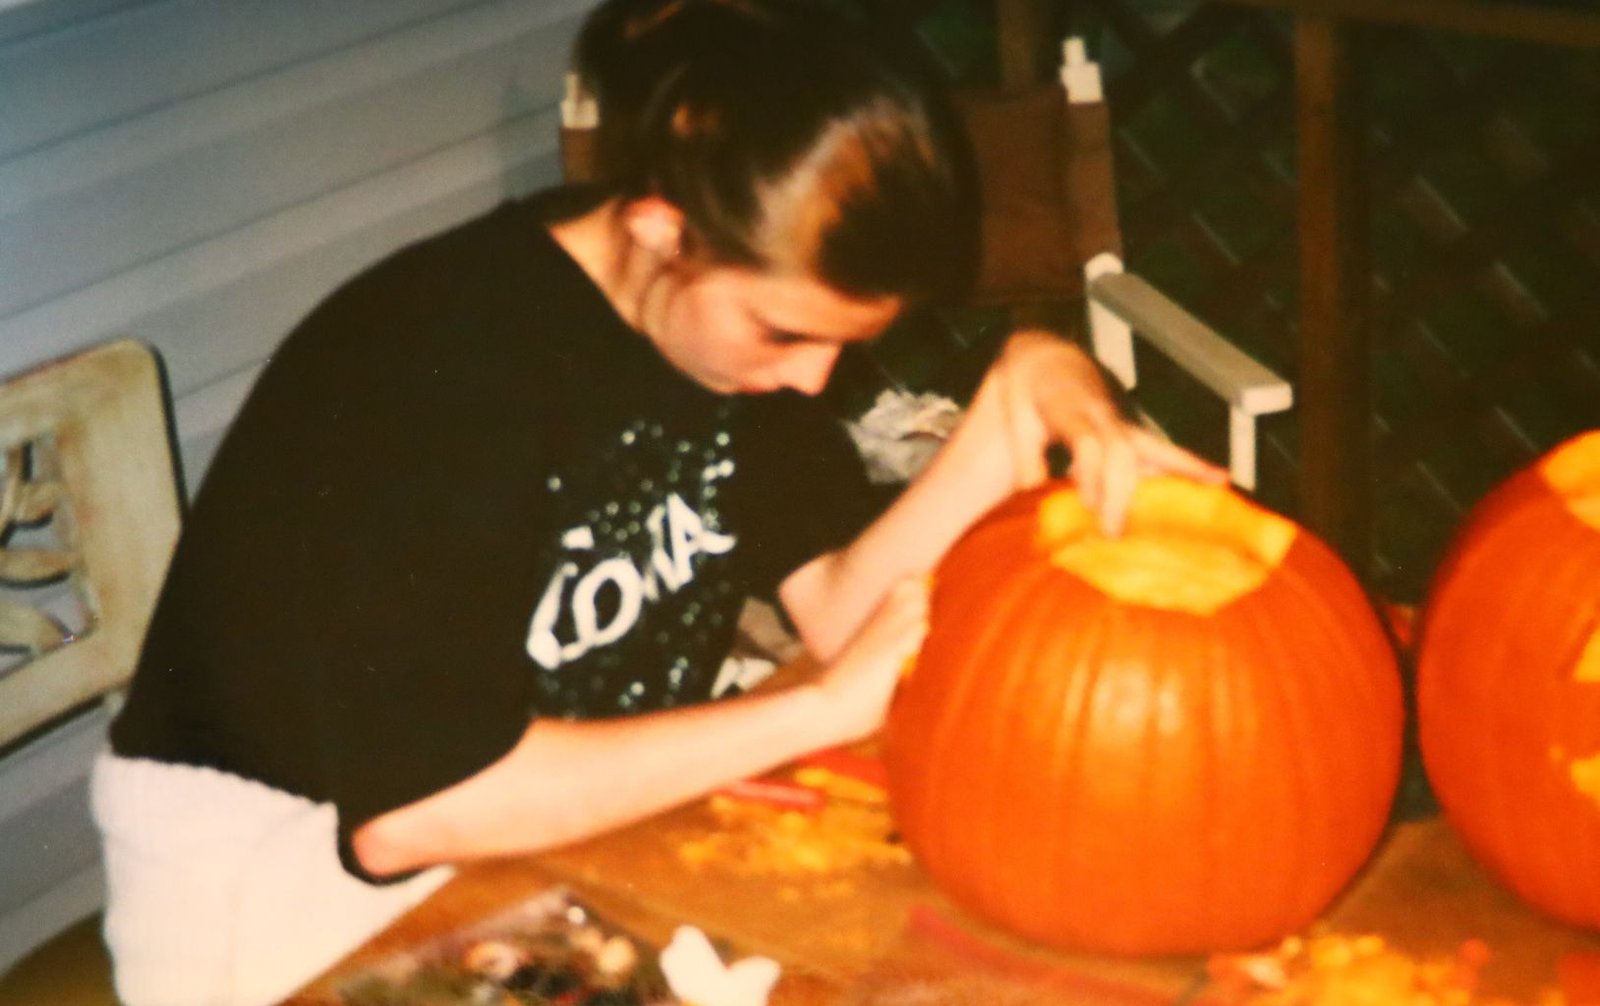
I just wanted to share some old photos of our Halloween times from Maryland.
Wonderful Memories Being Made
That is also what Autumn is about.
Trick or Treat!
———————————————————–

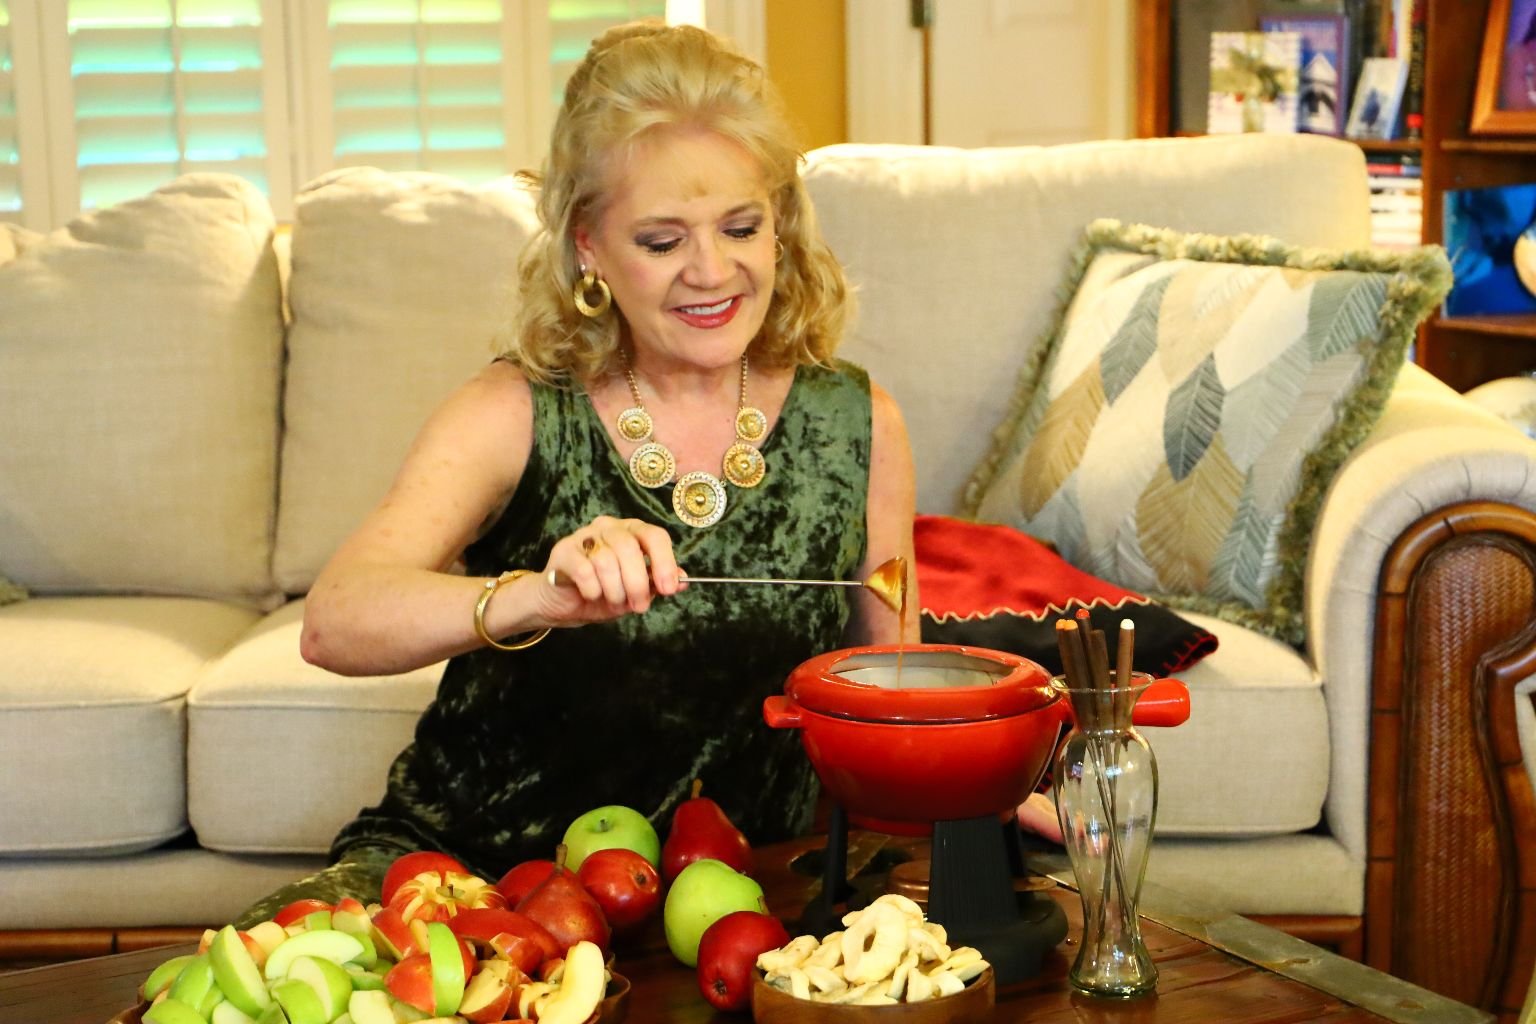
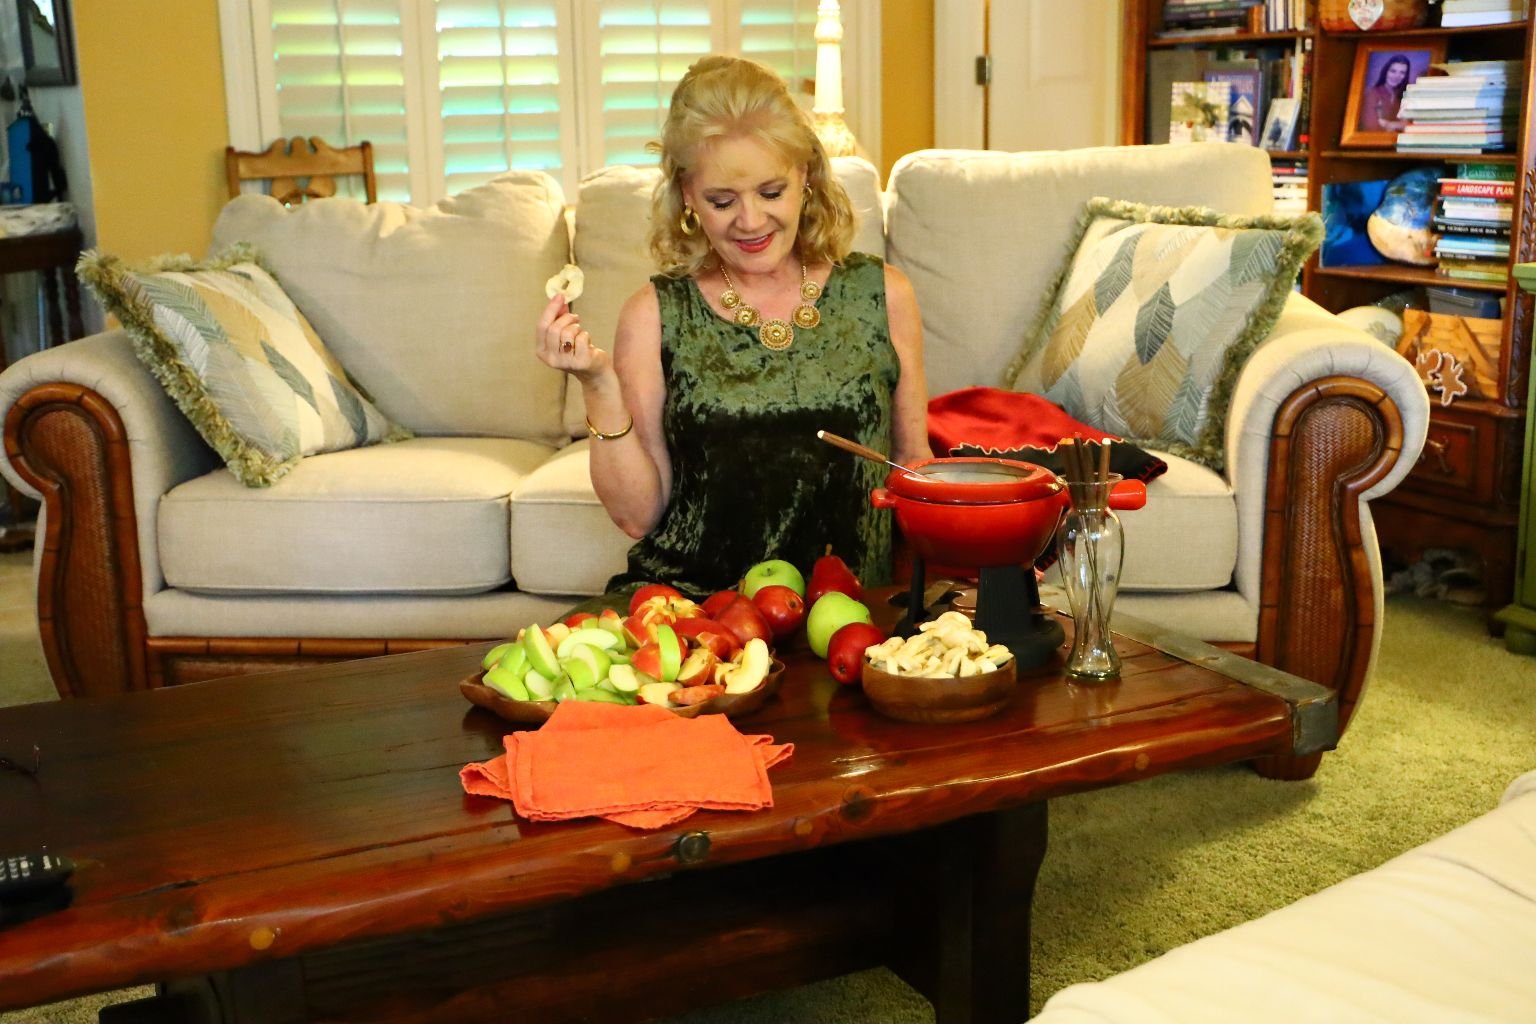
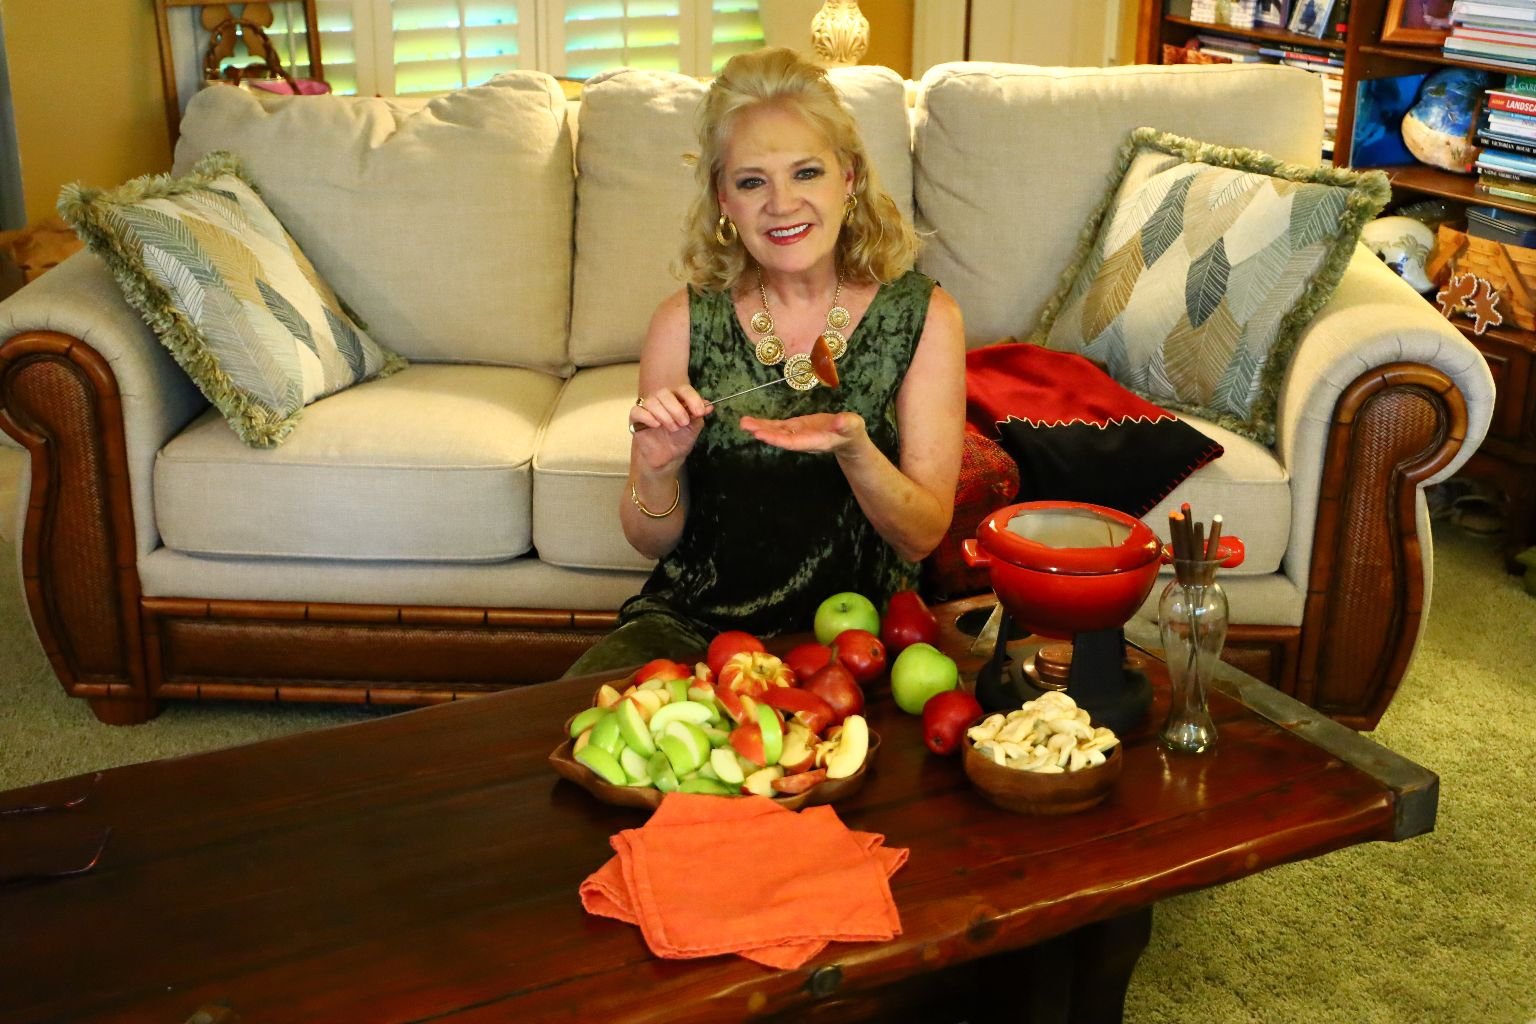
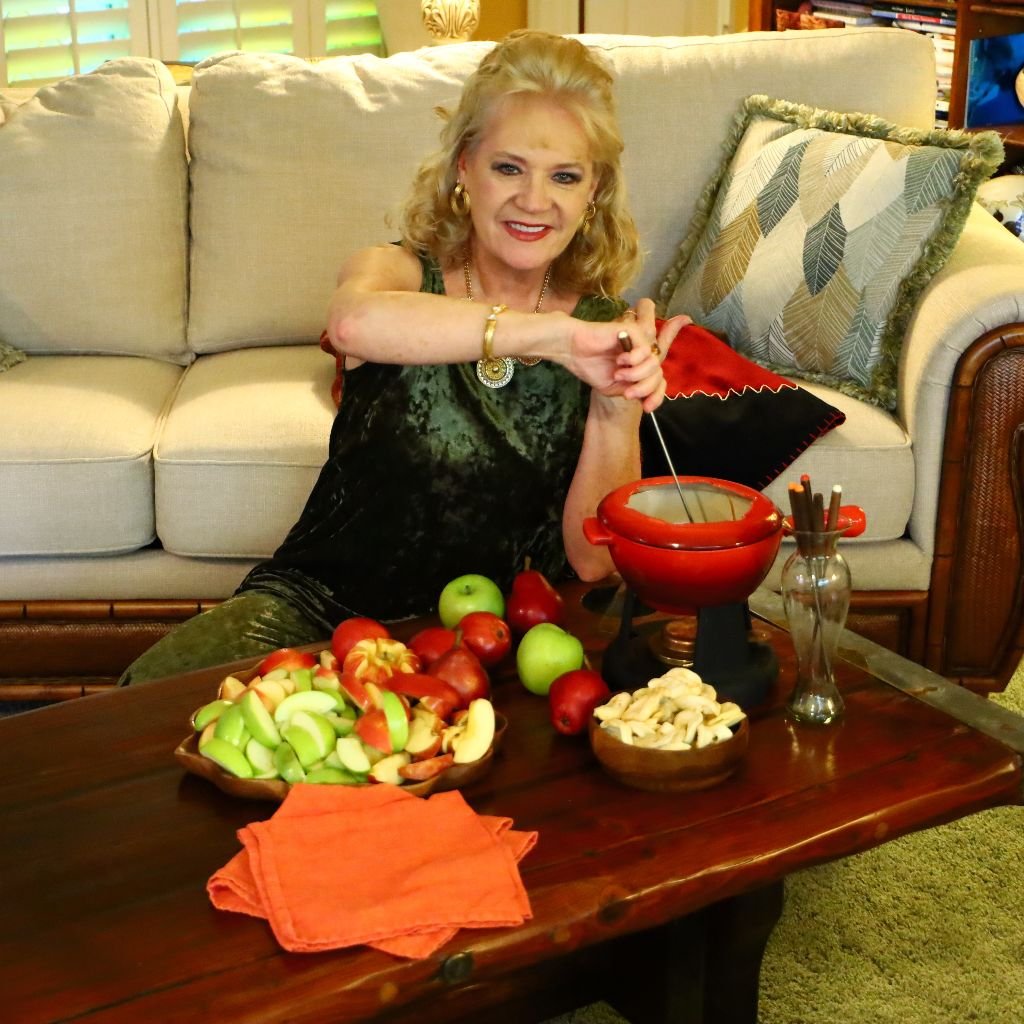
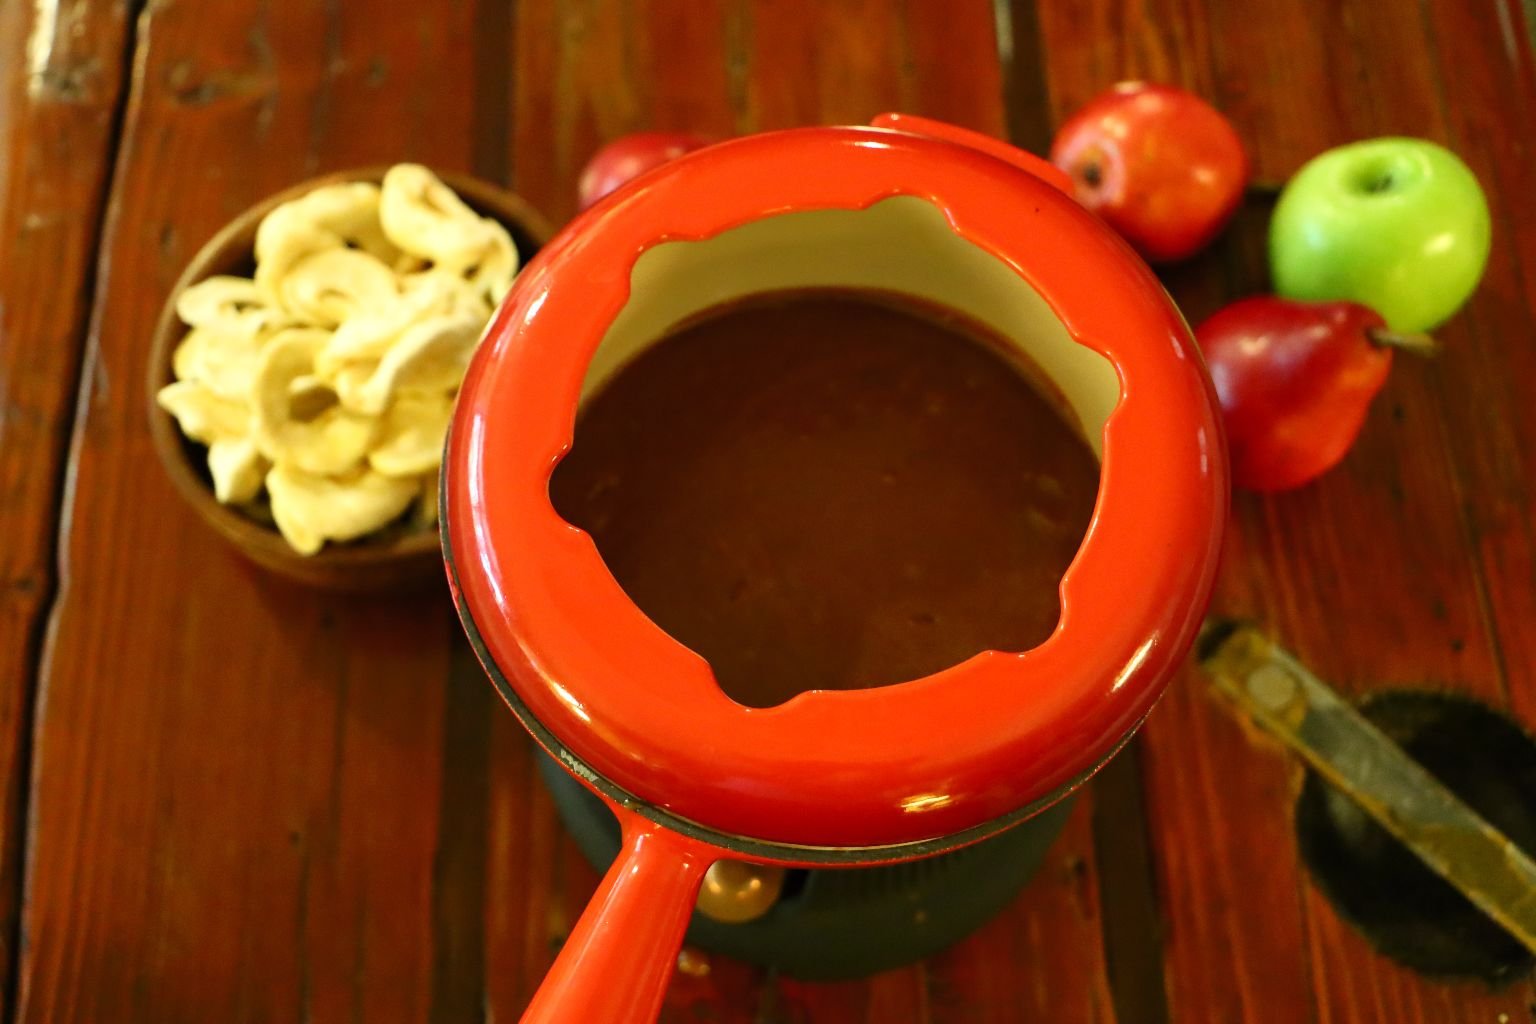
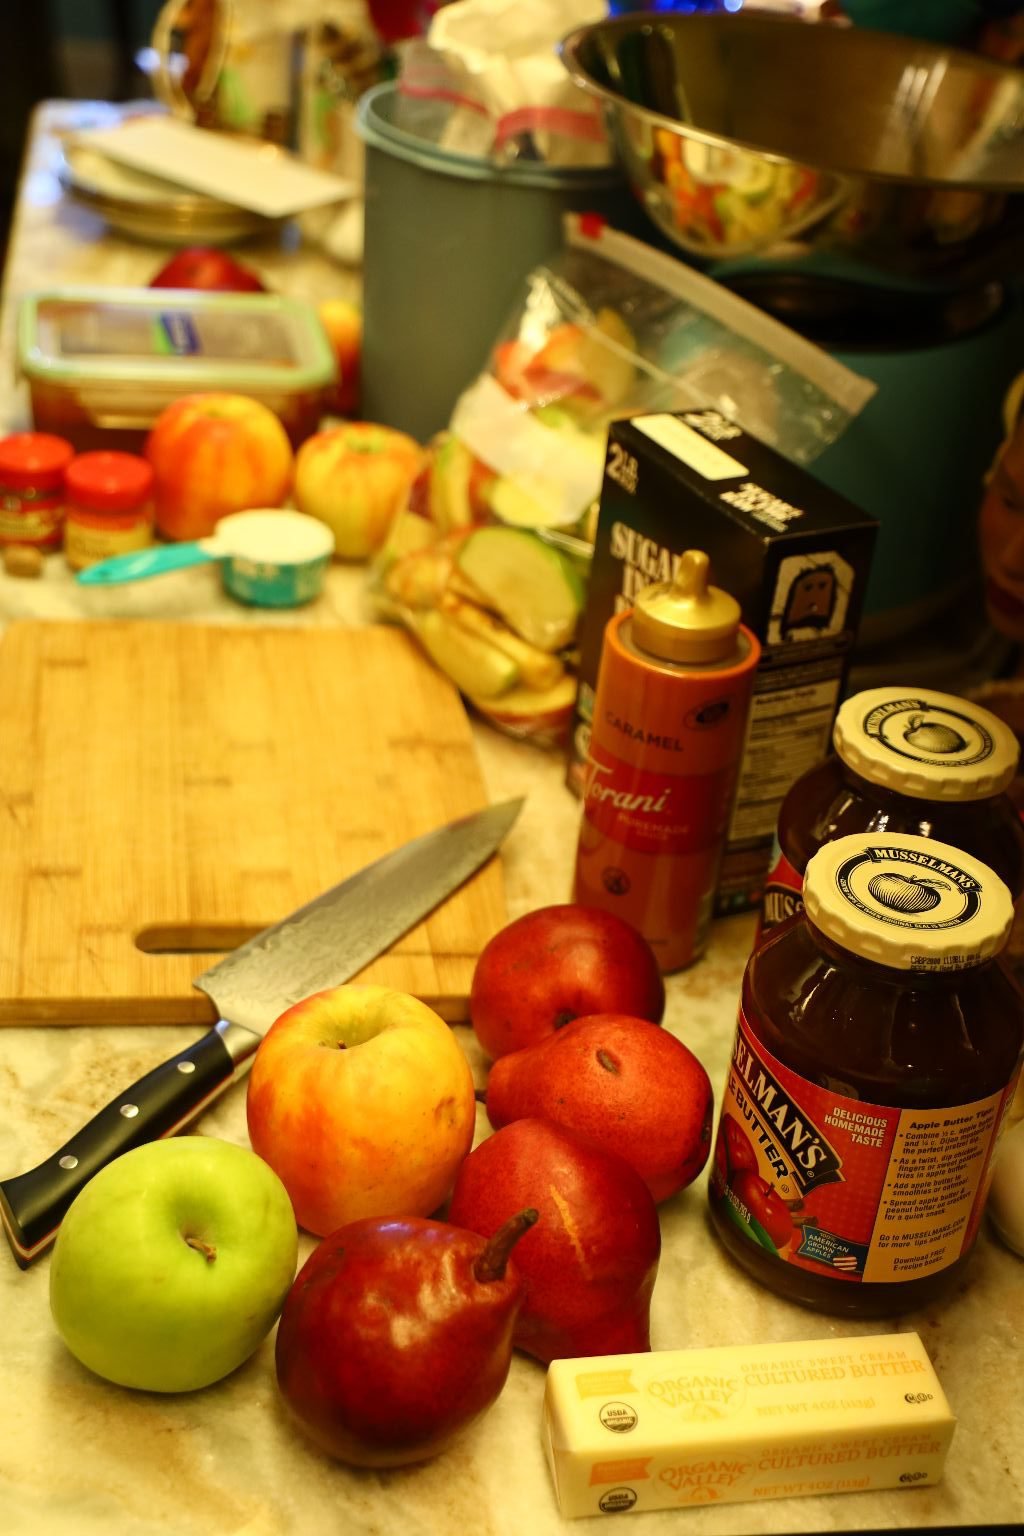
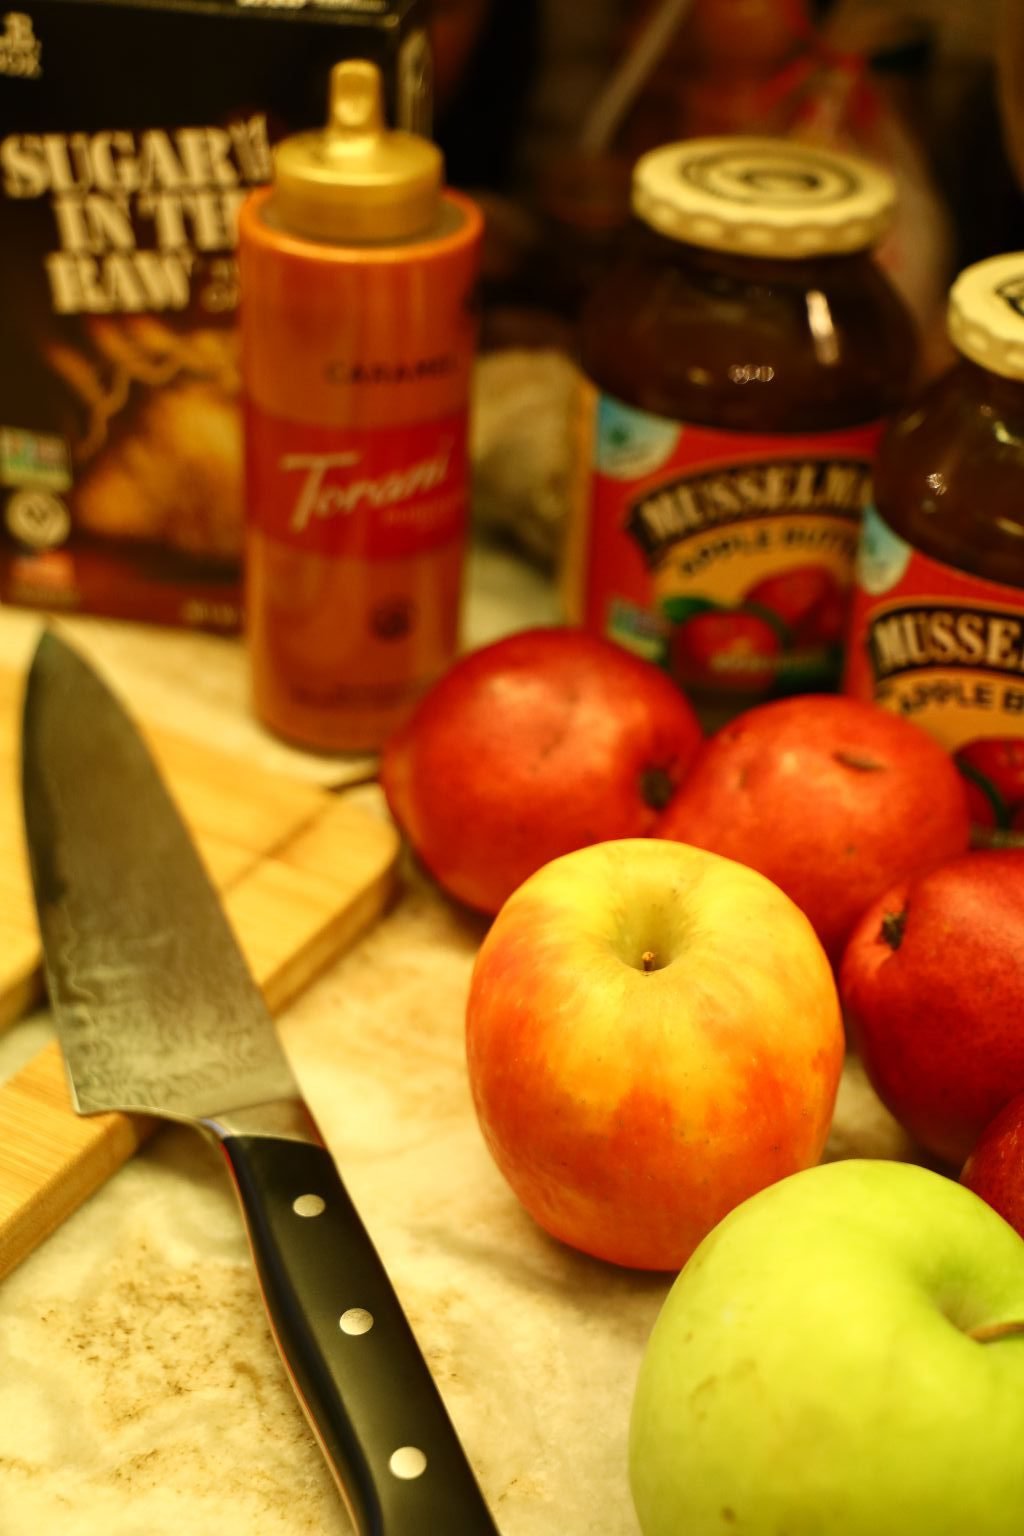
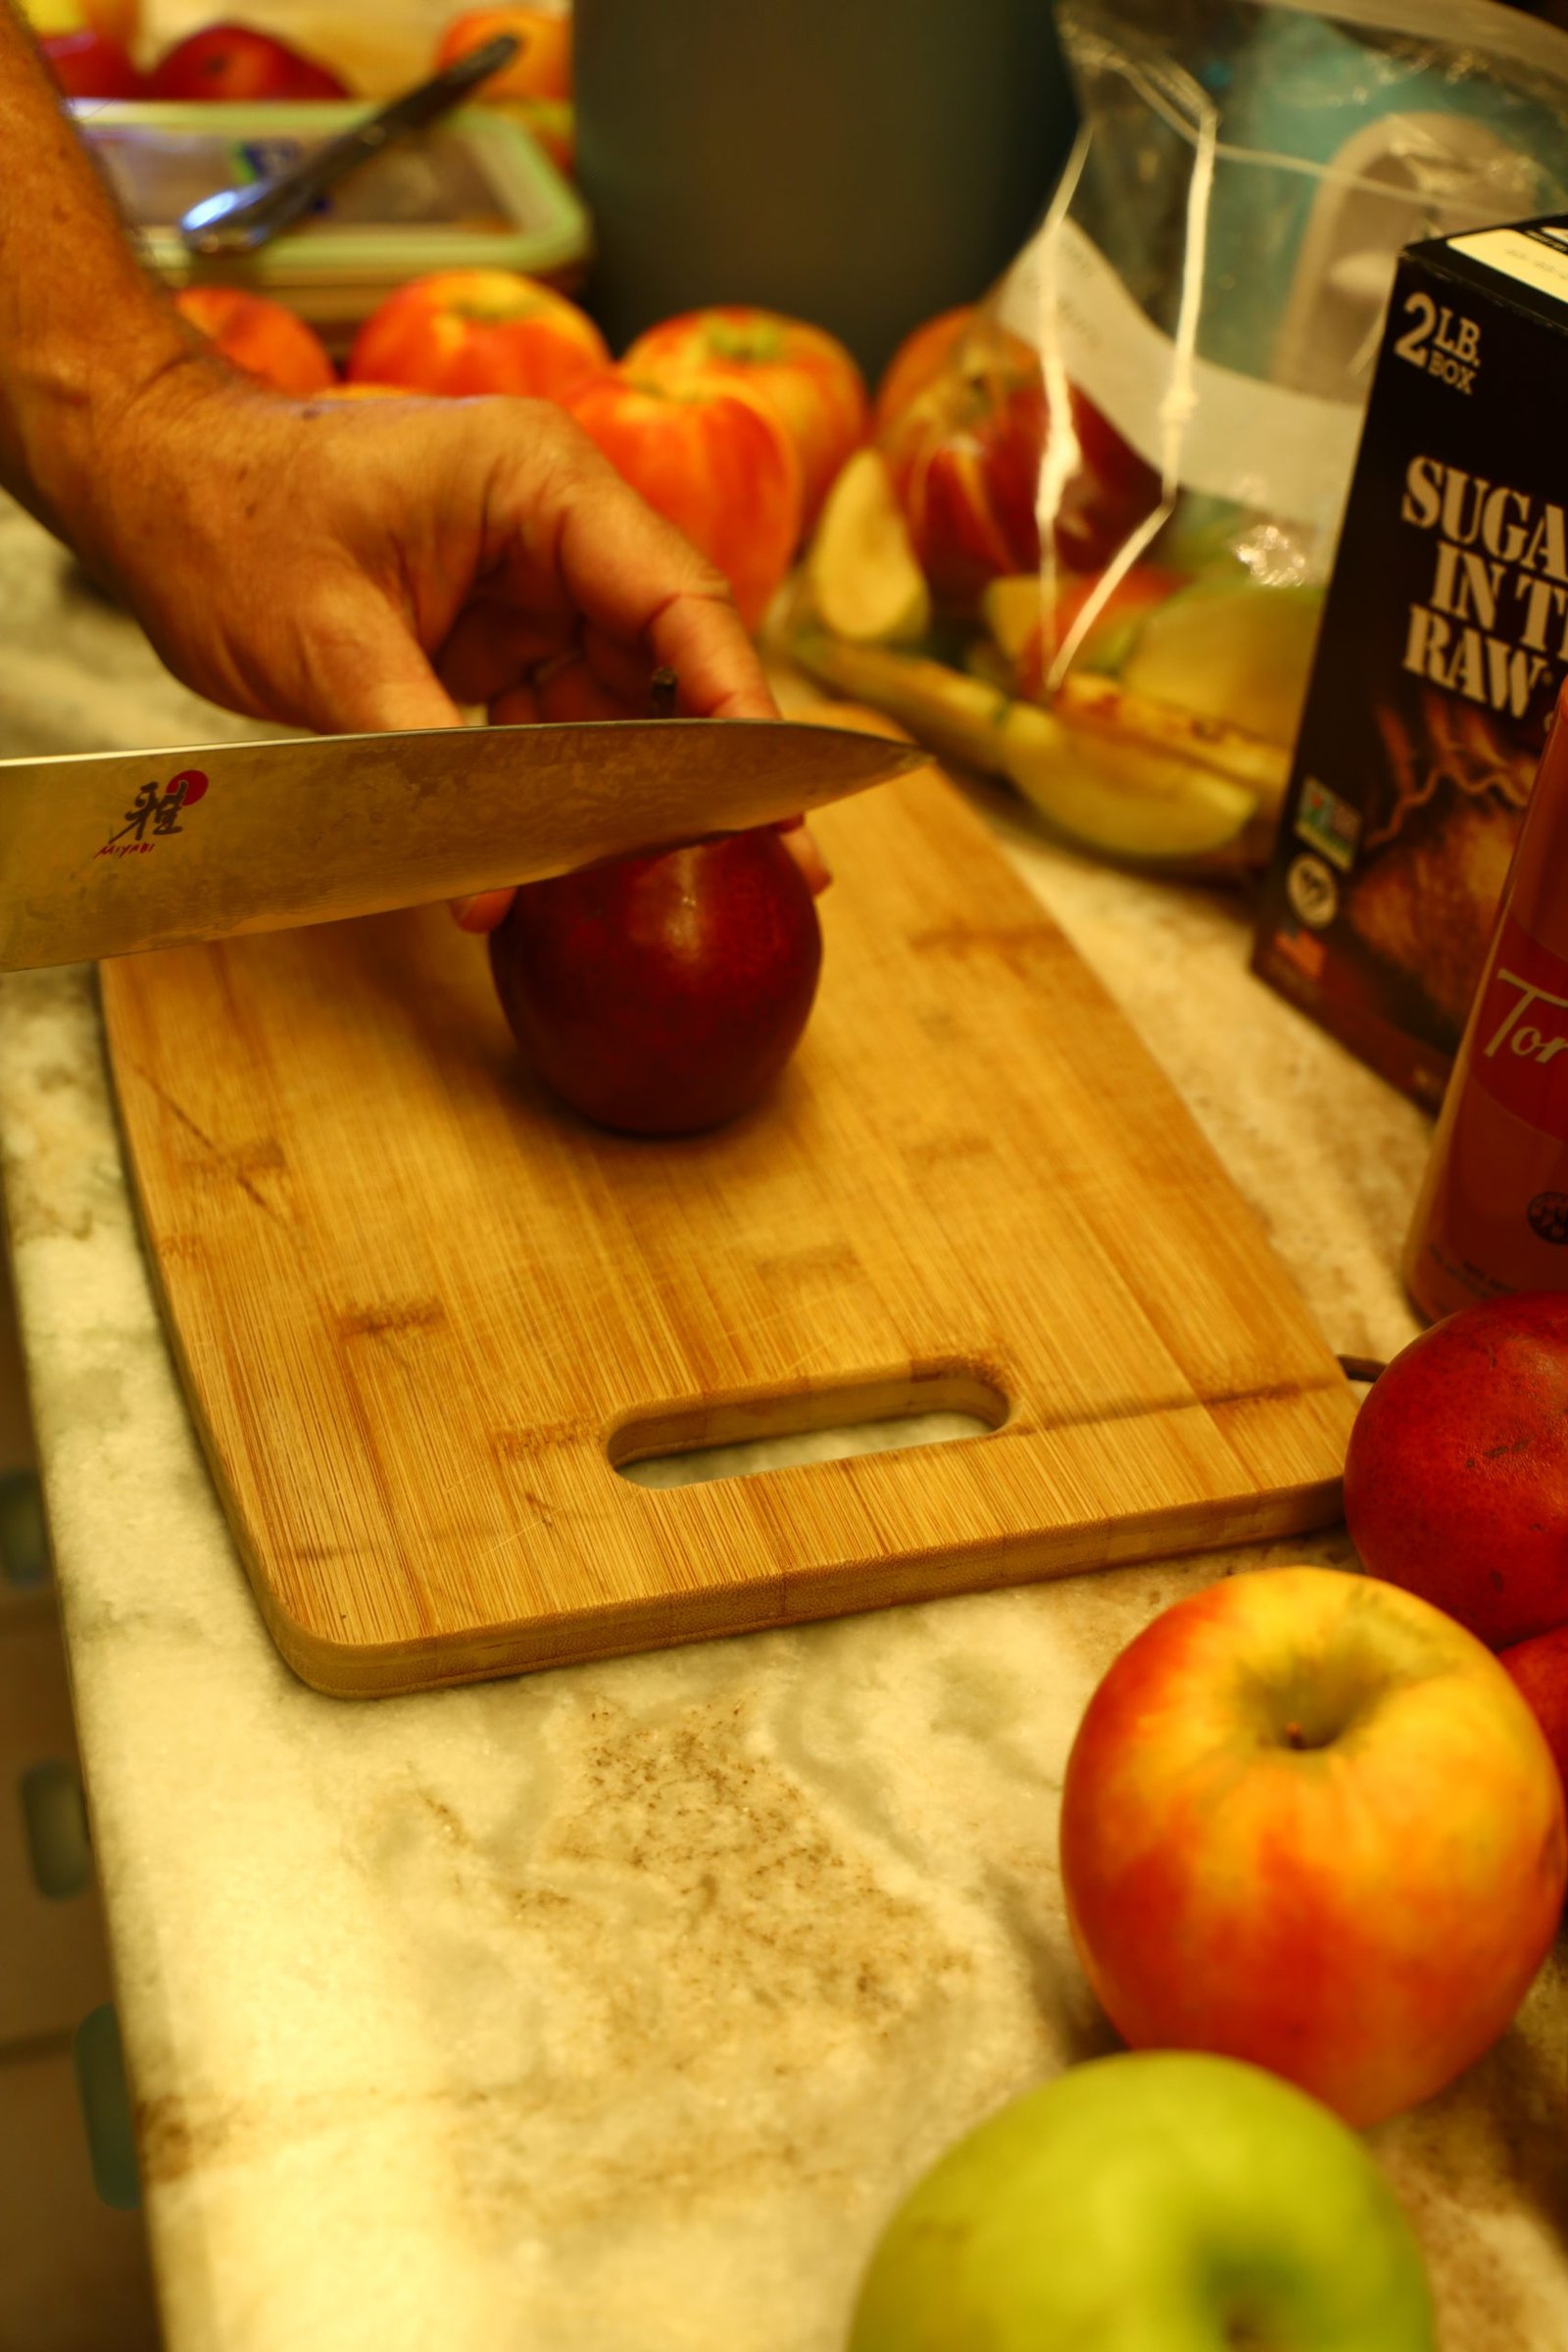
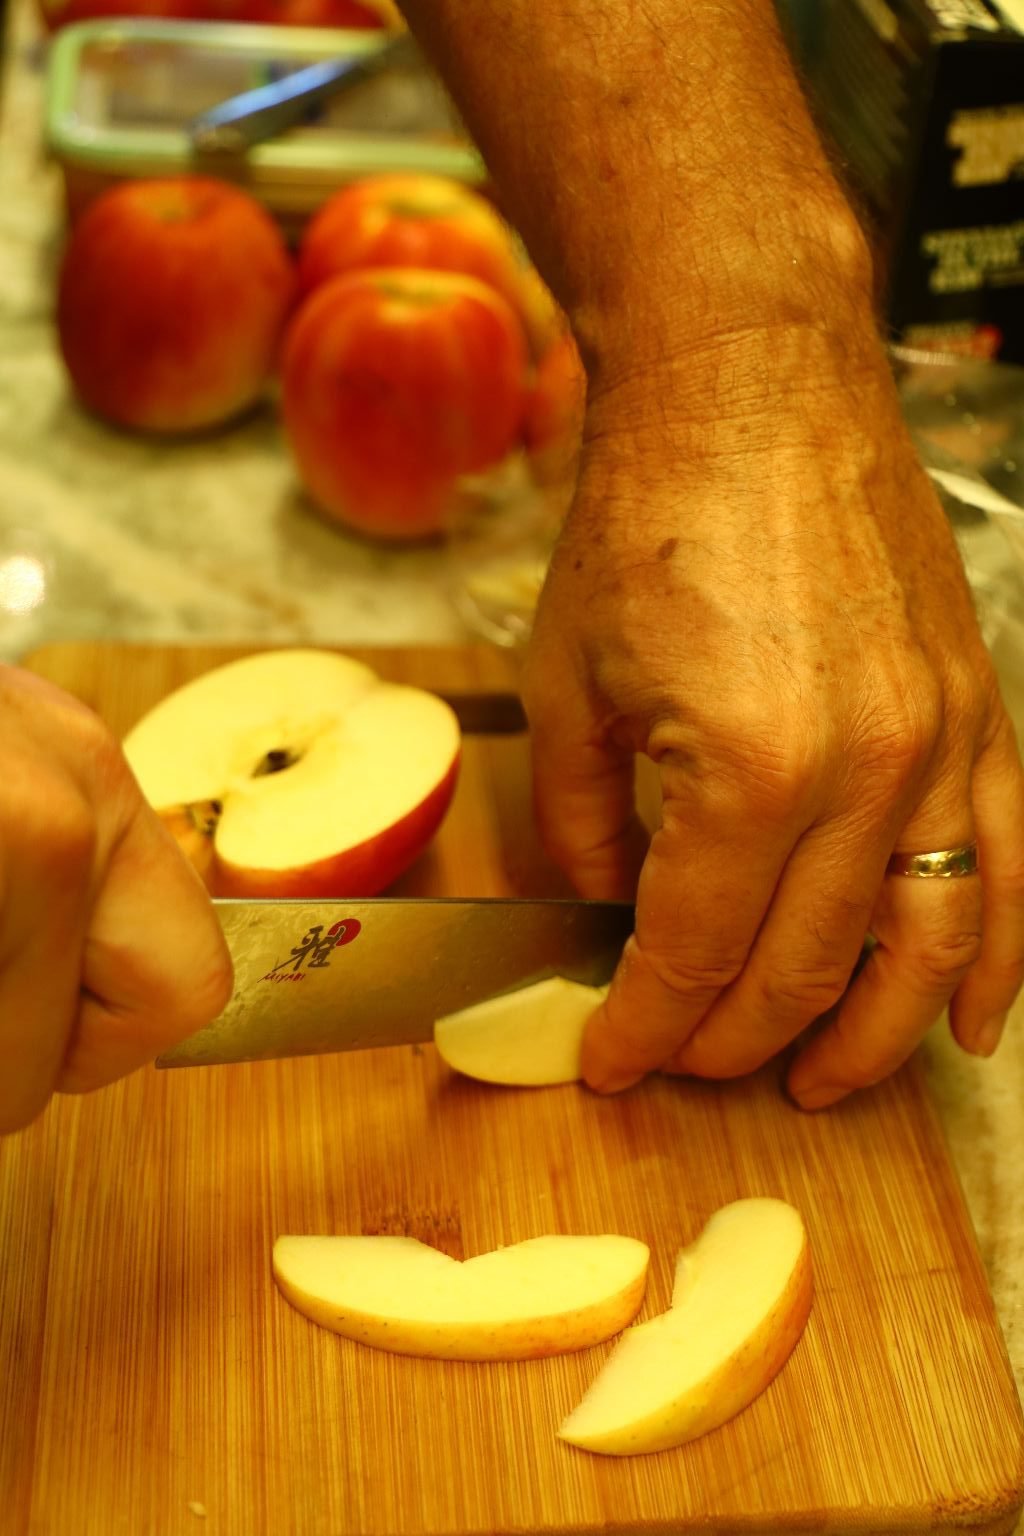
Sliced Apples with Delicious Fondue Caramel
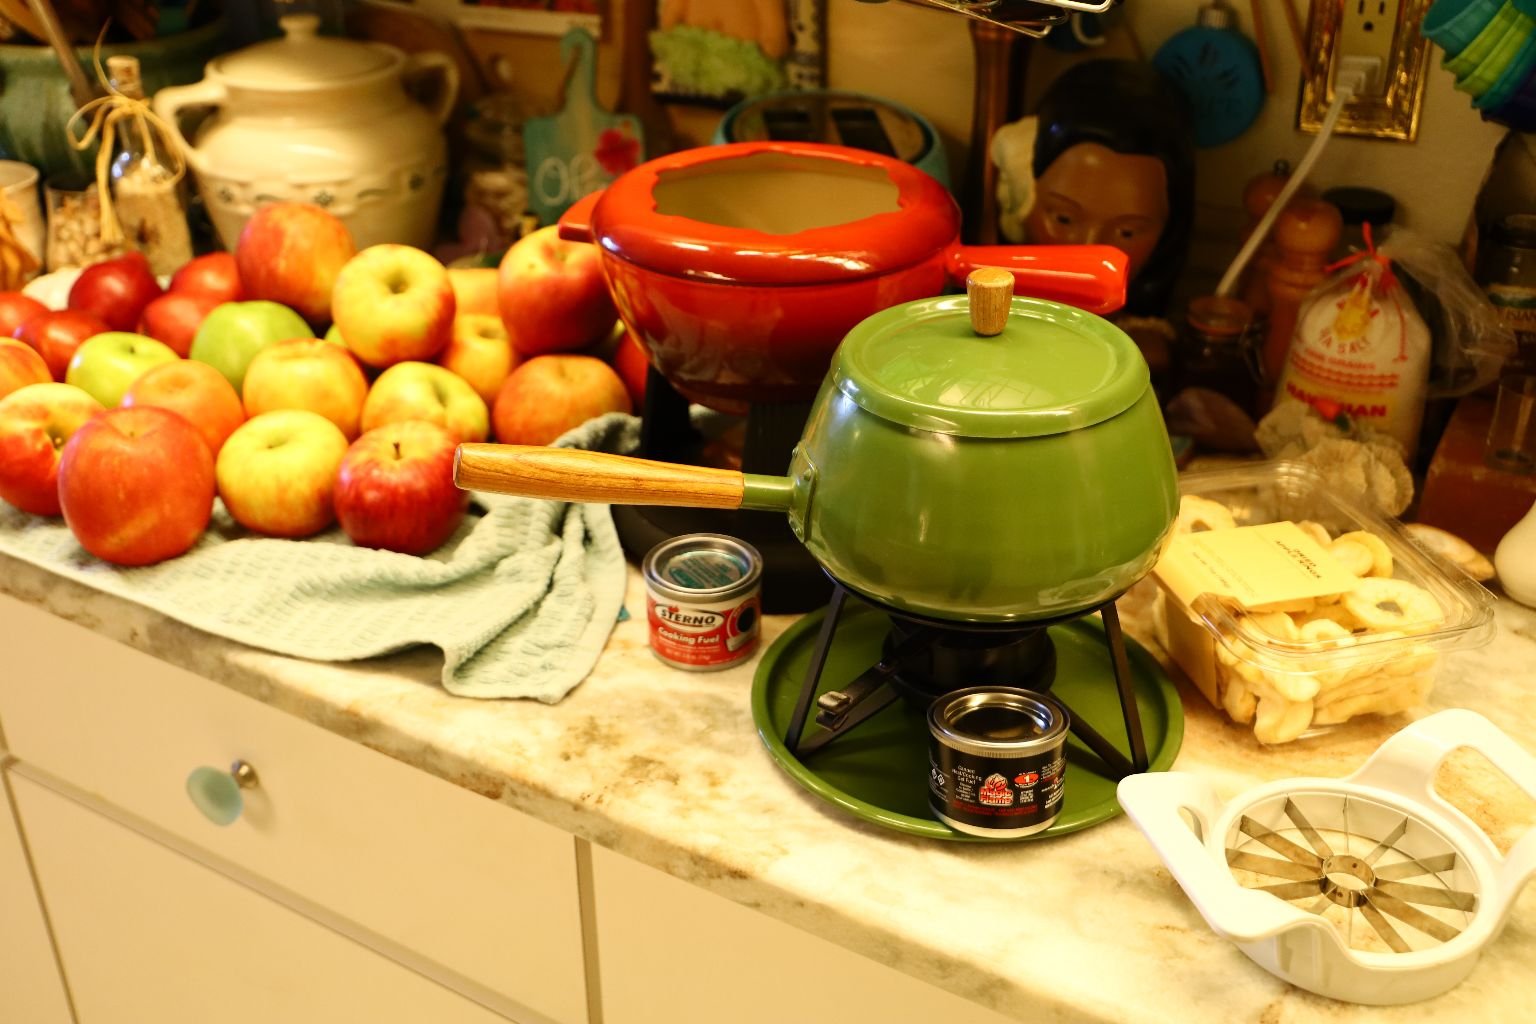
Trying to Decide Which Fondue Pot to Use
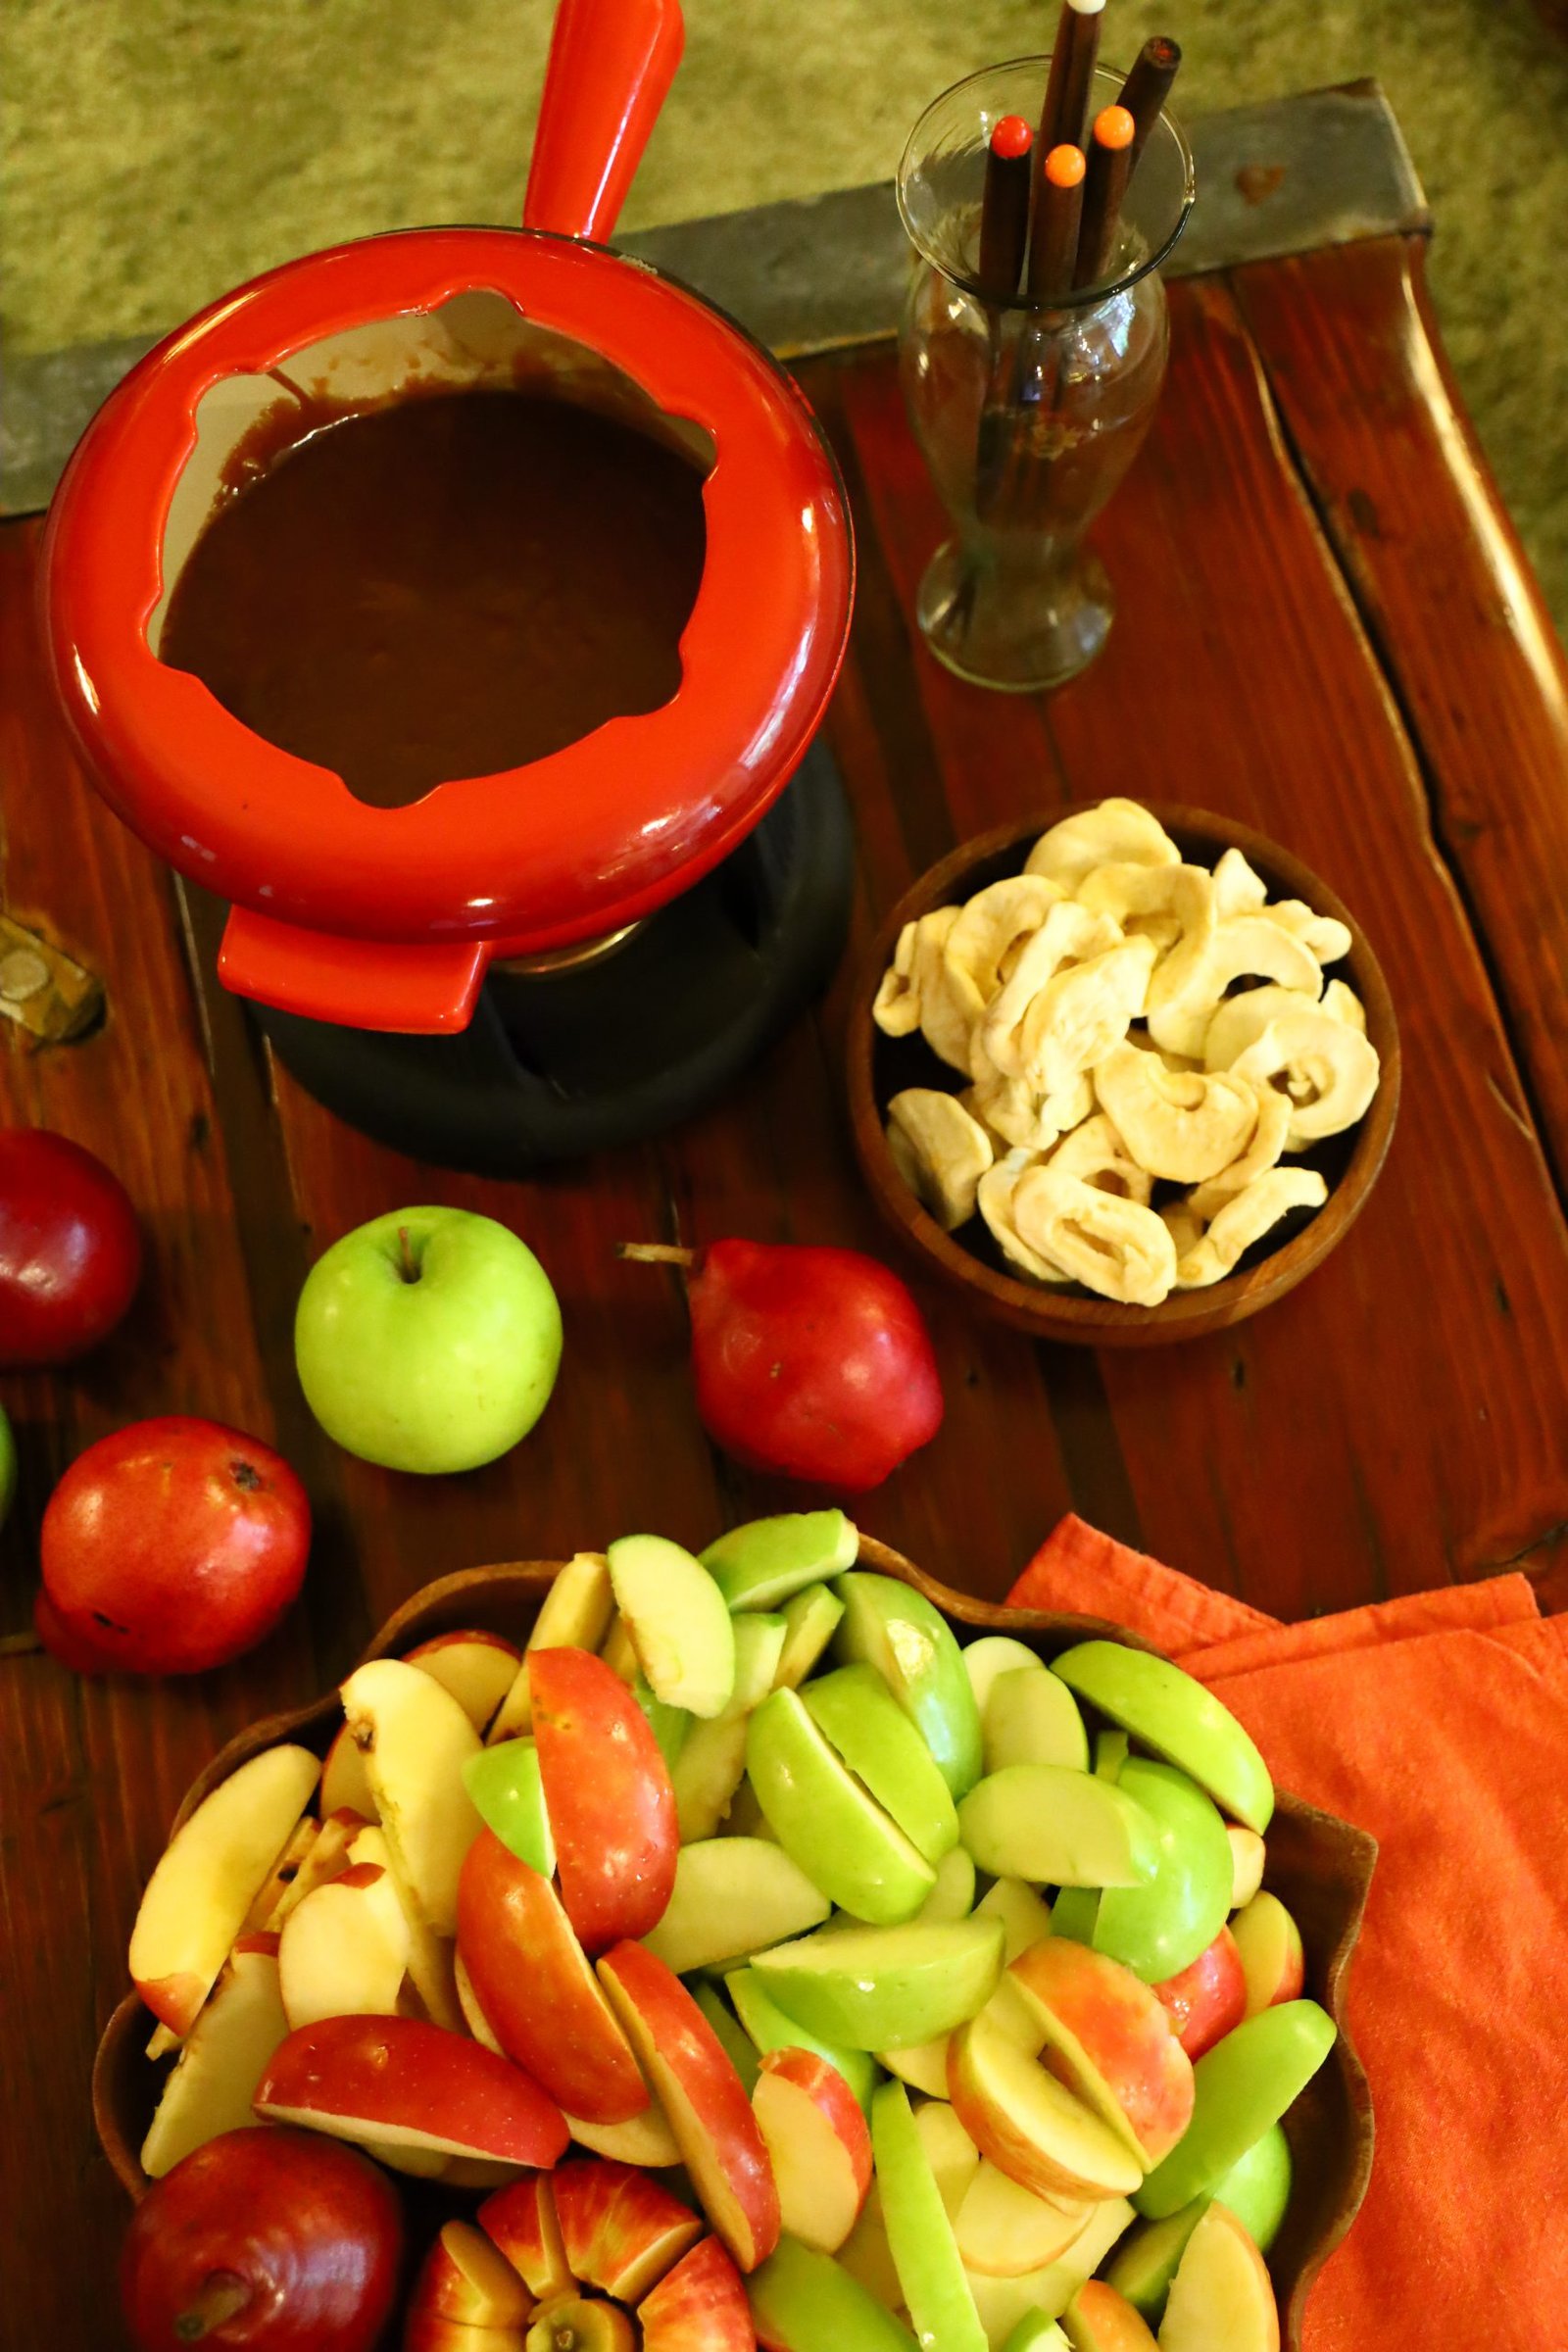
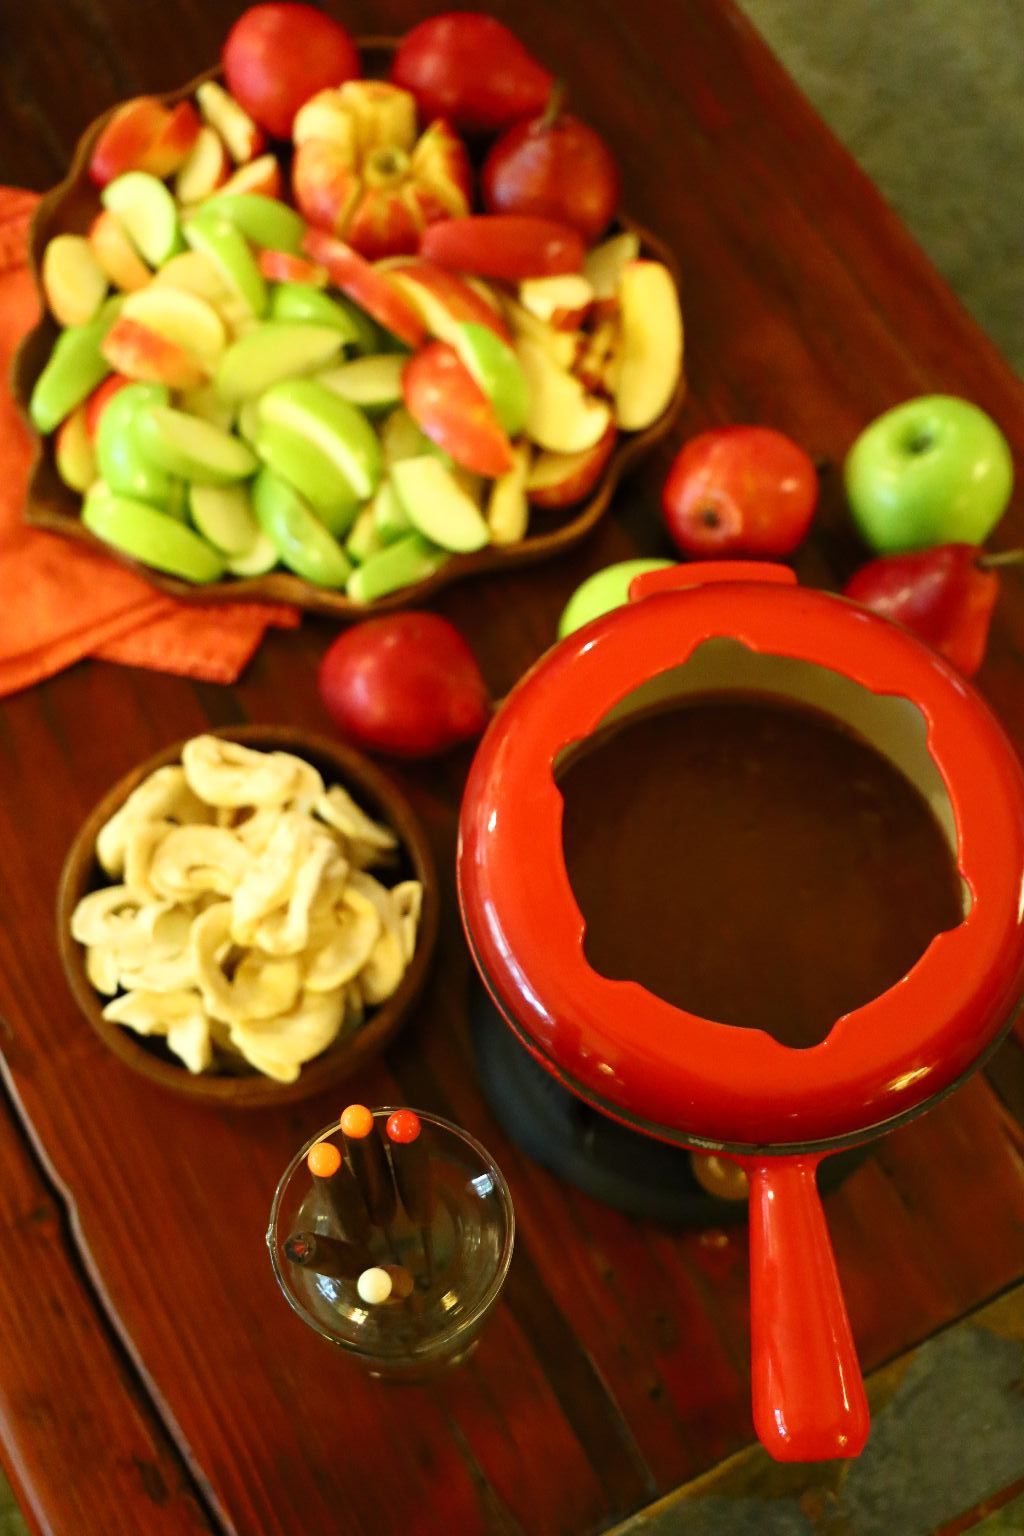
Granny Smith, Fuji Apple, Red Delicious, Gala Apples, Golden Delicious, Pink Lady Apple and Honeycrisp Apple
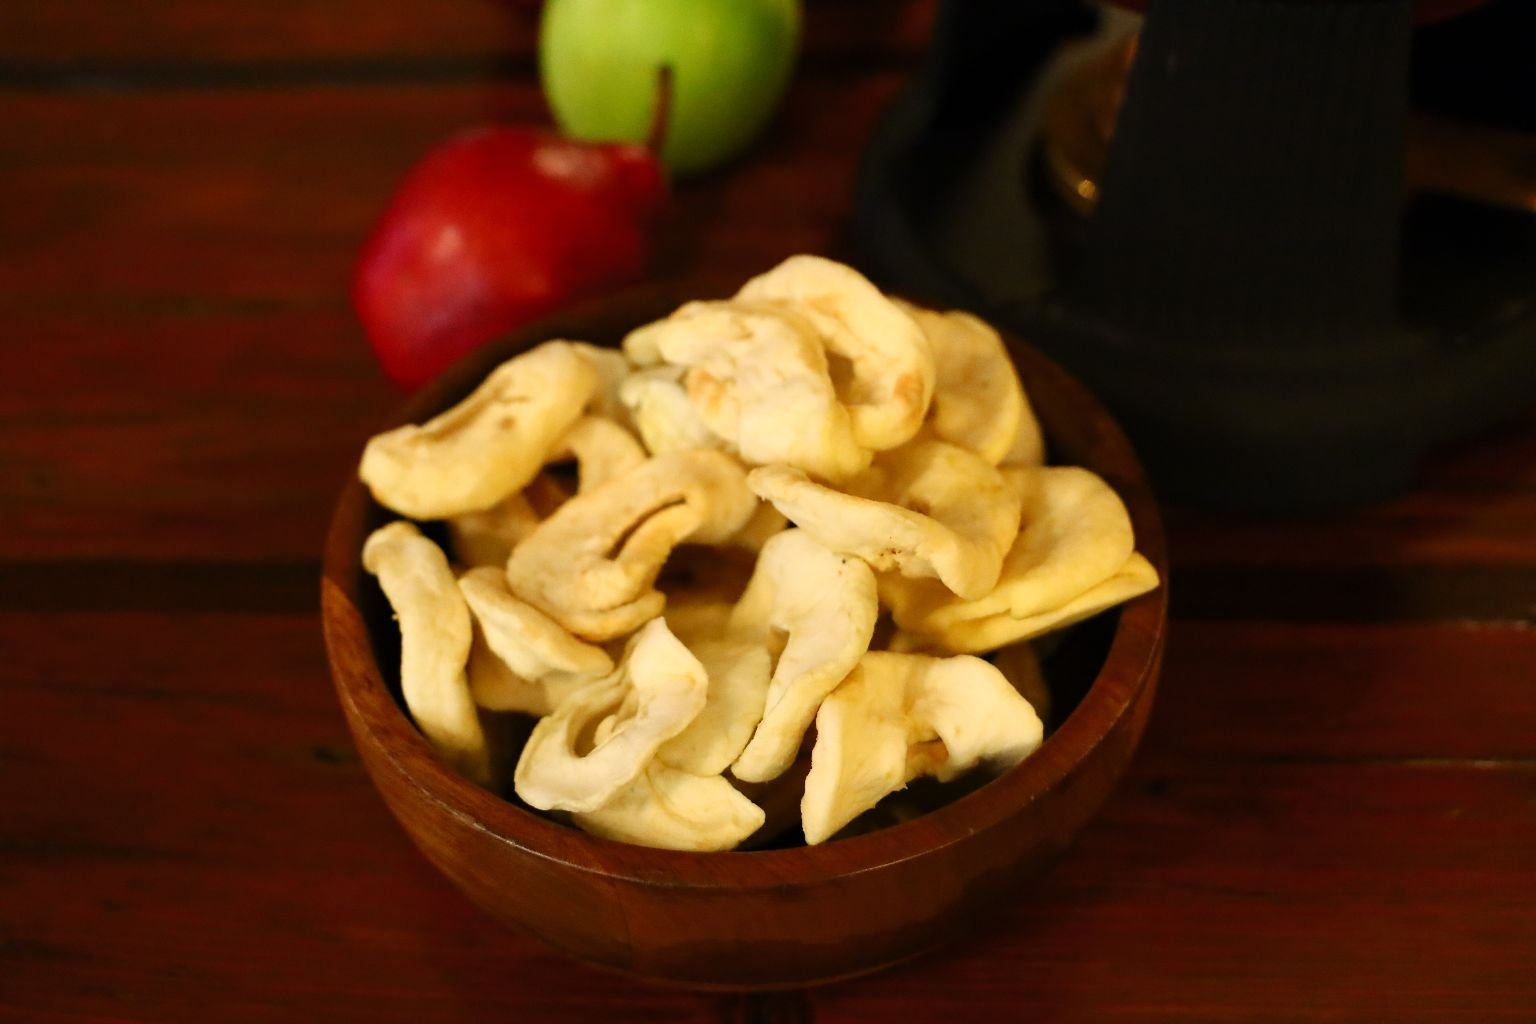
Dried Apples are Excellent Too!

Dipping Apples into Caramel
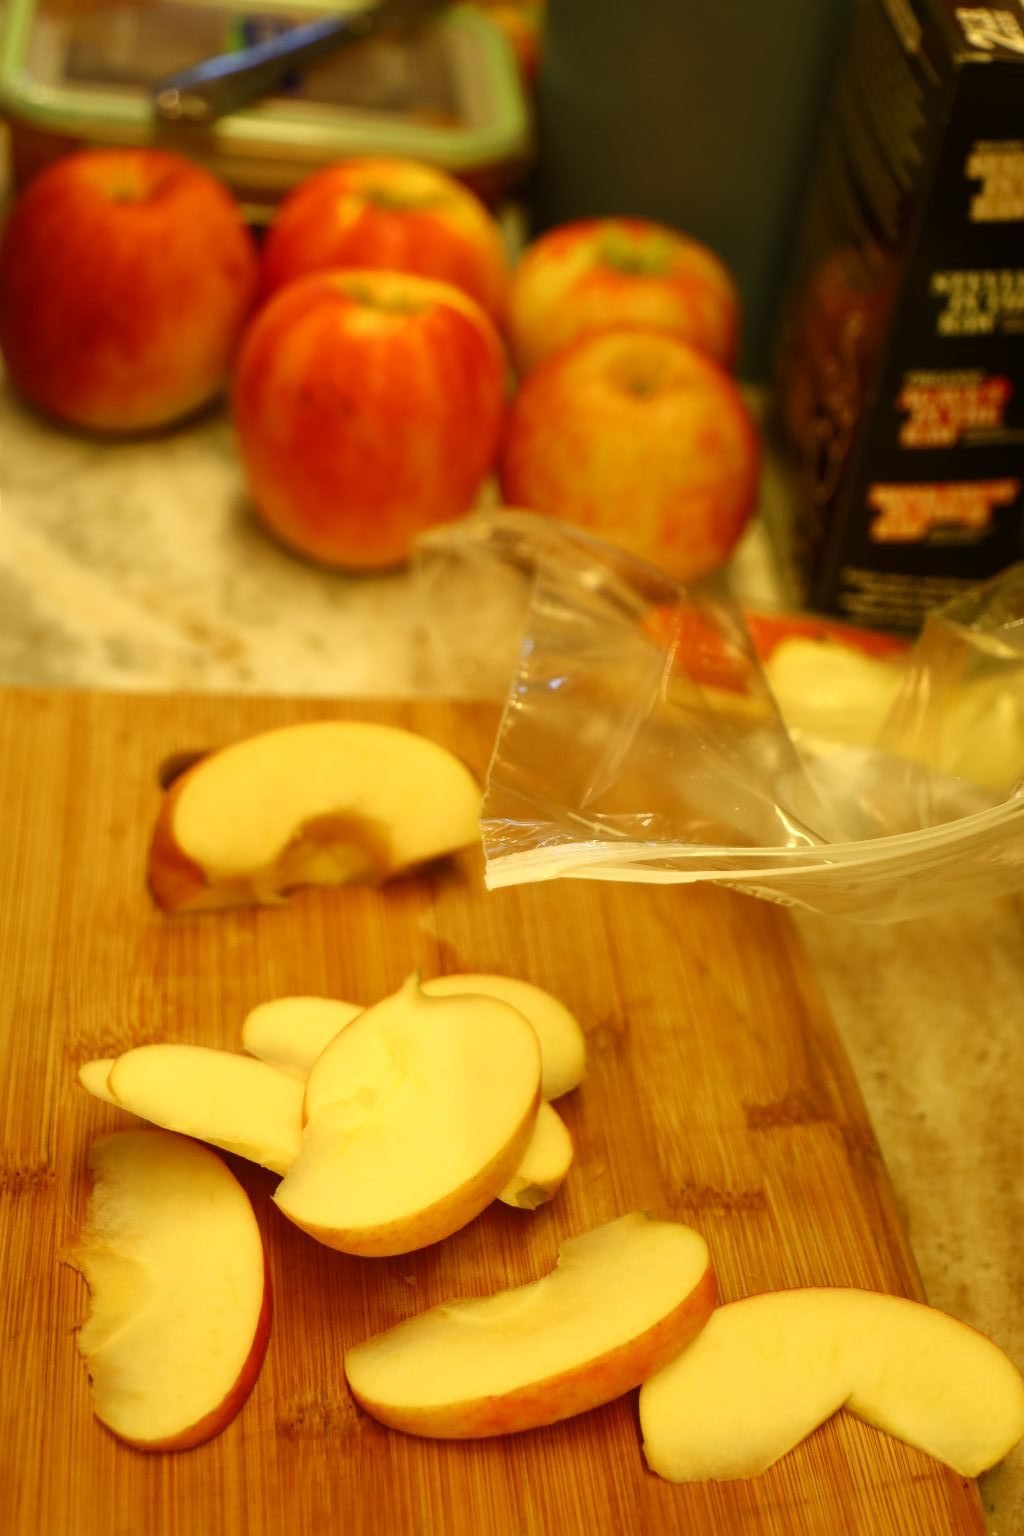
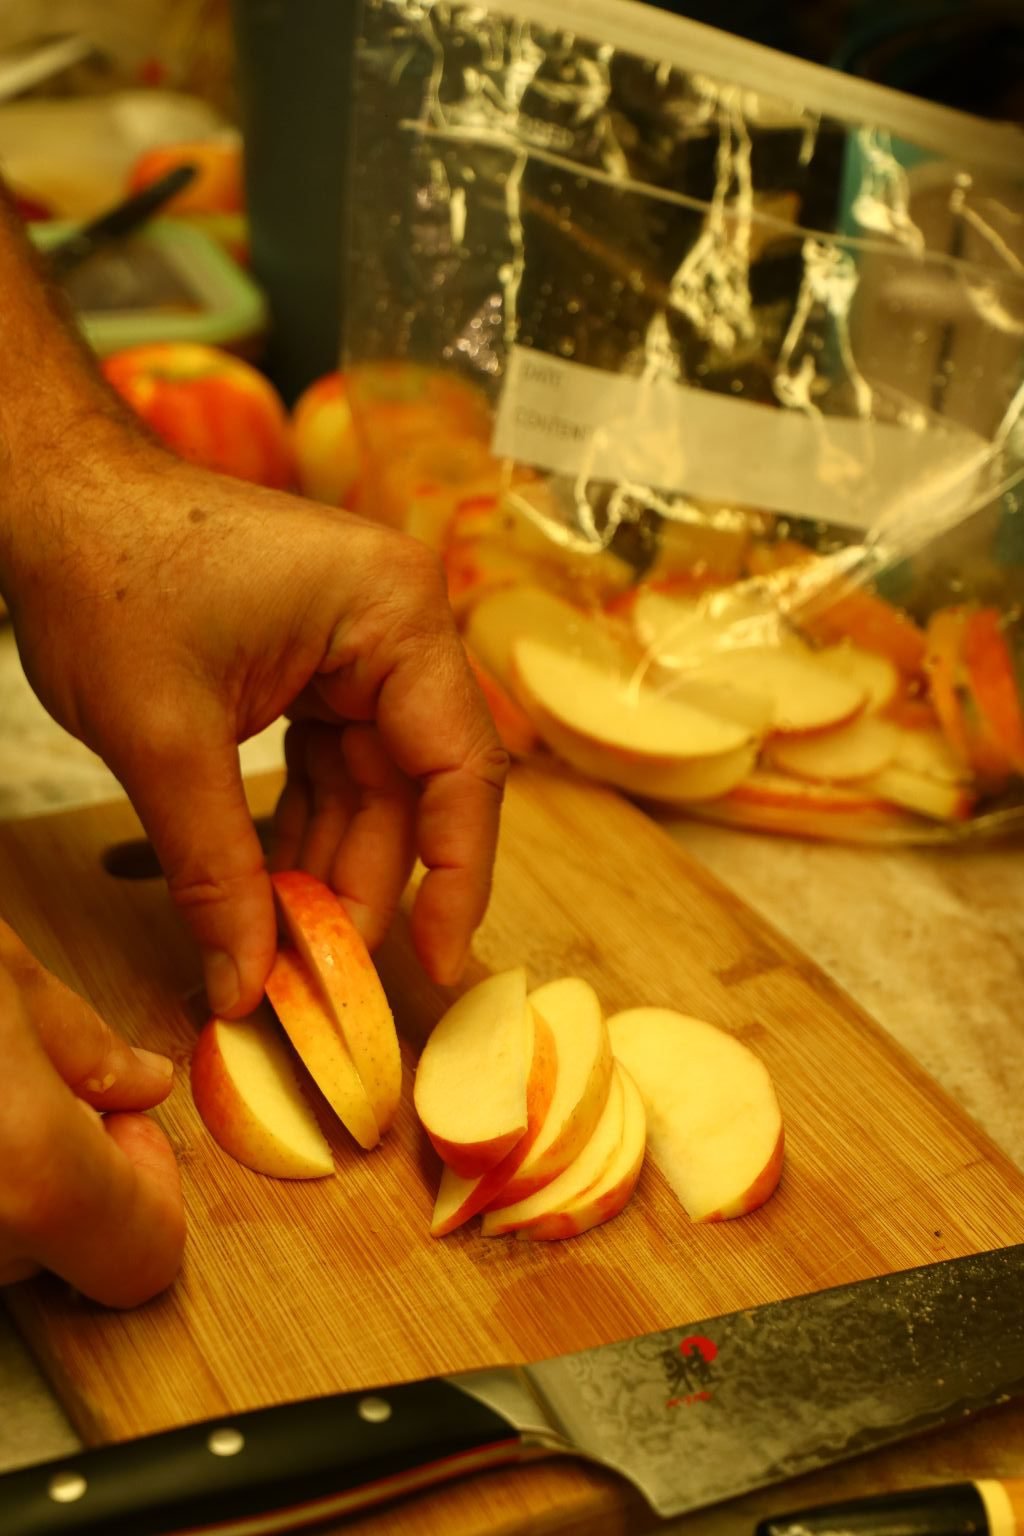
Make sure that when you slice your apples that you place them into a bowl or a baggie that has lemon or lime juice in it. Apples will turn brown quickly so they need the acidity to stay fresh.
When ready, place the apples onto a plate for dipping into a Caramel Fondue.
(Caramel Recipe Down Below)
—————————————————————-
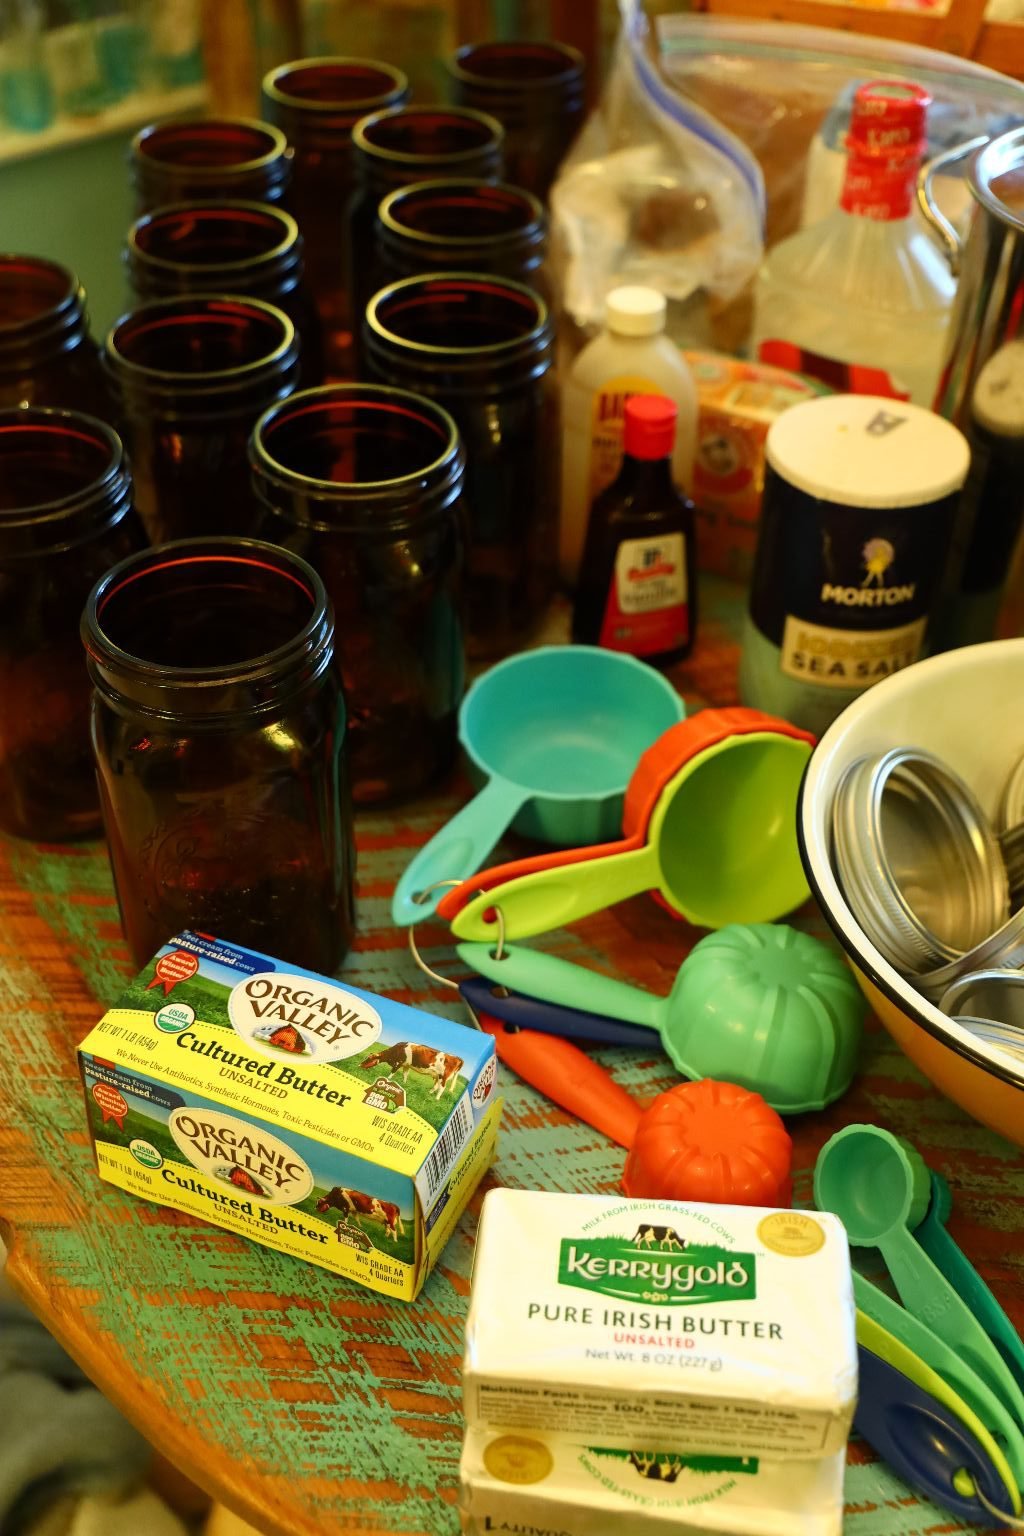
Making Old Fashioned Caramel
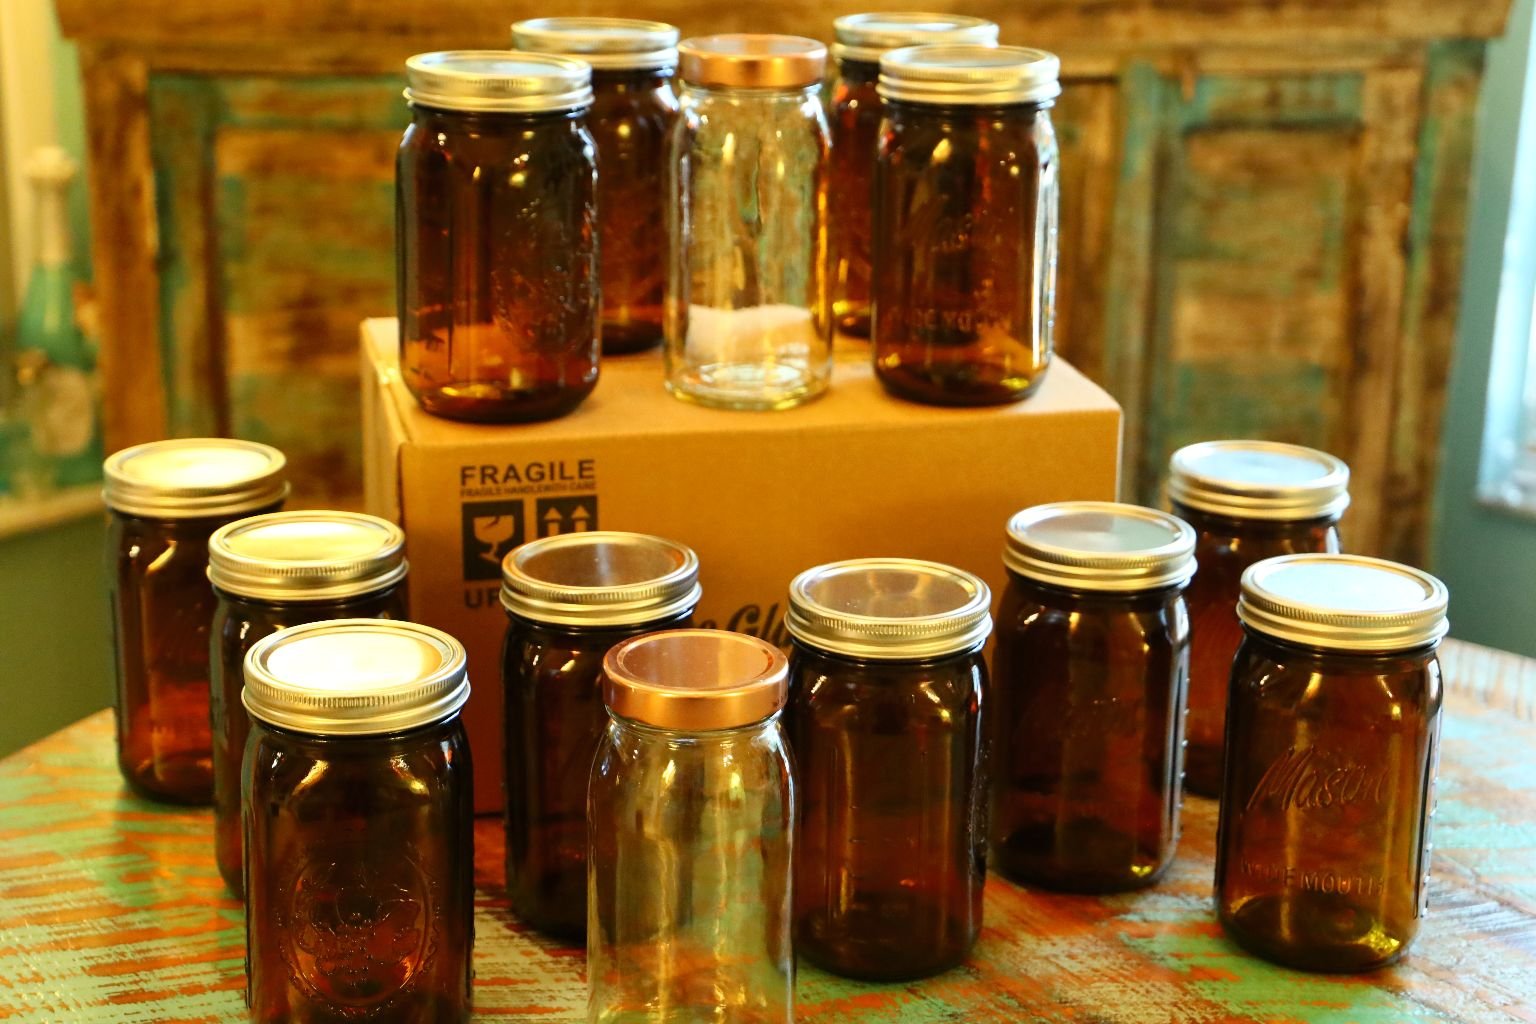
Beautiful Brown Jars
Hot Moulton Lava Caramel
Pouring our Caramel Into Jars
(Recipe Down Below)
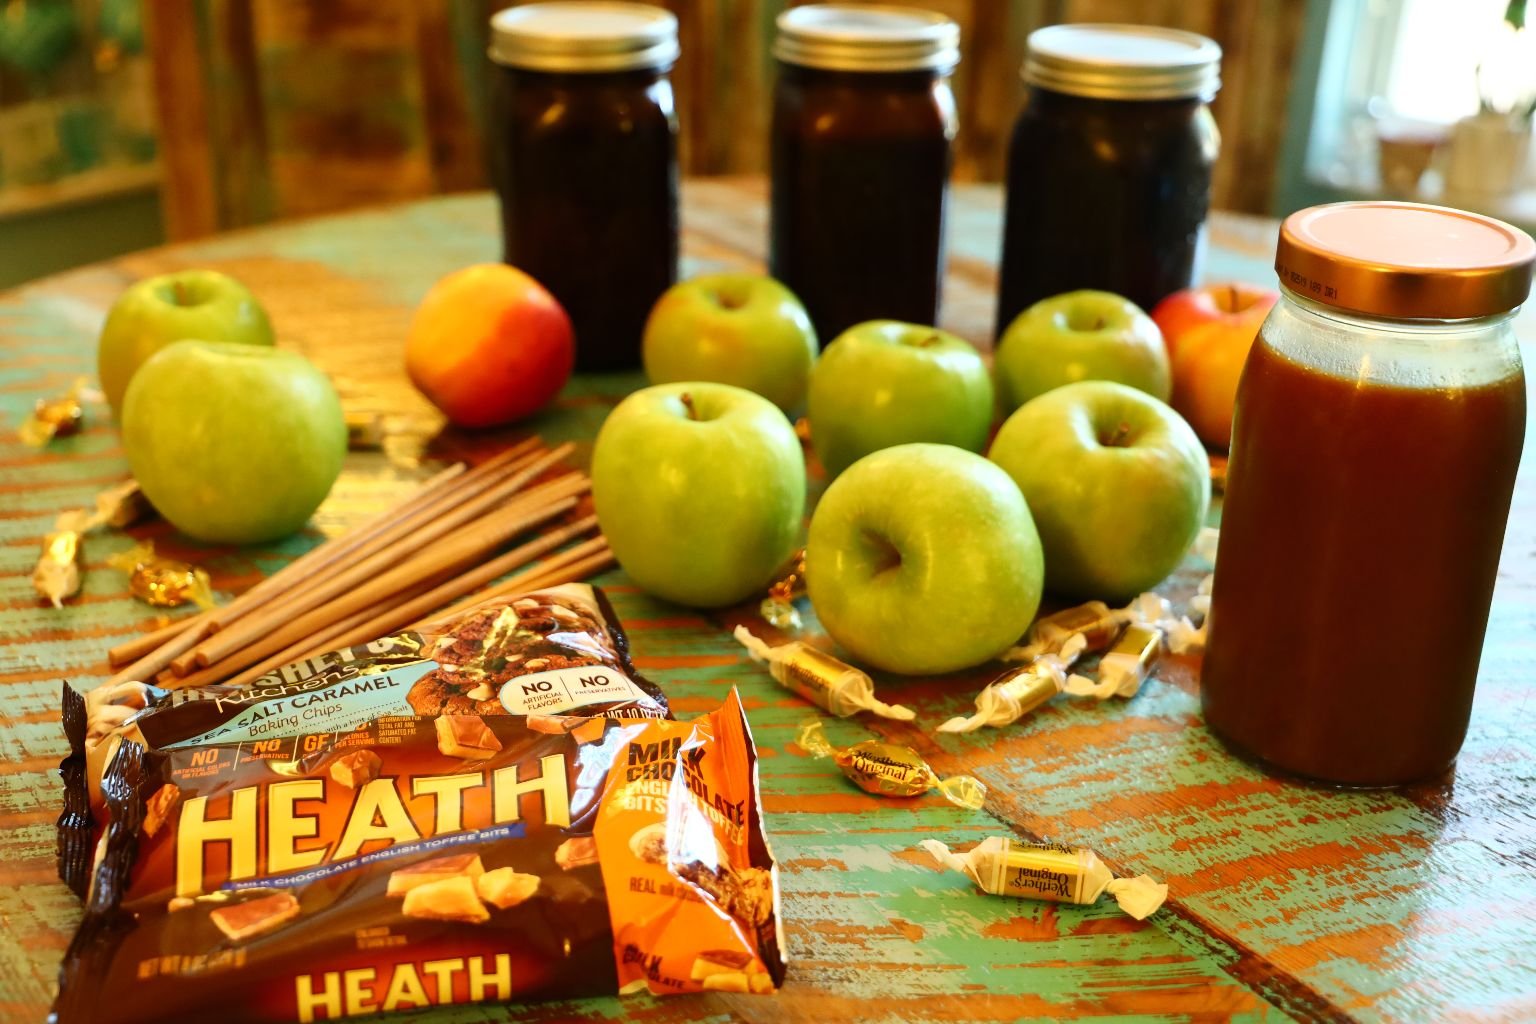
Ready to Give as Gifts or to Make Caramel Apples
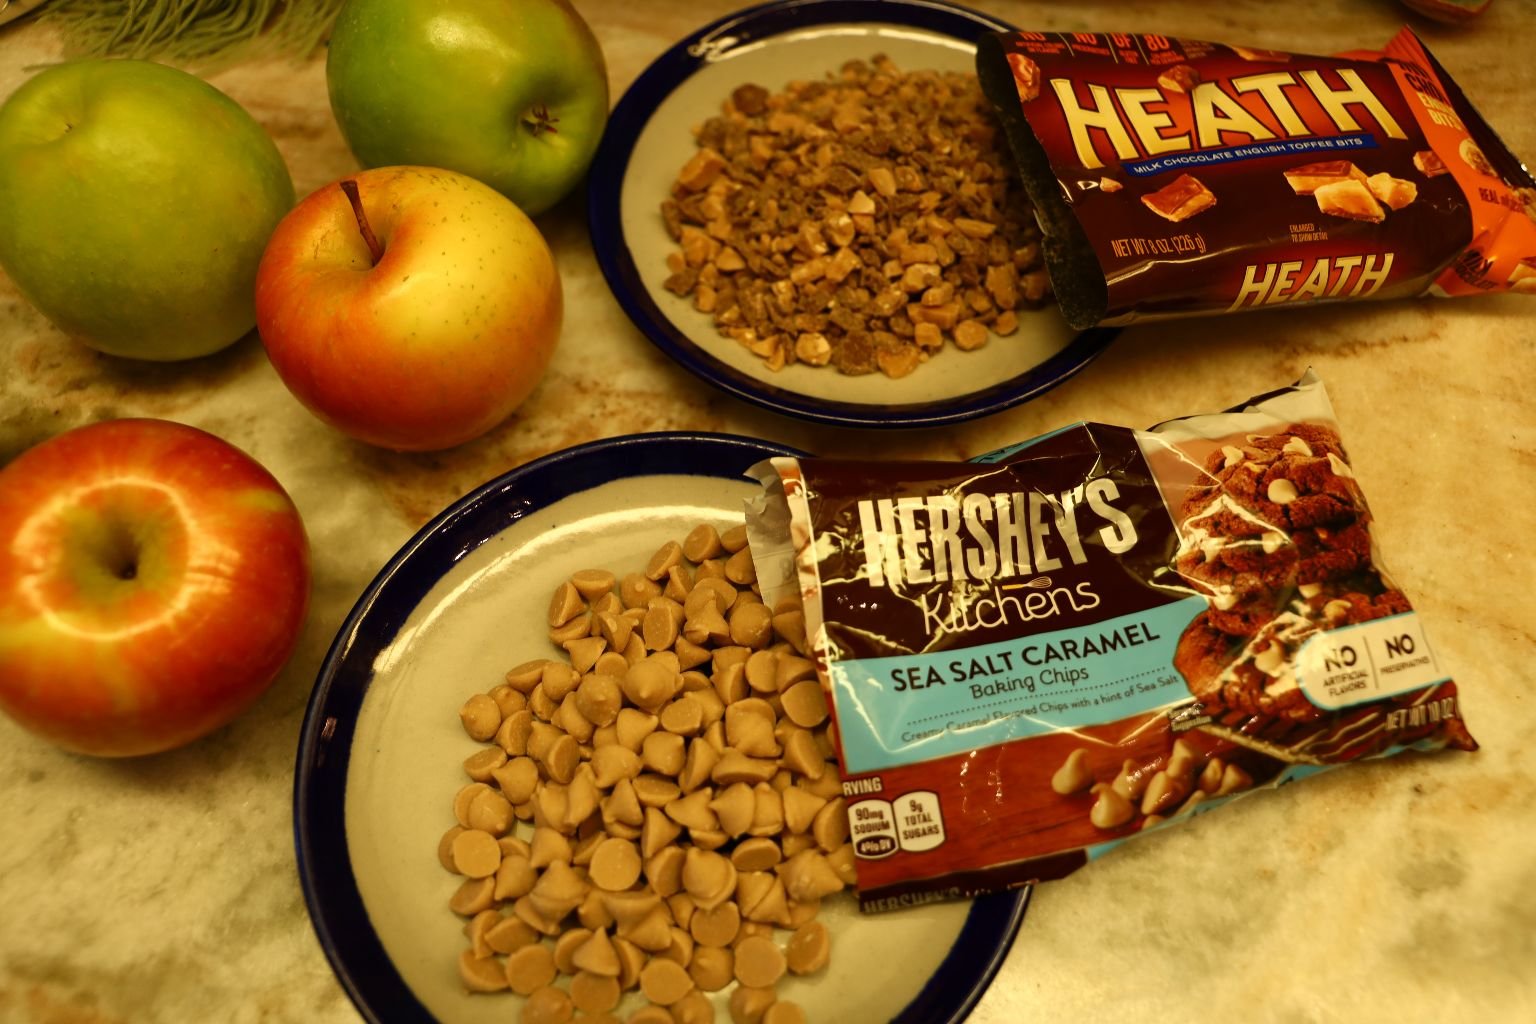
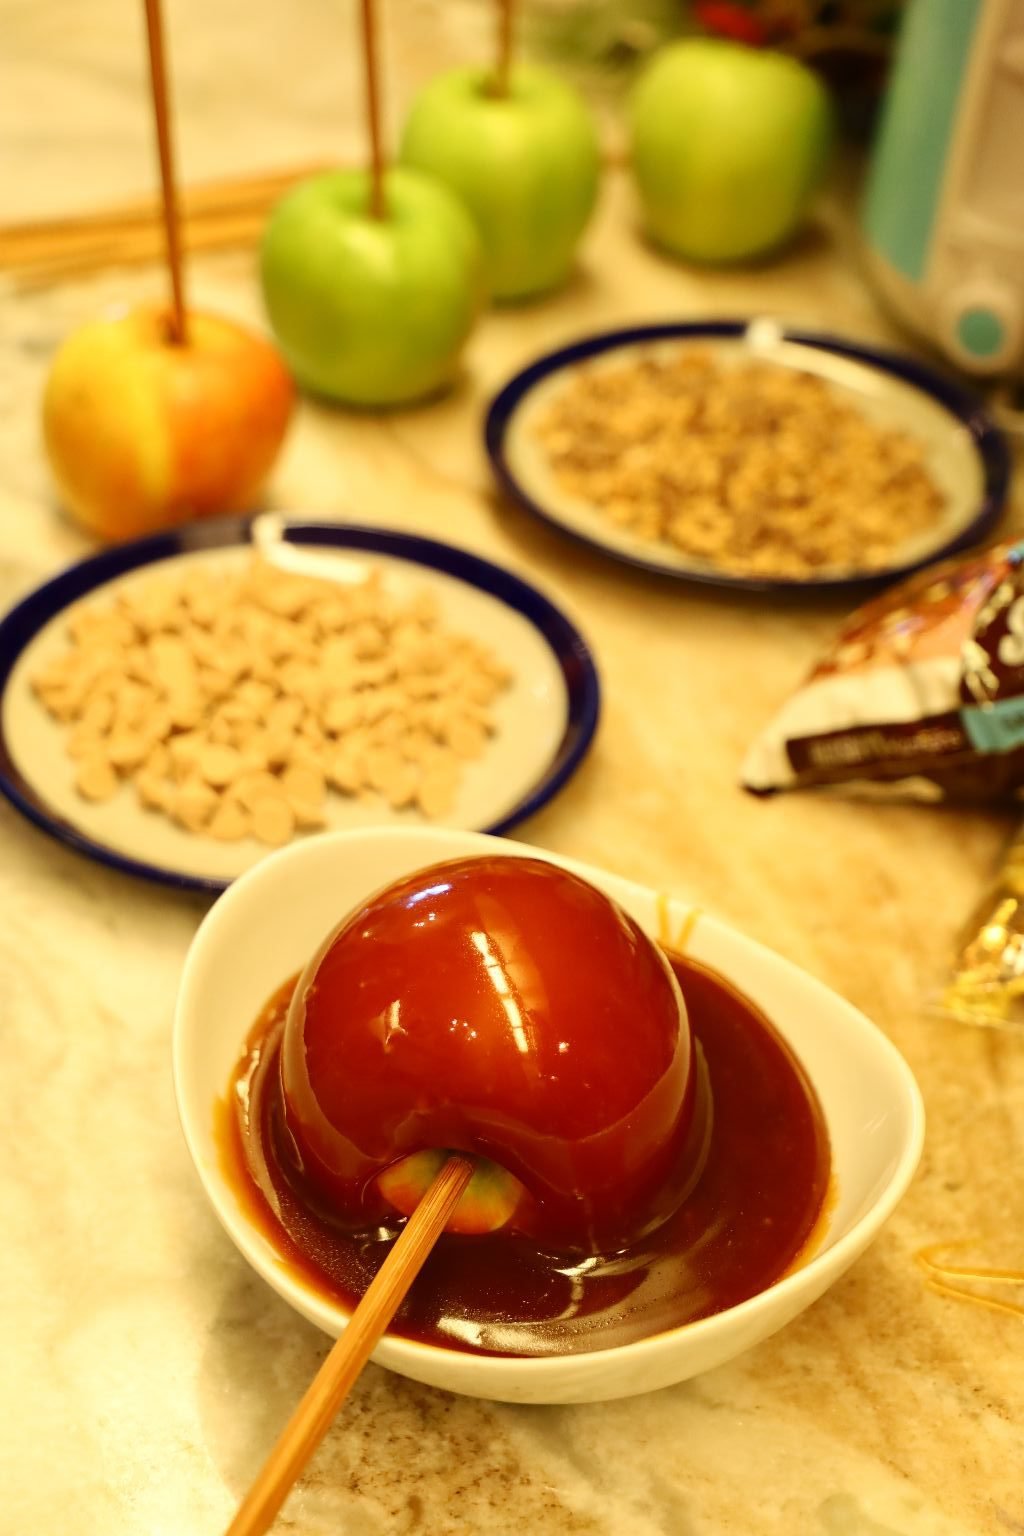
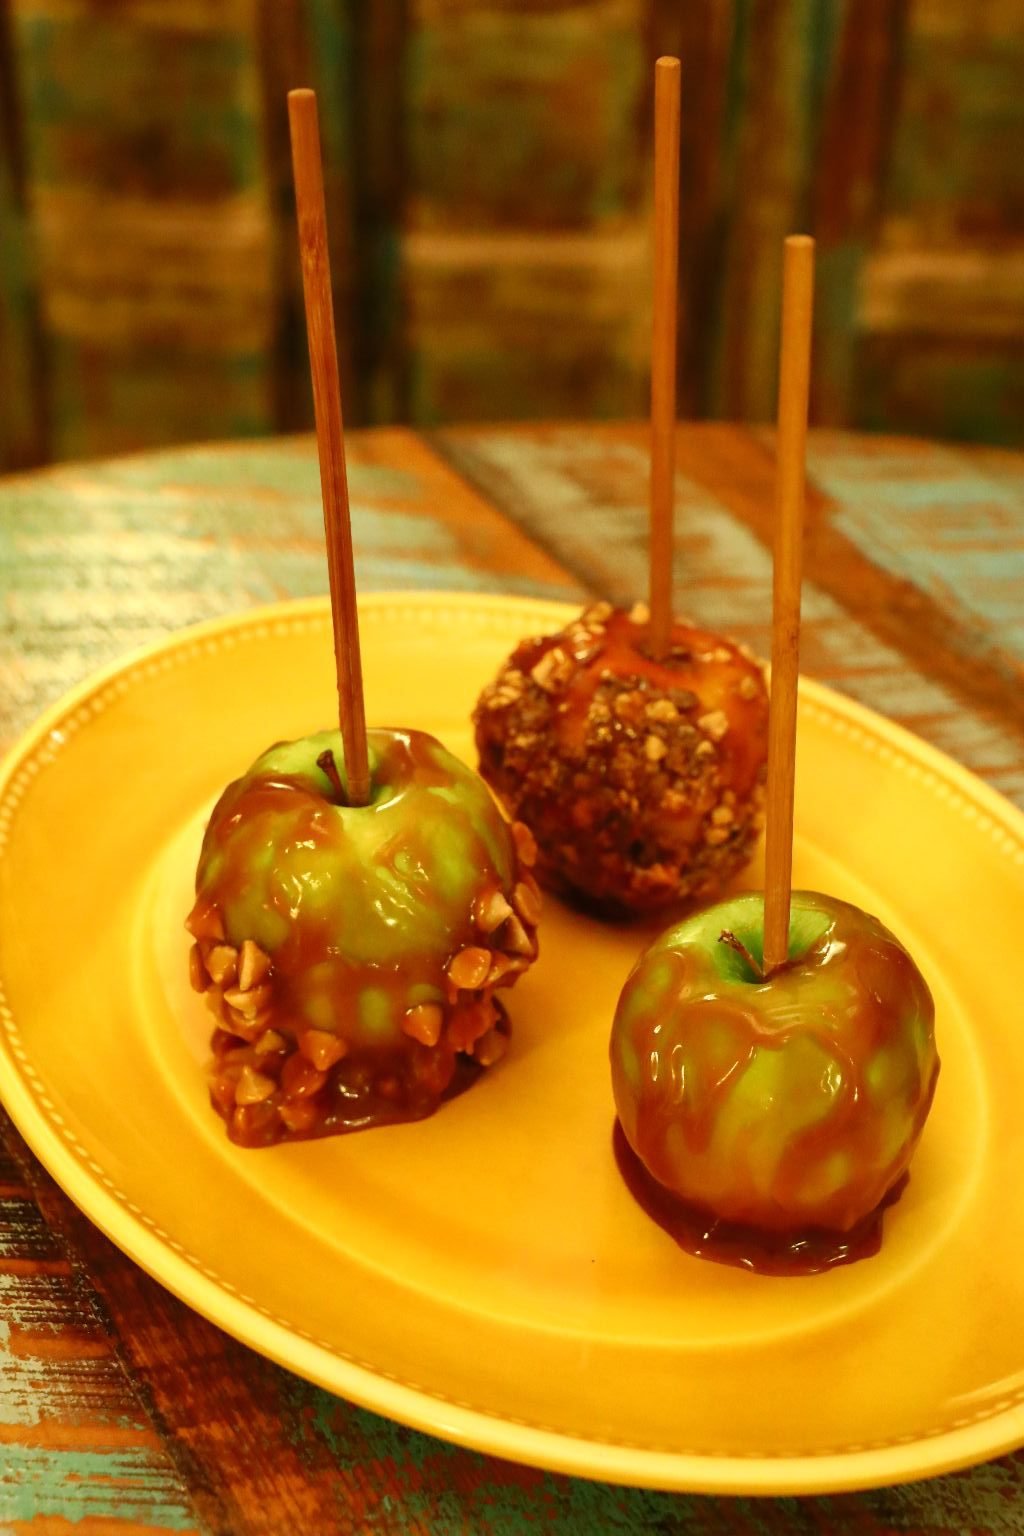
Rolling the Apples in the Caramel and Dipping Them into Sweet Treats
This Caramel is Better as a Dip,
also a great topping for ice cream
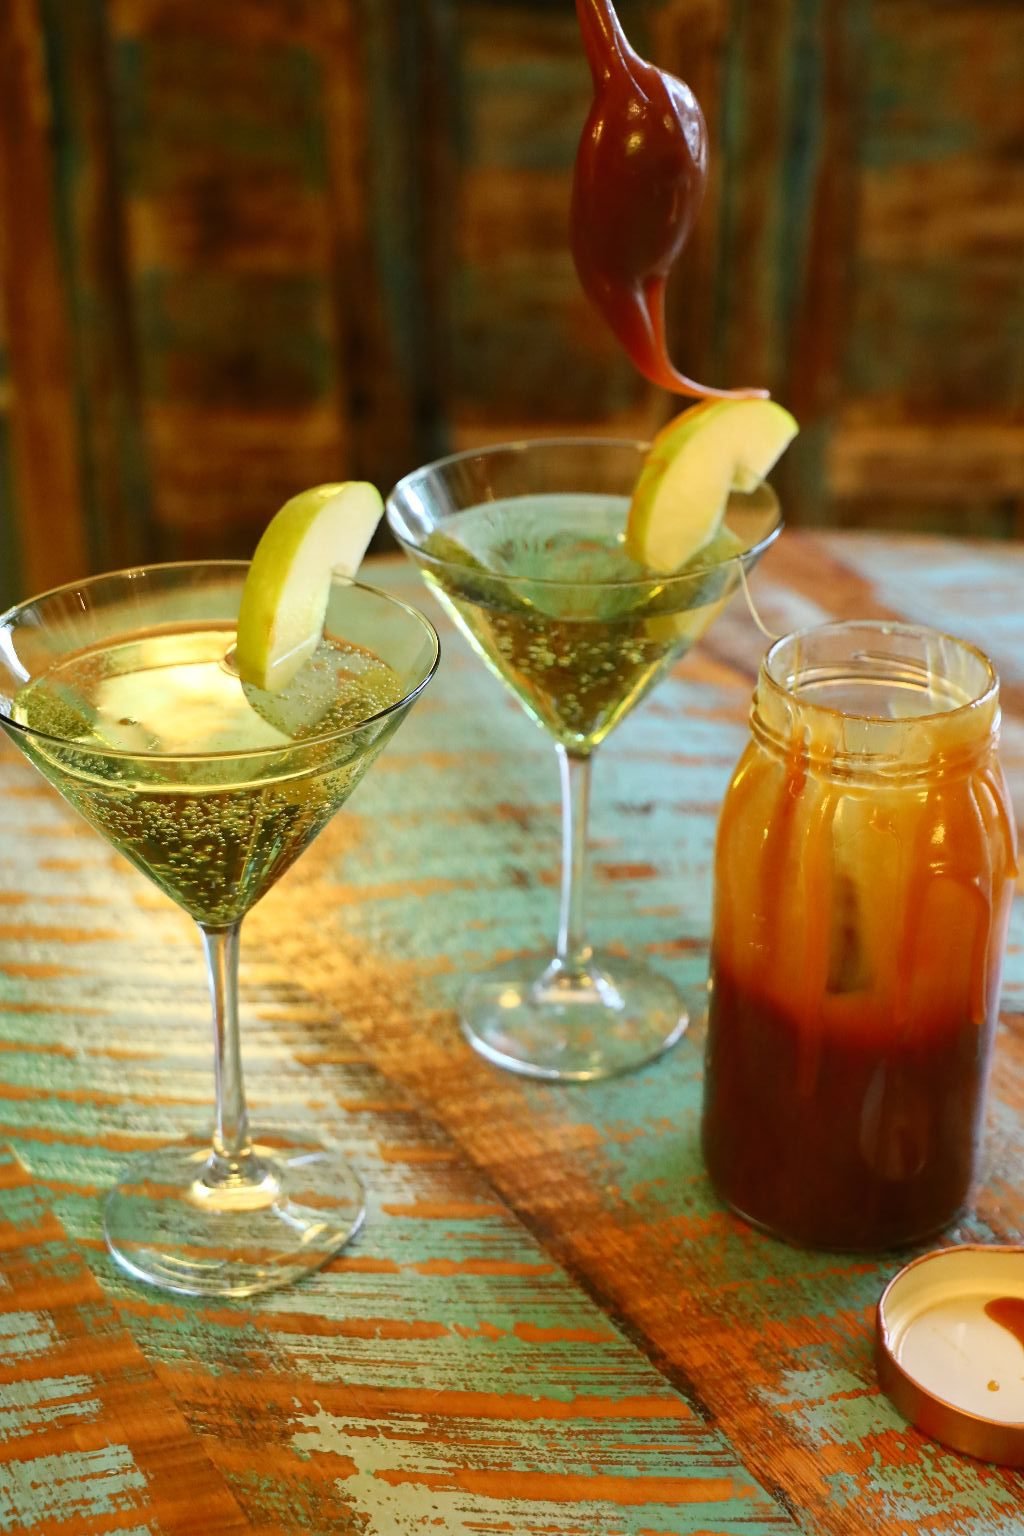
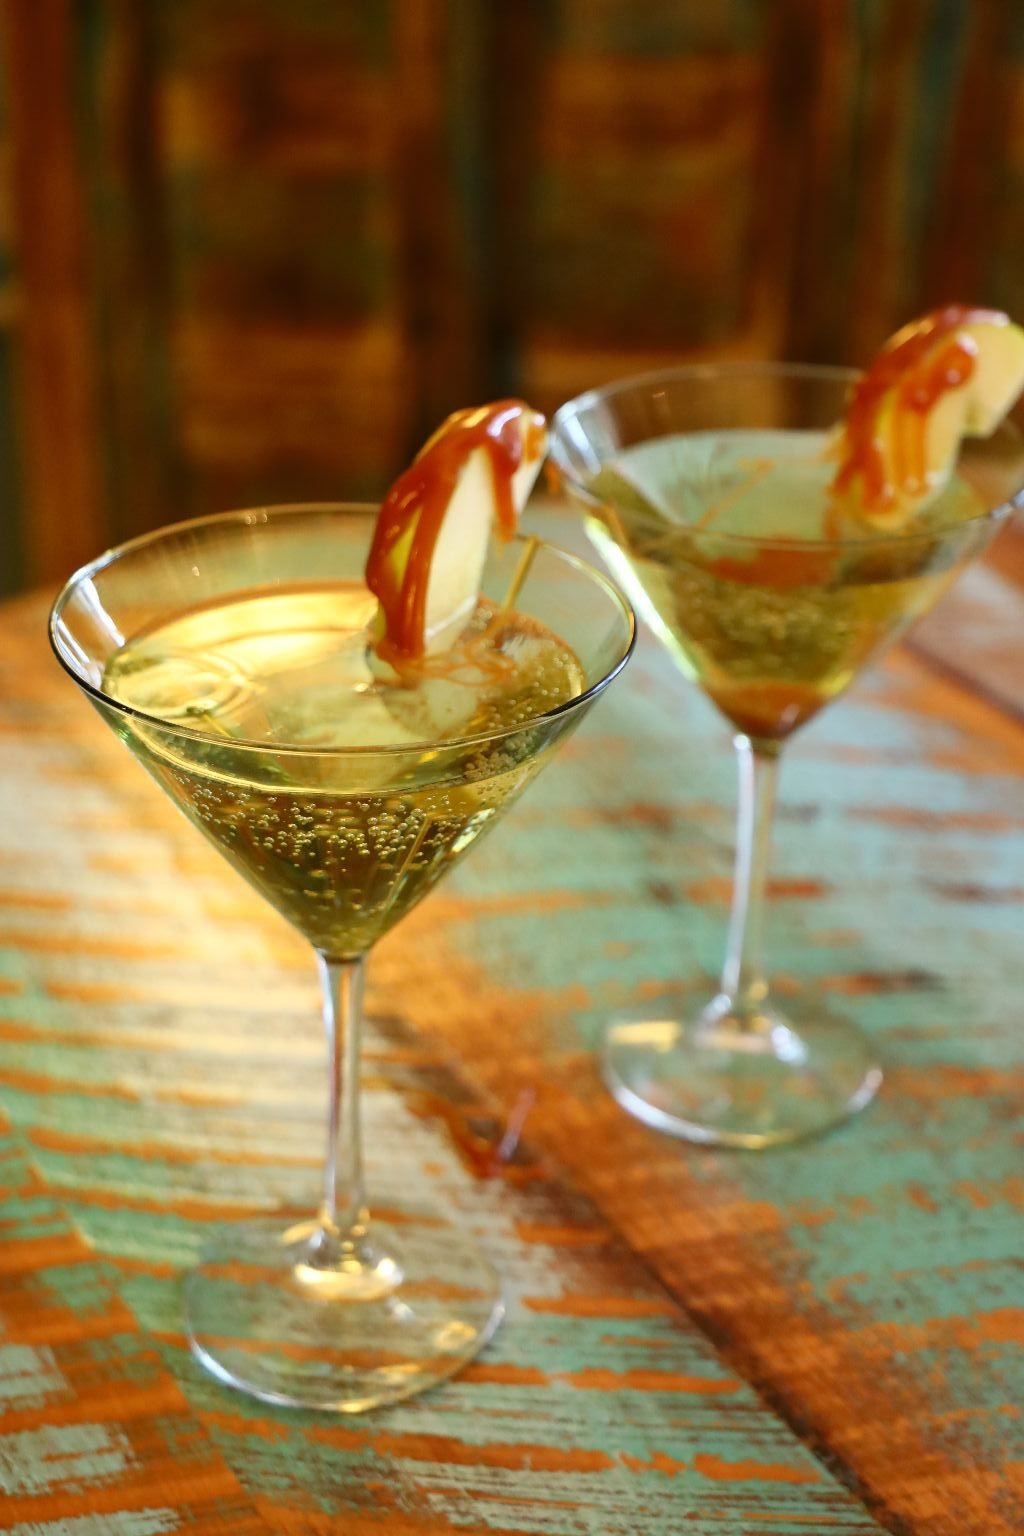
Here We Used Our Caramel with Our Green Apples in Our Appletini’s
———————————————————
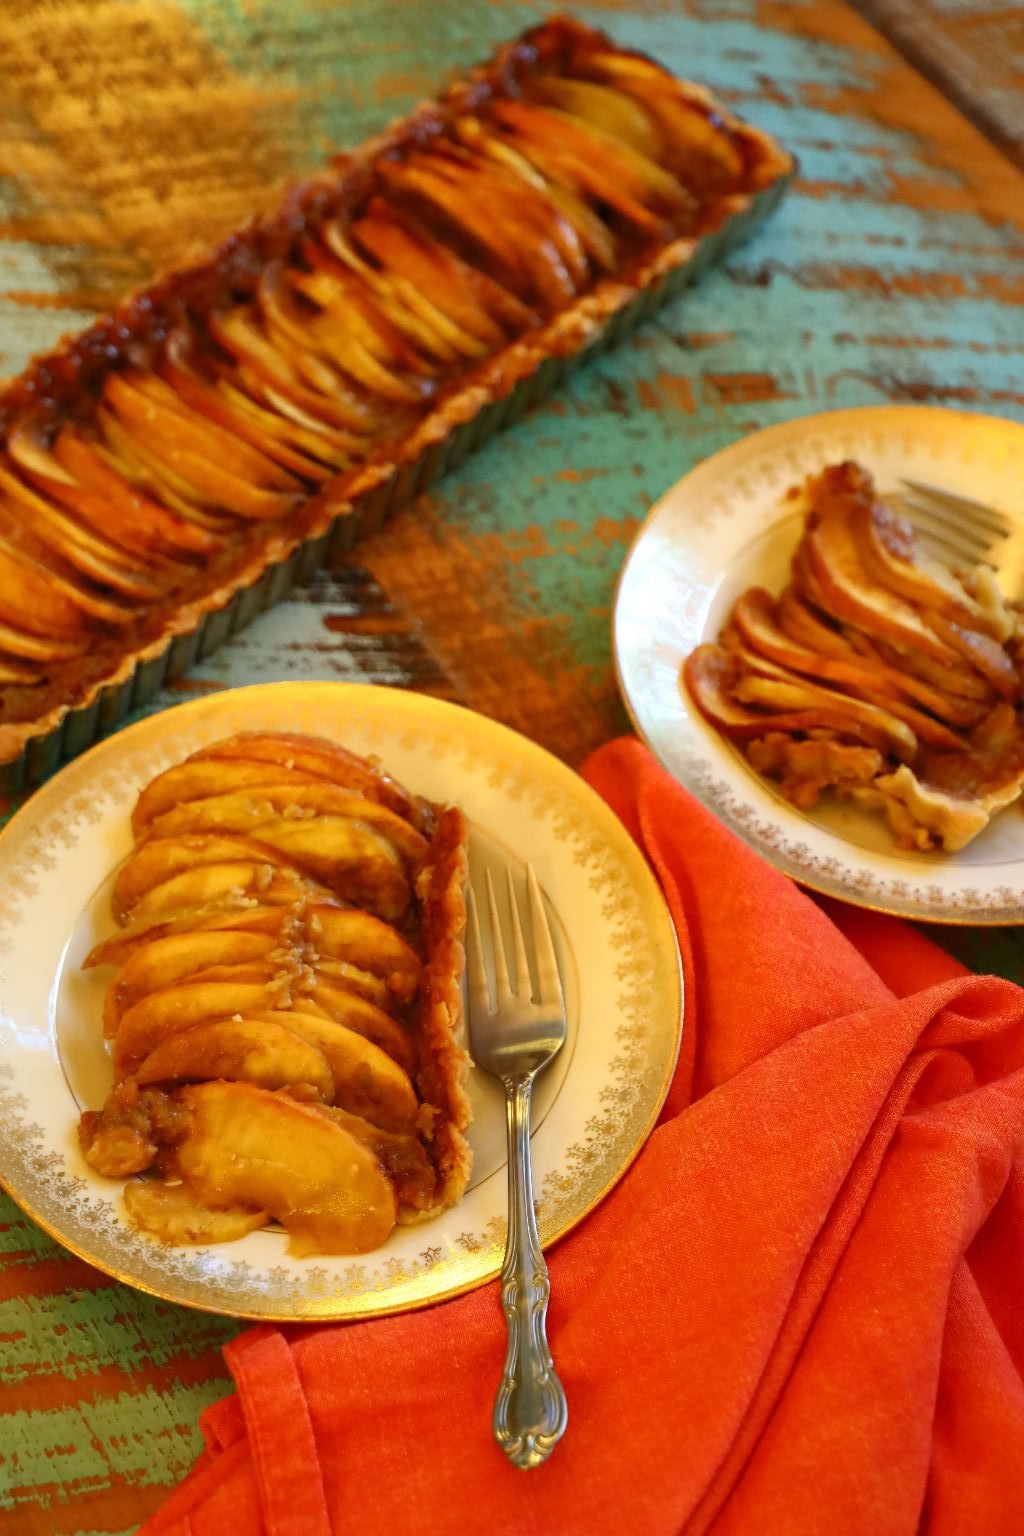
I Come Bearing Pies
We Made These For Our Kids and Their Partners
Apple and Pear with Apple Butter


Our Apple Tartlets
Caramel Base with Variety of Apples and Brushed with Middle Eastern Honey

Cooling on Racks
The Smell is Delicious
—————————————————————————

Julie’s Vintage Southern Caramel Cake

(Recipes are located at the bottom of this page.)
——————————————————————
Every Treat on this page has something in common.
CARAMEL!
To be specific, HOMEMADE CARAMEL!
The CARMEL that we made for this cake, is also the CARAMEL…
that we are eating in this Fondue Pot, and….
is in our Apple Pies and Tartlets.
So, grab a fork and let’s get to it!
———————————————————————
Making Old Fashioned Caramel
Beautiful Brown Jars
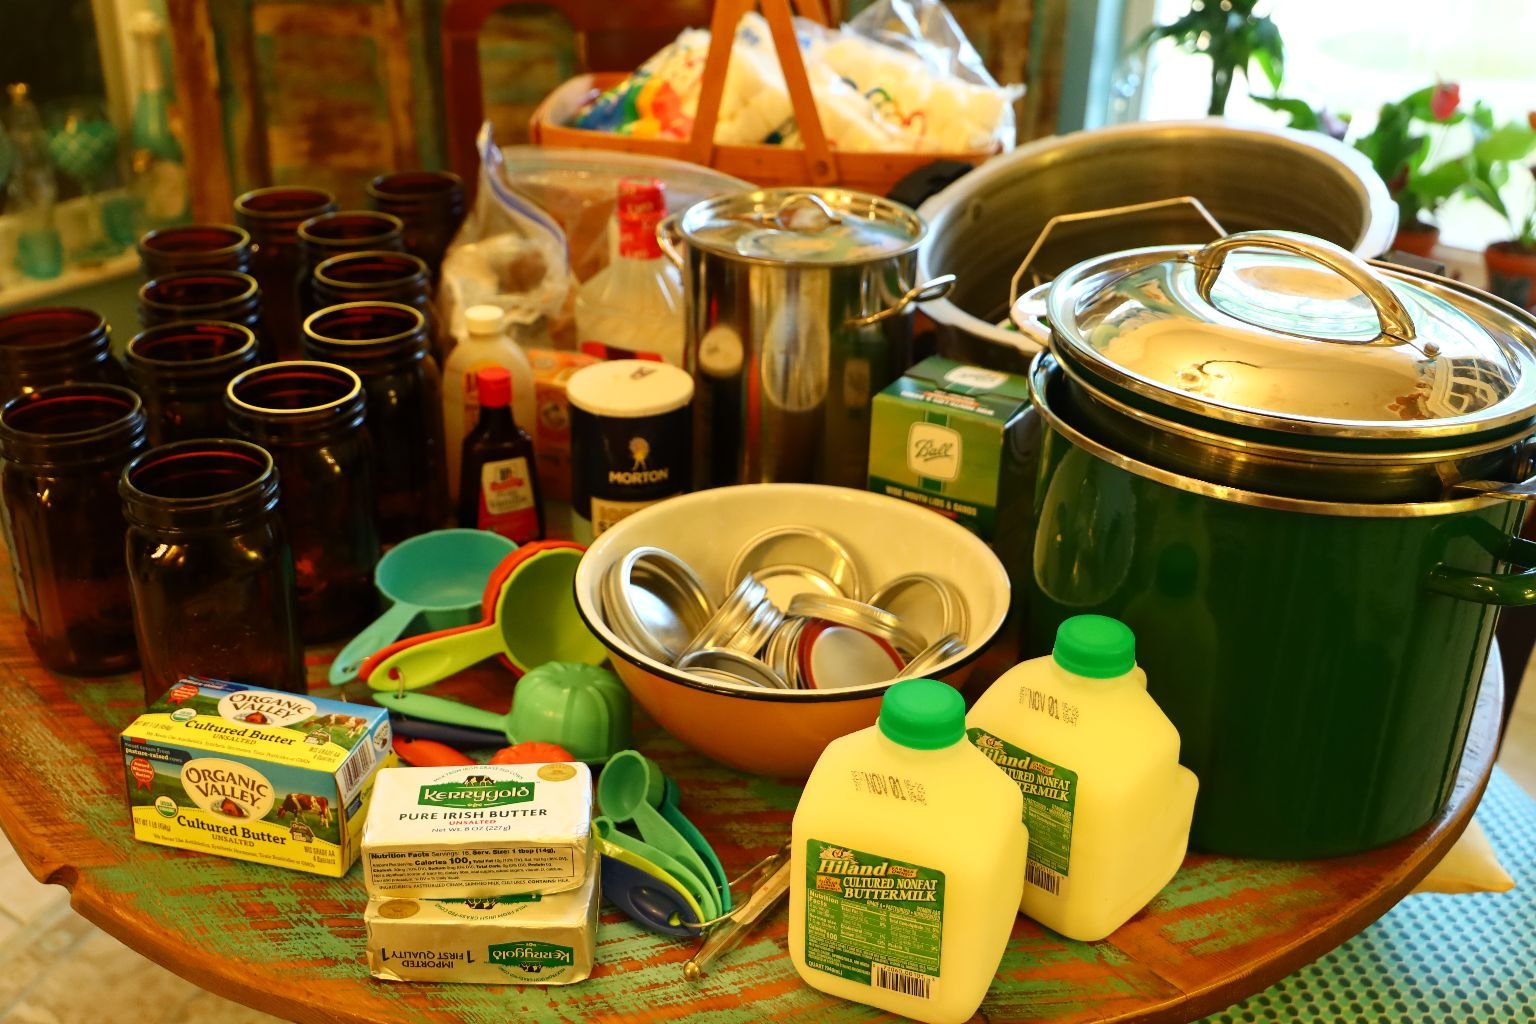
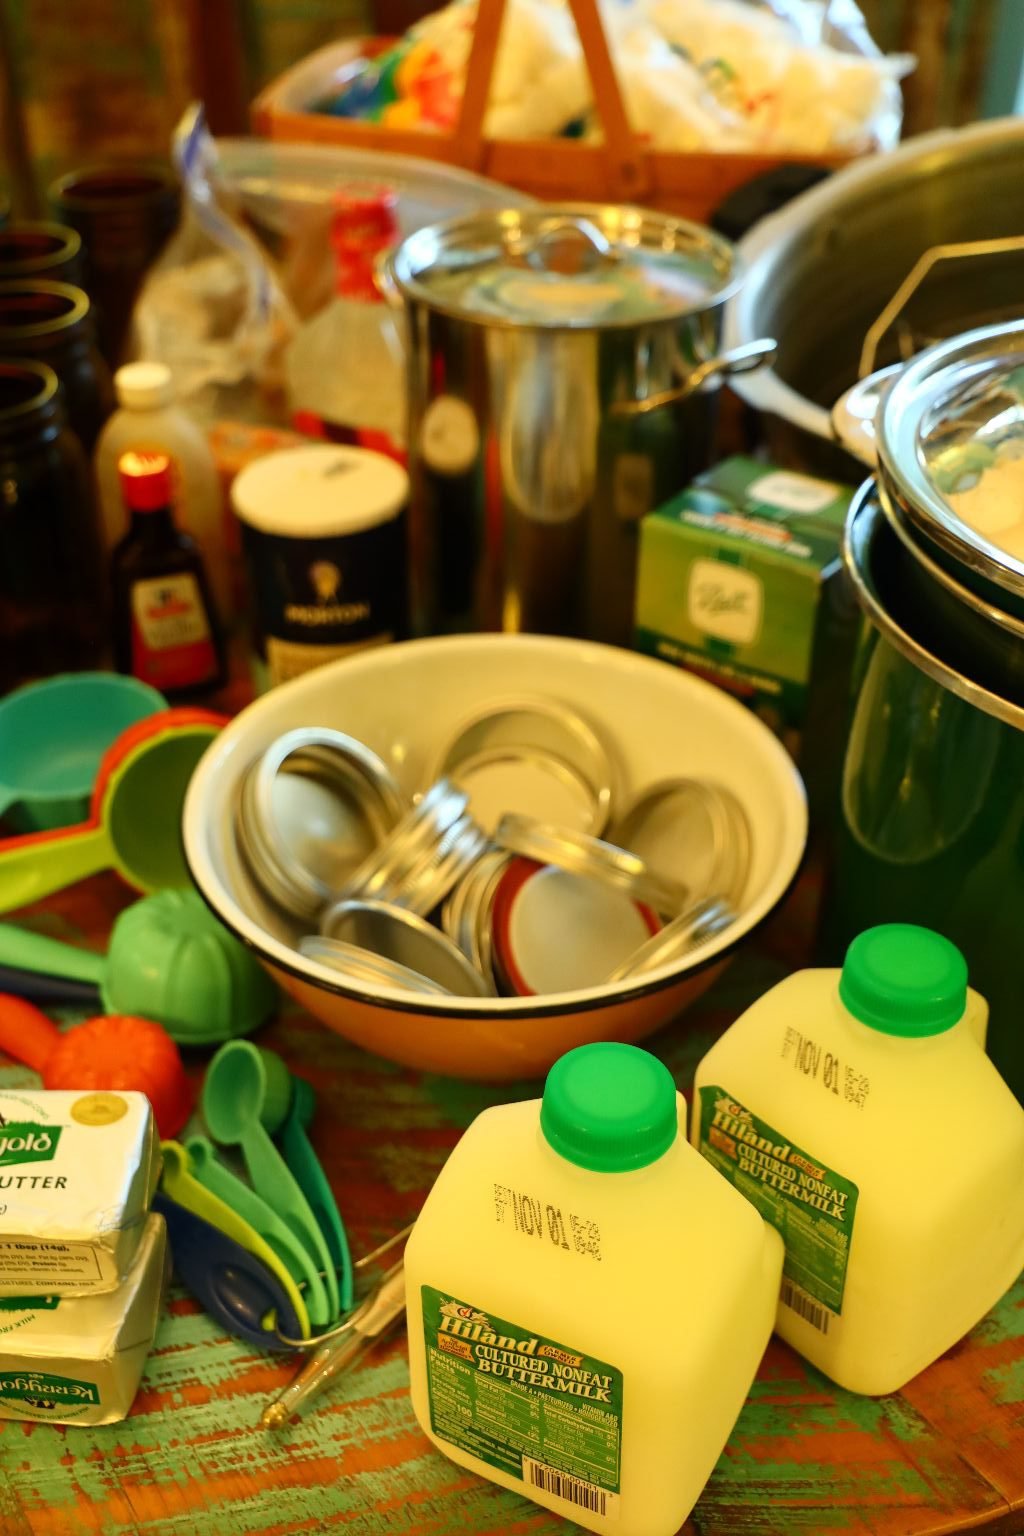
Ingredients and Equipment
(We are doubling this recipe.)
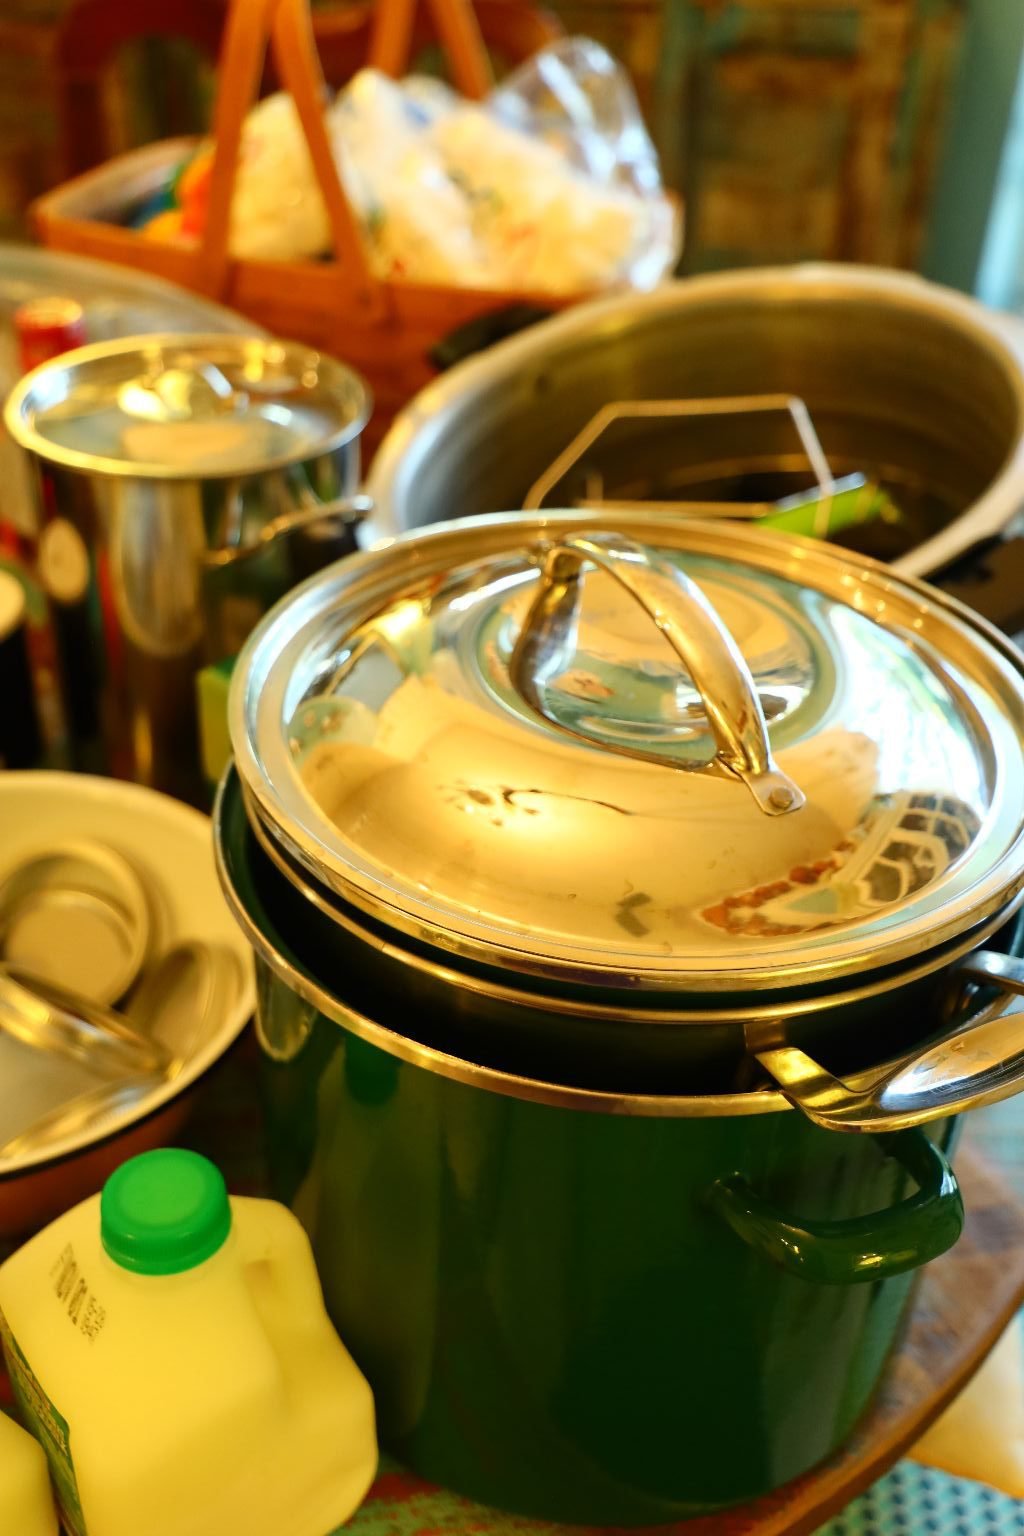
You will Need Two Large Pots
Jars, Rings and Lids
——————————————————
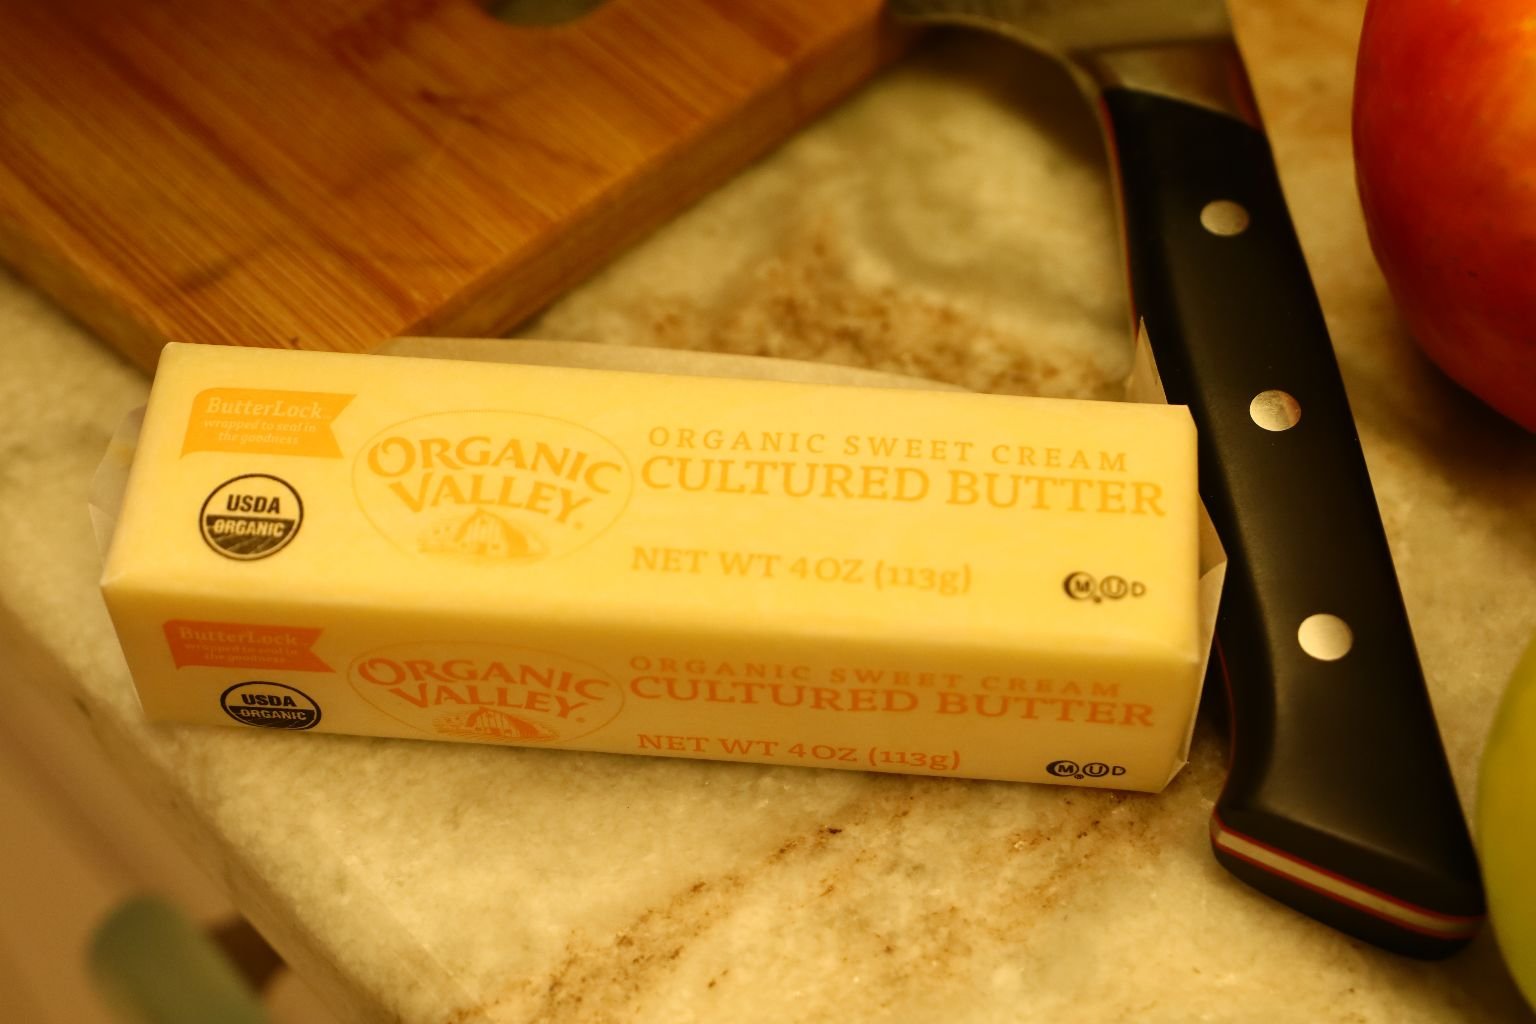
4 Sticks of Butter/Margarine (2 Cups)
5 Cups Sugar
1 1/2 Cups of Buttermilk
3 Tablespoons of Corn Syrup
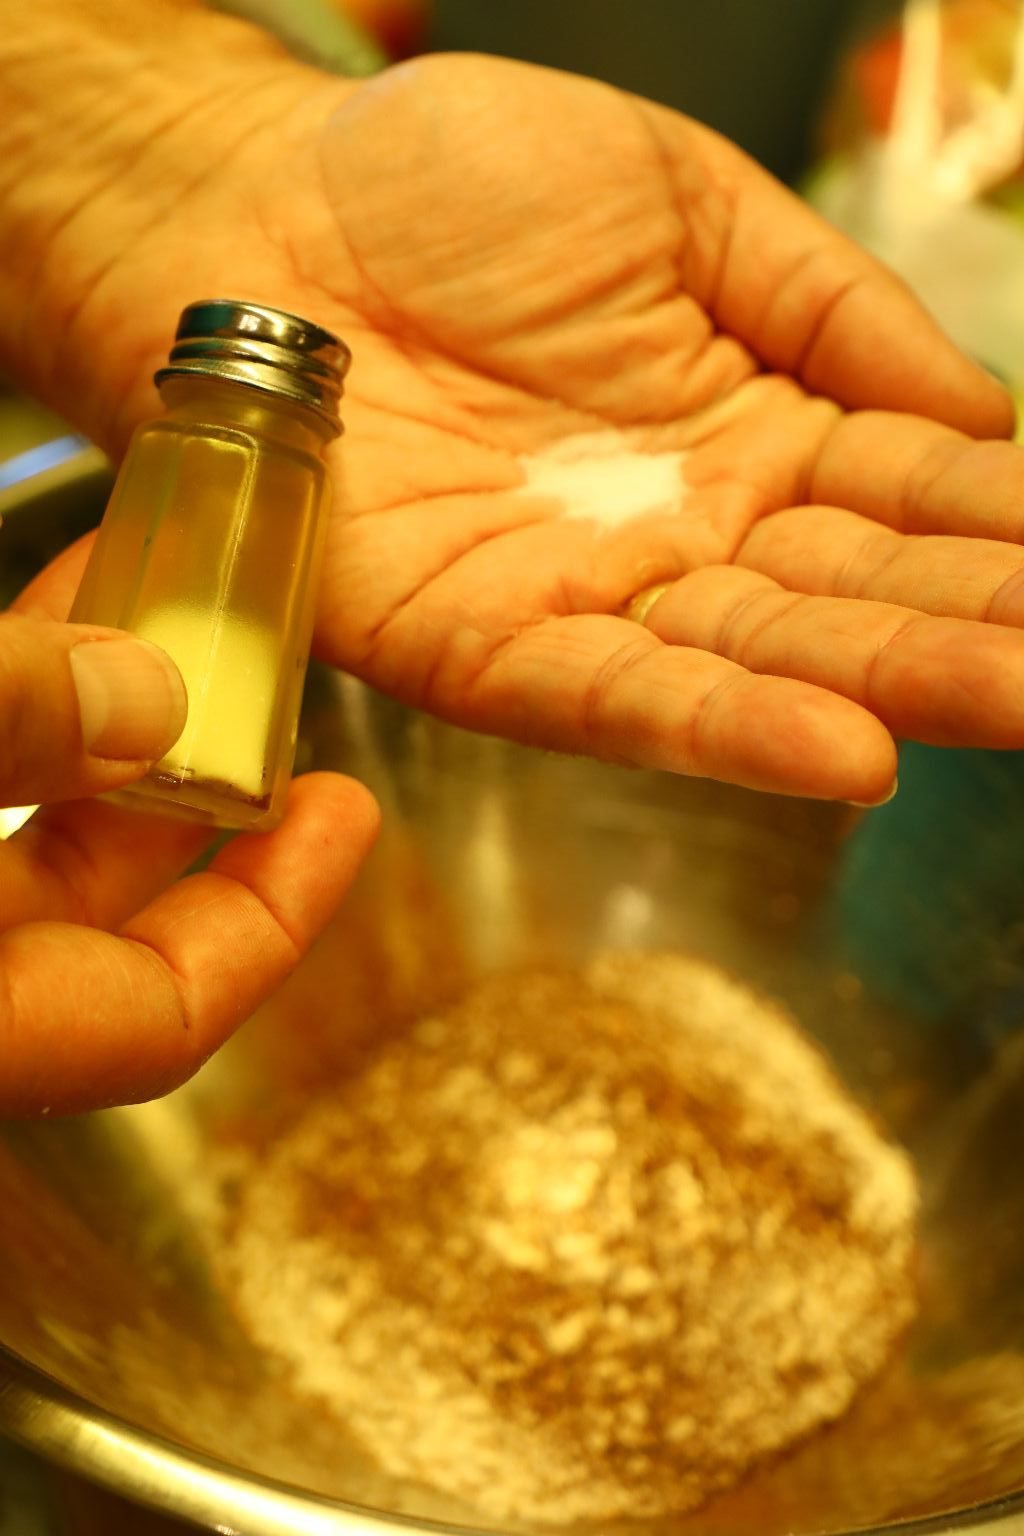
1 teaspoon Salt
2 1/2 teaspoons of Baking Soda
30 Marshmallows
2 Tablespoons Vanilla Extract
—————————————————————
————————————————————–
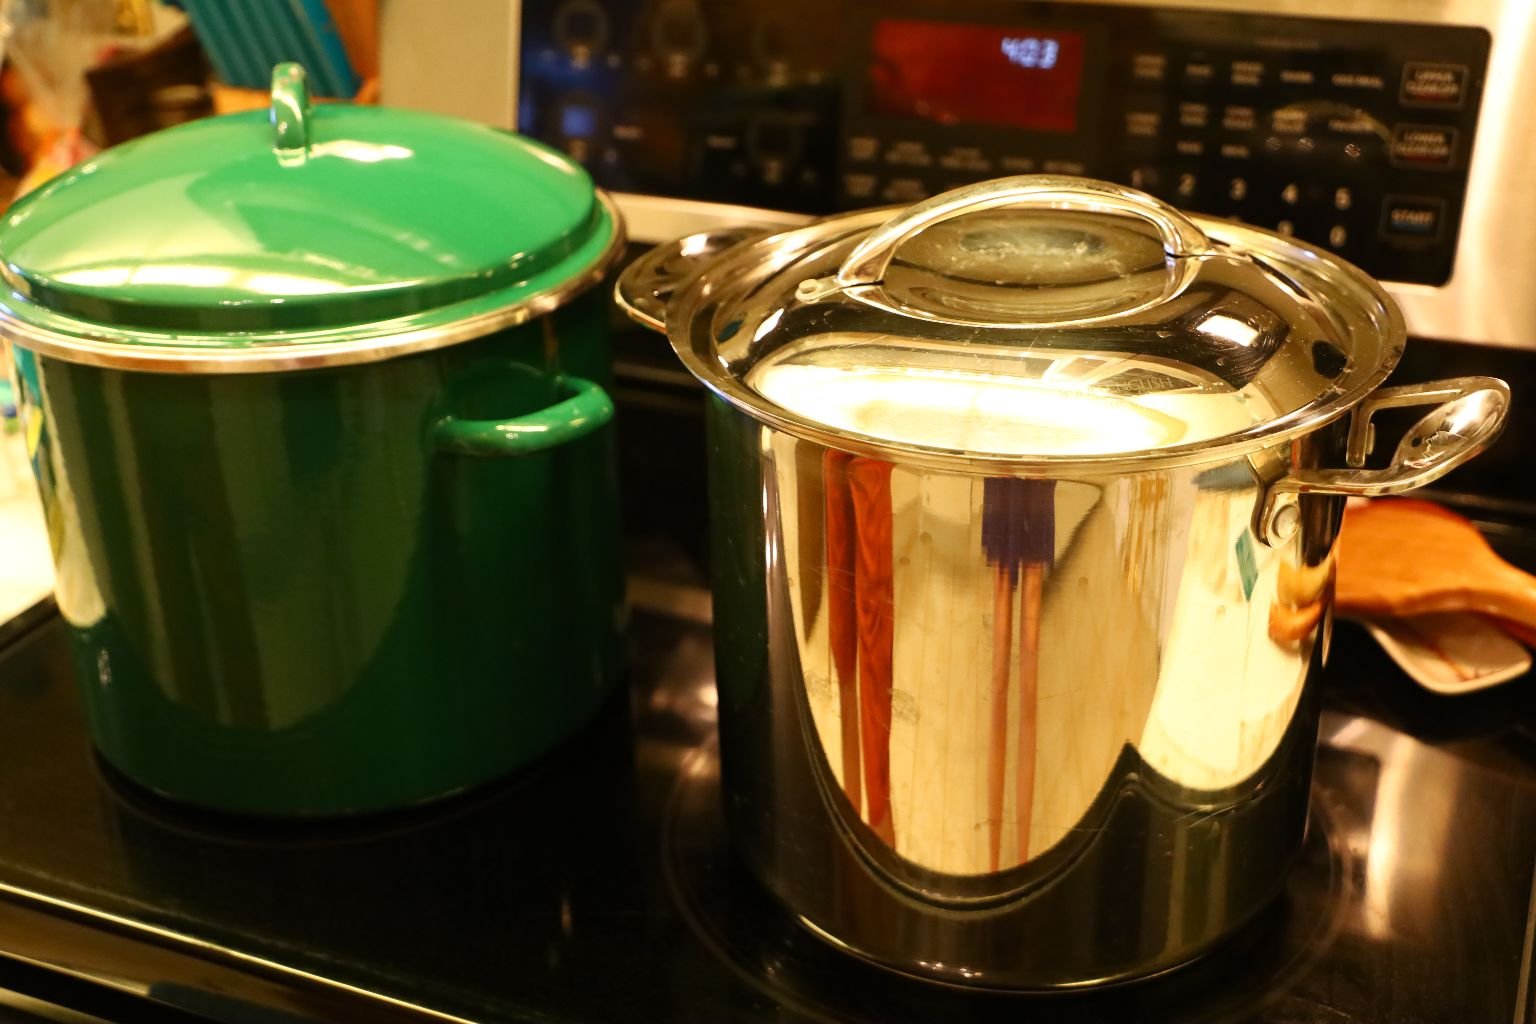
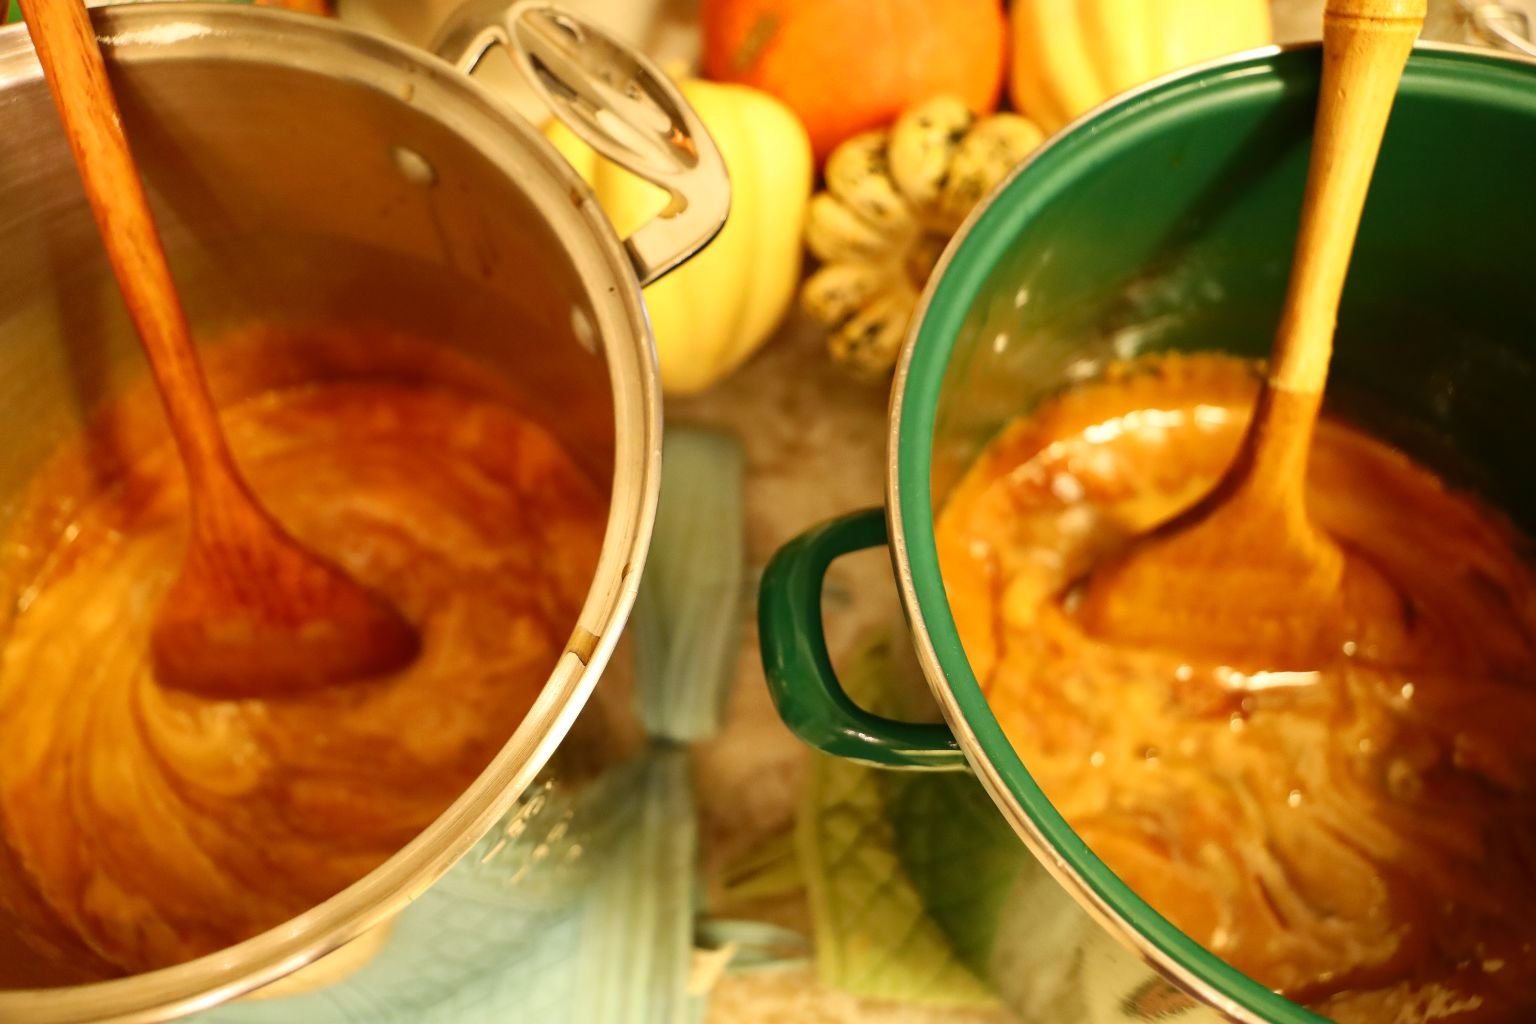
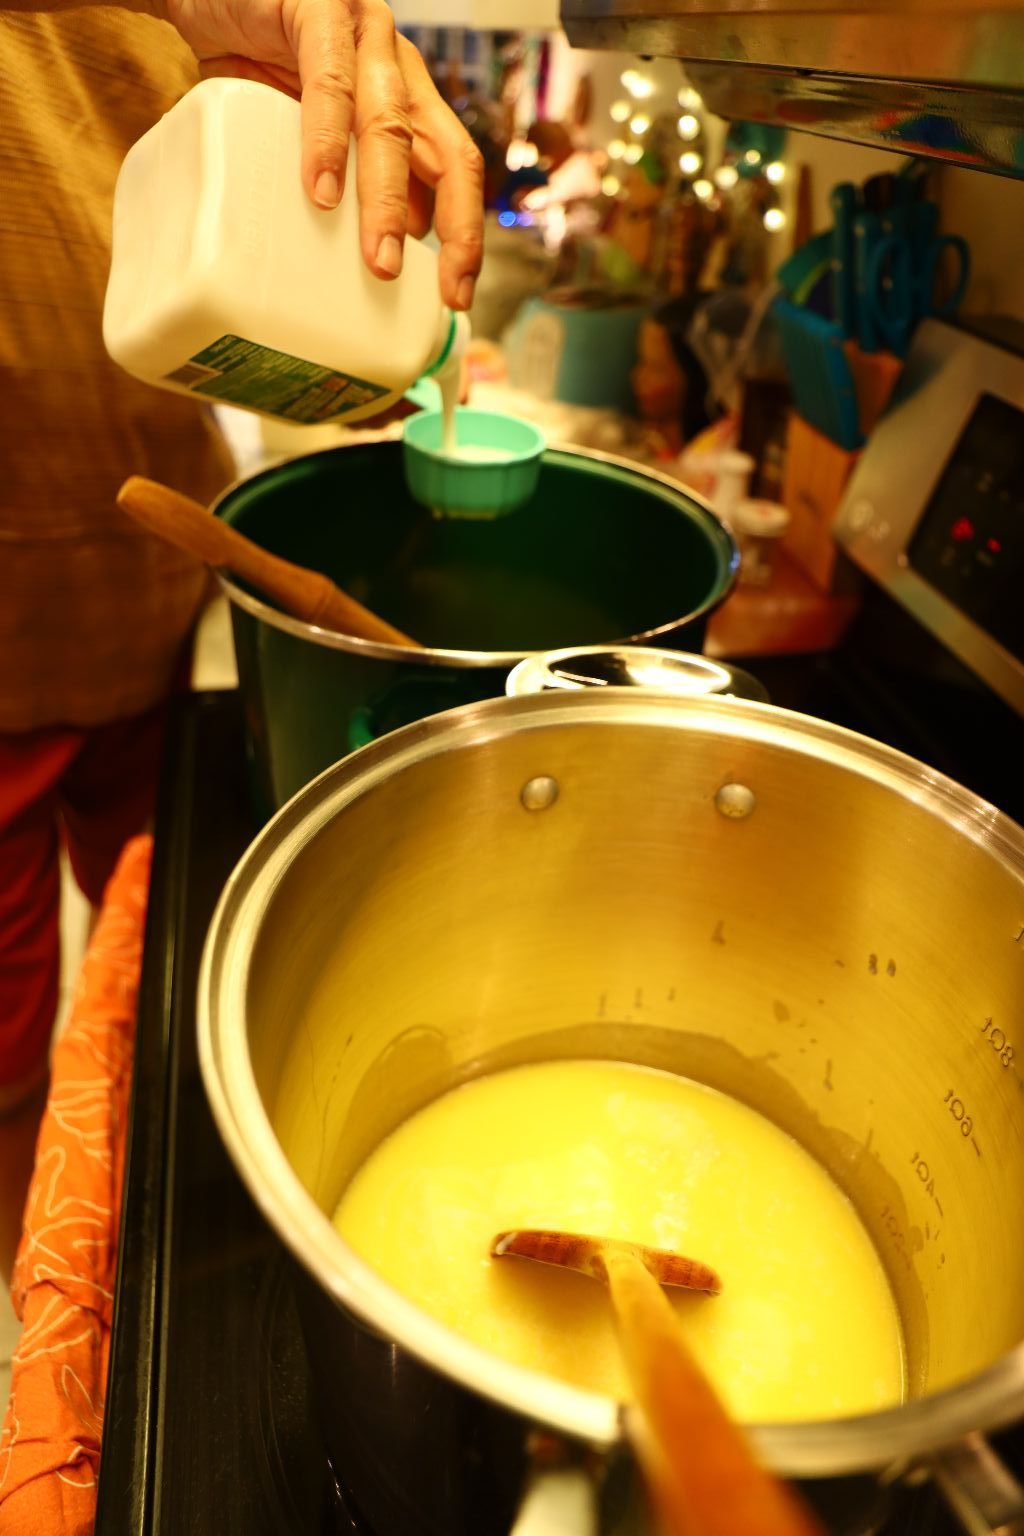
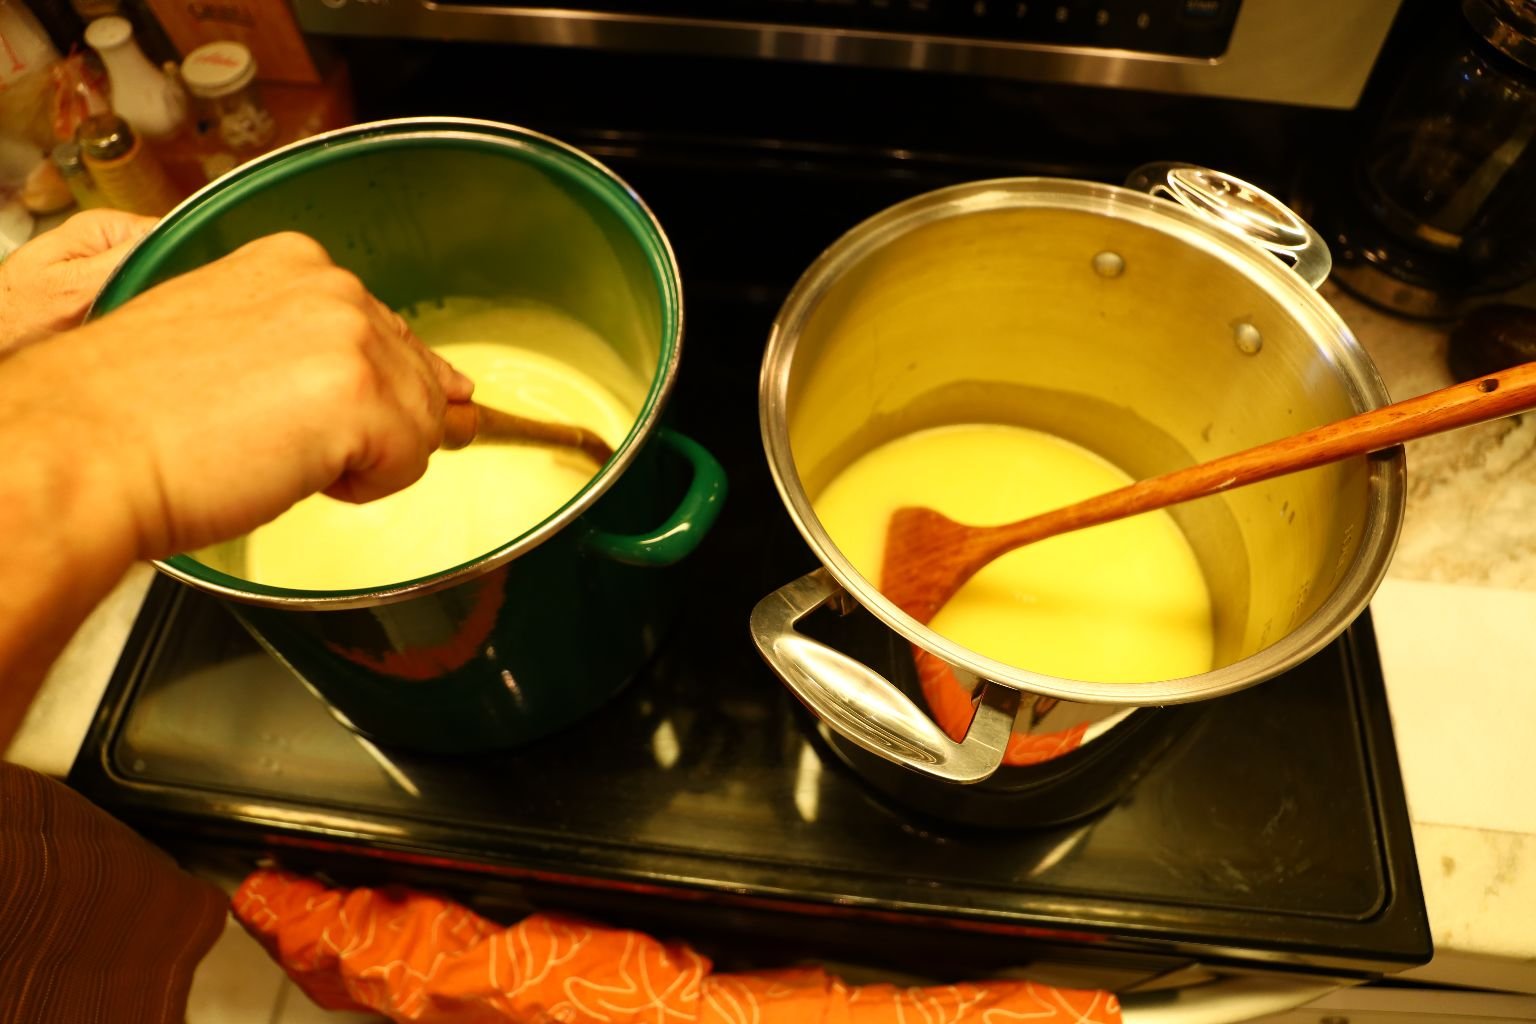
Here We Have Our Two Large Pots
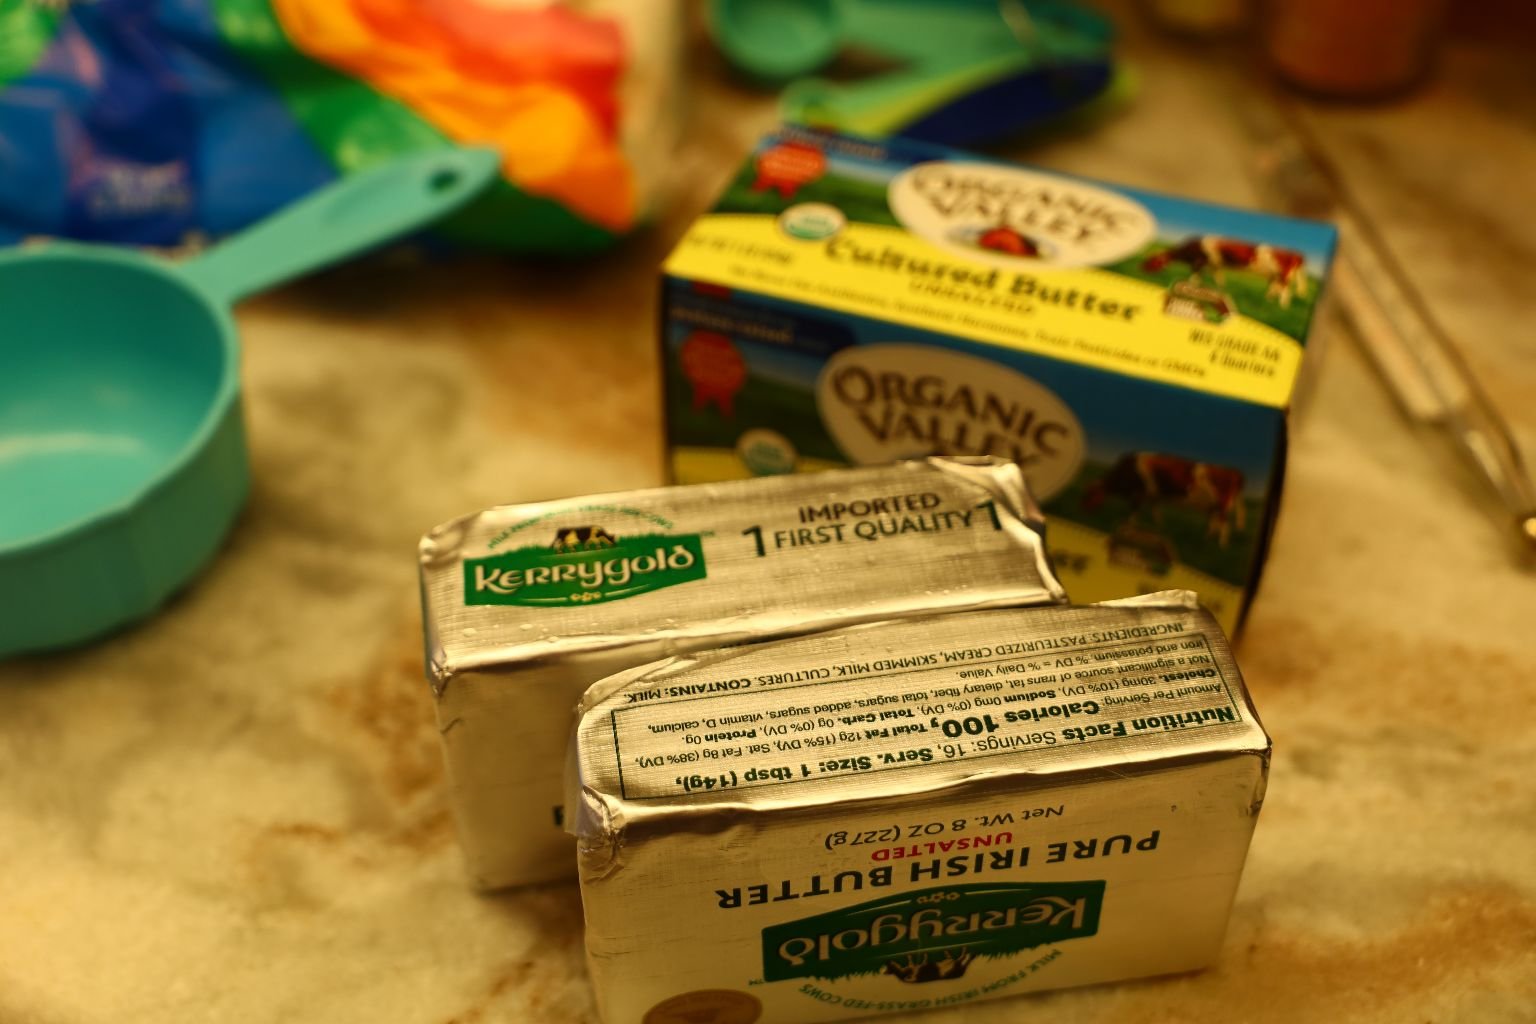
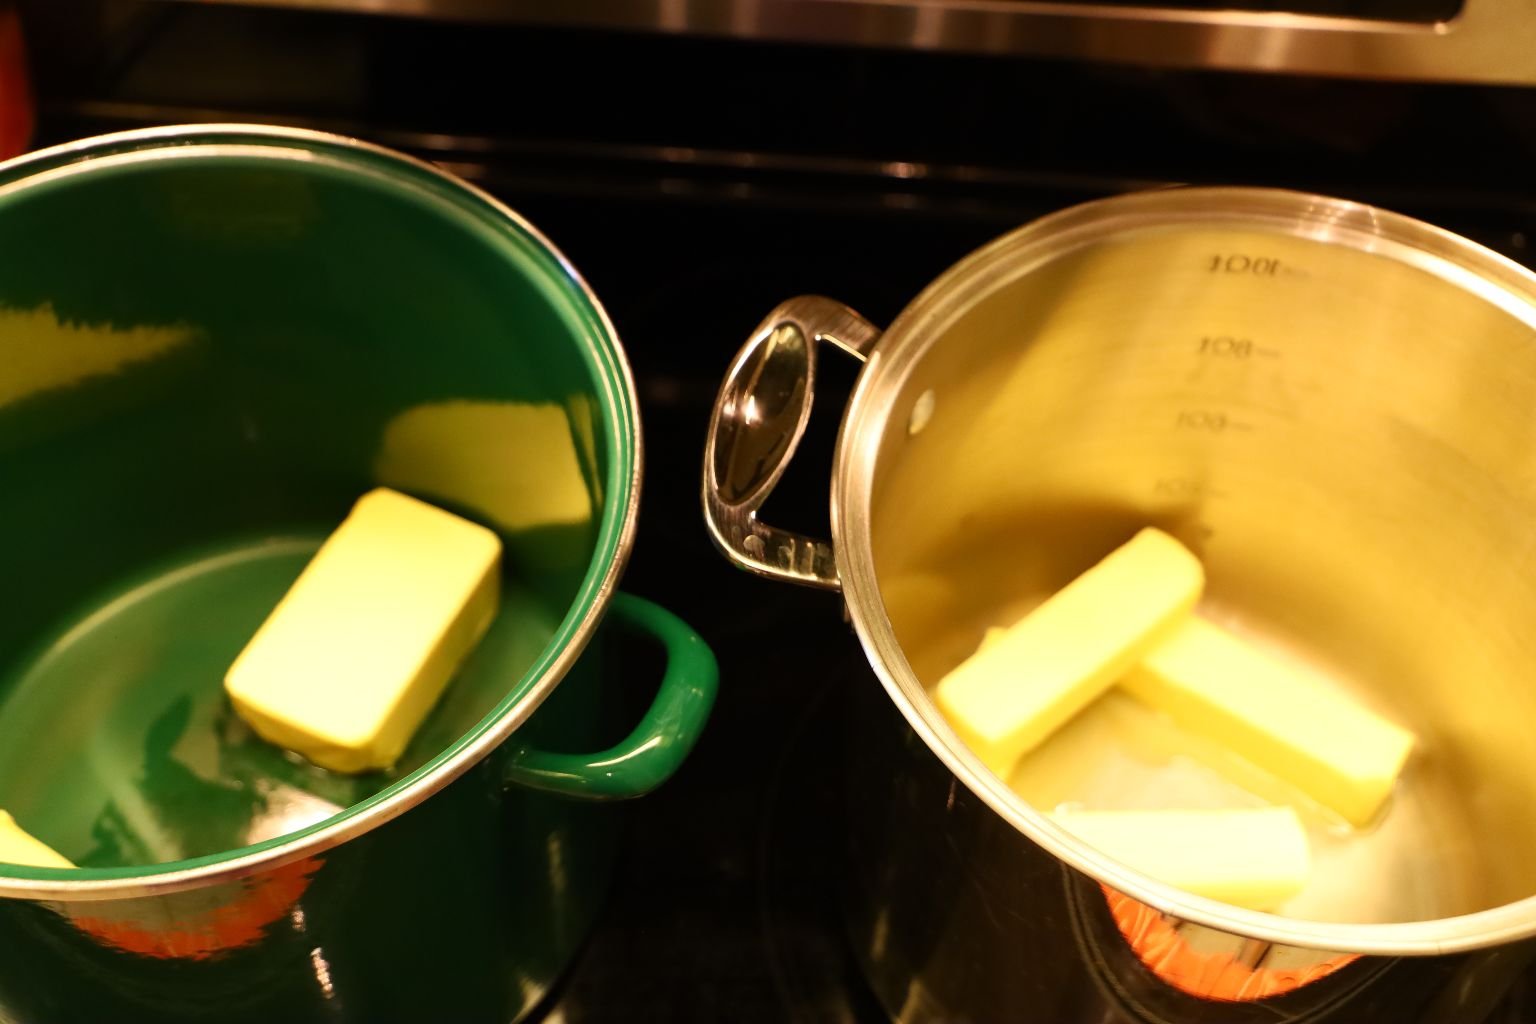
Placing Butter in One, and Margarine in the Other
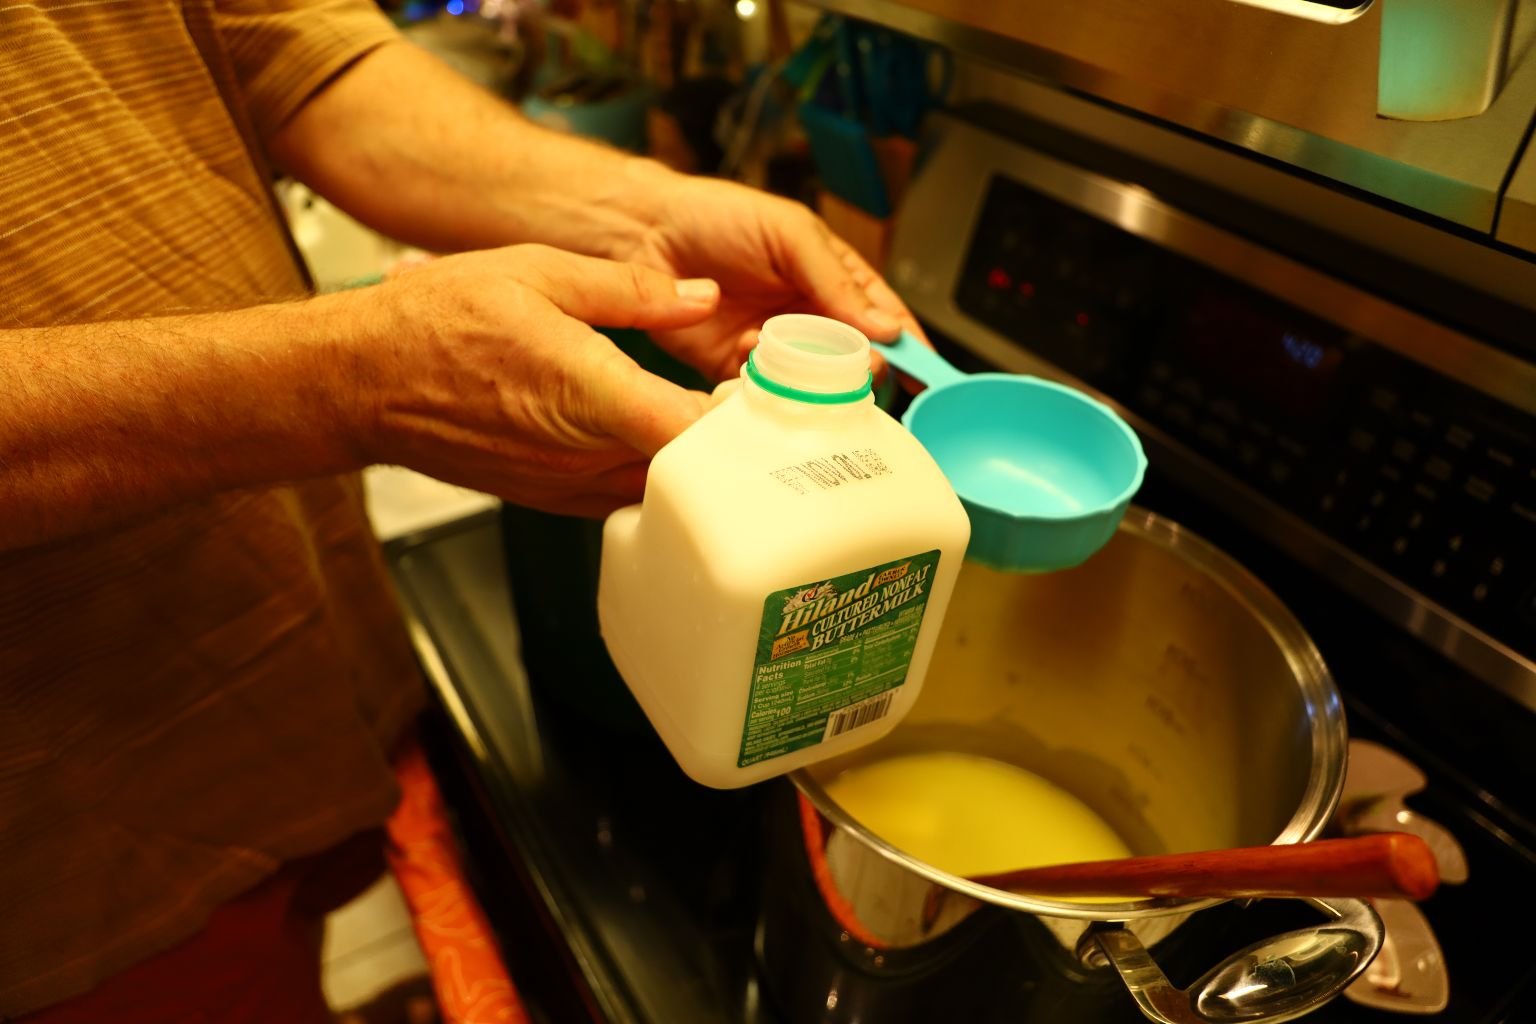
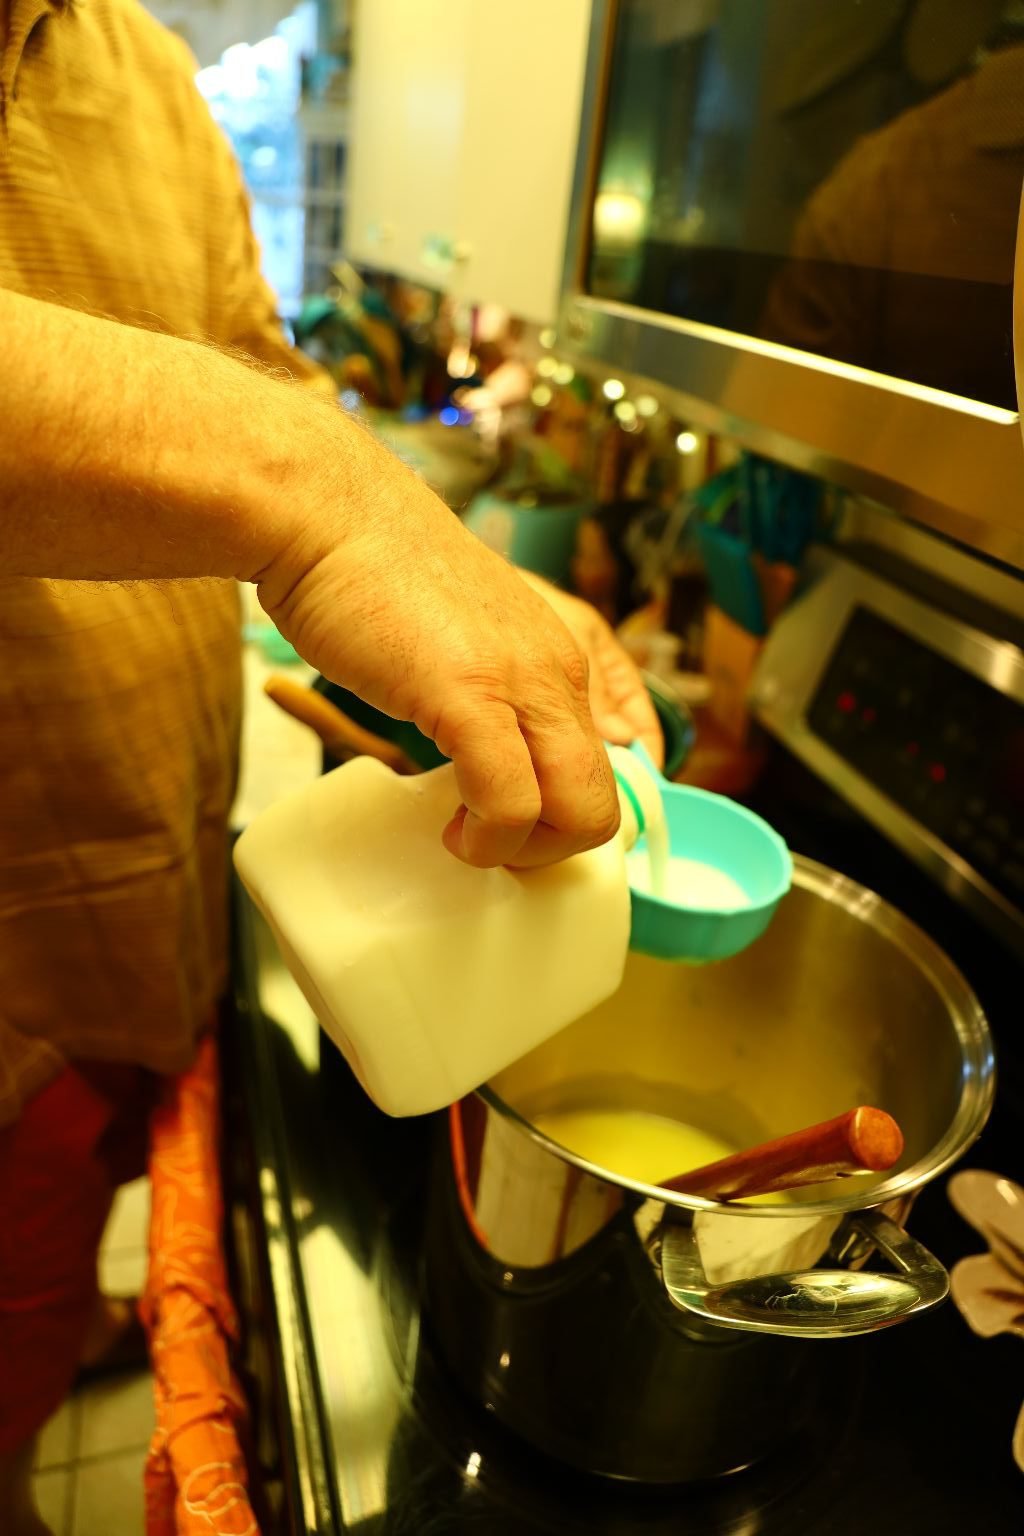
The Pot is on a Medium-Low Heat, As the Butter/Margarine Melts we Add our Buttermilk

———————————————————————-
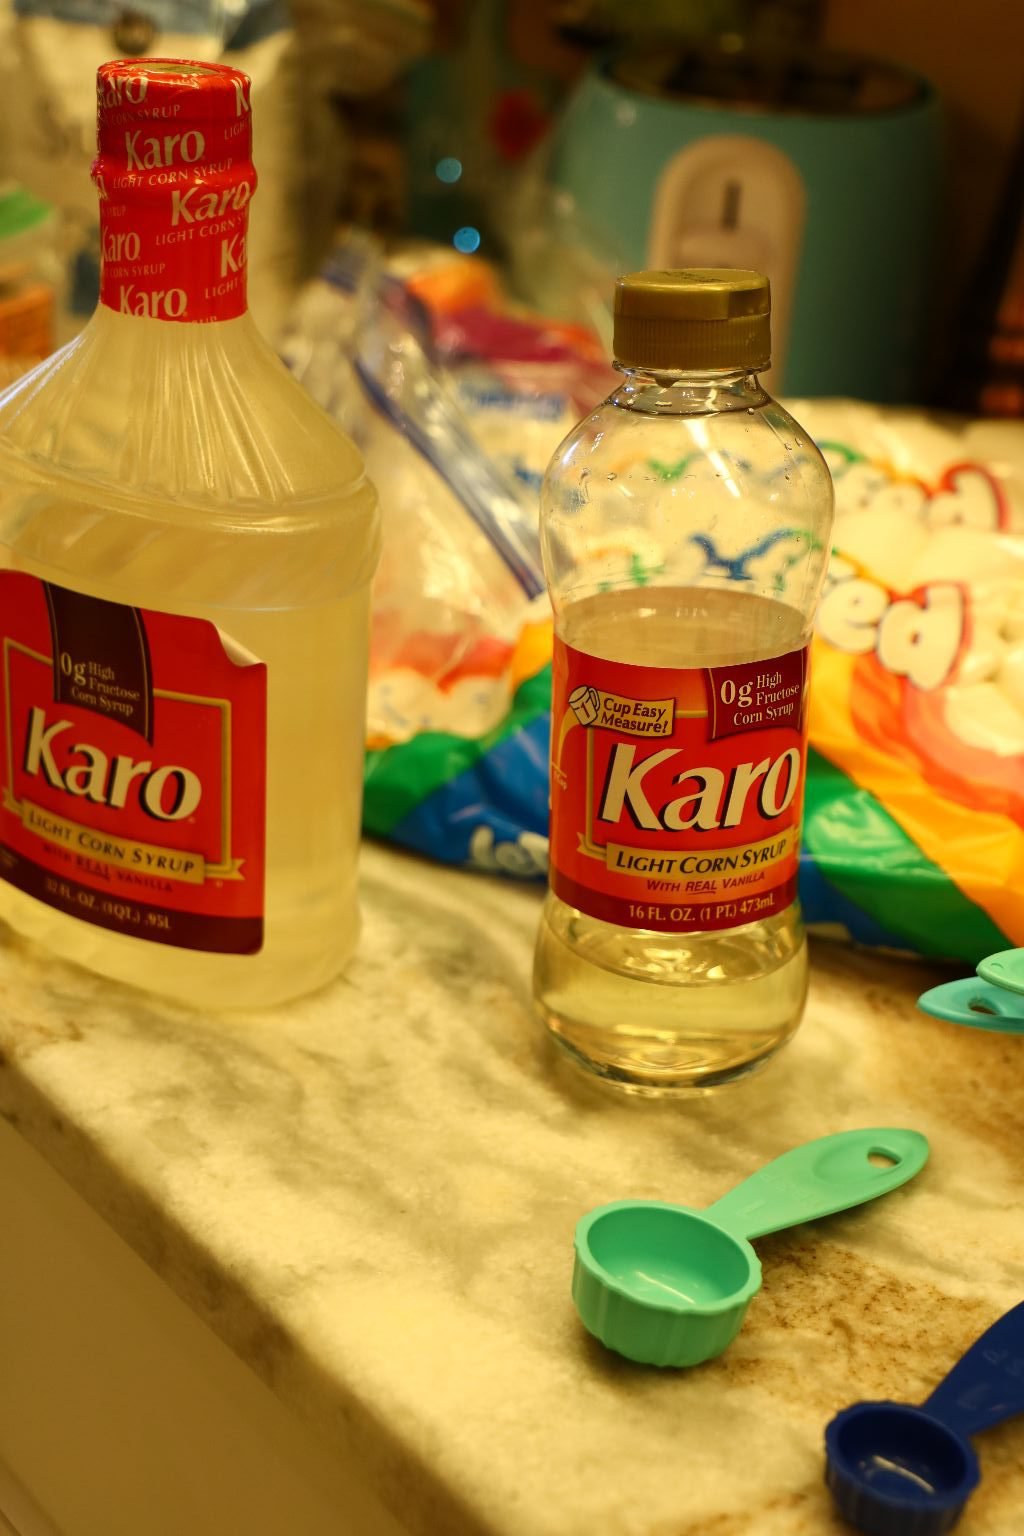
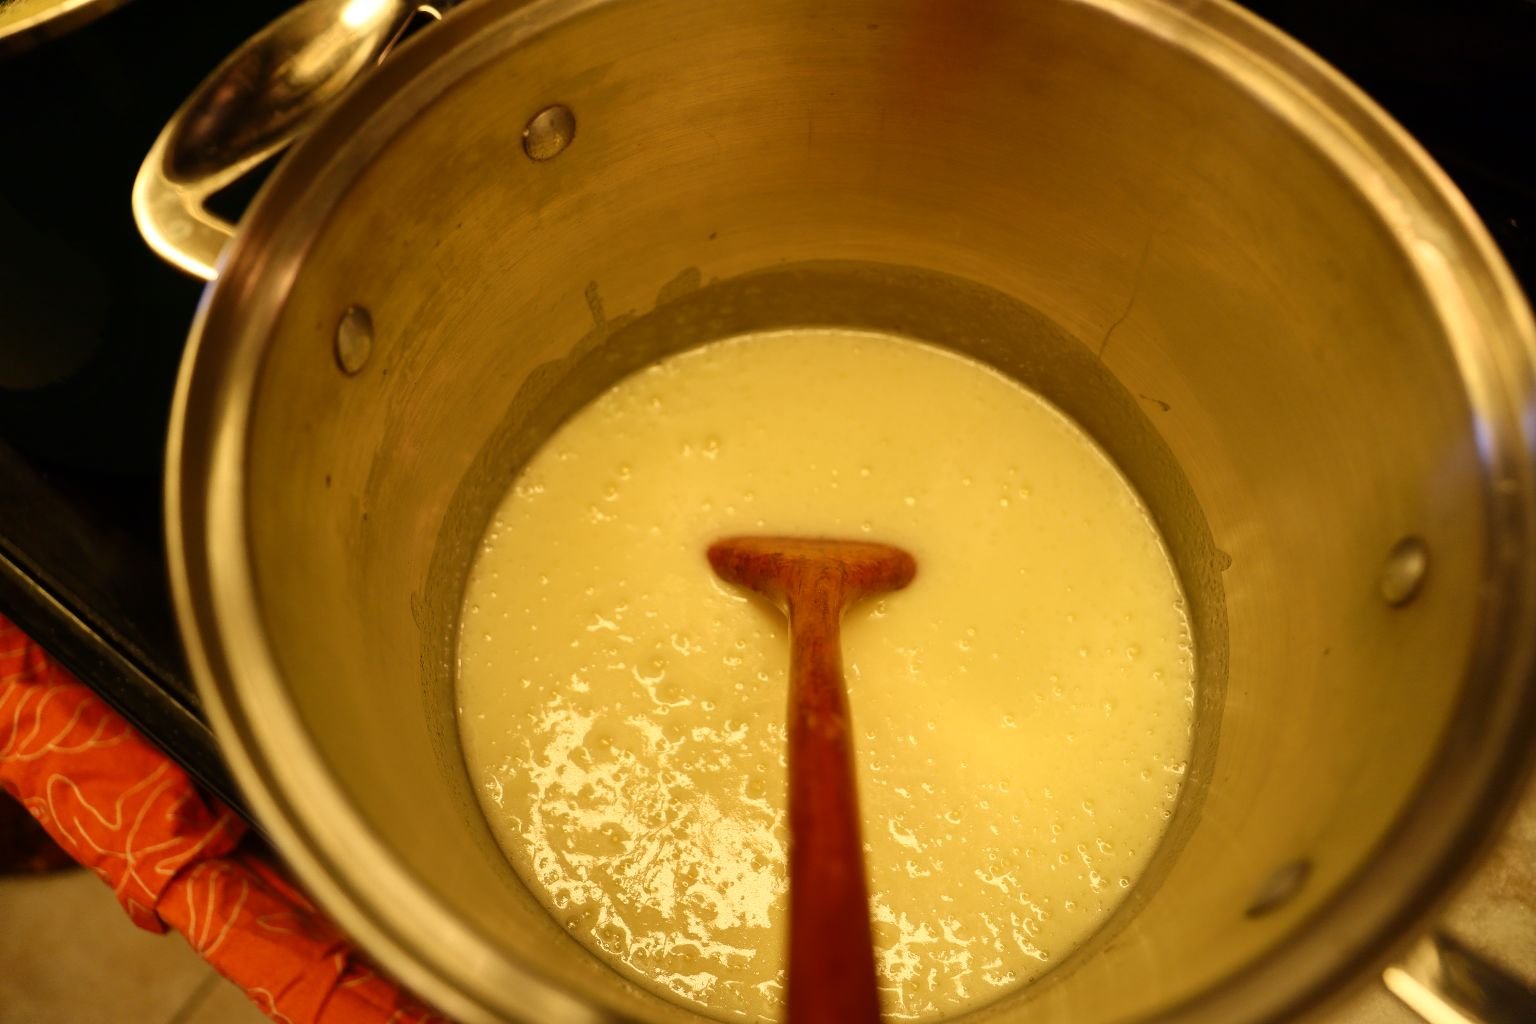
Ready To Add The Karo Syrup
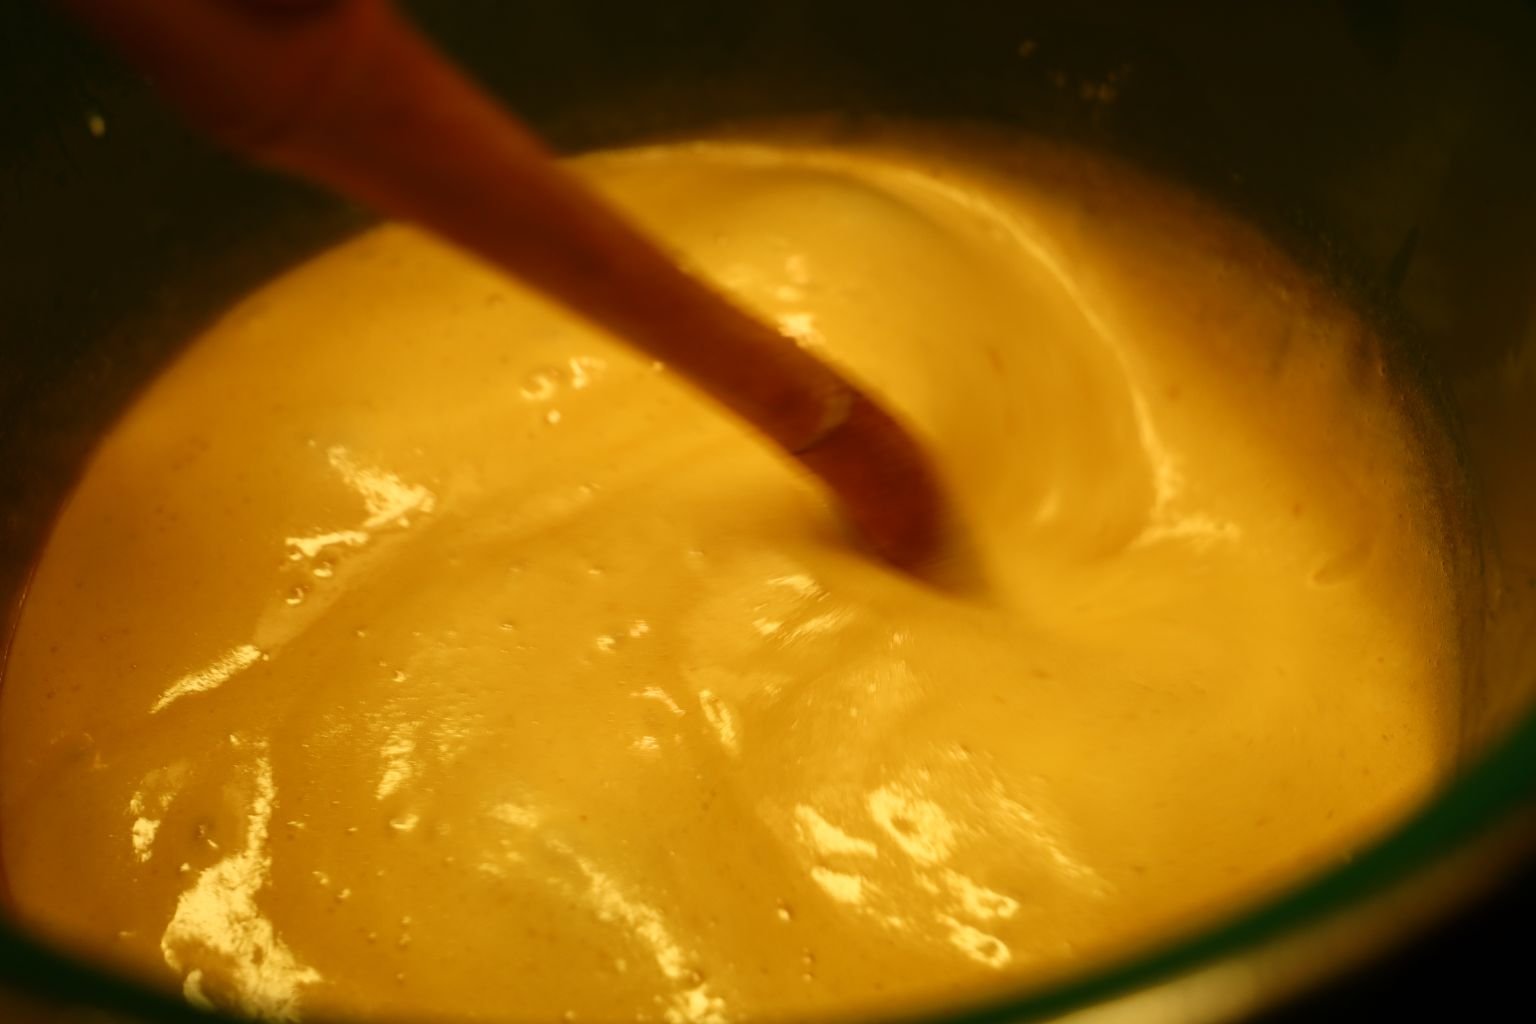
The Thing About Making This Caramel Is That You Have To Constantly Stir It

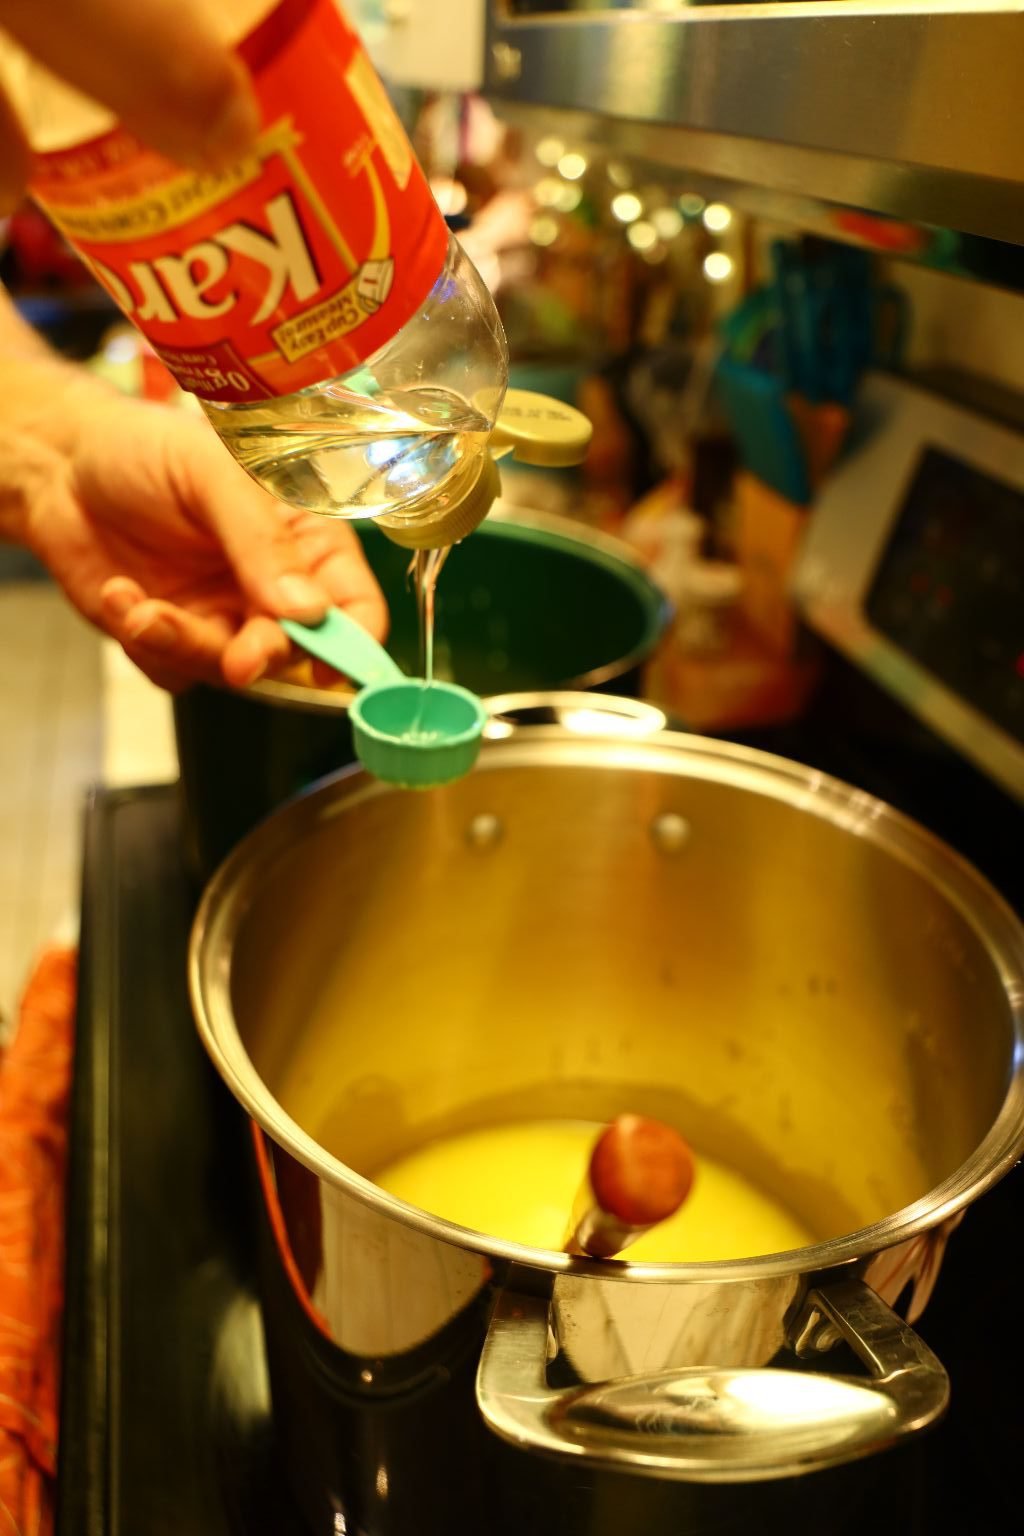
Adding The Karo Syrup

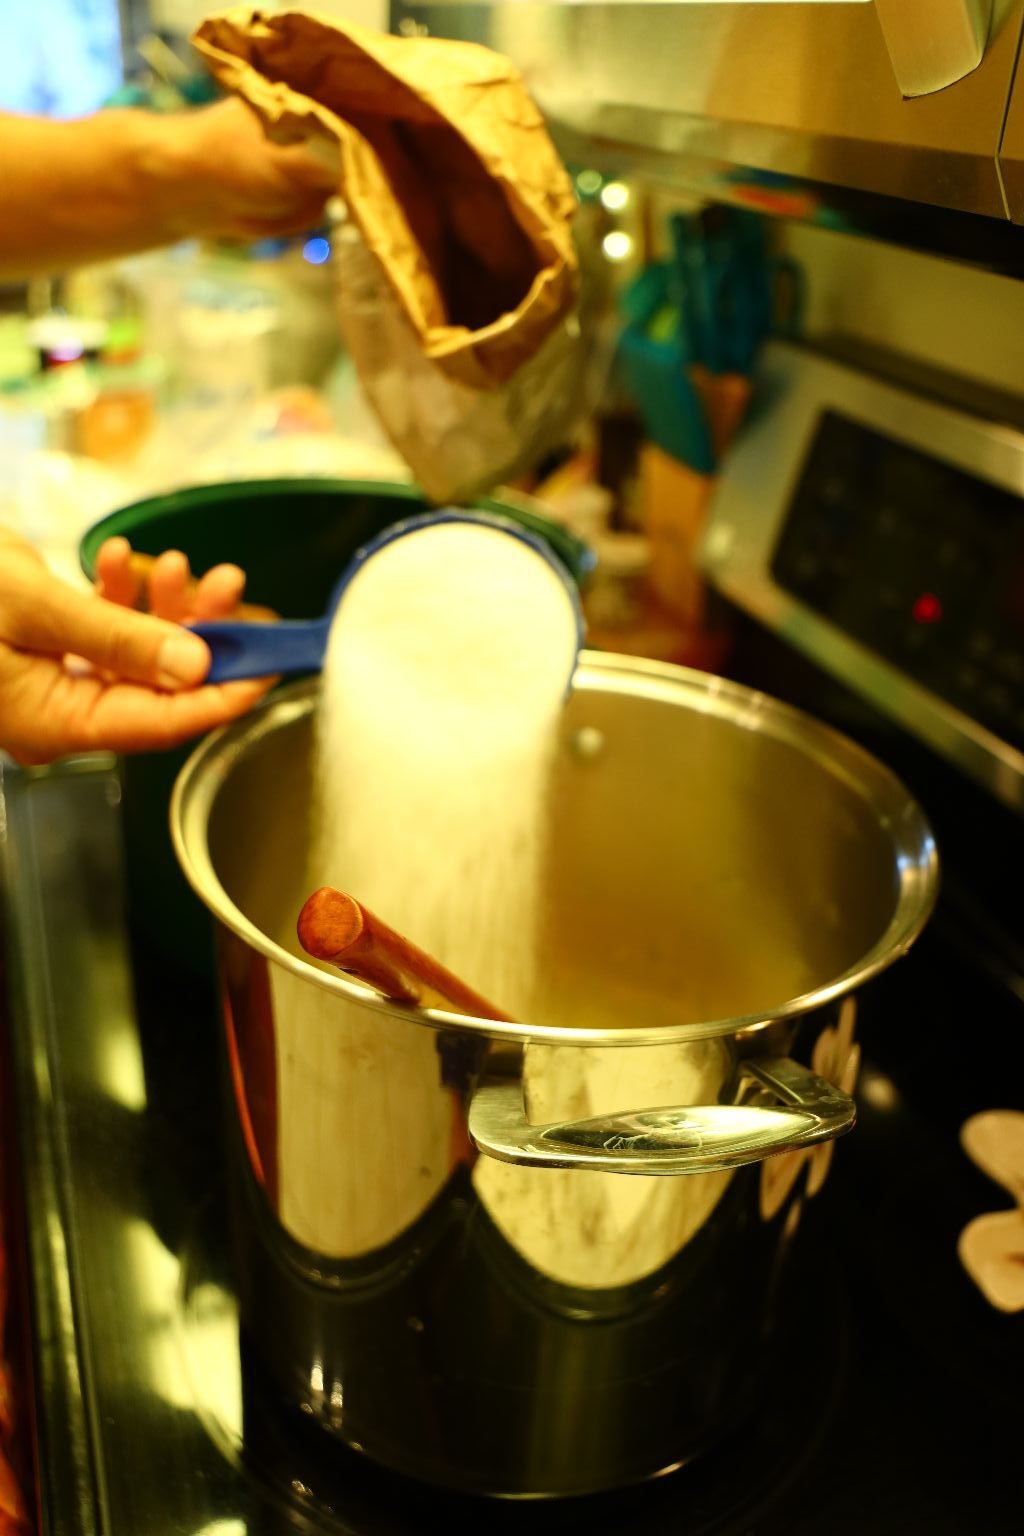
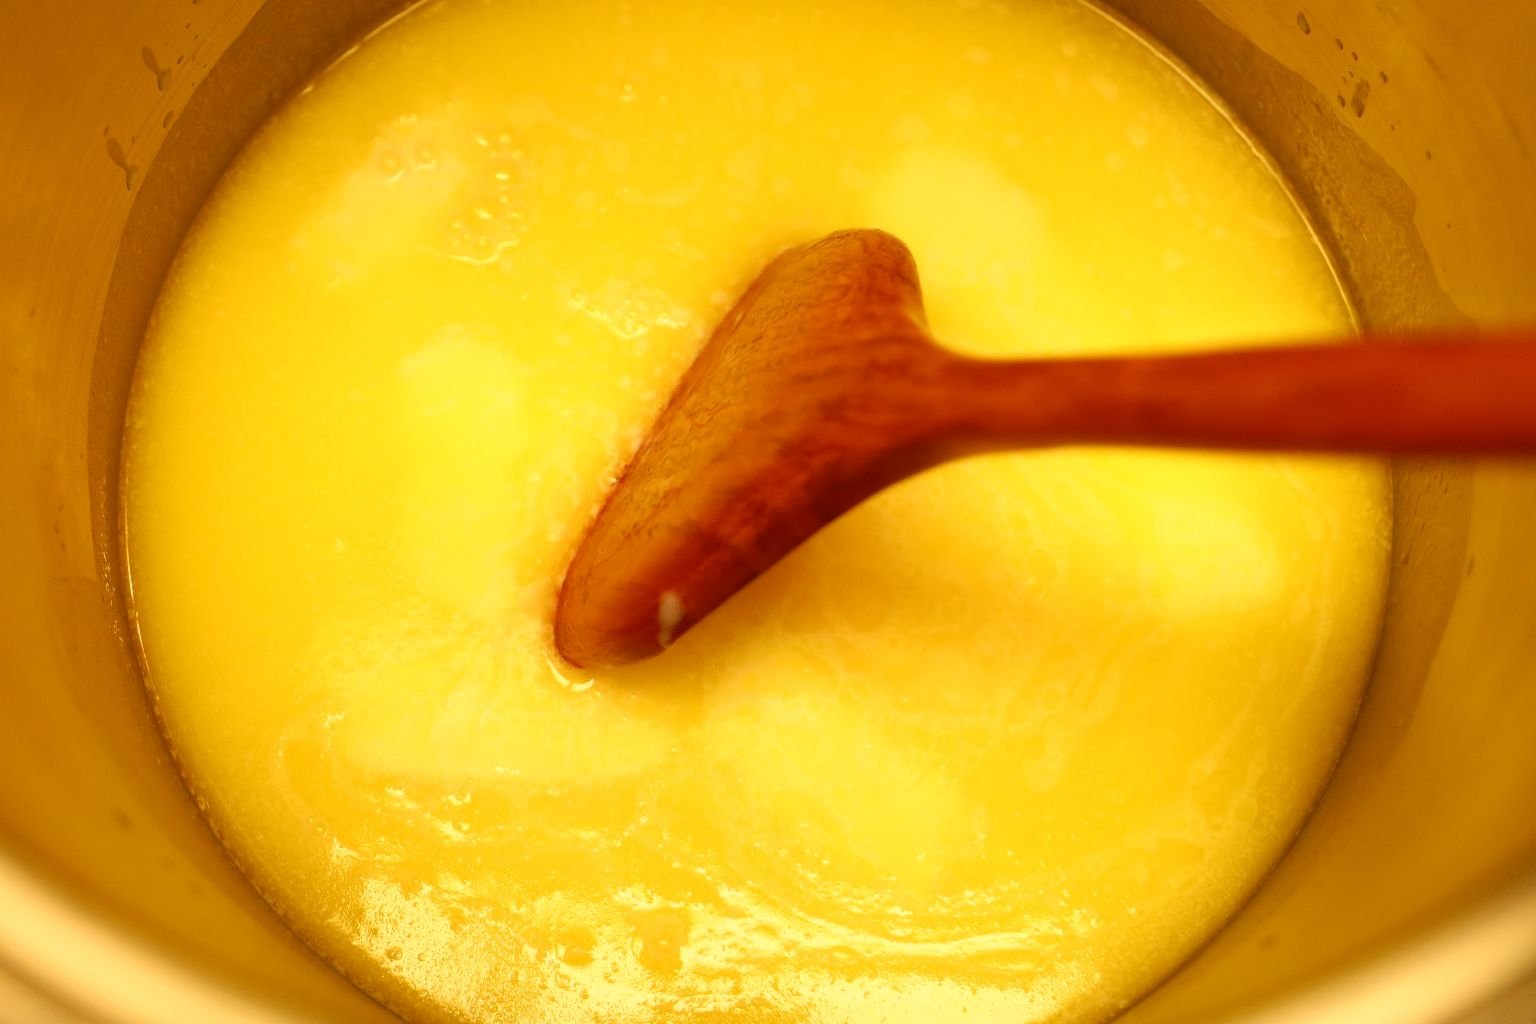
Now To Add The 5 Cups of Sugar
(Stir Constantly Until Sugar is Dissolved)
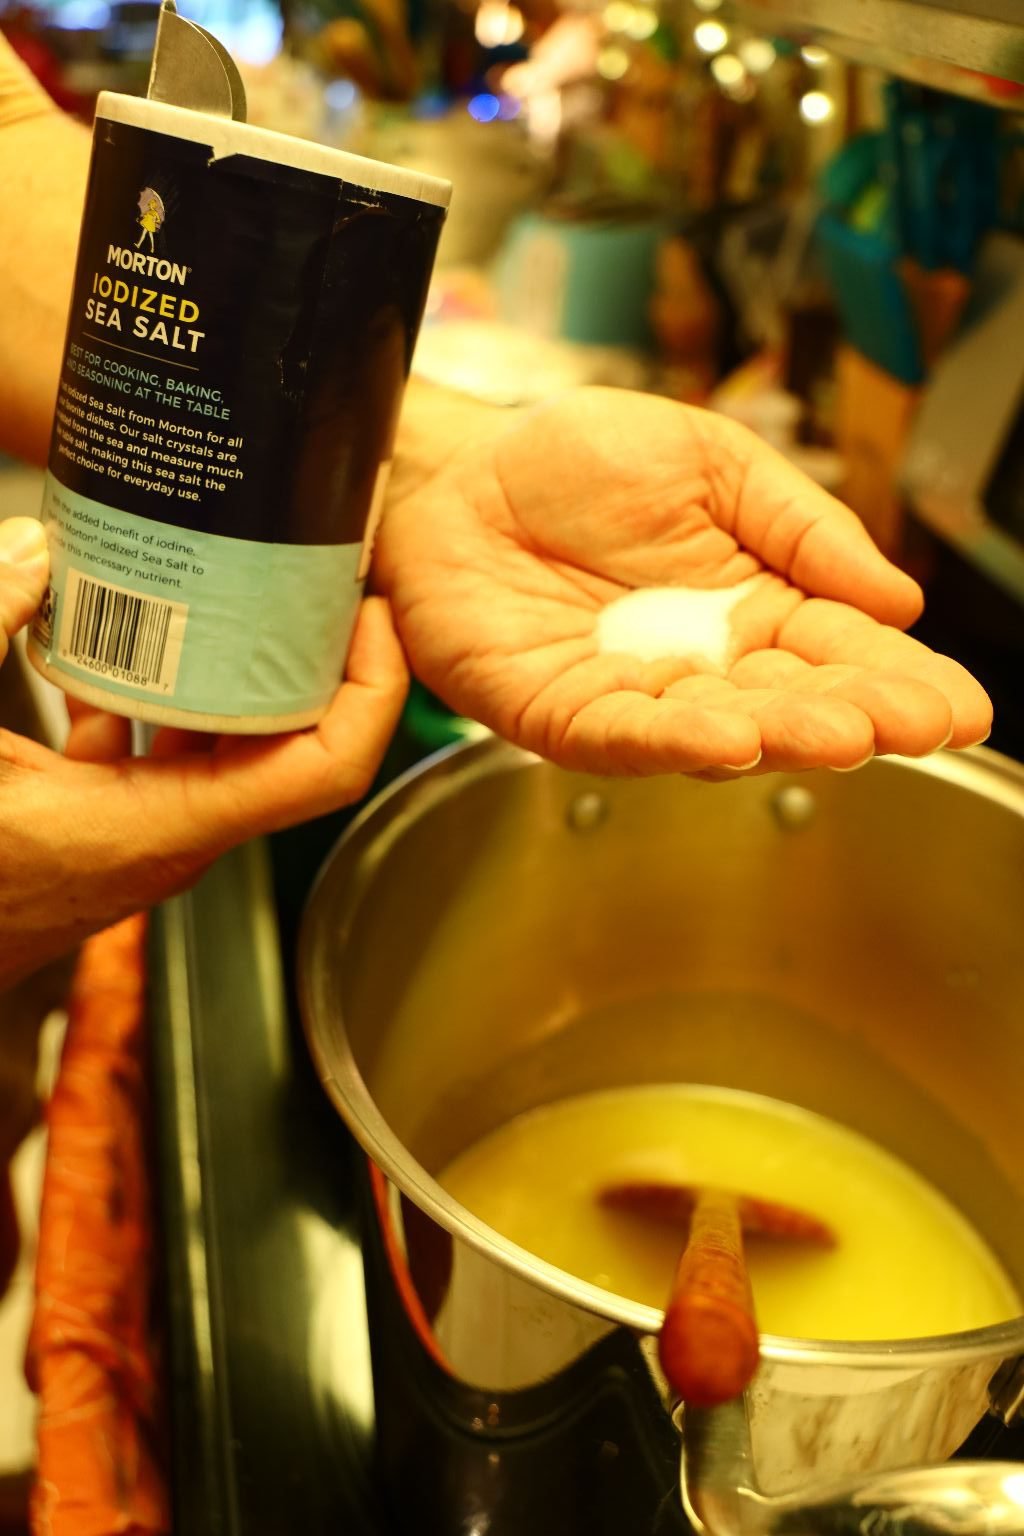
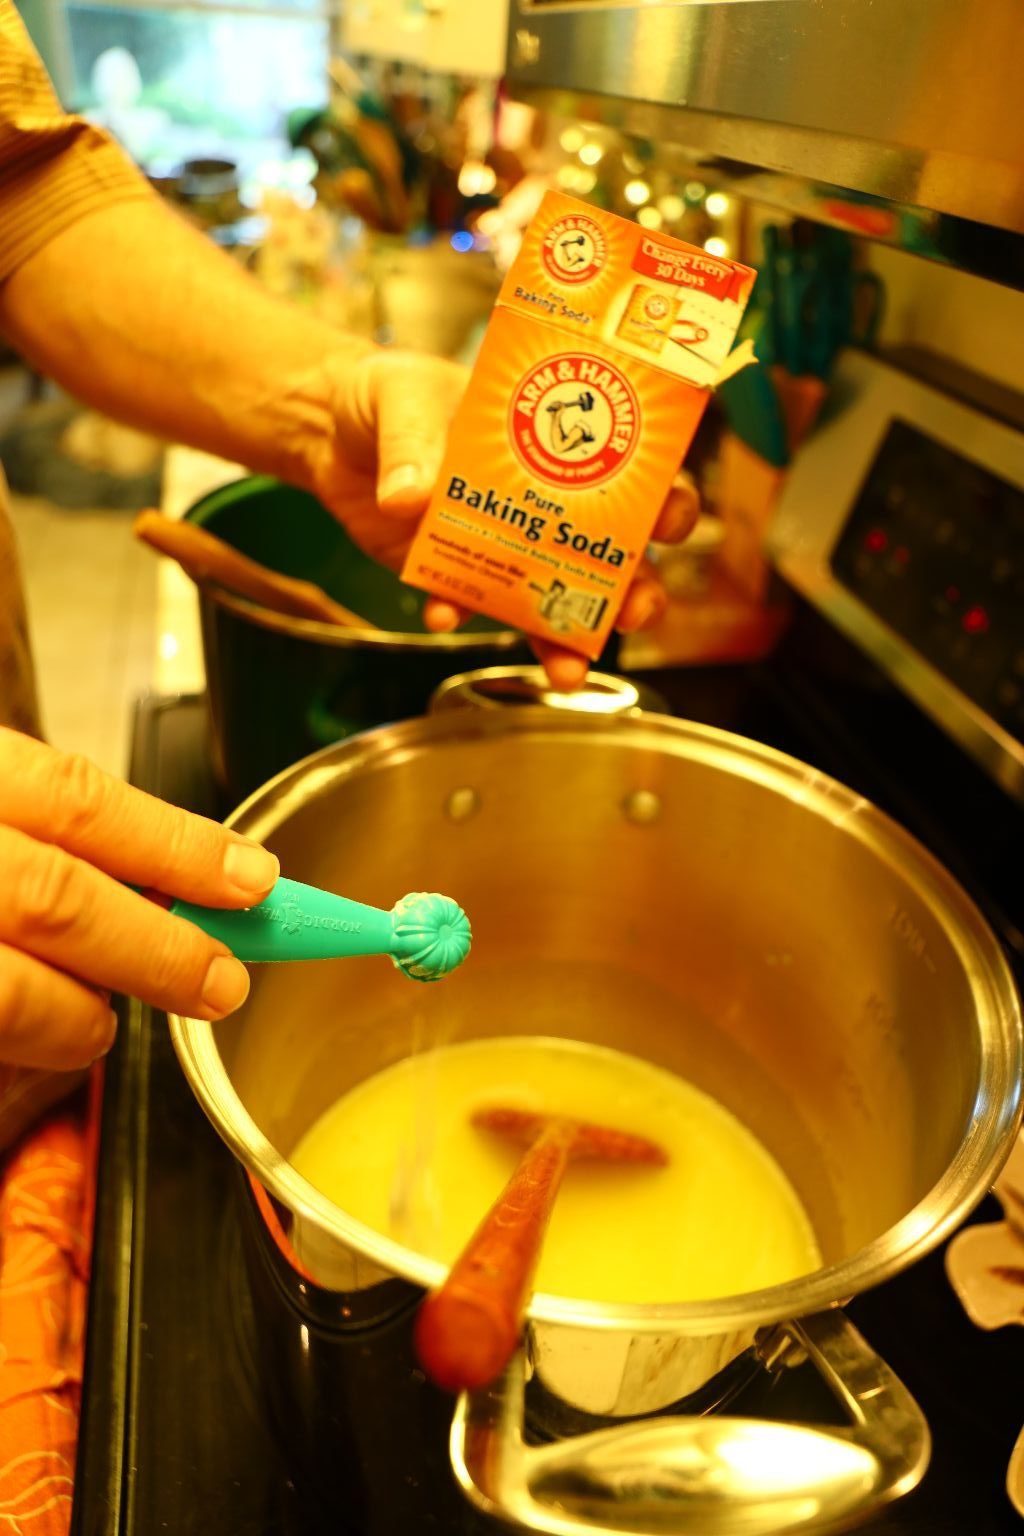
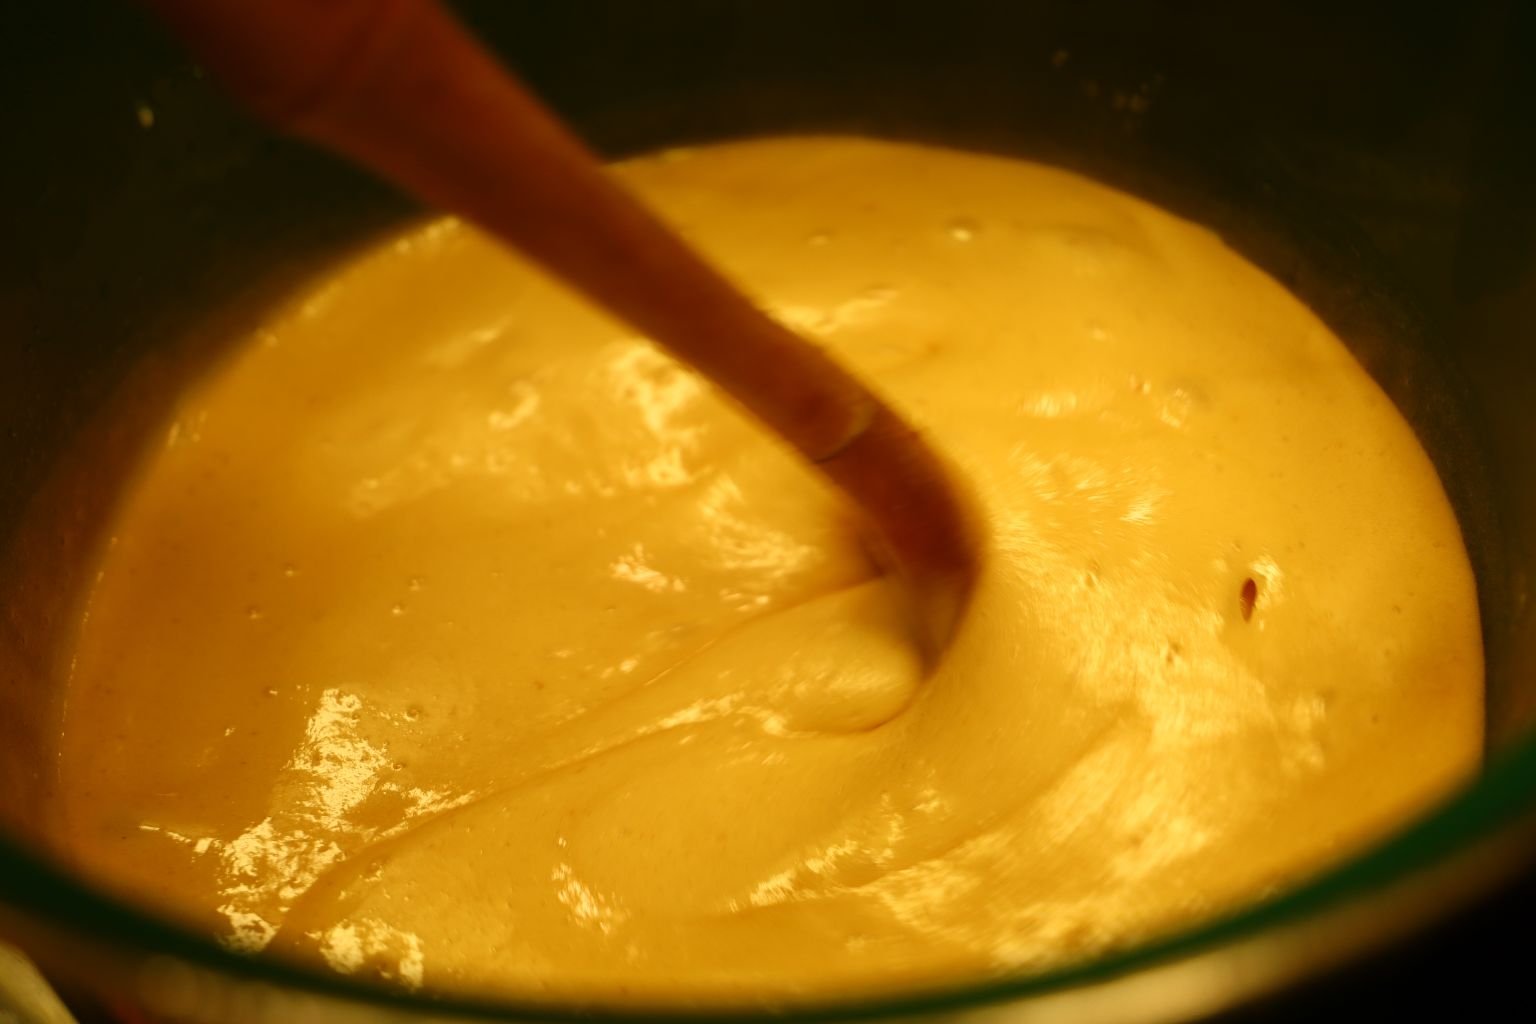
Now Add The Salt and Baking Soda
Continue To Stir
—————————————————————————
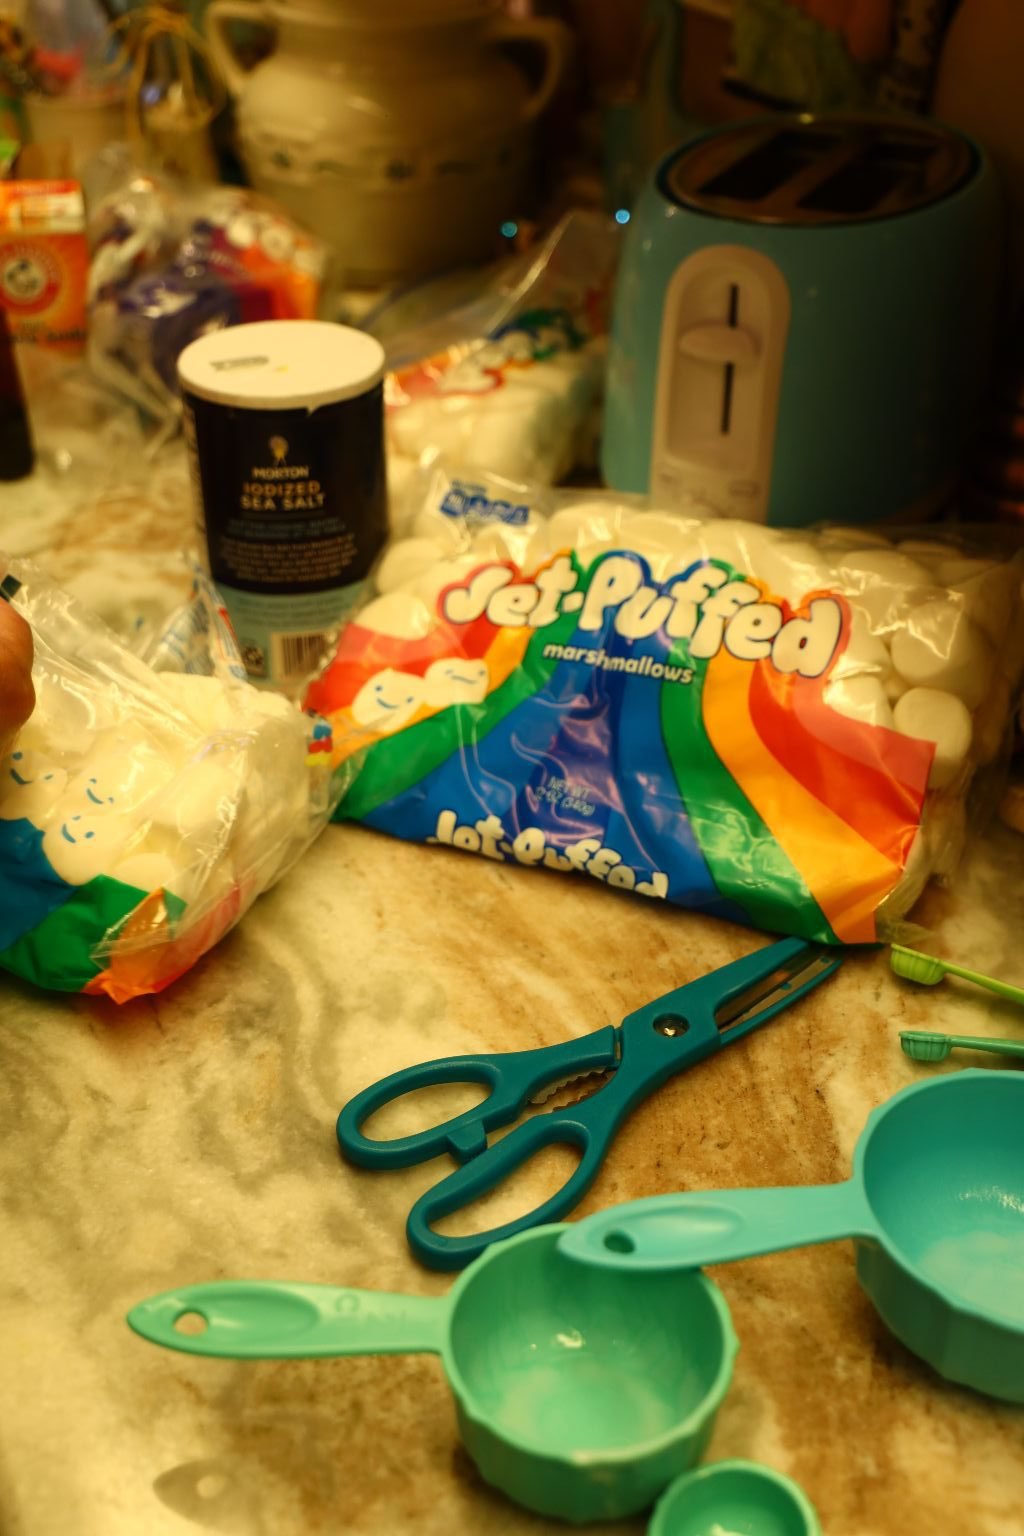
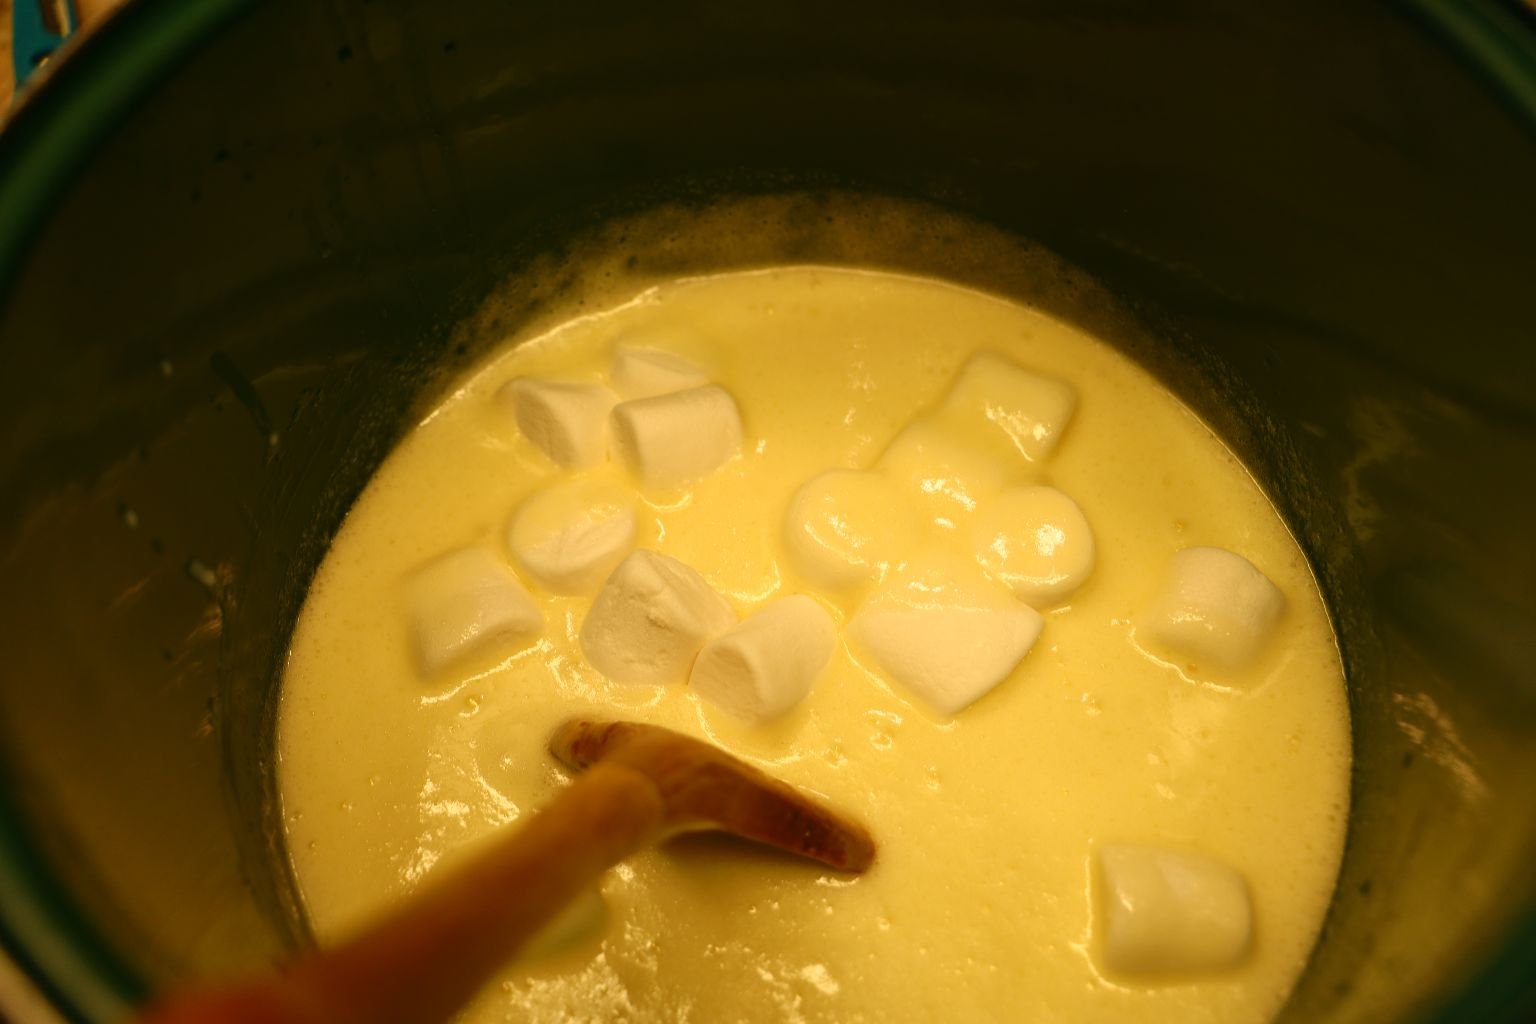
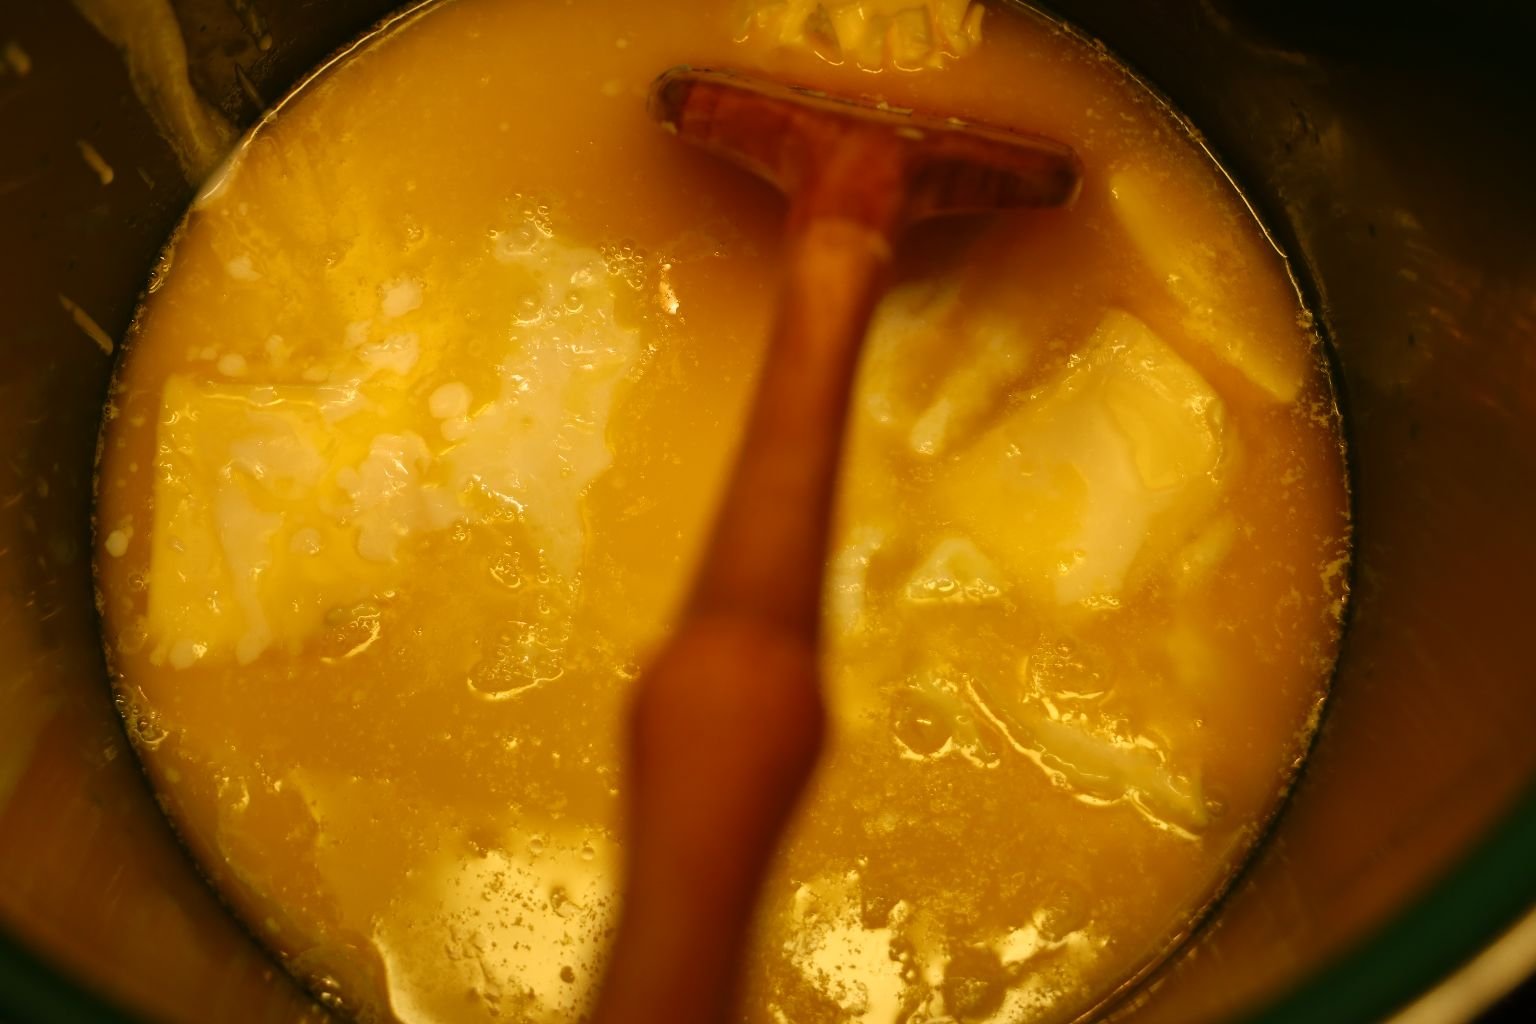
Now We Add About 30-35 Marshmallows To Melt

Again, Stirring Constantly
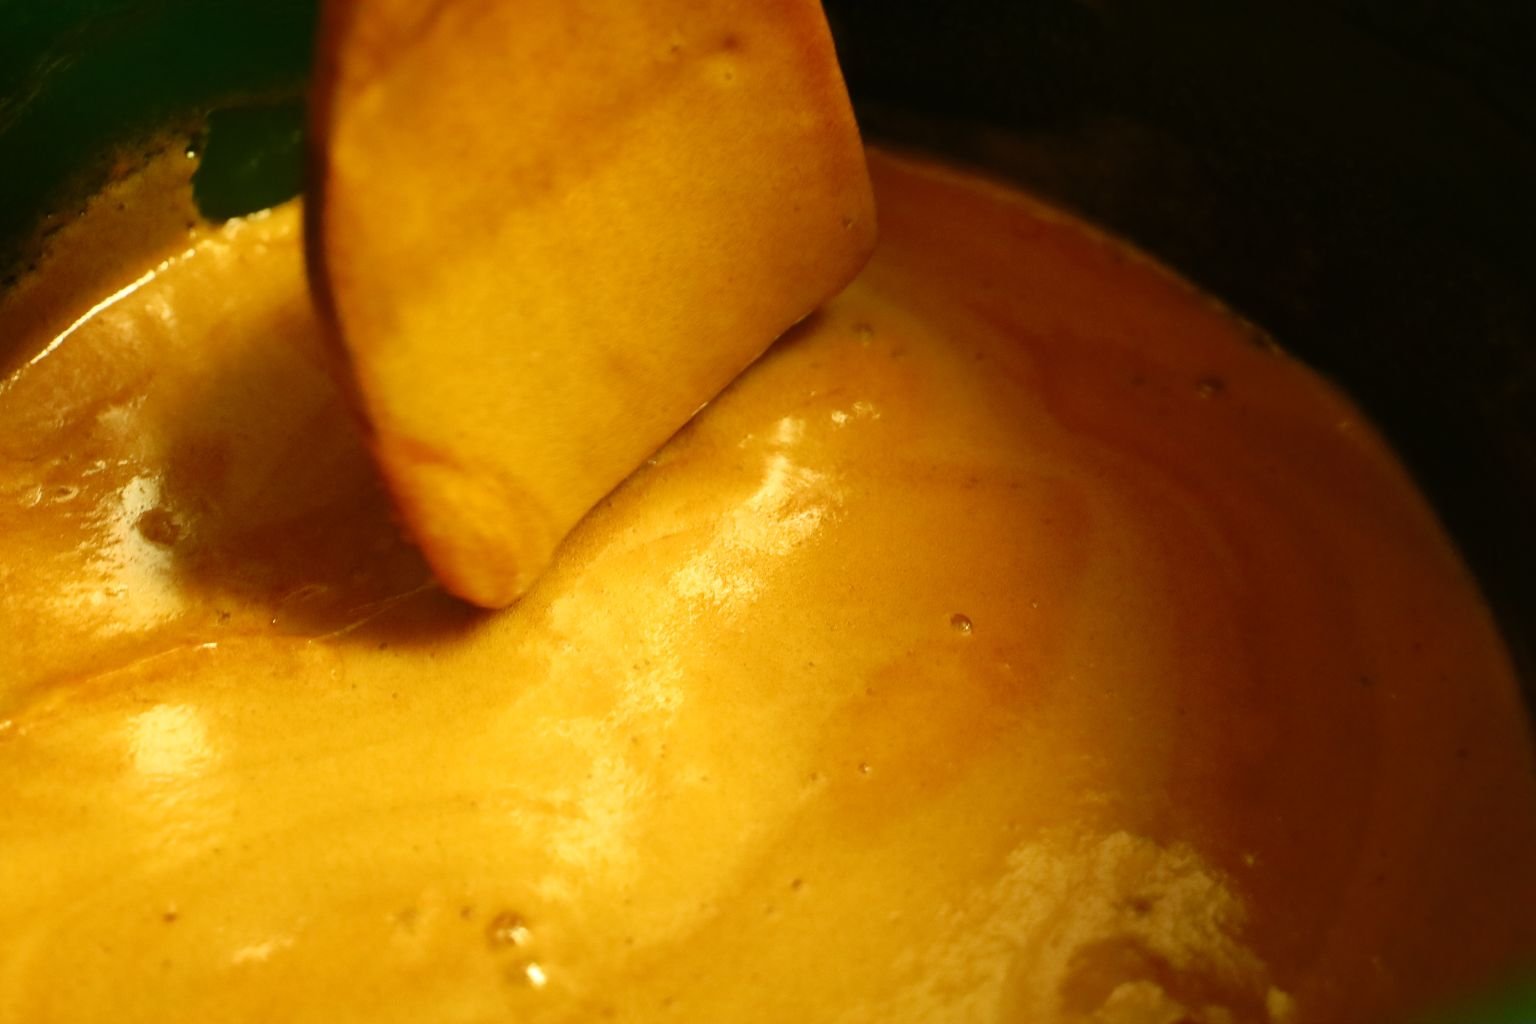
It Will Expand As It Cooks

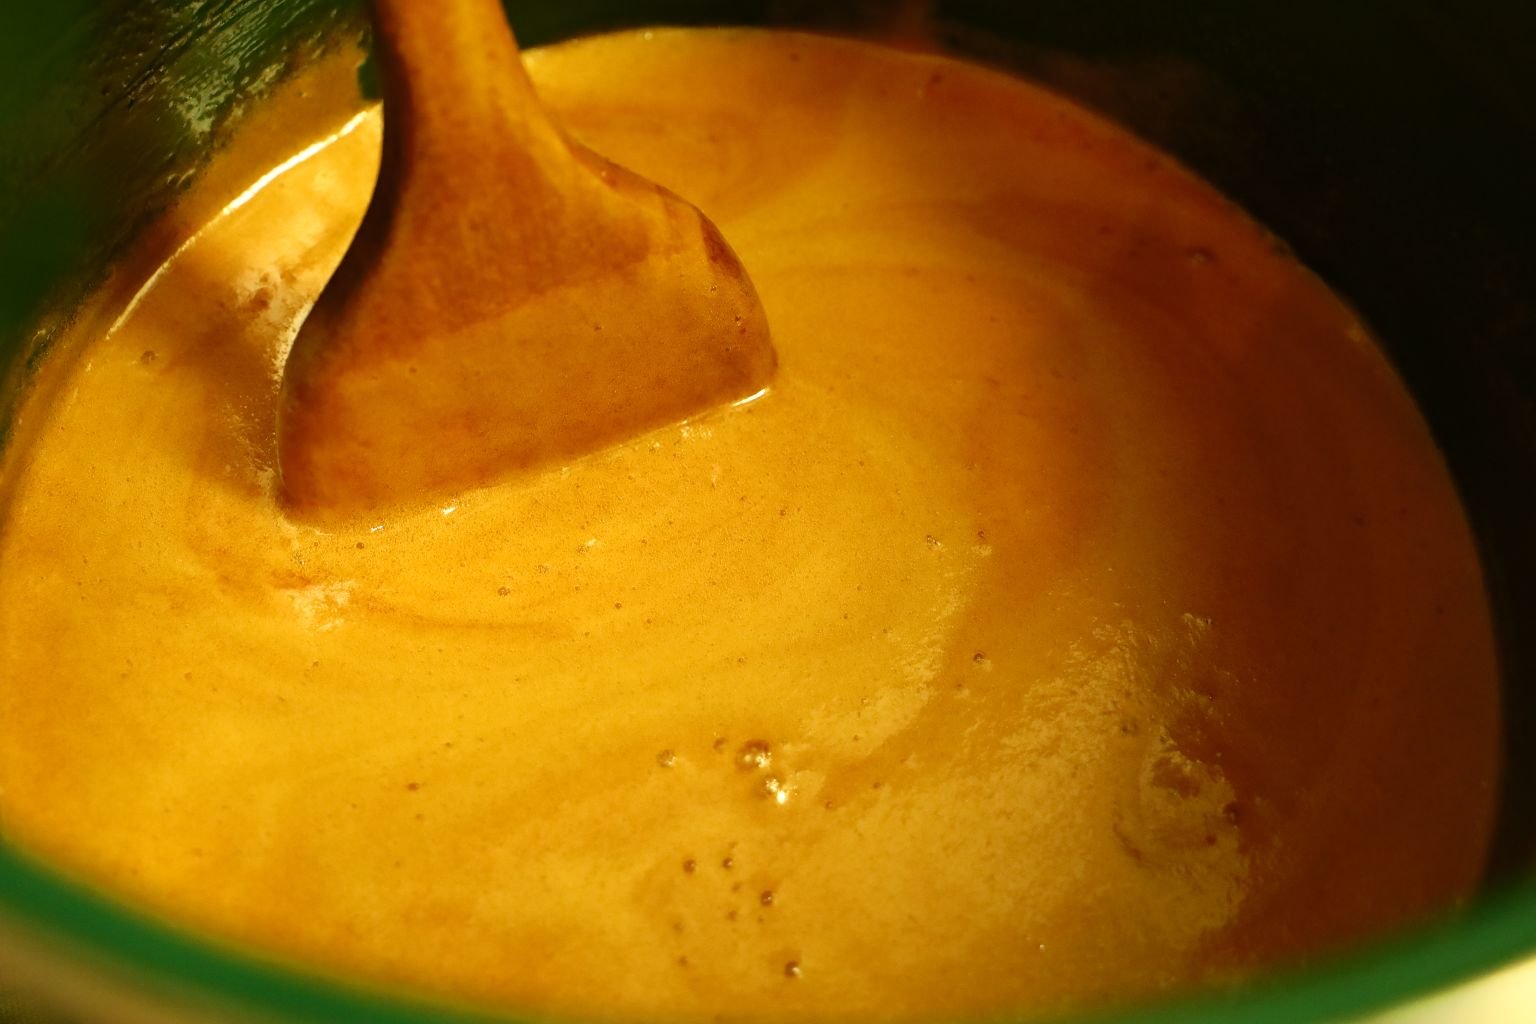
In order to make an icing you want the caramel to reach 238F. However, as we were cooking this, and it took a very long time, it was spitting hot lava at us. Gordon even got a 3rd. degree burn on his finger. Therefore, we stopped at about 225F. That way, the caramel is delicious and creamy, but not deadly.
—————————————————————————
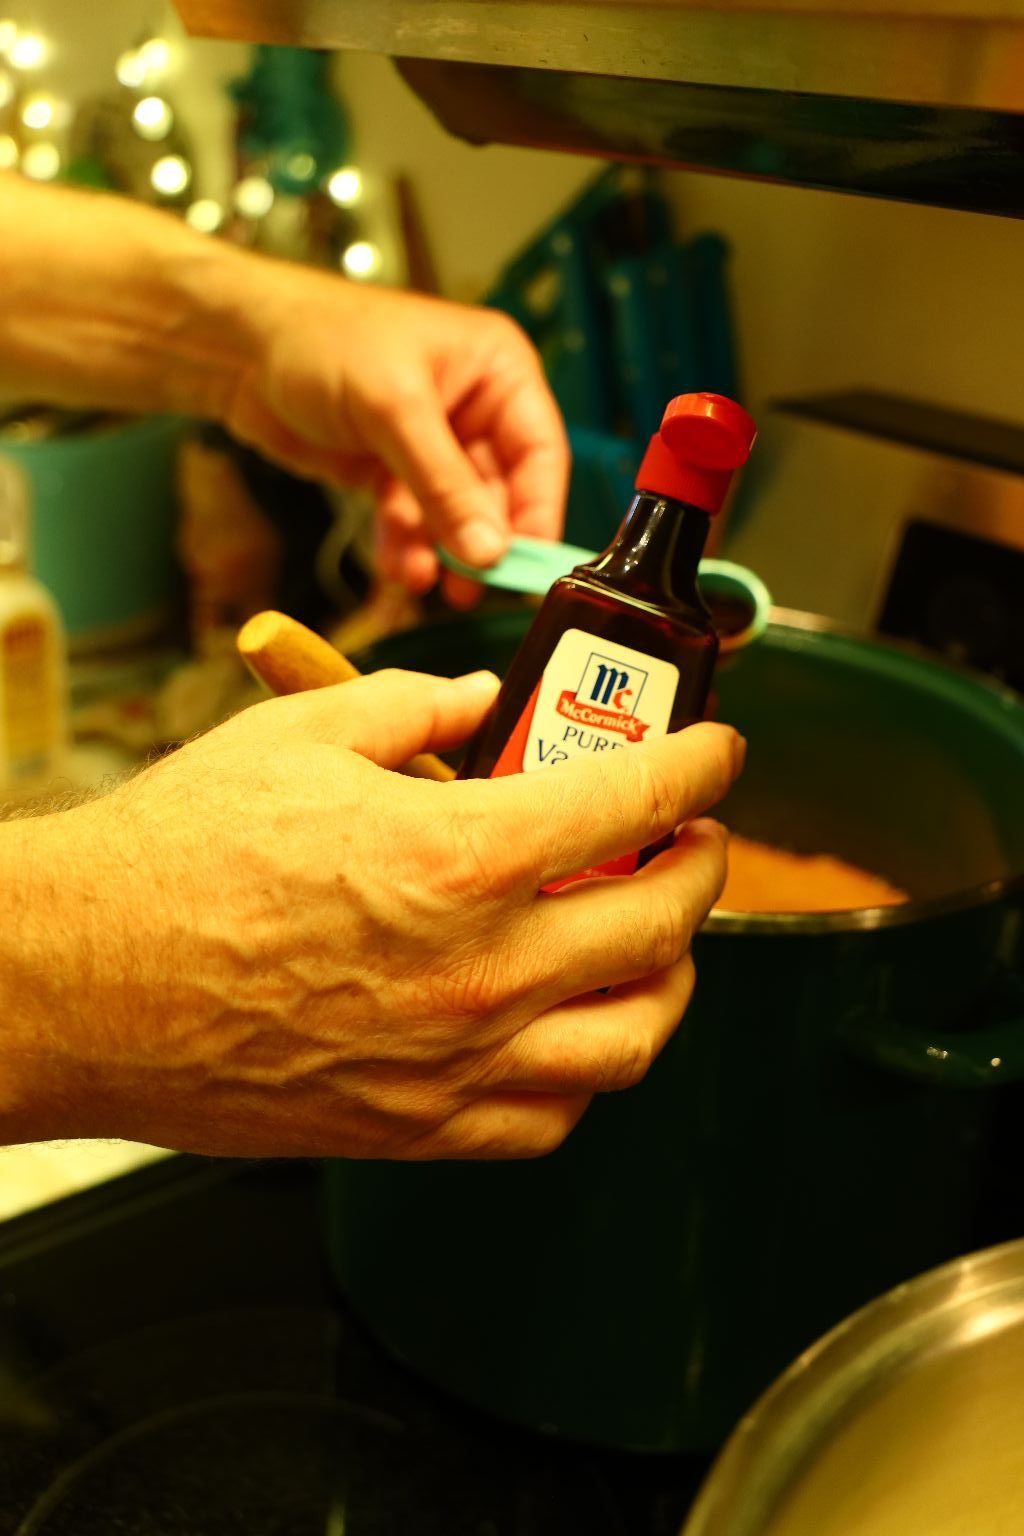
When it reaches the temperature that you desire, then add the Vanilla Extract.
———————————————————————-
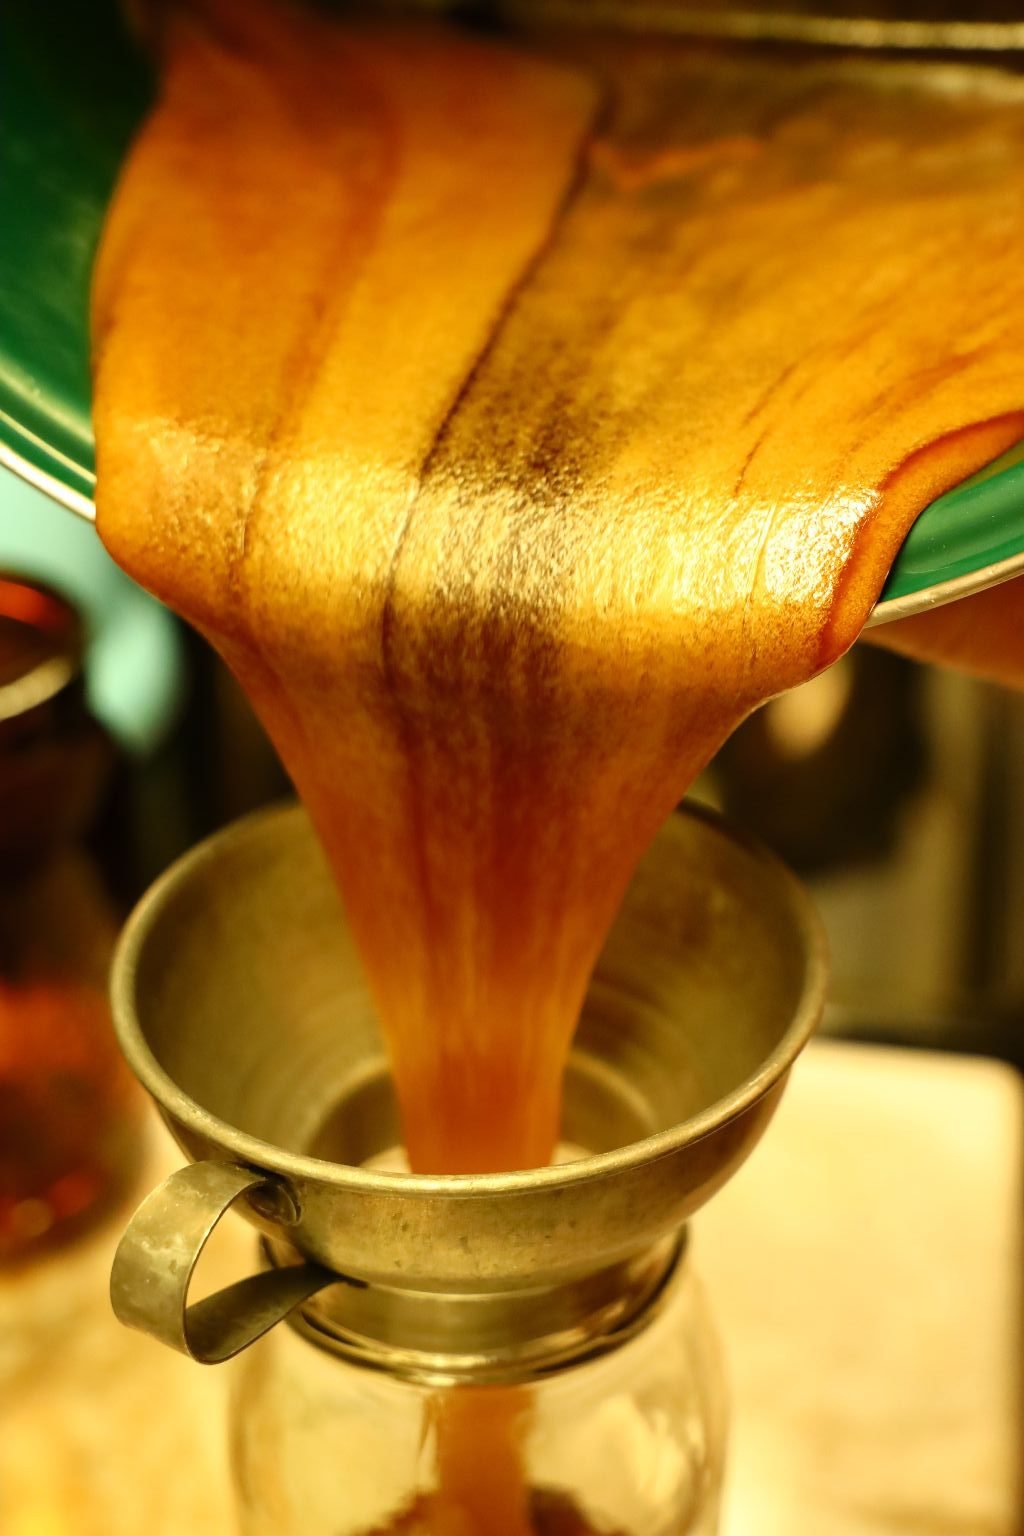
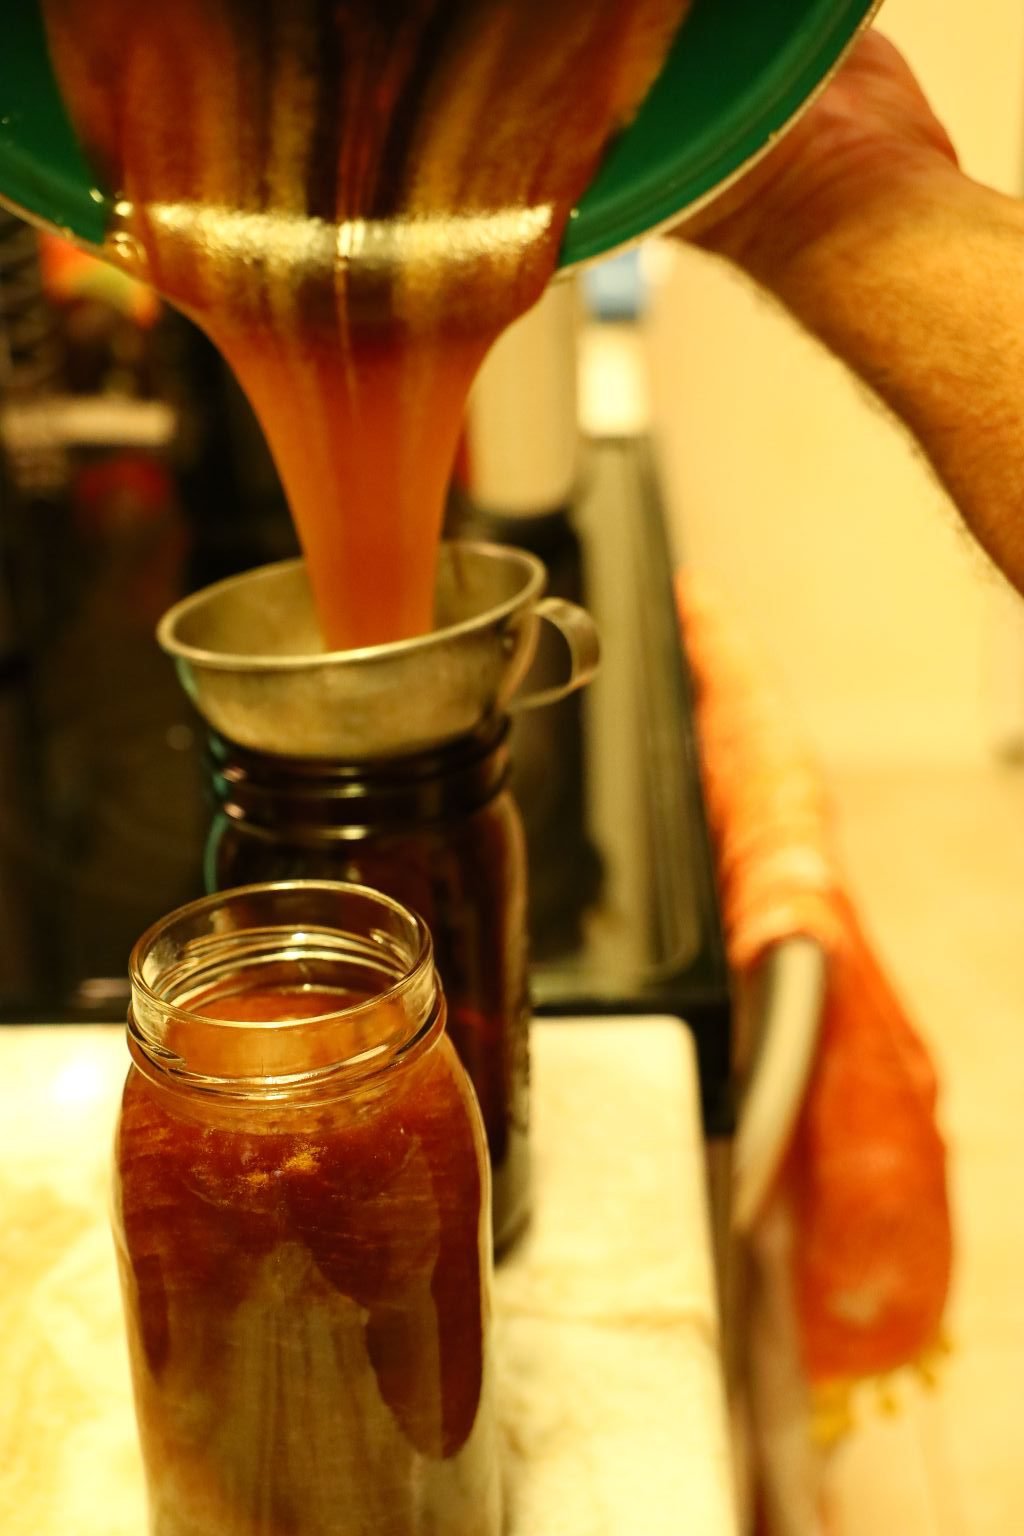
Hot Moulton Lava Caramel
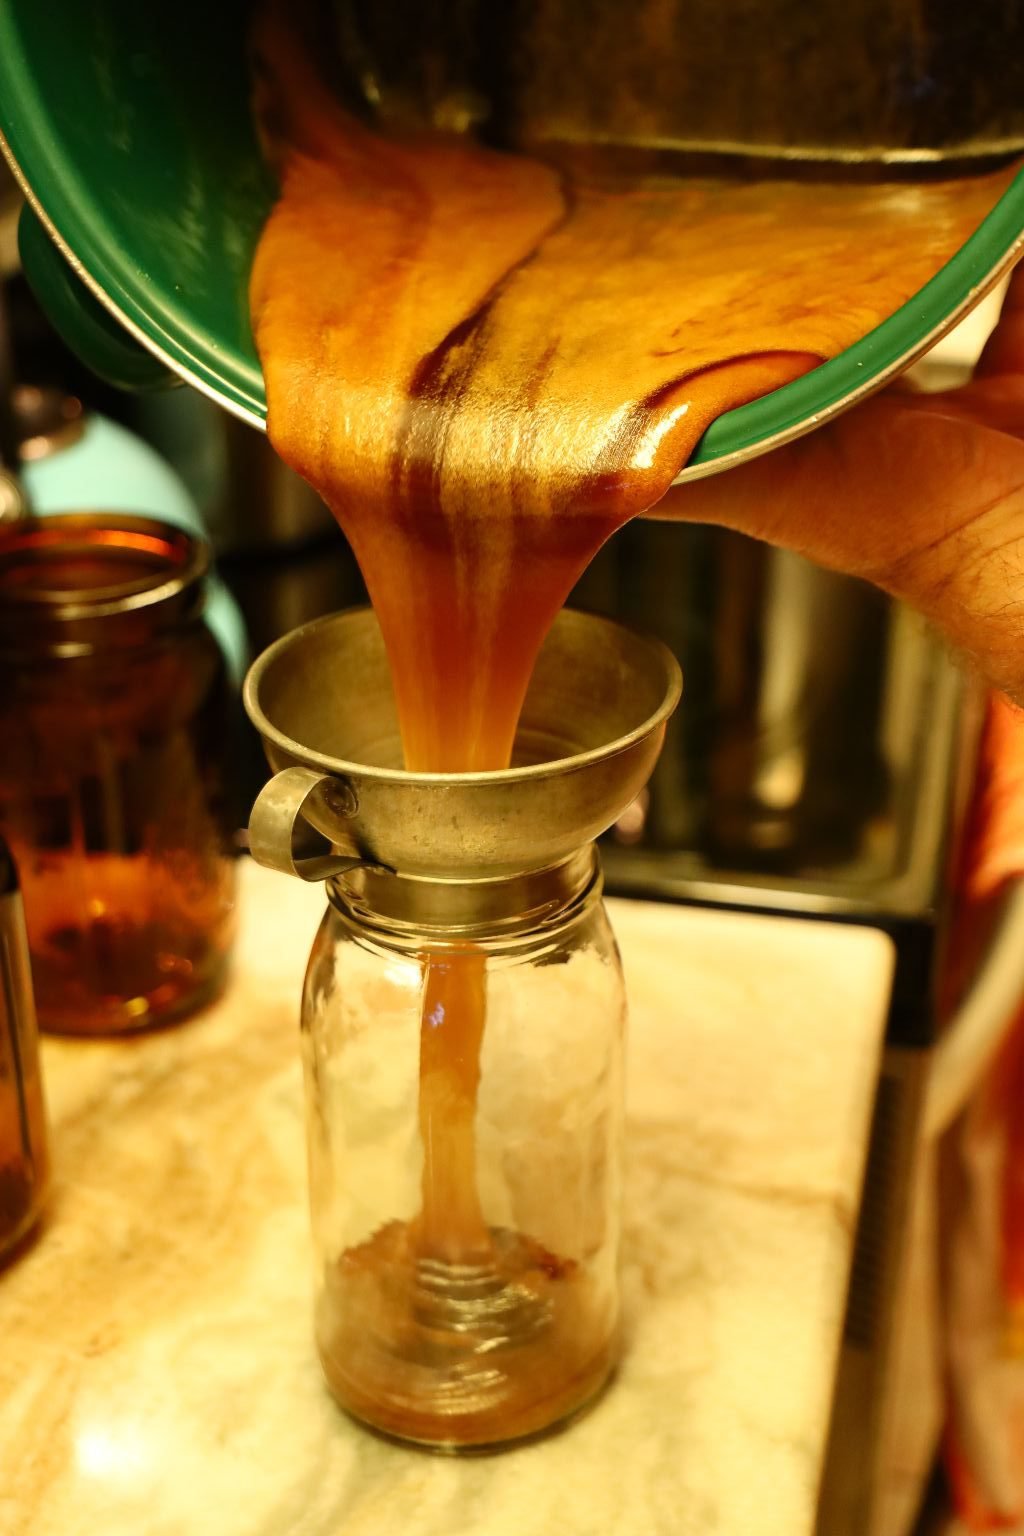
Here Gordon is Adding the Caramel to Jars
Isn’t it Beautiful?
We wanted to can the Caramel but because of the Buttermilk it isn’t safe to do so. However, we did give it as gifts to a few special people and they loved it! It lasts about 2 weeks in your refrigerator. Dollop it on everything!
———————————————————–
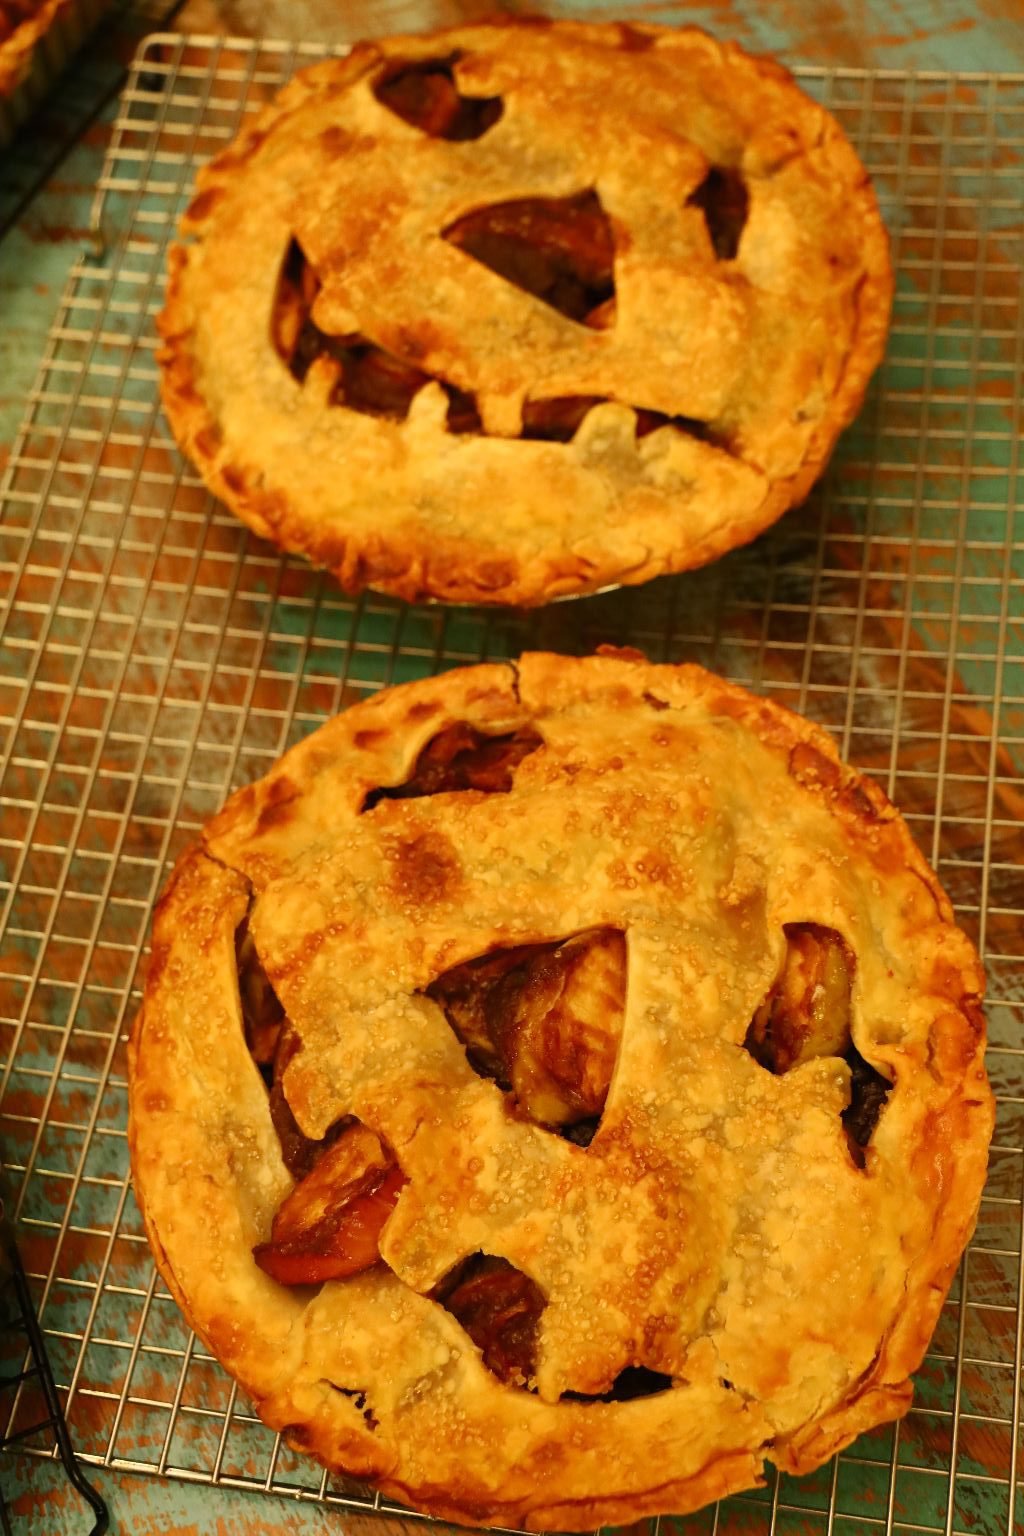
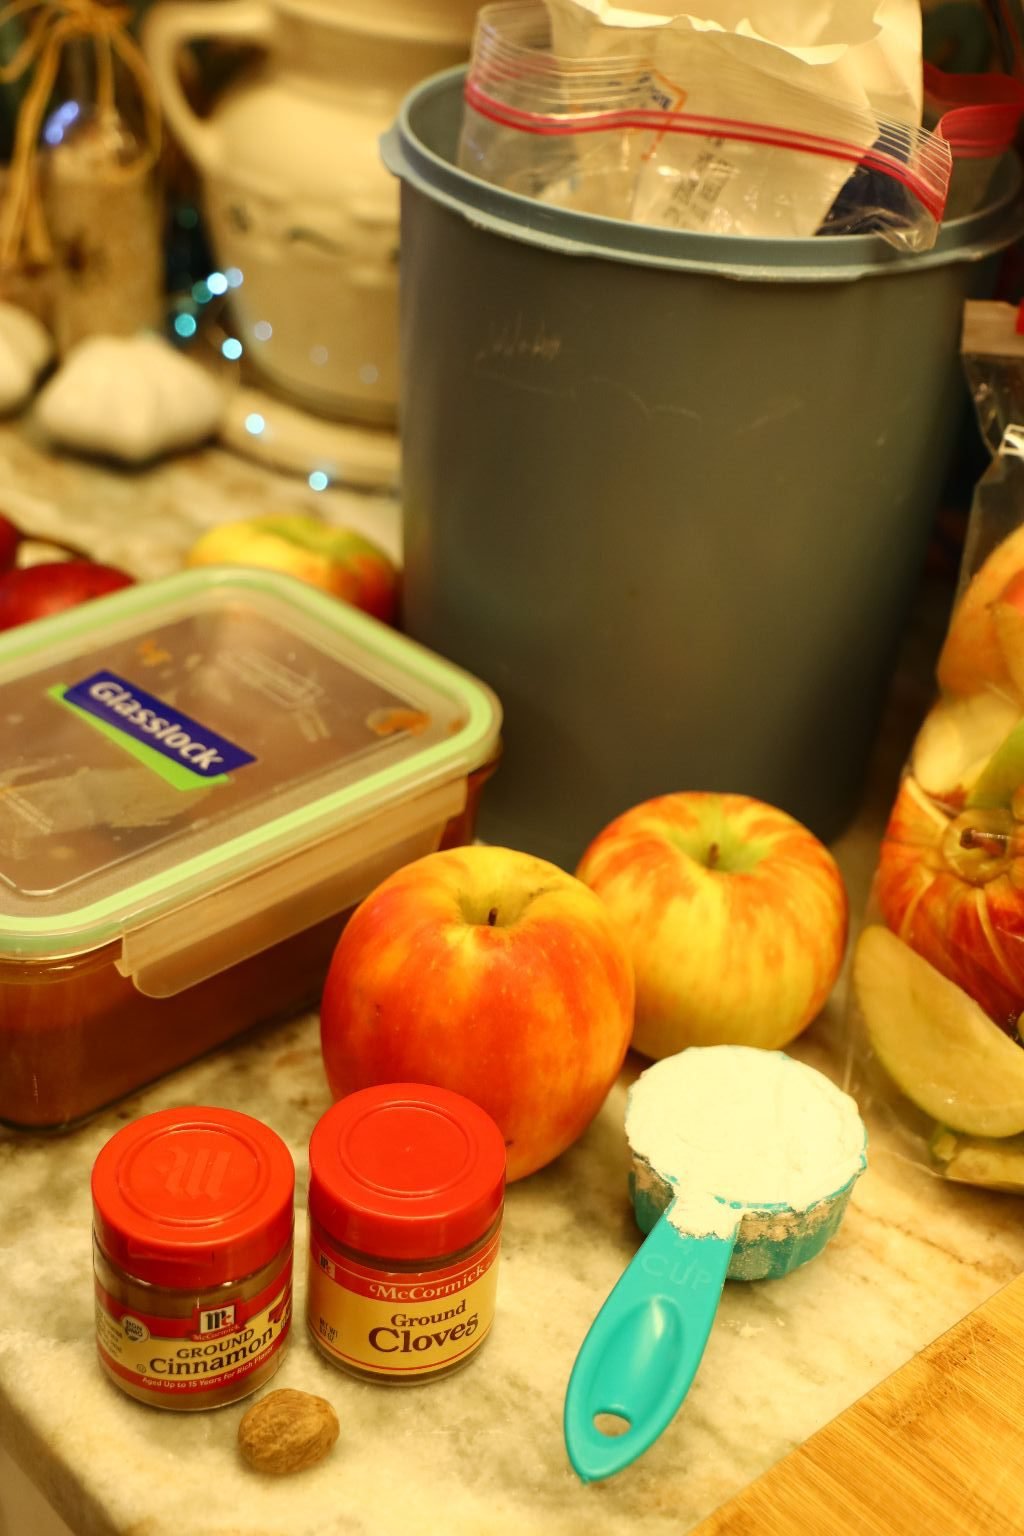
Our Halloween Pies of Apple/Pears/ and Apple Butter

Ingredients:
4 Ready made pie crusts – thawed
1/4 Cup + 2 Tbsp. flour
1 1/2 Tbsp. Ground Cinnamon
1/2 Tbsp. Ground Cloves
1/2 tsp. Freshly Ground Nutmeg
1/2 tsp. Salt
2 Tbsp. Unsalted Butter
1 Cup Musselman’s Apple butter (or any you prefer)
1/4 Cup Sugar
1 Pear – sliced thinly
7-8 Apples – (Gala, Granny Smith, Fuji, Red Delicious, Golden Delicious, Pink Lady and Honeycrisp – sliced thinly
1/2 Cup Lemon Juice
1 egg
1 Tbsp. Water
3 Tbsp. Sugar in the Raw
——————————————————————–
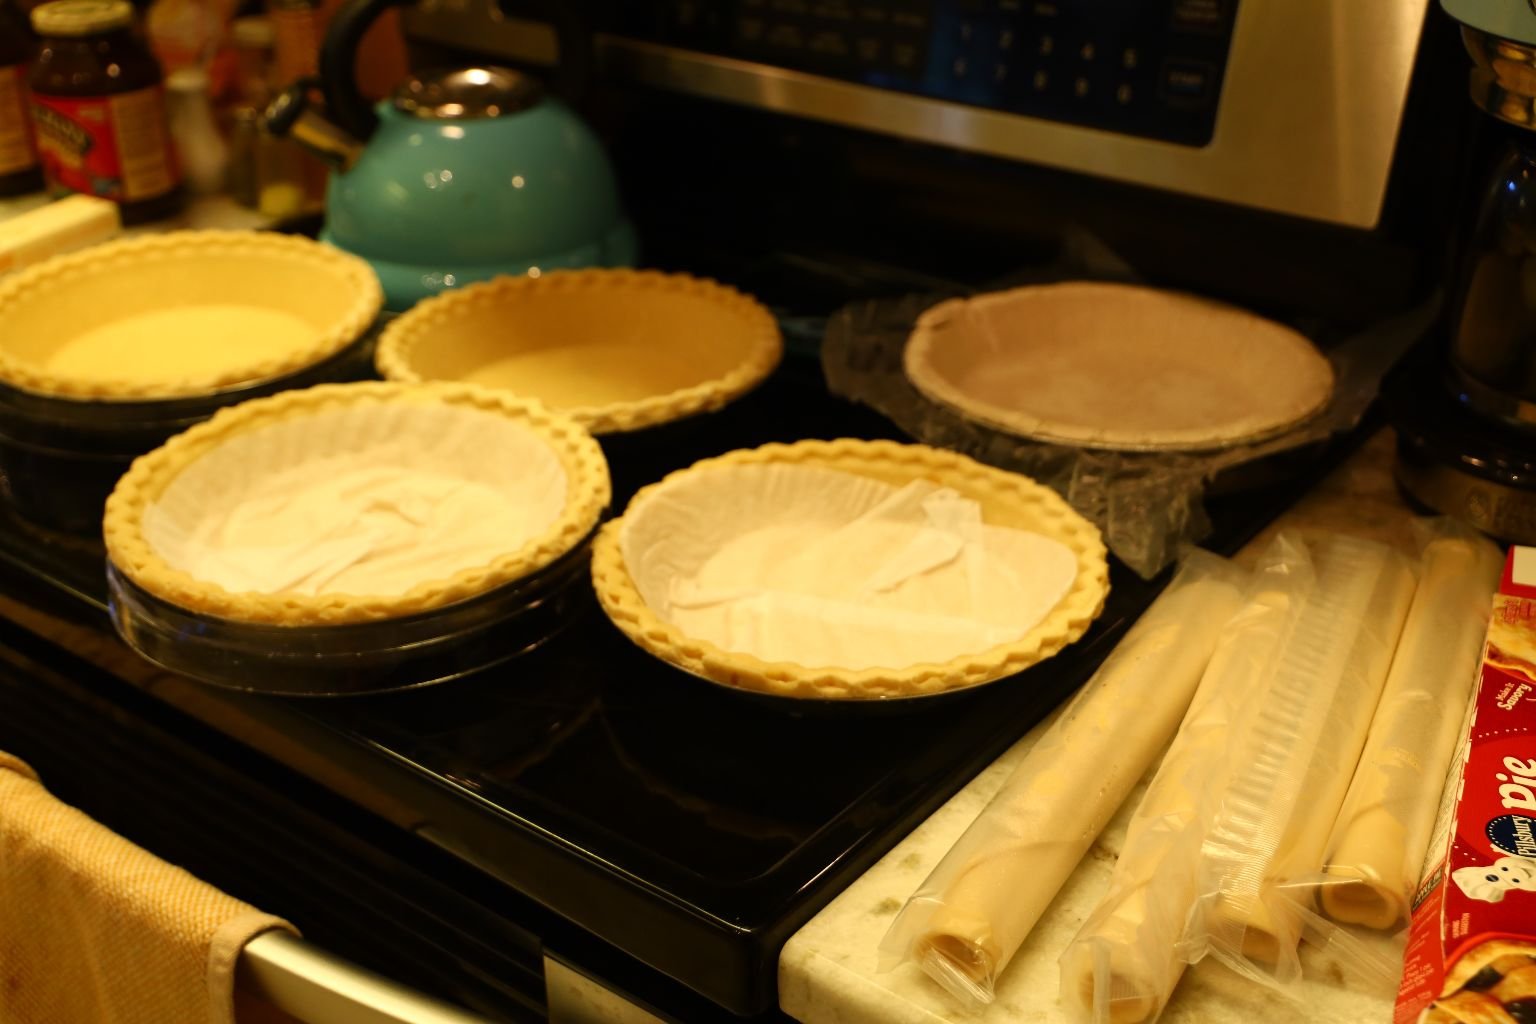
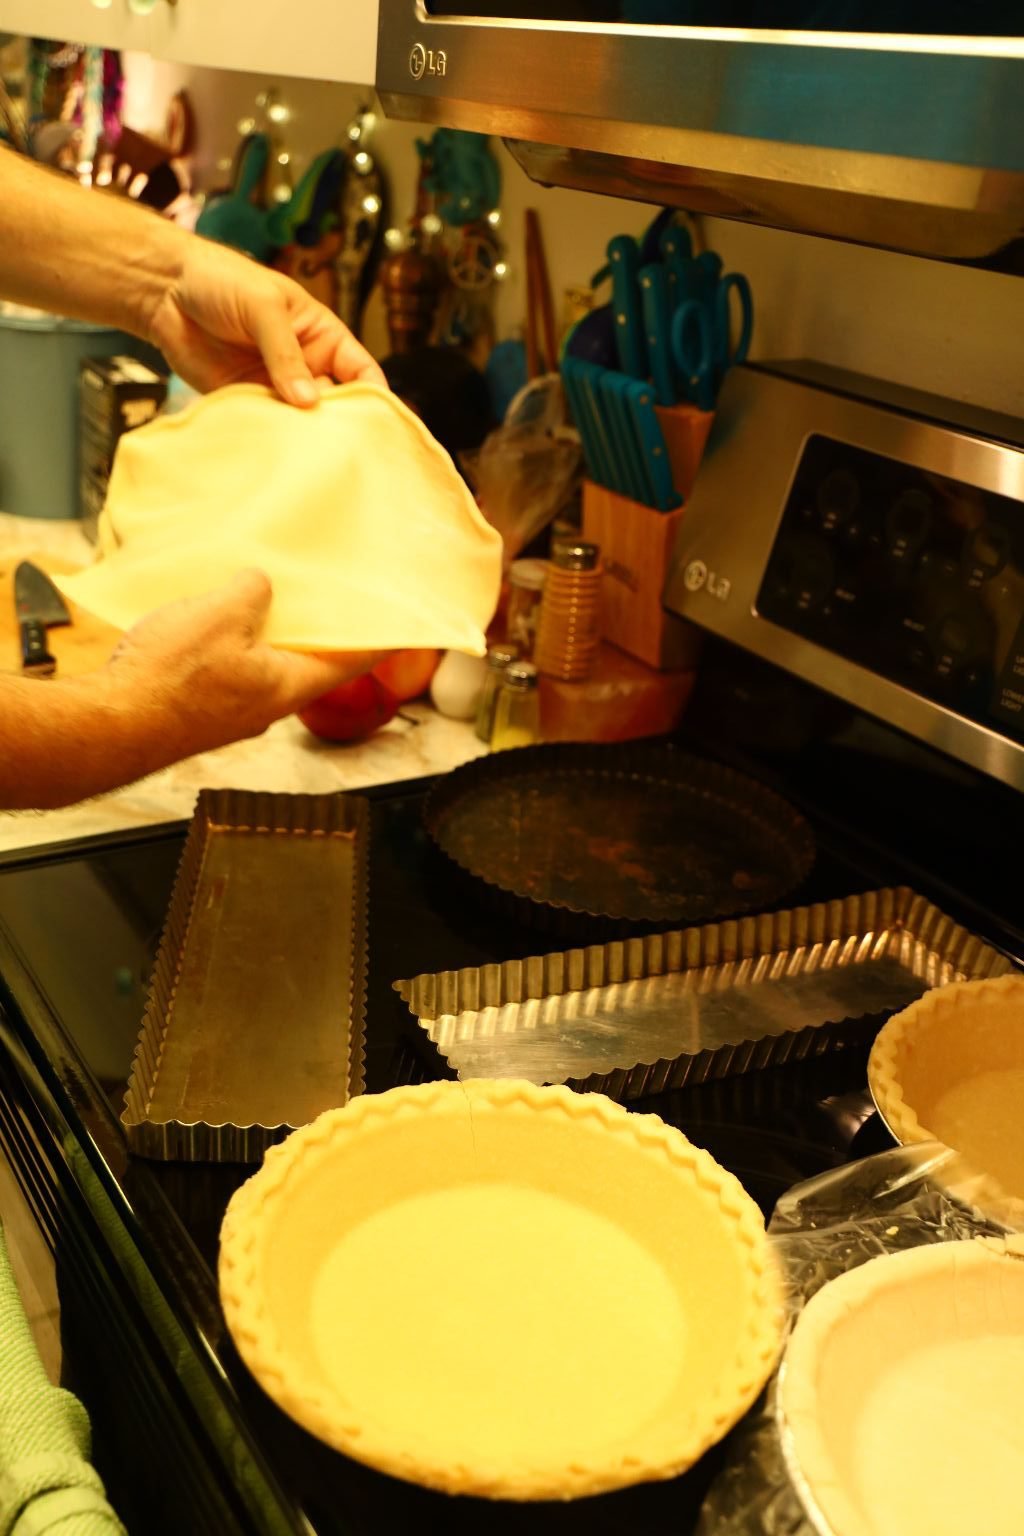
Here you see all the pie crusts which we used for both the pies and tarts.
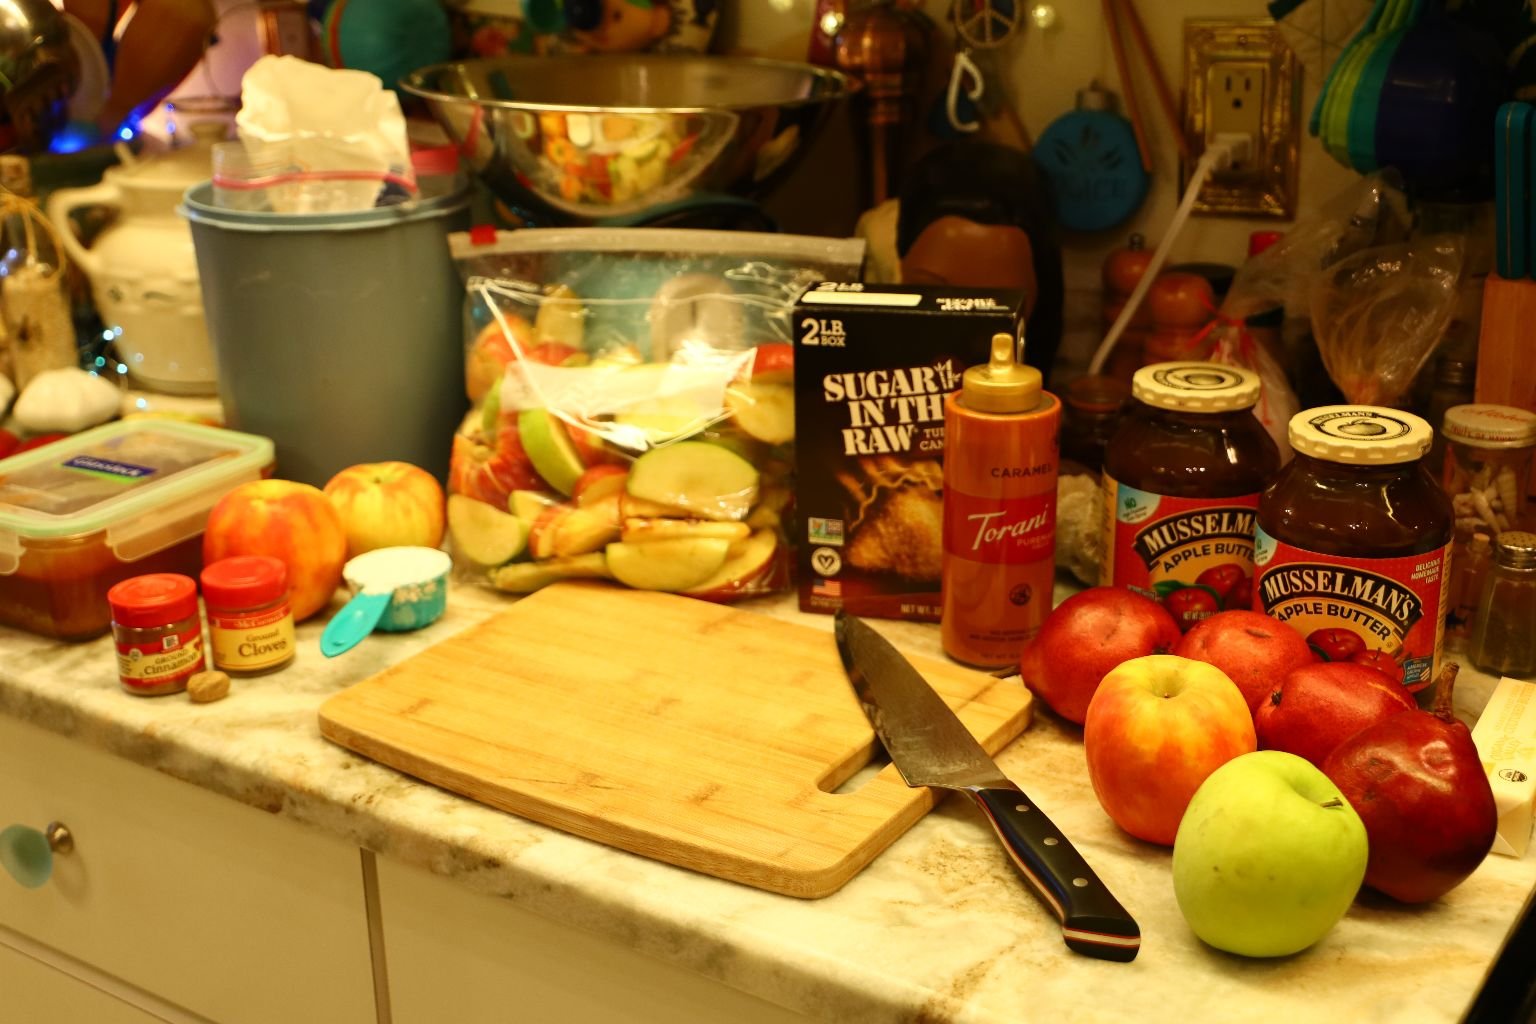
Here are all the ingredients we used for also both the pies and tarts.
——————————————————————–
—————————————————————————–
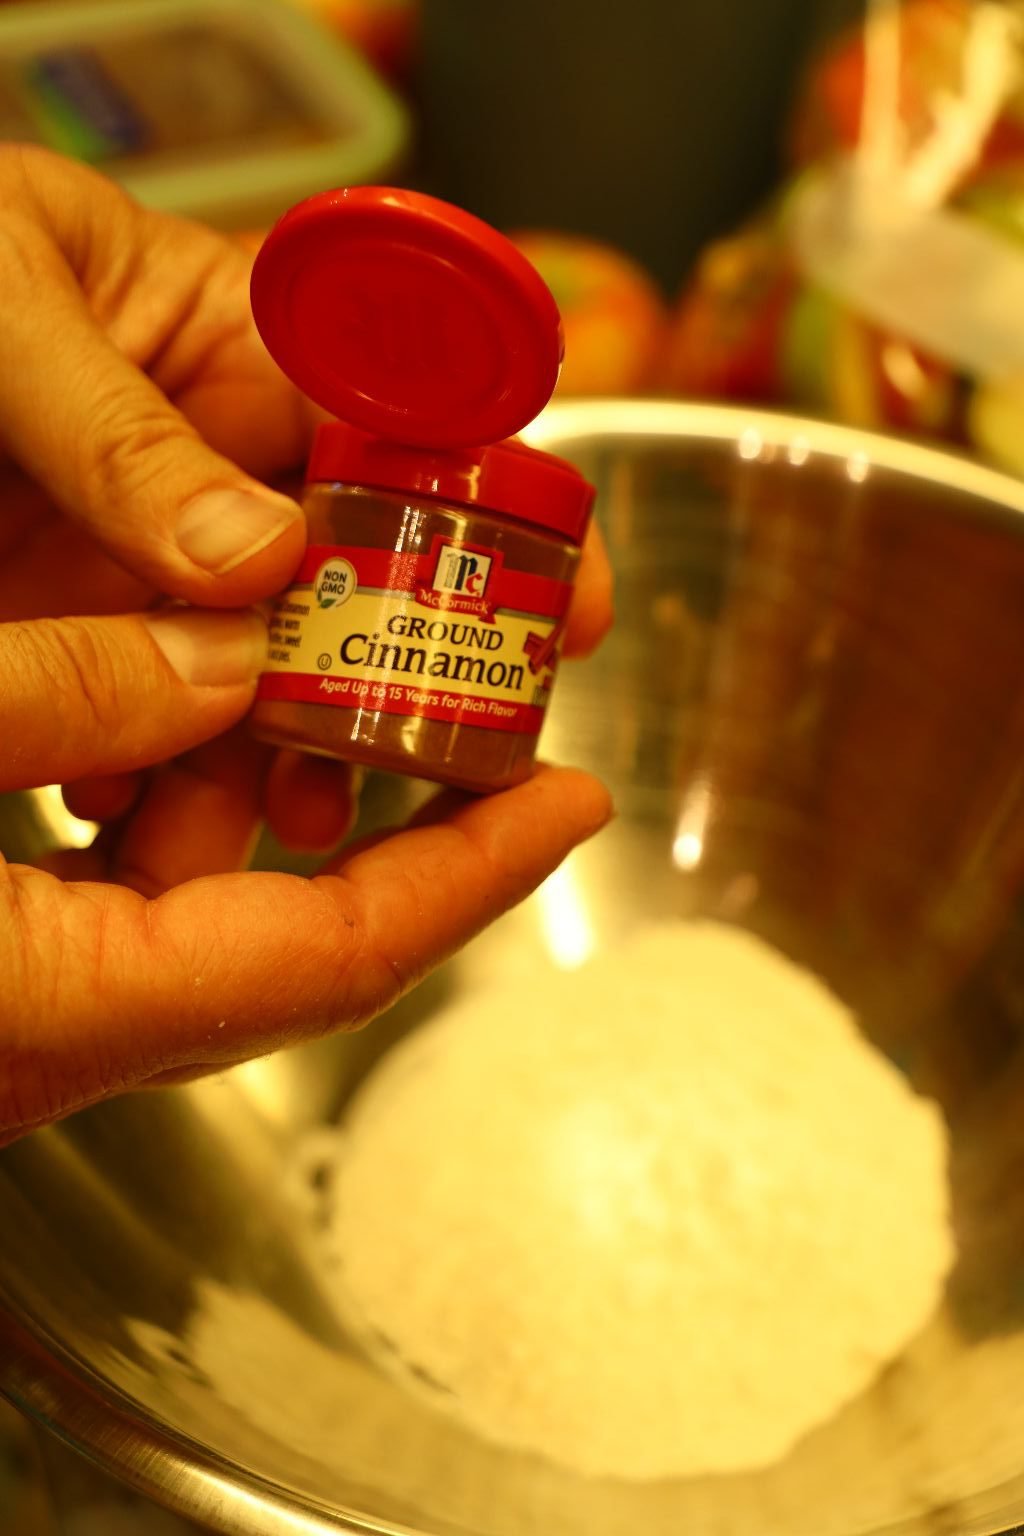
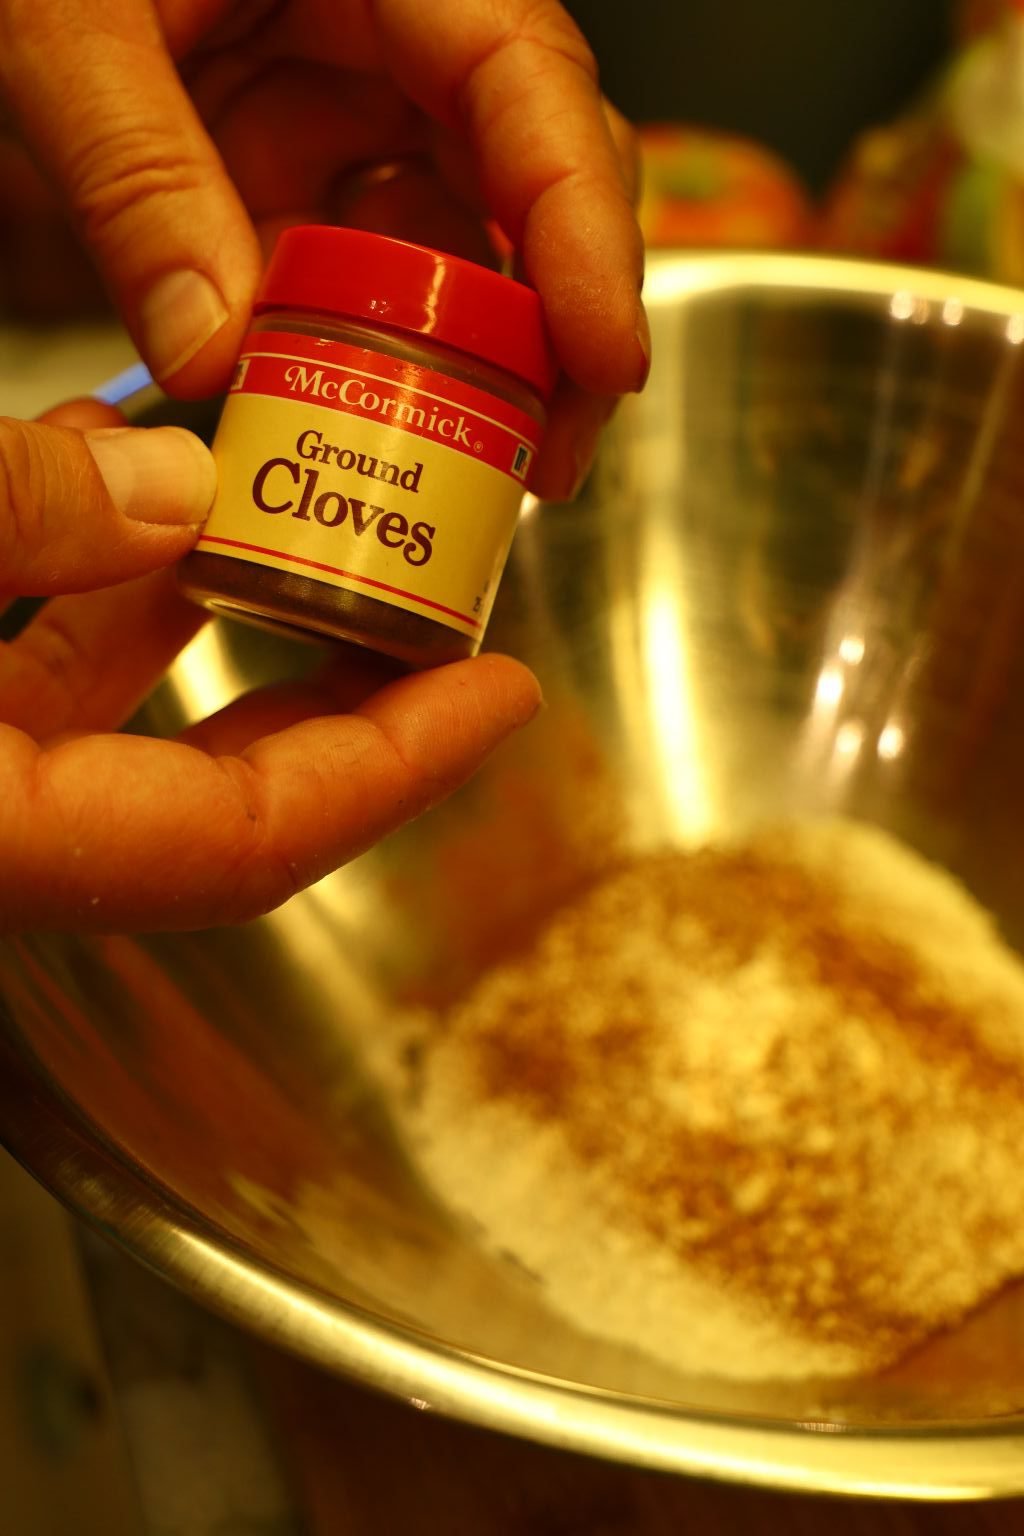
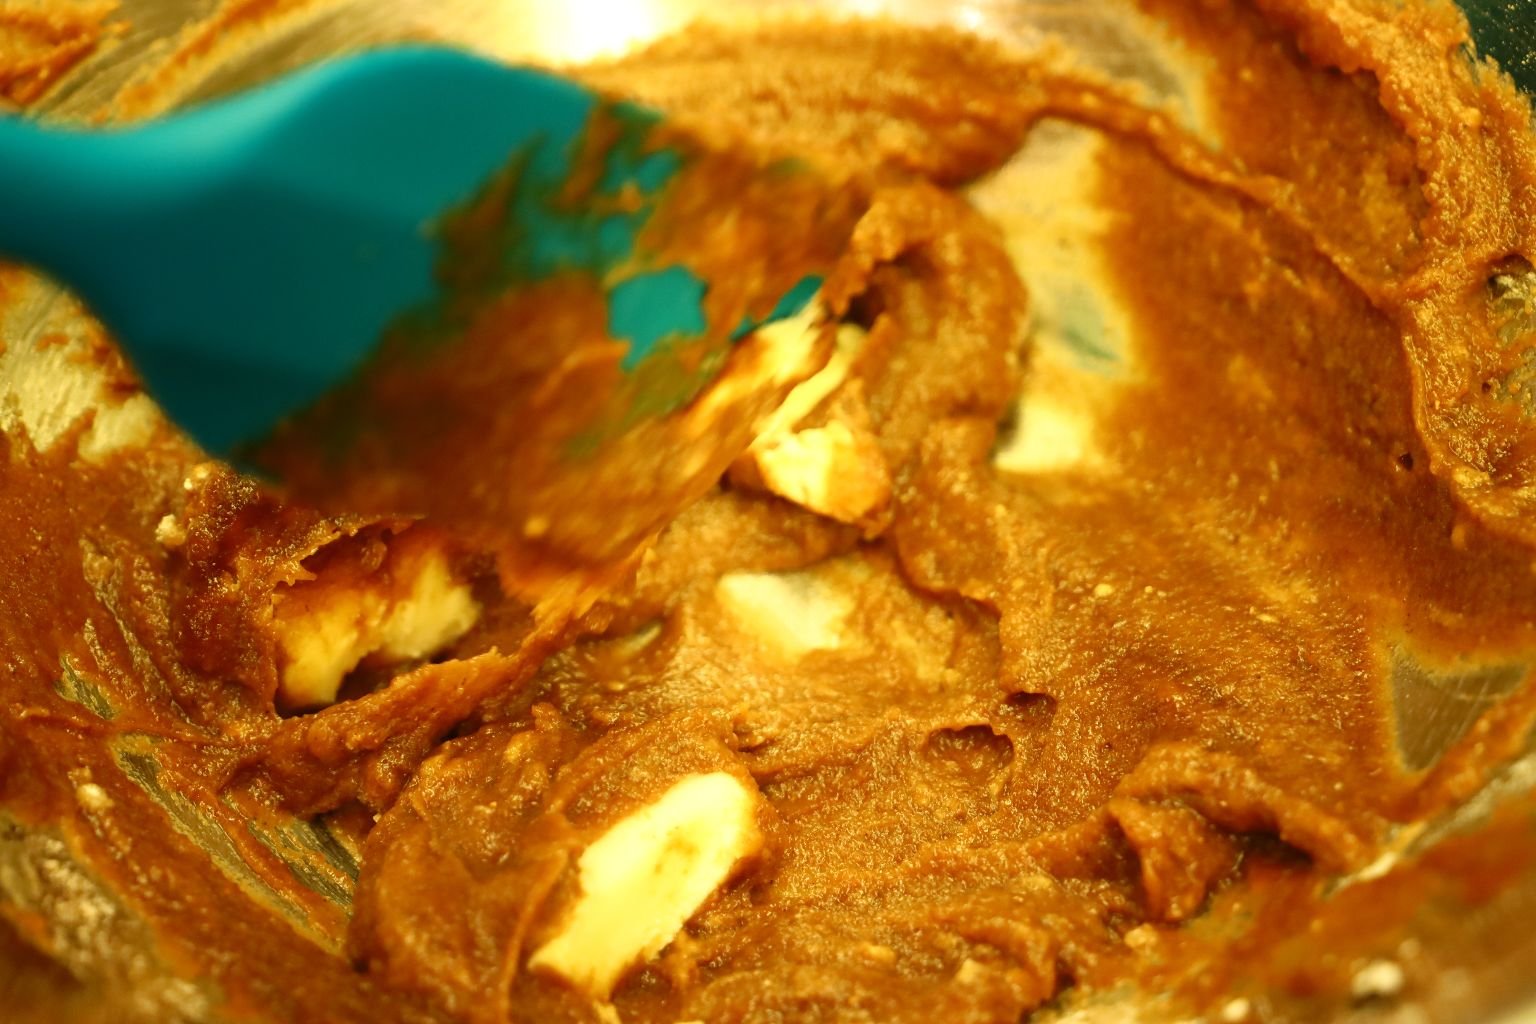
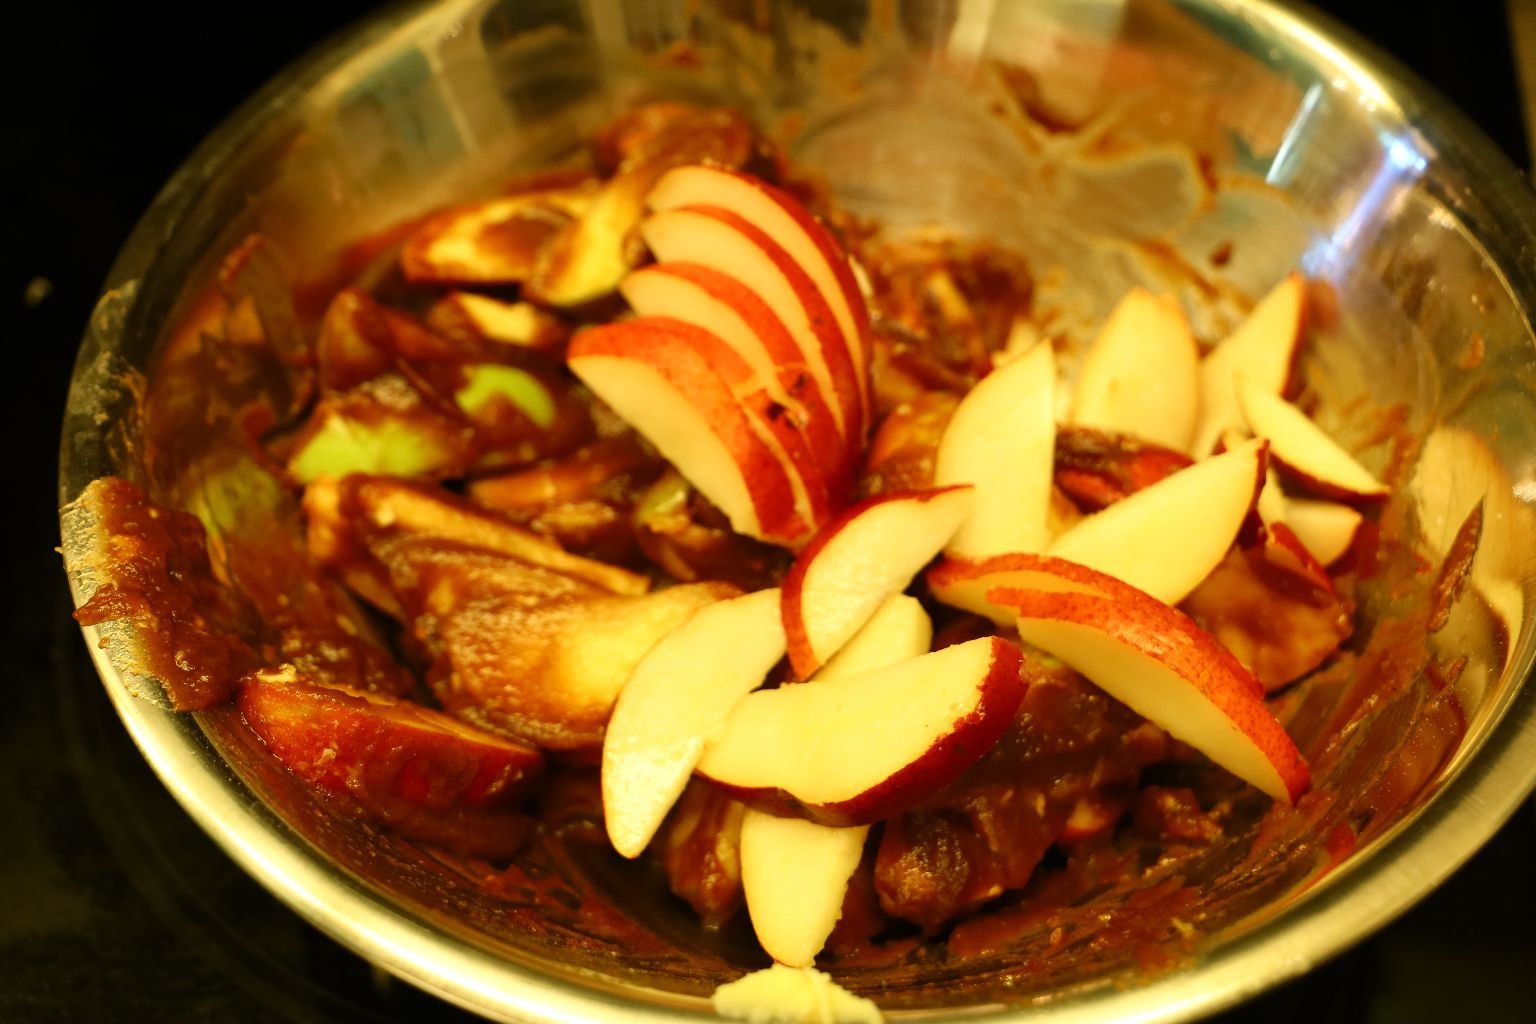
In a large bowl add your Flour, Ground Cinnamon and Ground Cloves.
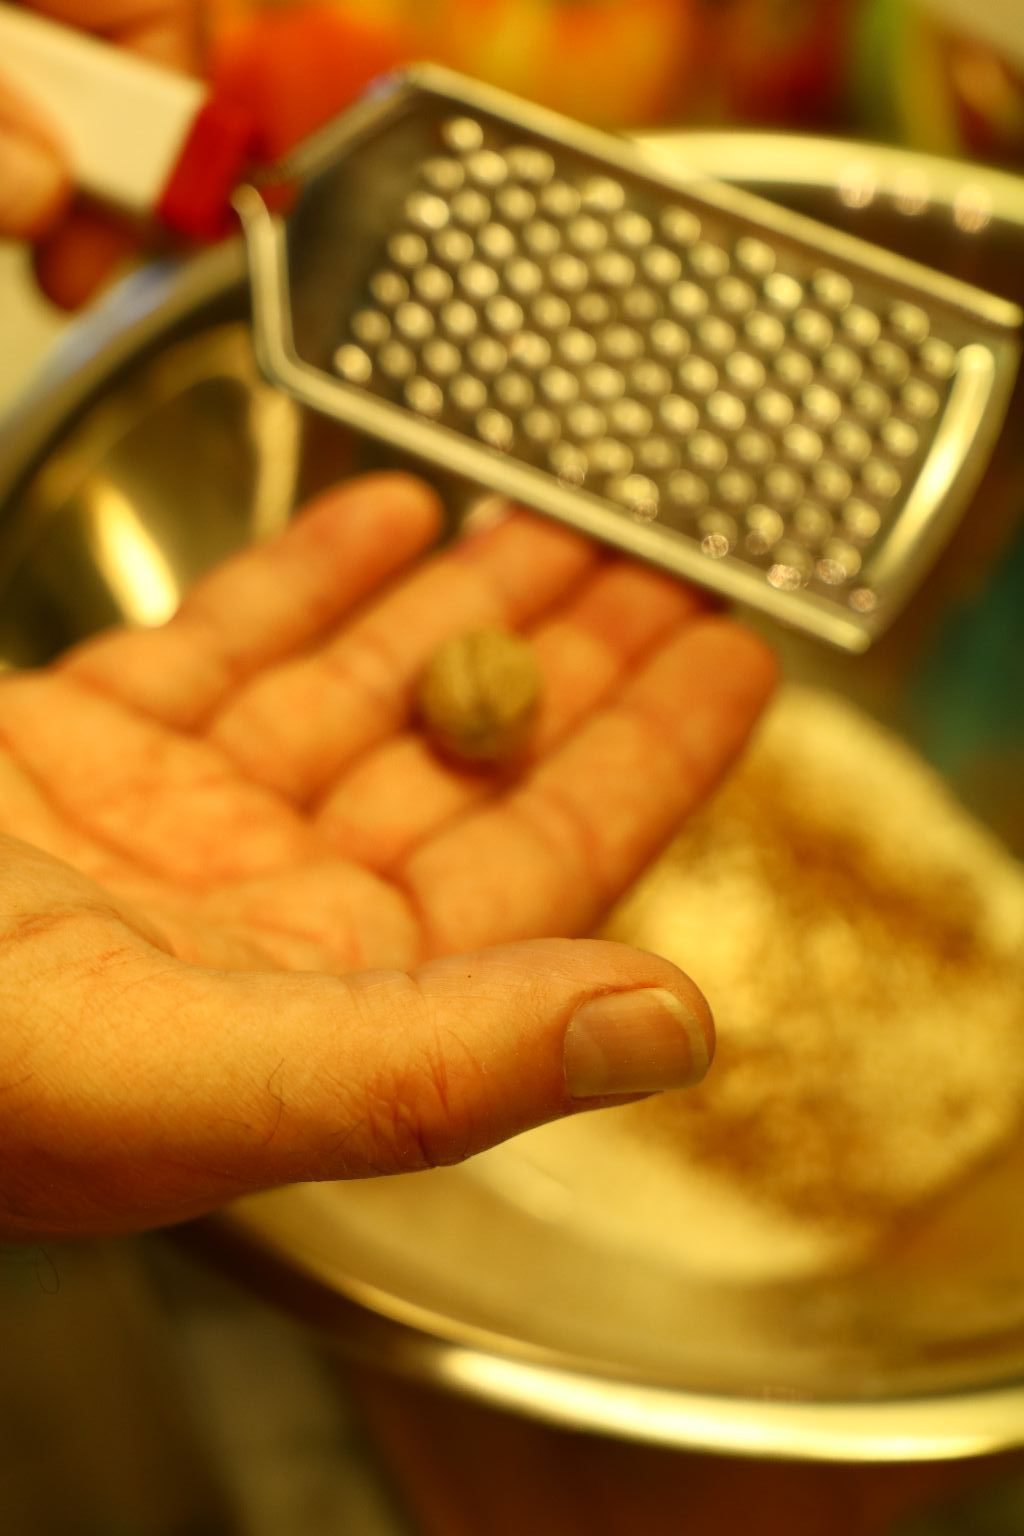
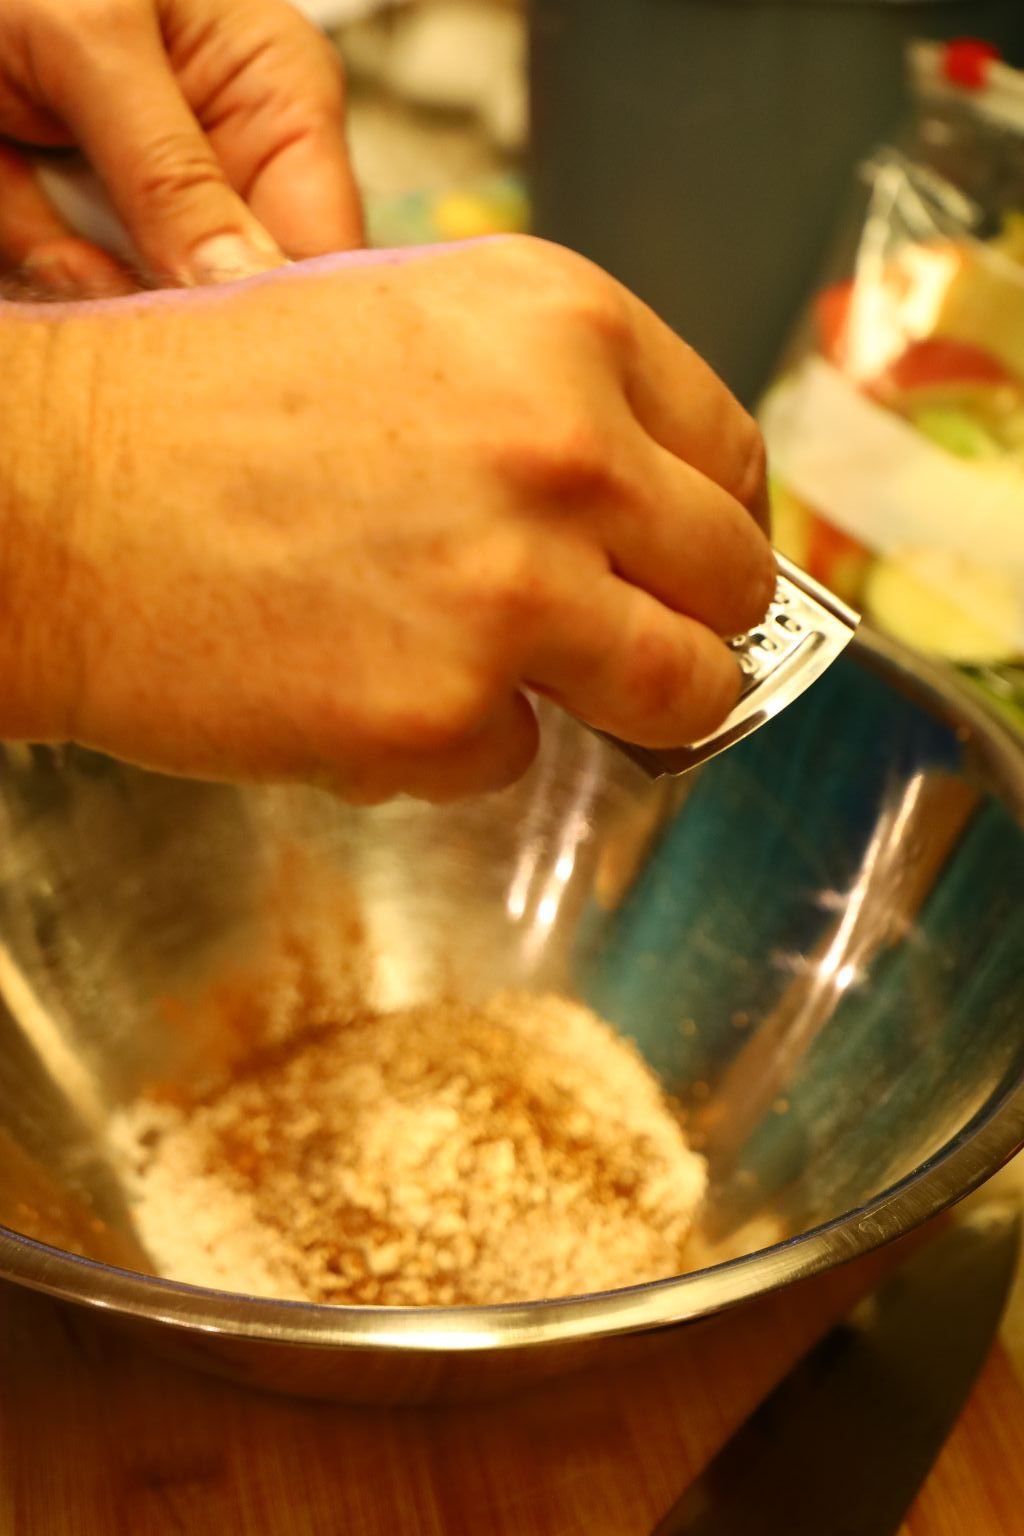
Now add your Nutmeg which should be freshly ground as it has a more intense flavor. Then add your Salt.
Lastly add your Butter
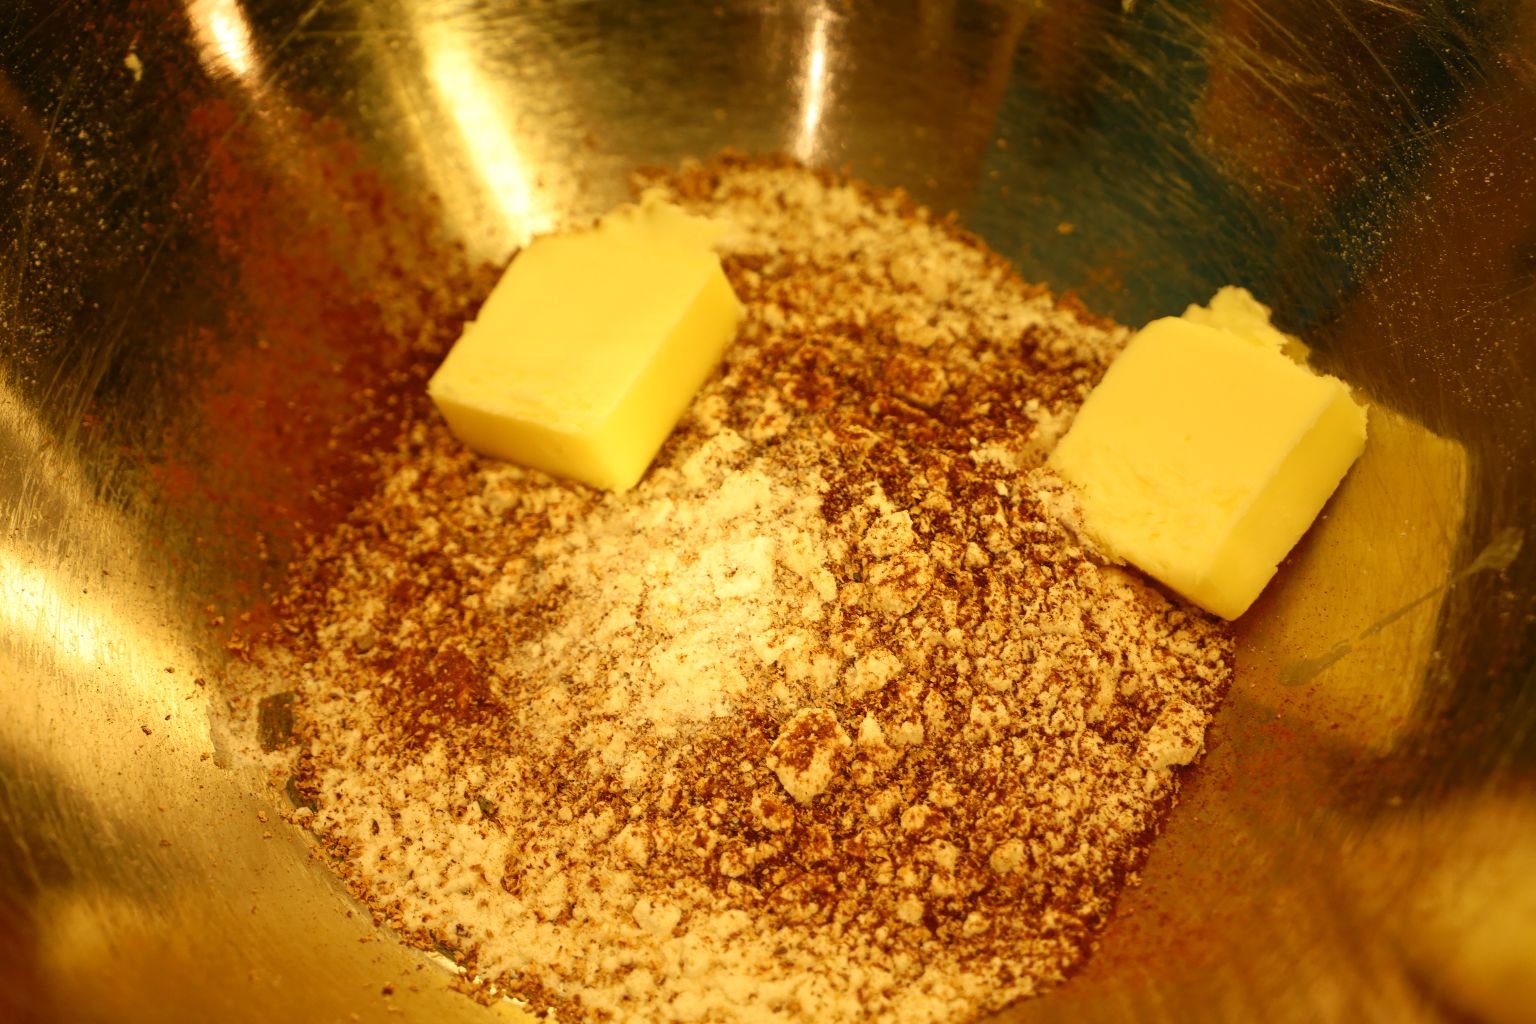
to the bowl.
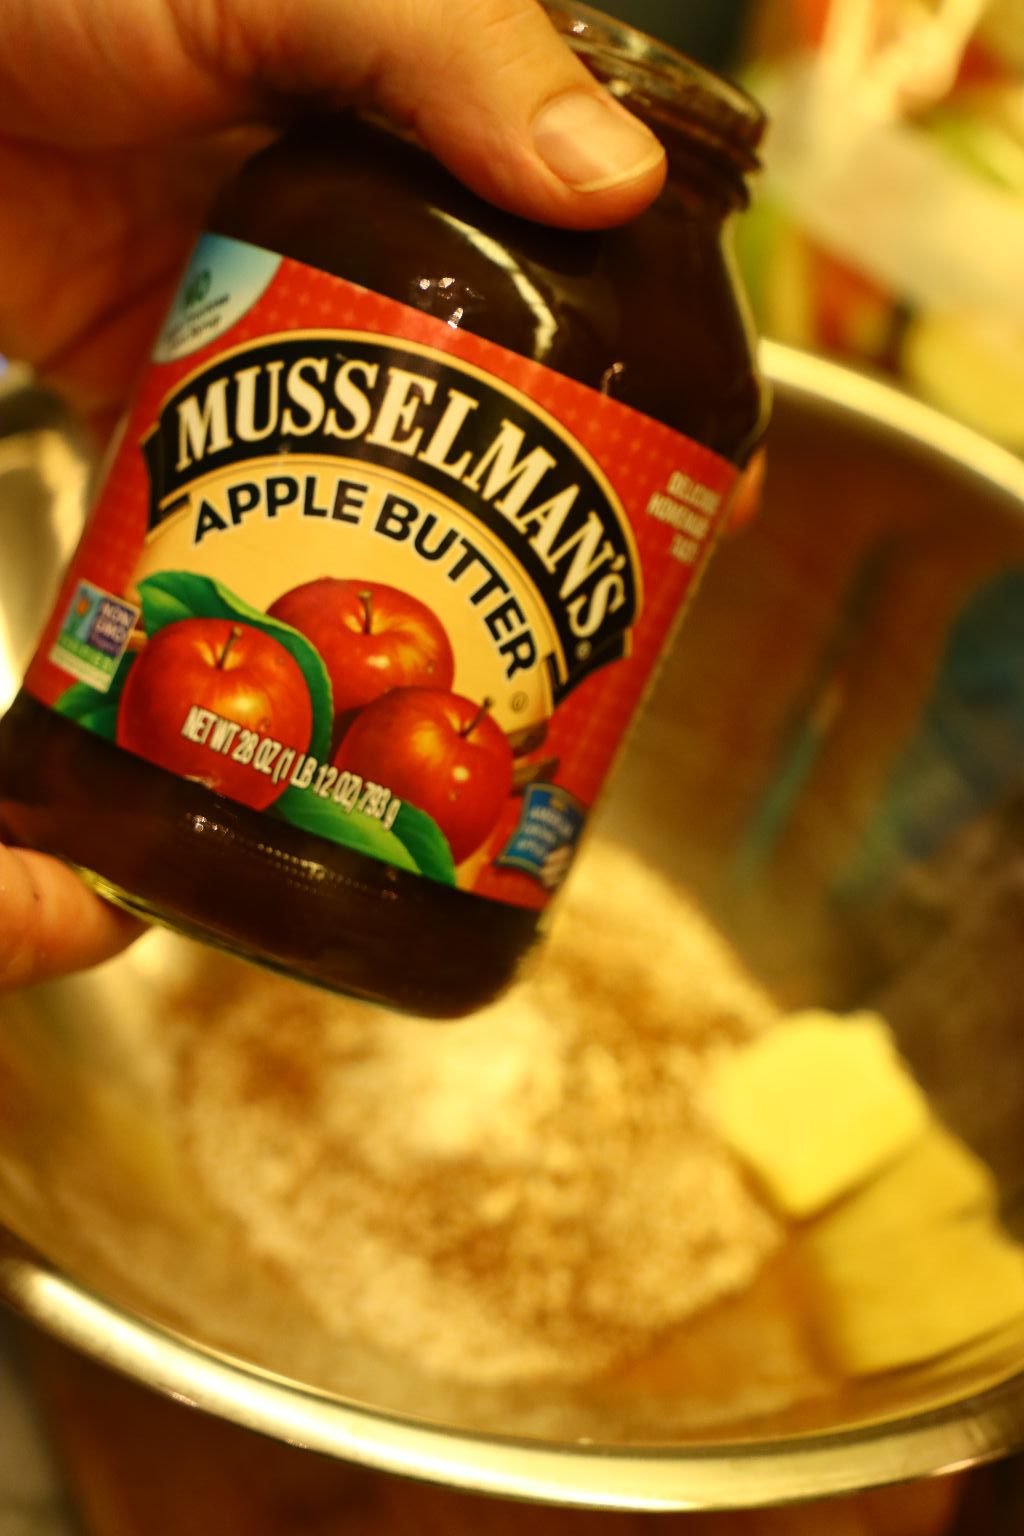
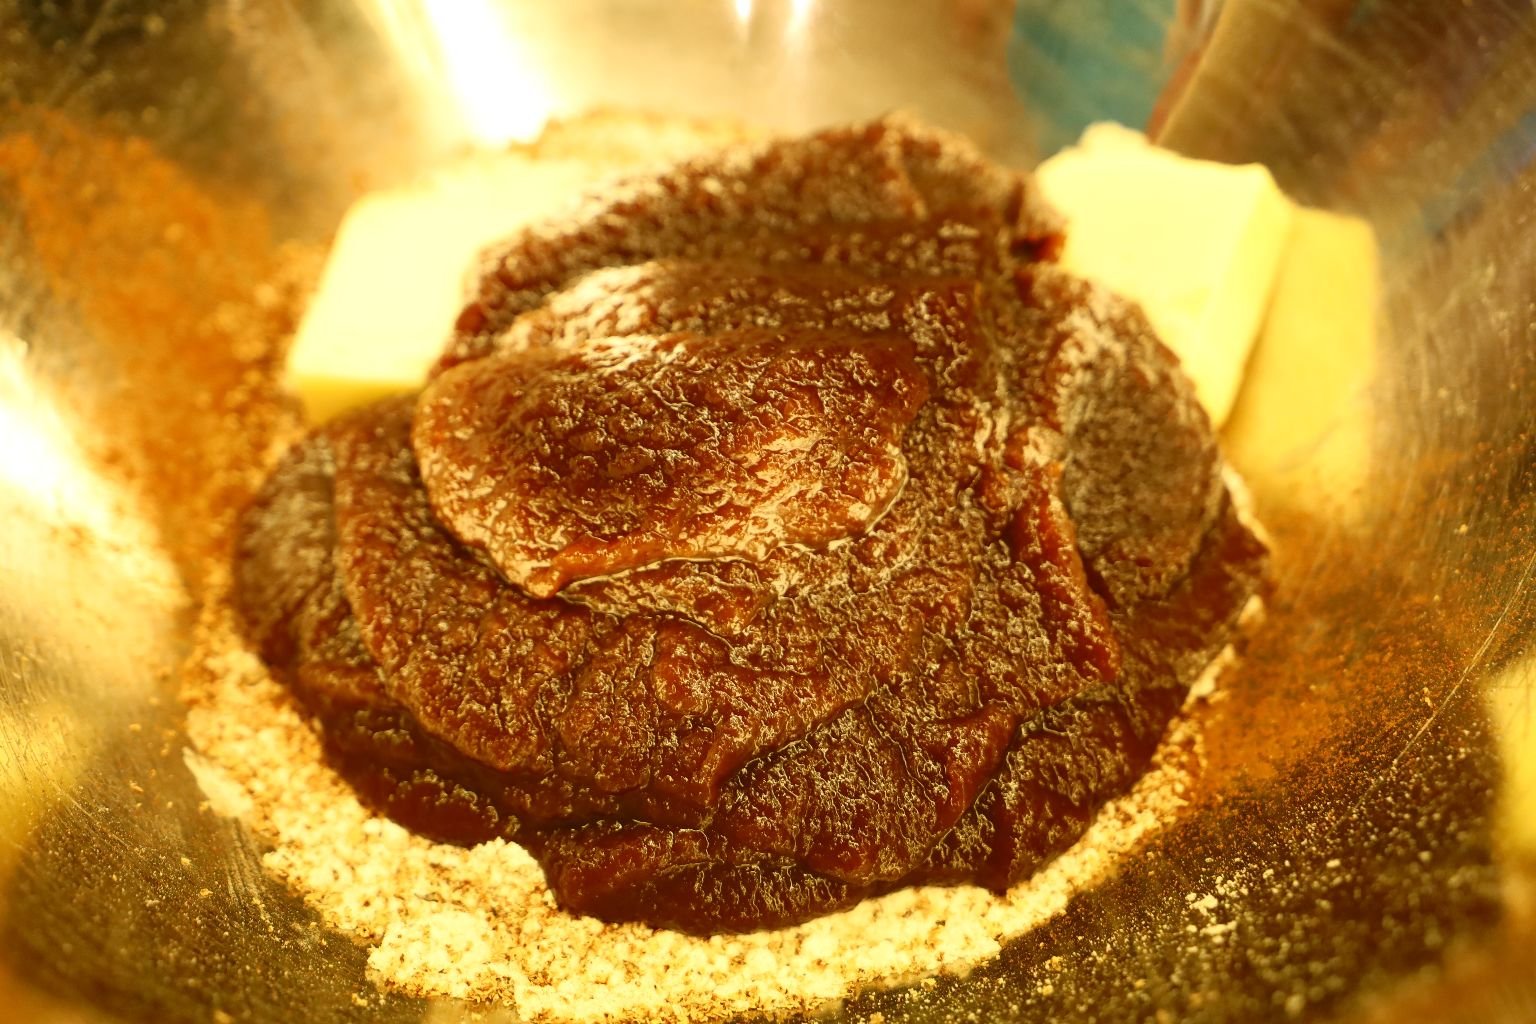
Now, add your Apple Butter.
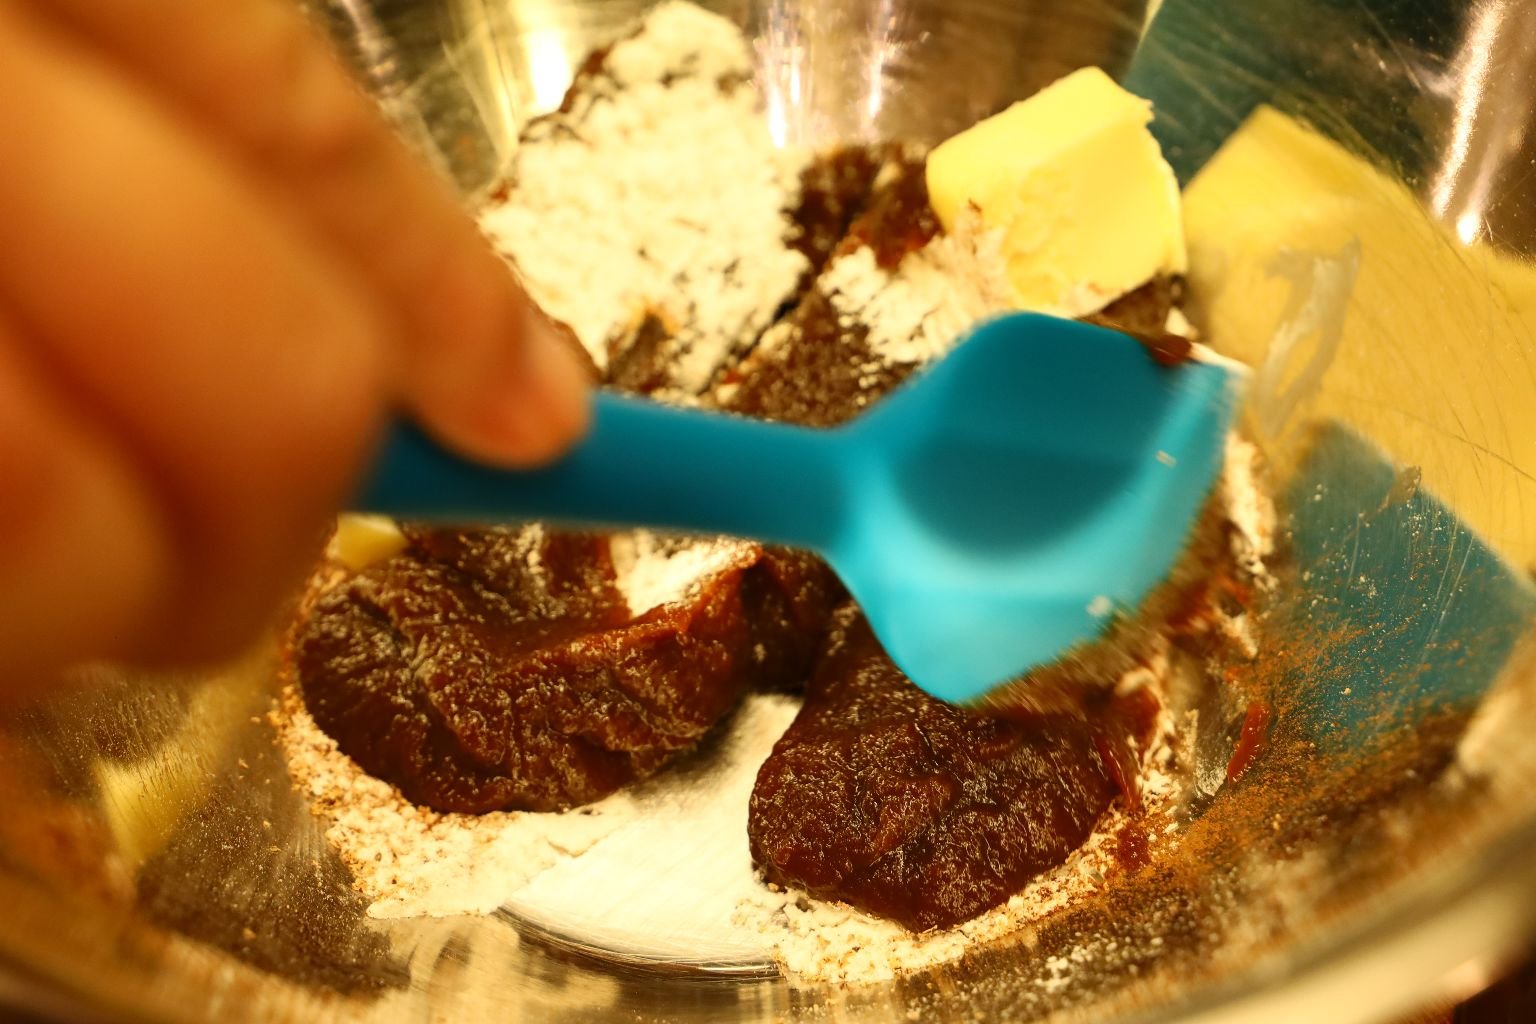
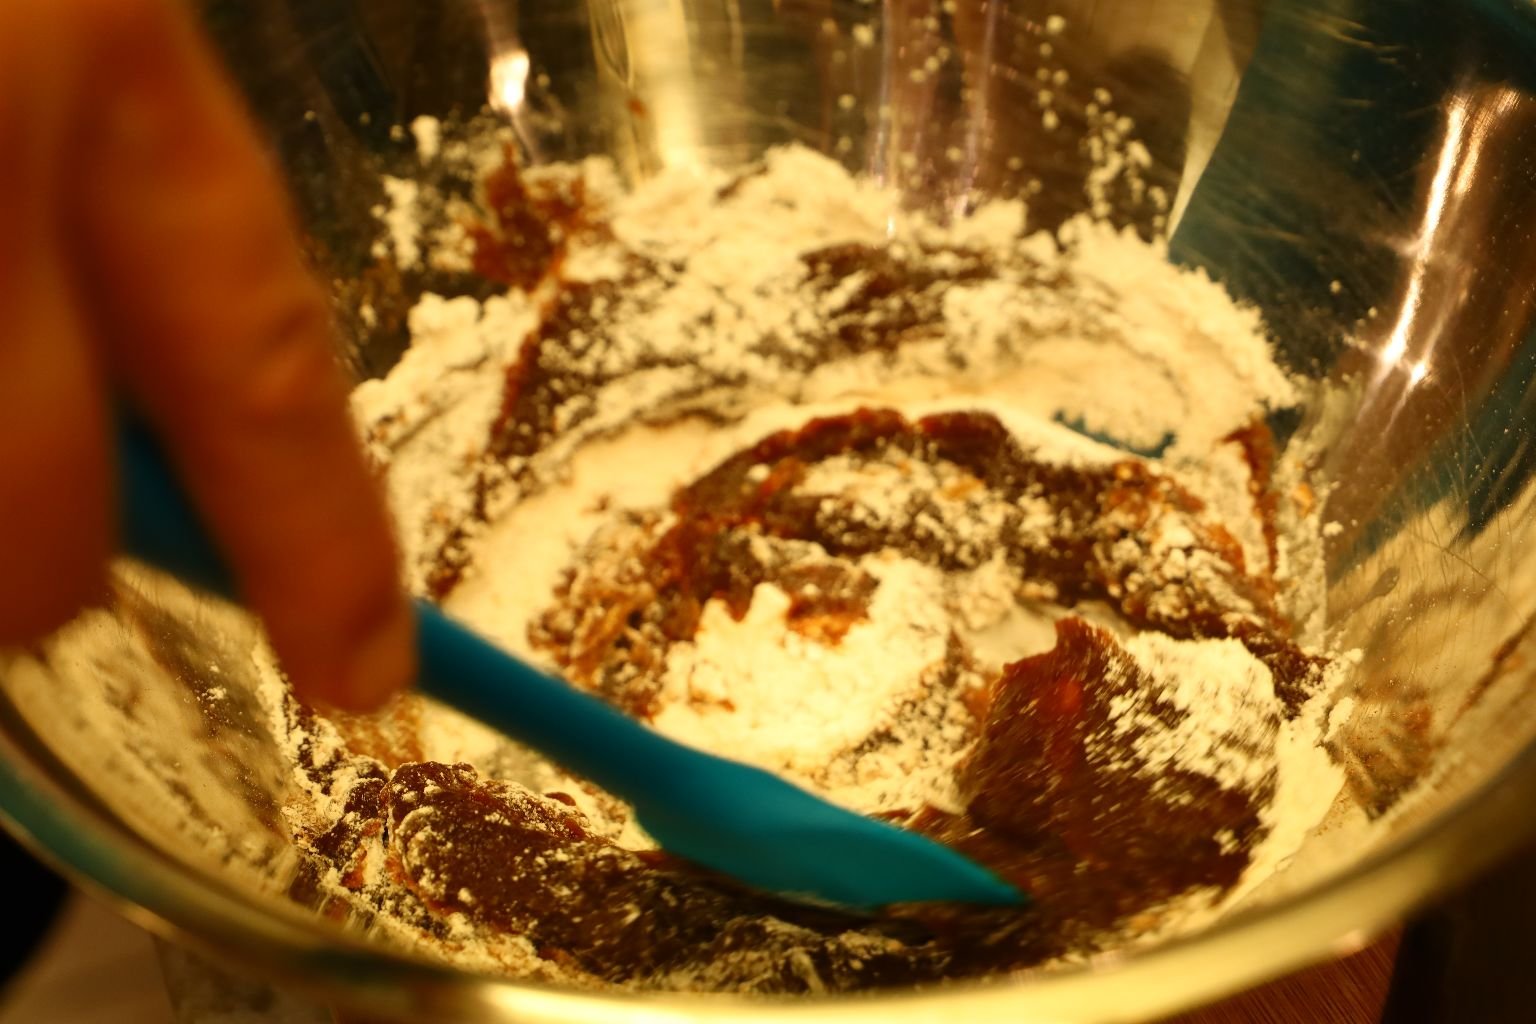
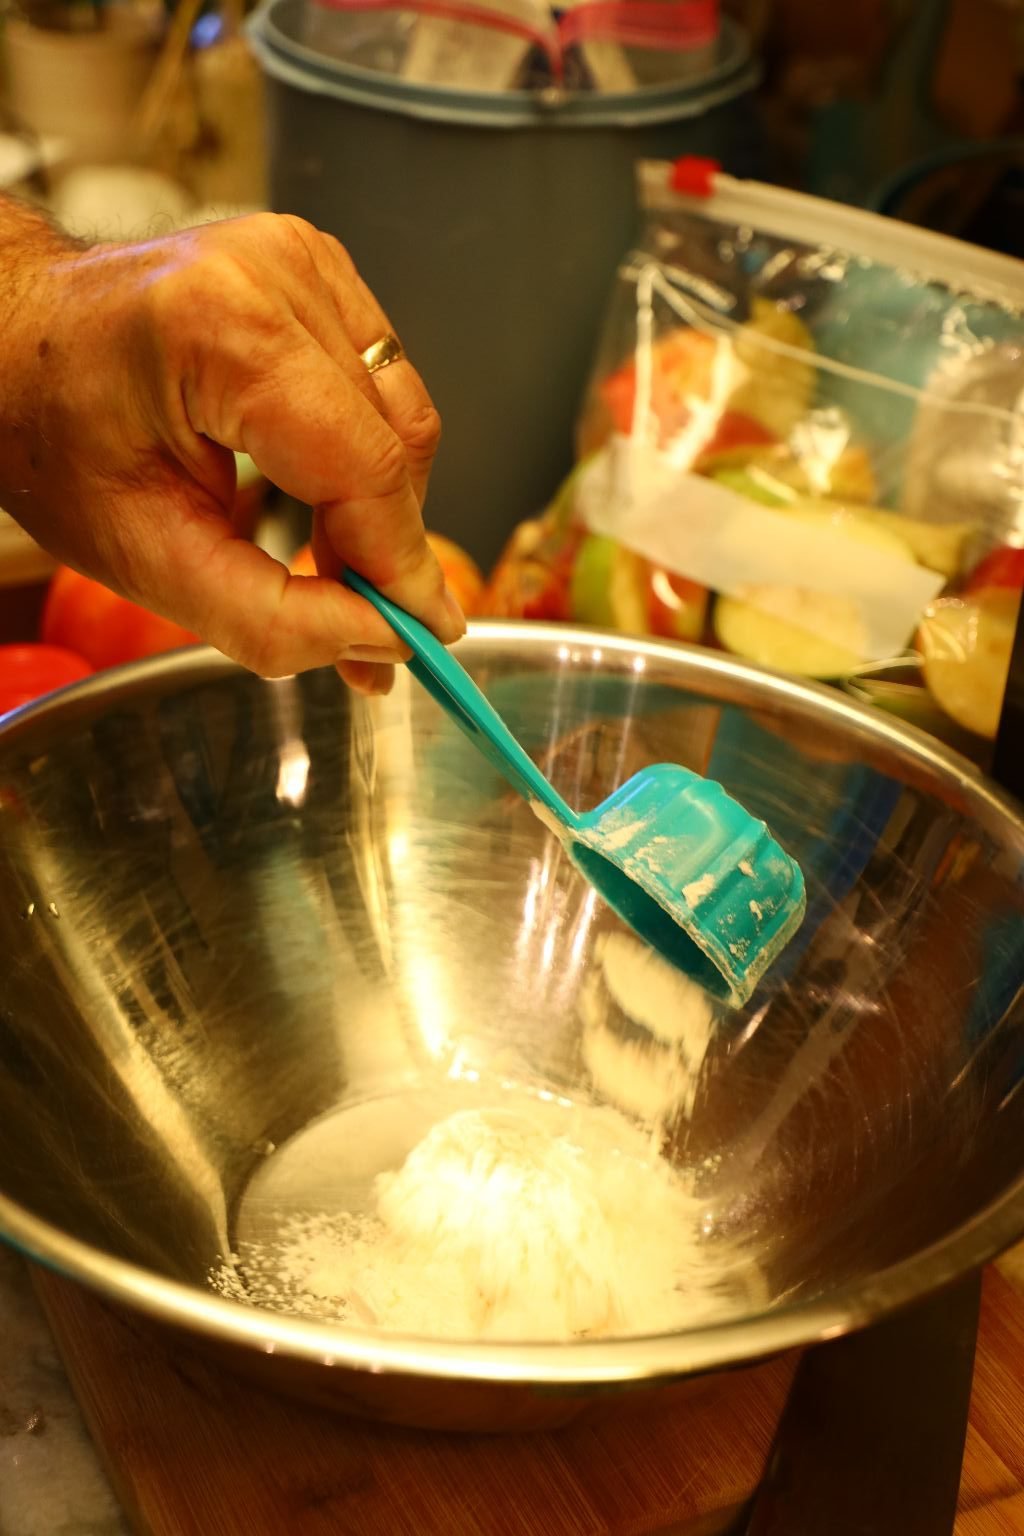
Mix the ingredients well with a rubber spatula.
———————————————————————–
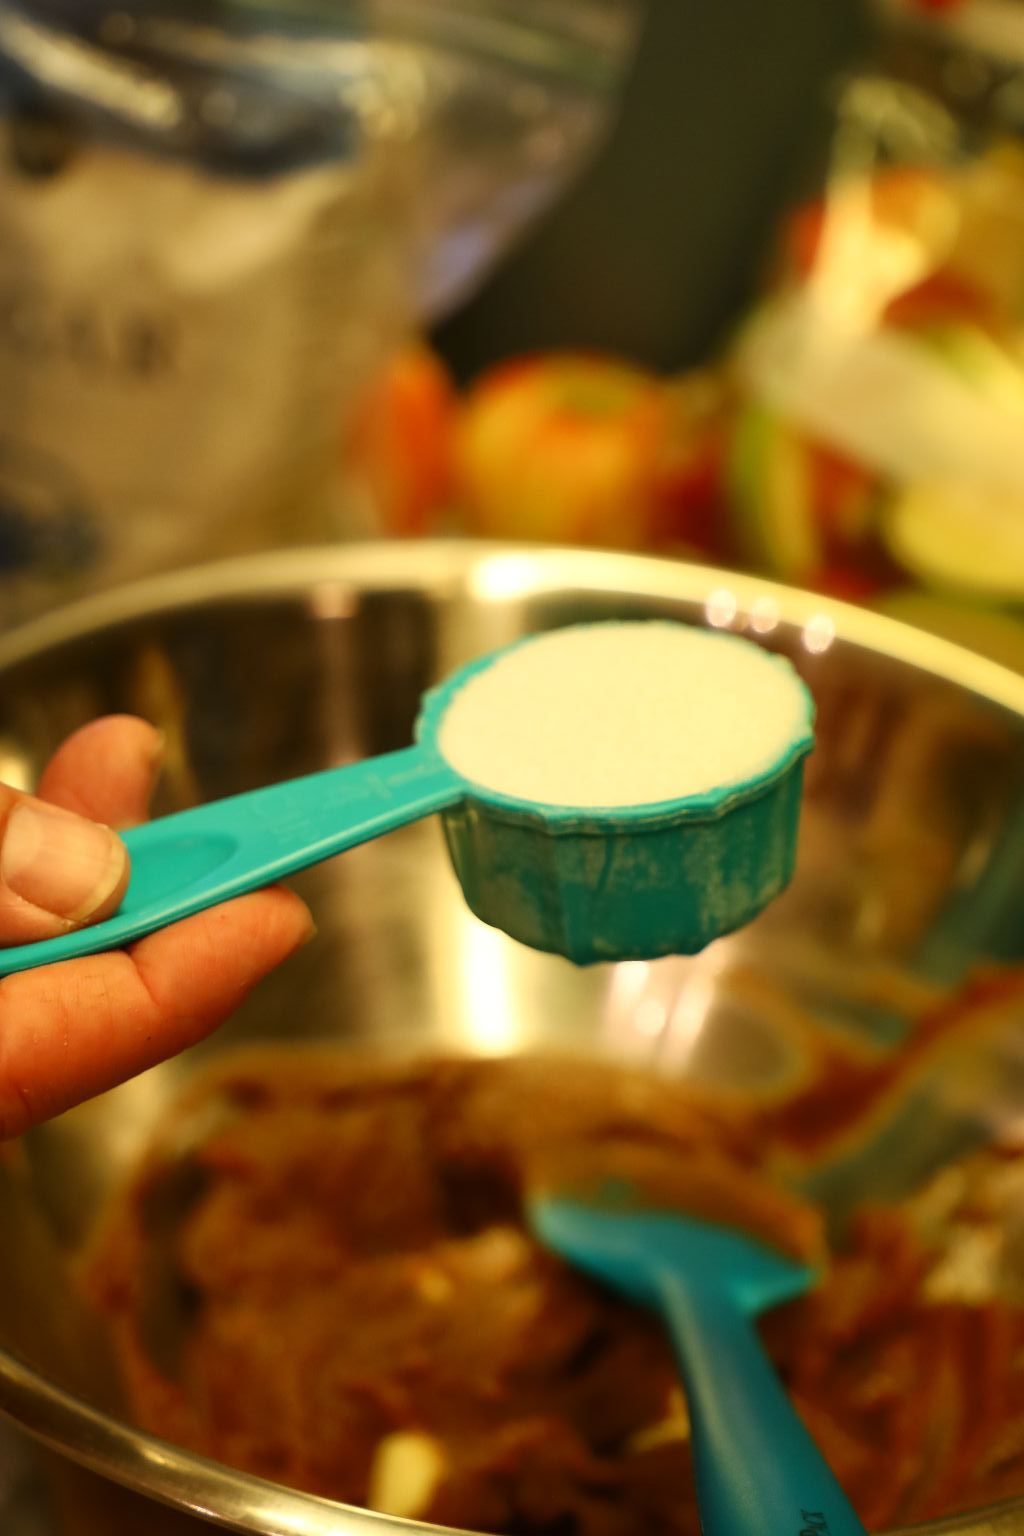
Now add your Sugar to the mix, and again…
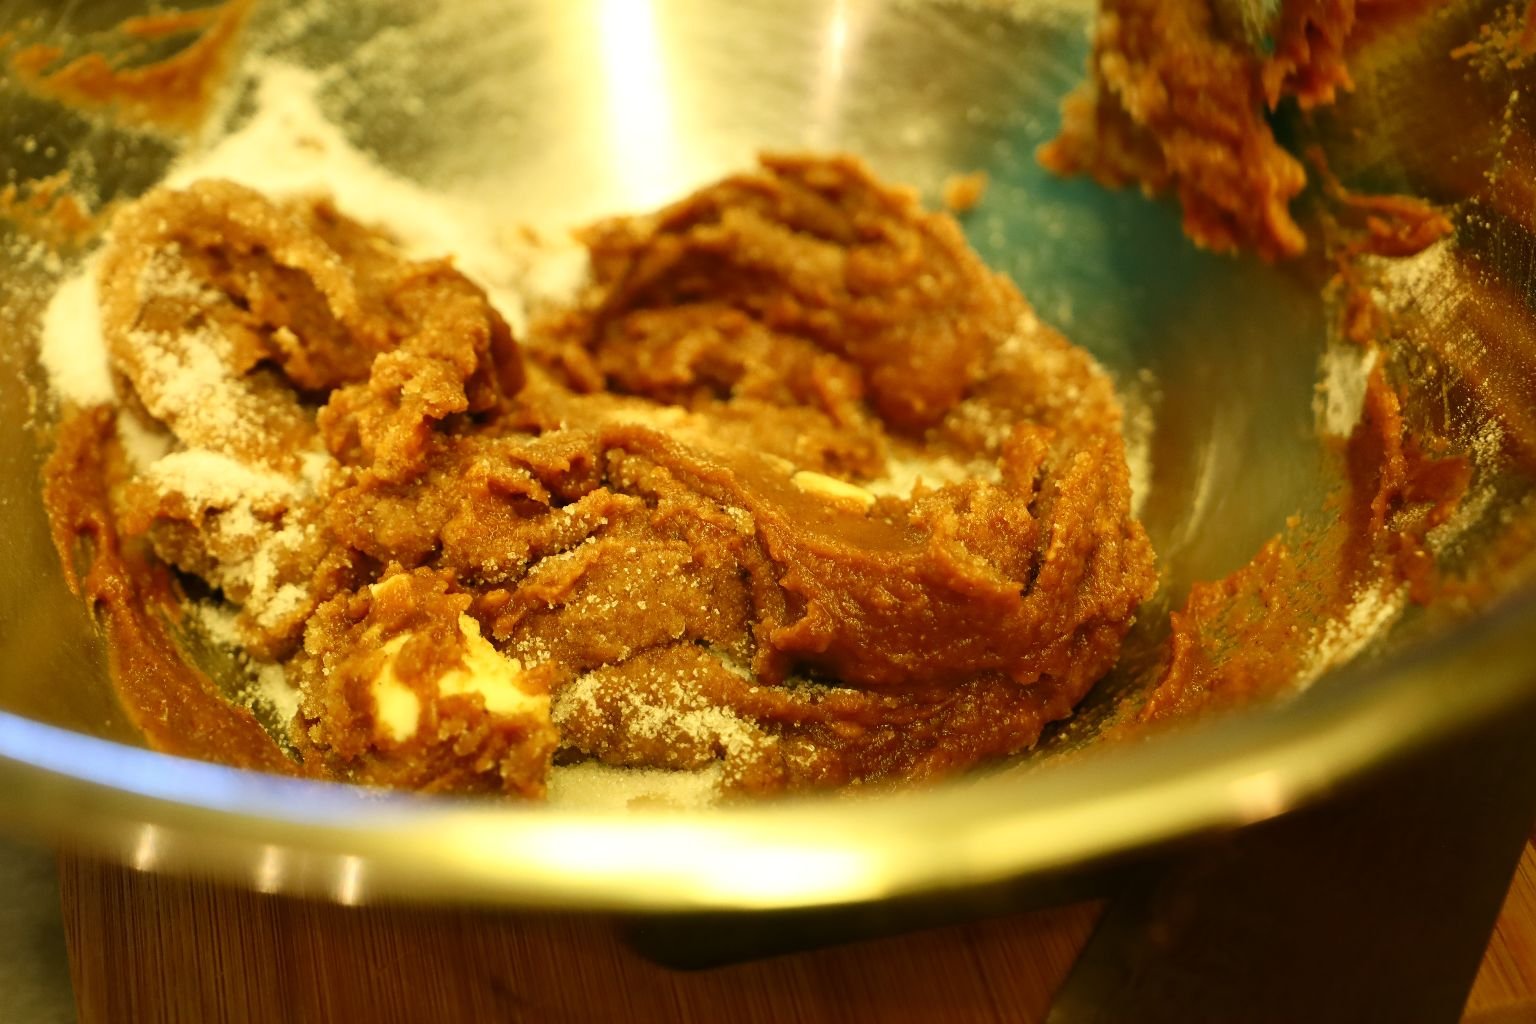
mix the ingredients well.
Slice your Pear just to the right of half to avoid the seeds.
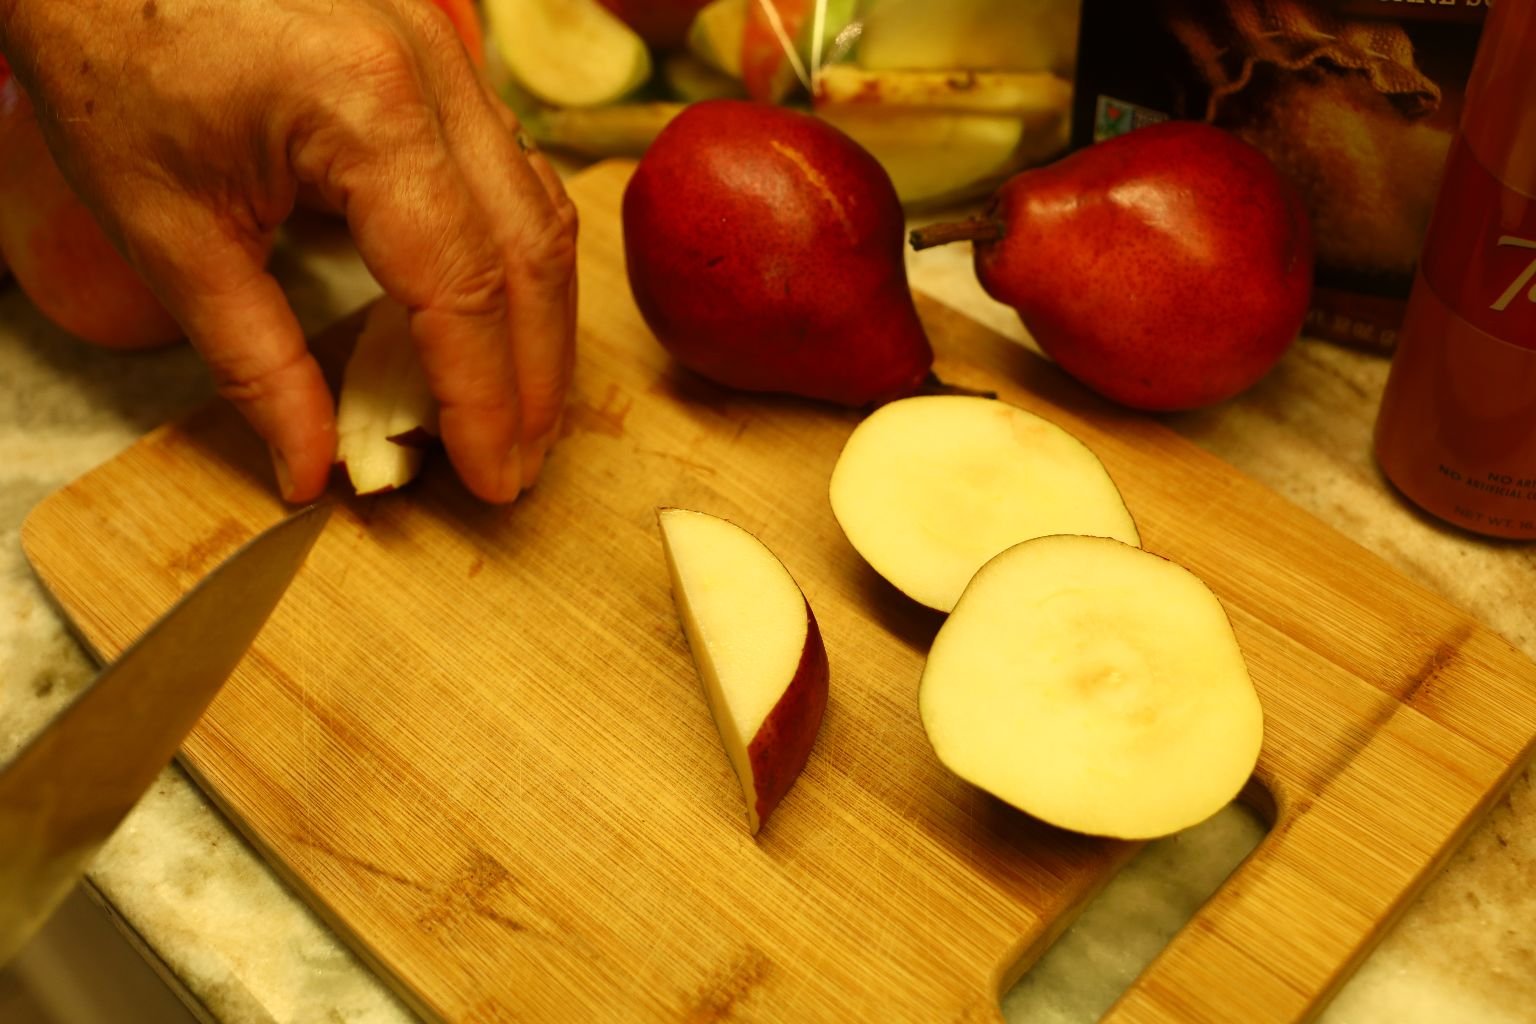
Then slice it just to the left of the seeds. Now, turn the Pear and slice off the smaller wedges avoiding the seeds in the center.
Slice the wedges into 1/8 inch slices and add the sliced Pear to the bowl.
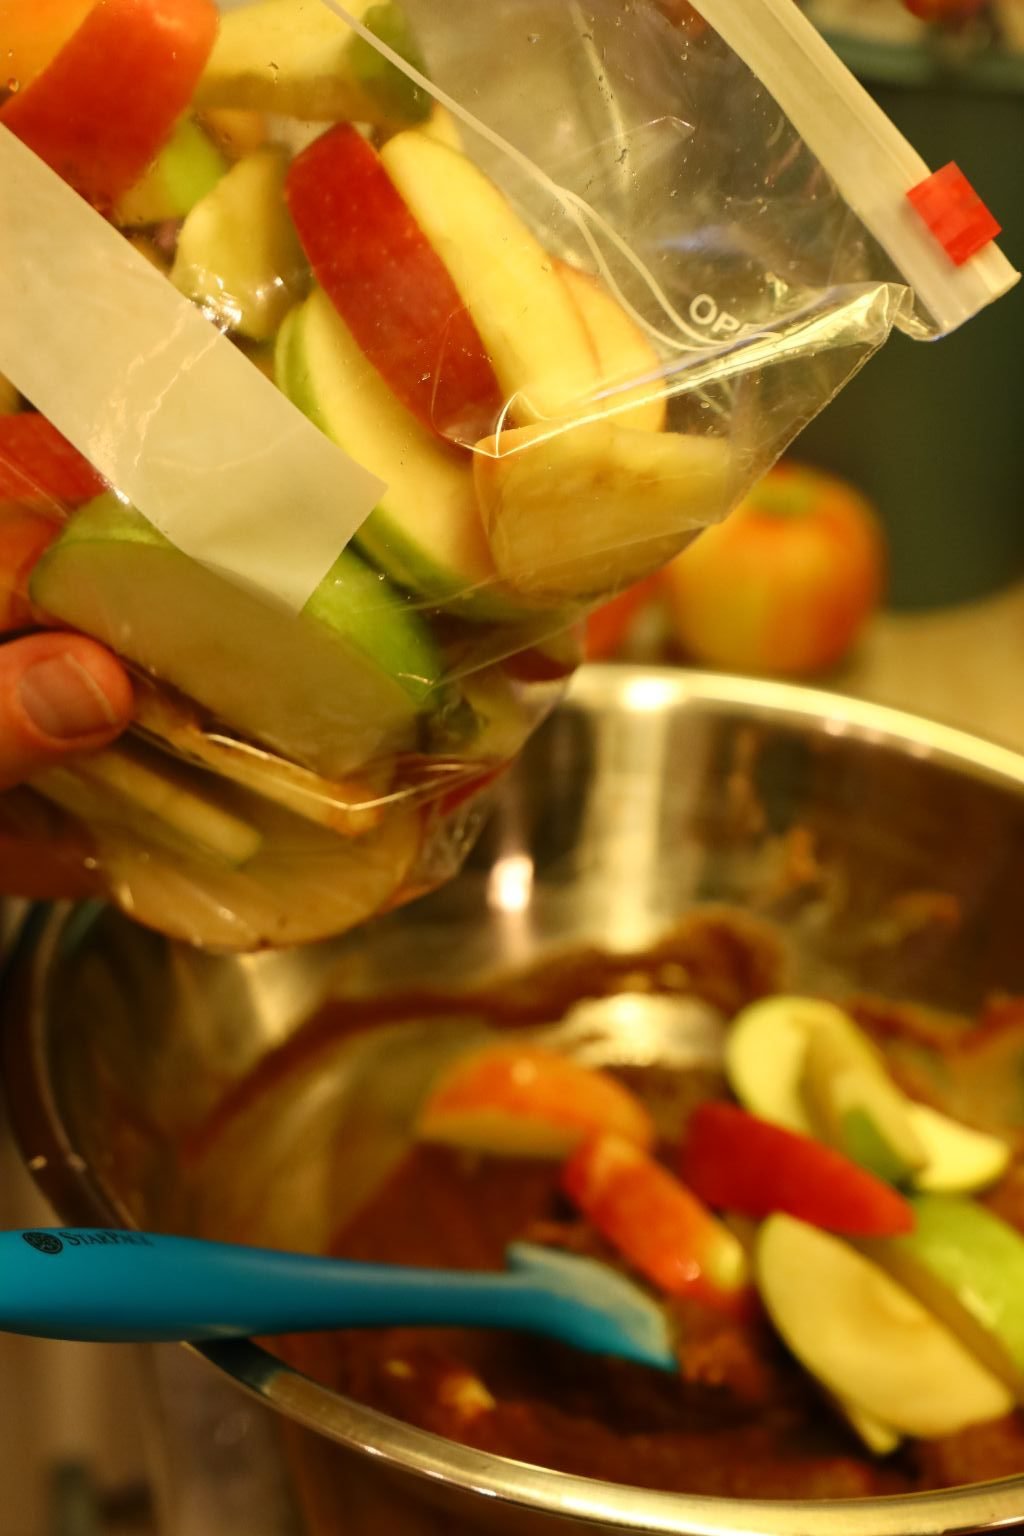
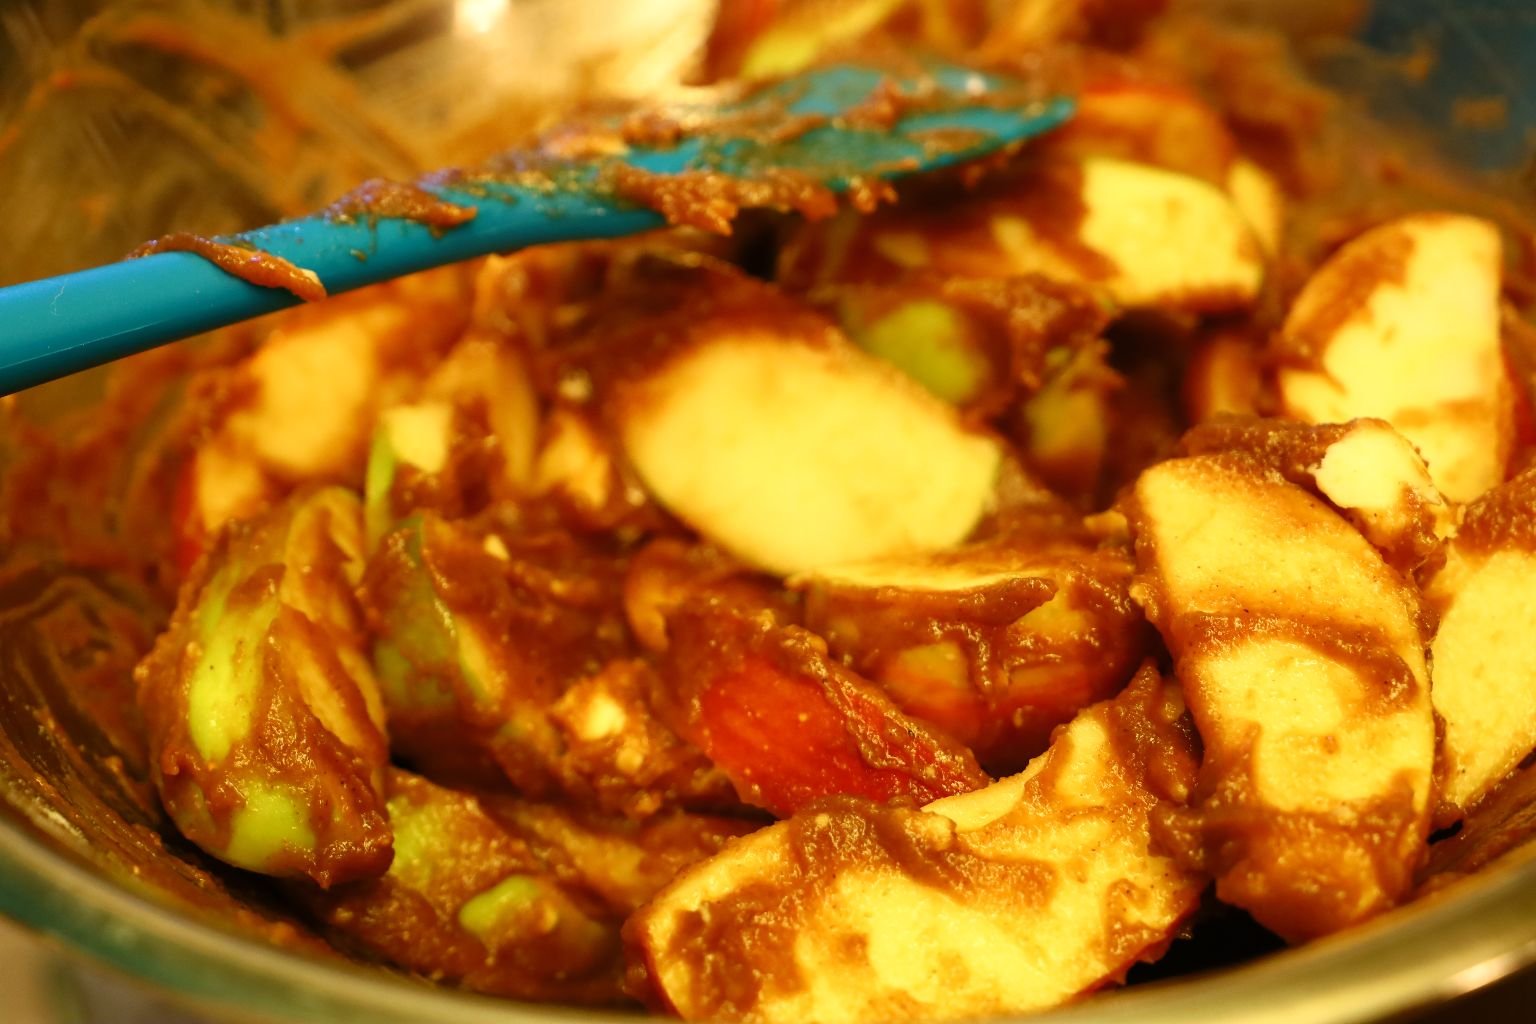
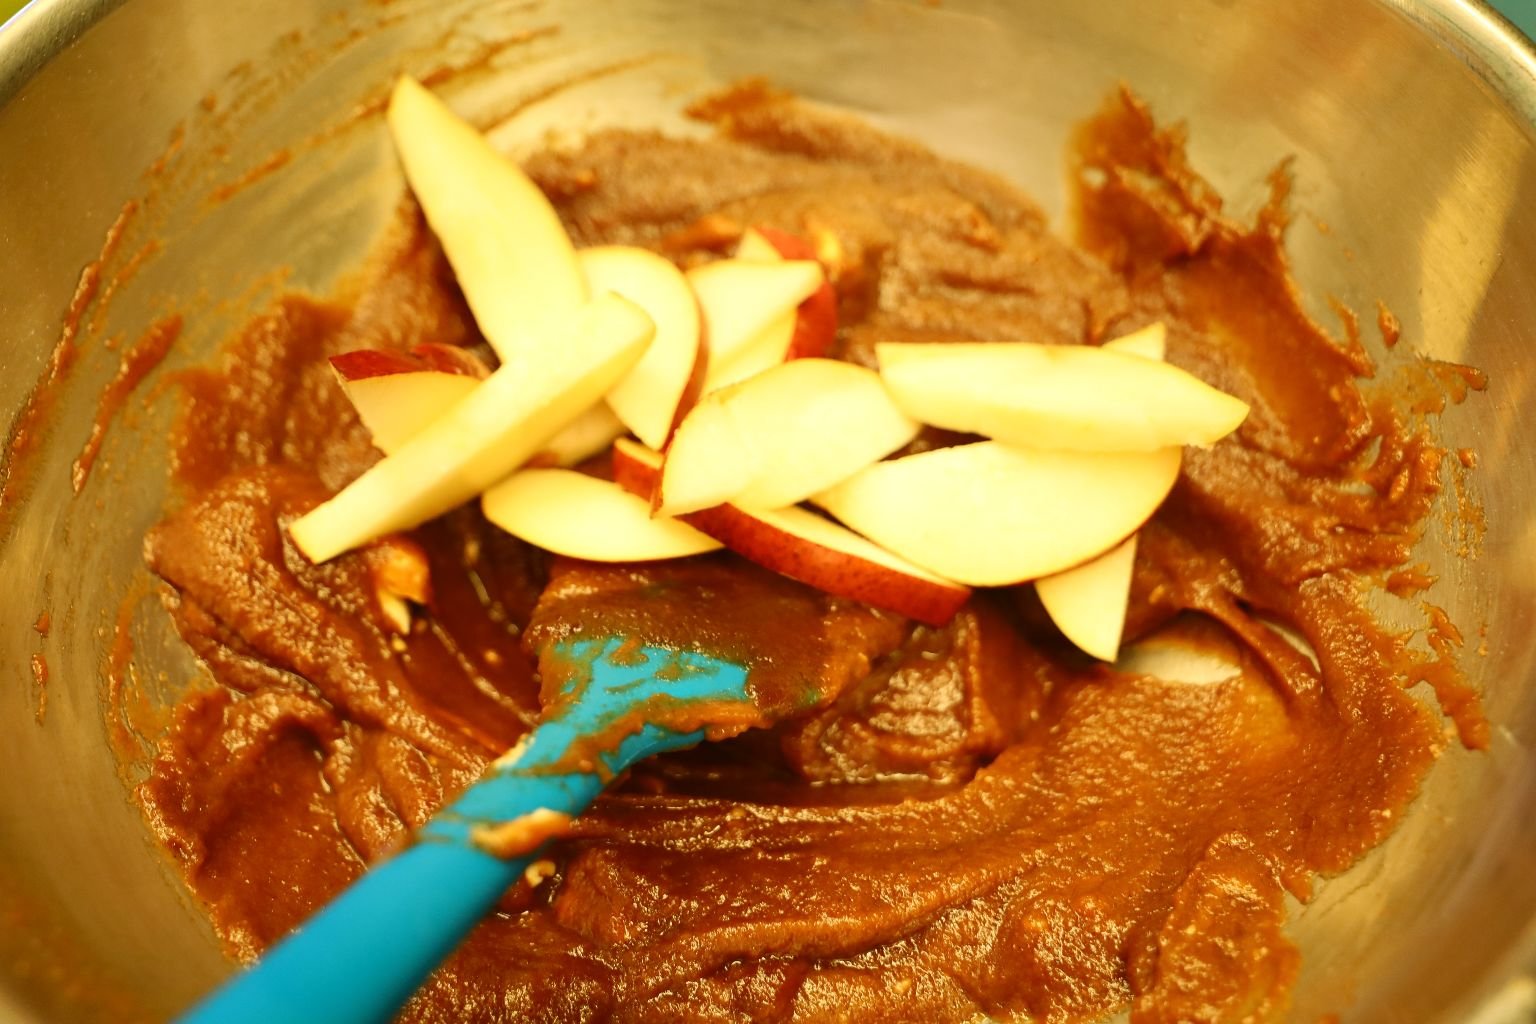
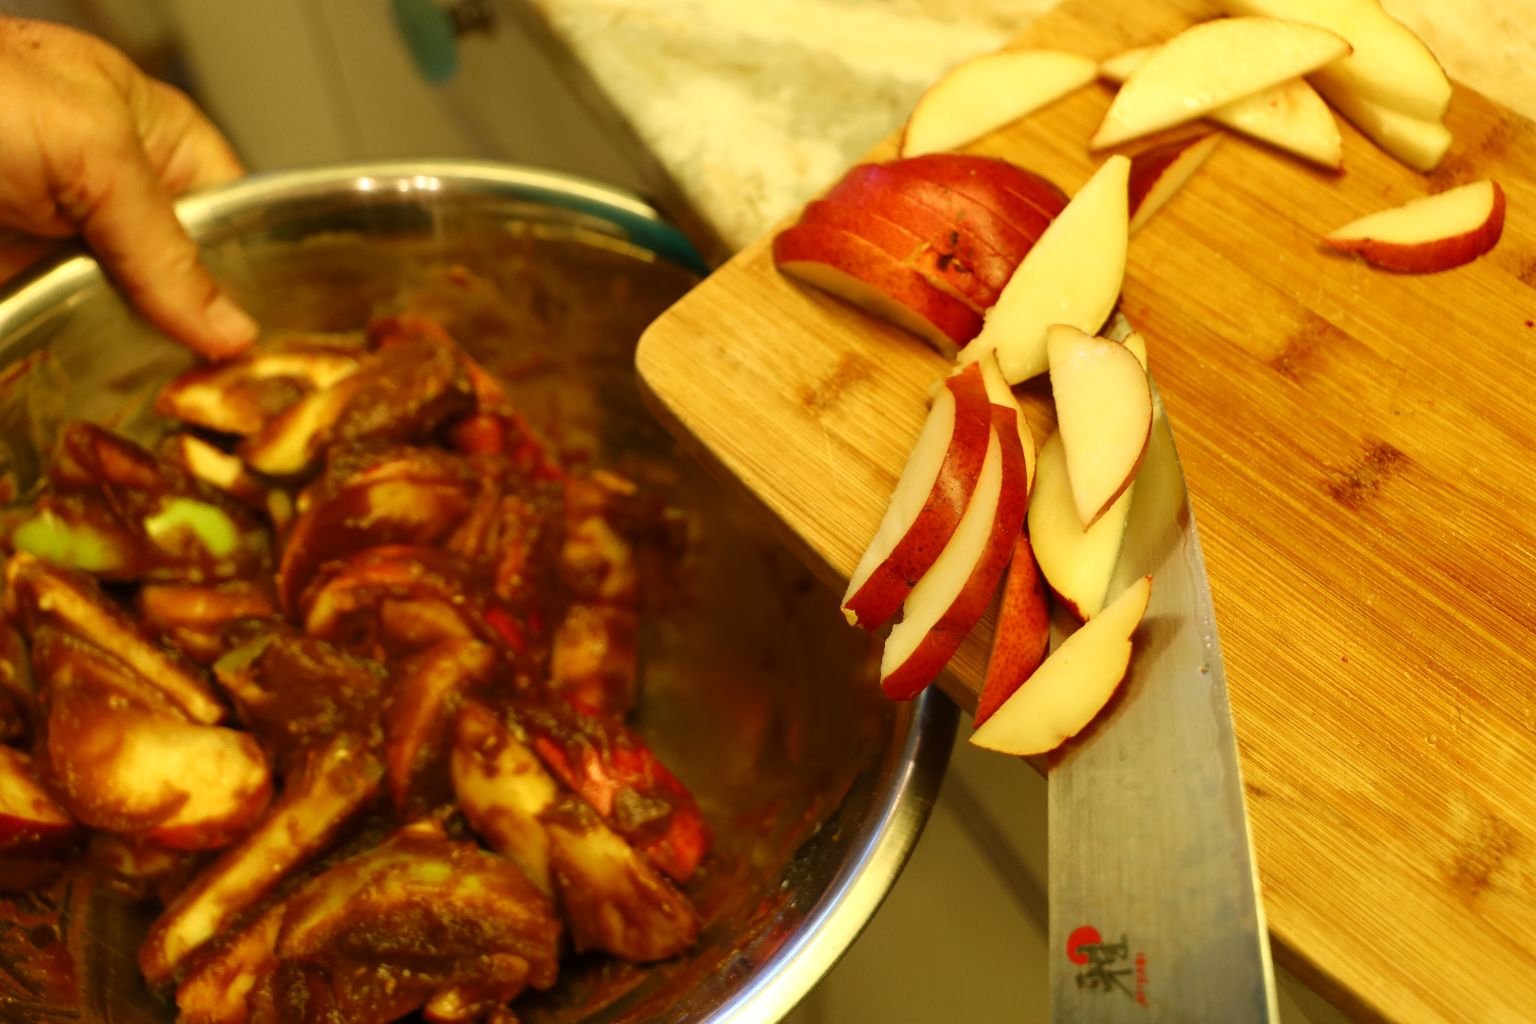
I previously sliced the Apples in the same way and placed them in a bag with some of the Lemon Juice to prevent the Apples from turning brown as they do when they are exposed to air. Mix the Apples with the other ingredients in the bowl and set aside.
———————————————————————-
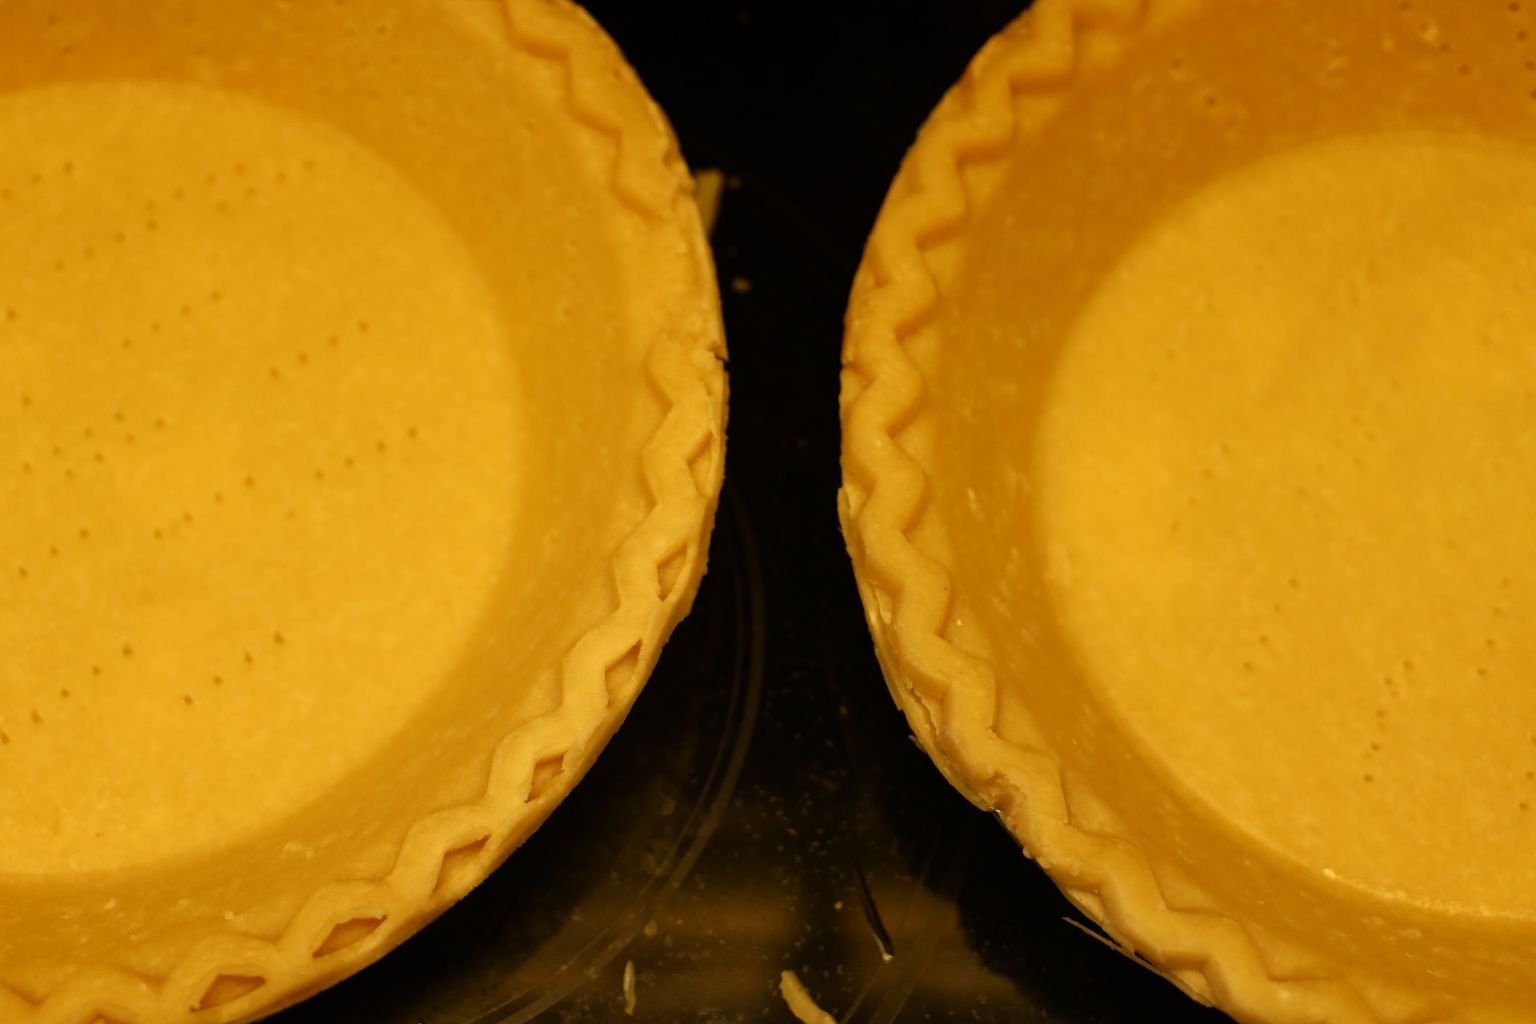
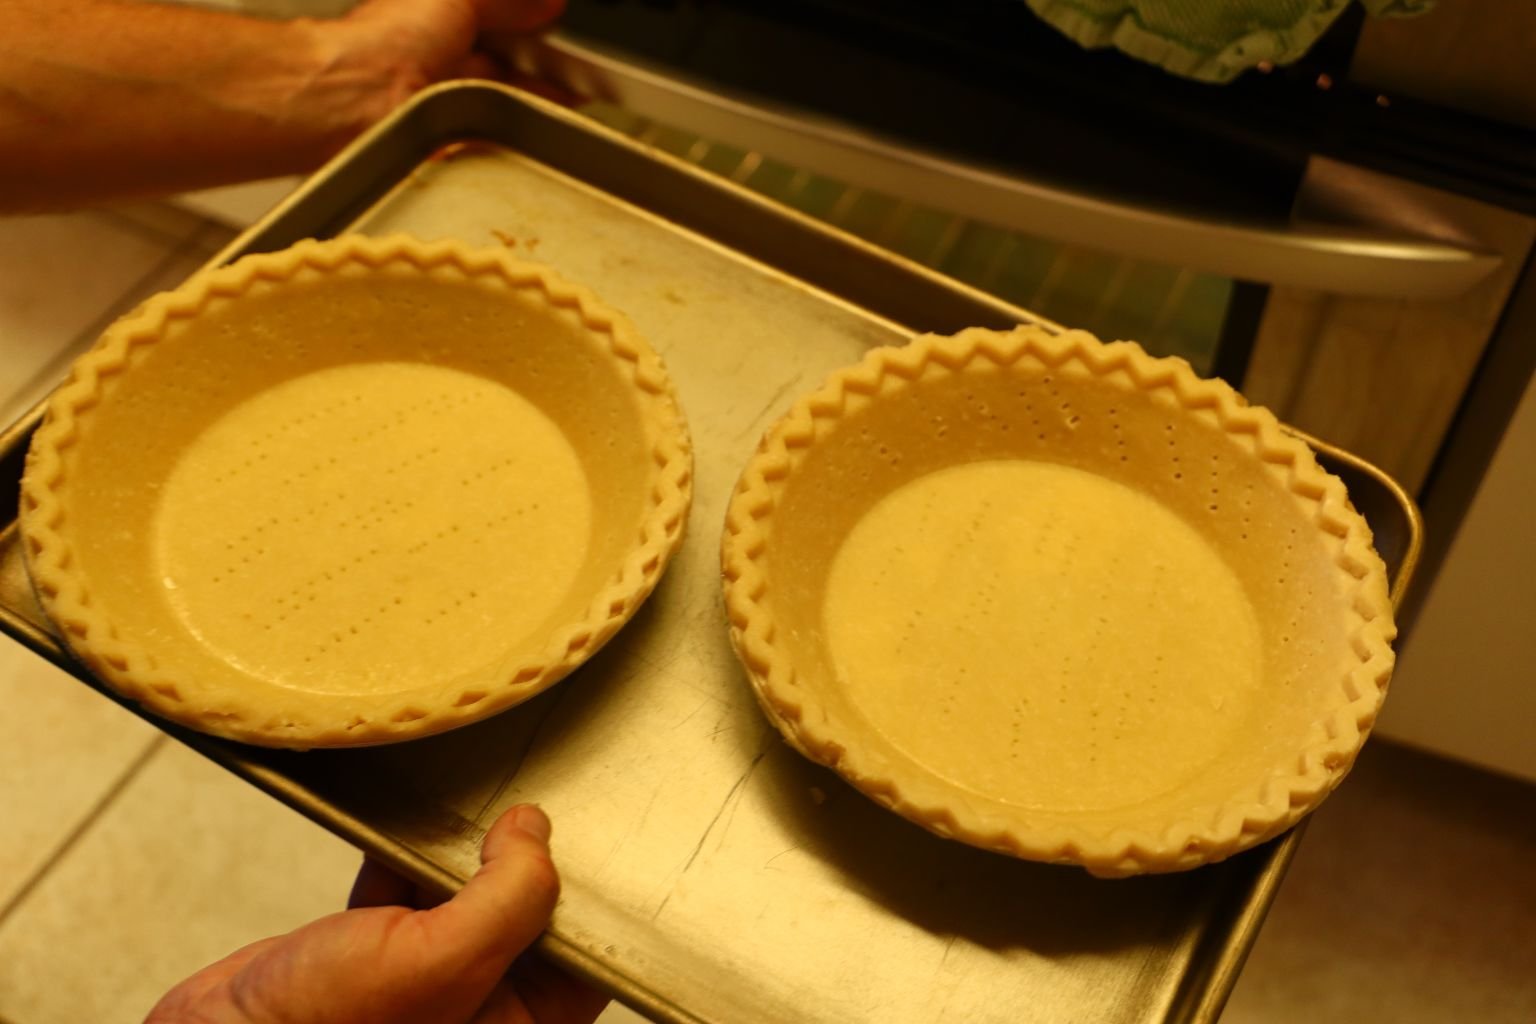
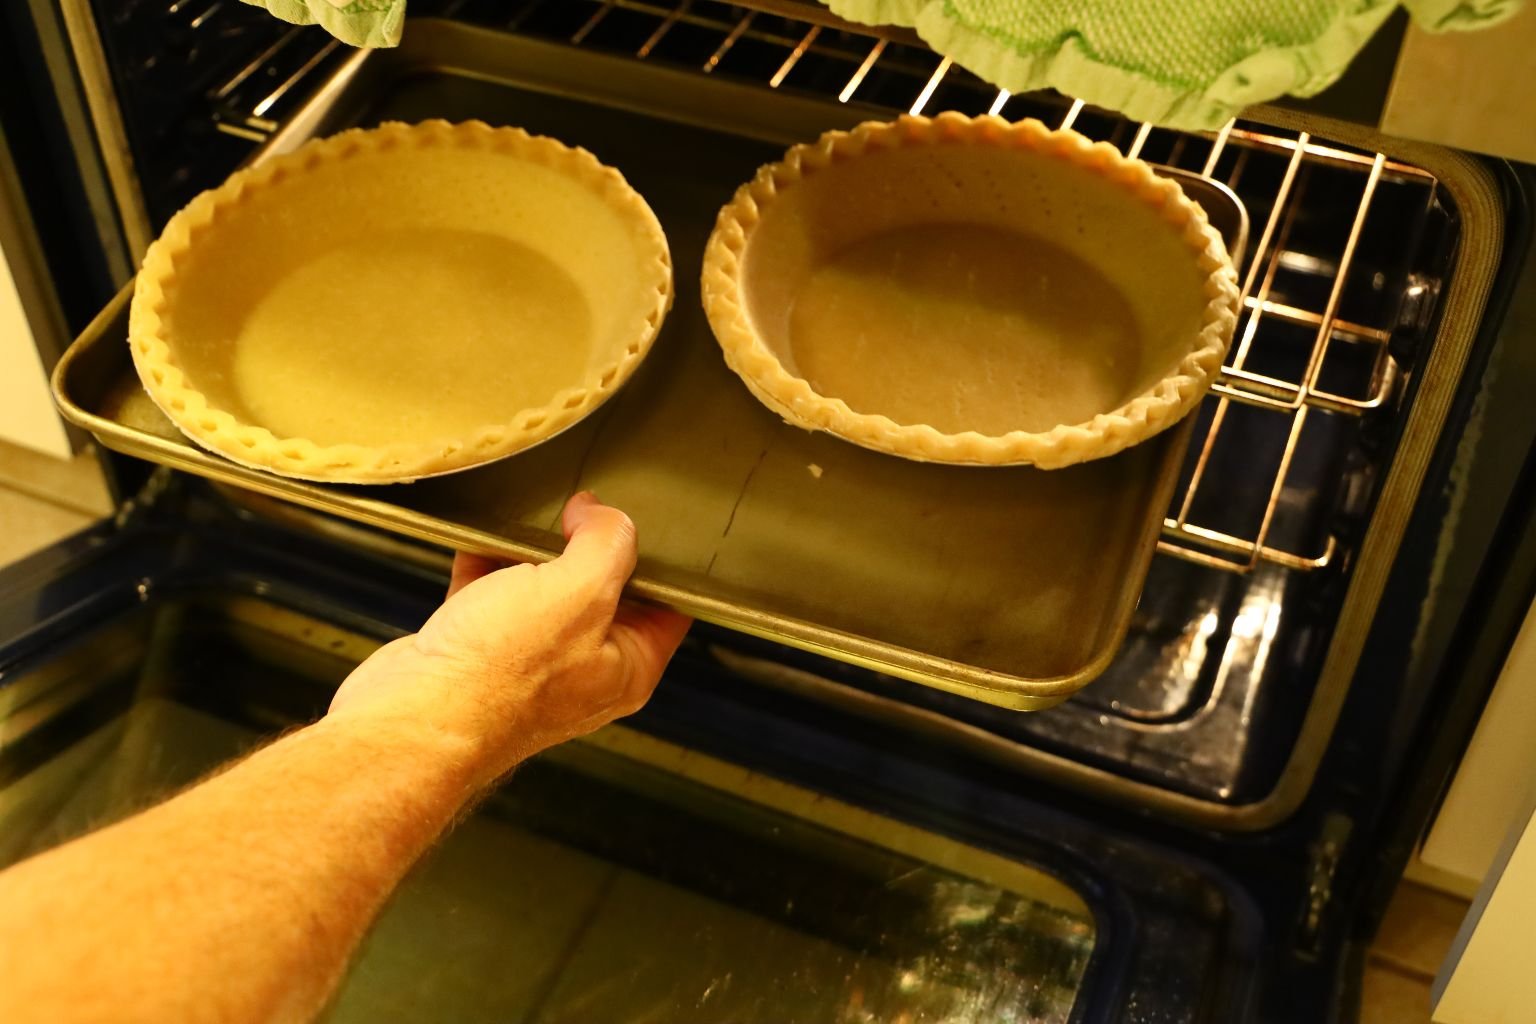
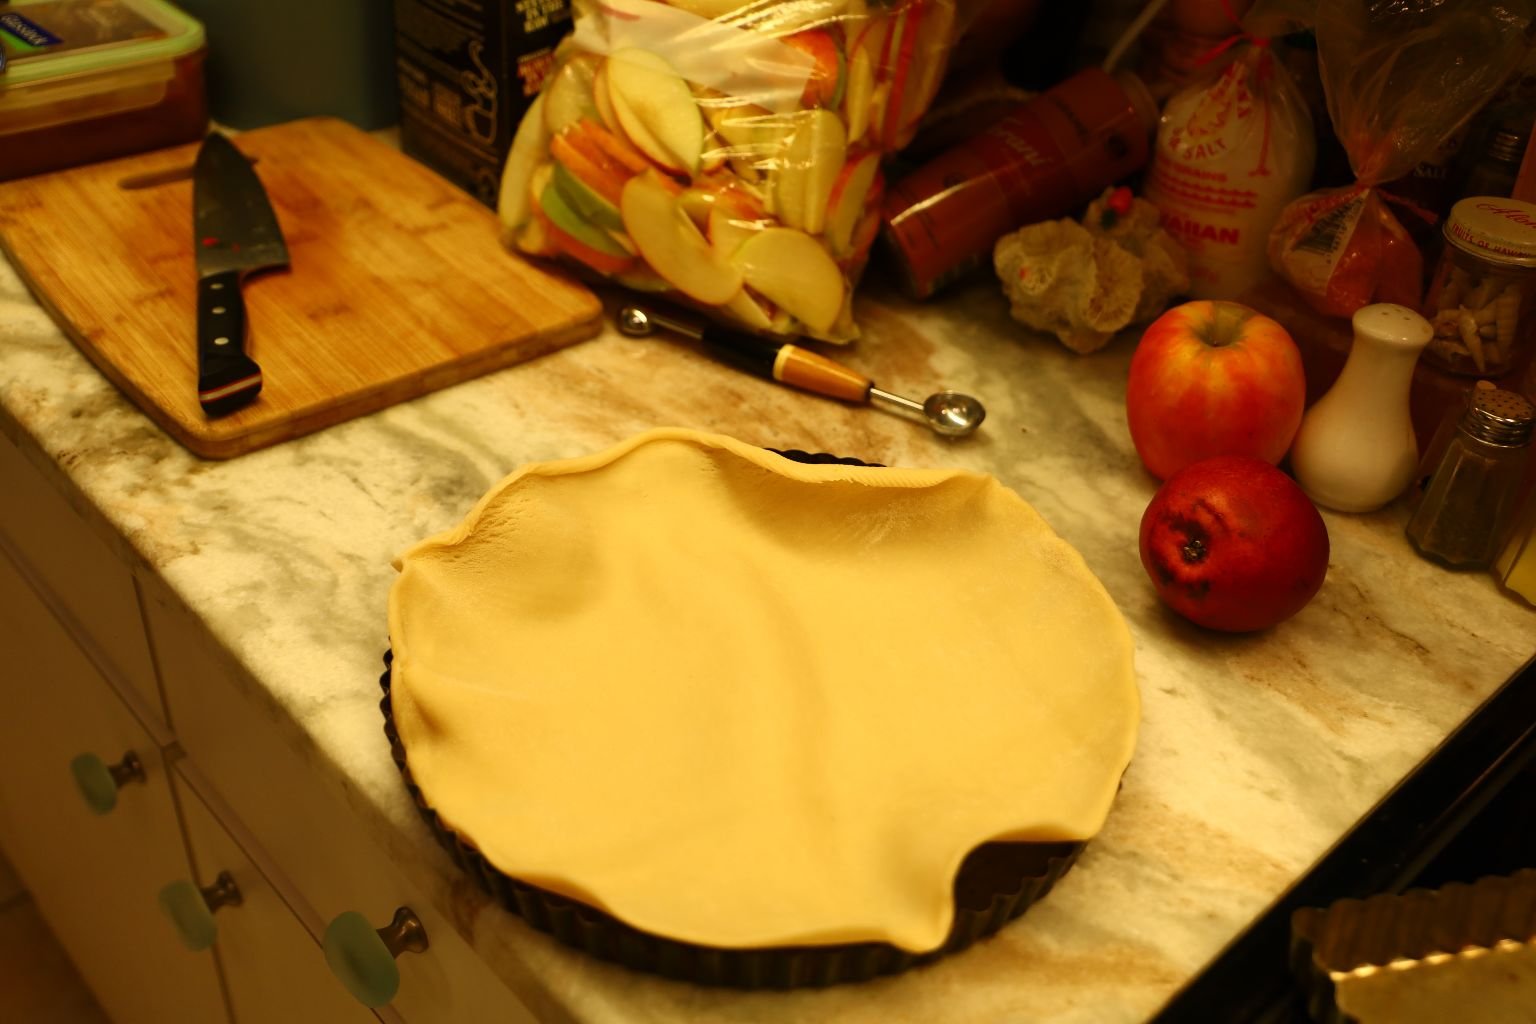
Now for the Piecrusts. You don’t have to pre-bake if you don’t want to and they will turn out just fine. We wanted to just because we feel it ensures the crusts are crispy. Using a fork, prick your crust all over as shown. Pre-bake your pie crusts in a 350’F oven for about 5-8 min.
————————————————————-
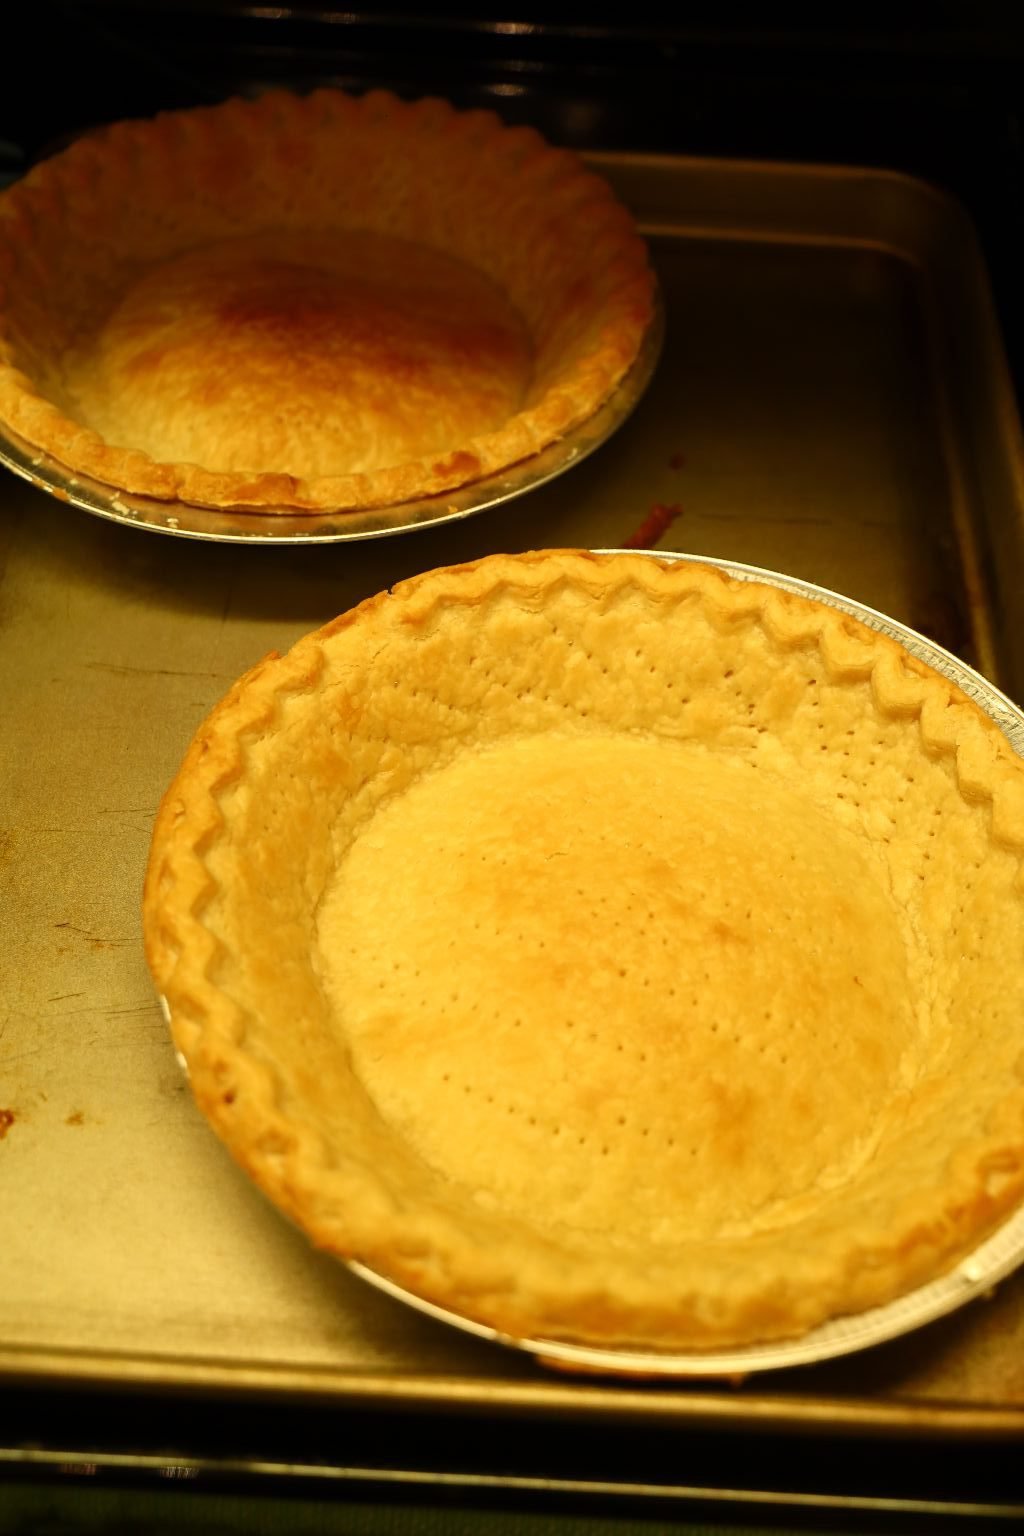
Here are our baked crusts which are just slightly browned.
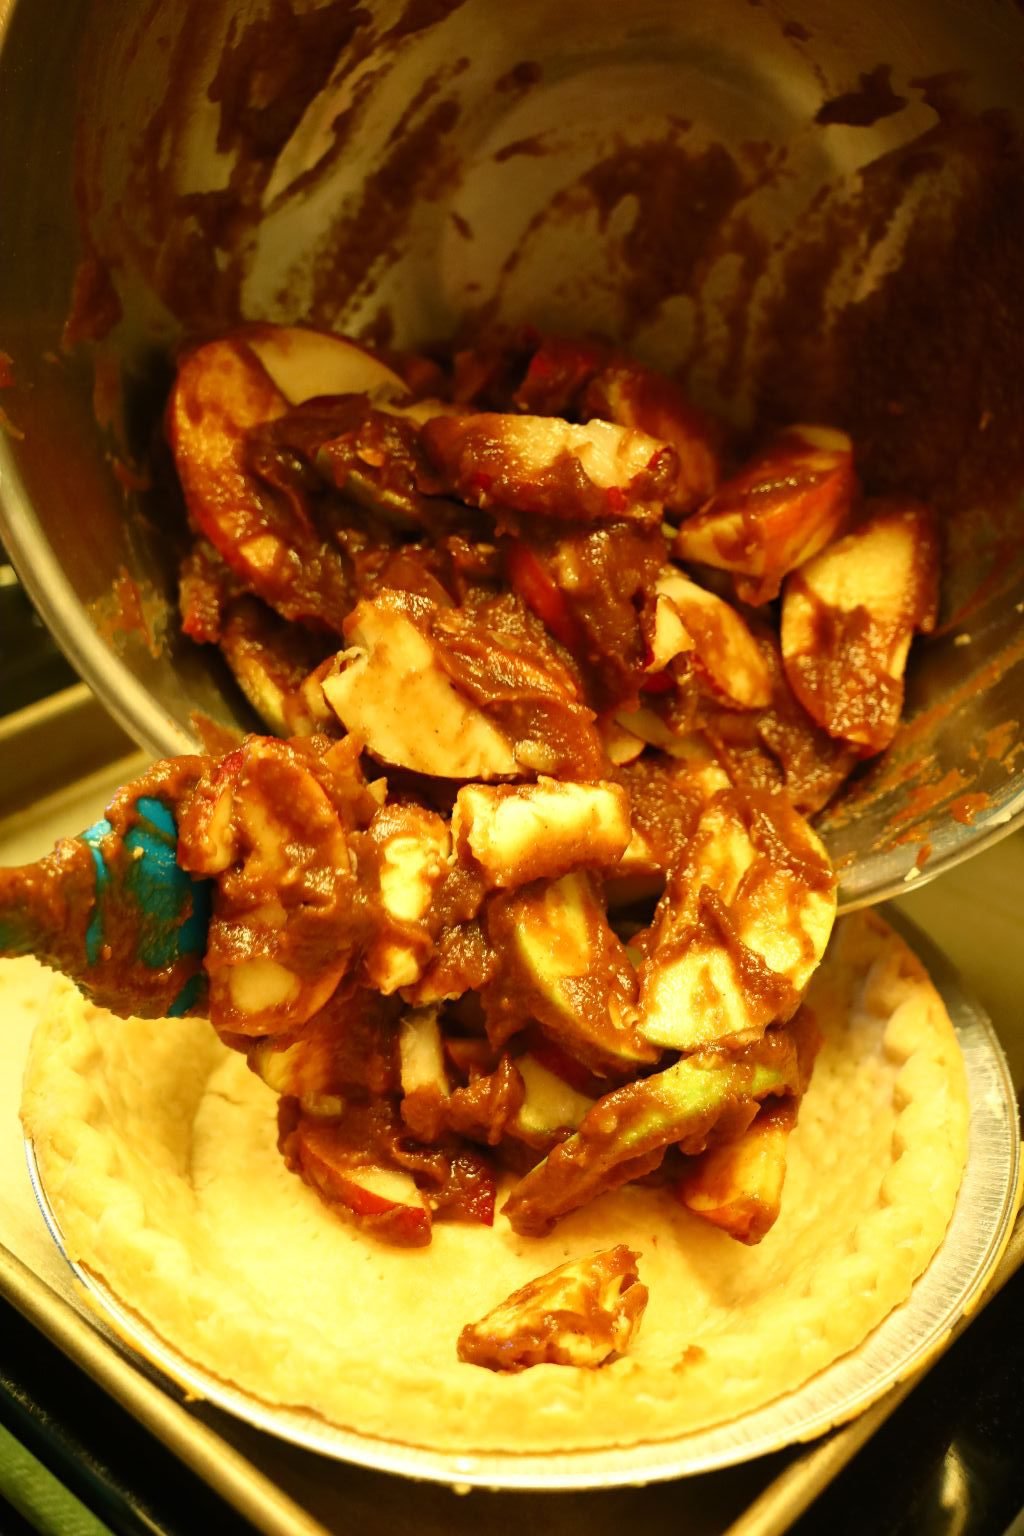
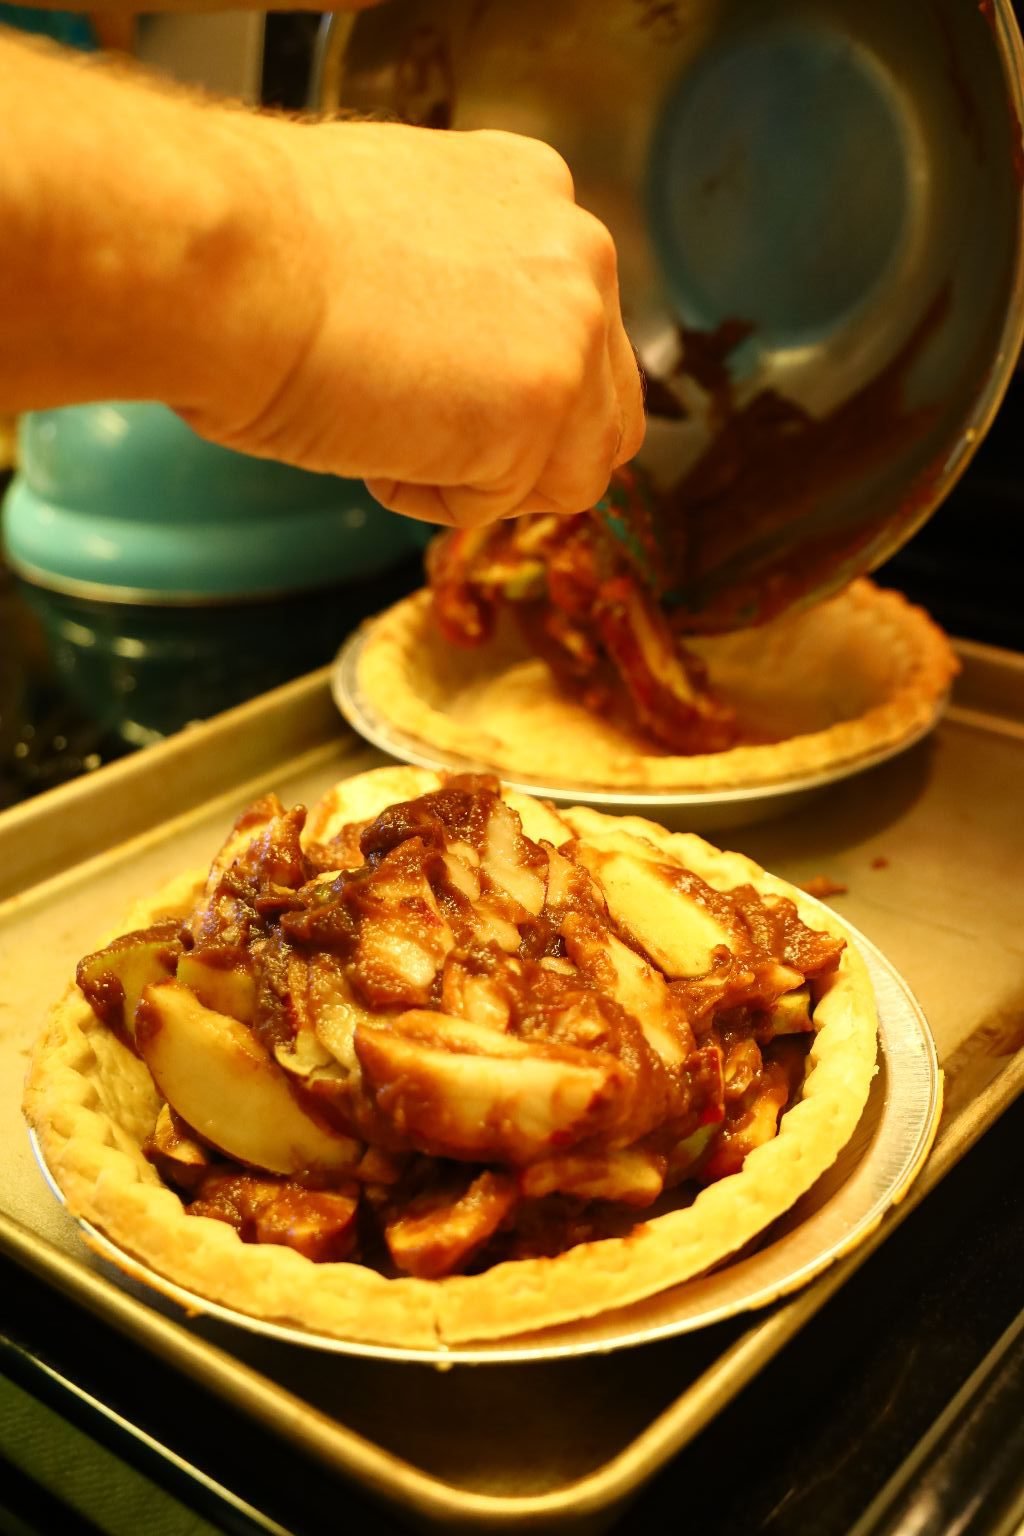
Pile in your Apple-Pear and Seasonings into each pie crust as shown.
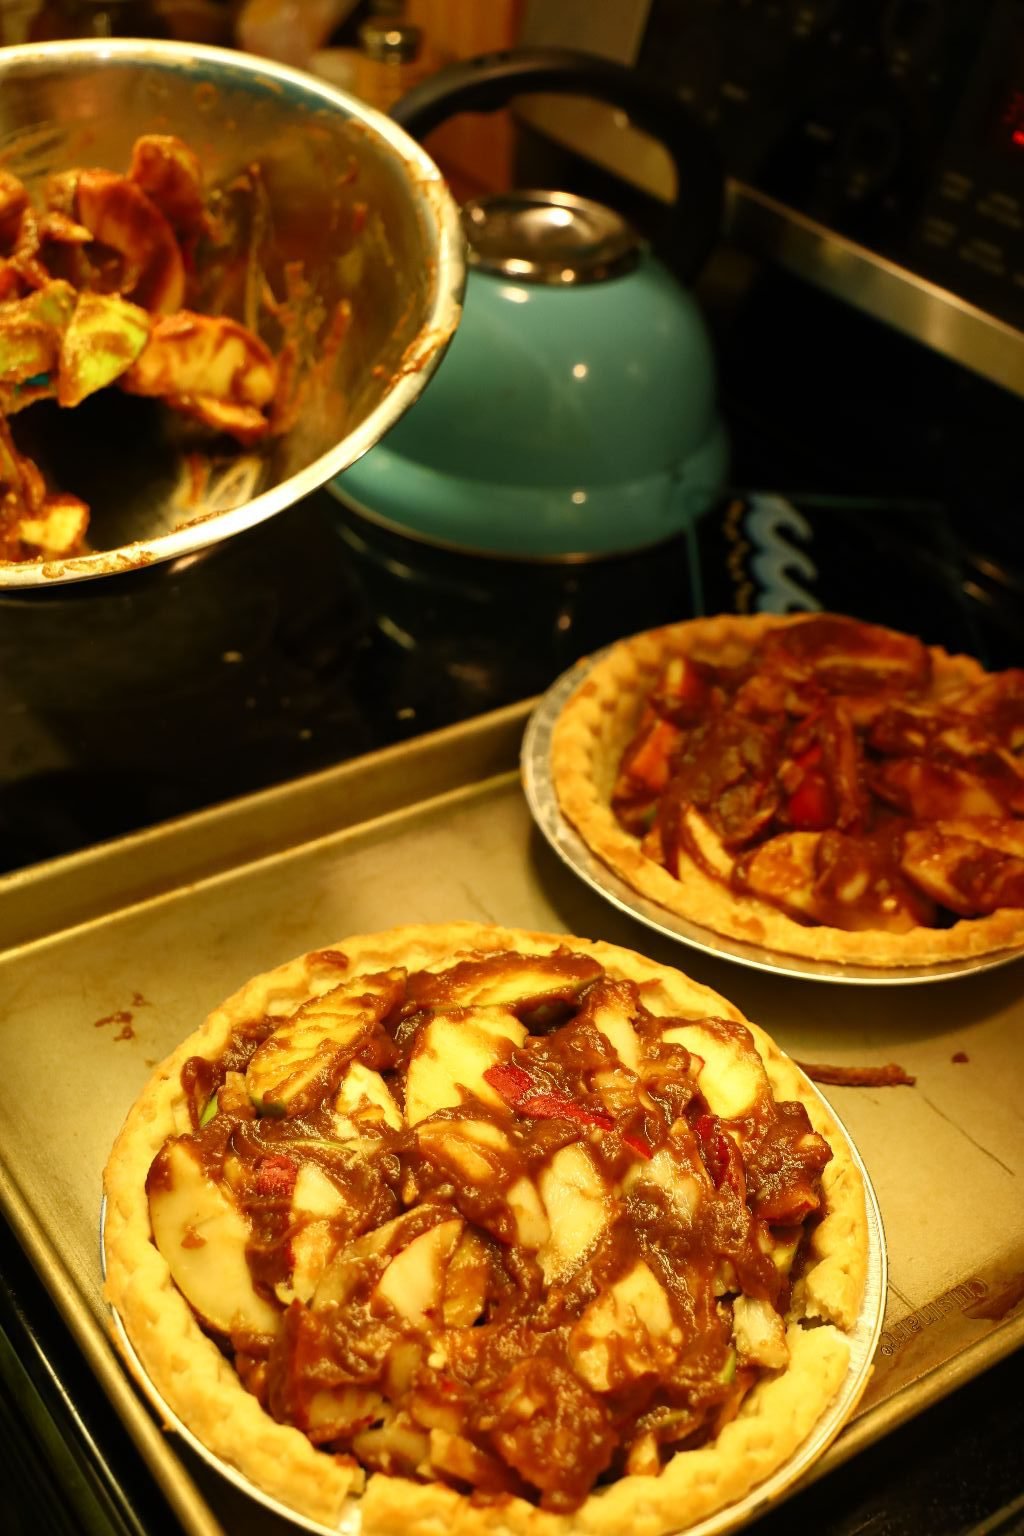
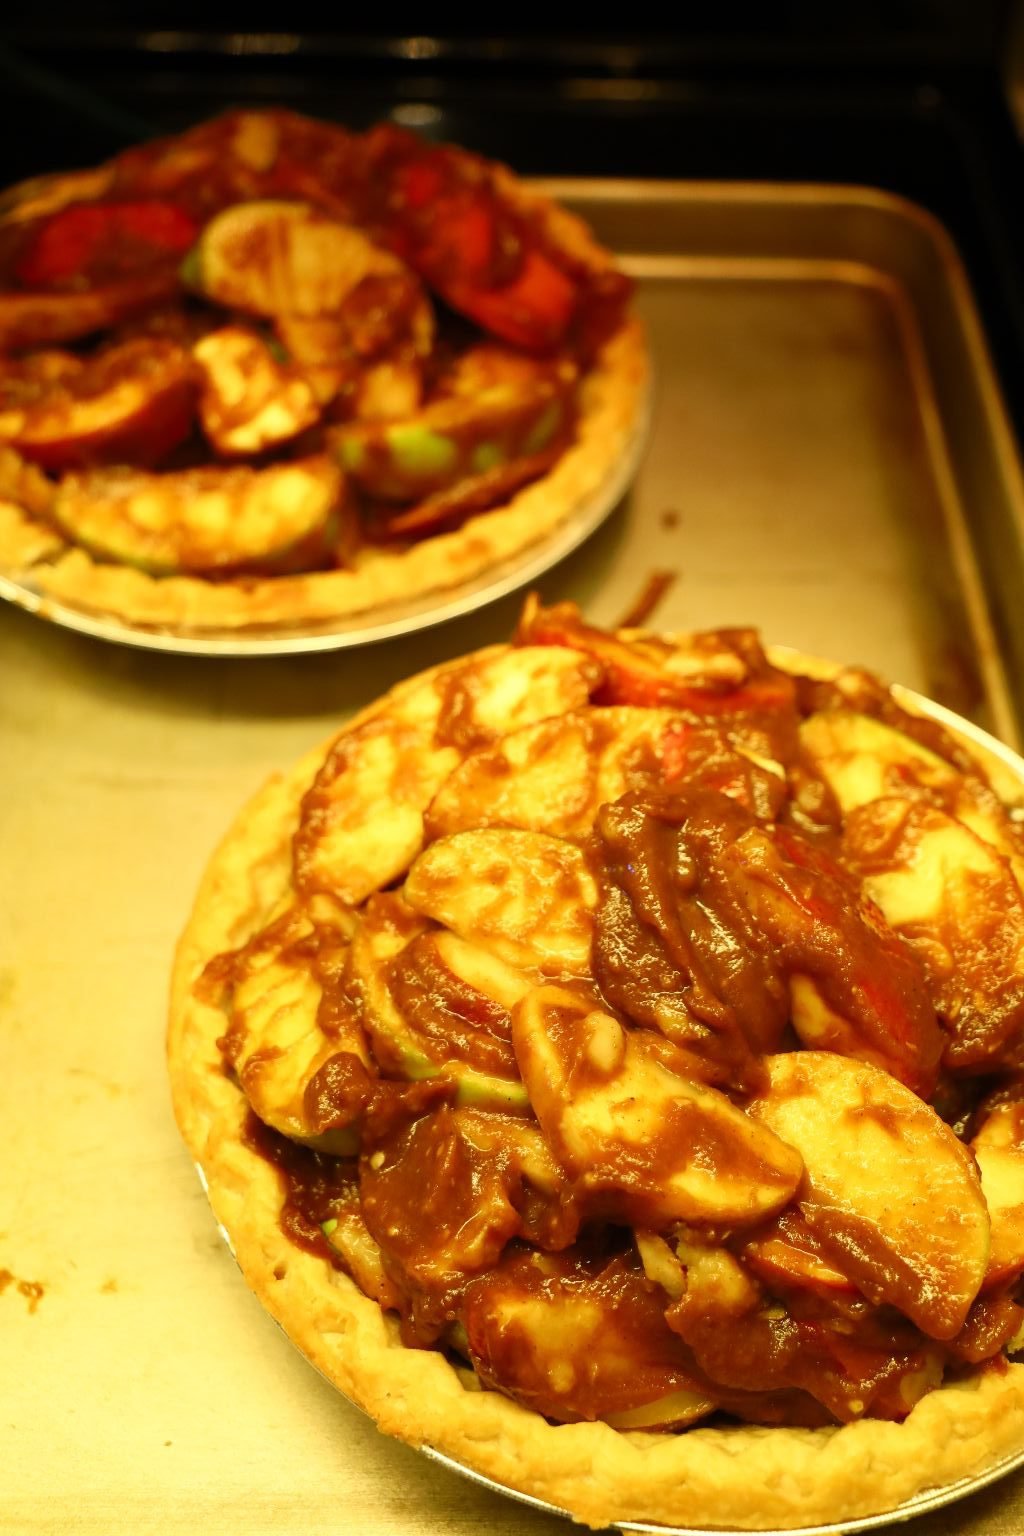
Place them on a sheet pan just in case they spill during baking.

——————————————————————
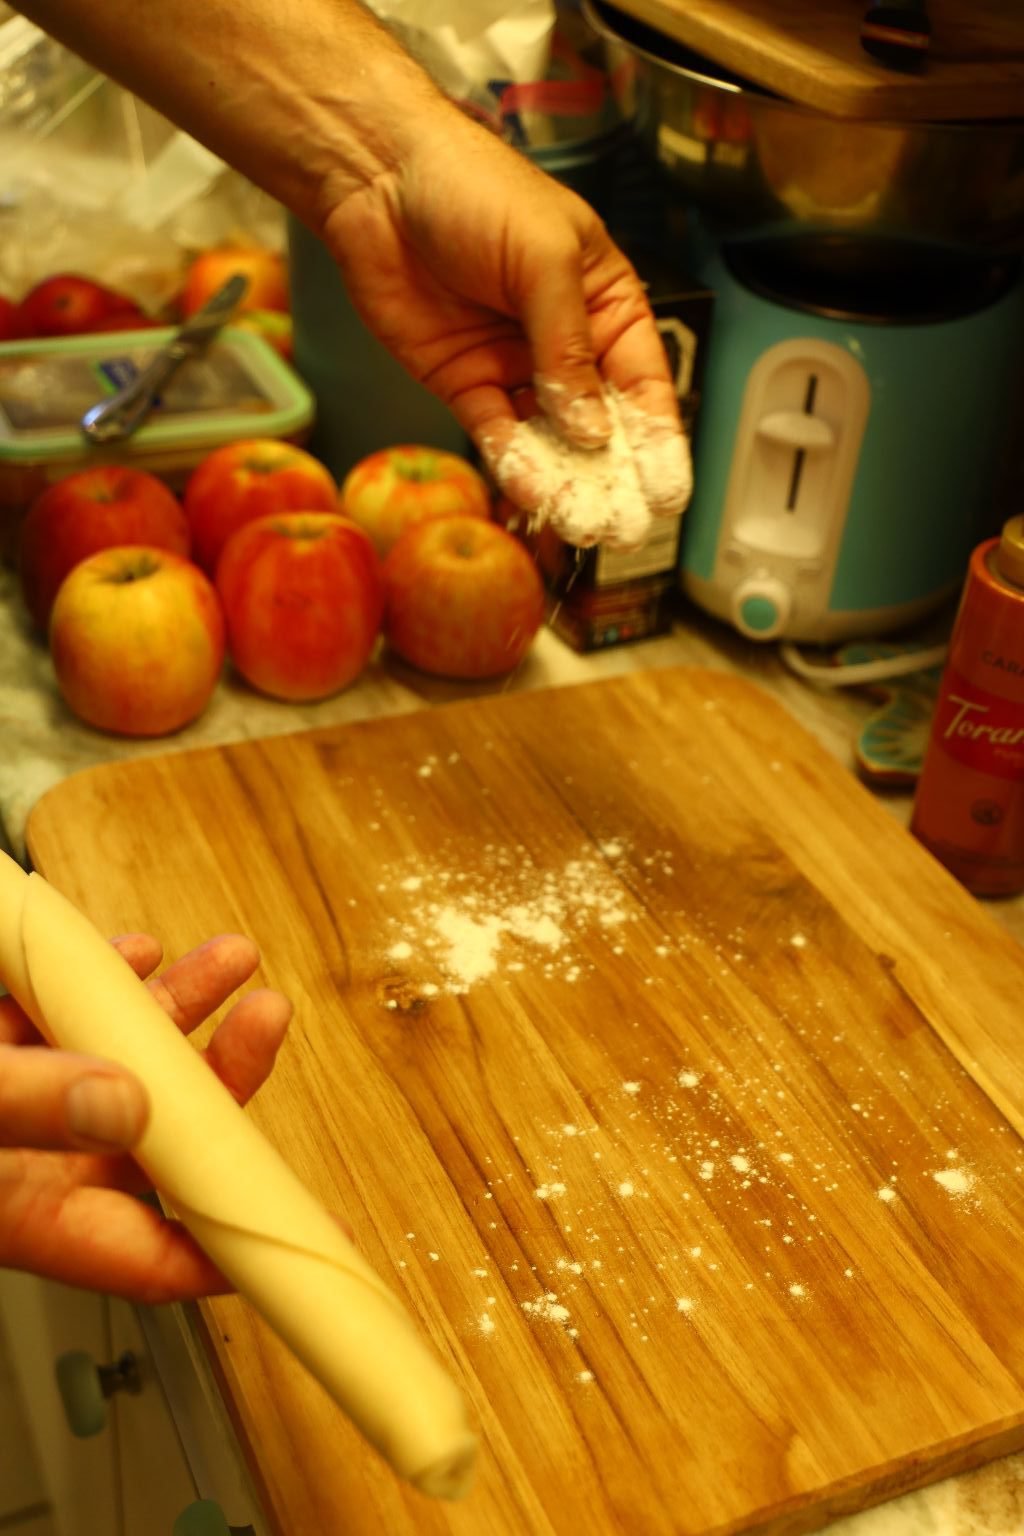
Flour your counter or cutting board with flour. Use a throwing motion to get the flour evenly dispersed.
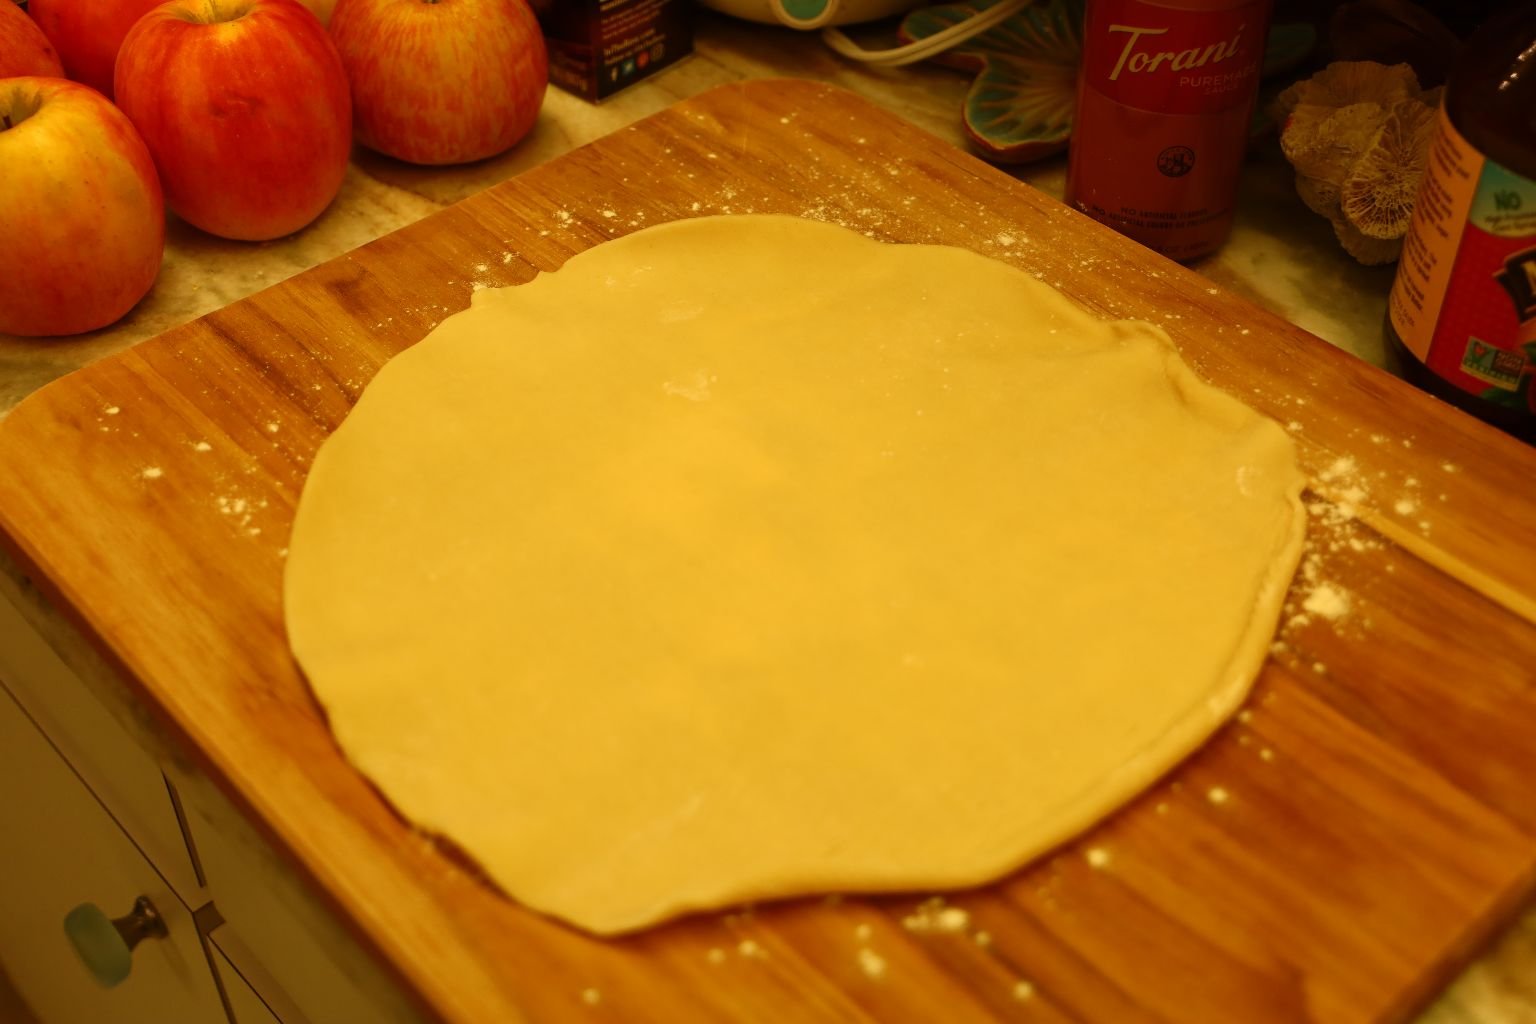
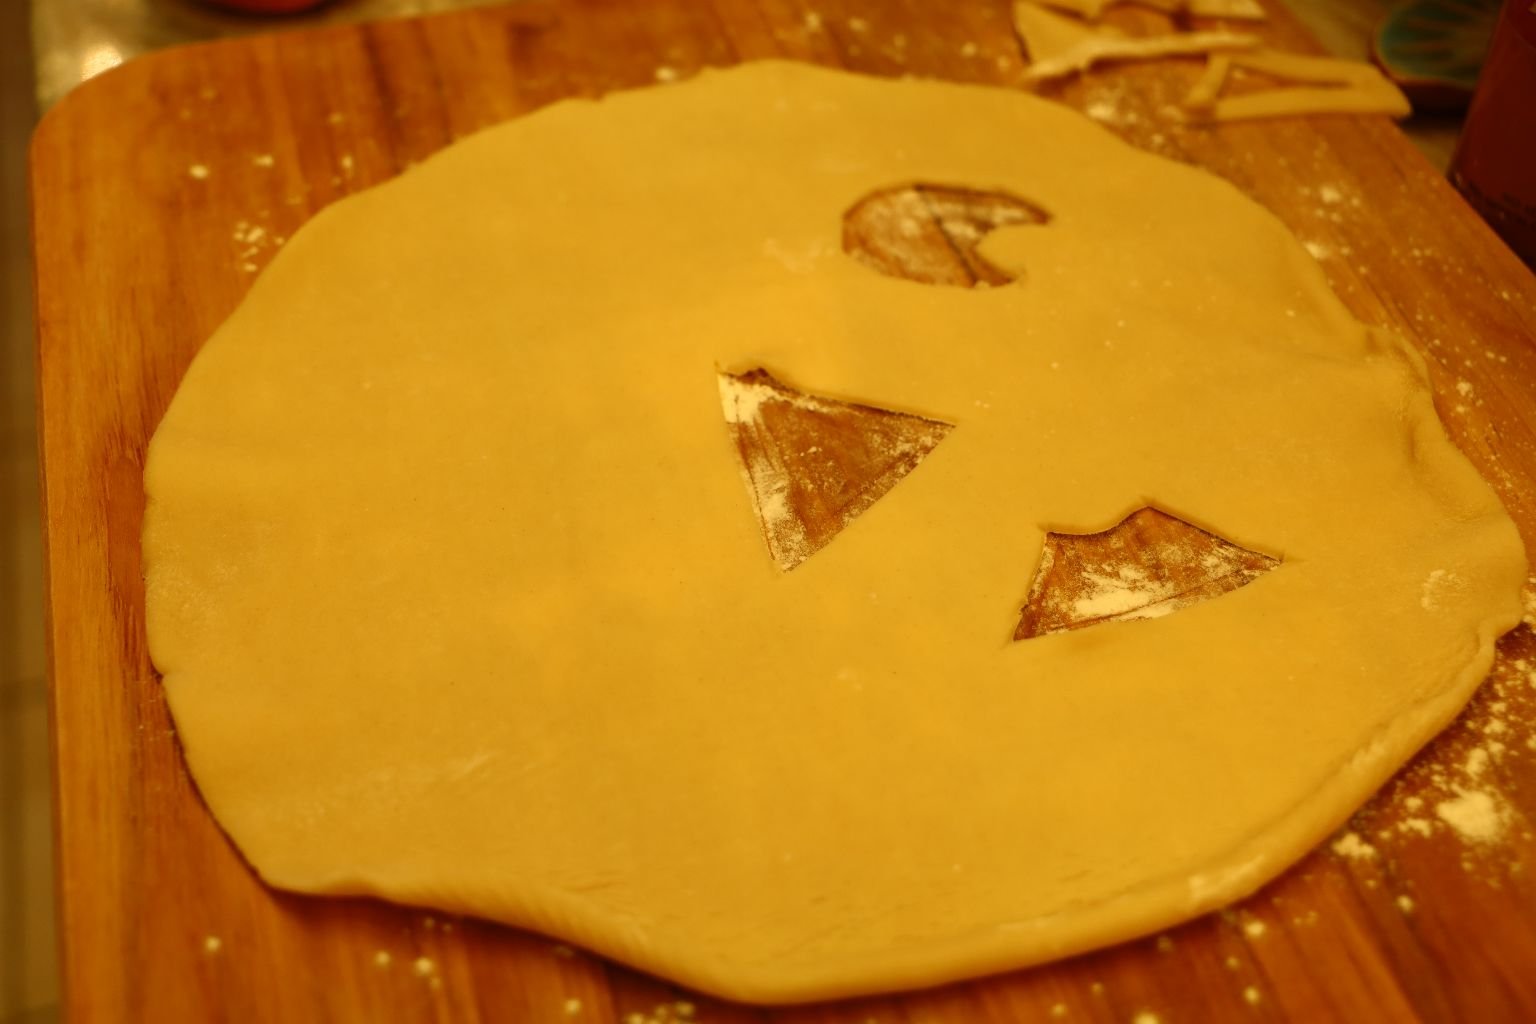

Roll out your thawed but still cold pie dough onto the floured surface and using a sharp knife, cut out your pumpkin face shapes as shown.
Be Creative!
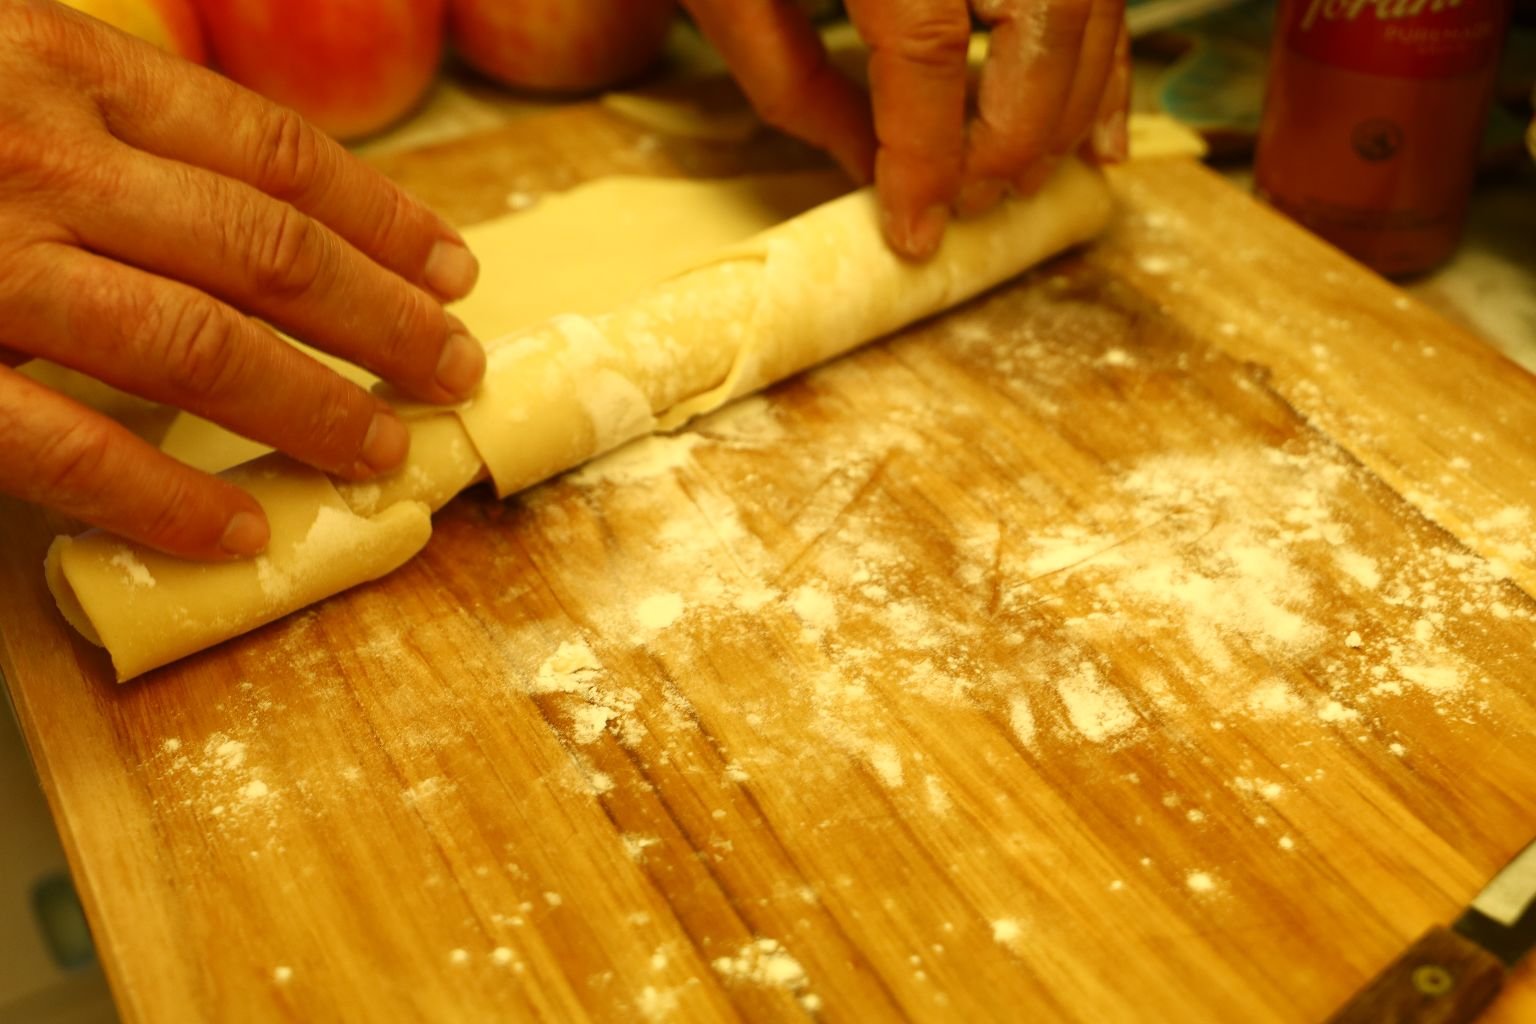
Roll the dough into a tube as shown…
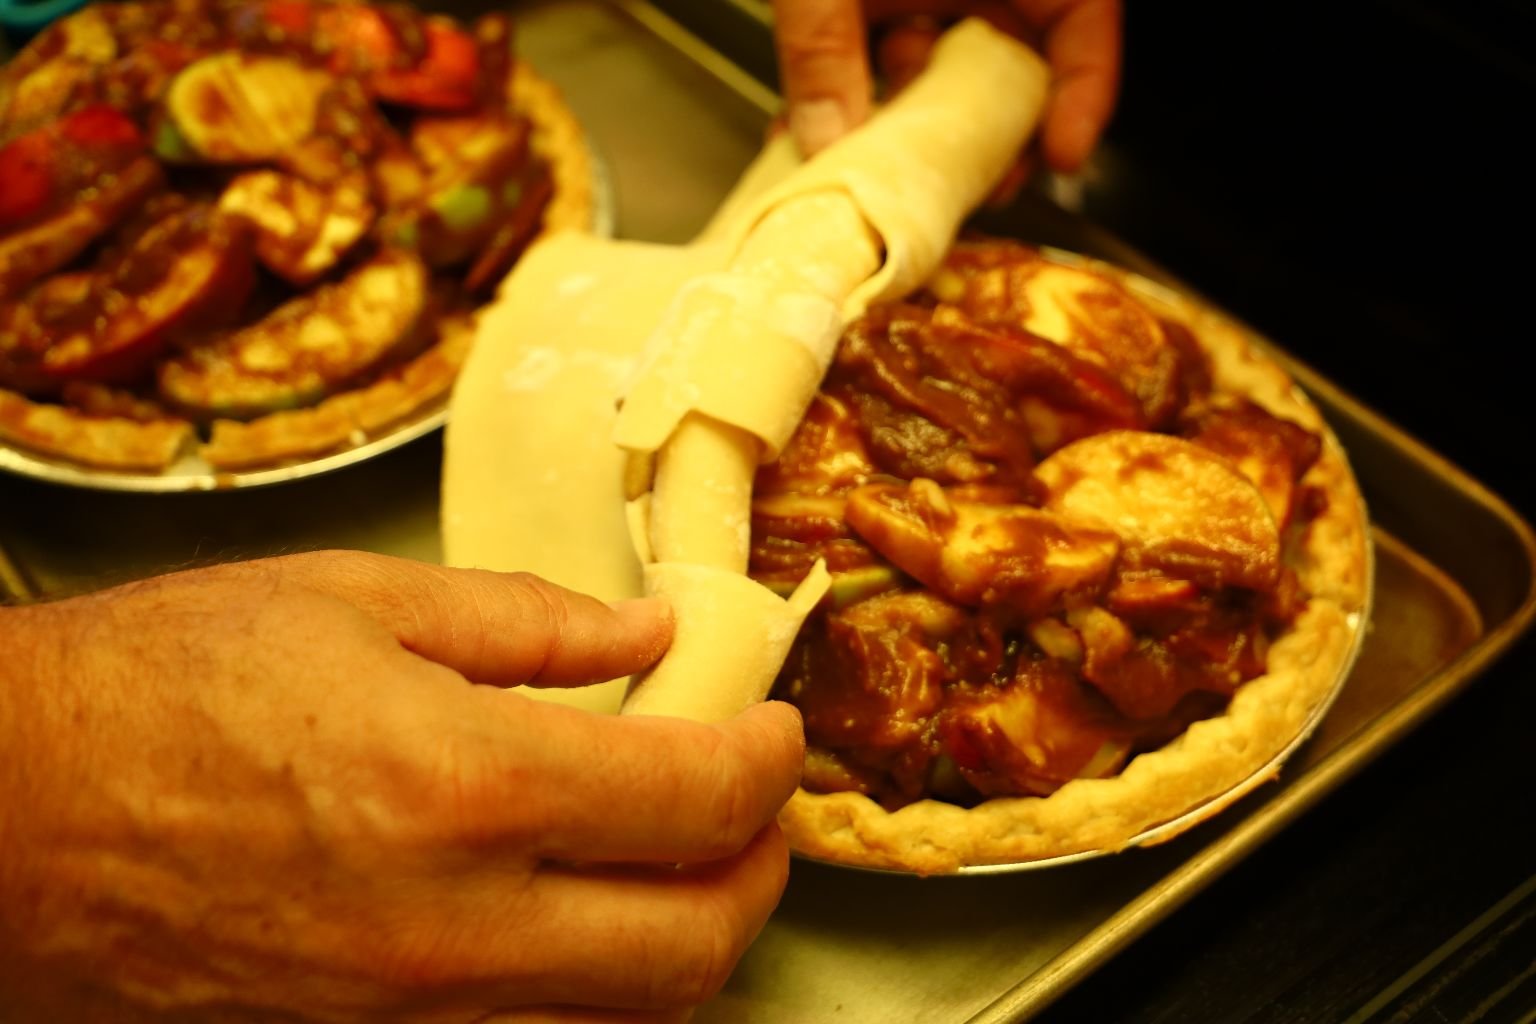
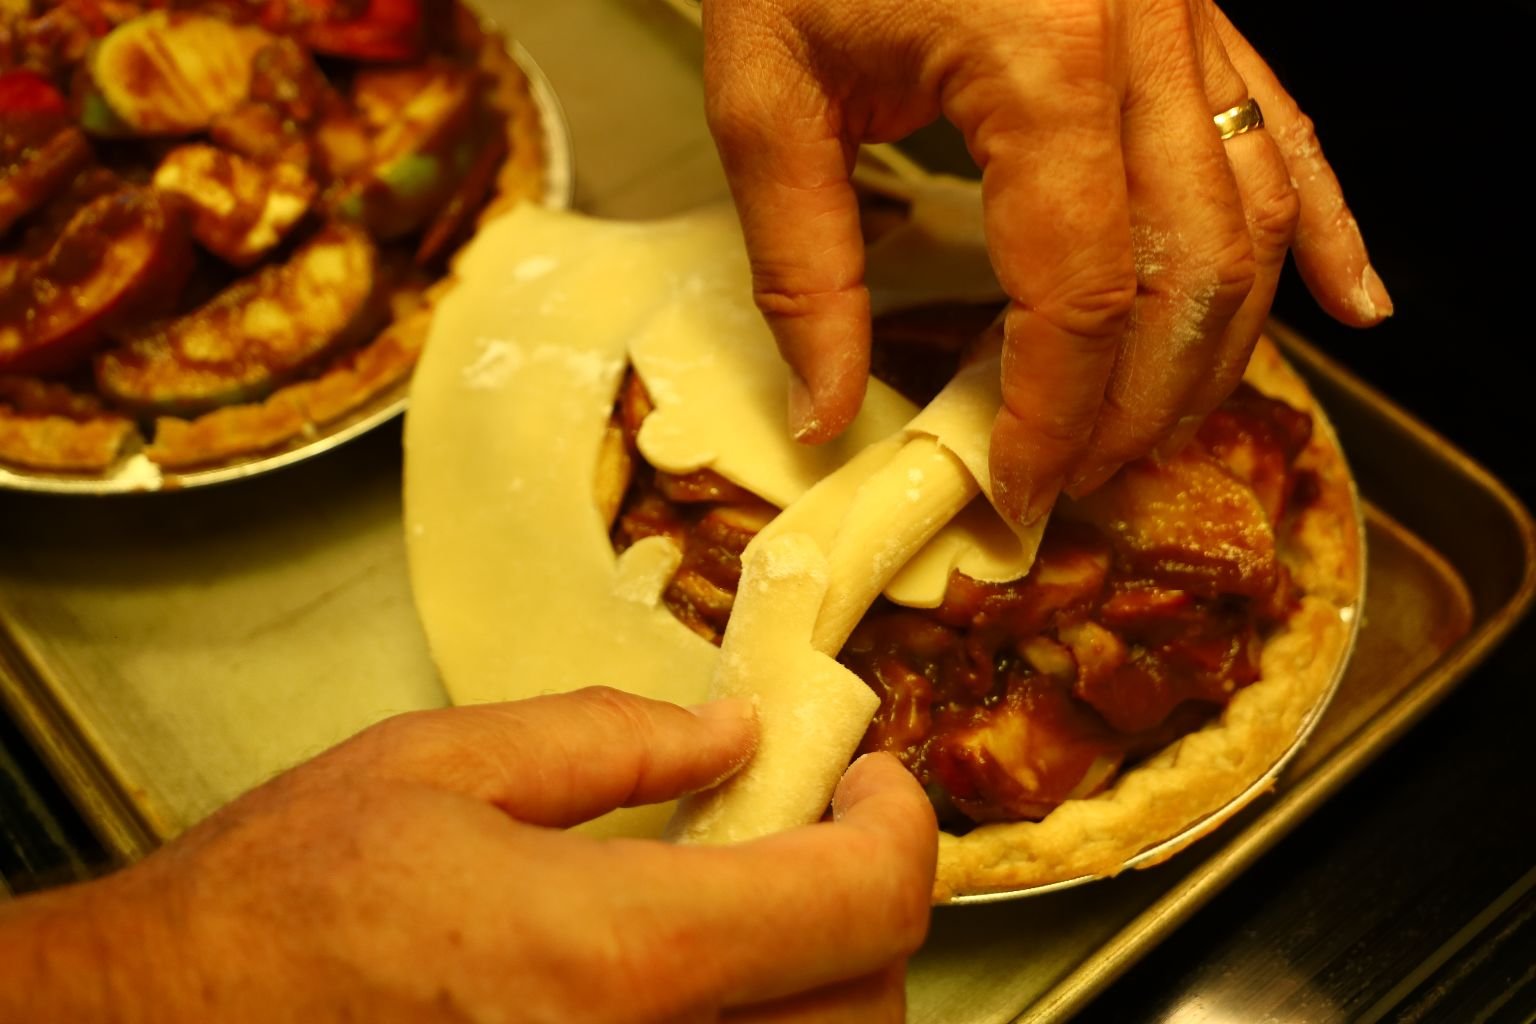
then unroll the dough over the top of the pie as shown.
Adjust and center the dough over the pie.
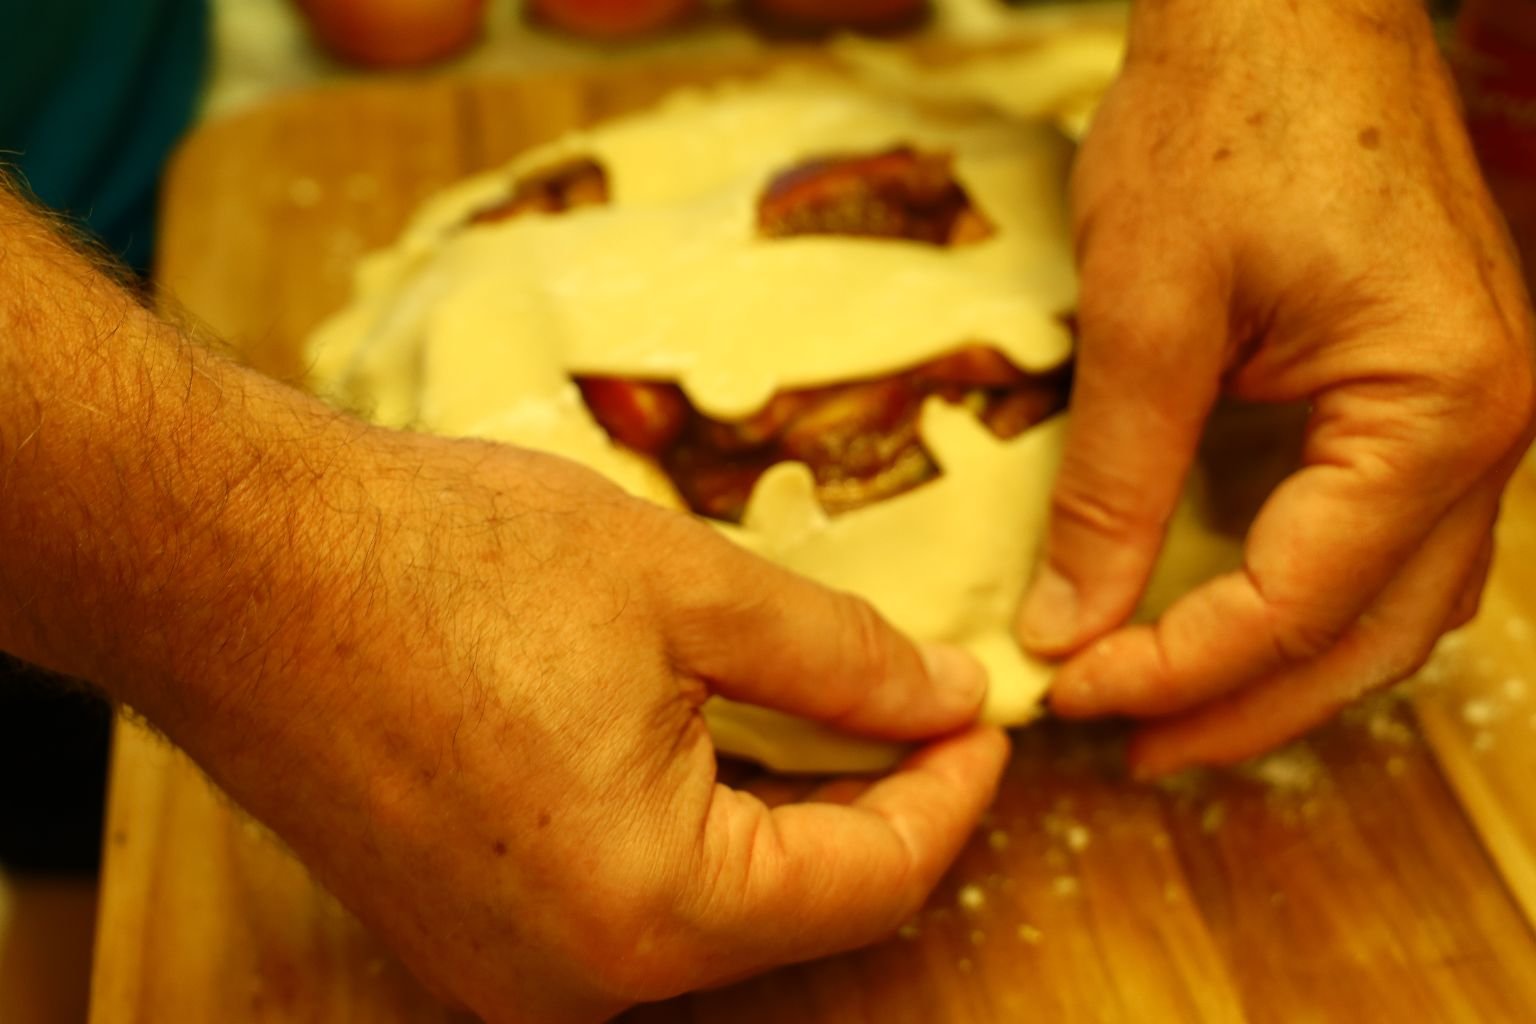
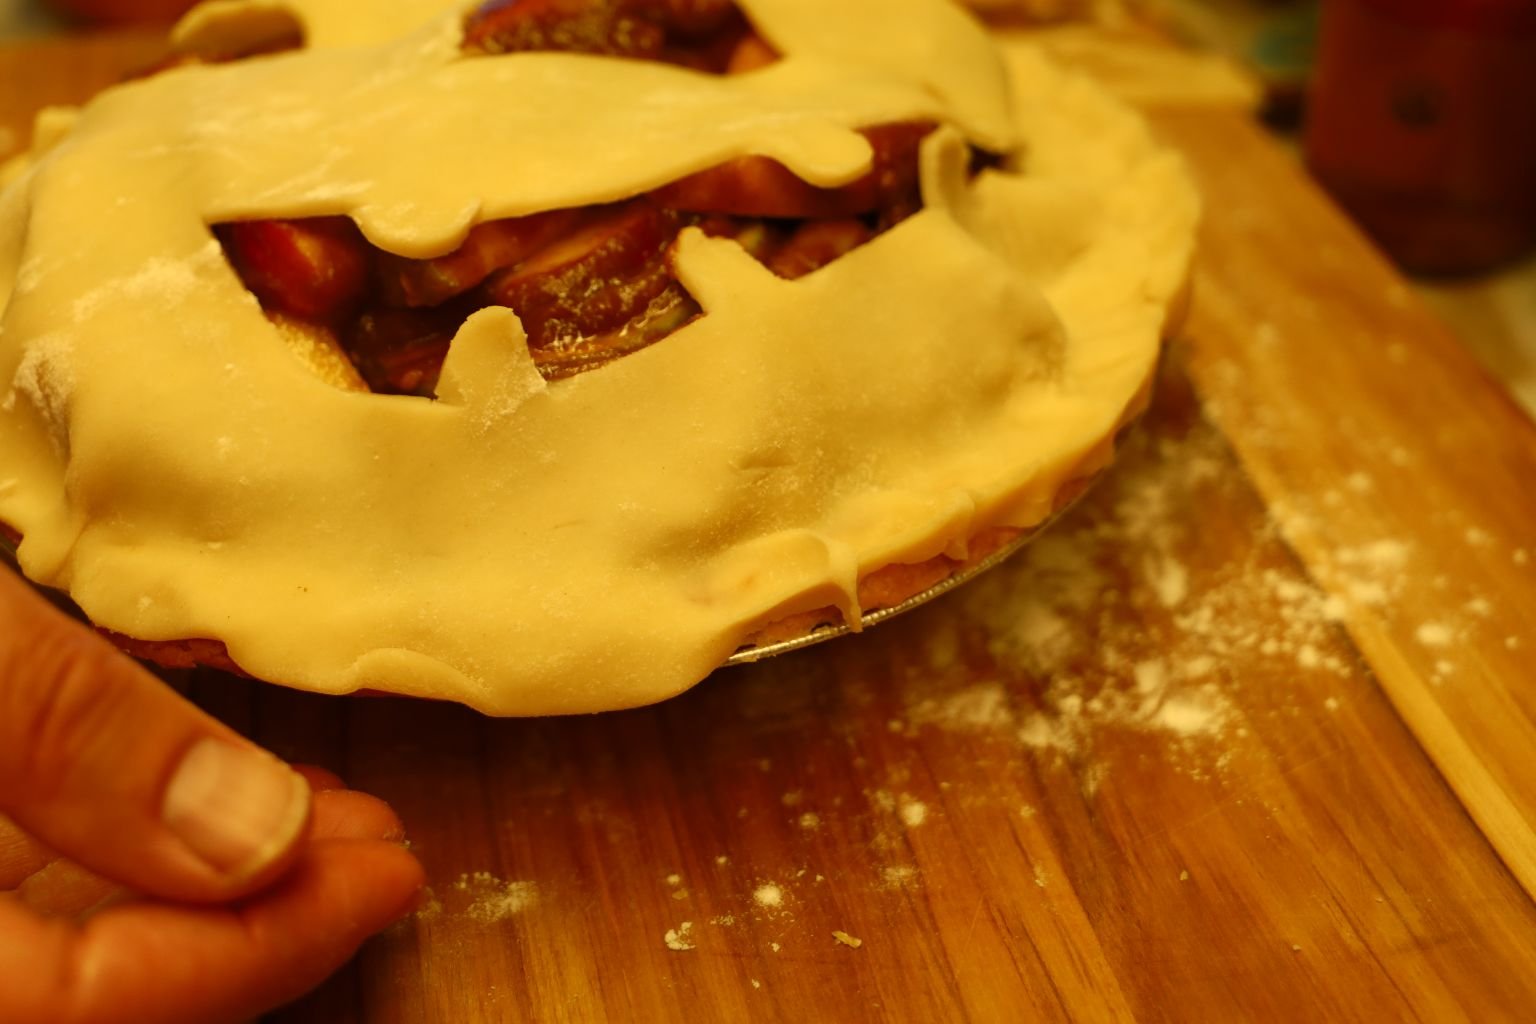
Crimp both edges together using a pinching motion.
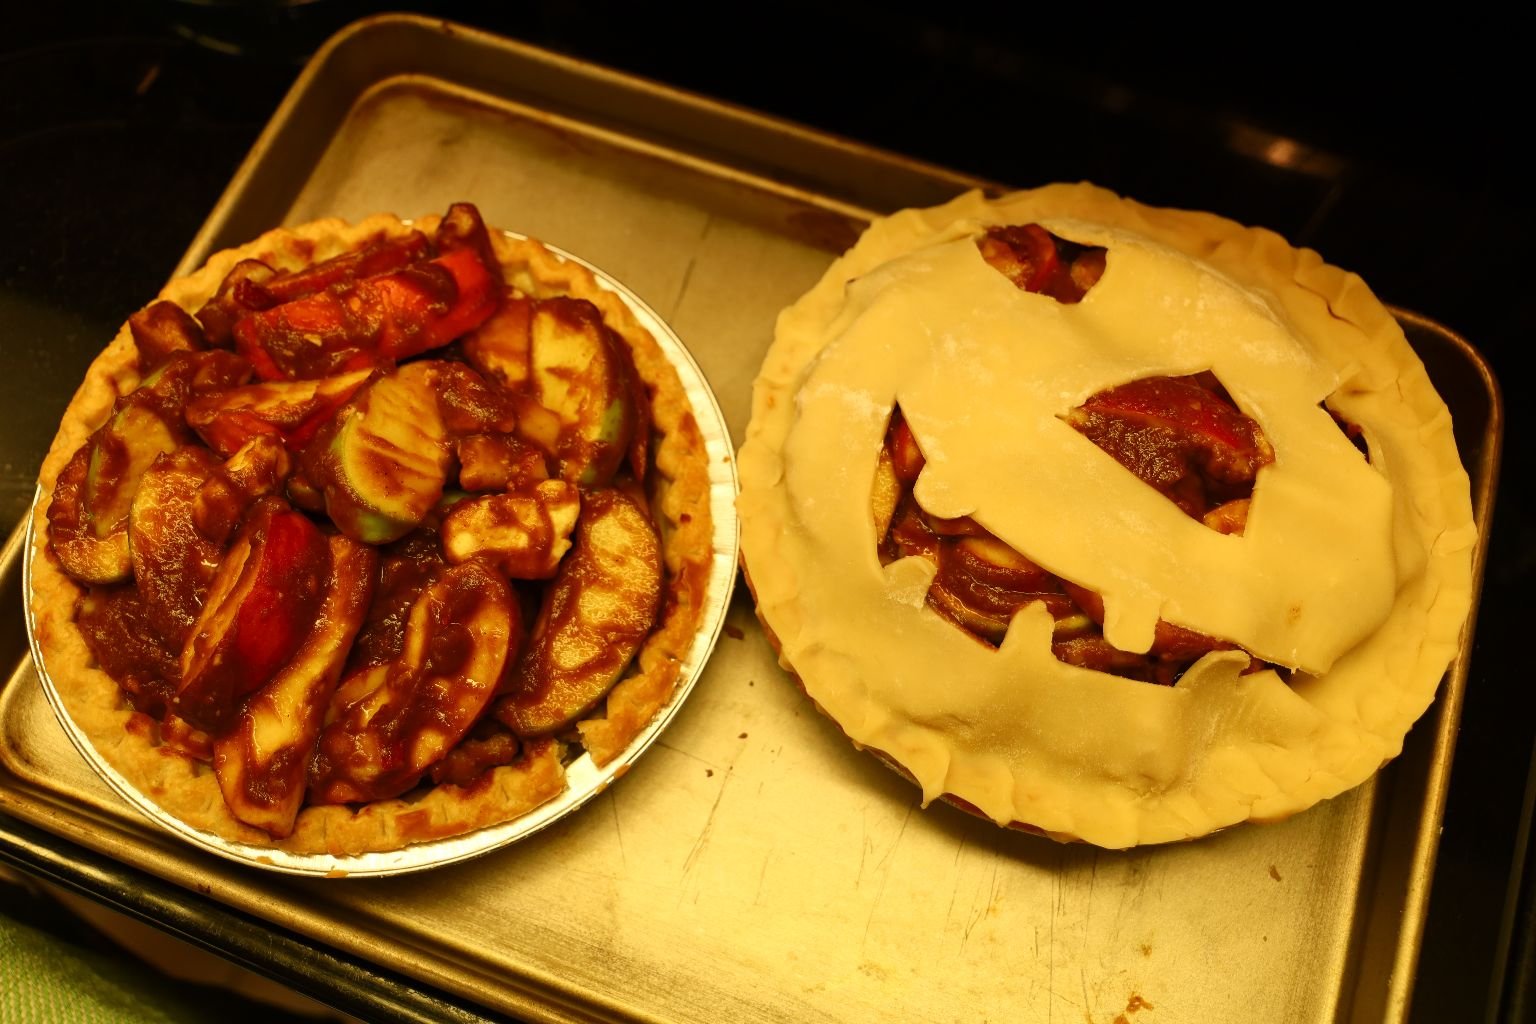
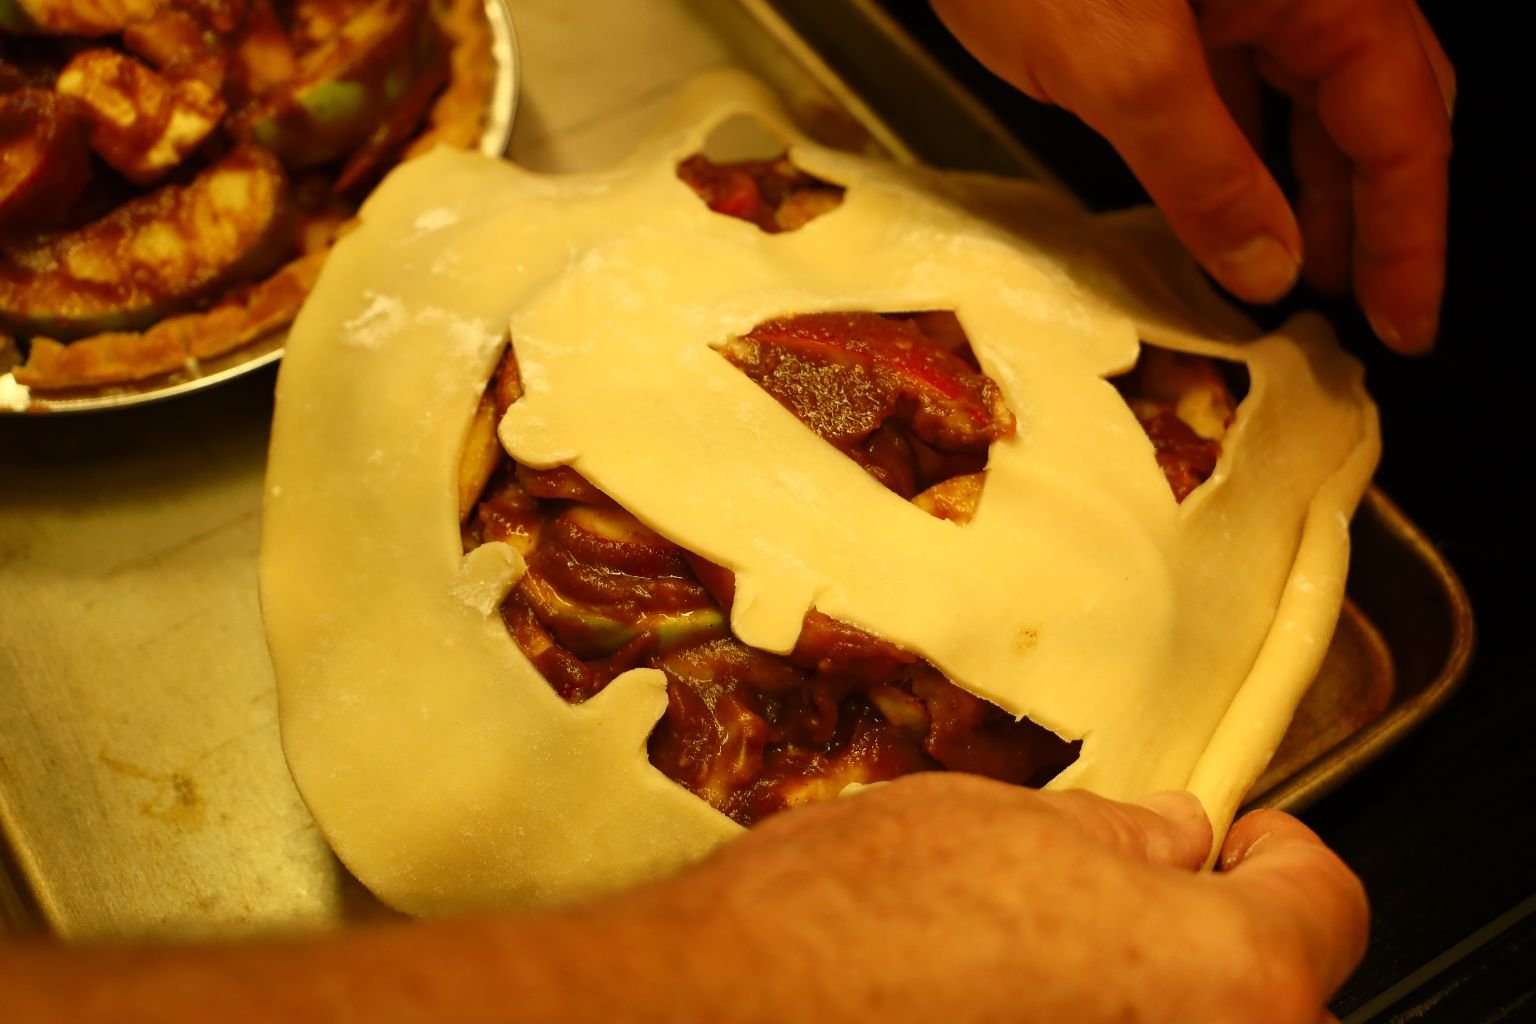
Here you can see one of the pies ready for baking.
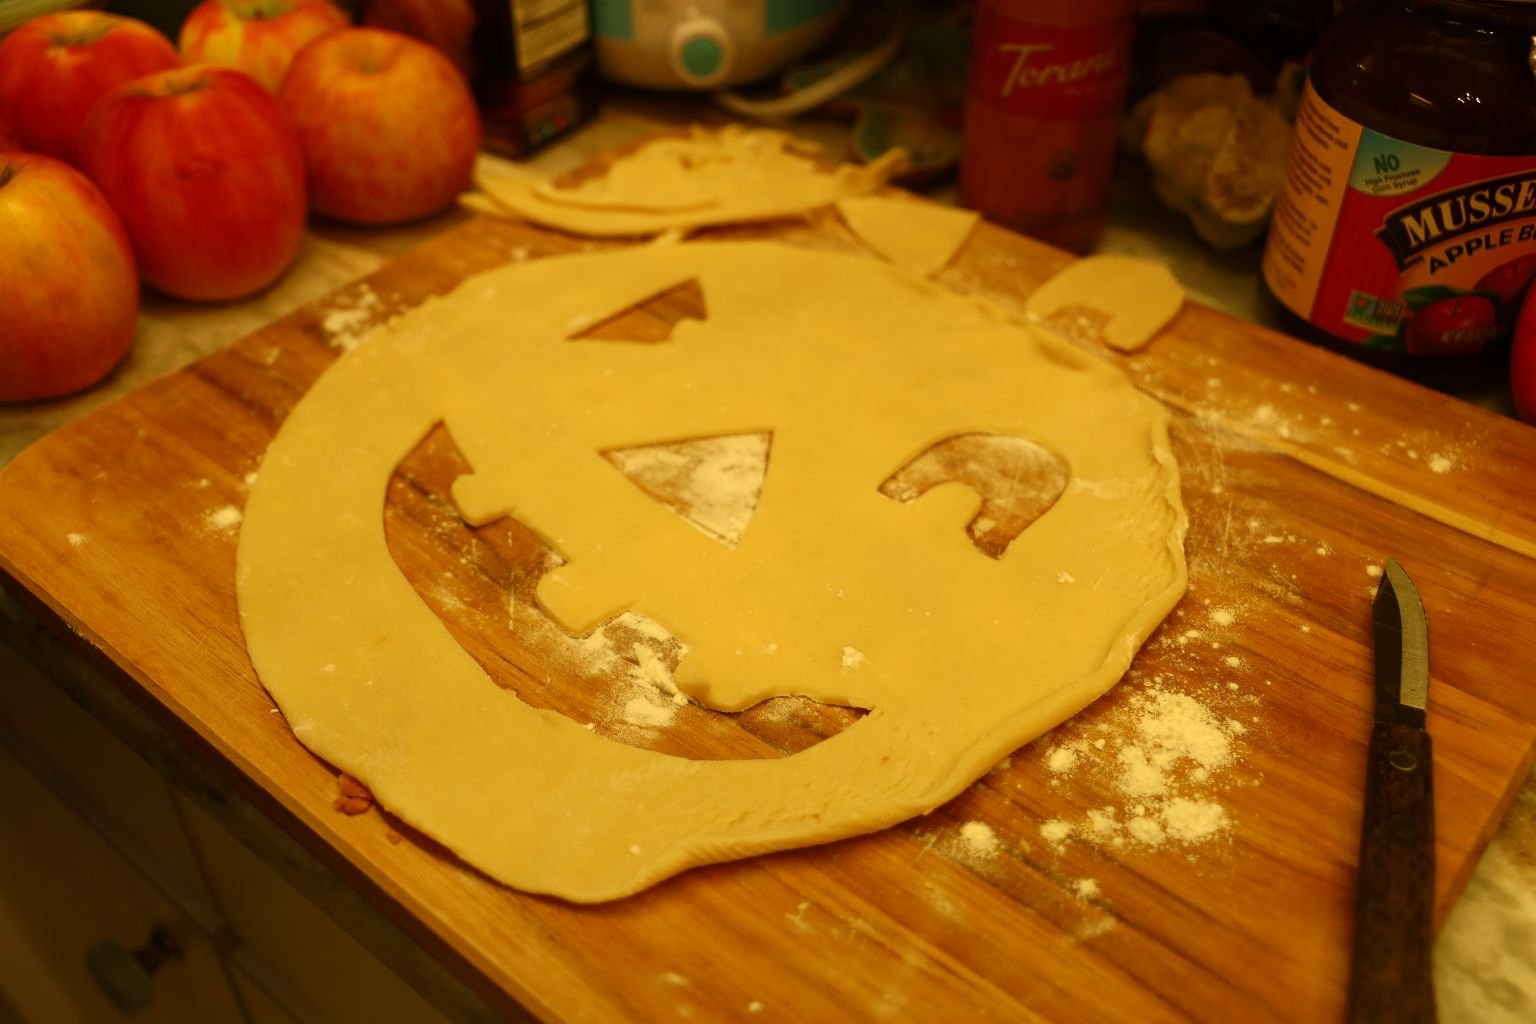
Cut the next pie dough in the same method.

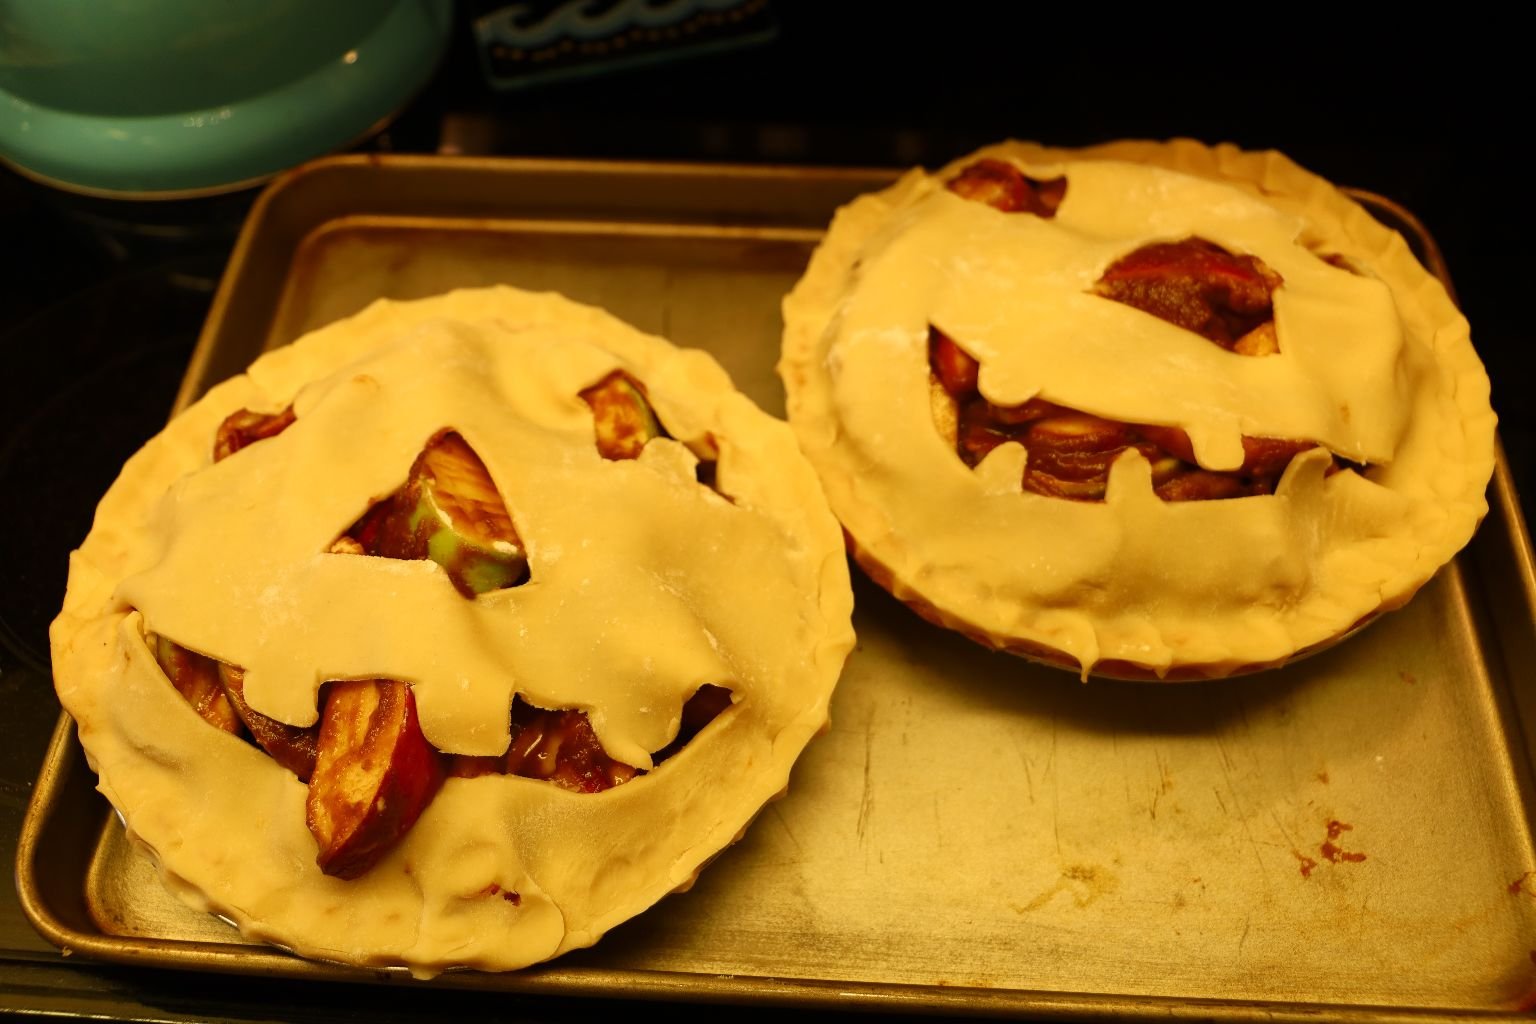
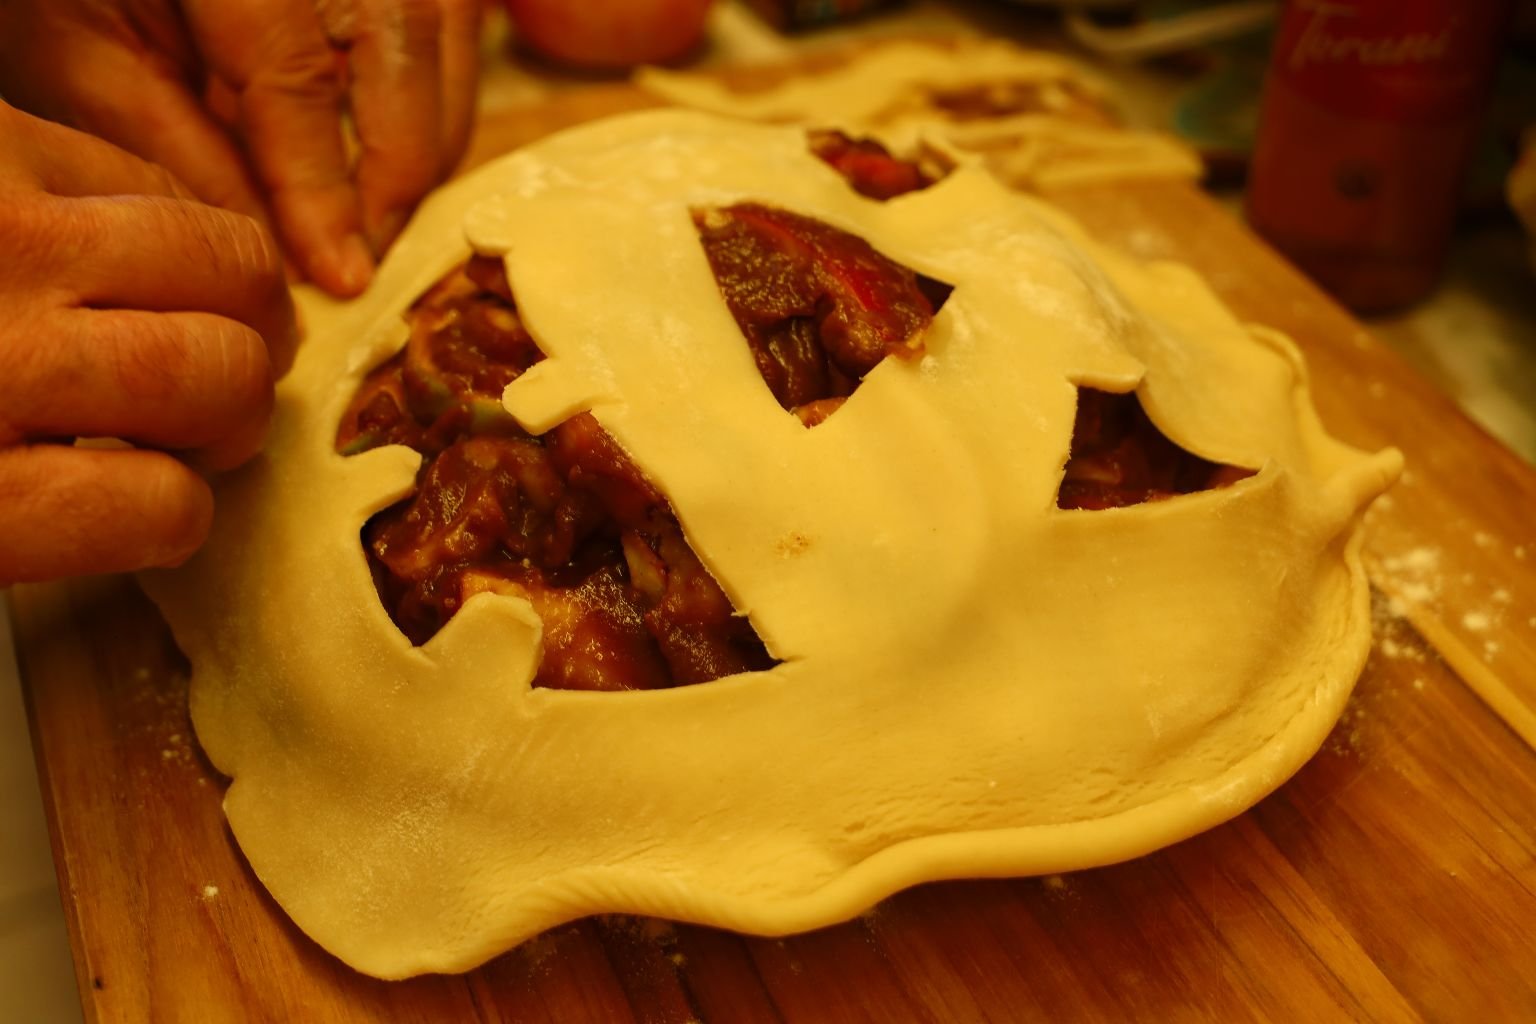
Julie had the brilliant idea to take one of the pieces of apple making a tongue with it.
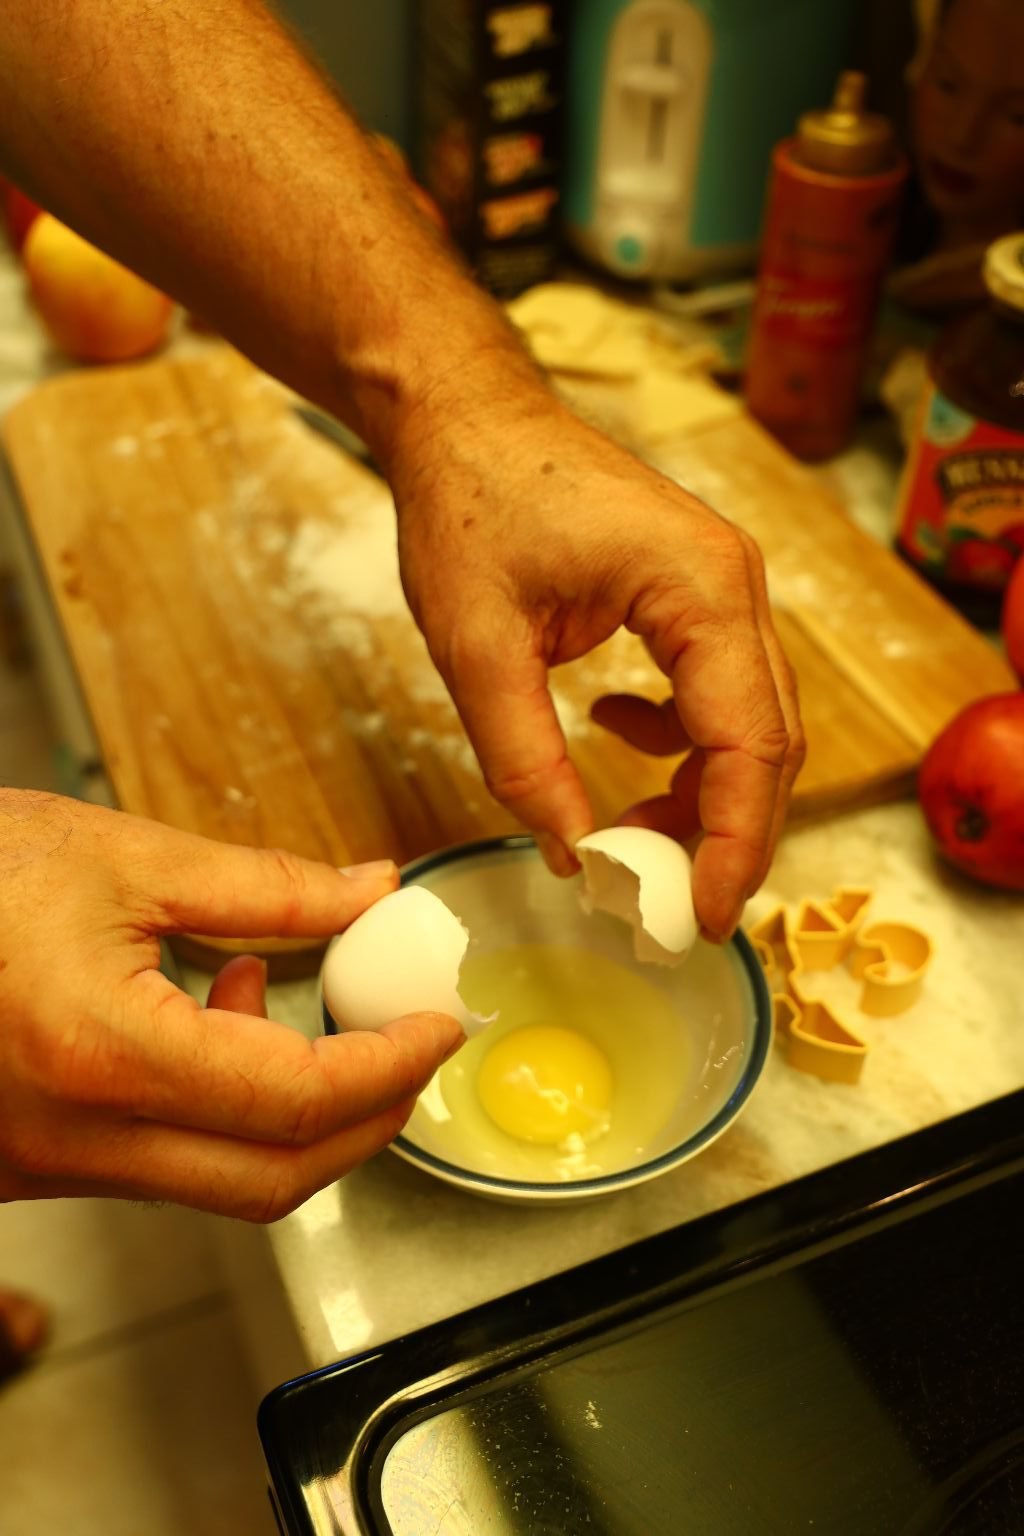
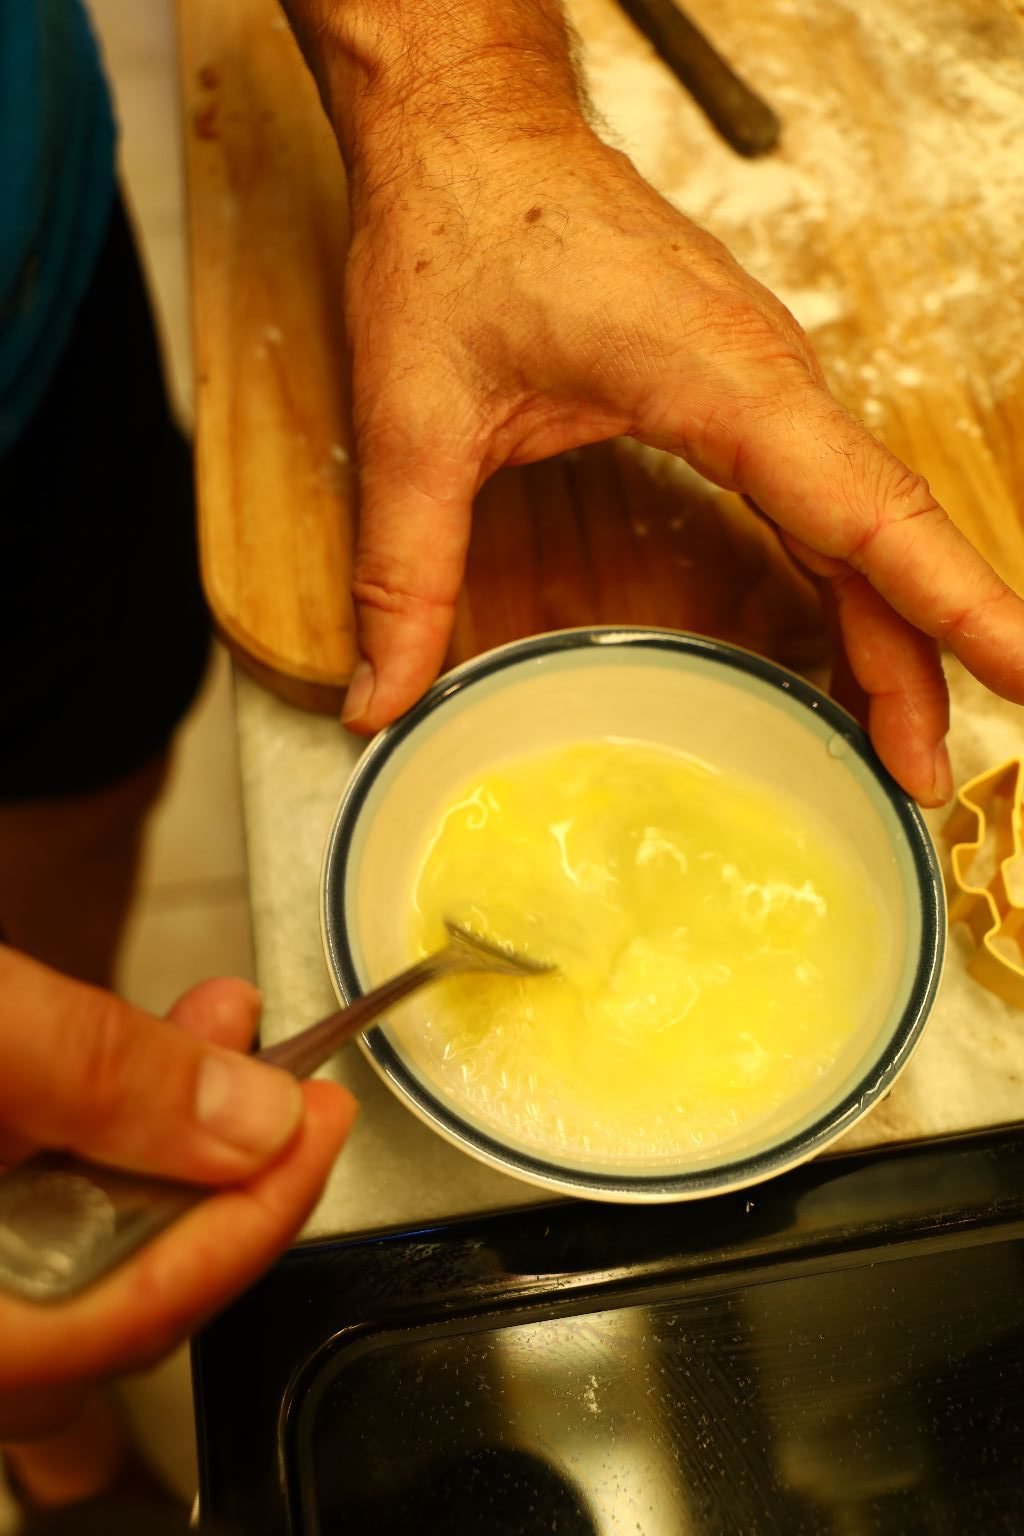
Crack one egg and one Tbsp. of water into a bowl and mix well. This is an egg wash which will put a nice glaze on the pie and help with browning.
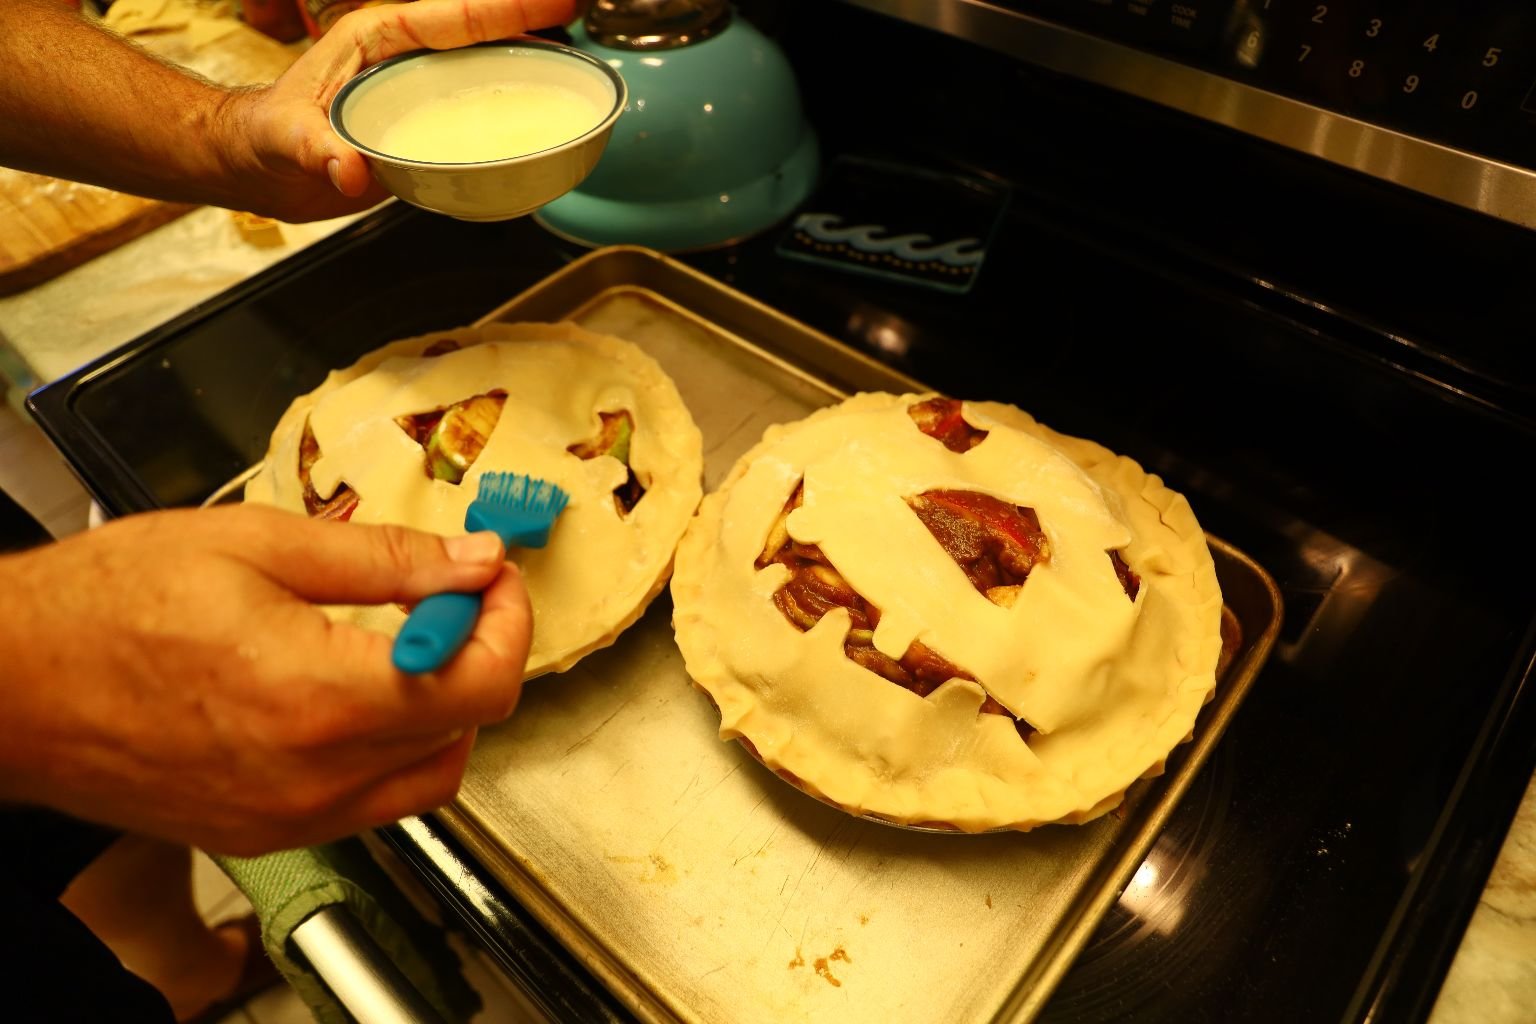
Brush a thin coat of the egg wash over the pie.
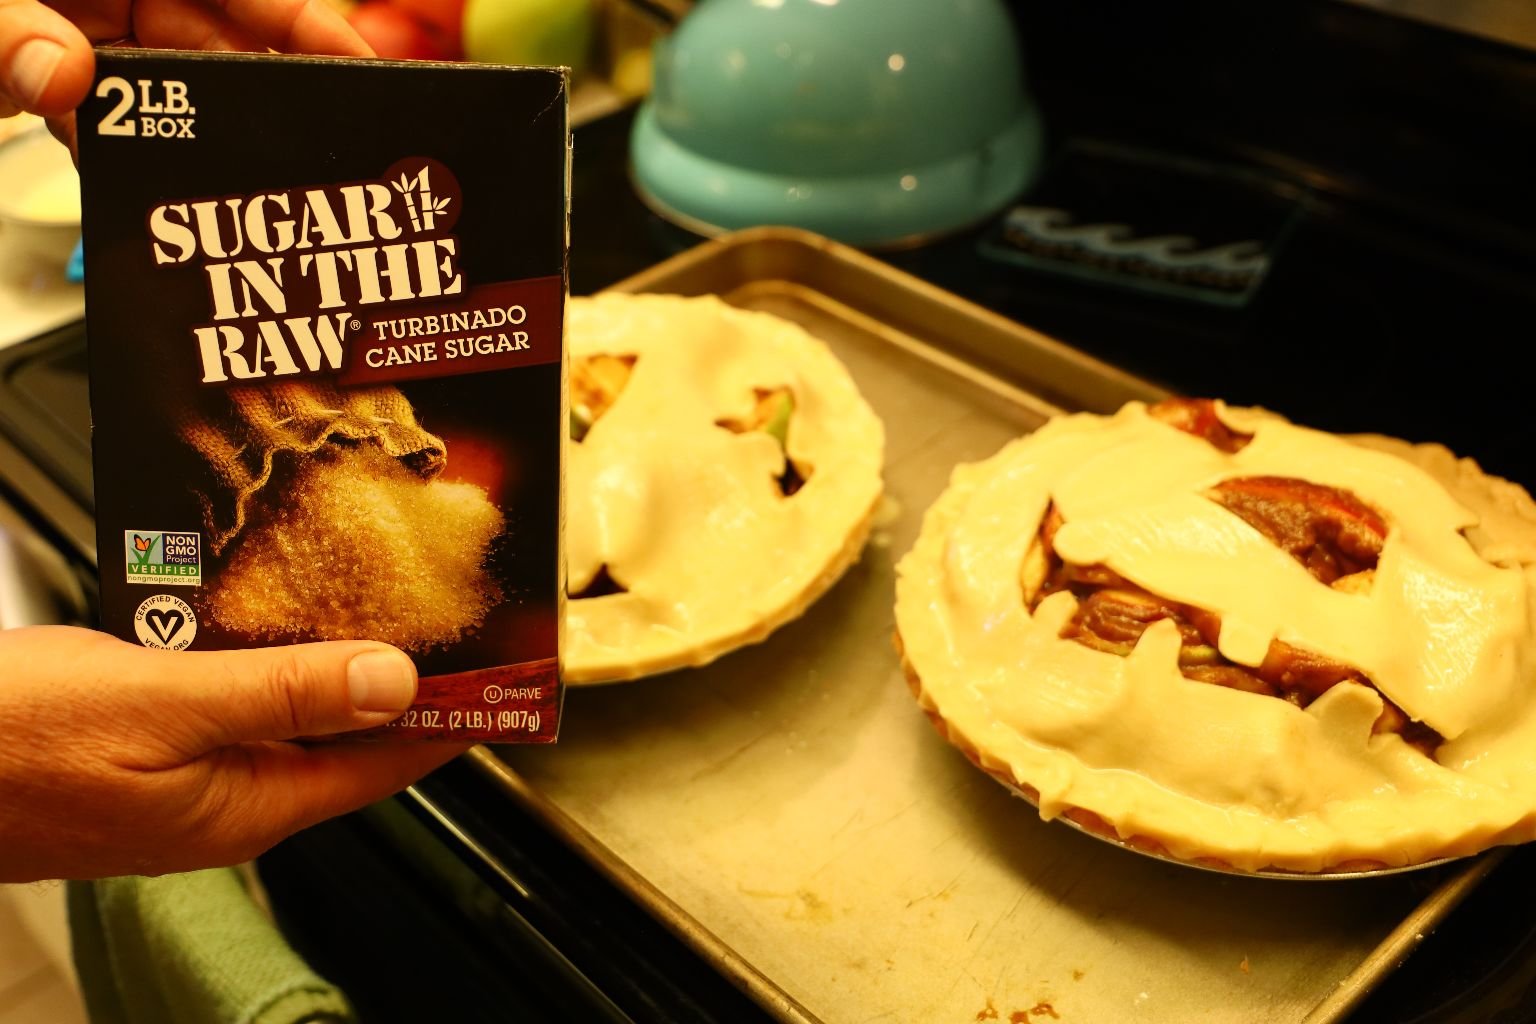
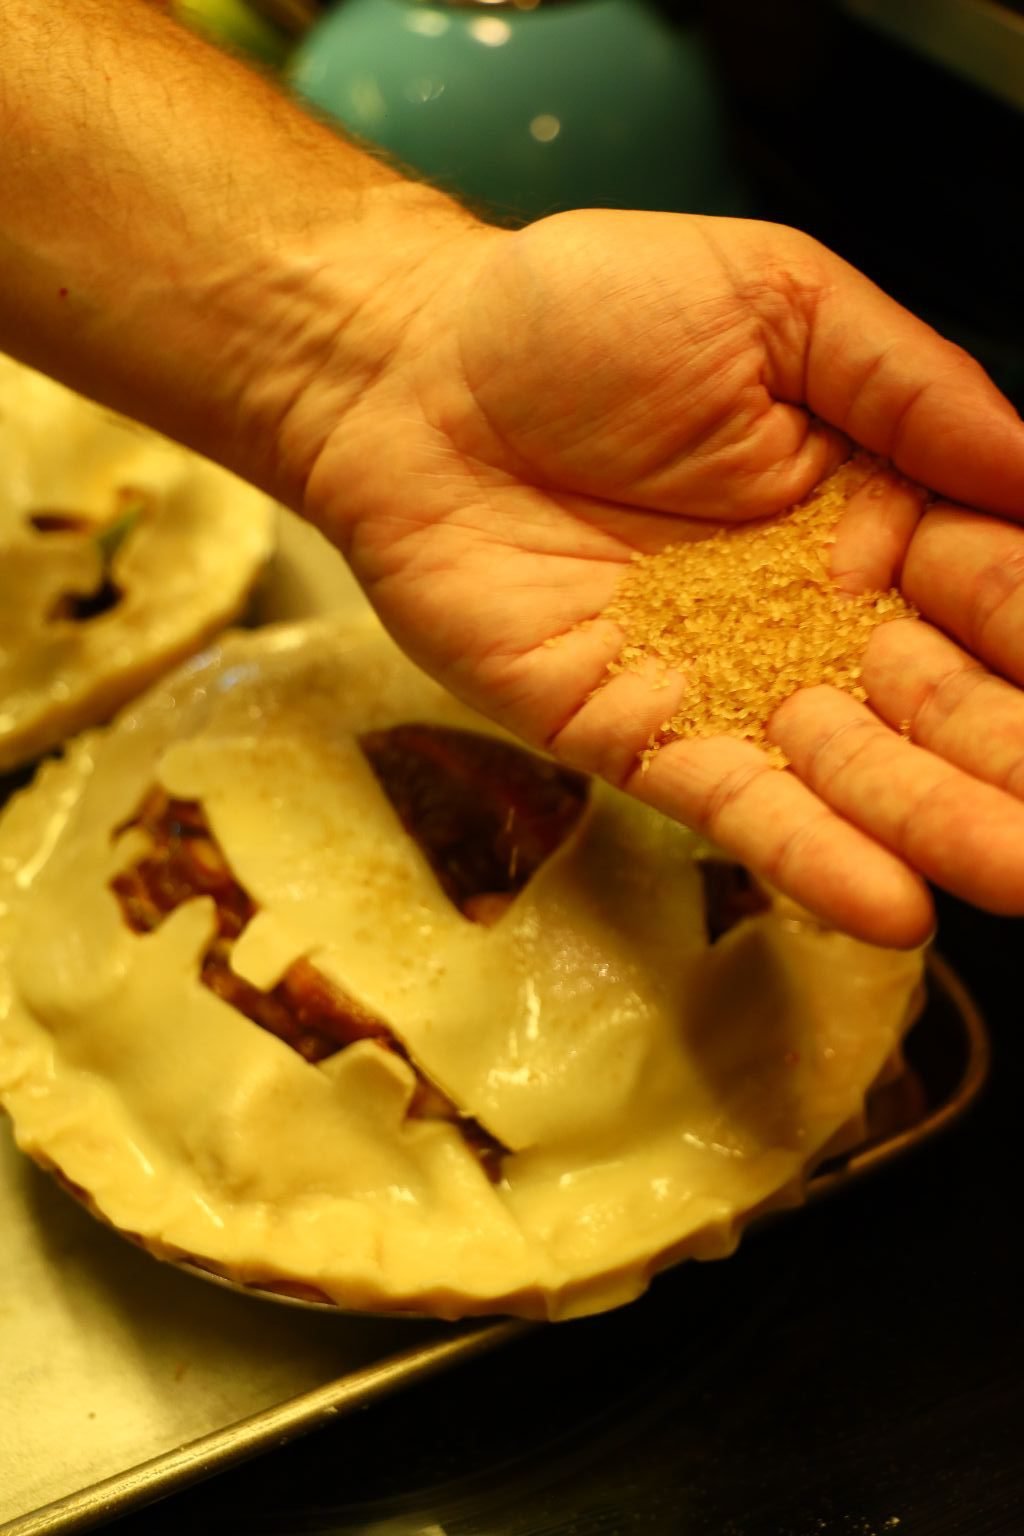
Evenly spread 1 1/2 Tbsp. of the Sugar in the Raw over each pie.
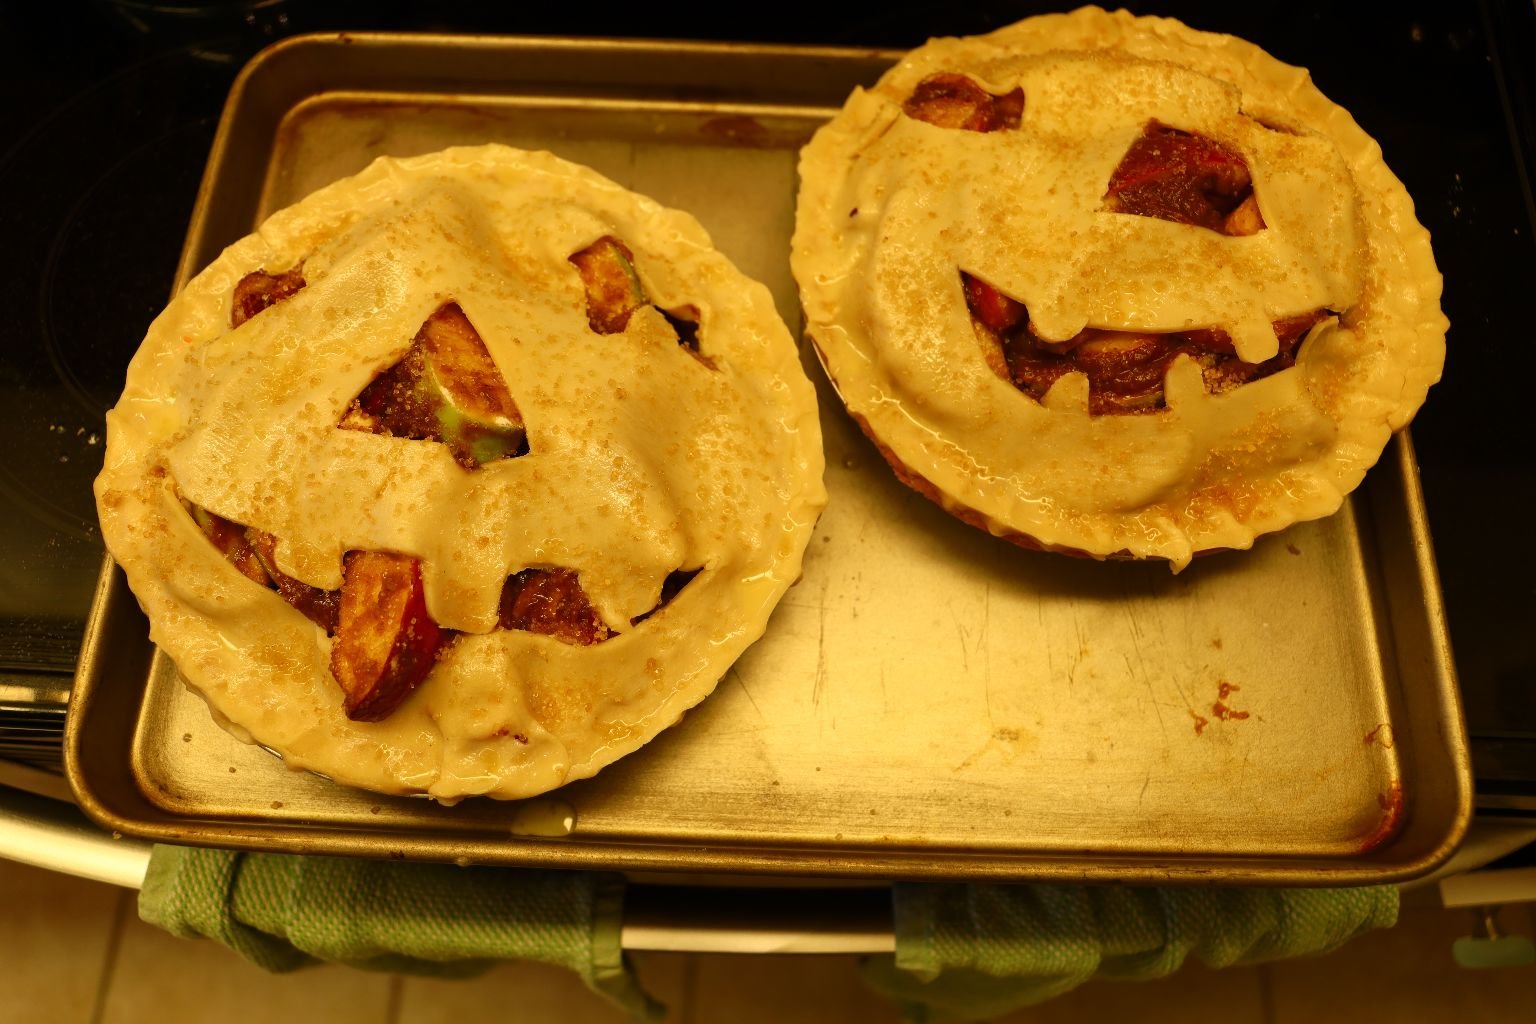
Here the pies are almost ready to be baked.
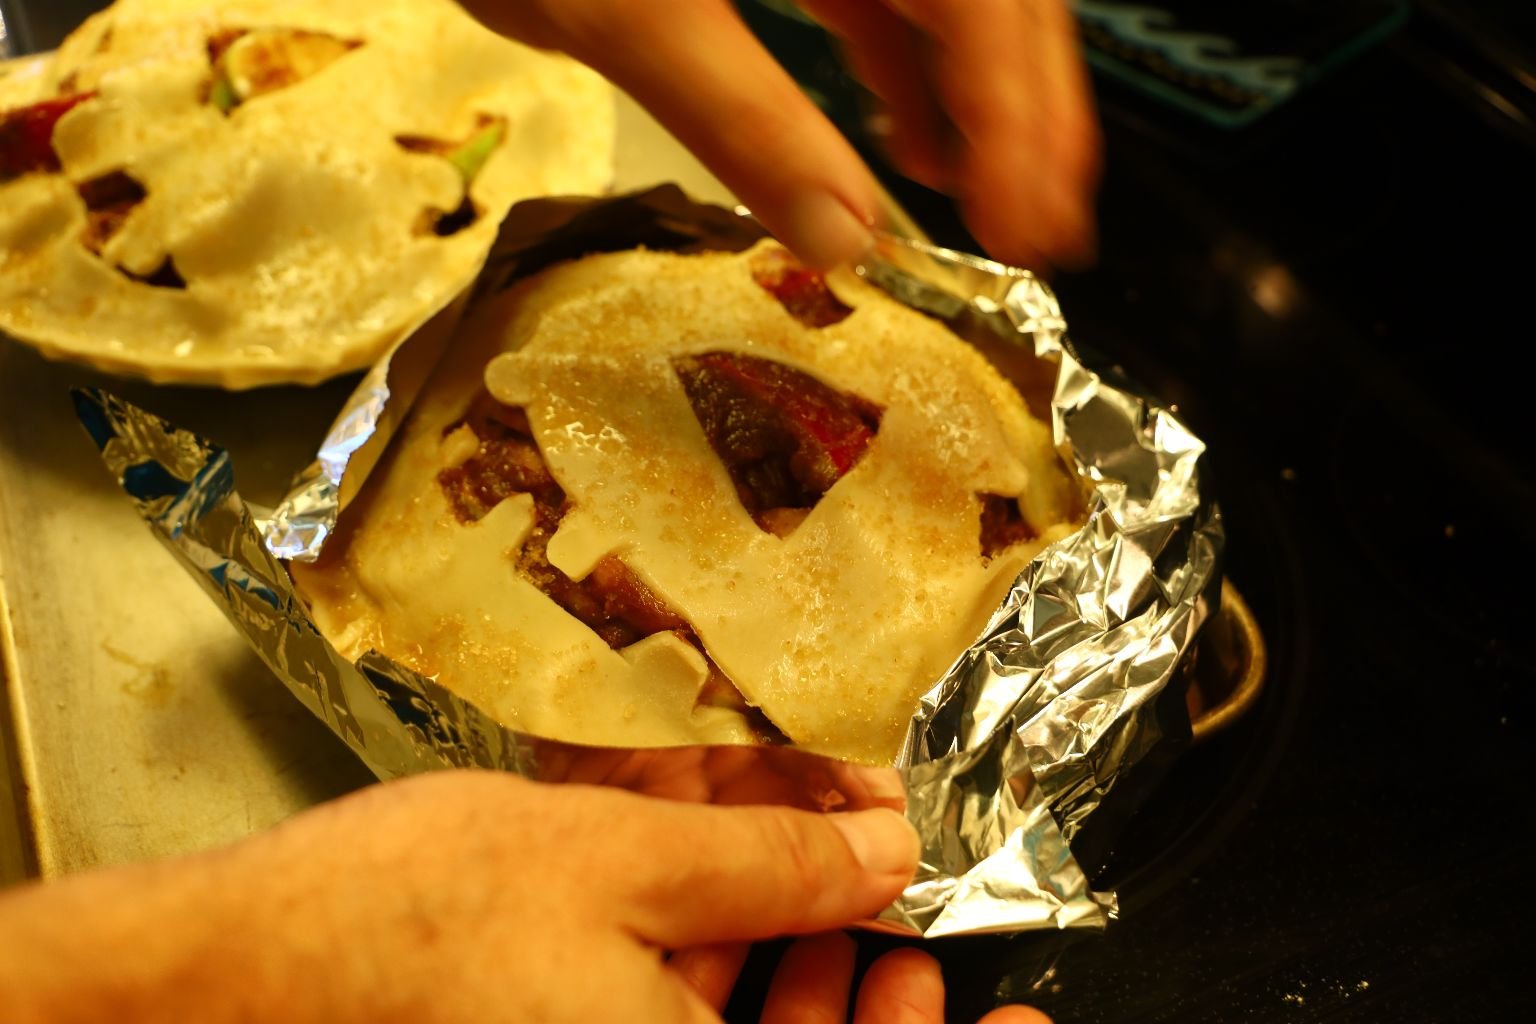
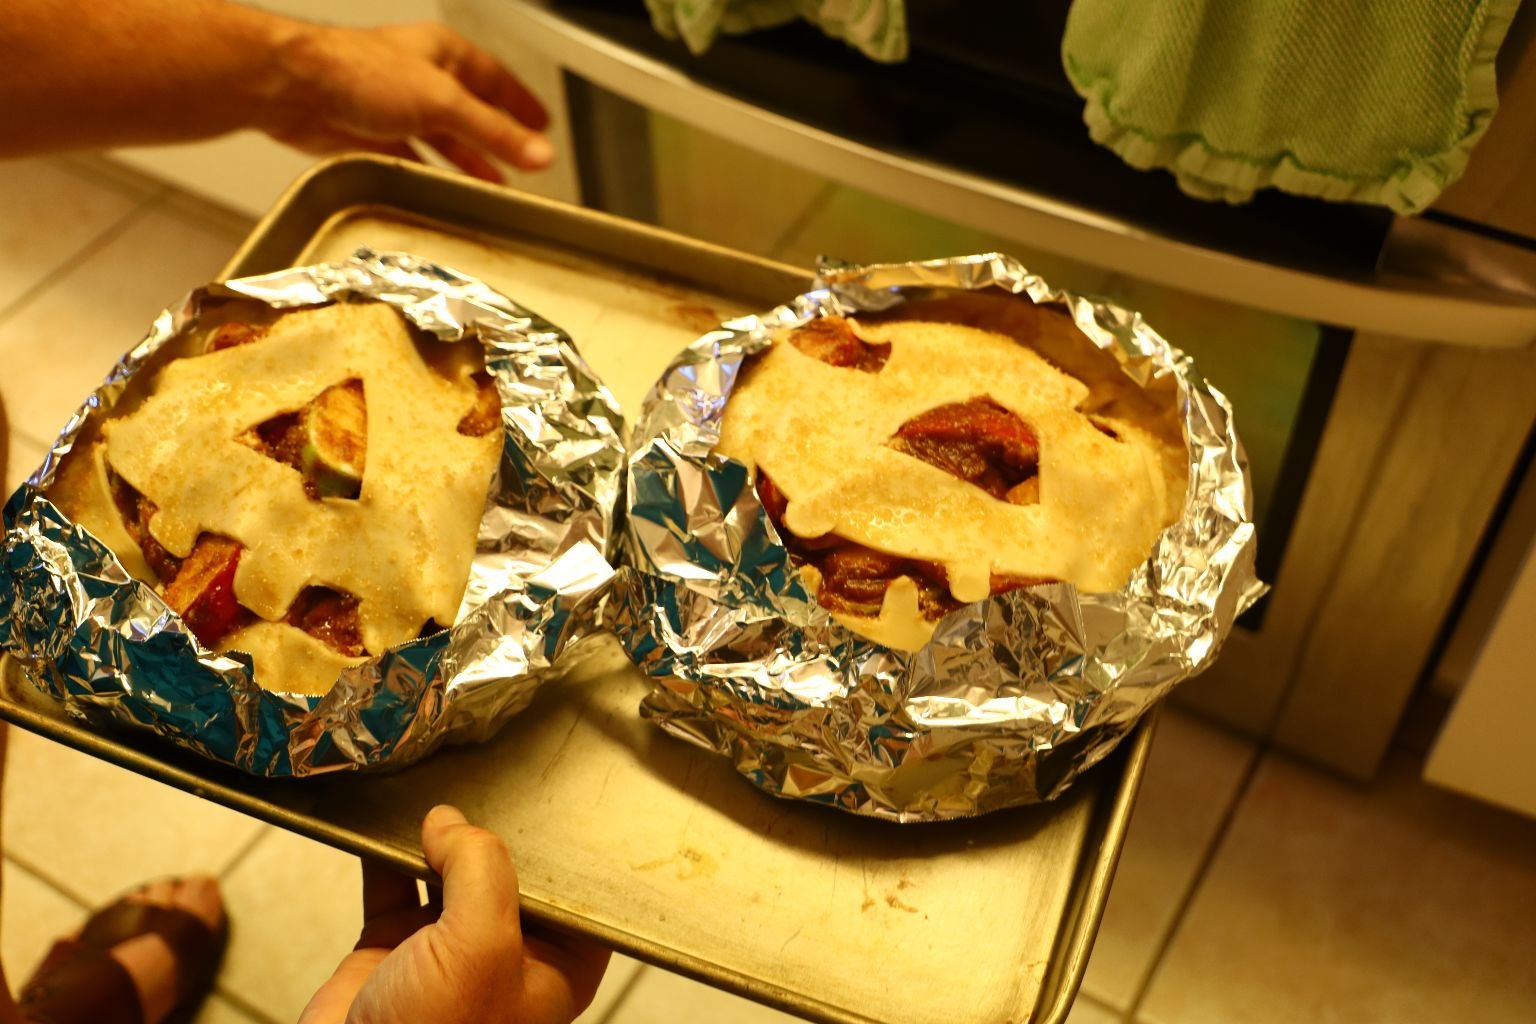
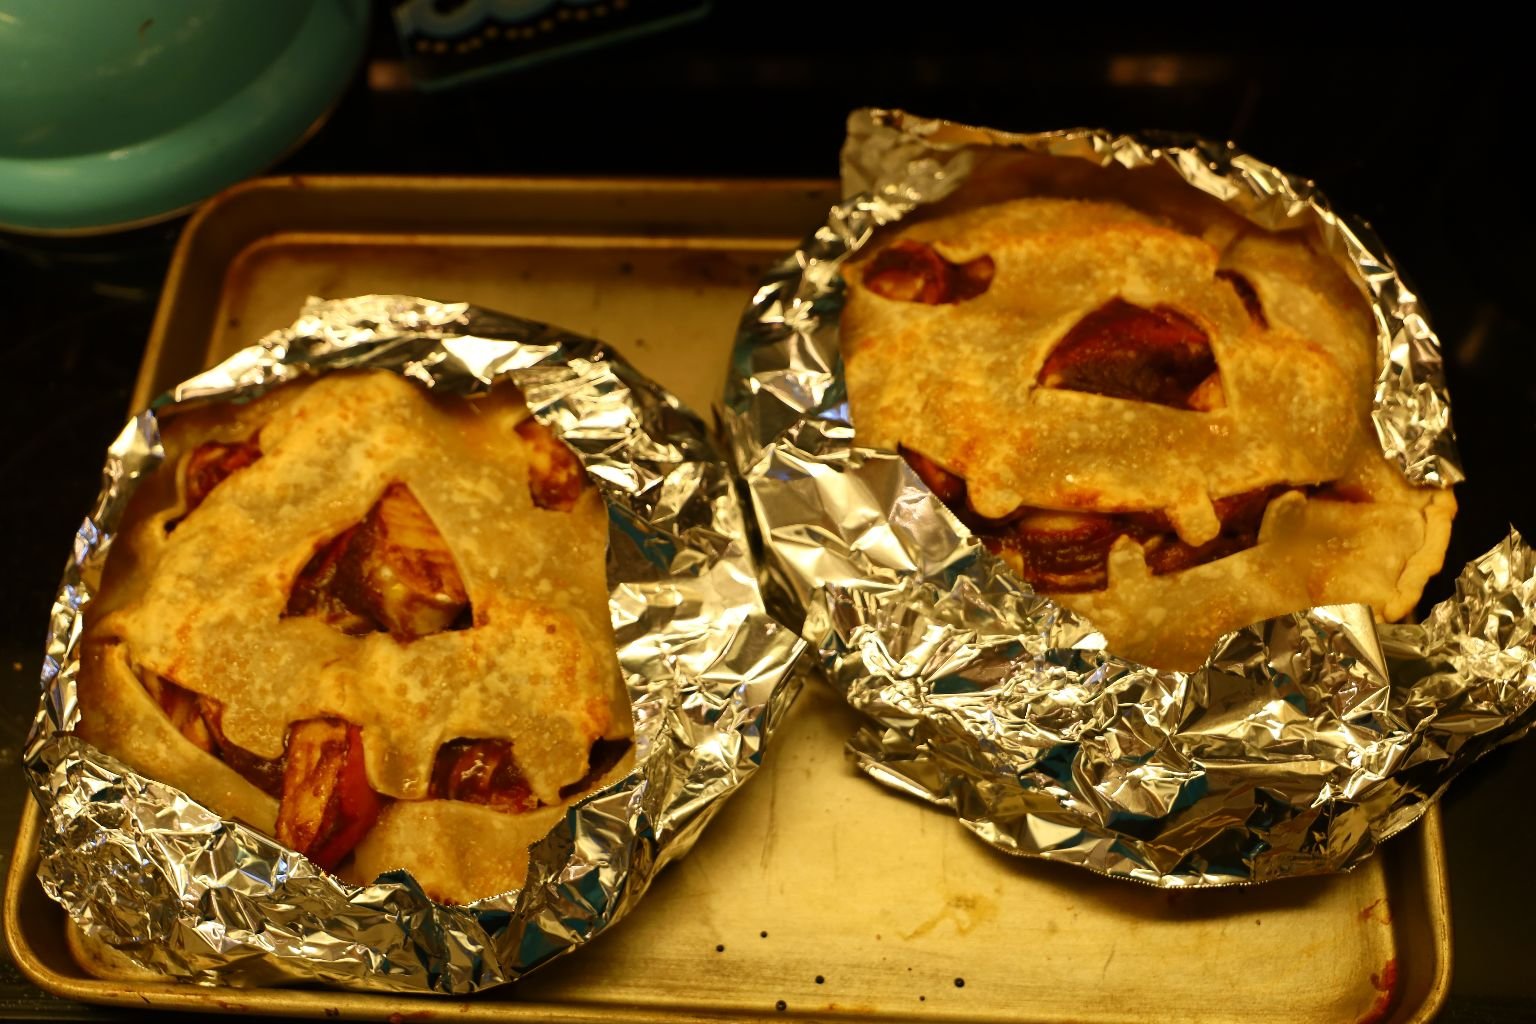
Use this strips of aluminum foil around the edges of the pie to protect them from burning. Place the pies into a 350″F oven for ~30 min. or until browned.
Remove the foil and cook for another 5-10 min. The tongue looks great!

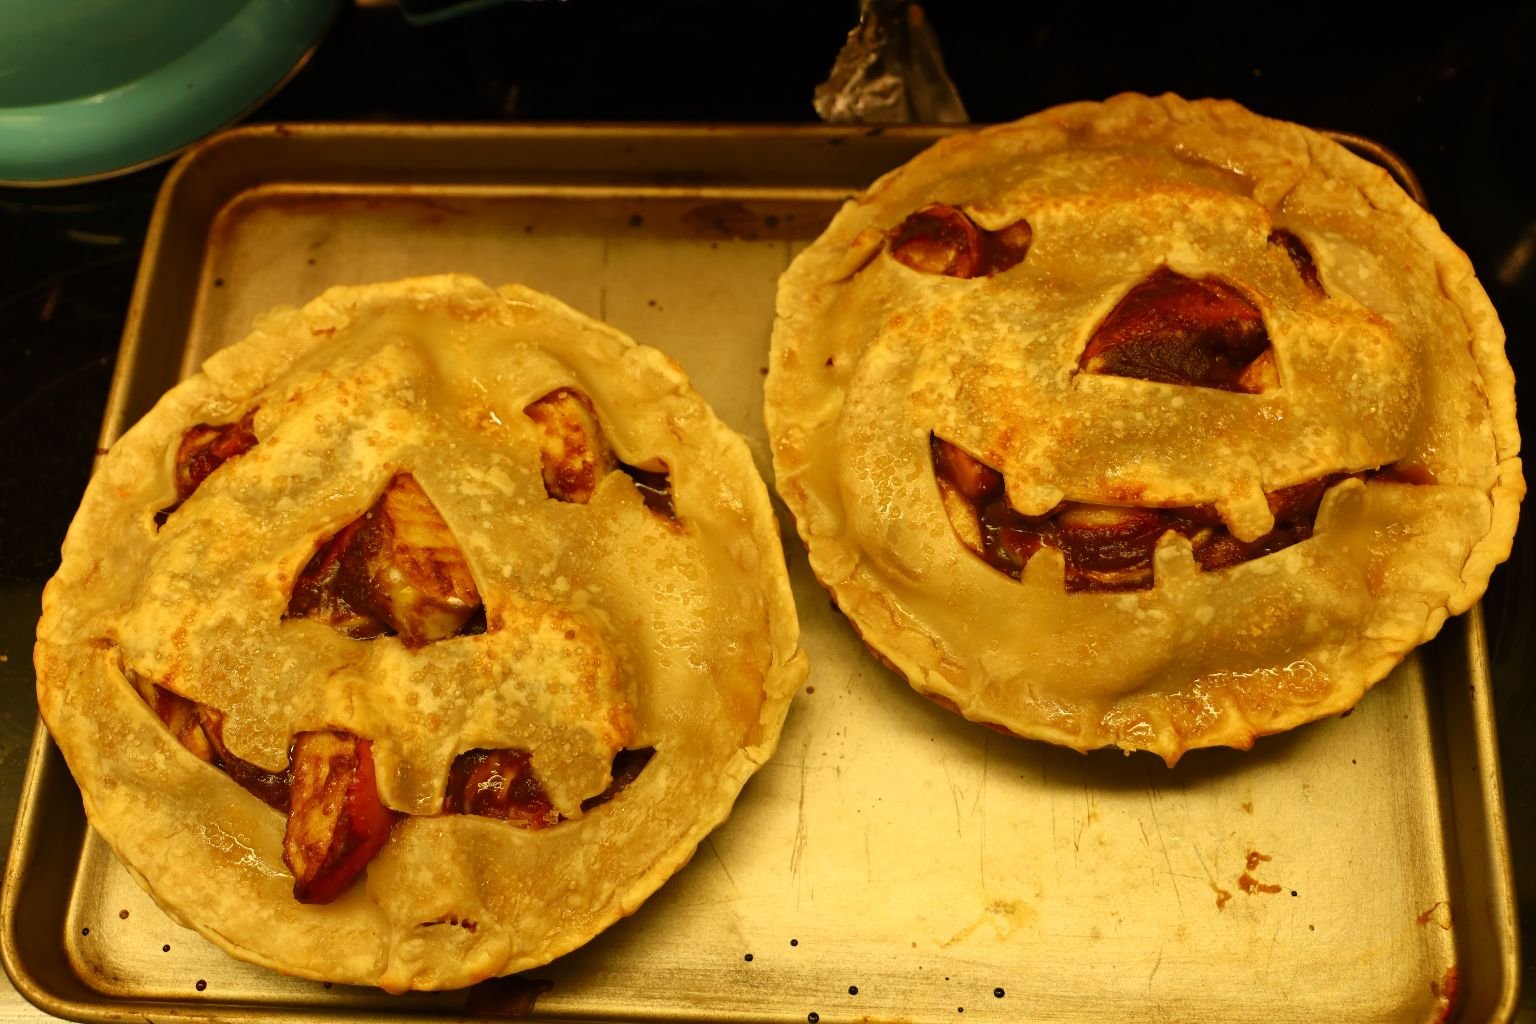
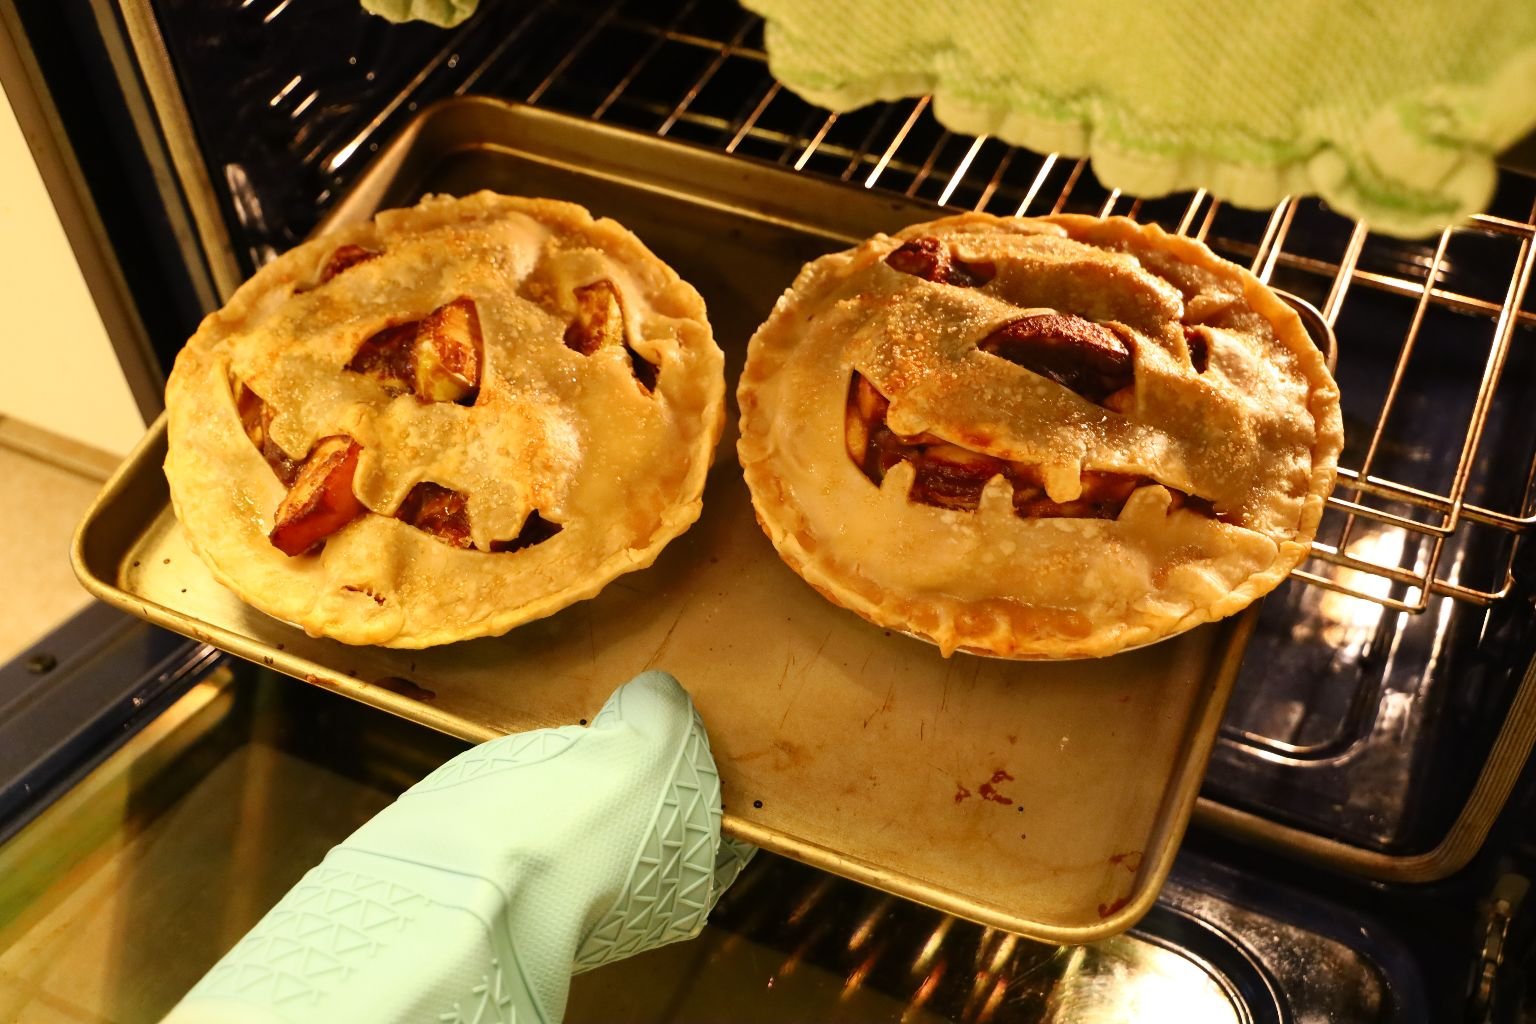
Out of the Oven and Cooling
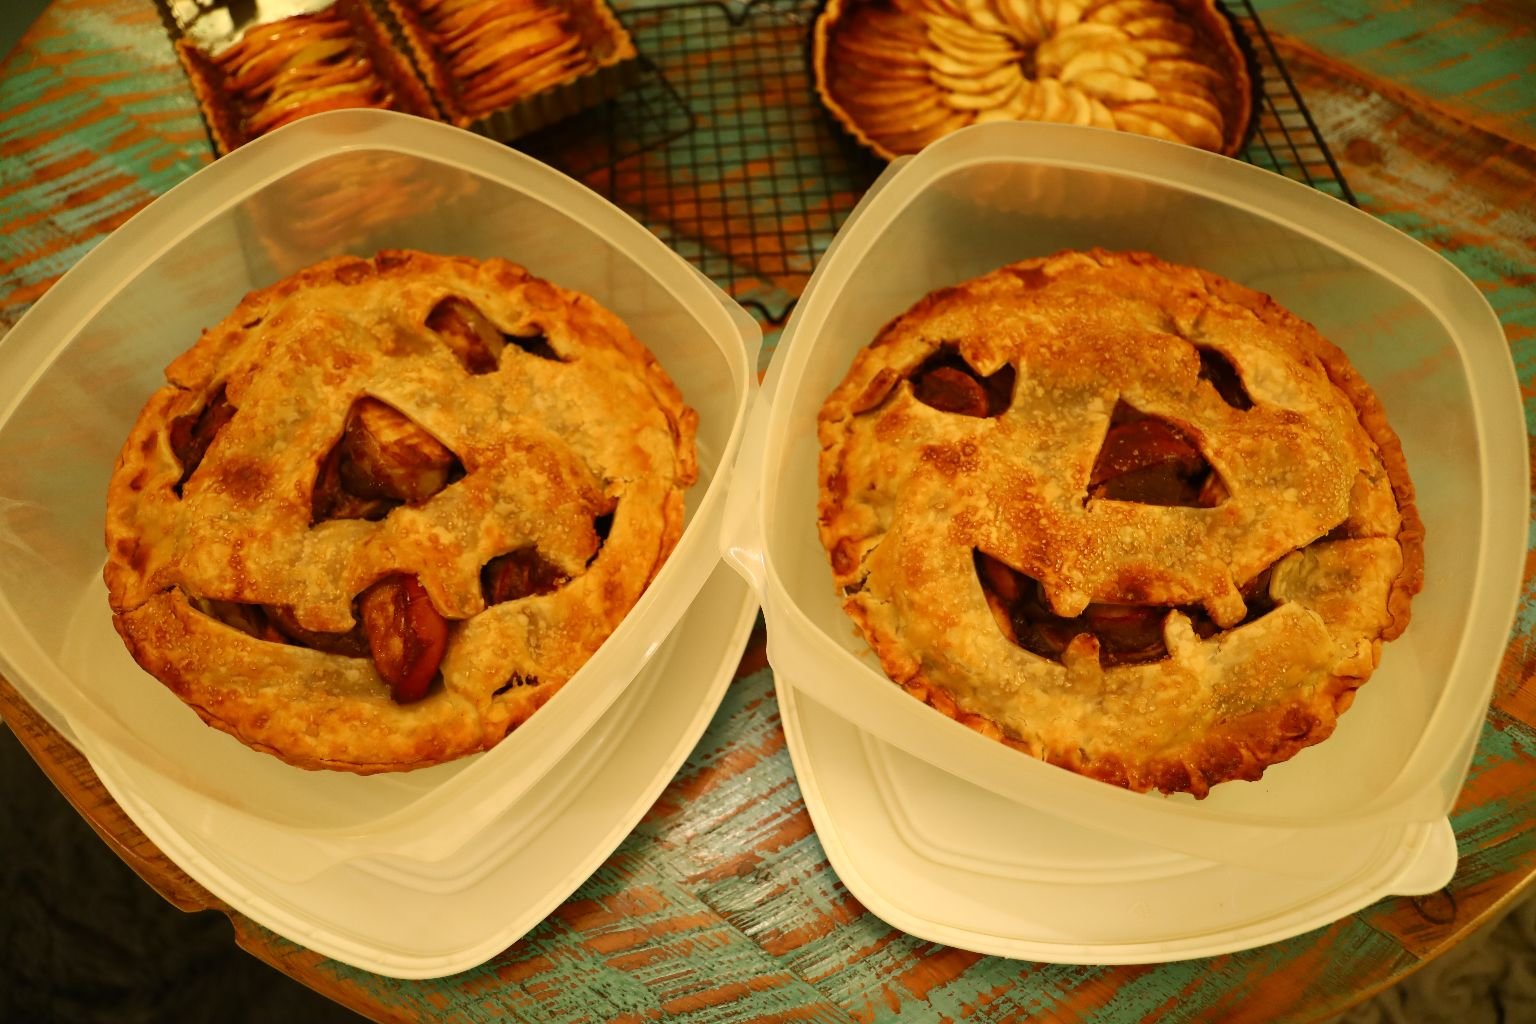
Ready to be Delivered to Our Children and Their Partners
—————————————————————

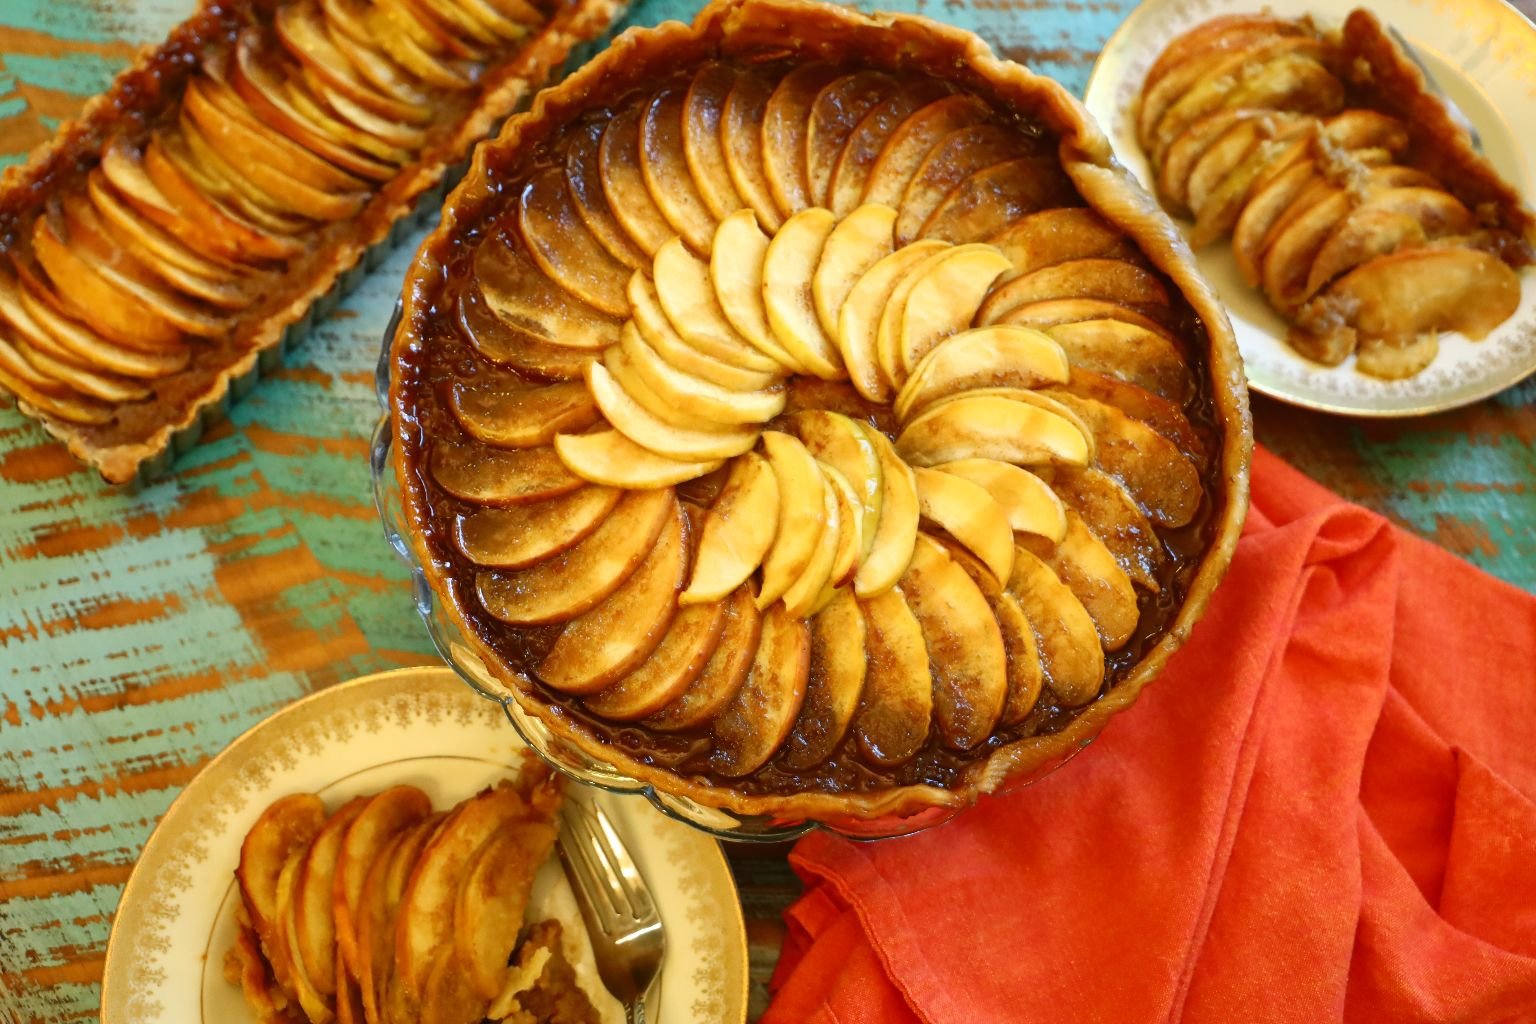
Apple Tartlet’s With Homemade Caramel, Apples, and Middle Eastern Honey
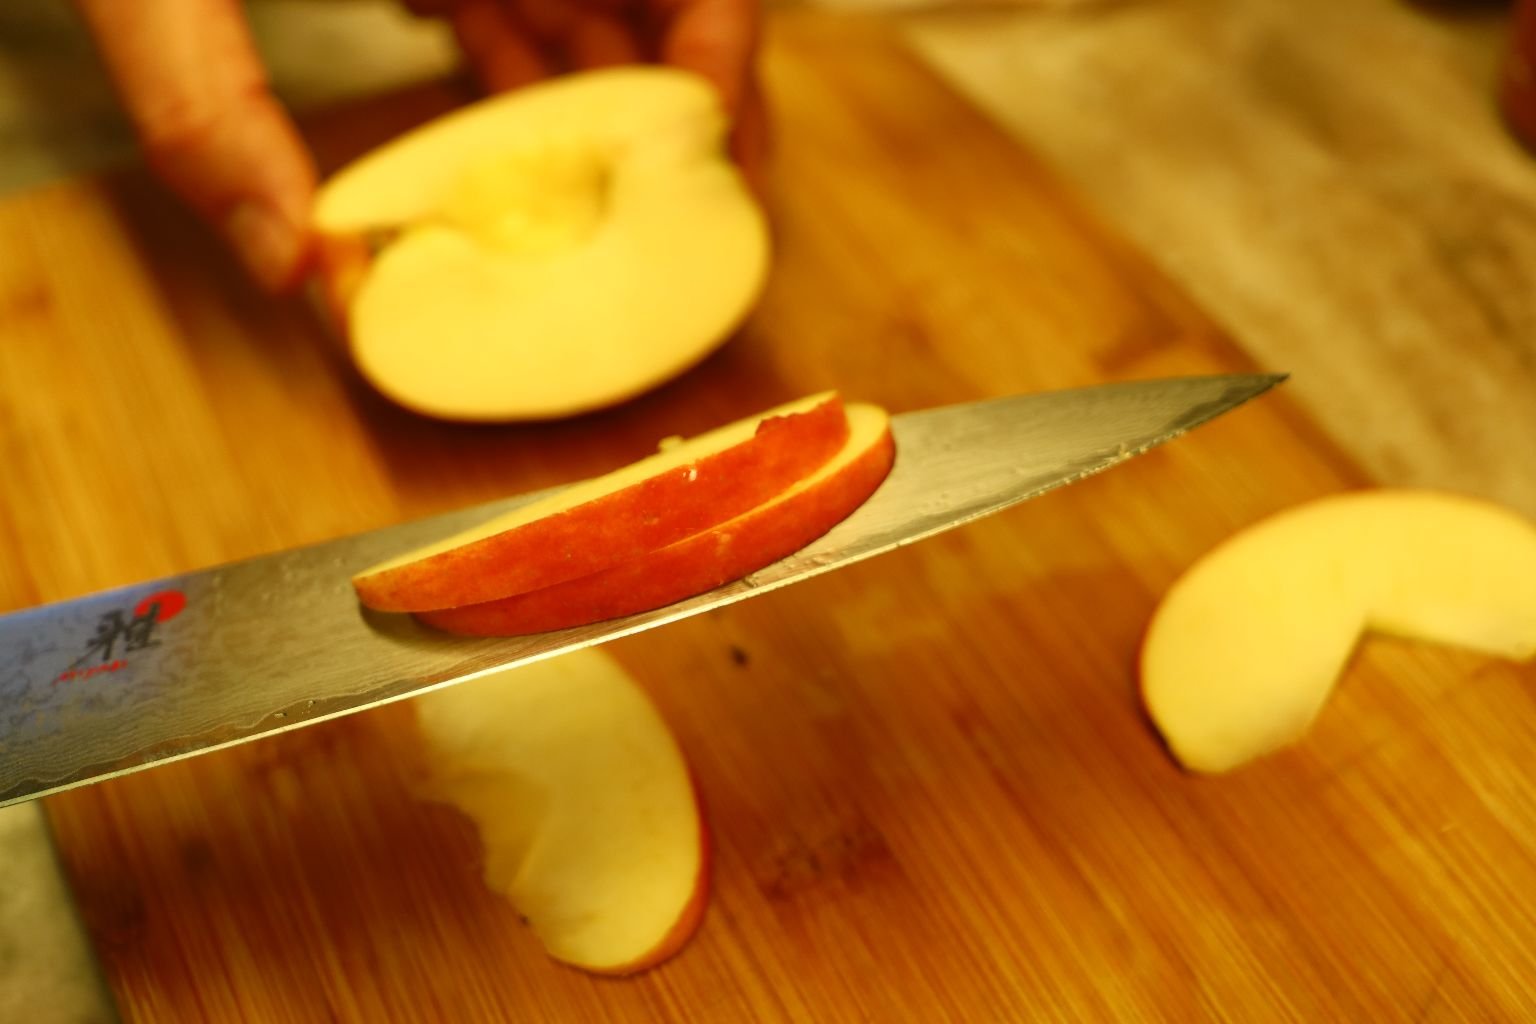
Slice your Apples into thin wedges. This can be done in a variety of methods. One method would be to slice the Apple in half then slice the wedges around the core turning the apple slightly for each slice. I found if you sliced the Apple straight down just to the right of center avoiding the core twice, then slice off the two remaining thinner pieces using the same method, left me with four straight wedges. Now, simply slice straight down through the wedges making even thin slices.
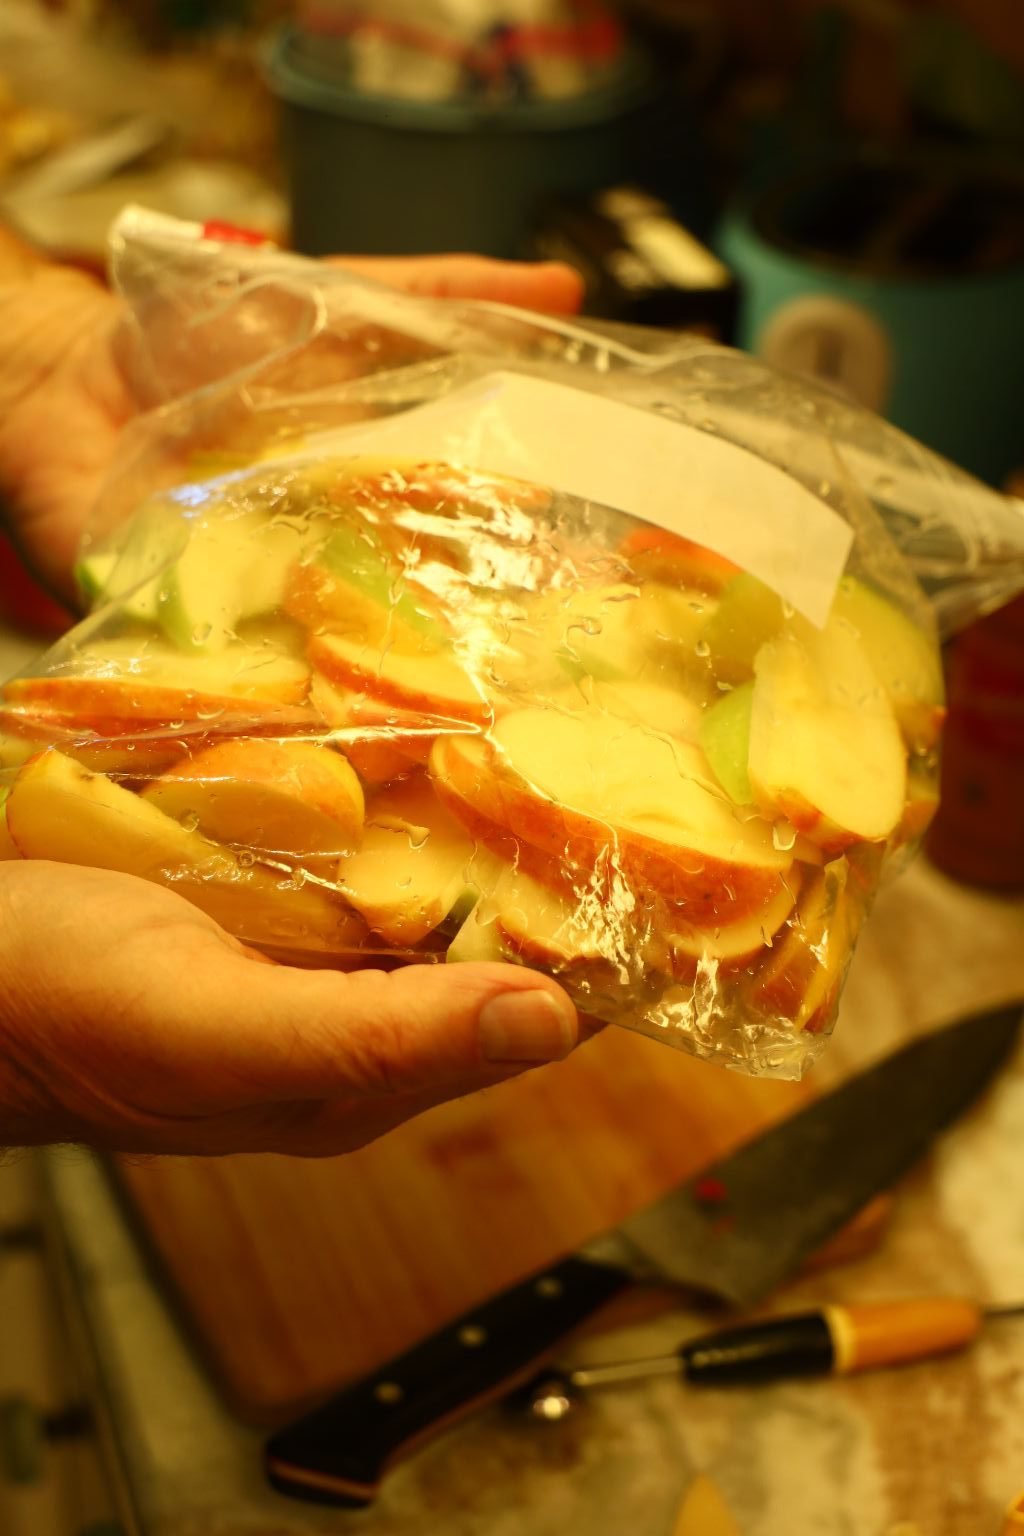
Place the cut Apple slices into a Zip Lock Bag with enough Lemon Juice to coat the wedges evenly to avoid the Apple from browning.
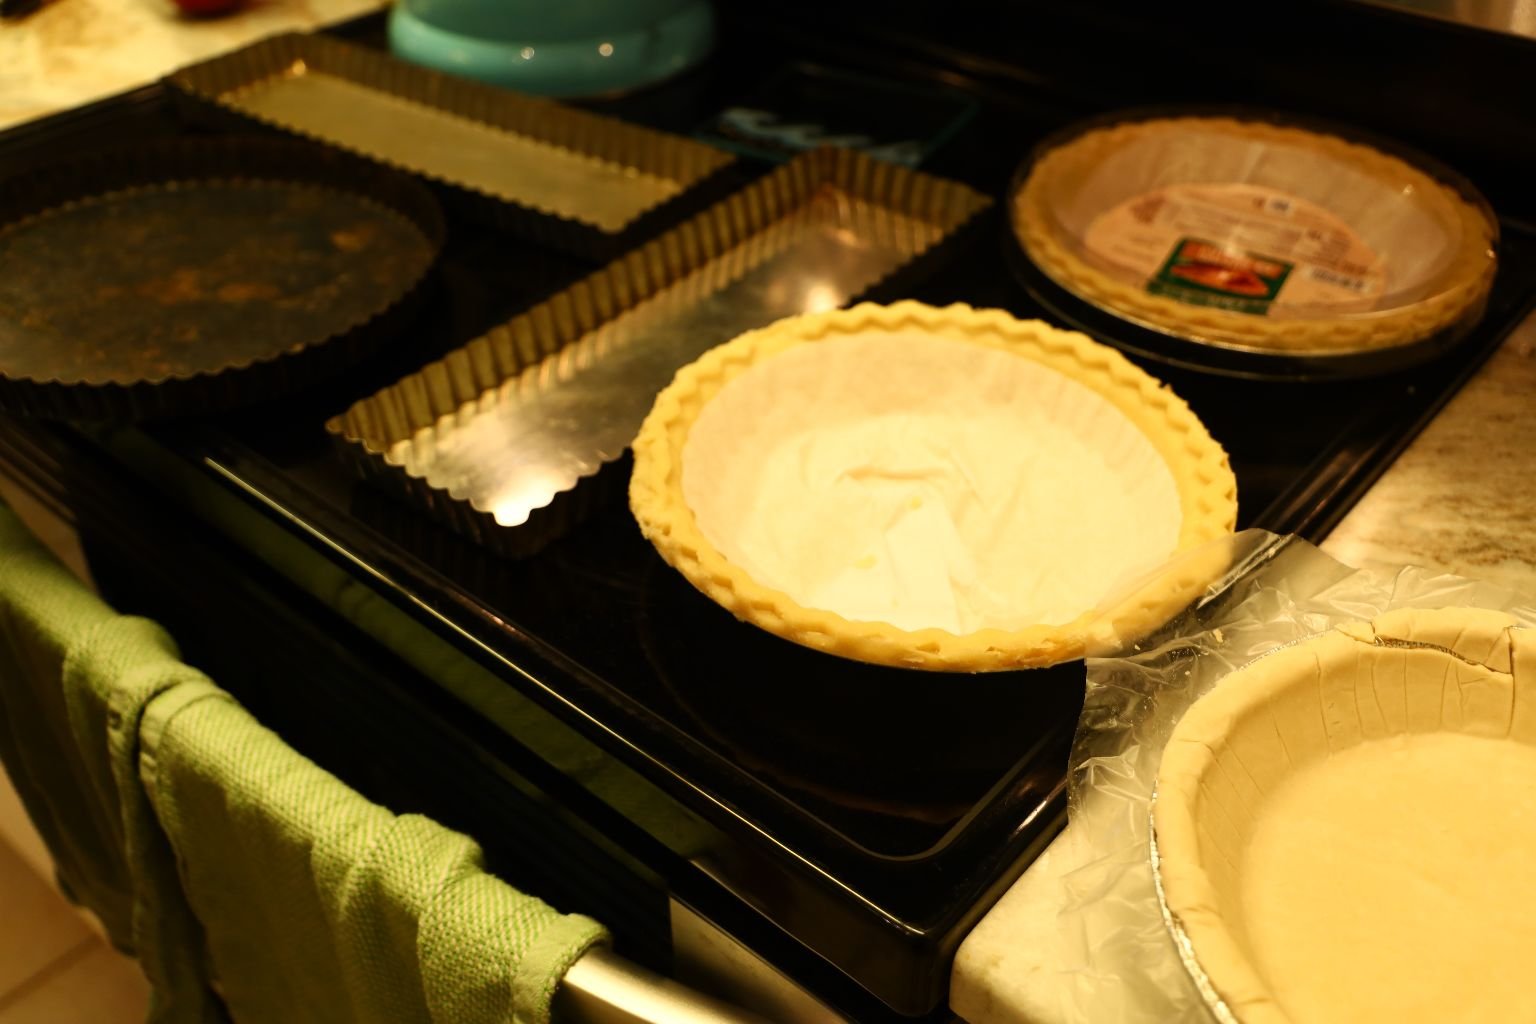
Here are the pie shells we used.
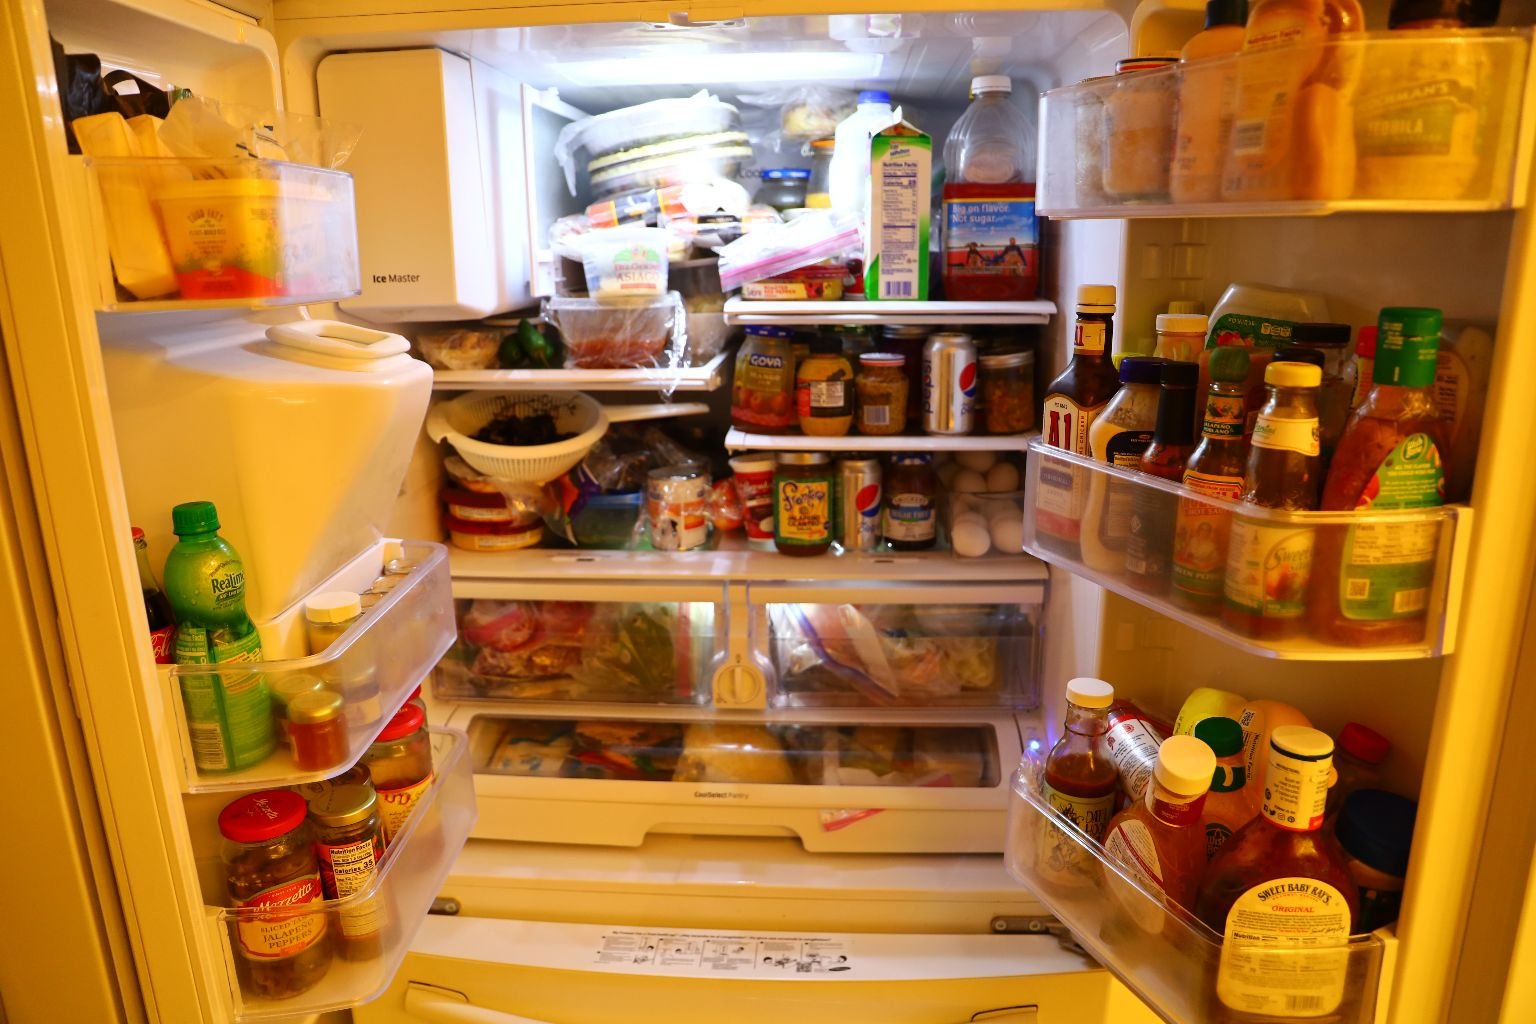
Keeping our Pie and Tartlet Dough Cool
Here is our very full refrigerator, stocked and ready for almost anything.
——————————————————–
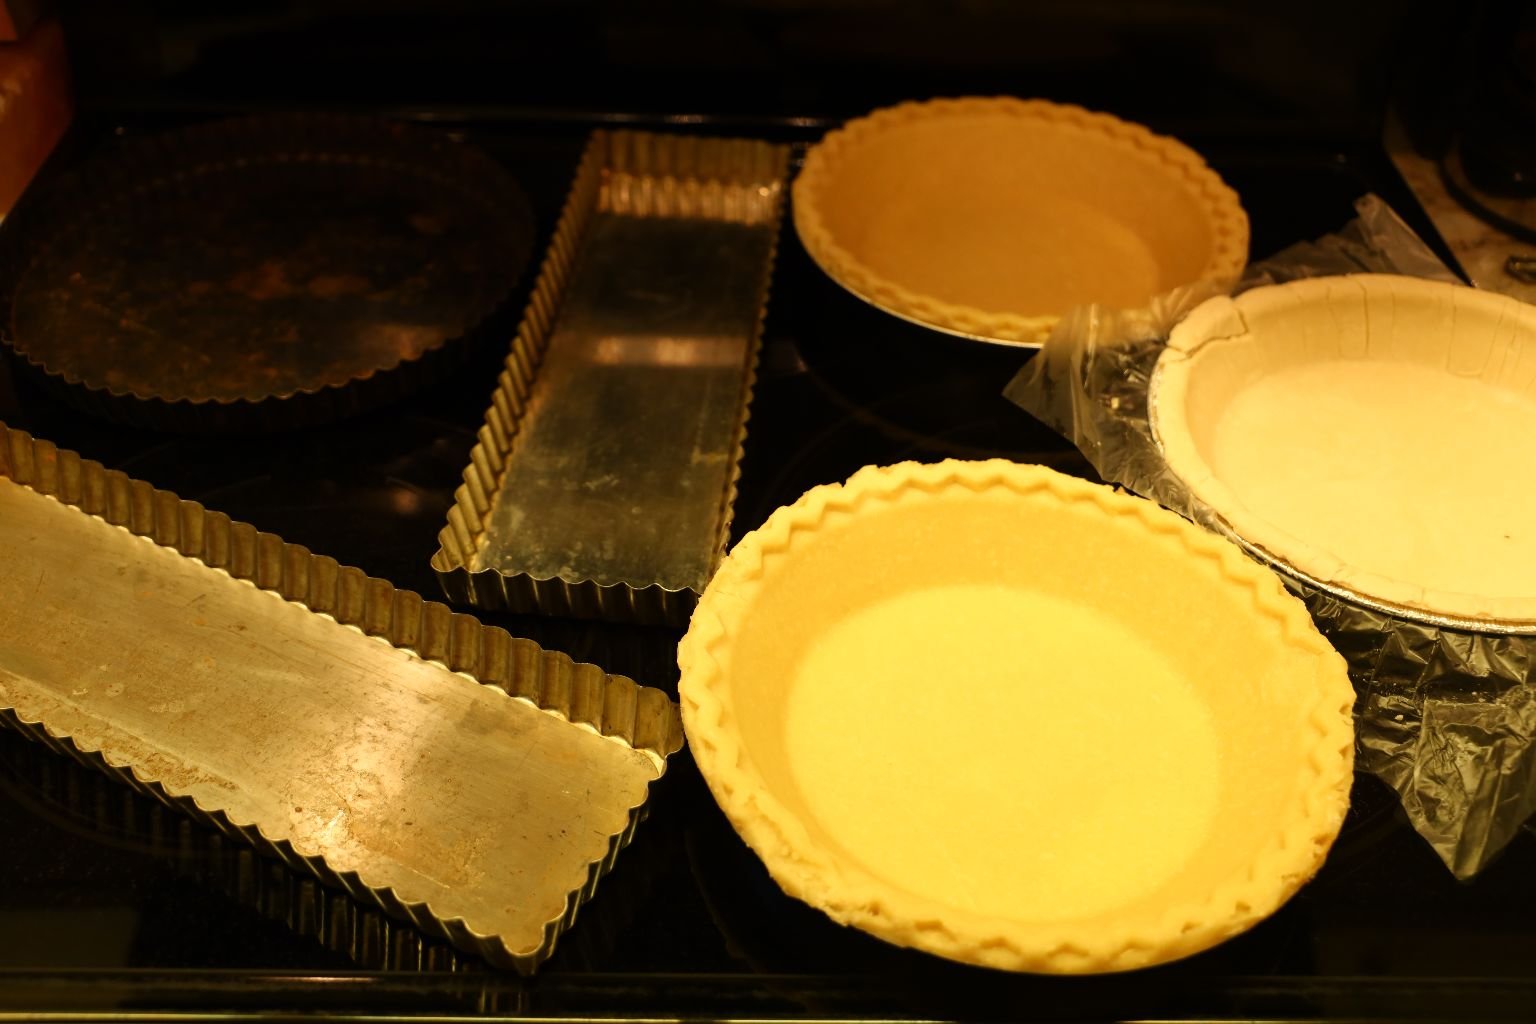
Here are our tart shells.
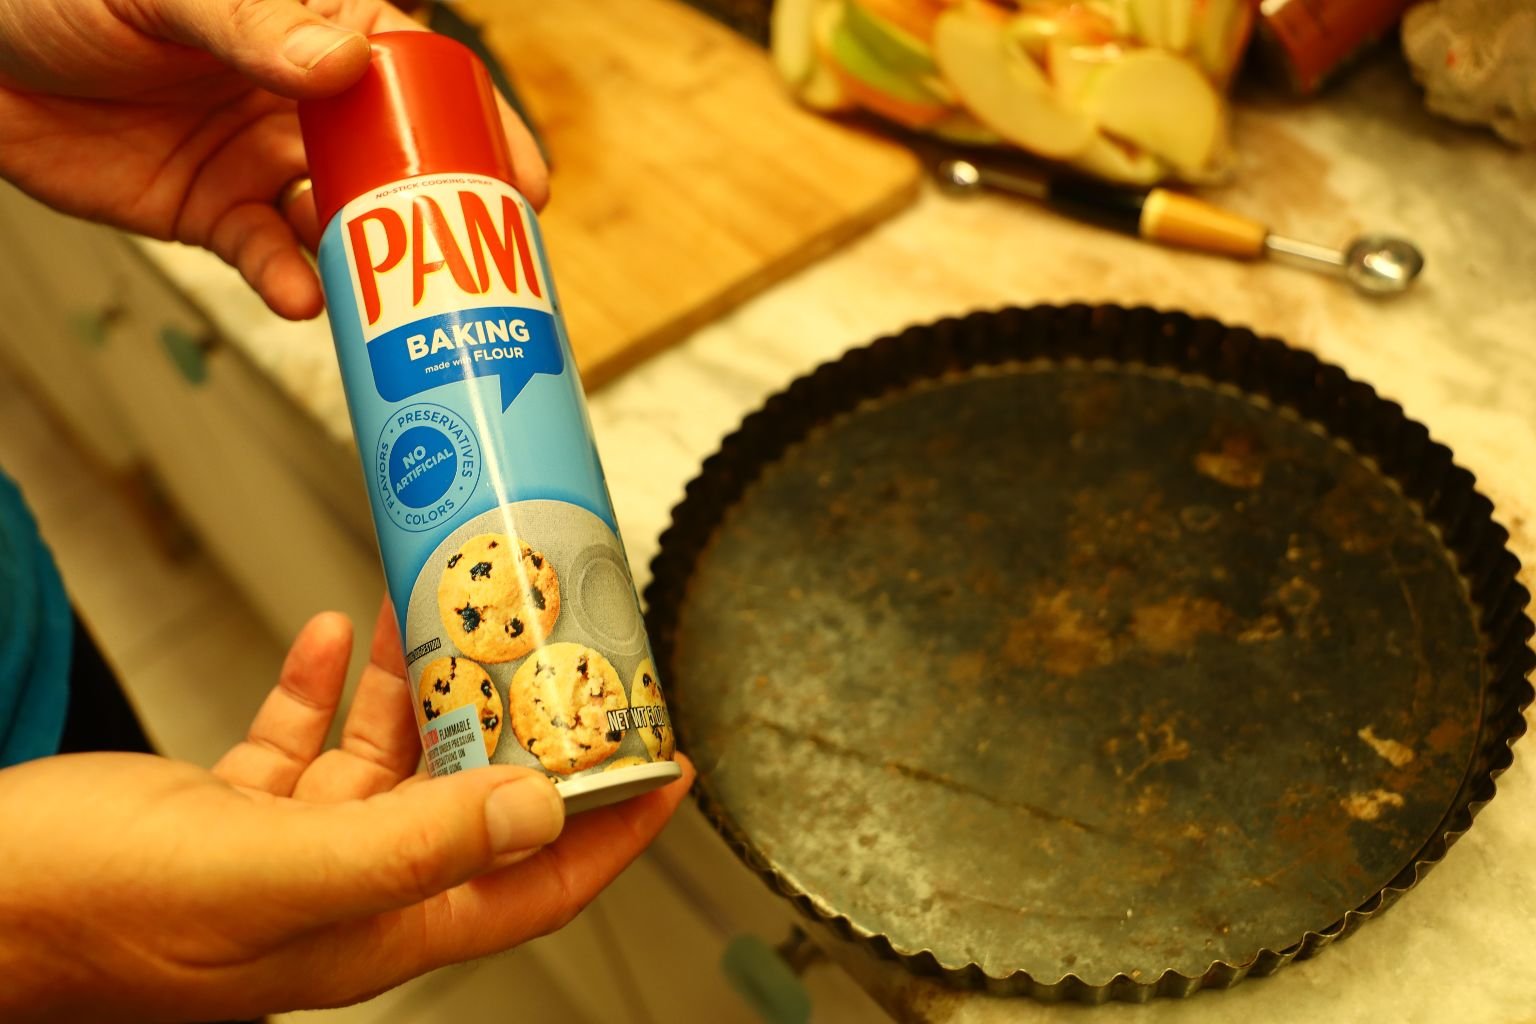
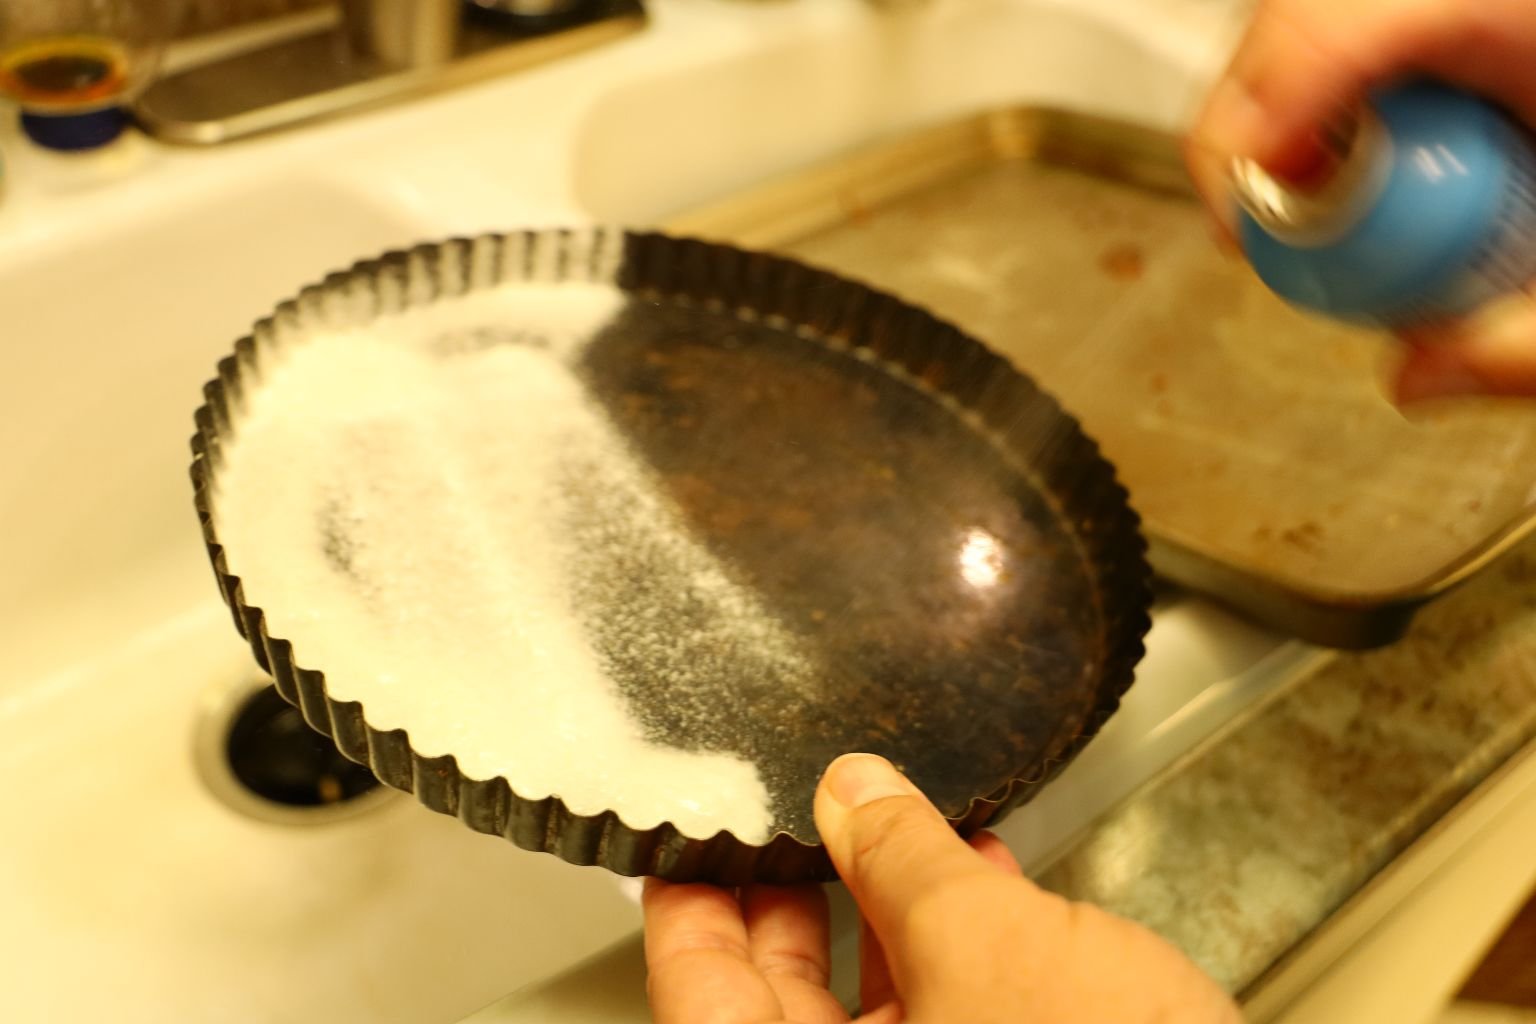
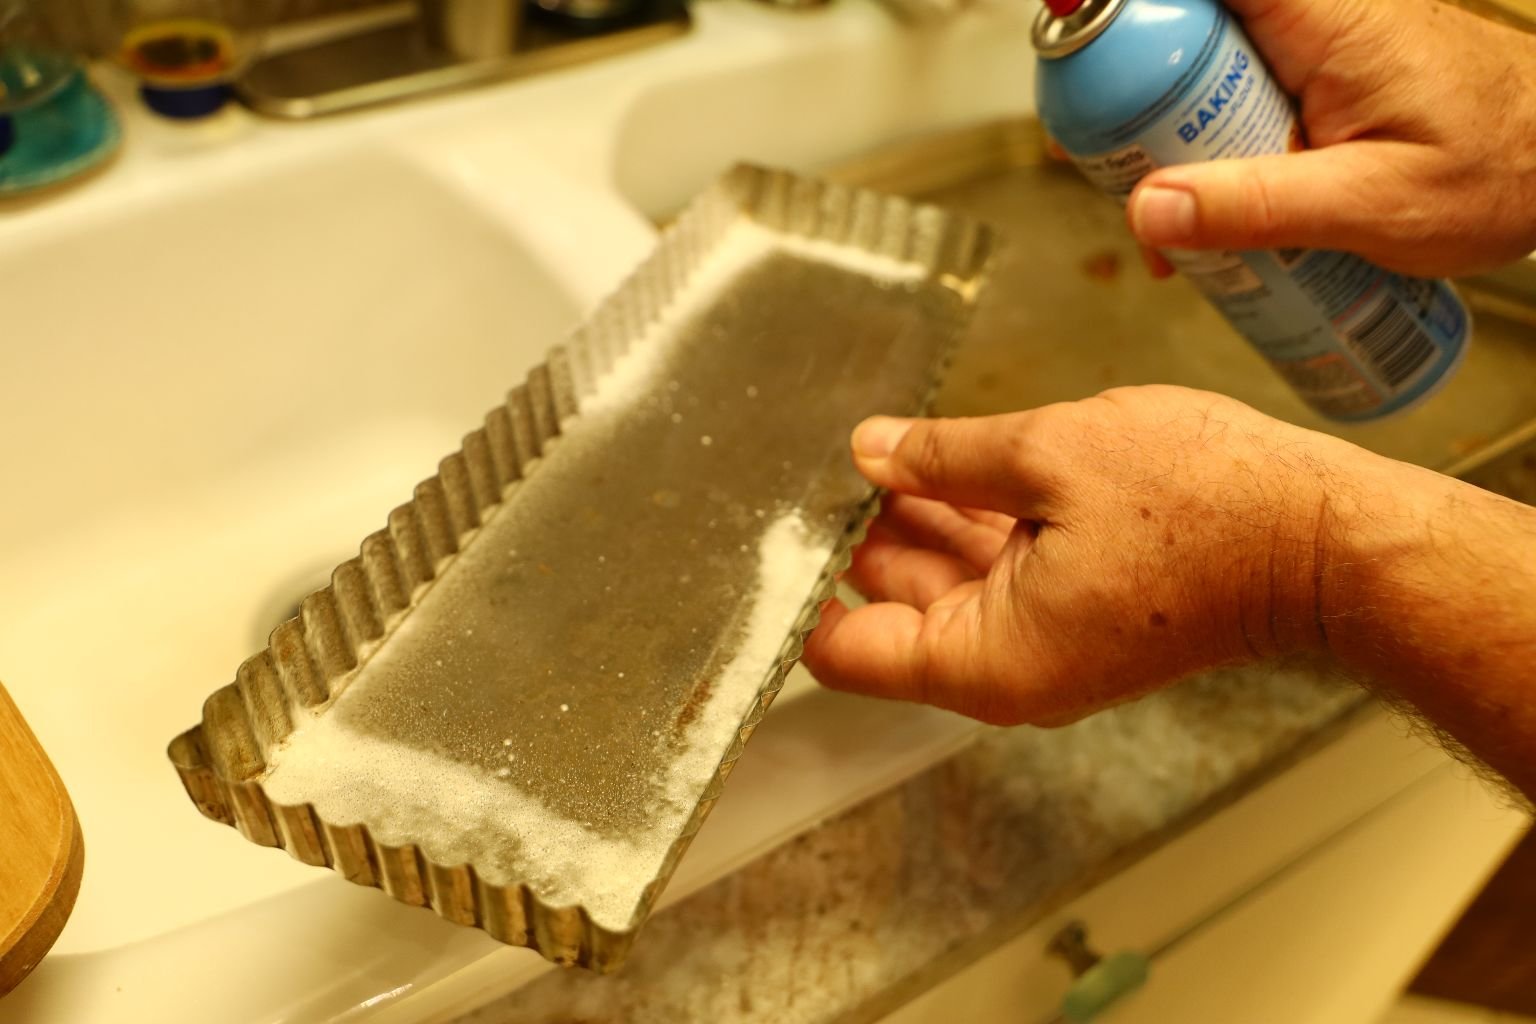
Spray the tart shells with a little cooking spray.
(We bought these at a thrift store a few years ago and this is our first time to use them.)
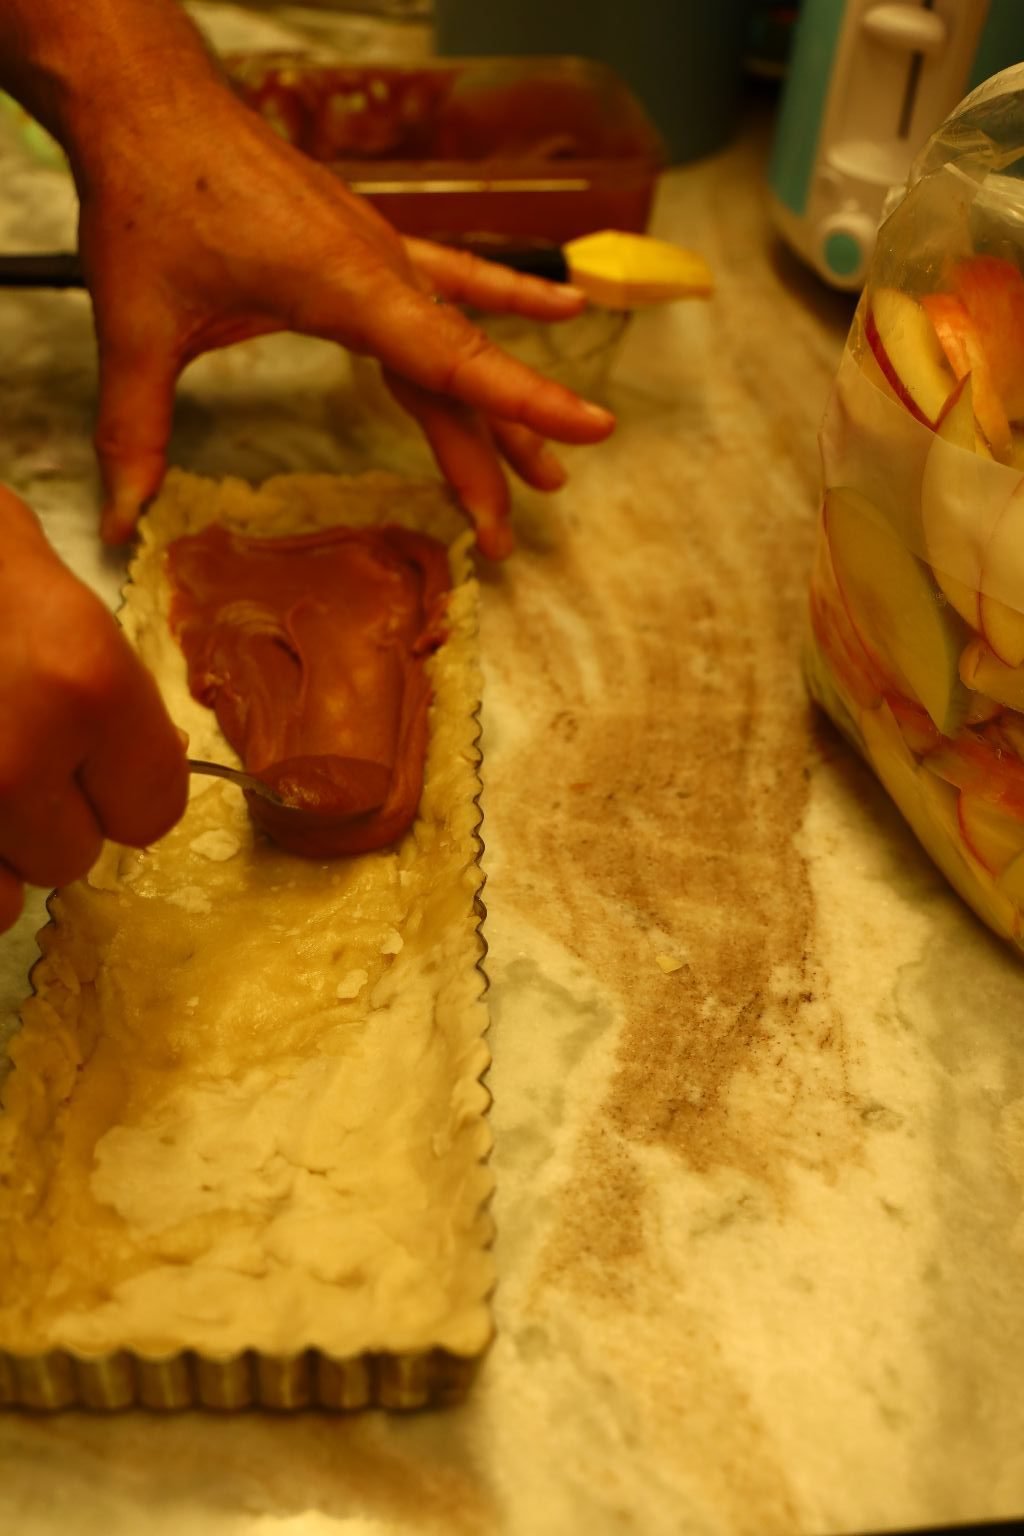
Place one of the thawed but still cool pie shells into a tart shell.
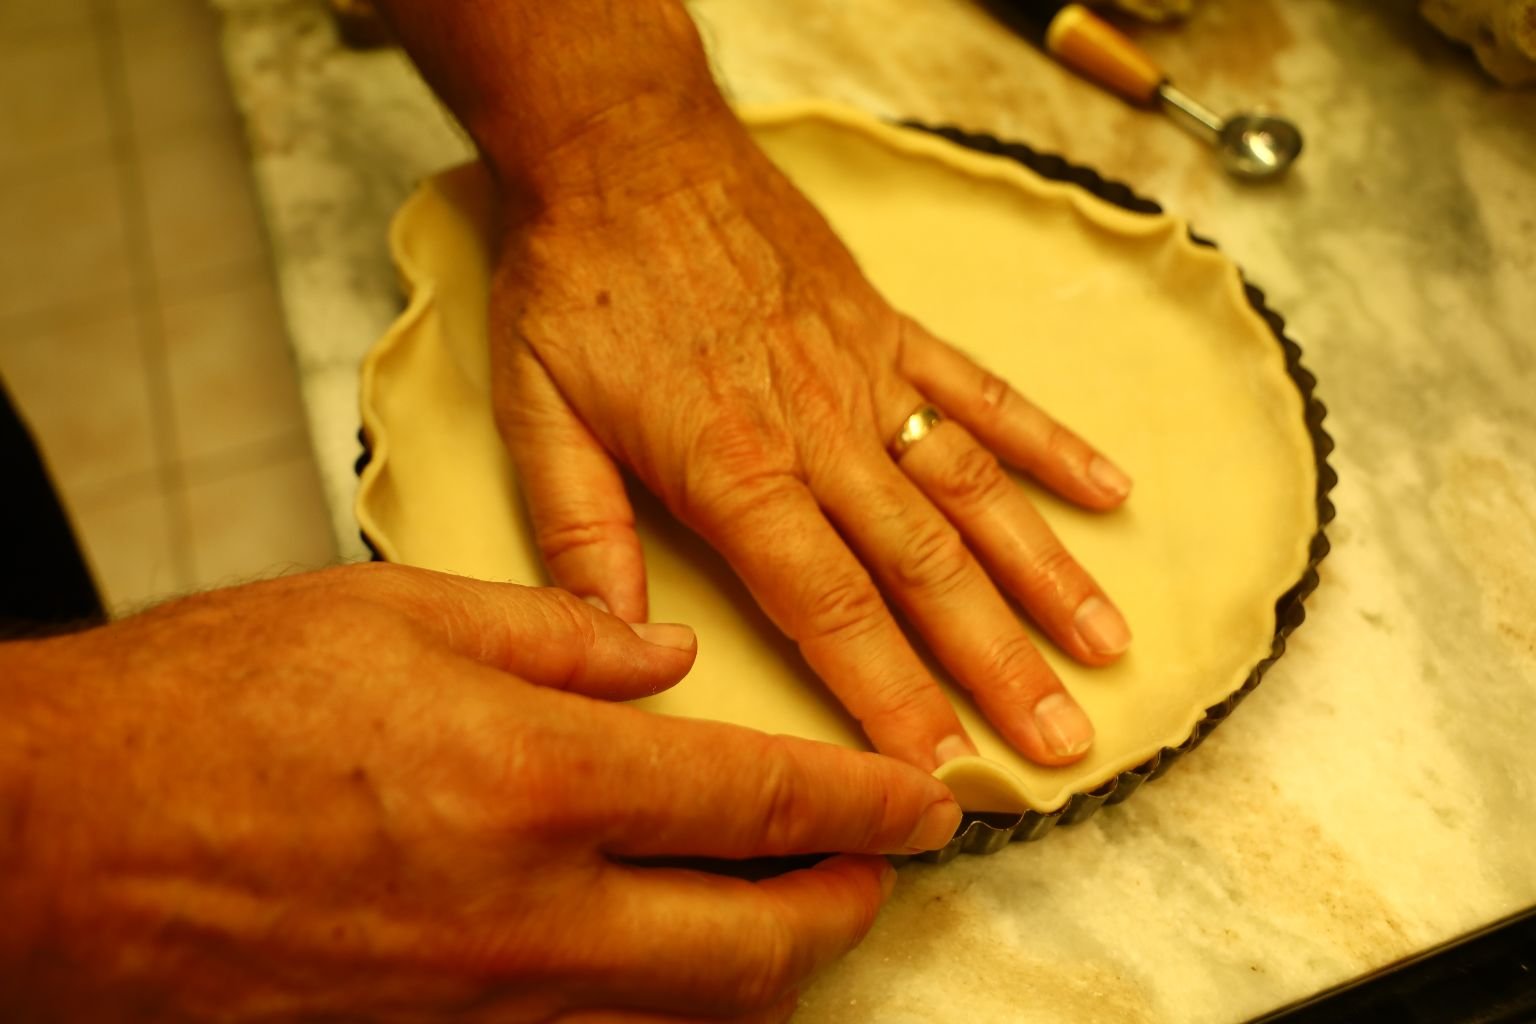
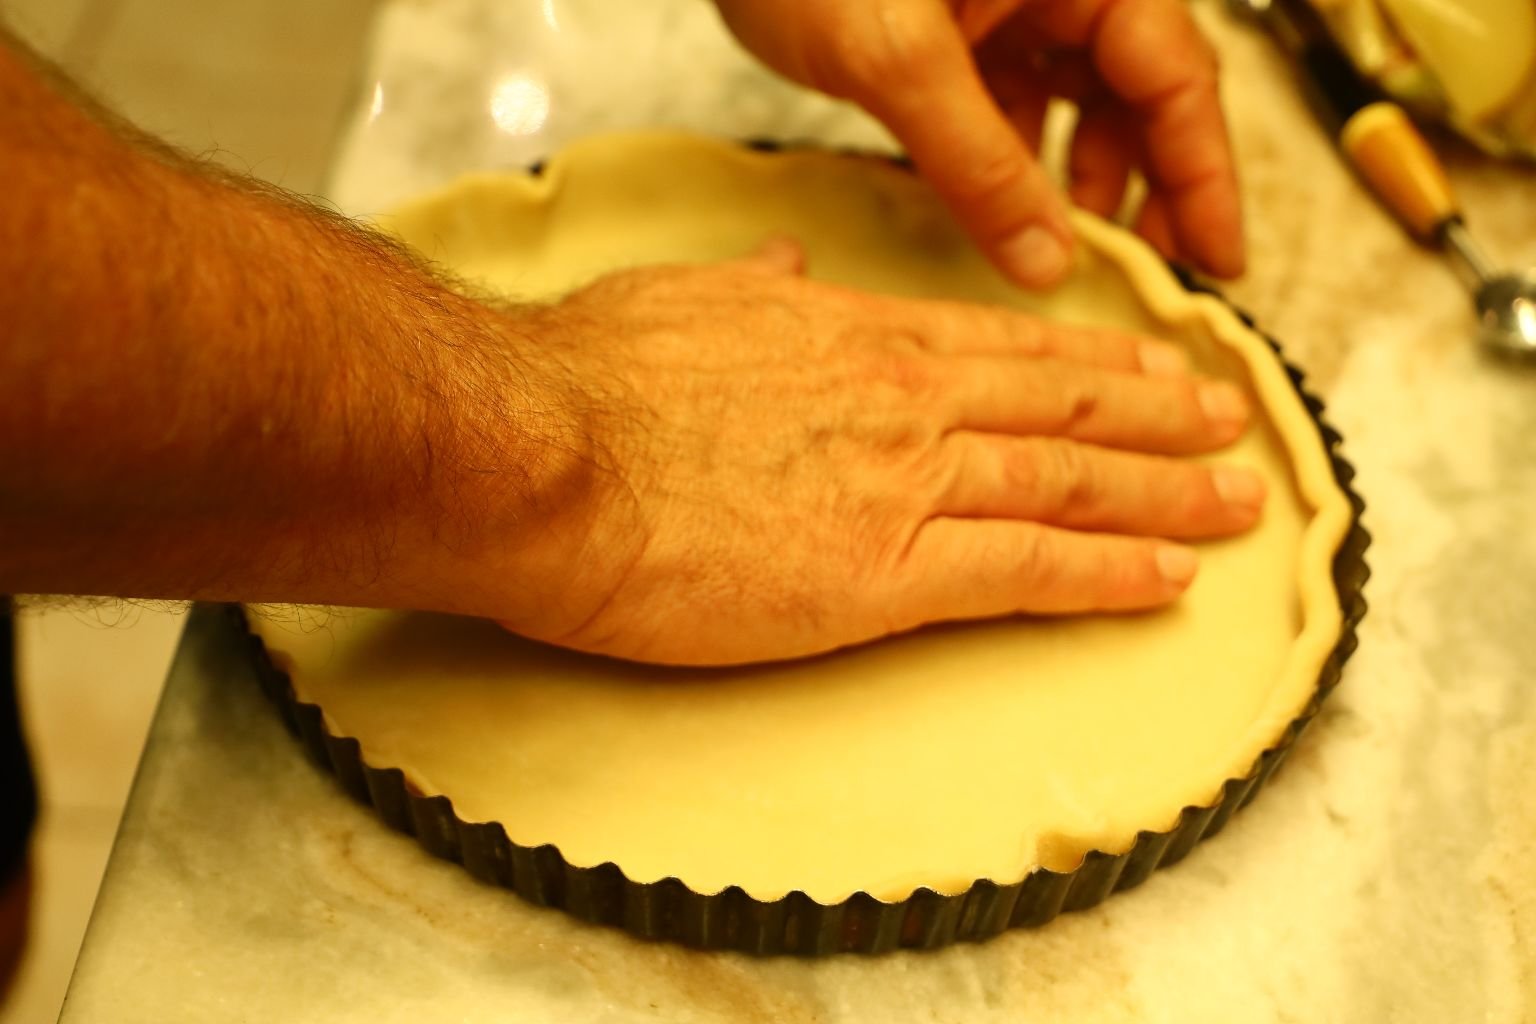
Evenly move the dough into all the edges of the shell.
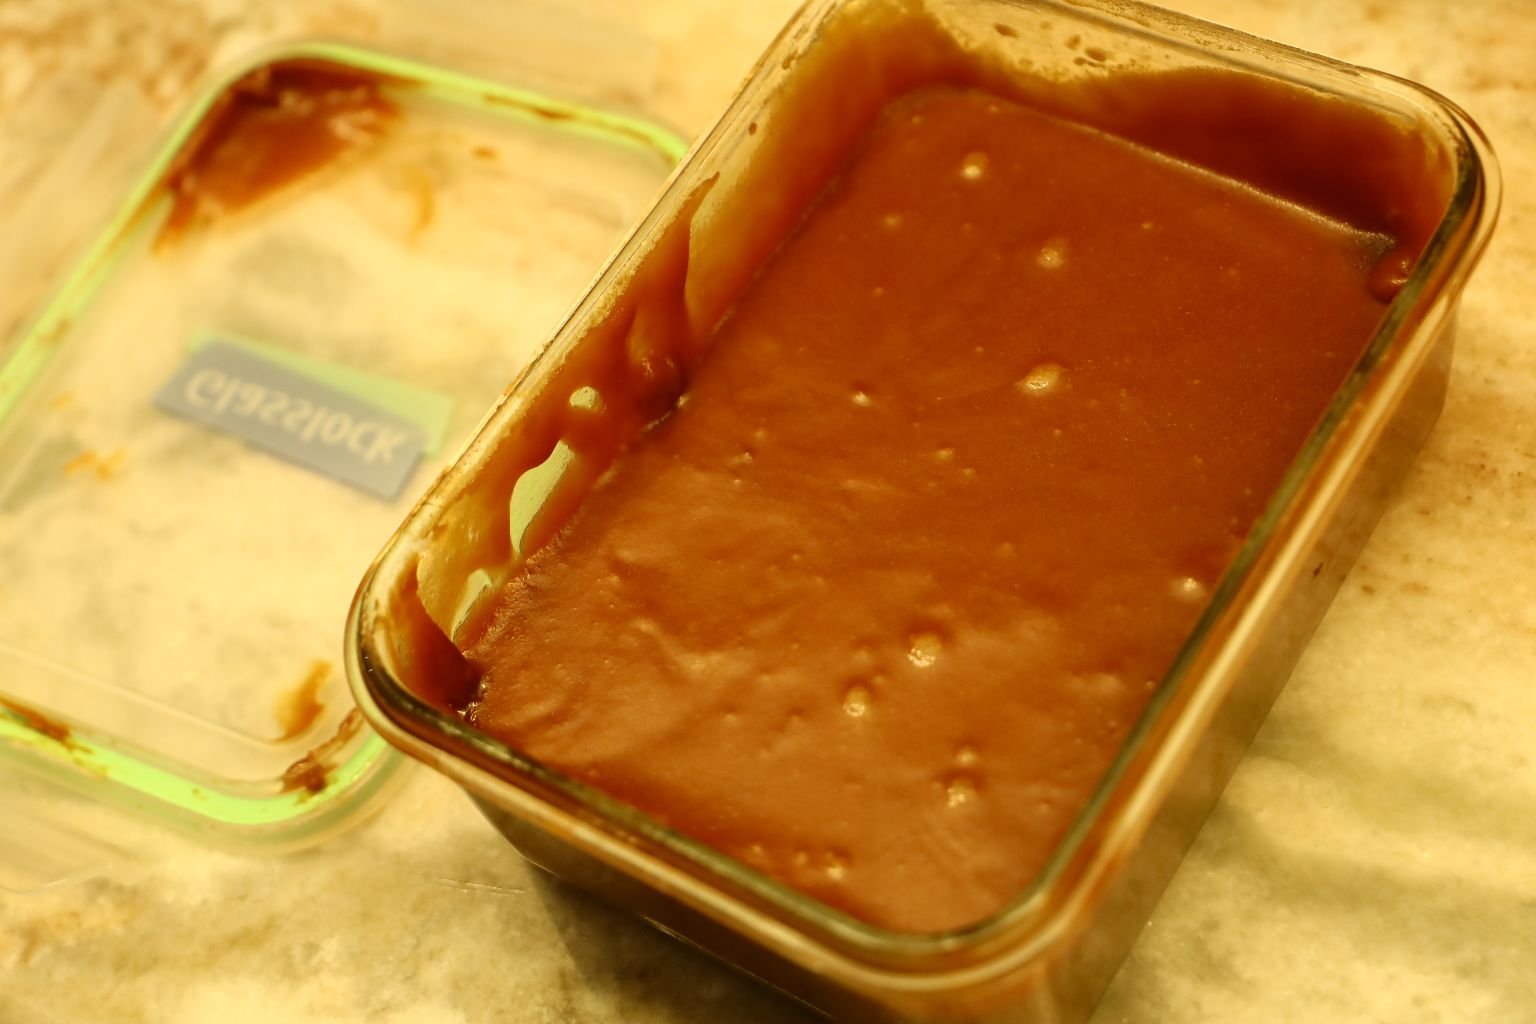
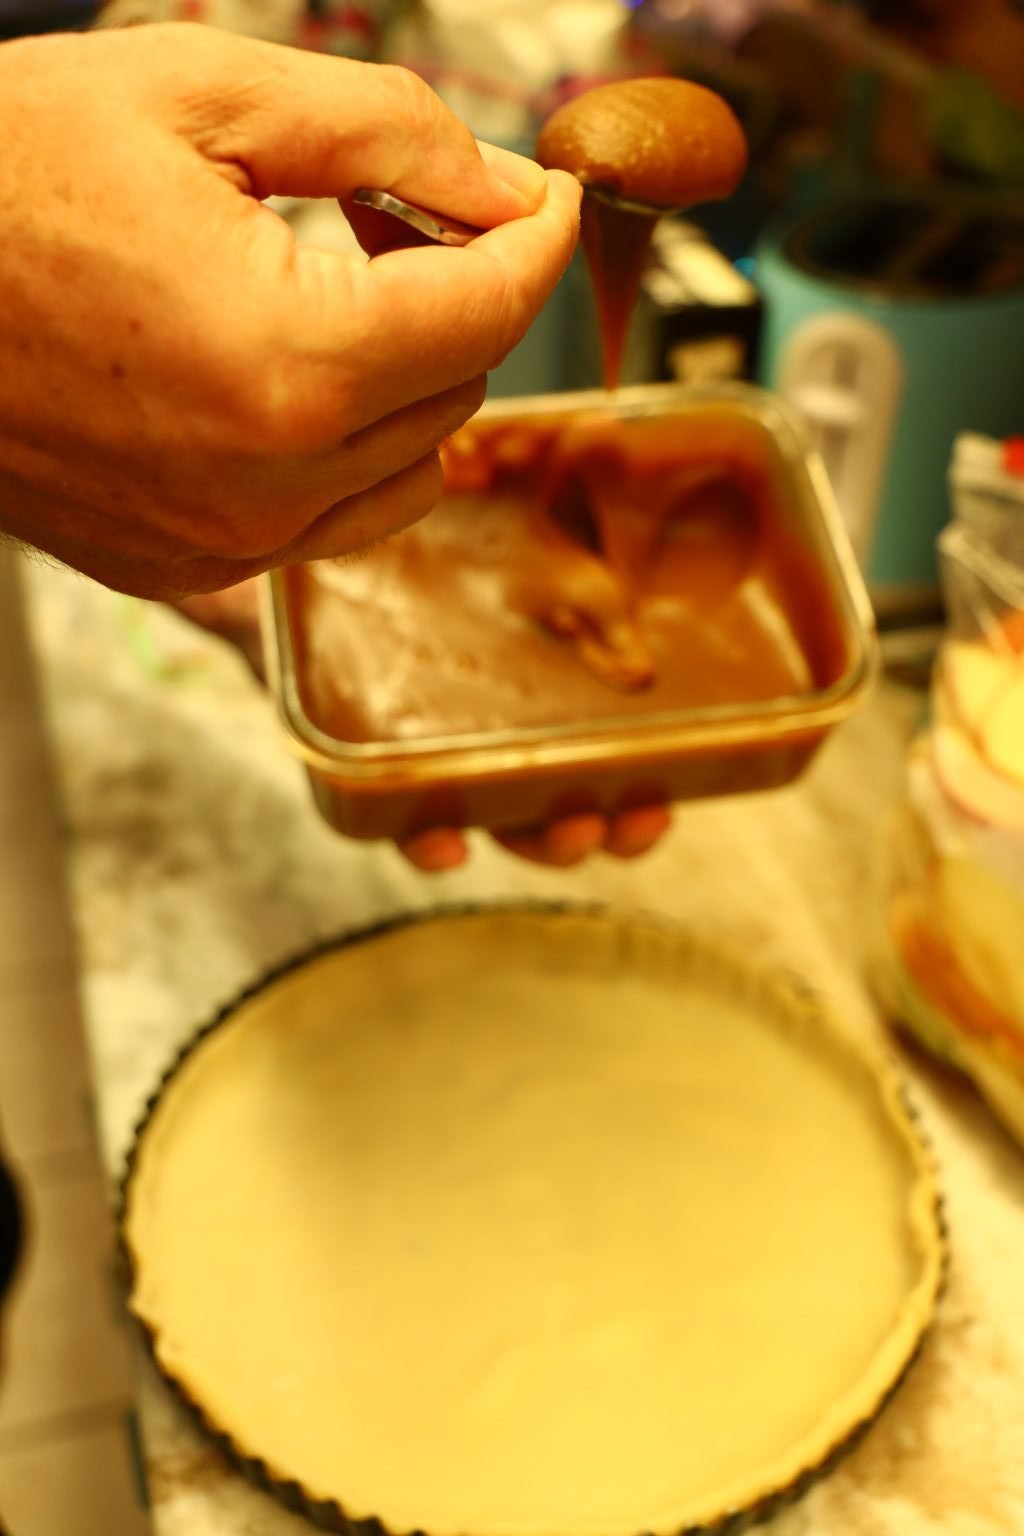
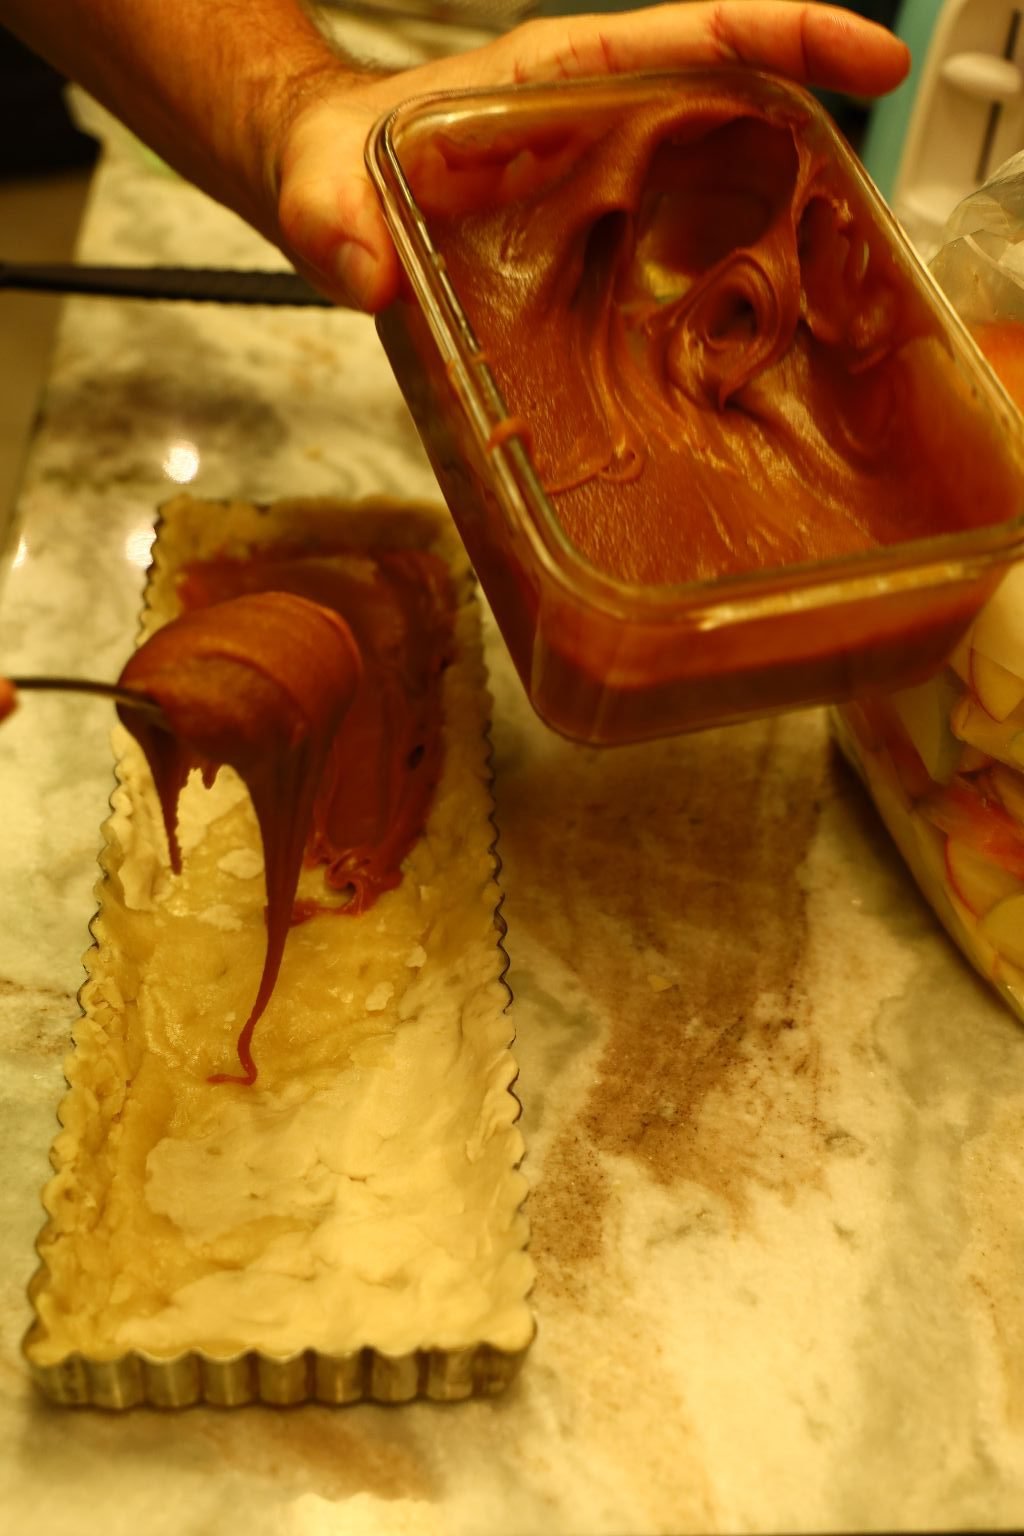
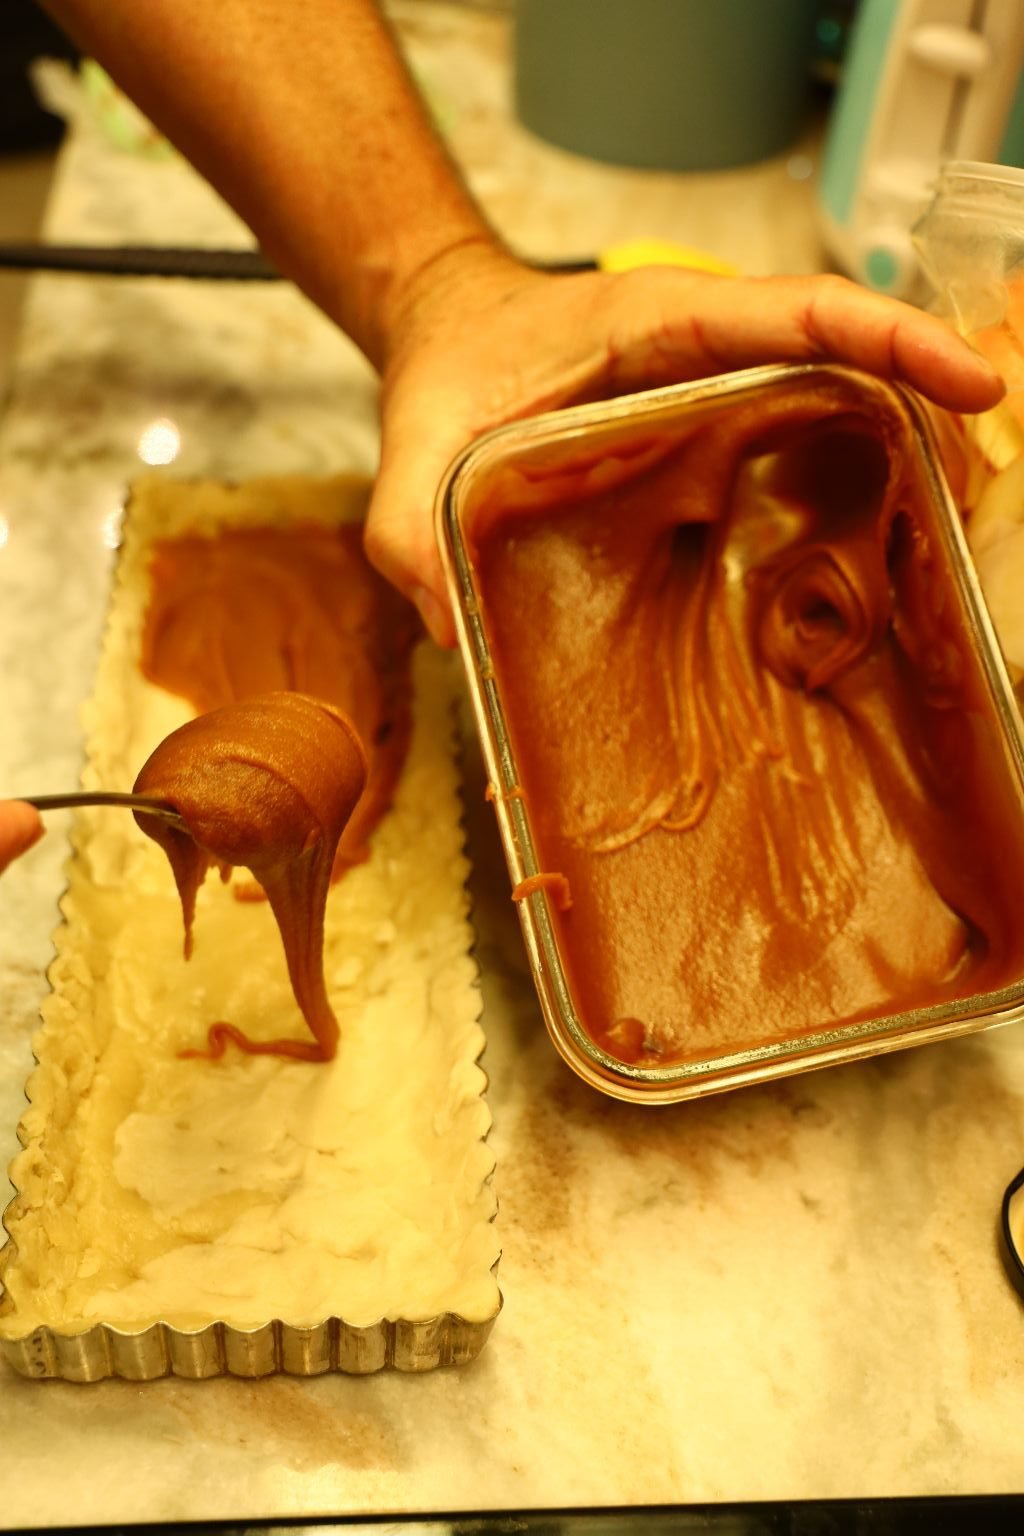
Here is our caramel icing sauce which is absolutely delicious. This is leftover from our Caramel Cake that we made, recipe below.
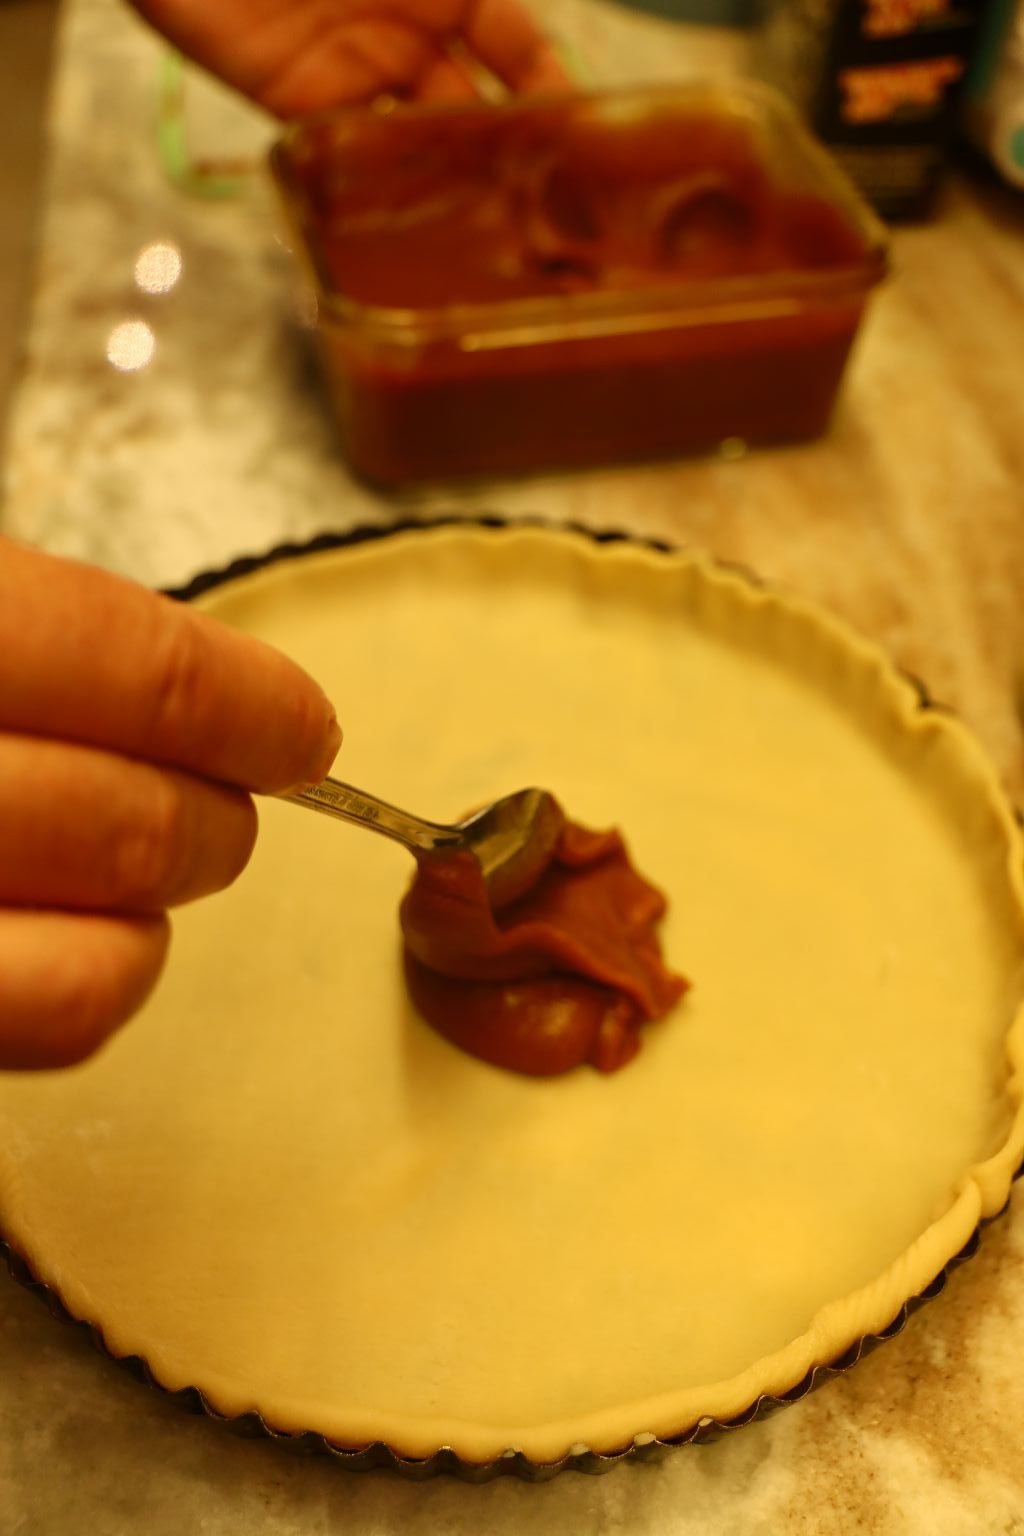
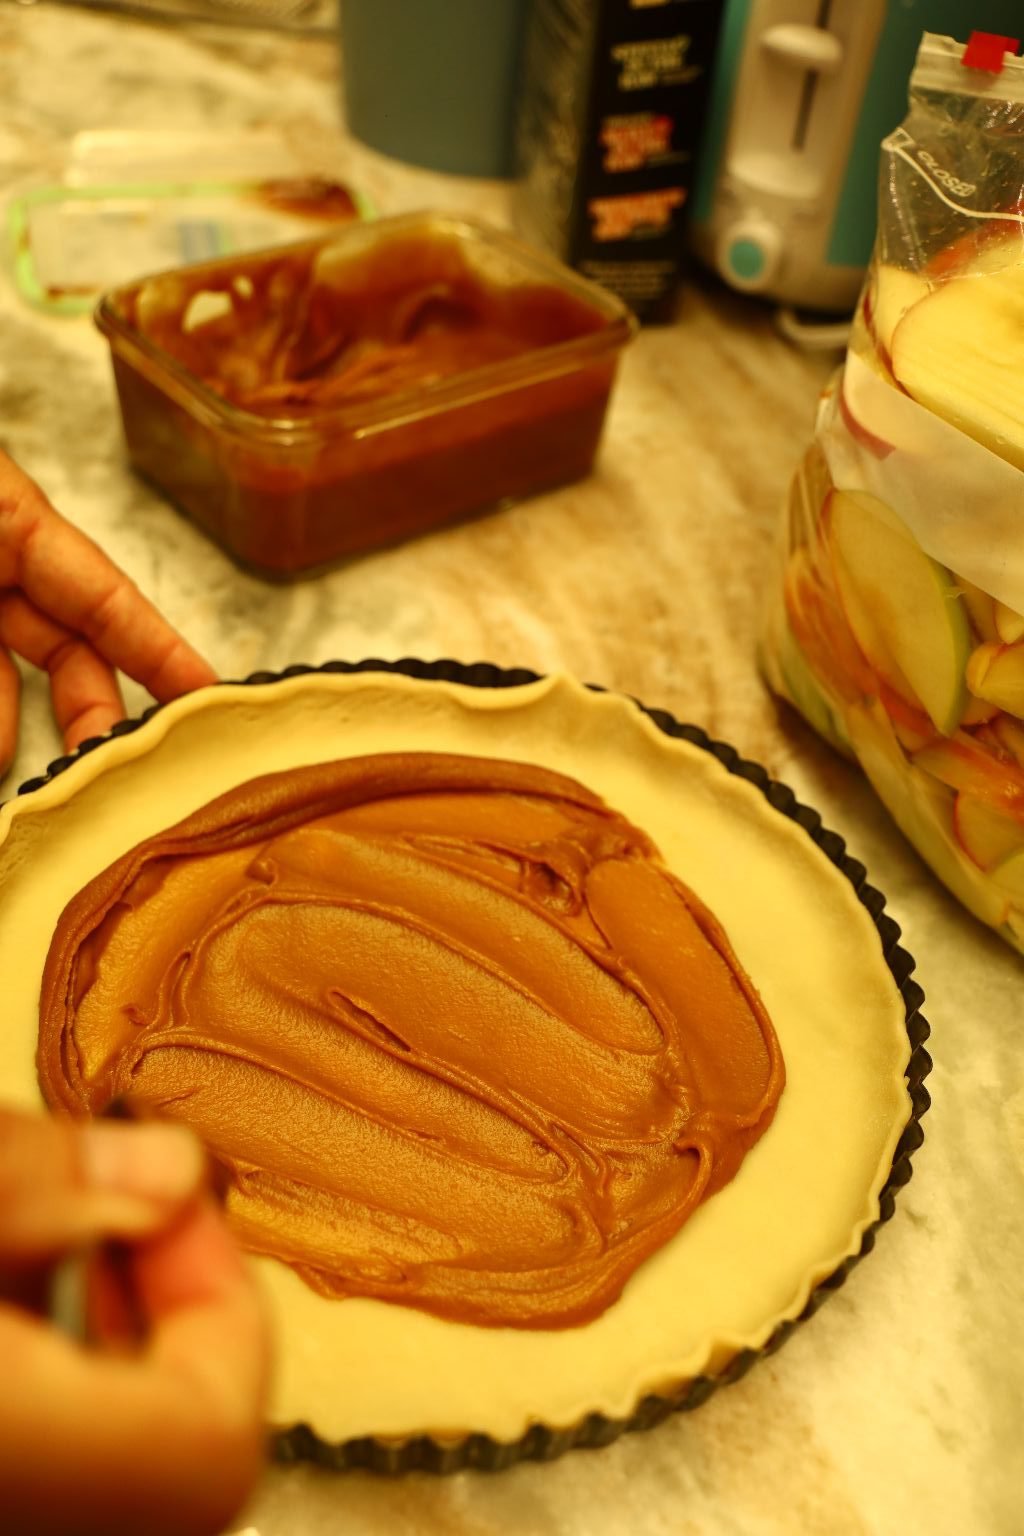
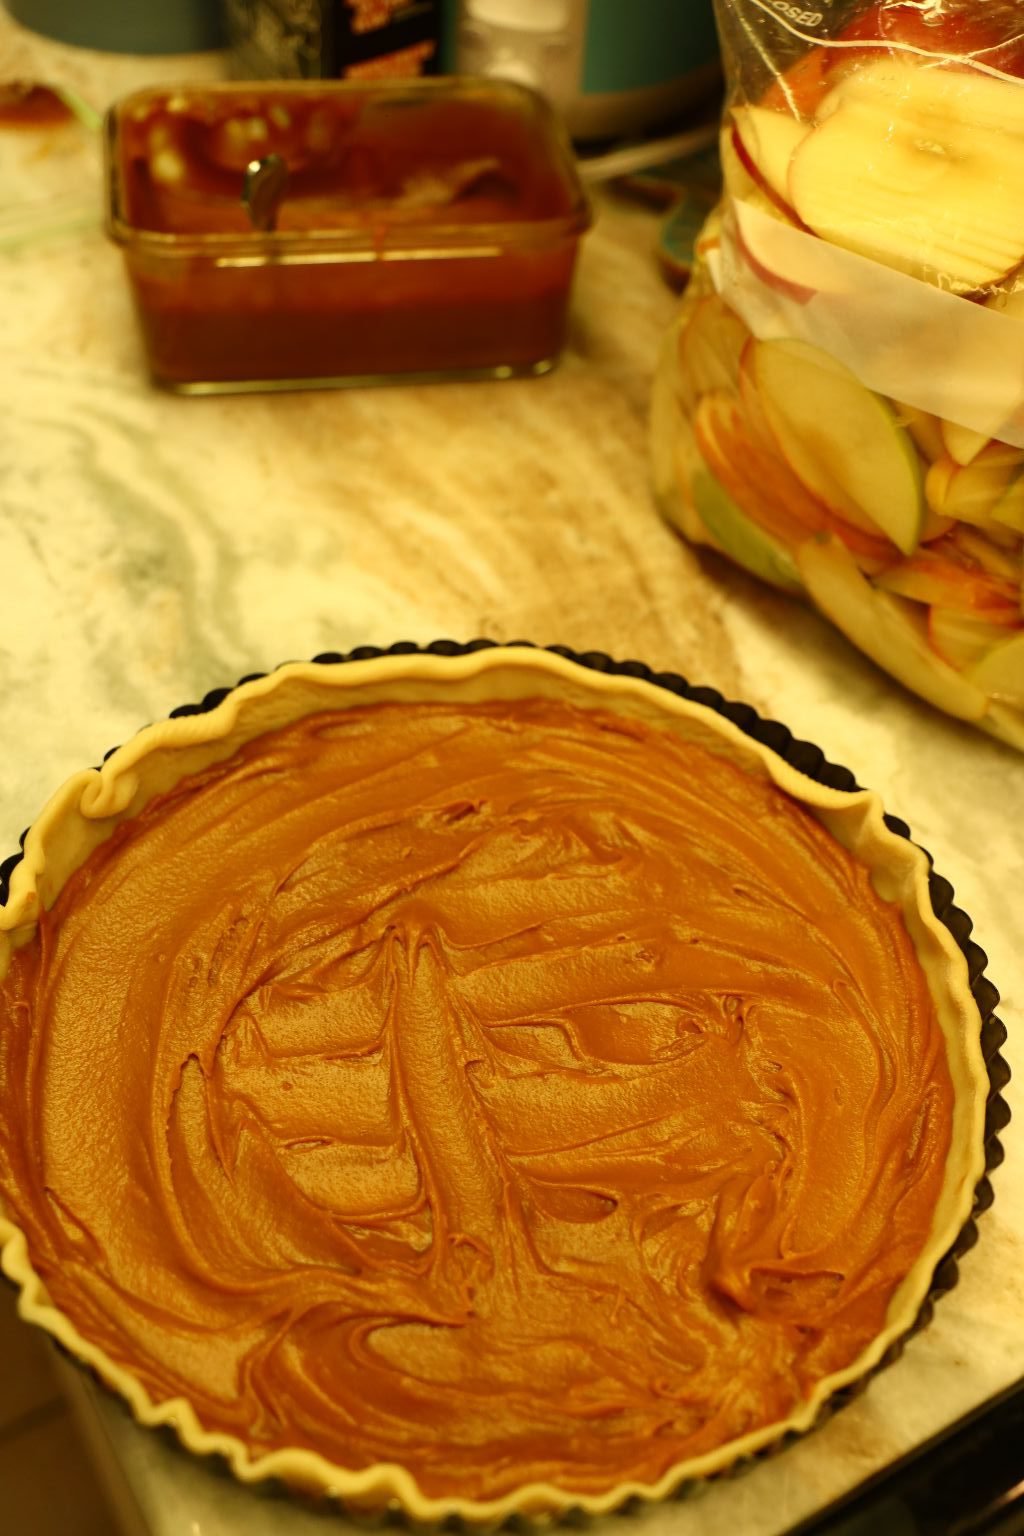
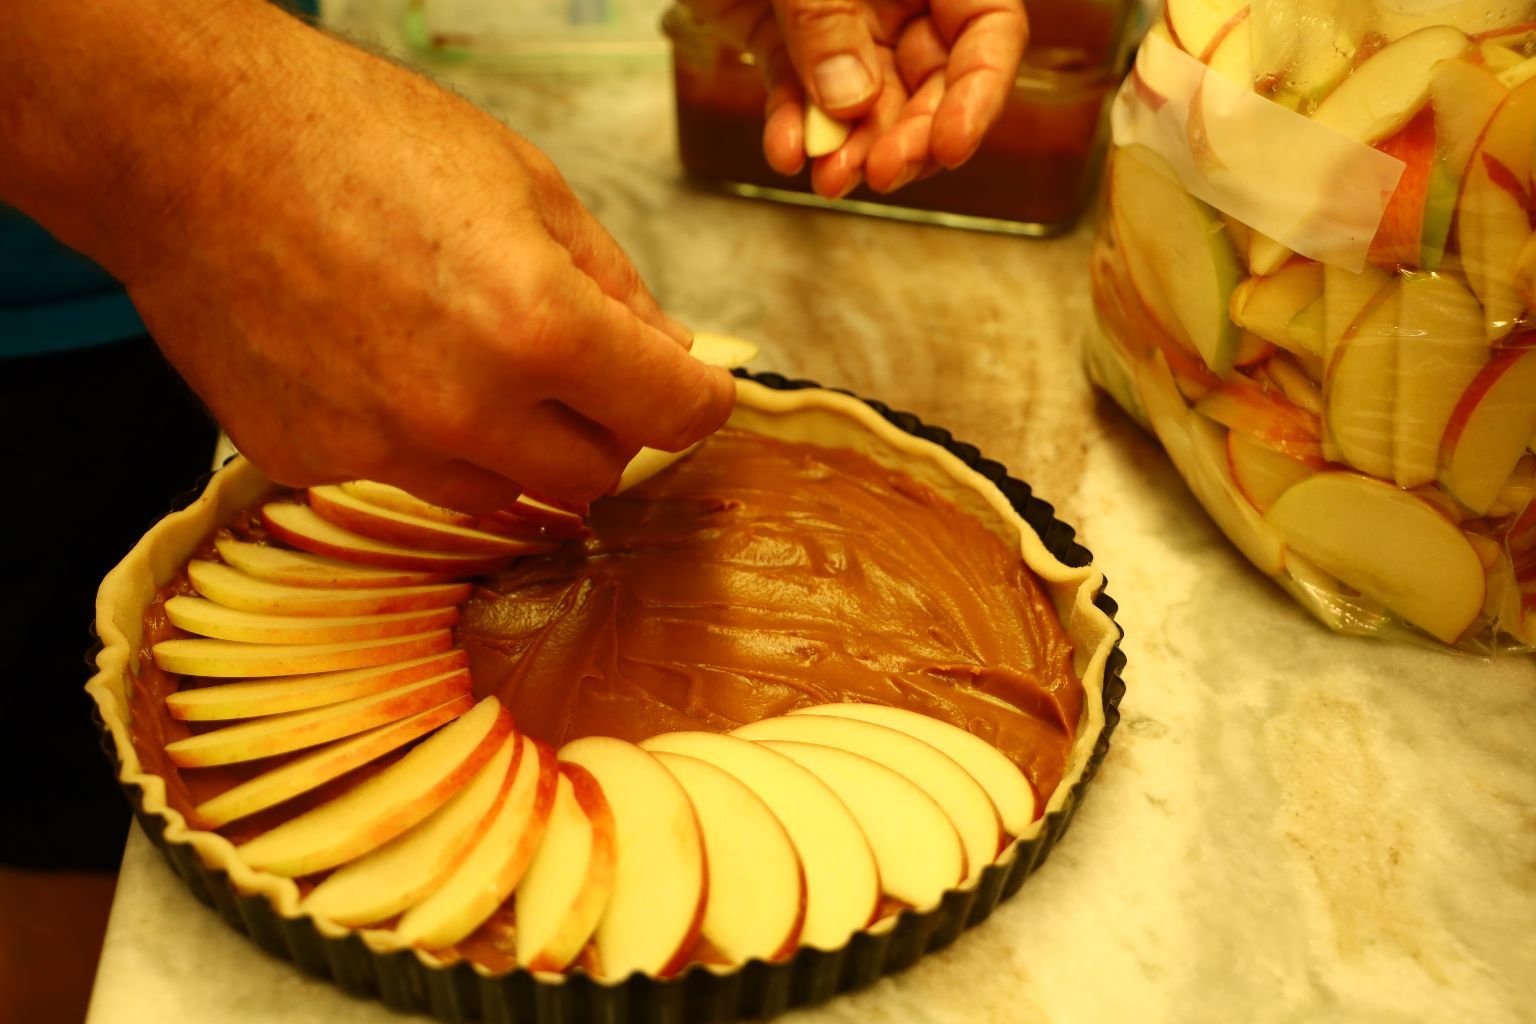
Place a few Tbsp. of the caramel into the center of the pie and spread it all over the bottom of the tart dough.

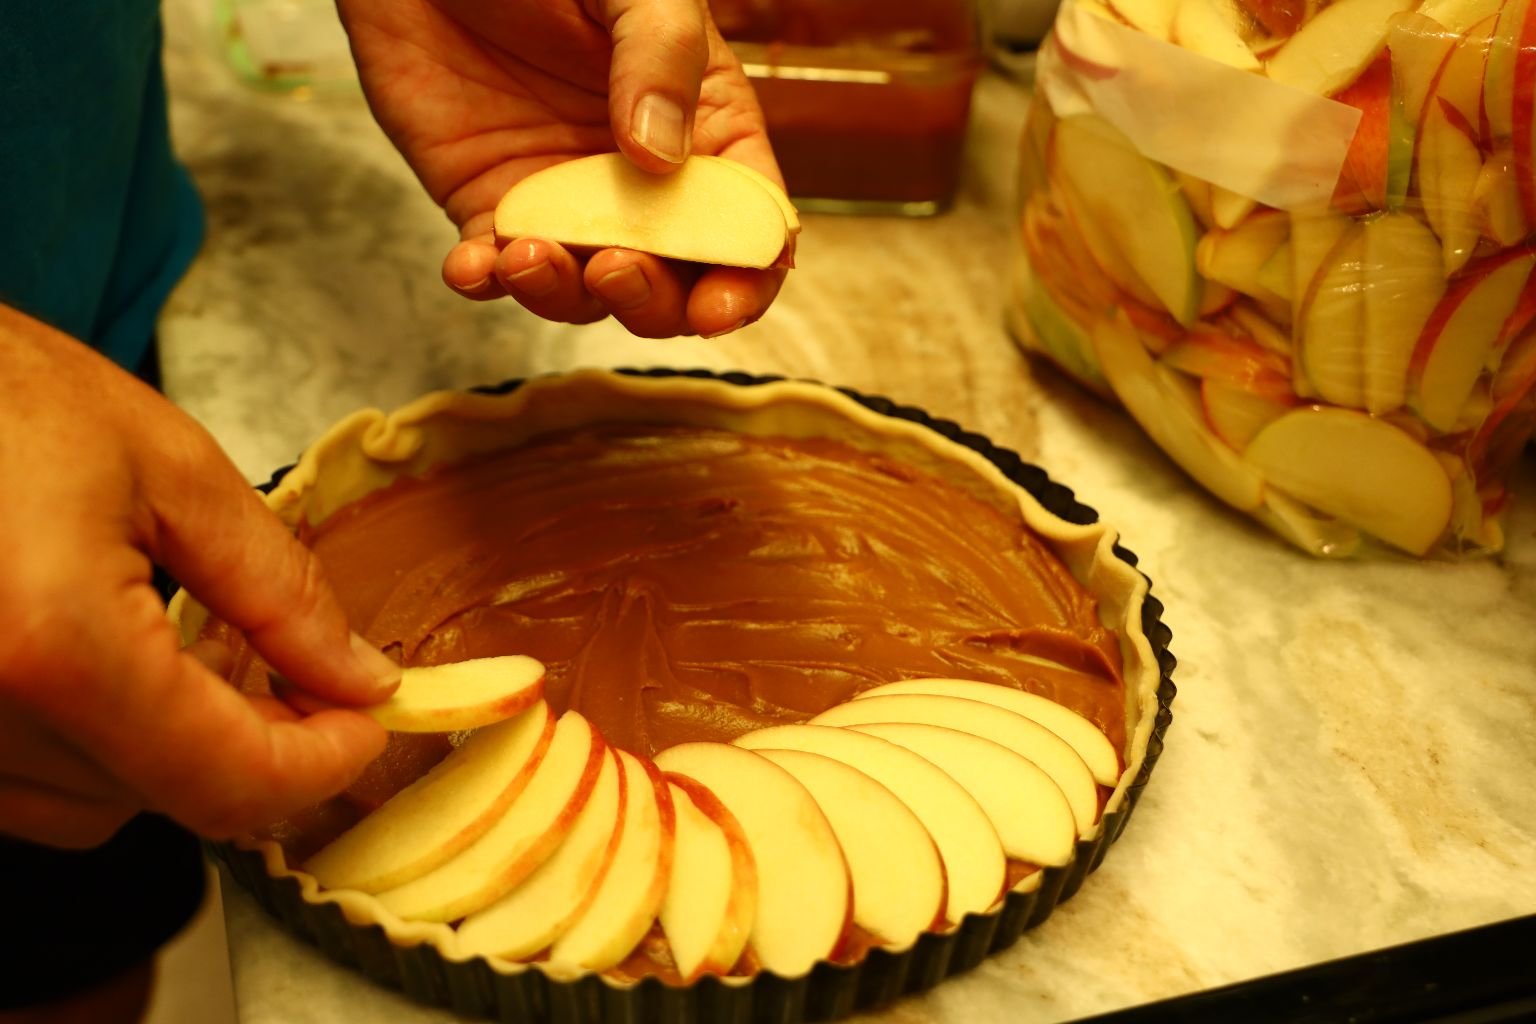
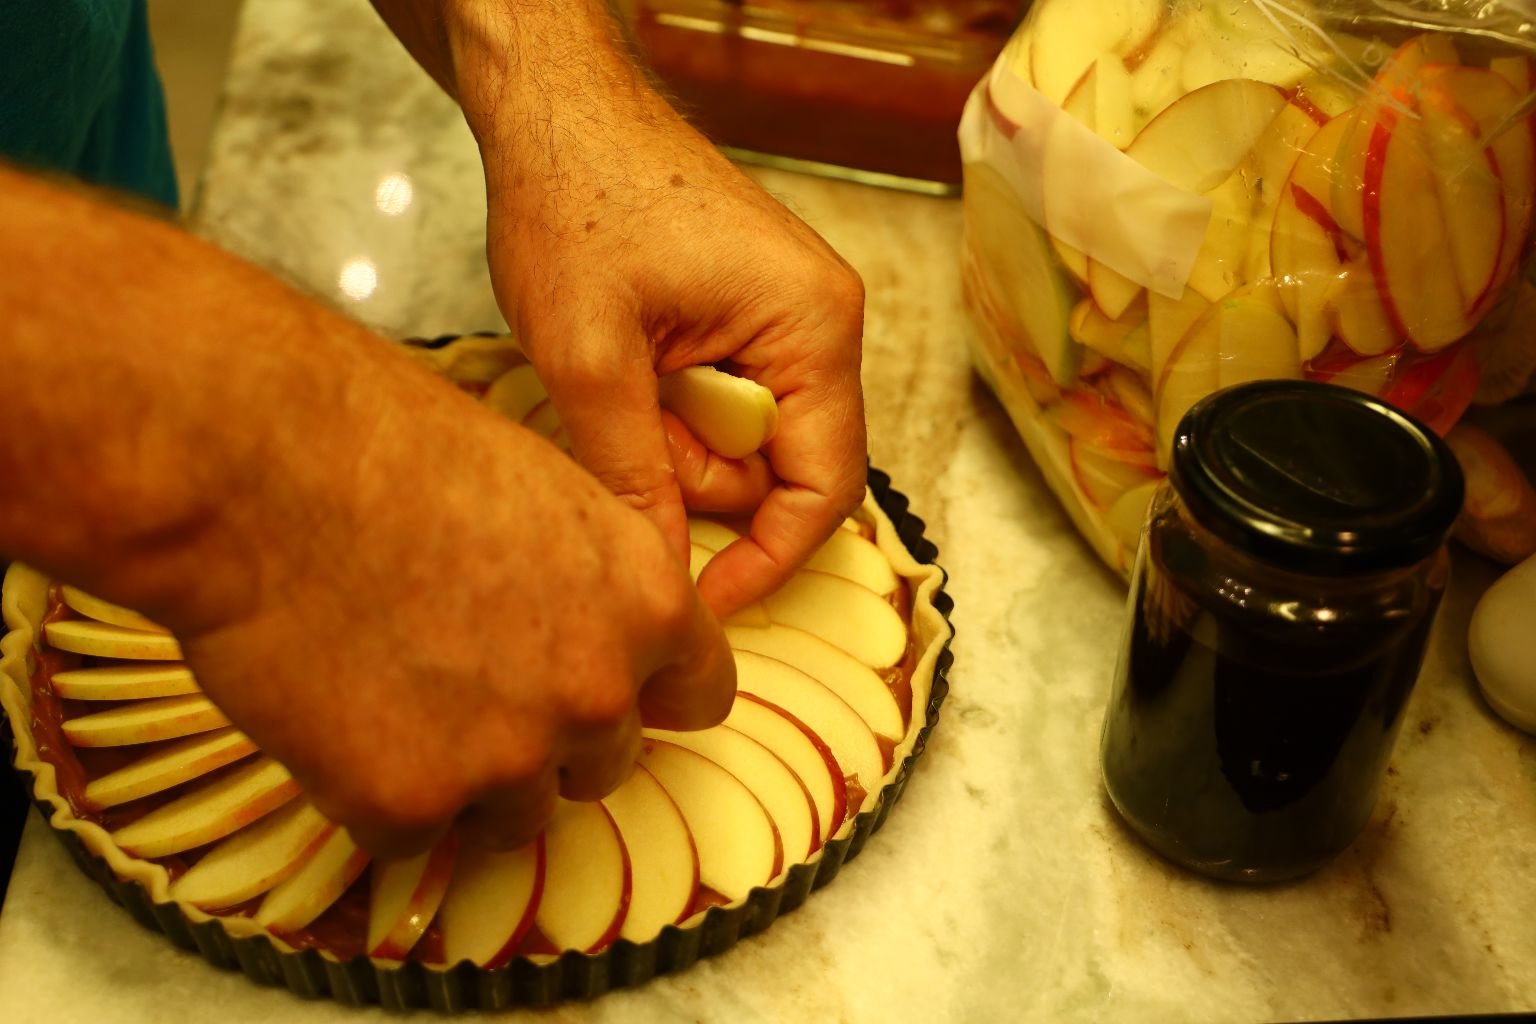
Take your Apple slices and decoratively place them into the tart. We used a fan method.
———————————————————————
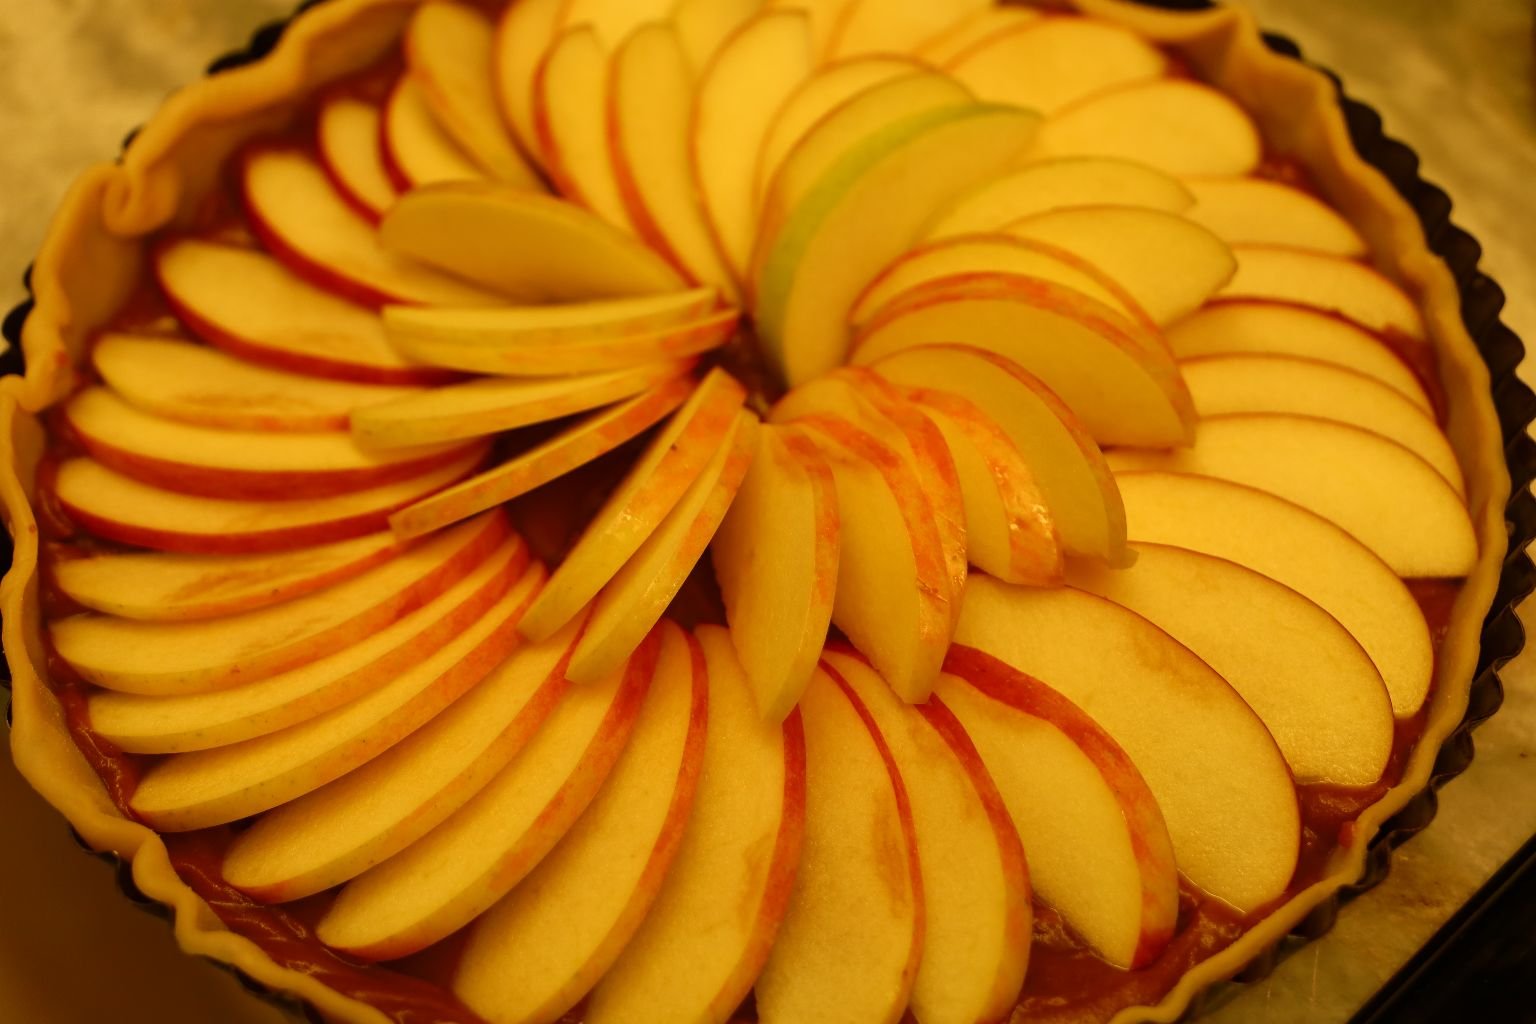
Here is the finished design.
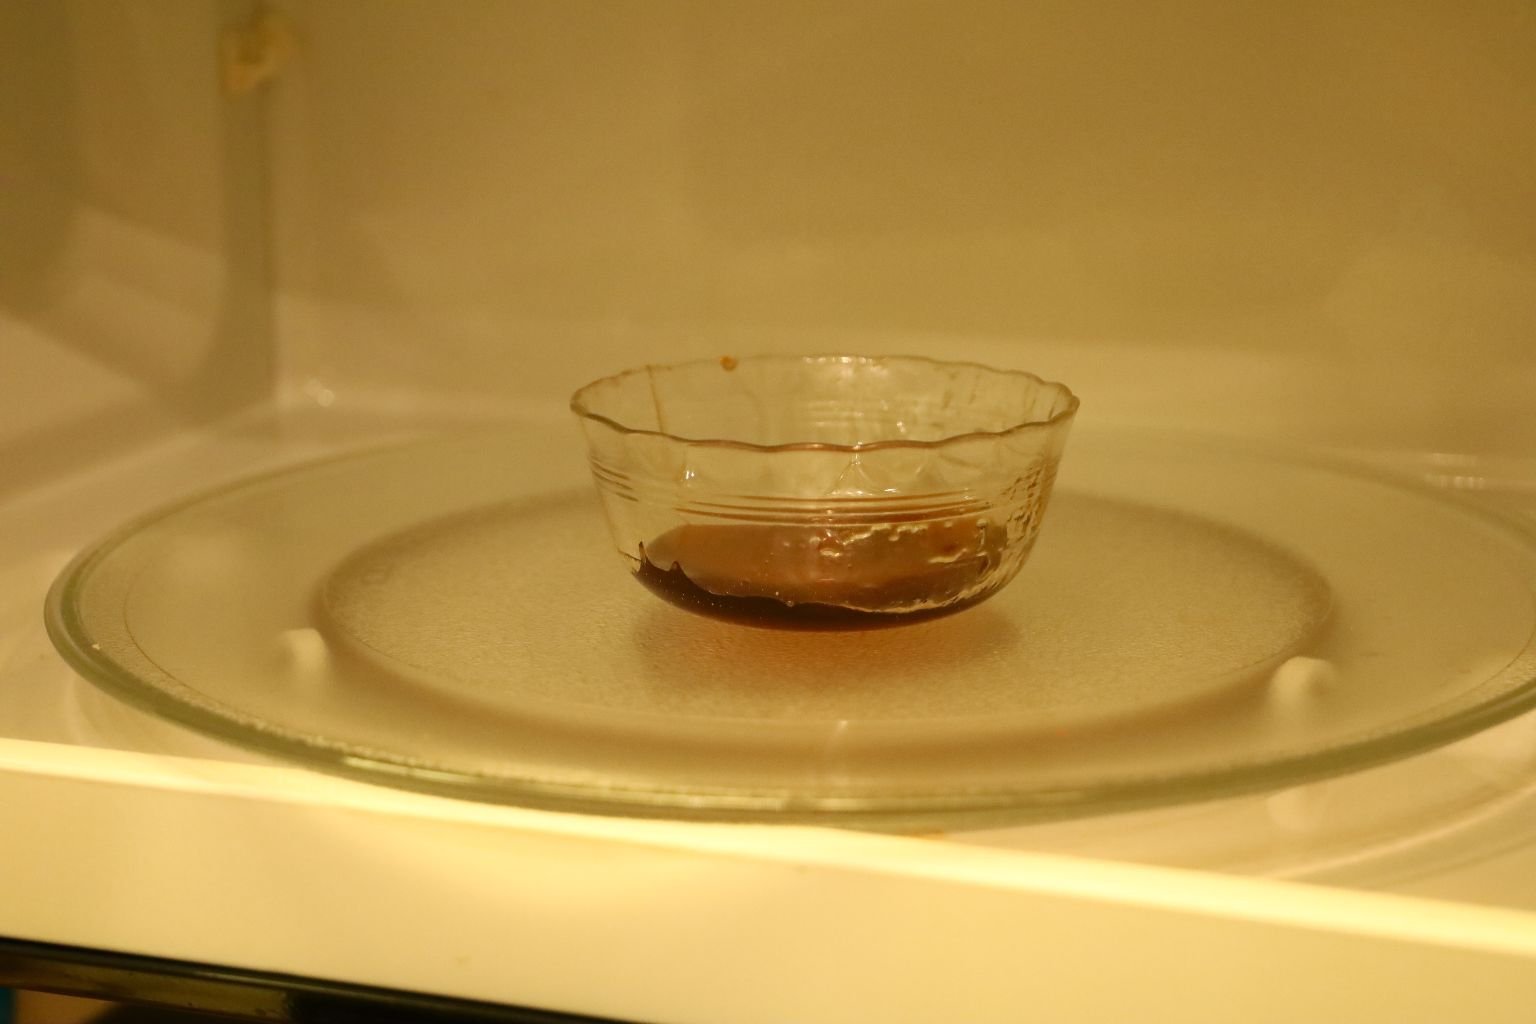
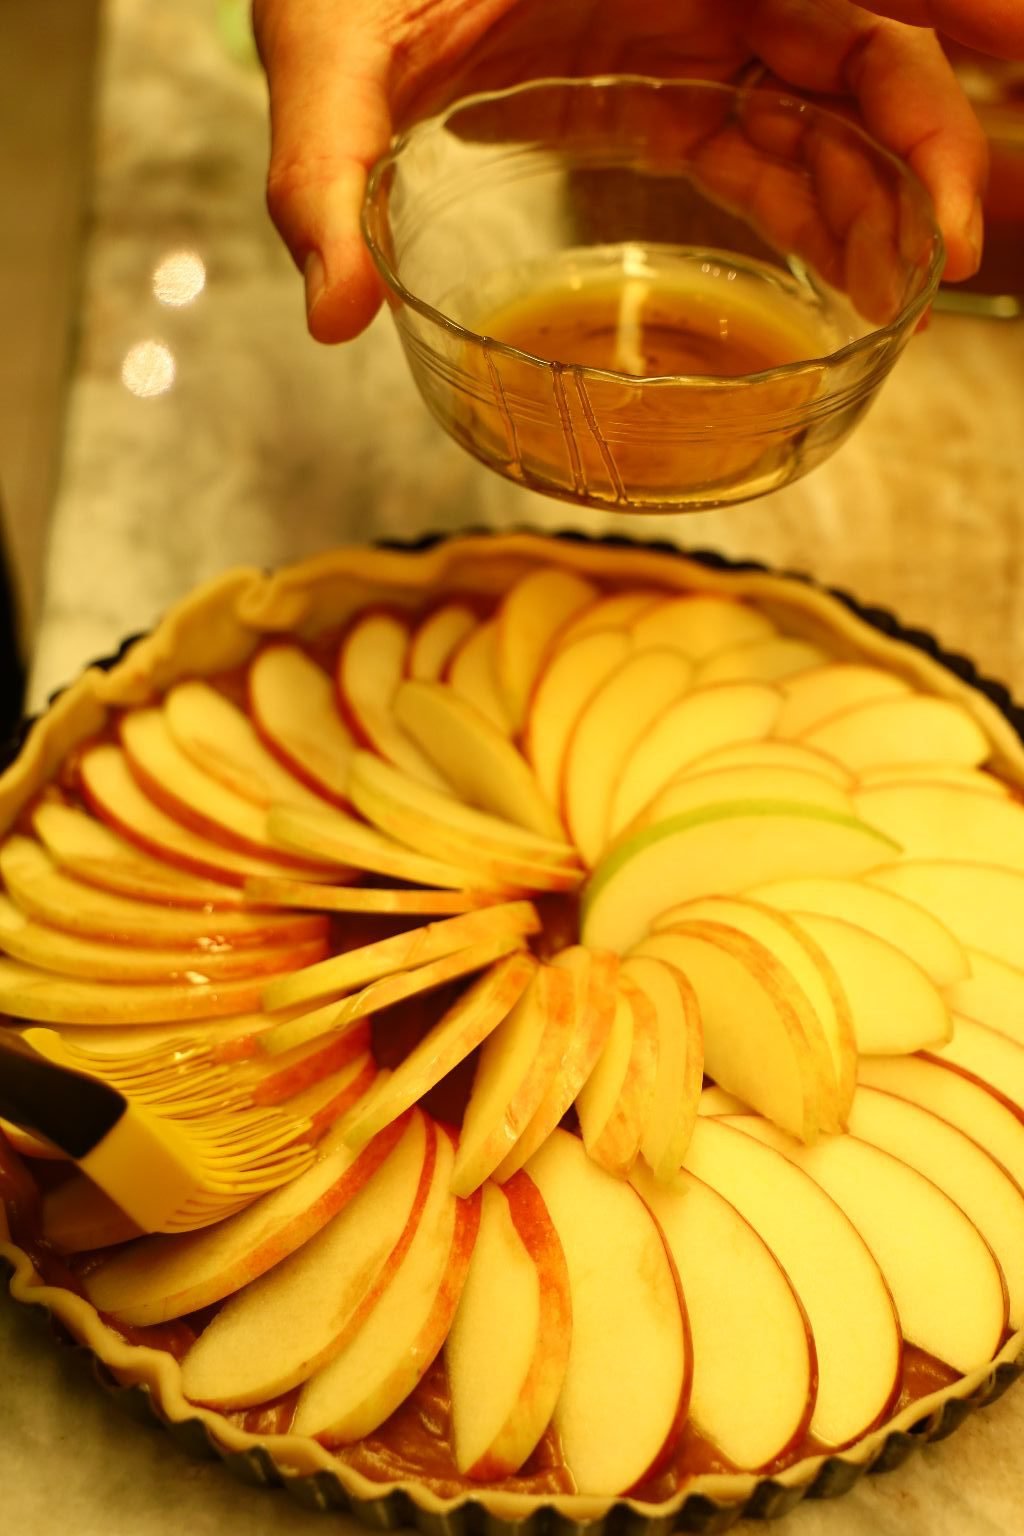
Take about 2 Tbsp. of Honey and place it into a microwave safe dish. Microwave the Honey for about 15 seconds to make it more viscous. Brush the Honey over the Apple slices to create a nice glaze.
(This honey is from The Middle East and it is heavenly! It tastes like our honey but yet it also doesn’t. You really have to try it to understand but it is really good.)
—————————————————————–
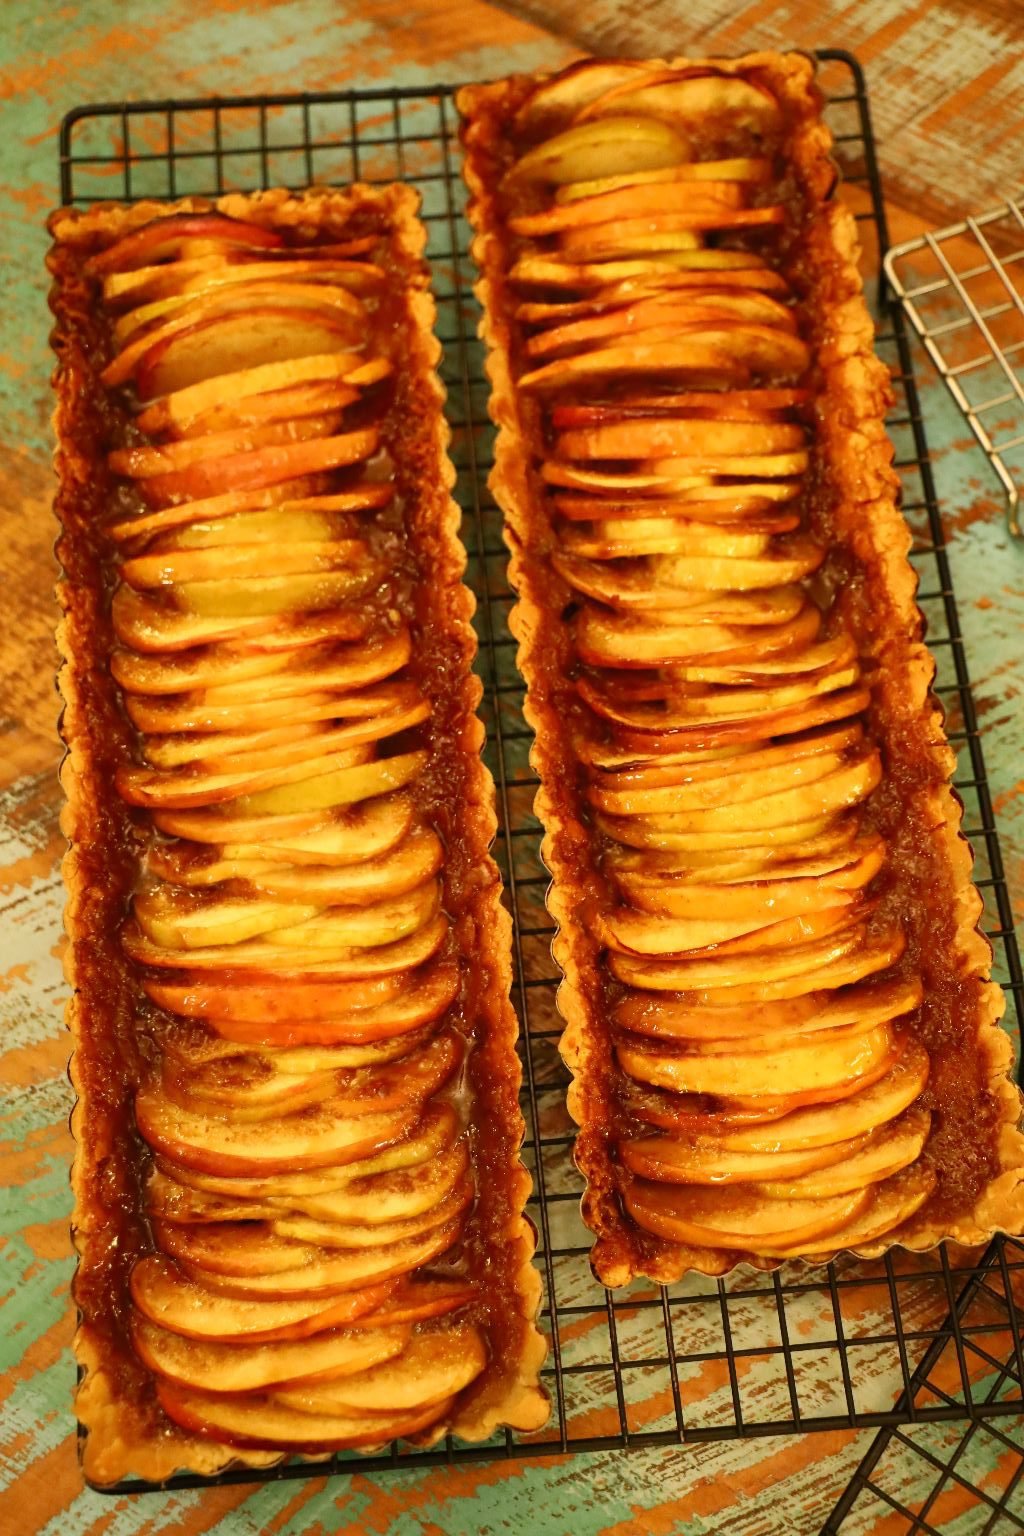
Here are our next tarts.
Again, spray the tart shells with cooking spray.
Spread your pie dough over the bottom of the tart shell then spread the caramel over the dough.
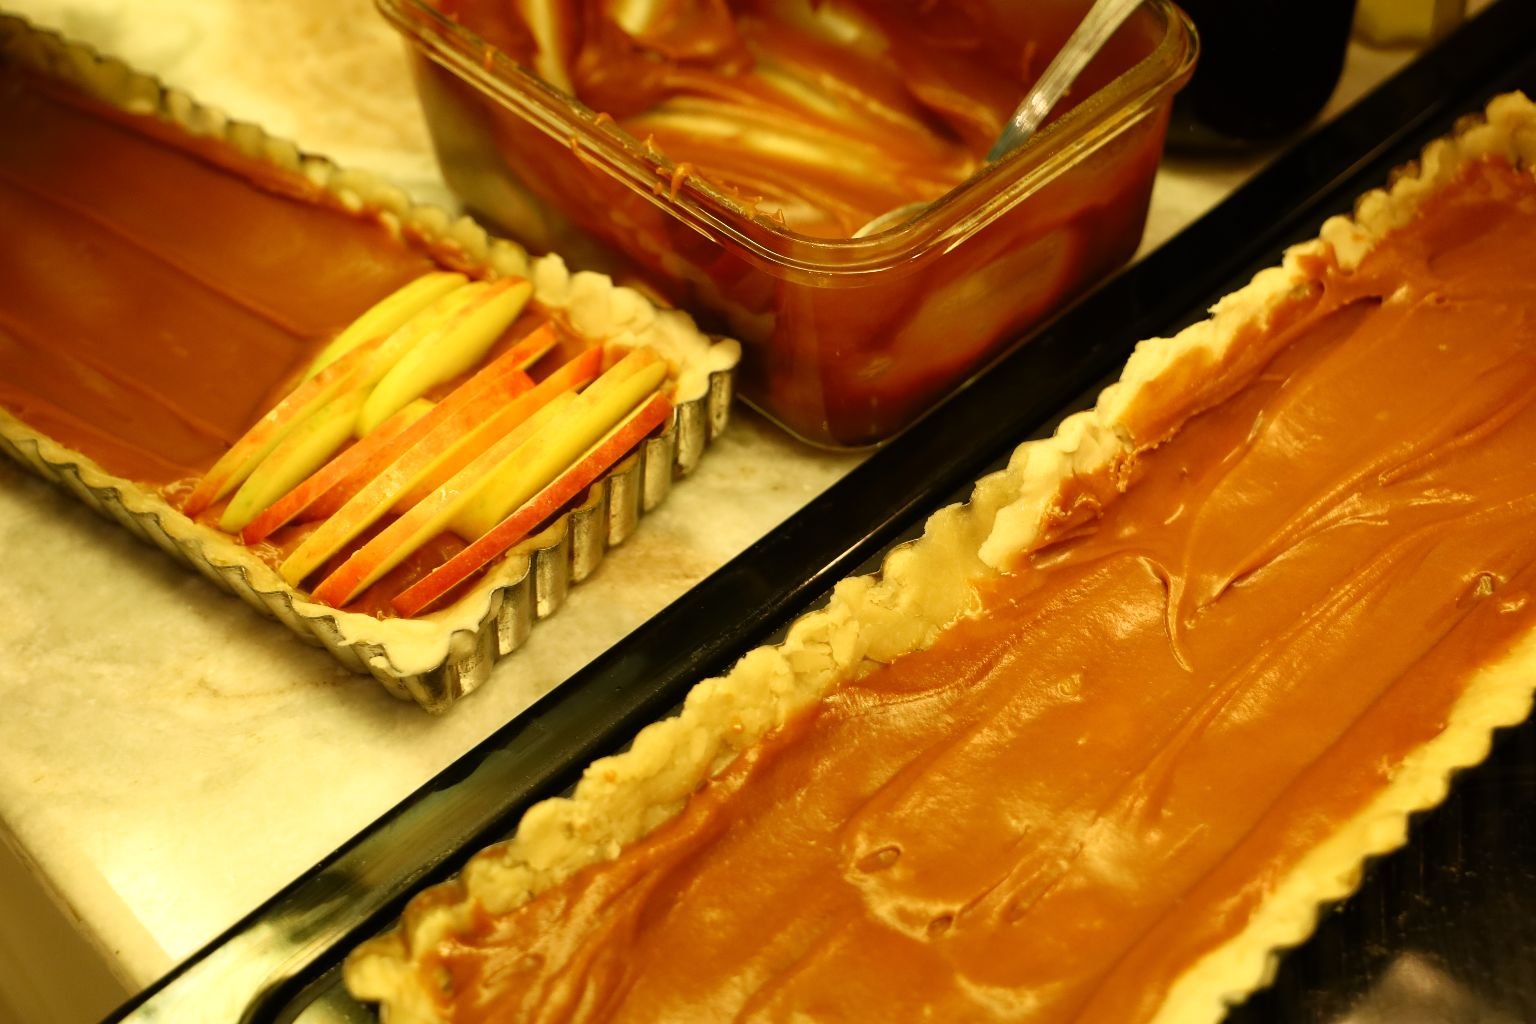
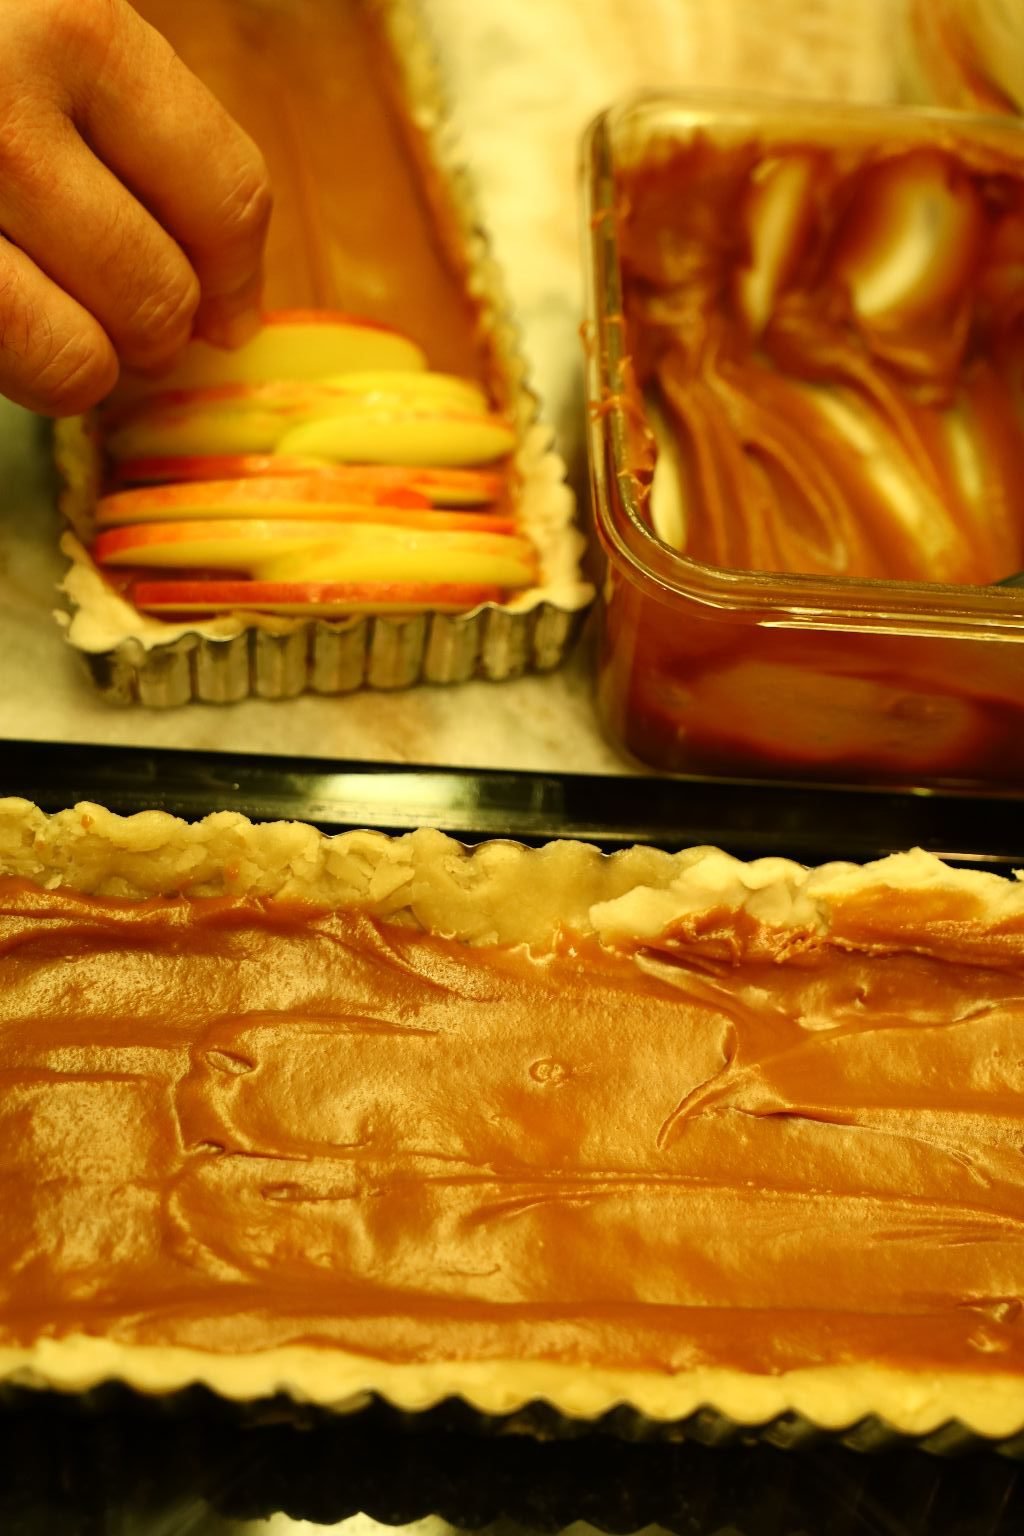
Here we simply placed the apple slices into the shells tightly next to each other.
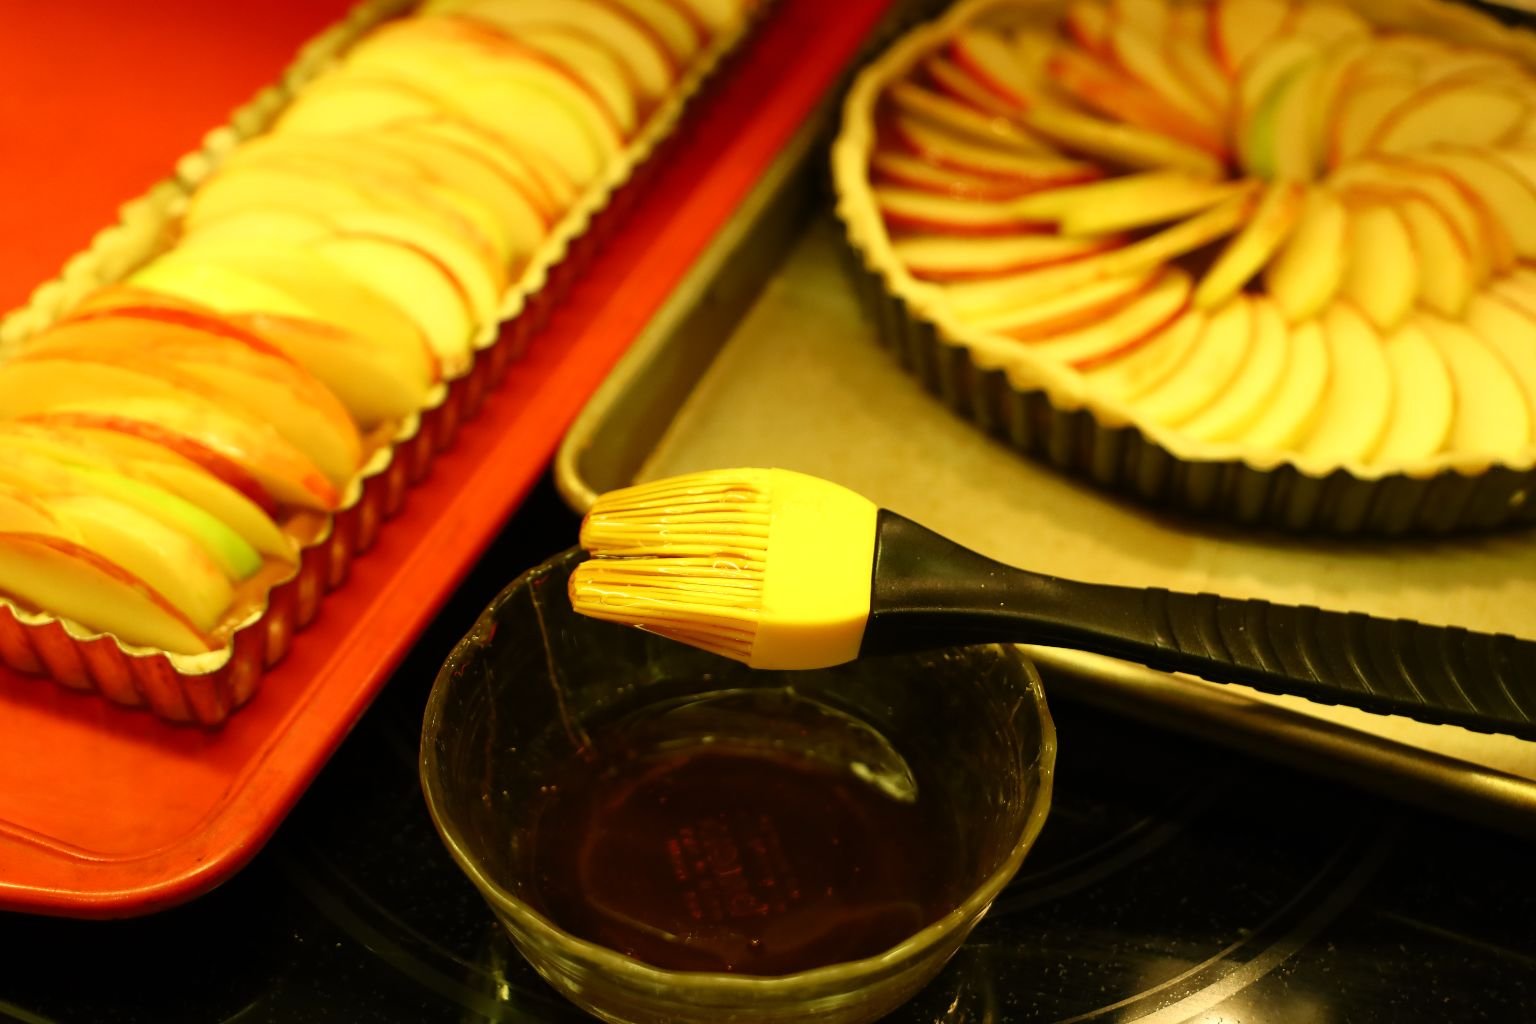

Again, brush some honey over the top of the apple slices as done before.
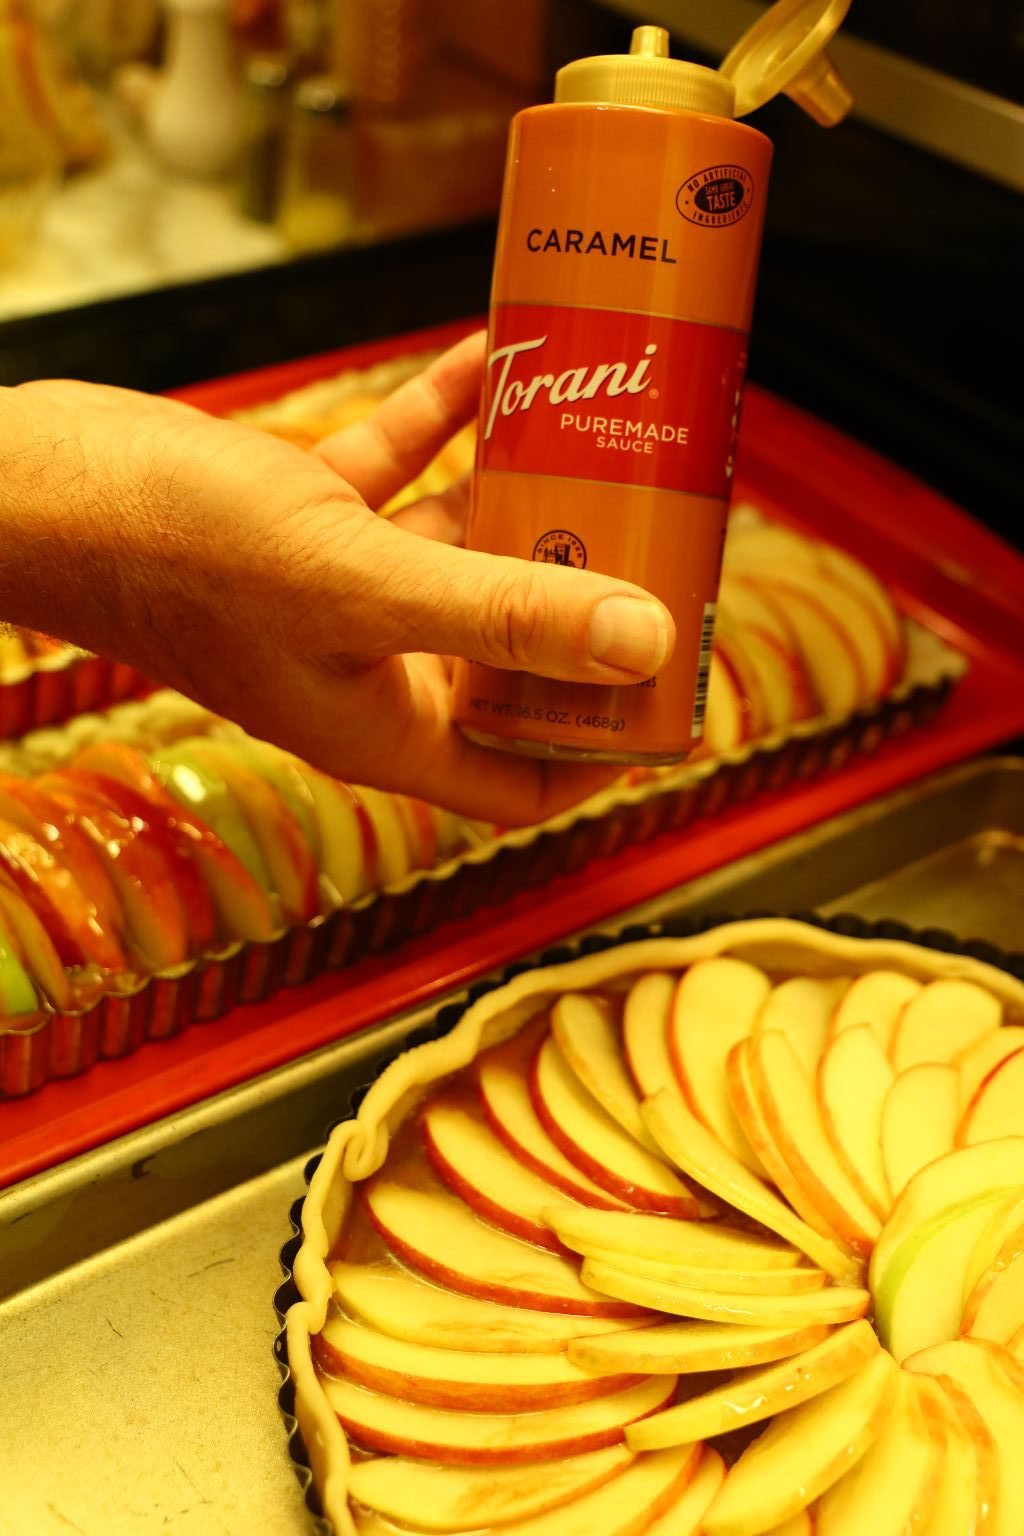
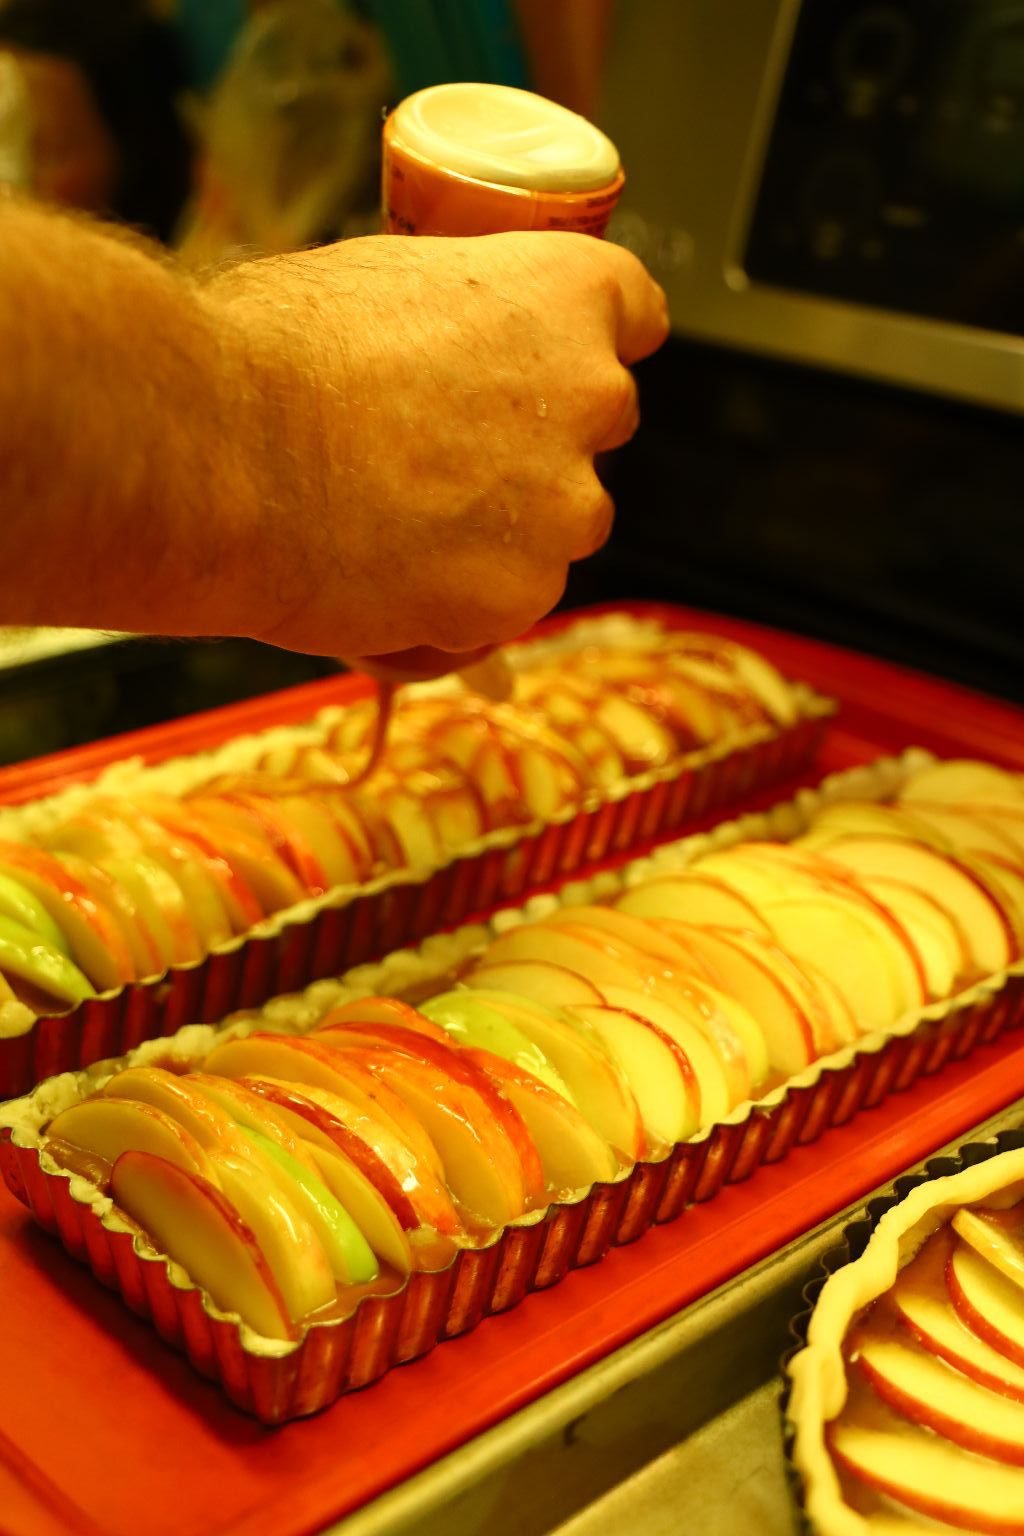
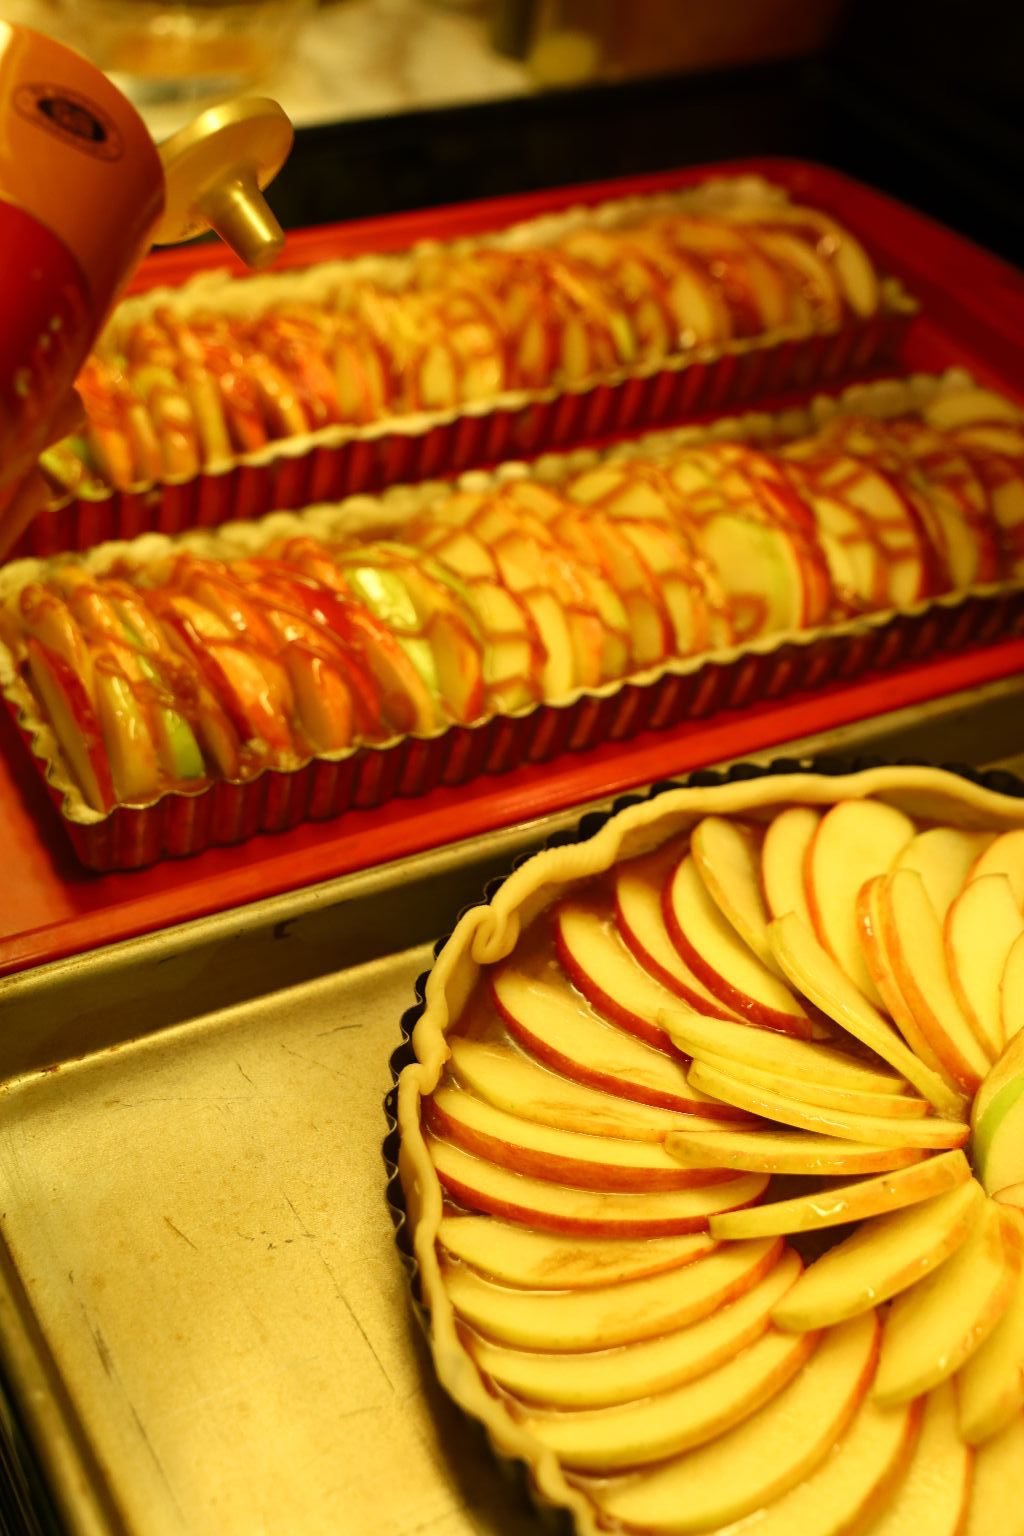
Now, drizzle some caramel over the apple slices in a decorative motion. I went back and forth diagonally for the longer tarts…
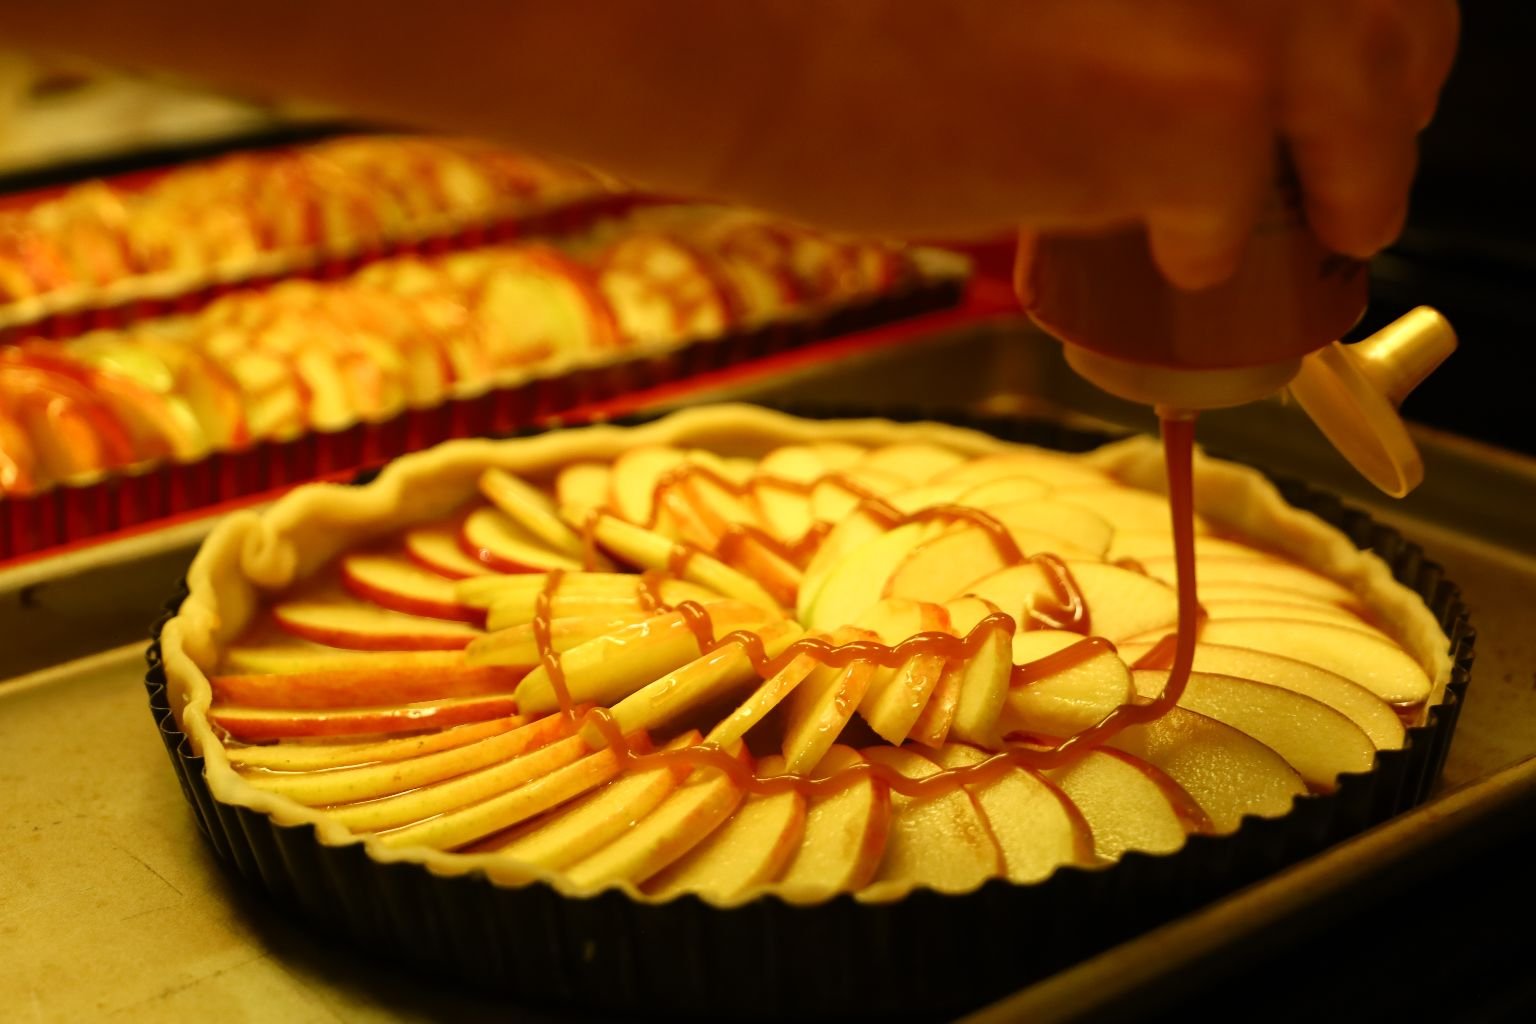
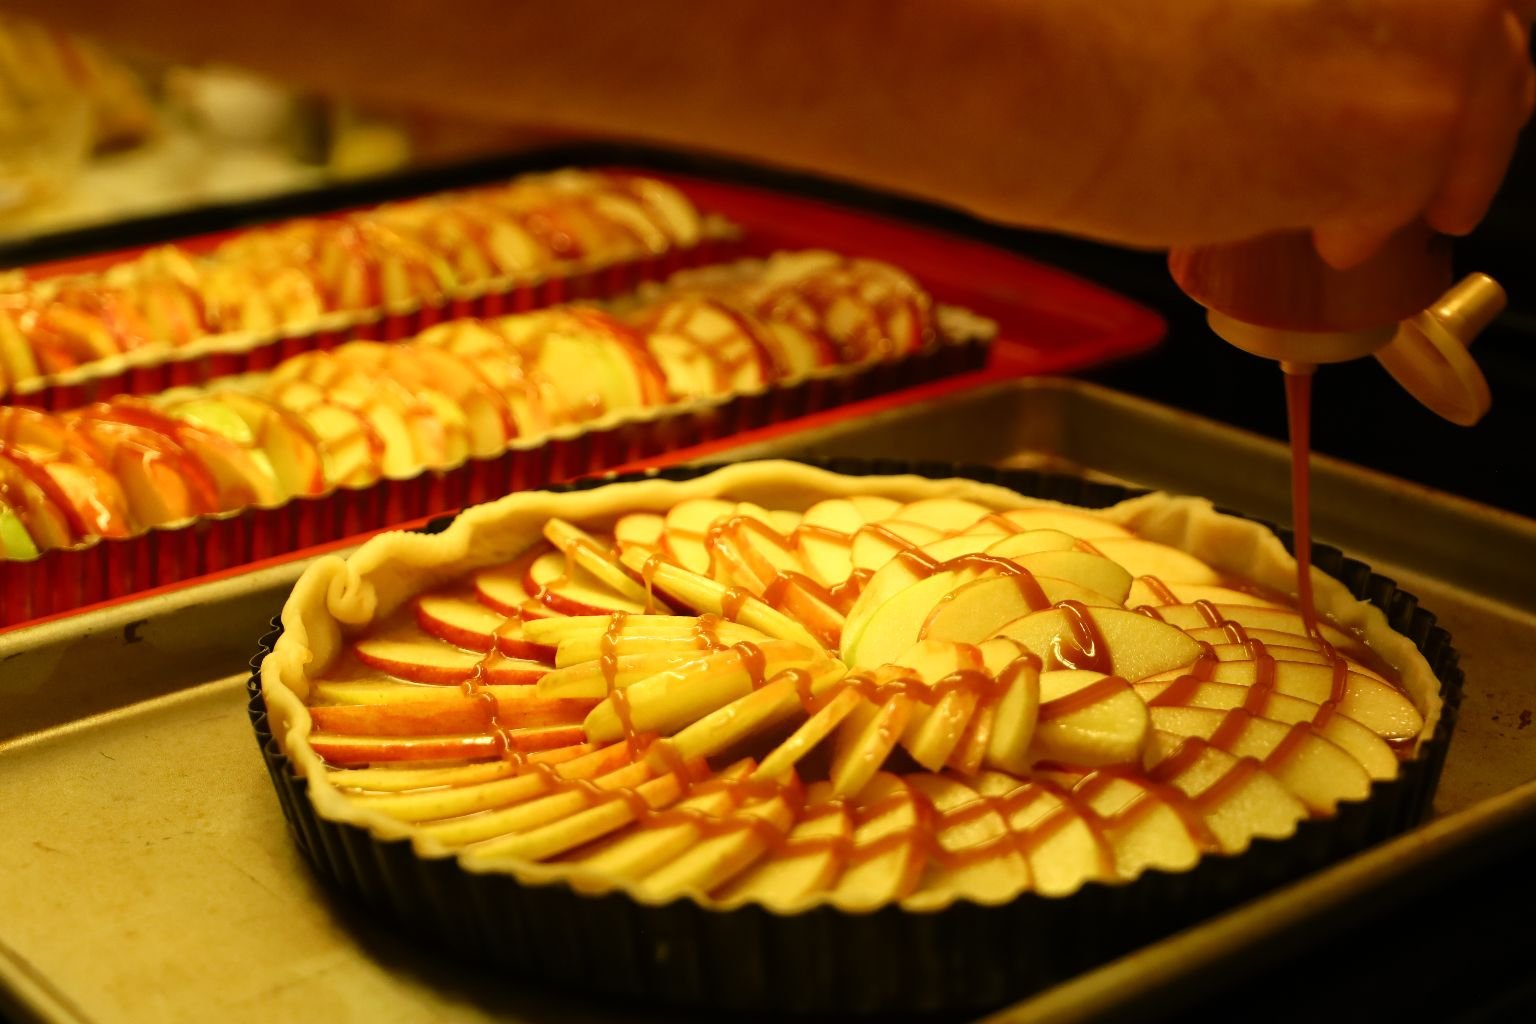
and used a round swirl motion over the round tart starting in the center and working my way out to the edge.
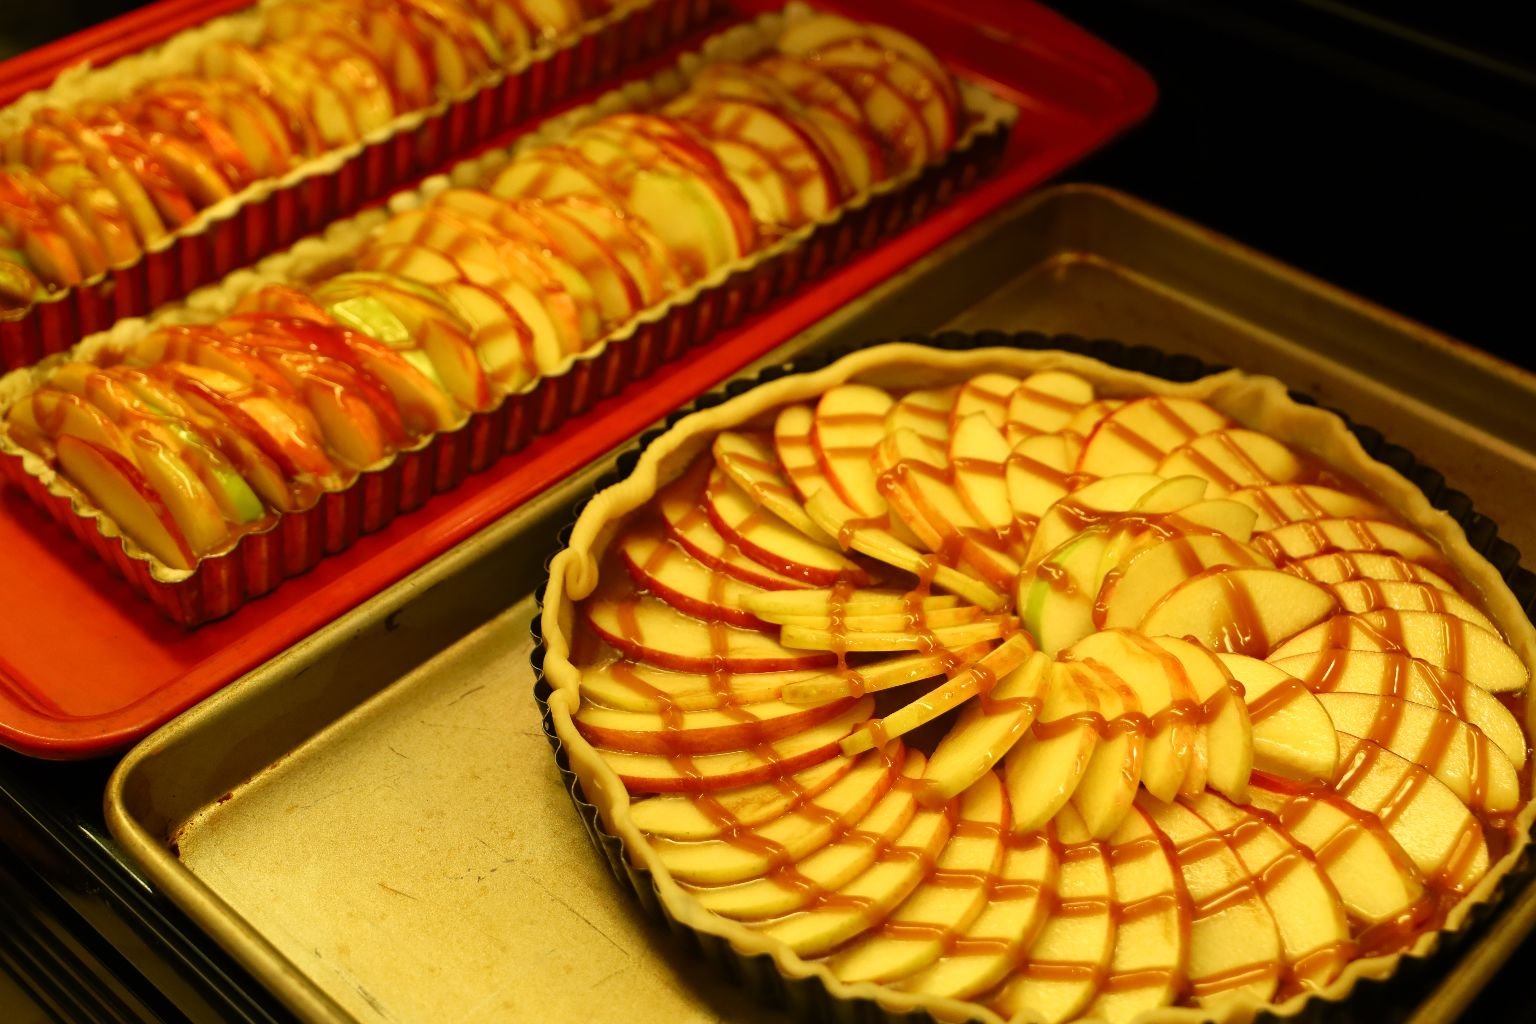
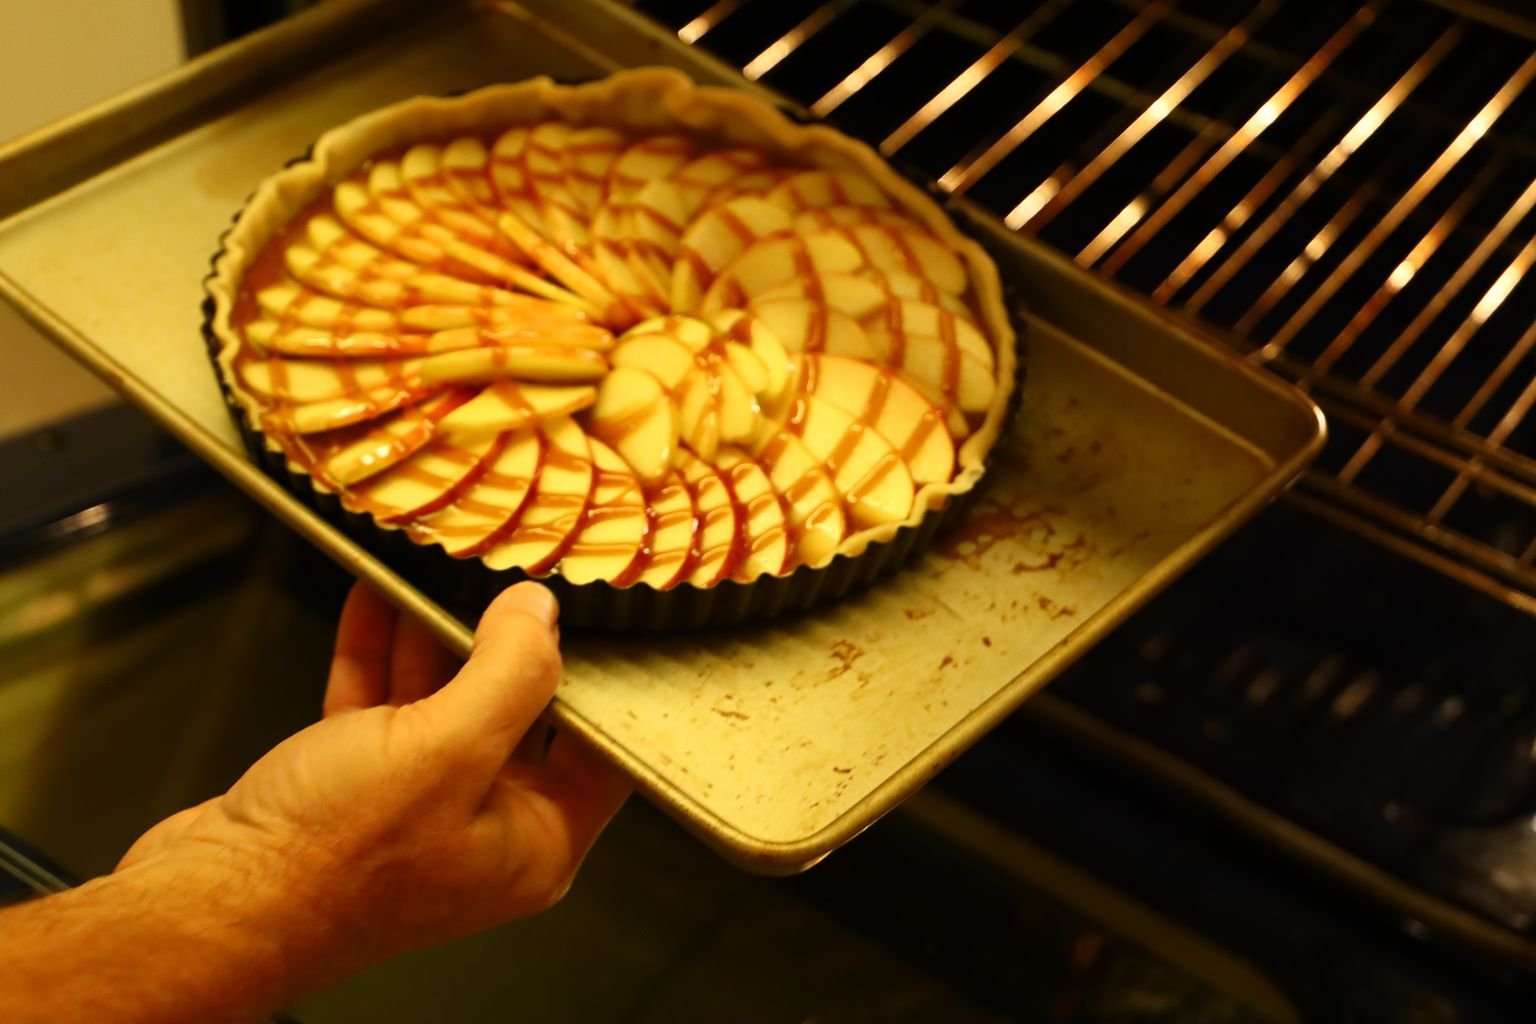
Into the Oven They go
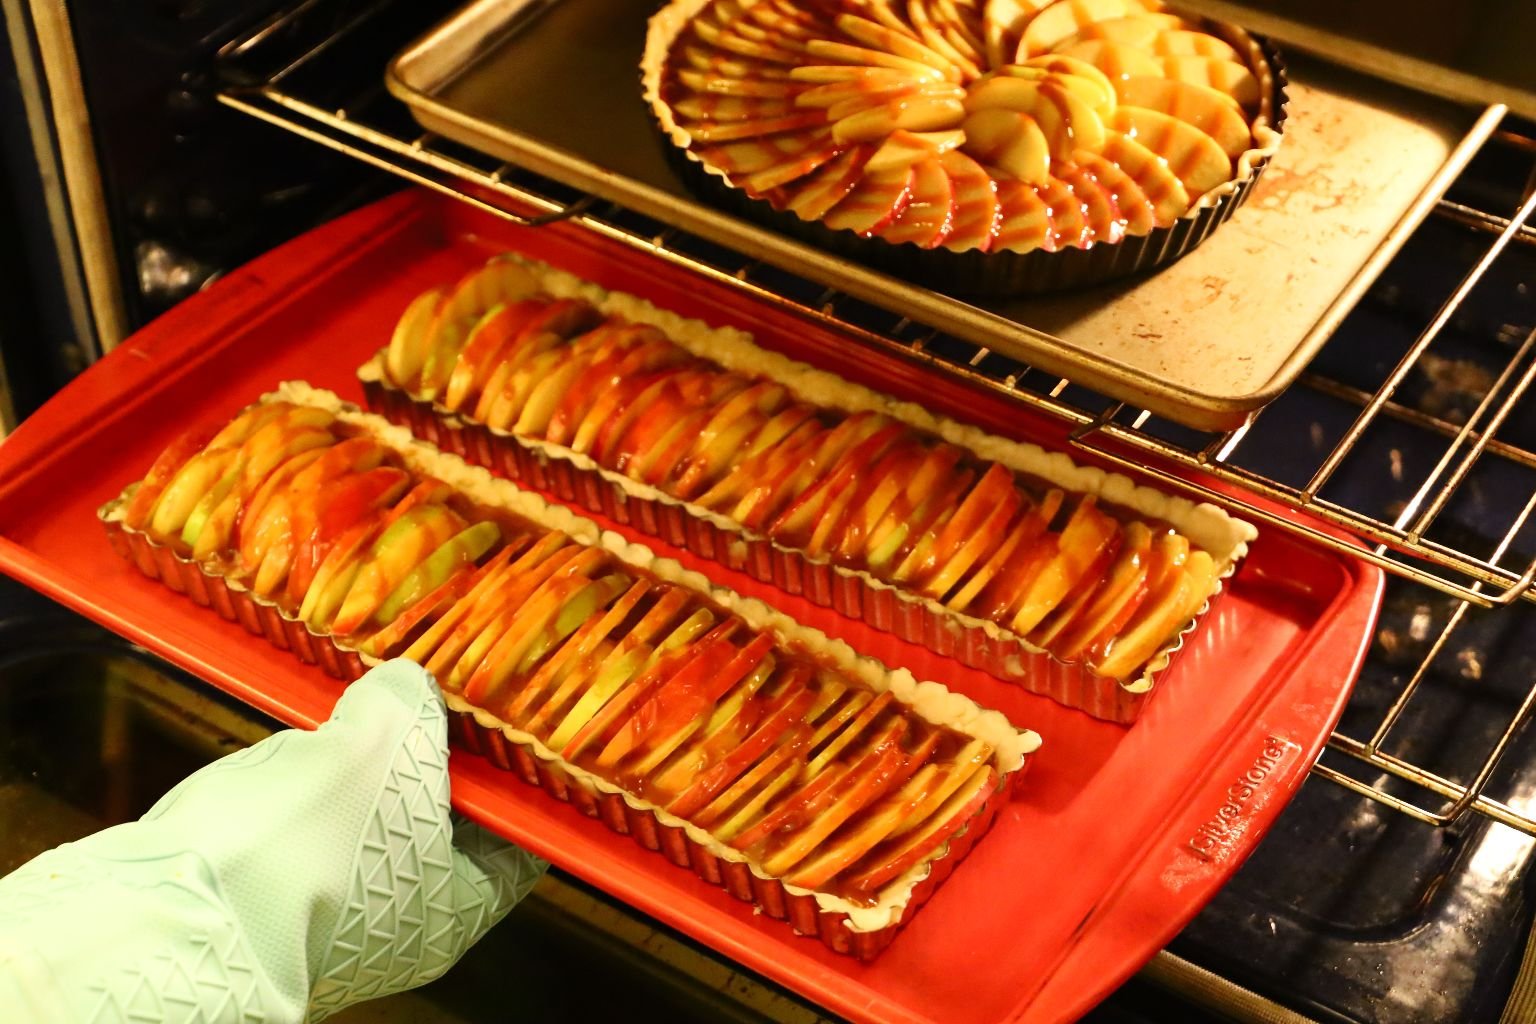
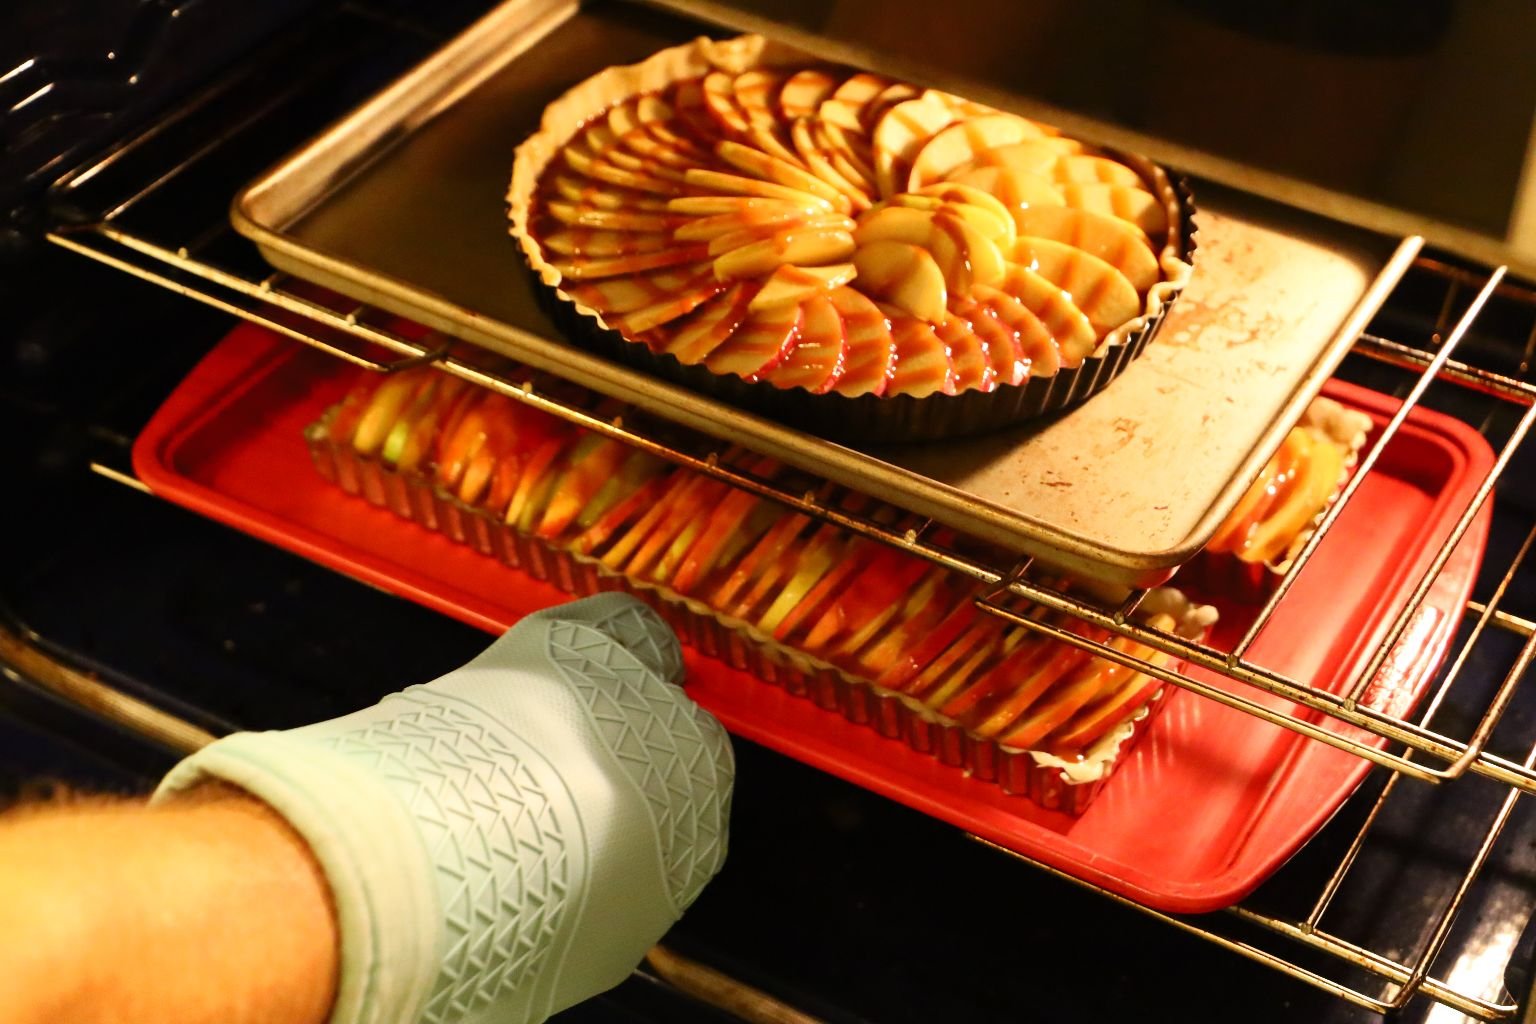
Bake the tarts in your over at 350’F for about 35-40 min. or until browned.
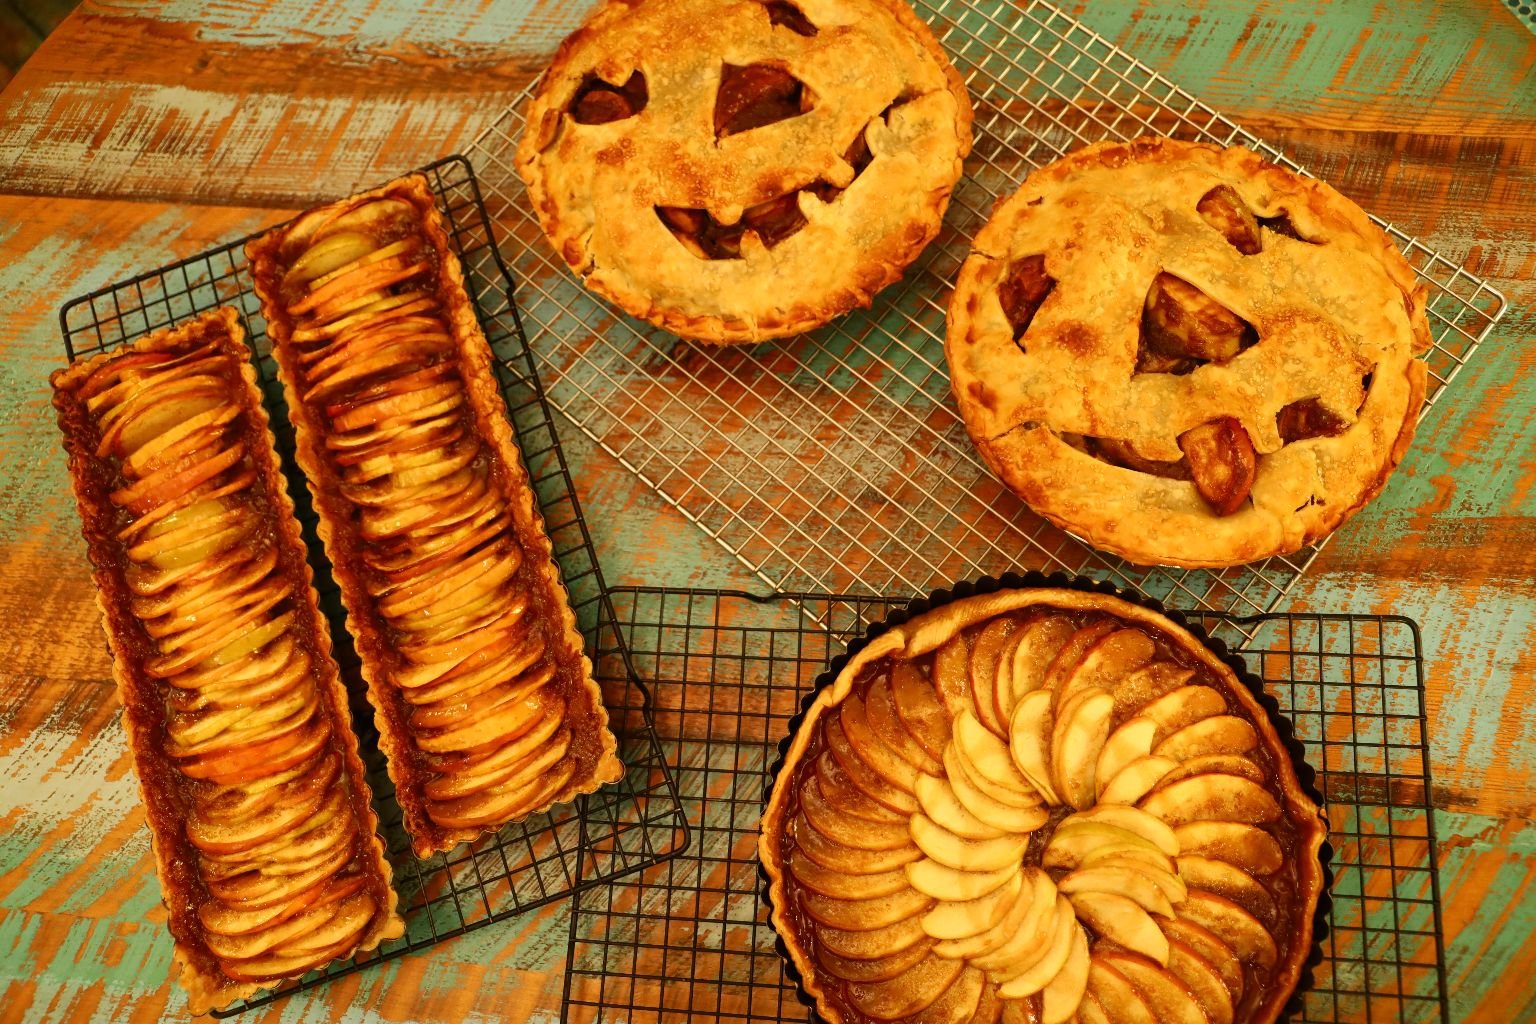
Cooling and Drooling 🙂
—————————————————————-
Julie’s Old Fashioned Southern Caramel Cake
(Homemade Caramel Recipe Here)
I’m very proud of this cake. It just reminds me of the south.
——————————————————————–

Ingredients:
2 1/2 Cups Cake Flour
3 Cups Sugar
2 Cups Butter
8 Eggs
1 Cup Milk
4 t. Baking Powder
1 T. Vanilla Extract
1/2 t. Almond Extract
1 t. Salt
————————————————


You will need an electric mixer for this.

You will also need some Parchment Paper and Cooking Oil Spray.
You want to use a pen or pencil and draw the shape of the cake pan onto it.
Then cut out the shape.


I first sprayed some of the cooking oil spray into the pan bottom and sides. I then placed the cut out parchment paper onto the bottom and then sprayed some more of the cooking oil spray.
—————————————————————
Time To Make The Cake


I cracked all the eggs into a small bowl.


I then added the Milk, Vanilla Extract, and Almond Extract to the Eggs.
I mixed everything together and let it sit.
——————————————————————

Cake Flour, Sugar, and Baking Powder


Add to the Mixing Bowl

Blend the Dry Ingredients Together on Low

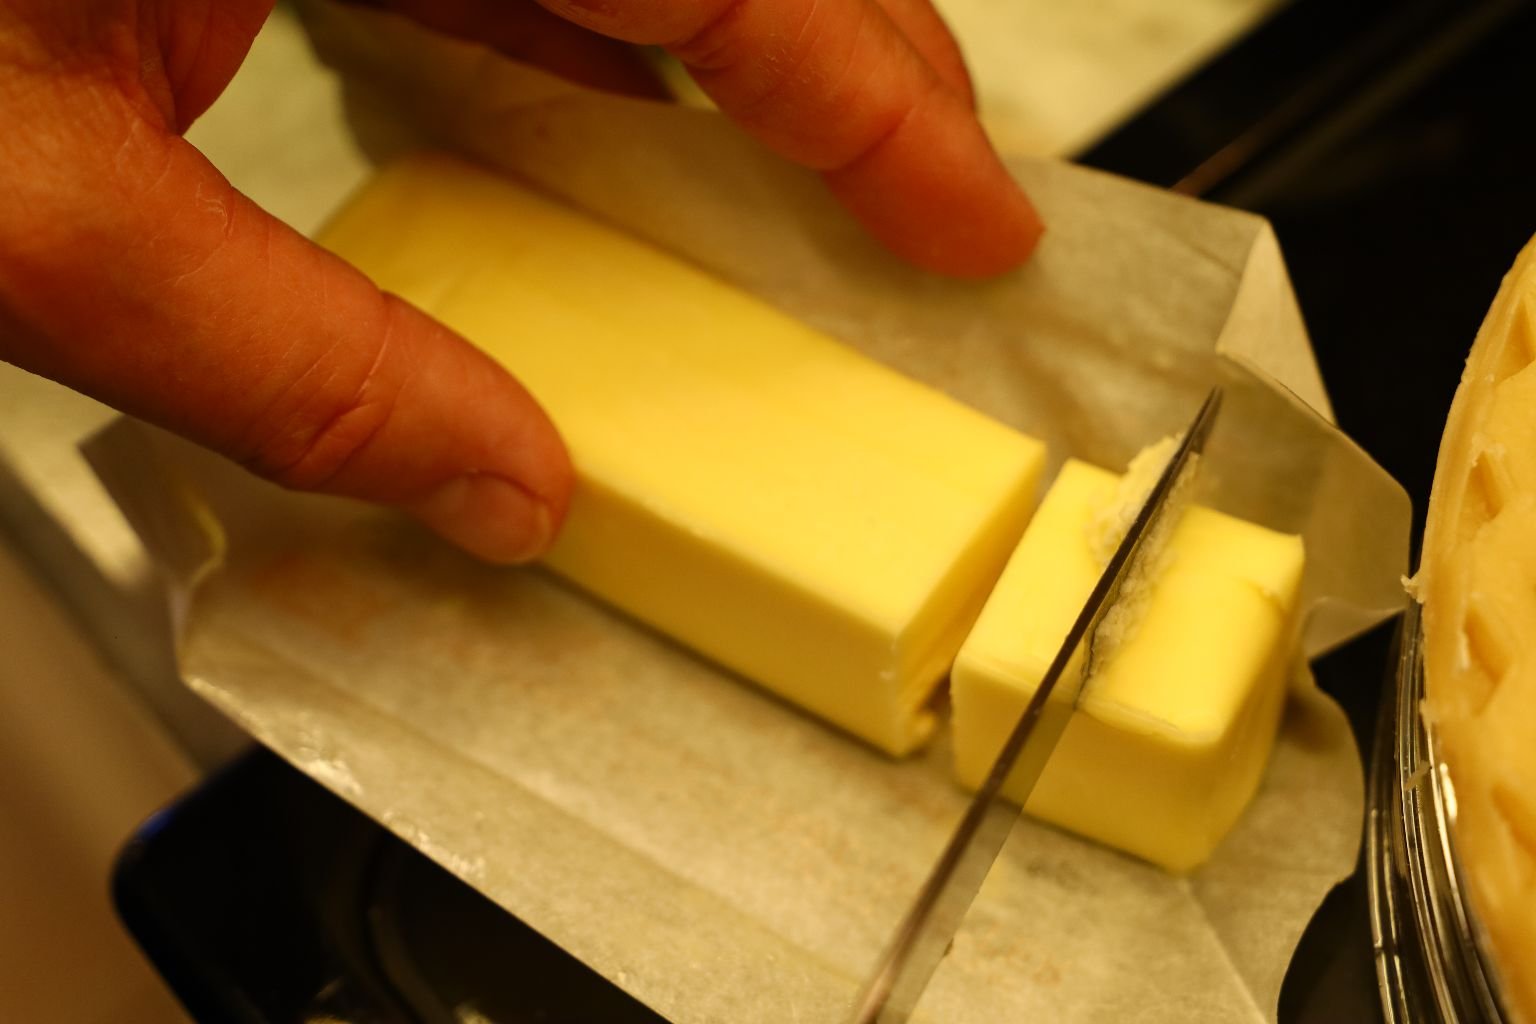
Slice Your Butter Into Tablespoon Chunks


You want to place your mixer on a low speed and add your butter one tablespoon at at time until it’s blended.

You Can See It Coming Along Here


You Want to Keep Blending the Dry Mixture and the Butter Together


I Then Add about Half of the Egg Mixture to the Butter and Dry Ingredients
When Blended I Add The Remaining Egg Mixture and Increase the Speed to Medium Until Blended


With the Batter Ready, It’s Time to Pour into the Cake Pans


Like So….


———————————————————————-

Pre-Heat Oven to 350F

Bake for 20-25 Minutes
To determine when the cake is done, place a toothpick or wooden skewer into the cake and if it comes out clean then the cakes are done.

Place Onto a Cooling Rack and Cool Thoroughly
————————————————————–
Preparing My Cake For The Icing

You Need a Cake Pedestal, Some Parchment Paper, and Your Cake


I cut some of the parchment into strips and placed all around the cake pedestal.

I then placed one of my cakes face down onto the parchment and removed the bottom layer of parchment that we cooked the cake in.

Now It Is Time To Make The Caramel Icing

This is a Caramel Icing Recipe. You are about to make Caramel. 🙂

Ingredients:
2 Cups Butter
5 Cups Sugar
1 1/2 Cups Buttermilk
3 T. Corn Syrup
2 T. Vanilla Extract
2 1/2 t. Baking Soda
1 t. Salt
30 Marshmallows
You will need a Candy Thermometer
———————————————————————-

————————————————————————–


In a heavy saucepan….. over low heat.


Add Your Butter, and Buttermilk


Sugar….


Corn Syrup, Salt, and Baking Soda….

Stirring Constantly Until the Butter and Sugar is Dissolved


You Then Add Your Marshmallows

Werther’s Original Caramels and Hard Candy Caramels
(Thinking about these as accents.)

Marshmallows Melting


The Mixture Kept Expanding So We Transferred Into a Larger Pot
You need to constantly stir so the mixture doesn’t stick to the bottom of the pan and burn.


In order to make the caramel icing you need for the candy thermometer to reach 238F. We never reached it. We even placed the burner on a medium-high. The caramel was spitting hot lava at us and we were getting burned so we called it quits at 220F.


Gordon Had to Oven Mit Up in Order to Deal with the Hot Caramel

We then removed from the heat and added our Vanilla.


Place Your Caramel Into A Mixing Bowl


Now, Use a Mixer to Mix It!

You want the mixture to get cloudy.
Just do the best you can. We did!


Beat about 5 Minutes

Now It’s Time To Start Spreading The Icing

I would like to stress that we never allowed this caramel to reach the 238F temp that would have made it more firm. However, it was still quite delicious as it is.


We also had other intentions where this caramel was concerned.
We wanted it runny enough to use as a fondue dip.
————————————————————————


So, now we have our gorgeously delicious caramel icing/dip.

I do wish that I had placed my cake onto a cookie rack so that the icing could fall down into it, as a glaze. But, instead I had to remove it from the parchment paper and place it back into my mixing bowl for later use.
It may have been a mess to make but it was one of the best cakes that Gordon and I had ever eaten.
This Was The Best Cake

I Added A Few Hard Candy Caramels To Accent
————————————————————————–
So Delicious
——————————————————————–