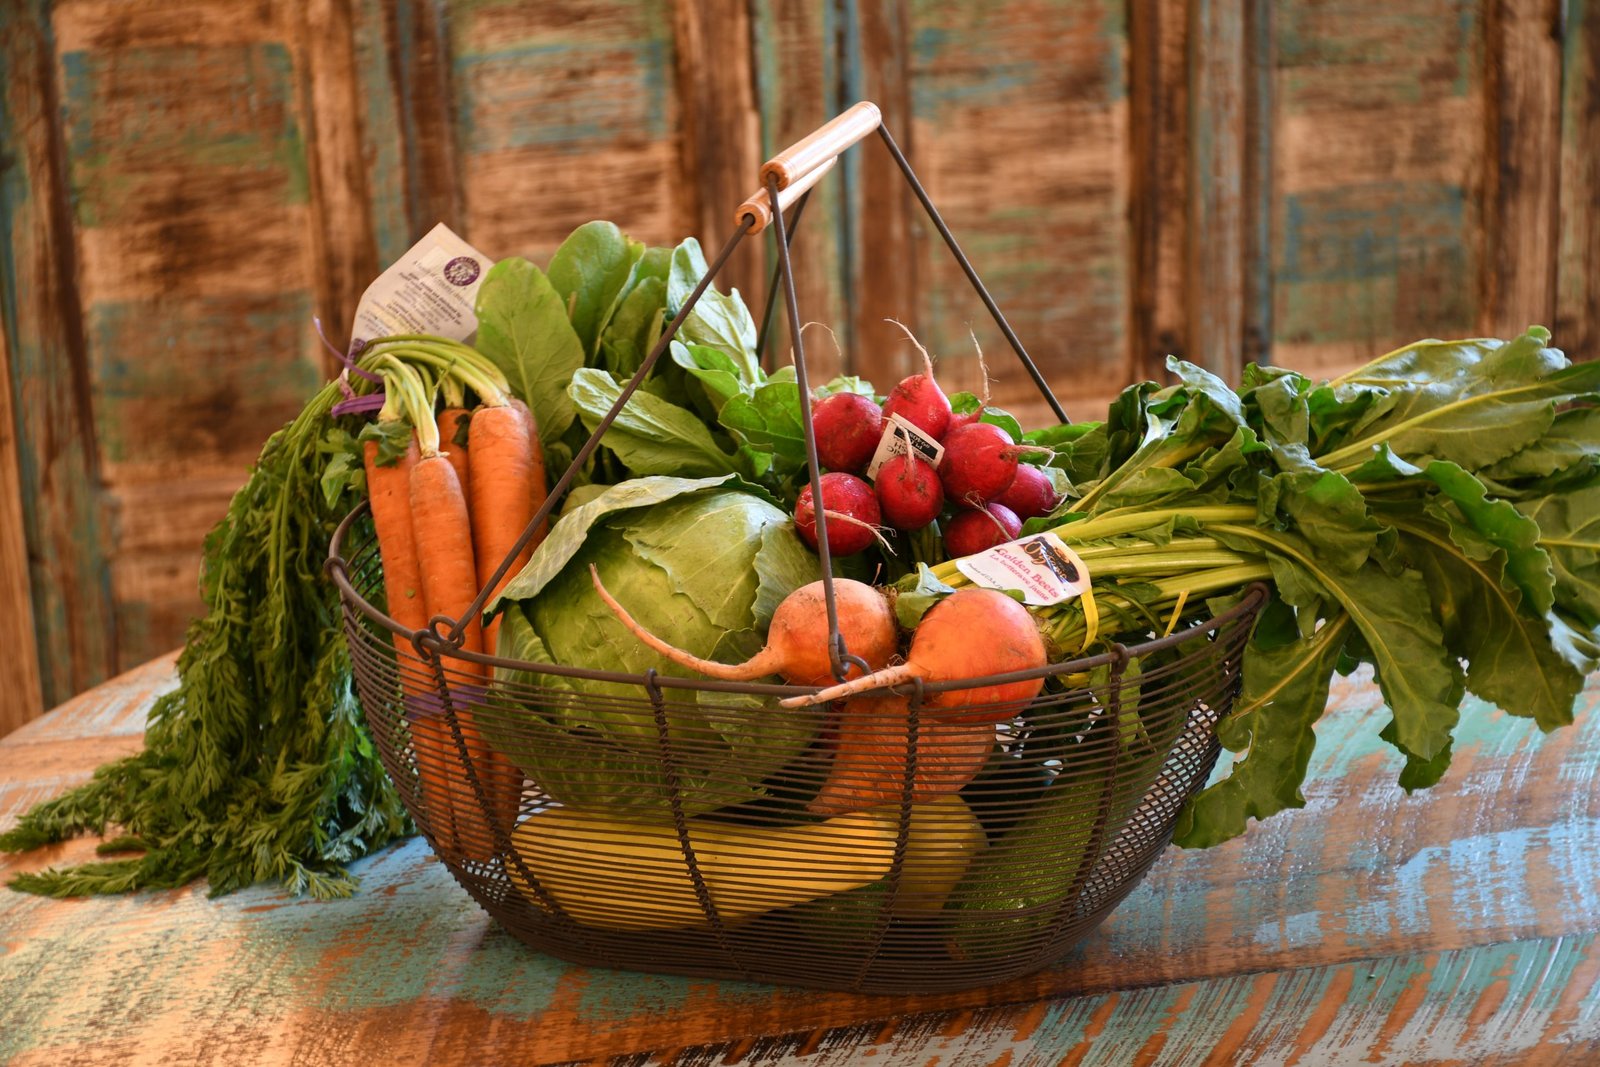
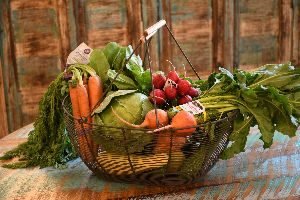
Eat Your Vegetables!
Everyone knows how important it is to ‘Eat Your Vegetables’.
We’ve heard it said since we were small children by our mother’s, father’s, grandmother’s and grandfather’s, and anyone else who may have fed us.

(Dedicated to my brother Frank, age 3 here. He’s 10 year’s younger than me.)
As a matter of fact my little brother, Frank’s, first words were “Pass the peas.” Frank skipped right over a first word of ‘Mama, or Dada’ to a whole sentence, one night at dinner.
Surprised the heck out of us. 🙂
So I would like to start off with the green pea recipe for Frank.
————————————
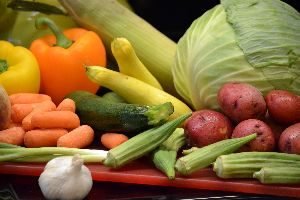
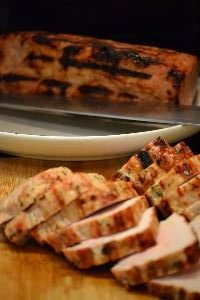
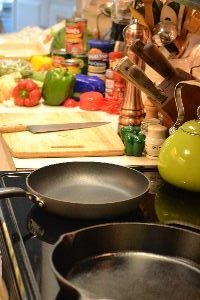
Although we have recipes for vegetables all over this website, this is where the ‘strays’ will end up. Odds and ends not necessarily associated with any big dinner’s. Just something simple and easy that can be pared with most anything you will be serving for dinner, such as the pork loins pictured here.
I hope you will stay and enjoy!
Julie

P.S. My favorite vegetable is OKRA.
——————————————
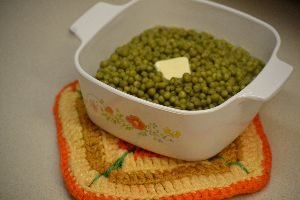
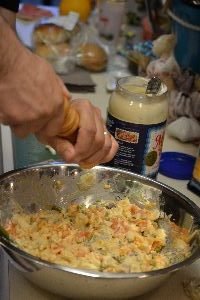
Frank’s, “Pass the Peas”
Pass Those 70’s Peas!
This really isn’t much of a recipe but sometimes I like simple food and not such elaborate eats today.
I opened 2 cans of early peas and placed into a pot on the stove top on a medium heat. I did drain the liquid from one can and poured it down the sink. The peas are already cooked, you just want to heat them up and add some butter/margarine, and some salt. Maybe even a little pepper. Other than that they are great! What could be more simple?
——————————————
Click Here for our: Soup


———————————–
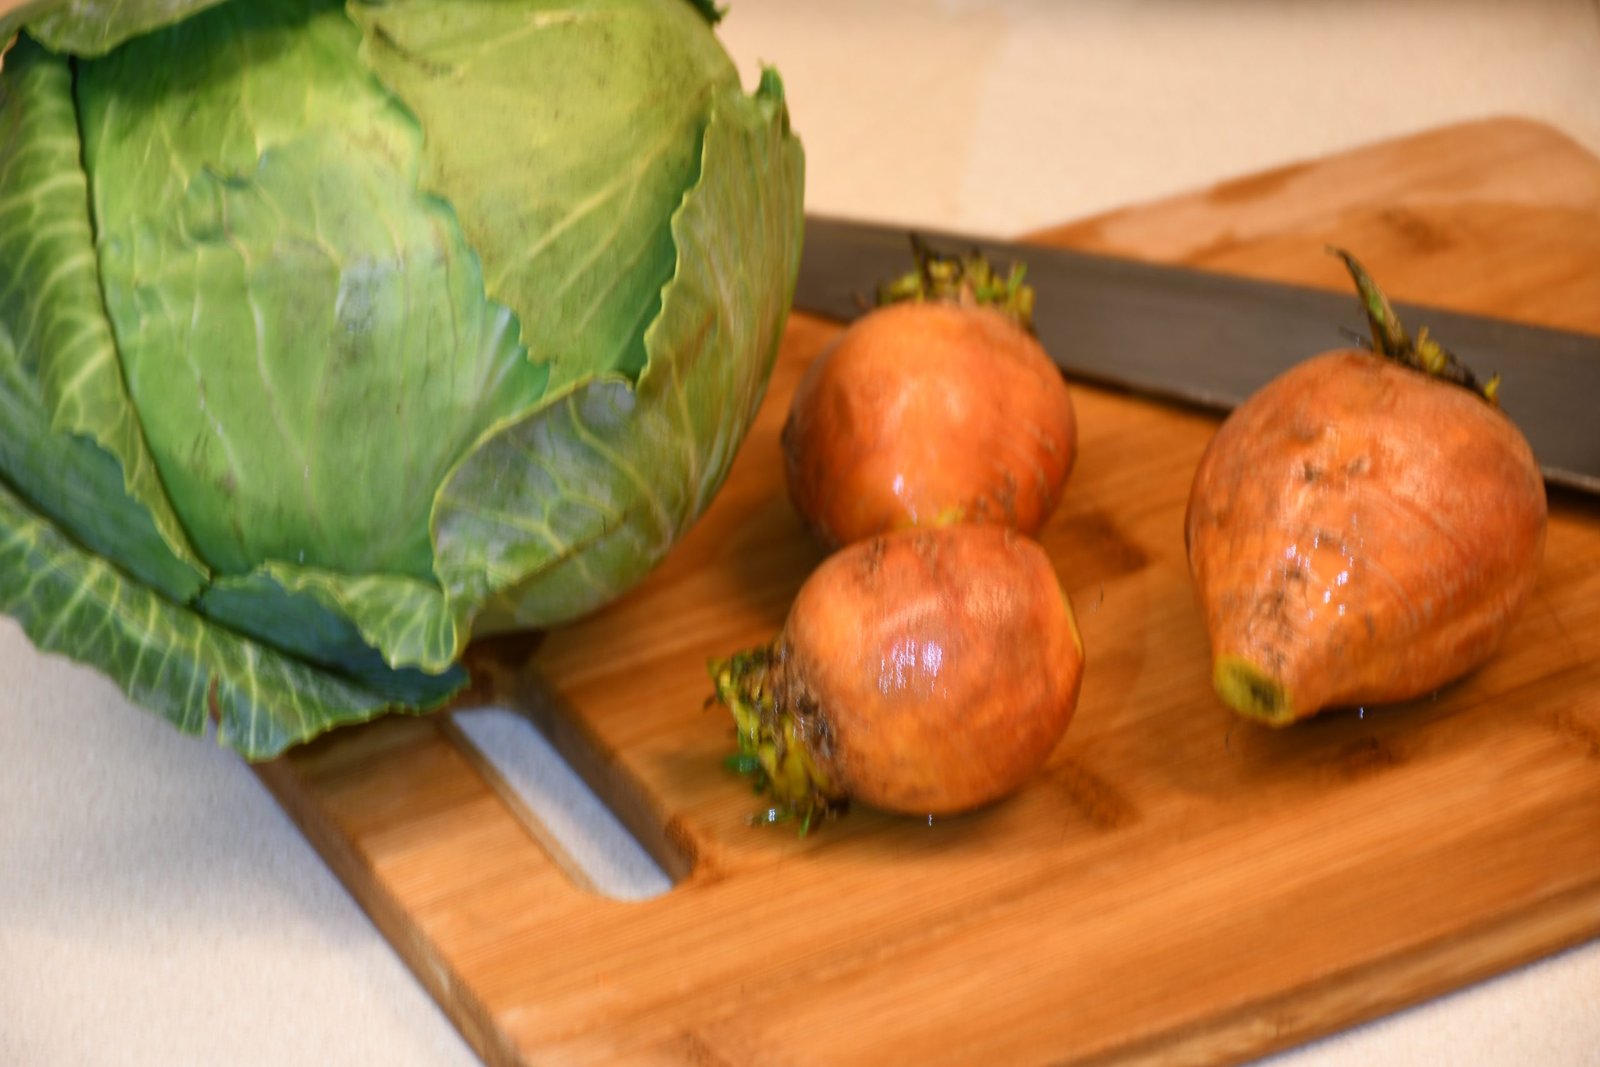
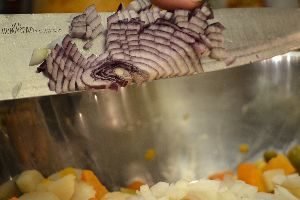
Strawberry Onions

These are the onions that strawberry grower’s plant at the end rows of the strawberry’s. They are a sweeter variety that are popular in Florida around the Strawberry Festival.
——————————————-

The Traditional Joy of Cast Iron Skillets
————————————————————————
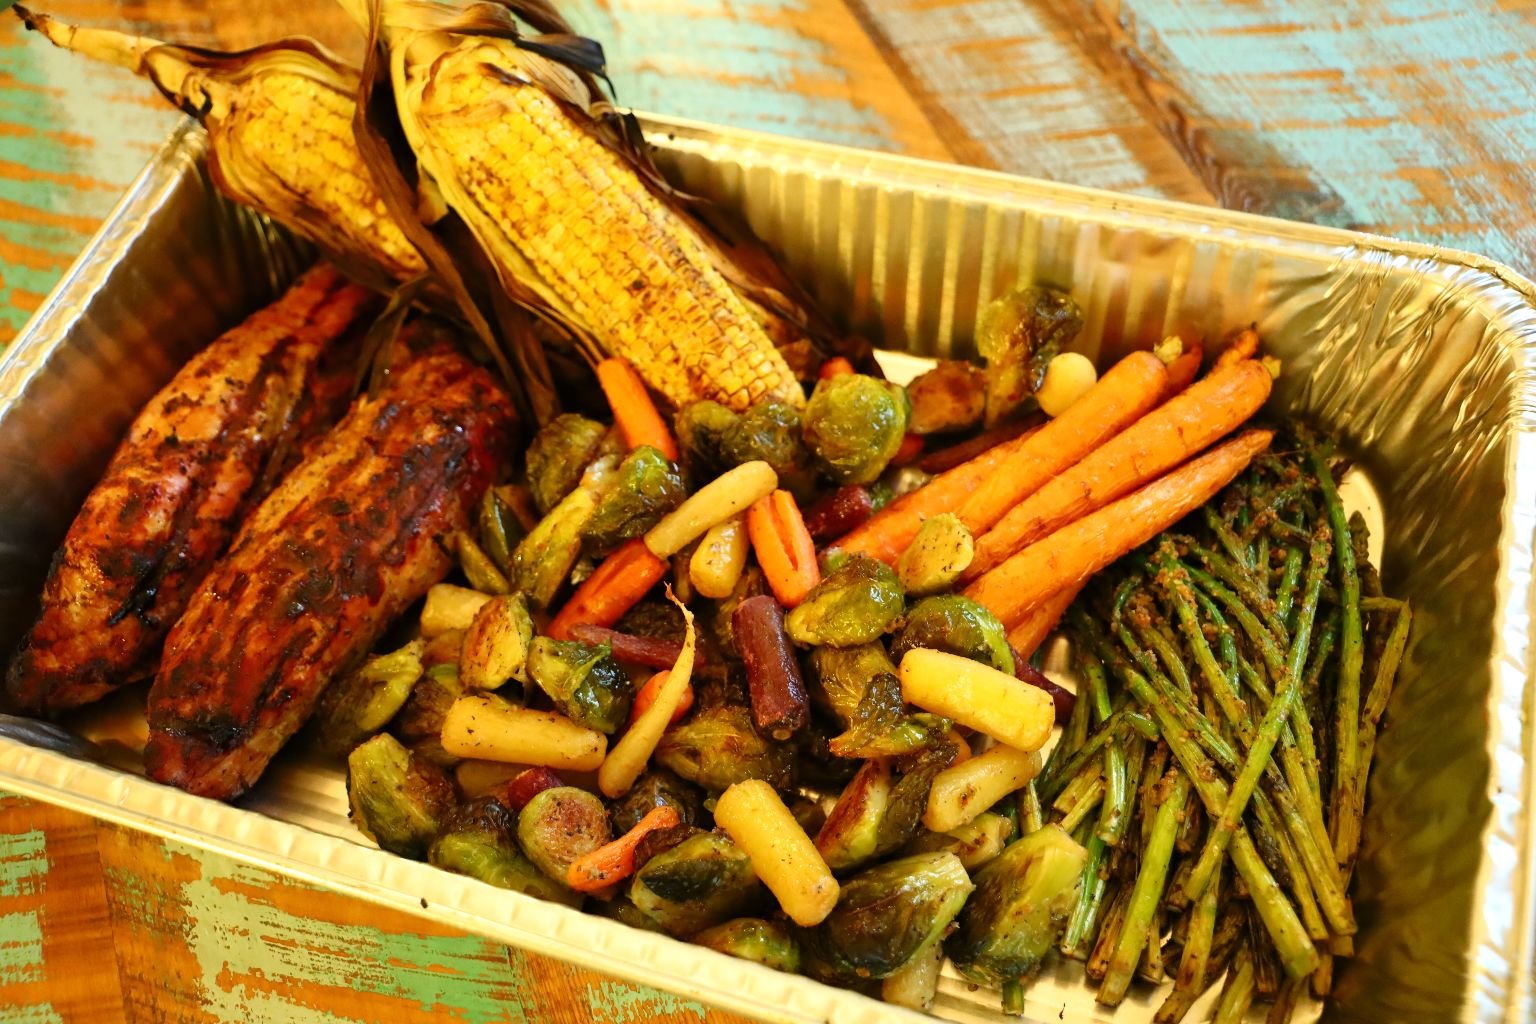
Vegetables on the Grill
w/ a Couple of Pork Tenderloin’s
Although this is a Vegetable website page, we do tend to love a good Pork Tenderloin with our veggies.

Here Gordon is shucking the corn getting it ready to grill.
Pull back the husk to remove the silk.

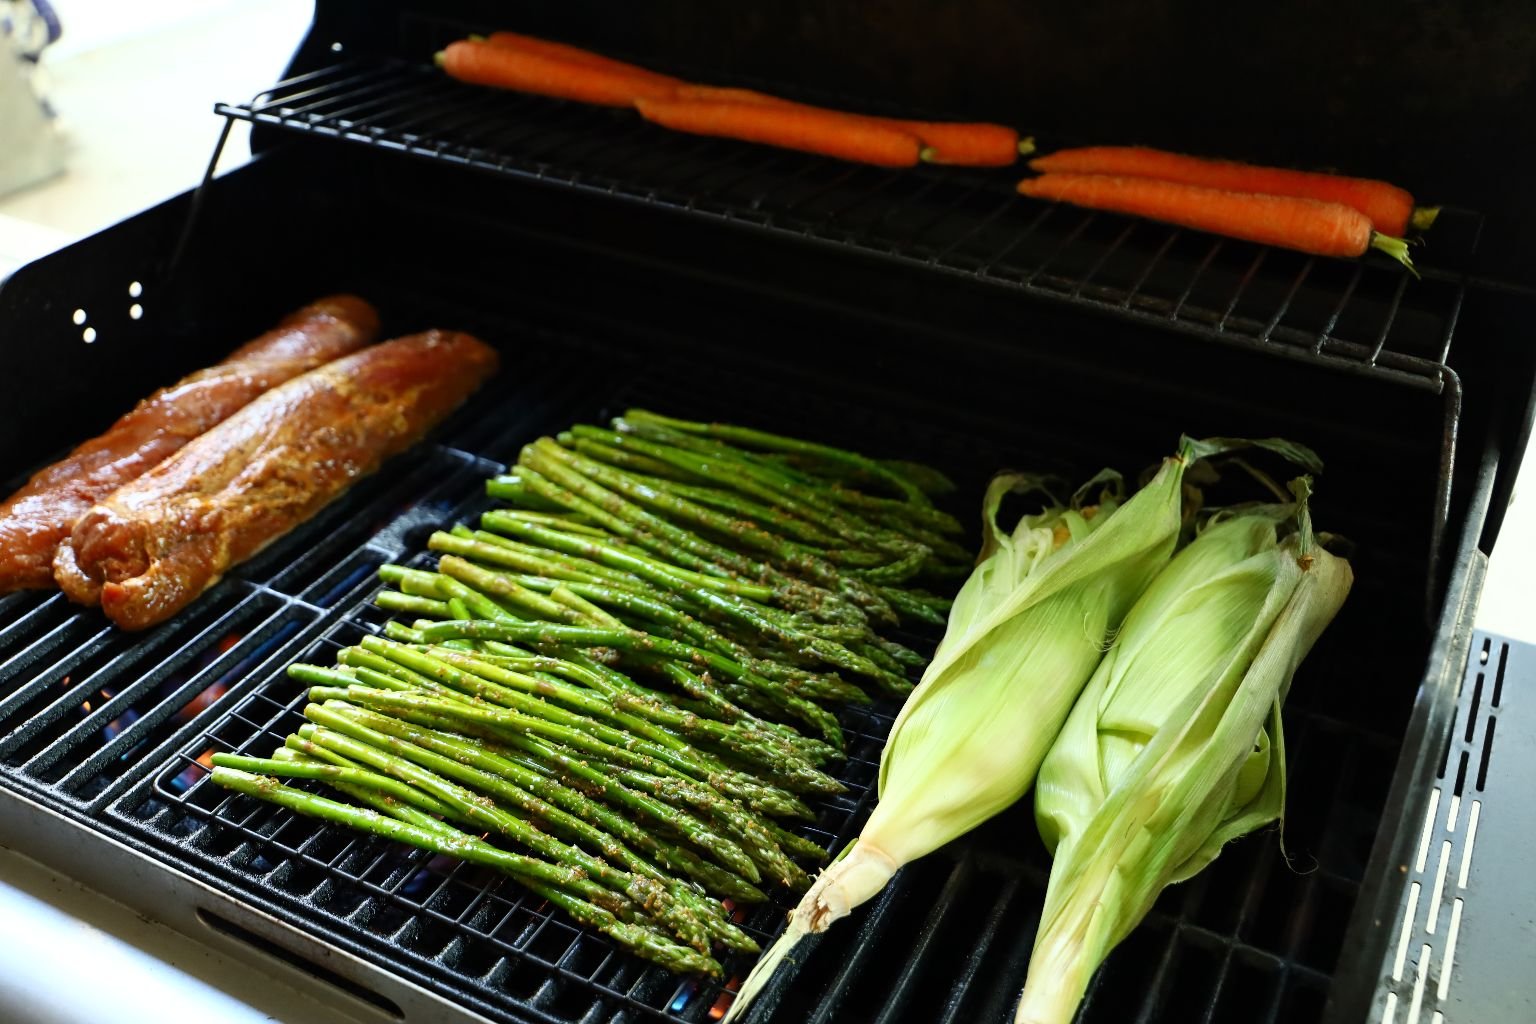
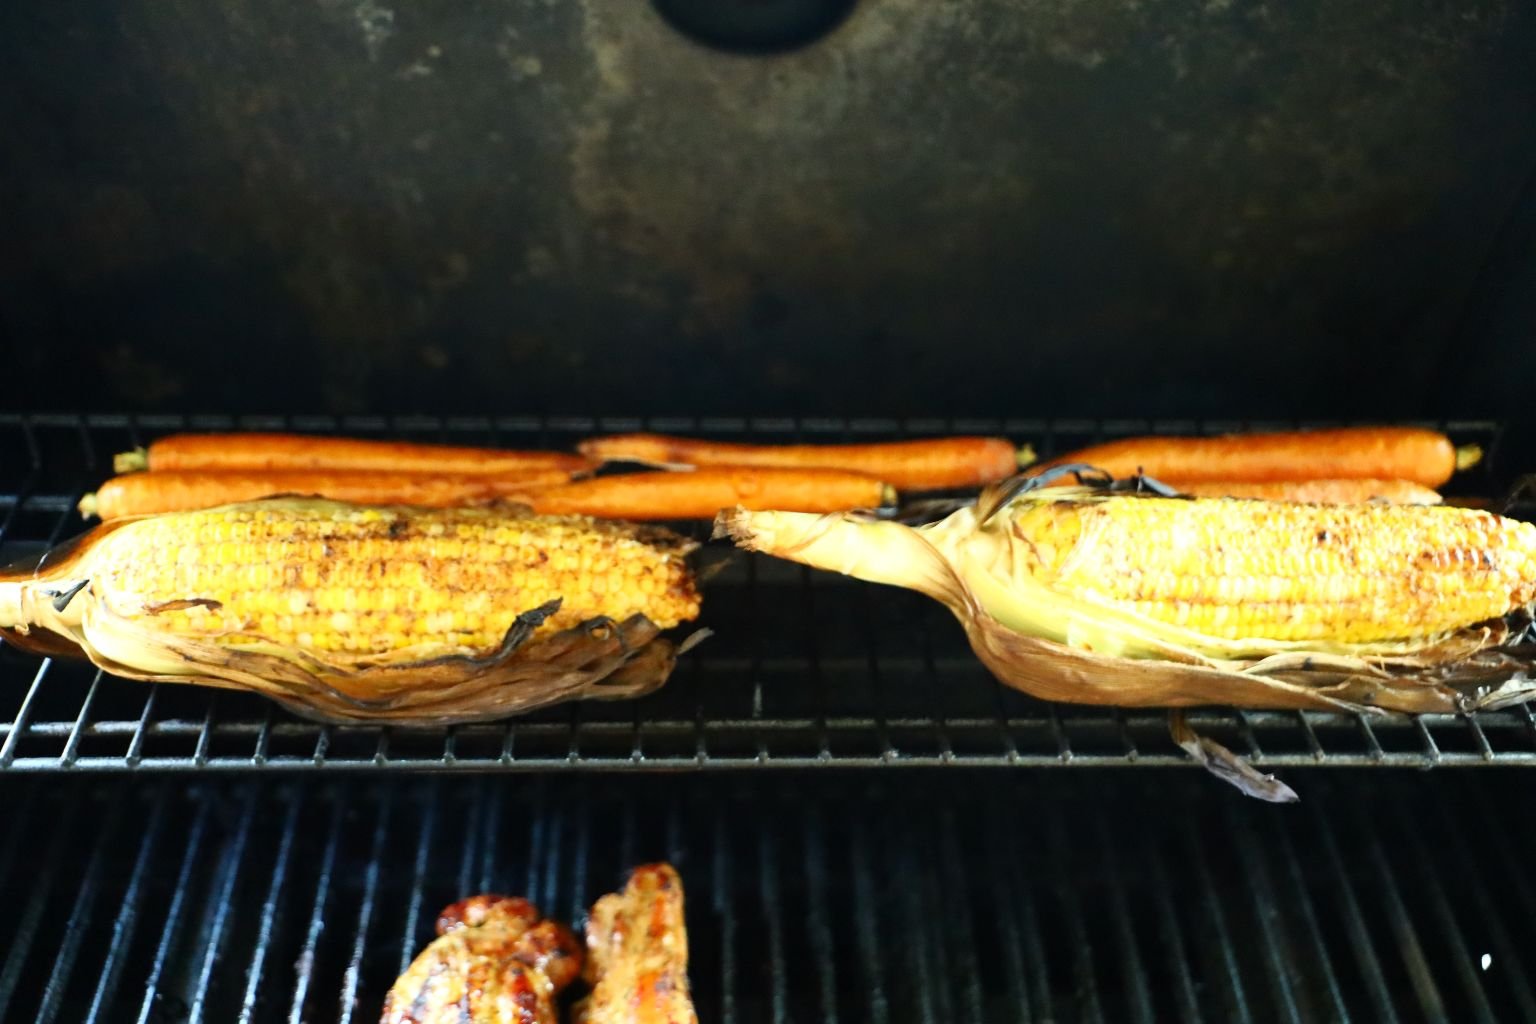
Then replace half of the husks on the ear of corn and place the corn side directly on the grill. Grill them for about 10 min. over medium high heat or until the corn is nicely charred. For the Asparagus, drizzle them with Olive Oil and Lemon Pepper in a pan to ensure they are all covered. Then grill them over a cooling rack so they won’t fall through the grill grates. These cook for about 8 min. on each side turning them over using tongs to scoop many of them up at a time.
———————————————————————–

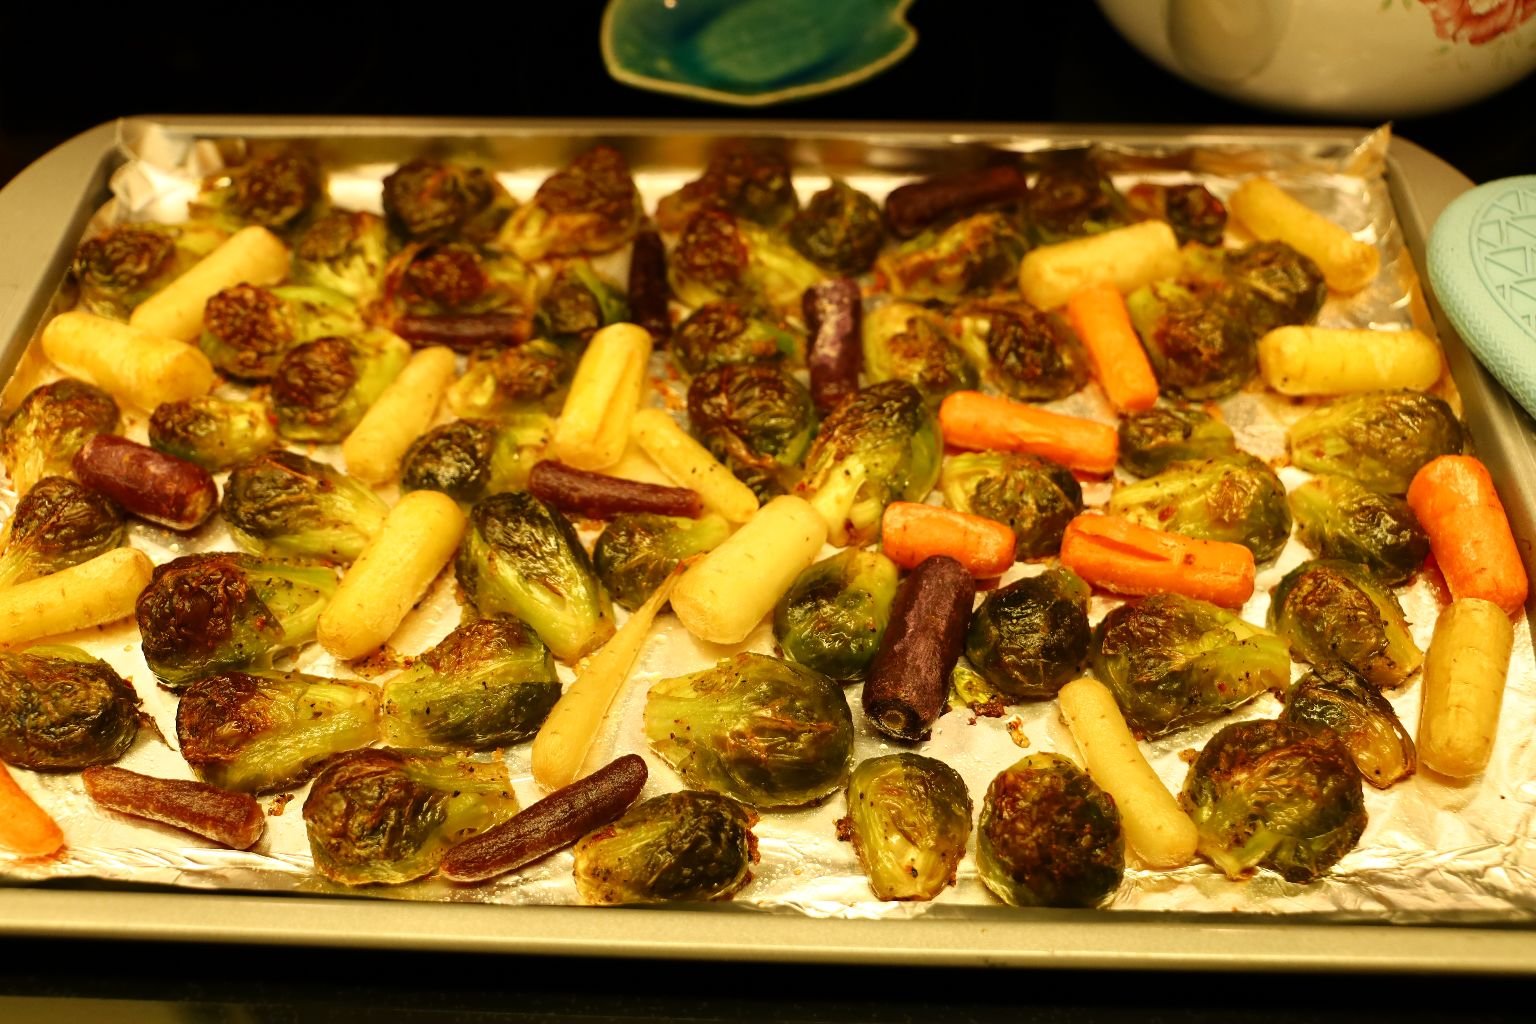
We like to roast the halved Brussels Sprouts and Rainbow Carrots in the oven as the temperature is more consistent and they just seem to do better in the oven. Marinate the halved Brussels Sprouts in a mixture of Italian Dressing Dry Mix Seasoning, and Olive Oil overnight. Roast them in a 400’F oven for about 25 min. or until the cut side of the Sprout is caramelized.
——————————————————————————-
Meanwhile on the grill…..
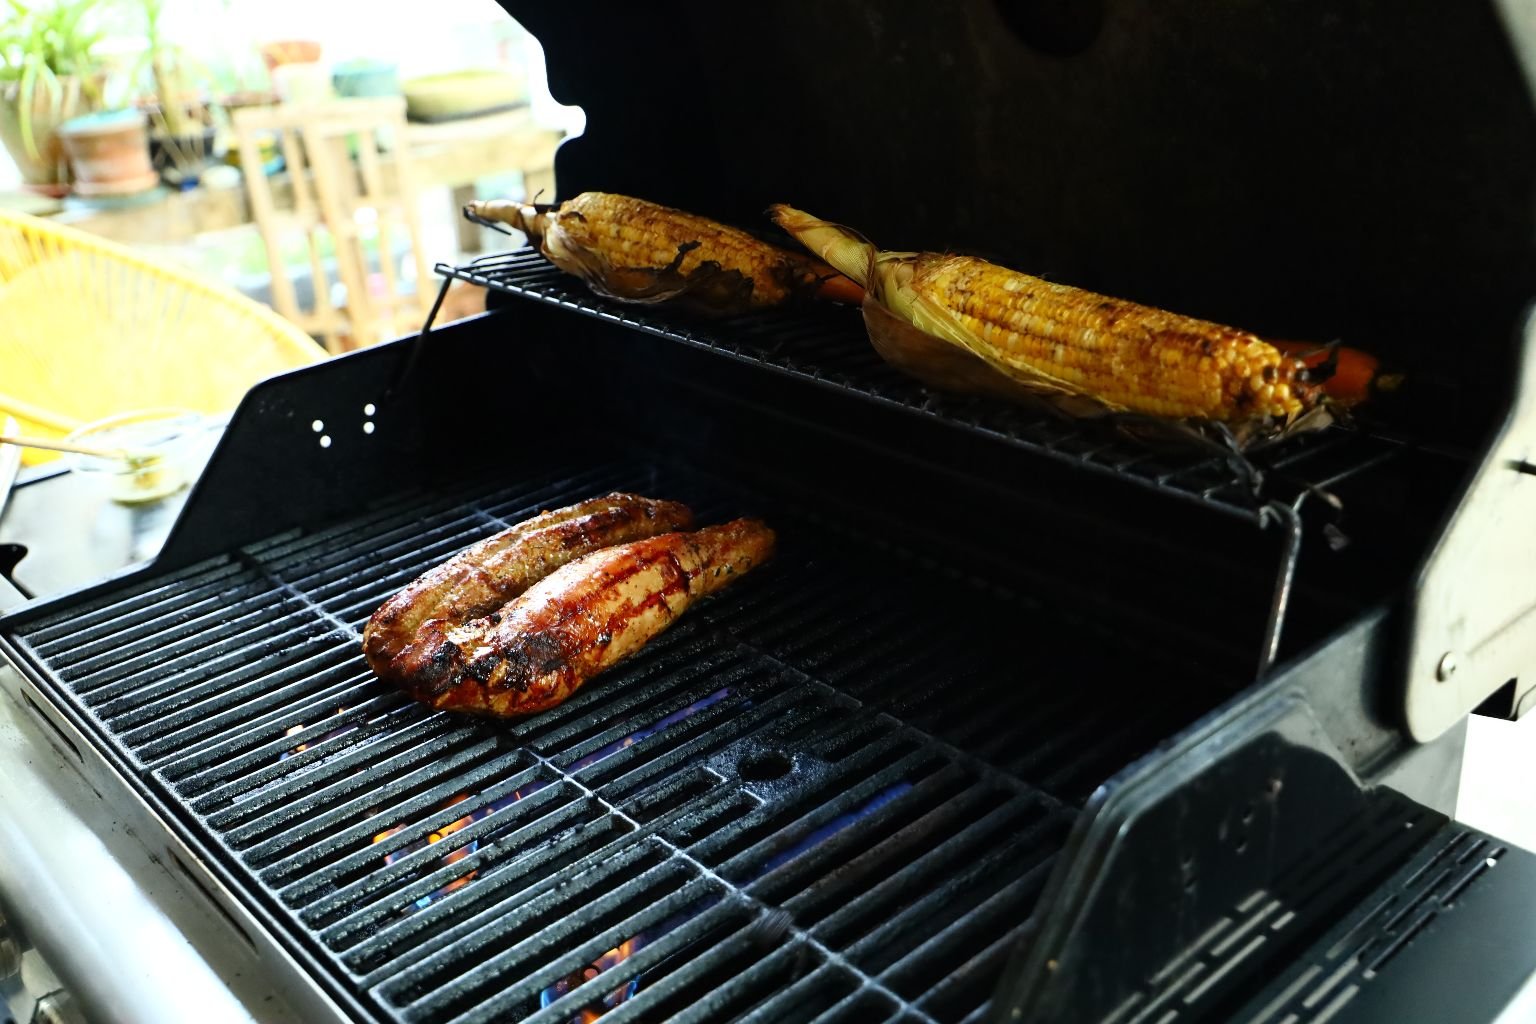
Here you can see the corn is finishing its cooking on the upper rack of the grill. Pork Tenderloins are one of our most favorite things to grill. Grill the Pork Tenderloins over medium high heat for 5 min. on each of the four sides over direct heat.

———————————————————————————–
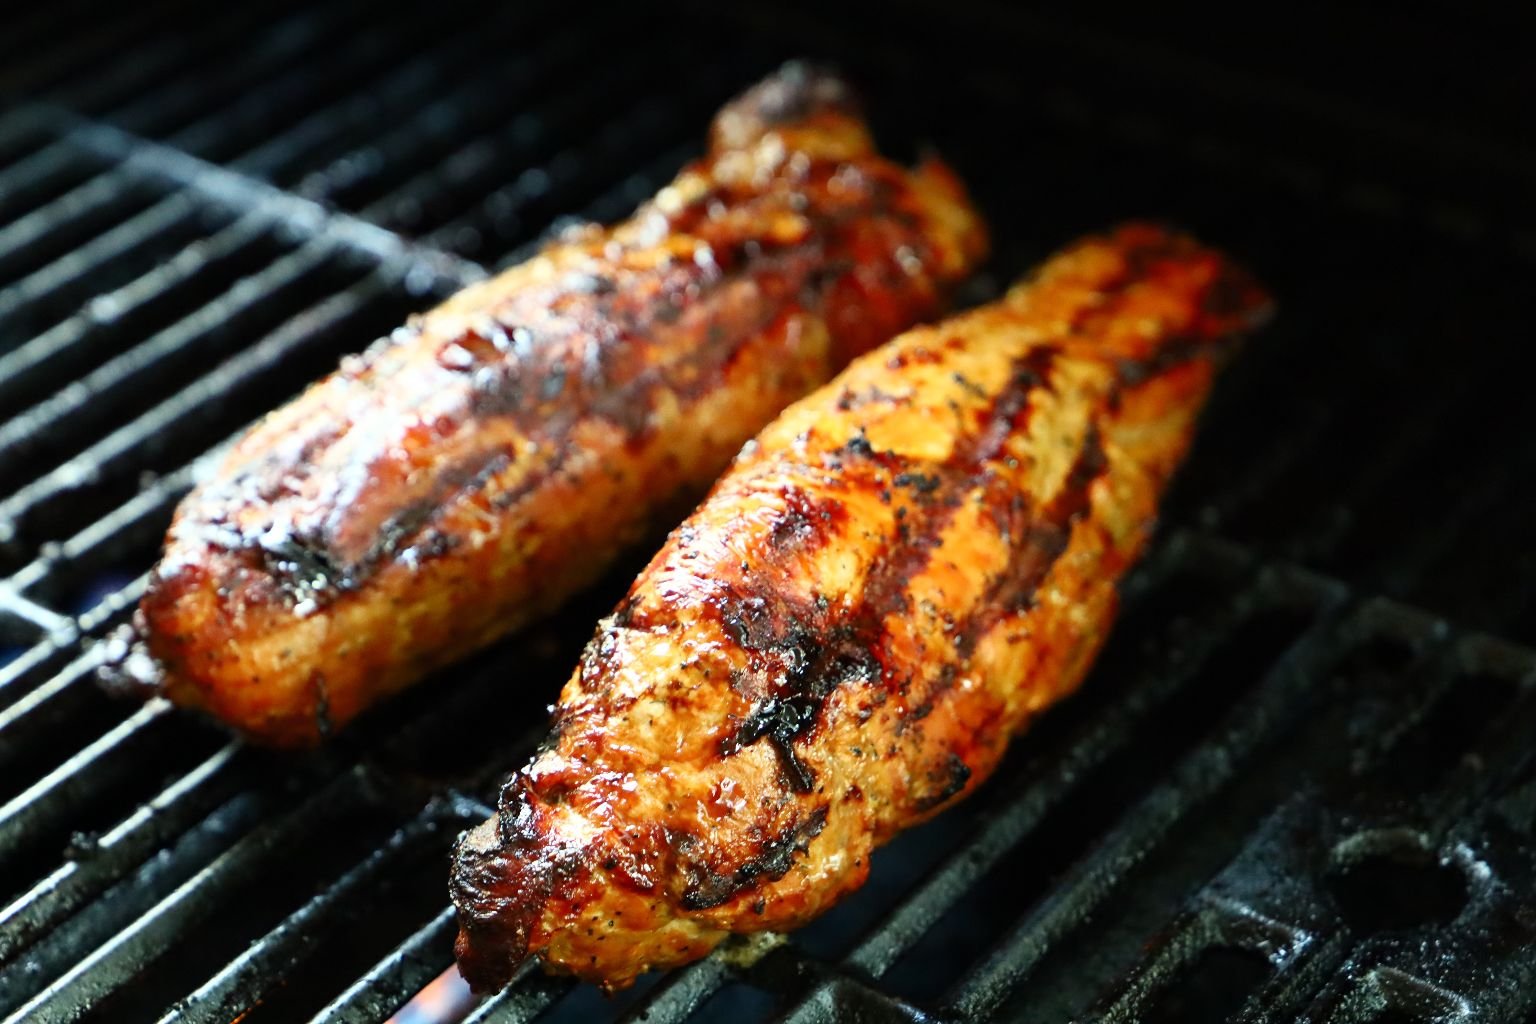
Then cook the pork tenderloins for another 5 min. over indirect heat basically baking them. What is meant by this is there is no flame from the grill directly under the tenderloins. The internal temperature of the loins should be near 138’F. Now, remove them from the grill and let them rest for about 10 min. as this allows the super heated outside juices to return to the center of the tenderloin, finishing the cooking process bringing the meat to an internal temperature of 145″F. This will give you a tenderloin that is slightly pink and very juicy in the center which is perfect. Cutting it directly after grilling and not letting it rest, allows those moving juices to just run out of the meat onto your cutting board. We used to be afraid of pink pork because of a parasite known as trichinosis, but the risk of contracting this now is virtually nonexistent.


Pictured are the grilled Corn and Asparagus.
Just add some butter, salt, and pepper to the corn, peel back the remaining husks and dig in.
———————————————–
Happy Easter Rabbit Foods
All of these delicious vegetables will be in my……

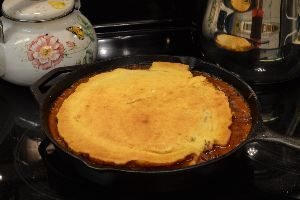
Roasted Rustic Cast Iron Pie
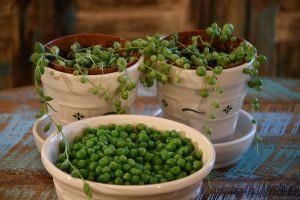
Peas, and my String-of-Pearl Plants, that look like Peas
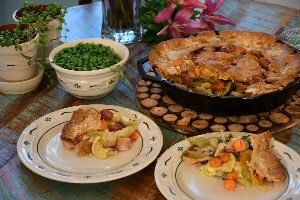
This was from Easter 2019. With Gordon working overseas for that year it was just me and Brodie here at home. I knew that I didn’t want to cook some huge meal just for the two of us. But I did want to enjoy an array of vegetables, (Rabbit Foods) to pay my homage to the Easter Bunny. That is when I came up with this.

I wanted ONE Dish to place on the table to eat out of and not many bowls. (With the exception of the small bowl of green peas.) 🙂 I wanted all my veggies to “touch.” Hence, this pie. I did think about making it into a chicken pot pie but I changed my mind and decided to make this Easter dish all about the “Rabbit Food.” Probably my very first Vegetarian Easter.

A Beautiful Hibiscus on my way out to my Garden.
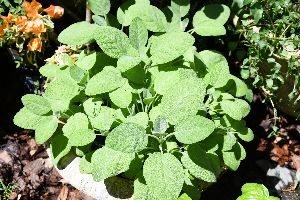
My Sage in my Herb Garden

Also, My German Thyme and my Oregano

Ingredients:
My ingredients are actually very simple. I just went into the grocery store and bought up those vegetables that I liked and wanted to include in my pie. The thing about this is, you can just make it into whatever you want. So, here is list of the vegetables that I used…….
Radishes,
Golden Beets,
(I didn’t want Purple Beets as I knew they would bleed all over my pie.)

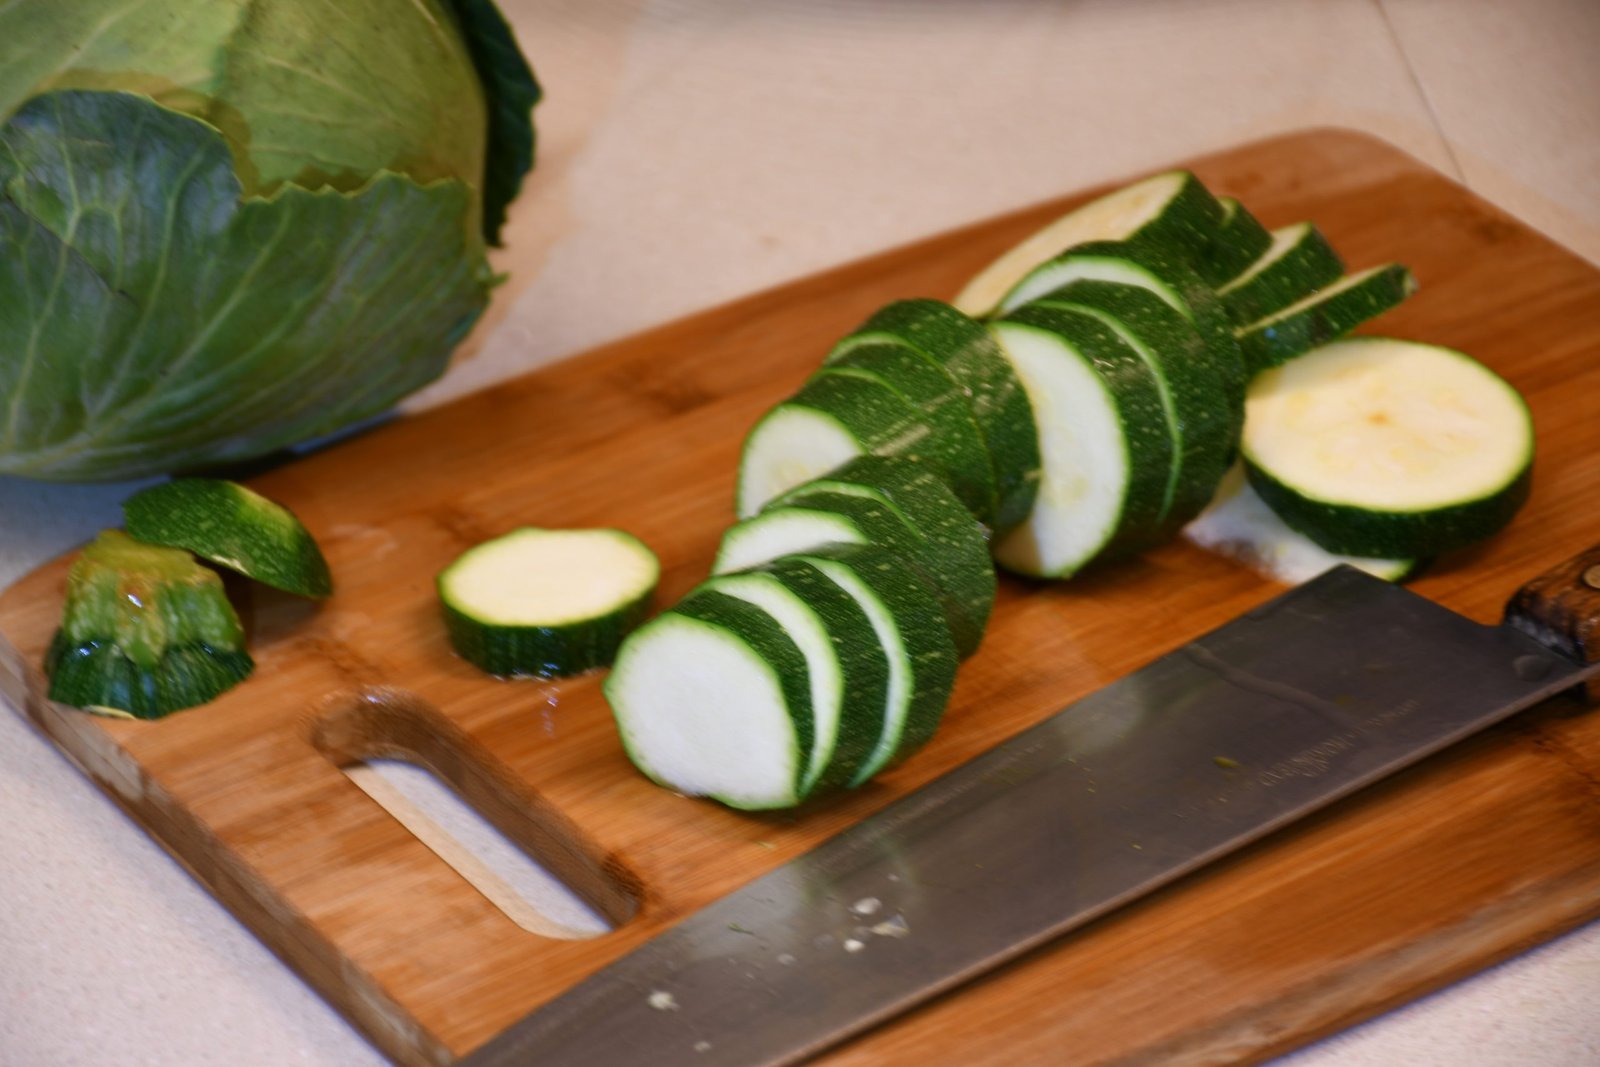
Yellow Squash
Green Zucchini
and of course some CARROTS!
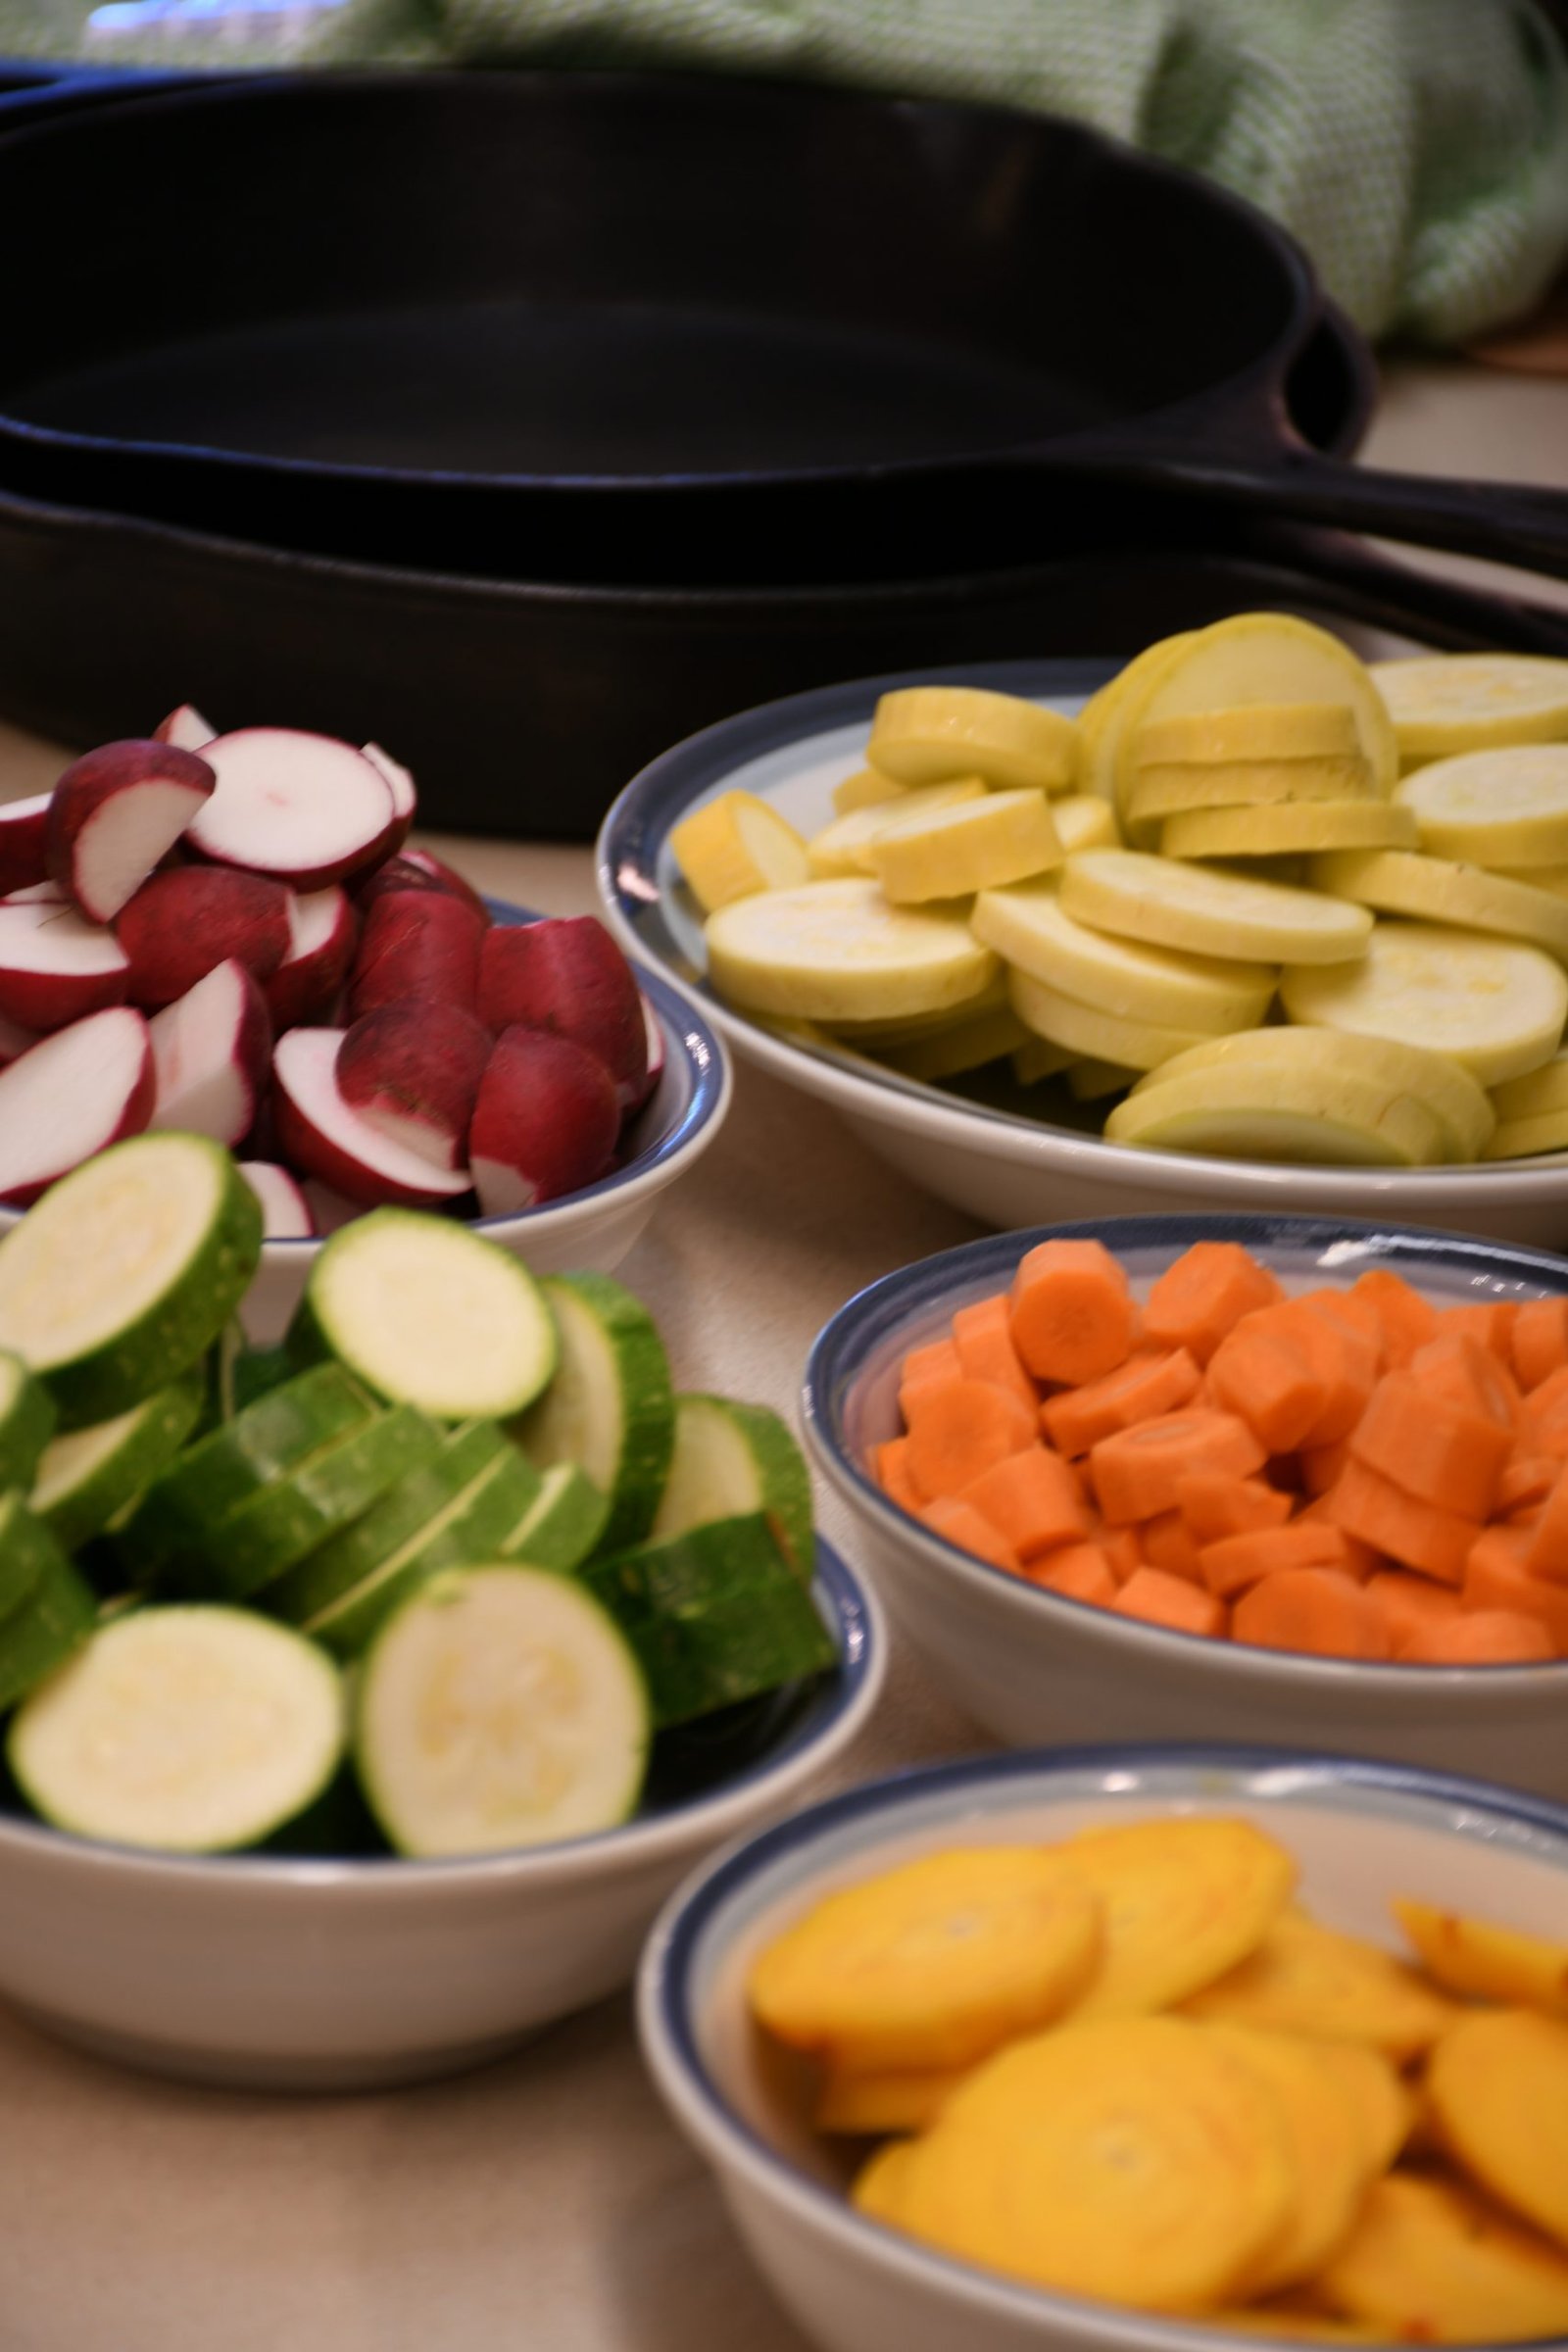
All of my Vegetables in Bowls


I’m Placing my Root Vegetables into a mixing bowl and adding some Olive Oil just to coat them. I’m also adding some Sea Salt and some Freshly Ground Black Pepper.

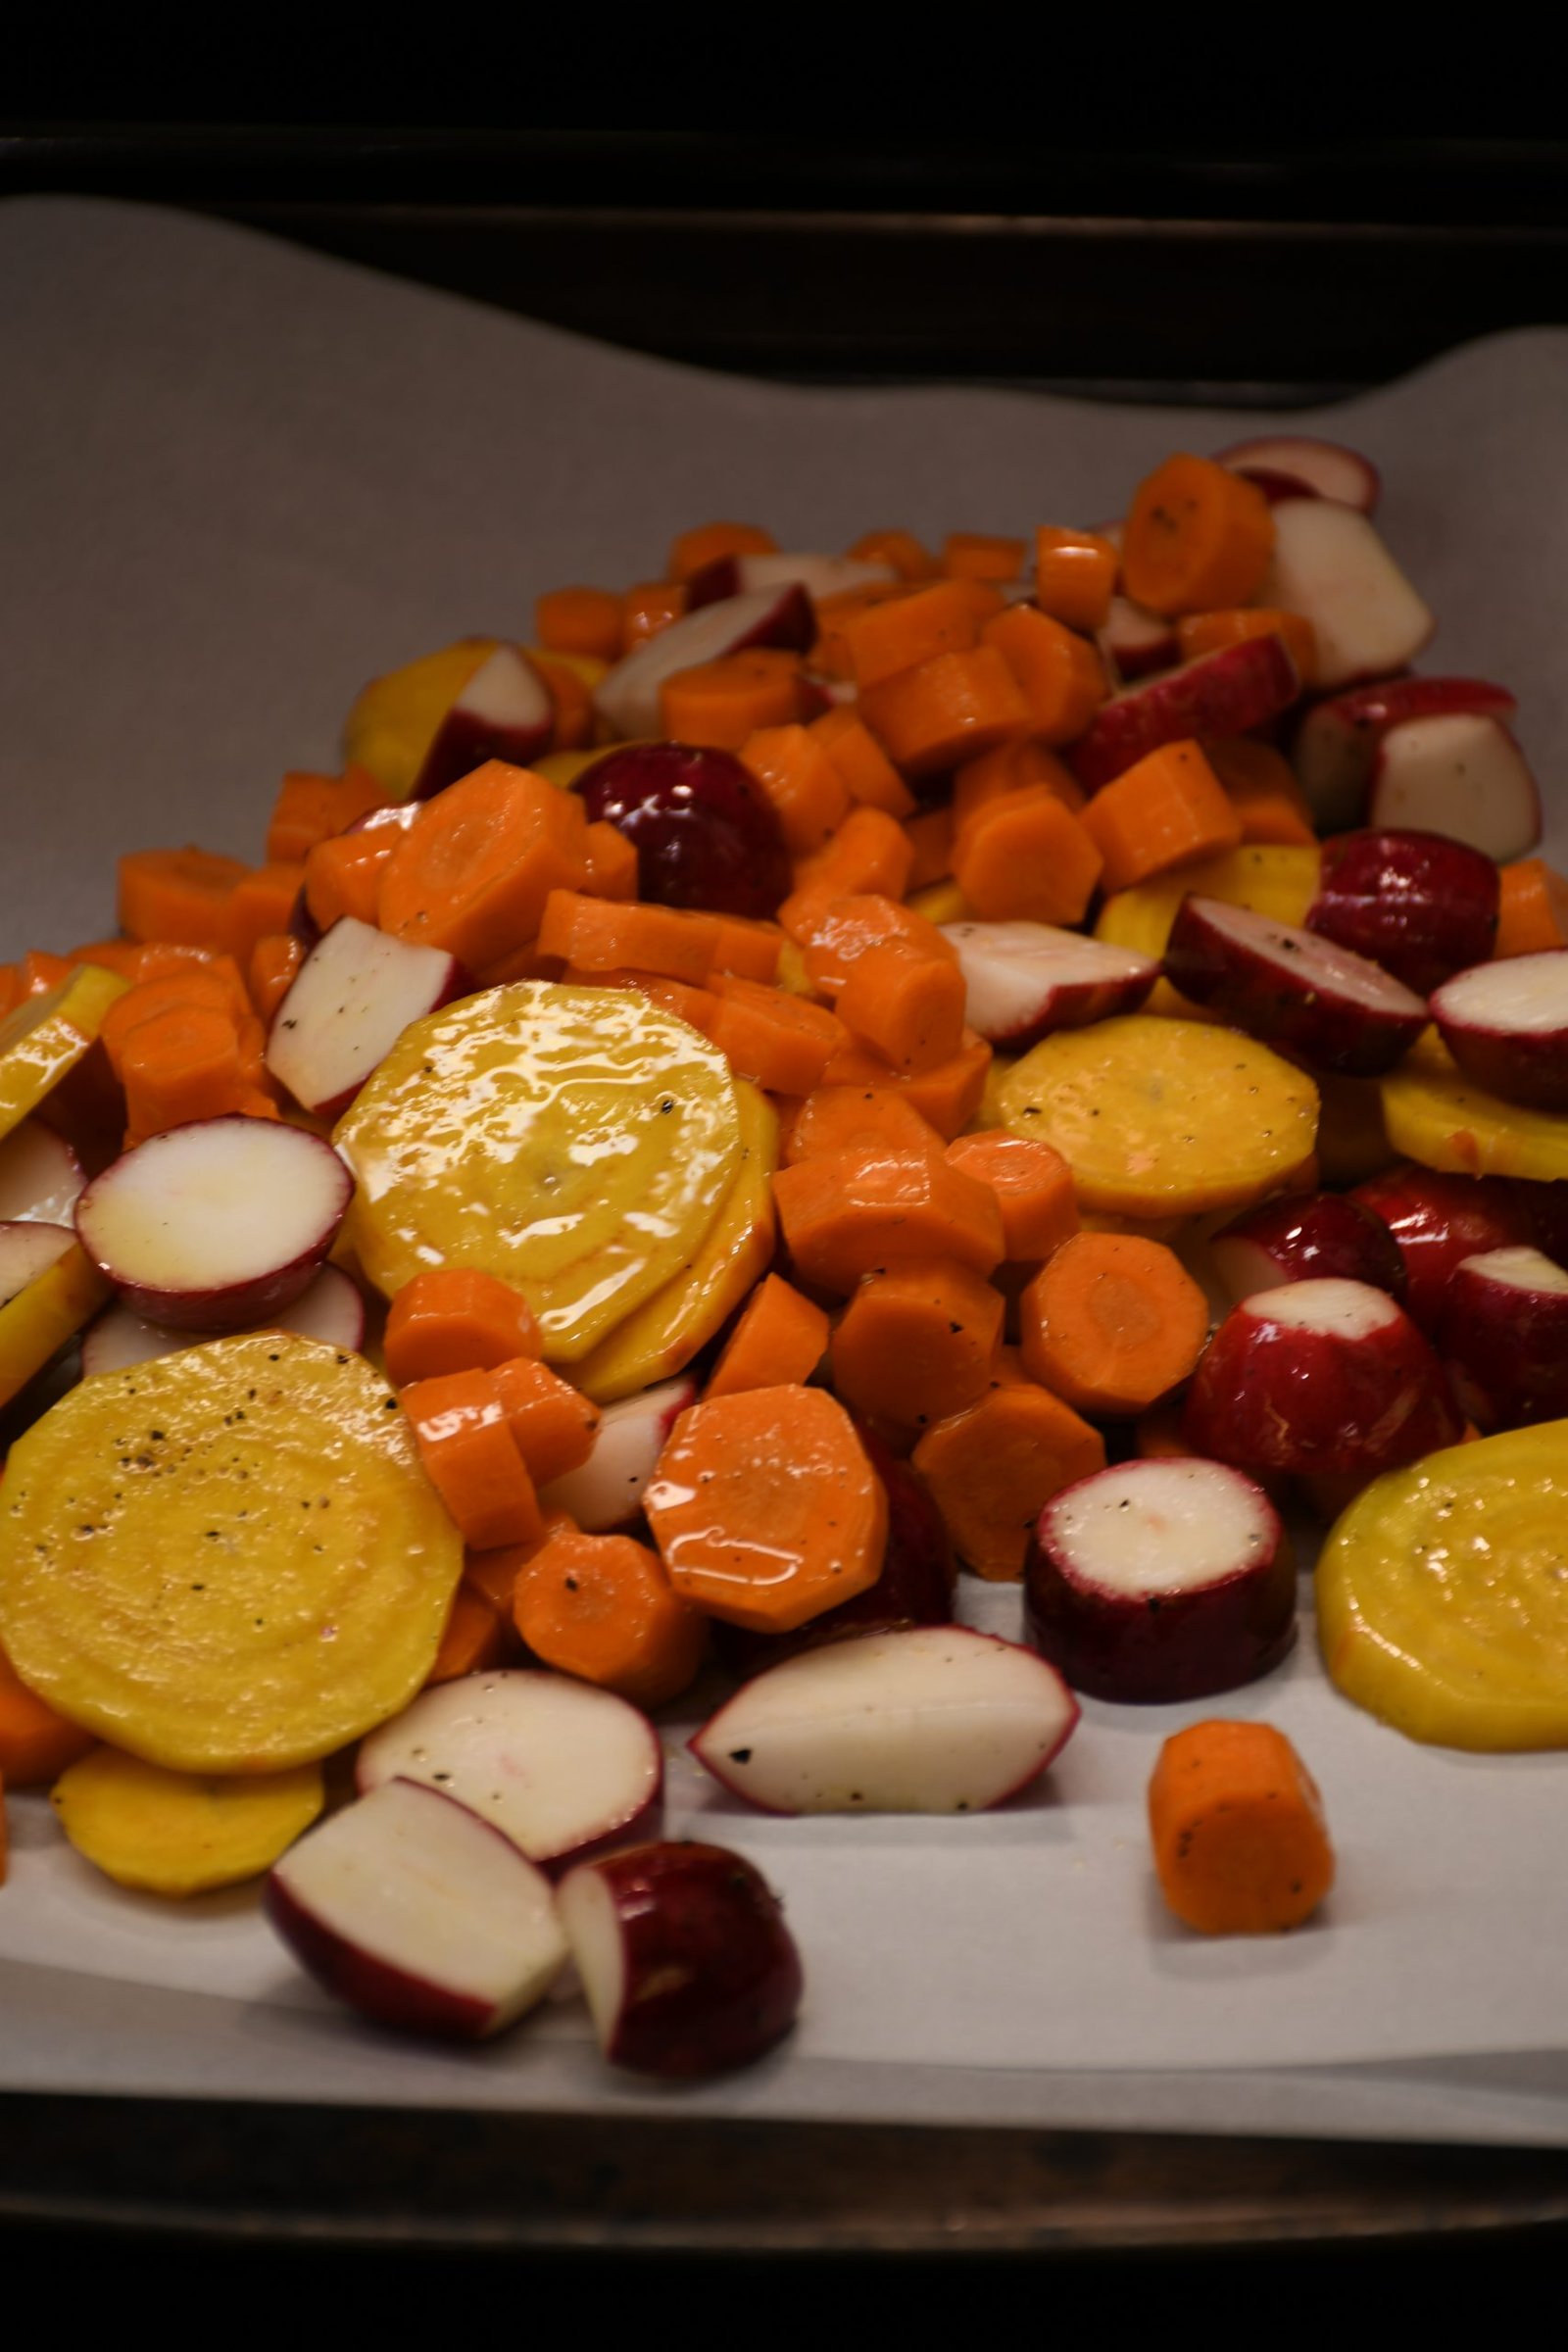
Give those a stir and then place onto a baking sheet lined with parchment paper.

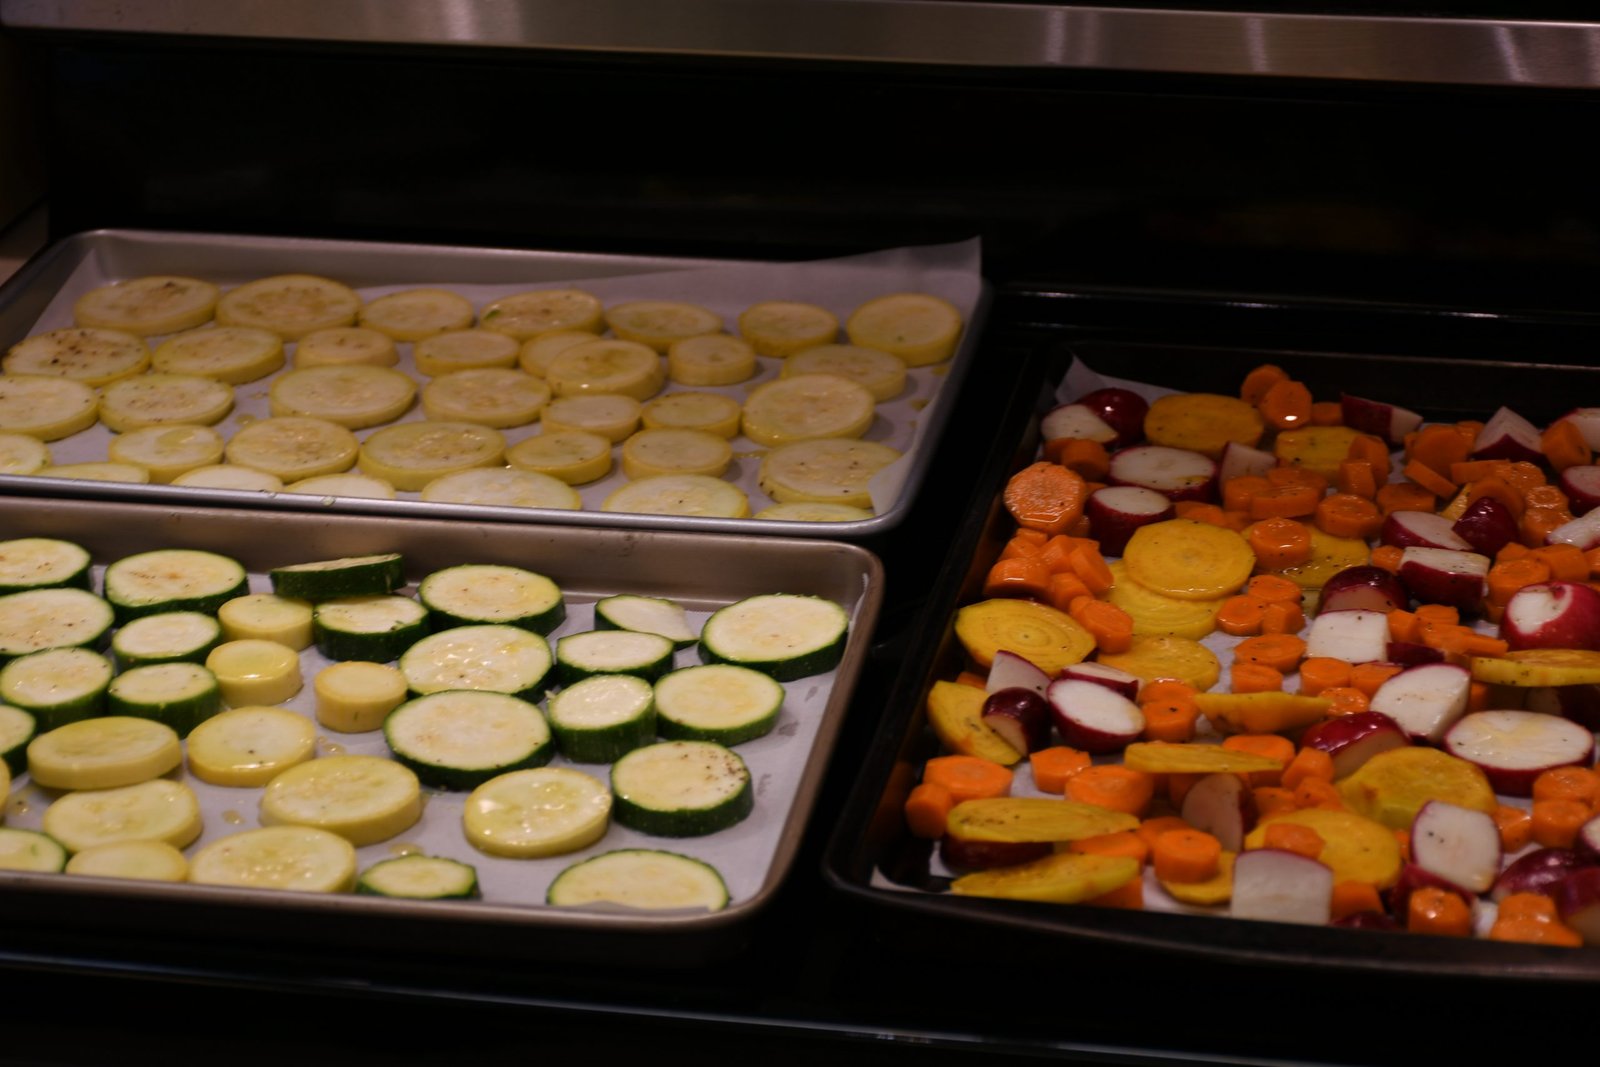
I also placed my sliced Yellow Squash and Green Zucchini, which I coated in Olive Oil as well, and added salt and pepper, onto 2 other baking sheets lined with parchment paper.
I placed them in a 350F oven for about 15 minutes.
——————————————————-

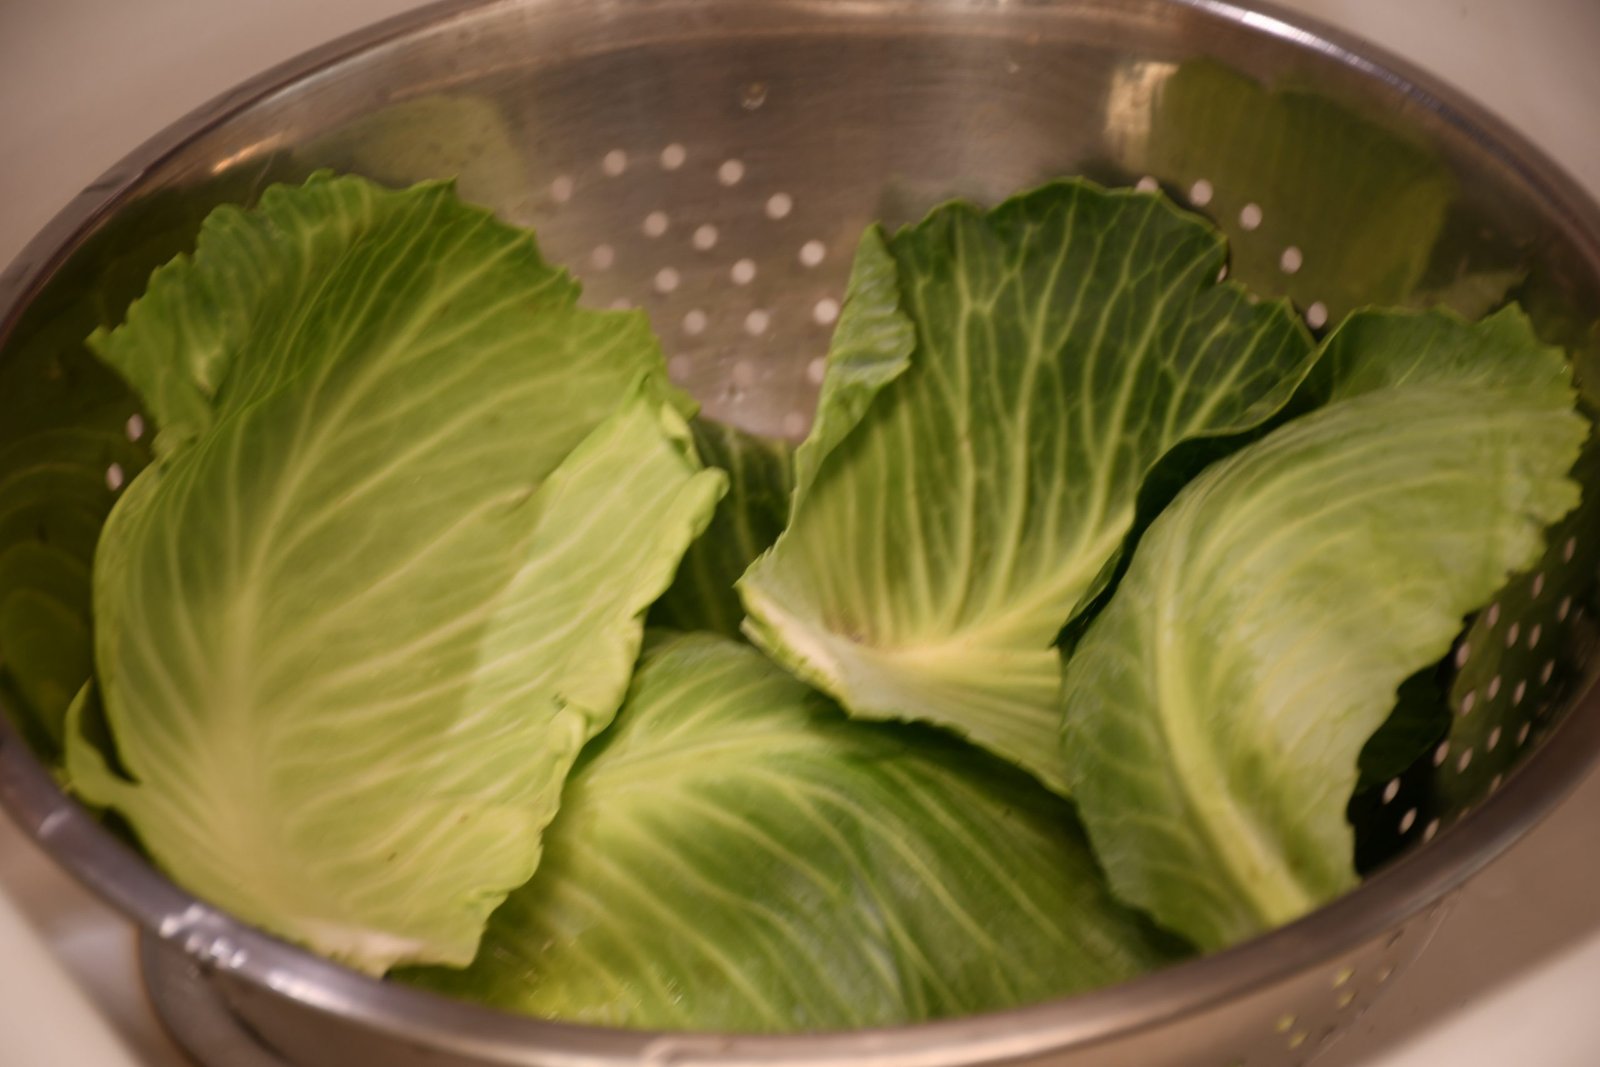
My Herbs from my Garden….

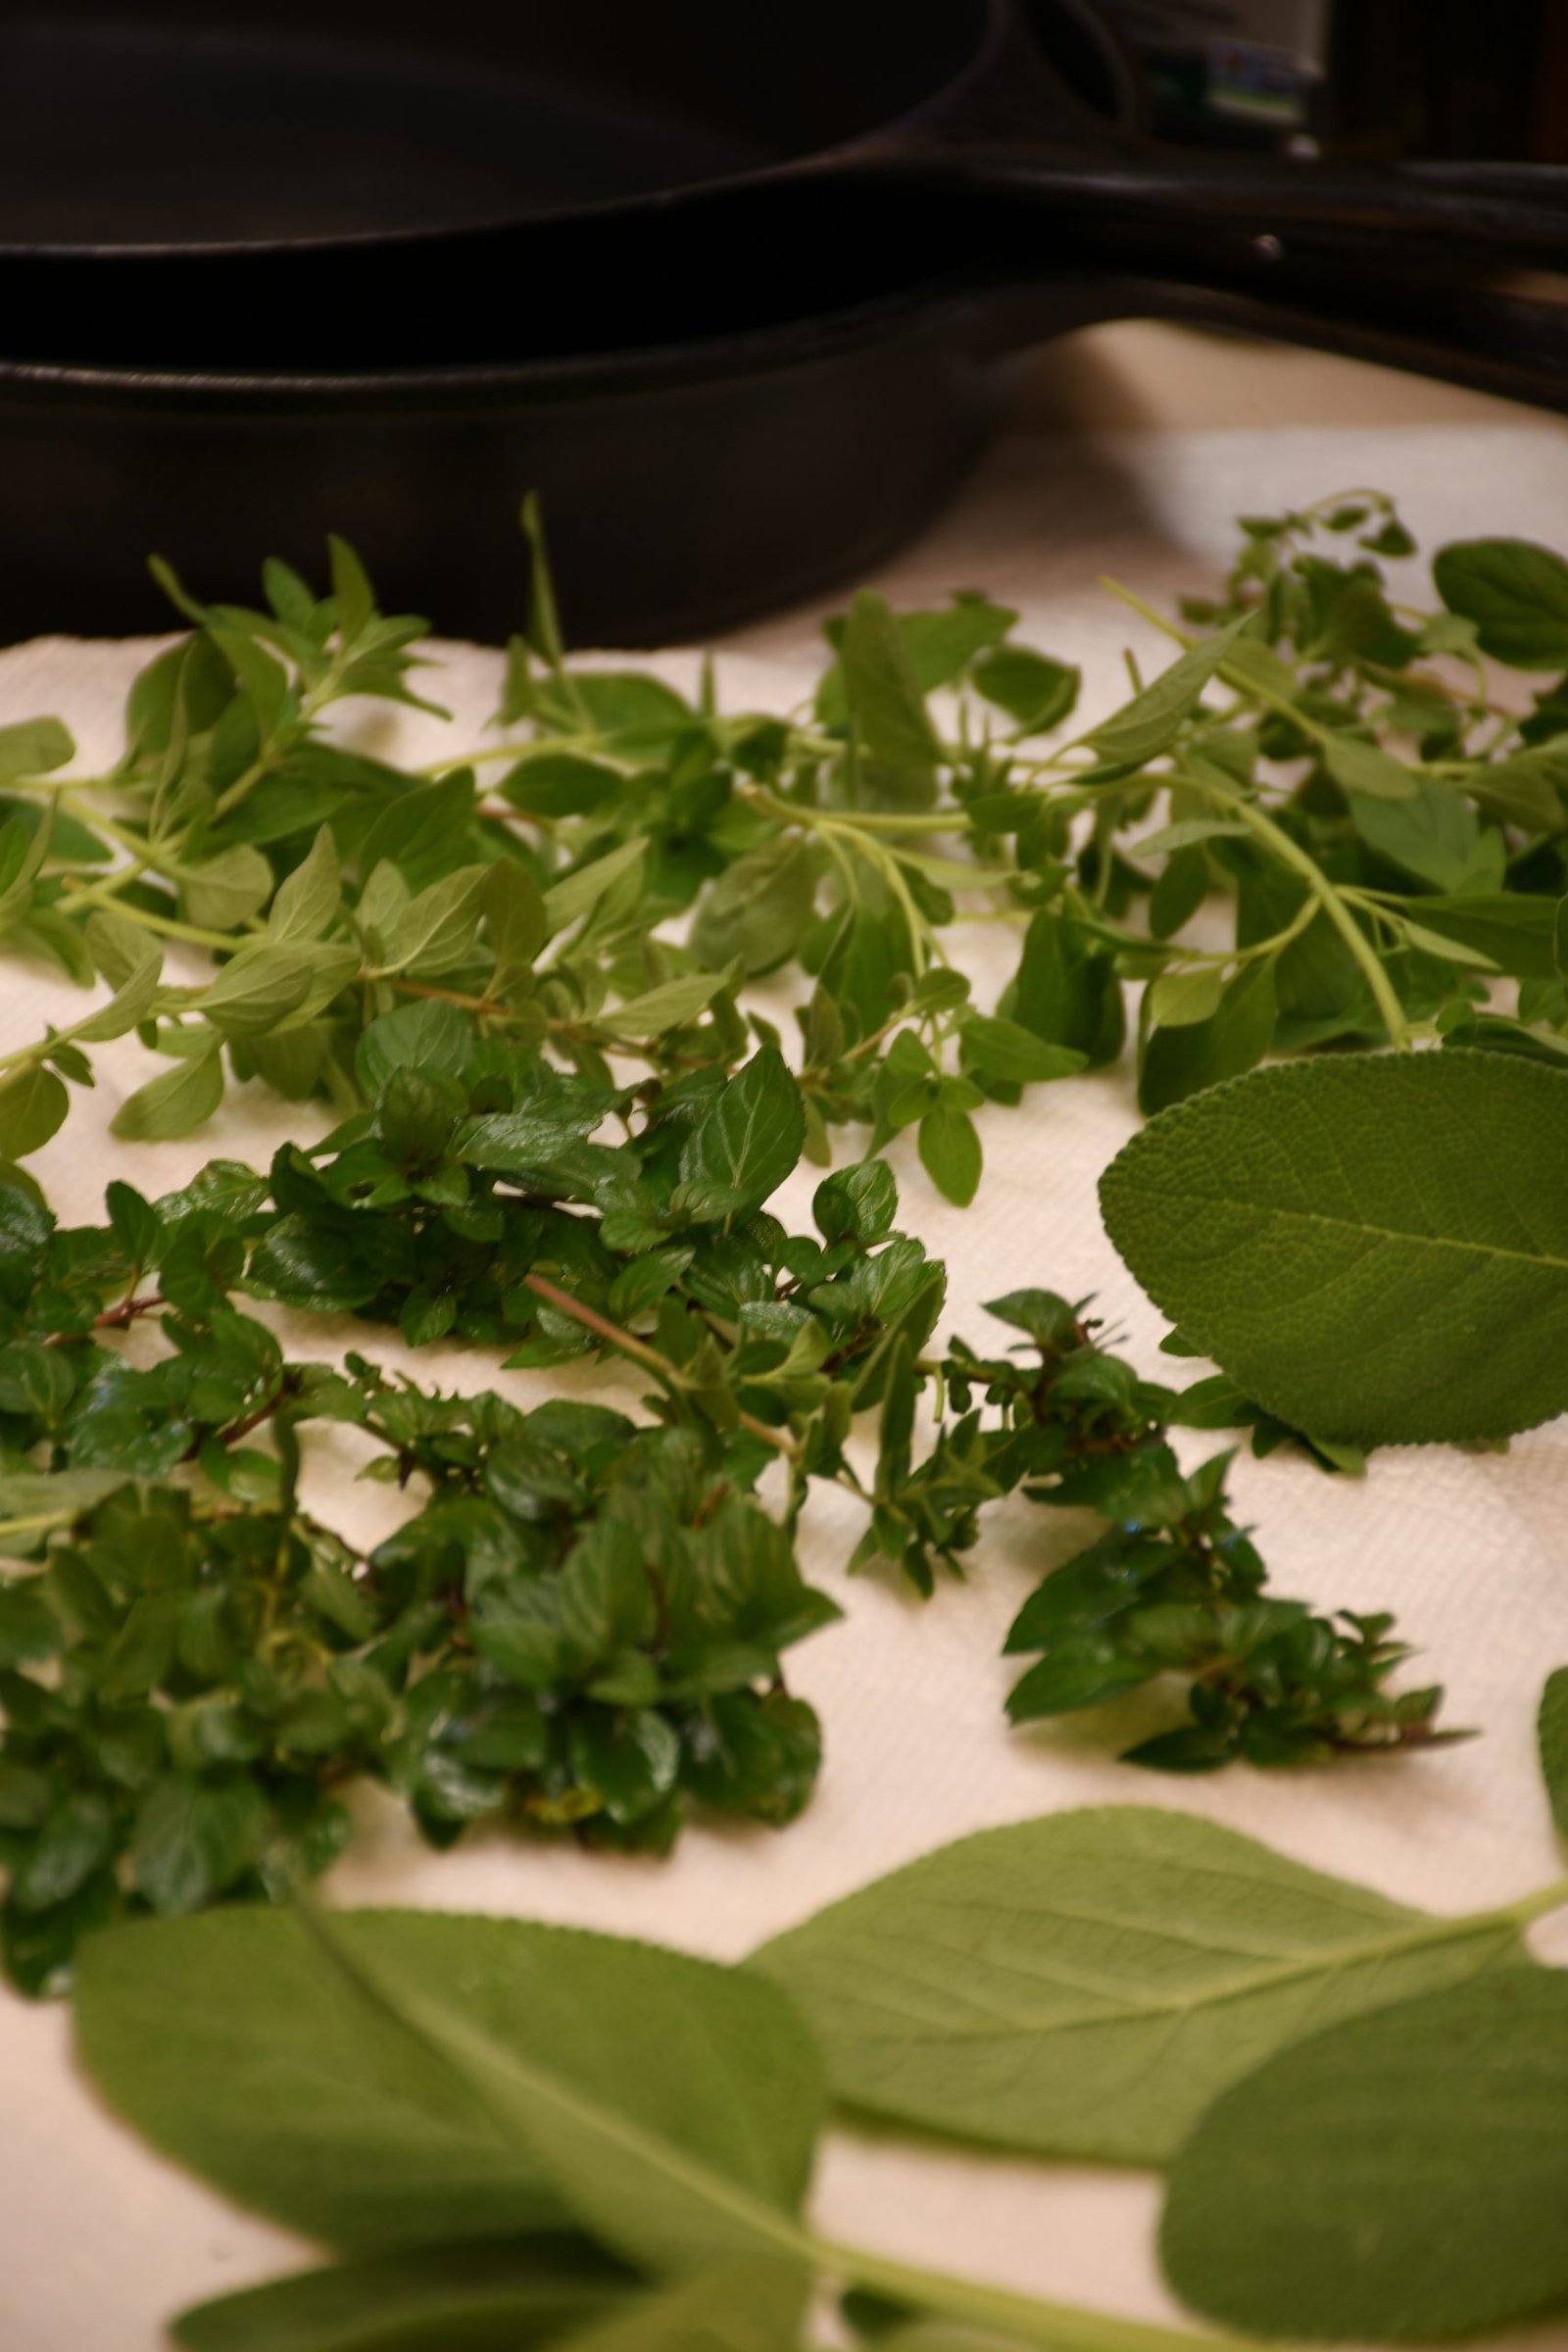
…..All Washed and Ready
———————————————————–
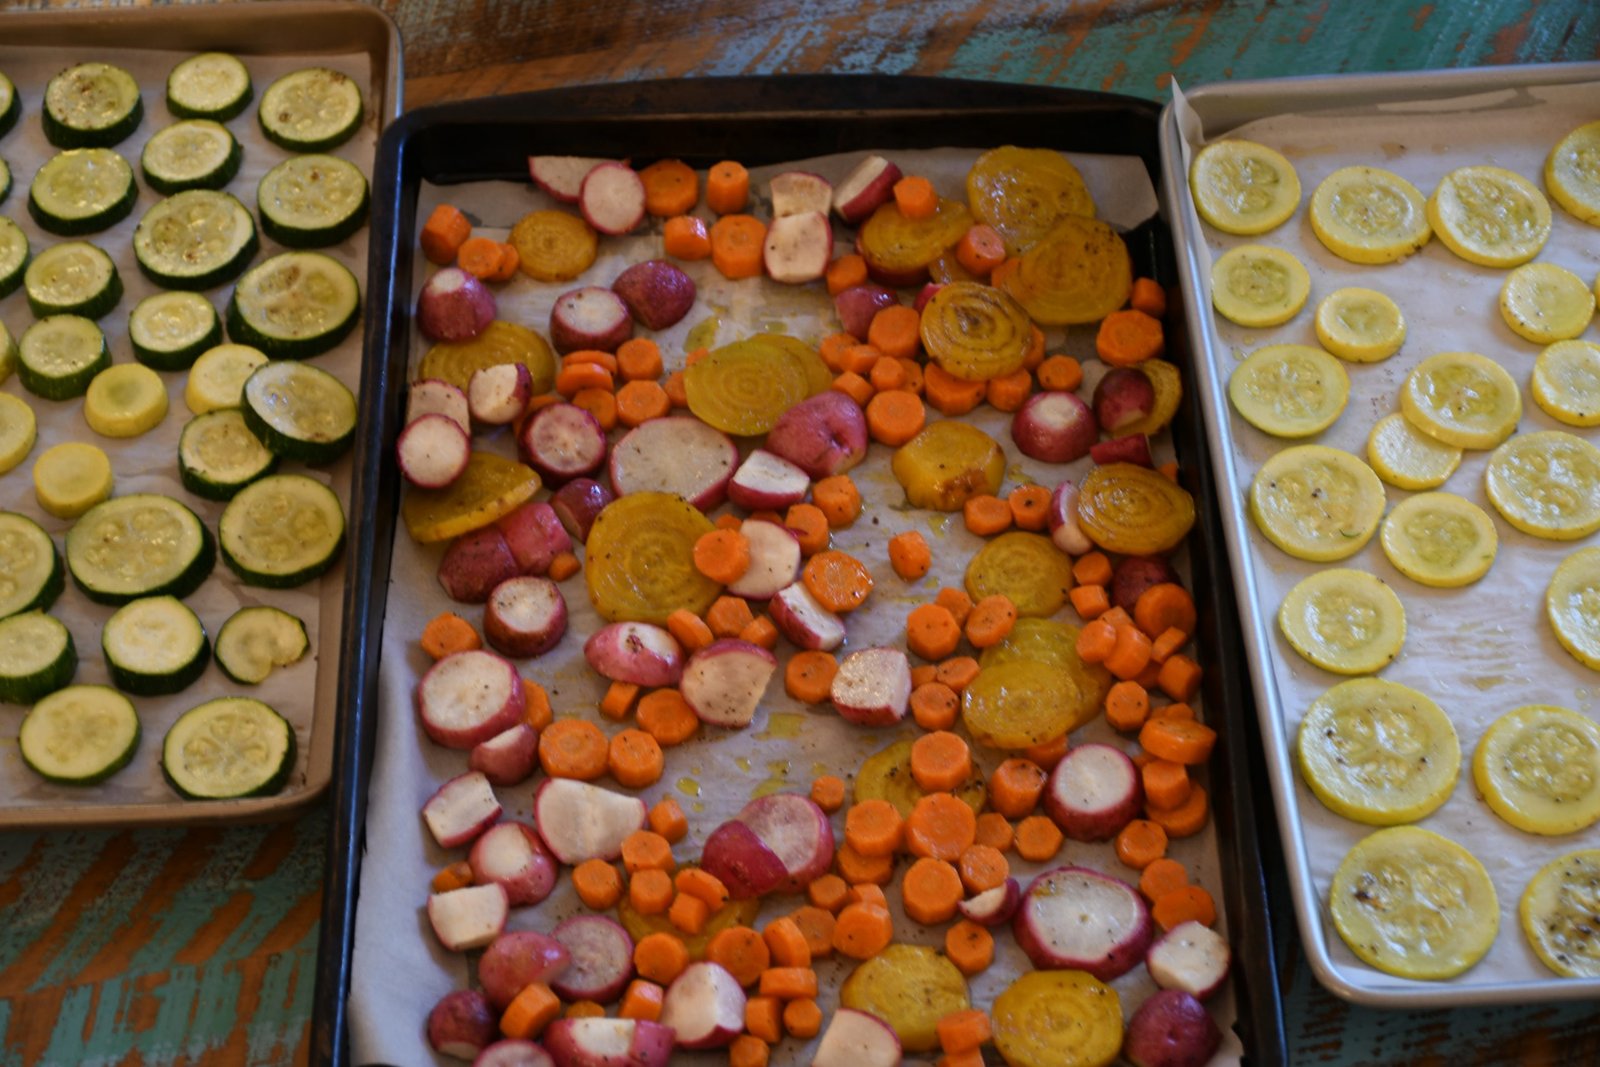
Right out of the Oven! Don’t they look Pretty?

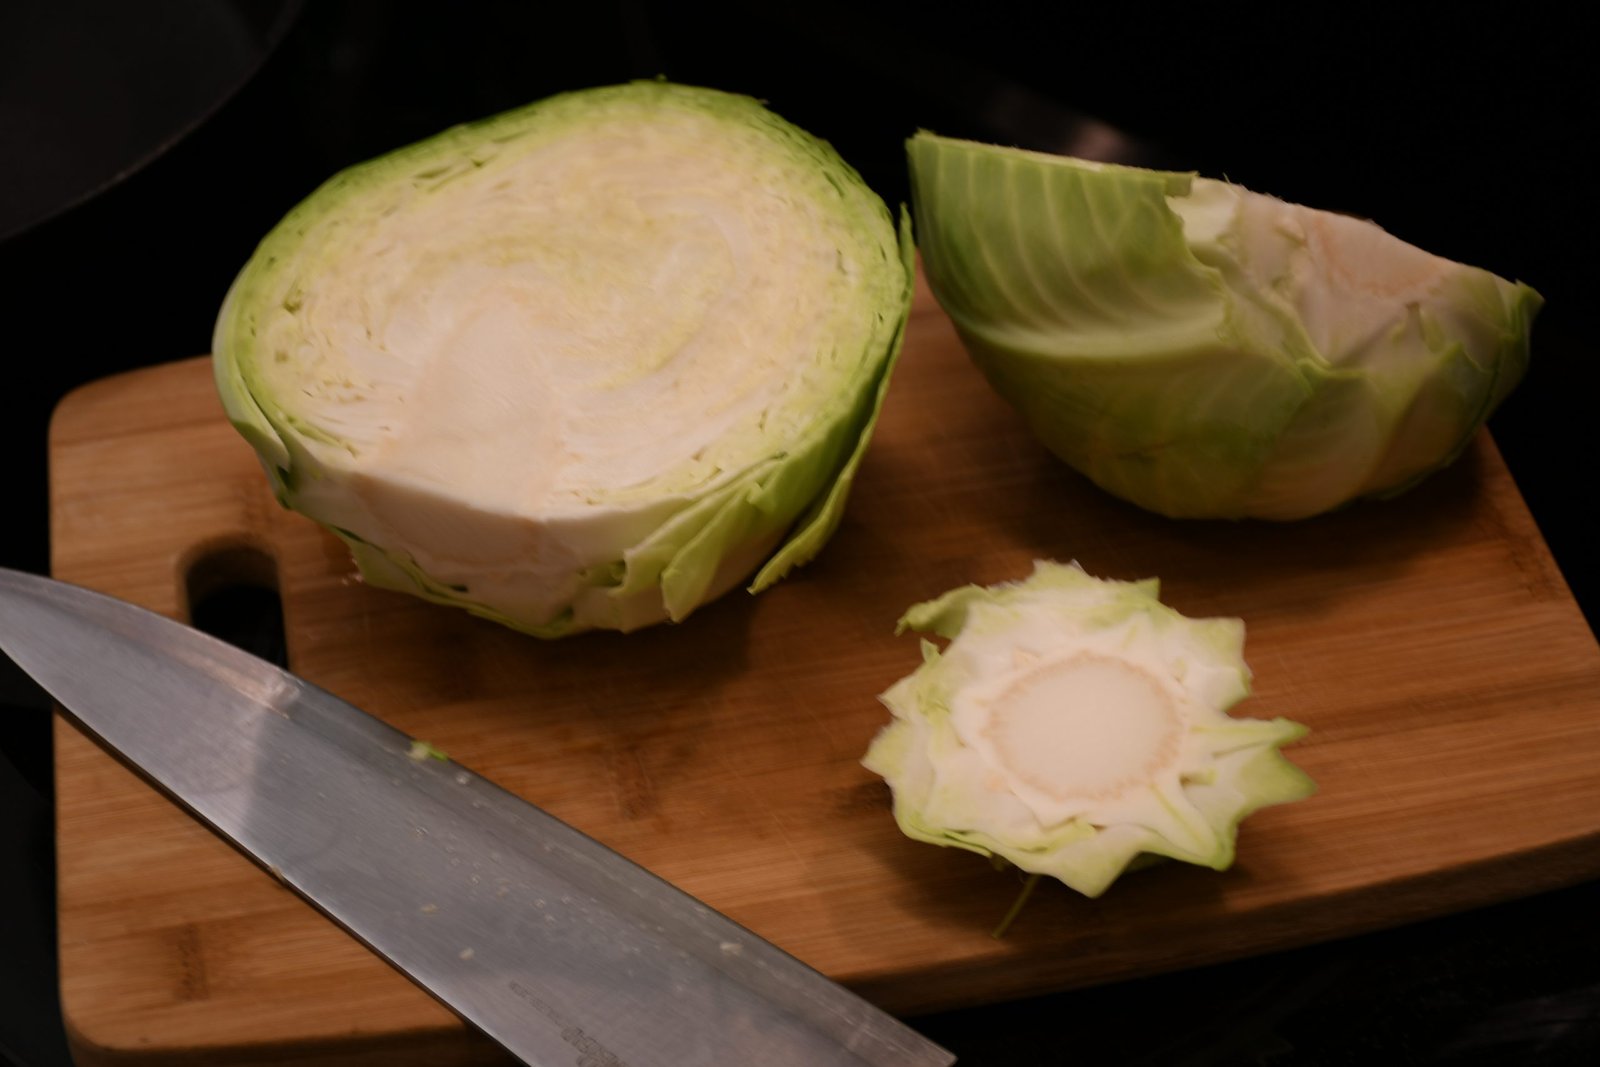
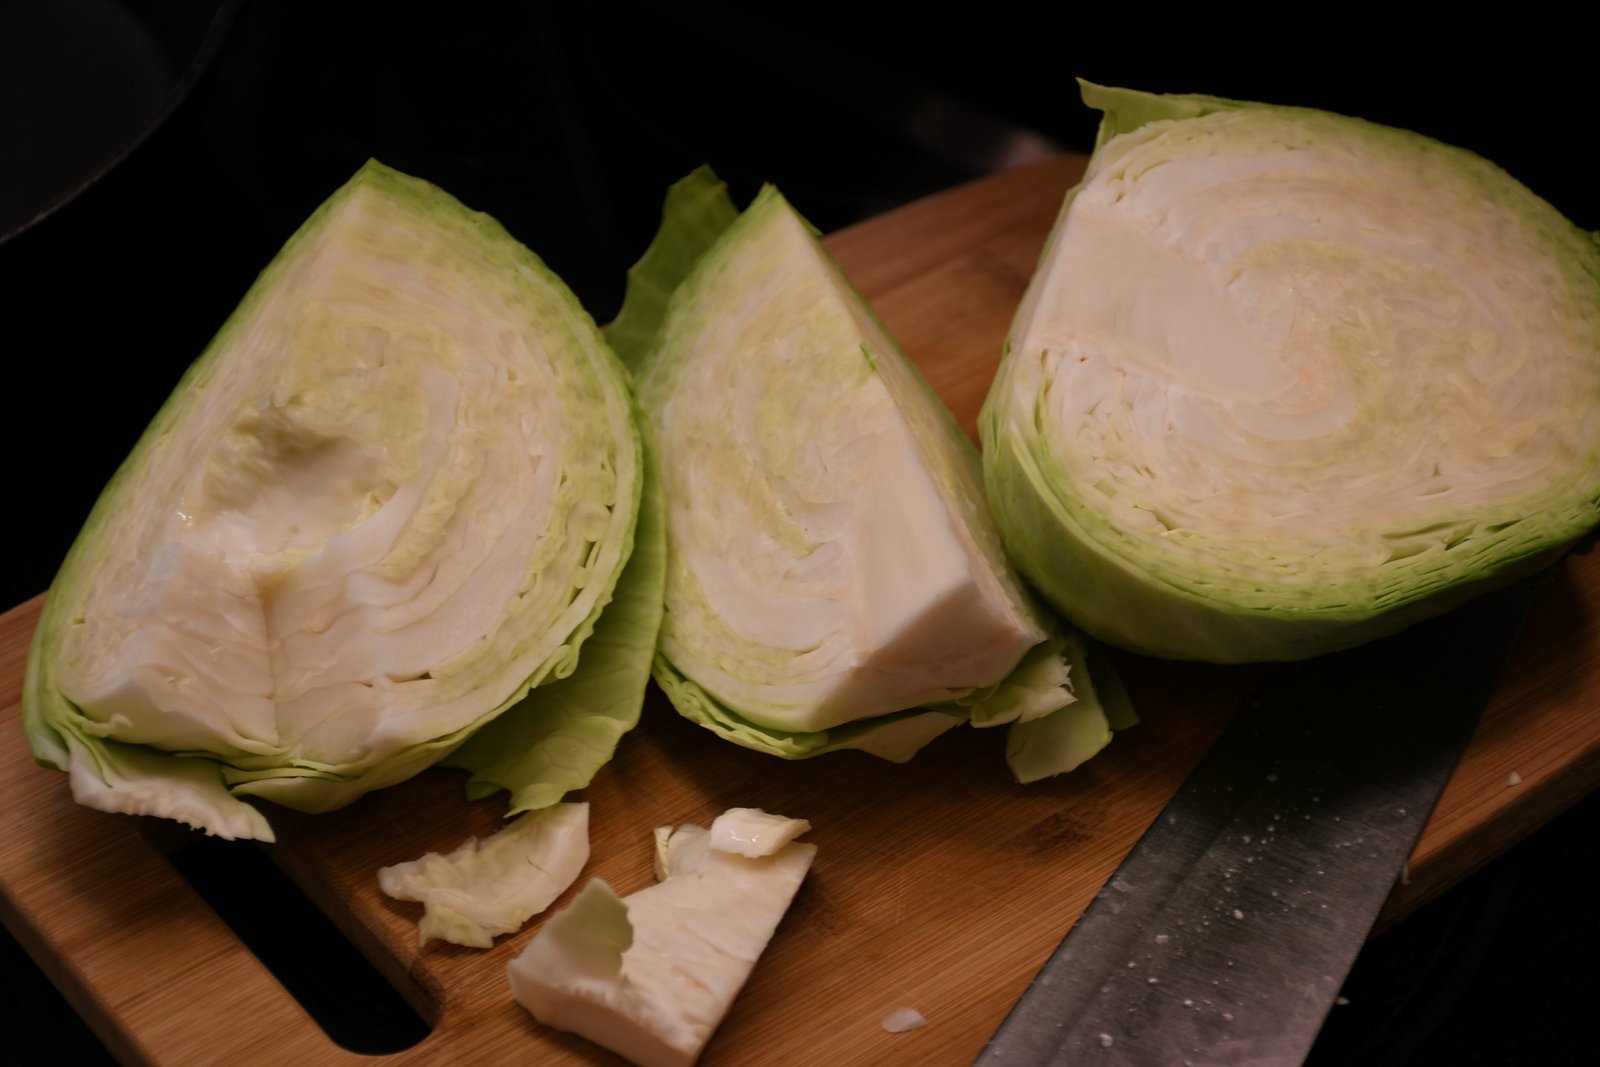
Now it’s time to prepare my cabbage. (Of course there had to be cabbage in honor of Peter Rabbit.)
Cabbage is very difficult to wash because the leaves are so close together. So, just remove the outer leaves and cut out the core.
————————————————–
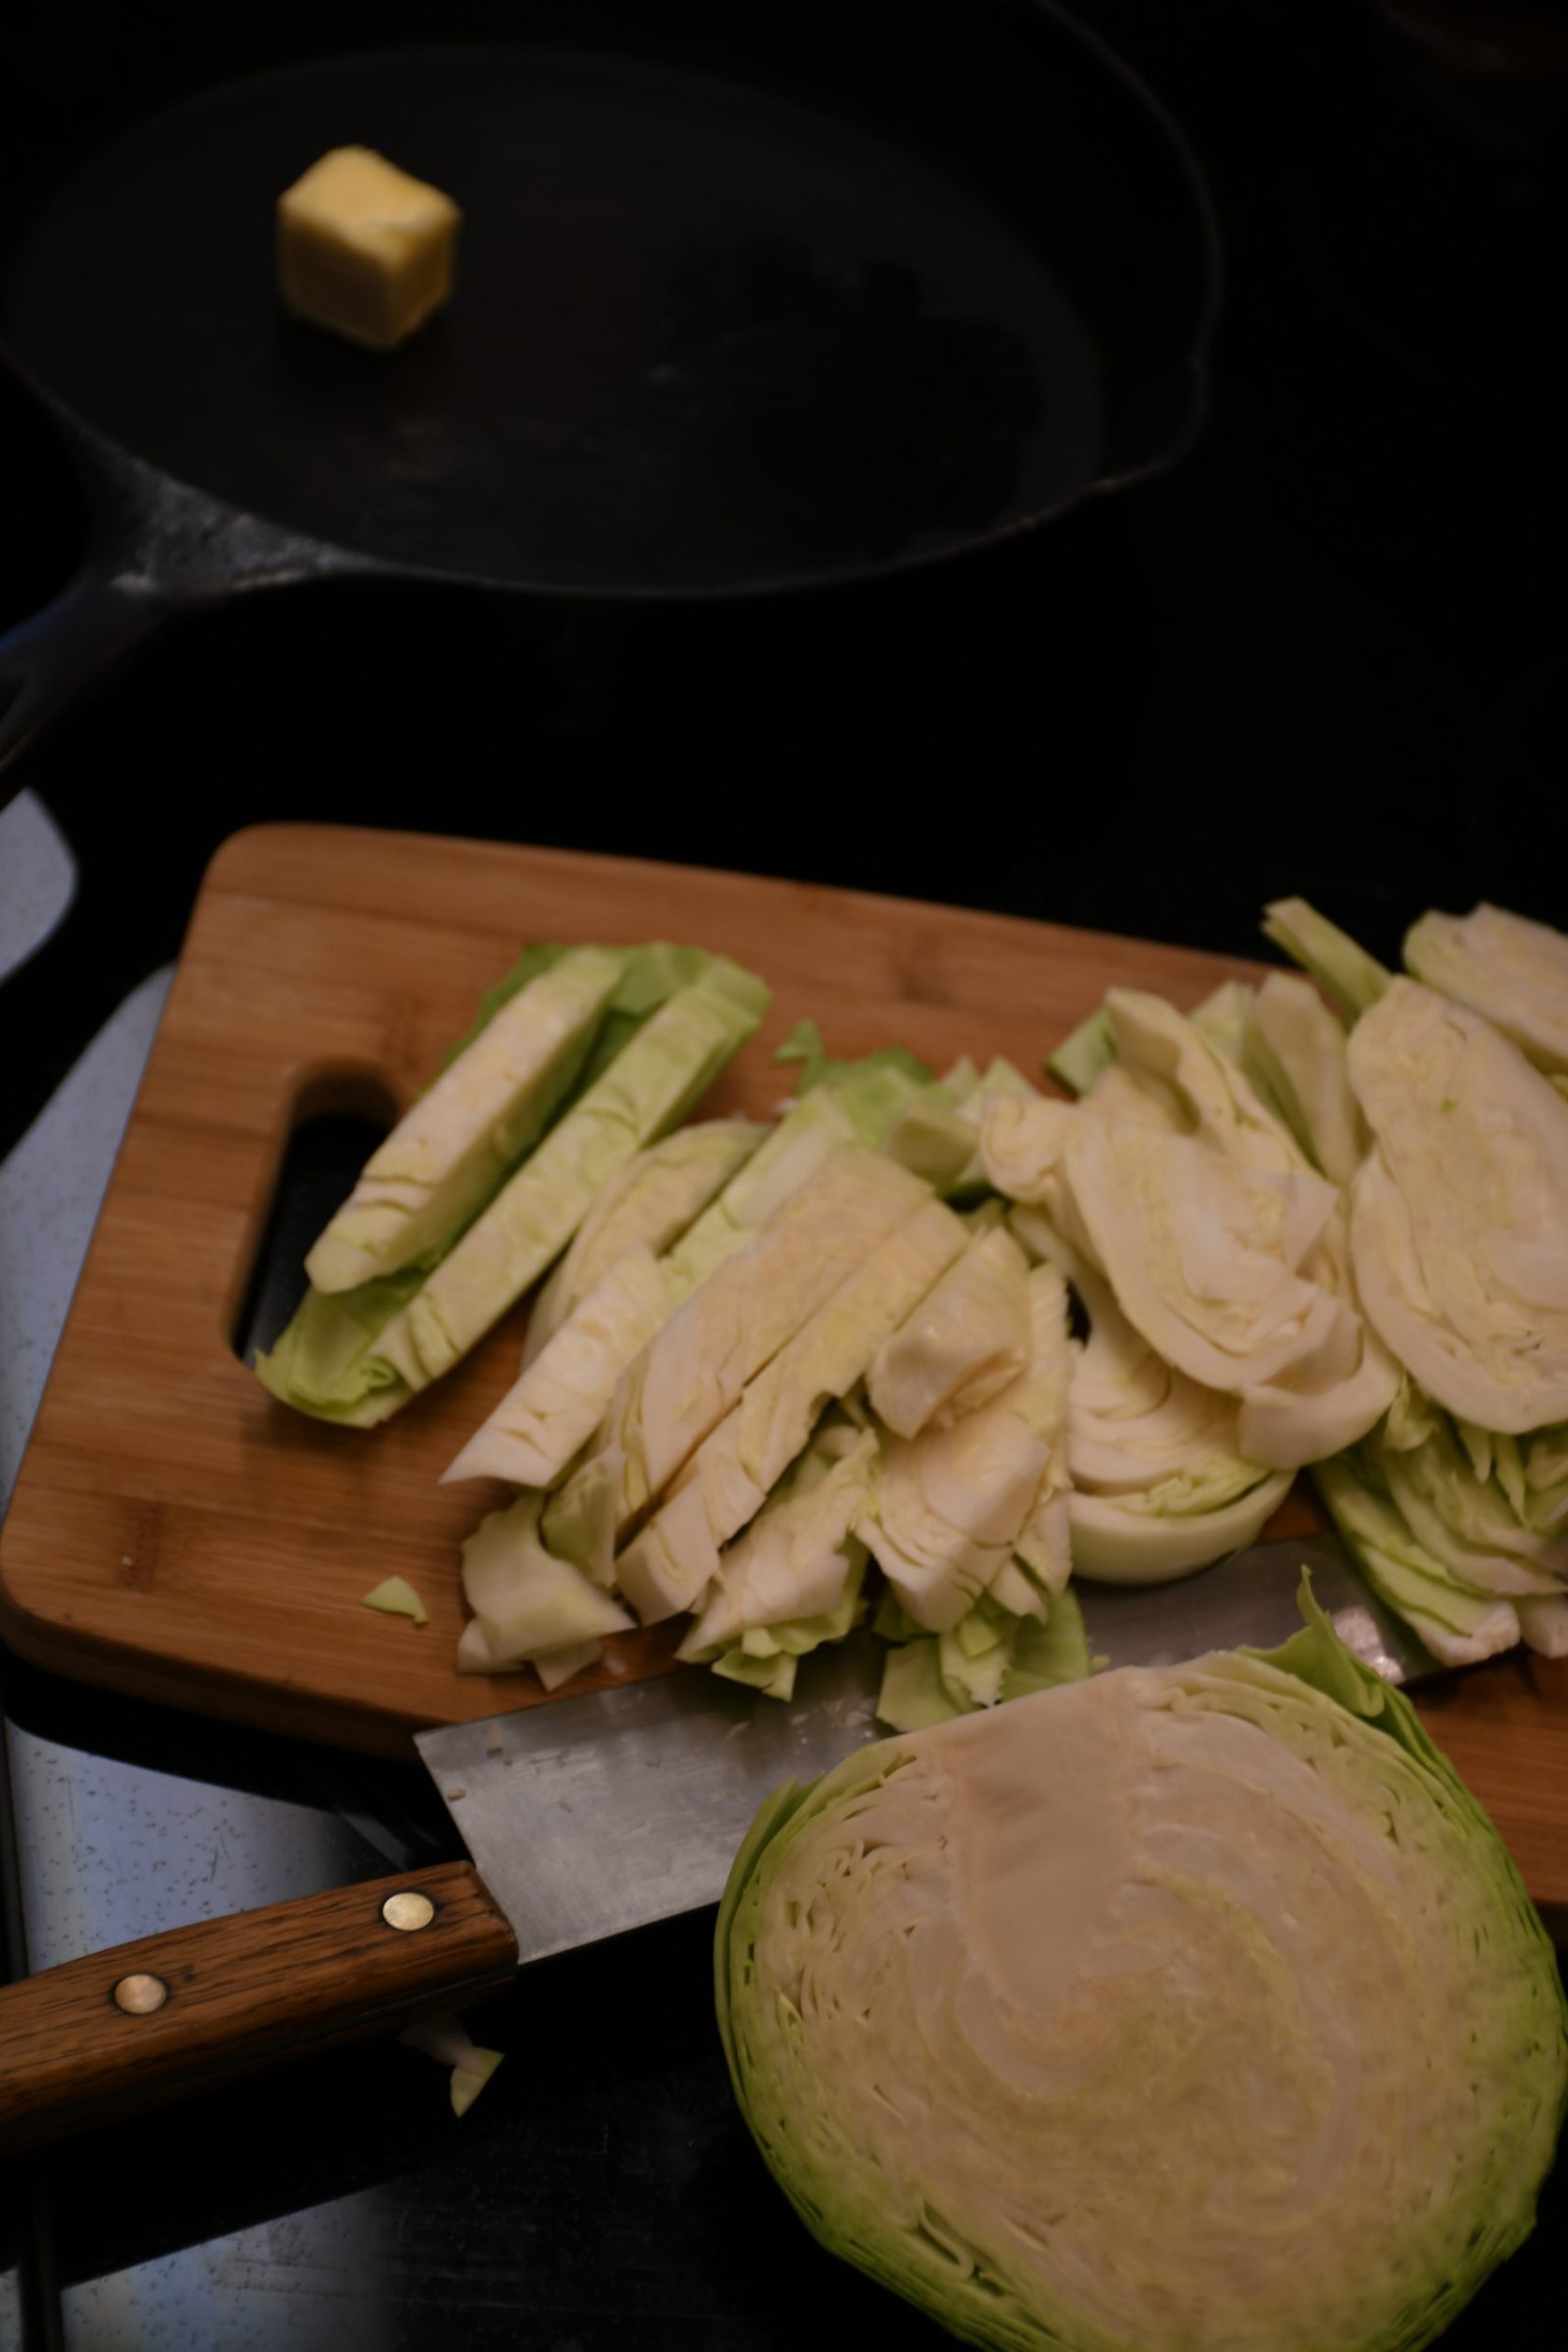
I’ve got some Butter in my Cast Iron Skillet at photo top, while I’m slicing up some Green Cabbage to wilt down a bit.
BUT, before I do that I am thawing out some frozen ready made pie crusts that I bought at the grocery store. I am lazy and figured that I could just piece together a bunch of pie dough to make my own Rustic Pie. 🙂

I tried to find one of those sheets of ready made pastry from the grocery store but because it was nearing Easter, they were all sold out. All that was left were these pie shell pastries.. So, I bought a few of them.

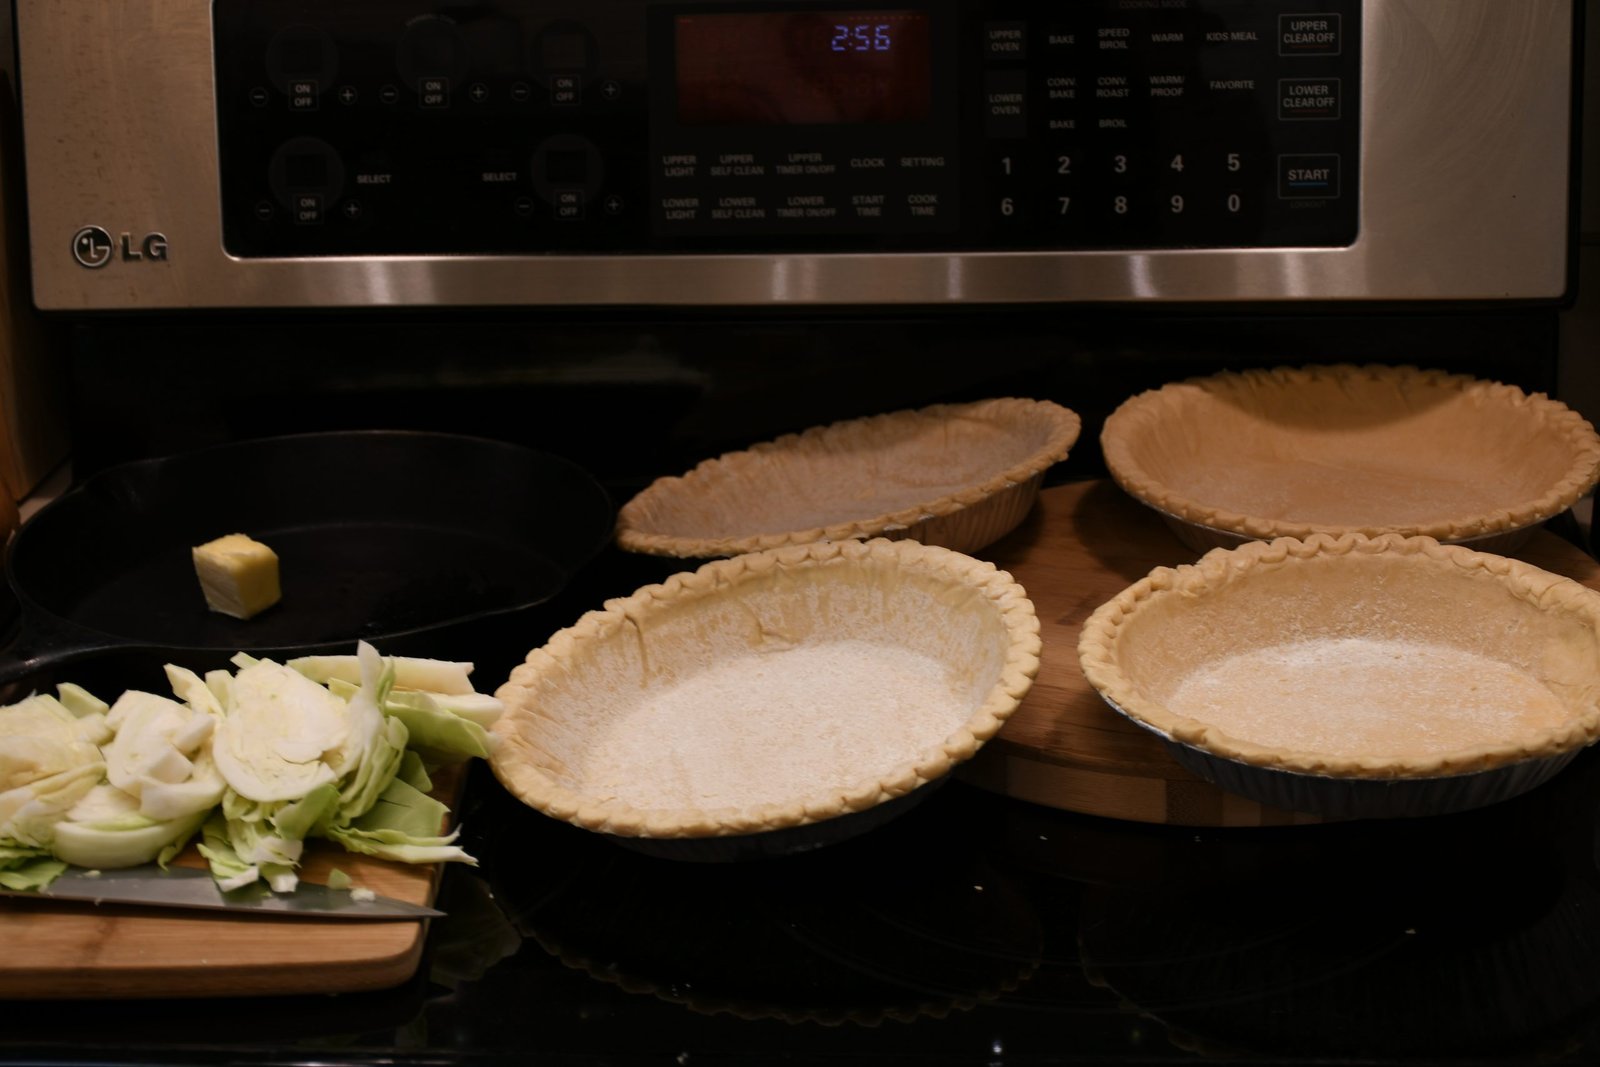
As they were thawing out I was able to lift them out of the aluminum pie pan. It was a work in progress so just keep reading.

So, while these are thawing out a bit…..
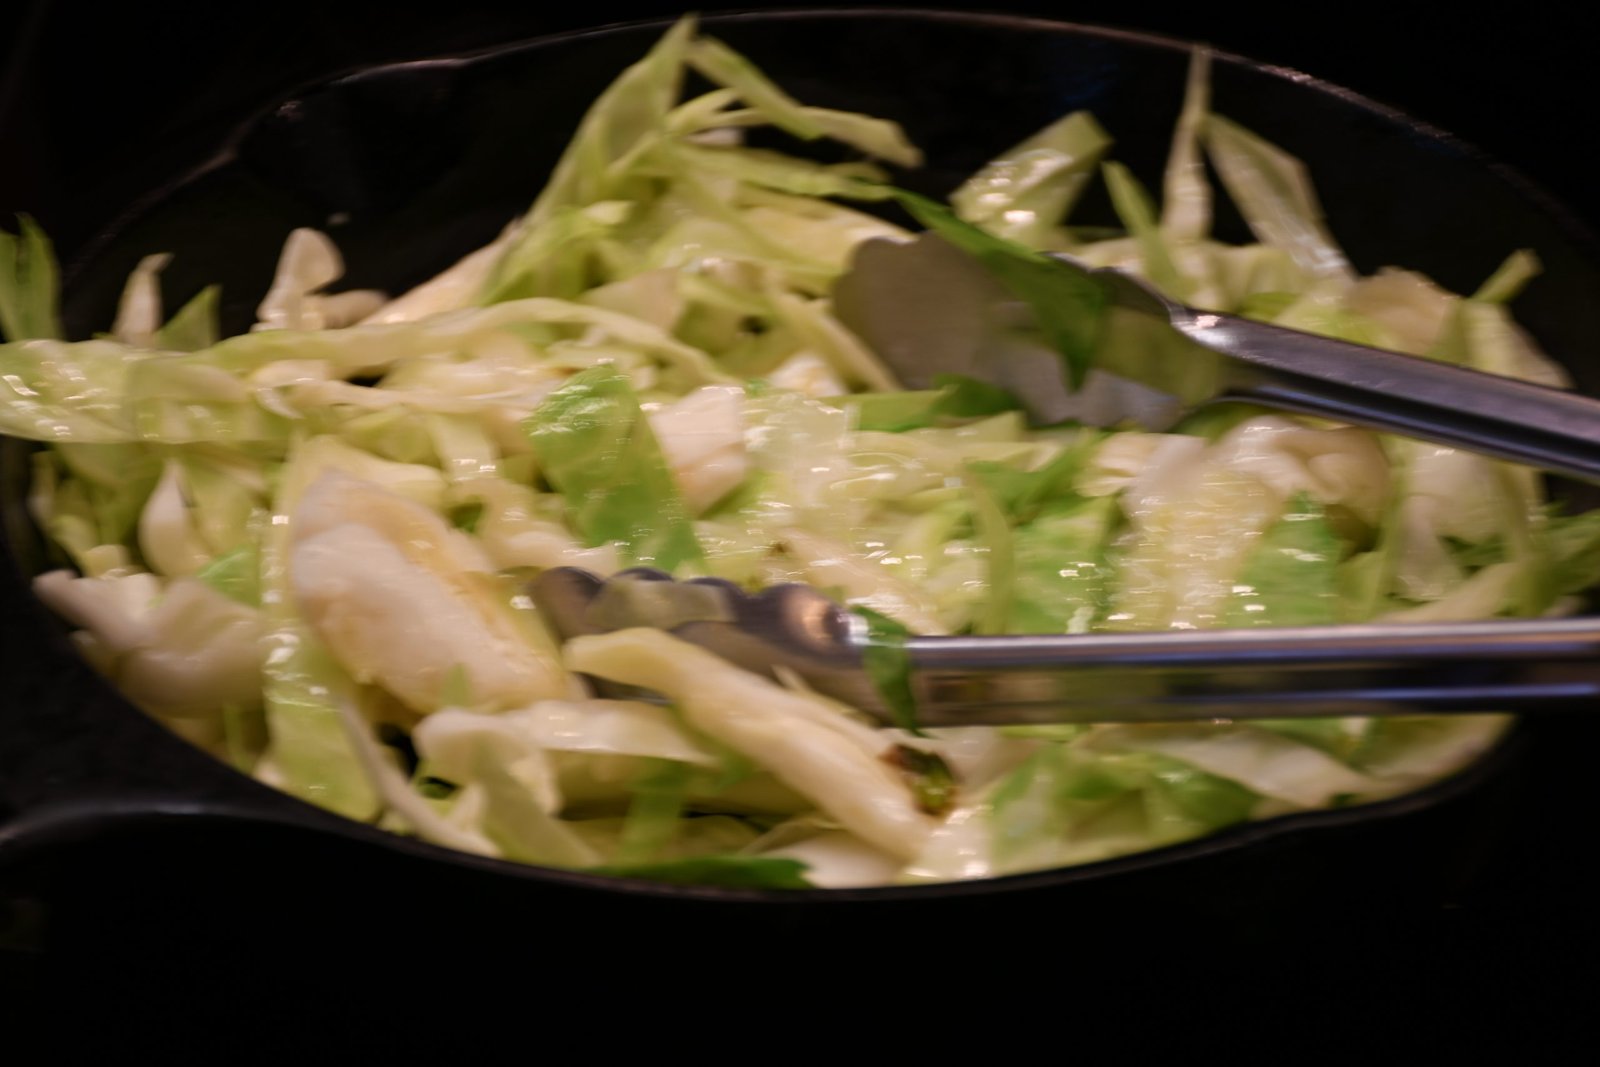
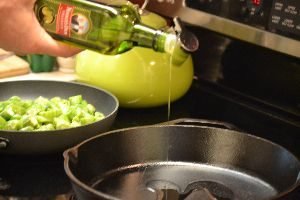
I’m wilting down some Green Cabbage in some Butter in my Cast Iron Skillet.
This was an experiment, and I am photographing my experiment as I go, so continue to bear with me.

My Cast Iron Skillet is all greased up and ready with Olive Oil.
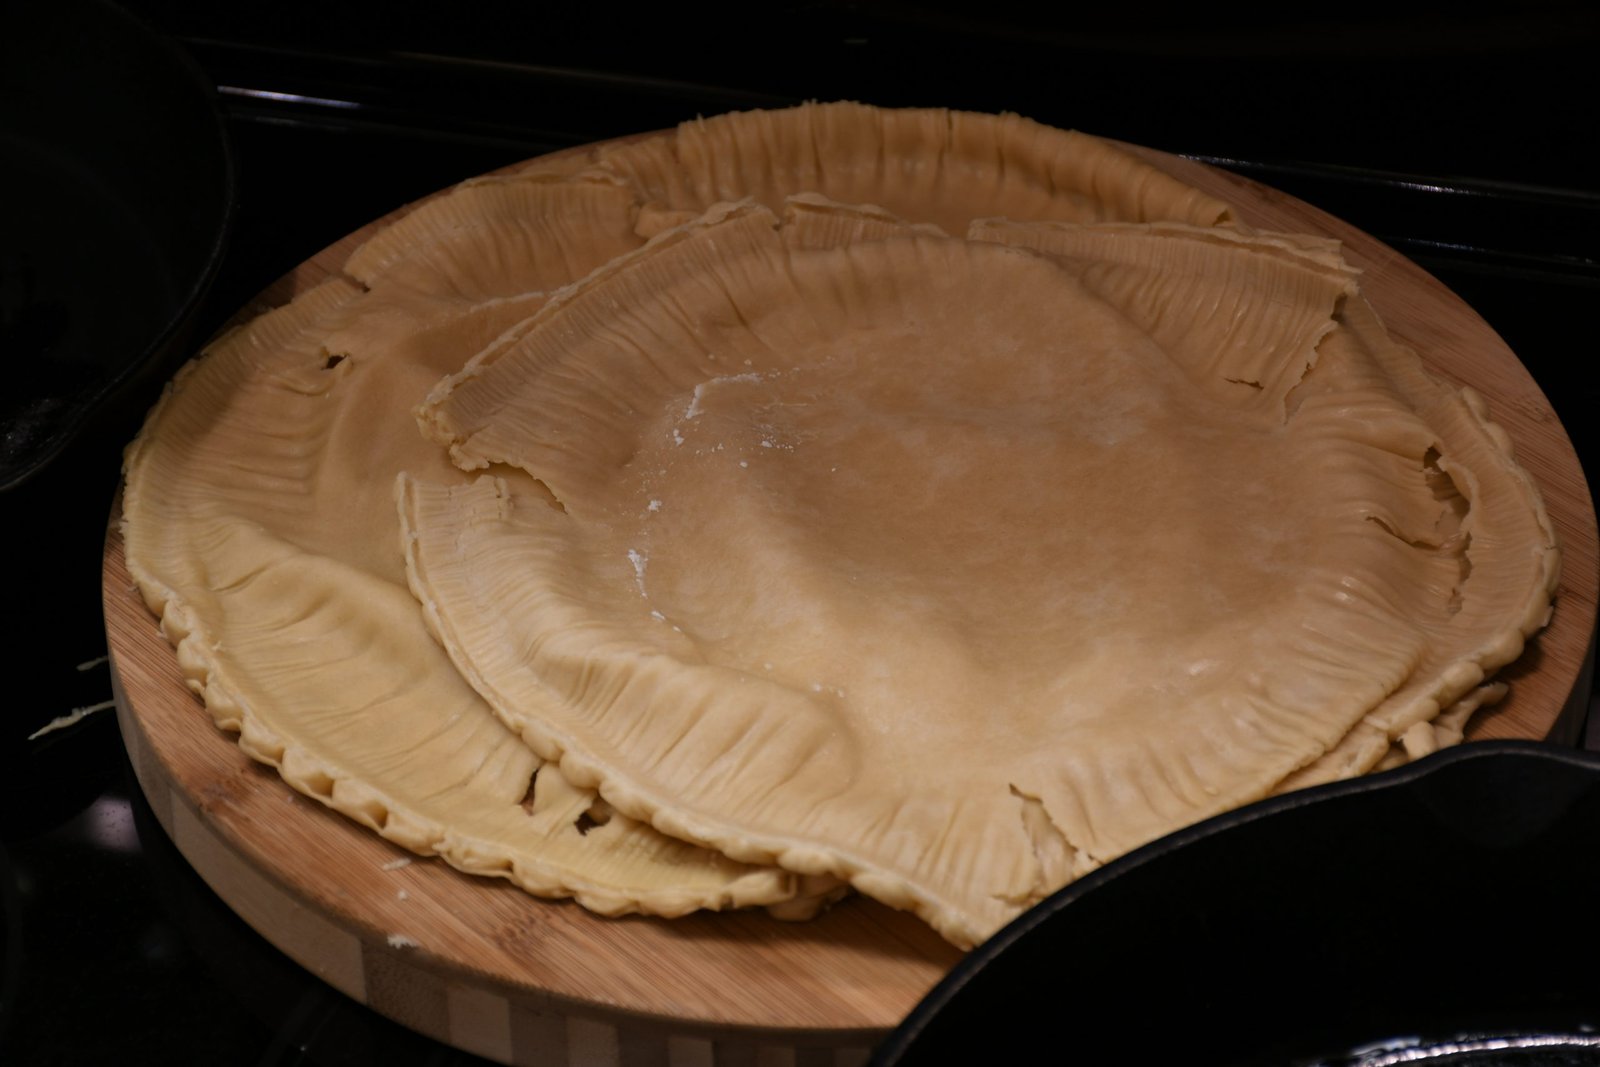
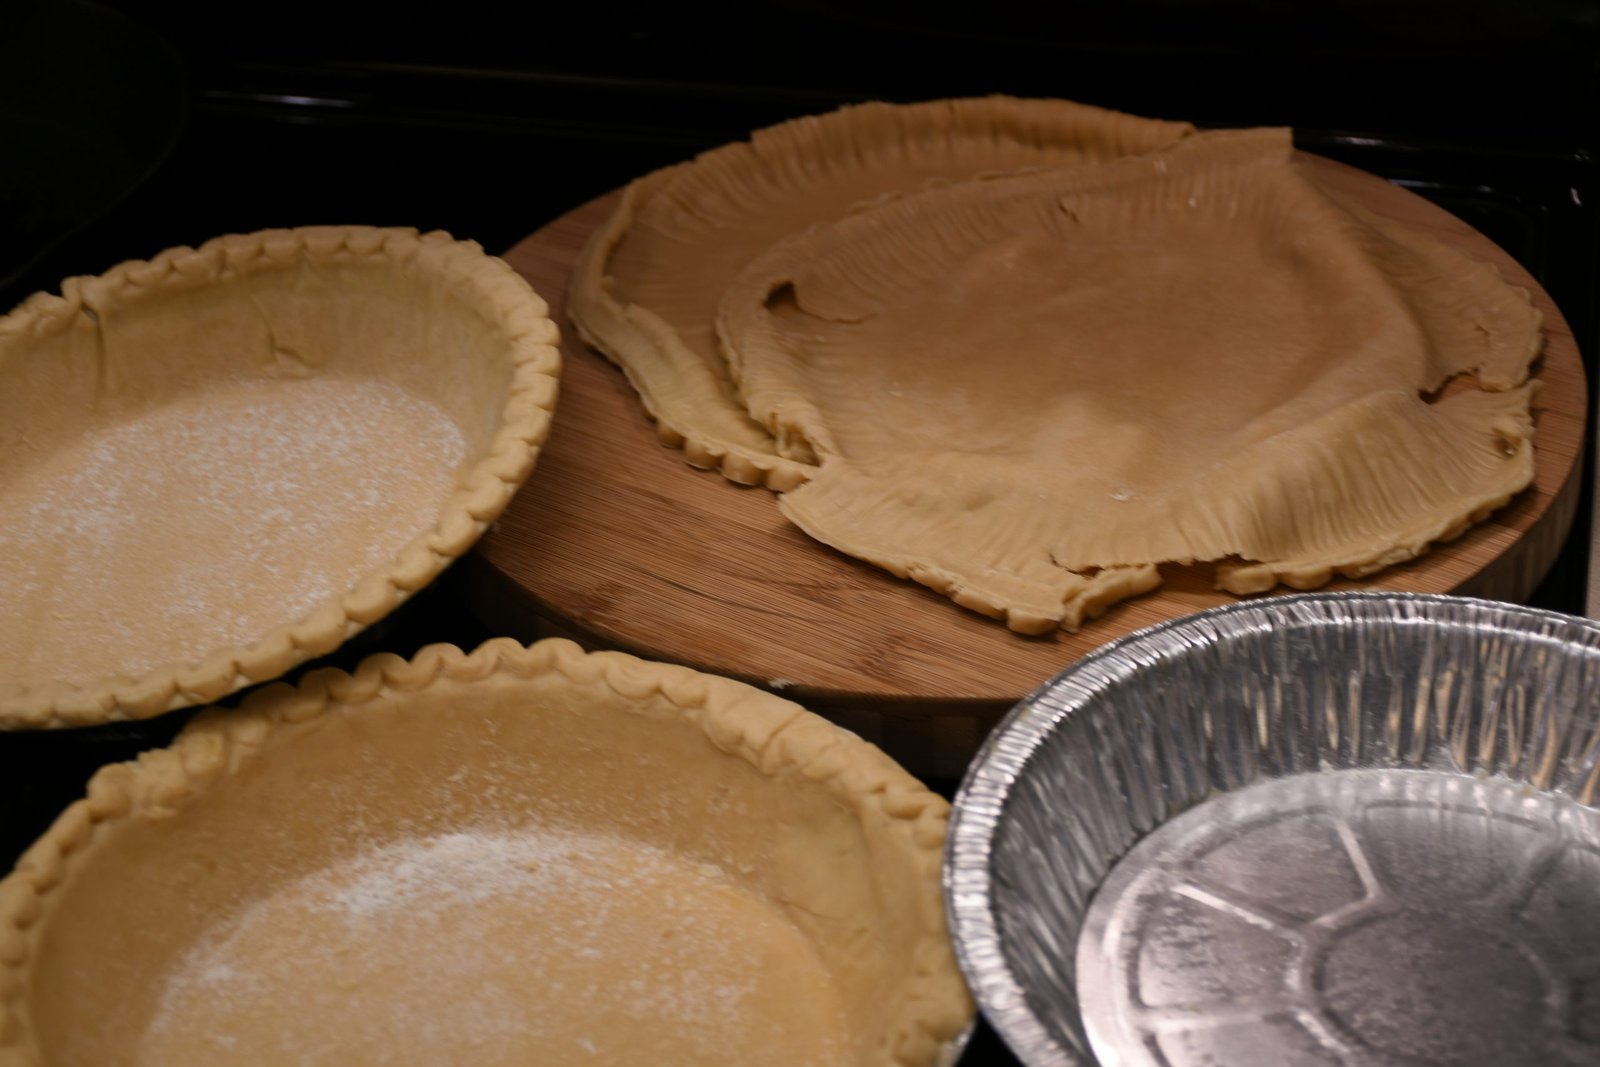
And you can see here a few of my pie crusts are thawed and I’ve removed them from their aluminum pie shells.
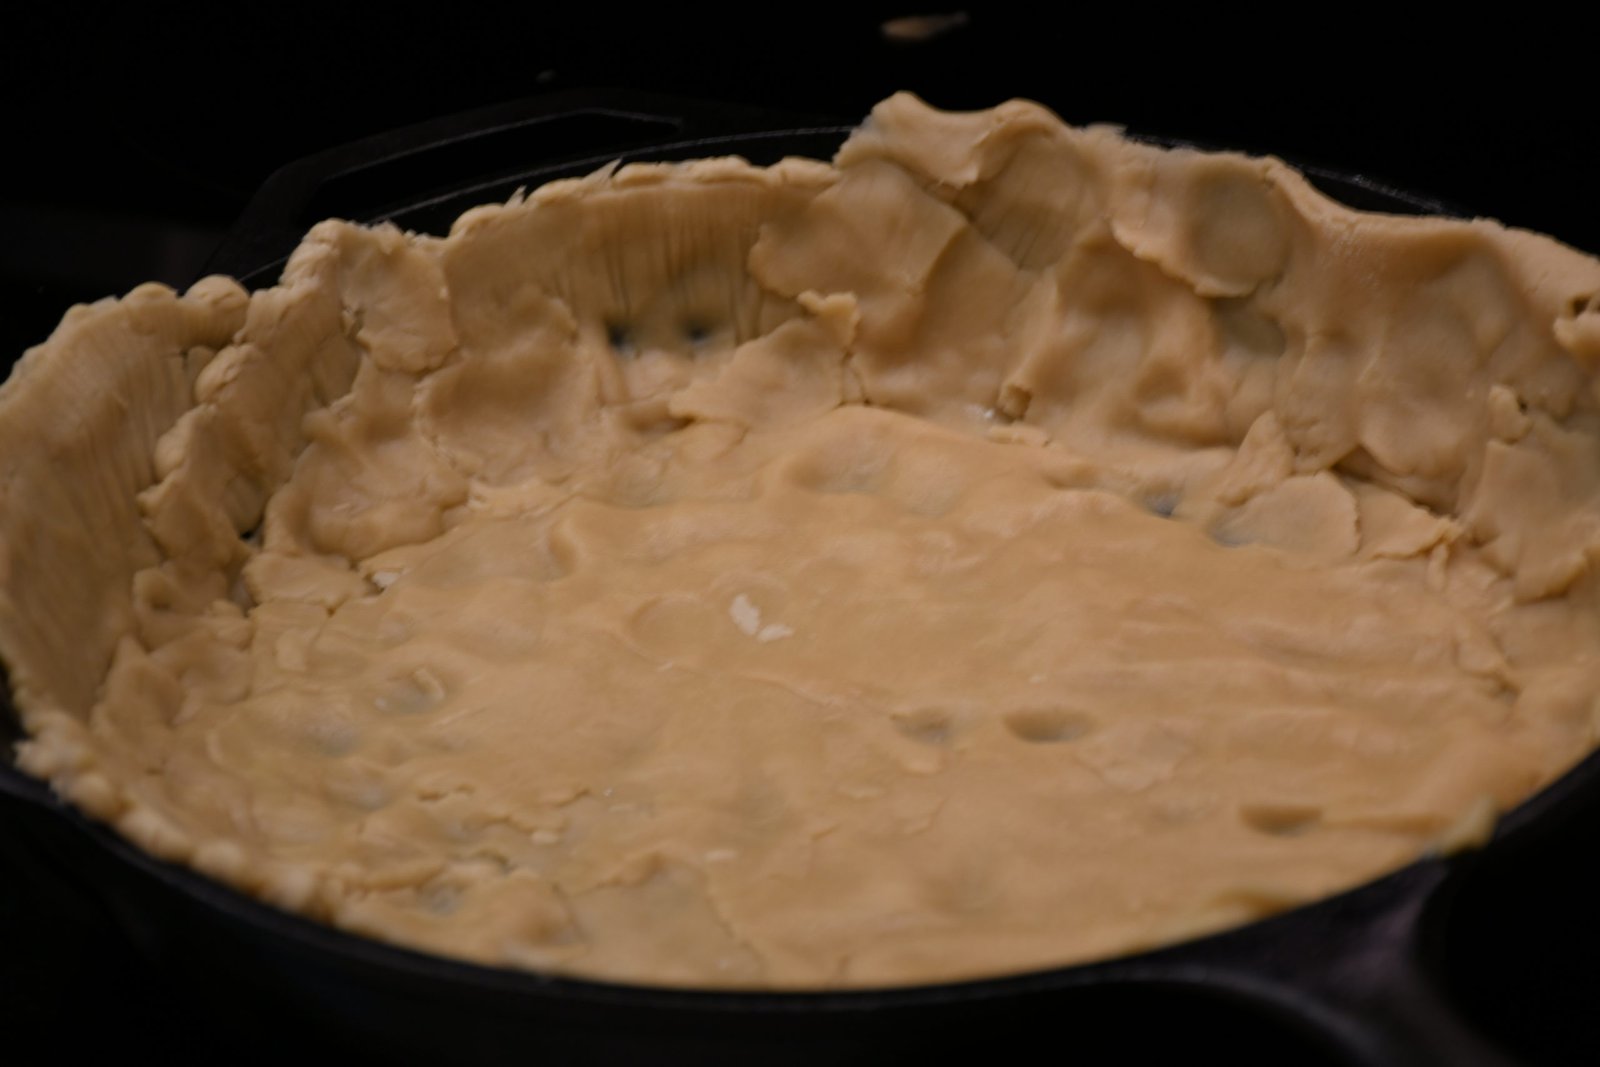
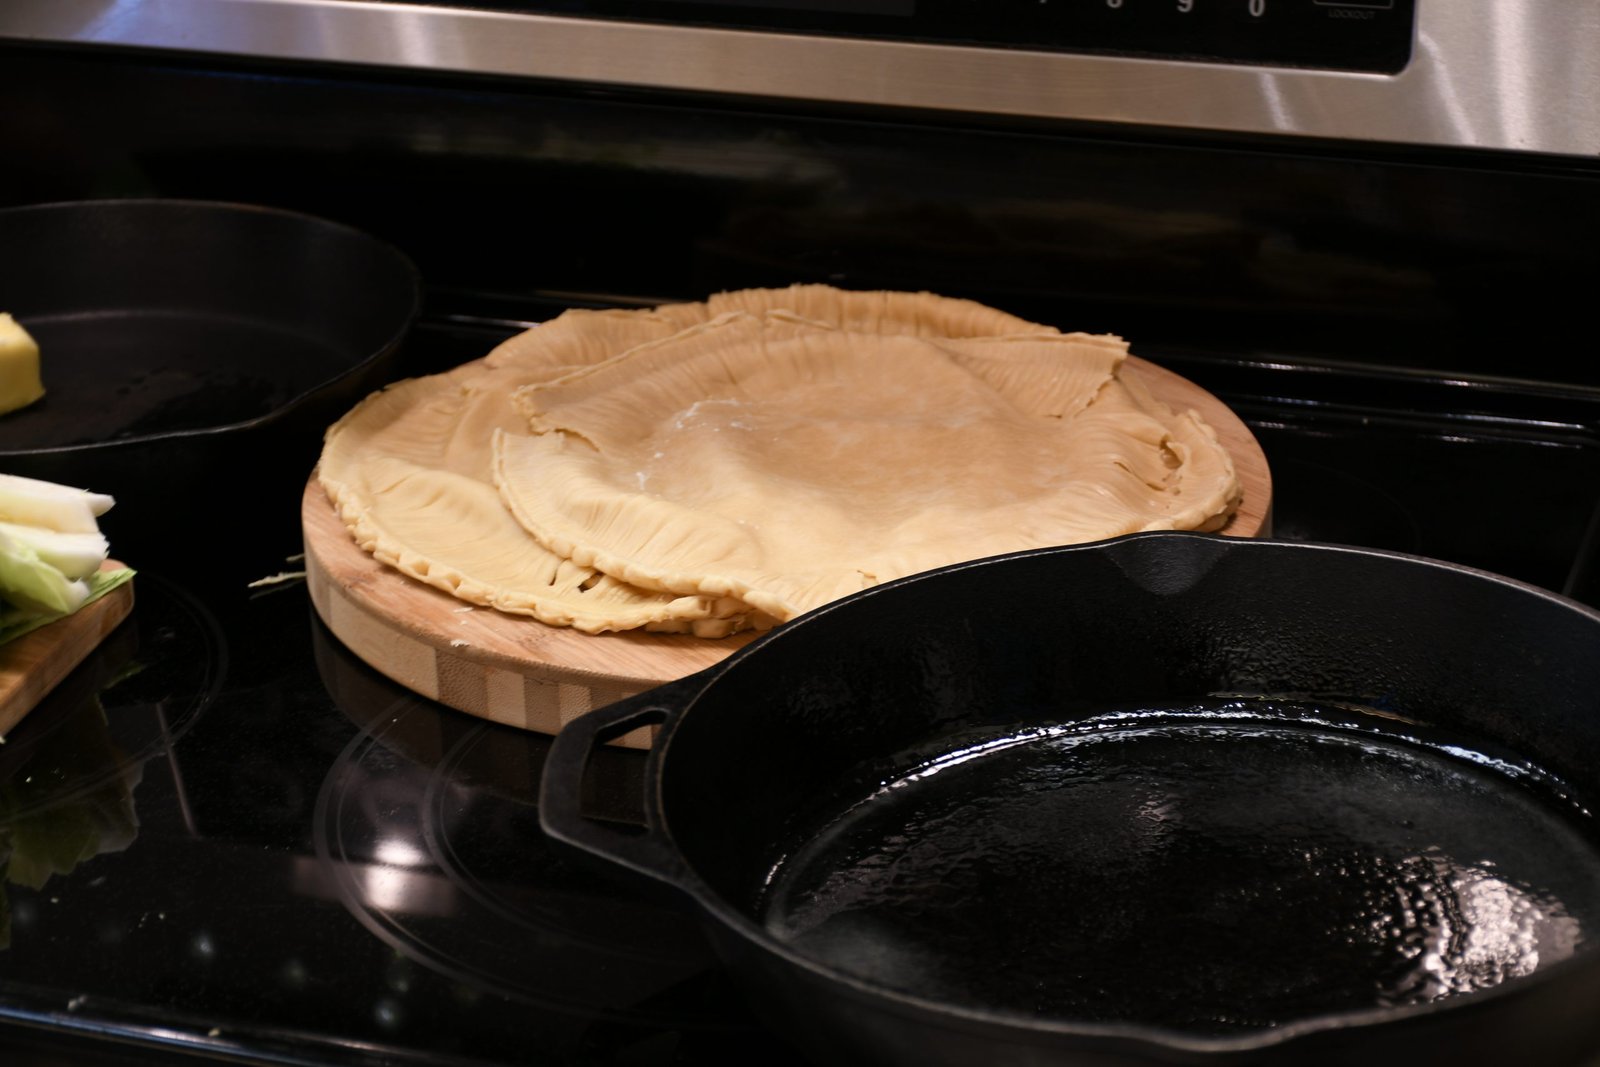
So, now I’m just smooshing it all together all around the skillet to form a pie crust. You can see all my fingerprints all over it. The truly sad part is that this is my best! My best is this equivialent of a kindergarten finger painting. And no disrespect to Kindergartener’s what-so-ever.
(And because this is my BEST, I decided to call it “rustic.”) Sad, huh? 🙁


Time to Chop My Herbs
————————————————————
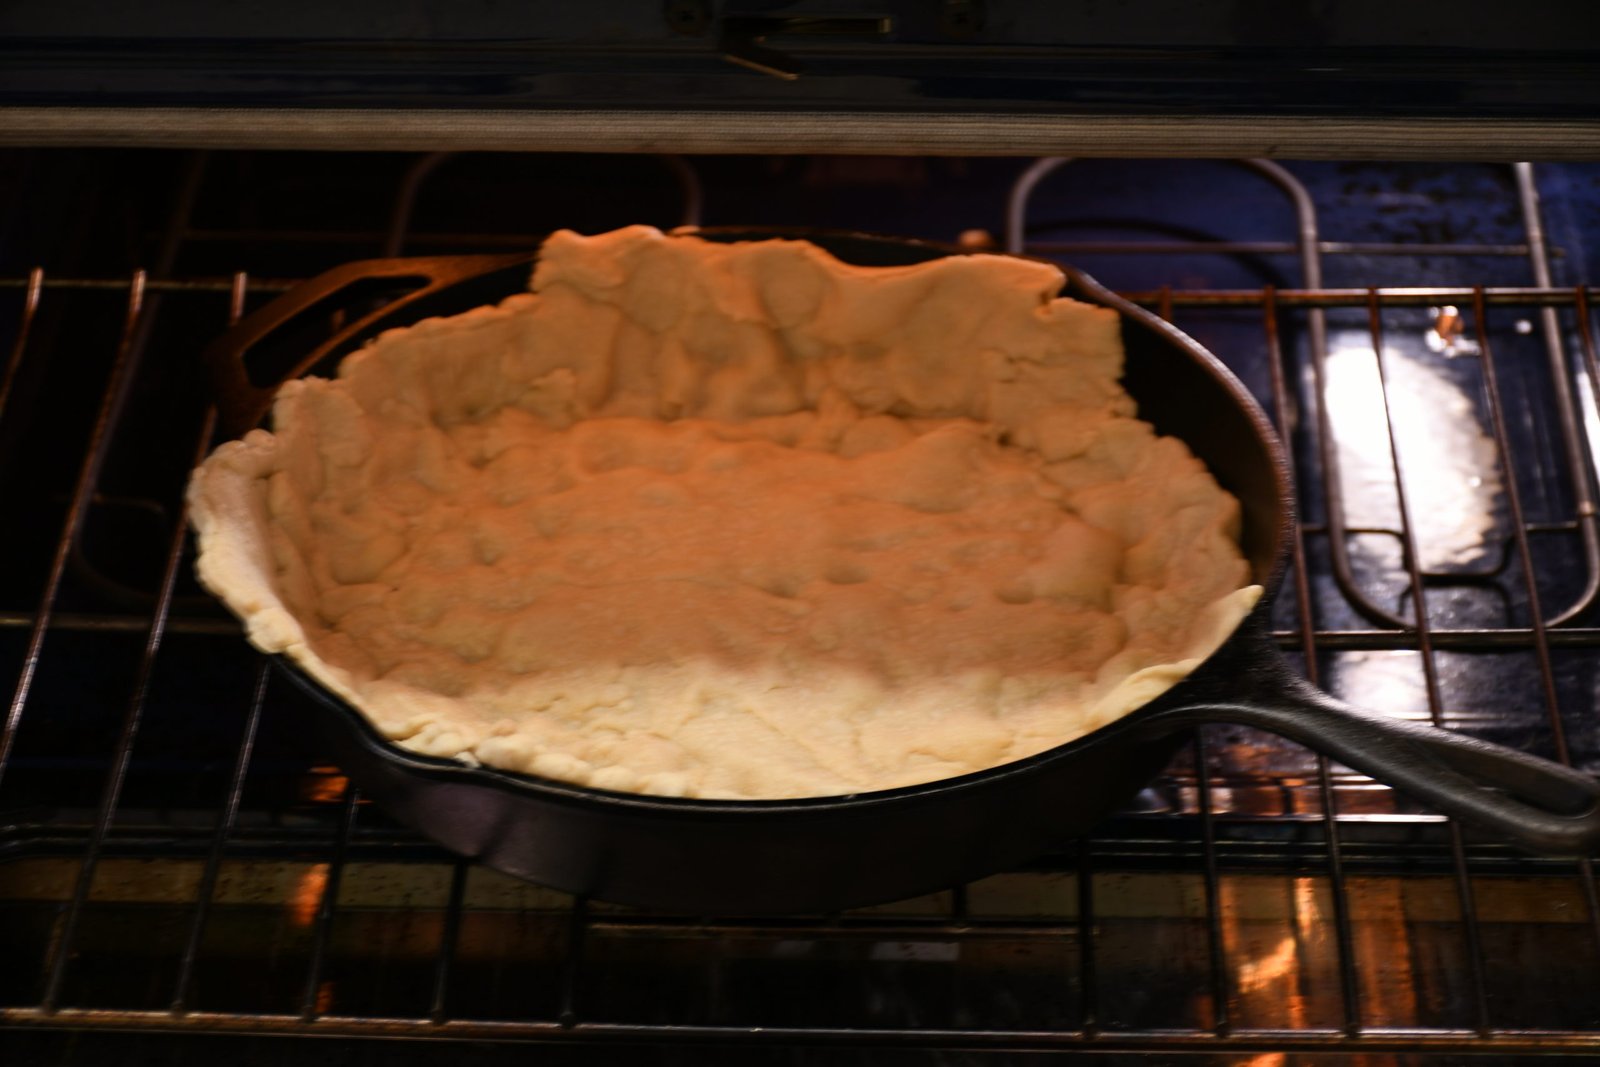
So, while I’m chopping my herbs I’ve placed my skillet into a 350F oven for about 5 minutes just so the crust with cook up a bit and not be so doughy.
Just in case you are wondering I bought up extra pie shells just in case I messed this up. Well, I realized that I would need some to top my pie so I got them out of the freezer and they are now thawing.


With my Cabbage wilting a bit on a medium heat, and my crust cooling a bit from the oven, it’s time to add some heat to my Cabbage.
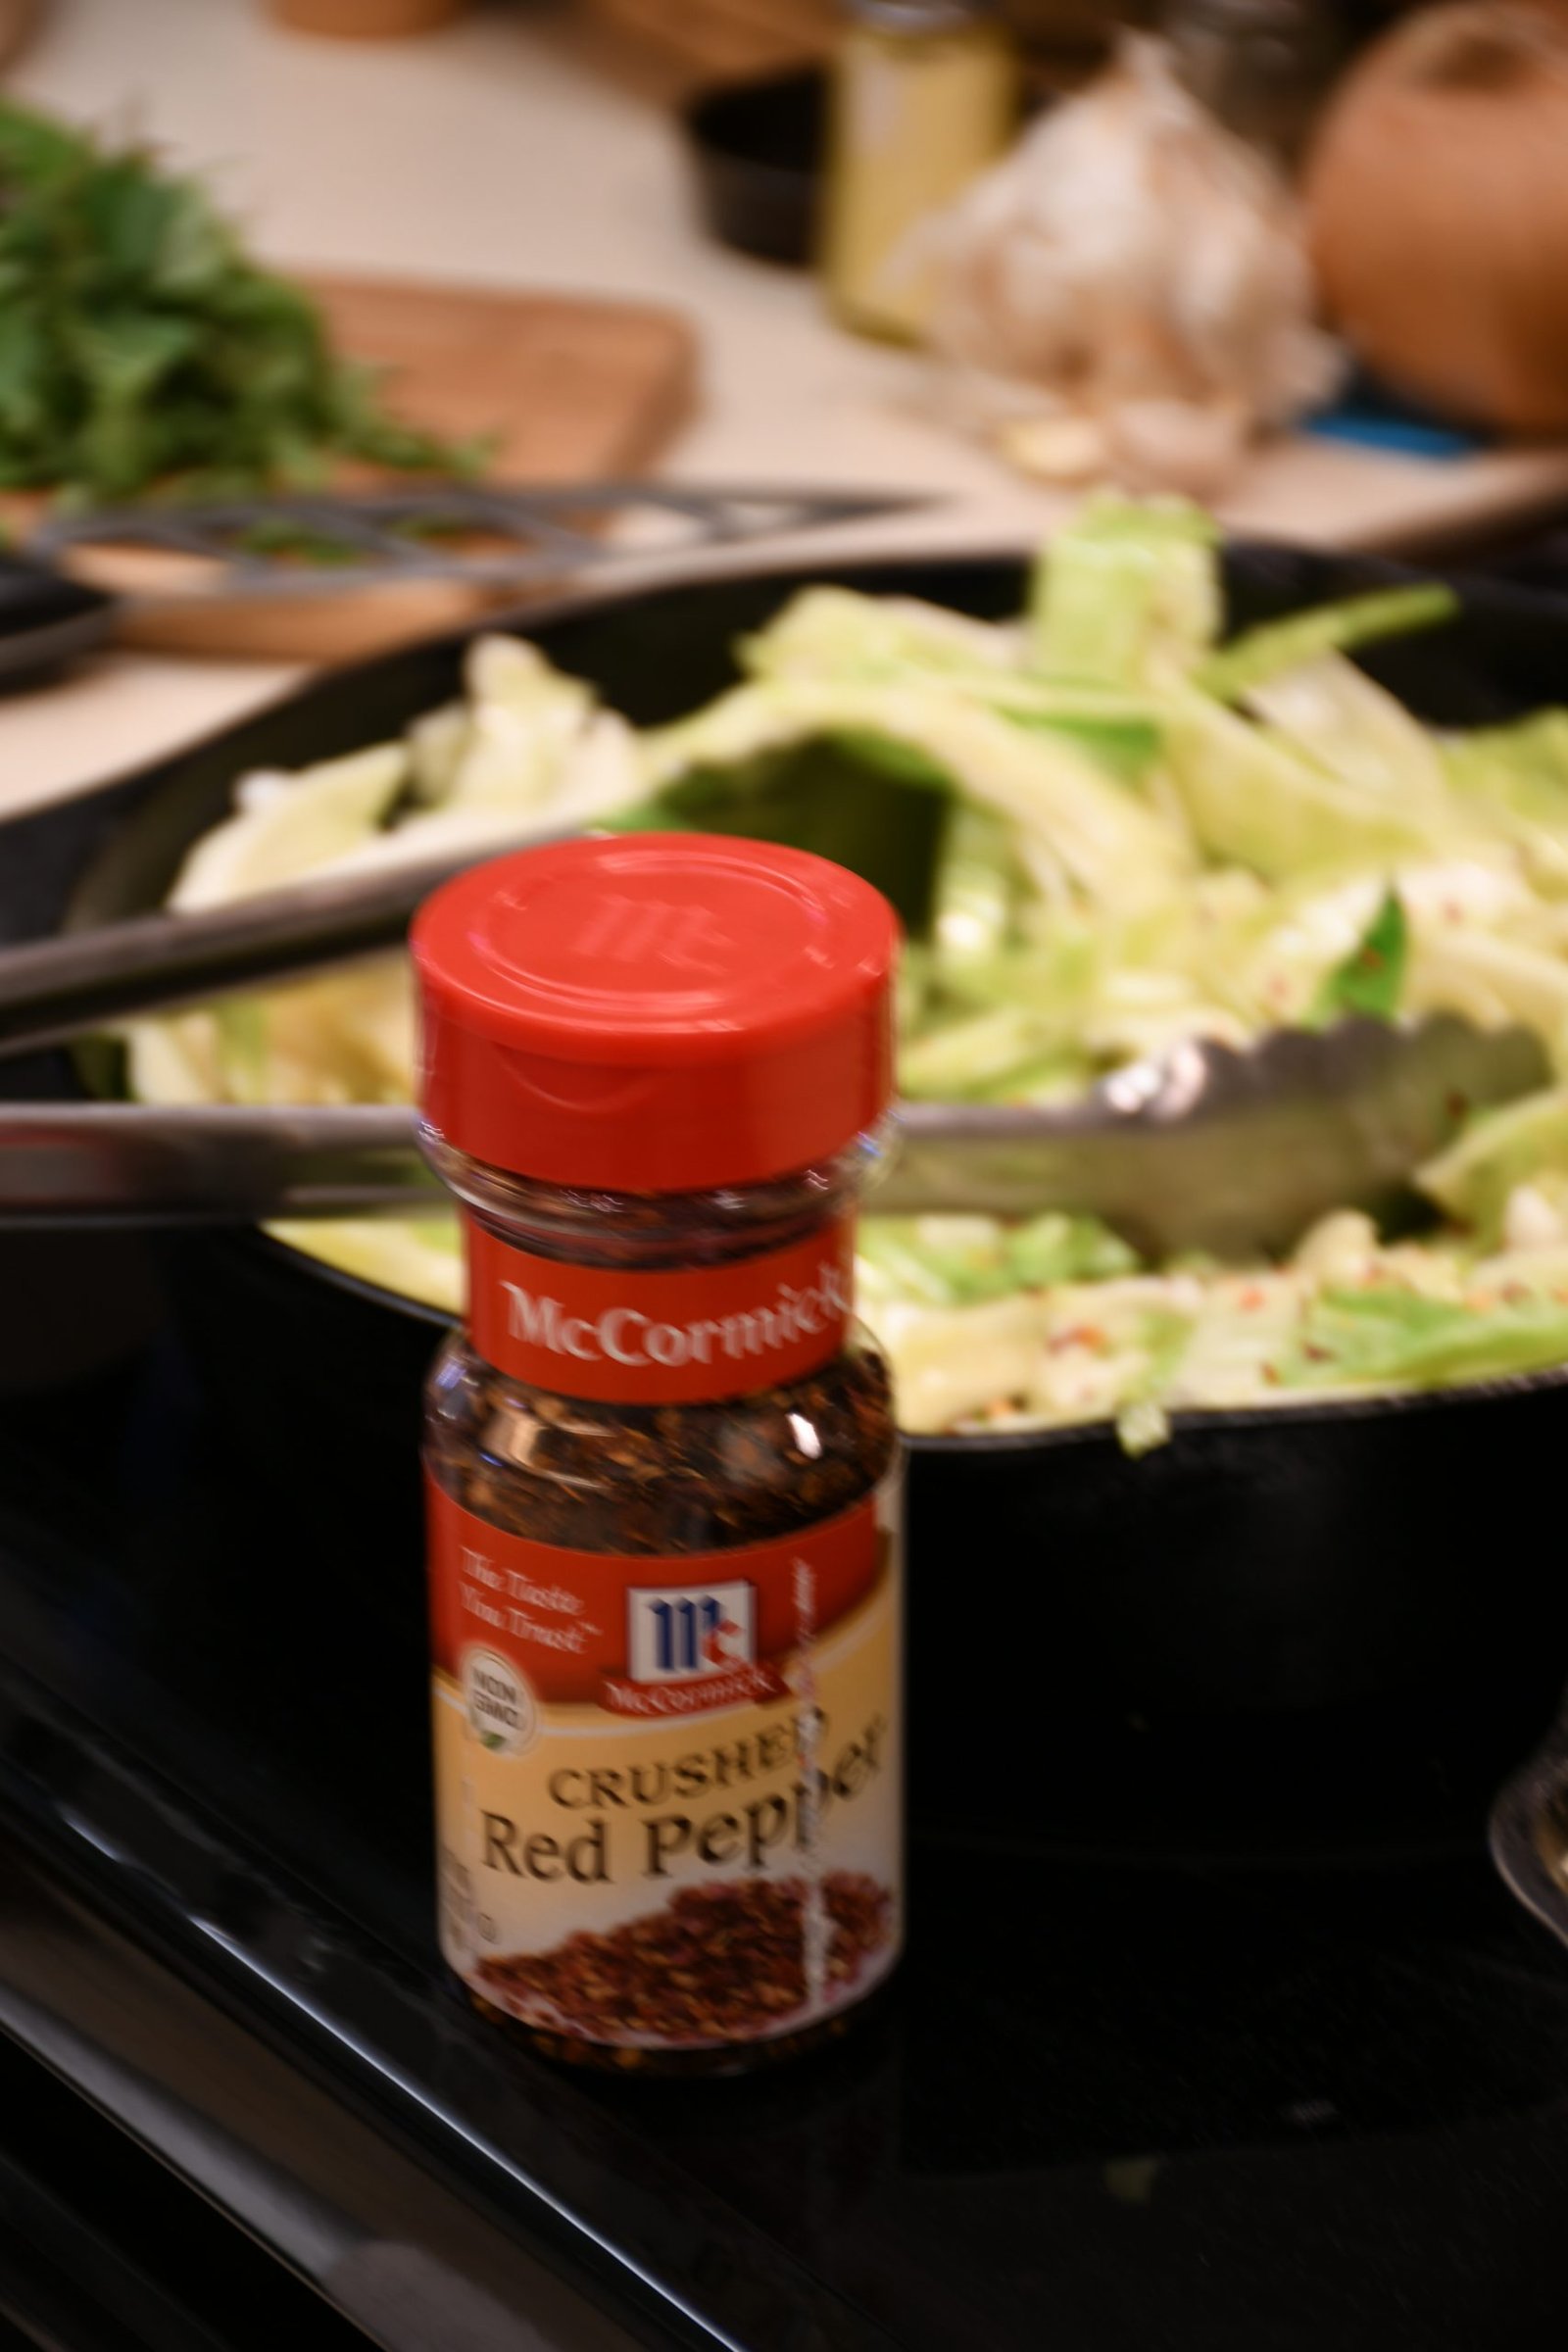
Crushed Red Pepper Flakes
(I added about a teaspoon.)


Now I’m adding my chopped up Herbs to the Cabbage.
I threw in about a handful, if that helps you.
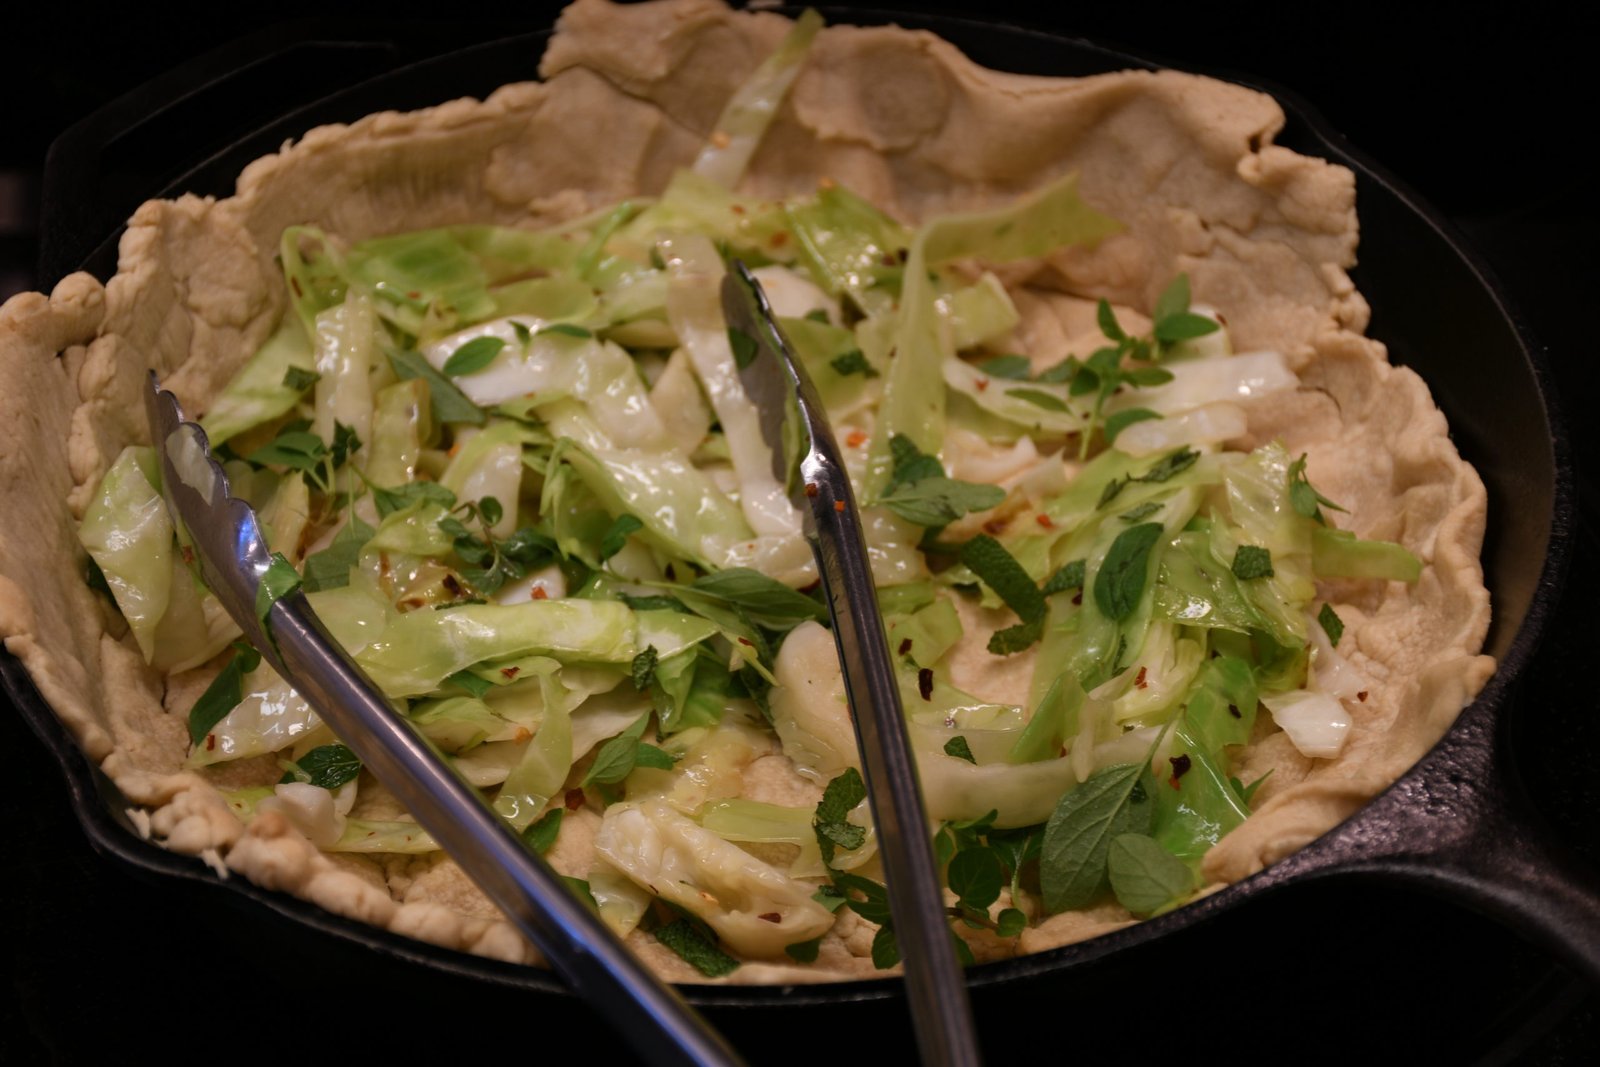
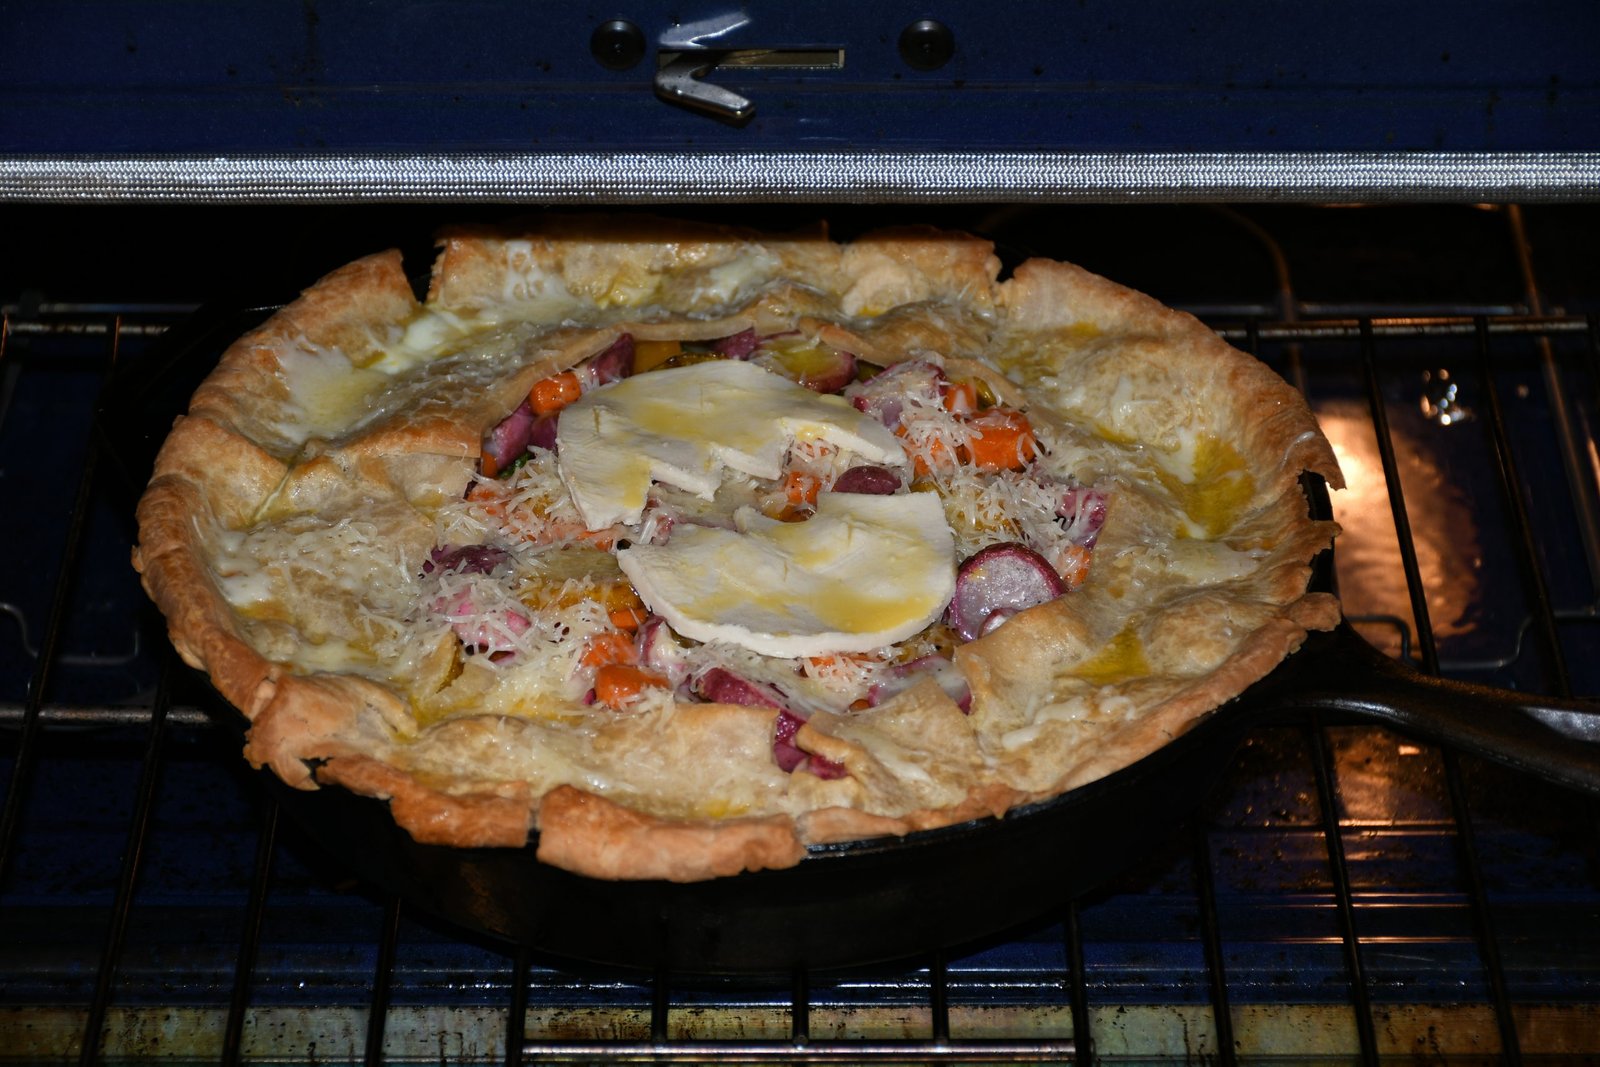
Time to Layer My Pie


Photo Top Left, I’ve got my sauteed Cabbage and Herbs. Then Photo Top Right, I’ve started to layer my Yellow Squash and my Green Zucchini.
Then obviously the rest of my root vegetables.
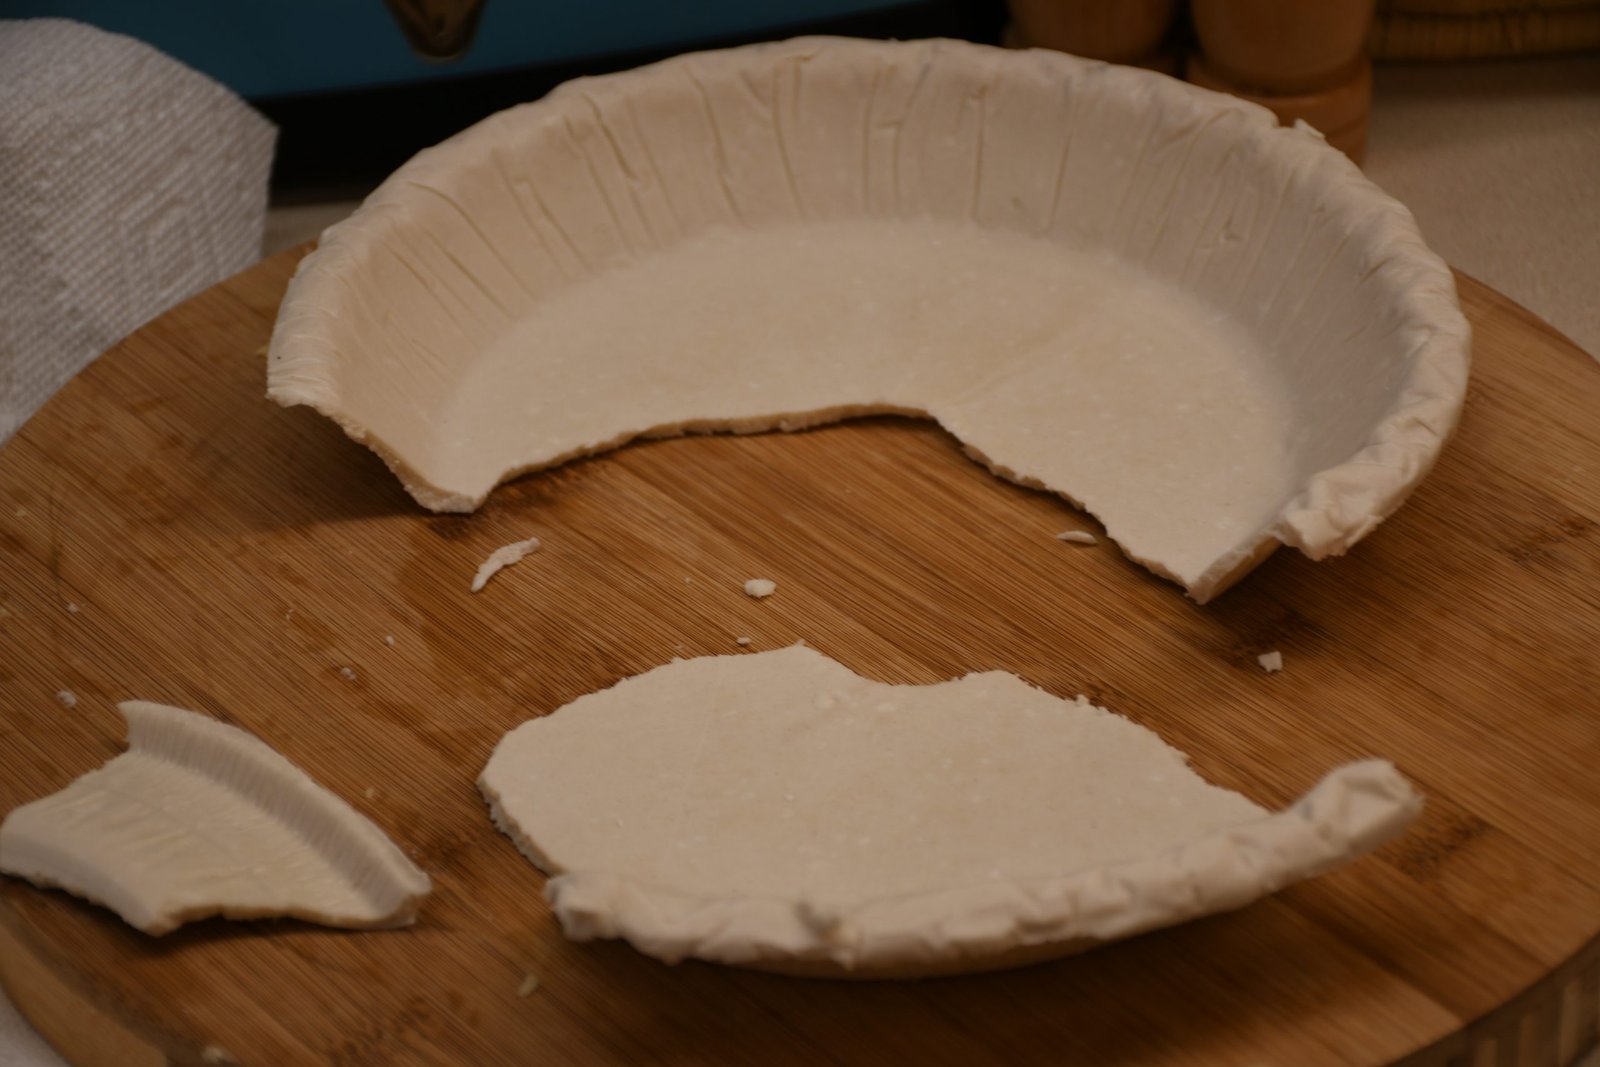
I then experimented and cut up about 2 more pie crusts to outline my pie, but to leave the center open.


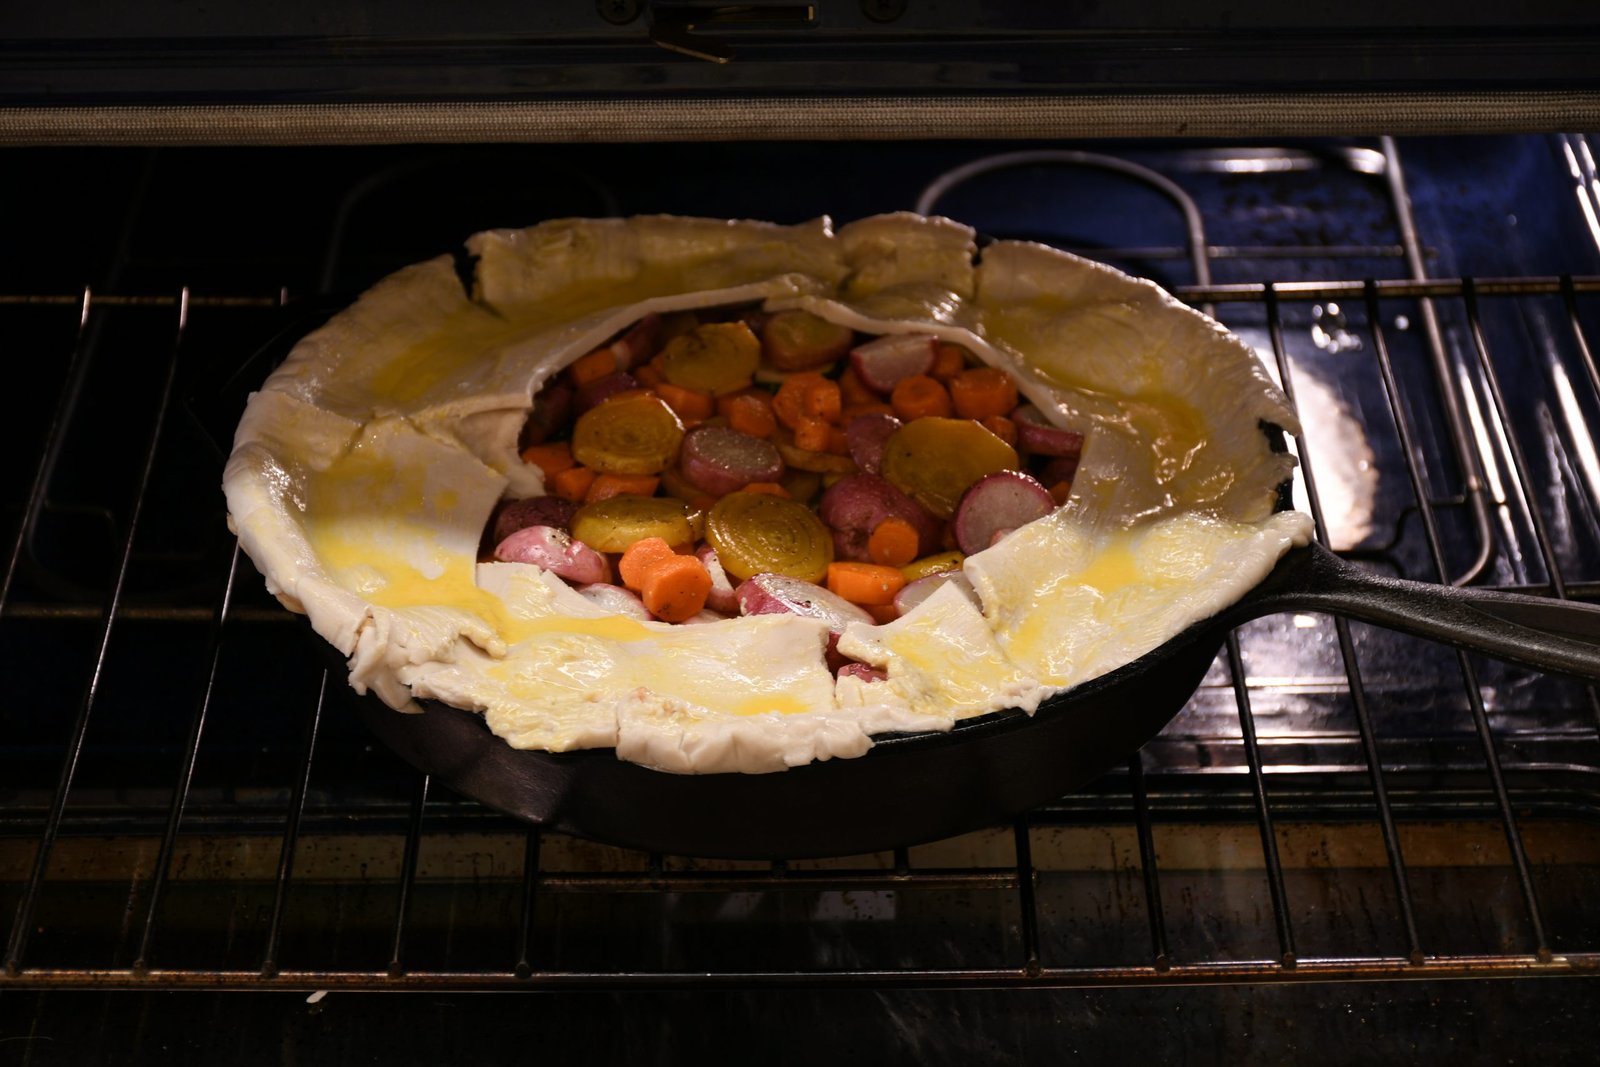
I did brush an egg lightly all around the crust to make it shiny and pretty.
Now I’m placing it in the oven for about 10 – 15 minutes for the crust on top to cook a bit.


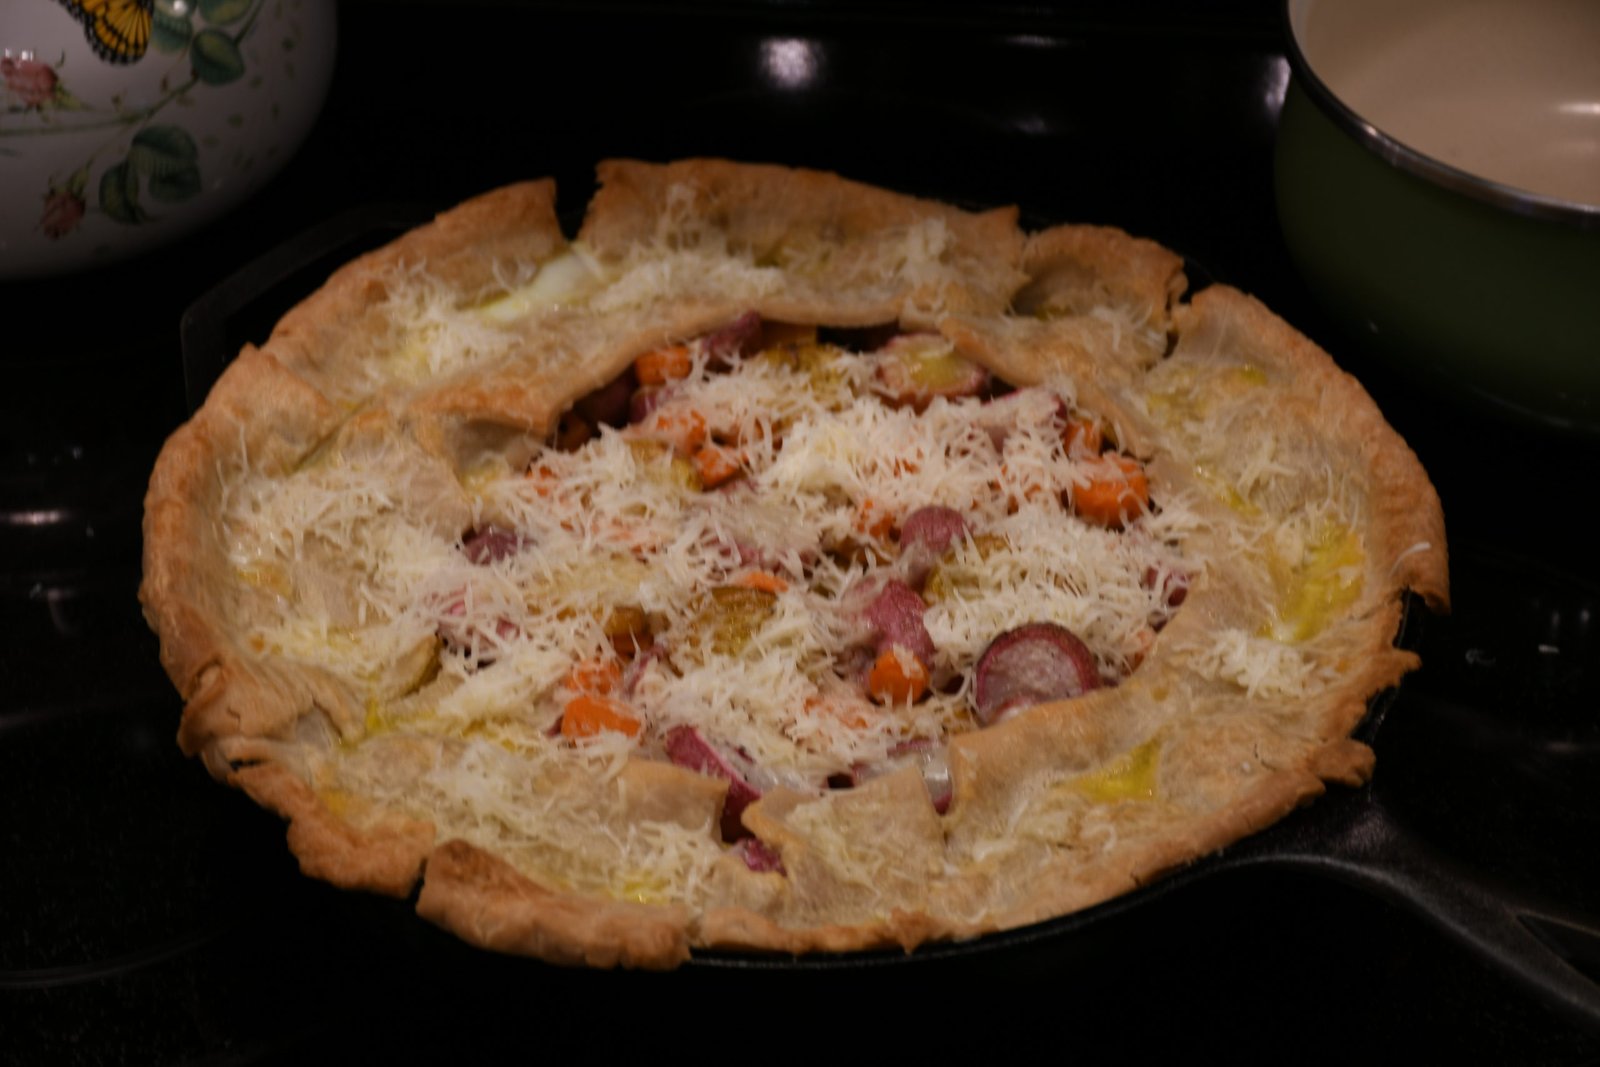
Now I’m Grating Cheeses
Fontina and Gruyere
Just enough to top my pie, all around.

——————————————————-


I had some leftover dough from all those pie crusts that I had bought, and as an after thought I cut out an Easter Egg and decided to place it on top of my pie.
So, I placed it back in the oven for about 10 more minutes. I did place some foil around the edges so that they wouldn’t burn too much so that my Easter Egg could brown.
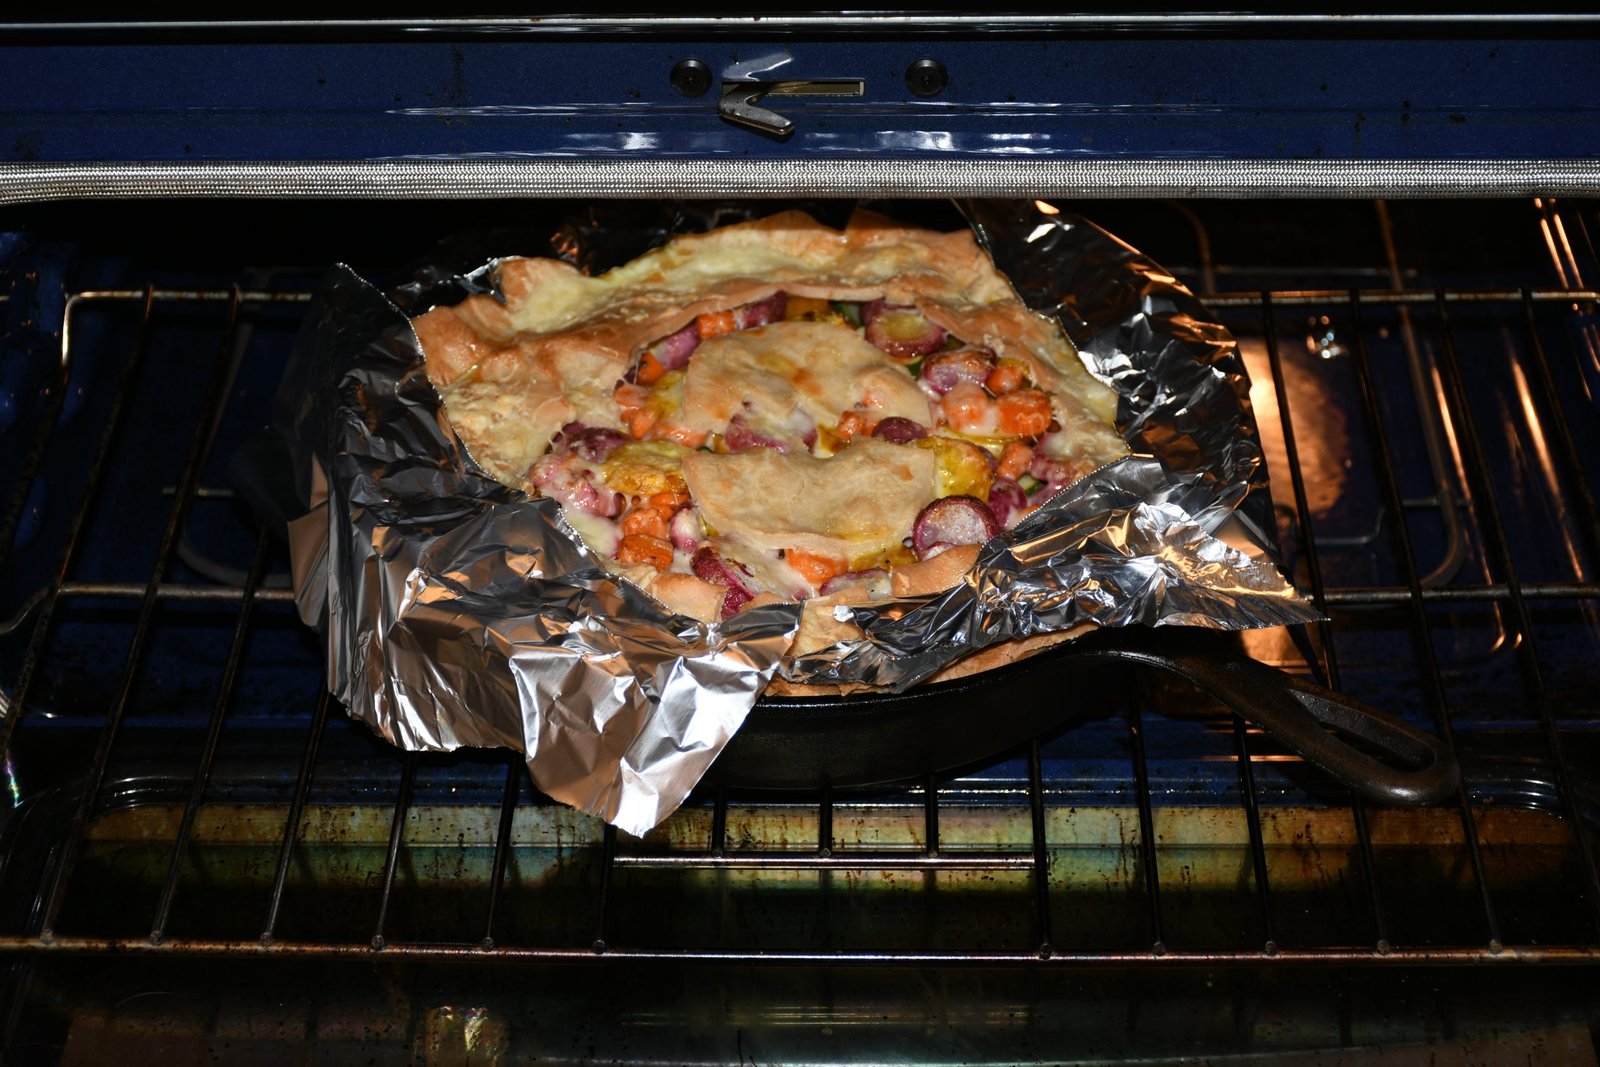

My Easter Egg is difficult to see, but it is there! 🙂
————————————————————

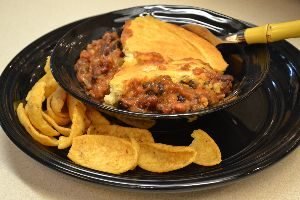
Time To Cool

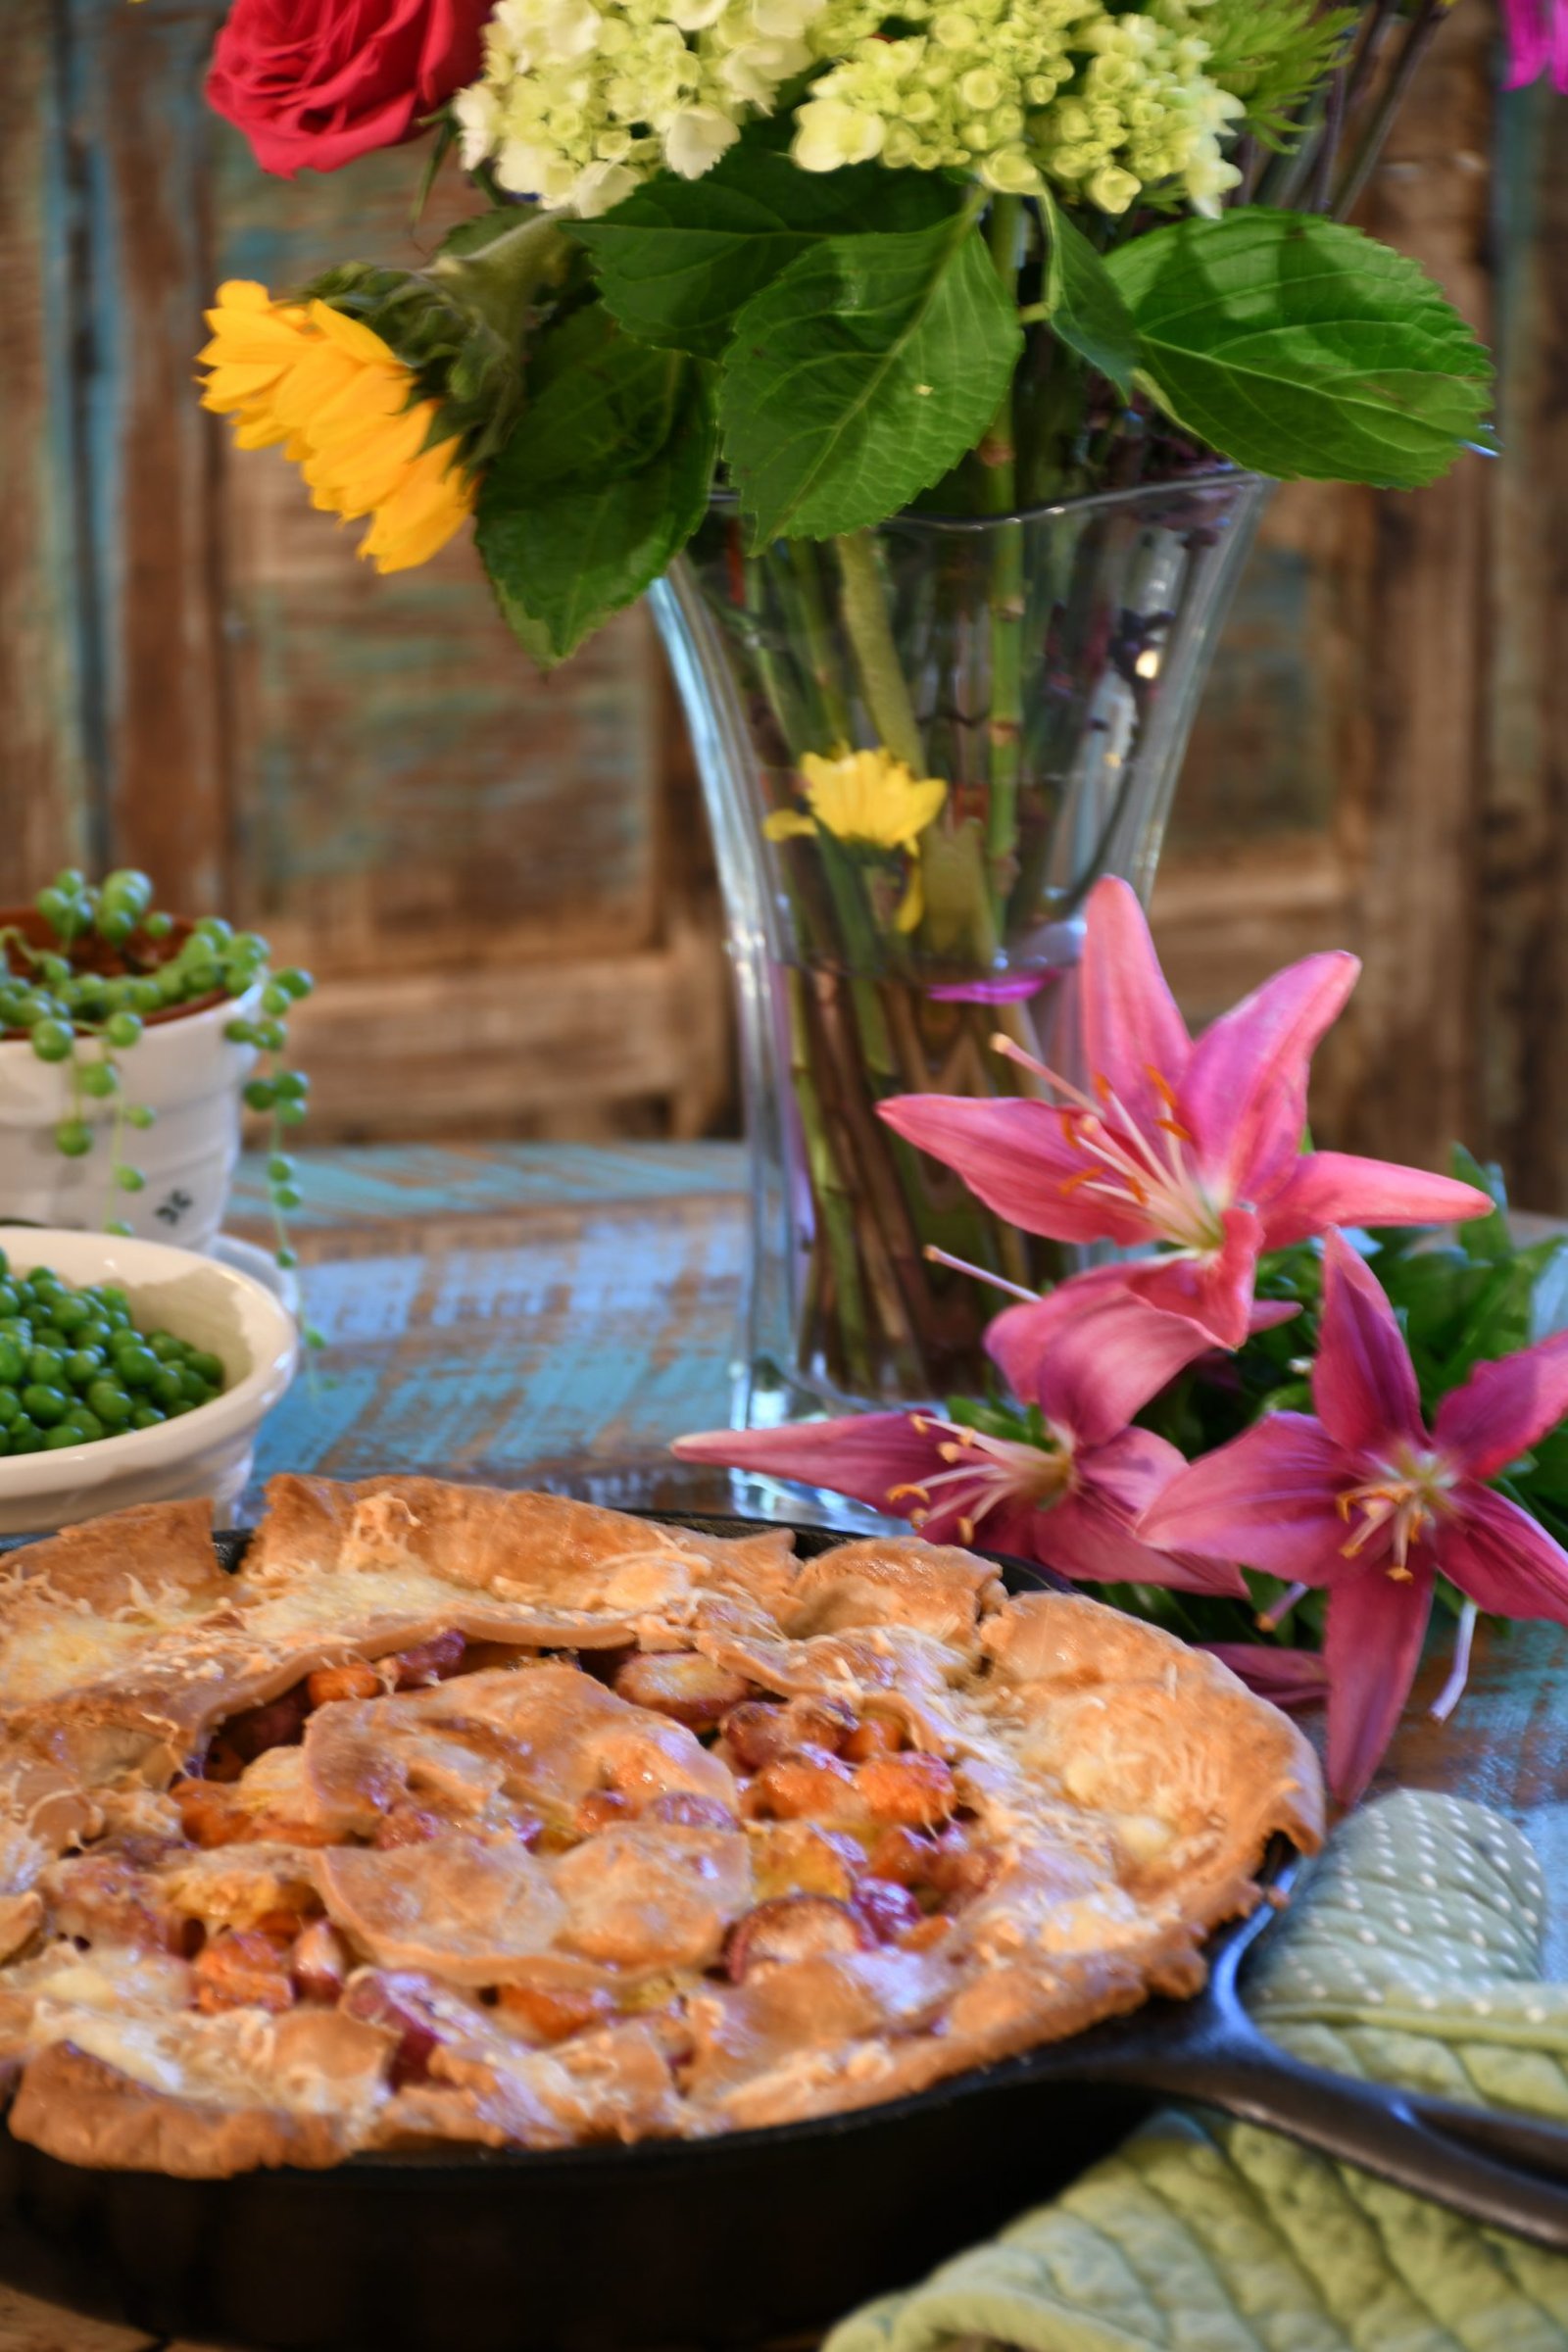
All in All I would say that my experiment turned out good. But I do think that had I added a can of Cream of Celery Soup that would have given it a more creamy taste. I mainly just relied on the olive oil and vegetables to shine and I do think they could have used a little help. I’m just being honest. I think I created a great foundation and next time I will build on the foundation to make it even better.
I am a firm believer that sometimes the spices we add end up changing the flavors of our foods so much that we no longer taste the food, we just taste the spices. I did enjoy this pie because I was able to taste the food, not all the extras that we are made to feel belong in our foods.
Happy Baking!
Julie
—————————————————————————-
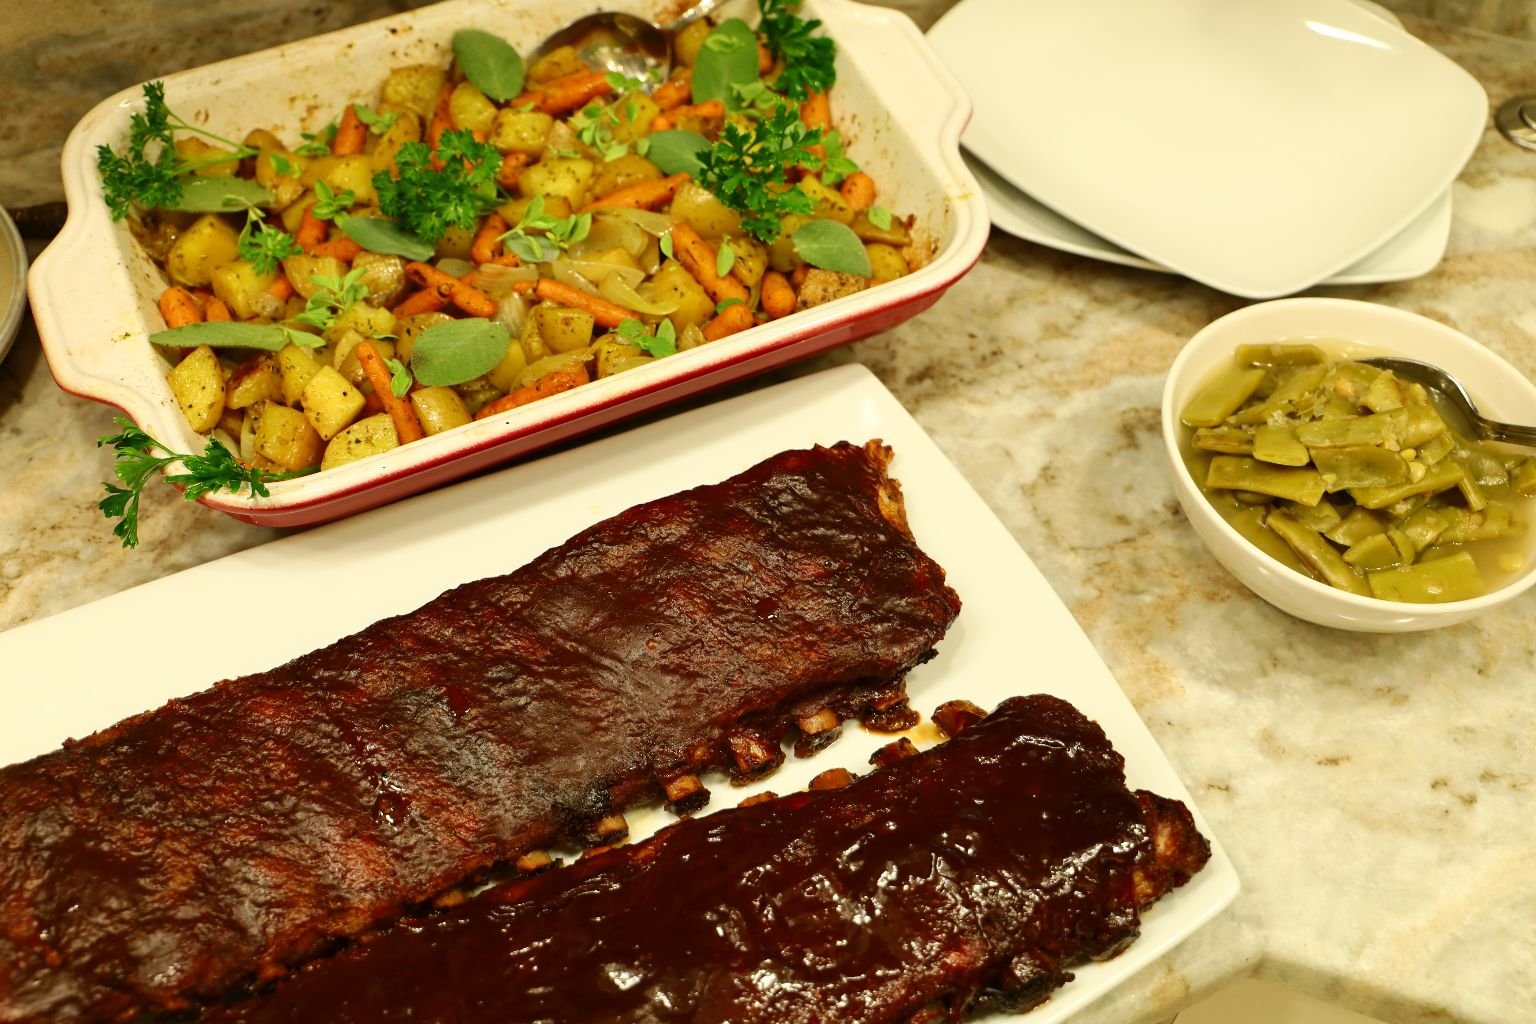
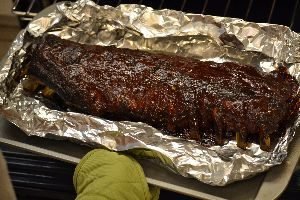
Ribs and Veggies
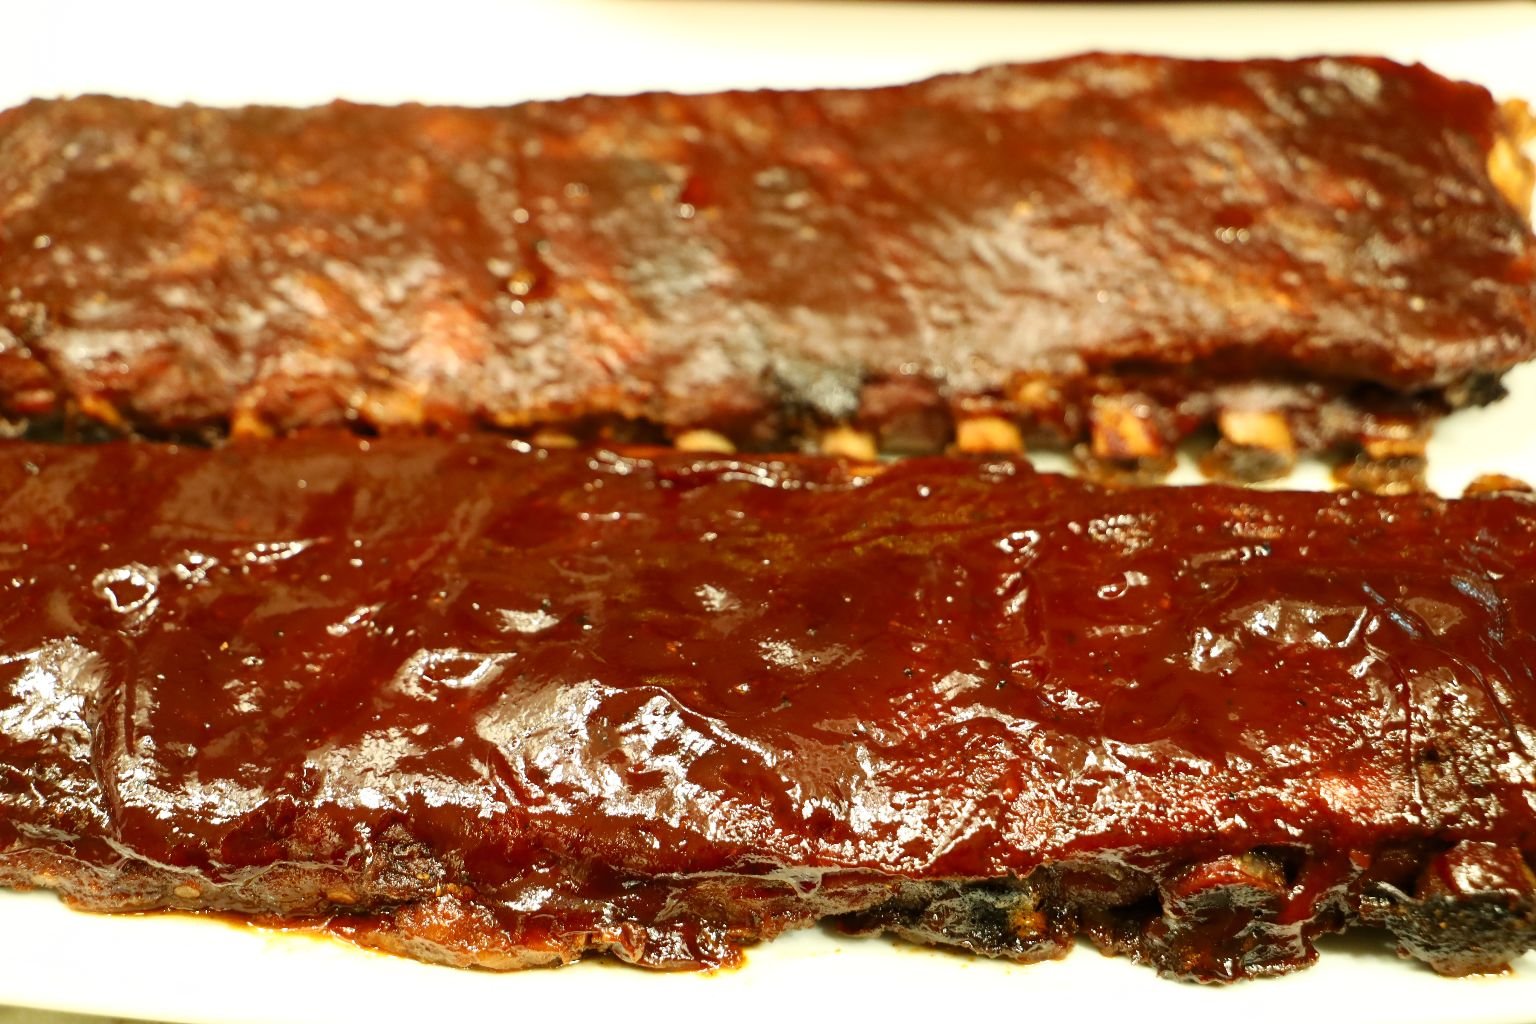
Gordon makes some of the best ribs you will ever eat.
Here is a link to his ribs:
Ah, Ribs!

You will love them, I promise!
——————————————————————————–
Excellent Sides For The Ribs
————————————————————————————–
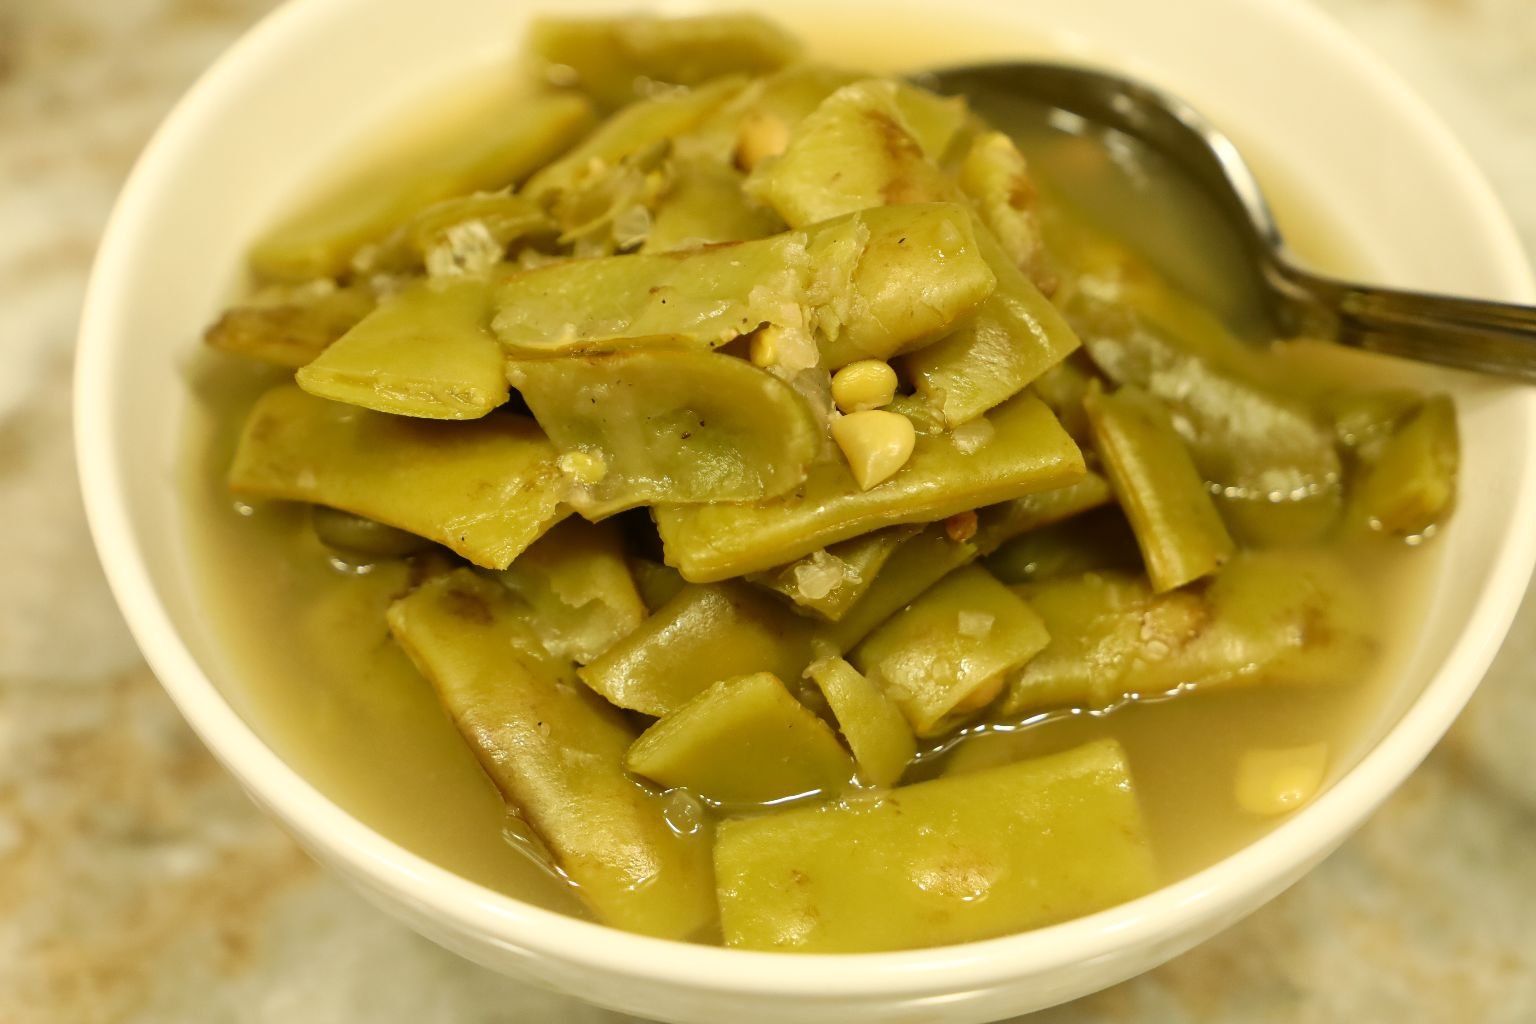
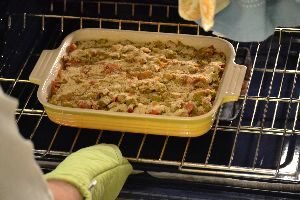
Italian Green Beans From a Can (Delicious)

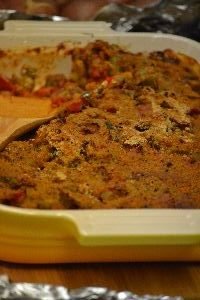
Our Herb Veg Casserole

Delicious With Our Ribs
——————————————————————————–
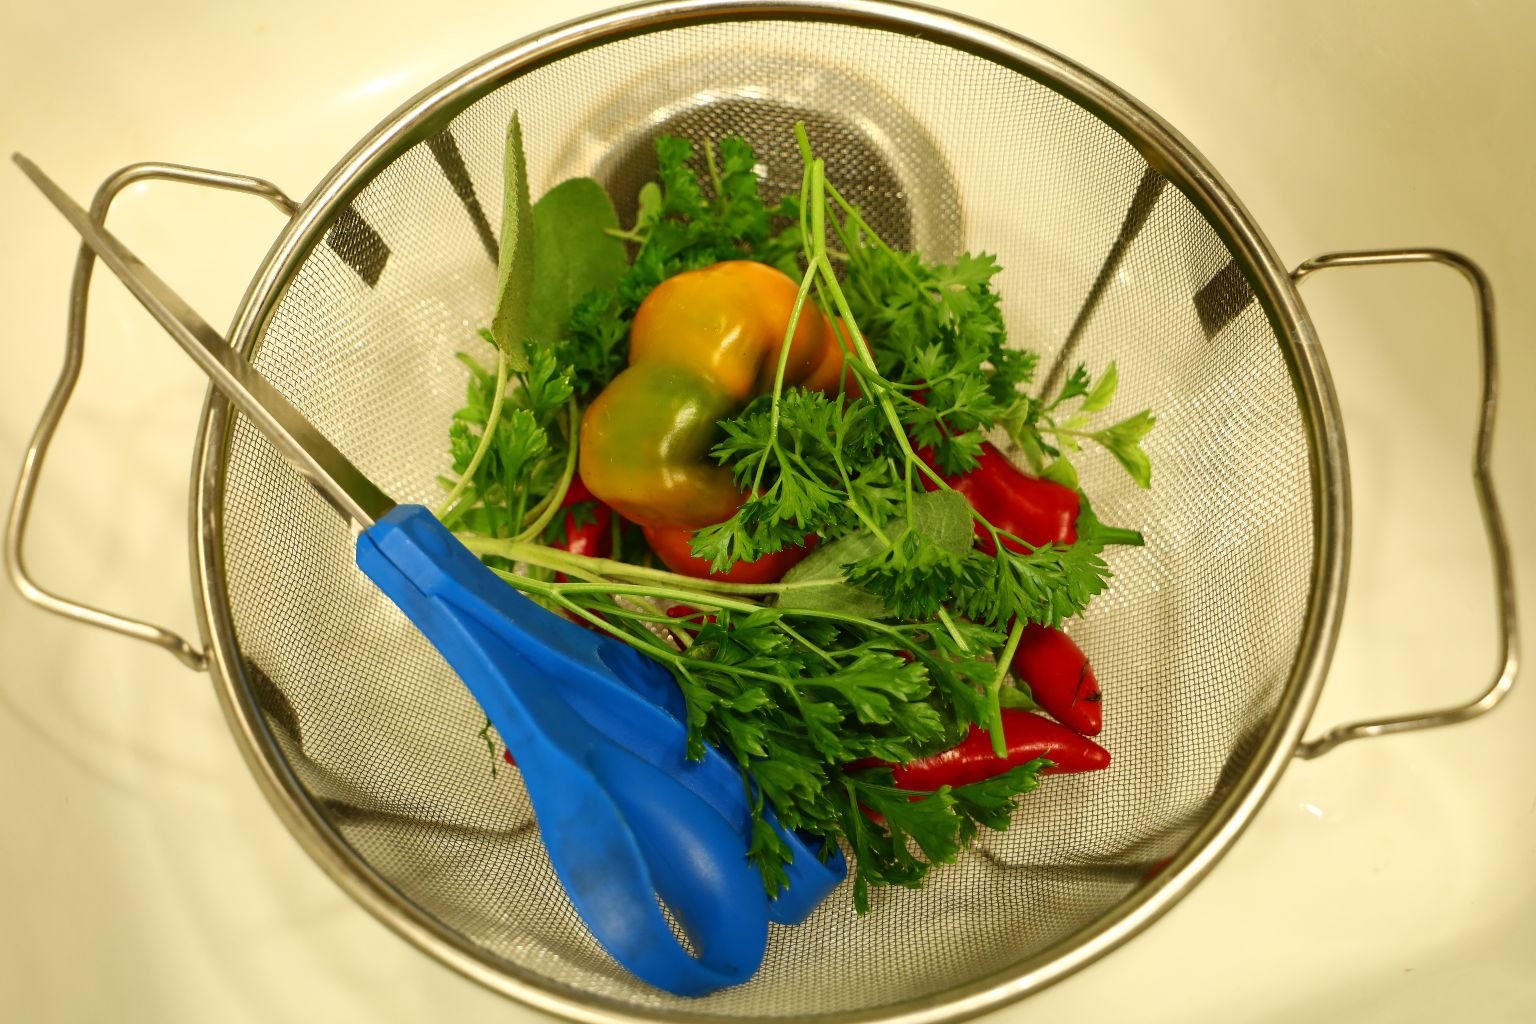
Washing Some of our Herbs
—————————————————————————-

Gathering Casserole Ingredients

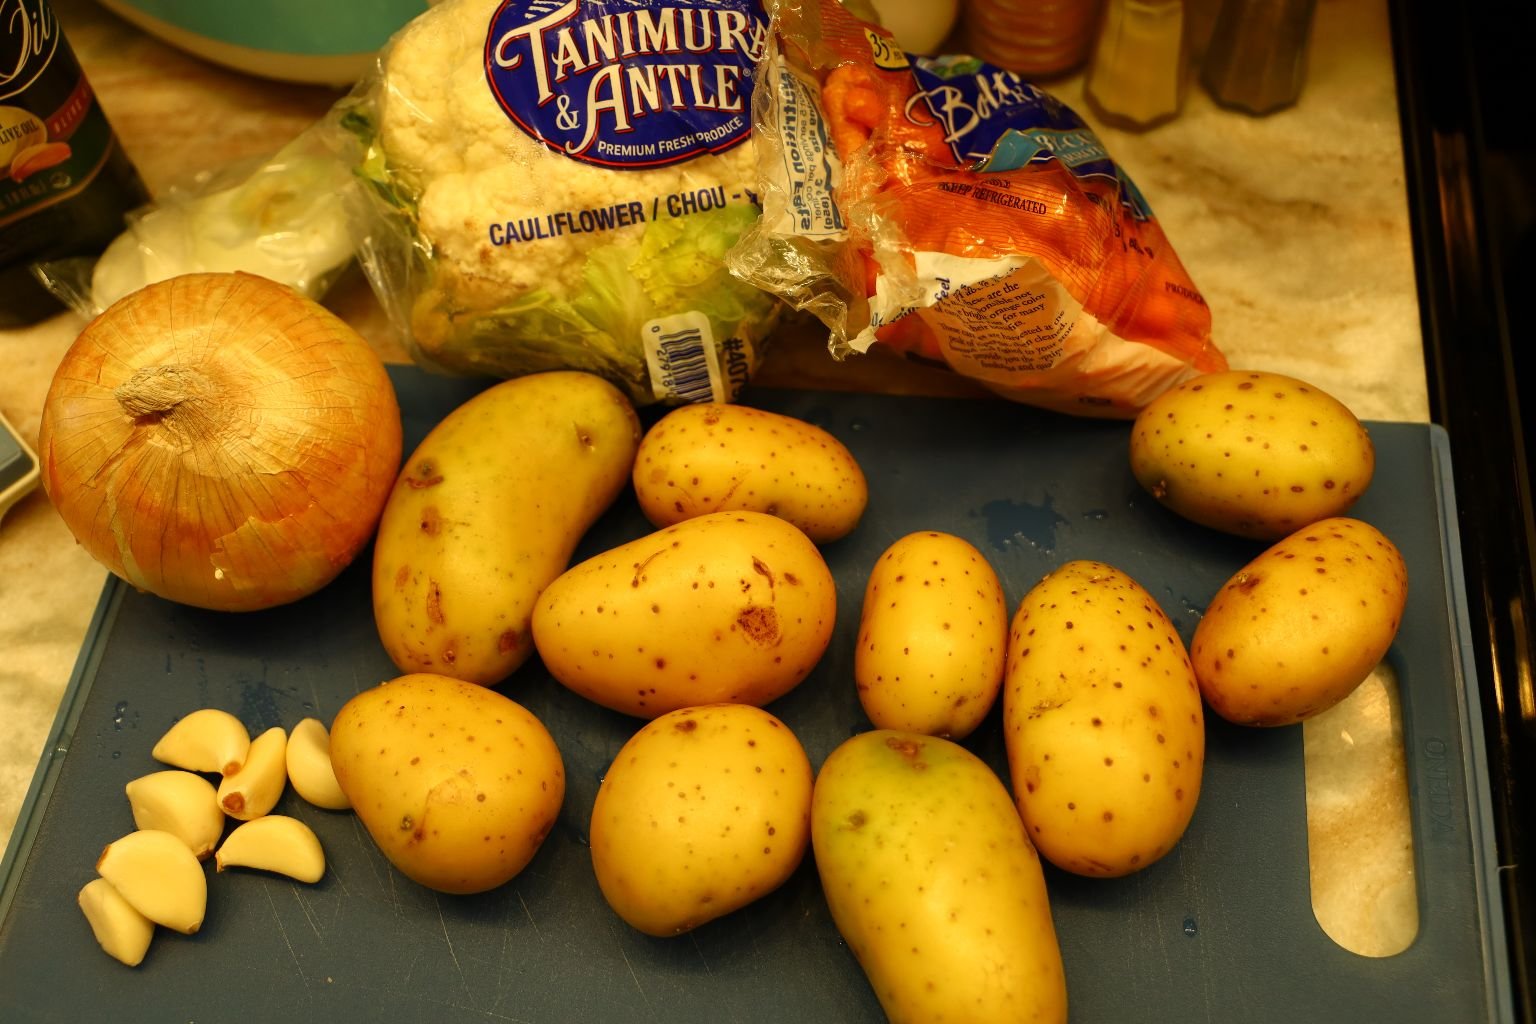
Ingredients:
6 Tbsp. Roasted Garlic infused Olive Oil
2 Cups Baby Carrots
8 Garlic Cloves
10 Yukon Gold Potatoes – Sliced into chunks
1 Large Onion – Sliced into chunks
4 Tbsp. Butter
Hawaiian Salt, and Freshly Ground Black Pepper to taste
1 tsp. Dried Oregano
1 tsp. Dried Basil
1 tsp. Ground Turmeric
1 tsp. Ground Sage
1 tsp. Ground Thyme
1 tsp. Dried Marjoram
Garnish with fresh Oregano, Parsley, and Sage Leaves
————————————————————————————-

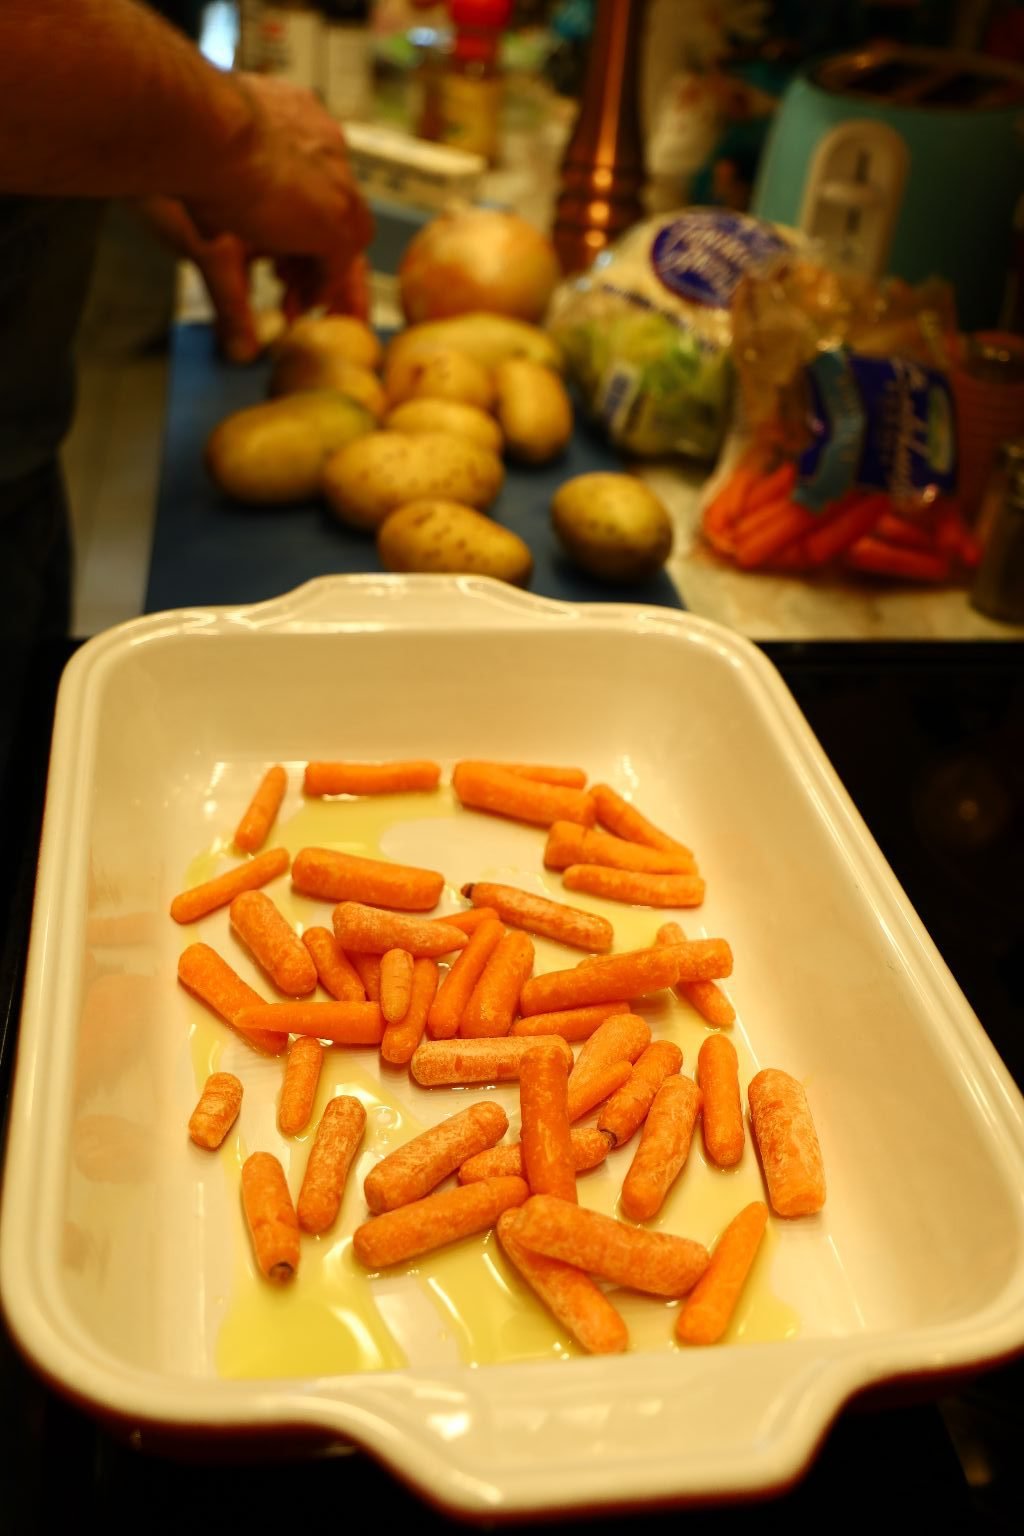
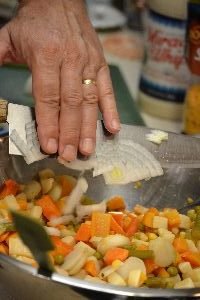
Start by pouring your Olive Oil into a large roasting pan, then add your Baby Carrots.


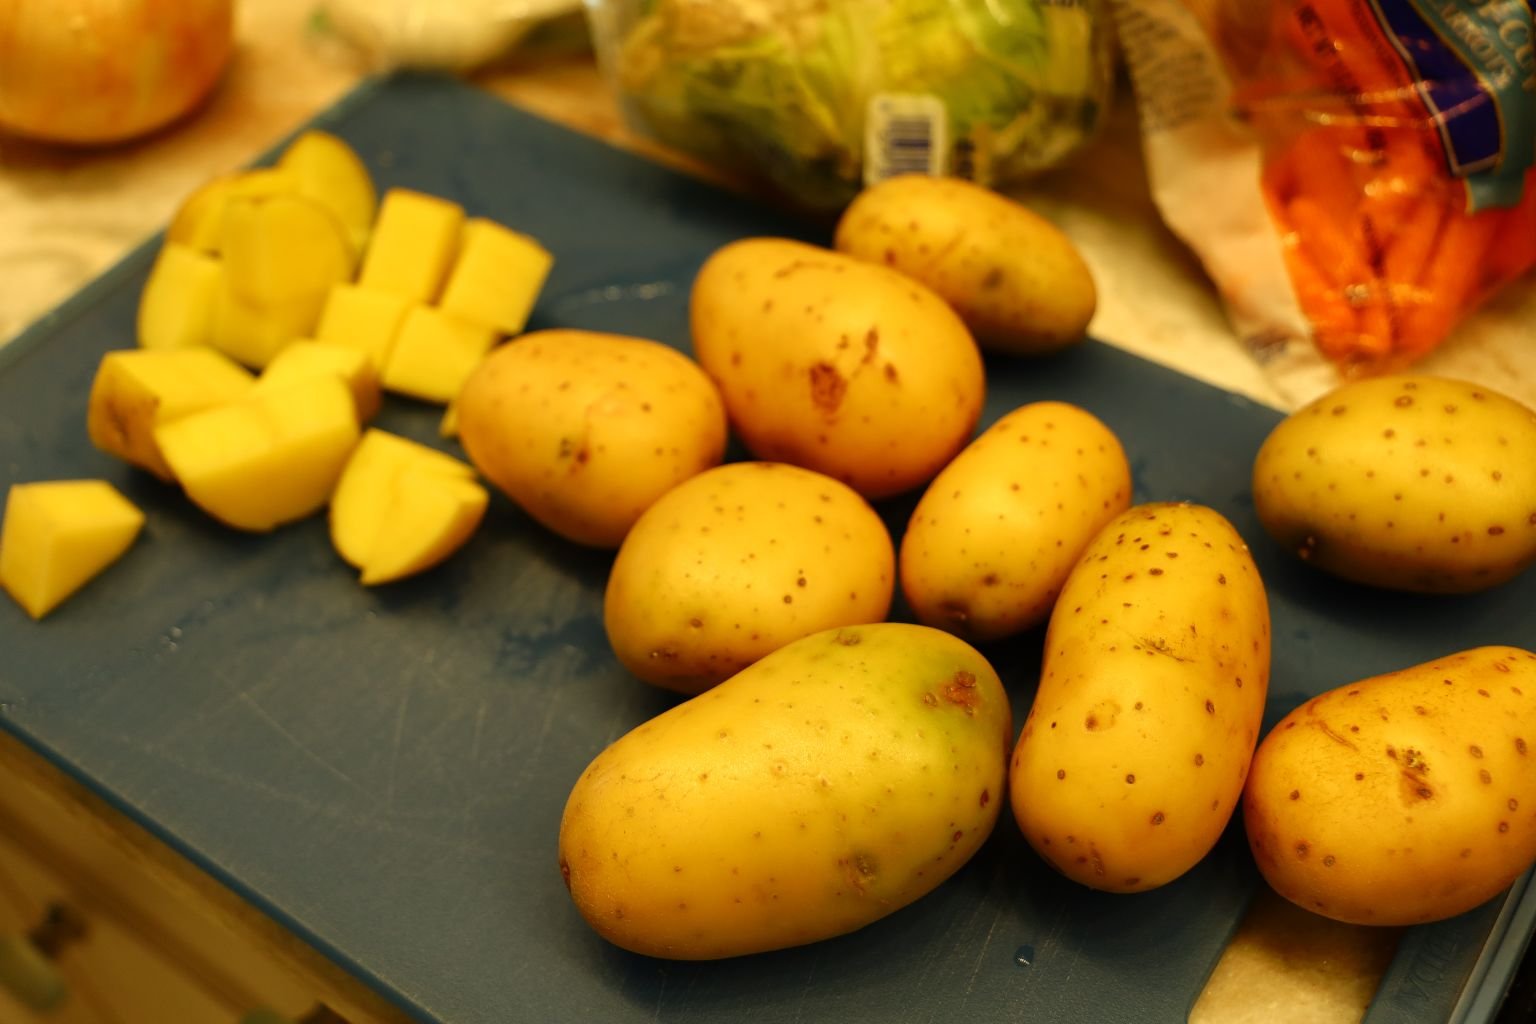
Here I am slicing the ends of the Garlic Cloves off. Now, slice your potatoes into chunks as shown.

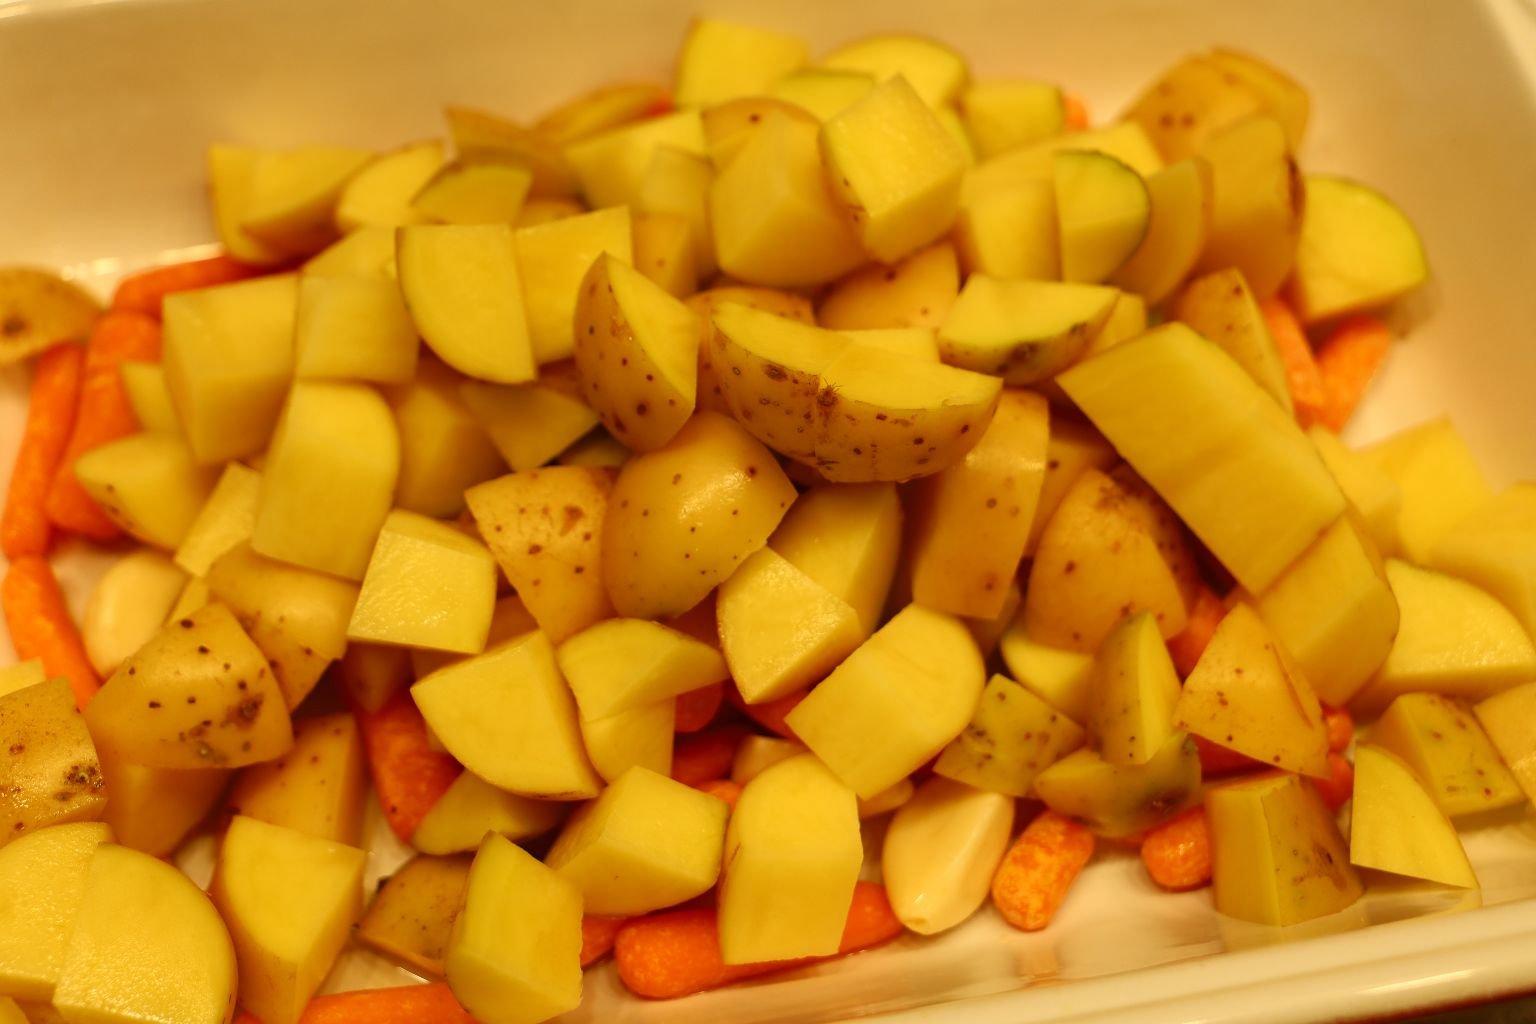
Slice all your potatoes then add them to the dish.

Slice your Onion in chunks and add them and your butter to the dish.

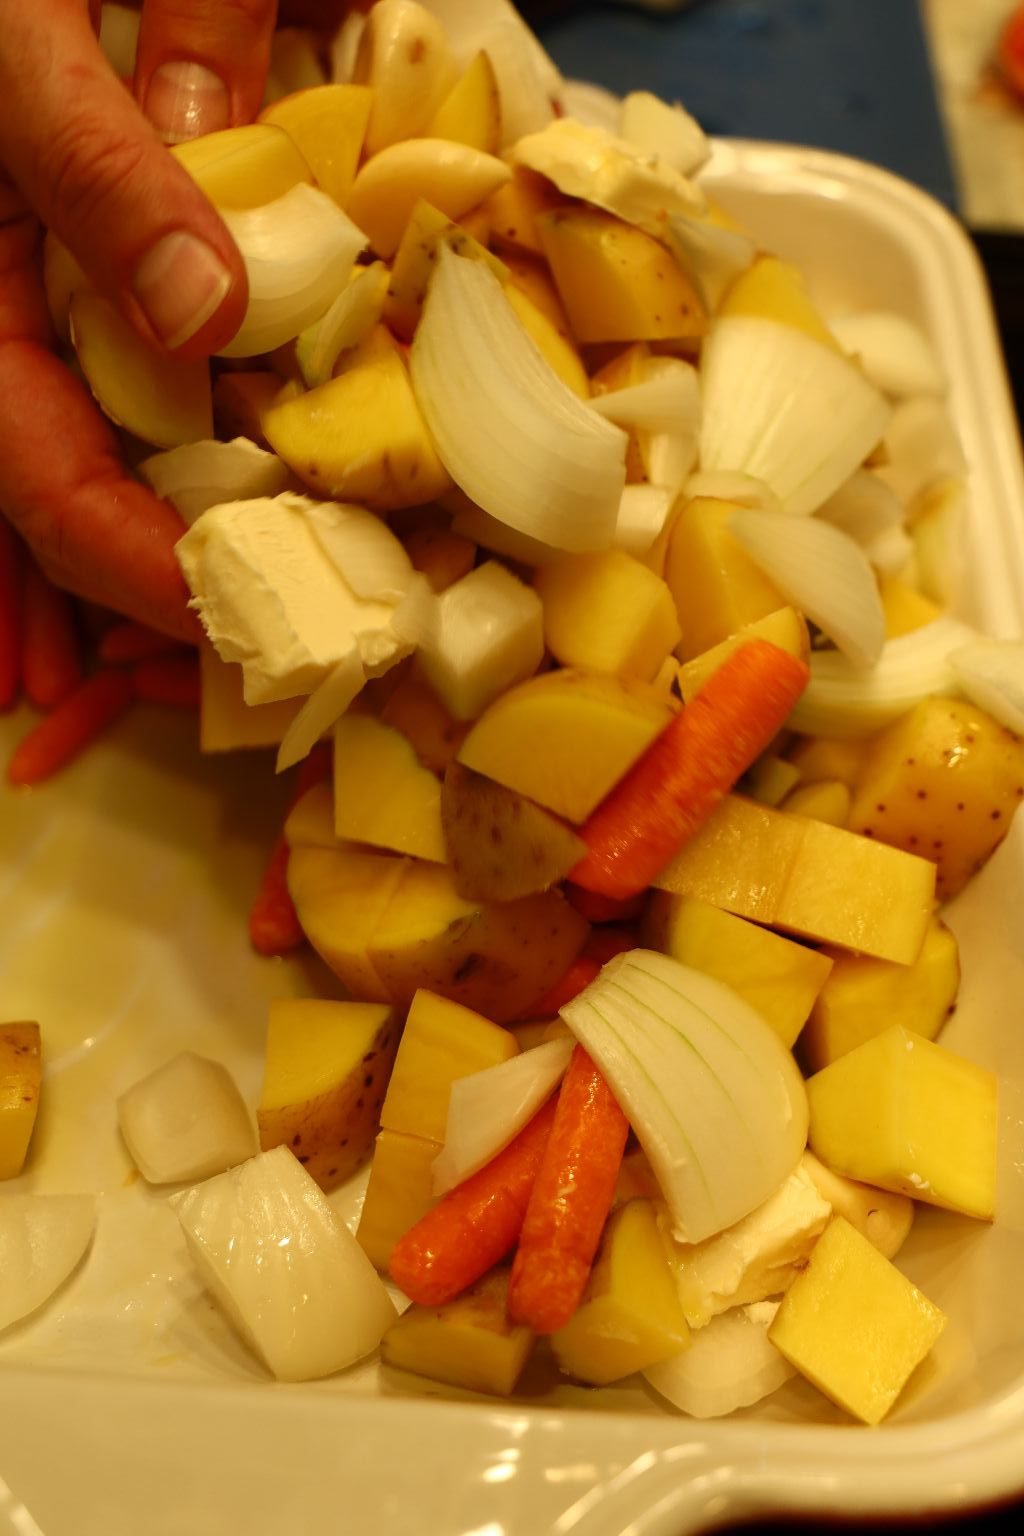
Mix all the vegetables well, coating all of them with the Olive Oil.

Here I am adding more Olive Oil for a total of about 6 Tbsp.
———————————————————————————–
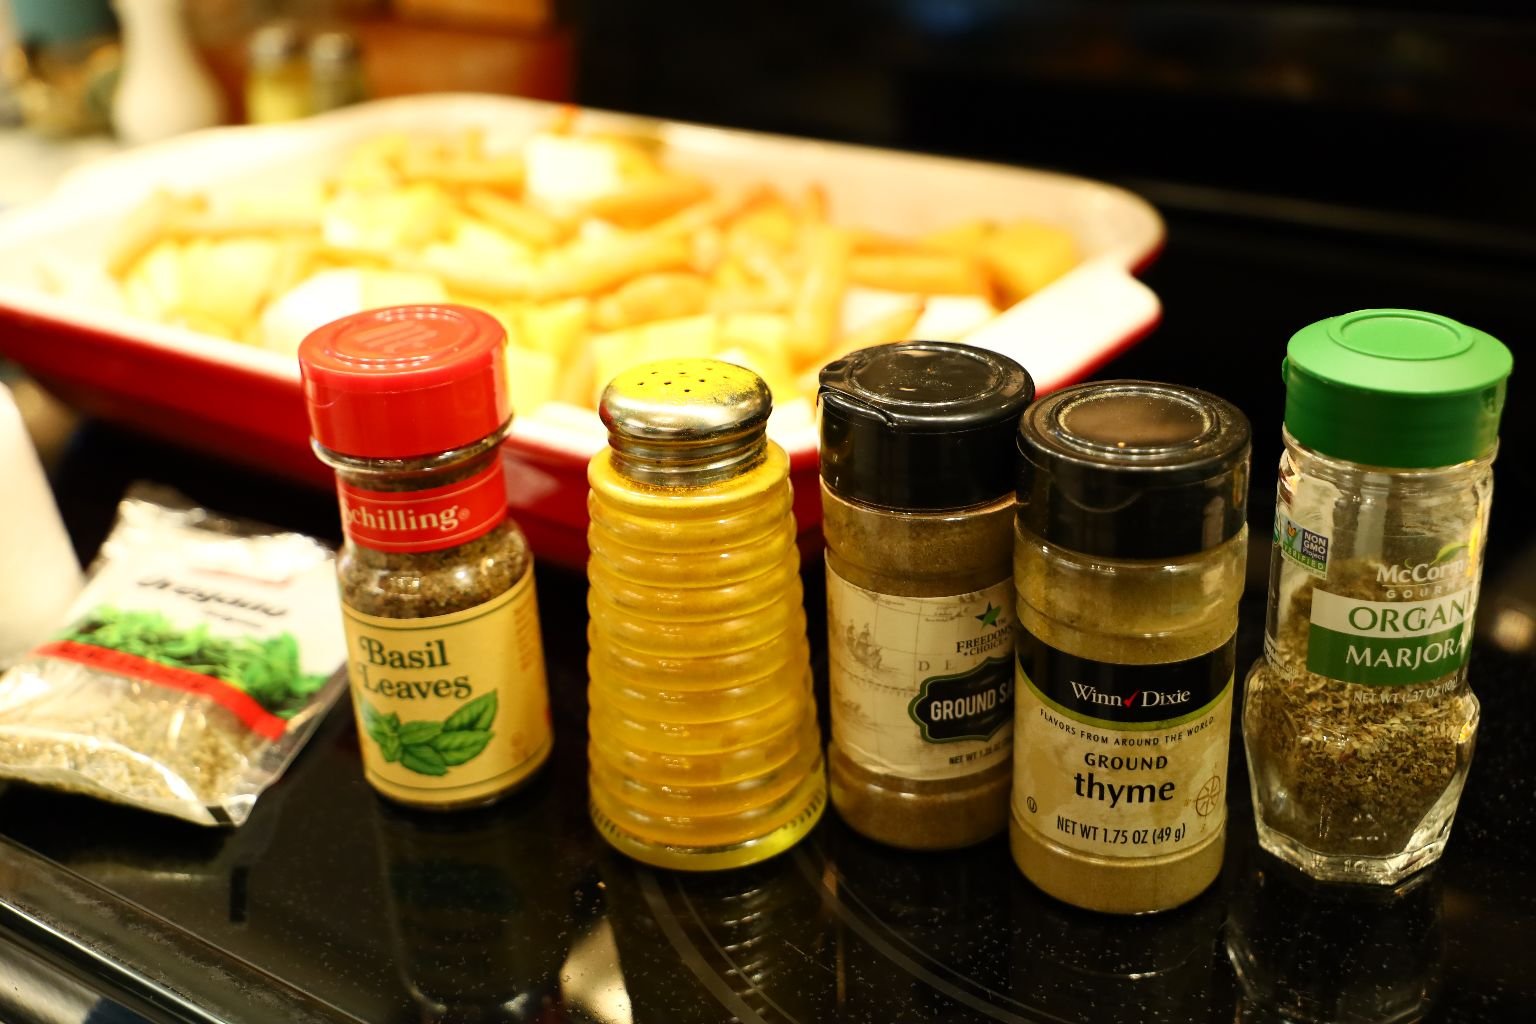
Here are all the herbs we used.

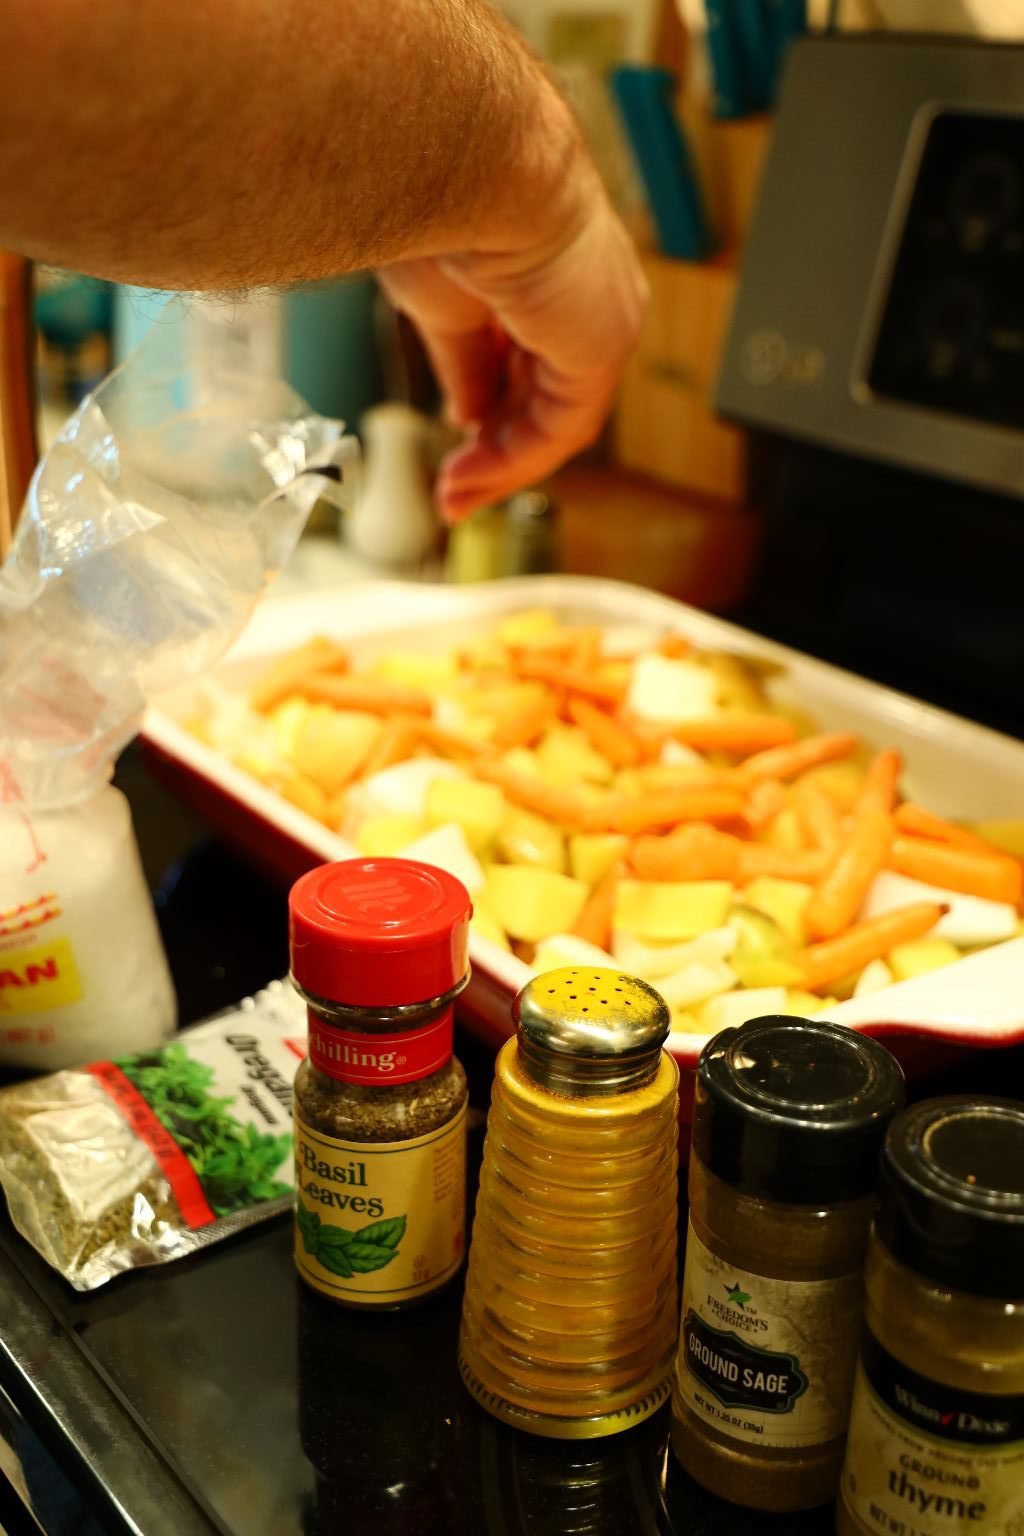
Add your Hawaiian Salt…if you don’t have this, any Sea Salt will work.

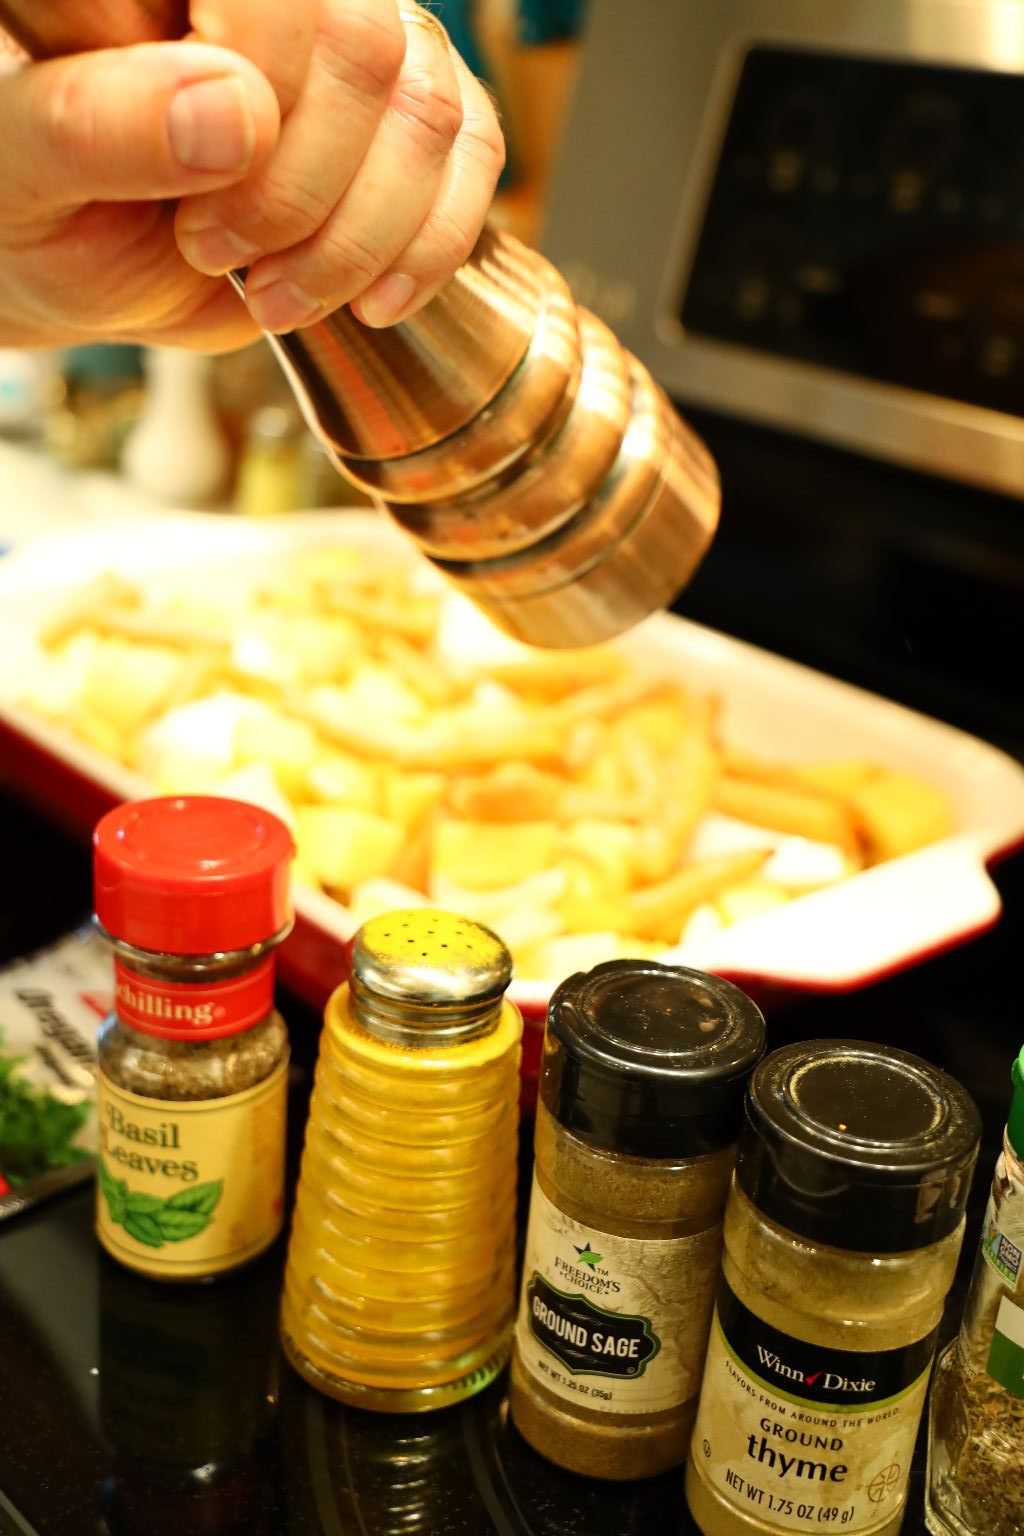
Add your freshly Ground Black Pepper to taste.


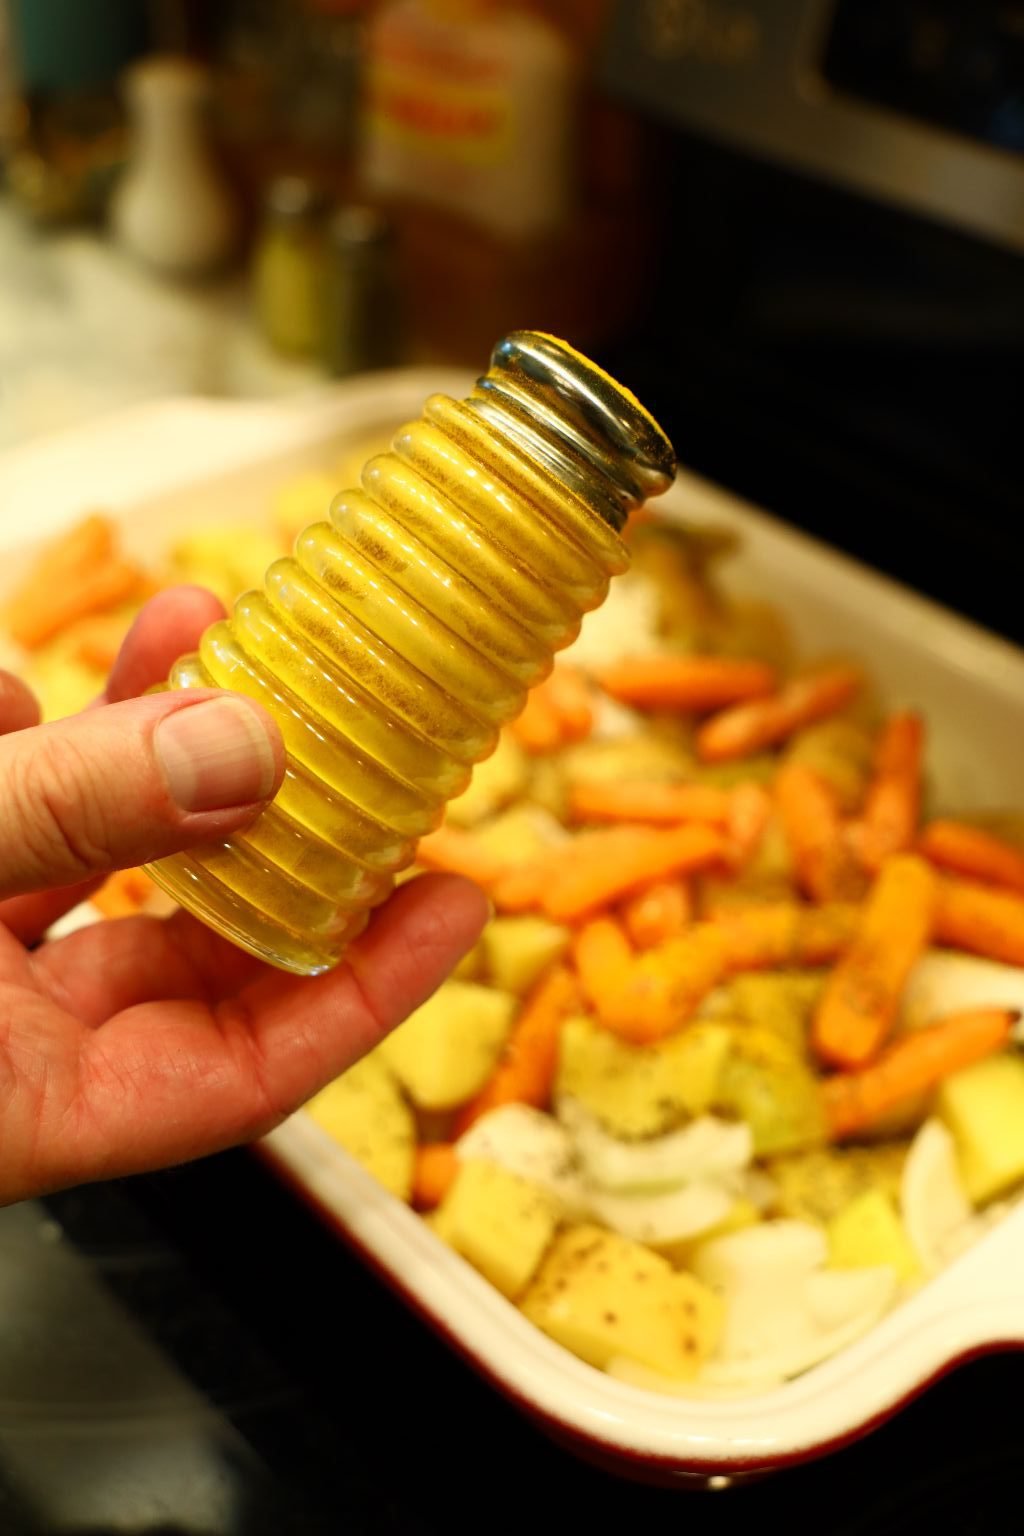
Now add your Oregano, Basil and Turmeric…


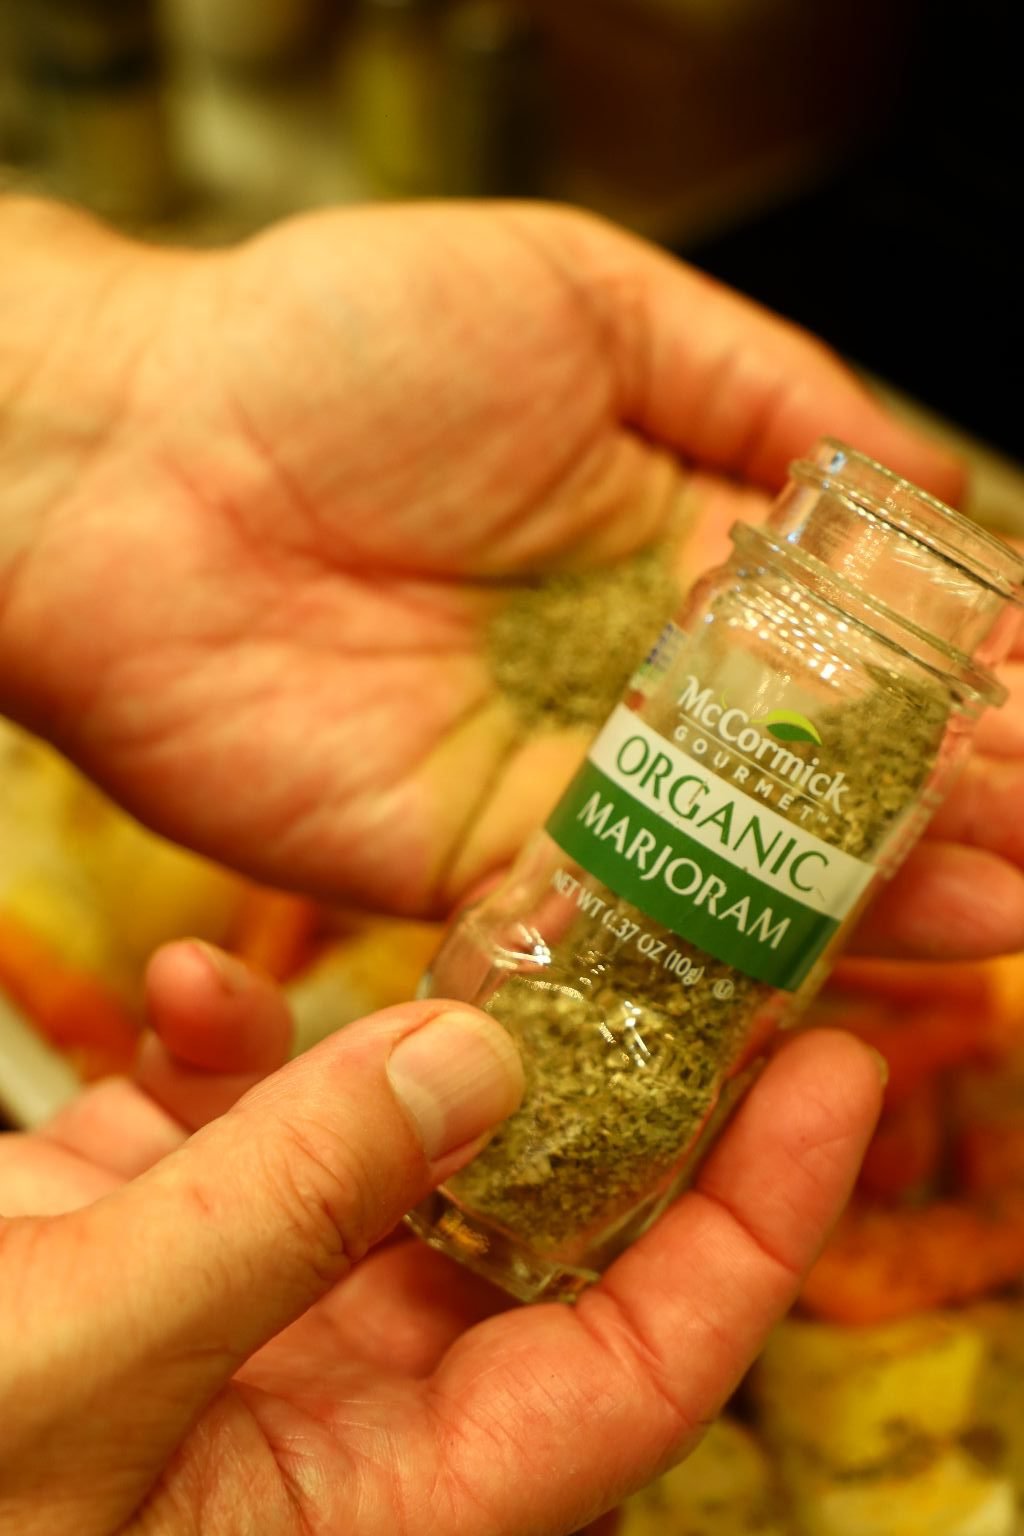
then your Sage, Thyme, and Marjoram to the dish.

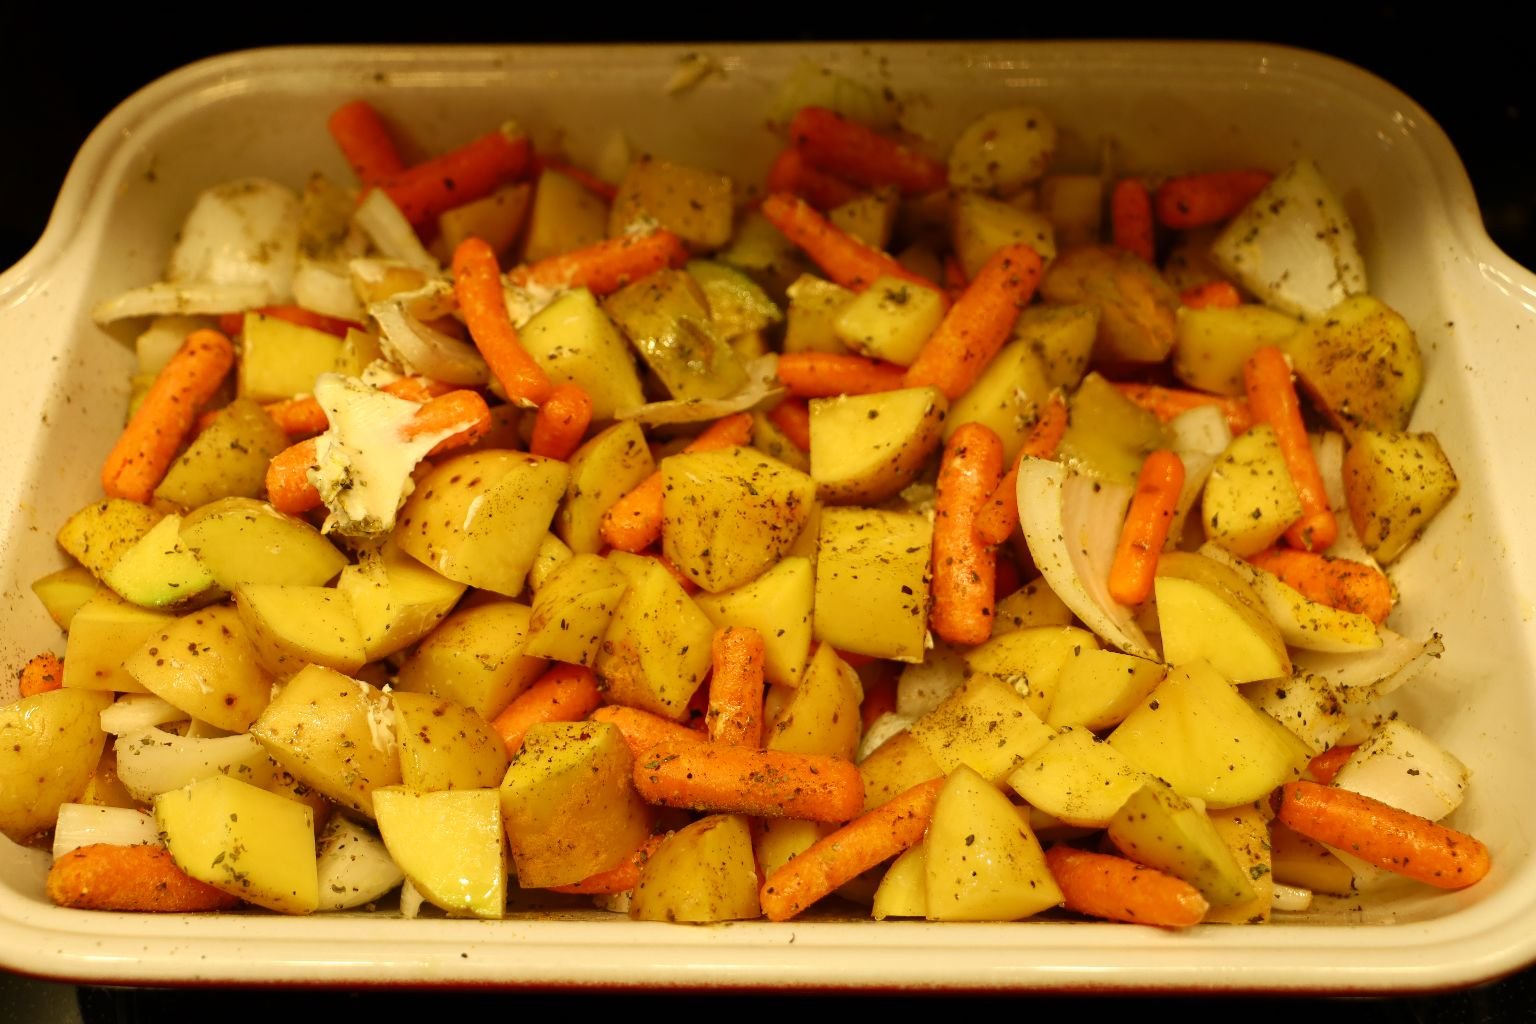
Mix all the ingredients well and place them into a 400″F oven and bake them for about 35 min. or until all the vegetables are tender. Cover with foil so as not to burn.
When done, garnish the dish with the fresh herbs.
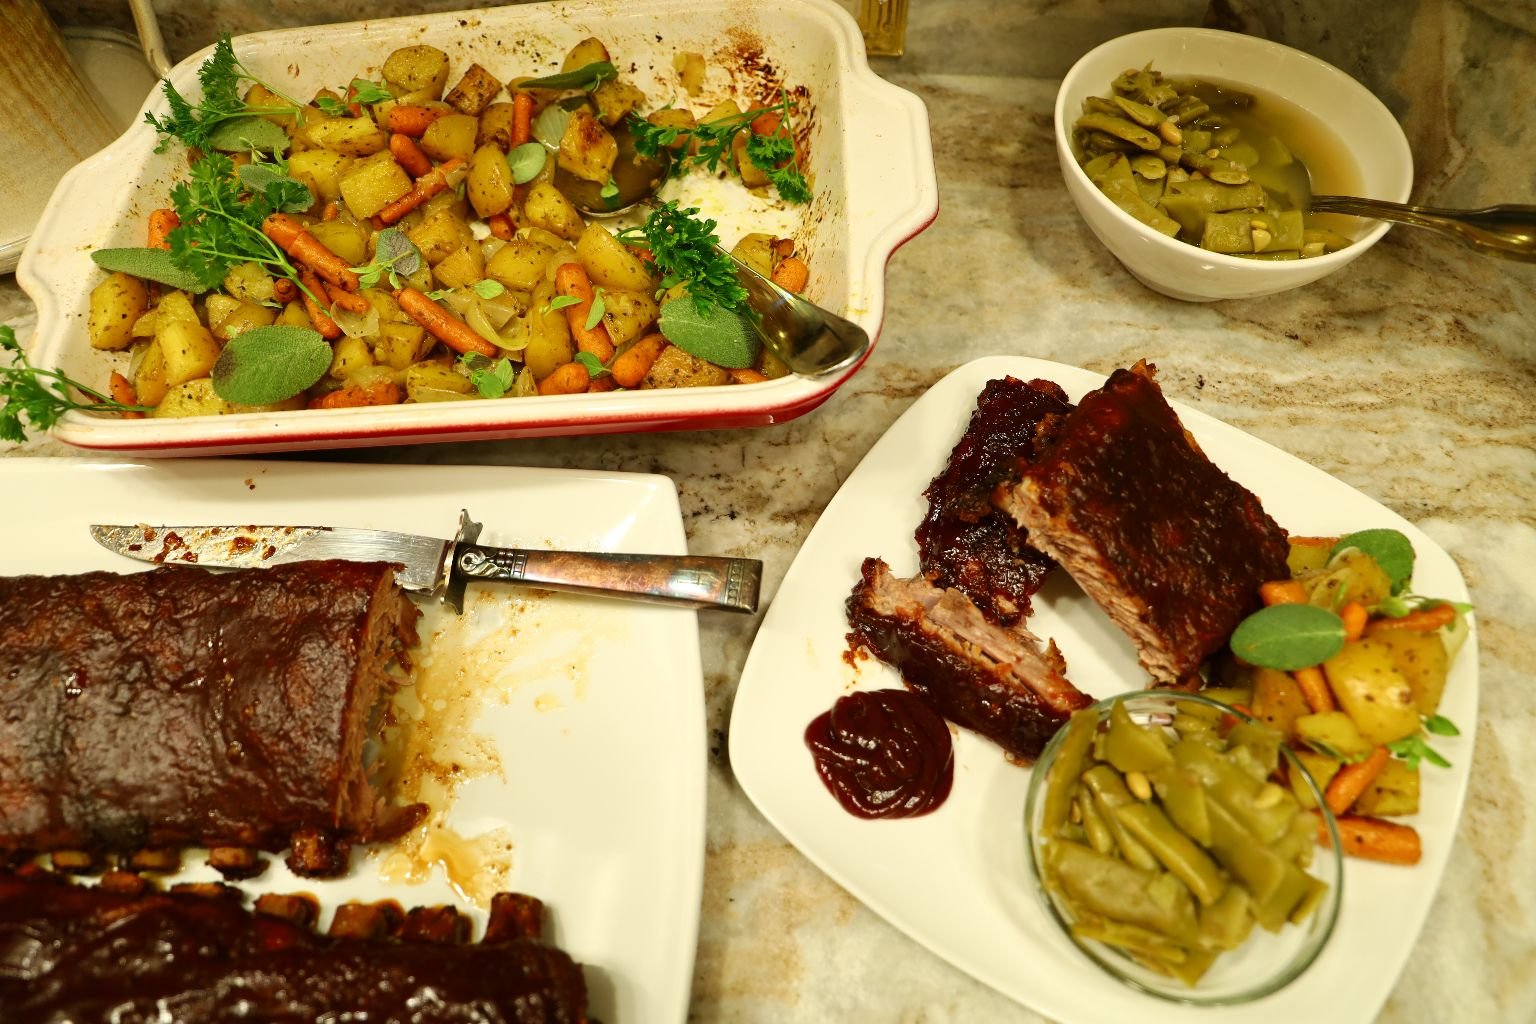
What a Great Dinner!
—————————————————————-
Fried Green Tomatoes

A Southern Traditional Favorite
(So good as a matter of fact that they make movie’s about Fried Green Tomatoes.) 🙂
Fried Green Tomatoes on IMDB

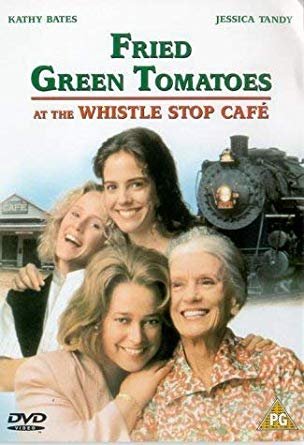
This movie starring Jessica Tandy, Kathy Bates, Mary-Louise Parker, Mary Stuart Masterson, and Cicely Tyson, just to name a few. Great cast! The movie was made in 1991. It’s a story about a woman who befriends an aging senior in a nursing home who then recounts her life in 1920’s Alabama.
The Whistle Stop Cafe Menu

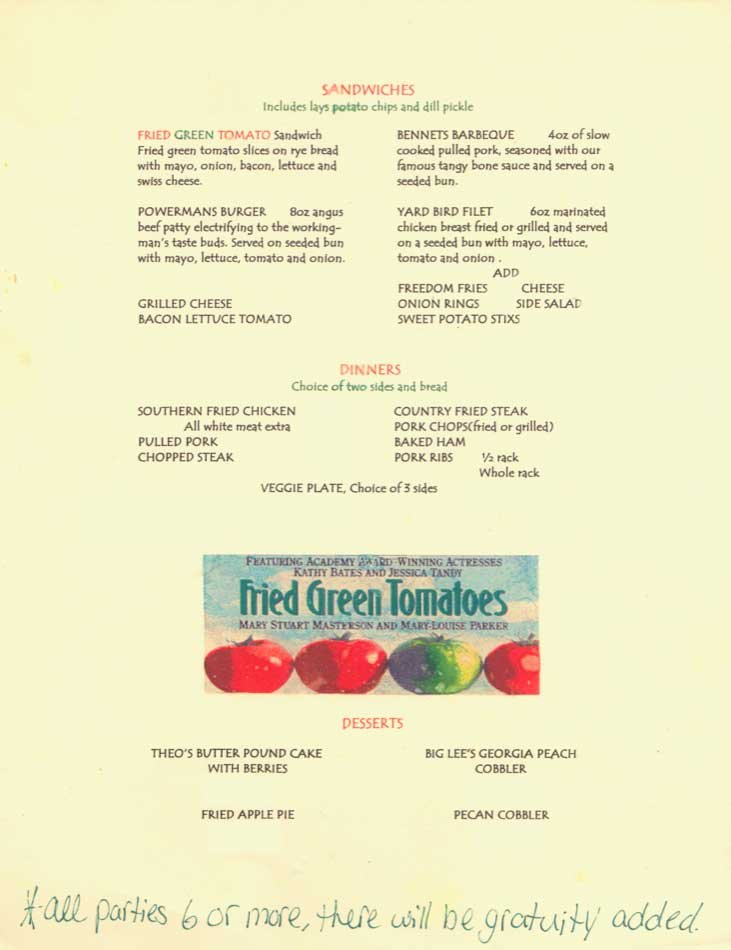
The Whistle Stop Cafe was made famous in the movie. The above is their menu. And of course they are famous for their Fried Green Tomatoes. The cafe is actually located in Juliette, Georgia.
Click Here For: Whistle Stop Cafe History
I grew up throughout the south and although we didn’t eat a ton of Fried Green Tomatoes, we did eat a whole lot of fried squash and fried zucchini. Same concept, most likely the same batter, just different vegetables.
If you do decide to watch the movie then can I please recommend a generous dose of Fried Green Tomatoes to keep you company?
Here is my recipe……
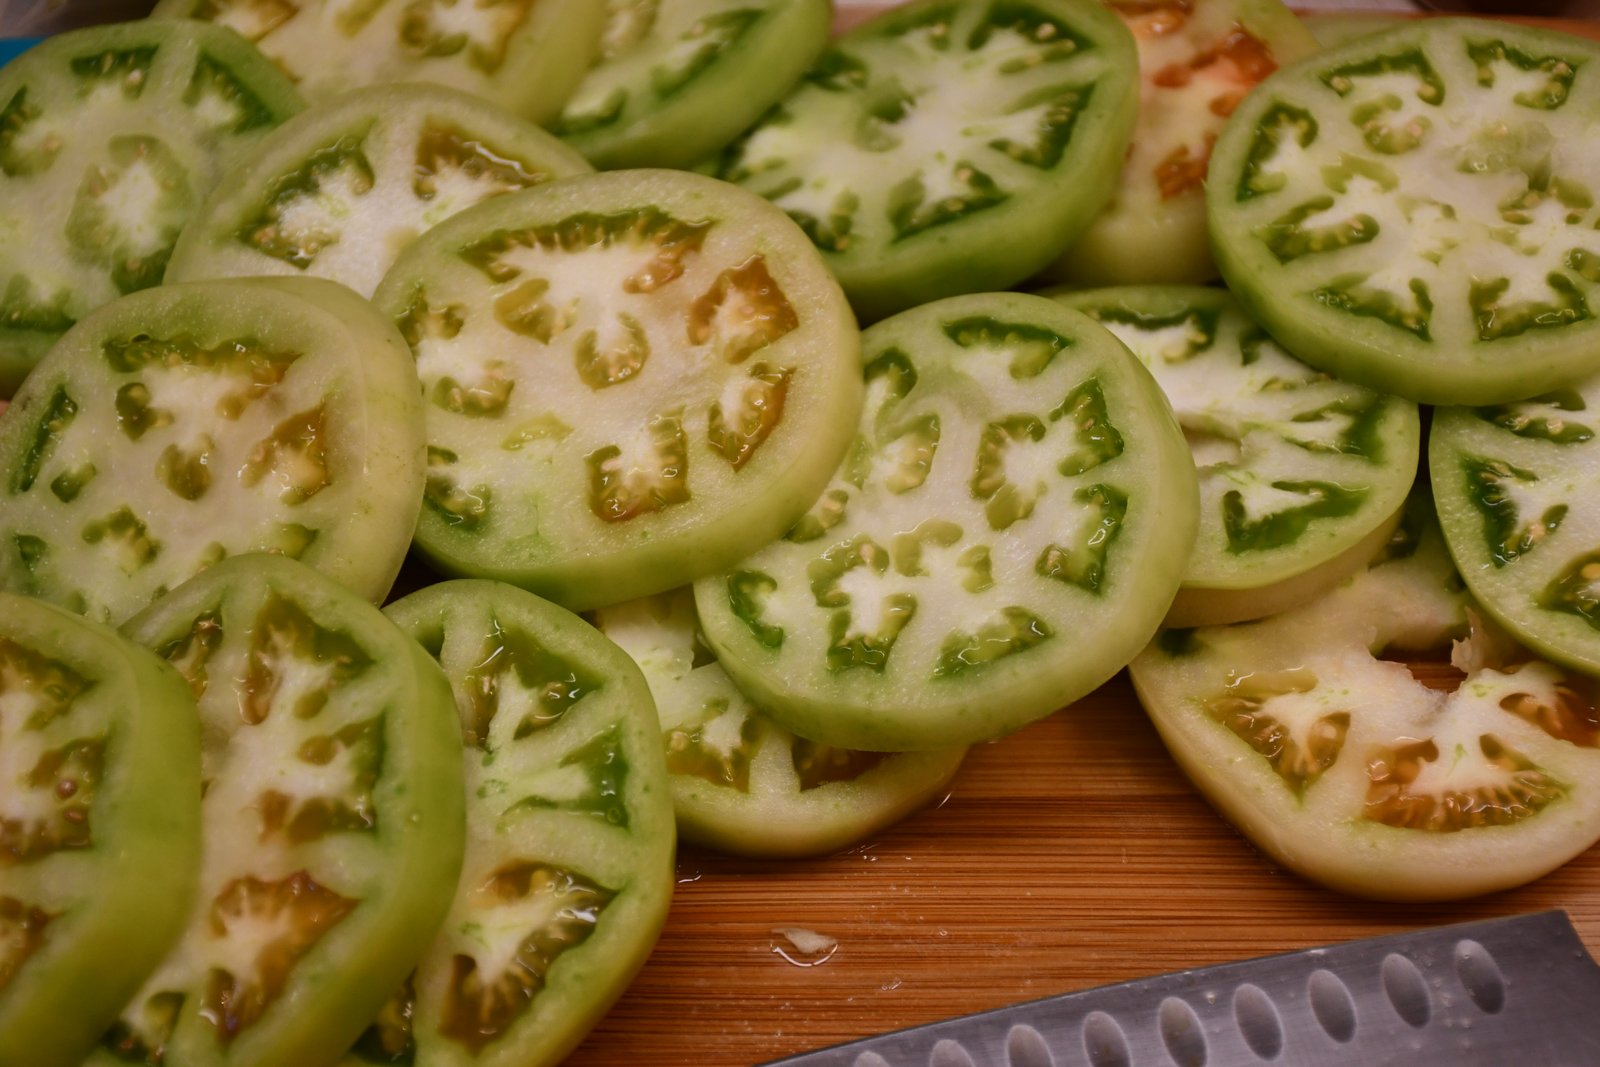
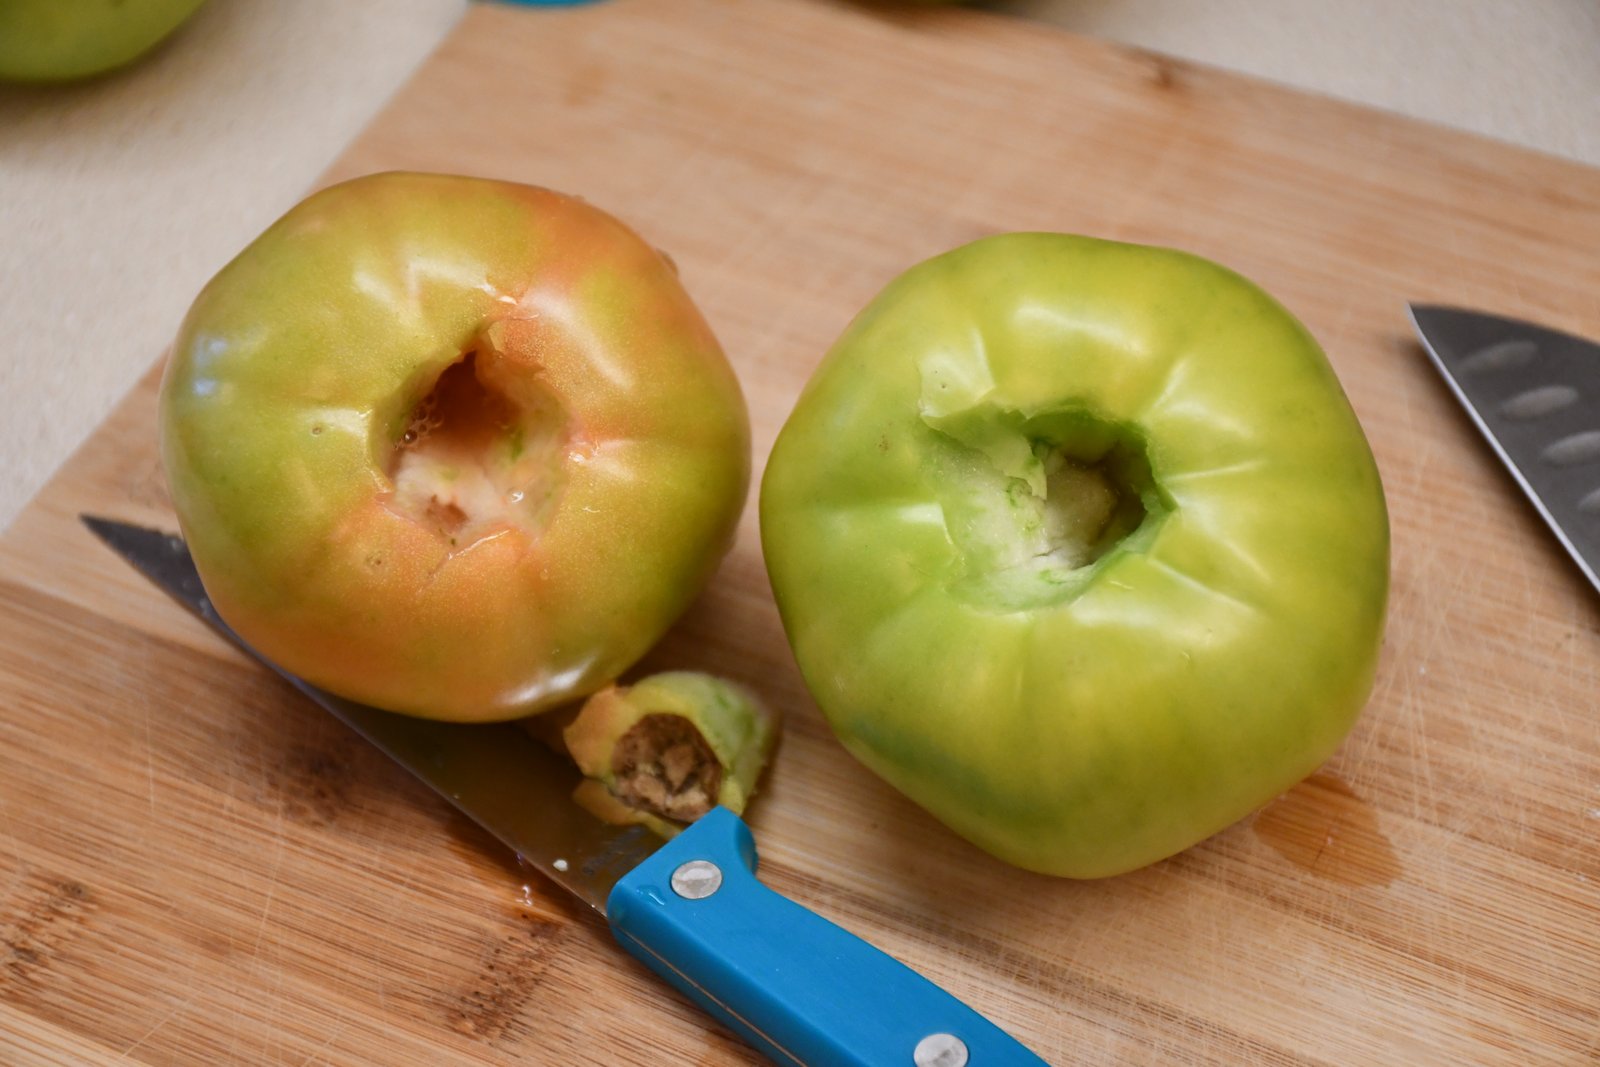
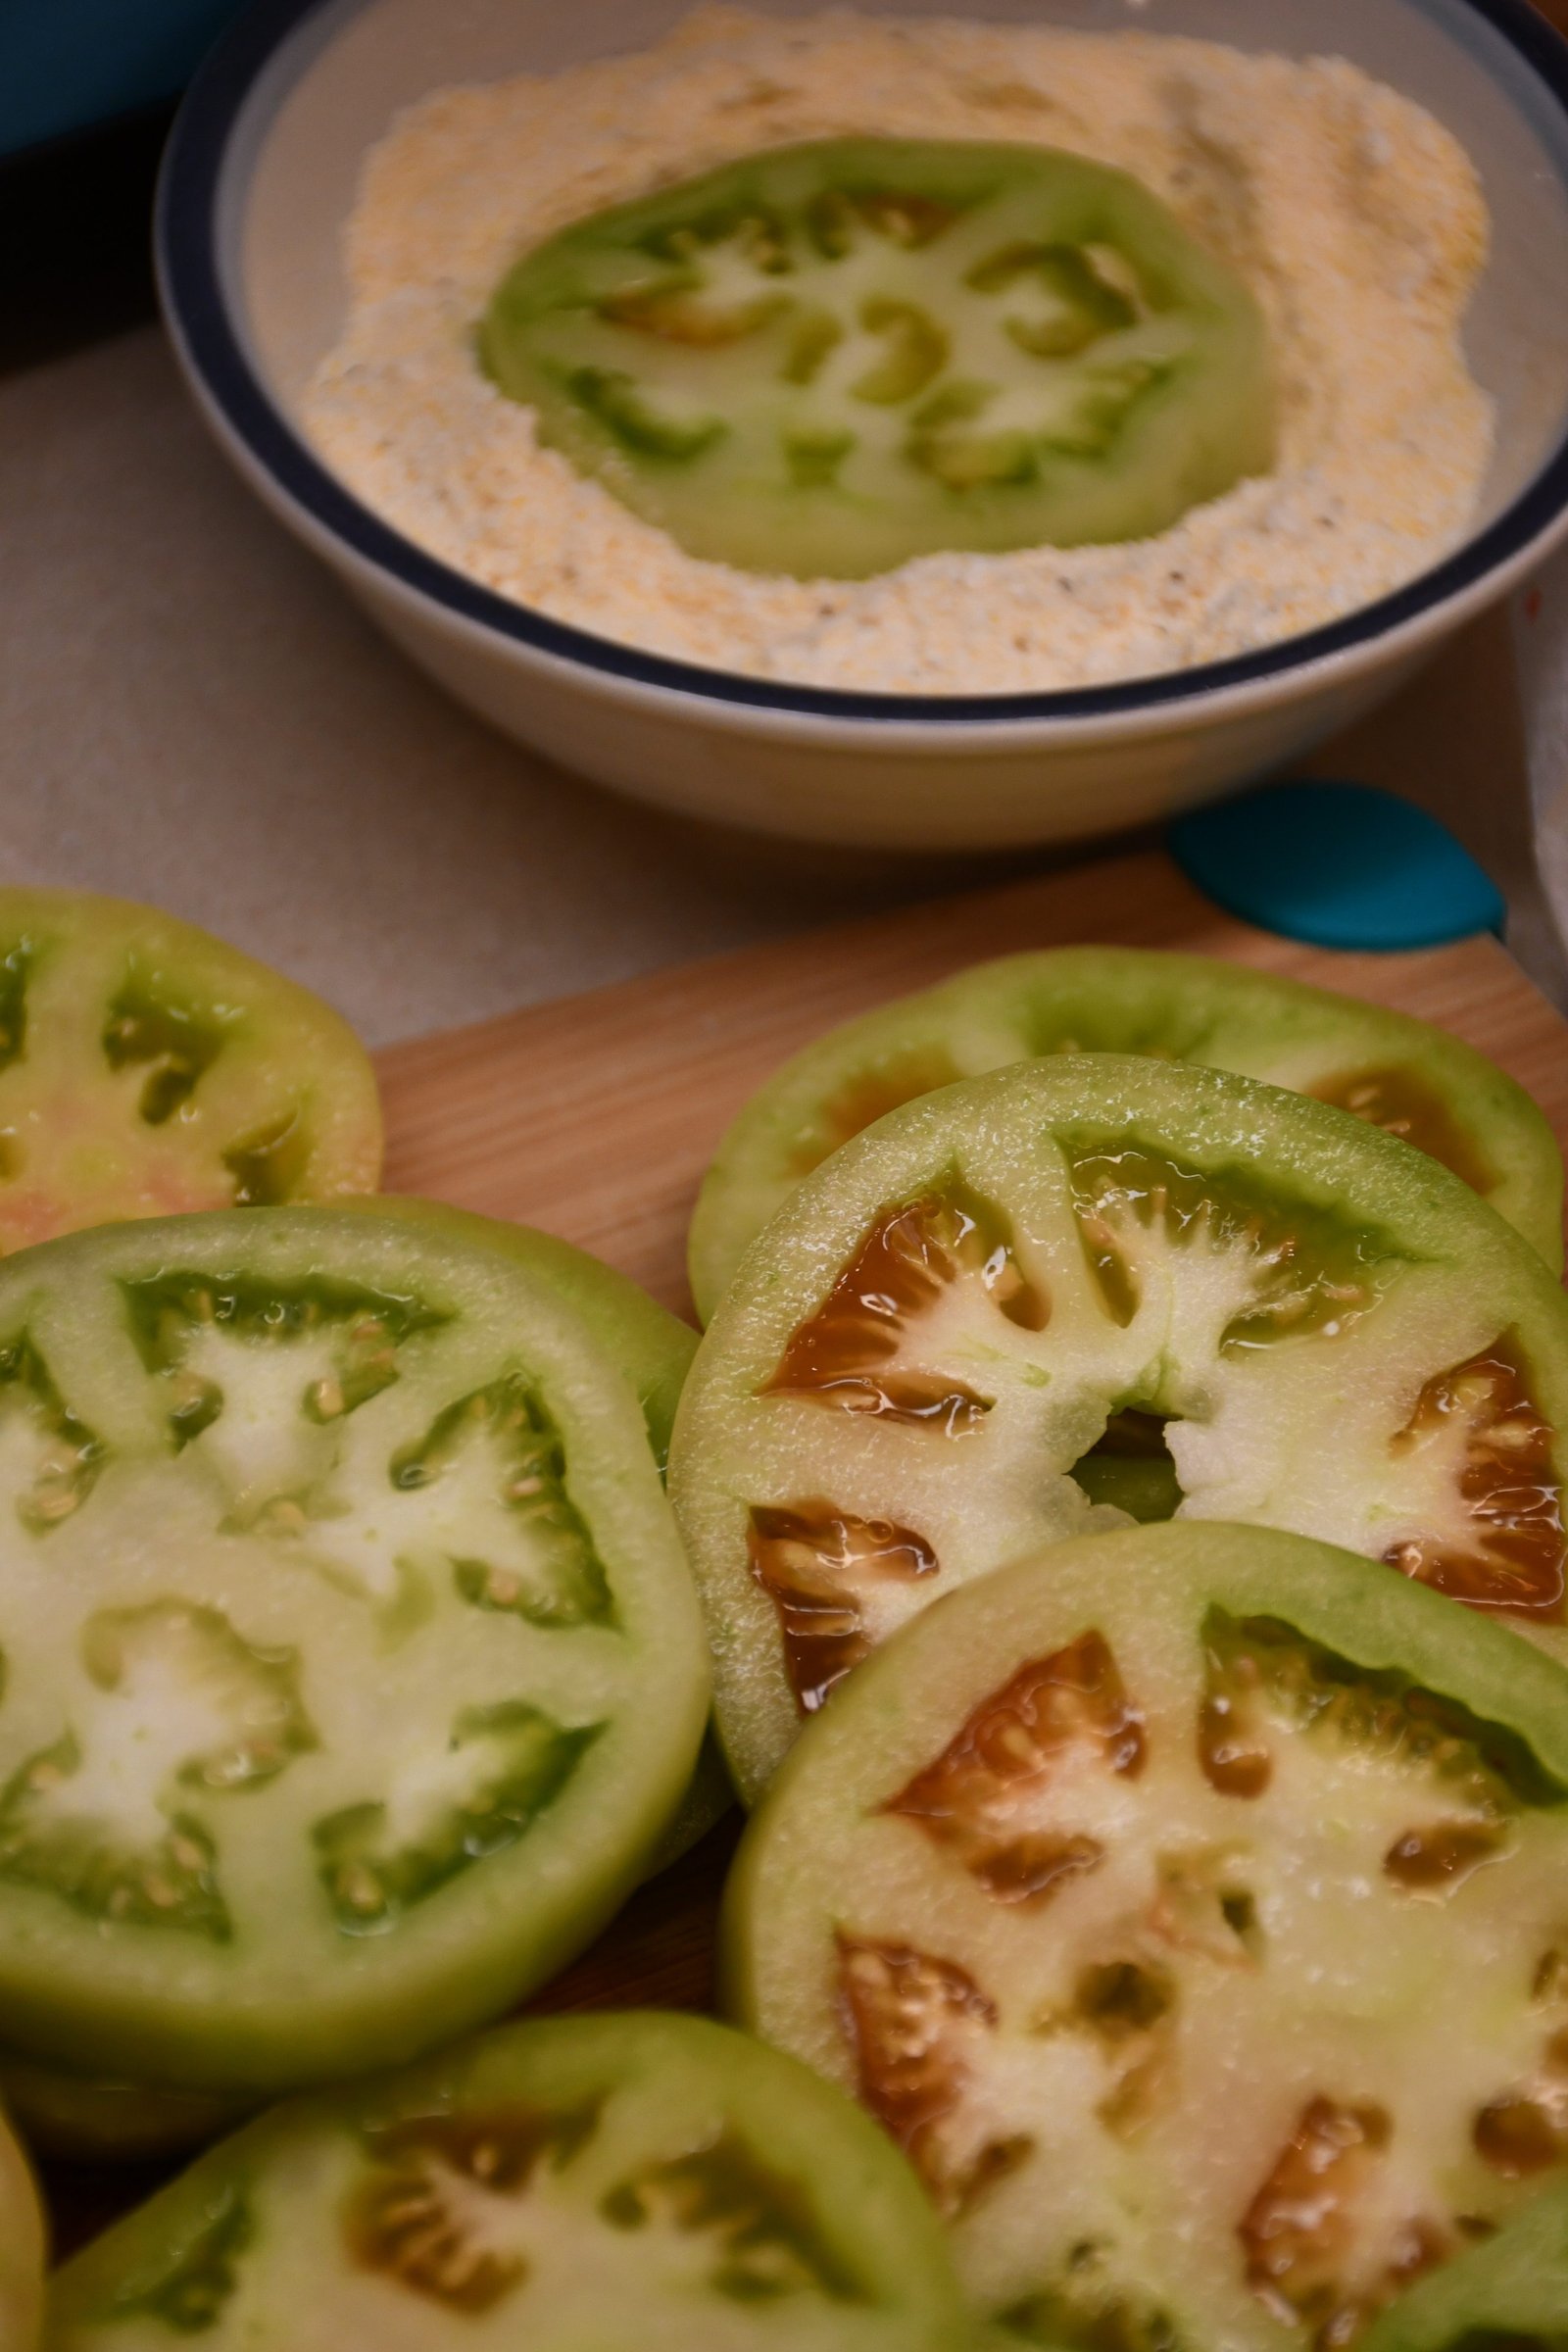
You Need GREEN Tomatoes!
(See those that are a teeny bit red? NOPE! They really don’t fry up very good. They have to be GREEN!)
Making Fried Green Tomatoes
This is a pretty basic recipe. I was going for tradition here and nothing fancy.
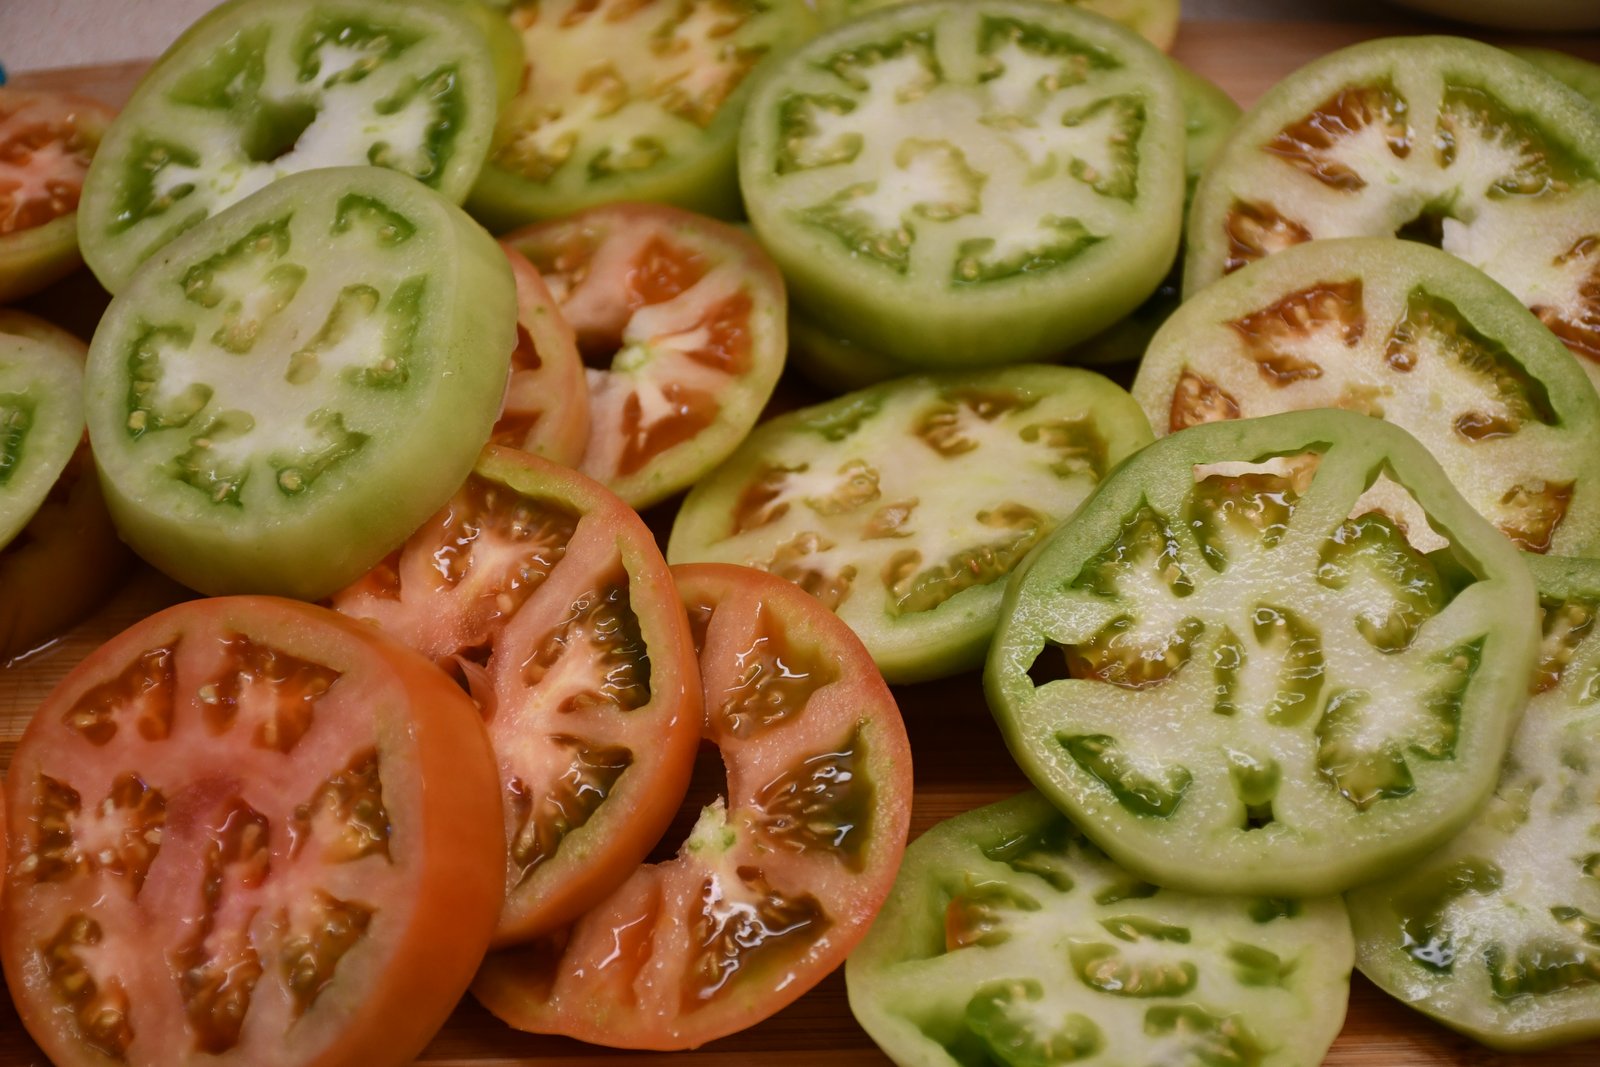
(And yes, I know there are some red tomatoes in the photo but they just did turn red and I thought I could get away with it. But, I didn’t.) 🙂
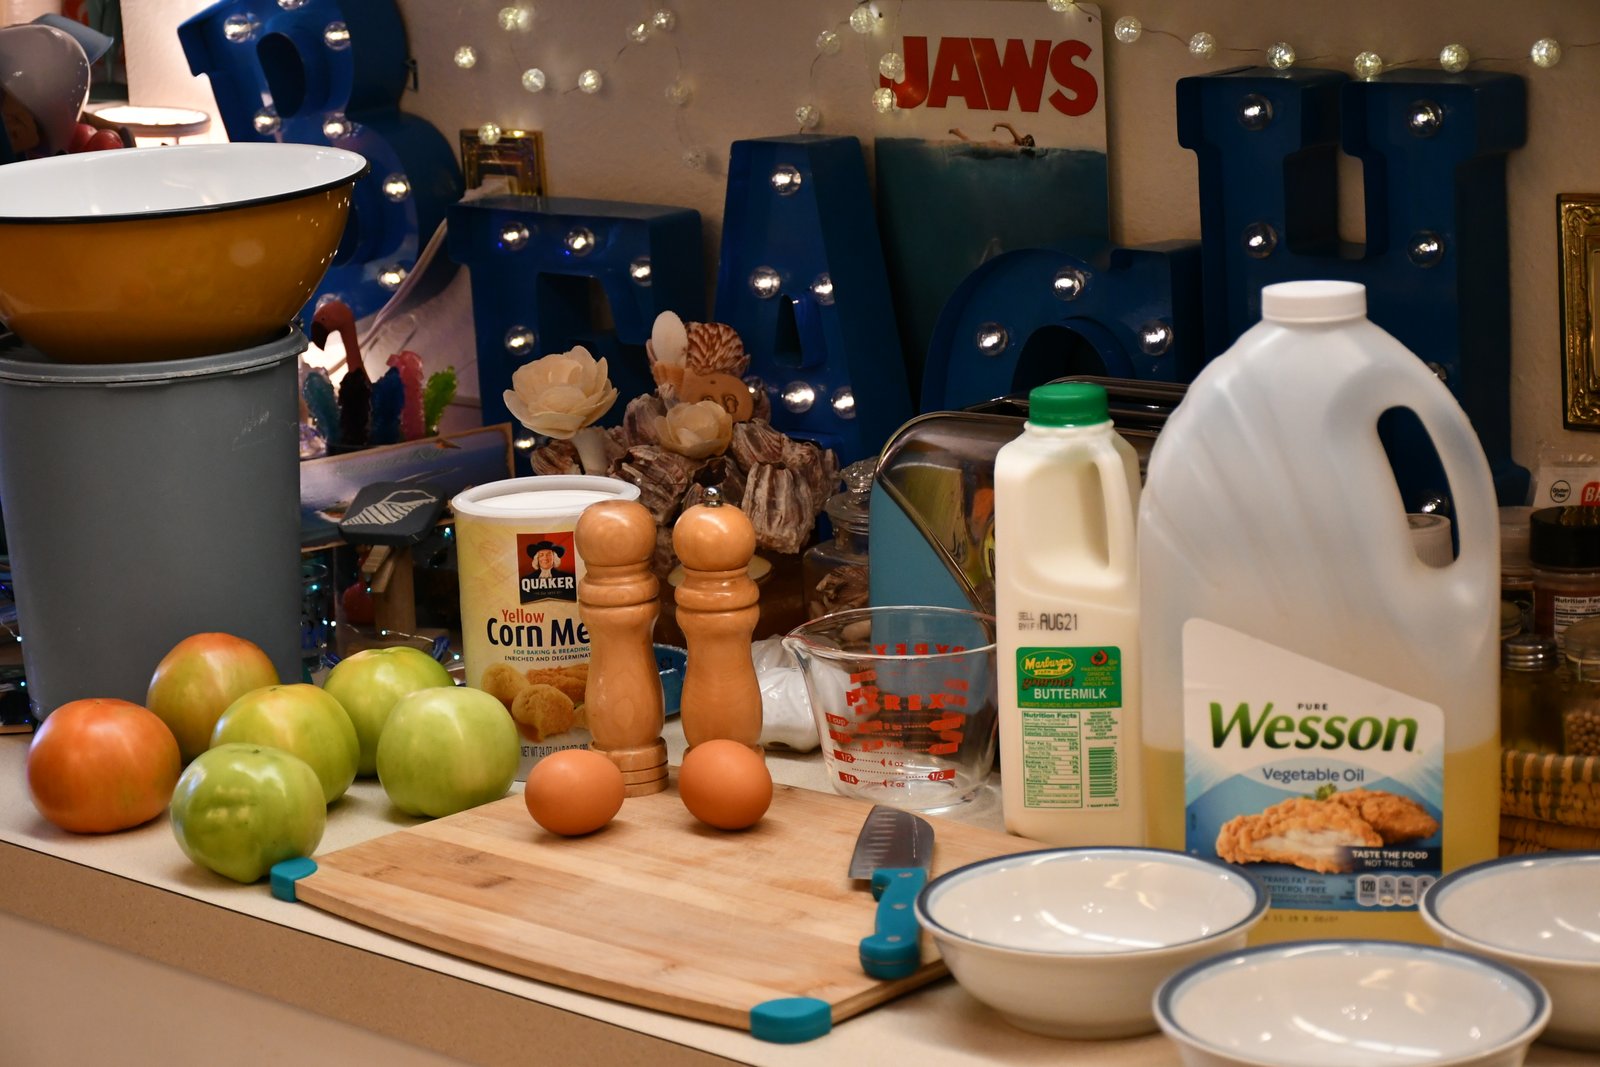
Ingredients:
(I used 6 tomatoes so I will adjust the ingredients for that amount.)
1 Cup All Purpose Flour (I sometimes use a little bit more.)
3/4 Cup Corn Meal Mix (I use the yellow kind.)
3/4 Cup Buttermilk
1 Egg, lightly beaten
1/2 t. Pepper
1/2 t. Salt
———————————————————
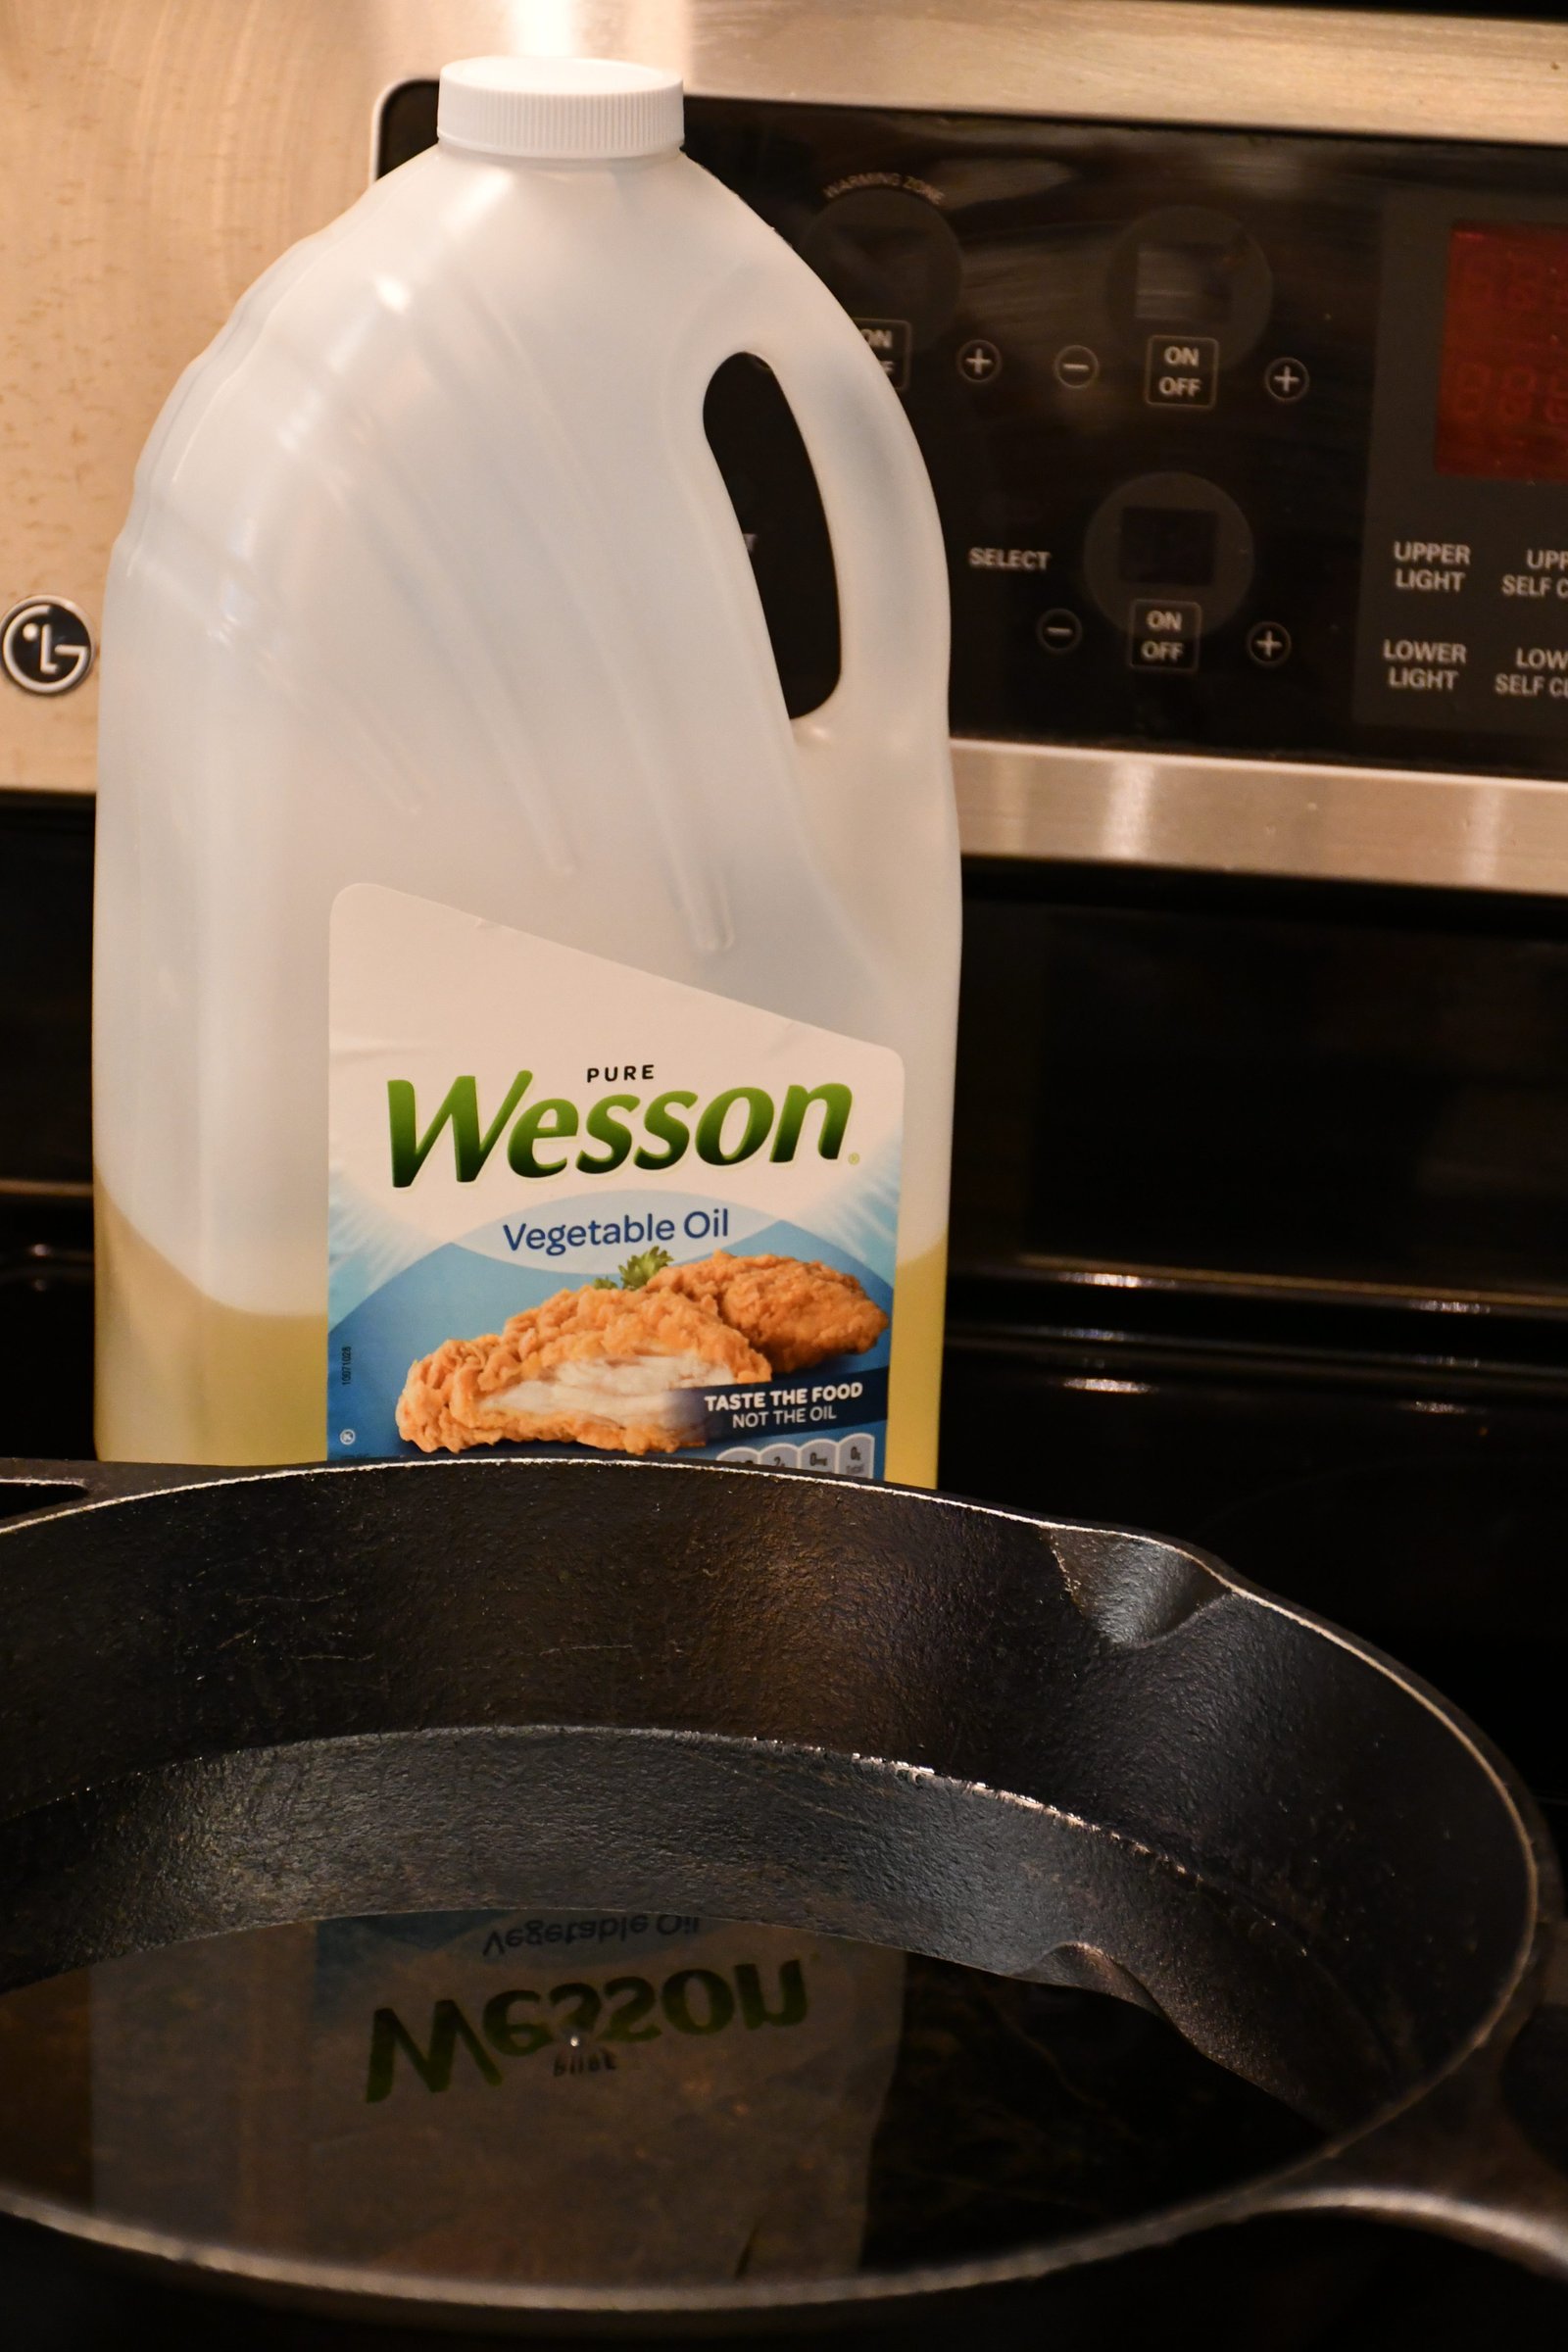
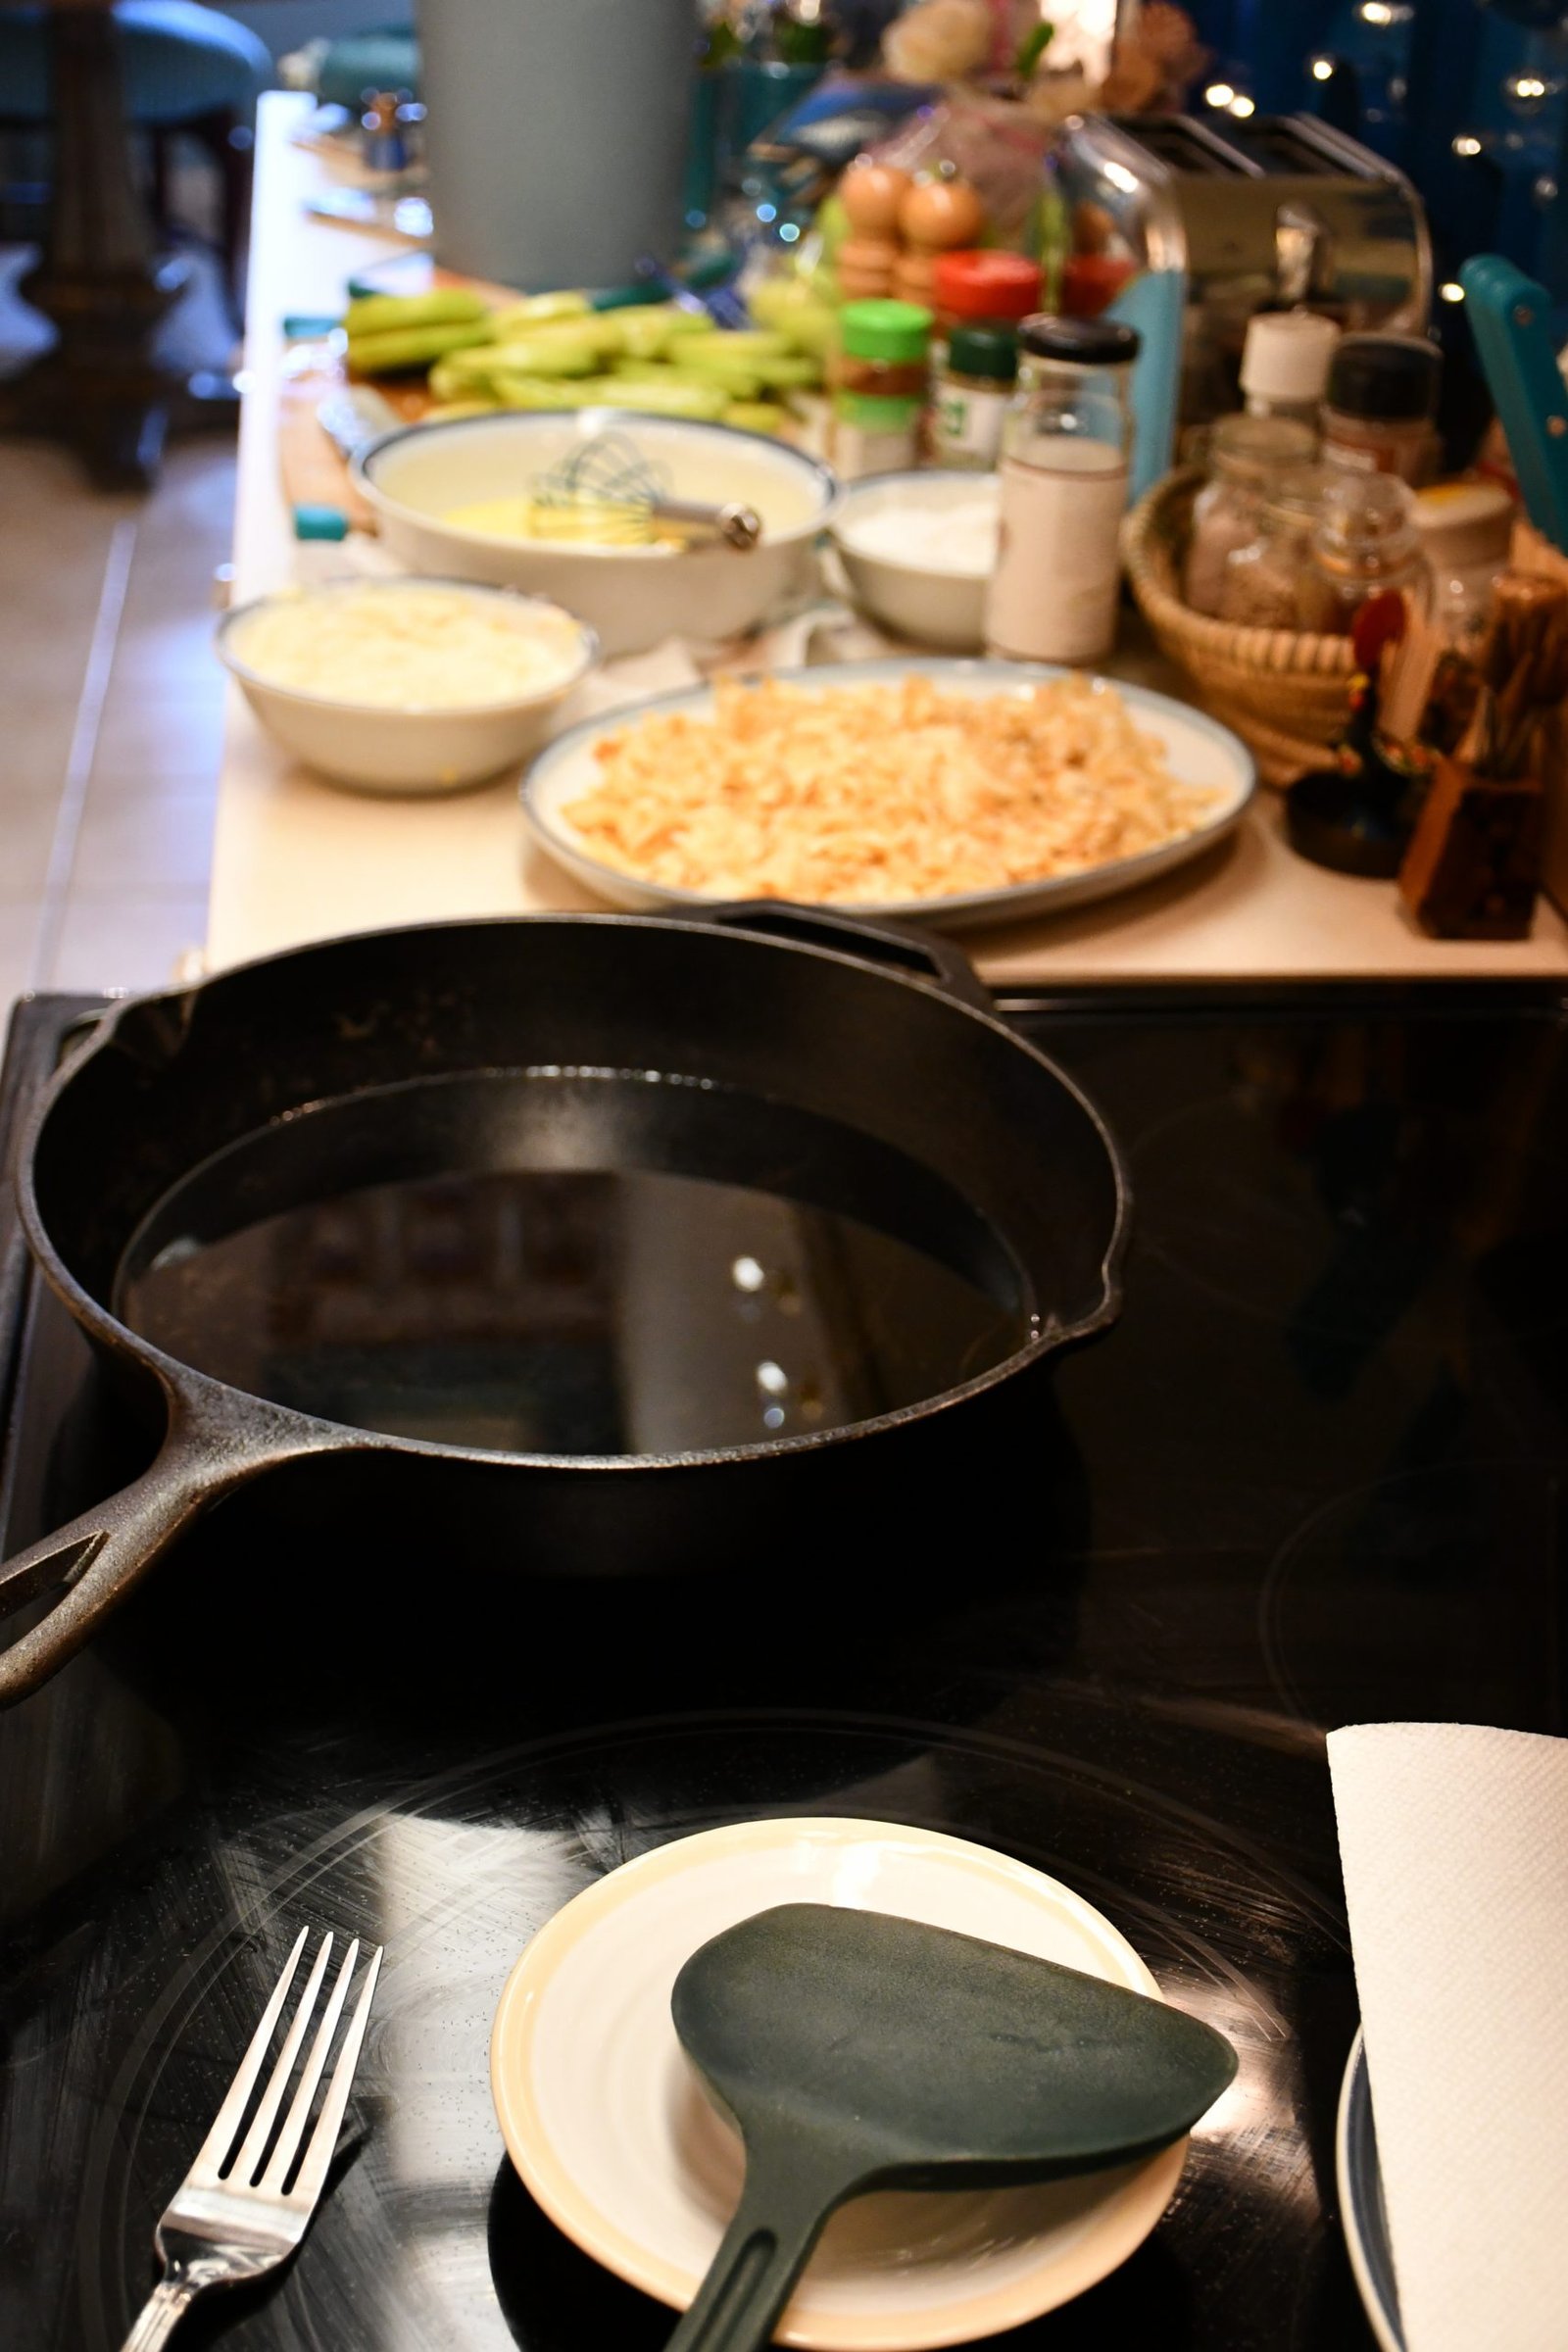
Main Ingredients: Vegetable Oil and a Cast Iron Skillet
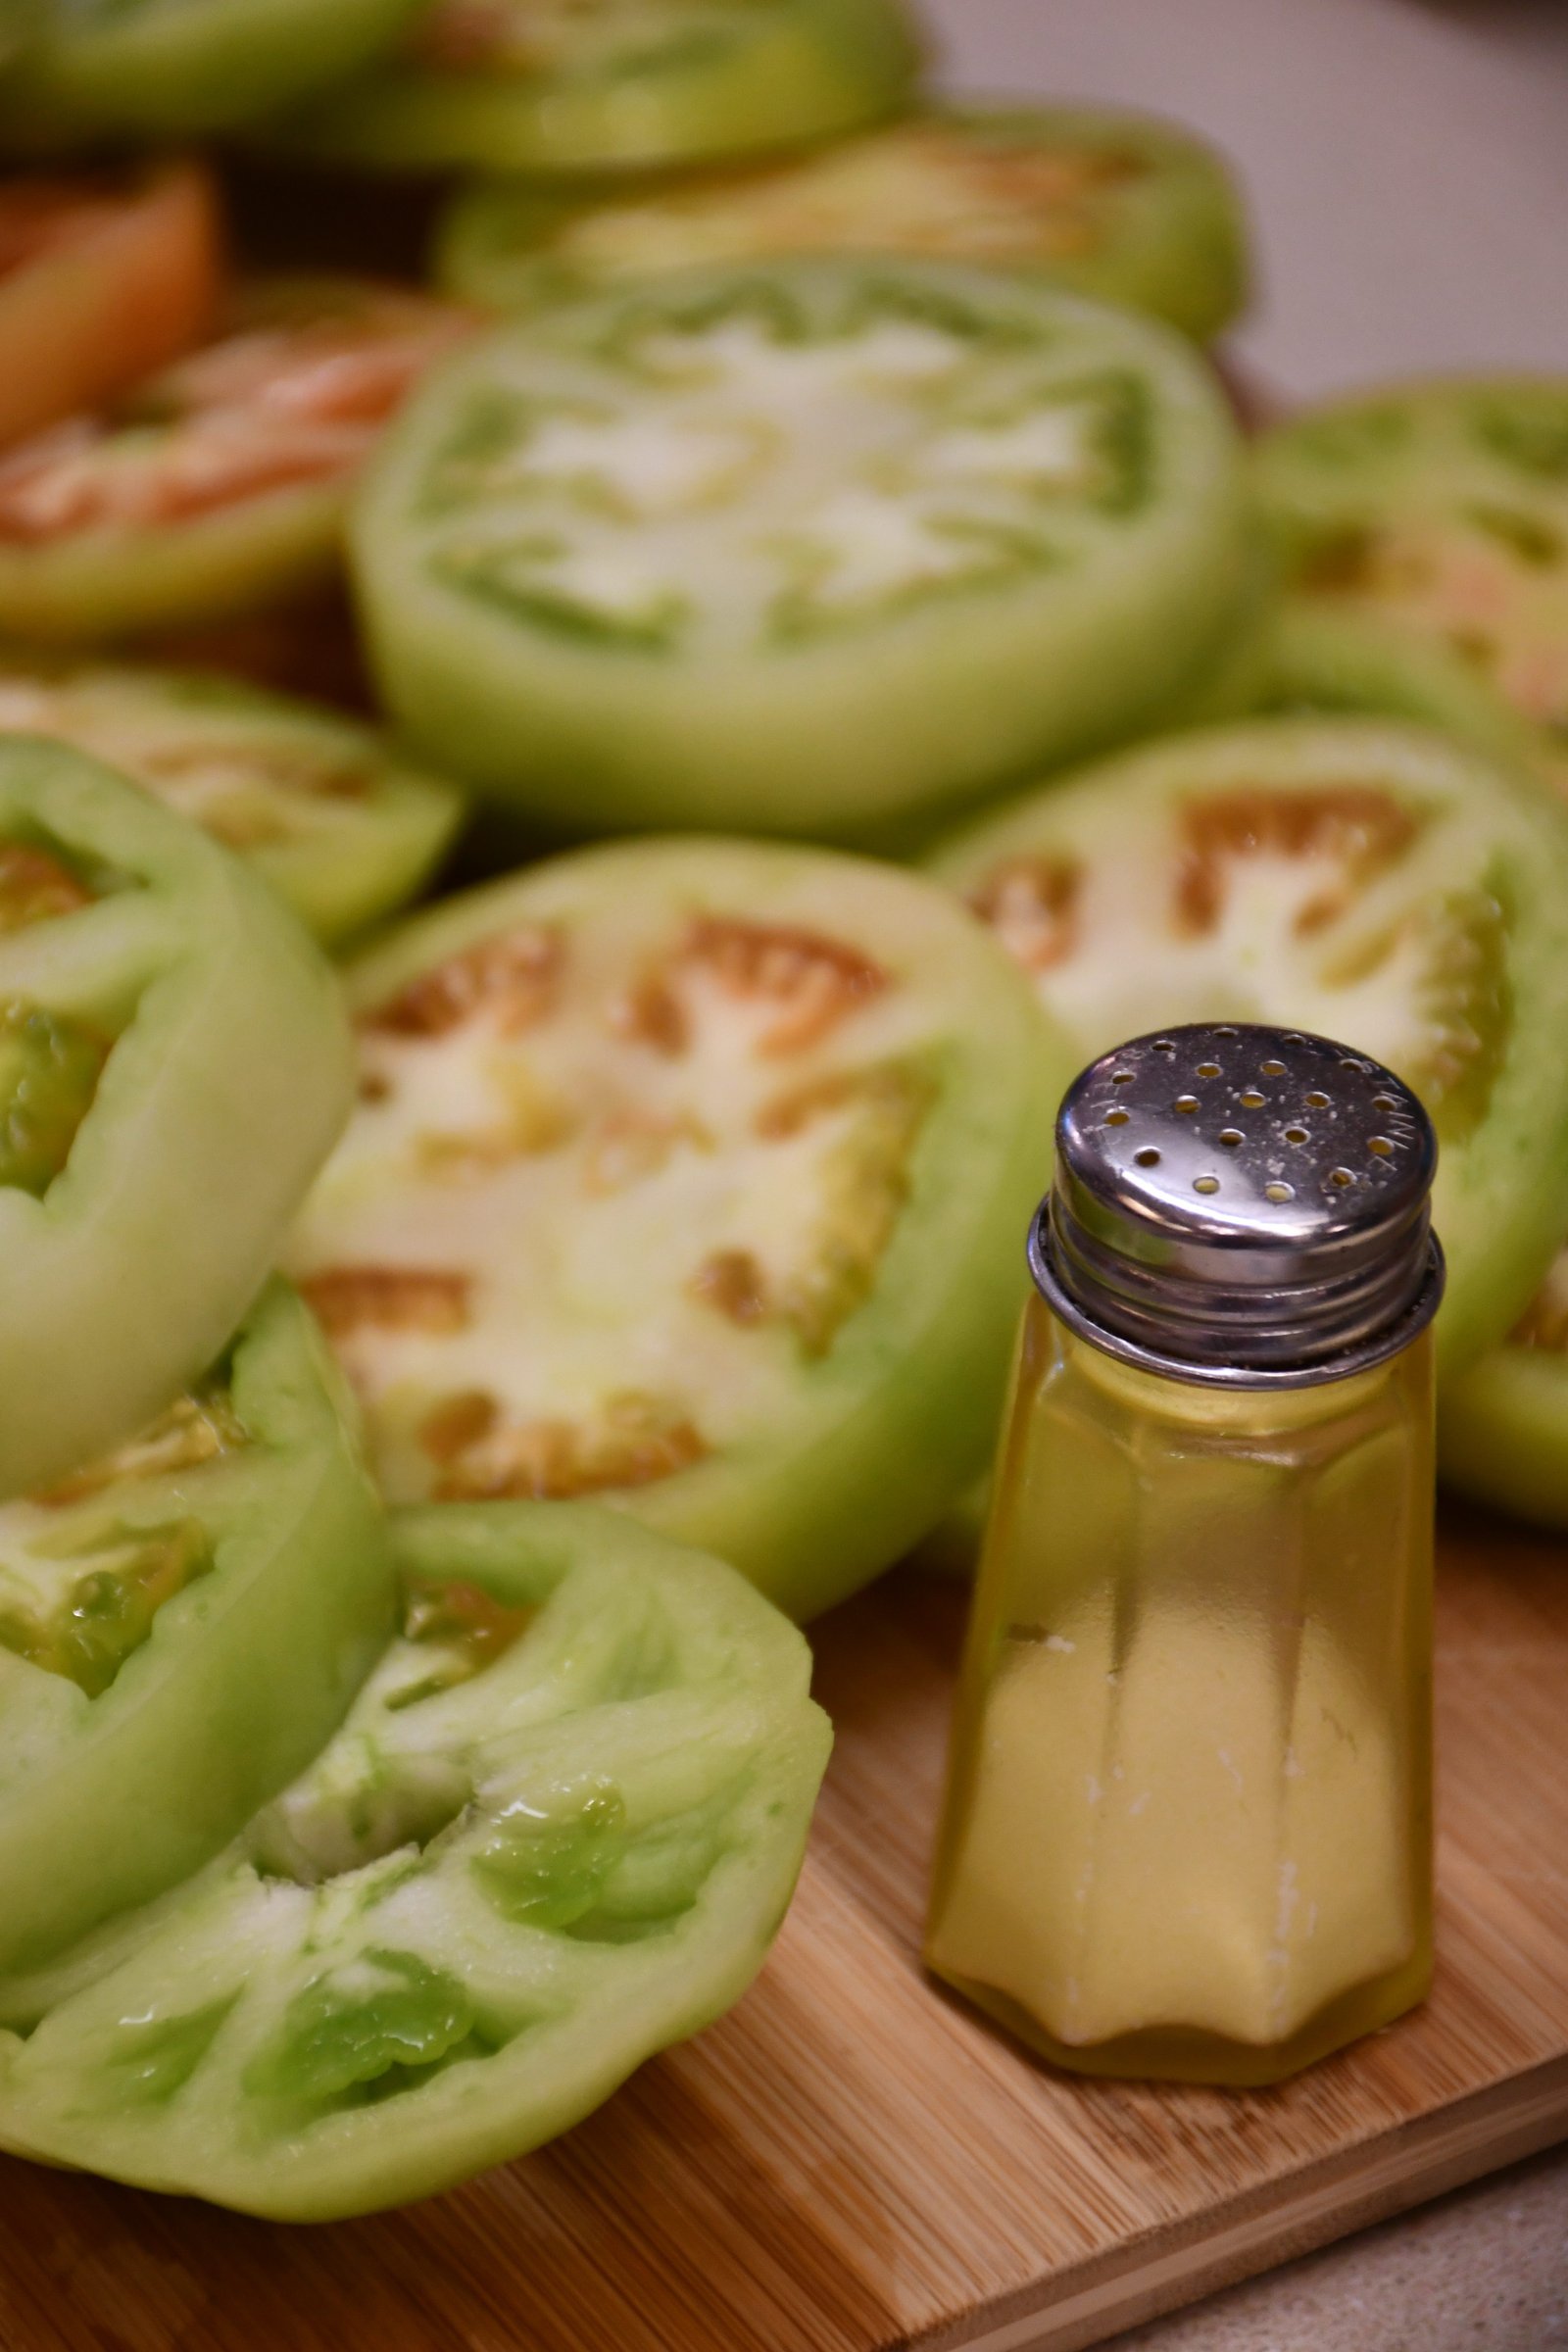
If you like you can salt your sliced tomatoes about 20 – 30 minutes prior so that the tomatoes can absorb it. That will give it a nicer taste. Although it is optional.

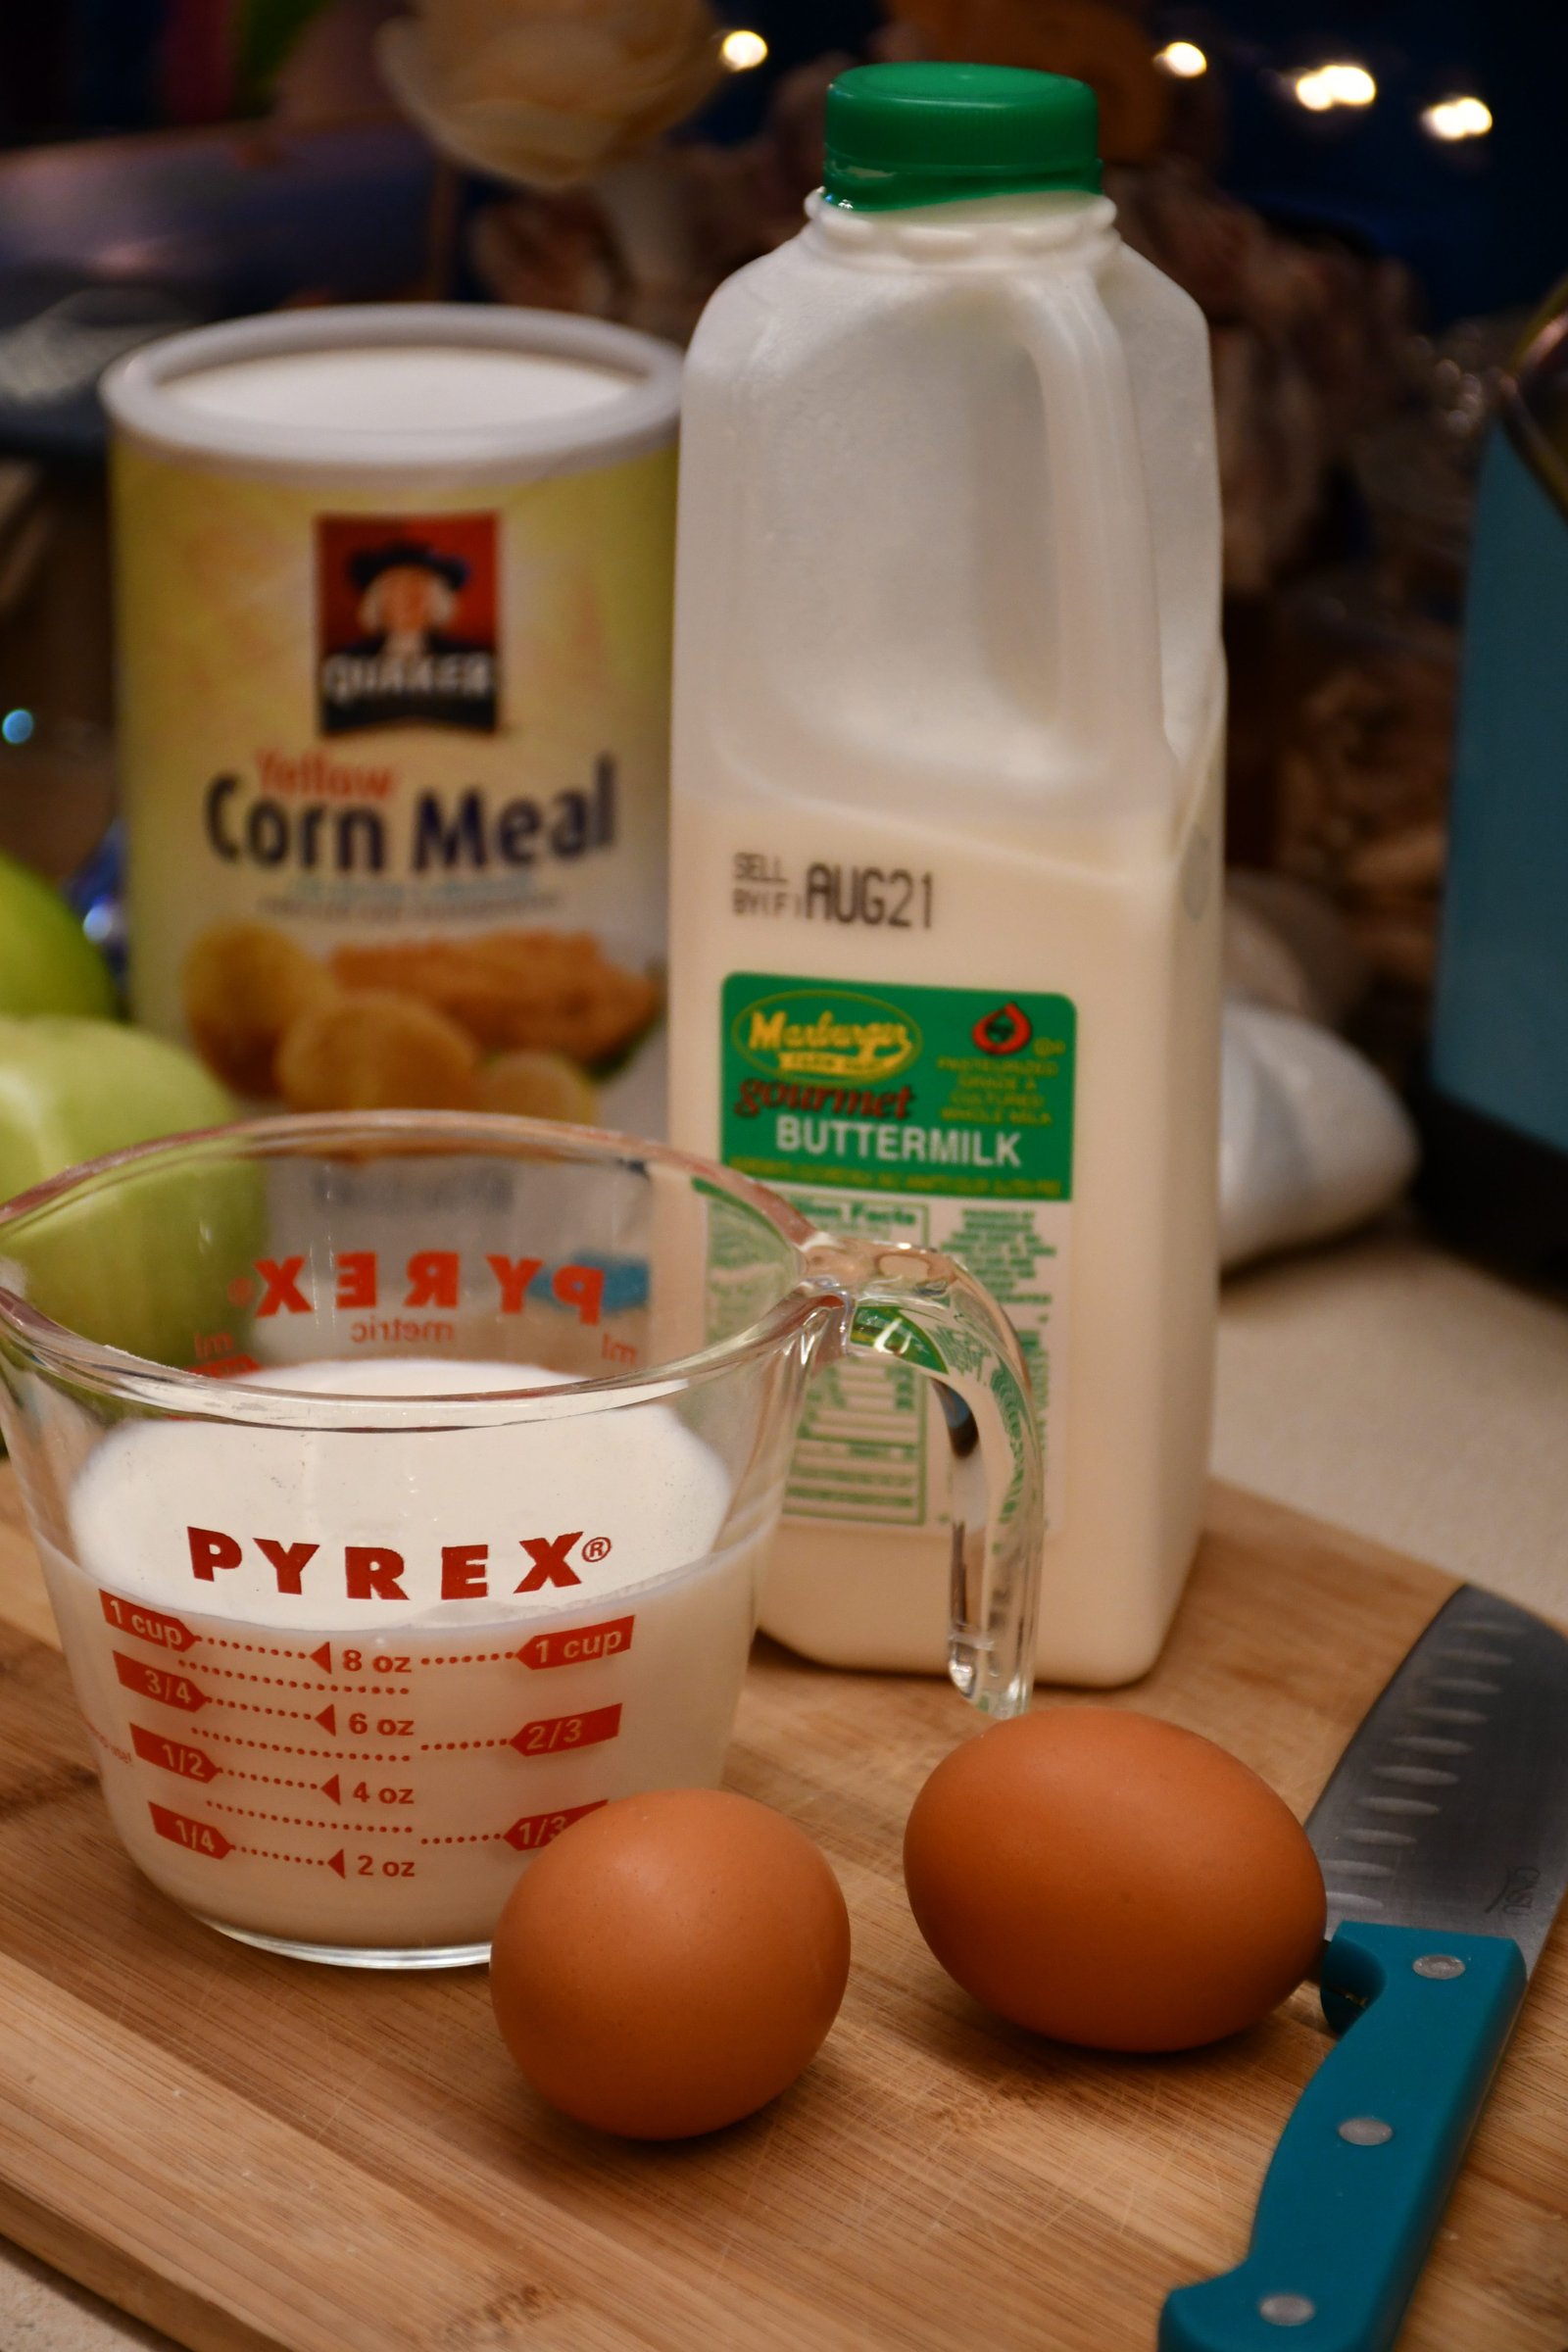
On the photo at left I am measuring out my Corn Meal, 1/4 Cup of my All Purpose Flour, and my Salt and Pepper. Mix together and add to a small bowl for dredging. In the photo at right I am measuring out my Buttermilk. You can see in the photo that I am using more than the 3/4 cup in my ingredients listing above. But, 3/4 – 1 Cup is fine.
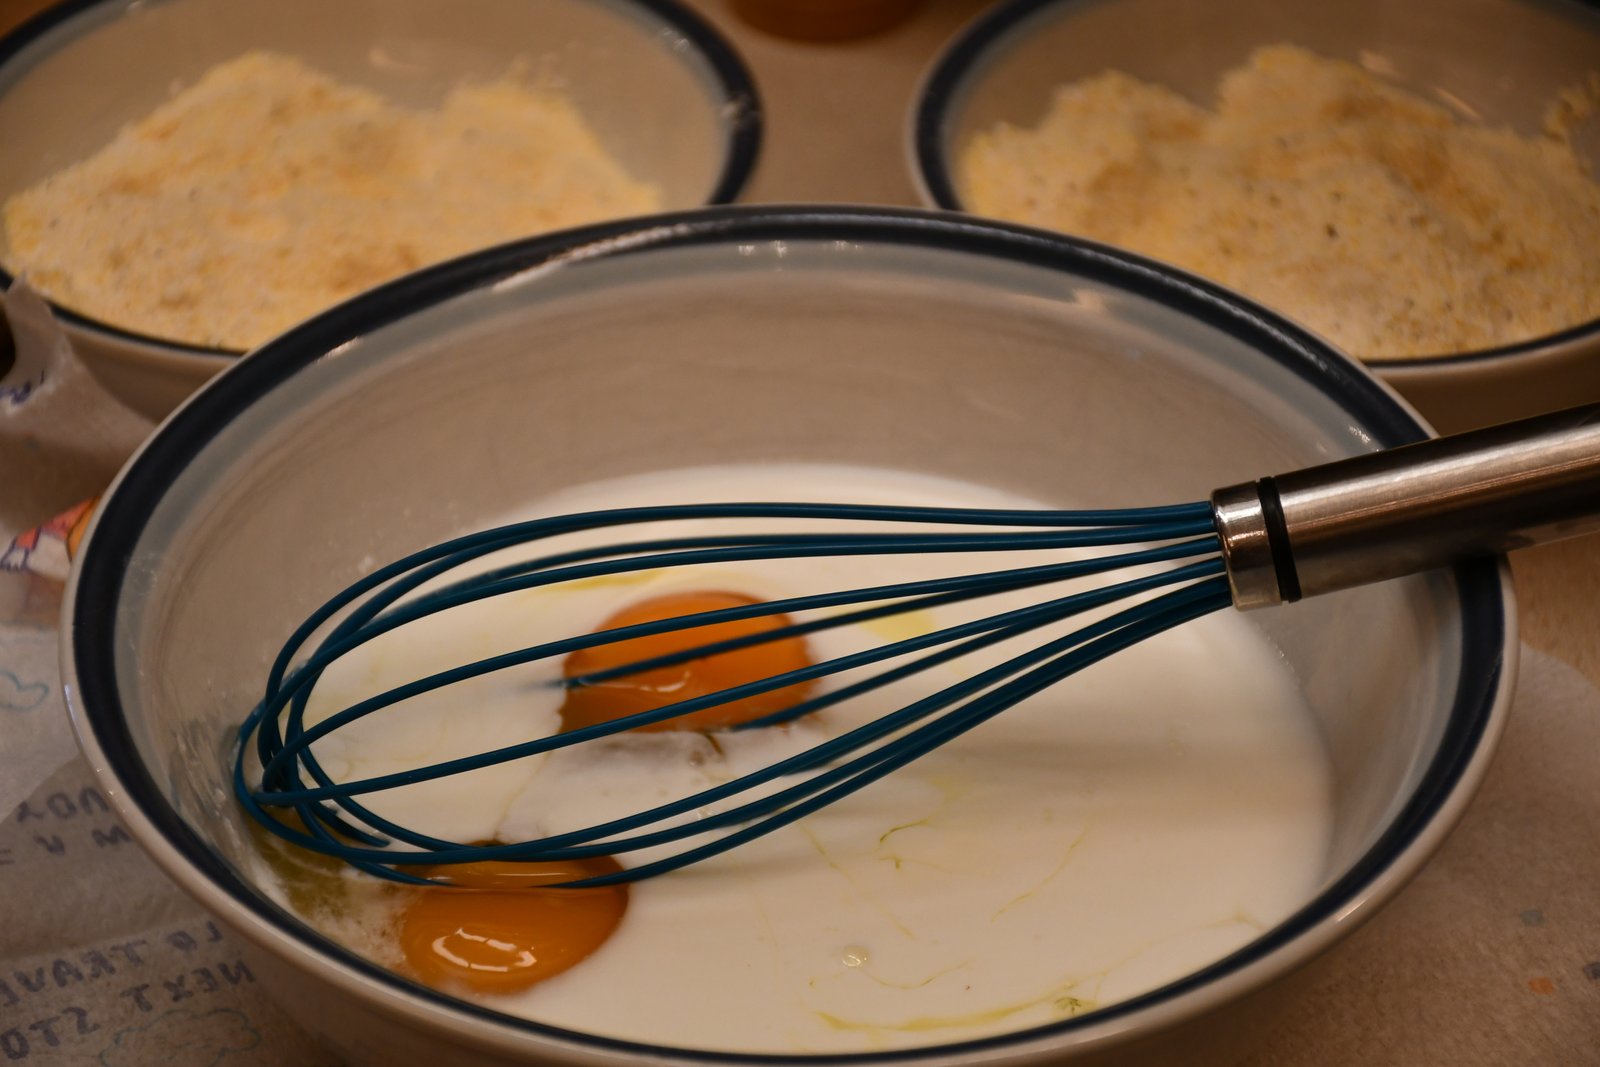
My Buttermilk and My Eggs, Ready to Whisk in a Bowl
——————————————————-
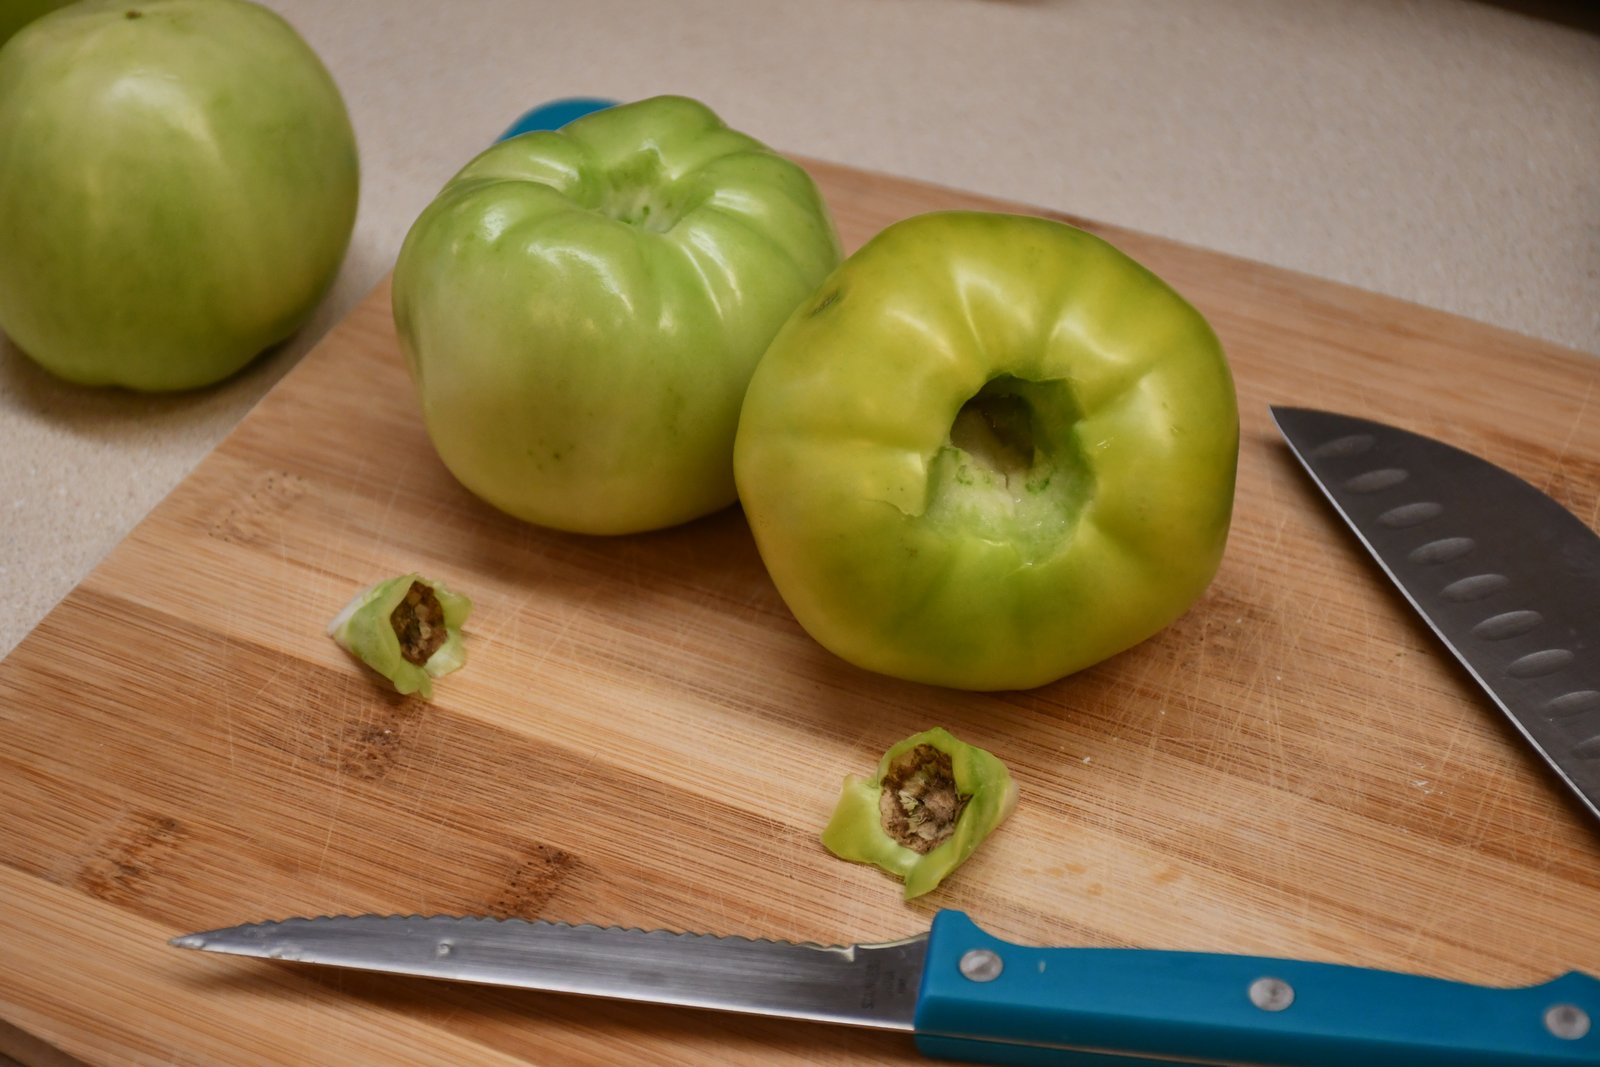
Remove the Core and slice your tomatoes a bit thick, not too thin. Oh, and see the top part of the tomato? That part doesn’t fry up very well at all, just to give you a heads up. The batter just doesn’t stick to that skin very well.
If you decide not to salt your tomatoes 20 – 30 minutes prior then you can give them a quick salting here. Just a quick sprinkle.
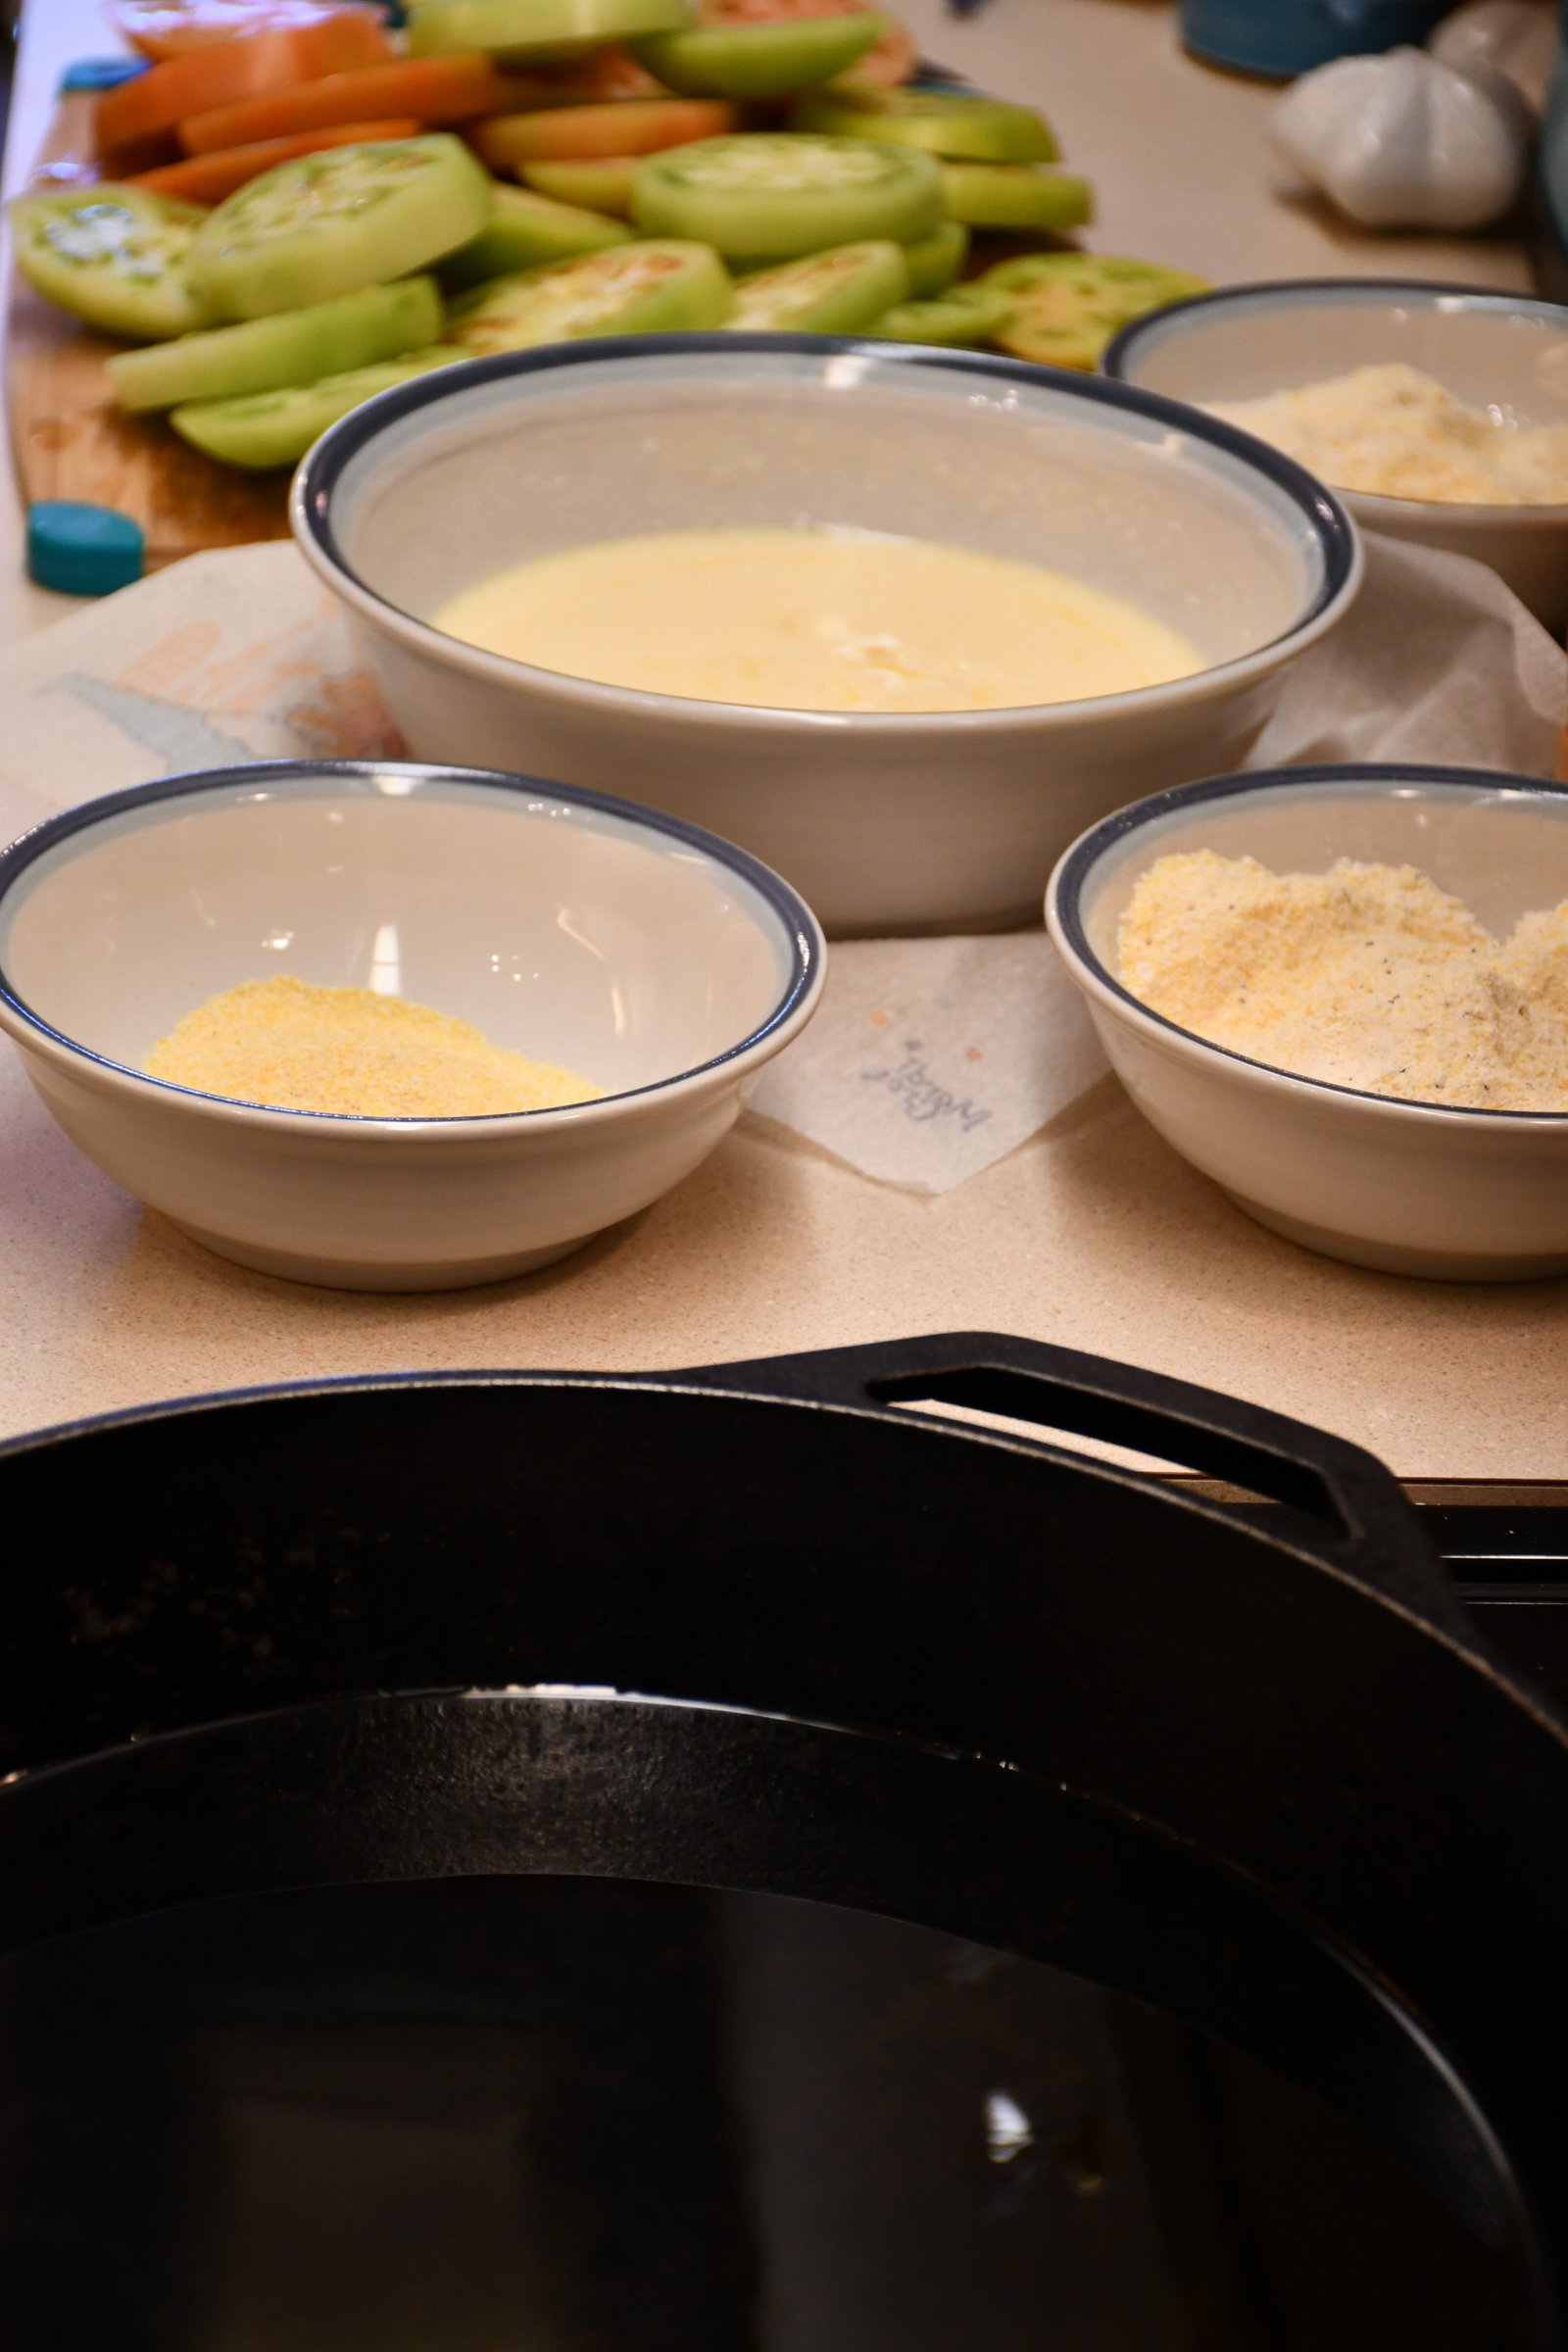
In the photo above you can see my various bowls. One is of my Egg and Buttermilk mixture, another is a Yellow Corn Meal, and the other is an All Purpose Flour, Corn Meal, and Salt and Pepper mix. The 4th. bowl houses the remaining All Purpose Flour. Therefore it is now time for dredging.
—————————————————————–
You can also set them up so that they resemble an assembly.
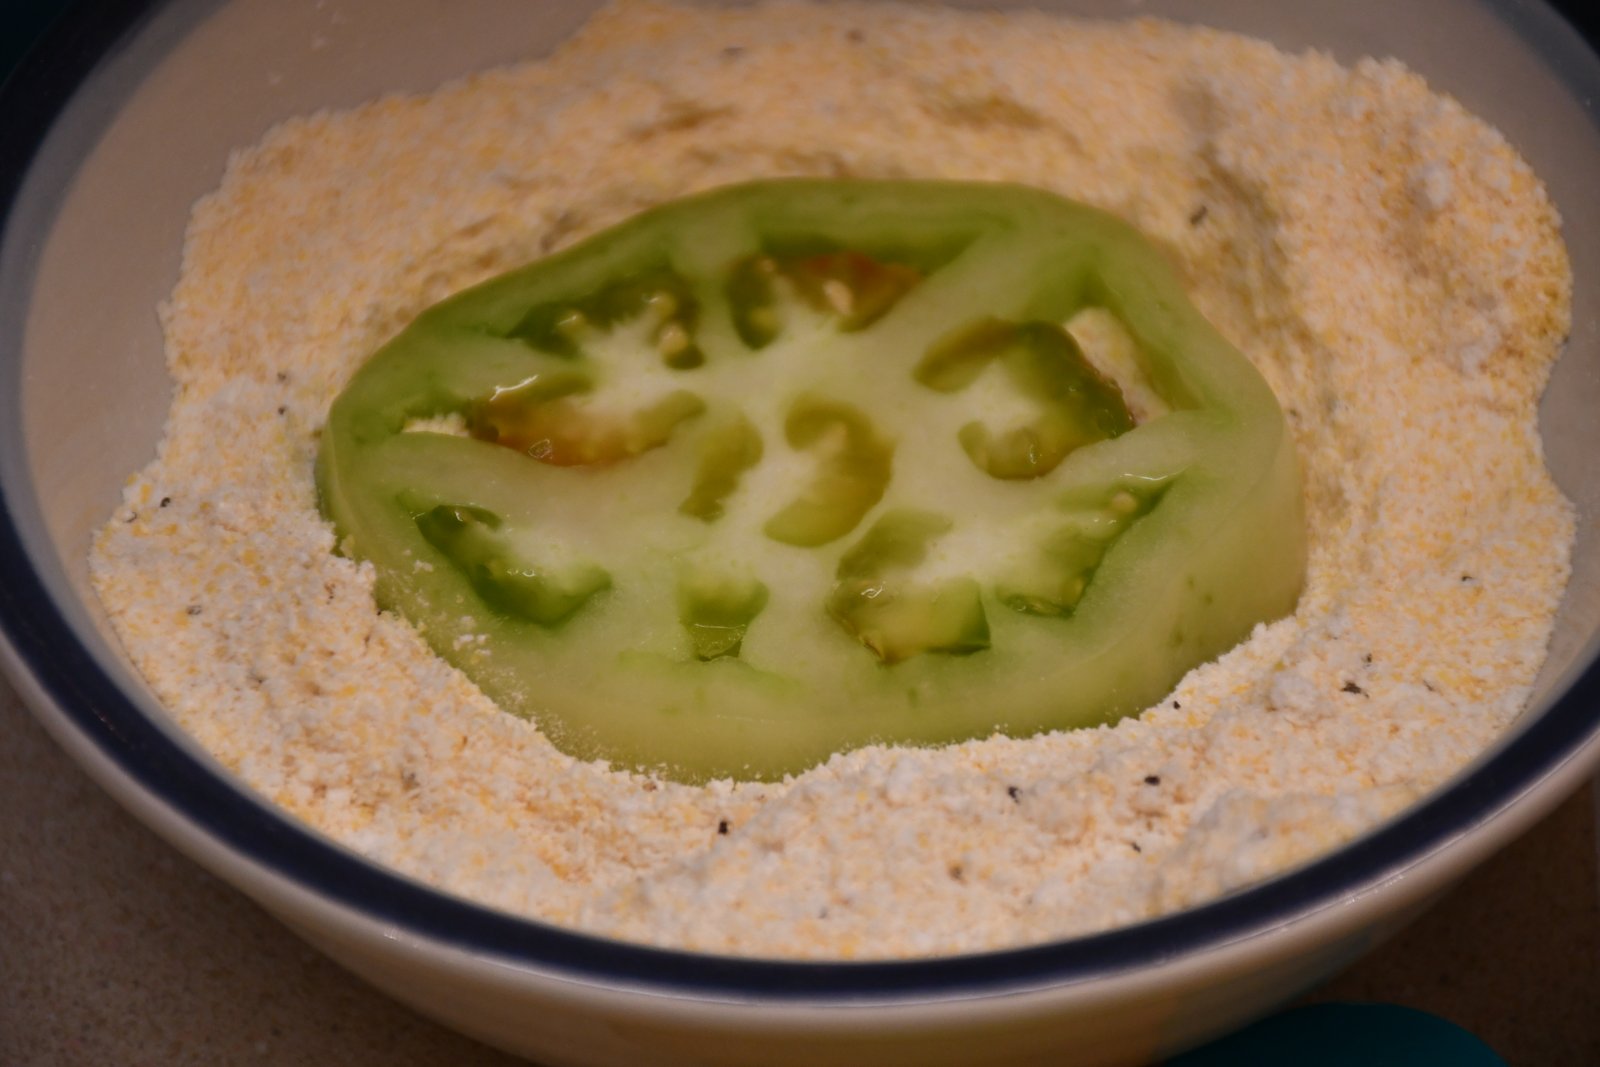
You can just use an All Purpose Flour Step 1#, then the Egg and Buttermilk Mix Step #2, and then the plain Cornmeal Step #3. Or you can use the mixture of the All Purpose Flour/Cornmeal/Salt/Pepper Step #1, then the Egg and Buttermilk Step #2, and then the plain Cornmeal Step #3. You can also add whatever spices you want to the dry mixture but I’m making these very plain and traditional.
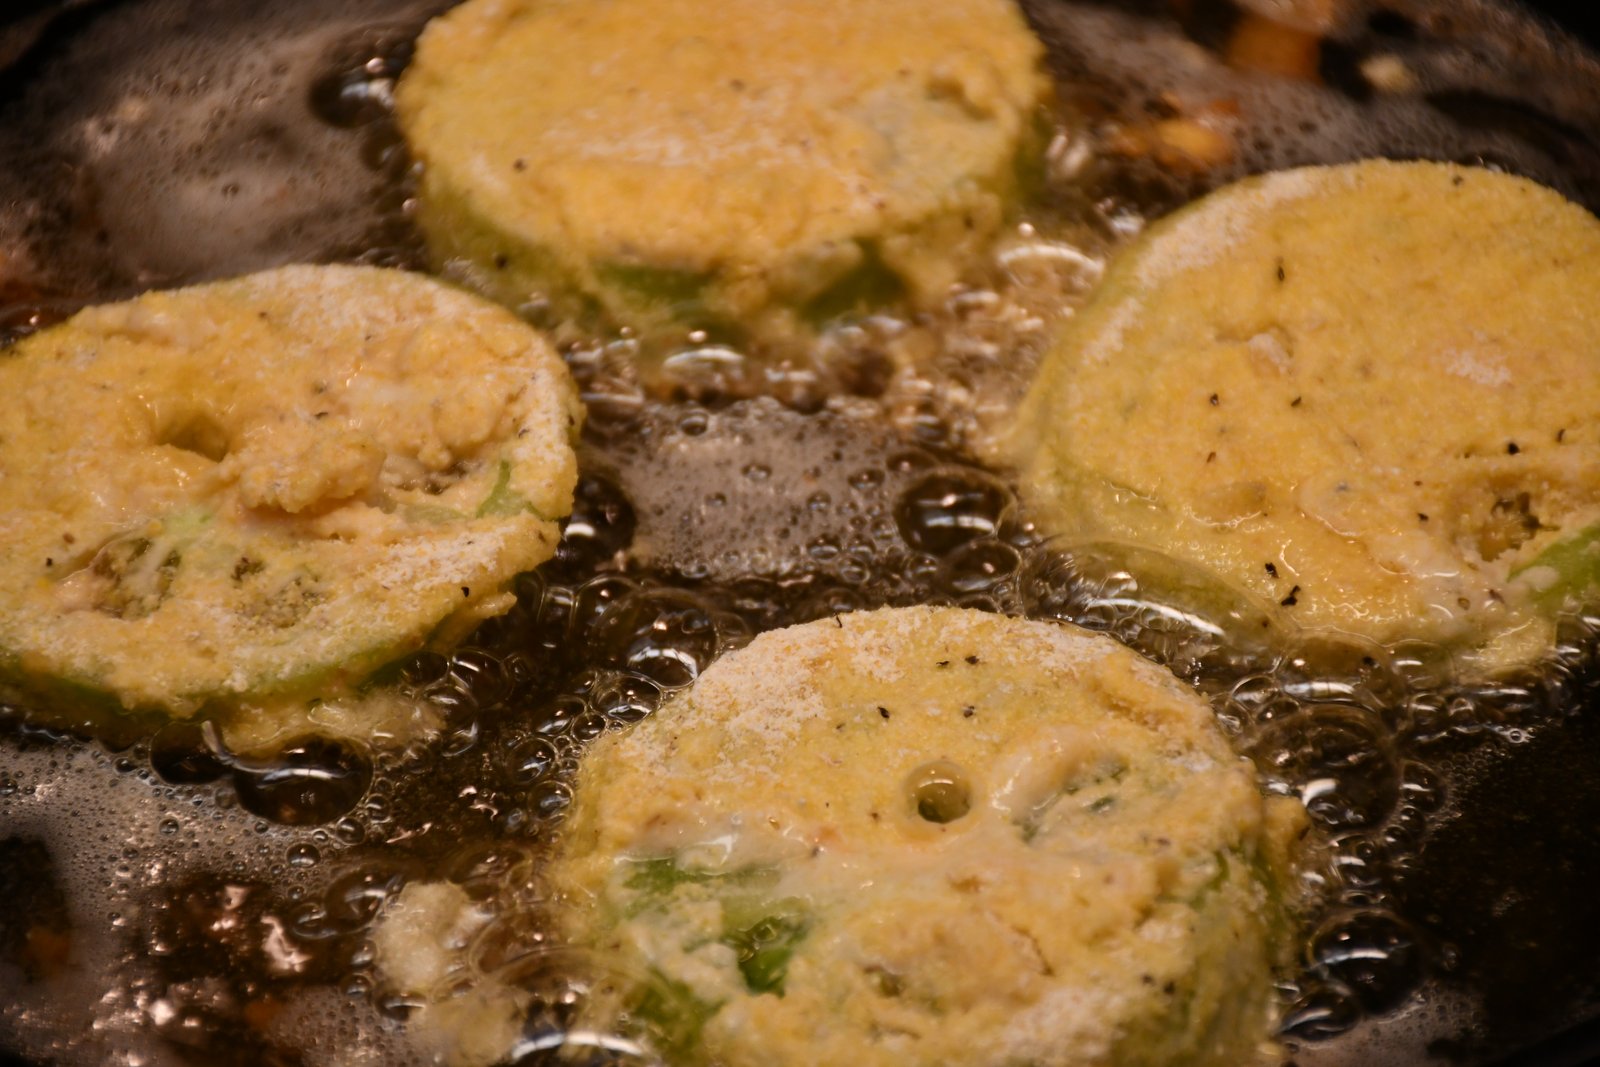
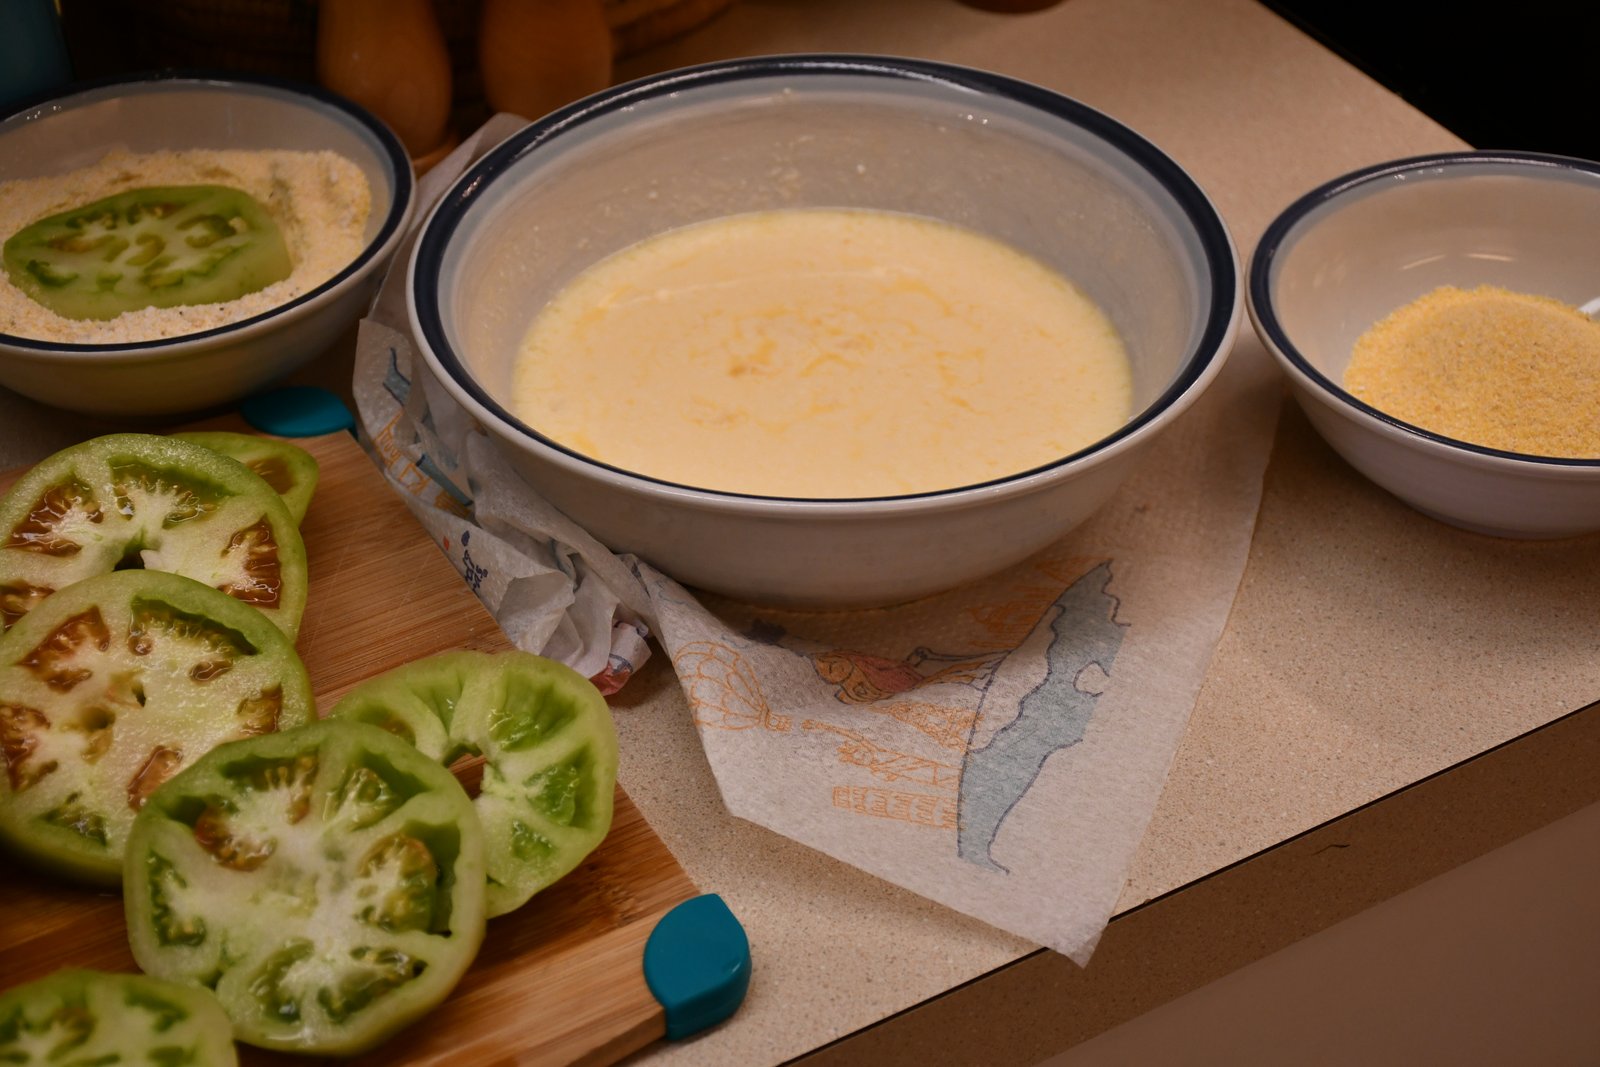
Here I placed my Vegetable Oil into a Cast Iron Skillet, about a half an inch of oil, then I turned the burner on to a Medium-High Heat.
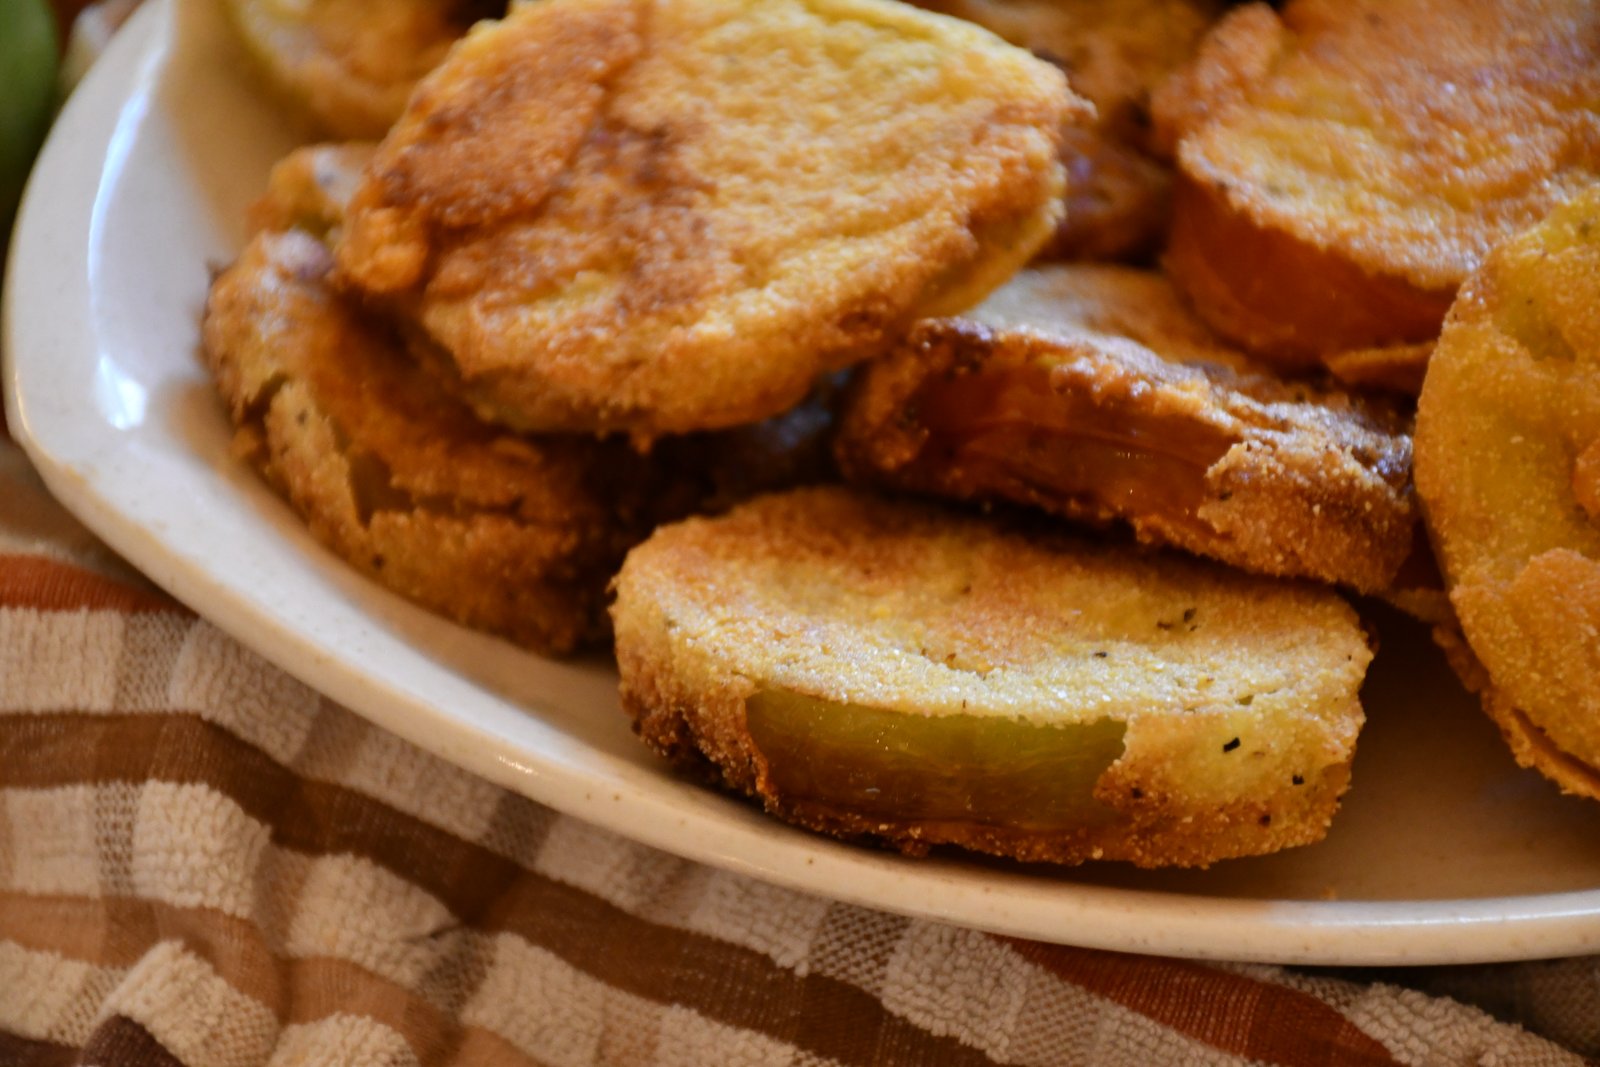
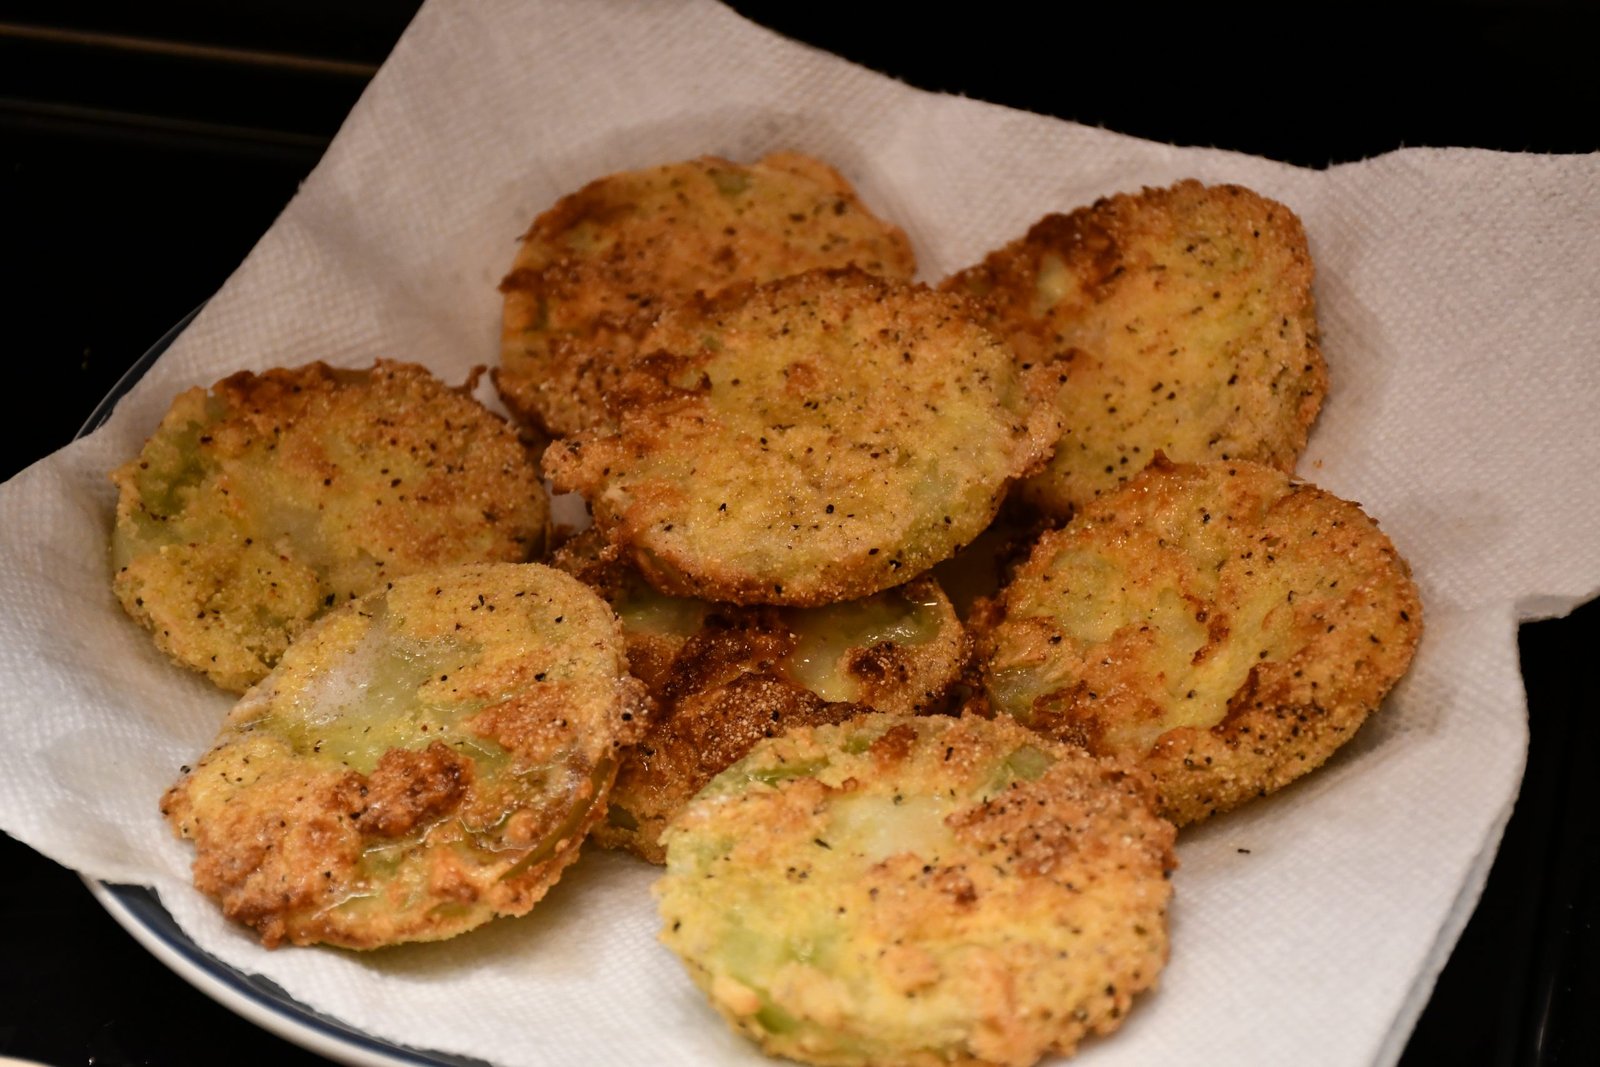
When the oil is ready then place about 4 tomatoes at a time into the oil. Use tongs to flip them once they are golden brown. Then place onto paper towels to absorb the grease. Add just a dash of salt!
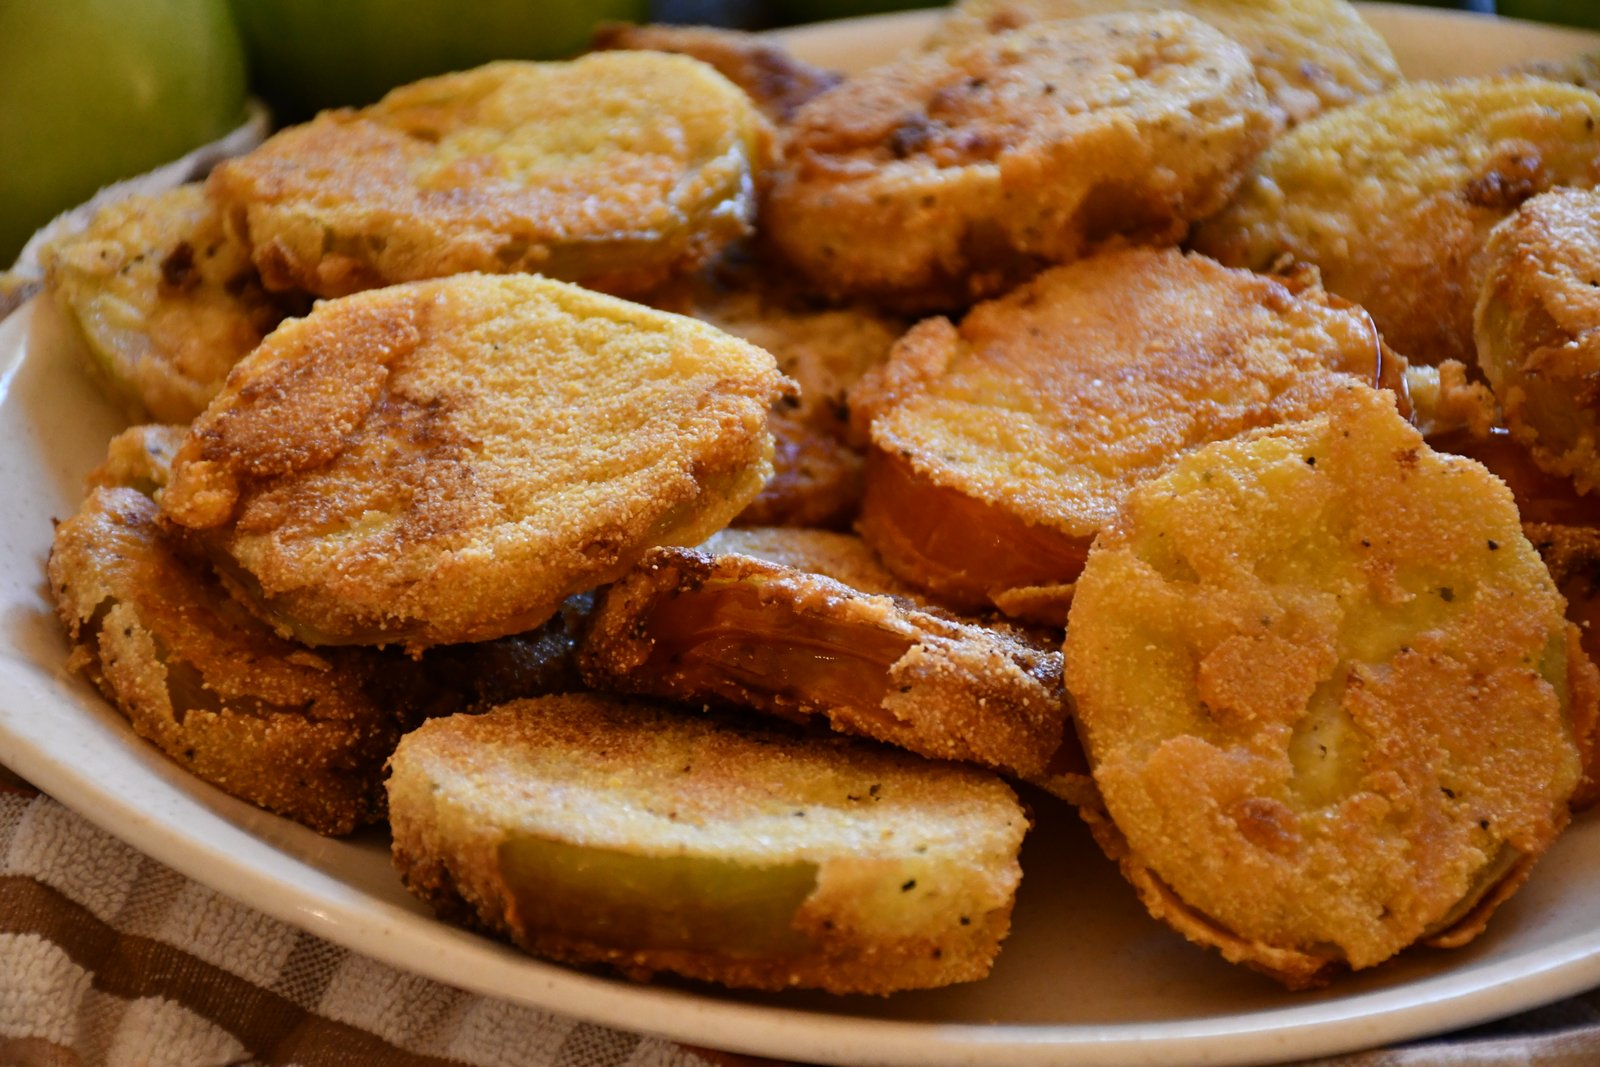

They are delicious just like this but you can top them with anything you like.
Your favorite sauce, hot sauce, a gravy, shrimp and grits, eat them on a sandwich….. You name it!
I think I hear the dinner bell !!!!

And the train will be here soon!! 🙂
—————————————————————————–
Julie’s Spicy Mexican Fried Green Tomatoes


Using the same concept from above, and the same measurements and ingredients, except I added lots of these spices to my Cornmeal/All Purpose Flour/ Salt and Pepper mixture. I added about a teaspoon of each…… Chili Powder, Sazon Completa, and Sazon Caliente. They are the Badia brands that you can find in your local supermarket, usually.

My 3 Bowls for the Assembly AND some Crushed up Jalapeno Potato Chips.

Time to Dredge and Fry
Vegetable Oil into my Cast Iron Skillet and heated on a Medium-High Heat.
These were fried in the Mexican Spices. I’m letting them cool and have the paper towels absorb the oil. Add a dash of salt here.
Sadly I don’t have a photo of the green tomatoes frying in the jalapeno potato chips. But you can see the end results below in the photo on the right. Nice Crunch!

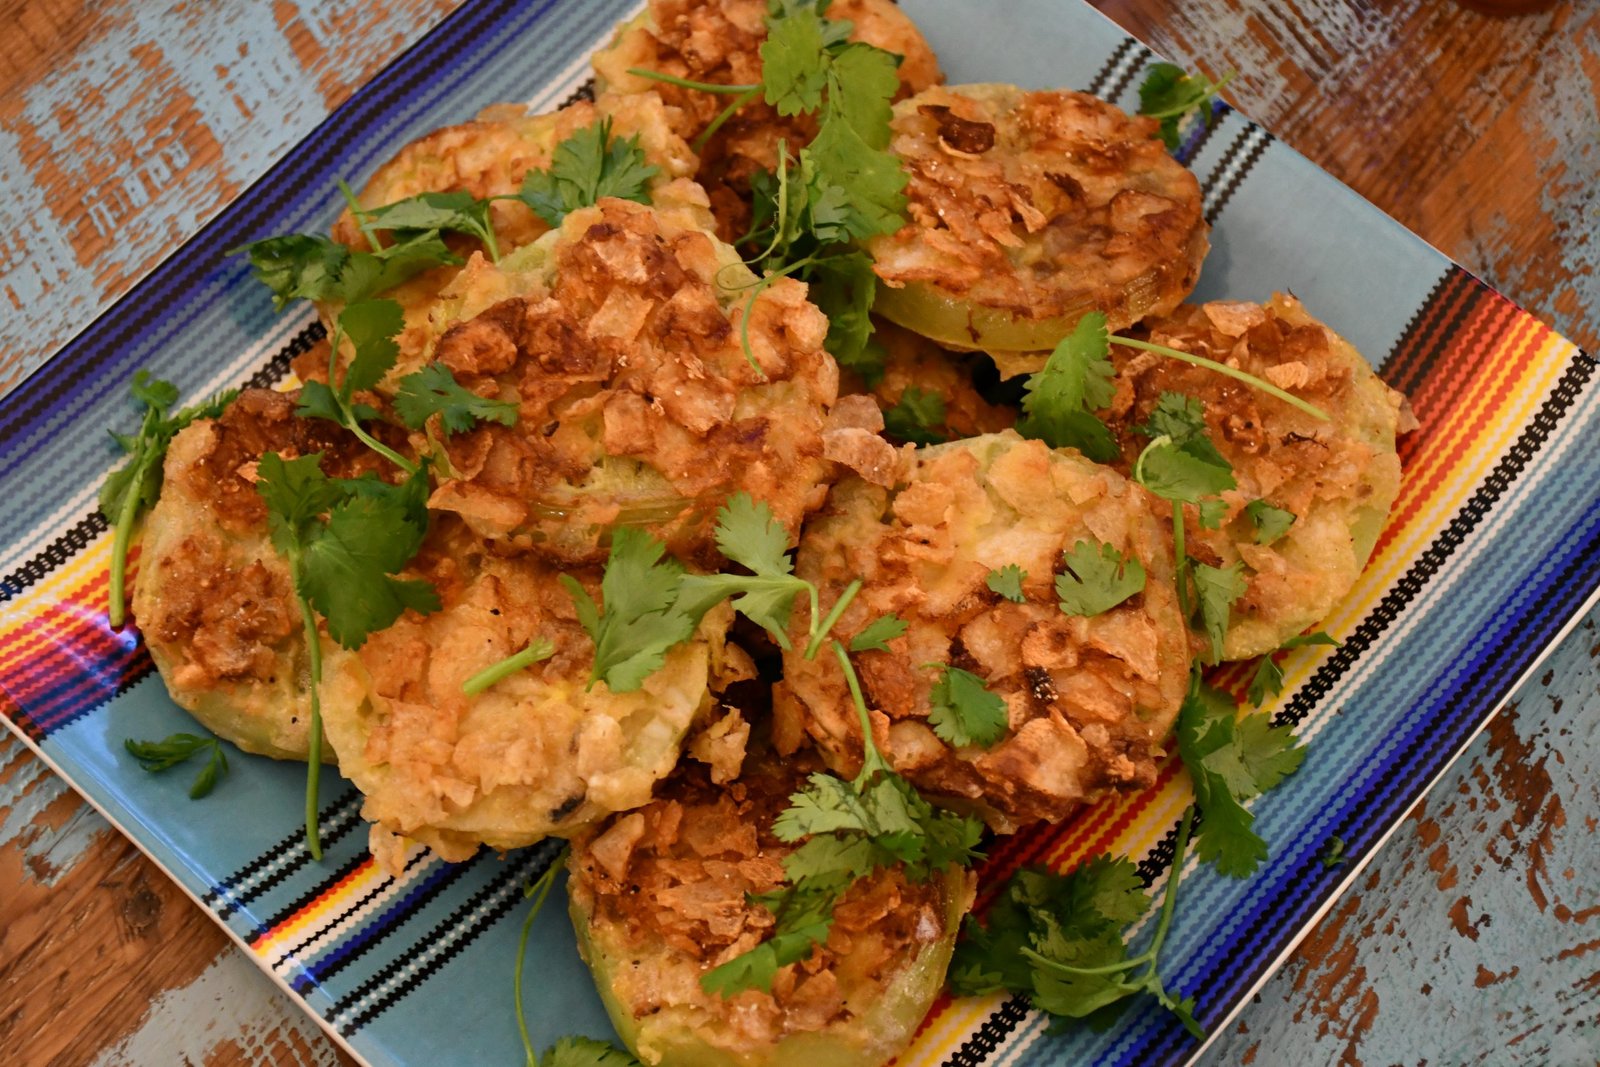
I just added some Cilantro as a delicious garnish.

I also love to eat these with my Green Chili Dip.
Just add a dollop!
————————————————————
Julie’s Green Chili Dip
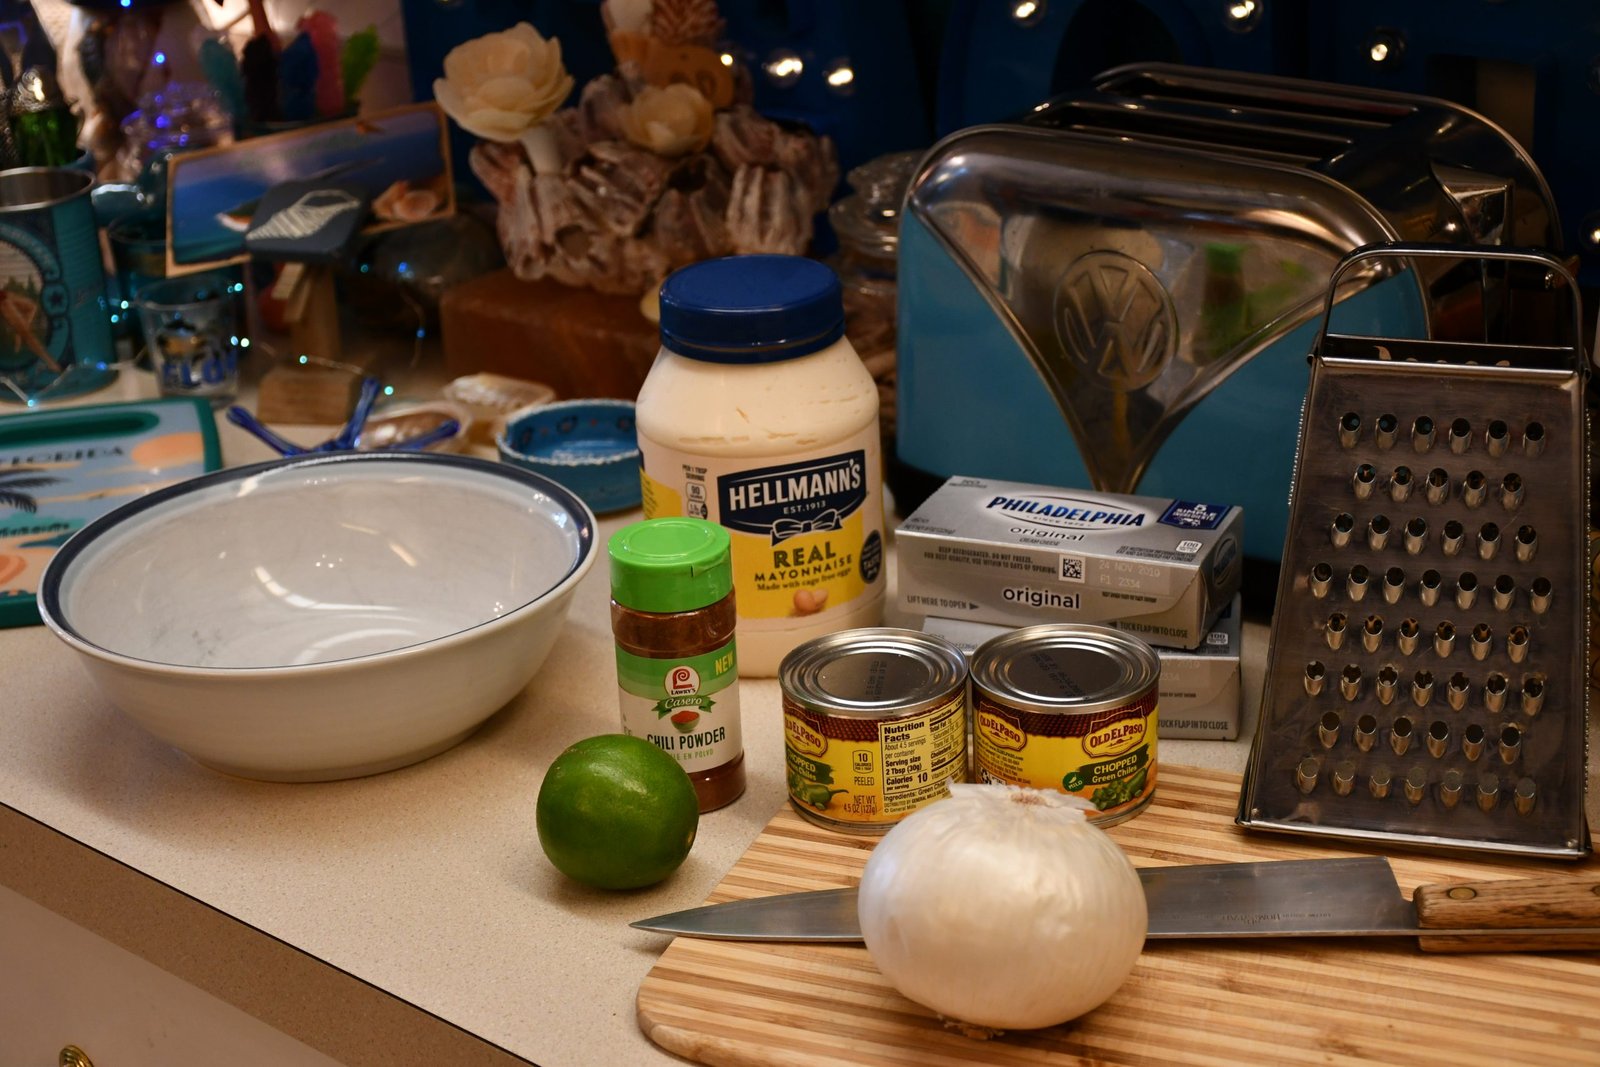
This is delicious! I know you will like it once you’ve tried it.
Here is the recipe ingredients:
2-8 oz. Cream Cheese, Softened
2- small cans of Diced Green Chili’s, 4.5 oz., drained
1/2 Cup Mayonnaise
5 t. Grated Onion, or thereabouts
Chili Powder
Juice of Half a Lime

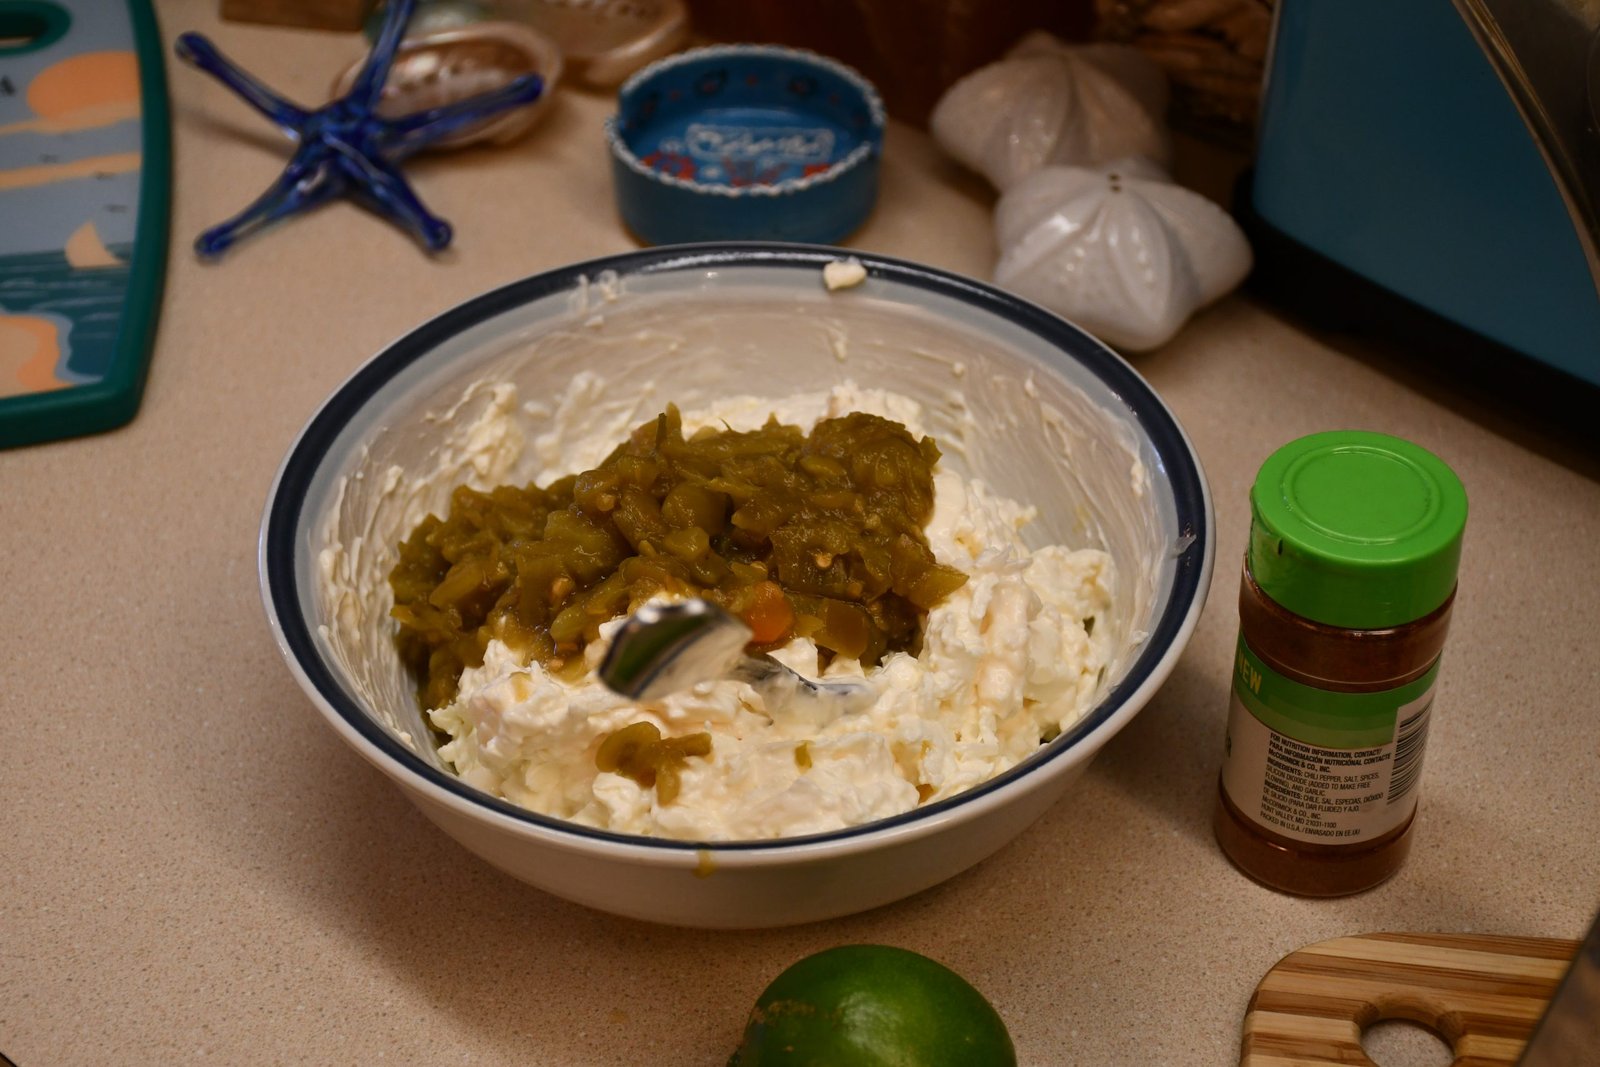
Grating the Onion and Mixing all Ingredients Together

You can add the lime juice last, and sprinkle with the Chili Powder to top.
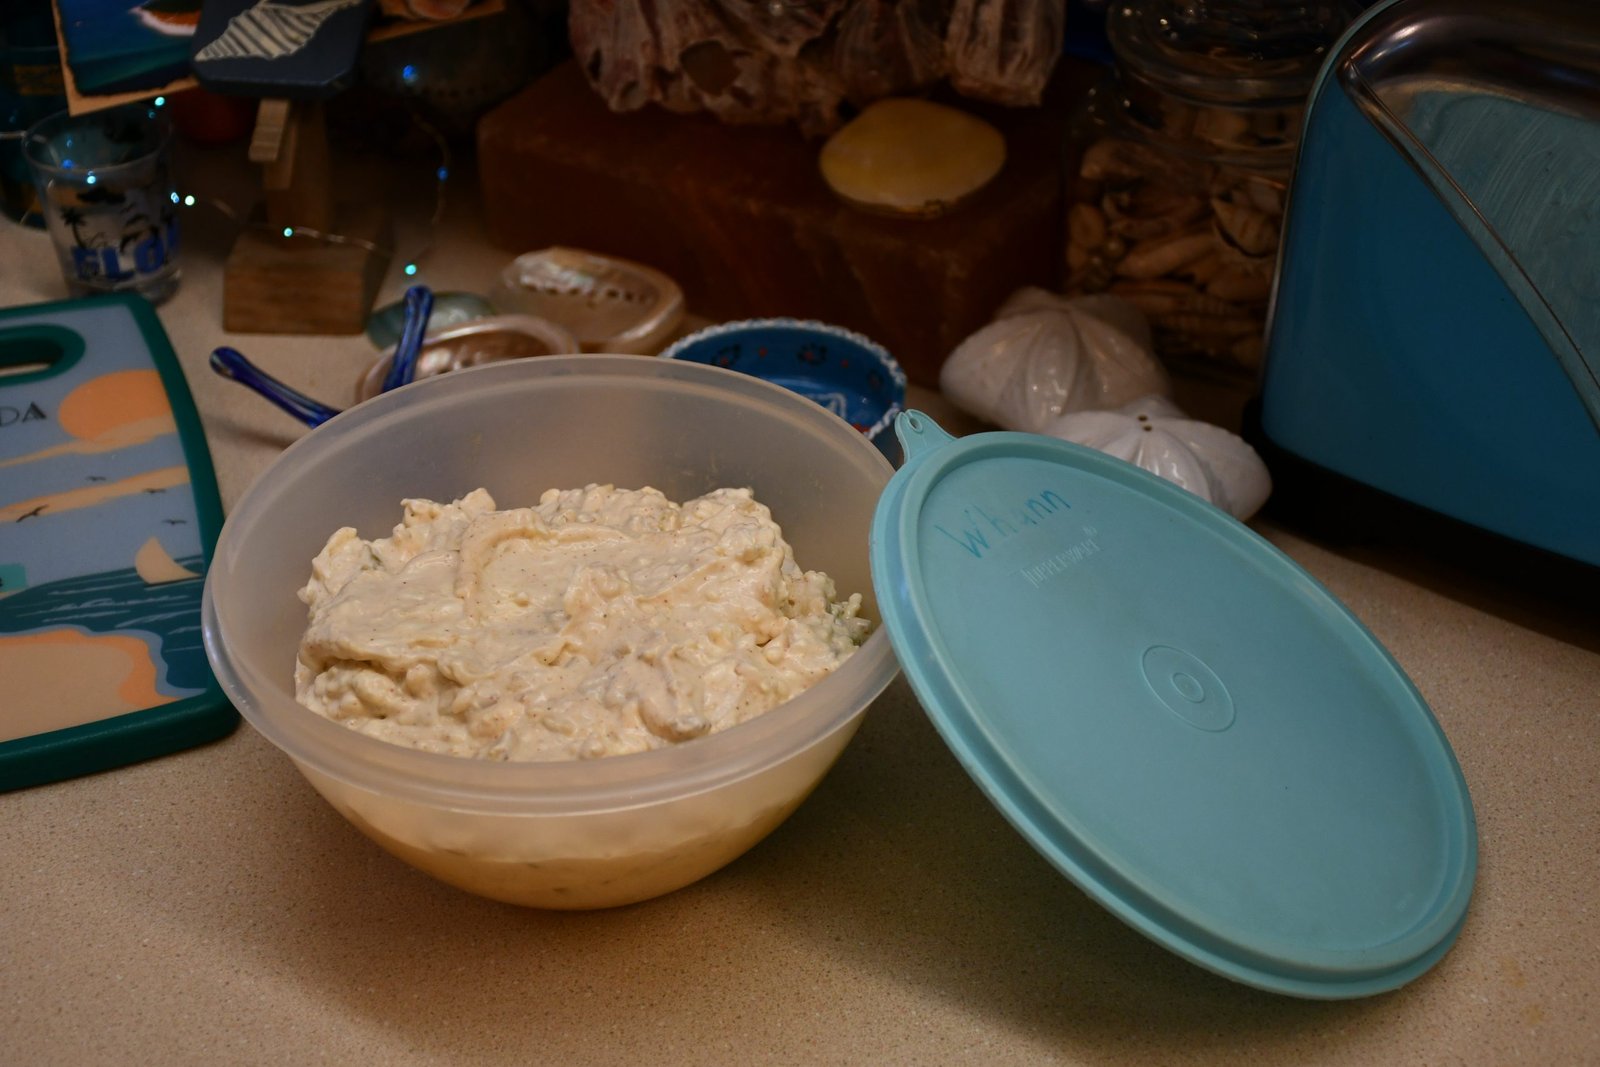
Chill in the refrigerator overnight for best results. But at least a few hours before ready to eat it.
Enjoy!
——————————————
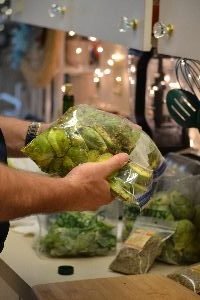
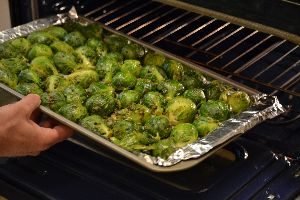
Brussel Sprouts
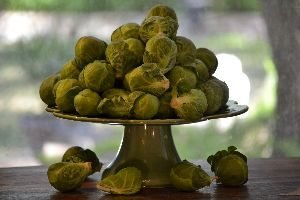
Roasted Brussel Sprouts, to be Precise
(This recipe can be halved if you don’t want this many.)
To start, prepare your Brussel Sprouts the day ahead… or in our case 3 days ahead. You want to marinate them in your spice mixture.
Here’s how!
First You Need:
30 Brussel Sprouts
6 Tbsp. Seasonings – Any you like
2 Gallon Baggies that you can Seal (You will divide the Brussel Sprouts, Seasonings, and Olive Oil into separate Baggies to marinate.)
1 Cup Olive Oil – 1/2 Cup in each bag
—————————–
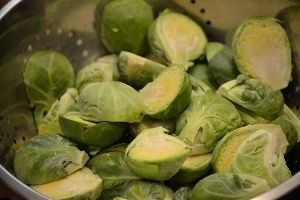
Cut 15 Brussel Sprouts in half, then wash them. Per Bag!
The Seasoning that we Used
Coastal Blend
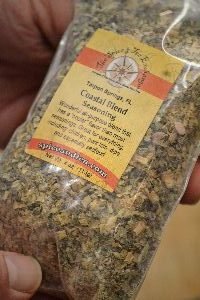
You can use something with herbs, garlic, with a touch of salt and pepper or you can use an already prepared seasoning as we did.

Here is a Greek Seasoning
Place your cut Brussel Sprouts in two large zip lock bags.

Add about 1/2 Cup Olive Oil to the bag and your seasonings.
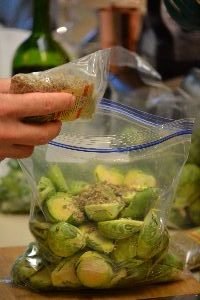

Zip the bag shut and toss to mix the ingredients.
The oil will help distribute the seasoning.
Place the bag in the refrigerator overnight to let the sprouts marinate.
We left them in the refrigerator 3 nights before cooking. That extra time with the marinade made them extra tender and delicious.
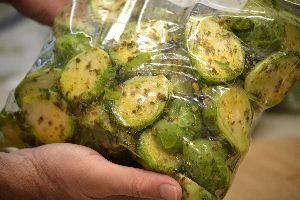
Here, we marinated the two bags of sprouts with different seasonings.
You could freeze one for later use if you like.
BUT FIRST, allow them to marinate for a day or two so that all the flavors can blend together before you place them in the freezer.

After 24 hours or so, place the sprouts on aluminum foil laid over a large sheet pan.
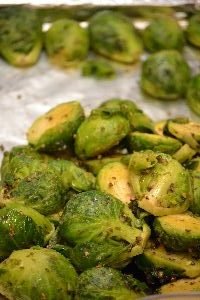
Ensure the sprouts are cut side down.
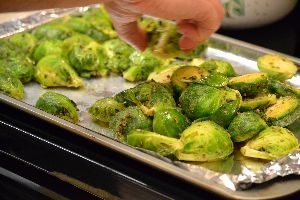

Roast them in the oven for ~35-40 min. at 350’F
—————————-
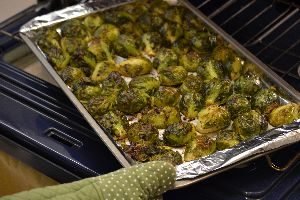
Here is a great picture of what they should look like when done.
The tops are well browned and the cut side caramelized.
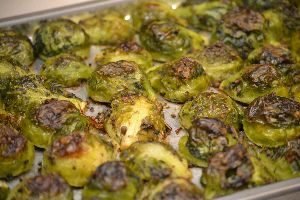
These are PERFECT!
And a family favorite of my brother Ben’s.
————————————-
Roasted Cauliflower
(I’ve dedicated this blog post to my brother Frank, well, his son Joseph came to visit us and wanted Gordon to teach him how to cook, as he is a college student at Georgia Tech. So, as we were taking Joseph around to visit with family, we went over to our daughter, Veronica, and her partner, Brian’s house. We knew we would be there visiting around dinner time so I told Gordon to pick up two rotisserie chicken’s and some dinner rolls when he got off work, and I would make my famous Macaroni and Cheese, and bring over a few cans of green beans……. then we could meet at V. and B.’s house and have dinner.)

Gordon and Joseph in Veronica and Brian’s Kitchen
That is when Gordon said that he would also buy some cauliflower from the commissary so that he could teach Joseph to make his Roasted Cauliflower. My job was to remember to bring the spices that were needed for this dish from home, as we all met here for dinner.


Gordon and Joseph’s Roasted Cauliflower
Recipe Ingredients:
4 Tbsp Curry Seasoning
4 Tbsp Olive Oil
1 Head of Cauliflower
Preheat your oven to 425’F
Wash your Cauliflower and cut off the florets, removing the stalk.
Cut the florets in half and place in a large Ziplock bag.
Add your Olive Oil and Curry Seasoning, close the bag, and shake well to distribute the spice.
Place the florets cut side down on a sheet pan.
Place the sheet pan in the oven and cook for about 25 min. or until the cut side is caramelized.

Veronica and Brian Doing Dinner Prep

Julie and the Mac and Cheese

Julie’s Dinner Plate
(Although the roasted cauliflower seems to be hidden underneath my dinner roll.)

The Family Photo
L-R, Veronica, Gordon, Julie, Joseph, and Brian
P.S. Gordon did buy Joseph a container of Curry Powder for him to take back to Atlanta so that he can make his own Roasted Cauliflower.
—————————————————–
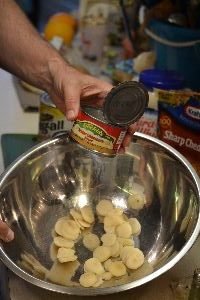
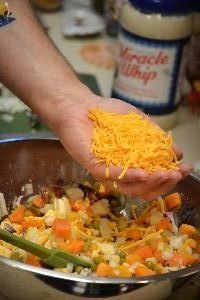
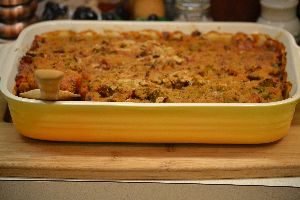
VeG ALL Casserole
Recipe Taken from Cherished Recipes from The First Christian Church, Rome, Georgia
This was a casserole that my grandmother made quite often because it was quick and easy and inexpensive. Although we bring you the original “canned” version, it would taste so much better by using fresh ingredients. (Although we did use a few fresh ingredients.) Don’t get me wrong, it tastes fine here, but everyone knows that most of the time fresher does taste better. Besides, I really just wanted to relive a food memory.
Although Gordon did have a great idea that next time we could roast all the vegetables and then assemble them into a casserole dish, add few toppings and that would would be delicious. 🙂

——————————————-

VEG ALL Casserole
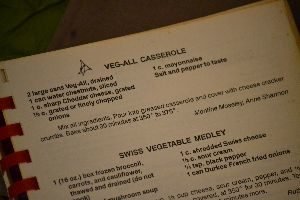
Recipe by: Montine Moseley and Anne Shannon
as taken from Cherished Recipes from First Christian Church, Rome, Georgia
This southern recipe was very popular at Covered Dish Dinners because all of the ingredients were always on hand in most every southern kitchen.
You can of course, use fresh veggies for this recipe but I wanted to relive a food memory so we made it the same way that most southern women did, they used CANS!

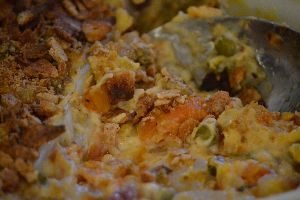
Topped with a Cracker Crust
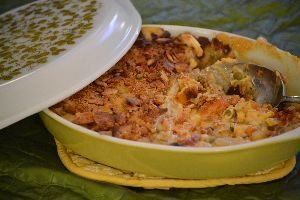
and Baked in my Grandmother’s Vintage Casserole Dish.
————————————–

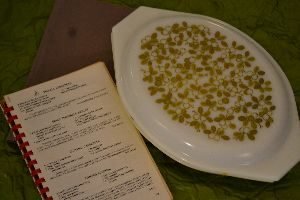
Recipe as Written in the Book
The Ingredients:
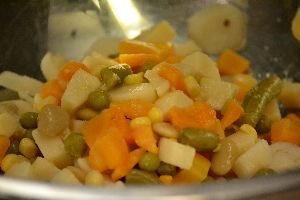
2 Large cans Veg-All, drained
1 can Water Chestnuts, sliced
1 Cup Sharp Cheddar Cheese, grated
1/2 Cup Grated or Finely Chopped Onions
1 Cup Mayonnaise
Salt and Pepper to Taste
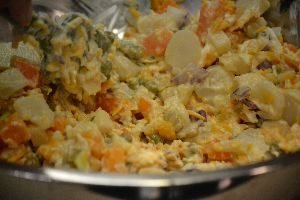
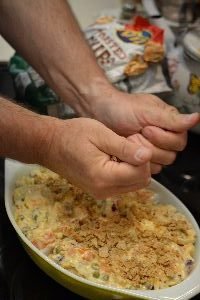
Mix all ingredients. Pour into greased casserole and cover with cheese cracker crumbs.
Bake about 30 minutes at 350*.
(We also added a few shakes of Tabasco Sauce)
———————————–
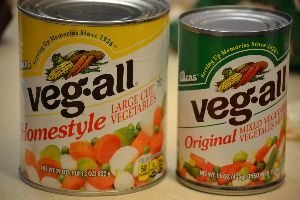
It wouldn’t be a Veg All Casserole without the cans of Veg All.
Let me just add that there is no need to add salt to this casserole as there is so much sodium in those cans of Veg-All!
Water Chestnuts
Start by adding all your cans to a large mixing bowl.
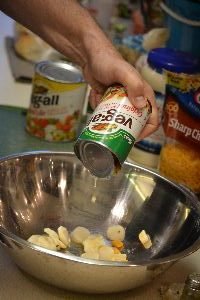

Be sure to drain them first.

————————————-
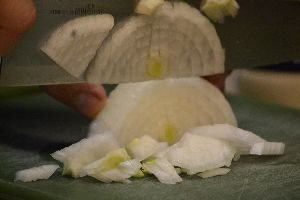
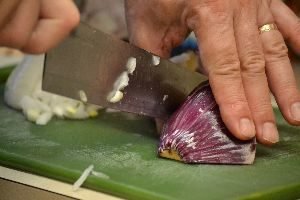
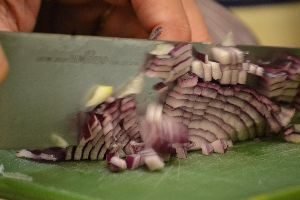
Here Gordon Chopped a Vidalia Onion and a Red Onion
————————————-

————————————–

Grate the Sharp Cheddar Cheese and add to Bowl.
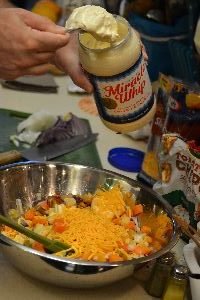
Next Comes the Mayo, you can add to Taste

—————————————-

Gordon Grating some Black Pepper, Adding a few Shakes of Tabasco, and Grating a Florida Blend Seasoning Mix.
Stir Together……..

Now spray your casserole dish with a non-stick cooking oil spray.
————————————–

We ended up doubling the recipe so that we could freeze two of them for later use.
In our freezer at any given time are casseroles just like this one. That way if we find we don’t have enough food to stretch to an extra person that shows up unexpectedly, we can always throw in the oven an extra casserole or two in order to have enough food for all.

Just make sure that you wrap them up really well with Saran Wrap and Wax Paper, and Saran Wrap again.
————————————

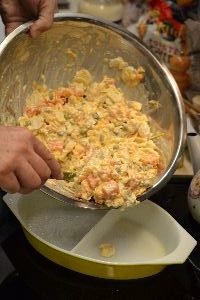
Here Gordon is adding the cracker crumb topping.
(I do think that had we cooked the casserole about 15 minutes first, then added the cracker topping that it wouldn’t have burnt like it did.)

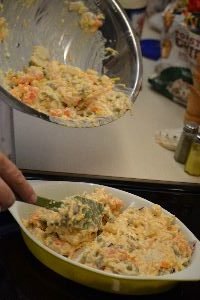
DO NOT add any of the cracker crumb topping to the casseroles you will be freezing.
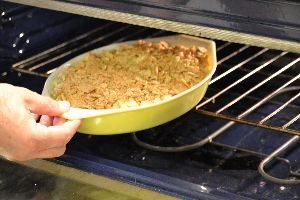
Into the Oven
Sometimes the Best Food to eat is a Memory
———————————
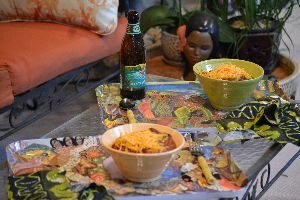
CHILI


L. Chicago Style, R. Southern Style
In the photo left, you see chili on spaghetti noodles, topped with sharp cheddar cheese. On the right, you see chili on corn chips topped with chopped onions and sharp cheddar cheese.
I did not know where to put this so I Googled “Are beans vegetables?”
They said “Yes.” So here we are!
——————————-
Chili Cheese Rice

(Sans the Cheese)
I do not have some fancy recipe to give you.
My chili is not some hand me down recipe from long ago by a deceased family member of mine, or some vintage secret recipe, but it is Darn Good!
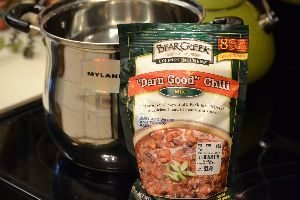
As in “Darn Good” Chili
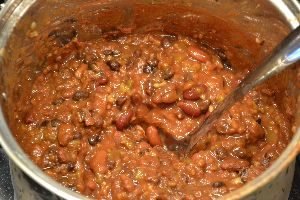
Not everything has to be homemade in order to be good. I use this as a base and I build on it by adding other ingredients. I can also stretch it to feed more people. A good idea for a large family living on a budget. Throw in the sticky rice and you can get it to stretch even further.
Here’s What I Do:
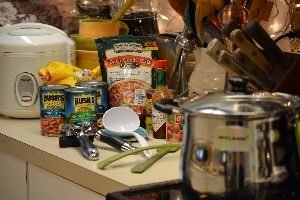
Set out all your ingredients along with the pot, utensils, and rice cooker.

In addition to the 1 bag of “Darn Good” Chili, I add 3-4 cans of Light Red, and Dark Red, Kidney Beans, and some black beans, but no more than 4 cans of all. I add 1-2 cans of Tomato Paste, some dashes of Tabasco Sauce, 2 cans of diced Green Chili’s, and plenty of freshly ground black pepper to taste.

Start making the chili by using the package directions on the bag of “Darn Good” Chili, or any chili that you prefer.
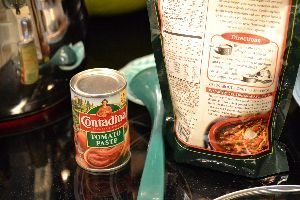
The recipe only calls for one can of tomato paste. Here is your base, now build on it.

So start with your chili base and start adding the cans of beans and other ingredients to the pot, but be sure to drain the water out of your beans first.

Bring everything to a boil then lower the temps gradually, that’s what I do anyway. I’ll reduce it from high, to med-high, then to med., then to med-low, then to low. Making sure the chili isn’t sticking and burning on the bottom.
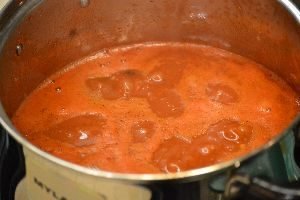
After about 20 minutes I’ve got the chili on a very low heat and I keep it there for the next 2 hours. Although it’s done after 20 minutes, I don’t care. I like it to really thicken up. Just make sure not to burn the chili.
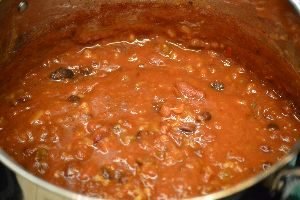
When it starts to look like this I always like to dip Saltine Crackers in it just to snack on. (My confession.) 🙂
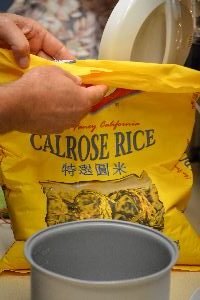
Calrose Rice
Calrose Rice is a staple in Hawaii. It’s a short to medium grain rice that works very well in island cooking.

It’s nice that the rice cooker does all the work here.

Add the Chili and Cheese and you’re all Set
A Great Dinner and a Nice Memory
“Beans, beans, good for your heart,
the more you eat, the more you ……”
———————————————
Another Way to Eat the Chili…..
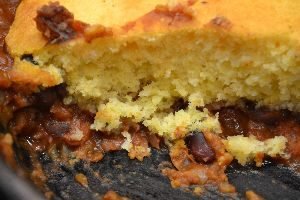

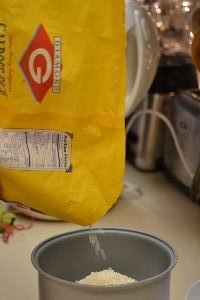
Cornbread Topped Chili

This is an excellent way to eat Chili….


You first want to heat your oven to 400F and melt some Crisco in a Cast Iron Skillet.
—————————————-
You Then Want to Take Your Chili and Place it into a Cast Iron Skillet, Like so….

Next use your favorite cornbread recipe……

Place it over the Chili……

Then Bake on 400F for the package instructions…..
Now you have an excellent dinner. Even by adding some corn chips. 🙂
————————————————–

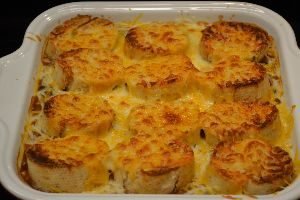
And yet ANOTHER great way to eat our Chili…..

This is when a stale baguette comes in handy.
————————————————–

Just make the Chili as we talk about above, except this time I added a can of Shoepeg Corn for an added flavor.

Slice your baguette into 2 inch thick slices and place onto a baking sheet and place underneath the broiler in your oven.


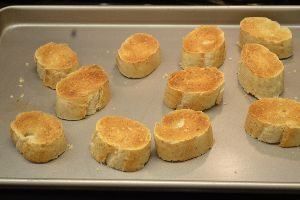
I just browned one side of the baguette. I’ll show you why coming up.

I placed some of the chili into a small little baking dish of mine and then I added the browned side of the baguette face down over the chili.

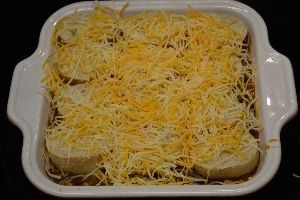
I then placed some shredded cheeses on top of the uncooked baguette side, and then I baked in a 350F oven for about 20 minutes or so. The chili is already cooked I just wanted to warm it through and to melt and brown the cheese’s on top.
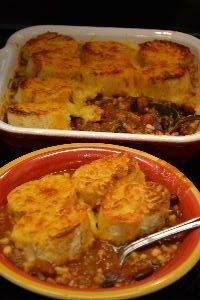
This was really good and yet another way to eat Chili!
——————————————–
Still Great Ways to Eat Chili……


Photo left: Sometimes I just get a Hankerin’ for a Chili Slaaaw Dawg with plenty of Yellow Mustard and a sprinkling of chopped onions. Kinda like those ballgame hotdogs that they serve at sporting events in stadiums. And, btw: They are called Hot Dawgs not Hot Dogs. (If you are in the south.)
Photo right: Chili topped red baked potatoes with a dollop of Sour Cream.
There are so many delicious ways to eat CHILI. 🙂
——————————————————————-
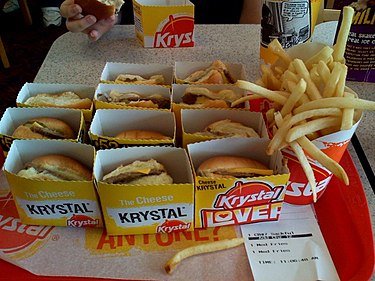
P.S. I wanted to give a shout out to my baby brother Ben. He is the inventor of Chili Cheese Fries. He was working at Krystal Burger in Rome, Ga. many years ago…….

Krystal Burgers, Turner-McCall Blvd. Rome, GA.
I loved Krystal Burger!
They had the cutest little square hamburgers on square buns.
Probably the original “Sliders.”
—————————————————————————-
Every day for lunch Ben would prepare a plate of french fries, topped with chili, and then cheese. One day a regional manager was visiting the restaurant and saw Ben preparing his meal. Ben quit shortly after that and then 2 months later….. Chili Cheese Fries were on the menu!
Pretty soon every restaurant in America had their own version of Chile Cheese Fries.
I just wanted to give a shout out to the inventor!
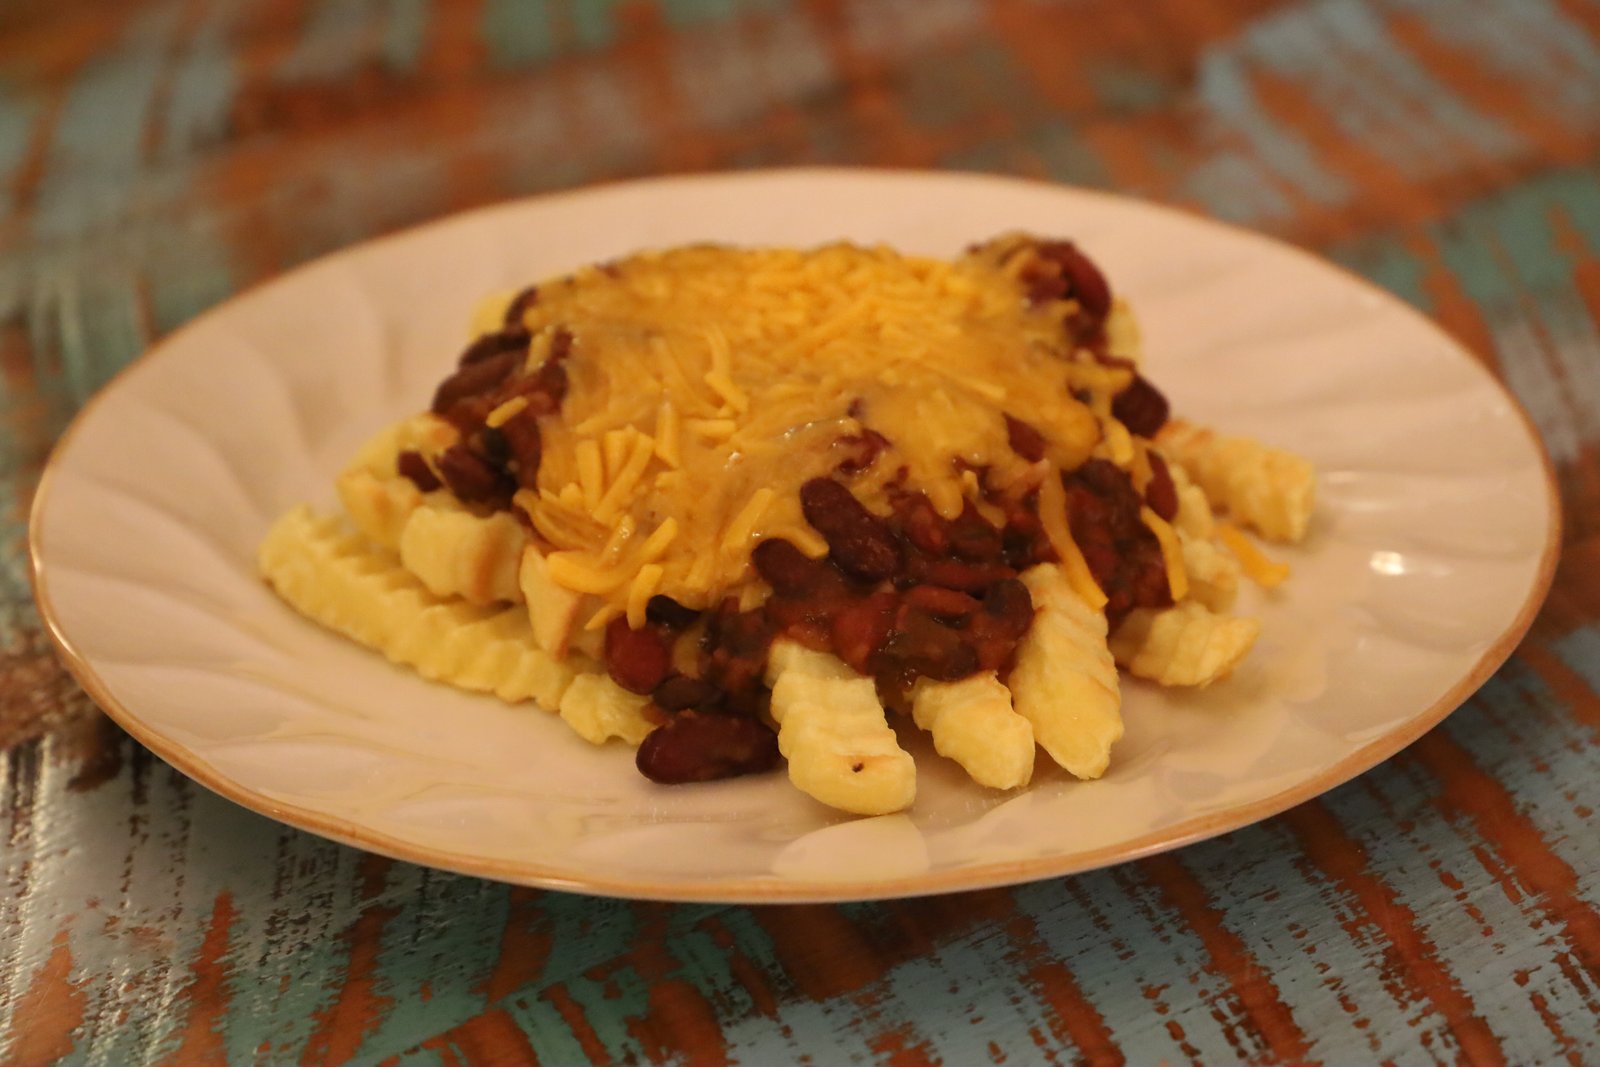

This is my version and they are delicious!
Thank you for the idea Ben! 🙂
——————————————
Mary Keith and John’s
Creole Celery and Okra Casserole
This casserole is from my mother and step-father. I hadn’t eaten it in decades but found the recipe card my mother gave me long ago. I gave it to Gordon to look over and told him that although I remember it being very good, that he could “Whann it up” and make it even better. So he did!


Delicious!
I Especially Love the Colors
(That’s why I went a little overboard posting the photos because the colors were just so beautiful)!
——————————————
The Ingredients
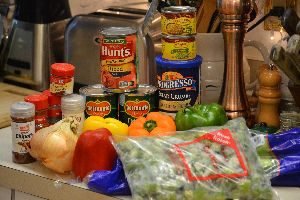
1/2 Chopped Med. Onion
4 Tbsp Butter/Margarine (We used Olive Oil)
2, 4.5 oz. Cans Chopped Green Chilis
2, 14.5 oz. Cans Cooked or Stewed Tomatoes
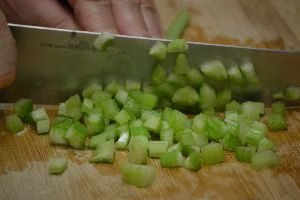
1 1/2 Cups Diced Celery
4 Cups Okra, (We used chopped, frozen)
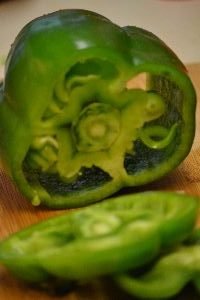
1/2 Chopped Green Bell Pepper
1/2 Chopped Red Bell Pepper
1/2 Chopped Yellow Bell Pepper
1/2 Chopped Orange Bell Pepper
3 Garlic Cloves sliced
1/2 tsp Salt
Fresh Ground Black Pepper to taste
Hot Sauce to taste (About 2 T.)
Fresh or Dried Basil or Oregano ( About 2 t.)
1 1/2 Cups Garlic and Herb Bread Crumbs
———————
The Spices
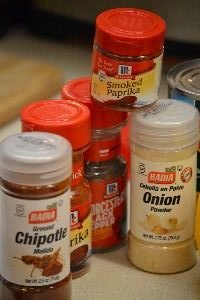
3/4 t. Paprika
3/4 t. Smoked Paprika
1 t. Onion Powder
1 t. Chipotle
1 t. Worchershire Black Pepper
—————————————-
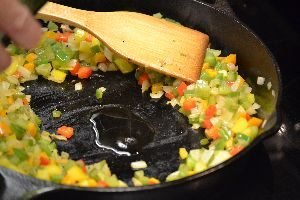
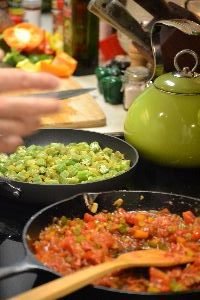
Gordon Used Frozen Okra

————————————–
All Prepped and Ready to Start


The Okra was still a little bit frozen, so Gordon ran it under the water in a strainer. Once thawed, he drained the water and added it to a saucepan with a little olive oil.

Adding Olive Oil:
To the Frying Pan and the Casserole Dish


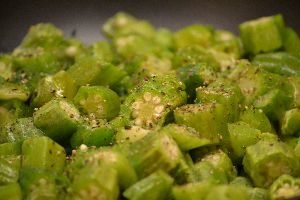
Freshly Ground Black Pepper

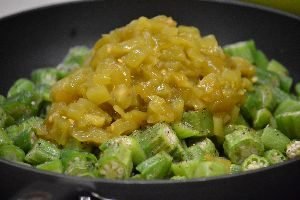
Adding the 2 Cans of Chili Peppers to the Okra


Dicing the Celery
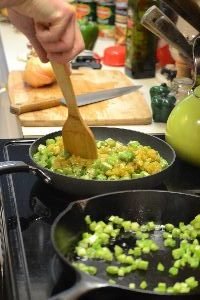
Add Celery to the Frying Pan

The saucepan in the top of the photo holds the okra and chili peppers. It just needs to be warmed through.


Next Gordon Chopped the Onion
Green Bell Pepper

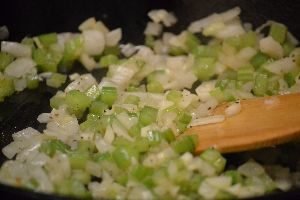
Saute the Celery and Onion in Olive Oil
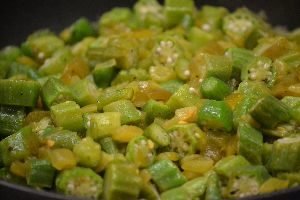
Okra and Chili’s Being Warmed Through

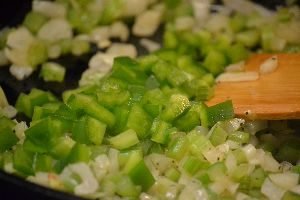
Add the Chopped Green Bell Pepper to the Frying Pan


Chopping the Red Bell Pepper, Adding to Pan


Chopping the Orange Bell Pepper, Adding to Pan

Chopping the Beautiful Yellow Bell Pepper


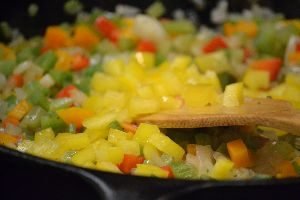
Adding to Pan
You can see the steam rising up from the cast iron skillet.
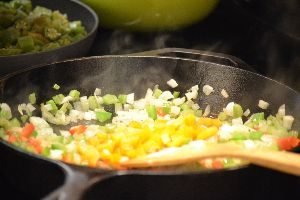
Here Gordon is making a ring and adding olive oil to the center of the pan.


Now Come the Spices Added to the Oil, doing this brings out the flavor of the spices.


Continue to Saute and Add some Salt if you Like


Chopped Garlic

Look How Beautiful!


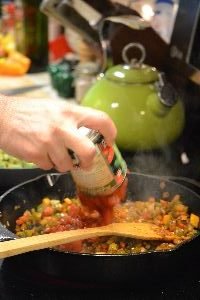
Now You Add the 2 Cans of Diced or Stewed Tomatoes
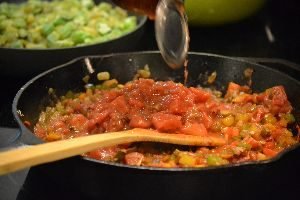
Now you just want to warm it through.

I Love the Pretty Green and Red Above

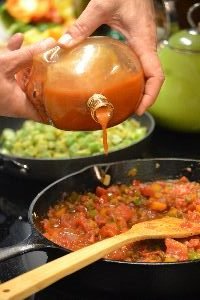
Adding The Skull Hot Sauce
(It wouldn’t be Creole without it.)

Ready to Pour Into the Casserole Dish
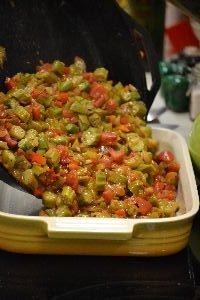
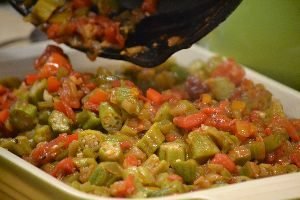
This has to be the prettiest casserole we’ve ever made.

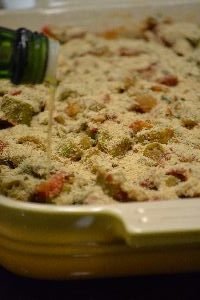
Here Gordon topped the casserole with bread crumbs and a little bit of olive oil to help it brown.
Next, into the oven on a 350F oven for about 20 minutes.

Fresh Out of the Oven
Although not the most attractive when brought out of the oven, it did not lack in taste!
————————————
We ate this delicious casserole with Gordon’s excellent ribs.
For the recipe just click on the title:
Ah, Ribs!
—————————————
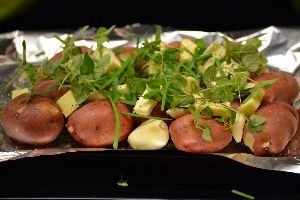
Julie’s Oven Baked Potatoes
This recipe was born out of leftovers.
I can’t remember the meal that they came from, but all of these ingredients were leftover from that meal.
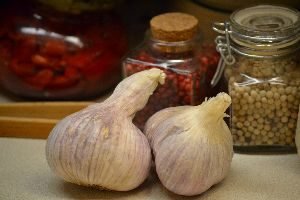
Elephant Garlic
We had leftover red potatoes, garlic, and fresh herbs.
I decided to gather everything up and place into aluminum foil. The red potatoes, the garlic cloves, some margarine, and our fresh herbs. Oh, and I sprinkled sea salt flakes over top, and some freshly ground pepper.
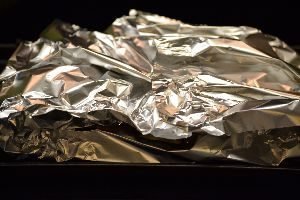
I just placed everything into foil and placed it in a 350F oven for about 45 minutes or so. I knew they were done when I could slide a fork into the potatoes.

My son Brodie loved them and said they were the best potatoes he had ever eaten.
Wow! That’s when you know you scored as a mom. 🙂

Enjoy!
—————————————-
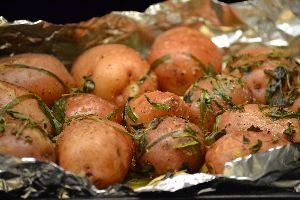
Here is Another Version of the Potatoes From Above
I did everything here that I did above, except I cooked more potatoes so therefore they required a longer cooking time.
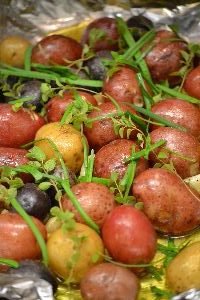
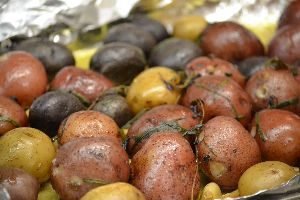
Photo at left I removed the potatoes from the oven after 30 minutes, that’s when I added the herbs, then put them right back into the oven. Photo at right is the finished results after 1 hour of cooking.
I used red potatoes as well as white fingerlings and blue potatoes.
Perfect, served with most anything.
——————————–
Gordon’s Quick Roasted Red Potatoes
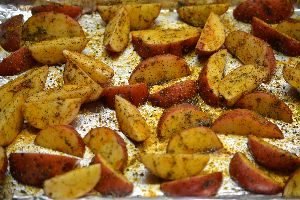
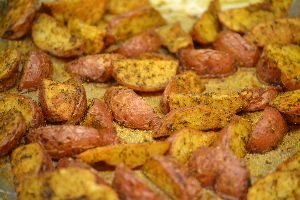
Before Left, After, Right
We had some (10) old red potatoes that would soon go bad, so Gordon quickly made this one night in order to use them up. They turned out very nice which is why they made it here. 🙂
Wash, then slice your red potatoes in half, then slice the half into thirds on the bias.
In a large plastic bag, add the potatoes and enough olive oil to coat them, and not have them swimming in it. It is easiest to pour a little at a time.
Next, add your seasoning dry dill, garlic powder, turmeric powder, onion powder, black pepper, sea salt, etc. to the bag. Close the bag and mix them well.
Pour your seasoned potatoes out onto a sheet pan covered with foil, adding more seasoning if needed.
Roast/Bake your potatoes at 400’F for about 35 min. turning after 15 min.
Lightly salt when done cooking if you would like!
———————————
Don’t forget to eat your vegetables!
Julie