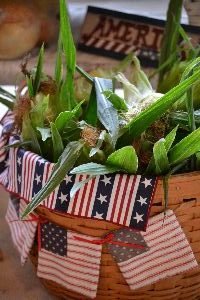
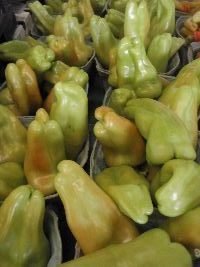
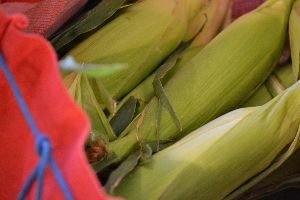
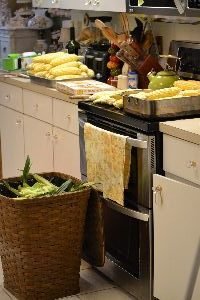
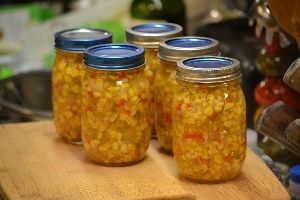
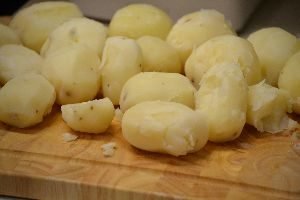
Corn on the 4th. of July
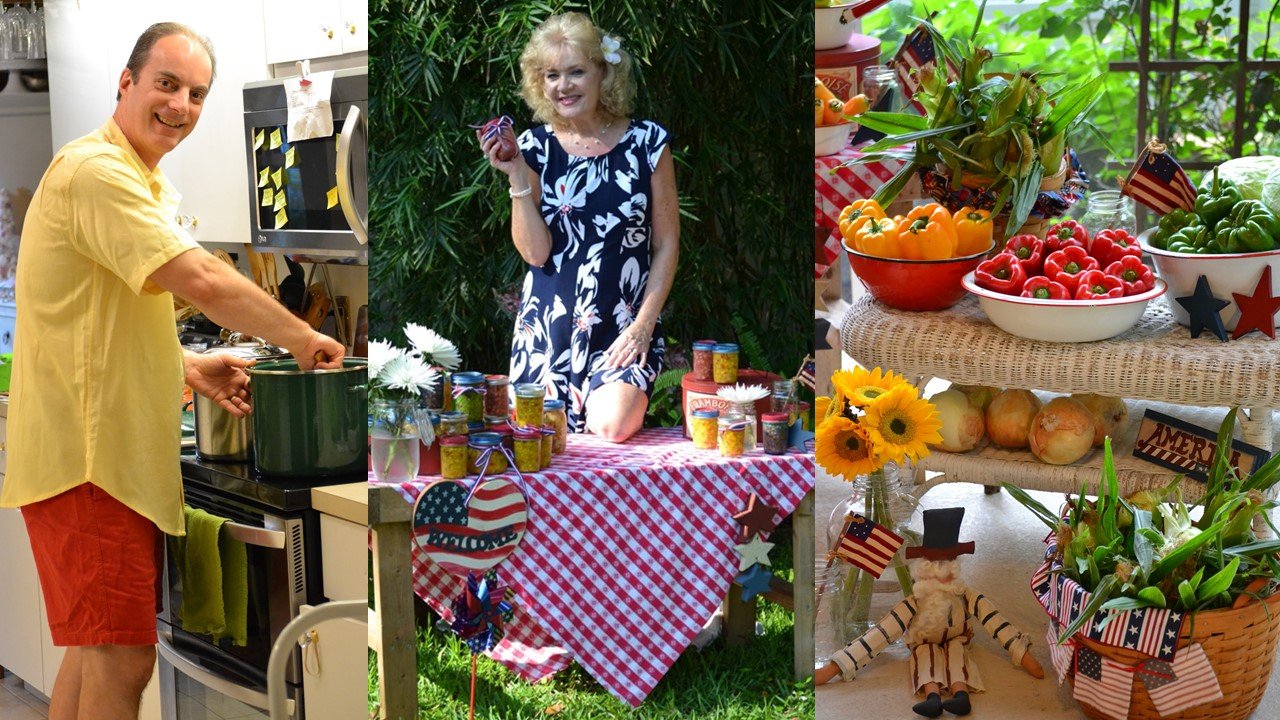

Corn on the 4th. of July

Happy July 4th.!
America’s Independence Day

———————————-

Sparklers and American Flags

Rice Krispy and Whole Grain Marshmallow/Caramel/Peanut Butter Treats

——————————-

Corn on the 4th. of July
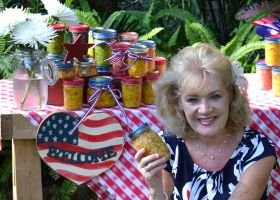
It All Starts Right Here
This is a Day of Food, Fun, and Fireworks
I am originally from Georgia where our traditional July 4th. meal consists of Pork B-B-Q Sandwiches, Baked Beans, Potato Salad, Deviled Eggs, Corn on the Cob, and Brunswick Stew.
Usually followed by a nice juicy and sweet watermelon for dessert, nothing ever fancy about this meal, it’s just always simple and delicious.
Gordon is originally from Pennsylvania, but when I met him we were both living in Charlotte, North Carolina working at an amusement park.
Gordon’s parents made the best corn relish in the world. It was always a treat whenever they would send us some through the mail in Christmas and birthday packages.

So, in the spirit of “Hey, you got your chocolate in my peanut butter.” “No YOU, got your peanut butter in MY chocolate.”


Gordon started putting his parents corn relish onto our traditional southern B-B-Q Sandwiches, which turned out to be perfection! From then on every July 4th. when we break out the B-B-Q Sandwiches, it’s just not the same without some Whann Corn Relish on it.
This year it was my idea for us to try our luck by making some of our own. Gordon contacted his parents for the recipe. We bought all the supplies needed, bought all the vegetables needed, and then went to work on 4 batches of corn relish.

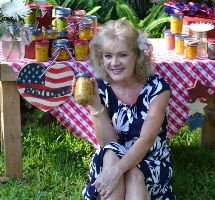
Get Your Corn Relish!

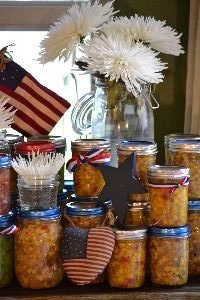
Southern Belle, Lazy as Hell
We made a traditional batch from his parents recipe.
I got the idea to make a Red/White/and Blue (Purple) Corn Relish.
Then we made a Peaches and Cream Corn Relish.

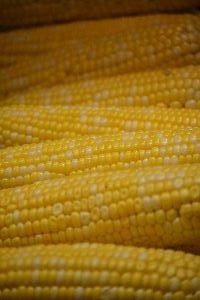
Peaches and Cream Corn is a mixture of yellow and white kernels on the same cob.
It is from Georgia, hence the name, Peaches and Cream.
Above Gordon is using a bundt pan as an easy way to cut the corn off the cob and gather it into the pan at the same time. That was my grandmother’s old bundt pan, by the way.
Brilliant Idea!
————————————-
And last but not least a Grilled Corn Relish.

This was my idea. Seeing as how we grill corn on the cob all the time, why not do it for the relish as well? The trick was not to grill it to much, we didn’t want all these charred flakes floating around in the jar.

————————————–
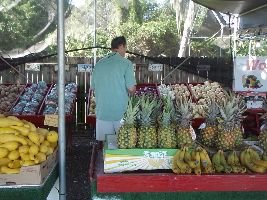
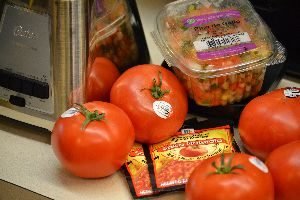
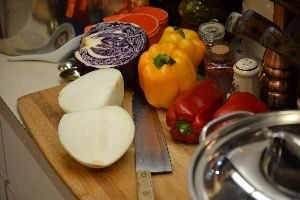
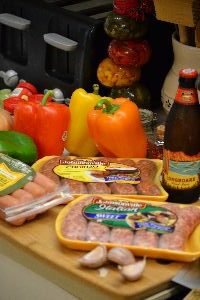
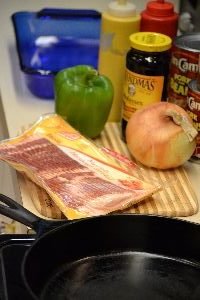
First The Shopping

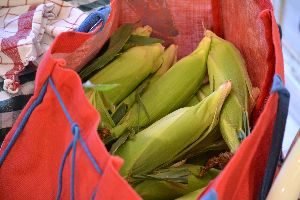
We went to a few farmer’s markets to buy our produce for our relishes. This is where we bought all of our corn though.

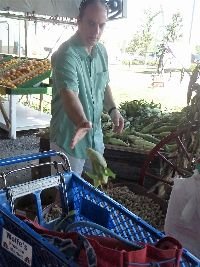
Gordon Choosing our Green and Yellow Bell Peppers

Buying Sweet Onions
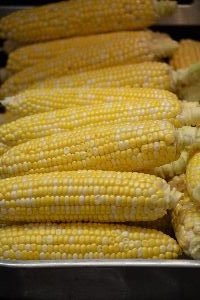
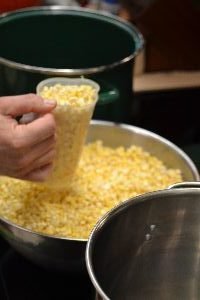
We Bought 70 Ears of Peaches and Cream Corn

Loading up the car.
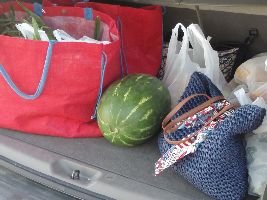
Oh, good. You remembered the watermelon.
Now onto the next market.
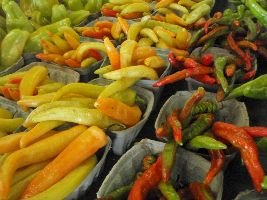

Oooo, look how beautiful!
Hot and Sweet. Don’t forget the red bell peppers.
Let’s try some Anaheim too.

We found an Australian Fern! Yeah!
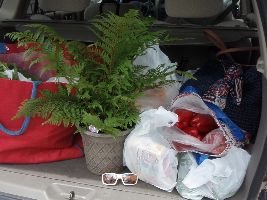
O.K. Trunk’s gettin’ full. Time to go.

Gotta Stop and Get Some Fireworks
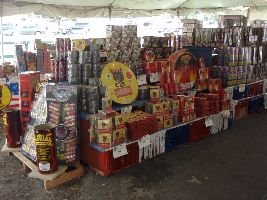

We’re very tame when it comes to fireworks, sparklers only.
Oh, one more stop? Can we run by the Indian grocery store and buy some homemade somosas?


Ahh. Hit’s the spot every time!
————————————–

—————————————
Back Home and Time to Start our Canning

Yeah, and why is it called canning when we put it in jars? Anyone?
Are you gonna make my Google it?

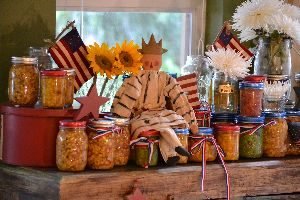
Uncle Sam and Old Glory

This is going to be a big job and I’m already tired.
————————————-
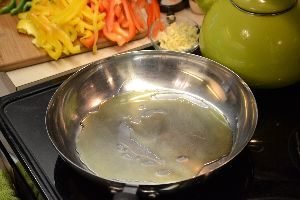
Doing the Prepping
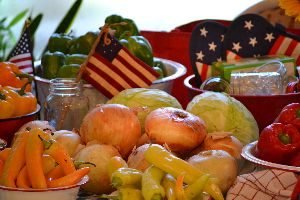
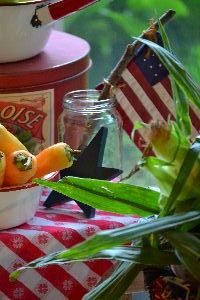
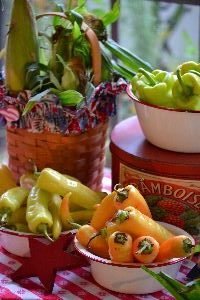
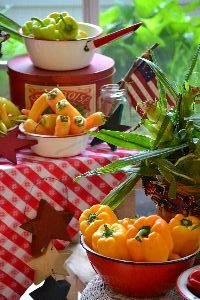
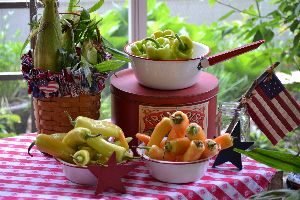
All the Veggies
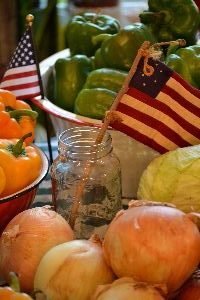
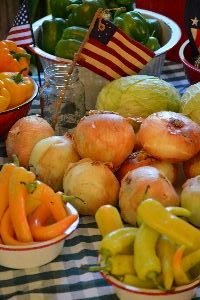
Our Patriotic Veggies 🙂

Once everything is bought then you need to sort things out for the project.

Notice all the condensation on the windows? That’s because of the difference in temperature from inside our home, and outside our home. It is Hot, Hot, Hot!
———————————————–
Corn, Corn, and More Corn
——————————————-
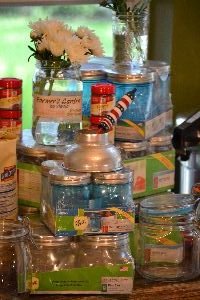
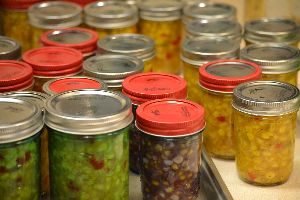
Jars, Jars, and More Jars….
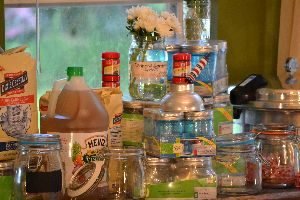
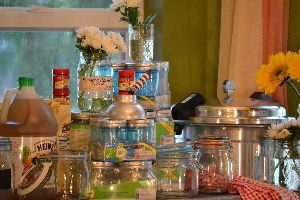
Also some funnels, a large pressure cooker, some apple cider vinegar, lots of sugar…

Everything is going into the dishwasher overnight. We even have a “Sanitized” setting just for jars for canning.
——————————————-
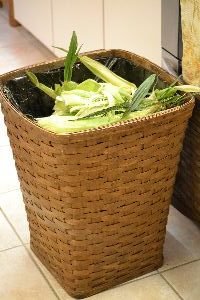
So While the Jars are Washing, It’s Time to Shuck the Corn

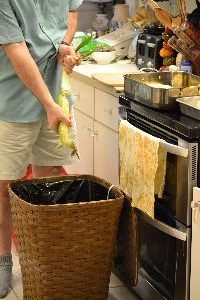
This is a messy process, but the rewards will be great!

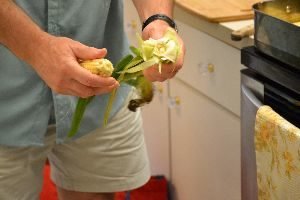
We even did an assembly line of corn. Gordon would shuck it and place it into the pan on the left. Then I would inspect it and remove all the fibers that he missed and then placed them into the pan on the right.
Each fiber is connected to each kernel of corn.


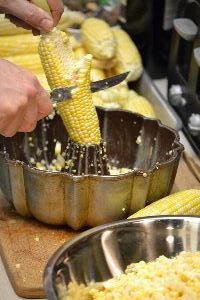
Once the corn has been thoroughly shucked and cleaned of fibers, now you want to remove the kernels of corn from the cob. A good way to do this is to use a bundt pan. Just stick the cob into the hole in the middle and use a knife to remove the kernels. They should all fall into the bundt pan making it easy to then add to a bowl.
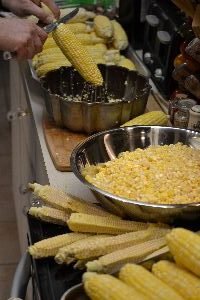
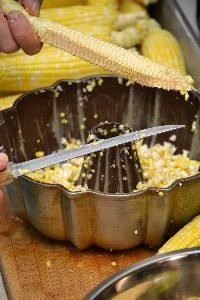
Transfer to a large bowl. Discard the cob when you have removed the kernels.
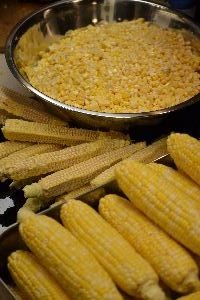

Look at all this corn, look at all that corn. It’s time for dinner and we are making it easy on ourselves.
It’s Naan Bread Pizza from the Indian Store for us.

Hey, only $3.00 and a great meal for each of us.
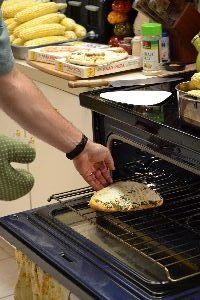

Soooo Good!

I had the spinach, and Gordon had the eggplant. I highly recommend the eggplant. 🙂
———————————————————
Our Spices Needed
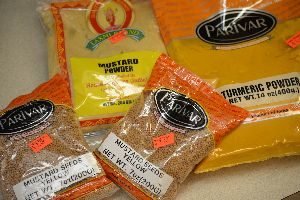
Shop at your local ethnic stores and you will find very inexpensive prices.
—————————————-
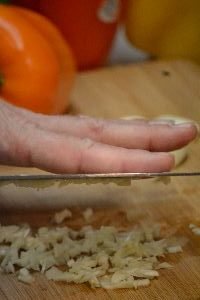
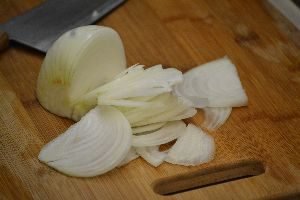
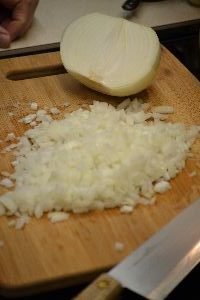
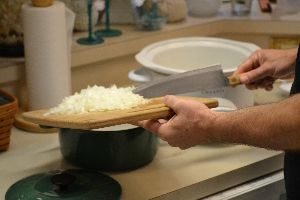
Onions
Your next ingredient for the Corn Relish is onions.
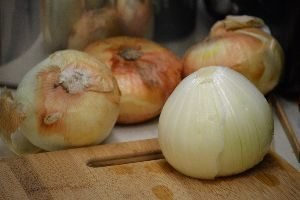
We used Both Vidalia, and Yellow Onions
The Vidalia are very sweet so they add a sweetness as well as the sweet Peaches and Cream corn that we used. The onions are from Vidalia, Georgia.


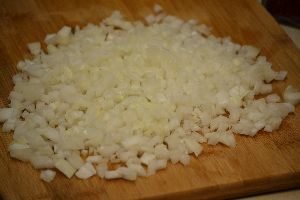
You Want to Chop the Onions Very Fine
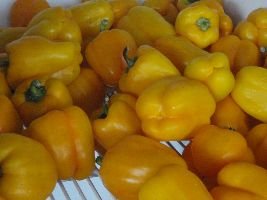
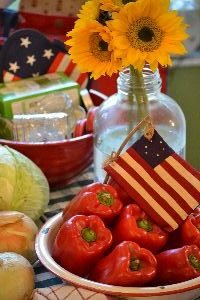
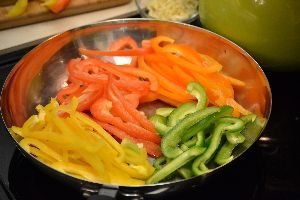
The Beautiful Bell Peppers
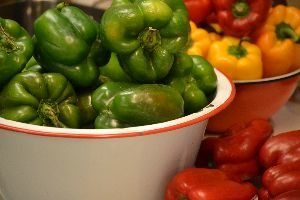
Yellow, Red, and Green
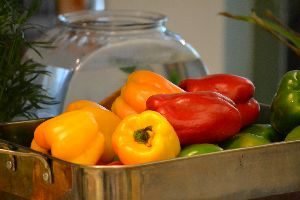
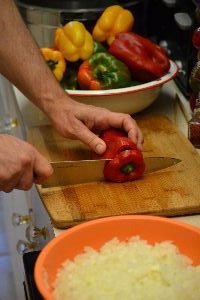
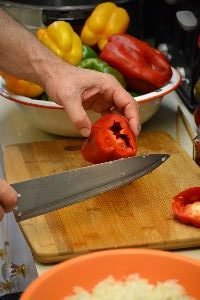
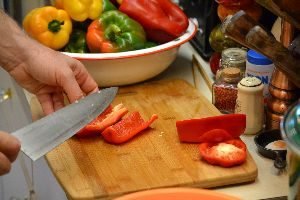
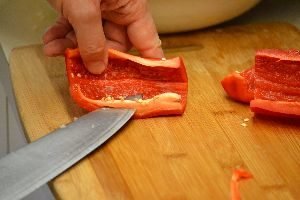
You Want to Cut the White Part out of the Bell Peppers

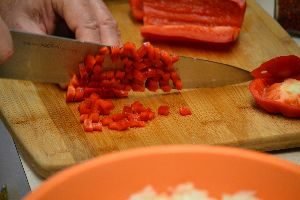
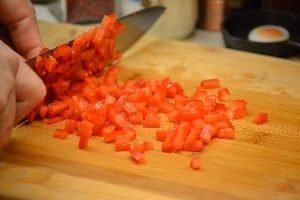
Chop Very Finely into Small Chunks and Set Aside in a Bowl
———————————————
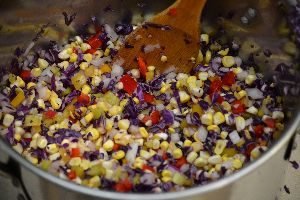
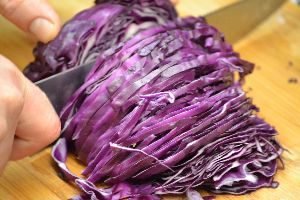
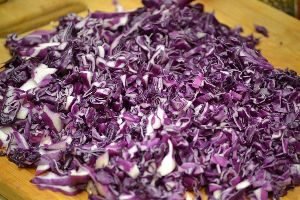
Cabbage

Gordon Cutting out the Core
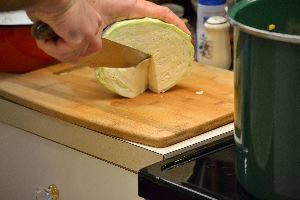
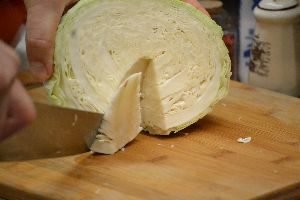
You Want to Discard it
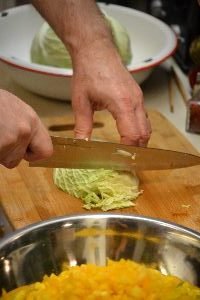
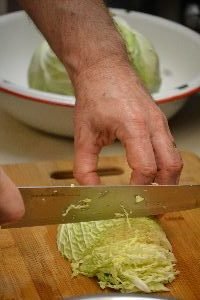
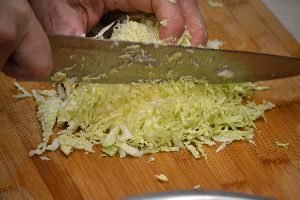
You Want to Chop Your Cabbage Very Fine
—————————————————
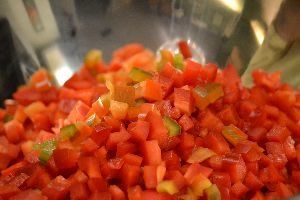
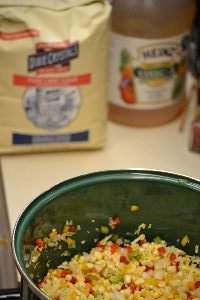
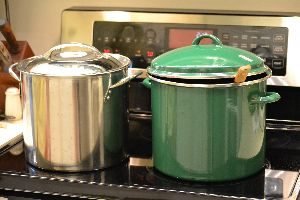
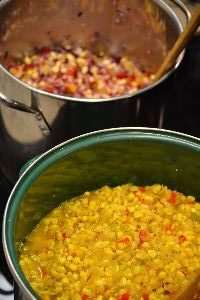
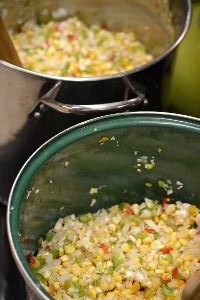
We Doubled the Batch so we used Two Large Pots
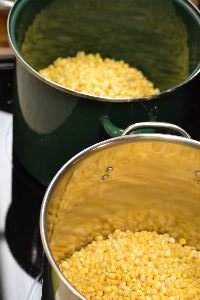
Here Gordon is dividing the corn equally between the two pots.


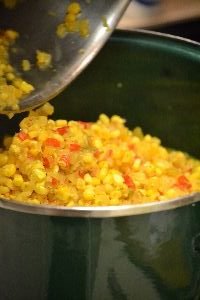
Add the Chopped Bell Peppers to the Corn and Onions
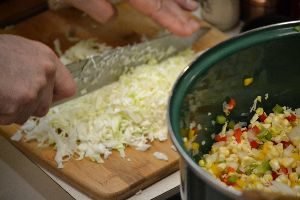
Add the Chopped Cabbage
————————————–
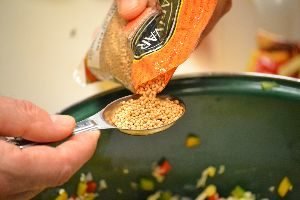
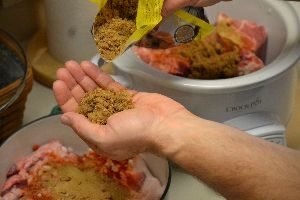
Next You Want to Add Your Spices
Turmeric Powder, Mustard Powder, Mustard Seeds, Celery Seeds, and Salt
————————————-
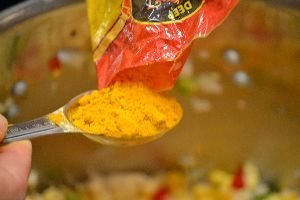
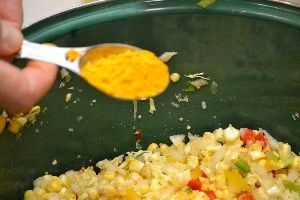
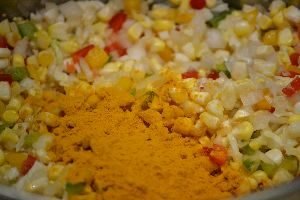
Turmeric
Turmeric will give the corn relish a golden color and also kills cancer cells. It has a light earthy flavor. By adding the turmeric we are erasing the pretty white corn kernels so our ‘Peaches and Cream corn will just be ‘Yellow’.
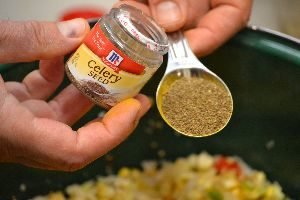

Celery Seeds, Mustard Seeds, and Himalayan Sea Salt
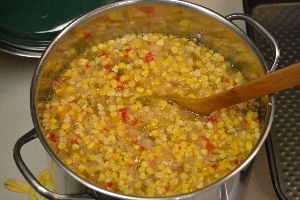
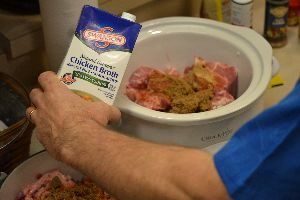
Now It’s Time to Add Your Sugar and Apple Cider Vinegar


Adding the Sugar


Adding the Apple Cider Vinegar

Water Goes in the Pots as Well

Stir Everything Together
This is what the corn relish looks like prior to your cooking it.

Mmmm… Smells Wonderful!
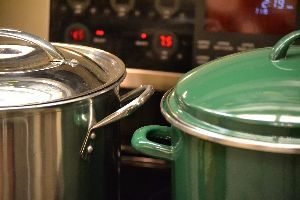
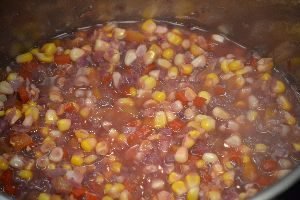
Each of these pots cooked the corn relish differently. The pot on the left cooked quicker and we had to watch it more. While the pot on the right seemed to have an even cooking time throughout. I liked that better.
————————————-
So while we are waiting on this batch to cook, what about a nice little snack?

Salsa and Blue Corn Chips
This is very easy and very good.
Just add the tomatoes and the salsa packets to a blender into a smooth consistency, then add some pico de gallo once you have poured the tomatoes into a bowl. Short cuts can make our lives a bit simpler especially when we have all this corn relish to cook.
————————————–

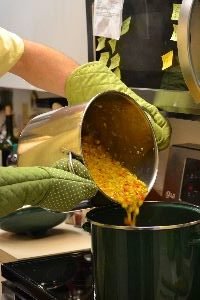
Gordon Stirring the Corn Relish
You do need to keep a close eye on it and stir pretty frequently.
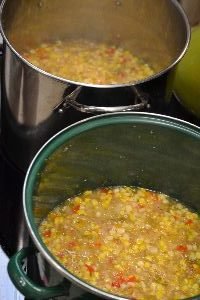
As the corn relish cooked down Gordon combined both pots into one.


Now we are just going to let it cool a bit while we start on the next batch.
———————————–
Basic Corn Relish Recipe
Ingredients for 18 Pints:
20 ears for corn (shucked and cut off the corn)
12 Bell Peppers chopped (we used Red, Yellow, and Green)
4 Large Onions chopped (we used Vidalia)
1/2 Head of Cabbage (thinly sliced)
3-4 Cups Sugar
2 Tbsp Dry Mustard
2 Tbsp Celery Seed
2 Tbsp Salt
1 Tbsp Tumeric
5 Cups Apple Cider Vinegar
1 Cup Water
(Gordon’s parents use celery in their corn relish. We didn’t.)
Place all ingredients into a large pot or two, cook until the corn is tender. While the corn relish is cooking, place the lids which have the rubber ring in water for 15 min. at a temp not above 180’F, any hotter will ruin the rubber seal. Now, top your jar with a now sterilized lid on top of the jar using your rod with a magnet tool. Place the ingredients into your sterilized jars leaving 1/2 inch to 1 inch of head space which will then create the vacuum. Wipe the top of your jar with a wet paper towel to remove any relish pieces. Place the rings on the jars to just tight. If you over tighten them, the air will not escape to create your vacuum when submerged in the boiling water. Boil your jars under an inch or so of water for 15 min. Using your canning jar lifter, lift the jars onto a wooden cutting board to let them cool and wait for the pop of the seal which let you know you have a good seal. Once done, the rings are mainly there so you don’t accidentally pop off your sealed lids. If a jar doesn’t seal, take off the lid, wipe off the top of the jar, and process the jar again under the boiling water for 15 min.
TIP: Be sure to take off the rings when done to ensure they don’t rust when in contact with your lids.
————————————————
Julie’s Red, White and Blue (Purple) Corn Relish
A.K.A. Julie’s Old Glory Corn Relish

Ingredients for Julie’s Corn Relish
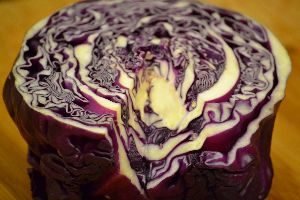
Purple Cabbage
The main difference here is that I wanted purple cabbage in my batch of relish.
In order to keep the colors looking the way that I wanted, I didn’t add any green bell peppers to this, or any turmeric. I also hoped that the white kernels of the peaches and cream corn would show through, which they do.
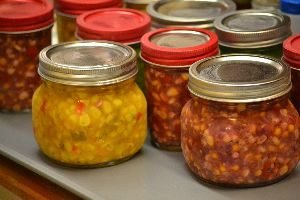
Gordon’s Golden Corn Relish and Julie’s Old Glory Corn Relish
You can see the difference.
———————————–
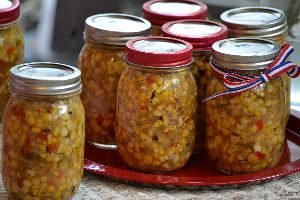
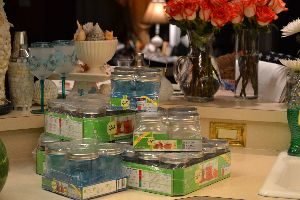
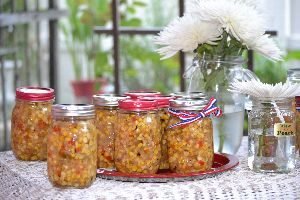
Time to Place into Jars to Actually do our Canning
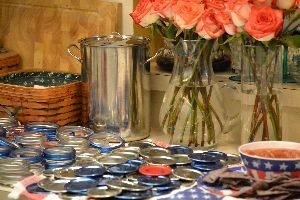
Gordon and I did some shopping and found some pretty decorative lids for this.
The Blue and Red were Perfect!
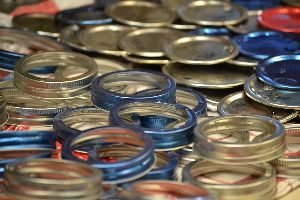
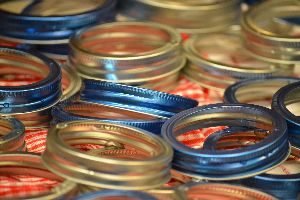
Lids and Bands

My Anniversary Roses Still Look Beautiful

We washed the jars in our dishwasher.

We have a ‘Sanitized’ Setting on our Dishwasher Which is Perfect Here
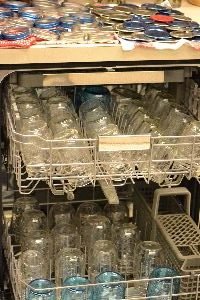
We also left them in the dishwasher until we needed them. It gave us more space in our very small and crowded kitchen.

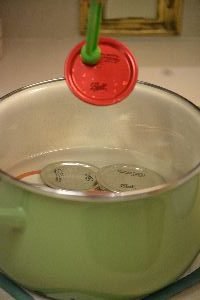
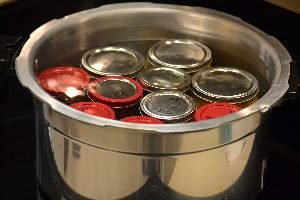
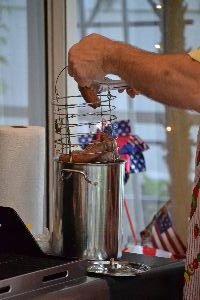
The lids need to be simmering in 180 degree water.

Gordon used his cooking timer that his parents gave him years ago.

You just want to put the lids into a pot of water and raise the temperature to 180 degrees.
Then you know they are sterile.

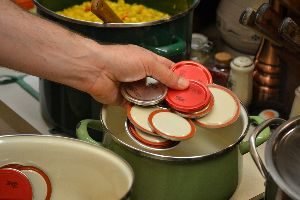
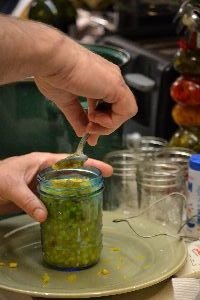
When the lids are ready you want to place them on top of the jars with the corn relish in them. However, you don’t want to touch them. So we used this tool that we bought specifically for canning. It has a magnetic end so it’s easy to remove from the hot water.
Gordon Used a Funnel

You can see here that as Gordon filled the jars with corn relish, I then added the lids using the tool above.

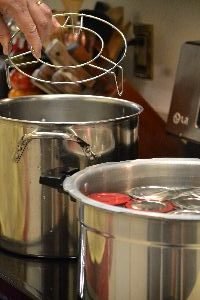
The next thing that you want to do is to place your corn relish jars into boiling water. You do NOT want them to touch the bottom of the pot. Here we are using an old pressure cooker with a base on the bottom so that the jars are not touching the bottom. We also used a regular cooking pot, see the photo at left below, but we added something to the bottom so that the jars wouldn’t touch.
Before Placing into the Water you want to add the Bands to the Jar Lids
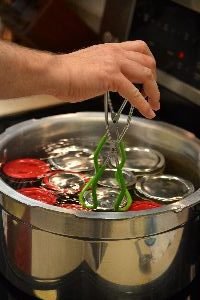
The tool above right, is perfect for placing, and removing the jars from the pot.
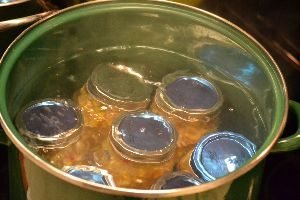
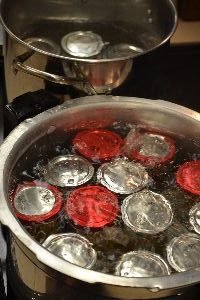
While the jars are boiling you will see bubbles escaping from the jars. That is good. It means the air is escaping and that is when the jar lids seal onto the jar of corn relish.
You then remove the jars from the boiling pot and place onto either a cookie sheet or a cutting board. You will start to hear them POP! That is good! It means they are sealed.
If they don’t POP and seal, then you must get a new lid being sure to wipe the top of the jar, then back into the water for 15 minutes. They need to seal, then you know they are ready.
———————————–
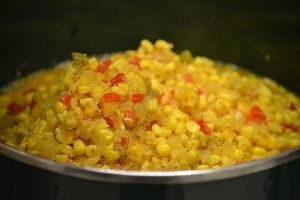
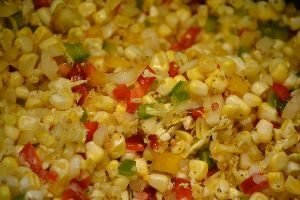
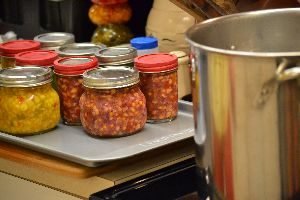
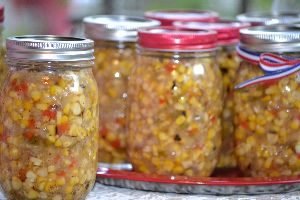
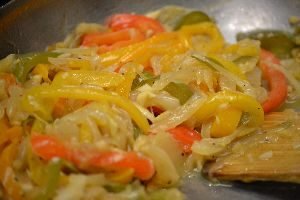
Peaches and Cream Corn Relish
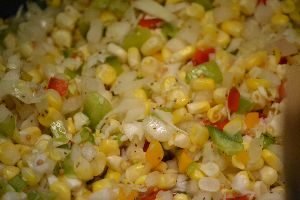
No turmeric was added to this batch so that the white kernels could show through nicely.
Other than that, this is the same recipe as the Golden Corn Relish above.

You can see the white kernels as well as the yellow ones.
————————————–
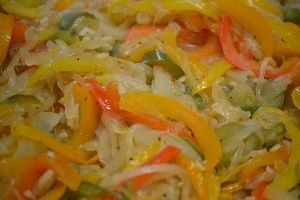
Grilled Corn Relish
The only thing to say about the grilled corn relish is that Gordon grilled the ears of corn before shucking them. Other than that, it was the same recipe as the Golden Corn Relish, minus the turmeric.
———————————-
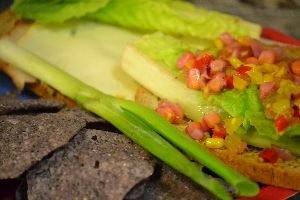
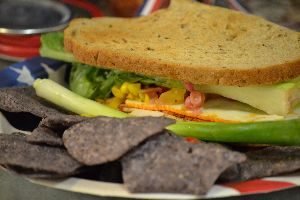
Ways That You can Eat Corn Relish


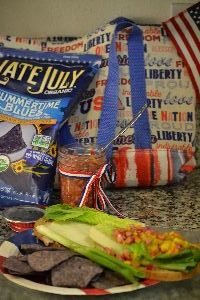
Try it as an appetizer/dip with some blue corn chips.
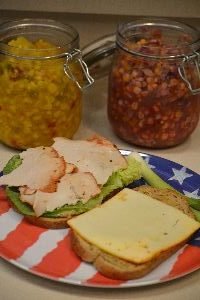
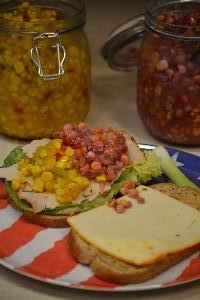
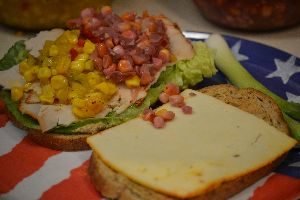
Try adding it to your sandwich.
Here is a turkey/Muenster/ and Romaine sandwich.
I started eating it when I realized that I forgot to take a picture of it.
It is good though.

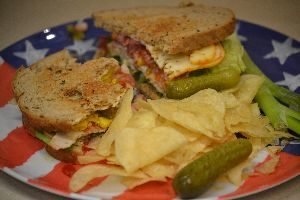
I also took a nice lunch with me when I had to go out to the condo that included my corn relish.
Such a great lunch!
————————————————————-

Corn Relish is Wonderful on Hot Dogs or Bratz


And of course, on your BBQ sandwich.
———————————————

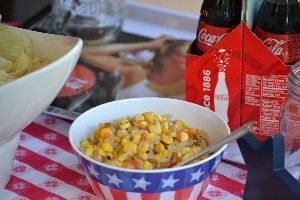
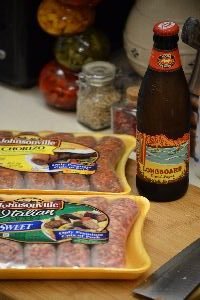
4Th. of July Brats and Hotdogs on the Grill
We are not big on processed meat but occasionally we like a brats or a turkey hot dog.
Today was that day!
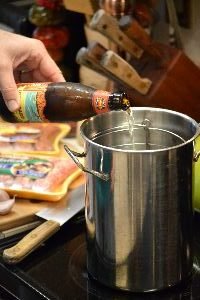

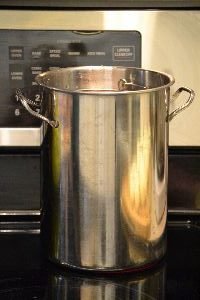
Boil Your Brats in Beer and Water for about 20 Minutes

In the Meantime, chop your garlic and bell peppers.
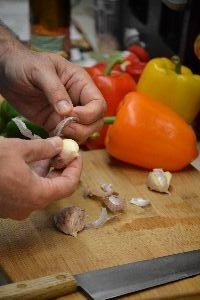
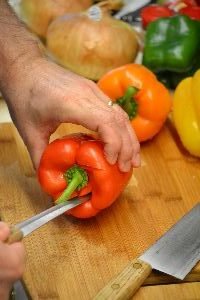
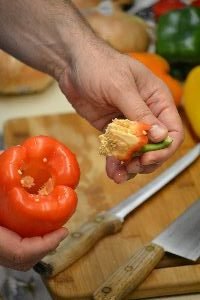
You want to remove the stem and the middle part of your bell peppers.

Cut the Bell Peppers in Half


Next you want to cut them into strips. This will all look consistent.
Sautee your peppers and onions and garlic in some olive oil in a pan for about 20 minutes or so until they soften.

Cut your onions into half moons.


Here Gordon is removing the brats from the beer and water mixture and placing them onto the grill.

Grill until grill marks are present. You are mainly reheating the brats. But you are cooking the hotdogs. So grill until you see the grill marks.

Gordon Enjoying a Brew
The perfect peppers and onions ready for the hotdogs and brats.

Only at our house do you eat a hotdog with a fork.
Oh, and don’t forget to top them with our Corn Relish!

Our Brats, Hotdogs, Buns, Onion dip and chips, and Sweet Potato Fries

We also grilled the hotdog and brats buns on the grill.

Kickin’ It Old School with Onion Dip and Ruffles Potato Chips
Topped with our garden chives.
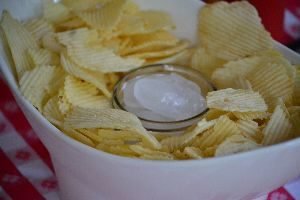
I wanted the dip to sort of hover over the chips so I turned to Gordon to make it happen.
He got the idea to place a wide mouth jar inside the bowl, then add ice cubes to help keep the onion dip cool. A coozy would have been nice to wrap around the jar but we didn’t have one. It would have absorbed the sweat from the ice cubes and not gotten the chips wet.
—————————————————–
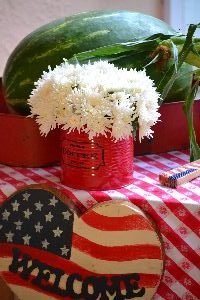
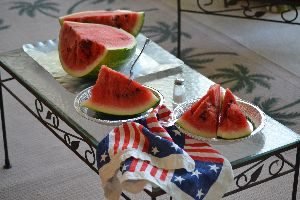
Watermelon Outside for Dessert


Salt for Grammaw
My family was never big on desserts. If it was summer, then it was watermelon. Always eaten outside either on a picnic table, or a screened in porch. Always eaten on old aluminum pie plates, with a salt shaker for those that wanted it. I never did, but my grandmother loved her watermelon salted. So to me, it’s just not summer without a good watermelon and there has to be a salt shaker on the table whether anyone uses it or not.
It’s also not a family get together without someone bringing up the fact that I once dropped a watermelon down the steps at my grandmother’s house. It would never fail. We’ll all be sitting there ready to dig in to that juicy watermelon when someone will always say, “Remember the time you dropped that watermelon down the steps when you were little Julie? Grandma was so mad at you for doing that. She really wanted that watermelon that night.”

That’s me with my grandmother and my baby brother Johnny.
Also the infamous steps where I dropped that precious cargo of watermelon that broke into a million pieces and went everywhere that no one will ever forget about. It was probably that summer too when I committed the crime by insisting that I can carry it all by myself.
(In the south they write that stuff on your tombstone.)
‘Here Lies Julie, She Dropped the Watermelon’
————————————————
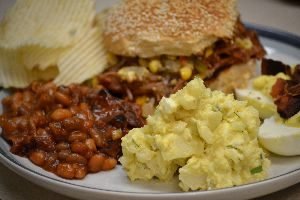
Traditional Southern 4th. of July Dinner
Old Southern BBQ
The 4th. Just Doesn’t Taste Any Better Than This!


Bacon and Egg Deviled Eggs, also Chive and Paprika Deviled Eggs
Red Potato Salad
Topped with our garden chives.
(Not the traditional southern potato salad that I grew up with. That was made with Idaho potatoes. But I’ve incorporated red potatoes into my diet as they are more waxy and not so starchy.)
One regular sized Idaho potato turns into a half cup of sugar in your stomach.

You know, most people that make red potato salad leave the red skins on. I didn’t want to.
I peeled them, and I boiled them.

When the potatoes were cool I chopped them into bite sized chunks, added some mayo, yellow mustard, pepper, a few dashes of Tabasco Sauce, chopped onion, chopped celery, pickle relish, and some sweet pickle juice to taste.
Some Paprika Sprinkled on Top Looks and Tastes Great
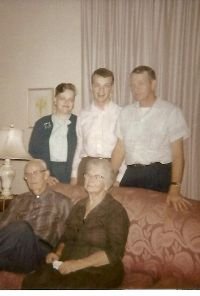
Seated, My Great-Grandparents Keith.
Standing, My Great Aunt Margie, and Great-Uncle Ray with their son Joe in the middle.
(My Grandmother Nellie Mae’s parents and brother.)
Whenever I think of Yellow Potato Salad, or Mustard Potato Salad, I always think of my Great-Aunt Margie and the trick that she would play to get my Great-Uncle Ray to eat her potato salad. Uncle Ray hated mayonnaise so she would tell him that she only used mustard. One day I nearly exposed the secret by explaining to someone at a family gathering that it is impossible to make potato salad without using mayonnaise with the mustard. Uncle Ray overheard me and brought up the fact that “Margie does it.” He then called Aunt Margie over to school me in the art of potato salad. I then realized that I was close to starting a family drama over potato salad when I backed down and said that I must be wrong then. Aunt Margie gave me that smile of approval and then went back to the kitchen.
This from the woman that punished me at age 6 for telling a lie. 🙂
————————————————–
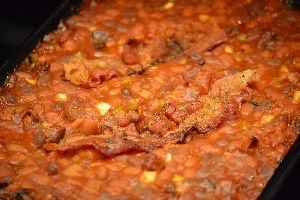
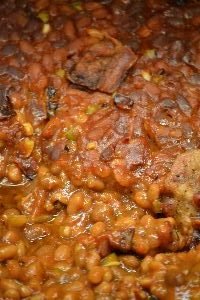
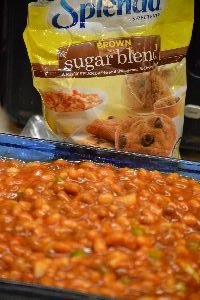
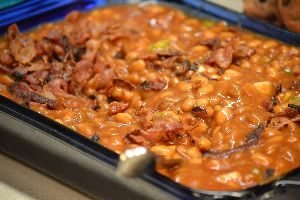
Julie’s Southern Baked Beans
My Pride and Joy
I would like to think that this is something that I have perfected. I guess it was all those southern pot luck dinners, luncheons, July 4th’s., cookouts, picnics, etc…..
Baked beans are a staple in the south. I loved them so much but they weren’t my grandmother’s specialty and seeing as how she never made any, I decided to try my hand. She just gave me the basic ingredients and I went from there.
You know, I can only give you the ingredients in making it, the rest is up to you. I have no Earthly idea of measurements, I just eyeball it and taste it, then I know it’s right.
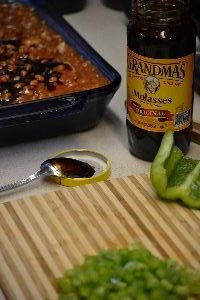
I use the cans of Van Kamp Baked Beans, drained. Then I add a lot of ketchup, some yellow mustard, chopped onions, chopped green bell peppers, lots of black pepper, dashes of Tabasco Sauce, brown sugar, Molasses, and BACON!!!

You want to chop your green bell pepper into small pieces, same with the onion.
I add about 2-3 Tablespoons of Molasses to my beans.
I add this to taste as well. But I probably put at least a half a cup in this batch.
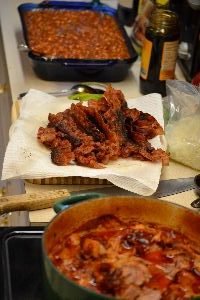
I add a lot of bacon to my beans. A nice thick cut holds up really well in this. A thin cut will just turn out to be kind of mushy.
Adding the cooked bacon to my beans.
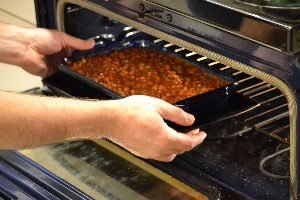
Here Gordon is putting them in a 350F oven for about 45 minutes.
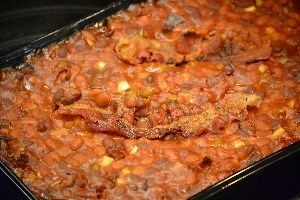
I always hold a few nice strips of bacon back in order to add them as a garnish when the beans come out of the oven.

——————————————
Franks and Beans

An American Classic
My leftover Baked Beans and Gordon’s leftover Grilled Franks
Perfect!!!
—————————————–
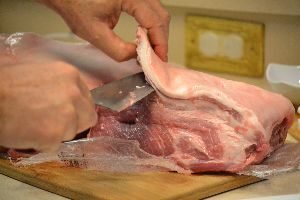
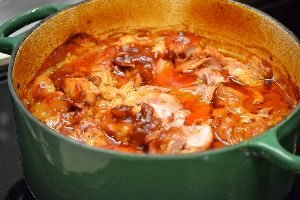
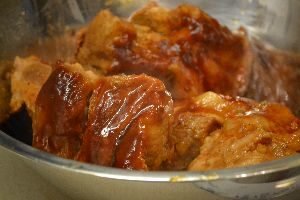
Now For The Pork Butt
(I Like Pork Butt and I Cannot Lie)
How to make this great Barbecue
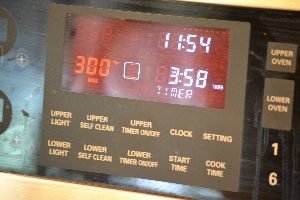
When ready set your oven to 300’F and cook for 4 hours.
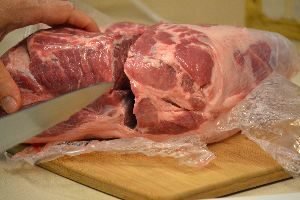
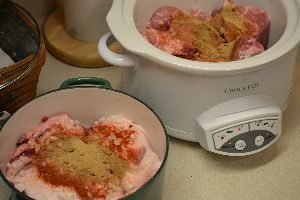
Before you cut your pork, it’s a good idea to chop your onion so you don’t work on a contaminated surface as you may not want all the onion for your Barbecue. Here I used 1/2 of a Vidallia Onion for each pot containing the pork.


I sliced the pork butt in half keeping the bone in one side of the pork. Be sure to trim off some of the extra fat as the meat has plenty. The fat gives the pork a lot of flavor. If you were doing this in a smoker or grill, the fat would help protect the meat from drying out, keeping the meat moist and juicy.


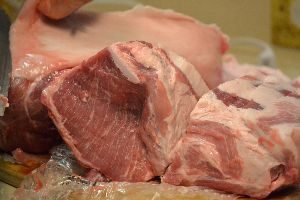

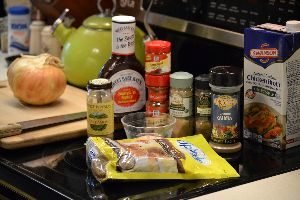
Ingredients for Gordon’s Pork Butt
I like to use the seasonings first when cooking the meat, so they give it some good flavor. I will then add the BBQ sauce after the meat has partially cooked.
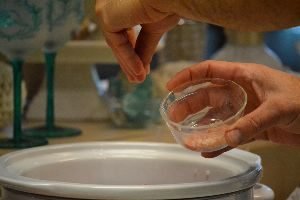
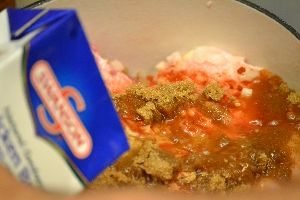
I used …(For Each Pot)
1/2 Vidallia Onion
1/2 cup Splenda Brown Sugar
1 Tbsp Chinese Ginger
1 Tbsp Paprika
1 Tbsp Smoked Paprika
1 Tbsp Ground Cumin
1 Tbsp Ground Cardamom
~1 1/2 cups Chicken Broth
1/2 tsp of Himalayan Salt
~1 1/2 cups Sweet Baby Ray’s BBQ Sauce
1/2 cup during cooking and 1 cup when done
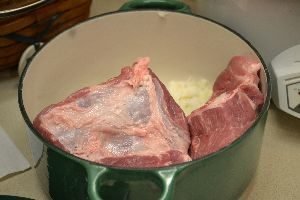


As you can see, I cut up the meat some so it sits in the pot better.

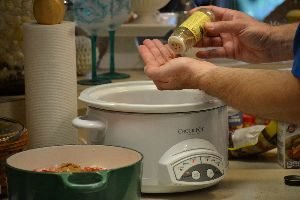


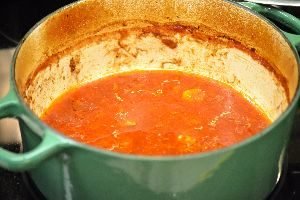
After about an hour, I add the BBQ sauce and my favorite is Sweet Baby Ray’s. They have many types to choose from and I haven’t found a bad one yet.

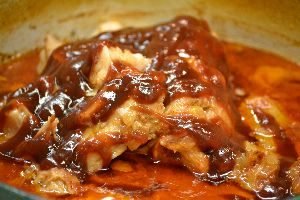
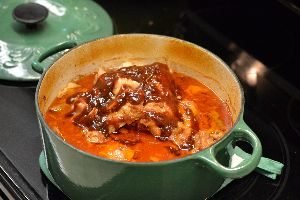
Here you can see the fat breaking down, which then evenly distributes the seasoning.
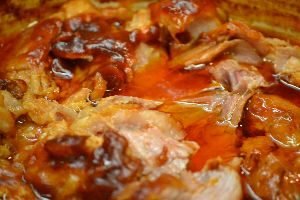
After about 4 hours of cooking time, you should be able to pull the meat right out and the bone should come out cleanly. This is also when I pull off the un-melted fat from the meat.
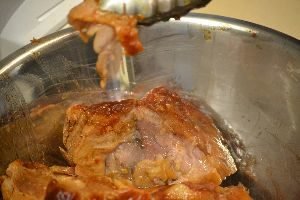
When completed, you will have about 1/2 inch of fat and then the rest is seasoning and onion. Do you best to pour off the fat keeping the great cooked onion and seasonings.
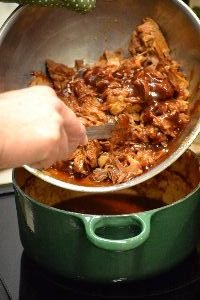
Here, I am pouring off the excess fat from the pulled BBQ. When done, add the seasoning and onion mixture to your BBQ then add the rest of your BBQ sauce and mix. Add as much or as little as you want to suit your taste.

Above is the amount of BBQ I got from both the slow cooker and the cast iron pot.
Enjoy!
—————————————–

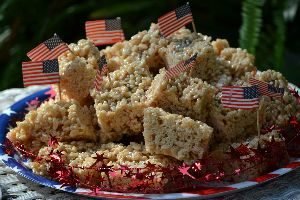
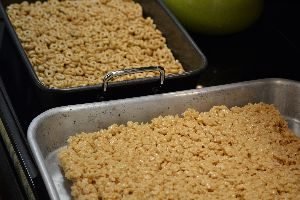
Rice Krispy/Whole Grain Oats Treats
————————————-
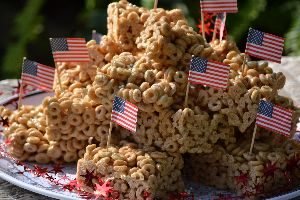
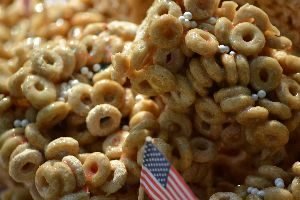
The whole grain oats batch held up better in the heat.
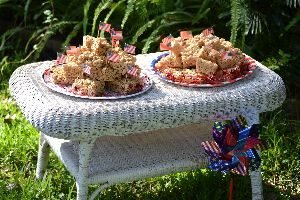
Gordon and I made two different kinds of “Rice Krispy Treats”.
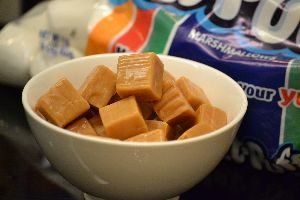
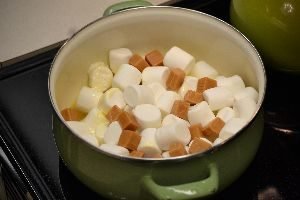
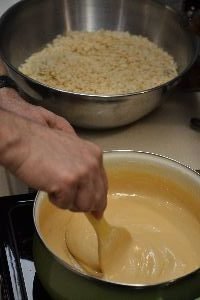
For the traditional ‘Rice Krispy Treats’ recipe, we added about 20 caramels to the marshmallows and butter. Of course we always add more butter/margarine that is required. Same with the marshmallows, and the cereal too. We don’t really follow the traditional recipe anymore.
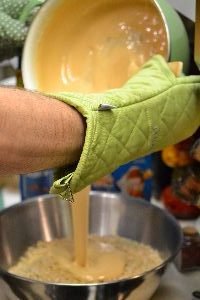
Look how beautiful and golden it is?
Just pour over your cereal, (any cereal that you like) and spread into a greased pan to set.
——————————————
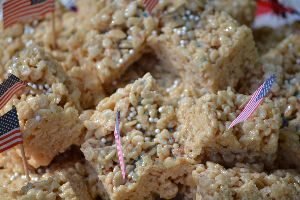
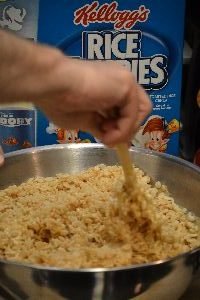
2nd. Batch
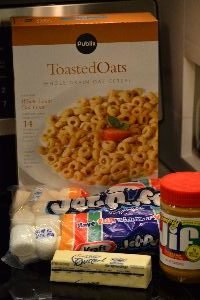
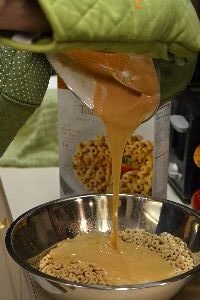
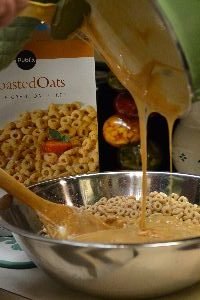
This Batch We Used Peanut Butter and Whole Grain Oats Cereal
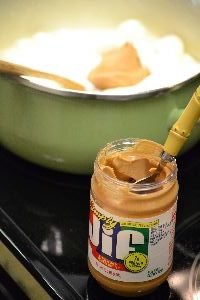
This is as DIET as I could get it!
I Can’t Believe It’s Not Butter, Toasted Whole Grain Cereal, AND Simply Jiff with less sugar added.

Look How Beautiful!
Ooey, Gooey, Goodness
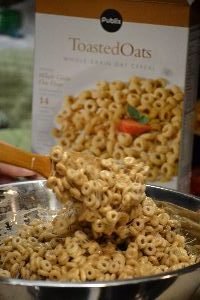

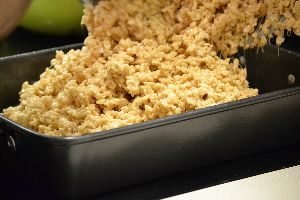
Mix together and then spread into a greased pan to set.
When they have cooled you can cut them up into blocks, stack them on top of each other and I added some sprinkles of Red, White and Blue, along with some American flags.
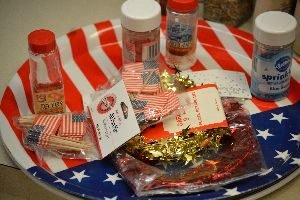
My Embellishments
———————————–
Bruce is one of the Good Ones!
I realize this is an anti-war song, but we are an anti-war family.
Here, here!
—————————————-
I happen to like Miley and I love this song.
So welcome Miley to my website.
————————————————————
This is a past July 4th. celebration of pictures.
Corn is always a big part of the meal.
Usually served just like this, in a pool of melted butter with just salt and pepper. Usually having it’s own plate.

Photos From Our 4th.

Appletini’s with Sparklers
(The flag is an art piece that Brodie did when he was in pre-school, I’m using it as a place mat).
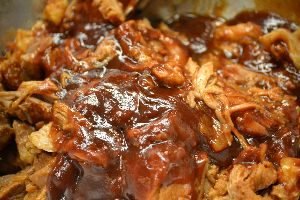
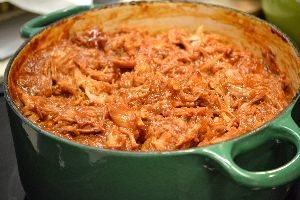
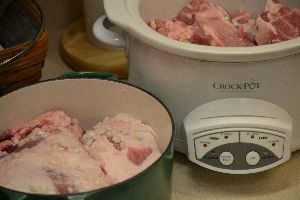
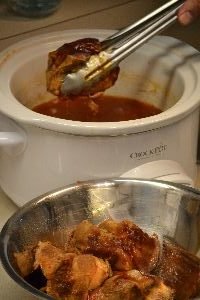
TEXAS BARBEQUE
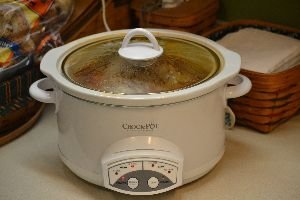
In the Crockpot
AND

In the oven.
Gordon bought 10 pounds of pork butt.

The one thing that Texas does better than anywhere else is barbecue.
This is the same recipe.
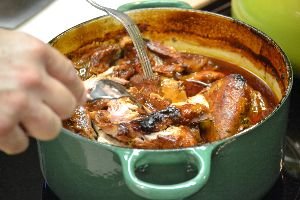
Except one cooked in our crock pot and another cooked in the oven in our cast iron pot. Both were perfect!

Don’t forget the beans!
(You know that when the pots look this messy and gooey that the food is going to be wonderful)!

My Dinner Plate!
And my other dinner plate.

A Very Happy 4th.!
FYI: I don’t advise trying this inside. WE should not have tried this inside. That’s all I’m going to say about that.

I’m almost embarrassed to say that I made this. Hey, it tastes delicious, it’s just not the prettiest thing. I used two no bake cheesecake mixes, let them set, and then I added the fresh berries and the redi-whip cream topping from the can.
————————–

Happy Independence Day!
Julie
——————————
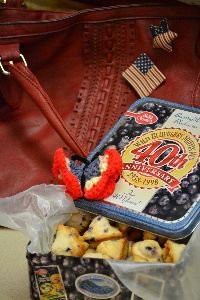
Patriotic Muffins
This is National Blueberry Month. We eat a lot of blueberries.
Love those antioxidants. Whether it be in juice or pancakes, muffins or any dessert.
Delicious!
———————————

Grilled with Herbs and Lots of Butter
Love that Corn!
Corn Relish as a Take Home Gift
Don’t forget your corn relish!
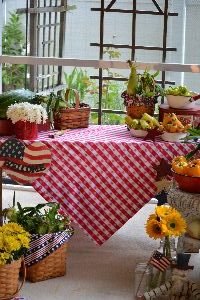
Have a Great Holiday

Julie and Gordon