A Haunted Jezebel, Together With A Haunted Mansion Halloween Repast

October, 2024

Morning, Foolish Mortals
———————————————————————————-

Gifts of Haunted Mansion Coffees and Mugs for our Foolish Mortal Family Members

Bones Coffee Company

Bones Coffee Company is located here in Florida’s Cape Coral.
It is excellent coffee and I love buying from local company’s.
—————————————————————————————-
Julie and Gordon
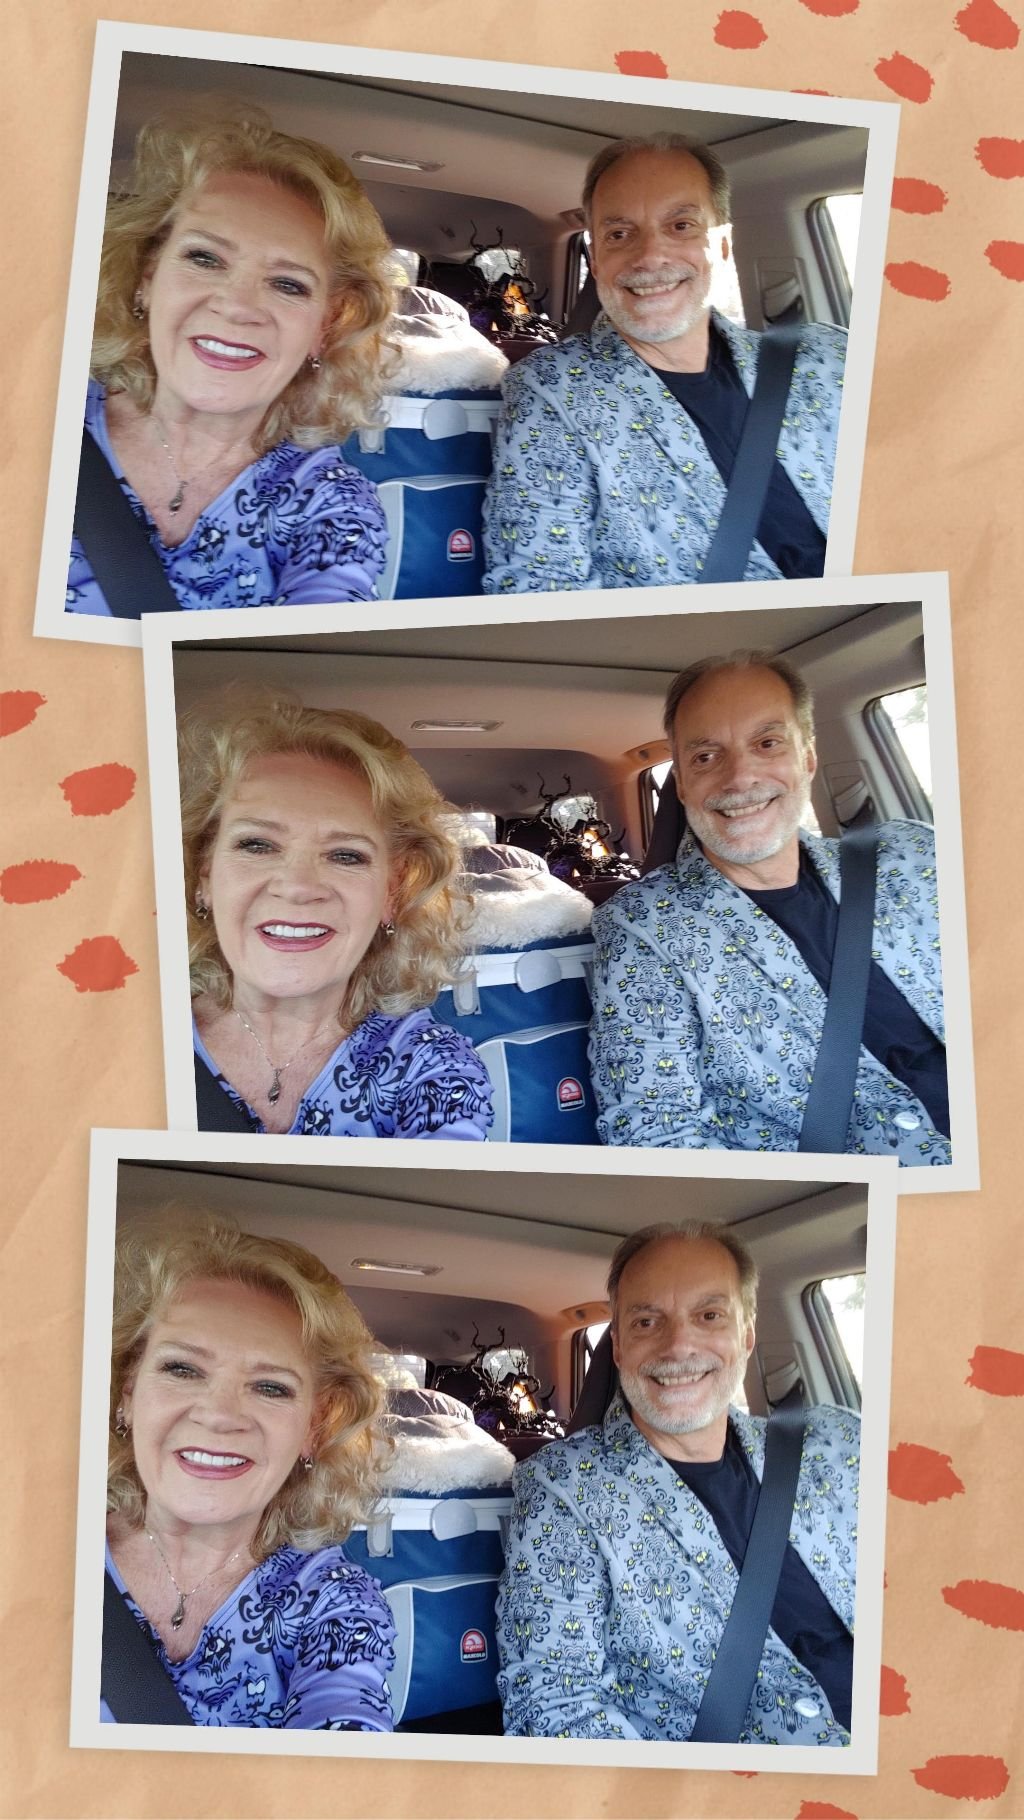
On Our Way To The Haunted Mansion Halloween Party at Veronica, Brian’s and Isabelle’s House
—————————————————————————————-
Ghoulie’s A Haunted Jezebel Sauce
I Love To Create Jezebel Sauces Based On My Favorite Jezebel’s

Looks Like You Are Seeing Double!
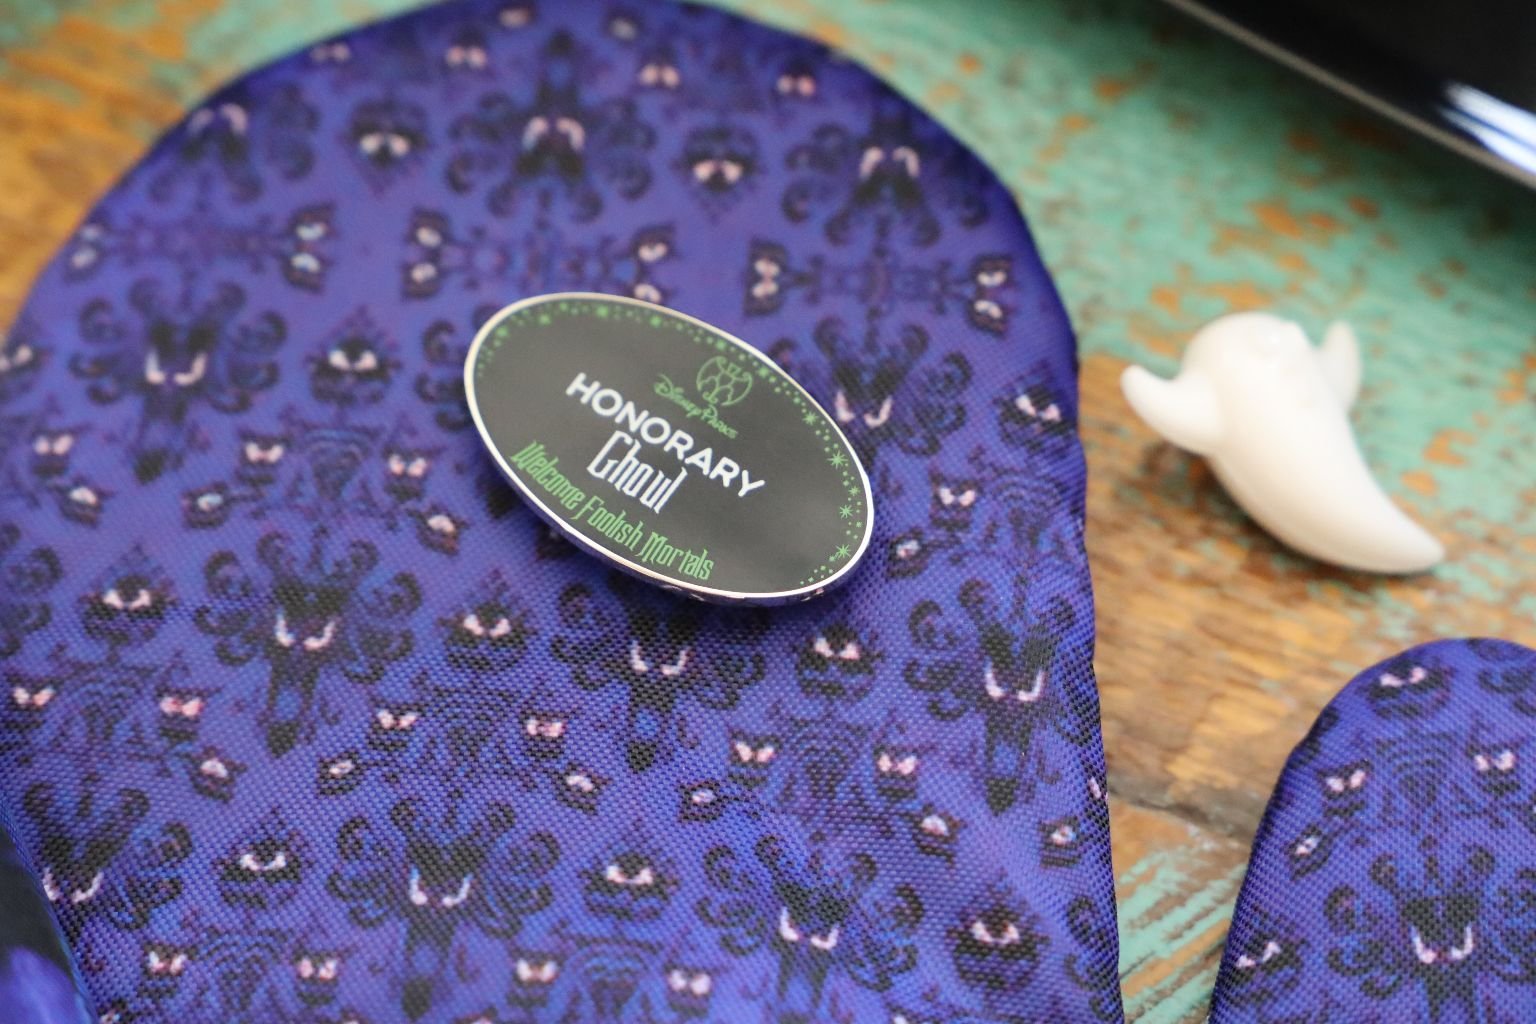
I Do Consider Myself An Honorary Ghoul(ie)
(Recipe Down Below)
———————————————————————————

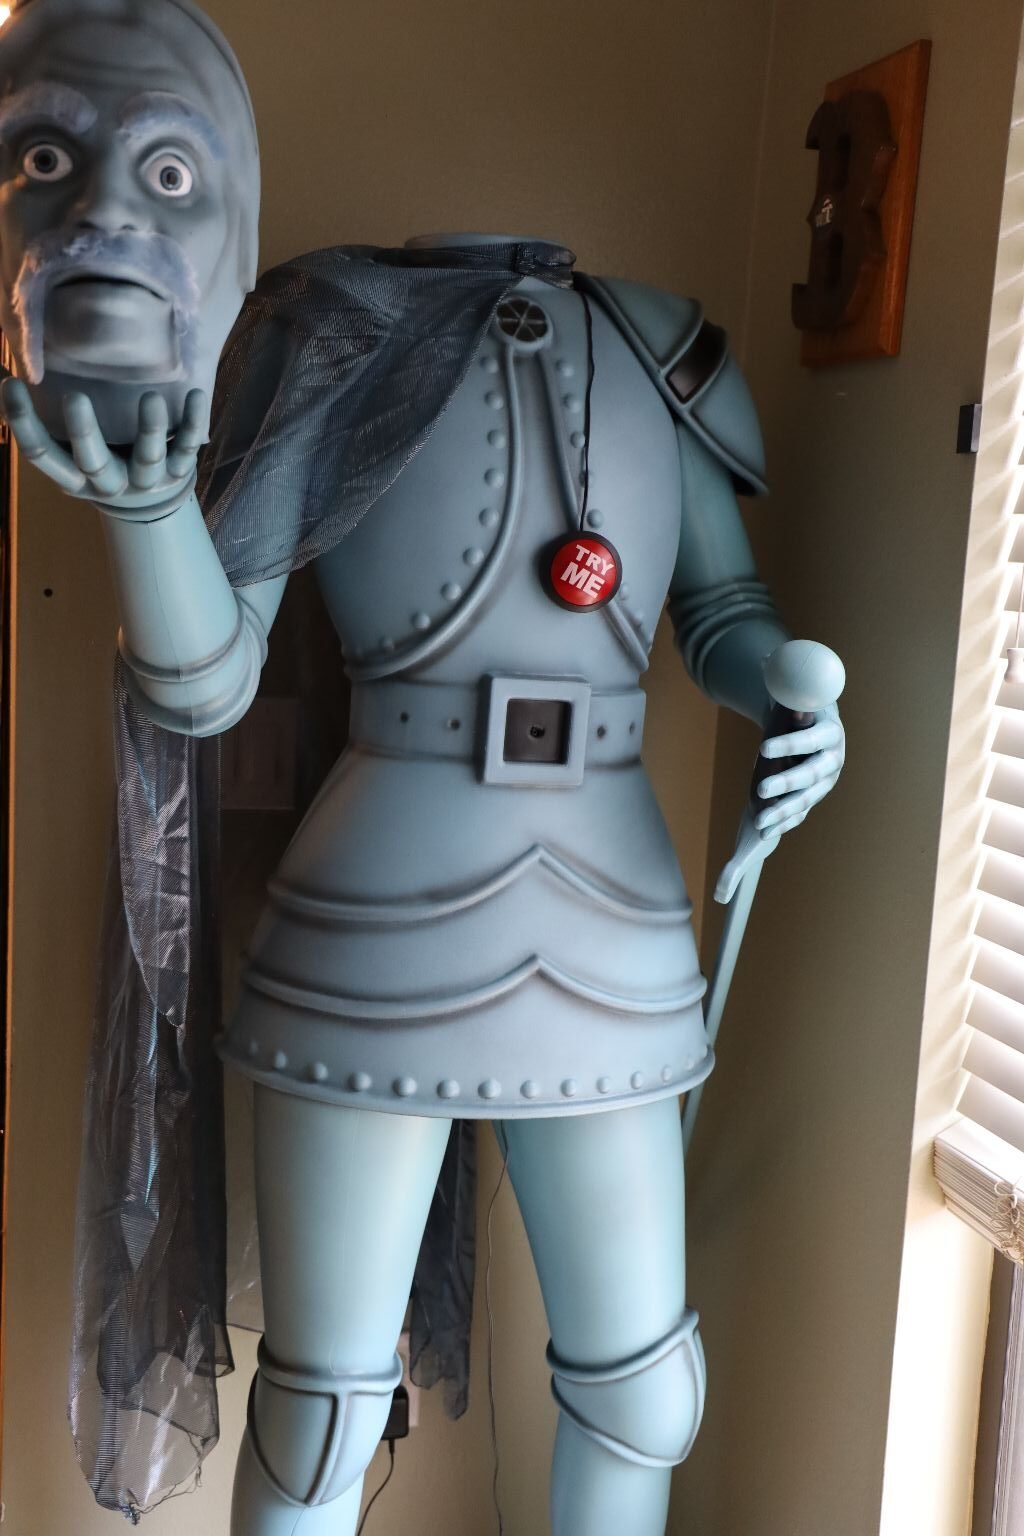
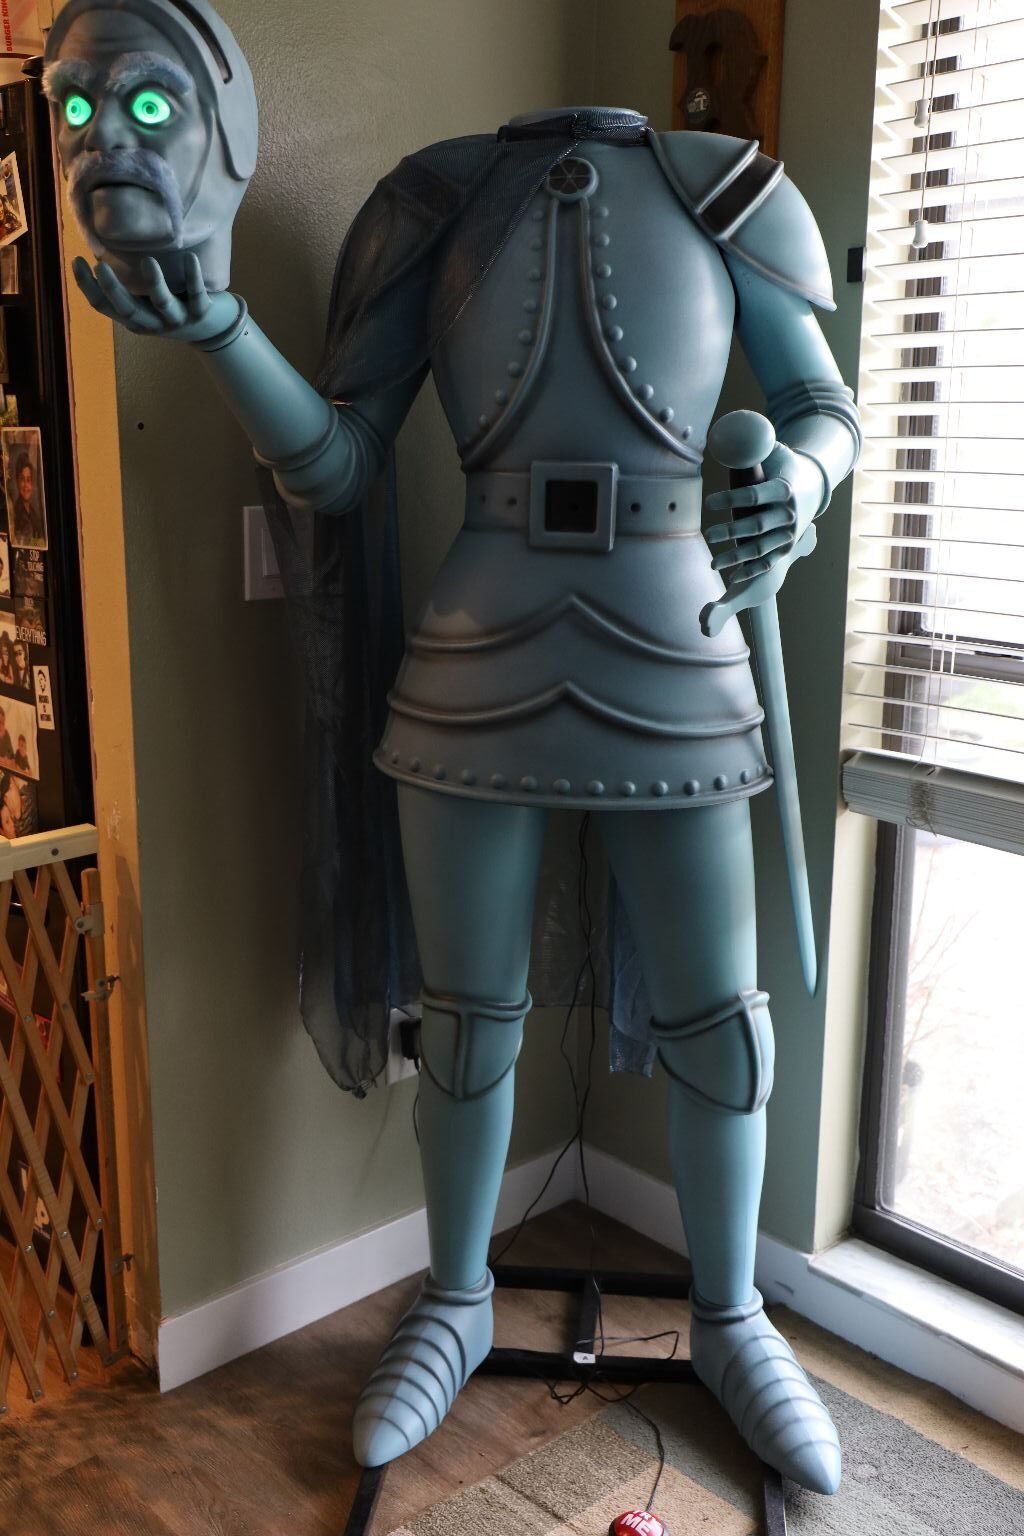
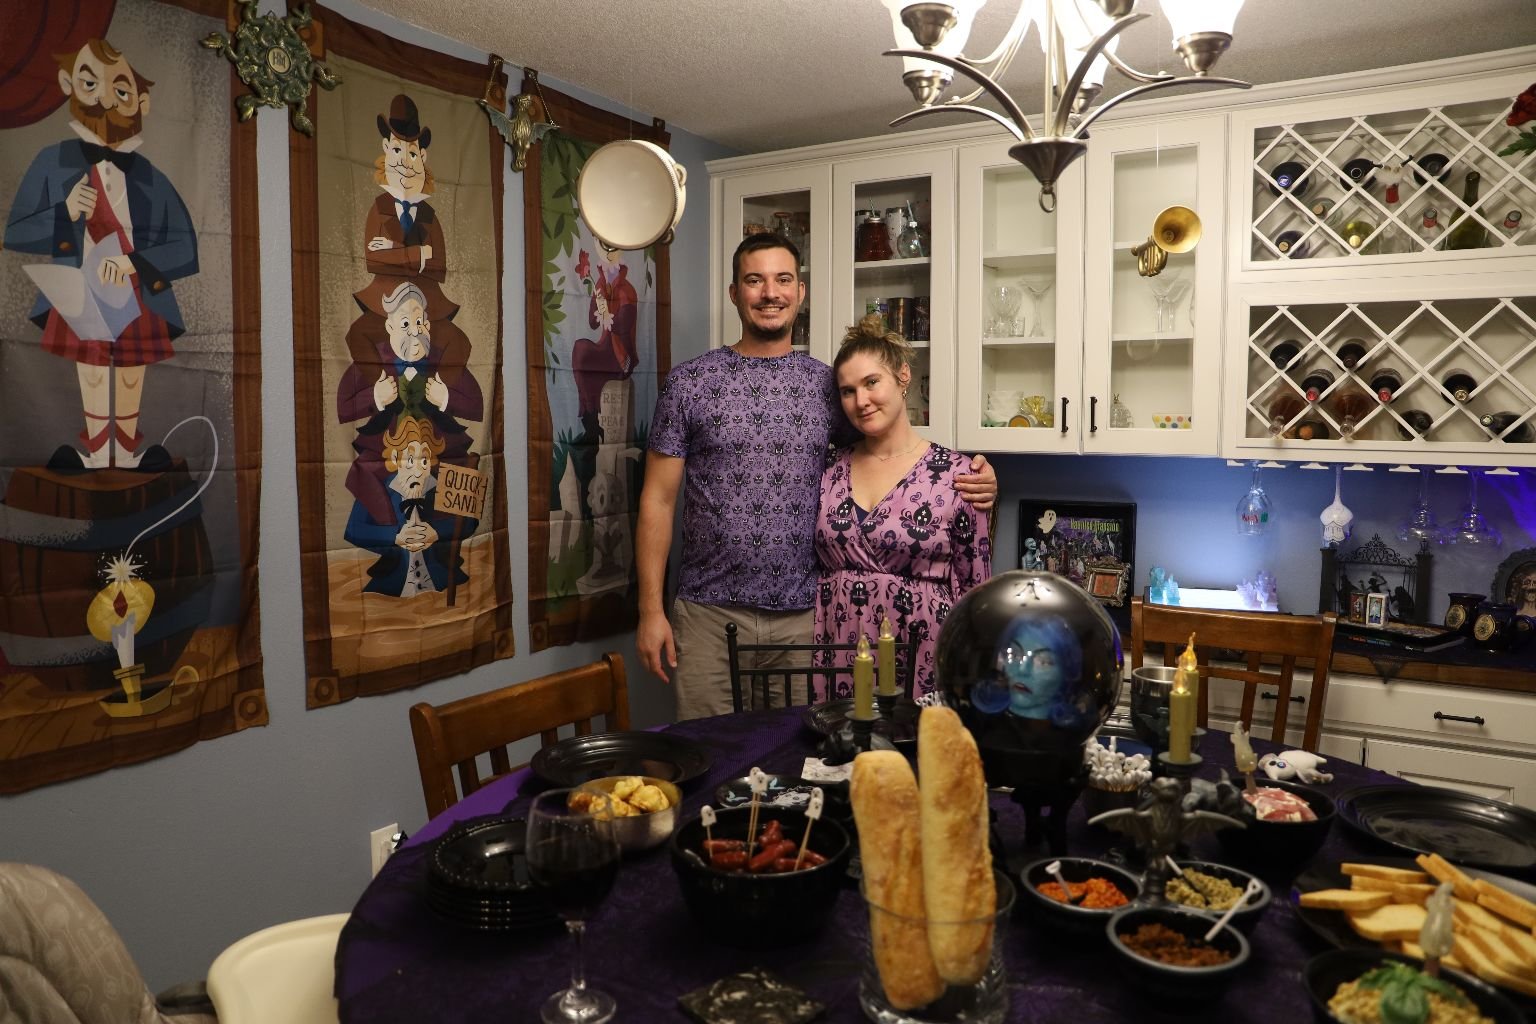
We Have Arrived at the Kelleher’s Haunted Mansion

He Must Be The Groundskeeper
———————————————————————————————

————————————————————————–
September 1, 2024
Our Son-In-Law Brian’s 40th. Birthday!
(This preempted our Halloween Party below.)

Brian loves The Haunted Mansion Ride at Disney’s Magic Kingdom, and he loves my Brunswick Stew,
so I incorporated the two and came up with this.
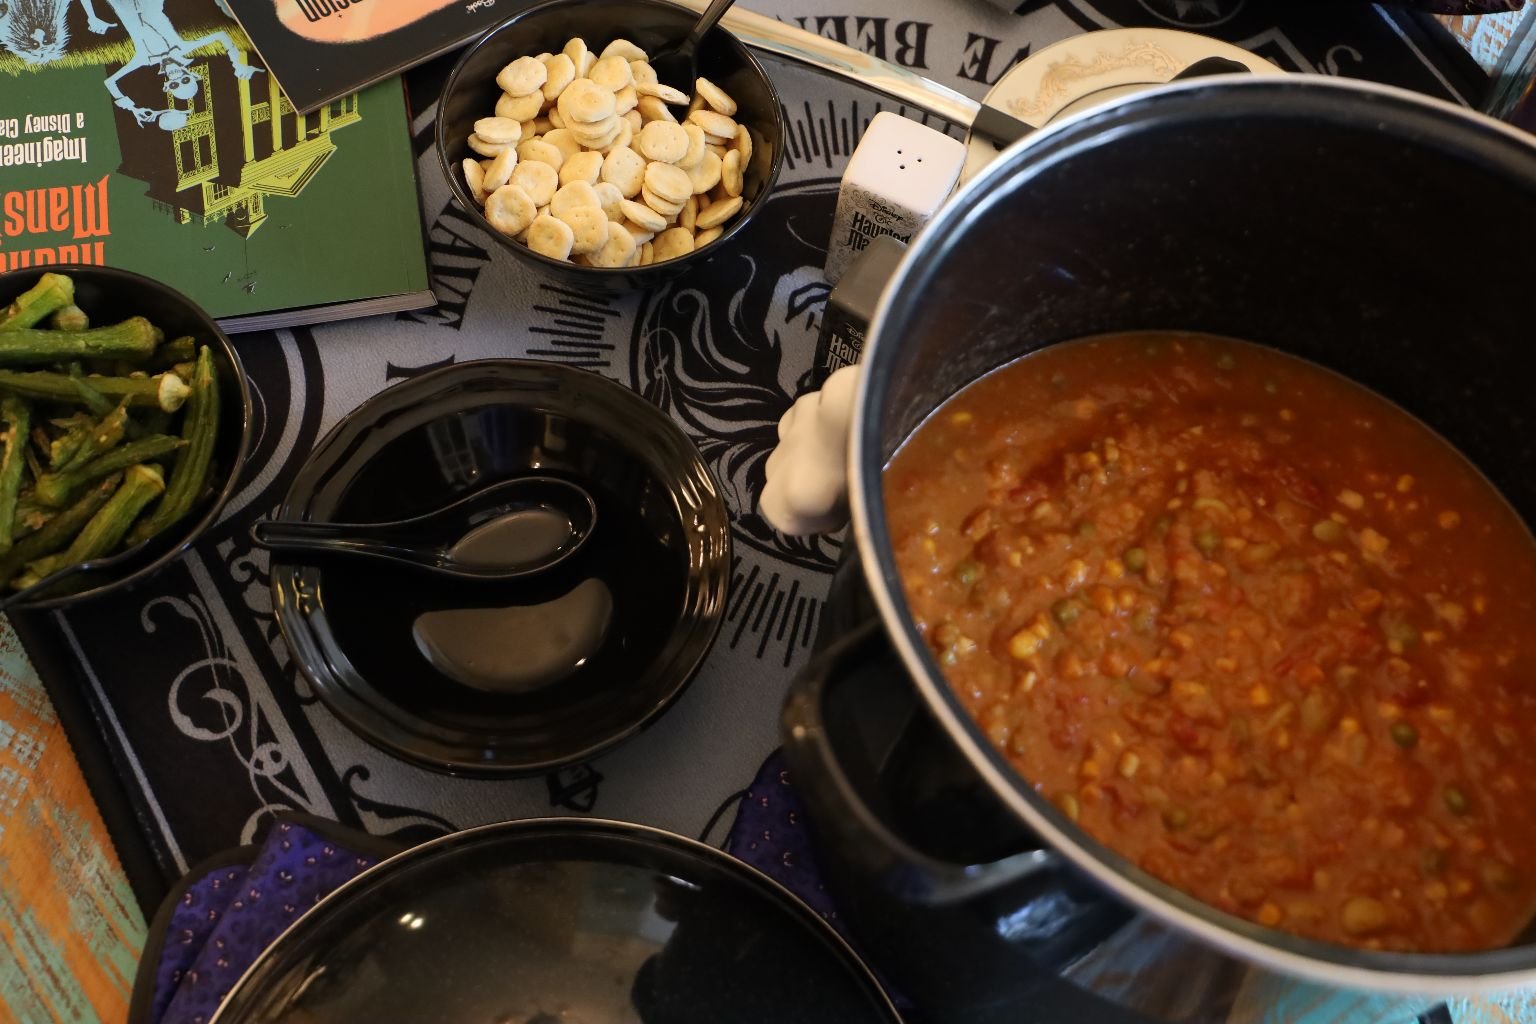
Sort of a Haunted Stew 🙂

The Wishbone is from the chicken I used to make the Brunswick Stew
Brian and Veronica are already Getting into the Halloween Spirit at their house.
I Set Everything Up for Them To Enjoy

Their Dining Room
Happy Birthday Brian! Have a Haunting Day!
Julie and Gordon
—————————————————————————————-
If you would like the recipe for my Brunswick Stew above:
Click Here For Brunswick Stew, Cheese Straws, and Angel Food Cake

————————————————————————————–
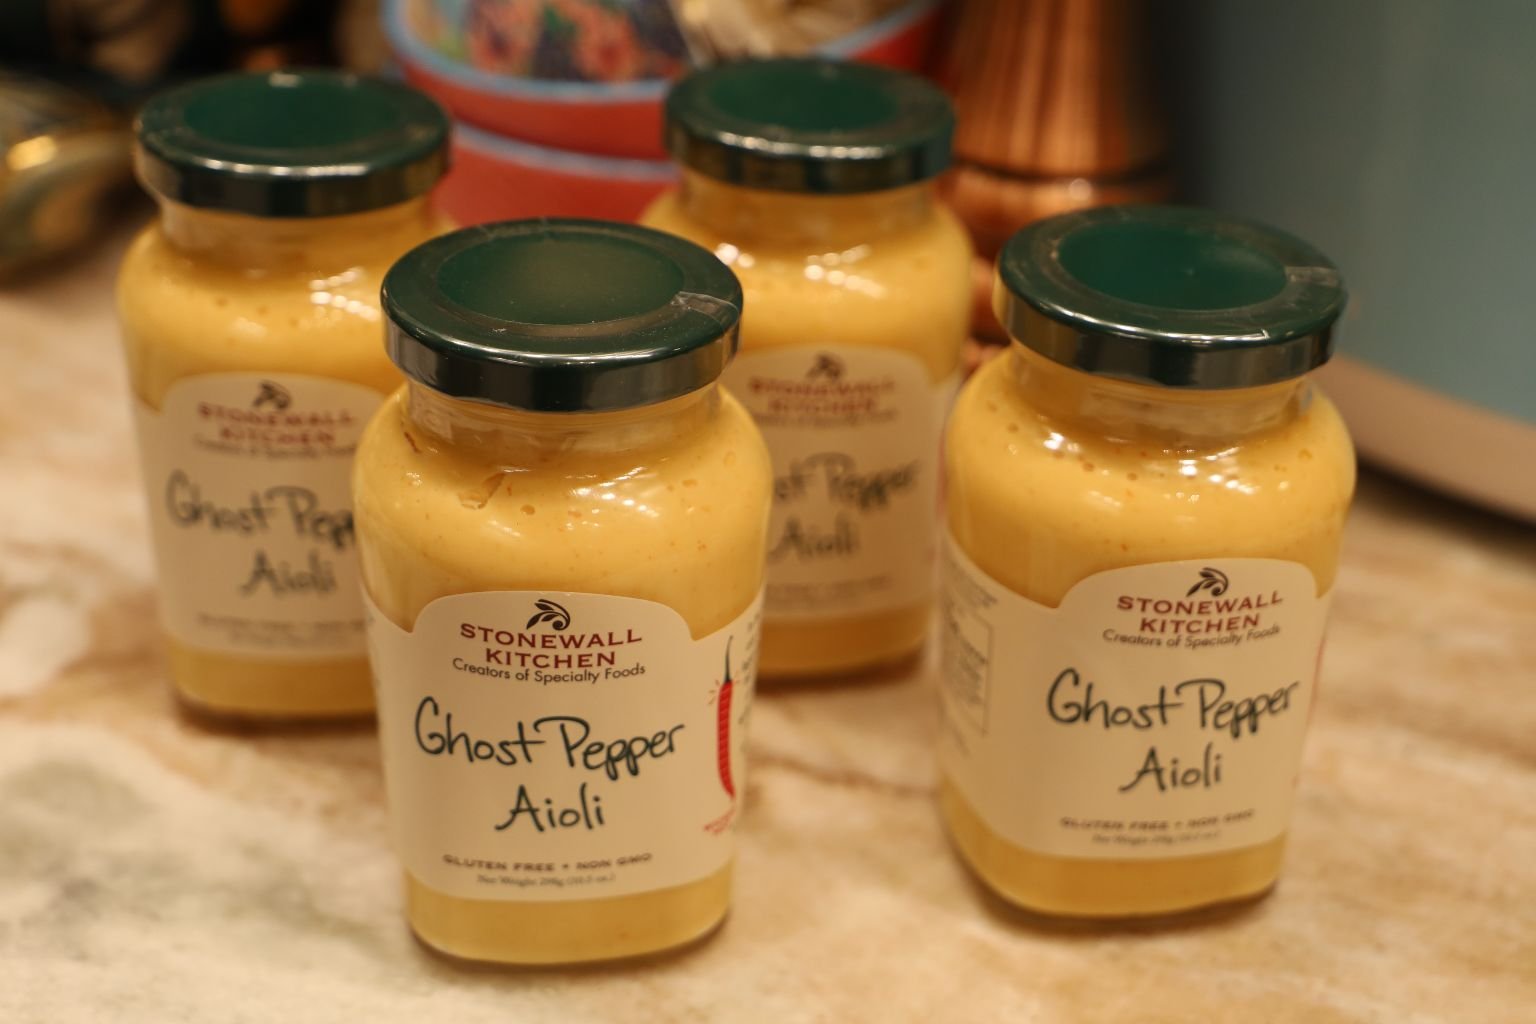
Giving The Gift of Ghost Pepper Aioli to our Favorite Mortals
————————————————————————————–
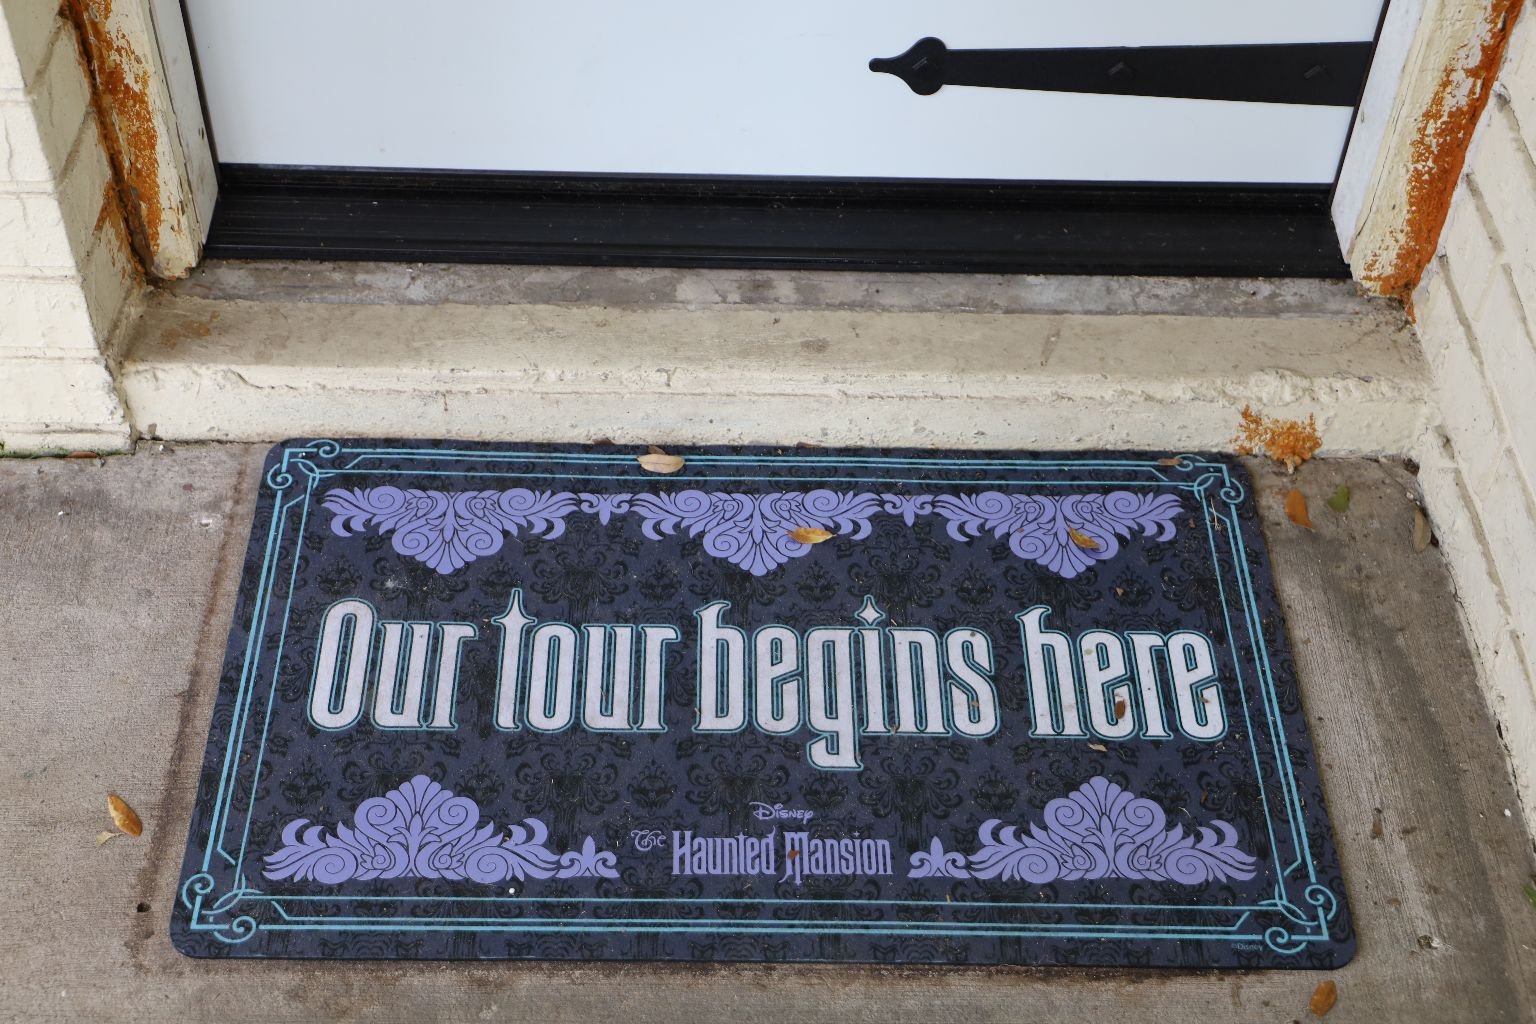
The Real Haunted Mansion
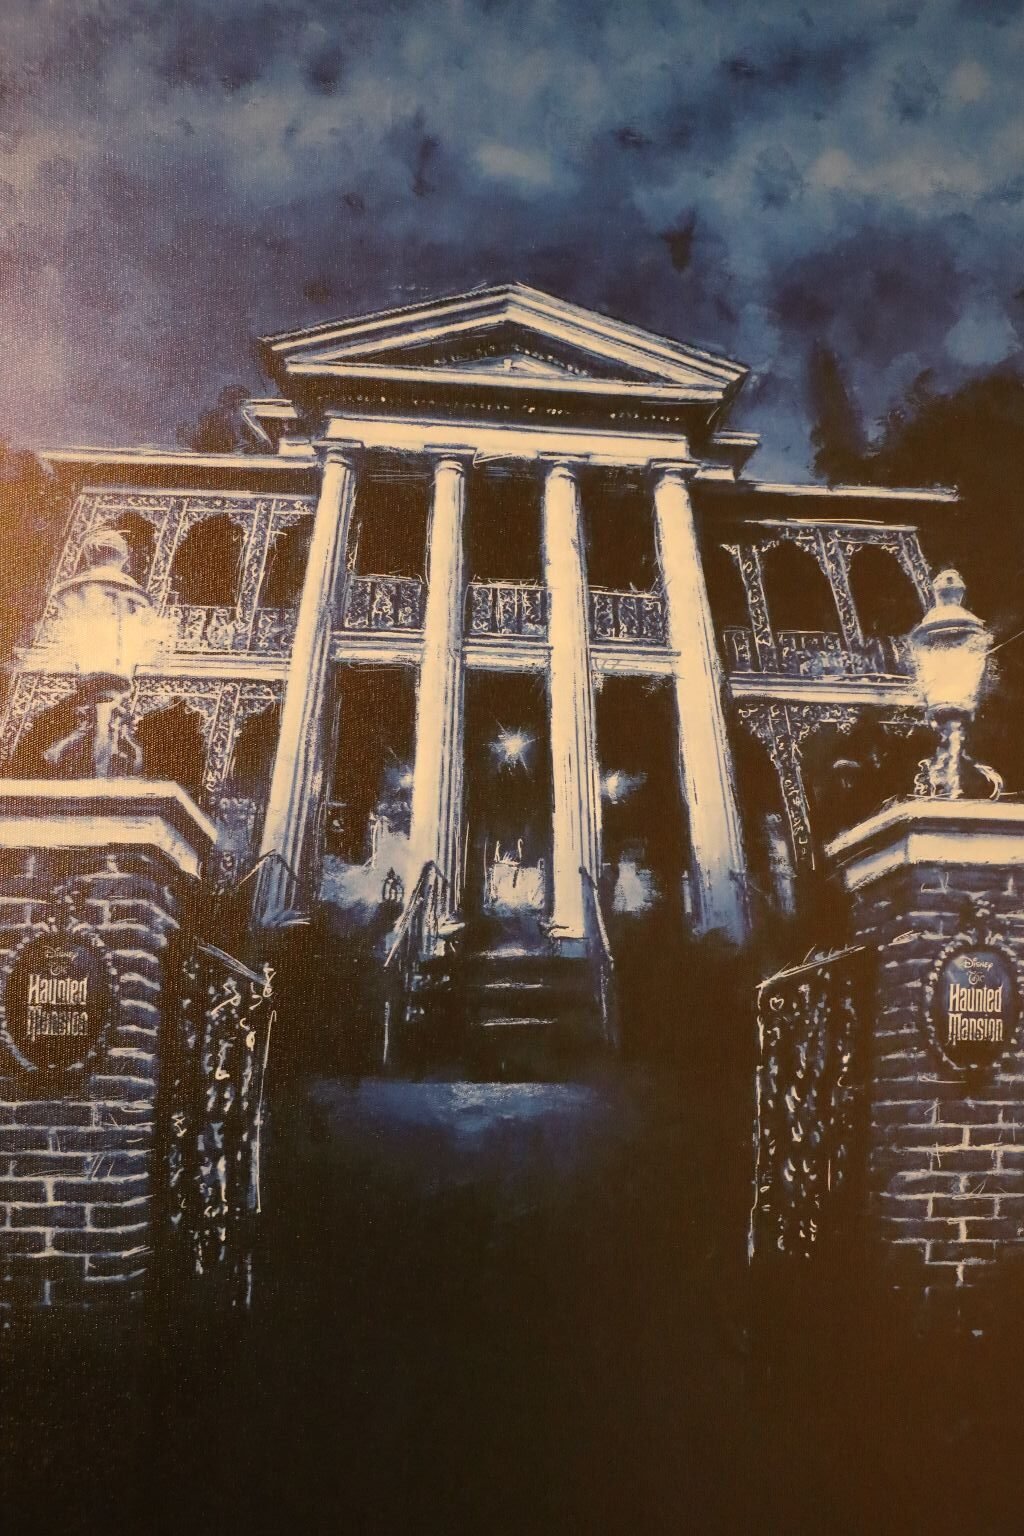
The Haunted Mansion was based on this house in Savannah, Georgia.
The Inspiration for The Haunted Mansion at Disney’s Magic Kingdom
The home was owned by someone we used to know, her name was Nancy Hillis and here is her real life ghost story……
So, Nancy is living in Savannah, working as a nightclub singer and owning a B&B that her ex-husband, Charlie, helped her buy. Nancy lived in the basement apartment and rented out the upper floors to tourists. She came and went as her schedule revolved around her nightclub job. She may have had one or two more jobs at that time but the one that sticks out most in my mind was that one.

Click Here for: Nancy’s Bed and Breakfast, Hamilton Turner Inn
They say Disney’s Haunted Mansion was based on this house.
Nancy would decorate her B&B with nice furniture and somehow, she came across a portrait of a Yankee soldier and hung it on the wall. I don’t remember which room but obviously she would have hung it somewhere like the living room, dining room, or even a sitting room. Somewhere out in the open for the guests that stayed there to view. Interestingly enough, every morning she would find that portrait of that Yankee soldier sitting on the floor beneath where it was hung. It was never broken, it didn’t fall, it was placed there. Even when she was all alone in the house every morning that portrait would be sitting there on the floor as if gently placed there. Nancy finally got the hint and put the portrait away in a closet. (How many people do you know that care to respect a ghost’s wishes?) So, was it a ghost? Savannah has a reputation for being haunted, so why not? The house was built on top of graves. They moved the headstones, not the graves. Yet another “unexplained” event. We in the south believe in ghosts. We’ve even seen a few.
If you would like to read more about Nancy, and hear of a few more ghost stories, then float on over to my Ghost Writer post. 🙂
——————————————————————————————
The Haunted Mansion Halloween Party

The Headless Horseman of The Haunted Mansion
———————————————————————————-
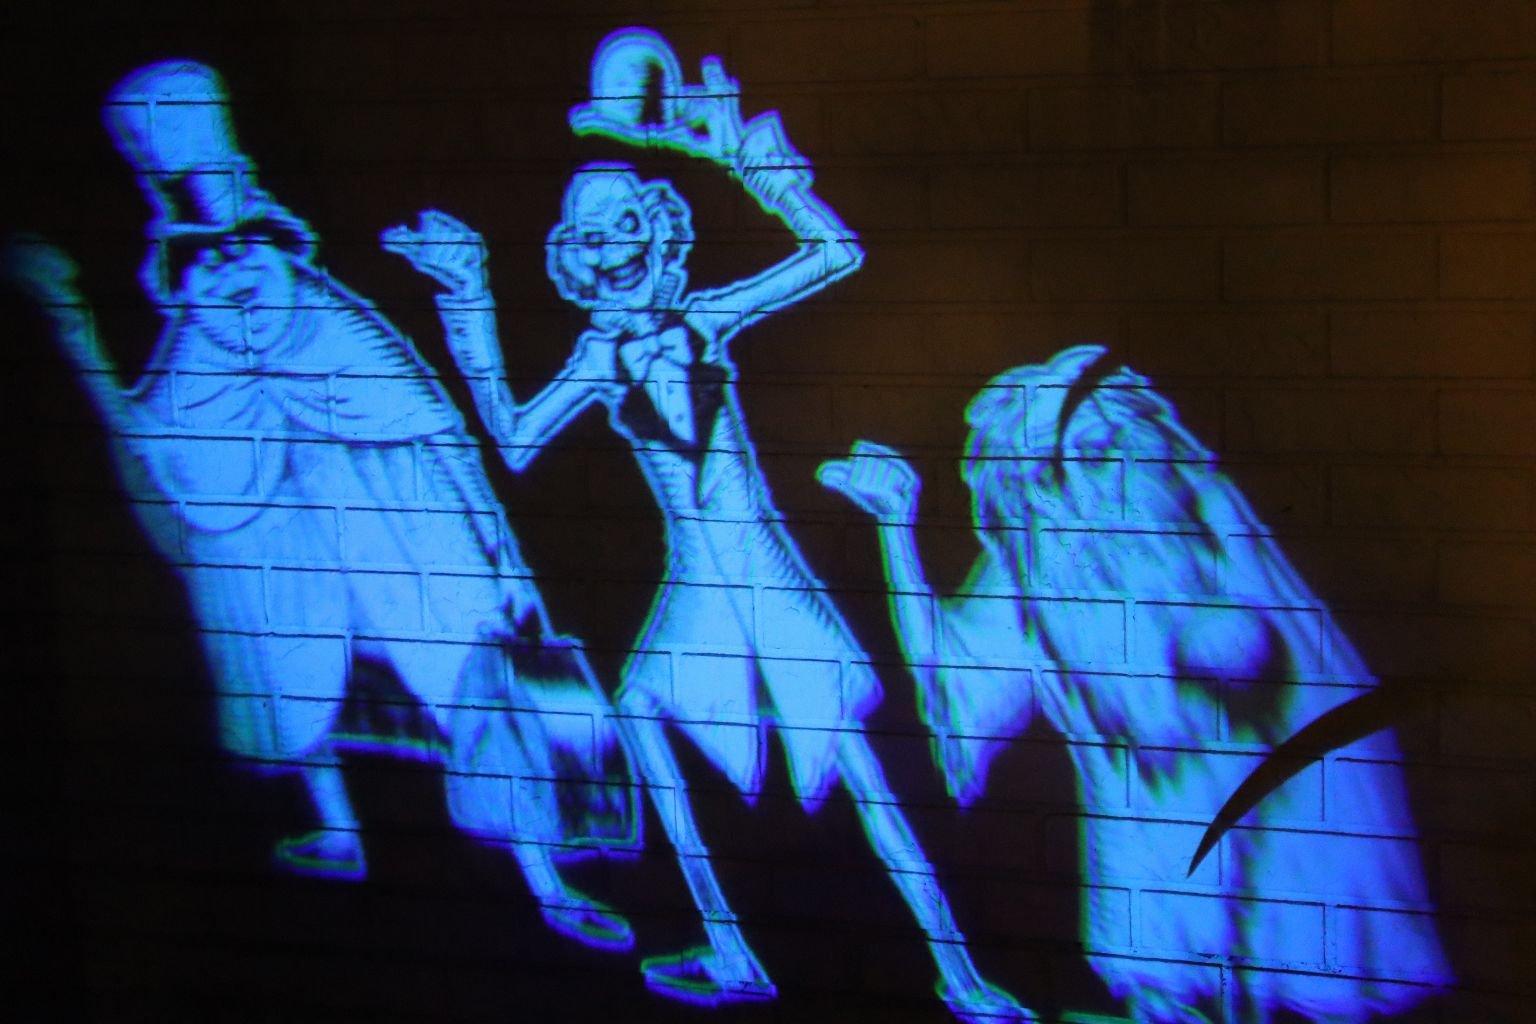
The Hitchhiking Ghosts in Shadow
————————————————————————————-
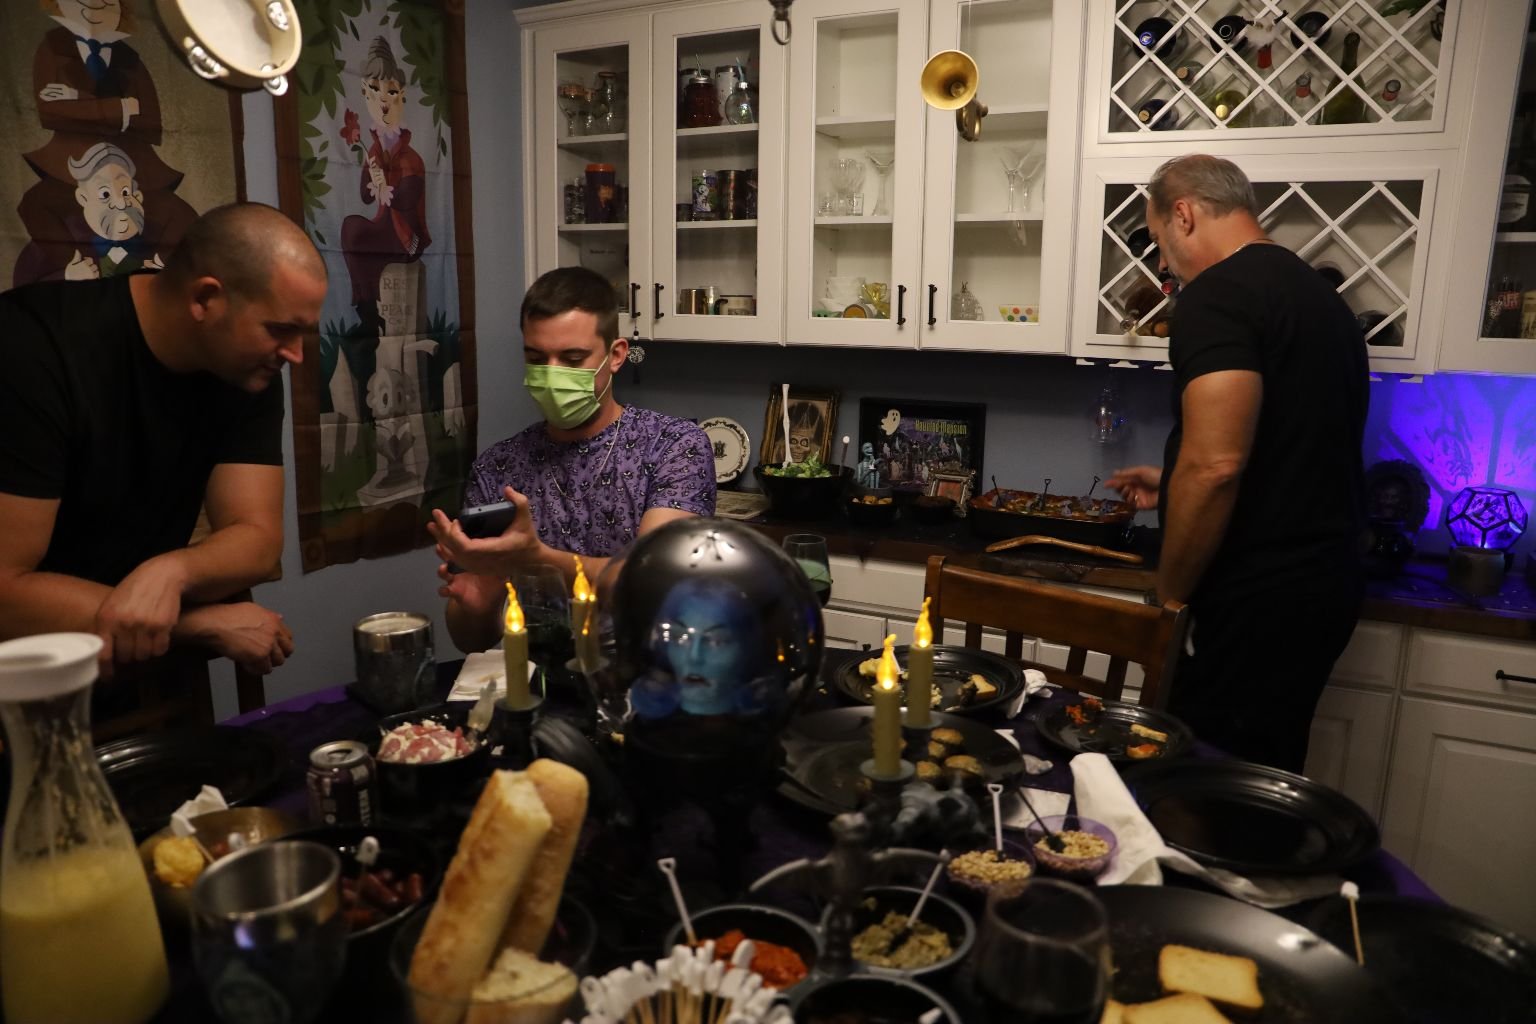
The Buffett
This is what Brian set up on their Haunted Mansion Buffet
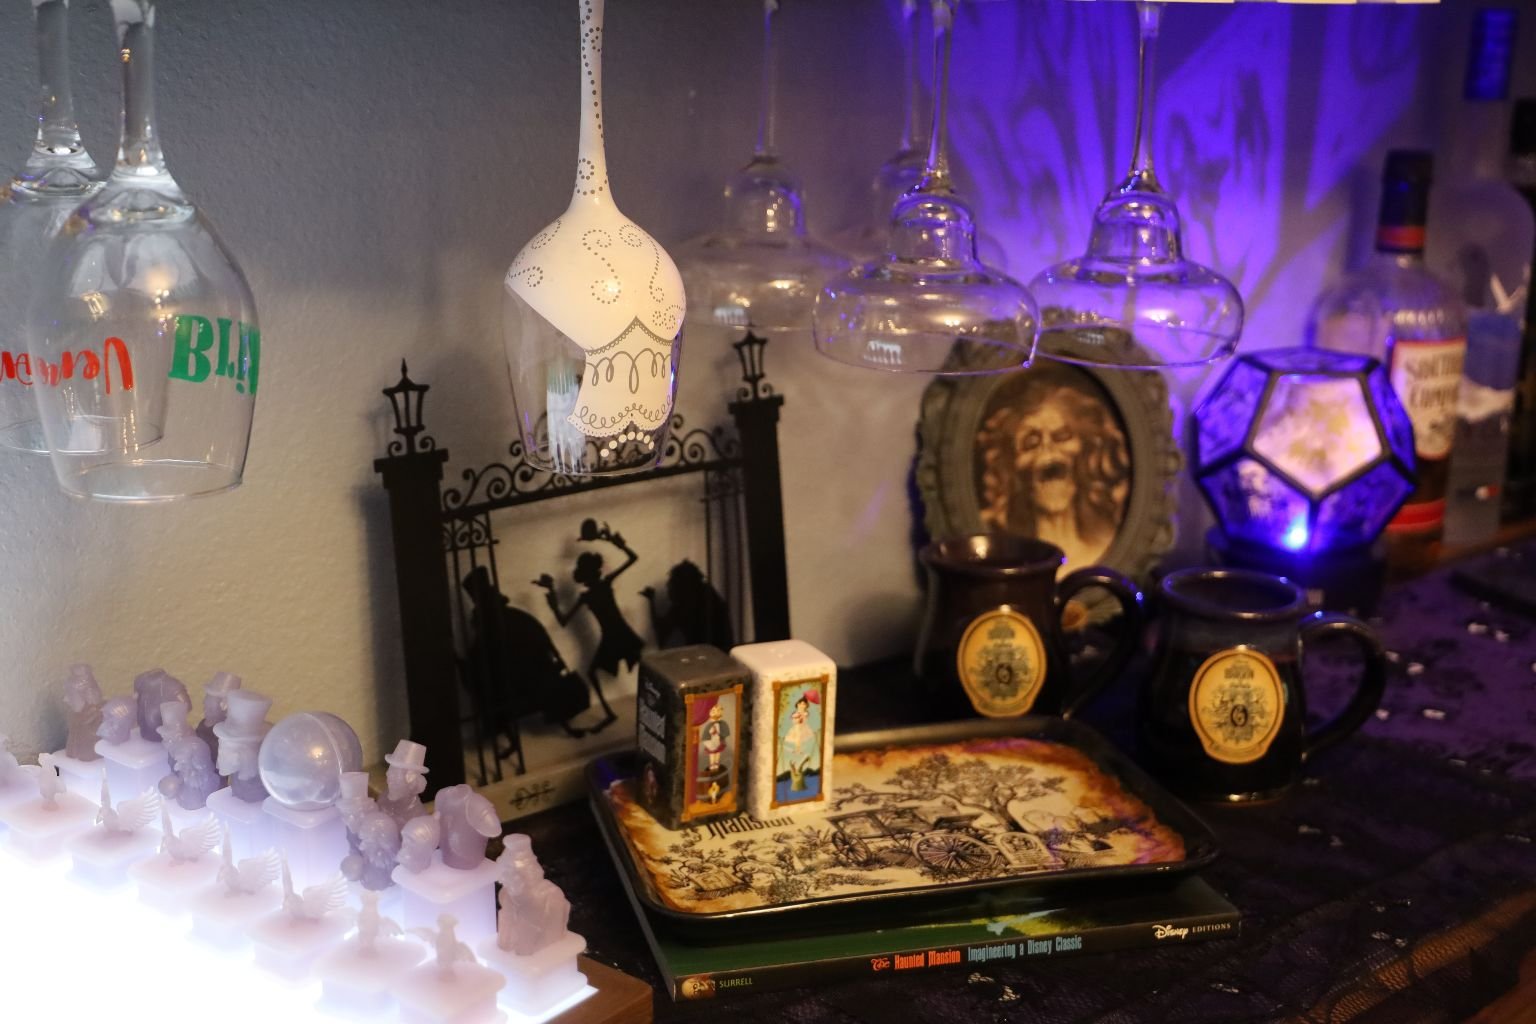
———————————————————————————————–
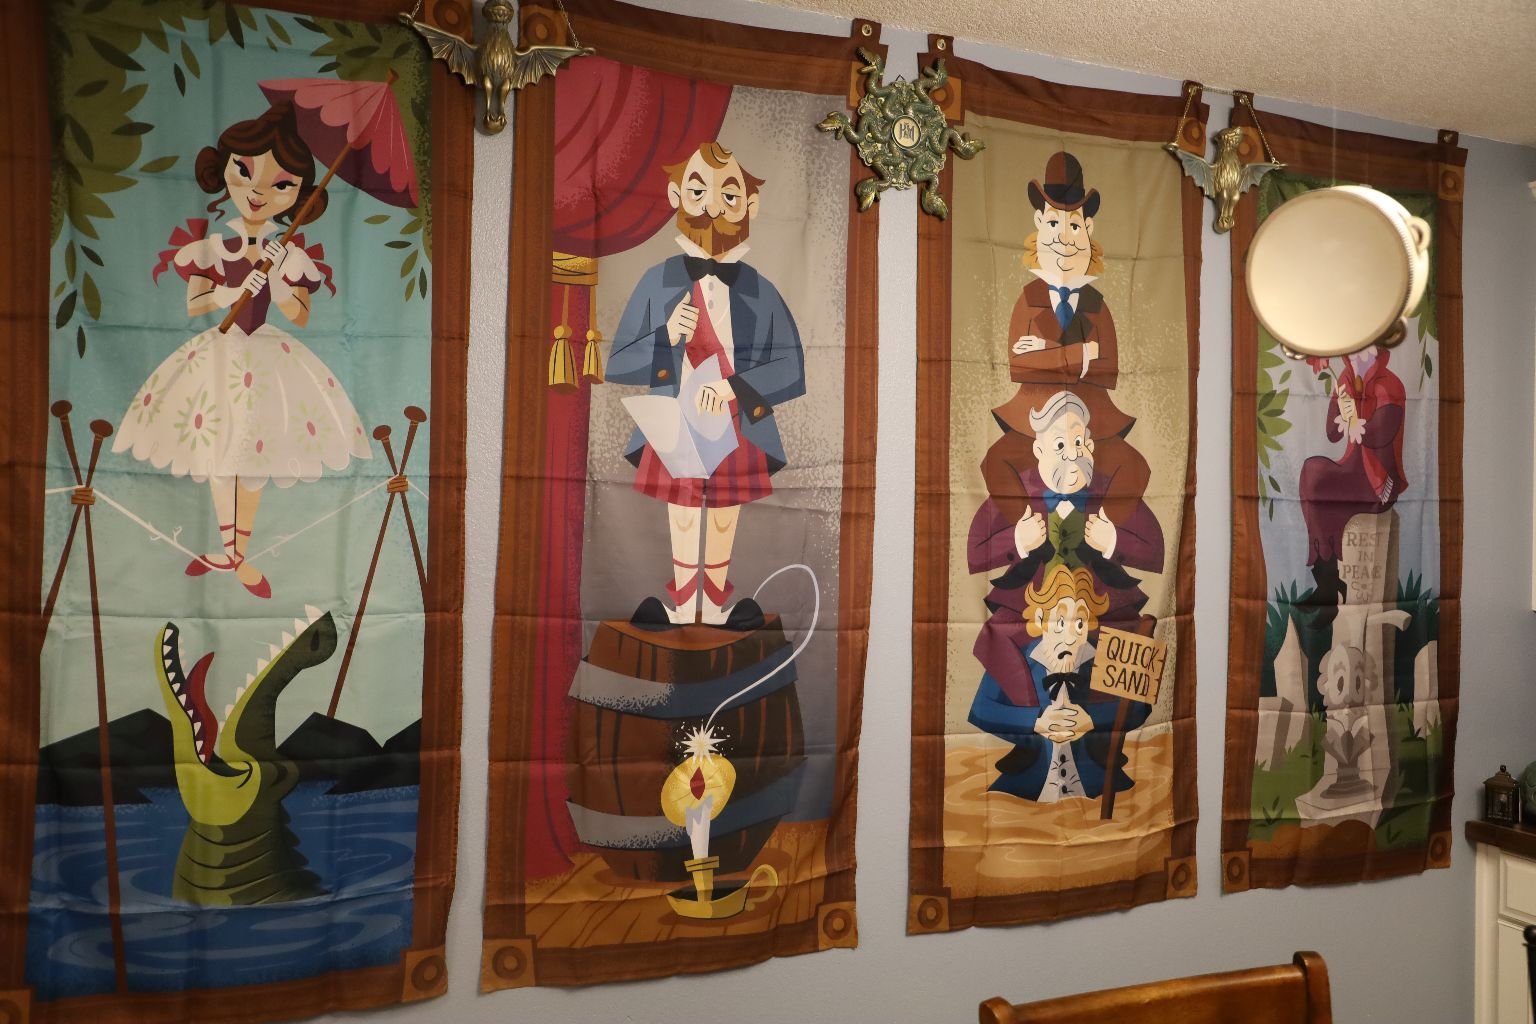
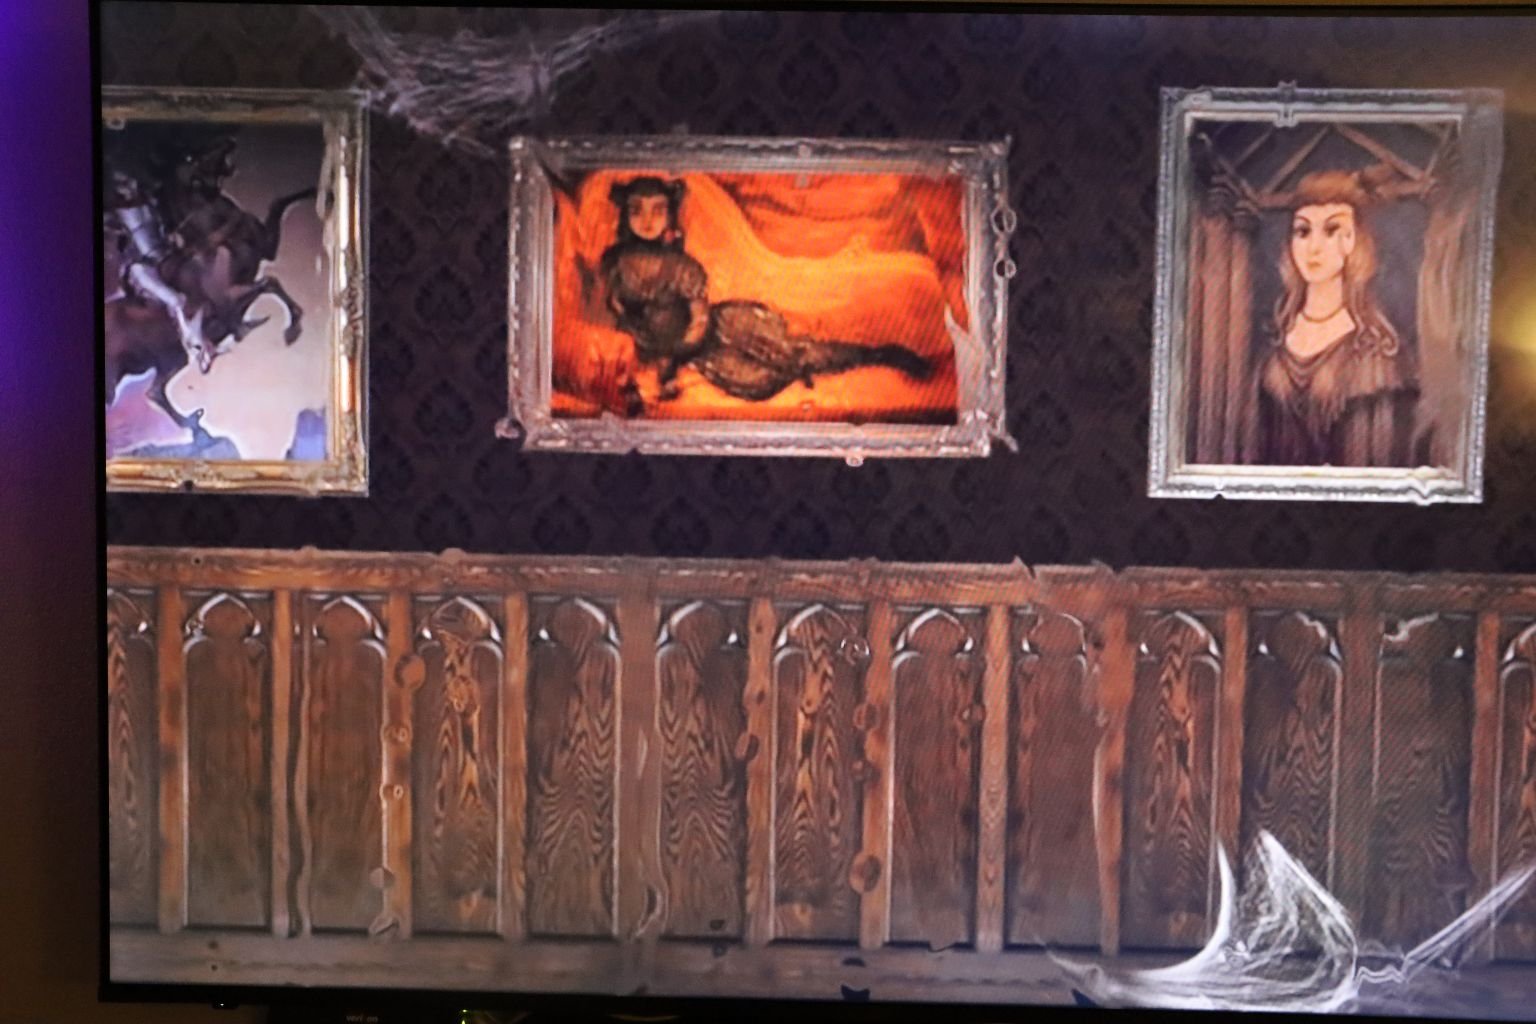
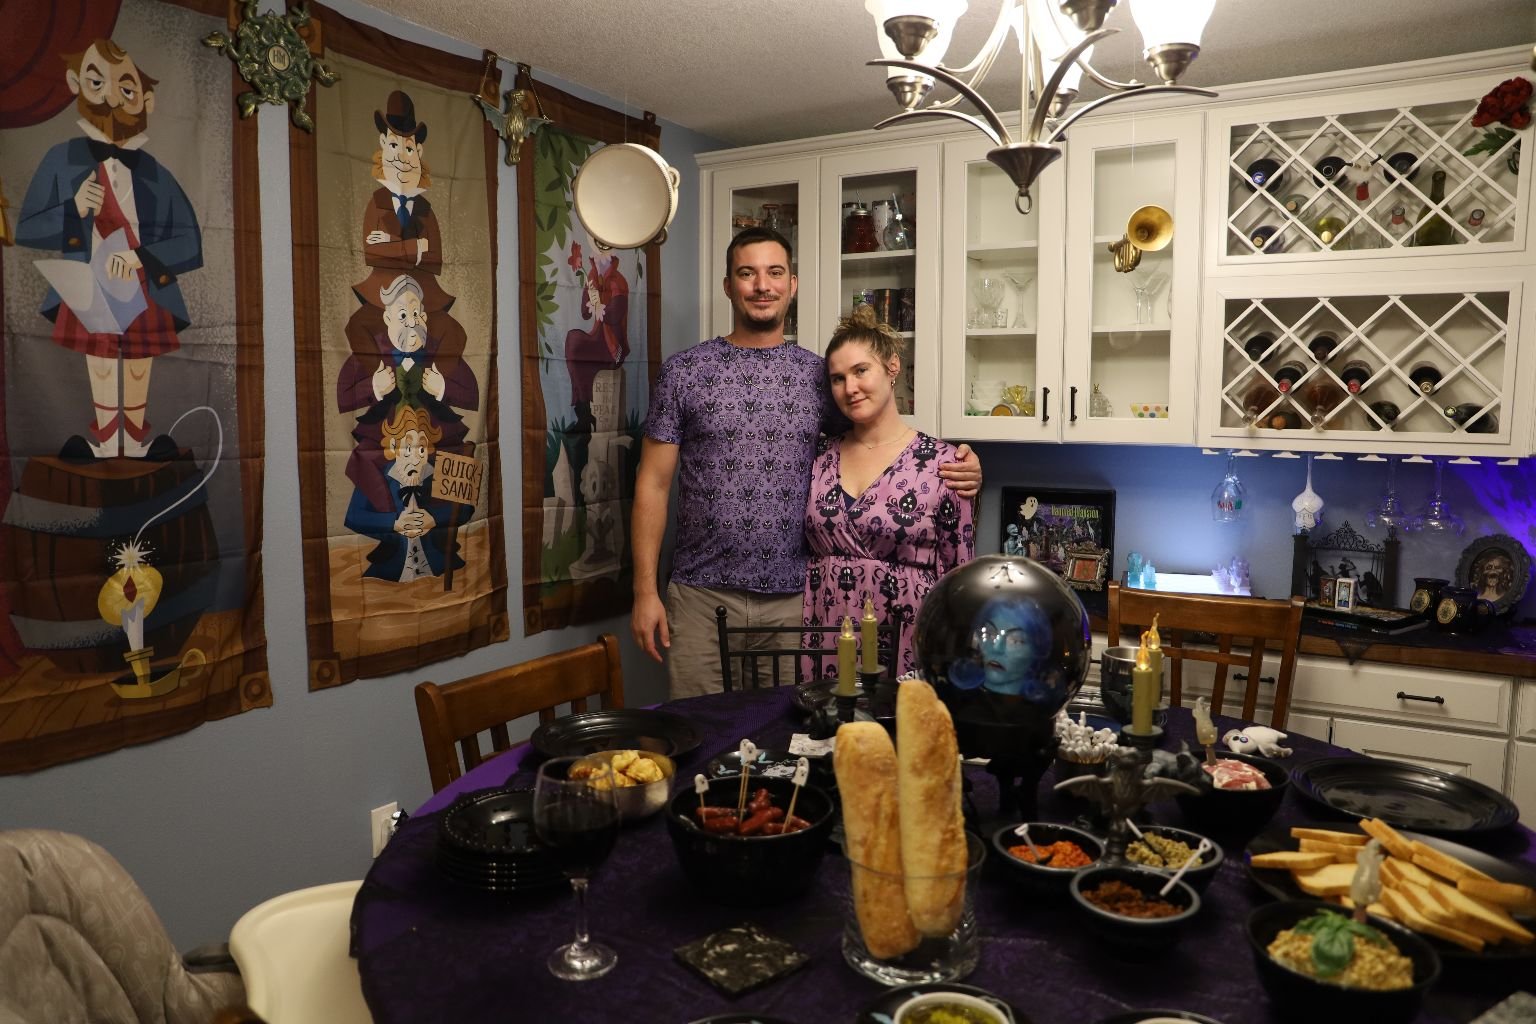
The Tapestry’s
From the book, The haunted Mansion, this is the Imagineering of the dinner.
————————————————————————————–
Our Haunted Mansion Halloween Party Dinner Table Inspiration
Brodie and Mackenzie
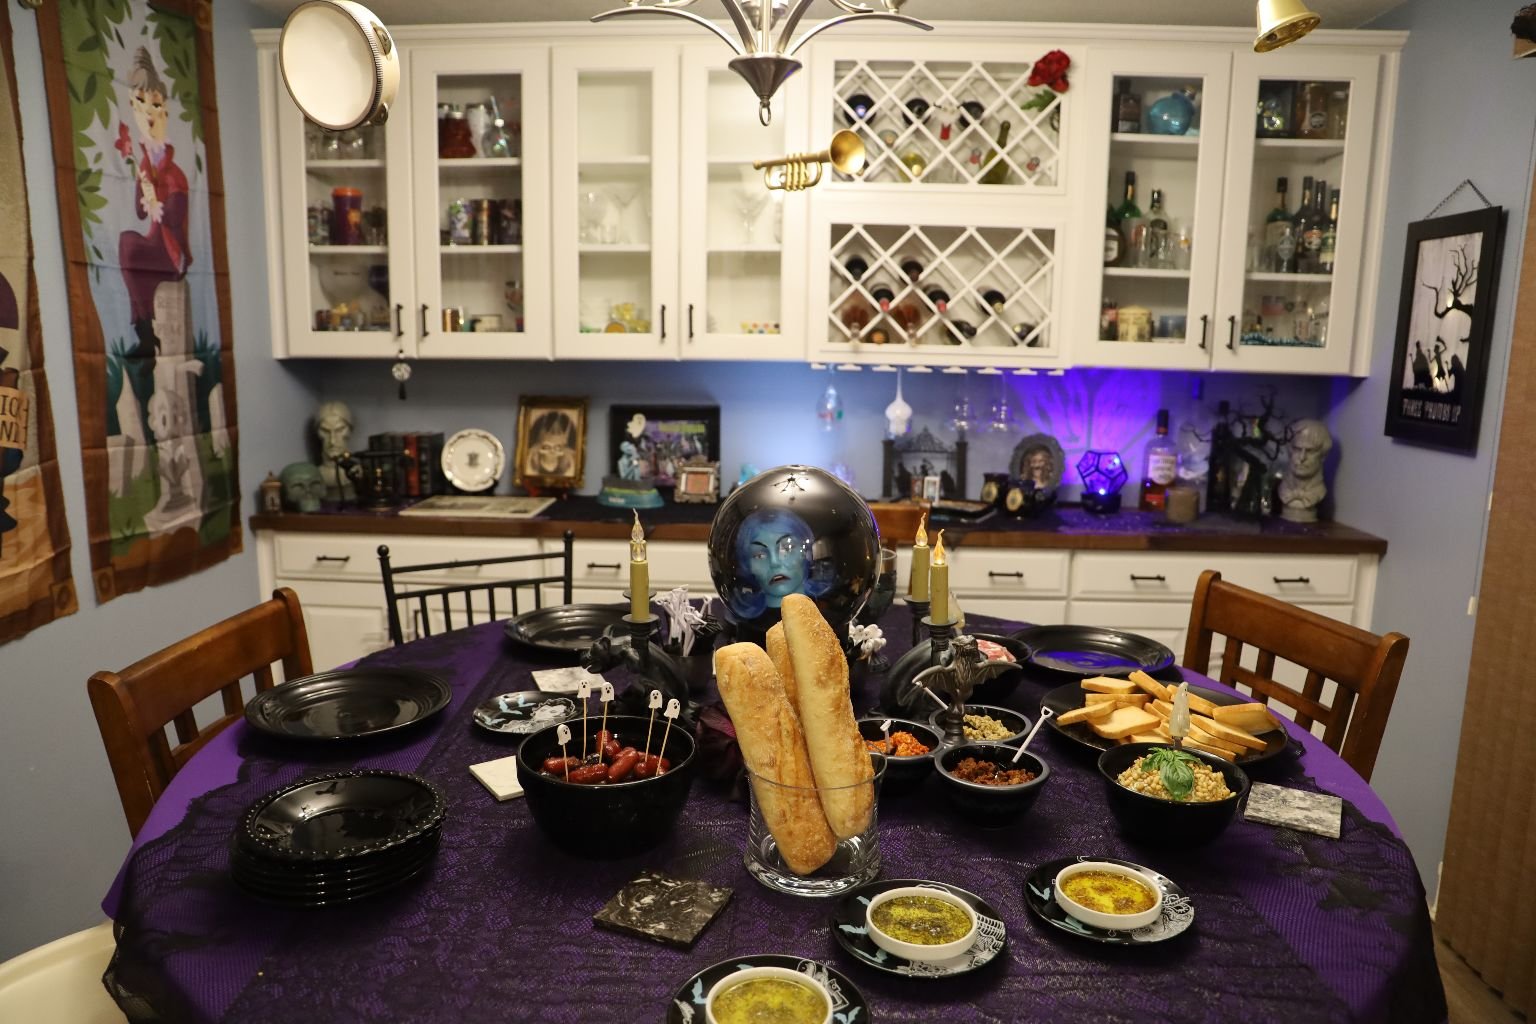
The Lovely Dining Room
————————————————————————————–
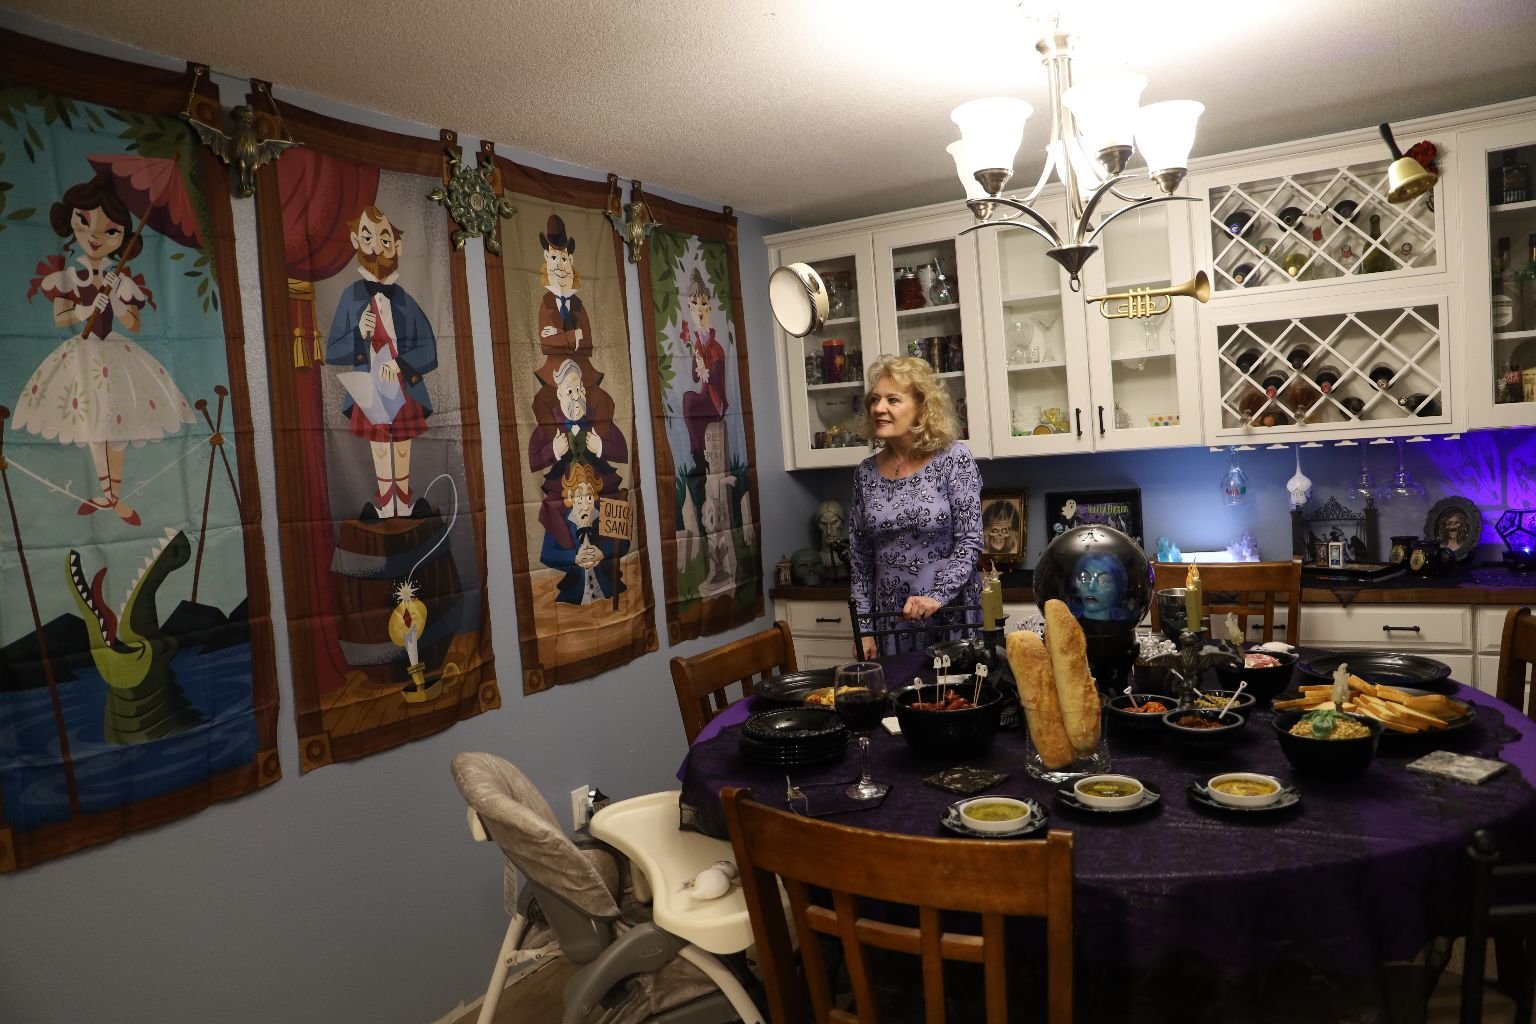
Me Julie, Admiring The Tapestry’s
(This actually gave me the inspiration to add the banner’s for my Harry Potter Christmas.
I really wouldn’t even thought to do it had I not seen how great this looked.)

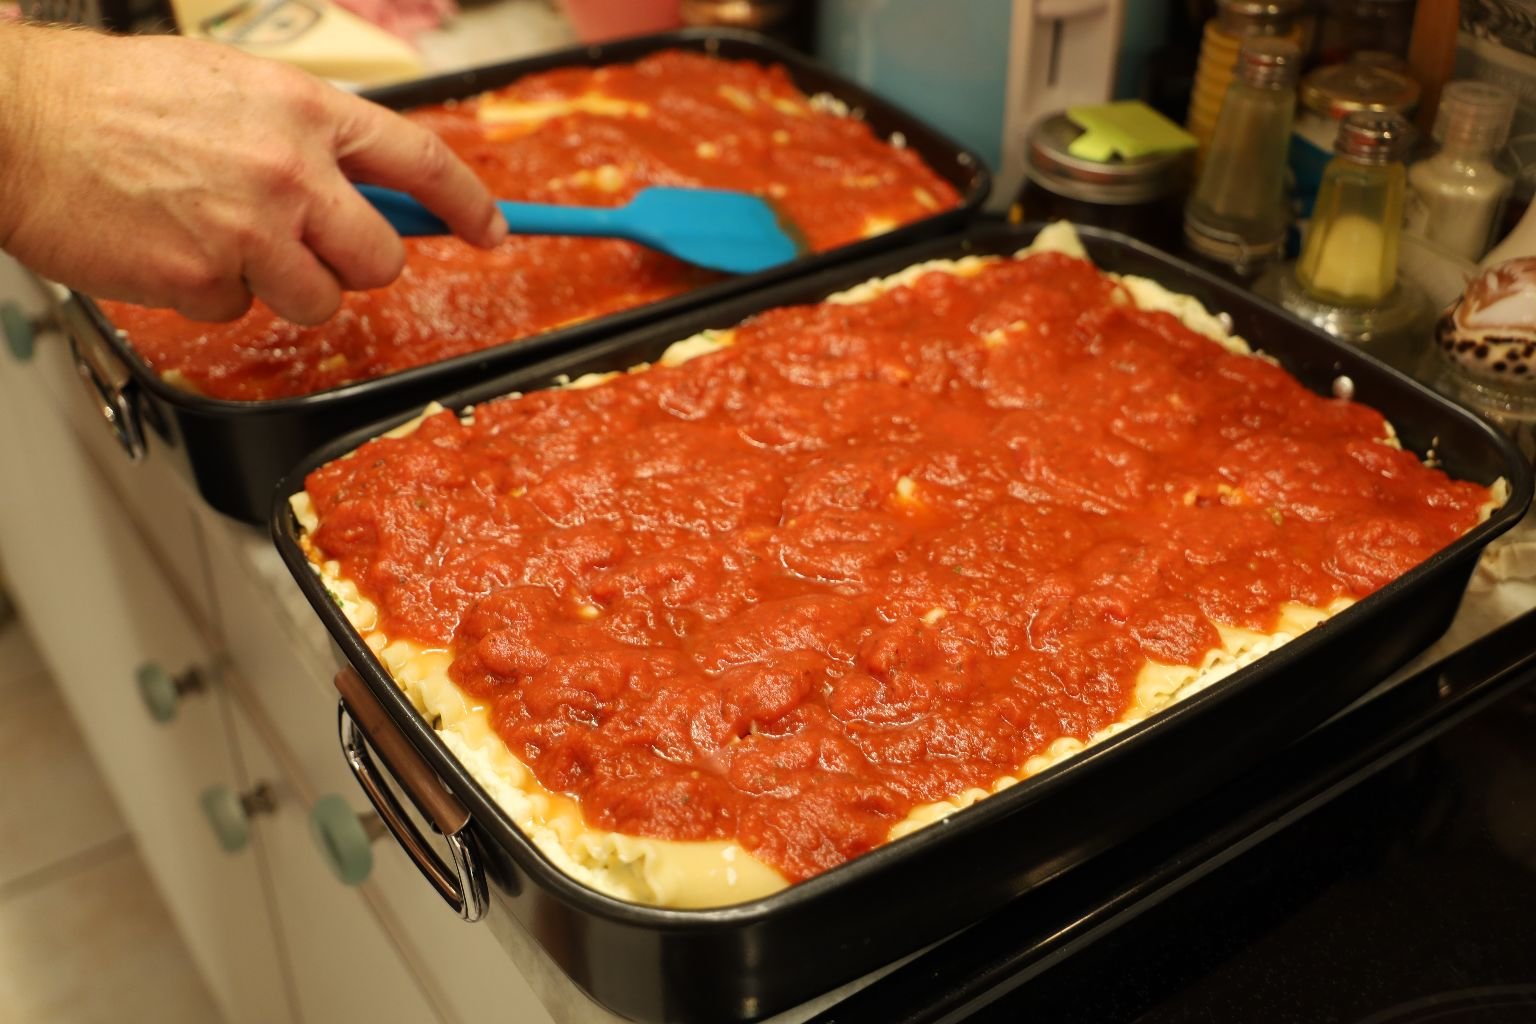
The Grave Digger’s Lasagna
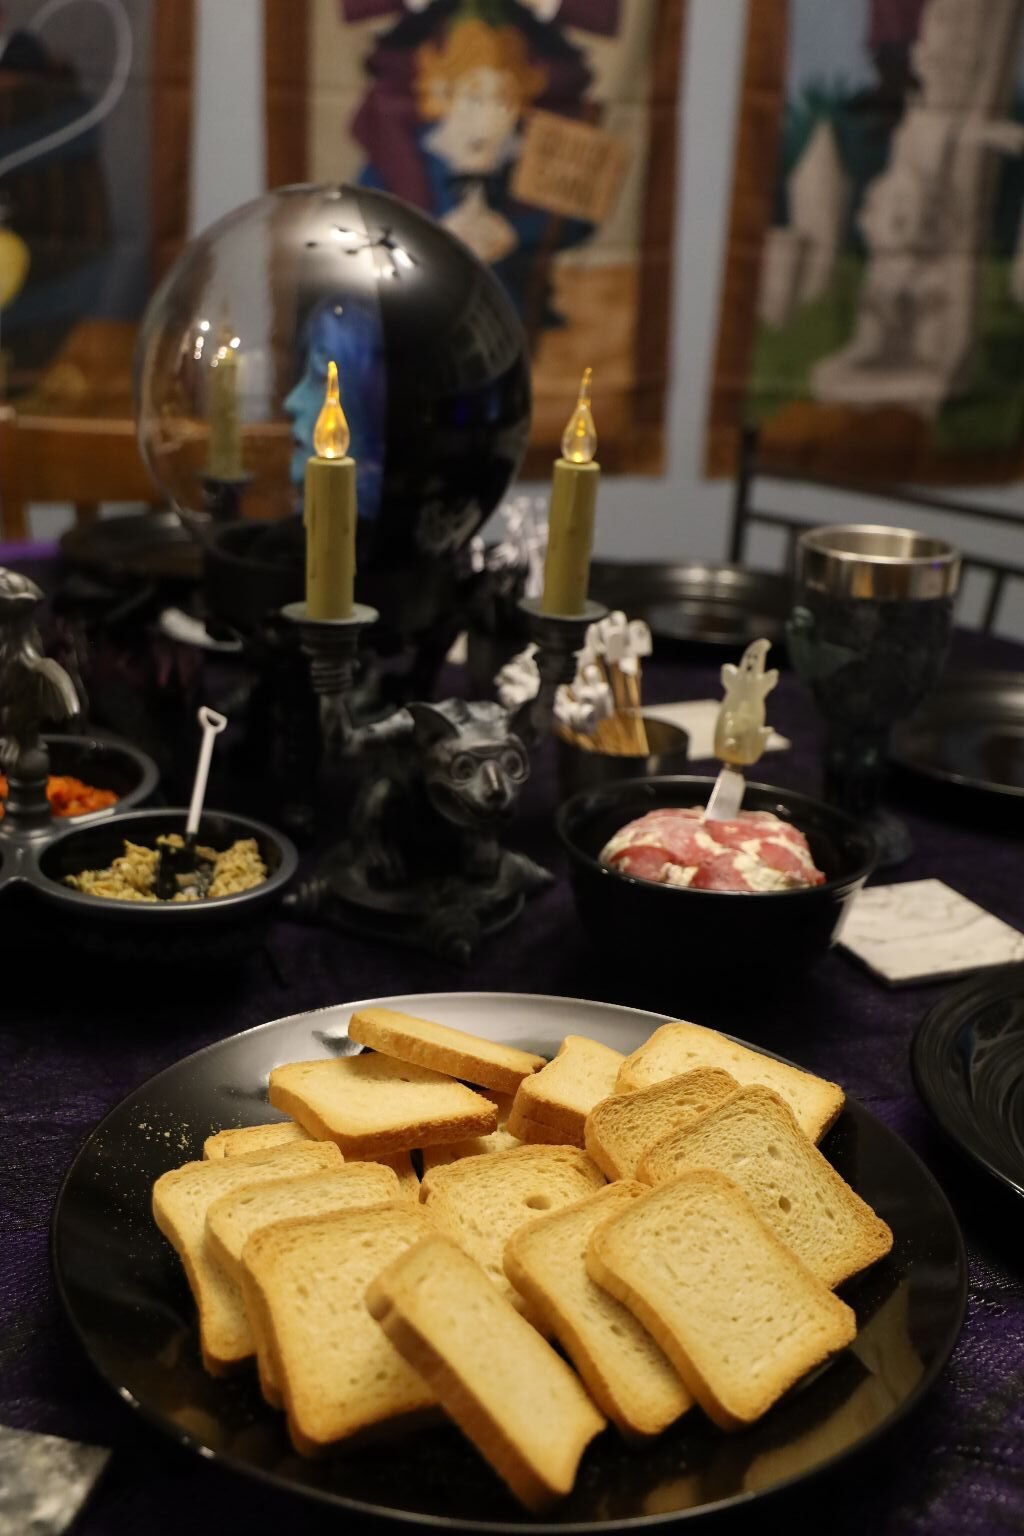
A Haunted Jezebel’s Bags of Mystery
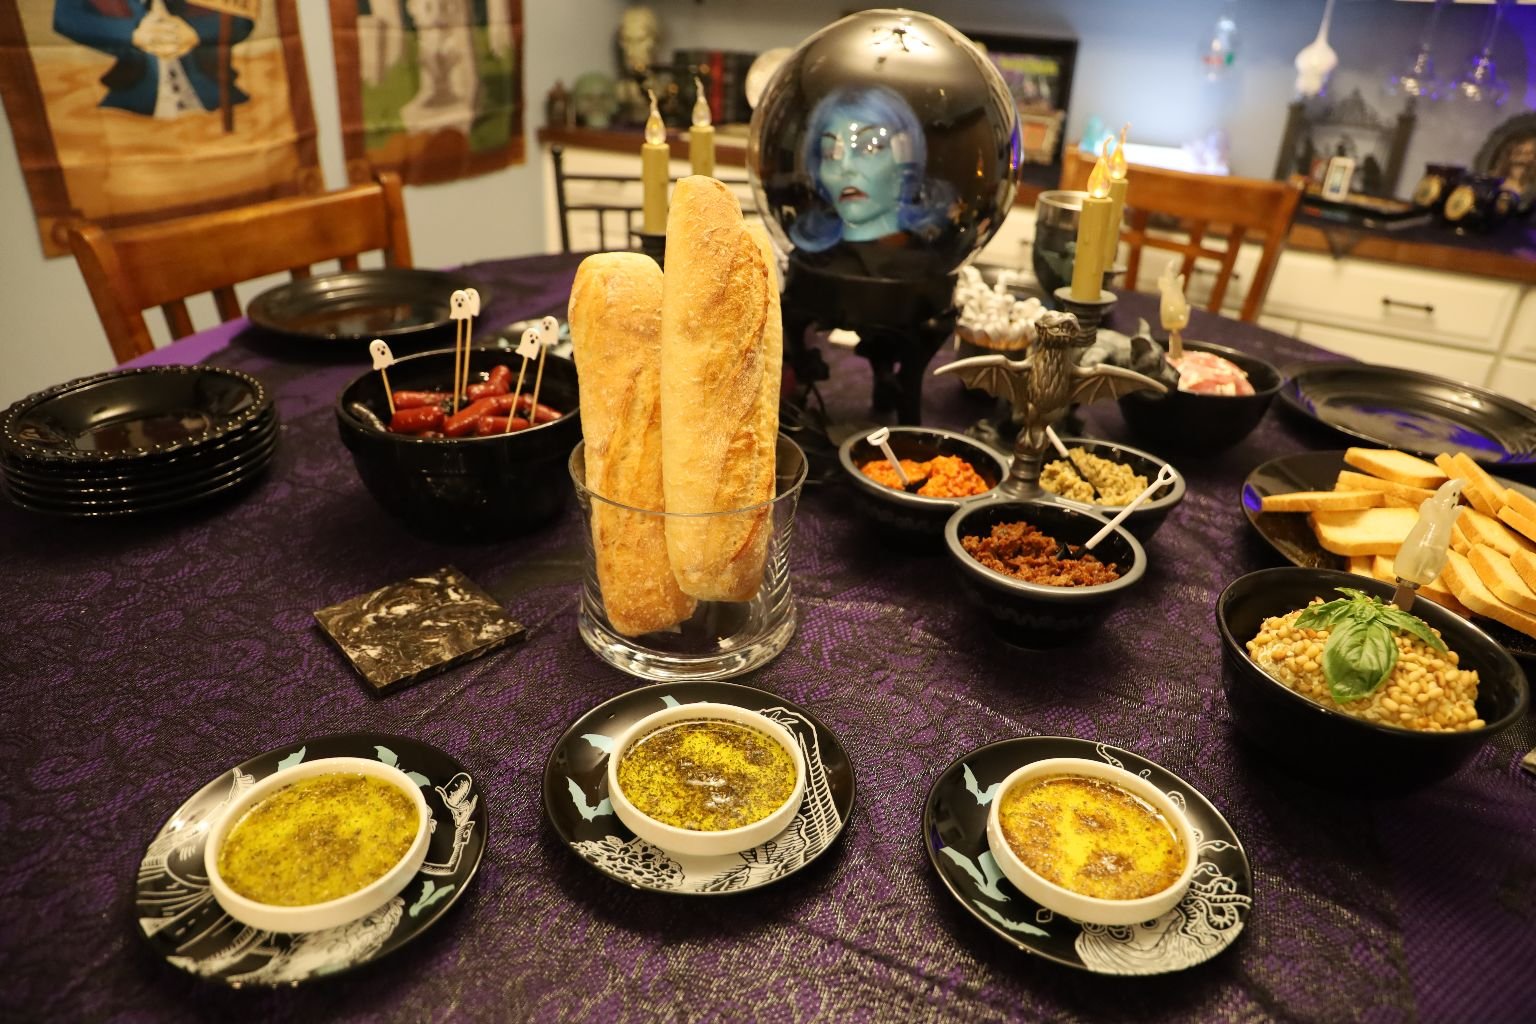
Our Flavored Olive Oils with Dipping Bread
———————————————————————————————
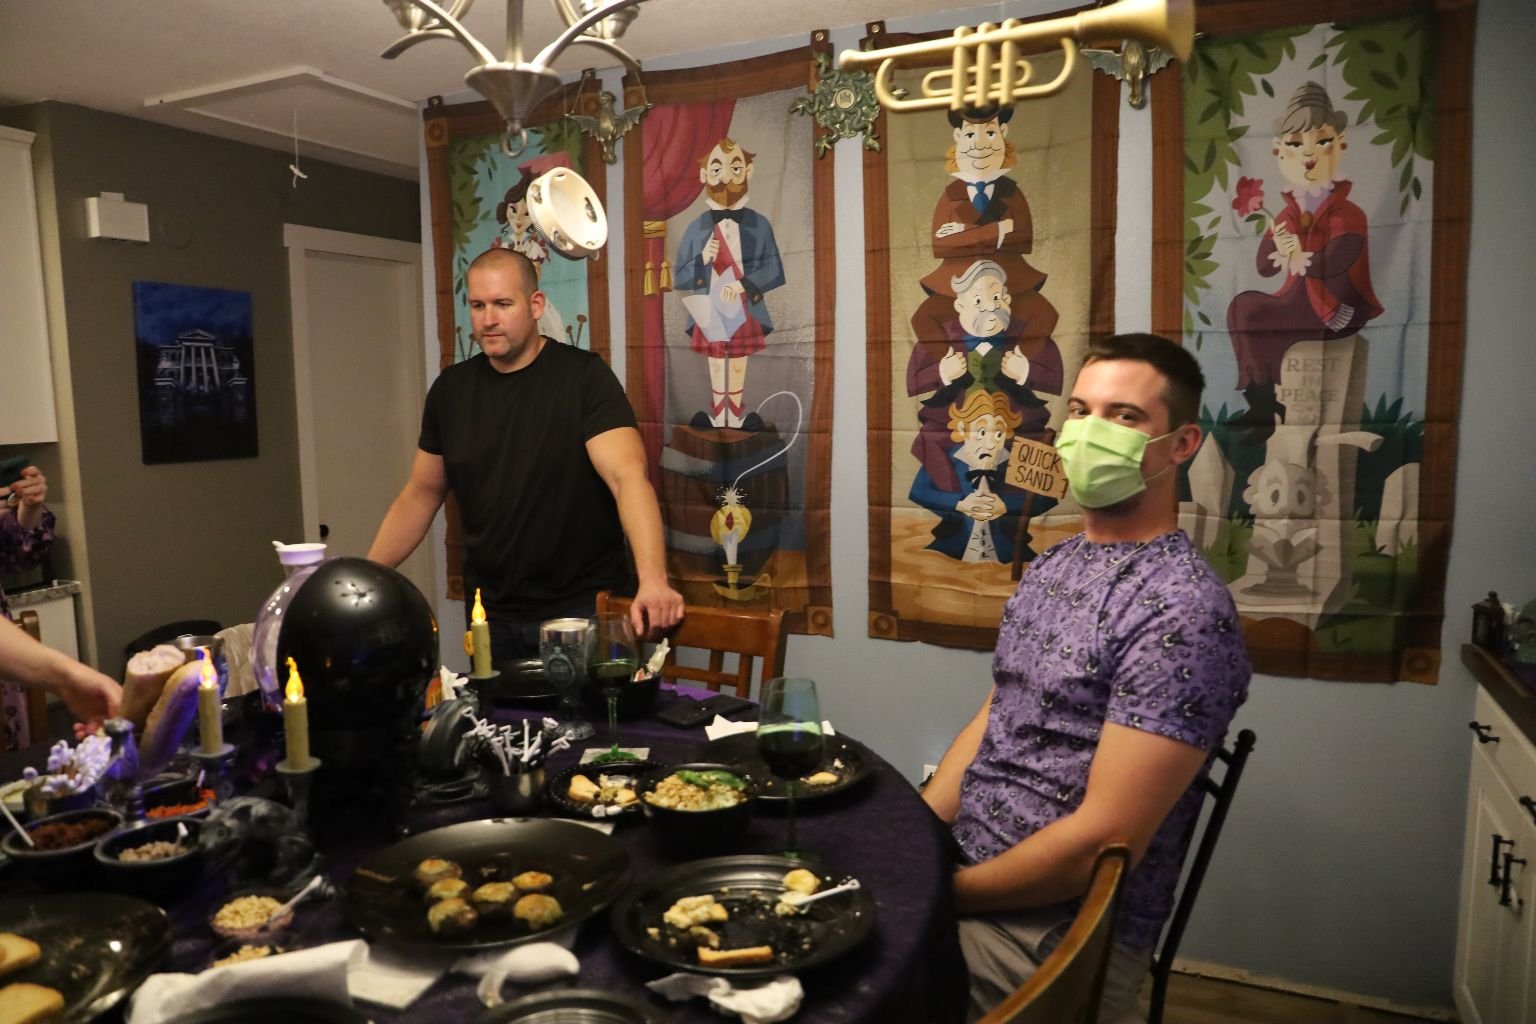
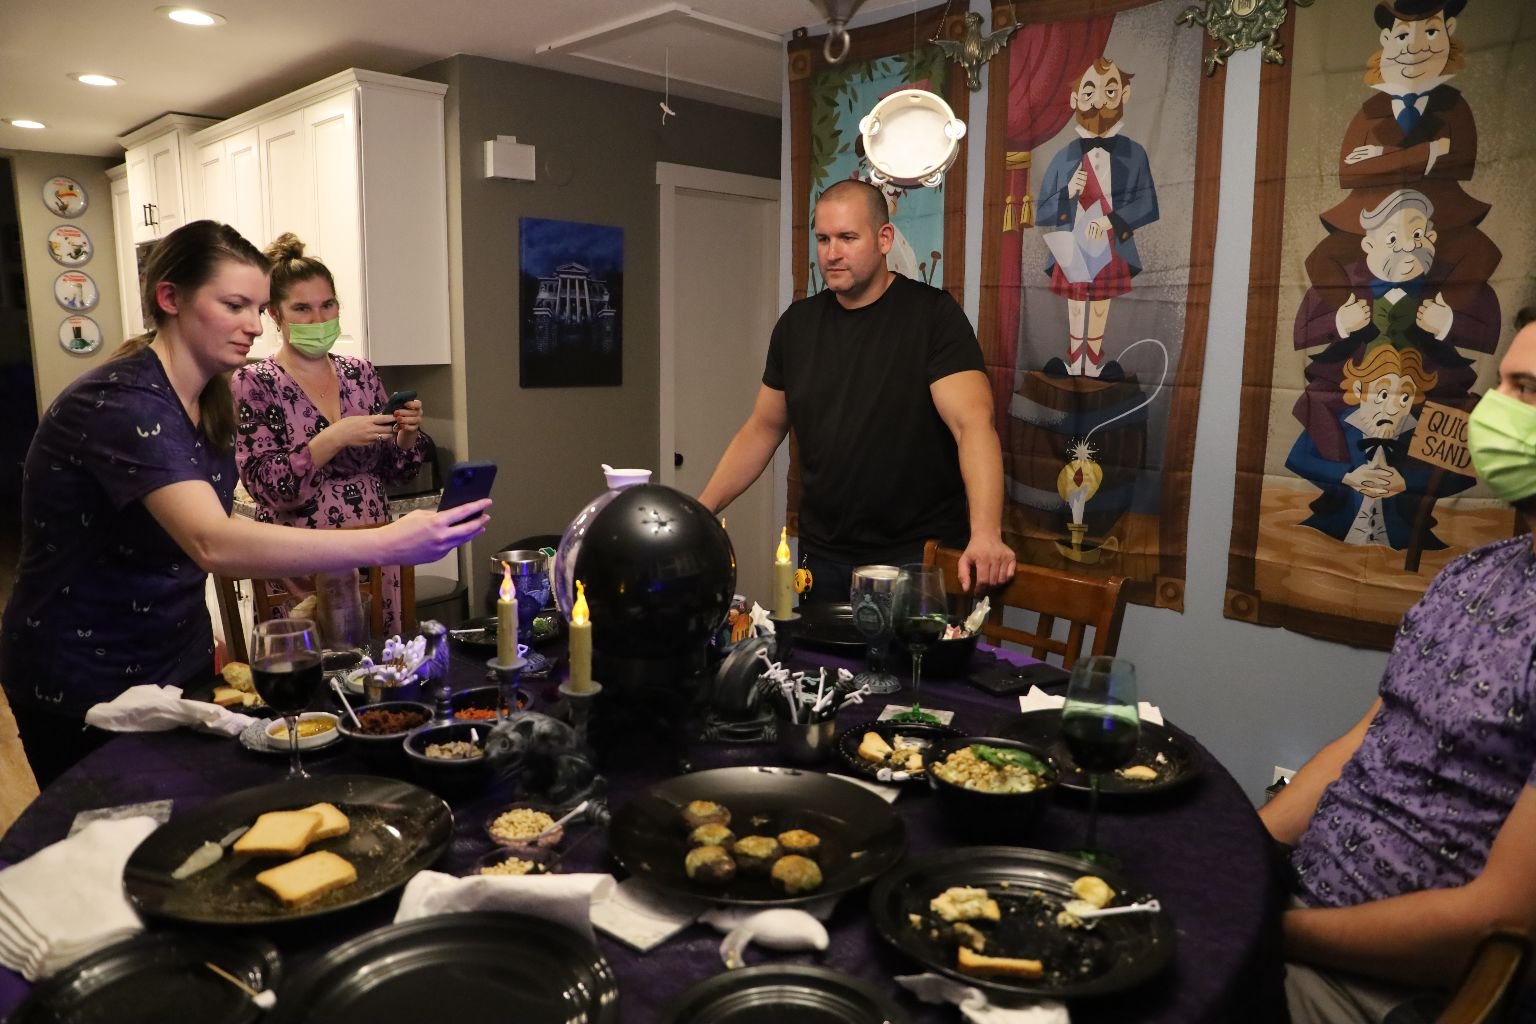
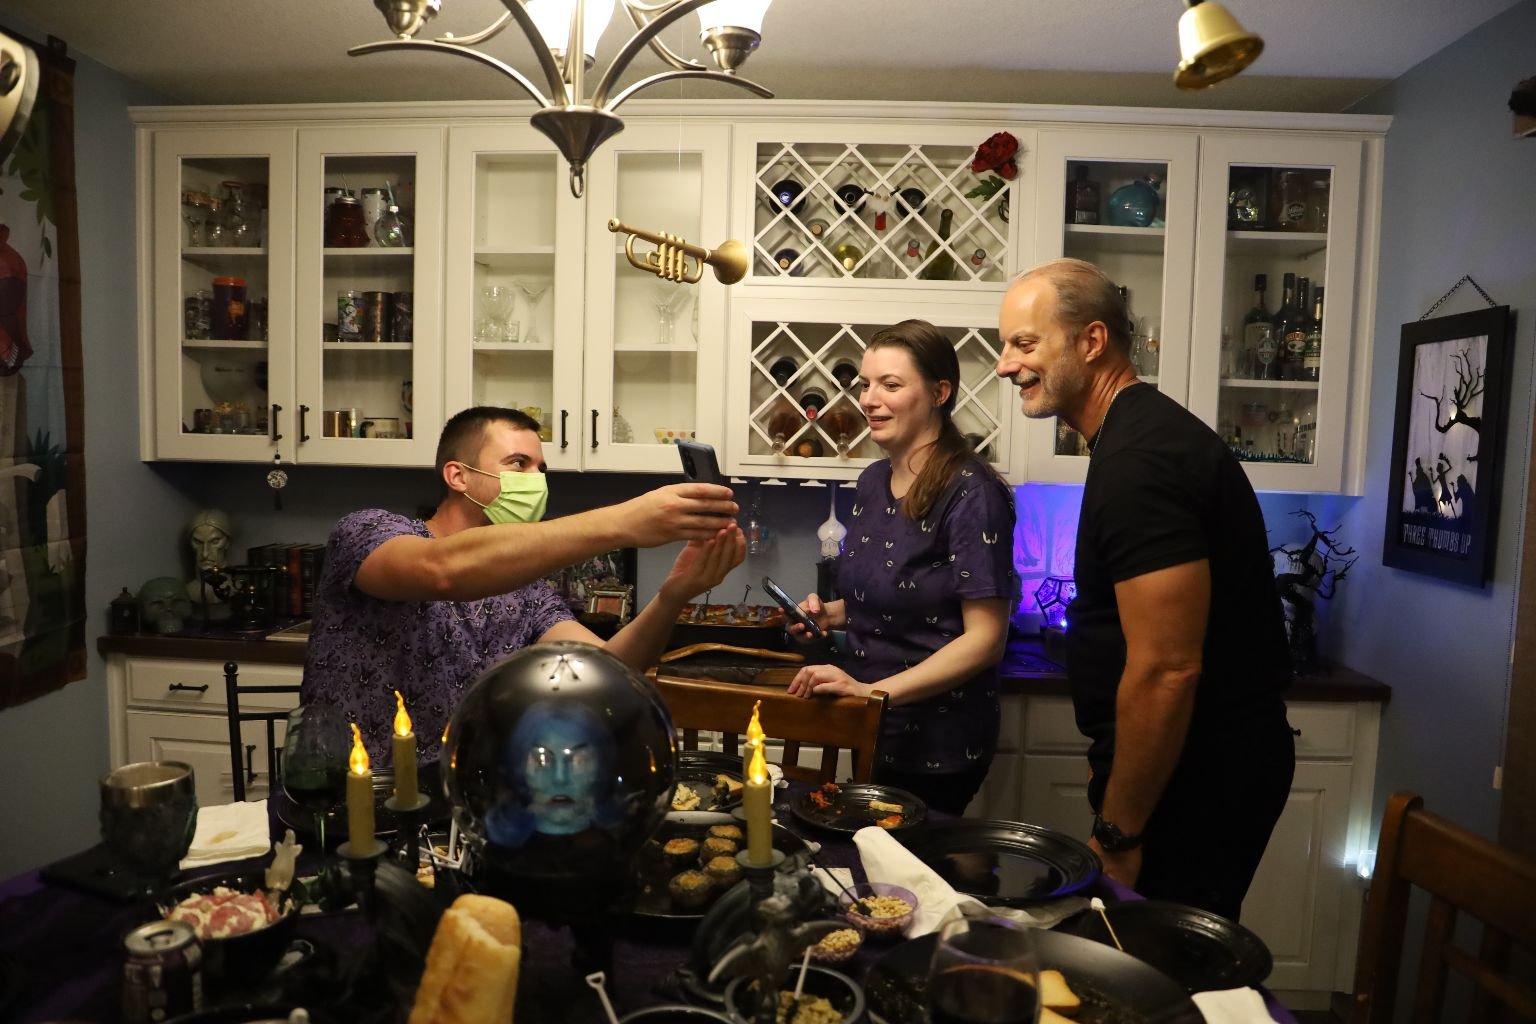
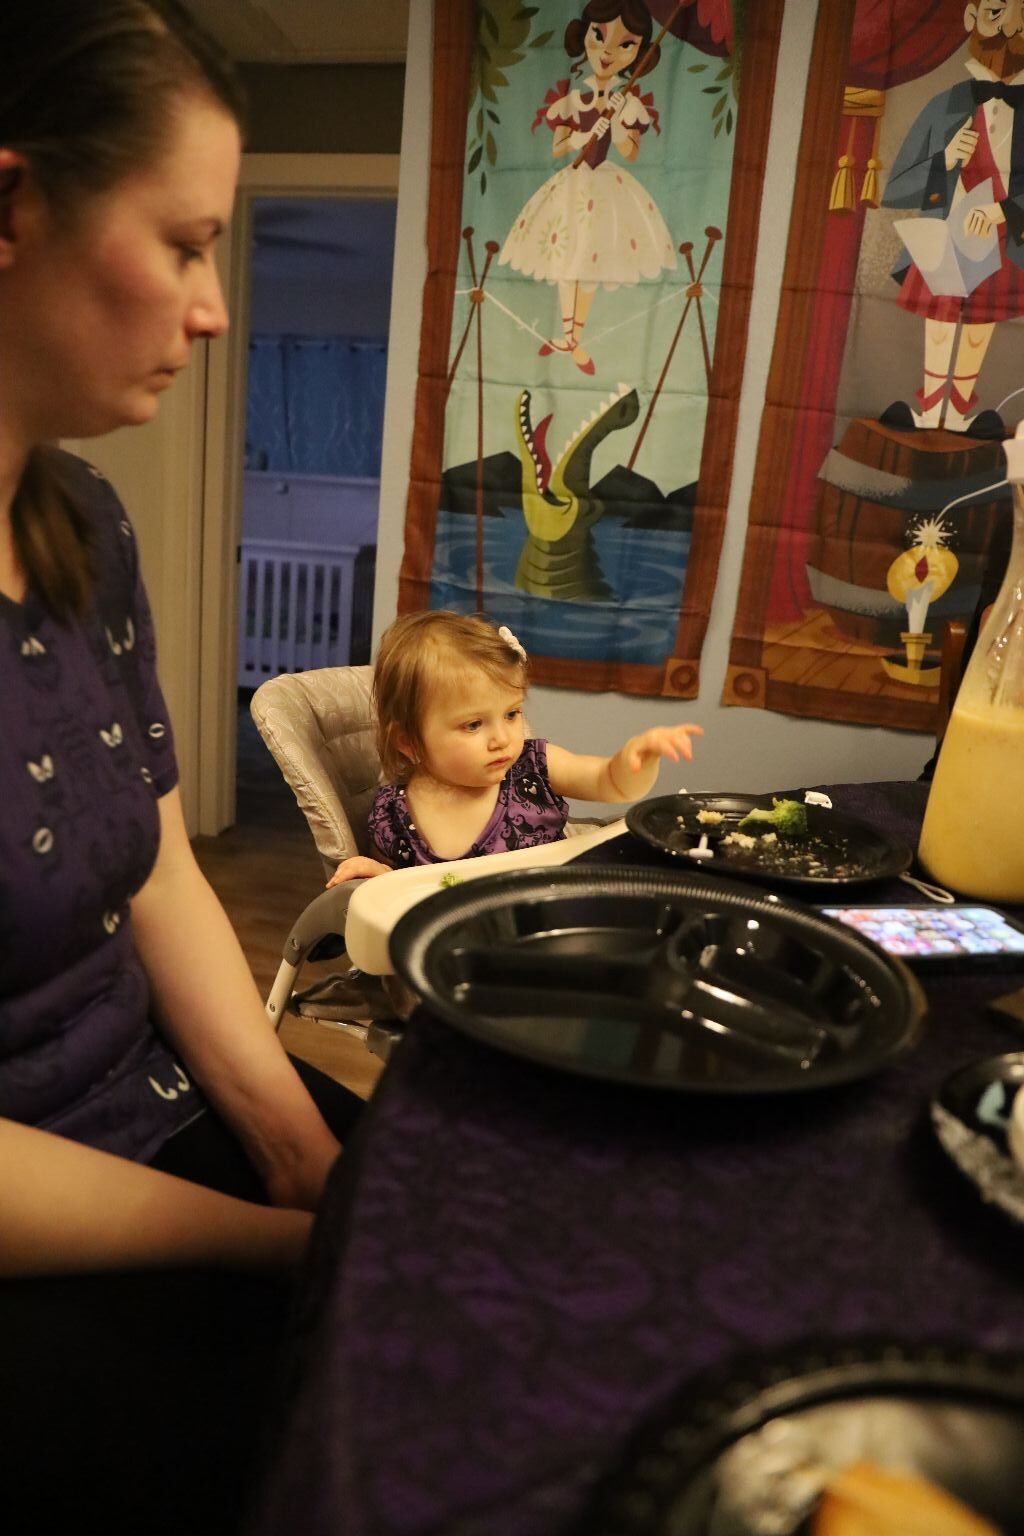
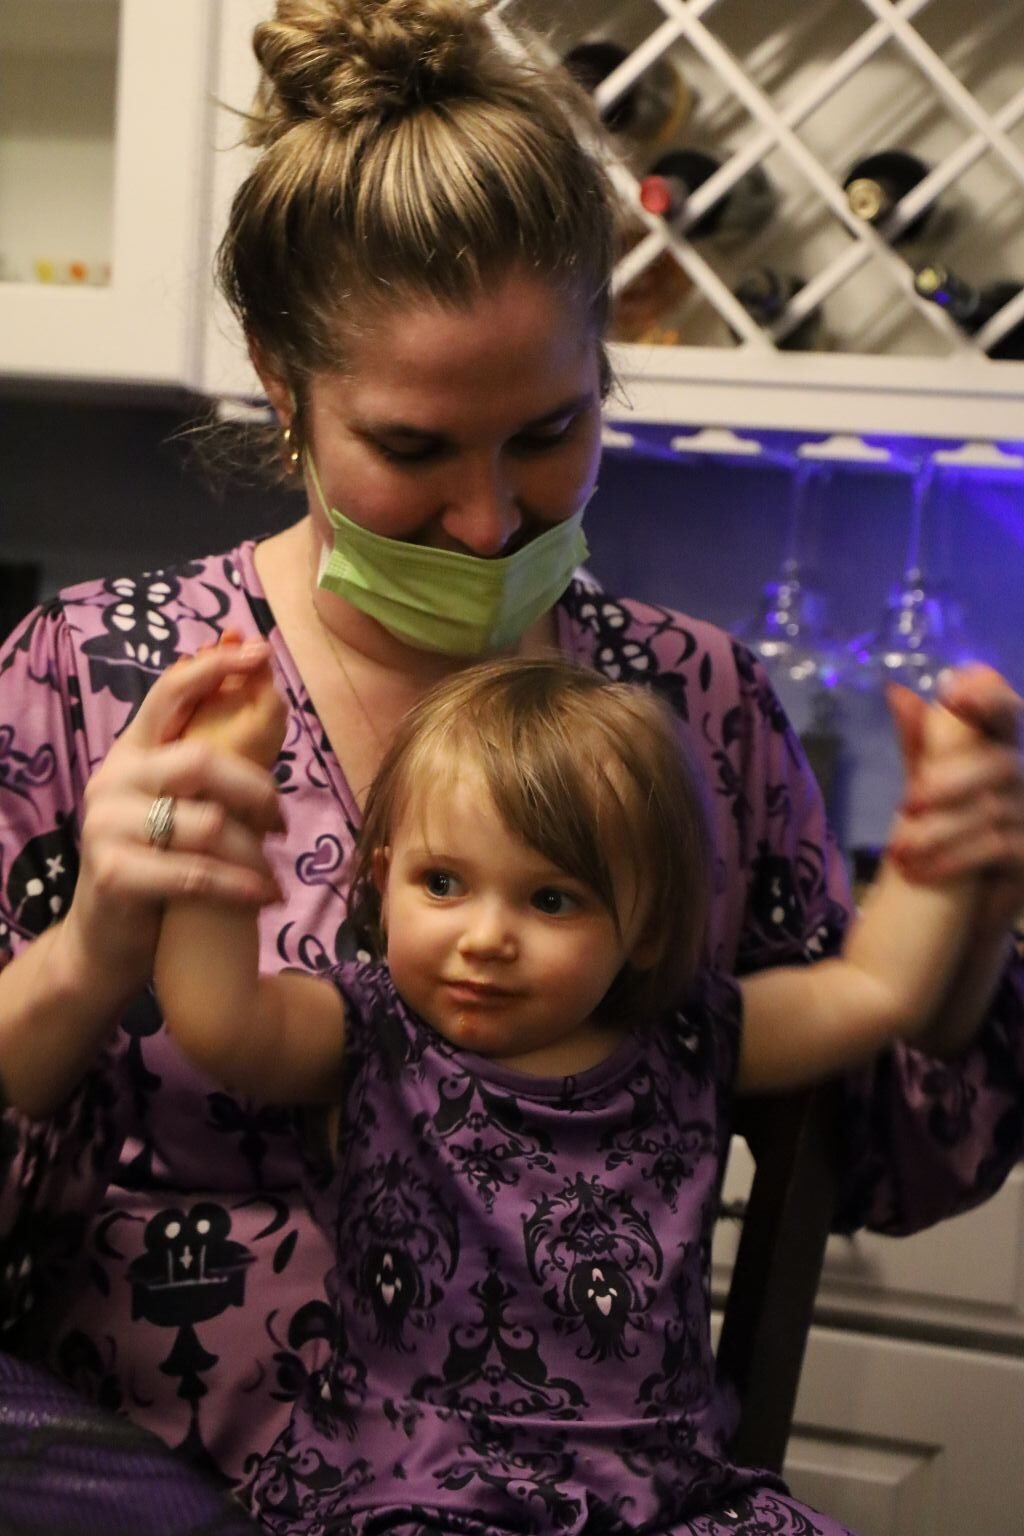
Mere Mortals Mingling
—————————————————————————–
Veronica and Isabelle
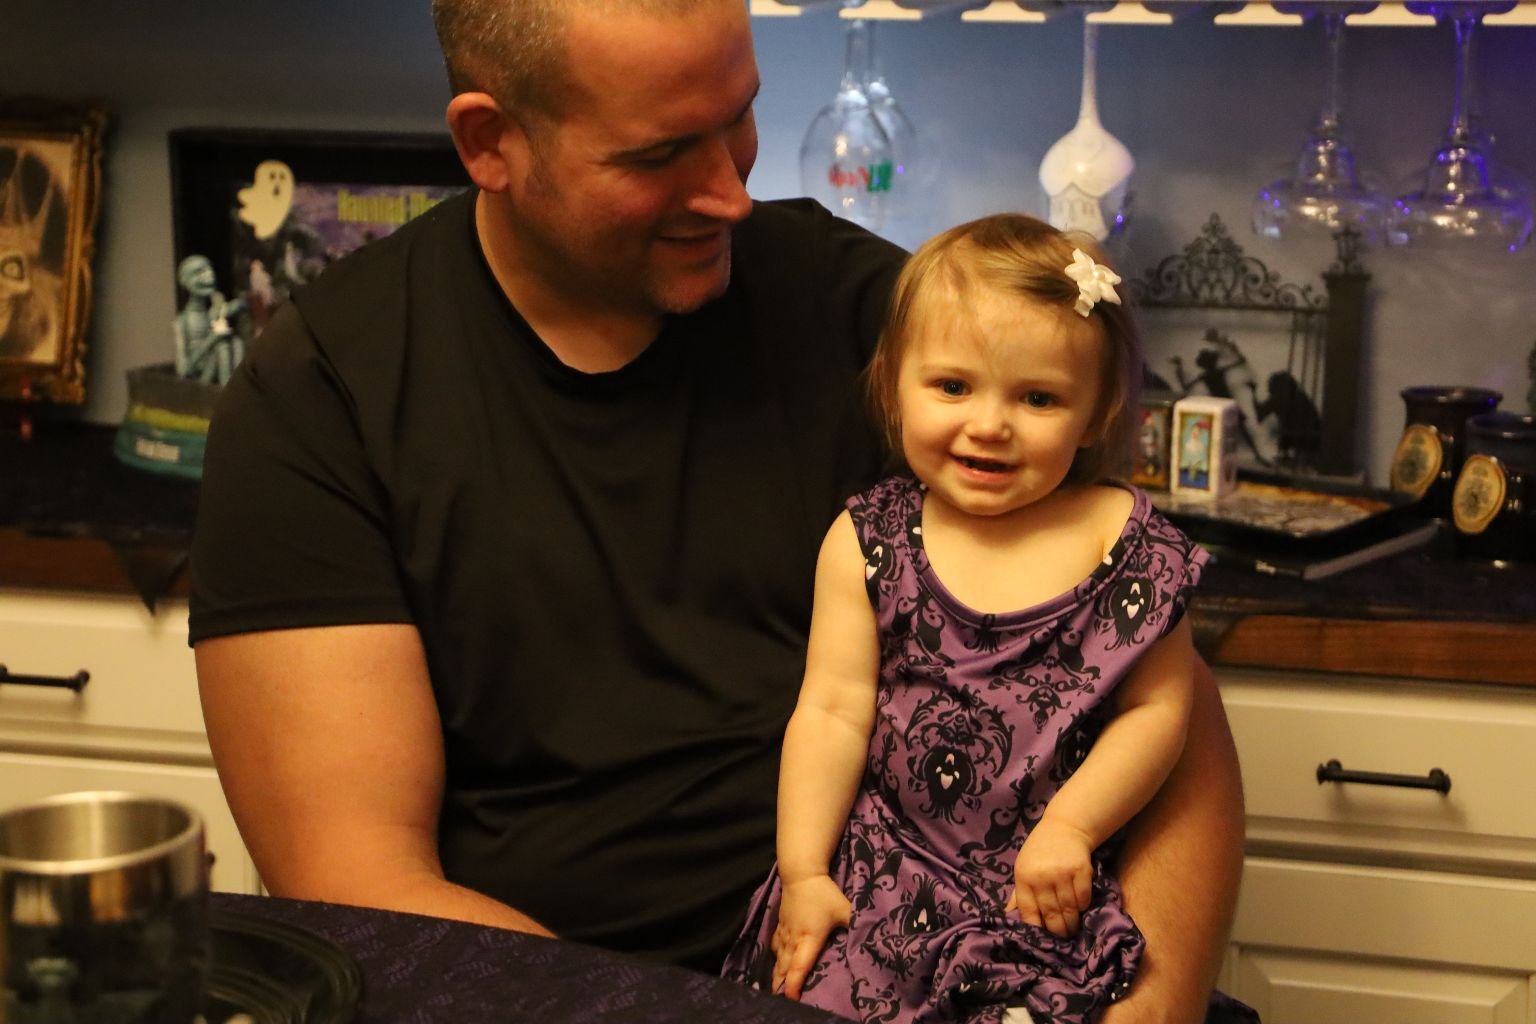
Brian and Isabelle
Mackenzie and Isabelly
————————————————————————————-
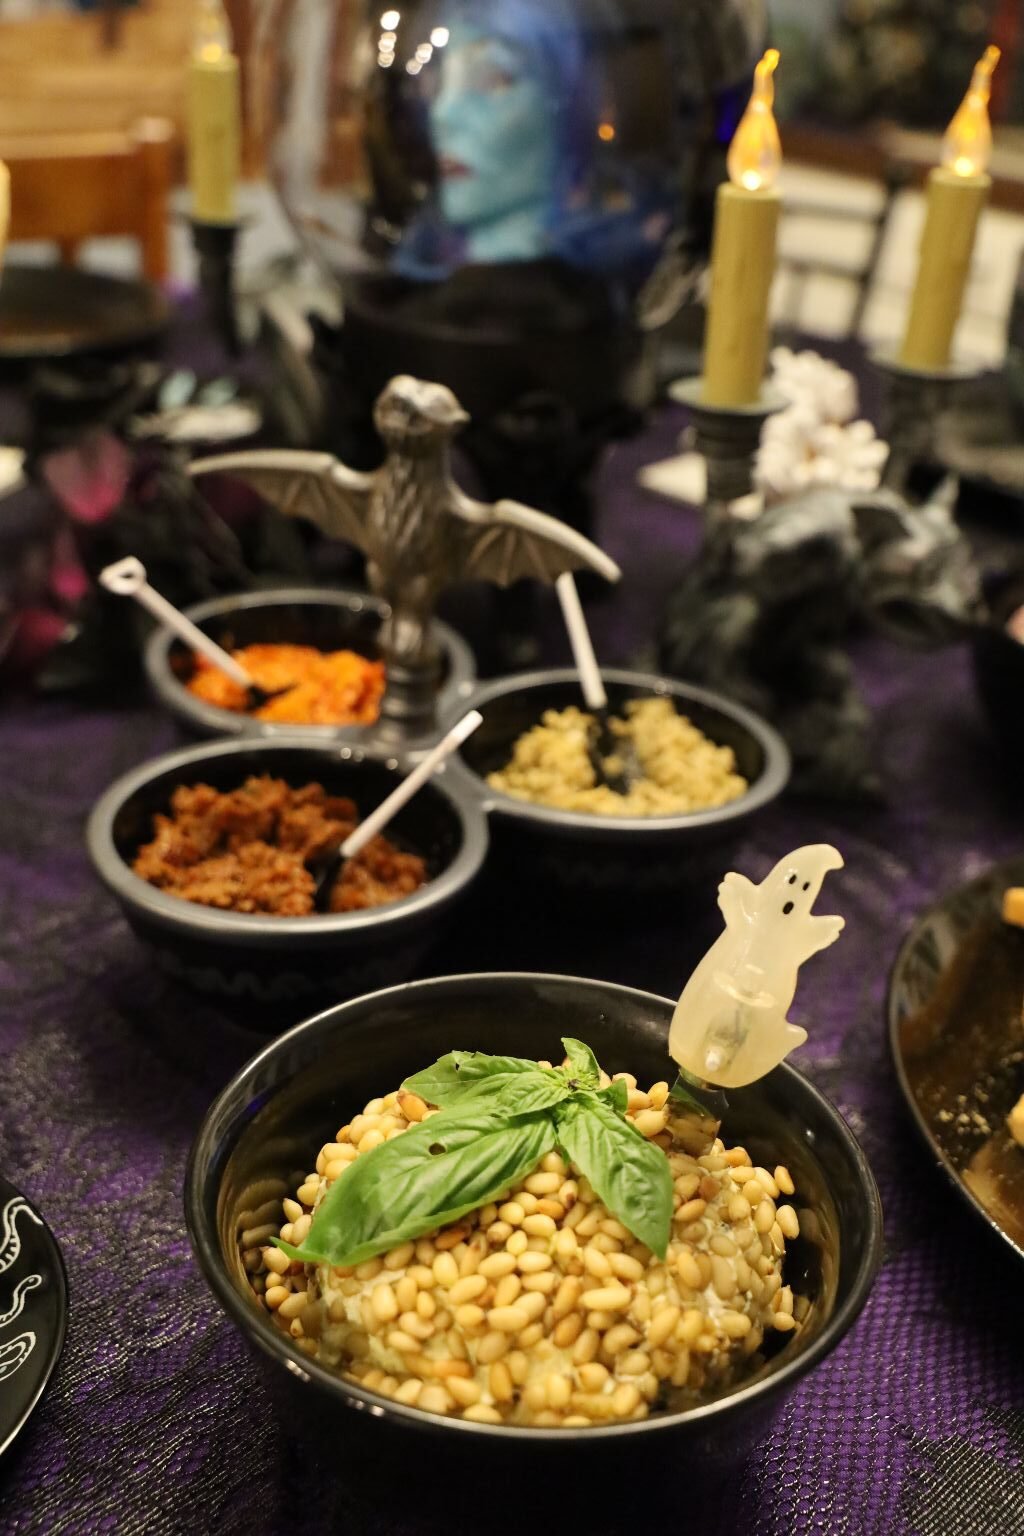
A Trio of Bruschetta’s, and a Pesto Pine Nut Cheeseball
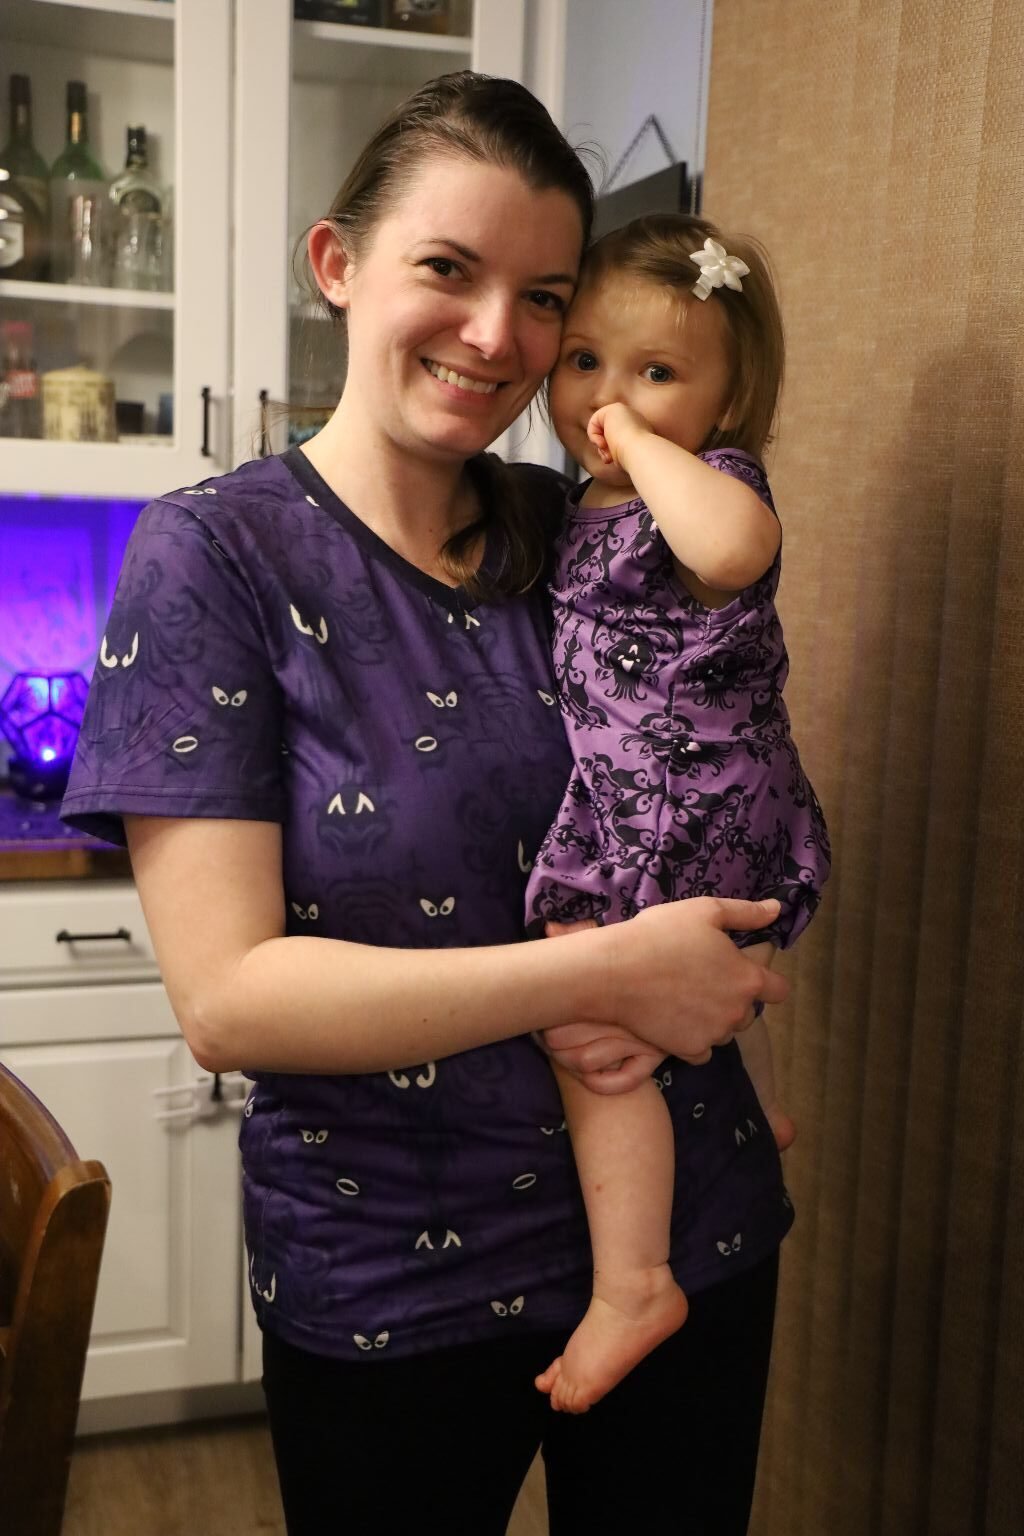
Mother and Daughter, Veronica and Isabelle
————————————————————————————–
Our Cheeseballs
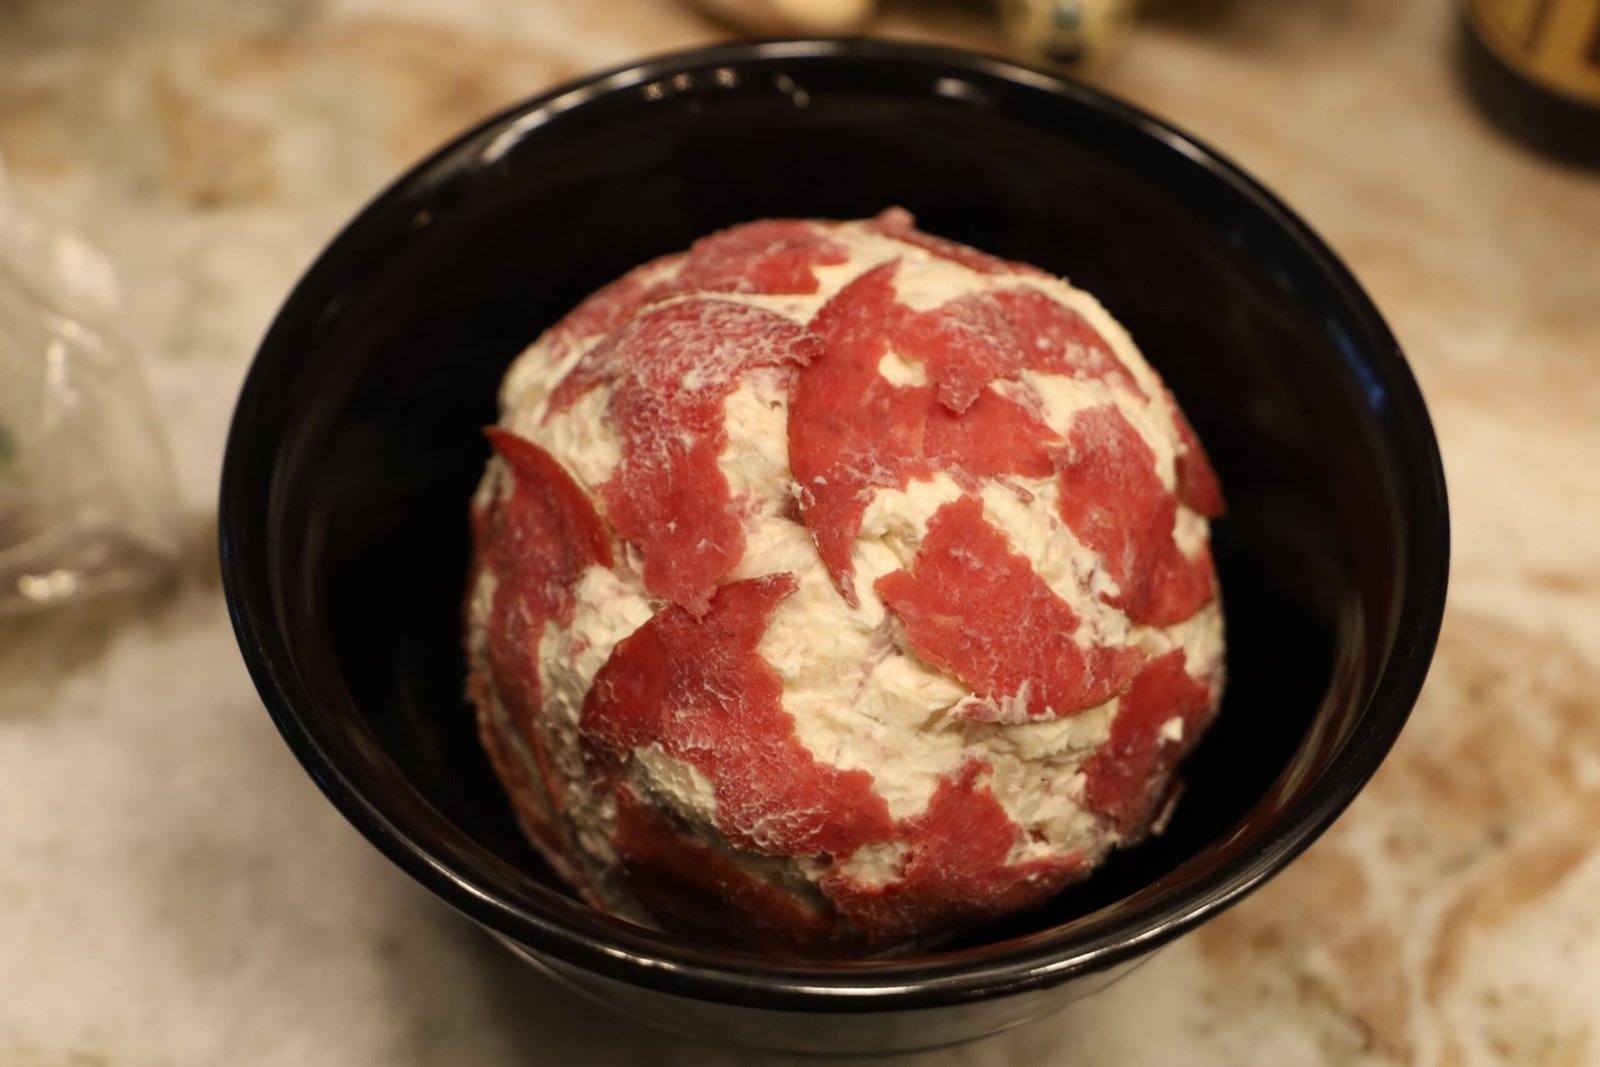
Vintage Dried Beef Cheeseball
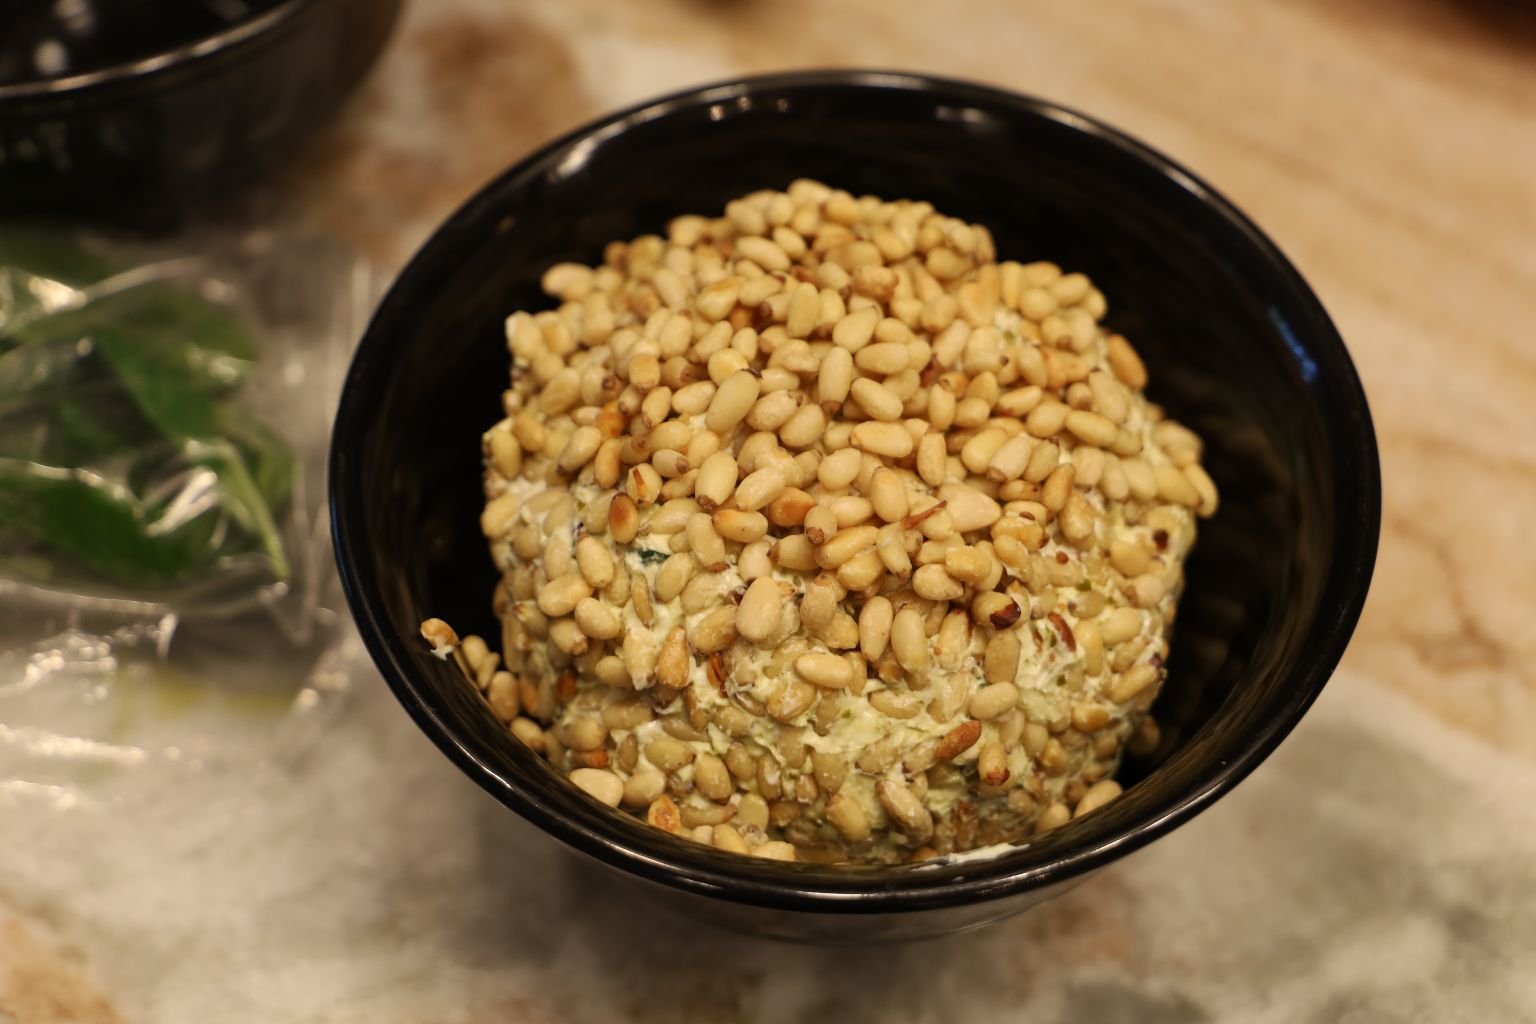
Pesto-Pine Nut Cheeseball
(Recipes Down Below)
———————————————————————————–

Our Grave Digger’s Lasagna
(Recipe Down Below)
—————————————————————————–
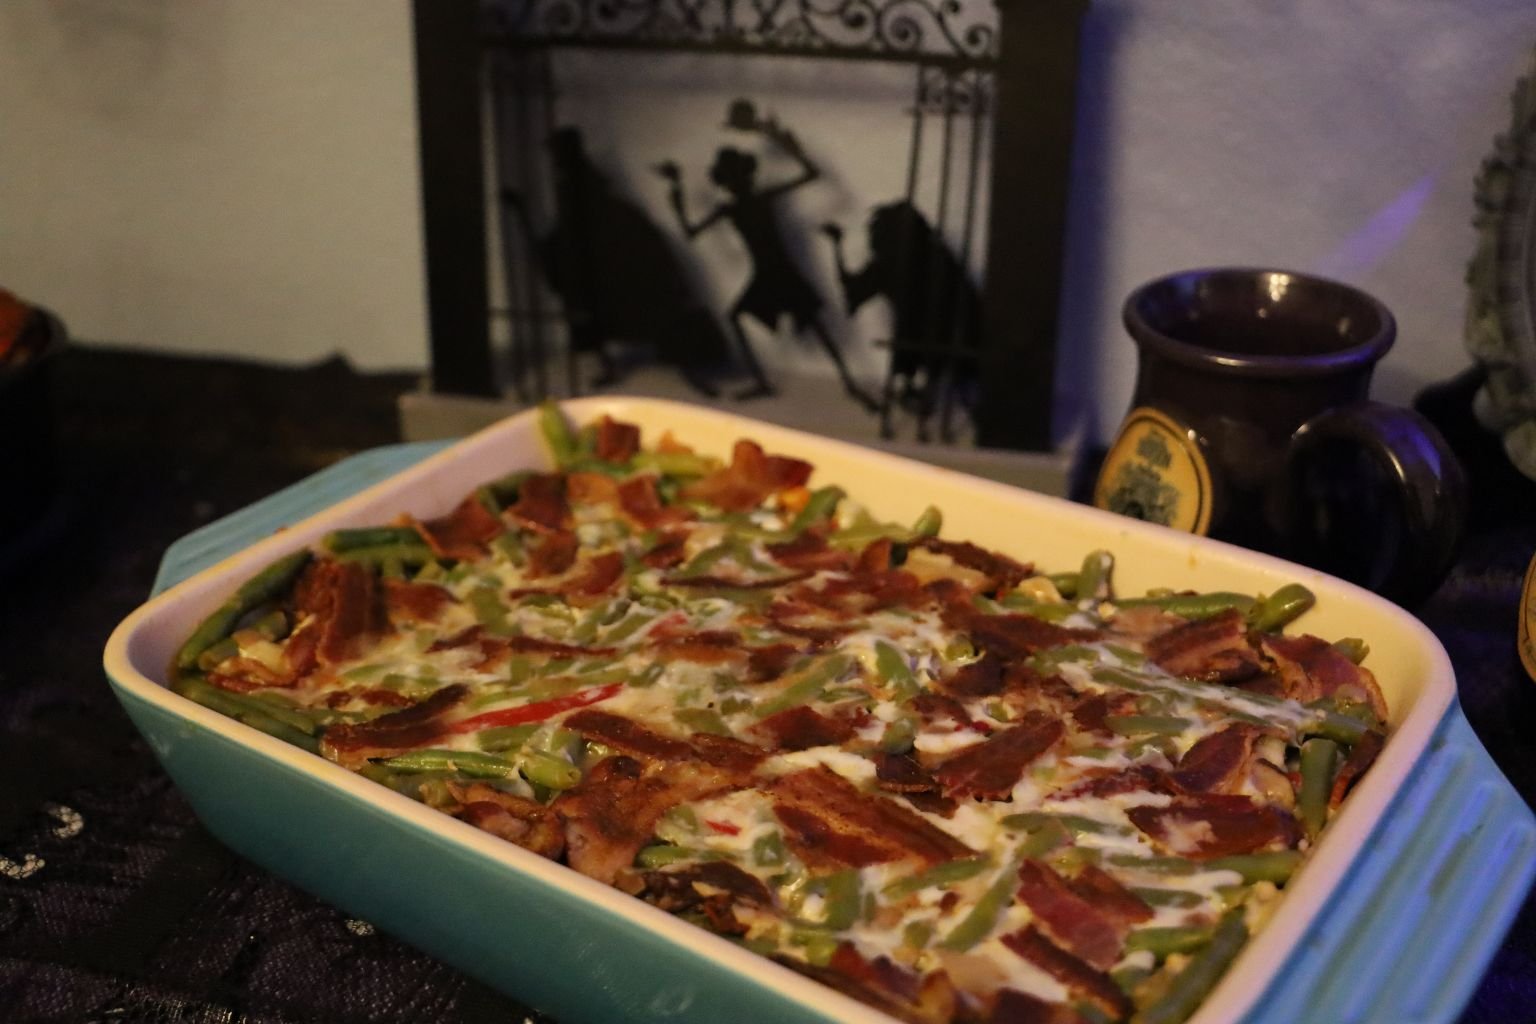
Italian Inspired Green Beans Topped With American Bacon
(Recipe Down Below)
———————————————————————————-

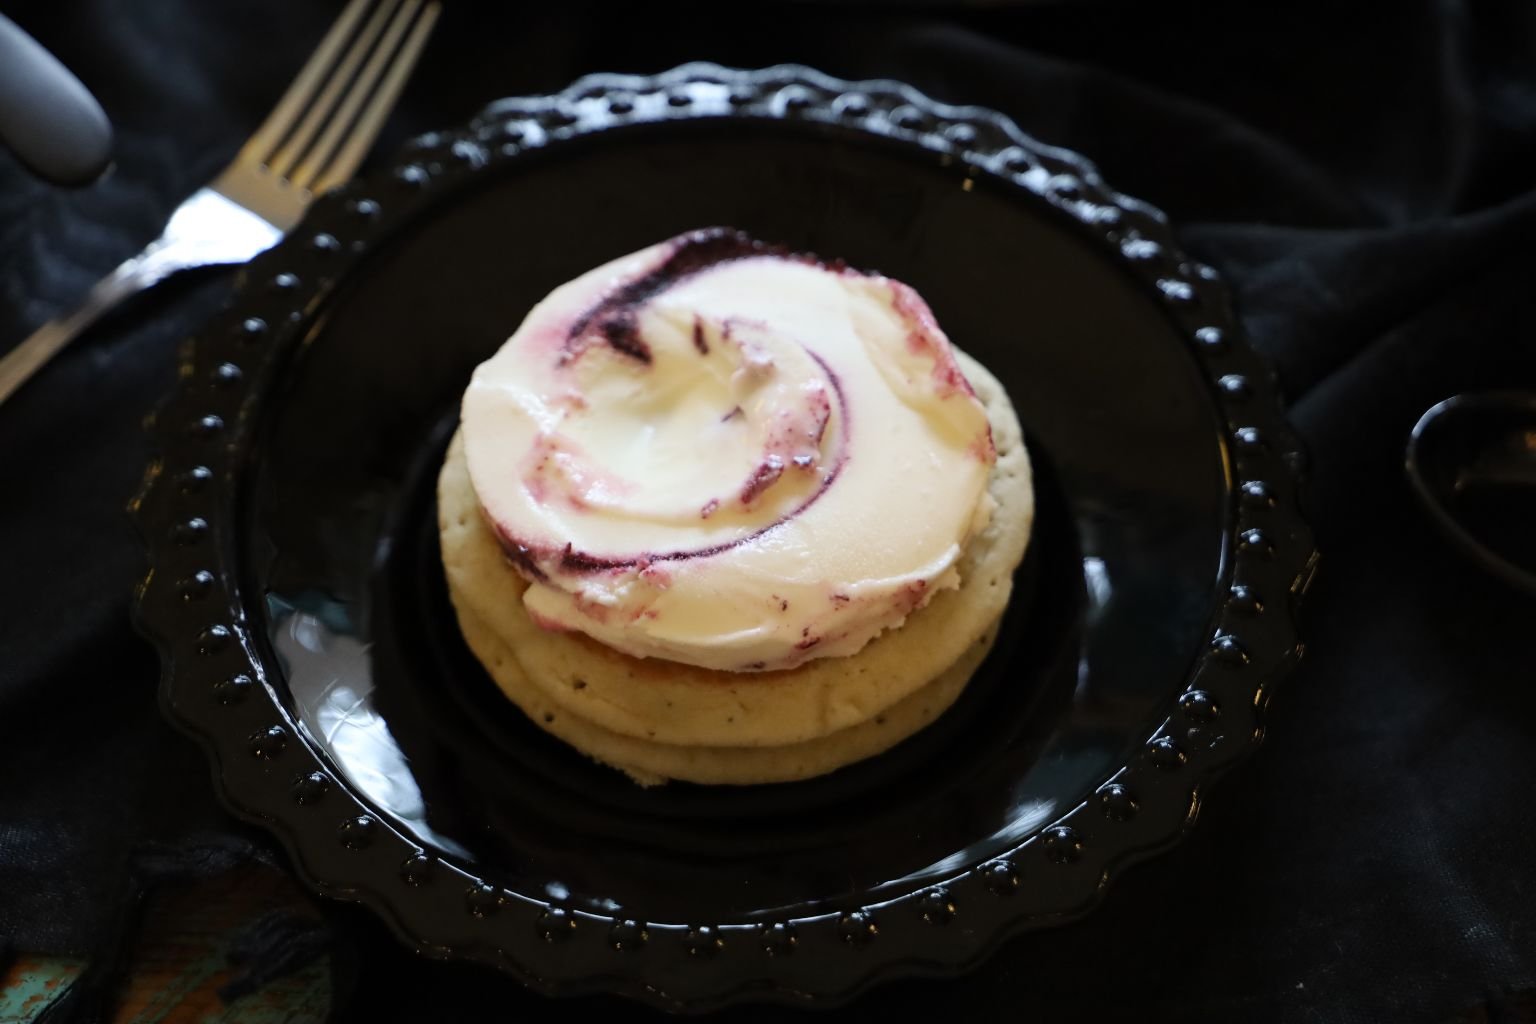
Blueberry Pancakes w/ Blueberry Lemon Ice Cream in the Center,
Topped w/ Whipped Cream, and A Haunted Jezebel Sauce


Haunted Pancake Ice Cream Sandwiches…

with Green Gummy’s
(Recipe Down Below)
———————————————————————————-
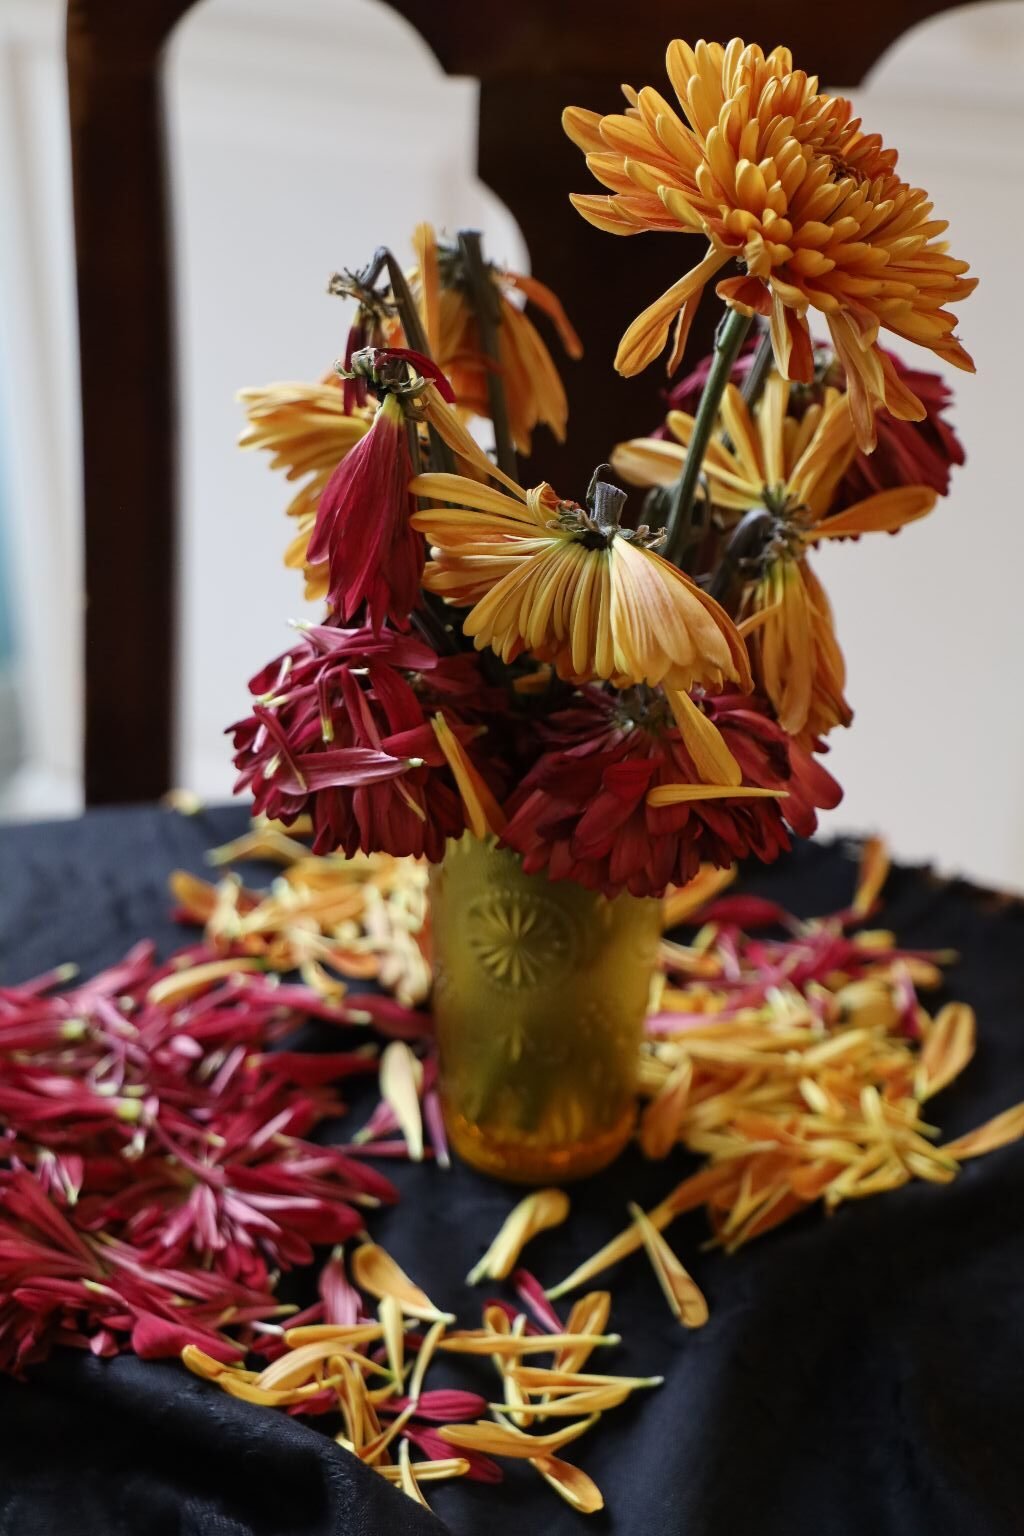
Just a Deathly Mood
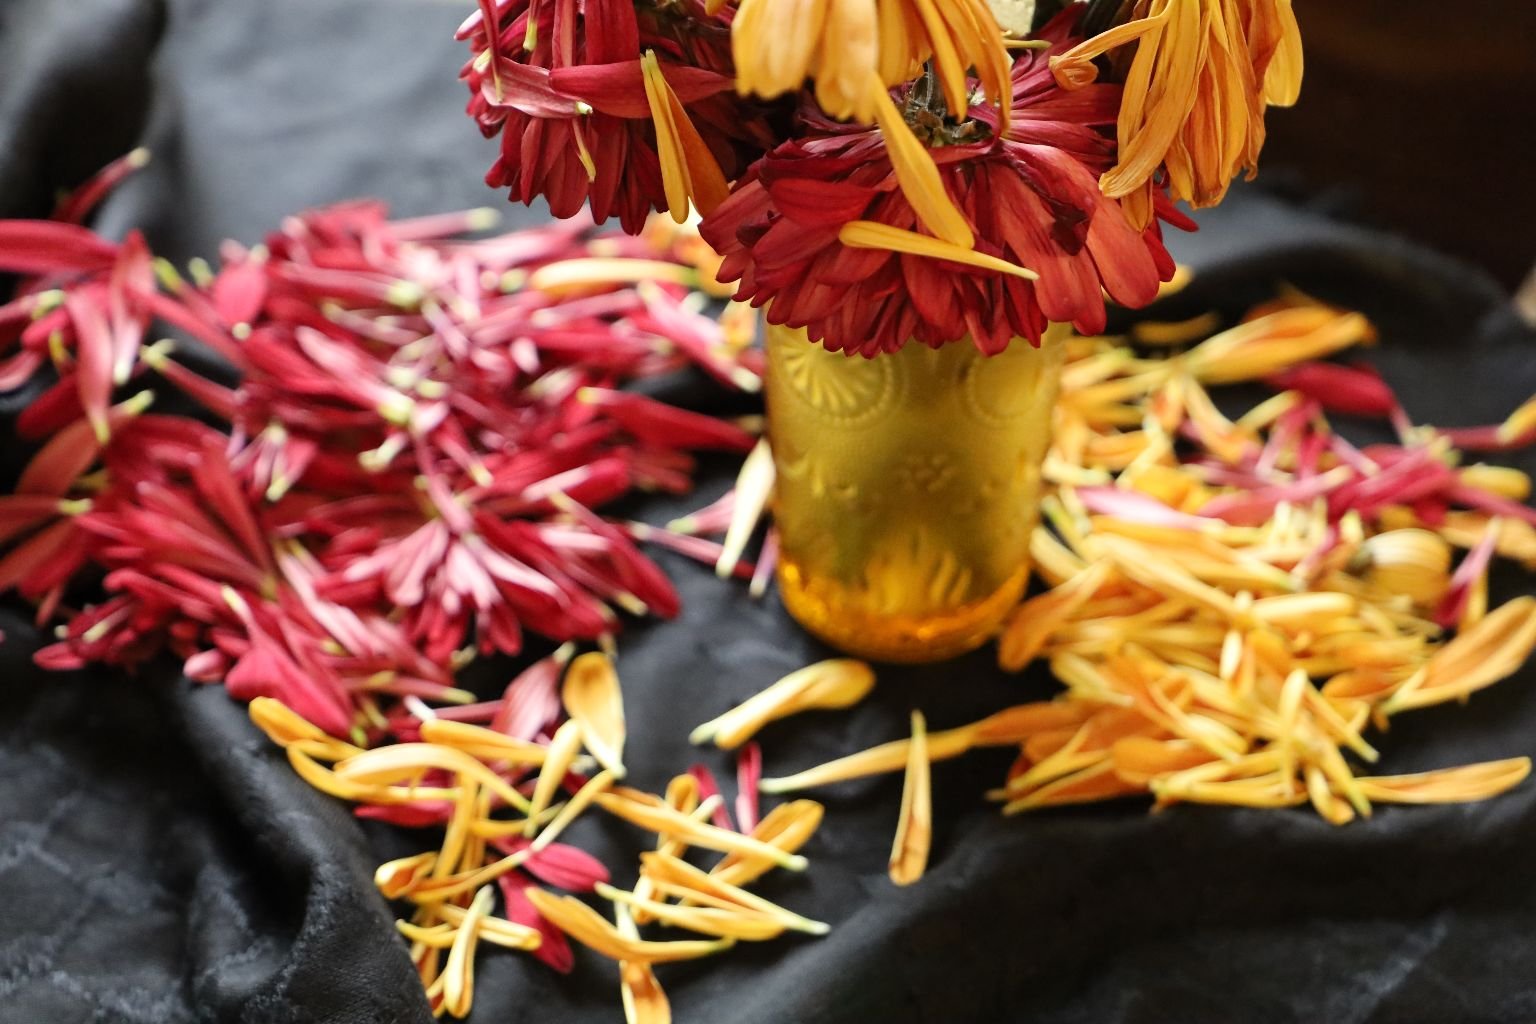
Who Doesn’t Love Dead Flowers?
—————————————————————————————
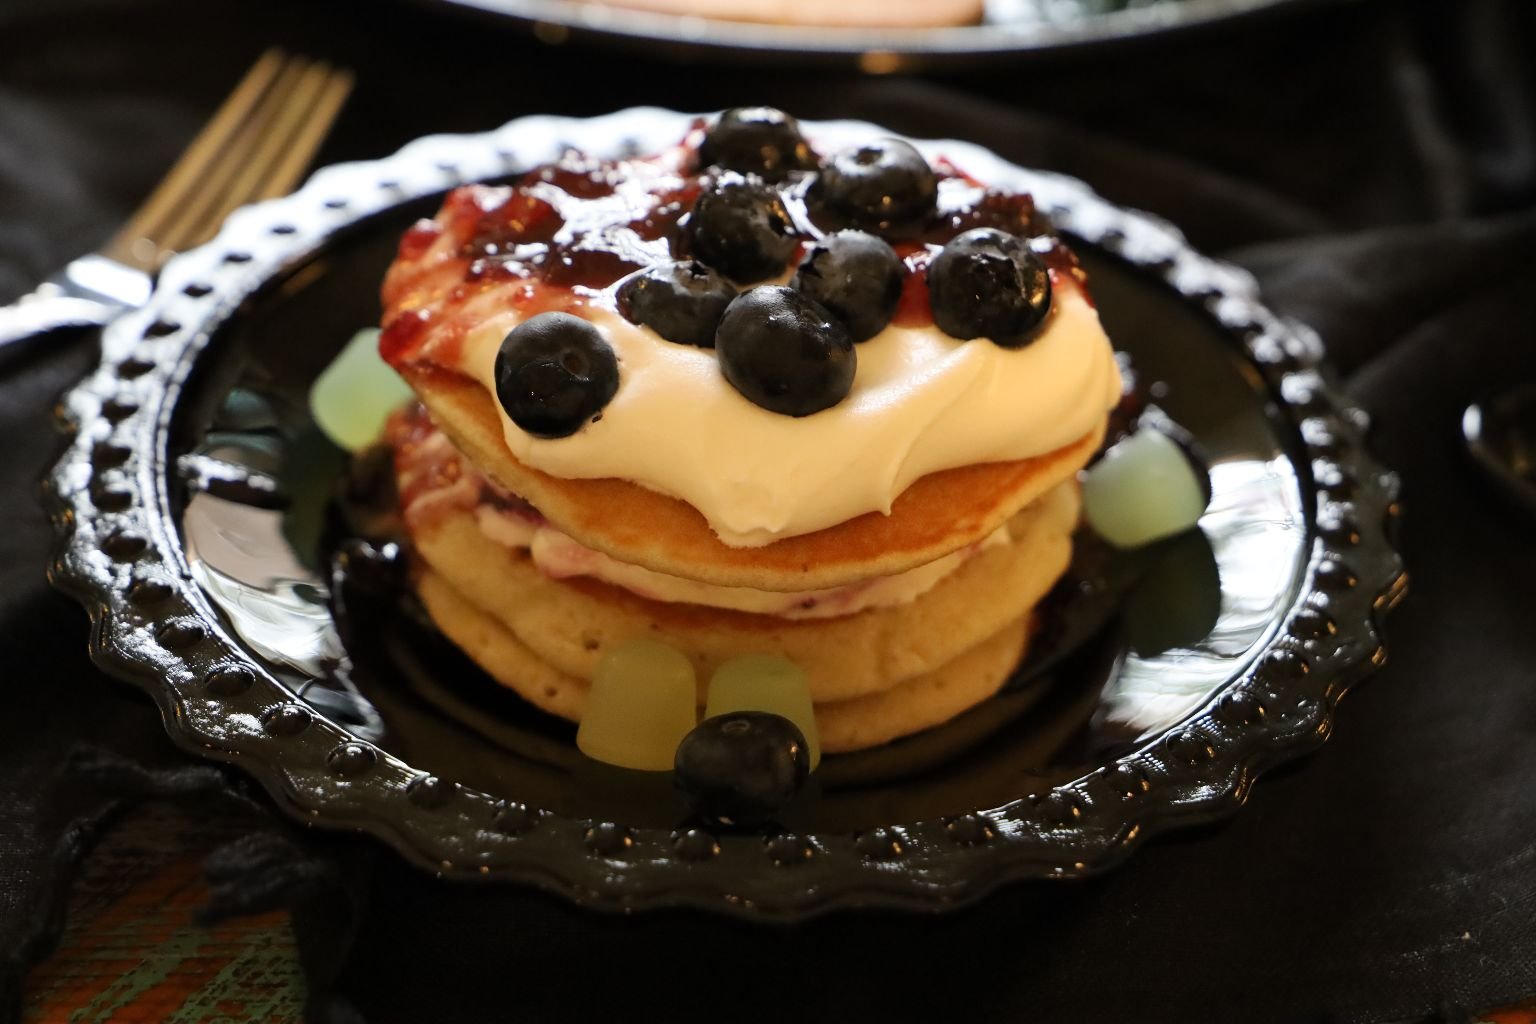
A Moody Dessert
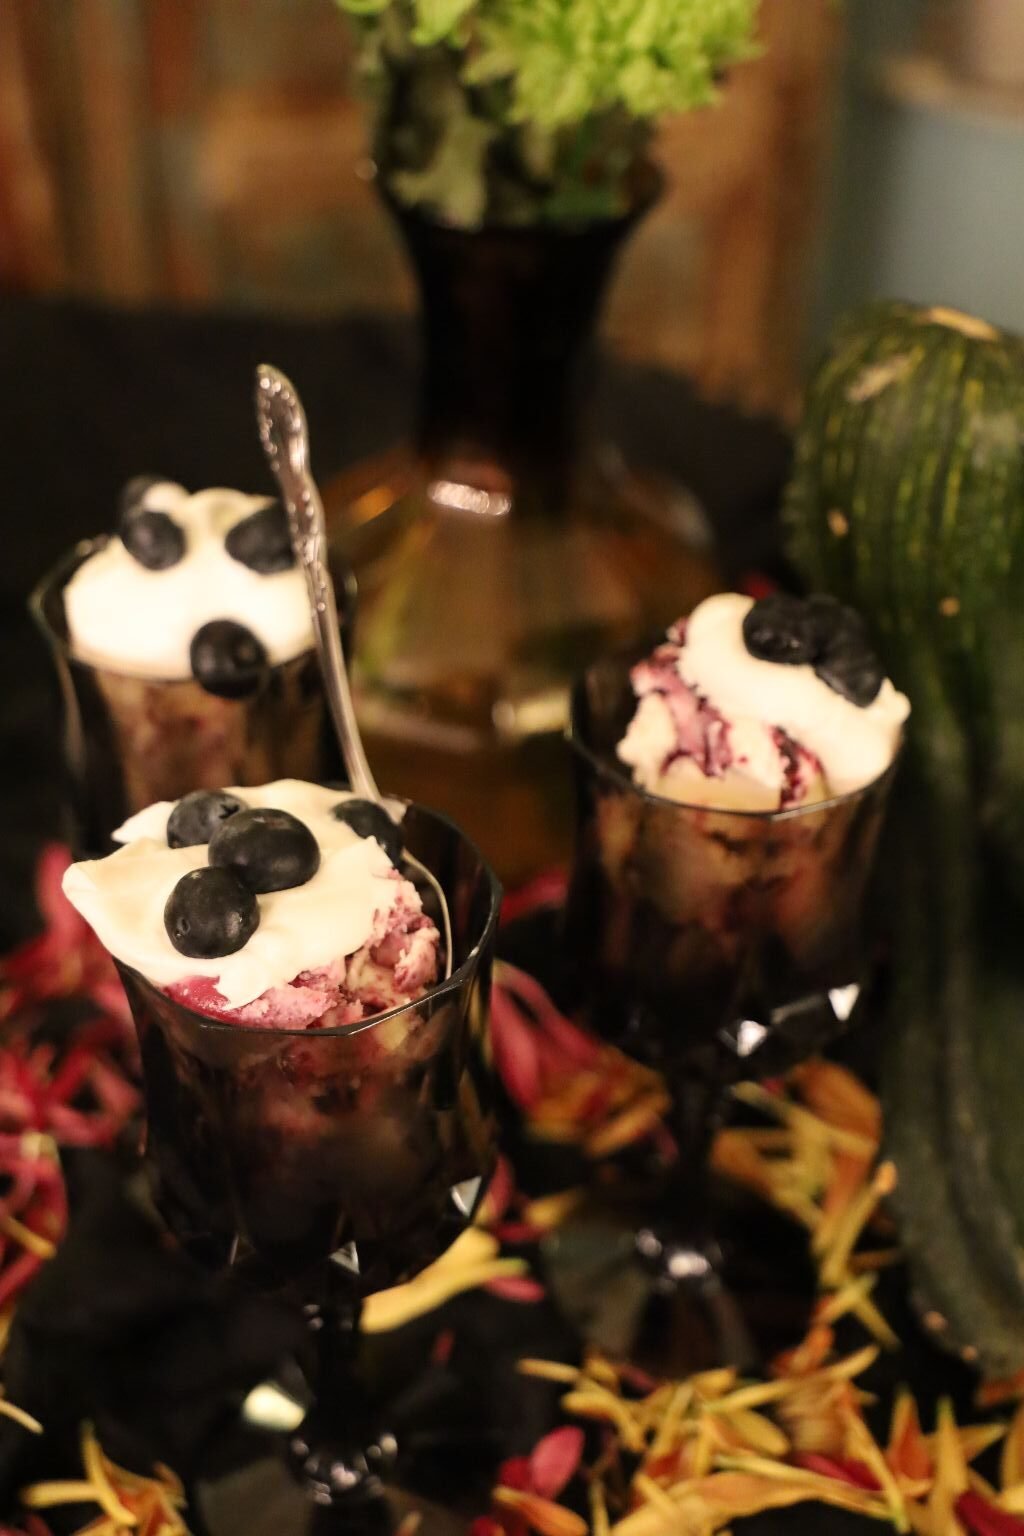
Reworked Blueberry Pancake/Ice Cream Whipped Cream Haunted Jezebel Sundaes
(Recipe Down Below)
———————————————————————————-
Spooky Graveyard Brownies
——————————————————

(Recipe Down Below)
————————————————————————————
A Bit of Comic Relief 🙂
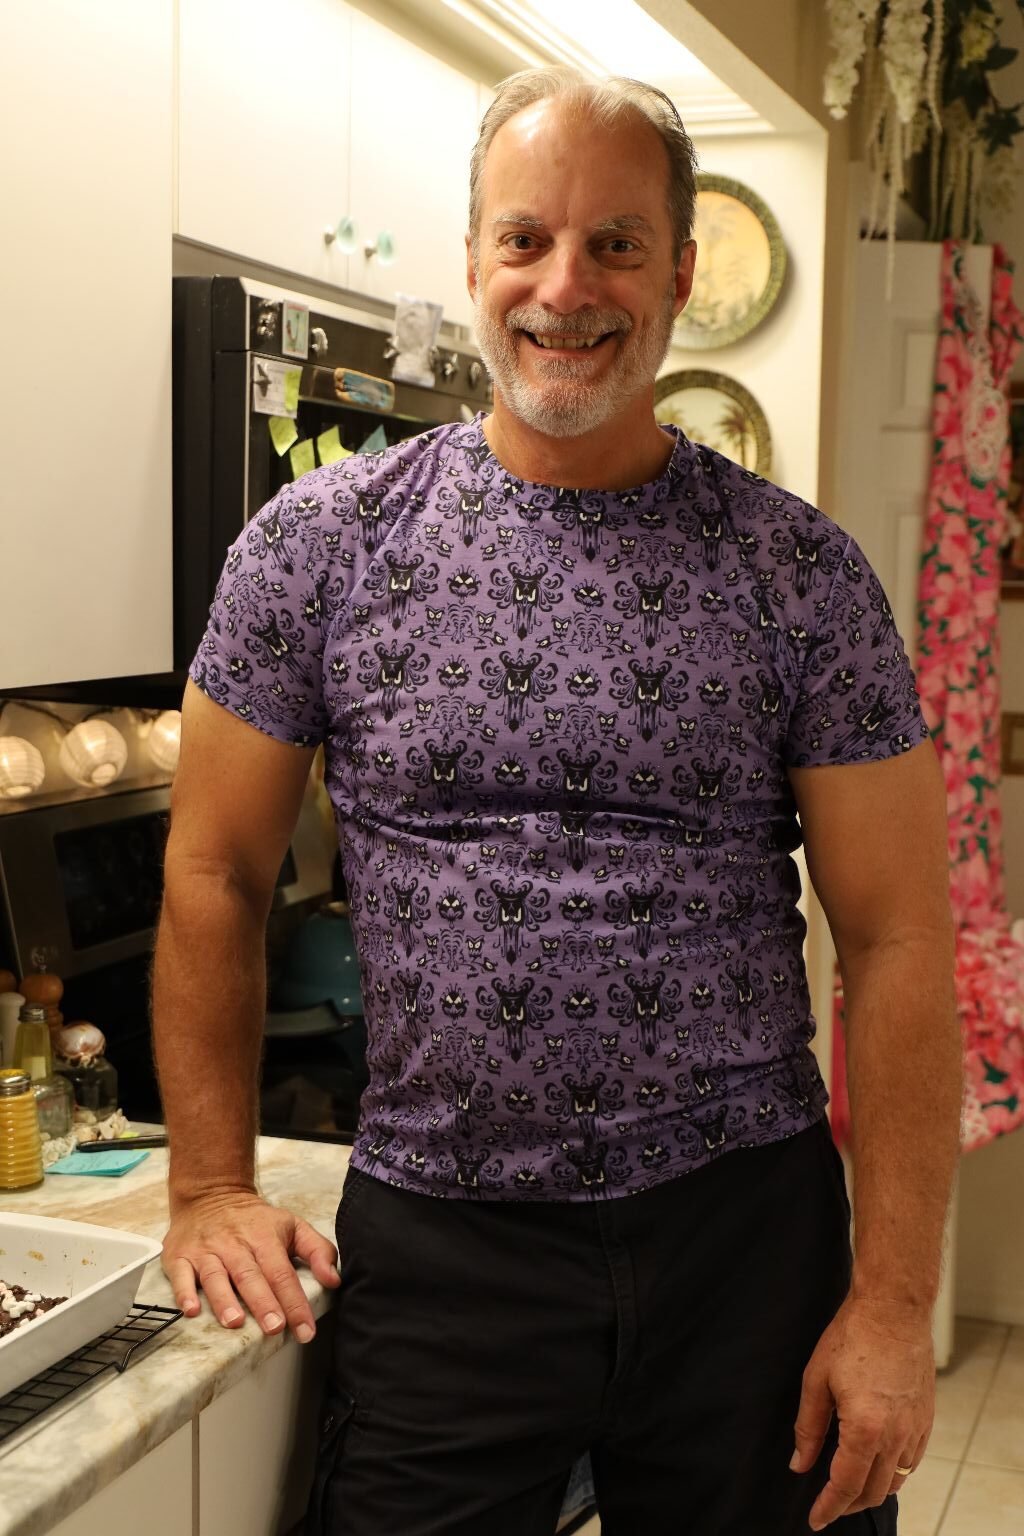
I purchased this Haunted Mansion shirt for Gordon overseas.
It arrived way too small. European sizing. We were laughing so hard! 🙂
We ended up giving it to our son Brodie. It fit him better.
———————————————————————————
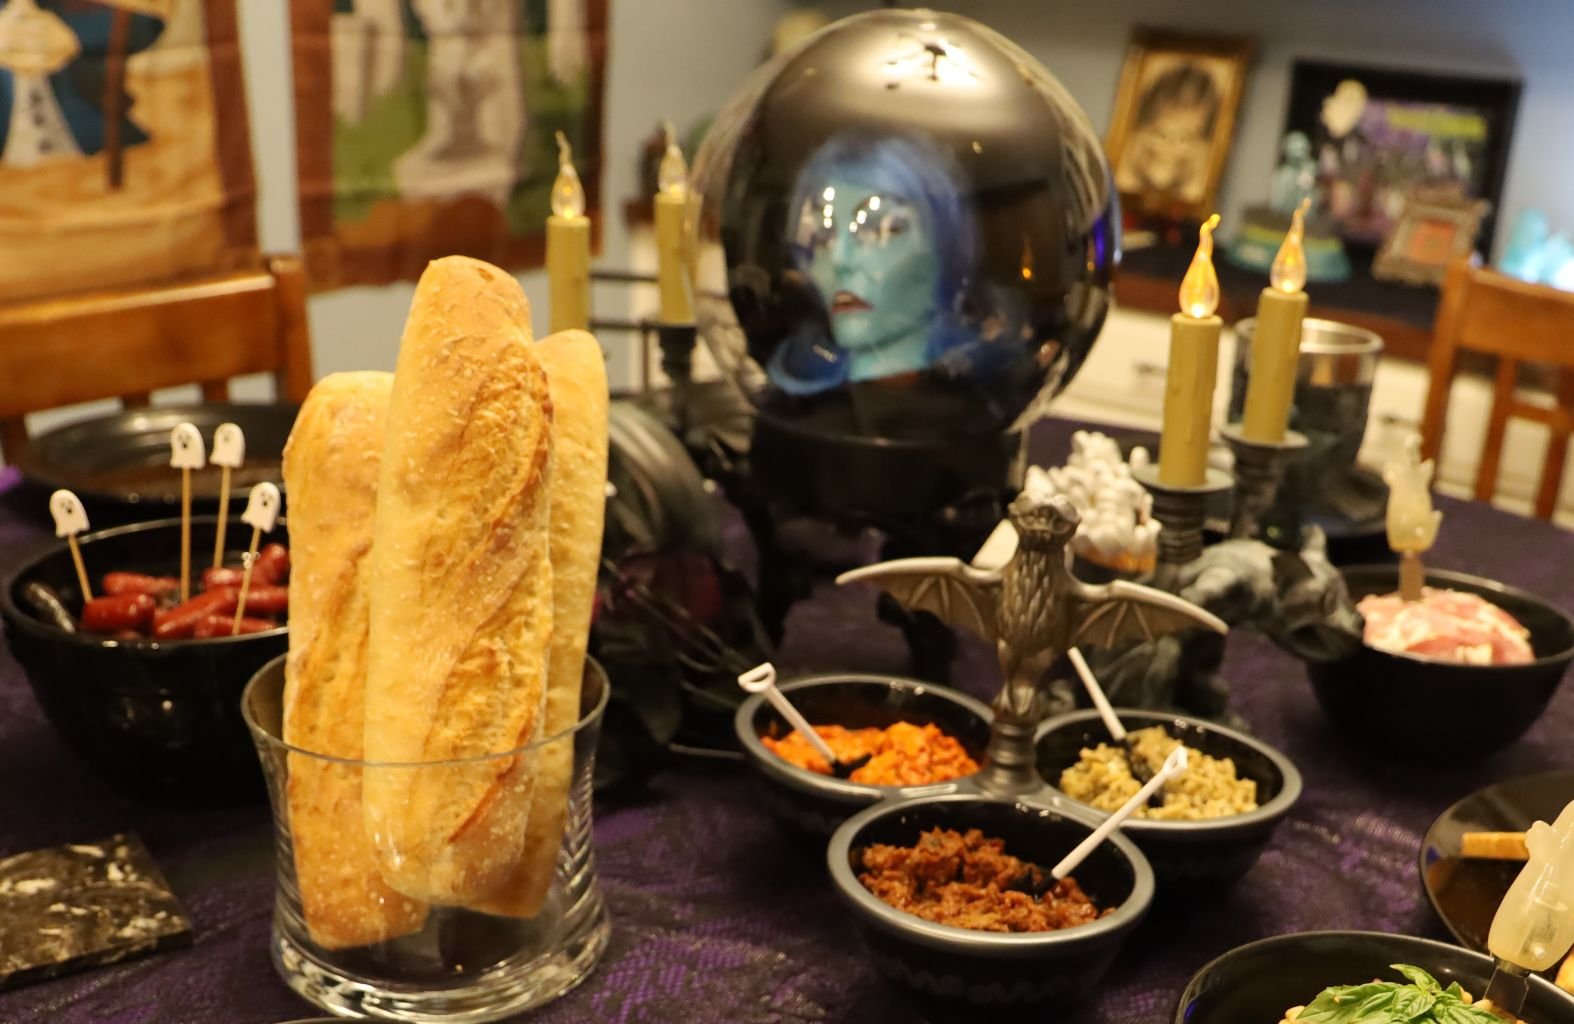
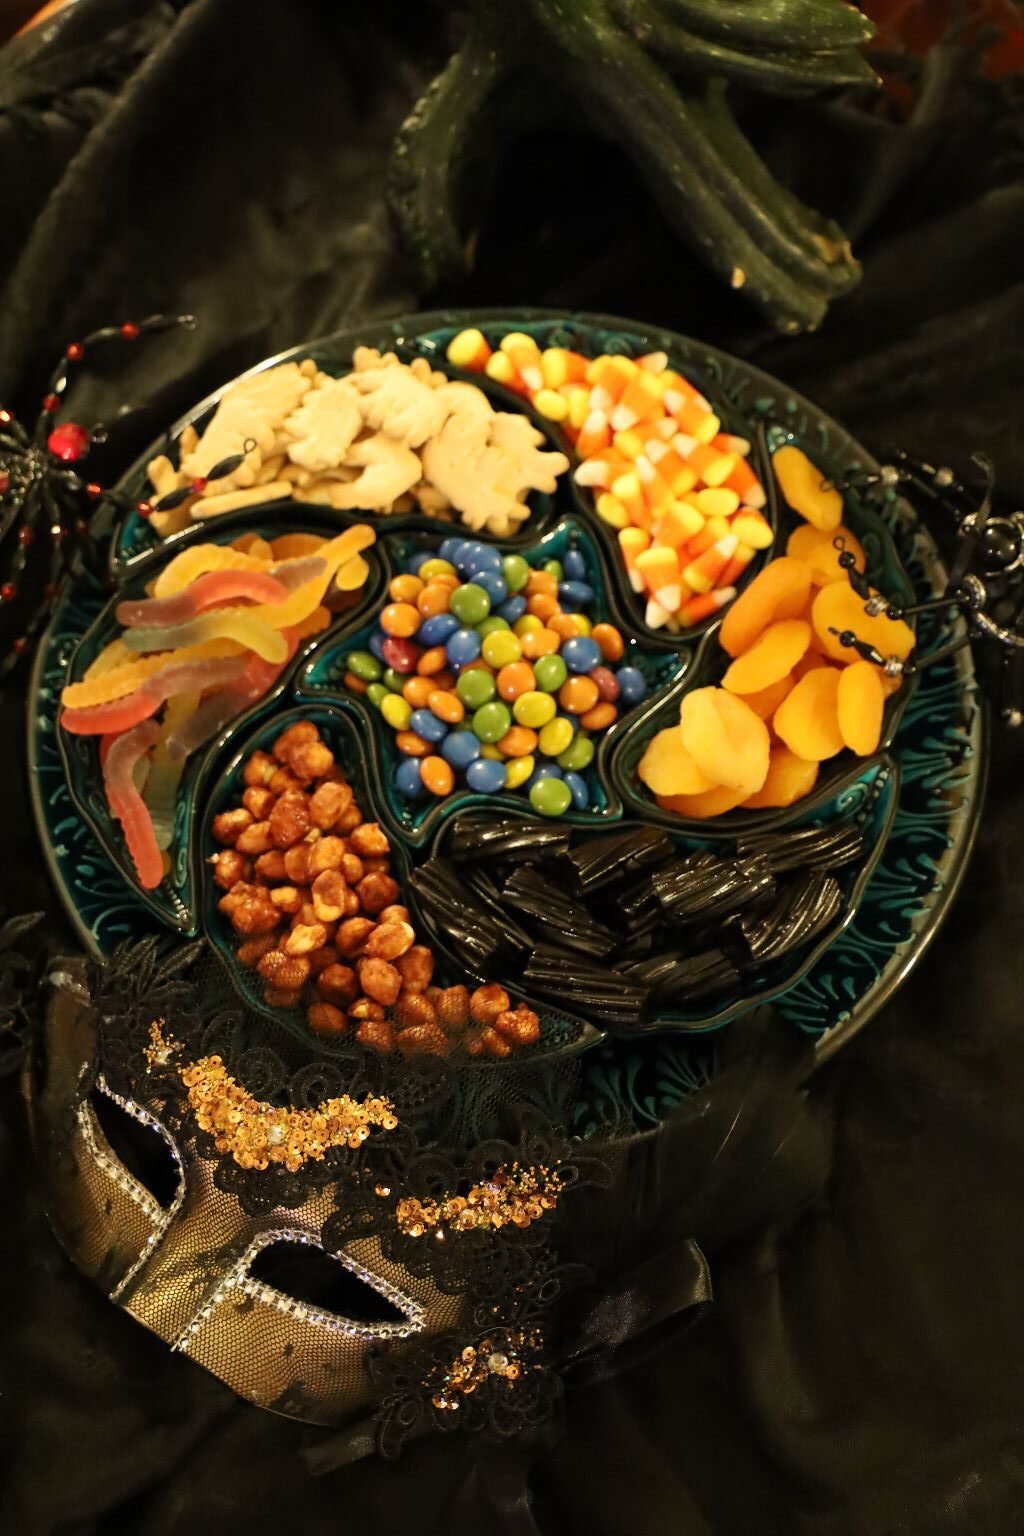
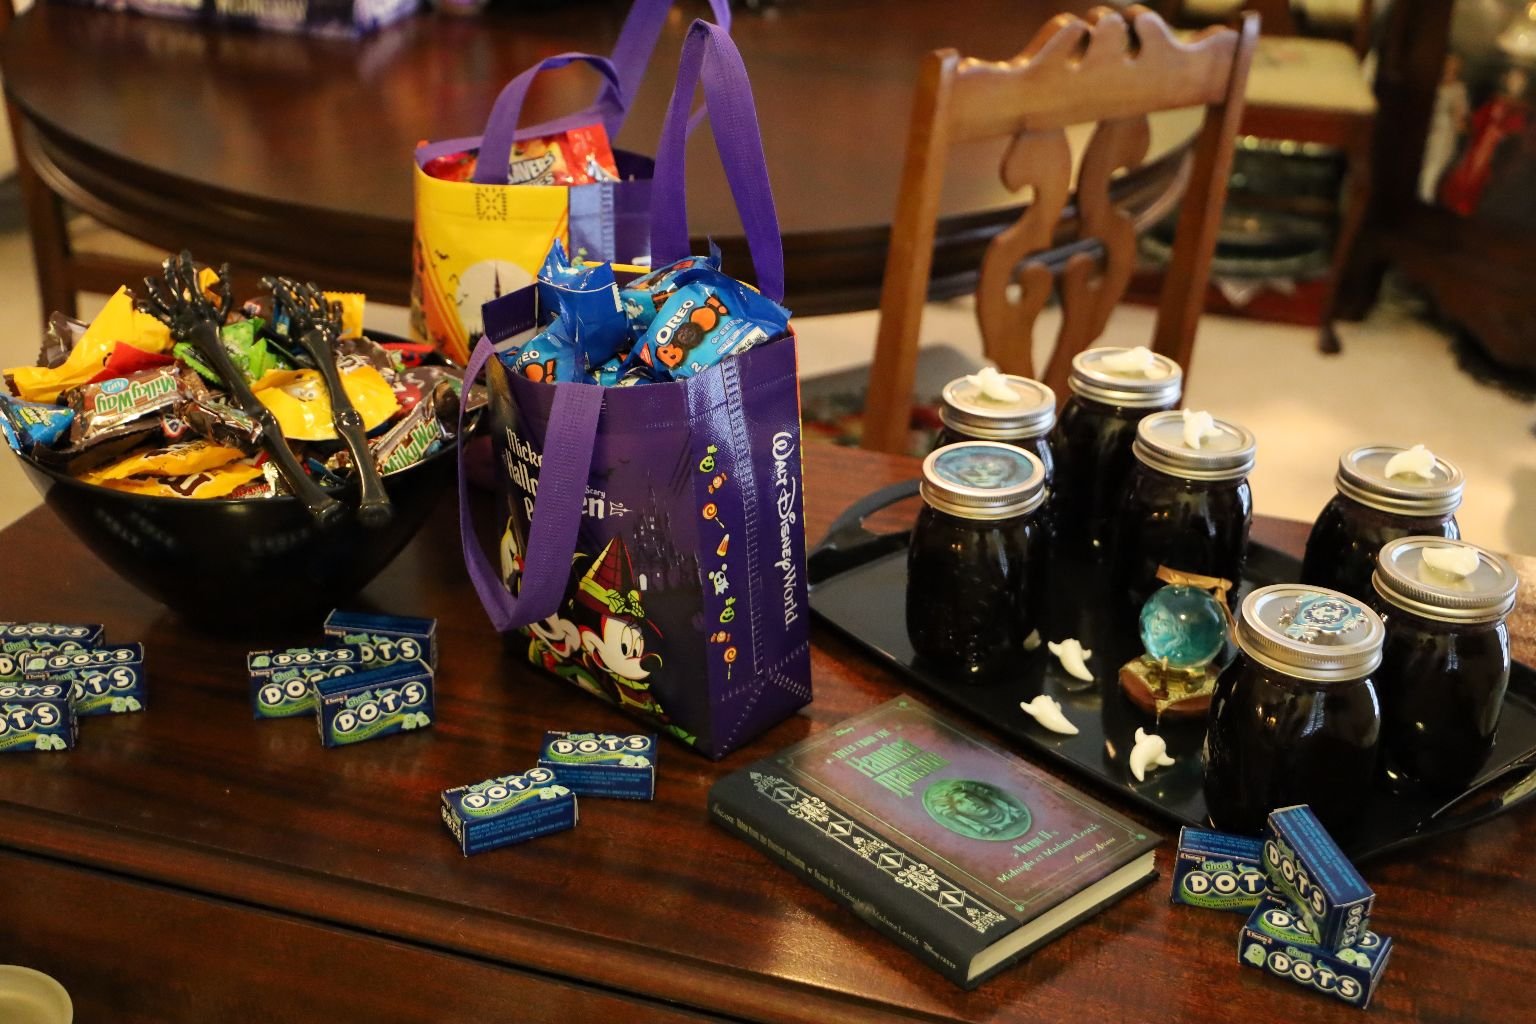
Haunted Halloween Night Treats
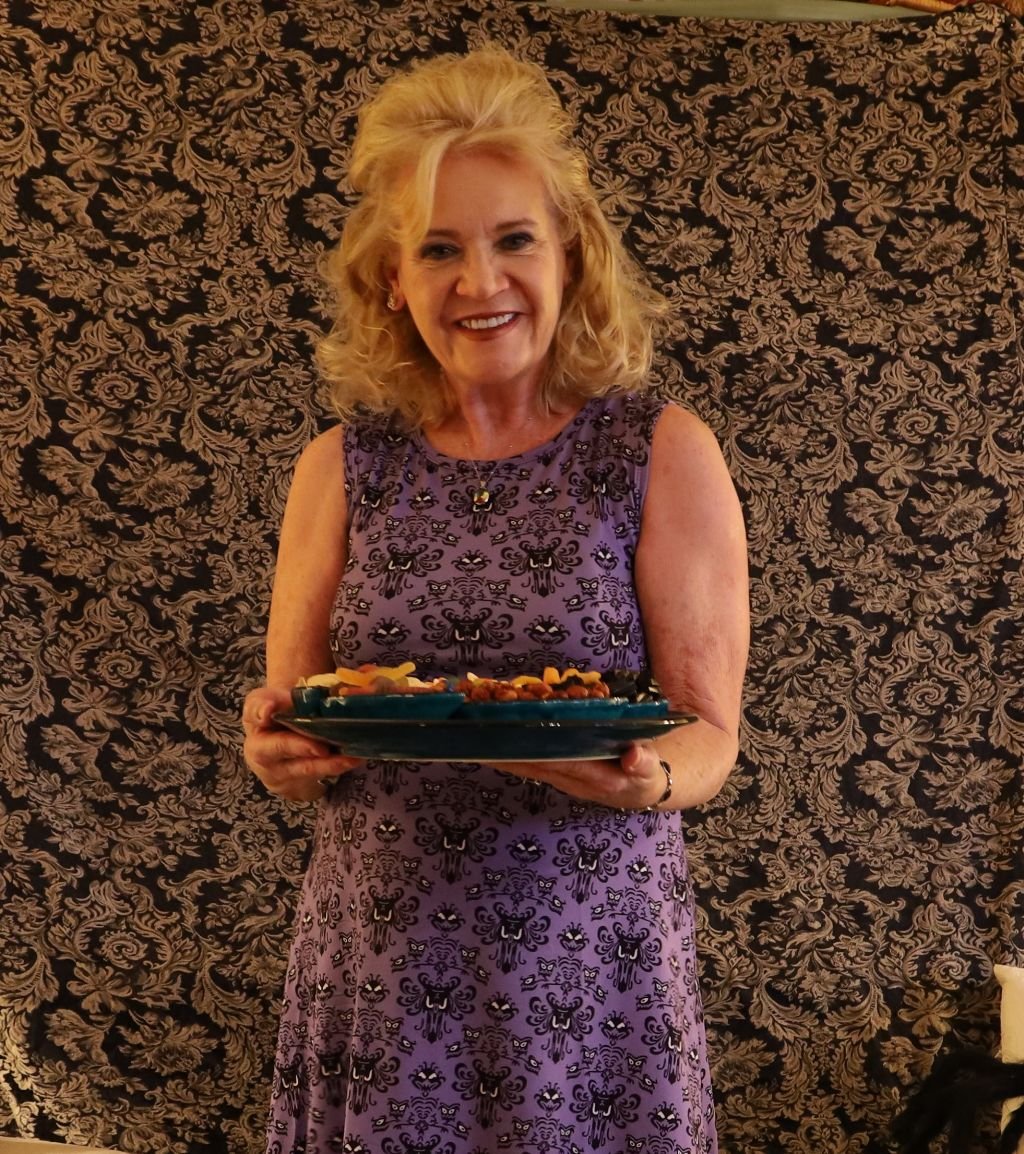
I have this lovely platter with many bowls that fit inside of it.
I wanted to buy some mini treats to place into each bowl. Some vintage candies came to mind.
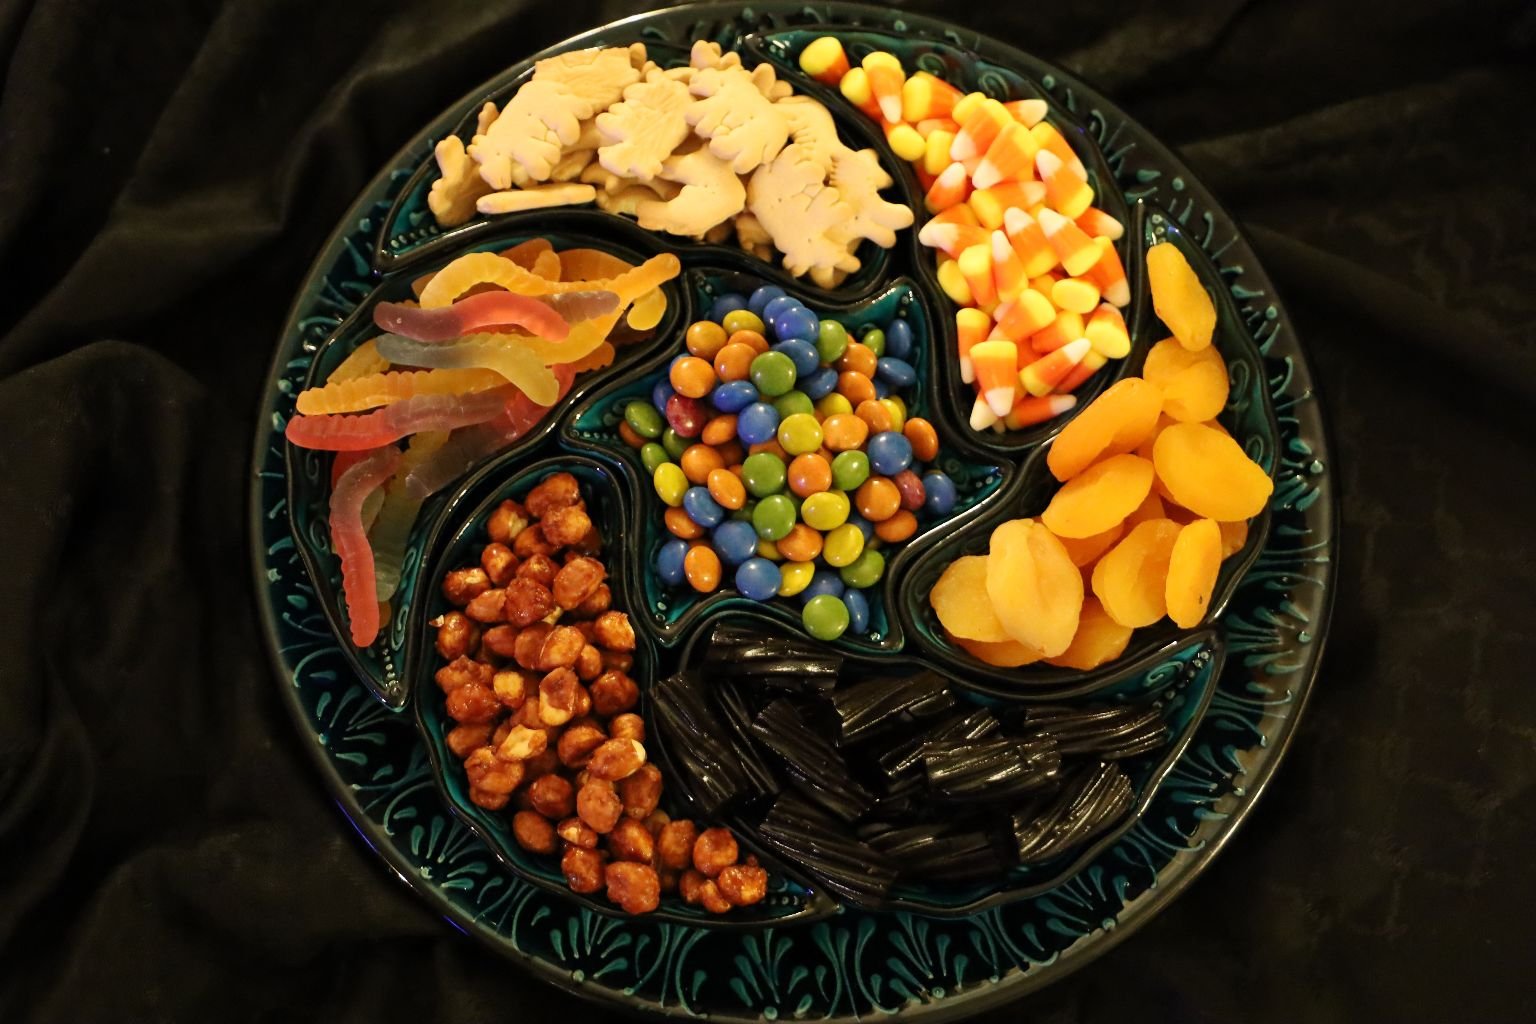
Sweet Nibbles to those Floating By….
————————————————————————————-

Can I Tempt You For A Haunted Treat?
———————————————————————————————-
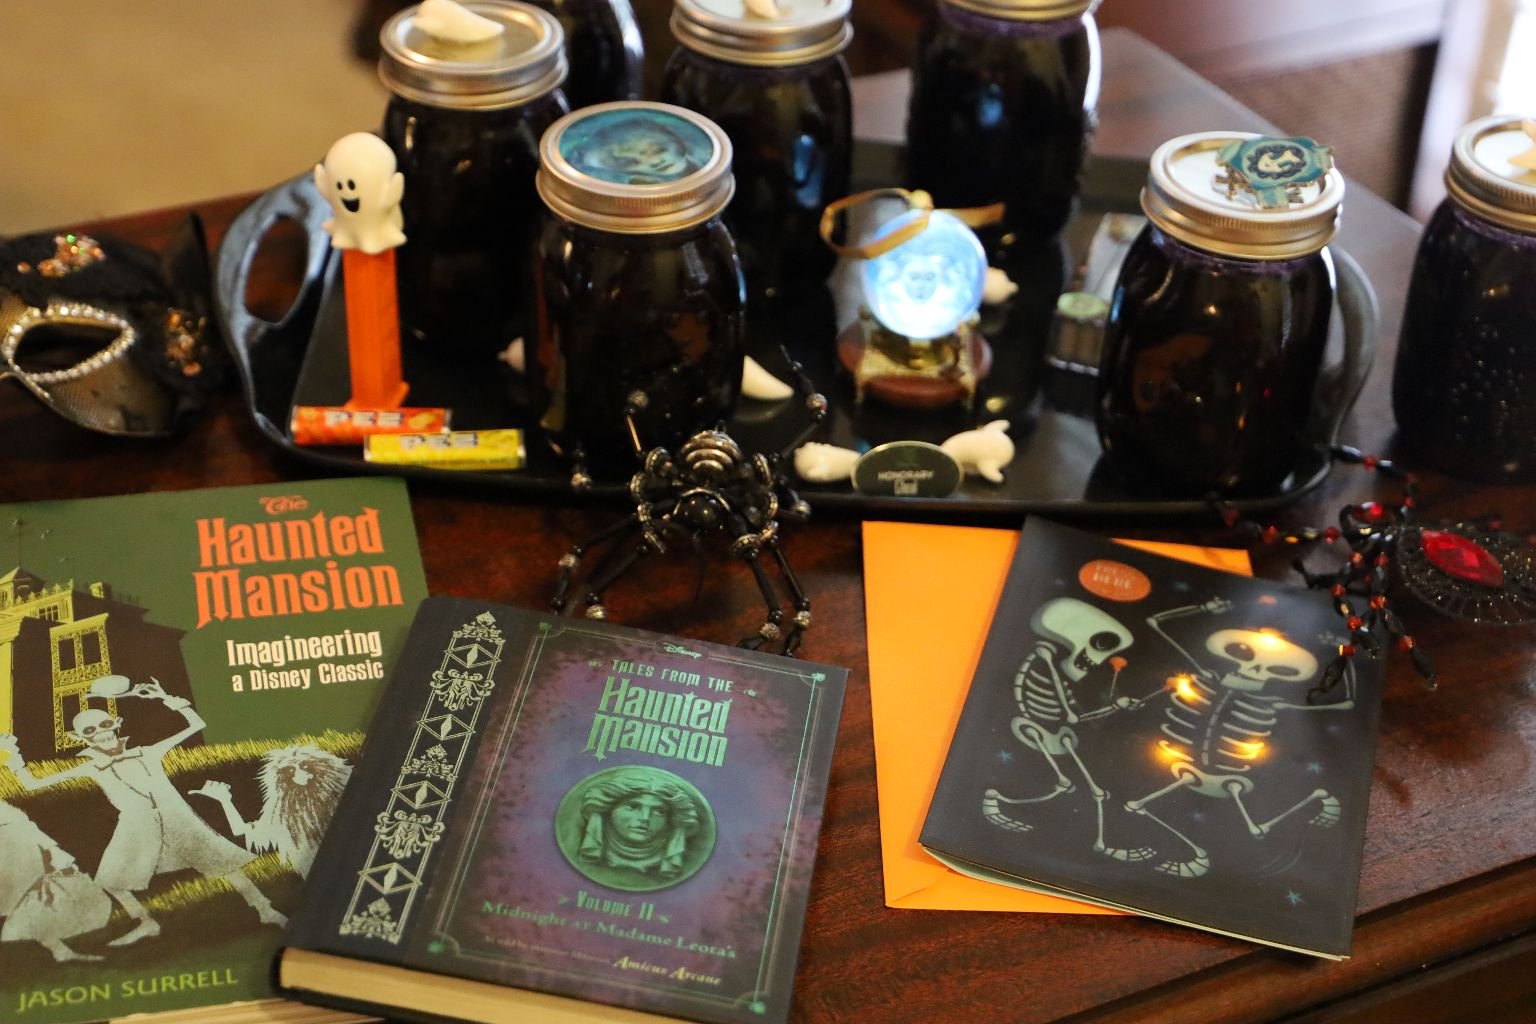
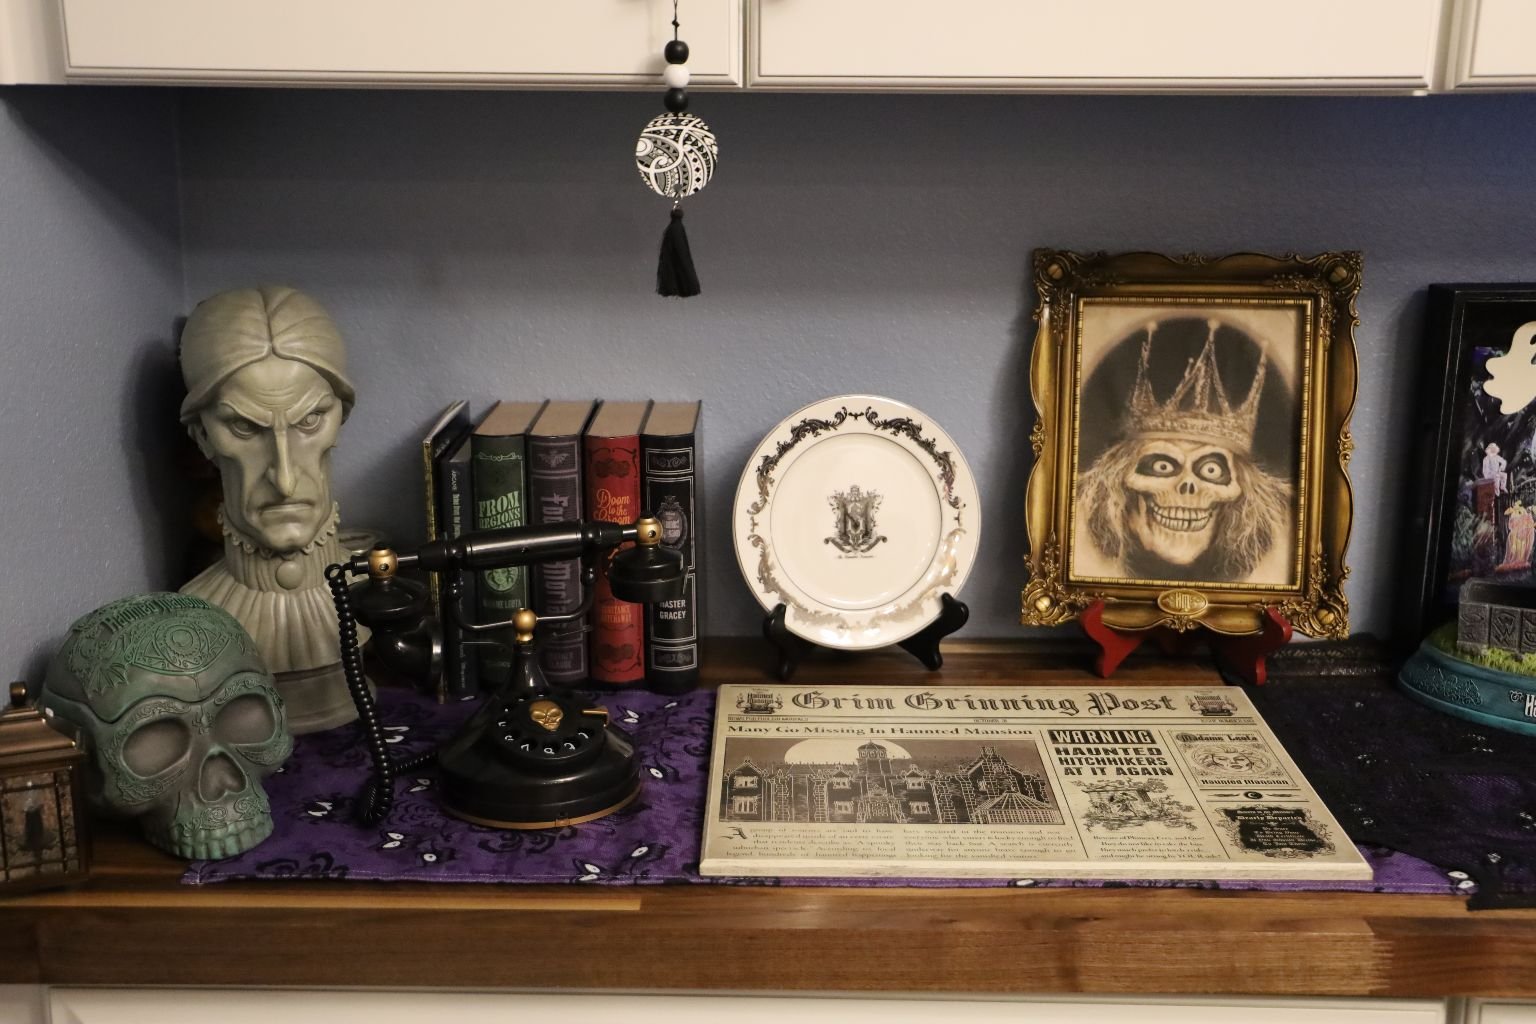
A Haunted Jezebel Gifts For My Favorite Ghouls and Ghosts
————————————————————————————
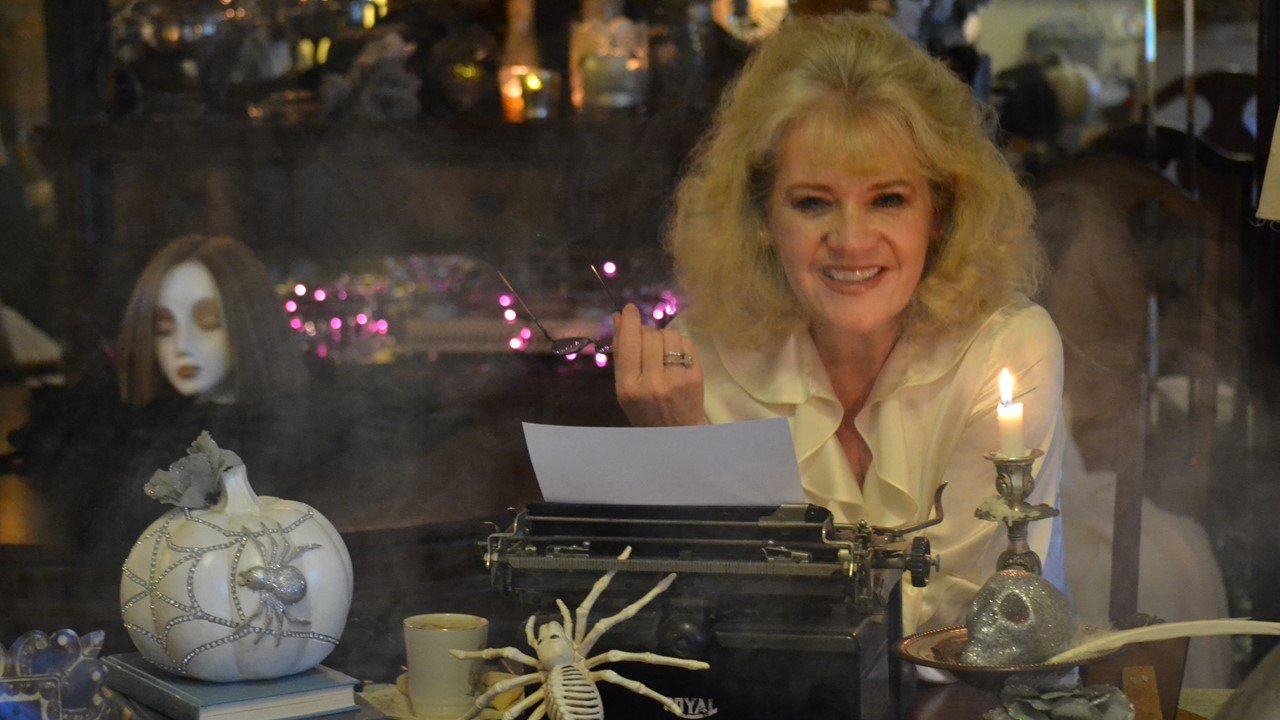
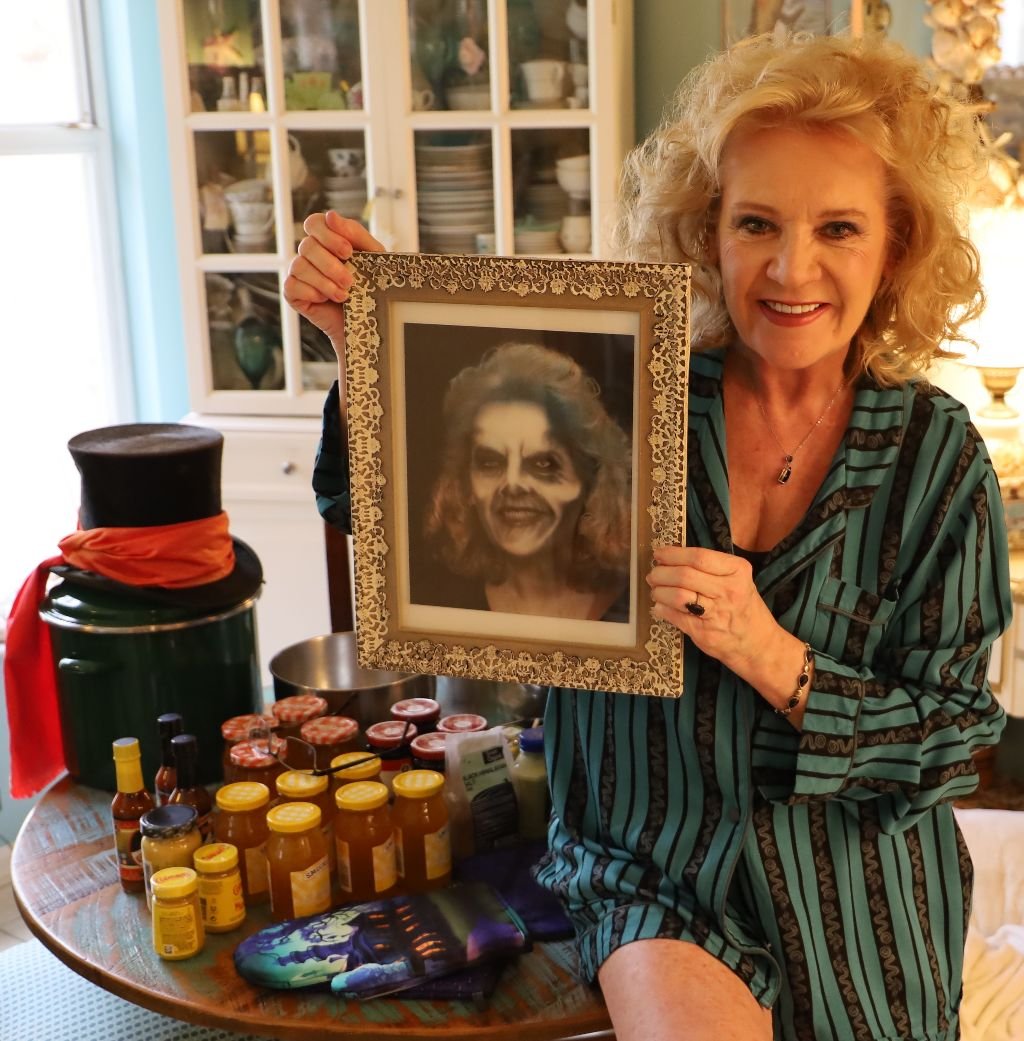
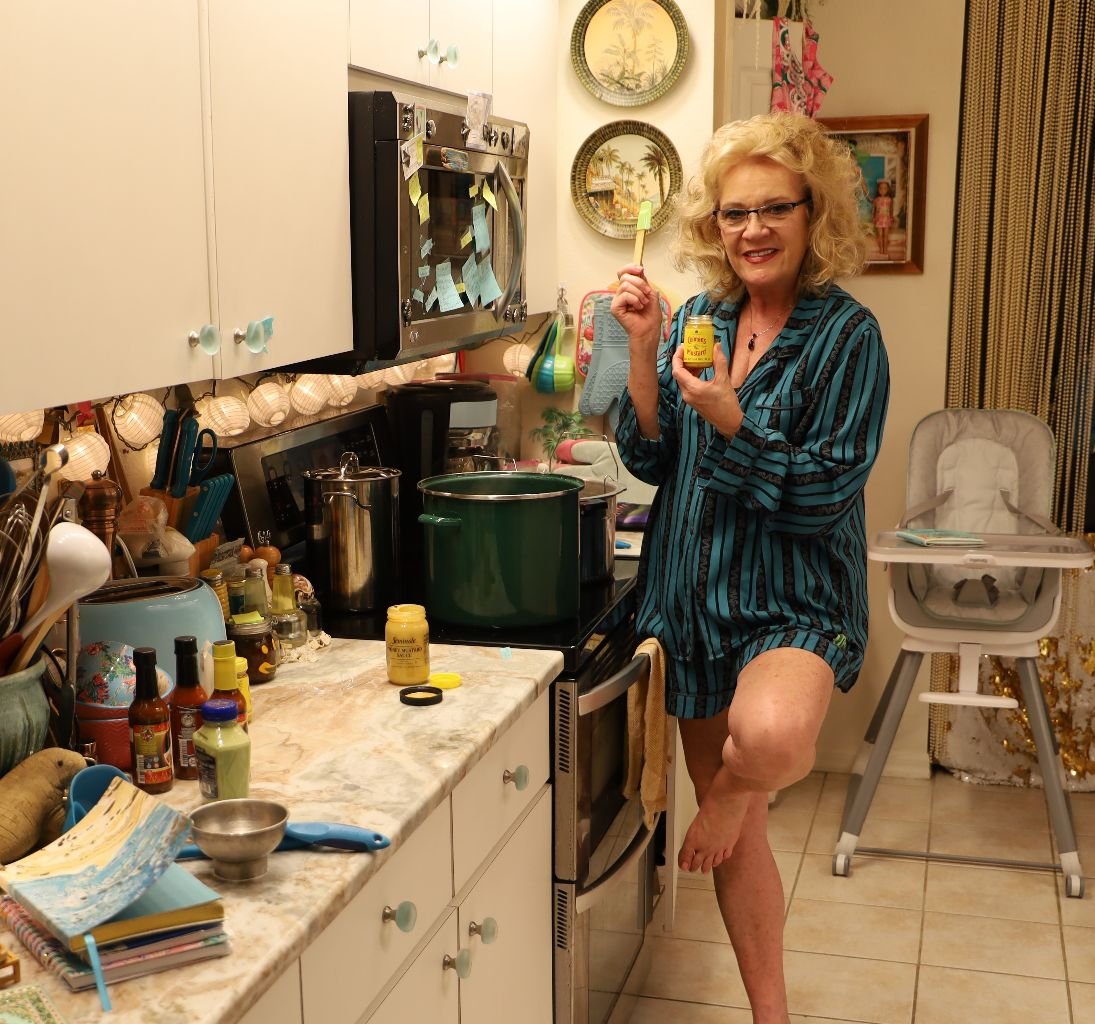
Ready To Make My Haunted Jezebel Sauce
(Me, Holding My Ghoulie Self- Portrait)

I Am Basing My Haunted Jezebel Sauce on Constance, The Black Widow Bride
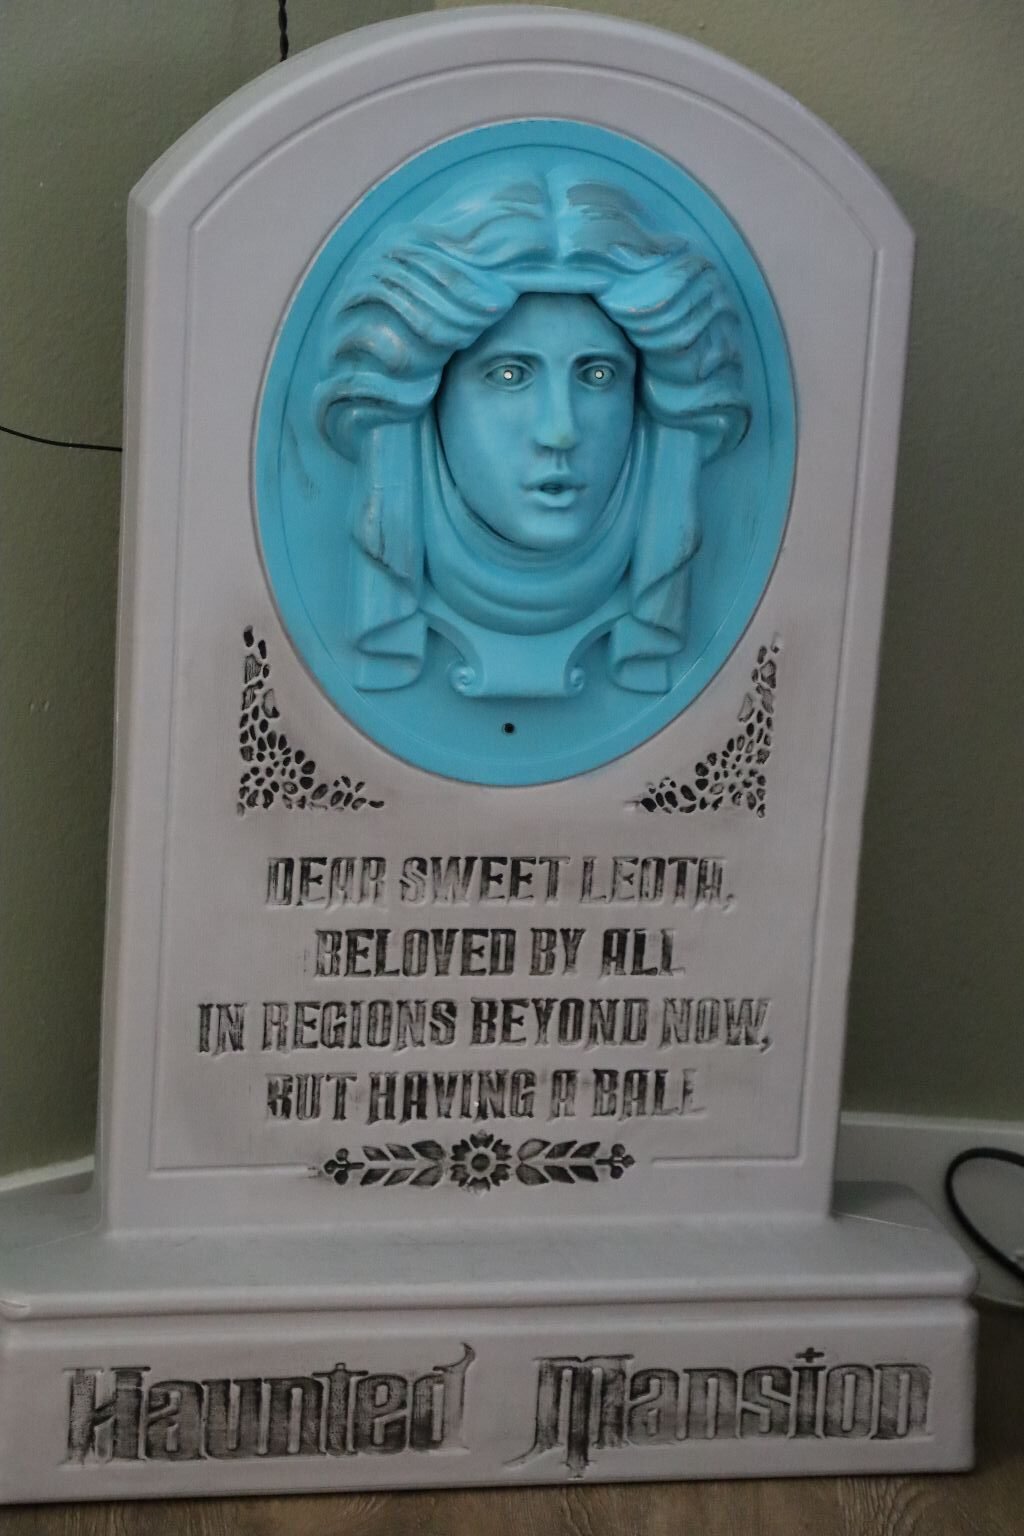
But, I also wanted to do a Shout-Out to Madame Leota.

Madame Leota is the Dismembered Medium
———————————————————————————————
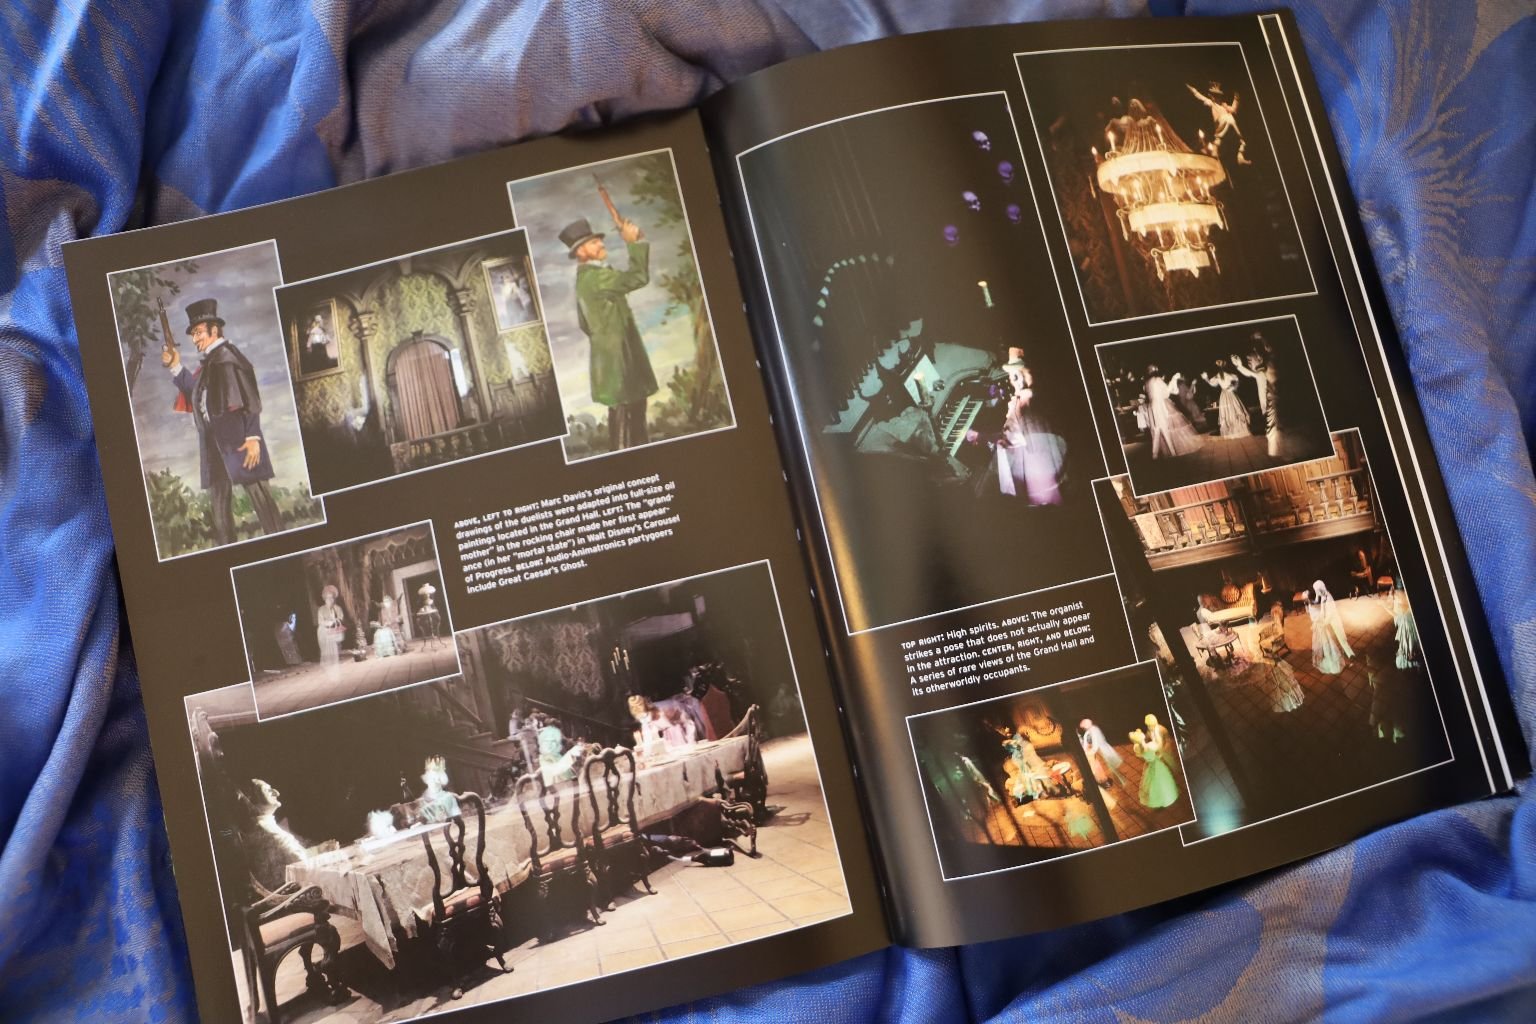
The Haunted Mansion
Imagineering a Disney Classic
by, Jason Surrell
————————————————————————–
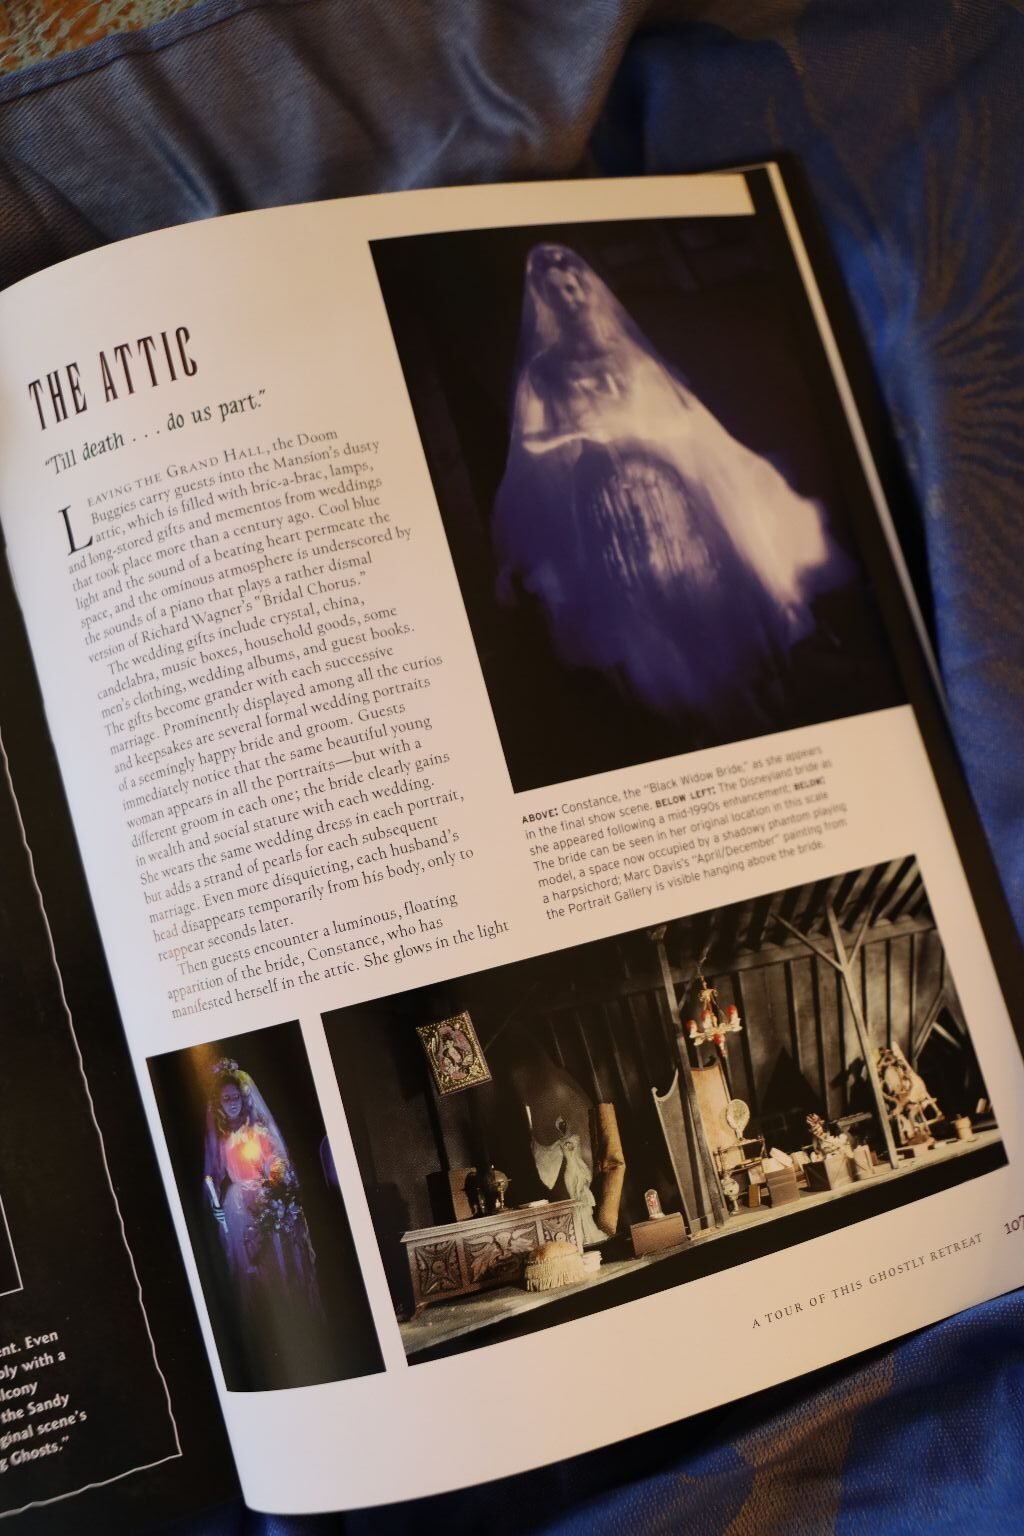
If you have ever ridden The Haunted Mansion ride at Disney’s Magic Kingdom, then you will have likely seen the Ghostly Bride.
“Till Death Do Us Part.”
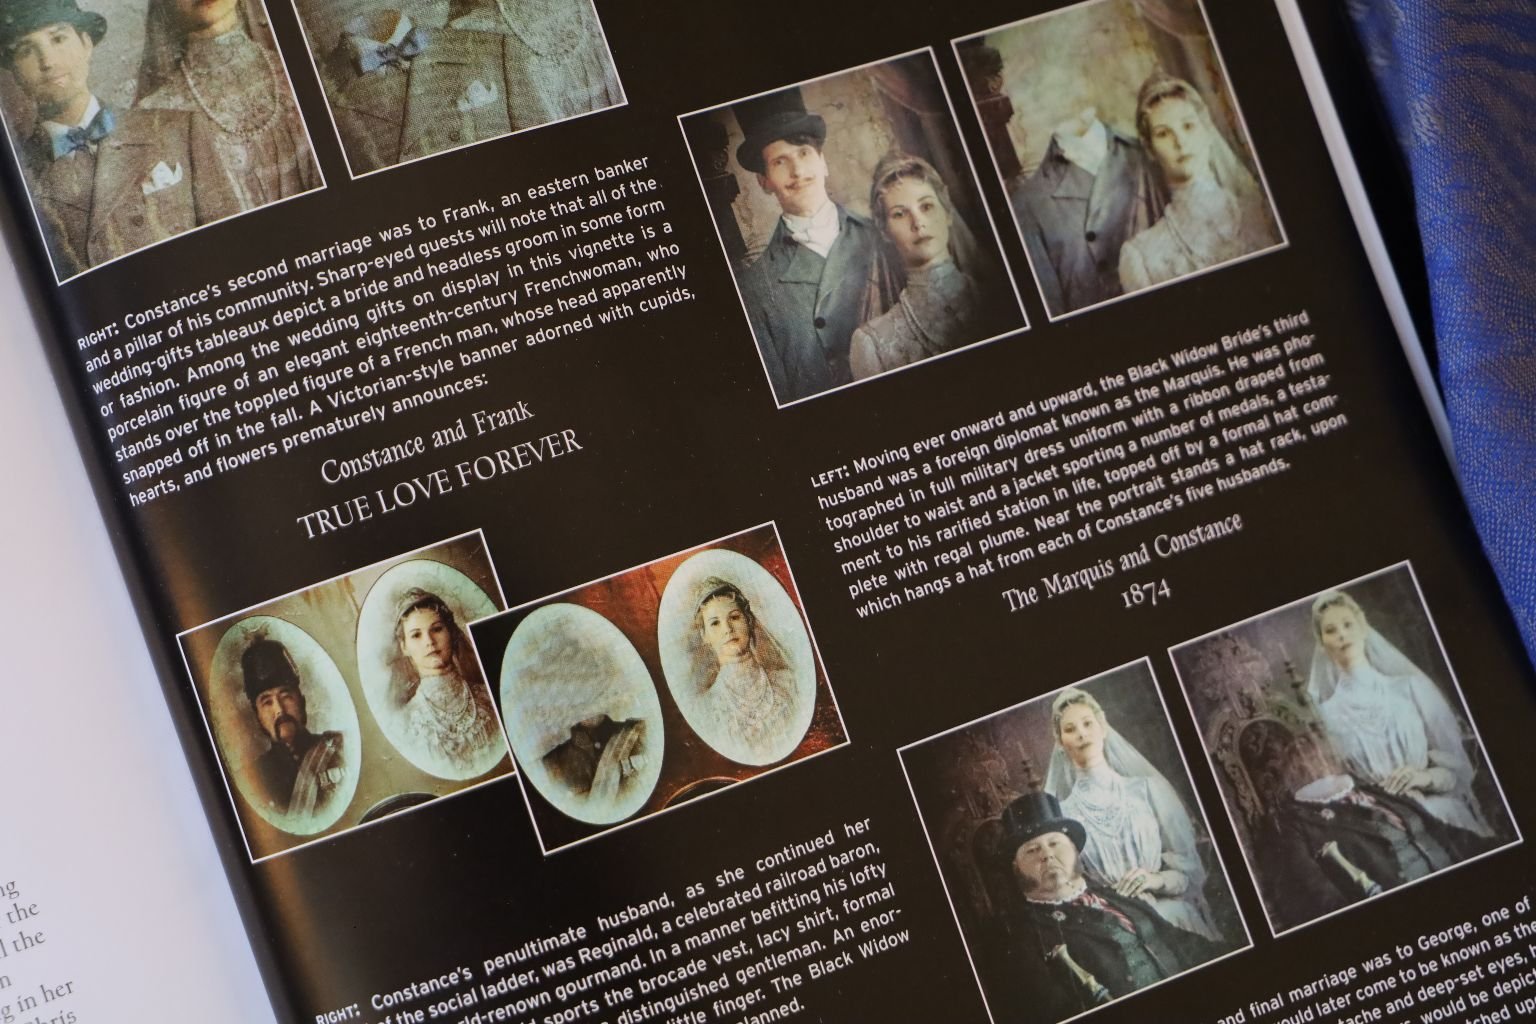
Constance, The Black Widow Bride
The Gold-Digging Seductress with a taste of the finer things.
Constance improved her station through each of her five marriages.
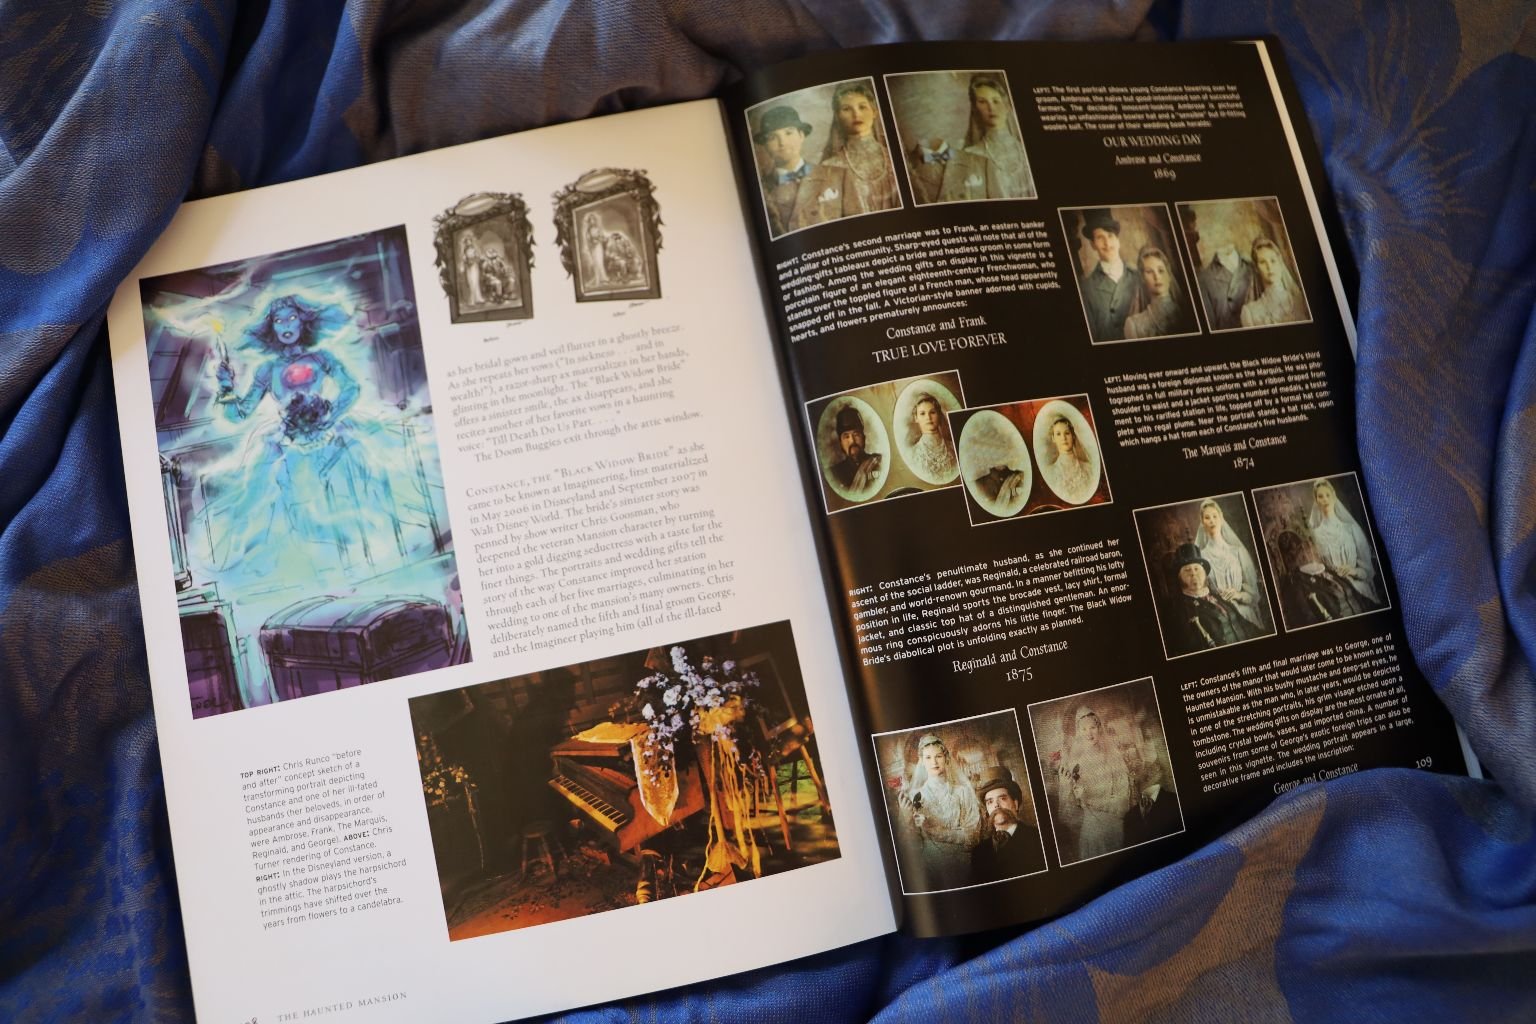
Our Wedding Days
Ambrose and Constance, 1869
Constance and Frank
The Marquise and Constance, 1874
Reginald and Constance, 1875
George and Constance, 1877
RIP Constance….
—————————————————————————————————
Creating A Haunting Jezebel (Sauce)
I Based This on a Boo-Berry, (Blue Berry) Template
I also took into mind America’s British influence at the time of the creation of The Haunted Mansion Ride. I can remember as a child of the 60’s, there being a strong French and British influence. Mr. Toad’s Wild Ride, Peter Pan, Alice in Wonderland, just to name a few. Therefore, I chose ingredients with all of that in mind. I also took into mind that Disney World is located in Florida, and I wanted to toss in a Florida influence into the pot.
———————————————————————————–
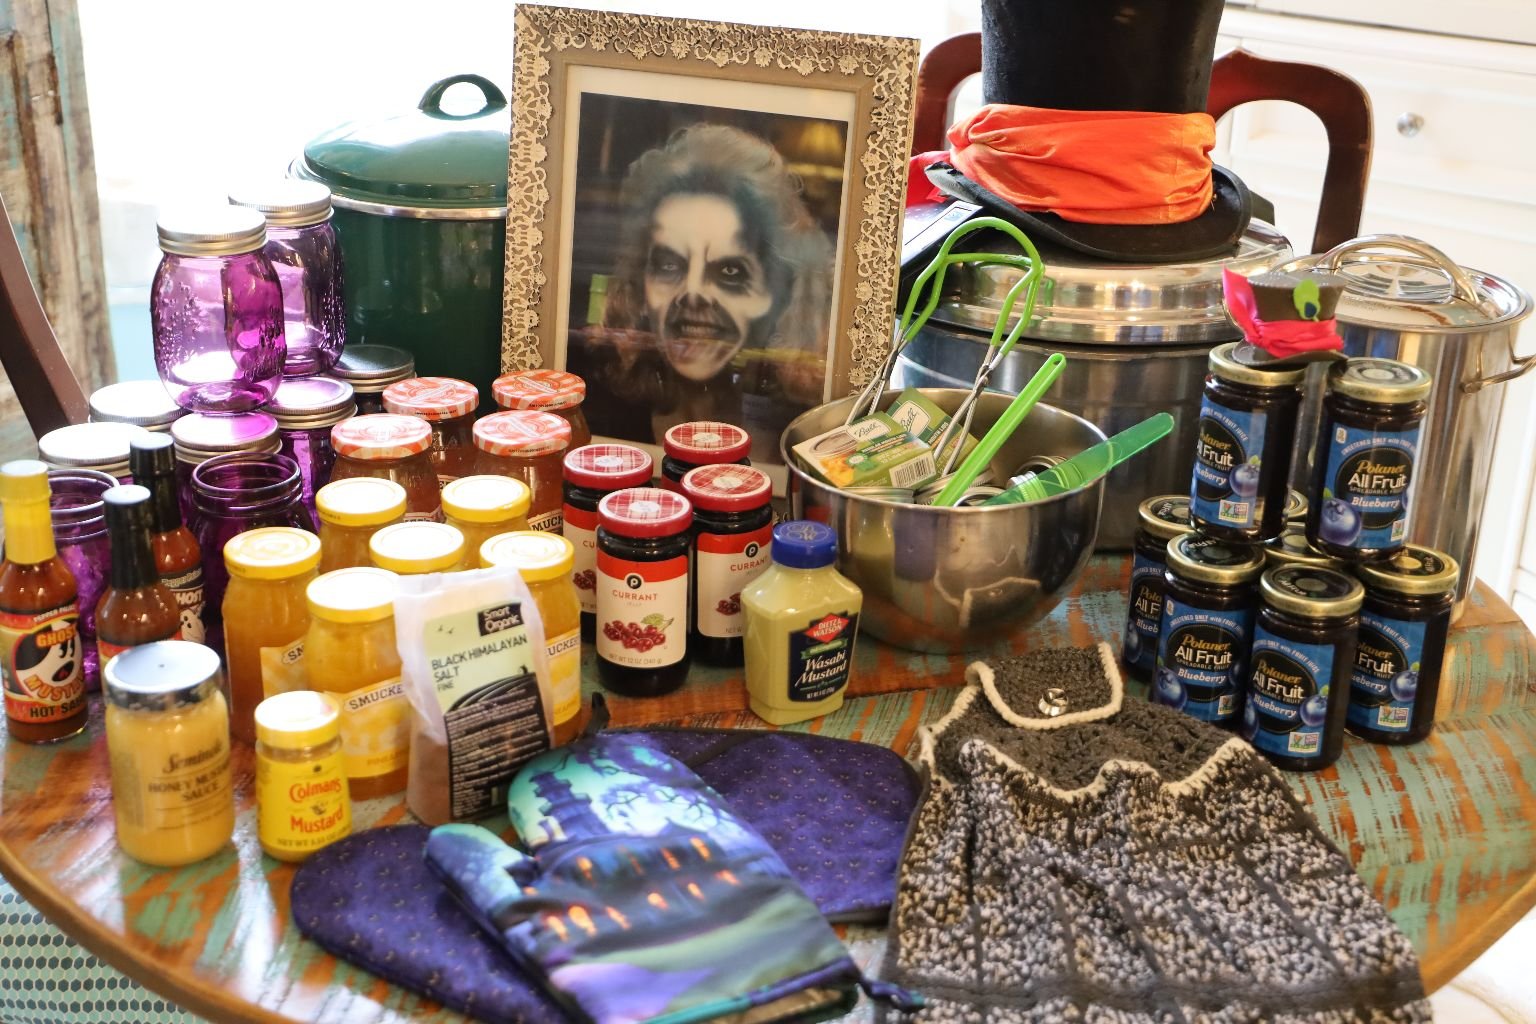
Ingredients:
Large Cooking Pots, and a Ladle
(I will give you the ingredients for making one batch. If you want to double, or triple the ingredients then that is up to you.)
4, 12 Ounce Jars of Pineapple Preserve Topping
3-4 Jars, 17 Ounces, of Apple Jelly
3-4, 12 oz. Jars, Currant Jelly
4, 10 oz. Polander All Fruit Blueberry Jars
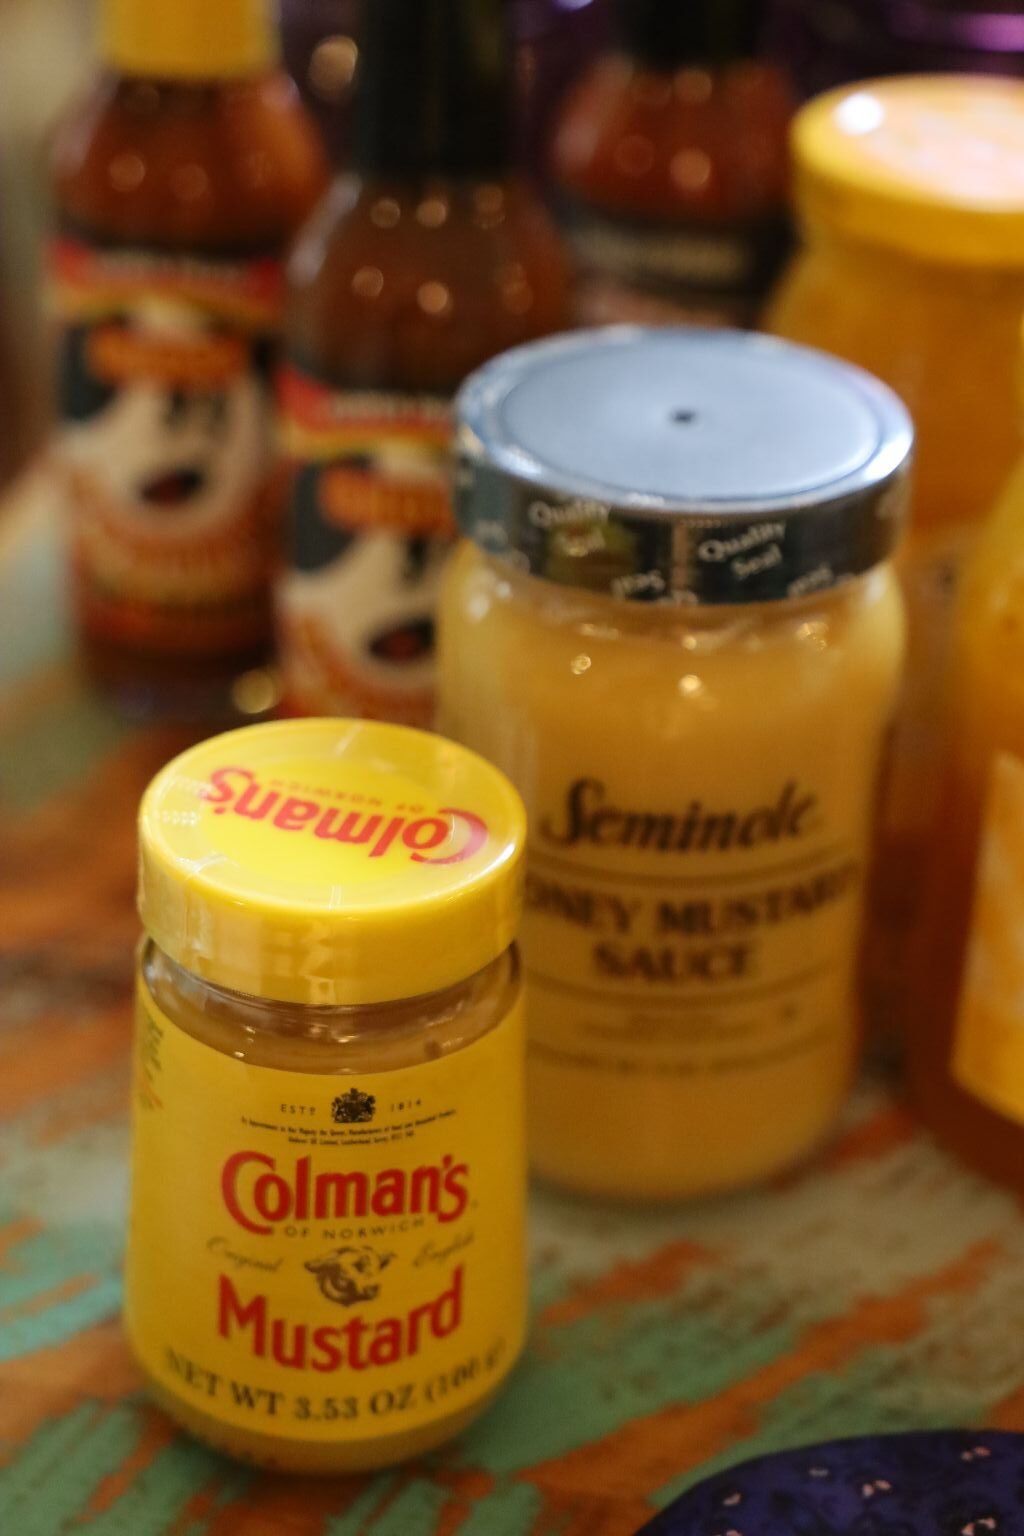
3.53 oz. Jar Colman’s Mustard
8 oz. Seminole Honey Mustard Sauce (I probably used 4 oz. of it)
Wasabi Mustard, Squirt to Taste
4 t. Black Himalayan Salt
Ghost Pepper Hot Sauce (As many dashes as you like)
About 2 lb.’s Fresh Blueberry’s, washed
As Always, Taste As You Go
——————————————————————-
Many Jars, Lids, and Rings
Large Pot For Canning, Along With Canning Tools
———————————————————————————-


————————————————————————————


The Top Hat Far Right, is a Shout-Out to The Haunted Mansions own Mad Hatter

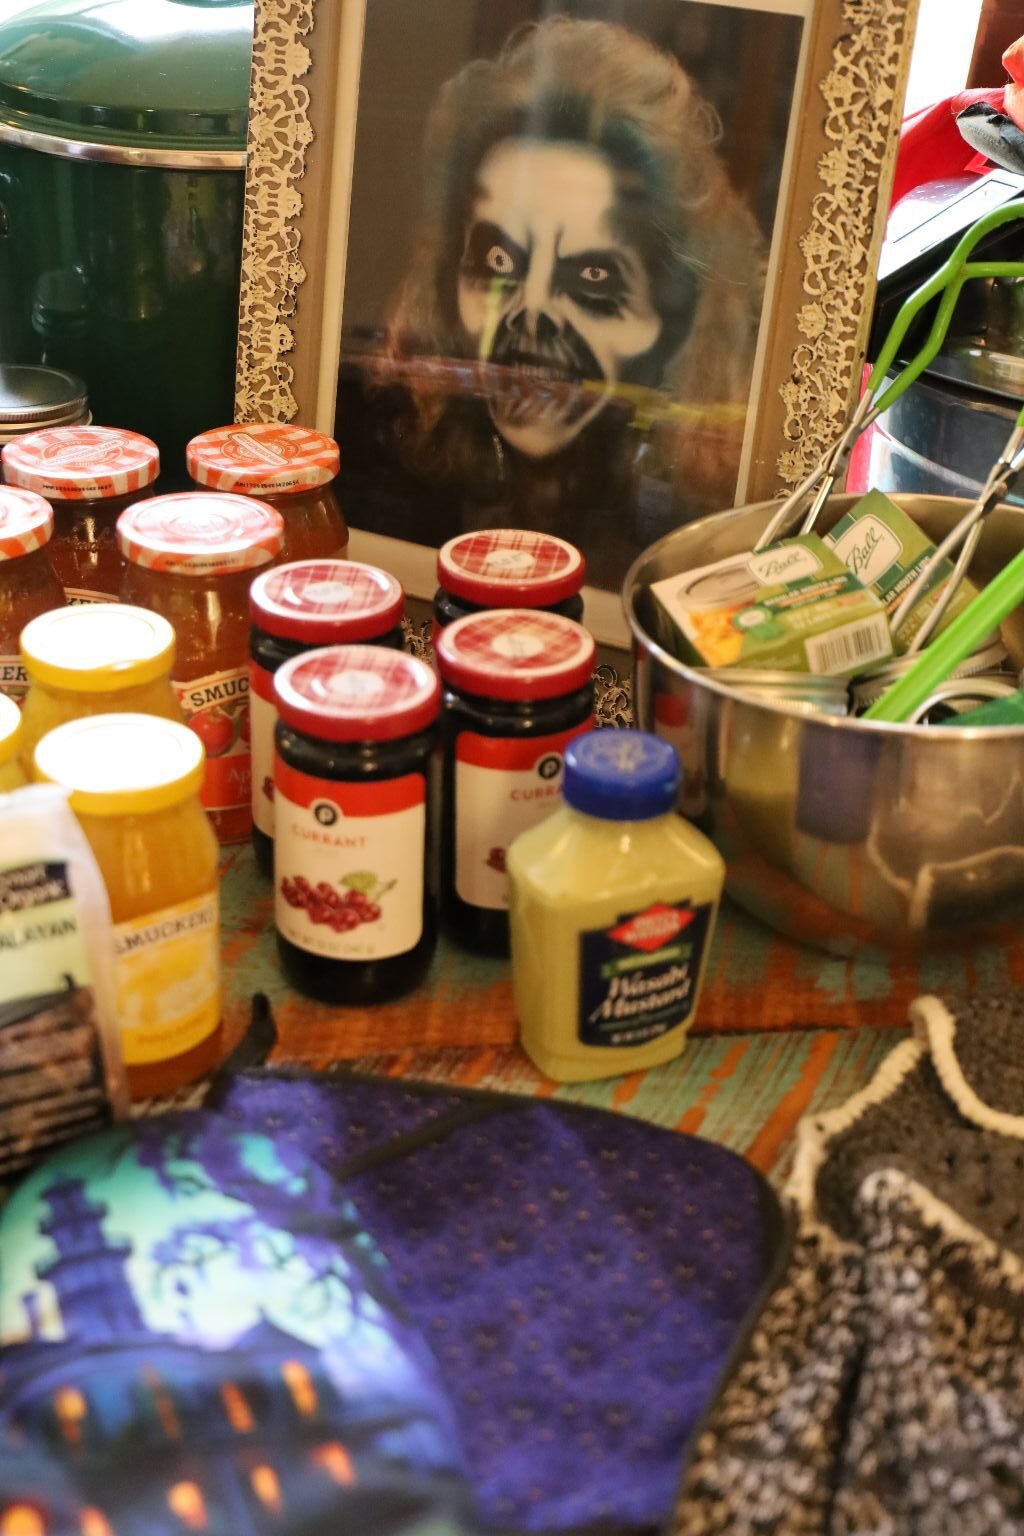
All of Ghoulie’s Ingredients
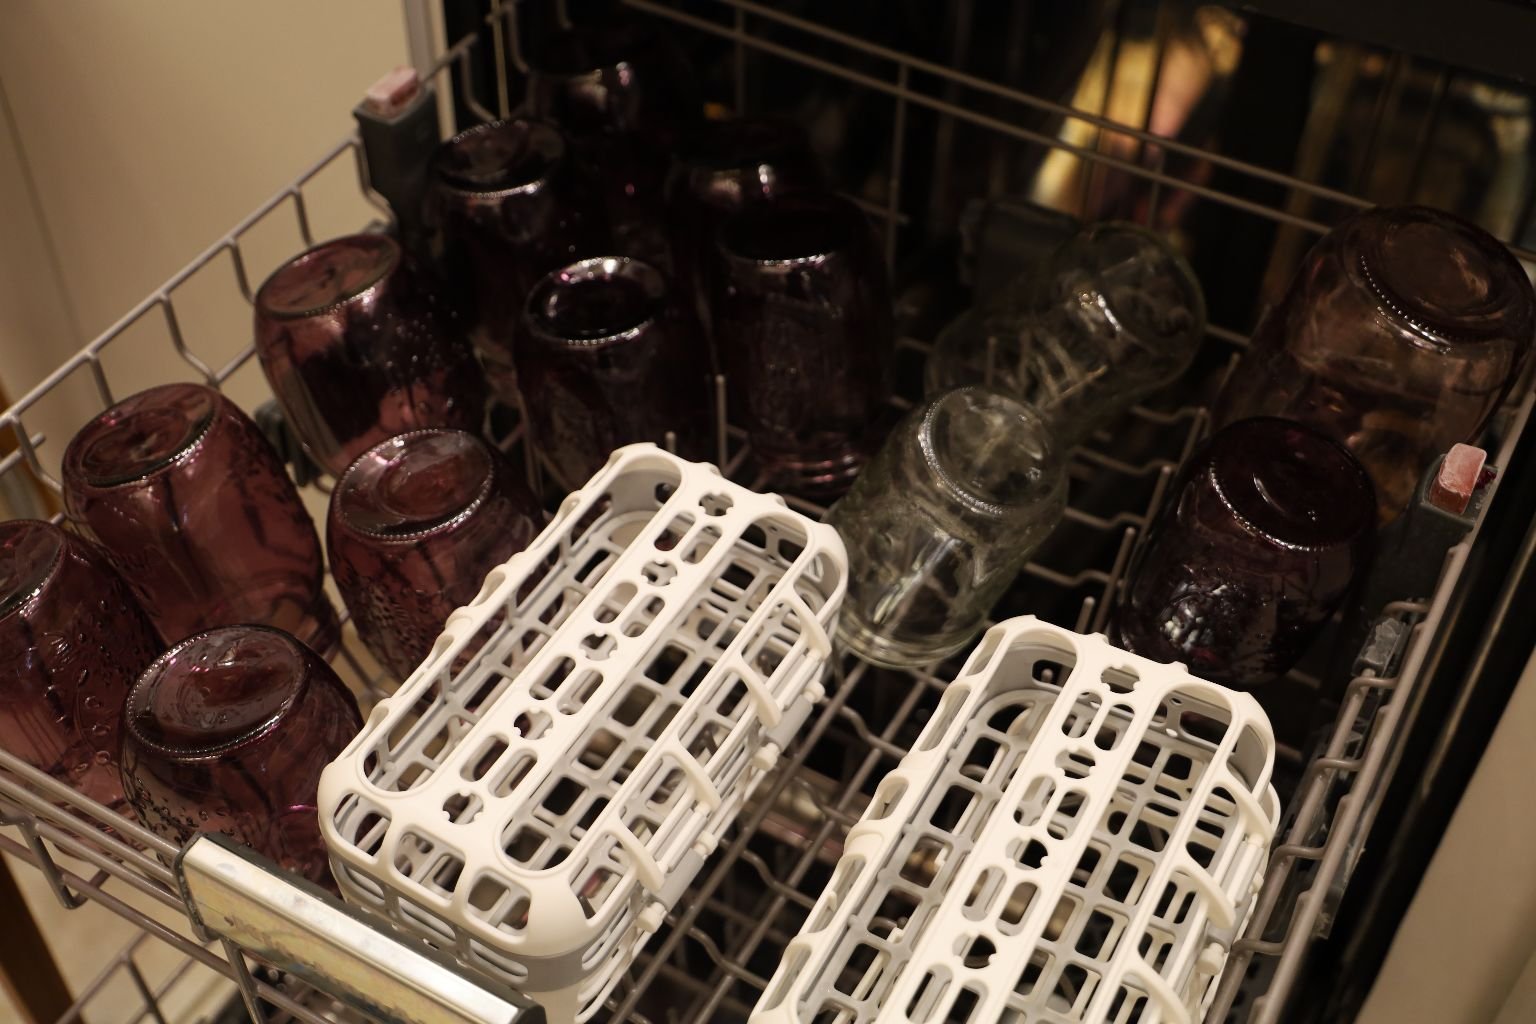

Before you start, you want to place all of your jars into the dishwasher to sanitize them for the canning process. You can wash your lids and rings in soapy water, then allow to dry, and place into a container or zip lock baggies until time for use. You want to keep them sterile.
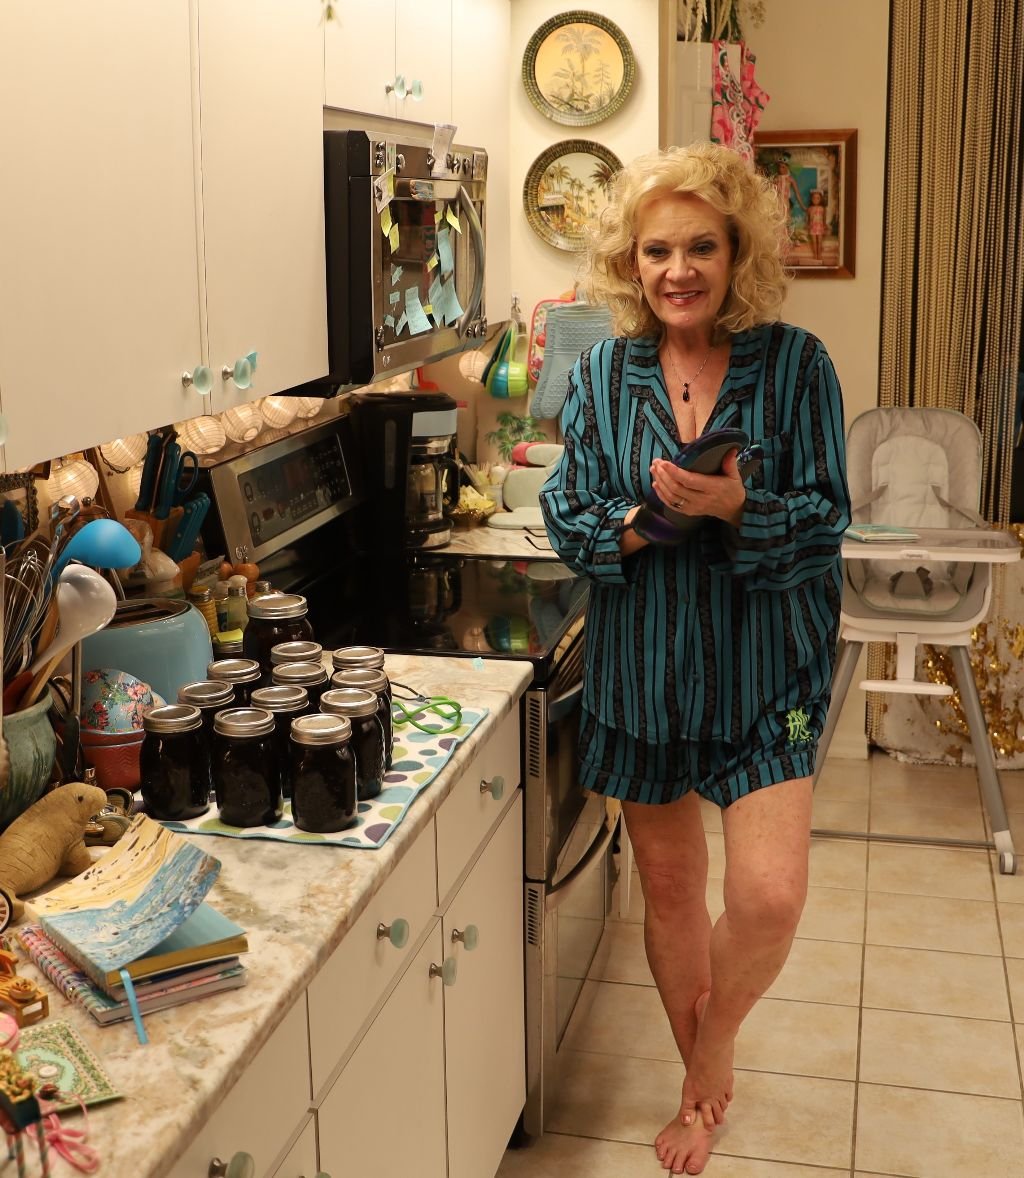
Wearing My Haunted Mansion Pajamas
My Ghoulish Photo was actually taken in 2014 at Disney’s Magic Kingdom Haunted Mansion gift shop.
They do have a photography studio there. At least they did back then. 🙂
———————————————————————————–
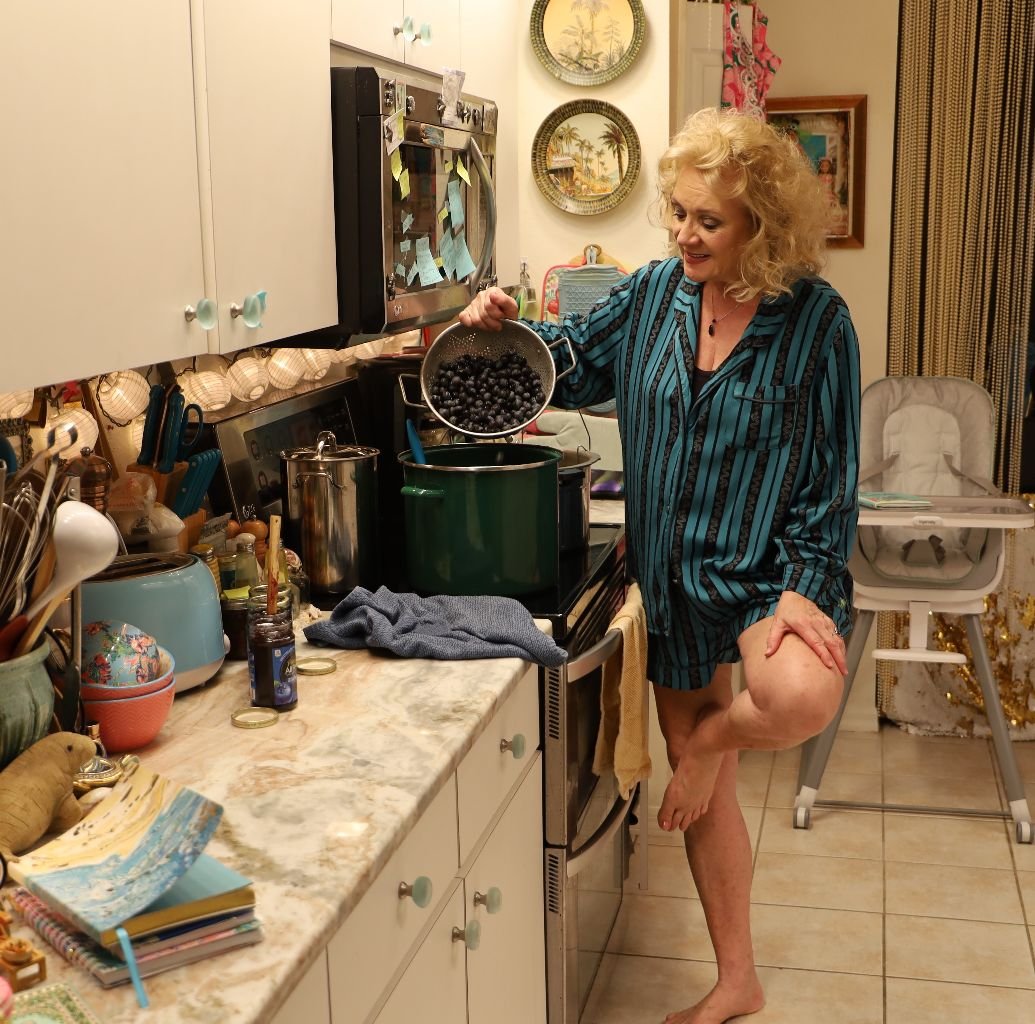
Making A Haunted Jezebel

Rinsing My Blueberry’s
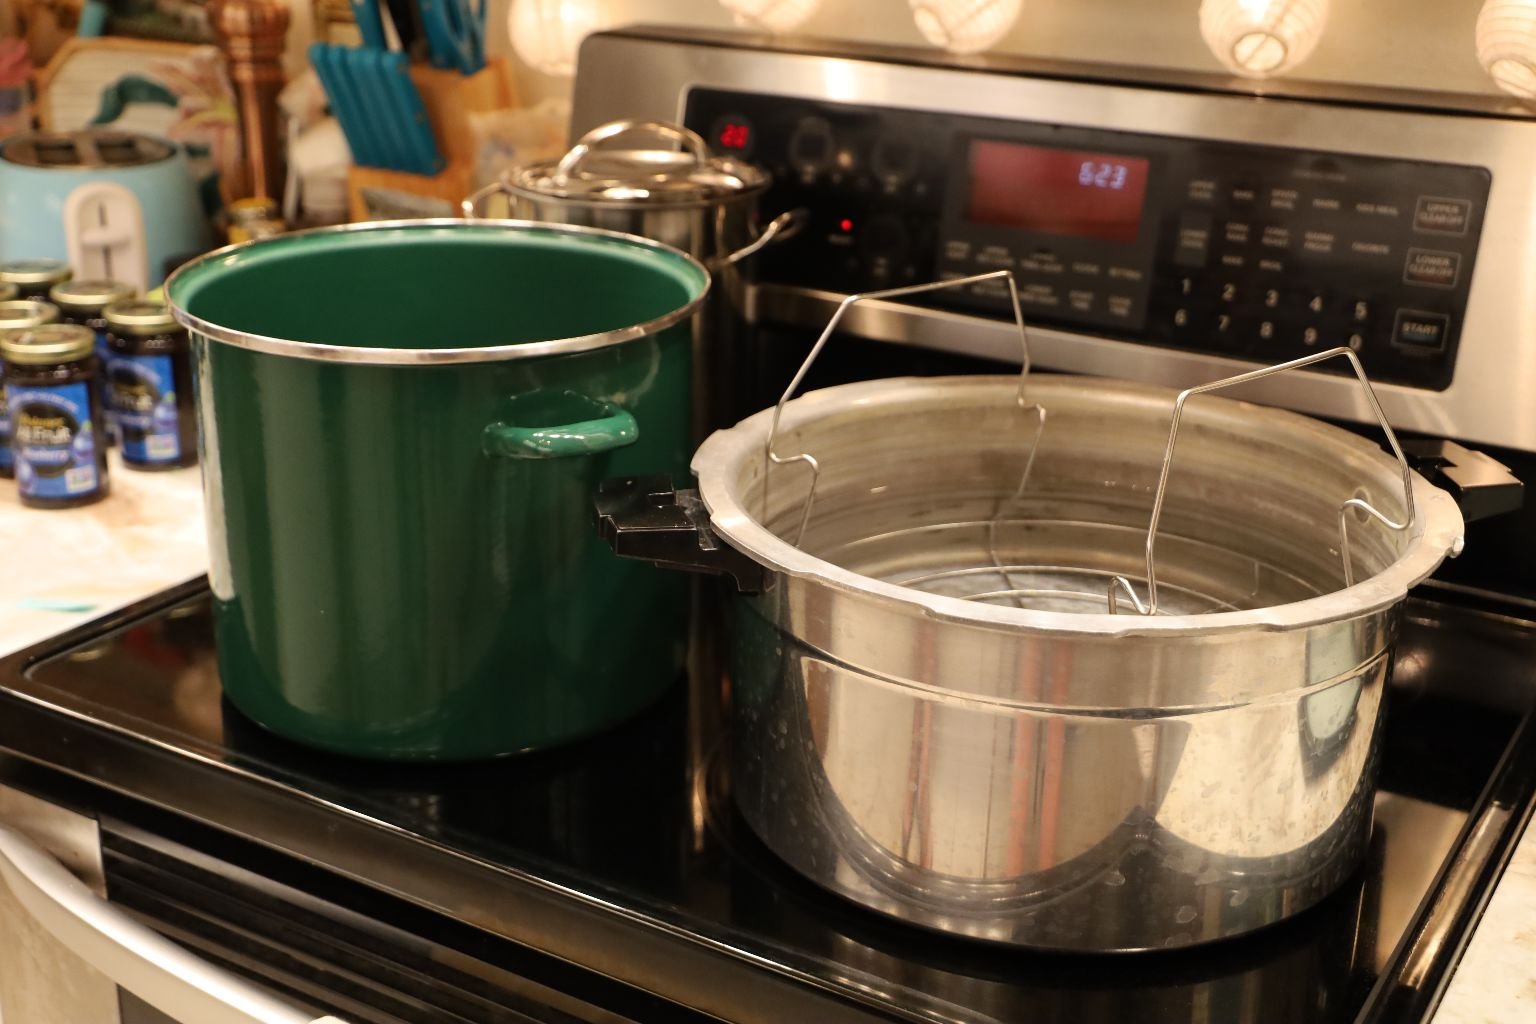
I Have 3 Pots Here
The tall green one is for my Jezebel Sauce, the large silver one right, is for canning, and there is a small silver pot in back of the green one that will sterilize the jar lids.
I have the large silver pot, and the small silver pot on a low simmer for when I need to use them. They are filled with water and ready.

Ready to Start Opening Jars


————————————————————————————-


Turn the stove burner onto a low and start adding the many jars of ingredients to the pot.

The Hardest Part Is Opening All Of Them
——————————————————————————————

I Added All The Jars and Mixed Them Together


Adding the Fresh Blueberry’s, and bringing the temp up to a Medium-High Heat
——————————————————————————
Always Taste As You Go


I am now adding the rest of the ingredients.

It’s time to bring the temp back down to a simmer. We just really wanted to cook the fresh Blueberry’s.
Now that they are a bit caramelized, it’s time to just simmer away on a low heat.

——————————————————————————————-

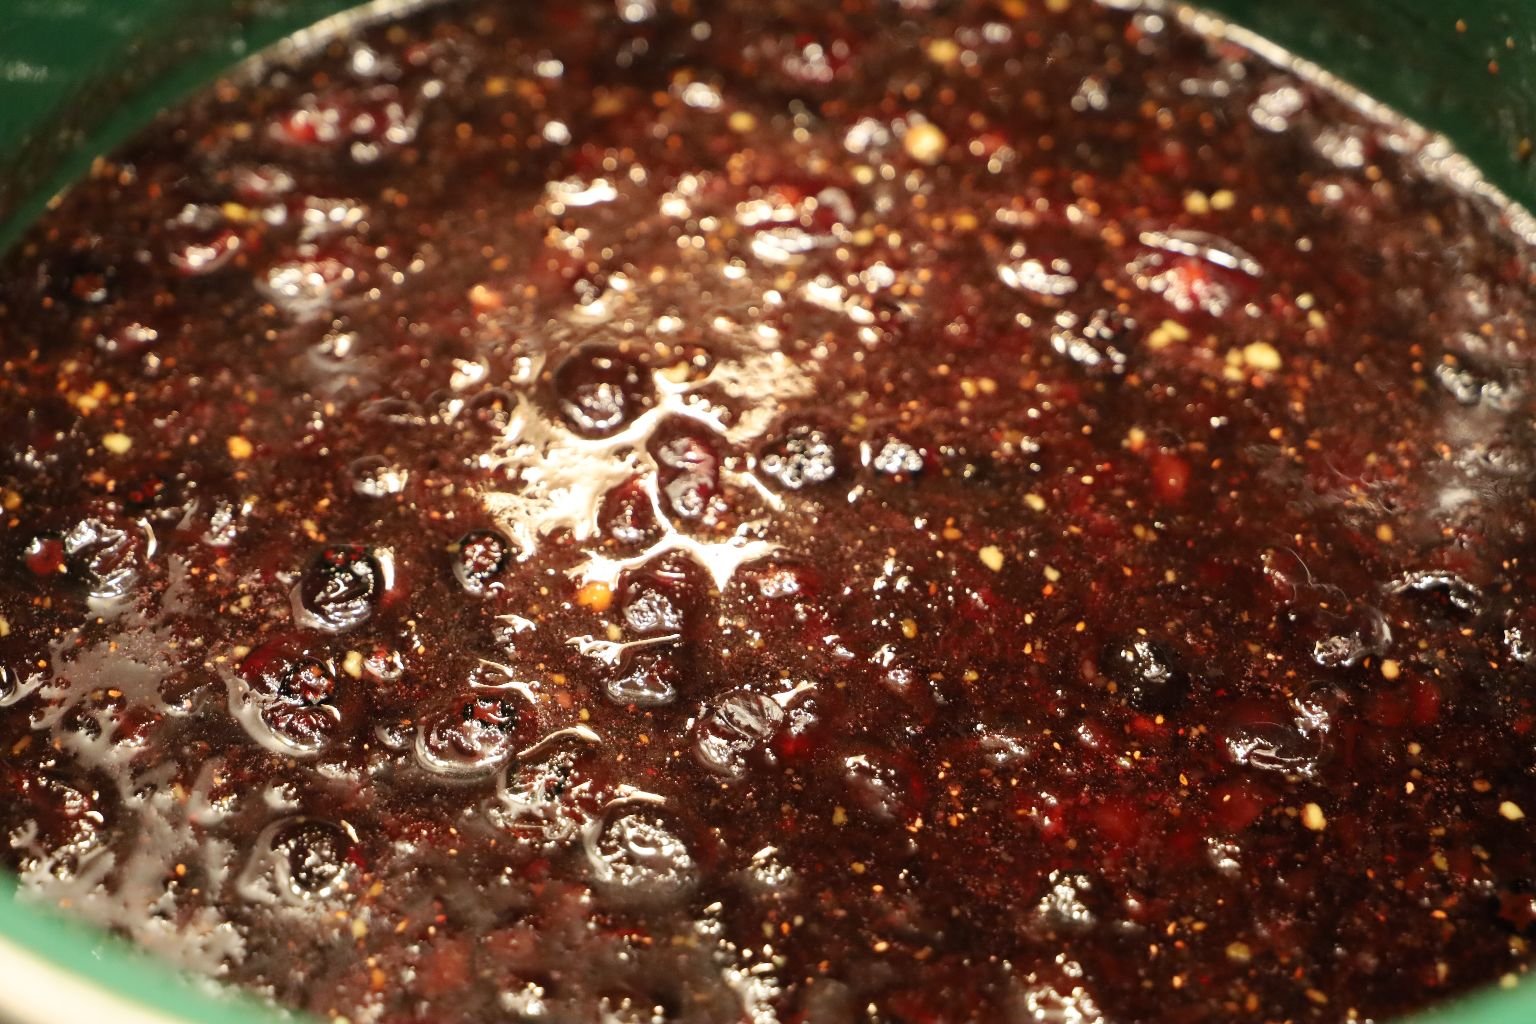
It’s Looking Really Good!


The Last Ingredients Are The Ghostly Ingredients
Just Add A Few Shakes Of These GHOST PEPPER SAUCES


It’s Ready!
———————————————————————————
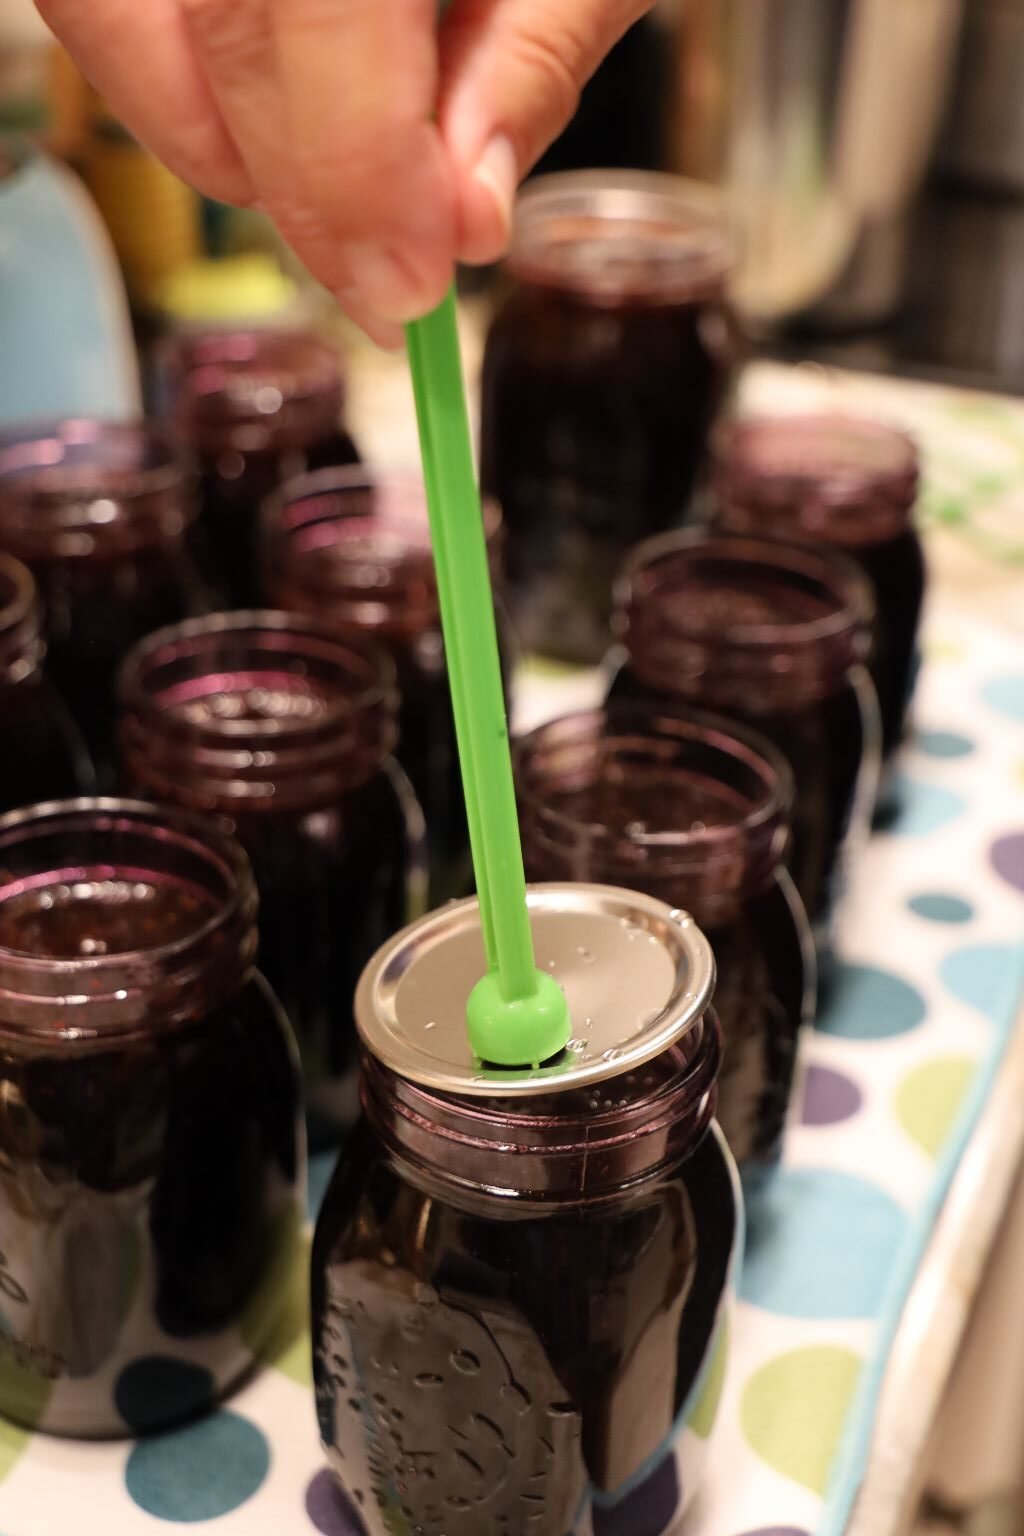
Gordon Does The Canning Process


Using a Funnel and Adding the Jezebel to the Jars


Fill the jars with a ladle leaving about 1 inch of head space which is the space from the top of the sauce to the top of the jar.
This space is needed to create a vacuum when the jars are in the boiling water.


—————————————————————————————————

Make sure to place a nice cushiony mat on your countertop to protect it, and something absorbable when the jars are removed from the canning pot. They will be wet.

Wipe the top of the jar clean with a wet paper towel. This will create a good seal between the lid and the jar.
———————————————————————————
Remember when I mention above of a smaller silver pot in back of the tall green one? That small pot is filled with water and the lids that go on the jars are simmering to sterilize and soften that seal…..
The lids in water that are heated just under a boil for about 10 min. are to sterilize the lids. Using a magnetized stick, remove the lids from the water and place them on the jars. Like so. So not touch the lid. See photos directly above.
Photo Top right: Place the rings around the jars just snug and not tight which will allow the air to escape creating a vacuum.
——————————————————————————————-

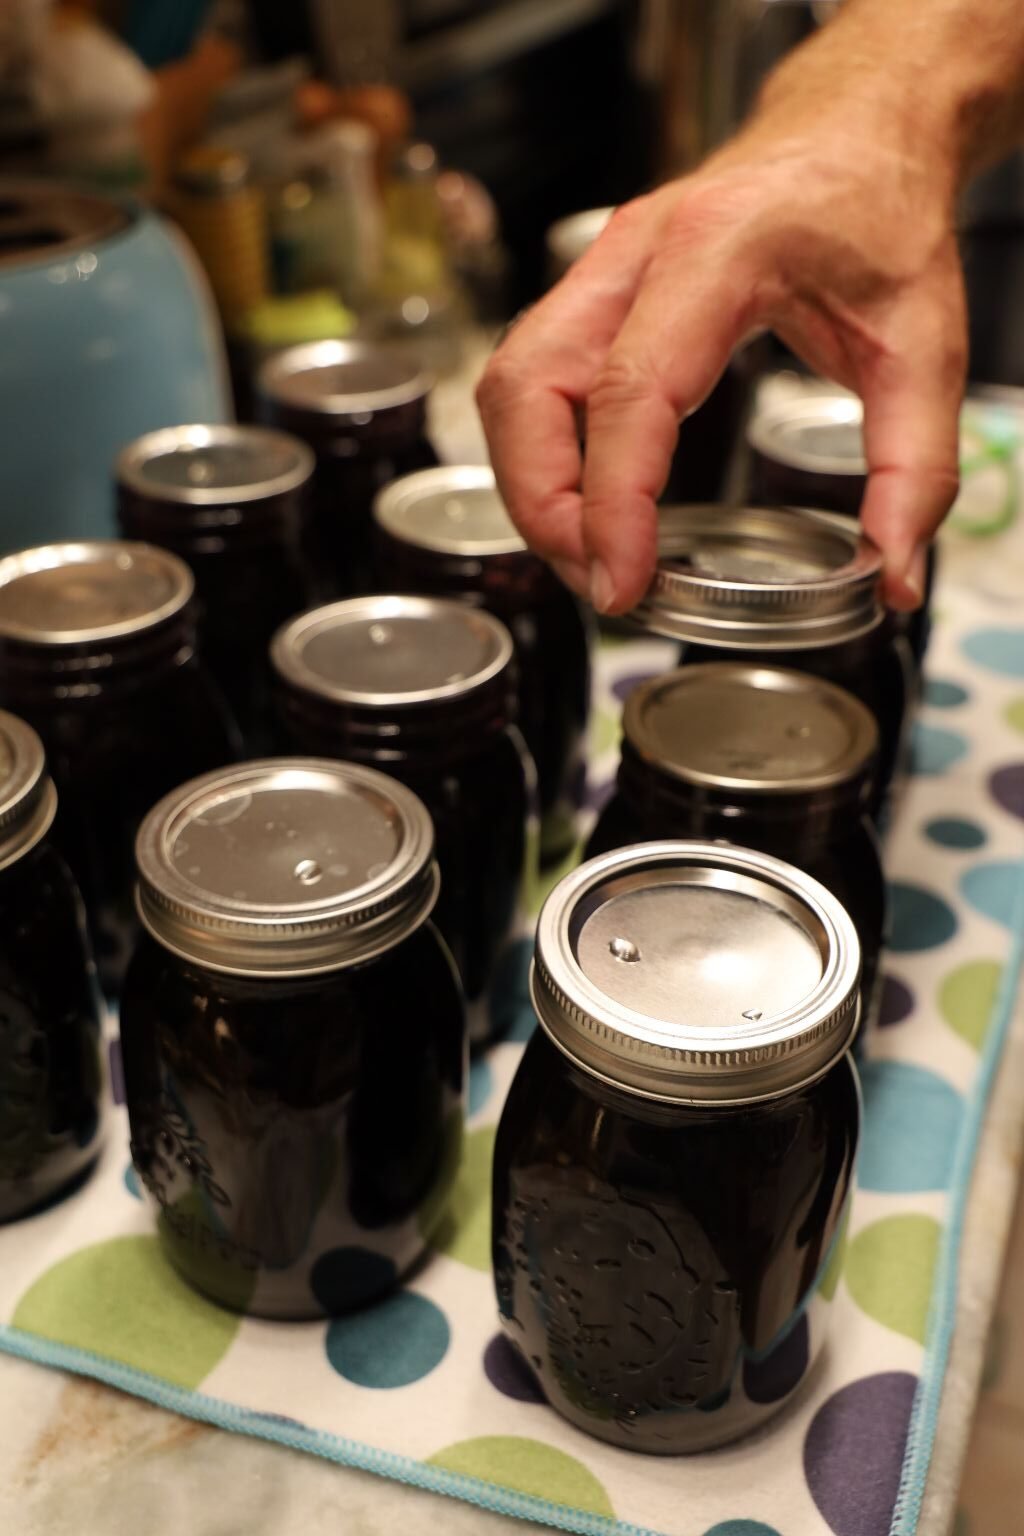
These Jars Are Ready For Canning


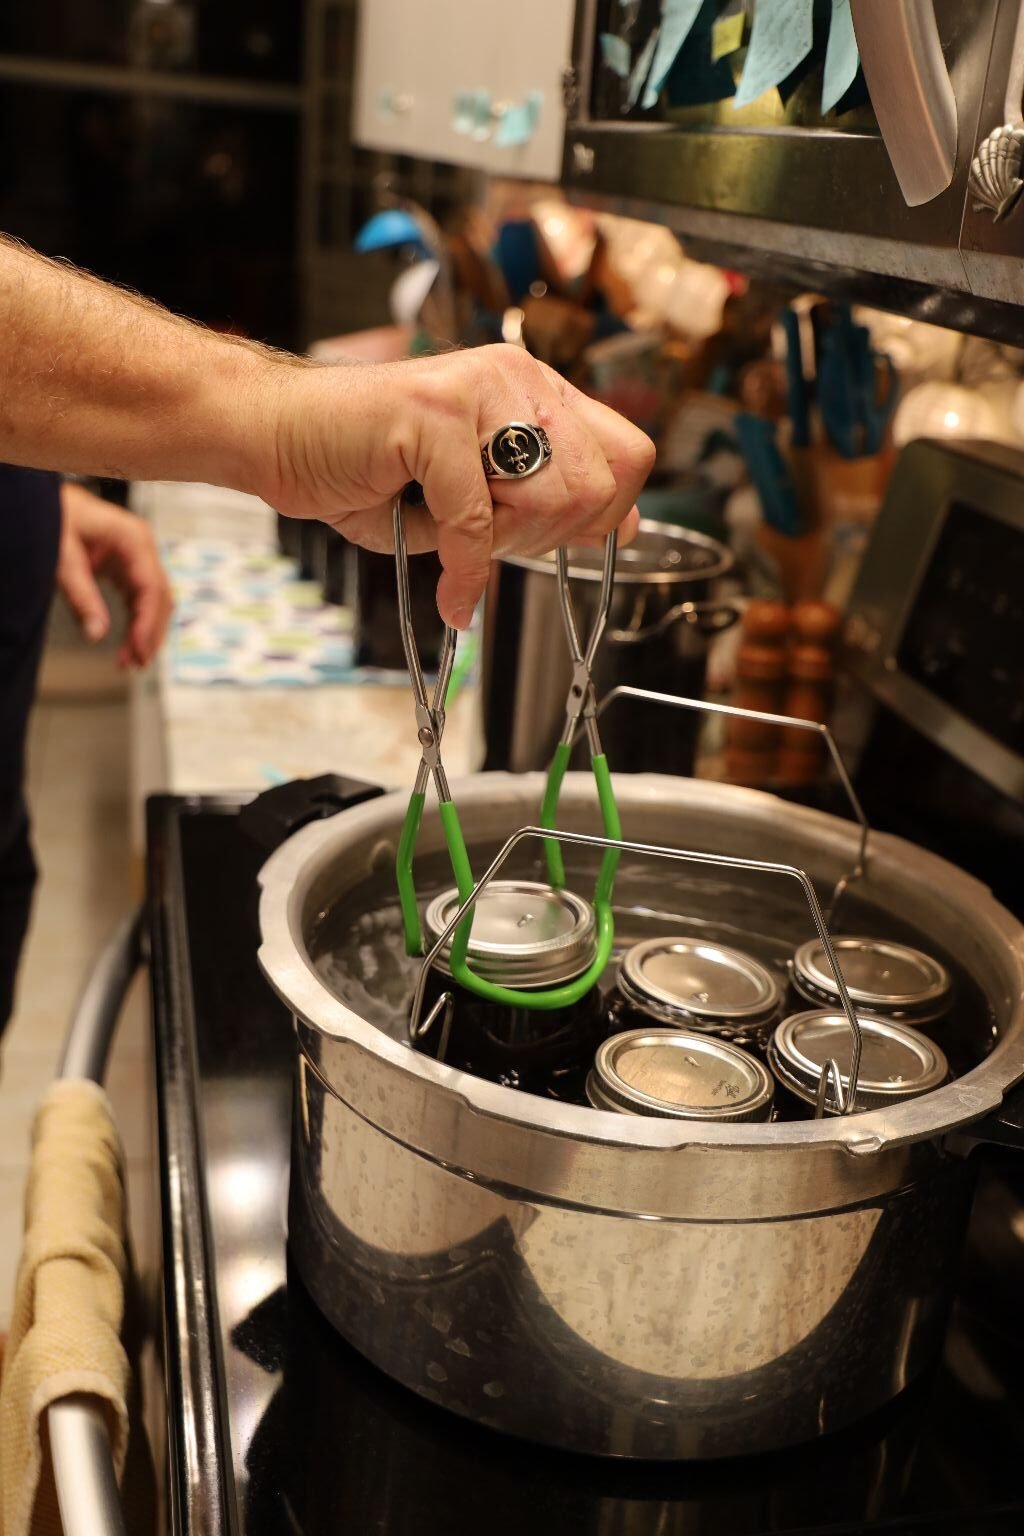
Place the closed jars under water where you should see bubbles leaving the jars.
Boil the jars for 15 min. This is the canning process.

———————————————————————————————————


When 15 min. are done, remove the jars with the tongs and place on a hand towel or mat to cool.


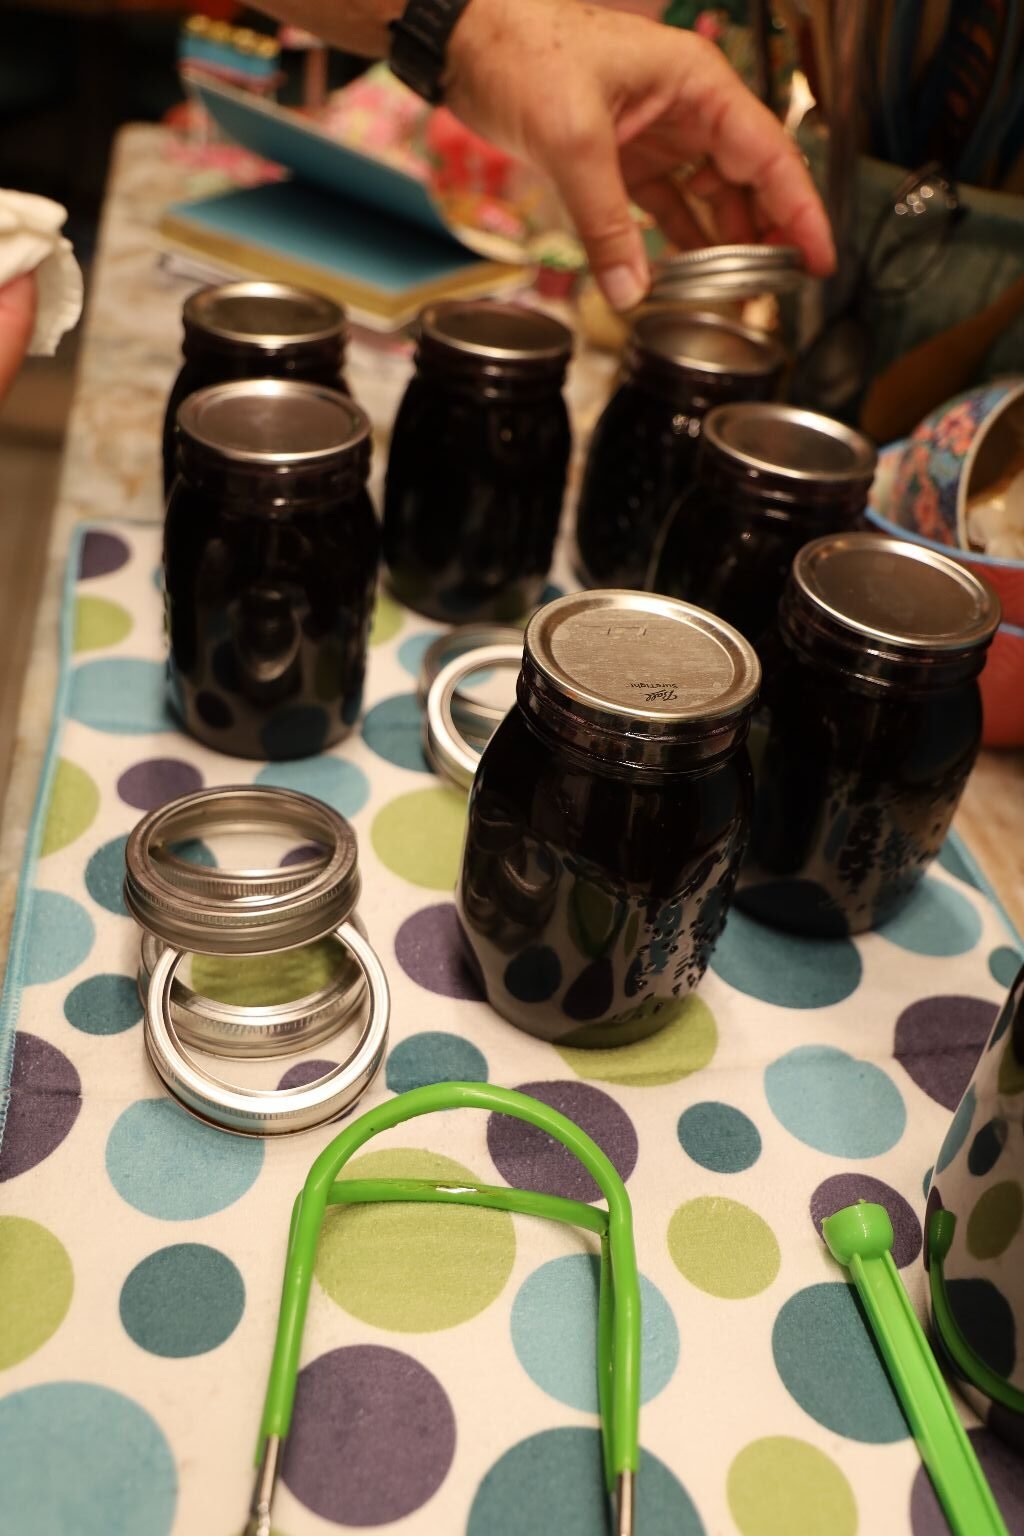
Wiping The Water Off The Jar Tops and Rings
———————————————————————————————-
You should begin to hear the jars pop as the vacuum pulls the lid down. Some jars don’t have a button top and will not pop, but will be in the down position. Any jar that didn’t pop or lid not in the down position needs to be re-done. It could be that the jar didn’t have a good seal, or there isn’t enough head space. Use a new lid, check the seal by wiping the top of the jar, and remove a touch of the sauce. Place the jar back under water and boil again for another 15 min. until sealed.
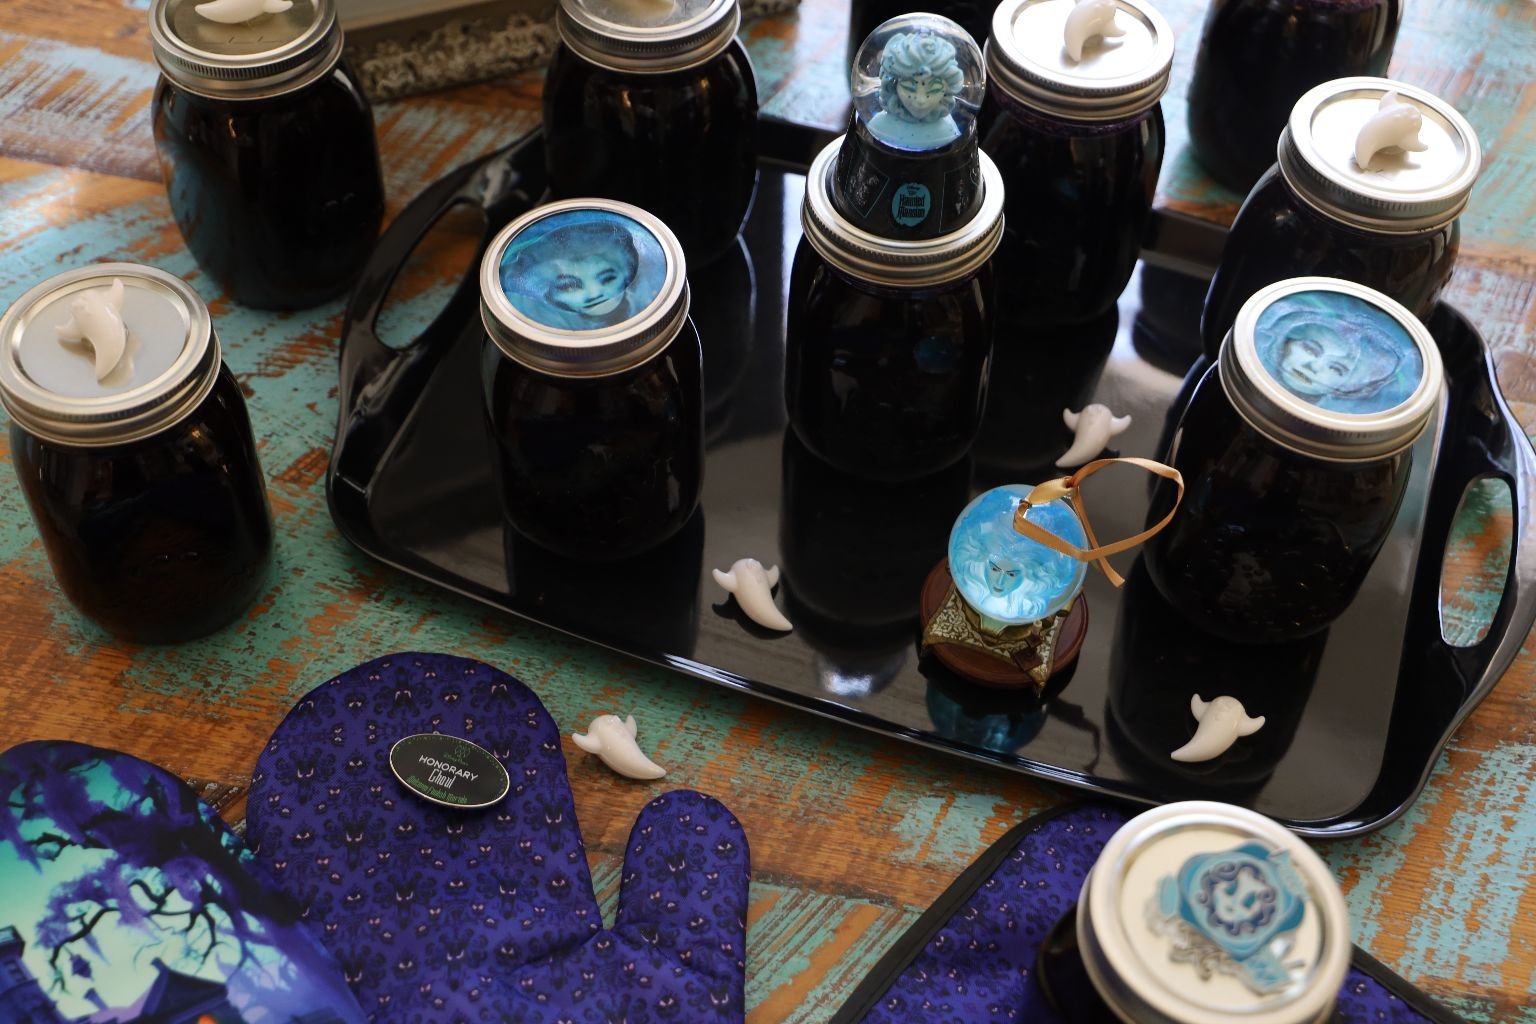
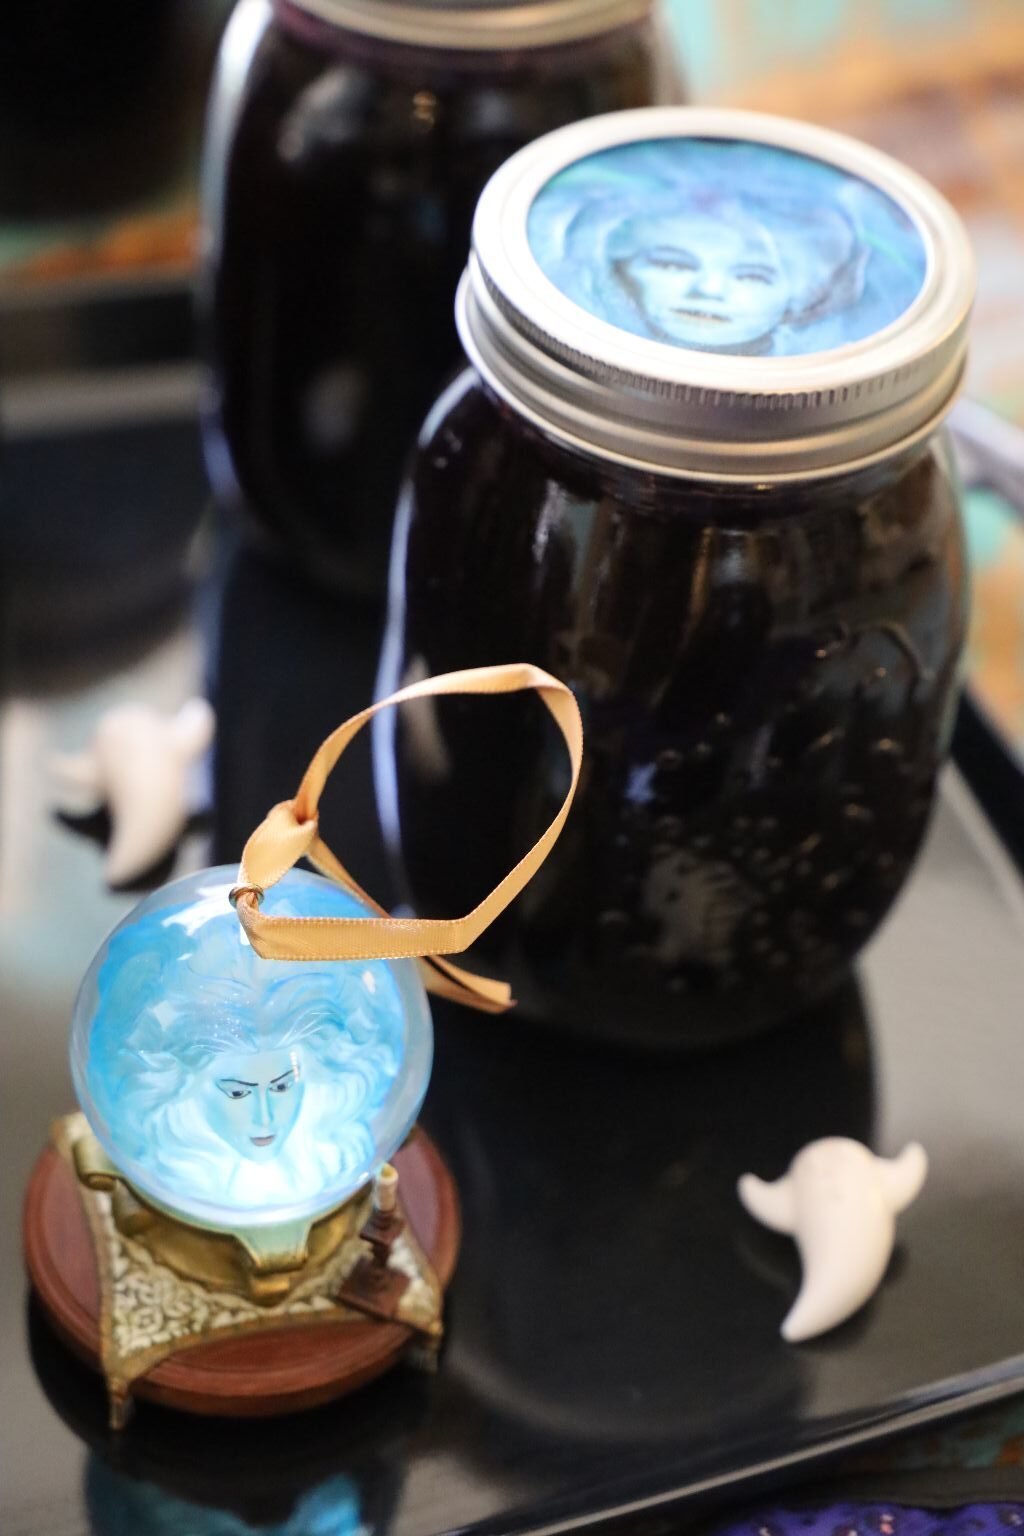
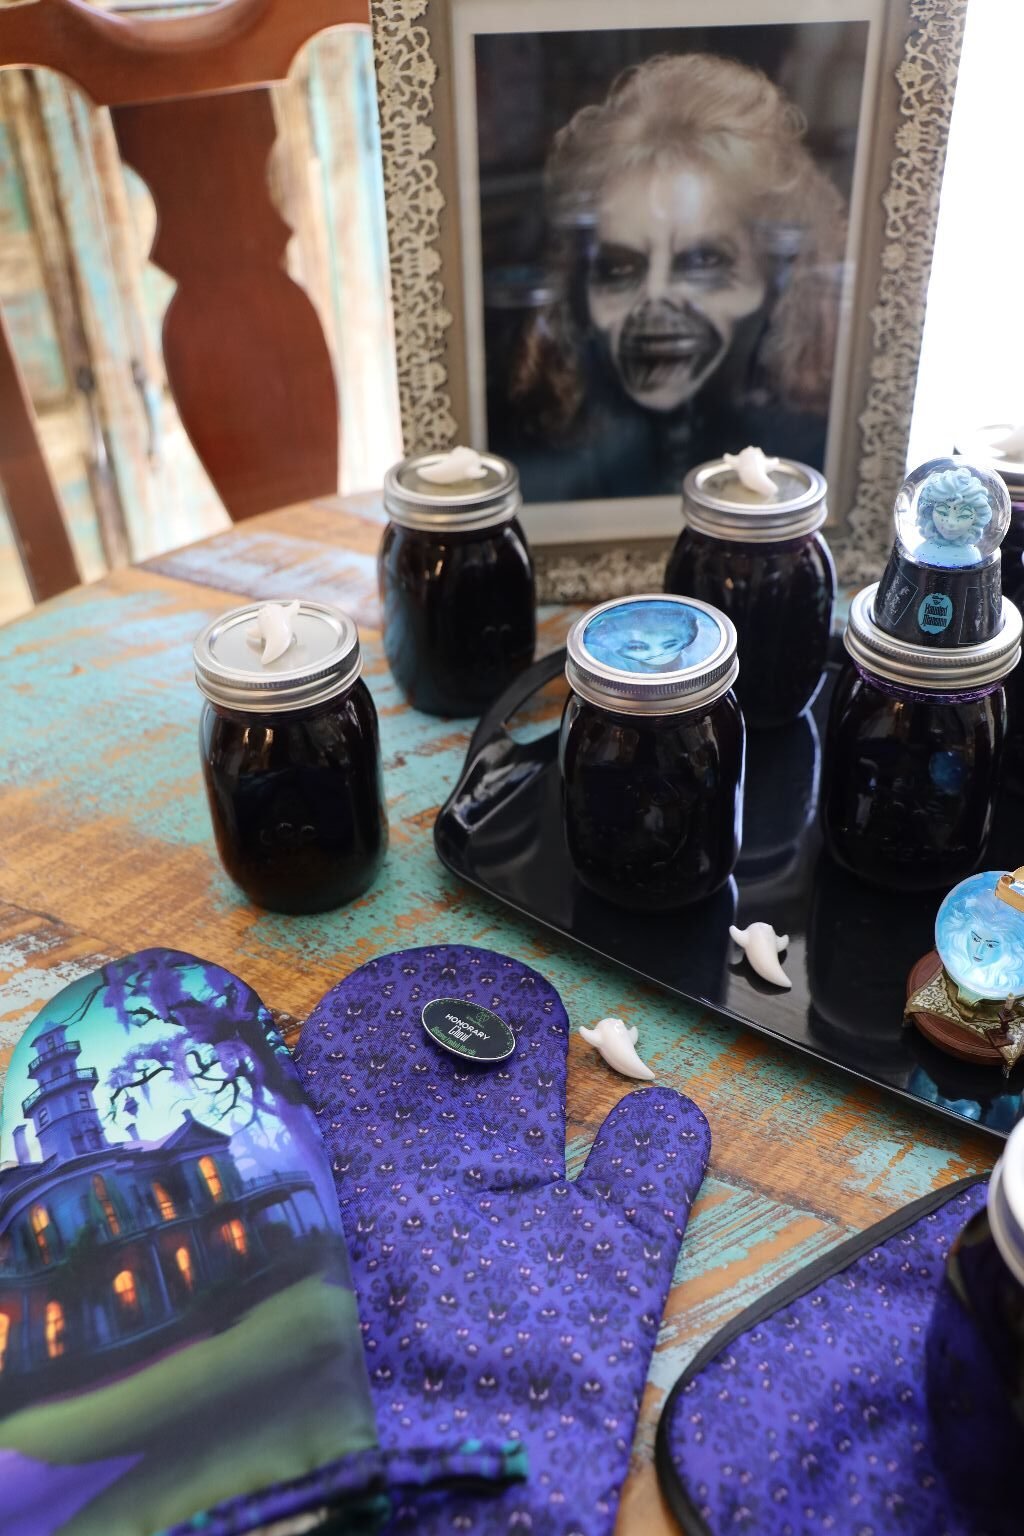
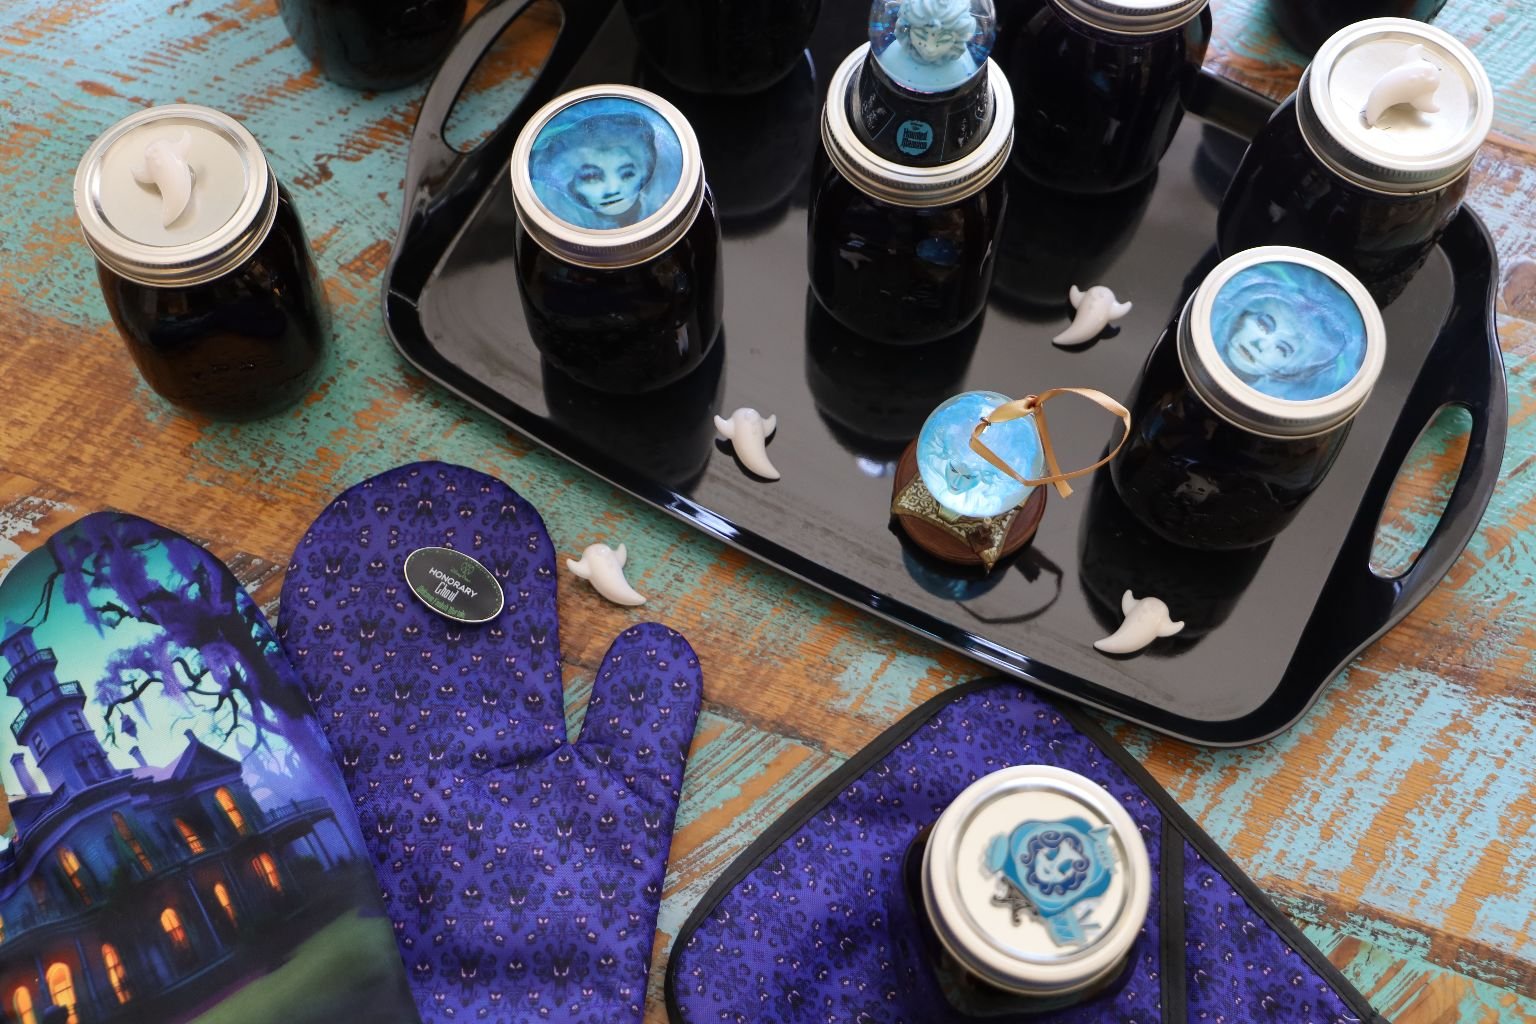
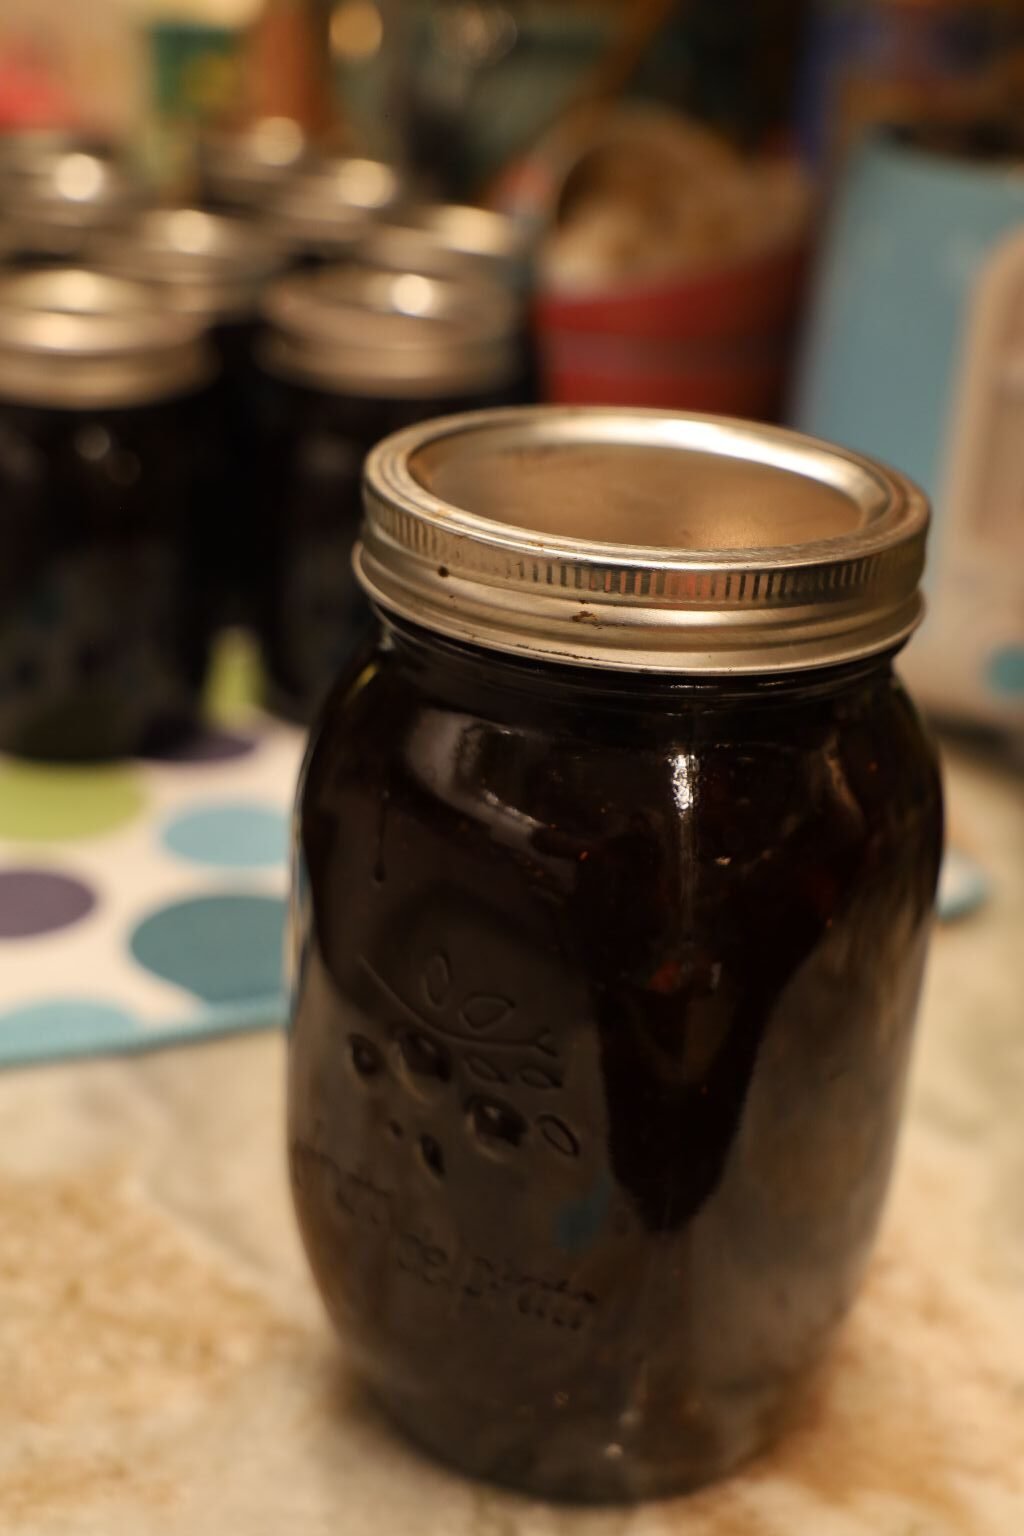
I was able to acquire the Madame Leota heads to place on the top of our lids as an accent.
I also had some old little ghost toys that I placed and glued on top of some of the jar lids.
Now they are ready to give as gifts.
——————————————————————————————-
Party Recipes Start Here
——————————————————-
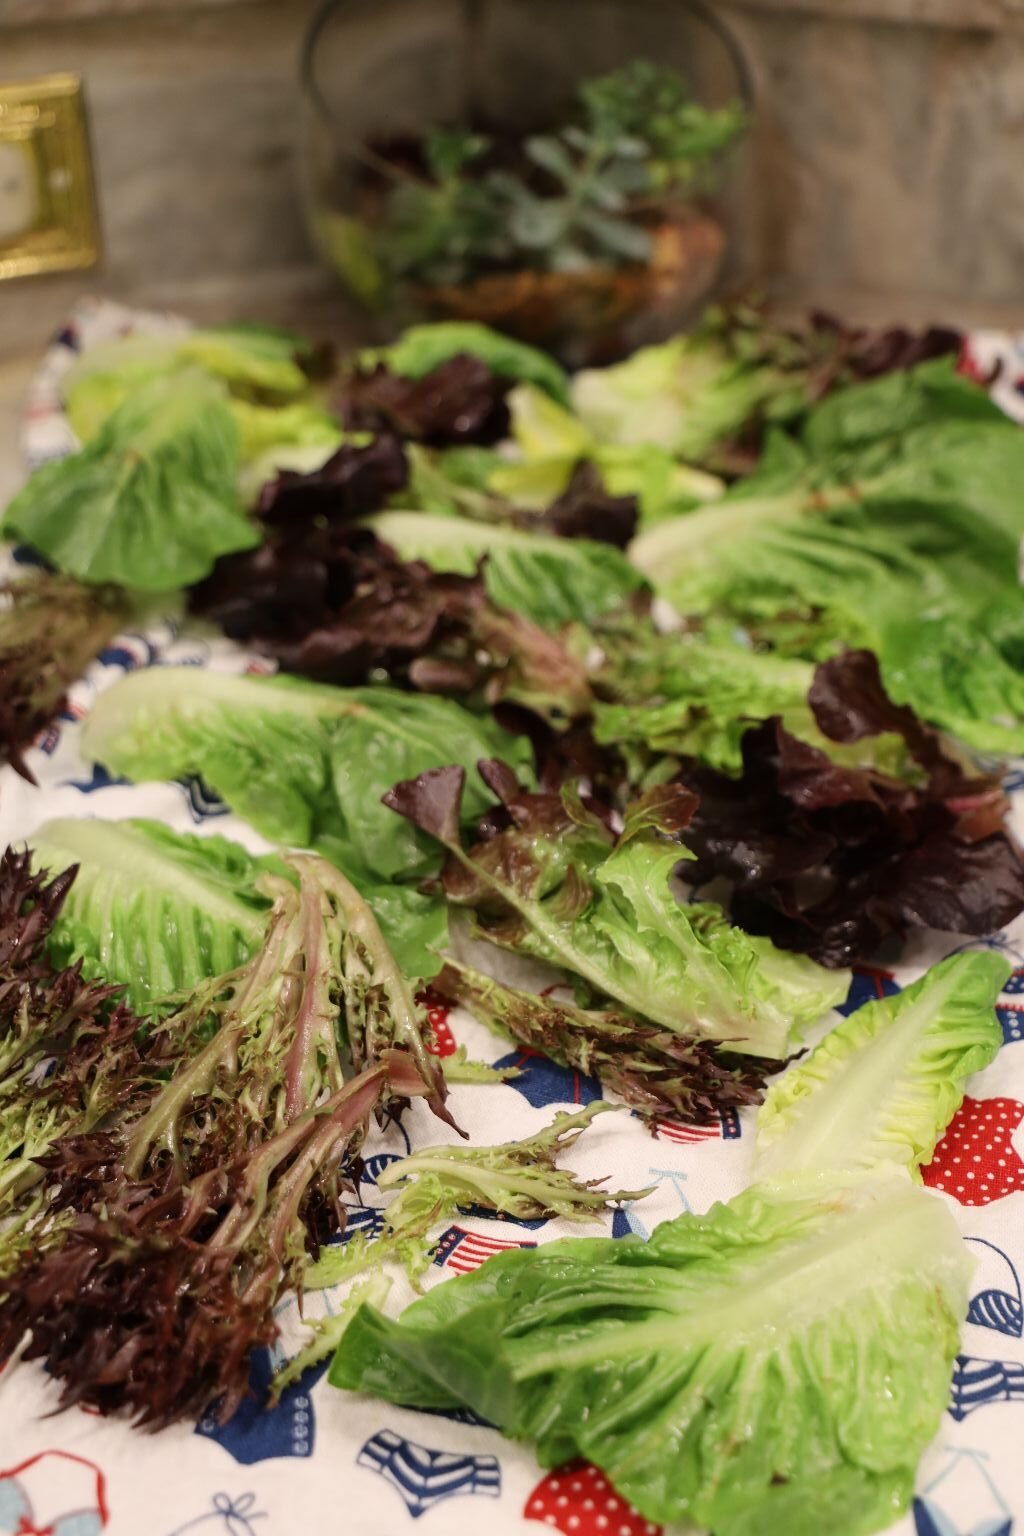
A Good Salad Is Always A Great Idea
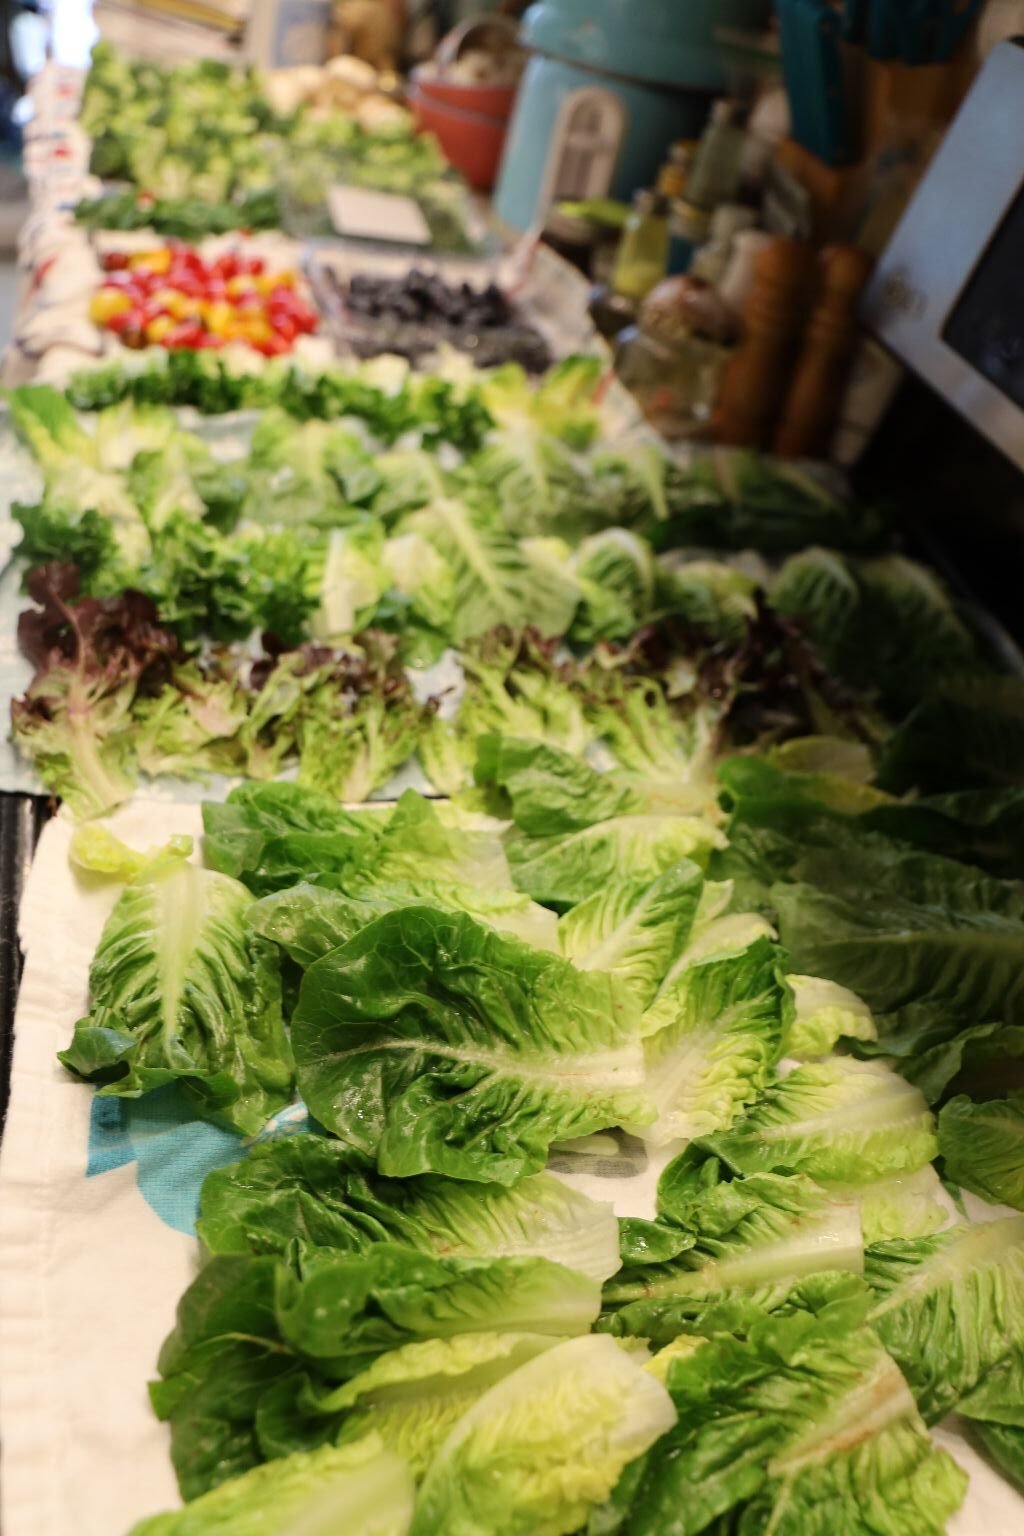
The nice thing about serving a large salad is that you can wash all of the ingredients ahead of time, keep them fresh in storage baggies or Tupperware Containers. Just keep in the refrigerator and combine when ready to serve.
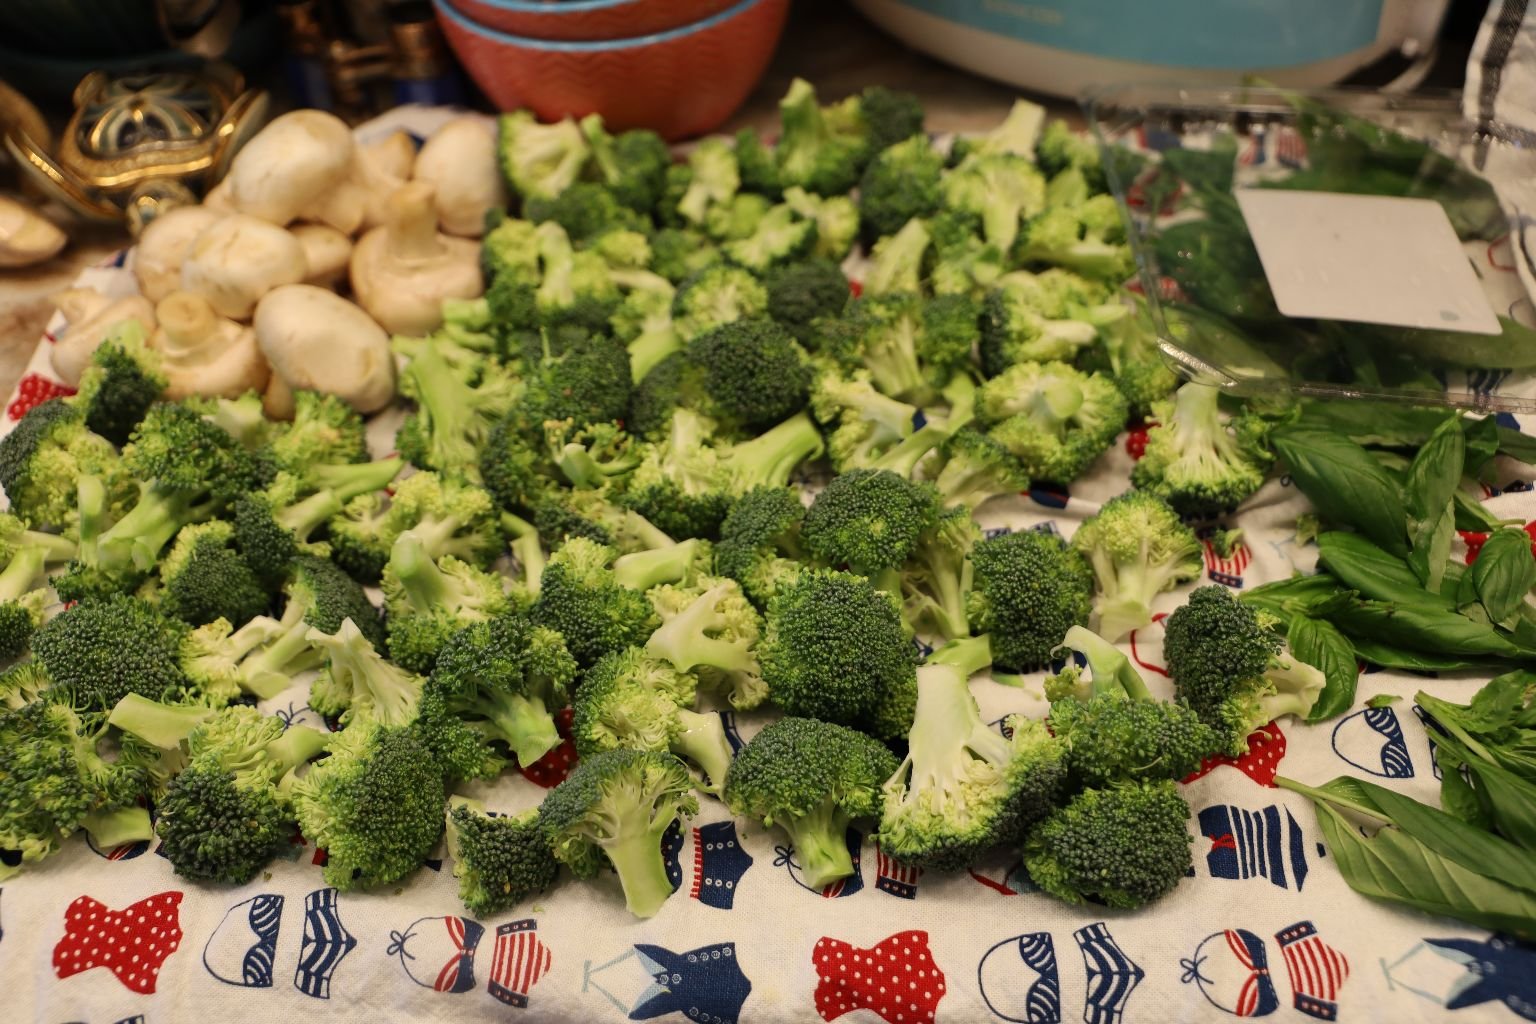
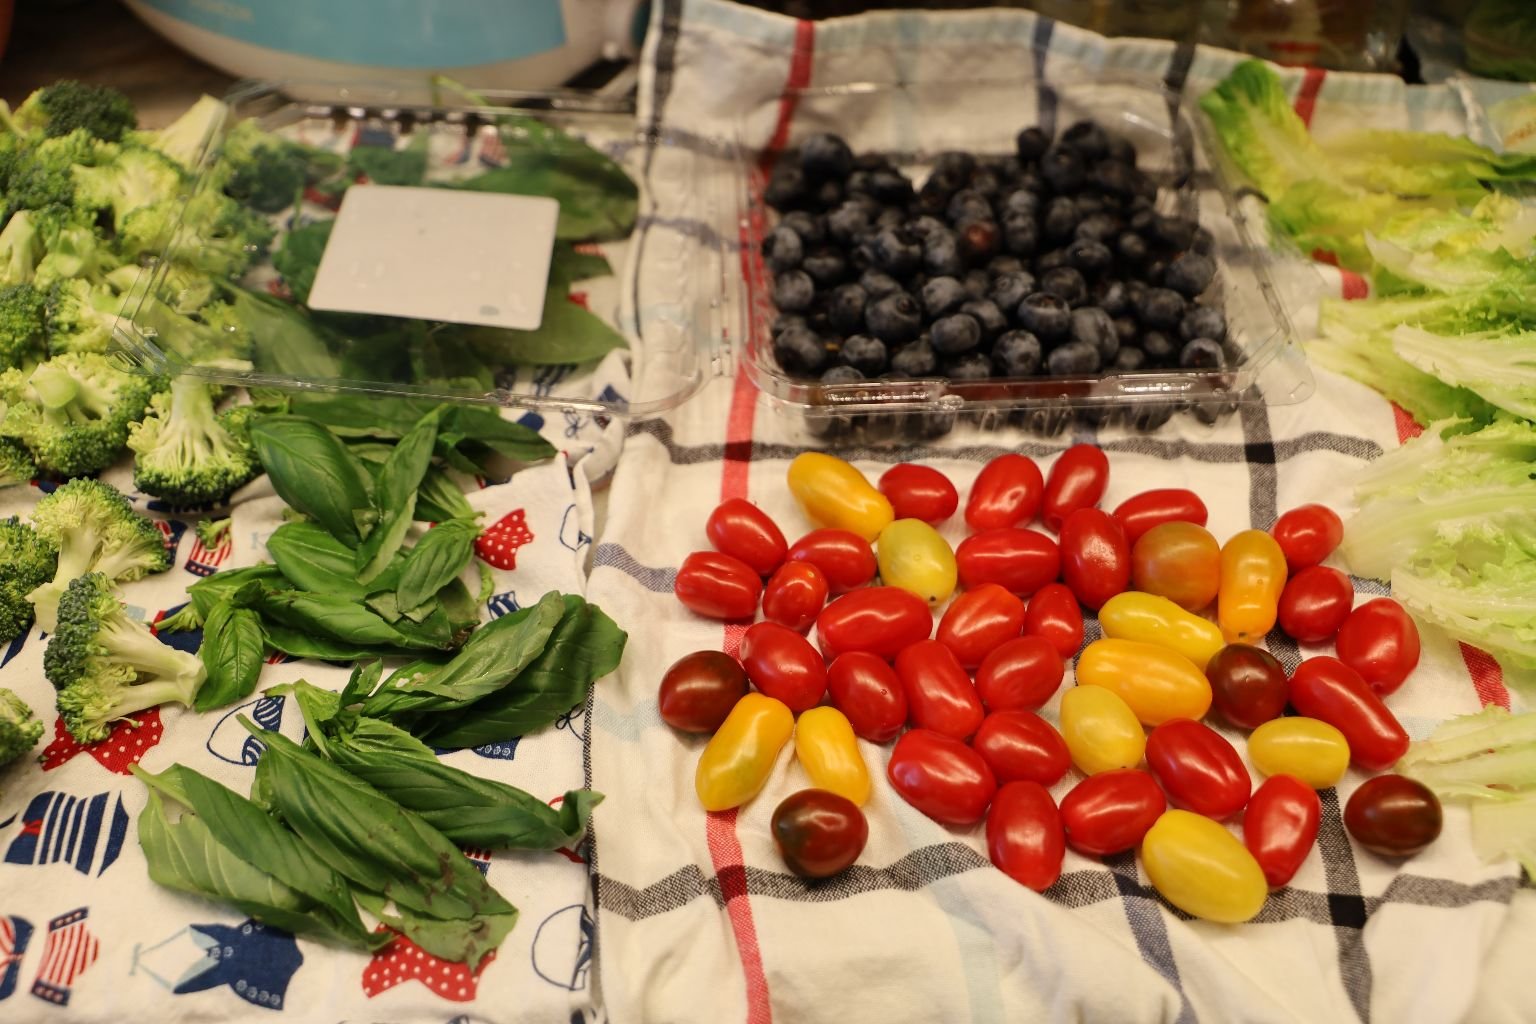
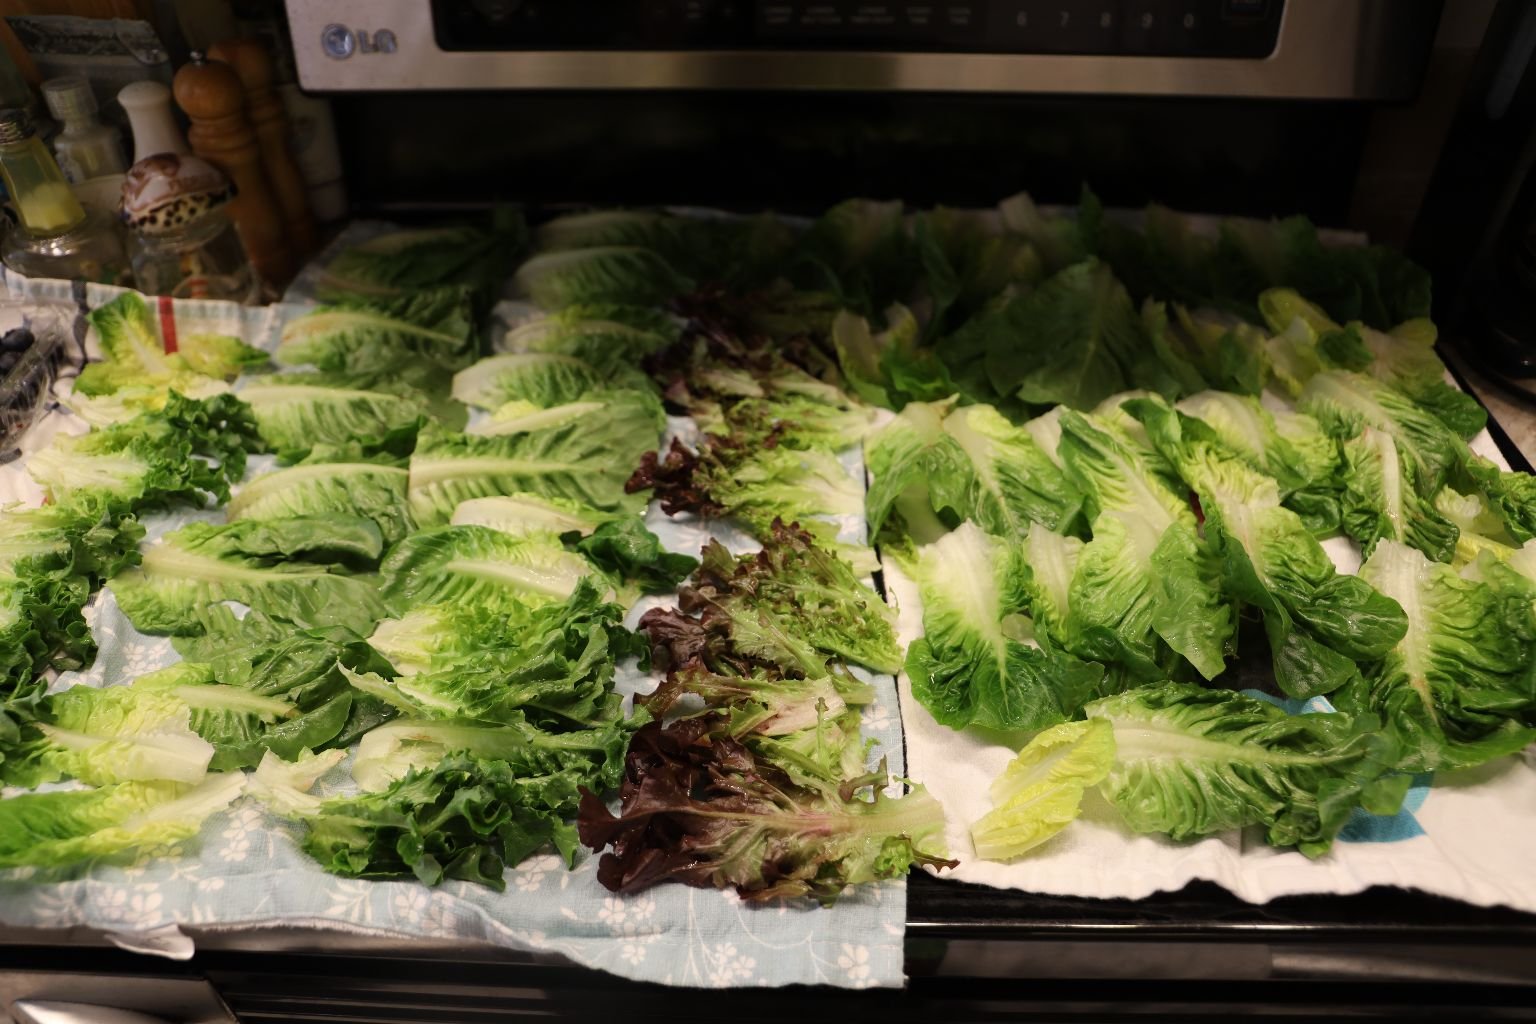
Also washing other Vegetables for the additional food items.
Something to prepare the day before that will save time the day of the party.
—————————————————————————-
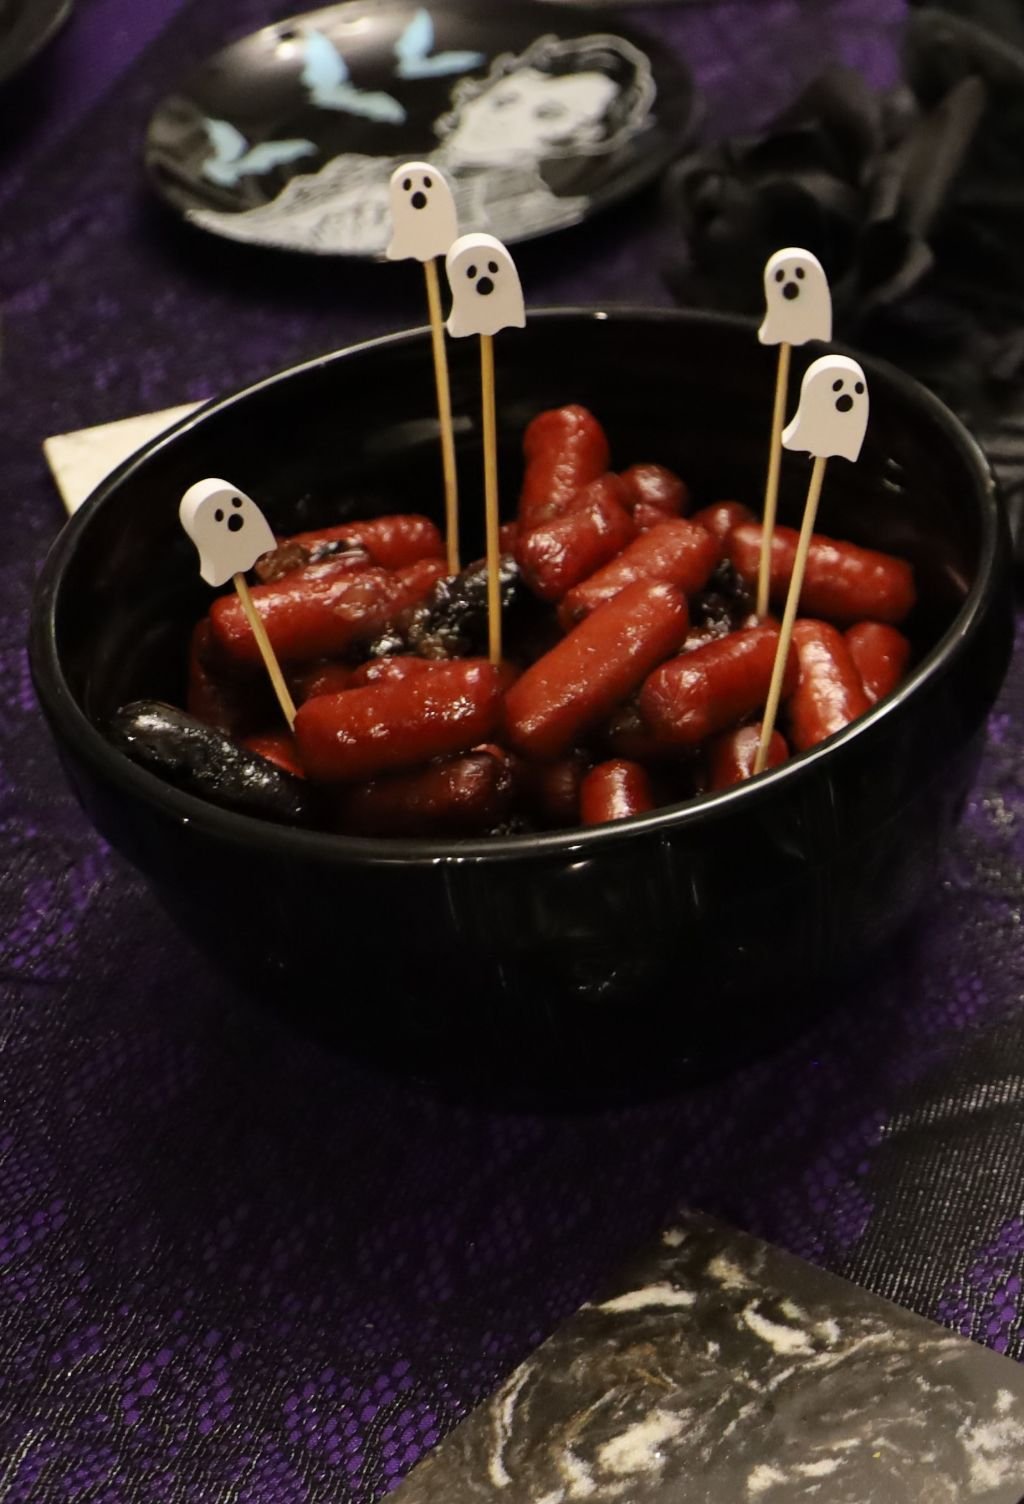
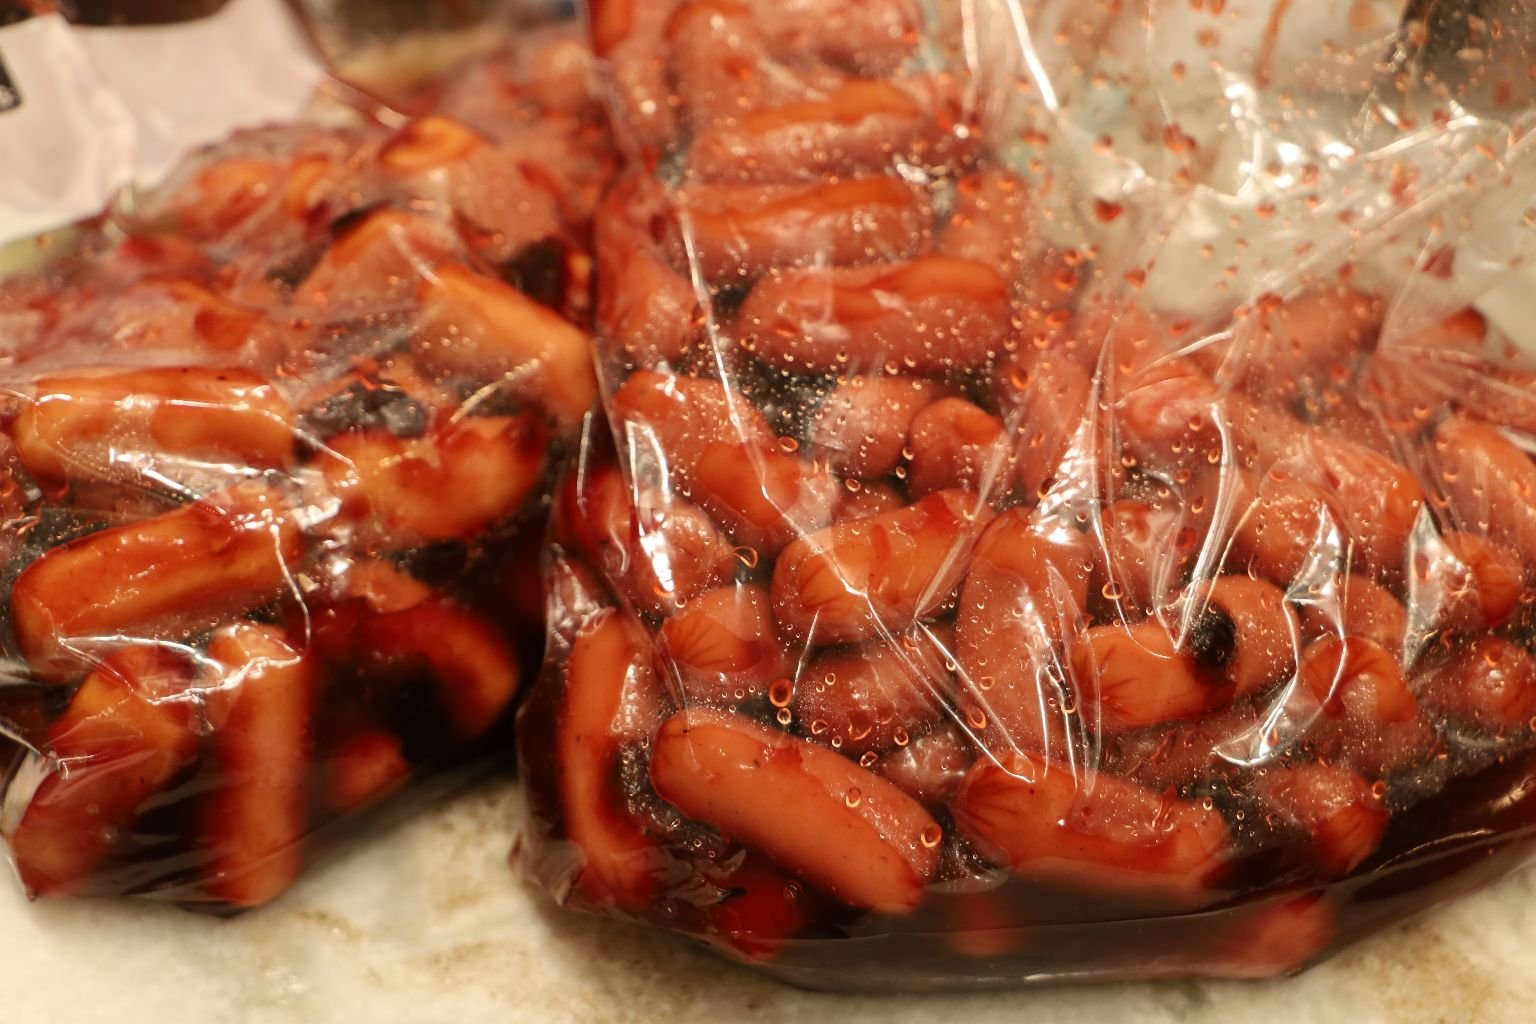
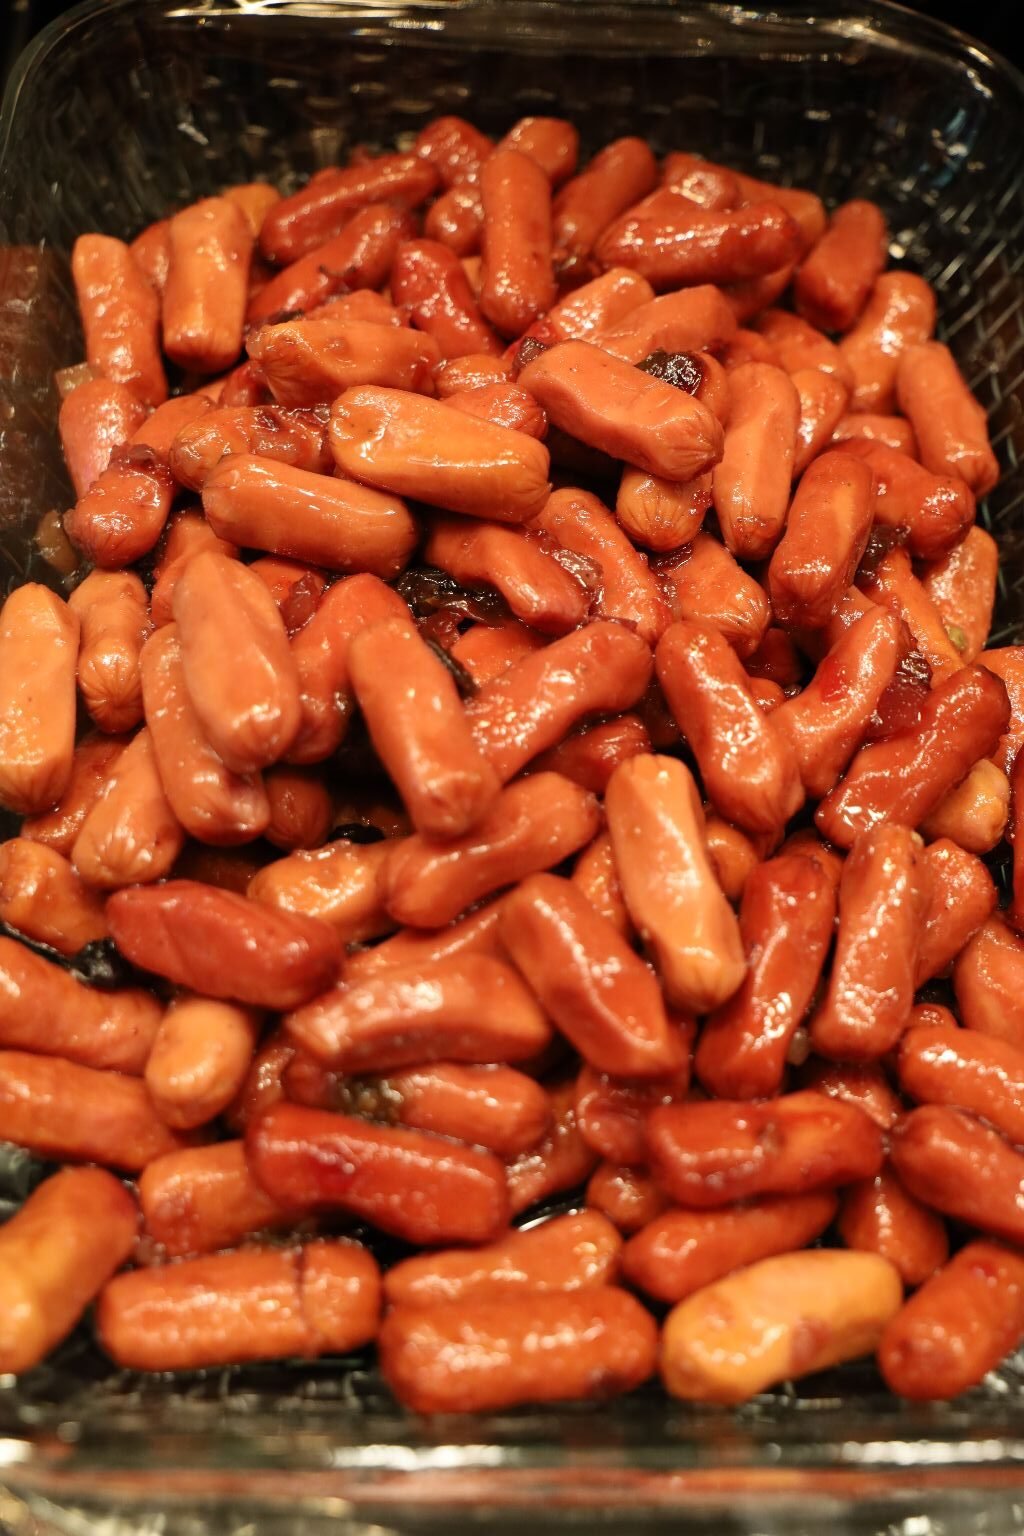
A Haunted Jezebel, Bags of Mystery
Just Add A Few Ghostly Picks
(Sausages were once called ‘Bags of Mystery’ because the only person who knew what was in them was the butcher.)
——————————————————————————————
Ingredients:

Li’L Smokies Sausages
I love these sausages! They work so great here, and taste delicious.
A Haunted Jezebel Sauce
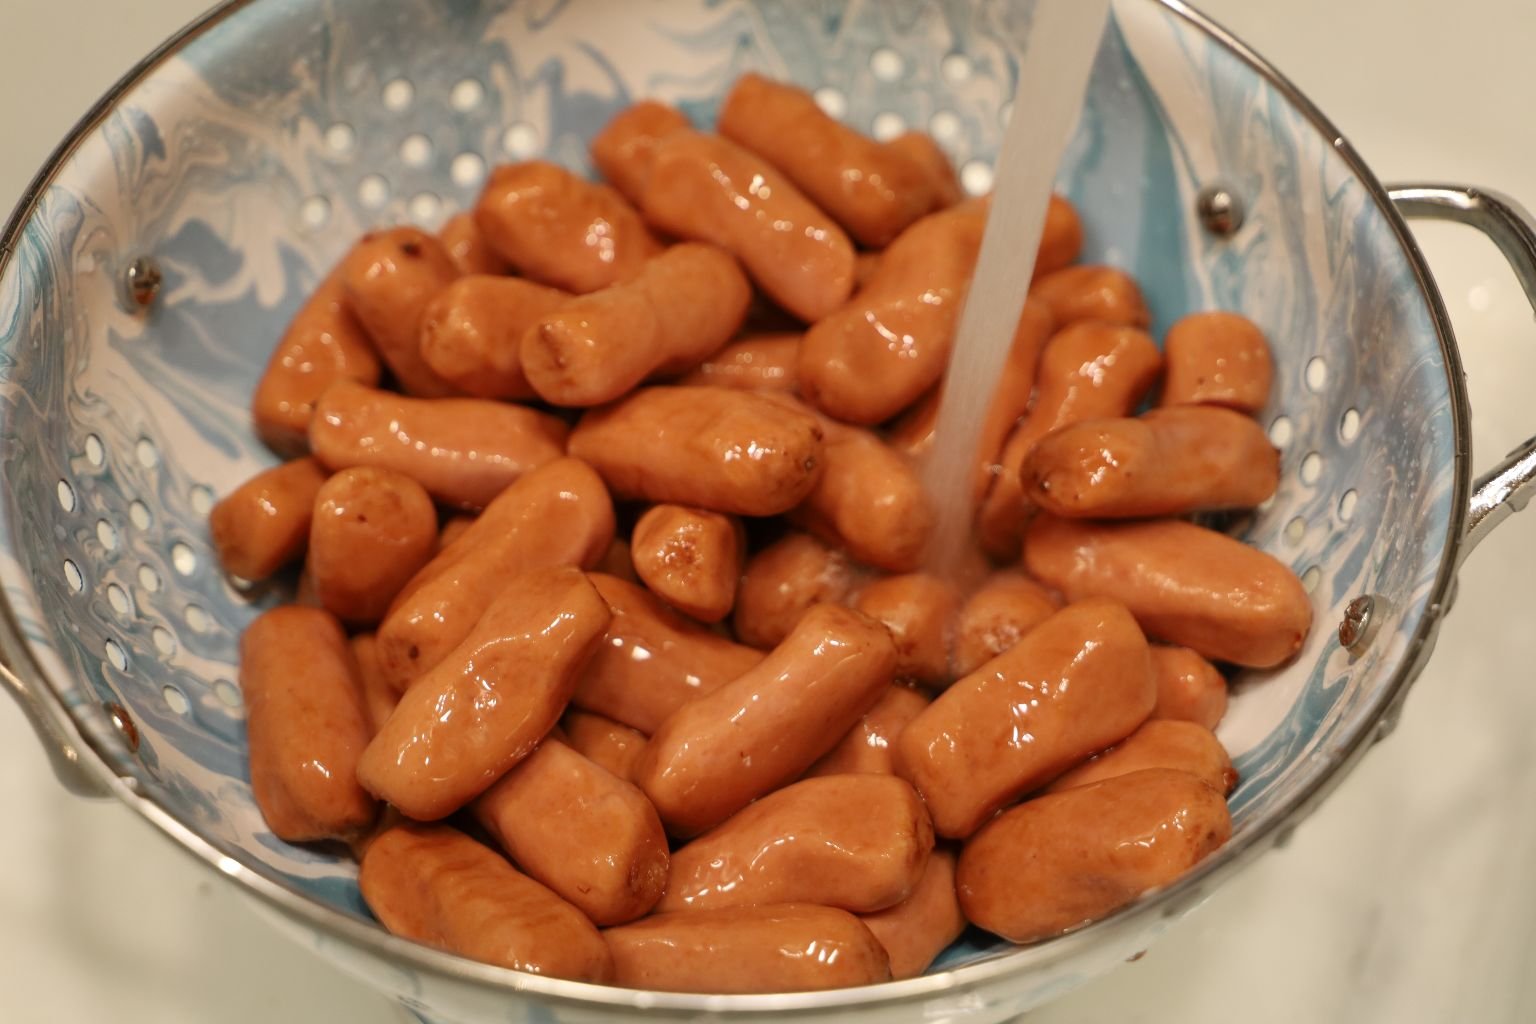
Rinse The Smokie Sausages in Water and Set Aside
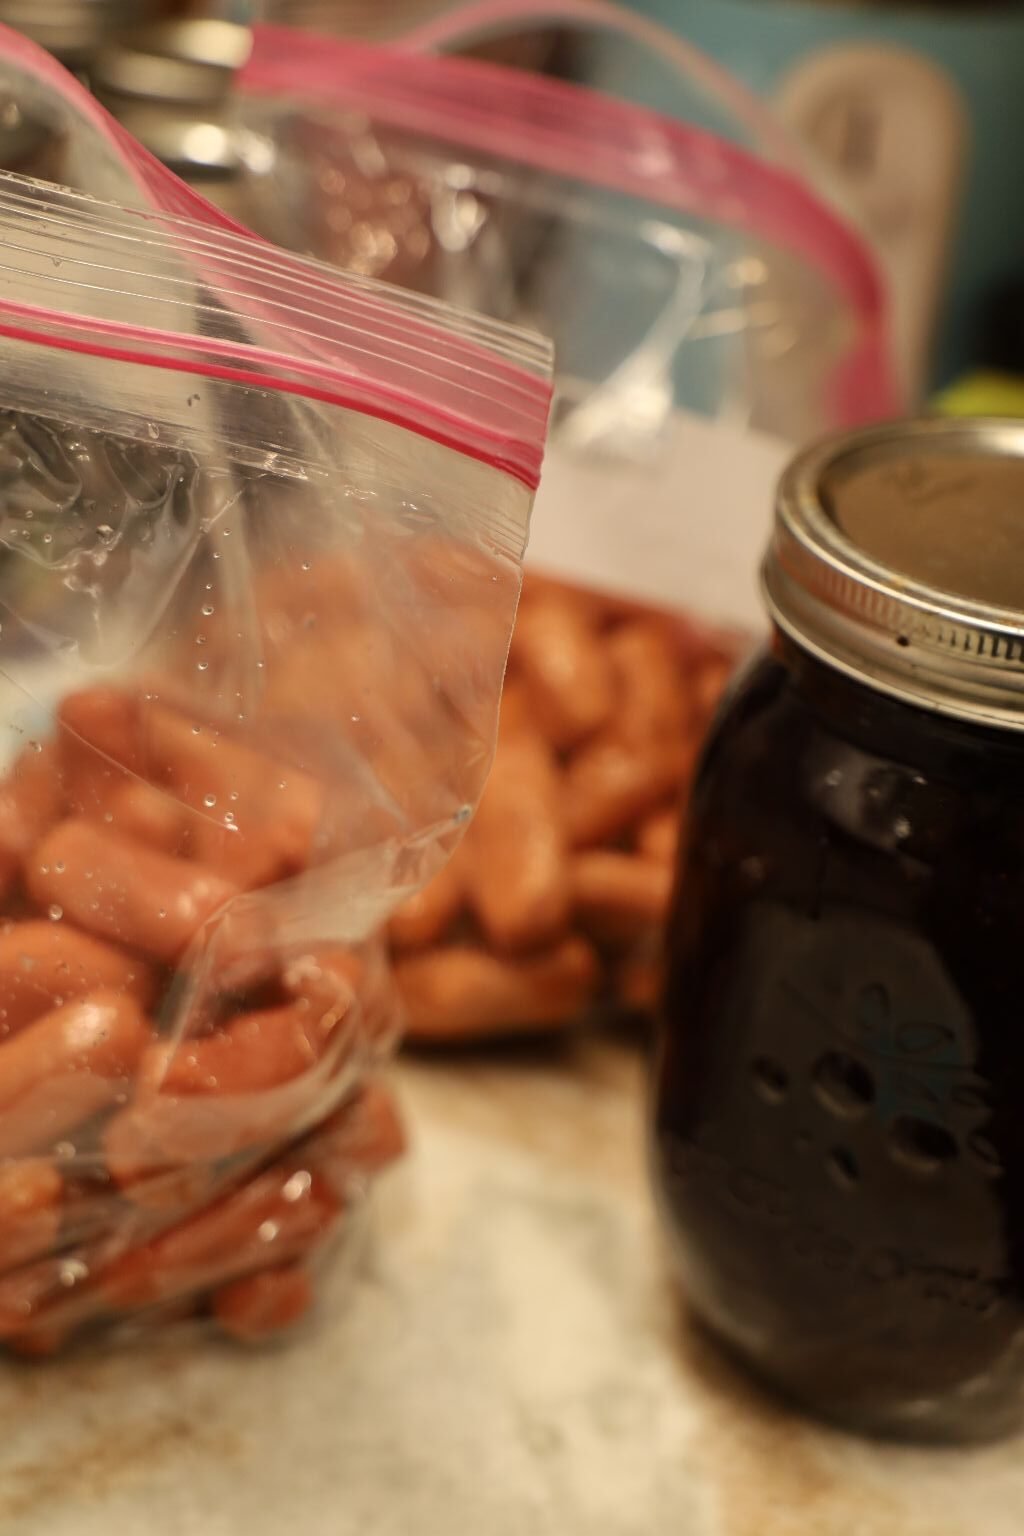
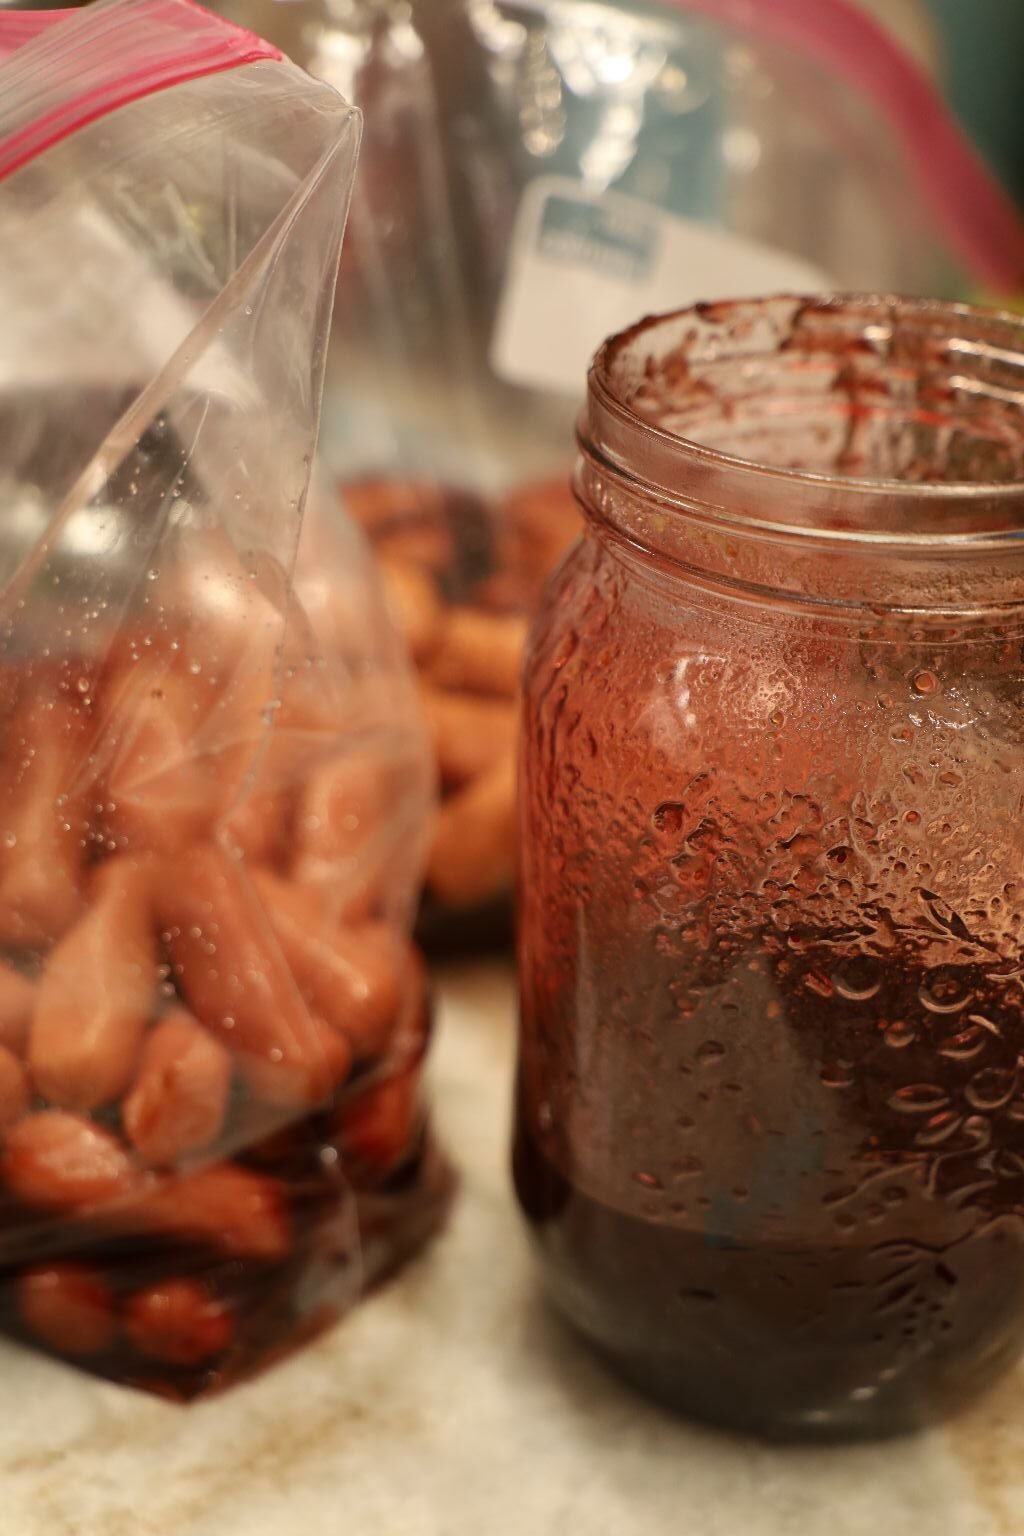
You will need a few Resealable Bags and a jar or two of A Haunted Jezebel Sauce
Combine The Two
You just want to add enough of the Haunted Jezebel to cover the Sausages.
Now, place into the refrigerator for a day or two to marinate.
——————————————————————————
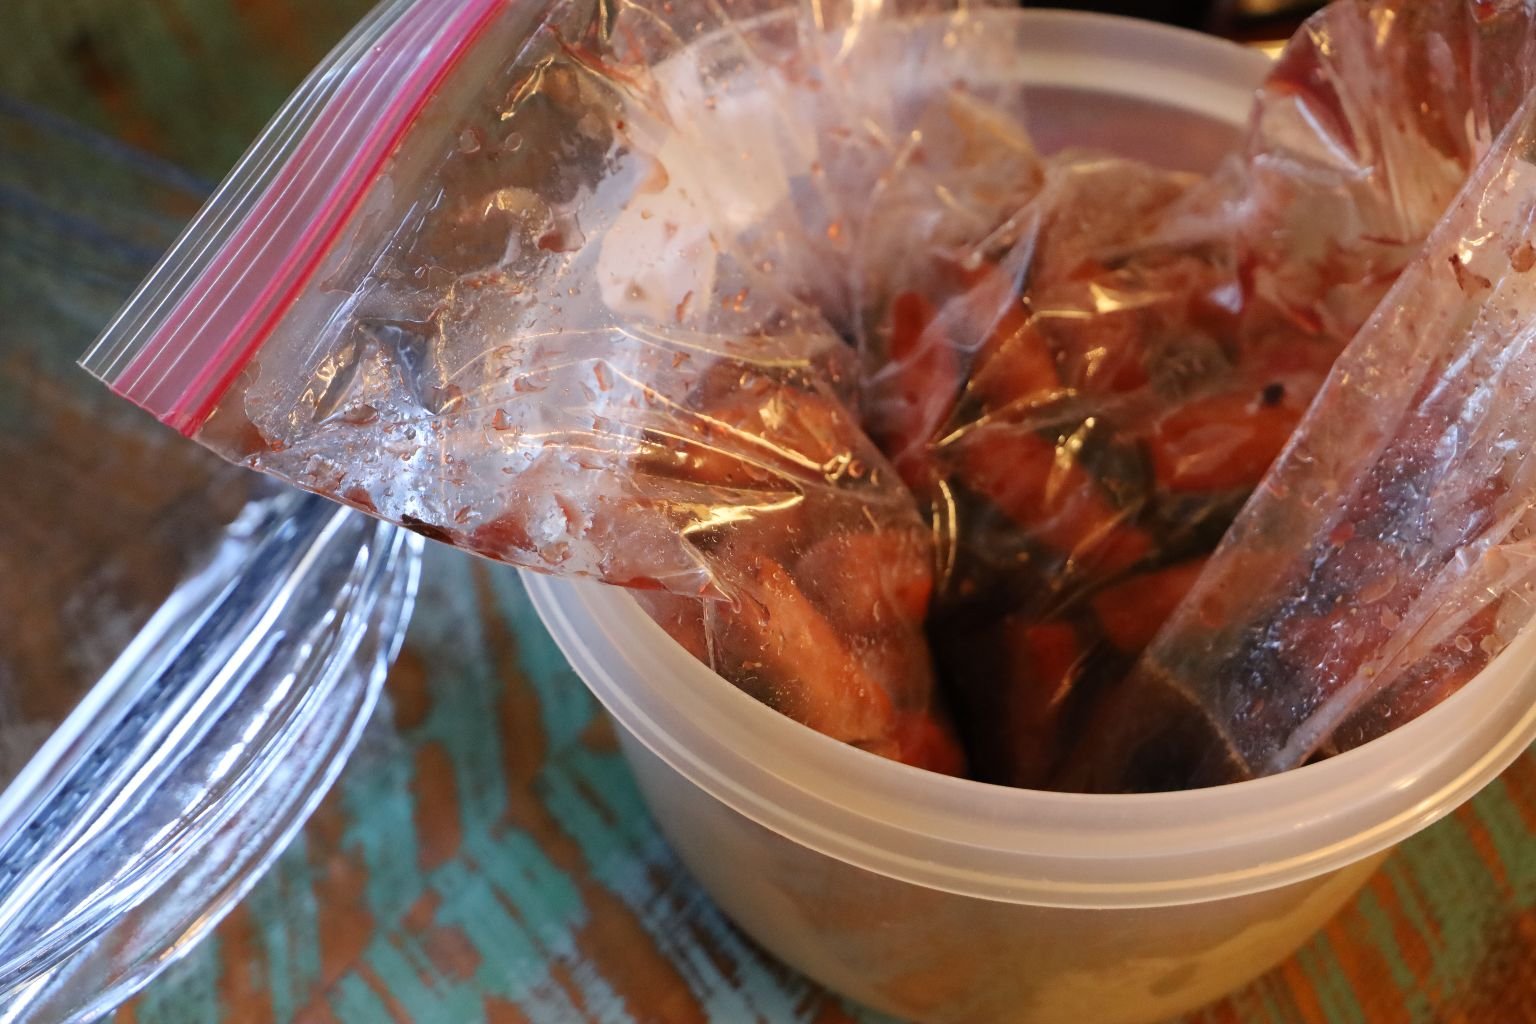
When I am ready to cook the Sausages, I remove them from the Refrigerator, and drain them into a Collander in the sink.
Do NOT rinse them!
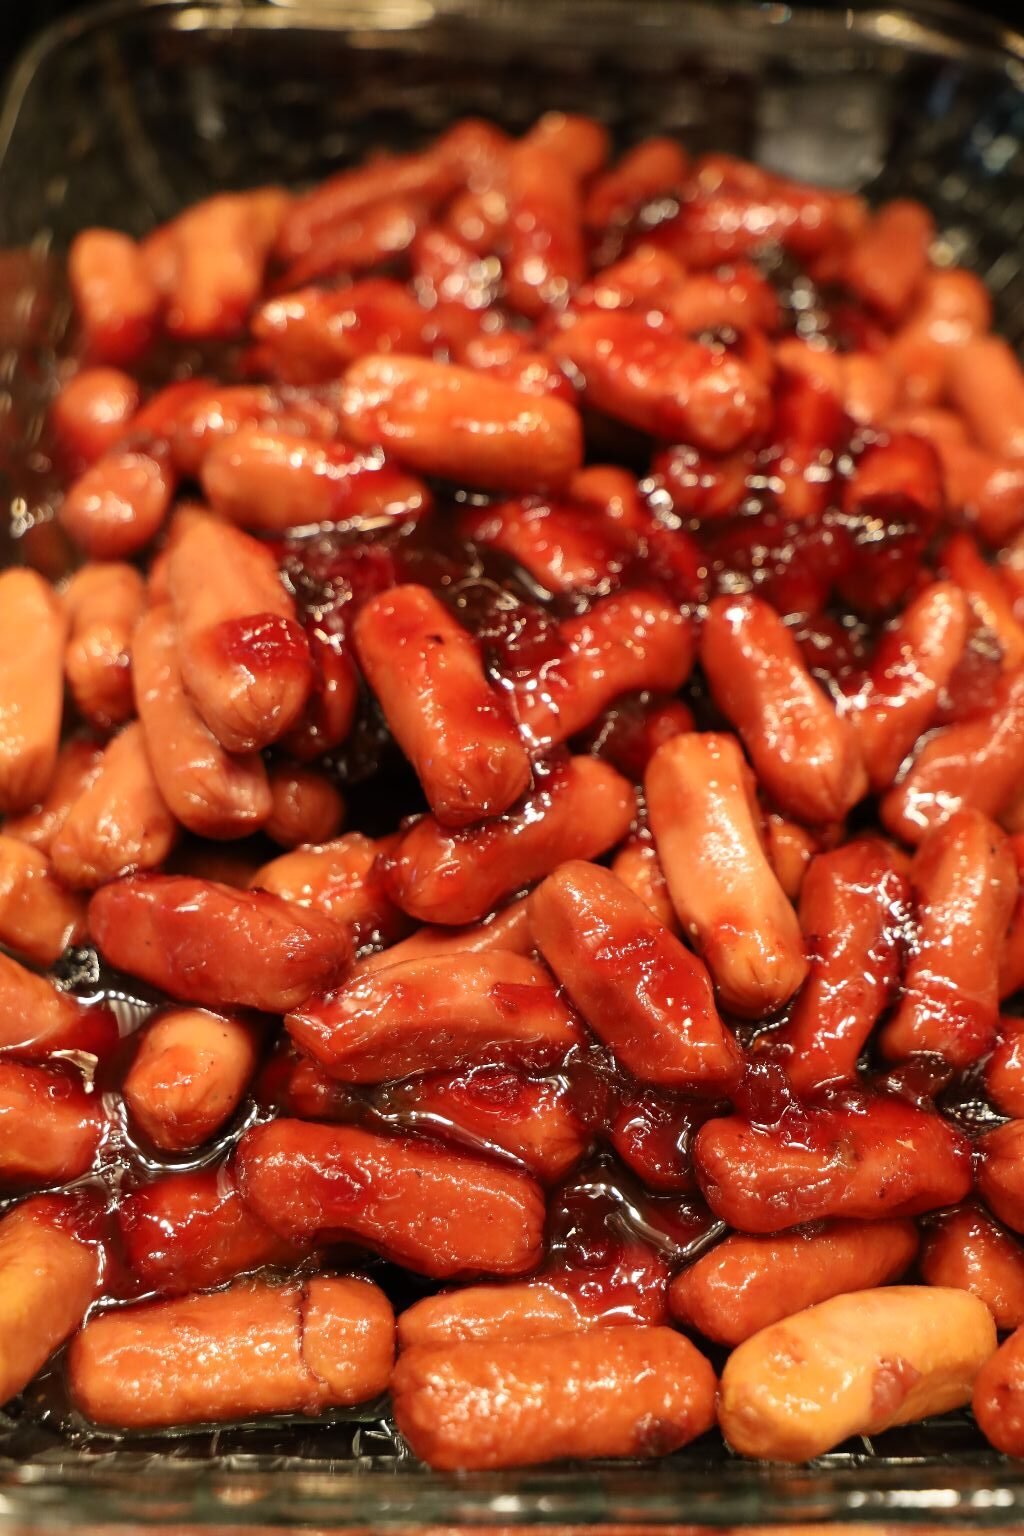
Now, transfer them to a casserole dish for baking. Turn the oven on 400F.
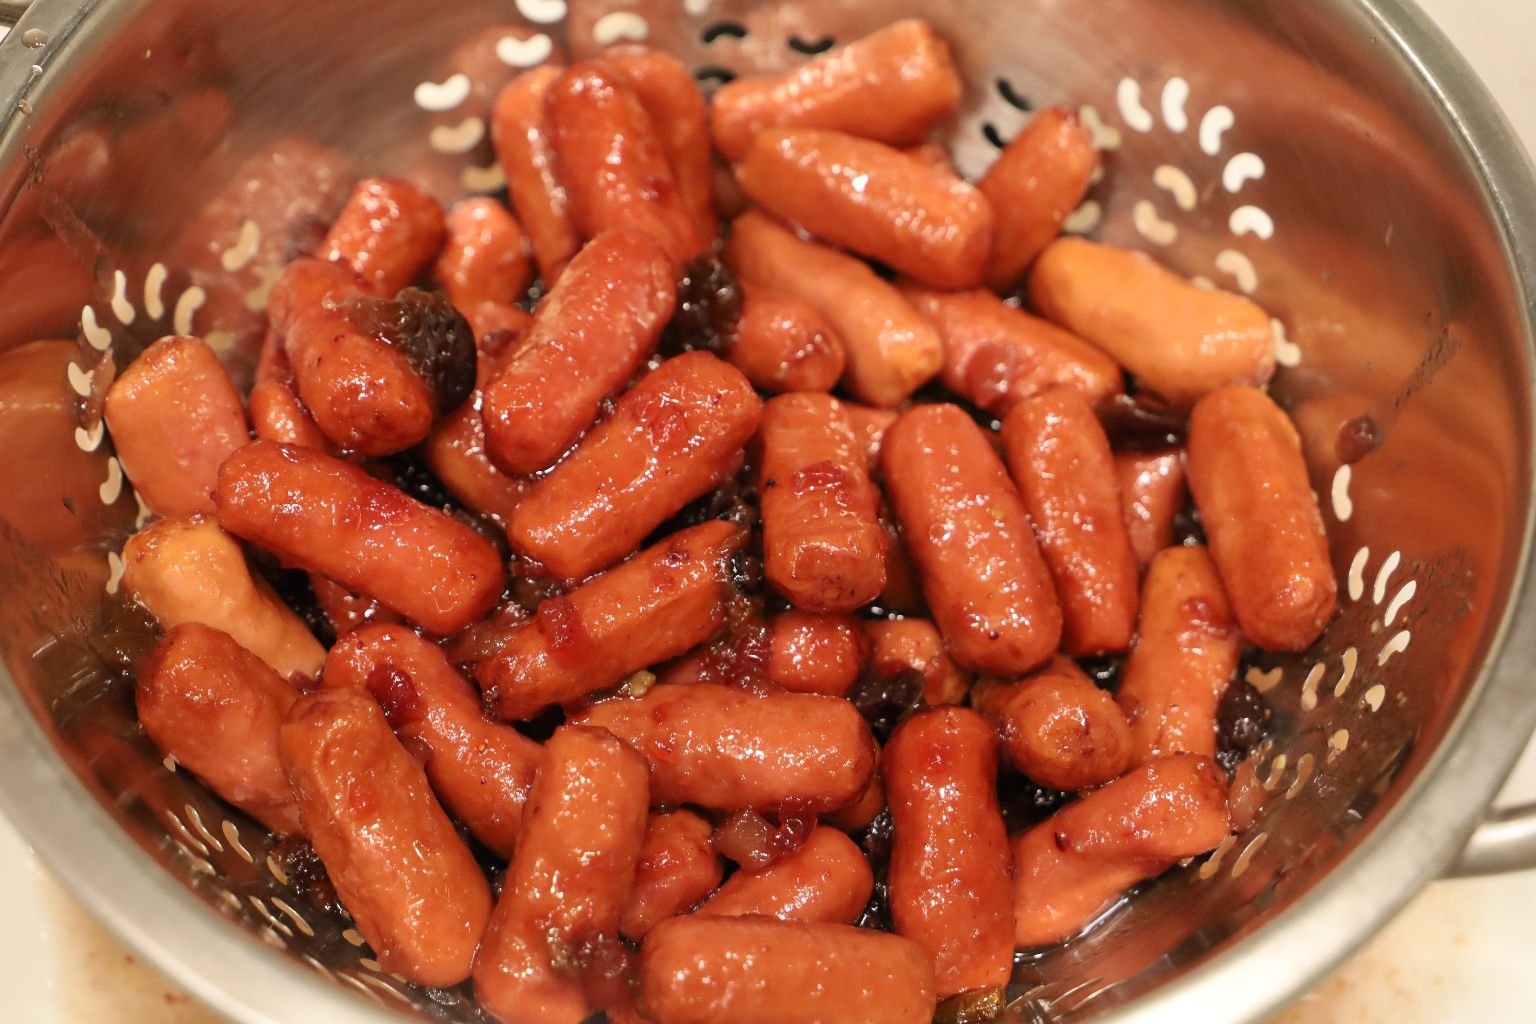
While the oven comes to temp, add some more of the Haunted Jezebel to the Sausages.
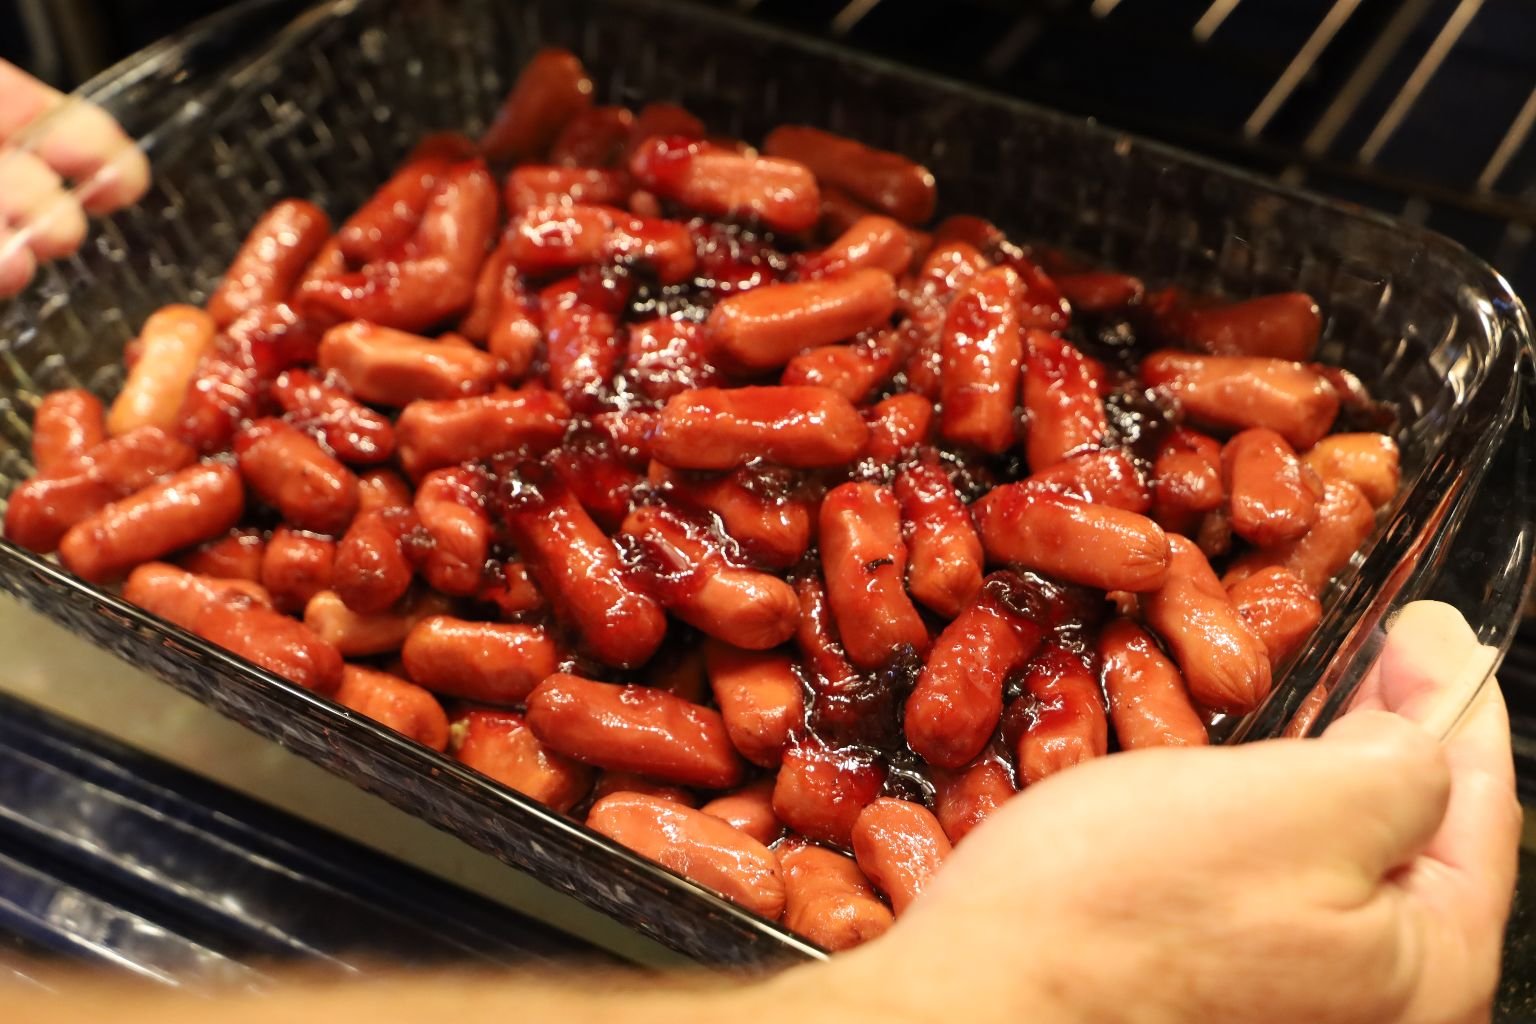
Now Place Into The Oven For About 45 Minutes
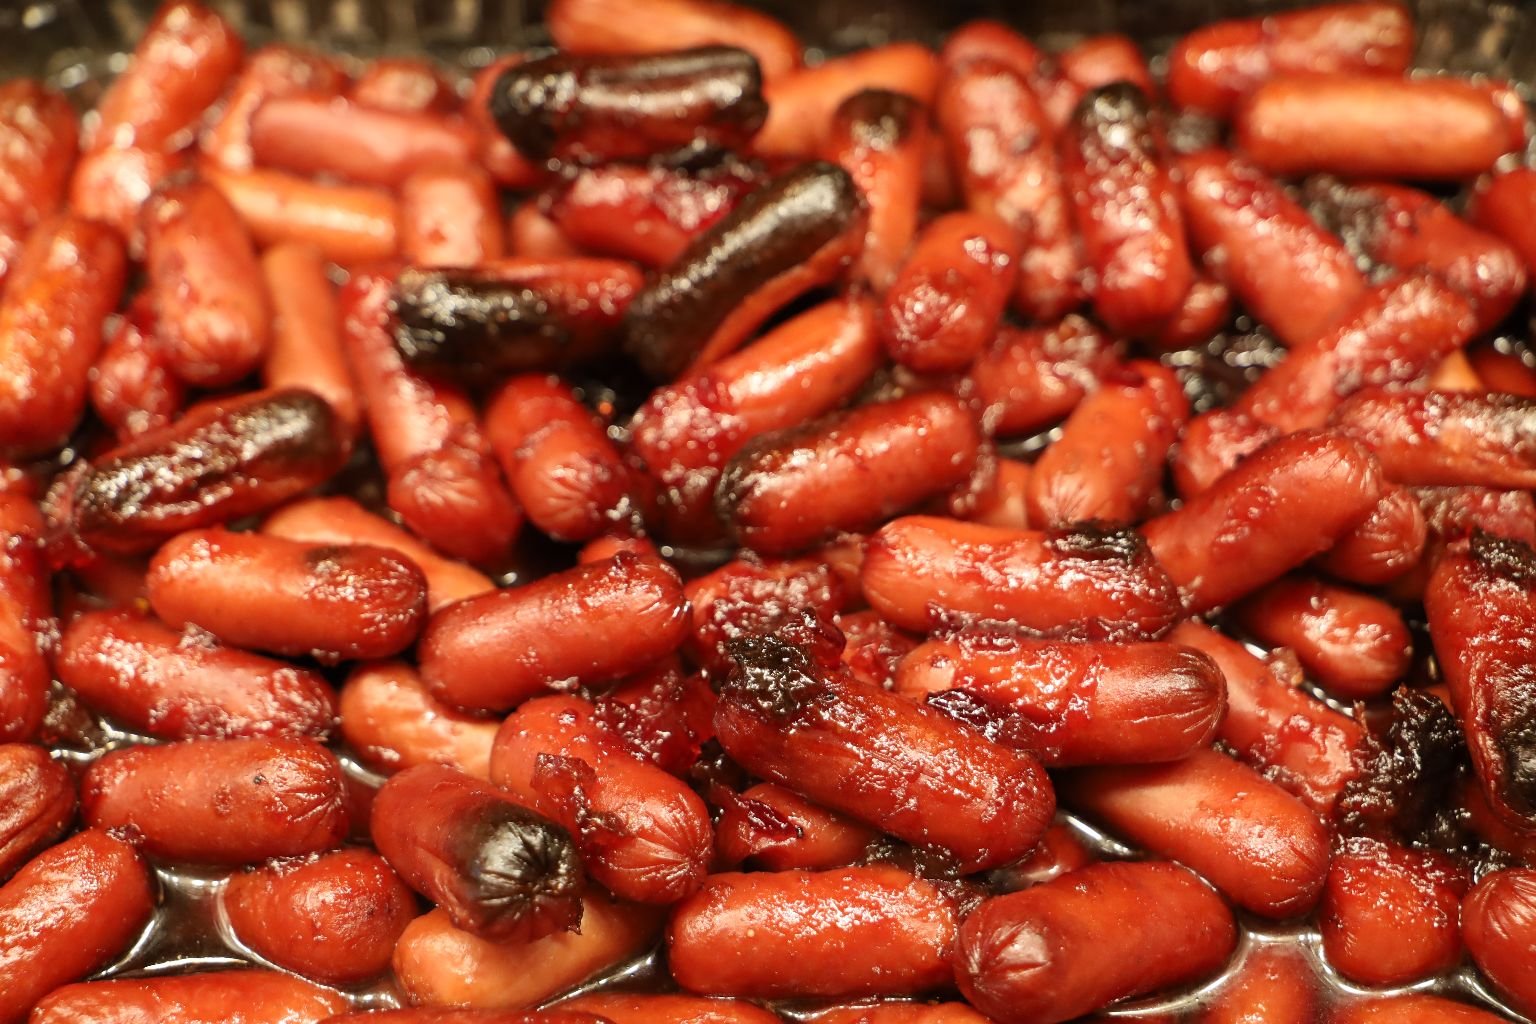
Bake Until Nice And Plump
————————————————————————-
Our Cheeseballs
(These Can Be Made The Day Before To Save Time)
Vintage Dried Beef Cheese Ball
Ingredients:
Jar of Dried Beef
3, 8 oz. Cream Cheese
1 Medium Onion, Chopped
3 t. Worchestershire Sauce
2 t. Accent Seasoning (Monosodium Glutamate)
———————————————————————————-
(I couldn’t find the recipe card on this Cheeseball so I copied and pasted this from an older post where we also served this Cheeseball.)
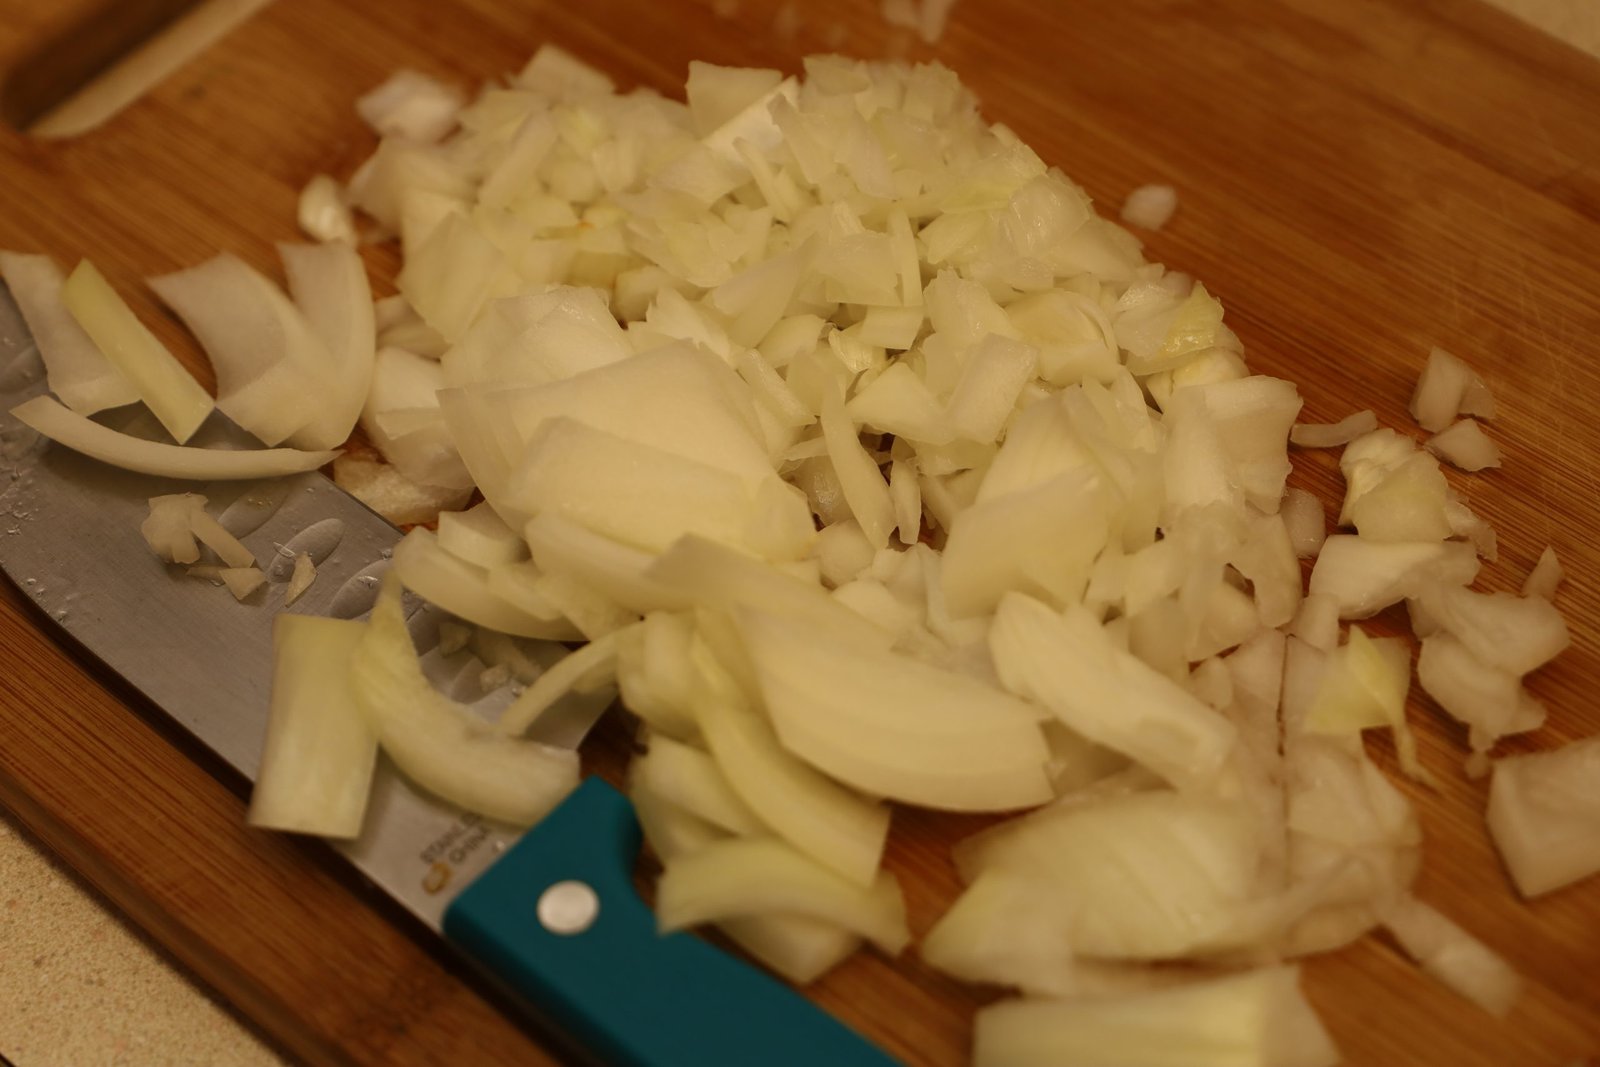
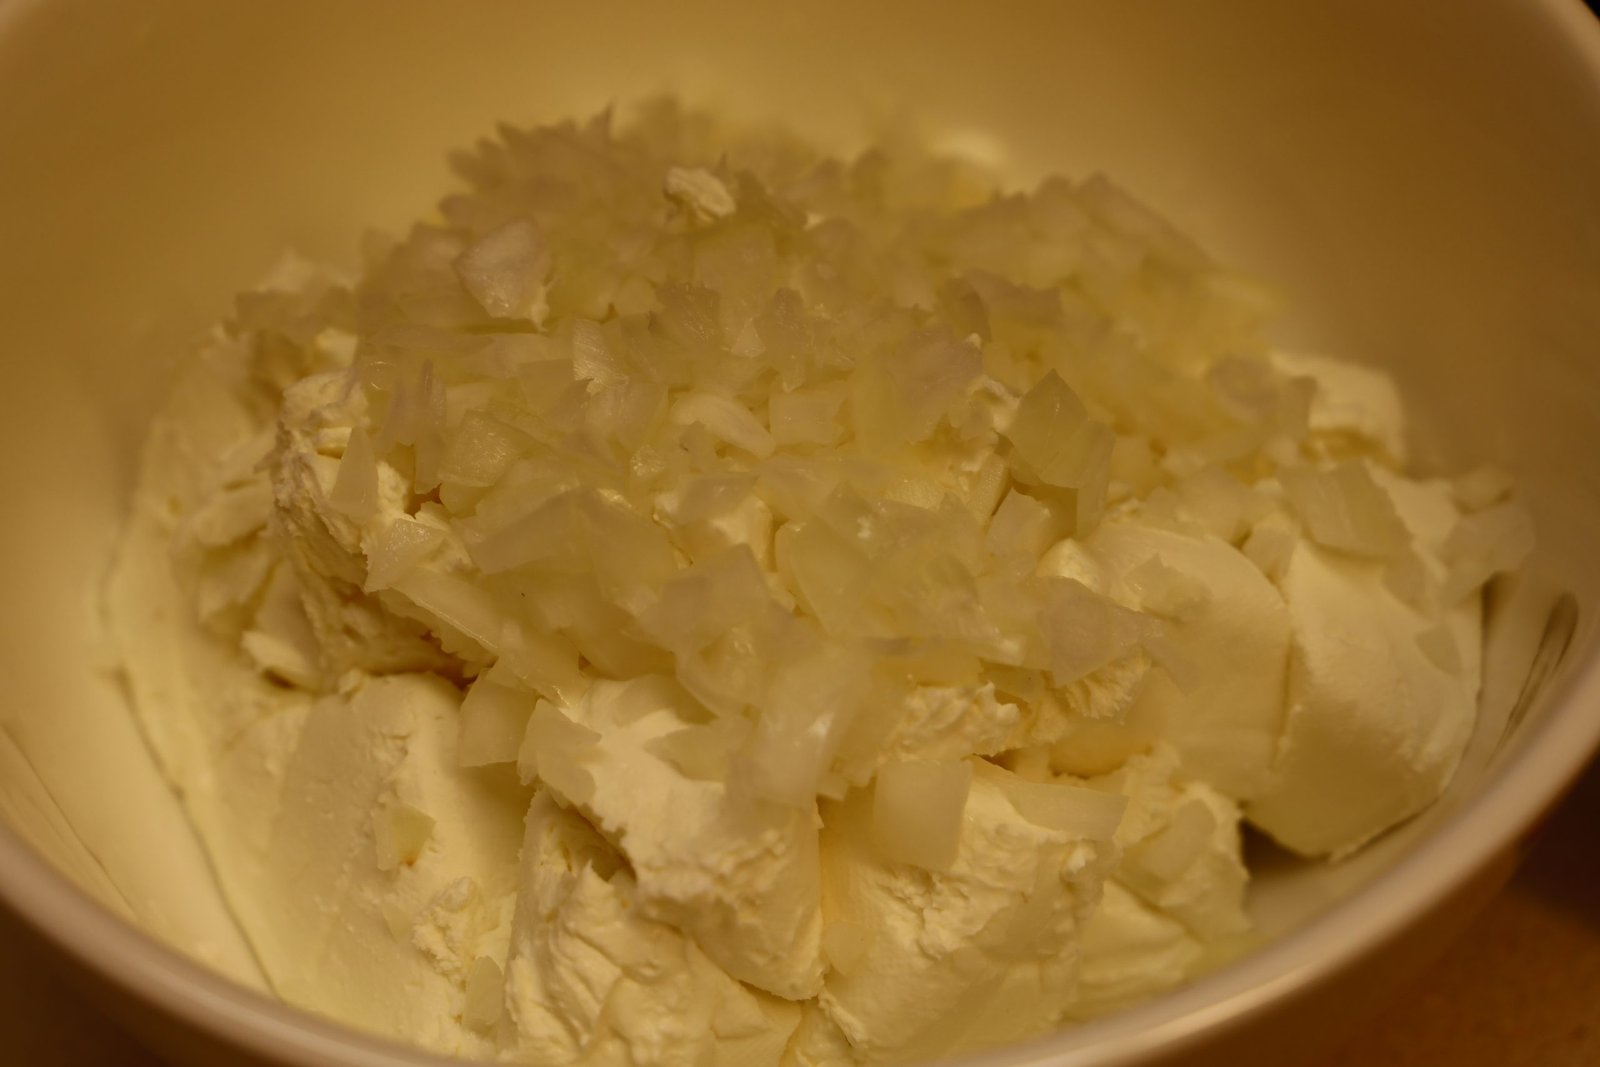
Let soften your Cream Cheeses. In the meantime chop your onion.
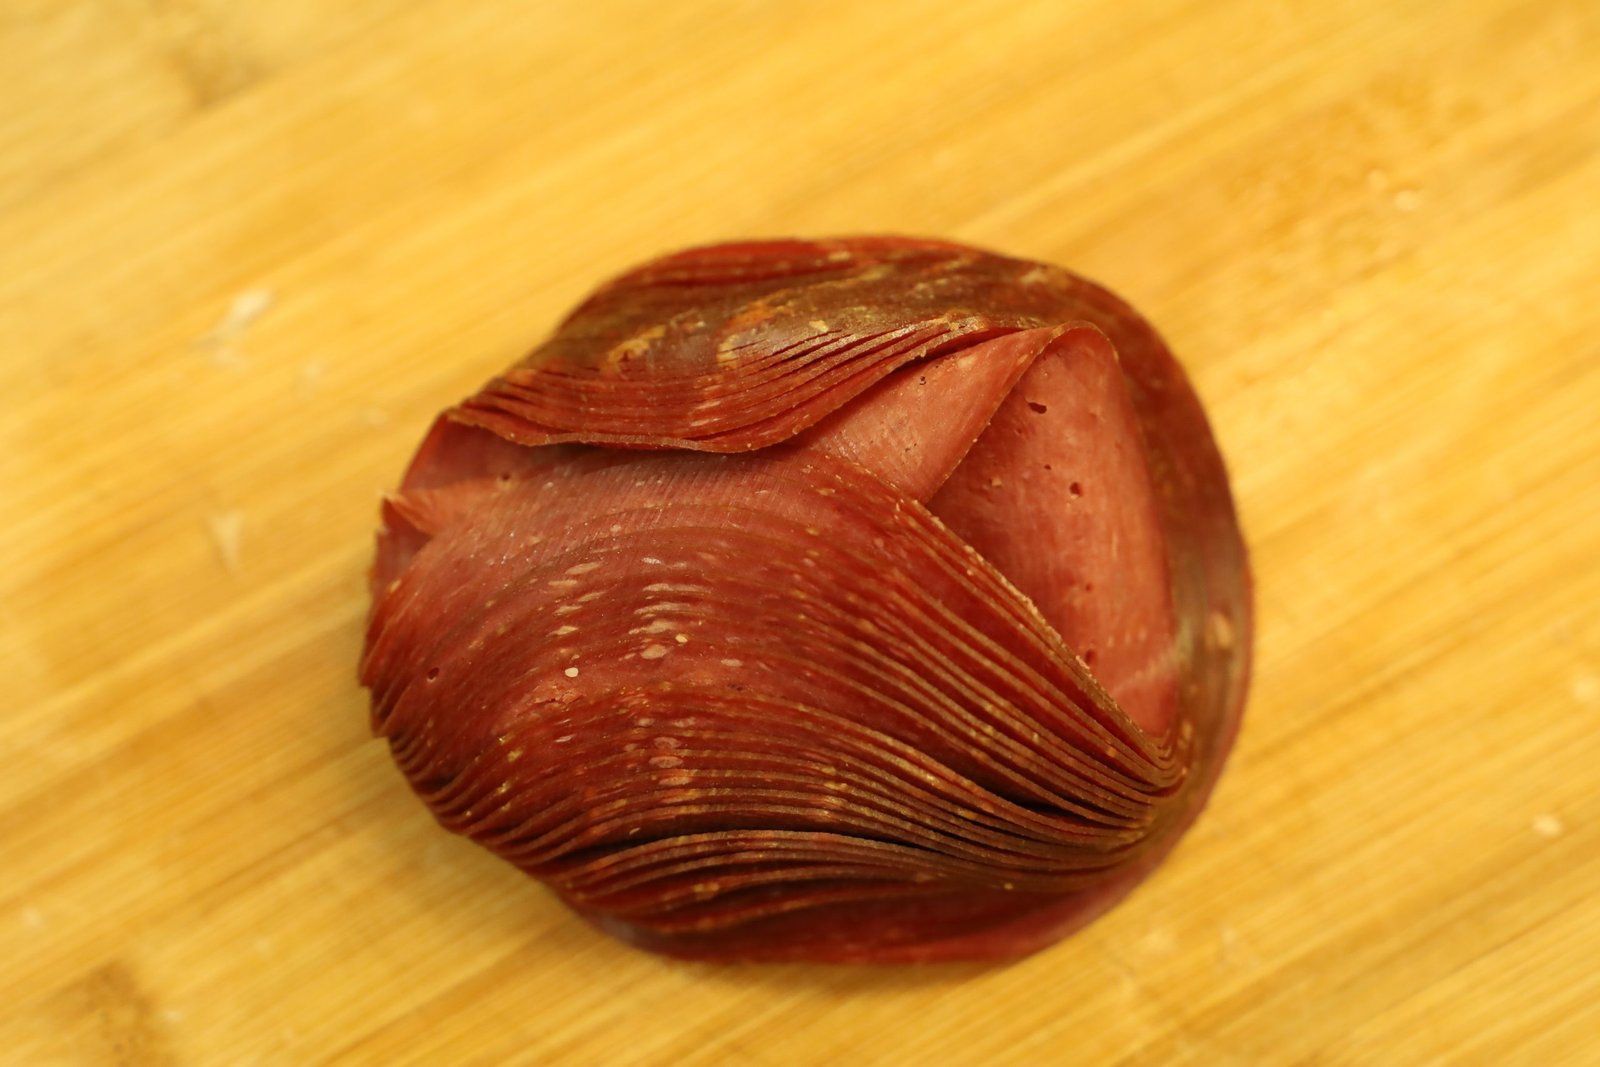
Dried Beef
(This is also the main ingredient in Chip Beef on Toast. Something I ate a lot of in Charlotte, North Carolina in the early 80’s.)
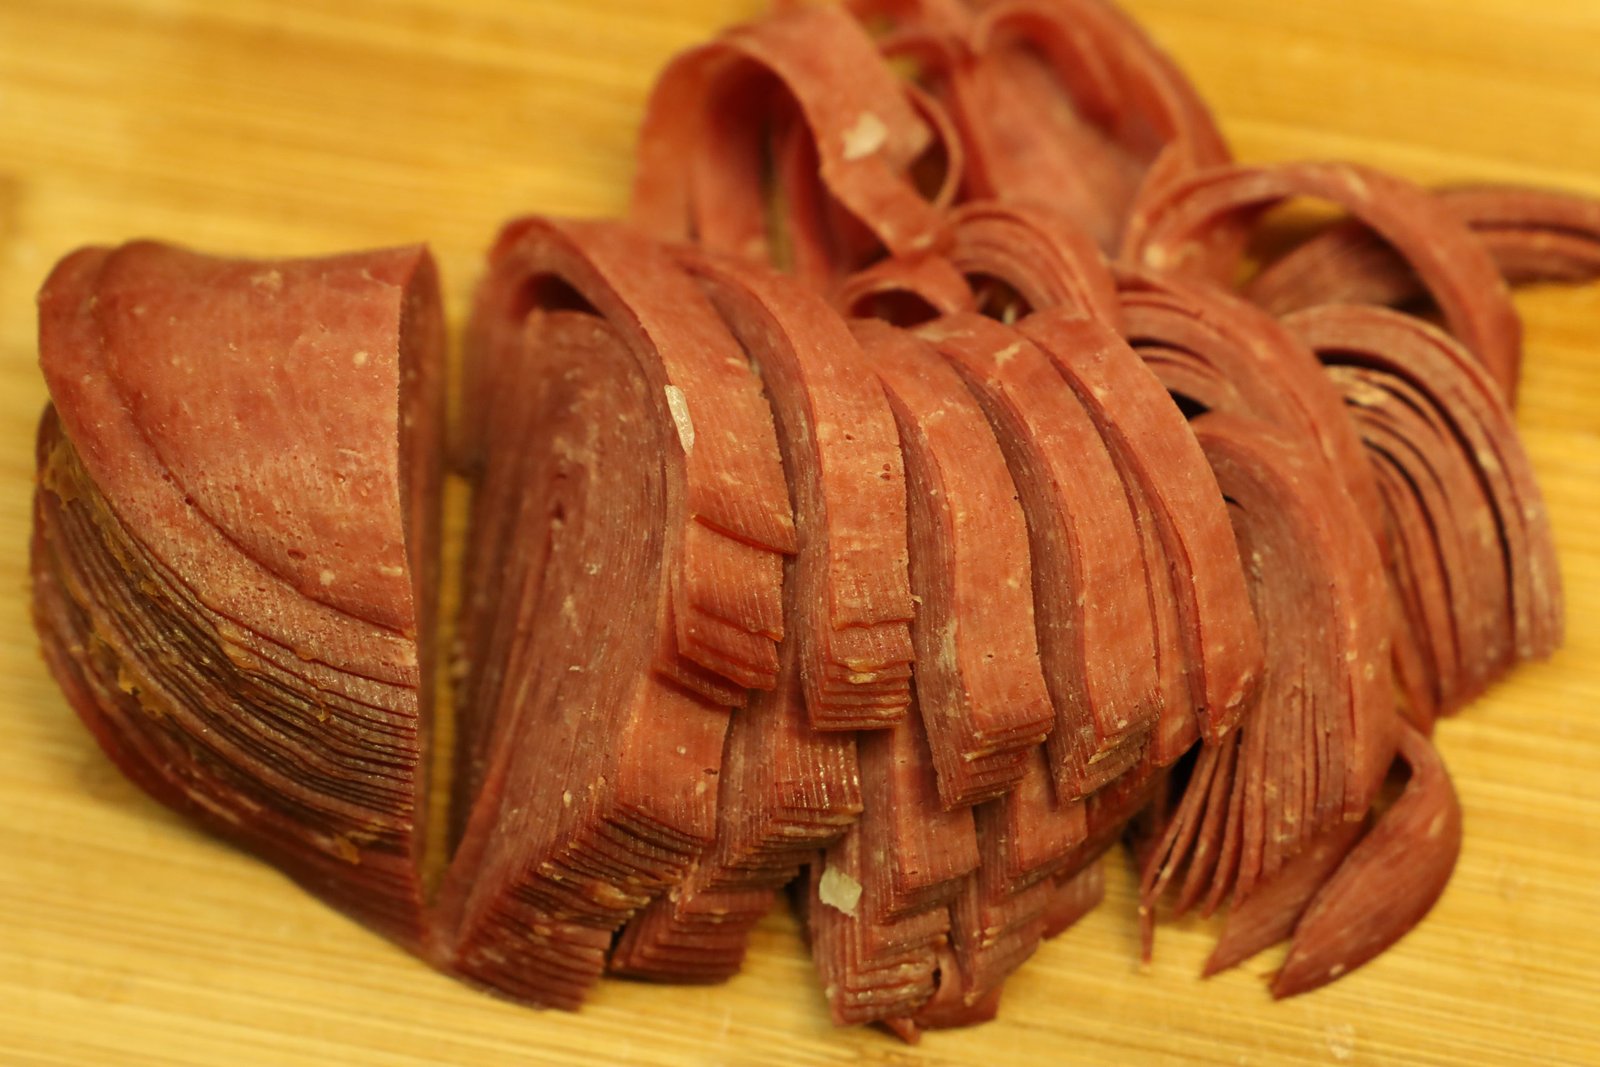
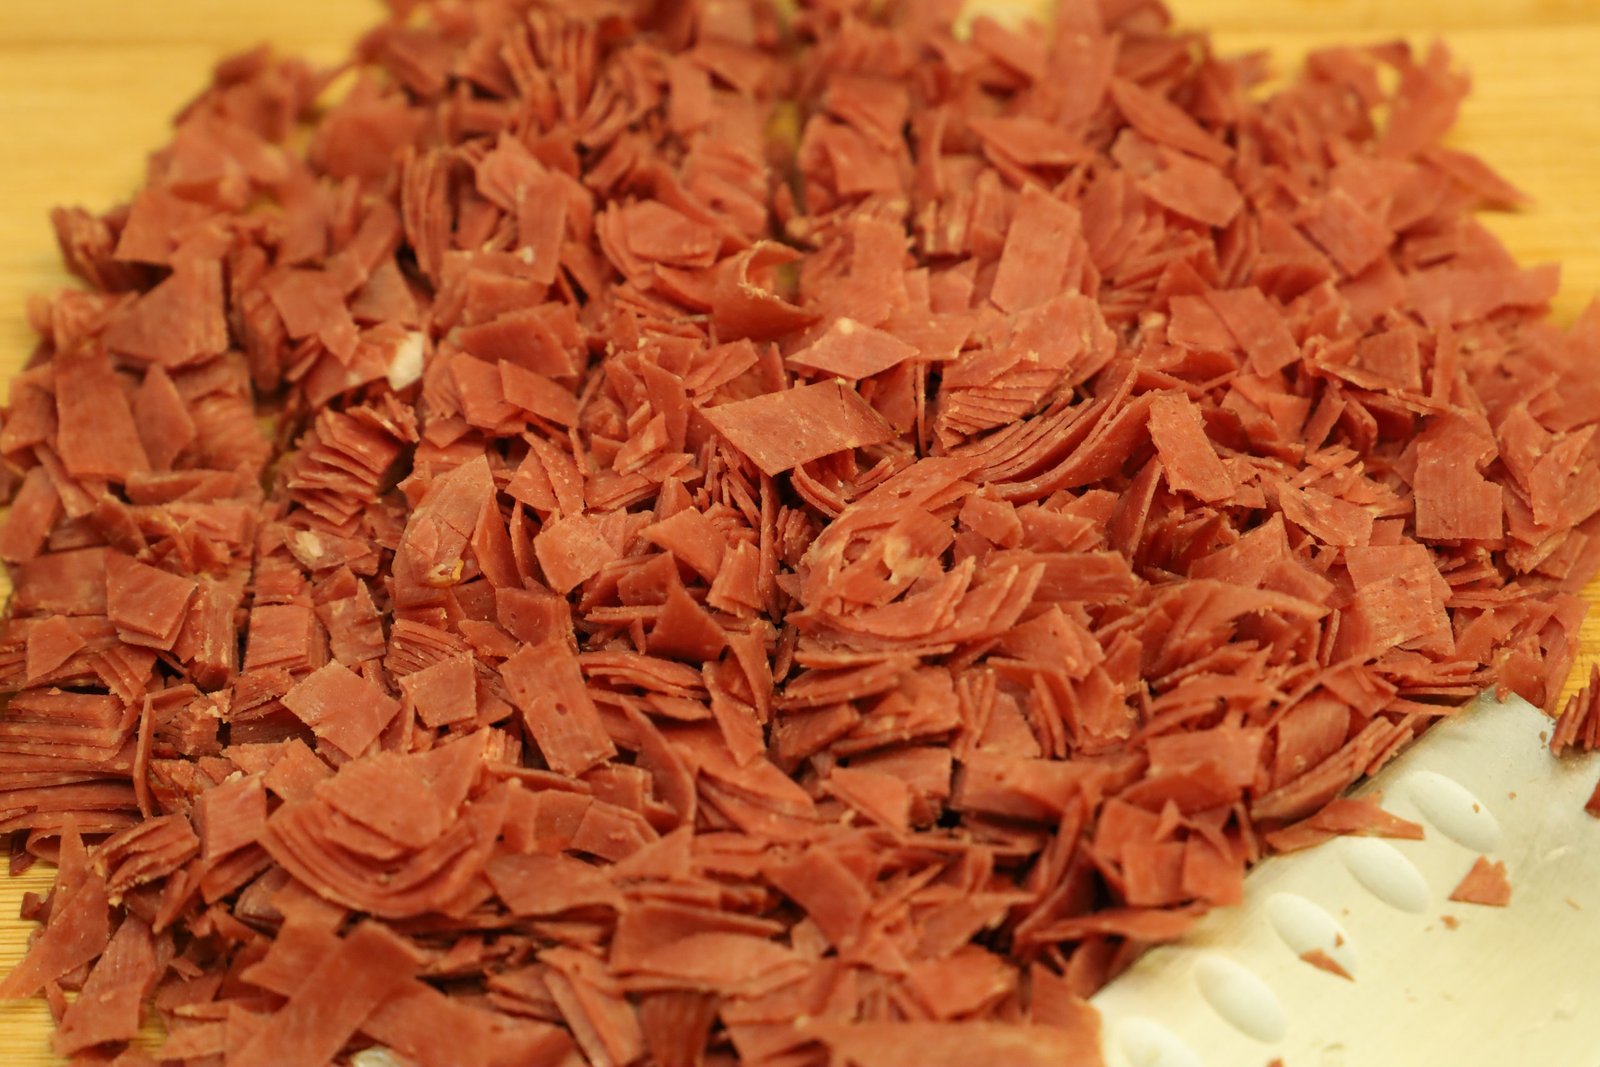
You want to chop up your dried beef into small pieces, like so.
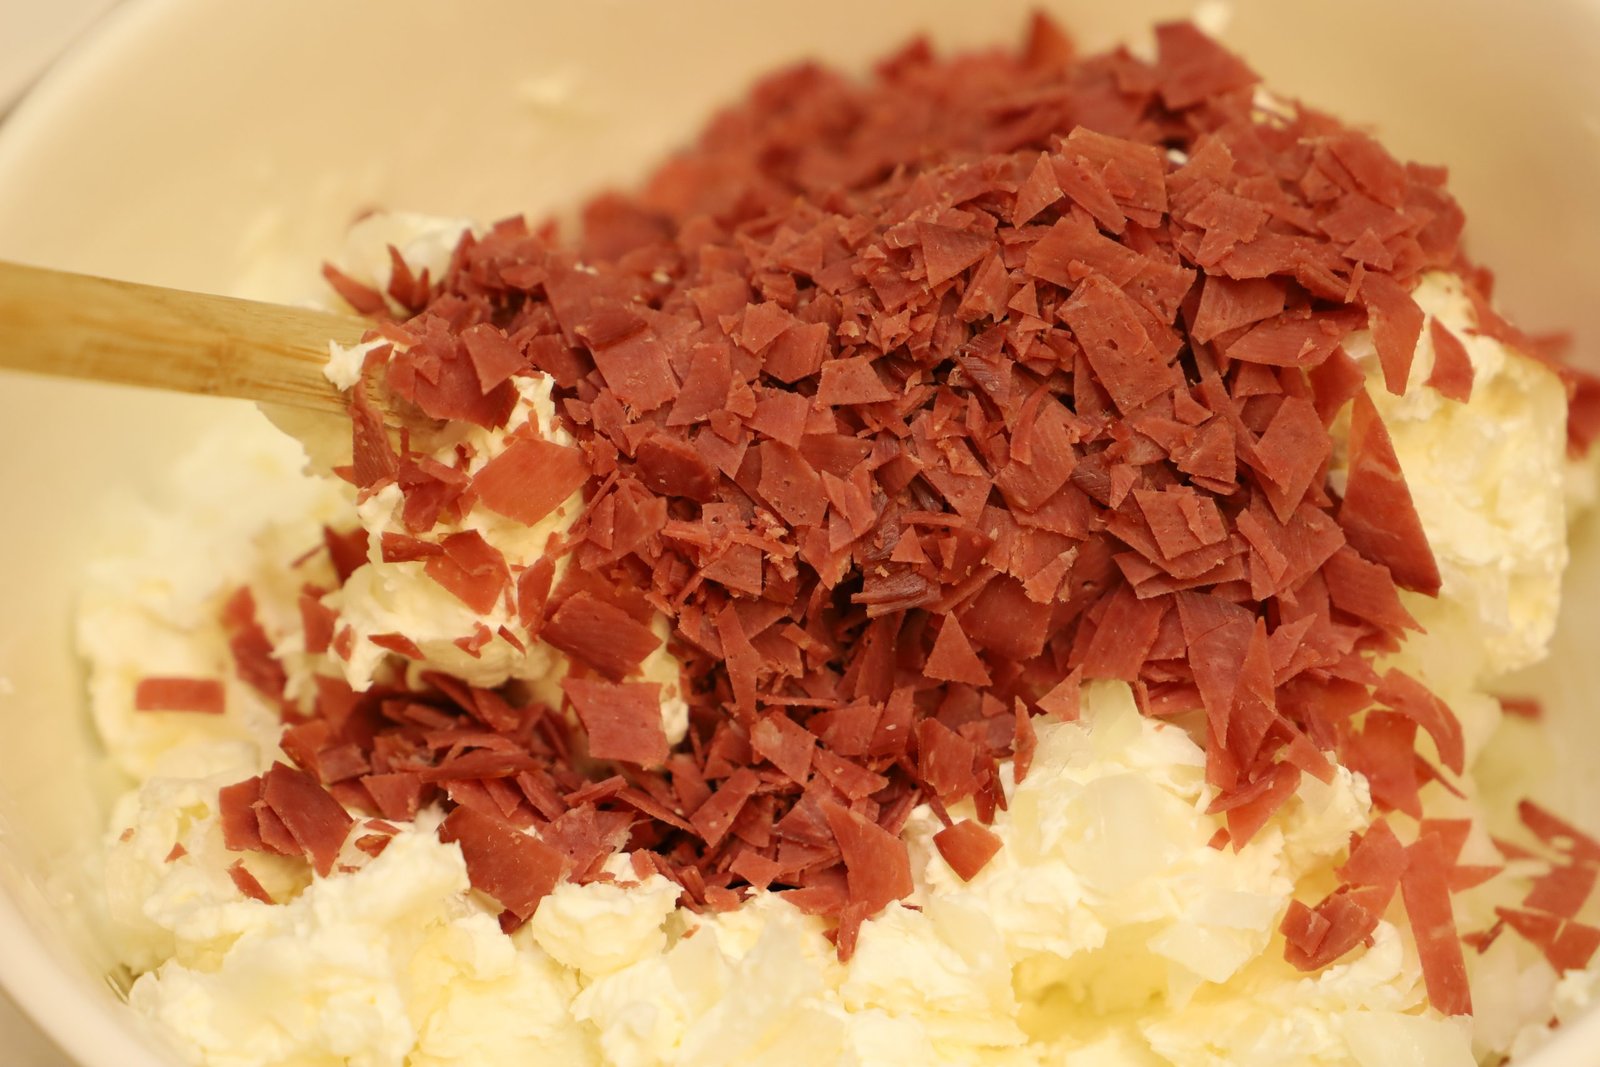
Add the dried beef to your softened cream cheese and chopped onions.
Although I don’t have a photo here, I did add the rest of the ingredients to the cheese ball and I worked it, mixing all the ingredients together with my hands. It’s messy but it is the best way to incorporate everything.
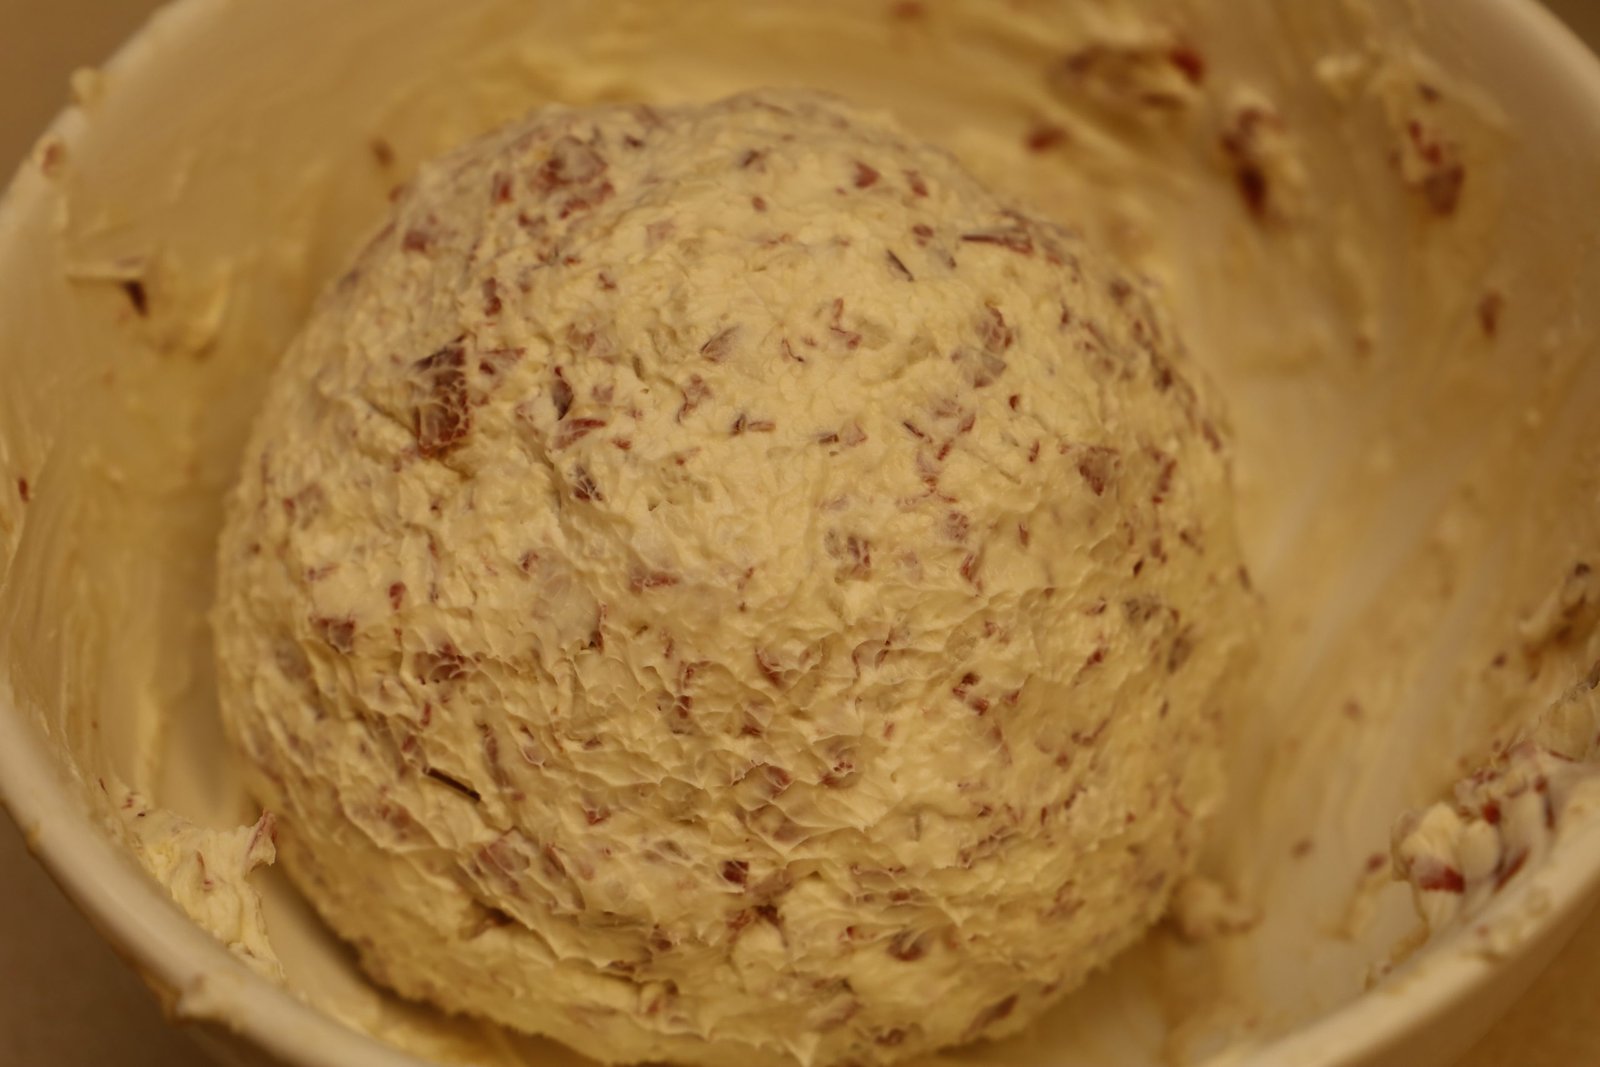
Once it is fashioned into a large ball then place it back into the refrigerator overnight so that all the flavors can blend together in harmony. 🙂
You can also roll the cheeseball in pieces of the Dried Beef to give it a nice look.
—————————————————————————————————
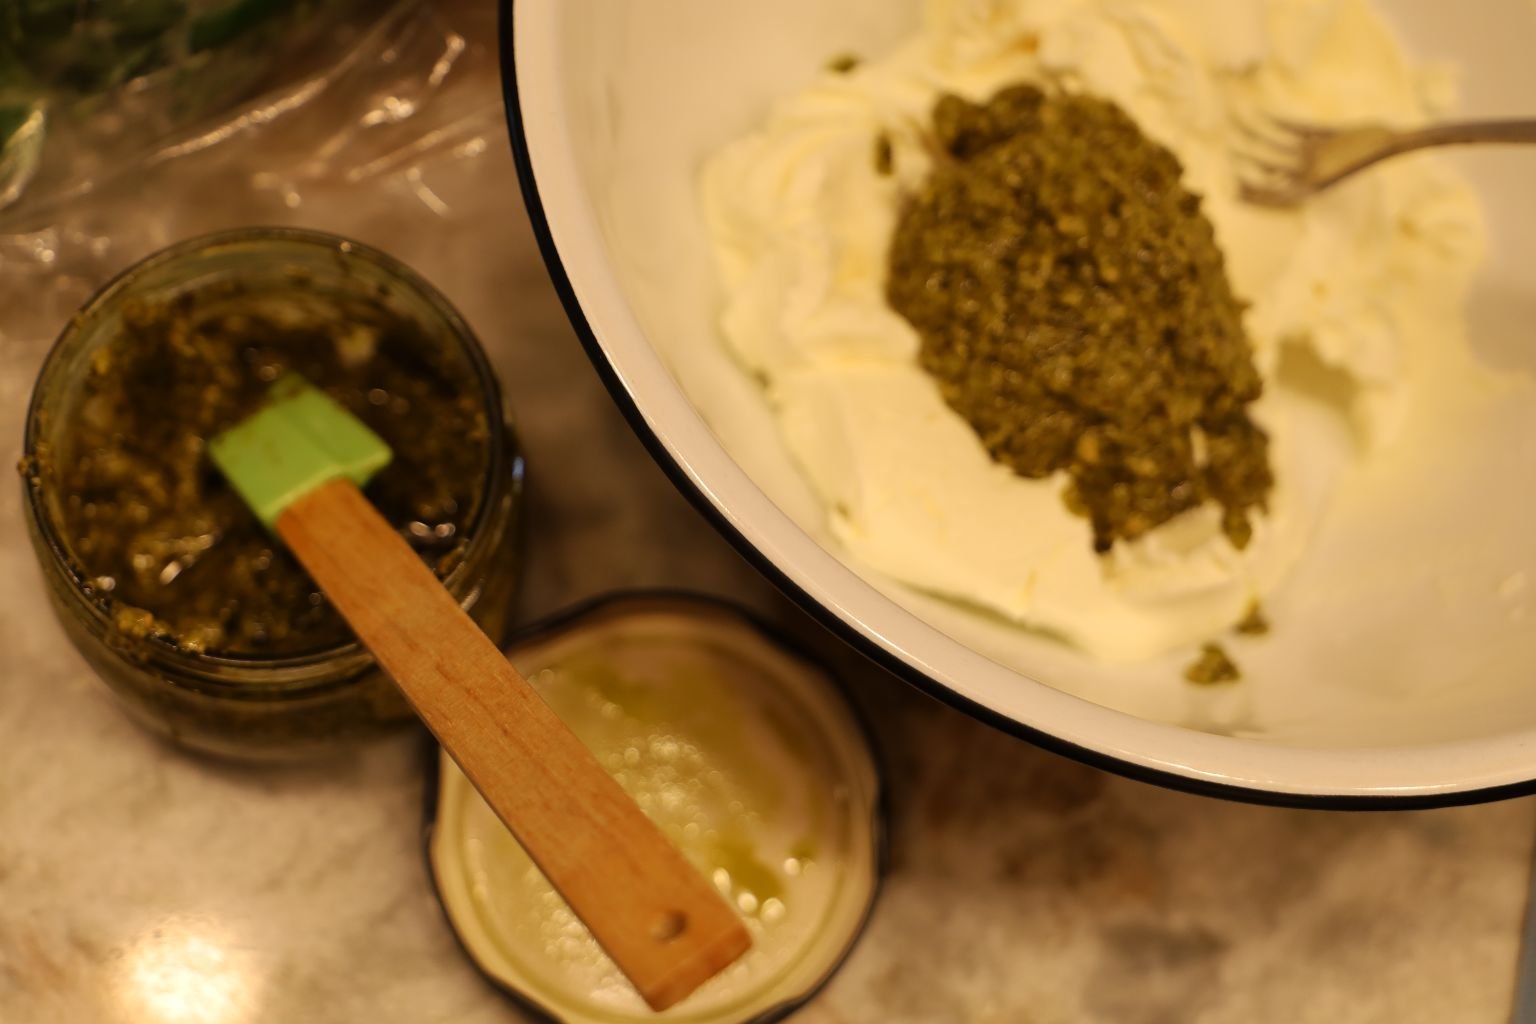
Pesto Pine Nut Cheeseball
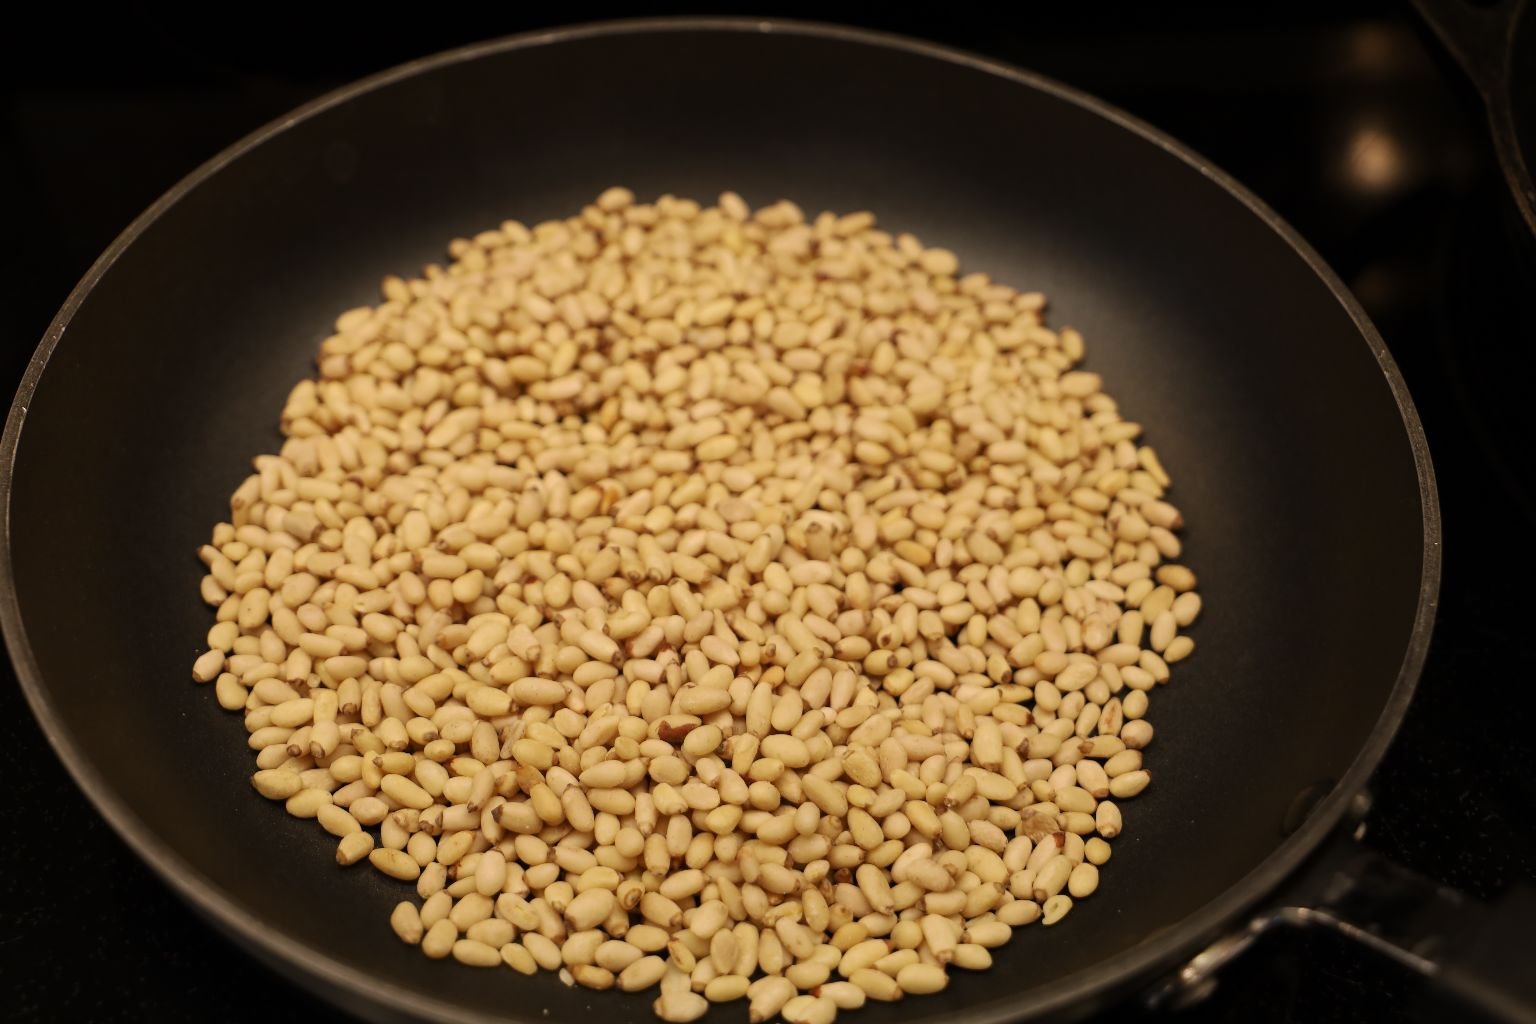
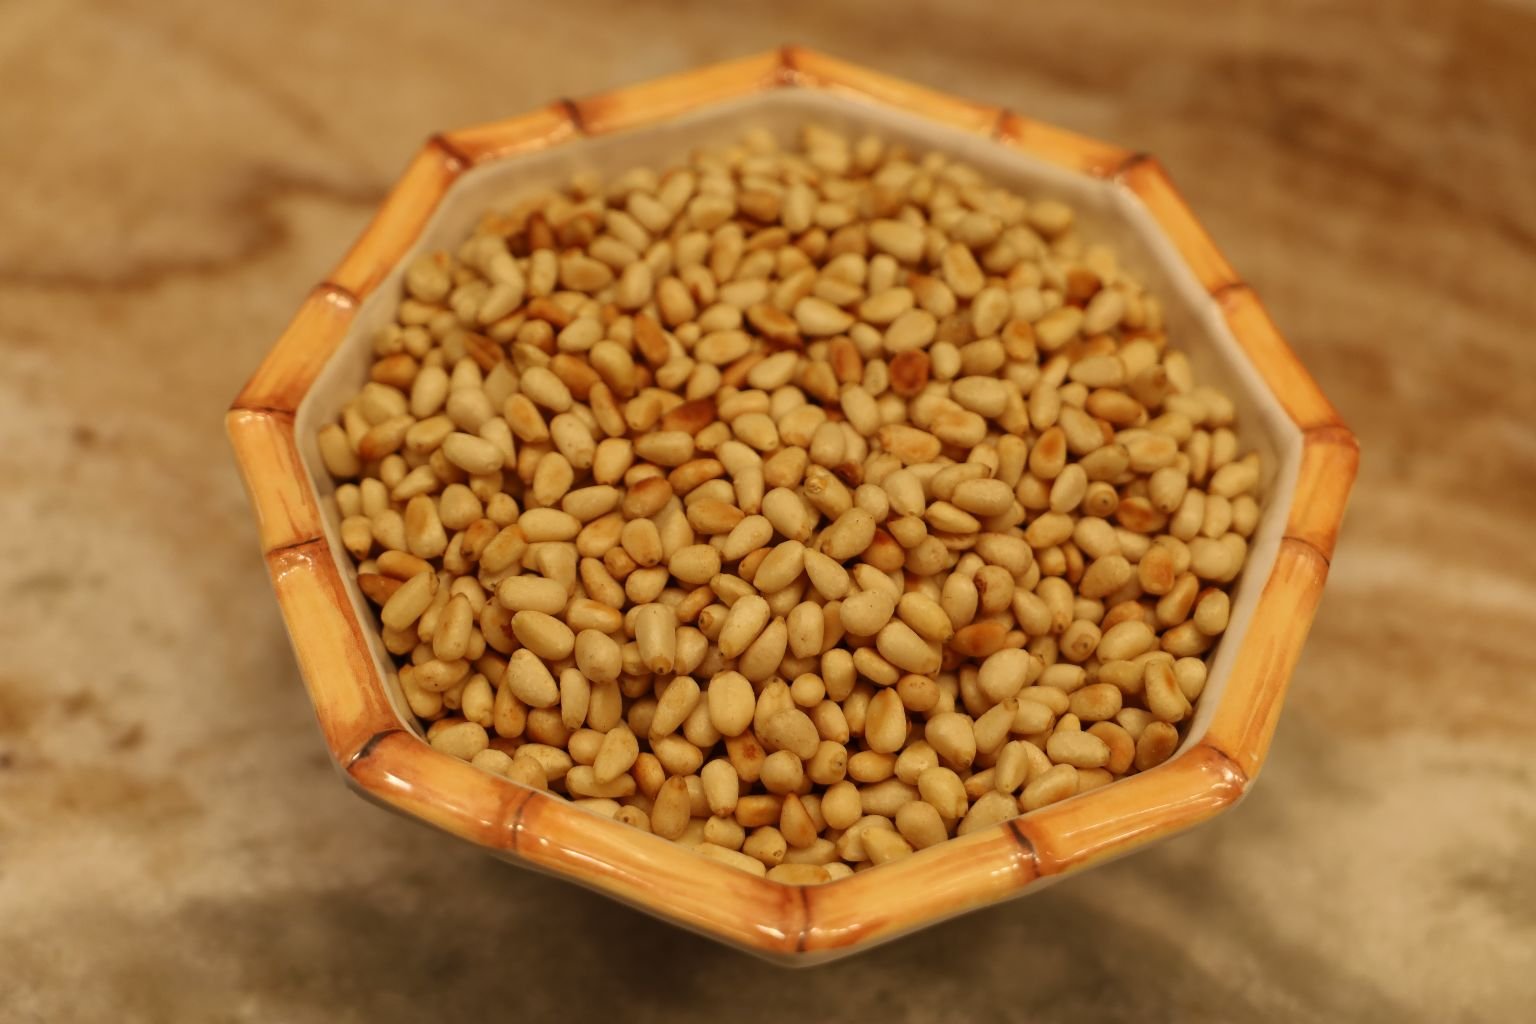
(Here I am Roasting Some Pine Nuts on the Stove Top on a Medium-Heat to turn them a little bit Brown. This gives a nice Flavor to them. I am Roasting quite a bit not only for this Cheeseball, but for the Gravediggers Lasagna as well.)
Ingredients:
2, 8 0z. Cream Cheese, Softened
2-3 T. Basil Pesto
2-3 T. Fresh Chopped Basil
Toasted Pine Nuts
————————————————————————–
(You could also add a few Garlic Cloves, minced, and maybe even some Onion, chopped, if you like. Or even some Onion Powder.)
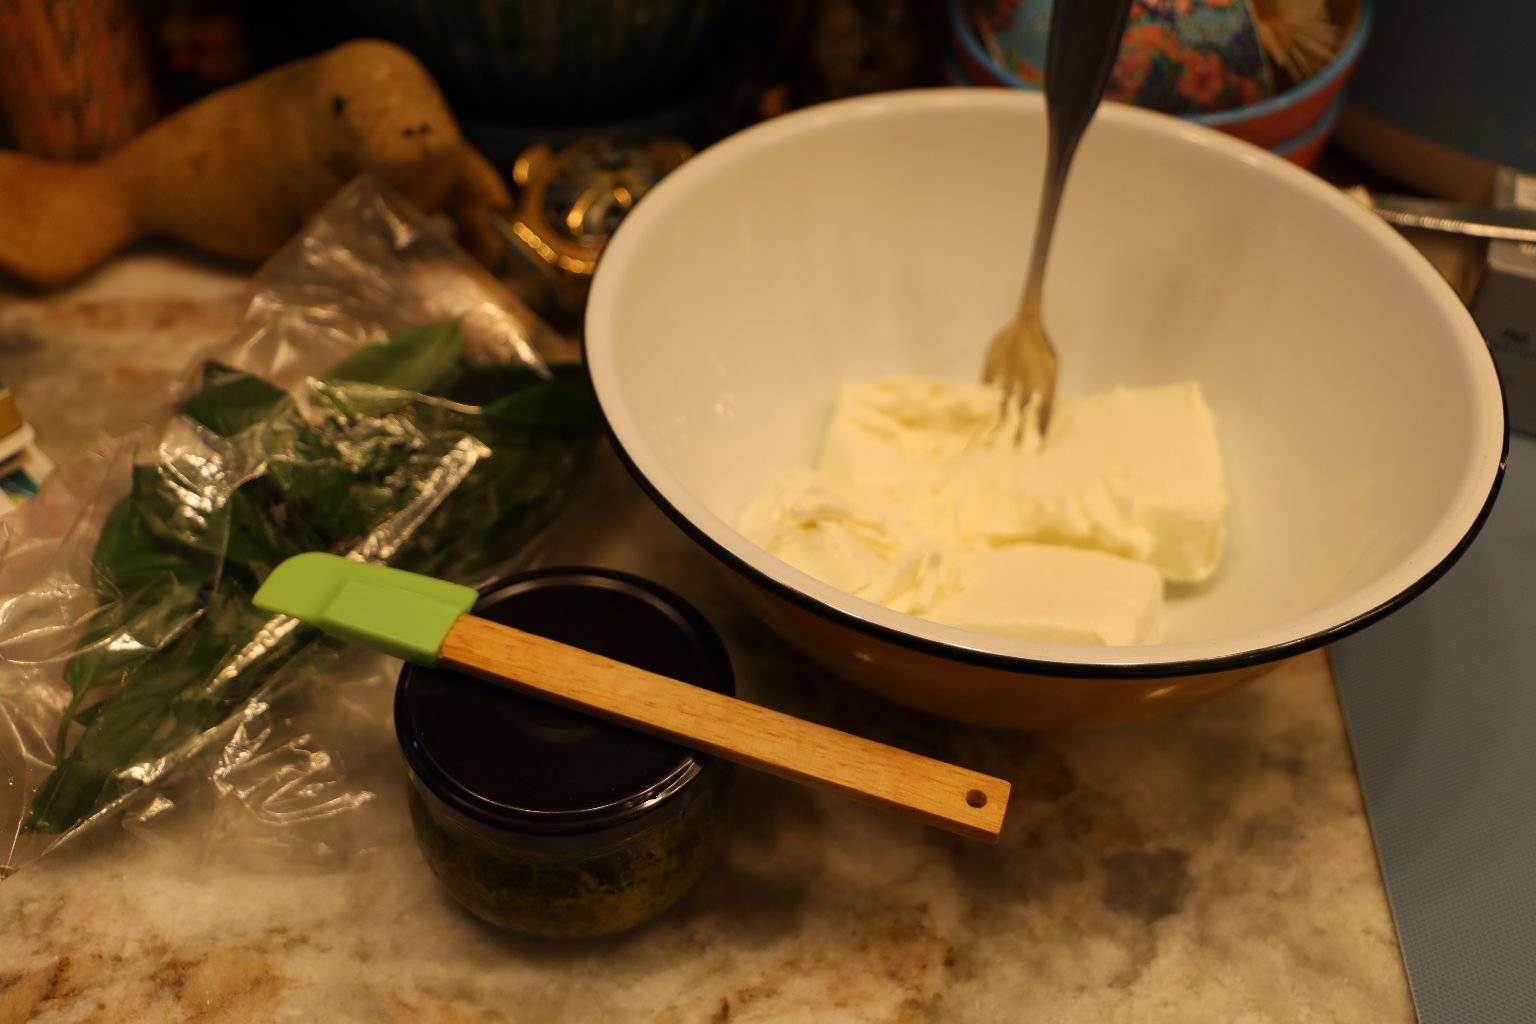
In a medium size bowl you want to add your Cream Cheese to soften.
Then just dollop in a few Tablespoons of any Pesto that you like. We are using a Basil Pesto here.
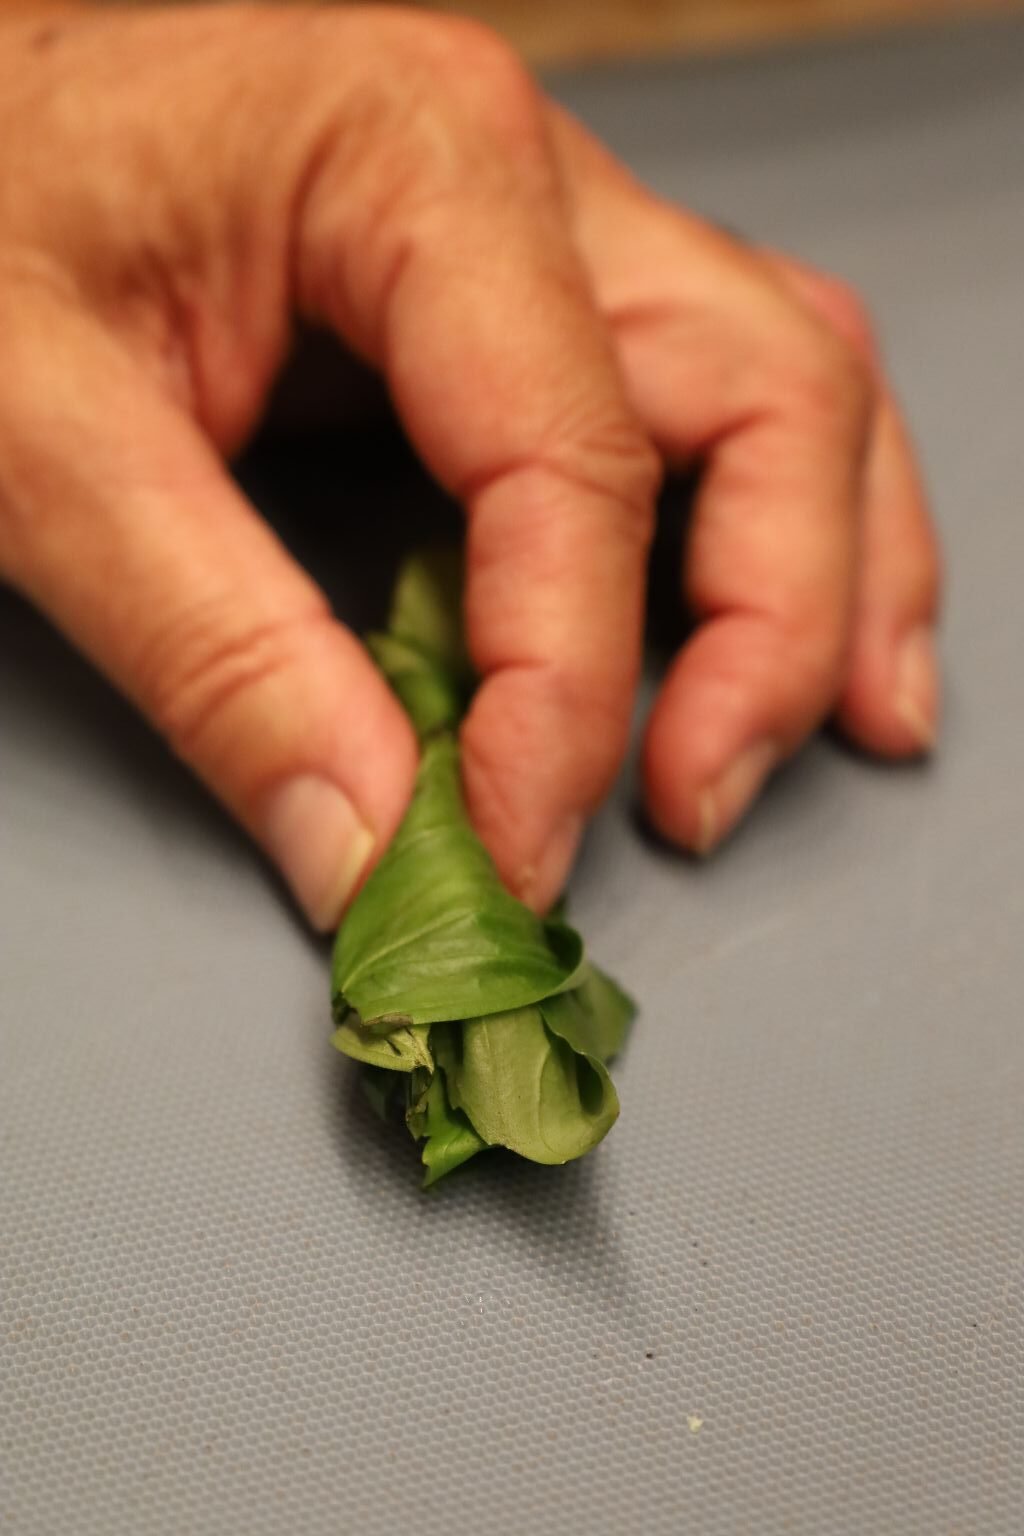
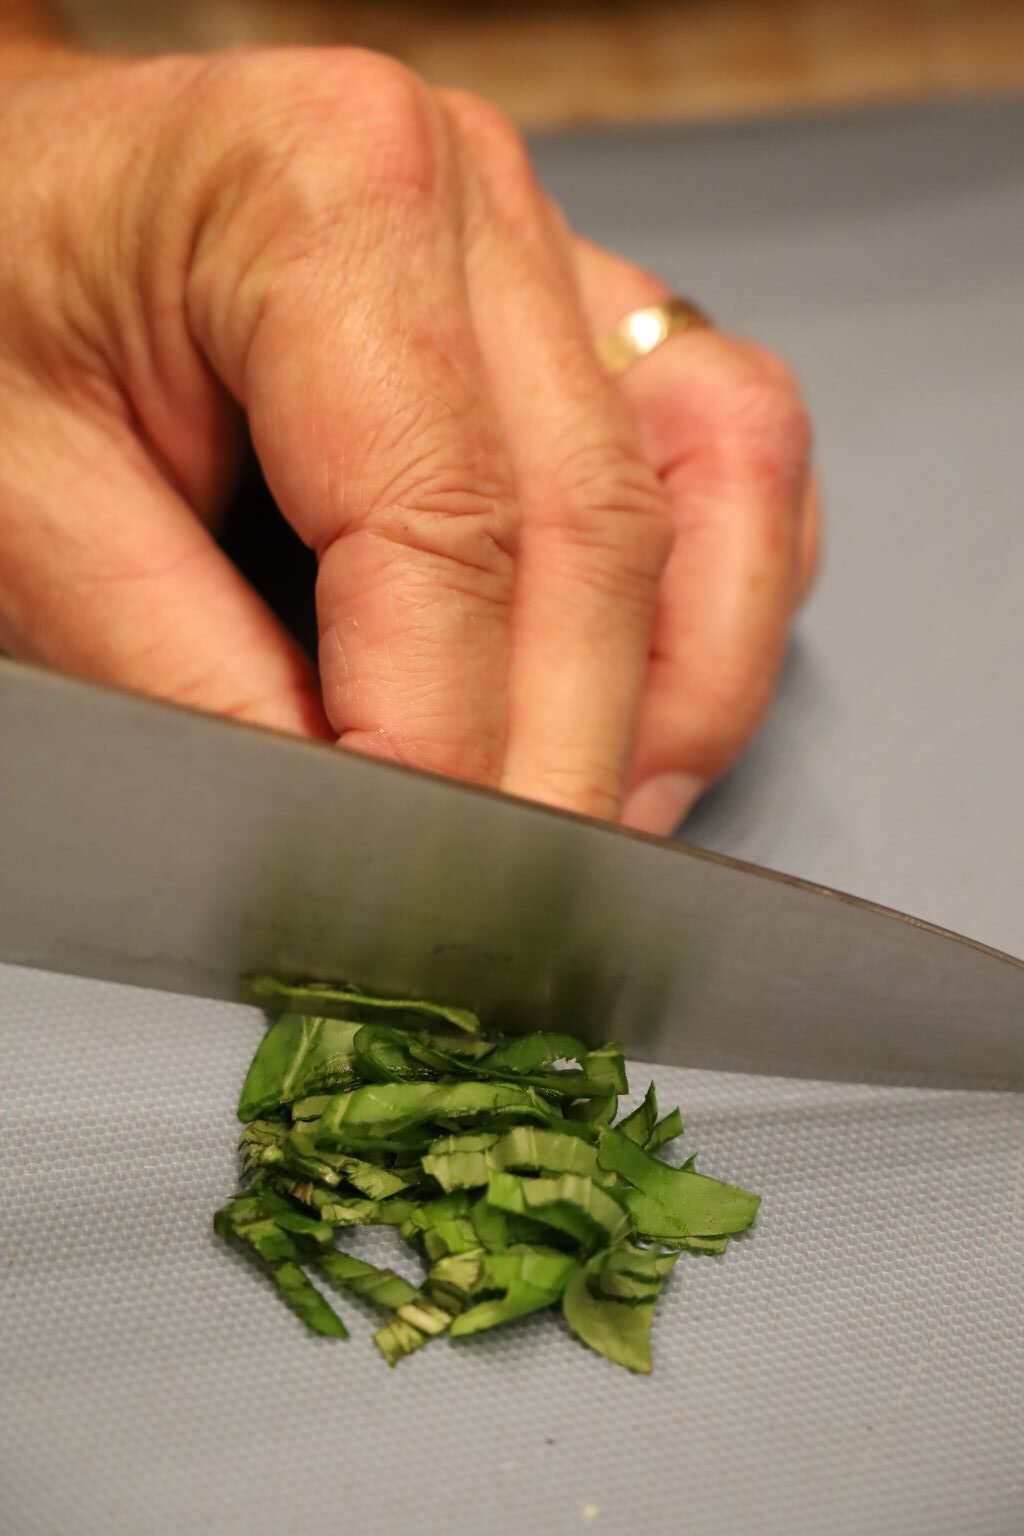
Chop some Fresh Basil Leaves and add to the bowl.
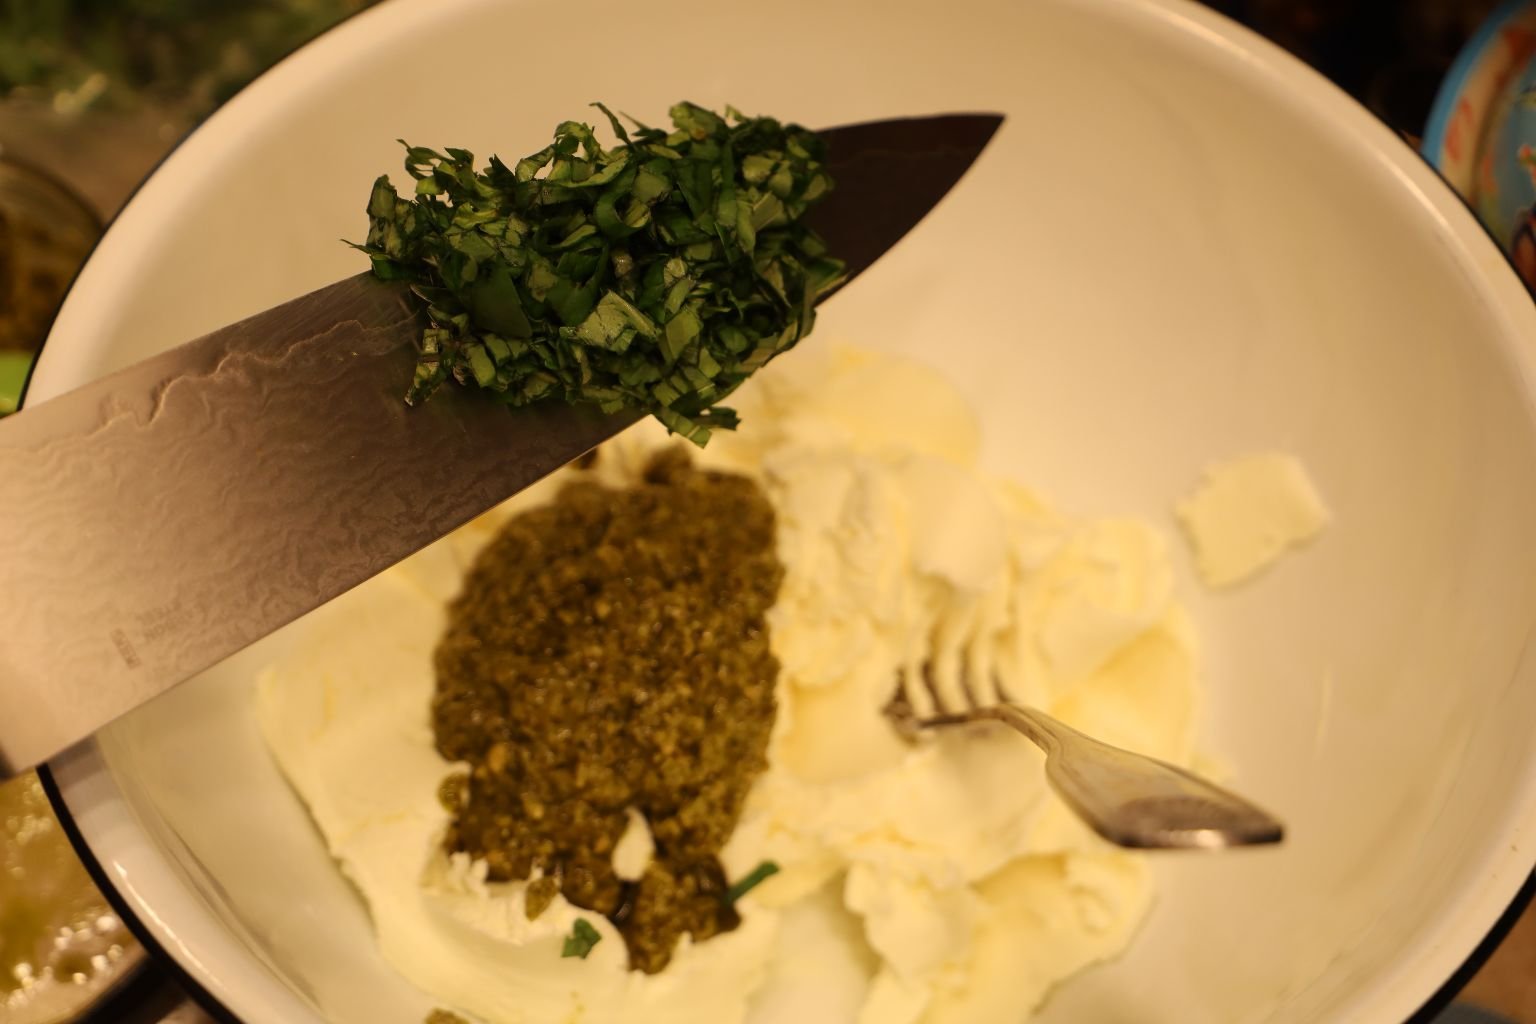
Combine all of the ingredients together.
It really is best if you use your hands. Roll into a ball and refrigerate.
Roll the Cheeseball in the Roasted Pine Nuts and then serve with either bread of crackers.
———————————————————————————————-
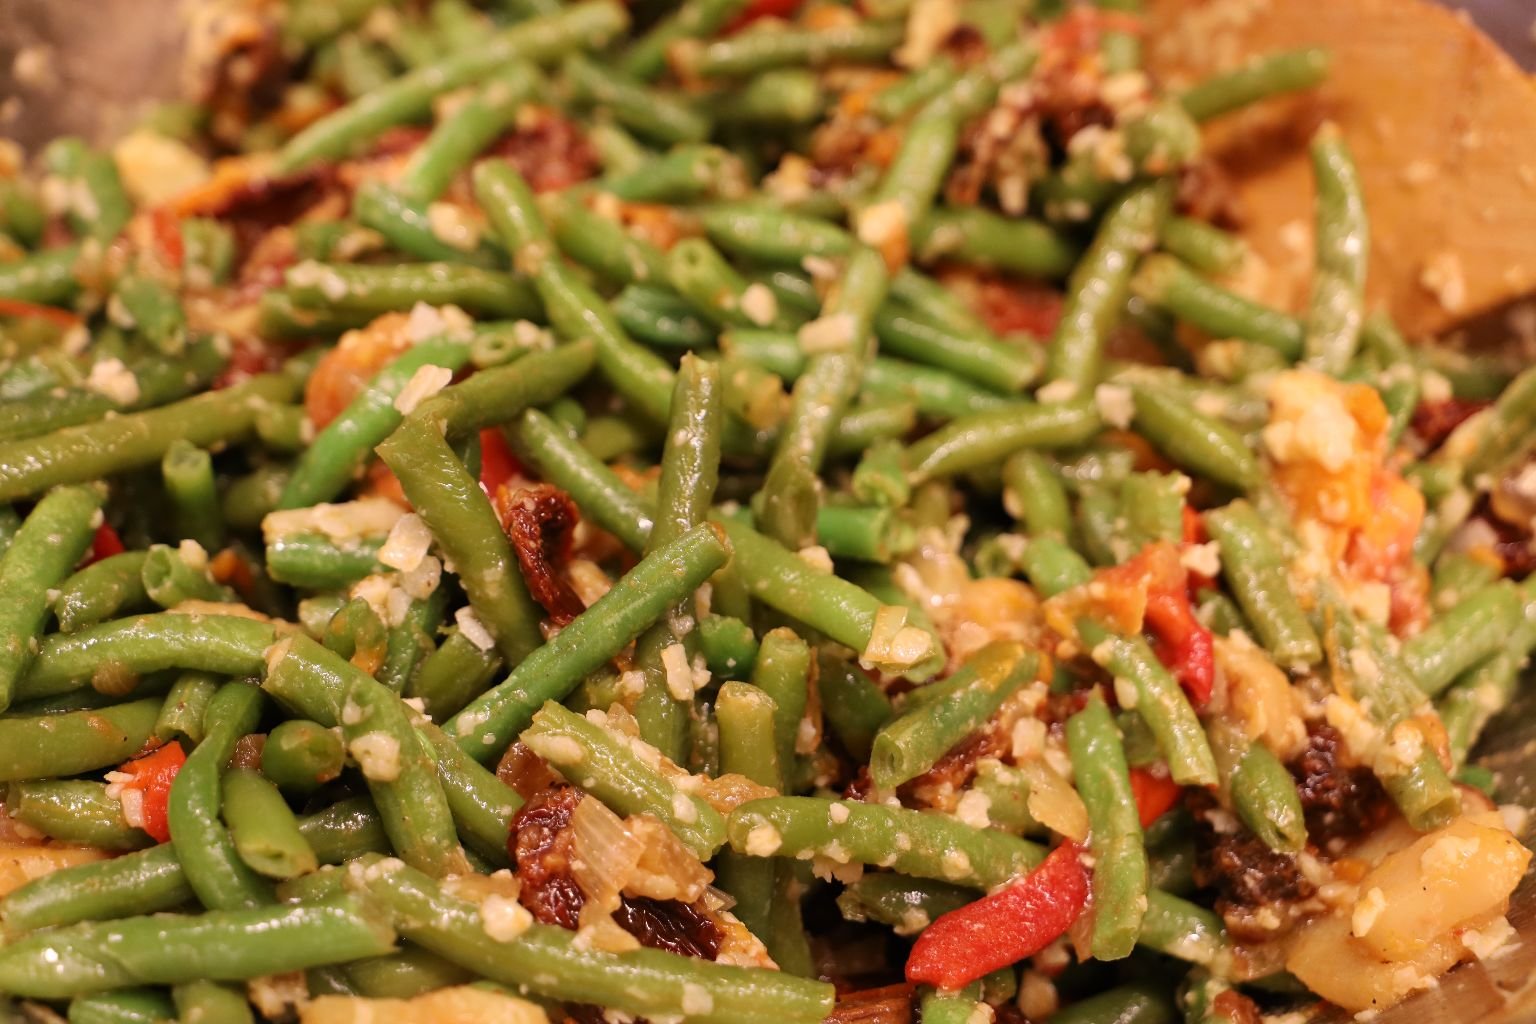
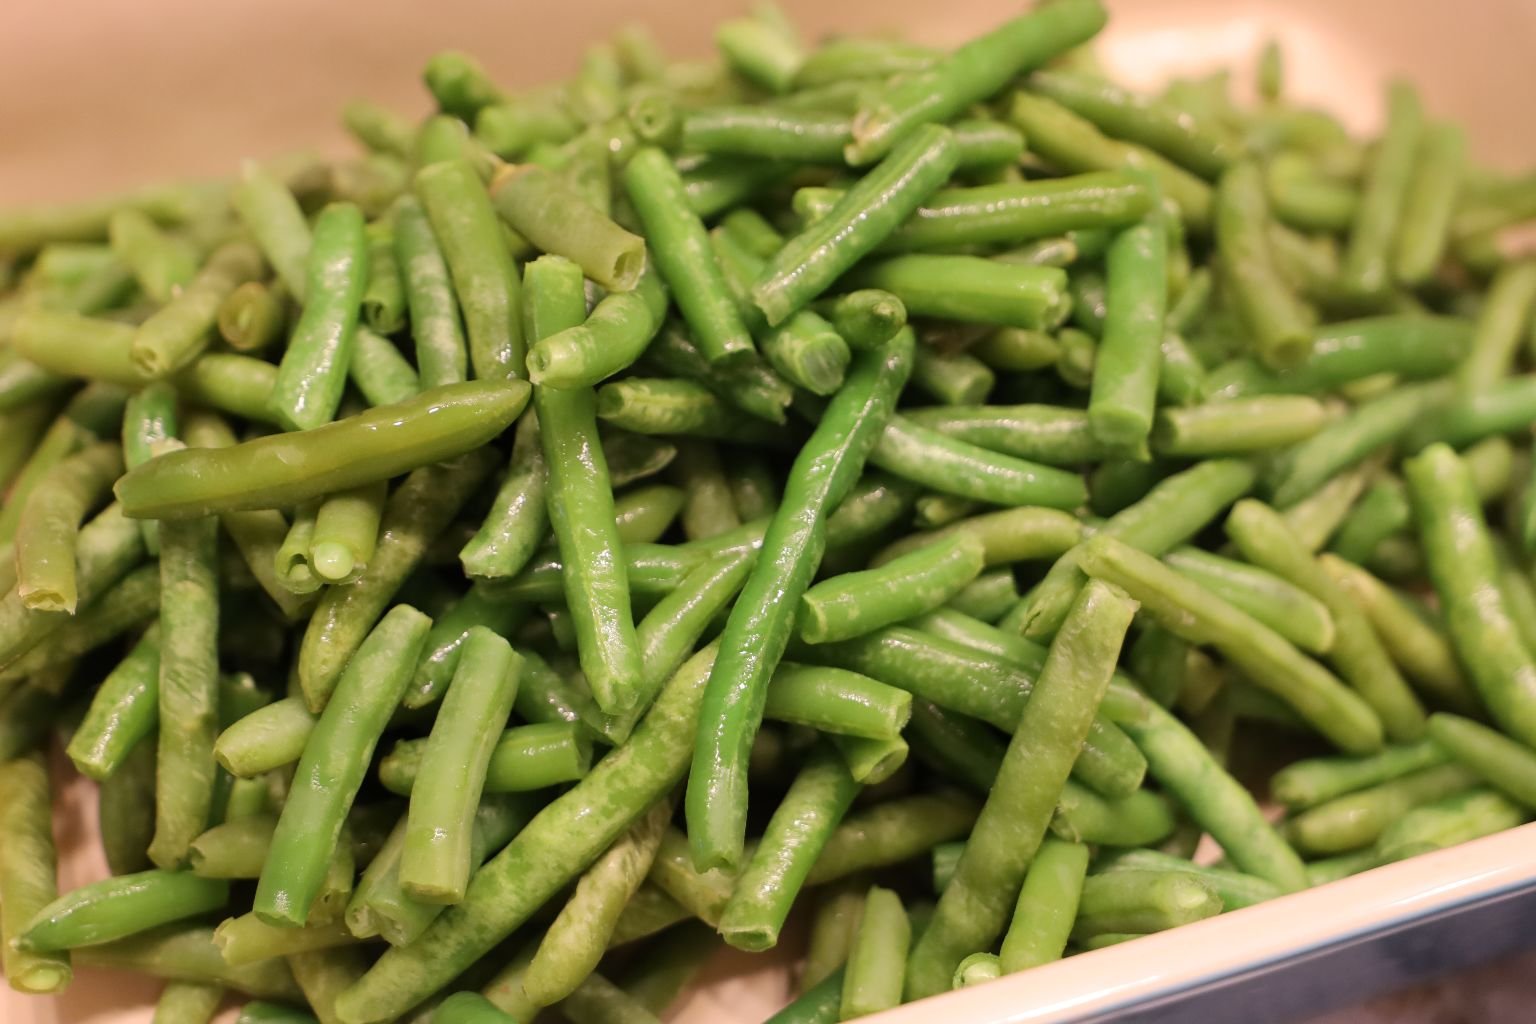
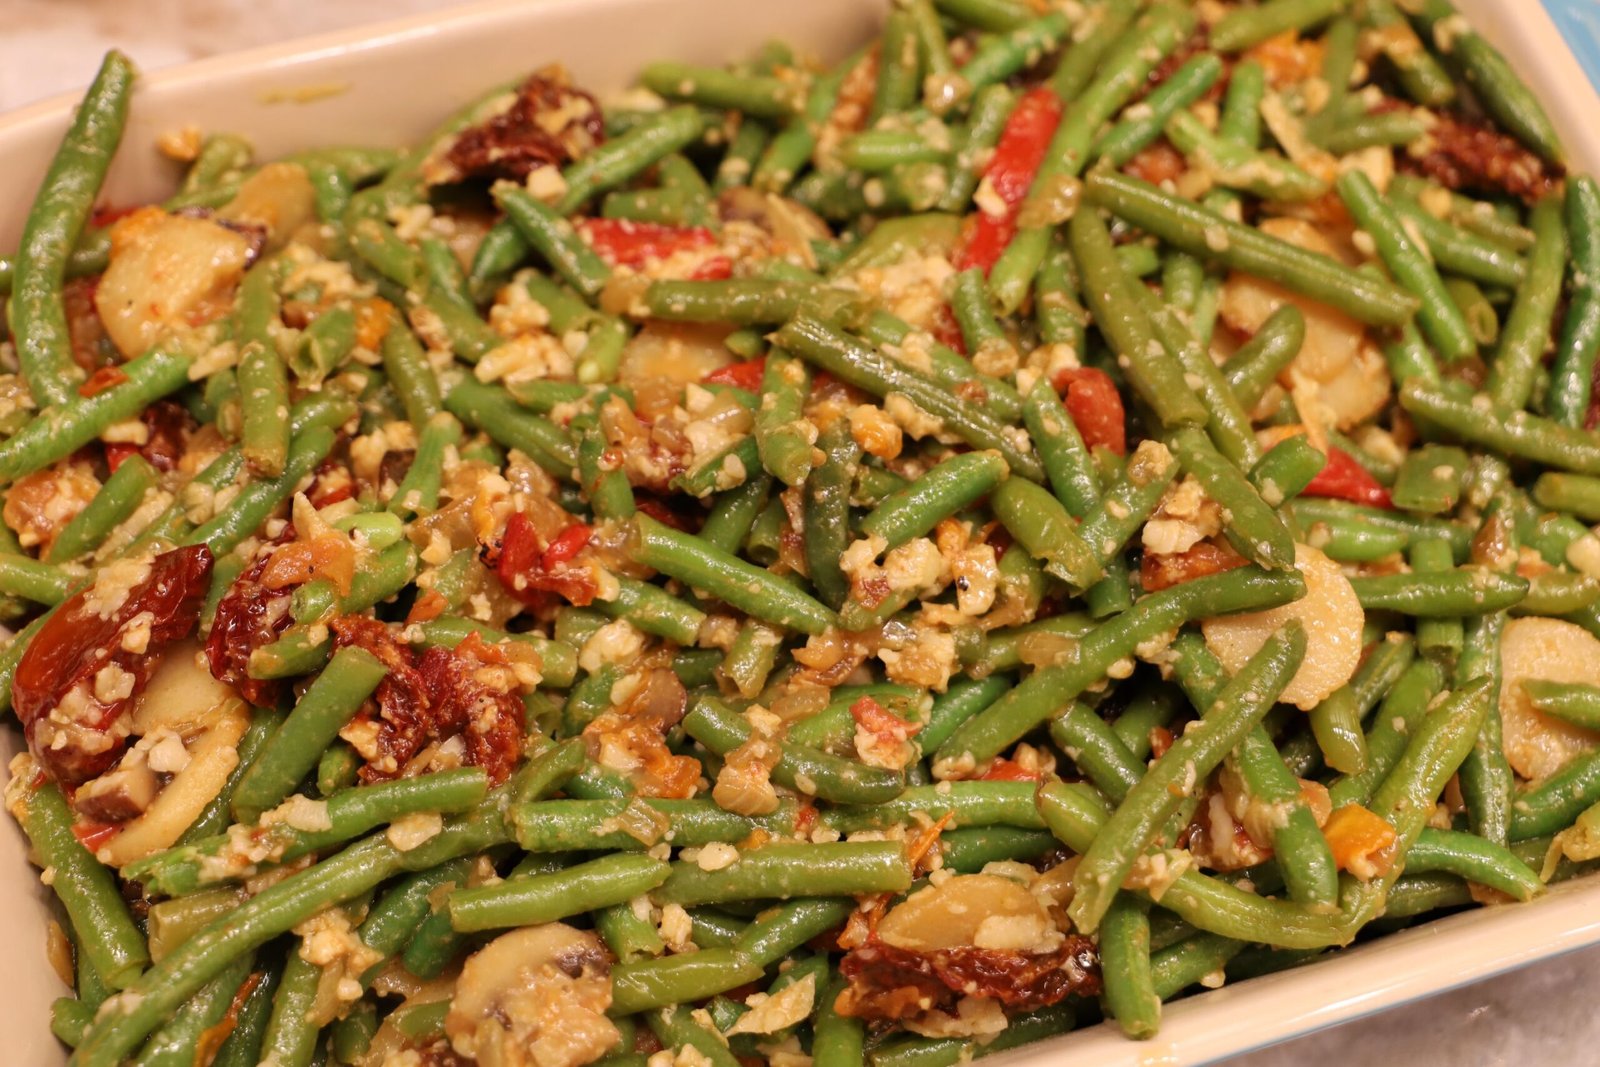
Italian Inspired Green Beans Topped With American Bacon
With Thanksgiving and Christmas right around the corner, here is a great Green Bean recipe for those family occasions or your holiday work parties. This would even make a great gift!
As you can see it makes a good amount and looks great. I believe there are never enough vegetable dishes at these work events, and your family will love the change.
—————————————————————————————
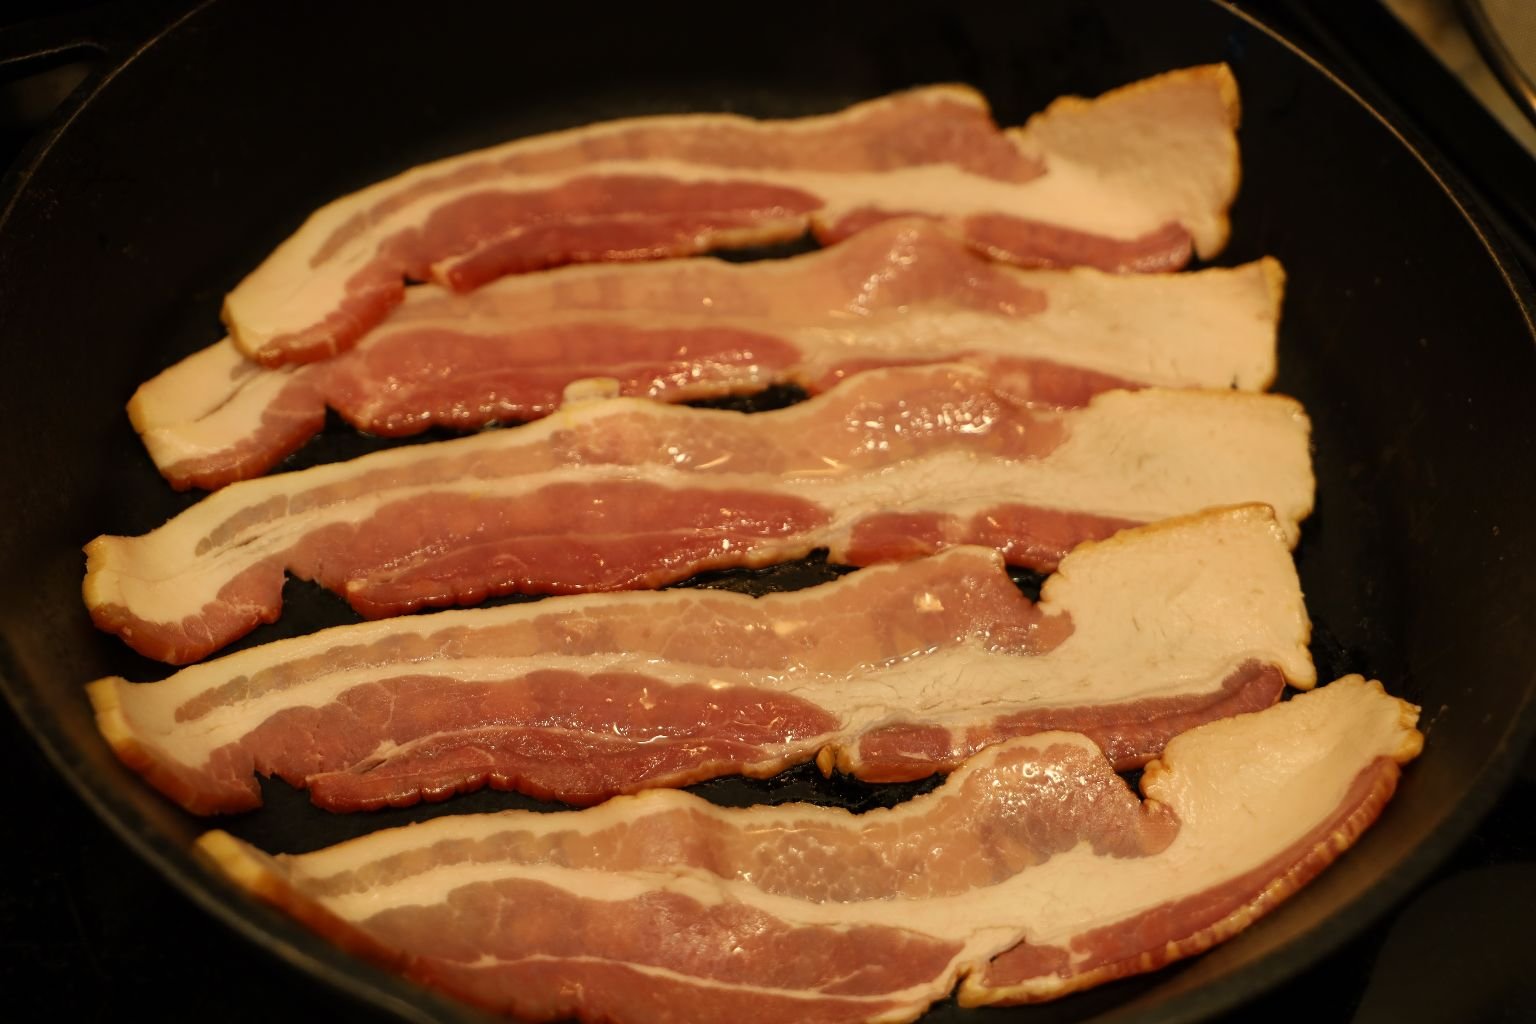

First Up: Frying The Bacon
This was some nice thick sliced bacon… a crowd pleaser for sure.
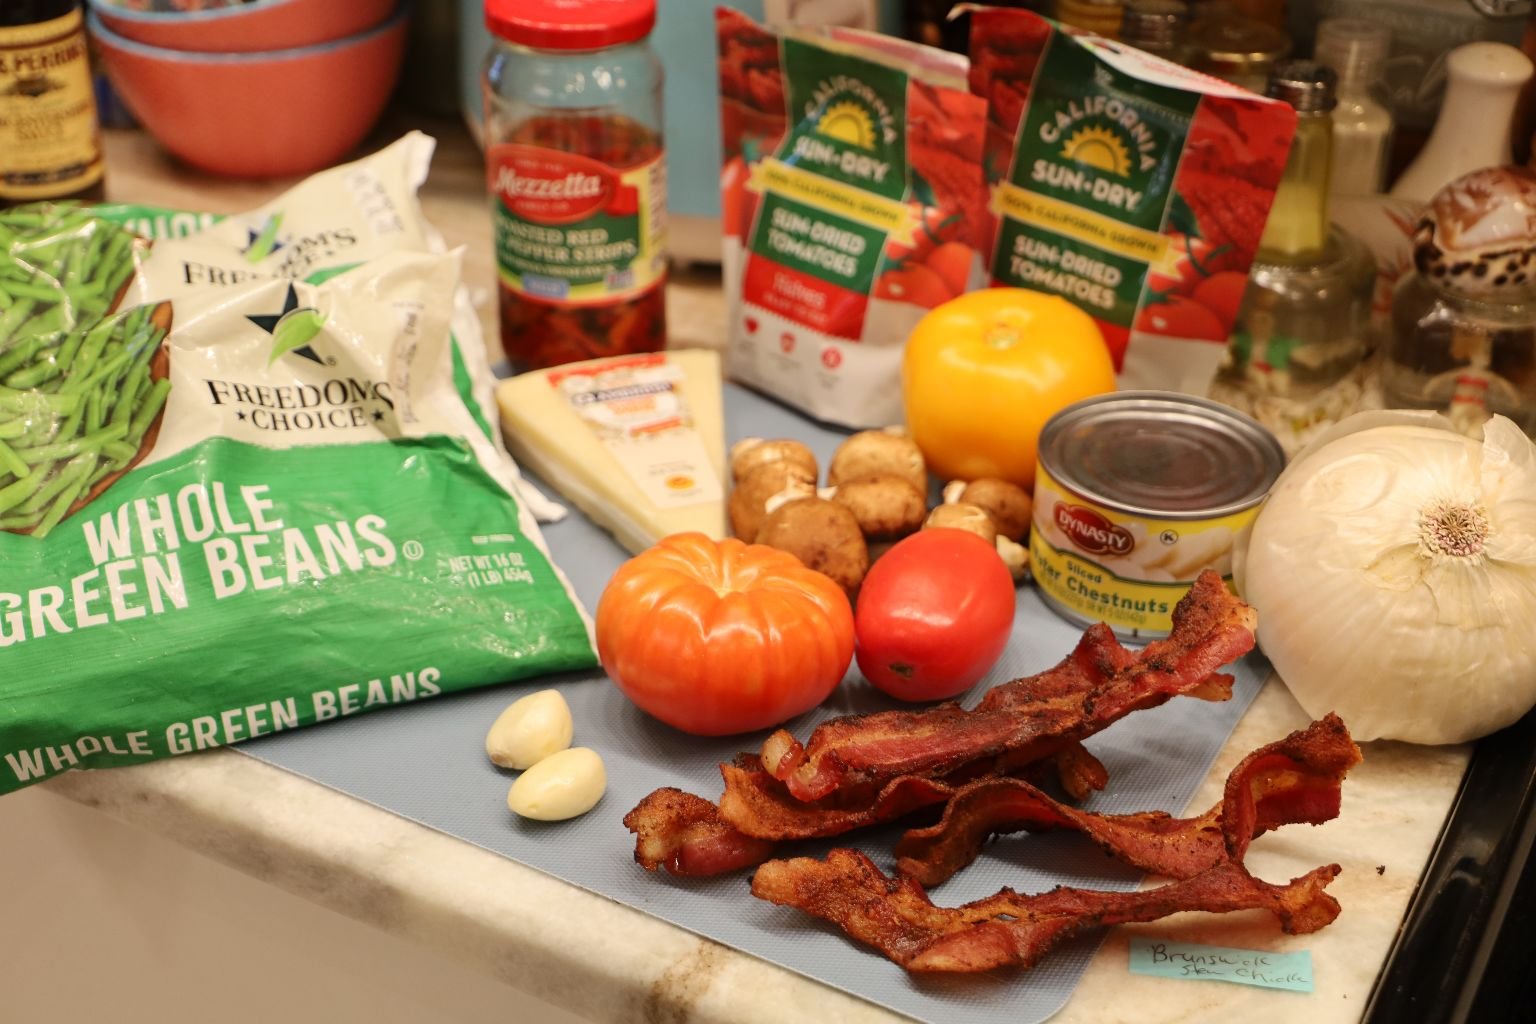
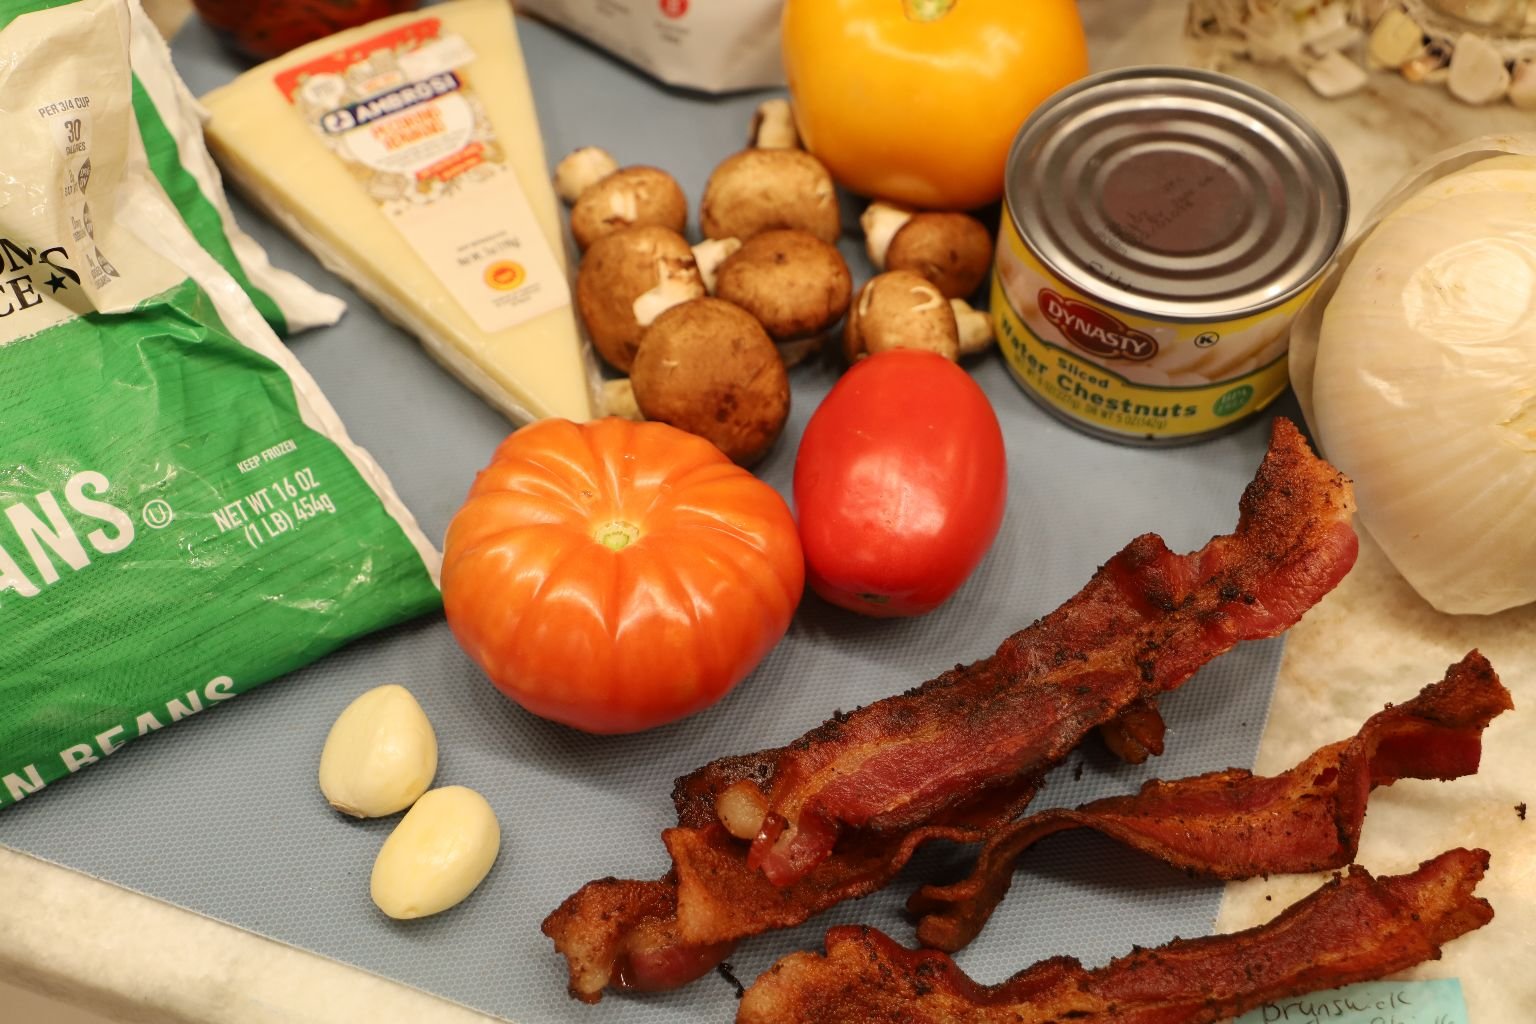
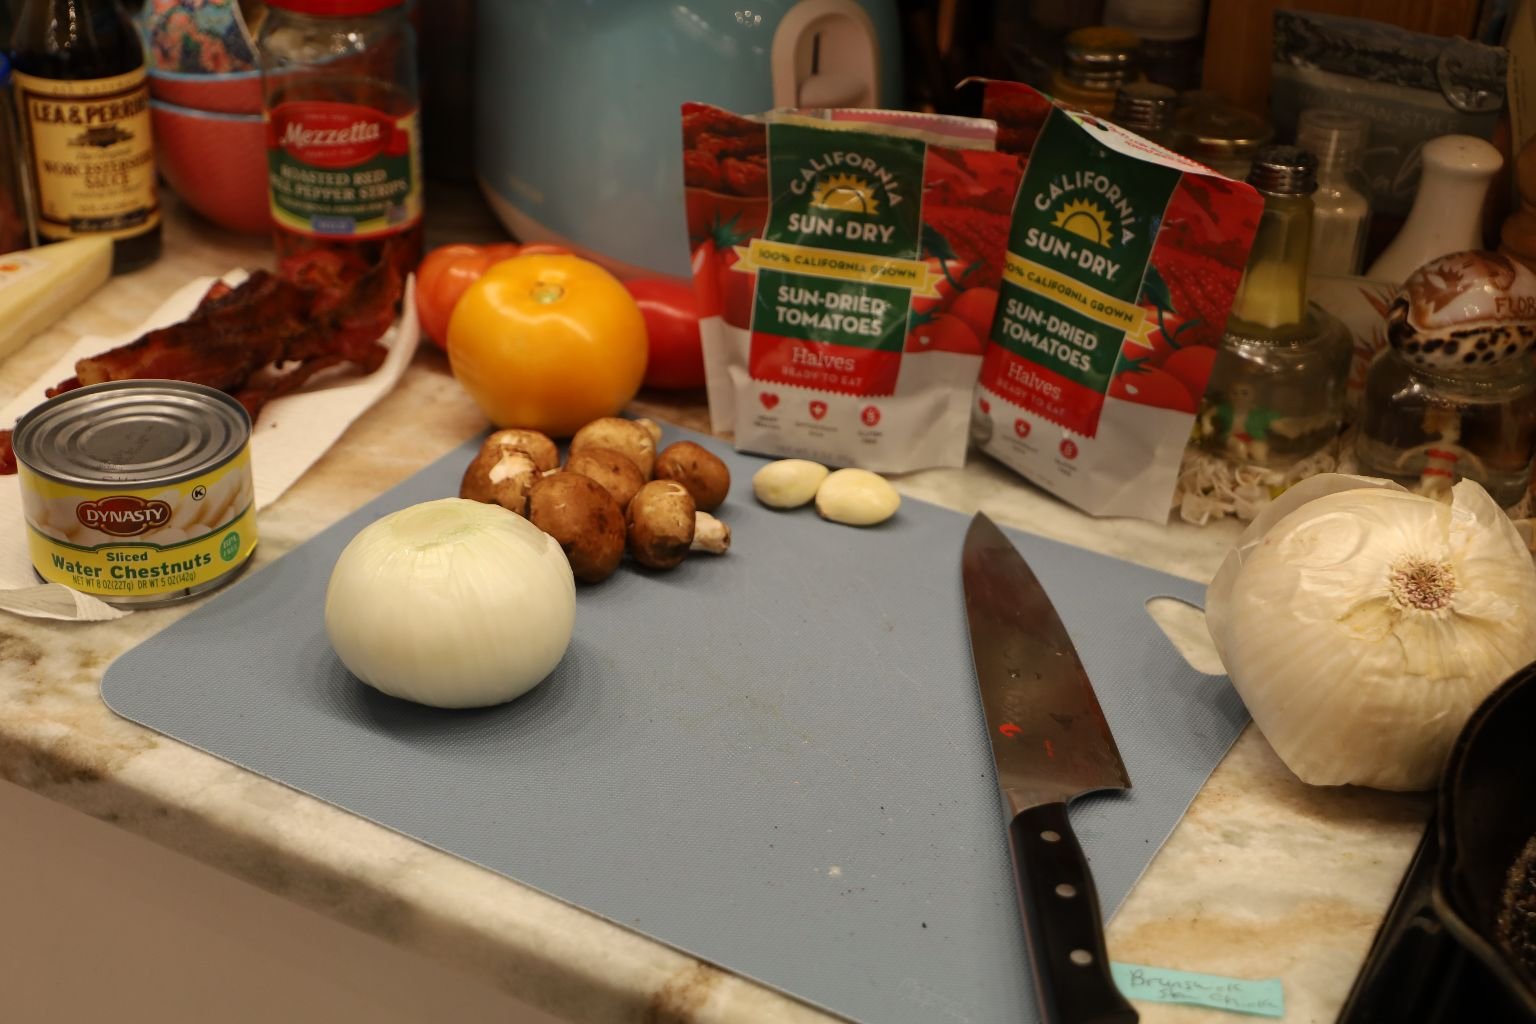
Ingredients:
5 Thick sliced bacon strips – cooked and save ~1/4 cup of the bacon fat!
1 White Onion – diced
7-8 Mushrooms – Sliced thinly, I used baby portobella
2 Garlic Cloves – chopped
Freshly Ground Black Pepper, and Sea Salt to taste
2 Bags Frozen Green Beans – thawed in microwave
Two Medium Heirloom Tomatoes – chopped
1 Roma Tomato – chopped
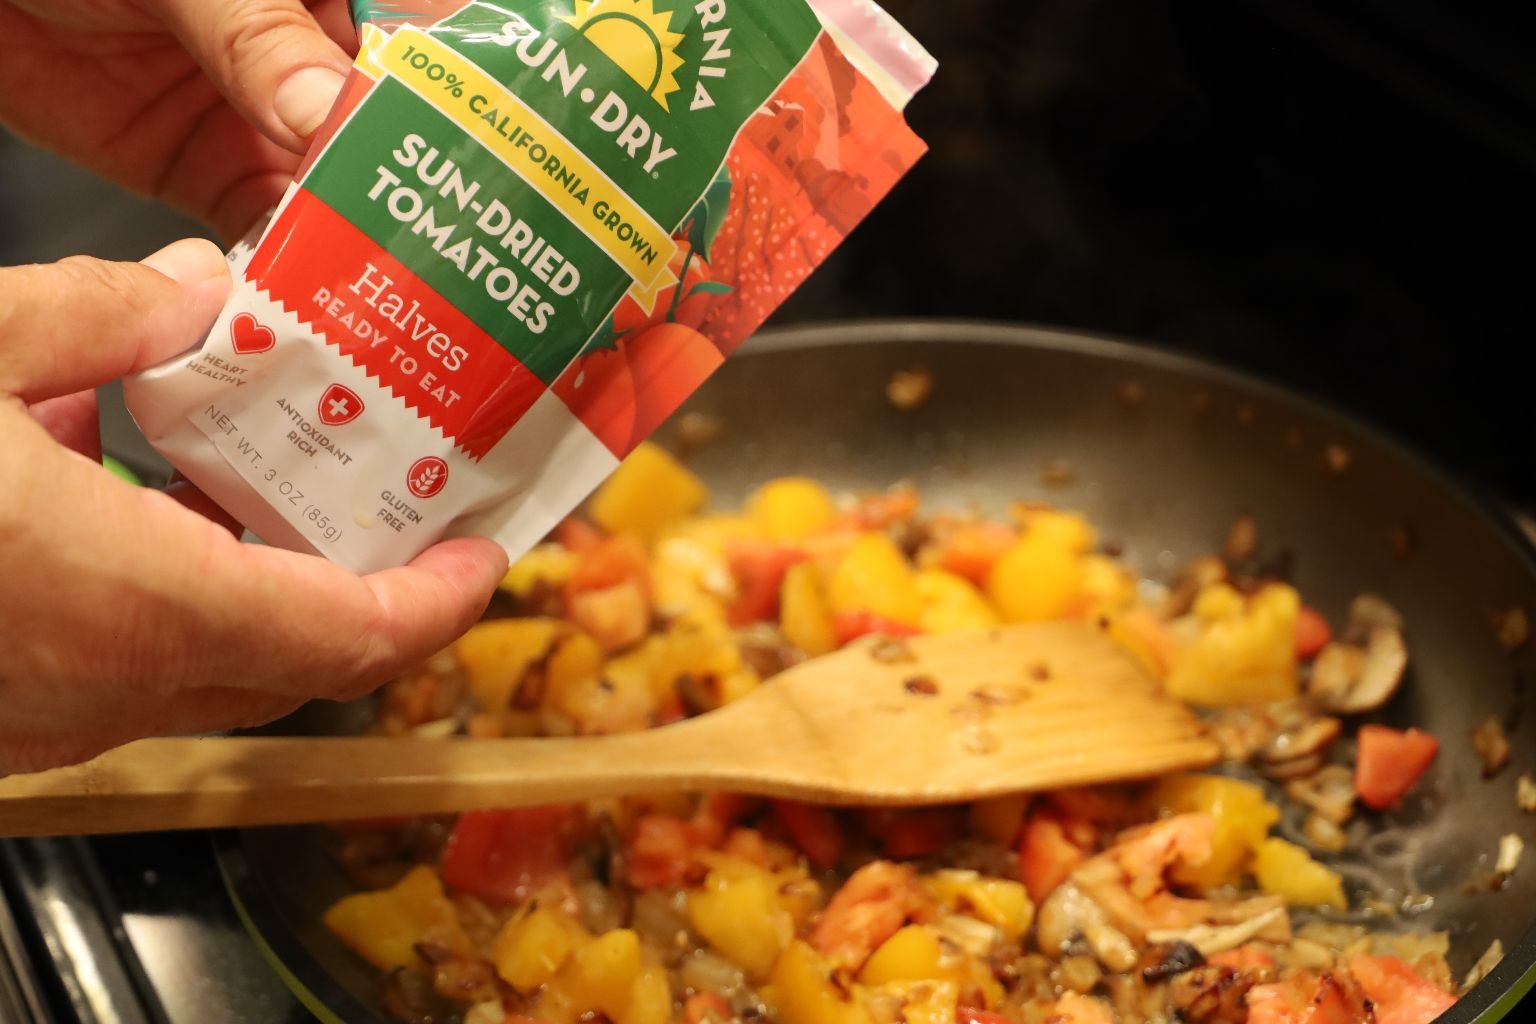
3 oz. Bag Sun-Dried Tomato Halves
½ Cup Roasted Red Bell Pepper Strips
5 oz. Sliced Water Chestnuts – drained
~1/4 Extra Virgin Cup Olive Oil for Green Beans
3 Tbsp. Extra Virgin Cup Olive Oil for casserole dish
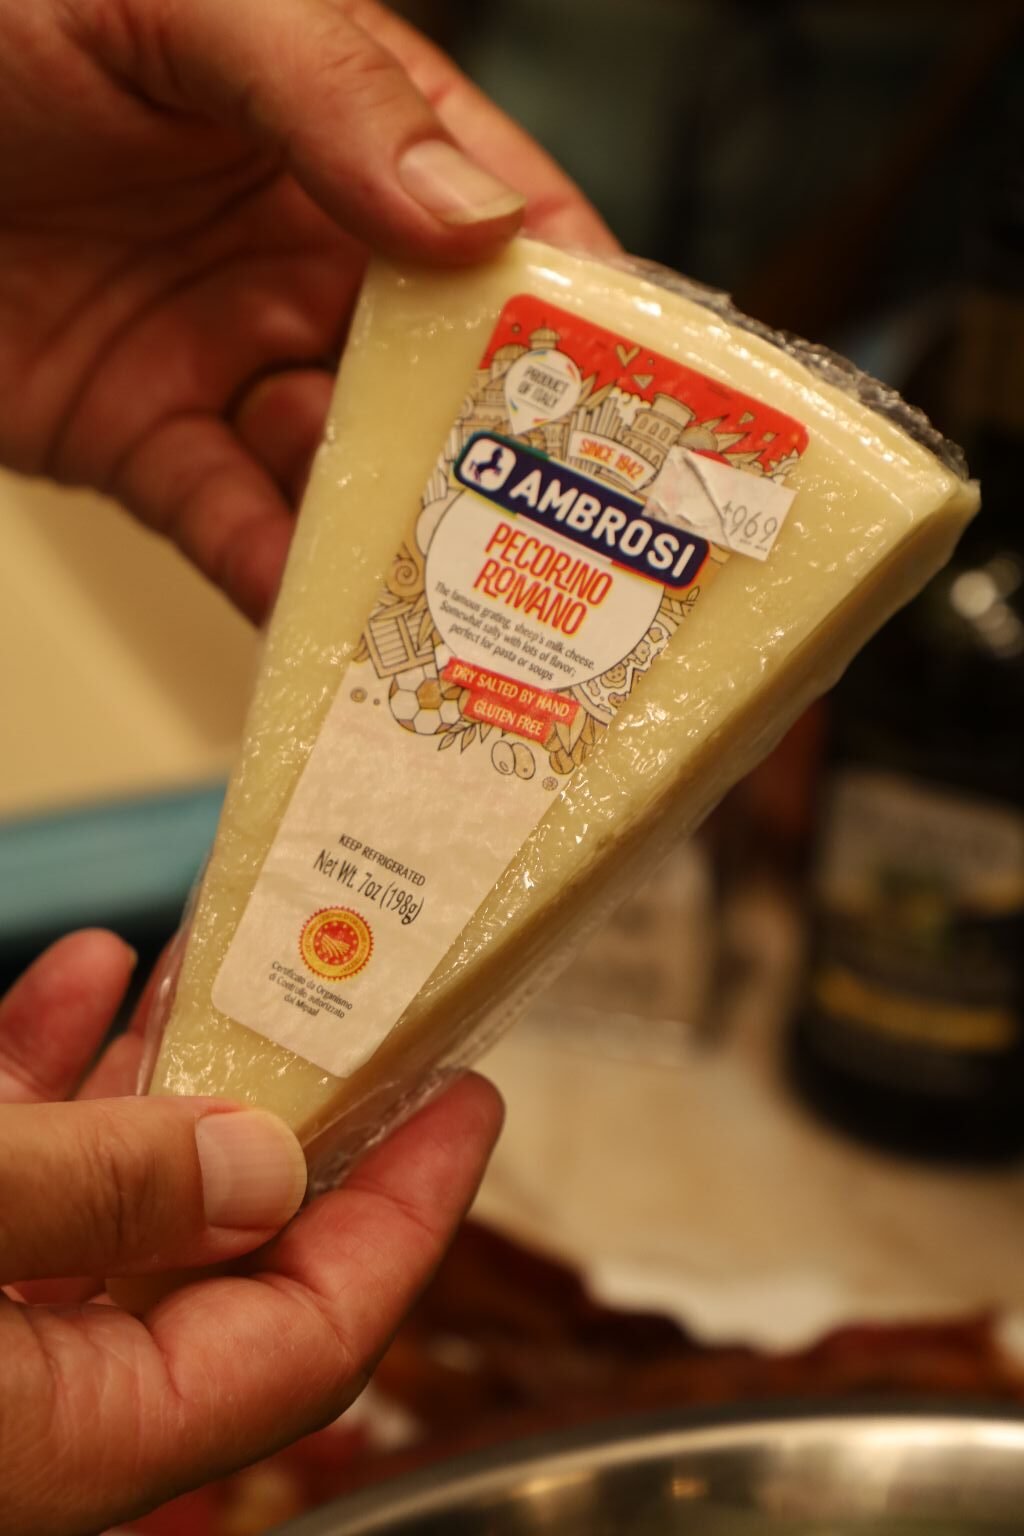
½ Cup Pecorino Romano Cheese – grated
For topping – ¼ Cup Pecorino Romano Cheese – grated
—————————————————————————————————
Again, cook your bacon and save the fat.
We like to use Julie’s Grandmothers Cast Iron skillet for this as it retains the heat and cooks the bacon evenly.
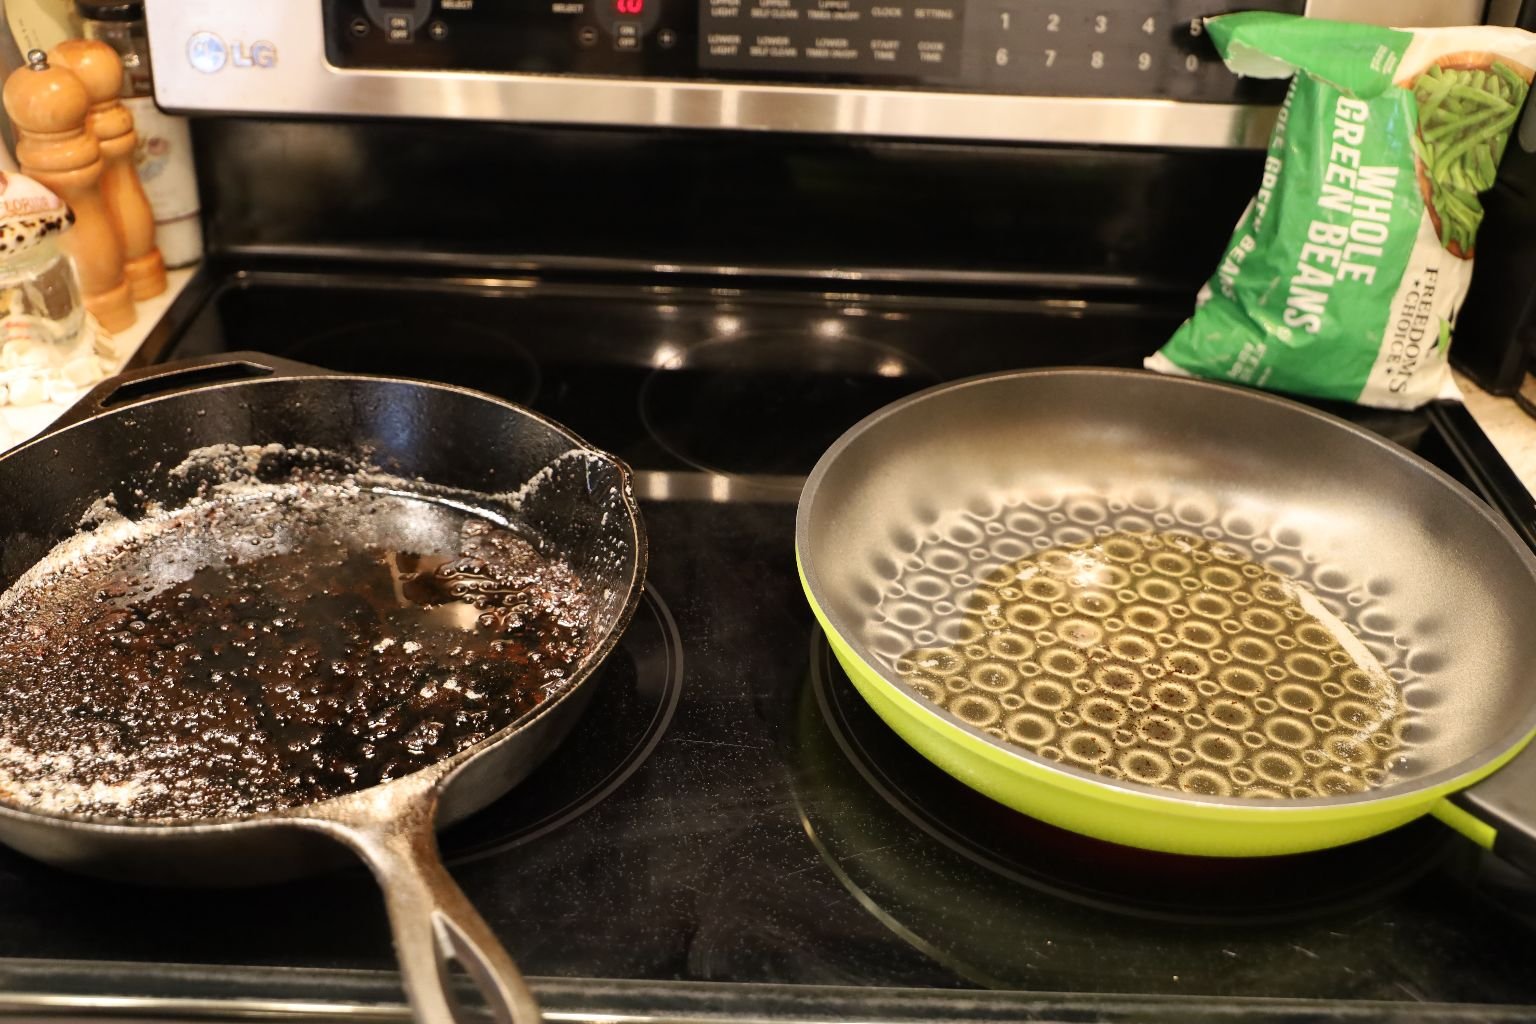
Pour your bacon fat into another large skillet as seen.
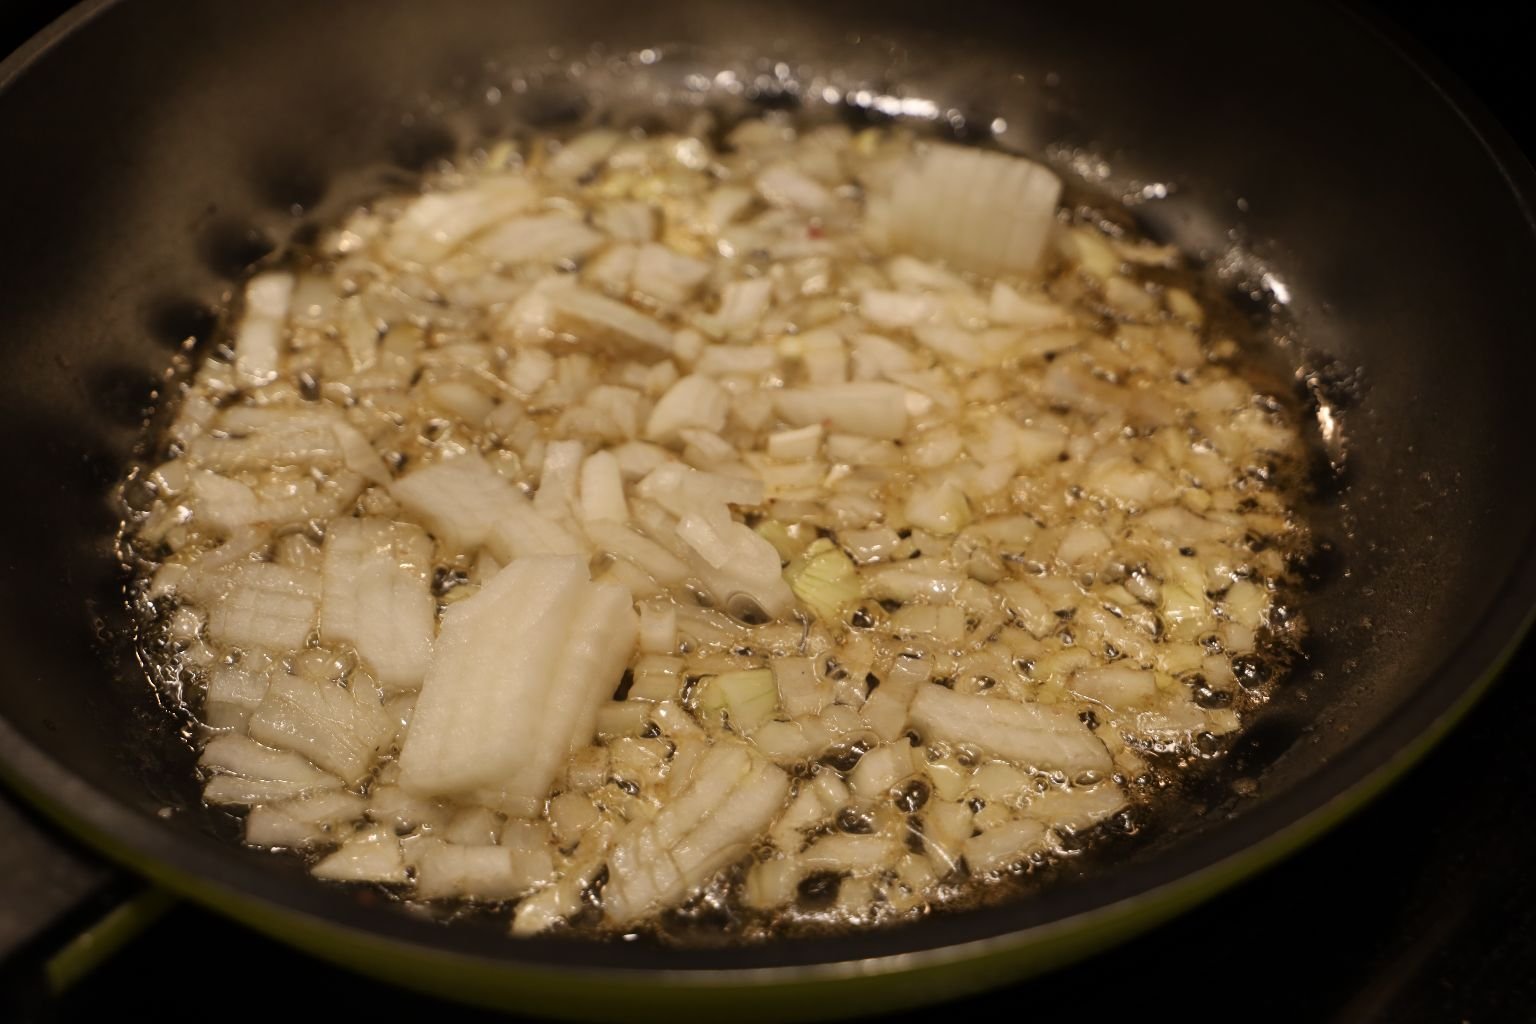
Slice and dice your White Onion and over medium heat, sauté your onion.
Stir occasionally.
———————————————————————————-

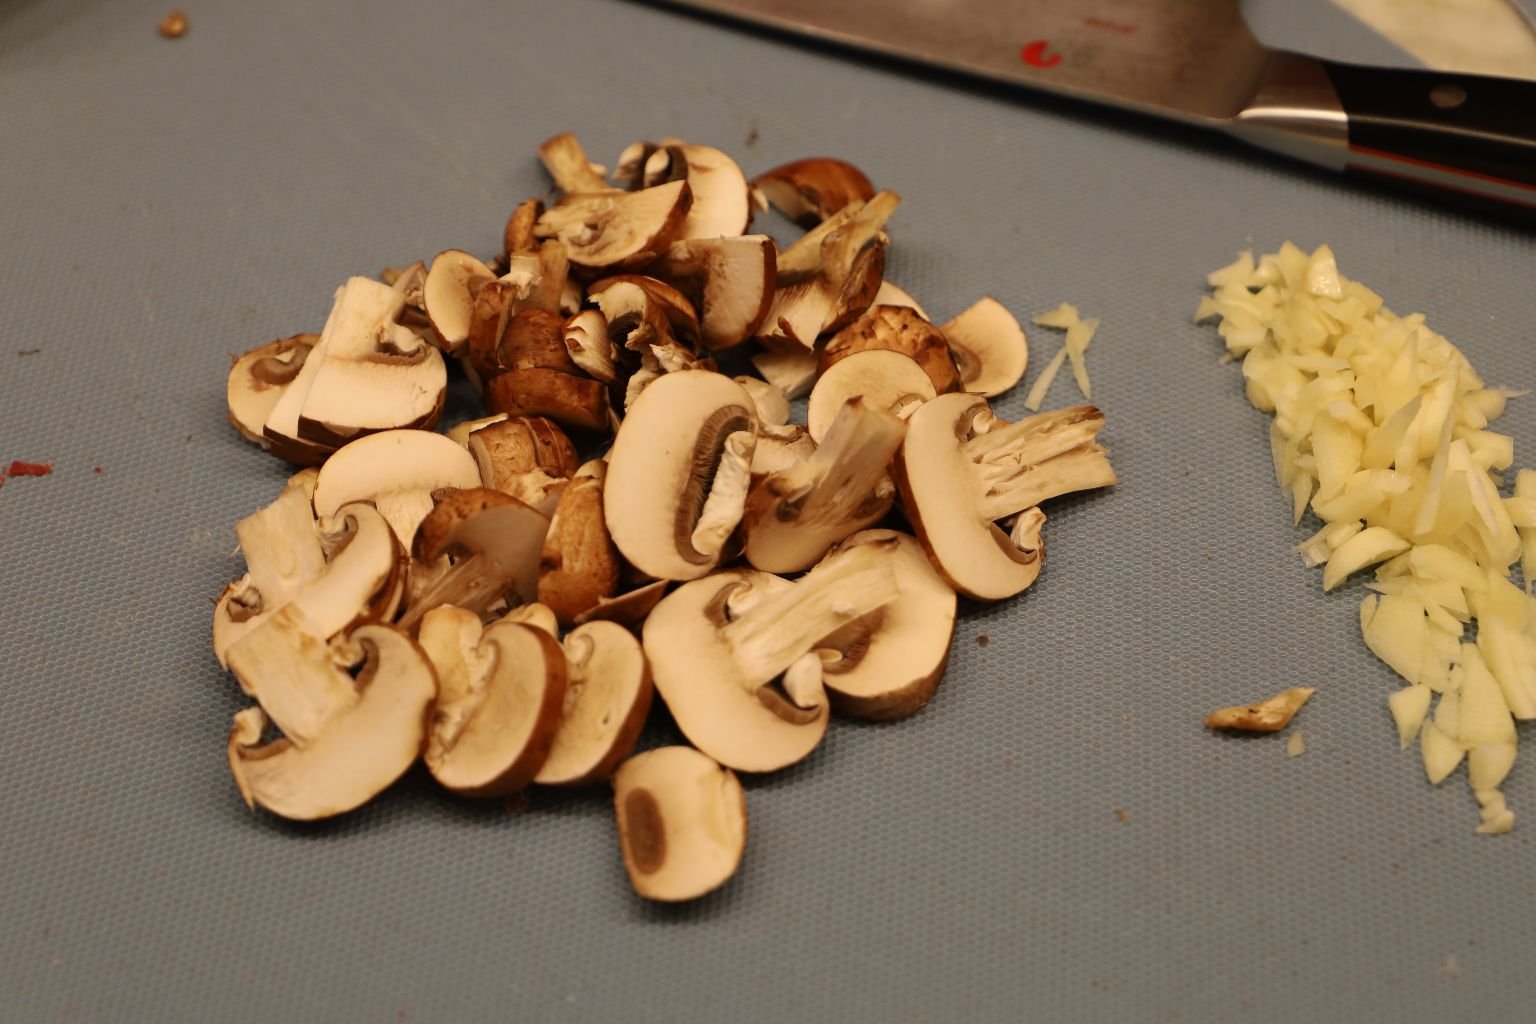
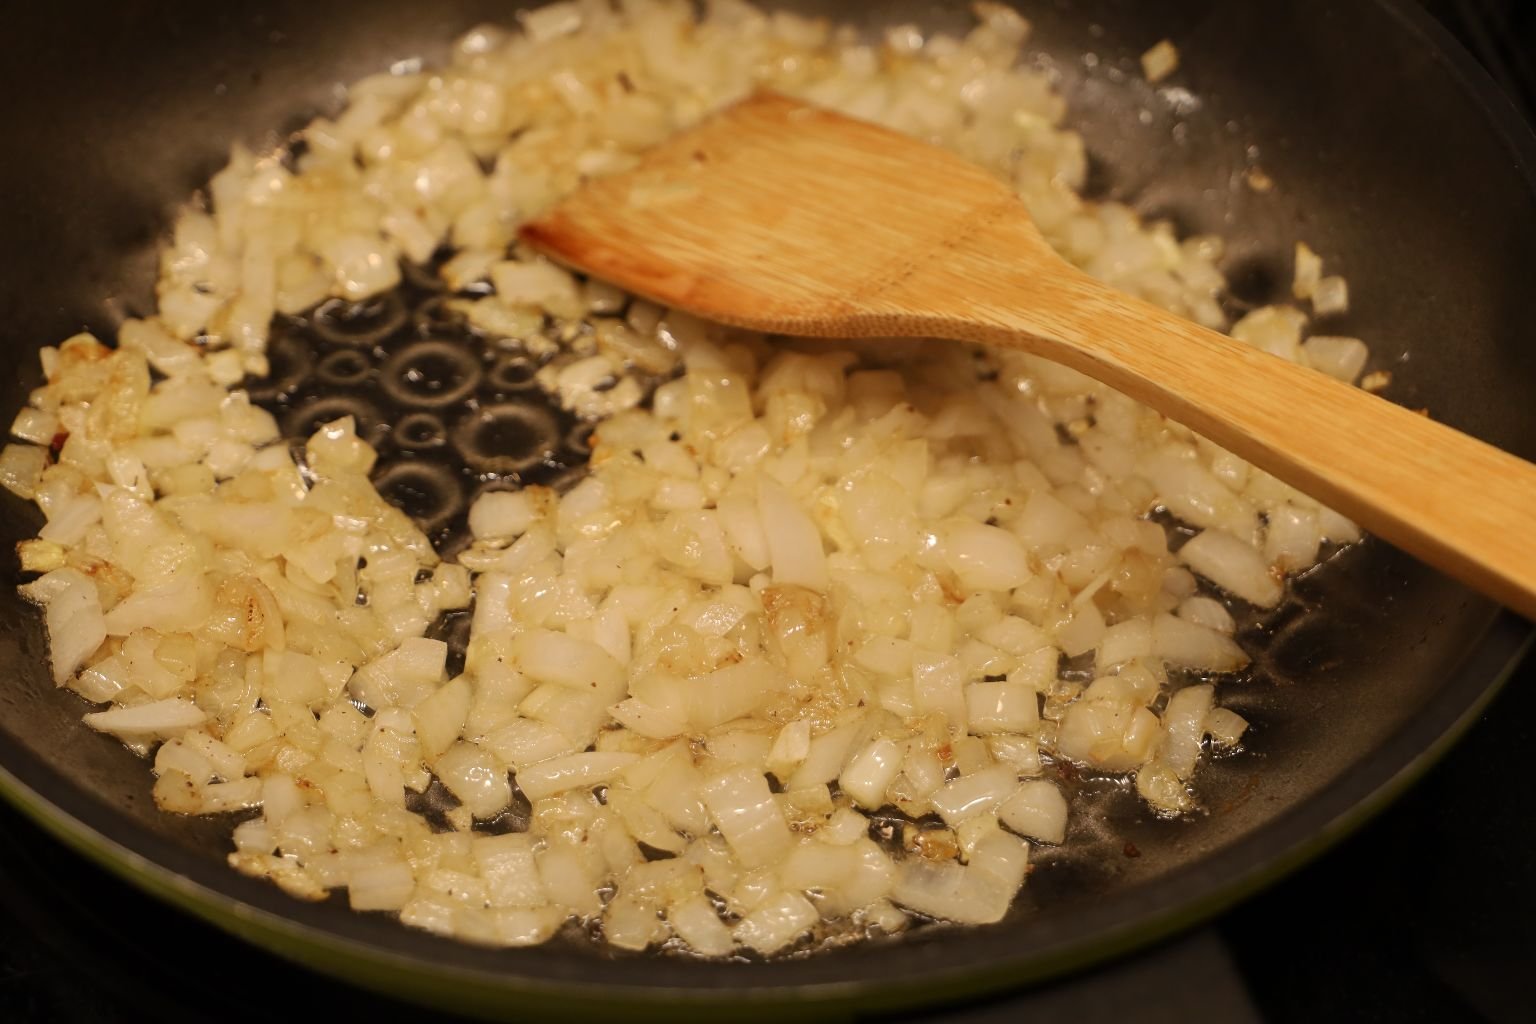
In the meantime, slice your Button Mushrooms and Garlic.
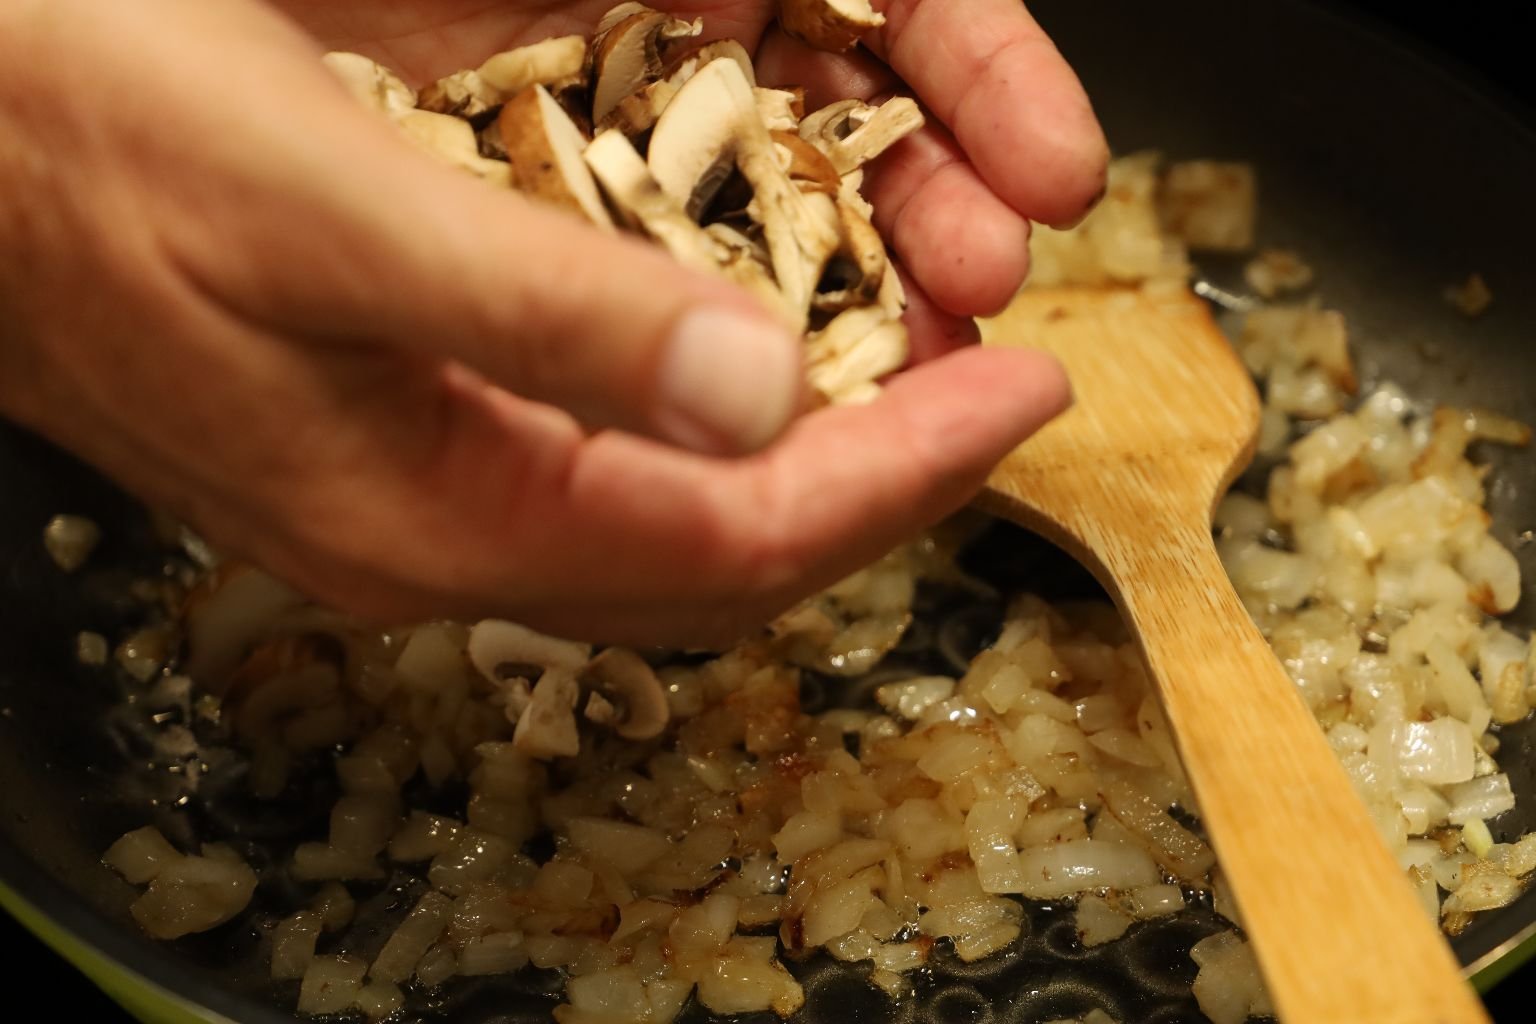
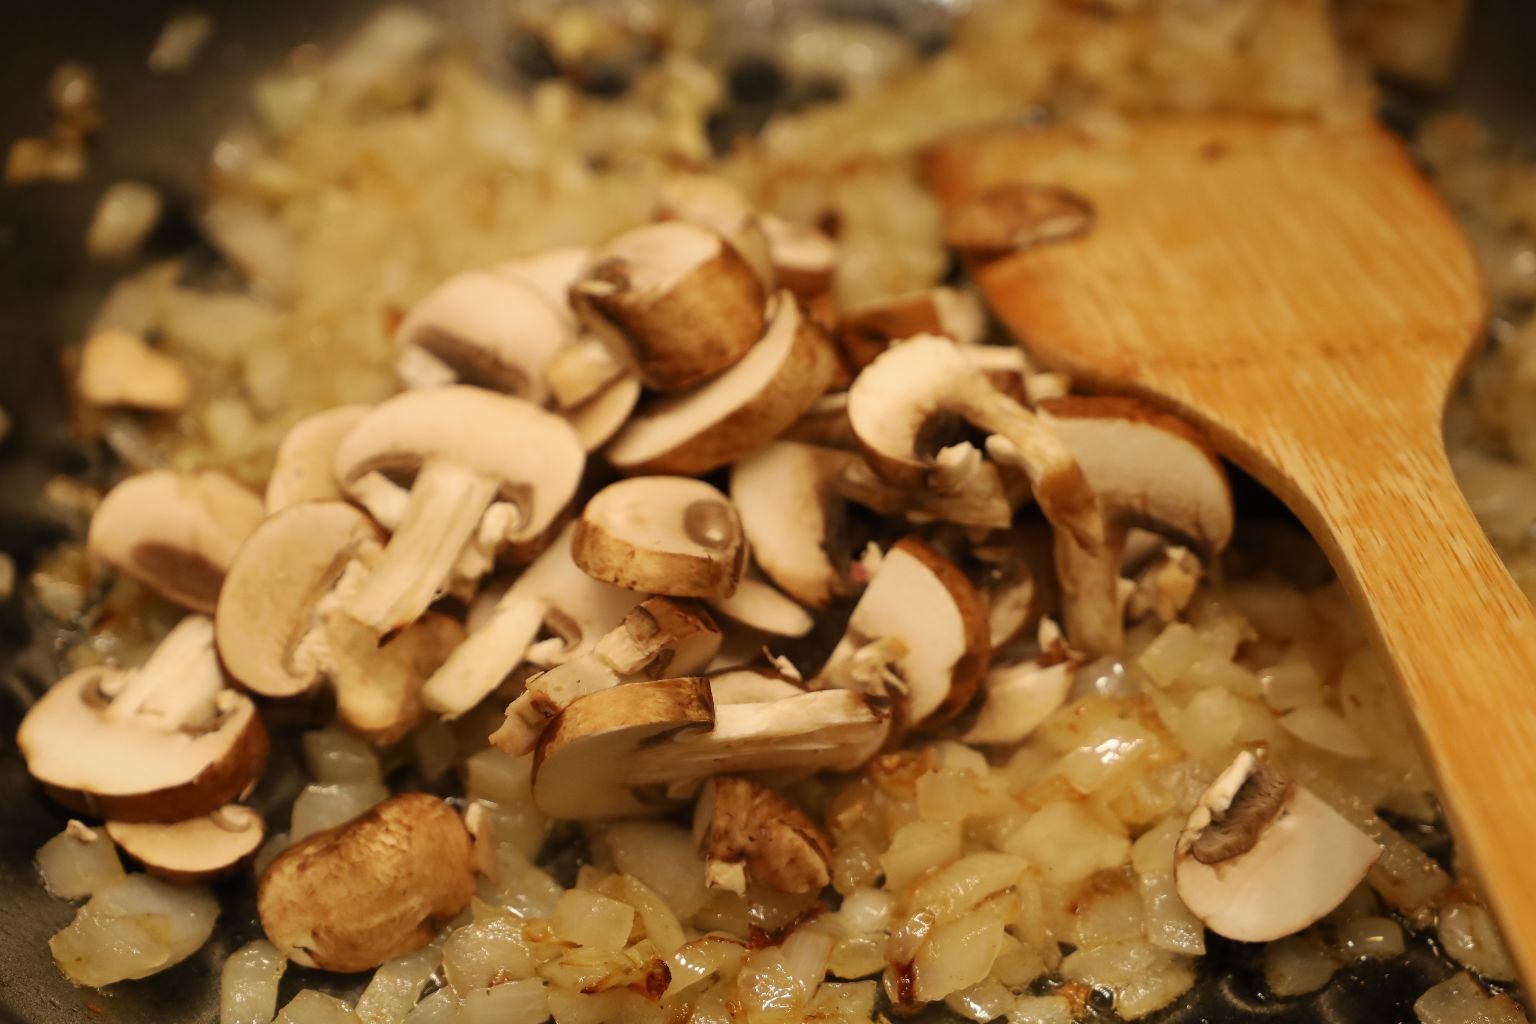
Once your onions become translucent, add your mushroom slices.

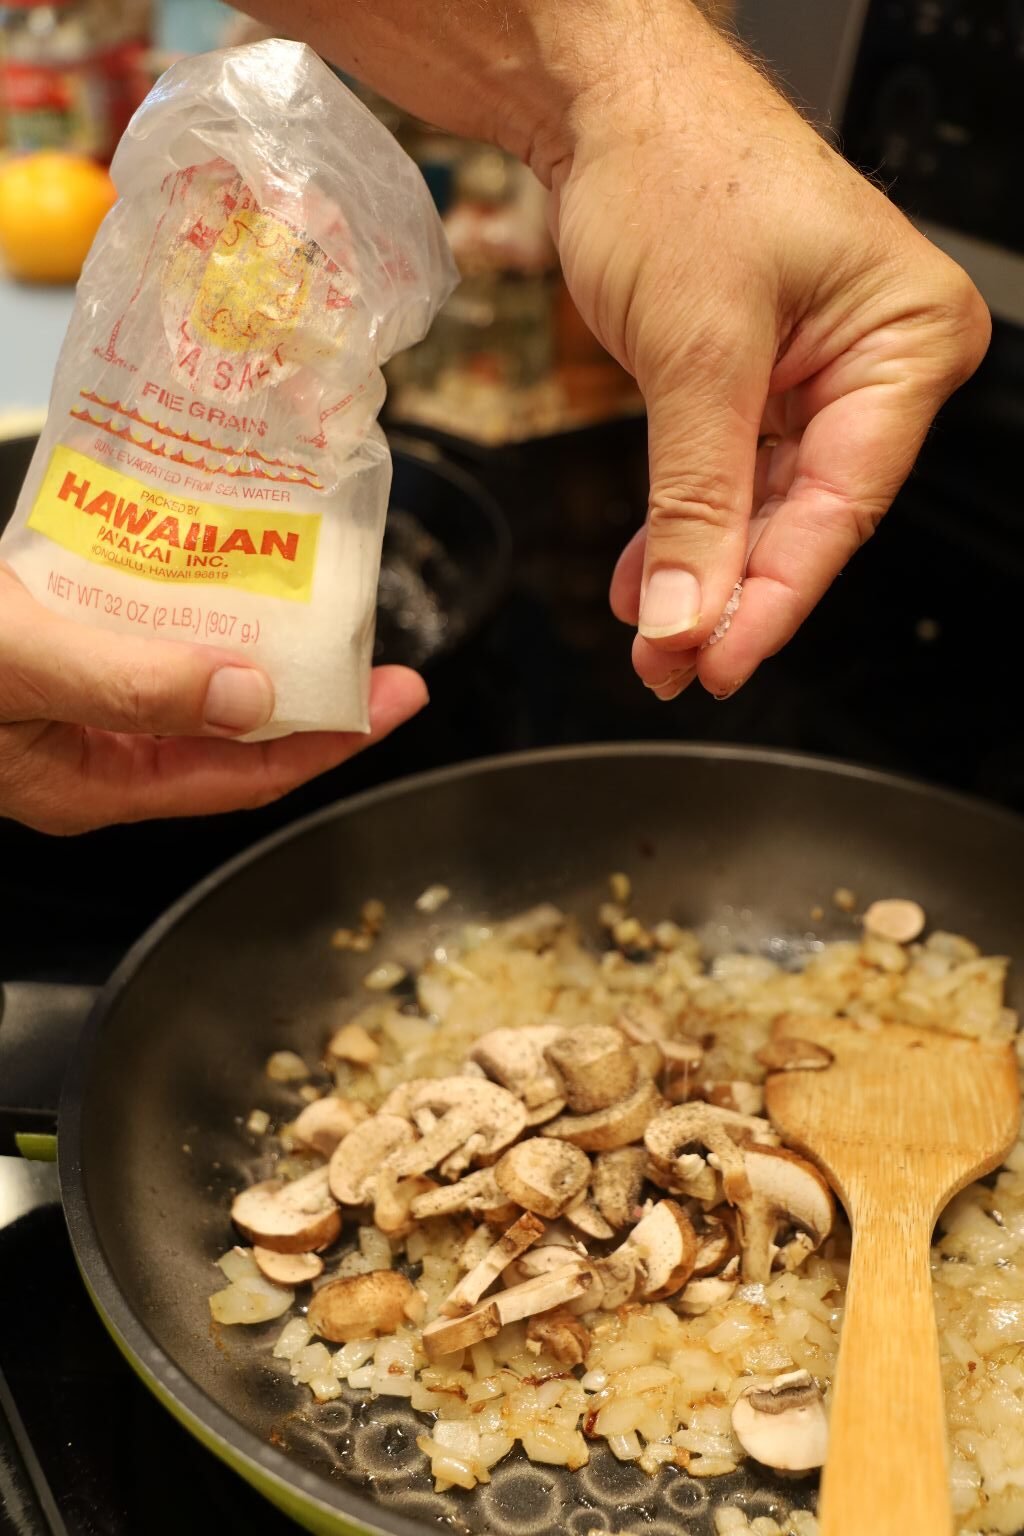
Add your Sea Salt and freshly ground Black Pepper to taste. Stir all your ingredients occasionally.
—————————————————————————————————
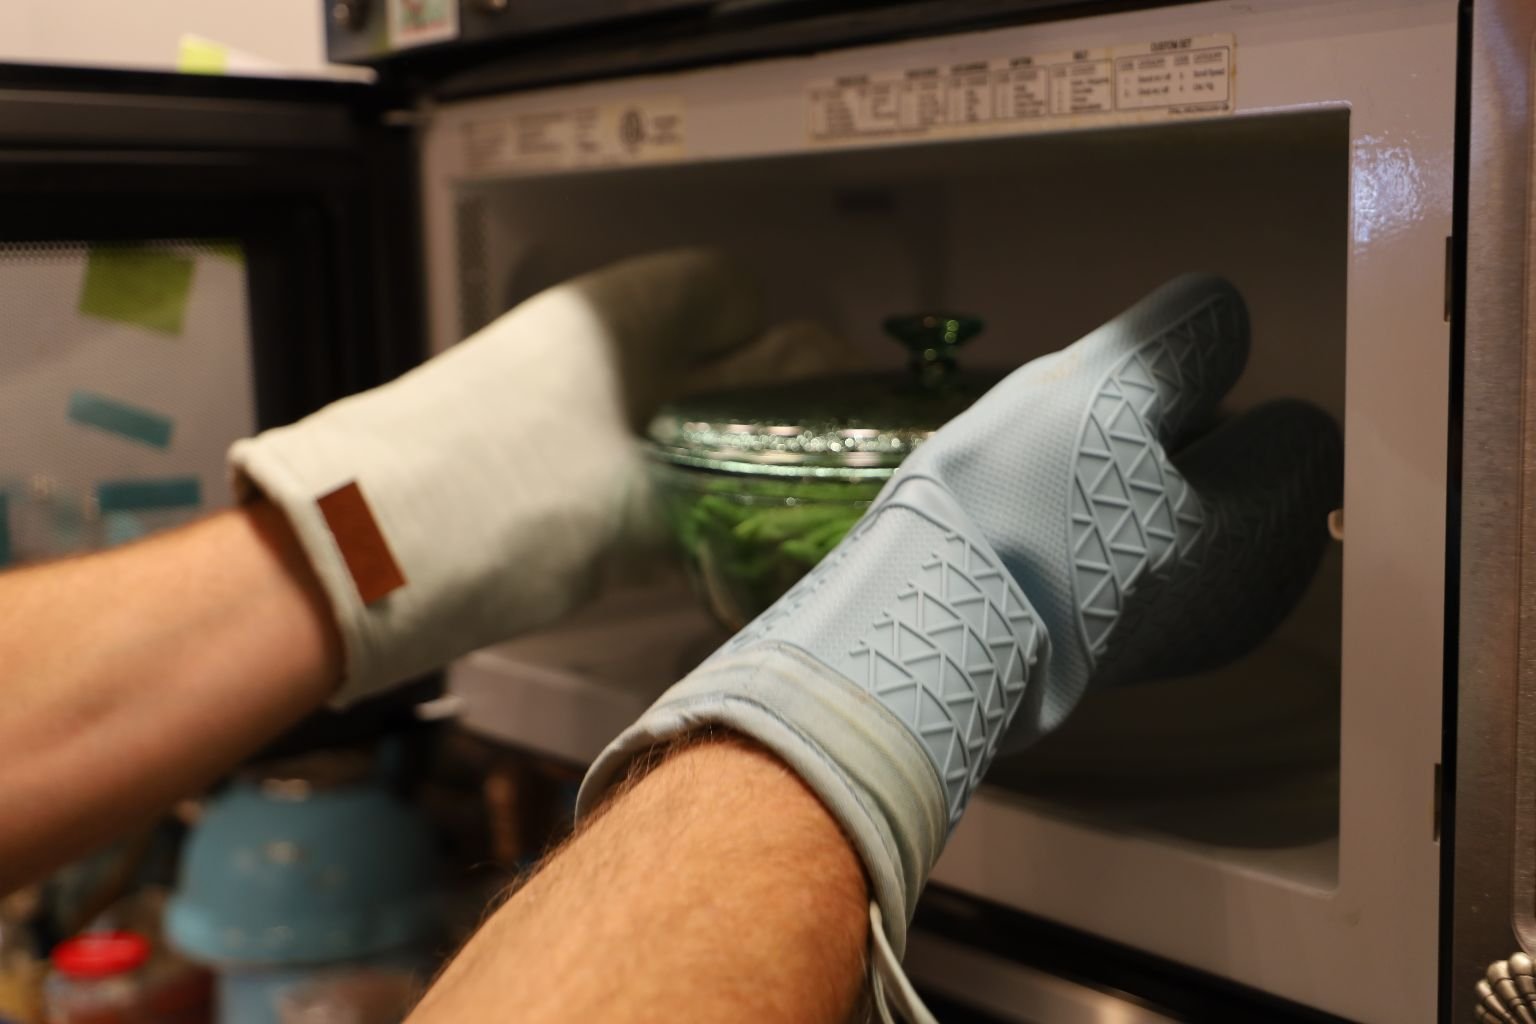
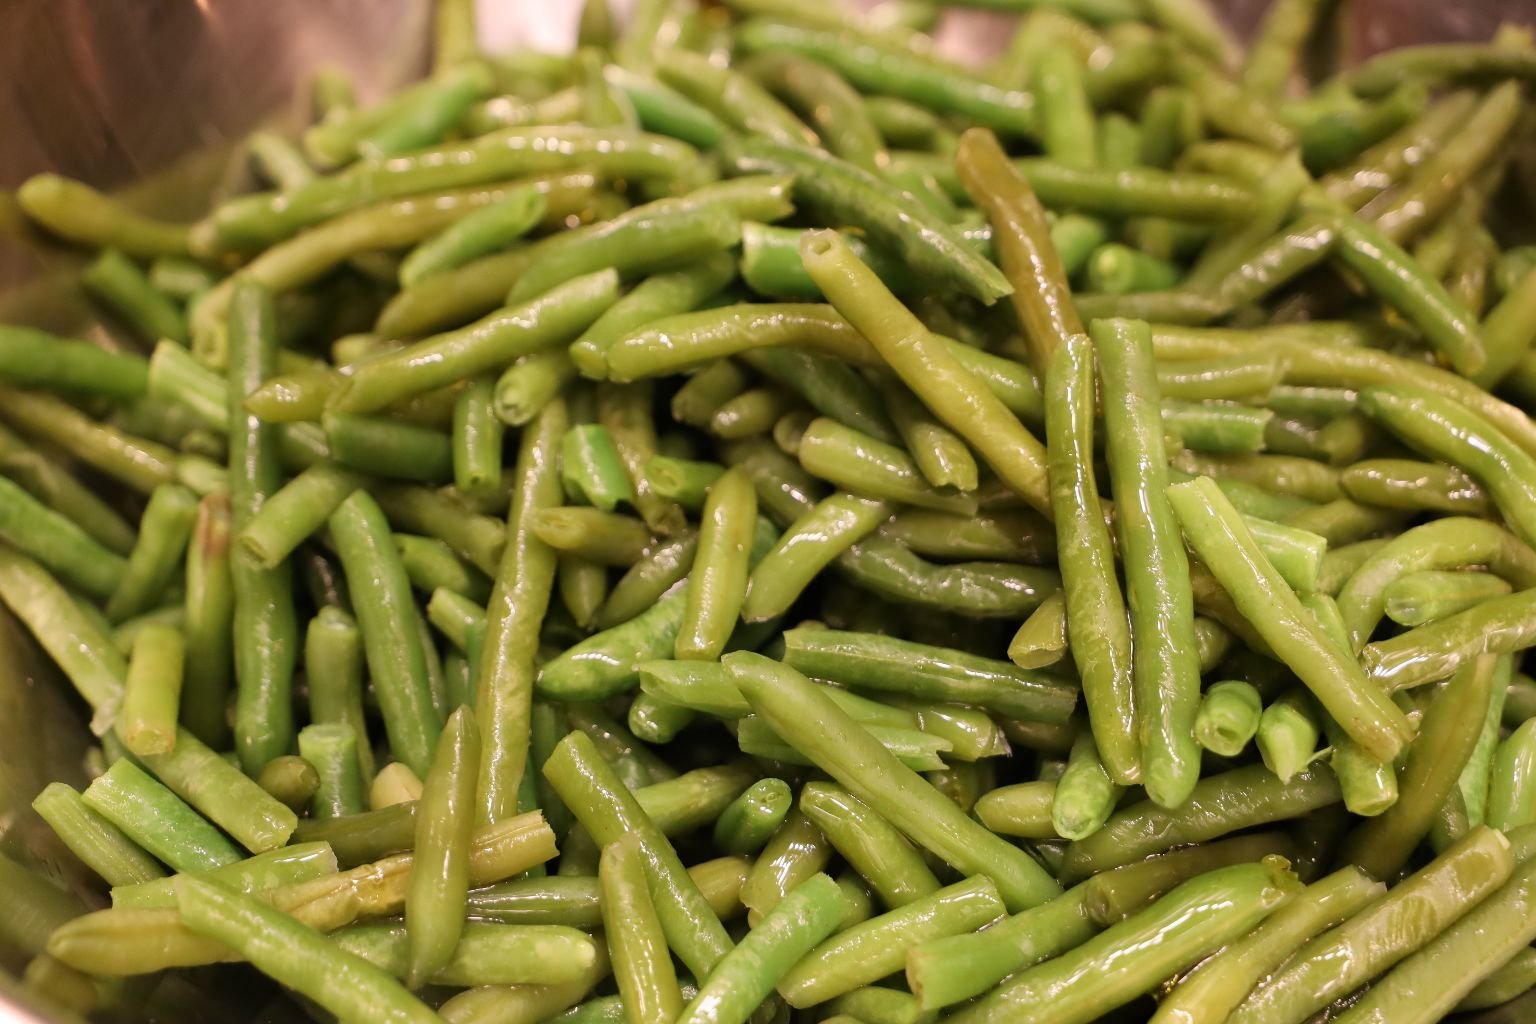
While those are cooking, place your green beans into a covered glass bowl and microwave until just cooked… about 8 min. or so.
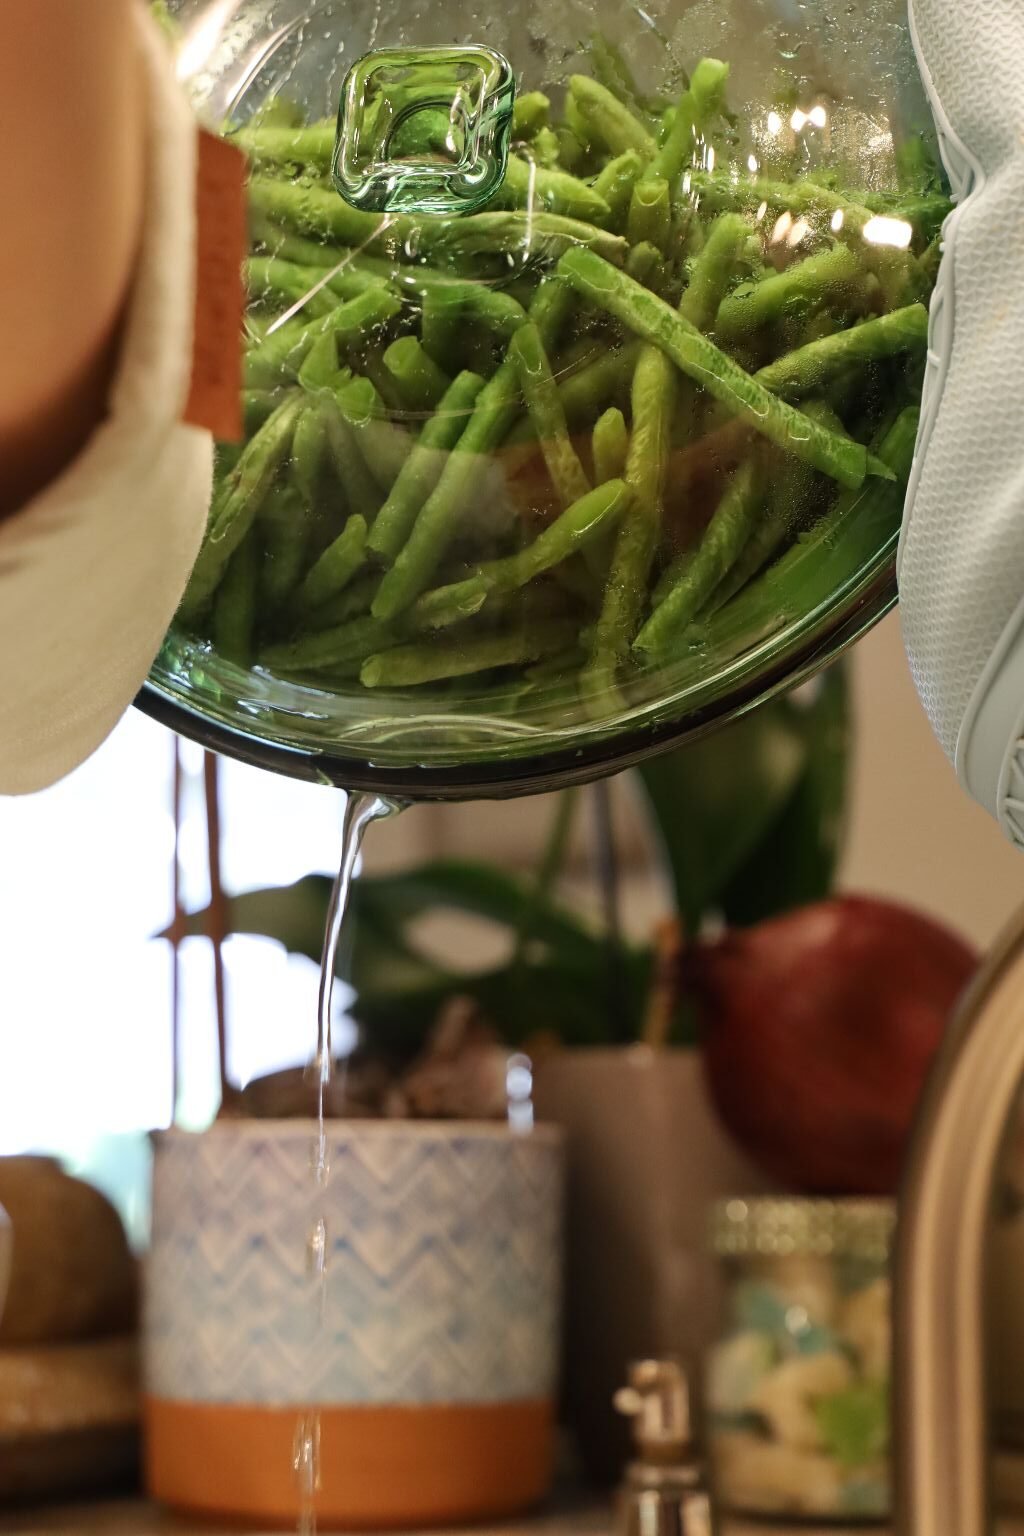
Drain the partially cooked green beans into the sink, using your gloves to keep the lid on. Add cold water over them while in the bowl to stop the cooking process. Drain them again with the lid on and place them into a large bowl for later use. Your bowl has to be large enough to hold all the ingredients in this recipe and have room to stir them together.
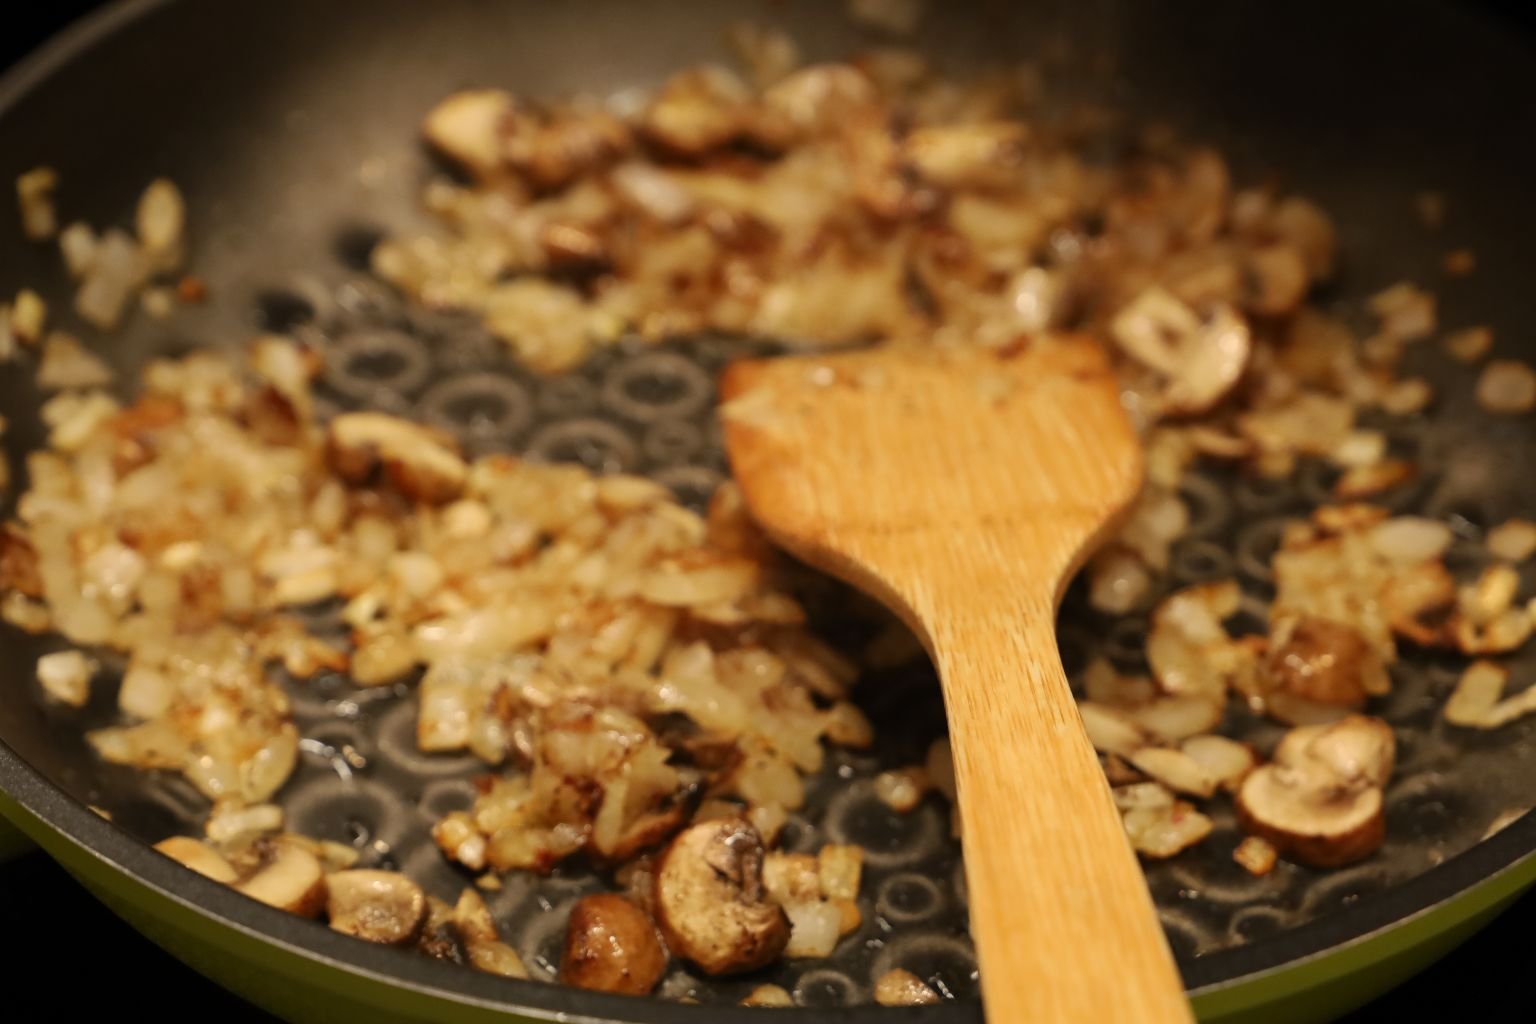
Here you can see the mushroom and onions are well cooked to the caramelized stage.
Meaning the onions are nicely browned, making them sweet.
——————————————————————————————–
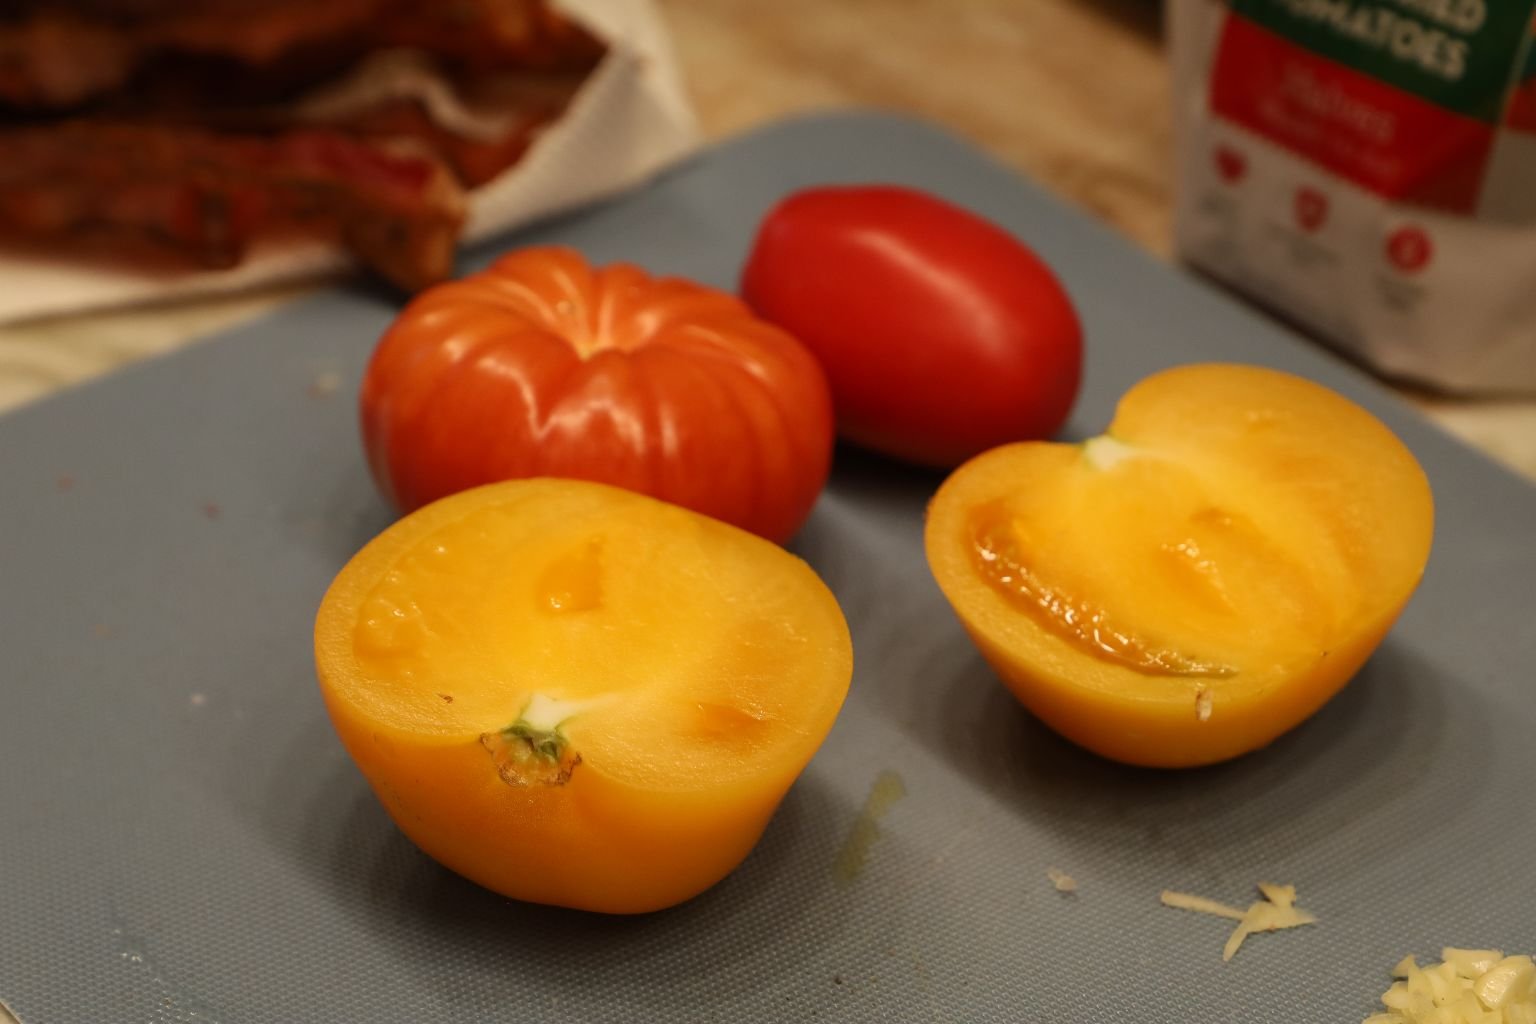

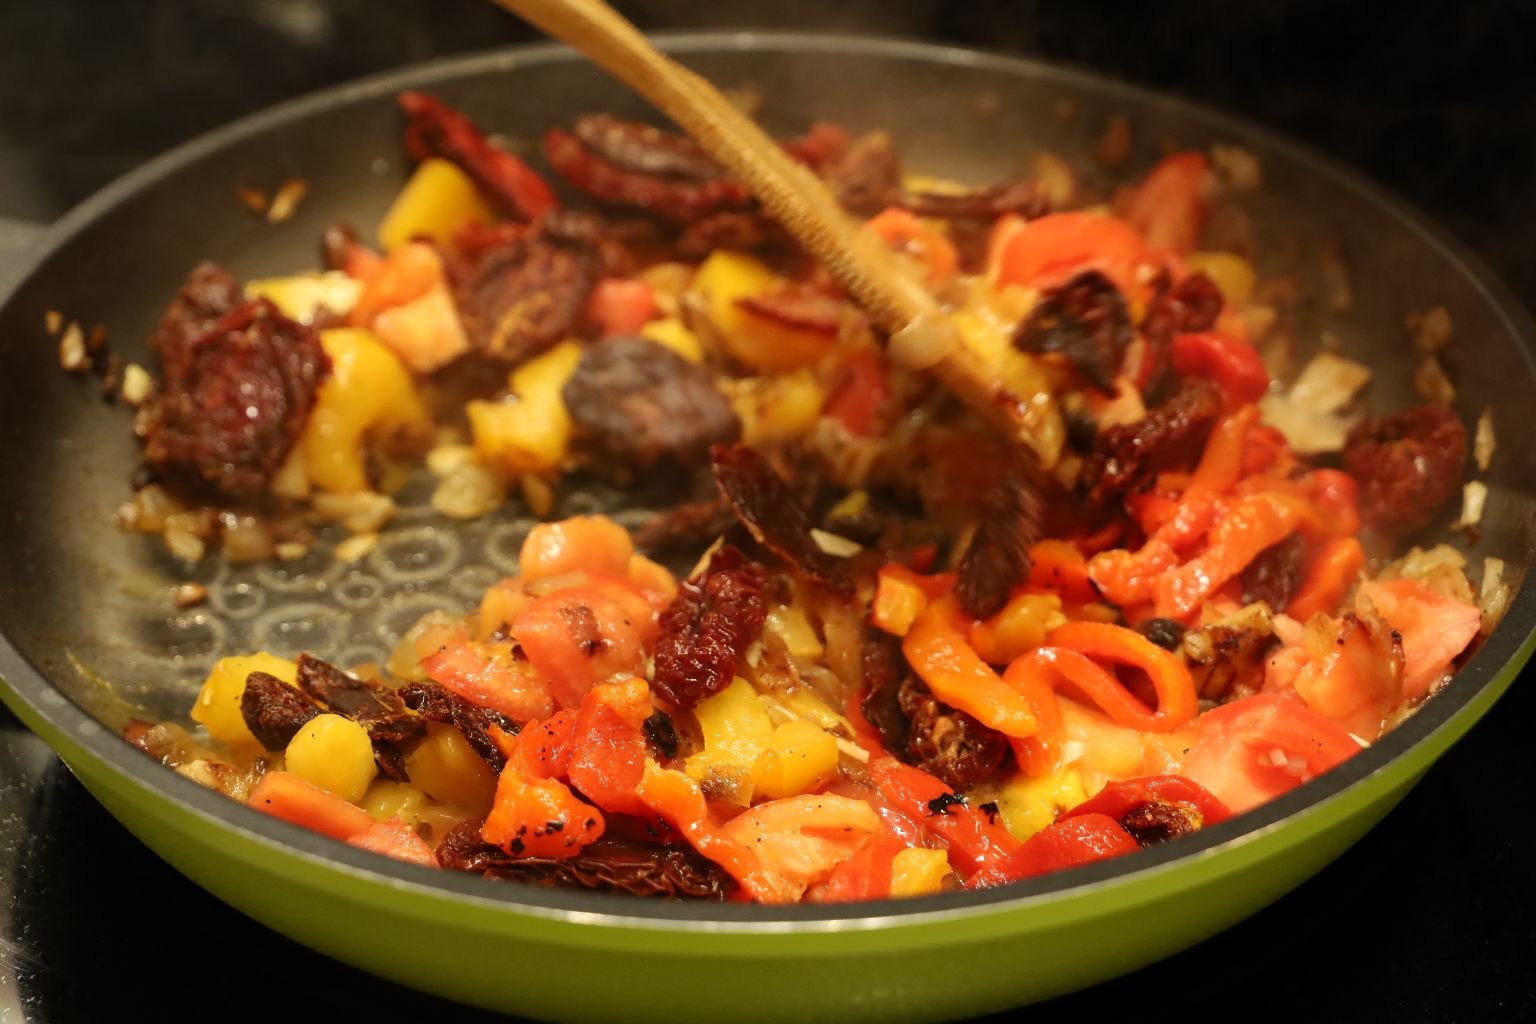
Slice, then chop your tomatoes.
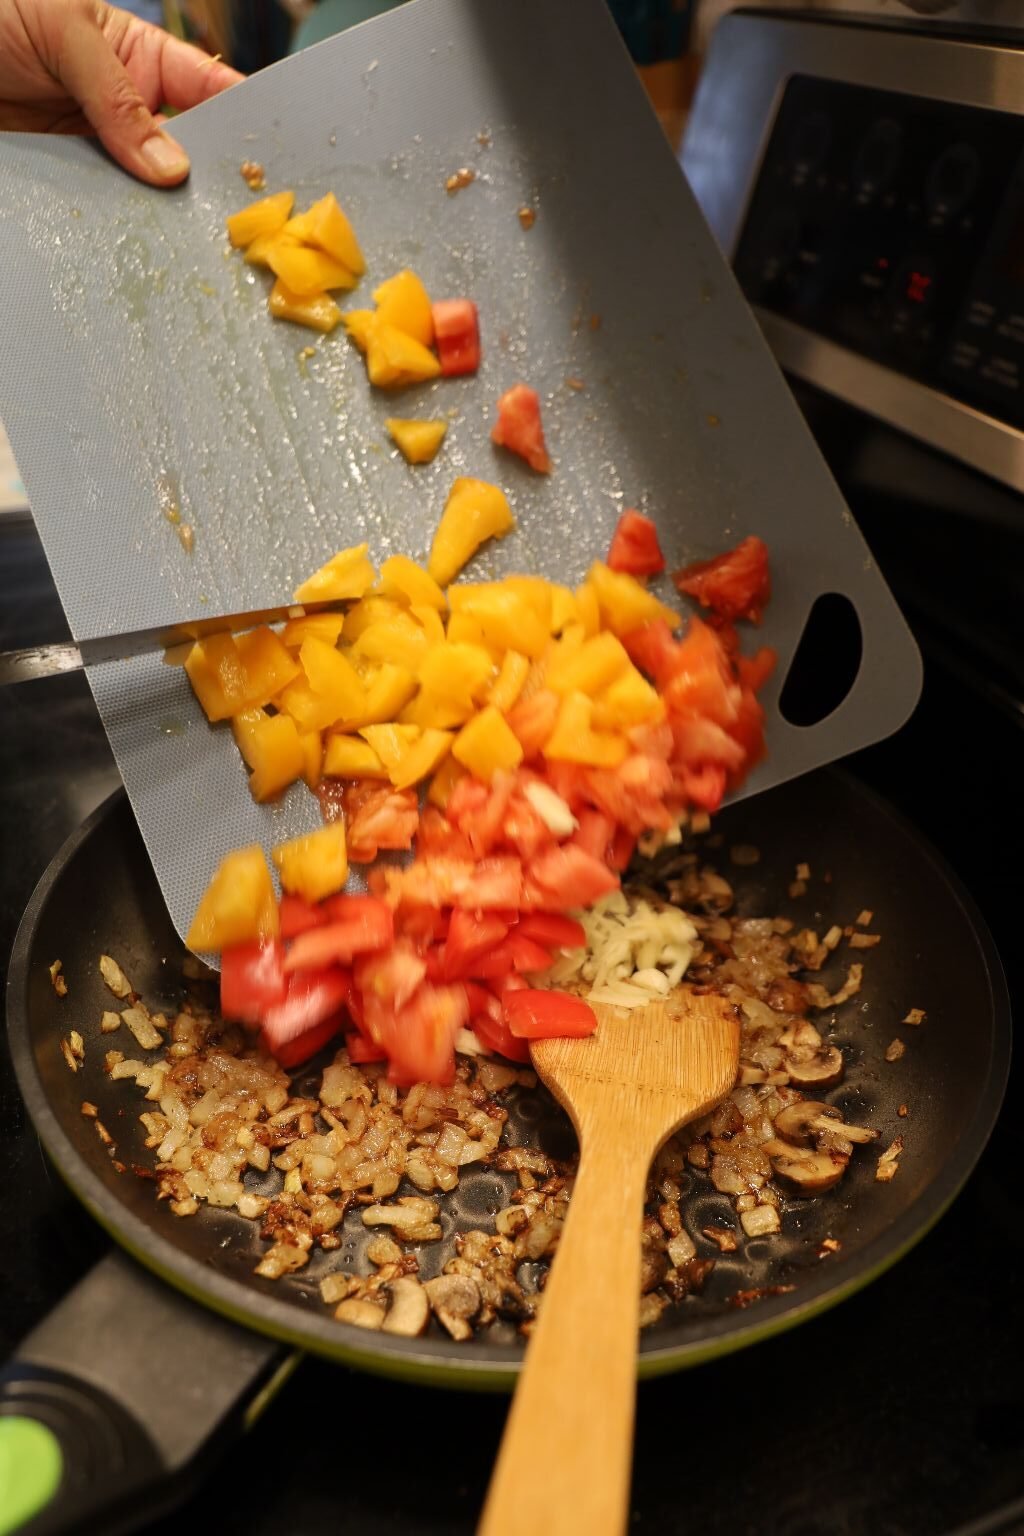
Here I sliced them into long strips, then chopped those strips in half. I wanted them to stay chunky.
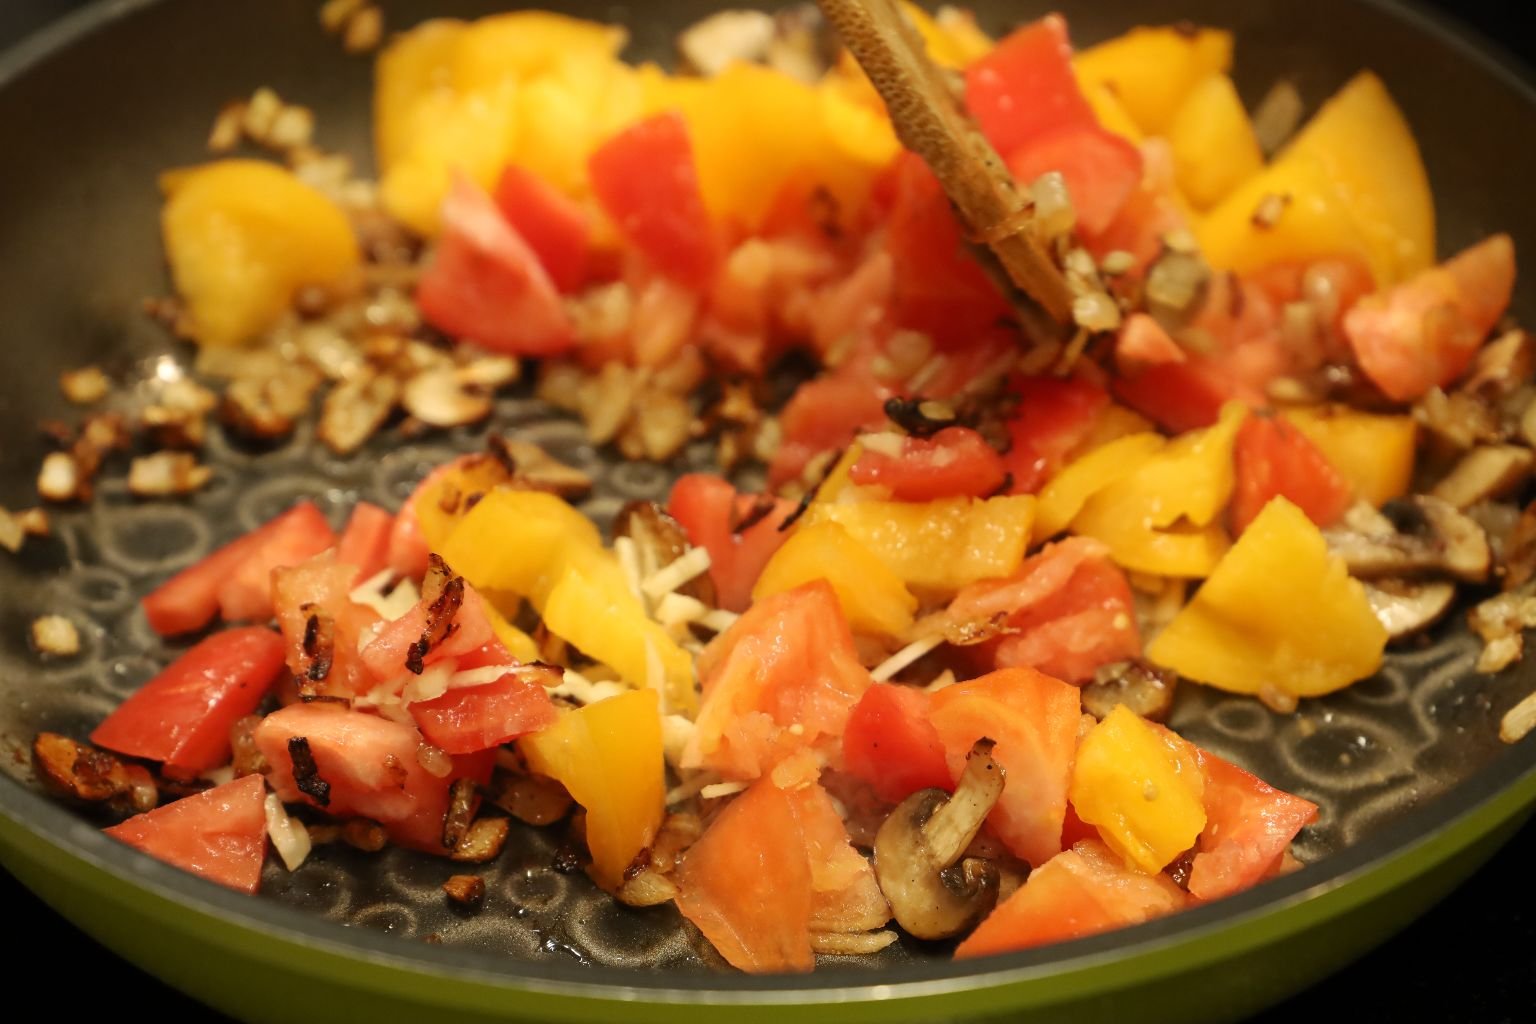
Add the tomatoes, and garlic to your pan as shown.
Mix all the ingredients together and continue to cook over medium heat.
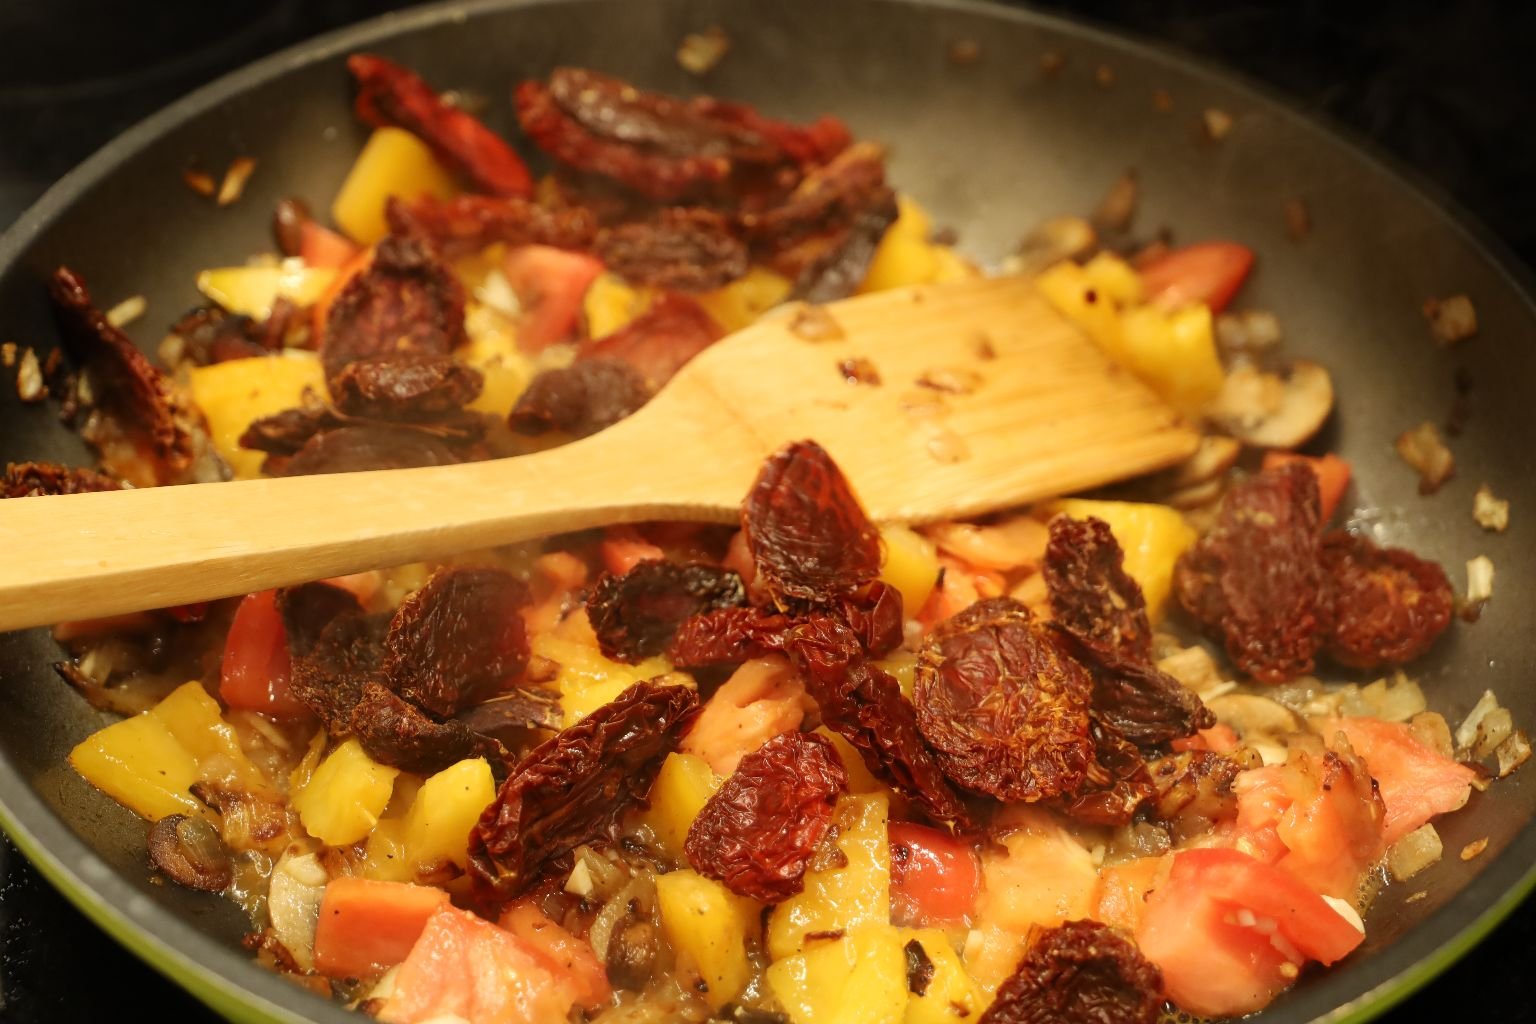
Time to add the Sun-Dried Tomatoes. I added these because they have a concentrated tomato flavor and will give the dish some texture.
—————————————————————————————————
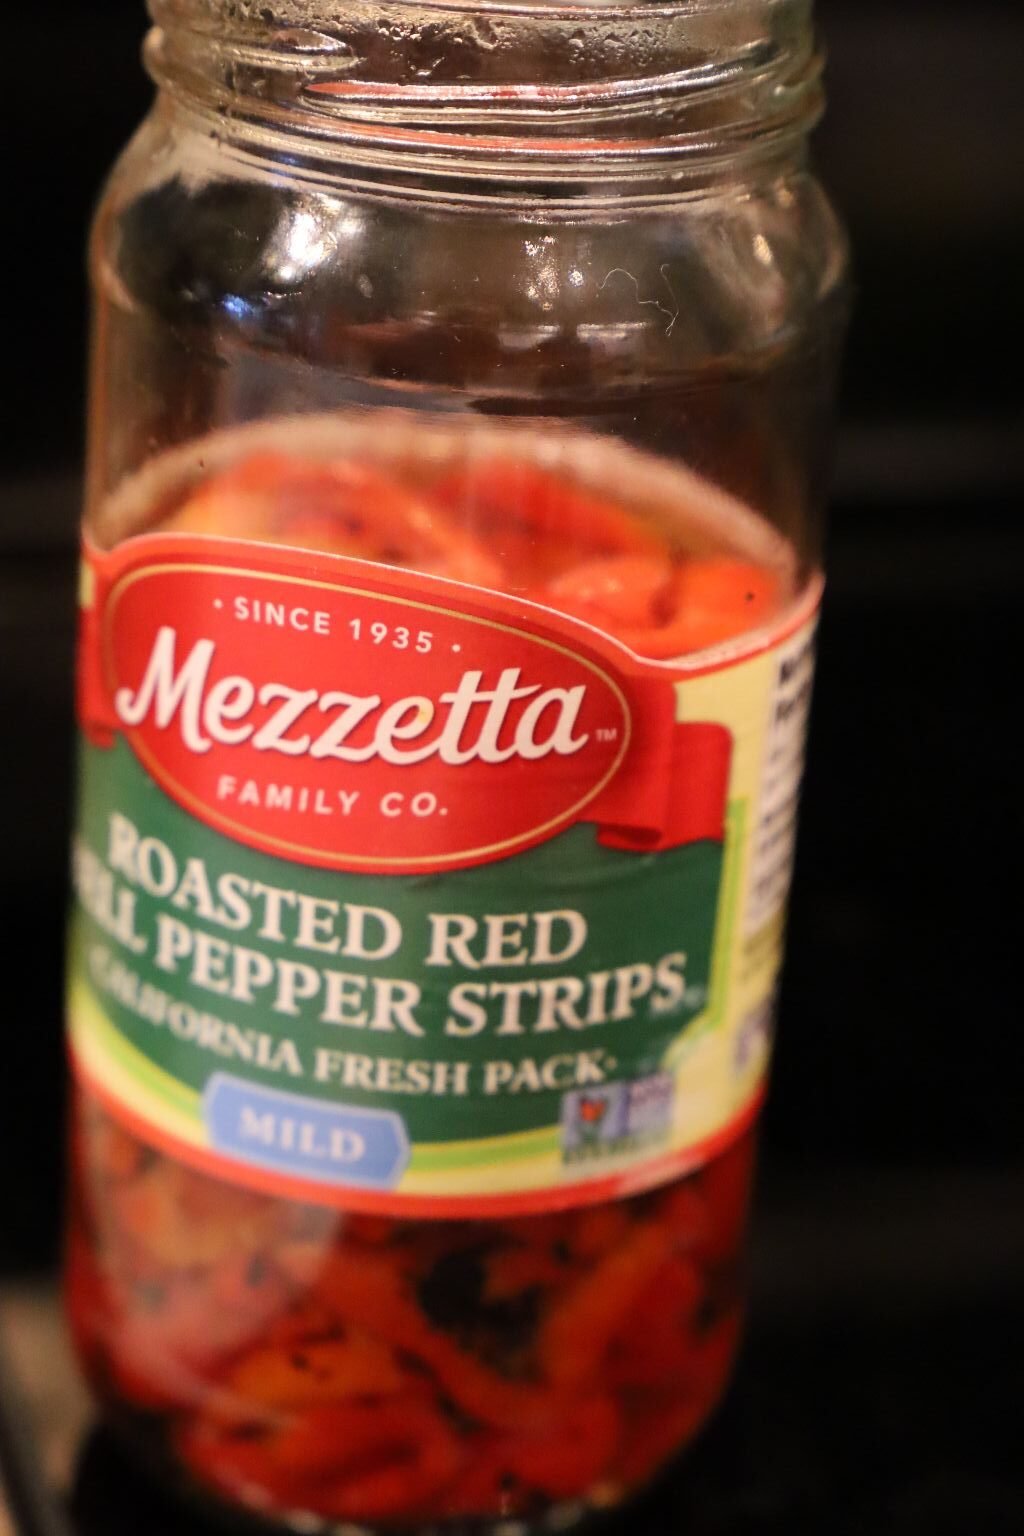
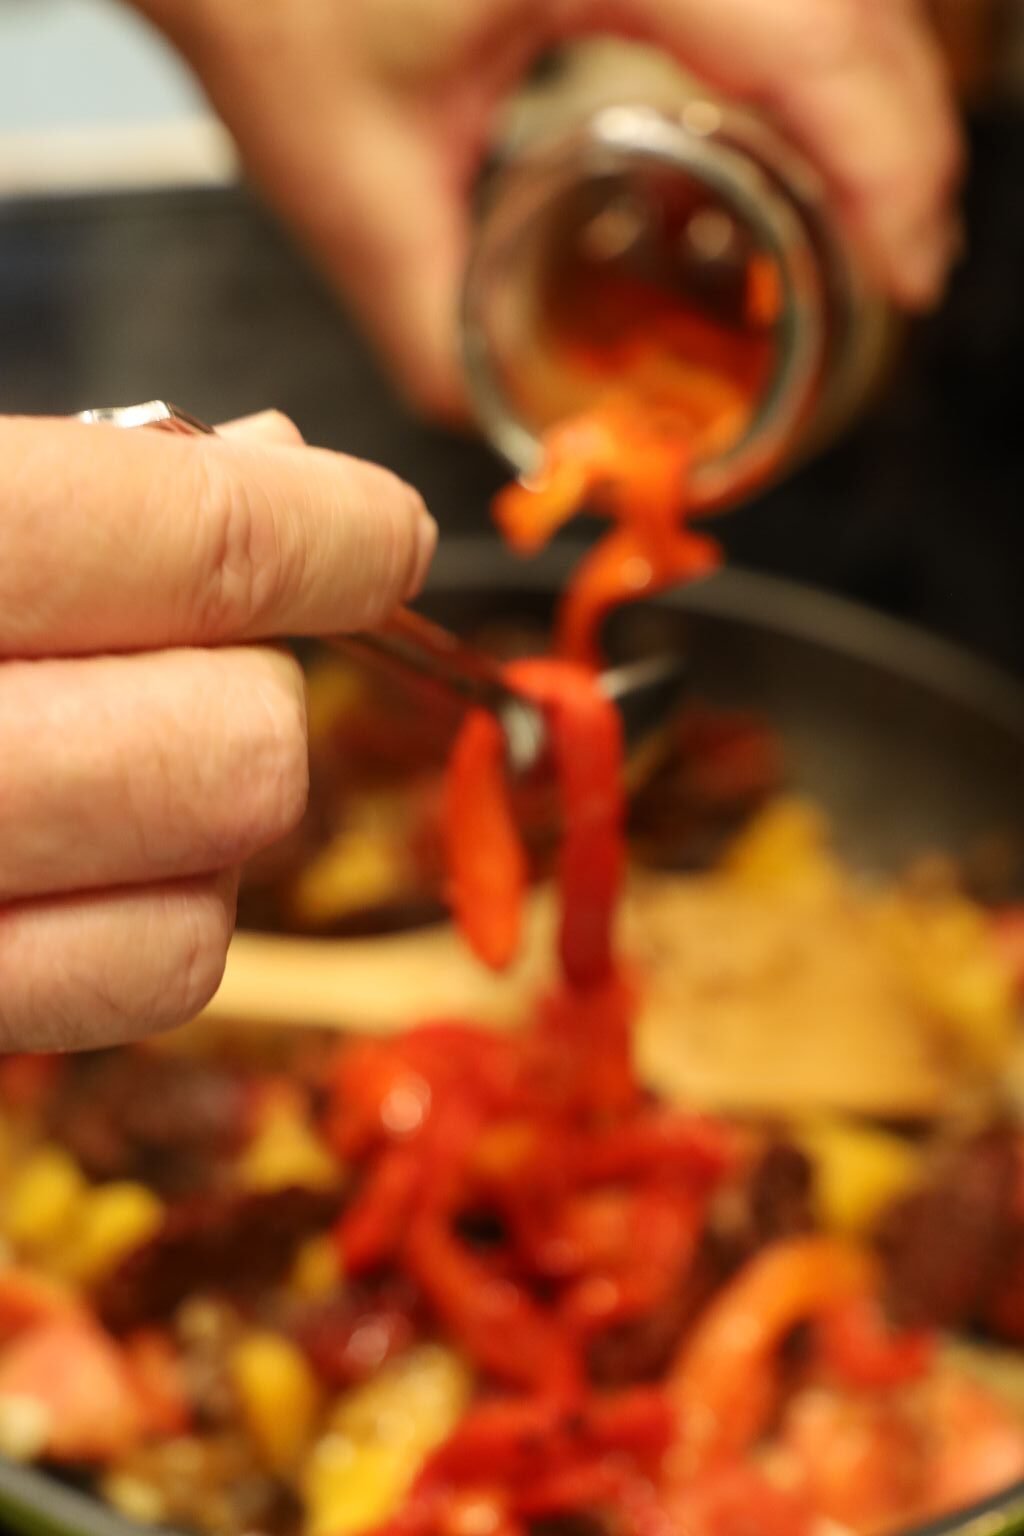
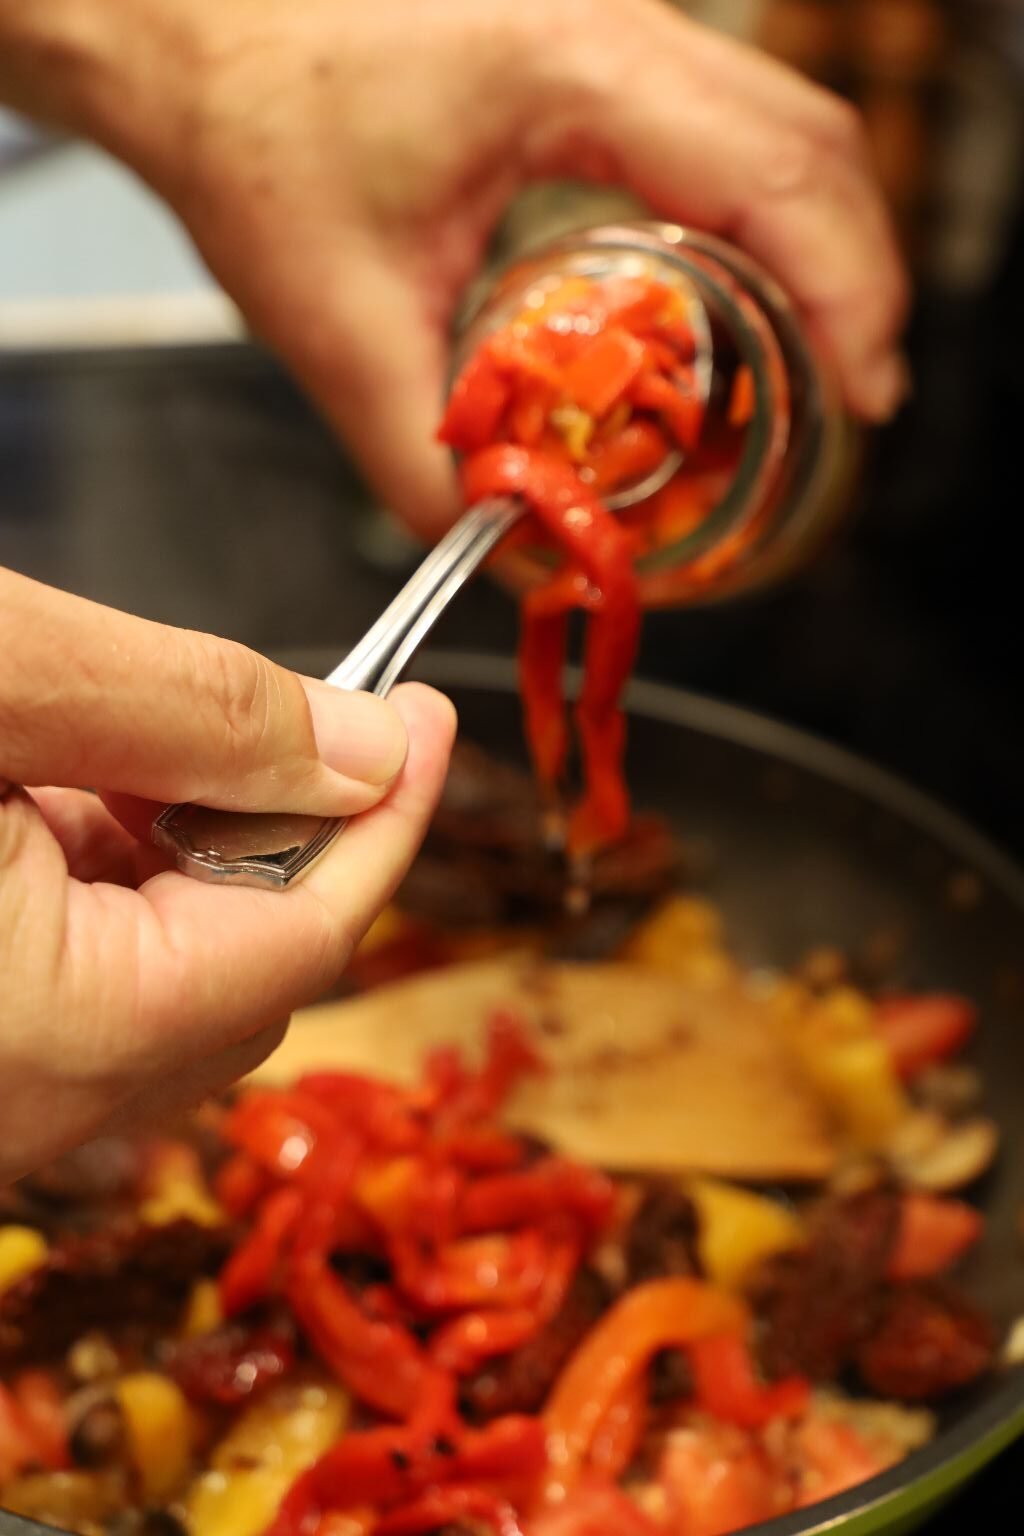
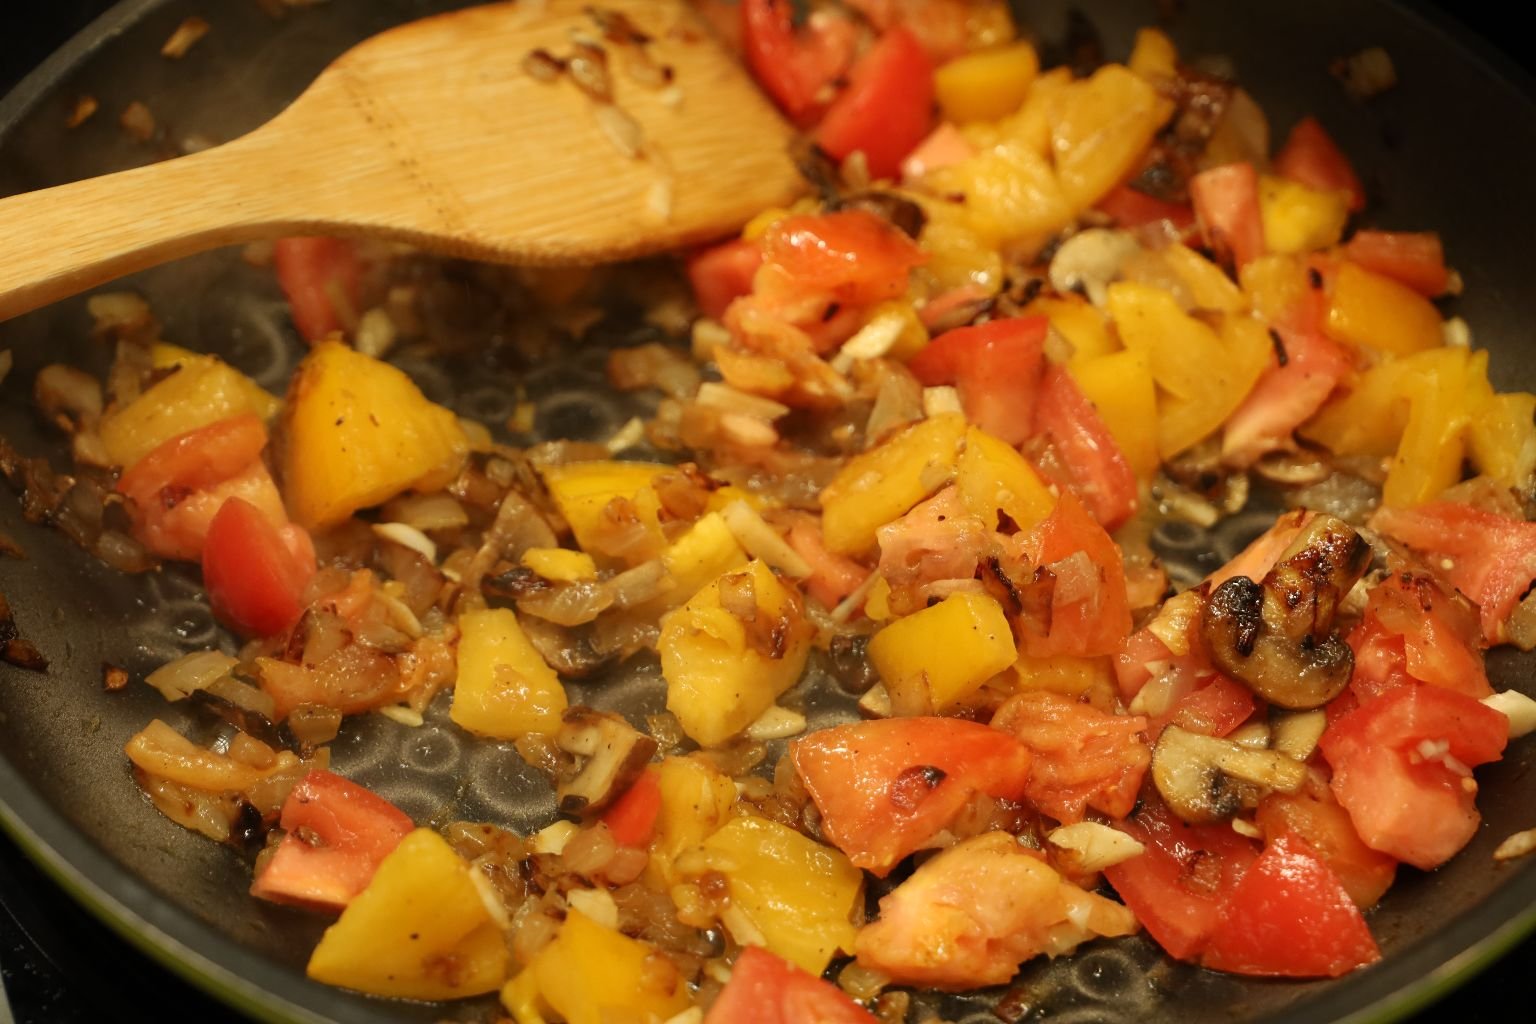
Now, add your Roasted Red Bell Pepper Strips to the pan.
So far, so good!
Stir all the ingredients together.
———————————————————-
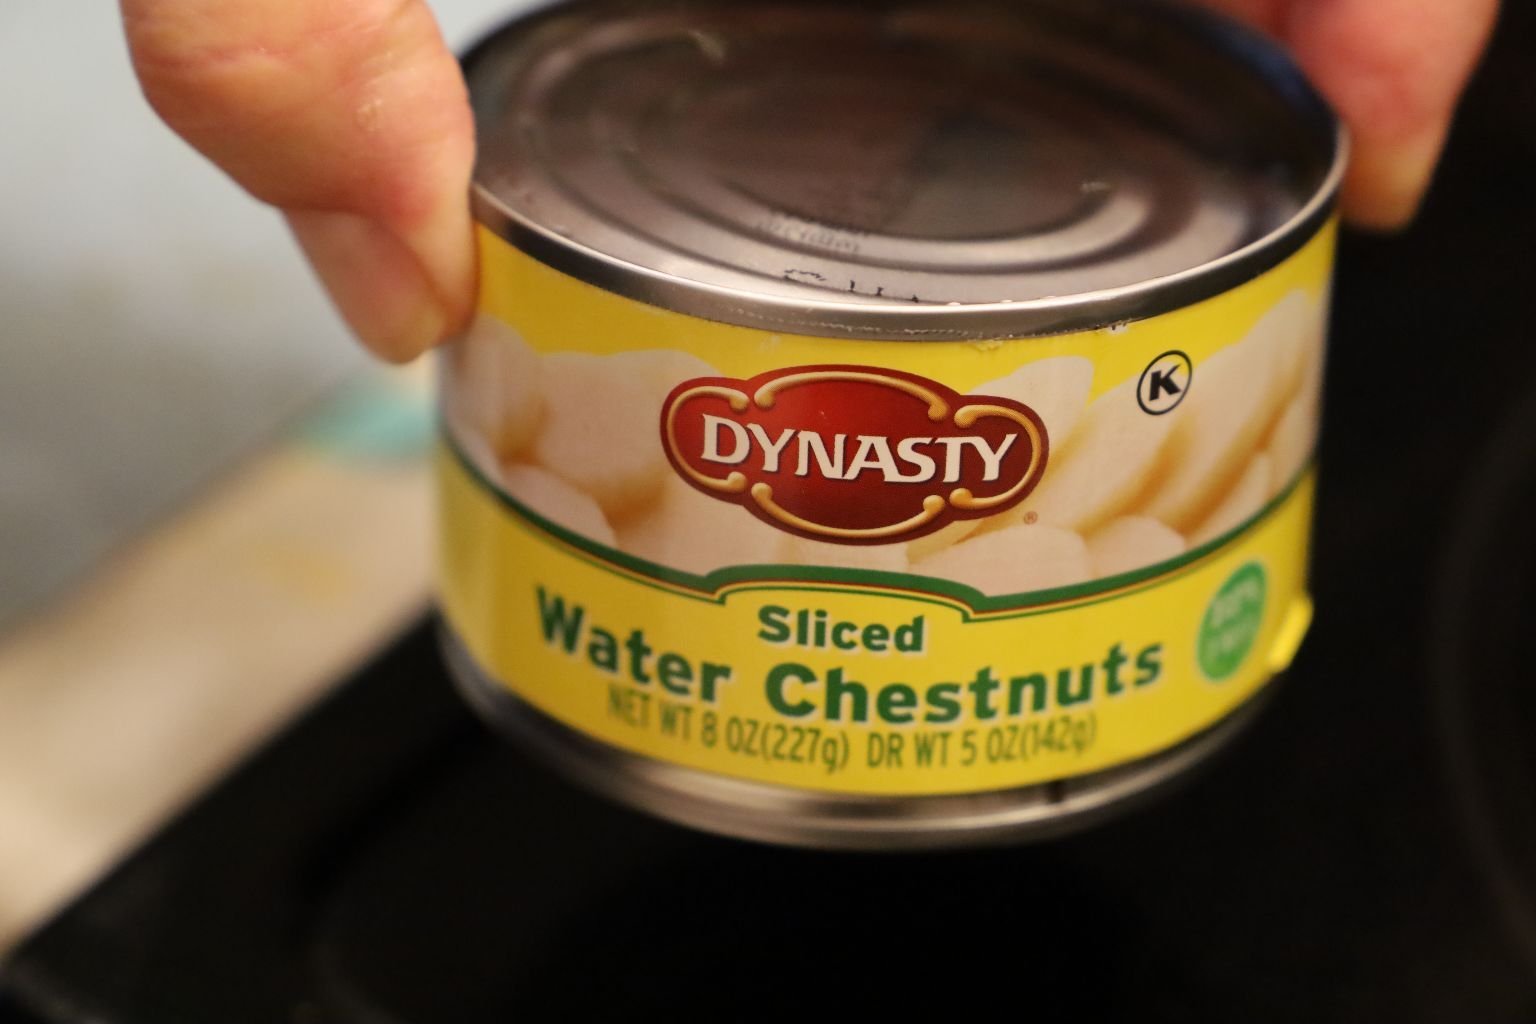
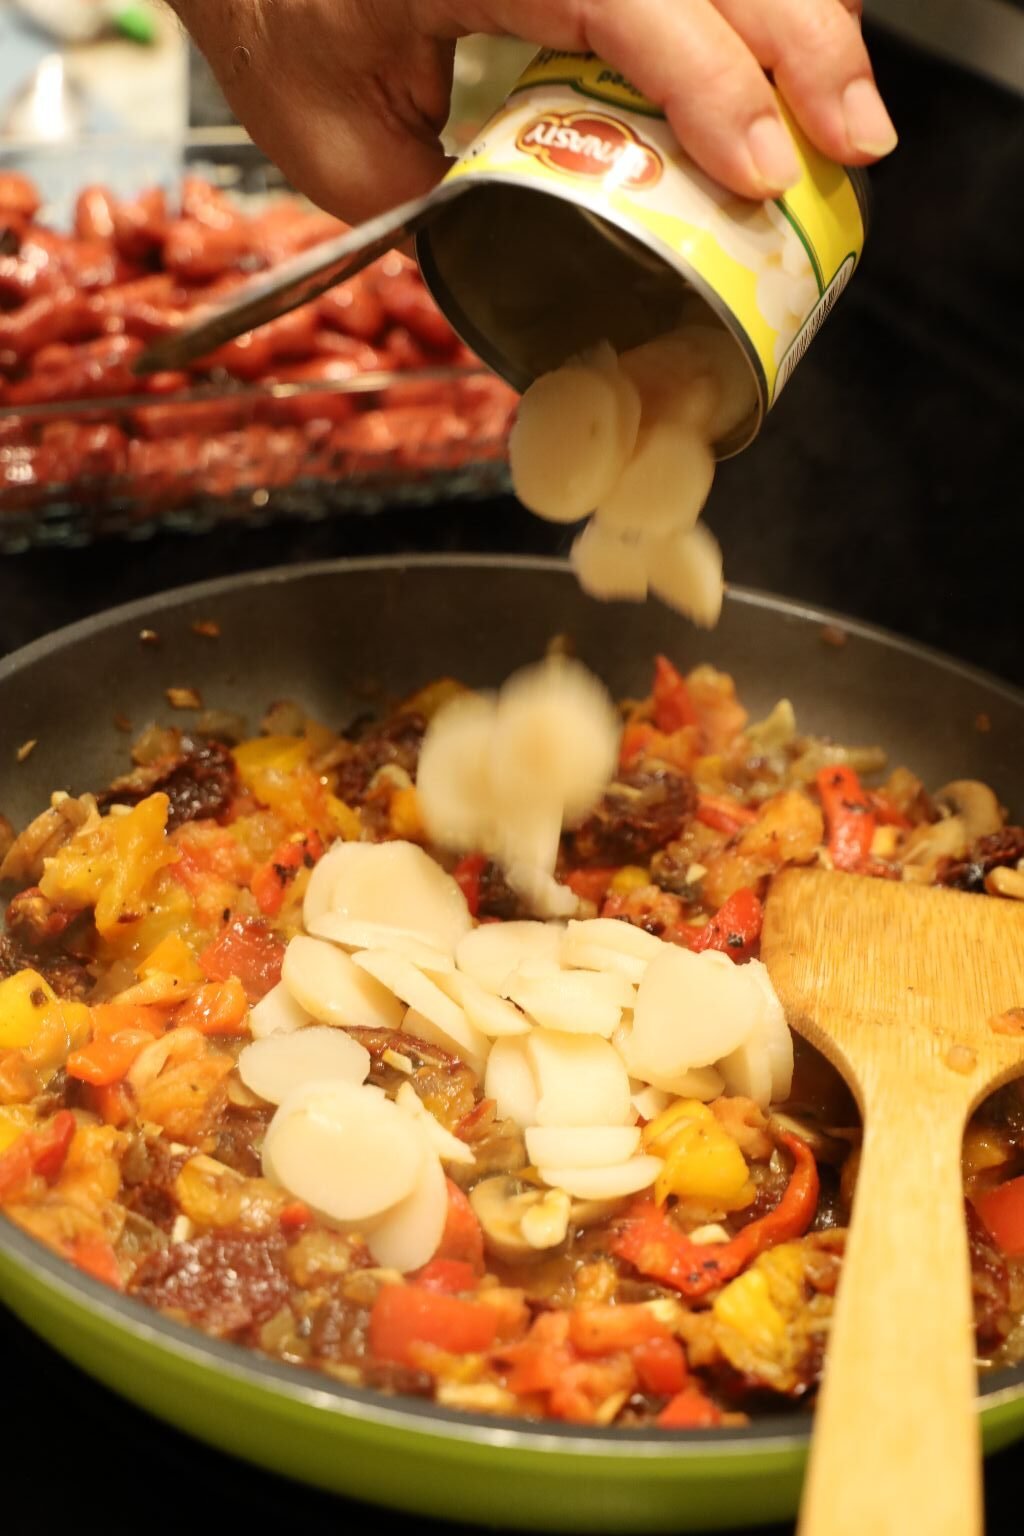
Open your can of Sliced Water Chestnuts and drain them well into your sink.
Then add all of them to the pan as shown. The Water Chestnuts will give some great crunch to the dish.
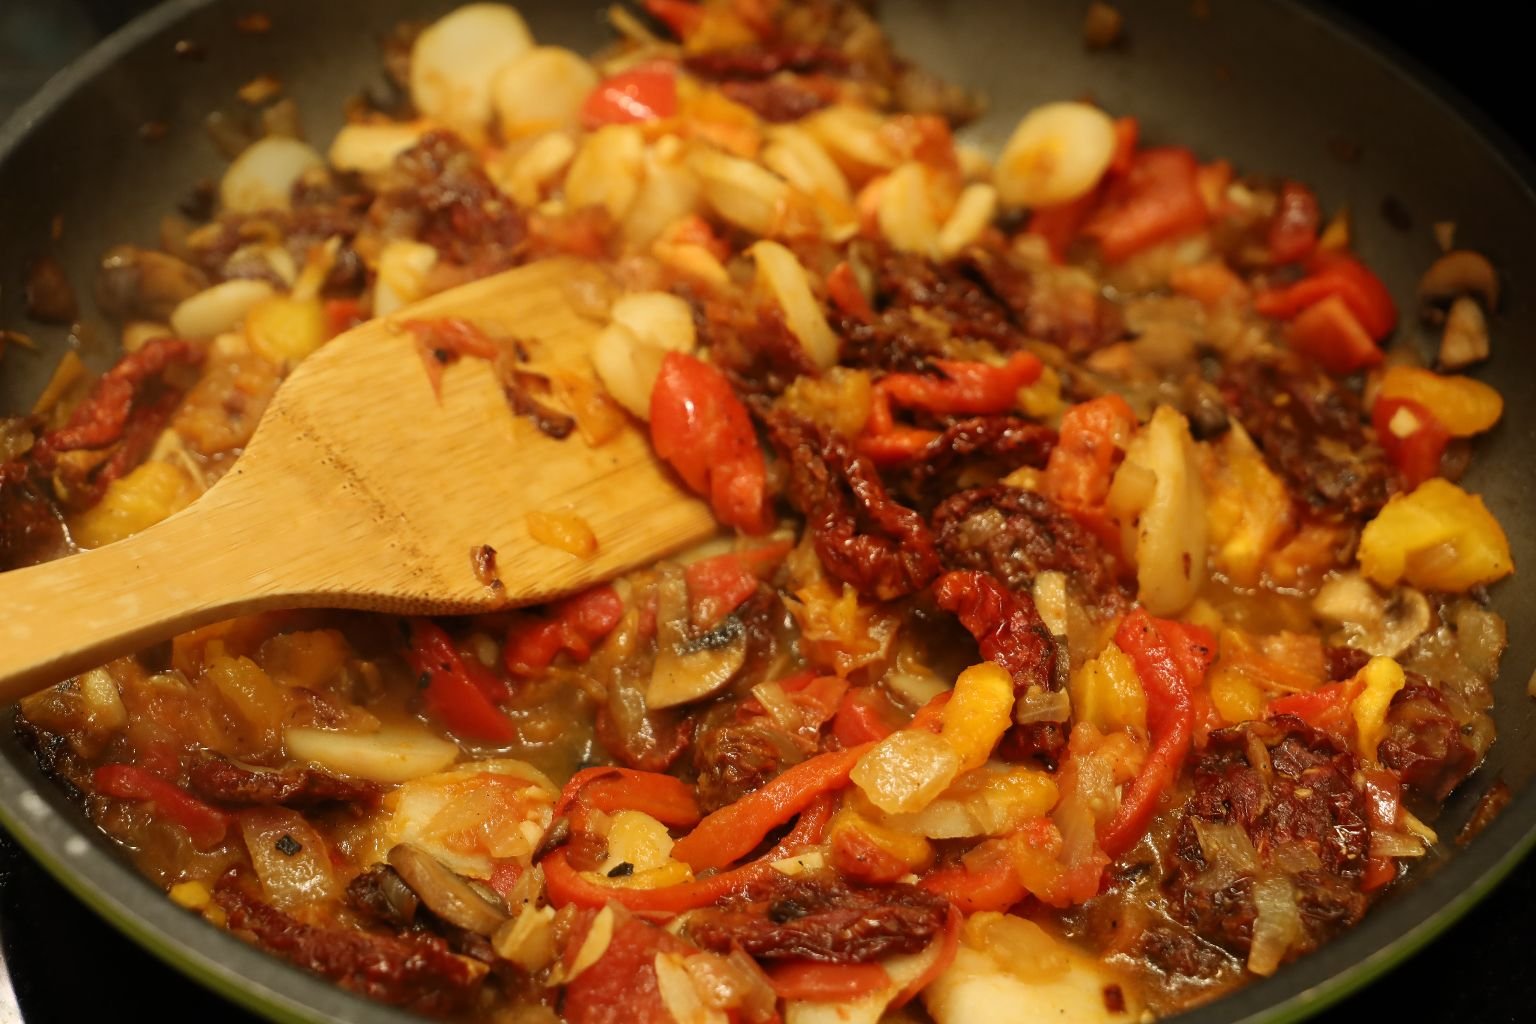
Mix all the ingredients together.
Here you can see the chopped tomatoes breaking down almost creating a sauce.
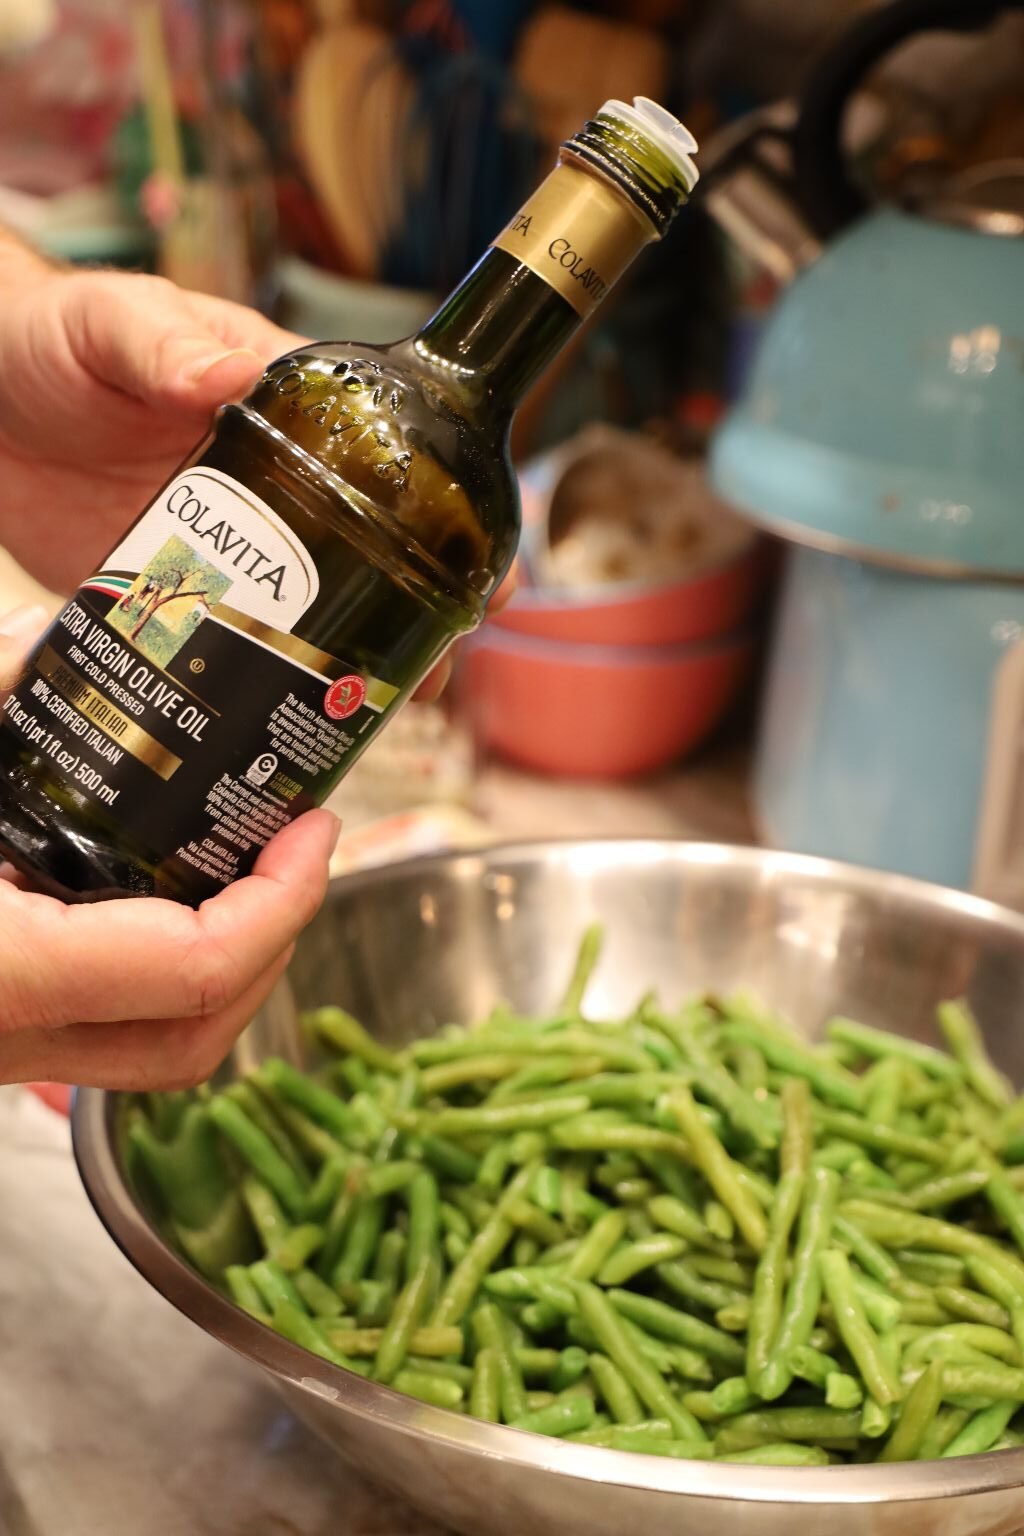
For some nice authentic flavor, add Extra Virgin Olive Oil to the Green Beans.
You want to add just enough Olive Oil to coat the Green Beans.
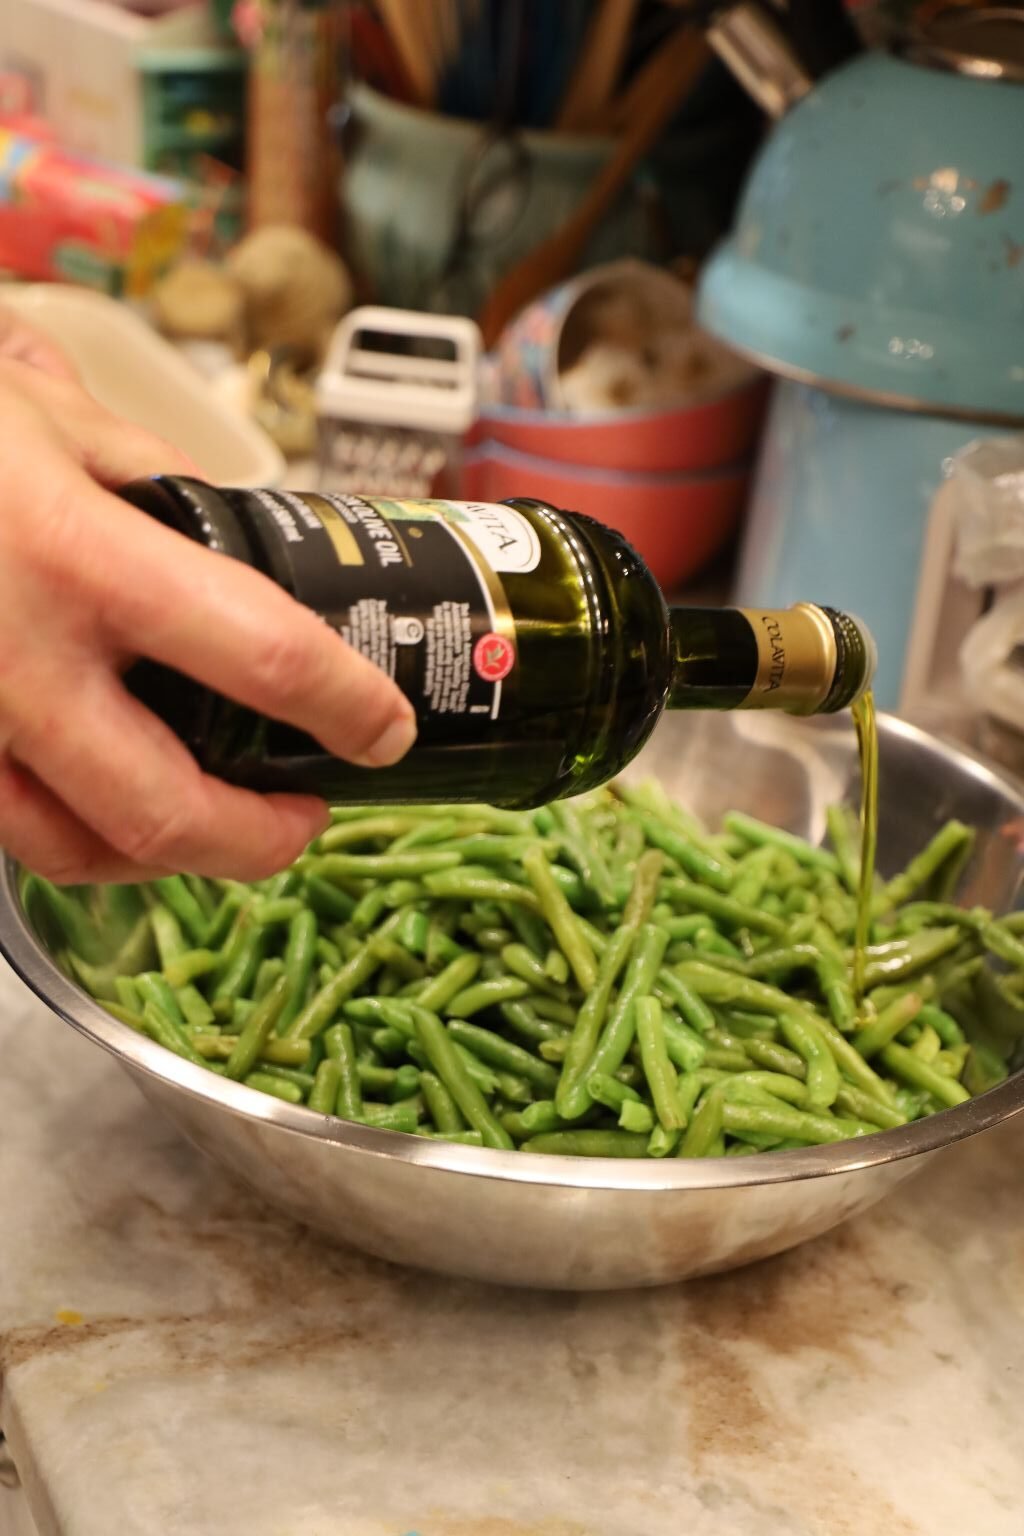
Give them a gentle stir.
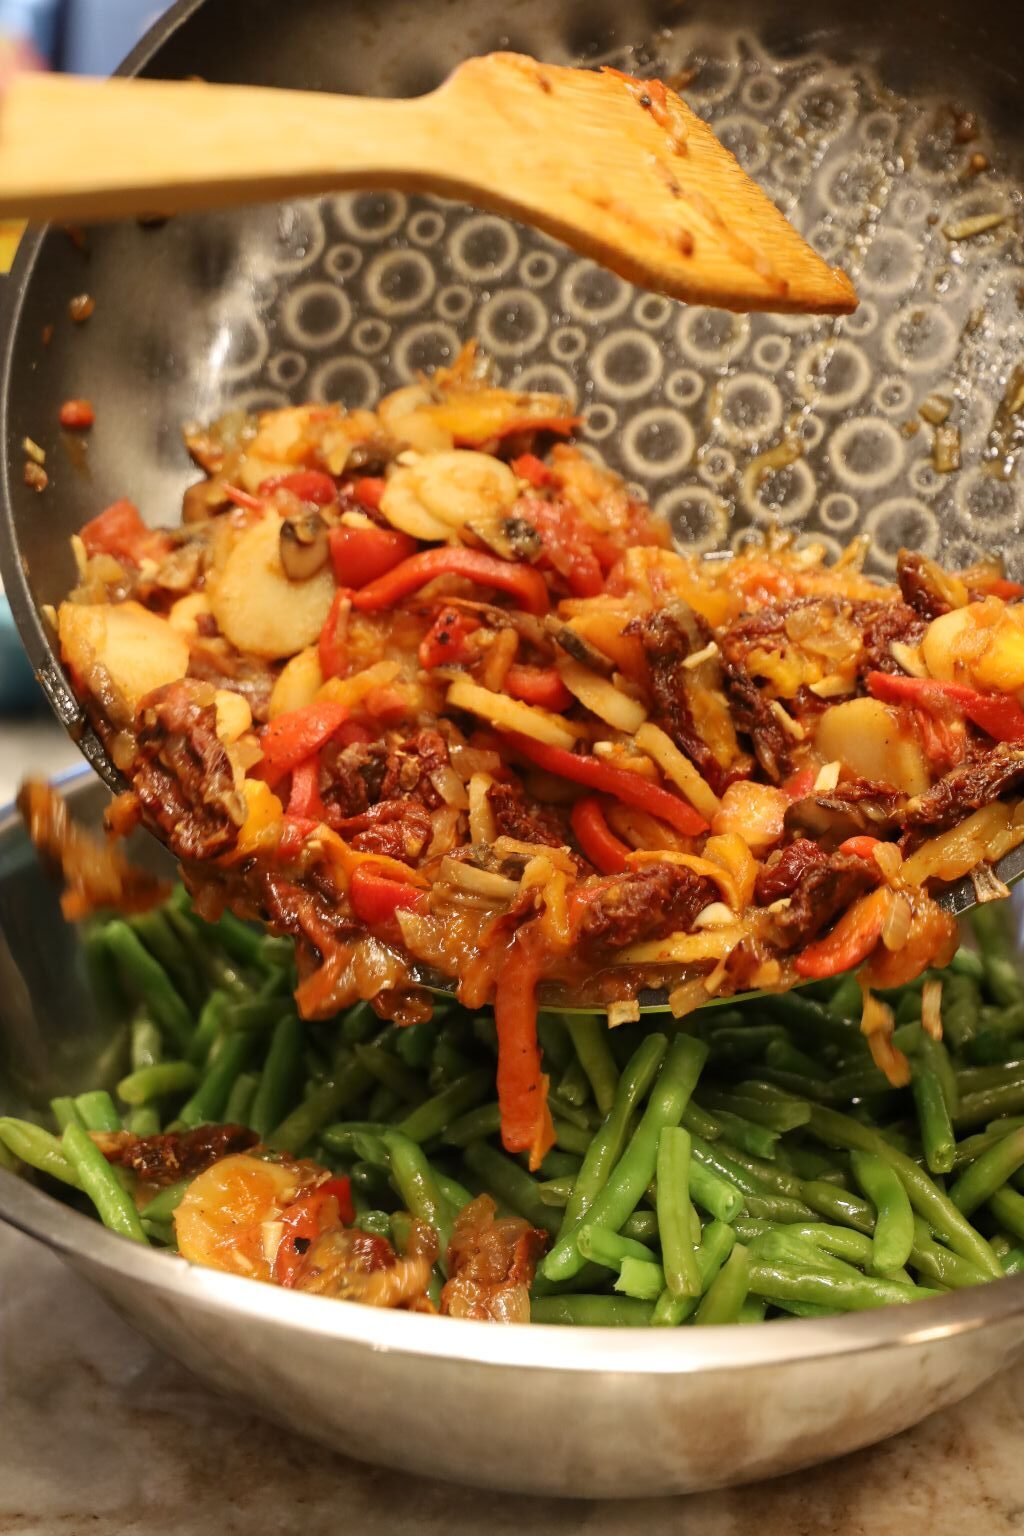
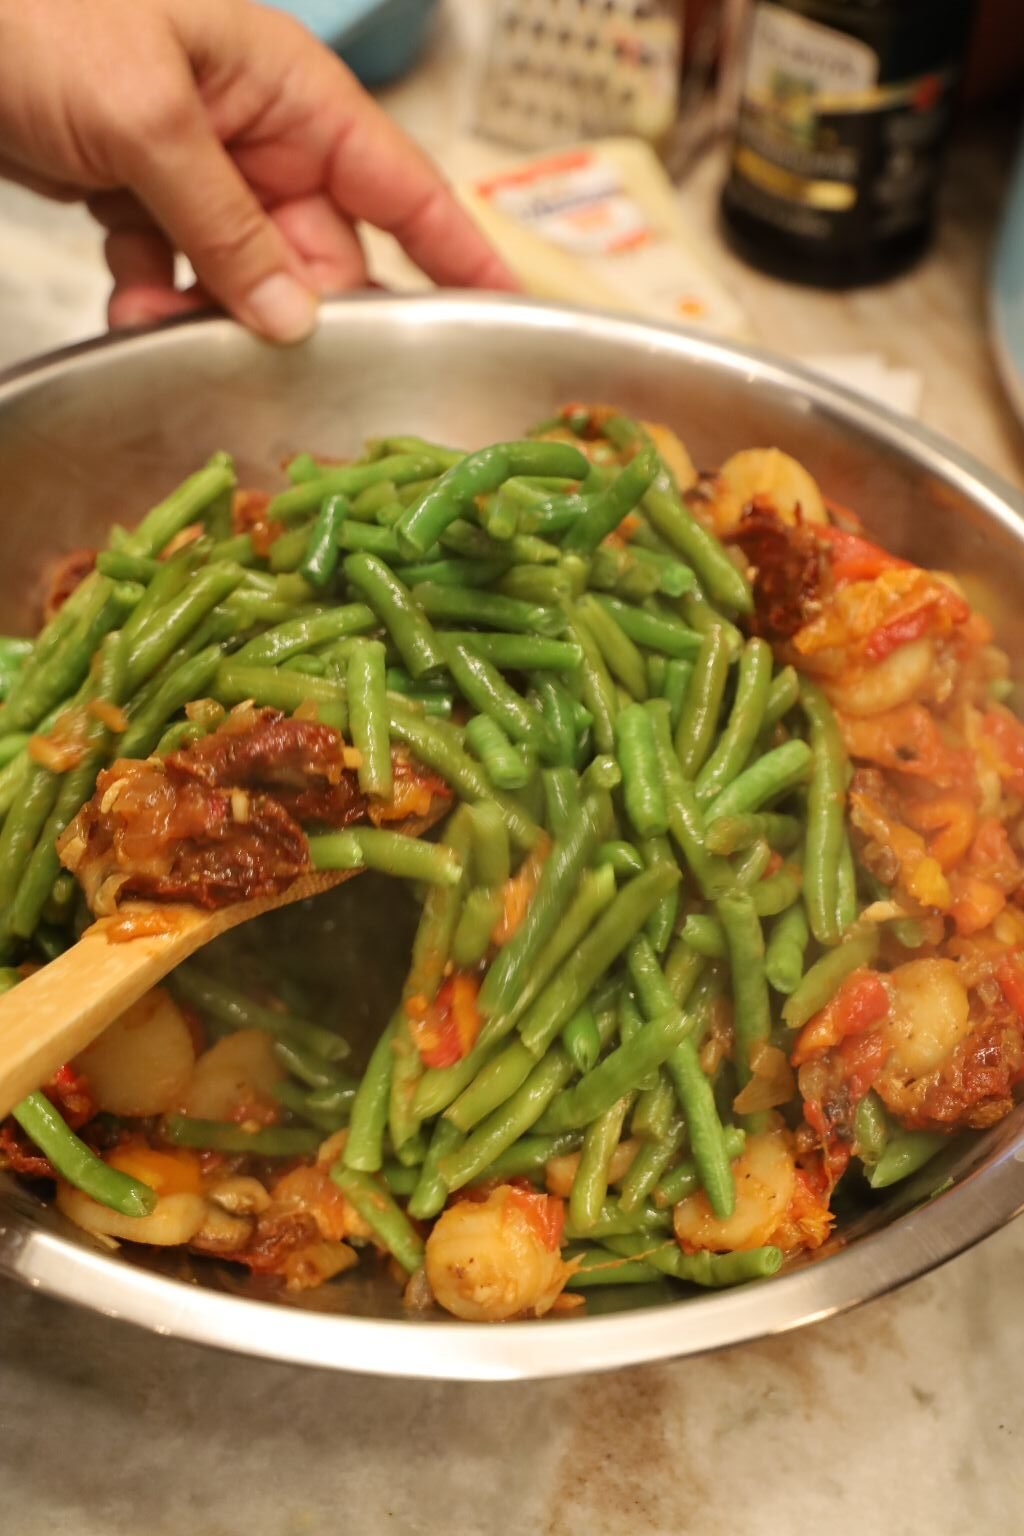
Add your pan cooked vegetables to your bowl of green beans and gently stir them together.
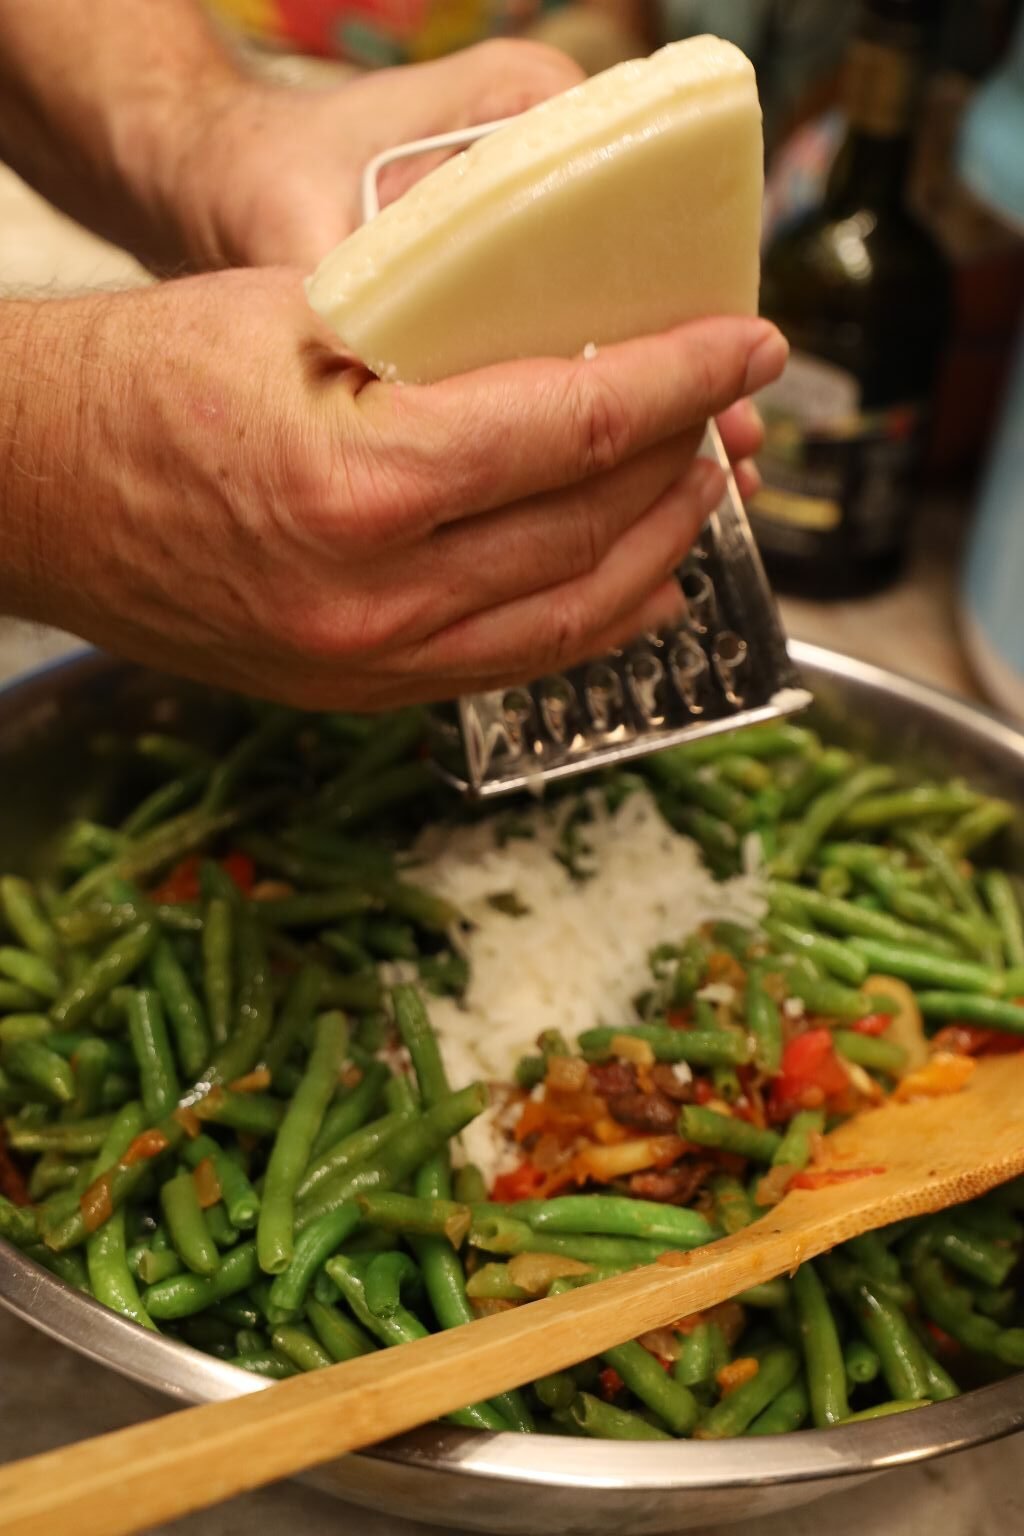

Grate ~½ Cup of your Pecorino Romano Cheese over them.
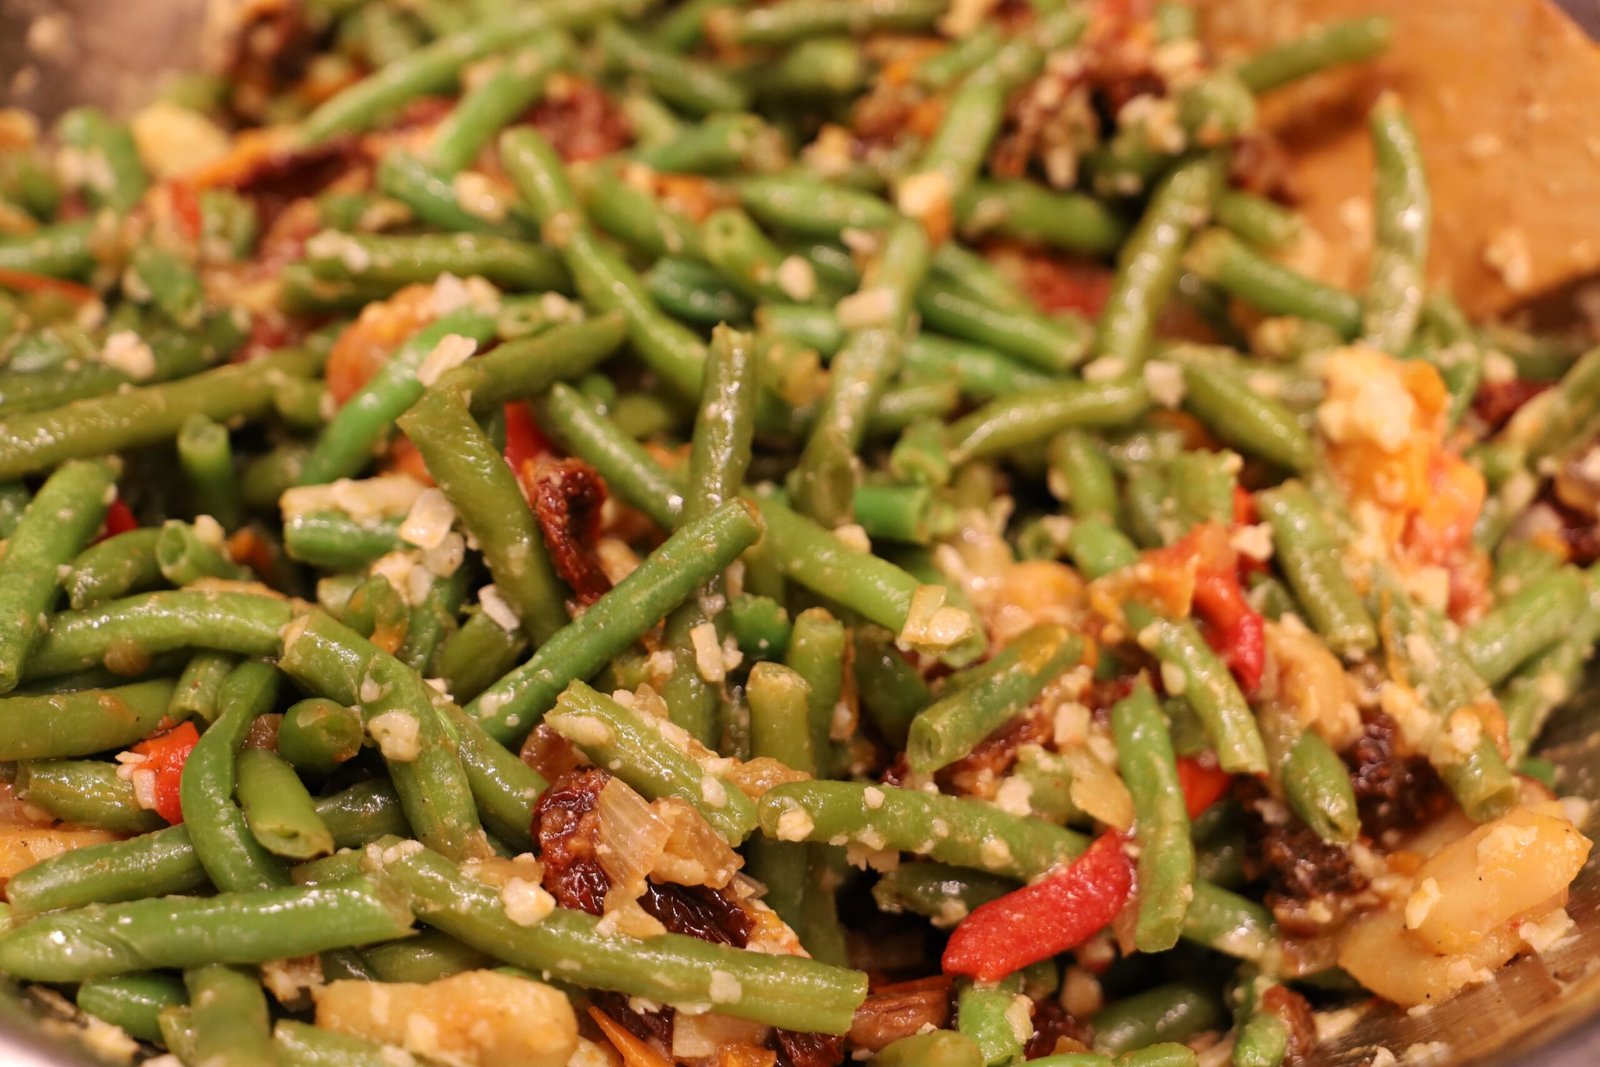
Stir all the ingredients and look at all that goodness.
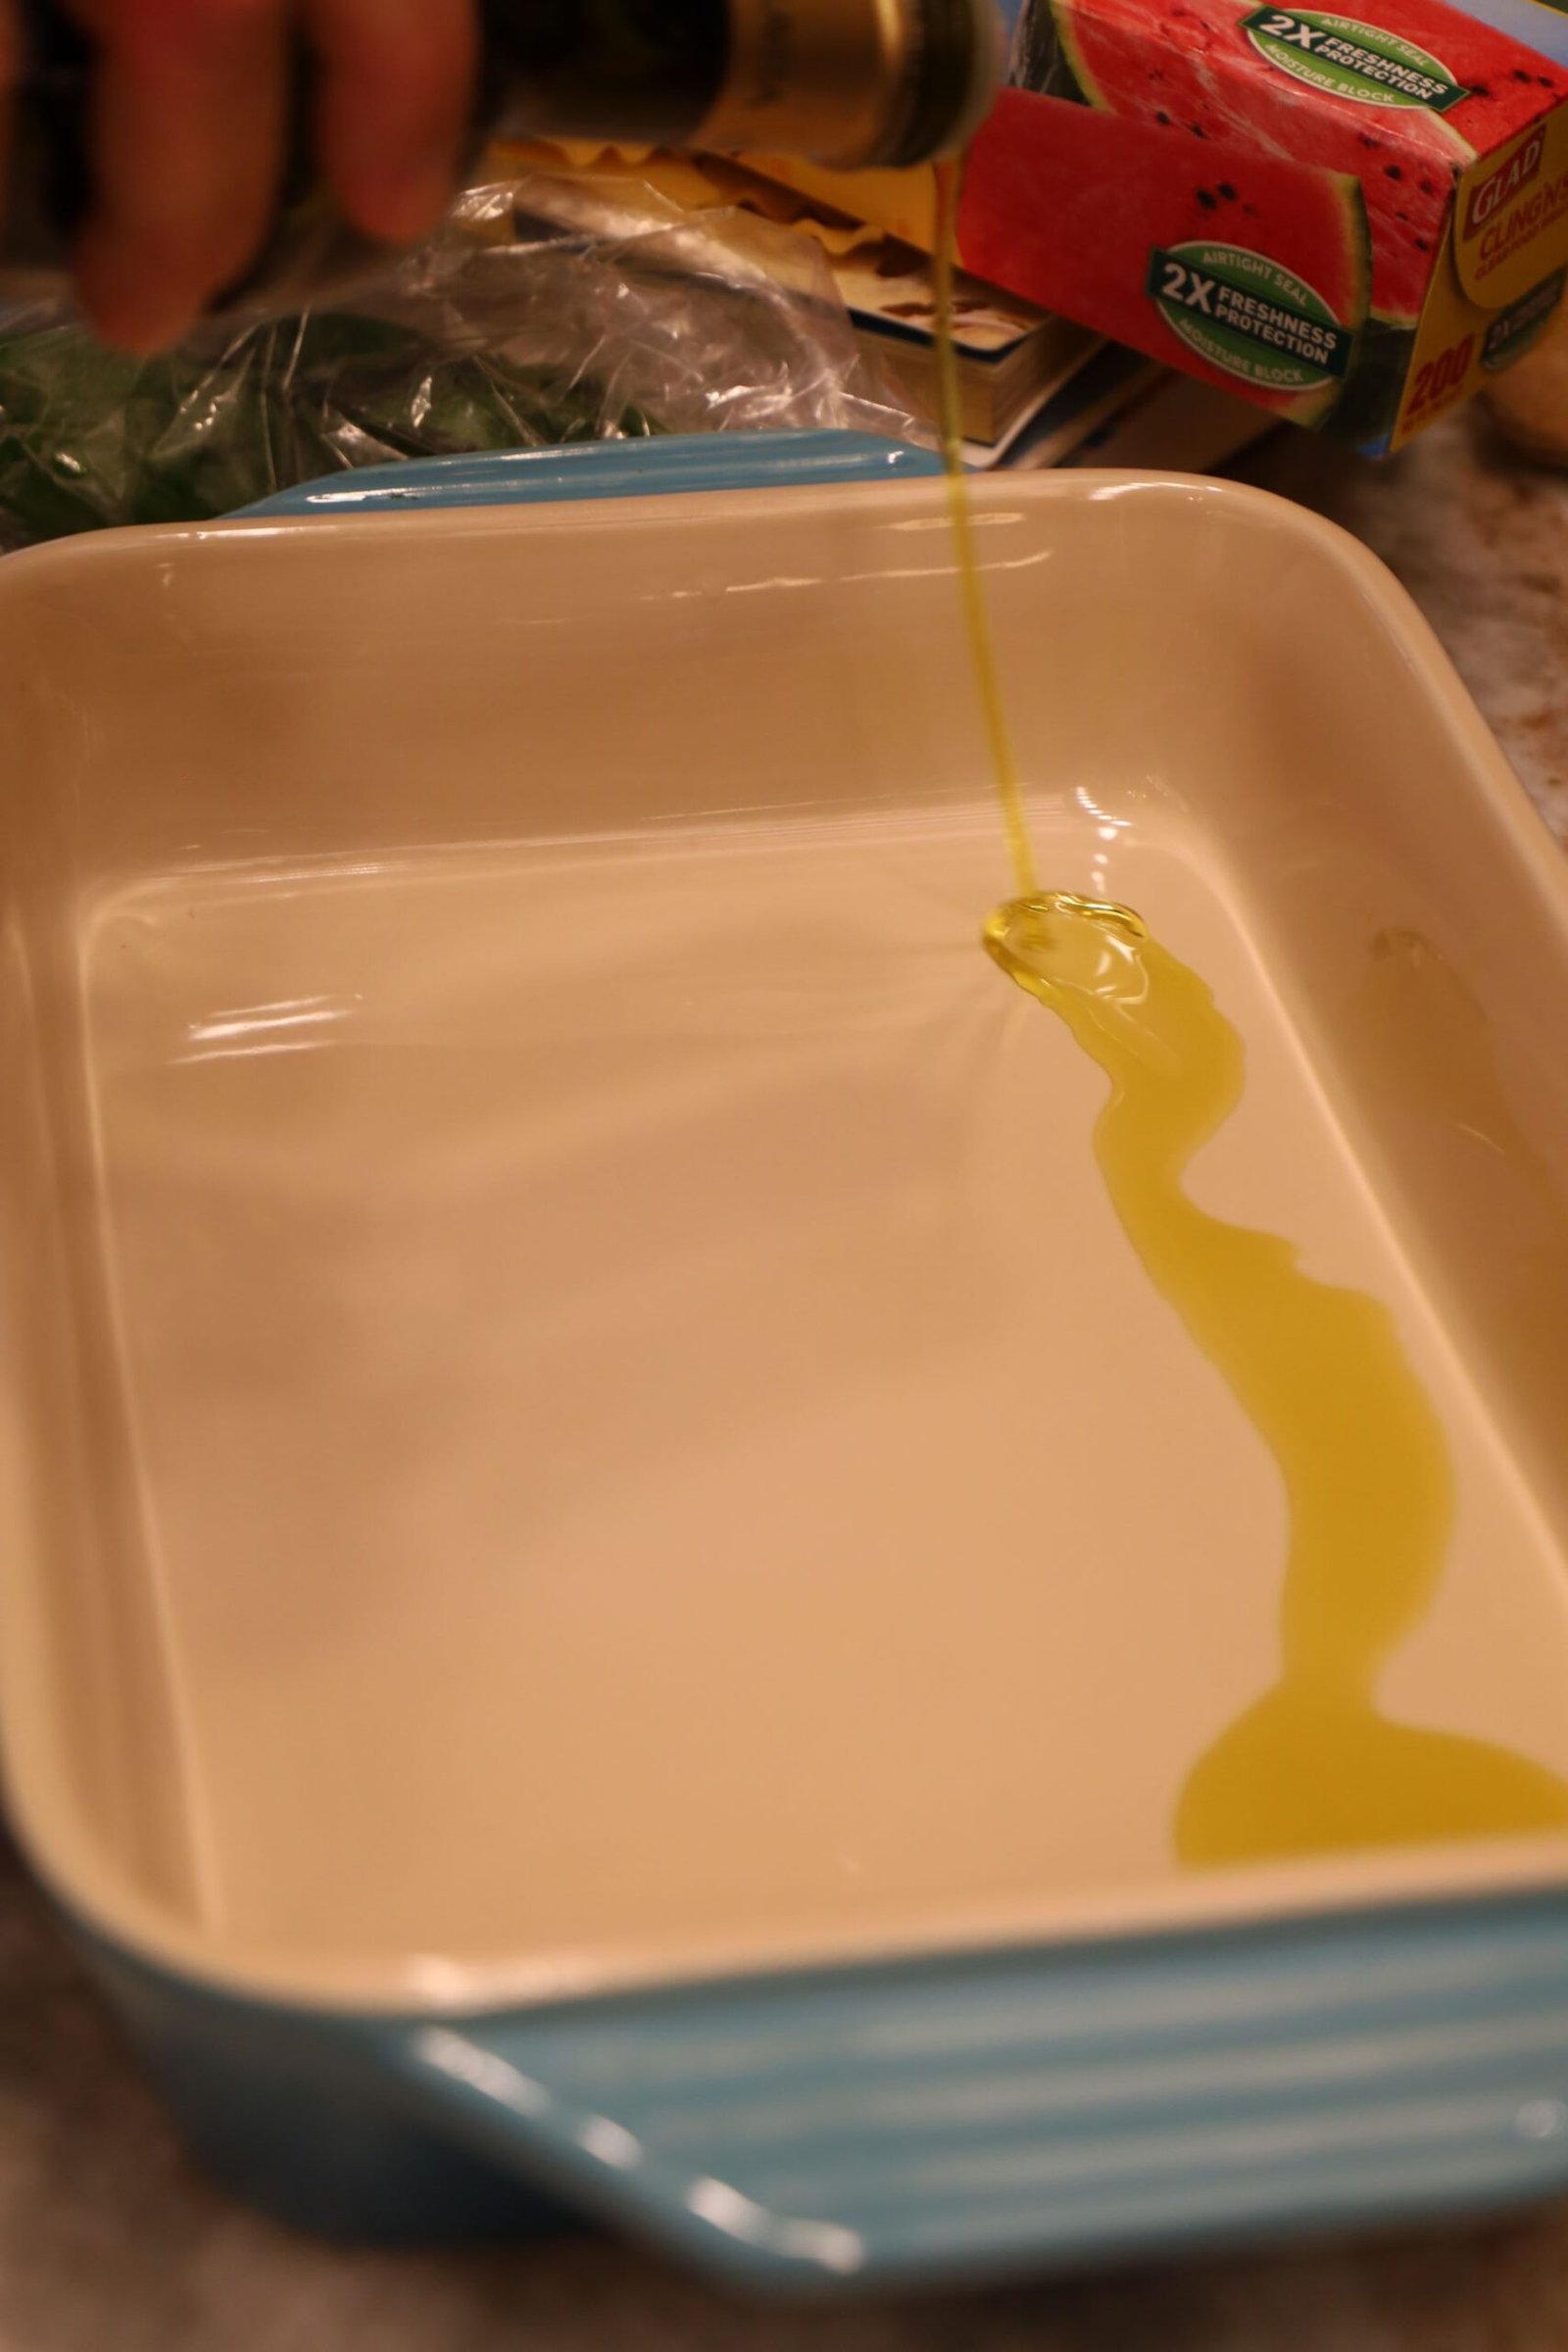
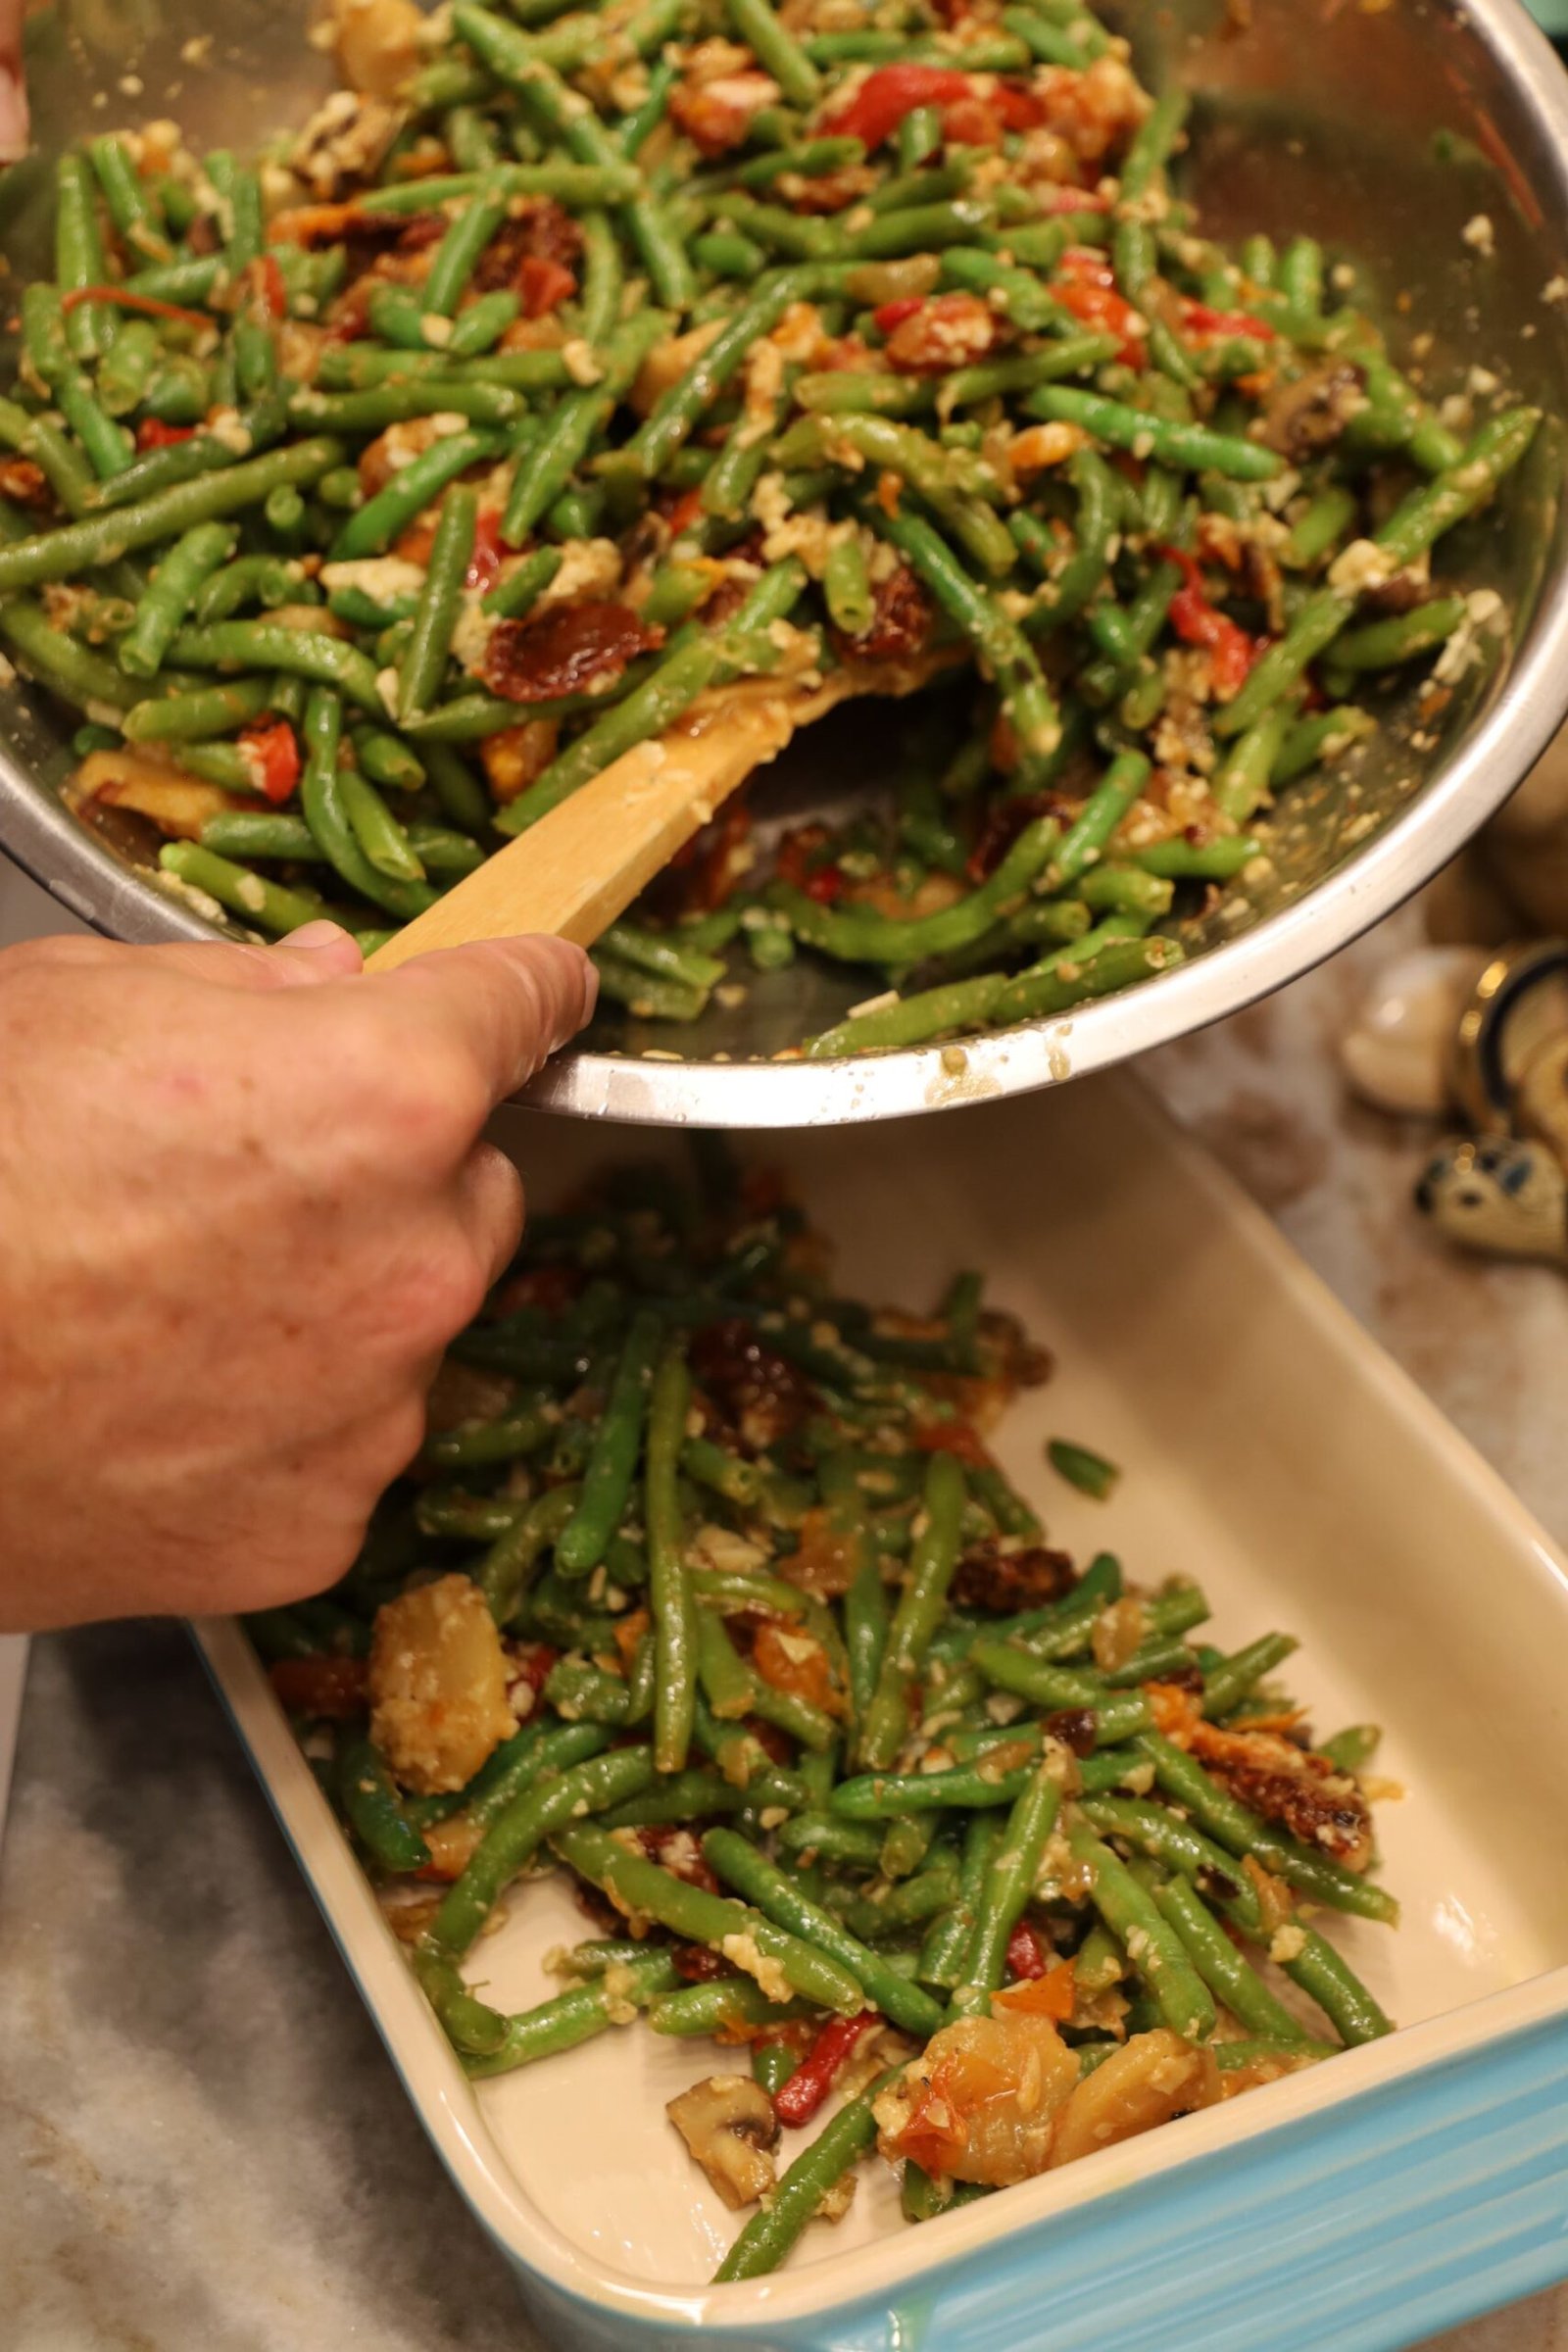
Add a few Tbsp. of Extra Virgin Olive Oil to your large baking dish then add all of your Green Bean ingredients.
Beautiful, and only a few more steps to go. Now, turn your oven to 350’F.

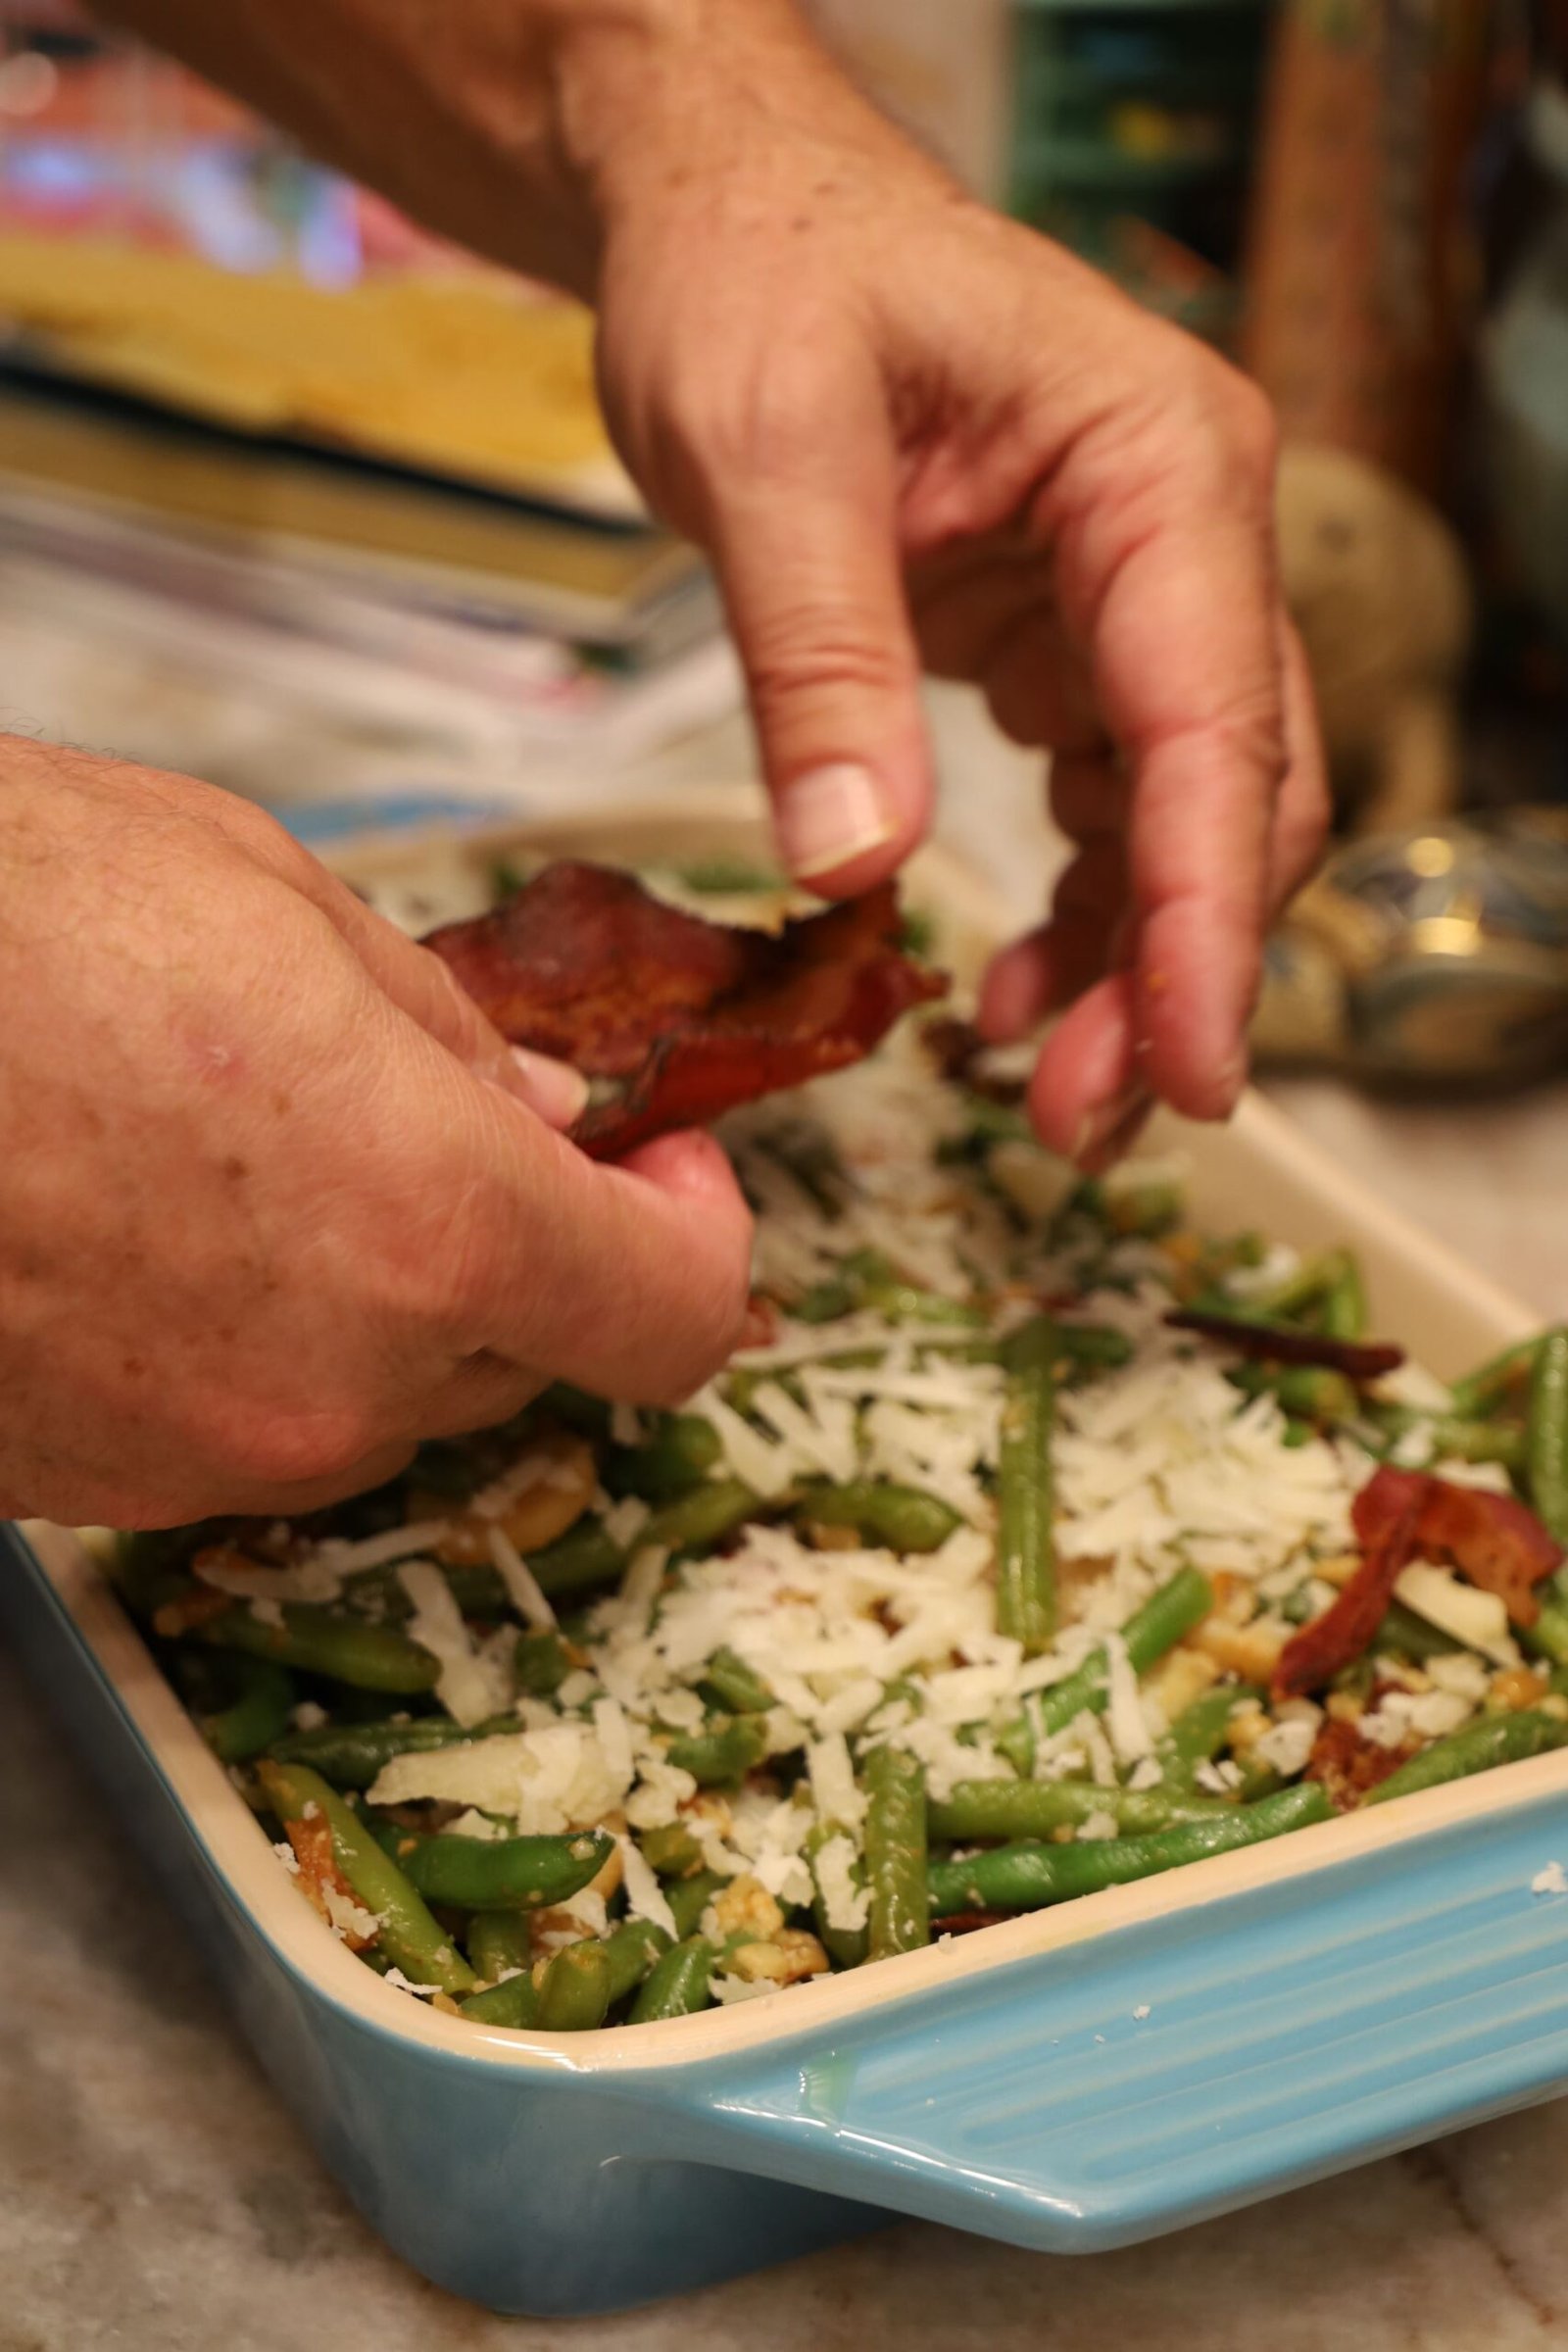
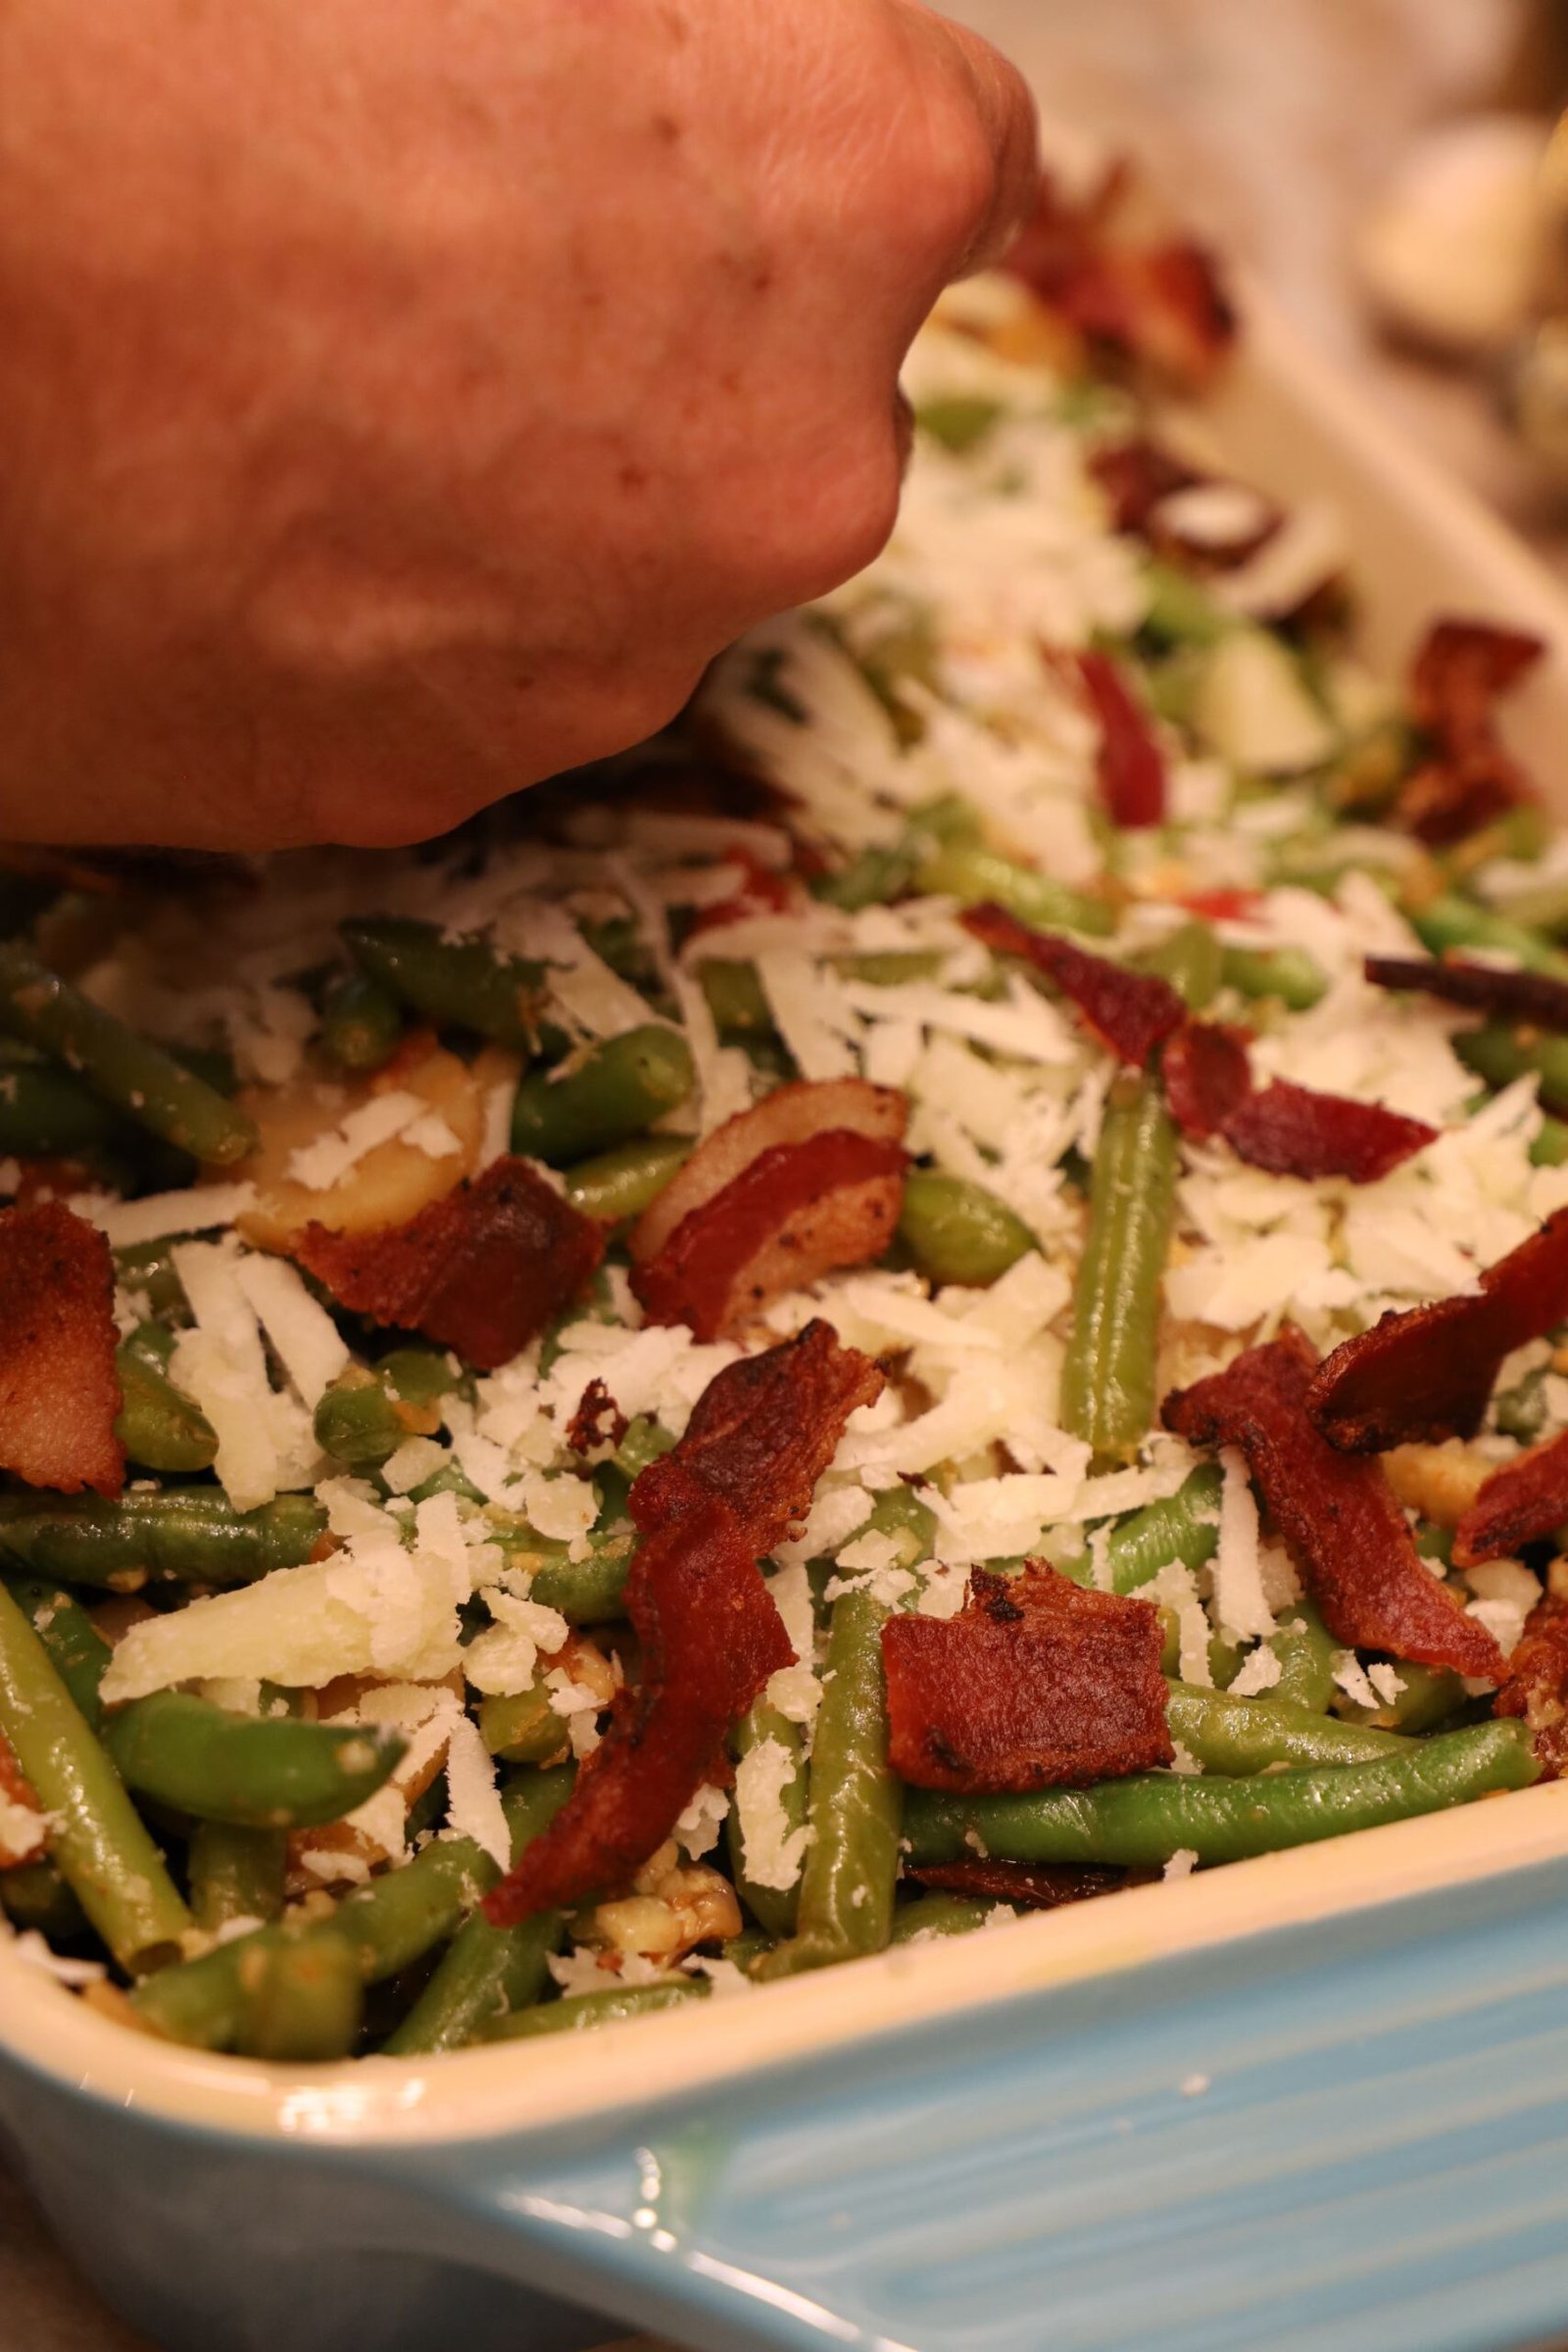
Grate more of your Pecorino Romano Cheese over the top of your casserole.
Break the bacon into nice sized pieces and add them to your casserole. You could freeze this to have for a later date. Simply wrap it all over with a few layers of plastic wrap, followed by some Aluminum Foil. This would also make a great gift!
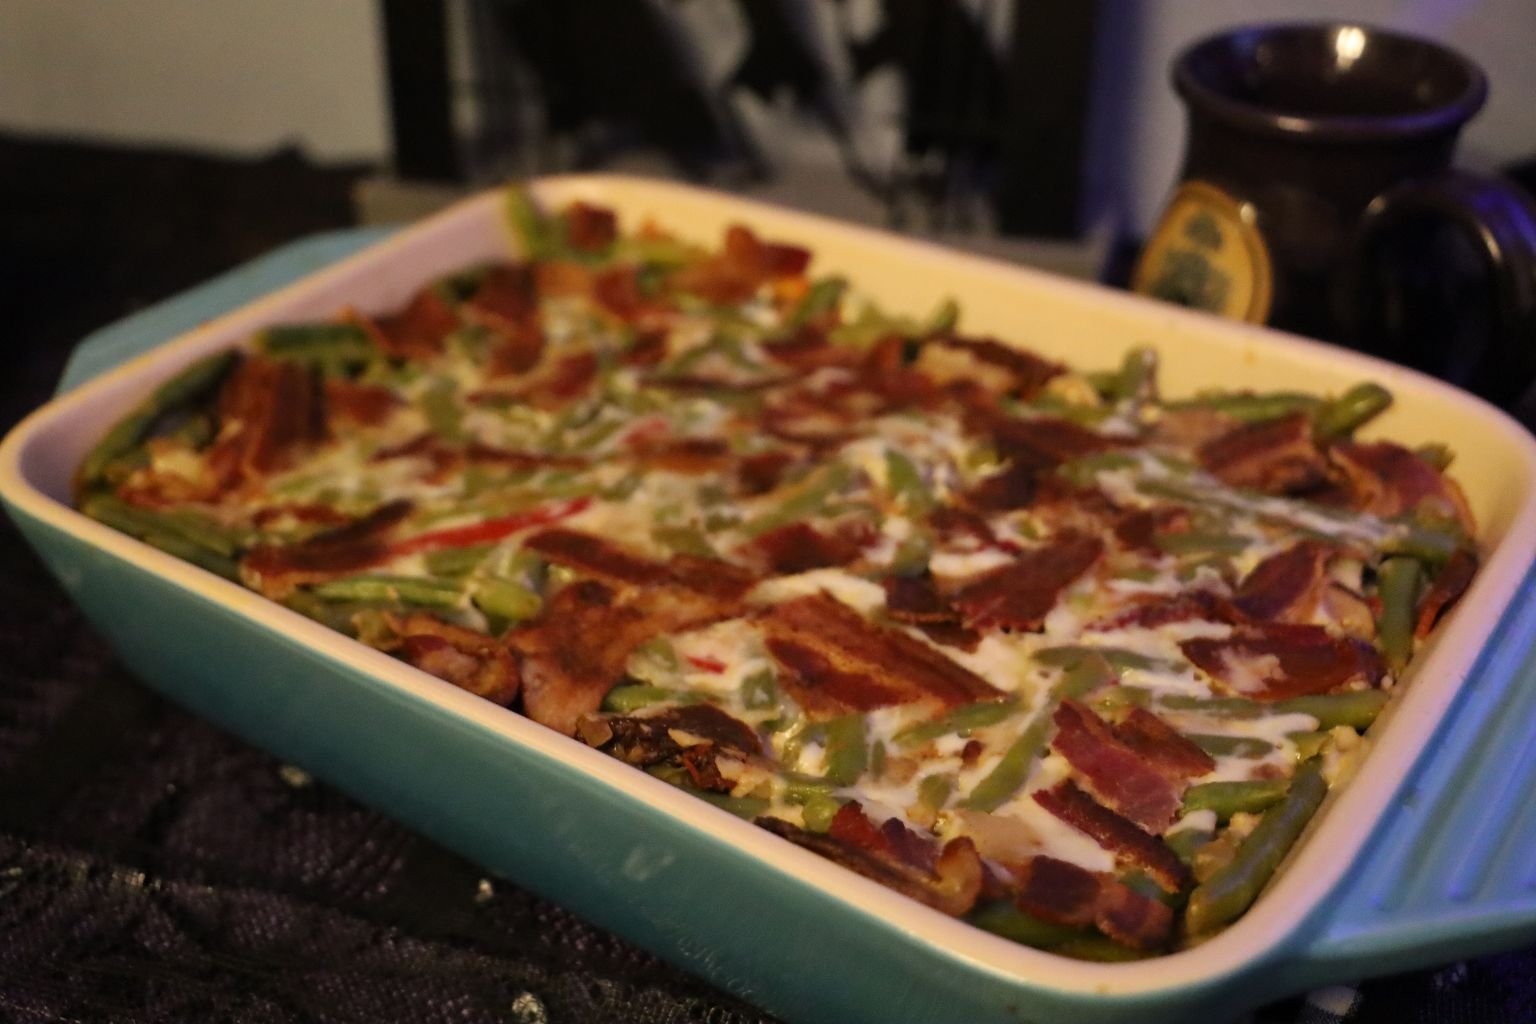
Bake the casserole for about 20-25 min. or until the cheese is melted and the top of the casserole becomes slightly browned. If frozen, remove from the freezer to thaw, then bake in your 350’F oven covered with aluminum foil for about 30 min. Check the center to ensure it is hot, then uncover for 10 min. to brown.
This was an excellent addition to our meal.
————————————————————————————————–
Grave Digger’s Lasagna
(The Ingredients you see Below Were Made for TWO Large Lasagna’s. One to Eat, One to Freeze.)

Ingredients: (Where Do I Even Start?)
(You can always half the ingredients in order to make just one large Lasagna.)
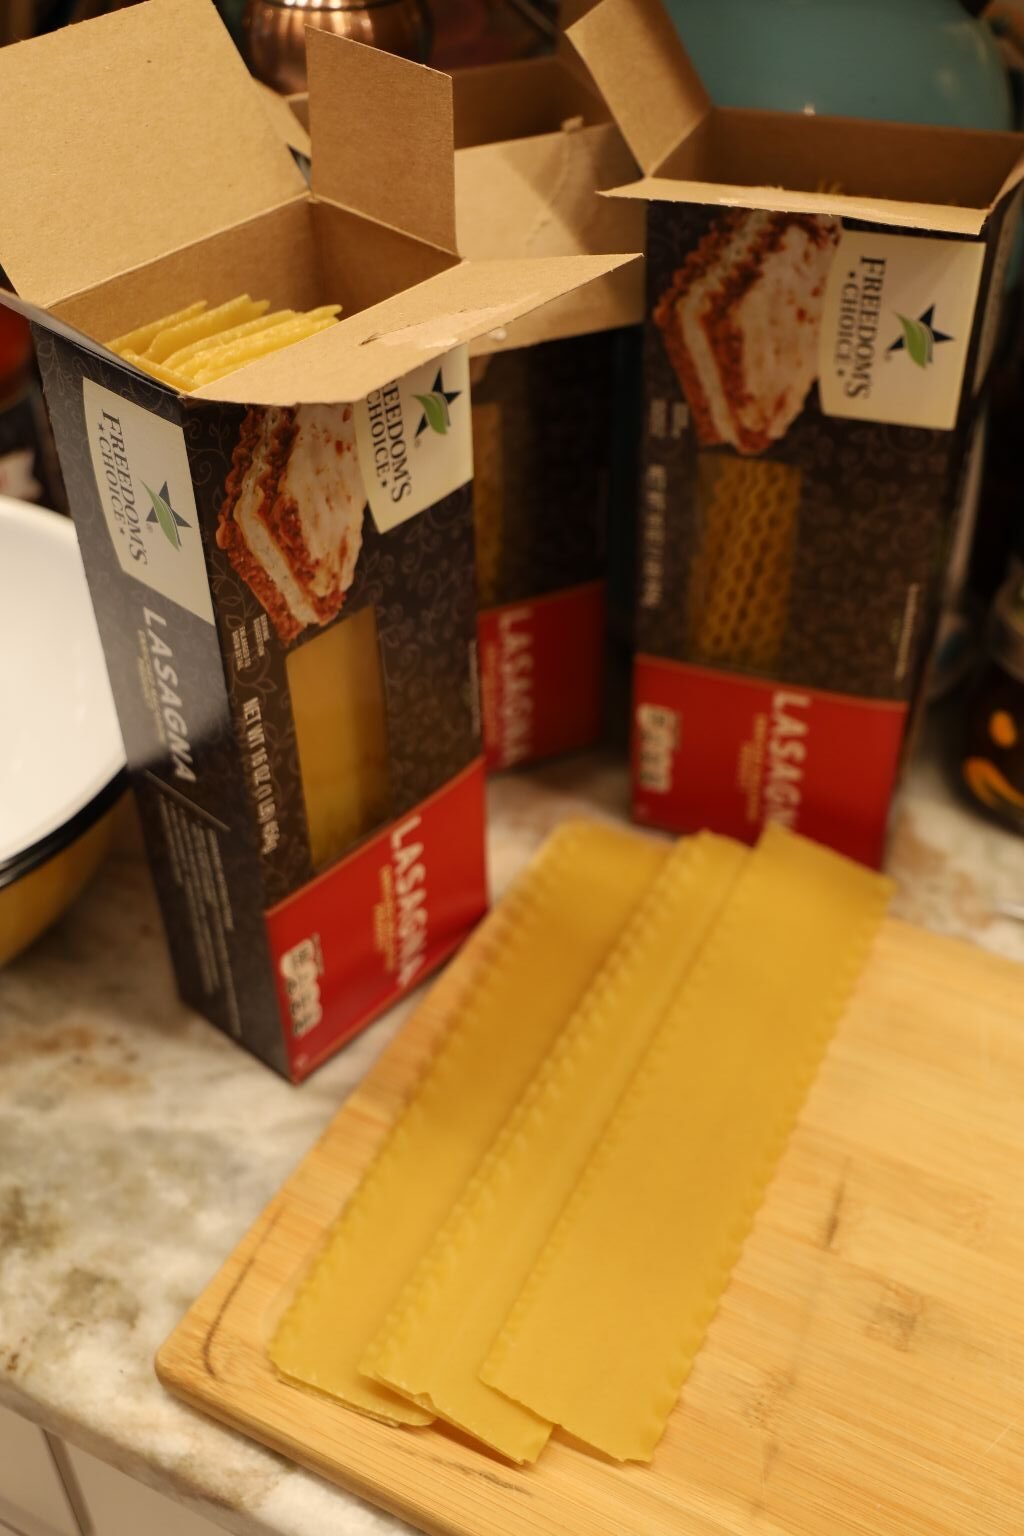
3, 16 oz. Lasagna Pasta Noodles (You may not use all of them, but you will use most of them.)
5 Jars Various Pasta Sauces (Around 24 to 32 oz. Each)
2, 1b. Italian Sausage, Sweet and Hot
3, 2 lb. Container’s of Ricotta Cheese
1, 16 oz. Container Cottage Cheese
Crinkle Cut Carrots (About 2 Cups)
2, 14 oz. Bags of Frozen Broccoli, Thawed and Drained
4-6 Large Whole Garlic Cloves, Minced
1/4 Cup or as Much as you Like of Italian Style Bread Crumbs
Sliced Fresh Mozzarella Cheese
8 oz. Blocks of Parmesan and Parmesan-Reggiano Cheese, Grated
Freshly Ground Black Pepper to Taste
Fresh Herbs of Basil, Oregano, and Parsley, as much as you want
Topping: 7.9 oz. Basil Pesto
High End Extra Virgin Olive Oil for Drizzling Overtop
————————————————————————————————————-


So Excited and Ready To Get Started
————————————————————————————————

The first thing that I want to do is to brown my Sausage in a large sauce pan on a medium-high heat.
The pan is a non-stick and I don’t need to add any Olive Oil. The Sausage will provide the fat needed.


Some of my Sausage is in casings. You just want to slit the casing open to remove the Sausage so that it can be browned evenly.
I’m using a combination of Sweet and Hot Sausage.


In the meantime, I have placed my Frozen Broccoli into a microwave safe casserole dish, with a lid, in order to thaw and cook my Broccoli. You can always use fresh Broccoli if you like. I’ve used both in the past and I don’t find that it matters much if you use Fresh or Frozen. I find that keeping Frozen Broccoli in the freezer to use for recipes like this comes in handy.
Cook the Broccoli according to your Microwave’s directions for Thawing and Cooking Frozen Vegetables.
—————————————————————————————


While my Sausage is browning in the sauce pan I am mincing some Garlic Cloves. Gordon and I used to chop so much Garlic that it would take forever to mince all that up into such small bits. Now, we just grab this wonderful tool and squeeze to have it turn out exactly how we want it and in just a few seconds. I’m mincing about 4-5 large Garlic Cloves in the photo above. You can use as much or as little as you like. We just LOVE Garlic!

Broccoli Ready…


Here I am draining the water out of the casserole dish and into the sink.
Then filling the casserole dish with cold water for the Broccoli to sit in so that it will stop the cooking process.
——————————————————————————————–

My Sausage and Garlic have finished browning.
I used the spatter screen you see in the photo above to drain the excess fat into the sink.
Just make sure your Sausage doesn’t fall into the sink as well.
————————————————————————————-


In a very large pot on the stove top on a high heat, start boiling your water to cook the Lasagna Noodles in.
Add a bit of Salt to the water.
While that comes to a boil….


Make Sure the Fresh Herbs are Clean and Dry
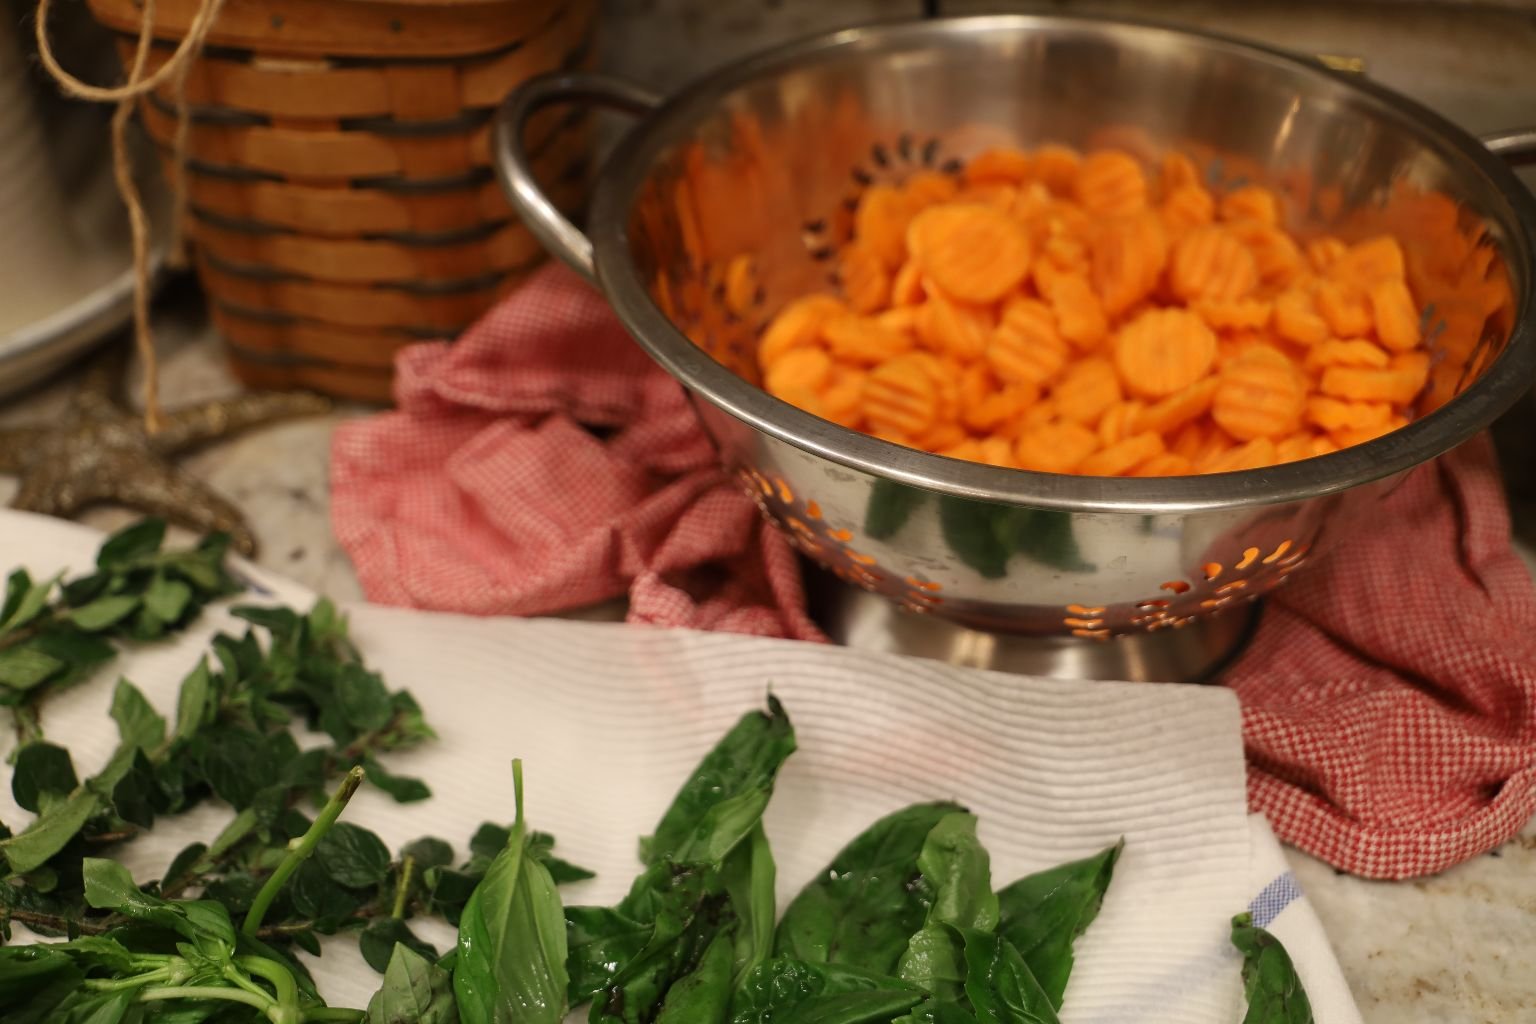

Fresh Herbs, Carrots, and the Broccoli
The Carrots have been washed and the water is being drained from them.
—————————————————————————————–
Now that my water has come up to boiling…
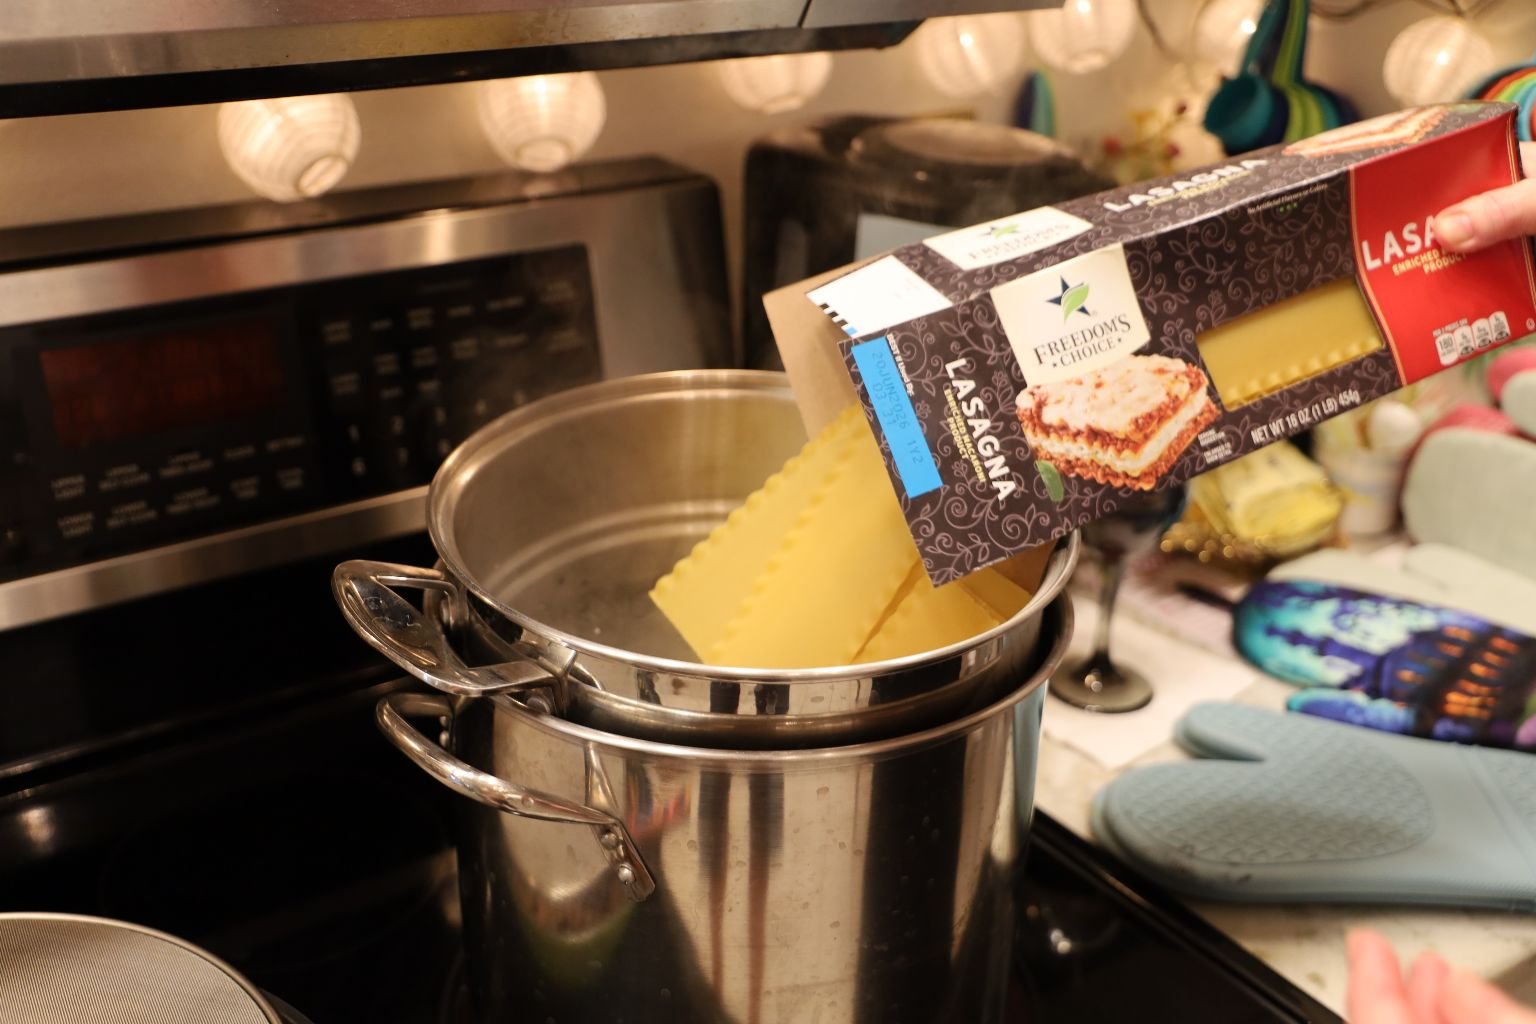

It’s time to add the Lasagna Noodles
—————————————————————————————


My Ricotta Cheese
In two separate bowls I will be mixing the Ricotta Cheese with other things.
I am evenly dividing up all 3 containers to place into the two bowls.


In this bowl I am placing in some Fresh Parsley Leaves.
I don’t chop them I just pluck the flowering end off and add it to the bowl.
———————————————————————————————–
My Lasagna Noodles are Done!


Time to Drain into a Colander

Allow to Cool a Bit
Keep them in the sink because you may need to add water to the noodles
if they start to harden up while you are still working with them building your Lasagna.
————————————————————————————————-
Into the Second Bowl of Ricotta…


Place a Nice Basil Pesto, as much as you Like
(Reserve some of the Pesto as a Lasagna topping.)
—————————————————————————————–


Here Gordon is Chopping Some Basil…

To be Equally Distributed into Each Bowl
——————————————————————————————–


Our Two Casserole Dishes
Coat Both Well With a Cooking Oil Spray, Bottom and Sides
(One we are giving to Veronica and Brian as a gift, along with this great Lasagna that it will house, and the other is ours to place into the freezer for a later date.)
——————————————————————————————————-


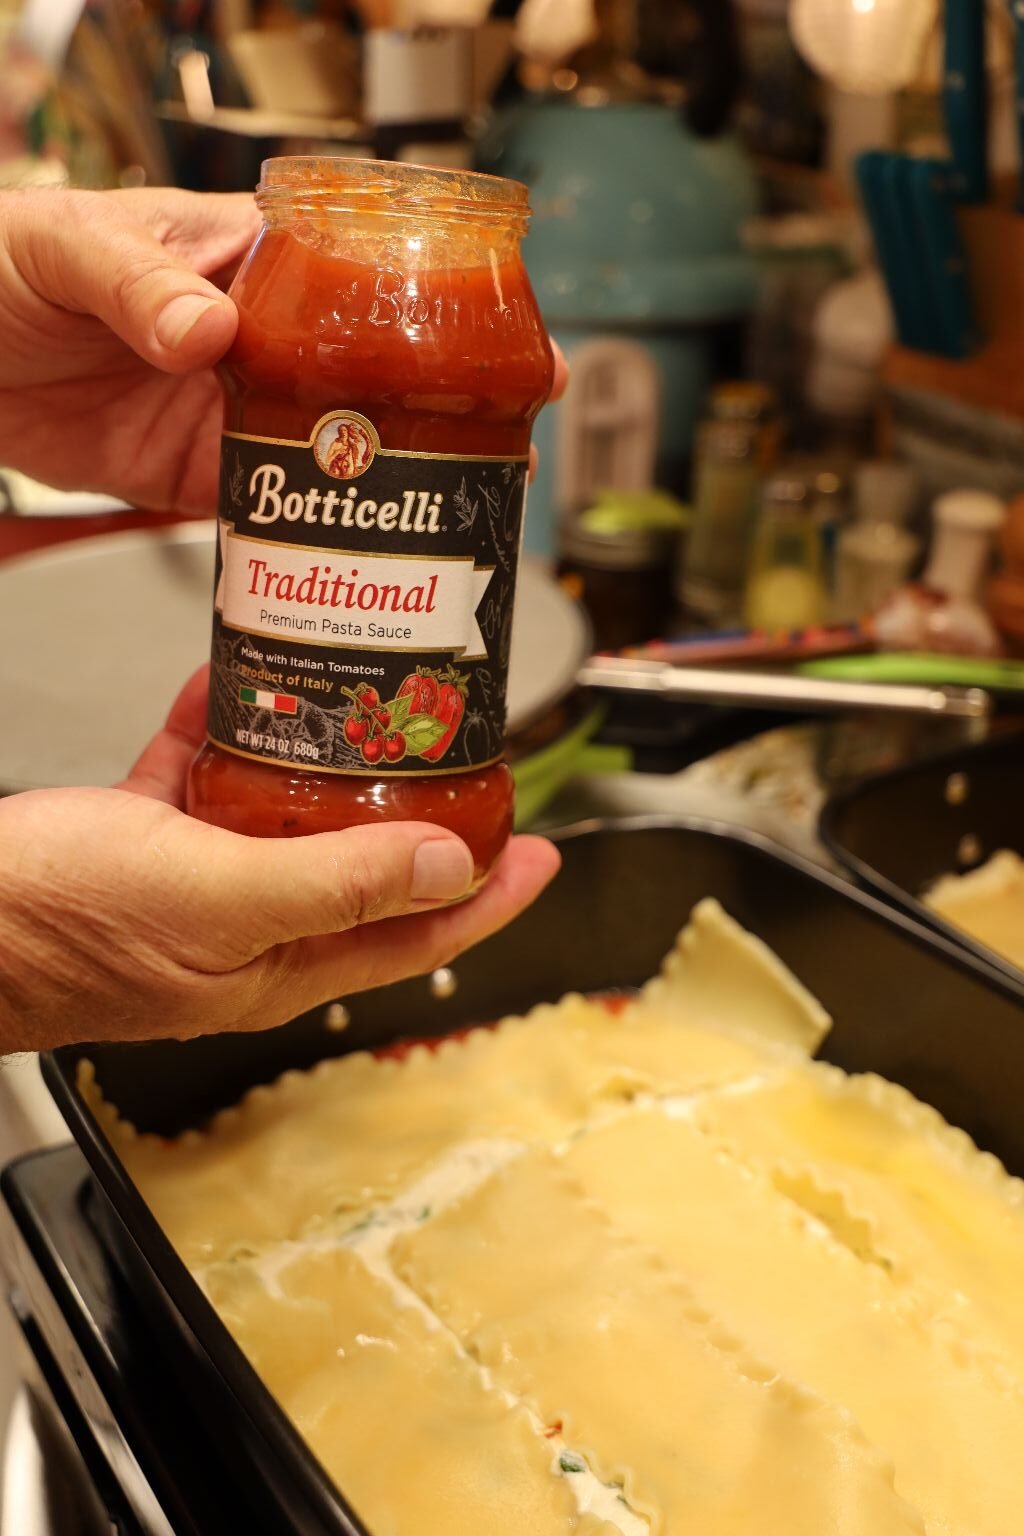
My Various Jars of Spaghetti Sauces

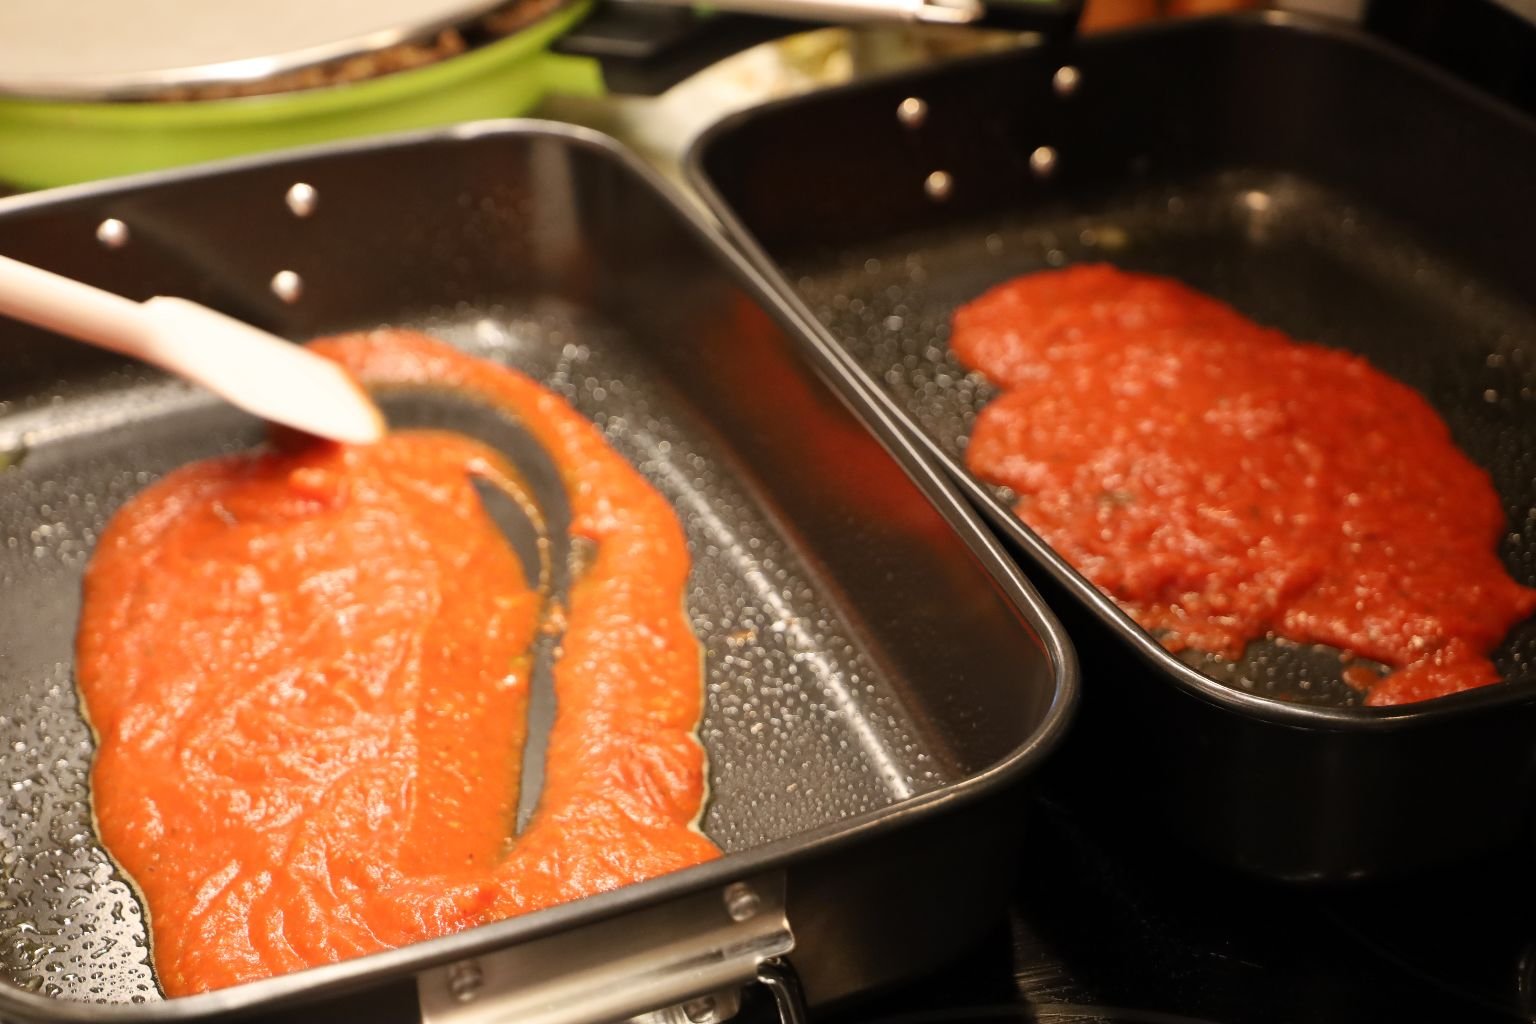
In the bottom of each casserole dish place enough of the Sauce to cover the bottom.
You just need a nice thin layer.


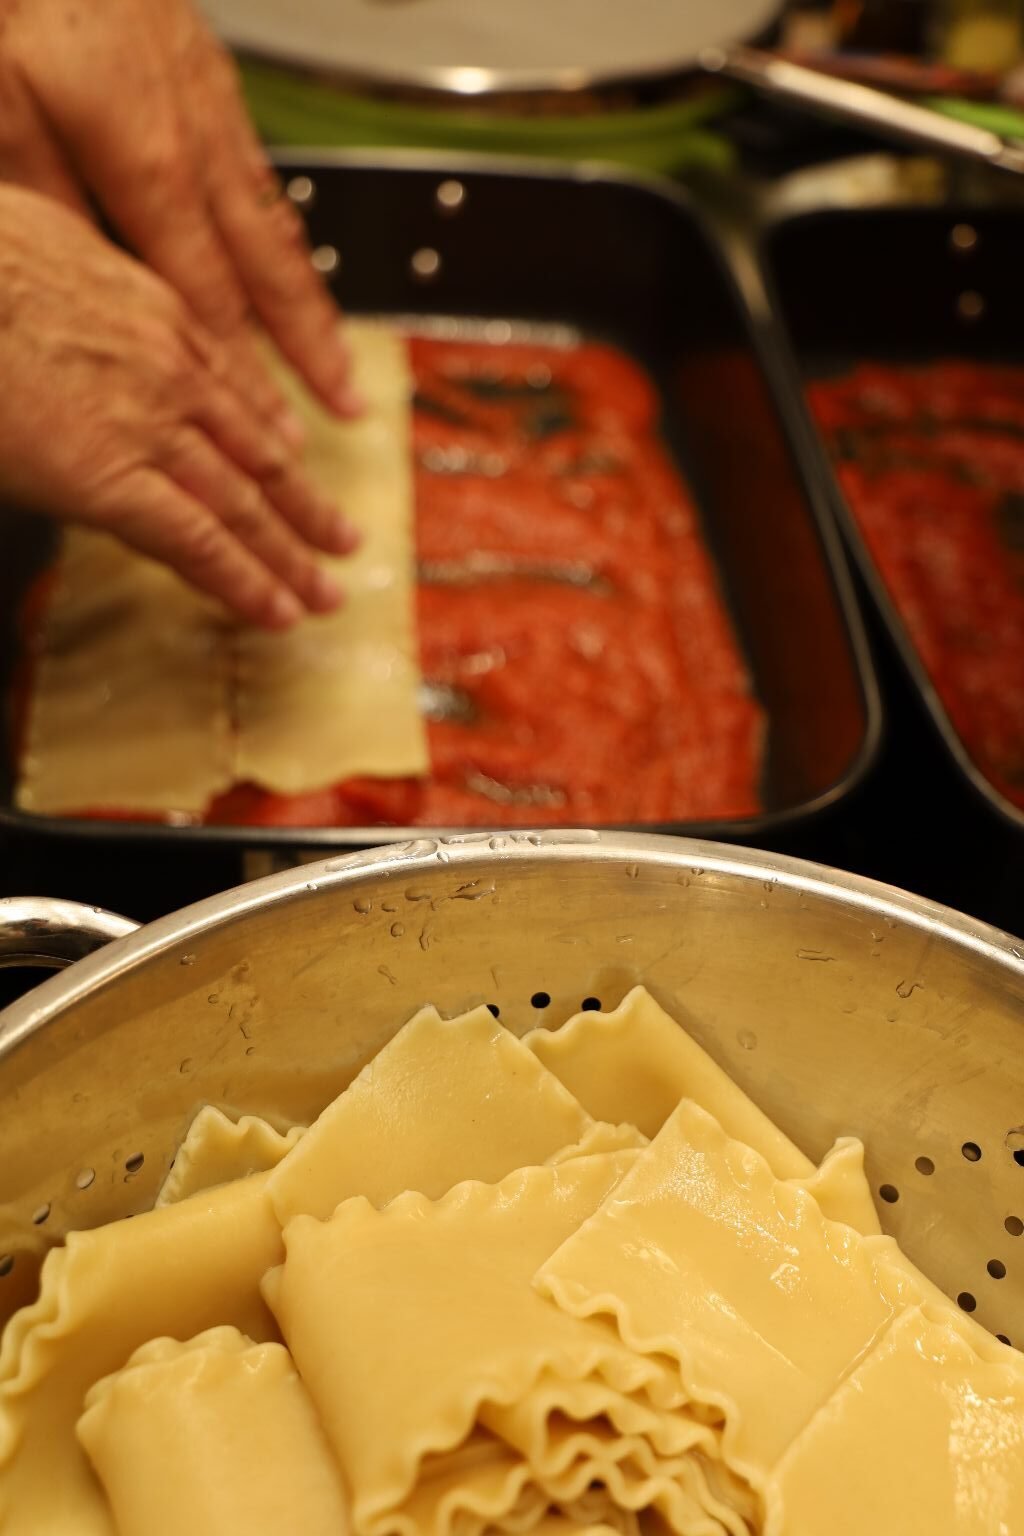
Now, place down a layer of the Lasagna Noodles over the Sauce.


Like So


Now place some of your Herby Ricotta Cheese.

Spread out a nice later. Use a spatula.


Then add more of the Lasagna Noodles over the Ricotta Cheese and then add a layer of yet another Spaghetti Sauce.

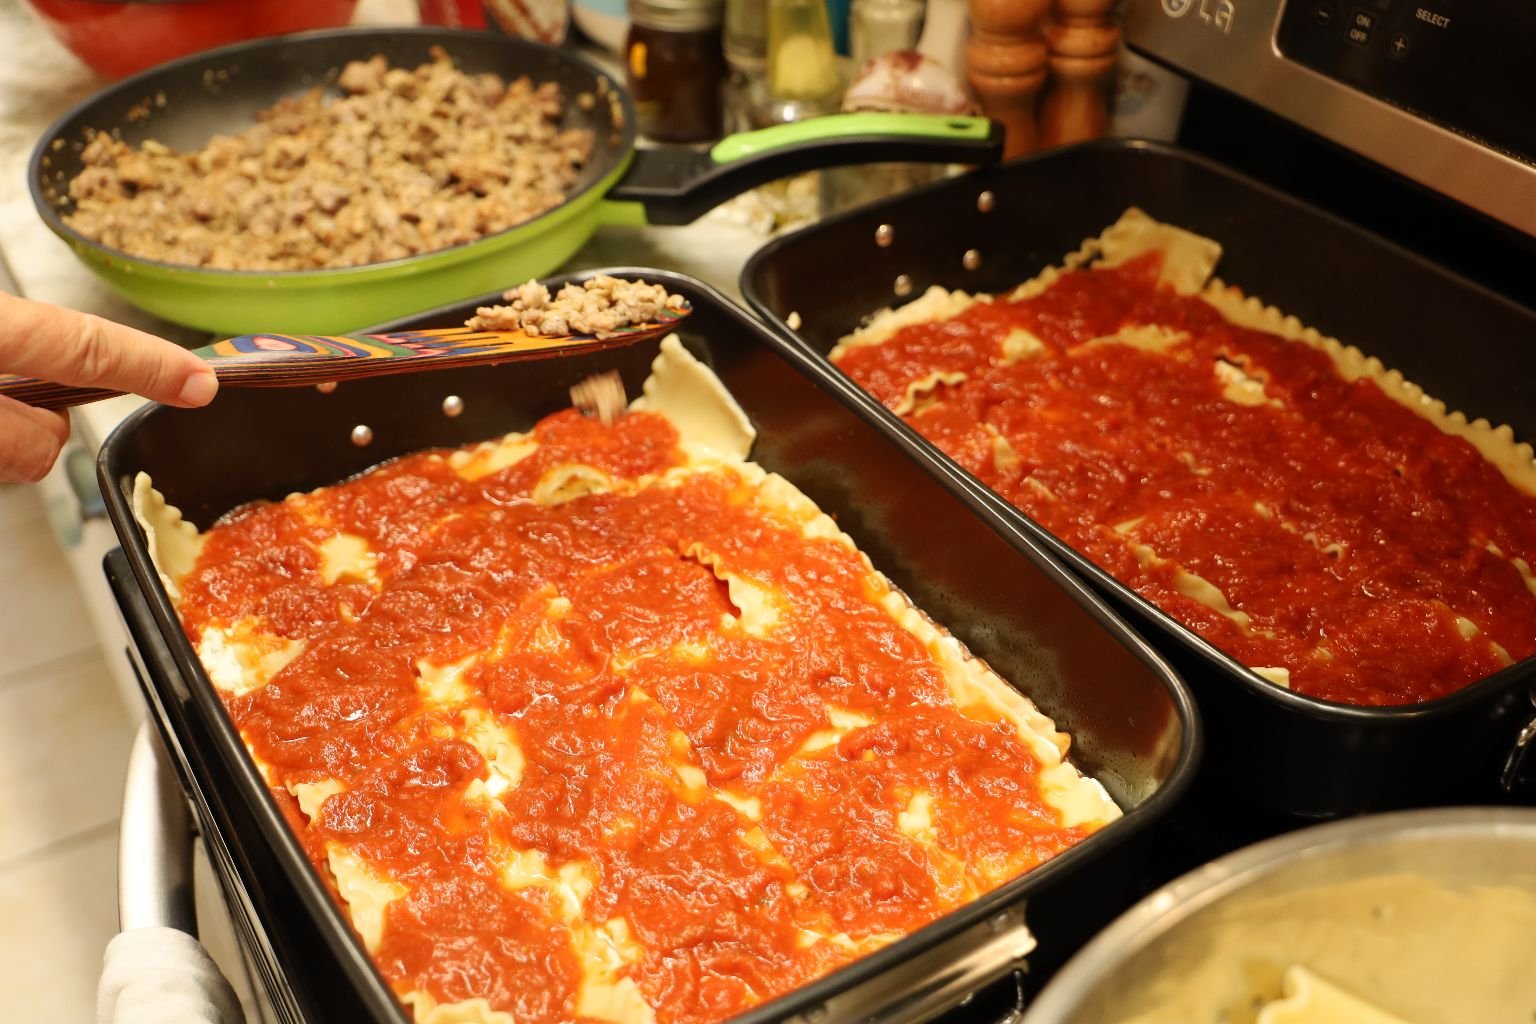
Like So


Time for a nice layer of the Sausage.


Then top with more Lasagna Noodles.


More Ricotta Cheese….

More Sauce….


————————————————————————————————–
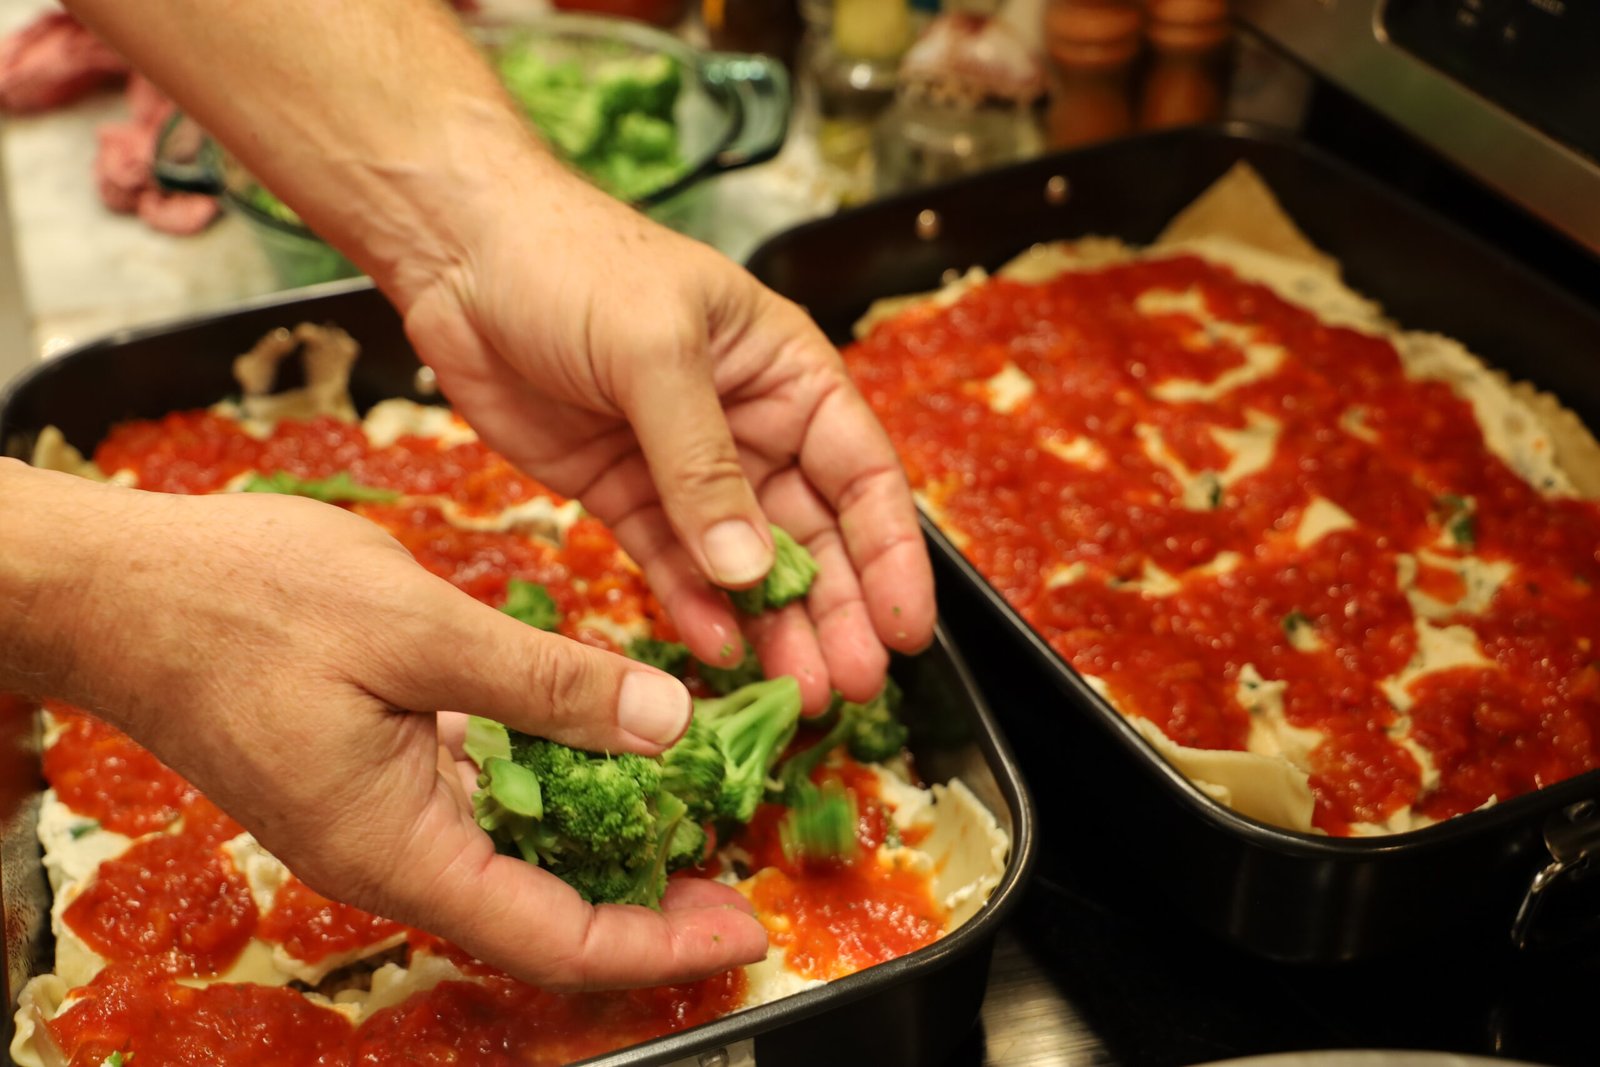

Remember our Broccoli? Time to add it here.


Cooking and Softening the Carrots in the Microwave
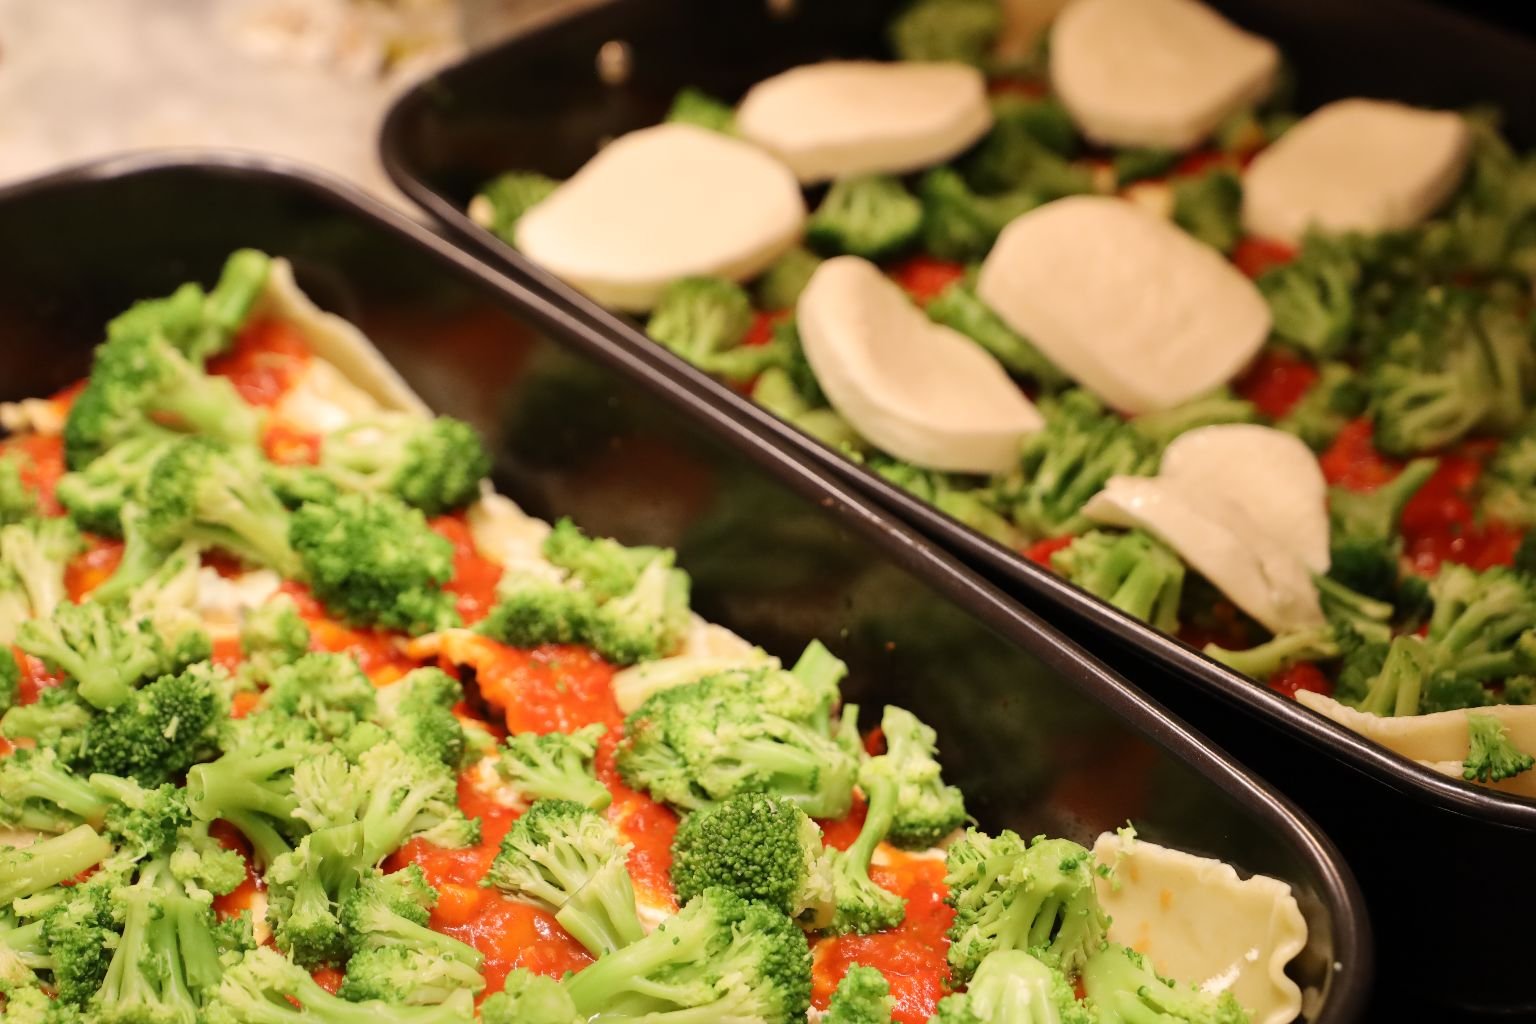

Adding Slices of Fresh Mozzarella Over the Broccoli
———————————————————————————

Cottage Cheese


Dolloping spoons of Cottage Cheese between the slices of Mozzarella Cheese Slices, photo top left.
My Carrots are cooked the ready, time to add them over top.
———————————————————————————-

Italian Bread Crumbs
————————————————————————————————

Here I did sprinkle some of the Italian Bread Crumbs from above, over the top.
Maybe about 1/4 Cup?


Now it’s time for more Lasagna Noodles
You can see them beginning to get hard in the photos above.
When this happens you can just add more water over top underneath the sink faucet and that will get them pliable again.

——————————————————————————–

Time For More Ricotta Cheese….


Dollop as much as you like and smooth over with a spatula.


Here I Added Fresh Herbs of Oregano
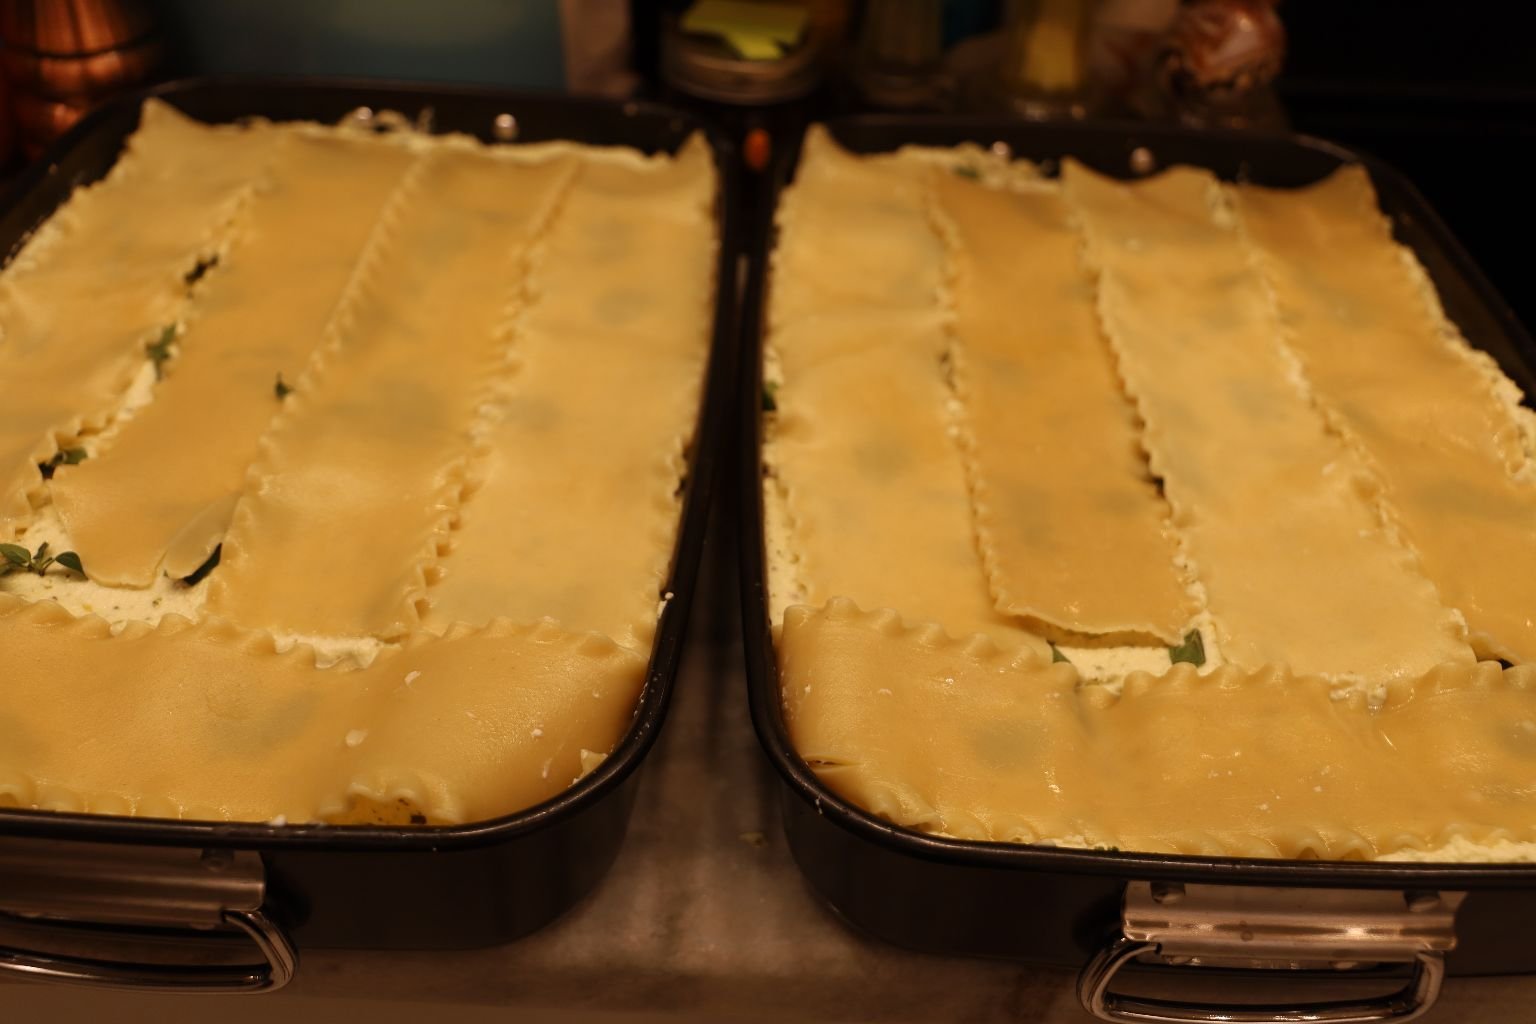
Then Top With More Lasagna Noodles
————————————————————————————————


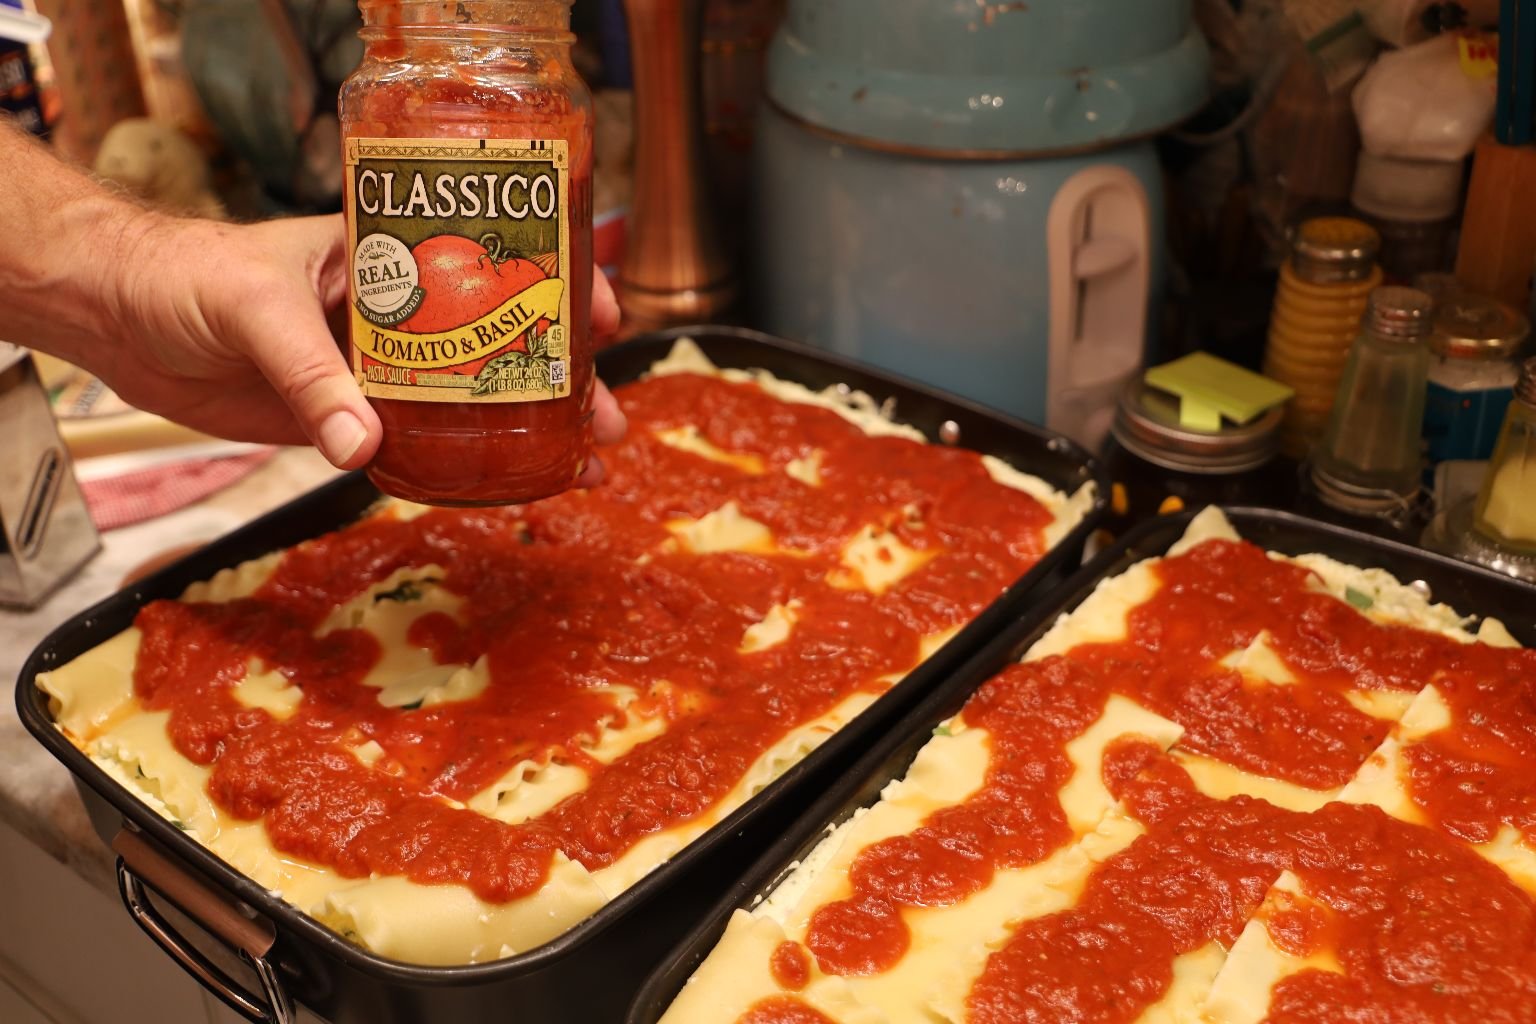
Time to Top Them Off With the Remaining Spaghetti Sauce
——————————————————————————————
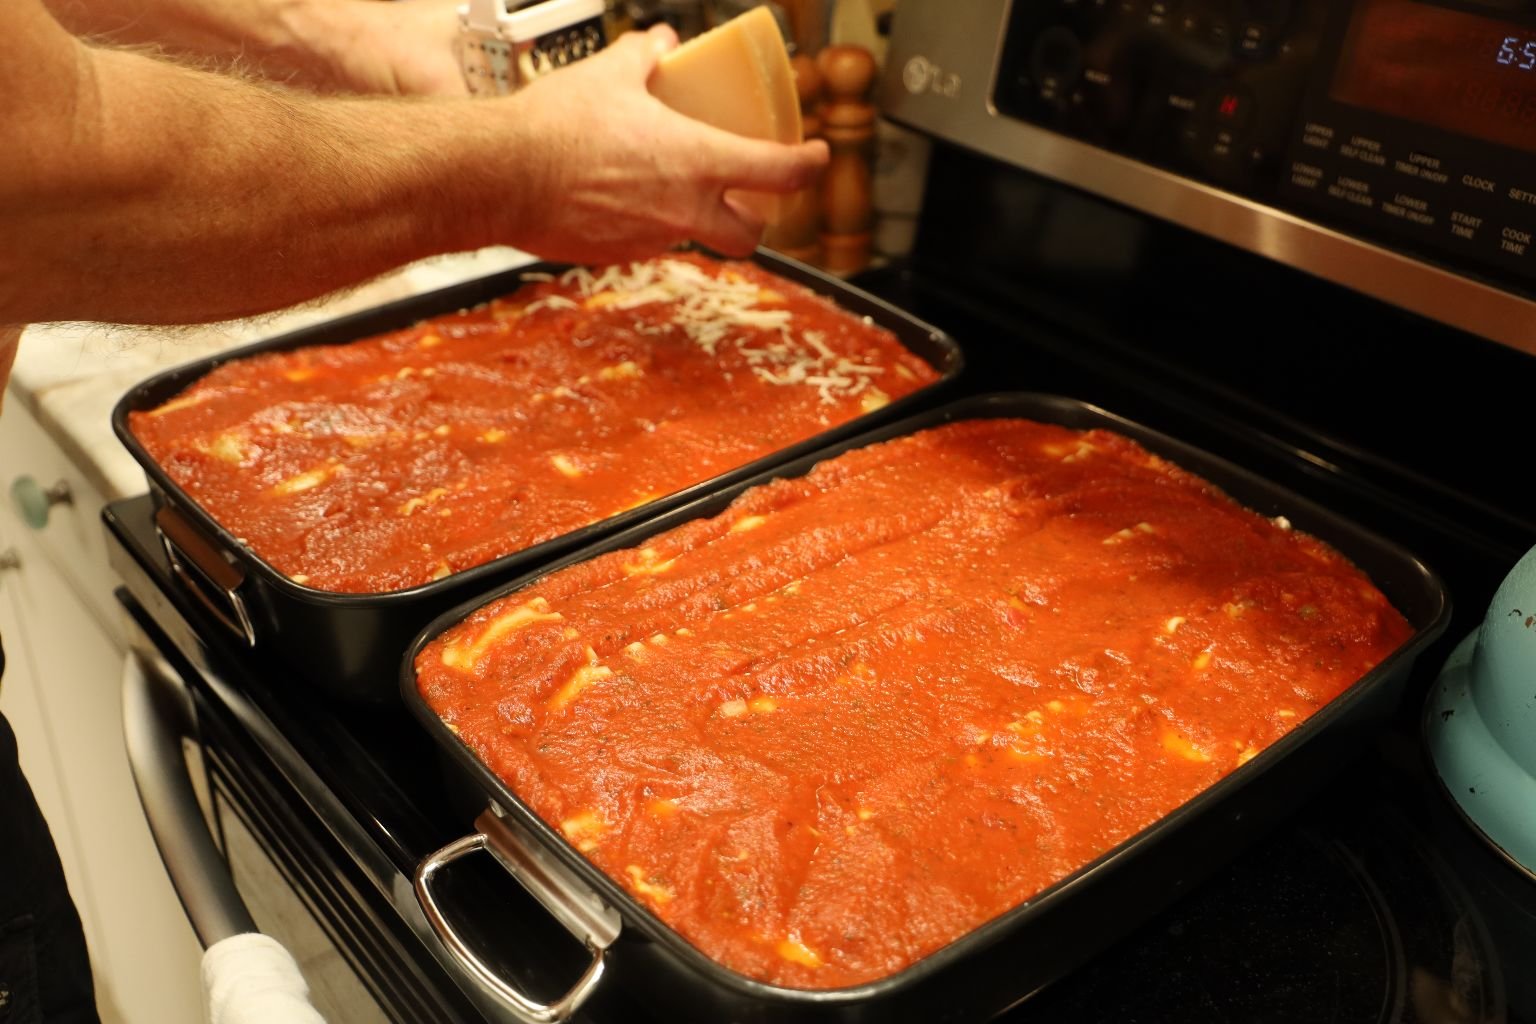
We Have Built Our Lasagna Up To The Very TOP!


Now It’s Time To Grate Our Parmesan Blocks Of Cheese

Grate As Much As You Like
—————————————————————————————-


We Then Topped This Lasagna With The Leftover Basil Pesto, and a Drizzle of Really Nice Extra Virgin Olive Oil Overtop
———————————————————————————————–

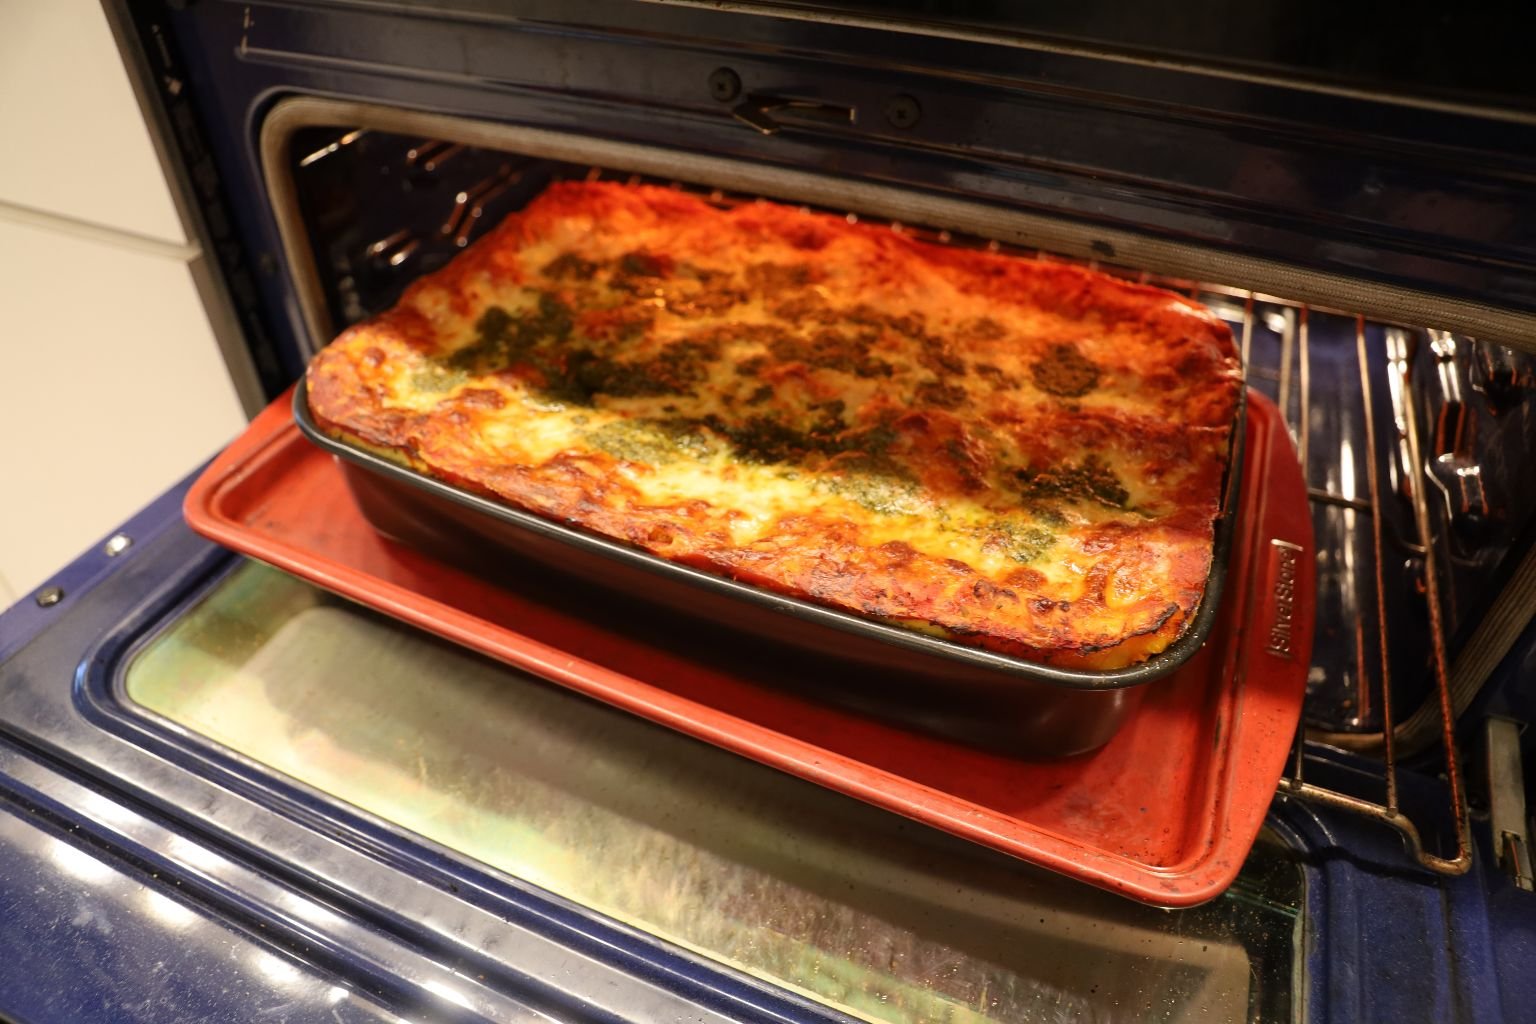
Place Into a 350F Oven for About 45 Minutes.
Be sure to check it at about 30 minutes to make sure it isn’t burning on top.
You can always cover it with Aluminum Foil to prevent it from burning.
——————————————————————————————-


Allow To Cool A Bit
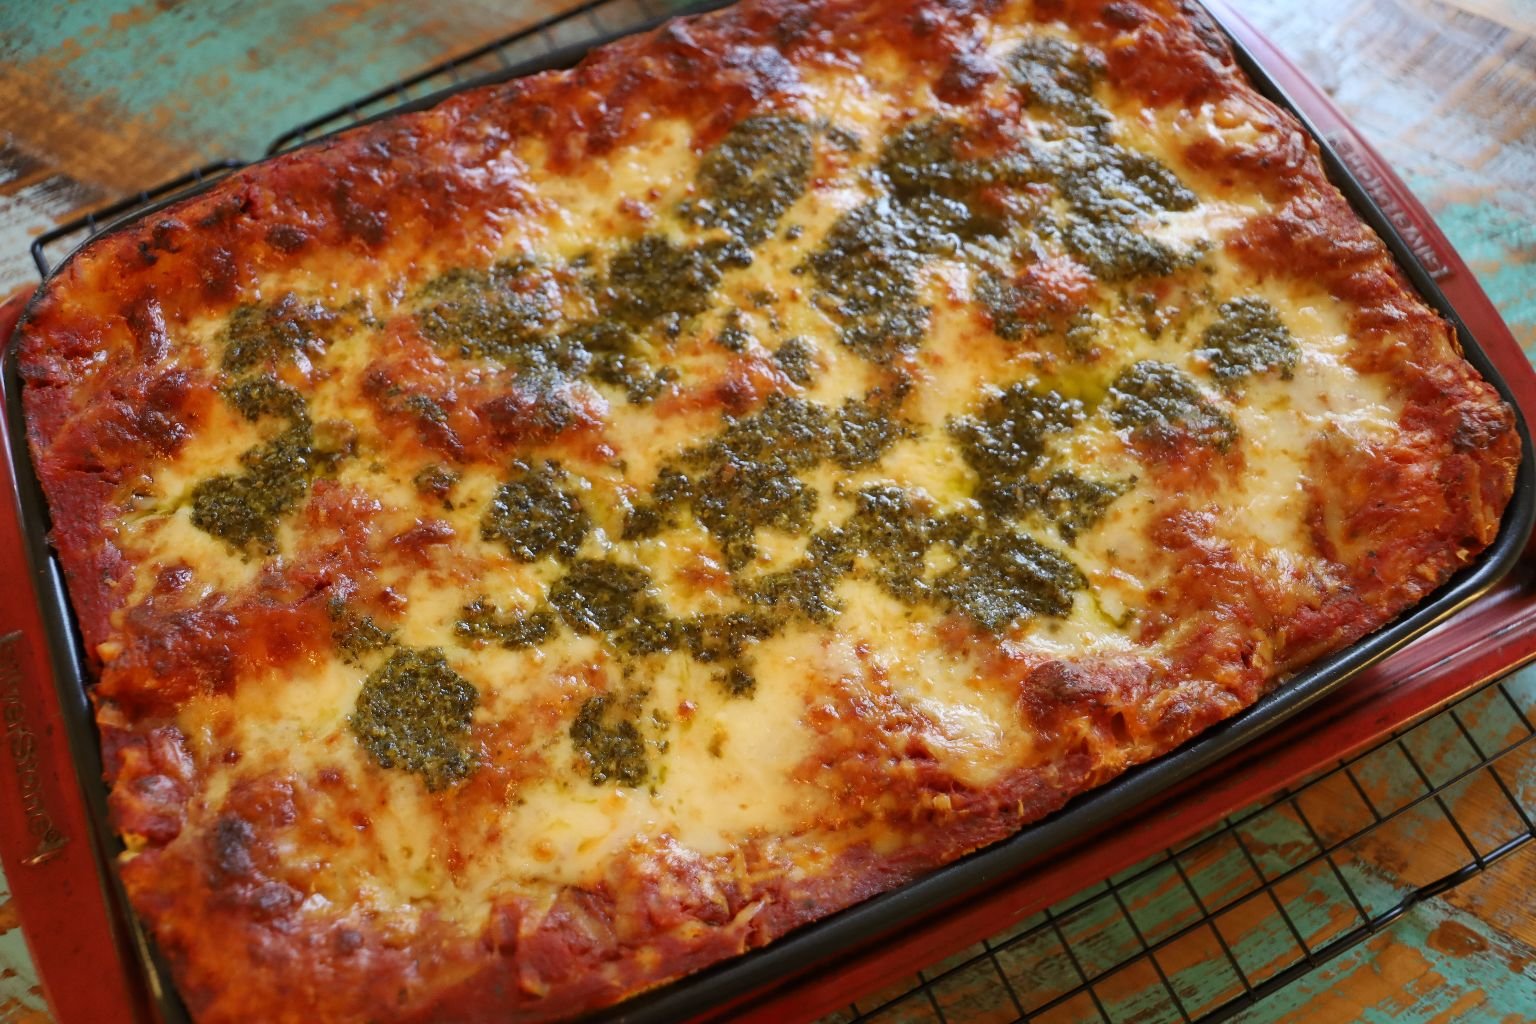
It’s Looking So Beautiful!

Delicious too!
——————————————————————————————–
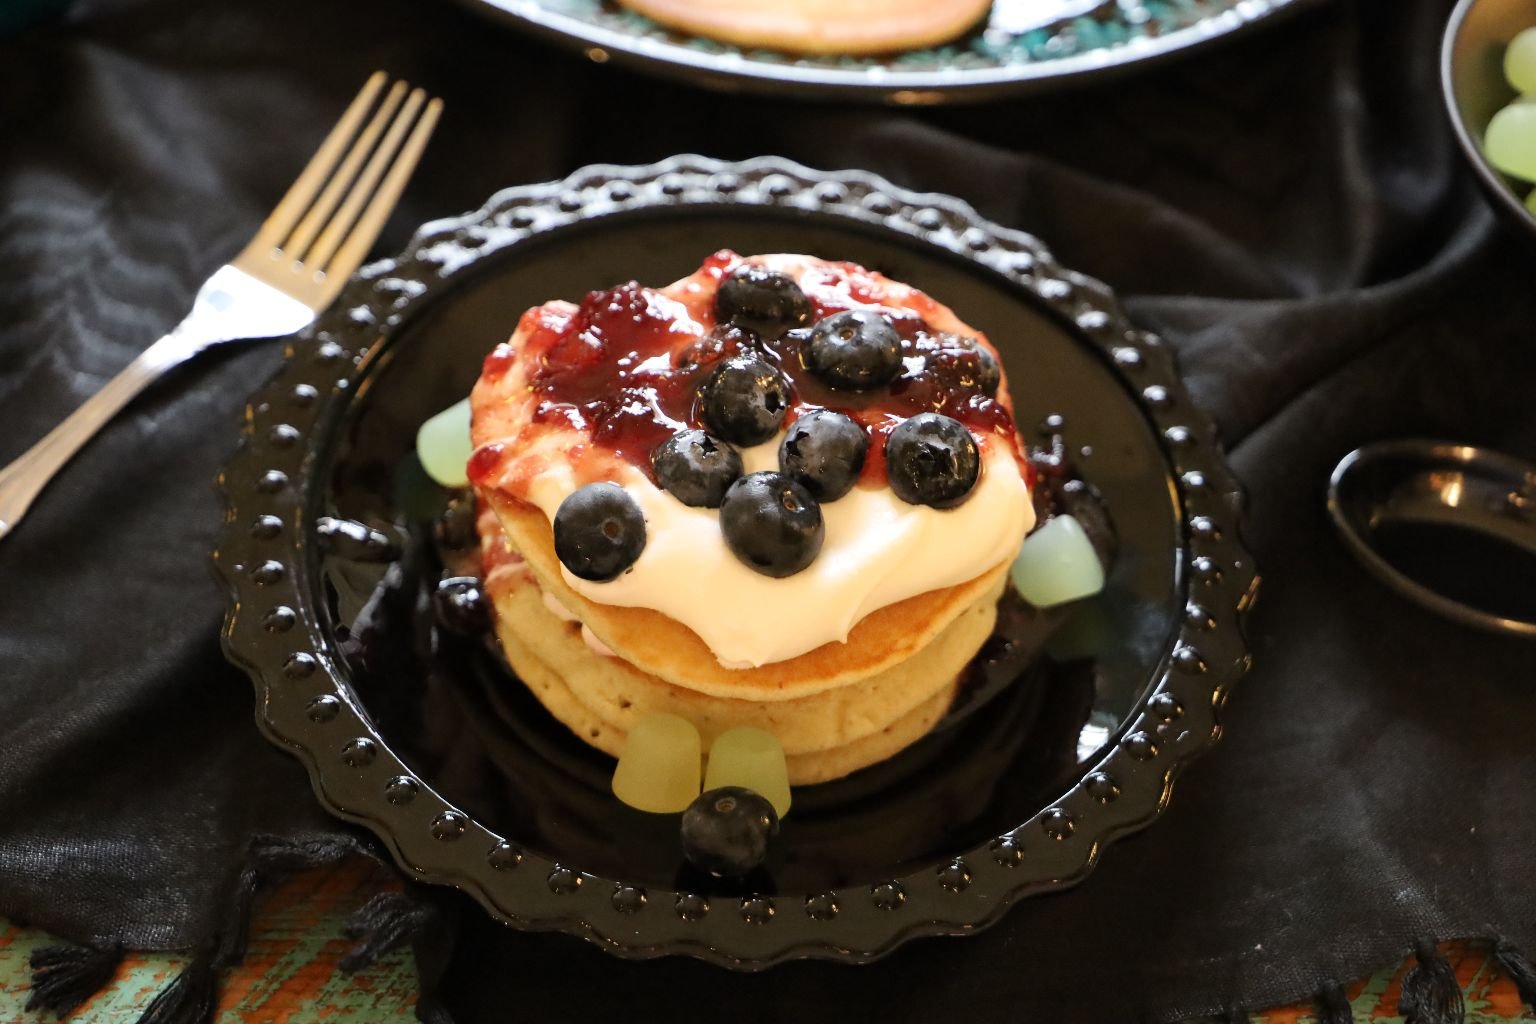
A Haunted Jezebel Blueberry Pancake Ice Cream Sandwich
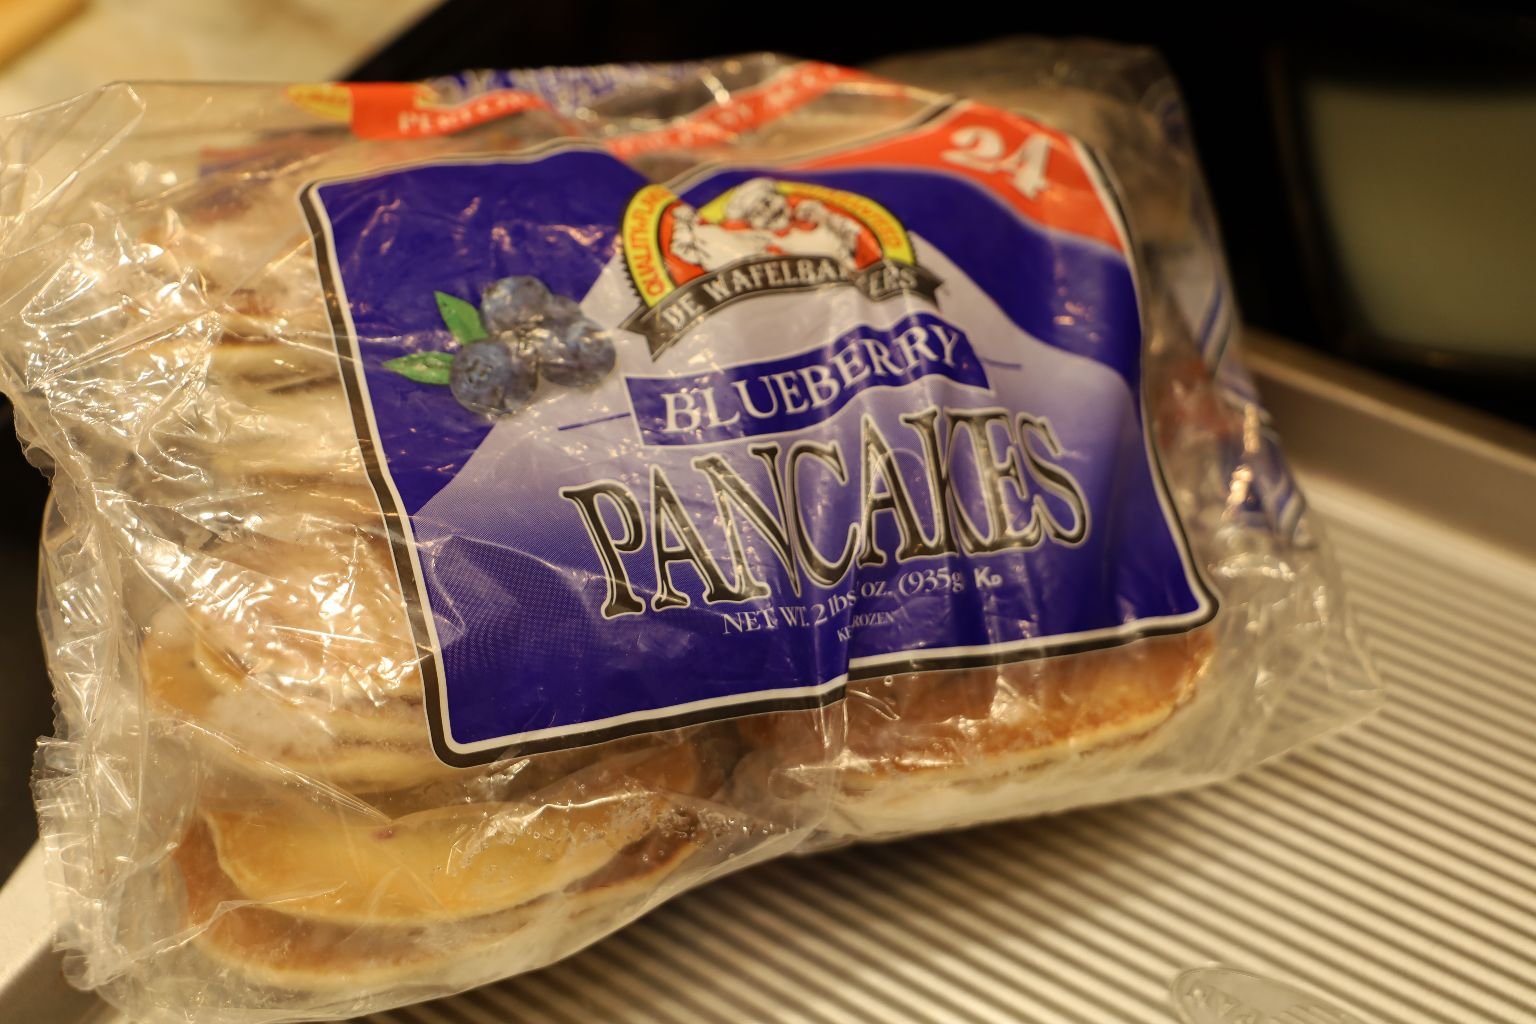
Frozen Blueberry Pancakes
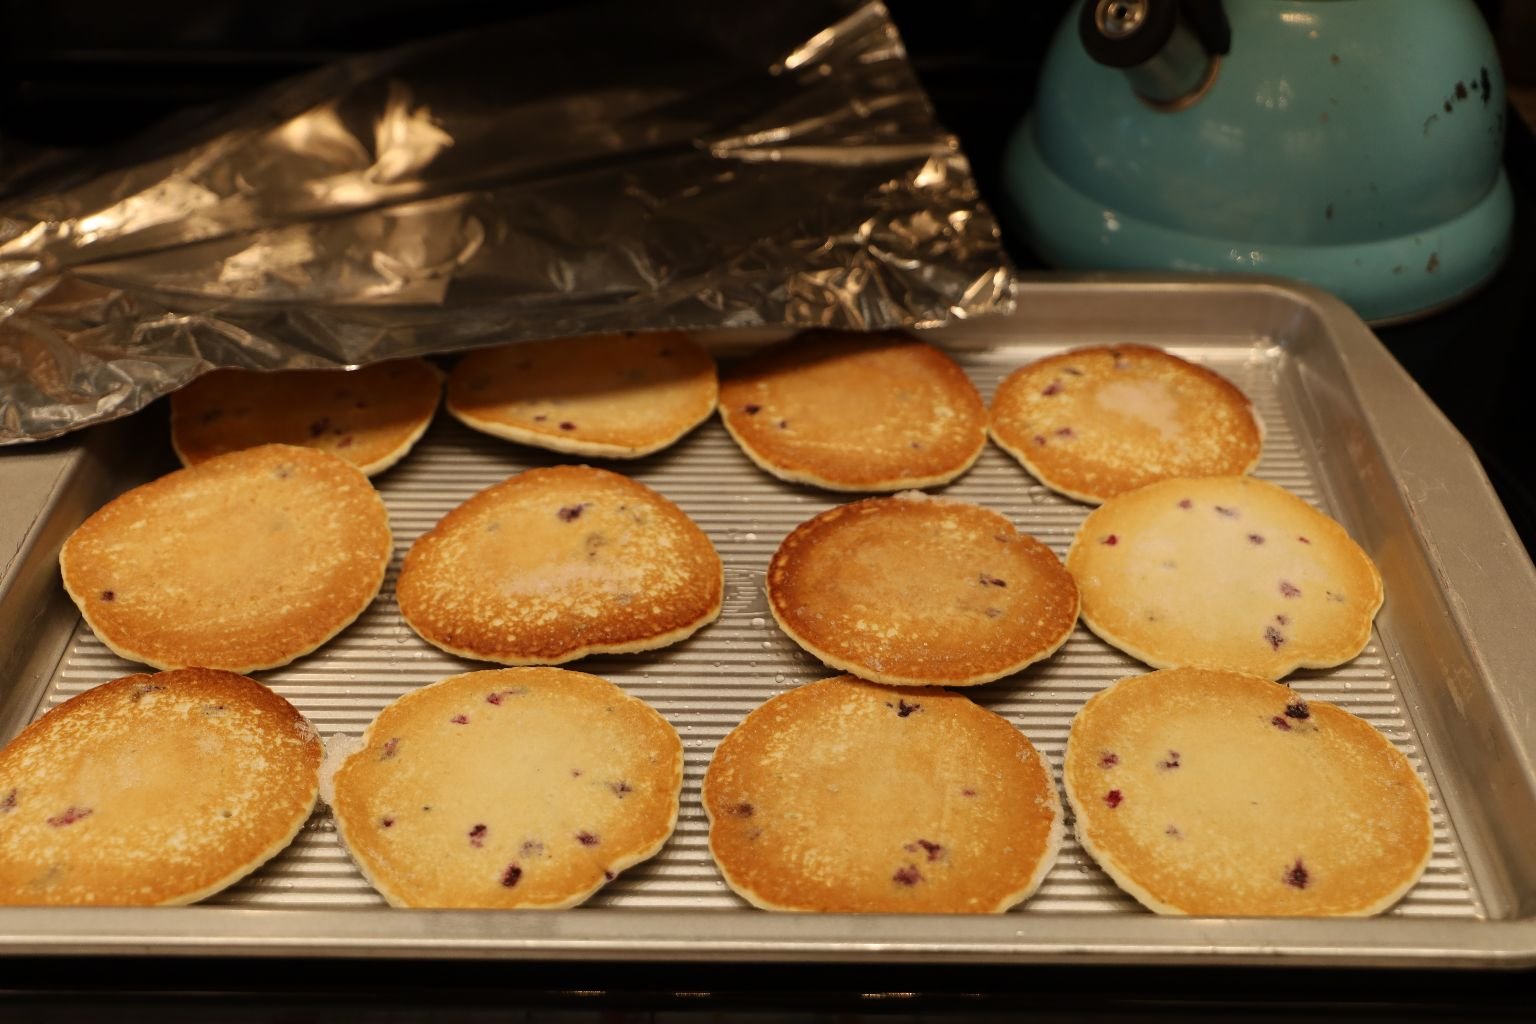
Baked According to Package Directions

Lemon/Blueberry Ice Cream
(I tried to find Blueberry Ice Cream and I just couldn’t. This Lemon/Blueberry was the closest that I could find. It was a bit sour.)
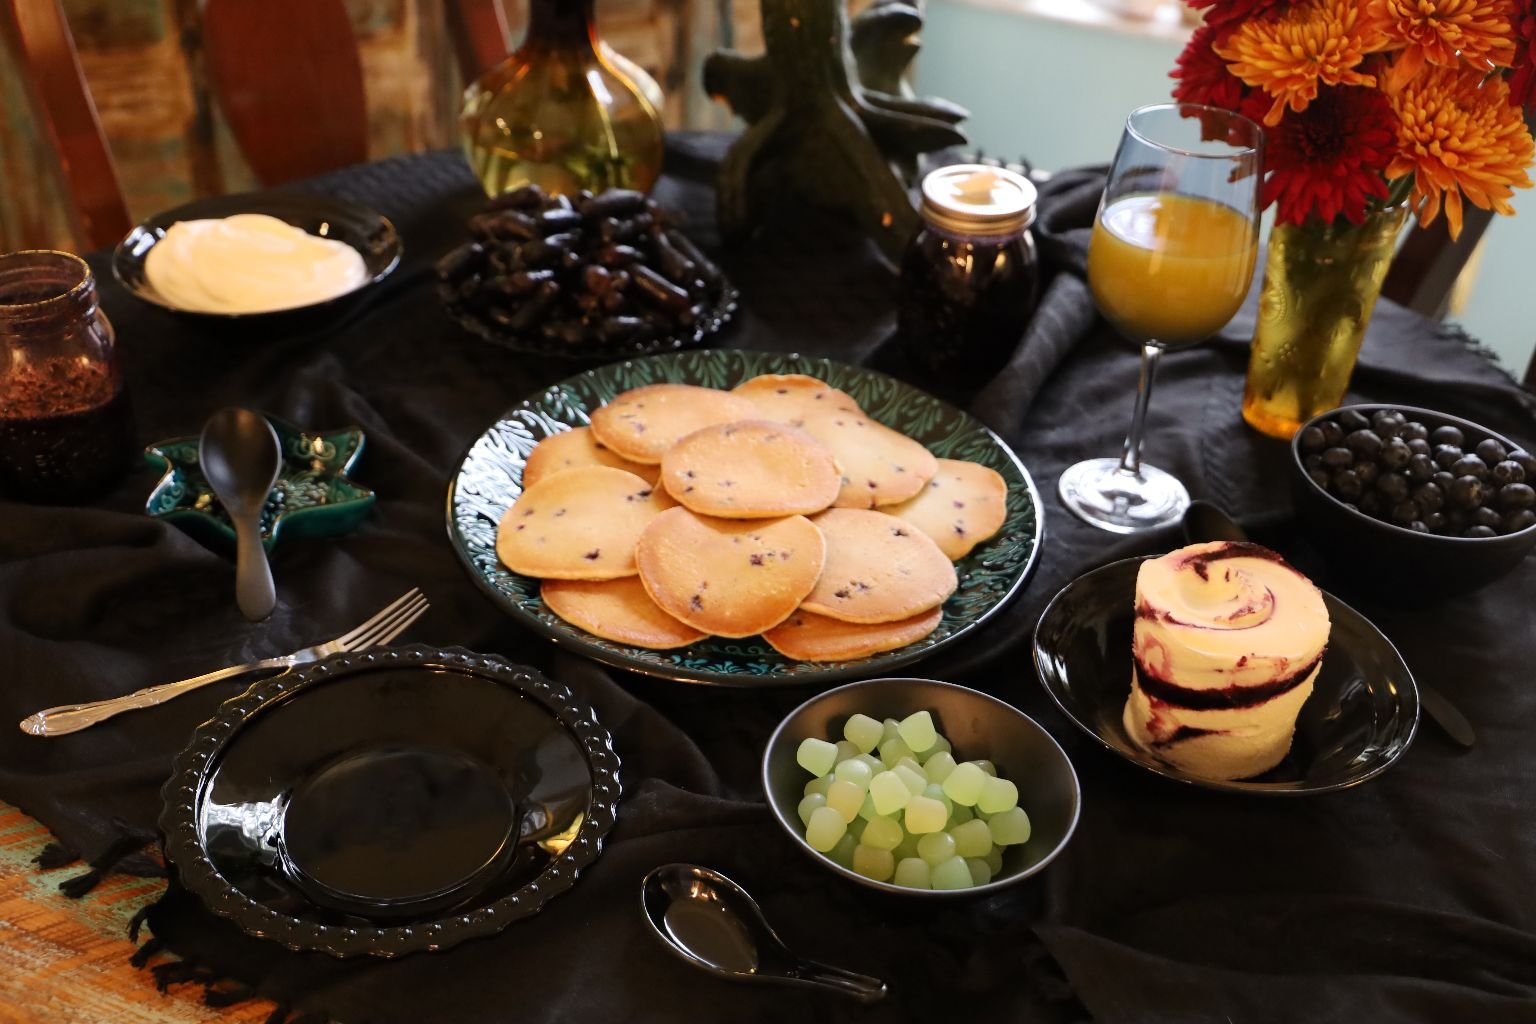
Blueberry Pancakes, Cool Whip, Lemon/Blueberry Ice Cream, A Haunted Jezebel, Fresh Blueberry’s, and some Green Ghoulish Gummy’s
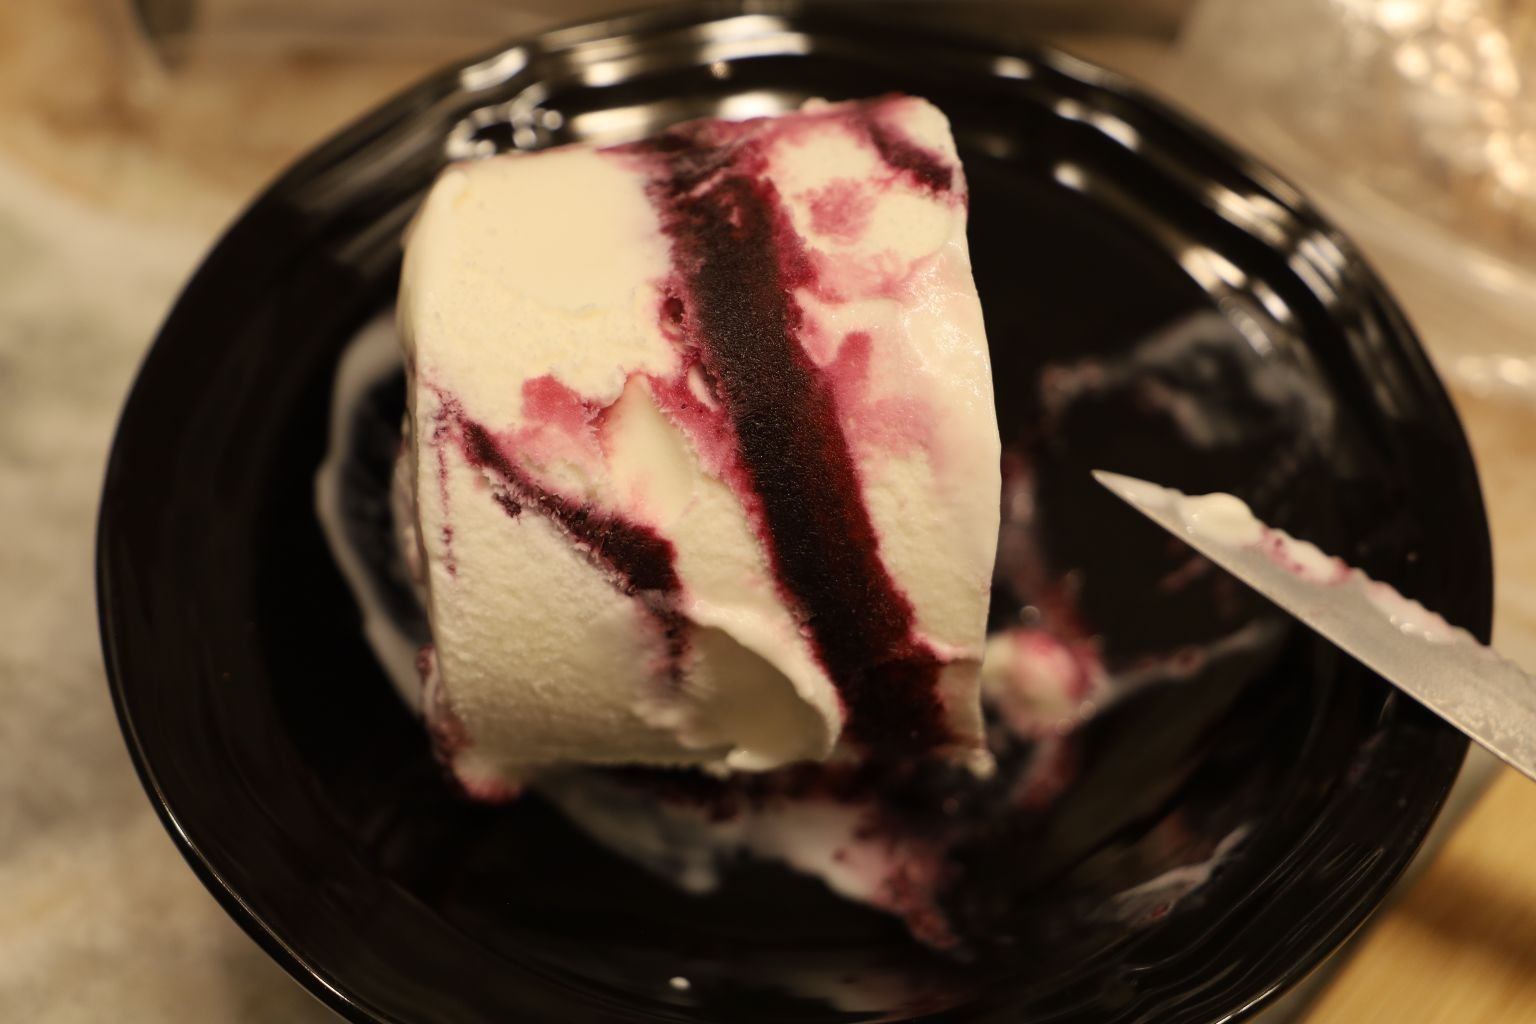
I sliced the Ice Cream into 1 inch rounds, to place onto my Pancakes…
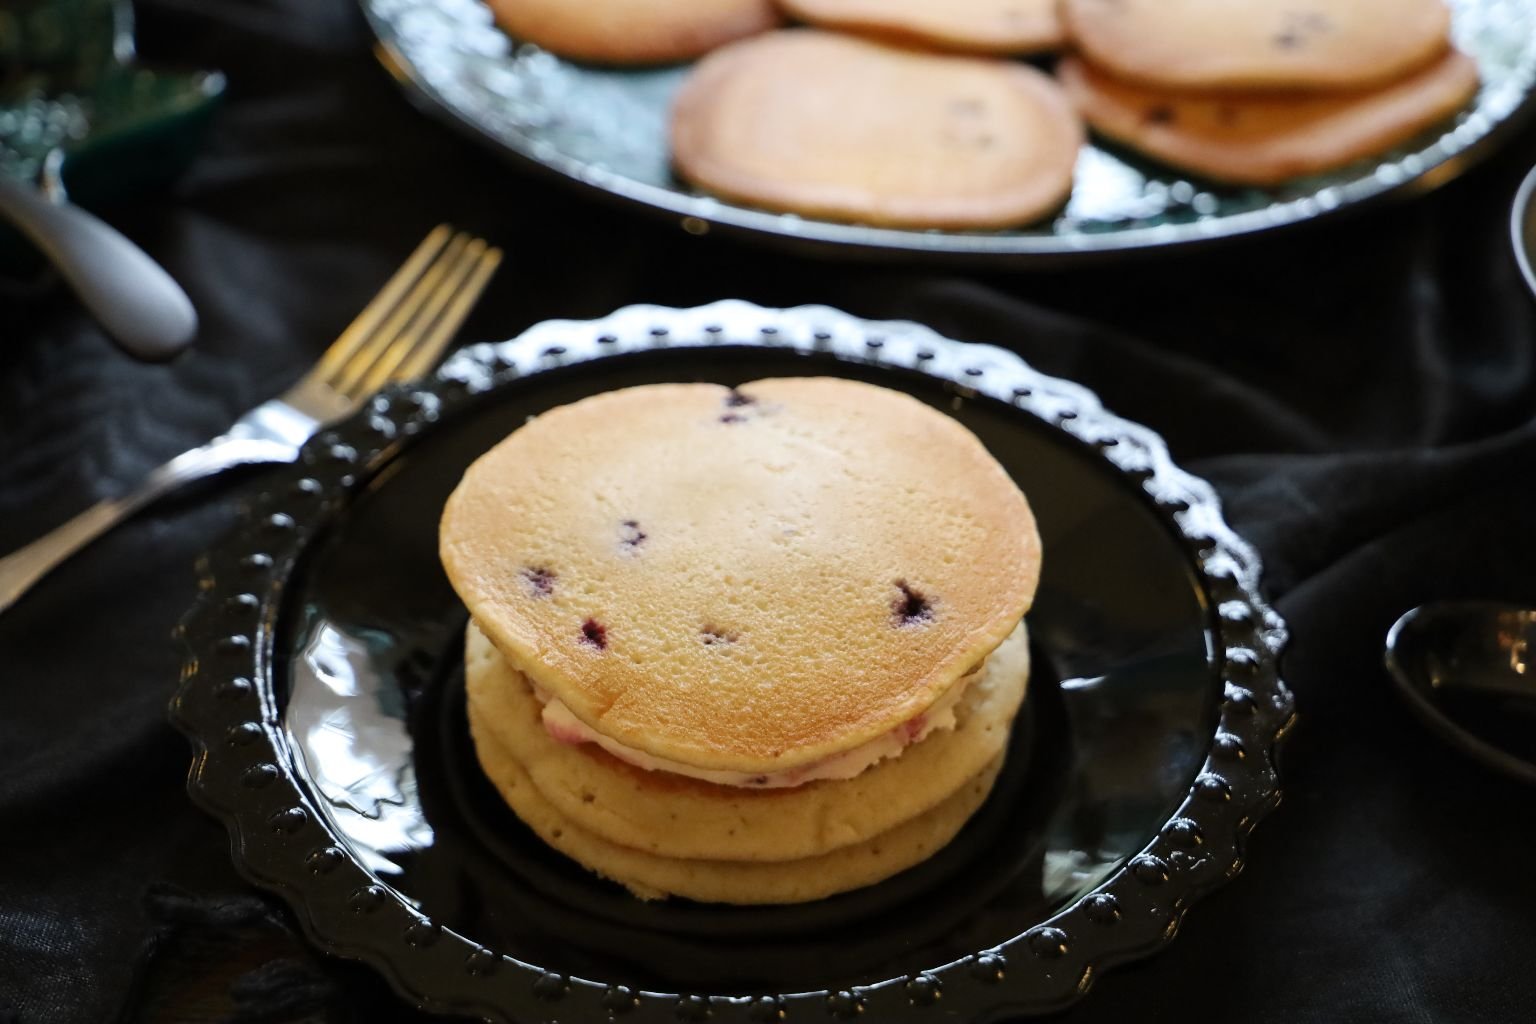
Topped with a Pancake and some of my Haunted Jezebel along with some Cool-Whip, and some Fresh Blueberry’s.
It was all quite delicious!
———————————————————————————-
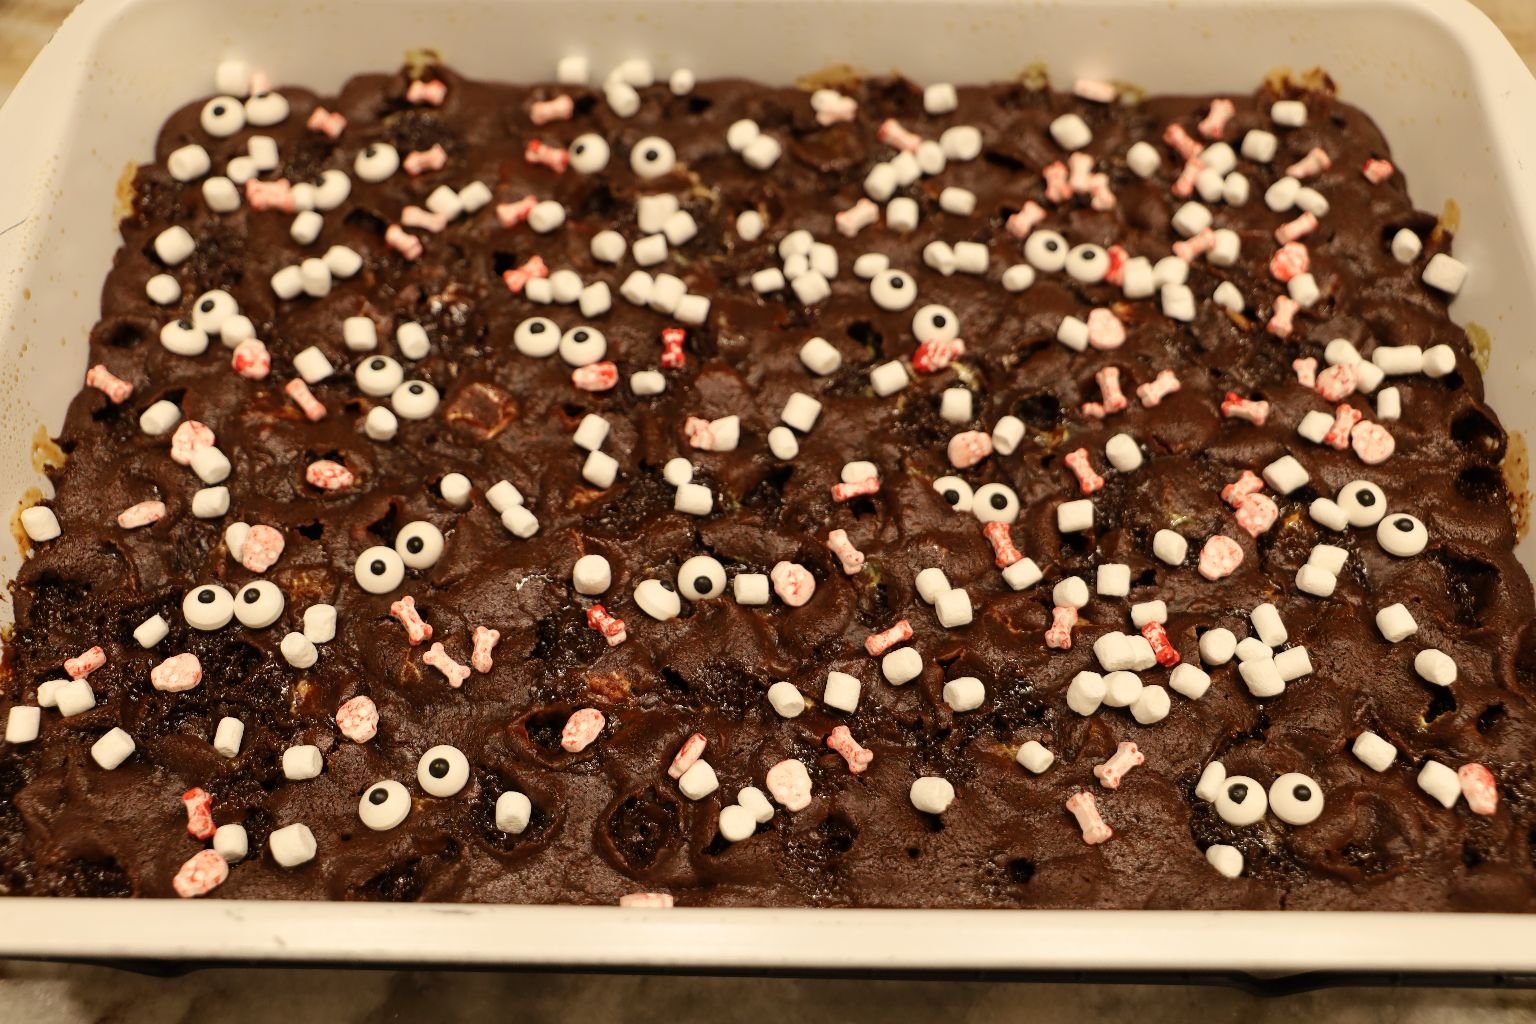
Spooky Graveyard Brownies
According to Gordon, these are the best Brownies he has ever eaten!
They are also so easy to make. Sometimes we cook from scratch, and other times we like to make an event a bit easier on us by just jazzing something that is already delicious, even more so. Here is one of those cases.


This is for a Large Casserole Sized Dish
Ingredients:
2, 12.35 oz. Pillsbury Zero Sugar Brownie Mix, Chocolate Fudge
(Make according to the package directions.)
Mini Marshmallows, as many as you like, I just threw in a few handfuls
Dried Cherries, as many as you like, about a cup or more
——————————————————————————–
Brownie Toppings
A sprinkling of Jet-Puffed Bits, Vanilla Marshmallows
A sprinkling of Candied Toppings shaped like Bones
As many Candied Eyes, to make it Spooky
————————————————————————————
The first thing you do is to make the Brownie mixes in a large bowl, following the package instructions.


You next want to add to the bowl, the Dried Cherries and Marshmallows, stir together.
Add the mixture to a large casserole dish, sprayed with a Cooking Oil Spray to coat. Then bake according to package directions.
NOTE: (You will want to insert a toothpick into the Brownie’s to determine they are done. BUT, understand that you may be inserting the toothpick into a gooey marshmallow, believing the Brownie’s to not be done. Don’t be fooled into thinking they aren’t done when they just might be. Try inserting a toothpick into a section of Brownie that isn’t a gooey marshmallow to determine if they are truly done.)
When Done, Remove From Oven and Immediately add the Toppings, then Cool.
————————————————————————————-

————————————————————————————-
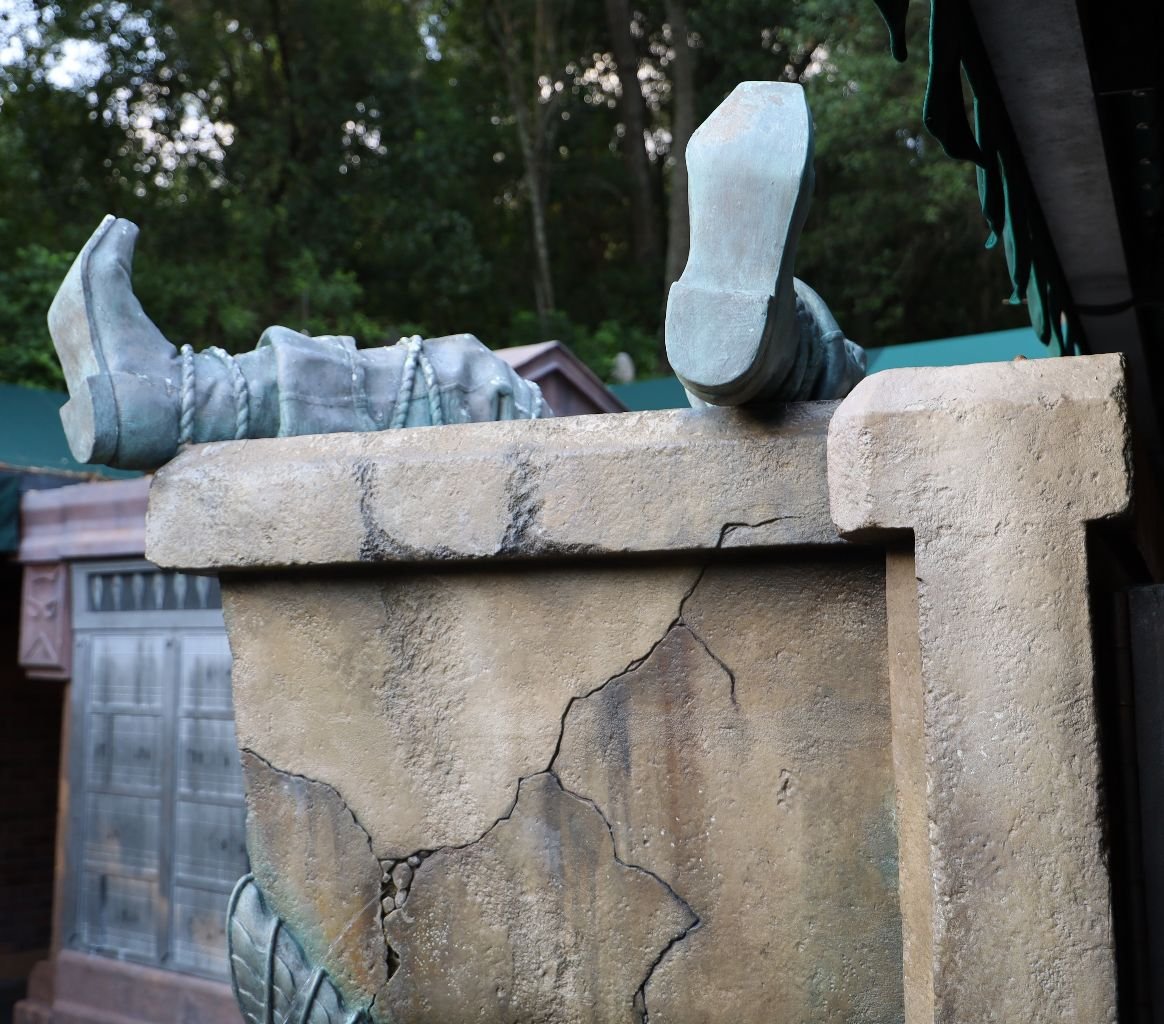
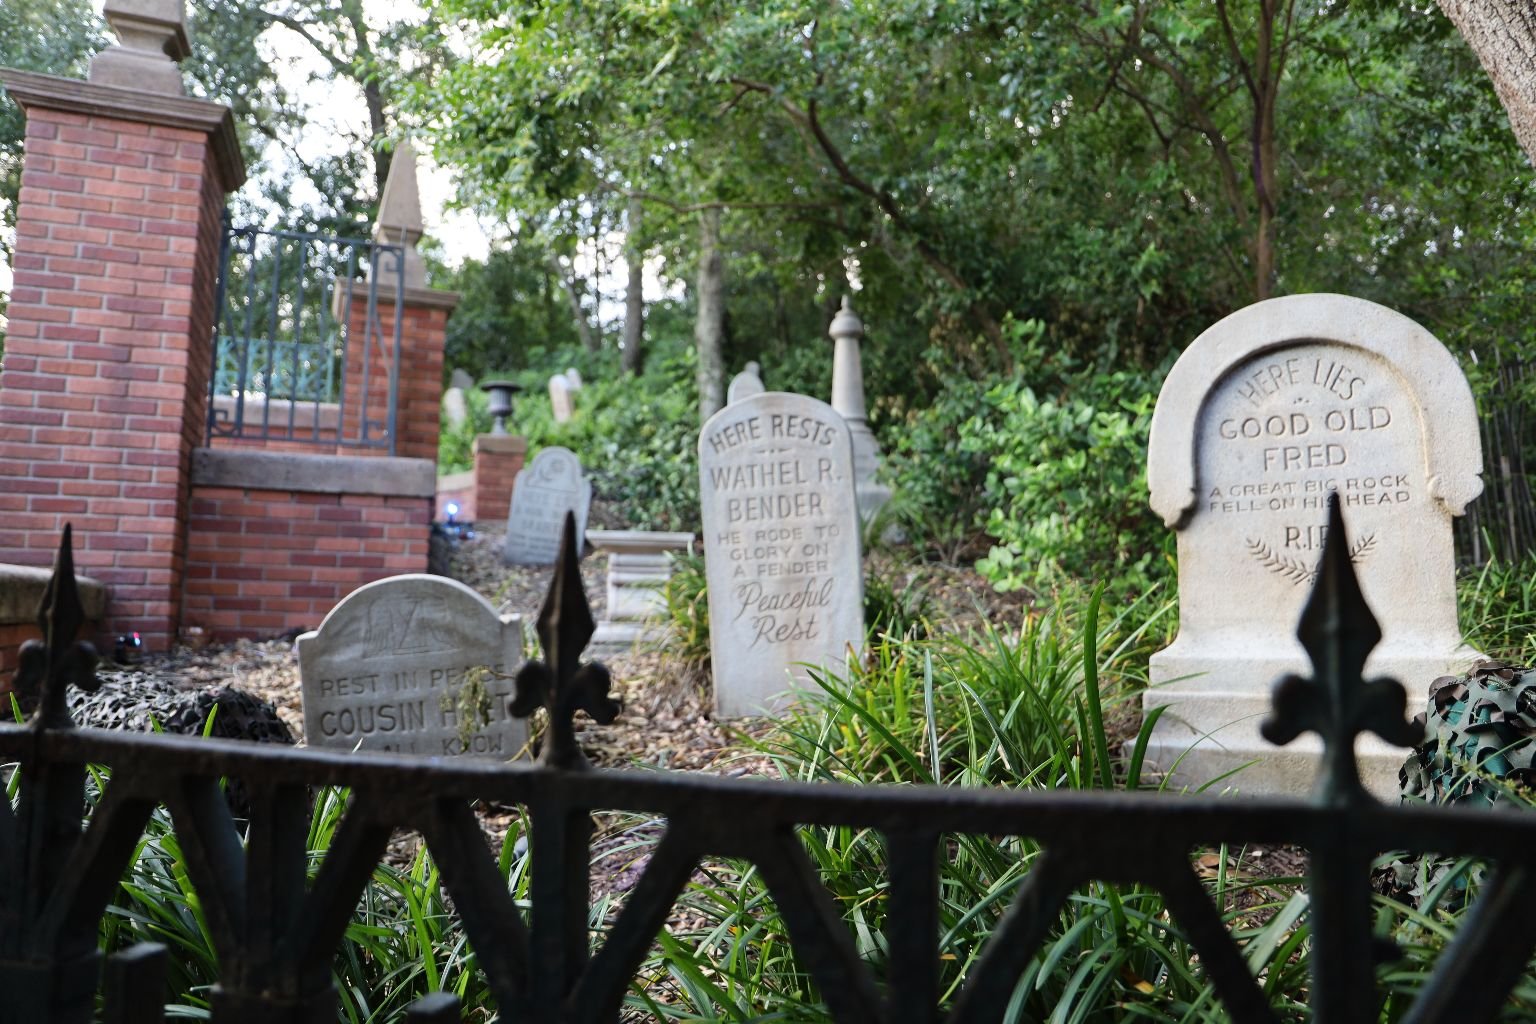
The Tombs at Magic Kingdom’s Haunted Mansion

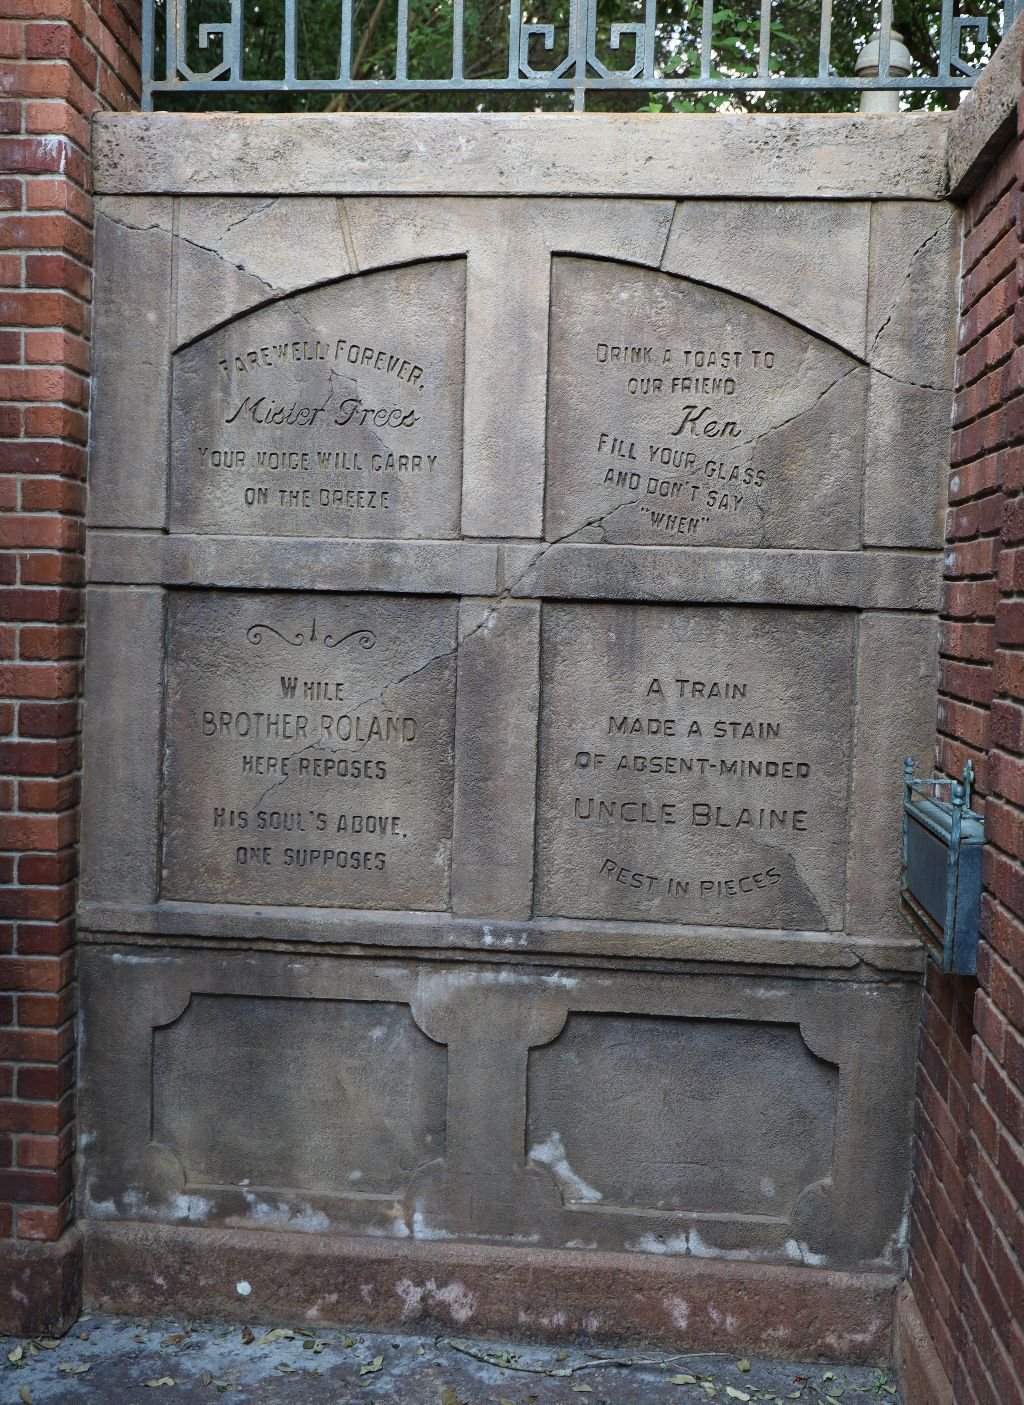
—————————————————————————————————–
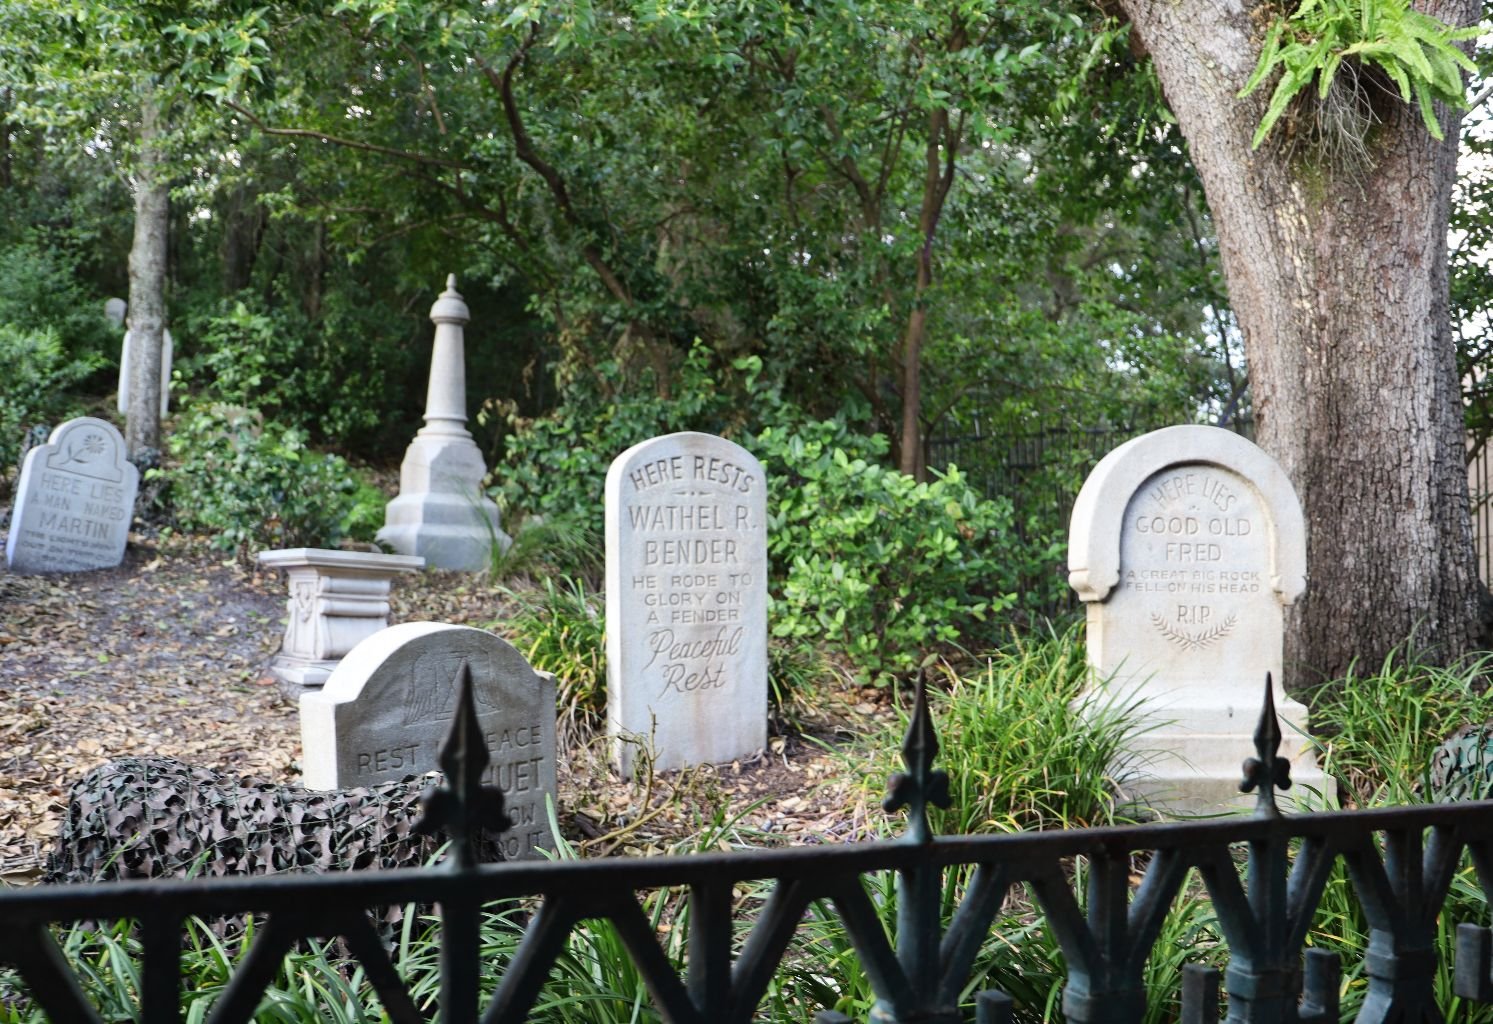
The Graveyard
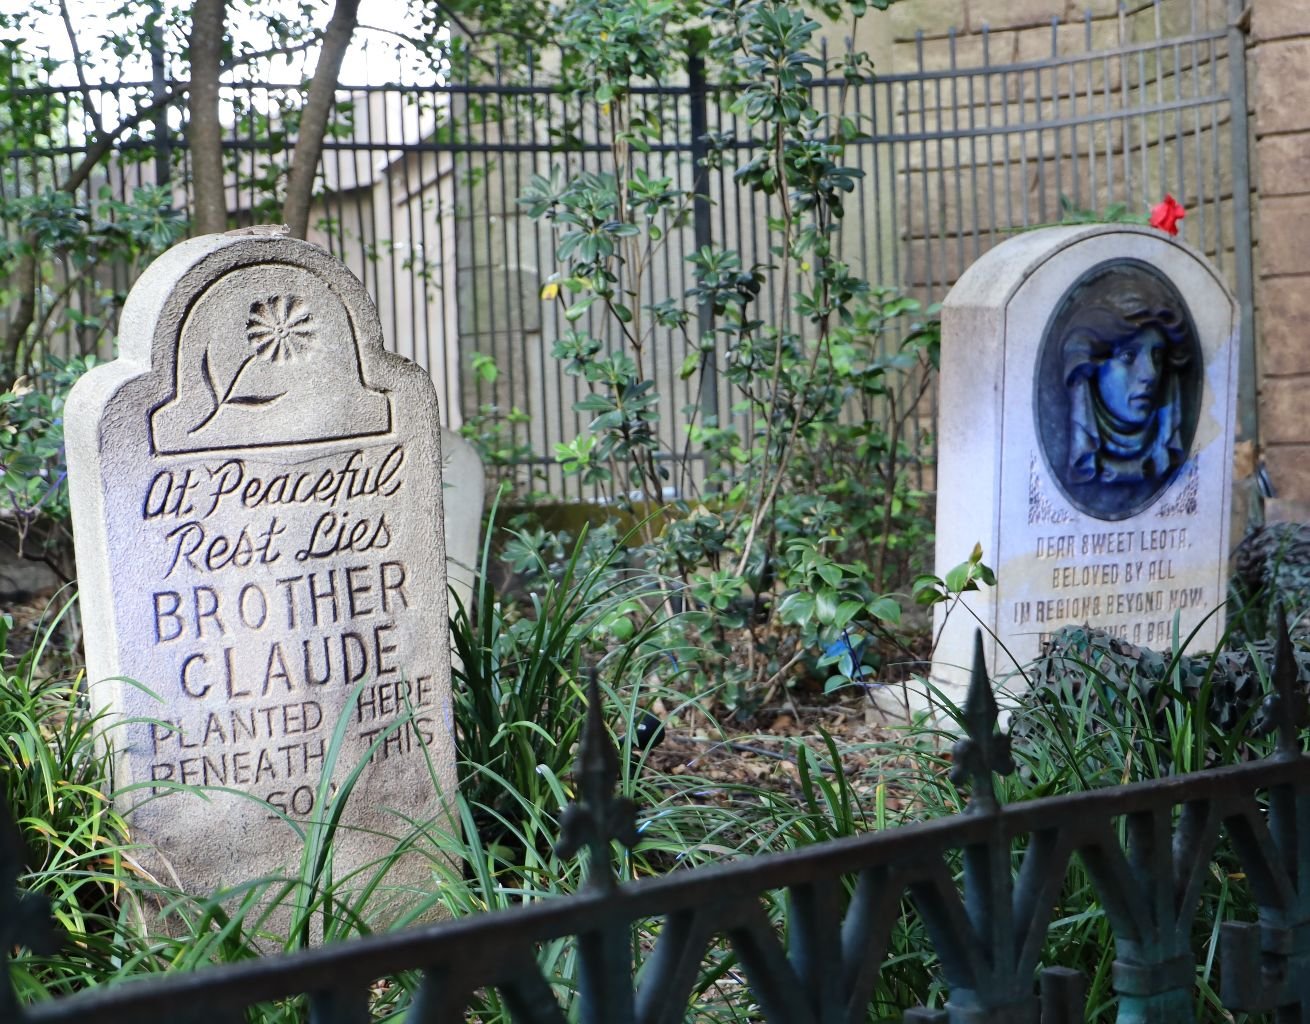
———————————————————————————–
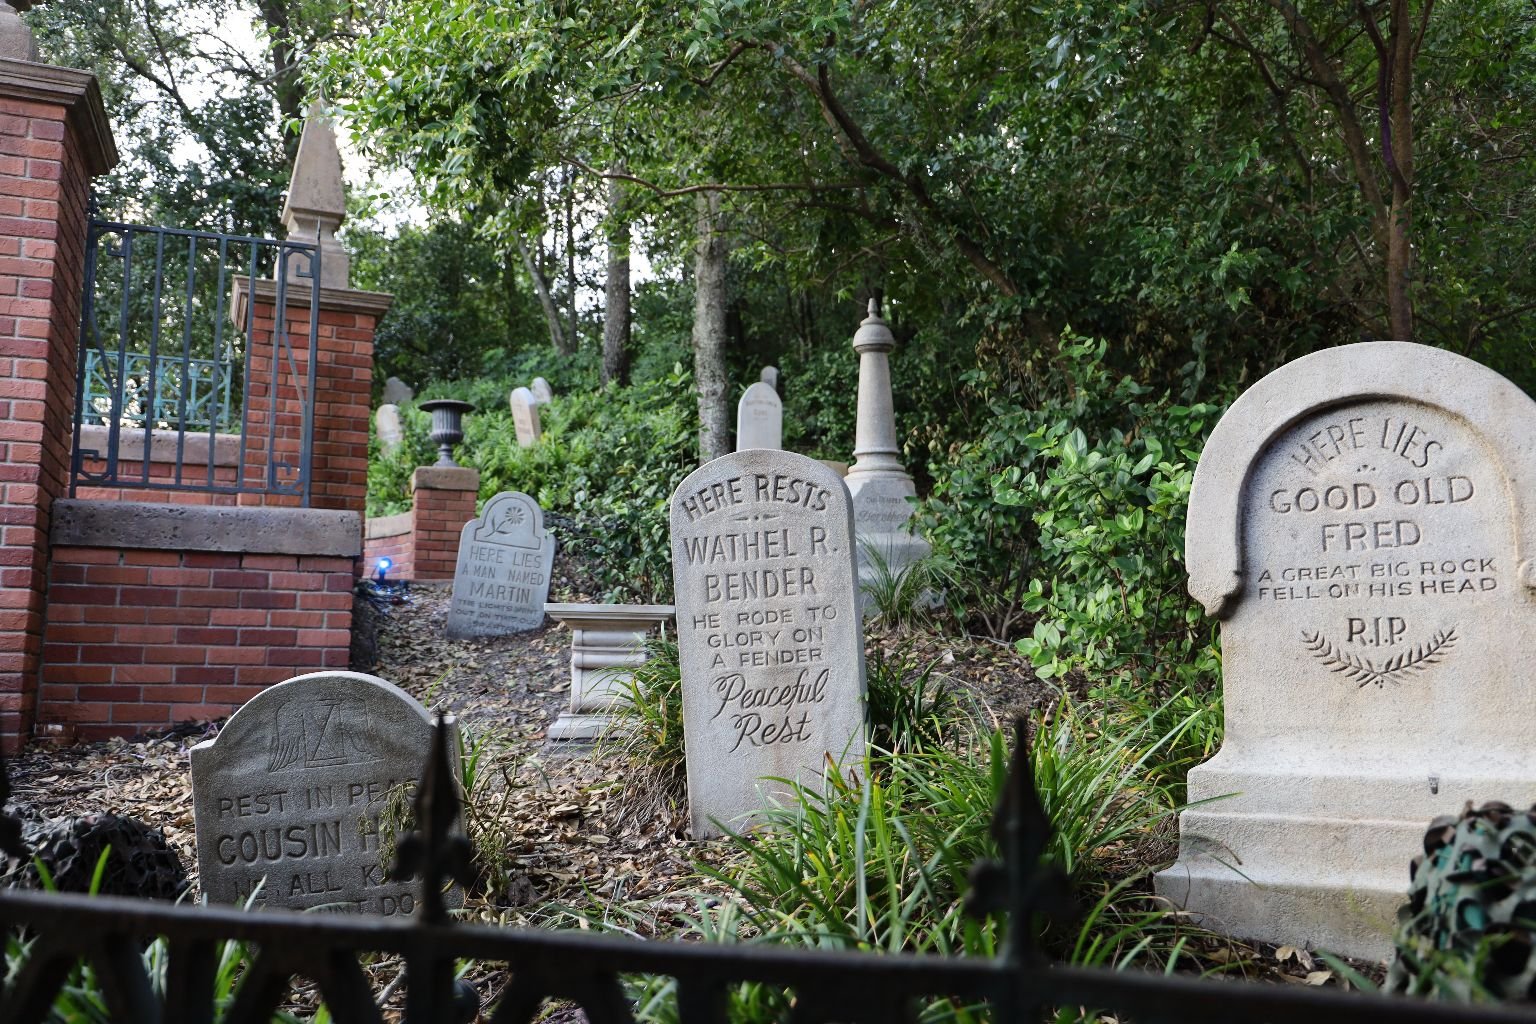
——————————————————————————————-
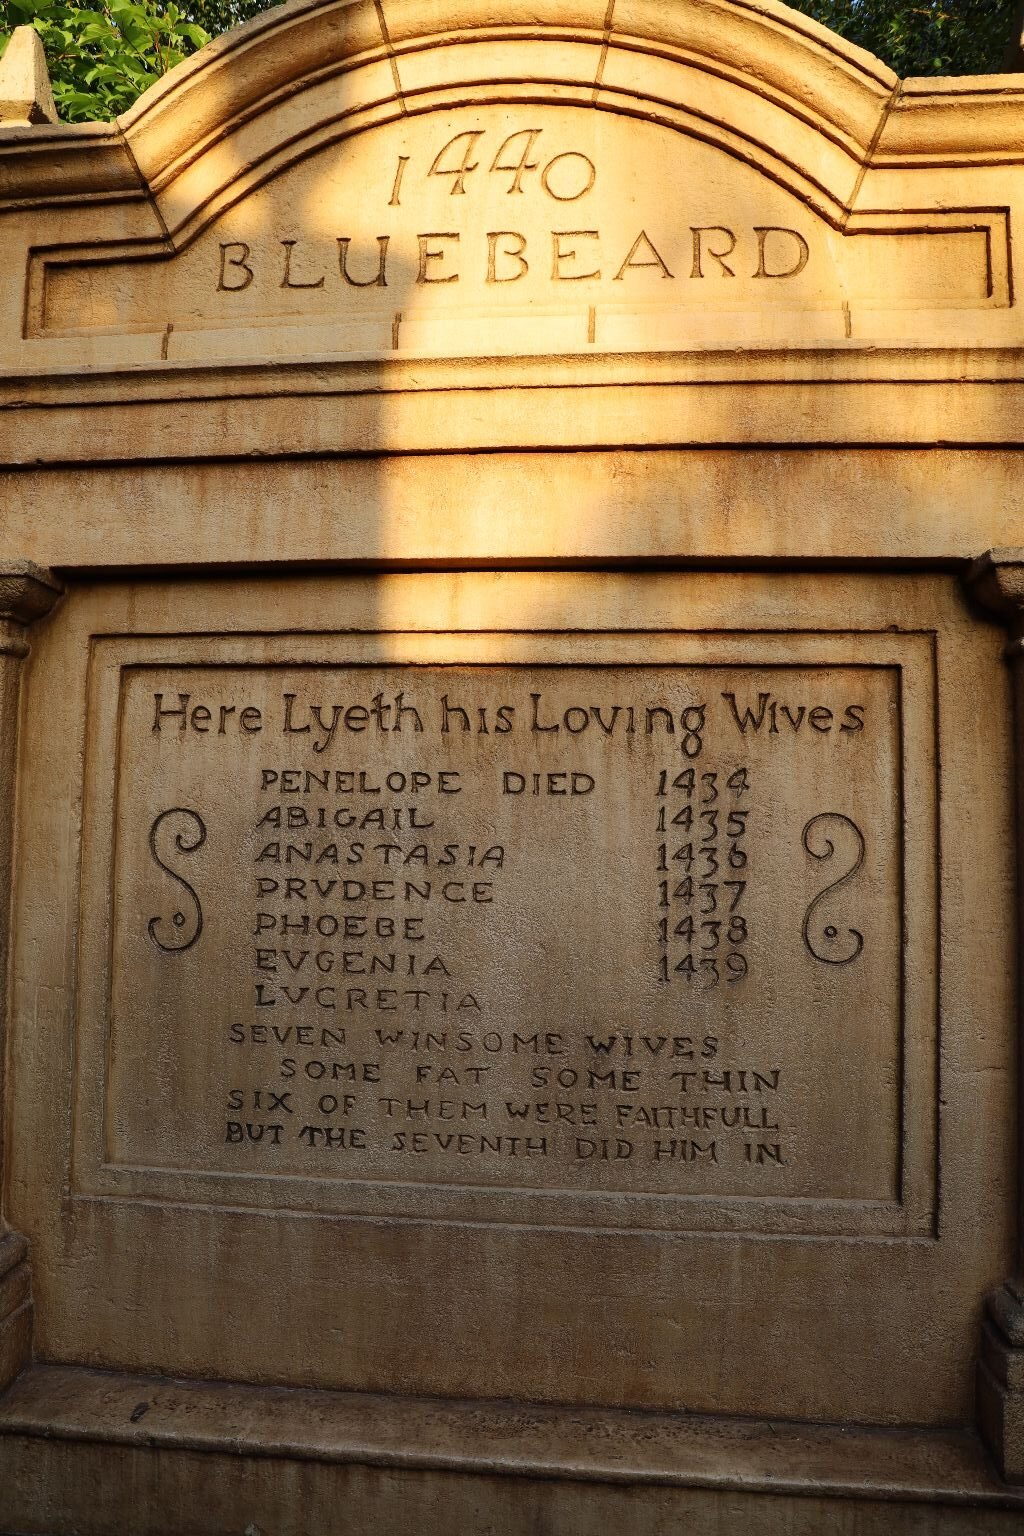
The Tomb of the Many Wives of a Widower
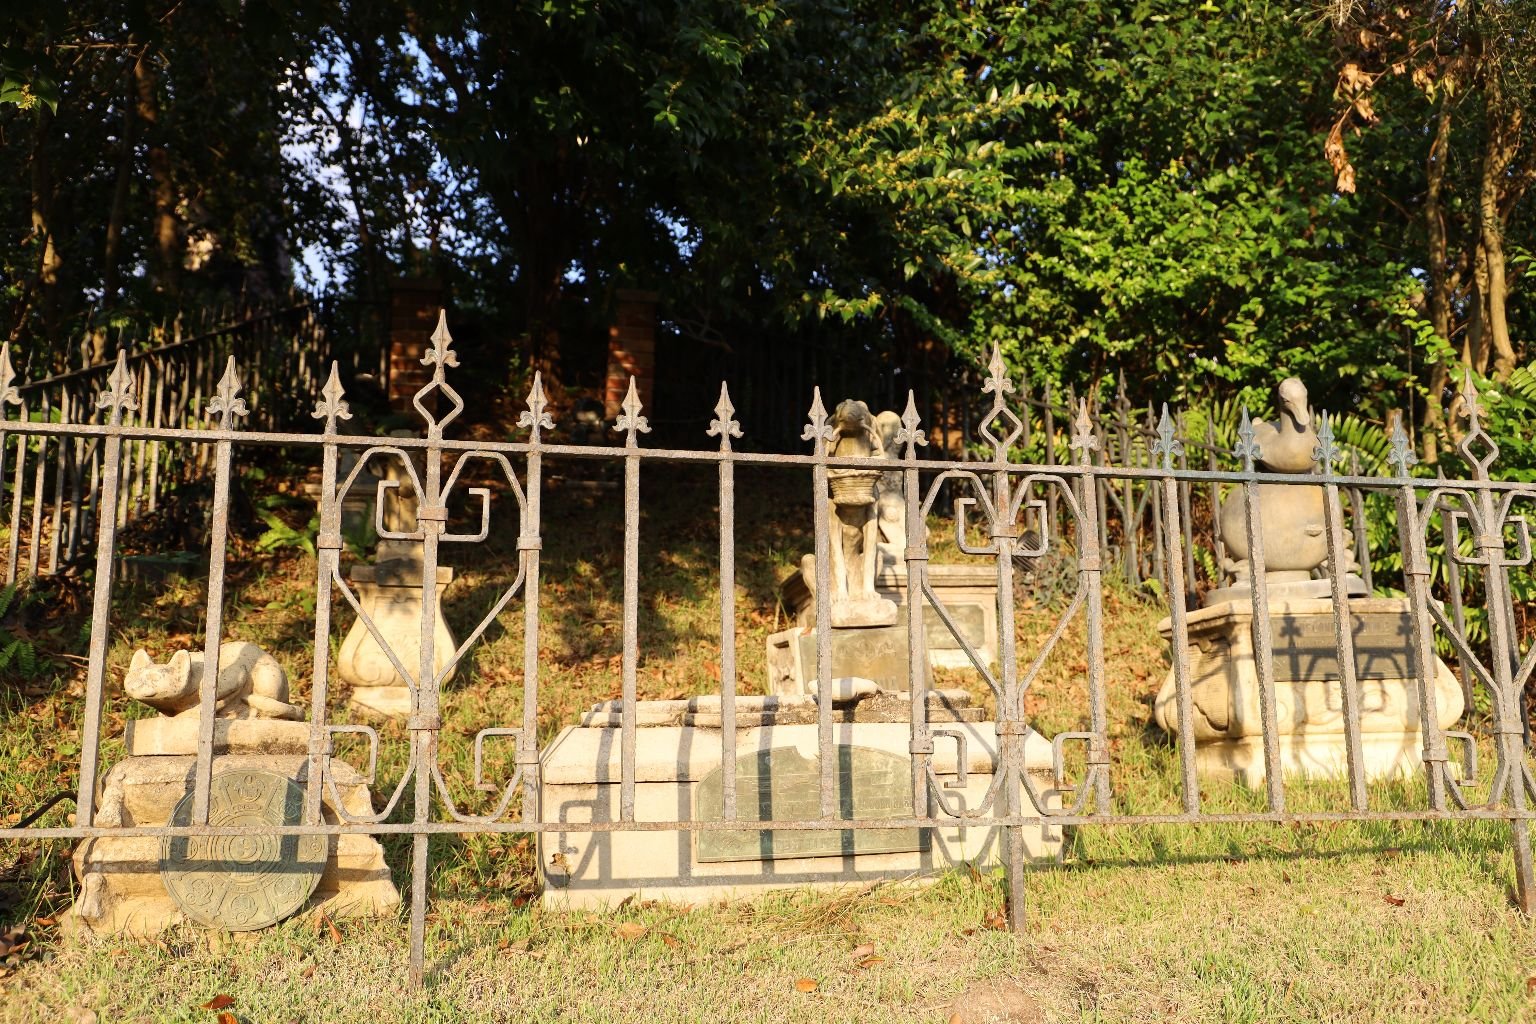
The Pet Cemetery
—————————————————————————————-
Buying Collectible Pins
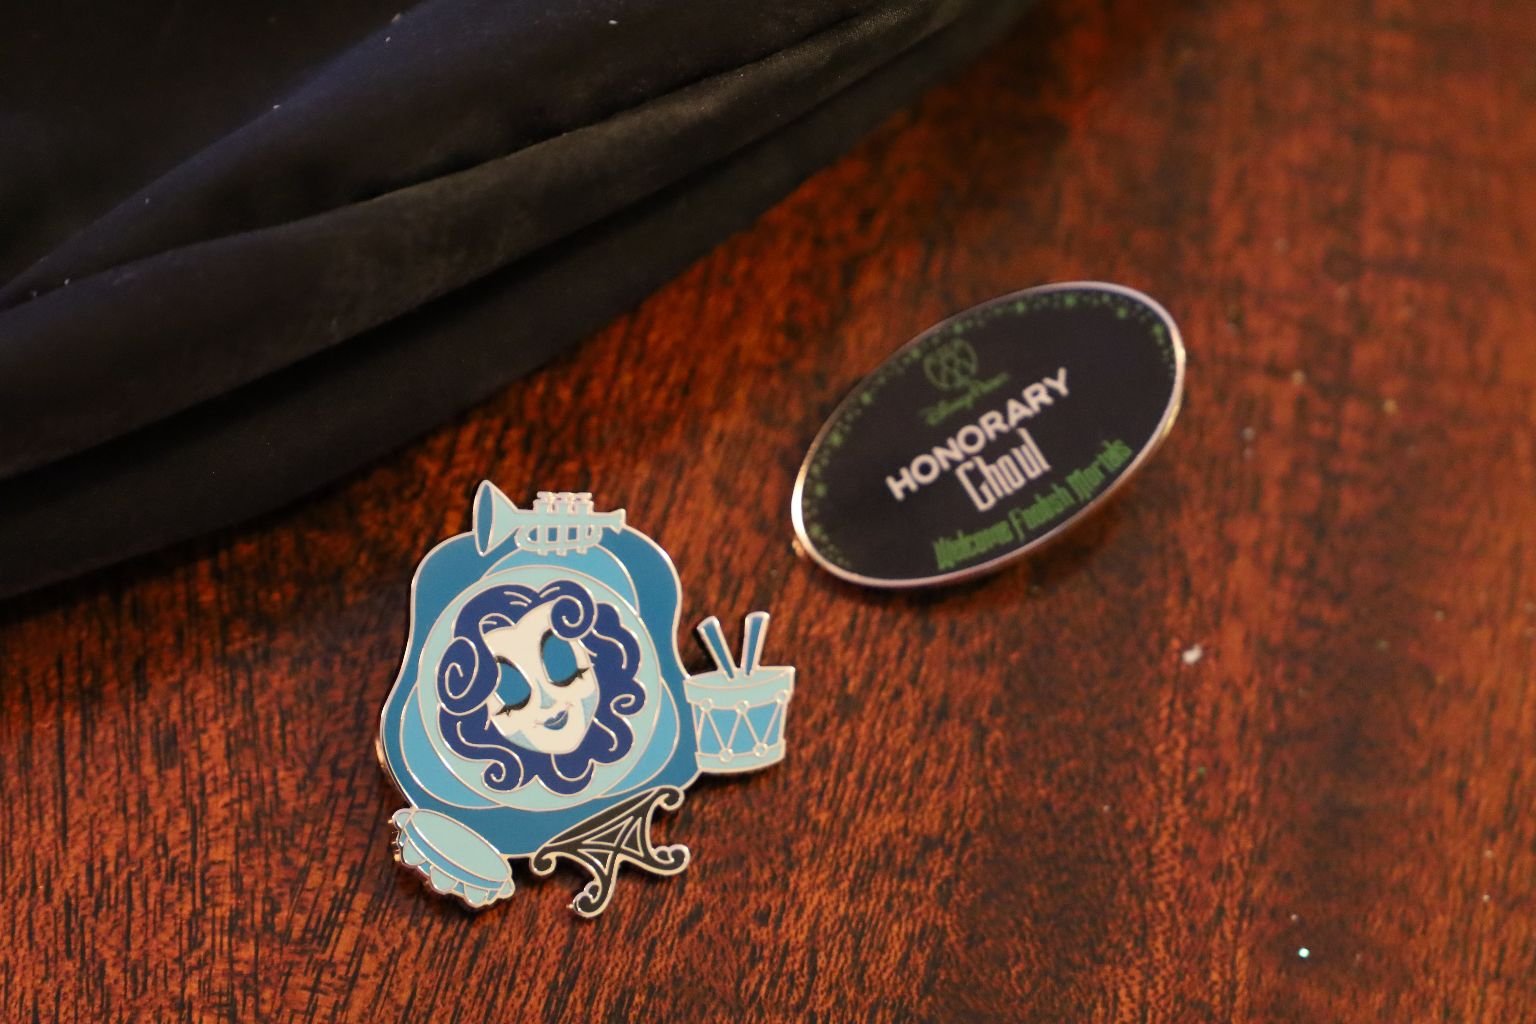
I am a Pin Collector. Every time I go to the park I always buy a few to add to my collection.
I have two bags where I put them. This black bag is more for Halloween, whereas my green bag is more for the rest of the year.
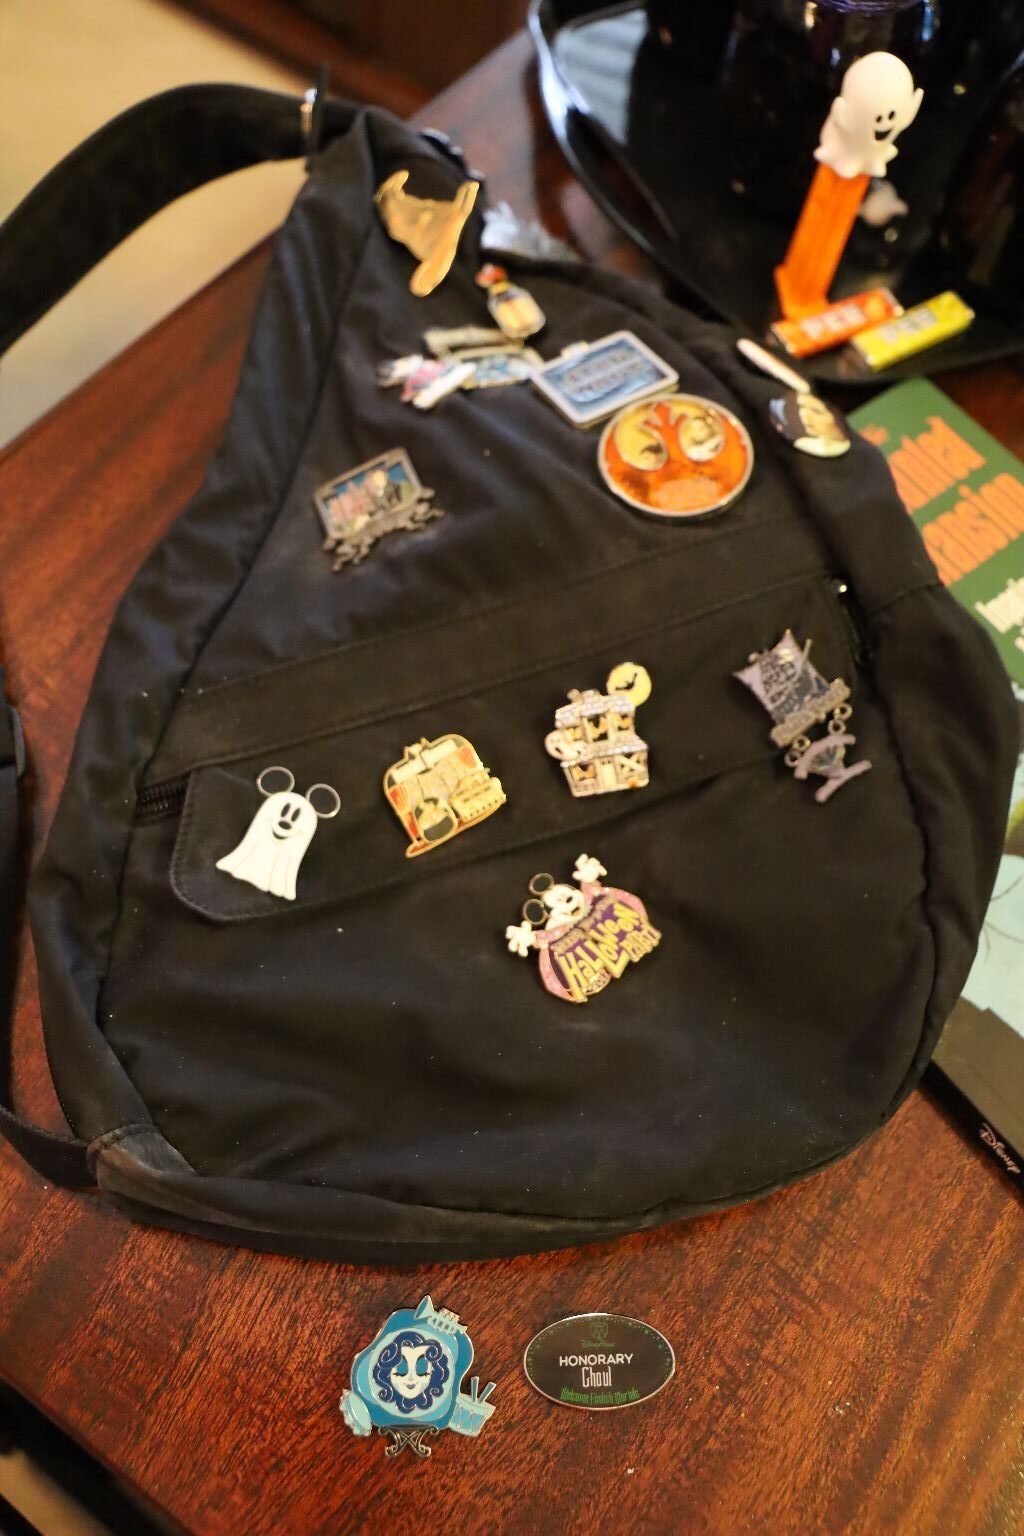
Happy Collecting!
————————————————————————————————
Disney’s Magic Kingdom Haunted Mansion for’ Mickey’s Not So Scary’ Halloween Nights

—————————————————————————————–
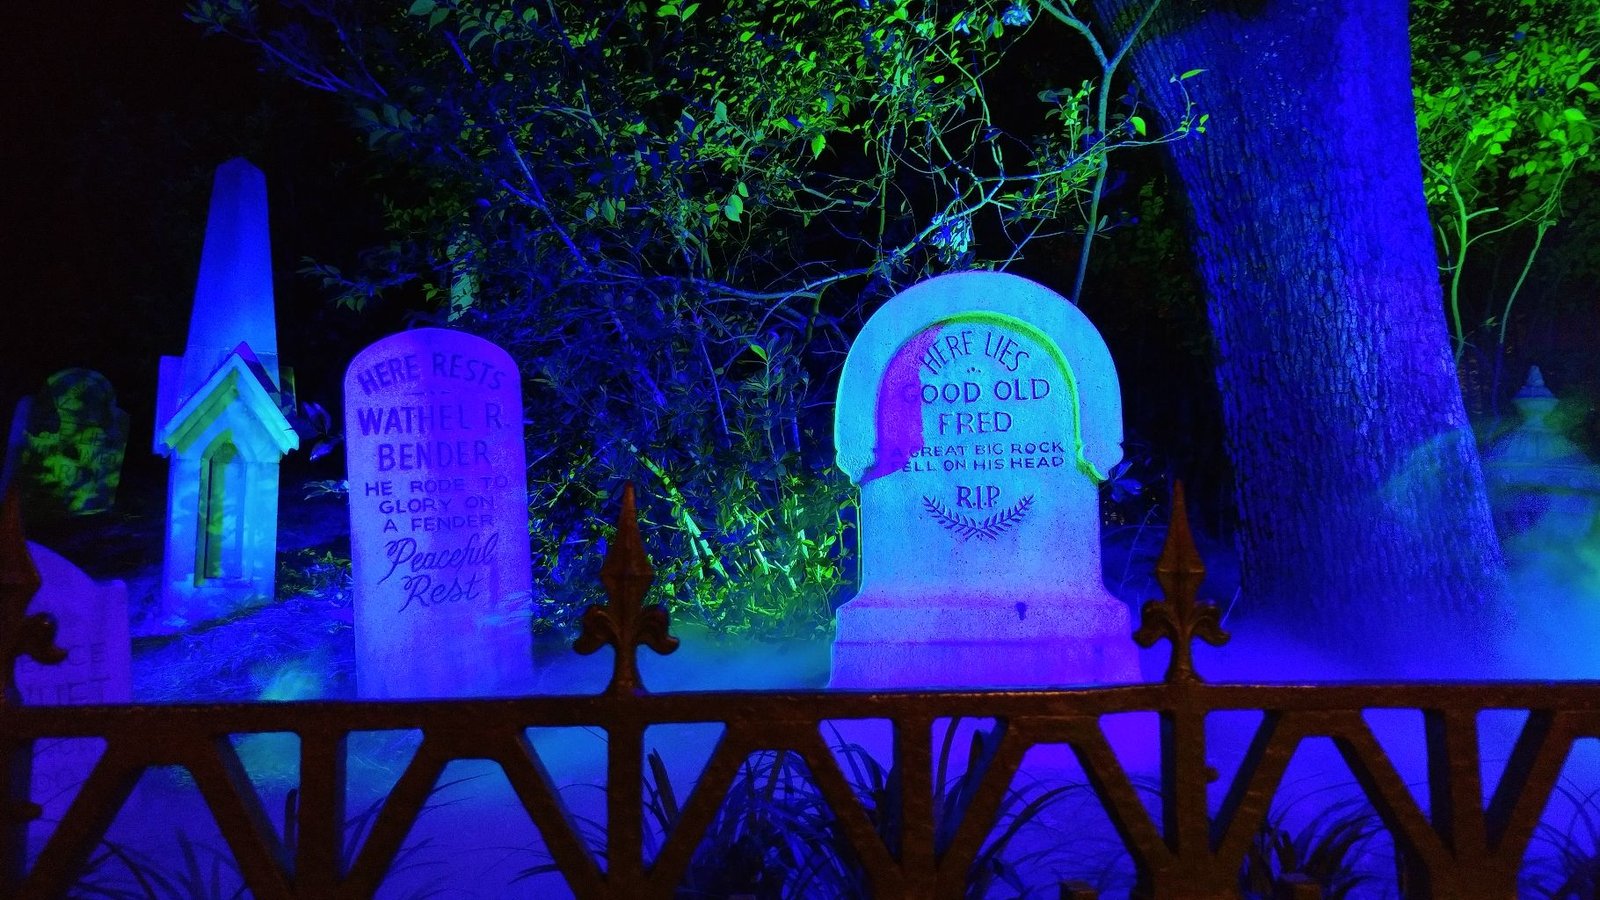
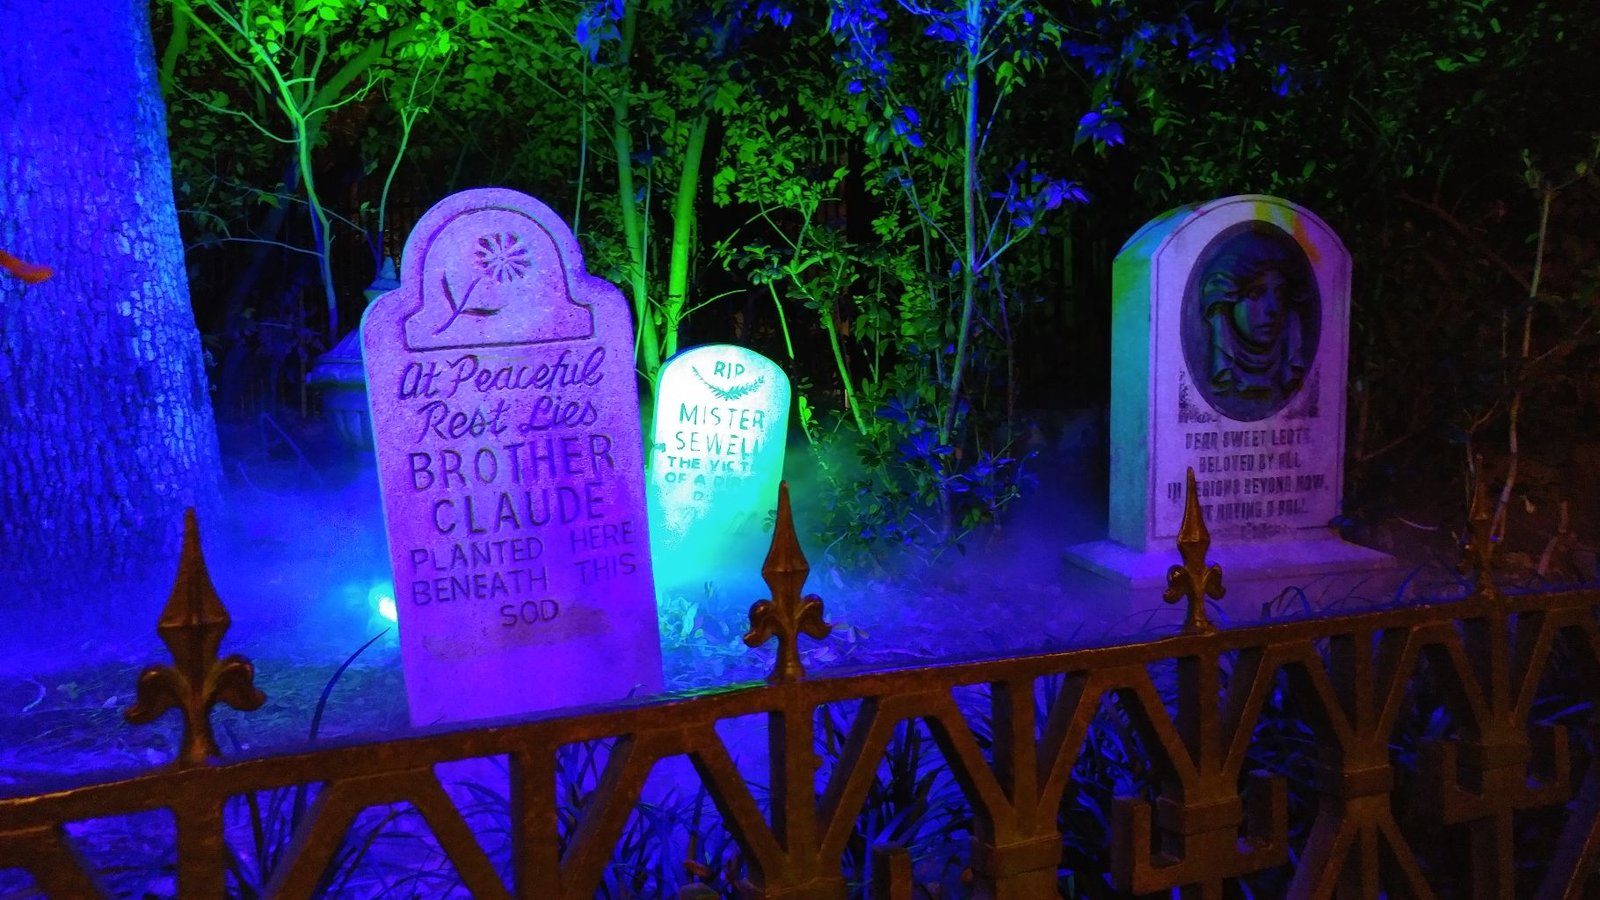
The Nighttime Graveyard
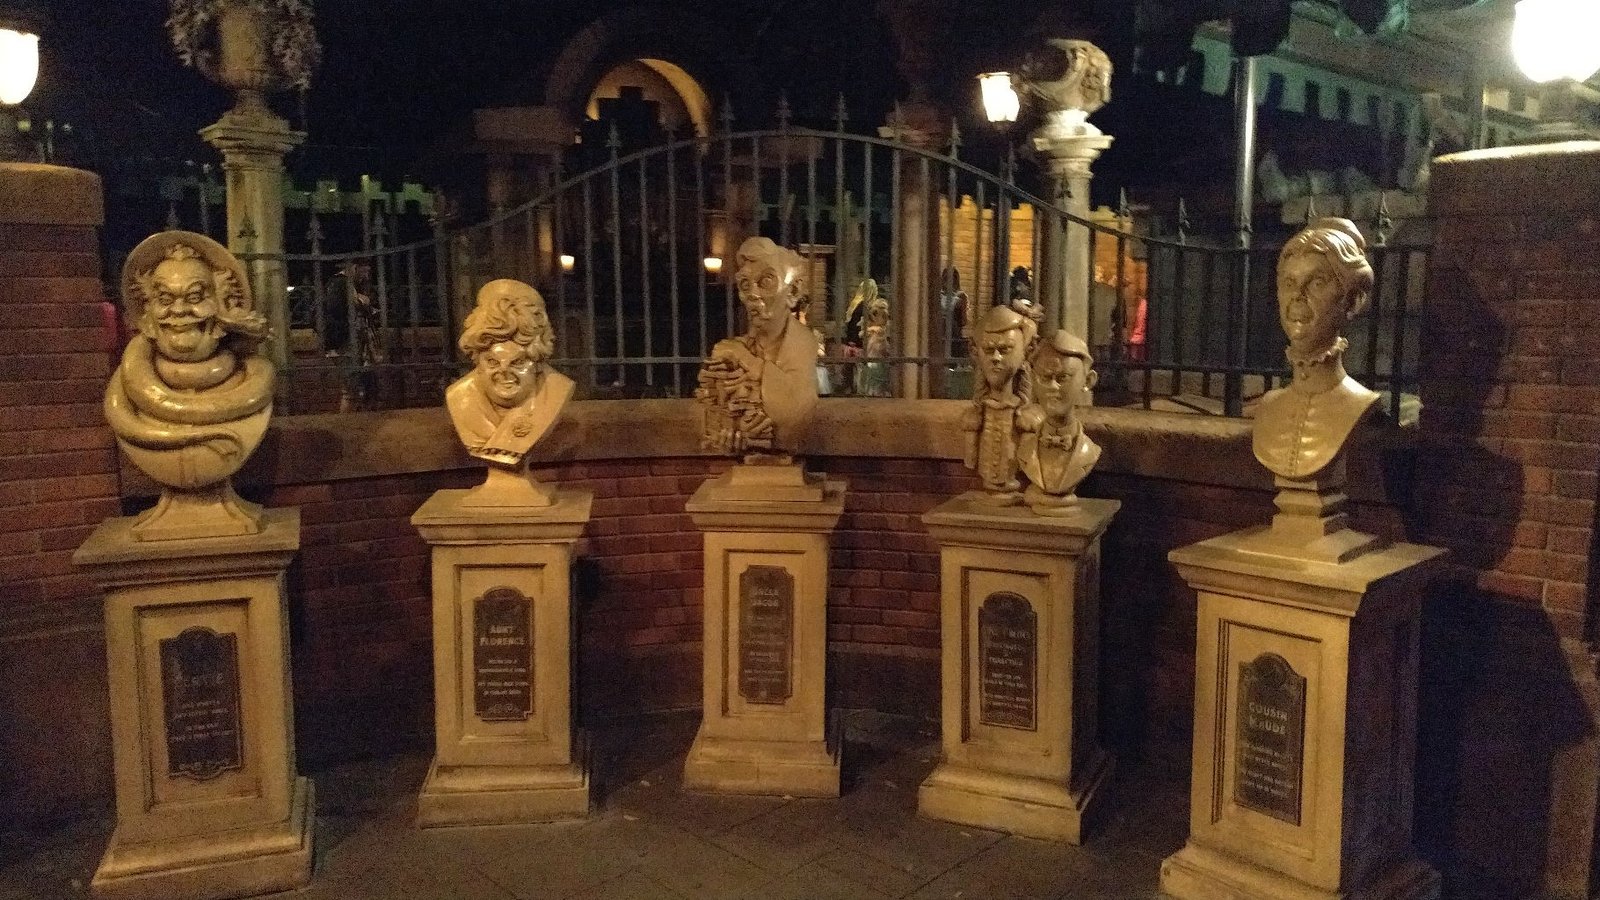
The Talking Busts
————————————————————————————————
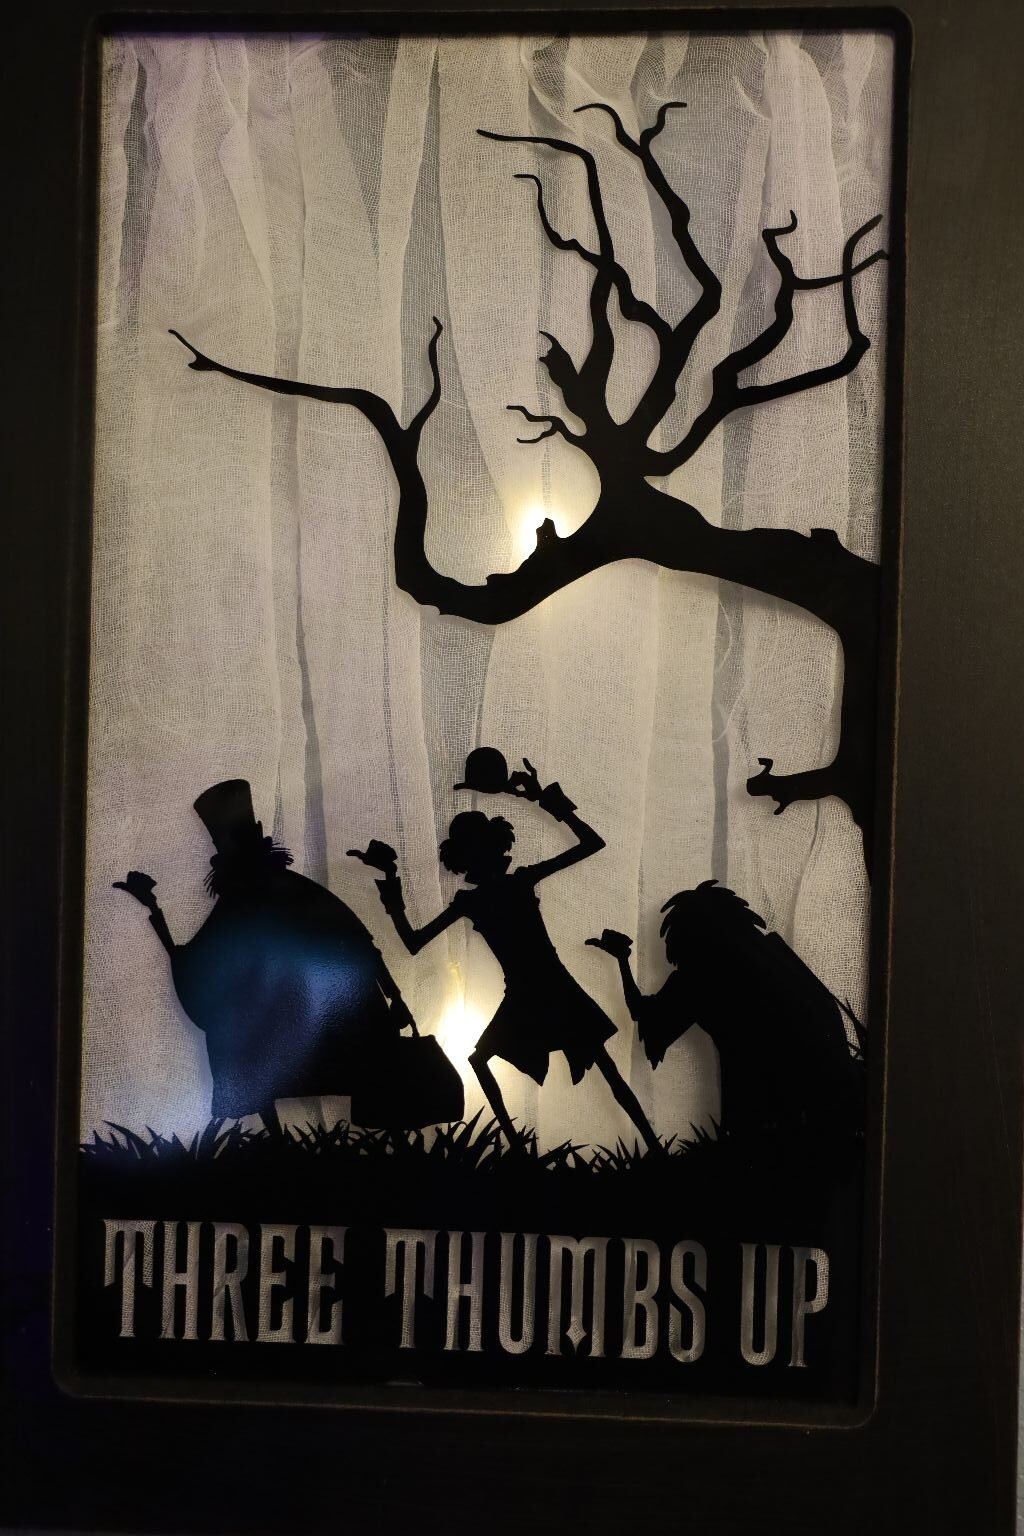
BEWARE OF HITCHHIKING GHOSTS
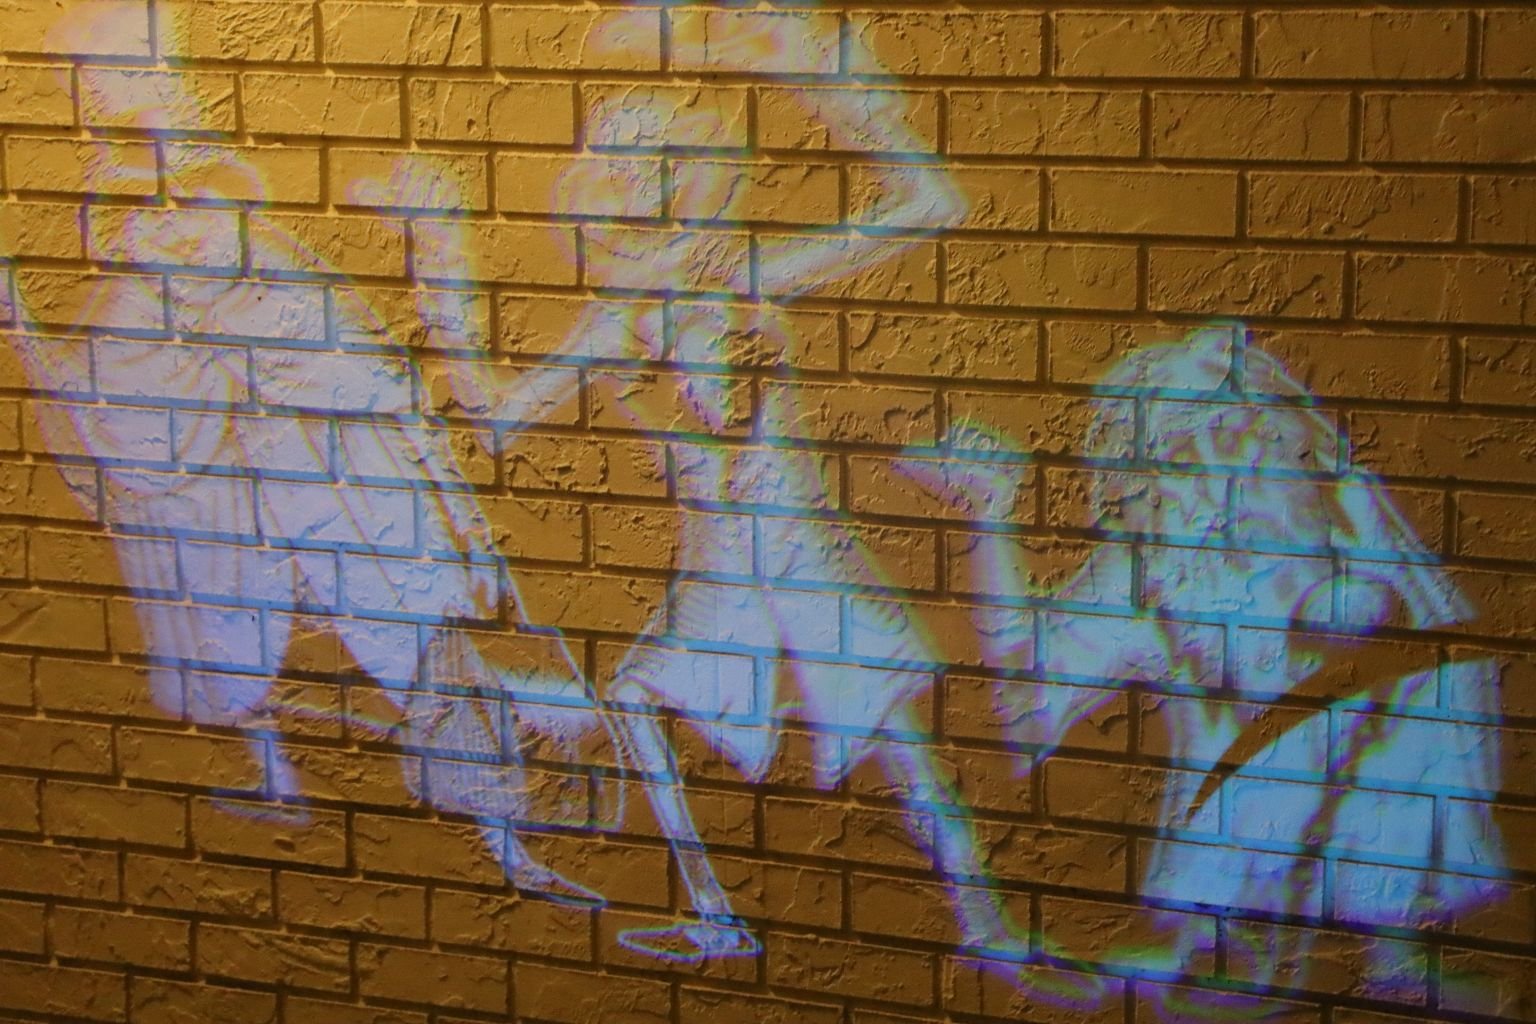
The Hitchhiking Ghosts..

have been a favorite of many for years now.

Who didn’t like them hitchhiking onto our Haunted Mansion Doom Buggies?
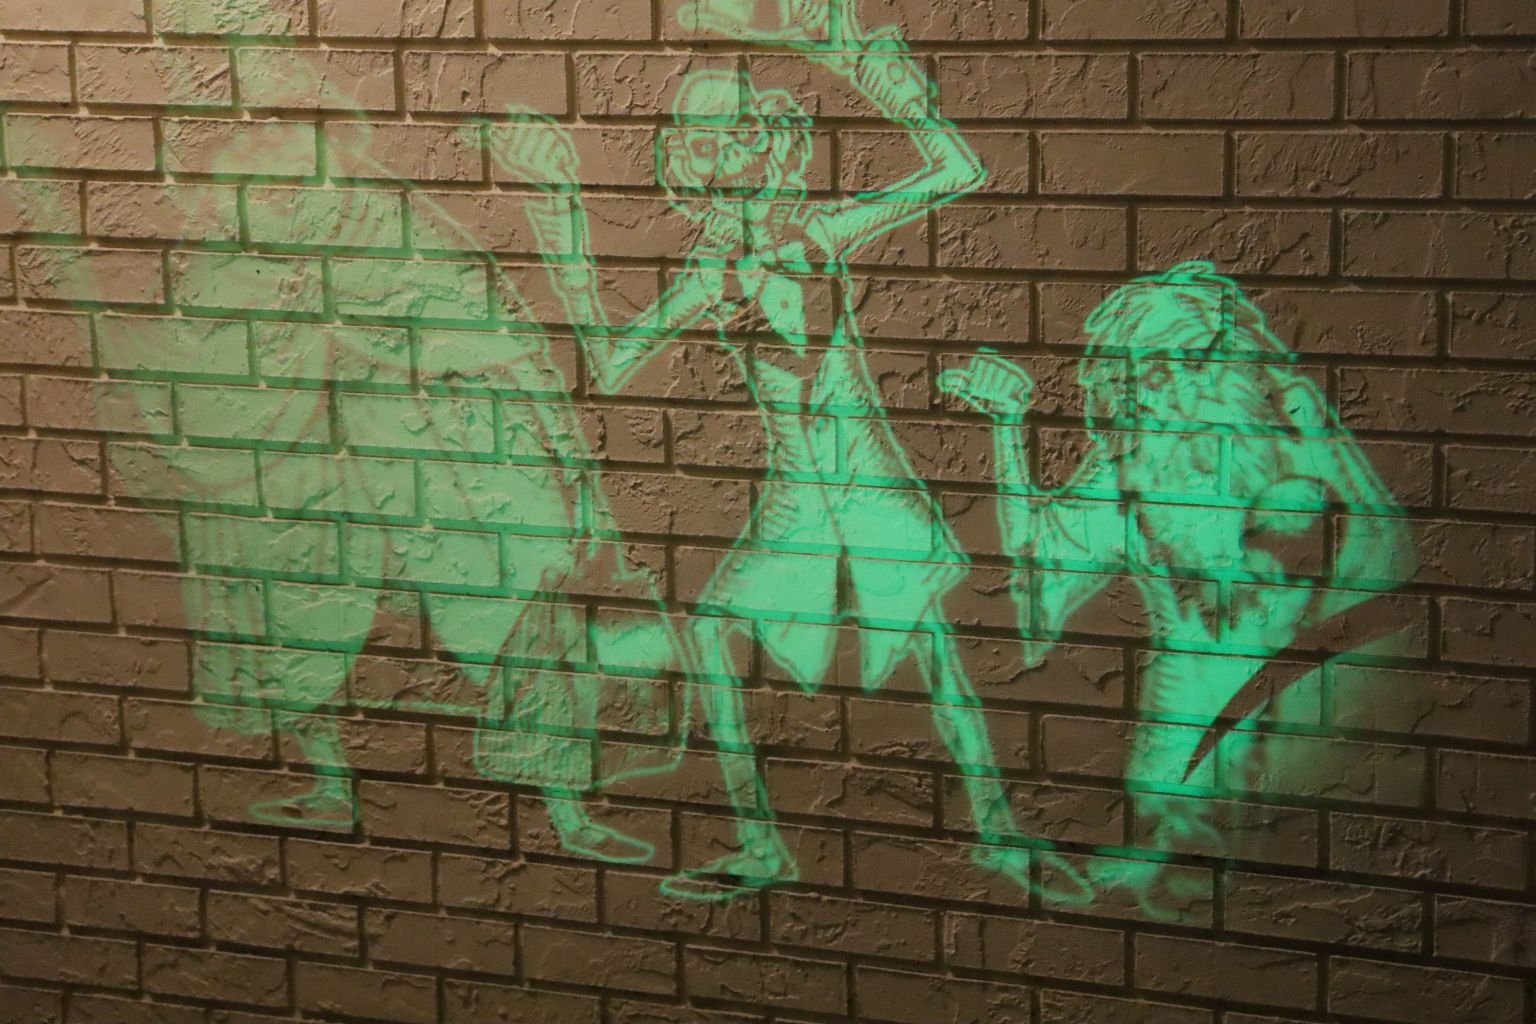
Always fun, Always Comical,
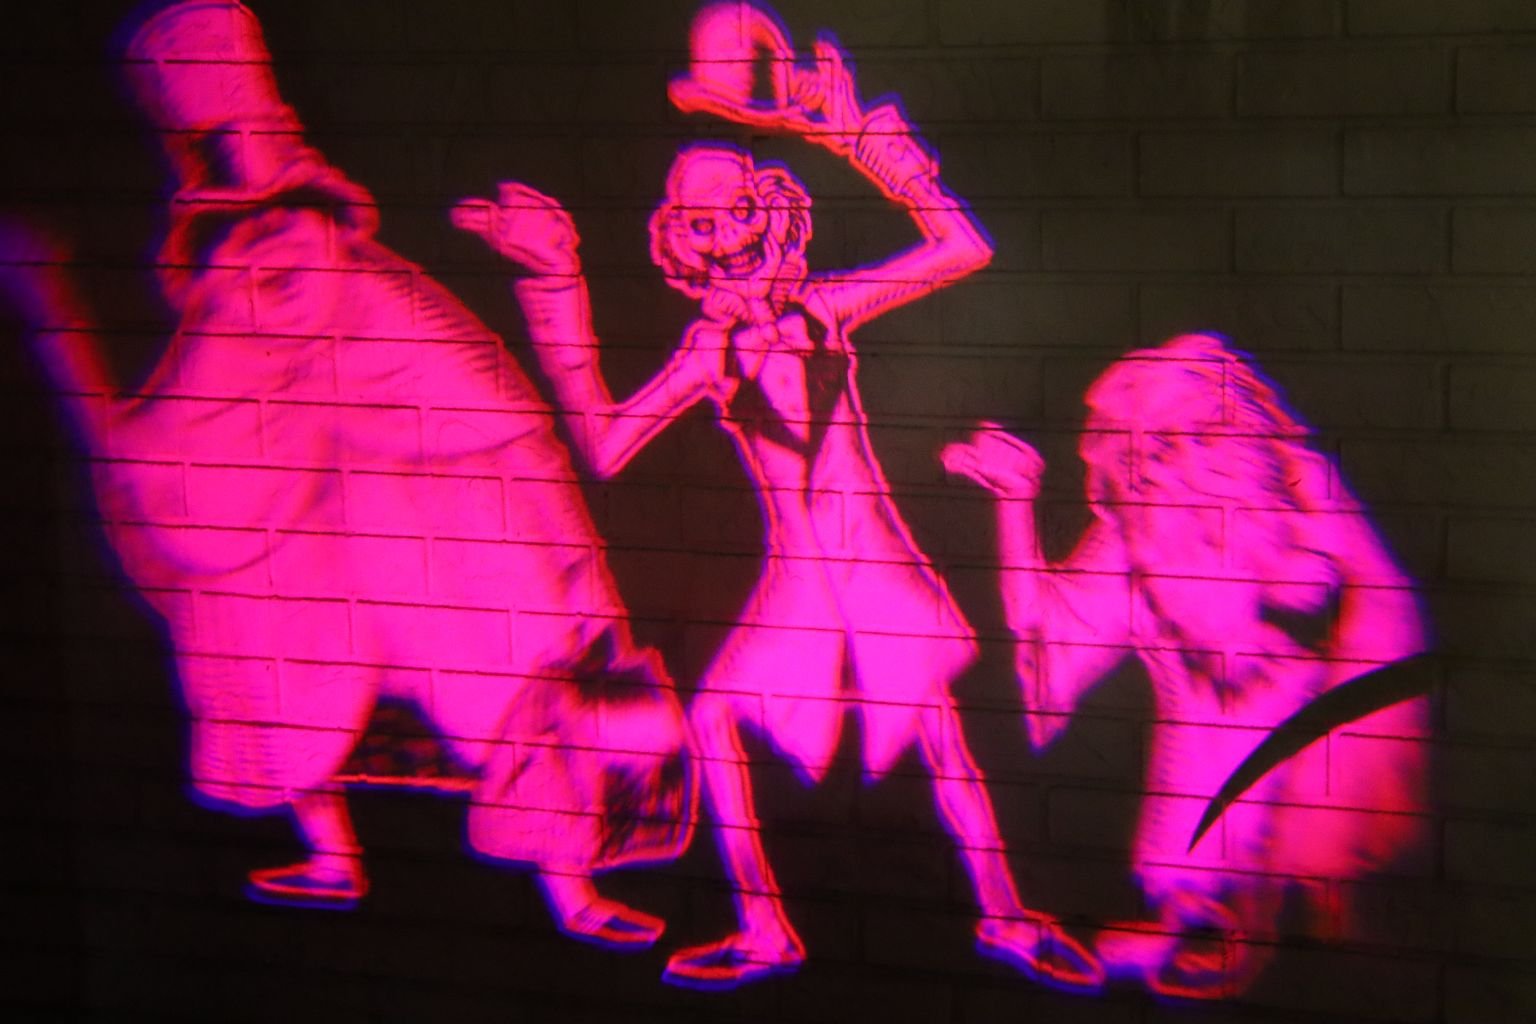
Always Exciting!
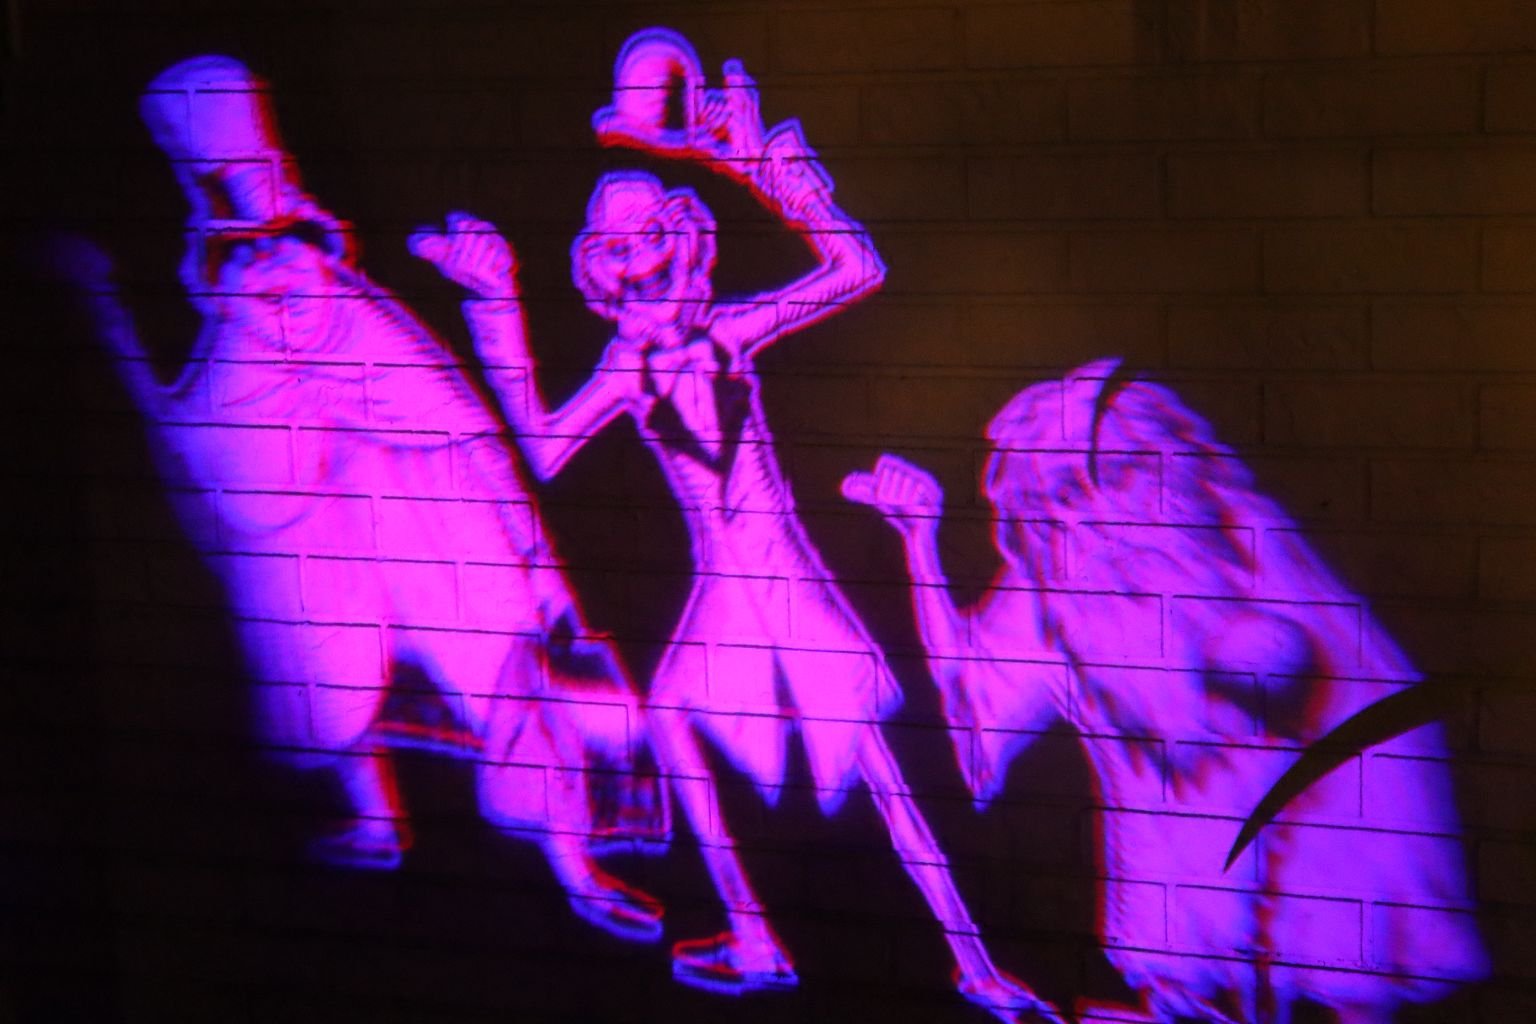
Here they are flashing onto the home of Veronica and Brian.
Happy Haunting Halloween!
————————————————————————————————–
Have a Very Happy Haunted Mansion Halloween,
Julie and Gordon, Veronica, Brian and Isabelle, Brodie and Mackenzie
BOO!!!!